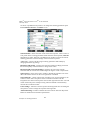
1
FARO LASER SCANNER FOCUS3D X 130 FEBRUARY 2014 ©FARO Technologies Inc., 2014. All rights reserved. No part of this publication may be reproduced, or transmitted in any form or by any means without written permission of FARO Technologies, Inc. FARO TECHNOLOGIES, INC. MAKES NO WARRANTY, EITHER EXPRESS OR IMPLIED, INCLUDING BUT NOT LIMITED TO ANY IMPLIED WARRANTIES OF MERCHANTABILITY OR FITNESS FOR A PARTICULAR PURPOSE, REGARDING THE FAROARM, FARO LASER TRACKER, FARO LASER SCANNER AND ANY MATERIALS, AND MAKES SUCH MATERIALS AVAILABLE SOLELY ON AN “AS-IS” BASIS. IN NO EVENT SHALL FARO TECHNOLOGIES INC. BE LIABLE TO ANYONE FOR SPECIAL, COLLATERAL, INCIDENTAL, OR CONSEQUENTIAL DAMAGES IN CONNECTION WITH OR ARISING OUT OF THE PURCHASE OR USE OF THE FAROARM, FARO LASER TRACKER, FARO LASER SCANNER OR ITS MATERIALS. THE SOLE AND EXCLUSIVE LIABILITY TO FARO TECHNOLOGIES, INC., REGARDLESS OF THE FORM OF ACTION, SHALL NOT EXCEED THE PURCHASE PRICE OF THE MATERIALS DESCRIBED HEREIN. THE INFORMATION CONTAINED IN THIS MANUAL IS SUBJECT TO CHANGE WITHOUT NOTICE AND DOES NOT REPRESENT A COMMITMENT ON THE PART OF FARO TECHNOLOGIES INC. ACCEPTANCE OF THIS DOCUMENT BY THE CUSTOMER CONSTITUTES ACKNOWLEDGMENT THAT IF ANY INCONSISTENCY EXISTS BETWEEN THE ENGLISH AND NON-ENGLISH VERSIONS, THE ENGLISH VERSION TAKES PRECEDENCE. FARO Technologies Inc. Internal Control File Locations: \CONTROL\RECORDS\05MANUFA\PARTSPEC\0_V7\02_Documentation\E1188_FARO_LASER_SCANNER_FOCUS3DX13 0_MANUAL_EN.pdf FARO® Laser Scanner Focus3D X 130 Manual January 2014 Table of Contents Chapter 1: Introduction.............................. 1 Chapter 2: Equipment ................................ 7 Chapter 3: Safety Precautions and Maintenance .............................................. 9 General Safety Information............................................ 9 Servicing ......................................................................... 10 Electrical Safety ............................................................. 10 PowerBlock Battery Safety Measures ...........................................11 PowerDock Battery Charger Safety Measures ...........................12 Laser Safety .................................................................... Mechanical Security ..................................................... Transport ......................................................................... Storage ........................................................................... Maintenance ................................................................. 12 13 14 14 15 General............................................................................................15 Cleaning Instructions for Optics ....................................................15 Slightly Contaminated Mirror .................................................... 16 Greatly Contaminated Mirror ................................................... 17 Cleaning the Receiver Lens ...................................................... 18 Suppliers....................................................................................... 18 Chapter 4: Parts and their Functions....... 19 Scanner........................................................................... 19 PowerDock Battery Charging Cradle ......................... 24 Chapter 5: Getting Started ...................... 27 Charging the FARO PowerBlock Battery .................... 27 Charging the Battery in the Focus3D X 130 ..................................27 Tips for Using the Battery ................................................................28 Charging the Battery with the PowerDock Battery Charger ....28 Setting up the Tripod ..................................................... 29 Mounting the Focus3D X 130 ......................................... 30 i FARO® Laser Scanner Focus3D X 130 Manual January 2014 SD Memory Card ........................................................... 31 Preparing a SD Memory Card.......................................................31 Inserting the SD Memory Card ......................................................32 Ejecting the SD Memory Card ......................................................32 Powering the Focus3D X 130.......................................... 33 Supplying Power with the Battery .................................................33 Supplying Power with the External Power Supply Unit ...............34 Switching the Focus3D X 130 On ................................... 35 Initial Scanner Settings .................................................. 36 Setting the Interface Language ...................................................37 Setting the Date and Time ............................................................38 Setting the Date Format ................................................................39 Changing Date and Time..............................................................39 Setting the Unit of Length and the Temperature Scale .............40 Entering Scanner Information ...................................................... 41 Scanning......................................................................... 41 Setting the Scanning Parameters .................................................41 Selecting a Scan Profile............................................................. 43 Setting Resolution and Quality.................................................. 44 Setting the Scan Range............................................................. 45 Selecting the Sensors ................................................................. 46 Color Settings .............................................................................. 47 Advanced Settings .................................................................... 50 Scanning Parameters Overview ...................................................51 Enhancing the Scanned Environment with Artificial Targets.....52 General ....................................................................................... 53 Checkerboard Targets .............................................................. 54 Reference Spheres..................................................................... 54 Environmental Conditions..............................................................55 Starting a Scan................................................................................55 Shutting Down the Focus3D X 130................................. 58 Powering Off the Focus3D X 130 ................................... 58 Removing the Battery from the Focus3D X 130............................58 Unplugging the Power Supply Unit ...............................................59 Chapter 6: The Focus3D X 130 Controller Software..................................................... 61 General Elements .......................................................... 61 Status Bar .........................................................................................61 ii FARO® Laser Scanner Focus3D X 130 Manual January 2014 Navigation Bar ................................................................................62 Frequently Used Buttons ................................................................64 Onscreen Keyboard.......................................................................65 Home Screen ................................................................. 66 Manage.......................................................................... 67 Managing Scan Projects .............................................................. 68 Creating a Scan Project............................................................ 69 Editing a Scan Project................................................................ 72 Selecting a Scan Project ........................................................... 72 Managing Scan Profiles ................................................................ 73 Creating a Scan Profile.............................................................. 73 Editing a Scan Profile ................................................................. 74 Factory Predefined Scan Profiles Overview ............................ 75 Managing Operators .................................................................... 75 Creating an Operator ............................................................... 76 Editing an Operator ................................................................... 77 Selecting an Operator............................................................... 78 General Settings ............................................................................ 78 Sounds ......................................................................................... 79 Power Management ................................................................. 81 Display ......................................................................................... 82 Date and Time ............................................................................ 82 Language.................................................................................... 82 Units.............................................................................................. 83 WLAN / Connecting to the scanner via WLAN....................... 83 Remotely Accessing the Scans on the SD card ..................... 85 Scanner Details........................................................................... 86 Service ............................................................................................ 87 Errors and Warnings.................................................................... 88 SD Card ....................................................................................... 89 Log File......................................................................................... 89 Backup ........................................................................................ 90 Restore......................................................................................... 91 Firmware Update........................................................................ 93 Factory Settings .......................................................................... 94 Sensors ............................................................................................ 94 Temperature Sensors.................................................................. 95 Inclinometer (Dual Axis Compensator) ................................... 96 Compass ..................................................................................... 97 Altimeter ...................................................................................... 99 GPS............................................................................................. 100 iii FARO® Laser Scanner Focus3D X 130 Manual January 2014 View Scans ................................................................... 102 Online Help................................................................... 104 Chapter 7: Technical Data .................... 107 General......................................................................... Ranging unit ................................................................. Color unit ...................................................................... Deflection unit.............................................................. Laser (optical transmitter)........................................... Data handling and control ........................................ Multi-Sensor .................................................................. Scanner power supply unit......................................... Ambient Conditions .................................................... 107 107 107 108 108 108 108 108 109 Chapter 8: Appendix ............................. 111 Available Replacement Parts .................................... LED Behavior ................................................................ File Structure of the SD Memory Card....................... Focus3D X 130 Error Messages ..................................... Focus3D X 130 Mount Dimensions ............................... Focus3D X 130 Dimensions ........................................... Focus3D X 130 Power Socket ....................................... 111 111 112 114 116 117 118 Chapter 9: Product Environmental Information.............................................. 119 Technical Support.................................. 121 Software License Agreement ............... A-1 Purchase Conditions ............................. B-3 Industrial Products Service Policy ...... C-13 Industrial Service Policy ...................... D-19 iv FARO® Laser Scanner Focus3D X 130 Manual January 2014 Expert Opinion - Classification of the Focus3D X 130 according to IEC 60825-1 Ed. 2.0 ......................................................... E-23 Implementation Notes ......................... F-27 Trademarks ......................................... G-53 FCC Compliance Statement (Applicable in the U.S.) ............................................ H-55 CE Conformity....................................... I-59 v FARO® Laser Scanner Focus3D X 130 Manual January 2014 vi FARO® Laser Scanner Focus3D X 130 Manual January 2014 Chapter 1: Introduction The FARO® Laser Scanner Focus3D X 130 is a high-speed three-dimensional laser scanner for detailed measurement and documentation. The Focus3D X 130 uses laser technology to produce exceedingly detailed three-dimensional images of complex environments and geometries in only a few minutes. The resulting images are an assembly of millions of 3D measurement points. Figure 1-1 FARO ® 3D Laser Scanner Focus X 130 1 Chapter 1: Introduction FARO® Laser Scanner Focus3D X 130 Manual January 2014 The main features are: • HYPERMODULATIONTM • high accuracy • high resolution • high speed • intuitive control via the built in touchscreen display. • high mobility due to its small size, light weight, and the integrated quick charge battery. • photorealistic 3D color scans due to the integrated color camera. • integrated dual axis compensator to automatically level the captured scan data. • integrated GPS sensor to determine the scanner‘s position. • integrated compass and altimeter to give the scans an orientation and a height information. • WLAN to remotely control the scanner. In principle, the Focus3D X 130 works by sending an infrared laser beam into the center of its rotating mirror. The mirror deflects the laser beam on a vertical rotation around the environment being scanned; scattered light from surrounding objects is then reflected back into the scanner. 2 Chapter 1: Introduction FARO® Laser Scanner Focus3D X 130 Manual January 2014 Figure 1-2 Laser Deflection To measure the distance, Focus3D X 130 uses phase shift technology, where constant waves of infrared light of varying length are projected outward from the scanner. Upon contact with an object, they are reflected back to the scanner. The distance from the scanner to the object is accurately determined by measuring the phase shifts in the waves of the infrared light. HYPERMODULATIONTM greatly enhances the signal-to-noise ratio of the modulated signal with the help of a special modulation technology. The x, y, z coordinates of each point are then calculated by using angle encoders to measure the mirror rotation and the horizontal rotation of the Focus3D X 130. These angles are encoded simultaneously with the distance measurement. Distance, vertical angle and horizontal angle make up a polar coordinate (δ, α, β), which is then transformed to a Cartesian coordinate (x, y, z). The scanner covers a 360° x 300° field of view. 3 Chapter 1: Introduction Figure 1-3 Vertical and Horizontal Rotation Additionally, the Focus3D X 130 determines the reflectivity of the captured surfaces by measuring the intensity of the received laser beam. In general, bright surfaces reflect a greater portion of the emitted light than do dark surfaces. This reflectivity value is used to assign a corresponding grey value to each single point. The single point measurements are repeated up to 976,000 times per second. The result is a Point Cloud, a three-dimensional dataset of the scanner's environment (hereinafter referred to as the „laser scan“ or „scan“). Depending on the selected resolution (points acquired per rotation) each point cloud consists of millions of scan points. The laser scans are recorded to the removable SD memory card, enabling easy and secure transfer to SCENE, FARO’s point cloud manipulation software. This manual provides an introduction to the Focus3D X 130. At a minimum, please read the safety information in chapter “Safety Precautions and Maintenance” on page 9 and the step-by-step guide in chapter “Getting Started” on page 27 before first use. You may also find various training and tutorial videos in the Internet at http://tutorial.faroeurope.com FARO® Laser Scanner Focus3D X 130 Manual January 2014 The scanner also has an onscreen help that can be accessed during operation by pressing the help button on the screen. For more information, see “Online Help” on page 104. A list of the potential fields of application of the Focus3D X 130 can be found on the FARO web page http://www.faro.com/. 5 Chapter 1: Introduction FARO® Laser Scanner Focus3D X 130 Manual January 2014 6 Chapter 1: Introduction FARO® Laser Scanner Focus3D X 130 Manual January 2014 Chapter 2: Equipment The Focus3D X 130 is shipped with the following standard equipment: Figure 2-1 Equipment Scanner transport and carry case AC power cable External power supply unit with cable PowerBlock battery Memory card case USB memory card reader Quick Start Guide, situated in the case lid DVD with SCENE software and this user's manual, situated in the case lid Panorama Quick Release with Tribrach adapter and appropriate screws Recommended equipment: • Tripod 7 Chapter 2: Equipment FARO® Laser Scanner Focus3D X 130 Manual January 2014 • Spare battery • PowerDock charging cradle Retain all packing materials as you may need them later. The SD memory card, a charged PowerBlock battery or the external power supply unit with AC power cable, and a tripod are the minimum required equipment you need to carry out a scanning project. 8 Chapter 2: Equipment FARO® Laser Scanner Focus3D X 130 Manual January 2014 Chapter 3: Safety Precautions and Maintenance General Safety Information • Please read this User's Manual carefully and completely and refer to it before using the product. Pay close attention to all warnings and follow the instructions step by step. • Intended use of the product includes having read this user manual and using the product with the operating conditions and limitations described in this user manual, especially in this chapter. • Improper use means using the product other than described in this instruction manual, or under operating conditions which differ from those described herein. • Improper use of the product may impair the protection provided by the product, and product damage or serious personal injury may be caused. • CAUTION: Do not open the housing. By opening the housing serious personaly injury may be caused and you can damage the product, which will affect the product's warranty. • Do not use parts which have not been supplied or recommended by FARO. • Only replacement parts authorized by FARO may be used according to the instructions obtained from FARO. For a list of available replacement parts, see “Available Replacement Parts” on page 111. • Do not expose the Focus3D X 130 and its accessories to extreme temperatures. The ambient temperature should not be lower or higher than given in the specifications. Do not use the Focus3D X 130 near heat sources such as radiators, heat registers, or other products (including amplifiers) that produce heat. • Do not immerse the Focus3D X 130 and its accessories into water. Liquid in the product's enclosure can lead to damage, fire, or electric shocks. • Do not use the Focus3D X 130 and its accessories in an explosive atmosphere. Do not operate the instrument in the presence of flammable gasses or fumes. Operation of any electrical instrument in such an environment constitutes a definite safety hazard. • Do not use the Focus3D X 130 in vicinity of strong magnetic or electrical fields. 9 Chapter 3: Safety Precautions and Maintenance FARO® Laser Scanner Focus3D X 130 Manual January 2014 • Before operating the Focus3D X 130 and its accessories in hazardous areas, please contact the local safety authorities and safety experts. • For outdoor use, please use the PowerBlock battery as the power supply and ensure that the device is protected from rain or spray water. The scanner should be used in a non-condensing environment. • When the product is transferred from a cold to a significantly warmer environment, water may condense on some elements inside the scanner. To avoid this, we recommend placing the scanner in an airtight plastic bag before bringing it from a cold to a significantly warmer environment. This allows the condensation to form on the bag and not inside the scanner. If you do not have the possibility to pack the scanner airtight, please wait until observable condensation water evaporates from the scanner before switching the Focus3D X 130 on. • Properly dispose of the product and batteries in accordance to the national regulations. For more information, see also “Product Environmental Information” on page 119. Servicing • Servicing and repair must only be done by qualified service personnel authorized by FARO. • Unplug this product from the power outlet, remove the battery and refer servicing to qualified service personnel under the following conditions: • The power-supply cord or plug is damaged. • The product has been exposed to rain, water, or other liquids. • The product has been dropped or damaged in any way. • Objects have fallen onto the product. • The product does not operate normally by following the operating instructions. • The product exhibits a distinct change in performance. • The required service and calibration date is reached. Electrical Safety • WARNING: Do not open the housing. Dangerous high voltages are present inside the enclosure. Only qualified service personnel should open the cabinet. Never push objects of any kind into this product through openings as they may 10 Chapter 3: Safety Precautions and Maintenance FARO® Laser Scanner Focus3D X 130 Manual January 2014 touch dangerous voltage points or cause short circuits. This could result in a fire, electric shock, and damage to the product. • This product should be operated only from the power source or the battery supplied or recommended by FARO. Please ensure that the specifications of the AC converter are met by your line voltage. If you do not know the power line voltage in your area, please consult your local power company. • To avoid electrical shock, use the power supply unit in dry indoor environments only. PowerBlock Battery Safety Measures Following safety measures must be followed when working with the PowerBlock battery: • Only use the charger recommended by FARO to charge the battery. • Do not charge or discharge damaged batteries. • Do not charge the battery in the Focus3D X 130 when it is stored in the transport case. • Do not use wet or dirty batteries in the Focus3D X 130 or with the charger. • Charge within limits of 0°C (+32°F) and 45°C (113°F) temperature. Recommended charging temperatures: 10°C (50°F) to 30°C (86°F). • Discharge within limits of -20°C (-4°F) and 60°C (140°F) temperature. Recommended operating temperatures: 5°C (41°F) to 40°C (104°F). • Insert or remove batteries from the laser scanner in dry and dust-free environments only. • When the Focus3D X 130 is not in use for a longer period of time, remove the battery. • Store the battery only when it is charged (at least 60% charge state). It is recommended to charge the battery once a year when it is stored longterm. • Storage temperatures: -20°C (-4°F) to 45°C (113°F), storage humidity range: 0% to 80%. Store in a well ventilated area. Do not store with metal objects. Short circuit can ransom burn. • Do not bring metal objects into contact with the batteries' terminals. The terminals may short circuit and generate heat in this condition. • Do not immerse batteries into water or fire (danger of explosion). 11 Chapter 3: Safety Precautions and Maintenance FARO® Laser Scanner Focus3D X 130 Manual January 2014 • Dispose of batteries in accordance with environmental regulations. Contact your local waste disposal management authority for guidelines concerning lithium ion batteries. PowerDock Battery Charger Safety Measures Observe the following safety measures when working with the FARO PowerDock battery charger: • Do not charge any batteries other than the FARO PowerBlock batteries in the FARO PowerBlock charger. • Regularly check plug, cord and the charger itself. In case of damage contact the FARO Customer Service. • Do not bring metal objects into contact with the charger terminals. The terminals may short circuit and generate heat in this condition. • To avoid electrical shock, use the charger and the power supply unit in dry indoor environments only. • Do not operate the charger in an environment allowing exposure to moisture, combustible fluids or gases. Danger of explosion! • The charger should be kept in a dry room, out of the reach of children. Laser Safety The FARO Laser Scanner Focus3D X 130 produces an invisible laser beam with a wavelength of 1550nm. The power of the emitted beam is below 500mW. The beam divergence is typically 0.27mrad (0.015°). The Focus3D X 130 is classified as laser class 1 in accordance with IEC 608251:2007: Safety of laser products. Part 1: Equipment classification and requirements; Edition 2.0 The Focus3D X 130 is safe under reasonably forseeable conditions of operation. The maximum permissible exposure (MPE) cannot be exceeded. It is harmless to the eyes if it is used and maintained in accordance with the instructions in this user manual. 12 Chapter 3: Safety Precautions and Maintenance FARO® Laser Scanner Focus3D X 130 Manual January 2014 In accordance with IEC 60825-1:2007, the Focus3D X 130 is equipped with the following explanatory label: Figure 3-1 Focus 3D X 130 label Mechanical Security • WARNING: The mirror unit rotates with high speed while scanning and for a short period after the scan. While the mirror is rotating keep distance to the product and do not touch the rotating mirror unit with your hands, fingers or any objects at the risk of personal injury and damage to the Focus3D X 130. • The Focus3D X 130 will rotate clockwise up to 360 degrees when performing a scan. Ensure that the case of the Focus3D X 130 can rotate freely and will not hit any objects during the scan. • CAUTION: The Focus3D X 130 may only be used when set on a flat and stable surface. Injuries may result if the Focus3D X 130 overturns. Only use equipment recommended by FARO and follow the setup instructions in this manual or in the manual of the manufacturer of the equipment. • If using a cart, move the setup with special care. Never move the cart by pulling at the power cables. Pushing or pulling of the cart with too much force, sudden stops, or an uneven surface can cause an upset of the Focus3D X 130. 13 Chapter 3: Safety Precautions and Maintenance FARO® Laser Scanner Focus3D X 130 Manual January 2014 Transport • When carrying the Focus3D X 130, take care not to drop it. Strong impact may damage the Focus3D X 130 and render it incapable of proper operation. • Carry the Focus3D X 130 separately from its equipment or - for best protection - use the original transport case. • When shipping and transporting the Focus3D X 130 by rail, sea, air, or in a road vehicle, make sure to use its original transport case and a suitable outer cardboard box for best protection against shock and vibration. • NOTE: The FARO PowerBlock batteries are Li-Ion batteries and are thus classified as "dangerous goods". When transporting or shipping the PowerBlock batteries, please ensure that you observe the applicable and international rules and regulations. For further information, please contact your local forwarder before transportation or shipping. • For Li-Ion batteries with less than 100 Wh energy content, an exemption is provided that allows you to carry such a battery without further paperwork. The maximum Li-Ion battery energy a single person may carry is 200 Wh. NOTE: Please make sure that the total energy content of all Li-Ion batteries that you (as a single person) carry is less than 200 Wh and that no single battery has more than 100 Wh energy content. • NOTE: The Focus3D X 130 must be turned off during transportation or shipping in a transport case. Please remove the battery from the Focus3D X 130 before shipping. Storage Prior to storing the Focus3D X 130 for a longer time, remove the battery. Pack the scanner and the battery in its shipping case to protect it from environmental hazards, dust, and dirt. Store all components in an environment where the humidity level is low, the temperature is relatively stable, and where they will not be subject to extreme temperatures, environmental conditions, or heavy vibrations. 14 Chapter 3: Safety Precautions and Maintenance FARO® Laser Scanner Focus3D X 130 Manual January 2014 Maintenance General It is recommended that you check your Focus3D X 130 at least once a month. This enables you to spot trouble before it starts and helps provide you with an efficient measuring system. The Focus3D X 130 is a precision instrument that contains many sensitive components, and it must be handled with care. Follow these procedures to prevent problems with your system: • Check the cables for damage to outside insulation, connectors, and pins. • Check the housing of the scanner for damage. • Check the housing and the connectors of the battery for damage. • Place a dust cover over the Focus3D X 130 when it is not in use. • Do not lubricate the Focus3D X 130. To ensure proper functioning of the Focus3D X 130, it should be checked by FARO customer service on a regular basis within the yearly maintenance and certification service. The service intervals should not exceed a maximum period of one year. Please contact your local FARO Customer Service team for more information. Cleaning Instructions for Optics ATTENTION: To avoid unnecessary damage or wear, only clean the optics when the degree of contamination has an impact on the scan quality (e.g. an increase in range noise or a decrease in scan range) and requires cleaning for proper function. Major contamination and improper handling to clean optics may impact the scanning quality. Self-caused damages can result in a complete replacement of the part at the expense of the customer. • We recommend using latex gloves. If you are suffering from latex allergies please use gloves that are suitable for you. Lightly rub the gloves after taking them off with laboratory cloths and isopropanol to remove grease and dirt. • Do not touch the optical surfaces with bare hands or laboratory gloves if at all possible. • ATTENTION: Before cleaning the mirror optics, cover the lens with a cap and avoid any contact with the lens. 15 Chapter 3: Safety Precautions and Maintenance FARO® Laser Scanner Focus3D X 130 Manual January 2014 • Only use cleaning fluid WITHOUT alcohol or acetone to clean the optics. We recommend alcohol-free lens cleaner that can be found in most optical supply stores. • In the event acetone accidentally comes in contact with the mirror or lens, IMMEDIATELY rinse with water (distilled, if possible). • Turn the scanner off before cleaning the optics. What's needed: • Compressed air spray (oil-free - optical supply store) • Alcohol free cleaning fluid in spray bottle / dropping bottle • 1 Package lens tissue (optical supply store) • 1 Package laboratory cloths (lint-free) • 1 Pair of tweezers or forceps • 1 Pair of non-powdered gloves Additionally for a greatly contaminated mirror: • Mild neutral soap (optical supply store) Slightly Contaminated Mirror Handling lens tissue: Fold two or three pieces of lens tissue and clamp them in the tweezers or forceps. Figure 3-2 Folding and Clamping Lens Tissues • First, use a little compressed air spray (oil-free) to clean the surface of the optics. 16 Chapter 3: Safety Precautions and Maintenance FARO® Laser Scanner Focus3D X 130 Manual January 2014 • Mist the clamped lens tissues with the cleaning fluid (do not soak). If necessary, wait a few seconds until some of the solution has evaporated. Figure 3-3 Misting Lens Tissues • Bring the scanner mirror into position and hold it with one hand; do not touch the mirror surface. Use the other hand to clean the mirror. Starting at the edge of the mirror, apply light pressure and wipe across the mirror into one direction. Repeat until the mirror surface is clean. Use a clean area of the lens tissue (fold used lens tissue accordingly) or new lens tissue for each wipe. Avoid touching the mirror surface with gloves. Do not touch the mirror surface and the receiver lens with the tweezers or forceps. Figure 3-4 Cleaning the Mirror Greatly Contaminated Mirror Folding laboratory cloths: Take several individual laboratory cloths out of the package and fold twice. Set onto an oil-free surface. • Fold the laboratory cloth and soak the edge in the cleaning fluid. Carefully clean the edge of the mirror. • Completely mist a fresh folded laboratory cloth with mild neutral soap along the edge. • Starting at the edge of the mirror, apply light pressure and wipe across the mirror. Repeat multiple times in linear direction. • Then clean with appropriate cleaning fluid. See “Cleaning Instructions for Optics” on page 15. 17 Chapter 3: Safety Precautions and Maintenance FARO® Laser Scanner Focus3D X 130 Manual January 2014 Cleaning the Receiver Lens See “Cleaning Instructions for Optics” on page 15. Use only alcohol free cleaning fluids! Do not touch the mirror or the receiver lens with your hands, tweezers or forceps. • Even small amounts of acetone on the lens may result in dullness of the lens surface or cracks in the lens body. • ATTENTION: To avoid unnecessary damage or wear, only clean optics when the degree of contamination requires cleaning for proper function. • Major contamination and improper handling to clean optics may impact the scanning quality. Self-caused damages can result in a complete replacement of the part at the expense of the customer. Suppliers Thorlabs, Inc. (http://www.thorlabs.com/) Edmund Optics (http://www.edmundoptics.com/) Gloves, lens tissues, laboratory cloths, tweezers, forceps, cleaning fluids Kugler GmbH (http://www.kugler-precision.com/) Cleaning set 18 Chapter 3: Safety Precautions and Maintenance FARO® Laser Scanner Focus3D X 130 Manual January 2014 Chapter 4: Parts and their Functions Scanner Right Side (Display / Mirror Side) 3D Figure 4-1 Mirror Side of the Focus X 130 POWER button - Press this button to power on the Focus3D X 130. If the Focus3D X 130 is on and running, press this button to power the Focus3D X 130 down. Pressing and holding the button more than 4 seconds will switch the Focus3D X 130 off without shutting down. Only use this option in exceptional cases; e.g., if the shutdown mechanism does not work or the Focus3D X 130 is non-responsive. START / STOP Button - Press this button to start or stop recording a scan. LED beneath START / STOP button Touch screen display LED on mirror side of the scanner SD memory card slot cover - Open the cover to insert a card into or release a card from the card slot (7). For more information, see “SD Memory Card” on page 31. 19 Chapter 4: Parts and their Functions FARO® Laser Scanner Focus3D X 130 Manual January 2014 Inside the cover Figure 4-2 SD Memory Card Slot SD card slot Micro USB port - Without function yet; reserved for future use. 20 Chapter 4: Parts and their Functions FARO® Laser Scanner Focus3D X 130 Manual January 2014 Left Side (Battery / Sensor Side) Figure 4-3 Sensor Side of the Focus3D X 130 Battery cover with FCC compliance statement on the inside. Battery compartment Battery fastener - push the fastener to release the battery. LED sensor side 21 Chapter 4: Parts and their Functions FARO® Laser Scanner Focus3D X 130 Manual January 2014 Front 3D Figure 4-4 Side View of the Focus X 130 Scanner mirror - for safety and cleaning instructions see “Mechanical Security” on page 13 and “Cleaning Instructions for Optics” on page 15. Scanner mount - see Figure 4-5 for more information. LED on scanner mount Power socket - for the pin assignment of the power socket, see “Focus3D X 130 Power Socket” on page 118. Reference area - used to adjust distance measurements while scanning. Avoid soiling this area and do not touch it. 22 Chapter 4: Parts and their Functions FARO® Laser Scanner Focus3D X 130 Manual January 2014 Bottom Figure 4-5 Bottom View of the Focus3D X 130 3/8” screw thread to mount the scanner to standard photo tripods. M5 screw threads to mount the scanner to customer specific fixtures. Pin hole (diameter 8 mm) for scanner adjustment. Pin hole (diameter 6 mm) for scanner adjustment. Cover of the automation interface for automated applications. Remove to get access to the automation interface of the Focus3D X 130. For more information, please read the Focus3D X 130 automation interface manual. Cover the automation interface if it is not needed or not in use. Type label Cooling fan openings - please keep these openings uncovered to ensure proper cooling of the scanner. For a detailed sketch of the scanner mount, see “Focus3D X 130 Mount Dimensions” on page 116. 23 Chapter 4: Parts and their Functions FARO® Laser Scanner Focus3D X 130 Manual January 2014 PowerDock Battery Charging Cradle Figure 4-6 PowerDock Power socket Bearing area for the battery LEDs (see Figure 4-7) Figure 4-7 PowerDock LEDs Connectors Power LED (LED 1) - indicates that power is connected to the PowerDock. LEDs 2 to 5 - indicate the charging state of the battery: 24 Chapter 4: Parts and their Functions FARO® Laser Scanner Focus3D X 130 Manual January 2014 Charge Level LED behavior 0 - 25% LED 2 is blinking blue, others are off 25 - 50% LED 2 is illuminating blue, LED 3 is blinking blue, LEDs 4 & 5 are off 50 - 75% LEDs 2 & 3 are illuminating blue, LED 4 is blinking blue, LED 5 is off 75 - 99% LEDs 2 to 4 are illuminating blue, LED 5 is blinking blue Fully charged LEDs 2 to 5 are illuminating blue LED behavior in case of errors: Error LED behavior Temperature too low LED 2 is blinking red Temperature too high LED 5 is blinking red Battery is defective Power Supply has under- or over voltage LEDs 2 to 5 are blinking red LED 1 is blinking red 25 Chapter 4: Parts and their Functions FARO® Laser Scanner Focus3D X 130 Manual January 2014 Chapter 5: Getting Started This chapter will provide preliminary steps and basic Focus3D X 130 operations and will guide you step-by-step from setting up the Focus3D X 130 to recording your first scan. Charging the FARO PowerBlock Battery The FARO PowerBlock battery can be charged in the Focus3D X 130 or in the FARO PowerDock battery charger. Carefully read the safety measures described in “PowerBlock Battery Safety Measures” on page 11 and “PowerDock Battery Charger Safety Measures” on page 12 before using them. It is recommended to fully charge the battery before use and that a spare battery is kept on hand just in case it is needed during your scan project. Charging the Battery in the Focus3D X 130 The Focus3D X 130 doesn't need to be switched on in order to charge the battery. 1 Mount the battery into the Focus3D X 130. See “Supplying Power with the Battery” on page 33. 2 Connect the AC Adaptor to the Focus3D X 130 and the wall outlet. See “Supplying Power with the External Power Supply Unit” on page 34. 3 If the Focus3D X 130 is turned off, the upper LEDs on both sides of the scanner as well as the LEDs at the scanner mount will start blinking slowly blue while charging. The LEDs will stop blinking and will illuminate constantly blue when the battery is fully charged. 4 If the Focus3D X 130 is turned on, you can check the exact charge state of the battery in the scanner's user interface under Home > Manage > General Settings > Power Management. For more information, see “Power Management” on page 81. PLEASE NOTE: • Take out the Focus3D X 130 from the transport case before connecting the power supply to the scanner. • Use the power supply unit indoor only. • Before longer storage, remove the power supply unit and the battery from the Focus3D X 130. 27 Chapter 5: Getting Started FARO® Laser Scanner Focus3D X 130 Manual January 2014 Tips for Using the Battery • Charge the battery the day it is to be used or on the day before. A charged battery unused will gradually lose power over time. • If the battery becomes exhausted quickly after being fully charged, replace it with a new one. • For best battery performance, an ambient temperature of 5°C (41°F) to 35°C (95°F) is recommended. In colder or warmer locations, battery performance and operation time may temporarily decrease. Charging the Battery with the PowerDock Battery Charger The charger can be used in foreign countries. It is compatible with a 100 V AC to 240 V AC 50/60 Hz power source. Use a plug adapter for other countries. 1 Connect the power supply unit cable to the power socket of the PowerDock charger. Confirm the direction of the power supply's plug (see Figure 5-1). If you forcibly insert the plug in a wrong direction, the plug, the PowerDock's power socket as well as the PowerDock itself can be damaged. Figure 5-1 PowerDock with Connected Power Cable 2 Connect the AC power cable to the power supply as well as to a power outlet. Check the input voltage on the type label before connecting. LED 1 of the PowerDock should illuminate blue, which means that power is connected to the PowerDock. NOTE: The power supply unit and the PowerDock charger are not for outdoor use. To avoid electrical shock, use them in dry indoor environments only. 3 Point the battery's contacts to the PowerDock and place the battery flat along the arrow mark on the FARO PowerDock and slide it carefully into charging 28 Chapter 5: Getting Started FARO® Laser Scanner Focus3D X 130 Manual January 2014 position until it snaps into place. Make sure that the battery's pins are in contact with the charger's terminals. Figure 5-2 Placing the Battery on the PowerDock 4 Charging starts automatically as soon as the battery has been inserted into the charger; LEDs 2 to 5 blink and illuminate according to the current charging state of the battery. For more information, see “PowerDock Battery Charging Cradle” on page 24. 5 After charging, carefully slide the battery out of position and remove it. Setting up the Tripod Extend and lock all legs of the tripod. Check that the tripod adjustment arrangements have been locked and that the legs are of even length. Ensure that the surface is stable, that the tripod feet are secured and that it is firm in its position. The tripod‘s plate should be levelled as horizontally as possible. 29 Chapter 5: Getting Started FARO® Laser Scanner Focus3D X 130 Manual January 2014 In extreme windy conditions, please make sure that the tripod has a stable standing. For this, you should affix a heavy weight to the tripod or sandbag its feet. Figure 5-3 Gitzo Carbon Fiber Tripod (available as optional accessory) Mounting the Focus3D X 130 To mount the Focus3D X 130 to a tripod we recommend using the quick release. 1 Remove the Focus3D X 130 from the case, check outer casing for any signs of damage or distortion. Check mirror for damage due to scratches, cracks, distortion and inspect for cleanliness. 2 Attach the upper part of the quick release to the scanner's mount. Make sure to tighten the screw. 3 Mount the counter piece of the quick release onto the tripod. Make sure that it is fixed securely. 4 Carefully mount the Focus3D X 130 with the upper part of the quick release to its counter piece and lock its fastener. Test that the scanner is correctly locked in place by gently attempting to lift it from the tripod. 5 If applicable, remove the ruggedized aluminium protection cover from the scanner. 30 Chapter 5: Getting Started FARO® Laser Scanner Focus3D X 130 Manual January 2014 6 The scanner should be set up as horizontally as possible. The levelling may be refined using the integrated dual axis compensator. See “Inclinometer (Dual Axis Compensator)” on page 96. Please see the user manual of your quick release for detailed instructions. SD Memory Card Preparing a SD Memory Card The Focus3D X 130 will store the recorded scans on a removable SD memory card. This memory card can also be used to create backups of the scanner settings, to import scanner settings and to install firmware updates. Before carrying out a scan project you may use the software SCENE to set up an SD card with project relevant information and settings, like the project structure, scan profiles or scanner operators. These settings can then be transferred to the scanner. For more information on scan project preparation with SCENE and transferring data to the scanner, please see the manuals of these software products and “SD Card” on page 89. You can use SD, SDHC or SDXC cards. Memory cards with a size up to 64 GB have been verified to operate with the scanner. We recommend using memory cards with a capacity of 4 GB or more. The speed of the card should be Class 6 or better and its temperature range should be from - 20°C (-4°F) to 85°C (185°F). NOTE: : The SD cards must be formatted in the FAT32 file system. When using a SD card other than the supplied one, please format it with the scanner‘s format function first. For more information, see “SD Card” on page 89. SD and SDHC cards may also be formatted with Windows. SDXC cards with a capacity of more than 32GB cannot be formatted with the Windows format function as Windows will format those cards in its own file system which is not supported by the scanner. There exist freeware tools that allow formatting such cards with Windows as FAT32 but it is recommended to use the scanner‘s format function. CAUTION: Do not remove the SD card from the scanner while it is busy, otherwise you risk corrupting the data on the card. A busy SD card is indicated by this icon blinking in the status bar of the controller software: 31 Chapter 5: Getting Started FARO® Laser Scanner Focus3D X 130 Manual January 2014 It is safe to remove the card from the scanner when this icon has disappeared from the status bar. CAUTION: When removing a Focus3D X 130 SD card from your computer, you should always use the “Safely Remove Hardware” option from the system tray in Windows, otherwise you risk corrupting the data on the SD card. To safely remove hardware in Windows, double-click on the Safely Remove Hardware icon in the system tray, and then select the device you want to remove from the list. For information on the folder and file structure of a Focus3D X 130memory card, see “File Structure of the SD Memory Card” on page 112. Inserting the SD Memory Card Figure 5-4 Inserting the SD Card 1 Open the SD memory card slot cover. 2 Insert the formatted SD card with the notched edge in the direction as illustrated until it clicks. 3 Confirm the direction of the memory card. If you forcibly insert the memory card in a wrong direction, the SD card, the card slot or data on the card can be damaged. 4 Close the cover. Ejecting the SD Memory Card To remove a SD card from the scanner, open the SD card slot cover and lightly push the memory card. • Do not eject the memory card while it is busy. • Take care that the memory card does not pop out and drop. 32 Chapter 5: Getting Started FARO® Laser Scanner Focus3D X 130 Manual January 2014 Powering the Focus3D X 130 The Focus3D X 130 can be operated with the battery and the external power supply unit. Supplying Power with the Battery Adhere to the battery safety measures (“PowerBlock Battery Safety Measures” on page 11) and mount a charged battery into the Focus3D X 130: 1 Open the scanner's battery compartment cover. 2 Turn the battery so that its type label is directed upwards, point the battery contacts to the scanner, push the battery straight in, and slide it downward into the battery compartment until the fastener clicks into position. 3D Figure 5-5 Focus X 130 with Battery 3 Close the battery cover. 33 Chapter 5: Getting Started FARO® Laser Scanner Focus3D X 130 Manual January 2014 Supplying Power with the External Power Supply Unit 1 Attach the power supply to one of the tripod's legs. Figure 5-6 Power Supply Attached to the Tripod's Leg 2 Connect the power supply unit cable to the power socket of the Focus3D X 130. Confirm the direction of the power supply's plug (see Figure 5-7). If you 34 Chapter 5: Getting Started FARO® Laser Scanner Focus3D X 130 Manual January 2014 forcibly insert the plug in a wrong direction, the plug, the scanner's power socket as well as the scanner can be damaged. Figure 5-7 Power Supply Connected to Focus3D X 130 [ 3 Connect the AC power cable to the power supply as well as to a power outlet. Check the input voltage on the type label before connecting. The upper LEDs of the scanner on the mirror and sensor side as well as the LED of the scanner mount begin to illuminate blue. NOTE: To avoid electrical shock, outdoor use of the power supply unit is not permitted. Use the power supply unit in dry indoor environments only. Switching the Focus3D X 130 On Pressing the scanner's On/Off button will start the boot process, which will be indicated by the scanner LEDs blinking blue. If power is supplied by the battery only and its charge state is too low to start the scanner, the scanner LEDs will blink orange. 35 Chapter 5: Getting Started FARO® Laser Scanner Focus3D X 130 Manual January 2014 When the Focus3D X 130 is ready, the LEDs will stop blinking and will illuminate constantly blue, the Home screen of the scanner's controller software will appear on the integrated touch screen. Figure 5-8 Home Screen of the controller software Focus3D The X 130 can be operated to its full extent by simply touching the elements on the screen with your fingers. The controller software is designed to be able to be controlled with your fingers only. Nevertheless, you can also use a stylus, if you want to. Initial Scanner Settings This chapter gives you a brief description on how to set up initial scanner settings using the scanner's controller software on the integrated touch screen. For more information, see “The Focus3D X 130 Controller Software” on page 61. 36 Chapter 5: Getting Started FARO® Laser Scanner Focus3D X 130 Manual January 2014 Setting the Interface Language Starting from the Home screen, go to Home > Manage > General Settings > Language to change the language of the controller software. Figure 5-9 Language Selection Screen Select the language by touching the corresponding button. The selected language will be highlighted and marked with a check mark. If the list of available languages exceeds the screen size, scroll the list up or down with the arrow buttons on the bottom. 37 Chapter 5: Getting Started FARO® Laser Scanner Focus3D X 130 Manual January 2014 Setting the Date and Time To change the date and time settings, go to Home > Manage > General Settings > Date & Time. Figure 5-10 Date and Time Settings Time Format - Click to set the time format. The controller software will show the time either using the 24-hour or the 12-hour clock. Switching the button to ON will select the 24-hour clock. Switching the button to OFF will select the 12hour clock. Selected date format - Click to choose the date format. The currently selected date format is displayed on the button itself. Change date and time - Click to set the internal clock of the Focus3D X 130. 38 Chapter 5: Getting Started FARO® Laser Scanner Focus3D X 130 Manual January 2014 Setting the Date Format Figure 5-11 Change Date Format Select the date format by touching the corresponding button. You can select between the date formats DD.MM.YYY, MM/DD/YYYY or YYYY-MM-DD, where YYYY is the year, DD the day and MM the month. The selected format will be highlighted and marked with a check mark. Changing Date and Time Figure 5-12 Change Date and Time Select the time button in the list to change the time, then use the buttons on the left to set the hours, the buttons on the right to set the minutes. Select the year button in the list to change the year, then use the buttons on the left or on the right to set the date. 39 Chapter 5: Getting Started FARO® Laser Scanner Focus3D X 130 Manual January 2014 Proceed accordingly with the month and the day buttons. Discard Changes - Click to discard your changes. Leaving the view with the back or home button applies your changes. A message will be displayed, informing you that you may need to restart the scanner for the changes to take effect. Figure 5-13 Restart Scanner Setting the Unit of Length and the Temperature Scale You can change the units scale under Home > Manage > General Settings > Units. Figure 5-14 Change Unit of Length Lengths will be displayed by the controller software either in meters or in feet. Select the favored unit of length by touching the corresponding button. Temperatures will be displayed either in Celsius or in Fahrenheit scale. Select the favored temperature scale by touching the corresponding button. GPS coordinates are either displayed in decimal degree notation (e.g. +34.9823450° E) or in degree-minute-second notation (e.g. 34º 58' 56.44'' E). 40 Chapter 5: Getting Started FARO® Laser Scanner Focus3D X 130 Manual January 2014 Entering Scanner Information You can specify a scanner name and the owner of the Focus3D X 130. Starting from the Home screen, go to Home > Manage > General Settings > Scanner Details. Figure 5-15 Scanner Details Scanner name - Click to change the name of the scanner. Owner - Click to enter the name of the company or person owning the scanner. For more information, see “Scanner Details” on page 86. Scanning This chapter will give you a brief description on how to set the scanning parameters in order to capture your first scans. Normally, you would provide and enter project information before starting with your scan project. This will be described later. For more information, see “Managing Scan Projects” on page 68. Setting the Scanning Parameters (Home > Parameters) Scanning parameters like resolution, quality or the scanning angles are the parameters used by the scanner for recording the scan data. There are two ways to set the scanning parameters: by changing them manually or by selecting a scan profile which is a predefined set of scanning parameters. When selecting a scan profile, its settings will overwrite the scanning parameters. 41 Chapter 5: Getting Started FARO® Laser Scanner Focus3D X 130 Manual January 2014 To choose a predefined scan profile or to change the scanning parameters push the Parameters button on the Home screen. Figure 5-16 Change the Scan Parameters Selected Profile - Shows the name of the selected scan profile. Click to select a scan profile. If the scanning parameters differ from the selected profile, altered is appended to its name. Selecting a predefined scan profile overwrites all current scanning parameters with the settings of the selected scan profile. Additionally, you may edit the single scanning parameters individually by changing the following settings: Resolution and Quality - Displays the selected resolution in Mega points and the selected quality. Click the button to change these values. Horizontal and Vertical Scan Range - Displays the scan range with the horizontal and the vertical start and end angles in degrees. Click to adjust them. Select Sensors - Opens the screen to enable or disable the automatic use of the data of the built-in sensors for the scan registration in SCENE. Scan with Color - Switch colored scan recording on or off. If switched on, the scanner will also take color photos of the scanned environment with the integrated color camera. These photos will be taken right after the laser scan and will be used in the point cloud processing software SCENE to automatically colorize the recorded scan data. Color Settings - Shows the current exposure metering mode used for taking the color photos. Click to change the exposure metering mode. Advanced Settings - Enable or disable the Clear Contour and Clear Sky filters. Enable or disable the Far Distance Optimization. 42 Chapter 5: Getting Started FARO® Laser Scanner Focus3D X 130 Manual January 2014 Scan Size [Pt] - Shows the size of the scan in points horizontally x vertically. The vertical size may only be changed by setting a new resolution or by changing the scan area angle. Scan Duration, Scan File Size - Expected scan time and file size in Megabytes according to the chosen resolution, quality value, and scan range. Please note that the values shown here are approximate values. NOTE: the scan duration shown in Figure 5-28 and the scan duration values shown in the scanning parameters view differ from each other, because the values in Figure 5-28 are pure net values, the time needed for capturing photos in color mode and pre and post processing time are not taken into account. Selecting a Scan Profile (Home > Parameters > Selected Profile) Prior to capturing a scan, you may select a scan profile that fits the needs of the scene and the desired scan quality. Figure 5-17 Select a Profile This view shows a list of all available scan profiles. This list contains factory predefined profiles which are read-only (see “Factory Predefined Scan Profiles Overview” on page 75 for an overview of the available factory predefined scan profiles) and custom profiles which can be created and manipulated under Home > Manage > Profiles. For more information, see “Creating a Scan Profile” on page 73. Select a profile by touching the corresponding button. The selected profile will be highlighted and marked with a check mark. To view the details of the selected profile, touch its button once again. 43 Chapter 5: Getting Started FARO® Laser Scanner Focus3D X 130 Manual January 2014 Setting Resolution and Quality (Home > Parameters > Resolution / Quality) Figure 5-18 Change Scan Resolution and Quality Resolution - The resulting scan resolution. You can choose among 1/1, 1/2, 1/4, 1/5, 1/8, 1/10, 1/16, 1/20 and 1/32. Use the slider on the left to change the resolution of the next scan. Quality - Affects the quality of the scan and the scanning time at constant scan resolutions. It allows the user to balance the needs of quality and speed with one simple slider. Moving the slider up reduces the noise in the scan data and thus increases the scan quality which results in an increased scanning time. Moving the slider down reduces the scanning time and increases the efficiency of your scan project. The Quality slider sets quality levels either via diverse measurement rates or by applying additional noise compression. For details about the various quality settings, please see Figure 5-28. The resulting Scan Duration, vertical and horizontal scan points (Scan Size [Pt]), as well as the resulting scan size in Mega points (MPts) will be displayed in the middle of the view. Point Distance [mm/10m] / [in/30ft] is the distance between the captured scan points in mm (in) in a scan distance of 10 meters (30 ft.). Depending on the chosen scan resolution only appropriate quality values are selectable (see Figure 5-28). If you plan to capture several scans from the same position (with different resolutions) and if it is important that these scans have the same horizontal start angle, then you should neither switch off the scanner nor change the quality between the recordings of these scans. 44 Chapter 5: Getting Started FARO® Laser Scanner Focus3D X 130 Manual January 2014 Setting the Scan Range (Home > Parameters> Horizontal / Vertical) Figure 5-19 Setting the Scan Range Vertical area - The size of the vertical scan area in degrees. Use the left up and down buttons to change the vertical start angle, use the right up and down buttons to adjust the vertical end angles. Horizontal area - The size of the horizontal scan area in degrees. Use the left buttons to change the horizontal start angle, use the right buttons to adjust the horizontal end angles. Default Area button - Click to reset the values to the default scan area (vertical from -60° to 90° and horizontal from 0° to 360°). The rectangle in this view illustrates the full scan area. If there are scans on the inserted SD card, the preview picture of the last recorded scan is displayed. If there is no preview picture available, a grid is displayed, where the space between the horizontal and vertical lines is equivalent to 30°. The yellow rectangle illustrates the selected scan area. 45 Chapter 5: Getting Started FARO® Laser Scanner Focus3D X 130 Manual January 2014 Selecting the Sensors (Home > Parameters > Select Sensors) Figure 5-20 Selecting the Sensors Use Inclinometer - Enable or disable the automatic use of the inclination measurement of the built-in dual axis compensator (inclinometer) for the scan registration in SCENE. However, regardless of your setting, the data of this sensor is always measured and attached to each scan. If the use of the inclinometer data is switched ON, it will automatically be used to register the scans in SCENE; if it is switched off, the data will be ignored. You can still change this behavior later in SCENE. See the SCENE manual for more information on this. PLEASE NOTE: To get the most reliable data from the dual axis compensator, make sure that the scanner‘s inclination is less than 5°. For more information, see “Inclinometer (Dual Axis Compensator)” on page 96. Use Compass - Enable or disable the automatic use of the data of the built-in compass for the scan registration in SCENE. Just like with the inclinometer, the data of the compass is always measured and attached to each scan during scanning and will automatically be used for the scan registration, if this button is switched to ON. For more information, see “Compass” on page 97. Use Altimeter - Enable or disable the automatic use of the altimeter data for the scan registration in SCENE. Just like with the inclinometer, the data of the altimeter is always measured and attached to each scan during scanning and will automatically be used for the scan registration, if this button is switched to ON. You may want to enter a reference height beforJanuary 2014e starting your scan project. This reference height will then act as basis for all the measurements made by the altimeter. You will find the altimeter settings under Home > Manage > Sensors > Altimeter. For more information, see “Altimeter” on page 99. 46 Chapter 5: Getting Started FARO® Laser Scanner Focus3D X 130 Manual January 2014 Use GPS - Turn the GPS sensor ON or OFF. Unlike the other sensors, the GPS data is only recorded during scanning and will thus only be available for scan registration in SCENE if this button is switched to ON. For more information, see “GPS” on page 100. Click the Recommended Settings button to enable the use of all sensors. PLEASE NOTE: The available sensors vary depending on the scanner model. Color Settings (Home > Parameters > Color Settings) Figure 5-21 Color Set the exposure metering mode - Set the way in which the integrated color camera determines the exposure for taking the color photos (if colored scan recording is switched on). Select beteween three exposure metering modes to meet the requirements of the current lighting conditions and to get best possible results for the area of interest. Even Weighted Metering - To determine the exposure settings, the camera will use the light information coming from the entire scene and averages without 47 Chapter 5: Getting Started FARO® Laser Scanner Focus3D X 130 Manual January 2014 giving special weighting to a particular area. Use this setting in scenarios with even lighting conditions. Figure 5-22 Even weighted metering Horizon Weighted Metering - With horizon weighted metering mode, the camera will use the light information coming from the horizon to determine its exposure setting. This mode is commonly used in scenarios with bright light coming from directly above (e.g. indoors with bright ceiling lighting or outdoors with bright sunlight coming from directly above) and if you want to achieve the most correct balance of light and exposure for objects at the horizon. This mode is the default setting. Compared to even weighted metering, this mode will increase scan duration by approximately 14 seconds. Figure 5-23 Horizon weighted metering If the vertical scan area is limited, then the area used to determine the exposure (exposure metering area) might move away from the horizon. This is the case if the vertical start angle is set to a value > -30° or if the vertical end angle is set to 48 Chapter 5: Getting Started FARO® Laser Scanner Focus3D X 130 Manual January 2014 a value < 30°. The exposure metering area will then be moved up or down and set to the center of the remaining vertical scan area. The following figures illustrate this behavior. Figure 5-24 shows the exposure metering area (highlighted yellow) for the full vertical scan area; Figure 5-25 shows the exposure metering area for a limited vertical scan area set to e.g. 10° to 90°. Figure 5-24 Full vertical scan area Figure 5-25 Limited vertical scan area Zenith Weighted Metering - With zenith weighted metering, the camera will use the light information coming from above the scanner to determine its exposure setting. Use this mode if there is very bright light coming from e.g. windows and if you want to achieve the most correct balance of light and exposure for objects at the ceiling of building (e.g. for ceiling paintings in 49 Chapter 5: Getting Started FARO® Laser Scanner Focus3D X 130 Manual January 2014 historical buildings). Compared to even weighted metering, this mode will increase scan duration by approximately 14 seconds. Figure 5-26 Zenith weighted metering Advanced Settings (Home > Parameters > Advanced Settings) Figure 5-27 Advanced Scanning Settings Clear Contour - Enables the dynamic contour filter. While scanning, this hardware filter will remove incorrect measurements at the edges of objects. It removes scan points resulting from hitting two objects with the laser spot which mainly happens at the edges of objects. 50 Chapter 5: Getting Started FARO® Laser Scanner Focus3D X 130 Manual January 2014 Clear Sky - Enables the dynamic sky filter. While scanning, this hardware filter will remove scan points resulting from hitting no objects at all which mainly happens when scanning the sky. Far Distances Optimization - The Far Distance Optimization is a feature which configures the scanner in order to increase the quality of the points captured at far distances (> 20m). This feature has the drawback that nearby points which are bright might be inaccurately measured. Enabling this feature is recommended when scanning outer spaces where the surfaces to scan are located at a distances greater than 20 meters from the scanner position, and is not recommended when scanning indoors. Recommended Settings button - Enables both filters and disables Far Distance Optimization. Scanning Parameters Overview Figure 5-28 shows the measurement speed, noise compression, net scan time for all the resolution and quality settings that are available. Resolution Quality Mio. Pts (full scan) 710.7 710.7 710.7 710.7 177.7 177.7 177.7 177.7 177.7 44.4 44.4 44.4 44.4 44.4 44.4 28.4 1/1 1/1 1/1 1/1 1/2 1/2 1/2 1/2 1/2 1/4 1/4 1/4 1/4 1/4 1/4 1/5 1x 2x 3x 4x 1x 2x 3x 4x 6x 1x 2x 3x 4x 6x 8x 2x Speed Noise (kpt/sec) Compression 976 488 244 122 976 488 244 122 122 976 488 244 122 122 122 488 2x 2x 4x - Net Scan Time (full scan) pt/360° 0:14:19 0:28:38 0:57:16 1:54:32 0:03:35 0:07:09 0:14:19 0:28:38 1:54:32 0:00:54 0:01:47 0:03:35 0:07:09 0:28:38 1:54:32 0:01:09 40,960 40,960 40,960 40,960 20,480 20,480 20,480 20,480 20,480 10,240 10,240 10,240 10,240 10,240 10,240 8,192 Figure 5-28 Resolution and Quality 51 Chapter 5: Getting Started FARO® Laser Scanner Focus3D X 130 Manual January 2014 Resolution Quality Mio. Pts (full scan) 28.4 28.4 28.4 11.1 11.1 11.1 11.1 11.1 7.1 7.1 7.1 7.1 2.8 2.8 2.8 2.8 1.8 1.8 1.8 0.7 0.7 0.7 1/5 1/5 1/5 1/8 1/8 1/8 1/8 1/8 1/10 1/10 1/10 1/10 1/16 1/16 1/16 1/16 1/20 1/20 1/20 1/32 1/32 1/32 3x 4x 6x 2x 3x 4x 6x 8x 3x 4x 6x 8x 3x 4x 6x 8x 4x 6x 8x 4x 6x 8x Speed Noise (kpt/sec) Compression 244 122 122 488 244 122 122 122 244 122 122 122 244 122 122 122 122 122 122 122 122 122 2x 2x 4x 2x 2x 2x 4x 2x 4x 2x 4x Net Scan Time (full scan) pt/360° 0:02:17 0:04:35 0:18:20 0:00:27 0:00:54 0:01:47 0:07:09 0:28:38 0:00:34 0:01:09 0:04:35 0:18:20 0:00:13 0:00:27 0:01:47 0:07:09 0:00:17 0:01:09 0:04:35 0:00:07 0:00:27 0:01:47 8,192 8,192 8,192 5,120 5,120 5,120 5,120 5,120 4,096 4,096 4,096 4,096 2,560 2,560 2,560 2,560 2,048 2,048 2,048 1,280 1,280 1,280 Figure 5-28 Resolution and Quality Enhancing the Scanned Environment with Artificial Targets Before scanning, you should make sure that there will be enough reference objects in the scans so that there will be no problems during the later registration process. References, or targets, are used to register multiple individual scans that are each on their own coordinate system, onto a single, aligned coordinate system. Although scan registration in SCENE can be done purely on the basis of natural targets, such as planes, walls, corners etc., we recommend to enhance the 52 Chapter 5: Getting Started FARO® Laser Scanner Focus3D X 130 Manual January 2014 scanned environment with additional artificial reference objects, like spheres or checkerboard paper targets. Spheres and paper targets can be combined within a scan site. Usually you will achieve more precise registration results when you have manually placed such targets. Figure 5-29 checkboard and sphere target The following tips and hints provide an overview of basic principles which should be obeyed when working with artificial reference objects like spheres or paper targets. General • Mathematically you need three corresponding references in the two scans which you like to register to each other. The inclination data captured by the built-in dual axis compensator may serve well as one reference, such that only 2 other scanner external references are required. But a higher number of references per scan may improve the registration results and may make registration easier and less error prone. • As artificial targets you should use checkerboard targets or reference spheres. • Use targets with a non-reflecting surface. • Print paper references with laser printers only. • The references should be easily and clearly visible in the scans. • Targets should not be positioned symmetrically. They should form a polygon around the scanner and have varying distances to the scanner. Place them in the scanning area at varying heights, distances and planes. Avoid placing the targets in a straight line. • If the references cannot be placed in an adequate distance to the scanner, increase the scanning resolution or the size of the targets. • Do not place targets in close proximity to one another. The distance between targets should not be smaller than 1m. • Make sure you see the targets in more than one scan (if you do not have surveyed coordinates for each targets). A target which is only visible in one scan is useless for registration. 53 Chapter 5: Getting Started FARO® Laser Scanner Focus3D X 130 Manual January 2014 • When capturing a chain of scans resulting in a tubular point cloud which is typical for e.g. tunnel surveying, it is recommended to make use of the inclination sensor and references with surveyed coordinates. Such references should be used along the entire chain. The scanner has a certain measuring uncertainty and if you do not use surveyed references when capturing and registering a chain of scans, this measuring uncertainty may propagate from scan to scan. Checkerboard Targets • The angle of incidence between the laser beam and checkerboard targets should not be smaller than 45°. • Depending on the chosen scanning resolution, the detection of checkerboard references in the scans by SCENE may get unreliable beyond a certain distance to the scanner. E.g. when using A4 checkerboard references and scanning with a resolution of 1/4, the distance to the scanner should not be greater than 15m. Larger distances can easily be achieved by enlarging the size of the target or scanning with a higher resolution. • Checkerboard targets should not be rotated by 45° in relation to the scanner's axis. • Have sufficient scan points on the checkerboard targets. They need four or more scan points per quadrant. • Checkerboard targets should not be attached to a curved surface. Reference Spheres • Reference spheres should be completely visible in the scan. Make sure that they are not partly covered by other objects. • Depending on the chosen scanning resolution, the detection of sphere references in SCENE may get unreliable beyond a certain distance to the scanner. E.g. when scanning with a resolution of 1/4 and using spheres with a diameter of 145mm, the distance to the scanner should not be greater than 18m. If you are using larger spheres, e.g. spheres with a diameter of 200mm, the distance to the scanner may be extended to 45m. For more information on registering scans and using references for registration, please see the SCENE manual. 54 Chapter 5: Getting Started FARO® Laser Scanner Focus3D X 130 Manual January 2014 Environmental Conditions • When the product is transferred from a cold to a significantly warmer environment, water may condense on some elements inside the scanner. To avoid this, we recommend placing the scanner in an airtight plastic bag before bringing it from a cold to a significantly warmer environment. This allows the condensation to form on the bag and not inside the scanner. If you do not have the possibility to pack the scanner airtight, please wait until observable condensation water evaporates from the scanner before switching the Focus3D X 130 on. • For applications requiring the highest degree of accuracy such as reverse engineering and starting with the scanner at lower temperatures, it is advised to turn the scanner on and warm it up until the internal temperature stabilizes. • If the temperature of the scanner is above or below the specified range, you will get a warning. Scanning is still possible but the temperature may have impact on the measuring accuracy. If an upper or lower temperature limit is exceeded, the scanner will automatically shut down to avoid damages. • Strong dust formation, fog, rain or snowfall may result in bad measurements. You should avoid scanning under these conditions. • You should avoid scanning objects against direct sunlight. This may result in limited scan data in this area. • Objects or surfaces may have an increased range noise if they are directly illuminated by bright sunshine. • Highly absorbing or highly reflective surfaces increase the range noise and thus the measuring inaccuracy. If these surfaces are of importance, you should treat them e.g. with developer or anti-glare-spray. Starting a Scan Remember that the scanner is turning and the mirror unit is rotating with high speed. Ensure that the scanner can move freely and that no objects can touch the mirror unit. You can start your scan either by clicking on the Start Scan button on the Home screen of the controller software or by pressing the Start / Stop button on the scanner. If there is not enough space on the SD memory card, you will be warned and the scanner will refuse scanning. In this case, please remove scan data from the memory card or insert a new card and try again. 55 Chapter 5: Getting Started FARO® Laser Scanner Focus3D X 130 Manual January 2014 The scan process starts, the laser of the scanner will be switched ON and the scanning view will be displayed. The scanner's LEDs are blinking red as long as the laser of the scanner is switched ON. During scanning, the scanner rotates clockwise by 180°. If you are scanning with color, the scanner will continue to turn to 360° to take the pictures. The executed processing steps are displayed in the status bar of the scanning screen, the scan progress is indicated by the progress bar.. Figure 5-30 Scanning View To stop a scan touch the Stop Scan button in the scanning view or press the Start / Stop button on the scanner. You will then be asked to keep or delete the incomplete scan. CAUTION: After having completed scanning and capturing the pictures, depending on environmental conditions, the scanner may make another full turn to capture inclination data. It is important NOT to move the scanner while it is capturing the inclination data. Else, the inclination data of the scan may be inaccurate and may not be usable for the scan registration. As soon as the entire scanning process is complete, the scanner plays a notification sound (if not turned off in the settings) and a new screen appears with 56 Chapter 5: Getting Started FARO® Laser Scanner Focus3D X 130 Manual January 2014 a preview picture of the captured scan. Now, you may move the scanner to the next scan position and start a new scan Figure 5-31 Scan Preview The scan preview shows a grayscale picture of the captured scan to verify the scan itself and to check if all objects (e.g. targets) are clearly visible. This preview does not show color. Parameters button - Change the scanning parameters for the next scans. Start Scan button - Starts the next scan. Delete Button - deletes the viewed scan file. Use the left and right captured scans. Use the plus and minus arrow buttons to browse through already buttons to zoom in or out. The Reset Zoom button is only visible when you zoom into the scan picture. With this button the scan picture can be zoomed back to its original size. When zoomed in you can move the zoomed picture by dragging it with your fingers in any direction. The Inclination Warning button is only visible when the current inclination of the scanner is above 5°. To get reliable measurements from the built-in dual axis compensator you should set up the scanner with an inclination less than 5° before starting your next scan. For this, you may use either a bubble inclinometer at the tripod or the inclinometer screen. Click this button to get to 57 Chapter 5: Getting Started FARO® Laser Scanner Focus3D X 130 Manual January 2014 the inclinometer screen. For more information, see “Inclinometer (Dual Axis Compensator)” on page 96. Shutting Down the Focus3D X 130 To shut down the Focus3D X 130, shortly press its On/Off button or use the shutdown button in the controller software under Home > Manage. All LEDs will start blinking blue. As soon as the Focus3D X 130 has finished the shutdown process the LEDs will stop blinking and you can safely remove the battery and the power supply. DO NOT turn off the power of the Focus3D X 130 before the shut down cycle is complete. The Focus3D X 130 has a PC with a hard drive integrated. This internal PC must be shut down before turning off the power supply. If the power supply is disconnected or switched off without the Focus3D X 130 being previously shut down, it may damage the internal PC and might lead to a loss of data. Pressing and holding the button more than 10 seconds will switch the Focus3D X 130 off without shutting down. Please use this option only if the Focus3D X 130 does not shut down regularly because of a malfunction. NOTE: If the Focus3D X 130 had not been shut down properly, the next boot process could take more time as usual as the Focus3D X 130 might check its hard disk for errors. Some settings, which were made shortly before shutting down the Focus3D X 130, might also be lost. Powering Off the Focus3D X 130 Once the Focus3D X 130 has been completely shut down, disconnect the AC power cable first, then disconnect the power supply cable from the Focus3D X 130, remove the battery and secure the equipment in protective cases. Removing the Battery from the Focus3D X 130 1 Open the battery cover. 2 Push the fastener to release the battery. 3 Remove the battery. 4 Close the battery cover. 58 Chapter 5: Getting Started FARO® Laser Scanner Focus3D X 130 Manual January 2014 Unplugging the Power Supply Unit Figure 5-32 Unplugging the Bend Connector Take care to unplug the bend connector from the Focus3D X 130 by pulling at the connector only! Do not pull at the cable or you might damage the connector and the Focus3D X 130! 59 Chapter 5: Getting Started FARO® Laser Scanner Focus3D X 130 Manual January 2014 60 Chapter 5: Getting Started FARO® Laser Scanner Focus3D X 130 Manual January 2014 Chapter 6: The Focus3D X 130 Controller Software General Elements Status Bar Figure 6-1 Status Bar Current view - The name of the currently active and visible screen on the display. Battery icon - shows the status and charge state of the internal battery: Battery is fully charged Charge state > 75 and < 100 % Charge state > 50 and < 75 % Charge state > 25 and < 50 % Charge state > 10 and < 25 %, you should recharge the battery or connect the power supply. Battery is almost empty; Focus3D X 130 will automatically shut down within the next minutes. Battery is charging. No battery in the Focus3D X 130. The exact charge state of the battery can be viewed under Home > Manage > General Settings > Power Management (see “Power Management” on page 81). If the charge state of the battery is below 25 percent you will get a warning. In this case please use a spare battery and / or connect the power supply to the 61 Chapter 6: The Focus3D X 130 Controller Software FARO® Laser Scanner Focus3D X 130 Manual January 2014 Focus3D X 130. If the charge state of the battery reaches 10 percent the Focus3D X 130 will stop scanning and will automatically shut down. Clock - shows the current time of the Focus3D X 130. See “Setting the Date and Time” on page 38 for information on how to change the date and time of the scanner. Further situational icons of the status bar: SD Card is busy. Do not remove the SD card from the scanner while it is busy, otherwise you risk corrupting the data on the card. No SD card inserted. SD card is write protected. Remove write protection to be able to scan. Unknown SD card inserted. The card cannot be read. This might be due to the SD card being formatted in an unsupported file system. You should format the SD card with the built in format function. See “SD Card” on page 89. WLAN is turned on. Navigation Bar Figure 6-2 Navigation Bar Back button - returns you to the previous screen. Errors and Warnings button - this button only appears if warning or errors are present. Pressing the button opens a screen that informs about details of the existent warnings or errors. See “Errors and Warnings” on page 88. Help button - opens the online help of the currently active screen and provides access to the Focus3D X 130 video guide. See “Online Help” on page 104. 62 Chapter 6: The Focus3D X 130 Controller Software FARO® Laser Scanner Focus3D X 130 Manual January 2014 Home button - returns you to the Home screen. See “Home Screen” on page 66. 63 Chapter 6: The Focus3D X 130 Controller Software FARO® Laser Scanner Focus3D X 130 Manual January 2014 Frequently Used Buttons Add button. Adds new scan profiles, projects or operators. Duplicate button. Adds new scan profiles, projects or operators by duplicating the selected list element. Delete button. Deletes selected list elements, like projects, scan profiles or operators. Disabled delete button. The selected list element can not be deleted. Scroll up and down buttons. Appear on the bottom of the screen if the content of a screen exceeds the screen height. Press the button to scroll the screen up or down. A blue arrow on buttons indicates that this button opens a new screen with further details or settings. A green check mark on buttons indicates that the list element is currently selected and active. Buttons with a check mark and the blue arrow indicate that the related list element is currently selected and that further details and settings are available by pressing the button once again. Check box. Used to turn functions on or off. Here, the function is turned on. Check box. Used to turn functions on or off. Here, the function is turned off. 64 Chapter 6: The Focus3D X 130 Controller Software FARO® Laser Scanner Focus3D X 130 Manual January 2014 Onscreen Keyboard Figure 6-3 Onscreen Keyboard Shift key to toggle between capital and lower case letters Key to toggle keyboard between standard and special characters Moves the cursor in the text field right or left Delete button - deletes the complete text Backspace OK button - applies your input and returns to the previous screen Cancel button - returns to the previous screen without applying your changes Clicking on a character of the keyboard will enlarge it as well as its neighboring characters. Choose between the enlarged characters by dragging the 65 Chapter 6: The Focus3D X 130 Controller Software FARO® Laser Scanner Focus3D X 130 Manual January 2014 finger a bit to the right or to the left. The selected character will be highlighted (see Figure 6-4). Figure 6-4 Onscreen Keyboard Home Screen Figure 6-5 Home Screen Start Scan button - Starts a scan. See “Starting a Scan” on page 55. Parameters button - Opens the dialog to select another scan profile and to edit the current scanning parameters. See “Setting the Scanning Parameters” on page 41. View Scans button - Preview the scans that are stored on the SD card. See “View Scans” on page 102. 66 Chapter 6: The Focus3D X 130 Controller Software FARO® Laser Scanner Focus3D X 130 Manual January 2014 Manage button - Manage scan profiles, projects, operators and the scanner. See “Manage” on page 67. Click the arrow button beneath the navigation bar to show or hide the info box. The info box informs about the currently selected operator, project and scan profile. It also shows information about the current scanning parameters resolution in mega points, quality, scan duration and color. Figure 6-6 Home Screen with Info Box Manage (Home > Manage) Figure 6-7 Manage 67 Chapter 6: The Focus3D X 130 Controller Software FARO® Laser Scanner Focus3D X 130 Manual January 2014 Projects - Select the current scan project, add new or edit existing projects (see “Managing Scan Projects” on page 68). Click to get a list of all available projects. Profiles - Select the current scan profile, create new or edit existing scan profiles. See “Managing Scan Profiles” on page 73. Operators - Select the current scanner operator, create new or edit existing operators. See “Managing Operators” on page 75. General Settings - Opens the menu of the general scanner settings. See “General Settings” on page 78. Service - Opens the menu for scanner services, like firmware updates, backups or viewing errors and warnings. See “Service” on page 87. Sensors - Opens the menu for the scanner sensors administration. See “Sensors” on page 94. Shut down Scanner - Click to shut down the scanner. See “Shutting Down the Focus3D X 130” on page 58. Managing Scan Projects (Home > Manage > Projects) Before starting with your scan project you should map this project to the controller software of the scanner by dividing the project into several appropriate sub projects or clusters. For example, if you are scanning a multi-level building, each floor of this building might represent a sub project or cluster of the scan project „Office Building“. Each of these floors or sub projects might have further sub projects, e.g. rooms. The structure of the scan project might then be like this: - Office building - Floor 1 - Room 1 - Room 2 - Room 3 - Floor 2 - Room 1 - Room 2 etc. 68 Chapter 6: The Focus3D X 130 Controller Software FARO® Laser Scanner Focus3D X 130 Manual January 2014 Once the project structure has been created, assign the single scans to the corresponding clusters: To do this, select a scan project from the projects list that has been prepared by you in advance before starting a scan. This project should correspond to the current scanner position. For example, if you are taking scans in the office building on floor 2, in room 2, select „room 2“ from the project list and then start taking the scans in this room. The next scans are then assigned to the selected project or sub project „room 2“ until you select another project or sub project. This information will be attached to each scan and helps SCENE to automatically combine the scans to scan clusters and thus to automate the registration of the scans. For more information on scan registration and combining scans to cluster, see the SCENE manual. You can enter scan projects with the controller software of the scanner or, more convenient, with SCENE and then transfer the project to the scanner via the SD card. Please read the SCENE manual for more information on this. PLEASE NOTE: Every project and subproject gets an unique internal identification number when it is created. Combining the scans to scan clusters during post processing in SCENE will be done according to this identification number and not on the basis of the project name. This is particularly relevant when working with several scanners on the same scan project. In this case you should create the project (structure) once as a master and then transfer it to all of your scanners. Thus, it is not recommended to create or edit a project of the same scan project separately on each scanner. Even if the separately created projects and subprojects might have the same name, they will get different identification numbers and will be treated as different projects by SCENE. 69 Chapter 6: The Focus3D X 130 Controller Software FARO® Laser Scanner Focus3D X 130 Manual January 2014 Creating a Scan Project Figure 6-8 Projects List This view shows a list of all available scan projects. The „Default Project“ is a standard project that may be selected when working in no particular scan project. The „Default Project“ is not deletable and you can not change its name or parent project. To add a project, click the add button on top of the projects list. A new subproject will be added to the selected project and the „View Project“ screen appears. Here, you can change the name and enter further details of the new project. If you want the new project to be a main project without any parent projects, you have to change its parent project to „no parent project“ (see below for details) or you have to select the „Default Project“ before adding the new project. With the „Default Project“ selected new projects will always be added as a main project without parent projects. Instead of adding a completely new project or subproject, you can also create new projects by duplicating existing ones. For this, select the project that you want to duplicate and click on the duplicate button on top of the list. The newly created project has the same settings and properties as the original project. To delete a project, select it in the list and click on the delete button. If the project has subprojects, they will be deleted too. Projects are stored on the SD card. If you remove the SD card from the scanner, the entire structure of the currently selected project (all of its parent projects and their sub projects) as well as the „Default Project“ remain on the scanner. All other projects will be removed from the list, but will be kept on the removed SD card of course. If you insert a new SD card, the selected project, its parent and sub projects that remained on the scanner will be saved to the new SD card as 70 Chapter 6: The Focus3D X 130 Controller Software FARO® Laser Scanner Focus3D X 130 Manual January 2014 soon as you make changes to it or as soon as a scan has been started. If the new SD Card contains projects too, they will be added to the projects list. Figure 6-9 Project Details Project Name - The name of the project. Click to change the name. Parent Project - The parent project of the displayed project, “No Parent Project” means that the current project is a main project and not a subproject. Click this button to change the parent project. A new screen appears with a list of all available parent projects. Select the parent project from this list. The currently edited project will then be assigned as a subproject to this project. Figure 6-10 Select Parent Scan Project This view shows all available projects that are applicable to be a parent project. Click on a button to select the parent project. The selected parent project will be highlighted and marked with a check mark. 71 Chapter 6: The Focus3D X 130 Controller Software FARO® Laser Scanner Focus3D X 130 Manual January 2014 No Parent Project - Select this button if the project is supposed to be a main project with no parent project. Customer - If you are carrying out the scan project by order of a company, you can enter its name here. File Base Name - The scan will be saved with a file name consisting of this base name followed by the current scan number. Initial Scan No. - Automatically increments with each successive scan. Can be reset and may be used to indicate the number of scans per scan session. Additional Info - Additional project information. Latitude [°] - If known, enter the approximate (+/- 10° is sufficient) latitude position of the scan project here. This information helps to improve the calibration of the inclination sensor and leads to more precise inclination data and thus to better scan registration results. Please enter the latitude value in decimal degree notation. Editing a Scan Project To edit a scan project, select it in the list and touch it once again to reach to its details view. Selecting a Scan Project Figure 6-11 Project List The project list contains the currently selected project and all further projects stored on the SD card. 72 Chapter 6: The Focus3D X 130 Controller Software FARO® Laser Scanner Focus3D X 130 Manual January 2014 To select a project, click its button in the list. The selected project will be highlighted and marked with a check mark. To view or change details of the selected project, touch its button once more. To display available subprojects of a project, select it and the list will be expanded with its sub projects. Proceed accordingly with further subprojects. If the list of projects exceeds the screen size, scroll the list up or down with the buttons on the bottom. Description of the icons on the project buttons: Project has no subprojects Project has sub projects. Click to expand the list to view the sub projects. Project has sub projects. Its sub projects are currently shown (list is expanded accordingly). Managing Scan Profiles (Home > Manage > Profiles) Selecting scan profiles to use their parameters for the next scan has already been described in “Setting the Scanning Parameters” on page 41. This chapter will describe how to add new and how to edit existing scan profiles. 73 Chapter 6: The Focus3D X 130 Controller Software FARO® Laser Scanner Focus3D X 130 Manual January 2014 Creating a Scan Profile Figure 6-12 Scan Profiles List As already mentioned, the Focus3D X 130 comes with factory predefined scan profiles (see “Factory Predefined Scan Profiles Overview” on page 75 for an overview of the available factory predefined scan profiles). These scan profiles are read-only and cannot be changed or deleted. But you can add and manage your own custom scan profiles of course. To add a new profile, click the add button. You can also add new profiles by duplicating existing profiles. To do this, select the profile that you want to duplicate and click the duplicate button. A new screen appears to enter the profile name and to adjust its scan parameters. 74 Chapter 6: The Focus3D X 130 Controller Software FARO® Laser Scanner Focus3D X 130 Manual January 2014 To delete a custom scan profile, select it and click the delete button. You cannot delete factory predefined profiles. Figure 6-13 Scan Profile Details Profile Name - name of the scan profile. Click to change it. The further settings in this view are similar to the settings of the scanning parameters. For more information, see “Setting the Scanning Parameters” on page 41. Editing a Scan Profile To edit a scan profile, select it in the list and touch it again to view its details. You cannot edit predefined profiles. 75 Chapter 6: The Focus3D X 130 Controller Software FARO® Laser Scanner Focus3D X 130 Manual January 2014 Factory Predefined Scan Profiles Overview Indoor ..10m Indoor 10m... Outdoor ...20m Outdoor 20m... Preview Object HD Scan certain objects or areas Scan outdoors in very high where the disresolution. It is Capture a fast tances from the recommended and rough prescanner to the to limit the scan view scan of the main objects of area to the environment in interests are object or area of low resolution. greater than interest, else the 20m scan might take very long to complete. Description Scan indoors where the distances from the scanner to the main objects of interests are less than 10m Scan indoors where the distances from the scanner to the main objects of interests are greater than 10m Scan outdoors where the distances from the scanner to the main objects of interests are less than 20m Resolution 1/8 1/5 1/5 1/4 1/16 Quality 3x 4x 4x 4x 4x 6x Vertical Area -60° - 90° -60° - 90° -60° - 90° -60° - 90° -60° - 90° -60° - 90° 1/2 Hor. Area 0° - 360° 0° - 360° 0° - 360° 0° - 360° 0° - 360° 0° - 360° Inclinometer ON ON ON ON ON ON Compass ON ON ON ON ON ON Altimeter ON ON ON ON ON ON Color ON ON ON ON OFF ON Exposure Metering Mode Horizon Weighted Horizon Weighted Horizon Weighted Horizon Weighted Even Weighted Horizon Weighted Clear Contour ON ON ON ON ON ON Clear Sky ON ON ON ON ON ON Far Distance Optimization OFF OFF OFF ON OFF OFF Point Distance (mm/10m) 12.272 7.670 7.670 6.136 24.544 3.068 The following values refer to full area scans (360° horizontally / 300° vertically): Resolution (MPts) 11 28.2 28.2 44 2.8 176.0 Net Scan Duration (hh:mm:ss) 00:02:57 00:06:38 00:06:38 00:09:12 00:00:57 01:56:00 Scan File Size (mb) 68.90 122.08 122.08 171.18 8.53 2216.66 8248 x 3414 8248 x 3414 10310 x 4268 2578 x 1067 20622 x 8534 Scan Size (Pt) 5156 x 2134 Managing Operators (Home > Manage > Operators) 76 Chapter 6: The Focus3D X 130 Controller Software FARO® Laser Scanner Focus3D X 130 Manual January 2014 The information, which scanner operator has recorded which scans, might be useful for the person who is post processing the scans; especially when there are several scanner operators working on the same scan project. You are able to assign scanner operators to the captured scans. To do this, select the operator in the operators list. You might have to create the operator first if it does not already exist. The name of the selected operator will then be stored in the metadata of the next scans and can be accessed in SCENE during the post processing of the scans. Creating an Operator Figure 6-14 Operators List To add a new operator, click the add button. You can also add new operators by duplicating an existing operator. To do this, select the operator you want to duplicate and click the duplicate button. A new screen appears to enter the operator details. 77 Chapter 6: The Focus3D X 130 Controller Software FARO® Laser Scanner Focus3D X 130 Manual January 2014 To delete an operator, select it and click the delete button. Figure 6-15 Operator Details Name - The name of the scanner operator. Company - The name of the company providing the scanning service. Department - The department the operator works for. Phone - The operator's phone number. Email - The operator's email address. Info - Any additional information required by the service provider. This may be shift leaders, project managers etc. Editing an Operator To edit an operator, select it in the list and touch it once again to reach to its details. 78 Chapter 6: The Focus3D X 130 Controller Software FARO® Laser Scanner Focus3D X 130 Manual January 2014 Selecting an Operator Figure 6-16 Operators List Select an operator in the list by touching the corresponding button. The selected operator will be highlighted, marked with a check mark and assigned to the next captured scans until another operator is selected. To view or edit the details of the selected operator, touch its button once again. General Settings (Home > Manage > General Settings) Figure 6-17 General Settings Sounds - Change the volume of the scanner sounds, enable or disable scanner sounds. See “Sounds” on page 79. 79 Chapter 6: The Focus3D X 130 Controller Software FARO® Laser Scanner Focus3D X 130 Manual January 2014 Power Management - Set up the screen saver; view the detailed battery charge state and enable or disable start on power which allows the scanner to be turned on by connecting the power supply. See “Power Management” on page 81. Display - Set the brightness of the screen, recalibrate it or change the wallpaper of the Home screen. See “Display” on page 82. Date & Time - Change the displayed time and date format and change the date and time of the scanner. See “Setting the Date and Time” on page 38. Language - Change the language of the controller software. See “Setting the Interface Language” on page 37. Units - Change the displayed unit of lengths. See “Setting the Unit of Length and the Temperature Scale” on page 40. WLAN - The Focus3D X 130 has an integrated WLAN antenna that allows to remotely connect to the scanner and to control it with an external device. Click the button to view and change the WLAN settings and to turn WLAN on or off. See “WLAN / Connecting to the scanner via WLAN” on page 83. PLEASE NOTE: WLAN is only officially supported on scanners with the multisensor package. Scanner Details - View and change details of the scanner. See “Scanner Details” on page 86. Remote Access to Scans - Enabling this function will allow you to have access to the scans on the inserted SD card on remote devices that are connected to the scanner via WLAN or Ethernet. For more information, see “WLAN / Connecting to the scanner via WLAN” on page 83. Please note that the status of the SD card will be set to busy as long as this function is enabled. Please disable it before you remove the SD card from the scanner. Remote access will automatically be disabled when shutting down the scanner, you will have to enable it again after reboot. CAUTION: Risk of Data Loss! Please only use if you’re about to access scan files via network! Absolutely make sure not to remove the SD card until remote access is disabled again. Sounds (Home > Manage > General Settings > Sounds) 80 Chapter 6: The Focus3D X 130 Controller Software FARO® Laser Scanner Focus3D X 130 Manual January 2014 The scanner has a built in loudspeaker. Certain scanner events will be signaled by various sound effects. You can change their volume here and switch sound effects on or off. Figure 6-18 Sounds Volume - Increase or decrease the volume of the scanner sounds. Touch pad clicks - Switch sound to confirm button clicks on or off. Sound during scanning - If switched on, the scanner will give a warning signal when the laser is switched on and the scanner is scanning. Sound when scan is finished - If switched on, the scanner will inform about scan completion with a sound. Sounds when warnings are issued - If switched on, the scanner will sound when a warning is issued. Sounds when warnings are issued - If switched on, the scanner will sound when an error is issued. 81 Chapter 6: The Focus3D X 130 Controller Software FARO® Laser Scanner Focus3D X 130 Manual January 2014 Power Management (Home > Manage > General Settings > Power Management) Figure 6-19 Power Management Screensaver - If the screen has not been touched for a certain period of time, a screensaver appears on the screen. Change the length of time before the screensaver appears by pressing the plus or minus buttons. Deactivate the screensaver by setting the time to „never“. When the screensaver is visible, simply touch the screen to return into operation mode. Dim display during scanning - If switched on, the brightness of the screen will be decreased during scanning to save battery power. Switching this option to ON is particularly useful for long lasting scans. Start on Power - Enable to allow the scanner to be turned on (if it was turned off) by connecting it to the external power supply. This option is useful, for example, for automation applications. Power supply info - Informs about the current power supply and the exact charge state of the battery. 82 Chapter 6: The Focus3D X 130 Controller Software FARO® Laser Scanner Focus3D X 130 Manual January 2014 Display (Home > Manage > General Settings > Display) Figure 6-20 Display Brightness - Set the brightness of the screen. Calibrate the display - If you experience the touch screen to be slightly misaligned, you may have to recalibrate it. Press this button and follow the instructions on the appearing screen. We recommend using a stylus to calibrate the display. If the calibration of the touch screen got corrupted so that it is unusable, you should reset the calibration of the display to its factory settings. To do this, shut down the scanner using the Power button. Wait until the scanner has shut down, then press and hold down the Power button for at least five seconds until the LED on the sensor side of the scanner illuminates yellow, then release the button again. The scanner will then boot up and reset the calibration of the touch screen to its factory settings. Change the wallpaper - Change the wallpaper of the Home screen. Click to get a list of available wallpapers which are stored on the scanner. To import new wallpapers to the scanner, please use the backup option. Date and Time (Home > Manage > General Settings > Date & Time) See “Setting the Date and Time” on page 38. Language (Home > Manage > General Settings > Language) 83 Chapter 6: The Focus3D X 130 Controller Software FARO® Laser Scanner Focus3D X 130 Manual January 2014 See “Setting the Interface Language” on page 37. Units (Home > Manage > General Settings > Units) See “Setting the Unit of Length and the Temperature Scale” on page 40. WLAN / Connecting to the scanner via WLAN (Home > Manage > General Settings > WLAN) Figure 6-21 WLAN PLEASE NOTE: WLAN is only officially supported with scanners that have the multi-sensor package. The Focus3D X 130 has an integrated WLAN antenna that allows to remotely connect to the scanner with portable devices, like notebooks, PDAs or tablet computers. Once you have connected your remote device to the scanner via WLAN, you are able to remotely access the scanner‘s controller software with a standard web browser. PLEASE NOTE: The used web browser must support Adobe® Flash® in order to run the controller software. The WLAN option also allows to have remote access to the scan files on the inserted SD card. WLAN Status - Press this button to turn WLAN on or off. If WLAN is not needed it is recommended to turn it off. Note that changes to the WLAN settings are only possible if WLAN is turned off. WLAN Mode - The scanner‘s WLAN network is configured as an access point1. 84 Chapter 6: The Focus3D X 130 Controller Software FARO® Laser Scanner Focus3D X 130 Manual January 2014 IP address - The WLAN IP address of the scanner. If your remote device is connected to the scanner, enter this address into the address field of your web browser followed by port 8400 (e.g. 172.17.16.23:8400) to access the controller software. Click to change the scanner‘s IP address. Subnet mask - The subnet mask of the scanner‘s wireless network. Port - The network port which is used for receiving requests from client hosts. When connecting to the scanner with your web browser, enter the scanner‘s IP address followed by this port number into the address field of the browser (see also IP address). Network name - The name of the wireless network. Usually it is the scanner‘s serial number. In the list of the wireless connections on your remote device, the Focus3D X 130 is listed with this name. If the scanner is not listed, refresh the network list, after some seconds the remote device should find the Focus3D X 130 and display it in the list. WLAN channel - The channel used for the WLAN network. Click to change it. If encountering interference from other devices, consider changing the channel to avoid it. Note that all WLAN devices on the network must use the same channel. Encryption key - The scanner‘s WLAN network is encrypted with this key. The encryption key is a WPA2 key. Enter this key on your remote device when prompted to establish the connection to the scanner. If you want to change the encryption key, click the button and enter your own key. The key must consist of 10 to 63 arbitrary digits1. Exemplary configuration of a notebook with Microsoft® Windows®:2 • On Windows, find the wireless network icon in the taskbar on the bottom right. On Windows XP, right-click the wireless network icon and select View Available Wireless Networks. On Windows 7, all you have to do is to click on the WLAN icon. 1.PLEASE NOTE: Depending on the manufacturing date of the scanner, the WLAN might be configured as an ad hoc network. 1. If the WLAN is running in ad hoc mode, the encryption key is a WEP key and must consist of 10 arbitrary digits. 2.The way of connecting to scanners with the WLAN running in ad hoc mode differs from the way decribed in this manual. Please see the online help in the scanner‘s user interface for more information on how to connect to scanners with their WLAN running in ad hoc mode. 85 Chapter 6: The Focus3D X 130 Controller Software FARO® Laser Scanner Focus3D X 130 Manual January 2014 • A list with the available wireless network connections appears. Choose the scanner‘s WLAN network in this list (the scanner should be listed with the above mentioned network name) and click the Connect button on Windows XP or just select it on Windows 7. • When prompted, enter the WLAN encryption key.As soon as the notebook is connected to the scanner, open your web browser. In the address field of the web browser enter the WLAN IP address of the scanner followed by port 8400 (e.g. http.//172.17.16.23:8400) to access the controller software. • PLEASE NOTE: the Adobe Flash Player must be installed on your system and please make sure that you do not use a Proxy server for the network connection. With some web browsers, like the Internet Explorer, it might also be necessary to allow blocked content in order to run the controller software. • The Home screen of the controller software appears in your web browser and you can control the scanner as usual. Figure 6-22 Controller software in web browser of remote device Remotely Accessing the Scans on the SD card If you would like to access the scan files that are stored on the scanner‘s removable SD card from a connected remote device, enable remote access in the scanner‘s controller software under Home > Manage > General Settings first. See “General Settings” on page 78. Then open a file explorer on your remote device (e.g. Windows Explorer) and enter the following address into its address bar: „\\WLAN_IP_ADDRESS_OF_SCANNER\Scans“ (e.g. \\172.17.16.23\Scans). You should have access to the scans now. You may 86 Chapter 6: The Focus3D X 130 Controller Software FARO® Laser Scanner Focus3D X 130 Manual January 2014 download them to your remote device by simple file operations. Note that copying the files from the scanner via WLAN may take a while, depending on connection speed and signal strength. Scanner Details (Home > Manage > General Settings > Scanner Details) Figure 6-23 Scanner Details Scanner Name - Give your scanner a name. Owner - Enter the owner of the scanner. LAN IP Address - The Ethernet IP address of the scanner. Subnet Mask - The Ethernet subnet mask of the scanner. Serial Number - Serial number of the scanner. This number is individual for each scanner. Model - The scanner type. Total No. of Scans - The total number of scans captured with this scanner. Firmware Revision / System Revision - The revisions of the currently installed firmware and system software. 87 Chapter 6: The Focus3D X 130 Controller Software FARO® Laser Scanner Focus3D X 130 Manual January 2014 Service (Home > Manage > Service) Figure 6-24 Service Errors & Warnings - Click to change to another screen to view details of present warnings and errors. Button will not be enabled if there are no warnings or errors. See “Errors and Warnings” on page 88. SD Card - View details about the currently inserted SD card or format the SD card. See “SD Card” on page 89. Log file - Export the log file to the SD card. See “Log File” on page 89. Backup - Backup scan profiles, operators, wallpapers and scanner parameters as scanner snapshots to the SD card. See “Backup” on page 90. Restore - Restore scan profiles, operators, wallpapers and scanner parameters from scanner snapshots or restore scanner snapshots that have been created with SCENE. See “Restore” on page 91. Firmware update - Update the scanner with new firmware versions. See “Firmware Update” on page 93. Factory Settings - Reset the scanner to its factory settings. See “Factory Settings” on page 94. FARO Customer Support - View the FARO Customer Support contact data. Command Prompt - Command prompt to send commands to the scanner. This function is for FARO Service purposes only. Last Service Date - Date of the last scanner maintenance and certification service. 88 Chapter 6: The Focus3D X 130 Controller Software FARO® Laser Scanner Focus3D X 130 Manual January 2014 Errors and Warnings (Home > Manage > Service > Errors & Warnings) Figure 6-25 Warnings and Errors This view provides a list of present warnings and errors. Click a list item to view details of the corresponding warning or error. Warnings and errors disappear from the list when they have been fixed. Figure 6-26 Warnings and Errors Details This screen shows a description of the warning or error and provides a possible solution to solve the problem. Warning ID / Error ID - The identification number of the warning or error. Description - A detailed description of the warning or error. Possible solution - Possible solution to solve the problem. 89 Chapter 6: The Focus3D X 130 Controller Software FARO® Laser Scanner Focus3D X 130 Manual January 2014 SD Card (Home > Manage > Service > SD Card) Figure 6-27 SD Card This view provides information about the currently inserted SD card and its contents. Format Card - Format the inserted SD card. PLEASE NOTE: This operation will delete all scans and other data of the SD card. Always use this formatting function for SDXC cards with a capacity of 64GB or more as Windows will format such cards with its own file system which is not supported by the scanner. For more information, see “Preparing a SD Memory Card” on page 31. Log File (Home > Manage > Service > Log File) 90 Chapter 6: The Focus3D X 130 Controller Software FARO® Laser Scanner Focus3D X 130 Manual January 2014 Important scanner operations, sensor data as well as warnings and errors will be saved to the log file that can help customer service to identify problems and the cause of possible errors. Figure 6-28 Log File Export - Writes the scanner log file to the SD card. It will be saved to a folder called “Logfile”. Clear - Clears the contents of the log file on the scanner. Backup (Home > Manage > Service > Backup) The scanner creates an automatic backup of the scanner settings and saves it to the inserted SD card. This backup will automatically be updated with the current scanner settings each time you start a scan. It includes the current scan profiles, scanning parameters, operators, wallpapers and general settings. Additionally, you can also create manual backups of certain scanner settings. This manual backup option saves scanner parameters, as well as operators, scan profiles but also wallpapers to the SD card. The manual backup option creates snapshots of this scanner data and helps you to protect it from accidental loss if your scanner's hardware or storage media fails. It creates a duplicate copy of your data on your SD card; you can then archive the data on another storage device or modify it with SCENE and transfer the modified data back to your scanner. 91 Chapter 6: The Focus3D X 130 Controller Software If you own more than one scanner, you can also transfer operators, scan profiles or wallpapers from one scanner to another without the need of entering the data individually. Figure 6-29 Backup Backup Name - Click to enter the name of the backup package. Data will be saved to the following directory on your SD card: /Backup/Your_backup_name/. After having specified the name of the backup folder, select the data you want to backup and click the Backup button to start the operation. NOTE: The number behind Operators, Profiles and Wallpapers informs about the number of operators, scan profiles and wallpapers on the scanner. Restore (Home > Manage > Service > Restore) With this function you can • restore operators, scan profiles, scanner parameters and wallpapers from archived backups or scanner snapshots. • import operators, profiles and wallpapers that were newly created with SCENE. • import formerly backed up operators, profiles and wallpapers that were modified with SCENE. • import operators, profiles, wallpapers and scanner parameters from other scanners. To restore data, it must be saved to a SD card. For this, create a directory on the SD card, named “Backup”, and then copy the folder with the data you want to FARO® Laser Scanner Focus3D X 130 Manual January 2014 restore to this directory. If you use SCENE to create new or modify backed up data, this will be done automatically by SCENE. When finished, insert the SD card with the data you want to restore. Figure 6-30 Restore - Select Backup File This screen shows you a list of all backup packages on the inserted SD card. _AUTO_BACKUP is the automatically generated scanner snapshot (see “Backup” on page 90). _SCENE_BACKUP is the scanner snapshot that has been created or modified with SCENE. Click on the backup package you want to restore. A new screen will appear. Figure 6-31 Restore - Select Restore Data Select the data from the backup package you want to restore and press the Restore button to start the restore operation. 93 Chapter 6: The Focus3D X 130 Controller Software FARO® Laser Scanner Focus3D X 130 Manual January 2014 PLEASE NOTE: The restored data will override existing data on the scanner. E.g. if you want to restore or import scan profiles, all the existing scan profiles on the scanner will be overridden by the new profiles. The scanner's default profiles remain unaffected from this operation. We recommend backing up your data before restoring. Firmware Update (Home > Manage > Service > Firmware Update) Figure 6-32 Update Firmware If you want to update the firmware of your Focus3D X 130 you have to copy the update file to the folder “Updates” on your SD card first. If this folder does not exist, you have to create it manually. Please pay attention to lower and uppercase when entering the folder name. Insert the SD card with a firmware update file, and then press the Update button. The update process may take up to 30 or 40 minutes depending on the extent of the update. Please do not manually shut down or power off the scanner during the update process! After the update is complete the scanner might restart automatically. 94 Chapter 6: The Focus3D X 130 Controller Software FARO® Laser Scanner Focus3D X 130 Manual January 2014 Factory Settings (Home > Manage > Service > Factory Settings) Figure 6-33 Reset to Factory Settings This function will reset your scanner settings to factory default. Use this option in exceptional cases only. Your scans, scan profiles, scan projects or operators that are saved on the scanner remain unaffected by this operation. Sensors (Home > Manage > Sensors) Figure 6-34 Sensors 95 Chapter 6: The Focus3D X 130 Controller Software FARO® Laser Scanner Focus3D X 130 Manual January 2014 Temperature - Click to view the current scanner temperature and to switch the scanner's fan on or off. See “Temperature Sensors” on page 95. Inclinometer - Click to level the scanner. See “Inclinometer (Dual Axis Compensator)” on page 96. Compass - Click to view the orientation of the scanner. See “Compass” on page 97. Altimeter - Click to view the currently measured altitude of the scanner‘s position and to sync the altimeter with a reference height. See “Altimeter” on page 99. GPS - Click to view details about the current GPS position and accuracy. See “GPS” on page 100. Temperature Sensors (Home > Manage > Sensors > Temperature) Figure 6-35 Temperature Sensors The scanner has several temperature sensors integrated that measure the temperature at different positions inside the scanner. This screen shows the temperature of the sensor with the currently most critical value. If a sensor is within a critical temperature range, just below or above a critical value, the indicator will be in the yellow area; scanning will still be possible, but the temperature might have a negative effect on the scan quality. Therefore, it is recommended to warm or cool down the scanner until the temperature indicator is within the green area again. 96 Chapter 6: The Focus3D X 130 Controller Software FARO® Laser Scanner Focus3D X 130 Manual January 2014 If the temperature is too high or too low, the indicator will be within the red area. In that case, scanning will not be possible anymore and the scanner will shut down within the next minutes. Fan cooling switches the scanner's integrated fan on or off. Please make sure that the fan is switched off in exceptional cases only! If the fan is switched off for a long period of time, the scanner may overheat and abort scanning or the scanner gets damaged in the worst case. If the temperature is above the critical limit, please check if the fan is switched on. If not, please switch it on. The temperature should drop within a short period of time. Inclinometer (Dual Axis Compensator) (Home > Manage > Sensors > Inclinometer) Figure 6-36 Inclinometer The data of the built-in dual axis compensator of the Focus3D X 130 is used to automatically level the captured scan data. The accuracy of the dual axis compensator is specified for inclinations up to 5 degrees and will degrade above 5 degrees. The inclination of the scan is electronically measured and stored in each scan. This information is used during the process of the registration of scans (see SCENE manual). Therefore it is advisable to level the scanner with an inclination less than 5°. For this, you may use either a bubble inclinometer at the tripod or the inclinometer screen. If you want SCENE to automatically use the inclination data for the scan registration, switch the Use Inclinometer button to ON, else switch it to OFF. This setting affects the current scanning parameters 97 Chapter 6: The Focus3D X 130 Controller Software FARO® Laser Scanner Focus3D X 130 Manual January 2014 and has the same function as the equivalent button in the parameters settings. See “Setting the Scanning Parameters” on page 41. The dual axis compensator is able to detect whether the scanner is mounted upside-down, i.e. turned by 180 degrees. To ensure the accuracy of the inclination measurements, make sure that the inclination of the upside-down mounted scanner to the horizontal line is less than 5 degrees, i.e. that it is turned between 175 and 185 degrees (or between -175 and -185 degrees). The view displays 3 bubble levels as they would appear if mounted on top of the scanner. If the bubble is inside the inner black circle of the circular level, the scanner is leveled with a vertical scanner's pan axis. If the bubble is inside the larger black circle, the inclination of the scanner is within 5 degrees and the background color of the level is green. If the inclination is larger, the background color of the level will turn red and the accuracy of the inclination measurement might then be reduced (this also applies if the scanner is mounted upside-down). The two linear levels help understanding the direction of inclination: If the bubble in the upper level is on the left side, the scanner is tilted to the right (if you are standing in front of the display). If the scanner is tilted towards you, the bubble in the left level is in the upper half. Compass (Home > Manage > Sensors > Compass) Figure 6-37 Compass The built-in electronic compass measures the orientation of the scanner on the earth‘s surface which is useful information for the registration process. This information is attached to each scan and can be used for the scan registration in SCENE (see SCENE manual for more information). If you want SCENE to 98 Chapter 6: The Focus3D X 130 Controller Software FARO® Laser Scanner Focus3D X 130 Manual January 2014 automatically use the compass data for the scan registration, switch the Use Compass button to ON, else switch it to OFF. This setting affects the current scanning parameters and has the same function as the equivalent button in the parameters settings. See “Setting the Scanning Parameters” on page 41. You can monitor the current orientation of the scanner on this screen. Initially, when entering this screen, the orientation is not displayed. To see the current orientation of the scanner, touch the Update Compass button on the bottom. For the measurement, the scanner needs to turn horizontally by 360 degress. Please ensure that the scanner can move freely and do not sway the scanner during the measurment. As soon as the scanner has completed the rotation and determined its orientation, a compass will be displayed as it would appear if mounted on top of the scanner. This compass illustrates the current scanner orientation. Additionally, the measured orientation value will be displayed in degrees. The given orientation refers to the direction to which the scanner's left side is currently facing (the left side if you are standing in front of the scanner‘s display). To get updated orientation data, e.g. if the scanner has been moved to another position, you need to touch the Update Compass button again. This manual compass measurement only affects the output on this screen and it is not necessary for the orientation data measured during scanning. During scanning an orientation measurement is performed automatically. The accuracy of compass measurements can be affected by magnetic or other environmental interference. An indicator of the strength of environmental interference and thus of the current compass measurement accuracy is the displayed Horizontal field strength of the magnetic field. The typical strength of the earth's magnetic field depends on geographical position and varies from 0.3 to 0.6 gauss (G). The displayed horizontal field strength is lower than the absolute field strength because of the inclination of the field. For example, the typical horizontal field strength for Europe is about 0.2 gauss. If the measured field strength differs a lot from the expected field strength there might be a strong artificial magnetic field near the scanner that probably affects the measurement. To get the most reliable orientation data for the scan registration, avoid positioning the scanner near to strong magnetic fields. If the measured horizontal field still significantly differs, you may switch the use of the compass data to OFF. 99 Chapter 6: The Focus3D X 130 Controller Software FARO® Laser Scanner Focus3D X 130 Manual January 2014 Altimeter (Home > Manage > Sensors > Altimeter) Figure 6-38 Altimeter The barometric height sensor (altimeter) determines the altitude of the current scanner position. The altitude determination is based on the measurement of the atmospheric pressure. The measured altitude is attached to each scan and can be used for the scan registration in SCENE (see SCENE manual for more information). If you want SCENE to automatically use the measured altitude for the scan registration, switch the Use Altimeter button to ON, else switch it to OFF. This setting affects the current scanning parameters and has the same function as the equivalent button in the parameters settings. See “Setting the Scanning Parameters” on page 41. To see the currently measured altitude on this screen, the use of the altimeter has to be switched ON. For scan registration it is sufficient to know the difference in altitude of the various scanner positions. Before starting your scan project, you should pick a position of your scanning site which you would like to use as the reference for the altitude measurements. Move the scanner to this reference position, enter any height you would like to use for this position and reset the altimeter to this reference height by clicking on the Sync Reference Height button. All further altimeter measurements will then be done on the basis of this reference height. If you want comparable height measurements across different projects, you may sync the altimeter with a real altitude. For this, pick a reference position of your scanning site where you know the approximate altitude above sea level. You may get this value from GPS, a topographic map, or from Google Earth. 100 Chapter 6: The Focus3D X 130 Controller Software FARO® Laser Scanner Focus3D X 130 Manual January 2014 As the altimeter determines the altitude based on the measurement of the atmospheric pressure, changes in the air pressure caused by changing weather conditions have an effect on the resulting altitude. To have precise altitude measurements, you should therefore check the reference altitude from time to time, at least at the beginning of each project day or if you experience changes in the weather. To do this, move the scanner to your reference position again and compare the altitude reading with the reference height. If there is a difference, sync the altimeter with the reference height again. GPS Figure 6-39 GPS The position information of the scanner‘s position provided by the built-in GPS sensor is attached to each scan and is automatically used for the scan registration in SCENE, if the use of the GPS sensor is switched ON. Use GPS - Turn the sensor ON or OFF. Unlike the other sensors, GPS data is only recorded and attached to each scan if this button is switched to ON. The reason for this differing behavior is to give you the opportunity to prevent GPS location data from being recorded in your scans, if you do not want to reveal this information to others. This button affects the current scanning parameters and has the same function as the equivalent button in the parameters settings. See “Setting the Scanning Parameters” on page 41. After the GPS sensor is switched ON, it automatically begins searching for GPS satellites. Note that it may take some minutes to find all the available satellites and to determine a precise position information. It is recommended to switch the GPS sensor OFF if it is not needed or if a GPS signal is not available (e.g. if you are scanning indoor). 101 Chapter 6: The Focus3D X 130 Controller Software FARO® Laser Scanner Focus3D X 130 Manual January 2014 GPS information - Provides information about the currently measured GPS coordinates latitude, longitude and the altitude as well as the UTC time of the last satellite contact and the number of satellites that are currently in view. The GPS receiver needs the signal of at least three satellites to calculate a 2D position (latitude and longitude). With four or more satellites in view, the receiver can determine the scanner‘s 3D position (latitude, longitude and altitude). The signal strength bars below the GPS information appear for each satellite in view with the appropriate satellite number underneath. They indicate the signal strength for each satellite. GPS precision - Provides information about the precision of the currently measured coordinates in metres or feet. The DOP (dilution of precision) values are an indicator of the quality of the geometry of the current satellite constellation. In general, good position measurements can be achieved, when the satellites are located at wide angles relative to each other. In this case the DOP values are low. Higher DOP values indicate a poor satellite geometry which might have a negative effect on the position accuracy. The current GPS status and signal quality is indicated by a different GPS icons in the status bar of the operating software: No GPS icon GPS is turned off GPS is enabled, position deviation in meters > 30m or no GPS data available. GPS is enabled, position deviation in meters > 20m and <30m GPS is enabled, position deviation in meters > 10m and <20m GPS is enabled, position deviation in meters < 10m Before starting a scan, you should always have look at the GPS icon and the indicated quality. If no GPS data is available or position deviation is high, try to find a position with better signal quality. 102 Chapter 6: The Focus3D X 130 Controller Software FARO® Laser Scanner Focus3D X 130 Manual January 2014 A limited GPS signal can have many different reasons. Like with portable navigation devices, make sure that the scanner always has an unobstructed view of the sky. Obstructions can block the signal reception, causing position inaccuracy or no position data. The GPS signal can also be reflected by objects (e.g. buildings or mountains), causing the measured position to wander. The more satellites the sensor has in view, the better the fix is. View Scans (Home > View Scans) You can examine preview pictures of the scans stored on the inserted SD cards. A list of all available scans will be displayed: Figure 6-40 Scans List This list contains all scans that are available on the SD card, displayed with their name, file size and creation date. The list is sorted by the creation date of the scans. 103 Chapter 6: The Focus3D X 130 Controller Software FARO® Laser Scanner Focus3D X 130 Manual January 2014 Click a scan in the list to see its preview picture. Figure 6-41 Zoomed Preview of a Scan Previous button - Shows the preview picture of the previous scan. Next button - Shows the preview picture of the next scan. Zoom in button - Zooms the picture in. Zoom out button - Zooms the picture out. Reset zoom button - Zooms the picture to its original size. Button is only visible if the picture is zoomed in. Delete Button - Deletes the currently displayed scan from the SD card. 104 Chapter 6: The Focus3D X 130 Controller Software FARO® Laser Scanner Focus3D X 130 Manual January 2014 Info - Click to view the scan properties. A warning or error icon on the button indicates that there was a warning or an error during recording the viewed scan. More information can be seen in the scan properties. Figure 6-42 Scan Details This view informs about the properties of the scan. This includes the parameters and settings used to record the scan as well as information about potential warnings or errors that might have had occured during scanning. Online Help You can open a description of the currently displayed view by pressing the help button in the navigation bar. 105 Chapter 6: The Focus3D X 130 Controller Software FARO® Laser Scanner Focus3D X 130 Manual January 2014 Figure 6-43 Online Help of Home Screen The online help provides useful information about the currently active view. 106 Chapter 6: The Focus3D X 130 Controller Software FARO® Laser Scanner Focus3D X 130 Manual February 2014 Chapter 7: Technical Data General Power supply voltage: 19V (external supply) 14.4V (internal battery) Power consumption: 40W and 80W (while battery charges) Battery life: 4.5 hours Ambient temperature: 5° - 40°C Humidity: Non-condensing Cable connector: Located in scanner mount Weight: 5.2kg Size: 240 x 200 x 100mm Maintenance / calibration: Annual Ranging unit Unambiguity interval: 130m Range Focus3D X 1301: 0.6m - 130m indoor or outdoor with upright incidence to a 90% reflective surface Measurement speed (pts/sec):122,000 / 244,000 / 488,000 / 976,000 Ranging error1: ±2mm Ranging noise2 @10m @10m - noise compressed3 @25m @25m - noise compressed3 @ 90% refl. @ 10% refl. 0.15mm 0.2mm 0.3mm 0.5mm 0.15mm 0.25mm 0.3mm 0.4mm Color unit Resolution: Up to 70 megapixel color Dynamic color feature: Automatic adaption of brightness Parallax: Co-axial design 107 Chapter 7: Technical Data FARO® Laser Scanner Focus3D X 130 Manual February 2014 Deflection unit Field of view (vertical/horizontal): 300° / 360° Step size (vertical/horizontal): 0.009° (40,960 3D-Pixel on 360°) / 0.009° (40,960 3D-Pixel on 360°) Max. vertical scan speed: 5,820rpm or 97Hz Laser (optical transmitter) Laser class: Laser class 1 Wavelength: 1550 nm Beam divergence: Typical 0.19 mrad (0.011°) (1/e, halfangle) Beam diameter at exit: Typical 2.25 mm (1/e) Data handling and control Data storage: SD, SDHC™, SDXC™; 32GB card included Scanner control: Via touchscreen display and WLAN New WLAN access: Remote control, scan visualisation are possible on mobile devices with Flash® Multi-Sensor Dual axis compensator: Levels each scan: Accuracy 0.015°; Range ± 5° Height sensor: Via an electronic barometer the height relative to a fixed point can be detected and added to a scan. Compass4: The electronic compass gives the scan an orientation. A calibration feature is included. GPS: Integrated GPS receiver Scanner power supply unit AC Input Voltage: 100 - 240 V AC Input Frequency: 50 - 60 Hz Input current: 2.0 A 108 Chapter 7: Technical Data FARO® Laser Scanner Focus3D X 130 Manual February 2014 Ambient Conditions Ambient Temperature: 5° - 40°C Humidity: max. 90 %, non-condensing Altitude: < 2000 m The FARO® Laser Scanner Focus3D X 130 is protected by U.S. patent 7,869,005. 1 Ranging error is defined as a systematic measurement error at around 10m and 25m, one sigma. 2 Ranging noise is defined as a standard deviation of values about the best-fit plane for measurement speed of 122,000 points/sec. 3 A noise-compression algorithm may be activated thereby compressing raw data noise by a factor of 2 or 4. Subject to change without prior notice. 4 Ferromagnetic objects can disturb the earth magnetic field and lead to inaccurate measurements. 109 Chapter 7: Technical Data FARO® Laser Scanner Focus3D X 130 Manual February 2014 110 Chapter 7: Technical Data FARO® Laser Scanner Focus3D X 130 Manual January 2014 Chapter 8: Appendix Available Replacement Parts • Power supply unit with cable • AC power cable • Transport case LED Behavior LED beneath LED on LED on sensor LED on START/ STOP mirror side of side of scanner scanner mount button scanner Scanner off, external power off supply not connected off Scanner off, off battery charging Dimmed blue, Dimmed blue, Dimmed blue, very slow blink very slow blink very slow blink Scanner off, battery fully charged, power off supply connected Dimmed blue, Dimmed blue, Dimmed blue, constantly constantly constantly Regular boot process off off blue fast blink blue fast blink blue fast blink blue fast blink Low battery orange fast error during blink boot process Failure during shutdown, scanner could not orange fast shutdown propblink erly, turn off scanner manually orange fast blink orange fast blink orange fast blink orange fast blink orange fast blink orange fast blink Figure 8-1 LED Behavior 111 Chapter 8: Appendix FARO® Laser Scanner Focus3D X 130 Manual January 2014 LED beneath LED on LED on sensor LED on START/ STOP mirror side of side of scanner scanner mount button scanner Scanner operable blue constantly blue constantly blue constantly blue constantly Scan operation red blink Laser on red blink red blink red blink Scan operation blue blink Laser off blue blink blue blink blue blink Error orange constantly orange constantly orange constantly orange constantly Shut down blue fast blink blue fast blink blue fast blink blue fast blink Figure 8-1 LED Behavior File Structure of the SD Memory Card The file structure of the Focus3D X 130 SD cards is as follows: Figure 8-2 SD Card File Structure Backup - Scanner backups will be saved to this folder. The backup folder will be created automatically as soon as you start a scanner backup. See “Backup” on page 91. Log file - When exporting the log file from the scanner, it will be saved to this folder. This folder will be created automatically by the scanner. See “Log File” on page 90. Preview - The preview pictures of captured scans will be saved to this folder. The folder will be created automatically as soon as you start a scan. See “Starting a Scan” on page 55. Projects - Scan projects information will be saved to this folder. The folder will be created automatically by the scanner. See “Managing Scan Projects” on page 68. 112 Chapter 8: Appendix Scans - The captured scans will be saved to this folder. The scans folder will be created automatically as soon as a scan has been started. See “Starting a Scan” on page 55. Updates - Copy firmware updates to this folder. This folder has to be created manually. See “Firmware Update” on page 94. FARO-LS - Signature file, used to identify the SD card as a Focus3D X 130 card. This file will be created automatically as soon as a scan has been started. Focus3D X 130 Error Messages Error Message Description Action Internal Error: Invalid parameter The scanner parameters are inconsistent. Please restart scanner. If the problem still occurs after restart, contact FARO Customer Service Distance measurement tolerance exceeded The white reference area on the scanner‘s base gave inconsistent measurements. Please check cleanliness of this reference area, mirror, and lenses. WLAN error The WLAN device could not be found. Please restart scanner. If the problem still occurs after restart, contact FARO Customer Service Color aquisition failure Color aquisition has stopped unexpectedly. Probably Please save log file and concolor aquisition is not com- tact FARO Customer Service plete. Out of time failure This indicates an internal scanner error. Please restart scanner. If the problem still occurs after restart, contact FARO Customer Service Module Status Error Module Status Error: Data version mismatch. Internal scanner communication problem. Please ask FARO Customer Service for a firmware upgrade. Figure 8-3 Error Message Please restart scanner. If the problem still occurs after restart, contact FARO Customer Service Scanner Operation Failure Internal scanner error. Command not executed Command could not be executed because of a previous running scan operation. A Wait until the scan has been scan is still active, you can- finished. not start the next operation now. FARO® Laser Scanner Focus3D X 130 Manual January 2014 Error Message Description Action Temperature of the scanner is too low. Scanning is not possible. Please warm up the scanner before further use. Temperature of the scanner is too high. Scanning is not possible. Please shut down the scanner and let it cool down or check if the fan is running. If not enable fan cooling under Manage - Sensors - Temperature Internal memory full The internal scanner harddrive is full. Please try to free some space by deleting wallpapers, operators, projects or profiles or by clearing the log file. If that does not help, please contact FARO customer service. Possible file system corruption on SD card detected. Do you want the scanner to repair the file system on the SD card? It is recommended to let the scanner repair the SD card. Please note that repairing The scanner has detected file might delete erroneous files system corruptions on the from the SD card. If you see inserted SD card. Damages this error message again and to the file system may again, you should consider occure when you remove the replacing the SD card. To SD card from your computer prevent damages to the file without using the „Safely system when removing the Remove Hardware“ option SD card from your computer, in Microsoft Windows. please always use the „Safely Remove Hardware“ option in Microsoft Windows. Scanner temperature too low Temperature too high Unknown error An unknown error occured. Please restart scanner. If the problem still occurs after restart, contact FARO Customer Service Figure 8-3 Error Message 115 Chapter 8: Appendix FARO® Laser Scanner Focus3D X 130 Manual January 2014 Focus3D X 130 Mount Dimensions Figure 8-4 Focus3D X 130 Mount Drawings 116 Chapter 8: Appendix FARO® Laser Scanner Focus3D X 130 Manual January 2014 Focus3D X 130 Dimensions Figure 8-5 Focus3D X 130 Dimensions 117 Chapter 8: Appendix FARO® Laser Scanner Focus3D X 130 Manual January 2014 Focus3D X 130 Power Socket 3D Figure 8-6 Focus X 130 Power Socket Not Connected GND GND +19V +19V 118 Chapter 8: Appendix FARO® Laser Scanner Focus3D X 130 Manual January 2014 Chapter 9: Product Environmental Information Legislation is now in place within the European Union (EU) that regulates waste from electrical and electronic equipment (WEEE). European Directive 2002/96/ EC on Waste Electrical and Electronic Equipment (the WEEE Directive) stipulates that WEEE is now subject to regulations designed to prevent the disposal of such waste and to encourage design and treatment measures to minimize the amount of waste that is placed into the waste stream. The objective of the WEEE Directive is to preserve, protect and improve the quality of the environment, protect human health, and stimulate the practical use of natural resources. Specifically, the WEEE Directive requires that producers of electrical and electronic equipment be responsible for the collection, reuse, recycling and treatment of WEEE which the Producer places on the EU market after August 13, 2005. FARO Technologies, Inc., as a producer of electrical and electronic equipment (EEE), has endeavored to meet these environmental responsibilities for managing WEEE. In so doing, FARO is providing the following to inform its customers about the WEEE collection process: In order to avoid any potential dissemination of hazardous substances into the environment, FARO has labeled this product with the WEEE symbol (see below) in order to alert the end-user that it should be disposed of within the proper waste management system. That system will recycle, reuse, and dispose of materials from this product in an environmentally sound way. The symbol represented below, and found on this FARO Technologies product, indicates that this product meets the European Directive 2002/96/EC on Waste Electrical and Electronic Equipment. This symbol, only applicable in European Union countries, indicates that when this product reaches the end of its useful life it should not be disposed of with normal household or municipal waste, but in an established waste stream for WEEE. Each EU Member State country has established a system for the collection, disposal, and recycling of WEEE. End-users in the EU should contact their local waste administration system for collection instructions concerning this product. 119 Chapter 9: Product Environmental Information FARO® Laser Scanner Focus3D X 130 Manual January 2014 Refer to www.faro.com for further environmental information concerning this product. WEEE Symbol 120 Chapter 9: Product Environmental Information FARO® Laser Scanner Focus3D X 130 Manual January 2014 Technical Support FARO Technologies, Inc. is committed to providing the best technical support to our customers. Our Service Policy is detailed in Appendix C: Industrial Products Service Policy of this manual. If you have any problem using one of our products, please follow these steps before contacting our Technical Support Team: • Be sure to read the relevant sections of the documentation to find the help you need. • Visit the FARO Customer Care area on the Web at www.faro.com to search our technical support database. This is available 24 hours a day 7 days a week. • Document the problem you are experiencing. Be as specific as you can. The more information you have, the easier the problem will be to solve. • If you still cannot resolve your problem, have your device’s Serial Number available before calling. Support Hours (Monday through Friday) North America: 8:00 a.m. to 8:00 p.m. Eastern Standard Time (EST). Europe: 8:00 a.m. to 5:00 p.m. Central European Standard Time (CET). Asia: 8:30 a.m. to 5:30 p.m. Singapore Standard Time (SST). Japan: 9:00 a.m. to 5:00 p.m. Japan Standard Time (JST). China: 8:30 a.m. to 5:30 p.m. China Standard Time (CST). India: 9:30 a.m. to 5:30 p.m. India Standard Time (IST). You can also e-mail or fax any problems or questions 24 hours a day. • Phone North America: 800 736 2771, +1 407 333 3182 (Worldwide) Europe: +800 3276 7378, +49 7150 9797-400 (Worldwide) Asia: 1800 511 1360, +65 6511 1350 (Worldwide) Japan: 121 FARO® Laser Scanner Focus3D X 130 Manual January 2014 +81 561 63 1411 (Worldwide) China: +400.677.6826 India: 1800.1028456 • Fax North America: +1 407 333 8056 Europe: +800 3276 1737, +49 7150 9797-9400 (Worldwide) Asia: +65 6543 0111 Japan: +81 561 63 1412 China: +86 21 6494 8670 India: +91 11.4646.5660 • E-Mail North America: [email protected] Europe: [email protected] Asia: [email protected] Japan: [email protected] China: [email protected] India: [email protected] E-Mails or Faxes sent outside regular working hours usually are answered before 12:00 p.m. the next working day. Should our staff be on other calls, please leave a voice mail message; calls are always returned within 24 hours. Please remember to leave a detailed description of your question and your device’s 122 FARO® Laser Scanner Focus3D X 130 Manual January 2014 Serial Number. Do not forget to include your name, fax number, telephone number and extension so we can reach you promptly. 123 FARO® Laser Scanner Focus3D X 130 Manual January 2014 Appendix A: Software License Agreement This Software License Agreement is part of the Operating Manual for the product and software System which you have purchased from FARO TECHNOLOGIES, INC. (collectively, the “Licenser”). By your use of the software you are agreeing to the terms and conditions of this Software License Agreement. Throughout this Software License Agreement, the term “Licensee” means the owner of the System. I. The Licenser hereby grants the Licensee the non-exclusive right to use the computer software described in this Operating Manual (the “software”). The Licensee shall have no right to sell, assign, sub-license, rent or lease the software to any third party without the Licenser’s prior written consent. II. The Licenser further grants the Licensee the right to make a backup copy of the software media. The Licensee agrees that it will not decompile, disassemble, reverse engineer, copy, transfer, or otherwise use the software except as permitted by this section. The Licensee further agrees not to copy any written materials accompanying the software. III. The Licensee is licensed to use the Software only in the manner described in the Operating Manual. Use of the Software in a manner other than that described in the Operating Manual or use of the software in conjunction with any nonLicenser product which decompiles or recompiles the software or in any other way modifies the structure, sequence or function of the software code, is not an authorized use, and further, such use voids the Licenser’s set forth below. IV. The only warranty with respect to the software and the accompanying written materials is the warranty, if any, set forth in the Quotation/Purchase Order and Appendix B: Purchase Conditions pursuant to which the software was purchased from the Licenser. V. THIS WARRANTY IS IN LIEU OF OTHER WARRANTIES, EXPRESS OR IMPLIED, INCLUDING, BUT NOT LIMITED TO, THE IMPLIED WARRANTIES OF MERCHANTABILITY AND FITNESS FOR A PARTICULAR PURPOSE WITH RESPECT TO THE SOFTWARE AND WRITTEN MATERIALS. IN NO EVENT WILL THE LICENSER BE LIABLE FOR DAMAGES, INCLUDING ANY LOST PROFITS OR OTHER INCIDENTAL OR CONSEQUENTIAL DAMAGES ARISING OUT OF THE USE OR INABILITY TO USE THE SOFTWARE, NOTWITHSTANDING THAT THE LICENSER HAVE BEEN ADVISED OF THE POSSIBILITY OF SUCH DAMAGES, THE LICENSER WILL NOT BE LIABLE FOR ANY SUCH CLAIM BY ANY OTHER PARTY. 1 FARO® Laser Scanner Focus3D X 130 Manual January 2014 VI. In the event of any breach by the Licensee of this Agreement, the license granted hereby shall immediately terminate and the Licensee shall return the software media and all written materials, together with any copy of such media or materials, and the Licensee shall keep no copies of such items. VII.The interpretation of this Agreement shall be governed by the following provisions: A. This Agreement shall be construed pursuant to and governed by the substantive laws of the State of Florida (and any provision of Florida law shall not apply if the law of a state or jurisdiction other than Florida would otherwise apply). B. If any provision of this Agreement is determined by a court of competent jurisdiction to be void and non-enforceable, such determination shall not affect any other provision of this Agreement, and the remaining provisions of this Agreement shall remain in full force and effect. If any provision or term of this Agreement is susceptible to two or more constructions or interpretations, one or more of which would render the provision or term void or non-enforceable, the parties agree that a construction or interpretation which renders the term of provision valid shall be favored. C. This Agreement constitutes the entire Agreement, and supersedes all prior agreements and understandings, oral and written, among the parties to this Agreement with respect to the subject matter hereof. VIII.If a party engages the services of an attorney or any other third party or in any way initiates legal action to enforce its rights under this Agreement, the prevailing party shall be entitled to recover all reasonable costs and expenses (including reasonable attorney’s fees before trial and in appellate proceedings). 2 FARO® Laser Scanner Focus3D X 130 Manual January 2014 Appendix B: Purchase Conditions All Purchase Orders (hereafter, the “Order”) for FARO-provided products and services (hereafter, the “Product”) are subject to the following terms and conditions, which are agreed to by the Purchaser. All capitalized terms are defined in Section 8.00 Definitions hereafter. 1.00Payment of Purchase Price 1.01Purchaser hereby promises to pay to the order of FARO all deferred portions of the Purchase Price, together with interest on late purchase price payments payable at 1.5% per month (18% per annum). 1.02The Purchaser grants to FARO a security interest in the products sold pursuant to the Order, which may be perfected by UCC-1 Financing Statements to be recorded in the applicable County of the Purchaser’s business location and filed with the Secretary of State’s Office, which security interest will remain in effect until payment in full of the purchase price together with interest on late purchase price payments payable thereon had been received by FARO. 1.03If the Purchaser fails to make full payment of the purchase price within the period set out in the Order, FARO shall at its option have the following remedies, which shall be cumulative and not alternative: a) the right to cancel the Order and enter the Purchaser’s premises to re-take possession of the Product, in which event the Purchaser agrees that any downpayment or deposit shall be forfeited to FARO, as liquidated damages and not as a penalty, and all costs incurred by FARO in connection with the removal and subsequent transportation of the Product shall be payable by the Purchaser upon written demand; b) the right to enter the Purchaser’s premises and remove any Software, components of the Product or other items necessary in order to render the Product inoperative; c) the right to withhold all services which would otherwise be required to be provided by FARO pursuant to the Warranties set out in Section 4.00 Warranties and Limitation of Liability hereof; d) terminate any existing software license agreement and e) pursue any other available remedy, including suing to collect any remaining balance of the purchase price (i.e., accelerate the payment of the purchase price causing the entire balance to immediately become due and payable in full). 3 FARO® Laser Scanner Focus3D X 130 Manual January 2014 f) Customer will be charged a 20% restocking fee for refusal to accept equipment as delivered. Equipment must be returned unopened within 10 business days of receipt at customer facility. 1.04If Purchaser fails to make payment(s) in accordance with the terms of this Order, the Purchaser’s Products may be rendered inoperable until such payment terms are met. No waiver by FARO of its rights under these conditions shall be deemed to constitute a waiver of subsequent breaches or defaults by the Purchaser. In the event more than one Product is being purchased pursuant to the Order, unless otherwise set forth herein, each payment received by FARO from Purchaser shall be applied pro rata against the cost of each product rather than being applied to the purchase price of any product. 2.00Delivery and Transportation 2.01Delivery dates are estimates and not guarantees, and are based upon conditions at the time such estimate is given. 2.02FARO shall not be liable for any loss or damage, whether direct, indirect or consequential, resulting from late delivery of the Product. The Purchaser’s sole remedy, if the Product is not delivered within 90 days of the estimated delivery date, shall be to cancel the Order and to recover from FARO without interest or penalty, the amount of the downpayment or deposit and any other part of the purchase price which has been paid by the Purchaser. Notwithstanding the foregoing, such right of cancellation shall not extend to situations where late delivery is occasioned by causes beyond FARO’s control, including, without limitation, compliance with any rules, regulations, orders or instructions of any federal, state, county, municipal or other government or any department or agency thereof, force majuere, acts or omissions of the Purchaser, acts of civil or military authorities, embargoes, war or insurrection, labor interruption through strike or walkout, transportation delays and other inability resulting from causes beyond FARO’s control to obtain necessary labor, manufacturing facilities or materials from its usual sources. Any delays resulting from such causes shall extend estimated delivery dates by the length of such delay. 2.03Responsibility for all costs and risks in any way connected with the storage, transportation and installation of the Product shall be borne entirely by the Purchaser. If any disagreement arises as to whether or not 4 FARO® Laser Scanner Focus3D X 130 Manual January 2014 damage to the Product was in fact caused in storage, transit or on installation, the opinion of FARO’s technical advisors, acting reasonably, shall be conclusive. 3.00Installation and Operator Training 3.01The Purchaser shall be responsible for installation of the Product, including, without limitation, the preparation of its premises, the uncrating of the Product and setting up of the Product for operation. Purchaser may elect to order contract services from FARO to perform this service should they elect to do so. 4.00Warranties and Limitation of Liability 4.01FARO warrants that (subject to Section 4.06), the Product shall be free from defects in workmanship or material affecting the fitness of the Product for its usual purpose under normal conditions of use, service and maintenance. A complete statement of FARO’s maintenance/warranty service is set forth in Appendix B: Purchase Conditions. 4.02FARO warrants that the Software shall operate according to specifications and the System shall operate and perform in the manner contemplated in connection with the usual purpose for which it is designed. 4.03The maintenance/warranty set out in paragraphs 4.01 shall expire at the end of the twelve (12) month period commencing on the date of shipment from the FARO factory (the “Maintenance/Warranty Period”). 4.04Subject to the limitations contained in Section 4.06, the Warranties shall apply to any defects found by the Purchaser in the operation of the Focus3D X 130 and reported to FARO within the Maintenance/Warranty Period. If the Focus3D X 130 or the Software is found by FARO, acting reasonably, to be defective, and if the defect is acknowledged by FARO to be the result of FARO’s faulty material or workmanship, the Focus3D X 130 will be repaired or adjusted to the extent found by FARO to be necessary or at the option of FARO, replaced with a new Focus3D X 130 or parts thereof at no cost to the Purchaser. 4.05Claims under the Warranties shall be made by delivering written notice to FARO of the defect in the System, the Focus3D X 130. Within a reasonable time of receipt of such notice, FARO shall have the System and Focus3D X 130 diagnosed by its service personnel, and maintenance/warranty service will be provided at no cost to the Purchaser if the System and Focus3D X 130 is found by FARO to be defective within the meaning of this Section. (If, in the reasonable opinion of FARO after diagnosis of the system and the Focus3D X 130 are not defective, the Purchaser shall pay the cost of service, 5 FARO® Laser Scanner Focus3D X 130 Manual January 2014 which shall be the amount that FARO would otherwise charge for an evaluation under a non-warranty service evaluation. 4.06The Warranties do not apply to: a) Any defects in any component of a System where, if in the reasonable opinion of FARO, the Focus3D X 130, Software or System has been improperly stored, installed, operated, or maintained, or if Purchaser has permitted unauthorized modifications, additions, adjustments and/or repair to any hard drive structure or content, or any other part of the System, or which might affect the System, or defects caused or repairs required as a result of causes external to FARO workmanship or the materials used by FARO. As used herein, “unauthorized” means that which has not been approved and permitted by FARO. b) The Warranties shall not cover replacement of expendable items, including, but not limited to, fuses, diskettes, printer paper, printer ink, printing heads, disk cleaning materials, or similar items. c) The Warranties shall not cover minor preventive and corrective maintenance, including, but not limited to, replacement of fuses, disk drive head cleaning, fan filter cleaning and system clock battery replacement. d) Any equipment or its components which was sold or transferred to any party other than the original Purchaser without the expressed written consent of FARO. 4.07Factory Repairs a) IF SYSTEM IS UNDER MAINTANENCE/WARRANTY: The Purchaser agrees to ship the Product to FARO in the original packing containers. FARO will return the repaired or replacement Product. FARO will incur the expense of the needed part and all return shipping charges to the Purchaser. FARO may authorize the manufacturer of a component of the Product to perform the service. b) IF SYSTEM IS UNDER PREMIUM SERVICE PLAN: When practical and subject to availability, FARO will make available to the Purchaser substitute component parts or Focus3D X 130’s (“Temporary Replacements”) while corresponding parts of the Purchaser’s system or Focus3D X 130 are undergoing repair at FARO’s factory. Shipping charges for these “Temporary Replacement” parts or Focus3D X 130’s will be the responsibility of FARO. c) IF SYSTEM IS NOT UNDER MAINTANENCE/WARRANTY: The Purchaser is responsible for the cost of the replacement part or software, and 6 FARO® Laser Scanner Focus3D X 130 Manual January 2014 all shipping charges. All charges shall be estimated and prepaid prior to commencement of repairs. 4.08Nothing herein contained shall be construed as obligating FARO to make service, parts, or repairs for any product available after the expiration of the Maintenance/Warranty Period. 4.09Limitation of Liability FARO shall not be responsible under any circumstances for special, incidental or consequential damages, including, but not limited to, injury to or death of any operator or other person, damage or loss resulting from inability to use the System, increased operating costs, loss of production, loss of anticipated profits, damage to property, or other special, incidental or consequential damages of any nature arising from any cause whatsoever whether based in contract, tort (including negligence), or any other theory of law. FARO’s only liability hereunder, arising from any cause whatsoever, whether based in contract, tort (including negligence) or any other theory of law, consists of the obligation to repair or replace defective components in the System or Focus3D X 130 subject to the limitations set out above in this section. This disclaimer of liability for consequential damage extends to any such special, incidental or consequential damages which may be suffered by third parties, either caused directly or indirectly resulting from test results or data produced by the system or any component thereof and the Purchaser agrees to indemnify and save FARO harmless from any such claims made by third parties. 4.10The foregoing shall be FARO’s sole and exclusive liability and the Purchaser’s sole and exclusive remedy with respect to the system. THE SOLE RESPONSIBILITY OF FARO UNDER THE WARRANTIES IS STATED HEREIN AND FARO SHALL NOT BE LIABLE FOR CONSEQUENTIAL, INDIRECT, OR INCIDENTAL DAMAGES, WHETHER THE CLAIM IS FOR BREACH OF WARRANTY, NEGLIGENCE, OR OTHERWISE. OTHER THAN THE EXPRESS WARRANTIES HEREIN STATED, FARO DISCLAIMS ALL WARRANTIES INCLUDING IMPLIED WARRANTIES OF MERCHANTABILITY AND FITNESS. 4.11FARO does not authorize any person (whether natural or corporate) to assume for FARO any liability in connection with or with respect to 7 FARO® Laser Scanner Focus3D X 130 Manual January 2014 the Products. No agent or employee of FARO has any authority to make any representation or promise on behalf of FARO, except as expressly set forth herein, or to modify the terms or limitations of the Warranties. Verbal statements are not binding upon FARO. 4.12The Maintenance/Warranties extend only to the Purchaser and are transferable, only under the following conditions: • The Focus3D X 130 is currently under maintenance/warranty. • New owner is, or becomes, a certified user. • A FARO maintenance/warranty transfer form is completed, and submitted to Customer Service. All claims under the Warranties must originate with the Purchaser, or any subsequent owner, and the Purchaser will indemnify and save FARO harmless from any claims for breach of warranty asserted against FARO by any third party. 4.13Oral representations of FARO or its sales representatives, officers, employees or agents cannot be relied upon as correctly stating the representations of FARO in connection with the system. Refer to this purchase order, any exhibits hereto and any written materials supplied by FARO for correct representations. 4.14PURCHASER ACKNOWLEDGES THAT IT HAS PURCHASED THE SYSTEM BASED UPON ITS OWN KNOWLEDGE OF THE USES TO WHICH THE SYSTEM WILL BE PUT. FARO SPECIFICALLY DISCLAIMS ANY WARRANTY OR LIABILITY RELATED TO THE FITNESS OF THE SYSTEM FOR ANY PARTICULAR PURPOSE OR ARISING FROM THE INABILITY OF THE PURCHASER TO USE THE SYSTEM FOR ANY PARTICULAR PURPOSE. 5.00Design Changes 5.01The Focus3D X 130, the Software and the System are subject to changes in design, manufacture and programming between the date of order and the actual delivery date. FARO reserves the right to 8 FARO® Laser Scanner Focus3D X 130 Manual January 2014 implement such changes without the Purchaser’s consent, however, nothing contained herein shall be construed as obligating FARO to include such changes in the Focus3D X 130, Software or System provided to the Purchaser. 6.00Non-Disclosure 6.01All Software including, without limitation, the Operating System Program and any FARO special user programs, provided to the Purchaser as part of the system, either at the time of or subsequent to the delivery of the Focus3D X 130, is the intellectual property of FARO. The Purchaser shall not reproduce or duplicate, disassemble, decompile, reverse engineer, sell, transfer or assign, in any manner the Software or permit access to or use thereof by any third party. The Purchaser shall forthwith execute any further assurances in the form of non-disclosure or licensing agreements which may reasonably be required by FARO in connection with the software. 7.00Entire Agreement / Governing Law / Miscellaneous / Guarantee 7.01These Purchase conditions constitute the entire agreement between FARO and the Purchaser in respect to the Product. There are no representations or warranties by FARO, express or implied, except for those herein contained and these conditions supersede and replace any prior agreements between FARO and the Purchaser. 7.02No representative of FARO has any authority to modify, alter, delete or add to any of the terms or conditions hereof. Any such modifications shall be absolutely void unless made by instrument in writing properly executed by an actual authorized employee or agent of FARO. 7.03The terms and conditions hereof shall be binding upon FARO and the Purchaser, and shall be construed in accordance with the laws of the State of Florida, United States of America. 7.04FARO shall be entitled to recover all of its reasonable fees and costs including, but not limited to, its reasonable attorney’s fees incurred by FARO in connection with any dispute or litigation arising thereunder or in connection herewith, including appeals and bankruptcy or creditor reorganization proceeds. 9 FARO® Laser Scanner Focus3D X 130 Manual January 2014 7.05These conditions shall not be construed more strictly against one party than another as a result of one party having drafted said instrument. 8.00Definitions 8.01“FARO” means FARO Technologies, Inc. 8.02“Purchaser” means the party buying the Product and who is legally obligated hereunder. 8.03“Software” means all computer programs, disk drive directory organization and content, including the computer media containing such computer programs and disk drive directory organization and content, sold pursuant to the Order. 8.04“Product” means the Focus3D X 130, the Software, operating manuals and any other product or merchandise sold pursuant to the Order. If the Purchaser is buying only a Focus3D X 130, or the Software, Product will mean the product being purchased by the Purchaser pursuant to the Order. 8.05“System” means a combination of the Focus3D X 130, the Software, the Computer, and optional parts and accessories associated with the Focus3D X 130. 8.06“Purchase Order” means the original document issued from the Purchaser to FARO, listing all parts and/or services to be purchased and the agreed purchase price. 8.07“Maintenance/Warranty Transfer Form” means a document to be completed for the transfer of the FARO Maintenance/Warranty. This document is available from FARO upon request. 10 FARO® Laser Scanner Focus3D X 130 Manual January 2014 11 FARO® Laser Scanner Focus3D X 130 Manual January 2014 Appendix C: Industrial Products Service Policy A one-year maintenance/warranty comes with the purchase of new FARO manufactured hardware products. Supplemental Service Plans are also available at additional cost. See Appendix D: Industrial Service Policy for further details. FARO Hardware under Maintenance/ Warranty The following is a summary of what services can be obtained under the original warranty or Supplemental Service Plan. 1 Factory repairs on FARO-manufactured hardware products. 2 Factory repairs are targeted for completion within 7 (FaroArms) or 14 (Laser Trackers and Laser Scanners) working days of FARO’s receipt of the defective item. The customer is responsible for returning the hardware to FARO in the original packing container or custom case. 3 FARO will return the hardware via 2-day air service to the Continental U.S. Outside the Continental U.S., FARO will return the hardware to the customs broker via 2-day air service. Expedited service can be arranged at the customer’s expense. 4 Upon expiration of original warranty a Supplemental Service Plan may be purchased and can be renewed annually on FARO-manufactured hardware products. 5 All Supplemental Service Plans will be due for renewal at the end of the month in which the Service Plan or warranty was purchased, plus 12 months. 6 The original warranty and Supplemental Service Plan are transferable to subsequent owners under certain conditions: • The Focus3D X 130 is currently under the original warranty and Supplemental Service Plan. • New owner is, or becomes, a certified user. • A FARO Transfer of Original Warranty or Service Plan Agreement form is completed and submitted to Customer Service. 13 FARO® Laser Scanner Focus3D X 130 Manual January 2014 FARO Hardware NOT under Maintenance/ Warranty Factory assessments and repairs on FARO-manufactured products will follow the following procedure: 1 The customer obtains a service number from FARO’s Customer Service Department. 2 The customer sends the part to FARO with the service number on the label along with payment or a corporate purchase order for system testing and evaluation, which includes calibration and recertification. 3 The payment will be applied toward the total service cost beyond the initial payment. The estimated repair cost will be given to the customer prior to the repair. The total cost must be paid prior to beginning the service. 4 System testing and evaluation can take up to 30 days. FAROmanufactured part repairs can take up to 60 days. However, the part will be scheduled for service as soon as it arrives at FARO’s factory. 5 The customer is responsible for all shipping charges to and from FARO, including import and export fees for international customers. FARO Software All FARO Software users will receive maintenance releases until the end of life for the version at no charge electronically or at a minimal fee for the computer media package. All enhancement and functionality upgrades will be available for purchase upon release. Hardware & Software Training FARO’s training program is designed to instruct trainees in the operation of FARO’s hardware and software, which the customer has purchased. The training classes are set up for each trainee to obtain valuable hands on application exposure. This will help the trainees in their everyday use of the hardware and software. FARO also feels that once the trainee completes the training, finding solutions to problems or applying applications will be simpler. 14 FARO® Laser Scanner Focus3D X 130 Manual January 2014 Focus3D X 130 Repair Fee Schedule (Out of Maintenance/Warranty Owners Only!) System Testing and Evaluation Fee - Contact your local FARO Service Center for pricing. A fee is charged for any system testing and evaluation. This includes system diagnosis, calibration and/or recertification, and applies to all Focus3D X 130s. However, this fee does not include disassembly/repair costs if required. An estimated cost for disassembly/repair will be given to the customer prior to the repair. The disassembly/repair charges must be paid in full prior to the actual disassembly/repair. However, if no repairs are needed the fee will be applied to the cost of system testing and evaluation. All evaluations contain a recertification. Re-certification will be performed on an “as needed” basis. Contact your local FARO Service Center for the current system testing and evaluation fee pricing. Repair Times Calibration and/or Recertification Only - Can take up to 14 days to complete. Disassembly and Repair - Can take up to 60 days to complete. This time is dependent on the supply of purchased components. *Includes Calibration and Recertification 15 FARO® Laser Scanner Focus3D X 130 Manual January 2014 Transfer of Original Warranty or Service Plan Agreement _________________________________________________________ (SELLER’S CORPORATE OR INDIVIDUAL NAME AS APPLICABLE), hereby waives all rights under the warranty service policy for Focus3D X 130 Serial Number______________________________ CAM2 Port Lock Number __________________ purchased originally on ______________________(DATE). _________________________________________________________ (BUYER’S CORPORATE OR INDIVIDUAL NAME AS APPLICABLE), hereby assumes all rights and obligations of the Hardware and/or Software Warranty Service Policy from __________________ (DATE OF TRANSFER). This transfer is only valid under the following conditions. 1 The Focus3D X 130 is currently under maintenance/warranty 2 New owner is, or becomes, a certified user. 3 This maintenance/warranty transfer form is completed and submitted to FARO Customer Service. 16 AGREED ________________________________________________________________ (PRINT SELLER’S CORPORATE (PRINT SELLER’S CORPORATE OR INDIVIDUAL NAME AS OR INDIVIDUAL NAME AS APPLICABLE) APPLICABLE) BY BY X___________________________ X___________________________ __ __ (PRINT NAME OF SIGNATORY) (PRINT NAME OF SIGNATORY) FARO Technologies Inc. Approved by x _________________________________ _________________________________ (PRINT NAME OF SIGNATORY) FARO® Laser Scanner Focus3D X 130 Manual January 2014 Appendix D: Industrial Service Policy This Service Plan (hereafter, the “Plan”) is part of the Operating Manual for the FARO manufactured product purchased from FARO TECHNOLOGIES INC. (hereafter, “FARO”). The Plan and all of the optional additions, are subject to the conditions in Appendices A, B, & C, and are subject to change. This appendix refers to FARO’s service plans as written in the sales advertising literature, and is meant to provide additional details that the literature does not permit. 1.00The purchase of the Plan shall occur with the purchase of the FARO products. 1.01The plan shall apply to systems exclusively created or authored by FARO. 1.02The plan shall include FARO product hardware only, and can not be extended or transferred through the sale of any part of the system to a third party unless the entire system has been sold or transferred. 1.03The plan shall not cover Hardware or Software which has been subjected to misuse or intentional damage. FARO reserves the right to determine the condition of all returned Hardware and/or Software. 1.04FARO shall determine the service method and contractor to service/repair all hardware which is not directly manufactured by FARO. All outside contractor terms and conditions are available from FARO and are incorporated herein by reference. 1.05FARO shall not be responsible for any non-FARO authored software which inhibits the operation of the system. Furthermore the plan will not cover the reinstallation of any software. 1.06The Hardware and Software are subject to changes in design, manufacture, and programming. All updates are as follows: a) Hardware - The Focus3D X 130 and all of the associated optional parts, and the Computer are not subject to updates. b) Software - All computer programs, authored by FARO, which are used in conjunction with the FARO provided Hardware, will be updated (maintenance upgrades) for the life of the Purchaser’s current version. All enhancement and functionality upgrades must be purchased. c) 3rd Party Software - All computer programs not authored by FARO will not be updated under the Plan. The purchaser is responsible for the acquisition of all 3rd party software updates and warranty service or claims. 19 FARO® Laser Scanner Focus3D X 130 Manual January 2014 1.07In the event that FARO replaces any product or replacement product, FARO retains all right, title, and interest in and to all products or portions of products that were replaced by FARO. 2.00 Definitions 2.01“FARO” means FARO Technologies, Inc. 2.02“Purchaser” means the party buying the Product and who is legally obligated hereunder. 2.03“Software” means all computer programs, disk drive directory organization and content, including the diskettes containing such computer programs and disk drive directory organization and content, sold pursuant to the Order. 2.04“Product” means the Focus3D X 130, the Software, operating manuals and any other product or merchandise sold pursuant to the Order. If the Purchaser is buying only a Focus3D X 130, or the Software, Product will mean the product being purchased by the Purchaser pursuant to the Order. 2.05“System” means a combination of the Focus3D X 130, the Software, the Computer, and optional parts associated with the Focus3D X 130. 2.06“Hardware” means the Focus3D X 130 and all of the associated optional parts, and the Computer if provided by FARO. 2.07“Software” means all computer programs, authored by FARO, which are used in conjunction with the FARO provided Hardware. The following is a layman’s definition of the coverage. Standard Service Plans All shipping times below are to destinations within the Continental United States. Outside the Continental U.S., FARO will ship equipment directly to the customs broker. • Standard Service Plans are contracted at time of purchase or at any time while a unit is covered by a FARO hardware service plan (as described in more detail later). • The Standard Service Plan covers the Focus3D X 130 and controller box. 20 FARO® Laser Scanner Focus3D X 130 Manual January 2014 • Shipping costs, including insurance from the Purchaser to FARO are the responsibility of the Purchaser. FARO will be responsible for all return shipping costs including insurance. • All reasonable efforts will be made to keep the service repair time within 7 (FaroArm) or 14 (Laser Tracker and Laser Scanner) working days. The equipment will be returned via 2-Day air service, therefore, total service repair time will vary due to return shipping location. • Since the Focus3D X 130 is designed to be used with many other software packages not authored by FARO, this service plan can be purchased in its entirety to cover only FARO produced or authored products. For items not produced or authored by FARO, the customer is responsible for securing their own separate warranty or service plan coverage. Hardware Coverage Focus3D X 130 Covered • All parts and labor for Focus3D X 130s failing under normal use as described in Appendix B. • Annual calibration and re-certification of the Focus3D X 130. Not Covered • Misuse • Intentional damage • Wear and tear of probes, ball bars, auxiliary hardware products such as cables, wrenches, hex keys, screwdrivers, etc. Computer Covered • FARO contracts with 3rd party service providers for this service for up to 3 years. The terms and conditions of FARO’s contract with the provider apply herein and are incorporated herein by reference. • Typically, these services include repair of the computer, memory cards, and video monitors. Not Covered • All exclusions contained in the 3rd party service providers policy which is incorporated herein by reference. 21 FARO® Laser Scanner Focus3D X 130 Manual January 2014 • Software operating system installation. • User intentional or unintentional removal of key software property or files. Software Coverage Covered • Periodically, FARO Technologies may release maintenance updates of its proprietary software. This will be supported through the life of the product version. All enhancement and functionality upgrades will be available in the next full version for a fee. Not Covered • End users are responsible for the procurement and installation of 3rd party authored or S/W updates as required to use with FARO authored software products, unless FARO Technologies resold these packages to the end user as an authorized reseller. Examples of 3rd party authored S/W are: DOS, Windows, AutoCAD, AutoSurf, SurfCAM and others. Premium Service Plans The Premium Service Plans additionally provide loaner Focus3D X 130s and Computers when service is required. All equipment shipping costs are paid for by FARO (both ways). FARO will make its best effort to ship all loaner Focus3D X 130s within 24 hours of the receipt of the purchasers request. Once the need for a service has been verified by FARO, FARO will make its best effort to ship all loaner computers within 72 hours of the receipt of the purchaser’s request. 22 FARO® Laser Scanner Focus3D X 130 Manual January 2014 Appendix E: Expert Opinion - Classification of the Focus3D X 130 according to IEC 60825-1 Ed. 2.0 23 FARO® Laser Scanner Focus3D X 130 Manual January 2014 24 FARO® Laser Scanner Focus3D X 130 Manual January 2014 Test House for Laser LED and Lamp Safety Expert Opinion Nr. LE-G-033/13 This document is an abstract of the Expert Opinion LE-G-033/13 dated Sept. 13th 2013. In LE-G-033/13, the laser safety class of a the laser product FARO Laser Scanner Focus3D X is determined according to IEC 60825-1 Edition 2.0. The classification is based on information provided by the manufacturer. It is noted that on the European level, the standard issued as EN 60825-1 Edition 2.0 is identical to IEC 60825-1 Edition 2.0. Reference: International Electrotechnical Commission. IEC 60825-1:2007 Safety of laser products – Part 1: Equipment classification and requirements. Geneva: IEC; Edition 2.0 (2007). Format of decimal figures Congruent with ISO and IEC standard regulations, a decimal comma is used in the test report in contrast to the usual usage of a decimal point for English texts (i.e. ½ = 0,5 in this report, and not 0.5). The product under assessment is a laser scanner emitting a collimated laser beam with a wavelength of 1550 nm and an average power of the emitted beam of 500 mW. The laser emits nanosecond pulses with a repetition rate so that for laser safety, the emission can be treated as quasi-continuous and analysis is based on the average power of 500 mW. For the wavelength of 1550 nm, IEC 60825-1 Edition 2.0 defines the Accessible Emission Limits (AEL) for the laser safety Class 1 as 10 mW for the emission duration of larger than or equal to 10 s. The limiting aperture defined to measure the accessible emission that is compared with the AEL is 3,5 mm in diameter. The laser beam diameter is defined to be 2,2 mm at the 1/e level at the mirror, so that for a simplified and worst-case analysis, the complete beam can be assumed to pass through the aperture. For a beam that continuously rotates around a full circle, i.e. 360°, the average power does not depend on the scanner frequency, as higher frequencies result in shorter individual pulse duration (the time it takes to pass over the aperture) but there would be correspondingly more pulses per seconds, which cancels each other out. For classification, the average power needs to be determined with a 3,5 mm aperture at 100 mm from the scanning vertex (Condition 3 of IEC 60825-1). The average power detected through the aperture is reduced from the power of the beam (500 mW) by the ratio of the angular subtense that is subtended by the aperture as seen from the scanning vertex to 2S rad (or 360°). The aperture subtends an angle of 3,5 mm/ 100 mm = 0,035 rad (due to the small diameter the curvature can be neglected). A full circle subtends 2S rad = 6,28 rad. The ratio equals 5,57 10-3, therefore the average power detected with the aperture equals 500 mW x 5,57 10-3 = 2,79 mW. The average power value of 2,79 mW is the accessible emission to be compared to the AEL for Class 1, which is 10 mW. NOTE: For classification as Class 1, a scanning safeguard is required according to IEC 60825-1 to limit the power to an average value of 10 mW (averaged over 10 s), which means that the power is switched off before the permitted average power of 10 mW is reached. This analysis assumes that such a scanning safeguard is in place. The accessible emission is a factor of 3,6 below the AEL of Class 1, and therefore the product as described above can be assigned to be Class 1 according to IEC 60825-1. Page 2 of 2 Seibersdorf Labor GmbH | 2444 Seibersdorf, Austria | Tel.: +43 (0) 50550-2500 | Fax: +43 (0) 50550-2502 | Mail: [email protected] | www.seibersdorf-laboratories.at Landesgericht Wiener Neustadt | FN 319187v | DVR: 4000728 | UID: ATU64767504 | Steuernummer: 192/6571 | Zertifiziert nach ISO 9001:2000 Bankverbindung: Erste Bank der Österreichischen Sparkassen AG | BLZ 20111 | Konto Nr. 291-140-380/00 | IBAN AT112011129114038000 | BIC GIBAATWW 25 FARO® Laser Scanner Focus3D X 130 Manual January 2014 26 FARO® Laser Scanner Focus3D X 130 Manual January 2014 Appendix F: Implementation Notes The scanner's firmware includes several standard applications and libraries which are released under different licenses. google-breakpad Copyright (c) 2006, Google Inc. All rights reserved. Redistribution and use in source and binary forms, with or without modification, are permitted provided that the following conditions are met: • Redistributions of source code must retain the above copyright notice, this list of conditions and the following disclaimer. • Redistributions in binary form must reproduce the above copyright notice, this list of conditions and the following disclaimer in the documentation and/ or other materials provided with the distribution. • Neither the name of Google Inc. nor the names of its contributors may be used to endorse or promote products derived from this software without specific prior written permission. THIS SOFTWARE IS PROVIDED BY THE COPYRIGHT HOLDERS AND CONTRIBUTORS "AS IS" AND ANY EXPRESS OR IMPLIED WARRANTIES, INCLUDING, BUT NOT LIMITED TO, THE IMPLIED WARRANTIES OF MERCHANTABILITY AND FITNESS FOR A PARTICULAR PURPOSE ARE DISCLAIMED. IN NO EVENT SHALL THE COPYRIGHT OWNER OR CONTRIBUTORS BE LIABLE FOR ANY DIRECT, INDIRECT, INCIDENTAL, SPECIAL, EXEMPLARY, OR CONSEQUENTIAL DAMAGES (INCLUDING, BUT NOT LIMITED TO, PROCUREMENT OF SUBSTITUTE GOODS OR SERVICES; LOSS OF USE, DATA, OR PROFITS; OR BUSINESS INTERRUPTION) HOWEVER CAUSED AND ON ANY THEORY OF LIABILITY, WHETHER IN CONTRACT, STRICT LIABILITY, OR TORT (INCLUDING NEGLIGENCE OR OTHERWISE) ARISING IN ANY WAY OUT OF THE USE OF THIS SOFTWARE, EVEN IF ADVISED OF THE POSSIBILITY OF SUCH DAMAGE 27 FARO® Laser Scanner Focus3D X 130 Manual January 2014 paintlib The scanner's firmware contains paintlib code. paintlib is copyright (c) 19962000 Ulrich von Zadow. libtiff Copyright (c) 1988-1997 Sam Leffler Copyright (c) 1991-1997 Silicon Graphics, Inc. JPEG The scanner's firmware is based in part on the work of the Independent JPEG Group. KissFFT Copyright (c) 2003,4 Mark Borgerding All rights reserved. Redistribution and use in source and binary forms, with or without modification, are permitted provided that the following conditions are met: • Redistributions of source code must retain the above copyright notice, this list of conditions and the following disclaimer. • Redistributions in binary form must reproduce the above copyright notice, this list of conditions and the following disclaimer in the documentation and/ or other materials provided with the distribution. • Neither the author nor the names of any contributors may be used to endorse or promote products derived from this software without specific prior written permission. THIS SOFTWARE IS PROVIDED BY THE COPYRIGHT HOLDERS AND CONTRIBUTORS "AS IS" AND ANY EXPRESS OR IMPLIED WARRANTIES, INCLUDING, BUT NOT LIMITED TO, THE IMPLIED WARRANTIES OF MERCHANTABILITY AND FITNESS FOR A PARTICULAR PURPOSE ARE DISCLAIMED. IN NO EVENT SHALL THE COPYRIGHT OWNER OR CONTRIBUTORS BE LIABLE FOR ANY DIRECT, INDIRECT, INCIDENTAL, SPECIAL, EXEMPLARY, OR CONSEQUENTIAL DAMAGES (INCLUDING, BUT NOT LIMITED TO, 28 FARO® Laser Scanner Focus3D X 130 Manual January 2014 PROCUREMENT OF SUBSTITUTE GOODS OR SERVICES; LOSS OF USE, DATA, OR PROFITS; OR BUSINESS INTERRUPTION) HOWEVER CAUSED AND ON ANY THEORY OF LIABILITY, WHETHER IN CONTRACT, STRICT LIABILITY, OR TORT (INCLUDING NEGLIGENCE OR OTHERWISE) ARISING IN ANY WAY OUT OF THE USE OF THIS SOFTWARE, EVEN IF ADVISED OF THE POSSIBILITY OF SUCH DAMAGE. Open Source Computer Vision Library Copyright (C) 2000, 2001, Intel Corporation, all rights reserved. Third party copyrights are property of their respective owners. Redistribution and use in source and binary forms, with or without modification, are permitted provided that the following conditions are met: • Redistribution's of source code must retain the above copyright notice, this list of conditions and the following disclaimer. • Redistribution's in binary form must reproduce the above copyright notice, this list of conditions and the following disclaimer in the documentation and/ or other materials provided with the distribution. • The name of Intel Corporation may not be used to endorse or promote products derived from this software without specific prior written permission. This software is provided by the copyright holders and contributors "as is" and any express or implied warranties, including, but not limited to, the implied warranties of merchantability and fitness for a particular purpose are disclaimed. In no event shall the Intel Corporation or contributors be liable for any direct, indirect, incidental, special, exemplary, or consequential damages (including, but not limited to, procurement of substitute goods or services; loss of use, data, or profits; or business interruption) however caused and on any theory of liability, whether in contract, strict liability, or tort (including negligence or otherwise) arising in any way out of the use of this software, even if advised of the possibility of such damage. Apache Apache License 29 FARO® Laser Scanner Focus3D X 130 Manual January 2014 Version 2.0, January 2004 http://www.apache.org/licenses/ TERMS AND CONDITIONS FOR USE, REPRODUCTION, AND DISTRIBUTION 1. Definitions. "License" shall mean the terms and conditions for use, reproduction, and distribution as defined by Sections 1 through 9 of this document. "Licensor" shall mean the copyright owner or entity authorized by the copyright owner that is granting the License. "Legal Entity" shall mean the union of the acting entity and all other entities that control, are controlled by, or are under common control with that entity. For the purposes of this definition, "control" means (i) the power, direct or indirect, to cause the direction or management of such entity, whether by contract or otherwise, or (ii) ownership of fifty percent (50%) or more of the outstanding shares, or (iii) beneficial ownership of such entity. "You" (or "Your") shall mean an individual or Legal Entity exercising permissions granted by this License. "Source" form shall mean the preferred form for making modifications, including but not limited to software source code, documentation source, and configuration files. "Object" form shall mean any form resulting from mechanical transformation or translation of a Source form, including but not limited to compiled object code, generated documentation, and conversions to other media types. "Work" shall mean the work of authorship, whether in Source or Object form, made available under the License, as indicated by a copyright notice that is included in or attached to the work (an example is provided in the Appendix below). 30 FARO® Laser Scanner Focus3D X 130 Manual January 2014 "Derivative Works" shall mean any work, whether in Source or Object form, that is based on (or derived from) the Work and for which the editorial revisions, annotations, elaborations, or other modifications represent, as a whole, an original work of authorship. For the purposes of this License, Derivative Works shall not include works that remain separable from, or merely link (or bind by name) to the interfaces of, the Work and Derivative Works thereof. "Contribution" shall mean any work of authorship, including the original version of the Work and any modifications or additions to that Work or Derivative Works thereof, that is intentionally submitted to Licensor for inclusion in the Work by the copyright owner or by an individual or Legal Entity authorized to submit on behalf of the copyright owner. For the purposes of this definition, "submitted" means any form of electronic, verbal, or written communication sent to the Licensor or its representatives, including but not limited to communication on electronic mailing lists, source code control systems, and issue tracking systems that are managed by, or on behalf of, the Licensor for the purpose of discussing and improving the Work, but excluding communication that is conspicuously marked or otherwise designated in writing by the copyright owner as "Not a Contribution." "Contributor" shall mean Licensor and any individual or Legal Entity on behalf of whom a Contribution has been received by Licensor and subsequently incorporated within the Work. 2. Grant of Copyright License. Subject to the terms and conditions of this License, each Contributor hereby grants to You a perpetual, worldwide, nonexclusive, no-charge, royalty-free, irrevocable copyright license to reproduce, prepare Derivative Works of, publicly display, publicly perform, sublicense, and distribute the Work and such Derivative Works in Source or Object form. 3. Grant of Patent License. Subject to the terms and conditions of this License, each Contributor hereby grants to You a perpetual, worldwide, non-exclusive, no-charge, royalty-free, irrevocable (except as stated in this section) patent license to make, have made, use, offer to sell, sell, import, and otherwise transfer the Work, where such license applies only to those patent claims licensable by such Contributor that are necessarily infringed by their Contribution(s) alone or by combination of their Contribution(s) with the Work to which such 31 FARO® Laser Scanner Focus3D X 130 Manual January 2014 Contribution(s) was submitted. If You institute patent litigation against any entity (including a cross-claim or counterclaim in a lawsuit) alleging that the Work or a Contribution incorporated within the Work constitutes direct or contributory patent infringement, then any patent licenses granted to You under this License for that Work shall terminate as of the date such litigation is filed. 4. Redistribution. You may reproduce and distribute copies of the Work or Derivative Works thereof in any medium, with or without modifications, and in Source or Object form, provided that You meet the following conditions: (a) You must give any other recipients of the Work or Derivative Works a copy of this License; and (b) You must cause any modified files to carry prominent notices stating that You changed the files; and (c) You must retain, in the Source form of any Derivative Works that You distribute, all copyright, patent, trademark, and attribution notices from the Source form of the Work, excluding those notices that do not pertain to any part of the Derivative Works; and (d) If the Work includes a "NOTICE" text file as part of its distribution, then any Derivative Works that You distribute must include a readable copy of the attribution notices contained within such NOTICE file, excluding those notices that do not pertain to any part of the Derivative Works, in at least one of the following places: within a NOTICE text file distributed as part of the Derivative Works; within the Source form or documentation, if provided along with the Derivative Works; or, within a display generated by the Derivative Works, if and wherever such third-party notices normally appear. The contents of the NOTICE file are for informational purposes only and do not modify the License. You may add Your own attribution notices within Derivative Works that You distribute, alongside or as an addendum to the NOTICE text from the Work, provided that such additional attribution notices cannot be construed as modifying the License. You may add Your own copyright statement to Your modifications and may provide additional or different license terms and conditions for use, reproduction, or distribution of Your modifications, or for any such Derivative Works as a 32 FARO® Laser Scanner Focus3D X 130 Manual January 2014 whole, provided Your use, reproduction, and distribution of the Work otherwise complies with the conditions stated in this License. 5. Submission of Contributions. Unless You explicitly state otherwise, any Contribution intentionally submitted for inclusion in the Work by You to the Licensor shall be under the terms and conditions of this License, without any additional terms or conditions. Notwithstanding the above, nothing herein shall supersede or modify the terms of any separate license agreement you may have executed with Licensor regarding such Contributions. 6. Trademarks. This License does not grant permission to use the trade names, trademarks, service marks, or product names of the Licensor, except as required for reasonable and customary use in describing the origin of the Work and reproducing the content of the NOTICE file. 7. Disclaimer of Warranty. Unless required by applicable law or agreed to in writing, Licensor provides the Work (and each Contributor provides its Contributions) on an "AS IS" BASIS, WITHOUT WARRANTIES OR CONDITIONS OF ANY KIND, either express or implied, including, without limitation, any warranties or conditions of TITLE, NON-INFRINGEMENT, MERCHANTABILITY, or FITNESS FOR A PARTICULAR PURPOSE. You are solely responsible for determining the appropriateness of using or redistributing the Work and assume any risks associated with Your exercise of permissions under this License. 8. Limitation of Liability. In no event and under no legal theory, whether in tort (including negligence), contract, or otherwise, unless required by applicable law (such as deliberate and grossly negligent acts) or agreed to in writing, shall any Contributor be liable to You for damages, including any direct, indirect, special, incidental, or consequential damages of any character arising as a result of this License or out of the use or inability to use the Work (including but not limited to damages for loss of goodwill, work stoppage, computer failure or malfunction, or any and all other commercial damages or losses), even if such Contributor has been advised of the possibility of such damages. 9. Accepting Warranty or Additional Liability. While redistributing the Work or Derivative Works thereof, You may choose to offer, and charge a fee for, acceptance of support, warranty, indemnity, or other liability obligations and/or 33 FARO® Laser Scanner Focus3D X 130 Manual January 2014 rights consistent with this License. However, in accepting such obligations, You may act only on Your own behalf and on Your sole responsibility, not on behalf of any other Contributor, and only if You agree to indemnify, defend, and hold each Contributor harmless for any liability incurred by, or claims asserted against, such Contributor by reason of your accepting any such warranty or additional liability. END OF TERMS AND CONDITIONS GPL GNU GENERAL PUBLIC LICENSE Version 3, 29 June 2007 Copyright (C) 2007 Free Software Foundation, Inc. <http://fsf.org/> Everyone is permitted to copy and distribute verbatim copies of this license document, but changing it is not allowed. Preamble The GNU General Public License is a free, copyleft license forsoftware and other kinds of works. The licenses for most software and other practical works are designedto take away your freedom to share and change the works. By contrast, the GNU General Public License is to guarantee your freedom to share and change all versions of a program--to make sure it remains free software for all its users. We, the Free Software Foundation, use the GNU General Public License for most of our software; it applies also to any other work released this way by its authors. You can apply it to your programs, too. When we speak of free software, we are referring to freedom, not price. Our General Public Licenses are designed to make sure that you have the freedom to distribute copies of free software (and charge for them if you wish), that you receive source code or can get it if you want it, that you can change the software or use pieces of it in new free programs, and that you know you can do these things. To protect your rights, we need to prevent others from denying you these rights or asking you to surrender the rights. Therefore, you have certain responsibilities 34 FARO® Laser Scanner Focus3D X 130 Manual January 2014 if you distribute copies of the software, or if you modify it: responsibilities to respect the freedom of others. For example, if you distribute copies of such a program, whether gratis or for a fee, you must pass on to the recipients the same freedoms that you received. You must make sure that they, too, receive or can get the source code. And you must show them these terms so they know their rights. Developers that use the GNU GPL protect your rights with two steps: (1) assert copyright on the software, and (2) offer you this License giving you legal permission to copy, distribute and/or modify it. For the developers' and authors' protection, the GPL clearly explains that there is no warranty for this free software. For both users' and authors' sake, the GPL requires that modified versions be marked as changed, so that their problems will not be attributed erroneously to authors of previous versions. Some devices are designed to deny users access to install or run modified versions of the software inside them, although the manufacturer can do so. This is fundamentally incompatible with the aim of protecting users' freedom to change the software. The systematic pattern of such abuse occurs in the area of products for individuals to use, which is precisely where it is most unacceptable. Therefore, we have designed this version of the GPL to prohibit the practice for those products. If such problems arise substantially in other domains, we stand ready to extend this provision to those domains in future versions of the GPL, as needed to protect the freedom of users. Finally, every program is threatened constantly by software patents. States should not allow patents to restrict development and use of software on general-purpose computers, but in those that do, we wish to avoid the special danger that patents applied to a free program could make it effectively proprietary. To prevent this, the GPL assures that patents cannot be used to render the program non-free. The precise terms and conditions for copying, distribution and modification follow. TERMS AND CONDITIONS 0. Definitions. "This License" refers to version 3 of the GNU General Public License. 35 FARO® Laser Scanner Focus3D X 130 Manual January 2014 "Copyright" also means copyright-like laws that apply to other kinds of works, such as semiconductor masks. "The Program" refers to any copyrightable work licensed under this License. Each licensee is addressed as "you". "Licensees" and "recipients" may be individuals or organizations. To "modify" a work means to copy from or adapt all or part of the work in a fashion requiring copyright permission, other than the making of an exact copy. The resulting work is called a "modified version" of the earlier work or a work "based on" the earlier work. A "covered work" means either the unmodified Program or a work based on the Program. To "propagate" a work means to do anything with it that, without permission, would make you directly or secondarily liable for infringement under applicable copyright law, except executing it on a computer or modifying a private copy. Propagation includes copying, distribution (with or without modification), making available to the public, and in some countries other activities as well. To "convey" a work means any kind of propagation that enables other parties to make or receive copies. Mere interaction with a user through a computer network, with no transfer of a copy, is not conveying. An interactive user interface displays "Appropriate Legal Notices" to the extent that it includes a convenient and prominently visible feature that (1) displays an appropriate copyright notice, and (2) tells the user that there is no warranty for the work (except to the extent that warranties are provided), that licensees may convey the work under this License, and how to view a copy of this License. If the interface presents a list of user commands or options, such as a menu, a prominent item in the list meets this criterion. 1. Source Code. The "source code" for a work means the preferred form of the work for making modifications to it. "Object code" means any non-source form of a work. A "Standard Interface" means an interface that either is an official standard defined by a recognized standards body, or, in the case of interfaces specified for a particular programming language, one that is widely used among developers working in that language. 36 FARO® Laser Scanner Focus3D X 130 Manual January 2014 The "System Libraries" of an executable work include anything, other than the work as a whole, that (a) is included in the normal form of packaging a Major Component, but which is not part of that Major Component, and (b) serves only to enable use of the work with that Major Component, or to implement a Standard Interface for which an implementation is available to the public in source code form. A "Major Component", in this context, means a major essential component (kernel, window system, and so on) of the specific operating system (if any) on which the executable work runs, or a compiler used to produce the work, or an object code interpreter used to run it. The "Corresponding Source" for a work in object code form means all the source code needed to generate, install, and (for an executable work) run the object code and to modify the work, including scripts to control those activities. However, it does not include the work's System Libraries, or general-purpose tools or generally available free programs which are used unmodified in performing those activities but which are not part of the work. For example, Corresponding Source includes interface definition files associated with source files for the work, and the source code for shared libraries and dynamically linked subprograms that the work is specifically designed to require, such as by intimate data communication or control flow between those subprograms and other parts of the work. The Corresponding Source need not include anything that users can regenerate automatically from other parts of the Corresponding Source. The Corresponding Source for a work in source code form is that same work. 2. Basic Permissions. All rights granted under this License are granted for the term of copyright on the Program, and are irrevocable provided the stated conditions are met. This License explicitly affirms your unlimited permission to run the unmodified Program. The output from running a covered work is covered by this License only if the output, given its content, constitutes a covered work. This License acknowledges your rights of fair use or other equivalent, as provided by copyright law. You may make, run and propagate covered works that you do not convey, without conditions so long as your license otherwise remains in force. You may convey covered works to others for the sole purpose of having them make modifications exclusively for you, or provide you with facilities for running those works, provided that you comply with the terms of this License in conveying all material for which you do not control copyright. Those thus making or running the covered works for you must do so exclusively on your 37 FARO® Laser Scanner Focus3D X 130 Manual January 2014 behalf, under your direction and control, on terms that prohibit them from making any copies of your copyrighted material outside their relationship with you. Conveying under any other circumstances is permitted solely under the conditions stated below. Sublicensing is not allowed; section 10 makes it unnecessary. 3. Protecting Users' Legal Rights From Anti-Circumvention Law. No covered work shall be deemed part of an effective technological measure under any applicable law fulfilling obligations under article 11 of the WIPO copyright treaty adopted on 20 December 1996, or similar laws prohibiting or restricting circumvention of such measures. When you convey a covered work, you waive any legal power to forbid circumvention of technological measures to the extent such circumvention is effected by exercising rights under this License with respect to the covered work, and you disclaim any intention to limit operation or modification of the work as a means of enforcing, against the work's users, your or third parties' legal rights to forbid circumvention of technological measures. 4. Conveying Verbatim Copies. You may convey verbatim copies of the Program's source code as you receive it, in any medium, provided that you conspicuously and appropriately publish on each copy an appropriate copyright notice; keep intact all notices stating that this License and any non-permissive terms added in accord with section 7 apply to the code; keep intact all notices of the absence of any warranty; and give all recipients a copy of this License along with the Program. You may charge any price or no price for each copy that you convey, and you may offer support or warranty protection for a fee. 5. Conveying Modified Source Versions. You may convey a work based on the Program, or the modifications to produce it from the Program, in the form of source code under the terms of section 4, provided that you also meet all of these conditions: a) The work must carry prominent notices stating that you modified it, and giving a relevant date. 38 FARO® Laser Scanner Focus3D X 130 Manual January 2014 b) The work must carry prominent notices stating that it is released under this License and any conditions added under section 7. This requirement modifies the requirement in section 4 to "keep intact all notices". c) You must license the entire work, as a whole, under this License to anyone who comes into possession of a copy. This License will therefore apply, along with any applicable section 7 additional terms, to the whole of the work, and all its parts, regardless of how they are packaged. This License gives no permission to license the work in any other way, but it does not invalidate such permission if you have separately received it. d) If the work has interactive user interfaces, each must display Appropriate Legal Notices; however, if the Program has interactive interfaces that do not display Appropriate Legal Notices, your work need not make them do so. A compilation of a covered work with other separate and independent works, which are not by their nature extensions of the covered work, and which are not combined with it such as to form a larger program, in or on a volume of a storage or distribution medium, is called an "aggregate" if the compilation and its resulting copyright are not used to limit the access or legal rights of the compilation's users beyond what the individual works permit. Inclusion of a covered work in an aggregate does not cause this License to apply to the other parts of the aggregate. 6. Conveying Non-Source Forms. You may convey a covered work in object code form under the terms of sections 4 and 5, provided that you also convey the machine-readable Corresponding Source under the terms of this License, in one of these ways: a) Convey the object code in, or embodied in, a physical product (including a physical distribution medium), accompanied by the Corresponding Source fixed on a durable physical medium customarily used for software interchange. b) Convey the object code in, or embodied in, a physical product (including a physical distribution medium), accompanied by a written offer, valid for at least three years and valid for as long as you offer spare parts or customer support for that product model, to give anyone who possesses the object code either (1) a copy of the Corresponding Source for all the software in the product that is covered by this License, on a durable physical medium customarily used for software interchange, for a price no more than your reasonable cost of physically performing this conveying of source, or (2) access to copy the Corresponding Source from a network server at no charge. 39 FARO® Laser Scanner Focus3D X 130 Manual January 2014 c) Convey individual copies of the object code with a copy of the written offer to provide the Corresponding Source. This alternative is allowed only occasionally and noncommercially, and only if you received the object code with such an offer, in accord with subsection 6b. d) Convey the object code by offering access from a designated place (gratis or for a charge), and offer equivalent access to the Corresponding Source in the same way through the same place at no further charge. You need not require recipients to copy the Corresponding Source along with the object code. If the place to copy the object code is a network server, the Corresponding Source may be on a different server (operated by you or a third party) that supports equivalent copying facilities, provided you maintain clear directions next to the object code saying where to find the Corresponding Source. Regardless of what server hosts the Corresponding Source, you remain obligated to ensure that it is available for as long as needed to satisfy these requirements. e) Convey the object code using peer-to-peer transmission, provided you inform other peers where the object code and Corresponding Source of the work are being offered to the general public at no charge under subsection 6d. A separable portion of the object code, whose source code is excluded from the Corresponding Source as a System Library, need not be included in conveying the object code work. A "User Product" is either (1) a "consumer product", which means any tangible personal property which is normally used for personal, family, or household purposes, or (2) anything designed or sold for incorporation into a dwelling. In determining whether a product is a consumer product, doubtful cases shall be resolved in favor of coverage. For a particular product received by a particular user, "normally used" refers to a typical or common use of that class of product, regardless of the status of the particular user or of the way in which the particular user actually uses, or expects or is expected to use, the product. A product is a consumer product regardless of whether the product has substantial commercial, industrial or non-consumer uses, unless such uses represent the only significant mode of use of the product. "Installation Information" for a User Product means any methods, procedures, authorization keys, or other information required to install and execute modified versions of a covered work in that User Product from a modified version of its Corresponding Source. The information must suffice to ensure that the continued functioning of the modified object code is in no case prevented or interfered with solely because modification has been made. If you convey an object code work under this section in, or with, or specifically for use in, a User Product, and the conveying occurs as part of a transaction in 40 FARO® Laser Scanner Focus3D X 130 Manual January 2014 which the right of possession and use of the User Product is transferred to the recipient in perpetuity or for a fixed term (regardless of how the transaction is characterized), the Corresponding Source conveyed under this section must be accompanied by the Installation Information. But this requirement does not apply if neither you nor any third party retains the ability to install modified object code on the User Product (for example, the work has been installed in ROM). The requirement to provide Installation Information does not include a requirement to continue to provide support service, warranty, or updates for a work that has been modified or installed by the recipient, or for the User Product in which it has been modified or installed. Access to a network may be denied when the modification itself materially and adversely affects the operation of the network or violates the rules and protocols for communication across the network. Corresponding Source conveyed, and Installation Information provided, in accord with this section must be in a format that is publicly documented (and with an implementation available to the public in source code form), and must require no special password or key for unpacking, reading or copying. 7. Additional Terms. "Additional permissions" are terms that supplement the terms of this License by making exceptions from one or more of its conditions. Additional permissions that are applicable to the entire Program shall be treated as though they were included in this License, to the extent that they are valid under applicable law. If additional permissions apply only to part of the Program, that part may be used separately under those permissions, but the entire Program remains governed by this License without regard to the additional permissions. When you convey a copy of a covered work, you may at your option remove any additional permissions from that copy, or from any part of it. (Additional permissions may be written to require their own removal in certain cases when you modify the work.) You may place additional permissions on material, added by you to a covered work, for which you have or can give appropriate copyright permission. Notwithstanding any other provision of this License, for material you add to a covered work, you may (if authorized by the copyright holders of that material) supplement the terms of this License with terms: a) Disclaiming warranty or limiting liability differently from the terms of sections 15 and 16 of this License; or 41 FARO® Laser Scanner Focus3D X 130 Manual January 2014 b) Requiring preservation of specified reasonable legal notices or author attributions in that material or in the Appropriate Legal Notices displayed by works containing it; or c) Prohibiting misrepresentation of the origin of that material, or requiring that modified versions of such material be marked in reasonable ways as different from the original version; or d) Limiting the use for publicity purposes of names of licensors or authors of the material; or e) Declining to grant rights under trademark law for use of some trade names, trademarks, or service marks; or f) Requiring indemnification of licensors and authors of that material by anyone who conveys the material (or modified versions of it) with contractual assumptions of liability to the recipient, for any liability that these contractual assumptions directly impose on those licensors and authors. All other non-permissive additional terms are considered "further restrictions" within the meaning of section 10. If the Program as you received it, or any part of it, contains a notice stating that it is governed by this License along with a term that is a further restriction, you may remove that term. If a license document contains a further restriction but permits relicensing or conveying under this License, you may add to a covered work material governed by the terms of that license document, provided that the further restriction does not survive such relicensing or conveying. If you add terms to a covered work in accord with this section, you must place, in the relevant source files, a statement of the additional terms that apply to those files, or a notice indicating where to find the applicable terms. Additional terms, permissive or non-permissive, may be stated in the form of a separately written license, or stated as exceptions; the above requirements apply either way. 8. Termination. You may not propagate or modify a covered work except as expressly provided under this License. Any attempt otherwise to propagate or modify it is void, and will automatically terminate your rights under this License (including any patent licenses granted under the third paragraph of section 11). However, if you cease all violation of this License, then your license from a particular copyright holder is reinstated (a) provisionally, unless and until the copyright holder explicitly and finally terminates your license, and (b) 42 FARO® Laser Scanner Focus3D X 130 Manual January 2014 permanently, if the copyright holder fails to notify you of the violation by some reasonable means prior to 60 days after the cessation. Moreover, your license from a particular copyright holder is reinstated permanently if the copyright holder notifies you of the violation by some reasonable means, this is the first time you have received notice of violation of this License (for any work) from that copyright holder, and you cure the violation prior to 30 days after your receipt of the notice. Termination of your rights under this section does not terminate the licenses of parties who have received copies or rights from you under this License. If your rights have been terminated and not permanently reinstated, you do not qualify to receive new licenses for the same material under section 10. 9. Acceptance Not Required for Having Copies. You are not required to accept this License in order to receive or run a copy of the Program. Ancillary propagation of a covered work occurring solely as a consequence of using peer-to-peer transmission to receive a copy likewise does not require acceptance. However, nothing other than this License grants you permission to propagate or modify any covered work. These actions infringe copyright if you do not accept this License. Therefore, by modifying or propagating a covered work, you indicate your acceptance of this License to do so. 10. Automatic Licensing of Downstream Recipients. Each time you convey a covered work, the recipient automatically receives a license from the original licensors, to run, modify and propagate that work, subject to this License. You are not responsible for enforcing compliance by third parties with this License. An "entity transaction" is a transaction transferring control of an organization, or substantially all assets of one, or subdividing an organization, or merging organizations. If propagation of a covered work results from an entity transaction, each party to that transaction who receives a copy of the work also receives whatever licenses to the work the party's predecessor in interest had or could give under the previous paragraph, plus a right to possession of the Corresponding Source of the work from the predecessor in interest, if the predecessor has it or can get it with reasonable efforts. You may not impose any further restrictions on the exercise of the rights granted or affirmed under this License. For example, you may not impose a license fee, royalty, or other charge for exercise of rights granted under this License, and you 43 FARO® Laser Scanner Focus3D X 130 Manual January 2014 may not initiate litigation (including a cross-claim or counterclaim in a lawsuit) alleging that any patent claim is infringed by making, using, selling, offering for sale, or importing the Program or any portion of it. 11. Patents. A "contributor" is a copyright holder who authorizes use under this License of the Program or a work on which the Program is based. The work thus licensed is called the contributor's "contributor version". A contributor's "essential patent claims" are all patent claims owned or controlled by the contributor, whether already acquired or hereafter acquired, that would be infringed by some manner, permitted by this License, of making, using, or selling its contributor version, but do not include claims that would be infringed only as a consequence of further modification of the contributor version. For purposes of this definition, "control" includes the right to grant patent sublicenses in a manner consistent with the requirements of this License. Each contributor grants you a non-exclusive, worldwide, royalty-free patent license under the contributor's essential patent claims, to make, use, sell, offer for sale, import and otherwise run, modify and propagate the contents of its contributor version. In the following three paragraphs, a "patent license" is any express agreement or commitment, however denominated, not to enforce a patent (such as an express permission to practice a patent or covenant not to sue for patent infringement). To "grant" such a patent license to a party means to make such an agreement or commitment not to enforce a patent against the party. If you convey a covered work, knowingly relying on a patent license, and the Corresponding Source of the work is not available for anyone to copy, free of charge and under the terms of this License, through a publicly available network server or other readily accessible means, then you must either (1) cause the Corresponding Source to be so available, or (2) arrange to deprive yourself of the benefit of the patent license for this particular work, or (3) arrange, in a manner consistent with the requirements of this License, to extend the patent license to downstream recipients. "Knowingly relying" means you have actual knowledge that, but for the patent license, your conveying the covered work in a country, or your recipient's use of the covered work in a country, would infringe one or more identifiable patents in that country that you have reason to believe are valid. If, pursuant to or in connection with a single transaction or arrangement, you convey, or propagate by procuring conveyance of, a covered work, and grant a patent license to some of the parties receiving the covered work authorizing them 44 FARO® Laser Scanner Focus3D X 130 Manual January 2014 to use, propagate, modify or convey a specific copy of the covered work, then the patent license you grant is automatically extended to all recipients of the covered work and works based on it. A patent license is "discriminatory" if it does not include within the scope of its coverage, prohibits the exercise of, or is conditioned on the non-exercise of one or more of the rights that are specifically granted under this License. You may not convey a covered work if you are a party to an arrangement with a third party that is in the business of distributing software, under which you make payment to the third party based on the extent of your activity of conveying the work, and under which the third party grants, to any of the parties who would receive the covered work from you, a discriminatory patent license (a) in connection with copies of the covered work conveyed by you (or copies made from those copies), or (b) primarily for and in connection with specific products or compilations that contain the covered work, unless you entered into that arrangement, or that patent license was granted, prior to 28 March 2007. Nothing in this License shall be construed as excluding or limiting any implied license or other defenses to infringement that may otherwise be available to you under applicable patent law. 12. No Surrender of Others' Freedom. If conditions are imposed on you (whether by court order, agreement or otherwise) that contradict the conditions of this License, they do not excuse you from the conditions of this License. If you cannot convey a covered work so as to satisfy simultaneously your obligations under this License and any other pertinent obligations, then as a consequence you may not convey it at all. For example, if you agree to terms that obligate you to collect a royalty for further conveying from those to whom you convey the Program, the only way you could satisfy both those terms and this License would be to refrain entirely from conveying the Program. 13. Use with the GNU Affero General Public License. Notwithstanding any other provision of this License, you have permission to link or combine any covered work with a work licensed under version 3 of the GNU Affero General Public License into a single combined work, and to convey the resulting work. The terms of this License will continue to apply to the part which is the covered work, but the special requirements of the GNU Affero General Public License, section 13, concerning interaction through a network will apply to the combination as such. 45 FARO® Laser Scanner Focus3D X 130 Manual January 2014 14. Revised Versions of this License. The Free Software Foundation may publish revised and/or new versions of the GNU General Public License from time to time. Such new versions will be similar in spirit to the present version, but may differ in detail to address new problems or concerns. Each version is given a distinguishing version number. If the Program specifies that a certain numbered version of the GNU General Public License "or any later version" applies to it, you have the option of following the terms and conditions either of that numbered version or of any later version published by the Free Software Foundation. If the Program does not specify a version number of the GNU General Public License, you may choose any version ever published by the Free Software Foundation. If the Program specifies that a proxy can decide which future versions of the GNU General Public License can be used, that proxy's public statement of acceptance of a version permanently authorizes you to choose that version for the Program. Later license versions may give you additional or different permissions. However, no additional obligations are imposed on any author or copyright holder as a result of your choosing to follow a later version. 15. Disclaimer of Warranty. THERE IS NO WARRANTY FOR THE PROGRAM, TO THE EXTENT PERMITTED BY APPLICABLE LAW. EXCEPT WHEN OTHERWISE STATED IN WRITING THE COPYRIGHT HOLDERS AND/OR OTHER PARTIES PROVIDE THE PROGRAM "AS IS" WITHOUT WARRANTY OF ANY KIND, EITHER EXPRESSED OR IMPLIED, INCLUDING, BUT NOT LIMITED TO, THE IMPLIED WARRANTIES OF MERCHANTABILITY AND FITNESS FOR A PARTICULAR PURPOSE. THE ENTIRE RISK AS TO THE QUALITY AND PERFORMANCE OF THE PROGRAM IS WITH YOU. SHOULD THE PROGRAM PROVE DEFECTIVE, YOU ASSUME THE COST OF ALL NECESSARY SERVICING, REPAIR OR CORRECTION. 16. Limitation of Liability. IN NO EVENT UNLESS REQUIRED BY APPLICABLE LAW OR AGREED TO IN WRITING WILL ANY COPYRIGHT HOLDER, OR ANY OTHER PARTY WHO MODIFIES AND/OR CONVEYS THE PROGRAM AS 46 FARO® Laser Scanner Focus3D X 130 Manual January 2014 PERMITTED ABOVE, BE LIABLE TO YOU FOR DAMAGES, INCLUDING ANY GENERAL, SPECIAL, INCIDENTAL OR CONSEQUENTIAL DAMAGES ARISING OUT OF THE USE OR INABILITY TO USE THE PROGRAM (INCLUDING BUT NOT LIMITED TO LOSS OF DATA OR DATA BEING RENDERED INACCURATE OR LOSSES SUSTAINED BY YOU OR THIRD PARTIES OR A FAILURE OF THE PROGRAM TO OPERATE WITH ANY OTHER PROGRAMS), EVEN IF SUCH HOLDER OR OTHER PARTY HAS BEEN ADVISED OF THE POSSIBILITY OF SUCH DAMAGES. 17. Interpretation of Sections 15 and 16. If the disclaimer of warranty and limitation of liability provided above cannot be given local legal effect according to their terms, reviewing courts shall apply local law that most closely approximates an absolute waiver of all civil liability in connection with the Program, unless a warranty or assumption of liability accompanies a copy of the Program in return for a fee. END OF TERMS AND CONDITIONS Written Offer If you, the owner of the scanner, like to get a copy of the source code of GPL covered parts of the scanner's firmware, please contact our support team [email protected]. This offer is valid for three years and valid for as long as FARO offers spare parts or customer support for this product model. LGPL The scanner's firmware includes the following applications and libraries, which are covered by the LGPL: • libusb • Linux API • DirectFB GNU LESSER GENERAL PUBLIC LICENSE Version 3, 29 June 2007 47 FARO® Laser Scanner Focus3D X 130 Manual January 2014 Copyright (C) 2007 Free Software Foundation, Inc. <http://fsf.org/> Everyone is permitted to copy and distribute verbatim copies of this license document, but changing it is not allowed. This version of the GNU Lesser General Public License incorporates the terms and conditions of version 3 of the GNU General Public License, supplemented by the additional permissions listed below. 0. Additional Definitions. As used herein, "this License" refers to version 3 of the GNU Lesser General Public License, and the "GNU GPL" refers to version 3 of the GNU General Public License. "The Library" refers to a covered work governed by this License, other than an Application or a Combined Work as defined below. An "Application" is any work that makes use of an interface provided by the Library, but which is not otherwise based on the Library. Defining a subclass of a class defined by the Library is deemed a mode of using an interface provided by the Library. A "Combined Work" is a work produced by combining or linking an Application with the Library. The particular version of the Library with which the Combined Work was made is also called the "Linked Version". The "Minimal Corresponding Source" for a Combined Work means the Corresponding Source for the Combined Work, excluding any source code for portions of the Combined Work that, considered in isolation, are based on the Application, and not on the Linked Version. The "Corresponding Application Code" for a Combined Work means the object code and/or source code for the Application, including any data and utility programs needed for reproducing the Combined Work from the Application, but excluding the System Libraries of the Combined Work. 1. Exception to Section 3 of the GNU GPL. You may convey a covered work under sections 3 and 4 of this License without being bound by section 3 of the GNU GPL. 2. Conveying Modified Versions. 48 FARO® Laser Scanner Focus3D X 130 Manual January 2014 If you modify a copy of the Library, and, in your modifications, a facility refers to a function or data to be supplied by an Application that uses the facility (other than as an argument passed when the facility is invoked), then you may convey a copy of the modified version: a) under this License, provided that you make a good faith effort to ensure that, in the event an Application does not supply the function or data, the facility still operates, and performs whatever part of its purpose remains meaningful, or b) under the GNU GPL, with none of the additional permissions of this License applicable to that copy. 3. Object Code Incorporating Material from Library Header Files. The object code form of an Application may incorporate material from a header file that is part of the Library. You may convey such object code under terms of your choice, provided that, if the incorporated material is not limited to numerical parameters, data structure layouts and accessors, or small macros, inline functions and templates (ten or fewer lines in length), you do both of the following: a) Give prominent notice with each copy of the object code that the Library is used in it and that the Library and its use are covered by this License. b) Accompany the object code with a copy of the GNU GPL and this license document. 4. Combined Works. You may convey a Combined Work under terms of your choice that, taken together, effectively do not restrict modification of the portions of the Library contained in the Combined Work and reverse engineering for debugging such modifications, if you also do each of the following: a) Give prominent notice with each copy of the Combined Work that the Library is used in it and that the Library and its use are covered by this License. b) Accompany the Combined Work with a copy of the GNU GPL and this license document. c) For a Combined Work that displays copyright notices during execution, include the copyright notice for the Library among these notices, as well as a reference directing the user to the copies of the GNU GPL and this license document. d) Do one of the following: 49 FARO® Laser Scanner Focus3D X 130 Manual January 2014 0) Convey the Minimal Corresponding Source under the terms of this License, and the Corresponding Application Code in a form suitable for, and under terms that permit, the user to recombine or relink the Application with a modified version of the Linked Version to produce a modified Combined Work, in the manner specified by section 6 of the GNU GPL for conveying Corresponding Source. 1) Use a suitable shared library mechanism for linking with the Library. A suitable mechanism is one that (a) uses at run time a copy of the Library already present on the user's computer system, and (b) will operate properly with a modified version of the Library that is interface-compatible with the Linked Version. e) Provide Installation Information, but only if you would otherwise be required to provide such information under section 6 of the GNU GPL, and only to the extent that such information is necessary to install and execute a modified version of the Combined Work produced by recombining or relinking the Application with a modified version of the Linked Version. (If you use option 4d0, the Installation Information must accompany the Minimal Corresponding Source and Corresponding Application Code. If you use option 4d1, you must provide the Installation Information in the manner specified by section 6 of the GNU GPL for conveying Corresponding Source.) 5. Combined Libraries. You may place library facilities that are a work based on the Library side by side in a single library together with other library facilities that are not Applications and are not covered by this License, and convey such a combined library under terms of your choice, if you do both of the following: a) Accompany the combined library with a copy of the same work based on the Library, uncombined with any other library facilities, conveyed under the terms of this License. b) Give prominent notice with the combined library that part of it is a work based on the Library, and explaining where to find the accompanying uncombined form of the same work. 6. Revised Versions of the GNU Lesser General Public License. The Free Software Foundation may publish revised and/or new versions of the GNU Lesser General Public License from time to time. Such new versions will 50 FARO® Laser Scanner Focus3D X 130 Manual January 2014 be similar in spirit to the present version, but may differ in detail to address new problems or concerns. Each version is given a distinguishing version number. If the Library as you received it specifies that a certain numbered version of the GNU Lesser General Public License "or any later version" applies to it, you have the option of following the terms and conditions either of that published version or of any later version published by the Free Software Foundation. If the Library as you received it does not specify a version number of the GNU Lesser General Public License, you may choose any version of the GNU Lesser General Public License ever published by the Free Software Foundation. If the Library as you received it specifies that a proxy can decide whether future versions of the GNU Lesser General Public License shall apply, that proxy's public statement of acceptance of any version is permanent authorization for you to choose that version for the Library. Written Offer If you, the owner of the scanner, like to get a copy of the source code of LGPL covered parts of the scanner's firmware, please contact our support team [email protected]. This offer is valid for three years and valid for as long as FARO offers spare parts or customer support for this product model. 51 FARO® Laser Scanner Focus3D X 130 Manual January 2014 52 FARO® Laser Scanner Focus3D X 130 Manual January 2014 Appendix G: Trademarks FARO and FARO Laser Scanner Focus3D X 130 are registered trademarks or trademarks of FARO Technologies Inc. All other brand and product names are trademarks or registered trademarks of their respective companies. Microsoft, Internet Explorer, Windows, Windows XP and Windows 7 are either registered trademarks or trademarks of Microsoft Corporation in the United States and/or other countries. Adobe and Flash are either registered trademarks or trademarks of Adobe Systems Incorporated in the United States and/or other countries. Gitzo is a registered trademark of Gitzo Sa. 53 FARO® Laser Scanner Focus3D X 130 Manual January 2014 54 FARO® Laser Scanner Focus3D X 130 Manual January 2014 Appendix H: FCC Compliance Statement (Applicable in the U.S.) This device complies with part 15 of the FCC Rules. Operation is subject to the following two conditions: 1 This device may not cause harmful interference, and 2 This device must accept any interference received, including interference that may cause undesired operation. FCC WARNING This equipment has been tested and found to comply with the limits for a Class B digital device, pursuant to Part 15 of the FCC Rules. These limits are designed to provide reasonable protection against harmful interference in a residential installation. This equipment generates, uses and can radiate radio frequency energy and, if not installed and used in accordance with the instructions, may cause harmful inerference to radio communications. However, there is no guarantee that interference will not occur in a particular installation. If this equipment does cause harmful interference to radio or television reception, which can be determined by turning the equipment off and on, the user is encouraged to try to correct the interference by one or more of the following measures: • Reorient or relocate the receiving antenna. • Increase the separation between the equipment and the receiver. • • Connect the equipment into an outlet different from that to which the receiver is connected. Consult the dealer or an experienced radio/TV technician for help. Caution: The Federal Communications Commission warns that changes or modifications of the unit not expressly approved by the party responsible for compliance could void the user's authority to operate the equipment. Radio Frequency Interference Statement Warning: 55 FARO® Laser Scanner Focus3D X 130 Manual January 2014 This is a Class B product. In a domestic environment, this product may cause radio interference in which case the user may be required to take adequate measures. Canadian Doc Notice For Class B Computing Devices This digital apparatus does not exceed the Class B limits for radio noise emissions from digital apparatus as set out in the Radio Interference Regulation of the Canadian Department of Communications. "Le présent appareil numérique n'èmet pas de bruits radioélectriques dépassant les limites applicables aux appareils numériques de la class B prescrites dans le Règlement sur le brouillage radioélectrique.“ 56 FARO® Laser Scanner Focus3D X 130 Manual January 2014 DECLARATION OF CONFORMITY 7UDGH1DPH )$52 3URGXFW1DPH )RFXV ;; ' This device complies with Part 15 of the FCC Rules 2SHUDWLRQLVVXEMHFWWRWKHIROORZLQJFRQGLWLRQV 7KHGHYLFHVPD\QRWFDXVHKDUPIXOLQWHUIHUHQFHDQG 2. 7KHGHYLFHVPXVWDFFHSWDQ\LQWHUIHUHQFHUHFHLYHGLQFOXGLQJLQWHUIHUHQFHWKDWPD\FDXVHXQGHVLUHG RSHUDWLRQ RESPONSIBLE PARTY 0DQXIDFWXUHU )$526ZLVV+ROGLQJ*PE+ :LHVHQJDVVH&+%HULQJHQ6ZLW]HUODQG 5HVSRQVLEOH3DUW\ V1DPH 5REHUW6DQYLOOH $GGUHVV )$527HFKQRORJ\3DUN/DNH0DU\)/86$ 7HOHSKRQH [ 'DWH6LJQDWXUH 3ULQWHG1DPH5%HFNHU 57 FARO® Laser Scanner Focus3D X 130 Manual January 2014 58 FARO® Laser Scanner Focus3D X 130 Manual January 2014 Appendix I: CE Conformity EC Declaration of Conformity according to the Council Directive 93/68/EEC FARO Scanner Production GmbH Lingwiesenstraße 11/2 D-70825 Korntal-Münchingen Germany Herewith we declare that the 3D-Laser Scanner product Focus3D X 330 is in conformity with the following directives and standards or normative documents: EC-Directives 2006/95/EC Low Voltage Directive 2004/108/EC EMC Directive Standards EN 61010-1:2010 Safety Requirements for Electrical Equipment for Measurement, Control and Laboratory Use - Part 1: General Requirements EN 60825-1:2007 Safety of laser products - Part 1: Equipment classification and requirements EN 55011:2009+A1:2010 Industrial, scientific and medical (ISM) radio-frequency equipment - Radio disturbance characteristics Limits and methods of measurement (Limit Class: A) EN 61000-6-2:2005 Electromagnetic compatibility (EMC) -- Part 62: Generic standards - Immunity for industrial environments Korntal-Münchingen, , 2 _______________________________ Dr. Reinhard Becker Director R&D Scanner Production GmbH This declaration certifies the conformity with the mentioned directives, but contains no assurance of properties. The safety notes detailed in the product documentation, which are provided, must be observed. 59 FARO® Laser Scanner Focus3D X 130 Manual January 2014 60 FARO Technologies, Inc. 250 Technology Park Lake Mary, FL 32746 800-736-2771 U.S. / +1 407-333-3182 Worldwide E-Mail: [email protected] FARO Europe GmbH & Co. KG Lingwiesenstrasse 11/2 D-70825 Korntal-Münchingen, Germany FREECALL +800 3276 73 78 / +49 7150/9797-400 FREEFAX +800 3276 1737 / +49 7150/9797-9400 E-Mail: [email protected] FARO Singapore Pte. Ltd. No. 03 Changi South Street 2 #01-01 Xilin Districentre Building B SINGAPORE 486548 TEL: +65 6511.1350 E-Mail: [email protected] FARO Japan, Inc. 716 Kumada, Nagakute-city, Aichi, 480-1144, Japan Tel: 0120-922-927, 0561-63-1411 FAX:0561-63-1412 E-Mail: [email protected] FARO (Shanghai) Co., Ltd. 1/F, Building No. 2, Juxin Information Technology Park 188 Pingfu Road, Xuhui District Shanghai 200231, China Tel.: 400.677.6826 Email: [email protected] FARO Business Technologies India Pvt. Ltd. E-12, B-1 Extension, Mohan Cooperative Industrial Estate, New Delhi-110044 India Tel.: 1800.1028456 Email: [email protected] FARO and FARO Laser Scanner Focus3D are registered trademarks and trademarks of FARO Technologies, Inc.