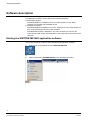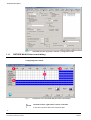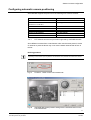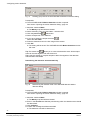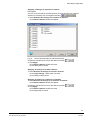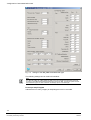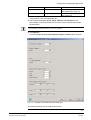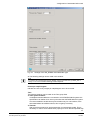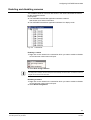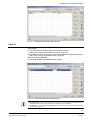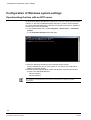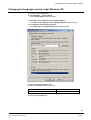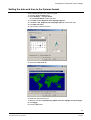
1
SISTORE MX NVS
Application Software
For Network-Based Video
Recording
Configuration Manual
Version 2.60 or higher
Fire Safety & Security Products
Siemens Building Technologies
Liefermöglichkeiten und technische Änderungen vorbehalten.
Data and design subject to change without notice. / Supply subject to availability.
© 2007 Copyright by
Siemens Building Technologies AG
Wir behalten uns alle Rechte an diesem Dokument und an dem in ihm dargestellten Gegenstand vor. Der Empfänger anerkennt diese
Rechte und wird dieses Dokument nicht ohne unsere vorgängige schriftliche Ermächtigung ganz oder teilweise Dritten zugänglich machen
oder außerhalb des Zweckes verwenden, zu dem es ihm übergeben worden ist.
We reserve all rights in this document and in the subject thereof. By acceptance of the document the recipient acknowledges these rights
and undertakes not to publish the document nor the subject thereof in full or in part, nor to make them available to any third party without our
prior express written authorization, nor to use it for any purpose other than for which it was delivered to him.
Contents
1
1.1
1.2
1.2.1
1.2.2
1.2.3
1.2.4
1.2.5
1.3
1.4
Safety .......................................................................................................9
Target readers...........................................................................................9
General safety instructions .......................................................................9
General information...................................................................................9
Transport...................................................................................................9
Operational setup....................................................................................10
Installation ...............................................................................................10
Storage....................................................................................................10
Meaning of the signal words ...................................................................10
Meanings of the hazard symbols ............................................................10
2
Details for ordering ...............................................................................11
3
Scope of delivery ..................................................................................11
4
4.1
4.2
4.3
4.3.1
4.3.2
4.3.3
4.3.4
4.4
4.5
Software description ............................................................................12
Starting the SISTORE MX NVS application software .............................12
Selecting other manuals .........................................................................13
SISTORE MX NVS application software ................................................13
Display mode ..........................................................................................13
Playback mode........................................................................................14
Configuration mode.................................................................................15
SISTORE MX NVS time control dialog ...................................................16
SISTORE RemoteView...........................................................................17
SISTORE WebView ................................................................................18
5
5.1
5.1.1
5.1.2
5.2
5.3
5.4
5.5
Setup ......................................................................................................19
Examples of system design ....................................................................19
SISTORE MX NVS server PC ................................................................19
General information about network cameras..........................................19
SISTORE MX NVS - IP camera - CKA4810/20 ......................................21
SISTORE MX NVS - SISTORE RemoteView - CKA4810 / CKA4820....22
SISTORE MX NVS – SISTORE MX NVS RemoteView – multiserver
mode .......................................................................................................23
SISTORE MX NVS - MX Multi Channel Box RCI 0601 and ATM ..........24
6
6.1
6.2
6.3
6.4
6.4.1
6.4.2
6.4.3
6.5
6.6
6.6.1
6.6.2
6.6.3
Network configuration..........................................................................25
Entering the system name ......................................................................25
Configuring the network connection........................................................25
Limiting bandwidth ..................................................................................27
Configuring ISDN dial-in .........................................................................27
Accept all incoming calls.........................................................................28
React to certain multiple subscriber numbers.........................................28
Activating channel bundling ....................................................................29
Configuring the live image server ...........................................................30
Controlling network access .....................................................................31
Adding a connection filter........................................................................31
Editing connection filters .........................................................................33
Deleting connection filters.......................................................................33
3
Siemens Building Technologies
Fire Safety & Security Products
08.2007
7
7.1
7.2
7.3
7.4
7.4.1
7.4.2
7.5
7.6
7.7
7.8
7.9
7.10
Network camera configuration ............................................................35
General information about network cameras ..........................................35
Adding a network camera .......................................................................36
Deleting a network camera .....................................................................37
Configuring image parameters................................................................38
Setting brightness, contrast and color saturation....................................38
Setting image quality and resolution .......................................................39
Selecting the frame rate ..........................................................................40
Configuring automatic camera positioning..............................................41
Releasing camera control .......................................................................43
Configuring access to the configuration of the network camera .............44
Configuring live image access ................................................................44
Opening proprietary camera configuration dialogs .................................45
8
8.1
8.2
8.3
8.4
Configuring motion detection..............................................................46
Opening the motion detection dialog ......................................................46
Setting the sensitivity of motion detection...............................................47
Defining the detection area (mask) .........................................................47
Configuring the time control of the detection area ..................................50
9
9.1
9.2
9.3
9.4
Configuring sabotage detection ..........................................................51
Opening the sabotage detection dialog ..................................................51
Setting the sensitivity of sabotage detection...........................................52
Defining the detection area (mask) .........................................................52
Saving a reference image .......................................................................54
10
10.1
10.2
10.3
Configuring alarm outputs ...................................................................55
Adding and deleting alarm outputs .........................................................55
Selecting the switch action......................................................................57
Event-based or time control of alarm outputs .........................................58
11
11.1
11.2
11.2.1
11.2.2
11.2.3
11.2.4
Configuring alarm inputs .....................................................................61
Adding and deleting alarm inputs............................................................61
Configuring alarm input ...........................................................................62
Trigger edge ............................................................................................62
Priority .....................................................................................................63
Time control.............................................................................................64
Testing the configuration of an alarm input.............................................64
12
12.1
12.2
12.3
12.4
12.4.1
12.4.2
12.5
12.5.1
12.5.2
12.5.3
12.5.4
12.5.5
Map configuration .................................................................................65
General information about maps.............................................................65
Adding a map ..........................................................................................66
Deleting a map ........................................................................................67
Edit layer .................................................................................................67
Import layer .............................................................................................67
Export layer .............................................................................................68
Edit object................................................................................................69
Insert object.............................................................................................69
Changing objects ....................................................................................70
Changing the camera icon ......................................................................71
Changing the position of the object.........................................................71
Deleting an object ...................................................................................72
4
Siemens Building Technologies
Fire Safety & Security Products
08.2007
13
13.1
13.1.1
13.1.2
13.1.3
13.2
13.2.1
13.2.2
13.2.3
13.2.4
13.2.5
13.2.6
13.3
13.4
13.4.1
13.4.2
13.4.3
13.5
13.6
14
Configuring user and access management .......................................73
General information on user management .............................................73
User groups.............................................................................................73
Global user rights ....................................................................................74
Camera-specific user rights ....................................................................75
User account configuration .....................................................................76
Creating a user account..........................................................................76
Deleting a user account ..........................................................................78
User account locking...............................................................................79
Unlocking a user account........................................................................80
Predefined user accounts: Administrator and Installer ...........................81
Configuring the validity period of a password .........................................81
Enabling password-protected start of the SISTORE MX NVS application
software...................................................................................................82
Configuring the logbook ..........................................................................82
Enabling extended logbook entries.........................................................82
Deleting logbook entries automatically ...................................................83
Sending logbook excerpts automatically ................................................83
Enabling software triggering ...................................................................84
Enabling operating panel control ............................................................85
14.1
14.2
14.2.1
14.2.2
14.2.3
14.2.4
14.2.5
14.2.6
14.3
14.4
14.5
14.6
Configuring the user interface of the SISTORE MX NVS application
software .................................................................................................86
Selecting the user interface language ....................................................86
Configuring the display area ...................................................................87
Selecting the initial arrangement of the display area ..............................87
Selecting the initial display mode............................................................87
Configuring the recording status display.................................................89
Configuring the live image change interval.............................................90
Enabling frame rate display ....................................................................91
Configuring text overlay for a network camera .......................................92
Configuring system messages................................................................93
Showing the on-screen keyboard ...........................................................93
Enabling automatic logout.......................................................................94
Keeping the SISTORE MX NVS application software in the foreground 95
15
15.1
15.2
15.2.1
15.2.2
15.2.3
15.3
15.3.1
15.3.2
15.3.3
15.4
Recording configuration ......................................................................96
Enabling automatic recording on start ....................................................96
Configuring video parameters.................................................................97
Configuring video parameters.................................................................97
Enabling video encryption.......................................................................97
Selecting video resolution .......................................................................98
Configuring recording modes..................................................................99
General information about recording modes ..........................................99
Combination example for recording modes ..........................................103
Transferring recording settings .............................................................104
Configuring the overwriting of recordings .............................................106
5
Siemens Building Technologies
Fire Safety & Security Products
08.2007
16
16.1
16.2
16.3
16.4
16.5
16.6
16.7
Configuring data storage ...................................................................108
General information about the storage location ....................................108
Selecting a storage location for recordings...........................................109
Selecting a storage location for the database.......................................110
Selecting a storage location for backup ................................................111
Clearing the backup directory ...............................................................112
Choosing the backup schedule .............................................................112
Selecting the type of recordings for backup..........................................113
17
17.1
17.1.1
17.1.2
17.1.3
17.1.4
17.1.5
17.2
17.2.1
17.2.2
17.2.3
17.3
17.3.1
17.3.2
17.3.3
17.4
Configuring alarm response ..............................................................114
Configuring e-mail notification...............................................................114
Enabling e-mail notification ...................................................................114
Setting notification via the SMTP server ...............................................115
Configuring the connection to the SMTP server ...................................116
Entering e-mail recipient data ...............................................................117
Configuring time control ........................................................................118
Configuring SMS notification.................................................................119
Enabling SMS notification .....................................................................119
Entering SMS recipient data .................................................................120
Configuring time control ........................................................................121
Configuring the alarm connection .........................................................121
Configuring the network alarm connection............................................121
Configuring the ISDN alarm connection................................................122
Configuring time control ........................................................................123
Configuring the FTP server ...................................................................123
18
18.1
18.2
Configuring bank mode......................................................................125
Enabling bank mode .............................................................................125
Configuring the number of recordings...................................................126
19
19.1
19.2
19.2.1
19.2.2
19.2.3
Configuration of automated teller mode...........................................127
Enabling automated teller mode ...........................................................127
Configuring automated teller monitoring ...............................................128
Configuring diIBM_PBM type ................................................................128
Configuring the NCR type .....................................................................134
Configuring the SNI_DREBA type ........................................................137
20
20.1
20.2
20.3
20.4
20.4.1
20.4.2
20.4.3
20.4.4
20.5
Configuration of cash box mode .......................................................141
Adding a cash box.................................................................................141
Deleting a cash box...............................................................................141
Configuring cash box monitoring...........................................................142
Configuring filters ..................................................................................142
Creating a new filter ..............................................................................142
Importing filters......................................................................................143
Deleting filters........................................................................................143
Exporting filters .....................................................................................144
Displaying cash box data ......................................................................145
21
21.1
21.1.1
21.1.2
Configuration of holidays...................................................................146
Adding a holiday....................................................................................146
Creating a new holiday..........................................................................146
Importing holidays .................................................................................147
6
Siemens Building Technologies
Fire Safety & Security Products
08.2007
21.2
21.3
Deleting a holiday..................................................................................148
Exporting holidays.................................................................................149
22
22.1
22.2
22.3
22.4
22.5
22.6
Configuration management ...............................................................149
Resetting the configuration ...................................................................149
Importing a configuration ......................................................................150
Exporting the configuration ...................................................................150
Printing the configuration ......................................................................152
Showing the configuration and system data overview..........................153
Importing user configurations................................................................154
23
Testing the Watchdog ........................................................................155
24
24.1
24.2
24.3
24.4
24.5
24.6
24.6.1
24.6.2
24.7
24.8
24.8.1
24.8.2
24.9
24.10
24.11
24.11.1
24.11.2
24.11.3
24.11.4
24.12
24.12.1
24.12.2
24.13
24.13.1
24.13.2
24.13.3
24.13.4
24.13.5
24.13.6
24.13.7
24.13.8
24.14
24.14.1
24.14.2
24.14.3
24.14.4
24.14.5
24.14.6
24.15
24.15.1
Configuring SISTORE RemoteView ..................................................156
Starting SISTORE RemoteView ...........................................................156
Program window ...................................................................................156
Status displays ......................................................................................158
Overview of functions............................................................................159
Opening configuration mode.................................................................159
Configuring network connections..........................................................160
Entering the system name ....................................................................160
Configuring the network connection......................................................161
Selecting the user interface language ..................................................163
Configuring the display area .................................................................163
Selecting the initial display mode..........................................................163
Configuring the live image change interval...........................................164
System message configuration.............................................................164
Enabling and disabling cameras ...........................................................165
Configuring connections .......................................................................166
Enabling automatic termination of the connection ................................166
Enabling connection logging .................................................................166
Selecting the download directory ..........................................................167
Connecting to SISTORE MX NVS ........................................................167
Enabling the CCTV keyboard ...............................................................168
Selecting the serial interface.................................................................168
Enabling button delay ...........................................................................168
Configuring the address book ...............................................................168
Opening the address book....................................................................168
Show all.................................................................................................169
Adding an entry .....................................................................................170
Editing an entry .....................................................................................171
Deleting an entry ...................................................................................171
Sorting entries .......................................................................................172
Specifying the camera selection ...........................................................172
Searching for SISTORE MX servers.....................................................174
Map configuration..................................................................................174
Opening and closing the map ...............................................................174
Importing a map ....................................................................................175
Exporting a map ....................................................................................175
Setting the display area for video images.............................................176
Configuring the map..............................................................................177
Selecting the map view .........................................................................178
Configuring SISTORE MX via SISTORE RemoteView ........................181
Configuring SISTORE MX via SISTORE RemoteView ........................181
7
Siemens Building Technologies
Fire Safety & Security Products
08.2007
24.15.2
24.15.3
24.15.4
24.16
24.16.1
24.16.2
24.17
Defining the detection area (mask) .......................................................183
Setting image quality.............................................................................183
Changing user data...............................................................................184
Virtual guard ..........................................................................................184
Starting and ending the virtual guard ....................................................184
Configuring the virtual guard .................................................................185
Transmit and receive files .....................................................................187
25
25.1
25.2
25.3
Configuration of Windows system settings .....................................188
Synchronizing the time with an NTP server ..........................................188
Changing the language version under Windows XP.............................189
Setting the date and time to the German format...................................193
26
Video formats supported....................................................................194
27
Index .....................................................................................................195
8
Siemens Building Technologies
Fire Safety & Security Products
08.2007
Safety
Safety
Target readers
The instructions in this document are designed for the following target readers:
Target readers
Qualification
Activity
Operational startup
personnel
Appropriate
professional training
regarding the function
and units or systems to
be brought into
operation and training
for the product.
Understands the
instructions in the
documentation and is
able to apply them in
practice. Has working
knowledge of
computers.
Additional instruction by
technical specialists is
recommended.
Puts the device
including the software
into operation for the
first time.
Operator
Performs only the
procedures for proper
operation of the
software.
Condition of the
equipment
The software is not yet
installed and
configured.
The software is already
installed and
configured.
General safety instructions
General information
z
z
z
z
Read the general safety precautions before operating the unit.
Follow the safety notes attached to the unit.
Keep this document for later reference.
Keep this document with the product upon transfer.
Liability claim
z Use only spare parts and accessories approved by the manufacturer.
Damage due to improper handling
z Protect the CD from scratching.
z To clean the CD use a soft dry cloth.
Transport
Damage during transport
z Always transport the CD in the case it originally came in.
9
Siemens Building Technologies
Fire Safety & Security Products
08.2007
Safety
Operational setup
Dangerous situation due to false alarm
z Make sure to notify all relevant parties and authorities providing assistance
before testing the system.
z To avoid panic, always inform all those present before testing any alarm
devices.
Installation
Data loss after software update
z Make sure to backup all data before updating the software.
Storage
Risk of electric shock during maintenance
z Damage due to improper storage
z Always store the CD in its protective case.
z Keep the CD in an environment with a relative humidity of 10 – 90 %.
z Keep the CD between -5 and +55 °C.
z Do not store the CD in excessively dusty places.
z Do not keep the CD close to sources of magnetic radiation.
z Protect the CD from moisture.
z Protect the CD from direct sunlight.
Meaning of the signal words
Signal word
DANGER
WARNING
CAUTION
IMPORTANT
Type of risk
Danger of death or severe bodily harm
Possible danger of death or severe bodily harm
Danger of minor bodily injury or property damage
Danger of malfunctions
Meanings of the hazard symbols
WARNING
Warning of a hazard area
WARNING
Warning of dangerous electrical voltage
10
Siemens Building Technologies
Fire Safety & Security Products
08.2007
Details for ordering
Details for ordering
Type
SISTORE MX NVS 4
SISTORE MX NVS 9
SISTORE MX NVS 16
SISTORE MX NVS 32
Order No.
S24245-P5099-A1
S24245-P5099-A2
S24245-P5099-A3
S24245-P5099-A4
Accessories, not included in delivery!
Type
Order No.
2GF4811-8CH
USBOPTO8
2GF4811-8CG
USBREL8
2GF4811-8CJ
USBOPTOREL16
Designation
Software license 4 - recording of up to 4 network cameras
Software license 9 - recording of up to 9 network cameras
Software license 16 - recording of up to 16 network cameras
Software license 32 - recording of up to 32 network cameras
Designation
USB input module - 8 channels with optocoupler function
USB output module - 8 channels with relay function
USB input and output modules
with 16 optocoupler inputs and 16 relay outputs
Note
The software license you purchase should correspond to the number of cameras installed in your
system. The license cannot be upgraded at a later date.
Scope of delivery
z USB dongle for software license with 4, 9, 16 or 32 network cameras
Dongle 4
Dongle 9
Dongle 16
Dongle 32
Operation of 4 network cameras
Operation of 9 network cameras
Operation of 16 network cameras
Operation of 32 network cameras
Note
If no USB dongle is installed, the software only runs in demo mode.
In demo mode you can configure and evaluate only one network camera.
z CD
– Software SISTORE MX NVS
– SISTORE MX NVS Configuration Manual and User Manual
– SISTORE MX NVS Installation Manual
z Supplement Getting Started in six languages
11
Siemens Building Technologies
Fire Safety & Security Products
08.2007
Software description
Software description
SISTORE MX NVS (Network based Video Software) is an application software.
The application software can be used for the following purposes:
z Stand-alone system:
SISTORE MX NVS is installed on 1 PC, the video streams of max. 32 IP
cameras are recorded and evaluated on site.
z Client/server system:
SISTORE MX NVS is installed on 1 to max. 10 server PCs, the video streams of
max. 32 IP cameras per server PC are recorded.
SISTORE RemoteView is installed on 1 to max. 16 client PCs. All PCs are
connected via LAN. Search and evaluation of the video data is performed on the
client PC.
Starting the SISTORE MX NVS application software
You have two options to start the SISTORE MX NVS application software:
1.
Double-click on the desktop shortcut SISTORE MX NVS.
or
2.
Select the directory SISTORE MX NVS in the Windows start menu.
12
Siemens Building Technologies
Fire Safety & Security Products
08.2007
Software description
Selecting other manuals
Prerequisites
z The SISTORE MX NVS application software is started.
See Section „Starting the SISTORE MX NVS application software“, page 12.
z The SISTORE MX NVS application software is in display mode.
See Section "Display mode", page 13
Click the
icon in the toolbar to access additional manuals.
SISTORE MX NVS application software
Display mode
Purpose
In display mode, the live images of the connected cameras are displayed and all
events that occur, such as camera failure, alarm inputs and malfunctions, are
logged.
Fig. 1
SISTORE MX NVS application software in display mode
13
Siemens Building Technologies
Fire Safety & Security Products
08.2007
Software description
Playback mode
Purpose of playback mode
The recordings can be evaluated in playback mode. The database enables a
flexible, precise search for particular events and the related camera images.
Access to this mode is controlled by authorization level and can be subject to dual
control. Camera recording and live image display continue to run in playback
mode.
Fig. 2
SISTORE MX NVS application software in playback mode
14
Siemens Building Technologies
Fire Safety & Security Products
08.2007
Software description
Configuration mode
Purpose of the configuration mode
Configuration mode offers the following functions:
Assignment of user rights, configuration of the digital IP cameras, of the alarm
inputs and all other inputs and outputs
Camera settings for motion detection, alarm contact, output contact, time control,
alarm forwarding, transmission, e-mail and SMS
Network parameters such as ISDN or LAN with bandwidth limitation
Open configuration mode
Prerequisites
z The SISTORE MX NVS application software is started.
See Section „Starting the SISTORE MX NVS application software“, page 12.
z The SISTORE MX NVS application software is in display mode.
.
Click the Login button
1. The SISTORE MX NVS login dialog will open.
2. The first time you log in, enter Administrator in the User name field.
3. The first time you log in, enter Administrator in the Password field.
NOTE:
Change the password after the first login, or create a new user.
4. Select Configuration... from the Administration menu.
Î
The configuration mode will open.
15
Siemens Building Technologies
Fire Safety & Security Products
08.2007
Software description
Fig. 3
1.1.1
SISTORE MX NVS application software in configuration mode
SISTORE MX NVS time control dialog
Configuring time control
Fig. 4
In
general
1
Click points in the SISTORE MX NVS time control dialog
left-click to select, right-click to remove a selection
A click at this position affects the entire time table.
16
Siemens Building Technologies
Fire Safety & Security Products
08.2007
Software description
2
3
4
A click at this position affects a column (= one hour).
A click at this position affects an individual time segment (= 20 minutes).
A click at this position affects a row (= one day).
Tip: By clicking and dragging on the click points 2 or 3 you can conveniently select
or deselect multiple columns or time segments.
Exporting a time control file
The Export button can be used to back up the time control file and transfer it to
other systems.
.
5. Click the Export button
Î The Save As... dialog will appear.
6. Select the directory into which you would like to export the time control file.
7. Enter a name in the File name field.
8. Click Save.
Î The time control file will be exported.
Î Importing time control
You can import a saved time control file with the Import button.
NOTE:
If the time control has already been configured, this configuration will be replaced.
9. Click the Import button
.
Î The Open dialog will appear.
10.Select the time control file to import.
11.Click Open.
Î The time control file will be imported.
SISTORE RemoteView
The SISTORE RemoteView application software provides you with the option of
convenient remote access evaluation of existing video sequences. SISTORE MX
NVS functions as the server with SISTORE RemoteView as the client. This makes
evaluation from any location possible if the SISTORE MX NVS system and the PC
intended for evaluation are networked. Finally a connection via LAN, DSL or ISDN
to the SISTORE MX NVS system is then required.
NOTE:
The time zones of the SISTORE RemoteView and the SISTORE MX NVS server must be set the
same, otherwise display errors will occur (such as incorrect time display).
NOTE:
You must have administrative rights to install and run the SISTORE RemoteView application software
on the PC.
17
Siemens Building Technologies
Fire Safety & Security Products
08.2007
Software description
SISTORE WebView
The SISTORE MX NVS servers can be operated not only with SISTORE MX NVS
RemoteView but also using a browser.
Use the following browsers for this:
z Microsoft Internet Explorer 6.x or later
SISTORE MX NVS WebView allows the use of all viewing functions of the
video system over the network on a client PC.
SISTORE MX NVS WebView provides the following functions:
z Retrieval and playback of video recordings
z Display of live images
z Bandwidth limitation of the video server
z Password protection, users and passwords are set up on each SISTORE MX
NVS server via the user administration.
z Live image display, up to 16 live images in parallel, with random access to
cameras connected to various SISTORE MX NVS servers (multi-server access)
for logged in users with the user right "Display".
z Playback of saved images, only 1-channel playback.
z Search by date and time
z Playback control: forward, reverse, single image step
As a web solution, SISTORE MX NVS WebView and the MX Video Server are
installed on a dedicated server and can be loaded and operated by any number of
Windows clients. The prerequisite is that the client be connected to the web server
via TCP-IP with Microsoft Internet Explorer and the Java Runtime Environment
installed in the versions required.
SISTORE MX NVS WebView can be run in German or English.
From the operating stations, any camera – regardless of the associated station –
can be selected. The images are output on the monitors of the client PCs.
NOTE:
As of version 2.60, the SISTORE WebView software is an independent product and has to be ordered
separately.
18
Siemens Building Technologies
Fire Safety & Security Products
08.2007
Setup
Setup
Examples of system design
SISTORE MX NVS server PC
Fig. 5
1
2
3
SISTORE MX NVS system overview
Max. 32 IP cameras or IP domes
MX NVS server PC
CKA4810/20 (optional)
General information about network cameras
Be aware of the following when using network cameras:
z The image quality of network cameras is generally inferior to that of analog
cameras. The reason for this is the compression required to reduce the load on
the network.
z Multiple users can access network cameras simultaneously. Simultaneous
access by multiple users lowers the frame rate.
z Settings made by a user on a network camera, such as modifying the image
parameters via a browser, have system-wide effects.
19
Siemens Building Technologies
Fire Safety & Security Products
08.2007
Setup
SISTORE MX NVS supports the following network cameras:
Arecont
Axis
CBC
Digilan
Eneo
IQ invision
JVC
Lumenera
Mobotix
Panasonic
Pixord
Samsung
Siemens
Sony
Vision 2100, Vision 3130 Day, Vision 3130 Night
205, 206/W, 206M, 210, 211, 212 PTZ, 213 PTZ, 216FD, 221, 223M,
231D+, 232D+, 240Q, 241Q, 241S, Generic HTTP Interface V1.0,
Generic HTTP Interface V2.0
MP2A, MP3DN Day, MP3DN Night
TV7214
ENC-1003L
IQ501, IQ603, IQ 752
VN-C10U; VN-C30U, VN-C625U, VN-C655U
LE175C, LE275C, LE375C
D12 one or two cameras, M1 Models, M10 Models, M10D-Night,
M12 Models, M12D-Night, M22M
KX-HCM-280, WV-NM100/G, WV-NP244E, WV-NP472, WV-NS202,
WV-NS320, WV-NW470
205
SNC-L200
CCIS1337-LP, CCIx1345, CFVA-IP NTSC, CFVA-IP PAL,
CVVA-IP NTSC, CVVA-IP PAL, TELSCAN WEB Server
Generic HTTP interface, SNC-CS11, SNC-CS3P, SNC-DF40P,
SNC-M1/W, SNC-M3/W, SNC-P1, SNC-P5, SNC-RZ25P, SNC-RZ30P,
SNC-Z20P, SNT-V704
Depending on the functional scope of the network camera, many operating
elements of the LAN cameras tab may be disabled.
Altogether a maximum of 32 network cameras can be connected.
Limitation: Network cameras cannot be connected to analog video outputs.
Access to network cameras takes place with significantly greater latency. The
reason for this is the greater communication load between the SISTORE MX NVS
and a network camera.
Network cameras cause a significantly higher processor load of the SISTORE MX
NVS than analogue cameras. The frame rates required are the determining factor.
The operation of the system can be slow if all connections for network cameras
(32) are used.
NOTE:
To keep the processor load below 90%, we recommend setting the resolution of network cameras low
(CIF format). The image quality should be set to approximately 70 %. The following rule applies: The
higher the performance of the server PC, the higher the image quality and the lower the processor
load. See Fig. 25, page 39 for further information.
Exact specifications for the image quality and the required hard drive capacity are
not possible with network cameras, since each network camera has different
quality levels and interprets specifications differently.
20
Siemens Building Technologies
Fire Safety & Security Products
08.2007
Setup
SISTORE MX NVS - IP camera - CKA4810/20
SISTORE MX NVS – IP camera –– CKA4810/20 system overview
Fig. 6
1
2
3
CKA4810/20
MX NVS server
Max. 32 IP cameras
Prerequisite:
The CKA driver is installed (please refer to the Installation Guide, Section 6.2).
1. Connect the CKA4810 / 4820 control panel (COM1A port) to the MX NVS server
(COM1/COM2).
2. Configure the COM1A connection on the operating console for use as an RS232
interface. For more information please refer to the respective instruction manual
for control panel CKA4810 / CKA4820.
3. Start the SISTORE MX NVS application software.
4. Switch to configuration mode.
5. Mark the checkbox CCTV keyboard on the System tab.
6. Click Apply.
Î The setting will be saved.
Î The interface for the operating console is enabled.
Connections
Signal
MX NVS Server
SISTORE RemoteView
CKA4810 / CKA4820
9-pin SubD plug
GND
Rxd
Txd
5
3
2
5
2
3
Interface configuration CKA4810 / CKA4820
z Protocol: SIMATRIX RS-232 or SIEMENS IVM
z Baud rate: 9600
z Parity: none
21
Siemens Building Technologies
Fire Safety & Security Products
08.2007
Setup
SISTORE MX NVS - SISTORE RemoteView - CKA4810 / CKA4820
SISTORE MX NVS – SISTORE RemoteView – CKA4810 system
overview
Fig. 7
1
2
3
4
CKA4810/20
Client PC with
RemoteView
MX NVS server
Max. 32 IP cameras
Prerequisite:
The CKA driver is installed (please refer to the Installation Guide, Section 6.2).
1. Connect the CKA4810/CKA4820 control panel (COM1A port) to the client PC
(COM1/COM2).
2. Configure the COM1A connection on the operating console for use as an RS232
interface. For more information please refer to the respective instruction manual
for control panel CKA4810 / CKA4820.
3. Start the SISTORE MX RemoteView application software.
4. Switch to configuration mode.
5. Mark the checkbox CCTV keyboard on the System tab.
6. Click Apply.
Î The setting will be saved.
Î The interface for the operating console is enabled.
Connections
Signal
Client PC
SISTORE RemoteView
CKA4810 / CKA4820
9-pin SubD plug
GND
Rxd
Txd
5
3
2
5
2
3
Interface configuration CKA4810 / CKA4820
z Protocol: SIMATRIX RS-232 or SIEMENS IVM
z Baud rate: 9600
z Parity: none
22
Siemens Building Technologies
Fire Safety & Security Products
08.2007
Setup
SISTORE MX NVS – SISTORE MX NVS RemoteView – multiserver
mode
Fig. 8
1
2
3
SISTORE MX NVS – SISTORE RemoteView – CKA4810 system
overview
1 ... max. 32 IP cameras / IP domes
1 … max. 16 Client PCs
1 … max. 10 MX NVS servers
Minimum system configuration
1 x server MX NVS, 1 x IP camera
Maximum system configuration
16 x SISTORE MX NVS RemoteView Client PC
10 x SISTORE MX NVS server, each with 32 IP cameras = 320 IP cameras
23
Siemens Building Technologies
Fire Safety & Security Products
08.2007
Setup
SISTORE MX NVS - MX Multi Channel Box RCI 0601 and ATM
Fig. 9
MX NVS - Multi-Channel Box RCI 0601and ATM system overview
1. Connect the MX Multi-Channel Box to the SISTORE MX NVS server PC
(COM1/COM2).
For this you require the converter 485SD9R (B&B Electronics).
2. Connect the ATM to the RCI 0601. For more information, refer to the user guide
for the MX Multi-Channel Box RCI 0601.
3. Start the SISTORE MX NVS application software.
4. Switch to configuration mode.
5. Select the System tab.
6. Mark the Bank mode checkbox.
7. Terminate the SISTORE MX NVS application software and restart it.
8. Switch to configuration mode and mark the Cash dispenser checkbox.
9. Configure the cash dispenser mode. For more information please refer to the
Configuration Manual, pp. 144.
10. Restart the PC.
Î
The SISTORE MX NVS application will be restarted (automatically or via the
start icon on the desktop). The ATM handler module will be started as well
(see task bar).
24
Siemens Building Technologies
Fire Safety & Security Products
08.2007
Network configuration
Network configuration
Entering the system name
The system name is used primarily for identification of the system during remote
access. Enter the location of the system, for example.
Fig. 10
The System Name text field on the System tab
Prerequisites
z The network has been set up in the operating system and is ready for use.
z The SISTORE MX NVS application software is started.
See Section "Starting the SISTORE MX NVS application software", page 12 for
further information.
z The SISTORE MX NVS application software is in configuration mode.
See Section "Configuration mode", page 15.
1. Select the System tab.
2. Enter the desired designation in the System Name text field (see "Fig. 10 ",
page 25).
3. Click Apply.
Î The setting will be saved.
Configuring the network connection
NOTE:
If you operate the SISTORE MX NVS application software or SISTORE RemoteView behind a firewall
and want to access via a network, open all ports in the firewall that are used by the software.
All users logged in to the SISTORE MX NVS application software (locally or via
SISTORE RemoteView) can simultaneously view live images or recordings and
alarm outputs.
All connections between the SISTORE MX NVS application software and users
logged in via SISTORE RemoteView will be terminated automatically when the
following events occur:
z The configuration of the SISTORE MX NVS application software is overwritten.
z Configuration mode is started in the SISTORE MX NVS application software.
25
Siemens Building Technologies
Fire Safety & Security Products
08.2007
Network configuration
Fig. 11
TCP/IP parameters group on the Network tab
Prerequisites
z The network has been set up in the operating system and is ready for use.
z The SISTORE MX NVS application software is started.
See Section „Starting the SISTORE MX NVS application software“, page 12.
z The SISTORE MX NVS application software is in configuration mode.
See Section "Configuration mode", page 15.
1. Select the Network tab.
2. Mark the checkbox Allow network access (see "Fig. 11 ", page 26).
Î The TCP/IP parameters group will be activated.
3. Confirm the message that follows with OK.
4. In the TCP/IP Port field, enter the number of the port to be used by the
SISTORE RemoteView clients for connecting to the SISTORE MX NVS
application software.
5. In the Max. clients field, select the maximum number of SISTORE RemoteView
clients that are permitted to connect simultaneously to the SISTORE MX NVS
application software.
6. Enter the initial value of the TCP/IP port range in the field for TCP/IP port range.
Î The end value of the TCP/IP port range is determined automatically. It
depends on the max. clients value: two ports are needed for each client.
7. Click OK.
8. Confirm the message that follows with Yes.
Î The settings will be saved. The SISTORE MX NVS application software will
close.
26
Siemens Building Technologies
Fire Safety & Security Products
08.2007
Network configuration
Limiting bandwidth
NOTE:
The limitation of bandwidth can have the consequence that the SISTORE MX NVS client reacts very
slowly to commands of a SISTORE RemoteView client.
Fig. 12
Bandwidth limitation checkbox on the Network tab
Prerequisites
z The network has been set up in the operating system and is ready for use.
z The SISTORE MX NVS application software is started.
See Section „Starting the SISTORE MX NVS application software“, page 12.
z The SISTORE MX NVS application software is in configuration mode.
See Section "Configuration mode", page 15.
1. Select the Network tab.
2. Mark the checkbox Bandwidth limitation (see "Fig. 12 ", page 27).
3. In the kBit/s text field, enter the maximum bandwidth that the SISTORE MX
NVS application software is to use for a connection to a SISTORE RemoteView
client.
4. Click Apply.
Î The setting will be saved.
Configuring ISDN dial-in
NOTE:
Use the ISDN modem AVM FRITZ! USB v2.0.
We cannot guarantee proper function with other ISDN modems that have not been tested by us.
The SISTORE MX NVS application software and SISTORE RemoteView are not
downward compatible as of version 2.2.
The SISTORE MX NVS application software reacts only to ISDN calls with the
service indicator for data. Thus SISTORE RemoteView or the SISTORE MX NVS
application software can be operated on an ISDN connection in parallel to ISDN
devices with other service indicators.
27
Siemens Building Technologies
Fire Safety & Security Products
08.2007
Network configuration
Accept all incoming calls
Fig. 13
Accept all incoming calls option field
Prerequisites
z The network has been set up in the operating system and is ready for use.
z An ISDN modem is connected to the SISTORE MX NVS unit.
z The SISTORE MX NVS application software is started.
See Section „Starting the SISTORE MX NVS application software“, page 12.
z The SISTORE MX NVS application software is in configuration mode.
See Section "Configuration mode", page 15.
1. Select the Network tab.
2. Mark the checkbox Allow ISDN dial in (see "Fig. 13 ", page 28).
3. Click the option field Accept all incoming calls.
4. Click Apply.
Î The settings will be saved.
React to certain multiple subscriber numbers
Fig. 14
Accept MSN option field on the Network tab
Prerequisites
z The network has been set up in the operating system and is ready for use.
z An ISDN modem is connected to the SISTORE MX NVS unit.
z The SISTORE MX NVS application software is started.
See Section „Starting the SISTORE MX NVS application software“, page 12.
z The SISTORE MX NVS application software is in configuration mode.
See Section "Configuration mode", page 15.
1. Select the Network tab.
2. Mark the checkbox Allow ISDN dial in (see "Fig. 14 ", page 28).
3. Click the radio button by Accept MSN ... only.
4. Enter the desired multiple subscriber number in the Allow MSN … only text
field.
5. Click Apply.
Î The settings will be saved.
28
Siemens Building Technologies
Fire Safety & Security Products
08.2007
Network configuration
Activating channel bundling
Fig. 15
Allow channel bundling checkbox on the Network tab
Prerequisites
z An ISDN modem is connected to the SISTORE MX NVS unit.
z The SISTORE MX NVS application software is started.
See Section „Starting the SISTORE MX NVS application software“, page 12.
z The SISTORE MX NVS application software is in configuration mode.
See Section "Configuration mode", page 15.
z Allow ISDN dial-in is configured.
See Section "
29
Siemens Building Technologies
Fire Safety & Security Products
08.2007
Network configuration
Accept all incoming calls", page 28 and Section "React to certain multiple
subscriber numbers", page 28 for further information.
1. Select the Network tab.
2. Mark the checkbox Allow channel bundling (see "Fig. 15 ", page 29).
3. Click Apply.
Î The setting will be saved.
Configuring the live image server
With SISTORE WebView you can access the live images and recordings of one or
more SISTORE MX NVS units. To do so, enter an IP address and port number in
the SISTORE MX NVS application software.
Fig. 16
Picture-Server in the Network tab
Prerequisites
z The network has been set up in the operating system and is ready for use.
z The SISTORE MX NVS application software is started.
See Section "Starting the SISTORE MX NVS application software", page 12 for
further information.
z The SISTORE MX NVS application software is in configuration mode.
See Section "Configuration mode", page 15.
30
Siemens Building Technologies
Fire Safety & Security Products
08.2007
Network configuration
1. Select the Network tab.
2. Mark the checkbox Picture server (see "Fig. 16 ", page 30).
3. Enter the IP address of the image server in the Video server address text field.
4. Enter the port number of the image server in the Video server port text field.
5. Click Apply.
Î The settings will be saved.
Controlling network access
Adding a connection filter
NOTE:
Please note when setting up filters for multiple subscriber numbers (MSNs) that these are
communicated differently depending on the telephone system. The formulation of a filter must match
the transmission method of your telephone system.
You can refuse certain telephone numbers and IP addresses network access to
the SISTORE MX NVS application software. To do this set up an appropriate
connection filter in the Reject incoming calls list field. Wildcards (*) can be used to
group IP addresses or telephone numbers.
In order to make an exception for a telephone number or IP address in a group of
banned telephone numbers or IP addresses, add a connection filter for it to Allow
incoming calls.
Example: In the list field Reject incoming calls set up the connection filter 127.* and
in the list field Allow incoming calls set up the connection filter 127.0.0.99.
NOTE:
IP addresses or telephone numbers for which a connection is refused receive no information or no
error message.
Result:
Î None of the IP addresses beginning with 127. are allowed to access the
SISTORE MX NVS application software except the IP address 127.0.0.99.
Allow connection
Fig. 17
Allow incoming calls filter list on the Network tab
31
Siemens Building Technologies
Fire Safety & Security Products
08.2007
Network configuration
Prerequisites
z The network has been set up in the operating system and is ready for use.
z The SISTORE MX NVS application software is started.
See Section „Starting the SISTORE MX NVS application software“, page 12.
z The SISTORE MX NVS application software is in configuration mode.
See Section "Configuration mode", page 15.
1. Select the Network tab.
next to the filter list Allow incoming calls (see "Fig.
2. Click the Add button
17 ", page 31).
Î A new text field will be created in the Allow incoming calls filter list.
3. Enter the telephone number or IP address that you want to allow in the new text
field.
Î Repeat steps 2 and 3 as often as required if you want to create multiple
connection filters.
4. Click Apply.
Î The setting will be saved.
Reject connection
Fig. 18
Reject incoming calls filter list on the Network tab
Prerequisites
z The network has been set up in the operating system and is ready for use.
z The SISTORE MX NVS application software is started.
See Section „Starting the SISTORE MX NVS application software“, page 12.
z The SISTORE MX NVS application software is in configuration mode.
See Section "Configuration mode", page 15.
32
Siemens Building Technologies
Fire Safety & Security Products
08.2007
Network configuration
1. Select the Network tab.
next to the filter list Reject incoming calls.
2. Click the Add button
Î A new text field will be created in the Reject incoming calls filter list.
3. Enter the telephone number or IP address that you want to block in the new text
field.
Î Repeat steps 3 and 4 as often as required if you want to create multiple
connection filters.
4. Click Apply.
Î The setting will be saved.
Editing connection filters
Fig. 19
The Filter text field on the Network tab
Prerequisites
z The network has been set up in the operating system and is ready for use.
z The SISTORE MX NVS application software is started.
See Section „Starting the SISTORE MX NVS application software“, page 12.
z The SISTORE MX NVS application software is in configuration mode.
See Section "Configuration mode", page 15.
1. Select the Network tab.
2. Click on the connection filter you want to edit.
Î The affected text field will be framed (see "Fig. 19 ", page 33).
3. Edit the connection filter.
4. Click Apply.
Î The setting will be saved.
Deleting connection filters
Deleting an individual connection filter
Fig. 20
Connection filter on the Network tab
Prerequisites
z The network has been set up in the operating system and is ready for use.
z The SISTORE MX NVS application software is started.
See Section „Starting the SISTORE MX NVS application software“, page 12.
z The SISTORE MX NVS application software is in configuration mode.
See Section "Configuration mode", page 15.
33
Siemens Building Technologies
Fire Safety & Security Products
08.2007
Network configuration
1. Select the Network tab.
2. Click on the connection filter you want to delete.
A Delete button
will be displayed on the right of the connection filter (see
"Fig. 20 ", page 33).
3. Click the Delete button.
Î The affected connection filter will be removed from the filter list.
4. Click Apply.
Î The setting will be saved.
Î
Deleting all connection filters
Fig. 21
Filter list on the Network tab
Prerequisites
z The network has been set up in the operating system and is ready for use.
z The SISTORE MX NVS application software is started.
See Section "Starting the SISTORE MX NVS application software", page 12 for
further information.
z The SISTORE MX NVS application software is in configuration mode.
See Section "Configuration mode", page 15.
1. Select the Network tab.
next to the filter list for which you want to delete
2. Click the Delete button
the filters.
3. Confirm the message that follows with OK.
4. If you no longer want to use connection filtering, unmark the checkbox Filter
incoming calls.
5. Click Apply.
Î The setting will be saved.
34
Siemens Building Technologies
Fire Safety & Security Products
08.2007
Network camera configuration
Network camera configuration
General information about network cameras
Be aware of the following when using network cameras:
z The image quality of network cameras is generally inferior to that of analog
cameras. The reason for this is the compression required to reduce the load on
the network.
z Multiple users can access network cameras simultaneously. Simultaneous
access by multiple users lowers the frame rate.
z Settings made by a user on a network camera, such as modifying the image
parameters via a browser, have system-wide effects.
SISTORE MX supports the following network cameras:
Arecont
Axis
CBC
Digilan
Eneo
IQ invision
JVC
Lumenera
Mobotix
Panasonic
Pixord
Samsung
Siemens
Sony
Vision 2100, Vision 3130 Day, Vision 3130 Night
205, 206/W, 206M, 210, 211, 212 PTZ, 213 PTZ, 216FD, 221, 223M,
231D+, 232D+, 240Q, 241Q, 241S, Generic HTTP Interface V1.0,
Generic HTTP Interface V2.0
MP2A, MP3DN Day, MP3DN Night
TV7214
ENC-1003L
IQ501, IQ603, IQ 752
VN-C10U; VN-C30U, VN-C625U, VN-C655U
LE175C, LE275C, LE375C
D12 one or two cameras, M1 Models, M10 Models, M10D-Night,
M12 Models, M12D-Night, M22M
KX-HCM-280, WV-NM100/G, WV-NP244E, WV-NP472, WV-NS202,
WV-NS320, WV-NW470
205
SNC-L200
CCIS1337-LP, CCIx1345, CFVA-IP NTSC, CFVA-IP PAL,
CVVA-IP NTSC, CVVA-IP PAL, TELSCAN WEB Server
Generic HTTP interface, SNC-CS11, SNC-CS3P, SNC-DF40P,
SNC-M1/W, SNC-M3/W, SNC-P1, SNC-P5, SNC-RZ25P, SNC-RZ30P,
SNC-Z20P, SNT-V704
Depending on the functional scope of the network camera, many operating
elements of the LAN cameras tab may be disabled.
Access to network cameras takes place with significantly greater latency than
access to analog cameras. The reason for this is the greater communication load
between the SISTORE MX NVS and a network camera.
Network cameras cause a significantly higher processor load of the SISTORE MX
NVS than analogue cameras. The frame rates required are the determining factor.
The operation of the system can be slow if all network cameras (32) are used.
35
Siemens Building Technologies
Fire Safety & Security Products
08.2007
Network camera configuration
NOTE:
To keep the processor load below 90%, we recommend setting the resolution of network cameras low
(CIF format). The image quality should be set to approximately 70%. See Fig. 25, page 39 for further
information.
Exact specifications for the image quality and the required hard drive capacity are
not possible with network cameras, since each network camera has different
quality levels and interprets specifications differently.
Adding a network camera
Fig. 22
Camera list on the LAN cameras tab
Prerequisites
z At least one network camera is connected to the SISTORE MX NVS.
See Section "General information about network cameras", page 35 for further
information.
z The SISTORE MX NVS application software is started.
z See Section „Starting the SISTORE MX NVS application software“, page 12.
z The SISTORE MX NVS application software is in configuration mode.
See Section "Configuration mode", page 15.
NOTE:
Please take into account that the IP cameras are counted from 65 to 96. We recommend integrating
the camera number into the camera name, e.g. Door_1, Cam_2(66).
36
Siemens Building Technologies
Fire Safety & Security Products
08.2007
Network camera configuration
1. Select the LAN cameras tab.
(see "Fig. 23 ", page 37).
2. Click the Add button
Î A network camera will be added in the camera list.
3. Enter a name for the camera in the Name text field.
4. Enter a short description, such as information on the camera position, in the
Description text field.
5. Make the appropriate settings in the following fields:
– Camera model / protocol
– TCP/IP
– Image quality and size
6. Repeat steps 2-5 for each camera.
7. Click Apply.
Î The settings will be saved.
Deleting a network camera
Fig. 23
Camera list on the LAN cameras tab
Prerequisites
z The SISTORE MX NVS application software is started.
See Section „Starting the SISTORE MX NVS application software“, page 12.
z The SISTORE MX NVS application software is in configuration mode.
See Section "Configuration mode", page 15.
z At least one network camera is in the camera list.
See Section "Adding a network camera", page 36 for further information.
37
Siemens Building Technologies
Fire Safety & Security Products
08.2007
Network camera configuration
1. Select the LAN cameras tab.
2. Select the camera you want to delete from the camera list (see "Fig. 23 ",
page 37).
button.
3. Click the Delete
4. Confirm the message that follows with OK.
5. Click Apply.
Î The setting will be saved.
Configuring image parameters
Setting brightness, contrast and color saturation
CAUTION
Malfunction due to too dark live image
With an image brightness of 0, the SISTORE MX NVS receives only black
images. Motion detection no longer functions.
Select the standard setting 50%.
NOTE:
The slide controls for the image parameters are not activated for every network camera. For many
network cameras the image parameters are instead set on the camera.
Image parameters
1
Brightness
2
Contrast
3
Colour saturation
38
Siemens Building Technologies
Fire Safety & Security Products
08.2007
Network camera configuration
Fig. 24
Camera list on the LAN cameras tab
Prerequisites
z The SISTORE MX NVS application software is started.
See Section „Starting the SISTORE MX NVS application software“, page 12.
z The SISTORE MX NVS application software is in configuration mode.
See Section "Configuration mode", page 15.
z At least one network camera is in the camera list.
See Section "Adding a network camera", page 36 for further information.
1. Select the LAN cameras tab.
2. Select the camera for which you want to configure the image parameters from
the camera list.
3. Move the slide control to the right or to the left.
4. Click Apply.
Î The setting will be saved.
Setting image quality and resolution
NOTE:
The higher the image quality, the less the image is compressed and the more network bandwidth is
required for its transmission.
Which image sizes are available depends on the network camera used.
The transmission of live images from SISTORE MX NVS to SISTORE RemoteView takes place
independent of the image size set in CIF format (352 x 288 pixels).
Fig. 25
Image quality and size group field on the LAN cameras tab
39
Siemens Building Technologies
Fire Safety & Security Products
08.2007
Network camera configuration
Prerequisites
z The SISTORE MX NVS application software is started.
See Section „Starting the SISTORE MX NVS application software“, page 12.
z The SISTORE MX NVS application software is in configuration mode.
See Section "Configuration mode", page 15.
z At least one network camera is in the camera list.
See Section "Adding a network camera", page 36 for further information.
1. Select the LAN cameras tab.
2. Select the camera for which you want to configure the image quality and size
from the camera list (see "Fig. 23 ", page 37).
3. Enter the image quality in the % text field (see "Fig. 25 ", page 39).
4. Select the image size from the dropdown list.
5. Click Apply.
Î The setting will be saved.
Î The setting will be saved.
Selecting the frame rate
The maximum frame rate is 100 frames/sec, distributed between 32 LAN cameras
max.
Fig. 26
Frames per second group field on the LAN cameras tab
Prerequisites
z The SISTORE MX NVS application software is started.
See Section „Starting the SISTORE MX NVS application software“, page 12.
z The SISTORE MX NVS application software is in configuration mode.
See Section "Configuration mode", page 15.
z At least one network camera is in the camera list.
See Section "Adding a network camera", page 36 for further information.
1. Select the LAN cameras tab.
2. Select the desired network camera in the camera list.
CAUTION
Poor recording quality due to too low frame rate
If the frame rate is too low, movements will no longer be recorded smoothly.
The following reference value applies: maximum frame rate per camera = the
maximum frame rate of the SISTORE MX NVS (100 frames/sec) divided by
the number of network cameras connected to the SISTORE MX NVS.
3. Select the radio button with the desired frame rate (see "Fig. 26 ", page 40).
4. Click Apply.
Î The setting will be saved.
40
Siemens Building Technologies
Fire Safety & Security Products
08.2007
Network camera configuration
Configuring automatic camera positioning
SISTORE MX supports the protocols of the following PTZ network cameras:
AXIS 212 PTZ/213 PTZ
AXIS 231/232 D+
AXIS Generic HTTP
Interface V1.0 und V2.0
JVC VN-C30U
JVC VN-C625U
JVC VN-C655U
Panasonic KX-HCM280
Panasonic WV-NM100/G
Tab. 1
Panasonic WV-NS202
Panasonic WV-NS320
Samsung SNC-L200
Sony SNC-M3/W
Sony SNC-P5
Sony SNC-RZ25P
Sony SNC-RZ30P
Sony Generic HTTP Interface
VIVOTEK PZ6122
PTZ network cameras and protocols supported by SISTORE MX NVS
Since different cameras from a manufacturer often use the same protocol, the list
of cameras or protocols above may cover more network cameras than shown in
the list.
Defining positions
Depending on the camera up to 32 positions can be defined. The positions are saved in the camera.
Fig. 27
Positions... button on the LAN cameras tab
Fig. 28
SISTORE MX camera position settings via the Positions button on the
LAN cameras tab
41
Siemens Building Technologies
Fire Safety & Security Products
08.2007
Network camera configuration
Prerequisites
z The SISTORE MX NVS application software is started.
See Section „Starting the SISTORE MX NVS application software“, page 12.
z The SISTORE MX NVS application software is in configuration mode.
See Section "Configuration mode", page 15.
z At least one controllable network camera is in the camera list.
1. Select the LAN cameras tab.
2. Select the camera for which you want to configure the positioning from the
camera list.
3. Click Positions... ().
Î The SISTORE MX NVS Camera position settings window will open.
4. Move the camera to the desired position.
You can control the camera with the mouse via the control element
, with
the keyboard or with a joystick.
5. Click New pos. to save a position or on Change pos to replace a position.
6. Click on the new position in the position list.
The position will be framed.
7. Enter an appropriate position name in the Description text field.
8. Select the duration of the position display using the arrows on the Duration (s)
field (or enter a value).
9. Click OK.
Î The SISTORE MX NVS Camera position settings window will close.
10.Click Apply on the LAN cameras tab.
Î The settings will be saved.
Î
Additional functions
Control element
Delete pos. button
Delete all button
Camera control (pan, tilt, zoom)
Button
Deletes the selected position
Delete all positions in the position list
Please note: The positions will be deleted without
confirmation!
Moves to the selected position
LED icon
If bright yellow: the camera is currently being moved
Slide control
Sets the control sensitivity (the speed with which a
camera moves to a position can be reduced for better
accuracy)
Moves the selected position up in the position list
Moves the selected position down in the position list
Up button
Down button
Activating automatic positioning (patrol)
42
Siemens Building Technologies
Fire Safety & Security Products
08.2007
Network camera configuration
Fig. 29
Activating automatic camera positioning on the LAN cameras tab
Prerequisites
z The SISTORE MX NVS application software is started.
See Section „Starting the SISTORE MX NVS application software“, page 12.
z The SISTORE MX NVS application software is in configuration mode.
See Section "Configuration mode", page 15.
z At least one controllable network camera is in the camera list.
z At least two camera positions have been defined for the affected network
camera. See the Section Defining camera positions (above) for more information
on this.
1. Select the LAN cameras tab.
2. Mark the checkbox PTZ.
3. Define the positions (see above).
4. Mark the checkbox Auto. pos.
5. Click Apply.
Î The setting will be saved.
Releasing camera control
As long as a user is controlling a network camera, this camera is blocked for other
users. In the PTZ timeout group field you can define the period without input after
which the camera is released for all other users.
Prerequisites
z The SISTORE MX NVS application software is started.
See Section „Starting the SISTORE MX NVS application software“, page 12.
z The SISTORE MX NVS application software is in configuration mode.
See Section “Configuration mode“, page 15 for further information.
1. Select the System tab.
2. Enter the period after which the network camera is to be released in the field
"Assumption of the control after...".
3. Click Apply.
Î The setting will be saved.
43
Siemens Building Technologies
Fire Safety & Security Products
08.2007
Network camera configuration
Configuring access to the configuration of the network camera
Fig. 30
Access to configuration group field on the LAN cameras tab
Prerequisites
z At least one network camera is connected to the SISTORE MX NVS unit.
See Section "Adding a network camera", page 36 for further information.
z The SISTORE MX NVS application software is started.
See Section „Starting the SISTORE MX NVS application software“, page 12.
z The SISTORE MX NVS application software is in configuration mode.
See Section "Configuration mode", page 15.
1. Select the LAN cameras tab.
2. Mark the checkbox Access to configuration (see "Fig. 30 ", page 44).
3. Enter a user name in the User name text field.
4. Enter a password in the Password text field.
5. Click Apply.
Î The settings will be saved.
Configuring live image access
Fig. 31
Access to images group field on the LAN cameras tab
Prerequisites
z At least one network camera is connected to the SISTORE MX NVS unit.
See Section "Adding a network camera", page 36 for further information.
z The SISTORE MX NVS application software is started.
See Section „Starting the SISTORE MX NVS application software“, page 12.
z The SISTORE MX NVS application software is in configuration mode.
See Section "Configuration mode", page 15.
1. Select the LAN cameras tab.
2. Mark the checkbox Access to images (see "Fig. 31 ", page 44).
3. Enter a user name in the User name text field.
4. Enter a password in the Password text field.
5. Click Apply.
Î The settings will be saved.
44
Siemens Building Technologies
Fire Safety & Security Products
08.2007
Network camera configuration
Opening proprietary camera configuration dialogs
Some network cameras (such as those from Mobotix) have a wide range of
functions that cannot be completely covered by the SISTORE MX NVS application
software. Therefore you can access the configuration dialog of the network camera
directly using a browser.
Fig. 32
TCP/IP group field on the LAN cameras tab
Prerequisites
z The SISTORE MX NVS application software is started.
See Section „Starting the SISTORE MX NVS application software“, page 12.
z The SISTORE MX NVS application software is in configuration mode.
See Section "Configuration mode", page 15.
z At least one network camera is in the camera list.
See Section "Adding a network camera", page 36 for further information.
1. Select the LAN cameras tab.
2. Enter the IP address of the relevant network camera in the URL text field.
3. Enter the port number of the network camera in the Port text field.
4. Click Browser...
Î A browser window with the proprietary configuration dialog for the camera will
open.
45
Siemens Building Technologies
Fire Safety & Security Products
08.2007
Configuring motion detection
Configuring motion detection
Opening the motion detection dialog
Fig. 33
Motion detection checkbox on the Cameras or LAN cameras tab
Prerequisites
z The SISTORE MX NVS application software is started.
See Section „Starting the SISTORE MX NVS application software“, page 12.
z The SISTORE MX NVS application software is in configuration mode.
See Section "Configuration mode", page 15.
z At least one network camera is in the camera list.
See Section "Adding a network camera", page 36 for further information.
1. Select the Cameras or LAN cameras tab.
2. Mark the checkbox Motion detection.
Î The Options… button will be enabled.
3. Click Options...
Î The SISTORE MX NVS Motion detection window will appear.
Fig. 34
The SISTORE MX NVS motion detection dialog opened with the
Options... button on the Cameras or LAN cameras tab
46
Siemens Building Technologies
Fire Safety & Security Products
08.2007
Configuring motion detection
Setting the sensitivity of motion detection
Use Sensitivity to determine how sensitively the SISTORE MX NVS reacts to
motions, i.e. to the position change of an object.
With Object size you can govern the minimum size an object must have for it to be
registered by the SISTORE MX NVS. The percentage refers to the object size in
relation to the size of the detection area. If no detection area is defined, the entire
recording area of the camera is taken as the detection area.
Fig. 35
Motion detection parameters in the SISTORE MX NVS Motion detection
dialog
Prerequisites
z The SISTORE MX NVS Motion detection window is opened.
See Section "Opening the motion detection dialog", page 46.
1. Enter the sensitivity level in the Sensitivity text field (see "Fig. 35 ", page 47).
2. In the Object size text field, enter the minimum size as of which objects are to
be registered.
3. Click OK.
Î The SISTORE MX NVS motion detection dialog will close.
Defining the detection area (mask)
You can define a detection area for analog and network cameras. Open the
relevant tab in the SISTORE MX NVS application software.
You have three options to define a detection area for motion detection:
z Draw detection area
z Determine the detection area automatically
z Copy detection area (save and load)
Draw detection area
Fig. 36
Mask (= detection area) group field in the SISTORE MX NVS Motion
detection dialog
47
Siemens Building Technologies
Fire Safety & Security Products
08.2007
Configuring motion detection
Fig. 37
Drawing group field in the SISTORE MX NVS Motion detection dialog
Prerequisite
z The SISTORE MX NVS Motion detection window is opened.
See Section "Opening the motion detection dialog", page 46.
1. Mark the checkbox Mask.
Î The Mask group field will be activated.
2. Select a drawing color from the Color… selection field.
radio button.
3. Click the pencil tool
4. Select a shape tool in the Tool line.
:
5. If you have chosen the shape tool Line
Select the line width.
6. Draw the detection area in the live image of the camera.
7. Click OK.
Î The setting will be saved. The SISTORE MX NVS Motion detection window
will close.
Tip: The eraser tool
allows you to correct the detection area. All the shape
tools can be used together with the eraser tool.
Tip: It may be simpler for complex shapes to draw the negative of the detection
area and then click Invert.
Determining the detection area automatically
Fig. 38
Determining the detection area in the SISTORE MX NVS Motion
detection dialog
Prerequisite
z The SISTORE MX NVS Motion detection window is opened.
See Section "Opening the motion detection dialog", page 46.
1. Mark the checkbox Mask.
Î The Mask group field will be activated.
2. Enter in the seconds text field the period during which the detection area should
be determined.
3. Click Calibrate.
4. Confirm the message that follows with OK.
Î The detection area will be determined.
48
Siemens Building Technologies
Fire Safety & Security Products
08.2007
Configuring motion detection
Copy detection area (save and load)
Fig. 39
Copying the detection area in the SISTORE MX NVS motion detection
dialog
Prerequisite
z The SISTORE MX NVS Motion detection window is opened.
See Section "Opening the motion detection dialog", page 46.
Saving the detection area
1. Click Save ....
Î The Save As... dialog will appear.
2. Select the directory in which to save the detection area file.
3. Enter a file name in the File name text field.
4. Click Save.
Î The Save As... dialog will close. The detection area file will be saved.
Loading the detection area
1. Mark the checkbox Mask.
2. Click Load ....
Î The Open dialog will appear.
3. Select the detection area file you want to load.
4. Click Open.
Î The Open dialog will close. The detection area will be displayed on the live
image in the SISTORE MX NVS Motion detection dialog.
49
Siemens Building Technologies
Fire Safety & Security Products
08.2007
Configuring motion detection
Configuring the time control of the detection area
The SISTORE MX NVS application software can switch between two detection
areas based on the time. This permits, for example, a different detection area to be
used during the day than the one at night.
Fig. 40
The Time controlled parameter group field in the SISTORE MX
NVS Motion detection dialog
Prerequisite
z The SISTORE MX NVS Motion detection window is opened.
See Section "Opening the motion detection dialog", page 46.
1. Mark the checkbox Time controlled parameter.
Î The Time controlled parameter group field will be activated.
2. Click the Mask 1 radio button (= detection area 1).
3. Set the sensitivity of the motion detection.
See Section "Setting the sensitivity of motion detection", page 47.
4. Define a detection area in the live image of the camera.
See Section "Defining the detection area (mask)", page 47 for further
information.
5. Click the Mask 2 radio button (= detection area 2).
6. Repeat the steps 3 and 4.
7. Click Options...
Î The SISTORE MX NVS Time control window will open.
8. Configure the time table.
See Section "SISTORE MX NVS time control dialog", page 16.
Î Mask 1 (detection area 1) will be used in the selected (blue) time segments;
mask 2 (detection area 2) will be used in the unselected (white) time
segments.
9. Click OK.
Î The settings will be saved. The SISTORE MX NVS Time control window will
close.
50
Siemens Building Technologies
Fire Safety & Security Products
08.2007
Configuring sabotage detection
Configuring sabotage detection
Opening the sabotage detection dialog
NOTE:
Sabotage detection is not possible with PTZ cameras.
Fig. 41
Anti-tampering (sabotage detection) checkbox on the Cameras or LAN
cameras tab
Fig. 42
The SISTORE MX NVS sabotage detection dialog opened with the
Options... button on the Cameras or LAN cameras tab
Prerequisites
z The SISTORE MX NVS application software is started.
See Section „Starting the SISTORE MX NVS application software“, page 12.
z The SISTORE MX NVS application software is in configuration mode.
See Section "Configuration mode", page 15.
z At least one network camera is in the camera list.
See Section "Adding a network camera", page 36 for further information.
51
Siemens Building Technologies
Fire Safety & Security Products
08.2007
Configuring sabotage detection
1. Select the Cameras or LAN cameras tab.
2. Mark the checkbox Anti-tampering (see "Fig. 41 ", page 51).
3. Click Options...
Î The SISTORE MX NVS Sabotage detection window will open (see "Fig.
42 ", page 51).
Setting the sensitivity of sabotage detection
Use Sensitivity to determine how sensitively the SISTORE MX NVS application
software should react to motions, i.e. to the position change of an object.
With Reaction time you can determine how much time should elapse before the
SISTORE MX NVS application software registers changes in the detection area
and reports them as tampering.
Prerequisite
z The SISTORE MX NVS Sabotage detection window is opened.
See Section "Opening the sabotage detection dialog", page 51.
Fig. 43
Parameters group field in the SISTORE MX NVS Sabotage detection
dialog
1. Enter a value in the Sensitivity text field (see "Fig. 43 ", page 52).
Î The higher the value, the more sensitive the tampering detection function.
2. Enter a value in seconds in the Reaction time text field.
3. Click OK.
Î The SISTORE MX NVS Sabotage detection window will close.
Defining the detection area (mask)
You can define a detection area for analog and network cameras. Open the
relevant tab in the SISTORE MX NVS application software.
You have two options to define a detection area for sabotage detection:
z Draw detection area
z Copy detection area (save and load)
Draw detection area
Fig. 44
Mask (= detection area) group field in the SISTORE MX NVS Sabotage
detection dialog
52
Siemens Building Technologies
Fire Safety & Security Products
08.2007
Configuring sabotage detection
Fig. 45
Drawing group field in the SISTORE MX NVS Sabotage detection dialog
Prerequisite
z The SISTORE MX NVS Sabotage detection window is opened.
See Section "Opening the sabotage detection dialog", page 51.
1. Mark the checkbox Mask.
Î The Mask (= detection area) group field will be activated.
2. Select a drawing color from the Color… selection field.
radio button .
3. Click the pencil tool
4. Select a shape tool in the Tool line.
shape tool:
5. If you have chosen the Line
Select the line width.
6. Draw the detection area in the live image of the camera.
7. Click OK.
Î The setting will be saved.
Tip: The eraser tool
allows you to correct the detection area. All the shape
tools can be used together with the eraser tool.
Copy detection area (save and load)
Prerequisite
z The SISTORE MX NVS Sabotage detection window is opened.
See Section "Opening the sabotage detection dialog", page 51.
Saving the detection area
1. Click Save ... (see "Fig. 44 ", page 52).
Î The Save As... dialog will appear.
2. Select the directory in which to save the detection area file.
3. Enter a file name in the File name text field.
4. Click Save.
Î The detection area file will be saved.
Loading the detection area
1. Mark the checkbox Mask (see "Fig. 44 ", page 52).
2. Click Load...
Î The Open dialog will appear.
3. Select the detection area file you want to load.
4. Click Open.
Î The detection area will be displayed on the live image in the SISTORE MX
NVS Sabotage detection dialog.
53
Siemens Building Technologies
Fire Safety & Security Products
08.2007
Configuring sabotage detection
Saving a reference image
NOTE:
The sabotage detection function does not evaluate the reference image. It is only for purposes of
visual checking by the user.
Fig. 46
Save reference image button in the SISTORE MX NVS sabotage
detection dialog
Prerequisites
z The SISTORE MX NVS Sabotage detection window is opened.
See Section "Opening the sabotage detection dialog", page 51.
1. Click Save reference image.
2. Confirm the message that follows with Yes.
Î The reference image of the camera will be saved.
54
Siemens Building Technologies
Fire Safety & Security Products
08.2007
Configuring alarm outputs
Configuring alarm outputs
Prerequisite:
A USB output module is connected to the SISTORE MX NVS PC (server PC). See
Section 0: Details for ordering and Section 11 of the Installation Guide.
Adding and deleting alarm outputs
Fig. 47
Alarm outputs list on the Alarm output tab
55
Siemens Building Technologies
Fire Safety & Security Products
08.2007
Configuring alarm outputs
Adding an alarm output
Prerequisites
z The SISTORE MX NVS application software is started.
See Section „Starting the SISTORE MX NVS application software“, page 12.
z The SISTORE MX NVS application software is in configuration mode.
See Section "Configuration mode", page 15.
1. Select the Alarm output tab.
.
2. Click the Add button
Î A new alarm output will be added to the alarm output list.
3. Enter a name for the alarm output in the Name text field.
4. Enter a short description, such as information on the switch position, in the
Description text field.
5. In the Output field, select the number of the physical device output (or the I/O
card output).
6. Click Apply.
Î The settings will be saved.
Deleting an alarm output
Prerequisites
z The SISTORE MX NVS application software is started.
See Section „Starting the SISTORE MX NVS application software“, page 12.
z The SISTORE MX NVS application software is in configuration mode.
See Section "Configuration mode", page 15.
1. Select the Alarm output tab.
2. Select the alarm output you want to delete in the list.
.
3. Click the Delete button
4. Confirm the message that follows with Yes.
5. Click Apply.
Î The settings will be saved.
56
Siemens Building Technologies
Fire Safety & Security Products
08.2007
Configuring alarm outputs
Selecting the switch action
You can define the response to an event for each alarm output. The following
options are available:
Open switch contact
Close switch contact
Negative switch pulse
Positive switch pulse
For the actions negative switch pulse and
positive switch pulse you can set the switch
pulse duration.
Alternating
You can set the frequency for the alternating
action.
The step width is:
0.01 Hz at 0.01 Hz to 0.5 Hz
0.1 Hz at 0.5 Hz to 1.0 Hz
1.0 Hz at 1.0 Hz to 5.0 Hz
The green LED icon is lit continuously in this
mode, since it does not show the switching state
of the output but rather its activity.
Tab. 2
Switch modes on the Alarm output tab
Prerequisites
z The SISTORE MX NVS application software is started.
See Section „Starting the SISTORE MX NVS application software“, page 12.
z The SISTORE MX NVS application software is in configuration mode.
See Section "Configuration mode", page 15.
1. Select an alarm output in the alarm outputs list.
2. Select a switch mode in the Alarm output switch on alarm group field.
3. Select the pulse duration or frequency as necessary.
4. Test the function of the alarm output with the Test button.
5. Click Apply.
Î The settings will be saved.
57
Siemens Building Technologies
Fire Safety & Security Products
08.2007
Configuring alarm outputs
Event-based or time control of alarm outputs
NOTE:
An alarm output with a special function assigned to it is not available for the configuration of recording.
Fig. 48
Special functions group field on the Alarm output tab
The field selection Normal means no special function (see "Fig. 48 ", page 58).
Name of the
Function
special function
Remote
The alarm output can be activated or deactivated by clicking the
controllable
status LED icon (in the status display of the switch outputs in
display mode) (see "Fig. 49 ", page 59). You require the user right
remote control (see Section Global user rights, page 74 for more
information).
Error
Alarm
Motion
Camera missing
Camera
sabotage
Recording
Alarm outputs to which the action negative switch impulse or
positive switch impulse have been assigned can also not be
activated or deactivated via the status LED icon.
The SISTORE MX sends a signal over the affected alarm output if
one of the following faults occurs:
UPS reports a power failure
The SISTORE MX NVS application software was not properly
closed (for example due to power failure or Watchdog)
Recording could not be started
Fatal recording error
Hard drive full, recording stopped
Failure of a hard drive
Windows device driver reports errors (event log)
SISTORE MX sends a signal over the affected alarm output if an
alarm recording is being made. The signal will be sent as long as
the alarm recording lasts.
SISTORE MX sends a signal over the affected alarm output if a
camera has detected a movement. The signal lasts one second. If
the camera detects another movement within this second, the
signal duration will be extended by another second, etc.
SISTORE MX sends a signal over the affected alarm output if at
least one camera has failed.
SISTORE MX sends a signal over the affected alarm output if
camera tampering has been detected.
During recording a signal will be sent periodically via the affected
alarm output.
58
Siemens Building Technologies
Fire Safety & Security Products
08.2007
Configuring alarm outputs
Time control
The SISTORE MX sends a signal over the affected alarm output at
the specified times.
If you select this special function the Options… button will be
enabled.
1. Click Options...
The SISTORE MX NVS Time control window will open.
1. Configure the time table. See Section "", page 16.
The SISTORE MX NVS will send a signal over the alarm output
during the marked (blue) time segments.
1. Click OK.
The dialog will close.
1. Click Apply.
The settings will be saved.
The alarm output will be activated as soon as there is at least one
connection to a SISTORE RemoteView client.
Remote
connection
Tab. 3
Special functions of the alarm outputs
Fig. 49
Status display of the alarm outputs in display mode
1 The special function remote controllable is assigned to the alarm output, and it is
activated.
2 The special function remote controllable is assigned to the alarm output, and it is
deactivated.
3 The special function remote controllable is not assigned to the alarm output, but
the output is configured.
4 The alarm output is not configured.
The status display of the alarm outputs is also shown in SISTORE RemoteView.
The status LED icons represent the alarm outputs in sequence (1 to 16) from the
top left to the bottom right.
59
Siemens Building Technologies
Fire Safety & Security Products
08.2007
Configuring alarm outputs
Event-controlled alarm output activation/deactivation
Prerequisites
z The SISTORE MX NVS application software is started.
See Section „Starting the SISTORE MX NVS application software“, page 12.
z The SISTORE MX NVS application software is in configuration mode.
See Section "Configuration mode", page 15.
1. Select the Alarm output tab.
2. Select a special function from the Special functions dropdown list (see "Fig.
48 ", page 58).
3. If you have selected the time control special function: see the table Special
functions of the alarm outputs under the entry time control.
4. Click Apply.
Î The settings will be saved.
Time-controlled alarm output activation/deactivation
Prerequisites
z The SISTORE MX NVS application software is started.
See Section „Starting the SISTORE MX NVS application software“, page 12.
z The SISTORE MX NVS application software is in configuration mode.
See Section "Configuration mode", page 15.
z The special function time control is not assigned to the affected alarm output.
1. Select the Alarm output tab.
2. Mark the checkbox Time control.
Î The Options… button will be enabled.
3. Click Options...
Î The SISTORE MX NVS Time control window will open.
4. Configure the time table. See Section "SISTORE MX NVS time control dialog",
page 16.
Î The alarm output is activated in the marked (blue) time segments and
deactivated in the unmarked (white) time segments.
5. Click OK.
Î The settings will be saved.
60
Siemens Building Technologies
Fire Safety & Security Products
08.2007
Configuring alarm inputs
Configuring alarm inputs
Adding and deleting alarm inputs
Prerequisite:
A USB output module is connected to the SISTORE MX NVS PC (server PC). See
Section 0: Details for ordering.
Fig. 50
Alarm inputs list on the Alarm input tab
Adding an alarm input
Prerequisites
z The SISTORE MX NVS application software is started.
See Section „Starting the SISTORE MX NVS application software“, page 12.
z The SISTORE MX NVS application software is in configuration mode.
See Section "Configuration mode", page 15.
1. Select the Alarm input tab.
.
2. Click the Add button
Î A new alarm input will be added to the alarm inputs list.
3. Enter a name for the alarm input in the Name text field.
4. Enter a short description, such as information on the position, in the Description
text field.
61
Siemens Building Technologies
Fire Safety & Security Products
08.2007
Configuring alarm inputs
5. In the alarm input field, select the number of the physical device input (the
trigger input of the I/O card).
6. Click Apply.
Î The settings will be saved.
Deleting an alarm input
Prerequisites
z The SISTORE MX NVS application software is started.
See Section „Starting the SISTORE MX NVS application software“, page 12.
z The SISTORE MX NVS application software is in configuration mode.
See Section "Configuration mode", page 15.
1. Select the Alarm input tab.
2. Select the alarm input you want to delete in the list.
.
3. Click the Delete button
4. Confirm the message that follows with Yes.
5. Click Apply.
Î The settings will be saved.
Configuring alarm input
Trigger edge
NOTE:
The trigger edge applies for all alarm inputs. It cannot be set differently for multiple alarm inputs.
With the trigger edge you can determine whether
z an alarm input normally carries voltage and the voltage is interrupted during an
alarm (
)
z or an alarm input carries voltage only in the case of an alarm and otherwise not
(
).
The level sensitive checkbox allows you to determine whether a recording ends
directly after an edge or continues until the next edge.
Example:
The SISTORE MX NVS should start recording when a door is opened and stop
when the door closes. The door opener (alarm input) generates a short signal
(level change / edge) upon opening and closing of the door. If the level sensitive
checkbox is not marked, the SISTORE MX NVS records only short sequences
when the door is opened and when it is closed. If the checkbox is marked, the
SISTORE MX NVS records a longer sequence from when the door opens until it is
closed.
Fig. 51
Trigger edge (global) group field on the Alarm input tab
62
Siemens Building Technologies
Fire Safety & Security Products
08.2007
Configuring alarm inputs
Fig. 52
Level sensitive checkbox on the Alarm input tab
Prerequisites
z The SISTORE MX NVS application software is started.
See Section „Starting the SISTORE MX NVS application software“, page 12.
z The SISTORE MX NVS application software is in configuration mode.
See Section "Configuration mode", page 15.
1. Select the Alarm input tab.
2. Select the alarm input you want to configure from the list (see "Fig. 50 ", page
61).
3. Select a trigger edge in the Trigger edge (global) group field (see "Fig. 51 ",
page 62).
4. Mark the checkbox level sensitive if relevant (see "Fig. 52 ", page 63).
5. Click Apply.
Î The setting will be saved.
Priority
The following priorities can be selected for alarm inputs:
z Normal (the alarm input icon in the alarm input list is red, see "Fig. 50 ", page
61)
z Hold-up (the alarm input icon in the alarm input list is orange)
z Suspicion (only possible if bank mode is active; the alarm input icon in the alarm
input list is purple)
The priority of an alarm input plays a role in the configuration of the recording (see
"Configuring recording modes", page 99). When an alarm with the priority hold-up
is triggered, active recordings with the normal alarm priority and movement
recordings are automatically ended. However, active recordings with the hold-up
alarm priority cannot be automatically ended.
Fig. 53
Priority group field on the Alarm input tab
Prerequisites
z The SISTORE MX NVS application software is started.
See Section „Starting the SISTORE MX NVS application software“, page 12.
z The SISTORE MX NVS application software is in configuration mode.
See Section "Configuration mode", page 15.
1. Select the Alarm input tab.
2. Select the alarm input you want to configure from the list (see "Fig. 50",
page 61).
3. Select the priority of the alarm input in the Priority group field (see "Fig. 53 ",
page 63).
63
Siemens Building Technologies
Fire Safety & Security Products
08.2007
Configuring alarm inputs
Time control
You can activate and deactivate alarm inputs under time control.
NOTE:
Alarm inputs with the priority hold-up or suspicion cannot be activated or deactivated with time control.
Prerequisites
z The SISTORE MX NVS application software is started.
See Section „Starting the SISTORE MX NVS application software“, page 12.
z The SISTORE MX NVS application software is in configuration mode.
See Section "Configuration mode", page 15.
Fig. 54
Time control checkbox on the Alarm input tab
1. Select the Alarm input tab.
2. Select the alarm input you want to configure from the list (see "Fig. 50",
page 61).
3. Mark the checkbox Time control (see "Fig. 54 ", page 64).
Î The Options… button will be enabled.
4. Click Options...
Î The SISTORE MX NVS Time control window will open.
5. Configure the time table. See Section "SISTORE MX NVS time control dialog",
page 16.
Î The alarm input is activated only in the marked (blue) time segments.
6. Click OK.
Î The setting will be saved.
Testing the configuration of an alarm input
Fig. 55
The signal detected LED icon on the Alarm input tab
Prerequisites
See Section „0“, page 12.
z The SISTORE MX NVS application software is in configuration mode.
See Section "Configuration mode", page 15.
1. Select the Alarm input tab.
2. Select the alarm input you want to test from the list (see "Fig. 50 ", page 61).
3. Trigger the (physical) alarm input.
Î The LED icon will appear bright green briefly if the signal of the alarm input
was detected.
64
Siemens Building Technologies
Fire Safety & Security Products
08.2007
Map configuration
Map configuration
General information about maps
On the Map tab you can combine and link any number of maps (BMP files) with
objects.
The following limitations apply:
z A maximum of 32 maps can be shown.
z The maps can be shown in a maximum of 2 hierarchy levels.
z A maximum of 192 objects can be placed.
z The minimum size of maps is 256 x 256 pixels.
z The maximum size of maps is 2048 x 2048 pixels.
z The color depth must be 8- or 24-bit.
Prerequisites
z The SISTORE MX NVS application software is started.
See Section „Starting the SISTORE MX NVS application software“, page 12.
z The SISTORE MX NVS application software is in configuration mode. See
Section "Configuration mode", page 15.
1. Select the Map tab.
Î The following window will open:
Fig. 56
SISTORE MX – map
65
Siemens Building Technologies
Fire Safety & Security Products
08.2007
Map configuration
1
2
3
4
Export / Import group field
Map display window
The selected map with the set objects will be shown in the display window.
The graphic of the selected map is not scaled. For a screen resolution of 1280
x 1024 pixels it is recommended that maps not exceed 800 x 600 pixels.
Map list
The map list shows all active maps in their hierarchy. A maximum of 2
hierarchy levels can be created.
Moving a map
To move one position up/down
5
6
.
. A maximum of 2 hierarchy
To move one hierarchy level up/down
levels can be created (one subordinate level per main level).
Layer group field
Objects group field
Adding a map
NOTE:
Maps must be present as BMP files. The minimum size of maps is 256 x 256 pixels, and the
maximum size is 2048 x 2048 pixels. The color depth must be 8- or 24-bit.
Since SISTORE MX NVS does not work with a copy of the specified file, the map file to use should be
saved in the directory ...\SISTORE MX NVS\Map.
Prerequisites
z The SISTORE MX NVS application software is started.
See Section „Starting the SISTORE MX NVS application software“, page 12.
z The SISTORE MX NVS application software is in configuration mode.
See Section "Configuration mode", page 15.
1. Select the Map tab.
button.
2. Click the Add new layer
Î The Open dialog will appear.
1. Select the desired map.
2. Click Open.
Î The map will be added to the map list.
Î The selected map will be shown in the display window.
66
Siemens Building Technologies
Fire Safety & Security Products
08.2007
Map configuration
Deleting a map
Prerequisites
z The SISTORE MX NVS application software is started.
See Section „Starting the SISTORE MX NVS application software“, page 12.
z The SISTORE MX NVS application software is in configuration mode.
See Section "Configuration mode", page 15.
Deleting a selected entry
1. Select the Map tab.
2. Click on the map to delete in the map list.
button.
3. Click the
4. Confirm the message that follows with Yes.
Î The entry will be deleted.
Deleting all entries
1. Select the Map tab.
button.
2. Click the
3. Confirm the message that follows with Yes.
Î All the entries will be deleted.
Edit layer
Import layer
You can import a saved layer as a map file with the Import layer button.
Prerequisites
z The SISTORE MX NVS application software is started.
See Section „Starting the SISTORE MX NVS application software“, page 12.
z The SISTORE MX NVS application software is in configuration mode.
See Section "Configuration mode", page 15.
1. Select the Map tab.
.
2. Click the Import button
Î The Open dialog will appear.
67
Siemens Building Technologies
Fire Safety & Security Products
08.2007
Map configuration
3. Select the layer you want to import.
4. Click Open.
Î The layer will be imported.
Export layer
If the current configuration is composed of multiple layers, you can export a
particular layer or all layers.
Prerequisites
See Section „0“, page 12.
z The SISTORE MX NVS application software is in configuration mode.
See Section "Configuration mode", page 15.
z At least one holiday has been configured.
See Section 26 for further information.
1. Select the Map tab.
2. Click the button of the desired export function.
The following export functions are available:
Export current layer
Export all layers
Î
The Save As... dialog will appear.
68
Siemens Building Technologies
Fire Safety & Security Products
08.2007
Map configuration
Save As dialog
1. Select the directory in which to save the layer(s).
2. Enter a name in the File name field.
3. Click Save.
Î The layer will be saved.
Fig. 57
Edit object
Insert object
Prerequisites
z The SISTORE MX NVS application software is started.
See Section „Starting the SISTORE MX NVS application software“, page 12.
z The SISTORE MX NVS application software is in configuration mode.
z See Section "Configuration mode", page 15. All objects used in the map must be
configured.
1. Select the Map tab.
2. Select an object type in the Objects group field.
The following object types are available:
Camera object type:
With the camera object type you can indicate the direction of the camera
using one of the following icons:
Alarm input object type
Alarm output object type
Map object type
The map object type enables switching to another map listed in the tree.
Delete button
The delete button deletes all objects of the selected level.
69
Siemens Building Technologies
Fire Safety & Security Products
08.2007
Map configuration
Î
Depending on the object type selected, the available elements of this object type
will be shown in the selection list:
Fig. 58
Selection list of the camera object type
3. Select the desired camera from the list.
Î If a camera was selected in the selection list for the camera object type, its
live image is shown in the window at the top right.
4. Left-click on the desired position of the object on the map.
Î The object will be inserted at this position on the map.
Î The placement of the object is confirmed in the selection list by a mark in the
checkbox.
5. Click Apply.
Î The setting will be saved.
Note
An object can be configured in multiple levels but only once in each level.
Changing objects
Individual objects within an object type can be changed subsequently.
Prerequisites
z The SISTORE MX NVS application software is started.
See Section „Starting the SISTORE MX NVS application software“, page 12.
z The SISTORE MX NVS application software is in configuration mode.
See Section “Configuration mode“, page 15 for further information.
1. Select the Map tab.
2. Select the desired object type in the Object field.
3. Select the desired object from the selection list.
4. Left-click on the object to be replaced on the map.
The following query appears:
5. Confirm the message that follows with Yes.
Î The object will be changed.
6. Click Apply.
Î The setting will be saved.
70
Siemens Building Technologies
Fire Safety & Security Products
08.2007
Map configuration
Changing the camera icon
You can use the context menu to change the camera icon for a camera later on the
map.
Prerequisites
z The SISTORE MX NVS application software is started.
See Section „Starting the SISTORE MX NVS application software“, page 12.
The SISTORE MX NVS application software is in configuration mode.
See Section "Configuration mode", page 15.
1. Select the Map tab.
2. Right-click on the relevant camera icon.
Î The following context menu will open:
3. Click on the desired camera icon.
Î The icon to be changed will be replaced by the desired icon.
4. Click Apply.
Î The setting will be saved.
Changing the position of the object
Prerequisites
z The SISTORE MX NVS application software is started.
See Section „Starting the SISTORE MX NVS application software“, page 12.
z The SISTORE MX NVS application software is in configuration mode.
See Section “Configuration mode“, page 15 for further information.
1. Select the Map tab.
2. Left-click on the relevant object.
3. Hold down the mouse button.
4. Move the object to the desired position.
5. Release the mouse button.
Î The object will be located at the desired position.
6. Click Apply.
Î The setting will be saved.
71
Siemens Building Technologies
Fire Safety & Security Products
08.2007
Map configuration
Deleting an object
Prerequisites
z The SISTORE MX NVS application software is started.
See Section „Starting the SISTORE MX NVS application software“, page 12.
z The SISTORE MX NVS application software is in configuration mode.
See Section "Configuration mode", page 15.
Deleting individual objects
The following options are available to delete individual objects:
z Remove the checkmark in front of the relevant object in the selection list.
z Double-click the affected object with the left mouse button.
z Select "Delete" from the context menu of the object.
Deleting all objects
1. Select the Map tab.
button in the Objects group field.
2. Click the
Î All objects in the corresponding layer will be deleted.
72
Siemens Building Technologies
Fire Safety & Security Products
08.2007
Configuring user and access management
Configuring user and access management
General information on user management
User groups
There are four user groups:
z Administrator: has all rights
z Installer: has all rights except the administration right
z User administrator: has the rights user management, database management
and delete. The rights of the user group User can also be assigned.
z User: can have the rights start/stop, remote control, remote access,
playback, audio playback, export and cash box search if they have been
assigned.
NOTE:
Assign the user group Administrator only to users who install complete systems (such as system
administrators).
For security reasons, assign all other users only the user group and rights they actually need. Then
input windows that are not needed will not be shown.
Assignment of rights to user groups
The following table gives information on the user groups and the assignment of
rights to these groups.
Rights
Administration
Installation
Configuration
User
administration
Database
Delete
Start/Stop
Remote control
Remote access
Playback
Audio playback
Cash box
search
Export
Display (cam)
PTZ (cam)
Camera
playback (cam)
Administrator
Installer
X
X
X
User
Administrator
X
+
X
X
X
X
-
+
+
+
+
+
+
X
X
X
X
X
X
X
X
X
X
X
X
X
X
X
X
X
X
X
X
X
X
X
X
o
o
o
o
o
o
+
+
+
X
X
X
X
X
X
X
X
X
o
o
o
+
X
X
X
o
+
+
User
73
Siemens Building Technologies
Fire Safety & Security Products
08.2007
Configuring user and access management
X
o
(cam)
+
The user has this as a basic right
The user never has this right
The user can have this right assigned
Camera-specific right
The right can be individually configured
As can be seen in the table above, the user groups Administrator, Installer und
User Administrator have fixed, predefined rights. Only the user group User can
have individual rights assigned.
Global user rights
Global rights are user rights that apply to all cameras. They cannot be assigned to
a user only for particular cameras. The following table describes the global user
rights.
Right
Administration
Installation
Configuration
User administration
Database
management
Delete
Start/Stop
Remote control
Remote access
Playback
Audio playback
Export
Description
Configure all system settings
Configuration of system settings with limitations
Create and delete users and assign rights
Configure the user interface
Configure hardware
Create new users
Deleting existing users
Change the rights of users
Edit the database during playback, for example:
Create a backup of the database
Create a new database, test and repair the database and reindex the database.
Prerequisite: playback right.
Delete messages and recordings
Prerequisite: playback right.
Start, pause and end recording.
Exit SISTORE MX
Activate or deactivate the alarm outputs locally on the server
or via RemoteView.
Control PTZ cameras
Prerequisite: These have been configured appropriately
Log on to the system via SISTORE MX NVS RemoteView
Perform remote maintenance and remote monitoring
The prerequisite to receiving a camera-specific playback
right.
Prerequisite for audio playback
Play back audio recordings.
Prerequisite: playback right.
Export recordings and save them in some form, for example:
Create AVIs
Create individual images (BMP or JPEG)
Print images
Prerequisite: playback right.
74
Siemens Building Technologies
Fire Safety & Security Products
08.2007
Configuring user and access management
Right
Cash box search
Description
Start a cash box search with a cash box system and
activated bank mode
The playback right is not mandatory for this. Users with the
"cash box search" right but not the playback right can in fact
switch to playback, but only run cash box search functions
there. They see no logbook, for example.
The "cash box search" right is available in the user
configuration, but only for systems with a GAA license and
activated bank system.
Camera-specific user rights
Camera-specific user rights are rights that can be assigned to a user only for
specific cameras. The following table describes the camera-specific user rights.
Right
Display
PTZ
Playback
Description
View the live images of a camera.
DISPLAY is a camera-specific right.
The DISPLAY right is not necessary to play back recordings
of a camera. The camera-specific or global playback right is
sufficient.
Pan/tilt camera control
Prerequisite: DISPLAY right for the same camera.
Play back recordings of a camera
Prerequisite: Global playback right
The playback right has no meaning for automated teller
cameras and cash box cameras. For automated teller
cameras the global "cash box search" right applies; for cash
box cameras the global cash box right applies.
Starting a cash box search with a cash box system. This is
only possible for systems with a cash box license or only
with bank systems.
75
Siemens Building Technologies
Fire Safety & Security Products
08.2007
Configuring user and access management
User account configuration
Creating a user account
Fig. 59
User account list on the User management tab
Fig. 60
User group field on the user management tab
Prerequisites
z The SISTORE MX NVS application software is started.
See Section „Starting the SISTORE MX NVS application software“, page 12.
z The SISTORE MX NVS application software is in configuration mode.
See Section "Configuration mode", page 15.
z You have the right user management.
See Section „User groups“, page 73.
1. Select the User management tab.
below the user account list.
2. Click the Add button
Î A new line will be added to the user account list.
NOTE:
If the text fields Name, Password and Password confirmation are not filled in completely or no user
rights have been assigned, an error message will be displayed.
3. Enter a name for the user account in the Name text field.
4. Enter a short description in the Description text field.
5. Enter a password with at least eight characters in the Password text field.
76
Siemens Building Technologies
Fire Safety & Security Products
08.2007
Configuring user and access management
6. Re-enter the password in the Password confirmation text field.
If users who are logged in to this account may change the password:
7. Mark the checkbox User can change password.
8. To assign a user category to the user, click the radio button Administrator,
Installer, Useradmin or User.
See also Fig. „User group field on the user management tab“, page 76.
If you have chosen the User radio button:
9. Mark the desired checkboxes in the User rights group field.
Fig. 61
User rights group field on the user management tab
10. Click the Camera rights... button.
Î The Camera Rights dialog will appear.
77
Siemens Building Technologies
Fire Safety & Security Products
08.2007
Configuring user and access management
11. Select the camera.
12. In the user rights field, select or deselect the checkboxes as desired.
13. Repeat steps 5 and 6 as often as required.
NOTE:
If a new user is created, this user automatically receives the same rights for each camera as the user
who created the new user.
If a new camera is created, all users automatically receive all rights for this camera at first. If individual
users are not to have all rights for the camera, these rights must be manually revoked after setting
up the camera.
14. Click OK.
Deleting a user account
Fig. 62
User account list on the User management tab
78
Siemens Building Technologies
Fire Safety & Security Products
08.2007
Configuring user and access management
Prerequisites
z The SISTORE MX NVS application software is started.
See Section „Starting the SISTORE MX NVS application software“, page 12.
z The SISTORE MX NVS application software is in configuration mode.
See Section "Configuration mode", page 15.
z You have the right user management.
1. Select the User management tab.
2. Select the user account you want to delete in the list.
.
3. Click the Delete button
4. Confirm the message that follows with Yes.
Î The user account will be deleted from the user account list.
User account locking
NOTE:
After a password is enter incorrectly three times, the user account affected will be blocked. To unlock:
see "Unlocking a user account", page 80
Fig. 63
Lock button on the User management tab
Prerequisites
z The SISTORE MX NVS application software is started.
See Section „Starting the SISTORE MX NVS application software“, page 12.
z The SISTORE MX NVS application software is in configuration mode.
See Section "Configuration mode", page 15.
z You have the right "user management".
1. Select the User management tab.
2. Select the user account you want to lock from the user account list
(see "Fig. 62 ", page 78).
3. Click Lock (see "Fig. 63 ", page 79).
4. Click Apply.
Î The setting will be saved. The user account is locked.
79
Siemens Building Technologies
Fire Safety & Security Products
08.2007
Configuring user and access management
Unlocking a user account
You can unlock a user account manually or automatically.
Fig. 64
User account group field on the User management tab
Manually unlocking a user account
Prerequisites
z The SISTORE MX NVS application software is started.
See Section „Starting the SISTORE MX NVS application software“, page 12.
z The SISTORE MX NVS application software is in configuration mode.
See Section "Configuration mode", page 15.
z You have the right "user management".
1. Select the User management tab.
2. Select the user account you want to unlock from the user account list.
3. Click the Unlock button (see "Fig. 63 ", page 79).
4. Click Apply.
Î The setting will be saved. The user account is unlocked.
Automatically unlocking a user account
Prerequisites
z The SISTORE MX NVS application software is started.
See Section „Starting the SISTORE MX NVS application software“, page 12.
z The SISTORE MX NVS application software is in configuration mode.
See Section "Configuration mode", page 15.
z You have the right "user management".
1. Select the User management tab.
2. Select the user account you want to unlock automatically from the user account
list.
3. Mark the checkbox Unlock automatically after (see "Fig. 63 ", page 79).
4. Enter a value in minutes in the minute(s) text field.
5. Click Apply.
Î The setting will be saved. The user account will be unblocked after the time
entered has passed.
80
Siemens Building Technologies
Fire Safety & Security Products
08.2007
Configuring user and access management
Predefined user accounts: Administrator and Installer
Only use the user account Administrator if it is necessary!
The software is shipped with two user accounts already set up: Administrator and
Installer. The associated passwords are Administrator and Installer respectively.
Change these passwords during the operational setup of the SISTORE MX NVS
unit.
Both of these user accounts cannot be deleted, and configuration of them is
restricted:
z Administrator: has all rights
z Installer: has all rights except the administration right
Users with only basic knowledge of SISTORE MX NVS should only work with the
user account Installer or with another limited user account.
Configuring the validity period of a password
Fig. 65
Password options group field on the User management tab
Limiting the validity period of a password
Prerequisites
z The SISTORE MX NVS application software is started.
See Section „Starting the SISTORE MX NVS application software“, page 12.
z The SISTORE MX NVS application software is in configuration mode.
See Section "Configuration mode", page 15.
z You have the right user management.
1. Select the User management tab.
2. Click the Password expires after radio button (see "Fig. 65 ", page 81).
3. Enter a value in the day(s) field to indicate how many days the password is to
be valid.
4. Click Apply.
Î The setting will be saved.
Extending the validity period of a password
Prerequisites
z The SISTORE MX NVS application software is started.
See Section „Starting the SISTORE MX NVS application software“, page 12.
z The SISTORE MX NVS application software is in configuration mode.
See Section "Configuration mode", page 15.
z You have the right user management.
1. Select the User management tab.
2. Click Expiration renewal (see "Fig. 65 ", page 81).
3. Click Apply.
Î The validity of the password will be extended by the number of days specified
in the day(s) text field. The date from which the extension is calculated is the
current one.
81
Siemens Building Technologies
Fire Safety & Security Products
08.2007
Configuring user and access management
Removing the restriction of validity of a password
Prerequisites
z The SISTORE MX NVS application software is started.
See Section „Starting the SISTORE MX NVS application software“, page 12.
z The SISTORE MX NVS application software is in configuration mode.
See Section "Configuration mode", page 15.
z You have the right user management.
1. Select the User management tab.
2. Click the Password never expires radio button (see "Fig. 65 ", page 81).
3. Click Apply.
Î The setting will be saved.
Enabling password-protected start of the SISTORE MX NVS
application software
If password protection is enabled, a user name and password must be entered to
start the SISTORE MX NVS application software.
Fig. 66
Start with password query checkbox on the System tab
Prerequisites
z The SISTORE MX NVS application software is started.
See Section „Starting the SISTORE MX NVS application software“, page 12.
z The SISTORE MX NVS application software is in configuration mode.
See Section "Configuration mode", page 15.
1. Select the System tab.
2. Mark the checkbox Start with password query (see "Fig. 66 ", page 82).
3. Click Apply.
Î The setting will be saved.
Configuring the logbook
Enabling extended logbook entries
If this option is enabled, an entry will be written in the logbook during printing,
saving of individual images or the export of sequences.
Fig. 67
Extended logbook entries checkbox on the System tab
82
Siemens Building Technologies
Fire Safety & Security Products
08.2007
Configuring user and access management
Prerequisites
z The SISTORE MX NVS application software is started.
See Section „Starting the SISTORE MX NVS application software“, page 12.
z The SISTORE MX NVS application software is in configuration mode.
See Section "Configuration mode", page 15.
1. Select the System tab.
2. Select the Extended logbook entries checkbox in the Options group field.
3. Click Apply.
Î The setting will be saved.
Deleting logbook entries automatically
Fig. 68
Delete logbook entries checkbox on the Database tab
Prerequisites
z The SISTORE MX NVS application software is started.
See Section „Starting the SISTORE MX NVS application software“, page 12.
z The SISTORE MX NVS application software is in configuration mode.
See Section "Configuration mode", page 15.
1. Select the Database tab.
2. Mark the checkbox Delete logbook entries.
3. Enter a value in the day(s) text field.
4. Click Apply.
Î The setting will be saved.
Sending logbook excerpts automatically
This option is only available if the sending of e-mail is configured. See Section
"Configuring e-mail notification", page 114 for further information.
If this option is enabled, SISTORE MX NVS will send an e-mail every 24 hours with
an excerpt consisting of the entries of the last 24 hours from the logbook.
Fig. 69
Automatic sending of logbook excerpts on the Database tab
83
Siemens Building Technologies
Fire Safety & Security Products
08.2007
Configuring user and access management
Prerequisites
z The SISTORE MX NVS application software is started.
See Section „Starting the SISTORE MX NVS application software“, page 12.
z The SISTORE MX NVS application software is in configuration mode.
See Section "Configuration mode", page 15.
1. Select the Database tab.
2. Mark the checkbox Send logbook excerpt of last 24h as e-mail.
3. Click Apply.
Î The setting will be saved.
Enabling software triggering
NOTE:
The checkbox Enable software trigger is only available if bank mode is not enabled.
If this option is enabled, the SISTORE MX NVS application software can
communicate with other programs, such as IVM.
Fig. 70
Enable software trigger checkbox on the System tab
Prerequisites
z The SISTORE MX NVS application software is started.
See Section „Starting the SISTORE MX NVS application software“, page 12.
z The SISTORE MX NVS application software is in configuration mode.
See Section "Configuration mode", page 15.
1. Select the System tab.
2. Select the Enable software trigger checkbox in the Recording group field.
3. Click Apply.
Î The setting will be saved.
84
Siemens Building Technologies
Fire Safety & Security Products
08.2007
Configuring user and access management
Enabling operating panel control
NOTE:
The CCTV keyboard group field is only visible if the CKA 4810 or CKA 4820 driver is installed.
Information on this will be found in the start-up instructions for SISTORE MX NVS.
Fig. 71
CCTV keyboard group field on the System tab
Prerequisites
z The SISTORE MX NVS application software is started.
See Section „Starting the SISTORE MX NVS application software“, page 12.
z The SISTORE MX NVS application software is in configuration mode.
See Section "Configuration mode", page 15.
1. Select the System tab.
2. Mark the checkbox CCTV keyboard (see "Fig. 71 ", page 85).
Î The CCTV keyboard group field will be enabled.
3. Select the interface to which your operating panel is connected from the COM
dropdown field.
4. Enter a value in milliseconds in the Button delay text field.
Î If no keyboard input takes place within the specified time, the entry is considered
complete.
5. Click Apply.
Î The settings will be saved.
85
Siemens Building Technologies
Fire Safety & Security Products
08.2007
Configuring the user interface of the SISTORE MX NVS application software
Configuring the user interface of the SISTORE MX NVS
application software
Selecting the user interface language
Languages can be added to the SISTORE MX NVS application software after installation. To do so,
copy the corresponding language files with the DLL extension into the
C:\Program Files\CEVIS\SISTORE directory.
Fig. 72
Language dropdown list on the System tab
Prerequisites:
z The SISTORE MX NVS application software is started.
See Section „Starting the SISTORE MX NVS application software“, page 12.
z The SISTORE MX NVS application software is in configuration mode.
See Section "Configuration mode", page 15.
1. Select the System tab.
2. Select a language from the Language dropdown list (see "Fig. 72 ", page 86).
If you select the entry automatic, the SISTORE MX NVS application software
starts in the language set as the regional language in the operating system.
3. Confirm the message that follows with OK.
4. Click OK.
5. Confirm the message that follows with Yes.
Î The setting will be saved and the SISTORE MX NVS application software will
close.
6. Start the SISTORE MX NVS application software. See Section „Starting the
SISTORE MX NVS application software“, page 12.
Î The SISTORE MX NVS application software now uses the selected language.
86
Siemens Building Technologies
Fire Safety & Security Products
08.2007
Configuring the user interface of the SISTORE MX NVS application software
Configuring the display area
Selecting the initial arrangement of the display area
In the Default screen split group field you can define whether the SISTORE MX
NVS application software shows a site plan, the event view or video images when
starting or whether everything is hidden.
Fig. 73
Dropdown list in the Default screen split group field
Prerequisites
z The SISTORE MX NVS application software is started.
See Section „Starting the SISTORE MX NVS application software“, page 12.
z The SISTORE MX NVS application software is in configuration mode.
See Section "Configuration mode", page 15.
1. Select the System tab.
2. Select the desired view from the dropdown list in the Default screen split group
field.
3. Click Apply.
Î The setting will be saved.
Selecting the initial display mode
With the checkbox Start in full screen mode you can determine whether the
display area of the SISTORE MX NVS application software is shown on the full
screen when the software is started. All control elements of the program window
are hidden in full screen mode.
Fig. 74
Start in full screen mode checkbox on the System tab
Prerequisites
z The SISTORE MX NVS application software is started.
See Section „Starting the SISTORE MX NVS application software“, page 12.
z The SISTORE MX NVS application software is in configuration mode.
See Section "Configuration mode", page 15.
1. Select the System tab.
2. Mark the checkbox Start in full screen mode.
3. Click Apply.
Î The setting will be saved.
87
Siemens Building Technologies
Fire Safety & Security Products
08.2007
Configuring the user interface of the SISTORE MX NVS application software
Exiting full screen mode
Prerequisites
z The SISTORE MX NVS application software is started.
See Section „Starting the SISTORE MX NVS application software“, page 12.
z The SISTORE MX NVS application software is in display mode.
See Section "Configuration mode", page 15.
z The display is in full screen mode.
1. Right-click in the background.
Î The SISTORE MX NVS context menu will open.
2. Select the menu option View.
Î The submenu will open.
3. Select the submenu option Normal screen.
Î The display mode will be the normal display.
Î The control elements of the program window will be shown.
Fig. 75
SISTORE MX NVS context menu
88
Siemens Building Technologies
Fire Safety & Security Products
08.2007
Configuring the user interface of the SISTORE MX NVS application software
Configuring the recording status display
In the Record status display group field, you can define whether the recording
status is shown as a symbol or a symbol and text on the live image or is not
shown.
Fig. 76
Live image with recording status display overlaid
Fig. 77
Recording status display group field on the System tab
Prerequisites
z The SISTORE MX NVS application software is started.
See Section „Starting the SISTORE MX NVS application software“, page 12.
z The SISTORE MX NVS application software is in configuration mode. See
Section "Configuration mode", page 15.
Note
You can observe the changes you make on the live image.
1. Select the System tab.
2. Select the desired option in the Record status display.
3. Click Apply.
Î The setting will be saved.
89
Siemens Building Technologies
Fire Safety & Security Products
08.2007
Configuring the user interface of the SISTORE MX NVS application software
Configuring the live image change interval
The Display mode group field refers only to analog video monitors.
Fig. 78
Display mode group field on the System tab
Prerequisites
z At least one network camera is connected to the SISTORE MX NVS unit and
configured.
See Section "Adding a network camera", page 36 for further information.
z The SISTORE MX NVS application software is started.
See Section „Starting the SISTORE MX NVS application software“, page 12.
z The SISTORE MX NVS application software is in configuration mode.
See Section "Configuration mode", page 15.
1. Select the System tab.
2. In the field Switch camera on video monitor every select the period after
which the view is switched to the next camera.
3. In the field Show event on monitor at least choose how long live images are to
be shown during an event.
4. In the field Switch camera group every select the period after which the switch
is made to the next camera group.
Switching times can be selected between 2 and 600 seconds.
5. Click Apply.
Î The setting will be saved.
90
Siemens Building Technologies
Fire Safety & Security Products
08.2007
Configuring the user interface of the SISTORE MX NVS application software
Enabling frame rate display
The Display framerate checkbox can be used to determine whether the frame rate
is shown on the live image. This function is only for checking the frame rate, and in
contrast to the name of the camera or the date and time, it is not saved.
The value shown can deviate from the actual frame rate.
The frame rate display appears only after recording 10 frames of the live image, after which a value is
calculated. At a slow frame rate this can require considerable time.
Fig. 79
Live image with frame rate shown
Fig. 80
Display framerate checkbox on the System tab
Prerequisites
z The SISTORE MX NVS application software is started.
See Section „Starting the SISTORE MX NVS application software“, page 12.
z The SISTORE MX NVS application software is in configuration mode.
See Section "Configuration mode", page 15.
1. Select the System tab.
2. Mark the checkbox Display framerate.
3. Click Apply.
Î The setting will be saved.
91
Siemens Building Technologies
Fire Safety & Security Products
08.2007
Configuring the user interface of the SISTORE MX NVS application software
Configuring text overlay for a network camera
In the Text overlay group field you can define whether the name of the camera,
the time and the date are shown in the video image of the SISTORE MX NVS
application software. Furthermore, the position of the overlay and the font and
background color can be defined. To facilitate an optimal overview, it is
recommended to show the text at the same position in all video images.
Fig. 81
Live image with overlaid camera name, time and date
Prerequisites
z At least one network camera is connected to the SISTORE MX NVS unit.
See Section "Adding a network camera", page 36 for further information.
z The SISTORE MX NVS application software is started.
See Section „Starting the SISTORE MX NVS application software“, page 12.
z The SISTORE MX NVS application software is in configuration mode.
See Section "Configuration mode", page 15.
Fig. 82
Text overlay group field on the LAN cameras tab
1. Select the LAN cameras tab.
2. In the camera list, select the camera for which you want to overlay the text on
the video image.
3. Mark the checkbox Text overlay.
Î The camera name will be overlaid.
4. Mark the checkbox Background.
Î The camera name will be given a white background.
5. Mark the checkbox Date and time.
Î The date and time will be overlaid.
There are four radio button options for determining the position of the text.
92
Siemens Building Technologies
Fire Safety & Security Products
08.2007
Configuring the user interface of the SISTORE MX NVS application software
6. Select the desired option.
Î The text will be overlaid at the position selected.
7. Select the desired color from the Text color… selection field.
Î The text will be overlaid in the color selected.
8. Select the desired color from the Background color… selection field.
Î The background of the overlay will be shown in the color selected.
9. Click Apply.
Î The setting will be saved.
Configuring system messages
Using the Audio signal checkbox, you can determine whether an audio signal is
given when a system message appears. Furthermore, it determines whether the
user can switch audio signals on and off in the display mode.
Fig. 83
Audio signal checkbox on the System tab
Prerequisites
z The SISTORE MX NVS application software is started.
See Section „Starting the SISTORE MX NVS application software“, page 12.
z The SISTORE MX NVS application software is in configuration mode.
See Section "Configuration mode", page 15.
1. Select the System tab.
2. Mark the checkbox Audio signal.
3. Click Apply.
Î The setting will be saved.
Showing the on-screen keyboard
The On-screen keyboard checkbox can be used to determine whether the Onscreen keyboard window is shown. This virtual keyboard serves as a keyboard
replacement for systems without an external keyboard. It can be operated with the
mouse.
Fig. 84
On-screen keyboard checkbox on the System tab
Prerequisites
z The SISTORE MX NVS application software is started.
See Section „Starting the SISTORE MX NVS application software“, page 12.
z The SISTORE MX NVS application software is in configuration mode.
See Section "Configuration mode", page 15.
1. Select the System tab.
2. Mark the checkbox On-screen keyboard.
Î The On-screen keyboard window will appear.
93
Siemens Building Technologies
Fire Safety & Security Products
08.2007
Configuring the user interface of the SISTORE MX NVS application software
Fig. 85
On-screen keyboard window
3. Click Apply.
Î The setting will be saved.
Enabling automatic logout
In the Auto logout group field you can determine whether a user is automatically
logged out after a specified period of inactivity.
Fig. 86
Auto logout group field on the System tab
Prerequisites
z The SISTORE MX NVS application software is started.
See Section „Starting the SISTORE MX NVS application software“, page 12.
z The SISTORE MX NVS application software is in configuration mode.
See Section "Configuration mode", page 15.
1. Select the System tab.
2. Mark the checkbox Auto logout.
3. In the minute(s) of inactivity field, specify the time after which the automatic
logout is to occur.
4. Click Apply.
Î The setting will be saved.
in the status bar will flash for one
Before the user is automatically logged off, the lock icon
minute. If the user performs an action during this time, the icon will stop flashing.
94
Siemens Building Technologies
Fire Safety & Security Products
08.2007
Configuring the user interface of the SISTORE MX NVS application software
Keeping the SISTORE MX NVS application software in the foreground
With the checkbox Always in foreground you can determine whether the
SISTORE MX NVS application software is to be shown in the foreground at all
times. This prevents other program windows from covering the SISTORE MX NVS
application software.
Fig. 87
Always in foreground checkbox on the System tab
Prerequisites
z The SISTORE MX NVS application software is started.
See Section „Starting the SISTORE MX NVS application software“, page 12.
z The SISTORE MX NVS application software is in configuration mode.
See Section "Configuration mode", page 15.
1. Select the System tab.
2. Mark the checkbox Always in foreground.
3. Click Apply.
Î The setting will be saved.
95
Siemens Building Technologies
Fire Safety & Security Products
08.2007
Recording configuration
Recording configuration
Enabling automatic recording on start
Fig. 88
Automatic recording on start checkbox on the System tab
Prerequisites
z The SISTORE MX NVS application software is started.
See Section „Starting the SISTORE MX NVS application software“, page 12.
z The SISTORE MX NVS application software is in configuration mode.
See Section "Configuration mode", page 15.
1. Select the System tab.
2. Mark the checkbox Automatic recording on start (see "Fig. 88 ", page 96).
3. Click Apply.
Î The setting will be saved.
96
Siemens Building Technologies
Fire Safety & Security Products
08.2007
Recording configuration
Configuring video parameters
Configuring video parameters
NOTE:
The higher the value in the Data compression text field,
the lower the compression
the higher the picture quality
the higher the hard drive capacity required
The compression set applies to all cameras connected to the SISTORE MX NVS.
Fig. 89
Data compression text field on the System tab
Prerequisites
z The SISTORE MX NVS application software is started.
See Section „Starting the SISTORE MX NVS application software“, page 12.
z The SISTORE MX NVS application software is in configuration mode.
See Section "Configuration mode", page 15.
1. Select the System tab.
2. Enter a value in the Data compression text field.
Î If you have selected normal resolution, the value must be between 10 and 40;
if you have set high resolution, the value must be between 20 and 80. For
setting the resolution see also Section "Selecting video resolution", page 98.
3. Click Apply.
Î The setting will be saved.
Enabling video encryption
If video encryption is enabled, the recordings will be saved in an encrypted
format. Encrypted recordings cannot be played back with an ordinary video
playback program, but instead require the SISTORE Player for viewing. Video
encryption also affects the export of recordings.
Encrypted recordings have the file extension k26; unencrypted recording have the
file extension avi.
Fig. 90
Encrypt video files checkbox on the System tab
97
Siemens Building Technologies
Fire Safety & Security Products
08.2007
Recording configuration
Prerequisites
z The SISTORE MX NVS application software is started. See Section „Starting the
SISTORE MX NVS application software“, page 12.
z The SISTORE MX NVS application software is in configuration mode.
See Section "Configuration mode", page 15.
1. Select the System tab.
2. Mark the checkbox Encrypt video files (see "Fig. 90 ", page 97).
3. Click Apply. The setting will be saved.
Selecting video resolution
NOTE:
The resolution of network cameras is generally limited to the CIF format (352x288 pixels).
Fig. 91
Radio buttons for video resolution on the System tab
Prerequisites
z The SISTORE MX NVS application software is started.
See Section „Starting the SISTORE MX NVS application software“, page 12.
z The SISTORE MX NVS application software is in configuration mode.
See Section "Configuration mode", page 15.
1. Select the System tab.
2. Select the normal resolution (CIF format) option or the high resolution (2CIF
format) option.
3. Click Apply.
Î The setting will be saved.
98
Siemens Building Technologies
Fire Safety & Security Products
08.2007
Recording configuration
Configuring recording modes
General information about recording modes
On the Recording tab there are five sub-tabs, each of which corresponds to a
recording mode:
Recording mode/Sub- Visibility
tab
Longtime recording
Always visible
Motion
Alarm input
Priority alarm
Software trigger
Cash box
Function
Only visible if motion detection is enabled for at least
one camera.
See Section "Configuring motion detection", page 46 for
further information.
Only visible if at least one alarm input with normal
priority is configured.
See Section "Configuring alarm inputs", page 61.
Only visible if at least one alarm input is configured as a
priority alarm.
See Section "Configuring alarm inputs", page 61.
Only visible if software control is enabled.
See Section "Enabling software triggering", page 84 for
further information.
Only visible if a cash box has been assigned to the
camera.
The Cash box mode has a higher priority than Motion
but lower than Alarm.
Tab. 4
Continuous recording of the live
image
Recording of the live image if
motion is detected
Recording of the live image in
case of an alarm with normal
priority
Recording of the live image in
case of a priority alarm
Recording of the live image with
a software trigger
Recording of the live image
upon transmission
of an alarm filter word
of a record if the camera is
making no other recording
Overview of the recording modes
The recording modes can
z be configured separately for each camera
z be combined with one another (see Section "Combination example for recording
modes", page 103).
The recording settings can be transferred easily to other cameras. See Section
"Transferring recording settings", page 104.
The following colors in the time table have been assigned to the recording
modes:
z Blue: Longtime recording
z Green: Motion
z Red: Alarm input
No color is assigned to the Priority alarm mode; it is always active if at least one
alarm input is configured as a priority alarm.
There is also no color assigned to the Software trigger recording mode; it is always
active if software control is enabled.
99
Siemens Building Technologies
Fire Safety & Security Products
08.2007
Recording configuration
You have the following setting options in the recording modes:
Fig. 92
Setting
Pretrigger
Duration
Control elements on the Recording tab
Function
The period prior to an event (movement,
alarm or software trigger) which is recorded
after the event occurs.
Note
Only available
in the recording modes motion, alarm input,
priority alarm and software trigger
if longtime recording is not enabled for all
time segments,
if the Single shot checkbox is not marked.
Pretrigger/
The frame rate at which the pre-alarm and
Applies to all recording modes of a camera; it
Longtime recording longtime recording is to be saved.
cannot be set differently for the various
recording modes.
Frame rate
Track length
The limitation of the hard drive capacity taken Write-protected recordings will not be
limitation
overwritten and can thus be longer than the
up by a camera. The SISTORE MX NVS
track length limitation setting.
application software checks the total
recording duration of the camera every hour; Use the track length limitation if you want to
prioritize cameras: limit the recording
if it exceeds the track length duration, older
recordings for this camera will be overwritten. duration of less important cameras in order to
keep more hard drive capacity free for more
important cameras.
Posttrigger
The period which is recorded after an event. Only available
Duration
in the recording modes motion, alarm input,
priority alarm and software trigger
if the Single shot checkbox is not marked.
If another event is detected during the posttrigger period, it is extended by the value set.
At least 10 frames will always be recorded.
The post-trigger period can also be controlled
via software (such as IVM); in this case, the
software control settings take priority over the
settings of the SISTORE MX NVS application
software.
100
Siemens Building Technologies
Fire Safety & Security Products
08.2007
Recording configuration
Setting
Frame rate
Function
The frame rate at which the post-alarm
recordings are to be saved.
Single shot
Instead of a video sequence, only up to 5
single images will be recorded. These
individual images will be recorded at the
maximum frame rate of the camera.
When an event occurs, an entry will be
written in the logbook.
Logbook entry
Camera to monitor
output
If an event occurs, the live image of the
affected camera will be connected to a
monitor.
Write protection
If enabled, the recordings of the affected
camera cannot be overwritten.
In case of an event, a connection will be
made to a SISTORE RemoteView client and
the live image of the affected camera is
shown there.
Alarm connection
FTP
In case of an alarm, the alarm message will
be stored as an MSG and an alarm image as
a JPEG in the root directory on the FTP
server.
E-mail/SMS
When an event occurs, the text entered will
be sent by e-mail or SMS.
Acoustic message
The acoustic signal selected is played when
an event occurs.
The text entered will be shown on the screen
when an event occurs.
When an event occurs, a signal will be sent
via the selected alarm outputs.
Alarm message
Alarm output
Note
Only available
in the recording modes alarm input, priority
alarm and software trigger
if the Single shot checkbox is not marked.
Only available in the recording modes alarm
input, priority alarm and software trigger
Only available in the recording modes alarm
input, priority alarm and software trigger and
suspicion
Only available
for analog cameras
in the recording modes motion, alarm input,
priority alarm and software trigger
if the checkbox External video monitor on the
Cameras tab is marked for the camera
affected.
Only available in the recording modes alarm
input, priority alarm and software trigger.
Only available
in the recording modes motion, alarm input
and priority alarm
if the connection is configured on the Alarm
connection tab (see "Configuring the alarm
connection", page 121).
The login to the SISTORE RemoteView client
takes place automatically.
Only available
in the recording modes motion, alarm input,
priority alarm and suspicion
if an FTP server is configured on the FTP
tab.
Only available
in the recording modes alarm input and
priority alarm
if e-mail and/or SMS delivery is configured on
the E-mail and SMS tab (see "Configuring
e-mail notification", page 114 or
"Configuring SMS notification", page 119).
The following variables can be used in the
text:
%C = camera name
%X = date and time of the start of the event
Only available in the recording modes
motion, alarm input and priority alarm
Only available in the recording modes
motion, alarm input and priority alarm
Only available in the recording modes
motion, alarm input, priority alarm and
software trigger
This function can be used to control
additional devices.
101
Siemens Building Technologies
Fire Safety & Security Products
08.2007
Recording configuration
Setting
Alarm input
Enable alarm
PTZ control
Function
When an assigned alarm input is triggered,
the live image of the camera will be recorded
even if the camera itself has detected no
movement.
Recording the live image of the affected
camera can be linked to additional conditions
here.
During an event the affected camera moves
to the selected position.
Note
Only available in the recording modes alarm
input and priority alarm
Only available in the recording modes
motion, alarm input and priority alarm.
All inputs to which the enable alarm function
has been assigned can be selected as a
condition.
Only available
in the recording modes alarm input, priority
alarm and software trigger
if the affected camera is a PTZ camera.
At least one position must be saved for the
affected camera (see "Configuring automatic
camera positioning", page 41 for PTZ
network cameras).
Setting options on the Recording tab
Pretrigger: Recording of live images that immediately precede an alarm.
Posttrigger: Recording of live images that occurs immediately after an alarm.
Tab. 5
102
Siemens Building Technologies
Fire Safety & Security Products
08.2007
Recording configuration
Combination example for recording modes
You want to record the live image of a camera continuously at a frame rate of 10
fps. Additionally for Saturdays and Sundays, if a movement is detected the live
image should be recorded during the movement and up to 1 minute thereafter at
20 fps. To do so, proceed as follows:
Prerequisites
z The SISTORE MX NVS application software is started.
See Section „Starting the SISTORE MX NVS application software“, page 12.
z The SISTORE MX NVS application software is in configuration mode.
See Section "Configuration mode", page 15.
z Motion detection is enabled for at least one camera.
See Section "Configuring motion detection", page 46 for further information.
1. Select the Recording tab.
2. Select a camera for which motion detection is enabled from the camera list.
3. Select the Longtime recording sub-tab.
4. Select all time segments in the time table.
See Section "", page 16.
5. In the Pretrigger/longtime recording group field under frame rate, select the
value 10.0/s.
6. Select the Motion sub-tab.
7. Select all time segments for Saturday and Sunday.
8. In the Pretrigger/longtime recording group field under frame rate, select the
value 20.0/s.
9. In the Posttrigger group field, enter the value 1 in the text field Duration: m and
the value 0 in the text field s.
10.Click Apply.
Î The settings will be saved. The time table will appear as follows:
Fig. 93
Time table on the Recording tab
103
Siemens Building Technologies
Fire Safety & Security Products
08.2007
Recording configuration
Transferring recording settings
In the Copy settings context menu, you can specify that a certain number of
recording settings are transferred from a camera to one or more other cameras.
Prerequisites
z The SISTORE MX NVS application software is started.
See Section „Starting the SISTORE MX NVS application software“, page 12.
z The SISTORE MX NVS application software is in configuration mode.
See Section “Configuration mode“, page 15 for further information.
1. Select the Recording tab.
2. Right click on a configured camera in the camera list.
Î
The Copy settings context menu will open.
You have four options:
Applying a setting to all other cameras
Prerequisite:
You are on the cameras list and have opened the possible options for a camera
(+); now right-click on an option, e.g. Longtime recording
1. Select Assume this setting for all other cameras.
Î The Copy settings context menu will close.
Î The setting will be saved.
.
104
Siemens Building Technologies
Fire Safety & Security Products
08.2007
Recording configuration
Applying a setting to a selection of cameras
Prerequisite
You are on the sub-tab for the setting which you want to apply to a particular
.
selection of cameras, such as longtime recording
1. Select Assume this setting for a selection of cameras.
Î The Select cameras window will appear.
Fig. 94
Select cameras dialog on the Recording tab
2. Mark the checkboxes in front of the desired cameras
3. Click Apply.
Î The Select cameras window will close.
Î The setting will be saved.
.
Applying all settings to all other cameras
1. Select Assume all settings for all other cameras.
Î The Copy settings context menu will close.
Î The settings will be saved.
Applying all settings to a selection of cameras
1. Select Assume all settings for a selection of cameras.
Î The Select cameras window will appear.
2. Mark the checkboxes in front of the desired cameras
3. Click Apply.
Î The Select cameras window will close.
Î The setting will be saved.
.
105
Siemens Building Technologies
Fire Safety & Security Products
08.2007
Recording configuration
Configuring the overwriting of recordings
Deactivating overwrite mode
With the checkbox Deactivate overwrite mode – stop recording you can
configure the SISTORE MX NVS software to stop saving recordings as soon as the
hard drive capacity is exhausted. This means that no recordings will be deleted on
the hard drive to make room for further recordings.
WARNING
If the hard drive capacity is exhausted, the message that recording has
stopped because no storage space is available will appear on the screen
and an entry will be made in the logbook. Furthermore, the Error LED will be lit.
To switch off the indication manually, you must first make space available on
the hard drive by deleting old recordings (see the user guide).
NOTE:
This option is not available if bank mode is enabled.
Fig. 95
Deactivate overwrite mode - stop recording checkbox
Prerequisites
z The SISTORE MX NVS application software is started.
See Section „Starting the SISTORE MX NVS application software“, page 12.
z The SISTORE MX NVS application software is in configuration mode.
See Section "Configuration mode", page 15.
1. Select the Database tab.
2. Mark the checkbox Deactivate overwrite mode - stop recording.
3. Click Apply.
Î The setting will be saved.
Warning if overwriting relevant data
With the day(s) field you can define a period in which all recordings are saved and
not automatically overwritten. With the checkbox Warning if overwriting relevant
data within you can configure a warning message to appear before the SISTORE
MX NVS application software deletes a recording from this period. This warning
makes you aware that the SISTORE MX NVS application software requires more
hard drive capacity or a higher image compression.
NOTE:
If you delete a recording from this period manually, no warning message will be shown.
Fig. 96
Warning if overwriting relevant data within checkbox
106
Siemens Building Technologies
Fire Safety & Security Products
08.2007
Recording configuration
Prerequisites
z The SISTORE MX NVS application software is started.
See Section „Starting the SISTORE MX NVS application software“, page 12.
z The SISTORE MX NVS application software is in configuration mode.
See Section "Configuration mode", page 15.
1. Select the Database tab.
2. Mark the checkbox Warning if overwriting relevant data within.
3. In the day(s) field, select the number of days that are to be saved and not
automatically overwritten.
4. Click Apply.
Î The settings will be saved.
107
Siemens Building Technologies
Fire Safety & Security Products
08.2007
Configuring data storage
Configuring data storage
General information about the storage location
The SISTORE MX NVS application software supports recording on separate hard
drives and hard drive partitions.
DANGER
Ensure that there is sufficient storage space on the target drive.
Do not use external USB hard drives, since this can lead to data loss.
Do not use CD/DVD writers as "substitute" hard drives, since these are not
supported by the SISTORE MX NVS application software.
Drives enabled for recording
After activating the bank and automated teller operation (cash box mode), the drive
D:\ is reserved for recording cash box image files and is no longer available.
Use of network drives
All network drives for which the user has rights will be shown in the list of drives.
As soon as a network drive is selected, the local drives serve only as replacement
drives for if the network drive fails. If the network drive becomes available again
after it has been unavailable, recording will take place again on the network drive
after the next file change.
Network drives must generally be mapped, i.e. access to a network drive can only
occur via a drive letter and not via a shared name. Ensure that the network drive is
sufficiently fast and has enough bandwidth.
Fig. 97
Drive list in the Recording media group field
108
Siemens Building Technologies
Fire Safety & Security Products
08.2007
Configuring data storage
Selecting a storage location for recordings
In the Recording media group field, you can specify the drives on which the video
data are to be saved.
Prerequisites
z The SISTORE MX NVS application software is started.
See Section „Starting the SISTORE MX NVS application software“, page 12.
z The SISTORE MX NVS application software is in configuration mode.
See Section "Configuration mode", page 15.
1. Select the System tab.
2. In the Recording media group field, select the drives on which you want to save
the video data.
3. Click Apply.
Î The setting will be saved.
Using maximum hard drive capacity
In order to ensure system stability, 15% of the hard drive capacity is reserved for
the operating system. By marking the checkbox Use max. hard drive storage
capacity you can deactivate this limitation. However, this can lead to an unstable
and unusable system. We recommend not setting this option.
After an update this option is set and must be manually reset by the user.
Fig. 98
Use max. hard disk storage capacity checkbox on the System tab
Prerequisites
z The SISTORE MX NVS application software is started.
See Section „Starting the SISTORE MX NVS application software“, page 12.
z The SISTORE MX NVS application software is in configuration mode.
See Section "Configuration mode", page 15.
1. Select the System tab.
2. If you want maximum usage of the hard drive capacity: Mark the checkbox Use
max. hard disk storage capacity.
3. Click Apply.
Î The setting will be saved.
109
Siemens Building Technologies
Fire Safety & Security Products
08.2007
Configuring data storage
Selecting a storage location for the database
In the Database directory group field, you can choose another directory if the
database is to be stored somewhere other than in the SISTORE MX NVS main
directory.
Fig. 99
Database directory group field on the Database tab
Prerequisites
z The SISTORE MX NVS application software is started.
See Section „Starting the SISTORE MX NVS application software“, page 12.
z The SISTORE MX NVS application software is in configuration mode.
See Section "Configuration mode", page 15.
1. Select the Database tab.
2. Mark the checkbox Database directory.
Î The SISTORE MX NVS dialog will open.
Fig. 100 SISTORE MX NVS dialog
3. Click OK.
.
4. Click the Open button
Î The Select directory dialog will appear.
5. Select the desired directory.
6. Click Select.
Î The Select directory dialog will close.
7. Click OK.
Î The SISTORE MX NVS Configuration window will close.
Î You will be in display mode.
8. Confirm the message that follows with Yes.
Î The SISTORE MX NVS application software will close.
NOTE:
If you wait longer than 10 seconds, the SISTORE MX NVS application software will close
automatically.
9. Start the SISTORE MX NVS application software.
110
Siemens Building Technologies
Fire Safety & Security Products
08.2007
Configuring data storage
Selecting a storage location for backup
In the Backup group field, you can specify the drives on which the backup will be
saved. The SISTORE MX NVS application software creates a new directory with
each backup in which a copy of the database is saved. The directory will be named
after the starting point of the backup:
YYYY-MM-DD-HH-MM-SS
YYYY
MM
DD
HH
MM
SS
year
month
day
hour
minute
second
A dedicated subdirectory will be created for each camera.
CAUTION
Ensure that there is sufficient storage space on the target drive. See Section
"General information about the storage location", page 108 for further
information.
In order not to affect the system performance too much the priority of the backup
process is lower than the priority of other processes. With a higher priority, it would
not be possible to record and play back at the same time. The backup process
takes a long time due to its low priority. An incremental backup should be complete
within 24 hours.
Prerequisites
z The SISTORE MX NVS application software is started.
See Section „Starting the SISTORE MX NVS application software“, page 12.
z The SISTORE MX NVS application software is in configuration mode.
See Section "Configuration mode", page 15.
1. Select the Database tab.
2. Mark the checkbox Backup.
.
3. Click the Open button
Î The Select directory dialog will appear.
4. Select the desired directory.
5. Click Select.
Î The Select directory dialog will close.
6. Click Apply.
Î The setting will be saved.
111
Siemens Building Technologies
Fire Safety & Security Products
08.2007
Configuring data storage
Clearing the backup directory
With the checkbox Clear directory before, you can specify that all subdirectories
of the backup directory be deleted.
Prerequisites
z The SISTORE MX NVS application software is started.
See Section „Starting the SISTORE MX NVS application software“, page 12.
The SISTORE MX NVS application software is in configuration mode.
See Section "Configuration mode", page 15.
Fig. 101 Clear directory before checkbox on the Database tab
1. Select the Database tab.
2. Mark the checkbox Backup.
3. Mark the checkbox Clear directory before.
4. Click Apply.
Î The setting will be saved.
Choosing the backup schedule
In order not to affect the system performance too much the priority of the backup
process is lower than the priority of other processes. With a higher priority, it would
not be possible to record and play back at the same time. The backup process
takes a long time due to its low priority. An incremental backup should be complete
within 24 hours.
Prerequisites
z The SISTORE MX NVS application software is started.
See Section „Starting the SISTORE MX NVS application software“, page 12.
The SISTORE MX NVS application software is in configuration mode.
See Section "Configuration mode", page 15.
Fig. 102 Schedule group field on the Database tab
1. Select the Database tab.
2. Mark the checkbox Backup.
3. Select the time at which the backup is to take place in the time field.
4. Mark the checkboxes for the days on which the backup is to be performed.
5. Click Apply.
Î The setting will be saved.
112
Siemens Building Technologies
Fire Safety & Security Products
08.2007
Configuring data storage
Selecting the type of recordings for backup
In the Backup group field, you can specify whether a complete backup or an
incremental backup is to be performed.
Complete
Incremental
All data will be saved. The backup can take a lot of time and require a
lot of storage space.
All data generated since the last backup are saved.
In order not to affect the system performance too much the priority of the backup
process is lower than the priority of other processes. With a higher priority, it would
not be possible to record and play back at the same time. The backup process
takes a long time due to its low priority. An incremental backup should be complete
within 24 hours.
Prerequisites
z The SISTORE MX NVS application software is started.
See Section „Starting the SISTORE MX NVS application software“, page 12.
The SISTORE MX NVS application software is in configuration mode.
See Section "Configuration mode", page 15.
Type group field on the Database tab
1. Select the Database tab.
2. Mark the checkbox Backup.
3. You have two options:
Fig. 103
z Select the radio button Complete
if you want to save all the data.
The backup can take a lot of time and require a lot of storage space.
or
z Select the radio button Incremental
if you want to save all the
data generated since the last backup.
4. Mark the checkboxes of the recording types you want to save in the backup.
5. Click Cameras...
.
Î The Select cameras window will appear.
6. Select the cameras the recordings of which you want to save in the backup.
7. Click Select.
Î The Select cameras window will close.
8. Click Apply.
Î The settings will be saved.
113
Siemens Building Technologies
Fire Safety & Security Products
08.2007
Configuring alarm response
Configuring alarm response
Configuring e-mail notification
Enabling e-mail notification
With the checkbox Send e-mail you can specify that an e-mail be sent if a warning
or problem occurs.
An e-mail is sent in the case of the following problems:
Camera is missing / available again
Hard drive full, recording stopped
UPS reports power failure / power supply Failure of a hard drive
restored
Hard drive online again after failure
Relevant data overwritten
Recording could not be started
SISTORE MX not properly closed
Fatal recording error
NOTE:
In case of a problem, only the main recipient will be notified.
Sending of these messages can take place via network/DSL or an installed
modem/ISDN. For the network option an SMTP mail server must be available on
the network.
Prerequisites
z The SISTORE MX NVS application software is started.
See Section „Starting the SISTORE MX NVS application software“, page 12.
z The SISTORE MX NVS application software is in configuration mode.
See Section "Configuration mode", page 15.
1. Select the System tab.
2. Mark the checkbox Send e-mail.
3. Select the E-mail and SMS tab.
4. Mark the checkbox Enable e-mail/SMS notification.
5. Click Apply.
Î The settings will be saved.
114
Siemens Building Technologies
Fire Safety & Security Products
08.2007
Configuring alarm response
Setting notification via the SMTP server
Prerequisites
Î The SISTORE MX NVS application software is started.
See Section „Starting the SISTORE MX NVS application software“, page 12.
Î The SISTORE MX NVS application software is in configuration mode.
See Section "Configuration mode", page 15.
1. Select the E-mail and SMS tab.
2. Enter the IP address or name of the outgoing mail server in the text field Name
or TCP/IP address.
This is either
z the IP address of the mail server available on the network
or
z the IP address or name of an SMTP server of a service provider
or
z the IP address or name of an ESMTP server of a service provider
Example: 123.45.67.8 or mail.providername.com
The fields User name and Password must only be filled out if an ESMTP server is
used.
3. Enter the user name for the ESMTP server in the User name text field.
4. Enter the password for the ESMTP server in the Password text field.
5. Enter the object name or SISTORE MX NVS server name in the e-mail address
format in the Sender text field.
Example: [email protected]
Note
If this information is not available, contact your network administrator or Internet service provider.
6. Click Apply.
Î The setting will be saved.
115
Siemens Building Technologies
Fire Safety & Security Products
08.2007
Configuring alarm response
Configuring the connection to the SMTP server
In the Connection to mail server group field, you can determine whether the
connection to the SMTP server takes place via a mail server on the local network
or via a dial-in connection (RAS).
NOTE:
RAS connections must be configured beforehand via the operating system.
Please ensure that the RAS server service does not use the same ISDN device as the SISTORE MX
NVS, because otherwise no connection to the SISTORE MX NVS unit will take place.
Prerequisites
z The SISTORE MX NVS application software is started.
See Section „Starting the SISTORE MX NVS application software“, page 12.
z The SISTORE MX NVS application software is in configuration mode.
See Section "Configuration mode", page 15.
1. Select the E-mail and SMS tab.
You have two options to specify the connection to the SMTP server:
2. Click the radio button by via local area network (LAN).
or
Click the radio button by via remote access service (RAS).
3. Select the desired connection from the dropdown list.
4. Click the RAS manager button.
Î The Network connection window will appear.
5. Select the desired connection or add a new connection.
6. If you have added an RAS connection or renamed one: close the Network
connection window and re-open it.
Î The newly added RAS connection will be shown.
7. Select this connection.
NOTE:
Give the RAS connection of an imported configuration and the RAS configurations of the original
device the same names.
8. Click Apply.
Î The setting will be saved.
116
Siemens Building Technologies
Fire Safety & Security Products
08.2007
Configuring alarm response
Entering e-mail recipient data
Fig. 104
Mail recipient text field on the E-mail and SMS tab
Prerequisites
z The SISTORE MX NVS application software is started.
See Section „Starting the SISTORE MX NVS application software“, page 12.
z The SISTORE MX NVS application software is in configuration mode.
See Section "Configuration mode", page 15.
1. Select the E-mail and SMS tab.
2. Select the Main receiver sub-tab.
3. Enter a main recipient for e-mail in the Mail receiver text field in e-mail address
format (mandatory).
4. Example: [email protected]
NOTE:
Multiple recipients can be entered in this text field. Separate the individual e-mail addresses with a
semicolon. The field is limited to 256 characters.
In case of a problem, only the main recipient will be notified.
This person will receive all e-mail notifications at any time of day or night.
5. Click Apply.
Î The setting will be saved.
E-mail notification test
You can test whether the main recipient receives an e-mail in case of a warning or
problem.
1. Click Test mail.
Î A test e-mail will be sent to the main recipient.
2. Check the e-mail inbox of the main recipient.
117
Siemens Building Technologies
Fire Safety & Security Products
08.2007
Configuring alarm response
Configuring time control
In the group field Time control, you can determine the period in which the second
through fifth recipient receives an e-mail. The main recipient receives all e-mail
notifications at any time of day or night.
Prerequisites
z The SISTORE MX NVS application software is started.
See Section „Starting the SISTORE MX NVS application software“, page 12.
z The SISTORE MX NVS application software is in configuration mode.
See Section "Configuration mode", page 15.
1. Select the E-mail and SMS tab.
2. Select the 2. receiver sub-tab.
3. Mark the checkbox Time control in the Time control group field.
4. Click Options....
Î The SISTORE MX NVS Time control window will open.
SISTORE MX NVS Time control dialog
5. Set the desired time period. See also Section "7.1.4 SISTORE MX NVS time
control window" for more information.
6. Click OK.
Î The SISTORE MX NVS Time control window will close.
7. Repeat steps 2 and 6 as often as required if you want to configure time control
for multiple recipients.
8. Click Apply.
Î The setting will be saved.
Fig. 105
118
Siemens Building Technologies
Fire Safety & Security Products
08.2007
Configuring alarm response
Configuring SMS notification
Enabling SMS notification
With the checkbox Send SMS you can specify that an SMS be sent if a warning or
problem occurs.
An SMS is sent in the case of the following problems:
Camera is missing / available again
UPS reports power failure / power supply restored
Hard drive online again after failure
Recording could not be started
Hard drive full, recording stopped
Failure of a hard drive
Relevant data overwritten
SISTORE MX not properly closed
Fatal recording error
NOTE:
In case of a problem, only the main recipient will be notified.
Prerequisites
z The SISTORE MX NVS application software is started.
See Section „Starting the SISTORE MX NVS application software“, page 12.
z The SISTORE MX NVS application software is in configuration mode.
See Section "Configuration mode", page 15.
1. Select the System tab.
2. Mark the checkbox Send SMS.
3. Select the E-mail and SMS tab.
4. Mark the checkbox Enable e-mail/SMS notification.
5. Click Apply.
Î The settings will be saved.
119
Siemens Building Technologies
Fire Safety & Security Products
08.2007
Configuring alarm response
17.2.2 Entering SMS recipient data
Fig. 106
SMS receiver text field on the E-mail and SMS tab
Prerequisites
z The SISTORE MX NVS application software is started.
See Section „Starting the SISTORE MX NVS application software“, page 12.
z The SISTORE MX NVS application software is in configuration mode.
See Section "Configuration mode", page 15.
1. Select the E-mail and SMS tab.
2. Select the Main receiver sub-tab.
3. In the text field SMS receiver, enter the telephone number with the network
information as shown in the example.
Examples:
z D1 network: <telephone number>@t-d1-sms.de
z D2 network: <telephone number>@d2-message.de
z E network <telephone number>@smsmail.eplus.de
z E2: <telephone number>@o2online.de
NOTE:
SMS messages are sent to the mobile telephone via the e-mail function of the provider, thus it must
be enabled to receive e-mail SMS messages. The receipt of such SMS messages generally incurs
fees for the mobile telephone user.
4. Repeat steps 2 and 3 as often as required if you want to set up multiple
recipients.
NOTE:
In case of a problem, only the main recipient will be notified.
He receives all SMS messages at any time of the day or night if the relevant mobile telephone is
switched on.
5. Click Apply.
Î The setting will be saved.
Sending a test SMS
You can test whether the main recipient receives an SMS in case of a warning or
problem.
1. Click Test SMS.
Î An SMS will be sent as a test.
2. Check whether the SMS arrives.
120
Siemens Building Technologies
Fire Safety & Security Products
08.2007
Configuring alarm response
Configuring time control
In the group field Time control, you can determine the period in which the second
through fifth recipient receives an SMS. The main recipient receives all SMS
notifications at any time of day or night.
Prerequisites
z The SISTORE MX NVS application software is started.
See Section „Starting the SISTORE MX NVS application software“, page 12.
z The SISTORE MX NVS application software is in configuration mode.
See Section "Configuration mode", page 15.
1. Select the E-mail and SMS tab.
2. Select the 2. receiver sub-tab.
3. Mark the checkbox in the Time control group field.
4. Click Options....
Î The SISTORE MX NVS Time control window will open.
5. Configure the time table. See Section "SISTORE MX NVS time control dialog",
page 16.
6. Click OK.
Î The SISTORE MX NVS Time control window will close.
7. Repeat steps 2 and 6 as often as required if you want to configure time control
for multiple recipients.
8. Click Apply.
Î The setting will be saved.
Configuring the alarm connection
Configuring the network alarm connection
On the main connection sub-tab you can specify that a connection to a SISTORE
RemoteView client is established in case of an event and the live image of the
affected camera is shown on the SISTORE RemoteView client.
Prerequisites
z The SISTORE RemoteView application software is started.
See Section "Starting SISTORE RemoteView", page 156 for further information.
z The option Allow alarm connection is enabled in the SISTORE RemoteView
application software.
See Section "", page 160 for further information.
z The SISTORE MX NVS application software is started.
See Section „Starting the SISTORE MX NVS application software“, page 12.
z The SISTORE MX NVS application software is in configuration mode.
See Section "Configuration mode", page 15.
1. Select the System tab.
2. Mark the checkbox Alarm call.
3. Select the Alarm connection tab.
4. Select the main connection sub-tab.
5. Select the option Connect via LAN.
121
Siemens Building Technologies
Fire Safety & Security Products
08.2007
Configuring alarm response
6. Enter the IP address in the IP address field.
7. Enter the port in the Port field.
8. Repeat steps 2 and 5 as often as required if you want to set up multiple
connections.
NOTE:
In case of an event, the system attempts to call the main recipient via the main connection. If this
does not succeed, a call to the second recipient is made via the first alternative connection, etc.
9. Click Apply.
Î The settings will be saved.
Configuring the ISDN alarm connection
On the main connection sub-tab you can specify that a connection to a SISTORE
RemoteView client is established in case of an event and the live image of the
affected camera is shown on the SISTORE RemoteView client.
Prerequisites
z The SISTORE RemoteView application software is started.
See Section "Starting SISTORE RemoteView", page 156 for further information.
z The option Allow alarm connection is enabled in the SISTORE RemoteView
application software.
See Section "", page 160 for further information.
z The SISTORE MX NVS application software is started.
See Section „Starting the SISTORE MX NVS application software“, page 12.
z The SISTORE MX NVS application software is in configuration mode.
See Section "Configuration mode", page 15.
1. Select the System tab.
2. Mark the checkbox Alarm call.
3. Select the Alarm connection tab.
4. Select the main connection sub-tab.
Allow ISDN dial-in group field on the Network tab
5. Select the radio button Connect via ISDN.
6. Enter the telephone number in the Phone number field.
7. Mark the checkbox ISDN channel bundling.
8. Repeat steps 2 and 5 as often as required if you want to set up multiple
connections.
Fig. 107
NOTE:
In case of an event, the system attempts to call the main recipient via the main connection. If this
does not succeed, a call to the second recipient is made via the first alternative connection, etc.
9. Click Apply.
Î The settings will be saved.
122
Siemens Building Technologies
Fire Safety & Security Products
08.2007
Configuring alarm response
Configuring time control
In the Time control group field, you can determine the period during which an
alarm connection is to take place.
Prerequisites
z The SISTORE RemoteView application software is started.
See Section "Starting SISTORE RemoteView", page 156 for further information.
z The option Allow alarm connection is enabled in the SISTORE RemoteView
application software.
See Section "Configuring network connections", page 160.
z The SISTORE MX NVS application software is started.
See Section „Starting the SISTORE MX NVS application software“, page 12.
z The SISTORE MX NVS application software is in configuration mode.
See Section "Configuration mode", page 15.
1. Select the Alarm connection tab.
2. Select the 1. alternative connection sub-tab.
3. Mark the checkbox in the Time control group field.
4. Click Options....
Î The SISTORE MX NVS Time control window will open.
5. Configure the time table.
See Section "SISTORE MX NVS time control dialog", page 16.
6. Click OK.
Î The SISTORE MX NVS Time control window will close.
7. Repeat steps 2 and 6 as often as required if you want to configure time control
for multiple alternative connections.
8. Click Apply.
Î The setting will be saved.
Configuring the FTP server
You can configure a connection to the FTP server on the FTP tab. In case of an
alarm, the alarm message will be stored as an MSG and an alarm image as a
JPEG in the root directory on the FTP server. This procedure is based on a special
German standard (EBÜS from Accelance). The root directory is in the Users
directory. Usually a dedicated root directory is created for each user of the FTP
server.
The alarm image and text file will be named after the starting point of the alarm:
YYYYMMDDHHMMSSxxx.jpg
YYYY
MM
DD
HH
MM
SS
xxx
year
month
day
hour
minute
second
milliseconds
123
Siemens Building Technologies
Fire Safety & Security Products
08.2007
Configuring alarm response
In case of an alarm, a subdirectory will be created which is named after the camera
for which the alarm occurred.
CAUTION
Fig. 108
Ensure that there is sufficient storage space on the target drive.
FTP server group field on the FTP tab
Prerequisites
z The SISTORE MX NVS application software is started.
See Section „Starting the SISTORE MX NVS application software“, page 12.
z The SISTORE MX NVS application software is in configuration mode.
See Section "Configuration mode", page 15.
1. Select the Alarm input sub-tab on the Recording tab.
.
2. Mark the checkbox FTP
3. Click Apply.
Î The setting will be saved.
4. Select the FTP tab.
5. Mark the checkbox FTP enabled.
6. Enter the IP address of the FTP server in the URL/IP text field.
Note
If this information is not available, contact your network administrator or Internet service provider.
7. Enter the port number of the FTP server in the Port text field. The port is
usually 21.
8. If the SISTORE MX NVS application software is operated behind a firewall, mark
the checkbox Passive FTP.
9. Enter the user name for the FTP server in the User name text field.
10. Enter the password for the FTP server in the Password text field.
11. Enter the name of the directory in which all alarm images are to be saved in
the text field Root directory.
If you have not entered a name in the text field Root directory, the alarm
images will be saved directly in the Users directory.
12. Click Apply.
Î The setting will be saved.
124
Siemens Building Technologies
Fire Safety & Security Products
08.2007
Configuring bank mode
Configuring bank mode
Enabling bank mode
NOTE:
Cash register mode and bank mode are mutually exclusive. Only one of the two tabs is available at
any time.
Fig. 109
Bank mode checkbox on the System tab
Prerequisites
z The SISTORE MX NVS application software is started.
See Section „Starting the SISTORE MX NVS application software“, page 12.
z The SISTORE MX NVS application software is in configuration mode.
See Section "Configuration mode", page 15.
1. Select the System tab.
2. Mark the checkbox Bank mode.
Î The SISTORE MX NVS dialog will open.
Fig. 110 SISTORE MX NVS dialog
3. Click OK.
Î The SISTORE MX NVS application software will close.
4. Start the SISTORE MX NVS application software.
Î The Banking tab will be shown.
125
Siemens Building Technologies
Fire Safety & Security Products
08.2007
Configuring bank mode
Configuring the number of recordings
In the Cash box parameters group field you can specify how many test, suspicion
and holdup recordings are saved continuously. For suspicion and holdup
recordings, the SISTORE MX NVS application software creates an internal write
protection that cannot be removed by the user.
As soon as the set number of suspicion and holdup recordings is reached, the
system enables the oldest recording of the particular type to be deleted. Afterward
this recording is treated like an ordinary room recording and can be automatically
overwritten by the system if necessary.
Fig. 111
Cash box parameters group field on the Banking tab
Prerequisites
z The SISTORE MX NVS application software is started.
See Section „Starting the SISTORE MX NVS application software“, page 12.
z The SISTORE MX NVS application software is in configuration mode.
See Section "Configuration mode", page 15.
1. Select the Banking tab.
2. Enter a value in the Number of test recordings field.
3. Enter a value in the Number of suspicion recordings field.
4. Enter a value in the Number of holdup recordings field.
5. Click Apply.
Î The settings will be saved.
126
Siemens Building Technologies
Fire Safety & Security Products
08.2007
Configuration of automated teller mode
Configuration of automated teller mode
Enabling automated teller mode
NOTE:
Cash register mode and bank mode are mutually exclusive. Only one of the two tabs is available at
any time.
Prerequisites
z The SISTORE MX NVS application software is started.
See Section „Starting the SISTORE MX NVS application software“, page 12.
z The SISTORE MX NVS application software is in configuration mode.
See Section "Configuration mode", page 15.
z Bank mode is enabled.
See Section "Enabling bank mode", page 125.
1. Select the System tab.
2. Mark the checkbox Cash dispenser.
Î Confirm the message that follows with OK.
3. Click OK on the System tab.
Î The SISTORE MX NVS dialog will open.
SISTORE MX NVS dialog
The SISTORE MX NVS application software will close.
Fig. 112
Î
If you wait longer than 10 seconds, the SISTORE MX NVS application software will close
automatically.
4. Start the SISTORE MX NVS application software.
Î The Banking tab will show the automated teller (cash dispenser) mode.
127
Siemens Building Technologies
Fire Safety & Security Products
08.2007
Configuration of automated teller mode
Configuring automated teller monitoring
Configuring diIBM_PBM type
Prerequisites
z The SISTORE MX NVS application software is started.
See Section „Starting the SISTORE MX NVS application software“, page 12.
z The SISTORE MX NVS application software is in configuration mode.
See Section "Configuration mode", page 15.
1. Select the Banking tab.
2. Select the desired cash dispenser in the automated teller list.
Fig. 113
Automated teller list on the Banking tab
3. Select the desired manufacturer or protocol from the Type dropdown list.
Fig. 114
Cash dispenser / access control group field on the Banking tab
The SISTORE MX NVS application software supports up to 8 automated tellers of
various manufacturers and protocols:
128
Siemens Building Technologies
Fire Safety & Security Products
08.2007
Configuration of automated teller mode
Automatic teller
ASCOM
DIEBOLD
IBM
IBM_PBM
KEBA_GAA
KEBA_ZKS
Type
IBM_PBM type
IBM_PBM type
IBM_PBM type
IBM_PBM type
IBM_PBM type
SNI_DREBA type
NCR
NCR type
SNI
NCR type
SNI_DREBA
SNI_DREBA type
SNI_PBM
IBM_PBM type
Cross-reference
Section "Configuring the
SNI_DREBA type", page 137
Section "Configuring the NCR
type", page 134
Section "Configuring the NCR
type", page 134
Section "Configuring the
SNI_DREBA type", page 137
The selected automated teller will be shown with the name of the manufacturer
or the protocol in the automated teller list.
Î The interface parameters speed, parity, data bits and stop bits are set
automatically. Further information on this will be found in the automated teller
documentation.
Î
Note
The combination 7 data bits and parity = none is not supported.
4. Click Options....
Î The SISTORE MX NVS Cash dispenser options – IBM_PBM window will
open.
129
Siemens Building Technologies
Fire Safety & Security Products
08.2007
Configuration of automated teller mode
Fig. 115
Settings of the IBM_PBM automated teller type
The following settings can be made in this window:
Note
The IBM, IBM_PBM, SNI_PBM, DIEBOLD, KEBA_GAA and ASCOM automated teller types work
according to the PBM (Personal Banking Machine) protocol from IBM. The settings options of these
automated teller types can differ a little from the settings options of the PBM type.
Picture per step/Telegram
Indicate here how many images per step/telegram are to be recorded.
130
Siemens Building Technologies
Fire Safety & Security Products
08.2007
Configuration of automated teller mode
Picture recording
The image recording for the images 1, 2 and 3 (or for the image group if multiple
images are recorded from one camera or various cameras for a telegram) will be
initiated based on the step ID, i.e. the step ID determines whether and when an
image or an image group is recorded. The setting for which steps are used is made
here with three configurable steps:
z First picture from step: for the first image recording
z Second picture from step: for the second image recording
z Third picture from step: for the third image recording
If no step is specified for the third image or for the image group, image 3 will be
recorded at a delay time (VZ_BILD_BILD) from image 2 which can be set in the
configuration.
Note
In order for the automated teller link to ensure secure operation, at least two fields (step 3 and 10 or
11) in the automated teller must be enabled!
The enabling takes place directly on the automated teller via the “CI”. This involves the configuration
file “Custom.dat”.
Time
The following settings can be made in the Time group field:
z Time synchronization:
If multiple automated tellers are connected to a SISTORE MX NVS system this
specification can define which ones synchronize the SISTORE MX NVS system.
We recommend enabling time synchronization only for one interface (one
automated teller); if the automated tellers have different times, this is urgently
necessary.
z Timeout:
After a set timeout period an active transaction is automatically ended. This is
necessary in order to close transactions properly for which the last specified step
is missing, for example with an account balance query. The specification of the
timeout is in seconds.
TIMEOUT=300
If a transaction is ended by a timeout, an archive entry with status=2 is made.
z Timestep:
The TIMESTEP parameter can determine which telegram is used for the
synchronization. This is to achieve optimal agreement of the time between the
SISTORE MX NVS archive and the automated teller journal.
Delay of picture recording
The following fields can be used to define the delay times in seconds between the
arrival of the telegram and the actual recording of the image:
z Portrait
z Cash
z Room
z Picture to picture
The picture to picture dropdown is enabled if a telegram is to result in multiple
images being recorded by a camera or an image each from various cameras.
131
Siemens Building Technologies
Fire Safety & Security Products
08.2007
Configuration of automated teller mode
Picture recording / Camera sequence
Here you set the sequence of the cameras for image recording at the various
telegram times.
Cash dispenser specific
Note
Here there are default values which can be changed for the individual automated teller types.
Date: day, month, year
Time: hours, minutes, seconds
Account number
Bank code
Amount
Currency
Status
Transaction number
Credit card number
ID no. (workstation ID)
To determine the positions from the telegram, the log mechanism in the file
GAA.ini in the [DEBUGINFO] section is to be activated.
Then the telegrams can be represented via the log file DTC_GAA.log.
z
z
z
z
z
z
z
z
z
z
EC / Credit card distinction
The telegrams of EC cards and credit cards differ, depending on automated teller
machines or computing centers, by particular characteristic characters (such as
blank spaces), which are at a particular position in the telegram and also differ
sometimes in the length of the telegram. These characteristic characters are
identifiable by their ASCII code.
z Enter the position of the characteristic character, such as 39, in the field
"Telegram position".
Example
39
Position for differentiating between EC and credit card
z Enter the ASCII code of the characteristic character in the field "Indication", such
as the number "32" for a blank space.
Example
37
Character for differentiation as ASCII code //e.g. Chr(32) = " "
In exceptional cases, the telegram generated by a credit card is longer.
z Enter the difference in telegram length of the two card types in the
corresponding field, for example 7.
Example
7
// Difference in telegram length between EC and credit card, for
example 7
132
Siemens Building Technologies
Fire Safety & Security Products
08.2007
Configuration of automated teller mode
With EC cards there is a blank space at position 39. Credit cards have no blank
space at this position. A blank space has the ASCII code "32".
Telegram for an EC card:
Telegram for a credit card:
1
2
3
Blank space at position 39; the ASCII code for a blank space is 32
No blank spaces
The difference in telegram length between an EC card and a credit card is 7 characters
1. Click OK.
Î The SISTORE MX NVS Cash dispenser options window will close.
You have two options to assign automated teller cameras:
2. Mark the checkbox in front of the desired camera in the automated teller camera
list.
or
3. Right-click on the automated teller camera list.
Î The SISTORE MX NVS context menu will open.
4. Mark Select all.
Î All cameras will be selected.
Note
You can assign a maximum of 3 automated teller cameras to each automated teller.
5. In the Stored for field, select the number of days that are to be saved and not
automatically overwritten.
6. In the Number of transactions field, select the number of transactions that are
to be saved and not automatically overwritten.
Fig. 116
Cash dispenser / access control General group field on the Banking tab
Note
Automated teller recordings will be deleted if the storage period or number of transactions is
exceeded or if the recording capacity of the hard drive (D:\) is exhausted.
133
Siemens Building Technologies
Fire Safety & Security Products
08.2007
Configuration of automated teller mode
Configuring the NCR type
Prerequisites
z The SISTORE MX NVS application software is started.
See Section „Starting the SISTORE MX NVS application software“, page 12.
z The SISTORE MX NVS application software is in configuration mode.
See Section "Configuration mode", page 15.
1. Select the Banking tab.
2. Select the desired cash dispenser in the automated teller list.
Fig. 117
Automated teller list on the Banking tab
3. Select the desired manufacturer or protocol from the Type dropdown list.
Fig. 118
Cash dispenser / access control group field on the Banking tab
The SISTORE MX NVS application software supports up to 8 automated tellers of
various manufacturers and protocols:
Automatic teller
ASCOM
Type
IBM_PBM type
DIEBOLD
IBM_PBM type
IBM
IBM_PBM type
IBM_PBM
IBM_PBM type
KEBA_GAA
IBM_PBM type
KEBA_ZKS
SNI_DREBA type
NCR
SNI
NCR type
NCR type
Cross-reference
Section "Configuring diIBM_PBM
type", page 128
Section "Configuring diIBM_PBM
type", page 128
Section "Configuring diIBM_PBM
type", page 128
Section "Configuring diIBM_PBM
type", page 128
Section "Configuring diIBM_PBM
type", page 128
Section "Configuring the
SNI_DREBA type", page 137
134
Siemens Building Technologies
Fire Safety & Security Products
08.2007
Configuration of automated teller mode
Automatic teller
SNI_DREBA
Type
SNI_DREBA type
SNI_PBM
IBM_PBM type
Cross-reference
Section "Configuring the
SNI_DREBA type", page 137
Section "Configuring diIBM_PBM
type", page 128
The selected automated teller will be shown with the name of the manufacturer
or the protocol in the automated teller list.
Î The interface parameters speed, parity, data bits and stop bits are set
automatically. Further information on this will be found in the automated teller
documentation.
Î
NOTE
The combination 7 data bits and parity = none is not supported.
4. Click Options....
Î The SISTORE MX NVS Cash dispenser options – NCR window will open.
Fig. 119
Settings of the NCR automated teller type
The following settings can be made in this window:
135
Siemens Building Technologies
Fire Safety & Security Products
08.2007
Configuration of automated teller mode
Note
In contrast to the automated teller type SNI, for the NCR automated teller type only the field "Number"
is shown in the group field Number of telegrams.
Picture per step/Telegram
Indicate here how many images per step/telegram are to be recorded.
Number of telegrams
Enter the number of telegrams sent by the automated teller here
Time
The following settings can be made in the Time group field:
z Time synchronization:
If multiple automated tellers are connected to a SISTORE MX NVS system this
specification can define which ones synchronize the SISTORE MX NVS system.
It is recommended to enable time synchronization only for one interface; if the
automated tellers have different times, this is urgently necessary.
z Timeout:
After a set timeout period an active transaction is automatically ended. This is
necessary in order to close transactions properly for which the last specified step
is missing, for example with an account balance query. The specification of the
timeout is in seconds.
TIMEOUT=300
If a transaction is ended by a timeout, an archive entry with status=2 is made.
Delay of picture recording / seconds
The following fields can be used to define the delay times in seconds between the
arrival of the telegram and the actual recording of the image:
z Portrait
z Cash
z Room
z Picture to picture
The picture to picture dropdown is enabled if a telegram is to result in multiple
images being recorded by a camera or an image each from various cameras.
Picture recording / Camera sequence
Here you set the sequence of the cameras for image recording at the various
telegram times.
1. Click OK.
2. The SISTORE MX NVS Cash dispenser options window will close.
You have two options to assign automated teller cameras:
z Mark the checkbox in front of the desired camera in the automated teller camera
list.
Î The SISTORE MX NVS context menu will open.
or
z Right-click on the automated teller camera list.
Î The SISTORE MX NVS context menu will open.
3. Mark Select all.
Î All cameras will be selected.
Note
You can assign a maximum of 3 automated teller cameras to each automated teller.
4. In the Stored for field, select the number of days that are to be saved and not
automatically overwritten.
136
Siemens Building Technologies
Fire Safety & Security Products
08.2007
Configuration of automated teller mode
5. In the Number of transactions field, select the number of transactions that are
to be saved and not automatically overwritten.
Fig. 120
Cash dispenser / access control General group field on the Banking tab
Note
Automated teller recordings will be deleted if the storage period or number of transactions is
exceeded or if the recording capacity of the hard drive (D:\) is exhausted.
Configuring the SNI_DREBA type
Prerequisites
z The SISTORE MX NVS application software is started.
See Section „Starting the SISTORE MX NVS application software“, page 12.
z The SISTORE MX NVS application software is in configuration mode.
See Section "Configuration mode", page 15.
1. Select the Banking tab.
2. Select the desired cash dispenser in the automated teller list.
Fig. 121
Automated teller list on the Banking tab
3. Select the desired manufacturer or protocol from the Type dropdown list.
Fig. 122
Cash dispenser / access control group field on the Banking tab
137
Siemens Building Technologies
Fire Safety & Security Products
08.2007
Configuration of automated teller mode
The SISTORE MX NVS application software supports up to 8 automated tellers of
various manufacturers and protocols:
Automatic teller
ASCOM
Type
IBM_PBM type
DIEBOLD
IBM_PBM type
IBM
IBM_PBM type
IBM_PBM
IBM_PBM type
KEBA_GAA
IBM_PBM type
KEBA_ZKS
NCR
SNI_DREBA type
NCR type
SNI
NCR type
SNI_DREBA
SNI_PBM
SNI_DREBA type
IBM_PBM type
Cross-reference
Section "Configuring diIBM_PBM
type", page 128
Section "Configuring diIBM_PBM
type", page 128
Section "Configuring diIBM_PBM
type", page 128
Section "Configuring diIBM_PBM
type", page 128
Section "Configuring diIBM_PBM
type", page 128
Section "Configuring the NCR type",
page 134
Section "Configuring the NCR type",
page 134
Section "Configuring diIBM_PBM
type", page 128
The selected automated teller will be shown with the name of the manufacturer
or the protocol in the automated teller list.
Î The interface parameters speed, parity, data bits and stop bits are set
automatically. Further information on this will be found in the automated teller
documentation.
Î
NOTE
The combination 7 data bits and parity = none is not supported.
4. Click Options....
Î The SISTORE MX NVS Cash dispenser options – SNI_DREBA window will
open.
138
Siemens Building Technologies
Fire Safety & Security Products
08.2007
Configuration of automated teller mode
Fig. 123
Î
Settings of the SNI_DREBA automated teller type
The following settings can be made in this window:
Note
In contrast to the automated teller type SNI_DREBA, with the automated teller type KEBA_ZKS no
settings can be made for Picture recording / Camera sequence.
Picture per step/Telegram
Indicate here how many images per step/telegram are to be recorded.
Time
The following settings can be made in the Time group field:
z Time synchronization:
If multiple automated tellers are connected to a SISTORE MX NVS system this
specification can define which ones synchronize the SISTORE MX NVS system.
It is recommended to enable time synchronization only for one interface; if the
automated tellers have different times, this is urgently necessary.
z Timeout:
After a set timeout period an active transaction is automatically ended. This is
necessary in order to close transactions properly for which the last specified step
139
Siemens Building Technologies
Fire Safety & Security Products
08.2007
Configuration of automated teller mode
is missing, for example with an account balance query. The specification of the
timeout is in seconds.
TIMEOUT=300
If a transaction is ended by a timeout, an archive entry with status=2 is made.
Delay of picture recording / seconds
The picture to picture field can be used to define the delay times in seconds
between the arrival of the telegram and the actual recording of the image:
The picture to picture dropdown is enabled if a telegram is to result in multiple
images being recorded by a camera or an image each from various cameras.
Picture recording / Camera sequence
Here you set the sequence of the cameras for image recording at the various
telegram times.
1. Click OK.
Î The setting will be saved.
You have two options to assign automated teller cameras:
z Mark the checkbox in front of the desired camera in the automated teller camera
list.
or
z Right-click on the automated teller camera list.
Î The SISTORE MX NVS context menu will open.
2. Mark Select all.
Î All cameras will be selected.
Note
You can assign a maximum of 3 automated teller cameras to each automated teller.
3. In the Stored for field, select the number of days that are to be saved and not
automatically overwritten.
4. In the Number of transactions field, select the number of transactions that are
to be saved and not automatically overwritten.
Fig. 124
Cash dispenser / access control General group field on the Banking tab
Note
Automated teller recordings will be deleted if the storage period or number of transactions is
exceeded or if the recording capacity of the hard drive (D:\) is exhausted.
140
Siemens Building Technologies
Fire Safety & Security Products
08.2007
Configuration of cash box mode
Configuration of cash box mode
Adding a cash box
Fig. 125
Cash box list on the Cash box tab
Prerequisites
z The SISTORE MX NVS application software is started.
See Section „Starting the SISTORE MX NVS application software“, page 12.
z The SISTORE MX NVS application software is in configuration mode.
See Section "Configuration mode", page 15.
1. Select the Cash box tab.
NOTE:
Depending on the license, the SISTORE MX NVS application software supports up to 4 cash boxes
from various manufacturers.
1. Click the Add button
.
2. A cash box will be added in the cash box list.
3. Enter a name for the cash box in the Name text field.
4. Click Apply.
Î The settings will be saved.
Deleting a cash box
Prerequisites
z The SISTORE MX NVS application software is started.
See Section „Starting the SISTORE MX NVS application software“, page 12.
z The SISTORE MX NVS application software is in configuration mode.
See Section "Configuration mode", page 15.
1. Select the Cash box tab.
2. Select the cash box you want to delete from the cash box list.
button.
3. Click the Delete
4. Confirm the message that follows with OK.
5. Click Apply.
Î The setting will be saved.
141
Siemens Building Technologies
Fire Safety & Security Products
08.2007
Configuration of cash box mode
Configuring cash box monitoring
Prerequisites
z The SISTORE MX NVS application software is started.
See Section „Starting the SISTORE MX NVS application software“, page 12.
z The SISTORE MX NVS application software is in configuration mode.
See Section "Configuration mode", page 15.
1. Select the Cash box tab.
2. Select the desired cash box in the cash box list.
Î In the Parameters group field, the type, interface and interface parameters
data rate, data bits, parity and stop bits are set automatically. Further
information on this will be found in the cash box documentation.
Parameters group field on the Cash box tab
3. Select the desired camera from the Camera dropdown list.
Fig. 126
NOTE:
You can assign only one camera to each cash box and multiple cash boxes to each camera.
4. Click Apply.
Î The setting will be saved.
Configuring filters
Creating a new filter
In the Filter group field you can specify that in the data stream (telegrams) sent by
the cash box either uninteresting data are deleted or that an alarm is triggered
when a filter word is received. All telegrams received are saved in the database.
NOTE:
Filters must be set up individually for each cash box.
Fig. 127 Fields for setting the filter properties
Prerequisites
z The SISTORE MX NVS application software is started. See Section „Starting the
SISTORE MX NVS application software“, page 12.
The SISTORE MX NVS application software is in configuration mode.
See Section "Configuration mode", page 15.
1. Select the Cash box tab.
There are three options for creating the filter:
142
Siemens Building Technologies
Fire Safety & Security Products
08.2007
Configuration of cash box mode
z Click the New filter
button.
Two fields for defining the filter properties will be opened. or
z Double-click the white list field.
Î Two fields for defining the filter properties will be opened. or
z Right-click on the background.
Î The context menu will open.
Î
2. Select Add new filter.
Î Two fields for defining filters will be opened.
3. Click on the arrow next to the list field.
4. Select the desired option from the dropdown list.
Word filter
Line filter
Alarm trigger
If the filter word occurs as a substring of the received line, the word
will be removed from the telegram.
If the filter word occurs as a substring of the received line, the entire
line will be removed from the telegram.
If the filter word occurs as a substring of the received line, an alarm
will be triggered.
1. Enter the word to search for in the text field.
2. Click Apply. The setting will be saved.
Importing filters
You can import saved filters with the Import button.
Prerequisites
z The SISTORE MX NVS application software is started.
See Section „Starting the SISTORE MX NVS application software“, page 12.
z The SISTORE MX NVS application software is in configuration mode.
See Section "Configuration mode", page 15.
1. Select the Cash box tab.
.
2. Click the Import button
Î The Open dialog will appear.
3. Select the filters you want to import.
4. Click Open.
Î The filters will be imported. The Open dialog will close.
Deleting filters
Prerequisites
z The SISTORE MX NVS application software is started.
See Section „Starting the SISTORE MX NVS application software“, page 12.
z The SISTORE MX NVS application software is in configuration mode.
See Section "Configuration mode", page 15.
143
Siemens Building Technologies
Fire Safety & Security Products
08.2007
Configuration of cash box mode
Deleting a single filter
1. Select the Cash box tab.
2. Click in the text field of the filter you want to delete.
You have two options to delete a single filter:
1. Right-click on the background.
Î The Filter context menu will open.
2. Select Delete selected filter.
3. Confirm the message that follows with Yes.
Î The entry will be deleted.
or
after the filter you want to delete.
1. Click the Delete button
2. Confirm the message that follows with Yes.
Î The entry will be deleted.
Deleting all filters
1. Select the Cash box tab.
2. You have two options to delete all entries:
3. Right-click on the background.
Î The Filter context menu will open.
4. Select Delete all filters.
5. Confirm the message that follows with Yes.
Î The filters will be deleted.
or
6. Click the Delete all button
.
7. Confirm the message that follows with Yes.
Î All the filters will be deleted.
Exporting filters
The Export button can be used to back up filters and transfer them to other
systems.
Prerequisites
z The SISTORE MX NVS application software is started.
See Section „Starting the SISTORE MX NVS application software“, page 12.
z The SISTORE MX NVS application software is in configuration mode.
See Section "Configuration mode", page 15.
z At least one filter has been configured.
1. Select the Cash box tab.
.
2. Click the Export button
Î The Save As... dialog will appear.
144
Siemens Building Technologies
Fire Safety & Security Products
08.2007
Configuration of cash box mode
Fig. 128 "Save As..." dialog
3. Select the directory in which to save the filter configuration.
4. Enter a name in the File name field.
5. Click Save.
Î The filter configuration will be saved.
Displaying cash box data
Prerequisites
z The SISTORE MX NVS application software is started.
See Section „Starting the SISTORE MX NVS application software“, page 12.
z The SISTORE MX NVS application software is in configuration mode.
See Section "Configuration mode", page 15.
1. Select the Cash box tab.
2. Select the desired cash box in the cash box list (see "Fig. 125 ", page 141).
3. Click Show data....
Î The SISTORE MX NVS Cash box data window will open.
Fig. 129
Options group field in the SISTORE MX NVS Cash box data window
4. In the Cash dropdown list, select all cash boxes or select one cash box.
5. Select the desired option from the Data dropdown list.
Raw
Codepage
Filter
Î
All data will be shown.
The data will be shown according to the codepage loaded.
The filtered data will be shown.
The data will be shown.
NOTE:
Changes to the filter settings will be seen with the next data received.
145
Siemens Building Technologies
Fire Safety & Security Products
08.2007
Configuration of holidays
Configuration of holidays
Adding a holiday
Creating a new holiday
For time control, in addition to the weekdays there is another category of day: the
special day, such as holidays.
"Holidays" apply throughout the system and thus cannot be saved separately for an
object.
Prerequisites
z The SISTORE MX NVS application software is started.
See Section „Starting the SISTORE MX NVS application software“, page 12.
z The SISTORE MX NVS application software is in configuration mode.
See Section "Configuration mode", page 15.
1. Select the Holidays tab.
There are three options for defining the holiday:
z Click the New entry
button.
Î Three fields for defining holidays will be opened.
or
z Double-click the white list field.
Î Three fields for defining holidays will be opened.
or
z Right-click on the background.
Î The context menu will open.
2. Select New entry.
Î Three fields for defining holidays will be opened.
3. Enter a name for the holiday in the text field.
You have two options to define a date for the holiday:
z Enter the desired date in the text field.
or
146
Siemens Building Technologies
Fire Safety & Security Products
08.2007
Configuration of holidays
1. Click on the arrow next to the list field.
Î The calendar will open.
2. Select the desired day on the calendar.
NOTE:
For annual repetition enter the year as of which the repetition is to occur. For monthly repetition enter
the month and year as of which the repetition is to occur.
3. Select "single", "monthly" or "yearly" from the selection field.
4. Click Apply.
Î The setting will be saved.
Importing holidays
You can import saved holidays with the Import button.
Prerequisites
z The SISTORE MX NVS application software is started.
See Section „Starting the SISTORE MX NVS application software“, page 12.
z The SISTORE MX NVS application software is in configuration mode.
See Section "Configuration mode", page 15.
1. Select the System tab.
.
2. Click the Import button
Î The Open dialog will appear.
3. Select the holidays you want to import.
4. Click Open.
Î The holidays will be imported.
Î The Open dialog will close.
147
Siemens Building Technologies
Fire Safety & Security Products
08.2007
Configuration of holidays
Deleting a holiday
Prerequisites
z The SISTORE MX NVS application software is started.
See Section „Starting the SISTORE MX NVS application software“, page 12.
z The SISTORE MX NVS application software is in configuration mode.
See Section "Configuration mode", page 15.
Deleting marked entries
1. Select the Holidays tab.
2. Click in the text field of the entry you want to delete.
You have two options to delete a marked entry:
3. Right-click on the background.
Î The context menu will open.
Fig. 130
Holidays context menu
4. Select Delete marked entry.
5. Confirm the message that follows with Yes.
Î The entry will be deleted.
or
after the entry you want to delete.
6. Click the Delete button
7. Confirm the message that follows with Yes.
Î The entry will be deleted.
Deleting all entries
1. Select the Holidays tab.
You have two options to delete all entries:
1. Right-click on the background.
Î The context menu will open.
2. Select Delete all entries.
3. Confirm the message that follows with Yes.
Î The entries will be deleted.
or
.
4. Click the Delete all button
5. Confirm the message that follows with Yes.
Î All the entries will be deleted.
Deleting past entries
1. Select the Holidays tab.
You have two options to delete past entries:
148
Siemens Building Technologies
Fire Safety & Security Products
08.2007
Configuration management
1. Right-click on the background.
Î The context menu will open.
2. Select Delete past entries.
3. Confirm the message that follows with Yes.
Î The entries will be deleted.
or
Delete old button .
4. Click the
5. Confirm the message that follows with Yes.
Î The entries will be deleted.
Exporting holidays
The Export button can be used to back up holidays and transfer them to other
systems.
Prerequisites
z The SISTORE MX NVS application software is started.
See Section „Starting the SISTORE MX NVS application software“, page 12.
z The SISTORE MX NVS application software is in configuration mode.
See Section "Configuration mode", page 15.
z At least one holiday has been configured.
See Section "Adding a holiday", page 146.
1. Select the System tab.
.
2. Click the Export button
Î The Save As... dialog will appear.
3. Select the directory in which to save the holiday configuration.
4. Enter a name in the File name field.
5. Click Save.
Î The holiday configuration will be saved. The Save As... dialog will close.
Configuration management
Resetting the configuration
You can reset the configuration to the default settings using the Reset
configuration button. The settings you have made in the User management tab
will be maintained.
Prerequisites
z The SISTORE MX NVS application software is started.
See Section „Starting the SISTORE MX NVS application software“, page 12.
z The SISTORE MX NVS application software is in configuration mode.
See Section "Configuration mode", page 15.
1. Select the Information tab.
2. Click the Reset configuration button.
3. Confirm the message that follows with Yes.
Î The settings made in the System tab will be reset; the user configurations
and system settings remain unchanged.
149
Siemens Building Technologies
Fire Safety & Security Products
08.2007
Configuration management
Importing a configuration
You can import saved configuration files with the Import configuration button.
NOTE:
If the SISTORE MX NVS unit has already been configured, this configuration will be replaced.
Camera-specific rights can only be imported with the system configuration. When user configurations
are imported, the users have all camera rights. The user administrator must check the assignment
of rights individually.
Prerequisites
z The SISTORE MX NVS application software is started.
See Section „Starting the SISTORE MX NVS application software“, page 12.
z The SISTORE MX NVS application software is in configuration mode.
See Section "Configuration mode", page 15.
1. Select the Information tab.
or Import user configuration
2. Click the Import configuration
button.
3. Confirm the message that follows with Yes.
Î The Open dialog will appear.
4. Select the configuration file you want to import.
5. Click Open.
Î The configuration file will be imported. The Open dialog will close.
NOTE:
Following the import, check the drives enabled for recording in the System tab (see Section
"General information about the storage location", page 108) and all backup settings in the
Database tab (see Section "Selecting a storage location for backup", page 111 to Section
"Selecting the type of recordings for backup", page 113). If the operating mode of the system was
changed, delete all old recordings or create a new database (see User Manual).
Exporting the configuration
The Export configuration button can be used to back up the system and user
configuration and transfer them to other systems.
Prerequisites
z The SISTORE MX NVS application software is started.
See Section „Starting the SISTORE MX NVS application software“, page 12.
z The SISTORE MX NVS application software is in configuration mode.
See Section "Configuration mode", page 15.
1. Select the Information tab.
2. Click the Export configuration button
Î The Save As... dialog will appear.
.
150
Siemens Building Technologies
Fire Safety & Security Products
08.2007
Configuration management
Fig. 131 Save As dialog
3. Select the directory in which to save the configuration.
4. Enter a name in the File name field.
5. Click Save.
Î The configuration will be saved.
Î The Save As... dialog will close.
151
Siemens Building Technologies
Fire Safety & Security Products
08.2007
Configuration management
Printing the configuration
The Print configuration enables you to print out the configuration in formatted text
form without graphics. First define what is to be printed.
Prerequisites
z The SISTORE MX NVS application software is started.
See Section „Starting the SISTORE MX NVS application software“, page 12.
z The SISTORE MX NVS application software is in configuration mode.
See Section "Configuration mode", page 15.
z At least one printer is installed on your computer.
1. Select the Information tab.
Print configuration button .
2. Click the
Î The SISTORE MX NVS Print options dialog will appear.
Fig. 132
SISTORE MX NVS print options dialog
3. Mark the checkbox Print heading.
NOTE:
You can enter any text in the Additional text field. This will be shown on the title page and may not
be longer than 64 characters.
4. Mark the information categories you want to print in the Themes group field.
5. Mark the checkbox Detailed.
6. Click OK.
152
Siemens Building Technologies
Fire Safety & Security Products
08.2007
Configuration management
Showing the configuration and system data overview
z The SISTORE MX NVS application software is started.
See Section „Starting the SISTORE MX NVS application software“, page 12.
z The SISTORE MX NVS application software is in configuration mode.
See Section "Configuration mode", page 15.
Select the Information tab.
The Hardware information field lists the technical data for the video recording
hardware installed.
The Software information field shows the version information. This information is
also saved in the configuration file. Thus SISTORE RemoteView can also show
with which software version (server) the configuration was saved.
153
Siemens Building Technologies
Fire Safety & Security Products
08.2007
Configuration management
Importing user configurations
You can import user configurations from a user configuration file using the Import
user configuration button.
NOTE:
If the SISTORE MX NVS unit has already been configured, this configuration will be replaced.
Camera-specific rights can only be imported with the system configuration. When user configurations
are imported, the users have all camera rights. The user administrator must check the assignment
of rights individually.
Prerequisites
z The SISTORE MX NVS application software is started.
See Section „Starting the SISTORE MX NVS application software“, page 12.
z The SISTORE MX NVS application software is in configuration mode.
See Section "Configuration mode", page 15.
1. Select the Information tab.
2. Click the Import user configuration button.
3. Confirm the message that follows with Yes.
Î The Open dialog will appear.
4. Select the configuration file you want to import.
5. Click Open.
Î The user configuration will be imported. The Open dialog will close.
154
Siemens Building Technologies
Fire Safety & Security Products
08.2007
Testing the Watchdog
Testing the Watchdog
NOTE:
In order that the Watchdog function is available on a server PC, the PC system a must have an
integrated Watchdog board.
We recommend integrating a Watchdog module type PWDOG1 from Quancom.
For more information please refer to the Installation Guide, Section 6.2.
The Watchdog restarts the system in case of certain events, such as a server
crash.
Function
If the PC system has an integrated Watchdog module from Quancom, this
watchdog acts as a timer which closes a relay contact after a specified time. In
normal operation, the timer is continuously restarted by the SISTORE MX NVS unit
so that it never runs out. If the system gets into a state in which it no longer reacts
and can no longer reinitialize the watchdog, the timer runs out, the relay contact is
closed and a restart is triggered via the reset line of the system.
Testing the Watchdog
Prerequisites
z The PC has an integrated Watchdog module from Quancom.
z The SISTORE MX NVS application software is started.
See Section „Starting the SISTORE MX NVS application software“, page 12.
z The SISTORE MX NVS application software is in configuration mode.
See Section "Configuration mode", page 15.
1. Select the Watchdog tab.
2. Click Test.
Î The SISTORE MX NVS dialog will open.
3. If you want to avoid a reset of the system, pull the reset wire from the main
board of the SISTORE MX NVS unit.
4. Click Yes.
Î The system will be closed down and restarted.
155
Siemens Building Technologies
Fire Safety & Security Products
08.2007
Configuring SISTORE RemoteView
Configuring SISTORE RemoteView
Starting SISTORE RemoteView
Start SISTORE RemoteView via the icon on the desktop.
Program window
The appearance and functions are similar to the display mode of SISTORE MX
NVS. In the SISTORE RemoteView display mode, if there are multiple servers
connected, the status displays of the selected server will be shown.
The SISTORE RemoteView program window contains the following components:
1
2
System status and system information.
Camera list
The available cameras of the server are shown below the entries of the connected servers.
3
Starting image
The starting image of the application will be shown if no PTZ camera is present or the logged in
user does not have the right to control a PTZ camera.
4
Display area for video images
5
Video images
6
Toolbar
7
Menu bar
8
Title
The name of the current active server will be shown.
156
Siemens Building Technologies
Fire Safety & Security Products
08.2007
Configuring SISTORE RemoteView
SISTORE RemoteView toolbar
Nearly all functions of the software can be accessed using the SISTORE
RemoteView toolbar. Buttons with the same functions in SISTORE RemoteView
have the same appearance as in SISTORE MX NVS.
Connect remote
Disconnect remote
You can close a single connection or all at once.
Show/hide logbook.
Change user
Next display group.
Manual switching to the next camera group.
Automatic cycle.
Automatic switching to the next camera group.
Show less cameras
Each click reduces the number of cameras in the display area.
More cameras. Clicking the arrow symbol will open a window showing the
possible display matrices.
Show alarm window.
An additional alarm window will be shown when an alarm occurs.
Open map.
Start monitor cycle.
Start recording.
Stop recording.
Start playback.
Start virtual guard rounds.
Open SISTORE RemoteView help.
157
Siemens Building Technologies
Fire Safety & Security Products
08.2007
Configuring SISTORE RemoteView
Status displays
In the SISTORE RemoteView display mode, if there are multiple servers
connected, the status displays of the selected server will be shown. To enable a
server, the server or a camera of the server must be selected in the camera list.
Fig. 133
Camera list
Server-specific status displays
z Time
z Alarm outputs
z Hard drive utilization
z System operating time
z Recording start/stop
Cross-server status displays
The cross-server status display reacts if one of the following events occurs on one
of the connected servers:
z Motion
z Alarm
z Loss of video
z Camera tamper
z Error
z Connection
158
Siemens Building Technologies
Fire Safety & Security Products
08.2007
Configuring SISTORE RemoteView
Overview of functions
Single server mode
z Configuration
z Restarting the system.
z Software update
z ATM and cash box search
z Delete
z View logbook
Multi-server mode
z Acknowledge sabotage
z Acknowledge malfunctions
z Cancel alarm
Server-specific functions
Test alarm
Cameras on monitor
Start/stop recording
Change user
Logbook comment
z
z
z
z
z
Camera-specific functions
Camera-specific functions can be assigned directly to the server belonging to the
camera:
z Connection of a camera to an external monitor
z PTZ control
Opening configuration mode
Prerequisites
z The SISTORE RemoteView application software is started.
See Section "Starting SISTORE RemoteView", page 156.
z The SISTORE RemoteView application software is in single server mode.
1. Click the Login
button.
Î The SISTORE RemoteView login dialog will open.
2. The first time you log in, enter Administrator in the User name field.
3. The first time you log in, enter Administrator in the Password field.
NOTE:
Change the user name and password after the first login.
159
Siemens Building Technologies
Fire Safety & Security Products
08.2007
Configuring SISTORE RemoteView
1. Click Administration in the toolbar.
2. Click Configure RemoteView.
Î The configuration mode will open.
Fig. 134
System tab on a client PC that has a CKA device driver installed
NOTE:
The parameters for the SISTORE RemoteView application software are saved in the file
SistoreRemoteView.dat.
Configuring network connections
Entering the system name
The system name is used primarily for identification of the system during remote
access. Enter the location of the system, for example, as the name.
Prerequisites
z The network has been set up in the operating system and is ready for use.
z The SISTORE RemoteView application software is started.
See Section "Starting SISTORE RemoteView", page 156.
z The SISTORE RemoteView application software is in configuration mode.
See Section "Opening configuration mode", page 159.
1. Select the System tab.
2. Enter the desired designation in the System name text field.
3. Click Apply.
Î The setting will be saved.
160
Siemens Building Technologies
Fire Safety & Security Products
08.2007
Configuring SISTORE RemoteView
Configuring the network connection
NOTE:
If you operate the SISTORE MX NVS application software or SISTORE RemoteView behind a firewall
and want to access via a network, open all ports in the firewall that are used by the software.
Fig. 135
Network tab
Prerequisites
z The client PC with the SISTORE MX RemoteView application software installed
is connected to the network.
z The SISTORE RemoteView application software is started.
See Section "Starting SISTORE RemoteView", page 156.
z The SISTORE RemoteView application software is in configuration mode.
See Section "Opening configuration mode", page 159.
1. Select the Network tab.
2. Mark the checkbox Allow alarm connection.
3. Confirm the message that follows with OK.
4. In the TCP/IP port field, enter the number of the port at which the
SISTORE RemoteView application software can be reached. Typically port 41 is
used.
5. Enter the initial value of the TCP/IP port range in the field for TCP/IP port range.
6. The end value of the TCP/IP port range is determined automatically. It depends
on the max. clients value: two ports are needed for each client.
161
Siemens Building Technologies
Fire Safety & Security Products
08.2007
Configuring SISTORE RemoteView
NOTE:
The TCP/IP address is set during the configuration of the network card. If there is more than one
network card in a computer, it is possible that the TCP/IP address shown here will not be that of the
LAN card but instead one for another network card.
The host name is shown for information only and is not used by SISTORE RemoteView for any other
purpose.
7. Click Apply.
Î The settings will be saved.
8. Select File -> Exit.
9. Restart the SISTORE RemoteView application software.
10. Configuring ISDN dial-in
Accept all incoming calls
NOTE:
Use the ISDN modem AVM FRITZ! USB v2.0.
We cannot guarantee proper function with other ISDN modems that have not been tested by us.
The SISTORE MX NVS application software and SISTORE RemoteView are not
downward compatible as of version 2.2.
The SISTORE RemoteView application software reacts only to ISDN calls with the
service indicator for data. Thus SISTORE RemoteView or the SISTORE MX NVS
application software can be operated on an ISDN connection in parallel to ISDN
devices with other service indicators.
Prerequisites
z The client PC with the SISTORE MX RemoteView application software installed
is connected to the network.
z An ISDN modem is connected to the SISTORE RemoteView unit.
z The SISTORE RemoteView application software is started.
See Section "Starting SISTORE RemoteView", page 156.
z The SISTORE RemoteView application software is in configuration mode.
See Section "Opening configuration mode", page 159.
1. Select the Network tab (see "Fig. 135 ", page 161).
2. Mark the checkbox Allow ISDN dial-in.
3. Click the option field Accept all incoming calls.
4. Click the radio button by Accept MSN ... only.
5. Enter the desired multiple subscriber number in the Allow MSN … only text
field.
You have two options:
z Mark the checkbox Allow channel bundling if two channels are to be permitted
for an ISDN connection.
or
z Ensure that the checkbox Allow channel bundling is not marked if a B channel
is to be kept free for a separate line (such as an alarm system).
6. Click Apply.
Î The setting will be saved.
162
Siemens Building Technologies
Fire Safety & Security Products
08.2007
Configuring SISTORE RemoteView
Selecting the user interface language
z The SISTORE RemoteView application software is started.
See Section "Starting SISTORE RemoteView", page 156.
z The SISTORE RemoteView application software is in configuration mode.
See Section "Opening configuration mode", page 159.
1. Select the System tab.
2. Select a language version from the Language dropdown list.
If you select the entry automatic, the SISTORE RemoteView application
software starts in the language set as the regional language in the operating
system.
3. Confirm the message that follows with OK.
4. Click Apply.
5. Select File -> Exit.
6. Restart the SISTORE RemoteView application software.
Î The SISTORE RemoteView application software now uses the selected
language.
Configuring the display area
Selecting the initial display mode
z The SISTORE RemoteView application software is started.
See Section "Starting SISTORE RemoteView", page 156.
z The SISTORE RemoteView application software is in configuration mode.
See Section "Opening configuration mode", page 159.
1. Select the System tab.
2. Mark the desired checkbox:
Name of the checkbox
Always in foreground
Start maximized
"Virtual guard" in full screen
mode
Function
The SISTORE RemoteView application software
will always be shown in the foreground and cannot
be covered up by another application.
The SISTORE RemoteView application software
will always be shown in the foreground and cannot
be covered up by another application.
The virtual guard will run in full screen mode. Only
video images will be visible.
See Section "Virtual guard", page 184.
3. Click Apply.
Î The setting will be saved.
163
Siemens Building Technologies
Fire Safety & Security Products
08.2007
Configuring SISTORE RemoteView
Configuring the live image change interval
z The SISTORE MX NVS application software is started.
See Section "Starting SISTORE RemoteView", page 156.
z The SISTORE MX NVS application software is in configuration mode.
See Section "Configuration mode", page 15.
1. Select the System tab.
2. In the field Switch camera group every select the period after which the switch
is made to the next camera group.
Switching times can be selected between 2 and 600 seconds.
3. Click Apply.
Î The setting will be saved.
System message configuration
In the View group field you can specify that the SISTORE RemoteView application
software is automatically shown in the foreground if an alarm occurs or motion is
detected.
z The SISTORE RemoteView application software is started.
See Section "Starting SISTORE RemoteView", page 156.
z The SISTORE RemoteView application software is in configuration mode.
See Section "Opening configuration mode", page 159.
1. Select the System tab.
2. Mark the checkbox Popup on alarm.
3. Mark the checkbox Popup on motion.
In the Audio signal group field you can specify that an audio file is played if an
alarm occurs or motion is detected.
1. Mark the checkbox Audio signal.
Î The Audio signal group field will be enabled.
2. Mark the checkbox Alarm sound.
Î The audio file will be shown in the text field.
3. Mark the checkbox Motion sound.
Î The audio file will be shown in the text field.
4. If you want to select another audio file, click the Open button.
Î The Open dialog will appear.
5. Select the desired audio file.
6. Click Open.
Î The audio file will be shown in the text field.
7. If you want to play the audio file to test it, click the Play button.
Î The audio file will be played.
8. Click Apply.
Î The setting will be saved.
164
Siemens Building Technologies
Fire Safety & Security Products
08.2007
Configuring SISTORE RemoteView
Enabling and disabling cameras
The available cameras of a server are shown in the camera list below the entries
for the connected servers.
Prerequisites
z The SISTORE RemoteView application software is started.
See Section 0 for further information.
z The SISTORE RemoteView application software is in display mode.
Fig. 136
Camera list
Enabling a camera
1. Right click on the camera in the camera list which you want to enable or disable.
Î The Cameras context menu will open.
2. Select Auto assign cameras.
NOTE:
The assignment of display windows takes place automatically with this function. A maximum of 36 live
images can be shown at the same time.
Disabling a camera
1. Right click on the camera in the camera list which you want to enable or disable.
Î The Cameras context menu will open.
2. Select Delete assignment.
165
Siemens Building Technologies
Fire Safety & Security Products
08.2007
Configuring SISTORE RemoteView
Configuring connections
Enabling automatic termination of the connection
With the Auto disconnect checkbox you can determine whether a user is
automatically logged out after a specified period of inactivity.
Prerequisites
z The SISTORE RemoteView application software is started.
See Section "Starting SISTORE RemoteView", page 156.
z The SISTORE RemoteView application software is in configuration mode.
See Section "Opening configuration mode", page 159.
1. Select the System tab.
2. Mark the checkbox Auto disconnect.
3. In the minute(s) of inactivity field, specify the time after which the automatic
logout is to occur.
NOTE:
The time specification can be set in the range of 1 – 300 minutes.
4. Click Apply.
Î The setting will be saved.
Enabling connection logging
In the Connection protocol group field, you can specify that logging takes place.
Prerequisites
z The SISTORE RemoteView application software is started.
See Section "Starting SISTORE RemoteView", page 156.
z The SISTORE RemoteView application software is in configuration mode.
See Section "Opening configuration mode", page 159.
1. Select the System tab.
2. Mark the checkbox Connection protocol.
3. Click the Open button.
Î The Select directory dialog will appear.
4. Select the desired folder.
NOTE:
It is recommended not to use a floppy disk drive, because the storage capacity is quickly used up.
You can select a network drive.
5. Click Select.
6. The Select directory dialog will close.
7. Click Apply.
Î The setting will be saved.
166
Siemens Building Technologies
Fire Safety & Security Products
08.2007
Configuring SISTORE RemoteView
Selecting the download directory
In the Download directory group field you can specify in which directory the
configuration files are saved that are received from the server and needed for the
remote configuration.
Prerequisites
z The SISTORE RemoteView application software is started.
See Section "Starting SISTORE RemoteView", page 156.
z The SISTORE RemoteView application software is in configuration mode.
See Section "Opening configuration mode", page 159.
1. Select the System tab.
2. Click the Open button.
Î The Select directory dialog will appear.
3. Select the desired folder.
NOTE:
It is recommended not to use a floppy disk drive, because the storage capacity is quickly used up.
4. Click Select.
5. The Select directory dialog will close.
6. Click Apply.
Î The setting will be saved.
Connecting to SISTORE MX NVS
In multi-server mode it is possible to observe live images and play back saved
ones from various servers via SISTORE RemoteView. Connections can be made
to up to 10 servers simultaneously. The connected servers and their cameras are
shown in the live image display. A maximum of 10 x 96 = 960 cameras can be
listed.
NOTE:
If multiple SISTORE RemoteView clients maintain a connection to the same servers simultaneously
there is a higher network load.
Prerequisites
z The SISTORE RemoteView application software is started.
See Section "Starting SISTORE RemoteView", page 156.
z The SISTORE RemoteView application software is in configuration mode.
See Section "Opening configuration mode", page 159.
You have two options for establishing a connection:
1. Click on the arrow next to the Connect button in the toolbar.
Î A menu with connections to the SISTORE MX NVS server will be displayed.
The upper section of the menu displays the links to up to 10 SISTORE MX NVS
servers that were dialled in last. This function is not available the first time a
connection is made, because the list shows a history of the connections.
The first ten entries of the address book are shown in the lower part of the
menu. The address book must be appropriately sorted to show the favored
connections here.
Î The connection will be established.
or
2. Open the address book.
See Section "Configuring the address book", page 168.
3. Select the desired connection.
4. Click OK.
Î The connection will be established.
167
Siemens Building Technologies
Fire Safety & Security Products
08.2007
Configuring SISTORE RemoteView
Enabling the CCTV keyboard
Selecting the serial interface
In the Connection protocol group field, you can specify that logging takes place.
NOTE:
The CKA driver must be installed.
Prerequisites
z The SISTORE RemoteView application software is started.
See Section "Starting SISTORE RemoteView", page 156.
z The SISTORE RemoteView application software is in configuration mode.
See Section "Opening configuration mode", page 159.
1. Select the System tab.
2. Mark the checkbox Operating panel.
3. Select the serial interface to which your operating panel is connected from the
COM field.
4. Click Apply.
Î The setting will be saved.
Enabling button delay
With the checkbox Button delay you can define the period after which input from
the CCTV keyboard is transmitted to the SISTORE RemoteView application
software.
Prerequisites
z The SISTORE RemoteView application software is started.
See Section "Starting SISTORE RemoteView", page 156.
z The SISTORE RemoteView application software is in configuration mode.
See Section "Opening configuration mode", page 159.
1. Select the System tab.
2. Mark the checkbox CCTV keyboard.
3. Select a value for the button delay in the field button delay.
4. Click Apply.
Î The setting will be saved.
Configuring the address book
Opening the address book
Prerequisites
z The SISTORE RemoteView application software is started.
See Section "Starting SISTORE RemoteView", page 156.
Opening the address book
You have two options for opening the address book:
z Click the Connect button in the toolbar.
Î The SISTORE RemoteView address book dialog box is opened.
or
z Select Connect from the File menu.
Î The SISTORE RemoteView address book dialog box is opened.
168
Siemens Building Technologies
Fire Safety & Security Products
08.2007
Configuring SISTORE RemoteView
Fig. 137
SISTORE RemoteView address book
Show all
Prerequisites
z The SISTORE RemoteView application software is started.
See Section "Starting SISTORE RemoteView", page 156.
z The address book is opened in the SISTORE RemoteView application software.
See Section "Opening the address book", page 168.
Mark the checkbox Show all.
Î The fields Duration and Cameras will be shown.
Fig. 138
SISTORE RemoteView address book
NOTE:
The field Duration is a function of the virtual guard. Here you can define how long the cameras of the
selected connection will be shown when the virtual guard function is enabled.
In the Name field you can enable the virtual guard function for the particular connection. See Section
"Virtual guard", page 184.
169
Siemens Building Technologies
Fire Safety & Security Products
08.2007
Configuring SISTORE RemoteView
Adding an entry
Prerequisites
z The SISTORE RemoteView application software is started.
See Section "Starting SISTORE RemoteView", page 156.
z The address book is opened in the SISTORE RemoteView application software.
See Section "Opening the address book", page 168.
button.
1. Click the Add new entry
Î The SISTORE MX address book entry window will open.
Fig. 139
SISTORE RemoteView address book entry window
2. Fill in the text fields description, server IP address and server port.
Note
Multiple entries can be made in the address book for an IP address. This makes it possible to
organize cameras in groups and show them via various connections.
In the text field server phone number only numbers and the characters ( ) and - are permitted.
Filling in the field server location is optional.
3. Select the desired connection type in the Connect via group field. The
appropriate conditions must be met for each connection type.
170
Siemens Building Technologies
Fire Safety & Security Products
08.2007
Configuring SISTORE RemoteView
Establishing a connection
1. Click the Setup connection button.
Î A connection will be established.
The progress display for the status of the data transmission is located in the middle
section of the status bar. By clicking on this section you can toggle between a view
of the progress and the display of the data transmission rate. The progress display
is no longer visible when transmission is completed.
Note
The remote access right is necessary for establishing a connection. Remote access also has to be
authorised in the configuration mode of SISTORE MX NVS in the "Allow network access" field.
2. Click OK.
Editing an entry
z The SISTORE RemoteView application software is started.
See Section "Starting SISTORE RemoteView", page 156.
z The address book is opened in the SISTORE RemoteView application software.
See Section "Opening the address book", page 168.
Click the Edit entry
button.
Î The SISTORE MX address book entry window will open. See Section "Adding
an entry", page 170 for information on editing options.
Deleting an entry
Prerequisites
z The SISTORE RemoteView application software is started.
See Section "Starting SISTORE RemoteView", page 156.
z The address book is opened in the SISTORE RemoteView application software.
See Section "Opening the address book", page 168.
Deleting individual entries
1. Click in the text field of the entry you want to delete.
2. Click the Delete entry button.
3. Confirm the message that follows with Yes.
Î The entry will be deleted.
Deleting all entries
1. Click the Delete all entries button.
2. Confirm the message that follows with Yes.
Î All the entries will be deleted.
171
Siemens Building Technologies
Fire Safety & Security Products
08.2007
Configuring SISTORE RemoteView
Sorting entries
Using the buttons Move up and Move down you can set the sequence of the
connections. This is used with the virtual guard and in the list for a quick
connection.
Prerequisites
z The SISTORE RemoteView application software is started.
See Section "Starting SISTORE RemoteView", page 156.
z The address book is opened in the SISTORE RemoteView application software.
See Section "Opening the address book", page 168.
1. Click the Move up button.
Î The entry will be moved upward.
2. Click the Move down button.
Î The entry will be moved downward.
3. Repeat steps 1 and 2 as often as required if you want to sort multiple entries.
Specifying the camera selection
Using the
button you can define a selection of cameras for which the live
images are to be shown after a connection is established.
NOTE:
A maximum of 16 cameras can be displayed simultaneously in the SISTORE RemoteView application
software. In the live picture, in contrast to SISTORE MX NVS the titles “REC“, “STOP“ or “DET“ are
not available.
z The SISTORE RemoteView application software is started.
See Section "Starting SISTORE RemoteView", page 156.
z The address book is opened in the SISTORE RemoteView application software.
See Section "Opening the address book", page 168.
1. Click on the desired connection.
Î The
button will be shown.
2. Click the
button.
Î The Select cameras window will open.
Î A connection to the selected server will be established in the background.
Î The "Please Wait" message window will be shown.
There are two options for how the cameras are shown in the Select cameras
window:
z The connection to the server has been established.
The cameras configured on the server are listed by name.
172
Siemens Building Technologies
Fire Safety & Security Products
08.2007
Configuring SISTORE RemoteView
Fig. 140
Select cameras – with server connection
or
z No connection to the server has been established.
A numbered list is shown for selecting the cameras. The camera names are only
shown if there is a connection to the server.
Note
In the numbered list, the numbers 1 to 64 are reserved for analog cameras, and the numbers 65 to 96
are reserved for network cameras.
Select cameras – without server connection
3. Tick the checkbox next to the desired camera.
4. Repeat this step as often as appropriate if you want to select multiple cameras.
Fig. 141
NOTE:
The options no camera and all cameras provide an option for editing the camera list quickly.
5. Click Apply.
Î The setting will be saved.
173
Siemens Building Technologies
Fire Safety & Security Products
08.2007
Configuring SISTORE RemoteView
Searching for SISTORE MX servers
Using the Search button you can search for SISTORE MX NVS servers in the
address book. Using the Scan network button you can search the local network
for a SISTORE MX NVS server.
Prerequisites
z The SISTORE RemoteView application software is started.
See Section "Starting SISTORE RemoteView", page 156.
z The address book is opened in the SISTORE RemoteView application software.
See Section "Opening the address book", page 168.
There are two possible ways to search for a SISTORE MX NVS server:
1. Click the Search button.
Î The address book will be searched for SISTORE MX NVS servers.
Î All existing SISTORE MX NVS servers on the network will be displayed.
or
2. Enter the port in the TCP/IP port text field.
NOTE:
The search is performed only on a specified port. If there are SISTORE MX NVS servers in the local
network with different ports, a search will have to be made for each port. This function is currently
available only for class C networks: yyy.yyy.yyy.xxx (where yyy entries are fixed, xxx is variable).
3. Click the Scan network button.
4. Confirm the message that follows with Yes.
Î The local network will be searched for SISTORE MX NVS servers.
Î All SISTORE MX NVS servers that are not yet listed in the address book will
be entered there automatically.
NOTE:
Due to limitations of the operating system Windows XP Service Pack 2 the scan network function
may take several minutes.
Map configuration
Opening and closing the map
Prerequisites
z The SISTORE RemoteView application software is started.
See Section "Starting SISTORE RemoteView", page 156.
1. Click the map display button
menu.
Î The map will open or close.
or select the map option from the View
NOTE:
The map can also be shown without a connection to a server. See Section "Selecting the map view",
page 178 for further information.
174
Siemens Building Technologies
Fire Safety & Security Products
08.2007
Configuring SISTORE RemoteView
Importing a map
Prerequisites
z The SISTORE RemoteView application software is started.
See Section "Starting SISTORE RemoteView", page 156.
z The SISTORE RemoteView application software is in configuration mode.
See Section "Opening configuration mode", page 159.
z There must be a connection to the server.
Click the Import button.
Î The Open dialog will appear.
1. Select the map to import.
2. Click Open.
Î The map will be imported.
NOTE:
Changes made to the configuration of the SISTORE MX NVS map must be entered manually
afterward in the map configuration of SISTORE MX RemoteView. Remote configuration of the map
on the server is not possible!
Changes made to the configuration of the SISTORE RemoteView map must be entered manually
afterward in the map configuration of SISTORE MX NVS. Remote configuration of the map on the
server is not possible!
Exporting a map
Prerequisites
z The SISTORE MX NVS application software is started.
See Section „Starting the SISTORE MX NVS application software“, page 12.
z The SISTORE MX NVS application software is in display mode.
z The SISTORE RemoteView application software is started.
See Section 0 for further information.
z The SISTORE RemoteView application software is in configuration mode.
1. Click on the map to export in the map list.
.
2. Click the Export button
Î The Save As... dialog will appear.
3. Select the directory in which to save the map as a *.map file.
NOTE:
You can save the map as a *.map file on an external data medium or
locally in the map directory on the RemoteView computer, for example:
C:\...\SISTORE MX REMOTEVIEW\Map.
4. Enter a name in the File name field.
5. Click Save.
– The Save As... dialog will close.
6. Click Apply.
Î The map will be saved.
NOTE:
Changes made to the configuration of the SISTORE MX NVS map must be entered manually
afterward in the map configuration of SISTORE MX RemoteView. Remote configuration of the map
on the server is not possible!
Changes made to the configuration of the SISTORE RemoteView map must be entered manually
afterward in the map configuration of SISTORE MX NVS. Remote configuration of the map on the
server is not possible!
175
Siemens Building Technologies
Fire Safety & Security Products
08.2007
Configuring SISTORE RemoteView
Setting the display area for video images
Prerequisites
z The SISTORE RemoteView application software is started.
See Section "Starting SISTORE RemoteView", page 156.
z The RemoteView client is connected to at least 1 server.
Select the desired image arrangement from the View menu.
Menu option
Auto matrix
1 – 36 cameras
Event view
Map
Fewer cameras
More cameras
Full screen
Status bar visible
System information visible
Function
Divides the display area automatically.
Depending on the number of cameras configured, up
to 36 camera images can be shown simultaneously.
The event view area will open.
The map will open.
The number of cameras shown will be reduced.
The number of cameras shown will be increased.
The display area will be shown in full screen mode.
The status bar will be shown.
The system information will be shown.
176
Siemens Building Technologies
Fire Safety & Security Products
08.2007
Configuring SISTORE RemoteView
Configuring the map
Prerequisites
z The SISTORE RemoteView application software is started.
See Section "Starting SISTORE RemoteView", page 156.
z The SISTORE RemoteView application software is in configuration mode.
See Section "Opening configuration mode", page 159.
1. Select the Map tab.
Î The following window will open:
Fig. 142
1
2
3
4
5
6
SISTORE RemoteView – configuration of the map
Objects group field
Export / Import group field
Server connection selection list
This dropdown list shows all addresses from the address book. A connection
to a server is made using the selection list. Afterward the objects available on
the server will be shown in the selection list. These are available for the
configuration of the SISTORE MX NVS RemoteView map.
Map display window
The selected map with the set objects will be shown in the display window.
The graphic of the selected map is not scaled. For a screen resolution of 1280
x 1024 pixels it is recommended that maps not exceed 800 x 600 pixels.
Map list
The map list shows all active maps in their hierarchy. A maximum of two levels
of hierarchy can be configured.
Layer group field
177
Siemens Building Technologies
Fire Safety & Security Products
08.2007
Configuring SISTORE RemoteView
Selecting the map view
View of the map without connection to a server
Prerequisites
z The SISTORE RemoteView application software is started.
See Section "Starting SISTORE RemoteView", page 156.
z There is no connection to a server.
Click the map display button
in the toolbar.
Î The following view of the map will appear:
Fig. 143
SISTORE RemoteView map without server connection
178
Siemens Building Technologies
Fire Safety & Security Products
08.2007
Configuring SISTORE RemoteView
View of the map with connection to a server
1. Select "Connect" from the file menu or click the corresponding button in the
toolbar.
Î The address book will open.
Fig. 144
SISTORE RemoteView address book
2. Select a connection.
3. Click the Connect button.
Î The following window will open:
Fig. 145
SISTORE RemoteView login dialog
4. Enter your user name and password.
5. Click OK.
Î The connection to the server has been established.
Note
No more than one connection to a server can be made at a given time.
179
Siemens Building Technologies
Fire Safety & Security Products
08.2007
Configuring SISTORE RemoteView
6. Click the map display button in the toolbar.
Î The following view of the map will appear:
Fig. 146
SISTORE RemoteView map with server connection
If you move the mouse pointer over an object in this view, the following object
information will be shown in an information field:
z Object name and description
z Server IP address and port
Fig. 147
Object information on the SISTORE MX NVS RemoteView map
Note
If there is no connection to the server only part of the information field is shown.
180
Siemens Building Technologies
Fire Safety & Security Products
08.2007
Configuring SISTORE RemoteView
Configuring SISTORE MX via SISTORE RemoteView
Configuring SISTORE MX via SISTORE RemoteView
SISTORE RemoteView can be used for remote configuration of a SISTORE MX
NVS server. This function corresponds to the function for importing a configuration,
except that a configuration file is sent by remote data transfer to the server.
NOTE:
Transmission errors should be detected by a checksum contained by the configuration file. If the
checksum is incorrect, the configuration will not be imported.
For changes to the configuration the same dialogs are used as in the SISTORE
MX NVS application software.
The functions of the dialogs and dialog elements are therefore the same.
The following limitations apply in this regard:
z It is not possible to display motion detection.
z Recording media (hard drive partitions) cannot be changed.
z A database directory cannot be specified.
z The language version cannot be changed.
z The option "Always in foreground" cannot be changed.
z The option "On-screen keyboard" cannot be changed.
z Network parameters cannot be changed.
Prerequisites
z The SISTORE RemoteView application software is started.
See Section "Starting SISTORE RemoteView", page 156.
z The SISTORE RemoteView application software is in configuration mode.
See Section "Opening configuration mode", page 159 for further information.
You have two options to configure a SISTORE MX NVS server:
z Option A: online, i.e. transmission of the configuration, changing of the
configuration, loading of the configuration, starting of the configuration on the
server.
or
z Option B: offline, i.e. an existing configuration is edited without a connection to
the server, then a connection is established and the configuration is sent to the
server.
Procedure for Option A
1. Select Configuration... from the Administration menu.
Fig. 148
SISTORE RemoteView – configuration path for the server
181
Siemens Building Technologies
Fire Safety & Security Products
08.2007
Configuring SISTORE RemoteView
2. Confirm the message that follows with Yes.
Fig. 149
SISTORE RemoteView – configuration option for the server
The configuration file will be transferred from the server and saved in the
download directory.
Î SISTORE RemoteView will switch to configuration mode.
Î The file will be opened automatically.
3. Change the configuration.
4. Click Apply.
5. Confirm the message that follows with Yes.
Î
Fig. 150
Î
Î
SISTORE RemoteView – sending the server configuration
The transmission will be performed.
After receiving the configuration, the server will import and apply it.
NOTE:
Recording will be stopped for a few seconds. The connection to RemoteView will be terminated.
6. Check whether the server is recording again and everything is running properly.
Î The transfer of a new configuration is recorded as information in the server's
logbook. The logbook will also indicate whether the server has accepted and
applied the new configuration.
NOTE:
If a configuration contains more cameras than are available on the recording system, only the first
cameras of the configuration will be applied. All further cameras will be ignored.
This also applies for objects that are in a configuration but are not physically present in the recording
system.
Settings which cannot be configured remotely, such as recording drives, network settings or deleting
or adding LAN cameras, will not be applied by the server from the new configuration. For these
parameters the existing settings will continue to be used. This is to avoid malfunctions.
Server crash due to remote configuration
1. The built-in Watchdog card will initiate a restart of the computer.
2. The SISTORE MX NVS unit will restart automatically.
Î The malfunction will possibly be corrected by the restart.
Malfunction due to remote configuration
If the server can be reached by remote data transfer, it can be restarted by the
SISTORE RemoteView application software.
182
Siemens Building Technologies
Fire Safety & Security Products
08.2007
Configuring SISTORE RemoteView
1. Select Restart system from the Action menu.
Procedure for Option B
1. Select Receive configuration from the File menu.
SISTORE RemoteView: File menu
Î The SISTORE RemoteView application software receives a copy of the
configuration from the SISTORE MX NVS server
Î The configuration can be edited without a remote data transfer connection.
Î Select Send configuration from the File menu.
Î You can select a file and send it to the SISTORE MX NVS server.
Fig. 151
Defining the detection area (mask)
Prerequisites
z The SISTORE RemoteView application software is started.
See Section "Starting SISTORE RemoteView", page 156.
z The SISTORE RemoteView application software is in configuration mode.
See Section "Opening configuration mode", page 159.
You can generate and change the detection area of cameras via remote
configuration. The drawing of the detection area is performed as in the
SISTORE MX NVS application software. See Section "Defining the detection area
(mask)", page 47.
NOTE:
The pencil drawing tool is not available.
If the camera is not in operation, the mask will be shown in a gray window. You can still draw the
mask, but this leads to a very inexact result.
Setting image quality
z The SISTORE RemoteView application software is started.
See Section 0 for further information.
z The SISTORE RemoteView application software is in configuration mode.
Quality of the video images
1. Click the View menu in playback mode.
2. Select the desired image quality.
NOTE:
If you have not selected an image quality, the default quality (LAN) of the system will be used.
There is no feedback from the system regarding detected motions (graphics, audio signals, signal
lamp).
183
Siemens Building Technologies
Fire Safety & Security Products
08.2007
Configuring SISTORE RemoteView
Changing user data
Prerequisites
z The SISTORE RemoteView application software is started.
See Section "Starting SISTORE RemoteView", page 156.
z The SISTORE RemoteView application software is in configuration mode.
See Section "Configuration mode", page 15.
z You have the user rights configuration, remote access and user administration.
You can change user data via remote configuration. However, for security reasons,
this is only possible with Option A (online).
See Section "Configuring SISTORE MX via SISTORE RemoteView", page 181.
The procedure is similar to that with the SISTORE MX NVS server. The changed
user data are transmitted to the SISTORE MX NVS server when the user
administration dialogs are closed.
Virtual guard
Starting and ending the virtual guard
Starting the virtual guard
You have several options to start the virtual guard:
With the mouse:
z Click the
button in the toolbar.
or
z Select Start virtual guard in the Administration menu.
or
z Using the command line:
Enter the following command in the command line: -vguard
or
Enter the following command in the command line: SistoreRemoteView.exe –
vguard
NOTE:
While the virtual guard rounds are running in SISTORE RemoteView it is not possible to make an
alarm connection to that RemoteView.
Ending the virtual guard
You have two options to end the virtual guard:
button in the toolbar.
1. Click the
or
1. Click the Administration menu in the toolbar.
2. Select the menu option End virtual guard.
Logging in to the server
Server login takes place automatically. However, the user rights for this automatic
login are very limited. Playback and configuration are not possible.
If you want additional rights:
.
1. Click Login
Î The SISTORE RemoteView login dialog will open.
2. Enter another user name in the User name text field.
3. Enter the appropriate password in the Password field.
184
Siemens Building Technologies
Fire Safety & Security Products
08.2007
Configuring SISTORE RemoteView
NOTE:
The virtual guard will be interrupted, i.e. there is no automatic disconnection and reconnection if the
user performs such an action.
Configuring the virtual guard
The virtual guard performs the following tasks:
z Establish connections to various recording systems in a specified sequence
automatically with time control
z Show specified cameras
z Terminate the connections after a specified time
The connection data are taken from the address book entries.
Prerequisites
z The SISTORE RemoteView application software is started.
See Section "Starting SISTORE RemoteView", page 156.
z The SISTORE RemoteView application software is in configuration mode.
See Section "Opening configuration mode", page 159.
z The address book contains connection entries.
See Section "Configuring the address book", page 168.
1. Select Connect from the File menu.
Î The SISTORE RemoteView address book window will open.
Fig. 152
SISTORE RemoteView address book
2. Mark the checkbox Show all.
Î The fields Duration and Cameras will be shown.
3. Click the Add new entry button.
Î The address book entry window will open.
185
Siemens Building Technologies
Fire Safety & Security Products
08.2007
Configuring SISTORE RemoteView
Fig. 153
SISTORE RemoteView address book entry window
4. Select one or more connections in the address book.
5. Click OK.
Î The address book will close.
Î The selected connections will be copied to the guard function and be
displayed in the configuration dialog of the virtual guard.
6. Set a connection duration in seconds for each connection.
7. Select the cameras for which the live images are to be shown after a connection
is established. See Section "Specifying the camera selection", page 172.
8. Change the sequence of the connections with the Move up and Move down
buttons.
NOTE:
The button Delete all entries deletes only the entries of the virtual guard. No entries from the address
book are deleted.
186
Siemens Building Technologies
Fire Safety & Security Products
08.2007
Configuring SISTORE RemoteView
Transmit and receive files
Using the file transfer function you can transfer files from the server to SISTORE
RemoteView and vice versa.
Prerequisites
z The SISTORE RemoteView application software is started.
See Section 0 for further information.
z There is a connection to a version 2.60 server.
Sending a file
1. Select the menu option File -> Send file....
Î The file transfer window will appear.
SISTORE RemoteView file transfer window
2. In the RemoteView group field, select the file you want to send.
3. Select the target directory in the Server group field.
4. Enter the file name in the text field in the Server group field.
Fig. 154
NOTE:
The name of the target file must match the name of the source file.
File transfer is only possible if the selected directory exists on the server and the file to transfer is not
opened. Thus the file SISTORE.exe cannot be transferred, for example.
5. Click OK.
Receiving a file
1. Select the menu option File -> Receive file....
Î The file transfer window will appear.
2. In the RemoteView group field, select the file you want to receive.
3. Select the source directory in the Server group field.
Click OK.
4.
187
Siemens Building Technologies
Fire Safety & Security Products
08.2007
Configuration of Windows system settings
Configuration of Windows system settings
Synchronizing the time with an NTP server
An NTP server always provides the current time. This is a cyclical synchronization
method, i.e. the time is updated at regular intervals. In order to synchronize the
time of the SISTORE MX NVS or client PC with an NTP server, the IP address of
the NTP server must be specified.
1. In the Windows Start menu, select Programs -> Accessories -> Command
Prompt.
Î The Command Prompt window will open.
1. Enter the following command in the command prompt window:
net time /setsntp:xxx.xxx.xxx.xxx (in place of "xxx.xxx.xxx.xxx" enter the IP
address of the NTP server.)
2. Restart the SISTORE MX NVS or enter the following command at the input
prompt of the SISTORE MX NVS:
net stop w32time
net start w32time
NOTE:
The IP address of a permitted server can be found on the Internet, or contact your system
administrator.
188
Siemens Building Technologies
Fire Safety & Security Products
08.2007
Configuration of Windows system settings
Changing the language version under Windows XP
1. Click the Windows Start menu.
2. Select Settings -> Control Panel.
Î The Control Panel window will open.
3. Click Date, Time, Regional and Language Options.
Î The Date, Time, Regional and Language Options window will open.
4. Click Regional and Language Options.
Î The Regional and Language Options window will open.
5. Select the Regional Options tab.
6. Make the following settings on the tab:
Standards and formats
Location
German (Germany)
Germany
7. Click Apply.
8. Select the Languages tab.
189
Siemens Building Technologies
Fire Safety & Security Products
08.2007
Configuration of Windows system settings
9. Click Details....
Î The following window will open:
190
Siemens Building Technologies
Fire Safety & Security Products
08.2007
Configuration of Windows system settings
10. Make the following settings on the Settings tab:
Default input language
German (Germany) - German
11. Click Apply.
12. Click OK.
Î The dialog will close.
13. Select the Advanced tab.
191
Siemens Building Technologies
Fire Safety & Security Products
08.2007
Configuration of Windows system settings
14. Make the following settings on the Advanced tab:
Language for non-Unicode programs
German (Germany)
15. Click Apply.
16. Click OK.
Î The system will restart.
192
Siemens Building Technologies
Fire Safety & Security Products
08.2007
Configuration of Windows system settings
Setting the date and time to the German format
Set the date and time to the German format.
1. Click the Windows Start menu.
2. Select Settings -> Control Panel.
Î The Control Panel window will open.
3. Click Date, Time, Regional and Language Options.
Î The Date, Time, Regional and Language Options window will open.
4. Click Date and Time.
Î The following window will open:
5. Select the Time Zone tab.
6. Select the desired time zone.
7. Mark the checkbox Automatically adjust clock for daylight saving changes.
8. Click Apply.
9. Click the OK button.
193
Siemens Building Technologies
Fire Safety & Security Products
08.2007
Video formats supported
Video formats supported
The image files created by SISTORE MX NVS have the file extension ".k26" or
".avi", depending on the setting. These are files in a format similar to AVI, though
the k26 files can only be viewed with the SISTORE Player. The AVI files can be
played back with any ordinary media player if an appropriate CODEC is installed in
the operating system.
The recordings have a resolution of 352 x 288 pixels (for normal picture quality)
and 704 x 288 pixels (for higher picture quality).
For more information, see Section 0 Selecting video resolution.
194
Siemens Building Technologies
Fire Safety & Security Products
08.2007
Index
Index
A
B
Access to live image
configuration:for network cameras, 44
Access to network camera
configuring, 44
Access to SISTORE MX
filtering, 31, 33
Acoustic system messages
activate, 93
Address book
use entry (SISTORE RemoteView), 185
Alarm connection
configuring ISDN alarm connection, 122
configuring network alarm connection, 121
Configuring time control, 123
Alarm input
adding, 61
configuring priority, 63
deleting, 62
level control activation/deactivation, 63
testing, 64
time control configuration, 64
trigger edge configuration, 62
Alarm output
adding, 56
deleting, 56
event-based control, 60
selecting switch action, 57
time-based control, 60
Audio signals for system events
activate, 93
Automated teller mode
activate, 127
IBM_PBM type configuration, 128
NCR type configuration, 134
settings of the IBM_PBM automated teller type,
130
settings of the NCR automated teller type, 135
settings of the SNI_DREBA automated teller
type, 139
SNI_DREBA type configuration, 137
Automatic camera positioning
for network cameras, 41
Automatic logout
activate, 94
Automatic recording on start
activate, 96
Backup
automatic backup, 113
clearing backup directory, 112
schedule, 112
Storage location, 111
type of recordings, 113
Bandwidth limitation
SISTORE MX application software, 27
Bank mode
activate, 125
configuring the number of recordings, 126
UVV group field, 126
C
Camera
adding (network camera), 36
Camera configuration dialog
opening (for network camera), 45
Camera control
automatic release, 43
Camera control timeout
defining, 43
Camera positioning
for network cameras, 41
Cash box mode
add cash box, 141
cash box monitoring configuration, 142
cash box monitoring parameters, 142
create new filter, 142
delete cash box, 141
delete filters, 143
exporting filters, 144
importing filters, 143
showing cash box data, 145
Change interval
configuring for live images, 90
Channel bundling (ISDN)
activate, 28, 29
Compression of recordings
configuring, 97
195
Siemens Building Technologies
Fire Safety & Security Products
08.2007
Index
Configuration
exporting, 150
importing, 150
printing, 152
reset, 149
showing configuration and system data overview,
153
Configuration file
receiving, 183
transfer, 181
Configuration mode
~ open, 15
Purpose, 15
Connection filter
configuring, 31, 33
D
Date format
setting, 193
Detection area
automatic determination, 48
Configuring time control, 50
copying, 49
draw, 47
Detection area for motion detection
defining, 47
Detection area time control
configuring, 50
Display area
setting initial arrangement, 87
E
E-mail notification
activate, 114
configuring the connection to the SMTP server,
116
Configuring time control, 118
entering recipient data, 117
in case of problem, 114
setting notification via the SMTP server, 115
test, 117
Encryption
enabling for recordings, 97
F
File extensions, 194
File transfer
SISTORE RemoteView, 187
Foreground display of the program window
activate, 95
Frame rate display
activate, 91
Framerate
for network cameras, 40
FTP server configuration, 123
G
Global user rights, 74
H
Holiday
creating, 146
deleting, 148
exporting, 149
importing, 147
I
Image quality
for network cameras, 39
setting (SISTORE RemoteView), 183
Image quality of network cameras, 19, 20, 35, 36
Image size for network cameras, 39
Initial screen
setting, 87
setting display mode, 87
ISDN dial-in
activate channel bundling, 29
configuring, 28
IVM control
activate, 84
K
k26 (file extension), 194
L
Language
setting, 86
Languages
subsequent installation, 86
Latency with network cameras, 20, 35
Layer
exporting, 68
importing, 67
Live image access protection
for network camera, 44
Live image change interval
configuring, 90
Logbook
deleting entries automatically, 83
enabling extended entries, 83
send excerpt automatically, 84
Login, 15
Longtime recording, 100
Low frame rate, 40
196
Siemens Building Technologies
Fire Safety & Security Products
08.2007
Index
M
Map
adding, 66
change camera icon, 71
change object, 70
change object position, 71
delete object, 72
deleting, 67
export layer, 68
import layer, 67
insert object, 69
Max. client access to SISTORE MX
defining, 26
Motion detection
configuring, 46
setting sensitivity, 47
N
Network access
allow, 26
Network accesses
filtering, 31, 33
Network camera
adding, 36
Delete, 37
Network cameras supported, 20, 35
O
Object
change position, 71
deleting, 72
Object
change, 70
Objects
insert, 69
On-screen keyboard
showing, 93
Operating panel control
configuring, 85
Overlay of camera data
configuring (network camera), 92
Overwriting of recordings
activating, 106
P
Pan/tilt control
for network cameras, 41
Password
assigning SISTORE MX start, 82
defining validity period, 81
extending validity period, 81
removing restriction validity, 82
Picture server
configuring, 30
IP address, 30
port, 30
Port number
edit, 26
Posttrigger, 100
Pretrigger, 100
PTZ network cameras, 41
R
Recording
resolution, 194
Recording modes, 99
example, 103
setting options, 100
Recording settings
transferring, 104
Recording status display
configuring, 89
Recordings
overwriting, 106
Reference image
save, 54
Regional and Language Options, 189, 193
Remote configuration, 181
Resolution of recordings
defining, 98
S
Sabotage detection
copy detection area, 53
defining the detection area, 52
draw detection area, 52
opening, 51
save reference image, 54
setting sensitivity, 52
SISTORE MX
password-protected start, 82
SISTORE Player, 194
SISTORE Remote View
adding a map, 175
adding an entry to the address book, 170
camera-specific functions, 159
changing user data, 184
configuring ISDN dial-in, 162
configuring network connection, 161
configuring the map, 177
configuring the virtual guard, 185
Connecting to SISTORE MX, 167
Defining the detection area, 183
deleting an entry in the address book, 171
Display area for video images, 176
197
Siemens Building Technologies
Fire Safety & Security Products
08.2007
Index
editing an address book entry, 171
enabling and disabling cameras, 165
enabling automatic termination of the connection,
166
enabling button delay, 168
enabling connection logging, 166
ending the virtual guard, 184
entering system name, 160
initial display mode selection, 163
language selection, 163
live image change interval configuration, 164
mask definition, 183
multi-server mode, 159
opening and closing the map, 174
opening configuration mode, 159
opening the address book, 168
program window, 156
Receiving a file, 187
searching for SISTORE MX server in the address
book, 174
selecting download directory, 167
selecting serial interface, 168
selecting the map view, 178
Send file, 187
server-specific functions, 159
setting image quality, 183
showing all entries in the address book, 169
single server mode, 159
SISTORE MX configuration, 181
sorting address book entries, 172
specifying camera selection in the address book,
172
starting, 156
starting the virtual guard, 184
status displays, 158
system message configuration, 164
Toolbar, 157
SMS notification
activate, 119
Configuring time control, 121
entering recipient data, 120
in case of problem, 119
Software trigger
activate, 84
Start display mode
defining, 87
Storage location
Backup, 111
clearing backup directory, 112
Database, 110
drives enabled for recording, 108
general information, 108
recordings, 109
use of network drives, 108
using maximum hard drive capacity, 109
System name
edit, 25
T
TCP/IP port range
defining, 26
Text overlay
configuring (network camera), 92
Time control
~ configuration, 16
~ import, 17
Time control file
~ exporting, 17
Time format
setting, 193
Track length limitation, 100
U
User account
automatic unlocking, 80
creating, 76
deleting, 79
locking, 79
manual unlocking, 80
User accounts
predefined, 81
User data
changing (SISTORE RemoteView), 184
User groups, 73
assigned rights, 73
User rights
camera-specific, 75
global, 74
V
Video server
see picture server, 30
Virtual guard
SISTORE Remote View, 184
SISTORE RemoteView, 185
W
Watchdog test, 155
198
Siemens Building Technologies
Fire Safety & Security Products
08.2007
Issued by
Siemens Building Technologies
Fire & Security Products GmbH & Co. oHG
D-76181 Karlsruhe
www.sbt.siemens.com
Document no.
A6V10072815
Edition
08.2007
© 2007 Copyright by
Siemens Building Technologies
Data and design subject to change without notice.
Supply subject to availability.