Download Vegas Pro
Transcript
Sony HDV Workflows
in Sony Vegas Pro 8
1 – Introduction . . . . . . . . . . . . . . . . . . . . . . . . . . . . . . . . . . . . . . . . . . .4
2 – Workflow Overview . . . . . . . . . . . . . . . . . . . . . . . . . . . . . . . . . . . . . .6
CompactFlash® Media & HVR-DR60
. . . . . . . . . . . . . . . . . . . . . . . . . . . . . . . . . . . . . . . .6
Key Workflow Features and Restrictions
System Requirements
Connections
. . . . . . . . . . . . . . . . . . . . . . . . . . . .7
. . . . . . . . . . . . . . . . . . . . . . . . . . . . . . . . . . . . . .7
. . . . . . . . . . . . . . . . . . . . . . . . . . . . . . . . . . . . . . . . . . .7
3 – Creating a Vegas® Software Project . . . . . . . . . . . . . . . . . . . . . . . . . .8
4 – Transferring Media to Local Hard Drive(s) . . . . . . . . . . . . . . . . . . . .10
4 – Transferring Media to
Local Hard Drive(s)
HDV™ Videotape
. . . . . . . . . . . . . . . . . . . . . . . . . . . . . .6
3 – Creating
a Vegas Project
Table of Contents
2 – Workflow
Overview
1– Introduction
HDV Workflows in Sony Vegas Pro 8
Use of the Sony Recording Unit Utility
. . . . . . . . . . . . . . . . . . . . . . . . . . . .11
Method 1: Dragging to Vegas Software Bin
. . . . . . . . . . . . . . . . . . . . . . . .11
Method 2: Using Vegas Software Import Media
. . . . . . . . . . . . . . . . . . . . . .11
Method 3: Using Vegas Software Special Import Module
From HVR-DR60
5 – Importing
Media Files
5 – Importing Media Files . . . . . . . . . . . . . . . . . . . . . . . . . . . . . . . . . . .11
. . . . . . . . . . . . . . . .12
. . . . . . . . . . . . . . . . . . . . . . . . . . . . . . . . . . . . . . . . .12
2
9 – Notes . . . . . . . . . . . . . . . . . . . . . . . . . . . . . . . . . . . . . . . . . . . . . . .18
7 – Adding Clips
to the Timeline
8 – Output to HDV Tape . . . . . . . . . . . . . . . . . . . . . . . . . . . . . . . . . . . .16
8 – Output
to HDV Tape
7 – Adding Clips to the Timeline . . . . . . . . . . . . . . . . . . . . . . . . . . . . . .15
9 – Notes
6 – Capturing HDV Video From Tape . . . . . . . . . . . . . . . . . . . . . . . . . .14
6 – Capturing HDV
Video From Tape
HDV Workflows in Sony Vegas Pro 8
3
1 – Introduction
This document explains how to work with HDV (MPEG2, Long GOP) based media utilizing
Vegas Pro 8 software. Three acquisition formats will be covered:
1 – Introduction
HDV Workflows in Sony Vegas Pro 8
• Sony HVR-DR60 Hard Disk Recording Unit
• Videotape
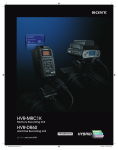
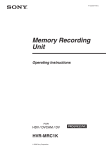
The Sony HVR-MRC1K Memory Recording Unit is an optional product for Sony's professional
HDV or DVCAM™ camcorders. It comes standard with the HVR-Z7U and HVR-S270U
camcorders. The HVR-MRC1K utilizes the widely-available standard CompactFlash card for
HDV, DVCAM, and DV file recording.
Table of Contents
• CompactFlash® media (via the Sony HVR-MRC1K Memory Recording Unit)
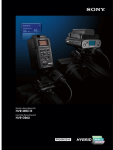
The HVR-DR60 is an optional hard disk recording unit for Sony's professional HDV and
DVCAM camcorders. Via an i.LINK®* cable connection, the HVR-DR60 can record HDV,
DVCAM, or DV streams from the camcorder and store them as video files. The internal hard
disk drive (HDD) offers a capacity of 60 GB, which translates into a recording time of
approximately 4.5 hours (270 minutes) for HDV, DVCAM, and DV formats.
These non-tape recording products offer “Hybrid recording” which records video on both
tape and non-tape media simultaneously. This Hybrid recording operation allows users to
have tape for archiving and files for NLE work at one time.
For HDV recordings, both the HVR-MRC1K and the HVR-DR60 record MPEG-2 files with the
extension “.M2T”. The file conforms to the HDV1080i specification in which MPEG-2 MP@H14 is used for its video codec and either MPEG-1 Audio Layer2 (for 2 ch) or MPEG-2 Audio
Layer2 (for 4 ch) is used for the audio codec.
The HVR-MRC1K and HVR-DR60 both use FAT32 for their file system, which allows a Windows
or Macintosh computer to recognize the recording media as an external drive without the
need for additional driver software. As FAT32 has a maximum file size of 4 GB
(approximately 20 minutes), recordings that exceed this capacity are automatically
recorded as separate new files.
In the HVR-MRC1K Memory Recording Unit, all files are stored in a single folder. Each file is
named according to the format: xx_nnnn_YYYY-MM-DD_HHMMSS.extension, as follows:
XX
A two-digit number (00 - 99) useful for numbering CompactFlash cards when more than
1 is used. This number can be changed via the menu of the HVR-MRC1K.
nnnn
A sequential clip number, incremented by one as each new recording begins.
*i.LINK is a trademark of Sony used only to designate that a product contains IEEE 1394 connector.
All products with an i.LINK connector may not communicate with each other. Please refer to the
documentation that comes with any device having an i.LINK connector for information on compatibility,
operating conditions and proper connection.
4
The HVR-DR60 folder structure differs from CompactFlash media in that the HVR-MRC1K
creates a new folder with an associated movie file each time a recording begins.
For long clips that exceed the FAT32 file size specification, subsequent files are stored in
the same folder.
For ingest into Vegas, the Sony Recording Unit Utility software (available as a free
download from the Sony Website) provides streamlined transfer of files from a
CompactFlash card or HVR-DR60. The software will reconnect M2T files that were
divided by FAT32, and will also rename HVR-DR60 files in the same style as those from a
CompactFlash card during the transfer.
Table of Contents
YYYY_MM_DD_HHMMSS
The date and time of the recording (which are derived from the date and time data
settings of the camcorder). Recordings separated due to FAT32 limitations will have new
time data, but retain the same clip number.
1 – Introduction
HDV Workflows in Sony Vegas Pro 8
Please note that the workflows outlined here represent just a few examples of how to
work with the HDV format, and that workflows can vary based on the project and/or
installation.
For more detailed information on any of the software or hardware mentioned in
this document, please refer to the manufacturer-supplied Operations Guide for the
associated product.
5
HDV Workflows in Sony Vegas Pro 8
2 – Workflow Overview
CompactFlash Media & HVR-DR60
1– Import MPEG2 (or DV) files from CompactFlash media, or HVR-DR60 Hard Disk
2– Edit
Table of Contents
3– Export to HDV videotape over i.LINK cable.
2 – Workflow
Overview
Recording Unit into Vegas software over i.LINK cable or USB 2.0.
HDV Videotape
4– Capture HDV videotape-based media into Vegas software over i.LINK cable.
5– Edit
6– Export to HDV videotape over i.LINK cable.
Note: It is also possible to import DV data from the CompactFlash card, HVR-DR60, or
videotape with the same workflow.
6
HDV Workflows in Sony Vegas Pro 8
Key Workflow Features and Restrictions
• Support for 1080 50/60i, 24/25/30p and 24pn
• Streamlined import of media from HVR-DR60
• Windows XP ® SP 2
• Sony Vegas Pro® 8.0c+
• Sony Recording Unit Utility software
• CompactFlash card reader or Memory Recording Unit from the camera,
mounted in an i.LINK Cradle (such as the Sony HVR-MRC1K/HVRA-CR1)
2 – Workflow
Overview
System Requirements
• Sony HVR-M35U or equivalent HDV recorder
Connections
• When using CompactFlash media, connect the CompactFlash reader via a
USB 2.0 cable or connect the memory recording unit cradle via an i.LINK
(Firewire) cable.
Table of Contents
• Sony HVR-DR60 Hard Disk Recording Unit
• When using the Sony HVR-DR60, connect via an i.LINK (Firewire) cable.
• When using HDV videotape, connect the camcorder or deck via an i.LINK
(Firewire) cable.
7
HDV Workflows in Sony Vegas Pro 8
3 - Creating a Vegas Software Project
1– Launch Vegas software.
3– In the New Project window, choose a template that closely matches the majority
of your material. Below are some examples:
Table of Contents
For HDV 1080i60 footage
3 – Creating
a Vegas Project
2– To create a new project, select File > New (or press CTRL + N).
For HDV 1080p/24A footage
8
HDV Workflows in Sony Vegas Pro 8
For 60i DV footage
Note: HDV native progressive format is not supported by the current version of
Vegas software.
4– Select OK.
Table of Contents
3 – Creating
a Vegas Project
For 60i DV anamorphic footage
5– Select File > Save (or CTRL + S) to name the project and save it to the computer
hard drive.
9
HDV Workflows in Sony Vegas Pro 8
4 – Transferring Media to Local Hard Drive(s)
Although Vegas software supports Direct Edit from CompactFlash and HVR-DR60, the
recommended ingest workflow is to first transfer the media to local hard drive(s) using the
Sony Recording Unit Utility (optional for the HVR-DR60, as explained below).
In the case of the HVR-DR60, a folder (e.g.,“100HDVF”) is created when recording begins,
and the recorded video is stored in that folder as a movie file (e.g.,“HDV10001.M2T”).
When a new recording is made, a new folder (e.g.,“101HDVF”) is created and a new file
(e.g.,“10101.M2T”) is stored within it. The Sony Recording Unit Utility transfers all of these
decentralized files to one specified folder on the HDD of the PC, eliminating the need to
open each folder to import the movie files to the NLE project.
Also, for HVR-DR60 files, the utility automatically changes the name of the transferred file,
according to the following format: “xx_nnnn_YYYY-MM-DD_HHMMSS”, as described in the
Introduction to this document.
Finally, the utility also connects divided .M2T files during transfer so they can be edited
precisely in the NLE as a single file without any pauses (in the case of DV files, no join
is necessary).
To transfer files, do the following:
2– Select the connected CompactFlash
card drive or HVR-DR60.
3– Select the file types (HDV and/or DV)
to be transferred.
4– Select the folders containing the files
to be transferred.
4 – Transferring Media to
Local Hard Drive(s)
1– Launch the Recording Unit Utility.
6– Set the prefix number of the file name.
(This number is useful when importing
files from several HVR-DR60 units).
7– Select the Import button to begin
the file transfer. Any files divided by
the FAT32 specification will be merged
automatically during the transfer.
Table of Contents
5– Specify a destination folder.
10
HDV Workflows in Sony Vegas Pro 8
5 – Importing Media Files
Use of the Sony Recording Unit Utility
Utilize the Sony Recording Unit Utility to transfer the media to the local hard drive(s) before
importing the files into Vegas software. Then import them in one of the following ways:
Method 1: Dragging to Vegas Software Bin
1– Use Windows Explorer ® to navigate to the folder where the transferred files
are stored.
2– Select the file(s) to import to the Vegas software project
1– Select File > Import > Media
5 – Importing
Media Files
Method 2: Using Vegas Software Import Media
Table of Contents
3– Drag the files to a Vegas software Bin
11
HDV Workflows in Sony Vegas Pro 8
2– Navigate to the folder where the transferred files are stored.
Note: Vegas software automatically filters-out the metadata files from the list of clips.
3– Do one of the following:
• To import all clips, select all of the M2T files.
• Selectively import files by highlighting specific clips.
4– Select Open (or press Enter).
Method 3: Using Vegas Software Special Import Module
Vegas software employs a special import module expressly for ingest from the HVR-DR60 or
a CompactFlash card from the HVR-MRC1K without using the Sony Recording Unit Utility.
Table of Contents
Note: Thumbnail View is not supported for M2T files.
media. To transfer/import individual files, use the Sony Recording Unit Utility to
transfer the files to local drive(s), followed by the Vegas “Import > Media” workflow
(as shown in the previous section).
5 – Importing
Media Files
Note: The following workflow imports all of the clips from the HVR-DR60/CompactFlash
12
HDV Workflows in Sony Vegas Pro 8
To import from the HVR-DR60/CompactFlash media, do the following:
1– Select a Bin.
2– Select File > Import > Hard Disk Recording Unit or Memory Recording Unit
3– Vegas software will automatically locate the recording units. Alternatively, you may
Table of Contents
browse to another location, such as a local disc where HVR-DR60/CompactFlash
media may have been archived to.
Select OK (or press Enter) to import the clips into the Vegas software Bin.
5 – Importing
Media Files
4–
13
6 – Capturing HDV Video from Tape
6 – Output
to HDV Tape
HDV Workflows in Sony Vegas Pro 8
2– Select the Capture Video icon
, located along the top of the Project Media
pane (or select File > Capture Video).
3– Select HDV or SDI for the Capture Format.
Table of Contents
1– Select the Project Media tab.
4– In the Capture pane, cue the tape to the desired location and enter pertinent
logging data.
5– Click the Record icon
6– Click the Play icon
to begin capturing.
to start tape playback.
7– Click the Record icon again to stop capturing.
For more detailed information, please consult the Vegas Software User Manual.
6
14
HDV Workflows in Sony Vegas Pro 8
7 – Adding Clips to the Timeline
Table of Contents
7 – Adding Clips
to the Timeline
There are a variety of methods for placing clips in the timeline, the easiest of which is to
simply drag the clip from the Project Media tab to the Timeline, as shown below:
Tips: It is possible to record HDV on tape and DV on CompactFlash media / HVR-DR60
simultaneously by using the built-in downconverter of a camcorder.
The DV file has uncompressed L-PCM audio data unlike HDV using compressed audio.
This means that you can use the DV file as high quality audio material if needed.
For more detailed information, please consult the Vegas Software User Manual.
15
HDV Workflows in Sony Vegas Pro 8
8 – Output to HDV Tape
1– In the Timeline, set In and Out points for the range to export.
2– Cue the HDV tape to a location suitable for recording.
8 – Output to
HDV Tape
3– Select Tools > Print Video to HDV Tape.
made automatically).
Table of Contents
4– Select the HDV device. (If there is only one connected device, the selection will be
5– Select Next (or press Enter).
16
HDV Workflows in Sony Vegas Pro 8
6– Choose a Device Control Mode.
Table of Contents
If Crash Recording was selected, the Sequence will be rendered and output to tape
automatically.
8 – Output to
HDV Tape
7– Select Finish (or press Enter).
17
HDV Workflows in Sony Vegas Pro 8
9 – Notes
• When archiving files from CompactFlash media or the HVR-DR60, maintain the
original folder structure.
• Perform a software “Eject” of the HVR-DR60 media prior to powering-down or
disconnecting the i.LINK cable.
Table of Contents
9 – Notes
• Perform a software “Eject” of the CompactFlash card prior to removing the card
from the reader.
©2009 Sony Electronics Inc. All rights reserved. Reproduction in whole or in part without written permission is prohibited. Sony, DVCAM and
i.LINK are trademarks of Sony. HDV and the HDV logo are trademarks of Sony Corporation and the Victor Company of Japan. CompactFlash
is a trademark of the CompactFlash Association. Vegas and Vegas Pro are trademarks of Sony Creative Software. Windows XP and Explorer
are trademarks of Microsoft Corporation.
18


