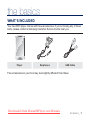
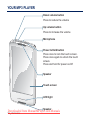
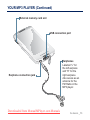
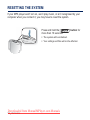
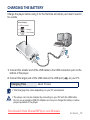
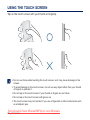
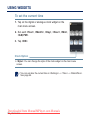
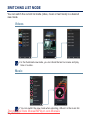
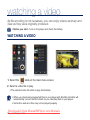
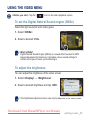
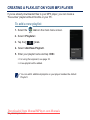
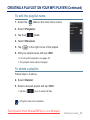
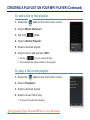
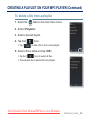
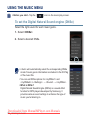
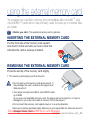
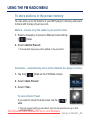
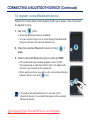
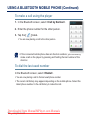
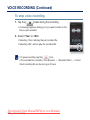
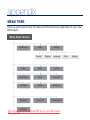
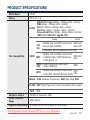
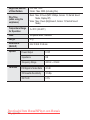
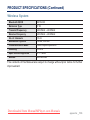
1
YP-M1 MP3 Player user manual imagine the possibilities Thank you for purchasing this Samsung product. To receive a more complete service, please register your product at www.samsung.com/register Downloaded from ManualMPlayer.com Manuals features of your new MP3 Player Good looking. Smart. Reliable. And lots of fun. Your new MP3 player is all this and more. Its state-of-the-art technology delivers rich sound, and vibrant pictures. You’ll love your new MP3 player, whether you’re exercising, downloading your favourite tunes, watching videos, or even listening to FM Radio. Use it once, and you’ll wonder how you ever lived without it. PUTTING THE “MULTI” IN MULTIMEDIA HANDY AND USEFUL WIDGETS! We call it an MP3 player, but it’s much more than that. It allows you to view pictures, text, videos and listen to FM radio. The built-in Bluetooth wireless technology turns your MP3 player into your own personal network. Place clock, calendar and other widgets on your main menu screen for your convenience, providing direct and easy access. You can change and decorate buttons and icons on the background. TACTILE TOUCHSCREEN ACOUSTIC WONDER Your MP3 player has a responsive touchscreen that reacts in a tactile way to your touch. You can experience various vibration effects. Your new MP3 player has built-in DNSe™ (Digital Natural Sound engine), Samsung’s unique sound technology created to deliver richer, deeper sound for an unbelievable listening experience. EXTERNAL MEMORY CARD Your MP3 player has a built-in memory slot compatible with microSDTM and microSDHCTM cards which are primarily used to back up or transfer files and data. Downloaded from ManualMPlayer.com Manuals safety information What the icons and signs in this user manual mean : Means that death or serious personal injury is a risk. WARNING CAUTION Means that there is a potential risk for personal injury or material damage. CAUTION To reduce the risk of fire, explosion, electric shock, or personal injury when using your MP3 player, follow these basic safety precautions: NOTE Means hints or referential pages that may be helpful to operate the player. Do NOT attempt. Do NOT disassemble. Do NOT touch. Follow directions explicitly. Unplug the power plug from the wall socket. Call the service centre for help. These warning signs are here to prevent injury to you and others. Please follow them explicitly. After reading this section, keep it in a safe place for future reference. Downloaded from ManualMPlayer.com Manuals safety information This manual describes how to properly use your new MP3 player. Read it carefully to avoid damaging the player and injuring yourself. Pay particular attention to the following serious warnings: PROTECT YOURSELF Do not disassemble, repair, or modify this product on your own. CAUTION Do not get the product wet or drop it in water. If the product gets wet, do not switch it on because you could get an electric shock. Instead, contact a Samsung Customer Service Centre near you. Do not use the product during a thunderstorm, as it may cause malfunction or a risk of electric shock. CAUTION Do not use the earphones while you are driving a bicycle, automobile or motorcycle. It can cause a serious accident, and furthermore, is prohibited by law in some areas. Using the earphones while walking or jogging on a road, in particular, on a crosswalk can lead to a serious accident. For your safety, make sure the earphone cable does not get in the way of your arm or other surrounding objects. WARNING Do not place the product in damp, dusty, or sooty areas because these environments could lead to fire or electric shock. Do not use the product if the screen is cracked or broken. Broken glass or acrylic could cause injury to your hand or face. Bring the product to a Samsung service center to replace the screen. Damage caused by careless handling will void the warranty. Downloaded from ManualMPlayer.com Manuals PROTECT YOURSELF WARNING Using earphones or headphones for an extended time may cause serious damage to your hearing. If you are exposed to sound louder than 85db for an extended time, you may adversely affect your hearing. The louder the sound is, the more seriously damaged your hearing may be (an ordinary conversation is between 50 to 60db and road noise is approximately 80db). You are strongly advised to set the volume level to medium (the medium level is usually less than 2/3 of the maximum). If you feel a ringing in the ear(s), lower the volume or stop using the earphones or headphones. Do not expose the battery to excessive heat such as sunshine, fire or the like. PROTECT YOUR MP3 PLAYER Do not leave the player in temperatures above 35°C (95°F), such as a sauna or a parked car. Do not cause excessive impact on the player by dropping it. Do not place heavy objects on top of the player. Prevent any foreign particles or dust from entering into the product. Do not place the product near magnetic objects. Be sure to backup important data. Samsung is not responsible for data loss. Use only accessories provided by or approved by Samsung. CAUTION CAUTION NOTE Do not spray water on the product. Never clean the product with chemical substances such as benzene or thinner, as it may cause fire, electric shock or deteriorate the surface. Failure to follow these instructions may lead to physical injuries or damage to the player. When printing this user manual, we recommend that you print in colour and check “Fit to Page” in the print option for better viewing. Downloaded from ManualMPlayer.com Manuals contents THE BASICS 11 11 12 14 15 16 16 17 17 18 18 19 20 24 26 28 33 35 36 38 39 40 41 42 43 44 45 What’s included Your MP3 player Resetting the system Charging the battery Caring for the battery Turning the Power on & off Controlling the volume Disabling the touch screen Browsing for files using “file browser” Deleting files with “file browser” Checking the status indicators Using the touch screen Setting the main menu display Widget icons Using widgets Using the Mini-player/Quick tray Using virtual keyboard Switching list mode Connecting to a TV Using screen rotation Changing the settings and preferences Sound Setting Options Display Setting Options Language Setting Options Time Setting Options System Setting Options Downloaded from ManualMPlayer.com Manuals contents EMODIO 47 WATCHING A VIDEO 52 LISTENING TO MUSIC 61 VIEWING PICTURES 75 47 48 50 51 PC requirements Using EmoDio Transferring files to removable disk Disconnecting from your PC 52 53 54 55 55 56 57 Watching a video Video playback display Touch icons for playback control Creating chapters Screen capture Using bookmarks Using the video menu 61 63 64 65 66 70 Listening by category Music playback display Touch icons for playback control Repeating a section Creating a playlist on your MP3 player Using the music menu 75 76 76 77 Viewing pictures Enlarging a picture Watching a slideshow Using the picture menu Downloaded from ManualMPlayer.com Manuals contents READING TEXT 80 USING THE EXTERNAL MEMORY CARD 83 80 81 82 Reading text Using bookmarks Using the text menu 83 83 84 Inserting the external memory card Removing the external memory card Playing a file in the external memory card To transfer a file in the memory card to the player Deleting a file in the external memory card To transfer a file in the player to the memory card 85 86 87 LISTENING TO FM RADIO 88 88 89 90 91 92 93 Listening to FM radio FM radio display To search for FM stations Recording FM radio Switching to preset or manual mode Using the FM radio menu PLAYING VIDEO GAMES 96 Playing video games 96 Downloaded from ManualMPlayer.com Manuals contents USING BLUETOOTH 102 SETTING THE ALARM 118 120 121 123 VIEWING DATACASTS VOICE RECORDING ENJOYING FLASH FILES 102 103 105 108 109 114 What is Bluetooth? Bluetooth settings Connecting a Bluetooth device Using a Bluetooth stereo headset Using a Bluetooth mobile phone Transferring files to/from a Bluetooth device 116 Checking Bluetooth devices 118 Setting the alarm 120 Viewing datacasts 121 Voice recording 123 Viewing flash files Downloaded from ManualMPlayer.com Manuals contents USING THE CALCULATOR 124 Using the calculator 124 VIEWING THE ADDRESS BOOK 125 Viewing the address book 125 TROUBLESHOOTING 127 Troubleshooting 127 APPENDIX 130 130 Menu tree 131 Product specifications 134 Licence Downloaded from ManualMPlayer.com Manuals the basics WHAT’S INCLUDED Your new MP3 player comes with these accessories. If you’re missing any of these items, please contact a Samsung Customer Service Centre near you. Player Earphones USB Cable The accessories in your box may look slightly different than these. Downloaded from ManualMPlayer.com Manuals the basics _ 11 YOUR MP3 PLAYER Down volume button Press to reduce the volume Up volume button Press to increase the volume Microphone Power & Hold button Press once to lock the touch screen. Press once again to unlock the touch screen. Press and hold for power on/off. Speaker Touch screen LED light Speaker Downloaded from ManualMPlayer.com Manuals 12 _ the basics YOUR MP3 PLAYER (Continued) External memory card slot USB connection port Earphone connection jack Downloaded from ManualMPlayer.com Manuals Earphones Labelled “L” for the left earpiece and “R” for the right earpiece. Also serves as an antenna for the FM Radio in the MP3 player. the basics _ 13 RESETTING THE SYSTEM If your MP3 player won’t turn on, won’t play music, or isn’t recognised by your computer when you connect it, you may have to reset the system. Press and hold the [ more than 10 seconds. ] button for The system will be initialized. Your settings and files will not be affected. Downloaded from ManualMPlayer.com Manuals 14 _ the basics CHARGING THE BATTERY Charge the player before using it for the first time and when you haven’t used it for a while. Screen Display <USB connected> < > - Charging < > - Fully Charged 2 1 1. Connect the smaller end of the USB cable to the USB connection port on the bottom of the player. 2. Connect the larger end of the USB cable to the USB port ( Charging Time ) on your PC. about 3 hours Total charging time varies depending on your PC environment. NOTE CAUTION The player can only be charged by connecting to your PC with the USB cable. Do not use a separate USB AC Adapter as it may not charge the battery or allow proper operation of the player. Downloaded from ManualMPlayer.com Manuals the basics _ 15 CARING FOR THE BATTERY Your battery will last longer if you follow these simple guidelines for caring and storing the player. • Recharge the battery within the temperature range of 5°C~35°C (40°F~95°F). • Do not overcharge (longer than 12 hours). Excessive charging or discharging may shorten the battery’s life. • Battery life naturally shortens slowly over time. NOTE If you are charging the player while it is connected to a laptop computer, make sure the laptop’s battery is also fully charged or that the laptop is plugged into its power source. TURNING THE POWER ON & OFF Turning the Power on Press and hold the [ ] button. Turning the Power off Press and hold the [ ] button. NOTE Your MP3 player will be automatically turned off when none of the buttons and icons have been pressed for 5 minutes in the pause mode. Downloaded from ManualMPlayer.com Manuals 16 _ the basics CONTROLLING THE VOLUME You can adjust the volume while a file is playing back. Press the [ ], [ ] button. DISABLING THE TOUCH SCREEN The Hold function disables the touch screen of your MP3 player, so that if you accidentally bump it while working out, for example-your music won’t be interrupted. 1. Press the [ ] button once. 2. Press the [ the hold function. ] button once again to release NOTE If you set to <All> in <Settings> ĺ <System> ĺ <Hold Option>, the touch screen and all the other buttons will be locked. See page 45. Downloaded from ManualMPlayer.com Manuals the basics _ 17 BROWSING FOR FILES USING “File Browser” Search easily for files using the “File Browser” function. 1. Select the icon on the main menu screen. 2. Select a desired folder to bring up the file list. 3. Select a desired file. The file will start playing. DELETING FILES WITH “File Browser” Follow steps 1-2 above. 3. Tap the [ ] icon. 4. Select <Delete>. 5. Select the file that you want to delete and tap <OK>. Tap the [ ] icon to select all files. The file will be deleted. NOTE You can delete a file directly in the file list of video and music modes as well as in the <File Browser>. The selected file cannot be deleted while it’s playing back. Once files are deleted, they cannot be recovered. Downloaded from ManualMPlayer.com Manuals CAUTION 18 _ the basics CHECKING THE STATUS INDICATORS The player’s current status indicators are displayed on the top of the screen. Alarm Indicator Lock Indicator Bluetooth Indicator Current Time Memory Card Indicator Battery Status The screen pictures are for illustration purposes only. The actual screen may differ. NOTE Downloaded from ManualMPlayer.com Manuals the basics _ 19 USING THE TOUCH SCREEN Tap on the touch screen with your thumb or fingertip. NOTE Do not use force when touching the touch screen, as it may cause damage to the screen. To avoid damage to the touch screen, do not use any object other than your thumb or fingers to operate it. Do not tap on the touch screen if your thumb or fingers are not clean. Do not tap on the touch screen with gloves on. The touch screen may not function if you use a fingernail or other instruments such as a ballpoint pen. Downloaded from ManualMPlayer.com Manuals 20 _ the basics USING THE TOUCH SCREEN (Continued) Tapping Tap on the desired part on the touch screen. Examples 1. To select an item or move to the next screen Run a function by tapping on its icon, or select 2. To display playback information and function icons Tap on the touch screen to display playback an item from the list. information and video, music, picture and text view icons. Downloaded from ManualMPlayer.com Manuals the basics _ 21 USING THE TOUCH SCREEN (Continued) Longer Touch Press and hold the desired part of the touch screen. Examples 1. Moving to the previous playback screen. Press and hold the or icon to play a recently played file or to move to the playback screen of the current file. Press and hold on the screen during video 2. Creating video chapters playback to create a total of 5 chapters for the current video. Downloaded from ManualMPlayer.com Manuals 22 _ the basics USING THE TOUCH SCREEN (Continued) Dragging Tap and drag your thumb or fingers to the desired point. Examples 1. Browsing the main menu screen 2. Moving to the previous/ next list 3. Controlling the Play Status Bar Drag on an empty space of the touch screen horizontally to browse the main menu screen. You can check the next/previous list by dragging vertically in the video and music menu screen. Tap the play status bar on the screen and drag your thumb or fingers to a desired point before releasing it. Drag horizontally while in video or music 4. Page Move / Playback Searching playback to skip backward / forward depending on the the horizontal stroke setting. Drag horizontally in the picture view screen to move to the previous / next picture. Drag horizontally in the text view screen to move to the previous / next page. While using widgets, select the main menu or 5. Moving Widget Icons widget icon to move and drag it to the desired point. Downloaded from ManualMPlayer.com Manuals the basics _ 23 SETTING THE MAIN MENU DISPLAY In the main menu, tap the [Ÿ] icon at the bottom to display a context menu where you can customize the main menu. 1 2 1 You can change the main menu style. 2 You can customize the main menu screen layout by moving each main menu icon to a desired location. 3 You can delete or add a widget icon from/to the main menu screen. 3 To change the main menu style Select a desired main menu style. Downloaded from ManualMPlayer.com Manuals 24 _ the basics SETTING THE MAIN MENU DISPLAY (Continued) To change the main menu screen layout Tap a main menu icon and drag it to a desired location/page. Drag the main menu icon to the lower menu bar to delete the icon from the main menu. To add / delete a widget icon Drag a widget icon from the widget bar to the main menu screen or drag it from the main menu screen to the widget bar. Downloaded from ManualMPlayer.com Manuals the basics _ 25 WIDGET ICONS A Widget is a small specialized GUI application on the screen that provides easy access to frequently used functions such as a clock, calendar and note. Place the clock, calendar and other widgets on your main menu screen for convenience, providing direct and easy access. Displays an analogue clock and shows the current time. The time can also be set. See page 28. Displays a digital clock and shows the current time. The time can also be set. See page 28. You can note and save a memo. See page 29. You can view the calendar and your schedules. See page 30. You can can check the current time of two major cities in the world. See page 31. You can view pictures saved in the player in slideshow mode. You can select a folder for a slideshow. See page 32. Tap the light bulb to adjust the brightness of the touch screen. You can set also the brightness in <Settings> <Display> <Brightness>. See page 42. Downloaded from ManualMPlayer.com Manuals 26 _ the basics WIDGET ICONS (Continued) Tap to schedule your sleep time. It will automatically turn the power off at the scheduled time. You can set also the sleep time in <Settings> ĺ <System> ĺ <Sleep>. See page 45. You can check the remaining capacity of the battery. You can listen to music or FM radio in the main menu screen without switching to music or FM radio mode. A decorative item showing a butterfly around a flower. A decorative item with floral leaves that flutter when tapped. A decorative item of a coffee cup that steams when tapped. A decorative item of a cookie that cracks a bit when tapped. Downloaded from ManualMPlayer.com Manuals the basics _ 27 USING WIDGETS To set the current time 1. Tap on the digital or analogue clock widget on the main menu screen. 2. Set each <Year>, <Month>, <Day>, <Hour>, <Min>, <AM, PM>. 3. Tap <OK>. Clock Option <Style>: You can change the style of the clock widget on the main menu screen. NOTE You can set also the current time in <Settings> <Time> <Date&Time>. See page 44. Downloaded from ManualMPlayer.com Manuals 28 _ the basics USING WIDGETS (Continued) To input a memo 1. Tap on the memo widget on the main menu screen. 2. Select <New Memo>. 3. Enter your memo and tap <OK>. For using the keyboard, see page 35. Memo options <Style>: You can change the style of the memo widget on the main menu screen. <Delete>: You can delete a stored memo. Set as Main Memo Displays a memo on the main menu screen. Downloaded from ManualMPlayer.com Manuals the basics _ 29 USING WIDGETS (Continued) To view the calendar/schedule You can check your schedules only when the schedule file(.ics file format) created using MS office outlook has been transferred to <File Browser> ĺ <My Pack> ĺ <Calendar> folder in the player. 1. Tap on the calendar widget on the main menu screen. 2. Select the desired month. Drag your thumb or fingers vertically to select a desired month. Drag your thumb or fingers horizontally to select a desired year. 3. Select a date with the schedule icon in the calendar. 4. Select a desired schedule. You can check your schedule. Calendar/Schedule options <Style>: Changes the style of the calendar widget on the main menu screen. <Delete All Schedule>: Deletes all saved schedules. A schedule cannot be created on the player. NOTE Downloaded from ManualMPlayer.com Manuals 30 _ the basics USING WIDGETS (Continued) To change the world time clock You can check the location and date/time of major world cities based on their respective time zone. Before you start - First, you should set the clock to the current time. See page 44. Set the time zone you want in the <Settings> <Time> <Time Zone>. See page 44. 1. Tap on the world time widget on the main menu screen. You can set the world time on both the top and bottom of the screen. 2. Select a desired time zone and tap <OK>. World Time Clock option <Style>: You can change the style of the world time widget on the main menu screen. Downloaded from ManualMPlayer.com Manuals the basics _ 31 USING WIDGETS (Continued) To watch a slideshow Tap on the slideshow widget on the main menu screen. The slideshow will start. During the slideshow, tap the screen once to display the icon where you set the options. Slideshow options <Select Slideshow Folder>: You can select a desired folder and have its pictures appear in a slideshow. The selected folder’s pictures are displayed in the slideshow at random. <Change Frame>: You can change the frame shape of the slideshow widget that appears in the main menu screen. Downloaded from ManualMPlayer.com Manuals 32 _ the basics USING THE MINI-PLAYER/QUICK TRAY To open the Mini-player/Quick Tray Tap on the top side of the touch screen. To close the Mini-player/Quick Tray Tap on the touch screen. To use the Mini-player You can listen to music or FM radio without moving to the music or FM radio mode by using the Mini-player. Tap the [ , , ] icon to skip forward and back and to pause playback. You cannot adjust the play status bar of the Mini-player. NOTE Downloaded from ManualMPlayer.com Manuals the basics _ 33 USING THE MINI-PLAYER/QUICK TRAY (Continued) To use the Quick Tray Provides quick access to the main menu, selecting sound output, Hold / Display off and Bluetooth stereo headset connecting. 1 2 3 4 1 Moves to the main menu screen. Sets the sound output to Speaker or Earphone. 2 3 ] (Auto), Select from the [ ] (Earphone), and [ ] [ (Speaker) icons. See page 41. Turn off the screen and lock the touch screen. This enables you to listen to the sound while saving battery power. This will automatically connect or disconnect a Bluetooth stereo headset. 4 If the Bluetooth stereo headset is not registered, you cannot connect to it. For more information, refer to <Using a Bluetooth Stereo Headset>. See page 108. Downloaded from ManualMPlayer.com Manuals 34 _ the basics USING VIRTUAL KEYBOARD You can use the virtual keyboard to enter text in the widget memo, enter your personal information and rename a Bluetooth device. To enter text Use the virtual keyboard to enter text and tap <OK>. The input mode will switch in the order of the button label characters. E.g. [Aa1]: The input mode switches in the order of Uppercase English Lowercase English Number. Moves the cursor backward / forward. You can delete the characters one at a time. You can add space between characters. You can insert line breaks. Deletes the entire text. The keyboard type differs depending on the use conditions. NOTE Downloaded from ManualMPlayer.com Manuals the basics _ 35 SWITCHING LIST MODE You can switch the current list mode (video, music or text mode) to a desired view mode. Videos NOTE In the thumbnail view mode, you can check the last run scene and play time of a video. Music You can switch the view mode when selecting <Album> in the music list. Downloaded from ManualMPlayer.com Manuals NOTE 36 _ the basics SWITCHING LIST MODE (Continued) Pictures Texts You can check the progress of the text you read. NOTE Downloaded from ManualMPlayer.com Manuals the basics _ 37 CONNECTING TO A TV Connect the player to your TV with an additional TV-OUT cable and view multimedia files, such as photos and videos, on the TV screen. Before you start - In <Settings> ĺ <System> ĺ <TV out Type>, set your TV out mode according to your area. See page 45. 1. Connect your player to a TV using a TV-OUT cable(optional). 2. Set the video/audio input source on your TV to match the corresponding cable connection. 3. Select a desired video or a photo on your player. 4. Tap the [ ] icon. 5. Select <TV out>. The TV screen displays the photo or video you are viewing on your player. In TV out mode, the sound outputs only from the TV speaker. NOTE Some features of your player may not be available when your player is connected to a TV. ] icon to exit the mode. In TV out mode, tap the [ Downloaded from ManualMPlayer.com Manuals 38 _ the basics USING SCREEN ROTATION The player is equipped with the three-axis sensor that detects the tilting angle to rotate the screen vertically or horizontally accordingly. Rotate your player sideways for horizontal view. NOTE This feature is available in some list screens and music, picture and text view modes. Downloaded from ManualMPlayer.com Manuals the basics _ 39 CHANGING THE SETTINGS AND PREFERENCES You can change the pre-set factory values to truly customize your MP3 player. 1. Select the icon on the main menu screen. 2. Select a desired item in the setting list. 3. Select a desired setting option. 4. Set the options you prefer. [Setting list] Downloaded from ManualMPlayer.com Manuals 40 _ the basics CHANGING THE SETTINGS AND PREFERENCES (Continued) Sound Setting Options You can set the master EQ, touch tone and wise volume, etc. Street Mode: Allows you to hear the music outdoors clearly by filtering out some of the street noise. Audio Upscaler: This function upscales audio so it sounds closer to its original condition. myDNSe: You can set DNSe options to your preference. You can set up to 2 myDNSe options. Vibe Woofer: You can experience various vibration effects according to the strength of the sound beat. You can set the option according to the music or video. Touch Tone: You can adjust the volume of the touch tone and vibration’s level. Notification/Alert tone: You can adjust the volume of the sound and vibration settings for alert and confirm pop-ups. Wise Volume: You can decrease the risk of hearing damage by setting the limit of the volume when using the earphones. If set to <On>, the warning message will be displayed if you have been exposed to higher volume levels for an extended time and automatically adjust the volume to moderate levels. The maximum volume level when wise volume is set to <Off> is 30. Even if you have selected <Off>, the volume will be set back to 15 to decrease the risk of hearing damage when you turn the player back on. Output: You can set the sound output to speaker or earphones. If you select <Auto>, you can hear sound through connected earphones when connected; otherwise, sound will be heard from the built-in speaker. Master EQ: You can optimize sound settings. Select the desired frequency and its level. Downloaded from ManualMPlayer.com Manuals the basics _ 41 CHANGING THE SETTINGS AND PREFERENCES (Continued) Display Setting Options Change the font, display off time and brightness of your screen, etc. Font: You can change the font type of the menu language. In some menu languages, <Font> menu will not be selected. Random Skin: You can set a picture file in <Pictures> <Skin> folder as your background skin at random when you turn on the player. For further information on saving pictures in the <Skin> folder, refer to page 78. Select <Assign> <My Skin> in the Picture menu after you set Random Skin to <On>, then the Random Skin automatically switches to <Off>. Reset My Skin: Initializes the background image of the touch screen to its default image. Select <Yes> to reset the background image. Reset Booting Image: Resets the booting image (image displayed when the player starts) to the default. Select <Yes> to reset the booting image. To set the booting image, refer to page 78. Display Off & Hold: If no buttons or icons are tapped within the preset time, the touch screen will automatically be turned off. When the touch screen turns off, it is locked. Brightness: You can adjust the brightness of the screen. LED Effect: You can set the LED light on or off. Downloaded from ManualMPlayer.com Manuals 42 _ the basics CHANGING THE SETTINGS AND PREFERENCES (Continued) Language Setting Options The menus on your new MP3 player can be set to appear in any one of the available languages. You can change your preference language easily. Menu: Set the menu language. Select from <English>, <䚐ạ㛨>, <Français>, <Deutsch>, <Italiano>, <襲莇蛑>, <ㅔԧЁ᭛>, <㐕储Ё᭛>, <Español>, <Ɋɭɫɫɤɢɣ>, <Magyar>, <Nederlands>, <Polski>, <Português>, <Svenska>, <ѳъѕ>, <ýeština>, <ǼȜȜȘȞȚțȐ>, <Türkçe>, <Norsk>, <Dansk>, <Suomi>, <Español(Sudamérica)>, <Português(Brasil)>, <Indonesia>, <TiӃng ViӋt>, <Ȼɴɥɝɚɪɫɤɢ>, <Romani>, <ɍɤɪɚʀɧɫɶɤɚ>, <Slovenšþina> or <Slovenský>. Contents: Set the language in which the track information and Text will appear. Select from <English>, <Korean>, <French>, <German>, <Italian>, <Japanese>, <Chinese(S)>, <Chinese(T)>, <Spanish>, <Russian>, <Hungarian>, <Dutch>, <Polish>, <Portuguese>, <Swedish>, <Thai>, <Finnish>, <Danish>, <Norwegian>, <Farsi>, <Afrikaans>, <Basque>, <Catalan>, <Czech>, <Estonian>, <Greek>, <Hrvatski>, <Icelandic>, <Romanian>, <Slovak>, <Slovene>, <Turkish> or <Vietnamese>. The supported languages can be changed or added. NOTE Downloaded from ManualMPlayer.com Manuals the basics _ 43 CHANGING THE SETTINGS AND PREFERENCES (Continued) Time Setting Options Setting the time allows you to use the date&time, date type and even time zone. Date&Time: Set the current date and time. Tap on the top or bottom of the digits of <Year>, <Month>, <Day>, <Hour>, <Min> and <AM, PM> icon to set the current time. Date Type: You can set the time display type for the world clock. Time Zone: You can check the current time by selecting an international city specific time zone. You must set the time zone before you can display the world time information. See page 31. Downloaded from ManualMPlayer.com Manuals 44 _ the basics CHANGING THE SETTINGS AND PREFERENCES (Continued) System Setting Options Choose the sleep timer and default setting that’s right for you. My Info: You can set your name and birth date. My Name Setting- Tap on the input area below the <My Name> and enter your name. For using the keyboard, see page 35. My Birthday Setting - Tap on the top or bottom of the digits of the <Year>,<Month>, <Day> icon below the <My Birthday> icon to set your birthday. Sleep: Turns off power automatically after the preset time. Auto Pivot: You can set the automatic screen rotation on or off. TV out Type: For displaying videos or photos stored in the player on a TV, you must select the same TV system (PAL/NTSC) to that of the connected TV. Hold Option: You can select the hold function to lock all buttons including the touch screen or the touch screen only. See page 17. Library Update: If a file name is displayed abnormally, set an appropriate language and select <Library Update> to correct the file name. Default Set: Returns all settings to the default value. Format: Formats the internal memory. Selecting <Yes> will format the internal memory and delete all files on the player. Check before formatting it. Downloaded from ManualMPlayer.com Manuals the basics _ 45 CHANGING THE SETTINGS AND PREFERENCES (Continued) System Setting Options (Continued) About: Checks the firmware version and memory capacity. Firmware - Displays the current firmware version. Memory - <Used> indicates the usage, <Remaining> indicates the remaining capacity and <Total> indicates the total memory capacity. NOTE You need to have at least 300 MB of free space on the player for the upgrade. Regarding the Built-In Memory 1GB=1,000,000,000 bytes : actual formatted capacity may be less as the internal firmware uses a portion of the memory. Downloaded from ManualMPlayer.com Manuals 46 _ the basics EmoDio EmoDio is a software application provided for this MP3 player for various content-related services as well as device support. EmoDio is subject to change without prior notice for further improvement. Before you start - For <EmoDio> installation, refer to the Quick Start Guide of the player. Connect the player to the PC, and run <EmoDio>. PC REQUIREMENTS Your PC system must meet the following minimum specifications in order to install and run EmoDio: • Windows 2000/XP/Vista • Windows Media Player 9.0 or higher • Pentium 500MHz or higher • Resolution 1024 X 768 or higher • Internet Explorer 6.0 or higher • DirectX 9.0 or higher Downloaded from ManualMPlayer.com Manuals EmoDio _ 47 USING EMODIO EmoDio is the easy-to-use software application that helps you organize your files on your PC. With your files already sorted and organized in EmoDio, you can quickly transfer them to your MP3 player without searching your entire hard drive for the right file. “EmoDio” file transfer is the easiest way to get files from your PC to your MP3 player. With “EmoDio”, you can create your own collection, or album, of audio files. You can transfer blog information and files registered on RSS to the player for your entertainment. Downloaded from ManualMPlayer.com Manuals 48 _ EmoDio USING EMODIO (Continued) Transferring files to the player with EmoDio 1. Connect the player to your PC with the USB cable. <EmoDio> will automatically start when the player is connected to your PC. 2. Click <My PC>. 3. Click <Add Folder> or <Add File> at the bottom of <EmoDio>. 4. Select a desired folder or file to add. The selected folder or file will be displayed in the file list of <EmoDio>. 5. Select the file to transfer from the list of <EmoDio>. 6. Click the [ ] icon. The file you selected is transferred to the player. CAUTION Do not disconnect the USB cable during file transfer. Disconnecting during transfer may damage the player or your PC. Connect the player to the computer directly rather than through a USB hub to avoid an unstable connection. NOTE For further information on <EmoDio>, click <MENU> ĺ <Help> ĺ <Help> on the top of the <EmoDio> program. Music recognition technology and related data are provided by Gracenote and Gracenote CDDB® Music Recognition ServiceSM. CDDB is a registered trademark of Gracenote. The Gracenote logo and logotype, the Gracenote CDDB logo and logotype, and the “Powered by Gracenote CDDB” logo are trademarks of Gracenote. Music Recognition Service and MRS are service marks of Gracenote. Downloaded from ManualMPlayer.com Manuals EmoDio _ 49 TRANSFERRING FILES TO REMOVABLE DISK When the player is connected to the PC, it will be recognised as removable disk where you can transfer desired files to and from the PC. Before you start - Connect the player to your PC. 1. Open files/folders to transfer on your PC. 2. Open <My Computer> <M1> on the desktop. 3. Select the files/folders to transfer from your PC and drag-and-drop them to a folder of your choice in the <M1>. The selected folders or files are transferred to the player. CAUTION The order of music files displayed in your PC may differ from the play order on your player. If you transfer a DRM (Digital Rights Management) file to the player, the file will not be played. NOTE Use FAT 32 for the file system when formatting the player on your PC. In Windows Vista, click Restore device defaults and format it. What is DRM? Digital Rights Management (DRM) is a technology and service to prevent the illegal use of digital contents and protect the profit and rights of copyright holders. DRM files are music files applied with copy protection technology. Downloaded from ManualMPlayer.com Manuals 50 _ EmoDio DISCONNECTING FROM YOUR PC Follow the steps below to prevent damage to the player and data when disconnecting from your PC. 1. Place the mouse cursor on top of the icon on the taskbar at the bottom right corner of the desktop and click the left mouse button. 2. Click the <Safely Remove USB Mass Storage Device Drive> message. 1 3. Disconnect the player from your PC. 2 CAUTION Do not disconnect the player from the PC during file transfer. This may cause damage to your PC or the player. You cannot safely disconnect the player while files within the player are being played on your PC. Please retry after file playback is finished. Downloaded from ManualMPlayer.com Manuals EmoDio _ 51 watching a video As file encoding is not necessary, you can enjoy videos as sharp and clear as they were originally produced. Before you start - Turn on the player and check the battery. WATCHING A VIDEO 1. Select the icon on the main menu screen. 2. Select a video file to play. The selected video file starts to play horizontally. NOTE When you download unsupported files to your player with EmoDio, EmoDio will automatically convert the file formats so you can play them in your player. Some Divx and wmv files may not be played properly. Downloaded from ManualMPlayer.com Manuals 52 _ watching a video VIDEO PLAYBACK DISPLAY Tap on the screen if you want to display the video playback information and icons. 1 6 2 7 3 4 8 5 9 1 DNSe Mode Indicator 6 Play/Pause/Search Indicator 2 Current /Total Play Time 7 File Name 3 Play Status Bar 8 Back Icon 4 Bookmark Icon 9 Menu Icon 5 Play/Pause/Search Icon The screen pictures are for illustration purposes only. The actual screen may differ. NOTE Downloaded from ManualMPlayer.com Manuals watching a video _ 53 TOUCH ICONS FOR PLAYBACK CONTROL Tap once 3 seconds after the current file started playing to play the beginning of the current file. Tap twice 3 seconds after the current file started playing to play the previous file. Press and hold to move backwards in the current file. Tap to pause during playback. Tap to resume playing. Tap to play the next file. Press and hold to move forwards in the current file. Downloaded from ManualMPlayer.com Manuals 54 _ watching a video CREATING CHAPTERS You can automatically create 5 chapters of the current video, of which you can then tap a desired chapter to move directly to it. 1. Press and hold the screen during video playback. Chapters will be created. 2. Select a desired chapter. The player starts playing the video from the selected chapter. To return to the previous screen, tap any area other than the chapters. SCREEN CAPTURE You can capture and save a desired scene during video playback. 1. Stop playing the video at a desired scene. 2. Tap the [ ] icon. The scene will be saved to <File Browser> ĺ <Pictures> ĺ <Captured> in the bmp format. Downloaded from ManualMPlayer.com Manuals watching a video _ 55 USING BOOKMARKS To set a bookmark Once you bookmark a specific scene that you want to see again, you can enjoy it at any time you want. ] icon at the scene you 1. Tap the [ want during video playback. 2. Select <Add Bookmark>. The currently played/stopped point is set to a bookmark. You will see the [ ] symbol on the play status bar. One bookmark can be set for each video file. NOTE The bookmark may be slightly different from the actual point you set. To move to (play) / remove the bookmark 1. Tap the [ screen. ] icon on the video playback 2. Select <Go to Bookmark> or <Delete Bookmark>. When you selected <Go to Bookmark> then it will move to the selected bookmark and start playing from that bookmark. <Delete Bookmark> will remove the selected bookmark from the video file. Downloaded from ManualMPlayer.com Manuals 56 _ watching a video USING THE VIDEO MENU Before you start - Tap the [ ] icon on the video playback screen. To set the Digital Natural Sound engine (DNSe) Select the right sound for each video genre. 1. Select <DNSe>. 2. Select a desired DNSe. NOTE What is DNSe? Digital Natural Sound Engine (DNSe) is a sound effect function for MP3 players developed by Samsung. It provides various sound settings to enhance the type of music you’re listening to. To adjust the brightness You can adjust the brightness of the video screen. 1. Select <Display> ĺ <Brightness>. 2. Select a desired brightness and tap <OK>. The brightness adjustment menu can only be adjusted in the video screen. NOTE Downloaded from ManualMPlayer.com Manuals watching a video _ 57 USING THE VIDEO MENU (Continued) To select the screen size You can select the display size of the video playback. 1. Select <Display> ĺ <Screen Size>. 2. Select a desired screen size. Screen Size Menu <Standard> <Full> <Zoom> For some video files, the screen size may not be adjusted. NOTE Downloaded from ManualMPlayer.com Manuals 58 _ watching a video USING THE VIDEO MENU (Continued) To view the subtitle You can play a video along with its subtitle if it is included. 1. Select <Display> ĺ <Subtitle> ĺ <View>. 2. Tap <On> or <Off>. Each tap of the <On> or <Off> toggles between subtitle on/off. Only the smi file format is supported for the subtitle. NOTE The name of the subtitle file should match that of the video file to play. - E.g. Video file: Video Track.avi / Subtitle file: Video Track.smi If the subtitle does not appear during video playback, the <Subtile> menu will not be selected. To adjust the subtitle synchronization If the subtitle runs faster or later than the video, you can adjust the sync time to match the two. 1. Select <Display> ĺ <Subtitle> ĺ <Sync>. 2. Select a desired time option and tap <OK>. NOTE If you exit the video mode after adjusting the subtitle sync, the sync time should be set again. Downloaded from ManualMPlayer.com Manuals watching a video _ 59 USING THE VIDEO MENU (Continued) To set the horizontal stroke You can fast forward through a file at various intervals when you touch the screen to the left or right. Skip a whole file or skip several seconds at a time. 1. Select <Horizontal Stroke>. 2. Select a desired horizontal stroke. When the <Seek> option is set, dragging your thumb or fingers to the left / right cycles through the <x2> ĺ <x4> ĺ <x8> playback speeds. NOTE The horizontal stroke interval can be different from the actual skip interval, depending on the file. To set the play speed Speed up or slow down your favourite video by adjusting the play speed. 1. Select <Play Speed>. 2. Select a desired play speed and tap <OK>. NOTE For some video files, the play speed may not be adjusted. You can not select <Play Speed> while the player is connecting to the Bluetooth stereo headset. To view video on the TV screen You can enjoy the current video on the TV screen. For more information, see page 38. Downloaded from ManualMPlayer.com Manuals 60 _ watching a video listening to music You can play and enjoy various music formats. Before you start - Turn on the player and check the battery. LISTENING BY CATEGORY 1. Select the icon on the main menu screen. 2. Select a desired item in the music list. 3. Select a music file to play. The music will start playing. Downloaded from ManualMPlayer.com Manuals listening to music _ 61 LISTENING BY CATEGORY (Continued) Music List File information including the artist name, album name, music title and genre will be displayed according to the ID3 Tag information on the appropriate music file. A file without an ID3 Tag is displayed as [Unknown]. Now Playing : Plays a recently played file or moves to the playback screen of the current file. Artists : To play by artist. Albums : To play by album. The album cover image will be displayed. Songs : To play in numeric or alphabetical order. For the recently played file or the current one, the [ ] symbol will appear in the right corner. Genres : To play by genre Playlists : To play by Playlist. Recently Added: : Shows 3 lists of recently added files by date. Recorded Files : Shows all recorded files. Music Browser : Shows all the music files stored in the Music Folder. NOTE What is an ID3 Tag? This is what is attached to an MP3 to carry information relevant to the file such as the title, artist, album, year, genre and a comment field. Downloaded from ManualMPlayer.com Manuals 62 _ listening to music MUSIC PLAYBACK DISPLAY Tap on the screen if you want to display the music playback icons. 8 1 Current track playing / Total number of tracks Indicator 2 Music Play Screen 3 Play Mode Indicator 4 Current /Total Play Time 5 Play/Pause/Search Icon 6 A-B Repeat Icon 7 Menu Icon 8 Play/Pause/Search Indicator 9 Parent Menu Indicator 10 Music Title 11 Play Status Bar 12 DNSe Mode Indicator 13 Back Icon 1 9 2 10 11 3 12 4 5 13 6 7 The screen pictures are for illustration purposes only. The actual screen may differ. NOTE Downloaded from ManualMPlayer.com Manuals listening to music _ 63 TOUCH ICONS FOR PLAYBACK CONTROL Tap once after 3 seconds of play to play the beginning of the current track. Tap twice after 3 seconds of play to play the previous file. Press and hold to move backwards in the current file. Tap to pause during playback. Tap to resume playing. Tap to play the next file. Press and hold to move forwards in the current file. NOTE When playing VBR files, the previous track may not play even if you tap the [ icon. Downloaded from ManualMPlayer.com Manuals 64 _ listening to music ] REPEATING A SECTION This function enables you to listen to specific parts of a track repeatedly. It’s helpful when learning a language, for example. ] icon at the beginning of the section you 1. Tap the [ want to repeat. The starting point is set and <A ļ > will appear. 2. Tap the [ ] icon again to set the ending of the section you want to repeat. <A ļ B> will appear and the specified section starts to play repeatedly. To cancel Repeating Tap the [ ] icon again during Section Repeat. Section Repeat will be canceled. NOTE Section Repeat will be automatically canceled in the following circumstances: - The starting point of the section repeat is set but the ending point is not set until after the current track ends. - The end point is set for less than 3 seconds of playback after the start point. Downloaded from ManualMPlayer.com Manuals listening to music _ 65 CREATING A PLAYLIST ON YOUR MP3 PLAYER If you’ve already downloaded files to your MP3 player, you can create a “Favourites” playlist without EmoDio or your PC. To add a new playlist 1. Select the icon on the main menu screen. 2. Select <Playlists>. 3. Tap the [ ] icon. 4. Select <Add New Playlist>. 5. Enter your playlist name and tap <OK>. For using the keyboard, see page 35. A new playlist will be added. NOTE You can add 4 additional playlists on your player besides the default Playlist1. Downloaded from ManualMPlayer.com Manuals 66 _ listening to music CREATING A PLAYLIST ON YOUR MP3 PLAYER (Continued) To edit the playlist name 1. Select the icon on the main menu screen. 2. Select <Playlists>. 3. Tap the [ ] icon. 4. Select <Rename>. 5. Tap [ ] in the right corner of the playlist. 6. Edit your playlist name and tap <OK>. For using the keyboard, see page 35. The playlist name will be changed. To delete a playlist Follow steps 1-3 above. 4. Select <Delete>. 5. Select a desired playlist and tap <OK>. Tap the [ ] icon to select all files. Playlist1 can not be deleted. NOTE Downloaded from ManualMPlayer.com Manuals listening to music _ 67 CREATING A PLAYLIST ON YOUR MP3 PLAYER (Continued) To add a file to the playlist 1. Select the icon on the main menu screen. 2. Select <Music Browser>. 3. Tap the [ ] icon. 4. Select <Add to Playlist>. 5. Select a desired playlist. 6. Select a file to add and tap <OK>. Tap the [ ] icon to select all files. The selected file will be added to the playlist. To play a file in the playlist 1. Select the icon on the main menu screen. 2. Select <Playlists>. 3. Select a desired playlist. 4. Select a music file to play. The music file will start playing. Downloaded from ManualMPlayer.com Manuals 68 _ listening to music CREATING A PLAYLIST ON YOUR MP3 PLAYER (Continued) To delete a file from a playlist 1. Select the icon on the main menu screen. 2. Select <Playlists>. 3. Select a desired playlist. 4. Tap the [ Tap [ ] icon. ] to add a file to the current playlist. 5. Select a file to delete and tap <OK>. Tap the [ ] icon to select all files. The selected file is deleted from the playlist. Downloaded from ManualMPlayer.com Manuals listening to music _ 69 USING THE MUSIC MENU Before you start - Tap the [ ] icon on the music play screen. To set the Digital Natural Sound engine (DNSe) Select the right sound for each music genre. 1. Select <DNSe>. 2. Select a desired DNSe. NOTE <Auto> will automatically select the corresponding DNSe mode if music genre information is included in the ID3 Tag of the music file. You can set DNSe options for <myDNSe1> and <myDNSe2> in <Settings> ĺ <Sound> ĺ <myDNSe>. What is DNSe? Digital Natural Sound Engine (DNSe) is a sound effect function for MP3 players developed by Samsung. It provides various sound settings to enhance the type of music you’re listening to. Downloaded from ManualMPlayer.com Manuals 70 _ listening to music USING THE MUSIC MENU (Continued) To set the play mode Select the playback mode from the options below. 1. Select <Play Mode>. 2. Select a desired play mode. Play Mode Options Normal: Plays all files of the current music list in order one time. Repeat: Repeats playing all files of the current music list. Repeat One: Repeats playing one file. Shuffle: Repeats playing all files of the current music list at random. Downloaded from ManualMPlayer.com Manuals listening to music _ 71 USING THE MUSIC MENU (Continued) To select the music play screen Choose a background image from those provided to be displayed as you listen to music. 1. Select <Music Play Screen>. 2. Select a desired music play screen and tap <OK>. Music Play Screen Options Album Art: The album cover image displays if it is included in the ID3 Tag information of the music file. Album cover images less than 2MB in data size are supported. Spectrum, Passionate, Sweet, Quiet, Cheerful: You can set various active images as a background image while listening to music. NOTE What is an ID3 Tag? This is what is attached to an MP3 to carry information relevant to the such as the title, artist, album, year, genre and a comment field. Downloaded from ManualMPlayer.com Manuals 72 _ listening to music USING THE MUSIC MENU (Continued) To set the horizontal stroke You can set the stroke interval of scrolling music file playback by dragging your thumb or fingers horizontally. 1. Select <Horizontal Stroke>. 2. Select a desired horizontal stroke. Select from <1 Song>, <5sec Skip>, <10sec Skip>, <30sec Skip> and <1min Skip>. This will set the amount of time that will be skipped each time you drag your finger while a music file is playing. NOTE The skip interval may differ from the actual interval, depending on the file. To add the current music file to the playlist You can add the current music file to a desired playlist. 1. Select <Add to Playlist>. 2. Select a desired playlist. The current music will be added to the playlist. Downloaded from ManualMPlayer.com Manuals listening to music _ 73 USING THE MUSIC MENU (Continued) To add to alarm sound You can add your favourite music file to the alarm sound list, so it can be heard the next time the alarm goes off. See page 118 to set the alarm. 1. Select <Add to Alarm>. 2. Select <Yes>. The current music will be added to the alarm sound list. NOTE A maximum of 3 music files can be added to the alarm sound. To set the play speed Speed up or slow down your favourite music by adjusting the play speed. 1. Select <Play Speed>. 2. Select a desired play speed and tap <OK>. NOTE You can not select <Play Speed> while the player is connecting to a Bluetooth stereo headset. Downloaded from ManualMPlayer.com Manuals 74 _ listening to music viewing pictures You can enlarge a picture or set a desired picture as a background image. Before you start - Turn on the player and check the battery. VIEWING PICTURES 1. Select the icon on the main menu screen. 2. Select a desired picture file. <Skin> is a folder where pictures set as background images are stored. See page 78. <Captured> is a folder where images captured in video mode are stored. See page 55. To move to the previous/next picture Tap [ , Tap the [ NOTE ] icon on the picture view screen. , ] icon for a landscape view. [ ] will be displayed if the picture files have the wrong thumbnail information. Some pictures may load slowly. Downloaded from ManualMPlayer.com Manuals viewing pictures _ 75 ENLARGING A PICTURE You can zoom in a picture. 1. Tap the [ ] icon on the picture view screen. The zoom bar appears. 2. Use the zoom bar to enlarge the picture as desired. NOTE To cancel the picture enlarging, tap once on the touch screen and ] icon. tap the [ To view the enlarged picture Drag the enlarged picture to move to the portion of the picture to magnify. WATCHING A SLIDESHOW You can play the pictures in a slideshow. Tap the [ ] icon on the picture view screen. The slideshow will start. You can also start the slideshow in picture preview mode. NOTE To stop the slideshow Tap on the screen in the slideshow mode. Downloaded from ManualMPlayer.com Manuals 76 _ viewing pictures USING THE PICTURE MENU Before you start - Tap the [ ] icon on the picture view screen. To set the slideshow effect You can set the transition effect for the way the current picture switches to the next one while watching a slideshow. 1. Select <Slideshow Effect>. 2. Select a desired slideshow effect and tap <OK>. To rotate a picture You can rotate a picture for your convenience. 1. Select <Rotate>. 2. Select a desired angle. Downloaded from ManualMPlayer.com Manuals viewing pictures _ 77 USING THE PICTURE MENU (Continued) Before you start - Select a desired picture and tap the [ picture view screen. ] icon on the To select a picture as a background image You can save a desired picture as a background image for the screen. 1. Select <Assign> ĺ <My Skin>. 2. Select <Yes>. The selected picture is set to the background image. To select a picture as a booting image You can set a desired picture to come up when booting up the unit. 1. Select <Assign> ĺ <Booting Image>. 2. Select <Yes>. The selected picture is set to a booting image. Downloaded from ManualMPlayer.com Manuals 78 _ viewing pictures USING THE PICTURE MENU (Continued) To transfer a picture to a Bluetooth device You can transfer picture files to a Bluetooth-compliant external device. 1. Select <Send>. 2. Select a desired Bluetooth device. If there is no Bluetooth device that you want in the list, tap ] icon to scan for new devices. See page 106. the [ 3. Confirm connection on the external Bluetooth device. The picture file will be transferred to the external Bluetooth device. To view a picture on the TV screen You can view the picture file on the TV screen. For more information, see page 38. Downloaded from ManualMPlayer.com Manuals viewing pictures _ 79 reading text Whether it’s a novel, the manuscript of a new story, or your research paper, your MP3 player allows you to read it… all while listening to music! Before you start - Turn on the player and check the battery. Set a preferred text language for text in <Settings> ĺ <Language> ĺ <Contents>. See page 43. READING TEXT 1. Select the icon on the main menu screen. 2. Select a desired text file. The text file is displayed in full screen. Tap on the screen if you want to display the text information and icons. To move to previous/next page Drag horizontally in the text view screen. Downloaded from ManualMPlayer.com Manuals 80 _ reading text USING BOOKMARKS To set a bookmark Set a bookmark to return to that point in the text at any time. ] icon at the desired page you want 1. Tap the [ while viewing a text file. 2. Select <Add Bookmark>. The current page will be bookmarked with the [ symbol displayed on the top in full screen. ] One bookmark can be set for each text file. NOTE To move to/remove the bookmark 1. Tap the [ ] icon on the text view screen. 2. Select <Go to Bookmark> or <Delete Bookmark>. When you select <Go to Bookmark>, it will move to the selected bookmark and <Delete Bookmark> will remove the selected bookmark from the text file. Downloaded from ManualMPlayer.com Manuals reading text _ 81 USING THE TEXT MENU Before you start - Tap the [ ] icon on the text view screen. To set the text viewer type Choose what type you’d like the text to appear. 1. Select <Text Viewer Type>. 2. Select a desired text viewer type and tap <OK>. To change the font size You can change the font size of the text. 1. Select <Font Size>. 2. Select a desired font size. Downloaded from ManualMPlayer.com Manuals 82 _ reading text using the external memory card Your player has a built-in memory slot compatible with microSDTM and microSDHCTM cards which are primarily used to back up or transfer files and data. Before you start - The external memory card is optional. INSERTING THE EXTERNAL MEMORY CARD Put the front side of the memory card upward and insert it to the end until you hear a click that indicates the card is securely installed. REMOVING THE EXTERNAL MEMORY CARD Press the end tip of the memory card slightly. The memory card will pop out from the slot. CAUTION Do not remove the memory card while using it. It may damage the card, as well as the player, and data stored in it. Your player accepts microSD or microSDHC cards up to 8GB. (If you use a incompatible memory card, the player will not recognize it, it may be damaged or you may not be able to remove it from the player.) Do not insert the memory card upside down or in a wrong direction. Be sure to backup important data. Samsung is not responsible for data loss due to a damaged memory card. Downloaded from ManualMPlayer.com Manuals using the external memory card _ 83 PLAYING A FILE IN THE EXTERNAL MEMORY CARD You can play pictures, videos, text and music files in the external memory card directly on the player. 1. Select the icon on the main menu screen. 2. Select a desired folder to bring up the file list. 3. Select a desired file. The file will start playing. icon : video file icon : music file icon : picture file icon : text file You can not play a file in formats that are not supported by the player. NOTE Some menu options will be disabled while you are playing a file in the memory card. CAUTION Downloaded from ManualMPlayer.com Manuals 84 _ using the external memory card TO TRANSFER A FILE IN THE MEMORY CARD TO THE PLAYER You can transfer a file in the memory card to the player. 1. Select the icon on the main menu screen. 2. Select a desired folder to bring up the file list. 3. Tap the [ ] icon. 4. Select <Copy>. 5. Select a desired file and tap <OK>. Tap the [ ] icon to select all files. 6. Select <Yes>. The selected file will be transferred to the player. To cancel the transfer, tap <Cancel>. NOTE The file transferred from the memory card will be saved in <File Browser> ĺ <Shared Data>. Downloaded from ManualMPlayer.com Manuals using the external memory card _ 85 DELETING A FILE IN THE EXTERNAL MEMORY CARD You can delete a file in the memory card directly on the player. 1. Select the icon on the main menu screen. 2. Select a desired folder to bring up the file list. 3. Tap the [ ] icon. 4. Select <Delete>. 5. Select a desired file and tap <OK>. Tap the [ ] icon to select all files. 6. Select <Yes>. The selected file will be deleted from the memory card. Downloaded from ManualMPlayer.com Manuals 86 _ using the external memory card TO TRANSFER A FILE IN THE PLAYER TO THE MEMORY CARD You can transfer a file in the player to the memory card. 1. Select the icon on the main menu screen. 2. Select a desired folder to bring up the file list. 3. Tap the [ ] icon. 4. Select <Copy to microSD card>. 5. Select a desired file and tap <OK>. Tap the [ ] icon to select all files. 6. Select <Yes>. The selected file will be transferred to the memory card. NOTE The file transferred from the player will be saved in the <Shared Data> folder of the memory card. Downloaded from ManualMPlayer.com Manuals using the external memory card _ 87 listening to FM radio You can listen to or record an FM radio program. Before you start - Connect the earphones, then turn on the player, and check the battery. LISTENING TO FM RADIO Select the icon on the main menu screen. FM radio reception will start. To use the Mute function 1. Tap the [ Tap the [ CAUTION ] icon while listening to FM Radio. ] icon once again to resume listening. Always connect your earphones to the player when searching or setting frequencies and listening to FM Radio. The earphones serve as antennas to receive FM Radio reception. In poor reception areas, the player may not find an available FM frequency. Downloaded from ManualMPlayer.com Manuals 88 _ listening to FM radio FM RADIO DISPLAY 6 1 7 2 8 3 9 12 10 4 5 11 [Manual mode] [Preset mode] 1 Manual Mode Icon 7 Previous Frequency Icon 2 Next Frequency Icon 8 Mute Icon 3 Current Frequency(MHz) Indicator 9 Frequency Location Indicator 4 Menu Icon 10 Frequency Scan Dial 5 Record Icon 11 Back Icon 6 Preset Mode Icon 12 Preset Frequency Icon The screen pictures are for illustration purposes only. The actual screen may differ. NOTE Downloaded from ManualMPlayer.com Manuals listening to FM radio _ 89 TO SEARCH FOR FM STATIONS Press and hold the [ , ] icon and then release in Manual mode. The search will stop at the frequency nearest from the point the icon is released. OR, Tap the [ , ] icon to progress through the frequencies one by one in Manual mode. Moves to frequencies whenever the icon is pressed. OR, In Manual mode, turn the frequency scan dial round as if drawing a circle. Downloaded from ManualMPlayer.com Manuals 90 _ listening to FM radio RECORDING FM RADIO To record FM Radio broadcasting You can record an FM radio program at any time while listening to the radio. Select a radio frequency to record on the FM Radio screen and tap the [ ] icon. The player starts recording. To stop recording 1. Tap the [ ] icon during the recording. A message appears asking you if you want to listen to the file you just recorded. 2. Select <Yes> or <No>. Selecting <Yes> will play the just recorded file. Selecting <No> will not play the recorded file. To pause recording, tap the [ NOTE ] icon. The recorded file is stored in <File Browser> ĺ <Recorded Files> ĺ <FM Radio>. Each recording file can be as long as 5 hours. Downloaded from ManualMPlayer.com Manuals listening to FM radio _ 91 SWITCHING TO PRESET OR MANUAL MODE To switch to Preset Mode Select this mode if you want to search through your saved FM presets one preset at a time. Tap [ NOTE ] in Manual mode. If no preset frequencies are set, the player will not switch to Preset mode. To switch to Manual Mode Select this mode if you want to manually search through the FM band one frequency at a time. Tap [ ] in Preset mode. Downloaded from ManualMPlayer.com Manuals 92 _ listening to FM radio USING THE FM RADIO MENU To store stations in the preset memory You can store up to 30 stations in your MP3 player’s memory and return to them with the tap of just one icon. Manual - choose only the stations you want to store 1. Select a frequency to preset in Manual mode and tap [ ] icon. 2. Select <Add to Preset>. The selected frequency will be added to the preset list. Automatic – automatically store all the stations the player receives 1. Tap the [ ] icon on the FM Radio screen. 2. Select <Auto Preset>. 3. Select <Yes>. To cancel Auto Preset If you want to cancel the auto preset, tap the [ icon. ] The auto preset setting is cancelled, and only frequencies set up to that point are stored. Downloaded from ManualMPlayer.com Manuals listening to FM radio _ 93 USING THE FM RADIO MENU (Continued) To listen to preset stations Select a desired preset frequency in Preset mode. You can listen to the stored radio frequency. To delete a preset You can remove a preset frequency from the preset list. 1. Tap the [ ] icon in Preset mode. 2. Select <Delete from Preset>. 3. Select a frequency to delete and tap <OK>. Tap the [ ] icon to select all preset frequencies. 4. Select <Yes>. The selected preset frequency is deleted. Downloaded from ManualMPlayer.com Manuals 94 _ listening to FM radio USING THE FM RADIO MENU (Continued) To set the FM region You can change an FM region setting in preparation for overseas travel. 1. Tap the [ ] icon on the FM Radio screen. 2. Select <FM Region>. 3. Select a desired FM region. Frequency range by region Worldwide USA Korea Japan Search for FM frequencies in 50 kHz increments between 87.50 MHz~108.00 MHz. Search for FM frequencies in 100 kHz increments between 87.5 MHz~108.0 MHz. Search for FM frequencies in 100 kHz increments between 76.0 MHz~108.0 MHz. 4. Select <Yes> or <No>. Select <Yes> to start the auto preset setting of the selected region and select <No> to change only the region. NOTE Your previously stored radio frequencies will be deleted when you change the <FM Region> on your player. FM region can be deleted or changed according to the target region of the player. Downloaded from ManualMPlayer.com Manuals listening to FM radio _ 95 playing video games Your MP3 player comes with exciting games already loaded! PLAYING VIDEO GAMES 1. Select the icon on the main menu screen. 2. Select a desired game. Games may be added or changed without notice. NOTE For more information, see the help section of the appropriate game. Downloaded from ManualMPlayer.com Manuals 96 _ playing video games PLAYING VIDEO GAMES (Continued) AstroRanger This is a rhythm beat game where you will gain scores by tapping the object-like button when a target object comes into the target zone according to the selected music. Select music, difficulty and button type when you start the game. You will gain more scores by purchasing items at the shop. Bubble Bang You have to gain scores by bursting as many bubbles as possible within the specified time. Tap or glide on the bubble to burst it. Downloaded from ManualMPlayer.com Manuals playing video games _ 97 PLAYING VIDEO GAMES (Continued) Omok2 To win this two person strategy board game, put your pieces in an unbroken row of five stones horizontally, vertically or diagonally before the opponent does. Tap on the area you want to put your stone, and the area is enlarged. Tap on the exact position to put your stone while the area is enlarged. Your stone is placed on the position. If you have not played your turn within the timeout, the turn goes to the opponent. NOTE To exit from the game screen in the middle of a round, tap on the bottom left corner of the touch screen. Downloaded from ManualMPlayer.com Manuals 98 _ playing video games PLAYING VIDEO GAMES (Continued) To play a 2-person Omok game in Bluetooth mode Before you start - If the player is connected to a Bluetooth stereo headset, mobile phone or external device, disconnect it first. Set the Bluetooth mode of the player to on. See page 103. 1. Run the <Omok2> on two YP-M1 models and select the <Double> mode. 2. Select <Wait> on one player and select <Connect> on the other player. YP-M1 appears on the YP-M1 selected <Connect>. 3. Select <YP-M1>. The Bluetooth connection is done and starts the 2-player battle. Downloaded from ManualMPlayer.com Manuals playing video games _ 99 PLAYING VIDEO GAMES (Continued) Pow Wow This is a shooting game where you can gain scores by shooting the moving target. Tap the moving target. If you want to reload your gun, tap <Reload> on the screen. Wise Star This is a puzzle game where you will gain space areas by aligning three planets in a raw horizontally or vertically, which will be exploded with a change to the background colour. Select a planet and replace it with a surrounding planet. The planets of [ ], [ ], [ ] and [ ] are bonus items that enable you to explode surrounding planets by tapping ] button twice. [ Downloaded from ManualMPlayer.com Manuals 100 _ playing video games PLAYING VIDEO GAMES (Continued) Sudoku Champ This is a board game where you have to fill numbers from 1 to 9 in each of not only the 9X9 rows and columns but also 3X3 small cells. Select an empty box and fill a number from 1 to 9 only one time each using the number pad below. Tap <Memo> to guess more than one number for an empty box and enter it. Tap <Menu> ĺ <Hint> to display the right number in the box. Tap <Menu> ĺ <Checkup> to check the box in which a wrong number is entered. Downloaded from ManualMPlayer.com Manuals playing video games _ 101 using bluetooth Using Bluetooth wireless, you can connect your player wirelessly to other Bluetooth devices and exchange data with them, talk hands-free or enjoy music using a Bluetooth stereo headset. WHAT IS BLUETOOTH? The Bluetooth device may cause a noise or malfunction, depending on the use conditions. Physical signal interference, for instance, if you hold the player in the hand and wear a stereo headset in your ears. When a part of the body is in contact with the receiving/transmitting system of the player or the Bluetooth device. Transmitting/receiving problems due to a wall, corner or office partitioning. Electrical interference from the same frequency-band devices including medical equipment, microwave oven and wireless LAN. When pairing the Bluetooth device with the player, make it as short a distance as possible. The farther the distance between player and Bluetooth device is, the worse the quality is. If the distance exceeds the limit, the communications are disconnected. We do not recommend you use text and picture view modes while listening to the music with the stereo headset as may can cause problems with both player performance and Bluetooth communications. In poor reception-sensitivity areas such as inside an elevator or underground, the Bluetooth connection may not work properly. The maximum distance that enables wireless connection between the player and the Bluetooth device is 10m. The connection will be automatically cut off if the distance is out of this range. Even within this range, the sound quality may be affected by obstacles such as walls or doors. Downloaded from ManualMPlayer.com Manuals 102 _ using bluetooth BLUETOOTH SETTINGS Check the Bluetooth settings of the player before using the function. Before you start - Select the icon on the main menu screen. To set on the Bluetooth mode You must set the Bluetooth mode to enabled if you want to connect the player to an external Bluetooth device. Tap the [ ] icon. When the Bluetooth mode is set to enabled, the indicator switches to the [ ] icon with the [ ] symbol. NOTE When not in use, set the <My Info> ĺ <Bluetooth> to <Off>. If you leave the <Bluetooth> <On>, the battery usage time is reduced. The Bluetooth features of the player are optimized with Samsung products. If used with third party products, the Bluetooth features may not work properly. Description of the Bluetooth icons : Bluetooth mode on : Connected to a stereo headset CAUTION : Connected to a mobile phone Do not use the Bluetooth function for illegal purposes (pirated copy of files, illegal wireless tapping and communications, etc. for commercial purposes). Samsung is not responsible for any of these illegal uses and the consequent results. Downloaded from ManualMPlayer.com Manuals using bluetooth_ 103 BLUETOOTH SETTINGS (Continued) Before you start - Tap the [ ] icon and tap the [ ] icon. To set off the Bluetooth mode 1. Select <My Info>. 2. Tap [ ] next to the Bluetooth item. The indicator switches to the [ symbol disappears. ] icon while the [ To rename a Bluetooth device You can rename a Bluetooth device in the device list. 1. Select <My Info>. 2. Tap the input box in the middle. 3. Rename the device. For using the keyboard, see page 35. Downloaded from ManualMPlayer.com Manuals 104 _ using bluetooth ] CONNECTING A BLUETOOTH DEVICE If you want to use the Bluetooth function, scan for a Bluetooth device and connect it with your player first. Before you start - First, set the Bluetooth mode of the player to enabled. Also set a desired Bluetooth device to Bluetooth-enabled mode. (refer to the Bluetooth device’s user manual) If the player is connected to a Bluetooth device already, disconnect it first. To set the search option You can search for Bluetooth devices that are available only in the selected Bluetooth service. 1. Tap the [ ] icon. 2. Select <Search Option>. 3. Select a desired Bluetooth service and tap <OK>. The player will scan for devices that are available only in the selected service. Downloaded from ManualMPlayer.com Manuals using bluetooth_ 105 CONNECTING A BLUETOOTH DEVICE (Continued) To register a new Bluetooth device Search for a new device and register it with your player. You only need to register it once. 1. Tap the [ ] icon. Scans for Bluetooth devices available. You can use the Page icon to scroll through the Bluetooth devices in the list and select a desired one. 2. Drag the selected Bluetooth device to the [ icon. ] 3. Select a desired Bluetooth service and tap <OK>. If the password input window appears, enter <0000>. If the password is other than 0000, refer to the Bluetooth device’s user manual for the password. When pairing is done, you will see the connection indicator ] icon. between device icon and [ NOTE The player will automatically try to connect to the Bluetooth device if you restart the player or the external Bluetooth device. Downloaded from ManualMPlayer.com Manuals 106 _ using bluetooth CONNECTING A BLUETOOTH DEVICE (Continued) To connect a registered Bluetooth device You can connect to a Bluetooth device directly, if it’s already registered with the player. 1. Select and drag a registered Bluetooth device to the ] icon. [ 2. Select a desired Bluetooth service and tap <OK>. You can use the Page icon in the upper right corner to scroll through the Bluetooth devices in the list and select a desired one. When pairing is done, you will see the connection indicator ] icon. between device icon and [ Downloaded from ManualMPlayer.com Manuals using bluetooth_ 107 USING A BLUETOOTH STEREO HEADSET You can use a Bluetooth stereo headset to enjoy music with high quality stereo sound, all without wires! To connect a Bluetooth stereo headset 1. Connect a desired Bluetooth stereo headset. For details, see pages 106 ~ 107. When the connection is successfully done, you will see the [ ] icon. 2. Play a file of your choice. You can listen to the music using a Bluetooth stereo headset. NOTE The Bluetooth function is not supported while you are listening to FM radio or playing games. For some video and music files, it may not work during playback. Use only a Bluetooth-certified stereo headset. This player may not be compatible with all Bluetooth stereo headsets. Bluetooth-compliant Stereo Headsets Company Model SAMSUNG YA-BS300, YA-BH270B Sony Ericsson HBH-DS200, HBH-DS970, HBH-DS980 MobiFren GBH-S100 MOTOROLA S9-HD I.Tech V20 Downloaded from ManualMPlayer.com Manuals 108 _ using bluetooth USING A BLUETOOTH MOBILE PHONE You can make and receive phone calls on your player once you connect a Bluetooth mobile phone. The player will function as a hands-free device. To connect a Bluetooth mobile phone Connect a desired Bluetooth mobile phone. When the connection is successfully done, you will see the [ NOTE ] icon. With some mobile phones, the search device and mobile conversation (placing/receiving calls) functions may not work properly. If you press a button on the mobile phone or make or end a call when there is a Bluetooth connection between the player and the mobile phone, you may hear a noise from the player. We recommended using English for the device name of the mobile phone. Downloaded from ManualMPlayer.com Manuals using bluetooth_ 109 USING A BLUETOOTH MOBILE PHONE (Continued) To make a call using the player 1. In the Bluetooth screen, select <Call by Number>. 2. Enter the phone number for the other person. 3. Tap the [ ] icon. You are now placing a call to the other person. NOTE If the connected mobile phone has set shortcut numbers, you can directly make a call on the player by pressing and holding the last number of the shortcut. To dial the last used number In the Bluetooth screen, select <Redial>. You are now placing a call to the last used phone number. The recent call history may appear depending on the mobile phone. Select the latest phone number in the call history to make the call. Downloaded from ManualMPlayer.com Manuals 110 _ using bluetooth USING A BLUETOOTH MOBILE PHONE (Continued) To make a call using the call history 1. In the Bluetooth screen, select <Call History>. 2. Select a desired phone number. You are now placing a call to the other person. To delete a phone number in the call history 1. In the <Call History>, tap the [ ] icon. 2. Select a phone number to delete and tap <OK>. 3. Select <Yes>. The selected phone number will be deleted. Downloaded from ManualMPlayer.com Manuals using bluetooth_ 111 USING A BLUETOOTH MOBILE PHONE (Continued) To answer the phone 1. You will see <Connect?> when you have an incoming call. 2. Select <Yes>. You can now make conversation. To switch to the mobile phone while talking on the player (YP-M1) While talking on the player, select <Voice to Phone>. You can now make conversation on the mobile phone. To switch to the player (YP-M1) while talking on the mobile phone While talking on the player, select <Voice to Hands-free>. You can now make conversation on the hands-free device. Downloaded from ManualMPlayer.com Manuals 112 _ using bluetooth USING A BLUETOOTH MOBILE PHONE (Continued) To adjust the volume While talking on the hands-free, press the [ adjust the volume. , ] button to To end the phone call Select <Disconnect> while making conversation. The call is hung up. Downloaded from ManualMPlayer.com Manuals using bluetooth_ 113 TRANSFERRING FILES TO/FROM A BLUETOOTH DEVICE You can transfer music, picture and video files to Bluetooth-compliant external devices such as an MP3 player, mobile phone, etc. to the player or vice versa. To transfer a file on the player to an external device Before you start - Check if the Bluetooth device supports the file transfer function. (refer to the device’s user manual) 1. Connect a desired Bluetooth device. For details, see pages 106 ~ 107. When the connection is completed, you will see the File Transfer screen. 2. Select a desired folder to bring up the file list. 3. Select a file to transfer and tap <OK>. The selected file on the player will be transferred to the external device. DRM files (chargeable) can not be played on the player. NOTE To cancel transferring the file Tap <Cancel> during the transfer. The file transfer is stopped. Downloaded from ManualMPlayer.com Manuals 114 _ using bluetooth Ex) <File Transfer> screen of the player TRANSFERRING FILES TO/FROM A BLUETOOTH DEVICE (Continued) To exit the File Transfer mode 1. Press and hold the [ ] icon in the file list window. Each time you tap the [ ] icon, the player will return to the previous screen and you will see the file transfer close window. 2. Select <Yes>. The file transfer mode is closed. To transfer a file in the external device to the player You can transfer files in an external Bluetooth device to your player. Before you start - If the player is connected to a Bluetooth device already, disconnect it first. For pairing the external device with and transferring it to the player, refer to the device’s user manual. When the Bluetooth connection window appears, select <Yes>. Files transferred to the player are saved in <File Browser> ĺ <Shared Data> folder. Downloaded from ManualMPlayer.com Manuals using bluetooth_ 115 CHECKING BLUETOOTH DEVICES To check the Bluetooth device that is connected You can check the name, address and services available of the connected Bluetooth device. 1. Select the connected Bluetooth device. 2. Tap the [ ] icon. 3. Select <Device Info>. You will see information on the selected device. Service items available in the selected device will be checked. Service Icons icon : Stereo headset icon : Mobile phone icon : File transfer Downloaded from ManualMPlayer.com Manuals 116 _ using bluetooth CHECKING BLUETOOTH DEVICES (Continued) To disconnect a Bluetooth device 1. Select the connected Bluetooth device. 2. Tap the [ ] icon. The Bluetooth device will be disconnected. To remove a registered Bluetooth device Before you start - If the player is connected to the Bluetooth device to remove, disconnect it first. 1. Select a device to remove in the device list. 2. Tap the [ ] icon. The selected device will be removed. Downloaded from ManualMPlayer.com Manuals using bluetooth_ 117 setting the alarm This player has an alarm which can be set to go off at a scheduled time. Before you start - First, you should set the clock for the current time. See page 44. SETTING THE ALARM 1. Select the icon on the main menu screen. 2. Select <New Alarm>. 3. Tap on the first item repeatedly to select the alarm frequency. 4. Tap on the second item. 5. Tap on the top or bottom of the digits of hour/minute and AM/PM icons to set your alarm time and tap <OK>. 6. Tap on the third item repeatedly to select the alarm sound. 7. Tap on the fourth item repeatedly to select the vibration type. 8. Tap on the fifth item repeatedly to set the alarm interval. 9. Tap <OK>. 10. Select <Yes>. The alarm setting is added to the alarm list. You can store up to 7 alarm settings. Downloaded from ManualMPlayer.com Manuals NOTE 118 _ setting the alarm SETTING THE ALARM (Continued) To turn off an alarm The player will sound the alarm when it reaches the scheduled time. To turn off the alarm, select <Alarm Off>. To delete an alarm setting 1. Tap [ ] icon on the alarm list screen. 2. Select an alarm setting to delete. Tap the [ ] icon to delete all of the alarm settings. 3. Tap <OK>. 4. Select <Yes>. The selected alarm will be deleted. If the player is connected to the PC, the alarm function does not work. CAUTION Downloaded from ManualMPlayer.com Manuals setting the alarm _ 119 viewing datacasts You can automatically receive updated information without having to visit your frequently visited news, blog and UCC sites every time. Before you start - Transfer a desired channel post to the player using <EmoDio>. VIEWING DATACASTS You can view channel posts added to <Datacasts>. 1. Select the icon on the main menu screen. 2. Select a desired channel title. icon : video file icon : music file icon : picture file icon : text file 3. Select a desired file. The selected file will start playing. Refer to the <Datacasts> of <EmoDio> for detailed instructions. NOTE Downloaded from ManualMPlayer.com Manuals 120 _ viewing datacasts voice recording You can make a voice recording. VOICE RECORDING To make a voice recording 1. Select the icon on the main menu screen. 2. Tap the [ ] icon. The player starts recording. CAUTION Do not put the microphone too close or far away from your mouth as it may cause a poor recording. Voice recording does not perform properly when the battery is low. Downloaded from ManualMPlayer.com Manuals voice recording _ 121 VOICE RECORDING (Continued) To stop voice recording 1. Tap the [ ] icon during the recording. A message appears asking you if you want to listen to the file you just recorded. 2. Select <Yes> or <No>. Selecting <Yes> will play the just recorded file. Selecting <No> will not play the recorded file. To pause recording, tap the [ NOTE ] icon. The recorded file is stored in <File Browser> ĺ <Recorded Files> ĺ <Voice>. Each recording file can be as long as 5 hours. Downloaded from ManualMPlayer.com Manuals 122 _ voice recording enjoying flash files You can enjoy viewing flash files(.swf file format). VIEWING FLASH FILES 1. Select the icon on the main menu screen. 2. Select a desired flash file. During playback, tap [ ] to display the direction buttons [Up, Down, Left, Right] with the <OK> (Enter) button. To use the stopwatch 1. Select the icon on the main menu screen. 2. Select a stopwatch flash file. Some swf files may not be supported. NOTE For some swf files, the player may turn off and restart while playing them. Downloaded from ManualMPlayer.com Manuals enjoying flash files _ 123 using the calculator The player includes a convenient calculator. USING THE CALCULATOR 1. Select the icon on the main menu screen. 2. Calculate numbers by tapping on the touch screen. Tap on the [ ] icon to display the numbers with the thousands separator (,). NOTE Downloaded from ManualMPlayer.com Manuals 124 _ using the calculator viewing the address book You can download a phone number address book using the Bluetooth function and directly call another person on the player. Before you start - First, use the Bluetooth-based file transfer function to download the address book from an external device. For more information, refer to <To transfer a file on the external device to the player>. See page 115. You must pair your mobile phone with the player before you make a call in the address book window. For more information, refer to <Using A Bluetooth Mobile Phone>. See page 109. VIEWING THE ADDRESS BOOK 1. Select the icon on the main menu screen. 2. Select a name to check in the Address Book screen. The selected address information will appear. The address book will be displayed in alphabetical order. NOTE The address book files transferred to the player are saved in <File Browser> ĺ <Shared Data> folder. Only the vCard file format is supported for the address book. Downloaded from ManualMPlayer.com Manuals viewing the address book _ 125 VIEWING THE ADDRESS BOOK (Continued) To make a call in the address book 1. Select a name to make a call in the Address Book screen. 2. Select a desired phone number. You are now placing a call to the other person. To insert a picture in the address book 1. In the address book, select a name in which you want to insert a picture. 2. Tap the [ ] icon. You will see the picture preview screen. 3. Select a desired picture. The photo will appear on the selected name of the address book. Downloaded from ManualMPlayer.com Manuals 126 _ viewing the address book troubleshooting If you have a problem with your new MP3 player, check for a solution in this list. If the problem persists, contact your local Samsung Customer Service Centre. PROBLEM SOLUTION Power will not turn on. • Power will not turn on if the battery is completely drained. Recharge the battery and turn the power on again. ] button for more than • Press and hold the [ 10 seconds to reset the player, and restart it. Buttons do not work. • Check if the HOLD function is set to lock all button operations. • Ensure that you press the right button and icon before trying. • Press and hold the [ ] button for more than 10 seconds to reset the player, and restart it. The screen will not turn on. • The screen may not be visible under direct sunlight. • When <Display Off & Hold> is selected from <Settings> ĺ <Display>, the touch screen will be turned off. Power is turning off. • Your MP3 player will be automatically turned off when none of the buttons and icons have been pressed for 5 minutes in the pause mode. Turn on the player again. Downloaded from ManualMPlayer.com Manuals troubleshooting _ 127 PROBLEM SOLUTION Battery life differs from what is stated in the manual. • The battery life can vary depending on the sound mode and display setting. • Battery life may be shortened when the player is left for extended periods in low or high temperatures. EmoDio Program Malfunction • Check if your PC meets the basic system requirements. Connection to your PC is disabled. • Check if the USB cable is correctly connected and try again. • Run Windows Update on your PC. Select Key Updates and Service Packs, then update all. Reboot your PC and reconnect. The file transfer rate is too slow. • If you have formatted the player on Windows 2000, the file transfer can be delayed. Format the player on Windows XP or Vista and try again. • If you are running multiple programs including <EmoDio> on your PC, the file transfer rate will be slow. Exit unnecessary programs and try transferring again. Player isn’t playing. • Check if the available file has been saved in the memory. • Check if the music file is damaged. • Check if there is enough battery power. File upload doesn’t work. • Check if the USB cable is securely connected. Reconnect if necessary. • Check if the memory is full. ] button for more than • Press and hold the [ 10 seconds to reset the player, and restart it. Downloaded from ManualMPlayer.com Manuals 128 _ troubleshooting PROBLEM SOLUTION Files or data are missing. • Check if the USB cable has been disconnected during file or data transmission. If this is the case, it may cause serious damage not only to files/data but also to the product. Samsung is not responsible for data loss. Abnormal play time display during play. • Check if the file is in Variable Bit Rate (VBR) format. Abnormal display of file name. • Go to <Settings> ĺ <Language> ĺ <Contents> in the Main Menu screen and set an appropriate language and update the library manually. The product is hot. • Heat may be generated during recharging. This has no effect on the product life or functions. A message appears while watching a video. • Try to download the video clip through EmoDio again. Bluetooth connections could not be made. • Check if the stereo headset is Bluetooth-certified. • The Bluetooth connection can be set off if you turn the player or stereo headset off and on. In this case, try to connect again. • If you want to talk on your mobile phone, check if you have set off the Bluetooth connections between player and stereo headset. Downloaded from ManualMPlayer.com Manuals troubleshooting _ 129 appendix MENU TREE Here’s a quick look at how the menus and functions are organized on your new MP3 player. Menu Select Screen File Browser Alarm Sound Settings Display Language Videos Music Pictures Flash Player Texts micro SD FM Radio Games Bluetooth Datacasts Voice REC Address Book Calculator Downloaded from ManualMPlayer.com Manuals 130 _ appendix Time System PRODUCT SPECIFICATIONS Model Name YP-M1 Rating DC 5.0V / 1 A AUDIO MPEG1/2/2.5 Layer3 (8kbps ~ 320kbps, 8kHz ~ 48kHz), WMA (8kbps ~ 320kbps, 8kHz ~ 48kHz), AAC-LC (16kbps ~ 256kbps, 8kHz ~ 48kHz), AAC-Plus (16kbps ~ 256kbps, 16kHz ~ 44.1kHz), Enhanced-AAC-Plus (16kbps ~ 56kbps, 32kHz ~ 44.1kHz), 16Bit linear PCM, FLAC, Ogg(Q0~Q10) Video AVI/ SVI File Compatibility VIDEO MP4 Audio ƒ MPEG4 (Max 720X480) Simple Profile MP3/AAC/ AAC+/AC3 ƒ Divx 4/5 (Max 720X480) ƒ H.264 (Max 1280X720) Baseline Profile AAC ƒ MPEG4 (Max 720X480) Simple Profile MP3/AAC/ ƒ H.264/AVC (Max 1280X720) Baseline AAC+ Profile @ level 1.3 WMV/ ƒ WMV7/8 (640X480) WMV9 Main ASF Profile (1280x720) WMA ƒ MPEG4 (Max 720X480) Simple Profile AAC/ MOV ƒ H.264 (Max 1280X720) Baseline Profile AAC+ IMAGE JPEG (Baseline, Progressive), BMP (Max 32bit), PNG FLASH SWF (Flash Player 8.0 or lower, ActionScript 2.0 or lower) TEXT TXT Earphone Output 20mW/Ch. (based on 16ȍ) Output Frequency Range 20Hz~20kHz Signal to Noise Ratio 91 dB with 20 kHz LPF(based on 1kHz 0 dB) Downloaded from ManualMPlayer.com Manuals appendix _ 131 Supported Number of Files/Folders File: Max. 5000 Folder : Max. 5000 (Including File) Play Time (when using the earphones) Music : Max. 30 hours (MP3 128kbps, Volume: 15, Normal Sound Mode , Display Off) Video : Max. 5 hours (Brightness 3, Volume: 15, Normal Sound Mode) Temperature Range for Operation -5~35°C (23~95°F) Case Tempered Glass, Stainless Weight 91 g Dimensions (WxHxD) 54.2 X 98.9 X 9.9 mm Speaker FM Radio Power Output 0.7W Impedance 8ȍ Frequency Range 400 Hz ~ 20 kHz FM Signal to Noise Ratio 40 dB FM Useable Sensitiivity 30 dB FM T.H.D 0.5% Downloaded from ManualMPlayer.com Manuals 132 _ appendix PRODUCT SPECIFICATIONS (Continued) Wireless System Bluetooth QD ID B015438 Emission Type F1D Transmit Frequency 2402MHz ~ 2480MHz Receive Frequency 2402MHz ~ 2480MHz No. of channels 79 ch Modulation System GFSK, 8DPSK Communication Mode Semi-duplex Operation Humidity 0~95% Spec Version Supported 2.1 + EDR Module BC06-ROM The contents of this Manual are subject to change without prior notice for further improvement. Downloaded from ManualMPlayer.com Manuals appendix _ 133 LICENCE The product player accompanying this user manual is licenced under certain intellectual property rights of certain third parties. This licence is limited to private non-commercial use by end-user consumers for licenced contents. No rights are granted for commercial use. The licence does not cover any product player other than this product player and the licence does not extend to any unlicenced product player or process conforming to ISO/IEC 11172-3 or ISO/IEC 13818-3 used or sold in combination with this product player. The licence only covers the use of this product player to encode and/or decode audio files conforming to the ISO/IEC 11172-3 or ISO/IEC 13818-3. No rights are granted under this licence for product features or functions that do not conform to the ISO/IEC 11172-3 or ISO/IEC 13818-3. “Protected by U.S. patents of Immersion Corporation. A list of applicable patents can be found on Immersion’s website at www.immersion.com.” Downloaded from ManualMPlayer.com Manuals 134 _ appendix CONTACT SAMSUNG WORLD WIDE If you have any questions or comments relating to Samsung products, please contact the SAMSUNG Customer Care Centre. Country CANADA MEXICO U.S.A ARGENTINE BRAZIL CHILE NICARAGUA HONDURAS COSTA RICA ECUADOR EL SALVADOR GUATEMALA JAMAICA PANAMA PUERTO RICO REP. DOMINICA TRINIDAD & TOBAGO VENEZUELA COLOMBIA Customer Care Centre 1-800-SAMSUNG(726-7864) 01-800-SAMSUNG(726-7864) 1-800-SAMSUNG(726-7864) 0800-333-3733 0800-124-421, 4004-0000 800-SAMSUNG(726-7864) 00-1800-5077267 800-7919267 0-800-507-7267 1-800-10-7267 800-6225 1-800-299-0013 1-800-234-7267 800-7267 1-800-682-3180 1-800-751-2676 1-800-SAMSUNG(726-7864) 0-800-100-5303 01-8000112112 BELGIUM 02 201 2418 CZECH REPUBLIC DENMARK FINLAND FRANCE GERMANY HUNGARY ITALIA LUXEMBURG NETHERLANDS NORWAY POLAND 800-SAMSUNG(800-726786) 8-SAMSUNG(7267864) 30-6227 515 01 4863 0000 01805 - SAMSUNG(726-7864 € 0,14/Min) 06-80-SAMSUNG(726-7864) 800-SAMSUNG(726-7864) 02 261 03 710 0900-SAMSUNG (0900-7267864) (€ 0,10/Min) 3-SAMSUNG(7267864) 0 801 1SAMSUNG(172678), 022-607-93-33 Downloaded from ManualMPlayer.com Manuals Web Site www.samsung.com/ca www.samsung.com/mx www.samsung.com/us www.samsung.com/ar www.samsung.com/br www.samsung.com/cl www.samsung.com/latin www.samsung.com/latin www.samsung.com/latin www.samsung.com/latin www.samsung.com/latin www.samsung.com/latin www.samsung.com/latin www.samsung.com/latin www.samsung.com/latin www.samsung.com/latin www.samsung.com/latin www.samsung.com/latin www.samsung.com.co www.samsung.com/be (Dutch) www.samsung.com/be_fr (French) www.samsung.com/cz www.samsung.com/dk www.samsung.com/fi www.samsung.com/fr www.samsung.de www.samsung.com/hu www.samsung.com/it www.samsung.com/lu www.samsung.com/nl www.samsung.com/no www.samsung.com/pl Country PORTUGAL SLOVAKIA SPAIN SWEDEN U.K EIRE AUSTRIA Customer Care Centre 80820-SAMSUNG(726-7864) 0800-SAMSUNG(726-7864) 902-1-SAMSUNG (902 172 678) 0771 726 7864 (SAMSUNG) 0845 SAMSUNG (7267864) 0818 717 100 0810-SAMSUNG(7267864, € 0.07/min) SWITZERLAND 0848-SAMSUNG(7267864, CHF 0.08/min) RUSSIA KAZAKHSTAN UZBEKISTAN KYRGYZSTAN TADJIKISTAN UKRAINE BELARUS MOLDOVA LITHUANIA LATVIA ESTONIA AUSTRALIA NEW ZEALAND CHINA 8-800-555-55-55 8-10-800-500-55-500 8-10-800-500-55-500 00-800-500-55-500 8-10-800-500-55-500 8-800-502-0000 810-800-500-55-500 00-800-500-55-500 8-800-77777 8000-7267 800-7267 1300 362 603 0800 SAMSUNG (0800 726 786) 400-810-5858, 010-6475 1880 HONG KONG 3698-4698 INDIA INDONESIA MALAYSIA 3030 8282, 1800 110011, 1800 3000 8282 0800-112-8888 1800-88-9999 1-800-10-SAMSUNG(726-7864) 1-800-3-SAMSUNG(726-7864), 1-800-8-SAMSUNG(726-7864), 02-5805777 1800-SAMSUNG(726-7864) 1800-29-3232, 02-689-3232 0800-329-999 1 800 588 889 444 77 11 0860-SAMSUNG(726-7864 ) 800-SAMSUNG (726-7864), 8000-4726 PHILIPPINES SINGAPORE THAILAND TAIWAN VIETNAM TURKEY SOUTH AFRICA U.A.E Downloaded from ManualMPlayer.com Manuals Web Site www.samsung.com/pt www.samsung.com/sk www.samsung.com/es www.samsung.com/se www.samsung.com/uk www.samsung.com/ie www.samsung.com/at www.samsung.com/ch www.samsung.com/ch_fr/(French) www.samsung.ru www.samsung.com/kz_ru www.samsung.com/kz_ru www.samsung/ua www.samsung.com/ua_ru www.samsung.com/lt www.samsung.com/lv www.samsung.com/ee www.samsung.com/au www.samsung.com/nz www.samsung.com/cn www.samsung.com/hk www.samsung.com/hk_en/ www.samsung.com/in www.samsung.com/id www.samsung.com/my www.samsung.com/ph www.samsung.com/sg www.samsung.com/th www.samsung.com/tw www.samsung.com/vn www.samsung.com/tr www.samsung.com/za www.samsung.com/ae Downloaded from ManualMPlayer.com Manuals REV. 0.0