1
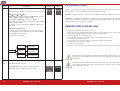
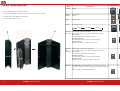
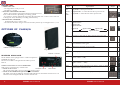
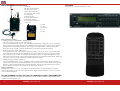
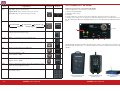
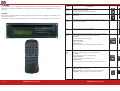
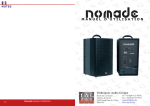
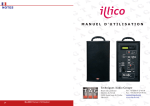
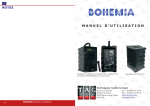
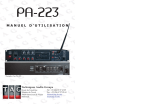
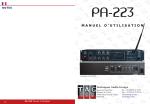
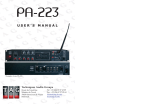
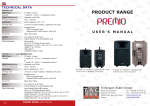
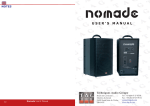
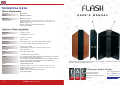
TECHNICAL DATA
Basic Equipment
RMS Power
Not amplified
Speaker
Without loudspeaker
Microphone
Without microphone
More Information
Dimensions folded : H 123 x W 24 x D 61 cm / 48.4 x 9.4 x 24"
Dimensions open : H 123 x W 73 x D 55 cm / 48.4 x 28.7 x 21.7"
Weight: 20 kg / 44 lbs
Outside: cottonwood colored plywood cabinet
Inside: black cladding
USER’S MANUAL
Options Flash amplified
RMS Power
70 Watts / 4 ohms
Speaker
2 loudspeakers 6" - 15 cm
Power Requirements
Operates on AC 220v
Frequency Response
50 Hz - 20 Khz
Lead Battery
Built-in battery 9 Ah - 12 V with automatic battery charger
Working Time
6 - 9 hours on built in battery / unlimited on AC main
Inputs
RCA Line control input
1 balanced MIC control input + phantom power on XLR
Bands EQ
Bass, Mid, Treble
Output
Line output on XLR 3 pins
MIC
1 Gooseneck MIC: GM-302/500 mm
3 Slots
For 1 wireless receiver SDR-6216M to introdue questions or comments
from the audience during a presentation.
For 1 wireless transmitter RP-6016M to link Flash to addtional cabinets.
Up to 2 Players possible: CD/USB player CD-456, Digital player
EM010PR, Digital recorder: EM020R
Lamp
Lamp Littlite with LED
More Information
Dimensions folded : H 123 x W 24 x D 61 cm / 48.4 x 9.4 x 24"
Dimensions open : H 123 x W 73 x D 55 cm / 48.4 x 28.7 x 21.7"
Weight: 29 kg / 63.8 lbs
Outside: cottonwood colored plywood cabinet
Inside: black cladding
20
FLASH User’s Manual
Example of a Flash/A with a built-in UHF receiver module, a Wireless transmitter RP
6016 M UHF and CD/MP3/USB player
Techniques Audio Groupe
Route de Lavérune
Montée du Terral
34430 Saint Jean de Védas
FRANCE
Tel : +33 (0)4 67 27 43 05
Fax : +33 (0)4 67 27 85 64
[email protected]
www.tag-fr.com
SUMMARY
Key
INTRODUCTION
Page 3
ADVICE FOR A GOOD USE
Page 3
SETTING UP
Page 4
BASIC EQUIPMENT OF FLASH/A
Page 5
- LOUDSPEAKER
Page 5
- MICROPHONE
Page 5
- ELECTRONICAL PART
Page 5
Inputs Mic/Line
Page 5
3 Bands Equalizer
Page 5
Line Output
Page 5
Battery
Page 5
Control LEDS
Page 6
Light and Bag
Page 6
OPTIONS OF FLASH/A
Page 6
- RECEIVER MODULE SDR-6216M
Page 6
- HANDHELD TRANSMITTER MIC SQ-5016
Page 7
- BELT TRANSMITTER SM-5016
Page 8
- CHARGERS HC-37 and HC-30
Page 8
- WIRELESS TRANSMITTER RP-6016M
Page 9
- PLAYERS
Page 10
CD-456
Page 10
EM010PR
Page 13
EM020R
Page 16
TECHNICAL DATA
2
FLASH User’s Manual
PREDOWN
FOLDER<<
REPEAT
Front panel
Player
Explanations
Remote
control
Skips to previous folder
Stop mode :
Skips to previous folder
Program mode:
Selects first title in previous folder
Play mode:
Selects first title in previous folder
"REPEAT"
Repeat all:
Repeat album:
Repeat off
repeat all
repeat album
PROG
PROG : to make a selection of titles
To delete this selection, press STOP
MUTE
Fonction Mute: music stops
To get back to music, press again
INTRO
Intro: each title is being played for 10 seconds
RANDOM
Random play mode
VOL-
Volume decreases by 1 dB
(lowest volume = 0dB)
VOL+
Increases volume by 1 dB
(highest volume 30dB)
FIND
Press to change the information on display (name of album
or title) and to select a title.
0~10
Tape directly on the keyboard number of title + Play
Page 20
FLASH User’s Manual
19
Keys
REC
Explanations
Press briefly the button FUNC to chose: MP3, SD MMC or
AUX
If you press a little longer you can choose the recording quality
MIDJHIGHJLOWJMID
MID (128Kbps = medium quality), LOW (64Kbps = lowest
quality), HIGH (256Kbps = highest quality)
Select USB or CARD with >> Next or << Back
Press "REC" to start recording . The display indicates REC
WAIT, then REC AUX
If you want to stop recording press STOP. On the display:
REC OK
CAUTION : Memory place
You need space on your USB key or your card, otherwise
recording will not be possible. The display indicates REC
NG if problem with recording
File structure of recording
USB Root
PRE-UP
FOLDER>>
TM-AUX
AUX001.MP3
AUX002.MP3
TMCDDA
Track001.MP3
Track002.MP3
TMCDROM
Filename001.MP3
Filename002.MP3
Remote
control
INTRODUCTION
Thank you for choosing FLASH. To ensure the best performance and get the maximum life out of
the equipment, we recommend that you read this manual carefully.
FLASH is a foldable lectern for conferences (not amplified, without loudspeaker and microphone)
FLASH/A is a foldable, transportable and amplified lectern (70 W) available with a wireless system
and a wireless transmitter to link with a sound system. The FLASH/A can also be equipped with a
CD/MP3/USB player or a digital record player
ADVICE FOR A GOOD USE
3 Charge the FLASH/A to 100 % before first use.
3 Do not use the FLASH in a humid or dusty place, or near any heat sources such as radiators,
heat registers, neither under the sun or at very low temperatures.
3 Place the FLASH in a ventilated place.
3 Be careful when moving the lectern in order not to damage the electronics.
3 Carry the lectern with caution.
3 Do not forget to decrease the volume switch before turning off the lectern.
3 Handle the control switches carefully.
3 Clean the lectern regularly.
3 Keep the carton in case of return.Transport will be safe and without any risk of damage.
The exclamation point inside an equilateral triangle indicates the existence of internal
components whose substitution may effect safety. Also indicates important operating
instructions.
Skips to next folder
Stop mode: skips to next file
Program mode : skips to the first file in next folder
Play mode : skips to the first file in next folder
.
18
Front panel
of player
FLASH User’s Manual
The lightning and arrowhead symbol warns about the presence of uninsulated dangerours voltage. To reduce the risk of electric shock, do not remove the cover. Refer servicing to qualified personnel.
FLASH User’s Manual
3
FLASH ASSEMBLING
Keys
Front panel
player
Explanations
POWER
On/Off
PLAY/
PAUSE
Plays music
Pause
STOP
Stops music
FUNC
To change mode
Remote
1. Take of the slide and open the two sides.
2. Put off the slide which is situated in the left inner side of the lectern.
4. Fix the slide in the middle of the lectern.
5. Your Flash is ready to work.
USB
CARD
AUX
UP/CUE Press briefly to select next title.
Title skip Press a little longer to go forward in the title (>0,7s)
Play mode :
The selected track starts automatically
Stop/Pause mode:
The selected track does not start automatically.
Program mode:
Skips to next track according to selection
DOWN/ Press briefly to select previous title.
REV
Press a little longer to go backward in the title (>0.7s)
Title skip Play mode :
The selected track starts automatically
Stop/Pause mode :
The selected track does not start automatically
Program mode :
Skips to previous track according to selection
DELETE
4
FLASH User’s Manual
In USB mode, press DEL and use >> Next or << Back to
select file. .Press for a while >> Next or << again to select the
file.
Press on DEL to start deleting the file
FLASH User’s Manual
17
EM020R
MP3 / USB + SD MMC digital player/recorder.
BASIC EQUIPMENT OF FLASH/A
FLASH/A(70 W RMS) basic equipment: 2 loudspeakers, 1 gooseneck microphone (GM-302)
Inputs: MIC/Line , 3 band Equalizer, Line Output, battery and control LED.
MIC/Line INPUTS
Mic Input equipped with 1 XLR (3 pins) connector and 1 unbalanced Line Input
equipped with 2 RCA connectors and a volume control.
The input selection is automatic.
L
CAUTION : MIC ADJUSTMENT
When switching on Mic, do not turn the gain on highest level to avoid larsen effect
on the loud speakers
TONE ADJUSTMENTS
The FLASH/A is equipped with 3 highly performing tone adjustments
1 Bass frequency tone control on 100 Hz with +/- 12 dB efficiency.
1 Treble frequency tone control on 10000 Hz with +/- 12 dB efficiency.
1 voice adjustment especially designed for use in medium frequency which allows
for a sharp increase of voice presence on the mic inputs.
LINE OUTPUT
The FLASH/A is equipped with a line output on XLR connector enabling connection to
other sound system You just have to connect the LINE OUT output to the LINE IN
input of the selected equipment.
BATTERIES
The FLASH/A is equipped with a lead 9Ah / 12V battery making lots of loadings and
unloadings possible.
When connected on AC main the Flash / A can work without time limit, while charging.
Minimum autonomy: 3 hours, maximum: 5 hours
L
CAUTION: BATTERY LOADING
NEVER STOCK THE EQUIPMENT WITHOUT HAVING RELOADED IT. If storage
for a long period is necessary, leave battery connected on AC main and switch OFF.
The charging station will load battery when necessary.
16
FLASH User’s Manual
FLASH User’s Manual
5
CONTROL LEDS
3 GREEN LED "ON":
- The equipment is ready to work
- The battery is loaded
3 RED LED "UNLOADED BATTERY":
- Battery has reached its time limit.Estimated working time left:
from 5 and 20 minutes depending on working options
- If you have to use the equipment longer than the estimated time connect on AC main. No
working time limit, the battery is loading simultaneously.
3ORANGE LED "CHARGER":
- FLASH under power, switch “ ON ”
- The internal automatic charger will increase battery tension up to its highest level +/- 13 V.
Keys
PREDOWN
FOLDER<<
REPEAT
OPTIONS OF FLASH/A
Explanations
Remote
Press this to skip to previous file
Stop mode : to select previous file
Program mode : to select the first title in previous file
Play mode : to select the first title in previous file
Press this for Repeat function
Repeat 1 track
Repeat 1 file:
Repeat all track
Repeat off
Flash/L1 Lamp Littlite with LED
Front Panel
Player
repeat 1 track
repeat 1 file
repeat all track
PROG
Press this to select title. To delete the selection press Stop.
MUTE
Mute: stops music
Press and music starts again
INTRO
Intro: plays each track for 10 seconds.
RANDOM
Random play mode
VOL-
Decreases volume by 1 dB
(lowest volume = 0 dB)
VOL+
Increases volume by 1dB
(highest volume = 30dB)
FIND
Press this to change information on display (name of album
or title) and to select title or file.
0~10
Tape directly number of title + play on the keyboard.
Bag for Flash
On/Off + Volume
RECEIVER SDR-6216M
The FLASH/A can be equipped with a UHF 16 frequencies
handheld microphone
The receiver module is integrated in the inferior part of
Flash A
Technical caracteristics of receiver SDR-6216M
UHF receiver, True Diversity, with Pilotone.
LED A &B
Channel switch
3 Switch on the receiver:
The switch on the right is power switch and volume control
3 Switch on the handheld microphone/beltpack transmitter:
The LEDS A and B are lightning when the UHF link between transmitter and receiver is ok.
Channel can be changed with the switch on the left side.
6
FLASH User’s Manual
FLASH User’s Manual
15
Explanations
POWER
To switch on or off the player
PLAY/
PAUSE
Play
Pause
STOP
Stops music
USB/Card
(FUNC) Changes mode
Pitch
Control
Clockwise to increase music speed and anticlockwise to
decrease music speed
UP/CUE Press briefly to skip to next title. Press a little longer (>0,7s)
Title Skip to play forwards within a title
Play mode:
The selected title starts automatically
Stop/Pause mode:
The selected title does not start automatically
Program mode:
Enables to skip to next title.
DOWN/ Press briefly to skip to previous title.
REV
Press a little longer (>0,7s) to play backwards within a title.
Title Skip Play mode:
The selected title starts automatically
Stop/Pause mode:
The selected title does not start automatically
Program mode:
Skips to previous title
PRE-UP
FOLDER>>
14
Press this to skip to next file
Stop mode : to choose next file
Program mode : to select the first title in next file.
Play mode : to select the first title in next file
FLASH User’s Manual
Front Panel
Player
Remote
HAND HELD TRANSMITTER MICROPHONE SQ-5016
The microphone is equipped with 16 frequencies
1. Microphone capsule
2. Battery status led
3. Power switch (ON/OFF)
4. LCD display
5. Battery compartment
6. Rotative protective cap for controls
7. Lock/Unlock
8. Set
9. UP
10.DOWN
11.Charging Port
12.Name plate
5016
Keys
Microphone settings
1. Making changes to CHANNEL/FREQUENCY
Press on Set for 2 seconds to enter into Settings.
Use UP or DOWN button to go to the Channel/Frequency page. Pressing UP or DOWN button will
increase of decrease the channel number. The corresponding frequency will change accordingly.
When a desired channel is being selected, it will automatically be saved and stored in the memory.
2. Making changes to SENSITIVIY
Use UP or DOWN button to go to the Set page.. Use UP or DOWN to decrease or increase sensitivity. Level: 1 - 4 . for singing, Level 4 for speech or if microphone is used with a tripod stand
3. Making changes to battery selection
Use UP or DOWN to go to the Battery selection page.
Press UP or DOWN to move the cursor to either: NiMH (rechargeable battery) or AKLN (alkaline).
When the battery has been selected it is saved and stored in the memory
Changing Batteries
2 pieces of AA batteries are used. Unscrew the tap of battery compartment
and insert the new batteries. BEWARE OF THE POLARITY
FLASH User’s Manual
7
EM-010PR
This player is equipped with Pitch Control
BELT TRANSMITTER SM-5016
1
2
3
4
5
6
7
1. Antenna
2. Battery weak indicator
3. Audio mute switch
4. Mini-XLR connector
5. Power ON / OFF switch
6. LCD display
7. Charging port
8. Cover release button
9. Charging contacts
10. Lavalier microphone
11. Mic clip
8
9
10
12
13
14
12. SET
13. UP
14. DOWN
15. GT
16. MT
15 16
11
Belt transmitter settings
1. Making changes to CHANNEL / FREQUENCY
Press on Set for 2 seconds to enter into Settings.
Use UP or DOWN button to go to the CHANNEL /FREQUENCY page. The cursor will flash to
allow changes to be made. Pressing UP or DOWN button will increase or decrease the channel
number. The corresponding frequency will change accordingly. When a desired channel(frequency) is being selected, it will be automatically saved and stored in the memory.
2. Input Level Gain Control Adjustment
Low impedance (Lo-Z) " MT" & high impedance (Hi-Z) " GT" gain controls are situated inside
the transmitter. Gain controls are adjustment ports that enable you touse microphones of differing output levels and Guitar or instruments with Hi-Z output. To adjust microphone (Lo-Z)
input levels, turn the "MT" control and to adjust the Guitar or instrument (Hi-Z) input, adjust the
"GT" gain control to set the transmitter's desired audio input level.
3. Making changes to Battery selection
Use UP or DOWN button to go to the Battery selection page. Press SET for about 2 seconds to
activate the cursor. Press UP or DOWN button to move the cursor to either NiMH (rechargeable
battery) or AKLN (Alkaline battery) position.When the desired option has been selected, press
SET for about 2 seconds to save and store the data in the memory.
Battery Installation
SM-5016 uses 2 pieces of " AA " size batteries (Alkaline battery is recommended ). To install or
remove the batteries, press the release buttons at the edges of the transmitter to open or close the
cover as illustrated below.
HC-30 CHARGER for MIC and HC-37 CHARGER for BELT TRANSMITTER
Handheld microphones and beltpack transmitters can be reloaded. Before loading check that the
batteries are rechargeable ones.
8
FLASH User’s Manual
FLASH User’s Manual
13
Keys
Explanations
Front panel
FOLDER Enables to skip to previous file
Skip
Stop mode : skips to previous file
Program mode: skips to first track in previous file
Play mode: skips to first track in previous file
REPEAT
"REPEAT" in following range
repeat all random
repeat track
repeat all
Remote
UHF TRANSMITTER RP-6016M
Technical specifications of transmitter RP-6016M
UHF 16 frequencies , True Diversity, with Pilotone
1. Power switch (ON/OFF)
2. Antenna socket (TNC)
3. Channel
4. Audio sensitivity: clockwise to increase sensitivity and anti-clockwise to decrease.
5. Output power switch. L for LOW power and H for HIGH power. Low Output power will reduce
the RF transmission distance and High Output power will extend the possible RF transmission distance.
play all
random repeat
2
1
PROG
Enables to choose the tracks .
To delete this selection press Stop.
MUTE
Mute: to cancel Mute press this button again.
3
CD
5
6
Changes mode and skips to CD-MP3 mode
USB
Changes mode and skips to USB mode
VOL-
Decreases volume by 1 dB
(lowest volume = 0dB)
VOL+
Increases volume by 1 dB
(highest volume 30dB)
FIND
Enables to change the display information (Album or title)
and to choose the right title or file.
0~10
The keyboard enables to choose the title directly by typing
title number + Play.
The RP-6016M transmitter enables the link between Flash / A and other active sound systems
(Nomade UHF, Premio UHF,...) or another sound system with a rackable UHF receiver (SDR
1816SC)
UHF amplified sound
system Nomade
12
4
FLASH User’s Manual
UHF amplified sound
system Premio
FLASH User’s Manual
UHF rackable receiver
SDR 1816 C
9
PLAYERS
The FLASH/A can be equipped with 3 possible players: a CD/MP3/USB Player(reference CD-456), a
digital player (reference EM010PR) or a digital player/recorder (referenceEM020R), built in under
the LED.
CD-456
The CD player /MP3/USB Plug is equipped with an antichoc memory making it insensible to use
handle and vibrations.
The absence of drawer makes handling CDs in and out secure. It is equipped with Pitch control.
Keys
PLAY/
PAUSE
Explanation
STOP/
EJECT
If on Stop CD starts playing
If on Play it turns to Pause
If on Pause the CD starts playing again
Stops music or
CD ejection
Pitch
Control
Clockwise to increase music speed and anti clockwise to
decrease music speed.
ESP
Anti choc memory. Lasts 40 seconds
UP/CUE
Skip
Single and slightly pressed skips to next track. If pressed
again a little longer goes forward in the track.
Play mode:
The selected track starts playing
Stop/Pause mode:
Skips to next track.
Program mode:
Skips to next track according to program selection
DOWN/
REV
Skip
Single and slightly pressed skips to previous track. If pressed again a little longer goes to previous track
Play mode:
The selected tracks starts automatically
Stop/Pause mode:
Playing does not start automatically
Program mode:
Skips to previous track according to program selection
Front Panel
Remote
FOLDER Enables to skip to next file
Skip
Stop mode: skips to next file
Program mode : skips to the first track in the next file.
Play mode : skips to the first track in the next file
10
FLASH User’s Manual
FLASH User’s Manual
11