1
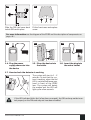
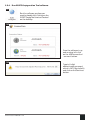
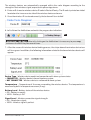
EPIR2 GSM Alarm System SAFETY INSTRUCTIONS Valid for EPIR2 v1.01.06 and up (later referred to as ‘the EPIR2’, ‘the system’, ‘the device’ ‘the unit’ or ‘the detector’) Please read and follow these safety guidelines to safeguard yourself and others: • DO NOT use the system where it can interfere with other devices - such as medical devices • The alarm system radio transceiver operates in the GSM850, GSM900, GSM1800 and GSM1900 bands • DO NOT use the system in hazardous environments • DO NOT expose the system to high humidity, chemical environments or mechanical impact • DO NOT attempt to repair the system yourself - any repairs must be carried out by fully qualified personnel only The EPIR2 comes with its own power supply unit so you can plug it in straight away. The unit is not meant for outdoor use, i.e. you should use it inside a building and the power supply must be plugged into a standard Euro 2-pin socket or UK 3-pin socket (depending on the version you have bought). The main circuit should be protected by short circuit or over-current protection. Please use the power supply unit which comes with your EPIR2, as it meets the EN 60950-1 standard. Any additional device you connect to the system, such as a computer, must also be powered by an EN 60950-1 approved supply. Disconnect the mains power before installing. Never install or carry out maintenance during stormy weather. The electric socket that powers the system must be easily accessible. In case of power cut, the system is powered by a back-up battery. WARNING: Only use the approved back-up battery with the system to avoid fire or explosion. Take care when connecting positive and negative battery terminals. To switch the system off, unplug the external electric power supply and disconnect the battery by first removing the front cover of the device. A blown fuse cannot be replaced by the user. The replacement fuse has to be of the kind indicated by the manufacturer (fuse F1 type – C1S 2.5A). If you use a computer to select your ideal settings, it must be earthed. The WEEE (Waste Electrical and Electronic Equipment) symbol on this product (see left) means it must not be disposed of in household waste. To prevent possible harm to human health and/or the environment, you must dispose of this product in an approved and environmentally safe recycling facility. For further information contact your system supplier, or your local waste authority. 2 EN EPIR2 User Manual v.1.2 Contents Technical Specifications..................................................................................................... 5 1. QUICK START GUIDE....................................................................................................... 7 1.1. How and where to fix the holder to the wall..............................................................................7 1.2. Prepare the SIM card..................................................................................................................... 8 1.3. How to insert the SIM card........................................................................................................... 8 1.4. Plug the power supply connector into the device.....................................................................9 1.5. Place the device into the holder...................................................................................................9 1.6. Insert the plug into the mains socket..........................................................................................9 1.7. How to check the detector is working.........................................................................................9 1.8. About the back-up battery and how to replace it .................................................................. 10 1.9. How to program EPIR2 system...................................................................................................11 1.10.How to arm and disarm the system.......................................................................................... 18 1.11.A 15 second delay allows you to leave the premises............................................................. 19 1.12.Receiving an alarm call................................................................................................................ 19 1.13.In case of mains power failure................................................................................................... 19 1.14.Additional capabilities................................................................................................................ 20 2. HOW TO MANAGE THE WIRELESS DEVICES................................................................. 20 2.1. How to bind a wireless device to the system.......................................................................... 21 2.2. How to remove a wireless device from the system............................................................... 24 2.3. EKB3W wireless keypad overview............................................................................................ 25 2.4. EWK1 wireless keyfob overview............................................................................................... 30 3. HOW TO PROGRAM THE SYSTEM USING YOUR MOBILE PHONE................................. 32 4.TROUBLESHOOTING..................................................................................................... 43 5. ADDITIONAL INFORMATION FOR ADVANCED USERS..................................................44 5.1. How to connect a wired siren or a LED indicator to the wired output................................44 5.2. How to connect a sensor to the wired zone............................................................................ 47 5.3. How to connect to the system remotely via GPRS connection............................................49 5.4. How to reset the system to default settings...........................................................................51 5.5. How to upgrade the firmware locally via USB connection.....................................................51 5.6. How to upgrade the firmware remotely via GPRS connection............................................. 52 5.7. Monitoring Station....................................................................................................................... 52 5.8. Smart Security.............................................................................................................................. 52 6. Related Products......................................................................................................... 56 Copyright © “ELDES UAB”, 2013. All rights reserved. It is forbidden to copy and distribute information in this document without advance written authorisation from ELDES UAB. We reserve the right to update or modify this document and/or related products without warning. The EPIR2 GSM Alarm System complies with the essential requirements and relevant provisions of Directive 1999/5/EC. The declaration of conformity may be viewed at www.eldes.lt EPIR2 User Manual v.1.2 3 Contents of pack: ItemQuantity EPIR2 alarm system ........................ 1 Power supply ....................................1 User manual ......................................1 MiniUSB cable ...................................1 Back-up battery ................................1 Screws ................................................1 5,6kΩ resistor....................................1 Not included: You will need to supply your own SIM card – we recommend you get a contract SIM, not Pay As You Go. Limited Liability The buyer agrees that the system will reduce the risk of fire, theft, burglary or other danger but that it does not guarantee against the occurrence of such events. ELDES UAB will not take any responsibility for the loss of personal effects, property or revenue whilst using the system. The liability of ELDES UAB is limited to the value of the system purchased. ELDES UAB is not affiliated with any mobile/wireless/cellular provider and is therefore not responsible for the quality of such services. Manufacturer’s Warranty The system carries a 24-month manufacturer warranty from ELDES UAB. The warranty begins the day the system is purchased by the user and the receipt must be retained as proof of purchase date. The warranty remains valid only if the system is used as intended, following all guidelines outlined in this manual and in accordance with the operating conditions specified. The warranty is void if the system has been exposed to mechanical impact, chemicals, high humidity, fluids, corrosive and hazardous environments or force majeure factors. Dear Customer, Thank you for choosing to purchase the EPIR2 alarm system to protect your property. Your thoughtful decision will ensure reliable protection for many years as all ELDES products are manufactured to meet the highest standards. We are confident that you will be completely satisfied with your product. However, in the unlikely event that you do experience a problem, please contact the dealer from whom you made your purchase. UAB ELDES www.eldes.lt 4 EN EPIR2 User Manual v.1.2 Protecting your home and property with the EPIR2 alarm system Where and how to use the alarm system The EPIR2 is a convenient, easy to use, remote control security system for houses, cottages, country homes, garages and other buildings. It uses an internal SIM card (not supplied by ELDES) and an infra red sensor, and communicates with your mobile phone so you can: • Protect your property while you are away from home • Listen to what is happening in your property following a security alert • Switch the system on or off from anywhere in the world at no cost • Receive SMS/text messages updating you on the system status • Include up to ten users to receive system status messages and/or security alerts • Receive SMS/text messages updating you on the temperature of the surrounding area In addition, the EPIR2 system has a built-in wireless module for system extension capabilities.The wireless module easily allows you to bind ELDES-made wireless devices to the system. For more details, please, refer to section 2. HOW TO MANAGE THE WIRELESS DEVICES. IMPORTANT Please read the user manual before operating the system. The user manual will show you how to install and operate the EPIR2 alarm security system safely and easily. You’ll find a quick start guide in section 1. To learn how to take advantage of additional functions, see sections 2, 3 and 4. Technical Specifications Supply voltage..........................................................11-15V 500mA max Back-up battery voltage, capacity........................8.4V; 250mAh Back-up battery type..............................................Ni-Mh GSM modem frequency...........................................850/900/1800/1900 Mhz Dimensions...............................................................104x60x33mm Operating temperature range...............................-10…+40 °C Humidity....................................................................0-90% RH @ 0... +40 °C (non-condensing) Back-up battery operating time............................up to 24 hours* Detection angle........................................................90° Maximum motion detection range........................10 metres Wireless transmitter-receiver frequency............868 Mhz Wireless communication range.............................up to 30m in premises; up to 150m in open areas Maximum number of wireless devices.................16 Communications......................................................SMS, Voice Calls, GPRS Network Supported protocols................................................Ademco Contact ID®, EGR100, Kronos, Cortex® SMS BELL+: siren output commuted values................Current - 150mA max.; voltage - 15V (EPIR2 on external power supply) / 7V (EPIR2 on backup battery) * - with Smart Security disabled; with wireless transmitter-receiver module disabled EPIR2 User Manual v.1.2 5 Components of the EPIR2 security system 5 1 3 1 8 15 2 BELL- / COM Z2 BELL+ 10 16 6 3 12 8 GSM 9 SIM 13 14 7 11 BACK SIDE BATTERY INSIDE VIEW 4 1. EPIR2 holder for fixing on the wall 2. Lens for movement detector and LED 3. Power supply socket to connect to mains electricity 4. Power supply transformer 5. Power supply connection lead 6. Reset button to restore default parameters 7. Holder to fix the unit in place 8. Mini-USB connector to allow programming via your PC 9. Holder for SIM card 10. GSM module 11. Back-up battery in case of mains power supply failure 12. Motion detector to sense possible intruders 13. TAMPER button to alert you if anyone interferes with the unit 14. Microphone to allow you to listen in to an incident using your mobile phone 15. Wired zone & output for siren or electrical appliance connection 16. Built-in GSM antenna Connector BELL- / COM Z2 BELL+ 6 EN Description Siren output negative terminal / output terminal / common return terminal Security zone terminal Siren output positive terminal EPIR2 User Manual v.1.2 1.QUICK START GUIDE OVERVIEW This section tells you how to install the EPIR2 system quickly and easily and covers all the procedures required for full system operation. The alarm system functions via the GSM network, so you will first need to purchase a SIM card so you can ‘talk’ to and program your device via your mobile phone. How to expand your system with additional wireless devices Your EPIR2 system has a built-in wireless module providing expansion capabilities to your system by binding additional ELDES wireless devices to it. However, the EPIR2 system can operate fully without any wireless devices bound to it. This section does not cover the procedures for adding wireless devices to the system. If you intend to use the wireless devices with your EPIR2 system, follow the instructions for setting up the EPIR2 in this section then refer to section 2: HOW TO MANAGE THE WIRELESS DEVICES. Step-by-step system installation 1.1. How and where to fix the holder to the wall The system should be installed indoors, in stationary environment ONLY. Choose a location where unauthorised entry is most likely. 2 3 4 To prevent false alarms, avoid installing the unit in the following locations: • With the lens facing direct sunshine, for instance in front of windows • Places with high temperature fluctuations, such as near fireplaces, boilers, ovens etc • Anywhere with high dust or air flow • In an area surrounded by metal or thick walls where the GSM connection may be lost 5 EPIR2 User Manual v.1.2 After a suitable location for your EPIR2 is chosen, fix the holder to the wall using the screws supplied. 7 1.2. Prepare the SIM card Place the SIM card in your mobile phone and disable the PIN code by following the appropriate menus on your mobile phone. This will help ensure that when you install the SIM card in the EPIR2 it will operate correctly. 63 IMPORTANT RECOMMENDATIONS • We advise you to choose the same GSM SIM provider for your system as for your mobile phone. This will ensure the fastest, most reliable SMS/text message delivery service and phone call connection. • For maximum system reliability we recommend you do NOT use a Pay As You Go SIM card. Otherwise, in the event of insufficient credit balance on the SIM card, the system would fail to make a phone call or send messages. • We also recommend you to disable call forwarding, voice mail/text message reports on missed/busy calls. Please contact your GSM provider for more details on these services and how to disable them. 1.3. How to insert the SIM card The SIM card must be prepared as described in (1.2) before being inserted into the device. 8 9 OPEN 7 To insert the SIM card, first remove the front cover of the device (containing the detector lens) by removing the screw at the base. 8 EN Open the SIM card holder by first sliding the the cover to the right then hinging it upwards. Then insert the SIM card into the holder. Insert SIM card so that gold contacts are face down when SIM card cover is flipped back down. EPIR2 User Manual v.1.2 11 LOCK 10 Slide the SIM card cover back to lock SIM card in place. Fit the front cover and replace screw. For more information see the diagram of the EPIR2 and the description of components on page <6>. 10 12 13 1.4. Plug the power supply connector into the device 1.5. Place the device into the holder 14 1.6. Insert the plug into the mains socket 1.7. How to check the detector is working The system will start in 1 - 2 minutes. To test that the system is working, when the red LED is switched off move your hand in front of the EPIR2 lens. The system will detect the motion and the LED will light up for a few seconds. 15 If the LED indicator blinks fast (a few times a second), the SIM card may not be inserted properly or the PIN code may not have been disabled. EPIR2 User Manual v.1.2 9 1.8. About the back-up battery and how to replace it The back-up battery should last for at least two years. Its lifespan will largely depend on the surrounding temperature and the frequency of disruptions to the mains power. During mains failure the battery should power the system for up to twenty-four hours. How to replace the battery: 16 17 1. Unplug the power supply from the mains electricity socket. 20 19 1 4. Remove the screw located on the base of the unit. 22 5. Open the cover. 3. Unplug the power supply connector. 10 21 6. Carefully remove the back-up battery. 23 7. With one hand holding the back-up battery, unplug the battery connector. 10 2. Remove the EPIR2 from its holder. 18 EN 8. Replace the battery with the type specified in the technical specifications. EPIR2 User Manual v.1.2 1.9. How to program EPIR2 system Before you continue, you need to program your EPIR system. We recommend that you program the EPIR system using your PC and ELDES Configuration Tool software as it’s the quickest, easiest way and offers more options for your system, such as flexible SMS/text message management. NOTE If you wish to program the EPIR2 system by SMS/text message, please refer to section 3. HOW TO PROGRAM THE SYSTEM USING YOUR MOBILE PHONE. If not, please proceed to section 1.9.1 Download ELDES Configuration Tool software 1.9.1.Download ELDES Configuration Tool software. Visit www.eldes.lt , you will find a link to the Configuration Tool under the menu option DOWNLOAD. 24 Once you are at Configuration Tool section, left-click on the ELDES Configuration Tool v3.x.xx (setup.exe). 25 In the newly popped-up window left-click on the Save button. EPIR2 User Manual v.1.2 11 26 Specify a location for setup file and left-click on the Save button. We recommend placing the file on your desktop. 1.9.2. install ELDES Configuration Tool software. 27 Double left-click on the downloaded setup file to run it. 12 EN EPIR2 User Manual v.1.2 28 29 EPIR2 User Manual v.1.2 In the newly popped-up window left-click on the Next button to continue. In the next window left-click on the Next button to continue. 13 30 In the following window left-click on the Next button to continue. 31 In the next window left-click on the Next button to continue. 14 EN EPIR2 User Manual v.1.2 32 33 EPIR2 User Manual v.1.2 In the following window left-click on the Install button to begin the installation process. Wait for the installation progress to complete and do not click on any button. 15 After the successful installation, the following window will pop-up. Left-click on the Finish button in order to end the installation and launch ELDES Configuration Tool software afterwards. 34 NOTE: You do not have to repeat the installation process the next time when you want to run ELDES Configuration Tool software again. 1.9.3. Connect EPIR2 to your PC via the USB cable IMPORTANT: Before connecting EPIR2 to your PC via the USB cable, first ensure the EPIR2 is powered up. 35 36 Plug the miniUSB connector into EPIR2. 16 EN Plug the USB connector into your PC. EPIR2 User Manual v.1.2 1.9.4. Run ELDES Configuration Tool software. 37 Run the software anytime you want by double left-clicking on the ELDES ConfigTool shortcut located on the desktop. 38 Once the software is up and running, left-click on the USB connection / -connect- button. 39 EPIR2 User Manual v.1.2 Type in 4-digit administrator password, which is 1470 (by default) and click on the Continue button. 17 40 On successful first-time connection, a Quick Start Wizard window will show up. Left-click on the Start Wizard button and follow the step-by-step instructions to program the EPIR2 system. After completing all of the Quick Start Wizard steps, your system is ready for use. 1.10. How to arm and disarm the system To arm your system dial the SIM card and wait until it rings three times and then drops the call. This means the system is now successfully armed. To disarm the system, dial the SIM card and wait until it rings once and then drops the call. The system is now successfully disarmed. In both cases be sure to wait until the system automatically drops your call. Again in both cases the user will receive a short SMS/text message each time the system is successfully armed or disarmed. IMPORTANT: Dialing the SIM card is free of charge as the system drops your call in both cases. Before arming the system it is necessary to close all doors and windows in the secured area and move yourself away from the movement detection field. Alternatively, you can arm/disarm your EPIR2 system by sending an SMS text message (see 3. HOW TO PROGRAM THE SYSTEM USING YOUR MOBILE PHONE). 18 EN EPIR2 User Manual v.1.2 41 Don’t stand in movement sensor detection zone Close all doors Close all windows Close all doors 1.11. A 15 second delay allows you to leave the premises When you arm the system via your phone, a keyfob or a keypad, the system will give you a 15 second delay before it activates, giving you time to leaving the premises. You can change the time delay at any time (see ELDES Configuration Tool software’s Help section). The red LED on the detector lens will start to blink, indicating the time delay is in operation and you must leave room. The red light will go off after 15 seconds when the system will be armed. 1.12. Receiving an alarm call When the detector is armed and motion is detected in the room, the system will send a SMS/text message to User 1 and then ring the user until the call is answered. If the call is not answered after several rings (predetermined by your mobile phone operator) the system will hang up. If the call is not picked up by User 1, the system will ring all the pre-programmed numbers in order of priority starting with User 2 until a user picks up or the call expires. If the first user is “busy” or “out of radio coverage”, the system will also ring the next pre-programmed number. When a call is answered, the system will activate the remote microphone so you can listen to what is happening in the building. You can also program the system to send an SMS/text message to all users (see ELDES Configuration Tool software’s Help section). 1.13. In case of mains power failure The system will automatically switch to the back–up battery supply in case of mains power failure. At this time you will receive an SMS/text message warning message. You will also receive an SMS/text message when the mains power has been restored. Likewise the system will warn you by SMS/text message when the back-up battery is getting low, just before the system is switched off. EPIR2 User Manual v.1.2 19 1.14. Receiving an SMS/text message when temperature exceeds the set values The system comes equipped with a feature intended for temperature measurement in the surrounding area. This feature allows to monitor the temperature and receive a notification by SMS text message, identified as the Temperature Info SMS, to user phone number when the set temperature MIN or MAX boundaries are exceeded. For this purpose you may use the system’s built-in temperature sensor or one of the temperature sensors incorporated in the wireless device (if any). The following wireless devices contain a built-in temperature sensor: • EWP1 - wireless PIR sensors (motion detectors); • EWS1 & EWS2 - internal and external sirens; • EWF1 – wireless smoke detectors; • EW1 - wireless zone and PGM output expansion module; • EW1B - battery-powered wireless zone and PGM output expansion module. By default, temperature measurement feature is disabled. To enable it, please refer to ELDES Configuration Tool software. To set the MIN and MAX temperature boundaries, please refer to section 3 or ELDES Configuration Tool software. 1.15. Additional capabilities You can also use your mobile to request information about the system, the power supply and the network quality. Plus you can listen in to what’s happening in the secured location through a remote microphone. See section 3 for more details. EPIR2 system comes equipped with built-in wireless module allowing to enhance your security system with the addition ELDES wireless PIRs (Passive Infrared Sensors), sirens, magnetic door and window sensors or expansion modules. See section 2 for more details. 2.HOW TO MANAGE THE WIRELESS DEVICES IMPORTANT: Before you continue, first follow the entire section 1. QUICK START and prepare the system for use as described. OVERVIEW Your EPIR2 has a built-in wireless module. This section tells you how to bind and remove a wireless device using your PC and ELDES Configuration Tool as well as briefly describing every available wireless device which can operate together with your EPIR2 system. It is possible to connect up to 16 wireless devices to the EPIR2 system. This includes the following: • EWP1 - wireless PIR sensors (motion detectors); • EWD1 - magnetic door contacts; • EWS1 & EWS2 - internal and external sirens; • EWK1 - wireless keyfobs to arm and disarm the system without using a mobile phone; • EKB3W – wireless keypads to arm,disarm and configure the system without using a mobilephone; • EWF1 – wireless smoke detectors; • EW1 - wireless zone and PGM output expansion module; • EW1B - battery-powered wireless zone and PGM output expansion module. You can also attach more devices which are not part of the ELDES wireless range by using expansion module EW1 with 2 inputs and 2 programmable outputs 20 EN EPIR2 User Manual v.1.2 Main features of built-in wireless module: • Up to 16 ELDES wireless devices per one EPIR2 unit; • Two-way wireless communication; • Supervised communication link with configurable self-test period; • Maximum wireless connection range is 150 meters in open areas, within a building wireless range will be up to 30m, depending on building construction. 2.1. How to bind a wireless device to the system IMPORTANT: Before you continue, first ensure the EPIR2 is powered up and connected to your PC via the USB cable. 1. Turn on the wireless device by following the instructions provided in the user manual of the wireless device. 2. Run ELDES Configuration Tool software and left-click on the USB connection / -connect- button. 42 EPIR2 User Manual v.1.2 21 3. Open Wireless Device Management section. This section uses a radar diagram to show ELDES wireless devices visible to EPIR2 within its wireless range. 43 80% 60% 40% 20% Unbound devices are indicated by a device icon with a red stripe above the icon. Once the device is bound, the stripe turns to green: Wireless device bound to alarm system (green stripe above the icon). 22 EN Wireless device not bound to alarm system (red stripe above the icon). EPIR2 User Manual v.1.2 The wireless devices are automatically arranged within the radar diagram according to the strength of their wireless signal, expressed in percentage terms. 4. Enter an 8-character wireless device ID code in Device ID entry. The ID code is printed on a label located on the inner or outer side of the wireless device enclosure. 5. Once the wireless ID is entered correctly, the button will turn to Add. 44 6. Left-click on the Add button and watch the progress bar indication. 45 IMPORTANT FOR EWK1: After left-clicking on the Add button it is necessary to press any button on the EWK1 keyfob several times. 7. After the successful wireless device binding process, the stripe above the wireless device icon will turn green. In addition, the following information related to the bound wireless device will appear: 46 Device Type – Wireless device model and connection with alarm system status: • CONNECTED – Wireless device is bound to alarm system; • NOT CONNECTED – Wireless device is not bound to alarm system. Temperature – Temperature of the area surrounding the wireless device. The temperature is measured by built-in temperature sensor (if any). Battery Level – Battery status of the wireless device: • 0% - Battery is empty; • 100% - Battery is full. Signal Level – Wireless connection signal strength: • 0% - No wireless signal; • 100% - Wireless signal is perfect. EPIR2 User Manual v.1.2 23 2.2. How to remove a wireless device from the system IMPORTANT: Before you continue, first ensure the EPIR2 is powered up and connected to your PC via the USB cable. 1. Turn on the wireless device by following the instructions provided in the user manual of the wireless device. 2. Run ELDES Configuration Tool software and left-click on the USB connection / -connect- button. 38 47 3. Open Wireless Devices section. 48 80% 60% 40% 20% 4. In the radar diagram, left-click (highlight) on the bound wireless device icon (green stripe above the icon) to select it. 24 EN EPIR2 User Manual v.1.2 5. Left-click on the Remove button to remove the wireless device. 49 6. Watch the progress bar indication. 50 7. After the successful wireless device removal process, the stripe above the wireless device icon will turn red. 2.3. EKB3W wireless keypad overview ATTENTION: The EKB3W commands provided in this user manual are intended for basic configuration and control of the EPIR2 system. For complete configuration and control using EKB3W, please refer to the latest version of EPIR2 Configuration Manual located at www. eldes.lt/en/download EKB3W is a wireless LED keypad intended for using with EPIR2 alarm system. LED Functionality ARMED Alarm system is armed / Configuration mode READY System is prepared for arming SYSTEM System fault / valid command is being entered BYPS Zone bypass mode 1-12 Violated zone A 51 B ARMED READY SYSTEM 1 BYPS 7 8 2 9 3 4 5 6 10 11 12 1 2 3 STAY 4 5 6 BYPS 7 8 9 INST * 0 # CODE Keys Functionality [BYPS] Zone bypass mode [CODE] Additional options - system fault list / violated high-numbered zone indication / violated tamper indication (EKB3W indicates up to 12 zones on the keypad, there is a different system to identify zones numbered 13 to 34) [*] Configuration mode (when typed as a 1st character) / cancel command (when typed as a 2nd character) / keypad partition switch (if enabled) [#] Confirm (enter) command [0] ... [9] Command typing [STAY] Manual Stay mode activation [INST] (currently inactive) EPIR2 User Manual v.1.2 25 The green LED READY indicates that no zones are violated or no fault is present and the system is ready for arming. LED SYSTEM lights up or flashes in case of zone violation or if system faults are present. The alarm system cannot be armed until the fault is corrected or violated zone (-s) is restored, bypassed or set up to operate under Force mode. The system can still be armed even when the following faults are present: • backup battery problem; • main power supply failure; • date & time not set; • GSM connection problem. Audio Indication The built-in buzzer uses two types of sound signals – three short beeps and one long beep. Three short beeps stand for successfully carried out configuration command, one long beep – for invalid configuration command. In addition, the buzzer will continuously provide short beeps for 10 seconds (by default) in case of alarm when the violated zone is of the associated EKB3W keypad. Visual Indication EKB3W keys have a back-light and in case of alarm the keypad back-light turns on and lasts for 10 seconds (by default) if the violated zone is of the associated EKB3W keypad. For battery power saving reasons the back-light and LED light lasts for 10 seconds after the last key-stroke. However, this duration is configurable. 2.3.1.How to configure and control the system by EKB3W System configuration and control by EKB3W keypad is carried out by entering a valid configuration command using the number keys 0... 9 and [#] key for confirmation. Some commands require [BYPS], [CODE] and [STAY] keys as well. The structure of the standard configuration command is a combination of digits. In this user manual configuration commands, valid parameter values and range are indicated in brackets. 2.3.2. How to arm the system by EKB3W 1. To arm the system, enter any out of 10 available 4-digit user passwords using the number keys: 1 2 3 4 5 6 7 8 9 Enter user password: uuuu Value: uuuu – 4-digit user password Example: 1111 0 2. The system will initiate the exit delay countdown (by default – 15 seconds) intended for user to leave the secured area. The countdown is indicated by short beeps provided by the minibuzzer built in to the keypad (if fitted). 26 EN EPIR2 User Manual v.1.2 3. After the system is successfully armed, it will reply with confirmation by SMS message to User 1 phone number (by default). 52 SMS User EPIR2 2.3.3. How to disarm & turn off alarm by EKB3W 1. The system will initiate the entry delay countdown (by default – 15 seconds) after the user has entered the secured area. Entry delay countdown is intended for user to enter a valid user password and disarm the system before the alarm is caused. ` 2. To disarm the system or turn off the alarm, enter any out of 10 available 4-digit user passwords using the number keys: 1 2 3 4 5 6 7 8 9 Enter user password: uuuu Value: uuuu – 4-digit user password Example: 1111 0 3. After the system is successfully disarmed, it will reply with confirmation by SMS message to User 1 phone number (by default). 53 SMS User EPIR2 2.3.4. About STAY mode and how to activate it by EKB3W Stay mode allows the user to remain in the secured area after arming the system. In Stay mode, the system does not cause the alarm when the zones, set up to operate under this mode, become violated. This mode is usually used when arming the system before night. There are two ways to activate Stay mode: • Automatic - This mode is activated automatically in case the user does not leave the secured EPIR2 User Manual v.1.2 27 area (if Delay zone is not violated) during Exit Delay countdown when arming the system. • Manual - The system goes into Stay mode after the user opens an additional menu or presses [STAY] key and enters a valid user password on the EKB3W keypad. There is no Exit Delay countdown when activating Stay mode manually. Stay mode is NOT activated when arming the system by phone call. 1. Arm the system in Stay mode manually by entering the following combination using [STAY] and number keys: Press the [STAY] key & enter user password: STAY uuuu Value: uuuu - 4-digit user password Example: STAY1111 2. After the system is successfully armed, it will reply with confirmation by SMS message to User 1 phone number (by default). 54 SMS User EPIR2 For more details on how to disarm & turn off the alarm by EKB3W keypad, please refer to section 2.3.3. 2.3.5. Alarm indications & how to view violated zones / tampers by EKB3W The built-in EKB3W mini-buzzer provide short beeps continuously in case of alarm. In addition, the violated zone number is indicated by illuminated zone LED or flashing SYSTEM LED (if the violated zone number is above 12). The violated tamper number is indicated by illuminated SYSTEM LED. The mini-buzzer can be silenced by disarming the system using any method. For more details on EKB3W violated high-number zone & tamper number indication, please refer to section 2.3.7 Fault messages. 2.3.6. How to bypass a violated zone & activate a bypassed zone by EKB3W Arming the system is disabled while there’s at least 1 violated zone. Bypassing the zone allows to temporally disable a particular violated zone and arm the alarm system afterwards. Bypass a violated zone by entering the following combination using [BYPS], number and [#] keys: 28 EN EPIR2 User Manual v.1.2 Press the [BYPS] key, enter zone number & user password: BYPS nn uuuu# Value: nn – zone number, range – [01... 34]; uuuu – 4-digit user password Example: BYPS051111# To activate a bypassed zone, enter the same combination again. NOTE: The alternative way to activate all bypassed zones at once is to disarm the system. NOTE: Zones can only be bypassed when the system is not armed. ATTENTION: Bypassing a violated tamper is NOT allowed. Please, restore the tamper (for example: close sensor‘s enclosure) before arming the system 2.3.7. Fault messages Yellow LED SYSTEM indicates a system fault. SYSTEM LED indications are mentioned in the table below. SYSTEM LED Illuminated continously Flashing Description One ore more zones or tampers are violated; other system fault One or more high-number zones are violated In order to find out more about the particular system problem, please enter command A. After this procedure the system will activate red zone LEDs for 15 seconds. The description on each LED indication is mentioned in the table below. Zone LED 1 2 3 4 5 6 Description One or more tampers are violated. Backup battery problem. Main power supply problem. Date/time not set. One or more high-number zones (Z13 - Z34) are violated. GSM connection problem. In order to find out which particular high-number zone is violated, please enter command B. In order to find out which particular tamper is violated, please enter command C. A. System fault indication - enter command: [CODE#] B. Violated high-number zone indication – enter command: [CODE1] C. Violated tamper indication – enter command: [CODE2] EPIR2 User Manual v.1.2 29 EKB3W indicates up to 12 zones on the keypad, in this section you can learn how to identify highernumbered zones (Z13-Z34). The number of the violated high-numbered zone or tamper can be calculated using the table below according to the formula: number from zone LED section B + number from zone LED section A. Example: LED #3 from section A is flashing and LED #8 from section B is illuminated continuously. According to the table below LED #8 is equal to number 18, therefore 18 + 3 = 21. Result: Violated high-number zone or tamper number is 21. Zone LED section - A (flashing) Zone LED 1 = 1 Zone LED 2 = 2 Zone LED 3 = 3 Zone LED 4 = 4 Zone LED 5 = 5 Zone LED 6 = 6 Zone LED section - B (illuminated continously) Zone LED 7 = 12 Zone LED 8 = 18 Zone LED 9 = 24 Zone LED 10 = 30 2.4. EWK1 wireless keyfob overview EWK1 is a wireless keyfob intended for using with EPIR2 alarm system. EWK1 keyfob features four configurable buttons intended to operate according to individual needs. After the button is pressed, EWK1 internal buzzer’s sound signal confirms a successfully carried out command. The status of the sent command can be checked by attempting to receive the feedback signal from the alarm system. This can be performed by pressing down the same button and holding it for 3 seconds. 3 short sound signals indicate a successfully carried out command while 1 long beep stands for failed command and feedback signal failure. By default one pair of buttons is already configured to arm and disarm the alarm system. 2.4.1. How to arm the system by EWK1 1. To arm the system, press 1 out of 4 EWK1 buttons (by default – alarm system. button) assigned to arm the 55 Arm the system 2. The system will initiate the exit delay countdown (by default – 15 seconds) intended for user to leave the secured area. 30 EN EPIR2 User Manual v.1.2 3. After the system is successfully armed, it will reply with confirmation by SMS message to User 1 phone number (by default). 56 SMS User EPIR2 2.4.2. How to disarm the system by EWK1 1. The system will initiate the entry delay countdown (by default – 15 seconds) after the user has entered the secured area. Entry delay countdown is intended for user to disarm the system before the alarm is caused. 2. To disarm the system or turn off the alarm, press 1 out of 4 EWK1 buttons (by default – button) assigned to disarm the alarm system. 57 Disarm the system 3. After the system is successfully disarmed, it will reply with confirmation by SMS message to User 1 phone number (by default). 58 SMS User EPIR2 User Manual v.1.2 EPIR2 31 3.HOW TO PROGRAM THE SYSTEM USING YOUR MOBILE PHONE NOTE: The system supports a flexible management of SMS/text message replies from the system. This can be configured using ELDES Configuration Tool software. In order to configure and control the EPIR2 system using SMS/text message, send the text command to the phone number of EPIR2 from one of the pre-programmed user numbers. ESSENTIAL INFORMATION FOR PROGRAMING VIA YOUR MOBILE PHONE • The underscore symbol ‘_’ in these instructions represents a space. So when following instructions and typing an SMS/text message, replace the underscore symbol with a single space. • Similarly, ‘XXXX’ means password. • Make sure you don’t leave any spaces at the beginning or end of the message. • If you receive the message “wrong syntax” please check your message and try again. Function Set the SMS language Command LL Change the SMS 0000_PSW_XXXX password Main Settings Value Range / Comment LL = CZ; EN; EE; FI; FR; DE; GR; IS; LV; LT; RU; SK; ES Example LT Choose your preferred lan guage for the device before you change the pre-set pass word. Use the code shown in the table on page 42 to set your device to your preferred language. Then send the code via SMS/text message to the SIM card inserted in your EPIR2 alarm system. XXXX = [0001... 9999] 0000_PSW_1111 All SMS/text message commands start with a password, so be sure to change the default password to a memorable number. It must be a four digit number – anything except four zeros. Non-numerical characters such as dots, colons and spaces are not allowed. NOTE: The underscore symbol ‘_’ in these instructions represents a space. So when typing an SMS/text message, replace the underscore symbol with a single space. 32 EN EPIR2 User Manual v.1.2 Function Add or change a single user phone number Command XXXX_NRn: +4417001111111 or XXXX_NRn: 004417001111111 or XXXX_ NRn:017001111111 Main Settings Value Range / Comment NRn = [NR1... NR10] The EPIR2 alarm system allows you to enter up to ten different mobile numbers to gain access to and control the system. User 1 number is mandatory - all the others can be skipped. Example 1111_ NR1:+4432101234 All numbers must be entered in one of the following formats: • International (with plus) – The phone numbers starting with plus and an international country code in the following format: +[international code] [area code] [local number], example for UK: +4417091111111. • International (with 00) – The phone numbers starting with 00 and an international country code in the following format: 00[international code][area code][local number], example for UK: 004417091111111. • Local – The phone numbers starting with an area code in the following format: [area code] [local number], example for UK: 017091111111. NOTE: The underscore symbol ‘_’ in these instructions represents a space. So when typing an SMS/text message, replace the underscore symbol with a single space. EPIR2 User Manual v.1.2 33 Function Command Add or change XXXX_ multiple user NR1:+4411111111_ phone numbers NR2:004411111112_ NR3:011111113_ NR4:011111114_ NR5:004411111115_ NR10:XXXX_ +4411111110 Verify added XXXX_HELPNR user phone numbers Delete a single XXXX_NRn:DEL user phone number Delete multiple XXXX_NR2:DEL_ user phone NR3:DEL_NR4:DEL_ numbers NR5:DEL NR10:DEL Set date & time XXXX_MMMM. mn.dd_hh:mi Arm the system XXXX_ARM Disarm the XXXX_DISARM system Change the exit XXXX_ delay timer EXITDELAY:YY Main Settings Value Range / Comment Enter numbers based on priority, because in case of alert, the system will attempt to contact the first number entered before the second and so on. The system will send you a text by return, with all pre-programmed numbers. NRn = [NR1... NR10] Example 1111_ NR1:+44321012341_ NR4:0321012352 1111_HELPNR 1111_NR2:DEL 1111_NR3:DEL_ NR4:DEL_NR5:DEL MMMM = year; mn = month, [01... 12]; dd = day, [01... 31]; hh = hour, [00... 23]; mi = minutes, [00... 59] The system will send you a text confirmation by return. The system will send you a text confirmation by return. YY = [0... 600] value is in seconds 1111_2012.05.25_ 14:15 1111_ARM 1111_DISARM 1111_EXITDELAY:20 When you exit your protected building, having just armed the system, you have to leave within a specified time to avoid activating the alarm. (The manufacturer pre-set default is 15 seconds.) During this time the detector will ignore any motion. This period is called the exit delay. By default, while the time-out is running, the LED will blink once a second. Disable the exit delay timer XXXX_ EXITDELAY:0 1111_EXITDELAY:0 NOTE: A combination of different phone number formats is allowed to use. NOTE: The underscore symbol ‘_’ in these instructions represents a space. So when typing an SMS/text message, replace the underscore symbol with a single space. 34 EN EPIR2 User Manual v.1.2 Function Edit zone alarm text Disable a zone Enable a zone Change the entry delay timer Disable the entry delay timer Check your system and zone status Function Rename PGM output Turn ON PGM output / set PGM output startup status to ON Command XXXX_Zn: NewTextHere XXXX_Zn:OFF XXXX_Zn:ON XXXX_ ENTRYDELAY:Zn,YY Zone Settings Value Range / Comment Zn = [Z1... Z34] Zn = [Z1... Z34] Zn = [Z1... Z34] Zn = [Z1... Z34], YY = [0... 65535] value is in seconds Example 1111_Z1: Motion_detected 1111_Z5:OFF 1111_Z7:ON 1111_ ENTRYDELAY:Z1,25 When you enter your protected building, you have to disarm the system within a specified time to avoid activating the alarm (manufacturer pre-set default is 15 seconds). During this time the detector will ignore any motion. This period is called entry delay. By default, while the time-out is running, the LED will bling once a second. XXXX_ Zn = [Z1... Z34] 1111_ ENTRYDELAY:Zn,0 ENTRYDELAY:Z5,0 XXXX_STATUS The system will reply to the 1111_STATUS user who sent the SMS/text message, with the following up-to-date information: • system status (armed/disarmed); • status of zones & PGM outputs (ON/OFF); • zone alarm texts; • PGM output names. PGM Output Settings** Command Value Range / Comment XXXX_Cn: Cn = [C1... C32] NewNameHere XXXX_Cn: Cn = [C1... C32] ON or XXXX_ OutputName:ON Example 1111_C2:Pump 1111_Pump:ON NOTE: The underscore symbol ‘_’ in these instructions represents a space. So when typing an SMS/text message, replace the underscore symbol with a single space. EPIR2 User Manual v.1.2 35 Turn OFF PGM output / set PGM output startup status to OFF PGM Output Settings** XXXX_Cn: Cn = [C1... C32] OFF or XXXX_ OutputName:OFF 1111_C3:OFF PGM Output Settings** Function Command Value Range / Comment Turn ON PGM XXXX_Cn:ON: Cn = [C1... C32]; HH = hour, output for a speci- HH.MM.SS or XXXX_ [00... 23]; MM = minutes, [00... fied time period OutputName:ON:HH. 59]; SS = seconds, [00... 59] MM.SS Turn OFF PGM XXXX_Cn: Cn = [C1... C32]; HH = hour, output for a speci- OFF:HH.MM.SS or [00... 23]; MM = minutes, [00... fied time period XXXX_OutputName: 59]; SS = seconds, [00... 59] OFF:HH.MM.SS Example 1111_C3:ON: 13.23.48 1111_Pump:OFF: 15.20.01 **- The EPIR2 system supports wireless PGM outputs allowing connection and control of various electrical appliances: water pumps, heating, lighting, blinds etc. The maximum number of PGM wireless outputs which can be connected to the EPIR2 system is 32. Function Change system alarm duration Alarm Duration Settings Command Value Range / Comment XXXX_SIREN:T T = [0... 5] Check system alarm duration XXXX_SIREN Function Check the status of your system Command XXXX_INFO vale is in minutes The system will reply to the user who sent the SMS/text message, with the current alarm duration set System Status Information Value Range / Comment The system will reply to the user who sent the SMS/text message, with the following up-to-date information: • system date & time; • system status (armed/disarmed); • GSM signal strength level; • main power supply status; • state of zones (OK/alarm). Example 1111_SIREN:4 1111_SIREN Example 1111_INFO NOTE: The underscore symbol ‘_’ in these instructions represents a space. So when typing an SMS/text message, replace the underscore symbol with a single space. 36 EN EPIR2 User Manual v.1.2 Function Set the periodic system status SMS/text message Command XXXX_INFO:FF.TT System Status Information Value Range / Comment FF = frequency in days, [01... 10]; TT = time, [01... 23] By default, this status SMS/text message will be sent daily at 11:00am. Disable periodic XXXX_ system status INFO:00.00 SMS/text message Alarm Notification Settings Function Command Value Range / Comment Disable ring from XXXX_CALLS:OFF By default the system makes a the system in case phone call to the User 1 number of alarm in the event of an alarm. You may wish to configure the system so that a phone call is NOT made when an alarm occurs (you may prefer to receive only SMS notifications). Enable ring from XXXX_CALLS:ON the system in case of alarm Disable SMS/text XXXX_SMS:OFF The system sends an SMS/text message from the message to the User 1 number system in case of in the event of an alarm. You alarm may wish to configure the system to cease sending these messages when alarm occurs. Enable SMS/text XXXX_SMS:ON message from the system in case of alarm Example 1111_INFO:02.10 This status SMS/ text message will be sent every 2nd day at 10:00am. 1111_INFO:00.00 Example 1111_CALLS:OFF 1111_CALLS:ON 1111_SMS:OFF 1111_SMS:ON NOTE: The underscore symbol ‘_’ in these instructions represents a space. So when typing an SMS/text message, replace the underscore symbol with a single space. EPIR2 User Manual v.1.2 37 Function Enable SMS to all users simultaneously in case of alarm Disable SMS/text message to all users simultaneously in case of alarm Alarm Notification Settings Command Value Range / Comment Example XXXX_SMSALL:ON By default, in case of alarm the 1111_SMSALL:ON system sends an SMS message to User 1. If the system does not receive a successful SMS message delivery confirmation in 20 seconds from the recipient, the SMS message is sent to User 2, and if there is still no delivery confirmation received, to Users 3, 4 and 5, but the sequence will stop as soon as a delivery confirmation is received. You may wish to configure the system to send these messages to all pre-programmed user numbers simultaneously when alarm occurs. XXXX_SMSALL:OFF 1111_ SMSALL:OFF External Power Supply & Backup Battery Status Notification Settings Function Command Value Range / Comment Example Disable SMS/text XXXX_M:OFF The EPIR2 will let you know 1111_M:OFF message regardwhen the mains 230V power ing the external supply fails or recovers. In some power supply remote places where the mains power supply is unreliable, you may wish to configure the system to ignore these changes. Enable SMS/text XXXX_M:ON 1111_M:ON message regarding the external power supply NOTE: The underscore symbol ‘_’ in these instructions represents a space. So when typing an SMS/text message, replace the underscore symbol with a single space. 38 EN EPIR2 User Manual v.1.2 External Power Supply & Backup Battery Status Notification Settings Function Command Value Range / Comment Example Disable SMS/text XXXX_BATREPORT: The system checks the backup 1111_ message regard- OFF battery resistance every 10 BATREPORT:OFF ing the battery days. If the backup battery is replacement disconnected or needs to be replaced (if more than 2,5Ω resistance is detected), the system sends an SMS message to User 1. You may wish to configure the system to ignore these changes. Enable SMS/text XXXX_BATREPORT: 1111_ message regard- ON BATREPORT:ON ing the battery replacement Function Set temperature MIN and MAX values Temperature Notification Settings Command Value Range / Comment XXXX_TEMP: MIN = minimum temperature MIN:MAX boundary, [-55... 125] C; MAX = maximum temperature boundary, [-55... 125] C. Example 1111_TEMP:10:30 System Control from Any Phone Number Settings Function Command Value Range / Comment Example Unblock unknown XXXX_STR:ON By default, the EPIR2 alarm sys- 1111_STR:ON incoming numtem can only be accessed from bers each of up to ten mobile phones that you program into it.. To allow access from any phone number you need to enable the current feature, which will allow all password holders to access the system. Block unknown incoming numbers XXXX_STR:OFF 1111_STR:OFF NOTE: The underscore symbol ‘_’ in these instructions represents a space. So when typing an SMS/text message, replace the underscore symbol with a single space. EPIR2 User Manual v.1.2 39 Function Command Hear what is XXXX_MIC happening in your property Remote Listening Value Range / Comment Example You can listen in to what is hap1111_MIC pening at your protected property whenever you want by sending this SMS/text message. The system will make a phone call to you and enable the microphone in EPIR2. You must answer the call within 20 seconds to listen in to what is happening in your property. If you do not pick up, the system will stop trying and will return to its previous state. NOTE: If there is an alarm the system will automatically make a call so that you can listen to what is happening in the property. In this case, the system will try the pre-programmed numbers in order until its call is answered. The phone call in the event of alarm will be made UNLESS „Disable ring from the system in case of alarm“ has been selected, see „alarm notification settings“ above. Detector Sensitivity Level Settings Function Command Value Range / Comment Example Change the XXXX_LEVEL:YY YY = [20... 99] 1111_LEVEL:35 sensitivity level of The greater the value, the the detector lower the sensitivity level of the detector. The EPIR2 device is pre-set by the manufacturer at the optimal detector sensitivity level. However, in some cases, for instance where the system is installed in windy premises, the air flow can cause false alarms. In this case you can reduce the sensitivity level. Check the sensiXXXX_LEVEL 1111_LEVEL tivity level of the detector NOTE: The underscore symbol ‘_’ in these instructions represents a space. So when typing an SMS/text message, replace the underscore symbol with a single space. 40 EN EPIR2 User Manual v.1.2 Function Disable wireless module Enable wireless module Bind a wireless device to the system Remove a wireless device from the system Replace a wireless device by another wireless device of the same model Wireless Device Management Command Value Range / Comment Example XXXX_RF:OFF The system disables the 1111_RF:OFF built-in wireless module XXXX_RF:ON 1111_RF:ON XXXX_SET:YYYYYYYY YYYYYYYY = 8-character wireless device ID code 1111_ SET:5261841A XXXX_DEL:YYYYYYYY YYYYYYYY = 8-character wireless device ID code 1111_ DEL:5261841A 1111_REP:YYYYYY <ZZZZZZZZ YYYYYYYY = old 8-character wireless device ID code; ZZZZZZZZ = new 8-character wireless device ID code The system will send you a text by return, with the number of available free wireless channels. Zn = [Z3... Z34] The system will send you a text by return, with the following information: • wireless device battery level; • wireless signal level; • error rate (number of failed data transmission attempts in a 10-minute period); • firmware version. Zn = [Z3... Z34] The system will send you a text by return indicating if a wireless device is operational. Zn = [Z3... Z34] The system will send you a text by return indicating temperature value measured by a built-in temperature sensor (if any) of a specified wireless device. 1111_ REP:5261841A <41286652 Verify free wireless channels XXXX_STATUS_FREE Get wireless device information XXXX_RFINFO:Zn or XXXX_RFINFO: YYYYYYYY Verify wireless device operation status XXXX_TEST:Zn Get wireless device temperature XXXX_TEMP:Zn 1111_STATUS_FREE 1111_ RFINFO:5261841A 1111_TEST:Z6 1111_TEMP:Z9 NOTE: The underscore symbol ‘_’ in these instructions represents a space. So when typing an SMS/text message, replace the underscore symbol with a single space. EPIR2 User Manual v.1.2 41 Function Verify SMS/text message central number SMS/Text Message Central Number Settings Command Value Range / Comment XXXX_ The text/SMS central number SMS_+4411111111 is normally already saved in the SIM by your mobile phone network provider. However if you fail to receive SMS/text messages from the EPIR2, you will have to enter it yourself having first got it from your mobile phone provider. Example 1111_SMS_ +4425568111 If you continue to have problems communicating with the SIM card you installed into EPIR2, try using a SIM card from a different mobile telephone operator. Function Get Smart Security ID code Command XXXX_SMART_ID Smart Security Value Range / Comment The system will send you a text by return, with the multi-character code required by Smart Security feature. Example 1111_SMART_ID Choose your preferred language for the device before you change the pre-set password. Use the code shown in the table below to set your device to your preferred language. Then send the code via SMS/text message to the SIM card inserted in your EPIR2 alarm system. LANGUAGE Czech English Estonian Finnish French German Greek Icelandic Latvian Lithuanian Russian Slovak Spanish CODE CZ EN EE FI FR DE GR IS LV LT RU SK ES IMPORTANT: To change the language once the system has already been configured you need to reset the device to the default settings. To do this press the reset button (located inside the upper half of the device), wait until the LED indicator blinks 5 times, then disconnect the power supply. NOTE: The underscore symbol ‘_’ in these instructions represents a space. So when typing an SMS/text message, replace the underscore symbol with a single space. 42 EN EPIR2 User Manual v.1.2 4. TROUBLESHOOTING Fault Lens indicator OFF • • • Indicator is blinking once a second • • • System does not send any SMS/ • text messages and/or does not • ring • • SMS/text message received: “In- • correct Format” • • • Possible reason No mains 230V power Power supply connector is unplugged Signal too weak or out of coverage SIM card is missing PIN code hasn’t been disabled SIM card is not active SIM card account is depleted Incorrect SIM central number No network signal User number is not programmed in (or call was made from an unprogrammed number and access from such numbers has been disabled) Wrong syntax Space is in wrong place in text/SMS message Manufacturer default password has not been changed The NR1 user has not been programmed in Your existing EPIR2 does not recognise an ELDES wireless device EITHER • Wireless mode is disabled. Please refer to ELDES Configuration Tool software to enable it. Some users are not getting arm-disarm and/or alarm notifications. OR • Wireless device battery is out of energy or the device is not switched ON. • If you normally configure your EPIR2 by SMS/text message, you should be aware that there are some user options which can be set when using the Configuration Tool but not when using configuration by SMS. Review system settings using the Configuration Tool and you will see a fuller picture of settings for individual users. If you cannot find the answer to your problem above, please contact your local distributor. More up to date information about your device and other ELDES products can be found at www.eldes.lt EPIR2 User Manual v.1.2 43 5. ADDITIONAL INFORMATION FOR ADVANCED USERS This section contains the wiring diagrams and other system features, such as remote configuration via GPRS network connection and firmware upgrade procedure. Your EPIR2 system comes equipped with wired zone and output terminals, therefore you may wish to connect a wired sensor, wired siren or a LED indicator to your EPIR2. The wired output can be used for wired siren connection or for system condition indication, while the wired zone is intended for one wired sensor connection. 5.1. How to connect a wired siren or a LED indicator to the wired output The output can be set to operate either as a siren output leading the connected wired siren activation in case of alarm or for showing the following system conditions by a connected LED indicator: • NO SIM Inserted - SIM card not present. The LED indicator will flash if the SIM card is not present in the EPIR2. • SIM PIN Enabled - PIN code left enabled. The LED indicator will flash with pauses if the PIN code is not disabled on the SIM card that is inserted in the EPIR2. • GSM Operator Error - GSM connection error. The LED indicator will flash with pauses in case of this error. • Exit/Entry Delay - Exit and entry delay time-out. The LED indicator will flash during countdown of exit and entry delay time-out. • Zone Z1 Violated - Zone Z1 violation. When PIR detector’s zone Z1 is violated, the LED indicator will illuminate and turn OFF when the detector’s zone Z1 is restored. • Alarm - System alarm. The LED indicator will turn ON in case of alarm and turn OFF when the alarm ends. • System Armed - System armed or disarmed. LED indicator will be illuminated once the system is armed and turned OFF once the system is disarmed. Wired siren/bell 1. Remove the terminal block from the slot. 59 44 EN EPIR2 User Manual v.1.2 2. Loosen the screws of the terminals using a flathead screwdriver. 60 3. Connect BELL wire (usually – red) of the wired bell/siren to BELL+ terminal, while the GND (usually - black) wire to BELL - / COM terminal. 61 GND BELL- / COM BELL Z2 BELL+ The wired siren/bell, connected to the wired output, must be piezo type and powered from +7... +11V. The current consumption must not exceed 150 mA. 4. Screw in the terminals. 62 5. Insert back the terminal block. 63 6. Set the Output Mode as Siren under Management section in the ELDES Configuration Tool software. EPIR2 User Manual v.1.2 45 NOTE: No additional power supply is required for the siren/bell. NOTE: For a more convenient installation, we recommend using EWS1 and EWS2 wireless sirens. System condition indication by LED indicator 1. Remove the terminal block from the slot. 64 2. Loosen the screws of the terminals using a flathead screwdriver. 65 3. Connect LED indicator’s cathode lead (shorter) to any of 1 kΩ nominal resistor lead and the to BELL+ terminal, while the anode (longer) lead to BELL - / COM terminal. 66 BELL- / COM resistor 1 kΩ Z2 BELL+ LED 46 EN EPIR2 User Manual v.1.2 4. Screw in the terminals. 67 5. Insert back the terminal block. 68 5. Under Management section in ELDES Configuration Tool software, set the Output Mode as Indicator and under the Output Indication column, enable the check-box (-es) corresponding to the desired system conditions, e. g. System Armed check-box. NOTE: The resistor and the LED indicator are NOT supplied with the EPIR2 system and are NOT mandatory to use. Please, obtain these components from your local store if desired. 5.2. How to connect a sensor to the wired zone EPIR2 system comes equipped with the wired zone, therefore you may wish to connect a wired sensor to your system. 5.2.1.Connecting a wired sensor of NO (normally open) type 1. Remove the terminal block from the slot. 69 EPIR2 User Manual v.1.2 47 2. Loosen the screws of the terminals using a flathead screwdriver. 70 3. Connect the Z wire (usually – yellow) of the wired detection device to Z2 terminal, while the COM (usually - green) wire to BELL - / COM terminal. 4. Connect the 5.6 kΩ nominal resistor, supplied with your EPIR2 system, across BELL- / COM and Z2 terminal in parallel to the connected wires of the detection device. 71 resistor 5,6 kΩ BELL- / COM COM Z2 BELL+ Z Magnet 5. Screw in the terminals. 72 48 EN EPIR2 User Manual v.1.2 6. Insert back the terminal block. 73 7. Set Zone Status of Z2 to Enabled under Zones/On Board section in ELDES Configuration Tool software.v 5.2.2. Connecting a wired sensor of NC (normally closed) type 1. Remove the terminal block from the slot. 74 2. Loosen the screws of the terminals using a flathead screwdriver. 75 3. Connect the Z wire (usually – yellow) of the wired detection device to any terminal of the 5.6 kΩ nominal resistor (supplied with your EPIR2 system), while the other resistor terminal - to Z2 terminal. EPIR2 User Manual v.1.2 49 4. Connect the COM (usually - green) wire to BELL - / COM terminal. 76 BELL- / COM resistor 5,6 kΩ Z2 COM BELL+ Z Magnet 5. Screw in the terminals. 77 6. Insert back the terminal block. 78 7. Set Zone Status of Z2 to Enabled under Zones/On Board section in ELDES Configuration Tool software. 50 EN EPIR2 User Manual v.1.2 5.3. How to connect to the system remotely via GPRS connection Before configuring EPIR2 remotely via GPRS connection, make sure that: • SIM card is inserted into EPIR2 device. • Mobile internet service is enabled on the SIM card. • Power supply is connected to EPIR2. • Default SMS password is changed to a new 4-digit password; • At least User1 phone number is set up • APN, user name & password are set up. 5.3.1.Establishing remote connection between EPIR2 system and configuration server Initiate the Connection to ELDES Server In order to activate a remote GPRS connection between EPIR2 system and ELDES configuration server, please, send the following SMS message from a preset user phone number. Upon successful SMS message delivery, the system establishes a connection session for 20 minutes. An SMS reply is sent containing device IMEI number and confirming that the connection has been successfully established. SMS Initiate the Connection to ThirdParty Server SMS text: XXXX_STCONFIG Example: 1111_STCONFIG In case it is necessary to establish a connection between EPIR2 system and a third-party configuration server, send the following SMS message. SMS SMS text: XXXX_STCONFIG:IPaddress:Port or XXXX_STCONFIG:HostName:Port Value: IPaddress – public IP address of third-party configuration server; Port – port number of thirdparty configuration server, HostName - public host-name of third-party configuration server. Example: 1111_STCONFIG:62.80.115.102:4522 NOTE: Public IP address (host-name) and port number are necessary when connecting to a third-party-server for the first time only. When connecting to the server next time, XXXX_ stconfig is enough as the IP address (host-name) and port number are saved in the device memory after the first successful connection. EPIR2 User Manual v.1.2 51 5.3.2. Connecting to ELDES configuration server using ELDES Configuration Tool software • Run ELDES Configuration Tool software. • Press Remote Configuration button. • In the next window, select Connect to Remote Server (recommended) and press Next button. • Enter the received IMEI number in Device IMEI entry. • Press Continue button. • Upon the successfully established connection, the system prompts for an administrator password. • By entering a valid administrator password, the system grants access to full configuration remotely. • Remote Configuration Management window displays all performed configuration actions. 79 80 81 82 5.3.3. Ending the configuration process Shut down the Connection with the Server After the system configuration is complete, use one of the following methods to end the configuration process: • Press Disconnect button and close ELDES Configuration Tool software; • Wait for the system to reply with an SMS message confirming the end of the session; • Shut down the connection with the server at any time by sending an SMS message. SMS 52 EN SMS text: XXXX_ENDCONFIG Example: 1111_ENDCONFIG EPIR2 User Manual v.1.2 5.4. How to reset the system to default settings 1. Unplug USB cable (if any) 2. Open EPIR2 enclosure. 3. Press and hold the RESET button. 4. Wait for the LED to flash quickly several times. 5. Power down EPIR2. 6. Power up EPIR2. 7. Configuration has been restored to default. 5.5. How to upgrade the firmware locally via USB connection 1. 2. 3. 4. 5. 6. Disconnect the power supply and backup battery.. Open EPIR2 enclosure. Connect EPIR2 to the PC via USB cable. Press and hold the RESET button. Connect the power supply. Release the RESET button after the new window pops-up containing a .bin file. Otherwise open My Computer and look for Boot Disk drive. 7. Delete the .bin file located in this drive. 8. Copy and paste in the very same window. 9. After the copying is done, power down EPIR2. 10. Unplug USB cable. 11. Power up EPIR2. 12. Firmware upgraded. 5.6. How to upgrade the firmware remotely via GPRS connection FOTA EPIR2 alarm system supports FOTA (firmware-over-the-air) feature. This allows to upgrade the firmware remotely via GPRS connection. Once the upgrade process is initiated, the system connects to the specified FTP server address where the firmware file is hosted and begins downloading and reflashing the firmware. The firmware file must be located in a folder titled Firmware. In order to initiate the upgrade process, please, send the following SMS message. SMS EPIR2 User Manual v.1.2 SMS text: XXXX_FOTA:ftp-server-IP,port, firmware-file-name.bin,user-name,password Value: ftp-server-IP - IP address of FTP server where EPIR2 firmware file is stored; port - port number of FTP server (usually - 21); firmware-file-name.bin - name of the firmware file, allowed max. length - up to 31 character; user-name - user name of FTP server login, allowed max. length - up to 31 character; password - password of FTP server login, allowed max. length - up to 31 character. Example: 1111_FOTA:84.15.143.111,21,EPIR2fw. bin,eldesuser,eldespassword 53 ATTENTION: Comma character is NOT allowed to use in user name and firmware file name. ATTENTION: “ELDES UAB” does not run a FTP server and does not host the firmware files online. Please, contact your local dealer to request the latest firmware file. NOTE: It is strongly recommended to restore default parameters after the firmware upgrade. For product warranty repair service, please contact the local dealer from whom this product was purchased If your problem could not be fixed by the self-guide above, please, contact your distributor. More up to date information about your device and other products can be found at the manufacturer’s website www.eldes.lt 5.7. Monitoring station Your EPIR2 system can be configured to report events to the monitoring station by transmitting data messages to the monitoring station. The system connects to the monitoring station when the MS (Monitoring Station) mode is enabled. For more details, please refer to EPIR2 Configuration Manual located at www.eldes.lt/en/download 5.8. SMART SECURITY EPIR2 system supports a Smart Security feature based on user-friendly graphical interface that can be accessed via web browser or a smart-phone application developed for Android and iPhone. Smart security feature easily allows to arm/disarm the system, monitor system status and alerts. 5.8.1. Before running SMART SECURITY on EPIR2, please ensure that: • SIM card is inserted into EPIR2 device. • GPRS connection is enabled on the SIM card. • Power supply is connected to EPIR2 • Default 4-digit SMS password is changed to a new one; • A phone number is set up for at least User 1. • APN, User name and Password set. NOTE: To set APN, User name and Password, please refer to ELDES Configuration Tool software. 54 EN EPIR2 User Manual v.1.2 5.8.2. Creating a SMART SECURITY account • Type in the following address in your web browser: http://security.eldes.lt • Press Register • In the next window fill in username, password, email address, your personal details verification code and press Register button. • Now open your email inbox and look for a new email message received from ELDES. The email message will contain an account activation link. Please, click on the link to confirm your account registration. 83 5.8.3. Adding your device to SMART SECURITY account. • Return to http://security.eldes.lt and enter the login details. • After successful login process you will be requested to fill in your device details in Create Device window. In this window, please, fill in the following details: • • Name – name of your device displayed in the main screen view of SMART SECURITY. • Smart Security ID – a unique multi-character security number provided with every EPIR2 unit. This ID number can be retreived using ELDES Configuration Tool software or by sending the following SMS message from User 1 – User 10 phone number: XXXX_smart_id • Device Model – select EPIR from the list. 84 After filling in the device details, press Create button. EPIR2 User Manual v.1.2 55 5.8.4. Controlling your device via SMART SECURITY. • After adding the device to the account time you will be brought to the next window Devices. In addition, a 6-month trial License Key will be granted for your each device added for the first time to your account. In this window you can view the following information on your EPIR2 device: • • • • • • • Online/Offline – device connection status. „Test Device“ – custom device name provided by you. ID – internal sequence number of the server. Imei – uniqe hardcoded GSM modem number of your EPIR2 device. License Key – a special key number provided after its‘ purchase. This key allows to continue using SMART SECURITY. Edit button – press to view and edit your device details Delete button – press to remove your device from SMART SECURITY account. 85 • 56 Press Control button to start controlling your security system and electrical appliances. In the next window you can arm/disarm the alarm system, view battery, network, temperature status, alarm reports and control electrical appliances. EN EPIR2 User Manual v.1.2 86 5.8.5. Obtaining a new License Key • When the period of your 6-month trial License Key is over, you will have to purchase a new key via PayPal. Press PayPal Extend License located in the Devices in Use section of Devices window. • In the next window follow the instructions of the PayPal system to complete the purchasing procedure. • After the purchase is complete, the License Key validity extends automatically for a specified device. EPIR2 User Manual v.1.2 87 57 6. Related products EWP1 - wireless PIR sensor (motion detector) EWD1 - magnetic door contact EWS1 - internal siren EWS2 - external siren 58 EN EPIR2 User Manual v.1.2 EWK1 - wireless keyfob EWF1 – wireless smoke detector EW1 - wireless zone and PGM output expansion module EW1B - battery-powered wireless zone and PGM output expansion module EKB3W – wireless LED keypad EPIR2 User Manual v.1.2 59 Made in the European Union www.eldes.lt