1
REPRODUCTION
22586099
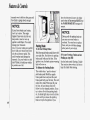
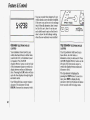
Table of Contents
. .
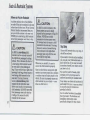
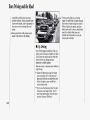
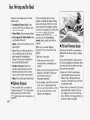
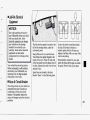
The Heritage of Oldsmobile
. . 3
,
. . 6
,
.
. . 41
.
*
. .
. 109
. 135
. . 159
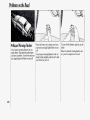
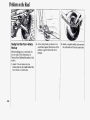
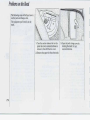
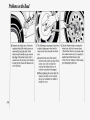
5 Problems on the Road.
6 Service & Appearance Care
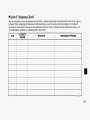
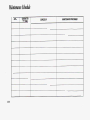
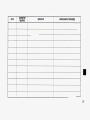
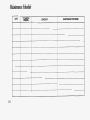
7 Maintenance Schedule.
. XI
.
.
.
.
.
.
. 183
.
.
. . 233
8 Customer Assistance Information .
. 253
Includes "Reporting SafetyDefects" on page 256
9 Index.
.
.
. .
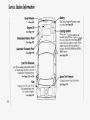
Service Station Information.
1 9 9 4 EIGHTY
*
.
. . 263
Last Page
EIGHT
OWNER'S
MANUAL
First Edition
22586099
Important Notes
About this Manual
Please keep this
manual in your
Oldsmobile, so it will be
there if you ever needit
when you’re on the
road. If you sell the
vehicle, please leavethis
manuaI in itso the new
owner can use it.
This manual includes
the latest information at
the time it was printed.
We reserve the rightto
make changes in the
product after that time
without further notiee.
Note to Canadian
Owners
For vehicles first sold in
For Canadian Owners
Who Prefer a French
Language Manual
Canada, substitute the
name “General Motors
of Canada Limitedfor
Oldsmobile Division
whenever it appearsin
this manual.
Aux proprietaires
canadiens: Vous
pouvez vous procurer
un exemplaire de ce
guide enfrancais chez
votre concessionaire ou
au DGN Marketing
Services Ltd., 1500
Bonhill Rd., Mississauga,
Ontario L5T lC7.
Published by
Oldsmobile Division
General Motors Corporation
920 Townsend Street
Lansing, Michigan 4892 1
The wordOldsmobile and the
Oldsrnobile rocket emblem
are registered trademarksof
General Motors Corporation.
The word Delco is a
registered trademarkof
General Motors Corporation.
0 Copyright 1993 General Motors Corporation, Oldsmobile Division. All rights reserved. Printed in USA,
.. ..
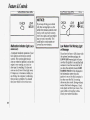
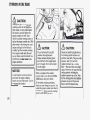
How to Use this Manual
MANY
PEOPLE READ THEIR OWNER’S
manual from beginningto end when
they first receivetheir new vehicle.
This will help you learn about the
features and controls for
your vehicle.
In this manual,you’ll rind that
pictures and words work together
to explain things quickly.
There are nineparts with thumbtabbed pages in this manual.
Each part beginswith a brief list of
contents, so you can usually tell at a
glance if that part containsthe
information you want.
You can bend the manual
slightly to
reveal the tabs that help
you find a
part.
6
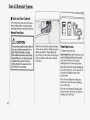
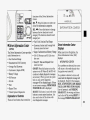
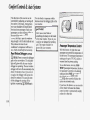
Part 1: Seats & Restraint Systems
Ths part tells you how to use your
seats and safety belts properly.
Part 2: Features 8 Controls
This part explains how to start and
operate
your Oldsmobile.
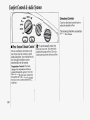
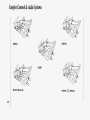
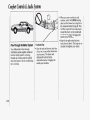
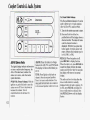
Part 3: Comfort Controls & Audio Systems
This part tells you how to adjust the
ventilation and comfortcontrols and
how to operate youraudio system.
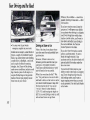
Part 4: Your Driving and the Road
Here you’ll find helpful infonnatian
and tips about theroad and how to
drive under different conditions.
Part 5: Problems on the Road
This part tells you what to
do if you
have a problem while driving, such as
a flat tire or engine overheating,
How to Use this Manual
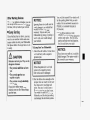
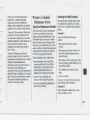
Safeiy warnings andSymbds
. r
You will f i d a number of safety
cautions in this book. We use a box
with graybackground and theword
CAUTION to tell you about things that
could hurtyou if you were toignore
the warning.
You 4 1 also find a circle with a slash In the notice area, we tell you about
something thatcan damage your
through it in t h s book. This safety
vehicle. Many times, this damage
symbol means:
would not be covered by your
Don’t
warranty, and itcould be costly. But
Don’t do this
the notice will tell you what to do to
Don’t /et this happen
help avoid the damage.
8
When you read other manuals, you
might see CAUTION and NOTICE
warnings in different colors or in
different words.
Vehicle Damage Warnin,-Also, in this book you wil fmd
these notices:
In the gray caution area,we tell
is. Then we tell
you what the hazard
NOTICE:
you what to do to help
avoid or reduce
These mean there is something
the hazard. Please read these cautions.
that could damage your vehicle.
If you don’t, you or otherscould be
hurt.
I
8
I
You’ll also see warning labels on your
vehicle. They use yellow for cautions,
blue for noticesand the words
CAUTION or NOTICE.
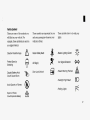
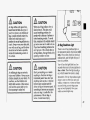
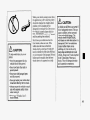
Vehicle Symbols
These are someof the symbols you
will find on your velucle. For
example, thesesymbols are used on
an original battery:
These symbols are important foryou
and your passengers wheneveryour
vehicle is driven:
These symbols have to do with your
lights:
Fasten Safety Belts
Master Lighting Switch
Protect Eyes by
Shielding
Air Bag(s)
Turn Signal Direction
Caustic SatteryAcid
Could Cause Burns
Door LocklUnlock
Hazard Warning Flashers
Caution Possible Injury
A
Headlight HighBeam
Avoid Sparks or Flames
Parking Lights
Spark or Flame
Could Explode Battery
A
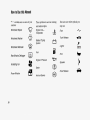
How to Use this Manual
These symbols are on some of your
controls:
Windshield Wipers
Windshield Washer
w
These symbols are used on warning
and indicator lights:
Here are some othersymbols you
may see:
Engine Coolant
Temperature
Fuse
Trunk Release
Battery Charging
System
Lighter
Windshield Defroster
Rear
Window Defogger
Iiii 1
Fuel
Engine Oil Pressure
Ventilating Fan
Horn
Speaker
Brake
Power Window
10
-%-
Hood Release
Anti-Lock Brakes
Er
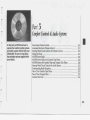
Part 1
Seats & Restraint Systems
Seats andSeat Controls ............................................................................................
Safety Belts ................................................................................................................
How to Wear Safety BeltsProperly ..........................................................................
Driver Position ..........................................................................................................
Supplemental Restraint System (Air Bags) .............................................................
Safety Belt Use During Pregnancy ...........................................................................
Right Front Passenger Position ................................................................................
Center Passenger Position ........................................................................................
Rear Seat Passengers ................................................................................................
Children .....................................................................................................................
Smaller Children and Babies ....................................................................................
Child Restraints .........................................................................................................
Larger Children .........................................................................................................
Safety BeltExtender ..................................................................................................
Replacing Safety BeltsAfter a Crash ........................................................................
12
14
18
18
22
27
27
27
28
30
31
31
38
40
40
11
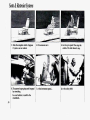
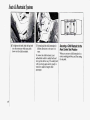
Seats & Restraint Systems
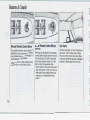
Seats and Seat Controls
This section tells you about the seatshow to adjust them-and also about
reclining seatbacks and head restraints.
Manual Front Seat
,
Move the control lever under the front
of the seat to unlock it. Slide the seat to
where you want it. Then release the
lever and try to move the seat with your
body, to make sure the seat is locked
into place.
12
,
, ,
~. . .
,
.
. ..
_ .
,
,.
'
. . . . . . ... . .. . _ . ". .. ' .. .' ' ,
,'
. .
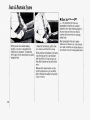
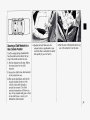
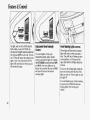
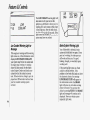
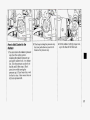
Power Seat (OPTION)
To adjust the power seat:
Seat Control (A): Raise the front of the
seat by holding the front of the switch
up. Lower the front of the seat by
holding the front of the switch down.
Raise the rearof the seat by holding the
rear of the switch up. Lower the rear of
the seat by holding the rear of the
switch down.
Move the seat higher by holding the
switch up. Lower the seat by holding
the switch down.
Move the seat forward by holding the
switch forward. Move the seat back by
holding the switch back.
Seatback Control (B): Tilt the
seatback forward by holding the switch
forward. Tilt the seatback backward by
holding the switch back.
Manual Reclining Seatback
Lift the lever to release the seatback,
then tilt the seatback forward or
baclward, as desired. Release the lever
to lock the seatback in place.
But don't have a seatback reclined if
your vehicle is moving.
13
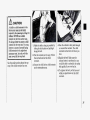
Seats di Restraint Systems
This part of the manual tells you how to
use safety belts properly. Italso tells
you some things you should not do with
safety belts.
And it explains the Supplemental
Restraint System, or “air bag” system.
Head Restraints
Slide the head restraint up or down so
that the topof the restraint is closest to
the topof your ears.
This position reduces the chance of a
neck injury in a crash.
14
CAUTION:
.Don’tlet anyone ride where they
can’t wear a safety heit properly. If
yau we in B trash an.dyou’re not
wearing a safety belt, your in,juries
c m be much wor’5e*You. can hit
things insidethe veh.ichUP be
ejected from it. You can be
smiousfy injured ur killed. In the
smx crash, you might n ~bet if you
we buckled up. Always hststexl your
safety bdt, and ch& that yuut
passengers’ beXts are fastened
prspcrly too.
iQ
This figure lights up as a reminder to
buclde up. (See Safety Belt Reminder
Light in the Index.)
In many states and Canadian provinces,
the law says to wear safety belts. Here's
why: They work.
You never know if you'll be in a crash.
If you do have a crash, you don't know
if it will be a bad one.
A few crashes are mild, and some
crashes can be so serious that even
buckled up a person wouldn't survive.
But most crashes are in between. In
many of them, people who buckle up
can survive and sometimes walk away.
Without belts they could have been
badly hurt or killed.
After more than 25 years of safety belts
in vehicles, the facts are clear. In most
crashes buckling up does matter ... a lot!
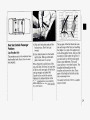
Why Safety Belts Work
When you ridein or on anything, you
go as fast as it goes.
1. For example, if the bikeis going 10
mph (16 km/h), so is the child.
I
2. When the bikehits the block,it
stops. But the child keeps going!
15
Seats & Restraint Systems
,
3. Take the simplest vehicle. Suppose
,.,
4.Put someone on it.
5. Get it upto speed. Then stop the
it's just a seaton wheels.
vehicle. The rider doesn't stop.
F
...
6. The person keeps going until stopped7. or the instrument panel
by something.
In a real vehicle, it could be the
windshield...
8. or the safety belts!
Seats di Restraint Systems
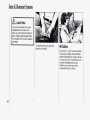
How To Wear Safety Belts
Properly
Adults
This sectionis only for people of adult
size.
Be aware that there arespecial things to
know about safety belts and chiIdren.
And there aredifferent rules for smaller
children and babies. If a child will be
riding in your Oldsmobile,see the
section afterthis one, called Children.
Follow those rules for everyone's
protection.
First, you'll want to know which
restraint systems your vehicle has.
We'll start with the driver position.
18
Driver Position
I'his section describes the driver's
qestraint system.
Lap-Shoclder Belt
The driver has a lap-shoulder belt.
Here's how to wear it properly.
1. Close and lock the door.
2. Adjust the seat (to see how, see Seats
in the Index) so you can sit up
straight.
~~
3.Pick up the latch plate and pull the
belt across you. Don’t let it get
twisted.
4. Push the latch plate into thebuckle
until it clicks.
Pull up on thelatch plate to make
sure it is secure. If the belt isn’t long
enough, see Safety Belt Extender at
the end of this section.
Make sure therelease button on the
buckle is positioned so you would be
able to unbuckle the safety belt
quickly if you ever had to.
The lap part of the belt should be worn
.ow and snug on the hips, just touching
:he thighs. In a crash, thisapplies force
to the strong pelvic bones. And you’d be
.ess likely to slide under the lap belt. If
you slid under it, thebelt would apply
force at your abdomen. This could
Zause serious or even fatal injuries. The
shoulder beltshould go over the
shoulder and across the chest. These
parts of the body are best able to take
2elt restraining forces.
The safety belt loclcs if there’s a sudden
stop or crash.
Shoulder Belt Height Adjuster
You can move the shoulder belt adjuster
to the height that is right foryou.
19
Seats & Restraint Systems
.
.
,
,
G
To move it up or down, squeeze the
release handle. When you release the
handle, try to move it down a little to
make sure ithas locked into position.
You can move the adjuster up from a
lower position by pushing the bottom of
the release handle.
20
Adjust the height so that the shoulder
portion of the belt is properly
positioned on your shoulder, away from
your face and neck.
To help you find a height that is right
for you, follow these guidelines:
For a tall person:Use the upper or
upper-middle position.
For a personof average height:Use a
position somewhere in the middle.
For a short person:Use the lower or
lower-middle position.
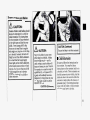
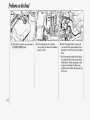
Q: What’s wrong with this?
A: The shoulder belt is too loose. It
won’t give nearly as much protection
this way.
L
li\ CAUTION:
You can be seriously hurt if your
shoulder beit is too loose. In a
crash you wouki move founvarci tau
much, which could increase injury.
The shauider beit ShauXd fit: against
yaur b d y .
II
Q: What’s wrong with this?
A: The belt is twisted across the body.
21
Seats & Restraint Systems
To unlatch the belt, just push the
button on the buckle. The belt should
go back out of the way.
Before you close the door,be sure the
belt is out of the way. If you slam the
door on it, you can damage both the
belt and your vehicle.
22
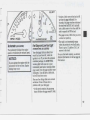
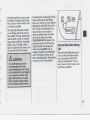
Supplemental Restraint
System (Air Bags)
This section explains the Supplemental
Restraint System (SRS)?or “air bag,”
system. Your Oldsmobilehas an air bag
for the driver and for the right-front
passenger.
Here are the most important thingsto
lmow:
VOLTS
4E
BRAKE
nur;
(a)
l
~~
Air Bag Readiness Light
There is an airbag readiness lighton
the instrument panel, which shows AIR
BAG. The system checks for electrical
malfunctions, and the light tells you if
there is a problem.
You will see this light flash fora few
seconds when you turn your ignition to
Run or Start. Then the light should go
out, which means the system is ready.
Remember, if the air bag readiness light
doesn't come on when you start your
vehicle, or stays on, or comes on when
you are driving, your air bag system
may not work properly. Have your
vehicle servicedright away.
23
Seats & Restraint Systems
How The Air Bag System Works
Where is the air bag?
The driver's air bag is inthe middle of
the steering wheel.
24
car which will move and deform
on
impact. Theair bag is also notdesigned
to inflate in rollovers, side impacts,or
rear impacts where the inflation would
provide no occupant protection benefit.
It is possiblethat in a crash, onlyone of
the two airbags in your Eighty Eight
will deploy. This is rare, but can happen
in a crash just severe enough to make
an
air bag inflate.
The right-front passenger'sair bag is
In any particular crash, the
located inthe instrument panel onthe
determination
of whether the airbag
passenger's side.
When is an air bag expected to inflate? should have inflated cannot bebased
solely on thelevel of damageon the
The air bag is designedto inflate in
vehicle(s). Inflation is determined by
moderate to severe frontalor nearthe angle of the impact andthe vehicle's
frontal crashes. Theair bag will only
deceleration, of which vehicle damage is
inflate if the velocity of the impact is
only one indication. Repair cost is not a
above the designed threshold level.
good indicator of whether an airbag
When impacting straightinto a wall that
shouId have deployed,
does not move or deform,the threshold
What makes an air bag inflate?
level for mostGM vehicles is between9
In a frontal or near-frontalimpact of
and 15 mph (14 and 23 lun/h).
sufficient severity, the air bag sensing
However, thisvelocity threshold
system detects that the vehicleis
depends on the vehicle designand may
suddenly
stopping as a result of a crash.
be several miles-per-hourfaster or
The sensing system triggers achemical
slower. In addition, thisthreshold
if the reaction of the sodium azidesealed in
velocity will be considerably higher
vehicle strikes an object such as a parked the inflator. The reaction produces
Seats & Restraint Systems
Is the smoke from an air bag inflation
harmful?
The particles emitted during air bag
inflation are not harmful to most people.
Some peoplewith respiratory ailments
may experience difficultybreathing if
they stay inthe vehicle with the
windows closedafter air bag inflation.
So, if your air bag inflates, you and any
passengers should exit the vehicle if and
when it is safeto do so. If you or your
passengers can’t getout of the vehicle,
try to get fresh air by opening a window,
turning on the fan, or opening a door.
26
Servicing YourAir BagEquipped
Oldsmobile
Air bags affect how your Oldsmobile
should be serviced.There are parts of
the air bag system in several places
around your vehicle. You don’t want
the system to inflate whilesomeone is
working on your vehicle. Your
Oldsmobile dealer and the 1994 Eighty
Eight Service Manualhave information
about servicing your vehicleand the air
bag system. The air bag system does not
need regular maintenance.
,
...
Seats & Resbaint Systems
1Rear Seat Passenger.
When you sit in a center seating
position, you have a lap safety belt,
which has no retractor.To make the
belt longer, tilt the latch plate and pull it
along the belt.
28
To make the belt shorter, pull its free
end as shown until the belt is snug.
Bucltle, position and release it the same
way as thelap part of a lap-shoulder
belt. If the belt isn’t long enough, see
Safety BeZt Extender at the end of this
section.
Make sure therelease button on the
bucltle is positioned so you would be
able to unbuckle the safety belt quickly
if you ever hadto.
It’s very important for rear seat
passengers to bucltle up! Accident
statistics show that unbelted people in
the rear seat arehurt more often in
crashes than those who are wearing
safety belts.
Rear passengers who aren’t safety
belted can be thrown out of the vehicle
in a crash. And they can strike others in
the vehicle who are wearing safetybelts.
Rear Seat Outside Passenger
Positions
LaplShoulder Belt
The positions next to thewindows havc
lap-shoulder belts. Here’s how to wear
one properly.
1. Pick up thelatch plate and pull the
belt across you. Don’t let it get
twisted.
2. Push thelatch plate into thebuckle
until it clicks. Pullup on thelatch
plate to make sure it is secure.
When the lap belt is pulled out all the
way, it will lock. If it does, let it go back
all the way and startagain. If the belt is
not long enough, see Safety BeZt
Extender at theend of this section.
Make sure the release button on the
buckle is positioned so you would be
able to unbuckle the safety belt quickly
if you ever had to.
The lap part of the belt should be worn
low and snug on the hips, justtouching
the thighs. In a crash, this applies force
to the strongpelvic bones. And you’d be
less likelyto slide under the lap belt.If
you slid under it, thebelt would apply
force at your abdomen. This could
cause serious or even fatal injuries.The
shoulder belt should go over the
shoulder and across thechest. These
parts of the body are best able to take
belt restraining forces.
The safety beltlocks if there’s a sudden
stop or a crash.
29
Seats & Restraint Systems
CAUTEQN:
To unlatch the belt, just push the
button on the buckle.
30
Chiiiiren
Everyone in a vehicle needs protection!
That includes infants and all children
smaller than adultsize. Infact, the law
in every state in the United States and
in every Canadian province says
children up to some age must be
restrained while in a vehicle.
...
y
A
.
:
...........
CAUTION (cowhua)
secure the b@byr
ir an ,idantrestfint.
Child Restraints
Be sure to follow the instructions for
the restraint. You may find these
instructions on the restraint itself or in
a booklet, or both.These restraints use
the belt system in your vehicIe,but the
child also has to be secured within the
restraint to help reduce the chanceof
personal injury. The instructions that
come with the infant or child restraint
wilI show you how to do that.
31
Securing a Child Restraint in a
Rear Outside Position
You’ll be using the lap-shoulder belt.
See the earlier section about the top
strap if the child restraint has one.
1, Put the restraint on the seat.Follow
the instructions for the child
restraint.
2. Secure the child in the child restraint
as the instructionssay.
3.Pick up the latch plate, and run the
lap and shoulder portions of the
vehicle’s safety beltthrough or
around the restraint. Thechild
restraint instructions will show you
how. If the shoulder belt goes in front
of the child’s faceor neck, put it
behind the child restraint.
4. Buckle the belt. Make sure the
release button is positioned so you
would be able to unbuckle the safety
belt quicldy if you ever had to.
5. Pull the rest of the lap belt all the way
out of the retractor to set the lock.
33
Seats & Restraint Systems
I
6. To tighten the belt,feed the lap belt
into the retractorwhile you push
down on thechild restraint.
34
7. Push and pull the child restraint in
different directions to be sure it is
secure.
To remove the child restraint, just
unbuckle the vehicle's safetybelt and
let it go back all the way. The safety belt
will move freely again and be ready to
work for an adult or larger child
passenger.
Securing a Child Restraint inthe
Rear Center Seat Position
#hen you secure a child restraint in a
:enter seating position, you'll beusing
:he lap belt.
See the earlier section about the top
strap if the child restraint has one.
1. Make the belt as long as possible by
4. Run the vehicle's safety belt through
tilting the latch plate and pulling it
along the belt.
2. Put the restraint on the seat.Follow
the instructions for the child
restraint.
3. Secure the child in the child restraint
as the instructions say.
or around the restraint. The child
restraint instructions will show you
how.
5. Buclde the belt. Make sure the
release button is positioned so you
would be able to unbuckle the safety
belt quicklyif you ever had to.
6. To tighten the belt, pull its free end
while you push down on the child
restraint.
35
Seats & Restraint Systems
7. Push and pull the child restraint in
different directions tobe sure it is
secure. If the child restraint isn’t
secure, turn the latchplate overanc
buckle it again. Then see if it is
secure. If it isn’t, secure the restraint
in a different place in the vehicle and
contact thechild restraint maker for
their advice about how to attach the
child restraint properly.
Securing a Child Restraint in the
To remove the child restraint, just
unbuckle the vehicle’s safety belt. It will R‘ight Front Seat
be ready to work for an adult or larger
Your vehicle has a right-front
child passenger.
Piassenger’s air bag.NEVER put a rearfa.cing childrestraint in this seat. Here’
W.hy:
36
You’ll be using the lap-shoulder belt.
See the earlier section aboutthe top
strap if the child restraint hasone.
1. Because yourvehicle has a right-front
passenger’s air bag, always move the
seat asfar back as it wiIl go before
securing afront-facingchild restraint.
2. Put the restrainton the seat. Follow
the instructionsfor the child
restraint.
3. Secure thechild in the child restraint
as the instructions say.
4. Pick up the latch plate, and run the
lap and shoulderportions of the
vehicle’s safety belt through or
around the restraint. The child
restraint instructions will show you
how. If the shoulder belt goes in front
of the child’s faceor neck, put it
behind the child restraint.
r
I .
.
5. Buclde the belt. Make sure the
release button is positioned so you
would be able to unbuckle thesafety
belt quicklyif you ever had to.
6. Pull the rest of the lap belt all the way
7 . To tighten the belt, feedthe lap belt
out of the retractor to set the lock.
back into the retractor while you
push down on the child restraint.
37
Seats & Restraint Systems
8. Push and pull the child restraint in
different directions to be sure it is
secure.
To remove the child restraint, just
unbuckle the vehicle's safety beltand
let it go back all the way.
The safety belt will move freely again
and be ready to work for an adult or
larger childpassenger.
38
Larger Children
Children who have outgrown child
restraints should wearthe vehicle's
safety belts.
If you have the choice, a child should sit
next to a window so the child can wear
a lap-shoulder belt and get the
additional restraint a shoulder belt can
provide.
Accident statistics show that children
are safer if they are restrained in the
rear seat. But they need to use the
safety belts properly.
Children who aren't bucltled up can
be thrown out in a crash.
Children who aren't bucltled up can
strike other people who are.
. ..
Q:
39
Seats & Restraint Systems
Safety Belt Extender
If the vehicle’s safety belt willfasten
around you, you should use it.
But if a safety beltisn’t long enough to
fasten, your dealer will order you an
extender. It’s free. When you go in to
order it, takethe heaviest coat you will
wear, so the extender will be long
enough for you. The extenderwill be
just for you, and justfor the seatin your
vehicle that you choose. Don’t let
someone else use it, anduse it only for
the seat it is made to fit. To wear it, just
attach it to the regular safety belt.
Checking Your Restraint
Systems
Now and then,make sure all your belts,
buckles, latch plates, retractors,
anchorages and reminder systems are
working properly. Look forany loose
parts or damage. If you see anything
that might keep a restraint system from
doing its job, have it repaired.
40
Replacing Safety Belts Ajier
a Crash
If you’ve had a crash, do you need new
belts?
After a very minor collision, nothing
may be necessary. Butif the belts were
stretched, as they would be if worn
during a more severe crash, thenyou
need new belts.
If belts are cut or damaged, replace
them. Collision damage also may mean
you will need to have safety belt or seat
parts repaired or replaced. New parts
and repairs may be necessary even if the
belt wasn’t being used at thetime of the
collision.
If your seat adjuster won’t work after a
crash, thespecial part of the safety belt
that goes through the seatto the
adjuster may need to be replaced.
Q: What’s wrong with this?
A: The belt is torn.
Torn or frayed beltsmay not protect
you in a crash. They can rip apart under
impact forces. If a belt is torn or frayed,
get a new one right away.
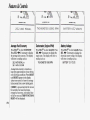
Part 2
Features & Controls
Here you can learn aboutthe many
standard and optional features on
your Oldsmobile, and information on
starting, shifting and braking.Also
explained are the instrument panel
and the warning systems that tell you
if everything is working properly and what to do if you have a problem.
41
Features & Controls
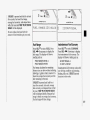
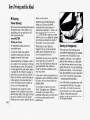
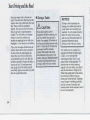
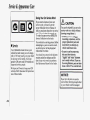
.Keys
42
The ignition keys are for the ignition
only.
The door keys are for the doors and all
Ither locks.
a e n a new Oldsmobile is delivered,
:he dealer removes theplugs from the
teys and gives them tothe first owner.
3owever, the ignition key may not have
L plug. If the ignition key doesn’t have a
)lug, it will have a bar-coded keytag.
Zach plug or tag has a code on it that
ells your dealer or a qualifiedlocksmith
low to make extra keys. Keep the plugs
)r key tag in a safe place.
If you lose
rour keys, you’ll be ableto have new
mes made easily using theseplugs or
ags. If your ignition keys don’t have
dugs or tags, go to your Oldsmobile
lealer for the correct key code if you
leed a new ignitionkey.
There are 15 alternative PASS-Key@
blanks, to help discourage theft. Your
dealer can help determinewhich blank
you need.
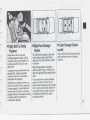
Door Loch
NOTICE:
Your Oldsmobile has a number of
new features that can help prevent
theft. But you can have a lot of
trouble getting into your vehicle if
you ever lock your keys inside. You
may even have to damage your
vehicle to get in. So be sure you
have extra keys.
There are several waysto lock and
unlock your vehicle.
From the Outside:
Use your door key or Remote Lock
Control, if your vehiclehas this option.
43
Fea&res & Controls
Programmable Automatic Door
Locks (OPTION)
. . . . . .... .. .. .. .. .. .. .. .. .. .. .. .. .. .. .. .. .. .. .. .. .. . . .. .. . .. .. . .. ..... . . .. ... .. .. .. ... .
. . . . . . . . . . . . . . . . . . .. .. . . . . -.......-.’.. . . . .
From the Inside:
ro lock the door, slide the locking lever
lown.
To unlock the door, slide the locking
ever up.
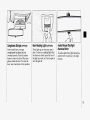
Power Door Locks
With power door loclts, you can lock or
unlock allthe doors of your vehicle
from the driver or front passenger door
lock switch.
The switch on each rear door worlrs
only that door’s lock. Itwon’t lock (or
unlock) all of the doors-that’s a safety
feature.
Door Open Reminder
If you have the information center anda
door is not fully closedwhen the
transaxle is in gear, a chime will sound
and the information center will display
one of these messages:
DRIVER DOOR AJAR
PASSENGER DOOR AJAR
REAR DOOR AJAR
44
Just close your doors andturn on the
ignition. Every time you moveyour shift
lever out of P (Park)all of the doors will
lock. And, every time youstop and move
your shift leverinto P (Park),your doors
will unlock. If someone needsto get out
while you’re not inP (Park),have that
person usethe manual or powerlock.
When the door is closed again,it will not
lock automatically. Just use the manual
or power lockto lock the door again.
You can program the automatic door
lock feature to allow the doorsto remain
locked afteryou shift into P (Park).
To do this:
1. Close your doors and turn
the ignition
On.
2. Keep yourfoot on the brake pedal.
3.Press and hold the driver’s power
door lock switch.
4.Move your shift lever outof P (Park),
then move the shift lever back into
P (Park).
5. Release the lock switch.
Features & Controls
Matching Transmitter(s)To Your
Vehicle
Each key chain transmitter is coded to
prevent another transmitterfrom
unlocking your vehicle. If a transmitter
is lost or stolen, a replacement can be
purchased through your dealer.
Remember to bring any remaining
transmitters with you when you go to
your dealer. When the dealer matches
the replacement transmitter to your
vehicle, the remaining transmitters
must also be matched. Once the new
transmitter is coded, the lost
transmitter will not unlock your vehicle.
You can match a transmitter to asmany
different vehicles as you own, provided
they are equipped with exactly the
same model system. (General Motors
offers several different modelsof these
systems on their vehicles.) Each vehicle
can have only two transmitters matched
to it.
See yourdealer to match transmitters to
another vehicle.
Battery Replacement
Rear Door SecurityLocks
Under normal use, the batteries in your
ley chain transmitter should last about
two years.
You can tell the batteries are weak if the
transmitter won’t work at thenormal
range in anylocation. If you have to get
close to your vehicle beforethe
transmitter works, it’s probably time to
change the batteries.
To Replace Batteries inthe Remote
Lock Control:
1. Remove the screw from back cover.
2. Lift the front coveroff, bottom half first.
3. Remove and replace the two batteries
Your Oldsmobile is equippedwith rear
door security loclts that help prevent
passengers from opening the rear doors
of your vehicle from the inside. To use
one of these loclts:
1. Move the lever on thedoor all the
way up to theENGAGED position.
2. Close the door.
3. Do the same thing to the otherrear
door lock.
(2016).
4. Reassemble the transmitter.
46
5. Check the transmitter operation.
The rear doors of your vehicle cannot
be opened frominside whenthis feature
is in use. If you want to opena rear
door when the security lock is on:
1. Unlock the doorfrom the inside.
I
2. Then open the door from the outside.
2. Move the lever all the way down.
If you don’t cancel the security lock
feature, adults or older children who
ride in the rear won’t be able to open
the rear door from the inside. You
should let adults and older children
know how these security locltswork,
and how to cancel the loclts.
To cancel the rear door security lock:
1. Unlock the door from the inside and
open the door from the outside.
3.Do the same for the other rear door.
The rear door locks will now work
normally.
I
47
I
I
Features & Corttrols
Theft
Vehicle theft is big business, especially
in some cities. Although your
Oldsmobile has a number of theft
deterrent features, we h o w that
nothing we put onit can make it
impossible to steal. However, there are
ways you can help.
Key in the Ignition
If you walk away from your vehicle
with
the keys inside, it’s an easy target for
joy riders or professional thieves - so
don’t do it.
When youpark your Oldsmobile and
open the driver’s door, you’ll hear a
chime reminding you to remove your
key fromthe ignition and take it with
you. Always do this. Your steering
wheel will belocked, and so will your
ignition and transaxle. And remember
to lock the doors.
Parking at Njght
Park in a lighted spot, close all windows
and lock your vehicle. Rememberto
keep your valuables out of sight. Put
them in a storage area, or take them
with vou,
48
Parking Lots
If you park in a lot where someone will
be watching your vehicle,it’s best to
lock it up and take your keys. But what
if you have to leave your ignition key?
What if you have to leave something
valuable in your vehicle?
Put your valuables in a storage area,
like your trunk or glove box.
Lock the glove box.
Lock all the doors except the driver’s.
Then take thedoor key with you.
Your vehicle is equipped with the
PASS-I<ey@II (Personalized
4utomotive Security System) theft
leterrent system. PASS-I<ey@IIis a
3assive theft deterrent system. This
neans you don’t have to doanything
lifferent to arm or disarm the system. It
works when you insert or removethe
rey from the ignition. PASS-Key@II
lses a resistor pellet in the ignition key
hat matches a decoder in your vehicle.
Features & Controls
I
illuminated Enfry System (OPTION)
When you lift the handle of either front
door, lights inside your vehicle will go
on. These lights willgo off after about 20
seconds, or when you start your engine.
The lights willalso go on when you press
any button on the optional Remote Lock
Control transmitter. If a door is leftajar,
your interior lightswill turn off after ten
minutes to save your battery.
Trunk Lock
To unlock the trunk from the outside,
insert the door key and turn it.
50
I
s
.
_...
I
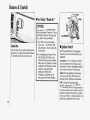
Remote Trunk Release (OPTION)
Trunk Securify Override(OPTION)
Convenience Net ( O P ~ O N ~
Press the release button located to the
left of the steering column to release the
trunk lid. The Trunk Security override
switch must be in the ON position, and
the transaxle in P (Park).
The system also worlts with the Remote
Lock Control.
This feature is standard withvehicles
equipped with Remote Trunk Release.
Inside the glove box is an override
switch that is useful if you want to leave
valuables in the trunk whenusing a
commercial parking lot.
Move the switch to OFF to override the
Remote Trunk Release. If you lock your
glove box door and take the door key
with you (and your Remote Lock
Control if so equipped), this will help
keep someone from getting into your
trunk. Move the switch to ON to again
make the Remote Trunk Release usable.
The optional Remote Lock Control
transmitter will open the trunkeven if
the override switch is in the OFF
position.
Your vehiclemay have a convenience
net. You’ll see it just inside the back
wall of the trunk.
Put small loads, like grocery bags,
behind the net to help keep them from
falling overduring sharp turns or quick
starts andstops.
The net isn’t for larger, heavier loads.
Store them in the trunk as far forwardas
you can. You can unhookthe net so that
it will lieflat when you’re not using it.
I
51
Features & Controls
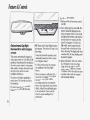
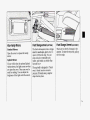
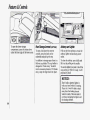
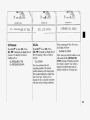
New Yehick “Break-In”
NOTICE:
p
s
Glove Box
Use the door key to lock and unlock the
glove box. To open, lift the latch release
on the left side of the glove boxdoor.
52
Your modern Oldsmobile doesn’t
need an elaborate “break-in.” But it
will perform better in the long run
if you followthese guidelines:
Don’t drive at any one speed fast or slow - for the first 500
miles (804 ltm). Don’tmake fullthrottle starts.
Avoid making hardstops for the
first 200 miles (322 km) or so.
During this time your new brake
linings aren’t yet broken in. Hard
stops with new liningscan mean
premature wear and earlier
replacement. Follow this
“breaking-in” guideline every
time you get new brake linings.
ACCE
U
IIgnition Switch
With the ignition key in the ignition
;witch, youcan turn the switch to five
Iositions:
4ccessory: An “on” position in which
IOU can operate your electrical power
lccessories. Press in the ignition switch
1s you turn thetop of it toward you.
;ock The only positionin which you
:an remove the key. This locks your
steering wheel, ignition and transaxle.
D f f Unlocks the steering wheel,
gnition, and transaxle, but does not
;end electrical power to any accessories.
Jse this position if your vehicle must be
~ushedor towed, but never try to push;tart your vehicle. A warning chime will
;ound if you open the driver’s door
3.If your engine still won’t
start (or starts
but then stops), it could be flooded
with too much gasoline.Try pushing
your accelerator pedal all
the way to
the floor and holding itthere as you
hold the key in Start for about three
seconds. If the vehicle starts briefly but
then stops again, do the same thing,
but this time keep
the pedal down for
five or six seconds. This clears the
extra gasoline from the engine. After
waiting about 15 seconds? repeatthe
normal starting procedure.
NOTICE:
Your engineis designed to work with
the electronics in your vehicle.If you
add electricalparts or accessories,
you could changethe way the fuel
injection system operates. Before
adding electrical equipment, check
with your dealer.If you don’t, your
engine mightnot perform properly.If
you ever haveto have your vehicle
towed, see the part of this manual
that tells howto do it without
damaging your vehicle. SeeTowing
Your Vehicle in the Index.
54
Driving n2rough Deep
Standing Water
NOTICE:
I
If you drive too quicldy through
deep puddles or standing water,
water can come in through your
engine’s air intake and badly damage
your engine. If you can’t avoid deep
puddles or standing water, drive
through them very slowly.
1
Coolant Heater
(Engine Block Heater) (OPTION)
IEngine
In very coldweather, 0°F (-18°C) or
colder, the engine coolant heater can
help. You’ll get easier starting
and
better fuel economyduring engine
warm-up. Usually, the coolant heater
should be plugged in a minimum of four
hours prior to starting your vehicle.
To use the coolantheater:
1. Turn off the engine.
2. Open thehood and unwrapthe
electrical cord.
3.Plug it into a normal, grounded 110volt outlet.
How long should you keep thecoolant
heater plugged in? The answer depends
on the weather, the kind of oil you
have, and some other things. Instead of
trying to list everything here, we ask
that you contact an Oldsmobile dealer
in the area where you’ll be parking your
vehicle. The dealer can give you the best
advice for that particular area.
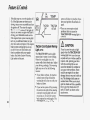
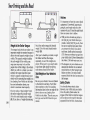
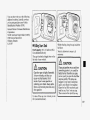
Automatic Transa.de
Your automatic transaxle may have a
shift leverlocated on the steering
column or on the console between the
seats. Both are shown.
55
Features & Con~ols
P
There are several shiftpositions. In this
manual, these are referred to by the
commonly used symbols in the right
column below:
Park
P
Reverse
R
Neutral
N
Overdrive
03
Third
3
Second
2
First
1
1Dark
P (Park): This locl<s yourfront wheels.
:t's thebest position to use when you
;tart your engine because your vehicle
:an't move easily.
-
1
Ensure the shift lever is fully in P (Park)
range before starting theengine. Your
Oldsmobile has a brake-transaxle shift
interlock. You have to fully apply your
regular brakes before you can shift from
P (Park) whenthe ignition key is inthe
On position. If you cannot shift out of P
(Park), ease pressure on theshift leverpush the shift lever allthe way into P
(Park) and also release the shift lever
button on floor shift console modelsas
you maintain brake application. Then
move the shift lever into the gear you
wish. (Press the shift lever button before
moving the shift lever on floor shift
console models.) See the Index under
Shifting Out of P (Park).
everse
(Reverse): Use this gear to back up.
NOTICE:
Shifting to R (Reverse) while your
vehicle is moving forward could
damage your transaxle. Shift to R
only after your vehicle is stopped.
To rock your vehicle back and forth to
get out of snow, ice or sand without
damaging your transaxle, see the Index
under I f You're Stuck: In Sand,Mud,
Ice or Snow.
Features & Controls
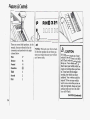
P
RNm321
Neutral
N (Neutral): In this position, your
engine doesn't connect with the wheels.
To restart when you're already moving,
use N (Neutral) only. Also, use N when
your vehicle is being towed.
58
NOTICE:
Damage to your transaxle caused
by shifting out of P (Park) or
N (Neutral) with the engineracing
isn't covered by your warranty.
When driving on hilly, windingroads.
When towing a trailer, so there is less
shifting between gears.
When going down a steep hill.
2 (Second Gear): This position gives
you more power but lower fuel
economy. You can use 2 on hills. It can
help control your speed asyou go down
steep mountain roads, but then you
would also wantto use your brakes off
and on.
RNB321
n
Forward Gears
ID1 (Automatic Overdrive):This
position is for normal driving. If you
need more power for passing, and
you're:
Going less than about 35 mph (56
ltm/h), push your accelerator pedal
about halfway down.
Going about 35 mph (56 km/h) or
more, push the accelerator all the way
down.
You'll shift down to thenext gear and
have more power.
NOTICE:
If your vehicle seemsto start up
rather slowly, orif it seems not to
shift gears as you go faster,
something may bewrong with a
transaxle system sensor. If you
drive very far that way, your vehicle
can be damaged. So, if this
happens, have your vehicle serviced
right away. Until then, you can use
2 (Second Gear) when you are
drivin less than 35 mph (56 km/h)
and D (Overdrive) for higher
speeds.
d
3 (Third Gear): This is like [D1, but yo'U
never go into Overdrive. Here are som
times you might choose 3 instead of E
j:
.~_,.I.
~
.
NOTICE:
Don't drive in 2 (Second Gear) for
more than 5 miles (8 Im), or at
speeds over 55 mph (88 lm/h), or
you can damage your transaxle.
Use (D1 or 3 as much as possible.
Don't shift into 2 unless you are
going slower than 65 mph
(105 ltrn/h), or you can damage
your engine.
1 (First Gear): This position gives you
even more power (but lower fuel
economy) than 2. You can use it on
very steep hills, or in deep snow or
mud. If the selector lever is put in 1, the
59
Features & Controls
transaxle won’t shift into first gearuntil
the vehicle is going slowlyenough.
have the electronic cluster, the chime
can be shut off by pressingRESET,but
the PARK BRAKE SET message will
remain.
NOTICE:
If your front wheels can’t rotate,
don’t try to drive. This might
happen if you were stuck in very
deep sand or mud or were up
against a solid object. You could
damage your transaxle.
Also, if you stop when going uphill,
don’t hold your vehicle there with
only the accelerator pedal. This
could overheat and damage the
transaxle. Use your brakes or shift
into P (Park) tohold your vehicle
in position on a hill.
60
L
NOTICE:
Driving with the parking brakeon
can cause your rear brakesto
overheat. You may have to replace
them, and you could also damage
other partsof your vehicIe.
Parking Brake
To Set the Parking Brake:
Hold the regular brake pedal down with
your right foot. Push down the parking
brake pedal with your leftfoot. If the
ignition is on, the brake system warning
light will comeon.
To Release the Parking Brake:
This vehicle has a “push to release‘’
park brake pedal. Hold the regular
brake pedal down and push thepark
brake pedal with your leftfoot. This will
unlock the pedal. When you lift your
left foot, the park brake pedal will
follow it to the released position. If you
try to drive off with the parking brake
on, thebrake light stays on and a chime
sounds until you release the parking
brake or recycle the ignition. If you
If You are Towing a Trailer and are
Parking on Any Hill:
See the Index under Towing a Trailer.
That section shows what to do first to
keep the trailer from moving.
I
1
Shifing Into ' F n(Park}
2. Move the shift lever into the P (Park)
position as follows:
Pull the lever toward you.
Move the lever up as far as it will go.
3. Move the ignition key to Lock.
3. Remove the key and take it with you.
If you can walk awayfrom your
vehicle with the ignition key in your
hand, your vehicle is in P (Park).
Sonsole Shift Lever
I . Hold the brake pedal down with your
right foot and set the parking brake.
1. Hold the brake pedal down with your
right foot and set theparking brake.
61
Features & Controls
k
Leaving Your Vehicle With the
Engine Running
Torque Lock
If you are parking on a hill and you
don’t shift your transaxleinto P (Park)
properly, the weight of the vehicle may
put too much force on the parking pawl
in the transaxle. You may find it difficult
to pull the shift lever outof P (Park).
This is called “torque lock.” To prevent
torque lock, set the parking brake and
then shift into P (Park)properly before
you leave the driver’s seat.To find out
how, seeShifting Into P (Park) in the
2. Move the shift leverinto theP (Park)
position as follows:
Hold in the button onthe lever;
Push the lever all the way toward
the front of your vehicle.
3. Move the ignition key to Lock.
4. Remove the key and take it with you.
If you can walk away fromyour
vehicle with the ignition key in your
hand, your vehicle is in P (Park).
62
If you can, it means thatthe shift lever
wasn’t fully locked intoP (Park).
Index.
If you have to leave your vehiclewith
the engine running, be sure your vehicle
is in P (Park) and your parking brake is
firmly set before you leaveit. After
you’ve movedthe shift lever into the
P (Park) position, hold the regular
brake pedal down. Then, see if you can
move the shift lever away fromP (Park)
without first pulling it toward you (or, if
you have the console shiftlever,
without first pushing the button).
When you are ready to drive, move the
shift leverout of P (Park) BEFORE you
release the parking brake.
If “torque lock” does occur, you may
need to have another vehicle push yours
a little uphill to take some of the
pressure from the transaxle, so you can
pull the shift lever outof P (Park).
Shifting Out of P (Park)
Your Oldsmobile has a brake-transaxle
shift interlock. You have to fully apply
your regularbrake before you can shift
from P (Park) when the ignition is in
the On position. See the Index under
Shifting the Automatic Transaxle.
If you cannot shift out of P (Park), ease
pressure on the shift lever-push the
shift lever allthe way into P (Park) as
you maintain brake application. Then
move the shift lever into thegear you
wish. (Press the shift lever button
before moving the shift lever on f l ~:
shift console models.)
If you ever hold the brakepedal down
but still can't shift out of P (Park), try
this:
1. Turn thekey to Off. Open and close
the driver's door to turn off the
Retained AccessoryPower feature.
2. Apply and hold the brake until the
end of step 4.
3.Shift to N (Neutral).
4. Start thevehicle and then shift to the
drive gear you want.
5. Have the vehicle fixedas soon as you
can.
-
Engine Exhaust
"
.
Parking Over i%ings That
63
Features & Controls
Running Your Engine Mile
You're Parked
It's better not topark with the engine
running. But if you ever have to, here
are some things to know.
Horn
You can sound thehorn by pressing the
horn symbols on your steeringwheel.
Follow the proper steps to be sure your
vehicie won't move. See Shifting Into E
(Park) in the Index.
If you are parking ona hill and if you'rt
pulling a trailer, also see Towing a
Trailer in the Index.
64
Tilt Steering Wheel
Power Windows
Window Lock
A tilt steering wheel allows you to
Switches on the driver’s armrest control
each of the windows when the ignition
is on. In addition, eachpassenger door
has a control switch for its own
window.
When the driver’swindow switch is
held rearward for more than a half
second, thewindow wiIl lower
completely. The window can be opened
in smaller amounts by pressing the
switch rearward and releasing it
immediately.
To stop thewindow while it is lowering,
press the switch again, then release. To
raise the window, hold the switch
forward.
Press the right side of the switch to
iisable all passenger windowswitches.
rhis is a useful feature when you have
:hildren as passengers.
adjust the steering wheel beforeyou
drive. You can also raise it to the
highest level to give your legs more
room when you ex‘ .nd enter the
vehicle.
To tilt the wheel, hold the steering
wheel and pull the lever. Move the
steering wheel to a comfortable level,
then release the lever to lock the wheel
in place.
65
Features & Controh
/
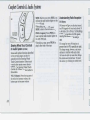
a Turn SipllMultifinction
Lever
The lever on the left side of the steering
column includes your:
Turn Signal and Lane Change
Indicator
Headlight High-Low Beam
Windshield Wipers
Windshield Washer
Cruise Control (Option)
The High-Low Beam feature is
discussed under HeadZights. See the
Index under Headlights.
66
rurn Signal and Lane Change
‘ndicator
The turn signal has two upward (for
3ight) and two downward (for Left)
Iositions. These positions allow you to
iignal a turn or a lanechange.
To signal a turn, move the lever all the
yay up ordown. When the turn is
inished, the lever will return
wtomatically.
f you leave the turn signal on, a chime
vi11 sound after you drive % of a mile.
A green arrow on theinstrument panel
will flash in the direction of the turn or
lane change.
To signal a lane change, just raise or
lower the lever until the greenarrow
starts to flash. Holdit there until you
complete your lane change. The lever
will return by itself when you release it.
As you signal a turn or a lane change, if
the arrows don’t flash but just stay on, a
signal bulb may be burned out and
other drivers won’t see your turn signal.
If a bulb is burned out, replace it to help
avoid an accident.
If the green arrows don’t go on atall
when you signal a turn, check the fuse
(see the Index under Fuses G Circuit
Breakers) and for burned-out bulbs.
Features di Controli
For steady wiping at low speed, turn thc
band away from you to theLO position.
For high speed wiping,turn theband
further, toHI. To stop thewipers, move
the band to OFF.
You can set the wiper speed fora long or
short delay between wipes. This can be
very useful in lightrain orsnow. Turn
the band to choose the delay time.The
closer to LO, the shorter the delay.
68
Remember that damaged wiper blades
may prevent you from seeing well
enough to drive safely. To avoid damage,
be sure to clear ice andsnow from the
wiper blades before usingthem. If
they're frozen to the windshield,
carefully loosen or thawthem. If your
blades do become damaged, get new
blades or bladeinserts.
Heavy snow or ice can overloadyour
wipers. A circuit breaker will stop them I
until the motor cools. Clear awaysnow
At the topof the turn signal/multior ice to prevent an overload.
function lever there's a paddle with the
word PUSH on it. To spray washer fluid
on the windshield, push the paddle for
less than onesecond. The wipers will
clear the window and then either stop or
return to your preset speed.For more
washer cycles, pushand hold the paddle.
If the fluid level in the windshield
washer is low, vehicles with the
Standard Cluster have a LOW WASH
FLUID light that will come on. On
vehicles with the Electronic Cluster, if
the fluid level in the windshield washer
bottle is low, the message LOW
WASHER FLUID will appear in the
information center. See the Index under
Low Washer Fluid Warning.
Windshield Washer
Driving without washerfluid can be
dangerous. A bad mud splash can block
your vision.You could hit another
vehicle or go off the road. Check your
washer fluid level often.
A CAUTiQN:
fn fre&2irrgweathm, dan’t tdse your
washer until the ~
~is
warmed. Otherwise the washeir
autd a
x
4 fQSm ice Qri the
windshield, blocEng yotar vision.
NOTICE:
1
~
4
When using concentrated washer
fluid, follow the manufacturer’s
instructions for adding water.
Don’t mix water with ready-touse washer fluid. Water can
cause the solution to freeze and
damage your washer fluid tank
and sotherparts~of the washer
~
system. Also, water doesn’t clean
as well as washer fluid.
Fill your washer fluid tank only
% full when it’s very cold. This
allows for expansion, which
could damagethe tankif it is
completely full.
Don’t use radiator antifreeze in
your windshield washer. It can
damage your washer system and
paint.
~~
~
~ Control
. (OPTION)~
Cruise
With cruise control, you can maintain a
;peed of about 25 mph (40 Iun/h) or
nore without keeping your foot on the
accelerator. This can really help on long
:rips.
Zruise control does not work at speeds
)elow about 25 mph (40 lm/h).
When you applyyour brakes, the cruise
:ontrol shuts off. Cruise control will
dso shut off when traction control is
mgaged. You will be able to operate
mise control again once the traction
:ontrol system disengages.
Features & Controls
To Set Cruise Control
1. Move the cruise control switch to ON.
3. Push in the SET button at the endof
the lever and release it.
4. Take your foot off the accelerator
pedal.
2. Get up to the speed you want.
70
Features & Controls
course, applyingthe brake tales you out
of cruise control. Many drivers findthis
to be too much trouble and don't use
cruise control on steep hills.
To Get Out of Cruise Control
There are two ways to turn off the
cruise control:
Step lightly on the brake pedal; OR
Move the cruise switch to OFF.
To Erase Cruise Control Memory
When you turn off the cruise control or
the ignition, or shift into P (Park) your
cruise control set speedmemory is
erased.
?
Headlights
1Push the switch marked
-n-
to turnon
t:he headlights, together with:
Push the switch marked pf to turn on:
Parking Lights
Side Marker Lights
Taillights
Instrument Panel Lights
Push the switch againto turnoff the
lights.
Parking Lights
m Side Marker Lights
Taillights
m Instrument Panel Lights
I?ush the switch again toturn off the
1ights.
I
m
I
I
I
1Jghts On Reminder
I
72
I f you open the door while leaving the
1ights on, you will hear a continuous
\.Yarning tone.
73
Features & Controls
At night, you can turn off all exterior
lights when you are in P (Park) by
moving the Twilight Sentinel control all
the way past OFF to turn it off, if it was
on. If it was off, move the control to the
right to turn itan, then back off. The
lights will come back on when you put
the transaxle in gear.
74
Instrument Panelintensity
Control
You can brighten or dimyour
instrument cluster, radio, climate
control, and interior lights by rotating
the INTERIOR control between MIN
and MAX when your lights are on.
Rotate the control all the way to MAX
and you will turn on the interior
courtesy lights.
Front Reading Lights (OPTION)
These lights and the interior courtesy
lights will come on when you open a
door. They will turn off when you turn
on the ignition, or if the door is left
open, they will turn off after about ten
minutes.
To turn on the reading lightswhen the
doors are closed, press the lens of the
light you want on. Press it againto turn
the light off.
To avoid draining your vehicle’s battery,
be sure to turn off all front and rear
reading lights when leavingyour
vehicle.
I
7
/I
Sunglasses Storage(OPTION)
Rear Reading Lights (OPTION)
Some models have a storage
compartment for glasses in your
overhead console. Press the release
button tolower the door. Place your
glasses insidethe door.To close the
door, raise it and press it into position.
These lights go on when you open a
door. To turn on a reading light when
the doors are closed, press the lens of
the light youwant on. Press it again to
turn the light off.
lnside Manual OaylNight
Rearview Mirror
To reduce glare from lights behindyou,
pull the lever toward you to the night
position.
75
Features & Controls
~~
Elecfrochromic DayINight
Rearview Mirrorwith Compass
(OPTION)
This mirror automatically changes to
reduce glare when set in the M or C/M
positions. One photocell on the back of
the mirror senses when it is becoming
dark outside. Another photocell is built
into the mirror surface to sense
headlights behind you.
The mirror will darken gradually to
reduce glare. This change may take a
few moments.
The mirror goes to a clear position
whenever you shift to R (Reverse).
76
OFF: Shuts off the Day/Night function
and compass. The mirror will stay in the
Day setting.
To keep the photocells operating well,
occasionally cleanthem with a cotton
swab and glass cleaner.
C/M: This setting turns thecompass
on, in addition to the Day/Night
function.
Once the compass is calibrated, it does
not need to be recalibrated as long as
the mirror is left in your vehicle.
If a compass mirror is ever removed
from a vehicle and placed onto another
vehicle, it should be recalibrated again
to the new vehicle. There could be
errors in compass readings if not
recalibrated.
To calibrate the compass:
1. Set the switch on the mirror control
to C/M.
2. Turn vehicle ignition switchOn. The
letter C should be displayed in the
mirror compass window. If not, hold
the CaI switch (bottom of the mirror)
for more than ten seconds, and the
letter C will appear. To hold in the
Cal switch, insert a paper clip into
the small holeon the bottom of the
mirror housing. The display will show
a number first, but keep holding until
the letter C appears.
3. Quick Calibration: Drive the vehicle
in a 360-degree circle at less than
5 mph (8 ltm/h) until the display
reads a compass direction.Normal
Calibration: Drive the vehicle on your
everyday routine, and the compass
will eventuallv ..hate.
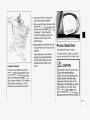
1. Locate your location on the zone
Compass Variance:
Variance is the difference between
nagnetic north and geographic north.
[n some areas the difference between
:he two can be great enough to cause
:alse compass readings. If this happens,
Iollow these instructions to set the
Jariance for your particular location:
map. Note your zone number.
2. Hold in the Cal switch (bottom of the
mirror housing) for five seconds until
the lastzone entry number appearsin
the display. To hold in the Cal
switch, insert a paper clip into the
small holeon the bottom of the
mirror housing.
3. Repeatedly press the Cal switch until
the number for the new zone entry is
displayed.
Once the desired zone number is
displayed, stop pressing the Cal
switch and the display will show
compass direction within a few
seconds.
77
Features & Conbols
.,*,...&.Ja,Y:&i
l
~
78
~~
Manual Remote Control Mirrors
Power Remote Control Mirrors
sun visors
The outside rearview mirrors should be
adjusted so you can j,ust see the sideof
your vehiclewhen you are sitting in a
comfortable drivingposition.
Adjust the driver’s side outside mirror
with the lever on thedriver’s door.
(OPTION)
To block out glare, you can swing down
the visors. You can also remove them
from the center mount and swingthem
to theside, whilethe auxiliary sunshade
remains to block glare fromthe front.
The lever on thedriver’s door w e s t
controls both outside
rearview mirrors.
Turn thelever to theleft to select the
driver side rearview mirror, or to the
right to select the passenger side
rearview mirror. Then move the lever to
adjust eachmirror so that you can just
see the side of your vehiclewhen you
are sitting in a comfortable driving
position.
I
Visor Vanity Mirrors
Front Storage Armrest(OPTION)
Front Storage Armrest(LSSONLY)
Standard Mirrors:
Open the cover to expose the vanity
mirror.
Lighted Mirrors:
If your vehiclehas the optional lighted
vanity mirrors, the lights come on when
you open the cover. These caneven be
used for reading. You can adjust the
brightness of the lights with the switch.
The front armrest opens into a storage
area for cassette tapes, gloves, etc. To
open it, lift the front edge. You can
store coins in the removable coin
holder, and the dual cup holder flips
forward foruse.
The cup holder is designed to “break
away” should it receive excessive
pressure. If it breaks away, snap the
edges back into place.
There are twolevels of storage in the
armrest. To raise the top cover, pullup
the front edge.
Features & Conlrok
To open the lower storage
compartment, press the release lever
under the frontedge of the lower cover.
Rear Storage Armrest(OPTION)
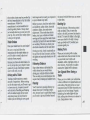
Ashtrays and Lighter
To open, fold down the armrest
console, press the latch on the
underside and pull up the top.
In addition to storage space there is a
fold-out cup holder. The cupholder is
designed to "break away" should it
receive excessivepressure. If it breaks
away, snap the edges back into place.
Pull out the front ashtray to reveal the
ashtray, lighter and accessory power
outlet.
To clean the ashtray, open it fully and
lift it out by pulling on the snuffer.
To use the lighter, just push it in allthe
way and let go. When it's ready,it will
pop back by itself.
NOTICE:
Don't hold a cigarette lighterin
with your hand while itis heating.
If you do, it won't be ableto back
away fromthe heating element
when it's ready. That canmake it
overheat, damaging the lighterand
the heating element.
80
...
.
*
,
Features & Con&oli
82
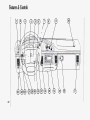
Eighty Eight Royale
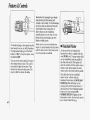
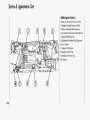
The Instrument PanelYour information System
Your instrument panel is designed to let
you lmow at a glance how yourvehicle
is running. You’ll know how fast you’re
going, how much fuel you’re using, and
many other thingsyou’ll need to drive
safely and economically.
The main components of your
instrument panel are:
1. Light Controls
2. Turn Signal/Multifunction Lever
3.Tilt Steering Wheel Lever
4. Instrument Cluster
5. Horn
6. Ignition Switch
7. Gearshift Lever
8. Steering Wheel Touch Controls for
Audio System
9. Climate Controls & Driver
Information Center (Option)
10. Passenger Side Air Bag
11. Air Outlet
12. Glove Box Release
13. Air Outlet
14. Audio System
15. Ashtray, Lighter and Auxiliary
Power Outlet
16. Air Outiet
17. Traction Control Switch
18. Hazard Warning Flashers Switch
19. Driver Side Air Bag
20. Steering Wheel Touch Controls for
Climate Control System
21. Fuse Panel (under instrument
panel)
22. Trunk Release Switch
23. Air Outlet
24. Hood Release
83
J
84
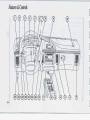
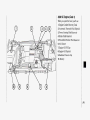
Eighty EightLSS
The Instrument PanelYour Information System
5. Horn
17. Ashtray, Lighter and Auxiliary
6. Ignition Switch
The instrument panel is designed to let
you know at a glance how your vehicle
is running. You’ll know how fast you’re
going, how much fuel you’re using, and
many other things you’ll need to drive
safely and economically.
The main components of your
instrument panel are:
1. Light Controls
2. Turn Signal/Multifunction Lever
3.Tilt Steering Wheel Lever
4. Instrument Cluster/Gages
8. Steering Wheel Touch Controls for
Power Outlet
18. Air Outlet
19. Traction Control Switch
20. Driver Side Air Bag
21. Steering Wheel Touch Controlsfor
Climate Control System
22. Fuse Panel (under instrument
panel)
23.Trunk Release Switch
24. Hood Release
25. Air Outlet
7 . Hazard Warning Flashers Switch
Audio System
9. Climate Controls & Driver
Information Center (Option)
10. Passenger Side Air Bag
11. Air Outlet
12. Glove Box Release
13. Air Outlet
14. Audio System
15. Gearshift Lever
16. Auxiliary Power Outlets
Features & Controls
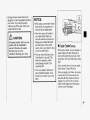
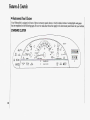
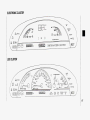
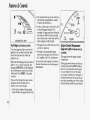
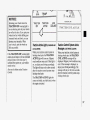
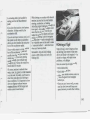
Instrument Panel Clusters
Your Oldsmobileis equipped withone of these instrument panel clusters, which includesindicator warning lights and gages
that are explained on the following pages. Besure to read about those that apply to theinstrument panel cluster foryour vehicle.
STANDARD CLUSTER
-?A
OIL
LEVEL
TRACTION
OFF
86
---
TEMP
TRACTION
ACTIVE
3 z 2 M
LOW
COOLANT
lo
M P H km/h
P
0
180
-
RND321
odbnnon
CHECK
LOW
ELECTRONlC CLUSTER
LSS CLUSTER
RPM X 1000
87
WarningLights, Gages and
Indicators
This section describes the warning
lights and gages that may be on your
vehicle. The pictures will help you
locate them.
Warning lights and gages can signal that
something is wrong before it becomes
serious enough to cause an expensive
repair or replacement. Paying attention
to your warning Iights and gages could
also save you or others from injury.
Warning lights goon when there may
be or is a problem with one of your
vehicle’s functions. As you will see in
the details on the next few pages, some
warning lights comeon briefly when
you turn theignition key just to let you
Imow they’re working. If you are
familiar with this section, you should
not be alarmed when thishappens.
Gages can indicate when there may be
or is a problem with one of your
vehicle’s functions. Often gages and
warning lights worktogether to let you
know when there’s a problem withyour
vehicle.
88
When one of the warning lights comes
on and stays on when you are driving,
or when one of the gages showsthere
may be a problem, check the section
that tells you what to do about it. Please
follow the manual’s advice. Waiting to
do repairs can be costly- and even
dangerous. So please get to know your
warning lights and gages. They’rea big
help.
Your vehicle may also have a driver
information system that works along
with the warning lights and gages. See
Driver Information System in the
Index.
,“
O
11oa
180,20
12”M P H kmlh
P
RNm321
1
I
Speedometer (STANDARD AND LSS
CLUSTERS)
Your speedometer lets you see your
speed in both miles per hour (mph) and
1kilometers per hour (ltm/h).
I
km/h
J
MPH
\
0
Speedometer (ELECTRONIC CLUSTER)
Odometer (STANDARD c L u s m )
Trip Odometer (STANDARDCLUSTER)
Your speed is displayed in either miles
per hour (mph) or kilometers per hour
(km/h).
Press the E/M (EnglisWMetric) button
on the left side of the instrument cluster
to switch the display between miles per
hour (mph) and kilometers per hour
(ltm/h). Pressing the E/M button will
also cycle all other displays, including
the optional automatic electronic
climate control display, through English
and metric units.
Your odometer shows how far your
vehicle has been driven in either miles
(used in the U.S.)or kilometers (used
in Canada).
Your Oldsmobile has a tamper resistant
odometer. If you see silver lines
between the numbers,you’ll know
someone has probably tampered with it
and the numbers may not be true.
You may wonder what happens if your
vehicle needs a new odometer installed.
If the new one canbe set to themileage
total of the old odometer, then it must
be. But if it can’t, thenit’s set at zero
and a label must be put on thedriver’s
door to show the old mileage reading
when the new odometer was instaiied.
Your trip odometer tells how far you
have driven since you last resetit. To
set it to zero, press the trip reset button
located belowthe trip odometer.
89
Features & Controls
You may wonder what happens if your
vehicle needs a newodometer installed.
If the new one can be set to themileage
total of the old odometer, then itmust
be. But if it can’t, then it’s set atzero
and a label must be put on thedriver’s
door to show the old mileage reading
when the new odometer was installed.
!
I
- 1
Odometer (ELEcrRonrrcAND Lss
Trip Odometer wcmoNIc AND u s
Cf USTERS~
Your odometer shows how far your
vehicle has been driven in either miles
(used in the U.S.)or kilometers (used
in Canada). Press the E/M
(EnglisWMetric) button on the left side
of the instrument cluster to switch the
display between miles and kilometers
(km). Pressing the E/M button will also
cycle all other displays through English
and metric units.
Your Oldsmobile hasa tamper resistant
odometer. The odometerwill read
ERROR if someone has tampered with
&.
Cf USTERS)
Your trip odometer tells how far you
have driven, in either miles or
kilometers, since you last reset it. Press
the E/M (English/Metric) button on the
left side of the instrument cluster to
switch the display between milesand
kilometers (km) .
The trip odometer is displayed by
pressing the TRIP button. To reset it to
zero, press TRIP to display the trip
odometer, then hold the buttonfor about
three seconds until thedisplay resets.
Features & Controls
UNLEADED FUEL ONLY
%e/ Gage ( a m R o N I c
cLusrm)
tour fuel gage bars light up when the
gnition is on to show you about how
nuch fuel you have left,when the
gnition is on.
When the third bar goes off, you have 3
;allom (11L) of fuel remaining. The
nessage LOW FUEL will be displayed
n the information center and a chime
vi11 sound. Press RESET to stop the
varning.
{ere are five things that some owners
isk about. None of these show a
Iroblem with your fuel gage:
' At the service station, the gas pump
shuts off before the gage reads F (Full).
92
The top bar does not go out until you
have drivena long distance-about
50 miles (80 kilometers).
It takes a little more or less fuel to fill
up than thegage indicated. For
example, the gage may have indicated
the tankwas half full, but it actually
took a little more or less than half the
tank's capacity to fill the tank.
The gage moves a little when you turn Engine Coolant Temperature
a corner or speed up.
Gage and Light (STANDARDAND LSS
The tank is not necessarily empty
CLUSTERS)
when the last bar goesout. There is a 1
This gage shows the engine coolant
to 1.5 gallon (4 to 5.6 L) fuel reserve.
temperature.
For your fuel tank capacity, see Service
If the gage pointer moves into the red
Station Information on the last page of
warning
zone and the HOT warning
this manual.
light on your instrument cluster goes
on: your engine is too hot! Itmeans
your engine coolant has overheated. A
warning chime may also sound. If you
have been operating your vehicle under
normal driving conditions,you should
pull off the road,stop your vehicle and
turn theengine off as soon as possible.
HOT COOLANT CAN BURN YOU
BADLY!
In ProbZems on the Road, this manual
shows what to do. See theIndex under
Engine Overheating.
normal driving conditions, you should
pull off the road, stopyour vehicleand
turn theengine off as soon as possible.
HOT COOLANT CAN BURN YOU
BADLY!
In Problems on the Road, this manual
shows what to do.See the Zndex under
Engine Overheating.
If your coolant level is low, the message
LOW ENGINE COOLANT will
Engine Coolant Temperature
Gage and Light (ELECTRONICCLUSTERJ appear. Add coolant. See theIndex
under Engine Coolant.
This gage has bars that show the engine
When the engine is warm, but off, and
coolant temperature.
the ignition is on! the word HOT will
If all bars light up, it indicates the
flash. This is normal.
coolant temperature is about 255°F
(124°C). A slow chime will sound for
five seconds and the HOT warning lighl
will comeon. Themessage HOT...AC
DISABLED will appear in the
information center.
If the coolant temperatureis over 261°F
(127"C), the message HOT...STOP
ENGINE will appear anda fast-pulsed
chime will sound. It means that your
engine coolant has overheated. If you
have been operating your vehicle under
r
93
Features & Controls
LOW
COOLANT
Low Coolant Warning Light or
Message
If the engine isrunning and this warning
light comes on, or the information center
displays LOW ENGINE COOLANT,
your system may be lowon coolant and
the engine mayoverheat. A warning
chime will also sound. See the Zndex
under Engine Coolant and check your
coolant levelat the coolant recovery
tank. If the level is low, bringit up to its
proper level. If the level is not low, have
your low coolant warning system
serviced.
94
The LOW COOLANTwarning light will
also come on when you turn on the
ignition as a bulb checkto show you it is
working. If it doesn’t comeon then, have
it fixed right away. Afterthe bulb check,
the light will go out for 20 seconds. If the
light comes backon after 20 seconds, the
system may be lowon coolant.
Brake System Warning Light
-
-
Your Oldsmobile’s hydraulicbrake
system is divided into twoparts. If one
part isn’t working, the other part can
still work and stop you. For good
braking, though, you need both parts
working well.
If the warning light comes on, there
could be a brake problem. If the
problem is low brake fluidand you have
the electronic cluster, the message
LOW BRAKE FLUID will appear in
the information center, the BRAKE
light will comeon, and a fast warning
chime will sound. You can stop the
chime by pressing RESET. The BRAKE
light and message will continue to be
displayed. Have your brake system
inspected right away.
Features & Controls
96
If the light stayson, turn the ignition off.
Or, if the light comeson when you’re
driving, stop as soon aspossible and turn
TRACTION TRACTION
the ignition off. Then start the engine
OFF
ACTIVE
again to reset the system. If the light still
stays on, or comes on again while you’re
driving, your Oldsrnobile needs service.
If the regular brake system warning light
isn’t on, you still have brakes, but you
don’t have anti-lock brakes.If the regular
Traction Control System Warning
brake systemwarning light is also on,
you don’t have anti-lock brakesand
Light (OPTION)
there’s a problem with your regular
The TRACTION OFF warning light
brakes. SeeBrake System Warning
means that thesystem is not working.
Light earlier in this part.
When this warning light is on, the
system will not limit wheel spin. Adjust
your driving accordingly.This warning
light may come on for the following
reasons:
If your brakes overheat, the traction
control system will go off and the
warning light wilI come on until your
brakes cool down.
If you turn the system off by pressing
the switch to theright of the steering
column, the warning lightwill come
on and stay on. To turn the system
back on, press the switch again. The
warning light should go off. The
system willalso turn itself on if you
turn your ignition off and back on
again.
There are some engine-related
problems that may cause the
TRACTION OFF warning light to
come on.
CAUTfUPC:
NOTICE:
Spinning your wheels whenthe
TRACTION OFF warning light is
on can destroy parts of your vehicle
as well as the tires. If you spin your
wheels too fast while shifting your
transaxle back and forth,you can
destroy your transaxle. When
you’re stuck, spin the wheels as
little as possible.
If the TRACTION OFF warning light
comes on and stays on for an extended
period of time, even when you’ve
switched the system on, your vehicle
needs service.
Also see the Index under Traction
Control.
TRACTfON
OFF
TRACTION
ACT1VE
LOW
1
COOLAN
TraCfjOn ActiveLight (STANDARD AND
LSS CLUSTERS)
When yourtraction control system is
limiting wheel spin, the TRACTION
ACTIVE light will come on. Slippery
road conditions may exist if this light is
on, so adjust your driving accordingly.
The lightwill stay on for a few seconds
after the traction control system stops
limiting wheel spin.
The TRACTION ACTIVE light also
comes on briefly, as a bulb check, when
the engine is started.
Traction Control System Active
Message (ELECTRONICCLUSTER)
When your traction control system is
limiting wheelspin, the TRACTION
CNTL ACTIVEmessage will be
displayed. Slippery road conditions may
exist if this message is displayed, so
adjust your driving accordingly.The
message will stay on for a few seconds
after the traction control system stops
limiting wheelspin.
Features & Conlrols
CHECK
NOTICE:
LOW
WASH
i
Malfunction lndicator Light(CHECK
ENGINE UGHT)
A computer monitors operation of your
fuel, ignition and emission controls
systems. Thiswarning light should
come on when the ignition is on but the
engine is not running, asa check to
show you it is working. If it does not
come on at all, have it fixed right away.
If it stays on, or it comes on while you
are driving, the computeris indicating
that you have a problem. You should
take your vehicle in for servicesoon.
98
If you keep driving your vehicle
with this warning light on, after
awhile the emission controls won't
work as well, your fuel economy
won't be as good, and your engine
may not run as smoothly. This
could lead to costly repairs not
covered by your warranty.
Low Washer Fluid Warning Light
or Message
If you have the base or LSS cluster with
the optional reminder package,the
LOW WASH warning light will come
on when theignition is on and the fluid
container is less than one-third full. If
you have the electronic cluster, LOW
WASHER FLUID will be displayed in
the information center whenthe
ignition is on and the fluid container is
less than one-third full. A warning
chime may also sound. Driving without
washer fluid can be dangerous. A bad
mud splash canblock your vision. You
could collide withanother vehicle.
Check your washer fluidoften.
If you have a problem with your oil, this
warning light may stay on after you start
your engine, or come on when you are
driving. A fast warning chime may also
sound. If you have the electronic cluster,
LOW PRES STOP ENGINE will be
displayed in the information center.
These indicate that oil is not going
through your engine quicklyenough to
keep it cool. The engine could be low on
oil, or could havesome other oil
problem. Haveit fixed right away.
NOTICE:
Damage to your engine from
neglected oil problemscan be costly
and is not covered by your warranty.
The oil pressure warning light could
also come on in three other situations:
When the ignition is on but the
engine is not running, the light will
come on as a test to show you it is
working, but the light will go out
when you turn the ignition to Start. If
it doesn’t come on with the ignition
on, you may have a problem with the
fuse or bulb. Have it fixed right away.
Sometimes when the engine is idling
at a stop, the light may blink on and
off. This is normal.
If you make a hard stop, the light may
come on for a moment. Thisis
normal.
99
r
/ /
level is okay, the warning light or
message
will remain off.
I
//
OIL
If the warning light or message comes
LEVEL
T E M ~on after the 15 to 25 second delay,
check the dipstick level. If it reads low,
the engine oil should be brought up to
the proper level (see the Index under
TRACTION
TRACT1 Engine Oil).The warning light or
mr r
A PTI\
message will remainoff after the engine
oil has been brought to theproper level
Oil Level Warning light or
and the ignition has been off for eight
Message
minutes. The eight-minute delay allows
the
majority of the oil to drain back into
When the CHECK OIL or OIL LEVEL
the oil pan to prevent a false low
warning lightcomes on, orthe
condition.
information center displays CHECK
OIL LEVEL, it indicates that the engine
oil level is 1 to 1 1/2 quarts (.95 L to
1.4 L) low. A warning chime may also
sound. The warning light or message
will come on for two to four seconds
when the ignition is turned on,as a
bulb check to show you it is working. If
it doesn't come on, have it fixed right
away. It will then go off. Even if you
have a low oil level, it will go off for 15
to 25 seconds. Then, if the oil level is
low, the warning light or messagewill
I
come on for20 to 40 seconds and a
warning chime maysound. If the oil
100
L
Battery Warning Light
This warning light will come on briefly
when you start the vehicle, as a check
to show you it is working;then it
should go out. If it stays on, or comes
on while you are driving, you may have
a problem with the electrical charging
system. If you have the electronic
cluster, the warning light may be
accompanied by the message CHECK
CHARGE SYSTEM in the information
center. Have it checked right away.
Driving whilethis light is on could
drain your battery.
If you must drive a short distance with
the warning light on, turn off all your
electrical accessories, suchas theradio
and climate control.
Driver Infomtion Center
(OPTION)
The Driver Information Center provides
useful infomation on:
Fuel Used and Range
Instantaneous Fuel Economy
Average Fuel Economy
Tachometer (Engine RPM)
Battery Voltage
Oil Pressure
* Oil Life
Date
Elapsed Time
Vehicle System Diagnosrrcs
Explanation of Controls
There are four buttons
that control the
functions of the Driver Information
Center.
SEL V : Press this button to select one
of the five information categories.
SEL 0 : Press this button to change
between the two functionsin each
category. The functions found in each
category are:
Fuel: Fuel Used and Fuel Range
Economy: Instant and Average Fuel
Economy since last reset
Gages: Tachometerand Battery Voltage
Oil: Oil Pressure and Oil Life since
last reset
Date/ET: Date and Elapsed Time
since last reset
ON/OFF: Press this button to turn the
system on or off. When off, the DIC will
continue to display diagnostic messages
as necessary. Whenyou turn the system
back on, any current diagnostic
If there
messages will be displayed again.
are no current messages, MONITORED
SYSTEMS OK will be displayed.
RE-SET: This button is used with other
buttons toreset system functions. It is
also used to shut off the chime with
most diagnostic messages.
Driver Information Center
Displays
When you turn on the ignition, the
Driver Information Center (DIC)
displays:
INFORMATION CENTER
If no problems are detected, the screen
will return to themode selectedwhen
the ignition was turned off.
If a problem isdetected, a chime will
sound and the diagnostic message will
be displayed. Exceptfor the messages
HOT...STOP ENGINE,LOW BRAKE
FLUID, LOW PRES STOP ENGINE
(low oil pressure), and PARKING
BRAKE SET, the message and chime
can be shut off by pressing RESET. If
the message PARKING BRAKESET
101
or LOW BRAKE FLUID is displayed,
only the chime can be shut off by
pressing RESET. If the message
HOT...STOP ENGINE or LOW PRES
STOP ENGINE is displayed, neither
the chime nor the message can be shut
off the problem requires immediate
attention. The chime associated with a
diagnostic message will shut off when
either SEL or SEL 4F is pressed to
view other functions.
If there are multiple diagnostic
messages, each will be displayed for two
seconds; then the system will display
the next message.
All displays are updated continuously.
d
To change the DIG display, and all
other displays, to English or metric
units, press the E/M button.
Fuel Used
Press SEL until FUEL is selected in
the display directlyabove the DIC
controls. Press SEL 4b if necessary to
display how much fuel has beenused
since you last pressed the resetbutton.
The displaywill show a reading such as:
10.4 GALLONS USED or
39.3 LITERS USED
To learn how much fuel will be used
from a new starting point, first display
fuel used, then press RESET until
RESET appears in the display (about
one second).
102
If RESET is pressed and held for at least
five seconds, fuel used, fuel range,
average fuel economy, and elapsed time
will all bereset and TRIP FUNCTIONS
RESET will be displayed.
Do not confuse fuel used with the
amount of fuel remaining in your tank.
UNLEAOED FUEL ONLY
-
Instantaneous Fuel Economy
Fuel Range
Press SEL v to select FUEL. Press
SEL 4b if necessary to display the
fuel range. The display will show a
reading such as:
FUEL RANGE235 MI or
FUEL RANGE378 KM
Fuel range calculatesthe remaining
distance you can drive without refueling,
allowing a 1gallon (4 liter) reserve. It’s
based on average fuel economyand the
fuel remaining inthe tank.
If RESET is pressed and held for at
least five seconds, fuel used, average
fuel economy, and elapsed time will all
be reset. TRIP FUNCTIONS RESET
will be displayed briefly.Because fuel
range is based on average fueleconomy,
the fuel range will also change.
I
Press SEL v to select ECONOMY.
Press SEL 4b if necessary to display
the instantaneous fuel economy. The
display will show a reading such as:
22 INST MI/GAL or
31 INST U100 KM
Instantaneous fuel economy varieswith
your driving conditions (accelerating,
braking, hills, etc.). RESET does not
function in this mode.
IO3
Features & Controls
UNLEAOEO FUEL ONLY
I
Average Fuel Economy
Press SEL 7 to select ECONOMY.
Press SEL 4b if necessary to display
the average fuel economy. The display
will show a reading such as:
25.2AVG MI/GAL or
35.1 AVG U100 KM
Average fuel economyis viewed as a
long term approximation of your driving
over all drivingconditions. Press RESET
until RESET appears in the display
(about one second) to learn the average
fuel economy from new
a starting point.
If RESET is pressed and held for at least
five seconds, fuel used, fuel range,
average fuel economy,and elapsed time
will all be reset and TRIP FUNCTIONS
RESET will be displayed.
Tachometer (Engine RPM)
Press SEL v to select GAGES.Press
SEL 4 b if necessary to display the
engine rpm. The displaywill show a
reading such as:
TACHOMETER 1800 RPM
Battery Voltage
Press SEL v to select GAGES. Press
SEL 4 b if necessary to display the
electrical system voltage. The display
will show a reading such as:
BATTERY 13.7 VOLTS
FUEL
E
UNLEADED FUEL ONLY
-
3
1
9
Oil Pressure
Press SEL v to select OIL. Press
SEL 4 b if necessary to display the oil
pressure. The display will showa
reading such as:
OIL PRESSURE 57 PSI
OIL PRESSURE 393 KPA
)
UNLEADED FUEL ONLY
Oil Life
..
1::)1.I.I.
.. .. ... i:?;, .*
.I.1- I:. *..#'T ::2s'f
i'i
Press SEL v to select OIL. Press
SEL 4b if necessary to display the oil
life. The display will showa reading
such as:
OIL LIFE 84%
This is an estimate of the oil's
remaining useful life. The system
predicts remaining oil life using inputs
from coolant temperature, engine rpm,
and vehicle speed. It alerts you to
change the oil on a schedule consistent
with your vehicle's drivingconditions.
/
UNLEADED FUEL ONLY
. .. ... ..... ....*. .. .
1::::i--fr...if=kEl::.1.. r.1.L. ::>Ll!A=!
When remaining oil life is 9% or less,
the display willshow:
CHANGE OIL SOON
Then, whenyou start the vehicle, a tone
will sound and theCHANGE OIL
SOON message will display each time
the vehicle is started. Your vehicle's
engine oil is almost spent and you
should schedule an oil change soon.
Feahres & Controls
message will be displayed and then
oil life will change to 1000/0.
UNLEAOEOFUEL ONLY
Be careful not to reset the oil life
accidentally at any time other than
... ... ...,..
i::::I 4 @I NL:;1::. f.f .I.I... i?
[:I h.i
when the oil has just been changed. It
can't be reset accurately until the next
oil change.
The DIC does not replace the
Maintenance Schedule in this manual.
The oil change reminder will not detect
When the oil life is zero, a tone will
dusty conditions or engine malfunctions
sound and the display will show:
that may affect the oil. If you drive in
CHANGE OIL NOW
dusty areas, change your oil every 3,000
Then, when you start thevehicle, a tone miles (5 000 ltm) or three months,
will sound and the CHANGE OIL
whichever comesfirst, unless the DIC
NOW message will display each time
instructs you to do so sooner.
the vehicle is started.
The DIC does not measure how much
To reset the oil life display after each oil oil is in the engine. So, be sure tocheck
change:
your oil level often. See the Index under
1. Acknowledge all diagnostic messages Engine Oil.
by pressing RESET.
2. Press SEL to select OIL. Press
SEL 4b if necessary to display the
oil life.
3.Press and hold the RESET button for
about five seconds. Once the oil life
index has been reset, aRESET
I
I06
Date
Press SEL to select DATE/ET. Press
SEL 4 b if necessary to display the
date. The display will show a reading
such as:
FRI OCTOBER 8
To change the date:
1. Display the date as described above.
2. Press and hold RESET €orabout one
second until the display shows
MONTH? MM/DD/YY with
MM/DD/YY representing the date
currently stored in the D E .
Features & Controls
If RESET is pressed and held for at
least five seconds, fuel used, fuel range,
average fueleconomy, and elapsed time
will all bereset and TRIP
FUNCTIONS RESET will be displayed.
Vehicle System Diagnostics
The following messages inyour
information center mean that there may
be a problem with the vehicle’s
electronic systems. See yourdealer as
soon as possible.
CHECK CHARGE SYSTEM
AIR BAG PROBLEM
COOLANT SENDER PROB
OIL PRES SENDER PROB
PASSKEY SYSTEM PROB
OIL LVL SYS PRO6
COOLANT LVLSYS PROB
The DIC will display manyother
messages, such as TURN SIGNAL
ON?, LOW BEAM LAMP OUT, and
REAR DOOR AJAR,of value to the
driver. For more information on bulb
messages! see the Index under
Replacement Bulbs.
108
Canadian & Export Vehicles On/y
English messages willappear in the
information center for two seconds.
Then the numeric equivalent will
appear for two seconds.
NO.
MESSAGE
1 HOT...STOPENGINE
2
PARK
BRAKE SET
3
LOW
BRAKE FLUID
4
LOWPRES STOP ENGINE
5
CLEANKEY-WAIT 3 MIN
9
HOT...ACDISABLED
10 CHECK
OIL
LEVEL
11
CHANGE
OIL SOON
12
CHANGEOIL NOW
13
LOW
FUEL
14 LOW
AC
REFRIGERANT
15 CHECK
CHARGE
SYSTEM
16
LOWENGINECOOLANT
17
LOWWASHERFLUID
18
PRND321PROB
19
DATE
FUNCTION
PROB
20
AIR
BAG PROB
21
22
24
25
26
27
28
29
30
31
32
33
34
35
36
37
38
39
40
49
50
51
COOLANT SENDER PROB
OIL PRES SENDER PROB
TRACTION CNTL ACTIVE
TURN SIGNAL ACTIVE
DRIVER DOOR AJAR
PASSENGER DOOR AJAR
REAR DOOR AJAR
PASSKEY SYSTEM PROB
HIGH BEAM LAMP OUT
LOW BEAM LAMP OUT
CENTER STOPLAMP OUT
TAIL LAMPOUT
BACK-UP LAMP OUT
REAR LAMP OUT
FRONT TURN LAMP OUT
FRONT PARK LAMP OUT
LAMP MON LINK PROB
OIL LVL SYS PROB
COOLANT LVL SYS PROB
BATTERY RECONNECT
MONITORED SYSTEMS OK
INFORMATION CENTER
Comfort Controls &Audio Systems
Directional Controls
Turn the directional controlknob to
select the desired airflow.
The followingillustration sumn
your air flow choices.
8:This knob manually selects the
Four Season Climate Control force
of air you want. Turn theknob
The air conditioner and heater work
best if you keep the windows closed
while using them. Your vehicle has the
flow-through ventilation system
described later in thissection.
Temperature Control: This knob
changes the temperature of the air
coming through the system. Turn the
knob toward the red zone (cloclwise)
for warmer air. Turn theknob toward
the blue zone (counterclockwise) for
cooler air.
cloclwise for more air flow. Turn the
knob counterclockwise for less air flow.
izes
BI-LEV (Bi-Level)
(Defrost)
LOWER
DEFOG
UPPER or REClRC
Comfort Controlk &Audio Systems
0(Defrost): Use to direct most of
Some air will also flow through the
lower outlets.
RECIRC (Recirculate): Use when
entering a smoky or dusty area.Air flow
is directed through the upper
instrument panel vents.
OFF: Turns off the climate control
system. This is the only setting which
fully shuts off the fan.
the air to thewindshield and side
window vents. The air conditioning may
run if the temperature isabove 40°F
(4°C) to dehumiddy the air.
DEFOG: Use on cold, humid days with
two or more passengers when the
windows fog. The airis directed
through the windshield, side window,
and lower vents.
Air Conditioning
LOWER: Use to direct most of the air
The air conditioning may run in Defrost
through the lower vents. Some air will
if the temperature is above 40°F (4°C).
flow through the windshield and side
In any other mode, you can select or
window vents.
shut off air conditioning as desired by
BI-LEV (Bi-Level):Use on cool, sunny pressing A/C. The indicator light will
days. This setting directs air intwo
glow whilethe air conditioning is
ways. Cool outside air is directed to the operating.
upper portion of your body through the
For maximum cooling, placethe
upper vents in the instrumentpanel.
directional
control in RECIRC, turn the
Warmed air isdirected through the
fan h o b cloclcwise for highest fan
lower vents, with a little air flow
speed, and turn the temperatureknob
through the windshield and side
counterclockwise to thecoldest setting.
window vents. At times this
On very hot days, open the windows
temperature difference may be more
long
enough to let the hotinside air out.
apparent than others.
This reduces the time the air
UPPER: Use to direct air flow through
the upper vents in the instrument panel. conditioner’s compressor will have to
run, which should help fuel economy.
112
Rear Window Defogger (OPTION)
Q R. DEF: Press towarm the defogger
grid on the rear window. Theindicator
light will glow while the rear window
defogger is operating. The rear window
defogger willturn off automatically after
about 10 minutes of use. If you turn it on
again, the defogger will operate forabout
5 minutes. You can also turn off the
defogger by turning off the ignitionor
pressing
R. DEF again.
Comfort Controls &Audio Systems
DEFOG
UPPER
LOWER
BI-LEV (Bi-Level)
I16
FRONT
(Defrost)
Comfort Controls &Audio Systems
The direction of the cool air can be
controlled by adjusting, or turning off,
the outlets in the dash.Aiming them
over your shoulder will benefit both
front and rear passengers. Back seat
passengers can also redirect airflow at
the rear of the centerconsole.
On very hot days, open thewindows
long enough to let the hot inside air out.
This reduces the timethe air
conditioner's compressor will have to
run, which should help fuel economy.
Rear Window Defogger (OPTION)
a
REAR: Press to warm the defogger
grid on the rear window. The indicator
light will glowwhile the rear window
defogger is operating. The rear window
defogger willturn off automatically after
about 10 minutes of use. If you turn it
on again, the defogger willoperate for
about five minutes. You can also turn
off the defogger by turning off the
ignition or pressing
REAR again.
a
118
Do not attach a temporary vehicle
license across the defogger grid on the
rear window.
~~
NOTICE:
Don't use a razor blade or
something else sharp on theinside
of the rear window. If you do, you
could cut or damage the warming
grid, The repairs wouldn't be
covered by your warranty.
Passenger Temperature Control
With this feature, the right front seat
passenger can control thetemperature of
his/her zone. Thepassenger temperature
setting can be up to 5°F (3°C) cooler or
wanner thanthe primary setting.
To use this feature, turn the PASS
TEMP (passenger temperature) knob on
the passenger's armrestto the desired
setting or press PASS (passenger). If
the climate controlsystem isoff,
actuating either control will placethe
system in automatic mode.
If you have this feature, sun on oneside
of the vehicle will causethe climate
control system to automatically supply
cooler air to that side.
Extended ldling with Automatic
Electronic Climate Control
When theengine idles for a long time,
the outside temperature sensormay be
affected by warm air from the engine.
The climate control system may blow
air that is too cool. This should stop
once thevehicle is moving again.
Extended idling is not recommended.
See the Index under Engine Exhaust.
Steering Wheel Touch Controls
For Climate Control(opnorq
Some heating and cooling controls can
)e adjusted at the steering wheel. Other
:ouch controls also operate some audio
:ontrols. See Steering Wheel Touch
Zontrols for Audio System later in this
jection.
Press the upper part of the control
:o increase the fan speed; press the
ower part to reduce the fan speed.
TEMP: Press the upper part of the
:ontrol to raise the inside temperature
;etting; press the lower part to lower
:he setting.
Pear Outlets (oprIoN)
Slide the center control up to direct air
lpward. Slide it down to direct air
iownward. The center position will
jirect air both up and down.
8:
119
Comfort Controls & Audio Svstems
J
I
I
When you enter a vehicle in cold
weather, select the LOWER setting,
then turn theblower fan to high for a
few momentsbefore driving off. This
will blow moist airfrom intake ducts
toward the floor, not thewindshield.
It reduces the chance of fogging.the
inside of your windows.
Keep the air path under the front
seats clear of objects. Thishelps air to
circulate throughout your vehicle.
4
Now-Through Ventilation System
Your Oldsmobile’s flow-through
ventilation system supplies outside air
into the vehicle when it is moving.
Outside airwill also enter thevehicle
when the heater or the air conditioning
:an is running.
120
Ventilation Tips
Keep the hood and front air inlet free
of ice, snow, or any other obstruction
(such asleaves). The heater and
defroster will work far better,
reducing the chance of fogging the
inside of your windows.
Audio Systems
The following pages describe the audio
systems available for your Oldsmobile,
and how to get the best performance
from them. Please read about the
system in your vehicle.
Hearing damage from loud noise is
almost undetectable until it is too late.
Your hearing can adapt to higher
volumes of sound. Sound that seems
normal can be loud and harmful to your
hearing. Take precautions by adjusting
the volume control on your radio to a
safe sound level before your hearing
adapts to it.To help avoid hearing loss
or damage:
Adjust the volume control tothe
lowest setting.
Increase volume slowly until you hear
Comfortably and clearly.
NOTICE:
Before you add any sound
equipment to your vehicle - like a
tape player, CB radio, mobile
telephone or two-way radio - be
sure you can add what you want. If
you can, it’s very important to doit
properly. Added sound equipment
may interfere with the operationof
your vehicle’sengine, Delco@radio
or other systems, and even damage
them. And,your vehicIe’s systems
may interfere with the operation of
sound equipment that has been
added improperly. So, before
adding sound equipment, check
with your dealer and be sure to
check Federal rules covering mobile
radio and telephone units.
AM
FM
1: I D ST
TAPE
FMI
CD
L
Oldsmobile
,-
Setting the Clock
U
No matter which audio system you have
in your vehicle,setting the clockis easy.
To set the clock, press and holdthe HR
or MN button until it begins to change.
Let up as it gets close to thecorrect
time. There will be an initial 2-second
delay before the clock goes into the
time-set mode. The A or P in the
display designates AM or PM in clock
adjust mode. The A or P replaces the
channel momentarily. The clock may be
set with the ignition off.
121
Comfort Controk di Audio Systems
1
9M/FM Stereo Radio
rhe digital display indicates information
In time or radio station frequency, the
4M or FM radio band, whether the
;tation is in stereo, and other audio
system functions.
PWR/VOL (PowerNolume): With the
gnition on, push this knob to turn the
system on or off. Turn it cloclnvise to
ncrease the volume. Turn it
:ountercloclwise to decrease the
rolume.
122
AM/FM: Press this button to change
between the AM,FM1,and FM2 bands.
The display will show whichband you
are on.
TUNE: Press lightly on this knob to
release it fromits recessed position.
Turn it to tune in radio stations. You
may push the knob back in to return it
to its recessed position when not in use.
To Preset Radio Stations:
The five pushbuttons labeled 1-5 can be
used to preset up to 15 radio stations
(five AM, five FM1,and five FM2).
1. Tune in the station you want to store.
2. Press and hold one of the five
pushbuttons until the display shows a
channel number. The radio will mute
until the channel number is
displayed. Whenever you press that
button again, the preset station will
return. Always checkwhether you’re
in AM, FM1,or FM2.
RECALL When the ignition is off,
press RECALL to display the time.
When the radio is on, press RECALL to
switch the display betweenthe radio
station and thetime. After fiveseconds
the display will return to its normal
display.
The radio can be set so that either the
time or radio station is normally
displayed when the radio is playing. To
do this, press RECALL to display the
time or radio station as desired, then
hold RECALL down until the display
flashes.
Comfort Contprols & Audio Systems
I
AMIFM Stereo Radio with
Automatic Tone Control and
Cassetfe Tape Player
The digital displayindicates information
on time or radio station Erequency, the
AM or FM radio band, whether the
station is in stereo, and other audio
system functions.
124
P W O L (Power/Vohme):With the
ignition on, push this knob to turnthe
system on or off. Turn itclockwise to
increase thevolume. Turn it
counterclockwise to decrease the
volume.
AM/FM: Press this button tochange
between the A M , FM1, and FM2 bands.
The display will show whichband you
are on. If you press thisbutton while a
tape is playing, the tapewill stop and
the radiowill return to theAM or FM
band that you were on.
release it from its recessed position.
in radio stations. You
Turn it to tune
may push theb o b back in to returnit
to itsrecessed position whennot in use.
To Preset Radio Stations:
The five pushbuttons labeled 1-5can be
used to preset upto 15 radio stations
(five AM, five FM1,and five FM2).
1. Tune in the station you want to store.
2. Press TONE to select the setting that
you prefer.
3.Press and hold oneof the five
pushbuttons until the display showsa
channel number. The radio will mute
until the channel number is
displayed. Whenever you press that
button again, the preset station and
tone settingwill return. Always check
whether you're in A M , FM1, or FM2.
dul
Comfort Controls &Audio Systems
BASS: Press this buttonlightly to
release it from its recessed position.
Turn it toadjust bass response. As you
turn theknob you will feelthe center
position. Push the knob back in to
return it to its recessed position.
Turning BASS will change the radio’s
Automatic Tone Control feature to
MANUAL.
TREB (Treble): Press this button
lightly to release it from its recessed
position, then pull it out toits fully
extended position. Turn it to adjust
treble response. As you turn theknob
you will feel the centerposition. Push
the knob back in to returnit to its
recessed position. Turning TREB will
change the radio’s Automatic Tone
Control feature to MANUAL.
126
BAL (Balance): Press this button
lightly to release it from its recessed
position. Turn it to adjust the right and
left speaker balance. Asyou turn the
knob you will feelthe center position.
Push the knob back into return it to its
recessed position.
FADE: Press this button lightly to
release it from its recessed position,
then pull it out to itsfully extended
position. Turn it to the right to increase
front speaker volume. Turn it to theleft
to increase rear speaker volume. As you
turn the knob you will feelthe center
position. Push the h o b back in to
return it to its recessed position.
To Play a CassetteTape:
With the ignition on, insert the tapeand
it will begin playing. Theaudio system
will turn on automatically. Yourtape
player is designed towork best with
tapes that are 30 to 45 minutes long on
each side. Longer tapes may not work
as well.
Note that when a tape is inserted, TP
will be displayed. When the tape is
playing,
will
be
displayed,
along
with an arrow toshow whether the top
or bottom of the tape is playing. Any
time a tape is inserted, the top side will
play first. If a high bias metalor Cr02
tape is played, HI-BIAS will appear in
the display and the equalization will be
adjusted automatically. If you select a
tone setting, it will be remembered
when you play a tape.
NR (Noise Reduction): This radio has
Dolby@B Noise Reduction to reduce
background noise on Dolby‘ B encoded
tapes. Press this button toreduce
background noise on your tape. The
Dolby symbol 00 will appear in the
display. Dolby’ Noise Reduction is
manufactured under license from Dolby
Laboratories Licensing Corporation.
Dolby@and the no symbol are
trademarks of Dolby Laboratories
Licensing Corporation.
SEEK A/V:When you press
SEEK A/V while playing a tape, it will
search for the next higher or lower
selection and stop.There must be at
least a four-second gap between
selections on the tape.
SCAN: When you press SCAN while
playing a tape, you’ll hear the first few
seconds of each selection. Press SCAN
again to stop on a selection. The tape
will be muted while scanning and
SCAN will appear on the display.
FWD (Fast Forward):Press to advance
a cassette taperapidly; press again to
play the tape.
REV (Reverse): Press to reverse a
cassette tape rapidly; press againto play
the tape.
PROG (Program): Press to play the
other side of the tape.
TAPE/CD: If you have a tape inserted
and the radio is playing, press
TAPE/CD to play your tape. To return
to the radio while the tape is playing,
press AM/FM. The tape will remain
safely inside the radio for future
listening.
EJECT: Press to eject the cassette tape.
The radio will then play.
127
Comfort Controls di Audio Systems
AMLFM: Press this button tochange
4MIFM Stereo Radiowith
between the AM, FM1, and FM2 bands.
4ufomafic Tone Control, Casseffe The
display will show whichband you
kpe and Compact DiscPlayer
are on.If you press this button while a
rhe digital displayindicates information
sn time or radio station frequency, the
4M or FM radio band, whether the
'tation is in stereo, and other audio
ystem functions.
?WR/VOL(Power/Volume):With the
gnition on, pushthis lmob to turn the
ystem on or off. Turn it clockwiseto
ncrease the volume. Turn it
:ounterclockwiseto decrease the volume.
128
tape orCD is playing,the tapeor CD
will stop and the radio will return tothe
AM or FM band that you were on.
TUNE: Press lightly onthis h o b to
release it from its recessed position.
Turn itto tunein radio stations. You
may push the lmob back in to return it
to its recessed position when not in use.
To Preset Radio Stations:
The five pushbuttons labeled 1-5 can be
used to presetup to 15 radio stations
(five AM, fiveFM1, and fiveFMZ).
1. Tune in thestation you want to store.
2. Press TONE to select the setting that
you prefer.
3.Press andhold one of the five
pushbuttons until the displayshows a
channel number.The radio will mute
until the channelnumber is
displayed. Whenever you press that
button again, thepreset station and
tone settingwill return. Always check
whether you're in A M , FM1, or FM2.
SEEK A/T:When you press
SEEK A/V while playing the radio, the
radio will search for thenext higher or
lower station andstop. Theradio will be
muted while seeking.
SCAN: When you press SCAN while
playing the radio, the radio willgo
through eachstation, pausing for a few
seconds at each station. Press SCAN
again to stop on station.
a
The radio
will bemuted while scanningand
SCAN will appear on the display.
5_=1
When you press SCAN and hoId it for
about two seconds until the display
shows PSCAN (Preset Scan), the radio
will scan only stations thatyou’ve
preset with your radio pushbuttons.
Press SCAN again to stop on a station.
RCL (Recall):When the ignition is off,
press RCL to display the time. When
the radio is on, press RCL to switch the
display between the radiostation and
the time. After fiveseconds the display
will return to its normal display.
The radio can be set so that either the
time or radio station is normally
displayed when the radio is playing. To
do this, press RCL to display the time
or radio station as desired, then hold
RCL down until the display flashes.
This button scrolls through three
functions when a CD is playing:
Press to see which track is playing.
Press again while the track is
dispiayed (within about five seconds) ,
and EL TM (Elapsed Time) will
appear in the display together with
how much time has elapsed since the
track started playing.
Press again to view the time.
You can select which function is
normally displayedwhen a CD is
playing. To do this, press RCL until the
display shows the desired function, then
hold RCL down until the display
flashes.
TONE This button controls the
Automatic Tone Control (ATC) feature
which lets you select an equalization for
the type of music or voice beingheard.
For example, JAZZ emphasizes bass
and treble while ROCK emphasizes
bass. Press TONE to stepthrough the
six settings: JAZZ, VOCAL, POP,
ROCK, CLASSIC, and MANUAL.
Each setting will appear on thedisplay.
In MANUAL you can adjust tonewith
the TREB and BASS controls. Any
time TREB or BASS is turned, TONE
will automatically go to theMANUAL,
setting. Radio, cassette tape and CD
player tone settings are set separately,
and you can set separate tone settings
with each radio station preset.If you’ve
selected a tone setting for a tape or CD,
then play the radio, the toneyou set for
the tape or CD will bereactivated when
the tape or CD is played again.
BASS: Press this button lightly to
release it from its recessed position.
Turn it to adjust bass response. As you
turn theknob, you will feel the center
position. Push the knob back in to
return it toits recessed position.
Turning BASS will change the radio’s
Automatic Tone Control featureto
MANUAL.
TREB (Treble): Press this button
lightly to release it from its recessed
position, then pull it out to itsfully
extended position. Turn it to adjust
treble response. As you turn the knob
you will feel the center position. Push
the knob back in to return it to its
recessed position. Turning TREB will
change the radio’s AutomaticTone
Control feature to MANUAL.
BAL (Balance): Press this button
lightly to release it from its recessed
position. Turn it to adjust the right and
left speaker balance. As you turn the
knob you will feelthe center position.
Push the knob back in to return it to its
recessed position.
129
Comfort Co&ok &Audio Systems
To Play A Compact Disc:
The CD player will playeither normalsize discs or the smaller 8 cm discs
without an adapter.
With the ignition on, insert the disc
partway into theslot, with the label side
up. The player should pullit in and it
will begin playing.
Note that when the disc is inserted, CD
will be displayed. When the disc is
playing,willbedisplayed.
If you
select a Tone setting on your CD, it will
be activated each time you play a CD.
As each new track starts toplay, the
track number will appear in the display.
If Err (Error) appears on the display,
the disc can’t play temporarily. If the
disc comesout or doesn’t play, check to
see if
The road is too rough. The disc
should play when the road is
smoother.
The disc is upside down.
The disc is dirty, scratched, or wet
The air is very humid. If so, wait
about one hour and try again.
SEEK A/V:When you press SEEK V
while playinga CD, it will go back to
the startof the current track if more
than eight seconds have played. When
you press SEEK A,it will search for
the next higher track and stop. There
must be atleast a three-second gap
between selections on the CD.
SCAN:When you press SCAN while
playing a CD, you’ll hear the first few
seconds of each selection. Press SCAN
again to stopon a selection. The CD
will be muted while scanning and
SCAN will appear on the display.
FWD (Fast Forward): To advance a
CD, press and hold this button. While
the CD advances, elapsed time will be
displayed to help you find the desired
passage.
REV (Reverse): To reverse a CD, press
and hold this button. While the CD
reverses, elapsed time will be displayed
to help you find the desired passage.
TAPE/CD:If you have a CD inserted
and the radio is playing, press
TAPE/CD to play your CD. To return
to theradio while the CD is playing,
press AM/FM. You can also press
TAPE/CD to switch between a tape
and a compact disc if both are inserted.
The tapeor CD that’s not being played
will remain safely inside the radiofor
future listening.
RDM (Random): Press to play the CD
tracks in random order. RDM will
appear on thedisplay. Press againto
play the tracks in disc order.
EJECT: Press to eject the CD. The radio
will then play. If both a tape and CDare
inserted, thelast one played will eject.
I31
Comfort Cont~ols&Audio Systems
Steering Wheel Touch Controls
for Audio System (opTIoIv)
Some audio system functions described
in the previous pages can also be
operated with theSteering Wheel
Touch Controls option. Othertouch
controls also operate some climate
controls. See Steering Wheel Touch
Controls for Climate Control earlier in
this section.
VOL (Volume): Press the top partof
the switch to increase volume, the
bottom part to decrease volume.
132
SEEK Each time you press SEEK, you
will tune in a radio station higher on the
AM or FM band.
When playing a tapeor CD, press
SEEK to listen to the nextselection.
PROG (Program): Press PROG to
tune in a preset radio station higher on
the AM or FM band.
When playing a tape, press PROG to
play the otherside of the tape.
Understanding Radio!
Reception
F M Stereo
FM stereo will give you the best sound,
but FM signals will reach only about 10
to 40 miles (16 to 65 km).Tall buildings
or hills can interfere with FM signals,
causing the sound to come and go.
,,
AM
The range for most AM stations is
greater thanfor FM, especially at night.
The longer range, however, can cause
stations to interfere with each other.
AM can alsopick up noise from things
like storms and power lines.To lower
this noise, try reducing the treble level.
Comfort Controls &Audio Systems
5. Make the antenna go up and down
Fixed MastAntenna
The fixed mast antenna can withstand
most car washes without being
damaged. If the mast should ever
become slightly bent, you can straighten
it outby .hand. If the mast is badly bent,
as it might be by vandals, you should
replace it.
Check every once in a while to be sure
the mast is still tightened to thefender.
by turning theradio or ignition on
and off.
6. Then repeat if necessary.
NOTICE:
Don’t lubricate the power antenna,
Lubrication could damage it.
Power Antenna MastCare
Your power antenna will look its best
and work well if it’s cleaned fromtime
to time.
To Clean the Antenna Mast:
1. Turn on the
ignition and radio to
raise the antenna tofull mast
extension.
2. Dampen a clean cloth with mineral
spirits or equivalent solvent.
3. Wipe cloth over the mast sections,
removing any dirt.
4. Wipe dry with clean cloth before
retracting.
134
NOTICE:
Before entering an automatic car
wash, turn off your radioto make
the power antenna go down. This
will prevent the .mast from possibly
getting damaged.If the antenna does
not go down when you turn the
radio off, it may be damagedor need
to be cleaned. In either case, lower
the antenna by hand by carefully
pressing the antenna down.
If the mast portion of your antenna is
damaged, you can easily replace it. See
your dealer for a replacement kit and
follow the instructions in the kit.
Part 4
Your Driving andthe Road
Here you’ll find information about
driving on different kinds of roads
and in varying weather
conditions.
We’ve also included many other
useful tipson driving.
..
Defensive Dnvlng .............................................................. ...................................... 136
Drunken Driving ..................................................................................................... 136
Control of a Vehicle
BraI<ing.................................................................................................................
138
Anti-Lock Brakes ................................................................................................. 139
Steering Tips ........................................................................................................
142
Steering in Emergencies ......................................................................................
142
Passing .................................................................................................................
143
Driving at Night ......................................................................................................
145
146
Driving in theRain ..................................................................................................
City Driving............................................................................................................. 148
Freeway Driving ...................................................................................................... 149
Hill and Mountain
Roads ........................................................................................ 150
.
.
Winter Dnvlng .........................................................................................................
151
Towing a Trailer ...................................................................................................... 154
135
YourDriving and the Road
Your Driving and the Road
true for brain, spinal cord and heart
injuries. That means thatif anyone who
has been drinking - driver or
passenger -is in a crash, the chanceof
being killedor permanently disabled is
higher than if that person had not been
drinking. And we’ve alreadyseen that
the chanceof a crashitself is higher for
drinking drivers.
Control of a Rhicle
You have three systems that make your
vehicle go where you want it to go.
They are thebrakes, the steering and
the accelerator. All three systems have
to do theirwork at the places where the
tires meet the road.
Sometimes, as when you’re driving on
snow or ice, it’s easy to askmore of
those controlsystems than the tires and
road can provide. That meansyou can
lose control of your vehicle.
138
I
Avoid needless heavy braking. Some
people drive in spurts - heavy
acceleration followed by heavy braking
- rather than keeping pace with traffic.
This is a mistake. Your brakes may not
have time to cool between hard stops.
Your brakes will wear out much faster if
you do a lot of heavy braking. If you
keep pacewith the traffic and allow
realistic following distances, you will
eliminate a lot of unnecessary braking.
That means better braking and longer
brake life.
If your engine ever stops while you're
driving, brake normally but don'tpump
your brakes. If you do, the pedal may
get harder to push down.If your engine
stops, you will still have some power
brake assist. But you willuse it when
you brake. Once the power assist is
used up, it may take longer to stop and
the brake pedal willbe harder to push.
Anti-Lock Brakes (ABS)
Your Oldsmobile has an advanced
electronic braking system that will help
prevent skidding.
A
This light on theinstrument panel will
go on when you start your vehicle.
When you start your vehicle and begin
to drive away, youmay hear a
momentary motor or clicking noise.
And you may even noticethat your
brake pedal moves a little whilethis is
going on. This is the ABS system
testing itself. If there's a problem with
the anti-lock brake system, the anti-lock
brake systemwarning light will stay on.
See Anti-Lock Brake System Warning
Light in the Index.
139
Your Driving and the Road
Traction Control System(Option)
Your vehicle may havea traction
control system that Iimits wheel spin.
This is especially useful in slippery road
conditions. The system operates only if
it senses that one or both of the front
wheels are spinning or beginning to lose
traction. When this happens, the system
works the front brakes andreduces
Here’s how anti-lock works. Let’s say
You can steer around the obstacle while engine power (by shutting off fuel
injectors and managing spark) to limit
the road is wet. You’re driving safely.
braking hard.
wheel
spin.
Suddenly an animal jumps out in front
As you brake, your computer keeps
of you.
The TRACTION ACTIVE light will
receiving updates on wheel speed and
come on when your tractioncontrol
controls braking pressure accordingly.
You slam on the brakes. Here’s what
system is limiting wheel spin. See
happens with ABS.
Remember: Anti-lockdoesn’t change
Traction Control SystemActive Lightin
the time you need to get your foot up to the Index.
A computer senses that wheels are
slowing down. If one of the wheels is
the brake pedal. If you get too close to
If your vehicle has the Driver
about to stoprolling, the computer will
the vehicle infront of you, youwon’t
Information System, theTRACTION
separately work the brakes at each front have time to apply your brakes if that
wheel and at therear wheels.
vehicle suddenly slows or stops. Always CNTL ACTIVE message will appear
when your traction control system is
leave enough room up ahead to stop,
The anti-lock system can change the
limiting wheel spin. SeeDriver
even though you have anti-lock brakes.
brake pressure faster than any driver
Information System in the Index.
could. The computer is programmed to
To Use Anti-Lock
make the most of available tire androacI Don’t pump the brakes. Just hold the
conditions.
brake pedal down and let anti-lock
work for you. You may hear a motor or
clicking noise during a hard stop, but
this is normal.
(
Your Driving and the Road
Steering
I42
factor you can control.
Suppose you’re steering through a
Power Steering
sharp curve. Then you suddenly
If you lose power steering assist because accelerate. Both control systems the engine stops or the system is not
steering and acceleration - have to do
functioning, you can steer but it will
their work where the tires meet the
take much more effort.
road. Unless you have traction control
and the system is on, adding the sudden
Sfeering Tips
acceleration can demand too much of
Driving on Curves
those places. You can lose control.
It’s important to takecurves at a
What should you do if this ever
reasonable speed.
happens? Ease up on the accelerator
pedal, steer the vehicle the way you
A lot of the “driver lost control”
want
it to go, and slow down.
accidents mentioned on the news
happen on curves. Here’s why:
Speed limit signsnear curves warn that
you should adjust your speed. Of
Experienced driver or beginner, each of
us is subject to the same laws of physics course, the posted speeds are based on
when driving on curves. The traction of good weather and road conditions.
the tires against the road surface makes Under less favorableconditions you’ll
want togo slower.
it possible for the vehicle to change its
path whenyou turn thefront wheels. If
If you need to reduce your speed as you
there’s no traction, inertia will keep the approach a curve, do it before you enter
vehicle going inthe same direction. If
the curve, while your front wheels are
you’ve ever triedto steer a vehicle on
straight ahead.
wet ice, you’ll understand this.
Try to adjust your speed so you can
The traction you can get in a curve
“drive” through the curve. Maintain a
depends on the condition of your tires
reasonable, steady speed. Wait to
and the road surface, the angle at which accelerate until you are outof the curve,
the curve is banked, and your speed.
and then accelerate gently into the
While you’re in a curve, speed is the one straightaway.
Sfeering in Emergencies
There are times when steering can be
more effective thanbraking. For example,
you come overa hill and finda truck
stopped in your lane, ora car suddenly
pulls outfrom nowhere, ora child darts
out from between parked carsand stops
right in front of you.You can avoid these
problems by braking -if you can stop in
time. But sometimes you can’t; there isn’t
room. That’sthe time for evasiveaction
-steering around the
problem.
Your Oldsmobile can perform very well
in emergencies like these. First apply
your brakes. It is better to remove as
much speed as you can froma possible
collision. Then steer around the
problem, to the left or right depending
on the space available.
E
fh
iour Driving and the Road
pass. A broken center line usually
indicates it’s all right to pass
(providing the road ahead is clear).
Never cross a solid line on your side
of the lane or a double solid line, even
if the road seems empty of
approaching traffic.
Do not get too close to thevehicle you
want to pass while you’re awaiting
an
opportunity. For one thing, following
too closely reduces your area of vision,
especially if you’re following a larger
vehicle. Also, youwon’t have
adequate space if the vehicle ahead
suddenly slows or stops. Keep back a
reasonable distance.
When it looks likea chance to passis
coming up, start to accelerate but stay
in the right laneand don’t get too close.
Time your moveso you will be
increasing speedas thetime comes to
move into the other lane. If the way is
clear to pass, you will have a “running
start” thatmore than makes up for the
distance you would loseby dropping
back. Andif something happensto
cause youto cancel your pass,you need
only slow downand drop back again
and wait foranother opportunity.
144
If other cars are linedup to pass a
slow vehicle, wait yourturn. But take
Let’s review what driving experts say
care that someone isn’t tryingto pass
about what happens when the three
you as you pull out to pass the slow
vehicle. Remember to glance over your control systems (brakes, steering and
acceleration) don’t have enough friction
shoulder and check the blind spot.
where thetires meet the road to do
Check your mirrors, glance over your what thedriver has asked.
shoulder, and start your left lane
change signal before movingout of the In anyemergency, don’tgive up. Keep
trying to steer and constantly seek an
right lane to pass. When youare far
escape routeor area of less danger.
enough ahead of the passed vehicle to
see its front in your inside mirror,
Skidding
activate your rightlane change signal
In a skid, a driver can losecontrol of
and move back into the right lane.
the vehicle. Defensive drivers avoid
(Remember that your right outside
most skids by taking reasonable care
mirror is convex. The vehicle you just
suited to existing conditions, and by not
passed may seemto be farther away
“overdriving” those canditions. But
from you than it really is.)
skids are always possible.
Try not to pass morethan one vehicle
The threetypes of skids correspond to
at a timeon two-lane roads. Reconsider
your Oldsmobile’s threecontrol
before passing the next vehicle.
systems. In the braking skid your
Don’t overtake a slowly moving
wheels aren’t rolling. In the steering or
vehicle too rapidly. Even though the
cornering slud, too much speed or
brake lights are not flashing, it may be steering in a curve causestires to slip
slowing down orstarting to turn.
and lose cornering force. Andin the
If you’re being passed, make it easy for acceleration skid too much throttle
causes thedriving wheels to spin.
the following driverto get aheadof you.
Perhaps you can ease a little
to the right.
145
Your Driving and the Rod
6
6
Slow down, especially on higher
speed roads. Your headlights can light
up only so much road ahead.
In remote areas, watch for animals.
If you're tired, pull off the road in a
safe placeand rest.
Night Vision
146
No one cansee as well at night as inthe
daytime. But as we get older these
differences increase. A 50-year-old
driver may require at least twice as
much light to see the same thing at
night as a 20-year-old.
What you do in thedaytime can also
affect your night vision. For example, if
you spend the day in bright sunshine
you are wise to wear sunglasses. Your
eyes will have less trouble adjusting to
night. But if you're driving, don't wear
sunglasses at night. They may cut down
on glare fromheadlights, but they also
make a lot of things invisible.
You can betemporarily blinded by
approaching lights. It can take a second
or two, or even several seconds, for
your eyes to readjust to the dark.When
you are faced with severe glare (as from
a driver who doesn't lower the high
beams, or a vehicle with misaimed
headlights), slow down a little. Avoid
staring directly into the approaching
lights.
Keep yourwindshield and all the glass
on your vehicle clean - inside and out.
Glare at night is made much worse by
dirt on the glass. Even the inside of the
glass can build up a film caused by dust.
Dirty glass makes lights dazzle and
flash more than clean glass would,
malting the pupils of your eyes contract
repeatedly.
Remember that your headlights light up
far less of a roadway when you are in a
turn or curve. Keep your eyes moving;
that way, it's easier to pick out dimly
lighted objects. Just asyour headlights
should be checked regularly forproper
aim, so should your eyes be examined
regularly. Some drivers suffer from
night blindness - the inability to see in
dim light - and aren't even aware of it.
Driving in the Rain
Rain and wet roads can mean driving
trouble. On a wet road you can't stop,
accelerate or turn as well because your
tire-to-road traction isn't as good as on
dry roads. And, if your tires don't have
much tread left, you'll get even less
traction. It's always wise to go slower
and be cautious if rain starts tofall
while you are driving. Thesurface may
get wet suddenly when your reflexes are
tuned for driving on dry pavement.
The heavier the rain, the harder it is
to
see. Evenif your windshield wiper blades
are in good shape, a heavy rain can make
it harder to see road signs and traffic
signals, pavement markings,the edge of
the road, and even people walking.
147
Your Driving and the Road
especially careful when you pass
another vehicle. AlIow yourself more
clear room ahead, andbe prepared to
have your viewrestricted by road
spray.
Have good tires with proper tread
depth. (See Tires in the Index.)
Treat a green light as a warning
signal. A traffic light is there because
the corneris busy enoughto need it.
When a light turns green, and just
before you start to move, check both
ways for vehicles that havenot
cleared the intersection or may be
running thered light.
4 City Driving
One of the biggest problems with city
streets is the amountof traffic on them.
You’ll want to watch out for what the
other drivers are doing and pay
attention totraffic signals.
Here are ways to increase your safety in
city driving:
Know the best way to get to where
you are going. Get a city map and
plan your trip intoan unknown part
of the city just as you would for a
cross-country trip.
Try to use the freeways that rim and
crisscross most large cities. You’ll
save time and energy. (See thenext
section, Freeway Driving.)
148
I
Your Driving and the Road
Hill and Mountain Roads
Driving on steep hills or mountains is
different from driving in flator rolling
terrain.
If you drive regularly in steep country,
or if you're planning to visitthere, here
are some tips that can makeyour trips
safer and more enjoyable.
Keep your vehicle in good shape.
Check all fluid leveis and also the
brakes, tires, cooling system and
transaxle. These parts can work hard
on mountainroads.
Know how to go down hills. The most
important thing to know is this: let
your engine do some of the slowing
down. Shift to a lower gear when you
go down a steep os long hill.
150
ki
I
I
Your Driving and the Road
You may want to put winter
emergency supplies in your trunk.
Include an ice scraper, a small brush or
broom, a supply of windshield washer
fluid, a rag, some winter outer clothing,
a small shovel, a flashlight, a red cloth,
and a couple of reflective warning
triangles. And, if you will be driving
under severe conditions, include a small
bag of sand, a piece of old carpet or a
couple of burlap bags to help provide
traction. Be sure you properly secure
these items in your vehicle.
152
Driving on Snow or Ice
Most of the time, those places where
your tires meet the road probably have
good traction.
However, if there is snow or ice
between your tires and the road,you
can have a very slippery situation.
You’ll havea lot less traction or “grip”
and will need to be very careful.
What’s the worst time for this? “Wet
ice.” Very cold snow or ice can be slick
and hard to drive on. But wet ice can be
even more trouble because it may offer
the least traction of all. You can get
“wet ice” when it’s about freezing
(32°F; O’C) and freezing rain begins to
fall. Try to avoid driving on wet ice until
salt and sand crews can get there.
Whatever the condition - smooth ice,
packed, blowingor loose snow - drive
with caution.
If you have traction control, keep the
system on. It will improve your ability
to accelerate when driving on a slippery
road. Even though your vehicle has a
traction control system, you’llwant to
slow down and adjust your driving to
the road conditions. See Traction
Control System in the Index.
If you don’t have the traction control
system, accelerate gently. Try not to
break the fragile traction.If you
accelerate too fast, the drive wheels will
spin and polish the surface under the
tires even more.
Your anti-lock brakes improveyour
ability to make a hard stop on a slippery
road. Even though you have the antilock braking system, you’ll want to
begin stopping sooner than you would
on dry pavement. See Anti-Lock Brakes
in the Index.
0
Allow greater following distance on
any slippery road.
Watch for slippery spots. Theroad
might be fine until you hit a spot
that’s covered with ice. On an
otherwise clear road, ice patches may
appear in shaded areas where the sun
can’t reach: aroundclumps of trees,
behind buildings, or underbridges.
Sometimes the surface of a curve or
an overpass may remain icy when the
surrounding roads areclear. If you see
a patch of ice ahead of you, brake
before you are on it. Try not to brake
while you’re actually on the ice, and
avoid sudden steering maneuvers.
153
Your Driving and the Road
Towinga Trailer
NOTICE:
Pulling a trailer improperlycan
damage your vehicle andresult in
costly repairs not covered by your
warranty. To pull a trailer correctly,
follow the advice in this section,
and see your Oldsmobile dealer for
important information about
towing a trailer with your vehicle.
Your vehiclecan tow a trailer if it is
equipped with either the3800 engine
(Code L) or theoptional 3800
supercharged engine (Code 1) and
proper trailertowing equipment. To
identify what thevehicle trailering
capacity isfor your vehicle, youshould
read the information in Weight of the
Trailer that appears later inthis section.
But trailering isdifferent than just
driving your vehicle
by itself. Trailering
means changes inhandling, durability,
and fuel economy. Successful,safe
trailering takes correct equipment,and it
has tobe used properly.
154
Your Driving and the Road
Hitches
Weight of the Trailer Tongue
The tongue load (A) of any trailer is an
important weight to measure because it
affects the totalcapacity weight of your
vehicle. The capacity weight includes
the curb weight of the vehicle, any
cargo you may carry in it,and the
people who will beriding in the vehicle.
And if you will tow a trailer, you must
subtract the tongue load from your
vehicle’s capacity weight because your
vehicle will becarrying that weight, too.
See Loading Your Vehicle in the Index
for more information about your
vehicle’s maximumload capacity.
If you’re using a “dead-weight” hitch,
the trailer tongue (A) should weigh
10% of the total loaded trailer weight
(B). If you have a “weight-distributing”
156
It’s importantto have the correct hitch
equipment. Crosswinds, largetrucks
going by, and rough roads are a few
reasons why you’ll needthe right hitch.
Here are some rules to follow:
Will you have to make any holes in
I
I the body of your vehicle when you
install a trailer hitch? If you do, then
hitch, the trailer tongue (A) should
be sure to seal the holes later when
weigh 12%of the total loaded trailer
you remove the hitch. If you don’t
weight (B).
seal them, deadly carbon monoxide
(CO) from your exhaust can get into
After you’ve loaded yourtrailer, weigh
your vehicle (see Carbon Monoxide in
the trailer and then the tongue,
the Index). Dirt and water can, too.
separately, to see if the weights are
proper. If they aren’t, you may be able
The bumpers on your vehicleare not
to get them right simply by moving
intended for hitches. Do not attach
some items around in the trailer.
rental hitches or other bumper-type
hitches to them. Use only a frameTotal Weight on Your Vehicle’s
mounted hitch that does not attachto
Tires
the bumper.
Be sure your vehicle’s tires are inflated
Safety Chains
to the limit for coldtires. You’ll find
You should always attach chains
these numbers on the Tire-Loading
Information label at the rear edge of the between your vehicle and yourtrailer.
Cross the safety chains under the
driver‘s door or see Loading Your
tongue of the trailer so that the tongue
Vehicle in the Index. Then be sure you
not drop tothe road if it becomes
will
don’t go over the GVW limit for your
separated from the hitch. Instructions
vehicle.
Your Driving andthe Road
When towinga trailer, the green arrows
on your instrument panel will flash for
turns even if the bulbs on thetrailer are
burned out. Thus, you may think
drivers behind you are seeing your
signal when they are not.It’s important
to check occasionallyto be sure the
trailer bulbs are still working.
Your vehicle mayhave bulb warning
messages. When you plugtrailer lights
into your vehicle‘slighting system, its
bulb warning messages maynot let you
know if one of your lights goesout. So,
when you have trailer lights plugged in,
be sure to check your vehicle and trailer
lights fromtime to time to be sure
they’re all working.Once you
disconnect the trailer lights, the bulb
warning messages again can tell you if
one of your vehicle lights isout.
Driving On Grades
Reduce speed and shift to a lower gear
before you start down a long or steep
downgrade. If you don’t shift down, you
might have to use your brakes so much
that they would gethot and no longer
work well.
158
On a long uphill grade, shift down to
3 (Third) and reduce your speed to
around 45 mph (70 ltm/h) to reduce the
possibility of engine and transaxle
overheating.
Parking on Hills
You really should not park your vehicle,
with a trailer attached, ona hill. If
something goes wrong, your rig could
start to move. Peoplecan be injured,
and both your vehicle and thetrailer
can be damaged.
But if you ever haveto park your rig on
a hill, here’s how to do it:
1. Apply your regularbrakes, but don’t
shift into P (Park) yet.
2. Have someone place chocks under
the trailer wheels.
3.When the wheel chocks are in place,
release the regular brakes until the
choclts absorb the load.
4. Reapply the regular brakes. Then
apply your parking brake, and then
shift to P (Park).
5. Release the regular brakes.
When You Are Ready to Leave
After Parking on a Hill
1. Apply your regular brakesand hold
the pedal downwhile you:
Start your engine;
Shift into a gear; and
Release the parking brake.
2. Let up on the brake pedal.
3. Drive slowly until thetrailer is clear
of the chocks.
4.Stop and have someone pick up and
store the chocks.
Maintenance When Trailer Towing
Your vehicle will need servicemore
often when you’re pulling a trailer. See
the Maintenance Schedule for more on
this. Things that are especially
important in trailer operation are
automatic transaxle fluid (don’t overfill),
engine oil, belt,cooling system, and
brake adjustment. Each of these is
covered in this manual, and the Index
will help you find them quicldy. If you’re
trailering, it’s a good idea to review
these sections before you start your trip.
Check periodically to see that all hitch
nuts and bolts are tight.
Part 5
Problems on the Road
Here you’ll find what to do about
some problems that can occur on the
road.
Hazard Warning Flashers ....................................................................................... 160
Jump Starting .......................................................................................................... 161
Towing YourOldsmobile........................................................................................
164
Engine Overheating................................................................................................. 167
If a Tire Goes Flat ................................................................................................... 173
Changing a Flat Tire ................................................................................................ 173
Compact Spare Tire ................................................................................................ 180
If You’re Stuck: In Sand, Mud, Ice or Snow ......................................................... 181
159
Problems on the Road
Hazard Warning Flushers
Your hazard warning flashers let you
warn others. They alsolet police know
you have a problem. Yourfront andrear
turn signal lights will flash on and off.
I60
Press the button in to make your front
and rear turn signal lights flash on and
off.
Your hazard warning flashers work no
matter what position your key is in, and
even if the key isn’t in.
To turn off the flashers, pull out on the
collar.
When the hazard warning flashers are
on, your turn signals won’twork.
Other Warning Devices
If you carry reflective triangles, you can
set one up at theside of the road about
300 feet (100 m) behind your vehicle.
Jump Starting
If your battery has rundown, you may
want to use another vehicle and some
jumper cables to startyour Oldsmobile.
But please follow the steps below to do
it safely.
NOTICE:
Ignoring these steps could result in
costly damage to your vehicle that
wouldn’t be covered by your
warranty. Trying to startyour
Oldsmobile by pushing or pullingit
won’t work, and itcould damage
your vehicle.
To Jump Start Your Oldsmobile:
1. Check the othervehicle. It must have
a 12-volt battery with a negative
ground system.
r
~~
~
You could be injured if the vehicles roll.
Set the parking brake firmly on each
vehicle. Put an automatic transaxle in
P (Park) or a manual transaxle in
N (Neutral).
3. Turn off the ignition on both
vehicles. Turn off all lights that aren’t
needed, and radios. This will avoid
sparks and help save both batteries.
And it could save your radio!
NOTICE:
If you leave your radioon, it could be
badly damaged.The repairs wouldn’t
be covered by yourwarranty.
NOTICE:
If the other system isn’t a 12-volt
system with a negative ground,
both vehicles can be damaged.
2. Get the vehicles close enough so the
jumper cables can reach, but be sure
the vehicles aren’t touching each
other. If they are, it could cause a
ground connection you don’t want.
You wouldn’t be able to start your
Oldsmobile, and thebad grounding
could damage the electrical systems.
Idi
Problems on the Road
4. Open the hoods and locate the
batteries.
Find the positive (+) and negative (-)
terminals on each battery.
!
5. Check that thejumper cables don’t
have loose or missing insulation. If
they do, you could get a shock. The
vehicles could bedamaged, too.
Before you connect the cables,here
are some basic thingsyou should
know. Positive (+) will go to positive
(+) and negative (-) will go to
negative (-) or a metal engine part.
Don’t connect (+) to (-) or you’ll get
a short thatwould damage the
battery and maybe other parts, too.
4!h CAUTION:
Fans UT Other moving engine parts
can injure p u bzxiity. Keep yaw
h.ands
from moving
ox1ce the engin&$are ntnxling.’
162
1
6. Connect the red positive (+) cable to
the positive (+) terminal of the
vehicle with thedead battery. Use a
remote positive (+) terminal if the
vehicle has one.
7. Don’t let the other end touchmetal.
Connect it to the positive (+)
terminal of the good battery. Use a
remote positive (+) terminal if the
vehicle has one.
8. Now connect the black negative (-)
cable to the good battery’s negative
(-) terminal. Don’t let the other end
touch anything until the next step.
The otherend of the negative cable
doesn’t go to the dead battery. It goes
to a heavy unpainted metal part on
the engine of the vehicle with the
dead battery.
9. Attach the cable at least 18 inches
(45 cm) away from the dead battery,
but not near engine parts that move.
The electrical connectionis just as
good there, but the chance of sparks
getting back to the battery is much
less.
10. Now start thevehicle with the good
battery and run the engine for a
while.
11. Try to start thevehicle with the
dead battery. If it won’t start after a
few tries, it probably needs service.
I 6.3
Problems on the Road
,.
U
.
I
12. Remove the cables in reverse order
to prevent electrical shorting. Take
care that they don’t toucheach
other or any other metal.
164
. . I
Towing Your Oldsmobile
Try to have a GM dealer or a
rofessional towing service tow your
Xdsmobile. The usual towing
:quipment is:
A) Sling-type tow truck
B) Wheel-lift tow truck
C) Car carrier
f your vehicle has been changed or
nodified since it was factory-new by
.dding aftermarket items like fog lamps,
.ero skirting, or special tires and
fheels, these instructions and
ilustrations may not be correct.
lefore you do anything, turn on the
lazard warning flashers.
When you call, tellthe towing service:
That your vehicle canonIy be towed
with certain equipment, as described
later inthis section.
That your vehicle has front-wheel
drive.
The make, model and yearof your
vehicle.
Whether you can still move the shift
lever.
If there was an accident, what was
damaged.
When the towing s---.ice arrives,let the
tow operator know Lllat this manual
contains detailed towing instructions
and illustrations. The operator may
want to see them.
When your vehicleis being towed, have
the ignition key off. The steering wheel
should be clamped in astraight-ahead
position, with a clamping device
designed for towing service. Do not use
the vehicle's steering column lock for
this. The transaxle should be in Neutral
and the parking brake released.
Don't have your vehicle towedon the
front wheels, unless you must.
If the
vehicle must be towed
on the front
wheels, don't go morethan 55 mph (88
lun/h) or fartherthan 500 miles (800 lun)
or your transaxlewill be damaged.If these
limits must be exceeded, thenthe front
wheels haveto be supported on a dolly.
165
Probkms on the Rod
Towing fromthe Front-Vehicle
HOO~-UP
Before hooking up to a tow truck, be
sure to read all the information on
Towing Your Oldsmobile earlier in this
section.
1. Attach T-hook chains into the
bottom slots in the cradle behind the
front wheels, on bothsides.
166
2. Across slingchains, position a 4x4
wood beam against the bottom of the
radiator support behind the front
bumper.
3.Attach a separate safety chain around
the outboard end of each control arm.
Towing from the Rear-Vehicle
HOOk-Up
Before hooking up toa tow truck, be
sure to read all the information on
Towing Your OLdsmobiLe earlier in this
section.
1. Attach T-hook chains on both sides
in the slotted holes in the floor pan
support rails just ahead of the rear
wheels.
2. Position the lower sling crossbar
directly under the rear bumper.
3.Attach a separate safety chain around
the outboard end of each lower
control arm.
Engine Overheating
You will find a coolant temperature
gage or warning light about a hot engine
on your Oldsmobile’s instrument panel.
If you have the Electronic CIuster, your
information center will also display
messages about engine overheating. See
the Index under Coolant Temperature
Gage or Coolant Temperature Warning
Light.
167
Problems onthe Road
NOTICE:
1
If Steam Is Coming From Your
Engine
If your engine catches fire because
you keep driving with no coolant,
your vehicle can be badIy damaged.
The costly repairs would not be
covered by your warranty.
I f No Steam Is Coming From Your
Engine
If you get the overheat warning but see
or hear no steam, the problem may not
be too serious. Sometimes the engine
can get a little too hot when you:
Climb a long hill on a hot day.
Stop after high speed driving.
Idle for longperiods in traffic.
Tow a trailer.
If you get the overheat warning with no
sign of steam, try this for a minute or so:
1. Turn off your air conditioner.
2. Turn on your heater to full hot at the
highest fan speedand open the
window as necessary.
3.If you’re in a traffic jam,shift to
N (Neutral).
If you no longer havethe overheat
warning, you can drive. Just to be safe,
drive slower for about ten minutes. If
the warning doesn’t come back on, you
can drive normally.
If the warning continues, pull over,
stop, andpark your vehicle right away.
If there’s still no sign of steam, you can
idle the engine for twoor three minutes
while you’re parked, to see if the
warning stops. But then,if you still
have the warning, TURN OFF THE
ENGINE AND GET EVERYONE OUT
OF THE VEHICLE until it cools down.
You may decide notto lift the hood but
to get service helpright away.
moturns on tne Koaa
/i\ CAUTfUN:
You can be burned if you spEiI
caoiant on hut engine parts<
Coolant contains ethylene glycof
and it \stilt bum if the engine parts
are hot enough, Don’t spilf cwfant
on a hut engine,
NOTICE:
In cold weather, water can freeze
and crack the engine, radiator,
heater core and otherparts. Use the
recommended coolant.
1 70
When the coolant in the coolant
recovery tank is at or above the FULL
COLD mark, start your vehicle.
If the overheat warning continues,
there’s one more thing you can try. Yoc
can add the proper coolant mix directly
to the radiator,but be sure the cooling
system is cool before vou do it.
I
How fo Add Coolantto the
Radiator
I. You can remove the radiator pressure
I
2.Then keep turning thepressure cap,
but now push down as you turn it.
Remove the pressure cap.
3.Fill the radiator with the proper mix,
up to thebase of the filler neck.
cap when the cooling system,
including the radiator pressure cap
and upper radiator hose,is no longer
hot. Turn the pressure cap slowly to
the left until it first stops. (Don’t
press down while turning the
pressure cap.) If you hear a hiss, wait
for that to stop.A hiss means there is
still some pressure left.
171
Problem on the Road
4. Then fill the coolant recovery tank to
the FULL COLD mark.
I 72
5. Put the cap back on the coolant
recovery tank, butleave the radiator
pressure cap off.
6. Start theengine and let it run until
you can feel the upper radiator hose
getting hot. Watch out forthe engine
fans.
7. By this time the coolant level inside
the radiator filler neck may be lower.
If the level is lower, add more of the
proper mix through the filler neck
until the level reachesthe base of the
filler neck.
t
'2.Remove thespare tire from the trunk.
.
.
.
4. Remove the jack and wheel wrench.
I
5. The following (a-d) are necessary
only if you have wire wheelcovers:
a) Remove the special key wrench
that’s attached to the trunk
sidewall.
b)Using the handle of the special key
wrench, pry off the center emblem
cover to reveal the theft-deterrent
wheel nut.
c ) Push the end of the special key
wrench onto the theft-deterrent
wheel nut and twist it
counterclockwise to remove the
nut.
d) Do not pry the wheel cover off.
Remove the wheel cover by hand.
1 75
Problems on the Road
B
Y
6. Remove the wheel cover. Non-wire
stainless finish full wheelcovers are
removed by using the end of the
wheel wrench handle to pry around
the edge of the wheel cover until it
comes loose.If you have wire wheels,
do not pry the cover off. Remove the
cover by hand.
176
7. The followingis necessary if you have
an alloy (aluminum) wheel with a
center cover that conceals the wheel
nuts.
a) Insert the flat end of the wheel
wrench in the notch andpry off the
center cover. Do not drop the
cover or lay it face down, as it
could be scratched or damaged.
b) When replacingthe cover after the
wheel is put back on thevehicle,
do not use a hammer or mallet to
install the cover.
8. Use the wheel wrench to loosen the
wheel nuts, butdon’t removethem.
(The bracket shown is on wheels
with
wire wheel covers only.It’s needed to
anchor wire wheel coversto the
wheel. Do not misplace it whileusing
your temporary spare tire.)
I
9. Attach the wheel wrench to thejack,
and rotate the wrench clockwise to
raise the jack head a few inches.
I
10. Near each wheel well is a notch in
the frame into which to put the jack
head. The front notch is 10 inches
back from the front wheel well. The
rear notch is 8 inches forward from
the rear wheel well. The wheel
wrench has these 8 and 10 inch
distances stamped on the handle.
Use the wheel wrench to measure to
the notch by flipping the socket into
the handle, then measure from the
socket end of the wrench.
11. Position the jack and raise the jack
head until it fits firmly on the ridge
in the vehicle's frame nearest the
flat tire. Do not raise the vehicleye
Put the compact spare tirenear yo^
A CAUTION:
Getting under it, vchicrle when it is
jacked 'upis dixs~g~rc;tus.
if t.he
vehidc slipsa€fthe jack, you could
be badly injured or BlI1ed. Never.@
under it vehicle when it is
supported only by if jtxck.
177
Problems on the R o d
13. Remove all the wheel nuts and take
off the flat tire.
/5\ CAUTIQN:
I
12. Raise the vehicle by rotating the
14. Remove any rust or dirt from the
wheel wrench clockwise in thejack.
Raise the jack far enough so there's
enough room for the spare tire to fit.
I
I
NOTICE:
Raising your vehiclewith the jack
improperly positioned will damage
the vehicle or may allowthe vehicle
to fall off the jack. Be sure tofit the
jack lift head into theproper
location before raising your vehicle.
I
1 78
wheel bolts, mounting surfaces and
spare wheel. Place the spare on the
wheel mounting surface.
16. Lower the vehicle by rotating the
e l
wheel wrench counterclockwise on
the jack. Lower the jack completely.
~~~~
15. Replace the wheel nuts with the
rounded end of the nuts toward the
wheel. Tighten each nut by hand
until the wheel is held against the
hub.
I79
Problems on the Road
Don’t tryto put thewheel cover on the
compact spare tire. It won’t fit. Store
the wheel cover in thetrunk untilyou
have replaced the compact spare tire
with a regular tire.
I Wheel
NOTICE:
covers won’t fit on your
compact spare. If you try to put a
wheel cover on your compact
spare, you could damage the cover
or the spare.
,
18. Store the flat tire as far forward in
the trunk as possible. Store thejack
and wheel wrench in their
compartment in the trunk.
The compactspare is for temporary use
only. Replacethe compact spare tire with
a full-size tire as soonas you can. See
Compact Spare Tire later in this section.
NOTICE:
Don’t take your compact spare
through an automatic carwash
with guide rails. The compactspare
can get caught on the sails. That
can damage the tire and wheel, and
maybe other parts of your vehicle.
180
Rocking your vehicle to get it out:
First, turn your steering wheel left and
right. That will clear the area around
your front wheels. You should turn your
traction control system off. (See
Traction Control System in the Index.)
Then shift backand forth between
R (Reverse) and a forward gear,
spinning the wheels as little as possible.
Release the accelerator pedal while you
shift, and press lightly on the
accelerator pedal when thetransaxle is
in gear. If that doesn’t get you out after
a few tries, you may need to be towed
out. If you do need to be towed out, see
Towing Your Vehicle in the Index.
Don’t use your compact spare on some
other vehicle.
And don’t mix your compact spare or
wheel with other wheels or tires. They
won’t fit. Keep your spare andits wheel
together.
NOTICE:
Tire chains won’t fit your compact
spare. Using them will damage your
vehicle and destroy the chains too.
Don’t use tire chains on your
compact spare.
L
I
#‘You’re Stuck: In Sand,
Mud, Ice or Snow
What youdon’t want to dowhen your
vehicle is stuck is to spin your wheels.
The method known as “rocking” can
help you getout whenyou’re stuck, but
you must use caution.
I
I
NOTICE:
Spinning your wheelscan destroy
parts of your vehicle as well as the
tires. If you spin the wheels too fast
while shifting your transaxle back
and forth, you can destroy your
transaxle.
Notes
182
A
Part 6
, .
.
I Service
&Appearance Care
Here you will find information about
the care of your Oldsmobile. This
part begins with service and fuel
information, and then it shows how
to check important fluid and
lubricant levels, There is also
technical information about your
vehicle, and a section devoted to its
appearance care.
I
183
Sewice & Appearance Care
Doing Your Own Senlice Work
PI
Delco
4 Service
Your Oldsmobiledealer knows your
vehicle best and wantsyou to be happy
with it. We hope you’ll go to your dealer
for all your serviceneeds. You’ll get
genuine GM parts and GM-trained and
supported service people.
We hope you’llwant to keep your GM
vehicle all GM. Genuine GM parts have
one of these marks.
If you wantto do some of your own
service work, you’llwant to get the
proper Oldsmobile Service Manual.It
tells you much more about how
to service
your Oldsmobilethan this manualcan.
To order the proper servicemanual, see
Service Publications in the Index.
Your vehicle has an air bag system. Before
attempting to do yourown service work,
see Servicing YourAir Bag-Equipped
Oldsmobile in the Index.
You should keep a recordwith all parts
receipts and list the mileage and the
date of any servicework you perform.
See Maintenance Record in the Index.
I NOTICE:
If you try to do your own service
work without knowing enough about
it, your vehicle could be damaged.
184
I
I
Fuel
The 8th digit of your Vehicle
Identification Number (VIN) shows the
code letter for yourengine. You will
find the VIN at the topleft of your
instrument panel, (See Vehicle
IdentificationNumber in the Index.)
3800 Tuned Port Engine (Code L)
Use regular unleaded gasoline rated at
87 octane or higher. It should meet
specifications ASTM D4814 in the U.S.
and CGSB 3.5-92 in Canada. These
fuels should have the proper additives,
so you should not have to add anything
to the fuel.
In the U.S.and Canada, it’s easy to be
sure you get the right kind of gasoline
(unleaded). You’ll see “UNLEADED”
You can also write us at thefollowing
address for advice. Just tell us where
you're going and give your Vehicle
Identification Number (VIN).
General Motors Overseas Distribution
Corporation
North American Export Sales (NAES)
1908 Colonel Sam Drive
Oshawa, Ontario
L1H 8P7
Filling Your Tank
Fuel Capacity: 18 U.S. Gallons (68L).
Use unleaded fuel only.
The cap is behind a hinged door on the
left side of your vehicle.
While refueling, hangthe cap inside the
fuel door.
-......
A CAUTION:
To take off the cap, turn it slowly to the
left (counterclockwise).
187
Service & Appearance Care
Be careful not to spill gasoline. Clean
gasoline from paintedsurfaces as soon
as possible. See Cleaning the Outside
of Your Oldsmobile in the Index.
When you put thecap back on, turnit
to theright until you hear at least three
cliclts.
NOTICE:
If you need a new cap, be sure to get
the right type. Your dealercan get
one for you.If you get the wrong
type, it may not fit or have proper
venting, and your fueltank and
emissions systemmight be damaged.
~
~
-~
Checking Things Underthe
Hood
The following sections tell you how to
check fluids, lubricants and important
parts underhood.
188
~~
Hood Release
To open the hood, first pull the hood
release handle inside the vehicle.
~~~
~
Then go to the frontof the vehicle and
pull up on theunderhood release.
Lift the hood.
Before closingthe hood, be sure all the
filler caps are on properly. Thenjust
pull the hood down and close it firmly.
Underhood Light
Your parking lights or headlights must
be on for the underhood light to
function when you open the hood.
189
Sewice & Appearance Care
3800 Engine (Code L)
P P
190
When you open the hood, you’ll see:
1. Engine Coolant Recovery Tank
2. Power Steering Fluid Reservoir
3.Automatic Transaxle Fluid Dipstick
4. Brake Fluid Reservoir
5. Windshield Washer Fluid Reservoir
6. Air Cleaner
7. Engine Oil Dipstick
8. Engine Oil Fill Cap
9. Radiator Pressure Cap
IO. Battery
3800 SC Engine (Code 1)
When you open the hood, you’ll see:
1. Engine Coolant Recovery Tank
2. Automatic Transaxle Fluid Dipstick
3.Power Steering Fluid Reservoir
4.Brake Fluid Reservoir
5. Windshield Washer Fluid Reservoir
6. Air Cleaner
7. Engine Oil Fill Cap
8. Engine Oil Dipstick
9. Radiator Pressure Cap
IO. Battery
191
Sewice & Appearance Care
Engine Oil
If the Check Oil Level message, Oil
Level light, or Check Oil light on the
instrument panel comes on, it means
you need to check yourengine oil level
right away. For moreinformation, see
Check Oil Level Message, Oil Level
Light, or Check Oil Light in the Index.
You should check yourengine oil level
regularly; this is an added reminder.
It’s a good idea
to check your engine oil
every time you get fuel. Inorder to get an
accurate reading, the oil must be warm
and the vehicle must beon level ground.
Turn off the engine and give the oil a
few minutes to drain back into the oil
pan. If you don’t, the oil dipstick might
not show the actual level.
I
To Check Engine Oil
When to Add Oil
Pull out the dipstick and clean itwith a
paper towel or cloth, then push it back
in all the way. Remove it again, keeping
the tip lower, and check the level.
If the oil is at or below the ADD mark,
then you’ll need to add some oil. But
you must use the right kind. This
section explains what kind of oil to use.
For crankcase capacity, seeCapacities
and Specifications in the Index.
NOTICE:
Don’t addtoo much oil. If your
engine hasso much oil that the oil
level gets abovethe cross-hatched
area that shows the properoperating
range, your engine couldbe damaged.
__
192
Just fill it enough to put the level
somewhere in the proper operating
range, Push the dipstick all the way
back in when you’re through.
1
RECOMMENDED SAE VISCOSITY GRADE ENGINE OILS
FOR BEST FUEL ECONOMY AND COLD STARTING,
SELECT THE LOWEST SAE VlSCOSlW GRADE OIL
FOR THE EXPECTED TEMPERATURE RANGE.
LOOK FOR
HOT
ONE OF THESE
WEATHER
LABELS
I
-
“C
O F
-+80 - - +27
+W - - +16
+loo
What Kind of Oil to Use
Beginning midyear 1993, oils of the
?roper quality for your vehiclewill be
.dentifiedwith this new “starburst”
jymbol. The “starburst”symbol
ndicates that theoil has been certified
3y the American Petroleum Institute
(API), andis preferred for use in your
5asoline engine.
You should look for this on thefront of
:he oil container, and use only oils that
lisplay this new symbol.
You should also use the proper viscosity
3il for your vehicle, as shown in the
!allowing chart.
+38
c40--+4
+20
0
- - -7
- - -18
-
COLD
WEATHER
J
, -SAE 1OW-30
PREFERRED
SAE 1OW-30
.IF. #EITHER SAE SW-30 NOR
~...
~~
GRADE OllS ARE
AVAILABLE.
SAE
30
GRADE MAY BE USED AT TEMPERATURES
A B O V E ~ ODEGREES F (4 DEGREESC).
DO NOT USE SAE 10W-40, SAE 2OW-50 OR
ANY OTHER GRADE OIL NOT RECOMMENDED.
As shown in the chart, SAE 1OW-30 is
you can
best for your vehicle. However,
use SAE 5W-30 if it’s going to be colder
than 60°F (16°C) before yournext oil
change. When it’svery cold, you should
use SAE 5W-30. These numbers on an oil
container show its viscosity, orthickness.
Do not use other viscosity oils, such as
SAE 1OW-40 or SAE 2OW-50.
If you cannot find oils withthe new
“starburst” symbol onthe front of the
container, you should look for and use
oils containing the following three
things:
S H or SG
“SH” or “SG” must be on the oil
container, either by itself or combined
with other quality designations, such
as “SH/CD,” “SH,SG,CD,”
“SG/CD,” etc. These letters show
American Petroleum Institute (API)
levels of quality.
S A E 1OW-30
Energy Conserving I1
Oils with thesewords onthe
container will help you save fuel.
193
Service & Appearance Care
These three things are usually included
in a doughnut shaped logo (symbol) on
most containers. If you cannot find oils
with the “starburst” symbol, you should
look foroils with the doughnutshaped
symbol, containing the three things
noted above.
NOTICE:
If you use oils that do not have
either the “starburst”symbol or an
API SH or SG designaiion, you can
cause engine damage not covered
by your warranty.
GM Goodwrench@oil (in Canada, GM
Engine Oil) meets all the requirements
for your vehicle.
Engine OilAdditives
Don’t add anything to your oil. Your
OIdsmobile dealer is readyto advise if
you think something should be added.
When to Change Engine Oil
See if any oneof these is true for you:
194
Most trips are less than4 miles (6 km).
It’s below freezing outsideand most
trips are less than 10 miles (16 ltm) .
The engine is at low speed most of the
time (asin door-to-door delivery, or in
stop-and-go traffic).
You tow a trailer often.
Most trips are through dusty places.
If any one of these is true foryour
vehicle, then you need to change your
oil and filter every 3,000 miles (5 000
ltm) or 3 months - whichever comes
first. (See Change Oil Indicator in the
Index.) If the CHANGE OIL NOW
message appears in the optional Driver
Information Center, you should change
your oil.
If none of them is true, change the oil
every 7,500 miles (12 500 lm) or 12
months -whichever comes first.
Change the filter at the first oil change
and atevery other oil changeafter that.
(See Change Oil Indicator in the
Index.) If your vehicle is equipped with
the Driver Information Center, always
reset the engine oil life to 100% after
every oilchange.
Engjne Coolant Heater (Engine
Block Heater)
An engine coolant heater can be a big
help if you have to park outside in very
cold weather, 0°F (-18°C) or colder. If
your vehicle has this option, see Engine
Coolant Heaterin theIndex.
What to Do with Used Oil
Did you lmow that used engine oil
contains certain elements that may be
unhealthy for your skin andcould even
cause cancer? Don’t let used oil stay on
your skin for very long. Clean yourskin
and nails with soap andwater, or a
good hand cleaner. Wash or properly
throw away clothing or rags containing
used engine oil. (See the manufacturer’s
warnings about the use and disposal of
oil products.)
Used oil can be a real threat to the
environment. If you change your own
oil, be sure todrain all free-flowing oil
from the filter before disposal. Don’t
ever dispose of oil by putting it in the
trash, pouring it on the ground, into
sewers, or into streams or bodies of
water. Instead, recycle it by taking it to
a place that collects used oil. If you
have a problem properly disposing of
your used oil, ask your dealer, a service
station or alocal recycling center for
help.
Air Cleaner
Refer to the Maintenance Schedule to
determine when to replace the air filter.
See Scheduled Maintenance Services in
the Index.
/i\ CAUTION:
0pemtin.gthe c n g i with
~ the air
cleaner off can calfst2 you 0.f others
to be burned. The air cleaner not
only C k m S the ais, it slops &%meif
the mgine backfires. If it isn’t
there, and the engine bacUira7you
euuld be burned. Don’t drive with .it
of€,and be careful working on ,the
engine with the air cXemet off.
NOTICE:
If the air cleaner is off,a backfire
can cause a damaging enginefire.
And, dirt can easily get into your
engine, which will damage it.
Always have the air cleaner in place
when you’re driving.
195
Service & Appearance Cure
To Check or Replace the Air Cleaner
(3800 Tuned Port Engine):
1. Unscrew the threewingscrews in the
housing cover and pull back.
2. Unscrew the clamp on the air intake
3. Remove the air filter.
hose where the hose attaches tothe
throttle body near the topof the
engine. Detach the hose from the
throttle body, then pull back the rear
of the housing cover.
3.. Be sure to install the air filter
and
replace the cover tightly.
5. Reattach the air intake hose and
tighten the clamp.
I
196
To Check or Replace the Air Cleaner
(3800 Supercharged Engine):
1. Unsnap the three clips in the housing
cover.
2. Unscrew the clamp on the air intake
hose where the hose attaches to the
throttle body near the top of the
engine. Detach the hose from the
throttle body, then pull back the rear
of the housing cover.
I
3. Remove the airfilter.
4. Be sure to install the new air filter
and replace the cover tightIy.
5. Reattach the air intake hose and
tighten the clamp.
3
I
197
Service & Appearance Care
How to Check and Add Oil
Check oil only whenthe engineis cold.
Allow the engine to cool two to three
hours after running.
When to Check
Check oil level every30,000 miles
(50 000 km)or 36 months. See
Scheduled Maintenance Services in the
Index.
What Kind of Oil to Use
See Recommended Fluids and
Lubricants in theIndex. Use only the
recommended oil.
198
A good time to check your automatic
transaxle fluid level is when the engine
oil is changed. Refex to the Maintenanc
Schedule to determine whento change
your fluid. See Scheduled Maintenancc
Services in the Index.
How to Check
Supercharger Oil
Unless you are technically qualified and
have the proper tools, you should let
your dealeror qualified servicecenter
perform this maintenance.
When ;to Check and Change
1. Remove the wiring harness shield.
2. Clean the area around the
oil fillplug
before removingit.
3.Remove the oil fill plugusing a%”
allen wrench.
$.The oil level iscorrect when it just
reaches the bottom of the threadsof
the inspectionhole.
5. Replace the oil plugwith theO-ring in
place. Torque to 10 Nom (88 lb. in.).
6. Replace the wiring harness shield.
Because this operation canbe a little
difficult, you maychoose to have this
done at an Oldsmobile dealership
Service Department.
If you do it yourself, be sure to follow
all the instructions here, or you could
get a false readingon the dipstick.
NOTICE:
Too much or too little fluidcan
damage your transaxle.Too much
can mean that some of the fluid
could come out and fall onhot
engine partsor exhaust system,
starting a fire. Be sure to get an
accurate reading if you check your
transaxle fluid.
Wait at least 30 minutes before
checking the transaxlefluid level if you
have been driving:
When outside temperatures areabove
90°F (32°C).
At high speed for quite a while.
In heavy traffic - especially in hot
weather.
While pullinga trailer.
To get the right reading, the fluid should
be at normal operating temperature,
which is 180°F to 200°F (82°C to 93°C).
Get the vehicle warmed up by driving
about 15 miles (24 km)when outside
temperatures are above 50°F ( 10OC). If
it’s colder than 50°F (10°C) , you may
have ta drive longer.
To check the fluid level:
Park your vehicle on a level place.
With the parking brake applied, place
the shift lever in P (Park).
With your foot on the brake pedal,
move the shift Iever through each gear
range, pausing for about three
seconds in each range. Then, position
the shift lever in P (Park).
Let the engine run at idle for three to
five minutes.
Then, without shuttingoff the engine,
follow these steps:
1. Pull out the dipstick and wipe it with
a clean rag or paper towel.
2. Push it back in all the way, wait three
seconds and then pull it back out
again.
3. Check both sides of the dipstick, and
read the lower IeveI. The fluid level
must be in the cross-hatched area.
1. If the fluid level is in the acceptable
range, push the dipstick back in all
the way.
Service di Appearance Care
Damage caused by fluid other than
DEXRONB-111 or DEXRONB-IIE isnot
covered by your new vehicle warranty.
After adding fluid, recheckthe fluid
level as described under How to
Check.
When the correct fluid level is
obtained, push the dipstickback in all
the way.
How to Add Fluid
Refer to the MaintenanceSchedule to
determine what kindof transaxle fluid
to use. See Recommended Fluids and
Lubricants in the Iadex.
If the fluid levelis low, add only enough
of the proper fluid to bring the level into
the cross-hatched area on thedipstick.
1. Pull out thedipstick.
2. Using a long-neck funnel, addenough
fluid at the dipstickhole to bring it to
the proper level.
It doesn’t take much fluid, generally less
than a pint(OSL). Don’t overfill. We
recommend you use only fluid labeled
DEXRONG-I11 or DEXRONB-IIE,
because fluidswith thatlabel are made
especially for yourautomatic transaxle.
200
Engine Coobnt
The following explains your cooling
system and how to add coolant when it
is low. If you have a problem with
engine overheating, see Engine
Overheating in the Index.
The proper coolant for your Oldsmobile
will:
Give freezingprotection down to-34”F
(-37°C).
Give boilingprotection up to 262°F
(128°C).
Protect against rust and corrosion.
Help keep the proper engine
temperature.
Let the warning lights work as they
should.
What to Use
Use a mixtureof one-half dean water
(preferably distilled) and one-half
antifreeze thatmeets “GM Specification
1825-M,” which won’t damage
aluminum parts. You can also use a
recycled coolant conforming to GM
Specification 1825-M witha complete
coolant flush and refill. If you use this
mixture, you don’t need to add anything
else.
NOTICE:
If you use an improper coolant mix,
your engine could overheat and be
badly damaged. The repair cost
wouldn't be covered by your
warranty. Too much waterin the
mix can freeze and crack the
engine, radiator, heater core and
other parts.
)
UNLEADED FUEL ONLY
I
Adding Coolant
To Check Coolant
When your engine is cold, the coolant
level should be at FULL COLD or a
little higher. When your engine is warm.
the level should be up to FULL HOT or
a little higher.
I..
(::!l*.L.l
.... ..,...
I:. r.!1 . j .L :.i.I:
.I.
r: (::I [:I
I.. 1::,p.! '1'
If you have the electronic clusterand
your coolant level is low, the
information center display will show:
LOW ENGINECOOLANT
If this light comes on, it means you're
low on engine coolant.
To Add Coolant
If you need more coolant, addthe
proper mix at the coolant recovery
tank.
n
201
Service &Appearance Care
IRadiator Pressure Cap
NOTICE:
Your radiator cap is a 15 psi
(10.5 kPa) pressure-type cap and
must be tightly installed to prevent
coolant loss and possible engine
damage from overheating. Be sure
the arrows on the cap line up with
the overflow tube on the radiator
filler neck.
Add coolant mix at therecovery tank,
but be careful not to spill it.
When you replace your radiator
pressure cap, an AC@cap is
recommended.
IThermostat
Engine coolant temperature is
controlled by a thermostat in the engine
coolant system. Thethermostat stops
the flow of coolant through the radiator
until the coolant reaches a preset
temperature.
When you replace yourthermostat, an
A P thermostat is recommended.
202
IPower Steering Fluid
How To Check Power Steering
Fluid
Unscrew the cap and wipe the dipstick
with a clean rag. Replace the cap and
completely tighten it. Then remove the
cap againand look at the fluid levelon
the dipstick.
When the engine compartment is hot,
the level should be at the HOT mark.
When the engine compartment is
cool, the level should be at theFULL
COLD mark.
NOTICE:
What to Add
Refer to the MaintenanceSchedule to
determine what kind of fluid to use. See
Recommended Fluids and Lubricants
in the Index.
NOTICE:
When adding power steering fluid
or malting a complete fluid change,
always use the proper fluid. Failure
to use the proper fluid can cause
Iealcs and damage hoses and seals.
Windshield Washer Fluid
To Add
Open the cap labeled WASHER
FLUID ONLY. Add washer fluid until
the bottle is full.
When using concentrated washer
fluid, follow the manufacturer’s
instructions for addingwater.
Don’t mix water with ready-touse washer fluid. Water can cause
the solution tofreeze and damage
your washer fluid tank and other
parts of the washer system.Also,
water doesn’t clean as well as
washer fluid.
Fill your washer fluid tank only 3
full when it’s very cold. This
allows for expansion, which could
damage the tank if it is
completely full.
Don’t use radiator antifreeze in
your windshield washer. It can
damage your washer systemand
paint.
203
Service & Appearance Care
leak. If you add fluidwhen your linings
are worn, then you’ll have too much
fluid when you get new brake linings.
You should add (or remove) brake
fluid, as necessary, onlywhen work is
done on the brake hydraulic system.
/i\ CAUTION;
Brakes
Brake Master Cylinder
Your brake master cylinder is here. Itis
filled with DOT-3 brake fluid.
There are only two reasons why the
brake fluid level in your master cylinder
might go down. The first is that the
brake fluid goesdown to anacceptable
level during normal brake lining wear.
When new linings are put in, thefluid
level goes backup. The other reason is
that fluid is leaking out of the brake
system. If it is, you should have your
brake system fixed, since a leak means
that sooner or lateryour brakes won’t
work well, or won’t work at all. So, it
isn’t a good idea to “top off’ your brake
fluid. Adding brake fluid won’t correct a
204
When your brake fluid falls
to a low
level, your brakewarning light will come
on. A chime will sound if you tryto drive
with this warning lighton. See Brake
System Warning Lightin the Index.
What to Add
When you do need brake fluid, use only
DOT-3 brake fluid - such as Delco
Supreme 11s (GM Part No.1052535).
Use new brake fluidfrom a sealed
container only, and always clean the
brake fluid reservoircap before
removing it.
NOTICE:
DOT-5 siliconebrake fluid can
damage your vehicIe. Don’t use it.
Don’t let someone put in the
wrong kind of fluid. For example,
just a few drops of mineral-based
oil, such as engine oil, inyour
brake system can damage brake
system parts so badly that they’ll
have to be replaced.
Brake fluid can damage paint, so
be careful not to spill brake fluid
on your vehicle. If you do, wash it
off immediately. SeeAppearance
Care in the Index.
Brake Wear
Your Oldsmobilehas front disc brakes
and rear drum brakes.
Disc brake pads have built-inwear
indicators that make a high-pitched
warning sound when the brakepads are
worn and new pads are needed.The
Sewice & Appearance Care
A CAUTION:
Battery
Every new Oldsmobile has a Delco
Freedoms battery. You never have to
add water to one of these. When it’s
time for a new battery, we recommenda
Delco Freedom@battery. Get one that
has the catalog number shown on the
original battery’s label.
Vehicle Storage
If you’re not going to drive your vehicle
for 25 days or more, take off the black,
negative (-) cabIe from the battery. This
will help keep your battery from
running down.
I
206
Contact your dealer to learn how to
prepare your vehicle for longer storage
periods.
Halugen Bulbs
/i\ CAUTION:
Headlight Bulb Replacement
For the type of bulb, see the Index
under Replacement Bulbs.
1. Remove the two quarter-turn wing
screws from the top of the headlight
housing.
2. Lift the headlight up, then pull the
bottom of the headlight forward. This
will release the tabs at the back of the
headlight.
3.Pull the inboard side of the headlight
forward until all of the glass is past
the grille. Slide the headlight toward
the grille. Pull the outboard side of
the headlight forward. The headlight
should come out.
I.
4. Twist the bulb assembly % turn and
6. Reverse steps 1-5 to replace the bulb
pull out the bulb assembly.
5. Unclip the bulb assembly from the
wiring harness and replace the bulb
assembly.
assembly and headlight housing.
Make sure thetabs (A) are locked
into slots (B) before tightening the
screws.
The Torxs screws (C)are headlight
aiming screws. Do not turn these
screws. Only a qualified service
technician using proper equipment
should adjust these screws.
'
.
. ..1..
.
.
Taillight Bulb Replacement
For the type of bulb, see the Index
under RepLacernent Bulbs.
1. In the trunk, remove the plastic screw
holding the carpeting in place and
pull back the carpeting. If you have
the optionalconvenience net, you
must first remove it from thehooks.
2.Pull the carpet away from the rear
corner of the trunk.
207
Service & Appearance Care
I
3.Rotate the bulb housing 1/8 turn and
remove it.
4. To remove the bulb, push in and
rotate it countercloclnvise.
5. Replace the bulb.
6. Reverse the steps to reassemble the
taillight.
208
Windshield Wiper Blade
Replacement
Replacement blades comein different
types and are removed in different
ways. Here's how to remove the type
with a release clip:
1. Pull the windshield wiper arm away
from the windshield.
2. Lift the release clipwith a
screwdriver and pull the blade
assembly off the wiper arm.
3.Push the new wiper bladesecurely on
the wiper arm.
ILoading Your Vehicle
Two labels on your vehicle show how
nuch weight it may properly carry. The
rire-Loading Information labelfound
In the rear edge of the driver's door
ells you the proper size, speed rating
md recommended inflation pressures
or the tires on your vehicle. It also
$ves you important information about
he number of people that can be in
rour vehicle and thetotal weight that
~ O Ucan carry. This weight is called the
Jehicle Capacity Weight and includes
he weight of all occupants,cargo, and
111 nonfactory-installed options.
I n vehicles equippedwith electronic
eve1 control, therear of the vehicle is
utornatically kept level as you load or
lnload your vehicle.
Service & Appearance Care
NOTICE (Canlinued)
.
'
,
If your tires have to80niwh ab
(overinflatian),you can get:
'Unusualwear
Rad handling
Rough.ride
Needless damage from rda
0
hazards.
210
TREAD WEAR INDICATORS
Tire Inspection and Rotation
r
r
r
To make your tires last longer, have
them inspected and rotatedat the
mileages recommended in the
Maintenance Schedule. See Schedukd
Maintenance Services in the Index.
Use this rotation pattern.
After the tireshave been rotated, adjust
the front and rearinflation pressure as
shown on theTire-Loading Information
label. Male certain that all wheel nuts
are properly tightened. See Wheel Nut
Torque in the Index.
When It’s Time for New Tires
One way to tell when it’s time for new
tires is to check the treadwear
indicators, which will appear whenyour
tires have only %Z inch (1.6 mm) or less
of tread remaining.
You need a new tire i f
You can see theindicators at three or
more places around thetire.
You can see cord orfabric showing
through thetire’s rubber.
The tread or sidewall is cracked,cut
or snagged deep enough to show cord
or fabric.
The tire has abump, bulge or split.
The tire has a puncture,cut, or other
damage that can’t be repaired well
because of the size or location of the
damage.
21 1
f
P
r
F
r
r
r
r
'
when tested undercontrolled
conditions on a speci€ied indoor
laboratory test wheel. Sustained high
temperature can cause the
material of
the tireto degenerate and reduce tire
life, and excessive temperature canlead
to sudden tirefailure. The grade C
corresponds to alevel of performance
meet
which all passenger car tires must
under theFederal Motor Vehicle Safety
Standard No. 109. Grades B and A
represent higher levels of performance
on the laboratory test wheel than the
minimum required by law.
Warning: The temperature gradefor
this tire is established for a tirethat is
properly infiated and notoverloaded.
Excessive speed, underinflation, or
excessive loading,either separately or in
combination, can causeheat buildup
and possible tire failure.
These grades aremolded on the
sidewalls of passenger car tires.
While the tires availableas standard or
optional equipment on General Motors
with respect to these
vehicles may vary
grades, all such tires meet General
Motors performancestandards and have
been approved foruse on General Motors
vehicles. All passenger type (P Mdtric)
tires must conform to Federal safety
requirements in addition to these grades.
Wheel Alignment and Tire
Balance
The wheels on your vehiclewere
aligned and balanced carefullyat the
factory to give youthe longest tire life
and best overall performance.
In most cases, you will not need to have
your wheels alignedagain. However, if
you notice unusual tirewear or your
vehicle pullingone way or the other, the
alignment may need to be reset. If you
notice your vehicle vibrating when
driving on a smooth road, your wheels
may need to be rebalanced.
Your dealer will lmow the kindof wheel
you need.
Each new wheel should have the same
load carrying capacity, diameter,width,
offset, and be mounted the same wayas
the one itreplaces.
If you need to replace any of your
wheels, wheel bolts, or wheel nuts,
replace them only with new GM
original equipment parts. This way, you
will be sure tohave the right wheel,
wheel bolts, and wheel nuts for your
Oldsmobile model.
Wheel Replacement
Replace any wheelthat is bent, cracked
or badly rusted. If wheel nuts keep
coming loose, the wheel, wheel bolts,
and wheel nuts should be replaced. If
the wheel leaks air, replace it (except
some aluminum wheels, which can
sometimes be repaired). See your
Oldsmobile dealer if any of these
conditions exist.
213
Service &Appearance Care
I'
I
Be carehl with a hair dryer or heat
.lamp%
Yaw could scorch the fabric.
I
sponge.
Don't saturate thematerid.
i
I
will set.
215
Service & Appearance Care
ICare of Safety
ICleaning
the Outsideof the
Windshield and Wiper
Blades
Belts
Keep belts clean and dry.
r
.
. ....-.-
IGEass
f
r
r
r
Glass should be cleaned often. GM
Glass Cleaner (GM Part No. 1050427)
or aliquid household glass cleaner will
remove normal tobacco smoke and dust
films.
Don’t useabrasive cleaners on glass,
because they maycause scratches.
Avoid placing decalson theinside rear
window, since they may haveto be
scraped off later. If abrasive cleaners are
used on the insideof the rearwindow,
an electric defoggerelement may be
damaged. Anytemporary license should
not be attached across thedefogger grid.
If the windshield is not clear after using
the windshield washer, or
if the wiper
blade chatters when running, wax or
other materialmay beon the blade or
windshield.
Clean the outsideof the windshield
with GM Windshield Cleaner, Bon-Ami
Powder@(GM Part No. 1050011). The
windshield is clean if beads do notform
when you rinse it with water.
Clean the blade by wiping vigorously
with a clothsoaked in full strength
windshield washer solvent. Then rinse
the blade with water.
Wiper blades should be checked on a
regular basis and replaced when worn.
ICkaning the
Outsideof Your
Oldsmobik
The paintfinish on your vehicle
provides beauty, depthof color, gloss
retention and durability.
Washing Your Vehicle
The best way to preserve your vehicle’s
finish is to keep it cleanby washing it
often with lukewarm or cold water.
Don’t wash your vehicle in the direct
rays of the sun.Don’t usestrong soaps
or chemical detergents. Use liquid hand,
dish or carwashing (mild detergent)
soaps. Don’t use cleaningagents that
contain acid or abrasives. All cleaning
agents shouldbe flushed promptly and
not allowed to dry on the surface, or
they could stain. Dry the finishwith a
soft, clean chamois or a 100% cotton
towel to avoid surfacescratches and
water spotting.
High pressure vehicle washes may
cause water to enter
your vehicle,
Finish Care
Occasional waxing or mild polishing of
your Oldsmobile may be necessary to
remove residue from the paint finish.
You can get GM approved cleaning
products from your dealer.
21 7
Service & Appearance Care
Your Oldsmobile hasa
“basecoat/clearcoat” paint finish. The
clearcoat gives more depthand gloss to
the colored basecoat. Always use waxes
and polishesthat are non-abrasive and
made fora basecoat/clearcoat paint finish.
NOTICE:
Machine compounding or
aggressive polishing on a
basecoat/clearcoat paint finish may
dull the finish or leave swirl marks.
IAluminum
Wheels(IfSo
Equ&ped)
Your aluminum wheels have a
protective coating similar to thepainted
surface of your vehicle. Don’t use
strong soaps, chemicals, chrome polish,
abrasive cleaners or abrasive cleaning
brushes on them because you could
damage this coating. After rinsing
thoroughly, a wax may be applied.
NOTICE:
If you have aluminum wheels, don’t
use an automatic vehicle wash that
has hard silicon carbide cleaning
brushes. These brushes can take off
the protective coating.
218
Iwhite Sidewall Tires
Your Oldsmobile dealer hasa GM
White SidewallTire Cleaner. You can
use a stiff brush with thecleaner.
I Weatherstrips
Silicone grease on weatherstrips will
make them last longer, seal better, and
not stick or squeak. Apply silicone
grease with a clean clothat leastevery
six months. During very cold, damp
weather more frequent application may
be required. (See Recommended Fluids
G Lubricants in the Index.)
1
I
Sheet Metal Damage
If your vehicle is damaged and requires
sheet metal repair or replacement, make
sure the body repair shop applies anticorrosion material to the parts repaired
or replaced to restore corrosion
protection.
IForeign Material
Calcium chloride and othersalts, ice
melting agents, road oil and tar, tree
sap, bird droppings, chemicals from
industrial chimneys, and other foreign
matter can damage your vehicle’s finish
if they remain on painted surfaces. Use
cleaners that are marked safe for
painted surfaces to remove foreign
matter.
IFinish
Damage
Any stone chips, fractures or aeep
scratches in the finish should be
repaired right away. Bare metal wilI
corrode quickly and may develop into a
major repair expense.
Minor chips and scratches can be
repaired with touch-up materials
available fromyour dealer or other
service outlets. Larger areas of finish
damage can be corrected in your
dealer’s body and paint shop.
1 Underbody
Maintenance
Chemicals used for ice and snow
removal and dust control can collecton
the underbody. If these are not
removed, accelerated corrosion (rust)
can occur on theunderbody parts such
as fuel lines, frame, floor pan, and
exhaust system even though theyhave
corrosion protection.
At least every spring,flush these
materials from the underbody with plain
water. Clean any areas where mudand
other debris can collect. Dirt packed in
closed areas of the frame should be
loosened before being flushed. Your
dealer or an underbody vehicle washing
system can do this for you.
Service & Appeurunce Cure
IChemical
Paint Spotting
Some weather and atmospheric
conditions can create a chemical fallout.
Airborne pollutants can fall upon and
attack painted surfaces on your vehicle.
This damage can tale two forms:
blotchy, ringlet-shaped discolorations,
and small irregular dark spots etched
into the paint surface.
Although no defect in the paint job
causes this, Oldsmobile will repair, at
no charge to theowner, the surfaces of
new vehicles damagedby this fallout
condition within 12 months or 12,000
miles (20 000 ltm) of purchase,
whichever comesfirst.
IYehick
Identification
Number WN)
This is the legal identifier for your
Oldsmobile. It appears on a plate in the
front corner of the instrument panel, on
the driver’s side. You can see it if you
look through the windshield from
outside your vehicle.The VIN also
appears on theVehicle Certificationand
Service Parts labels and the certificates
of title and registration.
Engine ldentification
The eighth character in your VIN is the
engine code. This code will help you
identify your engine, specifications, and
replacement parts.
220
I ServiceParts Identification
,r
abel
You’ll find this label on yourspare tire
cover. It’s very helpful if you ever need
to order parts. On this label is:
your VIN,
the model designation,
paint information, and
a list of all production options and
special equipment.
Be sure that this label is not removed
from the vehicle.
r
r
r
r
r
Ad=OnEkcb-ical
Equipment
U
NOTICE:
Don’t add anythingelectrical to
your Oldsmobile unless you check
with your dealer first.Some
electrical equipment can damage
your vehicleand thedamage
wouldn’t be coveredby your
warranty. Some add-on electrical
equipment can keep other
components from working as they
should.
Your vehicle has anair bag system.
Before attempting to addanything
electrical to yourOldsmobile, see
Servicing Your AirBag-Equipped
Oldsmobile in the Index.
1Fuses & Circuit
I
I
The left side fuse panel is located to the Look at the silver-colored bandinside
the fuse. If the band is broken or
left of the steering wheel, under the
instrument panel.
melted, replace the fuse. Be sure you
replace a bad fuse with a new one of the
Snap off the cover to reveal the fuses.
correct amp rating.
You’ll find a fuse puller clipped to the
When finished, replace the coverand
inside of the cover. Place the wideend
of the fusepuller overthe plastic end of pinch the releaselevers againto unlock
the fuse. Squeeze the endsover the fuse the panel. Press itback up into place.
and pull it out.
Spare fuses are located in the slots
labeled “Spare” on thefollowing chart.
Breakers
The wiring circuits in your vehicle are
protected from short circuits by a
combination of fuses andcircuit
breakers. Thisgreatly reduces the
chance of damage caused by electrical
problems.
221
Service & Appearance Cure
Position
Rating
Circuitry
(AMP.)
A
B
C
D
E
1A
2A
3A
4A
5A
6A
7A
$A
9A
1B
Left Side Fuse Panel
222
I
2B
3B
4B
5B
6B
7B
8B
9B
1c
2c
30
25
10
10
10
19
15
15
20
15
10
20
10
20
Circuit Breaker-Power Windows
Not Used
Power Seats
Not Used
Not Used
Start-up Signal - Air Bag
Spare
Not Used
Interior Lamps
Ignition (Run), AutomaticA/C Control
Courtesy Lights, Power Mirrors
Not Used
Not Used
Cigar Lighter
Turn Signal, Back-up Lights, Cornering Lights, BrakeTransaxle Shift Interlock
Spare
Not Used
Not Used
Anti-Lock Brake System
Brake and Hazard Lamps
Not Used
Not Used
Not Used
Air Bag
Spare
Position
3c
4c
5c
6C
Rating
(AMP.)
10
15
7c
8C
9c
1D
2D
3D
4D
5D
6D
7D
8D
9D
1E
2E
3E
4E
10
15
25
25
10
20
10
5E
6E
7E
8E
9E
25
30
Circuitry
Not Used
Not Used
Cooling Fans, Transaxle
Parking Lamps
Not Used
Not Used
(Battery) Chime, Radio, Cluster
Ignition (Run/Crank), Chime,Cluster
Spare
Not Used
Not Used
Base A/C
Not Used
Not Used
Radio
Not Used
Auxiliary Outlet(s)
Not Used
Ignition (Off/Unlocl<)
Not Used
Not Used
Not Used
Not Used
Wipers, Washer
Rear Defog
Rigbt Side Fuse Panel
Additional fuses are located in the relay
center, on the far right side, below the
instrument panel. You must remove the
sound insulatoron the right sideof the
passenger foot well to replace these
fuses.
Replacing these fuses is difficult. We
recommend that you see yourdealer if
you need one replaced.
223
Service & Appearance Care
Position
1
Rating
(AMP.)
20
2
15
3
4
5
15
20
6
7
8
9
10
11
12
?igMSide Fuse Panel (CONTJ
224
15
10
10
10
Circuitry
Door Locks
Cruise Control, Misc. Engine Controls
Not Used
Power Antenna, Lock Switch
Fuel Pump
Not Used
Horns
Injectors
A/C ProgrammerNot Used
Powertrain Control Module, PASS-I<ey@I1
Not Used
Headlight Wiring
Power Windows and Power Seats
The headlight wiring isprotected by a
circuit breaker in the wiring harness.
An electrical overload will cause the
lights to go on and off, or in some cases
to remain off. If this happens, have your
headlight system checked right away.
Circuit breakers in the fuse panel
protect the power windows and power
seats. When the current load is too
heavy, the circuit breaker opens and
closes, protecting the circuit until the
problem is fixed.
Windshield Wipers
MaxifuselRelay Center
To check the fuses in this underhood
fuse center, turn thetwo knobs 2 turn
counterclockwise and loosen the metal
wing nut on thepassenger side of the
cover. Then remove the cover. The
inside of the cover has a chart that
explains the featuresand controls
governed by each fuse and relay.
The windshield wiper motor is
protected by an internal circuit breaker
and a fuse in the left side fuse panel. If
the motor overheats due toheavy snow,
etc., thewiper will stop until the motor
cools. If the overload is caused by some
electrical problem, have it fixed.
225
Service di Appearance Care
Capacities & Specifications
226
Automatic Transaxle AT (Overdrive)
When draining or replacing torque converter,
more fluid may be needed.
Pan Removal and Replacement ................................... 6.5 quarts
6.1 L
After Complete Overhaul ............................................ 11 quarts
10.4 L
Cooling System ...................................................................
13 quarts
12.3 L
Refrigerant (R-l34A), Air Conditioning ......................... 2.42 pounds
1.1kg
Not all air conditioning refrigerants are
the same. If
the air conditioning systemin your vehicle needs
refrigerant,be sure the proper refrigerant is used. I f
you’re not sure,ask your Oldsmobile dealer.For
additional information,see your “Warranty and
Owner Assistance Information”booklet.
Engine Crankcase ............................................................... 4 quarts
3.8 L
When changing filter, up to 1 quart (1 liter) more
oil may be needed.
Fuel Tank ............................................................................ 18 gallons
68 L
Power Steering
Pump Only ...................................................................1 pint
0.5 L
Complete System ......................................................... 1.5 pints
0.7 L
Tire Pressures
All Except Spare ........................................................... 30 psi
2 10 ltPa
Spare ............................................................................. 60 psi
415 kPa
Wheel Nut Torque .............................................................. 100 pound-feet
140 Nom
NOTE: All capacities are approximate. When adding, be sure to fill to the appropriate level, as recommended in this manual.
223
Sewice & Appearance Care
FIuids & Lubricants
ITEM
APPLICATION
GM PART NUMBER
SIZE
1 gal.
(3.8 L)
Antifreeze Coolant ................................ Year-round antifreeze for .............. 1052753
(Ethylene Base)
Glycol
coolant mixtures
Chassis Lubricant ................................. General chassis lube, etc. .............. 1052497
14 02.
(Grease Gun Insert)
Delco Supreme 11s Brake Fluid ......... Brake System ................................. 1052535
16 oz.
Automatic Transmission Fluid ............ Automatic Transaxle
12346143
DEXRONB-111 ...........................................................................................
32 oz.
DEXRONQ-IIE ......................................................................................... 12345881
32 oz.
Engine Oil ............................................. Engine lubrication .......................... See Erzgine Oil in this section.
16 oz.
GM Engine Oil Supplement (E.O.S.) ... See your dealer for advice ............. 1052367
Engine Oil ............................................. Hood, trunk and door hinges
Windshield Washer Solvent................. Windshield washer fluid
Power Steering Fluid (Normal)............ Power Steering System .................. 1050017
32 oz.
16 oz.
1052884
32 oz.
Power Steering Fluid (Cold Climate).... Power Steering System .................. 12345867
12345866
(System must be drained and
16 oz.
refilled with it.)
1 oz.
Dielectric Silicone Grease ................... Weatherstrips ................................. 12345579
Spray-A-Squeak Silicone Lubricant .... General purpose silicone ................1052276 (aerosol) 4.5 02.
lubricant
1052277
12 oz.
228
(397 g)
(0.5 L)
(1.0 L)
(1.0 L)
(0.5 L)
(1.0 L)
(0.5 L)
(1.0 L)
(0.5 L)
(28 g)
(128 g)
(0.35 L)
BULB
. .
229
Service &Appearance Care
I
i
230
BULB
INSIDE
Overhead
Front Overhead Lights ........................................................... 906
906
Rear Overhead Lights .............................................................
Visor Vanity Lights ................................................................7065
Doors
Front Courtesy Lights ............................................................74
Rear CourtesyNarning Lights .............................................. 194
Instrument Panel
IP Sound Insulator Panel (Lower Floor Lighting) ................ 168
Glove Compartment Light ..................................................... 194
Ashtray Light .......................................................................... 194
231
I~PORTANT
Part 7
Maintenance Schedule
This part covers the maintenance
required for your Oldsmobile. Your
vehicle needs these services to retain
its safety, dependability and emission
control performance.
Section
Introduction
A Word About Maintenance................................................................ 234
Your Vehicle and theEnvironment ..................................................... 234
How This Part is Organized ................................................................ 234
A. Scheduled Maintenance Services
Using Your Maintenance Schedule ..................................................... 235
Selecting the Right Schedule............................................................... 235
Schedule I .............................................................................................
236
Schedule I1 ...........................................................................................
238
Explanation of Scheduled Maintenance Services .................... ......... . 240
B. Owner Checksand Services
At Each Fuel Fill ................................. ................................................. 242
At Least Once a Month ....................................................................... 242
At Least Once a Year........................................................................... 243
C. Periodic Maintenance Inspections
..................... ....... ........................... 245
D. Recommended Fluids and Lubricants................................................. 247
E.Maintenance Record.............................................................................. 249
,
Protection
Plan
Have you purchased the
GM Protection Plan?
The Plan supplements your
new vehicle warranties.
See vour Oldsmobile dealer for details.
~
233
Maintenance Schedule
Maintenance Schedule
Schedule I
Follow Schedule I if your vehicle is
MAINLY driven under oneor more of
the following conditions:
When most trips are less than 4 miles
(6 ltm).
When most trips are less than 10
miles (16 lm) and outside
temperatures remain below freezing.
When most trips include extended
idling and/or frequent low-speed
operation, as in stop-and-go traffic.
When towing a trailer.
When operating in dusty areas.
Schedule I should also be followed if
the vehicleis used for delivery service,
police, taxi or other commercial
applications.
WHEN TO PERFORM
TO BE SERVICED
Miles (kilometers) or Months
(whichever occurs first).
See Explanation of Scheduled Maintenance
Services following Schedules I and 11.
Engine Accessory Drive Belt Inspection"
I
Transaxle Service
Expfanaszon Scheduled Maintenance
1 Services
Schedules and
Spark PIua Wire 1nspection':'t
I
Every 30,000 Miles (50 000 ltm) or 24 Months
See
of
following
I
Every 30.000 Miles (50 000 l u n ) .
1
FuelTank. Cap andLines1nspection"'t
236
1 Every 30,000 Miles (50 000 Itm).
11.
The services shown onthis chart up to 60,000 miles (100 000 km) should be performed
after 60,000 miles at the same intervals.
MILES (000)
3
6
9
12 15 18 21 24 27 30 33 36 39 42 45 48 51 54 57 60
KILOMETERS (000)
:
t
Emission Control Service.
= The U.S. Environmental Protection Agency
or the CaliforniaAir Resources Board has
determined that the failure to perform this
maintenance item will not nullify the
emission warranty or limit recall liability
prior to the completion of vehicle useful life.
General Motors, however, urges that all
recommended maintenance services be
performed at the indicated intervals and the
maintenance be recorded in “SectionE:
Maintenance Record.
= An
I’
237
Maintenance Schedule
Schedule /I
Follow Schedule TI ONLY if none of
the driving conditions specified in
Schedule I apply.
WHEN TO PERFORM
TO BE SERVICED
ITEM
See
Explanation of Scheduled Maintenance
No‘
Sentices following Schedules I and 11.
1
8
238
I
-
Spark Plug Wire 1nspection“’t
Miles (kilometers) or Months
(whichever occurs first).
I
Evew 7.500 Miles (12 500 am)or 12 Months.
1
Every 311,000 Miles (50000 ltm).
1
The services shownon this chart up to 60,000 miles (100 000 km) should be performed
after 60,000 miles at the same intervals.
MILES (000)
5
7.5
10
15
1
22.5
25
30
35 57.5 40
45
50
52.5
55
60
KILOMETERS 1000)
’: = An
Emission Control berme.
t = The L I S . Environmental Protection Agency
or the CaliforniaAir Resources Board has
determined that thefailure to perform this
maintenance item will not nullifythe
emission warranty or limit recall liability
prior to the completion of vehicle useful life.
General Motors, however, urges that all
recommended maintenance services be
performed at the indicated intervalsand the
maintenance be recorded in “SectionE:
Maintenance Record. ’‘
Maintenance Schedule
Explanation of Scheduled
Maintenance Services
Following are explanations of the
services listed in Schedule I and
Schedule 11.
The proper fluids and lubricants to u”s’e
are listed in Section D. Make sure
whoever services your vehicleuses
these. All parts should be replaced and
all necessary repairs done before you or
anyone else drivesthe vehicle.
ITEM
SERVICE
NO.
1. Engine Oil and Filter Change‘?
Always use SH or SG Energy
Conserving I1 oiIs of proper viscosity.
The “SH” or“SG” designation may
be shown alone or in combination
with others, such as “SH/CD” “SH,
SG, CD,” “SG/CD,” etc. To
determine the preferred viscosity for
your vehicle’sengine (e.g., SAE 5W30 or SAE 10W-30), see Engine Oil
in the Index. If your vehiclehas an
Engine Oil-ChangeIndicator (EOCI),
the indicator will show you when to
change the oil, usuaIly between 3,000
miles (5 000 I a n ) and 7,500 miles
240
(12 500 l u n ) since your last oil
change. Under severeconditions the
indicator may come on before 3,000
miles (5 000 ltm). Never drive your
vehicle more than 7,500 miles
(12 500 ltm) or 12 months without
an oil change.
The system won’tdetect dust in the
oil. So if you drive ina dusty area be
sure to change your oil every3,000
miles (5 000 ltm) or sooner if the
CHANGE OIL NOW message
appears in the information center.
Remember to reset the Oil Change
Indicator when the oiI has been
changed. For moreinformation, see
Driver Information System in the
Index.
2. Chassis Lubrication- Lubricate
suspension and steering linkage.
Lubricate the transaxle shift linkage,
and parking brake cable guides,
underbody contact points and linkage.
3. Tire andWheel Rotation and
Inspection - For proper wear and
maximum tire life, rotate your tires
following the instructions in this
manual. See Tires, InspectionG.
Rotation in the Index. Check the
tires for uneven wear or damage.If
you see irregular or premature wear,
check the wheel alignment. Checkfor
damaged wheels also.
4. Engine Accessory DriveBelt
Inspection ‘%
- Inspect the belt for
cracks, fraying, wear and proper
tension. Replace as needed.
5. Cooling SystemService‘: - Drain,
flush and refill the system with new
or approved recycled coolant
conforming to GM Specification
1825M. Keep coolant at the proper
mixture as specified. See Coolant in
the Index. This provides proper
freeze and boil protection, corrosion
inhibitor level and maintains proper
engine operating temperature.
Inspect hoses and replace if they are
cracked, swollen ordeteriorated.
Tighten screw-type hoseclamps.
Clean the outside of the radiator and
air conditioning condenser. Washthe
pressure cap and neck.
To help ensure proper operation, we
recommend a pressure testof both the
cooling system andthe pressure cap.
6. Transaxle Service- Change both
the fluid and filter every 15,000 miles
(25 000 ltm) if the vehicle is mainly
driven under one or more of these
conditions:
In heavy city trafficwhere the
outside temperature regularly
reaches 90°F (32°C) or higher.
In hilly or mountainous terrain.
When doing frequent trailer towing.
Uses such as found in taxi, police
car or delivery service.
If you do not use your vehicle under
any of these conditions, change both
the fluid and filter every 100,000
miles (166 000 ltm) .
7. Spark Plug Replacement*’Replace spark plugs with theproper
type. SeeReplacement Parts in the
Index.
8. Spark Plug Wire Inspection‘:?Inspect for burns, cracks or other
damage. Check the boot fit at the
coils and at the spark plugs. Replace
wires as needed.
9. Air Cleaner Filter Replacement’:’
Replace every 30,000 miles (50 000
ltm) or more often under dusty
conditions. Ask your dealerfor the
proper replacement intervals for your
driving conditions.
IO. Fuel Tank, Cap and Lines
1nspection‘:t - Inspect fuel tank,
cap and lines (including fuel rails
and injection assembly) for damage
or leaks. Inspect fuel cap gasket for
an even filler neck imprint or any
damage. Replace parts as needed.
Periodic replacement of the fuel
filter is not required.
11. Supercharger Oil Check - Check
oil every 30,000 miles (50 000 ltm)
or 36 months. Add the proper
synthetic oil. SeeRecommended
Fluids G. Lubricants and
Supercharger Oil in theIndex.
NOTE: To determine your engine’s
displacement andcode, see Engine
Identification in the Index.
’:: = An
Emission Control Service.
t = The US. Environnlental Protection Agency
or the California Air Resources Board has
determined that the failure to perform this
maintenance item will no1 nullify the
emission warranty or limit recall liability
prior to the completion of vehicle useful life.
General Motors, however:urges that all
recommended maintenance services be
performed at the indicated intervals andthe
maintenance be recorded in “SectionE:
Maintenance Record.”
241
Maintenance Schedule
Section B: Owner Checks and Services
Listed below are owner checks and services which shouldbe performed at theintervals specified to help ensure the safety,
dependability and emission control performance of your vehicle.
Be sure any necessary repairs are completed at once. Whenever any fluids or lubricants are added to your vehicle, make sure
they are the proper ones, as shown in Section D.
At Each Fuel Fi// (/t is important for you or a service station affendanf to perform these underhood checksat each fuel fi//.)
CHECK
OR SERVICE
I
Engine Oil Level
Engine
Windshield Washer
Fluid Level
WHAT TO DO
Check the engine oil leveland add the proper oil if necessary. SeeEngine Oil in the Index for
further details.
sary. See Coolant in the
Check the engine coolant level and add the proper coolant mix if
Index for further details.
Check the windshield washer fluid level in the windshield wasllGrxlmand add the properfluid if
necessary. See Windshield WasherFluid in the Index for further details.
At least Once a Month
CHECK
OR SERVICE
Tire Inflation
Cassette Deck
242
WHAT TO DO
Check tire inflation. Make sure they are inflated to the pressures specified on the Tire-Loading
Information label located on the rear edge of the driver’s door. See Tires in the Index for
further details.
Clean cassette deck. Cleaning should bedone every 15 hours of tape play. SeeAudio Systems in
the Index for further details.
WHAT TO DO
,
.
Starter Switch
243
Maintenance Schedule
C,HECK
,ORSERVICE
Paking Brake
. a dAutomatic
'TmnsaxleP (Park)
iMech&m,Check
244
WHAT TO DO
.I
1
Section C: Periodic Maintenance Inspections
Listed below are inspections and services which should be performed at least twice a year (for instance, each spring andfall).
You should let your GM dealer’s service department or other qualified service center do thesejobs. Make sure any necessary
repairs are completed at once.
1
INSPECTION
OR SERVICE
Restraint Systems
WHAT SHOULD BE DONE
Now and then, make sure all yourbelts, buckles, latch plates, retractors, anchorages and
reminder systems are working properly. Look for any loose parts or damage. If yousee anything
that might keep a restraint system from doing its job, have it repaired.
Steering, Suspension
Inspect the front and rear suspension and steering system for damaged, loose or missing parts,
and Front-Wheelsigns of wear, or lack of lubrication. Inspect the power steering lines and hoses forproper
Drive Axle Boot and hookup,
binding, leaks, cracks, chafing, etc. Clean and then inspect the drive axle boot seals for
Seal Inspection
damage, tears or
leakage.
Replace
seals if necessary.
Inspect the complete exhaust system. Inspect thebody near the exhaust system. Look for broken,
Exhaust System
damaged, missing or out-of-position parts as well as open seams, holes, loose connections,or
Inspection
other conditions which could cause a heat build-up in the floor pan or could let exhaust fumes
into thevehicle. See Engine Exhaust in the Index.
245
INSPECTION
ORSERVICE
Inspection
~~
1
Section D:Recommended Fluids and Lubricants
NOTE: Fluids and lubricantsidentified below by name, part number or specification may be obtained from your GM dealer.
USAGE
FLUID/LUBRICANT
~~~
Engine Oil
API serviceSH or SG Energy Conserving II oils of the proper viscosity. The“SH”or”SG” designation
may be shown alone orin combination withothers, such as“SH/CD,” “SH,SG,CD,”“SG/CD,” etc.
To determine the preferred viscosity for your vehicle’s engine, see
Engine Oil in the Index.
Engine Coolant
50/50 mixture of water (preferably distilled) and good quality ethylene glycol base antifreeze
(GM Part No. 1052753 or equivalent) conforming to GM Specification 1825M or approved
recycled coolant conforming to GM Specification 1825M.
Hydraulic Brake
System
Delco Supreme 1Is Brake Fluid (GM Part No. 1052535 or equivalent DOT-3 brake fluid).
II
1I
II
Guides
Par’ting
Power Steering
System
1[
Supercharger
I I
I
I
Chassis lubricant (GM Part No. 1052497 or equivalent) or lubricant meeting requirements of
NLGI Grade 2: Category LB or GC-LB.
GM Hydraulic Power Steering Fluid (GM Part No. 1052884 or equivalent).
Key Lock Cylinders
Automatic Transaxle
Shift Linkage
t
I
I
I
1 1 Automatic Transaxle i DEXRONG-I11 or DEXRONs-IIE Automatic Transmission Fluid.
I
~~
Supercharger oil (GM Part No. 12345982).
Lubricate with Multi-Purpose Lubricant (GM Part No. 12345120) or synthetic SAE 5’””-30
engine
- oil.
I
1
Engine oil.
247
Maintenunce Schedule
FLUWLUBRICANT
USAGE
Floor Shift Linkage
Engine oil.
Chassis Lubrication
Chassis lubricant (GM rt do. 1052497 or equivalent) or lubricant meeting requirements of
NLGI Grade 2, Category LB or GC-LB.
Windshield Washer
GM OptikleenB Washer Solvent (GM Part No. 1051515) or equivalent.
Solvent
Hood Latch Assembly
a. Engine oil.
a. Pivots and Spring
Anchor
Category LB (GM Part No.
b. Chassis lubricant meeting requirements of NLGI C ~tde 2,
b. Rele-ase Pawl
1052497 or equivalent) or GC-LB.
Hood andDoor Hinges,
Fuel Filler Door
Hinge, Rear
Compartment Lid
Hinges
Weatherstrips
Engine oil or Lubriplate Lubricant (GM Part No. 1050109).
Dielectric Silicone Grease (GM Part No. 12345579 or equivalent).
See RepZacement Parts in the Index for recommended replacement filters, valves and spark plugs.
248
Section E: Muintenance Record
After the scheduled services are performed, record the date,odometer reading and who performed the service in the columns
indicated. When completing the Maintenance Performed column, insert the numbers from the Schedule I or ScheduleI1
maintenance chartswhich correspond to the maintenance performed. Also, you should retain all maintenance receipts. Your
owner information portfolio is a convenient place to store them.
DATE
ODOMETER
READING
SERVICED BY
MAINTENANCE PERFORMED
U
249
Maintenance Schedule
DATE
250
ODOMETER
READING
SERVICED BY
PERFORMED
MAINTENANCE
1
1
~~.
~
ODOMETER
DATE MAINTENANCE
PERFORMED SERVICED
READING
BY
U
251
Maintenance Schedule
DATE
252
ODOMETER
READING
SERVICED BY
MAINTENANCE PERFORMED
..
Part 8
CustomerAssistance Information
Here you will find out how to contact
Oldsmobile if you need assistance.
This part also tells you how to obtain
service publications and how to
report any safety defects.
Customer Satisfaction Procedure ............................. ..............................................
Customer Assistance for the Hearing or Speech Impaired ...................................
BBB Auto Line Program .........................................................................................
Reporting Safety Defects ........................................................................................
Oldsmobile Roadside Assistance Program ................ .............................................
Service Publications ............................................... ............ .....................................
254
255
255
256
257
257
1
253
CustomerAssistance Infomation
ICustomer Satisfaction
Procedure
254
Your satisfaction and goodwill are
important to your dealer and
Oldsmobile. Normally,any concern
with the sales transaction or the
operation of your vehicle will be
resolved by yourdealer’s Sales or
Service Departments. Sometimes,
however, despite the best intentionsof
d l concerned, misunderstandings can
occur. If your concern has notbeen
resolved to your satisfaction, the
Eollowing steps should be taken:
STEP ONE - Discuss your concern
with a member of dealership
management. Complaints can often be
quickly resolvedat thatlevel. If the
matter has already been reviewed with
the Sales, Service, or Parts Manager,
contact theowner of the dealershipor
the General Manager.
STEP TWO - If after contacting a
member of dealership management, it
appears your concern cannotbe
resolved by the dealership without
further help, contact the Oldsmobile
Customer Assistance Network by
calling 1-800-442-6537.In Canada,
contact GM of Canada Customer
Assistance Center in Oshawa by calling
1-800-263-3777 (English) or
1-800-263-7854 (French).
In Mexico, call (525) 254-3777. In
Puerto Rico or U.S. Virgin Islands, call
1-809-763-1315.In all other overseas
locations, contactGM North American
Export Sales inCanada by calling
1-416-644-4112.
For prompt assistance, please have
the
following information available
to give
the Customer Assistance Representative:
Your name, address, telephone number
Vehicle Identification Number (This
is available fromthe vehicle
registration or title,’or theplate at the
left top of the instrumentpanel and
visible through the windshield.)
Dealership name and location
Vehicle deliverydate and present
mileage
Nature of concern
We encourage you to call the toll free
number listed previously in order to
give your inquiry prompt attention.
However, if you wish to write
Oldsmobile, write to
United States
Customer Assistance Representative
Oldsmobile Central Office
920 Townsend St.
P. 0. Box 30095
Lansing, MI 48909
Canada
Customer Assistance Center
General Motors of Canada Limited
1908 Colonel Sam Drive
Oshawa, OntarioL1H 8P7
When contacting Oldsmobile, please
remember that your concern will likely
be resolved inthe dealership, using the
dealership’sfacilities, equipment and
personnel. Thatis why we suggest you
follow Step Onefirst if you have a
concern.
F
P
Customer Assistance
for the
Hearing or Speech Impaired
(TDD)
To assist owners who have hearing
difficulties, Oldsmobile has installed
special TDD (Telecommunication
Devices for the Deaf) equipment at its
Customer Assistance Center. Any
hearing or speech impaired customer
who has access to a TDD ora
conventional teletypewriter (TTY) can
communicate with Oldsmobile by
dialing: 1-800-TDD-OLDS. (TDD users
in Canada can dial 1-800-263-3830.)
1 GM Participation
inBBB
AUTO LINE- Alternative
Resolution Program*
Both Oldsmobile and your Oldsmobile
dealer are committed to malting sure
you are completely satisfied with your
new vehicle.If a situationarises where
you feel yourconcern has not been
adequately addressed, our experience
has shown that theCustomer
Satisfaction Procedure described earlier
in this section is very successful at
resolving problems.
There may be instances where an
impartial third-party can assist in
arriving at a solution to a disagreement
regarding vehiclerepairs or
interpretation of the New Vehicle
Limited Warranty. To assist in resolving
these disagreements Oldsmobile
voluntarily participates in BBB AUTO
LINE.
BBB AUTO LINE isan out-of-court
program administered by the Better
Business Bureau systemto settle
disputes between customers and
automobile manufacturers. This
program is availablefree of charge to
customers who currently own orlease a
GM vehicle.
If you are not satisfied after following
the Customer Satisfaction Procedure,
you may contact the BBB using the tollfree telephone number, or write them at
the following address:
BBB AUTO LINE
Council of Better Business Bureaus
4200 Wilson Boulevard
Suite 800
Arlington, VA 22203
Telephone: 1-800-955-5100
To file a claim, you will be askedto
provide your name and address,your
vehicle identification number(VIN),
and a statementof the nature of your
complaint. Eligibility is limited by
vehicle age and mileage, and other
factors.
We prefer you utilize the Customer
Satisfaction Procedure before you resort
to AUTO LINE, but you may contact
the BBB at any time. The BBB will
attempt to resolve the complaint serving
as an intermediary between you and
Oldsmobile. If this mediation is
unsuccessful, an informal hearing will
be scheduled where eligible customers
may present their case to an impartial
third-party arbitrator.
The arbitrator will make a decision
which you may accept or reject.If you
accept the decision, GM will be bound
by that decision. The entiredispute
resolution procedure should ordinarily
1
255
CustomerAssistance Infomultion
service, locate the nearest Oldsmobile
dealership, take your request for an
Oldsmobile computerized trip routing
or simply answer any questions the
Oldsmobile driver mayhave about the
coverage providedby your Oldsmobile
Roadside Assistance Program. The
Oldsmobile RoadsideAssistance
number is fully staffed and operational
24 hoursa day, 365 days a year.
Oldsmobile Roadside
Who is Covered?
Assistance Program Features Oldsmobile RoadsideAssistance covers
all 1994 Oldsmobile vehicles.';
& Benefits
Coverage is for the Oldsmobile vehicle,
The Oldsmobile Roadside Assistance
?rogram means help is just a toll-free call
iway-24 hours a day, 365 days a year.
2ourteous and capable Customer
4ssistance Advisors are on-call to
xovide you with prompt assistance.
24-Hour O/cismobi/e Roadside
4ssistance Number
1-800-442-OLDS (6537) is the one
lumber to call for assistance in the
Jnited States. Trained Customer
gssistance Advisors, on-call to render
tssistance to Oldsmobile drivers, can
Jispatch roadside assistance and towing
regardless of the driver, and is
concurrent with the Bumper-to-Bumper
warranty period.
Oldsmobile reservesthe right to limit
services or reimbursement to anowner
or driverwhen in Oldsmobile's
judgement the claims become excessive
in frequency or type of occurrence.
e Vehicles sold in Canada have a separate
roadside assistance program, as described later in
this section.
Canadian Roadside Assistance
Vehicles purchased in Canada havean
extensive Roadside Assistance program
accessible from anywherein Canada or
the U.S.A. Please refer to the separate
brochure provided by the dealer or call
1-800-268-6800for emergency services.
Service Publications
Information on how to obtain Product
Service Publications, Subscriptions and
Indexes and Service Manuals as
described belowis applicable onlyin the
fifty U S . states (and the District of
Columbia) and only for cars and light
trucks with GVWR less than 10,000
pounds (4 536 kg).
In Canada, information pertaining to
Product Service Bulletins and Indexes
can be obtained by writing to:
General Motors of Canada Limited
Service Publications Department
1908 Colonel Sam Dr.
Oshawa, Ontario L l H 8P7
257
CustopnerAssis~neeInfomtion
Toll-Free Telephone Number
Oldsmobile Service Manuals
If you want an ordering form for an
index or a subscription, justcall tollfree and we’ll be happy to send you one.
Automated recording equipment will
take your name and mailing address.
The number to call is 1-800-551-4123.
For Service Manual costs and ordering
information call 1-800-551-4123.
Copies at Participating Dealers
Copies of Indexes and PSP’s are at your
participating Oldsmobile dealer. You
can ask to see them.
A VERY IMPORTANT REMINDER:
These PSP’s are meant for technicians.
They are not meant for the “do-ityourselfer.” Technicians have the
equipment, tools, safety instructions,
and know-how to do a job quicldy and
safely.
1
259
Product Service Publication Ordering Informution
Oldsmobile Division service
publications are intended for use by
professional, qualifiedtechnicians.
Attempting repairs or service without
the appropriate training, tools, and
equipment could cause injury to you or
others and damage to your vehicle that
may cause it not to operate properly.
Available publications include Service
Manuals, Product Service Publication
indexes, quarterly and model year PSP’s
and binders. For 1994 Product Service
Publication pricing information and
orders call 1-800-551-4123.
260
261
Notes
262
Anti-Theft Tips ................................... 48
A B S Warning Light ......................... 95 Appearance Care .............................. 214
Accessory Power Outlets ................... 81 Armrest. Storage .......................... 79. 80
Adding
Ashtrays & Lighter ............................ 80
Brake Fluid .................................... 204 Audio Systems.................................. 121
Electrical Equipment ............. 121. 221
AM/FM Stereo Radio .................... 122
Engine Coolant ...................... 169. 171
AM/FM Stereo Radio with ATC.
Engine Oil.............................. 192. 198
Cassette Tape Player ................... 124
Power Steering Fluid ..................... 203
AM/FM Stereo withATC.
Sound Equipment .......................... 121
Cassette Tape and Compact
Transaxle Fluid .............................. 200
Disc Player .................................. 128
Windshield Washer Fluid .............. 203
Care of Audio Systems .................. 133
Air Bag (see Supplemental
Radio Reception, For the Best ...... 132
Restraint System)
Setting the Clock ........................... 121
Air Bag Readiness Light .................... 23
Steering Wheel Touch Controls .... 132
Air Cleaner Filter ..................... 195, 227 Automatic Electronic Climate
Air Conditioner ........................ 112, 117
113
Control ...........................................
Alcohol, DrivingUnder the
Automatic Transaxle .......................... 55
Influence of .................................... 136
Adding Fluid .................................. 200
Alcohol in Gasoline.......................... 185
Checking Fluid ............................... 198
Aluminum Wheels
Shifting.............................................
56
Cleaning ......................................... 2 18
Removing ....................................... 176 B a t t e v ...........................................
206
Antenna
Jump Starting ................................. 161
Fixed ..............................................
134
Warning.......................................... 206
Power .............................................
134 Battery Warning Light
Antifreeze ......................................... 200
Electronic ....................................... 101
Anti-Lock Brake System (ABS) ...... 139
Standard ......................................... 100
Anti-Lock Brake System
Blizzard .............................................
153
Warning Light.................................. 95 Block Heater, Engine ......................... 54
Blowout. Tire.................................... 173
Brake
Adjustment .................................... 205
Fluid ............................................... 204
Master Cylinder ............................. 204
Parking ............................................. 60
Pedal Travel ................................... 205
Warning Light............................94. 95
Wear Indicators-Front Brakes .... 204
Brake System WarningLight ............. 94
Brakes. Anti-Lock............................ 139
Warning Light..................................95
Braking ............................................. 138
Braking in Emergencies ................... 141
Braking Technique ........................... 138
Break-In. New Vehicle............... 52. 155
Buckling Up (see Safety Belts)
Bulb Replacement
Headlight ............................... 206. 229
Taillight .................................. 207, 229
Bulbs, Replacement.......................... 229
Capacities & Specifications.......... 226
Carbon Monoxide in
Exhaust .............................. 63, 64, 153
Cassette Tape Player
(see Audio Systems )
Center Passenger Position .................27
Chains, Tire .............................. 180, 214
Changing a Flat Tire ......................... 173
263
Index
Change Oil Reminder....................... 105
Change Oil Soon Message ............... 105
Checking
Brake Fluid ....................................204
Engine Coolant ...................... 169, 201
Engine Oil Level.................... 192, 198
Power Steering Fluid ..................... 203
Restraint Systems ............................ 40
Transaxle Fluid .............................. 198
Check Oil LevelWarning
Light ....................................... 100, 113
Chemical Spotting ............................ 220
Child Restraints .................................. 31
Child Security Locks .......................... 46
Children and Safety Belts............ 30, 38
Cigarette Lighter ................................ 80
Circuit Breakers & Fuses .................221
City Driving ...................................... 148
Cleaner, Air .............................. 195, 227
Cleaning
Aluminum Wheels ......................... 218
Cassette Player............................... 132
132
Compact Discs ...............................
Fabric ............................................. 215
217
Glass ..............................................
Inside of Your Oldsmobile............ 215
Leather and Vinyl .......................... 216
Outside of Your Oldsmobile ......... 217
Power Antenna .............................. 134
264
Proper Mixture to Use ...................200
Safety Belts.................................... 217
Safety Warnings
Special Problems ........................... 216
About ..................168. 169. 170. 200
Top of the Instrument Panel .........216
Temperature Gage ..................... 92. 93
Underbody Maintenance...............219
Temperature Warning Light...... 92. 93
Vinyl and Leather .......................... 216
Warnings................ 214, 215, 219, 220 Cornering Lights ................................73
Weatherstrips.................................218 Cruise Control .................................... 69
White Sidewall Tires..................... 218 Curves. Driving on ........................... 142
Windshield and Wiper Blades.......217 Customer Assistance Information... 255
Clock, Setting the ............................. 121
Clusters, Instrument Panel .......... 86, 87 D a y t i m e Running Lights................ 73
Coin/Cup Holder................................ 79 Dead Battery: What to Do ............... 161
Comfort Controls ............................. 110 Defects. Reporting Safety ................ 256
Defensive Driving ............................ 136
Automatic Electronic Climate
113 Defogger, RearWindow ........... 112. 118
Control ........................................
Four Season Climate Control ....... 110 Door Locks .........................................43
Passenger Temperature Control ..#118 Downshifting .............................. 59. 151
Rear Outlets ................................... 119 Driver Information System .............. 100
Steering Wheel Touch Controls .... 119 Driver Position ................................... 18
Ventilation, Flow-Through ........... 120 Driver’s Side SRS (“Air Bag”) .......... 22
Driving ..............................................
135
Compact Disc Player
At Night .........................................
145
(see Audio Systems)
City .................................................148
Compact Spare Tire ......................... 180
Controlling a Skid .........................
144
Compass ............................................. 76
Defensively .................................... 136
Convenience Net ................................ 51
Drunlten ......................................... 136
Convex Mirror, Outside..................... 77
Foreign Operation ......................... 186
Coolant ............................................. 200
149
Freeway ..........................................
Checking &
Hill and Mountain Roads .............. 150
Adding ........ 169, 171,201,226,228
a
.
In a Foreign Country .....................
186 I Change Oil Soon Message ............ 105 I Oil .......................................... 194. 227
Check Level Warning Light.... 99. 100 Finish Care ....................................... 217
In Rain ...........................................
146
Checking & Adding ....................... 198 Finish Damage .................................. 219
149
Long Distance ................................
Disposing of Used Oil ................... 195 Flashers, Hazard Warning ............... 160
Loss of Control .............................. 144
Energy Conserving......................... 193 Flat Tire ............................................ 173
On Curves ...................................... 142
Starburst ........................................ 193 Flooded Engine................................... 54
Passing ........................................... 143
Supercharger.................................. 198 Fluid
Through Deep Standing Water ....... 54
Brake ......................................
204, 228
Winter Driving ............................... 151
Warning Light ........................ 100. 105
.
.
Capacities....................................... 226
When to Change ............................ 194
With aTrailer ................................. 157
Drunken Driving .............................. 136 Engine Overheating ......................... 167
Power Steering .............. 202, 226, 228
Engine Specifications....................... 227
Transaxle ....................... 198, 226, 228
Engine. Starting.................................. 53
Windshield Washer ......... 67, 203, 228
Electrical Equipment,
Adding .................................... 121, 221 Ethanol in Gasoline.......................... 186 Fluids & Lubricants ......................... 228
Foreign Material ............................... 219
Electrochromic Day/Night Mirror ..... 76 Exhaust
Dangerous Gas in .............. 63. 64. 153 Foreign Operation ............................ 186
Electronic Cluster ............................... 87
Emergencies, Braking in .................. 141
Parking with the Engine
Four Season Climate Control .......... 110
Running ................................... 62. 64 Freeway Driving ............................... 149
Emergencies on the Road ................ 159
Emergencies, Steering in.................. 142 Expectant Mothers. Use of Safety
French Language Manual ....................2
185
Belts ................................................. 27 Fuel ...................................................
Emergency Starting .......................... 161
Alcohol in Fuel .............................. 185
Emergency Towing...........................
164 Expressway Driving......................... 149
Capacity .........................................
Engine Block Heater .......................... 54 Extender. Safety Belt ......................... 40
187
Exhaust Warnings ............. 63, 64, 153
Engine Coolant ......................... 169, 17 1 Exterior Appearance
Filling Your Tank ..........................
(see Appearance Care )
Engine Coolant Heater ...................... 54
187
Engine Coolant Temperature
Foreign Countries .......................... 186
Fuels with Alcohol ......................... 185
F a b r i c Cleaning
Warning Light (see Coolant)
(see Appearance Care )
Engine Exhaust .................................. 63
Gage ........................................... 91, 92
Engine Identification ........................ 220 Fan Warnings ........................... 169. 189
Low, Warning Light .................. 91, 92
Engine Oil ......................................... 192 Filling the Fuel Tank........................ 187
Requirements ................................. 185
Fuse Panel ................................ 222, 223
194
Additives ........................................
Capacities & SDecifications .......... 226
1
Cleaner ............................ 195. 227 Fuses & Circuit Breakers................. 221
265
G
age Cluster ............................. 86, 87
Gages
Coolant Temperature ...................... 93
Fuel ............................................ 91, 92
Speedometer.............................. 88, 89
Tachometer ...................................... 91
Gasoline............................................185
Gasoline Tank, Filling Your ............ 187
Gear Positions
(see Shifting the Transaxle )
Gearshift Lever
(see Shifting theTyansaxle )
Glove Box ........................................... 52
H a l o g e n Bulb Replacement ......... 206
Hazard Warning Flashers ................ 160
Headlight & Taillight, Removing
and Replacing ........................ 206, 207
Headlights
* . ..........................................72
Aiming............................................207
High-Low Beam Changer................ 67
... 74
Instrument Panel Intensity Control
On” Reminder ................................ 72
Operation ......................................... 67
Replacement Bulb.......................... 229
Torx* Screws ................................ 207
Wiring ............................................ 225
Head Restraint ...................................14
Heater (see Comfort Controls)
((
266
Manual Day/Night .......................... 75
Heater. Engine Coolant ..................... 54
High Beams ................................ 67. 146 Instrument Panel ..........................83. 85
Highway Hypnosis........................... 150 Instrument Panel Clusters........... 86. 87
Hill and Mountain Roads ................ 150 Instrument Panel Intensity Control..... 74
Hood Release ...................................
188 Instrument Panel Warning Lights ..... 88
safety Warning .............................. 189 Intensity Control ................................74
Warning. Overheated Engine... 167. 189
Horn ....................................................64 ,,&ck. Tire ........................................ 174
Jump Starting................................... 161
Hot Engine, Safety
Warnings................ 168, 169, 170, 200
K e y s ................................................. 42
How the Anti-Lock Brake System
Works ............................................. 139
Hydroplaning.................................... 147 L a n e Change Indicator ................... 66
Lap-Shoulder Safety Belt
Front ................................................ 18
Identification Number, Vehicle ..... 220
Rear .................................................. 29
Idling Your Engine............... 62, 64, 119
Use by Children ......................... 30, 38
If You’re Stuck: In Sand, Mud,
Ice or Snow.................................... 181 Lighter ................................................ 80
Lights
Ignition
Bulb Messages...............................229
Key ................................................... 42
Cornering ......................................... 73
Switch Positions..............................
52
Daytime Running Lights ................. 73
Illuminated Entry ............................... 50
Headlights ........................................72
Indicator Lights (seeWarning Lights)
On” Reminder................................ 72
Infant Restraint (seeChild Restraints)
Operation .........................................67
Inflatable Restraint............................. 22
Reading ............................................ 74
Inflatable Restraint Warning Light.... 23
Removing & Replacing Bulbs... 206, 207
Inflation, Tires .................................. 210
Replacement Bulbs ........................ 229
Inside Rearview Mirror
Taillights
.......................................... 72
Electrochromic................................. 76
Turn Signal ......................................66
Electrochromic withCompass ........ 76
(6
Underhood .....................................
Warning Lights .............................. 101
Loading Your Vehicle...................... 208
Locks .................................................. 43
Locks, Programmable Automatic ...... 44
Locks, Remote Control ...................... 45
Locks. Security................................... 46
Long Distance Driving ..................... 149
Low Battery .............................. 100. 101
Low FuelWarning........................ 91. 92
Low Oil LevelWarning .............. 99. 100
Low Washer FluidWarning ............... 98
Lubricants and Fluids ...................... 228
M a i n t e n a n c e Record ................... 249
Maintenance Schedule ..................... 233
Malfunction Indicator Lamp ............. 98
Manual Front Seat ............................. 12
Maxifuse/Relay Center .................... 225
Methanol in Gasoline ....................... 186
Mileage Indicator
(see Odometer G Speedometer)
Mirrors
Inside Electrochr i c Rearvlew
with Compass................................ 76
Inside Manual Rearview.................. 75
Manual Remote Control ..................78
Outside Convex ............................... 77
Power RemoteControl .................... 78
~
Visor Vanity..................................... 79
Mountain Driving ............................ 150
N
et. Convenience
New Vehicle Break-In
............................ 51
................52. 155
Night Driving ................................... 145
O c t a n e Requirements
(see Fuel Requirements )
Odometer & Speedometer
Electronic ................................... 89. 90
Standard .................................... 88. 89
Off-Road Recovery ........................... 143
Oil. Engine........................................
192
Additives ........................................ 194
Capacity ......................................... 226
Change Oil Reminder .................... 105
Check Oil Light....................... 99, 100
Checking and Adding ............ 192, 198
Disposing of Used Oil ...................195
Pressure Warning ............................ 99
Quality ........................................... 193
Starburst ........................................ 193
198
Supercharger..................................
Thickness ....................................... 193
Warning Light.......................... 99, 100
When to Change ............................ 194
Outside Rearview Mirrors ........... 77, 78
Overdrive, Automatic ........................ 59
Overheated Engine ........................... 167
Warnings ................................ 168. 169
Overheated Engine Coolant
Warning ......................... 168. 169. 200
Owner Checks & Services ............... 242
R r k ................................................... 56
Shifting Into ..................................... 61
Shifting Out of ................................. 62
Parking
On Hills .......................................... 158
Over Things That Burn ................... 63
With the Engine Running................ 64
Parking Brake ..................................... 60
PASS-I<ey@II System......................... 48
Passenger Belts (see Safety Belts)
Passenger Temperature Controls .....118
Passing .............................................. 143
Polishing and Waxing
(see Appearance Cave )
Power Antenna ................................. 134
Power Door Locks ............................. 44
Power Mirrors .................................... 78
Power Seat .......................................... 12
Power Seat Controls .......................... 12
Power Steering ......................... 142, 202
Power Steering Fluid ....... 202,226, 228
Power Windows......................... 65, 225
267
R
Ii
R
R
R
R
R
R
-?
R
R
I
142
Replacement Parts ......................... 227
Service Publications ......................... 257 I Tips ................................................
Service Station Information ............272 Steering Wheel. Tilt............................ 64
Service Parts Identification Label .. 220
Servicing YourAir Bag-Equipped
Vehicle Identification Number
Steering Wheel Touch Controls
Oldsmobile....................................... 26
Audio System ................................ 132
(VIN) ...........................................220
Setting the Clock ..............................
121
Climate Control ............................. 119 Temperature Warning ..................92. 93
Setting the Trip Odometer ........... 89, 90 Stereo Sound Systems
Theft-Deterrent System ..................... 48
Sheet Metal Damage........................ 219
Thermostat ....................................... 202
(see Audio Systems)
Shifting Into P (Park) ........................ 61 Storing Your Vehicle........................ 206 Tilt Steering Wheel ............................. 65
Shifting out of P (Park) ..................... 62 Storage
Time. Setting the .............................. 121
Shifting the Automatic Transaxle ..... 56
Armrest ............................................ 79 Tires .................................................. 209
Signaling Turns .......................... 66, 157
Coin/Cup Holder ............................. 79
173
Blowout ..........................................
Sltidding............................................ 144
Convenience Net ............................. 50
Buying New ................................... 212
Snowstorm, If You’re Caught in a ... 153
Glove Box ........................................ 52
180, 214
Chains ....................................
Sound Equipment, Adding .............. 121 Sun Visors .......................................... 78
Flat, Changing ............................... 173
Sound Systems (seeAudio Systems)
Sunglasses Storage ............................. 75
Inflation ......................................... 210
Spare Tire, Compact ........................ 180 Supercharger Oil .............................. 198
Inspection 2% Rotation ...................211
Specifications & Capacities ............. 226 Supplemental Restraint System
Loading .......................................... 210
(SRS) ............................................... 22
Speed Control (see Cruise Control)
Pressure ......................................... 210
Light ................................................. 23
Speedometer & Odometer ........... 88, 89
Quality Grading ............................. 212
SRS (Supplemental Restraint
Spare, Compact ............................. 180
Servicing Oldsmobiles with SRS.... 26
System) ............................................22
Wear Indicators ..................... 211, 212
Servicing Oldsmobiles with
achometer ....................................... 91
Wheel Alignment & Tire Balance ... 213
SRS ................................................ 26 Tape Player (see Audio Systems)
Wheel Replacement ....................... 213
Stains, Removing ..................... 215, 216 Technical Facts & Specifications
When to Replace Wheels ...............213
Starting your Engine.......................... 53
Bulbs .............................................. 229
Winter Driving ............................... 152
Starting Your Vehicle if the Battery
Electrical Equipment,
Top Strap ............................................ 32
is “Dead” (seeJump Starting)
Add-on ............................... 121, 221 Torque Lock ....................................... 62
Steering
Engine Specifications.................... 227 Towing a Trailer ............................... 154
In Emergencies .............................. 142
Fluid Capacities & Types ...... 226, 228
New Vehicle Break-In ................... 155
Off-Road Recovery ........................ 143
Fuses & Circuit Breakers .............. 221
Parking on Hills ............................. 158
T
269
J.
. . . ..
;..I
271
Service Station rrtfomtion
Hood
Battery
Re’e
The Delco Freedom@ batteryneeds
no water. See Page 206
See Page 188
Cooling System
Check and add coolant only at the
coolant recovery tank. Thefluid should
be at or a little above the FULL HOT
mark when the engine is warm. If the
engine is cool, the level should be
between the FULL COLD and FULL
HOT marks.
See Page 200
INI
I
Spare Tire Pressure
Compact Spare: 60 psi (420 kPa)
See Page 180
272