1
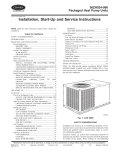
BURFORD CORP.
®
SERVICE MANUAL
FOR YOUR
BURFORD TOPPER
MODEL 9200 or 9300
MODEL #__________
SERIAL #__________
WIRING DIAGRAM__________
DATE: March 3, 2003
COPYRIGHT 1994-2003 by BURFORD CORP.
MANUAL PART No. A05501C
SAFETY PRECAUTIONS
AS BURFORD CORP. STRIVES TO PROMOTE SAFETY IN THE MAINTENANCE
AND OPERATION OF BURFORD EQUIPMENT, WE REQUEST THAT THE
FOLLOWING SAFETY FEATURES BE FOLLOWED, ALONG WITH ANY
ADDITIONAL SAFETY PROCEDURES SET BY THE CUSTOMER’S IN-PLANT
SAFETY OFFICERS OR LOCAL CODES.
1.
Read manual completely before attempting installation or operation of this
unit.
2.
Incoming electrical power must be properly shielded, routed, and
grounded. All safety codes should be followed and only qualified personnel
should attempt wiring terminations. Study wiring diagrams before
attempting installation.
3.
Disconnect power to equipment before removing any guards or covers.
Replace guards or covers before resuming operation of the unit.
4.
Loose clothing, jewelry and long hair should be considered a safety hazard
around mechanical equipment. Ensure that they will not be entangled in the
equipment.
5.
Do not bypass safety switches.
6.
Do not attempt repairs while equipment is running.
7.
Use only original equipment parts designed to safely operate in the
equipment.
8.
Only authorized personnel should be allowed to operate or perform
maintenance on the unit.
9.
The equipment should only be used for the purpose for which it was sold,
and should not be modified in any way without notifying the General
Manager of Burford Corporation in writing of the modification.
ii
DISCLAIMER
The descriptions contained in this Service Manual were in effect at the time this
manual was approved for printing. Our policy is one of continuous improvement,
and we do hereby reserve the right to discontinue models at any time, or to
change specifications, prices, or designs without notice and without incurring
obligations.
Burford Corp. expressly disclaims any liability for damages and/or injuries
caused as a result of negligence or misuse of its product. Such negligence or
misuse includes, but is not limited to the removal of guards, or faulty wiring due
to improper installation.
iii
TABLE OF CONTENTS
SAFETY PRECAUTIONS........................................................................................................................................... ii
DISCLAIMER............................................................................................................................................................. iii
TABLE OF CONTENTS............................................................................................................................................iv
1.0
INTRODUCTION ......................................................................................................................................... 1-1
1.1
BASIC IDENTIFICATION....................................................................................................................... 1-1
2.0
THEORY OF OPERATION ......................................................................................................................... 2-1
2.1
MAIN CONTROL ELECTRICAL PANEL.............................................................................................. 2-2
3.0
INSTALLATION PROCEDURES ............................................................................................................... 3-1
A. UNPACKING PROCEDURE FOR UNITS TO BE INSTALLED ON EXISTING CONVEYOR. ............ 3-1
B. DETERMINING LOCATION ...................................................................................................................... 3-2
C. UTILITY REQUIREMENTS........................................................................................................................ 3-3
D. TOPPER INSTALLATION .......................................................................................................................... 3-3
E. UTILITY INSTALLATION.......................................................................................................................... 3-4
F. ACCESSORY INSTALLATION.................................................................................................................. 3-4
4.0
SETUP PROCEDURES ................................................................................................................................ 4-1
4.1
WATER SPRAY SYSTEM....................................................................................................................... 4-1
4.2
PRODUCT SENSORS .............................................................................................................................. 4-4
4.3
SETUP PROCEDURES FOR SEED-SAVINGS ON THE BURFORD TOPPER ................................... 4-8
4.4
HOPPER.................................................................................................................................................... 4-8
4.4.1
HOPPER AGITATOR....................................................................................................................... 4-9
4.4.2
HOPPER VIBRATOR....................................................................................................................... 4-9
4.4.3
MANDREL ROTATION .................................................................................................................. 4-9
4.4.4
DEFLECTOR BAR ......................................................................................................................... 4-10
5.0
STARTUP PROCEDURES........................................................................................................................... 5-1
6.0
TROUBLESHOOTING ................................................................................................................................ 6-1
7.0
RECOMMENDED SPARE PARTS LIST.................................................................................................... 7-1
8.0
PREVENTIVE MAINTENANCE ................................................................................................................ 8-1
9.0
ASSEMBLY DRAWINGS / PARTS LIST................................................................................................... 9-1
9.1
FRAME AND HOPPER ASSEMBLY ..................................................................................................... 9-1
9.2
TRIGGER ASSEMBLY, PROXIMITY LIMIT........................................................................................ 9-5
9.3
WATER SPRAY NOZZLE....................................................................................................................... 9-8
9.4
PNEUMATIC COMPONENTS .............................................................................................................. 9-10
9.5
HOPPER, AGITATOR 40”..................................................................................................................... 9-12
9.6
DEFLECTOR ASSEMBLY .................................................................................................................... 9-14
iv
1.0 INTRODUCTION
The Burford Rotary Toppers have been designed to apply poppy, sesame, cracked
wheat, bran, rough salt and other similar ingredients, that have been factory approved.
The unit that you received was manufactured to apply only the ingredients that were
specified on your order. Your topper was factory tested with topping, into the pans that
were furnished to us from your company.
The following pages contain installation, operation and maintenance instructions. To
ensure maximum performance, these instructions should be followed with care.
1.1
BASIC IDENTIFICATION
Right Hand Unit Shown
1-1
2.0 THEORY OF OPERATION
As the conveyor is started, and the pan is placed on it, it travels toward the water spray
and topper.
The pan first encounters a proximity sensor. Once the cup has actuated the proximity
sensor, an electrical signal is sent to the air valve to transfer air to the upper portion
(black hose) of the nozzle. This air pulls the connecting pin upward to open the valve on
the nozzle and allows the water to spray out. Once the signal is gone, the internal spring
returns the valve to the “OFF” position and the water sprays stop until the signal is sent
by the following cup.
The pan now travels downstream a little further, where it encounters another proximity
switch. This is located under the conveyor in order to sense each cup of the pan. Once
the cup has covered the proximity switch, an electrical signal is sent to the clutch valve
to transfer air to the air clutch and begins to drive the mandrel. As the mandrel rotates,
the topping is dispensed from the hopper onto the dampened product. The DC control
motor controls the amount of topping dispensed in relation to the conveyor speed.
Once the cup has traveled off the proximity switch, the air clutch disengages the
mandrel and the topping stops until the next cup travels over the proximity switch.
2-1
2.1
MAIN CONTROL ELECTRICAL PANEL
REF
ITEM
DESCRIPTION
1
2
3
4
5
6
7
8
9
10
11
12
13
14
15
16
17
18
19
Power On Light
Start Switch
Stop Switch
Topper Jog
Hopper Selector
Proximity Sensor Selector
Water Spray Selector
Seeder Agitator
Conveyor Switch
Auto-Fill Switch
Low-Level Alarm Switch
Vibrator Switch
Water Splitter Jog
Water Splitter Selector
Mandrel Rotation
Main Disconnect
Audible Alarm
Speed Control
Stop/Run
Indicates electrical power to topper and spray system.
Supplies electrical power to unit to begin operation.
Stops incoming power to topper and spray system.
Depress to manually engage clutch to test topper coverage.
“Load Position” is normal operating position.
Turns topper proximity system “ON” or “OFF” only.
Turns water spray system “ON” or “OFF” only.
(IF EQUIPPED) Turns the topping agitator inside the hopper “ON” or “OFF”.
Turns conveyor drive motor “ON” or “OFF”.
(IF EQUIPPED) Controls power to Burford Auto-Fill system.
(IF EQUIPPED) Enables auto-fill alarm system.
(IF EQUIPPED) Controls power to Burford Hopper Vibrator system.
(IF EQUIPPED) Depress to manually turn “ON” splitter valves.
(IF EQUIPPED) Controls power to water splitter.
(IF EQUIPPED) Controls direction of mandrel rotation.
Controls incoming power to unit.
Signals operator when alarm condition occurs.
Controls the density of the topping in relation with conveyor speed.
Controls power to DC motor.
2-2
3.0 INSTALLATION PROCEDURES
The Burford Rotary Topper was shipped to you completely assembled. Partial
disassembly is required before the actual mounting. The disassembly of the unit should
be done carefully to prevent damage to the unit.
A.
UNPACKING PROCEDURE FOR UNITS TO BE INSTALLED ON
EXISTING CONVEYOR.
1. Uncrate the topper and set upright onto the packing crate cushions.
Keep the shafts below the lower cross frame cushioned.
2. Loosen and remove the bolts that hold the upper cross frame to the
uprights and carefully lay aside. You should now have two separate
assemblies of the topper. Remove pan sensor truck assembly.
3. Locate the four (4) mounting brackets, nuts and bolts in the Installation kit.
Fig. 3
3-1
3.0
INSTALLATION PROCEDURES (cont’d)
B.
DETERMINING LOCATION
CONVEYOR REQUIREMENTS:
1. The conveyor used should have at least 60 inches of free length. This distance should be
measured from the conveyor sides only, since some conveyor chains extend past the
conveyor sides.
2. The sides of the conveyor should be free of any interference from bolts, conduit, motors,
shafts, junction boxes, guarding, support members, etc.
3. The underside of the conveyor should also be clear of the interference’s listed above in
number 2.
4. The top of the conveyor should be an open style, so the actuation switches are free to
move from side to side, upstream and downstream.
5. Pan guides must be used to keep the pans straight when traveling through the topper. The
guides should not extend more than 1 1/2 inches above the top of the pan.
6. The conveyor chosen should not allow the pans to stop, turn, or back-up.
7. Area around the topper installation site should be clear of any obstructions and the topper
shall not be installed in such a way as to create a safety hazard, or block a normal passage
way. Clearance must conform to all local safety codes.
8. Installation site should have ample clearance on operator control side for:
A. Easy access
B. Removal of mandrel
C. Normal maintenance
Consideration must be made for the possibility of product storage near installation site.
3-2
3.0
INSTALLATION PROCEDURES (cont’d)
C.
UTILITY REQUIREMENTS
NOTE: This information is for standard toppers. See wiring diagram supplied with the topper in
the event your machine was a custom order, has other voltage or special circumstance.
1. Air - 80 psi
2. Water - 50 psi
3. Electricity - 110 volt, 1 phase, 60 cycle.
D.
TOPPER INSTALLATION
Measure the width of the conveyor and then bolt the four (4) mounting brackets onto the lower
cross frame in the corresponding mounting holes. If the exact distance cannot be obtained, then
spacers, between brackets and conveyor frame may be used.
With the mounting brackets in place, slide the lower cross frame under the conveyor and raise
upward until the top of the cross frame is 3/4 of an inch from touching the conveyor frame. The
holes in the mounting brackets are ready to be marked and drilled. The lower cross frame can
now be held up and bolted on.
After the lower cross frame is in place, the hopper and upper cross frame can be bolted on the
uprights, on each side of the lower cross frame.
Fig. 4
NOTE: When mounting hopper, use extreme care so as not to damage the tube of the hopper.
3-3
3.0
INSTALLATION PROCEDURES (cont’d)
E.
UTILITY INSTALLATION
A qualified electrician must make all electrical hook-ups and must be incorporated into a
suitable service with all safety requirements and compliance to local codes.
F.
ACCESSORY INSTALLATION
Once the topper is mounted in place, the control boxes, water regulator and air filter can
be mounted. The location is at your option, such as the conveyor, wall, post, etc. The
operators control box should be mounted so the operator can have easy access to the
controls.
3-4
4.0
SETUP PROCEDURES
4.1 WATER SPRAY SYSTEM
1. NOZZLE HEIGHT:
The nozzle height should be set approximately 2 - 3 inches above the product. This
distance may change for your particular product. The proper height can easily be
determined by the first few pans run through.
The height can be raised or lowered by the use of the two control knobs, located on either
side of the uprights.
CAUTION: DO NOT LIFT UP ON NOZZLE MOUNT ARM TO MAKE ADJUSTMENTS
AS THIS WOULD CAUSE THE ADJUSTMENT TEETH TO DISENGAGE
AND POSSIBLY DAMAGE THE ARM AND NOZZLES.
Fig. 6
4-1
4.0
SETUP PROCEDURES (cont’d)
2. NOZZLE POSITION
The position of the nozzles should be set so the spray is directly over the cups in the pan.
All the nozzles should be set in a direct line with one another. The nozzles can easily be
moved by the use of the T-handle lock on each nozzle. (See figure on page 5-4 for Thandle location.)
3. NOZZLE DAMPNESS OUTPUT
The degree of dampness obtained on the product will be determined by the number of
nozzles used, water pressure, and orifice size used in each nozzle.
3a. Each nozzle has its own manual cut off and should be used accordingly to the number of
cups in the pan.
3b. The recommended pressure settings are 40 psi for water and 60 psi for air, minimum.
Fig. 7
4-2
4.0
SETUP PROCEDURES (cont’d)
3c.
The orifice size of each nozzle as it came from factory is .012. This size should be
sufficient for your product, but larger or smaller sizes may be obtained if needed. (See
drawing C03245 for part numbers)
Fig. 8
4-3
4.0
SETUP PROCEDURES (cont’d)
4.2
PRODUCT SENSORS
1.
Mount the switch arm support bracket to the adjusting bracket of the lower cross
frame, so the window of the switch arm is ¼ of an inch above the conveyor chain.
For fine adjustments, loosen screws on the height
adjustment plate and move up and down in slot as
required, then re-tighten.
For large adjustments, loosen the height adjustment
mounting screws and slide the entire arm assembly
up and down into a different set of mounting holes
as required and re-tighten.
Fig. 9
2.
Set forward and back adjustment knob to center position. Switch arm should be
able to move forward and back ±2 inches.
Fig. 10
4-4
4.0
SETUP PROCEDURES (cont’d)
FOR CONVEYOR SPEEDS OF 80 FEET PER MINUTE OR LESS
3.
The measurement from the centerline of the spray nozzle tips* or hopper, to the
first micro switch should be ¾ of an inch. Adjust the arm forward or back by
loosening the arm adjusting screws and sliding the arm, re-tighten and check the
¾ of an inch dimension.
NOTE:
This setting is for initial setup only and for a conveyor speed of
approximately 80 feet per minute, with the hopper approximately three
(3) inches above the conveyor chain.
*These figures will change due to the increase or decrease of conveyor speed and
the height of the hopper.
Fig. 11
1. Water Spray Actuator – The limit switch is independently adjustable upstream or downstream
in order to obtain the correct starting and stopping point of the water
spray.
2. Actuator Arm – The arm can be raised or lowered in order to make the switch more or less
sensitive.
4-5
4.0
SETUP PROCEDURES (cont’d)
Fig. 12
4-6
4.0
SETUP PROCEDURES (cont’d)
SWITCH SENSITIVITY
5. The sensitivity of each proximity switch may be regulated by raising or lowering the
proximity switch as it sits in its holder.
When running pans with cups, that only have a small distance between each other, it
may be necessary to lower the proximity switch in order to sense each separate cup or
offset as shown below.
Fig. 13
4-7
4.0
SETUP PROCEDURES (cont’d)
4.3
SETUP PROCEDURES FOR SEED-SAVINGS ON THE BURFORD TOPPER
1.
4.
5.
The first step is to place the pan below the hopper and set the pan guides so there is No more
than ¼” of gap on the side and also that the pan is square beneath the pattern mandrel.
As shown in the diagram on page 5-11, confirm that the proximity switch is at the top of its
adjustment.
Next, offset the proximity switch as shown at on page 5-11 approximately ¼” – 3/8” behind
the centerline of the pan by using the adjustment handle on the operator side of the topper
base.
The hopper should be approximately 2” – 3” above the product to be topped.
Also note the Dump Valve can be removed from the clutch for quicker response.
4.4
HOPPER
2.
3.
The proper height of the hopper should be approximately 3 inches above the product. The
“vertical hopper adjustment” knob should be used to raise or lower the hopper.
Fig. 14
NOTE: This setting is for initial setup only and for a conveyor speed of 125 feet per minute.
*These figures will vary according to conveyor speed.
CAPACITY: The hopper is capable of holding approximately 60 pounds of sesame.
4-8
4.0
SETUP PROCEDURES (cont’d)
4.4.1
HOPPER AGITATOR
An optional hopper agitator is available for models which apply cracked oat, wheat, bran or other
toppings that “bridge” as the hopper empties. The agitator is turned on from the main control
panel. Once activated an air cylinder cycles the agitator rake inside the hopper to assure uniform
topping application.
Flow controls
Agitator rake
Agitator actuation cylinder
NOTE: The agitator should be set for smooth operation using the flow controls on the
agitator’s air valve. Hopper damage may result if agitator action is excessive.
4.4.2
HOPPER VIBRATOR
Some topping materials respond well to the dual vibrator. This optional equipment is attached to
the hopper wall and performs a similar function as the agitator.
NOTE: Hopper damage may result from excessive vibrator settings.
4.4.3
MANDREL ROTATION
An optional Mandrel Rotation switch may be located on the main operator panel (see section
2.1). This switch will change the direction the topping mandrel is rotating. By changing the
direction, which the mandrel is rotating, the topping’s application and appearance may improve.
This is a particular advantage when applying thin, large diameter material.
4-9
4.0 SETUP PROCEDURES (cont’d)
4.4.4
DEFLECTOR BAR
The deflector bar is available to provide optimal product coverage. With the deflector bar in the
active position, topping is dispensed by the mandrel onto the deflector bar, which allows the
topping to be applied more evenly to the product.
Locking Knob
Shown in the active position.
To change deflector bar position, unscrew locking knobs on both ends of hopper. Rotate to
desired position then securely tighten locking knobs.
4-10
5.0
STARTUP PROCEDURES
1. Set pan guides to hold pan straight during the travel under water spray and topper.
2. Check proximity switch location. Make sure cups in pan are covering switches properly.
3. Set spray nozzles to proper height.
4. Set hopper to proper height.
5. Install proper size mandrel.
6. Fill hopper with topping.
7. Close lid – Make certain lid is properly closed. (Topper will not run with lid up or
partially open).
8. Turn main power on to operator control panel. Turn main power on to DC controller.
9. Set DC controller to proper speed.
10. Turn on proximity sensor switch, water spray switch and start switch of DC controller
(and conveyor switch if used).
5-1
6.0 TROUBLESHOOTING
PROBLEM
Product not damp enough for topping to stick.
Possible Causes
Nozzles set too high from product.
Water or air pressure too low.
Nozzles not centered over cups of pan.
Nozzle tips too small.
Conveyor moving too fast.
Solutions
Decrease height.
Increase water pressure.
Re-adjust nozzles.
Order larger tips.
Slow conveyor speed.
PROBLEM
Spot spray system not activating.
Possible Causes
Water spray control switch is turned off.
Micro switches not sensing cups.
Pan guides allowing pans to turn and not
activating proximity switches.
Solutions
Check switch control.
Check switch.
Re-adjust pan guides.
PROBLEM
Nozzles not dispensing water.
Possible Causes
Water or air pressure too low.
Manual cut off closed.
Obstruction in nozzle tip.
Solutions
Increase air pressure.
Open cut off.
Clean tip.
PROBLEM
Not enough topping on product.
Possible Causes
DC controller set too low.
Hopper set too high over product.
Solutions
Speed DC controller up.
Lower hopper height.
6-1
6.0
TROUBLESHOOTING (cont’d)
PROBLEM
Too much topping on product
Possible Causes
DC controller set too fast.
Pans slowing down when going over switches.
Solutions
Slow DC controller down.
Re-adjust pan guides.
PROBLEM
Topper not activating.
Possible Causes
Proximity control switch turned off.
Proximity switches not sensing cups,
switches set too low in holder.
Pan guides allowing pans to turn and
miss proximity switch.
Solutions
Turn control on.
Raise switch height.
Re-adjust pan guide.
PROBLEM
Topping not dispensing.
Possible Causes
Air pressure too low.
Mandrel not engaged in air clutch.
Foreign material in hopper.
Pinched air line to clutch or main supply.
Solutions
Increase air pressure.
Engage mandrel.
Clean hopper.
Check and replace if necessary.
PROBLEM
Streaks showing on product.
Possible Causes
Foreign material in hopper, restricting
flow of topping
Pan guides off.
Solutions
Clean out hopper.
Re-adjust pan guides to center cups
of pan to pattern mandrel.
6-2
6.0
TROUBLESHOOTING (cont’d)
PROBLEM
Product not topped from one end to the other.
Solutions
Move proximity switch forward until coverage is obtained.
Check that proximity switches are the same height.
Raise or lower hopper.
Make sure proximity mount is able to move up and down.
Check pans for warped bottom.
6-3
7.0
RECOMMENDED SPARE PARTS LIST
QTY.
1
1
4
6
1
2
2
1
2
4
1
1
1
PART NUMBER
* A04965
A04674
C00534
* C00592
* 610678
* 959416
* C07048
C00498
* C00499
* C00579
C00005
C02125
* C07104
DESCRIPTION
Bushing
Air Clutch
Tips
Gaskets
Proximity Switch 24 vdc
Roll Pin
Fuse
Nozzle
Nozzle Repair Kit
Filter
Switch
Arm
Valve 24 vdc
*Must be kept in stock. All other parts are optional.
7-1
8.0
PREVENTIVE MAINTENANCE
We strongly recommend the following be done periodically to ensure proper performance
of the 9200 and 9300.
1. Check oil in main air supply.
2. Change water filter once a month.
3. Remove and clean nozzle tips once a month.
4. Visually inspect air and water lines. Replace when needed.
5. Clean topping out of tube at end of production run.
6. Keep proximity switch windows clean.
8-1
9.0 ASSEMBLY DRAWINGS / PARTS LIST
9.1
Quantity
2
REF
1
1
1
1
1
1
2
1
REF
REF
REF
1
1
1
1
2
1
2
2
1
1
REF
1
1
2
1
4
2
2
2
2
1
3
1
REF
REF
2
2
FRAME AND HOPPER ASSEMBLY
ITEM No.
1
2
3
4
5
6
7
8
9
10
11
12
13
14
15
16
17
18
19
20
21
22
23
24
25
26
27
28
29
30
31
32
33
34
35
36
37
38
39
40
PART No.
959418
A04640
A04648
A04658
A04659
A04660
A04661
A04662
A04670
A04673
A04674
A04678
A04681
A04679
A04691
A04692
A04698
A04699
A04730
A04732
A04671
A04734
A04735
A04747
A04752
A04755
A04756
A04757
A04764
A04767
A04768
A04770
A04772
A04773
A04774
A04779
A04780
A04783
A04784
A04785
DESCRIPTION
PIN, ROLL 3/16 DIA. X 1 1/8” LG.
COVER HOPPER A/W ASS’Y
BASE A/W ASS’Y
UPRIGHT, HOPPER
UPRIGHT, HOPPER
HOPPER ASS’Y W/ BUSHING
UPRIGHT WATER SPRAY
UPRIGHT WATER SPRAY
GEAR-BOX ASS’Y
CLUTCH SPROCKET
AIR CLUTCH
DC MOTOR
AIR CYLINDER
GEAR REDUCER 25:1
ARM A/W ASS’Y
ARM A/W ASS’Y
CLUTCH DRIVE SHAFT
SPROCKET 25-B-45
LATCH A/W ASS’Y
CHAIN GUARD DRIVE 2:1
CHAIN GUARD, CLUTCH
SHAFT NOZZLE MOUNTING
HANDLE
BRACKET VALVE MOUNTING
STEP ADJUSTMENT A/W ASS’Y
TRAY
RACK MANDREL
STOP MANDREL STORAGE
SPACER MOTOR
MOUNTING PLATE A/W, L.H.
MOUNTING PLATE A/W, R.H.
BEARING PLATE HOPPER
CHAIN GUARD 20T
CHAIN GUARD 45T
SPROCKET 20T
SCREW SWITCH ADJ.
HANDLE NUT
SCREW – HEIGHT ADJ.
NUT HEIGHT ADJ.
BEVEL GEAR – 16T
A05502 ISSUE “B”
9-1
9.1
Quantity
2
2
2
1
2
1
1
1
REF
REF
2
1
1
2
2
2
1
1
1
1
2
1
2
REF
2
2
2
1
1
2
2
2
2
REF
4
4
8
4
2
REF
4
FRAME AND HOPPER ASSEMBLY, cont’d.
ITEM No.
41
42
43
44
45
46
47
48
49
50
51
52
53
54
55
56
57
58
59
60
61
62
63
64
65
66
67
68
69
70
71
72
73
74
75
76
77
78
79
80
81
PART No.
A04787
A04788
A04792
A04793
A04794
A04797
A04800
A04926
A04952
A04961
152105
A04968
A04969
A04978
152303
A05015
A05327
A05514
A05517
A05520
A05521
A05522
A05526
A05536
A05544
C00128
C01105
C01121
C01122
C02447
100378
101665
111910
112122
115168
152082
152085
152102
152186
A04998
A04745
DESCRIPTION
SPACER BEVEL GEAR
SHAFT CYL. MOUNT
COLLAR LATCH RETURN (POR)
CRANK
CRANK KNOB, STEP ADJ. KNURLED
SHAFT HEIGHT ADJ.
SHAFT AGITATOR
SHAFT WATER SPRAY
SET COLLAR ECCENTRIC
TUBE – MANDREL STORAGE
COLLAR, ¾” SET
CHAIN SECTION (POR)
CHAIN SECTION (POR)
BEVEL GEAR – 48T ASS’Y
CHAIN CONNECTOR LINK #25
BEARING SEAL
LID STOP PLATE
CHANNEL MOTOR MOUNT
BRACKET MANDREL SUPPORT
GUSSET A/W ASS’Y
SPACER
CHANNEL MANIFOLD MTG
ARM WATER SPRAY SHORT
ECCENTRIC A/W ASS’Y
SPACER LOWER
BEARING 7/16” ROD END
RETAINING RING 7/16” EXTERNAL
RETAINING RING #5100-62, EXT.
RETAINING RING #5100-75
SPACER ARBOR
BEARING ¾” FLANGE
COLLAR, REWORKED, 33/64” BORE
BEARING ½” DIA. 2 BOLT FLANGE
MACHINE BUSHING ¾” ID X 1 ¼” OD
SPACER HOPPER COVER
BEARING ¾” ROLLER
BEARING FLANGE 2 HOLE
BUSH, BRZ, ½ ID X 5/8 OD X ½ LG
SPRING EXTENSION
BRACKET FLOW CONTROL MOUNTING
CRATING ANGLE A/W ASS’Y
A05502 ISSUE “B”
9-2
9.1
FRAME AND HOPPER ASSEMBLY, cont’d.
Quantity
2
8
8
2
8
2
30
32
4
4
2
14
1
1
2
4
4
5
1
4
13
4
8
8
2
8
16
8
6
6
ITEM No.
A
B
C
D
F
G
H
I
J
K
L
M
N
O
P
Q
R
S
T
U
V
W
X
Y
Z
AA
BB
CC
DD
EE
PART No.
975906
955962
990216
978032
971104
955759
989412
955648
989736
970504
975624
955646
955960
955765
955961
988620
988628
988612
955991
990210
955650
989432
955992
965416
975724
991016
955995
955634
990212
Description
SCREW, SHDLR, ¼ X 3/8, #10-24
WASHER, LOCK ¼
SCREW, FIN HEX, ¼-20 UNC X 1
SCREW, SOC HD CP, 5/16-18 X 2
SCREW, SET SOC, ¼-20 UNC X ¼
NUT, JAM, 7/16-20 UNF PLATED
SCREW, FIN HEX, 5/16-18 X ¾
NUT, HEX NYLOC, 5/16-18 UNC
SCREW, FIN HEX, 5/16-18 X 2-1/4
SCREW, SET SOC, 5/16-18 UNC X ¼
SCREW, SHLDR, ½” X 1-1/2”, 3/8”-16
NUT, HEX NYLOC, 3/8”-16 UNC
WASHER, LOCK, 3/8”
NUT, JAM 3/8-16 UNC PLATED
WASHER, LOCK, 5/16”
SCREW, FIN HEX, 3/8-16 X 1-1/4”
SCREW, FIN HEX, 3/8-16 X 1-3/4”
SCREW, FIN HEX, 3/8”-16 X ¾”
WASHER, FLAT, 3/8” SAE PLATED
SCREW, FIN HEX, ¼”-20 UNC X 5/8”
NUT, HEX NYLOC, ¼-20 UNC
SCREW, FIN HEX, 5/16-18 UNC X 2”
WASHER, FLAT, 5/16” SAE PLATED
SCREW, CARR, 5/16-18 UNC X 1
SCREW, SHLDR, 3/8” X 1-1/2”, 5/16”-18
SCREW, FIN HEX, #10-24 X 1”
WASHER, FLAT, #10 (.190)
NUT, HEX NYLOC, #10-24 UNC
SCREW, FIN HEX, ¼”-20 UNC X ¾”
986016
SCREW, BUTT HD SOC, ¼”-20 X 1”
A05502 ISSUE “B”
NOTE: One mandrel and storage tube provided standard. Additional tubes
provided with additional mandrels when ordered.
NOTE: Opposite Hand Drawing A05503
9-3
9-4
9.2
TRIGGER ASSEMBLY, PROXIMITY LIMIT
ITEM No.
1
2
3
4
5
6
7
8
9
10
11
12
13
14
15
16
17
18
19
20
21
22
23
24
25
26
27
28
29
30
31
32
33
34
35
36
37
38
39
40
PART No.
A04677
610678
119508
A04995
A04996
A04997
A05529
A05532
A05533
A05534
A07910
A05541
A05542
A05543
C00005
C02125
C03846
C03467
110479
152105
152193
955634
955650
955993
955995
970504
975908
119509
979210
979212
979220
982608
990210
990216
101665
119338
A04793
A04735
119335
A04952
QTY
1
1
2
1
1
1
1
2
1
1
1
1
1
1
1
2
2
2
18
16
4
6
2
2
2
4
4
9
3
12
2
3
1
1
1
1
1
DESCRIPTION
NUT A/W ASSEMBLY
PROXIMITY SWITCH , (110 PROX. A04682)
SLIDE BLOCK, TRUCK ASSEMBLY
PLATE PROX. MOUNTING
MOUNT PROXIMITY SWITCH
CLAMP LOWER SWITCH (NON-STANDARD)
TRUCK UPPER (SUB-ASSEMBLY)
TRUCK A/W ASSEMBLY
PLATE VERTICAL SW ADJ.
YOKE
TRUCK SWITCH A/W ASSEMBLY
SWITCH ARM (NON-STANDARD)
CHANNEL SWITCH ARM PIVOT
STOP TRIGGER
SWITCH MICRO
TRIGGER ARM REWORKED
MOUNT MICRO SW (VERT)
COVER SWITCH (NON-STANDARD)
BUSH, BRZ, FLG, ¼” ID X 3/8” OD X ¼” L
COLLAR, ¾” SET
SPRING EXTENSION
NUT HEX NYLOC #10-24 UNC
NUT HEX NYLOC ¼-20 UNC
WASHER FLAT ¼” SAE PL
WASHER FLAT #10
SCREW SET SOC, 5/16-18 X ¼”
SCREW SHLDR ¼” X ½”, #10-24
SLIDE BLOCK, TRUCK ASSEMBLY
SCREW SOC HD CP #10-24 X 5/8”
SCREW SOC HD CP #10-24 X 3/4”
SCREW SOC HD CP #10-24 X 1-1/4
SCREW FLT HD SOC #10-24 X ½”
SCREW FIN HEX ¼-20 X 5/8”
SCREW FIN HEX ¼-20 X 1
COLLAR, ¾” SET
SCREW SWITCH ADJ.
CRANK
HANDLE
ECCENTRIC A/W ASSEMBLY
SET COLLAR ECCENTRIC
A05507-XXX ISSUE “C”
9-5
9.2
TRIGGER ASSEMBLY, PROXIMITY LIMIT, cont’d.
ITEM No.
41
42
43
44
45
46
47
48
49
50
51
52
53
54
55
56
57
58
59
60
61
62
63
64
65
66
67
PART No.
A04780
142051
C00067
142072
103533
C01020
979232
A04747
C07104
C07264
C07265
C07266
C07088
C01246
C07102
C07192
955964
990224
118517
982612
142052
971108
A04478
303135
975906
303793
303794
QTY
2
1
1
3
3
1
2
2
2
1
1
1
2
1
3
1
2
2
1
1
1
1
1
1
1
1
DESCRIPTION
HANDLE NUT
CONNECTOR STRAIGHT CONDUIT
CONNECTOR ½” ELL
DRIVENUTS – CONDUIT ½”
SEAL ½” ID HOLE
CONNECTOR ¼” ELECTRICAL
SCREW SOC HD CAP #10-24 X 2
BRACKET VALVE MTG.
VALVE, SOLENOID, 24 VDC (110 VAC (C00401))
NAMEPLATE SEEDER JOG
NAMEPLATE WATER SPRAY OFF/ON
NAMEPLATE PROX. SENSOR OFF/ON
SWITCH, SELECTOR, 2 POSITION, BLACK
SWITCH, PUSHBUTTON, YELLOW
CONTACT CARTRIDGE (1 N.O.)
RELAY, SSR, DC-DC 3-30 VDC
WASHER, LOCK, #10
SCREW, FIN HEX, ¼-20 X 1-1/2”
CLAMP, CORD
SCREW, FLT HD SOC, #10-24 X 1-1/2”
CONNECTOR, 90° CONDUIT
SCREW, SET SOC, ¼-20 X ½”
GUIDE (NON-STANDARD)
SWITCH ARM, REWORK, TAB (NON-STANDARD)
SCREW, SHOULDER, ¼ X 3/8, #10-24
CHANNEL, SWITCH ARM, 4 DEGREE (STANDARD)
COVER, SWITCH, LEXAN, 4 DEGREE (STANDARD)
A05507-XXX ISSUE “C”
9-6
9-7
9.3
WATER SPRAY NOZZLE
ITEM
No.
PART
No.
QTY
1
2
3
4
5
6
7
C00498
110410
C01952
C00592
C00507
C00516
C00534
1
1
1
1
1
1
C00591
C00571
C00545
C00568
C00566
DESCRIPTION
SPRAY GUN, DRIPLESS
FITTING, HOSE BARB, 1/8 MPT X ¼ HOSE, BRASS
FITTING, ¼ NPS X ¼ NPT, ADAPTER
GASKET, TEFLON, .593 OD X .433 ID
TEFLON VALVE SEAT
SEAL
STANDARD SPRAY TIP
ORIFICE DIAMETER = .012
GMP @ 40 PSI = .023
OPTIONAL SPRAY TIP
ORIFICE DIAMETER = .021
GMP @ 40 PSI = .067
OPTIONAL SPRAY TIP
ORIFICE DIAMETER = .026
GMP @ 40 PSI = .10
OPTIONAL SPRAY TIP
ORIFICE DIAMETER = .028
GMP @ 40 PSI = .116
OPTIONAL SPRAY TIP
ORIFICE DIAMETER = .040
GMP @ 40 PSI = .231
OPTIONAL SPRAY TIP
ORIFICE DIAMETER = .072
GMP @ 40 PSI = .80
C03245 ISSUE “E”
9-8
9-9
9.4
PNEUMATIC COMPONENTS
ITEM
No.
1
2
3
4
5
6
7
8
9
10
11
12
13
14
15
16
17
18
19
20
21
22
23
24
25
26
27
28
29
30
31
32
33
34
35
36
PART
No.
C00404
110414
A07470
C00414
110423
103878
C01915
111498
C01916
A04747
C07104
110420
113589
C00443
C00402
110402
110404
A04998
A04894
A04681
110409
A04674
110410
C00399
C03335
C01947
C00578
C00579
C01948
118873
C00594
C00437
110415
C02343
C00998
111616
QTY
1
3
1
9
5
12’
7
4
1
REF
3
1
15’
1
2
2
5
2
2
2
2
1
1
1
1
1
1
1
1
1
1
12’
1
1
6
1
DESCRIPTION
FILTER / REGULATOR / LUBRICATOR ASSEMBLY
FITTING, NIPPLE ¼” NPT BRASS
MANIFOLD
CLAMP, 1/16” TO 5/8”, SST.
FITTING, HEX PLUG, ¼” NPT, BRASS
HOSE, ¼” BLACK NEOPRENE
FITTING, 7/16-20, FLAIR
MUFFLER, ¼”
FITTING, ¼” NPT X 7/16-20
VALVE MOUNTING BRACKET
VALVE, 24 VOLT (REF.)
FITTING, 90° ¼” X ¼”, TUBE
HOSE, ¼” OD, POLY NATURAL
VALVE, QUICK DUMP, ¼”
VALVE, FLOW CONTROL
FITTING
FITTING, 1/8” NPT X ¼” TUBE
BRACKET, FLOW CONTROL
NUT, PANEL MOUNT, FLOW CONTROL
CYLINDER, AIR, 6” STROKE
FITTING, TEE, 1/8” X ¼” X ¼”
CLUTCH, PNEUMATIC, .625 BORE
FITTING, 1/8” NPT, PUSH ON
UNIVERVAL MOUNTING KIT
PLATE, FRL MOUNTING BRACKET
FITTING, BUSHING ¾” X ½” BRASS
FILTER, ASS’Y, WATER
FILTER, REPLACEMENT
FITTING, BUSHING ¾” X ¼”
GAUGE, REGULATOR 0-60, ¼” BRASS
REGULATOR, WATER, ¼” BRASS
HOSE, ¼”, CLEAR, REINFORCED.
FITTING, ¼” NPT, PUSH ON
MOUNTING. BRACKET, WATER REGULATOR
FITTING, 90°, ¼” X ¼”, BRASS
FITTING, BUSHING REDUCER, ¼” X 1/8”
03-9200-001 ISSUE “C”
9-10
9-11
9.5
HOPPER, AGITATOR 40”
ITEM No. PART No. QTY
1
C01915
3
2
C07105
1
C06459
REF
3
110414
2
4
111748
1
5
110345
2
6
C01022
1
7
504709
2
8
A04343
1
9
A04353
1
10
A04348
4
11
A04341
1
A04342
1
12
152124
1
13
C00823
1
14
955977
1
15
955771
1
16
C03247
1
17
152074
1
18
A04350
1
19
152075
1
20
A04363
1
21
A04346
1
22
C00423
1
23
A04345
1
24
C07270
1
25
A04347
1
26
A04344
1
27
C05780
1
28
C00414
6
29
111616
1
30
A04349
2
31
955767
1
32
975816
1
33
110410
2
34
103878
10’
35
C06815
1
36
C00998
2
37
112030
1
38
110412
1
39
110415
1
DESCRIPTION
FITTING 7/16-20 F FLAIR
VALVE, SOLENOID 24 VDC
VALVE, SOLENOID 110 VAC
FITTING ¼” NPTM BRASS NIPPLE
NEEDLE VALVE ¼”
RESTRICTOR SPEED CONTROL
ELECTRICAL BOX 4X4X3, GREY PAINTED
SPACER
VALVE MOUNT PLATE
RAKE A/W ASS’Y 40”
BEARING BLOCK
BRACKET SLIDE BLOCK MOUNT
BRACKET SLIDE BLOCK MOUNT
NYLON ROLLER
SPRING #C-15
WASHER FLAT ¼”
NUT JAM ¼-28 UNF PLATED
WASHER COVER
BEARING ¼” ROD END
CYLINDER MOUNT A/W ASSY
BEARING 5/16” ROD END
SPACER, CYLINDER PYLON
CYLINDER MOUNT
CYLINDER #091-DP
STAND OFF
SWITCH, SMALL PROXIMITY
PROXIMITY MOUNT
SHUTTLE ARM
SPRING COMPRESSION
CLAMP 1/16” TO 5/8” SST.
FITTING REDUCER ¼ X 1/8 BRASS
LINK PLATE
NUT JAM 5/16-24 UNF PLATED
SCREW SHLDR 5/16 X 1, ¼-20
FITTING 1/8 NPTM PUSH ON
HOSE AIR ¼” DIA. NEOPRENE
NAMEPLATE SEED AGITATOR OFF/ON
FITTING 90° ¼ X ¼ ELL
FITTING 90° 1/8 X 7/16-20
FITTING TEE BRASS ¼ FPT
FITTING ¼ NPT M PUSH ON
A0434021 ISSUE “B”
9-12
9-13
9.6
ITEM
No.
1
2
3
4
5
6
7
8
DEFLECTOR ASSEMBLY
PART
No.
955995
978906
C04105
C04108
C04110
C04113
979208
955941
QTY
4
12
2
2
1
2
REF
8
DESCRIPTION
WASHER FLAT #10 (.190)
SCREW SOC HD #10-24 X 3/8 SS
PIVOT PLATE
KNOB & PLATE ASSY
DEFLECTOR A/W ASSY
CONNECTOR – PIVOT PLATE
SCREW SOC HD CP #10-24 X ½
WASHER, FLAT, #10
C04120 ISSUE “C
9-14
9-15