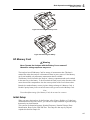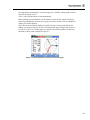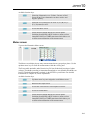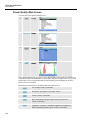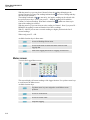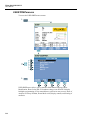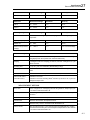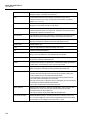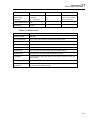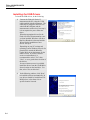
1
®
Fluke
434-II/435-II/437-II
Three Phase Energy and Power Quality Analyzer
Users Manual
EN
January 2012, rev.1 06/12
© 2012 Fluke Corporation, All rights reserved. Printed in the EU
All product names are trademarks of their respective companies.
Table of Contents
Chapter
1
Title
General Aspects .................................................................................. 1-1
Introduction........................................................................................................
Limited Warranty & Limitation of Liability......................................................
Shipment Note ...................................................................................................
Contacting a Service Center...............................................................................
Safety Information: Read First...........................................................................
Safe Use of Li-ion Battery Pack ........................................................................
2
Page
1-1
1-2
1-3
1-4
1-4
1-7
About This Manual .............................................................................. 2-1
Introduction........................................................................................................ 2-1
Users Manual Contents ...................................................................................... 2-1
3
Features of Fluke 434-II/435-II/437-II .................................................. 3-1
Introduction........................................................................................................
General Measurements ......................................................................................
Measuring modes to investigate details .............................................................
Logging of Measuring Values in Meter Screens ...............................................
4
Basic Operations and Menu Navigation............................................ 4-1
Introduction........................................................................................................
Tilt Stand and Hang Strap..................................................................................
Powering the Analyzer.......................................................................................
Installation and Replacement of a Battery Pack ................................................
SD Memory Card...............................................................................................
Initial Setup........................................................................................................
Display Brightness.............................................................................................
Locking the keyboard ........................................................................................
Menu Navigation ...............................................................................................
Display Contrast ................................................................................................
Reset to Factory Defaults...................................................................................
5
3-1
3-1
3-2
3-3
4-1
4-2
4-3
4-4
4-5
4-5
4-6
4-6
4-6
4-6
4-7
Display Information ............................................................................. 5-1
Introduction........................................................................................................ 5-1
i
Fluke 434-II/435-II/437-II
Users Manual
Phase Colors ...................................................................................................... 5-2
Screen Types...................................................................................................... 5-2
Screen information common for all screen types............................................... 5-3
6
Input Connections ............................................................................... 6-1
Introduction........................................................................................................ 6-1
Input Connections .............................................................................................. 6-1
7
Scope Waveform and Phasor............................................................. 7-1
Introduction........................................................................................................
Scope Waveform................................................................................................
Scope Phasor......................................................................................................
Tips and Hints....................................................................................................
8
Volts/Amps/Hertz................................................................................. 8-1
Introduction........................................................................................................
Meter screen.......................................................................................................
Trend..................................................................................................................
Events ................................................................................................................
Tips and Hints....................................................................................................
9
11-1
11-2
11-3
11-4
Energy Loss Calculator ...................................................................... 12-1
Introduction........................................................................................................
Energy Loss Calculator Display ........................................................................
Meter..................................................................................................................
Tips and Hints....................................................................................................
13
10-1
10-1
10-3
10-4
10-4
Power & Energy................................................................................... 11-1
Introduction........................................................................................................
Meter screen.......................................................................................................
Trend..................................................................................................................
Tips and Hints....................................................................................................
12
9-1
9-3
9-5
9-6
Harmonics ............................................................................................ 10-1
Introduction........................................................................................................
Bar Graph Screen...............................................................................................
Meter screen.......................................................................................................
Trend..................................................................................................................
Tips and Hints....................................................................................................
11
8-1
8-1
8-2
8-3
8-4
Dips & Swells ....................................................................................... 9-1
Introduction........................................................................................................
Trend..................................................................................................................
Events Tables.....................................................................................................
Tips and Hints....................................................................................................
10
7-1
7-1
7-2
7-3
12-1
12-2
12-3
12-4
Power Inverter Efficiency ................................................................... 13-1
Introduction........................................................................................................
Meter screen.......................................................................................................
Trend..................................................................................................................
Tips and Hints....................................................................................................
ii
13-1
13-2
13-3
13-3
Contents (continued)
14
Unbalance ............................................................................................ 14-1
Introduction........................................................................................................
Phasor screen .....................................................................................................
Meter Screen ......................................................................................................
Trend..................................................................................................................
Tips and Hints....................................................................................................
15
14-1
14-1
14-2
14-3
14-4
Inrush ................................................................................................... 15-1
Introduction........................................................................................................ 15-1
Inrush Trend Display ......................................................................................... 15-1
Tips and Hints.................................................................................................... 15-4
16
Monitor - Power Quality Monitoring................................................... 16-1
Introduction........................................................................................................
Power Quality Main Screen ...............................................................................
Trend Display ....................................................................................................
Events Table ......................................................................................................
Bar Graph Screen...............................................................................................
Tips and Hints....................................................................................................
17
Flicker................................................................................................... 17-1
Introduction........................................................................................................
Meter screen.......................................................................................................
Trend..................................................................................................................
Tips and Hints....................................................................................................
18
16-1
16-4
16-5
16-5
16-7
16-8
17-1
17-1
17-2
17-3
Transients ............................................................................................ 18-1
Introduction........................................................................................................ 18-1
Waveform Display ............................................................................................. 18-2
Tips and Hints.................................................................................................... 18-3
19
Power Wave ......................................................................................... 19-1
Introduction........................................................................................................
Power Wave Screen ...........................................................................................
Meter screen.......................................................................................................
Waveform screen ...............................................................................................
Tips and Hints....................................................................................................
20
Mains Signaling ................................................................................... 20-1
Introduction........................................................................................................
Trend..................................................................................................................
Events Table ......................................................................................................
Tips and Hints....................................................................................................
21
19-1
19-1
19-3
19-3
19-4
20-1
20-2
20-3
20-4
Logger .................................................................................................. 21-1
Introduction........................................................................................................
Start Menu..........................................................................................................
Meter screen.......................................................................................................
Trend..................................................................................................................
Events ................................................................................................................
iii
21-1
21-1
21-2
21-3
21-4
Fluke 434-II/435-II/437-II
Users Manual
22
Shipboard V/A/Hz ................................................................................ 22-1
Introduction........................................................................................................
Meter screen.......................................................................................................
Trend..................................................................................................................
Events ................................................................................................................
23
Cursor and Zoom ................................................................................ 23-1
Introduction........................................................................................................
Cursor on Waveform Displays...........................................................................
Cursor on Trend Displays ..................................................................................
From Events Table to Trend Display with Cursor On .......................................
Cursor on Bar graph Displays............................................................................
24
23-1
23-1
23-2
23-3
23-4
Setting up the Analyzer....................................................................... 24-1
Introduction........................................................................................................
USER PREFerences...........................................................................................
MANUAL SETUP.............................................................................................
Manual Setup - How to change the wiring configuration..............................
Manual Setup - How to change scale of Scope Display ................................
Limits Adjustments............................................................................................
25
22-1
22-1
22-3
22-4
24-1
24-4
24-6
24-10
24-11
24-13
Using Memory and PC ........................................................................ 25-1
Introduction........................................................................................................ 25-1
Using memory.................................................................................................... 25-1
Use of PC ........................................................................................................... 25-4
26
Tips and Maintenance ......................................................................... 26-1
Introduction........................................................................................................
Cleaning the Analyzer and its Accessories ........................................................
Storing the Analyzer ..........................................................................................
Keeping the Battery in Good Condition ............................................................
Installation of Options .......................................................................................
Parts and Accessories.........................................................................................
Troubleshooting .................................................................................................
27
26-1
26-1
26-1
26-1
26-2
26-2
26-4
Specifications ...................................................................................... 27-1
Introduction........................................................................................................ 27-1
Electrical Measurements.................................................................................... 27-2
iv
Chapter 1
General Aspects
Introduction
This chapter informs you about a number of general and important aspects concerning the
Fluke 434-II/435-II/437-II Three Phase Energy and Power Quality Analyzer (hereafter
referred to as ‘Analyzer’).
This concerns:
•
Warranty and Liability Conditions.
•
Shipment Note: Survey of items that should be included in your Analyzer Kit.
•
Contacting a Fluke Service Center.
•
Safety Information: Read First!
•
Safe Use of Li-ion Battery Pack.
1-1
Fluke 434-II/435-II/437-II
Users Manual
Limited Warranty & Limitation of Liability
Each Fluke product is warranted to be free from defects in material and workmanship
under normal use and service. The warranty period is three years for the Analyzer and
one year for its accessories. The warranty period begins on the date of shipment. Parts,
product repairs and services are warranted for 90 days. This warranty extends only to the
original buyer or end-user customer of a Fluke authorized reseller, and does not apply to
fuses, disposable batteries or to any product which, in Fluke's opinion, has been misused,
altered, neglected or damaged by accident or abnormal conditions of operation or
handling. Fluke warrants that software will operate substantially in accordance with its
functional specifications for 90 days and that it has been properly recorded on nondefective media. Fluke does not warrant that software will be error free or operate
without interruption.
Fluke authorized resellers shall extend this warranty on new and unused products to enduser customers only but have no authority to extend a greater or different warranty on
behalf of Fluke. Warranty support is available if product is purchased through a Fluke
authorized sales outlet or Buyer has paid the applicable international price. Fluke reserves
the right to invoice Buyer for importation costs of repair/replacement parts when product
purchased in one country is submitted for repair in another country.
Fluke's warranty obligation is limited, at Fluke's option, to refund of the purchase price,
free of charge repair, or replacement of a defective product which is returned to a Fluke
authorized service center within the warranty period.
To obtain warranty service, contact your nearest Fluke authorized service center or send
the product, with a description of the difficulty, postage and insurance prepaid (FOB
Destination), to the nearest Fluke authorized service center. Fluke assumes no risk for
damage in transit. Following warranty repair, the product will be returned to Buyer,
transportation prepaid (FOB Destination). If Fluke determines that the failure was caused
by misuse, alteration, accident or abnormal condition of operation or handling, Fluke
will provide an estimate of repair costs and obtain authorization before commencing the
work. Following repair, the product will be returned to the Buyer transportation prepaid
and the Buyer will be billed for the repair and return transportation charges (FOB
Shipping Point).
THIS WARRANTY IS BUYER'S SOLE AND EXCLUSIVE REMEDY AND IS IN
LIEU OF ALL OTHER WARRANTIES, EXPRESS OR IMPLIED, INCLUDING BUT
NOT LIMITED TO ANY IMPLIED WARRANTY OF MERCHANTABILITY OR
FITNESS FOR A PARTICULAR PURPOSE. FLUKE SHALL NOT BE LIABLE FOR
ANY SPECIAL, INDIRECT, INCIDENTAL OR CONSEQUENTIAL DAMAGES OR
LOSSES, INCLUDING LOSS OF DATA, WHETHER ARISING FROM BREACH OF
WARRANTY OR BASED ON CONTRACT, TORT, RELIANCE OR ANY OTHER
THEORY.
Since some countries or states do not allow limitation of the term of an implied warranty,
or exclusion or limitation of incidental or consequential damages, the limitations and
exclusions of this warranty may not apply to every buyer. If any provision of this
Warranty is held invalid or unenforceable by a court of competent jurisdiction, such
holding will not affect the validity or enforceability of any other provision.
Fluke Corporation, P.O. Box 9090, Everett, WA 98206-9090 USA, or
Fluke Industrial B.V., P.O. Box 90, 7600 AB, Almelo, The Netherlands
1-2
General Aspects
Shipment Note
1
Shipment Note
The following items are included in your Analyzer Kit:
Note:
This Shipment Note reflects the contents of the standard product. The
contents of a special version may be different. The difference is indicated in
a Manual Supplement that is part of the shipment.
Note:
When new, the Analyzer’s rechargeable Li-ion battery is not charged.
Refer to Chapter 4 – Powering the Analyzer.
Figure 1-1. Contents of Analyzer Kit
1-3
Fluke 434-II/435-II/437-II
Users Manual
#
Description
1
Power Quality Analyzer Fluke 43x Series II + Side Strap, Battery Pack BP290 (28 Wh) and 8 GB
SD Memory Card Installed
2
Decal Set for Input Sockets (EU & UK, EU, China, UK, US, Canada)
3
Hang Strap
4
Alligator Clips. Set of 5
5
Test Leads, 2.5 m + Color Coding Clips. Set of 5
6
Power Adapter
7
Line Plug Adapter Set (EU, US, UK, Australia/China, Switzerland, Brazil, Italy) or Regional Power
Cord.
8
Safety Instructions Booklet (Multi-Language)
9
CD-ROM with Manuals (Multi-Language), PowerLog Software, and USB drivers
10
USB Interface Cable for PC Connection (USB-A to mini-USB-B)
11
Flexible 6000 A AC Current Probe (not in Basic Version)
12
Fluke 434-II/435-II:
Fluke 437-II:
Soft Carrying Case C1740
Hard Case with Rollers C437-II
Contacting a Service Center
To locate a Fluke authorized service center, visit us on the World Wide Web at:
www.fluke.com or call Fluke using any of the phone numbers listed below:
+1-888-993-5853 in the U.S. and Canada
+31-40-2675200 in Europe
+1-425-446-5500 from other countries
Safety Information: Read First
The Fluke 434-II/435-II/437-II Three Phase Energy and Power Quality Analyzer
complies with:
IEC/EN61010-1-2001,
CAN/CSA C22.2 No 61010-1-04 (including cCSAus approval),
UL std No 61010-1,
Safety Requirements for Electrical Equipment for Measurement, Control and Laboratory
Use, Part 1: General requirements, Rated: 600V CAT IV 1000V CAT III Pollution
Degree 2.
Use the Analyzer and its accessories only as specified in the Users Manual. Otherwise,
the protection provided by the Analyzer and its accessories might be impaired.
A Warning identifies conditions and actions that pose hazard(s) to the user.
A Caution identifies conditions and actions that may damage the Analyzer.
The following international symbols are used on the Analyzer and in this manual:
1-4
General Aspects
Safety Information: Read First
See explanation in
manual
Direct Current
Safety Approval
Earth
Double Insulation
(Protection Class)
Conformité Européenne
Recycling information
Disposal information
Safety Approval
Conforms to relevant
Australian standards
RoHS China
Current Clamp
Do not apply around or
remove from hazardous
live conductors.
Do no dispose of this
product as unsorted
municipal waste. Go to
Fluke’s website for
recycling information
Alternating Current
1
Li-Ion
Warning
To avoid electrical shock or fire:
• Review the entire manual before use of the Analyzer and its
accessories.
• Carefully read all instructions.
• Do not work alone.
•
Do not use the product around explosive gas, vapor, or in
damp or wet environments.
•
Use the product only as specified, or the protection supplied
by the product can be compromised.
•
Use only insulated current probes, test leads and adapters as
supplied with the Analyzer, or indicated as suitable for the
Fluke 434-II/435-II/437-II Analyzer.
•
Keep fingers behind the finger guards on the probes.
•
Before use, inspect the Analyzer, voltage probes, test leads
and accessories for mechanical damage and replace when
damaged. Look for cracks or missing plastic. Pay special
attention to the insulation surrounding the connectors.
•
Verify the Analyzer’s operation by measuring a known voltage.
•
Remove all probes, test leads and accessories that are not in
use.
•
Always connect the Power Adapter first to the AC outlet before
connecting it to the Analyzer.
•
Do not touch voltages >30 V ac rms, 42 V ac peak, or 60 V dc.
•
Use the ground input only to ground the Analyzer and do not
apply any voltage.
•
Do not apply input voltages above the rating of the instrument.
•
Do not apply voltages in excess of the marked ratings of the
voltage probes or current clamps.
1-5
Fluke 434-II/435-II/437-II
Users Manual
•
Use only correct measurement category (CAT), voltage, and
amperage rated probes, test leads, and adapters for the
measurement.
•
Do not exceed the Measurement Category (CAT) rating of the
lowest rated individual component of a product, probe, or
accessory.
•
Comply with local and national safety codes. Use personal
protective equipment (approved rubber gloves, face
protection, and flame resistant clothes) to prevent shock and
arc blast injury where hazardous live conductors are exposed.
•
The battery door must be closed and locked before you
operate the product.
•
Do not operate the product with covers removed or the case
open. Hazardous voltage exposure is possible.
•
Take special care during fitting and removal of the flexible
current probe: de-energize the installation under test or wear
suitable protective clothing.
•
Do not use exposed metal BNC or banana plug connectors.
•
Do not insert metal objects into connectors.
•
Use only the power supply, Model BC430 (Power Adapter).
•
Before use check that the selected/indicated voltage range on
the BC430 matches the local line power voltage and frequency
(refer to figure below). If necessary set the slider switch of the
BC430 to the correct voltage.
•
For the BC430 use only AC line plug adapters or AC line cords
that comply with local safety regulations.
•
Remove the input signals before you clean the product.
•
Use only specified replacement parts.
Slider switch on Power Adapter to select line power voltage (Note: for Adapters without
slider switch, refer to Instruction Sheet as supplied with device):
115V
230V
Max. Input Voltage at Voltage Banana Inputs to Ground:
Input A (L1), B (L2), C (L3), N to Ground: 1000 V CAT III, 600 V CAT IV.
Max. Voltage at Current BNC Inputs (See marking):
Input A (L1), B (L2), C (L3), N to Ground: 42 V peak.
Voltage ratings are given as “working voltage”. They should be read as V ac rms
(50-60 Hz) for AC sinewave applications and as V dc for DC applications.
1-6
General Aspects
Safe Use of Li-ion Battery Pack
1
Measurement Category IV (CAT IV) refers to the overhead or underground utility service
of an installation. CAT III refers to distribution level and fixed installation circuits inside
a building.
If Safety Features are Impaired
If the Analyzer is used in a manner not specified by the manufacturer, the protection
provided by the Analyzer may be impaired.
Before use, inspect the test leads for mechanical damage and replace damaged test leads!
If the Analyzer or its accessories appear to be impaired or not functioning properly, do
not use it and send it in for repair.
Note
To accommodate connection to various line power sockets, the Power
Adapter is equipped with a male plug that must be connected to a line plug
adapter appropriate for local use. Since the PowerAdapter is isolated, you
can use line plug adapters with or without a protective ground terminal.
The 230 V rating of the Power Adapter is not for use in North America. A
line plug adapter complying with the applicable National Requirements
may be provided to alter the blade configurations for a specific country.
Safe Use of Li-ion Battery Pack
The Battery Pack Fluke model BP29x has been tested in accordance with the UN Manual
of Tests and Criteria Part III Subsection 38.3 (ST/SG/AC.10/11/Rev.3) – more commonly
known as the UN T1..T8 – tests, and have been found to comply with the stated criteria.
The Battery Pack has been tested acc. to EN/IEC62133. As a result they can be shipped
unrestricted internationally by any means.
Recommendations to safe storage of battery pack.
•
Do not store Battery Packs near heat or fire. Do not store in
sunlight.
•
Do not remove a Battery Pack from its original packaging until
required for use.
•
When possible, remove the Battery Pack from the equipment
when not in use.
•
Fully charge the Battery Pack before storing it for an extended
period to avoid a defect.
•
After extended periods of storage, it may be necessary to
charge and discharge the Battery Packs several times to
obtain maximum performance.
•
Keep the Battery Pack out of the reach of children and
animals.
•
Seek medical advise if a battery or part of it has been
swallowed.
1-7
Fluke 434-II/435-II/437-II
Users Manual
Recommendations to safe use of the Battery Pack.
•
The Battery Pack needs to be charged before use. Use only
Fluke approved power adapters to charge the battery pack.
Refer to Fluke’s safety instructions and Users Manual for
proper charging instructions.
•
Do not leave a battery on prolonged charge when not in use.
•
The Battery Pack gives the best performance when operated at
normal room temperature 20 °C ± 5 °C (68 °F ± 9 °F).
•
Do not put Battery Packs near heat or fire. Do not put in
sunlight.
•
Do not subject Battery Packs to severe impacts such as
mechanical shock.
•
Keep the Battery Pack clean and dry. Clean dirty connectors
with a dry, clean cloth
•
Do not use any charger other than that specifically provided
for use with this equipment.
•
Do not use any battery which is not designed or recommended
by Fluke for use with the product.
•
Take careful notice of correct placement of the battery in the
product or the External Battery Charger.
•
Do not short-circuit a Battery Pack. Do not keep Battery Packs
in a place where the terminals can be shorted by metal objects
(e.g. coins, paperclips, pens or other).
•
Never use a Battery Pack or charger showing visible damage.
•
Batteries contain hazardous chemicals that can cause burns
or explode. If exposure to chemicals occurs, clean with water
en get medical aid. Repair the product before use if the battery
leaks.
•
Alteration of Battery Pack: there shall be no attempt to open,
modify, reform or repair a Battery Pack, which appears to be
malfunctioning, or which has been physically damaged.
•
Do not disassemble or crush Battery Packs
•
Use the battery only in the application for which it is intended.
•
Retain the original product information for future reference.
Recommendations to safe transport of Battery Packs
1-8
•
The Battery Pack must adequately be protected against shortcircuit or damage during transport.
•
Always consult the IATA guidelines describing safe air
transport of Li-ion batteries.
•
Check-in luggage: Battery Packs are only allowed when
installed in the product.
General Aspects
Safe Use of Li-ion Battery Pack
•
Hand carried luggage: a number of Battery Packs as required
for normal and individual use is allowed.
•
Always consult national/local guidelines that are applicable for
shipment by mail or other transporters.
•
A maximum of 3 Battery Packs may be shipped by mail. The
package must be marked as follows: PACKAGE CONTAINS
LITHIUM-ION BATTERIES (NO LITHIUM METAL).
1
Recommendations to safe disposal of a Battery Pack.
•
A failed Battery Pack shall be properly disposed of in
accordance with local regulations.
•
Dispose of properly: do not dispose of the battery as unsorted
municipal waste. Go to Fluke’s website for recycling
information.
•
Dispose in discharged condition and cover the battery
terminals with isolation tape.
1-9
Fluke 434-II/435-II/437-II
Users Manual
1-10
Chapter 2
About This Manual
Introduction
This Users Manual gives full and comprehensive information on how to use the Fluke
Fluke 434-II/435-II/437-II Three Phase Energy and Power Quality Analyzers effectively
and in a safe manner. Read it carefully to learn about safe use of the Analyzer and its
accessories and to take full advantage of all measuring modes.
Information in this manual may be subject to minor changes without notice.
On the last pages of this manual there is an index that lists the most important subjects in
the manual with the manual pages where they can be found. Addionally you can use the
Edit, Find function of Acrobat Reader to find certain subjects. Use for instance the word
‘Transients’ to find all information on Transients.
Users Manual Contents
•
Introduction: Title, Table of Contents.
•
Chapter 1. General Aspects: Warranty and Liability, Shipment Note, Contacting a
Service Center, Safety information (Read First!), Safe Use of Li-ion Battery Pack.
•
Chapter 2. Overview of manual contents (this chapter).
•
Chapter 3. Summary of measuring modes and how to use them in a logical order.
•
Chapter 4. Basic operations: Tilt Stand and Hang Strap, Powering, Installation and
Replacement of a Battery Pack, SD Memory Card, Display adjustment, Keyboard
Locking, Reset, Menu Navigation.
•
Chapter 5. Display information: Screen types, General Screen Information, Screen
Symbols.
•
Chapter 6. Input Connections: Use of voltage and current probes.
•
Chapter 7 ... 22. Explanation of measuring functions with tips & hints:
- Scope Waveform & Phasor (7),
- Volts/Amps/Hertz (8),
- Dips & Swells (9),
- Harmonics (10),
- Power & Energy (11),
- Energy Loss Calculator (12),
- Power Inverter Efficiency (13),
2-1
Fluke 434-II/435-II/437-II
Users Manual
- Unbalance (14),
- Inrush Currents (15),
- Power Quality Monitoring (16).
- Flicker (17),
- Transients (18),
- Power Wave (19),
- Mains Signaling (20),
- Logger (21).
- Shipboard V/A/Hz (22)
2-2
•
Chapter 23. Cursor and Zoom: how to investigate measurement details.
•
Chapter 24. Setting up the Analyzer: a comprehensive explanation of adjustments to
customize measurements.
•
Chapter 25. Using Memory and PC: how to save, recall and delete screenshots and
data formats. How to make hard copies of measurement results and setup of
communication with PC.
•
Chapter 26. Tips and Maintenance: Cleaning, Storage, Batteries, Installation of
options, Replaceable parts, Troubleshooting.
•
Chapter 27. Specifications: Electrical, Mechanical, and Safety characteristics.
•
Appendices: Measurement principles of Power Measurement and Energy Loss
Calculation, Installing USB Drivers, Instrument Security Procedures (English only).
Remark: for a Material Safety Data Sheet (MSDS) or Compliance Information on the
supplied Li-ion Battery Pack refer to Fluke’s website.
•
Index.
Chapter 3
Features of Fluke 434-II/435-II/437-II
Introduction
The Analyzer offers an extensive and powerful set of measurements to check power
distribution systems. Some give a general impression of power system performance.
Others are used to investigate specific details. This chapter gives an overview on how to
perform measurements in a logical order.
The measuring modes are described in detail in Chapter 7 to 22. Each measuring mode is
explained in a separate chapter.
Refer to Chapter 27 Specifications for an overview of the parameters that are measured in
each measuring mode and their accuracies.
Note
After you have switched on a certain measurement, a settling time of about
10 seconds will pass before the measurement is started. During this time
the U (Unstable) symbol shows in the screen header. Moreover the timer
counts down from –10 seconds. A measurement has no unstable period
when used with a timed start.
Fluke 435-II and 437-II have additional features such as Flicker, Transients, Power
Wave, Mains Signaling, Wave Event, Rms Event, and 0.1 % voltage input accuracy.
Moreover Fluke 437-II has additional features such as Shipboard V/A/Hz and the
possibility to measure in 400 Hz power systems, and has a heavy duty Hard Case
with rollers.
In Fluke 434-II the functions Flicker, Transients, Power Wave and Mains Signaling
can be installed optionally. If not installed, they show up in the menu in grey color.
General Measurements
To check if voltage leads and current clamps are connected correctly, use Scope
Waveform and Scope Phasor. The clamps are marked with an arrow to facilitate proper
signal polarity. Chapter 6 Input Connections explains how to make connections.
3-1
Fluke 434-II/435-II/437-II
Users Manual
To get a general impression of the quality of a power system use MONITOR. The
MONITOR function displays a screen with Bar Graphs that show quality aspects of the
phase voltages. A Bar Graph changes from green to red if the related aspect does not
meet the active set of limits. An example of a set of limits is the set according to the
EN50160 norm. This set is present as a fixed set in the Analyzer’s memory. Also user
definable sets can be stored in memory.
Numerical data is shown by Volts/Amps/Hertz. For this press the MENU key. Then
select Volts/Amps/Hertz and press F5 – OK to display a Meter screen with the present
values of voltages (rms and peak), currents (rms and peak), frequency and Crest Factors
per phase. Press F5 – TREND so display the course over time of these values.
Measuring modes to investigate details
Phase voltages. Should be close to the nominal value. Voltage waveforms must be a sine
wave that is smooth and free from distortion. Use Scope Waveform to check the
waveform shape. Use Dips & Swells to record sudden voltage changes. Use Transients
mode to capture voltage anomalies.
Phase currents. Use Volts/Amps/Hertz and Dips & Swells to check current/voltage
relations. Use Inrush Current to record sudden current increases like motor inrush.
Crest Factor. A CF of 1.8 or higher means high waveform distortion. Use Scope
Waveform to see waveform distortion. Use Harmonics mode to identify harmonics and
THD (Total Harmonic Distortion).
Harmonics. Use Harmonics mode to check for voltage and current harmonics and THD
per phase. Use Trend to record harmonics over time.
Flicker. Use Flicker to check short and long term voltage flicker and related data per
phase. Use Trend to record these values over time.
Dips & Swells. Use Dips & Swells to record sudden voltage changes as short as half a
cycle.
Frequency. Should be close to nominal value. Frequency is normally very stable. Select
Volts/Amps/Hertz to display frequency. The course of frequency over time is recorded in
the Trend screen.
Unbalance. Each phase voltage should not differ more than 1 % from the average of the
three. Current unbalance should not exceed 10 %. Use Scope Phasor or Unbalance mode
to investigate unbalances.
Energy Loss Calculator. Helps to determine where energy losses occur and to visualize
their impact on your energy bill.
Power Inverter Efficiency. Measures the efficiency and amount of energy being delivered
by inverters that convert single phase DC into single or three phase AC.
Mains Signaling. Can be used to analyze the level of remote control signals that often are
present on power distribution systems.
Logger. Allows you to store multiple readings with high resolution in a long memory.
The readings to logged are selectable.
Power Wave. The Analyzer functions as a high resolution 8 channel scope recorder.
Hint: in general the most efficient way to troubleshoot electrical systems, is to begin at
the load and work towards the building’s service entrance. Measurements are taken along
the way to isolate faulty components or loads.
3-2
Features of Fluke 434-II/435-II/437-II
Logging of Measuring Values in Meter Screens
3
Logging of Measuring Values in Meter Screens
All measuring values in a Meter screen are logged. The average, minimun and maximum
values are logged with an adjustable average time (default value: 1 s) during the time that
the measurement is running. The average time is adjustable via the key sequence SETUP,
F4 – MANUAL SETUP, F3 – FUNCTION PREF. Use the arrow keys to select the
desired Average time. Also the total duration of the measurement and the start delay are
adjustable.
When the measurement is stopped by operation of function key F5 – HOLD the logged
data is saved on SD-card as Measurement xx. The measurement data is available via the
MEMORY key and function key F1 – RECALL DELETE. Next use the up/down arrow
keys to select the desired measurement and open it with function key F5 - RECALL. The
logged values are visible under F3 – TREND. Cursor and Zoom can be used to zoom in
on signal details.
If you resume the measurement via key sequence F5 – RUN, F3 – TIMED you enter a
menu that allows you to adjust average time, duration and start moment for that particular
measurement.
Note: under the LOGGER key you can log a maximum of 150 readings. The set or
reading to be logged is user definable. Refer to Chapter 21 for more information.
3-3
Fluke 434-II/435-II/437-II
Users Manual
3-4
Chapter 4
Basic Operations and Menu Navigation
Introduction
This chapter deals with a number of general aspects of the Analyzer’s operation:
•
Tilt Stand and Hang Strap
•
Powering the Analyzer
•
Installation and Replacement of a Battery Pack
•
SD Memory Card
•
Display Brightness
•
Locking the keyboard
•
Menu navigation
•
Display Contrast
•
Reset to Factory Defaults
4-1
Fluke 434-II/435-II/437-II
Users Manual
Tilt Stand and Hang Strap
The Analyzer has a tilt stand that allows viewing the screen at an angle when placed on a
flat surface. Figure 4-1 shows this. Also shown in this Figure is the location of the USB
Interface connector. This interface also allows RS-232 communication with GPS430
option.
Mini
USB
Figure 4-1. Tilt stand and location of USB interface connector
A hang strap is supplied with the Analyzer. The figure below shows how to attach the
strap correctly to the Analyzer.
Figure 4-2. Fixing the hang strap
4-2
Basic Operations and Menu Navigation
Powering the Analyzer
4
Powering the Analyzer
The Analyzer has a built-in rechargeable Li-ion battery that can power it for more than 7
hours when fully charged. When powered by battery, the battery condition symbol in the
screen header indicates the charge condition. This symbol ranges from fully charged to
. Detailed information on the battery condition can be found on the
empty:
Analyzer’s screen after the key operations: SETUP, F2 – VERSION & CAL, F2 –
BATT. INFO. Additional to this, the battery itself is provided with a 5 segment fuel
gauge. Each segment represents about 20 % of the battery’s total capacity.
When empty, allow the battery to fully charge with the Power Adapter. A full charge
takes at least 4 hours with the Analyzer turned off. When turned-on charging takes much
longer.
No damage will occur if the charger is connected for long periods, e.g. over the weekend.
The Analyzer automatically switches to trickle charging. At delivery the battery may be
empty and it is recommended to charge it before use.
Concerning the use of the Power Adapter bear the following in mind:
•
Use only the Power Adapter as supplied with the Analyzer.
•
Before use check that the voltage and frequency as indicated on the Power Adapter
and in the accompanying Instruction Sheet match with local line power.
If required set the slider switch of the Power Adapter to the correct voltage.
•
Connect the Power Adapter to the ac outlet.
•
Connect the Power Adapter to the INPUT for the Power Adapter input on the right
top side of the Analyzer.
•
To avoid overheating of the battery during charging, do not exceed the allowable
ambient temperature as given in the specifications.
Note
The Analyzer can not be powered up when the battery cover is not correctly
closed.
Caution
To prevent decrease of battery capacity, charge it at least twice
a year.
Power On/Off:
Press to power up or down with the last setup configuration.
The welcome screen shows what Analyzer settings are
currently in use. At power on a single beep can be heard.
To save battery power, the Analyzer display dims automatically when no keys are
operated during a certain time. This time is adjustable.
When a key is operated, the display turns on again.
For the adjustment of Auto-off time see Chapter 20, USER PREFerences.
Attention: the Analyzer switches off automatically when powered by battery only if no
further knobs are operated after power-on (i.e. when the welcome screen is displayed).
4-3
Fluke 434-II/435-II/437-II
Users Manual
Installation and Replacement of a Battery Pack
Warning
Never Operate the Analyzer with the Battery Cover removed!
Hazardous voltage exposure may occur.
To install or replace a Battery Pack, proceed as follows:
•
Remove all probes and/or test leads.
•
Fold the standup to the Analyzer.
•
Unlock the battery cover at the rear of the Analyzer (turn the screws a quarter turn
counter clockwise as shown in Figure 4-3).
•
Lift the standup and battery cover and remove it (Figure 4-4).
•
Lift one side of the battery and remove it (Figure 4-5)
•
Install a battery and close the cover (turn the screws a quarter turn clockwise).
All measurement data that is stored on the SD Memory Card will stay available when the
Analyzer is disconnected from its power sources.
As an option a double capacity battery and an external battery charger are available.
Refer to chapter 23 paragraph Parts and Accessories for more information.
Figure 4-3. Unlocking the Battery Cover
4-4
Basic Operations and Menu Navigation
SD Memory Card
4
Figure 4-4. Removing the Battery Cover
Figure 4-5. Removing the Battery
SD Memory Card
Warning
Never Operate the Analyzer with the Battery Cover removed!
Hazardous voltage exposure may occur.
The Analyzer has a SD Memory Card for storage of measurement data. This data is
retained also when the Analyzer is disconnected from its power sources. If the Memory
card is not installed, only momentary measurement data is available.
The Memory Card is located in the Analyzer’s battery compartment and can be reached
in the same way as the battery. To lock or unlock the Card press it in the direction of the
arrow shown in the compartment. Also the correct position of the Card is shown there.
Remark: the standard battery can stay in place during exchange of a Memory Card. A
Double Capacity battery however must be removed to get access to the Memory Card.
Note
To avoid malfunctioning of the Memory Card, do not touch its contacts.
Initial Setup
When you power the Analyzer for the first time, after a Factory Default, or if it has been
disconnected from all power sources, you will have to adjust a number of general settings
that match your local situation.
This concerns: Information language, Nominal Frequency, Nominal Voltage, Phase
Identification, Phase Colors, Date and Time. The setups are done step-by-step and
explained in detail in Chapter 24.
4-5
Fluke 434-II/435-II/437-II
Users Manual
Display Brightness
Press repeatedly to dim/brighten the backlight.
Keep pressed for more than 5 seconds for extra brightness
for better visibility in strong sunlight (when powered by
battery).
Low brightness saves battery power.
Locking the keyboard
The keyboard can be locked to prevent unwanted operation during unattended
measurements:
ENTER
Press for 5 seconds to lock or unlock the keyboard.
Menu Navigation
Most of the Analyzer functions are menu operated. Arrow keys are used to navigate
through menus. The Function keys F1 ... F5 and the ENTER key are used to make
selections. Active Function key selections are highlighted with a black background.
How to use the menus is illustrated in the example below on how to adjust the Analyzer
for use with a certain printer type.
SETUP
F1
The SETUP menu pops up.
Submenu SETUP USER PREF appears.
Highlight RS-232:
ENTER
.
The PRINTER submenu appears. In this menu you can
adjust PC communication baudrate.
Adjust the required transmission speed:
F5
.
Press to return to the next higher menu SETUP USER
PREF. This menu is the starting point for many adjustments
such as Display Contrast Adjustment and Reset to Factory
Defaults.
Display Contrast
Use submenu SETUP, USER PREF. as a starting point. How to get there is explained
above under Menu Navigation:
Adjust the Display Contrast to your personal taste.
4-6
Basic Operations and Menu Navigation
Reset to Factory Defaults
4
Reset to Factory Defaults
Proceed as follows to reset the Analyzer to factory default settings (initial setups, limits,
etc.):
Turn power off, then press and hold SAVE SCREEN and turn on again. You should hear
a double beep,
OR
Use submenu SETUP, USER PREF. as a starting point. How to get there is explained
above under Menu Navigation:
F1
Press to start the reset to default settings. Because of the risk
of unwanted erasure of data, a confirm menu pops up.
F5
Press to confirm the reset.
4-7
Fluke 434-II/435-II/437-II
Users Manual
4-8
Chapter 5
Display Information
Introduction
The Analyzer uses five different screen types to present measuring results in the most
effective way. The features these screens have in common are explained in this chapter.
Details that are specific for a certain measuring mode are presented in the chapter
explaining that mode. The screen header is presented in the selected information
language. The figure below gives an overview of the screen types 1 .. 6; common features
are explained under A ... F.
Figure 5-1. Survey of Display Types
5-1
Fluke 434-II/435-II/437-II
Users Manual
Phase Colors
Measuring results belonging to different phases are presented with individual colors. If for a certain phase - voltage and current are displayed simultaneously, the voltage color
has a dark tone and the current has a light tone.
The set of phase colors can be chosen via the SETUP key and function key F1 – USER
PREF. Then select Phase Colors with the up/down arrow keys. Next press ENTER to
reach the menu. Within the menu use the up/down arrow keys to choose the desired
colors and confirm with the ENTER. For detailed information see Chapter 24.
Screen Types
Below you will find a brief description of each screen type and its purpose. The
measuring mode it is used for is given as well as the manual chapter (Ch.) with detailed
information. Bear in mind that the amount of screen information depends on the number
of phases and the wiring configuration. Refer to Figure 5-1, item 1 ... 6.
5-2
1
Meter screen: gives an instantaneous overview of a big number of
important numerical measuring values. All these values are logged as
long as the measurement is on. They are stored in memory when the
measurement is stopped. Used for all measurements except Monitor
(Ch. 16) and Power Wave (Ch. 19).
2
Trend screen: this type of screen is related to a Meter screen. Trend
shows the course over time of measuring values from the Meter screen.
After selection of a measuring mode, the Analyzer starts recording all
readings in the Meter screen. Used for all measurements.
3
Waveform screen: shows voltage and current waveforms as displayed
on an oscilloscope. Channel A (L1) is reference channel and 4 complete
cycles are displayed. The nominal voltage and frequency determine the
measuring grid size. Used for: Scope Waveform (Ch. 7), Transients
(Ch. 18), Power Wave (Ch. 19), and Wave Event in Fluke 435-II/437II.
4
Phasor screen: shows the phase relation between voltages and currents
in a vector diagram. The vector of reference channel A (L1) points to
the positive horizontal direction. The A (L1) amplitude is also reference
for the measuring grid size. Used for: Scope Phasor (Ch. 7) and
Unbalance (Ch. 14).
5
Bar Graph screen: shows the density of each measuring parameter as a
percentage by means of a Bar Graph. Used for: Harmonics (Ch. 10),
and Power Quality Monitor (Ch. 16).
6
Events list: lists the events that occurred during the measurement with
data such as start date/time, phase and duration. Used for all
measurements except Power Wave (Ch. 19).
Display Information
Screen information common for all screen types
5
Screen information common for all screen types
Refer to Figure 5-1, item A ... F
A
Measuring mode: the active measuring mode is shown in the screen
header.
B
Measuring values: main numerical measuring values. Background
colors differ per phase and for voltage or current. If Cursor is on, the
values at the Cursor are shown.
C
Status indicators. The following symbols may appear on the screen to
show the state of Analyzer and measurements:
: Indication that the 150/180 cycle (3 s) aggregation interval (50/60
Hz) is active. With no indication, the aggregation interval is 10/12
cycles (50/60 Hz). The indication is of use for rms based readings.
Time that a measurement has been going on. Format:
hours, minutes, seconds. When waiting for a timed start, time counts
down with prefix -.
Measurement may be unstable. E.g. applicable for frequency
readout during absence of voltage at reference phase A (L1).
Indicates according to IEC61000-4-30 flagging convention that a
dip, swell or interruption has occurred during the displayed aggregation
interval. Indicates that an aggregated value may not be reliable.
/
Recording of measurement data is on / off.
Phasor rotation indicator.
Battery/Line power indication. During battery operation the
battery charge condition is displayed.
Keyboard locked. Press ENTER 5 seconds to unlock/unlock.
D
Main area with measuring data: features are explained under 1 ... 6.
5-3
Fluke 434-II/435-II/437-II
Users Manual
E
Status line: following information appears on the screen. How to adjust
these items is explained in Chapter 20 – General Settings. Following
information is given:
Date of Analyzer’s real time clock. Date format may be
month-day-year or day-month-year.
Time of day or cursor time.
Nominal line voltage and frequency: are a reference for
the measurements.
GPS signal strength indicator.
Number of phases and wiring configuration for the
measurement.
Name of the limits used for the power quality MONITOR
and Event Detection.
F
5-4
Softkey text area: softkey functions that can be selected with F1 ... F5
are indicated in white. Functions currently not available are indicated in
gray. Active Function key selections are highlighted with a black
background.
Chapter 6
Input Connections
Introduction
This chapter explains how to make connection to the power distribution system under test
and how to adjust the Analyzer settings.
Check that the Analyzer setup meets the characteristics of the system under test and the
accessories that are used. This concerns:
•
wiring configuration
•
nominal frequency
•
nominal voltage
•
limits used for power quality monitor and event detection
•
properties of voltage leads and current clamps
For a quick verification of the key elements, use the setup wizard attainable via the
SETUP key and function key F3 – SETUP WIZARD. Refer to Chapter 24 for more
information.
The actual setup is shown in the welcome screen that appears after power up. To change
the setup, refer to Chapter 24.
Input Connections
The Analyzer has 4 BNC inputs for current clamps and 5 banana-inputs for voltages.
Note: use only the current clamps as supplied or clamps that are recommended for safe
use with the Analyzer. These clamps have a plastic BNC connector. The use of insulated
BNC connectors is necessary for safe measurements.
Self-adhesive decals are supplied corresponding to wiring color codes used in the USA,
Canada, Continental Europe, the UK, and China. Stick the decals that fit to your local
wiring codes around the current and voltage inputs as shown in Figure 6-1.
6-1
Fluke 434-II/435-II/437-II
Users Manual
Figure 6-1. Mounting the decals for voltage and current inputs
De-energize power systems before making connections whenever possible. Always use
appropriate equipment for personal protection. Avoid working alone and work according
to the warnings listed in Chapter 1, Safety Information.
For a 3-phase system make the connections as shown in Figure 6-2.
Figure 6-2. Connection of Analyzer to 3-phase distribution system
First put the current clamps around the conductors of phase A (L1), B (L2), C (L3), and
N(eutral). The clamps are marked with an arrow indicating the correct signal polarity.
Next make the voltage connections: start with Ground and then in succession N, A (L1),
B (L2), and C (L3). For correct measuring results, always connect the Ground input.
Always double-check the connections. Make sure that current clamps are secured and
completely closed around the conductors.
6-2
Input Connections
Input Connections
6
For single phase measurements, use current input A (L1) and the voltage inputs Ground,
N(eutral), and phase A (L1).
A (L1) is the reference phase for all measurements.
Before making any measurements, set the Analyzer up for the line voltage, frequency,
and wiring configuration of the power system you want to measure. This is explained in
Chapter 24, General Settings.
Scope Waveform and Phasor display are useful to check if voltage leads and current
clamps are connected correctly. In the vector diagram the phase voltages and currents A
(L1), B (L2), and C (L3) should appear in sequence when observing them in clockwise
direction as shown in the example in Figure 6-3.
Figure 6-3. Vector diagram for correctly connected Analyzer
6-3
Fluke 434-II/435-II/437-II
Users Manual
6-4
Chapter 7
Scope Waveform and Phasor
Introduction
Scope mode shows voltages and currents in the power system under test by means of
waveforms or vector diagram. Also numerical values are shown such as phase voltages
(rms, fundamental, and at cursor), phase currents (rms, fundamental and at cursor),
frequency, and phase angles between voltages and currents.
Scope Waveform and Phasor can be used in combination with an other active
measurement such as for instance Volts/Amps/Hertz and does not interrupt logging of
readings.
Scope Waveform
To access the Scope Waveform screen:
c
SCOPE
The Scope Waveform screen offers an oscilloscope style of display of voltage and/or
current waveforms with a fast update rate. The screen header shows the related rms
voltage/current values (10/12 cycle rms or 150/180 cycle rms). Four waveform periods
are displayed. Channel A (L1) is the reference channel.
Available function keys:
F1
Selection of waveform set to be displayed: VOLT displays
all voltages, AMP displays all currents. A (L1), B (L2), C
(L3), N (neutral) give simultaneous display of phase voltage
and current for the selected phase.
F2
Switch cursor on/off. Use the left/right arrow keys to move
the cursor horizontally along the waveform.
7-1
Fluke 434-II/435-II/437-II
Users Manual
F3
Access to the Phasor screen. For description see below.
F4
Up/down arrow keys are assigned to vertical zoom.
F5
Switch back to active measurement (e.g.
Volts/Amps/Hertz). If Scope Waveform/Phasor is the only
active measurement: switch to MENU.
Cursor. When the Cursor is on, the waveform values at the Cursor are displayed in the
screen header.
Zoom. Allows you to expand or shrink the display vertically to view details or to see the
complete graph within the screen area.
Zoom and Cursor are operated by the arrow keys and are explained in Chapter 23.
The Range of waveforms is preadjusted for a good display in almost all cases. This is
based upon Nominal Voltage (Vnom) and Current range (A Range).
If desired, you can change the Volt and Amp range. Press in sequence:
the SETUP key, F4 - MANUAL SETUP, F2 – SCOPE SCALE. There are separate
adjustments for PHASE and NEUTRAL (to be selected with F3).
Also the PHASOR rotation indication can be set to your preference. Press in sequence:
the SETUP key, F4 - MANUAL SETUP, F3 – FUNCTION PREFerence. Use the
up/down arrow keys to select Phasor and the left/right arrow keys to select pos(itive) or
neg(ative).
Scope Phasor
To access the Phasor screen:
d
F3
The Phasor screen displays the phase relation between voltages and currents in a vector
diagram. The vector of reference channel A (L1) points in the positive horizontal
direction. Additional numerical values are fundamental phase voltage and/or current,
frequency, and phase angles. The screen header shows rms voltage and/or current values.
Available function keys:
7-2
F1
Selection of additional data to be displayed: all voltages, all
currents, or voltage and current phase by phase.
F3
Return to the Scope Waveform.
F5
Switch back to active measurement (e.g.
Volts/Amps/Hertz). If Scope Waveform/Phasor is the only
active measurement: switch to MENU .
Scope Waveform and Phasor
Tips and Hints
7
Tips and Hints
Scope Waveform gives a clear view of current and voltage waveform shapes. Voltage
waveforms in particular should be smooth and sinusoidal. If you see voltage distortion, it
is a good idea to check the harmonics display. The rms voltages and frequency should be
close to their nominal values.
Waveform and Phasor display are also useful to check if voltage leads and current clamps
are connected correctly. In the vector diagram the phase voltages A (L1), B (L2), and C
(L3) should appear in sequence at equal distance (120 degrees). Current vectors should
have the same direction as the voltage vector with usually less than 30 degree phase shift.
7-3
Fluke 434-II/435-II/437-II
Users Manual
7-4
Chapter 8
Volts/Amps/Hertz
Introduction
Volts/Amps/Hertz displays a Meter screen with important numerical measuring values.
The related Trend screen shows the changes over time of all values in the Meter screen.
Events such as dips and swells are listed in a table.
Fluke 437-II is able to perform measurements in 400 Hz power systems (Marine,
Aerospace, Rail, Military).
Meter screen
To access the VOLTS/AMPS/HERTZ Meter screen:
c
MENU
d
ENTER
The Meter screen gives an overview of voltages and currents in all phases. The rms
voltages are shown neutral-to-line and line-to-line. Also frequency and Crest Factors are
shown. The Crest Factor CF indicates the amount of distortion: a CF of 1.41 means no
distortion and higher than 1.8 means high distortion. Use this screen to get a first
impression of power system performance before examining the system in detail with
other measuring modes. The number of columns in the Meter screen depends on the
power system configuration. Use the up/down arrow keys to scroll the Meter screen.
8-1
Fluke 434-II/435-II/437-II
Users Manual
The figures in the Meter screen are present values that may update constantly. Changes in
these values over time are recorded as soon as the measurement is turned on. The
recording is visible in the Trend screen.
Logging. All measuring values in meter screen are logged. Refer to Chapter 3, paragraph
Logging of Measuring Values for more information.
The Cycle Aggregation Interval for rms based measurements such as Vrms and Arms can
be set to 10/12 cycles or 150/180 cycles. To adjust press in sequence: the SETUP key, F4
– MANUAL SETUP, F3 – FUNCTION PREF and the up/down arrow keys to select
Cycle Aggrega(tion) and use the left/right arrow keys to adjust.
Available function keys:
F1
Up/down arrow keys are assigned to scroll Meter screen.
F3
Access to the Trend screen. For description see below.
F4
Access to the Events screen. The number of events that
occurred is shown. For description see below.
F5
Switch between HOLD and RUN of screen update.
Switching from HOLD to RUN invokes a menu to select
immediate (NOW) or TIMED start time which allows you
to define start and duration of the measurement.
Trend
To access the VOLTS/AMPS/HERTZ Trend screen:
e
F3
All values in the Meter screen are recorded, but the Trends from each row in the Meter
screen are displayed one at a time. Press Function key F1 to assign the up/down arrow
keys to row selection.
The traces build up from the right side. Readings in the header correspond to the most
recent values plotted on the right.
Available function keys:
8-2
F1
Up/down arrow keys are assigned to scroll Trend screen.
F2
Access to cursor and zoom menu.
F3
Return to Meter screen.
F4
Access to Events menu. The number of events that occurred
is shown. For description see below.
Volts/Amps/Hertz
Events
8
Switch between HOLD and RUN of screen update.
Switching from HOLD to RUN invokes a menu to select
immediate (NOW) or TIMED start time which allows you
to define start and duration of the measurement.
F5
Cursor. When the Cursor is on, the Trend values at the Cursor are displayed in the screen
header. Moving the Cursor off the left or right side of the screen brings the next screen
into the viewing area.
Zoom. Allows you to expand or shrink the display vertically or horizontally to view
details or to fit a complete graph within the screen area. Zoom and Cursor are operated by
the arrow keys and explained in Chapter 23.
Cursor is active in Hold mode only.
Offset and Span of the Trends are auto ranging for a good display in almost al cases. If
desired, you can change Offset and Span of active measurements. Press in sequence:
the SETUP key, F4 – MANUAL SETUP, F1 – TREND SCALE. Use the up/down arrow
keys to select the item to be adjusted and the left/right arrow keys to adjust. There are
separate adjustments for PHASE and NEUTRAL (to be selected with Function key F3).
See Chapter 24 for more information.
Events
To access the VOLTS/AMPS/HERTZ Events screen:
f
F4
The Events table lists all threshold crossings of phase voltages. Thresholds according to
international standards or user-definable thresholds can be used. Threshold adjustment is
reached via the SETUP key and Limits. For detailed information see Chapter 24, Limits
Adjustments.
In Normal mode major event characteristics are listed: start time, duration, and voltage
magnitude. Detail shows details of threshold crossings per phase.
The following Abbreviations and Symbols are used in the tables:
Abbreviation
Description
Symbol
Description
CHG
Rapid Voltage Change
Rising voltage edge
DIP
Voltage Dip
Falling voltage edge
INT
Voltage Interruption
Change upwards
SWL
Voltage Swell
Change downwards
TRA
Transient
AMP
Amp value exceeded
8-3
Fluke 434-II/435-II/437-II
Users Manual
Available function keys:
F1
Switch to wave event display: this will show a scope
waveform around the selected event. Available in Fluke
435-II and 437-II.
F2
Switch to rms event display: this will show the ½ cycle rms
trend around the selected event. Available in Fluke 435-II
and 437-II.
F3
Switch between NORMAL and DETAILED event table.
F4
Return to Trend screen.
Tips and Hints
Voltage and frequency should be close to the nominal values of for example 120 V,
230 V, 480 V, 60 Hz, or 50 Hz.
The voltages and currents in the Meter screen can e.g. be used to check if power applied
to a 3-phase induction motor is in balance. Voltage unbalance causes high unbalanced
currents in stator windings resulting in overheating and reduced motor life. Each of the
phase voltages should not differ more than 1 % from the average of the three. Current
unbalance should not exceed 10 %. In case of too high unbalance, use other measuring
modes to further analyze the power system.
A Crest Factor close to 2.0 indicates high distortion. CF = 2.0 can e.g. be found if you
measure the current drawn by rectifiers that only conduct at the sine wave top.
8-4
Chapter 9
Dips & Swells
Introduction
Dips & Swells records Dips, Interruptions, Rapid Voltage Changes, and Swells.
Dips (Sags) and Swells are fast deviations from the normal voltage. Magnitude may be
ten up to hundreds of volts. Duration may vary from a half cycle to a few seconds as
defined in EN61000-4-30. The Analyzer allows you to choose nominal or sliding
reference voltage. A sliding reference voltage uses measured values filtered with a
1-minute time constant.
During a dip the voltage drops; during a swell the voltage rises. In three phase systems a
dip begins when the voltage on one or more phases drops below the dip threshold and
ends when all phases are equal to or above the dip threshold plus hysteresis. The trigger
conditions for dips and swells are threshold and hysteresis. Dips and swells are
characterized by duration, magnitude, and time of occurrence. Figure 9-1 and 9-2 explain
this.
Figure 9-1. Characteristics of a voltage dip
9-1
Fluke 434-II/435-II/437-II
Users Manual
Figure 9-2. Characteristics of a voltage swell
During an Interruption the voltage sinks well below its nominal value. In three phase
systems an interruption begins when the voltage on all phases are below threshold and
ends when one phase is equal to or above the interruption threshold plus hysteresis. The
trigger conditions for interruptions are threshold and hysteresis. Interruptions are
characterized by duration, magnitude and time of occurrence. Figure 9-3 explains this.
INTERRUPTION-INTNOMINAL
VOLTAGE
HYSTERESIS
THRESHOLD
duration
time
magnitude
0 VOLT
Figure 9-3. Characteristics of a voltage interruption
Rapid voltage changes are quick transitions of the rms voltage between two steady-states.
Rapid voltage changes are captured based on steady voltage tolerance, steady time,
minimum step detected, and minimum rate (%/s). When a voltage change crosses the dip
or swell thresholds, it is considered a dip or swell and not a rapid voltage change.
Additional to detection based upon voltage step (Vstep), detection based upon maximum
voltage change (Vmax) can be selected when setting up the limits. Note that the
Norwegian FoL requires detection on Vmax. The event list shows the voltage step and
transition time. The detailed event list shows the Vmax relative to the nominal voltage.
Figure 9-4 explains this.
9-2
Dips & Swells
Trend
9
Steady time
Maximum voltage change
Voltage tolerance
Normal voltage
Voltage step
Rate of change
Voltage tolerance
Steady time
Transition time
Figure 9-4. Characteristics of a rapid voltage change
In addition to the voltage also current is recorded. This allows you to see cause and effect
of deviations.
Function key F4 – EVENTS accesses event tables where voltage events are listed in
sequence.
Trend
To access to the Dips & Swells Trend screen:
c
MENU
d
e
ENTER
9-3
Fluke 434-II/435-II/437-II
Users Manual
For the main screen all configured voltage (Vrms half cycle) and current (Arms half
cycle) channels are recorded to allow viewing of cause and effect of deviations. Not all
channels are displayed simultaneously. The up/down arrow keys allow selection of the
set of trends to be displayed.
The screen builds up from the right side of the screen and the corresponding values are
displayed in the screen header.
Available function keys:
F1
Up/down arrow keys are assigned to scroll Trend screen.
F2
Access to cursor and zoom menu.
F3
Access to Meter screen.
F4
Access to Events tables. The number of events that occurred
is shown. For description see below.
F5
Switch between HOLD and RUN of screen update.
Switching from HOLD to RUN invokes a menu to select
immediate (NOW) or TIMED start time which allows you
to define start and duration of the measurement.
Logging. All measuring values in Meter screen are logged. Refer to Chapter 3, paragraph
Logging of Measuring Values for more information.
Cursor. When the Cursor is on, the Trend values at the Cursor are displayed in the screen
header. Moving the Cursor off the left or right side of the screen brings the next of six
screens into the viewing area.
Zoom. Allows you to expand or shrink the display vertically or horizontally to view
details or to fit a complete graph within the screen area. Zoom and Cursor are operated by
the arrow keys and are explained in Chapter 23.
Offset and Span of the Trends are auto ranging for a good display in almost al cases. If
desired, you can change Offset and Span of active trends. Press in sequence:
the SETUP key, F4 – MANUAL SETUP, F1 – TREND SCALE. Use the up/down arrow
keys to select the item to be adjusted and the left/right arrow keys to adjust. See Chapter
24 for more information. In this chapter is also explained how to adjust to Nominal or
Sliding Reference.
Event criteria such as threshold, hysteresis and others are preset, but they may be
adjusted. The adjustment menu is reached via the SETUP key, F4 – MANUAL SETUP
and Limits setup. See Chapter 24, Limits Adjustments.
9-4
Dips & Swells
Events Tables
9
Events Tables
To access the Dips & Swells Events Tables:
f
F4
The Events table lists all threshold crossings of phase voltages. Thresholds according to
international standards or user-definable thresholds can be used. Threshold adjustment is
reached via the SETUP key, F4 – MANUAL SETUP and Limits. For detailed
information see Chapter 24, Limits Adjustments.
With the Analyzer in HOLD mode you can see event details in the modes WAVE
EVENT and RMS EVENT. With the up/down arrow keys you can select a certain event
in the table.
WAVE EVENT (in Fluke 435-II and 437-II) gives oscilloscope style waveforms of the
selected event. The event is in the horizontal mid of screen.
RMS EVENT (in Fluke 435-II and 437-II) gives a trend display with the event in the mid
of screen (provided that there is sufficient data available after the event).
In Normal mode major event characteristics are listed: start time, duration, and voltage
magnitude. Detail shows details of threshold crossings per phase.
The following Abbreviations and Symbols are used in the tables:
Abbreviation
Description
Symbol
Description
CHG
Rapid Voltage Change
Rising voltage edge
DIP
Voltage Dip
Falling voltage edge
INT
Voltage Interruption
Change upwards
SWL
Voltage Swell
Change downwards
TRA
Transient
AMP
Amp value exceeded
Available function keys:
F1
Access to WAVE EVENT display.
F2
Access to RMS EVENT display.
F3
Switch between NORMAL and DETAILED event table.
F4
Return to Trend screen.
9-5
Fluke 434-II/435-II/437-II
Users Manual
Tips and Hints
The occurrence of Dips (Sags) and Swells may indicate a weak power distribution
system. In such a system voltage will change considerably when a big motor or a welding
machine is switched on or off. This may cause lights to flicker or even show visible
dimming. It may cause reset and loss of data in computer systems and process controllers.
By monitoring the voltage and current trend at the power service entrance, you can find
out if the cause of the voltage dip is inside or outside the building. The cause is inside the
building (downstream) when voltage drops while current rises; it is outside (upstream)
when both voltage and current drop.
9-6
Chapter 10
Harmonics
Introduction
Harmonics measures and records harmonics and interharmonics up to the 50th. Related
data such as DC components, THD (Total Harmonic Distortion), and K-factor are
measured. Harmonics are periodic distortions of voltage, current, or power sinewaves. A
waveform can be considered as a combination of various sinewaves with different
frequencies and magnitudes. The contribution of each of these components to the full
signal is measured. Readings can be given as a percentage of the fundamental, as a
percentage of all harmonics combined (rms value), or as rms value. Results may be
viewed in a Bar Graph display, a Meter screen, or a Trend display. Harmonics are often
caused by non-linear loads such as switched mode power supplies in computers, TV’s
and adjustable speed motor drives. Harmonics can cause transformers, conductors, and
motors to overheat.
Note: the number of harmonics is limited to DC and harmonics 1 … 13 for measurements
in 400 Hz power systems such as offered in Fluke 437-II. Measurement of
Interharmonics is disabled. The phase angle is not displayed. For further information
refer to the Specifications in Chapter 27.
Bar Graph Screen
To access to the Harmonics Bar Graph screen:
c
MENU
10-1
Fluke 434-II/435-II/437-II
Users Manual
d
e
ENTER
The Bar Graph display shows the percentage contribution of each of the components
related to the full signal. A signal without distortion should show a 1st harmonic (= the
fundamental) at 100 % while the others are at zero: in practice this will not occur because
there always is a certain amount of distortion resulting in higher harmonics.
A pure sinewave becomes distorted when higher frequency components are added to it.
Distortion is represented by the THD percentage. The display can also show the
percentage of the DC component and the K-factor. The K-factor is measurend for current
and power and displayed in the screen header. It is a number that quantifies potential
overload in transformers due to harmonic currents. Higher order harmonics influence the
K-factor more than low order harmonics.
The table below shows the number of Bar Graphs displayed simultaneously in one
screen:
Harmonics
Harmonics & Interharmonics
All phase display
1 ... 17
1 ... 9
Single phase display
1 ... 50
1 ... 25
The left/right arrow keys are used to position the Cursor on a particular bar. The screen
header will show for that bar phase identifier, harmonic number, frequency, and phase
angle. If not all bars are shown on the screen, you can bring the next set within the
viewing area by moving the Cursor off the left or right end of the screen. The up/down
arrow keys are used for vertical zoom: 100 %, 50 %, 20 %, 10 %, or 5 % at full scale can
be selected.
Press in sequence: the SETUP key, F4 – MANUAL SETUP, F3 – FUNCTION PREF and
use the up/down arrow keys to select Harmonics measurement parameters and if required
adjust them with the left/right arrow keys. For detailed information see Chapter 24,
FUNCTION PREFerences.
Filtering. When measuring harmonics with interharmonics off, harmonics group is used
and a 1.5 s smoothing filter is active. When measuring harmonics with interharmonics on,
harmonics subgroup and interharmonics centered subgroup are used and no filter is
active. Refer to IEC61000-4-7 for information on grouping.
10-2
10
Harmonics
Meter screen
Available function keys:
F1
Selection of harmonics type: Voltage, Current, or Real
Power (Watt). Power harmonics can have positive and
negative polarity.
F2
Selection of waveform set to be used: A (L1), B (L2), C
(L3), N (neutral) or ALL
F3
Access the Meter screen.
F5
Switch between HOLD and RUN of screen update.
Switching from HOLD to RUN invokes a menu to select
immediate (NOW) or TIMED start time which allows you
to define start and duration of the measurement.
Meter screen
To access the Harmonics Meter screen:
f
F3
The Meter screen display shows many measurements that are grouped per phase. Use the
up/down arrow keys to scroll all measurements within the viewing area.
The Events table attainable under Function key F4 lists all threshold crossings of phase
voltages. Thresholds according to international standards or user-definable thresholds can
be used. Threshold adjustment is reached via the SETUP key and Limits. For detailed
information see Chapter 24, Limits Adjustments.
Available function keys:
F1
Up/down arrow keys are assigned to scroll Meter screen.
F2
Return to Bar Graph screen.
F3
Access the Trend screen. For description see below.
F4
Access to Events tables.
F5
Switch between HOLD and RUN of screen update.
Switching from HOLD to RUN invokes a menu to select
immediate (NOW) or TIMED start time which allows you
to define start and duration of the measurement.
10-3
Fluke 434-II/435-II/437-II
Users Manual
Trend
To access the Harmonics Trend screen:
g
F4
Trend shows how harmonics and related parameters vary over time: Cursor and Zoom
can be used in HOLD mode to investigate trend details. All values in the Meter screen are
recorded, but the Trends from each row in the Meter screen are displayed one at a time.
Use the arrow keys to scroll the Trend screen.
Press in sequence: the SETUP key, F4 – MANUAL SETUP, F3 – FUNCTION PREF and
use the up/down arrow keys to select Harmonics measurement parameters and if
necessary adjust them with the left/right arrow keys. For detailed information see Chapter
24, FUNCTION PREFerences.
Available function keys:
F1
Up/down arrow keys are assigned to scroll the Trend screen.
F2
Access to cursor and zoom menu.
F3
Return to Meter screen.
F4
Access to events tables.
F5
Switch between HOLD and RUN of screen update.
Switching from HOLD to RUN invokes a menu to select
immediate (NOW) or TIMED start time which allows you
to define start and duration of the measurement.
Tips and Hints
The harmonic number indicates the harmonic frequency: the first harmonic is the
fundamental frequency (60 or 50 Hz), the second harmonic is the component with two
times the fundamental frequency (120 or 100 Hz), and so on. The harmonics sequence
can be positive (+), zero (0), or negative (-). The table below gives an overview.
Order
Frequency
Sequence
1st
Sequence
10-4
3rd
4th
5th
6th
60 Hz
120 Hz
180 Hz
240 Hz
300 Hz
360 Hz
50 Hz
100 Hz
150 Hz
200 Hz
250 Hz
300 Hz
+
-
0
+
-
0
Order
Frequency
2nd
7th
8th
9th
10th
11th
420 Hz
480 Hz
540 Hz
600 Hz
660 Hz
350 Hz
400 Hz
450 Hz
500 Hz
550 Hz
+
-
0
+
-
...
...
...
Harmonics
Tips and Hints
10
Positive sequence harmonics try to make a motor run faster than the fundamental;
negative sequence harmonics try to make the motor run slower than the fundamental. In
both cases the motor looses torque and heats up. Harmonics can also cause transformers
to overheat. Even harmonics disappear if waveforms are symmetrical, i.e. as equally
positive and negative.
Zero sequence current harmonics add in Neutral conductors. This can cause overheating
of these conductors.
Distortion. Current distortion is to be expected in a system with non-linear loads like DC
power supplies. When the current distortion starts to cause voltage distortion (THD) of
more than 5 %, this signals a potential problem.
K-factor: this is an indication of the amount of harmonic currents and can help in
selecting transformers. Use the K-factor along with kVA to select a replacement
transformer to handle non-linear, harmonics-rich loads.
10-5
Fluke 434-II/435-II/437-II
Users Manual
10-6
Chapter 11
Power & Energy
Introduction
Power & Energy displays a Meter screen showing all important power parameters. The
related Trend screen shows the changes over time of all measuring values in the Meter
screen. An Events table lists all crssings of threshold voltages.
The Analyzer also displays energy usage. Power calculations are done for Fundamental
and Full. FUNDamental considers voltage and current only at the fundamental frequency
(60, 50 Hz, or 400 Hz in Fluke 437-II) for power calculations; FULL uses the full
frequency spectrum (True rms voltage and current).
Press in sequence: the SETUP key, F4 – MANUAL SETUP, F3 – FUNCTION PREF and
the up/down arrow keys to select Power measurement parameters Method and Display
and if required adjust them with the left/right arrow keys. Also the Cycle Aggregation
Interval can be set to 10/12 or 150/180 cycles. This interval is of use for rms based
measurements. Refer to chapter 24 for detailed information.
Power measurement can be done according to the methods Unified and Classic. Selection
between both methods is done in the FUNCTION PREF menu.
Unified uses algoritms according to the unified method in accordance to IEEE 1149 as
developed at the Polytechnical University of Valencia. The method allows to measure
real power (kW), apparent power (kVA), reactive power (kvar), harmonic power
components ( kVA Harm), and unbalance power (kVA Unb).
The default setting for the Fluke 430 series II instruments is to use the Unified method to
measure power. For compatibility reason with guidelines that may exist within
companies, there is also a ‘classic’ method available that utilizes the arithmetic method
for system power as described in IEEE 1459. The method can be changed via the
Function Preference menu. To indicate that classic system with the arithmetic sum
method is used to calculate system power a ∑ (sigma) symbol is used behind the power
parameters e.g. VA∑.
11-1
Fluke 434-II/435-II/437-II
Users Manual
Meter screen
To access the Power & Energy Meter screen:
c
MENU
d
e
ENTER
The following power measurements are made:
- Real power (W, kW): measurement as normally registered by energy usage meters.
The full spectrum is used.
- Apparent power (VA, kVA): the full spectrum is used.
- Reactive power (var, kvar): the fundamental frequency is used.
- Harmonic power (VA or kVA Harm): non fundamental frequency powers.
- Unbalance power (VA or kVA Unb): unbalance part of real power.
- Fundamental real power (W or kW fund): the fundamental frequency is used.
- Fundamental apparent power (VA, kVA fund): the fundamental frequency is used.
- Cos ϕ or DPF: cos ϕ is phase angle between fundamental voltage and current. DPF is
(W fund)/(VA fund).
Energy measurements include:
- Active energy (Wh, kWh).
- Apparent energy (VAh, kVAh).
- Reactive energy (varh, kvarh).
- Forward energy (Wh, kWh forw): energy consumed.
- Reverse energy (Wh, kWh rev): energy delivered.
Also the the 12/10 or 180/150 cycle rms values of current and voltage are displayed.
Symbols indicate if a load is capacitive ( ) or inductive ( ).
The Analyzer displays power and energy usage by phase and in total.
11-2
11
Power & Energy
Trend
By a using TIMED start of the measurement, the Analyzer can be used to measure energy
usage during a predefined period of time. TIMED start can be adjusted when switching
from HOLD to RUN with function key F5.
Available function keys:
F1
Up/down arrow keys are assigned to scroll Meter screen.
F3
Access to Trend screen. For description see below.
F4
Access to Events menu. The number of events that occurred
is shown.
F5
Switch between HOLD and RUN of screen update.
Switching from HOLD to RUN invokes a menu to select
immediate (NOW) or TIMED start time which allows you
to define start and duration of the measurement.
Trend
To access the Power & Energy Trend screen:
f
F3
The figures in the Meter screen are instantaneous values that update constantly. Changes
in these values over time are recorded whenever the measurement is active. All values in
the Meter screen are recorded, but the Trends from each row in the Meter screen are
displayed one at a time. The arrow keys are assigned to scroll the Trend screen.
The traces build up from the right side. The readings in the header correspond to the most
recent measurements plotted on the right.
Available function keys:
F1
Up/down arrow keys are assigned to scroll Trend screen.
F2
Access to cursor and zoom menu.
F3
Return to Meter screen.
F4
Access to Events tables.
F5
Switch between HOLD and RUN of screen update.
Switching from HOLD to RUN invokes a menu to select
immediate (NOW) or TIMED start time which allows you
to define start and duration of the measurement.
11-3
Fluke 434-II/435-II/437-II
Users Manual
Cursor. When the Cursor is on, the Trend values at the Cursor are displayed in the screen
header. Moving the Cursor off the left or right side of the screen brings the next of six
screens into the viewing area.
Zoom. Allows you to expand or shrink the display vertically or horizontally to view
details or to fit a complete graph within the screen area. Zoom and Cursor are operated by
the arrow keys and explained in Chapter 23.
Offset and Span are auto ranging for a good display in most cases. This is based upon
Nominal Voltage (Vnom) and Current range (A range). If desired, you can change Offset
and Span. The adjustment menu is reached via the SETUP key, F4 – MANUAL SETUP,
F1 - TREND SCALE. There are separate adjustments for PHASE and TOTAL (to be
selected with F3). See Chapter 24, MANUAL SETUP.
Tips and Hints
Power mode can be used to record apparent power (kVA) of a transformer over several
hours. Look at the Trend and find out if there are times that the transformer is overloaded.
You can transfer loads to other transformers, stagger the timing of loads, or if necessary
replace the transformer with a larger one.
Interpretation of Power Factor when measured at a device:
•
PF = 0 to 1: not all supplied power is consumed, a certain amount of reactive power
is present. Current leads (capacitive load) or lags (inductive load).
•
PF = 1: all supplied power is consumed by the device. Voltage and current are in
phase.
•
PF = -1: device generates power. Current and voltage are in phase.
•
PF = -1 to 0: device is generating power. Current leads or lags.
If you see negative power readings and you are connected to a load, check to make sure
the arrows on your current clamps are pointing towards the load.
Reactive power (var) is most often due to inductive loads such as motors, inductors, and
transformers. Installation of correction capacitors can correct for inductive var’s. Be sure
to check with a qualified engineer before adding PF-correction capacitors, especially if
you measure current harmonics in your system.
11-4
Chapter 12
Energy Loss Calculator
Introduction
The Analyzer provides advanced analysis of energy usage to help you to determine where
energy losses occur and to visualize their impact on the energy bill. The Energy Loss
function allows to determine losses due to several causes:
-
Effective kW. Loss due to transport of the effective power. Caused by resistance of
wires. This is the only component of the power that is transferable in useful
mechanical energy.
-
Reactive kvar. Loss due to reactive power that is being transported back and forth
through the system, but does not deliver active work. The loss is caused due to the
current flowing.
-
Unbalance kVA. Loss due to unbalance in source and load. This unique measuring
function helps to reveal losses occurring due to unbalance in the network. Unbalance
power is Fundamental Power minus positive sequence Power.
-
Distortion kVA. Loss due to distortion power (harmonics). Allows you to quickly
determine on forehand the savings due to active filtering or other system
improvements. Distortion kVA due to harmonics is real power (W) minus
fundamental power (W fund).
-
Neutral A. Loss due to currents in neutral conductor. Besides from being a possible
source for unsafe situations such as overheating, large current that flows in the
Neutral conductor of the system will cause losses too.
The Analyzer will measure these components simultaneously. Energy Loss Calculator
uses patented algoritms to calculate losses and to monetize them. The costs due to
Effective W, Reactive var, Unbalance VA, Distortion VA and Neutral A are displayed
per Hour. The total costs are displayed per year which gives you an impression of
possible savings on a yearly basis.
Four different rates can be set (price per kWh as a function of period of day). The length
(meters or feet) and diameter (square millimeter or AWG/American Wire Gauge) of the
cables between service entrance and the load can be set manually.
In AUTO mode a loss of 3% due to wire resistance is assumed which is normal for an
average distribution system.
12-1
Fluke 434-II/435-II/437-II
Users Manual
Energy Loss Calculator Display
To access the Energy Loss Calculator screen:
c
MENU
d
e
ENTER
Cable properties, tariff and currency can be preset via the key sequence SETUP key, F4 –
MANUAL SETUP, F3 – FUNCTION PREFerence, F4 – ENERGY LOSS. How to
proceed is explained in Chapter 24 Setup.
Available function keys:
12-2
F1
Access to menu to adjust cable data, tariff, currency.
F2
Access to menu to adjust cable data, tariff, currency.
F3
Access to Meter screen. For description see below.
F4
Access to menu to adjust cable data, tariff, currency.
F5
Switch between HOLD and RUN of screen update.
Switching from HOLD to RUN invokes a menu to select
immediate (NOW) or TIMED start time which allows you
to define start and duration of the measurement.
12
Energy Loss Calculator
Meter
Meter
To access the Energy Loss Meter screen:
f
F3
A large number of measurements are available:
- Arms, kW fund, kVA fund, kvar, kVA harm are shown per phase and in total.
- kVA unb, kW R loss, kW var loss, kW unb loss, kW harm loss, kW An loss, kW tot
loss are shown in total.
- kWh R loss, kWh var loss, kWh harm loss, kWh unb loss, kWh An loss, kWh tot loss
are shown in total.
- kcost R, kcost var, kcost unb, kcost harm, kcost An, kcost tot are shown in total.
- kWh forw and kWh rev are shown per phase and in total.
Abbreviations that are used:
- Fund indicates that fundamental frequency is used; in all other cases the full spectrum
is used.
- kW or W is the power.
- Wh or kWh is the energy used.
- R indicates loss due to conductor resistance.
- var indicates loss due to reactive power.
- unb indicates loss due to sytem unbalance.
- harm indicates loss due to harmonics.
- An indicates loss due to current in the Neutral conductor.
- kWh forward is the energy taken from the distribution network; kWh reverse is the
energy supplied to the distribution network.
The figures in the Meter screen are instantaneous values that update constantly. The trend
of these values over time is visible in a Trend screen.
Also a Events table is available.
Available function keys:
F1
Up/down arrow keys are assigned to scroll Meter screen.
F2
Return to Energy Loss Calculator screen.
F3
Access to Trend screen.
F4
Access to Events table.
F5
Switch between HOLD and RUN of screen update.
Switching from HOLD to RUN invokes a menu to select
immediate (NOW) or TIMED start time which allows you
to define start and duration of the measurement.
12-3
Fluke 434-II/435-II/437-II
Users Manual
Tips and Hints
A power system is utilized in an optimal way if voltage and current are sinusoidal, in
phase, and balanced. Any deviation from this will cause efficiency loss and thus waste of
energy.
A poor power factor is usualy caused by reactive devices such as transformers and
motors. The power factor can be improved by adding capacitors in parallel with the
inductive load. The ideal situation is a cos phi or DPF equal or close to 1.
Reactive powers (var) do not contribute to efficient energy transfer. They are not
included in the real power (W, kW) measurement, but cause energy losses due to wire
resistance. Additionally utilities may charge additional cost when var readings are high
because they need to provide apparent power (VA, kVA) that does not include both var
and W.
Unbalanced powers and harmonic power are included in Watt measurement of energy
usage meters so that the user has to pay for it. But these powers can not be converted
effectively into mechanical energy and are therefore considered loss.
Increasing the diameter of conductors reduces copper loss (Effective kW).
If harmonics are present, consult a qualified engineer before installing capacitors. Nonlinear loads such as adjustable frequency motor drives cause non-sinusoidal load currents
with harmonics. Harmonic currents increase the kvar and thereby decrease total power
factor. A poor total power factor caused by harmonics requires filtering for correction.
In general the most efficient way to troubleshoot electrical systems, is to begin at the load
and work towards the building’s service entrance. Measurements are taken along the way
to isolate faulty components or loads.
12-4
Chapter 13
Power Inverter Efficiency
Introduction
Power Inverter Efficiency measures the efficiency and amount of energy being delivered
by inverters that convert single phase dc into single or three phase ac. This concerns
inverters such as used in solar panel systems, variable speed drives and Uninterruptable
Power Supply (UPS) systems. The Power Inverter Efficiency measurement measures the
dc voltage and current that feed the inverter input. The ac ouput current of the inverter
unit is measured as well as the three voltages between the phases (A/L1, B/L2, C/L3).
Power Inverter Efficiency requires balanced voltages in a three wire (delta) configuration.
To check voltage balance on the inverter output, you can use the Voltage Unbalance
function (Chapter 14). Voltage Unbalance Vneg. should be less than 0.5 %. For Power
Inverter Efficiency it is not required to have balanced currents. Unbalance Aneg. up to
100 % is allowed.
The measurement is started with a clear diagram how to connect current and voltage
probes to the system. The measurement requires an (optional) dc current clamp (refer to
chapter 26, paragraph Optional Accessories or visit www.fluke.com to find a clamp that
fits your application).
Measurements: Wac, Wfund, Wdc, Efficiency, Vdc, Adc, Vrms, Arms, Hz. The
measurements are displayed in a Meter screen and a Trend screen.
13-1
Fluke 434-II/435-II/437-II
Users Manual
Meter screen
To access the Power Inverter Efficiency Meter screen:
c
MENU
d
e
ENTER
f
F5
Available function keys:
13-2
F1
Up/down arrow keys are assigned to scroll Meter screen.
F3
Access to the Trend screen. For description see below.
F5
Switch between HOLD and RUN of screen update.
Switching from HOLD to RUN invokes a menu to select
immediate (NOW) or TIMED start time which allows you
to define start and duration of the measurement.
13
Power Inverter Efficiency
Trend
Trend
To access the POWER INVERTER EFFICIENCY Trend screen:
g
F3
All values in the Meter screen are recorded, but the Trends from each row in the Meter
screen are displayed one at a time. Press Function key F1 to assign the up/down arrow
keys to row selection.
The traces build up from the right side. Readings in the header correspond to the most
recent values plotted on the right.
Available function keys:
F1
Up/down arrow keys are assigned to scroll Trend screen.
F2
Access to cursor and zoom menu.
F3
Return to Meter screen.
Tips and Hints
Power Inverter Efficiency measurement is a useful tool to analyze how good an inverter
is functioning. A good inverter should have an efficiency over 90 %. Bear in mind that an
inverter usually has its highest efficiency when used between 40 to 70 % of its peak
power. If an inverter is always used at 100 % of its maximum power you may consider
installation of a device with a higher power. Examples of other factors that determine
overall system efficiency: the diameter of cabling is probably too small causing losses
and inverter temperature that may be decreased by a better air flow.
13-3
Fluke 434-II/435-II/437-II
Users Manual
13-4
Chapter 14
Unbalance
Introduction
Unbalance displays phase relations between voltages and currents. Measuring results are
based upon the fundamental frequency component (60 Hz, 50 Hz, or 400 Hz in Fluke
437-II) using method of symmetrical components). In a 3-phase power system, the phase
shift between voltages and between currents should be close to 120°. Unbalance mode
offers a Meter screen, a related Trend display, Events tables, and a Phasor display.
Phasor screen
To access the Unbalance Phasor screen:
c
MENU
d
e
ENTER
14-1
Fluke 434-II/435-II/437-II
Users Manual
The Phasor Screen shows the phase relation between voltages and currents in a vector
diagram divided in 30 degree sections. The vector of the reference channel A (L1) points
to the positive horizontal direction. A similar vector diagram is displayed under Scope
Phasor. Additional numerical values are given: negative voltage or current unbalance
(Relative %), zero sequence voltage or current unbalance (Relative %), fundamental
phase voltage or current, frequency, phase angles. With function key F1 you can choose
readings of all phase voltages, all phase currents, or voltage and current in one phase.
Available function keys:
F1
Selection of signals to be displayed: V displays all voltages,
A displays all currents. A (L1), B (L2), C (L3), N (neutral)
give simultaneous display of phase voltage and current.
F2
Access to Meter screen.
F5
Switch between HOLD and RUN of screen update.
Switching from HOLD to RUN invokes a menu to select
immediate (NOW) or TIMED start time which allows you
to define start and duration of the measurement.
Meter Screen
f
F2
The Meter screen shows all relevant numerical values: negative voltage unbalance
percentage, zero sequence voltage unbalance percentage (in 4-wire systems), negative
current unbalance percentage, zero sequence current unbalance percentage (in 4-wire
systems), fundamental phase voltage, frequency, fundamental phase current, angle
between phase-neutral voltages relative to the reference phase A/L1 and angles between
voltage and current for each phase.
Available function keys:
14-2
F1
Up/down arrow keys are assigned to scroll the Meter screen.
F2
Return to Phasor screen.
F3
Access to Trend screen. For description see below.
F4
Access Events menu. The number of events that occurred is
shown.
F5
Switch between HOLD and RUN of screen update.
Switching from HOLD to RUN invokes a menu to select
immediate (NOW) or TIMED start time which allows you
to define start and duration of the measurement.
14
Unbalance
Trend
Trend
To access the Unbalance trend screen:
f
F3
The figures in the Meter screen are instantaneous values that update constantly. Changes
in these values over time are recorded whenever the measurement is active. All values in
the Meter screen are recorded, but the Trends from each row in the Meter screen are
displayed one at a time. Press function key F1 to assign the arrow keys to row selection.
The Trend display may consist of 6 screens.
Available function keys:
F1
Up/down arrow keys are assigned to scroll the Trend screen.
F2
Access to cursor and zoom menu.
F3
Return to Meter screen.
F4
Access Events menu. The number of events that occurred is
shown.
F5
Switch between HOLD and RUN of screen update.
Switching from HOLD to RUN invokes a menu to select
immediate (NOW) or TIMED start time which allows you
to define start and duration of the measurement.
Cursor. When the Cursor is on, the Trend values at the Cursor are displayed in the screen
header. Moving the Cursor off the left or right side of the screen brings the next data into
the viewing area when available.
Zoom. Allows you to expand or shrink the display vertically or horizontally to view
details or to fit a complete graph within the screen area. Zoom and Cursor are operated by
the arrow keys and explained in Chapter 23.
Offset and Span are preset for a good display in most cases, but they are adjustable. The
adjustment menu is reached via the SETUP key, F4 – MANUAL SETUP, and F1 –
TREND SCALE. There are separate adjustments for PHASE and NEUTRAL (to be
selected with F3). Also the Phasor display is adjustable. The adjustment menu is reached
via the SETUP key, F4 – MANUAL SETUP, F3 - FUNCTION PREF. Use the up/down
arrow keys to select Phasor Clockwise and the left/right arrow keys to select pos(itive) or
neg(ative). See Chapter 24, FUNCTION PREFerences.
14-3
Fluke 434-II/435-II/437-II
Users Manual
Tips and Hints
The voltages and currents in the Meter screen can e.g. be used to check if power applied
to a 3-phase induction motor is in balance. Voltage unbalance causes high unbalanced
currents in stator windings resulting in overheating and reduced motor life. The Negative
Voltage component Vneg. should not exceed 2 %. Current unbalance should not exceed
10 %. In case of too high unbalance, use other measuring modes to further analyze the
power system.
Each three phase voltage or current can be split-up into three components: positive
sequence, negative sequence, and zero sequence.
The positive sequence component is the normal component such as present in balanced
3-phase systems. The negative sequence component results from unbalanced phase-tophase currents and voltages. This component for instance causes a ‘braking’ effect in
3-phase motors: this will result in overheating and life reduction.
Zero sequence components may appear in an unbalanced load in 4 wire power systems
and represent the current in the N (Neutral) wire. Unbalance exceeding 2 % is considered
as too high.
14-4
Chapter 15
Inrush
Introduction
Inrush Currents can be captured by the Analyzer. Inrush Currents are surge currents that
occur when a large, or low-impedance load comes on line. Normally the current will
stabilize after some time when the load has reached normal working condition. For
example the start-up current in induction motors can be ten times the normal working
current. Inrush is a ‘single shot’ mode that records current and voltage Trends after a
current event (the trigger) has occurred. An event occurs when the current waveform
exceeds adjustable limits. The display builds up from the right of the screen. Pretrigger
information allows you to see what occurred in advance of the inrush.
Inrush Trend Display
To access the Inrush Trend screen:
c
MENU
d
15-1
Fluke 434-II/435-II/437-II
Users Manual
e
ENTER
f
F3
Use the arrow keys in the Start menu to adjust the trigger limits: expected inrush time,
nominal current, threshold, and hysteresis. The maximum current determines the vertical
height of the current display windows. Threshold is the current level that triggers the
trend capture. The screen header displays the rms of all rms values during the inrush
time. If the Cursor is on, the rms measuring values at the Cursor are displayed. A Meter
screen shows half cycle rms for voltage (Vrms ½) and current (Arms ½).
Set the duration to a value higher than the expected inrush duration to assure that the
event is completely captured. Duration is selectable from 1 to 45 minutes.
The inrush starts when the Arms ½ of one of the phases is higher than the threshold. The
inrush ends when the Arms ½ is lower than the threshold minus the hysteresis. The inrush
duration is indicated with markers on screen and shown as a duration reading in the
Trend screen. The inrush value is the rms value between the markers and is measured on
each phase simultaneously.
15-2
15
Inrush
Inrush Trend Display
DURATION
AMPLITUDE WINDOW
THRESHOLD
(=TRIGGER)
} HYSTERESIS
pretrigger
inrush time
rms during inrush
t
35 s
1
12.3 A
2
12.3 A
3
1.5 A
Figure 15-1. Inrush characteristics and relation with start menu
Use Cursor and Zoom to investigate details of the recorded Trends. Selection of channels
to be displayed is done with the up/down arrow keys. Press function key F1 to assign the
arrow keys to this.
The adjustment menu is reached via the SETUP key, F4 – MANUAL SETUP, F3 –
FUNCTION PREF., and F2 – INRUSH. You can set up the default values of the trigger
limits (expected inrush time, nominal current, threshold, hysteresis).
To set Offset and Span of the half cycle rms voltage and current Trend display press
SETUP key, F4 – MANUAL SETUP, F1 – TREND SCALE. For detailed information
see Chapter 24, FUNCTION PREFerences.
15-3
Fluke 434-II/435-II/437-II
Users Manual
Available function keys:
F1
Up/down arrow keys are assigned to scroll Meter screen.
F2
Access to cursor and zoom menu.
F3
Access to Meter screen showing half cycle rms for voltage
and current.
F4
Access to Events menu. The number of events that occurred
is shown.
F5
Switch between HOLD and RUN of screen update.
Switching from HOLD to RUN invokes a menu to select
immediate (NOW) or TIMED start time which allows you
to define start and duration of the measurement.
Tips and Hints
Check the peak currents and their duration. Use the Cursor for readout of momentary
values. Check if fuses, circuit breakers, and conductors in the power distribution system
can withstand the inrush current during this period. Check also if phase voltages stay
stable enough.
High peak currents can cause circuit breakers to trip unexpectedly. Measuring Inrush
Current can help in setting trip levels. Since the Analyzer simultaneously captures Inrush
Current and Voltage Trends you can use this measurement to check voltage stability as
large loads come on line.
Use event capture on Arms ½ to capture high resolution voltage and current rms trends
and to capture waveform signals. This feature is available in Fluke 435-II and 437-II and
can display a 7.5 second trend and a 1 second waveform. To activate this press SETUP,
F4 – MANUAL SETUP, F3 – FUNCTION PREF., F1- WAVE CAPTURE. Then select
AMPS 0.50 A with the up/down arrow keys and press ENTER to activate.
15-4
Chapter 16
Monitor - Power Quality Monitoring
Introduction
Power Quality Monitoring or System Monitor displays a Bar graph screen. This screen
shows whether important Power Quality parameters meet requirements. Parameters
include:
1. RMS voltages
2. Harmonics
3. Flicker
4. Dips/Interruptions/Rapid Voltage Changes/Swells (DIRS)
5. Unbalance/Frequency/Mains Signaling.
Monitor is started via a menu to select immediate or timed start of the measurement.
When selecting timed start, synchronisation with the 10 minute real time clock is used.
Timed start in combination with the optional GPS Synchronisation Unit GPS430 will
give Class A timing accuracy.
Figure 16-1 shows the bar graph screen and its properties.
Note: Monitor is not available for measurements in 400 Hz power systems such as
offered in Fluke 437-II.
16-1
Fluke 434-II/435-II/437-II
UNBALANCE
FREQUENCY
MAINS SIGNALING
DIPS
INTERRUPTIONS
RAPID VOLTAGE CHANGES
SWEELS
B / L2
C / L3
A / L1
B / L2
C / L3
A / L1
B / L2
C / L3
A / L1
PER PHASE
ALL PHASES
Users Manual
Figure 16-1. Power Quality Monitor Main Screen
The length of a bar increases if the related parameter is further away from its nominal
value. The bar turns from green to red if an allowed tolerance requirement is violated.
Use the left/right arrow keys to position the cursor on a particular bar and measuring data
belonging to that bar is displayed in the screen header.
Power Quality Monitoring is usually done during a long observation period. Minimum
duration of the measurement is 2 hours. An usual measuring period is 1 week.
The Power Quality parameters rms voltages, Harmonics, and Flicker have a bar for each
phase. From left to right these three bars are related to the phases A (L1), B (L2), and C
(L3).
The parameters Dips/Interruptions/Rapid Voltage Changes/Swells and
Unbalance/Frequency have a single bar for each parameter representing performance
across three phases.
For Mains Signaling there is a single bar in the Main screen representing performance
across three phases and for frequency 1 and 2. Separate bars per phase and for frequency
1 and 2 are available in the submenu under Function key F5.
Most of the Bar Graphs have a wide base indicating adjustable time related limits (for
instance 95 % of time within limit) and a narrow top indicating a fixed 100 % limit. If
one of both limits is violated, the related bar changes from green to red. Dotted horizontal
lines on the display indicate the 100% limit and the adjustable limit.
The meaning of the bar graphs with a wide base and a narrow top is explained below. By
way of example this is done for the rms voltage. This voltage for instance has a nominal
value of 120 V with a tolerance of + and – 15% (tolerance range between 102 … 138 V).
16-2
16
Monitor - Power Quality Monitoring
Introduction
The momentary rms voltage is constantly monitored by the Analyzer. It calculates an
average from these measuring values across 10-minute observation periods. The 10minute averages are compared against the tolerance range (in this example 102 ... 138 V).
The 100 % limit means that the 10-minute averages must always (i.e. 100 % of time or
with 100 % probability) be within range. The bar graph will turn to red if a 10-minute
average crosses the tolerance range.
The adjustable limit of for instance 95 % (i.e. 95 % probability) means that 95 % of the
10-minute averages must be within tolerance. The 95 % limit is less stringent than the
100 % limit. Therefore the related tolerance range usually is tighter. For 120 V this for
instance can be + or – 10 % (a tolerance range between 108 ... 132 V).
The bars for Dips/Interruptions/Rapid Voltage Changes/Swells are narrow and indicate
the number of limits violations that occurred during the observation period. The allowed
number is adjustable (for instance to 20 Dips/week). The bar turns to red if the adjusted
limit is violated.
You can use a pre-defined set of limits or define your own. The pre-defined set is that
according to the EN50160 standard. You can define your own set of limits and save it in
memory under a user-definable file name. As a basis for this set you can use EN50160 or
any other set. Refer to Chapter 24 Paragraph Limits Adjustments for a description.
The table below gives a survey of the aspects of Power Quality Monitoring:
Parameter
Available Bar Graphs
Limits
Averaging Interval
Vrms
3, one for each phase
Probability 100 %: upper
& lower limit
Probability x %: upper &
lower limit
10 minutes
Harmonics
3, one for each phase
Probability 100 %: upper
limit
Probability x %: upper
limit
10 minutes
Flicker
3, one for each phase
Probability 100 %: upper
limit
Probability x %: upper
limit
2 Hrs.
Dips/Interruptions/Rapid
Voltage Changes/Swells
4, one for each
parameter covering all 3
phases
allowed number of
events per week
½ cycle rms based
Unbalance
1, covering all 3 phases
Probability 100 %: upper
limit
Probability x %: upper
limit
10 minutes
Frequency
1, covering all 3 phases
Measured on Reference
Voltage Input A/L1
* Probability 100 %:
upper & lower limit
Probability x %:
upper & lower limit
10 sec.
Mains Signaling
6, one for each phase,
for freq 1 and freq 2
* Probability 100 %
upper limit: N/A
Probability x %:
upper limit: adjustable
3 sec. rms
16-3
Fluke 434-II/435-II/437-II
Users Manual
Power Quality Main Screen
To access the Power Quality Main screen:
c
MENU
d
e
ENTER
f
F5
Power Quality Monitoring is reached via the MONITOR selection under the MENU key.
A start menu allows for Immediate or Timed start. With the left/right arrow keys you can
position the Cursor on a particular Bar Graph. Measuring data belonging to the bar is
shown in the screen header.
Detailed measurement data is available under the Function keys:
16-4
F1
rms voltage: trends, events table.
F2
Harmonics: bar graphs, events table, trends.
F3
Flicker: trends, events table.
F4
Dips, Interruptions, Rapid voltage changes, and Swells:
trends, events table.
F5
Unbalance, Frequency, and Mains Signaling: bar graphs per
Mains Signaling frequency/phase, trends, events table.
16
Monitor - Power Quality Monitoring
Trend Display
The measurement data available under the Function keys is explained in the following
sections. Data is presented in the formats Events Table, Trend Display, and Bar Graph
screen.
Trend Display
Figure 16-2. Trend Display
The Trend screen shows the changes over time of measuring values. Zoom and Cursor
are available to examine Trend details. Zoom and Cursor are operated by the arrow keys
and explained in Chapter 23.
Available function keys:
F1
Up/down arrow keys are assigned to scroll Trend screen.
F2
Access to Events menu. The number of events that occurred
is shown.
F3
Access to cursor and zoom menu.
F4
Return to bar graph screen.
F5
Switch between HOLD and RUN of screen update.
Switching from HOLD to RUN invokes a menu to select
immediate (NOW) or TIMED start time which allows you
to define start and duration of the measurement.
Events Table
Figure 16-3. Events Table
The events table shows the events that occurred during the measurement with date/time
of start, phase, and duration. The amount of information in the table can be selected with
the Function key F3.
16-5
Fluke 434-II/435-II/437-II
Users Manual
Normal lists the major event characteristics: start date/time, duration, event type, and
magnitude.
Detail gives information on threshold crossings for each phase of an event.
Wave event shows a scope waveform around the selected event. RMS event shows the ½
cycle rms trend around the selected event. Wave event and rms event are available in
Fluke 435-II and 437-II.
The following Abbreviations and Symbols are used in the tables:
Abbreviation
Meaning
Symbol
Meaning
CHG
Rapid Voltage Change
High value of 100 %
limit has been violated
DIP
Voltage Dip
Low value of 100 % limit
has been violated
INT
Voltage Interruption
High value of x % limit
has been violated
SWL
Voltage Swell
Low value of x % limit
has been violated
Hx
Number of the harmonic
that violated its limits
Unbalance event
TRA
Transient
Change upwards
AMP
Amp value exceeded
Change downwards
Available function keys:
F1
Switch to wave event display: this will show a 4 cycle
waveform around the selected event. Available in HOLD.
F2
Switch to rms event display: this will show the ½ cycle rms
trend around the selected event. Available in HOLD.
F3
Switch between Normal and Detailed events table.
F4
Return to previous menu.
Two ways to access Trend:
1. Use the up/down arrow keys to highlight an event in the table. To access Trend press
the ENTER key. The Cursor is on, in the mid of screen and located on the selected
event. Zoom is set to 4.
2. Press Function key F4 to view the Trend part showing the most recent measuring
values. Cursor and Zoom can be switched on afterwards when required.
16-6
16
Monitor - Power Quality Monitoring
Bar Graph Screen
Measurement specific features:
•
Vrms events: an event is recorded each time that a 10 minute aggregated rms value
violates its limits.
•
Harmonics events: an event is recorded each time a 10 minute aggregated harmonic
or THD violates its limit.
•
Flicker events: an event is recorded each time Plt (long term severity) violates its
limit.
•
Dips/Interruptions/Rapid Voltage Changes/Swells events: an event is recorded each
time one of the items violates its limits.
•
Unbalance, Frequency events: an event is recorded each time that a 10 minute
aggregated rms value violates its limits.
Bar Graph Screen
Figure 16-4. Bar Graph Screen
The main system monitor display shows the strongest harmonic for each of the three
phases. Function key F2 brings up a screen with Bar Graphs showing the percentage of
time each phase spent within limits for 25 harmonics and Total Harmonic Distortion
(THD). Each Bar Graph has a wide base (representing an adjustable limit of e.g. 95 %)
and a narrow top (representing the limit of 100 %). A Bar Graph changes from green to
red if the limits for that harmonic are violated.
Cursor: with the left/right arrow keys you can position the Cursor on a particular Bar
Graph and measuring data belonging to that bar is shown in the screen header.
Available function keys:
F1
Selection of Bar Graphs belonging to phase A (L1), B (L2),
or C (L3).
F2
Access to events table. The number of events that occurred
is shown.
F4
Access to Trend screen.
F5
Return to main menu.
16-7
Fluke 434-II/435-II/437-II
Users Manual
Tips and Hints
Monitor is intended to perform a quality check over a long period up to one week. For
compliance to international standards averaging time for Vrms and Harmonics are 10
minutes. This allows you to obtain a good impression of power quality, but is less
suitable for troubleshooting. For troubleshooting the measuring functions like Dips and
Swells or Logger are more suitable.
16-8
Chapter 17
Flicker
Introduction
Flicker is available in Fluke 435-II and 437-II. It quantifies the luminance fluctuation of
lamps caused by supply voltage variations. The algorithm behind the measurement meets
EN61000-4-15 and is based on a perceptual model of the human eye / brain sensory
system. The Analyzer converts duration and magnitude of voltage variations into an
‘annoyance factor’ caused by the resulting flicker of a 60 W lamp. A high flicker reading
means that most people would find the luminance changes irritating. The voltage
variation can be relatively small. The measurement is optimized to lamps powered by
120 V / 60 Hz or 230 V / 50 Hz. Flicker is characterized per phase by the parameters
shown in a Meter screen. The related Trend screen shows the changes in all measuring
values in the Meter screen.
Note: Flicker is not available for measurements in 400 Hz power systems such as offered
in Fluke 437-II.
Meter screen
To access the Flicker Meter screen:
c
d
MENU
F2
17-1
Fluke 434-II/435-II/437-II
Users Manual
e
ENTER
Flicker is characterized by: instantaneous flicker Pinst, short term severity Pst (measured
over 1 min for fast feedback), short term severity Pst (measured over 10 min) and a long
term severity Plt (measured over 2 hours). Also related data such as half cycle rms for
voltage (Vrms ½), current (Arms ½) and frequency are measured.
Available function keys (popup Meter screen must be off):
F1
Up/down arrow keys are assigned to scroll Meter screen.
F3
Access to Trend screen. For description see below.
F4
Access to Events menu. The number of events that occurred
is shown.
F5
Switch between HOLD and RUN of screen update.
Switching from HOLD to RUN invokes a menu to select
immediate (NOW) or TIMED start time which allows you
to define start and duration of the measurement.
Trend
To access Flicker Trend screen:
f
F3
The parameters in the Meter screen update over time. They are recorded whenever the
measurement is on. Trend displays the changes in these values over time. All values in
the Meter screen are recorded, but the Trends from each row in the Meter screen are
displayed one at a time. The arrow keys are assigned to scroll the trend screen. The Trend
display may consist of 6 screens.
Available function keys:
17-2
F1
Up/down arrow keys are assigned to scroll the Trend screen.
F2
Access to cursor and zoom menu.
17
Flicker
Tips and Hints
F3
Return to Meter screen.
F4
Access to Events menu. The number of events that occurred
is shown.
F5
Switch between HOLD and RUN of screen update.
Switching from HOLD to RUN invokes a menu to select
immediate (NOW) or TIMED start time which allows you
to define start and duration of the measurement.
Cursor. When the Cursor is on, the Trend values at the Cursor are displayed in the screen
header. Moving the Cursor off the left or right side of the screen brings the next of six
screens into the viewing area. This functions in HOLD mode only.
Zoom. Allows you to expand or shrink the display vertically or horizontally to view
details or to fit a complete graph within the screen area. Zoom and Cursor are operated by
the arrow keys and explained in Chapter 23.
Offset and Span are auto ranging for a good display in most cases, but they are
adjustable. The adjustment menu is reached via the SETUP key, F4 – MANUAL SETUP,
F1 – TREND SCALE. The lamp model can be adjusted via the SETUP key, F4 –
MANUAL SETUP, F3 - FUNCTION PREF. Use the up/down arrow keys to select
Flicker Lamp model and the left/right arrow keys to select the desired model. See
Chapter 24, FUNCTION PREFerences.
Tips and Hints
Use instantaneous flicker (Pinst) trend and half-cycle voltage or current trends to find the
source of flicker. Use the arrow keys to select flicker, voltage, and current trends.
The 10 min (Pst) uses a longer measuring period to eliminate the influence of random
voltage variations. It is also long enough to detect interference from a single source with
a long working cycle such as electrical household appliances, and heat pumps.
A measuring period of 2 hours (Plt) is useful when there may be more than one
interference source with irregular working cycles and for equipment such as welding
machines, and rolling mills. Plt ≤ 1.0 is the limit used in standards like EN15160.
17-3
Fluke 434-II/435-II/437-II
Users Manual
17-4
Chapter 18
Transients
Introduction
Fluke 435-II and 437-II can capture waveforms at high-resolution during a variety of
disturbances. The Analyzer will give a snapshot of the voltage and current waveforms at
the precise time of the disturbance. This allows you to see the waveforms during dips,
swells, interruptions, current swells and transients.
In Transients mode the Analyzer uses a special setting of its input circuit to allow
capturing signals up to 6 kilovolt in amplitude.
Transients are fast spikes on the voltage waveform. Transients can have so much energy
that sensitive electronic equipment can be affected or even damaged. The Transients
screen looks similar to that of Scope Waveform, but its vertical span is enlarged to make
voltage spikes visible that are superimposed on the 60 or 50 Hz sinewave. A waveform is
captured each time that the voltage (or rms current) exceeds adjustable limits. A
maximum of 9999 events can be captured. The sample rate for transient detection is
200 kS/s.
Transients also has a Meter mode showing half cycle rms for voltage (Vrms ½), current
(Arms ½), and frequency. Also an Events table is available.
18-1
Fluke 434-II/435-II/437-II
Users Manual
Waveform Display
To access the Transients Waveform screen:
c
d
MENU
F2
e
18-2
f
ENTER
g
F3
h
F5
18
Transients
Tips and Hints
In the Start menu you can choose a trigger event or a combination of trigger events,
transients (Volt) and current (AMP) trigger level, and Immediate or Timed start of the
measurement.
The Analyzer can be set up to capture waveforms each time it sees: Voltage Transient,
Voltage Swell, Voltage Dip, Voltage Interruption or Current swell. Dips (sags) and
swells are fast deviations from the nominal voltage. The duration of a transient must be 5
microseconds or more. The display window showing the transient is 4 cycles. A total of
50 or 60 (50/60 Hz) cycles will be captured. The cursor can be used to scroll these.
During a dip the voltage sinks, and during a swell the voltage rises. During an
interruption the voltage falls to only a few percent of its nominal value. A current swell is
a current increase from one cycle to several seconds in duration.
Trigger criteria such as threshold and hysteresis are adjustable. Criteria that are also used
for Power Quality Monitor: this adjustment can considered as default setup and is
reached via the SETUP key, F4 – MANUAL SETUP, use the up/down arrow keys to
select ‘limits’ and press ENTER. Adjustment for transient level dV/dt and Arms are
available in the Start screen.
Cursor and Zoom can be used to investigate details of captured waveforms.
Available function keys:
F1
Up/down arrow keys are assigned to scroll Trend screen.
F2
Access to cursor and zoom menu.
F3
Access to Meter screen.
F4
Access to Events menu. The number of events that occurred
is shown.
F5
Switch between HOLD and RUN of screen update.
Switching from HOLD to RUN invokes a menu to select
immediate (NOW) or TIMED start time which allows you
to define start and duration of the measurement.
Tips and Hints
Disturbances such as transients in a power distribution system can cause malfunctions in
many types of equipment. For example, computers may reset and equipment subjected to
repeated transients can eventually fail. Events occur intermittently, making it necessary to
monitor the system for a period of time to find them. Look for voltage transients when
electronic power supplies are failing repeatedly or if computers reset spontaneously.
18-3
Fluke 434-II/435-II/437-II
Users Manual
18-4
Chapter 19
Power Wave
Introduction
In this measuring mode that is available in Fluke 435-II and 437-II the Analyzer
functions as an 8 channel scope recorder that records high resolution waveforms in a
single shot acquisition. The function records half cycle rms values on 8 channels,
frequency and instantaneous power (Vrms½, Arms½, W, Hz and scope waveforms for
Voltage, Amps, Watts).
Note: Power Wave records a long waveform while Scope Waveform displays 4 periods
of the momentary waveform.
Note: Power Wave is not available for measuremens in 400 Hz power systems such as
offered in Fluke 437-II.
Power Wave Screen
To access the Power Wave screen:
c
d
MENU
F2
19-1
Fluke 434-II/435-II/437-II
Users Manual
e
f
ENTER
The traces build up from the right side. Readings in the header correspond to the most
recent values plotted on the right. With the up/down arrow keys you can select all
available trends.
Available function keys:
F1
Up/down arrow keys are assigned to select a set of trends
and the belonging readout.
F2
Access to cursor and zoom menu.
F3
Access to meter screen. For description see below.
F4
Access to waveform screen. Analyzer must be in HOLD
mode. For description see below.
F5
Switch between HOLD and RUN of screen update.
Switching from HOLD to RUN invokes a menu to select
Immediate or Timed Start and Duration of the measurement.
Cursor. When the Cursor is on, the Trend values at the Cursor are displayed in the screen
header. Moving the Cursor off the left or right side of the screen allows scrolling of the
trend on screen. Cursor is only active in Hold.
Zoom. Allows you to expand or shrink the display vertically to view details or to fit a
complete graph within the screen area. Zoom and Cursor are operated by the arrow keys
and explained in Chapter 23.
Offset and Span of the Trends are auto ranging for a good display in most cases, but they
are adjustable. The adjustment menu is reached via the SETUP key and function keys
F4 – MANUAL SETUP, F1 – TREND SCALE. See Chapter 24, MANUAL SETUP.
19-2
19
Power Wave
Meter screen
Meter screen
To access the Power Wave Meter screen:
g
F3
Available function keys:
F1
Up/down arrow keys are assigned to scroll meter screen.
F3
Access to Trend screen.
F4
Access to waveform screen. Analyzer must be in HOLD
mode. For description see below.
F5
Switch between HOLD and RUN of screen update.
Switching from HOLD to RUN invokes a menu to select
Immediate or Timed Start and Duration of the measurement.
Waveform screen
To access the Power Wave Waveform screen:
h
F4
Starting from the Trend screen, position the cursor on the area of interest. Then press
F4 – WAVE to open waveform display at this area.
Use the left/right arrow keys to move the cursor and to scroll all recorded waveforms.
The maximum recording time is about 5 minutes. The time of the displayed waveform at
the cursor position is shown in the status line in the bottom of the screen.
Available function keys:
F1
Selection of waveform set to be displayed: VOLT displays
all voltages, AMP displays all currents. A (L1), B (L2), C
(L3), N (neutral) give simultaneous display of phase voltage
and current for the selected phase.
F2
Access to cursor and zoom menu.
F4
Return to previous screen.
19-3
Fluke 434-II/435-II/437-II
Users Manual
Tips and Hints
Power Wave records high resolution waveforms during a time span of several minutes.
This allows you to monitor the influence of sudden load changes on voltage and current
waveforms. An example is switch on or off of big motors or welding machines. Big
voltage changes may indicate a weak power distribution system.
19-4
Chapter 20
Mains Signaling
Introduction
Mains Signaling is a function available in Fluke 435-II and 437-II. Power distribution
systems often carry control signals to switch appliances on and off remotely (also known
as ripple control). These control signals have a frequency that is higher than the normal
50 or 60 Hz line frequency and range up to about 3 kHz. Amplitude is significantly lower
than that of the nominal line voltage. The control signals are present only at the moments
that a remote appliance has to be controlled.
In Mains Signaling mode the 435-II and 437-II can capture the occurrence (signal level)
of control signals with 2 different frequencies. The frequency range is 70.0 – 3000.0 Hz
for 60 Hz systems and 60.0 – 2500.0 Hz for 50 Hz systems.
Selection of Frequency 1 and frequency 2 is attainable via key sequence SETUP, F4 –
MANUAL SETUP, select Limits with the up/down arrow keys, ENTER, F3 – EDIT,
select Mains Signaling with the up/down arrow keys, and press ENTER. Next use the
arrow keys to adjust Frequency 1 and 2.
The Duration of the measurement and Immediate or Timed start are selectable after a
measurement is set from HOLD to RUN.
Measuring results are presented in a Trend screen and in an Events Table.
Note: Mains Signaling is not available for measurements in 400 Hz power systems such
as offered in Fluke 437-II.
20-1
Fluke 434-II/435-II/437-II
Users Manual
Trend
To access the Mains Signaling Trend screen:
c
MENU
d
F2
e
f
ENTER
The traces build up from the right side. Readings in the header correspond to the most
recent values plotted on the right. With the up/down arrow keys you can select readout as
a percentage of nominal line voltage or as a 3 second average voltage (V3s).
The Neutral conductor is not used for Mains Signaling, but is shown for troubleshoot
purposes.
Available function keys:
20-2
F1
Up/down arrow keys are assigned to select a set of trends
and the belonging readout.
F2
Cursor on/off.
F3
Assign the arrow keys to Cursor or Zoom operation.
F4
Access to Events tables.
20
Mains Signaling
Events Table
Switch between HOLD and RUN of screen update.
Switching from HOLD to RUN invokes a menu to select
Immediate or Timed Start and Duration of the measurement.
F5
Cursor. When the Cursor is on, the Trend values at the Cursor are displayed in the screen
header. Moving the Cursor off the left or right side of the screen allows scrolling of the
trend on screen.
Zoom. Allows you to expand or shrink the display vertically or horizontally to view
details or to fit a complete graph within the screen area. Zoom and Cursor are operated by
the arrow keys and explained in Chapter 23.
Offset and Span of the Trends are auto ranging for a good display in most cases, but they
are adjustable. The adjustment menu is reached via the SETUP key and function key F3 –
FUNCTION PREF. See Chapter 24, FUNCTION PREFerences.
Events Table
To access the Mains Signaling events table:
g
F4
The events table shows in Normal mode the events (V3s above the limit) that occurred
during the measurement. Date, time, type (phase, signal 1 or signal 2), level and duration
of each event are listed. In Detail mode additional information is given on threshold
crossings.
Available function keys:
F3
Switch between Normal and Detailed events table.
F4
Return to next higher menu.
F5
Access to Trend screen. Two ways to access Trend are
explained below.
Two ways to access Trend:
1. Use the up/down arrow keys to highlight an event in the table. To access Trend press
the ENTER key. The Cursor is on, in the mid of screen and located on the selected event.
2. Press Function key F5 to view the Trend part showing the most recent measuring
values. Cursor and Zoom can be switched on afterwards when required.
20-3
Fluke 434-II/435-II/437-II
Users Manual
Tips and Hints.
To capture control signals it is essential to know their frequencies in advance. Consult the
Internet Website of your local energy supplier for information on what frequencies are
used for Mains Signaling in your area.
Voltage level in percent
EN 50160 shows the ‘Meister_Kurve’ for the allowed 3 second average voltage V3s as a
function of frequency. Limits should be programmed accordingly.
10
1
0,1
1
10
Frequency in kHz
Figure 20-1. Meister Kurve acc. to EN50160
20-4
100
Chapter 21
Logger
Introduction
Logger is a function that gives you the possibility to log multiple readings with high
resolution. The readings are observed during adjustable time intervals. At the end of the
interval the min, max, and average values of all readings are stored and the next
observation interval starts. This process continues for the Duration of the observation
period.
The Analyzer has as a default a predefined set of readings that is used for logging. This
set can be customized to your own set of readings. Via the Setup Readings from the
logger start menu you can Add or Remove readings to be logged.
You start the Logging function from the Start menu that allows you to select the Interval
time (0.25 s – 2 Hr.), the readings to be logged, the maximum duration of the logging
(1 Hr. – Max) and Immediate or Timed start of logging.
Readings are displayed in a Meter screen, a Trend screen, and an Events Table.
Start Menu
To access the Logger Start Menu:
c
LOGGER
The set of readings to be logged is selectable in the menu under function key F1 –
SETUP READINGS. The reading selection list for default frequency 50/60 Hz and
400 Hz are different. If you change the default frequency to 400 Hz or from 400 Hz to
50/60 Hz the reading selection list will be set to default!
With the up/down arrow keys you can select the Category of readings to be logged. These
Categories are listed in Column 1: Volt, Amp, Power, Energy, Volt Harmonic, Amp
Harmonic, Watt Harmonic, Frequency, Flicker (not for 400 Hz), Unbalance, and Mains
Signaling (not for 400 Hz).
21-1
Fluke 434-II/435-II/437-II
Users Manual
With the arrow keys you can select Column 2 where the readings belonging to the
selected Category are listed. The readings indicated with are active readings and they
also show up in Column 3.
The readings indicated with are not active. An inactive reading can be selected with
the up/down arrow keys. Next if you press F3 – ADD the reading will be added to
Column 3 of selected readings. Note that in column 2 the symbol now shows up in
front of the reading just selected.
With the arrow keys you can select an active reading in Column 3. Next if you press F4 –
REMOVE the reading is removed from the list of active readings.
With F3 – MOVE you can move a certain reading to a higher position in the list of
selected readings.
When ready press F5 – OK.
Available function keys in Start menu:
F1
Access to Readings Select menu.
F2
Access to the menu to define the name of the file with
logging data.
F5
Start of the logging and access to Logging Trend screen.
Meter screen
To access the Logger Meter screen:
d
F5
This screen displays all current readings of the logger function. Use up/down arrow keys
to scroll across the Meter screen.
Available function keys:
21-2
F1
Up/down arrow keys are assigned to scroll Meter screen
up/down.
F3
Access to Trend screen.
F4
Access to Events Table.
F5
Stop/Start logging.
21
Logger
Trend
Trend
To access the Logger Trend screen:
e
F3
All readings are recorded during logging, but not all of them are visible at a time. Use the
up/down arrow keys to make the desired set of trends visible within the viewing area.
The traces are build up from the right side. Readings in the header correspond to the most
recent values plotted on the right.
Available function keys:
F1
The up/down arrow keys are assigned to select a set of
loggings for Trend display. The selected set is displayed in
the screen header.
F2
Access to submenu for Cursor and Zoom operation.
F3
Access to Meter screen showing momentary measuring
results of all logged readings.
F4
Access to Events Table.
F5
Access to menu to stop the logging.
Cursor. When the Cursor is on, the Trend values at the Cursor are displayed in the screen
header. Moving the Cursor off the left or right side of the screen brings the next screens
into the viewing area. Cursor is only active in ‘Hold’ mode.
Zoom. Allows you to expand or shrink the display vertically or horizontally to view
details or to fit a complete graph within the screen area. The min, max, and average
values of the trend are displayed in the screen header if vertical zoom is expanded to one
trace in the viewing area. Zoom and Cursor are operated by the arrow keys and explained
in Chapter 23.
Offset and Span of the Trends are auto ranging for a good display in most cases, but they
are adjustable when required. The adjustment menu is reached via the SETUP key and
function key F3 - FUNCTION PREF. See Chapter 24, FUNCTION PREFerences
21-3
Fluke 434-II/435-II/437-II
Users Manual
Events
To access the Logger Events Table screen:
h
F3
The Events table lists all threshold crossings of phase voltages. Thresholds according to
international standards or user-definable thresholds can be used. Threshold adjustment is
reached via the SETUP key and Limits. For detailed information see Chapter 24, Limits
Adjustments.
In Normal mode major event characteristics are listed: start time, duration, and voltage
magnitude. Detail shows details of threshold crossings per phase.
Wave Event shows a scope waveform around the selected event. Rms event shows the
½ cycle rms trend around the selected event. Wave event and rms event are available in
Fluke 435-II and 437-II.
The following Abbreviations and Symbols are used in the tables:
Abbreviation
Description
Symbol
Description
CHG
Rapid Voltage Change
Rising voltage edge
DIP
Voltage Dip
Falling voltage edge
INT
Voltage Interruption
Change upwards
SWL
Voltage Swell
Change downwards
TRA
Transient
AMP
Amp value exceeded
Available function keys:
21-4
F1
Switch to wave event display: this will show a scope
waveform around the selected event.
F2
Switch to rms event display: this will show the ½ cycle rms
trend around the selected event.
F3
Switch between NORMAL and DETAILED event table.
F4
Return to Meter screen.
Chapter 22
Shipboard V/A/Hz
Introduction
Shipboard V/A/Hz (Volts/Amps/Hertz) displays a Meter screen with important numerical
measuring values. The function is available in the Fluke 437-II and provides measuring
functions that are useful for shipboard installations. The measuring results comply with
the requirements of the military standard MIL-STD-1399-300B. The related Trend screen
shows the changes over time of all values in the Meter screen. Events such as dips and
swells are listed in a table.
Meter screen
To access the Shipboard V/A/Hz Meter screen:
c
d
MENU
F2
e
22-1
Fluke 434-II/435-II/437-II
Users Manual
f
ENTER
The Meter screen gives an overview of the following measuring results:
V rms
the rms value of the nominal voltages
V tol%
voltage tolerance
V imb%
voltage imbalance
Please notice that the definition of Voltage imbalance according to MILSTD-1399-300B is different from the definition of unbalance in the function
Unbalance described in Chapter 14.
Unbalance uses the method of symmetrical components (see
IEC61000-4-30).
Imbalance uses the maximum deviation from the average voltage.
V mod
voltage modulation
A rms
the rms value of the currents
A imb%
current imbalance. Please notice that the definition of Current imbalance for
this function is different from the definition of unbalance in the function
Unbalance dewscribed in Chapter 14.
Unbalance uses the method of symmetrical components (see
IEC61000-4-30).
Imbalance uses the maximum deviation from the average current.
Hz
Frequency
Hz 10s
Frequency 10s
Hz tol
Frequency tolerance (absolute)
Hz tol%
Frequency tolerance relative (%)
Hz mod
Frequency modulation (absolute)
Hz mod% Frequency modulation relative (%)
Use the up/down arrow keys to scroll the Meter screen.
The figures in the Meter screen are present values that may update constantly. Changes in
these values over time are recorded as soon as the measurement is turned on. The
recording is visible in the Trend screen.
Logging.
All measuring values in meter screen are logged. Refer to Chapter 3, paragraph Logging
of Measuring Values for more information.
The Cycle Aggregation Interval for rms based measurements such as Vrms and Arms can
be set to 10/12 cycles or 150/180 cycles. To adjust press in sequence: the SETUP key,
F4 – MANUAL SETUP, F3 – FUNCTION PREF and the up/down arrow keys to select
Cycle Aggrega(tion) and use the left/right arrow keys to adjust.
22-2
22
Shipboard V/A/Hz
Trend
Available function keys:
F1
Up/down arrow keys are assigned to scroll Meter screen.
F3
Access to the Trend screen. For description see below.
F4
Access to the Events screen. The number of events that
occurred is shown. For description see below.
F5
Switch between HOLD and RUN of screen update.
Switching from HOLD to RUN invokes a menu to select
immediate (NOW) or TIMED start time which allows you
to define start and duration of the measurement.
Trend
To access the Shipboard V/A/Hz Trend screen:
e
F3
All values in the Meter screen are recorded, but the Trends from each row in the Meter
screen are displayed one at a time. Press Function key F1 to assign the up/down arrow
keys to row selection.
The traces build up from the right side. Readings in the header correspond to the most
recent values plotted on the right.
Available function keys:
F1
Up/down arrow keys are assigned to scroll Trend screen.
F2
Access to cursor and zoom menu.
F3
Return to Meter screen.
F4
Access to Events menu. The number of events that occurred
is shown. For description see below.
F5
Switch between HOLD and RUN of screen update.
Switching from HOLD to RUN invokes a menu to select
immediate (NOW) or TIMED start time which allows you
to define start and duration of the measurement.
Cursor. When the Cursor is on, the Trend values at the Cursor are displayed in the screen
header. Moving the Cursor off the left or right side of the screen brings the next screen
into the viewing area. Cursor is active in Hold mode only.
22-3
Fluke 434-II/435-II/437-II
Users Manual
Zoom. Allows you to expand or shrink the display vertically or horizontally to view
details or to fit a complete graph within the screen area. Zoom and Cursor are operated by
the arrow keys and explained in Chapter 23.
Offset and Span of the Trends are auto ranging for a good display in almost al cases. If
desired, you can change Offset and Span of active measurements. Press in sequence:
the SETUP key, F4 – MANUAL SETUP, F1 – TREND SCALE. Use the up/down arrow
keys to select the item to be adjusted and the left/right arrow keys to adjust. There are
separate adjustments for PHASE and NEUTRAL (to be selected with Function key F3).
See Chapter 24 for more information.
Events
To access the Shipboard V/A/Hz Events screen:
f
F4
The Events table lists all threshold crossings of phase voltages. Thresholds according to
international standards or user-definable thresholds can be used. Threshold adjustment is
reached via the SETUP key and Limits. For detailed information see Chapter 23, Limits
Adjustments.
In Normal mode major event characteristics are listed: start time, duration, and voltage
magnitude. Detail shows details of threshold crossings per phase.
The following Abbreviations and Symbols are used in the tables:
Abbreviation
Description
Symbol
Description
CHG
Rapid Voltage Change
Rising voltage edge
DIP
Voltage Dip
Falling voltage edge
INT
Voltage Interruption
Change upwards
SWL
Voltage Swell
Change downwards
TRA
Transient
AMP
Amp value exceeded
Available function keys:
22-4
F1
Switch to wave event display: this will show a scope
waveform around the selected event.
F2
Switch to rms event display: this will show the ½ cycle rms
trend around the selected event.
F3
Switch between NORMAL and DETAILED event table.
F4
Return to Trend screen.
Chapter 23
Cursor and Zoom
Introduction
This chapter explains how to use Cursor and Zoom to display and investigate details of
Waveform, Trend, and Bar Graph displays. Cursor and Zoom have a certain amount of
interaction and are both operated by the arrow keys.
The Cursor is a vertical line that can be positioned on a point on a Waveform, Trend, or
Bar Graph. The measured values at that point are displayed in the screen header.
Zoom allows you to stretch and shrink the graph to get a better view of details.
Horizontal Zoom is available for Waveform and Trend.
Put the Analyzer in HOLD mode if Cursor cannot be switched on.
Cursor on Waveform Displays
As an example the Scope Waveform display is used. Cursor and Zoom for the Transients
screen function in the same way.
Figure 23.1 shows the Scope Waveform display with Cursor and Zoom switched off. The
screen header shows the rms values of the displayed waveforms.
Figure 23-1. Waveform display, no cursor
23-1
Fluke 434-II/435-II/437-II
Users Manual
Figure 23-2. Waveform display, cursor on
Figure 23-3. Waveform display with cursor and zoom on
To control Cursor and Zoom:
•
Press F2 to switch the Cursor on. Use the left/right arrow keys to move the Cursor
horizontally along the waveforms. The value of the waveforms at the Cursor is
displayed in the screen header as shown in Figure 23.2.
•
The up/down arrow keys zoom in vertical direction (Figure 23.3).
Cursor on Trend Displays
As an example the Volts/Amps/Hertz Trend display is used. Cursor and Zoom for other
Trend displays function in the same way.
Figure 23.4 shows the Trend screen with Cursor and Zoom switched off. The screen
header displays rms values of the Trends at the right screen side. This is the screen side
with the most recent measuring values.
Figure 23-4. Trend display, no cursor
Figure 23-5. Trend display, cursor on
23-2
23
Cursor and Zoom
From Events Table to Trend Display with Cursor On
Figure 23-6. Trend display with cursor and zoom on
The Function keys F1, F2, F3 and F4 and the arrow keys are used to operate Cursor and
Zoom:
•
Operate F2 and F3 to switch the Cursor on (only in Hold mode). Use the left/right
arrow keys to move the Cursor horizontally along the trends. The value of the trends
at the Cursor is displayed in the screen header as shown in Figure 23.5. Positioning
the Cursor across the left or right screen end moves the trend to the left or right.
•
Press F4 to assign the arrow keys to Zoom operation. The left/right arrow keys can be
used now to stretch and shrink the trends horizontally as shown in figure 23.6. The
up/down arrow keys do this in vertical direction. If the Cursor is on, horizontal zoom
operates symmetrically around the Cursor; when off horizontal zoom operates from
the right screen side.
•
Press F1 to assign the arrow keys to select the Trend line(s) to be displayed.
•
Press F4 again to assign the arrow keys to Cursor operation.
From Events Table to Trend Display with Cursor On
Within an events table, you can highlight a certain event with the up/down arrow keys
(only in Hold mode). Next press the ENTER key. As a result a Trend display is shown
with the Cursor on and positioned on the highlighted event. The steps in this process are
shown below.
The example below shows the transition from Dips & Swells events table to trend display
with cursor on:
c
Use the arrow keys to highlight an event of
interest.
23-3
Fluke 434-II/435-II/437-II
Users Manual
d
ENTER
Press ENTER to obtain trend display with the
cursor on and positioned on the highlighted event
in the table.
Cursor on Bar graph Displays
As an example the Three-phase Voltage Harmonics display as shown in Figure 23.7 is
used. Cursor and Zoom for other Bar Graph displays function identically.
Figure 23-7. Cursor on bar graphs
On Bar Graph displays the Cursor is always on. Cursor and Zoom are operated with the
arrow keys:
23-4
•
Use the left/right arrow keys to position the Cursor on a certain bar. The header
shows relevant measuring data belonging to the bar. In certain cases there are more
bars available than can be displayed in one screen. In the figure for instance 17
harmonics out of a total of 51 are displayed. Positioning the Cursor across the left or
right screen end brings the next screen within the viewing area.
•
Use the up/down arrow keys to stretch (or shrink) the Bar Graphs vertically.
Chapter 24
Setting up the Analyzer
Introduction
The Analyzer offers many measuring functions. These functions are preset in a way that
the best possible representation of measuring results is obtained in almost all
circumstances. However - if desired - the user can make personal setups that meet
specific requirements. This chapter explains what setups can be made and where they can
be found in the menus. Some setups will be explained step by step.
Initial setups.
When you power the Analyzer for the first time, after a Factory Default, or if it has been
disconnected from all power sources, you will have to adjust a number of general settings
that match your local situation. The table below gives an overview:
Setting
Preset Value
Information language
English
Nominal Frequency
60 Hz
Nominal Voltage
120 V
Phase Identification
A, B, C
Phase Colors A/L1-B/L2-C/L3-N-Ground
Black-Red-Blue-Gray-Green
Date* + Date Format
Month/Day/Year
Time*
00:00:00
* will not be reset after a Factory Default
Starting in the LANGUAGE screen use the up/down arrow keys to highlight the
preferred language, press ENTER and confirm the banner message to set the language.
Press F5 – NEXT to set the next initial setup item.
When ready with setup of the parameters in the table, the screen shown in Figure 24-1 is
displayed. This screen gives you access to all adjustments of the Analyzer.
24-1
Fluke 434-II/435-II/437-II
Users Manual
Figure 24-1. Entry screen to Analyzers setups
Power on.
At power on the welcome screen in Figure 24-2 will be displayed. This screen gives an
overview of the most important settings such as: date, time, wiring configuration,
nominal frequency, nominal voltage, the set of power quality limits used, and the type of
voltage and current probes to be used.
Function key F1 gives access to a screen showing in detail how to connect voltage and
current probes to the power system to be examined. Figure 24-3 gives an example. Press
F1 again to return to the Welcome screen.
Figure 24-2. Welcome screen at power-on
Figure 24-3. Screen showing actual wiring configuration
Press the SETUP key gives access to menus with all the Analyzer’s setups:
c
24-2
SETUP
24
Setting up the Analyzer
Introduction
The Settings are grouped in four functional sections and are explained accordingly in four
sections of this manual chapter:
•
USER PREFerences: adjustment of Language, Phase Identification, Phase Colors,
RS-232 baudrate, Auto shut-off of display (to save battery power), definition of User
name (as shown in entry screen), reset to factory default settings, demo mode on/off,
display contrast, format SD Memory Card. Some menus have a function key for reset
to factory default settings.
Attainable under Function key F1. Explanation is done further on in this chapter.
•
VERSION & CALibration: access to a read-only menu showing Model Number,
Serial Number, Calibration Number, Calibration Date. Under Function key F1 there
is a submenu showing installed Options. Chapter 26 Tips and Maintenance explains
how to activate functions not installed.
Under Function key F2 there is Battery Information available such as charging state
and quality. Refer to Chapter 26 – Tips & Maintenance for more battery information.
•
SETUP WIZARD: provides a guided tour along the general setups that are essential
for a correct measurement. This concerns following parameters: wiring configuration,
nominal frequency, nominal voltage, the set of power quality limits used, and the
type of voltage and current probes to be used. The probe scaling is done separately
for Phase and Neutral. Attainable under Function key F3.
•
MANUAL SETUP: this extensive menu allows the user to customize many functions
to specific user requirements. Many of these functions however are preset to such
values that a clear display is obtained in almost all circumstances. Also Date, Time,
Config(uration), Frequency, Nominal Voltage (Vnom), and Limits used can be
adjusted here. Attainable under Function key F4.
Further on in this chapter is explained in detail what setups can be made.
The following keys are used for menu navigation and selections:
Selection of the item to be adjusted.
ENTER
Press to access the selected settings menu.
To select (up/down) and adjust (left/right) items in a settings
menu. Press ENTER to confirm a selection.
F1
...
F5
F3
Selections or access to submenus.
Return to previous menu.
The figure below shows the entry menu present under the SETUP key.
24-3
Fluke 434-II/435-II/437-II
Users Manual
USER PREFerences
To access the USER PREFerences menus:
1.
SETUP
F1
F4
6
3.
ENTER
F2
F1
7
8
F3
9
F4
10
F4
11
USER PREFerences allows you to customize Information Language, Phase
Identification, Phase Colors, RS-232 baudrate settings, Auto shut-off of display
backlight, programming of User name/address (as shown in entry screen), Reset of
Analyzer to Factory Defaults, Demo Mode on/off, display contrast, and clearing of
memories.
24-4
24
Setting up the Analyzer
USER PREFerences
Read below how to make adjustments:
1
Language: use the up/down arrow keys to select the desired information
language. Press ENTER and next Function key F5 – OK to confirm.
2
Phase Identification: Use the up/down arrow keys to select A, B, C or
L1, L2, L3. Press ENTER and next Function key F5 – BACK to leave
the menu.
3
Phase Colors: Use the up/down arrow keys to choose colors as used in
the USA, EU, UK, or according to HD 308 S2. Or define your own set
of colors: press ENTER and use the up/down arrow keys to select a
phase and use the left/right arrow keys to select a color. Press function
key F5 – BACK to leave the menu.
4
RS-232: Use the left/right arrow keys to adjust the baudrate for
communication with a PC. Press function key F5 – BACK to leave the
menu.
5
Battery save: Use the up/down arrow keys to select the time after which
the Display dims when no keys are operated. Press ENTER to confirm
and next Function key F5 – BACK to leave the menu.
6
User id: access to a menu to define 3 lines with user programmable text
(e.g. the owner’s name, site and address). This text appears in the
power-on and SETUP entry screens. Use the up/down arrow keys to
choose a character. Use the left/right arrow keys to choose the character
position. Use Function key F3 to insert spaces. Use ENTER to jump to
the next line. Press function key F5 – OK to leave the menu.
7
F1 – FACTORY DEFAULTS: resets all settings in this menu to factory
default.
8
F2 - DEMO mode: the voltage input sensitivities are increased to 2 V
for use with a demo generator. The generator is capable to generate 3phase voltages and currents with various interference types at safe
voltage levels.
9
F3 – CONTRAST: Use left/right arrow keys to adjust the display
contrast.
10
F4 – FORMAT SD CARD: All datasets, screens, and logging data is
cleared in this action. Protection is achieved via a confirm menu.
11
F5 – BACK: return to SETUP entry menu.
24-5
Fluke 434-II/435-II/437-II
Users Manual
MANUAL SETUP
To access the MANUAL SETUP menus:
1.
SETUP
F4
2.
3.
ENTER
F1
F2
8.
F3
9.
ENTER
4.
5.
ENTER
6.
10.
7.
11.
12.
ENTER
MANUAL SETUP allows you to customize Analyzer settings related to the
measurements.
24-6
13.
14.
24
Setting up the Analyzer
MANUAL SETUP
1
Press the SETUP key and next Function key F4 – MANUAL SETUP to
reach the MANUAL SETUP screen.
2
Use the up/down arrow keys to select one of the parameters listed
below and then press ENTER to access the setup menu:
- Date, Time: use the arrow keys to select date, time, and date format.
Press ENTER to confirm the selected date format. With a GPS receiver
connected and F2 set to GPS ON, date and time are synchronized
automatically. Time zone and daylight saving ON/OFF can also be set.
Press F1 to access the GPS test menu that informs you about reception
quality. Press Function key F5 – BACK to return to the previous menu.
- Config: selection of 10 wiring (50/60 Hz power systems)
configurations. Selection is done with F1, F2, F3 and the arrow keys.
Then press ENTER to confirm and to enter a screen showing how to
connect the Analyzer to the power system. When ready press Function
key F5 twice to return to the SETUP entry screen.
A step-by-step example on how to change the wiring configuration is
given further on in this chapter.
- Freq: adjustment of Nominal Frequency (50 Hz, 60 Hz or in Fluke
437-II also 400 Hz). Use the up/down arrow keys to select the Nominal
Frequency. Press ENTER to confirm and Function key F5 – BACK to
return to next higher menu.
- Vnom: adjustment of Nominal Voltage. Use the arrow keys to select
100 V, 120 V, 230 V, 400 V or any other voltage. Press ENTER to
confirm and Function key F5 – BACK to return to next higher menu.
- Limits: see paragraph Limits Adjustments.
- Clamp, A range, V scale: adjustment of the Analyzer to the
characteristics of current clamps and voltage leads. The default
selection is valid for the accessories as supplied with the Analyzer. The
supplied voltage leads are 1:1 types; when using attenuating leads or a
voltage transformer you must adapt the voltage scale accordingly (e.g.
10:1 for 10 times attenuation). Identically the current scale can be
adjusted when using current converters in combination with current
clamps. With the arrow keys you can customize voltage and current
readout to any desired transformation ratio. Selection of Amps and Volt
scaling is done with Function key F3 There are separate selection tables
for the Phase and Neutral: Function key F4 is used for selection.
Behind Amp clamp: you can select many Fluke clamp types. The
Analyzer’s sensitivity is adjusted automatically then. In case of clamps
with more than one sensitivity the sensitivity of the Analyzer must be
set to match with the clamp sensitivity (attainable under Sensitivity:).
Behind Amp clamp: you can also select clamp sensitivity values such as
1 V/A, 100 mV/A and others.
Sensitivity x10 increases amps sensitivity by 10 times. In this position
the signal is AC coupled which means that DC signal components are
blocked. Resolution is 10 times more with limited range.
3
24-7
Fluke 434-II/435-II/437-II
Users Manual
4
5
6
7
8
9
24-8
Trend Scale: adjustment of offset and span of the trends is possible in
this menu. Manual adjustment is possible when AUTO mode is set to
OFF with Function key F4. When AUTO mode is ON offset and span
are set to such a value that a clear display is obtained in almost all
circumstances (auto scaling). Separate adjustments are provided for
Phase and Neutral: selection is done with Function key F3.
Scope Scale: adjustment of the voltage and current range of the Scope
display. Separate adjustments are provided for Phase and Neutral:
selection is done with Function key F3. Function key F4 allows return
to Default values.
A step-by-step example on how to change the scope scaling is given
further on in this chapter.
Function Preferences: adjustment of functions related to Trend display,
Harmonics, Dips & Swells, Flicker, Phasor, Power, and number of
Aggregation Cycles for Vrms/Arms. The table below gives additional
information. Use the up/down arrow keys to select an item and the
left/right arrow keys to select values/ranges for that item.
24
Setting up the Analyzer
MANUAL SETUP
Table 24-1. Function Preference, Measurement Items Overview
Measurement items
Trend
Harmonics
Measurement sub
items
Default setting
Measurement sub
item values and
ranges
Default duration
7d
1 hr, 2 hr, 4 hr, 8 hr, 16
hr, 24 hr, 2 d, 7 d, 30 d,
3 mon, 6 mon, 12 mon.
Average time
1s
0.25 s, 0.5 s, 1 s, 3 s, 5
s, 10 s, 30 s, 1 m, 5 m,
10 m, 15 m, 30 m , 1 hr,
2 hr.
Start Delay
10 s
10 … 999 s (step: 1s)
Scale
%f
% f, % r, rms
Interharmonics
OFF
ON, OFF
THD
40 harmonics
40, 50 harmonics
K-factor method1
US
EU, US
1
0.1
0.00 ... 0.20 (step 0.01)
1
K-factor q
1.7
1.00 ... 2.00 (step 0.01)
Dips & Swells
Reference
Nominal
Nominal, sliding
Flicker
Lamp model
Fnom
50Hz/230V, 60Hz/120V
Phasor
Clockwise
neg
neg, pos
Power
Method
Unified
Classic, Unified
Display
Fnom = 50Hz: Cos Φ
Fnom = 60Hz: DPF
Cos Φ, DPF
Interval
10/12 cycles
10/12 cycles,
150/160 cycles (3s)
K-factor e
Cycle aggregation
400 Hz: 80 cycles fixed
1
When K-factor method is set to US, then K-factor e parameter and the K-factor q parameter are disabled.
10
Wave Capture (available under Function key F1): parameters can be set
here related with capture of voltage and current waveforms in modes
such as Transients and Flicker. In this menu Function key F4 can be
used to reset to Defaults and Function key F5 to leave the menu.
11
Inrush (available under Function key F2): menu to set the default
parameters for the Inrush measurement. In this menu Function key F5
can be used to leave the menu.
12
Rapid Change (available under Function key F3): menu to set the
parameters for the Rapid Voltage Change measurement (Voltage
tolerance, Steady time, Minimum step, Detect on Vstep/Vmax). In this
menu Function key F4 can be used to reset to Defaults and Function
key F5 to leave the menu.
24-9
Fluke 434-II/435-II/437-II
Users Manual
13
Energy Loss (available under Function key F4): menu to set the
parameters for the Energy Loss measurement. Parameters to be set are:
four different tariff rates, cable data (length in meters/feet, diameter in
square millimeter or acc. to AWG / American Wire Gauge). In
Automatic mode setup of cable data is not required: the Analyzer bases
cost calculations on the assumption of three percent copper loss in the
cable. Other losses are calculated in ratio to the copper loss.
14
Back (available under Function key F5).
Manual Setup - How to change the wiring configuration
Below you will find a step-by-step example on how to change wiring configuration to 3phase WYE IT (IT = Interrupted Terra = Interrupted Ground).
c
SETUP
The active configuration is indicated in text and
in a diagram behind Config.
d
F4
Note that a setup parameter is highlighted. If
required use the up and down arrow keys to select
setup parameter Config.
e
ENTER
The screen shows 4 wiring configurations; 3phase WYE IT configuration is not among them.
Press F2 to access a second screen with 4 other
configurations.
24-10
24
Setting up the Analyzer
MANUAL SETUP
f
Use the arrow keys to highlight 3φ IT. Then press
ENTER to confirm the selection.
g
ENTER
The diagram shows in detail how to connect
voltage and current probes to the power system
under test.
h
F5
(3x)
Return to Setup entry screen. The new
configuration is indicated behind Config. and the
belonging configuration symbol is shown on the
right side of the screen.
Manual Setup - How to change scale of Scope Display
The example below shows stepwise how to adjust Scope display scaling of the phase
voltages.
c
The voltage waveforms of the Phases are outside
the viewing window.
24-11
Fluke 434-II/435-II/437-II
Users Manual
d
SETUP
Press SETUP to access setup entry screen.
e
F4
Press function key F4 to access the Manual Setup
screen.
f
F2
Press function key F2 to access Scope display
scaling.
g
Use the left/right arrow keys to increase (e.g. to
300 V) the Voltage range of the Scope display.
h
SCOPE
Return to the Scope display: the voltage
waveforms of the Phases are inside the viewing
window.
24-12
24
Setting up the Analyzer
Limits Adjustments
Limits Adjustments
To navigate the Limits Setup menus:
1.
SETUP
2.
F4
3.
1
ENTER
F1
2
1.
2.
F2
5
F3
3
F4
6
F5
7
1.
F5
2.
F5
4
1.
2.
0...9
A...Z
1.
2.
3.
3.
4.
F5
F5
F1
F2
24-13
Fluke 434-II/435-II/437-II
Users Manual
Limits Adjustments is used to save, recall, and define sets of limits for:
•
Power Quality Monitoring (Monitor).
•
Event capture levels for Dips/Interruptions/Rapid Voltage Changes/Swells.
The entry menu is available in the selected information language.
Read below how to do this:
24-14
1
Adjust Limits is the entry menu. It shows the main settings of the active
set of limits: name, creation date, and a summary of limits data.
2
Recall Limits menu is used to recall a set of power quality limits:
- EN50160 is a factory installed read-only set of limits.
- User definable sets of limits can be stored. They can be recalled
afterwards. As a basis you may use EN50160 and edit it to the desired
set of limits. Use the up/down arrow keys to select a set of limits you
want to recall. Then press Function key F5 to recall and to use them.
Press Function key F1 to leave the menu without further actions.
3
Edit Limits menu is used to modify limits. Setups are grouped per
power quality item in separate submenus for voltage, harmonics,
flicker, etc.
Use the up/down arrow keys to select an item to be adjusted. Then press
the ENTER key to enter the adjustment submenu. All adjustment items
are listed in the table below.
4
Use the arrow keys to select and edit limits.
Press Function key F5 to confirm selections and return to the Edit
Limits menu. Use Function keys F1 – PREVious or F2 – NEXT to
move directly to an adjacent submenu. When ready with editing the
limits, Press Function key F5 – OK twice to return to the Adjust
Monitor Limits menu. Arrow keys can be used here to define a name
for the new set of limits. Then press Function key F2 – SAVE to enter
the Save Monitor Limits menu.
5
Save Limits menu is used to save sets of limits under a user definable
file name. The file name is selected with the arrow keys: the up/down
keys to select a character and the left/right keys to define the character
position. When done press ENTER to save the limits. Press F5 – BACK
to return to the Adjust Monitor Limits menu without saving limits.
6
View Limits menu. This menu has the same structure as the Edit
Monitor Limits menu and can be used to view limits without the risk of
changing them. Use F1 – PREVious and F2 – NEXT to select all sets of
limits.
7
Press Function key F5 – BACK to return to the MANUAL SETUP
menu.
24
Setting up the Analyzer
Limits Adjustments
Setup of Monitor Limits, a survey of adjustments.
Limits
Adjustments
2 Probability percentages (100 % and adjustable):
each with adjustable upper and lower limit.
Harmonics
For each harmonic 2 Probability percentages (100
% and adjustable): each with adjustable upper limit.
Flicker
2 Probability percentages (100 % and adjustable):
adjustable percentage with adjustable upper limit.
Weighing curve (lamp type): adjustable under
FUNCTION PREFerence, Flicker, Lamp Model.
Dips (*)
Reference voltage (Nominal or Sliding as selected
under Function Preference/Dips & Swells).
Threshold, hysteresis, allowed number of
dips/week.
Swells (*)
Reference voltage (Nominal or Sliding as selected
under Function Preference/Dips & Swells).
Threshold, hysteresis, allowed number of
swells/week.
Interruptions (*)
Threshold, hysteresis, allowed number of
interruptions/week. Reference voltage is Nominal.
Rapid Voltage Changes (*)
Allowed number of events/week. Voltage tolerance:
adjustable under FUNCTION PREFerence, F3 –
RAPID CHANGE
Unbalance
For each harmonic 2 Probability percentages (100
% and adjustable): adjustable percentage with
adjustable upper limit.
Frequency
2 Probability percentages (100 % and adjustable):
each with adjustable upper and lower limit.
Mains Signaling
2 Adjustable frequencies. For each frequency 2
probability percentages (100 % and adjustable):
adjustable upper limits (**).
(*): setups that are also valid for measuring mode Dips & Swells. Events per week is used for Monitor only.
(**): when changing frequency, limits automatically follow the EN50160 ‘Meisterkurve’, but can also be set
manually. The ‘Meisterkurve’ is shown in the figure below.
Voltage level in percent
Voltage
10
1
0,1
1
10
100
Frequency in kHz
Figure 24-4. Meister Kurve acc. to EN50160
24-15
Fluke 434-II/435-II/437-II
Users Manual
24-16
Chapter 25
Using Memory and PC
Introduction
This chapter explains how to save screens and data into the Analyzer’s memory and how
to view, rename and delete them.
The second part of the chapter explains how to setup the Analyzer for communication
with a PC, and laptop.
Using memory
Four types of data can be stored:
1. Save Limits: these contain Power Quality limits and thresholds. Limits can be edited
via SETUP, F4 – MANUAL SETUP and Adjust Limits menu.
2. Save Task: tasks include limits and analyzer setups. Setups include the reading
selections made for the Logger measurement.
3. Save Screen: are stored when operating the SAVE SCREEN key.
4. Measurements: they are automatically saved on the SD Card during the measurent.
Measurement data includes all trend data, the task and the limits of the measurement.
Additionally the screen shown when the measurement was stopped is included.
Memory space depends on the size of the installed SD Card. The maximum supported
size of the card is 32 GB.
The data files are numbered automatically.
25-1
Fluke 434-II/435-II/437-II
Users Manual
Making a Screenshot
SAVE
SCREEN
Press this key to make a screenshot.
Making a screenshot is a quick and easy way to store measuring results. However post
processing is not possible. A screenshot is saved each time you press this button. A
screenshot is saved as a file with date and time when saved. This occurs via a menu to
define a name for the file to be saved.
Name definition is done with the arrow keys: the up/down keys for character selection
and the left/right keys for character position. Spaces are inserted with Function key F3.
How to recall, print, and delete screenshots and how to rename them is explained in the
next section ‘Memory Operations’.
Memory Operations
The MEMORY button accesses menus to save, recall, view, delete and print datasets and
screenshots. When you press the MEMORY button, the current measurement is stopped
and data is saved. This action occurs via a confirm menu.
c
MEMORY
Available function keys:
25-2
F1
RECALL / DELETE. Accesses the submenu to view,
delete, rename files and to use data files. The submenu is
shown in the figure below: it lists all screenshots and data
files in the sequence of date and time. The type column
indicates all data files with a small icon. The table below
lists all icons that are used. You can use the up/down arrow
keys to highlight a particular data file to be viewed.
F2
SAVE TASK. Limits and analyzer setups are saved.
F3
SAVE LIMITS. Limits are saved..
F5
BACK. Press to resume the measurement.
25
Using Memory and PC
Using memory
Following icons are used to identify the data files:
Icon
Description
Icon
Description
Limits
Power Inverter Efficiency Meas.
Task
Unbalance Measurement
Screen
Inrush Measurement
Read only file
Monitor Measurement
Volts/Amps/Hertz Measurement
Flicker Measurement
Dip & Swells Measurement
Transients Measurement
Harmonics Measurement
Power Wave Measurement
Power & Energy Measurement
Mains Signaling Measurement
Energy Loss Calculator
Logger Measurement
Recalling and deleting Screenshots and Datasets:
d
F1
Available function keys for recall and delete:
F1
Return to main menu.
F2
Access to the menu where you can view the highlighted
screenshots and data sets. Use the Function keys PREVious
or NEXT to view other files. Files are grouped in sequence
of date and time. For datasets the entry screen is shown.
Complete data within a dataset becomes available for
investigation after you have pressed RECALL (F5).
F3
To delete the file highlighted with the up/down arrow keys.
F4
To rename the file highlighted with the up/down arrow
keys. Renaming occurs via a menu to define a new name.
Name definition is done with the arrow keys: the up/down
keys for character selection and the left/right keys for
character position. Spaces are inserted with Function key
F3. The selection is confirmed with Function key F5.
F5
Is only available for datasets to view their complete
contents.
25-3
Fluke 434-II/435-II/437-II
Users Manual
Use of PC
The Analyzer is equipped with an isolated USB interface for communication with a PC.
To make the connection with the USB port of PC’s, an USB-A to mini-USB interface
cable is supplied. With the Power Log software you can upload trend and waveform data
and screenshots in bitmap format to your PC or laptop. The information supplied with
Power Log software informs you in detail about its features. The interface connection is
located behind a dust cover at the lower left corner of the Analyzer.
Mini
USB
Figure 25-1. Location of USB interface connector
When started, Power Log software automatically detects the Analyzer baudrate setting.
For other applications communication baudrate can be adjusted as follows: press the
SETUP key, then Function key F1 – USER PREFerence, and then select RS-232 using
the up/down arrow keys and ENTER. Then adjust the baudrate with the left/right arrow
keys and leave the menu with F5 - BACK.
Figure 25-2. Analyzer and laptop PC
25-4
Chapter 26
Tips and Maintenance
Introduction
This chapter covers basic maintenance procedures that can be performed by the user. For
extensive service data such as disassembly, repair, and calibration information, see the
Service Manual. You will find the part number of the Service Manual in section ‘Parts
and Accessories’ in this chapter.
Cleaning the Analyzer and its Accessories
Warning
Disconnect the Analyzer and its accessories from all voltage
sources during cleaning!
Clean the Analyzer and accessories with a damp cloth and a mild soap. Do not use
abrasives, solvents, or alcohol. These may damage the text.
Storing the Analyzer
Before storing the Analyzer for an extended period of time, it is recommended to charge
the Li-ion battery to a level of about 50%. The charge level is attainable via key
sequence: SETUP, F2 – VERSION & CAL, F2 – BATT. INFO.
Keeping the Battery in Good Condition
When the Analyzer is powered by the battery, the battery condition symbol in the screen
header informs you about the charge condition. This symbol ranges from fully charged to
empty:
To keep the battery in optimal condition, you must let it discharge fully and then charge
it. A full charge takes about 3 hours with the Analyzer turned off. Repeat this at least
twice a year.
26-1
Fluke 434-II/435-II/437-II
Users Manual
Installation of Options
The INSTALL OPTION menu is intended for future expansions. The menu is attainable
via key sequence: SETUP, F2 – VERSION & CAL, F1 – INSTALL OPTION.
Note:
The VERSION & CALIBRATION menu indicates the last calibration date.
For this Analyzer a calibration interval of 1 year is recommended. Contact
your authorized Fluke Service Center if the calibration interval has been
expired.
Parts and Accessories
Standard Accessories.
The following tables list the user-replaceable parts. To order replacement parts or
additional accessories, contact your nearest Fluke Service Center.
Item
26-2
Ordering Code
Power Adapter
BC430
Rechargeable Li-ion battery 28 Wh
BP290
Test Lead Set 2.5 m incl. Alligator Clips (5 pieces).
TLS430
Flexible 6000 A AC Current Clamp Set (4 pieces).
i430-FLEXI-TF(-4PK)
Set with Color Coding Clips for Test Leads
2411463
Decal Set for Input Sockets, Colored
4137197
Decal Set for Input Sockets, Black & White
4137201
USB Interface Cable for PC Connection (USB-A to mini-USB-B)
---
Soft Carrying Case (Supplied with Fluke 434-II/435-II)
C1740
Hard Case with Rollers (Supplied with Fluke 437-II).
C437-II
Side Strap
3945370
Hang Strap
946769
Users Manual
www.fluke.com
26
Tips and Maintenance
Parts and Accessories
Optional Accessories.
Item
Ordering Code
Double Capacity Li-ion battery 56 Wh
BP291
External Battery Charger, charges BP290/BP291 externally using BC430/BC190
EBC290
Hanging Hook; allows the Analyzer to be hung on a cabinet door or separation
wall.
HH290
GPS Time Synchronization Unit
GPS430
AC/DC Current Clamp 100 A (10 mV/A) and 10 A (100 mV/A) switcheable.
80i-110s (*)
AC Current Clamp 1000 A (1 mV/A), 100 A (10 mV/A), and 10 A (100 mV/A)
switcheable.
i1000s (*)
AC Current Clamp 2000 A (1 mV/A) and 200 A (10 mV/A) switcheable, flexible.
i2000flex (*)
AC Current Clamp 3000 A (0.1 mV/A), 300 A (1 mV/A), and 30 A (10 mV/A)
switcheable.
i3000s (*)
Flexible AC Current Clamp 3000 A
i3000S-flex (*)
AC/DC Current Clamp 30 A (100 mV/A).
i30s (*)
AC/DC Current Clamp 300 A (1 mV/A) and 30 A (10 mV/A) switcheable.
i310s (*)
AC Current Clamp 400 A (1 mV/A)
i400s (*)
AC Current Clamp 5 A
i5s (*)
Flexible AC Current Clamp
i430Flex (*)
Flexible AC Current Clamp 6000 A
i6000s-flex (*)
Service Manual
www.fluke.com
(*): Listed are the Current Clamps that can be selected in the Analyzer’s Amps Scaling
menu.
Refer to www.fluke.com for an actual overview of all clamps and accessories available
for this product.
26-3
Fluke 434-II/435-II/437-II
Users Manual
Troubleshooting
Analyzer does not start up.
The battery may be completely empty. In this case the Analyzer will not start up.
However if it is powered by the Power Adapter it should start up immediately. Charge the
battery first: power the Analyzer with the Power Adapter without turning it on.
Note
The Analyzer can not be powered up if the battery cover is not correctly
closed.
Screen remains black.
Make shure that the Analyzer is on: at power-on you should hear a beep. If the screen
remains black, you might have a problem with the screen contrast. Proceed as follows to
change Contrast:
•
Press Function key F1
•
Press the SETUP key.
•
Press Function key F1.
•
Press the left (more light) or right (less light) arrow key for about five seconds to
return to normal display.
Operation time of fully charged battery is too short.
The battery may be in poor condition. This may improve after a full discharge and full
charge cycle as explained in section ‘Keeping the battery in good condition’ in this
Chapter. Detailed information on the battery condition can be found on the Analyzer’s
screen after the key operations: SETUP, F2 – VERSION & CAL, F2 – BATT. INFO.
Replace a battery that is in poor condition.
PowerLog Software does not recognize the Analyzer.
26-4
•
Make sure that the Analyzer is turned on.
•
Make shure that the USB interface cable is properly connected between Analyzer and
PC.
•
Make sure that all actions described in addendum ‘Installing USB Drivers’ have been
carried out properly.
Chapter 27
Specifications
Introduction
Models Concerned
Fluke 434-II: Energy Analyzer
Fluke 435-II: Power Quality and Energy Analyzer
Fluke 437-II: Power Quality and Energy Analyzer 400 Hz.
Performance Characteristics
Fluke guarantees the properties expressed in numerical values within the tolerances
stated. Numerical values without tolerances are typical and represent the characteristics
of an average instrument excluding accessories. The Analyzer meets the specified
accuracy 30 minutes and two complete acquisitions after power-on. All operational
specifications are valid under the restrictions mentioned in section ‘Environmental’
unless otherwise specified.
Specifications are based on a one year calibration cycle.
Environmental Data
The environmental data mentioned in this manual are based on the results of the
manufacturer’s verification procedures.
Safety Characteristics
The Analyzer has been designed and tested in accordance with standard EN61010-1 2nd
edition (2001), Safety Requirements for Electrical Equipment for Measurements Control
and Laboratory Use for Class III Pollution Degree 2 instruments.
This manual contains information and warnings that must be followed by the user to
ensure safe operation and to keep the Analyzer and its accessories in a safe condition.
Use of this Analyzer and its accessories in a manner not specified by the manufacturer
may impair the protection provided by the equipment.
27-1
Fluke 434-II/435-II/437-II
Users Manual
Electrical Measurements
The following specifications of the instrument are verified using the “implementation
verification” table 2 as specified in 61000-4-30 2nd edition chap-6-2.
INPUT CHARACTERISTICS
Voltage inputs
Number of inputs
4 (3 phases + neutral) dc coupled
Maximum input
voltage
1000 Vrms
Nominal Voltage
range
Selectable 1 V to 1000 V according IEC61000-4-30
Maximum peak
measurement
voltage
6 kV (Transients mode only)
Input impedance
4 MΩ // 5 pF
Bandwidth
> 10 kHz, up to 100kHz for Transients mode
Scaling
1:1, 10:1, 100:1, 1,000:1, 10,000:1 and variable
Current inputs
Number of inputs
4 (3 phases + neutral) dc or ac coupled
Type
Clamp on current transformer with mV/A output or i430flex-TF
Nominal input
Range
0 - ± 3.0 Vpeak, 0 - 3.97 Vrms sinewave (selection x1, AC+DC coupled)
0 - ± 0.3 Vpeak, 0 – 0.397 Vrms sinewave (selection x10, AC coupled)
Range
0.5 Arms to 600 Arms with included i430flex-TF (with sensitivity 10x)
5 Arms to 6000 Arms with included i430flex-TF (with sensitivity 1x)
0.1 mV/A to 1 V/A and custom for use with optional ac or dc clamps
Note: sensitive x10 position gives more resolution, but reduced range. Only AC
signals are supported; DC components are blocked.
Input impedance
1 MΩ
Bandwidth
>10 kHz
Scaling
1:1, 10:1, 100:1, 1,000:1 10,000:1 and variable
Nominal frequency
434-II, 435-II: 50 Hz, 60 Hz
437-II: 50 Hz, 60 Hz, 400 Hz
Sampling system
27-2
Resolution
16 bit analog to digital converter on 8 channels
Maximum sampling
speed
200 kS/s on each channel simultaneously
RMS sampling
5000 samples on 10/121 cycles according IEC 61000-4-30
PLL synchronization
4096 samples on 10/121 cycles according IEC 61000-4-7
27
Specifications
Electrical Measurements
CROSS TALK
Between V inputs
-60 dB @ Fnominal
Voltage to current input
-95 dB @ Fnominal (Amps Scaling: x1 AC+DC)
COMMON MODE REJECTION RATIO (CMRR)
CMRR
>60 dB
DISPLAY MODES
Waveform display
Available in all modes via SCOPE key.
Default display mode for Transients function
Update rate 5x per second
Displays 4 cycles of waveform data on screen, up to 4 waveforms
simultaneously
Phasor
Available in all modes via Scope waveform display
Default view for Unbalance mode
Meter readings
Available in all modes except Monitor, provides tabulated view of all available
readings
Fully customizable up to 150 readings for Logger mode
Trend graph
Available in all modes except Transients
Single vertical cursor with min max and average reading at cursor position
Bar graph
Available in Monitor and Harmonics mode
Event list
Available in all modes
Provides 50/601 cycles of waveform information and associated ½ cycle rms
values for Volts and Amps
27-3
Fluke 434-II/435-II/437-II
Users Manual
MEASUREMENT MODES
27-4
Scope
4 voltage waveforms, 4 current waveforms, Vrms, Vfund. Arms, A fund, V @
cursor, A @ cursor, phase angles
Volts/Amps/Hertz
Vrms phase to phase, Vrms phase to neutral, Vpeak, V Crest Factor, Arms,
Apeak, A Crest Factor, Hz
Dips and Swells
Vrms½, Arms½, Pinst with programmable threshold levels for event detection
Harmonics
DC, 1 … 50
Harmonics Volts, THD, Harmonic Amps, K factor Amps, Harmonic Watts, THd
Watts, K factor Watts, Interharmonic Volts, Interharmonic Amps, Vrms, Arms
(relative to fundamental or to total rms)
Fluke 437-II @ 400 Hz: DC, 1 … 13
Power and Energy
Vrms, Arms, Wfull, Wfund., VAfull, VAfund., VAharmonics, VAunbalance, var,
PF, DPF, CosQ, Efficiency factor, kWh forward, kWh reverse
Energy Loss Calculator
Wfund, VAharmonics, VAunbalance, var, A, Loss Active, Loss Reactive, Loss
Harmonics, Loss Unbalance, Loss Neutral, Loss Cost (based upon user
defined cost / kWh)
Inverter Efficiency
Wfull, Wfund, Wdc, Efficiency, Vdc, Adc, Vrms, Arms, Hz
Note: requires optional dc current clamp
Unbalance
Vneg%, Vzero%, Aneg%, Azero%, Vfund, Afund, V phase angles, A phase
angles
Inrush
Inrush current, Inrush duration, Arms½, Vrms½
Monitor
Vrms, Arms, harmonic Volts, THD Volts, Plt, Vrms½, Arms½, Hz, dips, swells,
interruptions, rapid voltage changes, unbalance and mains signalling.
All parameters are measured sumultaneously in accordance with EN50160.
Flagging is applied according to IEC61000-4-30 to indicate unreliable readings
due to dips or swells.
Note: not supported for measurements at 400 Hz as offered in Fluke 437-II
Flicker
Pst (1min), Pst, Plt, Pinst, Vrms½, Arms½, Hz.
Note: not available in Fluke 434-II
Note: not supported for measurements at 400 Hz as offered in Fluke 437-II
Transients
Transient waveforms 4x Voltage, 4x Amps, triggers: Vrms½, Arms½, Pinst
Note: not available in Fluke 434-II
Mains Signaling
Relative signaling voltage and absolute signaling voltage averaged over three
seconds for up to two selectable signaling frequencies
Note: not available in Fluke 434-II
Note: not supported for measurements at 400 Hz as offered in Fluke 437-II
Power Wave
Vrms½, Arms½, W, Hz and scope waveforms for Voltage, Amps and Watts
Note: not available in Fluke 434-II.
Note: not supported for measurements at 400 Hz as offered in Fluke 437-II
Logger
Custom selection of up to 150 Power Quality parameters measured
simultaneously on 4 phases
Shipboard V/A/Hz
Vrms, V tol%, V imb%, V mod, A rms, A imb%, Hz, Hz 10s, Hz tol, Hz tol%,
Hz mod, Hz mod% (all acc. To MIL-STD-1399-300B).
Note: not available in Fluke 434-II/435-II
27
Specifications
Electrical Measurements
ACCURACY, RESOLUTION AND RANGE
Volt/Amps/Hertz
Measurement Range
Resolution
Accuracy
Vrms (ac+dc)
Fluke 435-II/437-II
1…600 V
0.01 V
Fluke 434-II
600…1000 V
1…1000 V
0.01 V
0.1 V
Vpk
1…1400 Vpk
1V
5% of nominal voltage
1…1000 V phase to
neutral
1…1000 V phase to
neutral
0.1 V
± 0.2% of nominal
voltage
± 1% of nominal voltage
1…1000 V phase to
neutral
1…1000 V phase to
neutral
0.1 V
1.0 ... > 2.8
0.01
± 5%
Arms (ac+dc)
i430flex-TF 1x
i430flex-TF 10x
1 mV/A 1x
1 mV/A 10x
5...6000 A (ac only)
0.5...600 A (ac only)
5...2000 A
0.5...200 A (ac only)
1A
0,1 A
1A
0.1 A
± 0.5% ± 5 counts
± 0.5% ± 5 counts
± 0.5% ± 5 counts
± 0.5% ± 5 counts
Apk i430flex-TF
Apk 1 mV/A
8400 Apk
5500 Apk
1 Arms
1 Arms
± 5%
± 5%
A Crest Factor (CF)
1 … 10
0.01
± 5%
Arms½
i430flex-TF 1x
i430flex-TF 10x
1 mV/A 1x
1 mV/A 10x
5...6000 A (ac only)
0.5...600 A (ac only)
5...2000 A
0.5...200 A (ac only)
1A
0,1 A
1A
0.1 A
± 1% ± 10 counts
± 1% ± 10 counts
± 1% ± 10 counts
± 1% ± 10 counts
Afund
i430flex-TF 1x
i430flex-TF 10x
1 mV/A 1x
1 mV/A 10x
5...6000 A (ac only)
0.5...600 A (ac only)
5...2000 A
0.5...200 A (ac only)
1A
0,1 A
1A
0.1 A
± 0.5% ± 5 counts
± 0.5% ± 5 counts
± 0.5% ± 5 counts
± 0.5% ± 5 counts
0.001 Hz
± 0.001Hz
0.001 Hz
± 0.001Hz
0.1 Hz
± 0.1Hz
Vrms½
Fluke 435-II/437-II
Fluke 434-II
Vfund
Fluke 435-II/437-II
Fluke 434-II
Voltage Crest Factor
(CF)
Hz2
Fluke 435-II /437-II @ 50
42.5 ... 57.5 Hz
Hz nominal
Fluke 435-II /437-II @ 60
51 ... 69 Hz
Hz nominal
Fluke 437-II @ 400 Hz
340 ... 460 Hz
nominal
0.1 V
0.1 V
± 0.1% of nominal
voltage
± 0.1% of reading
± 0.5% of nominal
voltage
± 0.1% of nominal
voltage
± 0.5% of nominal
voltage
27-5
Fluke 434-II/435-II/437-II
Users Manual
Fluke 434-II @ 50Hz
nominal
Fluke 434-II @ 60Hz
nominal
Power
Watt (VA, var)
i430flex-TF
1 mV/A
Power Factor (Cos ϕ /
DPF)
Energy
42.5 ... 57.5 Hz
0.001 Hz
± 0.01Hz
51 ... 69 Hz
0.001 Hz
± 0.01Hz
Measurement Range
Resolution
Accuracy
max 6000 MW
max 2000 MW
0.1 W … 1 MW
0.1 W … 1 MW
± 1% ± 10 counts
± 1% ± 10 counts
0…1
0.001
± 0.1% @ nominal load
conditions
Measurement Range
Resolution
Accuracy
kWh (kVAh, kvarh)
i430flex-TF 10x
Depends on clamp scaling and V nominal
± 1% ± 10 counts
Energy loss
i430flex-TF 10x
Depends on clamp scaling and V nominal
± 1% ± 10 counts
Excluding line resistance
accuracy
Harmonics
Measurement Range
Resolution
Accuracy
Harmonic order (n)
DC, 1..50 Grouping: Harmonic groups according to IEC 61000-4-7
Inter-Harmonic order
Off, 1..50 Grouping: Harmonic and Interharmonic subgroups according to IEC
61000-4-7
Volts %f
0.0 … 100.0%
0.1%
± 0.1% ± n x 0.1%
Volts %r
0.0 … 100.0%
0.1%
± 0.1% ± n x 0.4%
Volts Absolute
0.0 … 1000 V
0.1 V
± 5% (*)
Volts THD
0.0 … 100.0%
0.1%
± 2.5%
Amps %f
0.0 … 100.0%
0.1%
± 0.1% ± n x 0.1%
Amps %r
0.0 … 100.0%
0.1%
± 0.1% ± n x 0.4%
Amps Absolute
0.0 … 600 A
0.1 A
± 5% ± 5 counts
Amps THD
0.0 … 100.0%
0.1%
± 2.5%
Watts %f or %r
0.0 … 100.0%
0.1%
± n x 2%
Watts Absolute
Depends on clamp scaling and V nominal
± 5% ± n x 2% ± 10
counts
Watts THD
0.0 … 100.0%
0.1%
± 5%
Phase angle
-360º ... +0º
1º
± n × 1º (8)
*) ± 5 % if ≥ 1 % of nominal voltage; ± 0.05 % of nominal voltage if < 1% of nominal voltage.
27-6
27
Specifications
Electrical Measurements
Flicker
Measurement Range
Plt, Pst, Pst (1min) Pinst
Unbalance
0.00 … 20.00
Measurement Range
Resolution
0.01
Accuracy
± 5%
Resolution
Accuracy
Volts %
0.0 … 20.0%
0.1%
± 0.1%
Amps %
0.0 … 20.0%
0.1%
± 1%
Mains Signaling
Measurement Range
Resolution
Accuracy
Threshold levels
Threshold, limits and signaling duration is programable for two signaling
frequencies
Signaling frequency
60 … 3000 Hz
0.1 Hz
Relative V%
0% .. 100%
0.1%
± 0.4%
Absolute V3s (3 second
average)
0.0 … 1000 V
0.1 V
± 5% of nominal voltage
Trend Recording
Method
Automatically records min, max and average values over time for all readings
being displayed for the 3 phases and neutral simultaneously Samping
5 readings/s continuous sampling per channel, 100/1201 readings/s for ½ cycle
values and Pinst
Recording time
1 hr up to 1 year, user selectable (default setting 7 days)
Averaging time
0.25 s to 2 hrs, user selectable (default 1s) 10 minutes when using Monitor
mode
Memory
Data is stored on SD-card (8 GB incuded. 32 GB max)
Events: Fluke 434-II
Fluke 435-II/437-II
Tabulated in event list
Tabulated in event list, including 50/601 waveform cycles and 7.5s ½ cycle rms
Voltage and Amps trend
MEASUREMENT METHOD
Vrms, Arms
10/121 contiguous non overlapping intervals using 500/4161 samples per cycle
in accordance with IEC 61000-4-30.
Vpeak, Apeak
Absolute highest sample value within 10/121 cycle interval with 40 µs sample
resolution.
V Crest Factor
Measures ratio between the Vpeak and Vrms.
A Crest Factor
Measures ratio between the Apeak and Arms.
Hz
Measured every 10 sec in accordance with IEC61000-4-30.
Vrms½, Arms½
value is measured over 1 cycle, commencing at a fundamental zero crossing,
and refreshed each half-cycle. This technique is independent for each channel
in accordance with IEC 61000-4-30.
27-7
Fluke 434-II/435-II/437-II
Users Manual
27-8
Harmonics
Calculated from 10/12-cycle gapless harmonic group measurements on
Voltage and Amps according to IEC 61000-4-7
Watt
Full and fundamental real power display. Calculates average value of
instantaneous power over 10/12 cycle period for each phase. Total Active
Power PT = P1 + P2 + P3.
VA
Full and fundamental apparent power display. Calculates apparent power
using Vrms x Arms value over 10/12 cycle period.
var
Fundamental reactive power display. Calculates reactive power on
fundamental positive sequence components. Capacitive and inductive load is
indicated with capacitor and inductor icons.
VA Harmonics
Total disturbance power due to harmonics. Calculated for each phase and for
total system based upon total aparent power and fundamental real power.
VA Unbalance
Unbalance power for total sytem. Calculated using symetrical components
method for fundamental apparent power and total apparent power.
Power Factor
Calculated Watt / VA
Cos ϕ
Cosine of angle between fundamental voltage and current
DPF
Calculated fundamental Watt/VA
Energy / Energy Cost
Power values are accumulated over time for kWh values.
Energy cost is calculated from user defined /kWh cost variable
Unbalance
The supply voltage unbalance is evaluated using the method of symmetrical
components according to IEC61000-4-30
Flicker
According to IEC 61000-4-15 flickermeter—functional and design specification.
Includes 230 V / 50 Hz lamp and 120 V / 60 Hz lamp models.
Transient capture
Captures waveform triggered on signal envelope. Additionally triggers on dips,
swells, interruptions and Amps level as specified by IEC61000-4-30.
Inrush current
The inrush current begins when the Arms half cycle rises above the inrush
threshold, and ends when the Arms half cycle rms is equal to or below the
inrush threshold minus a user-selected hysteresis value.
The measurement is the square root of the mean of the squared Arms half
cycle values measured during the inrush duration.
Each half-cycle interval is contiguous and non-overlapping as recommended by
IEC 61000-4-30. Markers indicate inrush duration.
Cursors allow measurement of peak Arms half cycle.
Mains Signaling
Measurements are based on: either the corresponding 10/12-cycle rms value
interharmonic bin or the rms of the four nearest 10/12-cycle rms value
interharmonic bins per IEC 61000-4-30.
Limit setup for Monitor mode follows EN50160 standard limits.
Time Synchronisation
Optional GPS430-II timesync module provides time uncertainty ≤ 20 ms or ≤
16.7 ms for time tagging of events and time aggregated measurements. When
synchronization is not available, time tolerance is ≤ 1 s/24h.
27
Specifications
Electrical Measurements
Transient capture
Measurement Range
Volts
cursor reading
rms reading
± 6000 Vpk
10 … 1000 Vrms
Minimum detect duration
5 µs
Sampling rate
200 kS/s
Resolution
0.1 V
0.1 V
Accuracy
± 15% of cursor reading
± 2.5% of Vnominal
WIRING COMBINATIONS
1Ø + NEUTRAL
Single phase with neutral
1Ø SPLIT PHASE
Split phase
1Ø IT NO NEUTRAL
Single phase system with two phase voltages without neutral
3Ø WYE
Three phase four wire system WYE
3Ø DELTA
Three phase three wire system Delta
3Ø IT
Three phase system without neutral WYE
3Ø HIGH LEG
Four wire three phase Delta system with center tapped high leg
3Ø OPEN LEG
Open delta three wire system with 2 transformer windings
2-ELEMENT
Three phase three wire system without current sensor on phase L2 / B (2 watt
meter method)
2½-ELEMENT
Three phase four wire system without voltage sensor on phase L2 / B
INVERTER
EFFICIENCY
dc voltage and current input with ac output power (automatically displayed and
selected in Inverter Efficiency mode)
27-9
Fluke 434-II/435-II/437-II
Users Manual
GENERAL
Case, Display, Memory, Real-time clock
Case
Design Rugged, shock proof with integrated protective holster.
Drip and dust proof IP51 according to IEC60529 when used in tilt stand
position. The IP rating refers to non-operation of the Product and does not
indicate that the Product should be used around hazardous voltages in wet
environments. Shock and vibration: Shock 30 g, vibration 3 g sinusoid, random
0.03 g2/Hz according to MIL-PRF-28800F Class 2.
Display
Brightness: 200 cd/m2 typ. using power adapter, 90 cd/m2 typical using battery
power.
Size 127 mm x 88 mm (153 mm/6.0 inch diagonal) LCD.
Resolution 320 x 240 pixels.
Contrast and brightness User-adjustable, temperature compensated.
Memory
8 GB SD-Card standard, upto 32 GB optionally.
Screen save and multiple data memories for storing data including recordings
(dependent on memory size).
Real-time clock
Time and date stamp for Trend mode, Transient display, System Monitor and
event capture.
Environmental
Operating temperature
0 °C ... +40 °C; +40 °C ... +50 °C excl. battery
Storage temperature
-20 °C ... +60 °C
Humidity
+10 °C ... +30 °C: 95 % RH non-condensing;
+30 °C ... +40 °C: 75 % RH non-condensing;
+40 °C ... +50 °C: 45 % RH non-condensing.
Maximum operating altitude
Up to 2,000 m (6666 ft) for CAT IV 600 V, CAT III 1000 V;
up to 3,000 m (10,000 ft) for CAT III 600 V, CAT II 1000 V;
Maximum storage altitude 12 km (40,000 ft).
Electro-Magnetic-Compatibility
(EMC)
EN 61326 (2005-12) for emission and immunity.
Interfaces
mini-USB-B , Isolated USB port for PC connectivity
SD-card slot accessable behind instrument battery
Warranty
Three years (parts and labor) on main instrument, one year on
accessories.
MECHANICAL
27-10
Size
265 x 190 x 70 mm
Weight
2kg including standard battery
27
Specifications
Electrical Measurements
POWER
Line power
Switchable 115V, 230V adapter with country specific plug
Power Adapter
input voltage
15 ... 23 V dc; Use only Power Adapter BC430
Battery power
Rechargeable Li-ion battery BP290 (installed)
Battery operating time
BP290 (standard
battery)
6.5 hours @ normal backlight
8 hours @ dimmed backlight
10.5 hours with display off
Charging time BP290
2.5 hours to 95 % (Analyzer off)
Battery operating time
BP291 (optional
battery)
13 hours @ normal backlight
16 hours @ dimmed backlight
21 hours with display off
Charging time BP291
5 hours to 95 % (Analyzer off)
Battery save
Adjustable time for dimmed backlight
INTERFACES
USB
USB 2.0 slave port. Max speed 460 k. Mini-USB input connector.
RS-232 Interface
Use special adapter cable DB-9 to Mini-USB to connect GPS430 Time
Synchronization Unit.
Baudrate
1200 ... 430 kb/s (No split baudrate available, receive and transmit baudrates
are equal. Default baudrate is 115200.)
Stop bits
1
Data bits
8
Parity
No
Transmission mode
Asynchronous, full duplex
Handshake
Xon Xoff (Software handshake only)
STANDARDS
Measurement methods
used
IEC61000-4-30 2nd edition class A
Measurement
performance
Fluke 435-II/437-II IEC61000-4-30 Class A, Fluke 434-II IEC61000-4-30
Class S
Power Quality
EN50160
Flicker
IEC 61000-4-15
Harmonics
IEC 61000-4-7
Shipboard V/A/Hz
MIL-STD-1399-300B
27-11
Fluke 434-II/435-II/437-II
Users Manual
SAFETY
Compliance
with
IEC/EN61010-1-2001,
CAN/CSA C22.2 No 61010-1-04 (including cCSAus approval),
UL std No 61010-1,
Safety Requirements for Electrical Equipment for Measurement, Control and
Laboratory Use, Part 1: General requirements.
Rated: 600V CAT IV 1000V CAT III Pollution Degree 2
Max voltage on
banana input
1000 V CAT III / 600 V CAT IV.
Max voltage on
current BNC
input
30 V max.
ELECTRO MAGNETIC COMPATIBILITY (EMC)
Compliance with
27-12
Fluke 434-II/435-II/437-II, including standard accessories, conforms to the
EEC directive 2004/108/EC for EMC immunity as defined by EN-61326
(2005-12): it meets Performance Criteria A.
1
50Hz/60Hz nominal frequency according to IEC 61000-4-30
2
Measured on reference voltage input A/L1
Appendices
Appendix
Title
Page
A
Measuring Methods................................................................................A-1
B
Installing USB Drivers............................................................................B-1
C
Instrument Security Procedures ...........................................................C-1
Fluke 434-II/435-II/437-II
Users Manual
-2
Appendix A
Measuring Methods
Introduction
This appendix describes the power measurement and energy loss calculation methods
used in the Fluke 430 Series II instruments.
Power Measurement Methods
The power measurement algorithms used in Fluke 430 Series II instruments are based
upon the Unified Method developed at the Polytechnical University of Valencia, and
build upon the IEEE1459 standard. These algorithms provide correct results at all
conditions, even with distorted unbalanced three phase systems. These methods make it
possible to calculate the energy that is lost if power quality is not optimal.
Energy Loss Calculation
The Energy Loss Calculator uses Line Power Loss (caused by the various currents
flowing through the line resistance) and Residual Power Loss (caused by Harmonics and
Unbalance) to measure the following losses in Ws (Joule):
Effective Loss
line power loss due to active system current (this current does the
actual work in transferring energy in the most optimal way. Loss
reduction can be done by lowering line resistance for example by using
thicker wires)
Reactive Loss
line power loss due to reactive system current. Reactive energy itself
does not cause losses.
Unbalance Loss line power loss due to unbalance system current and due to unbalance
residual power.
Distortion Loss
line power loss due to harmonic system current and due to harmonic
residual power.
Neutral Loss
line power loss due to neutral current.
The line resistance is either calculated automatically using an estimated 3% loss for the
active system power, or it uses the values entered in the Function Preference setting.
A-1
Fluke 434-II/435-II/437-II
Users Manual
The calculator shows an estimated cost using the measured values and the cost per kWh.
For more accurate results long term measurements (for example one week/month) can be
made showing results over time in the trend screen.
The Unified Method
The Unified Method allows to split power measurement into meaningful components
which can be used to identify the source of the various power components.
The various components are:
- Full Power
contains harmonic and unbalance components, also called
active power
- Fundamental Power
contains unbalance components, no harmonic components
- Symmetrical Power
contains no harmonic and no unbalance components
- Harmonic Power
harmonic components only
- Unbalance Power
unbalance components only
Furthermore distinction is made between:
- Phase Power
powers of the individual phases A, B, C (or L1, L2, L3)
- System (Total) Power powers of the total multi-phase system
Note that the System Power is not always the sum of the phase powers!
The basis for power measurements are the voltage and current sample values measured
on all inputs simultaneously. Power is measure over a 10/12 cycle (50/60Hz) time
window (Tw) as required by IEC 61000-4-30.
Voltage:
Current:
Urms =
Irms =
1
Tw
1
Tw
Tw
∑u
n =0
Tw
∑i
n =0
2
n
2
n
in which un are the voltage signal samples
in which in are the current signal samples
FFT algorithms
FFT algorithms in accordance with IEC 61000-4-7 are used to calculate the fundamental
and harmonic components of each input signal over a 10/12 cycle (50/60 Hz) time
window. This time window is approximately 200 ms but depends on the fundamental
frequency. Phase locked loop algorithms are required to capture an exact number of
cycles.
A-2
Appendices
Measuring Methods
A
Symmetrical components in Three-Phase Systems
In 1918, C. L. Fortescue published a paper called ‘Method of Symmetrical Coordinates
Applied to the Solution of Polyphase Networks’ in the Transactions of the American
Institute of Electrical Engineers. This paper describes a method to resolve an unbalanced
set of 3-phasors into 2 balanced 3-phase systems of different phase sequence and one
zero-phase system in which all phasors are of equal magnitude and angle.
This method can be used for voltage, current and power phasors.
The figure below shows three unbalanced voltage phasors resolved in three sets of
symmetrical components.
Va=Va1+Va2+Va0, Vb= Vb1+ Vb2+ Vb0, Vc= Vc1+ Vc2+ Vc0
Va,Vb,Vc are three phasors that are not in balance andVa1,Vb1, Vc1andVa2,Vb2,Vc2are
two sets of three balanced phasors with an angle of 120° between the components a, b,
and c.
The components of the phasor set Va0, Vb0, Vc0 are identical in amplitude and angle.
Va1, Vb1, Vc1 is the positive sequence.
Va2, Vb2, Vc2 is the negative sequence
Va0, Vb0, Vc0 is the zero sequence.
The names zero, positive, and negative refer to the sequence of rotation of the phasors.
The positive-sequence set of phasors (Va1,Vb1,Vc1) is the same as the voltages produced
by a synchronous generator in the power system that has phase sequence a-b-c. The
negative sequence (Va2,Vb2,Vc2) has phase sequence a-c-b, thus rotating the opposite
direction compared to the positive system. The zero sequence phasors (Va0,Vb0,Vc0)
have zero-phase displacement and are identical.
The method of symmetrical components is used to calculate the power components not
including harmonics and unbalance.
A-3
Fluke 434-II/435-II/437-II
Users Manual
W - Active Power (P)
The active power (all frequency components) is directly calculated from the samples
measured on the voltage and current inputs:
1 K+N
∑ u X (n )⋅ i X (n )
N n =K
Active phase power:
PX =
Active system power Υ:
PY = PA+ PB+ PC
System power is the sum of the phase powers!
Active system power Δ:
PΔ =
1 K+N
∑ u AB (n )⋅ i A (n ) − u BC (n )⋅ iC (n )
N n =K
W fund - Fundamental Active Power(P1)
The fundamental powers (50/60 Hz component only) are calculated using he FFT results
which are calculated according to IEC 61000-4-7 grouping into the first harmonic
subgroup. These rms values are here called U1Xfor voltage and I1X for current. The phaseangle between voltage and current is ϕu1x - ϕi1x.
Fundamental active phase power:
P1X = U1X ⋅ I1X ⋅ cos(ϕu1X − ϕi1X )
Fundamental active system powerΥ:
P1+ = 3 ⋅ U1+ ⋅ I1+ cos ϕu1+ − ϕi1+
(
)
In this case the system power is NOT the sum of the phase powers! The system power is
calculated from the positive sequence components of voltage and current, eliminating all
unbalance components. This component is also called Effective power as it is the most
effective way to transfer power (electrical into mechanical) if it would only consist of the
positive sequence power component.
Fundamental active system powerΔ:
P1Δ = U1AB ⋅ I1A ⋅ cos(ϕu1AB − ϕi1A )
− U1BC ⋅ I1C ⋅ cos(ϕu1BC − ϕi1C )
VA – Apparent Power (S)
The apparent power (all frequency components) is calculated from the rms values of
voltage UX and current IX.
Apparent phase power:
SX = U X ⋅ IX
Apparent system power Υ:
SY =
(U
2
A
)(
+ U 2B + U C2 ⋅ I 2A + I 2B + I C2
)
Apparent system power is NOT the sum of the phase powers!
Apparent system power Δ:
A-4
SΔ =
(U
2
AB
)(
)
2
+ U 2BC + U CA
⋅ I 2A + I 2B + I C2 / 3
Appendices
Measuring Methods
A
VA fund - Fundamental Apparent Power (S)
Fundamental apparent phase power:
S1X = U1X ⋅ I1X
Fundamental apparent system power Υ:
+
S1Y
= 3 ⋅ U1+ ⋅ I1+
Apparent system power is NOT the sum of the phase powers!
S1+Δ = 3 ⋅ U 1+ ⋅ I1+
Fundamental apparent system power Δ:
var –Fundamental Reactive Power (Q)
For reactive power only the fundamental power is of interest.
Fundamental reactive phase power:
Q1X = U1X ⋅ I1X ⋅ sin(ϕu1X − ϕi1X )
Fundamental reactive system power Υ and Δ:
Q1+ = 3 ⋅ U1+ ⋅ I1+ sin ϕu1+ − ϕi1+
(
)
System reactive power is NOT the sum of the phase powers!
VA Harmonics Power (Dh)
Harmonics powers are calculated using the full apparent power SX and the fundamental
apparent power S1X.
Harmonic distortion power:
Dh X = S2X − S12X
Harmonic distortion system power Υ and Δ:
Dh = S2 − S12
Harmonic distortion system power is NOT the sum of the phase powers!
VA Unbalance Power (Du)
Unbalance powers cannot be measured per phase. Unbalance is only measured on system
level.
Unbalance is calculated from the fundamental system apparent power and the positive
sequence component of the system apparent power.
Du = S12 − S1+2
Unbalance system power Υ and Δ:
Power Factor (PF)
Power Factor indicates system effectiveness at full bandwidth and is calculated from full
spectrum power (up to 50th harmonic) and apparent power.
Power factor:
PFX = PX SX
System power factor Υ and Δ:
PF = P S
A-5
Fluke 434-II/435-II/437-II
Users Manual
Displacement Power Factor (DPF) and Cos ϕ
Displacement power factor is calculated form fundamental power and apparent power
components. This identical to the Cos ϕ of the phase angle between fundamental voltage
and current.
Displacement Power Factor:
PF1X = P1X S1X
System Displacement Power Factor Υ and Δ:
PF1 = P1+ S1+
Power & Energy Losses
Energy Loss has 2 main components:
•
Line Power Loss, caused by the various currents flowing through the line resistance
(I2.R losses)
•
Residual Power Loss, caused by Harmonics and Unbalance
Using the method of symmetrical components the system current components are
calculated.
(
⋅ sin (ϕu
)
)
Active system current:
I1+a = I1+ ⋅ cos ϕu1+ − ϕi1+
Reactive system current:
I1+r = I1+
Harmonic system current:
I H = I 2HA + I 2HB + I 2HC
Unbalance system current:
I U = I1− + I10
Neutral current:
Measured directly when using 4 wire (wye) systems
2
+
1
− ϕi1+
2
In combination with wiring resistance the line power losses due to this currents can be
calculated (P= I2 . R)
Residual Power Loss is the loss caused by Harmonic power and Unbalance power.
Reactive Power (var) in itself causes no losses other than I2.R losses in the wiring.
Residual harmonic power loss:
PH = P − P1
Residual unbalance power loss:
PU = P1 − P1+
Classic Method
The default setting for the Fluke 430 series II instruments is to use the Unified method to
measure power. For compatibility reason with guidelines that may exist within
companies, there is also a ‘classic’ method available that utilizes the arithmetic method
for system power as described in IEEE 1459. The method can be changed via the
Function Preference menu. To indicate that classic system with the arithmetic sum
method is used to calculate system power a ∑ (sigma) symbol is used behind the power
parameters e.g. VA∑.
A-6
Appendices
Measuring Methods
A
Symbols used in formulas:
P
S
Q
Dh
Du
PF
DPF
P1
P1+
∑
u
i
Tw
N
K
n
U
I
X
Υ
Δ
- is used for power Watt
- is used for apparent power VA
- is used for reactive power var
- is used for harmonics power
- is used for unbalance power
- Power Factor
- Displacement Power Factor
- subscript 1 is used to indicate fundamental frequency components
- superscript + is used to indicate positive sequence components
- (sigma) indicates summing of components. Sigma is also used to indicate that
classic method is used.
- is used for voltage sample
- is used for current samples
- Time window of 10/12 cycles at 50/60 Hz
- number of samples in 10/12 cycle periods
- first sample of Tw record
- sample number
- is used for rms voltage calculated from samples over a 10/12 cycle window
- is used for rms current calculated form samples over a 10/12 cycle window
- is used to indicate phase A, B, C (or L1, L2, L3)
- is used to indicate 4 wire wye configuration
- is used to indicate 3 wire delta configuration
A-7
Fluke 434-II/435-II/437-II
Users Manual
x
x
x
x
x
Vrms∆
V
V rms phase neutral
x
x
V pk
V
V peak
●
●
V rms1/2
V
V rms 1/2 cycle
●
V-fund
V
V fundamental
●
CF V
Crest Factor V
●
Φ V(˚)
˚
Phase angle V
●
%Over
%
Overdeviation
●
●
●
●
●
●
●
●
●
●
●
Mains Signaling
x
Power Wave
x
Transients
x
Flicker
x
Monitor
x
Inrush
x
Unbalance
x
Energy Loss
V rms phase phase
Power & Energy
V
Harmonics
VrmsY
Dips&Swells
Description
V-A-Hz
Unit
Logger
Function
Volt
Shipboard V/A/Hz
Overview of available measurements and
measurements parameter list (English only)
●
●
%Under
%
Underdeviation
V tol%
%
Voltage tolerance
●
V imb%
%
Voltage imbalance
●
V mod
V
Voltage modulation
●
A
A rms
●
●
●
Amp
A rms
A pk
A
A pk
●
A rms1/2
A
A rms-1/2
●
A fund
A
A fund
●
CF A
CF
●
Φ A(˚)
˚
ΦA(˚)
●
A imb%
%
Current imbalance
●
●
●
●
●
●
●
●
●
●
●
●
●
●
●
●
●
Power
W
W
W full
●
●
W fund
W
W fundamenta
●
●
VA
VA
VA full
●
●c
●C
VA∑
VA
VA full classic
●
VA fund
VA
VA fundamenta
●
●c
VA fund∑
VA
VA fund classic
●
●C
A-8
●
●
●
VA harm
VA
VA harmonic
●
●
VA unb
VA
VA unbalance
●
●
●
var
VA
var
●
●c
●
var∑
VA
●C
var classic
●
PF
PF
●
●c
PF∑
PF classic
●
DPF
DPF
●
DPF∑
DPF classic
●
Cosϑ
Cosϑ
●
●C
●D
C
●D
c
●dc
Cosϑ∑
Cos ϑ Classic
●
●dC
Eff
Efficiency factor
Harmonic pollution
factor
●
●
Hpoll
x
●
●
Appendices
Φ VA unb (˚) ˚
L var unb
var
Φ L var unbr
(˚)
˚
C 'var unb
var
Φ C var unb
(˚)
Energy
˚
A
Shipboard V/A/Hz
Mains Signaling
Power Wave
Transients
VA
Flicker
VA unb
Monitor
˚
Inrush
Φ var unb (˚)
Unbalance
var
Energy Loss
var unb
Power & Energy
˚
Harmonics
Φ W unb (˚)
Description
Active Load unbalance
Active load unbalance
angle
Reactive Load
Unbalance
Reactive load unbalance
angle
Total Load Unbalance
Total Load Unbalance
angle
Inductive Load
Unbalance
Inductive load
unbalance angle
Capacitive Load
Unbalance
Capacitive load
unbalance angle
Dips&Swells
Unit
W
V-A-Hz
Function
W unb
Logger
Measuring Methods
●
●
●
●
●
●
●
●
●
●
Wh
Wh
Wh
●
●
VAh
VAh
VAh
●
●
varh
varh
varh
●
●
Wh forw.
Wh
Wh forward
●
●
Wh rev.
Wh
Wh reverse
●
●
Energy Loss
W R loss
W
W var loss
VA
W Unb loss
VA
W Harm loss
VA
W An loss
A
W Total loss
W
cost R/h
$
cost var/h
$
cost unb/h
$
cost harm/h
$
cost An/h
$
cost tot/y
$
Wh R loss
Wh
Wh varh loss
Wh
Wh Unb loss
Wh
Wh Harm
loss
Wh
Wh An loss
Wh
Wh Total loss Wh
Resistive loss due to
active power
Resistive loss due to
ractive power
Loss due to unbalance
power
Loss due to harmonics
power
Loss due to netrall
current
Total power loss
Cost /hr due to active
power loss
Cost /hr due to reactive
power loss
Cost /hr due to
unbalance loss
Cost /hr due to
harmonics loss
Cost /hr due to netral
current
Cost / year due to losses
Energy loss due
resistance
Energy loss due to
Energy loss due to
unbalance
Energy loss due to
harmonics
Energy loss due to
neutral currents
Total energy loss
●
●
●
●
●
●
●
●
●
●
●
●
●
●
●
●
●
●
●
●
●
●
●
●
●
●
●
●
●
●
●
●
●
●
●
●
A-9
Fluke 434-II/435-II/437-II
%
Volt DC
V
Volt Hn
V
Volt Φn
˚
Volt In
V
THD %f, %r or rms (up
to 40th or 50th)
DC component %f, %r
or rms
Harmonic n (n=1..50)
%f, %r or rms
Phase angle n (n=1..50)
Interharmonic n
(n=0..50) %f, %r or rms
Shipboard V/A/Hz
Volt THD
Mains Signaling
$
Power Wave
cost tot
Volt
Harmonic
Transients
$
Flicker
cost An
Cost due to harmonics
Cost due to nuetral
currents
Total cost of energy loss
Monitor
$
Inrush
$
cost harm
Unbalance
cost unb
Energy Loss
$
Power & Energy
cost var
Description
Cost due to resistive loss
activepower
Cost due to resistive loss
reactive power
Cost due to unbalance
Harmonics
$
Dips&Swells
Unit
cost R
V-A-Hz
Function
Logger
Users Manual
●
●
●
●
●
●
●
●
●
●
●
●
●
●
●
●
●
●
50
25
●
●
30 I
●
●
●
●
●
●
●
50
Amp
Harmonic
Amp THD
%
K-A
Amp A DC
A
Amp Hn
A
Amp Φn
˚
Amp In
A
THD %f, %r or rms (up
to 40th or 50th)
K factor Amp
DC component %f, %r
or rms
Harmonic n (n=1..50)
%f, %r or rms
Phase angle n (n=1..50)
Interharmonic n
(n=0..50) %f, %r or rms
●
●
30 I
●
●i
●
●i
●
●i
●
30 i
Watt
Harmonic
Watt DC
W
Watt Hn
W
Watt Φn
˚
THD %f, %r or rms (up
to 40th or 50th)
K factor Watt
DC component %f, %r
or rms
Harmonic n (n=1..50)
%f, %r or rms
Phase angle n (n=1..50)
Hz
Hz
Hz
●
Hz 10s
Hz
Hz 10s
●
Hz tol
Hz
Absolute freq. tolerance
●
Hz tol%
%
Relative freq. tolerance
●
Watt THD
%
K-W
●
Frequency
●
●
●
●
●
Hz mod
Hz
Abs. freq. modulation
●
Hz mod%
%
Rel. freq. modulation
●
Flicker
A-10
Pst(1min)
Pst (1 minute)
●
Pst
Pst (10 minutes)
●
Plt
Plt (2 hr)
●
Pinst
Instantaneous Flicker
●
●
●
●
●
●
Appendices
Aneg.
A
Azero
Mains
Signaling
A
Sig 1 %
%
V3s 1
V
Sig 2 %
%
V3s 2
V
Freq. 1 relative
signaling voltage
Freq. 1 voltage, 3s
average
Freq. 2 relative
signaling voltage
Freq. 2 voltage, 3s
average
A
Shipboard V/A/Hz
A
Mains Signaling
Apos.
Power Wave
V
Transients
Vzero
Flicker
V
Monitor
Vneg.
Inrush
V
●
Unbalance
Vpos.
unbalance
Positive sequence
voltage
Negative sequence
voltage
Zero sequence voltage
Positive sequence
current
Negative sequence
current
Zero sequence current
Energy Loss
%
Power & Energy
unbal(%)
Harmonics
Description
Dips&Swells
Unit
V-A-Hz
Function
Unbalance
Logger
Measuring Methods
●
●
●
●
●
●
●
●
●
●
●
●
●
●
●
●
●
x (wYe or Delta config)
c Power Classic Method OFF
C Power Classic Method ON
i Interharmonics OFF
I Interharmonics ON
D DPF
d Cos φ
A-11
Fluke 434-II/435-II/437-II
Users Manual
A-12
Appendix B
Installing USB Drivers
Introduction
The Fluke 430 Series II Power Quality and Energy Analyzer comes with a USB interface
and cable (connector type: ‘USB mini-B’) for establishing a communications link with a
personal computer. For the PC to be able to communicate with the instrument, drivers
need to be installed on to the computer.
This document describes how to install such drivers on a Windows XP computer.
Installation on other Windows platforms will be similar but screens may look different.
Drivers for Windows XP, Vista and Win-7 are available from the Windows Driver
Distribution Center and can be downloaded automatically if your computer is connected
to the internet. When no internet access is available, drivers may be installed from the
user manual CD-Rom.
The drivers have passed Windows Logo Verification and are signed by Microsoft
Windows Hardware Compatibility Publisher, as is required for installation on to Win-7
PCs.
Note:
The Fluke 430 Series II Power Quality and Energy Analyzers require two
separate drivers to be installed:
− a Fluke 430 series II USB driver
− a dedicated Fluke USB Serial port driver.
Both these drivers need to be installed in order for the PC to be able to
communicate with the Series II Power Quality Analyzer.
B-1
Fluke 434-II/435-II/437-II
Users Manual
Installing the USB Drivers
To install the USB drivers, do the following:
1
Connect the Fluke 430 Series II
instrument to the PC, using the USBcable supplied with the instrument. The
cable may be plugged in and out even
when both the computer and the
instrument are switched on (‘hot-swap’),
it is not required to power either one
down.
When the appropriate drivers for the
Fluke 430 series II instrument have not
yet been installed, Windows will show
that New Hardware is detected and the
Wizard for the installation of new
drivers will open.
Depending on your PC settings and
operating system, Windows may ask for
permission to search the Windows
Update Web site on the internet for the
latest revision. If you have internet
access at such moment, it is
recommended to select “Yes”, then
“Next”, so as to get the latest revision of
the drivers.
In case no internet access is available,
install the drivers from the CD-ROM or
from a location on the hard drive. For
that, select “No, not this time”.
2
B-2
In the following window, click “Next”
to install the software automatically. In
case drivers should be loaded from CDROM, select ‘select from a list or
specific location’ instead.
Appendices
Installing USB Drivers
3
While downloading, this screen will
show. Wait for the download to
complete.
4
When the driver has downloaded
completely and has been installed, click
“Finish” to accept this installation of this
first driver.
5
After completion of the first step, the
New Hardware Wizard will start again
so as to install the USB Serial Port
Driver.
B
Like before, click “Yes” if downloading
the driver from the internet is alright.
Click “Next” to actually install the
software automatically.
When no internet access is available,
load the driver from the CD-ROM,
supplied with the instrument.
6
Follow the instructions on screen.
Once the installation of the second
driver has been completed, click
“Finish”.
You are now ready to use the Power
Quality Analyzer with Fluke software.
You may want to check the Fluke
website to see what software is available
to support the Fluke 430-series II of
Power Quality Analyzers.
B-3
Fluke 434-II/435-II/437-II
Users Manual
7
To check if the drivers have been
installed properly, connect the Power
Qualiy Analyzer 430 Series II to your
computer and open the Device Manager
(see below).
From the device manager click on the +
sign or ► symbol to expand the
‘Universal Serial Bus controllers’ group.
The ‘Fluke 430 Series II’ instrument
should now be listed here.
From the device manager click on the +
sign or ► symbol to expand the ‘Ports
(COM & LPT)’ group.
The ‘Fluke USB Serial Port (COMx)’
should now be listed here.
Note that the COM-port number may
differ as this is automatically assigned by
Windows.
Accessing the device manager from within Windows XP is like this:
Click START and select the ‘Control Panel’.
- When in Classic View mode, select ‘System’, then the tab ‘Hardware’.
- Or when in Category View mode, select ‘Performance and Maintenance’, then
‘System’. Here, you’ll find the tab ‘Hardware’, just like described above.
Once you open the Hardware tab, you should see a selection field ‘Device Manager’.
From within Win-7, the device manager becomes accessible as soon as you open the control
panel.
Notes
1) Sometimes application software may require a different port number (for
example in the range Com 1....4). In such case, the COM port number can be
changed manually.
To manually assign a different COM port number right click on ‘Fluke USB
Serial Port COM(5)’ and select ‘properties’. From the Properties menu, select
the Port Settings tab, and click ‘Advanced…’ to change the port number.
2) Some application programs automatically occupy specific COM-ports, including
the newly created port. Usually, this can be overcomeby disconnecting the Fluke
430 Series II Power Quality Analyzer’s USB cable and then re-connecting the
cable.
B-4
Appendix C
Instrument Security Procedures
Introduction
Model Numbers:
Fluke 434-II, Fluke 435-II, Fluke 437-II
Short Description:
3-Phase Energy & Power Quality Analyzer
Memory.
Fluke 43x-II has the following memory devices:
1. RAM 8M x 16, U901, type: e.g. MT47H64M16HR-25IT:H,
contains: temp storage of measuring data
2. Video RAM 256k x 16, D1001, type: e.g. CY62146EV30LL,
contains: storage of data to be displayed on LCD-screen.
3. Flash-ROM 16M x 2, U1100, U1101, type: e.g. MW29W160EB,
contains: the instrument’s embedded software and calibration data.
Also Analyzer settings such as Config, Freq, Vnom, Limits, and Current Clamp data
that differ from Factory Default are stored here.
4. FIFO (First In First Out) RAM 2kB, U801, type: e.g. SN74V235-7PAG,
contains: data to be exchanged between DSP and Microcontroller.
5. SRAM 16 Mb x 2, D1100, D1103, type: e.g. CY62167DV30LL,
contains: temporary data storage for microcontroller.
6. SD Memory Card. Contains: all datasets, screens, and logging data.
C-1
Fluke 434-II/435-II/437-II
Users Manual
Security Summary:
C-2
Ad 1.
Memory contents erased at power-off. No user access.
Ad 2.
Memory contents erased at power-off. No user access.
Ad 3.
Flash memory: contents stays available at power off and disconnection of the Liion accumulator (can be loaded/exchanged with dedicated PC software that is
exclusively available in manufacturing and Fluke service). Note: the calibration
data is generated when the analyzer is sent through its calibration process and are
fundamental to the meter operation.
To erase Analyzer settings that differ from Factory Default, do the following key
operations: SETUP, function key F1 – USER PREF, F1 – FACTORY
DEFAULTS, F5 – YES (confirm menu).
Ad 4.
Memory contents erased at power-off. No user access.
Ad 5.
Memory contents erased at power-off. No user access.
Ad 6.
There are 2 ways of removing measurement data from the Analyzer:
1 - The SD Card is located in the battery-compartment at the rear of the
Analyzer. Open the compartment with a small screwdriver. Push the SD Card in
the direction of the arrow and take it out of the Analyzer. All measurement data
now has been removed from the Analyzer. Avoid touching the contacts of the
Card with you hands. When reinstalling the Card take careful notice of the
indication in the battery compartment.
2 - All measurement data at the SD memory card is erased by formatting it. The
format action occurs via a confirm menu. Do the following key operations with
the SD Card installed in the Analyzer: SETUP, function key F1 – USER PREF,
F4 – FORMAT SD CARD, F5 – YES.
Index
—1—
150/180 cycle, 5-3
—3—
3 s, 5-3
—A—
A range, 24-7
Accessories, 1-1
Aggregation interval, 5-3
—B—
Banana Inputs, 6-1
Bar Graph screen, 5-2
Battery Charger, 1-6
Battery Condition, 26-1
battery pack
safe disposal, 1-9
safe transport, 1-8
safe use, 1-7, 1-8
storage, 1-7
Battery save, 24-5
BNC Inputs, 6-1
Brightness, 4-6
—C—
Calibration, 27-1
Capacitive load, 11-2
CF, 8-1
Change Offset and Span, 24-11
Change wiring config, 24-10
Characteristics, 27-1
Charge Batteries, 4-3
CHG, 8-3, 9-5, 16-6, 21-4, 22-4
Clamp, 24-7
Cleaning, 26-1
Clear all, 24-5
Clock, 5-4
Colors, 5-2, 24-5
Configuration, 5-4
Configuration, wiring, 24-7
Contrast, 4-6
Contrast adjustment, 24-5
Count down, 5-3
Crest Factor, 8-1
Current clamps, 6-2
Cursor, 23-1
—D—
Date, 5-4
DC, 10-1
Decals, 6-1
Defaults, 4-7
Demo Mode, 24-5
DIP, 8-3, 9-5, 16-6, 21-4, 22-4
Dips, 9-1
DIRS, 16-1
Display, 4-6
Duration, 9-1
—E—
Efficiency, 13-1
Energy Loss, 12-1
—F—
F1 ... F5, 5-4
Factory defaults, 24-5
Features, 3-1
Filtering Harmonics, 10-2
Flagged, 5-3
Flicker, 17-1
Fluke 435, 3-1
Freq, 24-7
Frequency nominal, 5-4
1
Fluke 434-II/435-II/437-II
Users Manual
Full, 11-1
Fundamental, 11-1
—G—
GPS signal, 5-4
—H—
Hang Strap, 4-2
Harmonics, 10-1
Hx, 16-6
Hysteresis, 9-1
—I—
Inductive load, 11-2
Inputs, 6-1
Inrush currents, 15-1
Inrush time, 15-2
INT, 8-3, 9-5, 16-6, 21-4, 22-4
Interharmonics, 10-1
Interruptions, 9-1
—K—
Keyboard Lock, 4-6
K-factor, 10-1
—L—
Language, 24-5
Limits, 5-4, 16-2
Limits Setup, 24-13
Lock, 4-6
Locked keyboard, 5-3
Logger, 21-1
Logging, 21-1
Long term severity, 17-2
Luminance fluctuation, 17-1
—M—
Magnitude, 9-1
Mains Signaling, 16-1, 20-1
Manual, 2-1
Measuring mode, 5-3
Measuring modes, 3-2
Measuring values, 5-3
Memory, 25-1
Memory Config, 24-4
Menu Navigation, 4-6
Meter screen, 5-2
Monitor, 3-2, 16-1
—N—
Negative sequence, 10-5, 14-4
Numerical values, 8-1, 22-1
2
—O—
Optional parts, 26-3
Oscilloscope, 7-1
—P—
Parts, 26-2
PC, 25-4
Persistence, 12-2
Phase Colors, 5-2
Phase Identification, 24-5
Phasor Preference, 7-2, 14-3
Phasor screen, 5-2, 7-2
Positive sequence, 10-5, 14-4
Power, 4-3
Power Adapter, 1-6
Power and Energy, 11-1
Power Inverter, 13-1
Power Quality Monitor, 16-1
Power Wave, 19-1
Present values, 4-5, 24-1
Printer, 25-4
Probability, 16-3
—R—
Rapid Voltage Changes, 9-1
Readings Select, 21-1
Recording, 5-3
Reference phase, 6-3
Reset, 4-7
RS-232 Setup, 24-5
—S—
Safety, 1-1
Scope Recorder, 19-1
Screen Types, 5-1
Service Center, 1-1
Shipboard V/A/Hz, 22-1
Shipment Note, 1-1
Short term severity, 17-2
Shrink display, 23-1
Signal Polarity, 6-2
Signaling, 20-1
Single phase, 6-3
Sliding reference voltage, 9-1
Softkeys, 5-4
Standard parts, 26-2
Status indicators, 5-3
Status line, 5-4
Stickers, 6-1
Storage, 26-1
Stretch display, 23-1
Swells, 9-1
SWL, 8-3, 9-5, 16-6, 21-4, 22-4
Symbols, 5-3, 16-6
System Monitor, 16-1
Index (continued)
Sytem Monitor, 3-2
—T—
Technical data, 27-1
THD, 10-1
Threshold, 9-1, 15-2
Tilt Stand, 4-2
Time, 5-3, 5-4
Transients, 18-1
Trend screen, 5-2
Troubleshooting, 26-4
—U—
U, Unstable, 5-3
Unbalance, 14-1
Usage, 11-1
User ID, 24-5
Users Manual, 2-1
Using Memory, 25-1
—V—
Vector diagram, 7-2
Version & Cal, 24-3
Vnom, 24-7
Voltage nominal, 5-4
Voltage range, 1-6
Volts/Amps/Hertz, 8-1
—W—
Warranty, 1-1
Waveform screen, 5-2
Wiring configuration, 5-4
—Z—
Zero sequence, 10-5, 14-4
Zoom, 23-1
3
Fluke 434-II/435-II/437-II
Users Manual
4