1
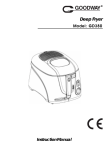
E350/36 and E350/37
FLOOR-STANDING FRYERS
USERS INSTRUCTIONS
SECTION 1 - GENERAL DESCRIPTION
SECTION 2 - CONTROLS and OPERATION
SECTION 3 - COOKING HINTS
SECTION 4 - CLEANING and MAINTENANCE
This appliance has been CE-marked on the basis of compliance with the Low Voltage and EMC Directives for
the voltages stated on the Data Plate.
IMPORTANT
This appliance must only be installed by a competent person in compliance with the regulations in
force at the time.
UK regulations are listed on the front of the Installation and Service Manual.
Regular servicing by a qualified person is recommended to ensure the continued safe and efficient
performance of the appliance.
WARNING - THIS APPLIANCE MUST BE EARTHED!
Upon receipt of this manual, the installer should instruct a responsible person (or persons) as to the correct
operation and maintenance of the unit.
This equipment is designed FOR PROFESSIONAL USE ONLY and be operated by QUALIFIED persons. It is
the responsibility of the supervisor or equivalent to ensure that the user wears SUITABLE PROTECTIVE
CLOTHING. Attention should also be drawn to the fact that some parts of the appliance will, by necessity,
become VERY HOT and could cause burns if touched accidentally.
Falcon Foodservice Equipment
HEAD OFFICE AND WORKS
Wallace View, Hillfoots Road, Stirling. FK9 5PY. Stirling.
SERVICELINE CONTACT -
PHONE - 01438 363 000 FAX - 01438 369 900
T100643 Ref.1
SECTION 1 - GENERAL DESCRIPTION
The Falcon E350/36 & E350/37 floor mounted fryers
are part of the Falcon 350 range of equipment.
All units comprising this series are of modular
dimensions of 350mm and 700mm wide.
This enables suites to be installed in a matching line.
Some appliances, such as these fryers and ranges
are floor mounted whereas others are designed for
counter mounting.
The E350/36 fryer is 350mm wide with a single pan.
The E350/37 model is a double pan appliance which
is 700mm wide.
Each pan has a separate element assembly which is
individually thermostatically controlled.
Warning - THIS APPLIANCE MUST BE EARTHED.
SECTION 2 - CONTROLS and OPERATION
CONTROLS
The thermostat control knob and two indicator lamps
are mounted on control panel. On E350/37 model,
these are duplicated).
The MAINS lamp (RED) will become lit when external
isolating switch is closed and will indicate that power
is available to fryer.
The THERMOSTAT lamp (AMBER) only lights when
heating elements are being supplied with current.
This will extinguish when frying medium has reached
selected frying temperature.
The elements are switched off when control knob is at
O (OFF) position.
A drain valve for each individual pan is concealed
behind door. This enables oil to be run off into a
suitable receptacle.
Each pan is equipped with two chip baskets and a
perforated base grid. A basket draining support is
also provided and a dust cover is supplied for each
pan.
Each pan is fitted with a SAFETY THERMOSTAT
which will switch off elements in event of the oil
becoming overheated should control thermostat fail.
Should this occur, it will be necessary to have the
appliance serviced by a qualified person who will
rectify the fault and re-set the safety thermostat.
FRYING MEDIUM
Caution
The appliance will achieve optimum performance
when a good quality vegetable oil is used as the frying
medium. Nevertheless, favourable results may also
be obtained from cooking fats, provided the following
procedures are adhered to.
a) Never operate thermostat above smoke point of
chosen fat, e.g. Some dripping can have a smoke
point as low as 170 o C. Reputable fat
manufacturers supply this information.
b) To prevent localised overheating around elements
or external walls of pan, fat should be broken up
into small pieces when charging pan or topping
up to a working level .The thermostat should not
be set above 120oC until fat is in a liquid state.
OPERATION
Initial Charging Of The Pan
important
Ensure that appliance has been turned OFF at mains
isolating switch.
Prior to operation, clean pan using hot water and
detergent.
Rinse pan and dry it thoroughly before use.
Ensure that drain valve is closed.
Fill pan with oil to level mark on element guard.
Turn ON at isolating switch and set thermostat knob
to desired frying temperature.
Leave appliance to heat up. When oil has reached
selected temperature, amber light will extinguish and
fryer is ready for use.
When oil temperature falls, ie. when food is immersed
in oil, thermostat automatically restores supply of
current to elements.
Oil capacity for model E350/36 is 12 litres and model
E350/37 is 12 litres for each pan (a total of 24 litres).
Warning
Your attention is drawn with regard to the following
safety related points Never under any circumstances switch fryer ON
unless it is filled with oil or water.
Before draining pan or raising elements for cleaning,
switch off at isolating switch.
Surge boiling may occur if over wet food or a larger
than recommended load requires to be prepared.
There is a possibility that unit could catch fire if oil is
allowed to go below specified operating level.
Old oil has a reduced flash point to that of fresh oil
and is therefore more prone to surge boiling.
The MAXIMUM RECOMMENDED LOAD is 0.9kg
(2 lbs) per pan.
SECTION 3 - COOKING HINTS
FRYING CHIPS
Chipped potatoes can be prepared by the following
methods.
Raw to Finish
Set thermostat to 190oC and load each basket with
0.9kg (2 lb) of raw chips. Cook for 4 to 5 minutes.
Using this method an hourly output of up to 24.1kg
(53 lb) of chips can be achieved from each pan.
Blanching
This method is used when large quantities of chips
are required at peak periods, and involves pre-frying
at a lower temperature (170oC). Basket loads of
0.9kg (2lbs) are recommended. Finishing should be
carried out within 3 hours of blanching at a thermostat
setting of 190oC. Cook for 1 to 2 minutes and serve
immediately. Avoid further storage if possible.
Frying Fish
Fish is best cooked directly on base grid, not in the
chip baskets. When fish is ready, remove it with a fish
lifter. The recommended temperature is 170oC. Time
varies in accordance with type and weight of fish.
Other Foods
Any type of food which is suitable for deep frying, has
a particular cooking temperature at which best results
are obtained. The following list gives a representative
selection of food which may be deep fried together
with recommended thermostat settings. The settings
may be varied to suit individual requirements.
FOOD TYPE
Fried Bread
Doughnuts
Fish Cakes
Chicken Portions
Sausages
Scampi
Meat (Chops, etc.)
Temperature
190oC
190oC
180oC
170oC
170oC
170oC
170oC
SECTION 4 - CLEANING and MAINTENANCE
Important
DISCONNECT THE ELECTRICITY SUPPLY
BEFORE ANY CLEANING IS UNDERTAKEN,
THE APPLIANCE MUST NOT BE CLEANED WITH
A JET OF WATER OR STEAM CLEANED.
Warning
Do not attempt to clean this appliance with acid or
halogen based (eg. chlorine) descaling liquids or
cleaning powders.
Stainless Steel Surfaces
It should be noted that stainless steel can be easily
marked by certain scouring pads including nylon
types and care should be exercised. When rubbing
stainless steel with a cloth always rub along the grain
direction.
Cleaning Procedure
In the interests of good housekeeping and hygiene, it
is recommended that the appliance be cleaned daily
as follows 1. Ensure that fryer has been switched OFF at mains
isolating switch.
2. Place a receptical directly below drain pipe.
3. Slowly open drain valve. This will allow oil to flow
gently into vessel. Take care not to overfill
receptical.
4. Having drained pan, close drain valve.
5. Remove basket and fish plate. Submerge these
items in a sink filled with hot, soapy water.
6. Pour hot water and detergent into fryer pan.
Detegent to water ratio is dependant upon
strength of cleaning medium.
7. Set fryer control between 160o and 165oC. Allow
water to heat and simmer slowly. Duration of this
process is dependant upon how soiled the pan is.
8. Turn fryer OFF.
9. Drain water from the pan as item 4.
10. Rinse pan with clean water. Dry thoroughly. To
gain access to wipe pan interior, elements can be
hinged upward. Having fully raised elements, a
supporting latch will automatically secure them in
raised position.
Important Note
Ensure that elements have cooled before attempting
this procedure
11. Wash and rinse basket and fish plate. These
should be perfectly dry before replacement within
the pan.
12. Ensure drain valve is closed. Remove pipe.
13. Strain/filter oil back into pan. If necessary, top up
with clean oil to maximum level mark. DO NOT
OVERFILL.
SERVICE
Contact address on title page of this manual.