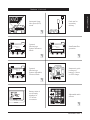
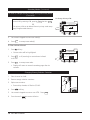
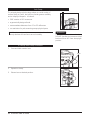
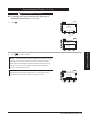
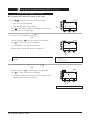
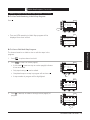
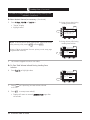
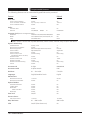
1
Signature Edition®
VOLUMETRIC INFUSION PUMPS
Model 7100 and 7200 (Adjustable Pressure capability)
Models 7130 and 7230
Models 7132 and 7232 (MIB capability)
®
A
RUN
HOLD
ml/hr
ml/hr
KVO OPT
HLD PRI
B
RUN
HOLD
POWER
POWER
SEC
PRI
PRI
SEC HLD
OPT KVO
SEC
A B
OPTIONS
1
2
3
4
5
6
7
8
9
•
0
Clear
Enter
1 2 3 4 hrs
DIRECTIONS FOR USE
TABLE OF CONTENTS
INTRODUCTION
1
4
8
10
12
13
INTRODUCTION
15
19
21
22
24
25
28
29
29
30
GETTING STARTED
ABOUT THE INSTRUMENTS . . . . . . . . . . . . . . . . . . . . . . . . . . . . . . . . . . . . . . . . . . . . . . . . . . . . . . . . . . . . . . . . . . . . . . . . . . . . . . . . .
FEATURES . . . . . . . . . . . . . . . . . . . . . . . . . . . . . . . . . . . . . . . . . . . . . . . . . . . . . . . . . . . . . . . . . . . . . . . . . . . . . . . . . . . . . . . . . . . . . . . . . . . . .
CONTROLS AND INDICATORS . . . . . . . . . . . . . . . . . . . . . . . . . . . . . . . . . . . . . . . . . . . . . . . . . . . . . . . . . . . . . . . . . . . . . . . . . . . . . .
DISPLAYS . . . . . . . . . . . . . . . . . . . . . . . . . . . . . . . . . . . . . . . . . . . . . . . . . . . . . . . . . . . . . . . . . . . . . . . . . . . . . . . . . . . . . . . . . . . . . . . . . . . . . .
AROUND THE INSTRUMENTS . . . . . . . . . . . . . . . . . . . . . . . . . . . . . . . . . . . . . . . . . . . . . . . . . . . . . . . . . . . . . . . . . . . . . . . . . . . . . . .
TERMS AND SYMBOLS . . . . . . . . . . . . . . . . . . . . . . . . . . . . . . . . . . . . . . . . . . . . . . . . . . . . . . . . . . . . . . . . . . . . . . . . . . . . . . . . . . . . . .
GETTING STARTED
OPERATIONAL PRECAUTIONS . . . . . . . . . . . . . . . . . . . . . . . . . . . . . . . . . . . . . . . . . . . . . . . . . . . . . . . . . . . . . . . . . . . . . . . . . . . . . . .
PREPARING AN INFUSION . . . . . . . . . . . . . . . . . . . . . . . . . . . . . . . . . . . . . . . . . . . . . . . . . . . . . . . . . . . . . . . . . . . . . . . . . . . . . . . . . . .
START-UP SEQUENCE . . . . . . . . . . . . . . . . . . . . . . . . . . . . . . . . . . . . . . . . . . . . . . . . . . . . . . . . . . . . . . . . . . . . . . . . . . . . . . . . . . . . . . . .
PRIMARY MODE . . . . . . . . . . . . . . . . . . . . . . . . . . . . . . . . . . . . . . . . . . . . . . . . . . . . . . . . . . . . . . . . . . . . . . . . . . . . . . . . . . . . . . . . . . . . . .
KVO MODE . . . . . . . . . . . . . . . . . . . . . . . . . . . . . . . . . . . . . . . . . . . . . . . . . . . . . . . . . . . . . . . . . . . . . . . . . . . . . . . . . . . . . . . . . . . . . . . . . . . .
SECONDARY MODE . . . . . . . . . . . . . . . . . . . . . . . . . . . . . . . . . . . . . . . . . . . . . . . . . . . . . . . . . . . . . . . . . . . . . . . . . . . . . . . . . . . . . . . . . .
CHANGING PRIMARY SOLUTION CONTAINER . . . . . . . . . . . . . . . . . . . . . . . . . . . . . . . . . . . . . . . . . . . . . . . . . . . . . . . . . . . .
UNLOADING SET . . . . . . . . . . . . . . . . . . . . . . . . . . . . . . . . . . . . . . . . . . . . . . . . . . . . . . . . . . . . . . . . . . . . . . . . . . . . . . . . . . . . . . . . . . . . .
POWERING OFF . . . . . . . . . . . . . . . . . . . . . . . . . . . . . . . . . . . . . . . . . . . . . . . . . . . . . . . . . . . . . . . . . . . . . . . . . . . . . . . . . . . . . . . . . . . . . . .
ALARMS, ALERTS AND PROMPTS . . . . . . . . . . . . . . . . . . . . . . . . . . . . . . . . . . . . . . . . . . . . . . . . . . . . . . . . . . . . . . . . . . . . . . . . . .
39
40
41
42
43
44
60
61
74
82
89
93
95
MAINTENANCE
97
100
101
101
102
103
104
105
APPENDIX
TRUMPET AND START-UP CURVES
.........................................................................
107
APPENDIX
SPECIFICATIONS . . . . . . . . . . . . . . . . . . . . . . . . . . . . . . . . . . . . . . . . . . . . . . . . . . . . . . . . . . . . . . . . . . . . . . . . . . . . . . . . . . . . . . . . . . . . . .
PROGRAMMABLE FEATURES . . . . . . . . . . . . . . . . . . . . . . . . . . . . . . . . . . . . . . . . . . . . . . . . . . . . . . . . . . . . . . . . . . . . . . . . . . . . . . . .
UNPACKING . . . . . . . . . . . . . . . . . . . . . . . . . . . . . . . . . . . . . . . . . . . . . . . . . . . . . . . . . . . . . . . . . . . . . . . . . . . . . . . . . . . . . . . . . . . . . . . . . . .
STORAGE . . . . . . . . . . . . . . . . . . . . . . . . . . . . . . . . . . . . . . . . . . . . . . . . . . . . . . . . . . . . . . . . . . . . . . . . . . . . . . . . . . . . . . . . . . . . . . . . . . . . . .
CLEANING . . . . . . . . . . . . . . . . . . . . . . . . . . . . . . . . . . . . . . . . . . . . . . . . . . . . . . . . . . . . . . . . . . . . . . . . . . . . . . . . . . . . . . . . . . . . . . . . . . . . .
INSPECTION REQUIREMENTS . . . . . . . . . . . . . . . . . . . . . . . . . . . . . . . . . . . . . . . . . . . . . . . . . . . . . . . . . . . . . . . . . . . . . . . . . . . . . . .
SERVICE INFORMATION . . . . . . . . . . . . . . . . . . . . . . . . . . . . . . . . . . . . . . . . . . . . . . . . . . . . . . . . . . . . . . . . . . . . . . . . . . . . . . . . . . . . .
WARRANTY . . . . . . . . . . . . . . . . . . . . . . . . . . . . . . . . . . . . . . . . . . . . . . . . . . . . . . . . . . . . . . . . . . . . . . . . . . . . . . . . . . . . . . . . . . . . . . . . . . .
MAINTENANCE
BATTERY MANAGEMENT SYSTEM . . . . . . . . . . . . . . . . . . . . . . . . . . . . . . . . . . . . . . . . . . . . . . . . . . . . . . . . . . . . . . . . . . . . . . . . .
NURSE CALL . . . . . . . . . . . . . . . . . . . . . . . . . . . . . . . . . . . . . . . . . . . . . . . . . . . . . . . . . . . . . . . . . . . . . . . . . . . . . . . . . . . . . . . . . . . . . . . . . . .
PANEL LOCK . . . . . . . . . . . . . . . . . . . . . . . . . . . . . . . . . . . . . . . . . . . . . . . . . . . . . . . . . . . . . . . . . . . . . . . . . . . . . . . . . . . . . . . . . . . . . . . . . . .
POLE CLAMP . . . . . . . . . . . . . . . . . . . . . . . . . . . . . . . . . . . . . . . . . . . . . . . . . . . . . . . . . . . . . . . . . . . . . . . . . . . . . . . . . . . . . . . . . . . . . . . . . .
AIR-IN-LINE AND ACCUMULATED AIR-IN-LINE . . . . . . . . . . . . . . . . . . . . . . . . . . . . . . . . . . . . . . . . . . . . . . . . . . . . . . . . . . .
DYNAMIC MONITORING® SYSTEM . . . . . . . . . . . . . . . . . . . . . . . . . . . . . . . . . . . . . . . . . . . . . . . . . . . . . . . . . . . . . . . . . . . . . . . .
FLOW SENSOR . . . . . . . . . . . . . . . . . . . . . . . . . . . . . . . . . . . . . . . . . . . . . . . . . . . . . . . . . . . . . . . . . . . . . . . . . . . . . . . . . . . . . . . . . . . . . . . .
DRUG SPECIFIC DOSE RATE CALCULATOR (DRC) . . . . . . . . . . . . . . . . . . . . . . . . . . . . . . . . . . . . . . . . . . . . . . . . . . . . . . . . .
MULTI-STEP PROGRAM . . . . . . . . . . . . . . . . . . . . . . . . . . . . . . . . . . . . . . . . . . . . . . . . . . . . . . . . . . . . . . . . . . . . . . . . . . . . . . . . . . . . . .
MULTI-DOSE PROGRAM . . . . . . . . . . . . . . . . . . . . . . . . . . . . . . . . . . . . . . . . . . . . . . . . . . . . . . . . . . . . . . . . . . . . . . . . . . . . . . . . . . . . .
LOADING DOSE . . . . . . . . . . . . . . . . . . . . . . . . . . . . . . . . . . . . . . . . . . . . . . . . . . . . . . . . . . . . . . . . . . . . . . . . . . . . . . . . . . . . . . . . . . . . . . .
RS-232 COMPUTER LINK (Models 7100, 7200, 7130 and 7230) . . . . . . . . . . . . . . . . . . . . . . . . . . . . . . . . . . . . . .
IEEE 1073 (MIB) COMPUTER LINK (Models 7132 and 7232 only) . . . . . . . . . . . . . . . . . . . . . . . . . . . . . . . . . . . . .
FEATURES / OPTIONS
FEATURES AND OPTIONS
T H I S PA G E
I N T E N T I O N A L LY
LEFT BLANK
INTRODUCTION
About the Instruments
•
The single channel (Model 71XX) provides a full range of
features in a small, easy-to-use, linear peristaltic pump.
•
The dual channel (Model 72XX) offers the same features
while providing two, independent infusion pumps in one
instrument.
INTRODUCTION
The Signature Edition® Infusion System includes Model 71XX
and Model 72XX Volumetric Infusion Pumps, Model 71XX and
Model 72XX Volumetric Infusion Pumps with MIB Capability,
Model 71XX and Model 72XX Volumetric Infusion Pumps with
Adjustable Pressure Capability, and AccuSlide® Flow Regulator
administration sets.
ALARIS Medical Systems® Infusion Pumps are intended for use in
today’s growing professional healthcare environment, including
healthcare facilities, home care and medical transport that utilize
infusion pumps for the delivery of fluids, medications, blood and
blood products.
The ALARIS Medical Systems® Infusion Pumps covered in this
document are indicated for continuous or intermittent delivery
through clinically acceptable routes of administration; such as,
intravenous (IV), intra–arterial (IA), subcutaneous, epidural,
enteral and irrigation of fluid spaces.
The Signature Edition® Infusion System uses a wide variety of
AccuSlide® Flow Regulator administration sets. The
ALARIS®/IVAC® 72 Series sets are designed for use with the
instruments as well as for gravity-flow, stand-alone use. The
unique, patented Accuslide® Flow Regulator has an integral flow
control device that minimizes accidental free-flow when the set
is removed from the instrument and provides accurate rate
control during gravity administration.
The Signature Edition® Infusion System incorporates the
Dynamic Monitoring® System, a versatile Intravenous Site
Monitoring System for detection of both full and partial
occlusions of the fluid pathway. This system includes both
precision pressure sensing and continuously computed Flow
Resistance. Flow Resistance measurement dramatically improves
the clinician’s ability to detect partial and full occlusions,
particularly at low flow rates. Both Pressure and Flow Resistance
monitoring modes feature numeric and bar graph displays of
current values plus easily selectable trend graphs displaying up
to twelve hours of monitored values. The Pressure Mode
provides 1 mmHg display resolution, either manual or auto
baseline setting, and a user adjustable alarm limit. The
INTRODUCTION 1
About the Instruments (Continued)
Resistance Mode provides two ranges and user alert limit
adjustment to meet needs from neonatal to adult patients.
Pressure mode and resistance monitoring modes (excluding High
Resistance Monitoring mode) include AutoRestartPlus
operation, to automatically continue the infusion if an occlusion
is resolved during a 40 second self-check time. Many
monitoring features and functions are configurable by qualified
personnel to allow customization to meet specific needs.
The instruments are equipped with a unique battery display
that provides the clinician continuous monitoring of battery time
available, indicated in 15 minute increments. This information is
displayed whether the instrument is turned on or not.
A dual rate feature allows the instruments to administer both
primary and secondary solutions at separate flow rates and
volumes. Using this feature, the clinician can select and start a
program for secondary (piggyback) medication. Upon
completion of the secondary dose, the instruments will
automatically switch over to a primary rate. Both channels of
the dual channel instrument can be programmed for primary
and secondary operation.
The panel lock feature helps prevent tampering. A panel lock
symbol ( ) is shown in the lower display when the panel lock is
on, and no changes can be made from the front panel. The
panel lock key is readily accessible, yet not obvious to
unauthorized users.
Optional modes are easily accessed with the press of one key.
The Drug-Specific Dose Rate Calculator allows the clinician to
select a drug name and calculate a volumetric or dose rate for
continuous infusion. Once calculated, the instruments will
display the drug name on the screen. A generic calculator is
also provided for drug names not on the drug list.
The Multi-Step program allows a sequential program to deliver
up to nine steps. Fluid volumes and delivery rates may be
programmed for each step. The program may be entered based
on Rate and Volume, or Volume and Time.
The Multi-Dose program allows the clinician to preprogram
multiple infusions over a period of up to 24 hours. The fluid
volume and delivery rate is repeated for each delivery. A delayed
start feature may be programmed.
The Loading Dose feature allows the clinician to set up an
initial infusion rate for a specific volume, automatically followed
by a maintenance rate from the same container.
2 INTRODUCTION
About the Instruments (Continued)
INTRODUCTION
The optional flow sensor kit allows the clinician to be notified
of empty fluid container(s) and/or if upstream occlusions are
present.
The Model 7132 and Model 7232 instruments replace the
RS–232 communications interface with the IEEE 1073 (Medical
Information Bus, or MIB) communications interface.
Qualified service personnel can configure many features of the
instrument to meet specialized needs. The
symbol is used
throughout this document to indicate the programmable
features. See the Specifications section of this document for a
list of the programmable features and the default settings.
Refer to the Technical Service Manual for the procedure to set
selected configuration parameters.
INTRODUCTION 3
Features
Simple two-step
loading.
AC
ml/hr
KVO
OPT
Lightweight and
portable.
HLD
PRI
SEC
ml/hr
PRI
Delivery from
multiple
containers.
SEC
HLD OPT KVO
Rates from 0.1 to
999.9 ml/hr.
Easy gravity
prime set for
hospital-wide
standardization.
IVAC
IV
OPEN
Set-based
anti–free–flow
protection.
AccuSlide® Flow
Regulator.
CLOSED
4 INTRODUCTION
Features (Continued)
Automatic KeepVein-Open (KVO)
mode.
50 0
5
Dual rate for
secondary
delivery.
.
ml/hr
ml/hr
A
B
OPTIONS
A
Rate= 125.0 ml/hr
VTBI=1000.0 ml
VI=
0.0 ml
Primary
25% Resistance
A
A
Dynamic
Monitoring®
System Resistance
Mode.
OPTIONS
B
Rate= 125.0 ml/hr
VTBI=1000.0 ml
VI=
0.0 ml
A
AutoRestartPlus
operation.
Checking Line
OPTIONS
B
Rate= 125.0 ml/hr
VTBI=1000.0 ml
VI=
0.0 ml
Primary
A
234 mmHg
Dynamic
Monitoring®
System Adjustable
Pressure Mode.
Automatic quick
recharge of
battery; 4 hours
to 95% charge.
1
1
2
3
4
hrs
Battery status is
continuously
displayed in
15 minute
increments.
2
3
4 hrs
1
2
3
4
5
6
7
8
9
•
0
Clear
Enter
Adjustable audio
volume.
1 2 3 4 hrs
INTRODUCTION 5
INTRODUCTION
KVO
Features (Continued)
1
2
3
4
5
6
7
8
9
•
0
Clear
Enter
Temporary alarm
and alert silence
key.
2 3 4 hrs
Customizable
instrument ID
label.
1 2 3 4 hrs
1 2 3 4 hrs
1 2 3 4 hrs
Panel lock helps
prevent
unauthorized
changes.
Computer
monitoring
capability.
1 2 3 4 hrs
Learn/Teach
configurations
through external
RS-232
communications
connection.
Rotating pole
clamp.
6 INTRODUCTION
Optional remote
nurse call.
Configurable airin-line detector.
Features (Continued)
Periodic
maintenance
reminder.
continue
Rate (ml/hr)
13.1
Maintenance
Reminder
e.g.:
5mcg/kg/min
Dose Rate
Calculator.
Time
250
Primary
Loading Dose
program.
0
Rate (ml/hr)
Rate (ml/hr)
Loading
Dose
Multi-Dose
programming.
0
Time
Rate (ml/hr)
Time
A
150
100
Multi-Step
programming.
50
0
B
OPTIONS
A
Set
Pressure
Baseline
return
-12h
return
Time
A
B
ok
Dynamic
Monitoring®
System manual
pressure baseline.
OPTIONS
A
600
m
m
H
g
A
PRESSURE
clear
B
now
time
OPTIONS
A
100
%
0
-4h
return
Resistance
now
clear
time
Dynamic
Monitoring®
System pressure
trend graph.
Dynamic
Monitoring®
System resistance
trend graph.
INTRODUCTION 7
INTRODUCTION
OPTIONS
A B
Controls and Indicators
Model 71XX
Power Key: Turns instrument on and off.
Power Indicator:
Green = Plugged in and charging.
Flashing Amber = Battery power.
Infusing Indicator: Indicates instrument
is infusing.
Alarm Indicator: Indicates instrument is
in alarm and has stopped infusing.
RUN•HOLD Key: Starts and stops
infusion.
RUN
HOLD
POWER
®
OPT
PRI
HLD
PRI
SEC
OPTIONS Key: Accesses additional
features.
ml/hr
KVO
SEC
OPTIONS
SECONDARY Key: Selects secondary
mode.
PRIMARY Key: Selects primary mode.
1
2
3
4
5
6
7
8
9
.
0
Clear
1 2 3 4 hrs
Enter
ENTER Key: Accepts value or selection
entered.
SILENCE Key: Silences audible alarm or
alert for two minutes; message remains
on screen. New alarm or alert will
reinstate audible tone.
CLEAR Key: Clears selected numeric
value.
AUDIO VOLUME Key: Sets audio volume
for alarms and alerts. Press key to adjust
volume.
Numeric Keypad: Enters/changes values.
8 INTRODUCTION
Controls and Indicators (Continued)
Model 72XX
Alarm Indicators: Indicate a channel is
in alarm and has stopped infusing.
Infusing Indicators: Indicate a channel
is infusing.
RUN•HOLD Keys: Start and stop
infusion on selected channel. (To restart,
channel must be selected.)
®
A
RUN
HOLD
ml/hr
ml/hr
KVO OPT
HLD PRI
B
RUN
HOLD
POWER
POWER
SEC
PRI
PRI
SEC HLD
OPT KVO
SEC
A B
OPTIONS
Power Indicator:
Green = Plugged in and charging.
Flashing Amber = Battery power.
Power Keys: Turn channels on and off.
OPTIONS Key: Accesses additional
features.
SECONDARY Key: Selects secondary
mode (channel must be selected).
1
2
3
4
5
6
7
8
9
•
0
Clear
PRIMARY Key: Selects primary mode
(channel must be selected).
SPLIT SCREEN Key: Displays information
for both channels when both channels
are infusing.
Enter
ENTER Key: Accepts value or selection
entered.
1 2 3 4 hrs
SILENCE Key: Silences audible alarm or
alert for two minutes; message remains
on screen. New alarm or alert will
reinstate audible tone.
CLEAR Key: Clears selected numeric
value.
AUDIO VOLUME Key: Sets audio volume
for alarms and alerts. Press key to adjust
volume.
Numeric Keypad: Enters/changes values.
INTRODUCTION 9
INTRODUCTION
Channel Select Keys/Indicators: Select
channel A or B. Light to indicate which
channel is selected.
Displays
Main Display
The Main Display is backlit for easy viewing. The backlight dims
when operating on battery power as an energy-saving feature.
Pressing any key automatically turns the backlight up again.
CAUTION
Appearance of lines and/or dots that
remain on constantly when the
device is powered on may indicate
improper functioning of the Main
Display. Although the instrument is
functioning properly, return the
instrument to qualified service
personnel.
Channel Indicator (dual channel only)
Indicates which channel is currently selected.
Highlight
Indicates value is selected. Values must be highlighted to be
changed.
Soft Keys
The keys on the side and bottom of the Main Display serve a
variety of functions. What each key does is indicated by the
text in the display at the time.
A
B
OPTIONS
Rate= 125.0 ml/hr
VTBI= 10.0 ml
VI=
0.0
PRIMARY
“Active” Soft Keys
Indicated by a “TICK”( ) mark next to the key.
A
1. Press an active key to highlight desired area in display.
2. Enter a value using numeric keypad.
3. Press
ENTER
to accept value highlighted.
“Inactive” Soft Keys
Indicated by having no “TICK” marks at the left and bottom
edges of the display.
Split Screen (dual channel only)
When both channels are infusing, the split screen showing
programmed information is displayed after one minute.
Pressing A B shows the split screen immediately.
10 INTRODUCTION
A
B
OPTIONS
A
Pri
Rate=125.0
VTBI=
10.0
Pri
VI=
VI=
0.0
B
Rate=130.5
VTBI=
460.0
40.0
Displays (Continued)
Rate Display(s)
INTRODUCTION
The LED rate display is easily viewed from a distance.
Rate Display(s)
Indicates current infusion rate(s) in ml/hr. Flashes to indicate
hold or alarm condition.
ml/hr
OPT
Model 71XX Status Bar
Indicates which mode the instrument is in: Options,
Primary, Hold, Secondary, or KVO.
Model 72XX Status Bars
Indicate which mode each channel is in: KVO, Options,
Hold, Primary, or Secondary.
PRI
HLD
SEC
KVO
PRI
SEC
ml/hr
KVO
OPT
HLD
PRI
SEC
HLD
OPT
ml/hr
KVO
Lower Display
The lower LCD display is backlit for easy viewing. The display
dims when operating on battery power, as an energy-saving
feature.
Panel Lock Indicator
Displayed if panel lock is on.
Audio Volume Indicator
Indicates audio volume for alarms and alerts.
Computer Mode Indicator
Displayed if instrument is in computer monitor mode.
Instrument ID Label
Characters are entered by qualified service personnel to
identify configuration, “ownership”, location, etc.
CTRL
MNTR
1
2
3
4
hrs
Battery Power Gauge
Indicates battery time remaining in 15 minute increments.
NOTE: The instrument label and battery gauge are always displayed
even when the instrument is turned off.
INTRODUCTION 11
Around the Instruments
Panel Lock Key
Handle
RS-232 Connector Cover
Flow Sensor Receptacle
RS-232 Connector
Pole Clamp
B
A
Pole Clamp Knob
Pole Clamp Rotation lever
Battery Door
Power Cord
B
RUN
HOLD
POWER
ml/hr
PRI
SEC HLD
OPT KVO
SEC
Latch
OPTIONS
Flow Control Actuator
2
3
5
6
8
9
0
Clear
Clamp Arms
Pumping Mechanism
Enter
Loading Guides
2 3 4 hrs
Pressure Transducer
Air-in-Line Detector
Air-in-Line Arm
12 INTRODUCTION
Terms and Symbols
RS 232
Alarm indicator.
RS-232 connector.
INTRODUCTION
Secondary
SEC
Attention: Refer to accompanying
documentation.
Silence
Audio volume.
1
2
3
4
hrs
Battery fully charged.
1
2
3
4
hrs
Battery time remaining.
Split screen (dual channel
instrument only).
A B
Transition Tone A brief tone during transition from
one mode to another.
Consult operating instructions.
Explosion risk if used in presence of
flammable anesthetics.
Flow sensor receptacle, channel A.
Manufacturing Date: Number
adjacent to symbol indicates month
and year of manufacture.
IC INFUSI
TR
LI
UL
R
ST
J
Flow sensor receptacle, channel B.
Infusing indicator.
MM-YYYY
®
PUMP
ON
B
UL
C
VOLUME
A
C22.2
No.
125
ED 2 50
VI
VTBI
Risk
Class
2G
Canadian Certification Mark:
Products bearing this mark have
been tested and certified in
accordance with applicable
Canadian electrical safety and
performance standards (CSA C22.2
No. 125).
U.S. Certification Mark: Products
bearing this mark have been tested
and certified in accordance with
applicable U.S. electrical safety and
performance standards (UL 544).
Volume infused.
Volume to be infused.
Nurse Call
Panel lock.
Green = plugged in
Flashing amber = battery power
PRI
Primary
Programmable feature.
INTRODUCTION 13
T H I S PA G E
I N T E N T I O N A L LY
LEFT BLANK
14 INTRODUCTION
GETTING STARTED
Operational Precautions
CAUTION
Federal (U.S.A.) law restricts this device to sale by or on the
order of a physician.
CAUTION
GETTING STARTED
Prior to use, ALARIS Medical Systems recommends that users
become familiar with the instrument, the administration sets
and any accessories that may be used.
WARNING
This instrument is designed to stop fluid flow under alarm
conditions. Periodic patient monitoring must be performed to
ensure the infusion is proceeding as expected. This instrument is
a positive pressure delivery system capable of developing positive
fluid pressures to overcome widely varying resistances to flow
encountered in practice, including resistances to flow imposed
by small gauge catheters, filters and intra-arterial infusions. It is
neither designed nor intended to detect infiltrations and will not
alarm under infiltration conditions.
WARNING
Hospital personnel must ensure the compatibility of the drugs,
as well as the performance of each instrument, as part of the
overall infusion. Potential hazards include drug interactions,
inaccurate delivery rates, inaccurate pressure alarms and
nuisance alarms.
WARNING
The use of positive displacement infusion devices ported
together with gravity flow infusion systems into a common IV
site may impede the flow of common “gravity only” systems,
affecting their performance (hospital personnel must ensure the
performance of the common IV site is satisfactory under these
circumstances).
WARNING
Each time the instrument is turned on, verify and/or set the
monitoring mode, resistance alert and/or pressure alarm limit. If
the monitoring mode, resistance alert and/or pressure alarm
limit are not verified, the instrument may not be operating with
the desired occlusion detection parameter(s).
GETTING STARTED 15
Operational Precautions (Continued)
Patient Precautions
To avoid possible injury to the patient, observe the following
precautions:
Administration Sets
•
Use only ALARIS®/IVAC® 72 Series administration sets. Use
of any other set may cause improper instrument operation
resulting in inaccurate fluid delivery.
A list of approved administration sets recommended by
ALARIS Medical systems for use with the Signature Edition®
Volumetric Infusion Pump is provided on the Set
Compatibility Card.
•
Before operating the instrument, verify that the
administration set is free from kinks and is installed correctly
in the instrument.
•
ALARIS®/IVAC® 72 Series administration sets are supplied
with a sterile fluid path for one-time use only. Do not
resterilize.
Artifacts
It is normal for infusion devices to produce nonhazardous
currents when infusing electrolytes. These currents vary in
proportion to the infusion device flow rate. When the ECG
monitoring system is not functioning under optimal
conditions, these currents may appear as artifacts,
simulating actual ECG readings. To determine if ECG
abnormalities are caused by patient condition or the ECG
equipment, place the infusion device on hold. If the ECG
readings become normal, the ECG equipment requires
attention. Proper setup of the ECG equipment should
eliminate these artifacts. Reference the appropriate ECG
monitoring system documentation for instructions on setup
and maintenance.
Contraindications
None known.
Dropping/Jarring
Should an instrument be dropped or severely jarred, it
should be immediately taken out of service and inspected
by qualified service personnel to ensure its proper function
prior to reuse.
16 GETTING STARTED
L
DE
F
RE
MO
LE
TIT
TS
EN
ON
MP
or
by
sale
to
vice
de
this
ts
ric
rest
w
th.
.) la
ing
pa
e
.S.A
USA
id
Primlum l
(U ician.
flu
l
33
ra
ys
Vo X m
the
de ph
1-27 UK
≈
S
R
12
P in
: Fer of a
4B
92
ON
MBE
DEH
22
UTI orde ains
NU
, CA , RG
CA the
RT
nt
iego ts
PA
on
t co
n D Han
is se
, Sa oke,
Th
Inc. ngst
s,
si
NTS
TE
stem , Ba
PA
Sy Ltd.
ical UK ICO
ed
M
ical EX
RIS Med IN M .com
ALA RIS
ED ed
ALA EMBLlarism
ASS w.a
ww
th
ng
t Le cm
Se XXX .)
≈ X in
(X
CO
E
RIL
T
LO
STE
R
Operational Precautions (Continued)
Patient Precautions (Continued)
Epidural Administration
• Epidural administration of anesthetic drugs: Use
indwelling catheters specifically indicated for short-term
(96 hours or less) anesthetic epidural drug delivery.
WARNING
It is strongly recommended that the
infusion instrument, source container
and administration set used for
epidural drug delivery be clearly
differentiated from those used for
other types of administration.
• Epidural administration of analgesic drugs: Use indwelling
catheters specifically indicated for either short-term or
long-term analgesic epidural drug delivery.
Parallel Infusions
There are no contraindications regarding the use of the
Signature Edition® Infusion Pump with any other positive
displacement infusion device when ported together into a
common IV site location.
Radio Frequency Interference
•
Operating the instrument near equipment which radiates
high energy radio frequencies (electrosurgical/cauterizing
equipment, portable radios, cellular telephones, etc.) may
cause false alarm conditions. If this happens, reposition the
instrument away from the source of interference or turn off
the instrument and manually regulate the flow with the
AccuSlide® Flow Regulator regulating clamp.
•
The Model 180 flow sensor was designed for use at a
standard head height of 24 inches. With the dual channel
instrument, use of the 180 flow sensor at a greater distance
from the instrument may result in radio frequency emissions
exceeding the CISPR 11 standard. If this is a concern, either
bring the 180 flow sensor to within 24 inches of the
instrument or discontinue flow sensor use.
WARNING
Use of accessories or cables other
than those specified may result in
degraded electromagnetic
compatibility performance of this
device.
GETTING STARTED 17
GETTING STARTED
The instrument can be used for epidural administration of
anesthetic and analgesic drugs. This application is only
appropriate when using analgesics and anesthetics labeled
for continuous epidural administration and catheters
intended specifically for epidural use. Use only an
ALARIS®/IVAC® 72 Series set, without a ‘Y’ connector or
injection port, for epidural infusions. The instrument’s
secondary features must not be used when the instrument is
being used for epidural administration of anesthetic and
analgesic drugs.
WARNING
Epidural administration of drugs
other than those indicated for
epidural use could result in serious
injury to the patient.
Operational Precautions (Continued)
User Precautions
To ensure proper performance of the instrument and to reduce
potential injury to the operator, observe the following
precautions:
•
The power cord must be connected to a properly grounded
three-wire receptacle (“Hospital Grade”).
•
Not for use in the presence of flammable anesthetics.
DANGER
Explosion risk if used
in the presence of
flammable anesthetics.
•
Do not open the instrument case. There are no userserviceable parts inside. The case should only be opened by
qualified service personnel using proper grounding
techniques. When the case is opened, an electrical shock
hazard exists which can result in serious injury to persons
and instrument component damage.
18 GETTING STARTED
Preparing an Infusion
Preparing Primary Solution Container
Prepare the primary solution container in accordance with the
manufacturer’s directions for use.
Use only an ALARIS®/IVAC® 72 Series administration set.
•
Slide the AccuSlide® Flow Regulator thumb clamp down
until an audible “click” verifies it is in fully closed position.
Thumb Clamp
AccuSlide® Flow Regulator
•
Spike solution container.
•
Fill drip chamber to 2/3 full.
NOTE: Open the vent cap on the spike if the container
requires venting.
•
Invert the AccuSlide® Flow Regulator.
•
Slide the
Flow Regulator thumb clamp up to
open position to prime set.
•
Close the AccuSlide® Flow Regulator clamp when priming is
complete. Verify no fluid is flowing.
•
A gravity flow rate may be adjusted with the AccuSlide®
Flow Regulator thumb clamp, if desired.
OPEN
AccuSlide®
CLOSED
GETTING STARTED 19
GETTING STARTED
Preparing Primary Administration Set
Preparing an Infusion (Continued)
Loading Primary Administration Set
1.
Slide the AccuSlide® Flow Regulator thumb clamp down
until an audible “click” verifies it is in fully closed position.
Thumb Clamp
AccuSlide® Flow Regulator
2.
Using both hands, press top and bottom of the AccuSlide®
Flow Regulator into instrument until it snaps into place.
Verify the three gray “fingers” (clamp arms) on each side of
pumping mechanism have engaged the AccuSlide® Flow
Regulator.
AC
Let go of set. A properly loaded set should stay in
instrument.
3.
Press firmly just below blue thumb clamp on the AccuSlide®
Flow Regulator with one hand while using other hand to
close latch fully to left.
NOTE: If resistance is met while closing the latch, remove the
set, verify the AccuSlide® Flow Regulator is fully closed and
then reinstall the set.
NOTE: Verify that the thumb clamp has moved to the open
(up) position prior to starting the infusion.
WARNING
After set installation, verify no fluid is
flowing through the administration
set’s drip chamber, to avoid free–flow.
4.
Attach set to patient’s vascular access device.
5.
Verify flow from IV container after starting infusion.
20 GETTING STARTED
Start-Up Sequence
Press
POWER
to turn the channel on.
• Instrument will perform a self test.
• All indicators and displays will light momentarily.
• Instrument will beep.
WARNING
Each time the instrument is turned on
verify and/or set the monitoring
mode, resistance alert and/or
pressure alarm limit. If the
monitoring mode, resistance alert
and/or pressure alarm limit are not
verified, the instrument may not be
operating with the desired occlusion
detection parameter(s).
Appearance of lines and/or dots that
remain on constantly when the device
is powered on may indicate improper
functioning of the Main Display.
Although the instrument is
functioning properly, return it to
qualified service personnel.
• System start-up page will be displayed.
A
• Mode indicator in status bar will be lit.
NOTE: Prerun prompts may appear if special operating modes
were interrupted in the previous six hours. Refer to the Alarms,
Alerts and Prompts section of this document to determine the
appropriate action. The screen display may differ from that shown
based on the defaults selected.
OPTIONS
Model 7230
©1998 ALARIS Medical
SW Rev.: xx.yy
ID No.: 123456789
• Hold indicator in status bar will be flashing.
• When self test is complete, primary setup page is displayed.
Instrument is ready for programming.
B
A
B
OPTIONS
Rate= 100.0 ml/hr
VTBI= 950.0 ml
VI=
50.0 ml
PRIMARY
A
NOTE: Operating parameters (rate, VTBI, etc.) are retained in
memory unless all power is lost (no AC and a depleted battery). A
“Program Lost” message at power up indicates existing operating
parameters have been erased.
GETTING STARTED 21
GETTING STARTED
CAUTION
Primary Mode
1.
Press
POWER
to turn channel on.
A
• Primary setup page will appear.
OPTIONS
Rate= 100.0 ml/hr
VTBI= 950.0 ml
VI=
50.0 ml
PRIMARY
• Primary infusion rate will be highlighted.
2.
B
If current primary infusion rate is appropriate, press
OR
Use numeric keypad to enter a new infusion rate.
Press ENTER .
ENTER
A
.
• Primary VTBI (volume to be infused) will be highlighted.
3.
If current primary VTBI is appropriate, press
OR
ENTER
Use numeric keypad to enter a new VTBI. Press
.
A
ENTER
B
OPTIONS
Rate= 125.0 ml/hr
VTBI= 950.0 ml
VI=
50.0 ml
PRIMARY
.
• VI (volume infused) will be highlighted.
A
NOTE: If the flow sensor option is being used, VTBI can be
turned OFF by selecting VTBI, pressing CLEAR and then ENTER .
OR
The primary VTBI can be deleted from the primary mode setup
page (Programmable Features).
4.
To clear VI, press
CLEAR
or 0 (zero key). Press
ENTER
.
A
• Volume infused will be reset to 0.0 ml.
5.
Verify programming parameters and then press channel’s
RUN
to start primary infusion.
HOLD
• Channel’s infusing indicators will light.
• Verify flow from IV container after starting infusion.
NOTE: Prerun prompts may appear if the start-up procedures were
not completed. Refer to the Alarms, Alerts and Prompts section of
this document to determine the appropriate action.
22 GETTING STARTED
B
Rate= 125.0 ml/hr
VTBI=1000.0 ml
VI=
50.0 ml
PRIMARY
A
B
Rate= 125.0 ml/hr
VTBI=1000.0 ml
VI=
0.0 ml
PRIMARY
OPTIONS
A
OPTIONS
A
Primary Mode (Continued)
Making Changes During Primary Mode
Select the desired channel (A/B), as necessary. The channel does
not need to be on hold to change or clear the settings for Rate,
VTBI or VI.
Press soft key for parameter you want to change.
• Current value will be highlighted.
B
OPTIONS
Rate= 125.0 ml/hr
VTBI= 900.0 ml
VI=
100.0 ml
PRIMARY
To Change Primary Infusion Rate:
A
B
OPTIONS
A
Rate= 125.0 ml/hr
VTBI= 900.0 ml
VI=
100.0 ml
PRIMARY
NOTE: If the flow sensor option is being used, VTBI can be
turned OFF by selecting VTBI, pressing CLEAR and then ENTER .
To Change Primary VTBI:
A
OR
Use numeric keypad to enter a new value.
3.
Press
ENTER
OPTIONS
A
to accept new value.
To Clear Volume Infused:
1.
B
Rate= 125.0 ml/hr
VTBI= 900.0 ml
VI=
100.0 ml
PRIMARY
The primary VTBI can be deleted from the primary mode setup
page (Programmable Features).
2.
A
Press VI soft key.
• Current value will be highlighted.
2.
Press
CLEAR
or 0 key to reset volume infused to 0.0 ml.
3.
Press
ENTER
to accept new value.
A
B
OPTIONS
Rate= 125.0 ml/hr
VTBI= 900.0 ml
VI=
100.0 ml
PRIMARY
A
GETTING STARTED 23
GETTING STARTED
1.
A
KVO Mode
The KVO (keep-vein-open) mode automatically occurs when the
primary VTBI has counted down to 0.0 ml. The channel
switches to the preset KVO rate or remains at the current rate,
whichever is less.
• The KVO rate is displayed in the rate LED display. The Main
Display will continue to show the programmed infusion rate.
ml/hr
KVO
A
OPT
HLD
PRI
SEC
B
OPTIONS
Rate= 125.0 ml/hr
VTBI=
0.0 ml
VI= 1000.0 ml
• KVO flashes in the infusion status bar.
• The KVO alert tone sounds.
A
Channel A
VTBI = 0
The VTBI = 0 message and alert tone will continue until the
channel is placed on hold.
To Resume Primary Operation from KVO
Select the desired channel, as necessary.
1.
Press channel’s
2.
Press VTBI soft key.
RUN
HOLD
to place channel on hold.
A
• Primary VTBI will be highlighted.
3.
Use numeric keypad to enter a new VTBI.
4.
Press
5.
Press channel’s
ENTER
B
OPTIONS
Rate= 125.0 ml/hr
VTBI=
0.0 ml
VI= 1000.0 ml
PRIMARY
A
to accept new value.
RUN
HOLD
to resume primary infusion.
A
B
Rate= 125.0 ml/hr
VTBI=1000.0 ml
VI= 1000.0 ml
PRIMARY
24 GETTING STARTED
OPTIONS
A
Secondary Mode
This mode is designed to support automatic secondary infusions
(“piggybacking”) in the same instrument channel. It can be
used where a second, independent volume to be infused with
an automatic rate change is useful. When the secondary VTBI
reaches zero, a transition tone will sound ( if the transition
tone feature is enabled), Secondary Complete message will be
displayed for a few seconds and the primary settings will
automatically take effect. Both channels of a dual channel
instrument can be programmed for primary and secondary
operation.
NOTE: Prepare the secondary container and set. Lower the
primary container using the hanger included with the secondary
set. If a flow sensor is being used, it must be placed on the
primary line.
WARNING
• Secondary applications require the
use of a check valve set.
• The secondary solution container
must be higher than the primary
solution container.
• The secondary VTBI settings
require consideration of such
variables as factory overfill,
medication additions, etc.
Underestimating the volume will
cause the remaining secondary
solution to be infused at the
primary rate; overestimating will
result in the primary solution
being infused at the secondary
rate. Multiple doses from a single
container are not possible.
• The clamp on the secondary set
must be opened. If the clamp is
not opened, the fluid will be
delivered from the primary
container.
• The secondary set must be primed
prior to beginning the secondary
infusion.
GETTING STARTED 25
GETTING STARTED
When the device is programmed and delivering in the secondary
mode, the primary infusion is temporarily stopped and fluid is
drawn from the secondary container. Delivery from the primary
container resumes when the fluid level in the secondary line is
level with the fluid in the primary container.
Secondary Mode (Continued)
1.
Press channel’s
POWER
to turn channel on.
A
• Primary setup page will appear.
NOTE: If programming a secondary from a running primary,
place the channel on hold and then proceed.
Press
SEC
.
B
Rate= 50.0 ml/hr
VTBI= 25.0 ml
Primary Settings
SECONDARY
• Secondary infusion rate will be highlighted.
A
WARNING
Do not access the secondary key until
first confirming the primary program.
A
• Secondary setup page will appear.
3.
OPTIONS
Rate= 125.0 ml/hr
VTBI= 950.0 ml
VI=
50.0 ml
PRIMARY
• Verify primary settings are appropriate.
2.
B
OPTIONS
A
If current secondary infusion rate is appropriate, press ENTER .
OR
Use numeric keypad to enter a new infusion rate. Press
ENTER .
• Secondary VTBI (volume to be infused) will be
highlighted.
4.
If current secondary VTBI is appropriate, press
OR
ENTER
Use numeric keypad to enter a new VTBI. Press
5.
Press channel’s
RUN
HOLD
.
ENTER
A
• Channel’s infusing indicators will light.
• When secondary infusion is complete, instrument
automatically switches to primary infusion parameters.
26 GETTING STARTED
Rate= 100.0 ml/hr
VTBI= 25.0 ml
Primary Settings
SECONDARY
.
to start secondary infusion.
B
A
B
Rate= 100.0 ml/hr
VTBI= 50.0 ml
Primary Settings
SECONDARY
OPTIONS
A
OPTIONS
A
Secondary Mode (Continued)
Making Changes During Secondary Mode
Select the desired channel, as necessary. The channel does not
need to be on hold to change the settings for Rate or VTBI.
1.
Press soft key for value you want to change.
• Current value will be highlighted.
To Change Secondary Infusion Rate:
A
B
OPTIONS
Rate= 100.0 ml/hr
VTBI= 50.0 ml
Primary Settings
SECONDARY
A
A
B
OPTIONS
A
Rate= 100.0 ml/hr
VTBI= 50.0 ml
Primary Settings
SECONDARY
2.
Use numeric keypad to a enter new value.
3.
Press
ENTER
to accept new value.
To View or Change Primary Settings During Secondary Mode
Select desired channel, as necessary.
1.
Press Primary Settings.
A
• Primary rate ( Pri Rate), primary volume to be infused ( Pr i
VTBI) and total volume infused ( Tota l VI) will be
displayed.
B
OPTIONS
A
Rate= 100.0 ml/hr
VTBI= 50.0 ml
Primary Settings
SECONDARY
• Display will return to normal secondary page after six
seconds.
2.
Press Pri Rate, Pri VTBI, or Total VI to:
• “freeze” display
• highlight value
To Change Primary Infusion Rate:
A
B
OPTIONS
Rate=
100.0
Pri Rate=125.0
Pri VTBI=950.0
Total VI= 50.0
ml/hr
ml/hr
ml
ml
A
GETTING STARTED 27
GETTING STARTED
To Change Secondary VTBI:
Secondary Mode (Continued)
To View or Change Primary Settings During Secondary Mode
(Continued)
NOTE: If the flow sensor option is being used, VTBI can be
turned OFF by selecting VTBI, pressing CLEAR and then ENTER .
OR
The primary VTBI can be deleted from the primary mode setup
page (Programmable Features).
3.
Use numeric keypad to enter new value(s).
4.
Press
ENTER
To Change Primary VTBI:
A
B
Rate=
100.0
Pri Rate=125.0
Pri VTBI=950.0
Total VI= 50.0
OPTIONS
ml/hr
ml/hr
ml
ml
A
to accept new value(s).
To Clear Volume Infused:
1.
Press VI soft key.
A
• Current value will be highlighted.
2.
Press CLEAR or 0 (zero key) to reset volume infused
to 0.0 ml.
3.
Press
ENTER
Rate=
100.0
Pri Rate=125.0
Pri VTBI=950.0
Total VI= 50.0
to accept new value.
• Display will return to normal secondary page after six
seconds.
Changing Primary Solution Container
1.
Place channel on hold.
2.
Remove empty solution container.
3.
Spike new container.
• Ensure drip chamber is filled to 2/3 full.
4.
Press VTBI soft key.
5.
Use numeric keypad to enter a new VTBI. Press
6.
Press channel’s
RUN
HOLD
28 GETTING STARTED
to restart infusion.
ENTER
B
.
OPTIONS
ml/hr A
ml/hr
ml
ml
Unloading Set
1.
Place channel on hold.
2.
Open latch.
• The AccuSlide® Flow Regulator will automatically close
to prevent accidental free-flow.
3.
Press lightly against open latch.
WARNING
To prevent free-flow, verify the AccuSlide® Flow Regulator is
closed when the set is removed from the instrument.
4.
Close latch(es) whenever instrument is not in use.
5.
Turn off power, as necessary.
GETTING STARTED
• Set will be ejected from instrument.
IV
Powering Off
Press and hold channel’s
POWER
until display turns off.
• Current monitoring mode, resistance alert and/or pressure
alarm limit will be retained in memory for six hours.
GETTING STARTED 29
Alarms, Alerts and Prompts
There are three types of displayed messages.
RUN
HOLD
POWER
®
ALARM — instrument or channel problem.
• infusion stops
•
icon illuminates
• alarm tone sounds
• rate LED display flashes
• message appears in Main Display
OPT
PRI
HLD
PRI
SEC
ml/hr
KVO
SEC
OPTIONS
Rate= 130.5 ml/hr
VTBI=1000.0 ml
VI=
0.0 ml
Resistance Alert
ALERT — may indicate a change in infusion status.
• channel continues to operate
• alert tone sounds
• message appears in Main Display
1
2
3
4
5
6
7
8
9
.
0
Clear
Enter
1 2 3 4 hrs
PROMPT — infusion status not changed.
Start-up procedures were not completed or an invalid key was
pressed.
NOTE: When using the dual channel instrument, some
messages will also display “Channel A” or “Channel B”, to
indicate which channel is affected. Always verify the
channel is selected before making any changes.
Selected Channel
®
A
RUN
HOLD
ml/hr
ml/hr
KVO OPT
HLD PRI
B
RUN
HOLD
POWER
POWER
SEC
PRI
PRI
SEC HLD
OPT KVO
SEC
A B
OPTIONS
Rate= 125.0 ml/hr
VTBI=1000.0 ml
VI=
0.0 ml
Channel A
Resistance Alert
1
2
3
4
5
6
7
8
9
•
0
Clear
1 2 3 4 hrs
Messages are listed alphabetically on the following pages,
with a probable cause and suggested remedy next to each one.
Use this section in conjunction with the appropriate clinical
practice or hospital procedure.
30 GETTING STARTED
Enter
A
Alarms, Alerts and Prompts (Continued)
MESSAGE
ACCUMULATED AIR IN LINE
Alarm
hold soft key active
ACCUMULATED AIR IN LINE
Alarm
reset soft key active
Prompt
AIR IN LINE
Alarm
hold soft key active
Air detector has detected
multiple small bubbles.
Air-in-Line Reset feature is
off.
Air detector has detected
multiple small bubbles.
Air-in-Line Reset feature is
on.
Alarm
reset soft key active
Alarm
RUN
HOLD
Evaluate air in set. Remove air.
OR
If air bubbles are clinically
insignificant, you may press
reset, then press run to resume
infusion.
Air detector has detected an air
bubble larger than configured
threshold tolerance.
Press hold. Open latch to
remove set. Clear air per hospital
protocol. Reinstall set. Press
Air detector has detected an air
bubble larger than configured
threshold tolerance.
Battery is too low to operate
instrument.
RUN
HOLD
Alert
Battery has 30 minutes or less of
charge remaining.
to resume infusion. At
flow rates of 1.0 ml/hr and
below, check for upstream
occlusion.
Evaluate air in set. Remove air.
OR
If air bubbles are clinically
insignificant, you may press
reset, then press run to resume
infusion. At flow rates of
1.0 ml/hr and below, check for
upstream occlusion.
Plug power cord into an AC
outlet immediately. Press run or
RUN
HOLD
Battery Low
to resume infusion.
Verify set is loaded correctly.
Prime and reload set or remove
air. Reshape tubing to ensure
optimum contact with sensor.
Air-in-Line Reset feature is
on.
BATTERY DEPLETED (Plug In)
Press hold. Open latch to
remove set. Clear air per hospital
protocol. Reinstall set. Press
Air detector has detected air
prior to starting infusion or is in
poor contact with set.
Air-in-Line Reset feature is
off.
AIR IN LINE
REMEDY
to resume infusion.
Plug power cord into an AC
outlet as soon as possible.
GETTING STARTED 31
GETTING STARTED
Air In Line
PROBABLE CAUSE
Alarms, Alerts and Prompts (Continued)
MESSAGE
Both A & B Not Running
Prompt
Dual channel instrument only.
CHANNEL MALFUNCTION
PROBABLE CAUSE
was pressed, but both
channels are not infusing.
Both channels must be infusing
for split screen feature to
operate.
Channel malfunction.
Turn channel off and then on. If
problem persists, do not use
channel. Contact qualified
service personnel.
A
B
Alarm
Dual channel instrument only.
Channel Not On
Prompt
Dual channel instrument only.
Checking Line
Channel’s
Alert
RUN
HOLD
or
B
O
was
pressed, but channel is not on.
Flow has been obstructed.
Alert
Complete Entry
REMEDY
AutoRestartPlus feature is
on.
was not pressed to accept
a new value.
ENTER
Channel must be turned on to
view or change settings.
AutoRestartPlus must be on for
downstream occlusion alerts.
(AutoRestartPlus not required for
upstream occlusion alerts).
Check administration set for
probable cause (kinked tubing,
clogged filter, etc.).
Press ENTER to confirm entry or
press CLEAR twice to return to
previous settings.
NOTE: Channel will operate as
previously programmed until
ENTER is pressed.
Complete or OK Setup
Prompt
Computer Control Released
Alert
RUN
HOLD
was pressed before setup
Complete setup. Press ok.
was completed or okayed.
Control of instrument has been
released from host computer (RS232 configuration only).
Reestablish or discontinue
computer control mode, as
appropriate.
Computer Link feature is in
control mode.
COMPUTER LINK FAILURE
Alarm
RS-232 connection to computer
was disrupted.
Computer Link feature is in
monitor mode.
32 GETTING STARTED
Check RS-232 connections.
Clearing this alarm automatically
puts instrument in monitor
mode. Reestablish infusion.
Alarms, Alerts and Prompts (Continued)
MESSAGE
Dose Complete
Alert
PROBABLE CAUSE
A dose delivery has just been
completed.
Multi-Dose Alert feature is
on.
Dose Out of Range
Prompt
Prompt
Entry Invalid
Prompt
FLOW SENSOR UNPLUGGED
Alarm
HOLD TIME EXCEEDED
Alarm
INSTRUMENT MALFUNCTION
Alarm
Instrument Self-Check Is Due
Please Eject the Set
Prompt
Invalid Entry Rate Out of Range
Prompt
KEY STUCK
Alarm
Channel will automatically switch
to timer ( ).
If Dose Complete Alert Option is
activated, press cancel alert to
silence audio signal.
Calculated dose is outside
allowable range.
Verify and reenter settings.
or SEC was pressed while
running in Dose Rate program.
Channel must be on hold to
change modes.
An invalid value was entered
during programming.
Press CLEAR or 0 key to clear
entry. Enter appropriate value.
Flow sensor is unplugged from
back of instrument.
Plug flow sensor into flow sensor
receptacle.
Channel has been on hold for
two minutes and no keys have
been pressed (on either channel
if dual channel).
Press hold to return to hold
mode.
Instrument malfunction. For a
dual channel instrument, neither
channel is functional.
Turn instrument off and then on.
If problem persists, do not use
instrument. Contact qualified
service personnel.
Instrument/channel has not
performed self-check within
programmed interval.
If set is loaded: Eject set, wait
five seconds and then reload set.
Instrument has calculated a rate
less than 0.1 ml/hr.
Verify and reenter settings.
A key is stuck or was held down
too long.
Release key. Turn instrument off
(both channels if dual channel
instrument) and then on. If
problem persists, do not use
instrument. Contact qualified
service personnel.
PRI
If no set is loaded: Load and
then eject set. Wait five seconds
and then reload set.
GETTING STARTED 33
GETTING STARTED
Dose Rate Running
REMEDY
Alarms, Alerts and Prompts (Continued)
MESSAGE
LATCH OPEN
Alarm
LATCH OPEN
Prompt
Load Dose Complete
Alert
Load Dose Running
Prompt
Maintenance Reminder
Prompt
PROBABLE CAUSE
Latch was opened during an
infusion.
Check for proper set installation.
Close latch. Press run.
Latch is open (prior to starting an
infusion).
Close latch fully to left.
Loading Dose program has just
been completed.
Channel will automatically switch
to primary infusion.
or SEC was pressed while
running in Loading Dose
program.
Channel must be on hold to
change modes.
Periodic maintenance interval has
elapsed.
Notify your Biomedical
Engineering department. If
desired, press continue to
temporarily bypass reminder.
PRI
Maintenance Reminder
feature is on.
Multi-Dose Running
Prompt
Multi-Step Complete
Alert
Multi-Step Running
Prompt
New Baseline Set
Prompt
PRI
or SEC was pressed while
running in Multi-Dose program.
Channel must be on hold to
change modes.
Multi-Step program has just
been completed.
Channel will automatically switch
to KVO infusion.
or SEC was pressed while
running in Multi-Step program.
Channel must be on hold to
change modes.
A new Manual Pressure Baseline
has successfully been set.
Baseline will remain set until a
new manual baseline is set,
instrument is turned off or latch
has been opened.
PRI
Manual Pressure Baseline
feature is on.
No Numeric Entries
Prompt
REMEDY
A numeric key was pressed
during nonnumeric selection.
Wait several seconds for popup
to finish. Press ok to approve all
displayed information.
OR
Press
to view available unit
selections.
34 GETTING STARTED
Alarms, Alerts and Prompts (Continued)
MESSAGE
NO UPSTREAM FLOW
DETECTED
Alarm
PROBABLE CAUSE
Flow has been obstructed
between container and
instrument when using a flow
sensor.
REMEDY
Check to see if container is
empty, flow sensor is
mispositioned or clouded, tubing
is kinked or air vent is closed.
Verify correct set connections
and open fluid path. Press run
to restart infusion.
OCCLUSION DOWNSTREAM
Alarm
No pressure reading displayed.
OCCLUSION DOWNSTREAM
Alarm
Pressure reading displayed.
Occlusion Downstream
Prompt
Flow has been obstructed
between instrument and patient.
Check administration set for
probable cause (kinked tubing,
clogged filter, etc.). Press run to
restart infusion.
Pressure in IV line has exceeded
Adjustable Pressure Limit due to
elevated resistance in delivery
path.
Check administration set for
probable cause (kinked tubing,
closed stopcock, high resistance
catheter, etc.). Press run to
restart infusion.
A very high pressure exists in
fluid line while baseline is being
set.
Remove source of high pressure
and repeat setting of pressure
baseline.
Pressure Baseline feature is
on.
OCCLUSION UPSTREAM
Alarm
Ok Entry
Prompt
Panel Locked
Prompt
Place on Hold to Change
Prompt
Flow has been obstructed
between fluid container and
instrument.
Check administration set for
probable cause (kinked tubing,
closed clamp, etc.). Press run to
restart infusion.
User has attempted to go to
another page before pressing ok.
Verify selection and press ok.
A key was pressed.
Turn panel lock off to access
panel controls. Panel lock key is
located behind handle.
Panel lock feature is on.
A key was pressed during KVO.
Channel must be on hold to
make changes.
GETTING STARTED 35
GETTING STARTED
NOTE: Infusing fluids which form smaller drops through a 60 drops/ml
set at high rates may result in a “No Upstream Flow Detected” alarm.
(This is because the small, rapidly falling drops form a continuous stream
which does not trigger the flow sensor). In this event, unplug the flow
sensor from the instrument.
Alarms, Alerts and Prompts (Continued)
MESSAGE
Place on Hold to Set Pressure
Baseline
PROBABLE CAUSE
SET PRESSURE BASELINE function
has been selected while running.
Prompt
Press and Hold Key to Turn Off
Pressure Baseline feature is
on.
POWER
was pressed.
Prompt
Pressure Unstable Cannot Set
Baseline
Prompt
Excessive variation in pressure
due to motion, flow from other
instruments or blood pressure
prevents accurate setting of
pressure baseline.
REMEDY
Place instrument on hold before
performing manual SET PRESSURE
BASELINE operation.
Press and hold
turns off.
POWER
until display
Reduce or temporarily remove
sources of variation while
performing manual baseline
setting operation.
Pressure Baseline feature is
on.
PRIMARY FLOW DETECTED
DURING SECONDARY
Alarm
Instrument detected flow from
primary container during
secondary infusion.
NOTE: Alarm can only occur
when using optional flow sensor.
Verify: • Flow sensor is on
primary line. • Primary set has
check valve. • Secondary
infusion is complete (underfilled
solution container). • Secondary
set fluid path is not blocked.
• Secondary settings are correct.
Press run to restart infusion.
Pri Running
Prompt
Program Lost Re-Enter Settings
Prompt
Rate Out of Range
Prompt
36 GETTING STARTED
or SEC was pressed while
channel was running in primary
mode.
Channel must be on hold to
change modes.
Instrument detected a memory
or power failure. Existing
operating parameters have been
erased.
Press continue and reenter all
infusion settings.
Calculated rate is outside
allowable range. (Arrows point
up or down, depending on
whether over or under rate
range.
Verify and reenter settings.
PRI
NOTE: Programmable features
are not affected.
Alarms, Alerts and Prompts (Continued)
MESSAGE
Resistance Alert
Alert
PROBABLE CAUSE
IV line resistance has reached
preset alert level.
Resistance Alert feature is
on.
Return To Dose Rate?
Prompt
Prompt
Return To Multi-Dose?
Prompt
Return To Multi-Step?
Prompt
Return to Secondary?
Prompt
Secondary Complete
Alert
Sec Running
Prompt
Select Channel
Prompt
Dual channel instrument only.
Set Must Be Loaded
Prompt
Check downstream line and site.
Raise resistance alert level, if
appropriate.
Channel was turned off during a
Dose Rate program within last six
hours.
Press yes to return to Dose Rate
program or press no to return to
primary setup page.
Channel was turned off during a
Loading Dose program within
last six hours.
Press yes to return to Loading
Dose program or press no to
return to primary setup page.
Channel was turned off during a
Multi-Dose program within last
six hours.
Press yes to return to Multi-Dose
program or press no to return to
primary setup page.
Channel was turned off during a
Multi-Step program within last
six hours.
Press yes to return to Multi-Step
program or press no to return to
primary setup page.
Channel was turned off during
secondary infusion within last six
hours.
Press yes to return to secondary
mode or press no to return to
primary setup page.
Secondary delivery has just been
completed.
Channel will automatically switch
to primary infusion settings.
or SEC was pressed while
channel was running in
secondary mode.
Channel must be on hold to
change modes.
A key was pressed but no
channel has been selected.
Press
The AccuSlide® Flow Regulator
segment is not loaded in selected
channel during a manual
pressure baseline setting
operation.
Load the AccuSlide® Flow
Regulator segment in selected
channel. Repeat manual
pressure baseline setting.
PRI
A
O
or
B
O
and then
continue with editing.
Pressure Baseline feature is
on.
GETTING STARTED 37
GETTING STARTED
Return To Loading Dose?
REMEDY
Alarms, Alerts and Prompts (Continued)
MESSAGE
Set Out
Prompt
SET OUT
Alarm
Set Pressure Baseline
Prompt
Set Pri VTBI
Prompt
Set Pri VTBI > Loading Dose
VTBI
PROBABLE CAUSE
The AccuSlide® Flow Regulator
segment is not installed correctly.
Reinstall the AccuSlide® Flow
Regulator segment.
Set has been removed during an
infusion.
Reinstall set. Press run.
Set Pressure Baseline has been
selected in options mode.
Press ok to set Pressure Baseline
or press return to go to Primary
Setup page.
A primary VTBI was not
programmed.
Enter a primary VTBI.
Loading Dose VTBI entered is
greater than primary VTBI.
Raise primary VTBI or lower
Loading Dose VTBI, as
appropriate.
Instrument has been turned on
but no keys have been pressed
for ten minutes.
Press hold to return to hold
mode.
Prompt
SETUP TIME EXCEEDED
Alarm
REMEDY
Instrument will turn off if left in
alarm more than five minutes.
If an audio alarm remains on,
turn instrument on and then off.
Stop Timer to Change
Prompt
Time Out of Range
Prompt
Timer Running
Prompt
VTBI = 0
Alert
38 GETTING STARTED
An invalid key was pressed while
timer was running in Multi-Dose
program.
Wait several seconds for popup
to finish. Press stop timer to
make changes.
Programmed step time exceeds
24 hours and 59 minutes, or is
less than one minute.
Verify and reenter settings.
or SEC was pressed while
timer was running in Multi-Dose
program.
Wait several seconds for popup
to finish. Press stop timer to
make changes.
VTBI has counted down to zero.
Channel is in KVO mode.
Put channel on hold to reenter a
primary VTBI. Change solution
container, if necessary.
OR
Terminate infusion.
PRI
FEATURES AND OPTIONS
NOTE: All features and options are shown enabled in this section.
The optional features illustrated may not have been enabled on
your instrument.
Battery Management System
The Battery Management System incorporates features which
enhance battery maintenance in order to maximize the life of
the battery, reduce associated costs and increase instrument
availability. The system provides:
• A green
that lights when instrument is plugged in.
• An amber
that flashes when instrument is operating on
battery power.
• Automatic battery power if instrument is unplugged or in the
event of a power failure.
• A low battery alert indicating battery depletion is imminent,
beginning at least 30 minutes prior to a BATTERY DEPLETED
alarm.
POWER
POWER
FEATURES / OPTIONS
Maximum battery capacity, as well as gauge accuracy, is reached
after several charge/discharge/recharge cycles. For best results,
fully charge, discharge and recharge the battery before putting
the instrument into service.
Battery run time may be affected by the operating mode, rate,
monitoring options and back pressure.
Battery Power Gauge
The gauge indicates approximate battery run time remaining in
15 minute increments under current operating conditions. It is
located in the lower display and is always on. Always check the
remaining battery run time after starting an infusion. The gauge
updates for each program change while infusing.
NOTE: The gauge accuracy is based on the last refresh cycle and is
affected by the number of charge/discharge/recharge cycles.
1
2
1
2
3
4
hrs
Battery Recharge
The battery recharges whenever the instrument is plugged into
an AC outlet.
Qualified service personnel can replace the battery when
charging capacity gets too low.
NOTE: All batteries gradually lose their capacity to hold a
charge over time and use.
3
4 hrs
FEATURES AND OPTIONS 39
Nurse Call
If your instrument is equipped with the optional nurse call
feature (not available with MIB configuration), alarms and some
alerts from the instrument will be relayed to the hospital’s
existing nurse call system. No operating features of the
instrument are changed. The instrument will alarm with or
without the nurse call installed.
To Activate the Nurse Call Feature
1.
Plug nurse call cable into
RS 232
on instrument back panel.
NOTE: A false remote alarm may occur if the nurse call plug
is not properly inserted.
2.
Press channel’s
POWER
.
• Instrument will beep briefly to signal proper operation.
3.
Plug nurse call cable into nurse call system.
4.
Operate instrument as described in this document.
• All alarms and some alerts will activate nurse call system.
Following alerts will not activate nurse call system:
Checking Line
Load Dose Complete
Secondary Complete
If an Alarm Occurs
1.
Go to instrument.
2.
Use Alarms, Alerts and Prompts section of this document to
determine cause and appropriate corrective action.
3.
Reset your nurse call system, as required.
NOTE: Disconnecting the nurse call cable from the wall or turning
off the instrument will activate the nurse call system. Disconnecting
the nurse call cable from the instrument will not activate the nurse
call system.
40 FEATURES AND OPTIONS
Panel Lock
The panel lock feature helps prevent unauthorized changes of
any instrument settings, including turning the instrument off.
The panel lock key,
, is located behind the handle.
To Turn Panel Lock Feature On
Press and hold
until
appears in lower display.
• Dual channel instrument only:
be used to view settings.
•
A
O
,
B
O
and
A
B
keys can
Panel Locked appears in Main Display if any other key is
pressed.
1 2 3 4 hrs
A
B
OPTIONS
Rate= 125.0 ml/hr
VTBI=1000.0 ml
VI=
0.0 ml
A
To Turn Panel Lock Feature Off
Press and hold
until
in lower display disappears.
NOTE: To make changes or respond to an alarm, the panel lock
must be turned off.
1 2 3 4 hrs
FEATURES AND OPTIONS 41
FEATURES / OPTIONS
Panel Locked
Pole Clamp
The uniquely designed pole clamp adapts to a wide variety of
surfaces (such as, poles, bed rails) to provide greater versatility
and to simplify transports. It features:
• 360º rotation in 90º increments
• ergonomically designed knob
• accommodates diameters from 15 to 35 millimeters
• no restrictions for pole mounting except physical space
NOTE: When using multiple instruments, care should be taken to
evenly distribute the instruments to ensure stability.
WARNING
To ensure proper occlusion detection,
DO NOT operate the instrument tilted
back more than 45º from the upright
position.
To Change Pole Clamp Orientation
1.
Press and hold rotation lever.
Lever
2.
Reposition clamp.
3.
Release lever at desired position.
42 FEATURES AND OPTIONS
Air-in-Line and Accumulated Air-in-Line
The Air-in-Line Detection System provides clinicians the ability to
detect inappropriate amounts of air in the IV line. The
instrument is configurable to allow single bubble plus
accumulated air detection. Accumulated air detection is based
on measurement of the average percentage produced by small
air bubbles passing the detector.
Air is detected by a pair of sensors located just below the
AccuSlide® Flow Regulator. One of these is located in an arm
which rotates into position as the latch is closed.
Qualified biomedical personnel may configure one of four
possible sensitivity levels. The instrument is also configurable to
permit the operator to clear (reset) any air registered in the
instrument’s memory.
NOTE: Ensure that the tubing is properly inserted into the air
detector to avoid false alarms. The tubing may be reshaped to
ensure optimum contact with the sensors.
RUN
HOLD
will not start infusion if any air is detected by the sensor.
1.
Press hold to place channel on hold.
A
B
OPTIONS
A
AIR IN LINE
hold
A
B
OPTIONS
ACCUMULATED
AIR IN LINE
A
hold
2.
Remove air per hospital protocol.
NOTE: Opening the latch or turning the channel off will clear
air memory.
3.
Reinstall set and then press
RUN
HOLD
to resume infusion.
FEATURES AND OPTIONS 43
FEATURES / OPTIONS
Single or Accumulated Air Bubble Detection
(NO Reset Feature)
Air-in-Line and Accumulated Air-in-Line (Continued)
Single or Accumulated Air Bubble Detection
(Reset Feature Available)
If air volume is clinically insignificant, press reset soft key or
RUN
RUN
HOLD key, followed by run soft key or HOLD key to resume
infusion.
A
B
OPTIONS
• A new bubble will again trigger alarm.
A
B
OPTIONS
A
A
AIR IN LINE
AIR IN LINE
reset
run
OR
A
B
OPTIONS
ACCUMULATED
AIR IN LINE
reset
Dynamic Monitoring® System
The Dynamic Monitoring® System provides the clinician the
ability to monitor downstream pressure or resistance, allowing
rapid detection of full and partial occlusions. Resistance
monitoring eliminates the impact of patient elevation and flow
rate to provide the most direct assessment of patency.
Components of this system are:
• Monitoring Options: to select IV line/site monitoring modes
of resistance, high resistance, and adjustable or fixed
pressure.
• AutoRestartPlus feature: allows instrument to automatically
resume operation when specific instrument operating
conditions are met.
• Adjustable Pressure Alarm: to provide an early warning of
increases in downstream pressure.
• Adjustable Resistance Alert: to provide an early warning of
increases in downstream flow resistance.
• Trend Graph: to display downstream pressure or flow
resistance over time.
• Pressure Baseline: to increase accuracy of pressure
measurements.
44 FEATURES AND OPTIONS
A
B
A
OPTIONS
ACCUMULATED
AIR IN LINE
run
A
Dynamic Monitoring® System (Continued)
Monitoring Options
IV lines, catheters and applications create various levels of
resistance to flow. Monitoring mode options are available to
meet each clinical need.
• Resistance: designed to monitor IV line/site resistance
providing optimum sensitivity. Used for larger catheter sizes.
• High Resistance: designed to monitor IV line/site resistance
with optimum sensitivity where higher resistance catheters
are used.
• Adjustable Pressure: designed to monitor IV line/site
pressure and provide user adjustable pressure alarm limits.
Used for Precision Flow mode or for high resistance systems;
such as, infusion through transducers, into dialysis systems
and through highest resistance catheters.
• Pressure: designed to monitor IV line/site pressure and alarm
based on a fixed pressure limit.
A
OPTIONS
A
Rate= 125.0 ml/hr
VTBI=1000.0 ml
VI=
0.0 ml
Primary
100% Resistance
Resistance Monitoring
A
B
OPTIONS
A
450 mmHg
Pressure Monitoring
NOTE: For dual channel instruments, select the desired channel as
necessary. The bar graph and numeric displays are not available
when the split screen is displayed.
➤ To Select One of Three Options:
1.
Press
OPTIONS
.
• Options page will appear.
A
B
OPTIONS
Rate= 125.0 ml/hr
VTBI=1000.0 ml
VI=
0.0 ml
Primary
A
Limit=250 mmHg
FEATURES AND OPTIONS 45
FEATURES / OPTIONS
Rate= 125.0 ml/hr
VTBI=1000.0 ml
VI=
0.0 ml
Primary
• Precision Flow: in fixed and adjustable pressure modes, the
Signature Edition® System provides enhanced flow continuity,
minimizing hemodynamic changes for a large volume
infusion instrument (at rates below 50 ml/hr only).
NOTE: The pressure limit may be reduced (clipped) if the
pressure in the line is high or changing. This results in the
pressure limit being lowered from the selected setting. If this
occurs, first try to remove or reduce the downstream pressure.
Following that, try to reload the set, wait 15 to 30 seconds and
then perform a Set Pressure Baseline operation. The pressure
baseline may need to be set a second time, after the pressure
readings have stabilized. If this does not work, the set could be
the cause of this clipping.
B
Dynamic Monitoring® System (Continued)
Monitoring Options (Continued)
➤ To Select One of Three Options: (Continued)
2.
Press Monitoring Options.
A
Press Resistance, High Resistance, or Adjustable Pressure.
• If pressure limit adjustment is available, selection will
read Adjustable Pressure; otherwise, it reads Pressure.
4.
Press ok.
OPTIONS
Resistance Trend
A
Monitoring Options
Dose Rate Calculator
Multi-Step
page
return
• Monitoring Options page will appear.
3.
B
A
B
OPTIONS
Monitoring Options
Resistance
High Resistance
Adjustable Pressure
ok
A
• Display will automatically return to normal operating
page.
NOTE: While the channel is on, the selected option,
resistance alert and pressure alarm thresholds will remain in
effect until changed by the operator. After the instrument has
been off for more than six hours, the channel will return to
the default option and thresholds which were set by a
qualified service personnel.
WARNING
Each time the instrument is turned on
verify and/or set the monitoring
mode, resistance alert and/or
pressure alarm limit. If the
monitoring mode, resistance alert
and/or pressure alarm limit are not
verified, the instrument may not be
operating with the desired occlusion
detection parameter(s).
46 FEATURES AND OPTIONS
Dynamic Monitoring® System (Continued)
Monitoring Options (Continued)
➤ If Adjustable Pressure Option is Selected:
• Pressure alarm limits may be adjusted using keys located
below arrow symbols. (See Adjustable Pressure Alarm
section.)
A
B
OPTIONS
A
Rate= 125.0 ml/hr
VTBI=1000.0 ml
VI=
0.0 ml
Primary
Limit=250 mmHg
NOTE: Maximum pressure limit settings may be
configured by qualified service personnel.
• Pressure system accuracy can be enhanced by ensuring no
occlusion or other pressure source exists in IV line when
activating
RUN
HOLD
.
• Set Pressure Baseline option enhances pressure system and
displays real-time pressure readings.
➤ If Resistance Option is Selected:
B
Rate= 125.0 ml/hr
VTBI=1000.0 ml
VI=
0.0 ml
Primary
• Resistance alert limit may be adjusted using keys located
below arrow symbols.
➤ If High Resistance Option is Selected:
• % High Resist message is displayed below bar graph display
while infusing.
OPTIONS
A
50% Resistance
A
B
OPTIONS
Rate= 125.0 ml/hr
VTBI=1000.0 ml
VI=
0.0 ml
Primary
• High Resistance alert limit may be adjusted using keys located
below arrow symbols.
A
50% High Resist
➤ Detection of Downstream Occlusions:
A very wide range of normal flow resistances may be
encountered to meet diverse clinical applications. The
appropriate monitoring mode should be selected to optimally
monitor the IV site.
When using the Adjustable Pressure monitoring mode, a
pressure alarm limit may be selected, in 25 mmHg increments,
from 25 mmHg to the maximum configured pressure limit.
When measured pressure exceeds this level, an OCCLUSION
DOWNSTREAM condition exists.
A
B
OPTIONS
Rate= 125.0 ml/hr
VTBI=1000.0 ml
VI=
0.0 ml
Primary
A
500 mmHg
FEATURES AND OPTIONS 47
FEATURES / OPTIONS
• % Resistance message is displayed below bar graph display
while infusing.
A
Dynamic Monitoring® System (Continued)
Monitoring Options (Continued)
➤ Detection of Downstream Occlusions: (Continued)
When using the Resistance or High Resistance monitoring mode,
an OCCLUSION DOWNSTREAM condition is detected when the
measured resistance reaches 100% of scale. For the Resistance
mode, 100% results from a resistance producing 2 mmHg per
ml/hr of flow. For the High Resistance mode, 100% results from
a resistance producing 6 mmHg per ml/hr flow. An OCCLUSION
DOWNSTREAM condition will also be detected when a fixed
pressure limit is exceeded. This limit may be set, by qualified
service personnel, from 1 mmHg to 600 mmHg.
A
B
OPTIONS
A
Rate= 125.0 ml/hr
VTBI=1000.0 ml
VI=
0.0 ml
Primary
100% Resistance
In either case, one of the following will occur:
• If AutoRestartPlus feature is on, instrument will notify
clinician with a Checking Line message and audible tone.
(See AutoRestartPlus section for further details.)
A
B
OPTIONS
Rate= 125.0 ml/hr
VTBI=1000.0 ml
VI=
0.0 ml
A
Checking Line
• If AutoRestartPlus feature is off, instrument will notify
clinician with an OCCLUSION DOWNSTREAM alarm.
A
B
OPTIONS
A
OCCLUSION
DOWNSTREAM
run
Resistance and High
Resistance Monitoring
A
B
OPTIONS
OCCLUSION
DOWNSTREAM
600 mmHg
run
Pressure Monitoring
48 FEATURES AND OPTIONS
A
Dynamic Monitoring® System (Continued)
Monitoring Options (Continued)
➤ Detection of Upstream Occlusions:
If the flow pathway between the fluid container and the
AccuSlide® Flow Regulator is obstructed due to kinked tubing, a
closed clamp or an improperly installed set, then an UPSTREAM
OCCLUSION condition exists.
Depending on where the upstream path is occluded, flow may
continue for a fraction of a ml before the UPSTREAM OCCLUSION
alarm is produced. At high infusion rates, the instrument will
take relatively little time to alarm. At low infusion rates, a longer
time will elapse before the instrument detects the condition and
alarms. In either case, some flow continues from the instrument
during the time prior to the alarm, due to the elastic behavior of
the tubing between the occlusion site and the pumping
mechanism.
FEATURES / OPTIONS
If an UPSTREAM OCCLUSION alarm does occur, investigate and
remedy the cause. Ensure that the upstream flow path
(tubing,etc.) is free of obstructions, that any clamp is open and
that the blue flow control on the AccuSlide® Flow Regulator is in
the open (up) position before resuming the infusion.
When the instrument detects an Upstream Occlusion condition,
it will present the message UPSTREAM OCCLUSION, sound the
audio alarm and stop infusion. In certain conditions, the
upstream alarm system may briefly pause the instrument and
present the Checking Line message for ten seconds to confirm or
rule out the presence of an occlusion. If the occlusion condition
is determined not to exist, flow will resume and no alarm is
produced.
AutoRestartPlus
The AutoRestartPlus feature provides the ability to automatically
continue an infusion if downstream resistance or pressure
measurements indicate that an occlusion condition has cleared
within a 40 second Checking Line period (excluding High
Resistance monitoring mode). If the condition is not cleared,
the OCCLUSION DOWNSTREAM alarm occurs and infusion is
stopped until manually restarted.
A
B
OPTIONS
OCCLUSION
DOWNSTREAM
A
run
NOTE: In the High Resistance monitoring mode the Checking Line
alert may result in an OCCLUSION DOWNSTREAM alarm, even if the
occlusion has been cleared.
FEATURES AND OPTIONS 49
Dynamic Monitoring® System (Continued)
AutoRestartPlus (Continued)
The Checking Line message and tone are presented whenever a
resistance or pressure measurement exceeds its alarm threshold.
• In Resistance monitoring modes, the Checking Line period is
caused by a measured resistance of 100% or a pressure level
exceeding a configured threshold. This pressure threshold is
separate from the Pressure mode threshold.
A
B
OPTIONS
Rate= 125.0 ml/hr
VTBI=1000.0 ml
VI=
0.0 ml
A
Checking Line
If resistance measurements initiate the Checking Line
condition, the channel will continue infusing in order to
determine if the measured flow resistance has changed. In
the Resistance monitoring mode, if the measured flow
resistance falls to any value below 100%, the channel will
resume normal operating conditions automatically (excluding
High Resistance monitoring mode).
A
B
OPTIONS
Rate= 125.0 ml/hr
VTBI=1000.0 ml
VI=
0.0 ml
Primary
A
90% Resistance
In a Resistance monitoring mode, pressure measurements
initiate the Checking Line period when the pressure exceeds
the configured limit. If the pressure falls to less than onethird of the configured limit within 40 seconds, normal flow
resumes.
• In the Pressure monitoring mode, the Checking Line period is
caused by pressure exceeding the alarm limit. If the pressure
falls to less than one-third of the alarm limit within 40
seconds, normal flow resumes. The Adjustable Pressure
mode allows the operator to control the pressure alarm limit.
Qualified service personnel can turn off this feature or
program from 1 to 9 restarts. In the High Resistance
monitoring mode, restarts do not occur for resistance
measurements. After the programmed number of restarts
has occurred, the channel will immediately alarm OCCLUSION
DOWNSTREAM when pressure or flow resistance conditions
indicate an occlusion. The programmed number of restarts
RUN
become available again when HOLD
or the soft key labeled
run is pressed.
50 FEATURES AND OPTIONS
A
B
OPTIONS
Rate= 125.0 ml/hr
VTBI=1000.0 ml
VI=
0.0 ml
Primary
500 mmHg
A
Dynamic Monitoring® System (Continued)
Resistance Alert
The Resistance Alert provides an early warning of increasing flow
resistance of the IV line/site. The Resistance Alert marker can be
set from 0% to 100% of scale in 5% increments.
Qualified service personnel can turn this Alert feature on or off
and set a power-on default alert level.
➤ To Set Alert Marker:
Press either
or
soft key to numerically display present alert
level marker. Vertical line on resistance bar graph visually
indicates alert level.
A
B
The instrument will notify the clinician with a Resistance Alert
message and alert tone.
A
Rate= 125.0 ml/hr
VTBI=1000.0 ml
VI=
0.0 ml
Primary
Alert = 70%
• Each additional press of either arrow soft key will increase or
decrease alert level marker and numeric value by 5%.
➤ If Flow Resistance Exceeds Alert Level Marker:
OPTIONS
OR
A
B
OPTIONS
A
Rate= 125.0 ml/hr
VTBI=1000.0 ml
VI=
0.0 ml
FEATURES / OPTIONS
The channel will continue to infuse and the message and tone
will continue until one of the following occurs:
Resistance Alert
• Resistance of IV line/site falls below Alert level marker.
• Resistance Alert level marker is increased above current
measured resistance value.
• Resistance rises to 100%, initiating a Checking Line or
OCCLUSION DOWNSTREAM condition.
Adjustable Pressure Alarm
In the Adjustable Pressure monitoring mode, the pressure alarm
limit may be varied from 25 mmHg to 600 mmHg, in 25 mmHg
increments. Qualified service personnel can turn the adjustment
feature on or off and set a default alarm level.
➤ To Set Alarm Limit Marker:
Press either
limit.
or
soft key to numerically display present alarm
• Each additional press of either arrow key will change alarm
limit by 25 mmHg in corresponding direction.
A
B
OPTIONS
Rate= 125.0 ml/hr
VTBI=1000.0 ml
VI=
0.0 ml
Primary
A
Limit = 450 mmHg
OR
FEATURES AND OPTIONS 51
Dynamic Monitoring® System (Continued)
Adjustable Pressure Alarm (Continued)
➤ If Pressure Exceeds Pressure Alarm Limit:
Instrument will notify clinician.
• If AutoRestartPlus is active and restarts are available, a visual
and audio Checking Line alert will occur. (Refer to
AutoRestartPlus description.)
Otherwise, an OCCLUSION DOWNSTREAM alarm occurs and
channel stops infusing.
➤ Pressure Monitoring using Automatic Baseline Calibration:
• Each activation of
RUN
HOLD
will automatically establish a
pressure baseline. First activation of
baseline. Subsequent activations of
RUN
HOLD
RUN
HOLD
will set maximum
will allow baseline
to decrease but not increase above maximum baseline.
• For an accurate pressure measurement ensure that, prior to
RUN
activation of HOLD
, pressure has not built up in IV line due to
either occlusion or flow from other instruments through a
common catheter.
• When loading a set connected to a small diameter catheter,
wait at least five seconds after loading set before activating
RUN
HOLD . This will allow pressure generated by loading process
to dissipate and sensor to stabilize. (Very small PICC
catheters; such as, 28 gauge/1.2 French, may require 60
seconds or more for stabilization.)
• When multiple instruments are infusing through a common
small diameter catheter, pressure measurement accuracy can
be optimized by temporarily stopping all infusions, then
restarting all instruments beginning with instrument
delivering at lowest rate.
• For additional measurement accuracy and real-time pressure
display, pressure baseline may be manually set. See Pressure
Baseline description.
52 FEATURES AND OPTIONS
Dynamic Monitoring® System (Continued)
Resistance Trend Graphs
In Resistance and High Resistance monitoring modes, a trend
graph displays flow resistance over time. Trend graphs of
15 minutes, 1 hour, 4 hours and 12 hours are available during
normal operation. Qualified service personnel can turn this
feature off or on.
A
B
OPTIONS
A
100%
50
0
-12h
return
RESISTANCE
clear
now
time
Downstream Occlusions, which occur in Pressure or Resistance
modes, will be indicated by a vertical tick mark at the top of the
trend screen.
➤ To View Resistance Mode Trend Graphs:
NOTE: For dual channel instruments, select the desired channel, as
necessary. The trend graph is not available while the split screen is
displayed.
NOTE: After the instrument has been off for more than six hours,
trend graphs are cleared and the time base is reset to 15 minutes.
Press
OPTIONS
.
• Options page will appear.
A
B
OPTIONS
A
Rate= 125.0 ml/hr
VTBI=1000.0 ml
VI=
0.0 ml
Primary
25% Resistance
2.
Press Resistance Trend.
• A trend graph will appear.
3.
Press time to change graph time frame.
• A dashed horizontal line represents current optional
resistance alert level.
• Gaps in graph may indicate noninfusing conditions; such
as, turned off, on hold, in alarm, etc.
A
B
OPTIONS
Resistance Trend
A
Monitoring Options
Dose Rate Calculator
Multi-Step
page
return
A
B
OPTIONS
A
100%
50
0
-12h
return
RESISTANCE
clear
now
time
FEATURES AND OPTIONS 53
FEATURES / OPTIONS
1.
Dynamic Monitoring® System (Continued)
Resistance Trend Graphs (Continued)
➤ To View Resistance Mode Trend Graphs: (Continued)
• If channel has been placed in Pressure Monitoring mode
for some portion of a trend graph window, resistance
data is not available and zero values are plotted.
• A bar at top of graph indicates an occlusion.
A
B
OPTIONS
A
100%
50
0
-12h
return
HI RESIST
clear
now
time
NOTE: When viewing Resistance Trend Graphs in the High
Resistance mode, HI RESIST will be displayed under the graph.
➤ To Clear Resistance Trend Graphs:
1.
Press clear to clear graphed data.
A
B
OPTIONS
A
100%
50
0
-12h
return
2.
Press ok.
A
• All data will be cleared from graphs.
RESISTANCE
clear
B
now
time
OPTIONS
All trend data
will be cleared
ok
return
A
B
OPTIONS
A
100%
50
0
-12h
return
54 FEATURES AND OPTIONS
A
RESISTANCE
clear
now
time
Dynamic Monitoring® System (Continued)
Resistance Trend Graphs (Continued)
➤ To Return to Normal Operating Screen:
Press return.
A
• Normal operating screen will appear.
B
OPTIONS
A
100%
50
NOTE: Any of the following events will also turn off the trend
graph.
• Pressing
A
B
• Pressing
RUN
HOLD
0
-12h
return
RESISTANCE
clear
now
time
(dual channel instrument only).
.
• An alarm.
A
• Dual channel instrument Trend Graphs will disappear after one
minute and be replaced with a split screen display if both
channels are infusing.
B
OPTIONS
A
Rate= 125.0 ml/hr
VTBI=1000.0 ml
VI=
0.0 ml
Primary
33% Resistance
In Pressure Monitoring mode, a trend graph displays monitored
pressure over time. Trend graphs of 15 minutes, 1 hour, 4 hours
and 12 hours are available during normal operation. Qualified
service personnel can turn this feature off or on.
Downstream Occlusions, which occur in Pressure or Resistance
modes, will be indicated by a vertical tick mark at the top of the
trend screen.
A
B
OPTIONS
A
600
m
m
H
g
-12h
return
PRESSURE
clear
now
time
➤ To View Pressure Mode Trend Graphs:
NOTE: For dual channel instruments, select the desired channel, as
necessary. The trend graph is not available while the split screen is
displayed.
NOTE: After the instrument has been off for more than six hours,
trend graphs are cleared and the time base is reset to 15 minutes.
1.
Press
OPTIONS
.
• Options page will appear.
A
B
OPTIONS
Rate= 125.0 ml/hr
VTBI=1000.0 ml
VI=
0.0 ml
Primary
A
Limit = 300 mmHg
FEATURES AND OPTIONS 55
FEATURES / OPTIONS
Pressure Trend Graphs
Dynamic Monitoring® System (Continued)
Pressure Trend Graphs (Continued)
➤ To View Pressure Mode Trend Graphs: (Continued)
2.
Press Pressure Trend.
A
Press time to change graph time frame.
A
• If channel has been placed in a Resistance Monitoring
mode for some portion of a trend graph window,
pressure data is not available and zero values are
plotted.
B
OPTIONS
A
600
m
m
H
g
• A solid horizontal line represents current pressure alarm
limit level.
• Gaps in graph may indicate noninfusing conditions; such
as, turned off, on hold, in alarm, etc.
OPTIONS
Pressure Trend
A
Monitoring Options
Dose Rate Calculator
Set Pressure Baseline
page
return
• A trend graph will appear.
3.
B
-12h
return
A
PRESSURE
clear
B
now
time
OPTIONS
A
600
m
m
H
g
-12h
return
PRESSURE
clear
now
time
➤ To Clear Pressure Trend Graphs:
1.
Press clear to clear graphed data.
A
B
OPTIONS
A
600
m
m
H
g
-12h
return
56 FEATURES AND OPTIONS
PRESSURE
clear
now
time
Dynamic Monitoring® System (Continued)
Pressure Trend Graphs (Continued)
➤ To Clear Pressure Trend Graphs: (Continued)
2.
Press ok.
A
B
OPTIONS
All trend data
will be cleared
ok
return
• All data will be cleared from graphs.
A
A
B
OPTIONS
A
600
m
m
H
g
-12h
return
PRESSURE
clear
now
time
➤ To Return to Normal Operating Screen:
A
B
OPTIONS
A
600
m
m
H
g
-12h
return
• Normal operating screen will appear.
NOTE: Any of the following events will also turn off the trend
graph.
• Pressing
A
• Pressing
RUN
HOLD
(dual channel instrument only).
B
A
PRESSURE
clear
now
time
B
OPTIONS
Rate= 125.0 ml/hr
VTBI=1000.0 ml
VI=
0.0 ml
Primary
A
Limit = 200 mmHg
.
• An alarm.
• Dual channel instrument Trend Graphs will disappear after one
minute and be replaced with a split screen display if both
channels are infusing.
FEATURES AND OPTIONS 57
FEATURES / OPTIONS
Press return.
Dynamic Monitoring® System (Continued)
Pressure Baseline
The Pressure Baseline feature increases the accuracy of the
pressure display, pressure trend graph, OCCLUSION UPSTREAM
and OCCLUSION DOWNSTREAM alarms, and provides real-time bar
graph and numeric display of line pressure.
Qualified service personnel can turn this feature off or on.
➤ To Manually Set Pressure Baseline While Operating in
Adjustable Pressure Mode:
NOTE: For dual channel instruments, select the desired channel as
necessary. The pressure bar graph is not shown when the split
screen display is active.
1.
Press channel’s
RUN
HOLD
key to place channel on hold. (All
infusions through line must be on hold.)
2.
Press
OPTIONS
.
• Options screen will appear.
A
B
OPTIONS
A
Rate= 125.0 ml/hr
VTBI=1000.0 ml
VI=
0.0 ml
Primary
Limit = 600 mmHg
3.
Press Set Pressure Baseline.
A
B
OPTIONS
Pressure Trend
A
Monitoring Options
Dose Rate Calculator
Set Pressure Baseline
page
return
• Set Pressure Baseline screen will appear.
A
B
return
Verify no pressure, due to occlusion or other infusions
through a common line, are present in IV line at this time.
58 FEATURES AND OPTIONS
A
Set
Pressure
Baseline
NOTE: To return to the normal screen without setting the
baseline, press return.
4.
OPTIONS
ok
Dynamic Monitoring® System (Continued)
Pressure Baseline (Continued)
➤ To Manually Set Pressure Baseline While Operating in
Adjustable Pressure Mode: (Continued)
5.
Press ok.
A
B
OPTIONS
A
Set
Pressure
Baseline
ok
return
A
B
OPTIONS
Rate=125.0 ml/hr
VTBI=500.0 ml
A
New
Baseline
Set
Press
RUN
HOLD
FEATURES / OPTIONS
6.
to start infusion.
NOTE: The auto pressure baseline calibration will remain in effect
until the instrument is turned off, the latch is opened, the set is
reloaded, or the Pressure Baseline function is performed again.
Setting the manual baseline overrides the auto baseline until the
instrument is turned off, the latch is opened, set is loaded, or
another manual baseline is set.
NOTE: Setting a manual Pressure Baseline displays a real-time bar
graph and numeric pressure readings. The vertical line on the
pressure bar graph visually indicates the pressure limit.
A
B
OPTIONS
Rate= 125.0 ml/hr
VTBI=1000.0 ml
VI=
0.0 ml
Primary
A
0 mmHg
FEATURES AND OPTIONS 59
Flow Sensor
The optional Flow Sensor notifies users of empty containers
and/or upstream occlusions. A handle cap accessory is available
for storing the flow sensor when not in use.
NOTE: If a flow sensor is not connected to the instrument, ensure
protective plugs are installed at the connector site to prevent entry
of foreign material.
1.
Plug a Model 180 Flow Sensor into applicable channel
connector on back of instrument.
Flow Sensor Connectors
B
2.
Attach flow sensor to upper portion of drip chamber.
• When using flow sensor, correct placement is essential
for proper operation. Drip chambers of some
administration sets have a flange at top to which flow
sensor can be attached. Attachment on flange will
ensure proper placement.
Upper surface of flow sensor should be slightly below
drop-forming orifice but above level of fluid in drip
chamber.
Ensure fluid level in drip chamber is at fill line and sensor
optics are clean. Fluid level in drip chamber must be
checked/re-eestablished after each empty container
condition.
• When using flow sensor option while ambulating or
transporting a patient from one area to another, use care
to avoid excessive swinging of solution container(s).
3.
Attach flow sensor to instrument handle when not in use.
60 FEATURES AND OPTIONS
A
Flow Sensor (Continued)
NOTE: The flow sensor should be routinely cleaned with warm
water while actuating the slider, then dried thoroughly.
CAUTION
Do not use solvents or cleaning
agents. Damage to plastic parts of
the flow sensor could occur.
NOTE: See the “Radio Frequency Interference” information in the
Precautions Section.
NOTE: Infusing fluids which form smaller drops, through a
60 drops/ml set, at high rates may result in a “No Upstream Flow
Detected” alarm. (This is because the small, rapidly falling drops
form a continuous stream which does not trigger the flow sensor.)
In this event, unplug the flow sensor from the instrument.
Drug Specific Dose Rate Calculator (DRC)
FEATURES / OPTIONS
This feature allows the clinician to select a drug name to
calculate a volumetric rate or a dose rate for continuous drug
infusions and is based on parameters such as drug dosage,
patient weight, concentration, etc. Once calculated, the
instrument will display the drug name selected on the infusion
Drug?) is provided for drugs not
screen. Generic calculation (D
available on the drug list.
When the DRC VTBI has counted down to 0.0 ml, the channel
will switch to the preset KVO rate or remain at the current rate,
whichever is less.
Qualified service personnel can turn the Dose Rate Calculator
feature on or off, and limit the list of drug names available.
Facts About DRC
• The patient weight, drug concentration and diluent volume
cannot be changed while infusing. Changes to any of these
items while on hold will recalculate the volumetric rate to
maintain the dose rate.
• All drug names are generic, and when necessary, they are
abbreviated. Dual channel instrument only: Drug names
longer than ten letters are abbreviated if displayed on the
split screen.
WARNING
Ensure the correct entry of all drug
calculation infusion parameters.
Consult the drug manufacturer’s
labeling for information concerning
appropriate administration
techniques and dosages.
• The Drug? selection can be used for calculating when a
particular drug name is not available on the drug list.
• When a drug amount is greater than 10,000 units (Un), a K is
used to indicate a value multiplied by 1,000 (for example,
1,000,000 = 1,000K).
• DRC cannot be used in conjunction with secondary or other
operating modes.
FEATURES AND OPTIONS 61
Drug Specific Dose Rate Calculator (DRC) (Continued)
To Enter a New Program
Select the desired channel, as necessary. The channel must be
infusing in the primary mode or on hold in the primary mode,
secondary mode, or a Loading Dose program.
1.
Press
OPTIONS
.
• Options page will appear.
A
B
OPTIONS
Rate=
VTBI=
VI=
A
25.0 ml/hr
4.0 ml
1.0 ml
Primary
20% Resistance
2.
Press Dose Rate Calculator.
A
B
• DOSE RATE MENU will appear.
Resistance Trend
A
Monitoring Options
Dose Rate Calculator
Multi-Step
return
3.
Press Enter New Program.
A
• A list of drug names will be displayed.
4.
Press á page or page á to view additional drug name
selections.
Press GO TO EXTENDED LIST (if shown) to view full list of drug
names.
• If desired drug name is listed, proceed to step 6.
• If desired drug name is not listed, proceed to step 11.
62 FEATURES AND OPTIONS
page
B
OPTIONS
DOSE RATE MENU
Review/Resume
Enter New Program
Quit Program
A
B
A
A
OPTIONS
A
Dobutamine
Dopamine
Esmolol
Heparin
menu
5.
OPTIONS
page
B
OPTIONS
Morphine
A
Nitroprusside
Drug?
GO TO EXTENDED LIST
menu
page
Drug Specific Dose Rate Calculator (DRC) (Continued)
To Enter a New Program (Continued)
➤ To Program DRC With a Listed Drug Name:
6.
Press soft key next to a drug name to select it.
A
B
menu
Press ok to approve all displayed information and advance
to first setup page (step 16).
A
B
page
OPTIONS
Dose in mcg/kg/min
Conc in mg/ml
Weight in kg
OR (step 8)
menu
A
ok
To change concentration, height, or weight units, press soft
key next to a unit to select it.
• Weight or height unit selections will be displayed only if
appropriate for drug selected.
•
9.
soft key will appear.
Press and release
to scroll through units available.
ENTER
Press
when correct unit is displayed.
A
B
OPTIONS
Dose in mcg/kg/min
Conc in mg/ml
Weight in kg
menu
A
ok
Concentration: mcg, mg, gm, Un, mUn, or mEq
Weight: kg or lb
Height: cm or inches
10. Press ok to approve all displayed information and advance
to first setup page (step 16).
A
B
OPTIONS
• To calculate volumetric rate, proceed to step 16.
Dose in mcg/kg/min
Conc in mg/ml
Weight in kg
• To calculate dose rate, proceed to step 20.
menu
A
ok
FEATURES AND OPTIONS 63
FEATURES / OPTIONS
8.
A
Dobutamine
Dopamine
Esmolol
Heparin
• Appropriate dose units for selected drug will be
displayed. Dose units cannot be changed.
7.
OPTIONS
Drug Specific Dose Rate Calculator (DRC) (Continued)
To Enter a New Program (Continued)
➤ To Program DRC When Drug Name is Not Listed:
11. Press Drug? to use generic dose calculation feature.
A
• First segment will be highlighted.
Press ok at any time to approve all displayed information
and advance to first setup page.
ENTER
OPTIONS
Morphine
A
Nitroprusside
Drug?
GO TO EXTENDED LIST
• Dose units will be displayed.
12. If dose unit is appropriate, press
OR
B
menu
page
.
Press and release
to scroll through units available.
ENTER
Press
when correct unit is displayed.
A
menu
NOTE: Day* is defined as continuous delivery for 24 hours
per day.
13. If concentration unit is appropriate, press
OR
ENTER
OPTIONS
Dose in mcg/kg/min
Conc in mg/ml
Weight in kg
• Concentration unit will be highlighted.
Repeat steps for other two dose unit segments.
B
A
ok
Dose Units: mcg, mg, gm, Un, mUn, or mEq
- kg or m2
- min, hr, or day*
.
Press and release
to scroll through units available.
ENTER
Press
when correct unit is displayed.
• Weight or height unit selections will be displayed only if
appropriate for dose unit selected.
A
B
OPTIONS
Dose in mcg/kg/min
Conc in mg/ml
Weight in kg
menu
A
ok
Concentration: mcg, mg, gm, Un, or mEq
64 FEATURES AND OPTIONS
Drug Specific Dose Rate Calculator (DRC) (Continued)
To Enter a New Program (Continued)
➤ To Program DRC When Drug Name is Not Listed:
(Continued)
14. If weight or height unit is appropriate, press
OR
ENTER
.
Press and release
to scroll through units available.
Press ENTER when correct unit is displayed.
A
B
OPTIONS
Dose in mcg/kg/min
Conc in mg/ml
Weight in kg
menu
A
ok
Weight: kg or lb
Height: cm or inches
A
B
OPTIONS
• To calculate volumetric rate, proceed to step 16.
Dose in mcg/kg/min
Conc in mg/ml
Weight in kg
• To calculate dose rate, proceed to step 20.
menu
A
ok
➤ To Calculate Volumetric Rate:
16. Use numeric keypad to enter dose rate. Press
ENTER
.
A
B
OPTIONS
Rate=----- ml/hr
A
Dose=---- mcg/kg/min
Conc=---- mg/--- ml
Wt=---- kg
• Concentration will be highlighted.
menu
A
B
OPTIONS
Rate=----- ml/hr
A
Dose= 5 mcg/kg/min
Conc=---- mg/--- ml
Wt=---- kg
menu
FEATURES AND OPTIONS 65
FEATURES / OPTIONS
15. Press ok to approve all displayed information and advance
to first setup page.
Drug Specific Dose Rate Calculator (DRC) (Continued)
To Enter a New Program (Continued)
➤ To Calculate Volumetric Rate: (Continued)
17. Use numeric keypad to enter concentration. Press
ENTER
.
A
B
OPTIONS
Rate=----- ml/hr
Dose= 5 mcg/kg/min
Conc=800 mg/---ml
Wt=---- kg
• Diluent volume will be highlighted.
A
menu
18. Use numeric keypad to enter diluent volume. Press
ENTER
.
A
B
OPTIONS
Rate=----- ml/hr
Dose= 5 mcg/kg/min
Conc=800 mg/500 ml
Wt=---- kg
• If applicable, patient weight and/or height will be
highlighted.
A
menu
19. Use numeric keypad to enter weight and/or height. Press
ENTER .
• Instrument will automatically calculate and display
volumetric infusion rate in ml/hr.
A
B
OPTIONS
Rate=13.1 ml/hr
Dose= 5 mcg/kg/min
Conc=800 mg/500 ml
Wt= 70 kg
menu
A
ok
NOTE: ↑↑↑↑↑ or ↓↓↓↓↓ will appear if a calculated value is
outside the display’s range.
• Use soft key to highlight value you want to change.
• Use numeric keypad to enter value.
• Press ENTER to accept change.
• Proceed to step 24.
➤ To Calculate Dose Rate:
20. Press Rate to move highlight to volumetric rate. Use
numeric keypad to enter rate. Press ENTER .
A
B
OPTIONS
Rate=----- ml/hr
A
Dose=---- mcg/kg/min
Conc=---- mg/--- ml
Wt=---- kg
menu
• Concentration will be highlighted.
A
B
OPTIONS
Rate=13.1 ml/hr
A
Dose=---- mcg/kg/min
Conc=---- mg/--- ml
Wt=---- kg
menu
66 FEATURES AND OPTIONS
Drug Specific Dose Rate Calculator (DRC) (Continued)
To Enter a New Program (Continued)
➤ To Calculate Dose Rate: (Continued)
21. Use numeric keypad to enter concentration. Press
ENTER
.
A
B
OPTIONS
Rate=13.1 ml/hr
A
Dose=---- mcg/kg/min
Conc=800 mg/--- ml
Wt=---- kg
• Diluent volume will be highlighted.
menu
22. Use numeric keypad to enter diluent volume. Press
ENTER
.
• If applicable, patient weight and/or height will be
highlighted.
23. Use numeric keypad to enter weight and/or height. Press
ENTER .
B
OPTIONS
Rate=13.1 ml/hr
A
Dose=---- mcg/kg/min
Conc=800 mg/500 ml
Wt=---- kg
menu
A
B
OPTIONS
Rate=13.1 ml/hr
Dose= 5 mcg/kg/min
Conc=800 mg/500 ml
Wt= 70 kg
menu
A
FEATURES / OPTIONS
• Instrument will automatically calculate and display dose
rate.
A
ok
NOTE: ↑↑↑↑↑ or ↓↓↓↓↓ will appear if a calculated value is
outside the display’s range.
• Use soft key to highlight value you want to change.
• Use numeric keypad to enter value.
• Press ENTER to accept change.
• Proceed to step 24.
24. Verify all values and units. Press ok to approve all calculated
and displayed information.
NOTE: If the channel is running in the primary mode while
setting up the calculation, proceed to step 28.
• Next setup page will appear.
• VTBI will be highlighted.
A
B
OPTIONS
Rate=13.1 ml/hr
Dose= 5 mcg/kg/min
Conc=800 mg/500 ml
Wt= 70 kg
menu
A
ok
B
VTBI=
VI=
menu
A
OPTIONS
A
Dopamine
0.0 ml
10.0 ml
ok
FEATURES AND OPTIONS 67
Drug Specific Dose Rate Calculator (DRC) (Continued)
To Enter a New Program (Continued)
➤ To Calculate Dose Rate: (Continued)
25. Use numeric keypad to enter VTBI value. Press
ENTER
.
A
VTBI=
VI=
NOTE: If the flow sensor option is being used, Dose Rate VTBI
can be turned off by selecting VTBI, then pressing CLEAR .
OR
B
OPTIONS
A
Dopamine
250.0 ml
10.0 ml
menu
ok
Dose Rate VTBI can be deleted from VTBI/VI screen and main
hold page (Programmable Features).
• VI will be highlighted.
26. To clear VI, press
CLEAR
or 0 (zero key). Press
ENTER
.
A
27. Press ok to approve all displayed information and advance
to main hold page.
B
VTBI=
VI=
OPTIONS
menu
28. Press
RUN
HOLD
or run to start infusion.
A
A
Dopamine
250.0 ml
0.0 ml
ok
B
OPTIONS
Rate=13.1 ml/hr
Dose= 5 mcg/kg/min
VTBI=250.0 VI= 0.0
Dopamine
menu
Making Changes During DRC Program
Select the desired channel, as necessary. The channel does not
need to be on hold to change volumetric rate, dose rate, or
VTBI, to clear the VI or to view more information.
NOTE: The instrument will recalculate the program values if the
volumetric or dose rate, drug amount, diluent volume, weight, or
height are changed.
68 FEATURES AND OPTIONS
setup
run
A
Drug Specific Dose Rate Calculator (DRC) (Continued)
Making Changes During DRC Program (Continued)
➤ To View More Information on Dose Rate Setup:
Press
✔
.
A
• Additional Dose Rate setup information will be displayed for
a short interval.
B
OPTIONS
Rate=13.1 ml/hr
Dose= 5 mcg/kg/min
VTBI=248.0 VI= 2.0
Dopamine
A
10% Resistance
A
B
OPTIONS
Rate=13.1 ml/hr
Dose= 5 mcg/kg/min
Conc=800 mg/500 ml
Wt= 70 kg
A
➤ To Change Volumetric Rate or Dose Rate:
Press Rate or Dose to highlight value.
A
B
OPTIONS
Rate=13.1 ml/hr
Dose= 5 mcg/kg/min
VTBI=248.0 VI= 2.0
Dopamine
OR
A
10% Resistance
2.
Use numeric keypad to enter new value. Press
ENTER
• New/recalculated value takes effect as soon as
pressed.
.
ENTER
A
B
OPTIONS
Rate=10.5 ml/hr
A
Dose= 4.0 mcg/kg/min
VTBI=248.0 VI= 2.0
Dopamine
is
10% Resistance
NOTE: ↑↑↑↑↑ or ↓↓↓↓↓ will appear in the dose field if rate
titration causes the calculated dose value to be outside the
display’s range. Recheck the entered parameters.
➤ To Change VTBI:
1.
Press VTBI to highlight value.
A
B
OPTIONS
Rate=13.1 ml/hr
Dose= 5 mcg/kg/min
VTBI=248.0 VI= 2.0
Dopamine
A
10% Resistance
FEATURES AND OPTIONS 69
FEATURES / OPTIONS
1.
Drug Specific Dose Rate Calculator (DRC) (Continued)
Making Changes During DRC Program (Continued)
➤ To Change VTBI: (Continued)
2.
Use numeric keypad to enter new value. VI will temporarily
disappear. Press ENTER .
NOTE: If the flow sensor option is being used, Dose Rate
VTBI can be turned off by selecting VTBI and then pressing
CLEAR .
OR
Dose Rate VTBI can be deleted from VTBI/VI screen and main
hold page (Programmable Features).
➤ To Clear VI:
1.
Press VTBI soft key twice to move highlight to VI.
A
OR
Press VTBI soft key and then press
ENTER
B
OPTIONS
Rate=13.1 ml/hr
Dose= 5 mcg/kg/min
VTBI=248.0 VI= 2.0
Dopamine
.
A
10% Resistance
2.
Press
or 0 (zero key).
CLEAR
A
ENTER
OPTIONS
Rate=13.1 ml/hr
Dose= 5 mcg/kg/min
VI= 0.0
Dopamine
• VTBI will temporarily disappear and VI will be
highlighted.
Press
B
.
A
10% Resistance
➤ To Change Weight or Height:
NOTE: Any change to the weight or height will recalculate the
volumetric rate to maintain dose rate.
1.
Press
2.
Press setup to return to setup page.
RUN
HOLD
to place channel on hold.
A
B
OPTIONS
Rate=13.1 ml/hr
Dose= 5 mcg/kg/min
VTBI=248.0 VI= 2.0
Dopamine
menu
70 FEATURES AND OPTIONS
setup
run
A
Drug Specific Dose Rate Calculator (DRC) (Continued)
Making Changes During DRC Program (Continued)
➤ To Change Weight or Height: (Continued)
3.
Press Wt or Ht.
A
B
OPTIONS
Rate=13.1 ml/hr
Dose= 5 mcg/kg/min
Conc=800 mg/500 ml
Wt= 70 kg
menu
4.
Use numeric keypad to enter new value. Press
ENTER
.
A
Press ok to approve all displayed information and advance
to main hold page.
6.
Press
RUN
HOLD
or run to resume infusion.
B
OPTIONS
menu
A
ok
B
OPTIONS
Rate=12.9 ml/hr
Dose= 5 mcg/kg/min
VTBI=248.0 VI= 2.0
Dopamine
menu
A
setup
A
run
FEATURES AND OPTIONS 71
FEATURES / OPTIONS
5.
ok
Rate=12.9 ml/hr
Dose= 5 mcg/kg/min
Conc=800 mg/500 ml
Wt= 69 kg
• Recalculated volumetric rate will be displayed.
A
Drug Specific Dose Rate Calculator (DRC) (Continued)
Making Changes During DRC Program (Continued)
➤ To Change Concentration:
NOTE: Any change to the drug amount or diluent volume will
recalculate the volumetric rate to maintain dose rate.
1.
Press
2.
Press setup to return to setup page.
RUN
HOLD
to place channel on hold.
A
B
OPTIONS
Rate=13.1 ml/hr
Dose= 5 mcg/kg/min
VTBI=248.0 VI= 2.0
Dopamine
menu
3.
Press Conc once to select concentration value. Press Conc
twice to move highlight to diluent value or press Conc and
then ENTER .
A
setup
B
Use numeric keypad to enter new value. Press
ENTER
.
Rate=13.1 ml/hr
Dose= 5 mcg/kg/min
Conc=800 mg/500 ml
Wt= 70 kg
A
• Recalculated volumetric rate will be displayed.
Press ok to approve all displayed information and advance
to main hold page.
B
OPTIONS
Rate=13.1 ml/hr
Dose= 5 mcg/kg/min
Conc=800 mg/500 ml
Wt= 70 kg
A
Press
RUN
HOLD
or run to resume infusion.
B
OPTIONS
Rate=14.0 ml/hr
Dose= 5 mcg/kg/min
Conc=750 mg/500 ml
Wt= 70 kg
A
OPTIONS
Rate=14.0 ml/hr
Dose= 5 mcg/kg/min
VTBI=248.0 VI= 2.0
Dopamine
72 FEATURES AND OPTIONS
A
ok
B
menu
A
ok
menu
6.
A
ok
menu
5.
run
OPTIONS
menu
4.
A
setup
run
A
Drug Specific Dose Rate Calculator (DRC) (Continued)
Resuming an Interrupted DRC Program
The channel will retain its place in the program up to six hours if
the instrument is turned off. After six hours, the channel will
restart at the primary mode setup page.
1.
Press
POWER
.
A
B
A
• Return to Dose Rate? page will appear.
2.
Return To
Dose Rate?
Press yes.
Press Review/Resume to access setup parameters.
yes
no
• Pressing no will return to primary setup page. Verify
settings prior to resuming an infusion.
3.
OPTIONS
A
B
OPTIONS
DOSE RATE MENU
Review/Resume
Enter New Program
Quit Program
Press ok to verify drug being infused and advance through
Dose Rate setup pages.
A
B
OPTIONS
A
Drug=
Dopamine
ok
menu
5.
Press
RUN
HOLD
or run to resume infusion from main hold page.
A
B
OPTIONS
Rate=13.1 ml/hr
Dose= 5 mcg/kg/min
VTBI=248.0 VI= 2.0
Dopamine
menu
setup
A
run
FEATURES AND OPTIONS 73
FEATURES / OPTIONS
4.
A
Drug Specific Dose Rate Calculator (DRC) (Continued)
To Quit DRC Program
Channel must be on hold.
1.
Press menu.
A
B
OPTIONS
Rate=13.1 ml/hr
Dose= 5 mcg/kg/min
VTBI=248.0 VI= 2.0
Dopamine
menu
2.
Press Quit Program to return to primary setup page.
A
setup
run
B
OPTIONS
DOSE RATE MENU
Review/Resume
Enter New Program
Quit Program
A
B
50% Resistance
This feature allows a sequential drug delivery program (up to
nine steps) to be set, delivering volumes of fluid at different
rates during each step. This allows the clinician to set up the
instrument parameters once and deliver a step profile,
eliminating the need to change the rate and VTBI after each step
of the infusion.
The infusion may be programmed in either Rate and Volume or
Volume and Time.
At completion of the last programmed step, the channel will
switch to the preset KVO rate or remain at the current rate,
whichever is less.
Qualified service personnel can turn the Multi-Step feature on or
off.
74 FEATURES AND OPTIONS
A
OPTIONS
Rate= 13.1 ml/hr
VTBI= 248.0 ml
VI=
2.0 ml
Primary
Multi-Step Program
A
A
Multi-Step Program (Continued)
To Enter a New Program
Select the desired channel, as necessary. The channel must be
on hold in the primary mode, secondary mode, or a Loading
Dose program.
1.
Press
OPTIONS
.
A
Press Multi-SStep.
• MULTI-SSTEP MENU will appear.
3.
OPTIONS
Resistance Trend
A
Monitoring Options
Dose Rate Calculator
Multi-Step
page
return
• Options page will appear.
2.
B
Press Enter New Program.
A
B
OPTIONS
A
MULTI-STEP MENU
Review/Resume
Enter New Program
Quit Program
Press a soft key to select setup method.
• If Rate andVolume is selected, instrument will calculate
step infusion time. Proceed to step 5.
A
B
OPTIONS
PROGRAMMING OPTIONS
Rate and Volume
Volume and Time
OR
• If Volume and Time is selected, instrument will calculate
rate. Proceed to step 10.
A
menu
➤ To Program by Rate and Volume:
5.
Press Rate and Volume.
A
B
OPTIONS
PROGRAMMING OPTIONS
Rate and Volume
Volume and Time
A
menu
• STEP 1 of infusion profile will be displayed.
• Rate will be highlighted.
A
B
OPTIONS
STEP 1
A
Rate= ----- ml/hr
VTBI= ----- ml
Time= -- hrs -- min
menu
FEATURES AND OPTIONS 75
FEATURES / OPTIONS
4.
Multi-Step Program (Continued)
To Enter a New Program (Continued)
➤ To Program by Rate and Volume: (Continued)
6.
Use numeric keypad to enter rate. Press
ENTER
.
A
Use numeric keypad to enter VTBI. Press
OPTIONS
STEP 1
A
Rate= 25.0 ml/hr
VTBI= ----- ml
Time= -- hrs -- min
menu
• VTBI will be highlighted.
7.
B
ENTER
.
A
Press ok to approve all displayed information and advance
to STEP 2 of infusion profile.
9.
Repeat steps 6 through 8 to set up each additional step of
infusion profile, then proceed to step 16.
OPTIONS
STEP 1
Rate= 25.0 ml/hr
VTBI= 5.0 ml
Time= 0 hrs 12 min
• Instrument will automatically calculate and display time
in hours and minutes.
8.
B
menu
A
ok
➤ To Program by Volume and Time:
10. Press Volume and Time.
A
B
OPTIONS
PROGRAMMING OPTIONS
Rate and Volume
Volume and Time
A
menu
• STEP 1 of infusion profile will be displayed.
A
• Time (hours) will be highlighted.
76 FEATURES AND OPTIONS
OPTIONS
STEP 1
A
Rate= ----- ml/hr
VTBI= ----- ml
Time= -- hrs -- min
menu
• VTBI will be highlighted.
11. Use numeric keypad to enter VTBI. Press
B
ENTER
.
A
B
OPTIONS
STEP 1
A
Rate= ----- ml/hr
VTBI=
5.0 ml
Time= -- hrs -- min
menu
Multi-Step Program (Continued)
To Enter a New Program (Continued)
➤ To Program by Volume and Time: (Continued)
12. Use numeric keypad to enter hours. Press
ENTER
.
A
• Time (minutes) will be highlighted.
B
OPTIONS
STEP 1
Rate= ----- ml/hr
VTBI=
5.0 ml
Time= 0 hrs -- min
menu
13. Use numeric keypad to enter minutes (0-59) if desired.
Press ENTER .
A
B
OPTIONS
STEP 1
Rate= 25.0 ml/hr
VTBI=
5.0 ml
Time= 0 hrs 12 min
ok
menu
• Instrument will automatically calculate and display
volumetric rate.
A
A
14. Press ok to approve all displayed information and advance
to STEP 2 of infusion profile.
16. When all steps have been entered and ok’d, press done.
A
B
OPTIONS
STEP 4
A
Rate= ----- ml/hr
VTBI= ----- ml
Time= -- hrs -- min
• Review page(s) will display three profile steps at a time.
menu
17. Press ok to approve and advance through review page(s).
A
done
B
OPTIONS
# RATE VTBI TIME A
1 25.0
5.0 0h12m
2 50.0 25.0 0h30m
3 100.0 100.0 1h 0m
menu
18. Press
CLEAR
or 0 (zero key) to clear VI if desired. Press
ENTER
.
A
B
ok
OPTIONS
STEP TOTALS (3)
VTBI= 130.0 ml
Time= 1 h 42 min
VI
25.0 ml
menu
A
ok
FEATURES AND OPTIONS 77
FEATURES / OPTIONS
15. Repeat steps 10 through 13 to set up each additional step
of infusion profile, then proceed to step 16.
Multi-Step Program (Continued)
To Enter a New Program (Continued)
➤ To Program by Volume and Time: (Continued)
19. Press ok to approve STEP TOTALS page.
A
B
OPTIONS
STEP TOTALS (3)
VTBI= 130.0 ml
Time= 1 hrs 42 min
VI
0.0 ml
• Main hold page will be displayed.
ok
menu
20. Press
RUN
HOLD
or run to start Multi-Step infusion program.
A
A
B
OPTIONS
A
Rate= 25.0 ml/hr
VTBI= 5.0 ml
VI=
0.0 ml
STEP 1 of 3
menu
setup
run
Making Changes During Multi-Step Program
Select the desired channel, as necessary. The channel does not
need to be on hold to clear the VI or to view the totals
remaining.
➤ To Clear Volume Infused:
1.
Press VI.
A
B
OPTIONS
Rate= 25.0 ml/hr
VTBI= 4.0 ml
VI=
1.0 ml
STEP 1 of 3
10% Resistance
2.
Press
CLEAR
3.
Press
ENTER
or 0 (zero key).
.
78 FEATURES AND OPTIONS
A
Multi-Step Program (Continued)
Making Changes During Multi-Step Program (Continued)
➤ To View Totals Remaining in Multi-Step Program:
Press
✔.
A
B
OPTIONS
A
Rate= 50.0 ml/hr
VTBI= 25.0 ml
VI=
5.0 ml
STEP 2 of 3
10% Resistance
• Time and VTBI remaining in Multi-Step program will be
displayed for a short interval.
A
B
OPTIONS
A
Rate= 50.0 ml/hr
VTBI= 25.0 ml
Totals Remaining
VTBI= 125.0 ml
Time= 1 hr 30 min
➤ To View or Edit Multi-Step Program:
1.
Press
2.
Press setup to return to review page(s).
RUN
HOLD
to place channel on hold.
A
B
OPTIONS
• A tick mark ( ) next to a step on review page(s) indicates
it has not started.
Rate= 25.0 ml/hr
VTBI= 4.0 ml
VI=
1.0 ml
• Only steps having a
menu
can be edited.
A
STEP 1 of 3
setup
run
• Completed steps or a step in progress will not have a .
• A step number in progress will be highlighted.
A
B
OPTIONS
# RATE VTBI TIME A
1 25.0
5.0 0h12m
2 50.0 25.0 0h30m
3 100.0 100.0 1h 0m
menu
3.
Press ok, if desired, to advance through review page(s) of
program.
A
B
ok
OPTIONS
# RATE VTBI TIME A
1 25.0
5.0 0h12m
2 50.0 25.0 0h30m
3 100.0 100.0 1h 0m
menu
ok
FEATURES AND OPTIONS 79
FEATURES / OPTIONS
The channel must be on hold to view or edit the steps in the
program.
Multi-Step Program (Continued)
Making Changes During Multi-Step Program (Continued)
➤ To View or Edit Multi-Step Program: (Continued)
4.
Press a soft key to select a step for editing.
A
B
OPTIONS
# RATE VTBI TIME A
1 25.0
5.0 0h12m
2 50.0 25.0 0h30m
3 100.0 100.0 1h 0m
• Step setup page will be displayed.
ok
menu
5.
Press a soft key to select value for editing.
6.
Use numeric keypad to enter new value. Press
A
ENTER
B
OPTIONS
STEP 2
Rate= 50.0 ml/hr
VTBI= 25.0 ml
Time= 0 hrs 30 min
.
menu
7.
Press ok when programming is complete, to return to
review page(s).
A
ok
B
OPTIONS
STEP 2
Rate= 25.0 ml/hr
VTBI= 25.0 ml
Time= 1 hrs 00 min
menu
8.
Press ok to approve review page(s) and STEP TOTALS page.
A
A
A
ok
B
OPTIONS
# RATE VTBI TIME A
1 25.0
5.0 0h12m
2 25.0 25.0 1h00m
3 100.0 100.0 1h 0m
ok
menu
9.
Press
RUN
HOLD
or run to resume infusion.
A
B
OPTIONS
Rate= 25.0 ml/hr
VTBI= 4.0 ml
VI=
1.0 ml
STEP 1 of 3
menu
80 FEATURES AND OPTIONS
setup
run
A
Multi-Step Program (Continued)
Resuming an Interrupted Program
The channel will retain its place in the program up to six hours if
the instrument is turned off. The program can be restarted from
STEP 1 or resumed where it left off. After six hours, the channel
will restart in the primary mode.
1.
Press
POWER
.
A
B
A
• Return to Multi-SStep? page will appear.
2.
OPTIONS
Return To
Multi-Step?
Press yes.
yes
no
• Pressing no will return to primary setup page.
NOTE: Verify all settings prior to resuming an infusion.
3.
Press Review/Resume.
A
B
• STEP In Progress page will appear.
Press Continue Program to resume program from point of
interruption.
OR
Press Restart Program to restart program at beginning of
STEP 1.
A
MULTI-STEP MENU
Review/Resume
Enter New Program
Quit Program
A
B
OPTIONS
A
STEP 1 of 3
In Progess
Continue Program
Restart Program
OR
menu
• Review page(s) will appear.
5.
Press ok to approve review page(s) and STEP TOTALS page.
A
B
OPTIONS
# RATE VTBI TIME A
1 25.0
5.0 0h12m
2 25.0 25.0 1h00m
3 100.0 100.0 1h 0m
ok
menu
6.
Press
RUN
HOLD
or run to continue or restart program.
A
B
OPTIONS
Rate= 25.0 ml/hr
VTBI= 4.0 ml
VI=
1.0 ml
A
STEP 1 of 3
menu
setup
run
FEATURES AND OPTIONS 81
FEATURES / OPTIONS
4.
OPTIONS
Multi-Step Program (Continued)
To Quit Multi-Step Program
The channel must be on hold.
1.
Press menu.
A
B
OPTIONS
A
Rate= 25.0 ml/hr
VTBI= 4.0 ml
VI=
1.0 ml
STEP 1 of 3
menu
2.
Press Quit Program to return to primary setup page.
NOTE: Primary setup page parameters may be different from
the MULTI-SSTEP MENU. Verify all parameters prior to resuming
infusion.
Multi-Dose Program
This feature permits the clinician to preprogram 1 to 24
infusions with the same rate and volume, over a period of up to
24 hours.
This feature also offers a delayed start option up to 8 hours and
a Dose Complete Alert Option to alert the clinician of the
completion of each dose delivered.
This program requires another infusing line to keep the vein
open between programmed doses since there is no KVO
infusion between doses or following program completion.
Qualified service personnel can turn the Multi-Dose and Dose
Complete Alert Option features on or off.
82 FEATURES AND OPTIONS
A
B
setup
run
OPTIONS
MULTI-STEP MENU
Review/Resume
Enter New Program
Quit Program
A
Multi-Dose Program (Continued)
To Enter a New Program
Select the desired channel, as necessary. The channel must be
on hold in the primary mode, secondary mode, or a Loading
Dose program.
1.
Press
OPTIONS
.
• Options page will appear.
2.
Press á page or page á , as necessary to view additional
selections.
A
B
Rate=
VTBI=
VI=
A
Resistance Trend
A
Monitoring Options
Dose Rate Calculator
Set Pressure Baseline
A
DOSE MENU page will appear.
• MULTI-D
4.
Press Enter New Program.
OPTIONS
page
B
OPTIONS
A
Multi-Step
Multi-Dose
Loading Dose
Computer Link
page
return
A
B
OPTIONS
A
MULTI-DOSE MENU
Review/Resume
Enter New Program
Quit Program
• Setup page will appear.
• Infusion rate will be highlighted.
A
B
OPTIONS
Rate=----- ml/hr
VTBI/Dose=----- ml
No. Doses= -Frequency= -- hrs
A
menu
FEATURES AND OPTIONS 83
FEATURES / OPTIONS
Dose.
Press Multi-D
A
25.0 ml/hr
4.0 ml
0.0 ml
Primary
B
return
3.
OPTIONS
Multi-Dose Program (Continued)
To Enter a New Program (Continued)
5.
Use numeric keypad to enter infusion rate. Press
ENTER
.
A
B
• VTBI/Dose (volume to be infused per dose) will be
highlighted.
OPTIONS
Rate=250.0 ml/hr
VTBI/Dose=----- ml
No. Doses= -Frequency= -- hrs
A
menu
6.
Use numeric keypad to enter VTBI/Dose. Press
ENTER
.
A
B
OPTIONS
Rate=250.0 ml/hr
VTBI/Dose=100.0 ml
No. Doses= -Frequency= -- hrs
• Number of doses to be given will be highlighted.
A
menu
7.
Use numeric keypad to enter number of doses. Press
ENTER
.
A
B
OPTIONS
Rate=250.0 ml/hr
VTBI/Dose=100.0 ml
No. Doses=
4
Frequency= -- hrs
• Dose frequency will be highlighted.
A
menu
8.
9.
Use numeric keypad to enter dose frequency (time interval
from start of one dose until start of next). Press ENTER .
A
B
OPTIONS
Rate=250.0 ml/hr
VTBI/Dose=100.0 ml
No. Doses=
4
Frequency=
6 hrs
Press ok to approve all information.
menu
• If Dose Complete Alert Option is enabled, DOSE
COMPLETE ALERT OPTION page will appear.
A
ok
10. Use soft keys to select On or Off.
A
B
OPTIONS
A
DOSE COMPLETE
ALERT OPTION
On
Off
menu
11. Press ok to advance to time until first dose page.
NOTE: All doses must be programmed to start within
24 hours.
• To start first dose immediately, proceed to step 12.
• To delay start of first dose, proceed to step 15.
84 FEATURES AND OPTIONS
A
B
ok
OPTIONS
A
DOSE COMPLETE
ALERT OPTION
On
Off
menu
ok
Multi-Dose Program (Continued)
To Enter a New Program (Continued)
➤ To Start First Dose Immediately After Programming:
12. A displayed time of 0 hours, 0 minutes identifies that first
dose will start immediately after programming.
A
B
OPTIONS
13. Press ok to approve and advance to main hold page.
menu
14. Press
RUN
HOLD
or run to start infusion.
A
0 hrs
0 min
Until First Dose
VI= 0.0 ml
A
ok
B
OPTIONS
A
Rate=250.0 ml/hr
VTBI=100.0 ml
VI= 0.0 ml
Dose 1 of 4
menu
run
15. Use numeric keypad to enter number of hours until first
dose. Press ENTER .
A
B
OPTIONS
• Number of minutes will be highlighted.
menu
16. Use numeric keypad to enter number of minutes (0 to 59)
until first dose. Press ENTER .
A
0 hrs
0 min
Until First Dose
VI= 0.0 ml
A
ok
B
OPTIONS
3 hrs
0 min
Until First Dose
VI= 0.0 ml
menu
A
start timer
FEATURES AND OPTIONS 85
FEATURES / OPTIONS
➤ To Delay Start of First Dose:
Multi-Dose Program (Continued)
To Enter a New Program (Continued)
➤ To Delay Start of First Dose: (Continued)
17. Press start timer to advance to timer hold page.
A
B
OPTIONS
3 hrs
12 min
Until First Dose
VI= 0.0 ml
menu
• Hourglass icon will flash to indicate timer is counting
down to start of dose.
A
18. Press
✔
start timer
B
OPTIONS
3 hrs
12 min
Until First Dose
• Dose will automatically start its infusion when timer
reaches 0 hours, 0 minutes.
A
A
start timer
to see Multi-Dose programmed information.
Making Changes During Multi-Dose Program
Select the desired channel, as necessary. The channel does not
need to be on hold to view more information.
➤ To View More Information on Multi-Dose Setup:
Press
✔
.
A
B
OPTIONS
Rate=250.0 ml/hr
VTBI=100.0 ml
VI= 100.0 ml
• Additional Multi-Dose setup information will be displayed for
a short interval.
A
DOSE 2 of 4
10% Resistance
A
B
Rate=250.0 ml/hr
VTBI=100.0 ml
OPTIONS
A
100.0ml @ 250.0ml/hr
0 6h x 4
VI=100.0
86 FEATURES AND OPTIONS
Multi-Dose Program (Continued)
Making Changes During Multi-Dose Program (Continued)
➤ To Change Time Interval Until Next Dose:
1.
Press stop timer.
A
B
OPTIONS
A
3 hrs
12 min
Until Dose 2 of 4
start timer
2.
Press a soft key to select a value for editing.
A
B
OPTIONS
3 hrs
12 min
Until Dose 2 of 4
VI= 100.0 ml
menu
Use numeric keypad to enter new value. Press
4.
Press start timer when editing is complete.
ENTER
.
A
start timer
B
OPTIONS
2 hrs
12 min
Until Dose 2 of 4
VI= 100.0 ml
menu
A
start timer
Resuming an Interrupted Multi-Dose Program
The channel will retain its place in the program up to six hours if
the instrument is turned off and the program can be resumed
where it left off. After six hours, the channel will restart in the
primary mode. Primary mode settings may be different from
those in the previous Multi-Dose program.
1.
Press
POWER
.
A
B
Dose? page will appear.
• Return to Multi-D
2
A
Return To
Multi-Dose?
Press yes.
• Pressing no will return to primary setup page.
OPTIONS
no
yes
NOTE: Verify all settings prior to resuming an infusion.
FEATURES AND OPTIONS 87
FEATURES / OPTIONS
3.
A
Multi-Dose Program (Continued)
Resuming an Interrupted Multi-Dose Program (Continued)
3.
Press Review/Resume to access setup parameters.
A
• If infusion was in progress when interrupted, proceed to
step 4.
B
OPTIONS
MULTI-DOSE MENU
Review/Resume
Enter New Program
Quit Program
• If infusion was not in progress when interrupted,
proceed to step 6.
A
➤ If Infusion was in Progress When Interrupted:
4.
Press ok to approve and advance to main hold page.
A
B
OPTIONS
Rate=250.0 ml/hr
VTBI/Dose=100.0 ml
Frequency= 6 hrs
DOSE 1 INCOMPLETE
menu
5.
Press
RUN
HOLD
or run to resume infusion.
A
A
ok
B
OPTIONS
A
Rate=250.0 ml/hr
VTBI=80.0 ml
VI= 20.0 ml
DOSE 1 of 4
menu
run
➤ If Infusion Was Not in Progress When Interrupted:
6.
Press ok.
A
B
OPTIONS
Rate=250.0 ml/hr
VTBI/Dose=100.0 ml
Frequency= 6 hrs
DOSE 1 COMPLETE
menu
7.
Edit time to delivery of next dose, as necessary.
8.
Press start timer to begin timer’s countdown to delivery of
next dose.
A
B
88 FEATURES AND OPTIONS
ok
OPTIONS
2 hrs
4 min
Until Dose 2 of 4
VI= 100.0 ml
menu
A
A
start timer
Multi-Dose Program (Continued)
To Quit Multi-Dose Program
The channel must be on hold or the last dose complete.
1.
Press menu.
A
B
OPTIONS
A
Rate=250.0 ml/hr
VTBI=100.0 ml
VI= 0.0 ml
DOSE 1 of 4
menu
2.
Press Quit Program to return to primary setup page.
A
run
B
OPTIONS
MULTI-DOSE MENU
Review/Resume
Enter New Program
Quit Program
NOTE: Primary setup page parameters may be different from
those of the Multi-Dose program. Verify all settings prior to
resuming an infusion.
A
This feature allows the clinician to set up an initial infusion rate
for a specific volume, automatically followed by a maintenance
rate (primary settings) from the same container. The primary
VTBI and VI include the Loading Dose volumes. When the
Loading Dose VTBI reaches zero, a transition tone will sound (
if the transition tone feature is enabled), Load Dose Complete
message will be displayed for a few seconds, and the primary
settings will automatically take effect.
Qualified service personnel can turn the Loading Dose feature on
or off.
WARNING
This mode is useful for loading a
medication prior to the start of a
continuous infusion or delivering fluid
challenges. This feature is for delivery
from primary containers only. Using
this feature with two separate
containers may result in unintended
flow rates.
NOTE: Verify the primary mode parameters prior to accessing the
Loading Dose option.
Entering a New Program
Select the desired channel, as necessary. The channel must be
on hold in the primary or secondary mode.
1.
Press
OPTIONS
.
• Options page will appear.
A
B
OPTIONS
Rate= 25.0 ml/hr
VTBI= 4.0 ml
VI=
1.0 ml
A
PRIMARY
20% Resistance
FEATURES AND OPTIONS 89
FEATURES / OPTIONS
Loading-Dose
Loading-Dose (Continued)
Entering a New Program (Continued)
2.
Press á page or page á , as necessary to view additional
selections.
A
B
OPTIONS
Resistance Trend
A
Monitoring Options
Dose Rate Calculator
Set Pressure Baseline
return
3.
Press Loading Dose.
A
• Loading Dose infusion rate will be highlighted.
4.
page
B
OPTIONS
A
Multi-Step
Multi-Dose
Loading Dose
Computer Link
page
return
If current value is appropriate, press ENTER .
OR
Use numeric keypad to enter a new infusion rate and press
ENTER .
A
B
OPTIONS
A
Rate= 200.0 ml/hr
VTBI= 500.0 ml
Primary Settings
LOADING DOSE
• Loading Dose VTBI will be highlighted.
5.
If current value is appropriate, press
OR
ENTER
.
Use numeric keypad to enter a new VTBI and press
A
ENTER
.
NOTE: The Loading Dose VTBI must be less than the primary
VTBI.
6.
Press
RUN
HOLD
to start Loading Dose infusion.
90 FEATURES AND OPTIONS
B
OPTIONS
Rate= 200.0 ml/hr
VTBI= 500.0 ml
Primary Settings
LOADING DOSE
A
Loading-Dose (Continued)
Making Changes During Loading Dose Program
Select the desired channel, as necessary. The channel does not
need to be on hold to change settings for Loading Dose Rate or
VTBI.
1.
Press soft key for value you want to change.
• Current value will be highlighted.
To Change Loading Dose
Infusion Rate
A
B
OPTIONS
Rate= 200.0 ml/hr
VTBI= 500.0 ml
Primary Settings
A
LOADING DOSE
To Change Loading Dose
Volume To Be Infused
A
B
OPTIONS
A
FEATURES / OPTIONS
Rate= 200.0 ml/hr
VTBI= 500.0 ml
Primary Settings
LOADING DOSE
2.
Use numeric keypad to enter new value.
3.
Press
ENTER
to accept new value(s).
To View or Change Primary Settings During Loading Dose
Infusion
➤ Select desired channel, as necessary.
1.
Press Primary Settings.
• Primary rate ( Pri Rate), primary volume to be infused ( Pri
VTBI) and total volume infused ( Total VI) will be
displayed.
A
B
Rate= 200.0 ml/hr
VTBI= 500.0 ml
Primary Settings
A
LOADING DOSE
• Display will return to normal Loading Dose page after six
seconds.
FEATURES AND OPTIONS 91
Loading-Dose (Continued)
To View or Change Primary Settings During Loading Dose
Infusion (Continued)
➤ Select desired channel, as necessary. (Continued)
2.
Press Pri Rate, Pri VTBI or Total VI to:
• “freeze” display
• highlight value
To Change Primary Rate During
Loading Dose Infusion
A
B
OPTIONS
Rate= 200.0 ml/hr A
Pri Rate=125.0 ml/hr
Pri VTBI=1000.0 ml
Total VI= 0.0 ml
NOTE: If the flow sensor option is being used, VTBI can be turned
off by selecting VTBI, pressing CLEAR and then ENTER .
OR
To Change Primary VTBI During
Loading Dose Infusion
A
Primary VTBI can be deleted from the primary mode setup page
(Programmable Features).
3.
B
OPTIONS
Rate= 200.0 ml/hr A
Pri Rate=125.0 ml/hr
Pri VTBI=1000.0 ml
Total VI= 0.0 ml
Use numeric keypad to enter a new value.
➤ To Clear Total Volume Infused During Loading Dose
Infusion:
4.
Press Total VI to highlight value.
A
B
OPTIONS
Rate= 200.0 ml/hr
A
Pri Rate= 125.0 ml/hr
Pri VTBI= 900.0 ml
Total VI= 100.0 ml
5.
Press CLEAR or 0 (zero key) to reset volume infused
to 0.0 ml.
6.
Press
ENTER
to accept new value(s).
• Display will return to normal LOADING DOSE page after
six seconds.
92 FEATURES AND OPTIONS
Loading-Dose (Continued)
Resuming an Interrupted Loading Dose Program
The channel will retain its place in the program up to six hours if
the instrument is turned off. After six hours, the channel will
restart in the primary mode. Primary mode parameters may be
different from those in the Loading Dose program.
1.
Press
POWER
.
A
B
• Return to Loading Dose? page will appear.
2.
OPTIONS
A
Return To
Loading Dose?
Press yes.
yes
no
• Pressing no will return to primary set up page.
NOTE: Verify all parameters prior to resuming an infusion.
3.
4.
Verify primary settings prior to resuming Loading Dose
program.
Press
RUN
HOLD
A
B
OPTIONS
Rate= 200.0 ml/hr
VTBI= 500.0 ml
Primary Settings
to resume infusion.
A
LOADING DOSE
The optional Computer Link feature allows a hospital computer
to interact with the instrument. The computer cannot start or
stop the instrument, set the rate, or make any change in status.
If the feature is off, the computer cannot communicate with the
instrument. Available Computer Link options are:
• Monitor mode, which allows the computer to only receive
information from the instrument.
WARNING
Use of accessories or cables other
than those specified may result in
degraded electromagnetic
compatibility performance of this
device.
• Control mode, which allows the computer to send
information to the instrument’s display. This information (for
example, drug being infused) will be displayed every five
seconds.
NOTE: To assure continued electromagnetic compatibility
performance, the communications cable attached to the
instrument should be no longer than one meter, have fully
shielded connector housings, and have a 100% coverage
braid/foil shield attached to the connector housings around
the signal conductors with the cable jacket.
Qualified service personnel can turn the Computer Link feature
on or off.
FEATURES AND OPTIONS 93
FEATURES / OPTIONS
RS-232 Computer Link (Models 7100, 7200, 7130 and 7230)
RS-232 Computer Link (Continued)
To Connect to a Computer
1.
Press
OPTIONS
.
A
• Options page will appear.
Press á page or page á , as necessary to view additional
selections.
2.
Press Computer Link.
B
OPTIONS
Resistance Trend
A
Monitoring Options
Dose Rate Calculator
Set Pressure Baseline
page
return
A
B
OPTIONS
page
return
3.
Press Monitor or Control.
4.
Press ok.
A
Multi-Step
Multi-Dose
Loading Dose
Computer Link
• Computer Link page will appear.
A
B
OPTIONS
A
Computer Link
Off
Monitor
Control
ok
5.
Connect an RS-232 cable from hospital computer to
on instrument’s back panel.
RS 232
• While instrument is waiting for a connection:
Control mode - CTRL flashes
Monitor mode - MNTR appears at connection
CTRL
MNTR
• If communication is interrupted
Control mode - CTRL flashes until alarm is answered
Monitor mode - MNTR flashes for 60 seconds
NOTE: MNTR or CTRL will remain in the lower display once
the mode is selected and communication with the computer
has been established.
94 FEATURES AND OPTIONS
1
2
3
4
hrs
RS-232 Computer Link (Continued)
To Disconnect from a Computer
1.
Press
OPTIONS
.
A
3.
Press á page or page á , as necessary to view additional
selections.
Press Computer Link.
page
return
A
• Computer Link page will appear.
OPTIONS
Resistance Trend
A
Monitoring Options
Dose Rate Calculator
Set Pressure Baseline
• Options page will appear.
2.
B
B
OPTIONS
page
return
Press Off.
5.
Press ok.
A
B
OPTIONS
A
Computer Link
Off
Monitor
Control
ok
IEEE 1073 (MIB) RS-232 Computer Link (Models 7132 and 7232 only)
The IEEE 1073 (Medical Information Bus or MIB) computer link
feature allows a hospital computer to interact with the
instrument. The computer cannot start or stop the instrument,
set the rate, or make any change in status.
This link allows the computer to receive information from the
instrument and to send information to the instrument’s display.
This information (such as, drug being infused) will be displayed
every five seconds.
MIB Connector
MEDICAL
!
SYSTEMS
There are no configurable options.
Operation
The communications cable may be connected or disconnected at
any time without affecting instrument operation.
CTRL
MNTR
MNTR will remain in the lower display while the communication
link is active.
1
2
3
4
hrs
FEATURES AND OPTIONS 95
FEATURES / OPTIONS
4.
A
Multi-Step
Multi-Dose
Loading Dose
Computer Link
T H I S PA G E
I N T E N T I O N A L LY
LEFT BLANK
96 FEATURES AND OPTIONS
MAINTENANCE
Specifications
Administration Sets:
Use only ALARIS®/IVAC® 72 Series administration sets.
Alarms:
Accumulated Air In Line
Air In Line
Battery Depleted
Channel Malfunction
Computer Link Failure
Flow Sensor Unplugged
Hold Time Exceeded
Instrument Malfunction
Battery:
Rechargeable nickel cadmium. A single channel instrument will operate for 4 hours
nominal and a dual channel instrument will operate for 3 hours nominal, under the
following conditions:
•
•
•
•
Key Stuck
Latch Open
No Upstream Flow Detected
Occlusion Downstream
Occlusion Upstream
Primary Flow Detected During Secondary
Set Out
Set Up Time Exceeded
new, fully charged battery
ambient room temperature, 74±3°F (23±2°C)
resistance monitoring modes
rate, 100 ml/hr (sum of channels) or at the Intermediate rate of 25 ml/hr (each
channel)
Battery run time is affected by operating mode, rate, monitoring options and back
pressure. (See Battery Management System section of this document.)
Case:
Impact and flame resistant plastic
Critical Volume:
Maximum incremental volume in case of single point failure will not exceed 1.0 ml
at 999.9 ml/hr.
Dimensions: (Nominal)
72XX
5.0 in/12.7 cm
8.6 in/21.8 cm
10 ft/3 m
6.6 lb/3.0 kg
7.6 in/19.3 cm
5.0 in/12.7 cm
8.6 in/21.8 cm
10 ft/3 m
8.4 lb/3.8 kg
10.7 in/26.7 cm
* Without pole clamp.
MAINTENANCE
Depth*
Height
Power Cord
Weight**
Width
71XX
** Without power cord.
MAINTENANCE 97
Specifications (Continued)
Downstream Occlusion:
Time to Alarm
Monitoring Options
Time to Detect
Downstream Occlusion
(minutes)
Threshold Settings
1 ml/hr
25 ml/hr
Maximum
Typical
Maximum
Typical
Pressure
Resistance and
High Resistance
25
mmHg
600
mmHg
100%
25 mmHg
100%
600 mmHg
1.2
0.6
0.3
0.1
75
30
25
1
1.2
0.6
0.3
0.1
7
4
3
1
When the occlusion alarm pressure limit is set to the maximum threshold setting,
the maximum infusion pressure generated into a hard occlusion at 25 ml/hr is
11.6±3.9 psi.
Bolus Volume
Monitoring Options
Bolus Volume Released
Upon Correcting
Downstream Occlusion
(ml)
Threshold Settings
1 ml/hr
25 ml/hr
Maximum
Typical
Maximum
Typical
Pressure
25
mmHg
Resistance and
High Resistance
600
mmHg
0.5
<0.1
0.5
<0.1
100%
25 mmHg
0.5
0.3
0.5
0.3
0.5
<0.1
0.5
<0.1
100%
600 mmHg
0.5
<0.1
0.5
0.3
Testing performed using IV set model 72003, at 68±8°F (20±4°C).
Environmental Conditions:
Operating
Storage
Atmospheric Pressure
700 to 1060 hPa
500 to 1060 hPa
Relative Humidity
20 to 90%
Noncondensing
5 to 95%
Noncondensing
50 to 104°F
(10 to 40°C)
-40 to 140°F
(-40 to 60°C)
Temperature Range
Flow Rate Range:
0.1 to 270.0 ml/hr in 0.1 ml/hr increments (secondary mode)
0.1 to 999.9 ml/hr in 0.1 ml/hr increments (all other modes)
Ground Current Leakage:
Tested to UL 544 and CSA C22.2 No. 125 for medical and dental equipment.
KVO Flow Range:
0.1 to 20.0 ml/hr in 0.1 ml/hr increments
Mode of Operation:
Continuous
Power Requirements:
100-240 V~, 50/60 HZ (40 watts), 3-wire grounded system
Class 1 with Internal Power Source
98 MAINTENANCE
Specifications (Continued)
Rate Accuracy:
For rates greater than 1 ml/hr, up to 999.9 ml/hr: ±5%, 95% of the time with 95%
confidence, under the conditions listed below.
For rates equal to or less than 1 ml/hr: ±6.5%, 95% of the time with 95%
confidence, under the conditions listed below.
Rate Accuracy Test Conditions:
Infusion rate range: 0.1 to 999.9 ml/hr
Head height: 24 inches
Test solution: distilled water
Environment temperature: 68±8°F (20±4°C)
Back pressure: 0 psi
Needle: 18 gauge
Set Model: 72003
Minimum collection volume: 6 ml
CAUTION
Variations of head height, back pressure, time, monitoring mode option, pump tilt
or any combination of these may affect rate accuracy. Factors that can influence
head height and back pressure are: IV set configuration, IV solution viscosity and IV
solution temperature. Back pressure may also be affected by catheter type. Refer
to Appendix - Trumpet and Start-up Curves for data on how certain factors
influence rate accuracy.
Volume Infused Range:
0.0 to 9999.9 ml in 0.1 ml increments
Volume To Be Infused Range:
0.1 to 9999.9 ml in 0.1 ml increments (primary and dose rate modes)
0.1 to 999.9 ml in 0.1 ml increments (all other modes)
MAINTENANCE
MAINTENANCE 99
Programmable Features
The following features can be customized by qualified service personnel.
Feature
Options
Default
On/Off
50, 100, 200, or 500 mcL
On/Off
On
100 mcL
Off
Air in Line:
Air-in-Line Accumulator
Air-in Line Alarm Threshold
Air-in-Line Reset Feature
Audio:
Transition Tone
Volumes
On/Off
Low/Med/Hi
Med/Hi
Hi
On
Low/Med/Hi
Computer Link (RS-232 Configuration Only):
Baud Rate
Mode
Parity
300/600/1200/1800/2400/4800/9600
Control/Monitor/Off, Monitor/Off, Off
Even/Odd/ None
9600
Off
None
NOTE: Models 7132/7232 have only 9600 (Baud Rate), Monitor (mode), and None (Parity) as options and defaults.
Dynamic Monitoring:
AutoRestartPlus
Manual Pressure Baseline
Monitoring Options
Pressure Alarm
Pressure Display
Pressure Limit, Initial
0 (Off) /1 to 9
On/Off
Resistance/High Resistance/Pressure
Adjustable/Fixed
On/Off
25-600 mmHg
3
On
Pressure
Adjustable
On
600 mmHg
Resistance Alert
Resistance Alert Level
Resistance Display
Resistance Pressure Setting
Trends
On/Off
0-100%
On/Off
1-600 mmHg
On/Off
On
100%
On
600 mmHg
On
Instrument ID
9 digits
000000000
Instrument Label
4 alpha-numeric
IVAC
KVO Rate
0.1 - 20.0 ml/hr
5.0 ml/hr
Languages
English/Canadian French
English
1-52 wks
On/Off
52 wks
On
On/Off
On/Off
On/Off
On/Off
On/Off
On
On
Off
Off
Off
On/Off
On
1-52 wks
12 weeks
Rate, Maximum
0.1 - 999.9 ml/hr
999.9 ml/hr
VTBI
On/Off (Flow Sensor use)
On
(Configuration Mode: Def Alarm)
Maintenance:
Maintenance Interval
Maintenance Reminder
Optional Modes:
Dose Rate Calculator
Loading Dose
Multi-Dose
Multi Dose Alert
Multi-Step
Panel Lock
Pressure Sensor
Self Check Interval
100 MAINTENANCE
Unpacking
1.
Remove instrument from its carton.
2.
Plug instrument into an AC outlet a minimum of 24 hours
prior to use.
• Maximum battery capacity, as well as gauge accuracy, is
reached after several charge/discharge/recharge cycles.
For best results, fully charge, discharge and recharge
battery two or three times before putting instrument
into service.
3.
AC
Perform Periodic Inspections as indicated in Inspection
Requirements section of this document.
See the Programmable Features section of this document for a
list of the configurable features. Complete programming
instructions are in the Technical Service Manual.
Storage
Plug the instrument into an AC outlet during storage to ensure a
fully charged battery when needed.
•
(AC indicator light) will be green whenever instrument is
plugged in.
Close the latch(es) whenever the instrument is not in use.
1
2
3
4 hrs
MAINTENANCE
MAINTENANCE 101
Cleaning
1.
Unplug power cord from AC outlet before cleaning.
2.
Verify RS-232 connector is covered. Do not spray fluid
directly into any connector.
3.
Use a soft cloth dampened with warm water and a mild,
nonabrasive cleaning solution.
CAUTION
DO NOT SPRAY onto or immerse the
instrument in fluids. Cleaning
solutions should be applied to the
instrument with a soft cloth.
• A soft-bristled brush may be used to clean narrow areas.
• Use light pressure when cleaning pressure transducer
and air-in-line detector areas of pumping channels.
• Acceptable cleaning solutions (use per manufacturers’
instructions):
Warm water
Vesphene®
Manu-Klenz® (cleaning only)
10% Bleach Solution (1part bleach to 9 parts water)
4.
Flow sensor should be routinely cleaned by running warm
water over it while actuating slider, and then thoroughly
dried.
DO NOT
use solutions containing aromatic solvents (naphtha,
paint thinner, etc.), chlorinated solvents*
(Trichloroethane, MEK, Toluene, etc.), alcohol, or
phosphoric acid.
DO NOT
use hard or pointed objects or pressurized sprays to
clean any part of instrument.
DO NOT
steam autoclave, EtO sterilize, or immerse
instrument.
DO NOT
use pressurized sprays on instrument.
* Excluding 10% bleach solution in water.
102 MAINTENANCE
CAUTION
Do not use solvents or cleaning
agents. Damage to plastic parts of
the flow sensor could occur.
Inspection Requirements
To ensure the instrument remains in good operating condition,
both regular and periodic inspections are required.
WARNING
Failure to perform these inspections
may result in improper instrument
operation. Instruments are tested
and calibrated before they are
packaged for shipment. To ensure
proper operation after shipment, it is
recommended that an incoming
inspection be performed by your
facility before putting the instrument
into use.
Regular inspections consist of a visual inspection for damage
and cleanliness, and performing the procedure described in the
Start-Up Sequence section of this document before each usage
of the instrument. Regular inspections are not covered under
any contract or agreement offered by ALARIS Medical Systems
and must be performed by the user.
Regular Inspections
Preventive maintenance inspections are recommended at the
indicated intervals.
PROCEDURE
FREQUENCY
Cleaning
As required
Inspect for Damage:
Case
Communication Cable
Power Cord
Each usage
Each usage
Each usage
Start-Up Sequence
Each usage
Preventive Maintenance Inspections
PROCEDURE
FREQUENCY
The preventive maintenance inspections listed are recommended
in accordance with ALARIS Medical Systems® requirements and
guidelines. Customers within the United States and Canada
should note that these inspections are also intended to
complement the intent of the Joint Commission on the
Accreditation of Healthcare Organizations’ requirements.
Battery Refresh Cycle
Ground Resistance Test
12 months
For detailed instructions on performing preventive maintenance
inspections and maintenance, refer to the Technical Service
Manual and supplemental service bulletins. A service agreement
may be obtained from ALARIS Medical Systems for the
performance of all required periodic inspections.
Pressure Calibration
12 months
12 months
Flow Stop Test
12 months
Functional Test
12 months
Ground Current
Leakage Test
12 months
12 months
Regular Inspection
12 months
Reset Time
12 months
For more information, see the Service Information section of this
document or contact ALARIS Medical Systems® Customer
Service at (800) 482–4822.
MAINTENANCE 103
MAINTENANCE
Rate Accuracy Calibration
Service Information
NOTE: If the instrument shows evidence of damage in transit,
notify the carrier’s agent immediately. Do not return damaged
equipment to the factory before the carrier’s agent has authorized
repairs.
If the instrument fails to respond as described in this document
and the cause cannot be determined, do not use the instrument.
Contact qualified service personnel.
Within the United States, application and service information
may be obtained by writing to ALARIS Medical Systems at:
ALARIS Medical Systems, Inc
9190 Activity Road
San Diego, California 92126
ATTN: Instrument Service
Within the United States and Canada, information or assistance
may be obtained by calling one of the following toll–free
numbers:
In United States:
In Canada: Eastern
Western
(800) 482-4822
(800) 908-9918
(800) 908-9919
Outside the United States and Canada, service information,
applications, and manuals may be obtained by contacting your
local ALARIS Medical Systems® Service Department or
distribution center.
When submitting any request for service, include:
•
•
•
•
•
a description of difficulty experienced
instrument settings
administration set/lot number
solution(s) used
message displayed at time of difficulty
If it is necessary to return the instrument for service, obtain a
return authorization number prior to shipment. Carefully
package the instrument (preferably in the original packaging),
reference the return authorization information, and return it to
the appropriate service or distribution center. ALARIS Medical
Systems does not assume any responsibility for loss of, or
damage to, returned instruments while in transit.
Dispose of instruments as appropriate per national and local
environmental regulations or contact ALARIS Medical Systems.
104 MAINTENANCE
WARRANTY
ALARIS Medical Systems, Inc., (hereinafter referred to as “ALARIS Medical Systems”) warrants that:
A. Each new ALARIS Medical Systems Signature Edition® instrument, excluding the battery, is free
from defects in material and workmanship under normal use and service for a period of two (2)
years from the date of delivery by ALARIS Medical Systems to the original purchaser.
B. The battery and each new accessory are free from defects in material and workmanship under
normal use and service for a period of ninety (90) days from the date of delivery by ALARIS
Medical Systems to the original purchaser.
If any product requires service during the applicable warranty period, the purchaser should
communicate directly with ALARIS Medical Systems headquarters (San Diego, CA) to determine the
appropriate repair facility. Except as provided otherwise in this warranty, repair or replacement will be
carried out at ALARIS Medical Systems expense. The product requiring service should be returned
promptly, properly packaged and postage prepaid by purchaser. Loss or damage in return shipment
to the repair facility shall be at purchaser’s risk.
In no event shall ALARIS Medical Systems be liable for any incidental, indirect or consequential
damages in connection with the purchase or use of any ALARIS Medical Systems product. This
warranty shall apply solely to the original purchaser. This warranty shall not apply to any subsequent
owner or holder of the product. Furthermore, this warranty shall not apply to, and ALARIS Medical
Systems shall not be responsible for, any loss or damage arising in connection with the purchase or
use of any ALARIS Medical Systems product which has been:
(a) repaired by anyone other than an authorized ALARIS Medical Systems service representative;
(b) altered in any way so as to affect, in ALARIS Medical Systems’ judgment, the product’s stability or
reliability;
(c) subjected to misuse or negligence or accident, or which has had the product’s serial or lot number
altered, effaced or removed;
or
This warranty is in lieu of all other warranties, express or implied, and of all other obligations or
liabilities of ALARIS Medical Systems, and ALARIS Medical Systems does not give or grant, directly or
indirectly, the authority to any representative or other person to assume on behalf of ALARIS Medical
Systems any other liability in connection with the sale or use of ALARIS Medical Systems products.
ALARIS MEDICAL SYSTEMS DISCLAIMS ALL OTHER WARRANTIES, EXPRESS OR IMPLIED, INCLUDING ANY
WARRANTY OF MERCHANTABILITY OR OF FITNESS FOR A PARTICULAR PURPOSE OR APPLICATION.
See packing inserts for international warranty, if applicable.
MAINTENANCE 105
MAINTENANCE
(d) improperly maintained or used in any manner other than in accordance with the written
instructions furnished by ALARIS Medical Systems.
T H I S PA G E
I N T E N T I O N A L LY
LEFT BLANK
106 MAINTENANCE
APPENDIX
Trumpet and Start-Up Curves
DESCRIPTION AND EXPLANATION OF TRUMPET AND
START-UP CURVES
FLOW CHARACTERISTICS UNDER VARYING
DELIVERY CONDITIONS
In this instrument, as with all infusion systems, the
action of the pumping mechanism and variations in
individual administration sets cause short-term
fluctuations in rate accuracy. The following graphs
show typical performance of the system for both
Pressure and Resistance Modes in two ways:
Effects of Pressure Variations
1.
the accuracy during various time periods over
which fluid delivery is measured (trumpet
curves), and
2.
the delay in onset of fluid flow when infusion
commences (start-up curves).
Product operation is not affected by the selection of
Resistance or High Resistance at 0.1, 1.0 and
25 ml/hr; therefore, High Resistance graphs are not
included.
Trumpet curves are named for their characteristic
shape. They display discrete accuracy data
averaged over particular time periods or
“observation windows”, not continuous data versus
operating time. Over long observation windows,
short-term fluctuations have little effect on
accuracy, as represented by the flat part of the
curve. As the observation window is reduced,
short-term fluctuations have greater effect, as
represented by the “mouth” of the trumpet.
Knowledge of system accuracy over various
observation windows may be of interest when
certain drugs are being administered. Because the
clinical impact of short-term fluctuations on rate
accuracy depends on the half-life of the drug being
infused and on the degree of intravascular
integration, the clinical effect cannot be determined
from the trumpet curves alone. Knowledge of the
start-up characteristics should also be considered.
Under conditions of +300 mmHg pressure, the
Signature Edition® Infusion System typically exhibits
a long-term accuracy offset of approximately -1.5%
from mean values.
Under conditions of -100 mmHg pressure, the
Signature Edition® Infusion System typically exhibits
a long-term accuracy offset of approximately -0.8%
from mean values.
Resulting trumpet observation points typically track
those of accuracy; therefore, no significant change
in short–term variations result under these pressure
conditions.
Effects of Negative Solution Container Heights
With a negative head height of -0.5 meters, the
Signature Edition® Infusion System typically exhibits
a long–term accuracy offset of approximately -5.8%
from mean values.
Resulting trumpet observation points typically track
those of accuracy; therefore, no significant change
in short–term variations result under negative head
height conditions.
Effects of Rate
For applications where flow uniformity is a concern,
use of the Pressure Mode at rates of 1.0 ml/hr or
above is recommended.
NOTE: Tests conducted in accordance with
IEC 60601–2–24, “Particular requirements for
safety of infusion pumps and controllers” and
AAMI ID26–1998 “Medical electrical equipment Part 2: Particular requirements for the safety of
infusion pumps and controllers”, using AccuSlide®
Model 72003 Administration Sets.
APPENDIX 107
APPENDIX
The start-up curves represent continuous flow rate
versus operating time for two hours from the start
of the infusion. They exhibit the delay in onset of
delivery due to mechanical compliance and provide
a visual representation of uniformity. Trumpet
curves are derived from the second hour of this
data.
Under conditions of +100 mmHg pressure, the
Signature Edition® Infusion System typically exhibits
a long-term accuracy offset of approximately -1.4%
from mean values.
Trumpet and Start-Up Curves (Continued)
Pressure Mode
Pressure Mode Start-Up at 0.1 ml/hr (initial)
0.18
1.8
0.16
1.6
0.14
1.4
0.12
1.2
0.10
0.08
1.0
0.8
0.06
0.6
0.04
0.4
0.02
0.2
0.00
0.0
-0.02
-0.2
0
20
40
60
80
Pressure Mode Start-Up at 1 ml/hr (initial)
2.0
(ml/hr)
(ml/hr)
0.20
100
120
0
20
40
Pressure Mode Trumpet Curve at 0.1 ml/hr (initial)
100
106.1
61.2
15.5
7.6
-11.7
-6.6
1.4
0
-20
-22.0
-40
-60
5
-100
3.2
10
15
20
25
30
0
51.0
40
12.3
6.0
-11.9
-7.5
0.0
0
-20
-21.8
-40
-60
-42.9
-80
5
20.3
5
10
15
20
25
30
10.7
4.4
3.9
3.0
0.1
0.2
1.1
2.1
0
-5
-10
-13.9
-124.5
-100
2.0
10
23.8
20
1.1
Pressure Mode Trumpet Curve at 1 ml/hr (48 hr)
Flow Rate Error (%)
Flow Rate Error (%)
98.0
0.8
Observation Interval (min)
15
60
3.9
-6.2
Pressure Mode Trumpet Curve at 0.1 ml/hr (48 hr)
80
4.9
-12.1
Observation Interval (min)
100
4.9
-5
-15
5
120
12.2
0
-117.6
0
21.2
-10
-42.5
-80
Flow Rate Error (%)
Flow Rate Error (%)
31.5
20
100
10
60
40
80
Pressure Mode Trumpet Curve at 1 ml/hr (initial)
15
80
60
Time (min)
e
-6.2
-15
0
5
10
15
20
Observation Interval (min)
25
30
0
5
10
15
20
25
30
Observation Interval (min)
Legend:
108 APPENDIX
n Maximum rate error
Overall rate error
◆ Minimum rate error
y
NOTE: The plot range has been
increased to ±100%, to allow
visualization of the graph.
Trumpet and Start-Up Curves (Continued)
Pressure Mode (Continued)
Pressure Mode Start-Up at 25 ml/hr (initial)
Pressure Mode Start-Up at 999.9 ml/hr (initial)
50
2000
45
1800
40
1600
35
1400
(ml/hr)
(ml/hr)
30
25
20
1200
1000
800
15
600
10
400
5
200
0
0
-5
0
20
40
60
80
100
-200
120
0
Time (min)
20
15
10
10
5
2.9
2.2
0
1.3
2.5
1.8
2.3
2.2
2.0
2.1
2.2
2.1
-5
100
120
5
0
-0.9
-1.2
-1.8
-5
-1.0
-1.5
-1.1
-1.1
-1.4
-1.3
-1.2
-1.3
-15
-15
0
5
10
15
20
25
0
30
5
10
10
5
-0.2
-1.1
-5
-0.7
0.0
-0.1
-0.5
-0.3
-0.1
-0.3
Flow Rate Error (%)
15
0.1
15
20
25
30
Pressure Mode Trumpet Curve at 999.9 ml/hr (24 hr)
Pressure Mode Trumpet Curve at 25 ml/hr (48 hr)
15
0.5
10
Observation Interval (min)
Observation Interval (min)
Flow Rate Error (%)
80
-10
-10
0
60
Time (min)
Pressure Mode Trumpet Curve at 999.9 ml/hr (initial)
15
Flow Rate Error (%)
Flow Rate Error (%)
Pressure Mode Trumpet Curve at 25 ml/hr (initial)
40
5
0
-5
-3.3
-3.7
-4.0
-3.4
-3.8
-3.5
-3.5
-3.6
-3.7
-3.6
-3.6
-10
-10
-15
-15
0
5
10
15
20
Observation Interval (min)
25
30
0
5
10
15
20
25
30
Observation Interval (min)
y
n Maximum rate error
Overall rate error
◆ Minimum rate error
APPENDIX 109
APPENDIX
Legend:
Trumpet and Start-Up Curves (Continued)
Resistance Mode
Resistance Mode Start-Up at 1 ml/hr (initial)
2.0
0.18
1.8
0.16
1.6
0.14
1.4
0.12
1.2
(ml/hr)
(ml/hr)
Resistance Mode Start-Up at 0.1 ml/hr (initial)
0.20
0.10
0.08
1.0
0.8
0.06
0.6
0.04
0.4
0.02
0.2
0.00
0.0
-0.02
-0.2
0
20
40
60
80
100
0
120
20
40
Resistance Mode Trumpet Curve at 0.1 ml/hr (initial)
153.4
Flow Rate Error (%)
80
60
43.0
14.6
18.8
1.8
0
-20
-6.3
-19.0
-22.7
-40
-60
-80
-104.7
-100
4.8
5
-1.4
-5
-23.4
10
15
20
25
30
0
10
46.4
13.3
17.2
-1.5
0
-20
-6.7
-22.0
-22.9
-40
-60
-109.5
-100
0
33.1
30
14.2
5.9
5
4.2
3.2
-1.0
0.1
1.7
0
-0.6
-5
-23.5
-15
5
25
-10
-48.9
-80
20
10
40
20
15
Resistance Mode Trumpet Curve at 1 ml/hr (48 hr)
15
74.6
60
-0.6
Observation Interval (min)
Flow Rate Error (%)
Flow Rate Error (%)
80
-1.6
-11.5
5
Resistance Mode Trumpet Curve at 0.1 ml/hr (48 hr)
173.6
2.6
0
Observation Interval (min)
100
3.7
1.2
-10
-49.2
5
120
13.3
32.6
-15
0
100
10
40
20
80
Resistance Mode Trumpet Curve at 1 ml/hr (initial)
15
73.0
Flow Rate Error (%)
100
60
Time (min)
Time (min)
10
15
20
Observation Interval (min)
25
30
0
-11.7
5
10
15
20
25
30
Observation Interval (min)
Legend:
110 APPENDIX
n Maximum rate error
Overall rate error
◆ Minimum rate error
y
NOTE: The plot range has been
increased to ±100%, to allow
visualization of the graph.
Trumpet and Start-Up Curves (Continued)
Resistance Mode (Continued)
Resistance Mode Start-Up at 25 ml/hr (initial)
1800
45
1600
40
1400
35
(ml/hr)
30
(ml/hr)
Resistance Mode Start-Up at 999.9 ml/hr (initial)
2000
50
25
20
1200
1000
800
600
15
400
10
200
5
0
0
-200
-5
0
20
40
60
80
100
0
120
20
40
60
80
100
120
Time (min)
Time (min)
Resistance Mode Trumpet Curve at 25 ml/hr (initial)
Resistance Mode Trumpet Curve at 999.9 ml/hr (initial)
15
15
15.6
10
5
0
10
5.0
3.0
3.2
2.3
-2.0
1.5
1.3
-0.2
-5
-10
Flow Rate Error (%)
Flow Rate Error (%)
6.1
5
0
0.1
-0.9
-1.9
-5
-1.5
-0.6
-0.7
-1.2
-1.1
-0.7
-1.0
-10
-8.4
-15
-15
0
5
10
15
20
Observation Interval (min)
25
30
0
5
Resistance Mode Trumpet Curve at 25 ml/hr (48 hr)
10
15
20
Observation Interval (min)
25
30
Resistance Mode Trumpet Curve at 999.9 ml/hr (24 hr)
15
15
13.4
10
4.1
5
3.1
0
-3.6
-5
1.2
1.4
0.5
-0.2
-0.5
-2.0
-9.9
-10
Flow Rate Error (%)
10
Flow Rate Error (%)
-0.3
5
0
-5
-2.7
-3.3
-3.9
-2.9
-3.7
-3.1
-3.1
-3.2
-3.5
-3.4
-3.3
-10
-15
-15
0
5
10
15
20
Observation Interval (min)
25
30
0
5
10
15
20
Observation Interval (min)
25
30
y
n Maximum rate error
Overall rate error
◆ Minimum rate error
APPENDIX 111
APPENDIX
Legend:
Trumpet and Start-Up Curves (Continued)
High Resistance Mode
High Resistance Mode Start-Up at 999.9 ml/hr (initial)
2000
1800
1600
(ml/hr)
1400
1200
000
800
600
400
200
0
-200
0
20
40
60
80
100
120
Time (min)
High Resistance Mode Trumpet Curve at 999.9 ml/hr (initial)
15
Flow Rate Error (%)
10
5
0
-0.1
0.8
0.0
-0.3
-0.5
-1.4
-1.1
-0.9
-0.7
-1.3
-5
-2.3
-10
-15
0
5
10
15
20
25
30
Observation Interval (min)
High Resistance Mode Trumpet Curve at 999.9 ml/hr (24 hr)
15
Flow Rate Error (%)
10
5
-1.7
0
-5
-2.7
-2.5
-2.8
-3.0
-3.9
-3.5
-3.3
-3.1
-3.7
-4.7
-10
-15
0
5
10
15
20
Observation Interval (min)
25
30
Legend:
y
n Maximum rate error
Overall rate error
◆ Minimum rate error
112 APPENDIX
®
ALARIS Medical Systems, Inc.
10221 Wateridge Circle
San Diego, California 92121 U.S.A.
(800) 854-7128
Mail:
P.O. Box 85335
San Diego, California 92186-5335 U.S.A.
ALARIS®, ALARIS Medical Systems®, AccuSlide®, Dynamic Monitoring®, IVAC® and Signature Edition® are trademarks and registered trademarks of
ALARIS Medical Systems, Inc.
Vesphene® and Manu-Klenz® are registered trademarks of Calgon Vestal Laboratories, Division of Calgon Corporation, Subsidiary of Merk & Co.,
Inc.
U.S. Patent Nos.: 4,534,756; 4,898,576; 5,087,245; 5,096,385; 5,534,691; 5,537,853; 5,542,826; 5,563,347; 5,568,912; 5,575,632; 5,601,420;
5,603,613; 5,609,576; 5,712,795; 5,716,194; 5,719,761; 5,827,223; D367,527; D367,528; D371,194; Canada Patented/Breveté: 78,376; 78,377;
78,378; 1,219,497; 1,279,800; 2,199,156; 2,199,631; France Brevet Nos.: 121,931; 248,632; 387,724; 431,310; 612,004; 951,426; 951,427; 951,428;
Germany D.B.P. Nos.: 612,004; M9,501,995.2; M9,501,996.0; M9,501,997.9; P3,482,620.3; P3,778,211.8-08; P69,004,833.5-08; P690,244,923; Great
Britain Patent Nos.: 121,931; 248,632; 387,724; 431,310; 612,004; 2,045,812; 2,045,813; 2,045,814; Hong Kong Nos.: HK1,006,005; HK1,006,006;
HK1,006,041; Japan Patent No.:
;
1,003,444 ;
1,003,445 ;
1,006,528 ; 1,743,342; 1,924,062;
2,553,557 ;
2,802,171
;
3,025,018
;
3,025,019
; Switzerland: 122,210; 122,211; 122,212; 248,632; 328,162; 328,163; 387,724; +EP0,121,931.
Other U.S. and Foreign Patents Issued and Pending.
145828-100
Copyright© 2002 ALARIS Medical Systems, Inc.
All rights reserved.