1
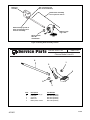
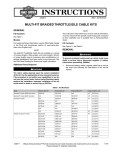
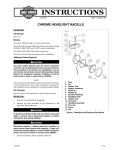
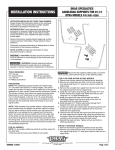
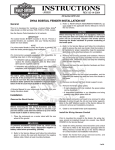
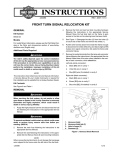
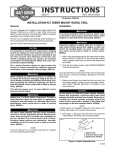
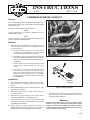
INSTRUCTIONS
®
REV. 1-31-99
-J01461
Kit Number 42617-99
CHROME REAR BRAKE LEVER KIT
General
This chrome brake pedal is designed for installation on all
1990 and later FXD, FXDL, FXDS-CONV, FXDX and FXDB
model motorcycles.
See Service Parts Illustration for kit contents.
NOTE
A Service Manual for your vehicle is available from your
Harley-Davidson Dealer.
NOTE
It will be necessary to purchase a replacement snap ring, part
number 11005 before installing this kit.
Removal
1.
Remove original rear brake lever as follows. Be sure to
note all removal processes for installation of new
chrome brake lever.
a.
Remove the exhaust system and heat shield
according to the instructions in the Fuel System
section of the appropriate Service Manual.
b.
See Figure 2. Remove the footpeg by removing the
two capscrews and all related hardware. Pull the
footpeg off. Save the capscrews and hardware for
reinstallation.
c.
Remove snap ring from behind the brake lever and
remove brake pedal assembly from foot peg
mount.
d.
See Figure 3. Loosen the entire brake pedal
assembly. Back off the jam nut and hold on the
flats of the pushrod at the reservoir assembly.
Rotate the entire assembly until it is removable.
Remove the jam nut from the assembly and save
for reinstallation.
Figure 1. Typical installed rear brake pedal
Installation
1.
See Service Parts Illustration. Install new chrome brake
lever assembly, by reversing removal step 1d from
above.
2.
Reassemble footpeg to new chrome brake lever using
the saved spring washer.
3.
Replace the snap ring part number 11005 removed in
1c under Removal.
4.
Reinstall foot peg by reversing step 1b from above.
Tighten the capscrews to 47 in-lbs (5.3 N-m).
5.
Adjust rear brake free play and brake pedal height
according to instructions in the Product section of the
applicable Service Manual.
6.
Check brake for proper operation following all
appropriate warnings and cautions in the Product and
Chassis sections of the appropriate Service Manual.
Remove
and save
Figure 2. Footpeg removal
7.
Reinstall exhaust system and heat shield according to
the instructions in the Fuel System section of the
appropriate Service Manual.
1WARNING
Whenever the brake system is serviced, always test the
brakes on dry, clean pavement at slow speeds before
putting the motorcycle in regular use. Failure to properly test the brakes may result in brake failure which may
result in death or serious injury.
1 of 2
Jam nut (remove and
save for reinstallation)
Reservoir
assembly
Rotate entire assembly
as one piece to remove.
Hold assembly by flats of
push rod extending from
reservoir assembly.
Remove snap
ring 11005
Spring washer
Save for
reinstallation
Figure 3. Existing brake assembly removal
®
Service Parts
Part No. 42617-99
Date 1-99
Chrome Brake Lever Kit
4
1
2
5
1
3
Item
1
2
3
4
5
-J01461
Description
Bearing sleeves (2)
Cotter pin
Clevis pin
Brake rod
Brake pedal, chrome
Part Number
Not sold separately
Not sold separately
Not sold separately
Not sold separately
Not sold separately
2 of 2