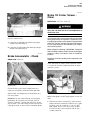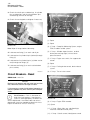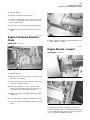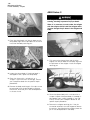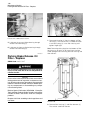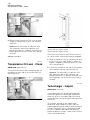
1
SAFETY.CAT.COM™
AD45 and AE40 SERIES II
UNDERGROUND
ARTICULATED TRUCKS
Maintenance Intervals
Excerpted from Operation & Maintenance Manual ((SEBU7326-01)
© 2007 Caterpillar
All Rights Reserved
®
97
Maintenance Section
Maintenance Interval Schedule
i01907748
Maintenance Interval Schedule
SMCS Code: 1000; 7000
Note: All safety information, warnings, and
instructions must be read and understood before
you perform any operation of any maintenance
procedure.
Note: Before each consecutive interval is performed,
all of the maintenance requirements from the
previous intervals must be performed.
When Required
Battery - Recycle ................................................ 102
Battery, Battery Cable or Battery Disconnect Switch Replace ............................................................. 103
Brake Oil Cooler Screen - Clean ......................... 105
Circuit Breakers - Reset ...................................... 112
Engine Air Filter Secondary Element - Replace .. 128
Exhaust Purifier - Inspect/Clean ......................... 135
Fuel System - Prime ........................................... 137
Fuses - Replace .................................................. 141
Hoist, Torque Converter and Brake Tank Breather Replace ............................................................. 144
Oil Filter - Inspect ................................................ 146
Radiator Core - Clean ......................................... 149
Steering Tank Screen - Clean ............................. 162
Torque Converter Sump Screen - Clean ............. 166
Window Washer Bottle - Fill ................................ 171
Window Wiper - Inspect/Replace ........................ 172
Every 10 Service Hours or Daily
Automatic Lubrication Grease Tank - Fill ............ 100
Automatic Lubrication Grease Tank - Fill ............ 100
Backup Alarm - Test ............................................ 101
Belts - Inspect/Adjust/Replace ............................ 103
Body Pivot Bearings - Lubricate ......................... 104
Braking System - Test ......................................... 107
Cooling System Level - Check ............................ 118
Ejector Cylinder Bearing - Lubricate ................... 125
Engine Air Filter Primary Element Clean/Replace .................................................. 126
Engine Air Precleaner - Clean ............................ 128
Engine Oil Level - Check .................................... 130
Fire Suppression System - Check ...................... 135
Fuel Tank Water and Sediment - Drain ............... 141
Hoist Cylinder Bearings - Lubricate .................... 142
Hoist, Torque Converter and Brake Oil Level Check ................................................................ 144
Indicators and Gauges - Test .............................. 146
Oscillating Hitch - Lubricate ................................ 147
Seat Belt - Inspect .............................................. 150
Service Inspection .............................................. 151
Steering Cylinder Bearings - Lubricate ............... 159
Steering System Oil Level - Check ..................... 162
Suspension and Suspension Cylinder Bearings Lubricate ........................................................... 163
Tailgate and Tailgate Cylinder Bearings Lubricate ........................................................... 164
Transmission Oil Level - Check ........................... 170
Window - Clean .................................................. 171
Every 50 Service Hours or Weekly
Automatic Lubrication Filler Filter - Clean ...........
Cab Air Filter - Clean/Replace ............................
Fuel System Water Separator - Drain .................
Tire Inflation - Check ...........................................
100
110
140
164
Initial 250 Service Hours (or at first oil
change)
Engine Valve Lash - Check/Adjust ...................... 133
Oscillating Hitch - Adjust ..................................... 147
Every 250 Service Hours or Monthly
Automatic Brake Application System (Low
Transmission Oil Pressure) - Test ....................... 99
Automatic Lubrication Inline Filter - Clean .......... 101
Battery Electrolyte Level - Check ........................ 102
Cab Tilt Pin and Lockdown Pin - Check/
Lubricate ........................................................... 111
Cooling System Coolant Additive (DEAC) - Add .. 115
Differential and Final Drive Oil Level - Check ..... 123
Drive Shaft Universal Joints, Splines and Bearings Inspect/Lubricate ............................................... 124
Engine Oil and Filter - Change ........................... 130
Engine Shutdown to Idle Protection System Test ................................................................... 132
Fan Drive Bearing and Belt Tightener Lubricate ........................................................... 135
Frame and Body - Inspect ................................... 135
Fuel System Primary Filter - Clean/Replace ...... 138
Fuel System Secondary Filter - Replace ............ 139
Steering Stop - Check ......................................... 159
Suspension Cylinder - Check ............................. 163
Wheel Bolt Torque - Check ................................. 171
Every 500 Service Hours or 3 Months
Brake Oil Filter - Replace ....................................
Engine Crankcase Breather - Clean ...................
Fuel Tank Cap and Strainer - Clean ...................
Parking Brake Release Oil Filter - Replace ........
Steering System Oil Filter - Replace ...................
Torque Converter Oil Filter - Replace .................
Transmission Oil Filter - Replace ........................
106
129
140
148
161
165
169
Every 1000 Service Hours or 6 Months
Brake Accumulator - Check ................................ 105
Ejector Line Screen - Inspect/Clean ................... 125
Frame and Body Support Pads - Clean/Inspect .. 137
Hoist, Torque Converter and Brake Oil Change ............................................................. 142
Hoist, Torque Converter and Brake Tank Screen Clean ................................................................. 145
Oscillating Hitch - Adjust ..................................... 147
98
Maintenance Section
Maintenance Interval Schedule
Rollover Protective Structure (ROPS) and Falling
Object Protective Structure (FOPS) - Inspect ... 149
Steering System Oil - Change ............................ 159
Transmission Breather - Clean ........................... 167
Transmission Magnetic Screen - Clean .............. 167
Transmission Oil - Change .................................. 168
Every 2000 Service Hours or 1 Year
Differential Thrust Pin Clearance - Check ...........
Differential and Final Drive Oil - Change ............
Engine Mounts - Inspect .....................................
Engine Valve Rotators - Inspect ..........................
Turbocharger - Inspect ........................................
120
121
129
134
170
Every 3000 Service Hours or 2 Years
Cooling System Coolant (DEAC) - Change ........
Cooling System Coolant Extender (ELC) - Add ..
Cooling System Pressure Cap - Clean/Replace ..
Engine Valve Lash - Check/Adjust ......................
113
117
119
133
Every 3 Years
Seat Belt - Replace ............................................. 151
Every 6000 Service Hours or 4 Years
Cooling System Coolant (ELC) - Change ........... 114
Cooling System Water Temperature Regulator Replace ............................................................. 119
Engine Water Pump - Inspect ............................. 134
99
Maintenance Section
Automatic Brake Application System (Low Transmission Oil Pressure) - Test
i01869573
Automatic Brake Application
System (Low Transmission Oil
Pressure) - Test
3. Remove switch (1) from the manifold on the
transmission. Install a 9S-4191 Plug (9/16-18
straight thread, O-ring type) in the manifold
where the switch was removed. Reconnect the
switch to the transmission wiring harness at
connector (2).
SMCS Code: 4284-081
Certain Caterpillar machines may be equipped with
an optional Automatic Brake Application (ABA)
system.
The ABA system warns the operator of an
impending brake application (low transmission
oil pressure) and applies the parking brake if the
pressure further decreases, e.g. engine stalled.
If your machine is equipped with the optional ABA
system, perform the following test to check that the
system is functioning correctly.
Illustration 171
Note: Before testing the operation of the Automatic
Brake Application (ABA) system, test the holding
ability of the machine parking brake.
Reference: For more information on testing the
parking brake holding ability, refer to the Operation
and Maintenance Manual, “Braking System - Test”
for the machine that is being serviced.
1. Be sure the area around the machine is clear of
personnel and obstructions.
g00940746
4. Move the transmission control to the NEUTRAL
position. Start the engine.
5. Disengage the parking brake by moving the
parking brake control to the OFF position.
6. Move the transmission direction and speed
control to the FIRST SPEED FORWARD position.
7. Gradually increase the engine speed to 1300
rpm. The parking brake should remain engaged
and the machine should not move.
Note: The parking brake indicator and the action
lamp should flash and the action alarm should
sound.
8. Reduce the engine speed to low idle, move the
transmission direction and speed control to the
NEUTRAL position. Engage the parking brake.
Illustration 170
g00952087
(1) Transmission oil pressure switch for brake application
(2) Connector
2. Disconnect transmission oil pressure switch
(1) from the transmission wiring harness at
connector (2).
Note: The correct transmission oil pressure switch
can be identified by the EL331 blue wire and the
EL330 grey wire in the transmission wiring harness
that is connected to the switch.
NOTICE
If the parking brake disengaged and the machine
moved while testing the Automatic Brake Application
(ABA) system, have the system inspected and repaired immediately before returning the machine to
operation. Contact your Caterpillar dealer or refer to
the Braking Section of the machine Service Manual.
9. Remove the plug and install transmission oil
pressure switch for brake application (1) in the
transmission manifold. Connect the switch to the
harness at connector (2).
100
Maintenance Section
Automatic Lubrication Filler Filter - Clean
i01872259
Automatic Lubrication Filler
Filter - Clean
(Hydraulic Type)
SMCS Code: 7540-070-HR
1. Use a manual lubricant gun or pump to fill the
reservoir through filler fitting (2) in the pump
body. Fill the reservoir until lubricant appears at
overflow relief valve (1).
2. Check all lubricant lines for leakage.
3. Check hydraulic lines for leakage. Check for
worn or damaged houses.
4. Check all lubricant injectors are operative. Check
all bearings that are lubricated by the automatic
lubrication system for signs of lubrication.
5. Inspect the electrical system for worn or frayed
wiring, damaged connectors or a tripped circuit
breaker.
Illustration 172
g00953579
Clean the filler filter (if equipped) every 50 service
hours or weekly.
Reference: For information on cleaning the
automatic lubrication system filler filter, refer
to Systems Operation, Testing and Adjusting,
“Automatic Lubrication System, Hydraulic Type” for
the machine that is being serviced.
Reference: For more information on the automatic
lubrication system, refer to Systems Operation,
Testing and Adjusting, “Automatic Lubrication
System, Hydraulic Type” for the machine that is
being serviced.
i01872083
Automatic Lubrication Grease
Tank - Fill
(Electric Type)
SMCS Code: 7540-544-HR
i01872085
Automatic Lubrication Grease
Tank - Fill
(Hydraulic Type)
SMCS Code: 7540-544-HR
Illustration 174
g00953494
1. Check the grease level in the reservoir. Use a
manual grease gun or grease pump to fill the
reservoir through filler fitting (3) in the pump
body.
2. Fill the reservoir to MAXIMUM indicator (1).
Illustration 173
g00953529
Note: The lubricant tank (if equipped) should
be refilled at regular intervals. Refills should be
performed daily to prevent emptying the system.
NOTICE
When filling the reservoir, caution should be used as
extreme pressure and overfilling can cause damage
to the reservoir assembly.
101
Maintenance Section
Automatic Lubrication Inline Filter - Clean
3. With the battery disconnect switch and the
engine start switch in the ON position, trigger a
lubrication cycle by pressing switch (2) on the
side of the cover assembly.
Backup Alarm - Test
4. Observe the stirring paddle in the lubricant
reservoir. When the pump is operating, the
stirring paddle should be rotating.
Make sure that the parking brake is engaged.
5. Check all discharge lines for leakage.
6. Check all injectors are operative. Check all
bearings that are lubricated by the automatic
lubrication system for signs of greasing.
7. Inspect the electrical system or worn frayed
wiring, damaged connectors or a tripped circuit
breaker.
Note: For more information on the automatic
lubrication system, refer to Systems Operation,
Testing and Adjusting, “Automatic Lubrication
System, Electric Type” for the machine that is being
serviced.
i01855693
SMCS Code: 7406-081
Turn the engine start switch to the ON position to
perform the test.
Make sure that the area behind the machine is clear
of personnel and clear of obstacles.
Apply the service brake. Move the transmission
direction and speed control to the REVERSE
position.
The backup alarm should start to sound
immediately. The backup alarm should continue to
sound until the transmission direction and speed
control is moved to the NEUTRAL position or to the
FORWARD position.
i01872267
Automatic Lubrication Inline
Filter - Clean
(Hydraulic Type)
SMCS Code: 7540-070-HR
Illustration 176
g00946518
Rear view of AD45
Illustration 175
g00953599
Clean the inline filter (if equipped) every 250 service
hours or monthly.
Reference: For information on cleaning the
automatic lubrication system inline filter, refer
to Systems Operation, Testing and Adjusting,
“Automatic Lubrication System, Hydraulic Type” for
the machine that is being serviced.
Illustration 177
g00946519
Rear view of AE40 Series ll
The backup alarm is located at the rear of the
machine.
102
Maintenance Section
Battery - Recycle
Check the following areas at a minimum interval
of 1000 hours. Check the following areas more
frequently during adverse conditions.
g00896957
Illustration 178
To adjust the sound level, turn the adjustment knob
that is on the back of the alarm. The backup alarm
is set at the highest sound level when the machine
is shipped from the factory. The adjustment knob
should remain at the HIGH position unless the job
site requires a lower sound level.
i01765195
Battery - Recycle
Illustration 179
g00946649
1. The batteries are located under the cab. Tilt the
cab to access the batteries.
Reference: For information on tilting the cab, refer
to the Operation and Maintenance Manual, “Cab
- Tilt” for the machine that is being serviced.
SMCS Code: 1401-561
Always recycle a battery. Never discard a battery.
Always return used batteries to one of the following
locations:
• A battery supplier.
• An authorized battery collection facility.
• Recycling facility.
Illustration 180
g00946657
i01856935
Battery Electrolyte Level Check
SMCS Code: 1401-535-ESG
Table 13
Battery Electrolyte Level
Battery
Interval
Conventional
100 Hours
Low Maintenance
250 Hours
Maintenance Free
No Interval
Tighten the battery retainers on all of the batteries.
Tighten the battery retainers at every 1000 hours.
2. Clean the battery surface with a clean cloth.
3. Disconnect all battery cables from the batteries.
Reference: To disconnect the battery cables,
refer to the Operation and Maintenance Manual,
“Battery, Battery Cable or Battery Disconnect
Switch - Replace” for the machine that is being
serviced.
4. Clean the battery cables and the battery
posts. Coat the battery posts with 1P-0808
Multipurpose Grease or petroleum jelly.
5. Connect the battery cables to the batteries.
103
Maintenance Section
Battery, Battery Cable or Battery Disconnect Switch - Replace
Reference: To connect the battery cables, refer to
the Operation and Maintenance Manual, “Battery,
Battery Cable or Battery Disconnect Switch Replace” for the machine that is being serviced.
6. Coat the terminals with 1P-0808 Multipurpose
Grease or petroleum jelly. Then, install the post
cover.
7. For conventional batteries and batteries of low
maintenance, follow these additional instructions:
• Inspect the battery electrolyte level in each
battery cell. A maintenance free battery does
not require inspection.
• Maintain the level of the distilled water to the
Illustration 181
g00946530
bottom of the filler openings. If distilled water
is not available, use clean drinking water.
3. Turn the battery disconnect switch to the OFF
position and remove the key.
not require more than 30 cc
• A battery should
3
4. Disconnect the negative end (-) of the battery
cable from the electric starting motor.
(1.8306 in (1 ounce) ) of water per cell per
week. This requirement should exist with the
proper charging rate and with a moderate
climate.
• In extreme temperatures, check the water in
the cells weekly. Cell water usage could be
higher in extreme temperatures.
5. Disconnect the negative end (-) of the battery
cable from the battery.
6. Disconnect the positive end (+) of the battery
cable from the battery
7. Replace the battery or make all necessary
repairs to the battery.
i01856382
Battery, Battery Cable or
Battery Disconnect Switch Replace
8. Connect the positive end (+) of the battery cable
to the battery.
SMCS Code: 1401-510; 1402-510; 1411-510
10. Connect the negative end (-) of the battery
cable to the electric starting motor.
Reference: For information on tilting the cab, refer
to Operation and Maintenance Manual, “Cab - Tilt”
for the machine that is being serviced.
9. Connect the negative end (-) of the battery cable
to the battery.
11. Install the key. Turn the battery disconnect
switch to the ON position.
1. The batteries are located under the cab. Tilt the
cab to access the batteries.
2. Turn the engine start switch to the OFF position.
Turn all switches to the OFF position.
i01876860
Belts - Inspect/Adjust/Replace
SMCS Code: 1357-025; 1357-040; 1357-510
For maximum engine performance and utilization
of your engine, inspect the belts for wear and for
cracking. Check and adjust the belt tension to
minimize belt slippage which will decrease belt life
and cause poor performance of the alternator and
any driven equipment.
1. Inspect the condition of the belts.
2. If a belt is worn or is damaged, replace the belt.
104
Maintenance Section
Body Pivot Bearings - Lubricate
3. Inspect the tension of the alternator belt and air
conditioning compressor belts.
2. Turn adjusting nut (3) to obtain the correct
adjustment.
4. Check the belt tightener for wear/alignment and
that it is maintaining correct belt tension.
3. Tighten the locknut and mounting bolts.
4. Check the belt deflection. If the amount of
deflection is incorrect, repeat Steps 1 to 3.
Adjust the Air Conditioning
Compressor Belt
Illustration 182
g00954945
To check the belt tension, apply 110 N (25 lb) of force
midway between the pulleys. Correctly adjusted
belts will deflect 17 ± 3 mm (0.67 ± 0.12 inch).
If new belt(s) are installed, check belt adjustment
again, after 30 minutes of operation. For multiple
belt drive applications, always replace belts in
matched sets.
If only one belt of a matched set is replaced, it will
carry more of a load than the belts not replaced
since the older belts are stretched. The additional
load on the new belt could cause it to break.
Adjust the Alternator Belt
Illustration 184
g00954950
1. Loosen two mounting bolts (1) and locknut (2).
2. Turn adjusting nut (3) to obtain the correct
adjustment.
3. Tighten the locknut and the mounting bolts.
4. Check the belt deflection. If the amount of
deflection is incorrect, repeat Steps 1 to 3.
i01857128
Body Pivot Bearings Lubricate
SMCS Code: 7258-086-BD
NOTICE
Check that the lines attached to all remote grease fittings are undamaged. If the lines are split, grease will
not reach the bearings or pins. Machine damage will
result.
Illustration 183
g00954948
1. Loosen two mounting bolts (1) and locknut (2).
Wipe all fittings clean before lubricating.
105
Maintenance Section
Brake Accumulator - Check
i01857629
Brake Oil Cooler Screen Clean
SMCS Code: 4257-070; 4295-070
Hot oil and hot components can cause personal
injury. Do not allow hot oil or hot components to
contact the skin.
Illustration 185
g00946696
Rear view of AD45 machine
1. Lubricate the left body pivot bearing through
remote mounted fitting (1).
2. Lubricate the right body pivot bearing through
remote mounted fitting (2).
i01857165
Brake Accumulator - Check
NOTICE
Care must be taken to ensure that fluids are contained
during performance of inspection, maintenance, testing, adjusting and repair of the product. Be prepared to
collect the fluid with suitable containers before opening any compartment or disassembling any component containing fluids.
Refer to Special Publication, NENG2500, “Caterpillar
Tools and Shop Products Guide” for tools and supplies
suitable to collect and contain fluids on Caterpillar
products.
Dispose of all fluids according to local regulations and
mandates.
SMCS Code: 4263-535
Clean the brake oil cooler screen whenever there
is a failure of the hoist, torque converter or brake
hydraulic system.
Illustration 186
g00946733
Correct brake accumulator charge pressure is
necessary for efficient hydraulic brake operation.
Special tools and equipment are required to test
the accumulator.
Reference: For the correct testing and charging
procedures for the brake accumulator, refer to
Systems Operation, Testing and Adjusting, “Brake
Accumulator - Test and Charge” for the machine that
is being serviced, or consult your Caterpillar dealer.
Illustration 187
g00946944
Note: Hand tighten the NPT pipe nipple. Do not use
tools.
1. Remove tank drain valve plug (1) from the hoist,
torque converter and brake hydraulic tank. Open
the drain valve by installing a 1 1/4 inch NPT
pipe nipple, 88 mm (3.50 inch) long, to open
the internal drain valve and drain the oil into a
suitable container.
106
Maintenance Section
Brake Oil Filter - Replace
10. With the oil cold, check the oil level in sight
gauge (4). For the AD45 truck check the oil level
with the body fully lowered. For the AE40 Series
ll truck check the oil level with the ejector plate
fully retracted and the tailgate fully raised.
11. Maintain the oil level to the FULL mark in the
sight gauge.
12. Remove oil filler cap (5) and add oil if necessary.
i01857359
Brake Oil Filter - Replace
Illustration 188
g00946983
SMCS Code: 4295-510
2. Remove drain plug (3) from the oil cooler and
drain the oil into a suitable container. Clean and
install the plug.
3. Remove plug (2) from the end of the cooler.
Hot oil and hot components can cause personal
injury. Do not allow hot oil or hot components to
contact the skin.
4. Remove the screen. Clean the screen in clean
nonflammable solvent.
5. Install the screen in the cooler.
6. Clean plug (2) in clean, nonflammable solvent.
Inspect the seal. Replace the seal if the seal is
damaged.
NOTICE
Care must be taken to ensure that fluids are contained
during performance of inspection, maintenance, testing, adjusting and repair of the product. Be prepared to
collect the fluid with suitable containers before opening any compartment or disassembling any component containing fluids.
7. Install the plug.
8. Fill the hydraulic tank.
Reference: For information on lubricants
and refill capacities, refer to Operation and
Maintenance Manual, “Lubricant Viscosities and
Refill Capacities” for the machine that is being
serviced.
Refer to Special Publication, NENG2500, “Caterpillar
Tools and Shop Products Guide” for tools and supplies
suitable to collect and contain fluids on Caterpillar
products.
Dispose of all fluids according to local regulations and
mandates.
9. Start the engine and operate the engine at low
idle. Check for leaks and make any necessary
repairs.
Illustration 190
Illustration 189
g00947009
g00946864
107
Maintenance Section
Braking System - Test
Note: The brake oil filter should be replaced every
500 service hours or 3 months. This frequency
can increase if the filter is dirty. Observe brake
filter indicator (1) while repeatedly applying the
brakes. Replace the filter if the indicator is in the
red area with the machine running and the brake
accumulator charging.
1. Release the pressure in the braking system.
Reference: For information on releasing the
pressure in the braking system, refer to Braking
System, Systems Operation, Testing and
Adjusting, “Braking System Pressure - Release”
for the machine that is being serviced.
2. Remove brake filter housing (2). Remove the
element and discard.
3. Wash the filter housing in clean nonflammable
solvent.
4. Inspect the seal in the filter housing. If the seal is
damaged, replace the seal with a new seal.
5. Install the new element in the housing. Install the
element and housing in the housing base.
6. Start the engine and operate the engine at low
idle. Inspect for leaks.
i01857847
Braking System - Test
SMCS Code: 4250-081; 4251-081; 4267-081
Note: Perform the following brake test at the start of
each shift and before entering a ramp.
Be sure the area around the machine is clear of
personnel and obstructions. Be sure the steering
frame lock is in the stored position.
Test the brakes on a dry, level surface. Fasten the
seat belt before testing the brakes.
The following tests are to determine if the parking
brake and the service brakes are functional. These
tests are not intended to measure the maximum
brake holding effort. Brake holding effort required
to hold a machine at a specific engine rpm will
vary from machine to machine due to differences in
engine setting, power train efficiency, etc., as well
as differences in brake holding ability.
Engine rpm at beginning of machine movement,
with the brake applied, should be compared against
the engine rpm your specific machine was able
to hold on a prior test, as an indication of system
deterioration.
To carry out the brake test, first start the engine and
let the brake oil pressure build up to the operating
range. The parking brake will stay engaged until
operating oil pressure has been reached and the
parking brake control is moved to the OFF position
(parking brake disengaged). Once operating oil
pressure has been reached a test of the braking
system can be commenced.
Service Brake Holding Ability Test
Illustration 191
g00946895
7. With the oil cold, check the oil level in the sight
gauge (3). For the AD45 truck check the oil level
with the body fully lowered. For the AE40 Series
ll truck check the oil level with the ejector plate
fully retracted and the tailgate fully raised.
8. Maintain the oil level to the FULL mark in the
sight gauge.
9. Remove oil filler cap (4) and add oil if necessary.
Personal injury can result if the machine moves
while testing.
If the machine begins to move during test, reduce
the engine speed immediately and engage the
parking brake.
1. Move the transmission control to the NEUTRAL
position. Start the engine.
108
Maintenance Section
Braking System - Test
6. Reduce the engine speed to low idle. Move the
transmission control to the NEUTRAL position.
Engage the parking brake. Stop the engine.
NOTICE
If the machine moved while testing the brakes, contact
your Caterpillar dealer.
Have the dealer inspect and, if necessary, repair the
service brake before returning the machine to operation.
Parking Brake Holding Ability Test
Illustration 192
g00940766
NOTICE
The standard parking brake control is a pull-to-engage
type. When the knob is pulled OUT, the parking brake
will be engaged.
2. Apply the service brake pedal.
Certain mining regulations require machines to be
equipped with a push-to-engage parking brake control. When the knob is pushed IN, the parking brake
is engaged.
Before operating the machine, ensure you are familiar
with the operation of the parking brake control.
Standard Pull-to-Engage Type
Illustration 193
g00940749
3. Disengage the parking brake by moving the
parking brake control to the OFF position.
Personal injury can result if the machine moves
while testing the parking brake.
If the machine begins to move during the test, reduce the engine speed immediately and apply the
service brakes.
1. Move the transmission control to the NEUTRAL
position. Start the engine.
Illustration 194
g00992888
4. Move the transmission control to the FIRST
SPEED FORWARD position.
5. Gradually increase the engine speed to 1300
rpm. The machine should not move.
Illustration 195
g00940749
109
Maintenance Section
Braking System - Test
2. Engage the parking brake by pulling the parking
brake control knob out to the ON position.
Optional Push-to-Engage Type
Personal injury can result if the machine moves
while testing the parking brake.
If the machine begins to move during the test, reduce the engine speed immediately and apply the
service brakes.
1. Move the transmission control to the NEUTRAL
position. Start the engine.
Illustration 196
g00992888
3. Move the transmission control to FIRST SPEED
FORWARD position.
Illustration 198
g00940749
2. Engage the parking brake by pushing the
parking brake control in to the ON position.
Illustration 197
g00947041
Note: The parking brake indicator and the action
lamp should illuminate. The action alarm should
sound.
4. Gradually increase the engine speed to 1300
rpm. The machine should not move.
5. Reduce the engine speed to low idle. Move the
transmission control to the NEUTRAL position.
Lower the bucket to the ground. Stop the engine.
Illustration 199
NOTICE
If the machine moved while testing the brakes, contact
your Caterpillar dealer.
Have the dealer inspect and, if necessary, repair the
parking brakes before returning the machine to operation.
g00992888
3. Move the transmission control to the FIRST
SPEED FORWARD position.
110
Maintenance Section
Cab Air Filter - Clean/Replace
Air Conditioning Recirculation
Filter
Illustration 200
g00947041
Note: The parking brake indicator and the action
lamp should illuminate. The action alarm should
sound.
4. Gradually increase the engine speed to 1300
rpm. The machine should not move.
5. Reduce the engine speed to low idle. Move the
transmission control to the NEUTRAL position.
Stop the engine.
Illustration 201
g00949643
1. Remove bolt (1) that fastens recirculation filter
assembly (2).
2. Remove the cover and the air conditioning
recirculation filter from the canister.
3. Clean the recirculation filter using air pressure.
When you use air pressure, the maximum air
pressure should be 205 kPa (30 psi).
NOTICE
If the machine moved while testing the brakes, contact
your Caterpillar dealer.
4. Install the filter in the canister. Install the cover
and refit the filter assembly.
Have the dealer inspect and, if necessary, repair the
parking brakes before returning the machine to operation.
Note: When rips or tears are noticed in the filter
element, or a reduction of air circulation is noticed
in the cab after cleaning filter, install a new element.
i01862774
Air Conditioning Filter
Cab Air Filter - Clean/Replace
SMCS Code: 7342-070; 7342-510
Note: Clean the cab air filter weekly or when a
reduction of air circulation in the cab is noticed. If
working in less dusty conditions, the service interval
for the cab air filters can be extended.
Illustration 202
g00949651
1. Release two latches (1). Remove air conditioning
filter cover (2).
111
Maintenance Section
Cab Tilt Pin and Lockdown Pin - Check/Lubricate
2. Wash the cover and the precleaner cup in clean
water and allow to air dry.
3. Install the precleaner cup and the cover. Tighten
the retaining nut finger tight. Do not use a tool to
tighten the retaining nut.
4. Loosen clamp bolt (3) and remove end cap (4).
Remove the rubber baffle from the end cap.
Empty the dust from the end cap.
5. Install the rubber baffle in the end cap.
Illustration 203
g00949654
2. Remove air conditioning filter (3) from the air
conditioning duct.
3. Clean the filter element with pressure air or wash
the element in warm water and a nonsudsing
household detergent. When you use air pressure,
the maximum air pressure is 205 kPa (30 psi).
When you use water pressure, the maximum
water pressure is 280 kPa (40 psi).
4. If washed, rinse the element in clean water and
air dry thoroughly.
5. Install the clean filter element and cover.
Note: When rips or tears are noticed in the filter
element, or a reduction of air circulation is noticed
in the cab after cleaning filter, install a new element.
6. Remove the wing nut on the filter element.
Remove the filter element.
7. Clean the filter element with pressure air or wash
the element in warm water and a nonsudsing
household detergent. When you use air pressure,
the maximum air pressure is 205 kPa (30 psi).
When you use water pressure, the maximum
water pressure is 280 kPa (40 psi).
8. If washed, rinse the element in clean water and
air dry thoroughly.
9. Install the filter element and wing nut. Tighten
the wing nut finger tight. Do not use a tool to
tighten the wing nut.
10. Install end cap (4). Tighten clamp bolt (3) finger
tight. Do not use a tool to tighten the clamp bolt.
i01863183
Cab Tilt Pin and Lockdown Pin
- Check/Lubricate
Cab Pressurizer Filter
SMCS Code: 7301-086; 7301-535
Do not work on or near the cab or left side of the
engine until the cab is in the fully tilted position.
Disconnect the batteries by turning the battery
disconnect switch to the OFF and remove the key
before performing and service work under the
cab.
Illustration 204
g00949690
Note: When the debris reaches the full level on the
precleaner, empty the precleaner.
1. Loosen the retaining nut and remove cover
(2). Remove precleaner cup (1). Empty the
precleaner cup.
Accidental cab lowering can cause severe personal injury or death from crushing could occur.
1. Tilt the cab.
Reference: For information on tilting the cab, refer
to Operation and Maintenance Manual, “Cab Tilt” for the machine that is being serviced.
112
Maintenance Section
Circuit Breakers - Reset
2. Check the cab tilt pins and bearings, tilt cylinder
pins and bearings and the cab lockdown pins
and bearings for wear or damage.
3. Check all mounting bolts and tighten if necessary.
Illustration 206
g00949839
(1) Spare
(2) Spare
Illustration 205
g00949797
(3) 15 Amp - Caterpillar Monitoring System, engine
ECM, shutdown to idle system.
Note: Wipe all fittings before lubricating.
4. Lubricate one fitting (1) on each cab tilt pin.
5. Lubricate the tilt cylinder tilt pin (rod end) through
fitting (2).
6. Lubricate the tilt cylinder tilt pins (cylinder anchor
end) through two fittings (3).
7. Lubricate one fitting (4) on each cab lockdown
pin assembly.
i01863237
(4) 15 Amp - Window wipers/washers, residual
brake pressure/stop lights, exhaust back
pressure control.
(5) 15 Amp - Engine start switch, fire suppression
control.
(6) Spare
(7) 15 Amp - Parking brake control, brake release
system.
(8) 15 Amp - Transmission control
Circuit Breakers - Reset
SMCS Code: 1420-529
NOTICE
Replace circuit breakers with the same type and size
only. Otherwise, electrical damage can result.
If it is necessary to reset circuit breakers frequently, an
electrical problem may exist. Contact your Caterpillar
dealer.
Circuit Breakers – Push in the button to
reset the circuit breaker. If the electrical
system is working properly, the button will
remain depressed. If the button does not remain
depressed, check the appropriate electrical circuit.
Repair the electrical circuit, if necessary.
Illustration 207
g00949848
(9) 15 Amp - Engine ECM recorder
(10) Spare
(11) 15 Amp - Block light, rear cab flood light,
Automatic Retarder Control (ARC).
(12) 15 Amp - Cab tilt control, hoist/ejector control.
113
Maintenance Section
Cooling System Coolant (DEAC) - Change
(13) 30 Amp - (Automatic) - Head lights, tail lights,
dash lamps.
(14) 30 Amp - (Automatic) - Rear lights.
(15) 30 Amp - Air conditioner.
(16) 15 Amp - Horn, automatic lubrication system,
reversing camera, low coolant level control,
dash indicator lamps.
NOTICE
Do not change the coolant until you read and understand the cooling system information in Special Publication, SEBU6250, “Caterpillar Machine Fluids Recommendations”.
Failure to do so could result in damage to the cooling
system components.
Note: This procedure pertains only to Caterpillar
Diesel Engine Antifreeze/Coolant (DEAC). This
does not pertain to machines that are shipped
from the factory with Extended Life Coolant (ELC).
Also this does not pertain to the machines that are
maintained with Extended Life Coolant (ELC).
If the coolant is dirty or if you observe any foaming
in the cooling system, drain the coolant before the
recommended interval.
Illustration 208
g00949860
View of battery compartment under the operator’s station.
(17) 80 Amp - Main
i01863424
Cooling System Coolant
(DEAC) - Change
SMCS Code: 1352-044; 1395-044
Illustration 209
g00949921
1. Loosen the pressure cap slowly to relieve cooling
system pressure. Remove the pressure cap.
Pressurized system: Hot coolant can cause serious burn. To open cap, stop engine, wait until radiator is cool. Then loosen cap slowly to relieve
the pressure.
NOTICE
Care must be taken to ensure that fluids are contained
during performance of inspection, maintenance, testing, adjusting and repair of the product. Be prepared to
collect the fluid with suitable containers before opening any compartment or disassembling any component containing fluids.
Refer to Special Publication, NENG2500, “Caterpillar
Tools and Shop Products Guide” for tools and supplies
suitable to collect and contain fluids on Caterpillar
products.
Dispose of all fluids according to local regulations and
mandates.
Illustration 210
g00949922
2. Open the drain valve for the engine cooling
system. Drain the coolant into a suitable
container. The drain valve is located on the
bottom radiator tube.
114
Maintenance Section
Cooling System Coolant (ELC) - Change
3. Close the drain valve. Fill the system with clean
water and a 6 to 10 percent concentration of
cooling system cleaner.
4. Start and run the engine for 90 minutes. Stop
the engine and drain the cleaning solution into a
suitable container.
5. When the engine is stopped, flush the cooling
system with water until the draining water is
clear. Drain the water into a suitable container.
6. Close the drain valve.
7. Add the coolant solution. Add coolant slowly to
help avoid air locks, 20 L (5 US gal) per minute.
Reference: For additional information on the
cooling system capacity, refer to the Operation
and Maintenance Manual, “ Refill Capacities” for
the machine that is being serviced.
8. Start the engine. Run the engine with the cooling
system pressure cap removed. Run the engine
until the water temperature regulator opens and
the coolant level stabilizes.
Note: If you are using Caterpillar antifreeze, do not
add supplemental coolant additive or change the
coolant conditioner element at this time.
i01863489
Cooling System Coolant (ELC)
- Change
SMCS Code: 1352-044-NL; 1395-044-NL
Pressurized system: Hot coolant can cause serious burn. To open cap, stop engine, wait until radiator is cool. Then loosen cap slowly to relieve
the pressure.
NOTICE
Care must be taken to ensure that fluids are contained
during performance of inspection, maintenance, testing, adjusting and repair of the product. Be prepared to
collect the fluid with suitable containers before opening any compartment or disassembling any component containing fluids.
Refer to Special Publication, NENG2500, “Caterpillar
Tools and Shop Products Guide” for tools and supplies
suitable to collect and contain fluids on Caterpillar
products.
Dispose of all fluids according to local regulations and
mandates.
NOTICE
Do not change the coolant until you read and understand the cooling system information in Special Publication, SEBU6250, “Caterpillar Machine Fluids Recommendations”.
Failure to do so could result in damage to the cooling
system components.
Illustration 211
g00949925
9. Maintain the coolant level to within 13 mm
(0.50 inch) of the bottom of the filler pipe or to
the proper level in the sight gauge.
10. Install the cooling system pressure cap.
11. Stop the engine.
NOTICE
Mixing ELC with other products reduces the effectiveness of the coolant and shortens coolant life. Use only Caterpillar products or commercial products that
have passed the Caterpillar EC-1 specifications for
premixed or concentrate coolants. Use only Caterpillar
Extender with Caterpillar ELC. Failure to follow these
recommendations could result in the damage to cooling systems components.
If ELC cooling system contamination occurs see the
topic Extended Life Coolant (ELC) in the Operation
and Maintenance Manual, SEBU6250, “Caterpillar
Machine Fluids Recommendations”.
Note: This procedure pertains to machines using
Extended Life Coolant (ELC) only.
115
Maintenance Section
Cooling System Coolant Additive (DEAC) - Add
If the coolant is dirty or if you observe any foaming
in the cooling system, drain the coolant before the
recommended interval.
Illustration 212
g00949921
1. Loosen the pressure cap slowly to relieve cooling
system pressure. Remove the pressure cap.
Note: If Caterpillar antifreeze is being used, do not
add supplemental coolant additive or change the
element at this time.
Illustration 214
g00949925
6. Maintain the coolant level to within 13 mm
(0.50 inch) of the bottom of the filler pipe or to
the proper level in the sight gauge.
7. Install the cooling system pressure cap.
8. Stop the engine.
i01863543
Cooling System Coolant
Additive (DEAC) - Add
SMCS Code: 1352-538; 1395-538
Illustration 213
g00949922
2. Open the drain valve for the engine cooling
system. Drain the coolant into a suitable
container. The drain valve is located on the
bottom radiator tube.
3. Flush the cooling system with water until the
draining water is clear. Close the drain valve.
4. Add the coolant solution. Add coolant slowly to
help avoid air locks, 20 L (5 US gal) per minute.
Reference: For information on the cooling system
capacity, refer to the Operation and Maintenance
Manual, “Refill Capacities” for the machine that
is being serviced.
5. Start the engine. Run the engine with the cooling
system pressure cap removed. Run the engine
until the water temperature regulator opens and
the coolant level stabilizes.
Personal injury can result from hot coolant, steam
and alkali.
At operating temperature, engine coolant is hot
and under pressure. The radiator and all lines
to heaters or the engine contain hot coolant or
steam. Any contact can cause severe burns.
Remove cooling system pressure cap slowly to
relieve pressure only when engine is stopped and
cooling system pressure cap is cool enough to
touch with your bare hand.
Do not attempt to tighten hose connections when
the coolant is hot, the hose can come off causing
burns.
Cooling System Coolant Additive contains alkali.
Avoid contact with skin and eyes.
116
Maintenance Section
Cooling System Coolant Additive (DEAC) - Add
Add Coolant Additive (If Required)
NOTICE
Adding coolant to an overheated engine could result in
damage to the engine. Allow the engine to cool before
adding coolant.
If the machine is to be stored in, or shipped to, an area
with freezing temperatures, the cooling system must
be protected to the lowest outside (ambient) temperature.
The engine cooling system is normally protected to a
minimum of−29C (−20F) with Caterpillar Antifreeze,
when shipped from the factory unless special requirements are defined.
NOTICE
Care must be taken to ensure that fluids are contained
during performance of inspection, maintenance, testing, adjusting and repair of the product. Be prepared to
collect the fluid with suitable containers before opening any compartment or disassembling any component containing fluids.
Refer to Special Publication, NENG2500, “Caterpillar
Tools and Shop Products Guide” for tools and supplies
suitable to collect and contain fluids on Caterpillar
products.
Dispose of all fluids according to local regulations and
mandates.
NOTICE
Excessive additive (greater than the recommended
6% initial fill) together with concentrations of antifreeze
greater than 60% cause deposits to form and can result in radiator tube blockage and overheating.
Note: This procedure pertains only to Caterpillar
Diesel Engine Antifreeze/Coolant (DEAC). This
procedure does not pertain to machines that are
shipped from the factory with Extended Life Coolant
(ELC) and machines that are maintained with
Extended Life Coolant (ELC).
Illustration 215
g00949921
1. Loosen the pressure cap slowly to relieve cooling
system pressure. Remove the pressure cap.
2. It may be necessary to drain enough coolant
from the radiator to allow for the addition of the
liquid supplemental coolant additive.
Note: Make sure the coolant is drained into a
suitable container.
3. Add liquid supplemental coolant additive
(conditioner) according to the requirements
of your cooling system as determined by the
coolant additive concentration test.
4. Clean the pressure cap and inspect the pressure
cap. Install the pressure cap.
5. Start the engine and check for leaks. Allow the
coolant level to stabilize.
6. If necessary, add premixed coolant in order to
bring the coolant to the proper level in the sight
gauge.
Change Coolant Conditioner
Element (If Required)
Reference: For all cooling system requirements, refer
to Caterpillar Machine Fluids Recommendations,
SEBU6250, “Cooling System Specifications”.
Use the 8T-5296 Test Kit in order to check the
concentration.
Illustration 216
g00949952
117
Maintenance Section
Cooling System Coolant Extender (ELC) - Add
1. Loosen the pressure cap slowly to relieve cooling
system pressure. Remove the pressure cap.
2. Close element inlet valve (1) and outlet valve (2).
Remove and discard element (3).
3. Clean the element mounting base. Make sure all
of the old seal is removed.
4. Replace with a new maintenance element.
5. Coat the seal of a new element with a thin film of
clean engine oil.
6. Install and turn the element until the seal contacts
the base, then tighten 3/4 of a turn more.
7. Open the inlet and outlet valves.
8. Clean the pressure cap and inspect the pressure
cap. Install the pressure cap.
9. Start the engine and check for leaks. Allow the
coolant level to stabilize.
10. If necessary, add premixed coolant in order to
bring the coolant to the proper level in the sight
gauge.
i01863569
Cooling System Coolant
Extender (ELC) - Add
SMCS Code: 1352-538-NL; 1395-538-NL
Personal injury can result from hot coolant, steam
and alkali.
At operating temperature, engine coolant is hot
and under pressure. The radiator and all lines
to heaters or the engine contain hot coolant or
steam. Any contact can cause severe burns.
Remove cooling system pressure cap slowly to
relieve pressure only when engine is stopped and
cooling system pressure cap is cool enough to
touch with your bare hand.
Do not attempt to tighten hose connections when
the coolant is hot, the hose can come off causing
burns.
Cooling System Coolant Additive contains alkali.
Avoid contact with skin and eyes.
NOTICE
Adding coolant to an overheated engine could result in
damage to the engine. Allow the engine to cool before
adding coolant.
If the machine is to be stored in, or shipped to, an area
with freezing temperatures, the cooling system must
be protected to the lowest outside (ambient) temperature.
The engine cooling system is normally protected to a
minimum of−29C (−20F) with Caterpillar Antifreeze,
when shipped from the factory unless special requirements are defined.
NOTICE
Care must be taken to ensure that fluids are contained
during performance of inspection, maintenance, testing, adjusting and repair of the product. Be prepared to
collect the fluid with suitable containers before opening any compartment or disassembling any component containing fluids.
Refer to Special Publication, NENG2500, “Caterpillar
Tools and Shop Products Guide” for tools and supplies
suitable to collect and contain fluids on Caterpillar
products.
Dispose of all fluids according to local regulations and
mandates.
NOTICE
Excessive additive (greater than the recommended
6% initial fill) together with concentrations of antifreeze
greater than 60% cause deposits to form and can result in radiator tube blockage and overheating.
NOTICE
Mixing ELC with other products reduces the effectiveness of the coolant and shortens coolant life. Use only Caterpillar products or commercial products that
have passed the Caterpillar EC-1 specifications for
premixed or concentrate coolants. Use only Caterpillar
Extender with Caterpillar ELC. Failure to follow these
recommendations could result in the damage to cooling systems components.
If ELC cooling system contamination occurs see the
topic Extended Life Coolant (ELC) in the Operation
and Maintenance Manual, SEBU6250, “Caterpillar
Machine Fluids Recommendations”.
When a Caterpillar Extended Life Coolant (ELC) is
used, an Extender must be added to the cooling
system.
118
Maintenance Section
Cooling System Level - Check
Reference: For the proper service interval, refer
to the Operation and Maintenance Manual,
“Maintenance Interval Schedule” for the machine
that is being serviced.
i01863687
Cooling System Level - Check
SMCS Code: 1350-535-FLV; 1395-535-FLV
The amount of extender is determined by the
cooling system capacity.
Reference: For information on the cooling system
capacity, refer to the Operation and Maintenance
Manual, “Refill Capacities” for the machine that is
being serviced.
Reference: For all cooling system requirements, refer
to Caterpillar Machine Fluids Recommendations,
SEBU6250 or consult your Caterpillar dealer.
Pressurized system: Hot coolant can cause serious burn. To open cap, stop engine, wait until radiator is cool. Then loosen cap slowly to relieve
the pressure.
NOTICE
Care must be taken to ensure that fluids are contained
during performance of inspection, maintenance, testing, adjusting and repair of the product. Be prepared to
collect the fluid with suitable containers before opening any compartment or disassembling any component containing fluids.
Refer to Special Publication, NENG2500, “Caterpillar
Tools and Shop Products Guide” for tools and supplies
suitable to collect and contain fluids on Caterpillar
products.
Dispose of all fluids according to local regulations and
mandates.
Illustration 217
g00949921
1. Loosen the pressure cap slowly to relieve cooling
system pressure. Remove the pressure cap.
2. It may be necessary to drain enough coolant
from the radiator to allow for the addition of the
liquid coolant extender.
Note: Make sure that the coolant is drained into a
suitable container.
3. Add the recommended amount of ELC Extender
to the cooling system.
4. Clean the pressure cap and inspect the pressure
cap. Install the pressure cap.
5. Start the engine and check for leaks. Allow the
coolant level to stabilize.
6. If necessary, add premixed coolant in order to
bring the coolant to the proper level in the sight
gauge.
Illustration 218
g00950097
1. Maintain the coolant level in the sight gauge
located on the right side of the machine. If it is
necessary to add coolant daily, check for leaks.
2. Inspect the radiator core for debris. Clean the
radiator core, if necessary.
Reference: For information on cleaning the
radiator core, refer to the Operation and
Maintenance Manual, “Radiator Core - Clean” for
the machine that is being serviced.
119
Maintenance Section
Cooling System Pressure Cap - Clean/Replace
1. Loosen the pressure cap slowly in order to
relieve cooling system pressure. Remove the
pressure cap.
2. Inspect the pressure cap for damage, foreign
material and for deposits.
3. Inspect the condition of the pressure cap seal.
Replace the pressure cap if damaged. If the seal
is not damaged, use a 9S-8140 Pressurizing
Pump to pressure test the pressure cap. The
correct cap relief pressure is stamped on the
radiator cap. If the pressure cap does not hold
the correct pressure, install a new cap.
Illustration 219
g00949921
3. If coolant level is low, loosen the pressure cap
slowly to relieve pressure. Remove the pressure
cap. Add coolant as required to within 13 mm
(0.50 inch) of the bottom of the filler pipe or to
the proper level in the sight gauge.
4. Inspect the pressure cap and cap seal for
damage, deposits or foreign material. Clean the
pressure cap with a clean cloth or replace the
cap if it is damaged.
4. Install the pressure cap.
i01863760
Cooling System Water
Temperature Regulator Replace
SMCS Code: 1355-510
5. Install the cooling system pressure cap.
i01863732
Cooling System Pressure Cap
- Clean/Replace
Pressurized system: Hot coolant can cause serious burn. To open cap, stop engine, wait until radiator is cool. Then loosen cap slowly to relieve
the pressure.
SMCS Code: 1382-070; 1382-510
Replace the water temperature regulator on a
regular basis in order to reduce the chance of
unscheduled downtime and of problems with the
cooling system.
Pressurized system: Hot coolant can cause serious burn. To open cap, stop engine, wait until radiator is cool. Then loosen cap slowly to relieve
the pressure.
The water temperature regulator should be replaced
after the cooling system has been cleaned. Replace
the water temperature regulator while the cooling
system is completely drained or while the cooling
system coolant is drained to a level that is below
the water temperature regulator housing.
NOTICE
Failure to replace the engine’s water temperature regulator on a regularly scheduled basis could cause severe engine damage.
Note: If you are only replacing a water temperature
regulator, drain the cooling system coolant to a
level that is below the water temperature regulator
housing.
Illustration 220
g00949921
120
Maintenance Section
Differential Thrust Pin Clearance - Check
NOTICE
Care must be taken to ensure that fluids are contained
during performance of inspection, maintenance, testing, adjusting and repair of the product. Be prepared to
collect the fluid with suitable containers before opening any compartment or disassembling any component containing fluids.
Refer to Special Publication, NENG2500, “Caterpillar
Tools and Shop Products Guide” for tools and supplies
suitable to collect and contain fluids on Caterpillar
products.
Dispose of all fluids according to local regulations and
mandates.
NOTICE
Since Caterpillar engines incorporate a shunt design
cooling system, it is mandatory to always operate the
engine with a water temperature regulator.
Depending on load, failure to operate with a water temperature regulator could result in either an overheating
or an overcooling condition.
NOTICE
If the water temperature regulator is installed incorrectly, it will cause the engine to overheat.
3. Install a new seal in the water temperature
regulator housing. Install a new water temperature
regulator and a new gasket. Install the water
temperature regulator housing and the hose.
4. Refill the cooling system.
Reference: For all cooling system requirements,
refer to the Operation and Maintenance
Manual, SEBU6250, “Caterpillar Machine Fluids
Recommendations”.
Reference: For information on the cooling system
capacity, refer to the Operation and Maintenance
Manual, “Refill Capacities” for the machine that is
being serviced.
i01864361
Differential Thrust Pin
Clearance - Check
SMCS Code: 3258-535-T9
Illustration 221
g00950132
Front view of engine
1. Remove the water temperature regulator housing.
2. Remove the gasket, the water temperature
regulator and the seal from the water temperature
regulator housing.
NOTICE
Former water temperature regulators may be used, if
they meet the test specifications and are not damaged
or have excessive buildup or deposits.
Illustration 222
g00950497
For the correct thrust pin adjustment procedures
for the front and rear differentials, refer to Power
Train, Specifications, “Differential and Bevel Gear”
for the machine that is being serviced or contact
your Caterpillar dealer.
121
Maintenance Section
Differential and Final Drive Oil - Change
i01863799
Differential and Final Drive Oil
- Change
2. Clean the area around the drain/level plug. Clean
the drain/level plug.
SMCS Code: 3258-044; 4050-044
Note: The oil change interval for the differential and
for the final drives can be monitored with the S·O·S
(Scheduled Oil Sampling) program. The change
intervals is based on the condition of the oil. If
scheduled oil sampling program is not used, the
oil change interval for the differential and the final
drives is at 2000 service hours.
Hot oil and hot components can cause personal
injury. Do not allow hot oil or hot components to
contact the skin.
Illustration 224
g00950204
View of front differential
NOTICE
Care must be taken to ensure that fluids are contained
during performance of inspection, maintenance, testing, adjusting and repair of the product. Be prepared to
collect the fluid with suitable containers before opening any compartment or disassembling any component containing fluids.
Refer to Special Publication, NENG2500, “Caterpillar
Tools and Shop Products Guide” for tools and supplies
suitable to collect and contain fluids on Caterpillar
products.
Dispose of all fluids according to local regulations and
mandates.
Wipe covers and surfaces around openings before
checking or adding oil. Park on a level surface.
Illustration 225
g00950210
View of rear differential
3. Remove front differential drain plugs (3) and
allow the oil to drain into a suitable container.
4. Clean the drain plugs and install the drain plugs.
5. Remove differential filler plugs (2). Fill the
differential to the bottom of the filler plug opening.
Reference: For information on lubricants and
refill capacities, refer to the Operation and
Maintenance Manual, “Lubricant Viscosities and
Refill Capacities” for the machine that is being
serviced.
6. Clean the area around the filler plug. Clean the
filler plug. Install the filler plug.
Illustration 223
g00950196
1. Position the wheels so that final drive drain/level
plugs (1) are facing downward. Remove the final
drive drain/level plugs and allow the oil to drain
into a suitable container.
122
Maintenance Section
Differential and Final Drive Oil - Change
Illustration 226
g00950216
Illustration 228
g00954303
Location of the rear axle breather for AD45 machines
7. Position each wheel so that drain/level plugs (1)
for the final drives are even with the center line
of the wheel. Remove filler plugs (4).
8. Fill the final drives slowly to the bottom of the
drain/level plug openings.
Reference: For information on lubricants and
refill capacities, refer to the Operation and
Maintenance Manual, “Lubricant Viscosities and
Refill Capacities” for the machine that is being
serviced.
9. Install the drain/level plugs. Clean the filler plugs
and install the filler plugs.
Illustration 229
10. Operate the machine and recheck the oil level.
The oil level should reach the bottom of the
drain/level plug openings.
g00954304
Location of the rear axle breather for AE40 Series II machines
12. Remove the breathers from the front and rear
axle housing.
11. Add oil if necessary. Install the plugs.
13. Wash the breathers in, nonflammable solvent.
14. Allow the breathers to dry.
15. Install the clean breathers.
Illustration 227
Location of the front axle breather
g00954302
123
Maintenance Section
Differential and Final Drive Oil Level - Check
i01864250
Differential and Final Drive Oil
Level - Check
SMCS Code: 3258-535-FLV; 4050-535-FLV
NOTICE
Care must be taken to ensure that fluids are contained
during performance of inspection, maintenance, testing, adjusting and repair of the product. Be prepared to
collect the fluid with suitable containers before opening any compartment or disassembling any component containing fluids.
Note: If the oil level is higher than the filler plug
opening, do not allow the oil to drain to the level of
the filler plug opening. Install the filler plug.
Note: All of the drain/level plugs are magnetic
plugs. The magnetic will attract metal from the oil. A
bearing failure is indicated by an increased amount
of metal on the magnetic plug.
Note: If any abnormal particles are found, consult
your Caterpillar dealer.
Refer to Special Publication, NENG2500, “Caterpillar
Tools and Shop Products Guide” for tools and supplies
suitable to collect and contain fluids on Caterpillar
products.
Dispose of all fluids according to local regulations and
mandates.
Wipe covers and surfaces around openings before
checking or adding oil. Park on a level surface.
Illustration 231
Note: Perform Steps 1 and 2 to the final drive on
each wheel.
Illustration 230
g00950397
g00950420
View of front differential
Illustration 232
g00950427
View of rear differential
1. Position the wheels so that the drain/level plug
(1) for the final drive is even with the center line
of the wheel.
3. Remove differential filler plugs (3) and (4). The
oil level should be at the bottom of the filler plug
openings. Add oil, if necessary.
2. Remove the drain/level plug. The oil level should
be at the bottom of the drain/level plug opening.
If necessary, remove filler plug (2) and add oil
through the filler opening.
Reference: For information on lubricants, refer
to the Operation and Maintenance Manual,
“Lubricant Viscosities ” for the machine that is
being serviced.
Reference: For information on lubricants, refer
to the Operation and Maintenance Manual,
“Lubricant Viscosities ” for the machine that is
being serviced.
Note: If the oil level is higher than the filler plug
opening, do not allow the oil to drain to the proper
level. Install the filler plugs.
124
Maintenance Section
Drive Shaft Universal Joints, Splines and Bearings - Inspect/Lubricate
i01864384
Drive Shaft Universal Joints,
Splines and Bearings Inspect/Lubricate
SMCS Code: 3251-040; 3251-086; 3253-040-SN;
3253-086-SN; 3267-040-BD; 3267-086-BD
Inspect the drive shaft universal joints for wear,
loose bolts, or missing bolts. Tighten loose bolts and
replace missing bolts. Inspect the drive shaft splines
and bearings for wear. Replace worn components.
NOTICE
Check that the lines attached to all the remote grease
fittings are undamaged. If the grease lines are split,
grease will not reach the components that require lubricating. Machine damage will result.
Illustration 235
g00950509
Illustration 236
g00950510
Wipe off the fittings before any lubricant is applied.
3. Lubricate the front oscillation drive shaft bearing
through remote mounted fitting (1).
Illustration 233
g00950506
1. Lubricate all drive shaft universal joints through
nine fittings.
Illustration 237
Illustration 234
g00950507
2. Lubricate the center drive shaft slip joint spline
through the fitting.
g00950511
125
Maintenance Section
Ejector Cylinder Bearing - Lubricate
Illustration 238
g00950513
Illustration 240
g00950579
Rear view of AD45 machine
1. Lubricate the left ejector cylinder bearing in the
rod end of the ejector cylinder through remote
mounted fitting (1).
2. Lubricate the right ejector cylinder bearing in the
rod end of the ejector cylinder through remote
mounted fitting (2).
Illustration 239
g00950527
Left side view of AE40 Series II machine
4. Lubricate the rear oscillation drive shaft bearing
through one remote mounted fitting (2).
5. Lubricate the rear intermediate drive shaft center
bearing through one remote mounted fitting (3).
i01864514
Ejector Cylinder Bearing Lubricate
Illustration 241
3. Move the ejector plate to the fully ejected
position. Lubricate the ejector body cylinder
bearings in the head end of the ejector cylinder
through two fittings (3) (one on each side of the
machine).
SMCS Code: 5305-086-BD
NOTICE
Check that the lines attached to all the remote grease
fittings are undamaged. If the grease lines are split,
grease will not reach the components that require lubricating. Machine damage will result.
Wipe off the fittings before any lubricant is applied.
g00950580
i01864765
Ejector Line Screen Inspect/Clean
SMCS Code: 5057-040-Z3; 5057-070-Z3
Clean the ejector line screen every 1000 service
hours or 6 monthly or whenever there is failure of
the regenerative sequence valve.
126
Maintenance Section
Engine Air Filter Primary Element - Clean/Replace
Hot oil and hot components can cause personal
injury. Do not allow hot oil or hot components to
contact the skin.
NOTICE
Care must be taken to ensure that fluids are contained
during performance of inspection, maintenance, testing, adjusting and repair of the product. Be prepared to
collect the fluid with suitable containers before opening any compartment or disassembling any component containing fluids.
Refer to Special Publication, NENG2500, “Caterpillar
Tools and Shop Products Guide” for tools and supplies
suitable to collect and contain fluids on Caterpillar
products.
Dispose of all fluids according to local regulations and
mandates.
3. Wash screen adapter (4) in clean, nonflammable
solvent. Inspect the screen mesh. Replace the
screen adapter if the mesh is worn or damaged.
4. Inspect the hose assembly seals and the screen
adapter seals. Replace the seals if they are worn
or damaged.
5. Install the screen adapter, hose assembly,
flanges, and bolts.
6. Start the engine. Eject and retract the ejector
plate several times. Check for leaks.
i01864768
Engine Air Filter Primary
Element - Clean/Replace
SMCS Code: 1054-070-PY; 1054-510-PY
Illustration 244
Illustration 242
g00950622
1. Remove four bolts (1), flanges (2) and the body
end of hose assembly (3).
2. Remove the ejector line screen adapter from
behind the hose flanges.
Illustration 243
g00950623
g00950627
Service the air cleaner daily or if the air filter
restriction indicator located on the dash panel
comes on. Stop the engine.
NOTICE
Service the air cleaner only with the engine stopped.
Engine damage could result if the air cleaner is serviced while the engine is running.
127
Maintenance Section
Engine Air Filter Primary Element - Clean/Replace
NOTICE
Do not clean the primary elements by bumping or tapping them. Do not use primary elements with damaged pleats, gaskets or seals. Engine damage can result.
Make sure the cleaned primary elements are completely dry before installing them into the filter housing. Water remaining in the elements can cause false
indications of contamination in S·O·S Analysis test results.
Illustration 245
g00950630
6. If the primary element is not damaged, clean the
primary element. The primary element can be
cleaned by using the following methods:
1. Loosen wing nut (1).
• Pressure air.
2. Use handle (2) to remove the engine air filter
primary element from the air cleaner housing.
3. Inspect the air filter service indicator on the
secondary element. This indicator is normally
green. If the indicator is red replace the
secondary element.
Reference: For the correct procedure to replace
the secondary filter element, refer to the
Operation and Maintenance Manual, “Engine
Air Filter Secondary Element - Replace” for the
machine that is being serviced.
• Pressure water.
• Detergent washing.
When you use pressure air, the maximum air
pressure is 205 kPa (30 psi). When you use
pressure water, the maximum water pressure is
280 kPa (40 psi).
Illustration 247
Illustration 246
g00950634
4. Clean the inside of the air cleaner housing.
5. Inspect the primary element. If the pleats, the
gaskets or the seals are damaged, discard the
primary element. Replace a damaged primary
element with a clean primary element.
g00905242
7. When you clean the inside pleats and the outside
pleats, direct the air along the pleats or direct
the water along the pleats.
The primary element can be washed in a solution
that consists of warm water and of nonsudsing
household detergent. Fully rinse the pleats. Allow
the primary element to air dry completely.
8. Inspect the primary element after you clean the
primary element. Do not use a primary element if
the pleats, the gasket or the seals are damaged.
9. Cover the clean primary element. Store the
primary element in a clean, dry location.
128
Maintenance Section
Engine Air Filter Secondary Element - Replace
A primary element may be cleaned for a
maximum of six times. Also replace the primary
element if the primary element has been in
service for one year.
10. Install a clean primary element and the wing
nut. Tighten the wing nut finger tight. Do not use
a tool to tighten the nut.
Note: Make sure that the primary filter element is
properly seated and sealed.
Note: If the air filter restriction indicator remains on
after starting the engine, or the exhaust smoke is
still black after installing a clean primary element,
install a new primary filter element. If the indicator
remains on after installing a new primary filter
element, replace the secondary filter element.
Reference: For the correct procedure to replace the
secondary filter element, refer to the Operation and
Maintenance Manual, “Engine Air Filter Secondary
Element - Replace” for the machine that is being
serviced.
i01864772
Engine Air Filter Secondary
Element - Replace
SMCS Code: 1054-510-SE
NOTICE
Service the air cleaner only with the engine stopped.
Engine damage could result.
Illustration 248
g00950640
2. Remove the split pin, air filter service indicator,
and the secondary element .
3. Cover the air inlet opening. Clean the inside of
the air cleaner housing.
4. Direct low air pressure into the air filter service
indicator in order to reset the indicator. This will
change the color of the indicator from a red color
to a green color.
5. Uncover the air inlet opening. Install a new
secondary element. Install the air filter service
indicator and the split pin.
6. Install a clean primary element and wing nut.
Tighten the wing nut finger tight. Do not use a
tool to tighten the nut.
i01864776
NOTICE
Always replace the secondary element. Do not attempt to reuse it by cleaning. Engine damage could
result.
Replace the engine air filter secondary element
under the following conditions:
Engine Air Precleaner - Clean
SMCS Code: 1055-070
NOTICE
Service the air cleaner only with the engine stopped.
Engine damage could result.
• A clean primary element has been installed and a
warning for the air filter still occurs.
• The engine air filter primary element is serviced
for the third time.
• The exhaust smoke remains black and a clean
primary element has been installed.
1. Remove the wing nut and the primary element.
Reference: For additional information, refer to the
Operation and Maintenance Manual, “Engine Air
Filter Primary Element - Clean/Replace” for the
machine that is being serviced.
Illustration 249
g00950641
129
Maintenance Section
Engine Crankcase Breather - Clean
1. Stop the engine.
2. Remove the engine air precleaner.
3. Inspect the precleaner inlet screen for dirt and
for trash. If the screen is dirty, clean the screen
with compressed air.
4. Check the air intake precleaner rotor operation.
5. Periodically remove the precleaner and wash in
water.
i01865682
Engine Crankcase Breather Clean
Illustration 251
g00950944
8. Repeat Steps 1 through 7 for the breather on the
other side of the engine.
SMCS Code: 1317-070
i01865691
Engine Mounts - Inspect
SMCS Code: 1152-040
Illustration 250
g00950943
1. Stop the engine.
2. Loosen hose clamps (1) and (2) and remove the
hose from the breather.
Illustration 252
g00950960
Illustration 253
g00950963
3. Loosen breather retaining clamp (3) and remove
the clamp and the breather.
4. Wash the breather in a clean, nonflammable
solvent. Shake the element dry or use pressure
air in order to dry the breather element.
5. Inspect the hose for damage. Replace the hose,
if necessary.
6. Install the breather. Tighten the breather clamp.
7. Install the hose on the breather. Tighten the hose
clamps.
Caterpillar recommends inspecting the engine
mounts for deterioration and for proper bolt torque.
This will help to prevent excessive engine vibration
that is caused by improper mounting.
130
Maintenance Section
Engine Oil Level - Check
Reference: For the proper bolt torques for the
engine mounts, refer to Specifications, “3408E HEUI
Engine” for the machine that is being serviced.
i01866047
Engine Oil Level - Check
SMCS Code: 1000-535-FLV
NOTICE
Do not underfill or overfill the engine crankcase with
oil. Either condition can cause engine damage.
Illustration 256
g00951107
1. Before starting the engine, the oil level must
be in the hatched area on the SAFE STARTING
RANGE side of dipstick (2).
2. With the engine running and the oil warm,
maintain the oil level in the hatched area on the
SAFE OPERATING RANGE side of the dipstick.
3. Remove filler cap (1) and add oil if necessary.
4. Clean the filler cap and install the filler cap.
Illustration 254
g00951104
i01865763
Check the engine oil level with the machine level
and the parking brake engaged.
Engine Oil and Filter - Change
SMCS Code: 1318-044
The dipstick is located on the cab side of the
engine.
Note: Some commercial oils that meet API
specifications may require shorter oil change
intervals. The oil change intervals are determined
by close monitoring of the oil condition and engine
wear metals. Caterpillar prefers scheduled oil
sampling as the proper method of checking engine
wear metals.
Consult your Caterpillar dealer for the latest oil
recommendations.
Do not work on or near the cab or left side of the
engine until the cab is in the fully tilted position.
Illustration 255
Engine dipstick
g00951105
Disconnect the batteries by turning the battery
disconnect switch to the OFF position and remove
the key before performing any service work under
the cab.
Accidental cab lowering can cause severe personal injury or death from crushing could occur.
131
Maintenance Section
Engine Oil and Filter - Change
Hot oil and hot components can cause personal
injury. Do not allow hot oil or hot components to
contact the skin.
NOTICE
Care must be taken to ensure that fluids are contained
during performance of inspection, maintenance, testing, adjusting and repair of the product. Be prepared to
collect the fluid with suitable containers before opening any compartment or disassembling any component containing fluids.
Refer to Special Publication, NENG2500, “Caterpillar
Tools and Shop Products Guide” for tools and supplies
suitable to collect and contain fluids on Caterpillar
products.
Illustration 258
g00951058
1. Open the drain valve and allow the oil to drain
into a suitable container. Close the drain valve.
Dispose of all fluids according to local regulations and
mandates.
The machine must be level and the parking brake
engaged. The oil must be warm and the engine
stopped.
Illustration 259
g00951064
2. Remove the used oil filter elements and discard
the used oil filter elements.
3. Clean the filter housing base. Make sure that all
of the old seal is removed from the filter base.
Illustration 257
g00951023
The engine oil filters are located on the left side of
the engine. Tilt the cab to access the filters.
Reference: For information on tilting the cab, refer
to Operation and Maintenance Manual, “Cab - Tilt”
for the machine that is being serviced.
4. Apply a thin film of clean engine oil to the new
filter element seal.
5. Install both filters hand tight. Tighten the filters
until the sealing surface contacts the filter base.
Tighten the filter element by an additional 3/4
of a turn.
Note: There are rotation index marks on each filter,
spaced 90 degrees (1/4 turn) apart. Use these
rotation marks as a guide when tightening the filters.
132
Maintenance Section
Engine Shutdown to Idle Protection System - Test
3. Disconnect connector (1) from coolant
temperature switch (2). Engine speed should
reduce to low idle. Reconnect the wiring at the
connector.
Illustration 260
g00951067
6. Remove filler cap (1). Fill the crankcase with new
oil. Clean the filler cap and install the filler cap.
Illustration 262
Reference: For information on lubricants and
refill capacities, refer to the Operation and
Maintenance Manual, “Lubricant Viscosities and
Refill Capacities” for the machine that is being
serviced.
g00951195
4. Disconnect connector (3) from oil pressure
switch (4). Engine speed should reduce to low
idle. Reconnect the connector.
5. Stop the engine.
7. Start the engine and run the engine at low idle
for five minutes. Inspect the engine oil filter for
leaks. Stop the engine.
8. Maintain the oil level in the hatched area on the
SAFE OPERATING RANGE side of dipstick (2).
Add oil if necessary.
i01866116
Engine Shutdown to Idle
Protection System - Test
SMCS Code: 1408-081
Illustration 263
g00951197
1. Start the engine
2. Depress the accelerator pedal to achieve engine
rpm above low idle.
6. Disconnect wire (5) from coolant level sensor
(6). Secure the wire to prevent it from touching
any metal objects or protruding through the fan
guard.
7. Start the engine and depress the accelerator
control. Engine speed should not increase above
low idle.
8. Stop the engine. Reconnect the wire to the
coolant level sensor.
9. Seal wiring connector with electrical corrosion
protectant.
10. Replace any cable ties that were removed when
disconnecting wiring connectors.
Illustration 261
g00951190
133
Maintenance Section
Engine Valve Lash - Check/Adjust
Note: If the engine shutdown to idle protection
system does not function correctly, check the
electrical system or contact your Caterpillar dealer.
i01866230
Engine Valve Lash Check/Adjust
SMCS Code: 1102-025; 1102-535
Ensure that the engine can not be started while
this maintenance is being performed. To help prevent possible injury, do not use the starting motor
to turn the flywheel.
Hot engine components can cause burns. Allow
additional time for the engine to cool before measuring/adjusting valve lash clearance.
g00951266
Illustration 264
If the valve clearance is within 0.08 mm (0.003 inch)
of nominal clearance given, adjustment is not
required. If the clearance is not within these limits,
set the clearance as specified in table 14.
Table 14
Valve Clearance Setting
Note: The following warning is located on the valve
covers or valve base covers of the engine.
Intake
0.38 mm (0.015 inch)
Exhaust
0.76 mm (0.030 inch)
Electrical Shock Hazard. Unit Injector System. 90
- 120 Volts.
Perform the first valve lash check for new engines
and rebuilt engines at the first oil change. The initial
wear and seating of the valve train components
causes this valve lash adjustment to be required.
Subsequent checks of the valve lash and
adjustments of the valve lash are scheduled for
every 3000 service hours.
Engine valve rotators should also be inspected
when the valve lash is checked.
Reference: For information on inspecting the engine
valve rotators, refer to Operation and Maintenance
Manual , “Engine Valve Rotators - Inspect” for the
machine that is being serviced.
NOTICE
Only qualified service personnel should perform this
maintenance. Refer to the Service Manual or your
Caterpillar dealer for the complete valve lash adjustment procedure.
Operation of Caterpillar engines with improper valve
adjustments can reduce engine efficiency. This reduced efficiency could result in excessive fuel usage
and/or shortened engine component life.
Illustration 265
g00951267
Reference: For further information on checking the
engine valve lash, refer to Systems Operation,
Testing and Adjusting, “3408E & 3412E Engines” for
the machine that is being serviced. Contact your
Caterpillar dealer for additional information.
134
Maintenance Section
Engine Valve Rotators - Inspect
i01770623
i01866298
Engine Valve Rotators - Inspect
Engine Water Pump - Inspect
SMCS Code: 1109-040
SMCS Code: 1361-040
When inspecting the valve rotators, protective
glasses or face shield and protective clothing
must be worn, to help prevent being burned by
hot oil or spray.
NOTICE
A valve rotator which does not operate properly will
accelerate valve face wear and valve seat wear and
shorten valve life. If a damaged rotator is not replaced,
valve face guttering could result and cause pieces of
the valve to fall into the cylinder. This can cause piston
and cylinder head damage.
Valve rotators cause the valve to rotate when the
engine runs. This helps to prevent deposits from
building up on the valve and the valve seats.
Illustration 267
g00951327
Front view of engine
A water pump that has failed may cause severe
engine overheating problems. The engine
overheating problems could result in the following
problems:
Illustration 266
g00905744
Perform the following steps after the valve lash is
set, but before the valve covers are installed:
1. Start the engine. Operate the engine at low idle
2. Observe the top surface of each valve rotator.
The valve rotators should turn slightly when the
valves close.
If the valve fails to rotate, contact your Caterpillar
dealer.
• Cracks in the cylinder head.
• Piston seizure.
• Other potential engine damage.
Visually inspect the water pump for leaks. If leaks
are found, all of the seals on the water pump must
be replaced.
Note: For further information, refer to Disassembly
and Assembly, “3408E & 3412E Engine” for the
machine that is being serviced.
135
Maintenance Section
Exhaust Purifier - Inspect/Clean
i01866342
Exhaust Purifier Inspect/Clean
2. Lubricate the belt tightener pulley through fitting
(2).
Note: If regular lubrication is performed at the
recommended interval, only two or three shots of
lubricant will be required.
SMCS Code: 1089-040; 1089-070
i01866430
Fire Suppression System Check
SMCS Code: 7401-535
Reference: For detailed information on the fire
suppression system service procedures, refer to the
fire system manufacturer’s service information.
Illustration 268
g00951352
Inspect the catalytic purifier for damage and for
leaks. If necessary, make repairs. If the catalytic
purifier is damaged, consult your Caterpillar dealer.
If the engine has low power, the catalytic purifier
may be blocked. Clean the catalytic purifier.
Reference: For information on cleaning the catalytic
purifier, refer to the Operation and Maintenance
Manual, “Emission Control Systems” for the machine
that is being serviced.
Illustration 270
g00951410
Foam type fire suppression system
i01866399
Fan Drive Bearing and Belt
Tightener - Lubricate
Perform fire suppression system checks and service
procedures in accordance with the fire suppression
system manufacturer’s service information.
i01866667
SMCS Code: 1358-086; 1359-086-BD
Frame and Body - Inspect
SMCS Code: 7051-040; 7258-040
AD45
The body (bed) may fall unexpectedly and without
warning resulting in personal injury or death.
Illustration 269
g00951357
1. Lubricate the fan drive bearing through fitting (1).
When it is necessary to work under the truck with
the body (bed) raised, install the body (bed) retaining pins through the pin bores in the frame and
body.
136
Maintenance Section
Frame and Body - Inspect
AE40 Series ll
The tailgate may move suddenly and without
warning, resulting in personal injury or death.
When it is necessary to work under the tailgate
with the tailgate raised, install the tailgate retaining pins through the pin bores in the tailgate and
body.
Illustration 271
g00951543
1. Raise the dump body until the pin bores on the
dump body align with the pin bores on the frame.
Install the two body retaining pins.
Illustration 273
g00943713
1. Fully retract the ejector plate and raise the
tailgate until the pin bores on the body align with
the pin bores on the tailgate. Install the tailgate
retaining pin.
Illustration 272
g00951544
2. Inspect the dump body. If the dump body is
damaged or worn, repair the dump body.
3. Clean the frame with a wire brush or a
scraper. If you find cracks or damage, contact
your Caterpillar dealer for the specific repair
procedures.
4. Remove the body retaining pin. If the pin cannot
be removed, raise the dump body to release
the tension. Place the pin in the stored position
in the rear frame.
Illustration 274
g00951548
2. Clean the ejector body with a wire brush or a
scraper. Inspect the ejector body. If the body is
damaged or worn, repair the body. If you find
cracks, contact your Caterpillar dealer for the
specific repair procedure.
3. Remove the tailgate retaining pin. If the pin
cannot be removed, raise the tailgate to release
the tension. After lowering the tailgate, place the
pin in the stored position in the body.
137
Maintenance Section
Frame and Body Support Pads - Clean/Inspect
i01866693
Frame and Body Support Pads
- Clean/Inspect
SMCS Code: 7051-040; 7051-070; 7258-040;
7258-070
AD45
To prevent personal injury or death, do not work
under the truck with the body (bed) raised.
When it is necessary to work under the truck with
the body (bed) raised, install the body (bed) retaining pins through the pin holes in the frame and
body.
3. Visually inspect each of the body support pads.
Look for uneven wear of the body support pads.
Look for gaps between the body support pads
and the mating surfaces. If problems are found
contact your Caterpillar dealer for additional
information.
4. Remove the body retaining pins. If the pins
cannot be removed, raise the dump body to
release the tension. After lowering the dump
body, place the pins in the stored position in the
dump body.
i01866816
Fuel System - Prime
SMCS Code: 1250-548
After changing the fuel filters or if the engine fuel
system is run dry, prime (purge) the fuel system to
fill filters and remove air bubbles from the system.
NOTICE
Do not loosen the fuel lines at the fuel manifold. The
engine components may be damaged.
Do not remove the fitting in the fuel filter base in order
to release air from the fuel system while priming the
engine. Periodic removal of the fitting will result in increased wear of the threads in the fuel filter base and
will lead to fuel leakage.
Illustration 275
g00951543
1. Raise the dump body until the retaining bores on
the dump body align with the retaining bores on
the frame. Install the two body retaining pins.
Do not allow dirt to enter the fuel system. Thoroughly clean the area around any fuel system component
that will be disconnected. Fit a suitable cover over any
disconnected fuel system component in order to protect it from dirt and debris.
NOTICE
Care must be taken to ensure that fluids are contained
during performance of inspection, maintenance, testing, adjusting and repair of the product. Be prepared to
collect the fluid with suitable containers before opening any compartment or disassembling any component containing fluids.
Refer to Special Publication, NENG2500, “Caterpillar
Tools and Shop Products Guide” for tools and supplies
suitable to collect and contain fluids on Caterpillar
products.
Illustration 276
g00951578
2. Clean the body support pads with high pressure
water or steam. If damage is found, contact
your Caterpillar dealer for the specific repair
procedure.
Dispose of all fluids according to local regulations and
mandates.
138
Maintenance Section
Fuel System Primary Filter - Clean/Replace
NOTICE
Care must be taken to ensure that fluids are contained
during performance of inspection, maintenance, testing, adjusting and repair of the product. Be prepared to
collect the fluid with suitable containers before opening any compartment or disassembling any component containing fluids.
Refer to Special Publication, NENG2500, “Caterpillar
Tools and Shop Products Guide” for tools and supplies
suitable to collect and contain fluids on Caterpillar
products.
Illustration 277
g00951618
1. Turn the priming pump counterclockwise and
pull out the priming pump plunger. This will
unlock the hand priming pump.
2. Use the hand priming pump to fill the engine fuel
lines with fuel. Continue to prime the fuel system
until the pump resists operation.
Dispose of all fluids according to local regulations and
mandates.
NOTICE
Do not fill fuel filters with fuel before installing them.
The fuel will not be filtered and could be contaminated.
Contaminated fuel will cause accelerated wear to fuel
system parts. The fuel system should be primed prior
to starting the engine.
3. Start the engine and inspect the fuel system for
leaks.
4. If the engine will not start or continues to misfire
or smoke, further priming is necessary.
Note: The engine ECM is cooled by fuel. It may be
necessary to block the fuel from flowing through
the ECM during priming in order to force the fuel
to flow to the injectors.
5. Push the priming pump plunger inward and turn
the priming pump plunger clockwise. This will
lock the priming pump plunger.
Illustration 278
g00951651
i01867384
Fuel System Primary Filter Clean/Replace
SMCS Code: 1260-070; 1260-510
Clean the primary element when the engine has a
loss of power or when the exhaust smoke is black.
Personal injury or death can result if spilled fuel
ignites. Fuel leaked or spilled onto hot surfaces
or electrical components can cause a fire.
To help prevent possible injury, turn the battery
disconnect switch to the OFF position when
changing fuel filters or water separator elements.
Clean up fuel spills immediately.
1. Remove the fuel filter assembly from the base
with a strap-type wrench.
2. Remove the water separator bowl and seal from
the filter element and discard the used filter.
Inspect the seal. If the seal is damaged, use a
new one.
3. Clean the filter mounting base. Be sure all of the
old seal is removed.
4. Wash the water separator bowl in clean,
nonflammable solvent.
5. Lubricate the seals of a new filter with clean
diesel fuel.
6. Install the seal and the water separator bowl on
the new primary filter element.
139
Maintenance Section
Fuel System Secondary Filter - Replace
7. Install the filter assembly by hand. When the seal
contacts the base, tighten 3/4 of a turn more.
8. Prime the fuel system.
Reference: For information on priming the fuel
system, refer to the Operation and Maintenance
Manual, “Fuel System - Prime” for the machine
that is being serviced.
NOTICE
Do not fill fuel filters with fuel before installing them.
The fuel will not be filtered and could be contaminated.
Contaminated fuel will cause accelerated wear to fuel
system parts. The fuel system should be primed prior
to starting the engine.
9. Start the engine and inspect the filter for leaks.
Make any necessary repairs. If the engine has a
loss of power or the exhaust smoke is still black,
replace the secondary filter.
Reference: For information on replacing the
secondary fuel filter, refer to the Operation and
Maintenance Manual, “Fuel System Secondary Filter
- Replace” for the machine that is being serviced.
i01867519
Fuel System Secondary Filter Replace
SMCS Code: 1261-510-SE
Illustration 279
g00951660
1. Remove the fuel filter element with a strap-type
wrench. Discard the used filter.
2. Clean the filter housing base. Make sure that all
of the old seal is removed.
Personal injury or death can result if spilled fuel
ignites. Fuel leaked or spilled onto hot surfaces
or electrical components can cause a fire.
To help prevent possible injury, turn the battery
disconnect switch to the OFF position when
changing fuel filters or water separator elements.
Clean up fuel spills immediately.
NOTICE
Care must be taken to ensure that fluids are contained
during performance of inspection, maintenance, testing, adjusting and repair of the product. Be prepared to
collect the fluid with suitable containers before opening any compartment or disassembling any component containing fluids.
Refer to Special Publication, NENG2500, “Caterpillar
Tools and Shop Products Guide” for tools and supplies
suitable to collect and contain fluids on Caterpillar
products.
Dispose of all fluids according to local regulations and
mandates.
3. Lubricate the sealing surface of the new filter
element with clean diesel fuel.
4. Install the new filter by hand. Tighten the filter
element until the sealing surface contacts the
base. Tighten the filter element an additional
3/4 of a turn.
Note: There are rotation index marks on each filter,
spaced 90 degrees (1/4 turn) apart. Use these
marks as a guide when tightening the filter.
5. Prime the fuel system.
Reference: For information on priming the fuel
system, refer to the Operation and Maintenance
Manual, “Fuel System - Prime” for the machine
that is being serviced.
6. Start the engine and inspect the filter for leaks.
Make any necessary repairs.
140
Maintenance Section
Fuel System Water Separator - Drain
i01867663
i01867731
Fuel System Water Separator
- Drain
Fuel Tank Cap and Strainer Clean
SMCS Code: 1263-543
SMCS Code: 1273-070-STR; 1273-070-Z2
Note: The water separator is not a filter. The water
separator separates the water from the fuel.
Note: Machines equipped with an optional fast-fill
fuel system do not contain a breather filter element
in the fuel cap. Perform Steps 3 and 5 only to
standard machines without the fast-fill fuel system.
Personal injury or death can result if spilled fuel
ignites. Fuel leaked or spilled onto hot surfaces
or electrical components can cause a fire.
To help prevent possible injury, turn the battery
disconnect switch to the OFF position when
changing fuel filters or water separator elements.
Clean up fuel spills immediately.
NOTICE
Care must be taken to ensure that fluids are contained
during performance of inspection, maintenance, testing, adjusting and repair of the product. Be prepared to
collect the fluid with suitable containers before opening any compartment or disassembling any component containing fluids.
Illustration 281
g00951678
Illustration 282
g00906284
Refer to Special Publication, NENG2500, “Caterpillar
Tools and Shop Products Guide” for tools and supplies
suitable to collect and contain fluids on Caterpillar
products.
Dispose of all fluids according to local regulations and
mandates.
1. Lift lever (5) and turn the lever counterclockwise
until the lever stops. Lift the cap straight up to
remove the cap.
2. Inspect seal (4) for damage. Replace the seal,
if necessary.
Illustration 280
g00951669
3. Remove screws (1), filter assembly (2), valve (3)
and gaskets.
4. Wash the cap in a clean, nonflammable solvent.
1. Open the drain valve and allow the water and
sediment to drain into a suitable container.
2. Close the drain valve.
5. Install a new filter kit in the cap. Install the
components in reverse order.
141
Maintenance Section
Fuel Tank Water and Sediment - Drain
Illustration 283
g00951679
6. Remove strainer (6) from the filler opening.
Illustration 284
g00951692
The drain valve is located on the right side of the
machine under the fuel tank.
7. Wash the strainer in a clean, nonflammable
solvent.
8. Install strainer (6) in the filler opening.
9. Install the fuel tank cap.
i01867877
Fuel Tank Water and Sediment
- Drain
SMCS Code: 1273-543-M&S
NOTICE
Care must be taken to ensure that fluids are contained
during performance of inspection, maintenance, testing, adjusting and repair of the product. Be prepared to
collect the fluid with suitable containers before opening any compartment or disassembling any component containing fluids.
Refer to Special Publication, NENG2500, “Caterpillar
Tools and Shop Products Guide” for tools and supplies
suitable to collect and contain fluids on Caterpillar
products.
Illustration 285
g00951696
1. Open (turn counterclockwise) drain valve (1) and
allow the water and sediment to drain out of
opening (2) into a suitable container.
2. Close drain valve (1).
i01868070
Fuses - Replace
SMCS Code: 1417-510
Dispose of all fluids according to local regulations and
mandates.
Fuses – Fuses protect the electrical
system from damage caused by
overloaded circuits. Replace the fuse if
the element separates. If the element of a new fuse
separates, check the circuit. Repair the circuit, if
necessary.
NOTICE
Replace the fuses with the same type and size only.
Otherwise, electrical damage can result.
If it is necessary to replace fuses frequently, an electrical problem may exist. Contact your Caterpillar dealer
142
Maintenance Section
Hoist Cylinder Bearings - Lubricate
Illustration 286
g00951770
Illustration 288
g00951840
View of battery compartment under the operator’s station
Rear view of the AD45 machine
(1) 675 Amp - Fusible link.
1. Lubricate the left upper hoist cylinder bearing
through remote mounted fitting (1).
2. Lubricate the left lower hoist cylinder bearing
through remote mounted fitting (2).
3. Lubricate the right lower hoist cylinder bearing
through remote mounted fitting (3).
4. Lubricate the right upper hoist cylinder bearing
through remote mounted fitting (4).
i01868836
Illustration 287
g00951772
Hoist, Torque Converter and
Brake Oil - Change
View under right side of console cover in the operator’s station
SMCS Code: 5050-044
(2) 8 Amp (if equipped) - voltage reducer
Operate the machine long enough to warm the oil.
(3) 5 Amp - Torque converter lock-up
The machine must be level, the parking brake
engaged and the engine stopped.
i01868381
Hoist Cylinder Bearings Lubricate
1. Remove the filler cap to prevent a vacuum in the
tank. Install the cap after the tank is drained to
prevent dirt from entering the system.
SMCS Code: 7551-086-CD
NOTICE
Check that the lines attached to all remote grease fittings are undamaged. If the lines are split, grease will
not reach the bearings or pins. Machine damage will
result.
Wipe all fittings clean before lubricating.
Hot oil and hot components can cause personal
injury. Do not allow hot oil or hot components to
contact the skin.
143
Maintenance Section
Hoist, Torque Converter and Brake Oil - Change
NOTICE
Care must be taken to ensure that fluids are contained
during performance of inspection, maintenance, testing, adjusting and repair of the product. Be prepared to
collect the fluid with suitable containers before opening any compartment or disassembling any component containing fluids.
Refer to Special Publication, NENG2500, “Caterpillar
Tools and Shop Products Guide” for tools and supplies
suitable to collect and contain fluids on Caterpillar
products.
Dispose of all fluids according to local regulations and
mandates.
4. Remove the pipe nipple. Clean and install the
tank drain plug.
5. Remove the hoist, torque converter and brake
hydraulic tank filler cap.
6. Remove the strainer.
7. Wash the cap and the strainer in clean,
nonflammable solvent. Allow them to dry.
8. Inspect the cap seal. Use a new seal if the used
one is damaged. Install the strainer.
9. Fill the hoist, torque converter and brake
hydraulic tank.
Reference: For information on lubricants
and refill capacities, refer to Operation and
Maintenance Manual, “Lubricant Viscosities and
Refill Capacities” for the machine that is being
serviced.
10. Start the engine and run the engine at low idle.
Check for leaks.
Illustration 289
g00951917
Note: Hand tighten the NPT pipe nipple. Do not use
tools.
2. Remove the tank drain plug. Open the drain
valve by installing a 1 inch NPT pipe nipple,
88 mm (3.50 inch) long, in the bottom of the
tank, to open the internal drain valve and drain
the oil. Drain the oil into a suitable container.
Illustration 291
g00951948
11. With the oil cold, check the oil level in sight
gauge (1). For the AD45 truck check the oil level
with the body fully lowered. For the AE40 Series
ll truck check the oil level with the ejector plate
fully retracted and the tailgate fully raised.
12. Maintain the oil level to the FULL mark in the
sight gauge.
13. Remove filler cap (2) add oil if necessary.
Illustration 290
g00951920
3. Remove the drain plug from the brake oil cooler
and drain the oil. Drain the oil into a suitable
container. Clean and install the plug.
144
Maintenance Section
Hoist, Torque Converter and Brake Oil Level - Check
i01868920
Hoist, Torque Converter and
Brake Oil Level - Check
2. Maintain the oil level to the FULL mark in the
sight gauge.
3. Remove filler cap (2) add oil if necessary.
4. Clean the filler cap and install the filler cap.
SMCS Code: 5050-535-FLV
Hot oil and hot components can cause personal
injury. Do not allow hot oil or hot components to
contact the skin.
NOTICE
Care must be taken to ensure that fluids are contained
during performance of inspection, maintenance, testing, adjusting and repair of the product. Be prepared to
collect the fluid with suitable containers before opening any compartment or disassembling any component containing fluids.
Note: If the system has been drained, it will be
necessary to stop the engine and add oil several
times.
i01874943
Hoist, Torque Converter and
Brake Tank Breather - Replace
SMCS Code: 5057
Refer to Special Publication, NENG2500, “Caterpillar
Tools and Shop Products Guide” for tools and supplies
suitable to collect and contain fluids on Caterpillar
products.
Dispose of all fluids according to local regulations and
mandates.
Illustration 293
g00954327
1. Remove cover (1).
Illustration 292
g00951948
NOTICE
Ensure the dump body is fully lowered (AD45) or the
ejector plate is fully retracted and the tailgate fully
raised (AE40 Series ll) when checking the tank oil level.
Illustration 294
The hoist, torque converter and brake hydraulic
tank is located on the right side of the machine.
2. Loosen the retaining clamp on the bottom of
breather element (2). Remove and discard the
used breather element.
1. With the oil cold, check the oil level in sight
gauge (1). For the AD45 truck check the oil level
with the body fully lowered. For the AE40 Series
ll truck check the oil level with the ejector plate
fully retracted and the tailgate fully raised.
g00954328
3. Install the new breather element. Tighten the
retaining clamp.
4. Install cover (1).
145
Maintenance Section
Hoist, Torque Converter and Brake Tank Screen - Clean
i01868954
Hoist, Torque Converter and
Brake Tank Screen - Clean
2. Remove bolts (2) from the hydraulic tank cover
and remove the cover.
3. Clean the debris from the bottom of the tank.
SMCS Code: 5056-070-Z3
There is one return screen and two suction screens
inside the hoist, torque converter and brake tank.
Clean the return screen and suction screens
whenever there is a failure of the brakes, torque
converter, hoist/eject cylinders or hoist pumps.
Hot oil and hot components can cause personal
injury. Do not allow hot oil or hot components to
contact the skin.
NOTICE
Care must be taken to ensure that fluids are contained
during performance of inspection, maintenance, testing, adjusting and repair of the product. Be prepared to
collect the fluid with suitable containers before opening any compartment or disassembling any component containing fluids.
Refer to Special Publication, NENG2500, “Caterpillar
Tools and Shop Products Guide” for tools and supplies
suitable to collect and contain fluids on Caterpillar
products.
Illustration 296
g00952019
4. Remove the retaining nuts from bolts (3). Remove
the cover located at the bottom of hoist return
screen (4). Remove and clean or discard the
screen.
5. Install new or clean screen (4), the screen cover
and cover retaining nuts.
6. Clean the hydraulic tank cover in clean,
nonflammable solvent. Inspect the cover gasket.
If the gasket is damaged, use a new gasket.
Dispose of all fluids according to local regulations and
mandates.
Illustration 297
g00952025
7. Remove four bolts (5) that hold suction pipes
(6) and (7) to the hydraulic tank. Remove the
suction pipe, seal and screen assemblies.
Illustration 295
g00993169
8. Remove the suction screens from the pipes.
Note: Hand tighten the NPT pipe nipple. Do not use
tools.
1. Remove the tank drain plug. Open the drain
valve by installing a 1 inch NPT pipe nipple,
88 mm (3.50 inch) long, in the bottom of the
tank, to open the internal drain valve and drain
the oil. Drain the oil into a suitable container.
9. Wash the screens in clean, nonflammable
solvent.
10. Inspect the suction pipe seals. Replace if
damaged.
146
Maintenance Section
Indicators and Gauges - Test
• Move the engine start switch key to the ON
11. Inspect the suction screens in the pipe
assemblies.
position and check the Caterpillar Monitoring
System self test.
12. Install the suction pipe, screen and seal
assemblies in the hydraulic tank. Secure the
pipes to the hydraulic tank with bolts (5).
13. Install the tank cover and bolts.
Reference: For information on the Caterpillar
Monitoring System self test, refer to the Operation
and Maintenance Manual, “Caterpillar Monitoring
System - Self Test” for the machine that is being
serviced.
14. Fill the hydraulic tank.
• Make sure the parking brake is engaged. Start
Reference: For information on lubricants
and refill capacities, refer to Operation and
Maintenance Manual, “Lubricant Viscosities and
Refill Capacities” for the machine that is being
serviced.
the engine.
• Check for oil leaks. Repair any oil leaks around
the covers or around the hoses.
• Look for inoperative gauges.
15. Start the engine and run the engine at low idle.
Check for leaks.
• Turn on all machine lights. Check for proper
operation.
• Sound the horn.
• Stop the engine.
i01773398
Oil Filter - Inspect
SMCS Code: 1308-507; 3067-507; 5068-507
Inspect a Used Filter for Debris
Illustration 298
g00952032
16. With the oil cold, check the oil level in sight
gauge (8). For the AD45 truck check the oil level
with the body fully lowered. For the AE40 Series
ll truck check the oil level with the ejector plate
fully retracted and the tailgate fully raised.
17. Maintain the oil level to the FULL mark in the
sight gauge.
18. Remove filler cap (9) and add oil if necessary.
i01869547
Indicators and Gauges - Test
SMCS Code: 7000-081; 7450-081
Before you operate the machine, perform the
following checks and make any necessary repairs:
• Look for broken lenses on the gauges. Also, look
for broken indicator lights, broken switches and
other broken components in the operator’s station.
Illustration 299
g00907074
The Element is Shown with Debris
Use a 4C-5084 Filter Cutter to cut the filter element
open. Spread apart the pleats and inspect the
element for metal and for other debris. An excessive
amount of debris in the filter element can indicate
a possible failure.
If metals are found in the filter element, a magnet
can be used to differentiate between ferrous and
nonferrous metals.
147
Maintenance Section
Oscillating Hitch - Adjust
Ferrous metals can indicate wear on steel parts and
on cast iron parts.
Nonferrous metals can indicate wear on the
aluminium parts of the engine, such as main
bearings, rod bearings or turbocharger bearings.
Small amounts of debris may be found in the filter
element. This could be caused by friction and by
normal wear. Consult your Caterpillar dealer to
arrange for further analysis if an excessive amount
of debris is found.
Using an oil filter element that is not recommended
by Caterpillar can result in severe engine damage
to engine bearings, to the crankshaft, and to other
parts. This can result in larger particles in unfiltered
oil. The particles could enter the lubricating system
and the particles could cause damage.
i01869706
Oscillating Hitch - Lubricate
SMCS Code: 7113-086
NOTICE
Check that the lines attached to all remote grease fittings are undamaged. If the lines are split, grease will
not reach the bearings or pins. Machine damage will
result.
Wipe all fittings clean before lubricating.
i01869668
Oscillating Hitch - Adjust
SMCS Code: 7113-025
Illustration 301
g00952133
1. Lubricate the upper hitch bearing through remote
mounted fitting (1).
2. Lubricate the lower hitch bearing through remote
mounted fitting (2).
Illustration 300
g00952100
Adjust the oscillating hitch bearing preload at the
initial 250 Service Hours or 1 month service interval
and then at every 1000 service hours or 6 monthly
service interval.
Reference: For the correct oscillating hitch bearing
adjustment procedures, refer to Steering Systems,
Specifications, “Oscillating Hitch” for the machine
that is being serviced or contact your Caterpillar
dealer.
Illustration 302
g00952140
Rear view of AD45 machine
3. Lubricate the front oscillation bearing through
remote mounted fitting (3).
4. Lubricate the rear oscillation bearing through
remote mounted fitting (4).
148
Maintenance Section
Parking Brake Release Oil Filter - Replace
Illustration 303
g00952146
Illustration 304
g00952181
Left side view of AE40 Series II machine
5. Lubricate the rear oscillation bearing through
remote mounted fitting (5).
6. Lubricate the front oscillation bearing through
remote mounted fitting (6).
i01869854
1. Remove drain plug (2) from the bottom of filter
housing (1). Drain the oil into a suitable container.
Install drain plug (2) in the filler housing and
tighten finger tight.
Note: Removing drain plug from the bottom of filter
housing may not drain all of the oil from the filter.
Avoid spillage when removing the filter housing and
filter element.
Parking Brake Release Oil
Filter - Replace
SMCS Code: 4267-510-FI
Hot oil and hot components can cause personal
injury. Do not allow hot oil or hot components to
contact the skin.
NOTICE
Care must be taken to ensure that fluids are contained
during performance of inspection, maintenance, testing, adjusting and repair of the product. Be prepared to
collect the fluid with suitable containers before opening any compartment or disassembling any component containing fluids.
Refer to Special Publication, NENG2500, “Caterpillar
Tools and Shop Products Guide” for tools and supplies
suitable to collect and contain fluids on Caterpillar
products.
Dispose of all fluids according to local regulations and
mandates.
Illustration 305
g00952184
2. Remove filter housing (1) and filter element (4).
Discard the used filter element.
149
Maintenance Section
Radiator Core - Clean
3. Remove drain plug (2) from the filter housing.
Wash the drain plug and filter housing in clean,
nonflammable solvent. Install the filter housing
drain plug.
i01869990
Radiator Core - Clean
SMCS Code: 1353-070-KO
4. Inspect seal (3) in the filter base. If the seal is
damaged, replace the seal with a new seal.
5. Install the new element in the filter housing.
Install the filter housing and element.
Illustration 307
Illustration 306
g00952191
6. Start the engine and operate the engine at low
idle. Check for leaks.
7. With the oil cold, check the oil level in sight
gauge (5). For the AD45 truck check the oil level
with the body fully lowered. For the AE40 Series
ll truck check the oil level with the ejector plate
fully retracted and the tailgate fully raised.
8. Maintain the oil level to the FULL mark in sight
gauge (5).
g00907092
You can use compressed air, high pressure water
or steam to remove dust and other debris from the
radiator core. However, the use of compressed air
is preferred.
Care must be taken when you are using high
pressure water. High pressure water can cause
damage to the radiator. Using a water spray nozzle
on the pressure washer which will disperse the
water pressure is preferred.
Reference: For the complete procedure for cleaning
the radiator core, refer to Special Publication,
SEBD0518, “Know Your Cooling System” for the
machine that is being serviced.
i01870049
9. Remove filler cap (6) and add oil if necessary.
Rollover Protective Structure
(ROPS) and Falling Object
Protective Structure (FOPS) Inspect
SMCS Code: 7325-040
NOTICE
Do not attempt to straighten the ROPS structure. Do
not repair the ROPS by welding reinforcement plates
to the structure.
If there are any cracks in the welds, in the castings, or
in any metal section of the ROPS, consult your Caterpillar dealer for repairs.
150
Maintenance Section
Seat Belt - Inspect
i01773416
Seat Belt - Inspect
SMCS Code: 7327-040
Illustration 308
g00952272
Inspect the ROPS/FOPS for bolts that are loose or
damaged. Use original equipment parts only to
replace bolts that are damaged or missing. Tighten
the mounting bolts to the correct torque.
Reference: For the correct bolt torques, refer to the
Power Train, Specifications, “Cab Mounting (FOPS)
or Cab Mounting (ROPS)” for the machine that is
being serviced.
Illustration 309
g00907536
Always check the condition of the seat belt and the
condition of the belt mounting hardware before you
operate the machine.
Inspect the seat belt for worn or frayed webbing.
Note: Apply thread lubricant to all ROPS/FOPS bolt
threads before installation. Failure to apply lubricant
can result in improper bolt torque.
Replace ROPS/FOPS mounting supports if the
ROPS/FOPS rattles or makes a noise when the
machine is operated on a rough surface.
Check cab lockdown pins for wear and
serviceability. Lubricate the cab pivot pins.
Check for full extension and retraction of the cab
lockdown pins. Check for correct cab tilt sequence.
Check for leaks from lockdown pin hydraulic
cylinders.
Illustration 310
Do not repair the ROPS/FOPS by welding
reinforcement plates to the ROPS/FOPS. Consult
your Caterpillar dealer for repair of cracks in any
welds, in any castings, or any metal section of the
ROPS/FOPS.
Ensure any certification labels are firmly fixed and
legible.
g00907537
Inspect the belt mounting hardware. Replace any
belt mounting hardware that is worn or damaged.
Keep the mounting bolts tight.
Regardless of the appearance, replace the seat belt
once during every three year interval.
151
Maintenance Section
Seat Belt - Replace
i01773427
Seat Belt - Replace
SMCS Code: 7327-510
Illustration 311
g00907536
Regardless of the appearance of the seat belt, the
seat belt should be replaced at every three year
interval. A date label is attached to each seat belt.
Use this label in order to determine the age of the
seat belt.
Consult your Caterpillar dealer for replacement of
the seat belt.
i01870130
Service Inspection
SMCS Code: 7000
For maximum service life of the machine, make
a thorough service inspection when you perform
lubrication and maintenance work. Look around
the machine and under the machine. Inspect the
condition of all major components. Check all grease
fittings. Look for the following discrepancies:
• loose bolts
• trash buildup
• oil, coolant, or fuel leaks
• broken parts or worn parts
• cracks in the frames
Remove any trash and any debris. As needed,
adjust the tire inflation. Make any necessary repairs.
Make sure that all loose connections and all parts
are tightened to the specified torques. Replace any
missing parts before starting the engine or before
operating the machine.
Inspect the machine for leaks. If leaks are observed,
find the source of the leak and correct the leak. If
leaks are suspected, check the fluid levels more
frequently than the recommended intervals.
152
Maintenance Section
Service Inspection
AD45
g00952317
Illustration 312
Inspection points for the service inspection
(A) Ground level controls
(B) Front lights
(C) Cooling system
(D) Engine
(E) Power train hydraulic system
(F ) Air cleaner
(G) Fuel tank
(H) Hydraulic system
(I) Front suspension cylinders
(J) Tires
(K) Steering hydraulic system
(L) Rear axle
(M) Frame and body
(N) Articulating hitch and oscillating hitch
(O) Automatic lubrication system (if
equipped)
(P) Rollover Protective Structure (ROPS)
and Falling Object Protective Structure
(FOPS)
153
Maintenance Section
Service Inspection
Illustration 313
g00943874
(A) Inspect the ground level controls for proper
operation. Replace a damaged or worn engine
shutdown switch (1). Replace a damaged or
worn battery disconnect switch (2).
(B) Inspect the lights for broken lamps, lenses and
proper operation. Replace broken lamps and
lenses.
Illustration 315
g00952402
(E) Inspect the hydraulic system for the torque
converter and transmission (4). Check for
leaks from the torque converter and from the
transmission. Check for worn hoses and for
damaged lines. Repair any leaks, worn hoses
and damaged lines.
(C) Inspect the cooling system for leaks, worn
hoses and debris. Repair any leaks and
damaged hoses. Remove any debris that could
block the air flow through the radiator.
Illustration 316
Illustration 314
g00943815
(D) Inspect the engine. Use dipstick (3) to check
the engine oil level. Check for oil leaks, coolant
leaks, and exhaust leaks. Check the belts of
the engine for proper tension and for good
condition. Check the level in the washer fluid
bottle.
g00952419
(F) Check engine air precleaner (5) for accumulated
debris. If necessary, clean engine air precleaner
(5). For the correct procedure, refer to
Operation and Maintenance Manual, “Engine
Air Precleaner - Clean” for the machine that is
being serviced.
(G) Inspect fuel tank (6). Make sure that the filler
cap is installed correctly. Check the welds and
mounting brackets for the fuel tank. Look for
any leaks or damage to the fuel tank.
(H) Inspect the hydraulic systems. Check for leaks,
worn hoses and for damaged lines. Repair any
leaks, worn hoses and damaged lines.
154
Maintenance Section
Service Inspection
Check the oil level in hydraulic tank (7). Check
the level in steering tank (8). Make sure that the
filler caps are installed. Inspect the tank covers for
damaged bolts, loose bolts or missing bolts. Tighten
loose bolts and replace missing bolts. Check the
welds and mounting brackets for the hydraulic tank
and the steering tank. Inspect the tank for leaks or
for damage. If necessary, make repairs.
(L) Inspect the rear axle for leaks. Inspect the rear
lights for damage.
(I) Inspect the front suspension cylinders for leaks
or damage. Repair any leaks in the suspension
cylinders. Check for the following conditions.
If any of these conditions are present, refer
to Operation and Maintenance Manual,
“Suspension Cylinder - Check” for the machine
that is being serviced.
• The chrome has been wiped off and the whole
length of the chrome is used during normal
operation.
• The ride is harsh and the suspension cylinders
extend fully when the machine is empty.
(J) Inspect tires for cuts, gouges and proper
inflation. Remove large rocks from the treads.
Look for abnormal wear or uneven wear that
may indicate mechanical problems elsewhere.
Make sure that you check the inside of the tire
for damage or for wear. Inspect the tire treads
for damage. If necessary, repair the tires.
Illustration 318
g00952460
(M) Inspect the frame and the dump body. Check
frame (10) for cracks or damage. Inspect dump
body (11) for damage, wear or distortion. Check
for uneven wear of the body support pads.
(N) Inspect the articulating hitch and the oscillating
hitch for wear, damage, and loose or missing
bolts. Have necessary repairs made.
Look for damaged rims. Replace any missing valve
caps. Check the wheels for bolts that are loose or
missing.
Note: Rust behind a bolt may indicate that the
bolt is loose. Shiny metal areas around a bolt may
indicate that the bolt is loose.
Illustration 319
g00952465
(O) Inspect the automatic lubrication system.
Inspect tank (12) for leaks. Fill tank (12) with
lubricant. For the correct procedure, refer to the
Operation and Maintenance Manual, “Automatic
Lubrication System - Fill” for the machine that is
being serviced. Check all of the grease fittings.
Illustration 317
g00952458
(K) Inspect the steering hydraulic system for leaks,
worn hoses and damaged lines. If necessary
repair leaks, worn hoses and damaged lines.
Inspect steering cylinders (9).
155
Maintenance Section
Service Inspection
Illustration 320
g00993186
(P) Inspect Rollover Protective Structure (ROPS)
or Falling Object Protective Structure (FOPS)
(13) for cracks in welds, castings or any metal
section on the ROPS/FOPS. Check the mounting
bolts and the mounting pads for damage.
Consult your Caterpillar dealer for necessary
repairs. Inspect the operator’s station. Check
the Caterpillar Monitoring System for diagnostic
codes. Correct any discrepancies.
156
Maintenance Section
Service Inspection
AE40 Series ll
g00952469
Illustration 321
Inspection points for the service inspection
(A) Ground level controls
(B) Front lights
(C) Cooling system
(D) Engine
(E) Power train hydraulic system
(F ) Air cleaner
(G) Fuel tank
(H) Hydraulic system
(I) Front suspension cylinders
(J) Tires
(K) Steering hydraulic system
(L) Rear axle
(M) Frame and body
(N) Articulating hitch and oscillating hitch
(A) Inspect the ground level controls for proper
operation. Replace a damaged or worn engine
shutdown switch (1). Replace a damaged or
worn battery disconnect switch (2).
(B) Inspect the lights for broken lamps, lenses and
proper operation. Replace broken lamps and
lenses.
(O) Automatic lubrication system (if
equipped)
(P) Rollover Protective Structure (ROPS)
and Falling Object Protective Structure
(FOPS)
(C) Inspect the cooling system for leaks, worn
hoses and debris. Repair any leaks and
damaged hoses. Remove any debris that could
block the air flow through the radiator.
157
Maintenance Section
Service Inspection
(F) Check engine air precleaner (5) for accumulated
debris. If necessary, clean engine air precleaner
(5). For the correct procedure, refer to
Operation and Maintenance Manual, “Engine
Air Precleaner - Clean” for the machine that is
being serviced.
(G) Inspect fuel tank (6). Make sure that the filler
cap is installed correctly. Check the welds and
mounting brackets for the fuel tank. Look for
any leaks or damage to the fuel tank.
Illustration 322
g00943815
(D) Inspect the engine. Use dipstick (3) to check
the engine oil level. Check for oil leaks, coolant
leaks, and exhaust leaks. Check the belts of
the engine for proper tension and for good
condition. Check the level in the washer fluid
bottle.
(H) Inspect the hydraulic systems. Check for leaks,
worn hoses and for damaged lines. Repair any
leaks, worn hoses and damaged lines.
Check the oil level in hydraulic tank (7). Check
the level in steering tank (8). Make sure that the
filler caps are installed. Inspect the tank covers for
damaged bolts, loose bolts or missing bolts. Tighten
loose bolts and replace missing bolts. Check the
welds and mounting brackets for the hydraulic tank
and the steering tank. Inspect the tank for leaks or
for damage. If necessary, make repairs.
(I) Inspect the front suspension cylinders for leaks
or damage. Repair any leaks in the suspension
cylinders. Check for the following conditions.
If any of these conditions are present, refer
to Operation and Maintenance Manual,
“Suspension Cylinder - Check” for the machine
that is being serviced.
• The chrome has been wiped off and the whole
length of the chrome is used during normal
operation.
Illustration 323
g00952402
• The ride is harsh and the suspension cylinders
extend fully when the machine is empty.
(E) Inspect the hydraulic system for the torque
converter and transmission (4). Check for
leaks from the torque converter and from the
transmission. Check for worn hoses and for
damaged lines. Repair any leaks, worn hoses
and damaged lines.
(J) Inspect tires for cuts, gouges and proper
inflation. Remove large rocks from the treads.
Look for abnormal wear or uneven wear that
may indicate mechanical problems elsewhere.
Make sure that you check the inside of the tire
for damage or for wear. Inspect the tire treads
for damage. If necessary, repair the tires.
Look for damaged rims. Replace any missing valve
caps. Check the wheels for bolts that are loose or
missing.
Note: Rust behind a bolt may indicate that the
bolt is loose. Shiny metal areas around a bolt may
indicate that the bolt is loose.
Illustration 324
g00952419
158
Maintenance Section
Service Inspection
Illustration 325
g00952458
(K) Inspect the steering hydraulic system for leaks,
worn hoses and damaged lines. If necessary
repair leaks, worn hoses and damaged lines.
Inspect steering cylinders (9).
(L) Inspect the rear axle for leaks. Inspect the rear
lights for damage.
Illustration 327
(O) Inspect the automatic lubrication system.
Inspect tank (12) for leaks. Fill tank (12) with
lubricant. For the correct procedure, refer to the
Operation and Maintenance Manual, “Automatic
Lubrication System - Fill” for the machine that is
being serviced. Check all of the grease fittings.
Illustration 328
Illustration 326
g00952465
g00952467
g00952543
(M) Inspect the frame and the ejector body. Check
frame (10) for cracks or damage. Inspect ejector
body (11) for damage, wear or distortion. Check
for uneven wear of the body support pads.
(N) Inspect the articulating hitch and the oscillating
hitch for wear, damage, and loose or missing
bolts. Have necessary repairs made.
(P) Inspect Rollover Protective Structure (ROPS)
or Falling Object Protective Structure (FOPS)
(13) for cracks in welds, castings or any metal
section on the ROPS/FOPS. Check the mounting
bolts and the mounting pads for damage.
Consult your Caterpillar dealer for necessary
repairs. Inspect the operator’s station. Check
the Caterpillar Monitoring System for diagnostic
codes. Correct any discrepancies.
159
Maintenance Section
Steering Cylinder Bearings - Lubricate
i01870669
Steering Cylinder Bearings Lubricate
4. Lubricate the right steering cylinder bearing in
the rod end of the steering cylinder through
remote mounted fitting (4).
i01870697
SMCS Code: 4303-086-BD
Steering Stop - Check
NOTICE
Check that the lines attached to all the remote grease
fittings are undamaged. If the grease lines are split,
grease will not reach the components that require lubricating. Machine damage will result.
SMCS Code: 7188-535
Wipe off the fittings before any lubricant is applied.
Illustration 331
g00952594
Check the clearance between the front frame and
the rear frame steering stops.
Illustration 329
g00952584
1. Lubricate the right steering cylinder bearing in
the head end of the steering cylinder through
remote mounted fitting (1).
2. Lubricate the left steering cylinder bearing in the
head end of the steering cylinder through remote
mounted fitting (2).
Reference: For additional information about the
correct procedure, refer to Steering System Systems
Operation, Testing and Adjusting , “Steering
Neutralizer Valve - Check and Adjust” for the
machine that is being serviced.
i01871013
Steering System Oil - Change
SMCS Code: 4332-044
Operate the machine to warm the steering system
oil.
The machine must be on level, the parking brake
engaged and the engine stopped.
Hot oil and hot components can cause personal
injury. Do not allow hot oil or hot components to
contact the skin.
Illustration 330
g00952585
3. Lubricate the left steering cylinder bearing in the
rod end of the steering cylinder through remote
mounted fitting (3).
160
Maintenance Section
Steering System Oil - Change
NOTICE
Care must be taken to ensure that fluids are contained
during performance of inspection, maintenance, testing, adjusting and repair of the product. Be prepared to
collect the fluid with suitable containers before opening any compartment or disassembling any component containing fluids.
Refer to Special Publication, NENG2500, “Caterpillar
Tools and Shop Products Guide” for tools and supplies
suitable to collect and contain fluids on Caterpillar
products.
Dispose of all fluids according to local regulations and
mandates.
Illustration 333
g00952743
4. Remove filler cap (1).
1. Remove the steering tank filler cap slowly to
relieve any steering tank pressure. Remove the
filler cap to prevent a vacuum in the steering
tank. Install the filler cap after the tank is drained
to prevent dirt from entering the system.
5. Remove the strainer retaining ring.
6. Remove the strainer. Wash the cap and strainer
in clean, nonflammable solvent.
7. Inspect the cap seal. Use a new seal if the seal
is damaged.
8. Install the strainer and the retaining ring.
9. Fill the steering tank.
Reference: For information on lubricants and
the refill capacity, refer to Operation and
Maintenance Manual, “Lubricant Viscosities and
Refill Capacities” for the machine that is being
serviced.
Illustration 332
g00952739
Note: Hand tighten the NPT pipe nipple. Do not use
tools.
10. Install the filler cap.
11. Start the engine and run at low idle. Check for
leaks.
2. Remove the tank drain plug from the steering
tank. Open the drain valve by installing a 1 inch
NPT pipe nipple, 88 mm (3.50 inch) long, to
open the internal drain valve and drain the oil.
Drain the oil into a suitable container.
3. Remove the pipe nipple and install the drain
plug.
Illustration 334
g00952752
12. Maintain the oil level to the FULL mark in sight
gauge (2).
13. Remove the filler cap and add oil, if necessary.
161
Maintenance Section
Steering System Oil Filter - Replace
i01871097
Steering System Oil Filter Replace
SMCS Code: 431F-510; 5068-510
Hot oil and hot components can cause personal
injury. Do not allow hot oil or hot components to
contact the skin.
g00952780
NOTICE
Care must be taken to ensure that fluids are contained
during performance of inspection, maintenance, testing, adjusting and repair of the product. Be prepared to
collect the fluid with suitable containers before opening any compartment or disassembling any component containing fluids.
Illustration 336
Refer to Special Publication, NENG2500, “Caterpillar
Tools and Shop Products Guide” for tools and supplies
suitable to collect and contain fluids on Caterpillar
products.
5. Clean the cover and screen in clean,
nonflammable solvent. Inspect the cover seal. If
the seal is damaged, use a new seal.
Dispose of all fluids according to local regulations and
mandates.
The machine must be level, the parking brake
engaged and the engine stopped.
1. Remove the steering tank filler cap slowly to
relieve any steering tank pressure. Install the
filler cap.
2. Remove bolt (1) and filter cover (2).
3. Remove and discard used filter element (4).
4. Remove screen (5).
6. Install the clean screen and the new filter
element.
7. Install the cover. Tighten cover bolt (1) to
59 ± 5 N·m (43 ± 4 lb ft).
8. Start the engine and run at low idle. Check for
leaks.
Illustration 337
Illustration 335
g00952779
g00952784
9. Maintain the oil level to the FULL mark in sight
gauge (6).
10. Remove filler cap (3) and add oil, if necessary.
162
Maintenance Section
Steering System Oil Level - Check
i01871099
Steering System Oil Level Check
i01870723
Steering Tank Screen - Clean
SMCS Code: 4332-070-Z3
SMCS Code: 4332-535-FLV
Hot oil and hot components can cause personal
injury. Do not allow hot oil or hot components to
contact the skin.
NOTICE
Care must be taken to ensure that fluids are contained
during performance of inspection, maintenance, testing, adjusting and repair of the product. Be prepared to
collect the fluid with suitable containers before opening any compartment or disassembling any component containing fluids.
g00952788
The steering tank is located on the right side of the
machine.
Refer to Special Publication, NENG2500, “Caterpillar
Tools and Shop Products Guide” for tools and supplies
suitable to collect and contain fluids on Caterpillar
products.
1. With the engine running, maintain the oil level to
the FULL mark in sight gauge (1).
Dispose of all fluids according to local regulations and
mandates.
Illustration 338
Illustration 339
g00952789
2. Stop the engine.
3. Remove filler cap (2) slowly to relieve any
steering tank pressure. Add oil, if necessary.
Illustration 340
g00952620
1. Remove the steering tank filler cap slowly to
relieve any steering tank pressure. Remove the
filler cap to prevent a vacuum in the steering
tank. Install the filler cap after the tank is drained
to prevent dirt from entering the system.
4. Clean the filler cap and install the filler cap.
Note: Hand tighten the NPT pipe nipple. Do not use
tools.
2. Remove tank drain plug (2) from the steering
tank. Open the drain valve by installing a 1 inch
NPT pipe nipple, 88 mm (3.50 inch) long, to
open the internal drain valve and drain the oil.
3. Remove bolts (1) from the steering tank cover
and remove the cover.
163
Maintenance Section
Suspension Cylinder - Check
4. Clean the debris from the bottom of the steering
tank.
Illustration 341
Engage the parking brake. Stop the engine.
g00952714
5. Remove four bolts (3), retainer plate (4) and
suction screen (5).
6. Wash the screen in clean, nonflammable solvent.
Illustration 342
7. Install suction screen (5), retaining plate (4) and
mounting bolts (3).
g00952831
8. Clean the steering tank cover in clean,
nonflammable solvent. Inspect the cover gasket.
If the gasket is damaged, use a new gasket.
Check the front suspension cylinders against the
dimensions from the last time you performed the
charging procedure. If you do not have those
dimensions, the following dimension can be a
guideline.
9. Install the steering tank cover and bolts.
• Distance (A) of the cylinder from pin to pin should
be 882 ± 6 mm (34.7 ± 0.25 inch)
10. Fill the steering tank.
Reference: For information on lubricants and
the refill capacity, refer to Operation and
Maintenance Manual, “Lubricant Viscosities and
Refill Capacities” for the machine that is being
serviced.
11. Start and run the engine at low idle. Inspect the
steering tank for leaks.
12. Maintain the low level to the FULL mark in the
sight gauge.
13. Add oil if necessary. Stop the engine.
Note: If the height of the front cylinder is not
within the acceptable range, perform the charging
procedure.
Reference: For the charging procedure, refer
to Systems Operation, Testing and Adjusting,
“Suspension Cylinders” for the machine that is
being serviced.
i01871150
Suspension and Suspension
Cylinder Bearings - Lubricate
SMCS Code: 7200-086; 7201-086-BD
i01871167
Suspension Cylinder - Check
SMCS Code: 7201-535
Make sure the body is empty. For the AD45 truck
lower the dump body. For the AE40 series II truck
fully retract the ejector plate.
Stop the machine gradually on a level surface
without using the brakes.
NOTICE
Check that the lines attached to all the remote grease
fittings are undamaged. If the grease lines are split,
grease will not reach the components that require lubricating. Machine damage will result.
Wipe all fittings clean before lubricating.
164
Maintenance Section
Tailgate and Tailgate Cylinder Bearings - Lubricate
Illustration 343
g00952811
1. Lubricate the right upper suspension cylinder
bearing through remote mounted fitting (1).
Illustration 344
1. Lubricate the tailgate pivot and cylinder bearings
through three remote mounted fittings (1) on
each side of the machine.
2. Lubricate the left lower suspension cylinder
bearing through remote mounted fitting (2).
3. Lubricate the front suspension frame, left pivot
bearing through remote mounted fitting (3).
4. Lubricate the left upper suspension cylinder
bearing through remote mounted fitting (4).
g00952850
i01871248
Tire Inflation - Check
SMCS Code: 4203-535-AI; 4203-535-PX
5. Lubricate the front suspension frame, right pivot
bearing through remote mounted fitting (5).
6. Lubricate the right lower suspension cylinder
bearing through remote mounted fitting (6).
i01871223
Tailgate and Tailgate Cylinder
Bearings - Lubricate
SMCS Code: 5107-086-BD; 7271-086-BD
NOTICE
Check that the lines attached to all the remote grease
fittings are undamaged. If the grease lines are split,
grease will not reach the components that require lubricating. Machine damage will result.
Wipe all fittings clean before lubricating.
Illustration 345
g00952922
Measure the tire pressure on each tire. Consult your
Caterpillar dealer for correct load rating and for the
correct operating pressures.
Inflate the tires, if necessary.
Reference: For additional information about tire
inflation, tire pressures, and tire inflation pressure
adjustment, refer to the Operation and Maintenance
Manual, “Tire Inflation Information” for the machine
that is being serviced.
165
Maintenance Section
Torque Converter Oil Filter - Replace
i01871266
Torque Converter Oil Filter Replace
SMCS Code: 3004-510
The machine must be level, the parking brake
engaged and the engine stopped.
Hot oil and hot components can cause personal
injury. Do not allow hot oil or hot components to
contact the skin.
NOTICE
Care must be taken to ensure that fluids are contained
during performance of inspection, maintenance, testing, adjusting and repair of the product. Be prepared to
collect the fluid with suitable containers before opening any compartment or disassembling any component containing fluids.
Refer to Special Publication, NENG2500, “Caterpillar
Tools and Shop Products Guide” for tools and supplies
suitable to collect and contain fluids on Caterpillar
products.
Dispose of all fluids according to local regulations and
mandates.
Illustration 347
g00952934
2. Remove filter housing (1) and element (4).
Discard the used element.
3. Remove drain plug (2) from the filter housing.
Wash the drain plug and filter housing in clean,
nonflammable solvent. Install the filter housing
drain plug.
4. Inspect seal (3) in the filter base. If the seal is
damaged, replace it with a new seal.
5. Install the new element in the filter housing.
Install the filter housing and element.
6. Start the engine and run the engine at low idle.
Check for leaks.
Illustration 346
g00952933
1. Remove drain plug (2) from the bottom of filter
housing (1) and drain the oil into a suitable
container. Install drain plug (2) in the filter
housing and tighten finger tight.
Note: Removing the drain plug from the bottom of
the filter housing may not drain all the oil from the
filter housing. Avoid spillage when removing the
filter housing and filter element.
Illustration 348
g00952935
166
Maintenance Section
Torque Converter Sump Screen - Clean
7. With the oil cold, check the oil level in sight
gauge (5). For the AD45 truck check the oil level
with the body fully lowered. For the AE40 Series
ll truck check the oil level with the ejector plate
fully retracted and the tailgate fully raised.
8. Maintain the oil level to the FULL mark in the
sight gauge.
9. Remove filler cap (6) and add oil if necessary.
i01871346
Torque Converter Sump
Screen - Clean
SMCS Code: 3101-070-Z3
Clean the screen whenever there is a failure of the
torque converter.
The machine must be level, the parking brake
engaged and the engine stopped.
Illustration 349
g00952990
Note: Approximately 15 L (4 US gal) of oil will drain
when cover assembly (1) is removed.
1. Remove bolts (2) from cover assembly (1).
Remove the cover assembly. Drain the oil into a
suitable container.
2. Remove the screen and baffle retaining nut (5).
3. Remove baffle (3) and screen (4) from the cover.
Hot oil and hot components can cause personal
injury. Do not allow hot oil or hot components to
contact the skin.
NOTICE
Care must be taken to ensure that fluids are contained
during performance of inspection, maintenance, testing, adjusting and repair of the product. Be prepared to
collect the fluid with suitable containers before opening any compartment or disassembling any component containing fluids.
4. Wash the screen, baffle and cover in clean,
nonflammable solvent. Do not crush the screen.
5. Inspect the cover gasket for damage. If
damaged, use a new gasket.
6. Assemble the screen and baffle on the cover.
Install the cover assembly.
7. Start the engine and run the engine at low idle.
Inspect for leaks.
Refer to Special Publication, NENG2500, “Caterpillar
Tools and Shop Products Guide” for tools and supplies
suitable to collect and contain fluids on Caterpillar
products.
Dispose of all fluids according to local regulations and
mandates.
Illustration 350
g00952994
8. With the oil cold, check the oil level in sight
gauge (6). For the AD45 truck check the oil level
with the body fully lowered. For the AE40 Series
ll truck check the oil level with the ejector plate
fully retracted and the tailgate fully raised.
167
Maintenance Section
Transmission Breather - Clean
9. Maintain the oil level to the FULL mark in the
sight gauge.
10. Remove filler cap (7) and add oil if necessary.
i01871355
Transmission Breather - Clean
NOTICE
Care must be taken to ensure that fluids are contained
during performance of inspection, maintenance, testing, adjusting and repair of the product. Be prepared to
collect the fluid with suitable containers before opening any compartment or disassembling any component containing fluids.
Refer to Special Publication, NENG2500, “Caterpillar
Tools and Shop Products Guide” for tools and supplies
suitable to collect and contain fluids on Caterpillar
products.
SMCS Code: 3030-070-BRE
Dispose of all fluids according to local regulations and
mandates.
Illustration 351
g00953029
1. Remove the transmission breather from the
transmission cover.
2. Wash the breather in clean, nonflammable
solvent.
3. Allow the breather to dry.
Illustration 352
g00953038
1. Remove the magnetic screen cover and the
wave washer assembly.
4. Install the clean transmission breather.
i01871361
2. Remove the screen, magnet and tube assembly
from the housing.
Transmission Magnetic Screen
- Clean
SMCS Code: 3030-070-MGS
The machine must be level, the parking brake
engaged and the engine stopped.
Hot oil and hot components can cause personal
injury. Do not allow hot oil or hot components to
contact the skin.
Illustration 353
g00953041
3. Wash the magnet, screen and tube assembly in
clean, nonflammable solvent. Clean the magnets
with a cloth, a stiff bristle brush or pressure air.
168
Maintenance Section
Transmission Oil - Change
NOTICE
Do not drop or rap the magnets against any hard objects. Replace any damaged magnets.
4. Clean the cover and inspect the seal. Replace
the seal if it is damaged.
5. Install the clean screen, magnet and tube
assembly with the magnet opening down.
6. Install the cover. Tighten the cover bolts.
7. Fill the transmission with oil.
Illustration 354
Reference: Refer to Operation and Maintenance
Manual, “Transmission Oil Level - Check” for the
machine that is being serviced.
i01871482
Transmission Oil - Change
SMCS Code: 3030-044
1. Operate the machine to warm the transmission
oil.
g00953064
Note: Hand tighten the NPT pipe nipple. Do not use
tools.
3. Remove the transmission drain plug. Open the
drain valve by installing a 1 inch NPT pipe
nipple, 88 mm (3.5 inch) long, in the bottom of
the transmission, to open the internal drain valve.
Drain the oil into a suitable container.
4. Remove the pipe nipple. Clean the drain plug
and install the transmission drain plug.
2. Park the machine on a level surface. Engage the
parking brake. Stop the engine.
Hot oil and hot components can cause personal
injury. Do not allow hot oil or hot components to
contact the skin.
NOTICE
Care must be taken to ensure that fluids are contained
during performance of inspection, maintenance, testing, adjusting and repair of the product. Be prepared to
collect the fluid with suitable containers before opening any compartment or disassembling any component containing fluids.
Refer to Special Publication, NENG2500, “Caterpillar
Tools and Shop Products Guide” for tools and supplies
suitable to collect and contain fluids on Caterpillar
products.
Dispose of all fluids according to local regulations and
mandates.
Illustration 355
g00953092
5. Remove filler cap (2). Fill the transmission with
oil through the filler tube. Clean the filler cap and
install the filler cap.
Reference: For information on lubricants and
refill capacities, refer to the Operation and
Maintenance Manual, “Lubricants Viscosities and
Refill Capacities” for the machine that is being
serviced.
6. Start and run the engine at low idle. Inspect the
machine for leaks.
7. Operate the transmission control to circulate oil
in the transmission.
169
Maintenance Section
Transmission Oil Filter - Replace
8. Maintain the oil level to the FULL mark on sight
gauge (1). Add oil, if necessary.
9. Stop the engine.
Note: Removing the drain plug from the bottom of
the filter housing may not drain all the oil from the
filter housing. Avoid spillage when removing the
filter housing and filter element.
i01871600
Transmission Oil Filter Replace
SMCS Code: 3067-510
1. Park the machine on a level surface. Engage the
parking brake. Stop the engine.
Hot oil and hot components can cause personal
injury. Do not allow hot oil or hot components to
contact the skin.
NOTICE
Care must be taken to ensure that fluids are contained
during performance of inspection, maintenance, testing, adjusting and repair of the product. Be prepared to
collect the fluid with suitable containers before opening any compartment or disassembling any component containing fluids.
Refer to Special Publication, NENG2500, “Caterpillar
Tools and Shop Products Guide” for tools and supplies
suitable to collect and contain fluids on Caterpillar
products.
Dispose of all fluids according to local regulations and
mandates.
Illustration 357
g00953160
3. Remove filter housing (1) and element (4).
Dispose of the used filter element.
4. Remove drain plug (2) from the filter housing.
Wash the drain plug and filter housing in clean,
nonflammable solvent. Install the filter housing
drain plug.
5. Inspect seal (3) in the filter base. If the seal is
damaged, replace the seal with a new seal.
6. Install a new filter element in filter housing. Install
the filter housing and element.
7. Start and run the engine at low idle. Inspect for
leaks.
8. Operate the transmission control to circulate oil
in the transmission.
Illustration 356
g00953154
2. Remove drain plug (2) from the bottom of
filter housing (1) and drain the into a suitable
container. Install drain plug (2) in the filter
housing and tighten finger tight.
170
Maintenance Section
Transmission Oil Level - Check
Illustration 358
g00953168
9. Maintain the oil level to the FULL mark on sight
gauge (5). Remove filler cap (6) and add oil, if
necessary.
Reference: For information on lubricants and
refill capacities, refer to the Operation and
Maintenance Manual, “Lubricant Viscosities and
Refill Capacities” for the machine that is being
serviced.
10. Stop the engine.
i01871603
Transmission Oil Level - Check
SMCS Code: 3030-535-FLV
The transmission oil filler tube and sight gauge are
located on the right side of the machine near the
articulating hitch.
Illustration 360
g00953217
(3) FULL mark when engine is stopped
(4) FULL mark when engine is running
Check the transmission oil level with the machine
on a level surface and the parking brake engaged.
1. While the engine is running, maintain the oil level
to FULL mark (4) in sight gauge (1). When the
engine is stopped, maintain the oil to FULL mark
(3) in sight gauge (1).
2. If necessary, remove oil filler cap (2) and add oil.
Clean the filler cap and install the filler cap.
Reference: For information on lubricants and
refill capacities, refer to the Operation and
Maintenance Manual, “Lubricant Viscosities and
Refill Capacities” for the machine that is being
serviced.
i01871783
Turbocharger - Inspect
SMCS Code: 1052-040
Illustration 359
g00953216
If the turbocharger fails during engine operation,
severe damage to the turbocharger compressor
wheel can result. If the turbocharger fails during
engine operation, severe damage to the engine can
also result.
For example, damage to the turbocharger
compressor wheel could cause parts from the
turbocharger compressor wheel to enter the engine
cylinder. These parts from the compressor wheel
can cause additional damage to the following
engine components: pistons, intake valves, exhaust
valves and cylinder head.
171
Maintenance Section
Wheel Bolt Torque - Check
Note: Turbocharger failure can cause large
quantities of oil to enter the intake and exhaust
systems. Loss of engine lubricant can result in
serious engine damage
i01871904
Window - Clean
SMCS Code: 7310-070; 7340-070
If no turbocharger bearing failure has occurred,
minor leakage of a turbocharger housing during an
extended period of operation at low idle will not
cause problems.
Do not continue to operate the engine when a
turbocharger bearing failure is accompanied by a
significant loss of engine performance. One of the
following characteristics will be present with a loss
of engine performance;
• Engine smoke.
• Speeding up of the engine with no load.
Note: For specifications used to check the
turbocharger, refer to Specifications, “3408E HEUI
Engine” for the machine that is being serviced.
i01871868
Wheel Bolt Torque - Check
Illustration 362
g00953351
Use commercially available window cleaning
solutions to clean the windows. Only clean the
outside windows from the ground unless handholds
are available. Use a mop or use a similar device
with a long handle to clean the windows from the
ground.
SMCS Code: 4210-535
i01871882
Window Washer Bottle - Fill
SMCS Code: 7306-544-KE
NOTICE
When operating in freezing temperatures, use
Caterpillar nonfreezing window washer solvent or
equivalent. System damage can result from freezing.
Illustration 361
g00953329
Check the wheel bolt torque at each wheel.
Continue to check the torque on new wheels and
rebuilt wheels. Check the torque until the torque
remains at the specified amount.
Reference: For the correct wheel bolt torque, refer
to Power Train, Specifications, “Final Drive, Brake
and Wheel” for the machine that is being serviced.
Illustration 363
g00953340
The window washer reservoir is located at the rear
of the operator station. Remove the cap and fill the
window washer reservoirs. Refit the cap.
172
Maintenance Section
Window Wiper - Inspect/Replace
i01871895
Window Wiper Inspect/Replace
SMCS Code: 7305-040; 7305-070
Illustration 364
g00953347
Inspect the condition of the wiper blades on the
front and rear windows. Replace the wiper blades if
the wiper blades are worn or damaged. If the wiper
blades streak the window, replace the wiper blades.