1
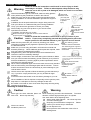
Keep this manual for future reference. Suspension Kit Instruction Manual This instruction manual provides you with important instructions on proper and safe installation and use of this product. Please read instructions carefully before starting any work on this suspension kit. Keep this manual in a safe place for future reference. Caution: For Your Safety Please read this instruction manual and the attached manual carefully before beginning. Installation of this product must be performed by a qualified mechanic at a fully-equipped service shop. Installation workers have responsibility for removal and installation of this kit. Read this manual carefully and understand all required work. The attached manual only covers main points of procedures. Please refer to your vehicle’s service manual for complete instructions. Do not install this kit in flammable environment. We do not accept liability for any damage or accident arising from improper modification, installation, assembly or misuse. When you sell or pass it on this product, make sure you supply this installation manual and the attached manual with the product. Definitions of Symbols: This manual contains safety and warning symbols as follows. Understand each meaning before reading this manual. Warning Indicates a potentially hazardous situation which, if instructions are not followed exactly or the product is handled improperly, may result in a serious accident which could lead to serious injury or death. Caution Indicates a potentially hazardous situation which, if instructions are not followed exactly or the product is handled improperly, may result in personal injury or property damage. Other “Safety” and “Warning” Symbols: Do not Avoid flammable environment Do not dispose in fire Do not disassemble or modify Check Cautions: Removal & Installation Failure to follow the instructions could result in serous injury and/or death caused by an accident. Use of any part other than component parts or Warning genuine parts can lead to insufficient strength or loose, which can result in an accident or damage to your car. Make sure this product fits your vehicle by checking your vehicle information (model and year) against the product’s part number listed in the attached manual. Do not attempt to disassemble, modify or add to any part of this kit, or do not replace any part contained in this kit with non-qualified parts. Assemble this kit with parts contained in this kit only. Check the conditions of existing suspensions, and check every part for damage before installation. If you find any deformation or damage, replace before installation, if necessary. Make sure all fasteners are torqued to the proper specifications specified in the attached manual or your vehicle’s service manual. Make sure all parts listed in the manual are contained. Some kit requires preparation of genuine parts separately. Never modify or assemble with non-qualified parts. Check reusing parts for their conditions before fitting them. Contact Information CARROSSER Co. Ltd. ( Manufacturer ) CUSCO U.S.A.,INC. ( Branch Office ) Address:1664-1 Shinbo-cho, Takasaki-shi, Gunma-ken, Japan TEL:027-352-3578 / FAX:027-352-1919 e-mail : [email protected] Address:16631 Gemini Lane, Huntington Beach, CA 92647 U.S.A TEL:714-907-0033 / FAX:714-369-8142 e-mail : [email protected] Cautions: Removal & Installation Failure to follow the instructions could result in serous injury or death caused by an accident. Failure to take adequate safety measures may Warning cause the car to fall or parts to be damaged, which can result in an accident and/or injury. Wear heat resistance groves, work outfit, hard-hat, safety glasses Wear outfit when performing the procedures covered in this manual. which covers Make sure every part is fully cooled to normal temperature before your body and starting installation. Do not start installation right after the engine is is easy to move turned off. to prevent Installation should be performed with the engine being turned off. injury. Park your vehicle on a stable and flat ground during installation. Lift up your vehicle with rigid racks to ensure your safety. Never modify any part of this product or your vehicle unless specified in this manual. Installation right after diving is not safe. Make sure the jack or rigid rack comes in contact with the proper lift point of your vehicle. Is the engine turned off? Is work area flat and level? Is the car cooled? Failure to follow the instructions could result in injury or failure of your Caution vehicle. Fasten every comprising part and designated genuine part to the torque specified in the attached manual or your vehicle’s service manual. Make sure this product fits your vehicle by checking your vehicle The statutory ground information (model and year) against the product’s part number listed in clearance must be maintained. the attached manual. The measuring point of ground Make sure you have every part listed in this instruction manual and clearance varies by the model or assembly drawings. When additional genuine parts are required, make accessories. sure you prepare requested genuine parts. Retighten every part to the specified torque recommended in this instruction manual or assembly drawings. Vehicle weight, accessories or tire sizes alters ground clearance. Make Measure a distance between a projecting portion (such a muffler or differential box) sure your vehicle meets the statutory ground clearance (9 cm) with this and the ground kit before installation by checking against “product specification sheet” Cover the surface with specified in the attached manual. Fender cover to avoid When camber adjustable upper mounts are used, the strut may interfere any damage while with the vehicle body, and it damages parts and the vehicles. Ensure installation. that the strut doesn’t touch the vehicle body to prevent damage to your vehicle and the struts. Vehicle owners are required to follow the statutory ground clearance (9 cm). If you fail to comply with the law, you may be liable for legal Be careful not to cut or penalties. damage electric cables or Cover the surface with fender cover to avoid any damage to your car. couplers. When installation of this kit requires to temporally remove genuine parts, keep them in a safe place to avoid any damage for later use. Be careful not to break or short-circuit when temporally removing wiring couplers or connectors. Handling of Shock Absorbers Caution Never grip the shock absorber piston rod with a tool. Never drop the body. Never use a tool to handle the piston rod. Warning Never modify any part of the shock absorber. The shock absorber contains high pressure gas in its cylinder. Use extra caution when disposing them. Always wear safety glasses. Oil or dust may blow out when releasing gas. Disposing shock absorbers is dangerous. Please contact your service shop or dismantler. Do not dispose in fire. Never place the shock absorber close to fire or welding flame. Cautions After Installation Failure to follow the instructions could result in serous injury and/or death caused by an accident. If component parts or other genuine parts are Warning improperly installed, or if removed parts or used tools are handled improperly, it can result in an accident or injury. After installation, check the following carefully. Is every shock 1) The kit is properly installed as specified in the attached manual installed properly? and your vehicle’s service manual. 2) The spring and spring seat fit securely. 3) No fastener is damaged, and every fastener is tightened in position to their proper torque. 4) The installed suspension doesn’t come into contact with the tire or wheel, even during driving. Check the following when a wheel spacer is used to maintain proper Is ground clearance clearance between the vehicle body, tires, and wheels. maintained? 1) Wheel nuts can be tightened to the manufacturer’s specified Don’t tires or wheels protrude torque, and at least first twelve (12) threads of wheel hub bolt are beyond the body? covered by a nut. 2) No tire and wheel protrudes beyond the exterior body. Check the following before starting the engine after the completion of Is ground clearance maintained? work. 1) No tool or removed part is left in the engine room. 2) The vehicle’s transmission is put in neutral or parking, and the parking brake is securely engaged. 3) Jacks, lifts or rigid racks must be securely placed apart from the The measuring point of ride height varies by vehicle body, and all four tires touch the ground. the model or installed accessory. Perform daily inspection or maintenance for safe and comfortable use. 1) Periodically retighten fasteners. 2) Shock absorbers deteriorate gradually. When oil leakage, deterioration at mounting points, at washers or at rubber, damage, abnormal pitch or roll, vibration or noise is realized while driving, stop the vehicle as soon as possible. Contact your purchasing dealer or service shop and replace with designated repair shock absorbers, if necessary. Warning If damping force adjustment is available, make sure the both sides set at the same level. Mark Showing a set number Failure to follow the instructions could result in injury and/or damage to your car. Changes in ride height can alter Before start driving, make sure ground clearance required by the alignment. applicable law is maintained and the spring has no play. When ride height is changed, adjustment of wheel alignment is needed. Wheel alignment should be adjusted within the manufacturer’s specification stated in your service manual. Some vehicle model contains adjustable pillow ball upper mounts or camber adjustment bolts. Refer to the attached manual for proper adjustment. For damping force adjustable shock absorbers, set the right and left dials (or selectors) in an identical position. Refer to the attached manual for details. When scrapping shock absorbers, drill a 2 mm (0.079”) to 3 mm (0.118”) hole at a position shown below to release gas. Gas cartridge Mono tube inverted type Mono/twin tube gas type Twin tube strut type Twin tube full length ride height adjustment type Cautions: After Installation Warning Failure to observe the following instructions could result in injury and/or damage to your car. Before installation, remove sand or dust from the spring seat, lock nut, case lock nut and adjusting case with lubricant. Fasten to the specified torque shown below using the wrench included with shipment. Specified torque: Spring seat/lock nut Case lock nut (strut) Case lock nut (Wishbone) 29.4N-m (3.0kgf-m) 78.2N-m (8.0kgf-m) 39.2N-m(4.0kgf-m) There is a tolerance on every part comprising this suspension kit. The spring may have some play even if it is set at conditions recommended in this instruction manual. Adjust it in a way that the spring has no play, if necessary. Clean the adjustment portion before modifying ride height. Tighten each fastener to the specified torque. Due to the vehicle design or individual difference, sometimes the right and left fender height may not correspond even though the spring seat positions are set at the same level. Reposition the spring seat at proper height, if necessary. Breaking in or warming up can lead to long term performance of the ride height adjustable suspension kit. After installation of the kit, we recommend to have your vehicle driven for 500 km (310.7 mi) to 1000 km (621.4 mi) to breaking it in. The break in process allows sliding surfaces to be polished, and life span of your vehicle can be maximized. In the case of twin tube type shock absorbers, oil and air may be mixed during shipment. This problem can be also solved by “breaking-in”. Full throttle operation should be avoided right after the installation. Like engines, transmissions, or differentials, warming-up will lead to improved long term performance. Break in your vehicle for 500km (310.7 mi) to 1000 km (621.4 mi) after the installation of the height adjustable suspension kit. Warm-up your vehicle after the installation. Avoid heavy loads. Troubleshooting Information There are a few troubleshooting items that you can perform. Please check instructions listed below before you have your suspensions repaired or replaced. If your shock absorbers set at a soft damping force level, they Noise Set to the maximum make “swish-swish” noise. This shock absorber structurally hard damping force level. produces these noise when oil passes a damping force They are not broken if bypass, and it is not failure. Altering to the maximum “hard” noise is reduced or erased. damping force level reduces noise. Installation of pillow-ball upper mounts with this kit improves response. However, be aware that in some model, noise from the suspension kit or other parts (gutter on arm ball joints or hub-bearing rings, etc.,) may increase. When larger wheels are chosen (inch-up) it alters tire rigidity and also changes ride feeling of or noise from the suspension kit. When Those ride height datashown in this manual is actual recommended measured values and designed values obtained from our test Theses measurements setting doesn’t vehicles. Ride height varies by the model, grade, their shown in this manual are fit your car accessories, aging conditions, or mounting conditions of reference only. bushes on arms etc. Ride height also changes if a vehicle equipped with non-standard springs. Make sure you measure your vehicle’s ride height on a flat level surface. To the Customers z We are not liable for any deformation or product malfunction arising from deterioration over age. Be aware that we take no responsibility for any property damage, accident or personal injury arising from improper regular inspections or maintenance. z We make effort to improve our products to achieve superior performance; thus, be aware that we may change our product specifications without notification.