1
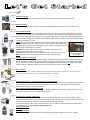
The primary goal of this instruction sheet is to educate and inform you. The compressor which is being
replaced must be installed in a clean, lubricant free, completely evacuated, leak free system. This instruction sheet will assist you with a step by step process to make that repair which will last summer after summer
Caution: Only qualified service technicians trained in automotive HVAC who has a thorough knowledge of such systems should perform these repairs.
Caution: A mixture of air and R134a can result in an explosion if the two are subjected to a spark, shop air should not be used to locate leaks because of this volatility.
Caution: Prior to compressor removal follow the vehicles manufacturer’s service procedure for disabling the electrical system, if necessary
Caution: Follow the service procedures for oiling this compressor, this information can be found on the colored tag attached to the compressor.
Air Bag Caution
No Smoking
Always Wear Eye Protection
Work In A Well Ventilated Area
Avoid Skin Contact With Refrigerant, Oil & Flush
Wear Skin Protection (Gloves & Long Sleeves)
Recover/Discharge The System Prior to Making Repair
Keep Refrigerant Container From Direct Heat Less Than 130f
Keep Refrigerant Away From An Open Flame
Follow All Local, State and Federal Laws & Regulations
Know Which System You Are Repairing,
Cycling Clutch Expansion Valve (CCTXV)
Cycling Clutch Orifice Tube (CCOT)
Variable Displacement Orifice Tube (VDOT)
Variable Displacement Expansion Valve (VDTXV)
Dual Evaporator Systems
Suggested A/C tools and equipment:
Safety Goggles
Assorted hand tools
Torque wrench
Refrigerant recovery/recycle/evacuate and recharge machine/
A/C O-Ring Lube
Charging Cylinder/refrigerant scale
Manifold Gauge Set
Ultra Violet or Electronic Leak Detection equipment
Belt tension gauge
Refrigerant Identifier
Spanner Wrench
Vacuum Pump
Micron Gauge
Flush Tool
DMM
Temperature probes
Clutch removal tool
Compressor Styles Vary From Vehicle To Vehicle
Scroll Compressors
Rotary Vane Compressors
Variable Displacement Compressors
Piston Compressors
Clutchless Compressors
Proper A/C performance is dependent on all systems performing properly. Make certain that the engine coolant/cooling
system is at peak operation, the cooling fan/fan clutch is operating properly, and air dams and seals are in place. Worn
belts, idlers, and tensioners can cause poor cooling system performance due to belt slippage. Low voltage at the AC
clutch assembly can cause premature compressor failure. Available voltage at the compressor clutch should be within
one volt of alternator output voltage.
Tip!! Virgin refrigerant can reduce duct temperatures 1-5 degrees. Because recovered refrigerant contains non condensable gas (ncg)
Caution: Check the system for Sealer, Stop Leak or O-Ring Conditione. These additives will destroy the new parts...
Check as you go
1
Discharge The System
Look at your gauge set, if there is positive pressure you must recover the refrigerant with a refrigerant recovery machine.
2
Remove all the parts
Remove all of the parts you plan on replacing. Compressor, accumulator, expansion device, condenser, hose assemblies….then….
3
Clean and Flush the System
When the system is repaired, every inch of the refrigerant path should be new or flushed. Oil will trap and hold metal debris and moisture,
it’s imperative to remove all dirty oil, moisture and debris to avoid a compressor failure. Newer condenser designs make it almost impossible to completely clean therefore it must be replaced to avoid contaminating the vehicles new system. After completely flushing the evaporator a 30 minute air purge @ 80 p.s.i. is necessary to remove all trace elements of flush, oil and debris. Failure to do this step could result
in diluting or contaminating your new oil.
Caution: Never use mineral spirits, denatured alcohol, carburetor cleaner, brake cleaner, heptanes or any
other solvent to clean the AC system. Always use filtered dry shop air to push and purge the flush solvent.
Tip!! Always flush in reverse from normal refrigerant flow. Allow a 10 minute soak of the evaporator, push
the flush through at 40psi then purge for 30 minutes.
Remember!!!Compressors, expansion devices, filters, driers, mufflers, accumulators, and most
condensers cannot be flushed, they have to be replaced.
Current condenser passages
Remember!!!Condenser designs are difficult, if not impossible to thoroughly clean and in many cases
are too small to effectively
MUST be replaced. These condenser designs were introduced in early 1990 model vehicles.
remove debris
4
Replace the Filter Drier or Accumulator
To Maintain the compressor warranty, the drier must be replaced. All Filter Driers, Desiccant Drier Kits and Accumulators contain desiccant
material. This material is designed to absorb the moisture that has seeped into the A/C system, desiccant has a limited lifespan. Moisture
in an A/C system will form corrosive contaminates that will cause rapid degradation and system failure. It is very important to remove all
moisture from the A/C system before charging. Proper moisture removal requires a minimum vacuum of 29.5”Hg
5
Hose Assemblies
Replace hoses which contain filters or mufflers they trap the small and large particles which will ruin the new compressor
which is being installed. Also check for internal hose degradation or softening.
6
Replace the Orifice Tube / Liquid Line Which Contains the Orifice Tube
The orifice tube is the main filter in a CCOT system. If it is not replaced, the replacement compressor will not be lubricated properly and will
fail. Some orifice tubes systems have the tube crimped into the liquid line. The liquid line must be replaced or an orifice tube repair kit
installed to prevent compressor failure or poor performance
Inspect / Replace the Thermostatic Expansion Valve
TXV inlets must be checked for debris or metal particles. Any restrictions will lead to poor performance or compressor failure. It’s a good
idea to place a screen into the valve or an inline filter ahead of the TXV.
7
Add the Correct Type and Amount of Oil
Oil is the lifeblood of an A/C system. Running the compressor without adequate lubrication will cause catastrophic damage. Unless instructed otherwise by the colored tag on the compressor add half the oil charge to the compressor suction port, on orifice tube systems add
the other half to the accumulator, on expansion valve systems add the other half to the evaporator.
In a compressor which has an oil sump, like a variable compressor (V-5 or V-7) half the oil charge is placed in the sump, remove the bolt
and add half the oil charge. Use the right Type, Amount and Viscosity
Check the Clutch Air Gap
www.4s.com
Lubricate the Shaft Seal
After the oil has been added hand turn the compressor 10-12 times then gently set the compressor on its nose for 10-15 minutes
7
Continued
Note!! Using high quality oils will allow the oil to stay in suspension with the refrigerant when an adverse condition with the AC system occurs.
Caution!! All Hybrid vehicles require special non-conductive oil. Consult service manual to avoid cross contamination of oils which will result in
component failures.
Tip!! Rotary vane compressors require specific quantities and viscosity oil to function properly. Excessive oil or wrong viscosity oil will result in
immediate failures.
REMEMBER
Compressors are shipped with assembly lubricant or ICE32 (patented technology developed by NASA) and it is not necessary to drain. It IS necessary
to add the correct type and amount of lubricant per specific system specifications. If your replacement compressor contains ICE32 there is no need to
add UV dye, It’s already in the compressor
O-rings should be installed using o-ring lube (59019), mineral oil, or silicone dielectric grease. NEVER use PAG oil to lubricate o-rings.
Caution!! PAG oil becomes contaminated with moisture from the atmosphere if not used soon after opened. Discard unused PAG oil.
Tip!!
When mounting the replacement compressor to the vehicle, the compressor must fit or rest with even contact at each mounting point. Warped brackets must be completely straightened or replaced. Leave mounting bolts loose until all bolts are in place. Tighten bolts equally according to torque
specs for that specific compressor. Do NOT over tighten. (Over tightening CAUSES leaks)
8
Proper Evacuation
The A/C system must be free of moisture and air to work properly. Removing the air and moisture with an A/C system vacuum pump for forty-five
minutes to an hour minimum pulling 29.5 hg @ sea level, or to completely take the guess work out of when to charge use a micron gauge, when your
gauge reads 500 microns or less the system is leak checked and ready to charge.
Remember!! As a general rule of thumb, routine service requires only an evacuation time of 10 minutes prior to recharging. When replacing major
components due to a catastrophic failure evacuate for as long as the system was open during the repair.
Tip!! A warm engine compartment will help with moisture removal. You should be able to pull 500 microns at any altitude. A vacuum
MUST be held for 5 minutes to insure there are no leaks.
Note!! Properly evacuated air conditioning systems will produce colder duct temperatures.
Remember!! Service your vacuum pump oil on a regular basis.
Caution!! Clutchless compressors run all the time and can NOT be run low on refrigerant or without refrigerant.
9
Correct Refrigerant Charge and Amount
R12 or R134a should be the only refrigerants used to maintain system integrity and warranty. The right amount of refrigerant is critical for proper performance. Undercharged systems will not have enough refrigerant to move the oil through the system. Overcharged systems elevate pressures and
shorten compressor life, plus could allow liquid to return to the compressor which will result in a catastrophic failure
Remember...Contaminated refrigerant continues to be one of the most significant problems facing the A/C service industry today. Use a refrigerant
identifier to verify the system is not contaminated with a blend refrigerant or has a high concentration of air. Air in the system is a contaminate and will
cause excessive system pressures, compressor noise, and excessive condenser temperature drop
Tip!! Virgin refrigerant can reduce duct temperatures 1-5 degrees, because recovered refrigerant contains non condensable gas (ncg)
Remember!! The refrigerant carries the oil to the compressor, keeping it cool and lubricated; low refrigerant charges will destroy a compressor due to
reduced oil circulation and increased friction.
Tip!! Dual A/C systems require additional refrigerant and oil, therefore, check vehicle specifications
Tip!! Service hoses will trap up to 4oz of refrigerant. Adjust your charge accordingly
Tip!! Scroll compressors must be charged using a charging station to capacity with the engine OFF, minor adjustments in charging the system can be
made with the engine running
Visit www.4s.com to get the latest up to date information on refrigerant and oil charges for practically every make-model and year vehicle.
10
11
12
Before Start-Up
Hand turn the compressor shaft at least 15 times with the hose assembly installed. This will remove the liquid oil and refrigerant from the cylinder and
13
Proper Air Flow is Critical for Efficient Operation and Cold Duct Temperatures
Inadequate air flow through the condenser and radiator will cause excessive discharge pressures, poor performance and compressor or clutch failure.
Always clean the condenser and radiator, (if washing with high pressure water be careful not to bend the very soft aluminum fins on these components)
Check the cooling fan operation and fan clutch operation. Check for air dams and radiator seals. Check between the radiator and condenser for trash
and debris, as well as the radiator cap for pressure range and sealing.
Tip!! A thermostatic fan clutch when engaged at 1500 engine RPM should NOT spin more than three (3) revolutions after the
vehicle has been shut off. If it does, replace fan clutch.
An electro vicious fan clutch can be tested with a scan tool
Burnish the Clutch
With the engine running at 2,000 rpm cycle the compressor on and off 15—20 times using the A/C control switch on the dash. This process will increase the grip between the clutch hub and the clutch pulley and enhance system performance.
Clutch Circuit Electrical Test
Perform a voltage-drop test at the compressor clutch when the clutch is engaged. The available voltage should be within 1.5 volts of system voltage,
never less than 12 volts. It is always a good practice to perform a vehicle charging system test including a battery load test as part of this procedure
14
Check for Leaks
Use an electronic leak detector or fluorescent dye to check for leaks. A leak will cause system failure. A job that was preformed perfectly in every
other way can still come back with a failed compressor if a leak goes undetected. When the refrigerant level falls too low there will not be enough liquid
refrigerant to carry the oil around in the system to maintain compressor lubrication and a catastrophic failure will occur...uggh.
Remember...to always work in a well ventilated area however if you choice of leak detection is electronic you must close the doors and windows and
turn the fans off. This air movement will reduce your chances of finding a leak or finding a leak that is really not there (a ghost leak)
15
Verify the Repair
You’re almost there, when all repairs are completed, confirm the overall integrity and efficiency of the system by performing a “Maximum Heat Load
Temperature Test” Go to www.4S.com for complete instruction on how to accomplish.
A/C System Quick Reference Guide
Maximum Heat Load Test (Ambient temperature around the vehicle must be above 79 degrees)
*Duct to Ambient Temperature – More than 30° = Normal System Performance
Duct to Ambient Less Than 30° = Outside air entering cabin; Inspect Evaporator for Restrictions or Debris; Excessive Refrigerant or Oil
*Evaporator Temperature Inlet to Outlet - 0°to ± 5° = Normal for “Fixed Orifice” Tube System
Evaporator Temperature Outlet Colder Than 5° = Refrigerant Overcharge; Inspect Orifice Tube: “O” Rings Not Sealing; Check Tube for Correct
Application
Evaporator Temperature Outlet Warmer Than 5° Difference = Refrigerant Undercharge; Excessive Oil in System; Orifice Tube Inlet Screen Restricted; Wrong Orifice Tube Application
*Condenser Temperature Inlet to Outlet - 20° to 50° = Normal Operating Temperature
Condenser Temperature Inlet to Outlet Less Than 20° = Check Condenser for Air Flow/Cooling System; Check
Cooling Fan Operation; Fan Shrouds and Seals: Refrigerant Overcharge: Internal Contamination; Wrong Size Condenser
Condenser Temperature Inlet To Outlet More Than 50° = Refrigerant Undercharge; Excessive Air in System; Internal Condenser Restrictions
A/C System Gauge Readings Cycling Clutch Orifice Tube System
Normal Low Side
23-45 PSI
Normal High Side
150-285 PSI
Normal
Low Side
Normal Duct Temp.
35-50
Normal
High Side
Evaporator Outlet
Cold
Cold
System OK
Center Duct Temp.
Symptom(s)
Probable Solution
Normal to High
High
Warm
Poor cooling @ low speeds
Possible engine running hot
to overheating
Replace fan clutch, motor
Clean debris from condenser
& radiator. Check for bent fins
Low
Low
Warm
Poor Cooling
Low Refrigerant Charge
Repair leak evac & recharge
Low
Normal
Cold then gets Warm
Compressor runs all the time
Evaporator Fins Icing, replace
cycling switch
High
Low
Warm
Poor to no cooling,
Internal Compressor Failure
PAC-Kit time, R&R complete system
Clean flush evacuate and recharge
High
High
Warm
Poor or no Cooling
Excessive air in A/C System
System overcharge
Evac and recharge
Low To Vacuum
Normal to Low
Warm
Evap outlet warm,
Pressure equalizes slower than
Normal
Check orifice tube, if clogged
screen replace then temp drop test
condenser if excessive replace
(over a 50 degree drop)
AC system will not turn on;
No refrigerant in system
Blown Fuse
Defective switches or open wires
Check Scan Data if possible
Repair leak, evac and recharge
Replace fuse and test components for excessive resistance
Repair as needed