1
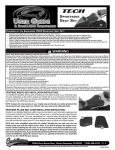
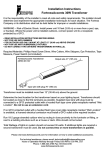
BULLET-STYLE LED
MARKER LAMPS
www.saddlemen.com
F EATURES
•
•
•
•
•
•
•
OF THE
2040-0802 .................... RED LED ..................... FLAT - SILVER POLISHED STAINLESS FINISH
2040-0803 .................... RED LED ..................... HOODED - SILVER POLISHED STAINLESS FINISH
2040-0804 .................... AMBER LED ............... FLAT - SILVER POLISHED STAINLESS FINISH
2040-0805 .................... AMBER LED ............... HOODED - SILVER POLISHED STAINLESS FINISH
2040-0806 .................... RED LED ..................... FLAT - BLACK TITANIUM FINISH
2040-0807 .................... RED LED ..................... HOODED - BLACK TITANIUM FINISH
2040-0808 .................... AMBER LED ............... FLAT - BLACK TITANIUM FINISH
2040-0809 .................... AMBER LED ............... HOODED - BLACK TITANIUM FINISH
B ULLET - STYLE LED M ARKER L AMPS :
Lamps are available with standard or hooded bezels, amber or red lights and titanium-coated black chrome or polished stainless steel.
Great looking, easy-to-install lights with six pairs of lenses in every kit: Flat, domed and bullet, each pair in clear or smoke treatment.
Twenty-five highly visible, vibration-resistant LEDs that will last more than twenty times longer than traditional filament bulbs.
Twelve-volt, three-wire design compatible with brake, turn and running light functions.
Corrosion-resistant 304 stainless ring, injection-molded high-impact ABS and polycarbonate internal components and water-resistant wire grommets provide
long-lasting durability and IP66 waterproof rating.
Universal post installation is perfect for forward or rearward mounting.
Includes two lamps plus instructions, extra mounting studs, wires and four load resistors (needed to balance the bike's turn signal flash rate on basic systems).
Note: Not DOT-approved
READ THESE INSTRUCTIONS THOROUGHLY BEFORE INSTALLATION!
Because of the variety of motorcycle configurations, other accessories, and the features and intended use of this Saddlemen accessory, there are many different mounting
options. You are responsible for the proper installation of this accessory on your motorcycle. Your attention to these installation instructions and recommendations will
permit the safe and proper use of this accessory. You must mount this accessory properly and securely before riding your motorcycle. If you lack the ability to safely and
properly install this accessory, seek out a qualified motorcycle technician for assistance. During installation, you may need to support the motorcycle with a suitable stand
or lift so it will not tip over and injure you, or damage the vehicle. Using or mounting this accessory improperly could result in a loss of control of the motorcycle which
could result in damage to your motorcycle or other personal property, the property of third parties, and/or personal injury to yourself or others, up to and including death.
BE SURE TO THOROUGHLY READ AND CLOSELY FOLLOW THE MOUNTING INSTRUCTIONS THAT ARE INCLUDED WITH THIS ACCESSORY:
• The LED marker lamps must be installed and securely fastened onto the chassis of the motorcycle.
• Install and route any wires securely so they will not shift or move while riding. Make sure the marker lamps or their wires will not contact the wheels, suspension or any
other moving parts of the motorcycle.
• If you do not understand the mounting and electrical connection instructions DO NOT mount the marker lamps. Remove the lamps or any components you may have
already installed on your motorcycle.
• Thoroughly inspect your motorcycle’s accessories before every ride. Do not use this accessory if its mounting system has been modified, has deteriorated, loosened
or is beginning to fail.
• Continually check the security and operation of your accessories at each stop as you ride. Items attached to your motorcycle or electrical connections can loosen
during operation, so be sure to check them frequently.
• Do not use this accessory if you have any doubts as to whether it is properly mounted or electrically connected to your motorcycle.
• When using any accessory, do not exceed your vehicle's Maximum Gross Vehicle Weight as listed on your motorcycle or in the manufacturer's owner's manual.
• If your lamps are ever damaged, do not use them until they have been inspected by your local professional motorcycle dealer. Replace any lamp immediately if it has
sustained damage that will prevent it from being properly secured to your motorcycle or being able to electrically function.
• These marker lamps are a custom accessory. They are not DOT approved and it is your responsibility to check your local and state laws to determine if they are legal
to use if you intend to operate your vehicle on-road.
DO NOT ATTEMPT TO USE THIS ACCESSORY IF:
• You do not understand these installation and use instructions,
• You do not understand any part of the accessory mounting system or its electrical connection,
• You have any doubts as to the security of the mounting system.
If you have any concerns or questions, seek help at your qualified motorcycle dealer or call the Saddlemen support line at (310) 638-1222.
Remember: Motorcycling can be a dangerous activity. Installation of any accessory can increase your risk if it is not installed properly. You are responsible to install this accessory
so it will not contact any portion of the drive train, suspension or steering, or if it will in any way interfere with the operation of your motorcycle.
PARTS
INCLUDED WITH THE
Part
Qty.
Bullet LED lamps
Long mounting studs
Load resistors
2
2
4
BULLET-STYLE LED MARKER LAMPS:
Part
Qty.
Dome lenses (2 clear & 2 smoked) 4
Rocket lenses (2 clear & 2 smoked) 4
Flat lenses (smoked)
2
R ECOMMENDED T OOLS :
To tighten mounting nuts or change lenses:
To complete electrical connections:
Part
Qty.
Instruction sheet
1
NOTE: One pair of clear, flat lenses pre-installed in lamps
Wrenches - 17mm & Phillips screwdriver - #2
Soldering iron, solder, insulating heat-shrink tube or electrical tape
(Other tools may be required, depending upon your vehicle, signal mounting or mounting stud modification)
The images in this instruction set may be different than your accessory or motorcycle.
www.saddlemen.com
17801 SOUTH SUSANA ROAD, RANCHO DOMINGUEZ, CA 90221
Continued on next page...
(310) 638-1222 1 / 3
Rev 2 (10-09-2012)
33-400210
INSTALLATION INSTRUCTIONS:
Your Saddlemen Bullet-style LED Marker Lamps have been designed to provide
you the flexibility to mount them to a variety of motorcycles using the included mounting hardware. You (or your professional motorcycle technician) will need to determine the best mounting configuration for your motorcycle or scooter.
To change the lens cover (or hooded lens cover) orientation or lens use a screw
driver to remove the cover retention screw 1
1
Grasp the lens cover 2 (or hooded lens cover) and rotate it CLOCKWISE to release it from the marker lamp’s main body.
With the lens cover 2 off, you can remove the gasket 4 and swap the lens 3.
Replace the gasket and press the lens cover back onto the lamp’s main body 5
and rotate it COUNTER-CLOCKWISE 90-degress to lock it into place. Once you
have completed the lens charge or cover reorientation, reinstall the retention screw.
2
4
3
2
NOTE:
With a hooded lens cover, check the orientation before and after reinstallation so you have the cover positioned the way you desire when you mount
the marker lamp to the motorcycle. The hooded cover can be set at 12 oclock, 3 o-clock, 6 o-clock and 9 o-clock positions on the main lamp body.
NOTE:
Included with the marker lamp set is a pair of hollow, threaded mounting
studs you can cut to different lengths for your custom application.
5
8
7
9
If you need to change the marker lamps’s mounting stud 6, remove the retention
screw and lens cover as noted above. Remove the LED lamp module 9 from the
marker lamp body 5 and set it aside. Use two 17mm wrenches to remove the
external lock nut 7 and the internal lock nut 8 from the mounting stud. Install the
new length stud and reassemble in the reverse order of disassembly.
NOTE:
You may need to use a vise with soft-jaws to hold the mounting studs as you
remove and reinstall the lock nut inside the marker lamp body.
6
5
The images in this instruction set may be different than your accessory or motorcycle.
www.saddlemen.com
17801 SOUTH SUSANA ROAD, RANCHO DOMINGUEZ, CA 90221
Continued on next page...
(310) 638-1222
Rev 2 (10-09-2012)
2/3
33-400210
INSTALLATION INSTRUCTIONS (continued):
LED WIRE COLOR CODES:
Your LED Marker Lamps have two levels of brightness, so they can be used as low-intensity running lamps with
high-intensity turn signals, or a low-intensity running lamps with high-intensity brake lights. Refer to the LED
wire color code chart at right. Connect your LEDs to a 12-volt, DC power source only.
Ground (negative) - Black
Low intensity (positive) – Orange
High intensity (positive) - Red
COMMON TURN SIGNAL & TAIL/BRAKE WIRE COLOR CODES:
While the codes listed here are common, it is possible that the wiring color codes on your motorcycle may differ. Make note of the colors of the wires on
your motorcycle before you make any changes to the turn signal or tail/brake light wiring. Refer to your vehicle’s Service Manual or seek out a qualified
technician at a motorcycle dealership for assistance.
HARLEY-DAVIDSON
Ground (negative) - Black
Right Turn Signal (positive) – Brown
Left Turn Signal (positive) – Purple
Tail light (positive) - Blue
Brake Light (positive) - Red/Yellow
HONDA
Ground (negative) - Green
Right Turn Signal (positive) – Blue
Left Turn Signal (positive) – Orange
Tail light (positive) - Brown
Brake Light (positive) - Green/Yellow
KAWASAKI
Ground (negative) - Black/yellow
Right Turn Signal (positive) – Gray
Left Turn Signal (positive) – Green
Tail light (positive) - Blue
Brake Light (positive) - Red
SUZUKI
Ground (negative) - Black/white
Right Turn Signal (positive) – Green
Left Turn Signal (positive) – Black
Tail light (positive) - Grey
Brake Light (positive) - White/Black
YAMAHA
Ground (negative) - Black
Right Turn Signal (positive) – Green
Left Turn Signal (positive) – Brown
Tail light (positive) - White
Brake Light (positive) - Red
TRIUMPH (modern)
Ground (negative) - Black
Right Turn Signal (positive) – Green & White
Left Turn Signal (positive) – Green & Red
Tail light (positive) - Red
Brake Light (positive) - Blue
LOAD RESISTORS:
If you elect to use your LED lamps as turn signals in a custom application, you may need to use one or more of
the included load resistors 1 to make the motorcycle’s turn signal flasher activate and flash at the proper rate. AT
The electrical draw of an LED light cluster is far less than an incandescent bulb so some flasher modules may not
work properly. When used with a basic turn signal system, the resistor(s) mimic the load an incandescent bulb
would place upon the flasher unit, causing it to function normally.
Test your new LED lamps to see if they flash and blink at a rate similar to the original signals. If so, the load
resistors are not needed. If the LED lamps fail to flash, or flash too quickly, wire one or two resistors electrically in
parallel to the LED turn signal’s positive and negative wires. After connecting the resistors into the motorcycle’s
wiring take steps to insulate the connections. Find a weather resistent and secure location for the resistors (for
example, you can use double sided tape to secure the resistors in place under the seat). Be aware that the resistors may dissipate heat when the
signals are activated, take care to mount them away from heat-sensitive components. If your motorcycle is equipped with an electronic module that
jointly operates the turn signal and brake light functions of your standard turn signals, or if your new LED signals will not flash, or if their flash rate is still
too slow with the supplied resistors installed, refer to the DRAG Specialties or PARTS UNLIMITED catalogs for other LED-related accessory solutions.
IMPORTANT:
Failure to install this accessory properly may allow portions of the marker lamp or its wires to contact the vehicle’s moving parts. It is vital that
you verify that the accessory and/or any of its parts will not touch or interfere with other components while the suspension moves through its
entire stroke. Make sure that your lamps’ wires do not touch the exhaust or other non-moving components as they may be damaged from
contact with the accessory.
Occasionally, the configuration of this accessory on certain motorcycles may require relocation and/or adjustment of certain components on
the vehicle. Check to be sure that all lights and safety reflectors are visible once the accessory lamps are in place. If the lamp installation
causes the removal of, or obscures, any side safety reflectors, place reflectors in another location on the vehicle. Reflectors with self-adhesive
backing are available from Saddlemen (part #2040-0416) or from motorcycle or automobile supply stores.
It is your responsibility to make sure the installation does not create an unsafe or illegal situation. Remember that these marker lamps are a
custom accessory. They are not DOT approved and it is your responsibility to check your local and state laws to determine if they are legal to
use if you intend to operate your vehicle on-road.
After 50 miles (80 kilometers), recheck the lamps’ mounting and electrical connections to make sure they are still tight, secure and that the
lamps’ electrical function is proper. Inspect all of your accessories and related hardware before and during each ride. A loose or improperly
functioning accessory can interfere with the vehicle’s operation and cause an unsafe riding condition.
SADDLEMEN LIMITED ONE-YEAR WARRANTY
Saddlemen warrants its products for defects in materials, design or workmanship for a period of one year after retail purchase. Items that are
defective will be repaired or replaced by Saddlemen at its sole discretion. Damage caused by improper use or improper installation is not a
defect; therefore repair or replacement of a damaged accessory will not be covered under this warranty. This warranty contains other provisions and conditions, so please visit www.saddlemen.com for additional information. Thank you for purchasing your Bullet-style LED Marker
Lamps. You can count on Saddlemen's quality, innovation, service and style. We want you to be completely satisfied. If you have any comments, or are not satisfied with the performance of your Saddlemen accessory, please contact the Saddlemen support line at (310) 638-1222.
www.saddlemen.com
17801 SOUTH SUSANA ROAD, RANCHO DOMINGUEZ, CA 90221
(310) 638-1222 3 / 3
Rev 2 (10-09-2012)
33-400210