1
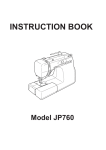
TEST & SET MODES
MODEL(S)
MODE(S)
Janome model(s):
MB4
Screen Calibration:
1. While holding down the Left Arrow button on the RCS, turn on the machine. Release when you see crosshairs on the screen.
2. Touch the middle of each displayed crosshair until the screen displays ‘OK’. If ‘NG’ displays, start over.
Elna models:
940 / 9900
Upgrading: With the ATA card already inserted in the RCS, hold down the Left Arrow & Trace buttons on the RCS then turn the machine on. Keep holding the buttons down until
you start to see vertical bars start to slide across the screen. Do not touch the machine until the screen displays 'Finish'. Once it does, turn the machine off and remove the
card.
Test Mode: While holding down the Start/Stop & Scissors buttons, turn on the machine. Release the buttons once you see icons on the screen:
Phase: Press “All Init” to initialize the machine before doing anything else in the set mode.
Bottom dead pt.: Displays ‘L’ at all times except when the hand wheel is at 0° where it will display ‘H’. This all depends on where the upper shaft sensor shield plate is.
Needle Change: Displays ‘L’ at all times except when the hand wheel is at 270° where it will display ‘H’. This all depends on where the upper shaft sensor shield plate is.
Needle: Left & Right arrow buttons to move the head to the specific needle. “Init” to initialize.
NCHM Init Sen: Moving Head Stop Position Sensor.
NCHM No. Sen: Needle Stop Position Sensor.
Brightness: Press the ‘–‘ and ‘+’ keys to make the screen brighter or darker.
X/Y Motor: Press “Init” to initialize. Using the carriage gauge template, change where the carriage home position is by pressing the jog buttons on the RCS unit.
Pick Up: Press “Init” to initialize.
Cut Motor: Press “Init” to initialize.
Sensor Solenoid: Thread Tension Sensor, Thread Break Sensor, Thread keeper, and Needle Bar Release Solenoid.
Thread Tension Sen: When the tension discs are closed, this will read ‘L’ and when they are open, it will read ‘H’.
Thread Break Sen: When the tension disc wheels are not spinning, the display will read ‘L’. They will read ‘H’ each time the ‘slit’ rolls thru the sensor when you roll them by hand.
Solenoid1: Needle bar release solenoid
Solenoid2: Thread keeper solenoid
Spool: Bobbin Winder
Aging: Press “Start/Stop” to run the machine for the selected time & speed.
Clear Set: Clears the memory completely. This is for factory-use only.
Sensor Off: Turns off the thread check sensor for testing purposes. Once selected, the machine will turn off then back on again with the thread check sensor turned off.
Cut Adjust: Dynamic cutter adjustment.
To Find Out How Long the Machine was Run: While holding down the Forward & Bobbin Winder buttons, turn on the machine.
To Reset Motor: While holding down the Forward & Bobbin Winder buttons, turn on the machine. A new screen will show. Press the button called “Clear”. Turn off the machine.
Janome model(s):
MC15000
Screen Calibration:
1. While holding down the Left Arrow button on the RCS, turn on the machine. Release when you see crosshairs on the screen.
2. Touch the middle of each displayed crosshair until the screen displays ‘OK’. If ‘NG’ displays, start over.
Test Mode: While holding down the Start/Stop & Reverse buttons, turn on the machine. Release the buttons once you see icons on the screen:
Foot Sensor: Presser foot height adjustment. Follow the “Adjustments” section of the PowerPoint service manual.
Foot Up/Down: Presser foot pressure adjustment. Follow the “Adjustments” section of the PowerPoint service manual.
Foot Up/Down “Offset”: ‘P’ foot height adjustment. Follow the “Adjustments” section of the PowerPoint service manual.
Knee Lifter: Knee lifter & variable zigzag adjustment. Follow the “Adjustments” section of the PowerPoint service manual.
Bobbin: Remaining bobbin thread adjustment. Follow the “Adjustments” section of the PowerPoint service manual.
Feed Dog: Press the feed dog up & down keys to raise or lower the feed dog to check the micro switch on the feed dog drop step motor. When the feed dog is up, the machine should
display ‘H’ and ‘L’ when the feed dog is lowered.
Aging: Once you press the Start/Stop button, the machine will run by itself for a certain amount of time for testing purposes in either sewing or embroidery mode.
BH Sensor: Buttonhole sensor & Thread tension unit check.
Free: The step motor will rotate and open the discs.
3.4: The step motor will calibrate to the default setting.
Init: The step motor will initialize.
BH Sensor “BH Sen”: Remove any foot you have on the machine then lower the button lever. When it is in the lowest position, it should read ‘L’. When you push on the lever or when
the lever is all of the way up, it should read ‘H’.
Cloth Guide: With the cloth guide attached to the hoop, press the
button to initialize the position of the guide. Press the '<-' or '->' keys to move the cloth guide 15mm to the
right from center needle position. Press 'OK' to save it.
8 Adjust: Feed (decorative) stitch balance. Press the ‘Start/Stop’ button to sew eight 8’s. Press ‘Adjust’ to recalibrate the step motors after making an adjustment.
Sew Test: Once you push the Start/Stop button, the machine will sew several stitches & monogramming to test the machine.
Hoop Adjust: Embroidery unit home-set position. Press ‘UP’, ‘DOWN’, ‘LEFT’, or ‘RIGHT’ to move the carriage so it aligns with the hole of the template. Press ‘OK’ to save the
adjustment.
MEM: This will reset the carriage position to the previous saved setting.
DEF: This will reset the carriage unit to factory specs (‘X’ = 1200 & ‘Y = 1500).
Sensor Off: The machine will restart back into normal sewing mode with the thread check sensor turned off.
Phase: Turn the hand wheel toward you slowly until the needle from its lowest position until "Bight" changes from L to H. The needle height should be 7.2 to 8.2 mm above from the
surface of the needle plate. If not, adjust the upper shaft shield position.
Other Sensor:
Trim Foot SW: Thread cutter switch foot controller. When plugged in and pressed, the ‘H’ will display. When depressed or not plugged in, the LCD will display ‘L’.
TB: Thread check sensor. When in the home position, this should indicate ‘L’ and ‘H’ when manually pushed inwards.
Foot: Foot controller check. When not plugged in, this should indicate ‘255’. When plugged in and not pressed, this should indicate around ‘5’ and around ‘215’ when completely
pressed.
Slide: Speed volume (speed control on front cover). This should read ‘255’ when pushed to the left and around ‘1’ when pushed to the right.
Straight: With the straight stitch needle plate attached, this should indicate ‘H’ and ‘ZigZag’ should indicate ‘L’
ZigZag: With the standard zigzag needle plate attached, this should indicate ‘H’ and ‘Straight’ should indicate ‘L’
Bright: Press the ‘– ‘ or ‘+’ keys to make the screen brighter or darker. Press ‘OK’ to save the setting.
Clear Set: Clears the memory completely. This is for factory-use only.
Needle Thread: Needle threader adjustments. Follow the “Adjustments” section of the PowerPoint service manual.
Spool: Bobbin winder adjustment. Press the ‘–‘ or ‘+’ keys to adjust the speed of the bobbin winder then press ‘OK’ to save the setting. ‘0’ should be default.
Spool SW: Not used
SM Init: Calibrates all of the step motors in the machine.
To Find Out How Long the Machine was Run: While holding the Presser Ft. Up/Down & Needle Up/Down buttons, turn on the machine.
Upgrading: With the USB stick already inserted in the machine, hold down the Needle Up/Down & Lockstitch buttons then turn the machine on. Keep holding the buttons down until you
start to see horizontal bars start to slide across the screen. Do not touch the machine until the screen displays 'Finish'. Once it does, turn the machine off and remove the stick.
Janome model(s):
MC12000
Elna model(s):
900
Test Mode: While holding down the Start/Stop & Reverse buttons, turn on the machine. Release the buttons once you see icons on the screen:
Foot Sensor: Presser foot height adjustment. Follow the “Adjustments” section of the PowerPoint service manual.
Foot Up/Down: Presser foot pressure adjustment. Follow the “Adjustments” section of the PowerPoint service manual.
Foot Up/Down “Offset”: ‘P’ foot height adjustment. Follow the “Adjustments” section of the PowerPoint service manual.
Knee Lifter: Knee lifter & variable zigzag adjustment. Follow the “Adjustments” section of the PowerPoint service manual.
Bobbin: Remaining bobbin thread adjustment. Follow the “Adjustments” section of the PowerPoint service manual.
Feed Dog: Press the feed dog up & down keys to raise or lower the feed dog to check the micro switch on the feed dog drop step motor. When the feed dog is up, the machine should
display ‘H’ and ‘L’ when the feed dog is lowered.
Aging: Once you press the Start/Stop button, the machine will run by itself for a certain amount of time for testing purposes in either sewing or embroidery mode.
BH Sensor: Buttonhole sensor & Thread tension unit check.
Free: The step motor will rotate and open the discs.
3.4: The step motor will calibrate to the default setting.
Init: The step motor will initialize.
BH Sensor “BH Sen”: Remove any foot you have on the machine then lower the button lever. When it is in the lowest position, it should read ‘L’. When you push on the lever or when
the lever is all of the way up, it should read ‘H’.
Cloth Guide: With the cloth guide attached to the hoop, press the
button to initialize the position of the guide. Press the '<-' or '->' keys to move the cloth guide 15mm to the
right from center needle position. Press 'OK' to save it.
8 Adjust: Feed (decorative) stitch balance. Press the ‘Start/Stop’ button to sew eight 8’s. Press ‘Adjust’ to recalibrate the step motors after making an adjustment.
Sew Test: Once you push the Start/Stop button, the machine will sew several stitches & monogramming to test the machine.
Hoop Adjust: Embroidery unit home-set position. Press ‘UP’, ‘DOWN’, ‘LEFT’, or ‘RIGHT’ to move the carriage so it aligns with the hole of the template. Press ‘OK’ to save the
adjustment.
MEM: This will reset the carriage position to the previous saved setting.
DEF: This will reset the carriage unit to factory specs (‘X’ = 1200 & ‘Y = 1500).
Sensor Off: The machine will restart back into normal sewing mode with the thread check sensor turned off.
Phase: Turn the hand wheel toward you slowly until the needle from its lowest position until "Bight" changes from L to H. The needle height should be 7.2 to 8.2 mm above from the
surface of the needle plate. If not, adjust the upper shaft shield position.
Other Sensor:
Spool: Bobbin winder
TB: Thread check sensor
Foot: Foot controller
Slide: Speed volume (speed control on front cover)
Straight: With the straight stitch needle plate attached, this should indicate ‘H’ and ‘ZigZag’ should indicate ‘L’
ZigZag: With the standard zigzag needle plate attached, this should indicate ‘H’ and ‘Straight’ should indicate ‘L’
Bright: Press the ‘– ‘ or ‘+’ keys to make the screen brighter or darker. Press ‘OK’ to save the setting.
Clear Set: Clears the memory completely. This is for factory-use only.
SM Init: Calibrates all of the step motors in the machine.
To Find Out How Long the Machine was Run: While holding the Presser Ft. Up/Down & Needle Up/Down buttons, turn on the machine.
Upgrading: With the USB stick already inserted in the machine, hold down the Needle Up/Down & Lockstitch buttons then turn the machine on. Keep holding the buttons down until you
start to see horizontal bars start to slide across the screen. Do not touch the machine until the screen displays 'Finish'. Once it does, turn the machine off and remove the stick.
Janome model(s):
MC11000S / MC11000
Upgrading: With the ATA card already inserted in the RCS, hold down the Needle Up/Down & Lockstitch buttons then turn the machine on. Keep holding the buttons down until
you start to see vertical bars start to slide across the screen. Do not touch the machine until the screen displays 'Finish'. Once it does, turn the machine off and remove the
card.
Elna model(s):
9600 / 9500
Screen Calibration:
1. While holding down the Needle Up/Down button, turn on the machine. Release when you see crosshairs on the screen.
2. Touch the middle of each displayed crosshair until the screen displays ‘OK’. If ‘NG’ displays, start over.
To Find Out How Long the Machine was On & Run: With the machine off, hold down the Needle Threader & Scissors buttons, then turn the machine on.
Test Mode: While holding down the Start/Stop & Reverse buttons, turn on the machine. Release the buttons once you see icons on the screen:
8 Adjust: Press the Start/Stop button to sew out 8x 8’s. Adjust the feed balance mechanically then press ‘Initialize’ to reset the feed system. Press Start/Stop to re-test.
BH Sensor: The display should read ‘H’ when the lever is either up or when the slit is out of the sensor and ‘L’ when the lever is all of the way down and not being touched.
Foot Sensor Feed Dog:
Foot (P foot sensor): With the ‘P’ foot on the machine and the presser bar up, the display should read ‘L’ will change to ‘H’ when the presser bar is down.
Feed Dog (Feed dog drop step motor micro switches): When the feed dogs are up, the display should read ‘H’ and ‘L’. With the feed dogs down, the display will change to ‘L’ and ‘H’.
Bobbin: Low bobbin check adjustment. Use the green & red bobbin gauges (#00310KGAUGE) to perform the adjustment:
1. With the machine off, hold down the Start/Stop & Reverse buttons, then turn the machine on.
2. Press ‘Bobbin’.
3. Insert the red bobbin gauge. Press ‘Key’ until you get the most common number, then press ‘MEM1’.
4. Remove the green gauge and Insert the red gauge. Press ‘Key’ until you get the most common number, then press ‘MEM2’.
5. Press ‘X’ to save it and turn the machine off.
Sew Test: Press the Start/Stop button to let the machine sew several different stitches by itself to test the sewing.
Sensor Off: The machine will turn restart itself back into normal sewing mode with all of the sensors turned off.
Aging: Once you press the Start/Stop button, the machine will run by itself for a certain amount of time for testing purposes.
Brightness: Press the ‘–‘ and ‘+’ keys to make the screen brighter or darker. Press ‘X’ to save it.
Foot UD: Zigzag foot micro switch. ‘H’ will display when the presser bar is up and ‘L’ when the presser bar is down.
PH Sensor: Lower shaft sensor check. Turn the hand wheel to test it.
Solenoid: Press each icon to test the following solenoids:
Solenoid 1: Low bobbin check solenoid.
Solenoid 2: Thread cutter solenoid (this will only work properly when the needle is in the lowest position.)
Solenoid 3: Upper shaft clutch solenoid
Spool: Bobbin winder
Hoop Adjust: Adjust the ‘X’ and ‘Y’ position of the carriage.
Clear Set: Clears the memory completely. Do not press “YES” on either selection! This is for factory-use only and can possibly blow the ‘A’ board!
Cloth Guide: Press ‘L’ to bring the carriage arm to the left and ‘R’ to bring it to the home position. Press ‘+’ and ‘–‘ to adjust its position. Press ‘OK’ to save the adjustment.
Needle Threader: ‘L’, ‘M’, and ‘R’ changes needle position. Press ‘+’ and ‘–‘ to give the step motor more or less power to drive it thru the eye of the needle. Press ‘X’ to save the adjustment
Self-Check Mode: While holding the Start/Stop, Reverse, and Lockstitch buttons, turn on the machine then let go when you enter the test mode:
No. 1: Flash ROM (LCD, LED, buzzer, and USB checks).
No. 2: Button check:
S/S: Start/Stop
Rev: Reverse
AL: Lockstitch
U/D: Needle Up/Down
NT: Needle Threader
Trim: Scissors
Spool: Bobbin Winder
LCD U: LCD Up
LCD Down: LCD Down
No. 3:
TB Sensor: Thread break/check sensor
Foot Sensor: Foot up/down micro switch
YC Sensor: Embroidery arm open/close micro switch
BH Sensor: Buttonhole sensor
P Foot Sen: 'P' foot sensor
No. 4:
Tr: Low bobbin thread solenoid
Trim: Thread cutter solenoid
Spool: Clutch release solenoid
No. 5 (Be careful as the next step will cause the machine to run by itself!):
Controller: Foot controller
Sliding Volume: Speed control (on front cover)
No. 6:
B SM: [Zigzag motor]
X SM: [X-step motor on base]
TT SM: [Thread tension unit]
FD SM: [Feed dog step motor]
DC Motor: [DC motor]
SPL Motor: [Bobbin winder unit]
F SM: [Feed step motor]
Y SM: [Y-step motor on base]
NT Motor: [Needle threader step motor]
LCD SM: [LCD Up/down step motor]
PH Sensor: [Lower shaft sensor]
No. 7:
PC Card Check: 1
No. 8: If an ATA memory card were already inserted, this would read ‘OK’
USB Memory Check: 1
No. 9: If a USB stick were already inserted, this would read ‘OK’
NG Result: Displays any micro switch, sensor, solenoid, or step motor that did not work. This will always show some steps as 'NG' (no good) but it does not mean that part is not
working. When the checks were made, the needle bar must be in a specific spot in order for certain micro switches, sensors, and solenoids to correctly work.
Janome model(s):
MC10001 / MC10000
Test Mode: While holding down the Start/Stop & Reverse buttons, turn on the machine. Release the buttons once you see icons on the screen:
Screen Calibration:
1. While holding down the Needle Up/Down button, turn on the machine. Release when you see crosshairs on the screen.
2. Touch the middle of each displayed crosshair until the screen displays ‘OK’. If ‘NG’ displays, start over.
Upgrading: With the ATA card already inserted in the RCS, hold down the Needle Up/Down & Lockstitch buttons then turn the machine on. Keep holding the buttons down until
you start to see vertical bars start to slide across the screen. Do not touch the machine until the screen displays 'Finish'. Once it does, turn the machine off and remove the card.
Janome model(s):
MC9900
Test Mode: While holding down the Start/Stop & Reverse buttons, turn on the machine. Release the buttons once you see icons on the screen:
Bobbin: Remaining bobbin thread adjustment. Follow the “Adjustments” section of the PowerPoint service manual.
Elna model(s):
860
Foot Sen Feed Dog:
Foot U/D: Presser foot up/down micro switch
P Foot: Presser foot ‘P’ sensor
Feed Dog: Feed dog drop micro switch. When the feed dogs are down, this should read ‘L’
Free: Opens the tension discs
3.4: Sets the tension unit to default tension
Init: Calibrates the tension unit
Aging: Once you press the Start/Stop button, the machine will run by itself for a certain amount of time for testing purposes for both sewing and embroidery.
BH Sensor:
BH Sen: Buttonhole sensor. When the buttonhole lever is all of the way up, this should read ‘H’. With it all the way down, this should read ‘L’
TTM Sen: Thread check sensor. This should read ‘L’ when in its home position. With the shield plate out of the sensor, it should read ‘H’
Free: Opens the tension discs
3.4: Sets the tension unit to default tension
Init: Calibrates the tension unit
Cloth Guide: With the cloth guide attached to the hoop, press the button to initialize the position of the guide. Press the '<-' or '->' keys to move the cloth guide 15mm to the
right from center needle position. Press 'OK' to save it.
8 Adjust: Feed (Decorative) stitch balance.
Sew Test: Once you push the Start/Stop button, the machine will sew several stitches & monogramming to test the machine.
Hoop Adjust:
Sensor Off: The machine will turn restart itself back into normal sewing mode with all of the sensors turned off.
Phase: Turn the hand wheel toward you slowly until the needle from its lowest position until "Bight" changes from L to H. The needle height should be 7.2 to 8.2 mm above from the
surface of the needle plate. If not, adjust the upper shaft shield position.
Other Sensor:
Spool: Bobbin winder
TB: Thread check sensor
Foot: Foot controller
Slide: Speed Volume (Speed control on front cover)
Straight: With the straight stitch needle plate attached, this should indicate ‘H’ and ‘ZigZag’ should indicate ‘L’
ZigZag: With the standard zigzag needle plate attached, this should indicate ‘H’ and ‘Straight’ should indicate ‘L’
Bright: Press the ‘– ‘ or ‘+’ keys to make the screen brighter or darker.
Clear Set: Clears the memory completely. Do not press “YES” on either selection! This is for factory-use only and can possibly blow the ‘A’ board!
SM Init: Calibrates all of the step motors in the machine.
Screen Calibration:
1. While holding down the Needle Up/Down button, turn on the machine. Release when you see crosshairs on the screen.
2. Touch the middle of each displayed crosshair until the screen displays ‘OK’. If ‘NG’ displays, start over.
To Find Out How Long the Machine was Run: While holding down the Scissors & Needle Up/Down buttons, turn on the machine.
Janome model(s):
MC9700 / MC9500
Elna model(s):
8600
Janome model(s):
MC8900QCP
Screen Calibration:
1. While holding down the Needle Up/Down button, turn on the machine. Release when you see crosshairs on the screen.
2. Touch the middle of each displayed crosshair until the screen displays ‘OK’. If ‘NG’ displays, start over.
Test Mode: While holding down the Start/Stop button, turn on the machine. Release the buttons once you see icons on the screen:
Test Mode: While holding down the Needle Up/Down & Lockstitch buttons, turn on the machine. Release the buttons once you see icons on the screen. Turn the jog dial to highlight the
option and press the jog dial button to select it. Press the reverse button to go back to the main menu (for most steps):
01: LCD Brightness: Spin the jog dial to make the screen lighter or darker. Press the jog dial button to save it.
02: TTP Coordinate: Using a stylus, press the center of each indicated button and crosshair. Press the jog dial button to save it.
03: Self-Check: Enters the self-check mode:
04: Version: Displays manufacturing version information
05: Initialize EEPROM:
06: Sensor:
Bobbin: Push the bobbin winder to the right and left to check the micro switch.
Foot Lift:
Assist Lift: d
Remote Cut: d
Needle Plate: d
BH Lever: Pull the buttonhole lever down to test the sensor.
Feed Dog: Flip the feed dog up/down lever to drop and raise the feed dogs to check the micro switch
07: Phase Check:
08: 88888888:
09: Solenoid:
10: Width-Max:
11: Feed-Max:
12: Test Sewing:
13: Aging:
14: Step Check:
15: Cutting Set:
Janome model(s):
MC9000
Screen Calibration:
1. Hold down the first 3 buttons on the front panel, then turn the machine on.
2. Release the buttons once you enter the screen calibration mode.
Elna model(s):
CE20
‘P’ Foot Sensor Adjustment:
1.
Janome model(s):
MC8000
Elna model(s):
9006
Janome model(s):
MC9500 / MC350E / MC300E
Elna model(s):
8300 / 8200
Janome model(s):
MC350E / MC300E
Elna model(s):
820 / 8300 / 8200
Screen Calibration:
1. With the machine off, hold down the Reverse, Lock Stitch, and Needle Up/Down buttons, then turn the machine on. Release when you see crosshairs on the screen.
Upgrading:
1. With the machine off, insert the ATA Card.
2. With the ATA card already inserted, turn on the machine. Press and release the Start/Stop button when prompted.
Brightness: Press '–' to make the screen brighter or '+' to make the screen darker.
Foot UD: Presser foot up/down micro switch. 'H' will display when the micro switch is activated or when the presser foot is up and 'L' when the micro switch is deactivated or when the
presser foot is down.
Sensor Off: Press this key to sew with the broken thread sensor turned off.
Card / USB: Insert either a PC Card or USB Stick to check whether the 'A' board can read these. It may not read them if either the stick or card is not formatted correctly.
PH Sensor: Turn the hand wheel to bring the needle up & down. Depending on where the shield plate goes thru the sensor will it display 'H' or 'L'.
Aging: This will make the machine run by itself. Press '–' to decrease the time or '+' to increase the time.
Solenoid: Tension Solenoid (thread tension release solenoid), Thread Hold (thread drawing lever solenoid), Thread Cut (thread cutter solenoid)
Solenoid Hold: Tension Solenoid (thread tension release solenoid) & Thread Hold (thread drawing lever solenoid).
Bobbin: Remaining bobbin thread check. With the green bobbin gauge in first, press 'Key' until you get the most common number, then press 'MEM1'. Now insert the red bobbin gauge,
press 'Key' until you get the most common number, then press 'MEM2'. Press 'OK' to save it.
Bobbin Check Mode: Remaining bobbin thread solenoid check. Press 'Key' to engage & disengage.
Screen Calibration: While holding the Start/Stop button, turn on the machine then let go when you enter the test mode. Now press & release the Start/Stop. Press ‘TTP’ Adjust. Press
each of the 5 crosshairs (left, middle, right, top, bottom).
Self-Check: While holding the Start/Stop button, turn on the machine then let go when you enter the test mode:
Step 1: Buzzer & LED check
Step 2: Start/Stop & Scissor button check
Step 3: TB Sensor (broken thread sensor) check
Step 4: Solenoid2, Spool (bobbin winder), Solenoid3, Trim, End Solenoid4, Foot check
Step 5: X Motor (left-right step motor), Y Motor (front-back step motor), PH Sensor (upper shaft sensor), DC Motor check
Step 6: PC Card check
Step 7: Design Card check
Step 8: Design Card check
Upgrading: With the ATA card already inserted in the machine, turn the machine on. Press the Start/Stop button when prompted. Vertical bars will start to slide across the screen. Do not
touch the machine until the screen displays 'Finish'. Once it does, turn the machine off and remove the card.
Janome model(s):
MC200E
Elna model(s):
8100
Janome model(s):
MC7700QCP
Elna model(s):
740
Screen Calibration: While holding down the Start/Stop button, turn on the machine and let go when you enter the test mode. Now press the Start/Stop button.
Upgrading: With the USB stick already inserted, turn on the machine. Press and release the Start/Stop button once when prompted.
Self-Check: Needle Up/Down & Lock Stitch > Turn Jog Dial to #3 "Self Check" > Press Reverse Button for Each Step
Test Mode: While holding down the Needle Up/Down & Lockstitch buttons, turn on the machine. Release the buttons once you see icons on the screen. Turn the jog dial to highlight the
option and press the jog dial button to select it. Press the reverse button to go back to the main menu (for most steps):
Screen Calibration: Needle Up/Down & Lock Stitch > Turn Jog Dial to #2 "TTP Coordinate" > Press Each Indicated Button/Crosshair > Press the Jog Dial Button to Save it.
Reset Memory to Factory Default: Needle Up/Down & Lock Stitch > Turn Jog Dial to #5 "Initialize EEPROM" > Press the Jog Dial Button to Save it.
Janome model(s):
MC6600P
Elna model(s):
7300
Test Mode: While holding the Needle Up/Down & Lockstitch buttons, turn on the machine then let go when you enter the test mode:
Step 1: Self Check
Step 2:
Step 3: Erase EEPROM
(M) Yes (Press (M) to reset all settings & saved stitches in the machine to factory-default)
(C) No (Press (C) to cancel)
Step 4: Sensor (The machine will read the propellers going thru the lower shaft sensor unit [depending on which of the 3 blades are entering the sensor] and the buttonhole sensor.
Csen: Thread cut sensor (left sensor)
Bsen: Zigzag step motor sensor (center sensor)
Fsen: Feed step motor sensor (right sensor)
BH: Buttonhole sensor. It should show 'L' in the lowest position and 'H' when pushed towards the front or back of the machine.
Step 5: Width Motor
(1) OFF (Press 1 to turn off the zigzag step motor)
(2) ORG
(3) STUP (Press 3 once to turn on or twice to calibrate it)
Step 6: Feed Motor
(1) OFF (Press 1 to turn off the feed step motor)
(2) ORG
(3) STUP (Press 3 once to turn on or twice to calibrate it)
Step 7: Tens Motor
(1) OFF (Press 1 to turn off the thread tension release step motor)
(2) ORG
(3) STUP (Press 3 once to turn on or twice to calibrate it)
Step 8: 88888888 (Feed balance adjustment)
Step 9: Switch
SP: Bobbin Winder
FL: Foot Up/Down Micro switch (Step 1)
TD: Foot Up/Down Micro switch (Step 2)
DD: Feed Dog Up/Down Micro switch
CL: Thread Cutter Solenoid Micro switch
Step 0: Solenoid
Sol1: Thread Cutter Solenoid
Sol2: Bobbin Holder Solenoid
Sol3: Clutch Solenoid
Step M: Step Check
[Mirror Stitch Button]: Feed Max
[Elongation Button]: Width Max
[Bobbin Winding Button]: Sew Test
[Twin Needle Button]: Aging (Press the Edit key to decrease the time & ? keys to increase the time the machine will sew by itself)
Janome model(s):
MC6600P / MC6500P /
MC4900QC
Test Mode:
1. While holding down the Needle Up/Down & Lockstitch buttons, turn on the machine.
2. Press the #1 button within 3 seconds.
Elna model(s):
720 / 7300 / 7200
Reset Memory to Factory Default:
1. While holding down the Needle Up/Down & Lockstitch buttons, turn on the machine.
2. Press ‘3’.
3. Press ‘M’ (Memory).
Janome model(s):
4120QDC
Set Mode: While holding down the Memory Key button, turn on the machine. Press mode for each step. Use left/right arrow keys to select the option and press ‘Mem’ to save it.
01: Buzzer (On/Off)
02: Needle Position (Up/Down)
03: Ttp
Janome model(s):
3160QDC
Test Mode: While holding down the Needle Up/Down & Lock Stitch buttons, turn on the machine. Release the buttons then press the Start/Stop button. Press Reverse for each check:
01: LCD, Buzzer and LED Light check
02: Button check
03: Buttonhole Sensor check
04: Bobbin Winder Switch check
05: Presser Ft. Lifter Switch check (Press reverse to skip this step, since there is no presser foot lifter switch on this model)
06: Upper Shaft Sensor check
07: Zigzag & Feed Motor check
08: Foot Controller check
09: Speed Control check
10: DC Motor check
11: Tension Unit Solenoid check
12: Thread Cutter Motor & Button check
Janome model(s):
DC5100
Test Mode: Press and hold down the Needle Up/Down & Lockstitch buttons. Press the following key to enter the mode:
#1: “Self-Check”. See “MEM” below for instructions.
#2: “Version”. The display the manufacturing version of the machine.
#3: “Erase EEPROM”. Press “MEM” to reset the memory to factory-default settings. Press “CLR” to cancel and return to the test mode.
#4: “Sensor” (Buttonhole & upper shaft sensor check):
BH: Buttonhole sensor. Remove any foot you have on the machine. When the buttonhole lever is all of the way down, the LCD display will read “L” and “H” when the lever is touched
or in the up position.
BS: Upper shaft sensor check (zigzag mode). When the needle bar is up, the LCD will display “H” and “L” when the needle bar is not in the highest position.
FS: Upper shaft sensor check (feed step mode). When the needle bar is up, the LCD will display “L” and “H” when the needle bar is not in the highest position.
#5: “Switch” (bobbin winder). The LCD will display “SP: OFF” when the bobbin winder is to the left and “SP: ON” when the bobbin winder is to the right.
#6: [Blank]
#7: [Blank]
#8: “8 Adjust” (feed balance adjustment). Press the Needle Up/Down button to test the 8’s. After each mechanical adjustment, press the Start/Stop button to initialize (reset) the feed
step motor.
#9:
#0:
MEM: “Step Check” (Self-check). Press “CLR” (clear) for each check:
Step1: “LCD&LED”. The LCD and LED will flash.
Step2: “Key” (Buttons). The LCD will display the name of each button as you press and hold each one.
Step3: “Switch” (Bobbin winder).
Step4: “Sensor” (Buttonhole & upper shaft sensor check):
BH: Buttonhole sensor. Remove any foot you have on the machine. When the buttonhole lever is all of the way down, the LCD display will read “L” and “H” when the lever is touched
or in the up position.
BS: Upper shaft sensor check (zigzag mode). When the needle bar is up, the LCD will display “H” and “L” when the needle bar is not in the highest position.
FS: Upper shaft sensor check (feed step mode). When the needle bar is up, the LCD will display “L” and “H” when the needle bar is not in the highest position.
Step5: “VeloSen” (Velocity check). The display will change numbers as you turn the hand wheel backwards.
Step6: Speed control check
Step7: Foot controller check
Step8: Zigzag & Feed Step Motor Check (Press "MEM" to calibrate each motor depending on if the needle is up or down)
Step9: DC Motor Check
Janome model(s):
JP760 / JP720 / AQS2009 /
JNH720
Janome model(s):
DC4030PR / DC4030
Elna model(s):
Diva 9000
Janome model(s):
888
Test mode: Press and hold down the Start/Stop & Reverse buttons then turn on the machine. Press the Start/Stop button to go to each mode, then the Needle Up/Down button to select
the mode.
_1: 8 Adjust (feed balance adjustment). Press the Needle Up/Down button to test the 8’s. After each mechanical adjustment, press the Start/Stop button to initialize (reset) the feed
step motor.
_2: Buttonhole sensor check. Remove any foot you have on the machine. When the buttonhole lever is all of the way down, the LCD display will read “L” and “H” when the lever is
touched or in the up position.
_3: Machine resets.
_4: Machine resets.
_5: Machine resets.
_6: Self-check mode. Press the Needle Up/Down button for each check:
Step 1: LCD check
02: LED/LCD check. “LD” displays on the LCD and all of the buttons flash.
03: “- -“ displays on the LCD.
04: “||” displays on the LCD.
05: Presser foot up/down micro switch check. When the presser foot is up, the LCD displays “UP” and when “dn” when the presser foot is down.
06: Buttonhole sensor check. Remove any foot you have on the machine. When the buttonhole lever is all of the way down, the LCD display will read “L” and “H” when the lever is
touched or in the up position.
07: Upper shaft sensor check. When the needle bar is in the up position, the LCD will display “H.L”. When the needle bar is in the down position, the LCD will display “L.L”.
08: Velocity (upper shaft sensor) check. Numbers will display on the LCD and will change as you turn the hand wheel.
09: Speed volume (speed control) check. “FE” displays on the LCD and will then change to numbers as you slide the speed control to the left and right.
10: “F9” displays on the LCD.
11: Zigzag & feed step motor check. When the needle bar is up, “bs” (zigzag step motor) will display on the screen and when the needle bar is down, the screen will display “fs” (feed
step motor). Press the Start/Stop button to initialize (calibrate) each step motor.
12: DC motor check. Run the machine using either the Start/Stop button or the foot controller to test the DC motor.
_7: Machine resets.
_8: Machine resets.
_9: Bobbin winder check. The LCD will display “||” when the bobbin winder is to the left (regular sewing mode) and “] [“ when the bobbin winder is to the right (bobbin winding
mode).
10: The LCD will flash different characters.
Test mode: While holding down the to-left button & top-right button on the keypad, turn on the machine.
Test mode: While holding down the button on the lower part of the rear cover, turn on the machine.