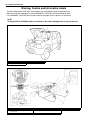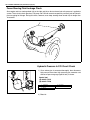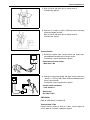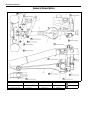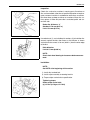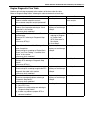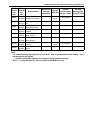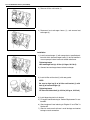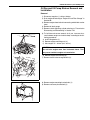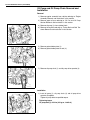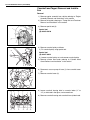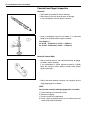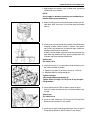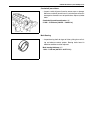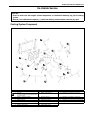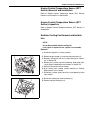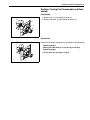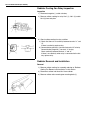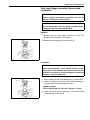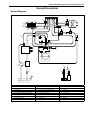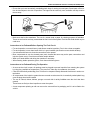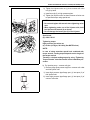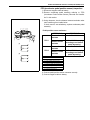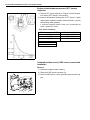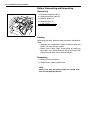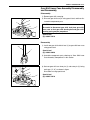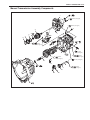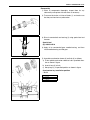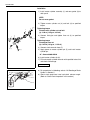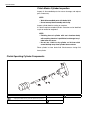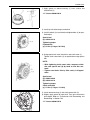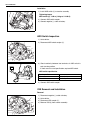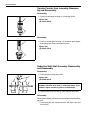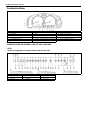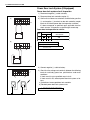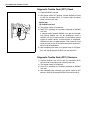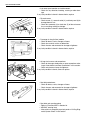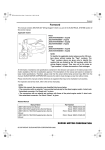
1
IMPORTANT
WARNING/CAUTION/NOTE
Please read this manual and follow its instructions carefully. To emphasize special information, the words
WARNING, CAUTION and NOTE have special meanings. Pay special attention to the messages highlighted by
these signal words.
WARNING:
Indicates a potential hazard that could result in death or injury.
CAUTION:
Indicates a potential hazard that could result in vehicle damage.
NOTE:
Indicates special information to make maintenance easier or instructions clearer.
WARNING:
This service manual is intended for authorized Suzuki dealers and qualified service technicians only.
Inexperienced technicians or technicians without the proper tools and equipment may not be able to
properly perform the services described in this manual.
Improper repair may result in injury to the technician and may render the vehicle unsafe for the driver
and passengers.
WARNING:
For vehicles equipped with a Supplemental Restraint (Air Bag) System:
• Service on and around the air bag system components or wiring must be performed only by an
authorized SUZUKI dealer. Refer to “Air Bag System Components and Wiring Location View” under
“General Description” in air bag system section in order to confirm whether you are performing service on or near the air bag system components or wiring. Please observe all WARNINGS and “Service Precautions” under “On-Vehicle Service” in air bag system section before performing service
on or around the air bag system components or wiring. Failure to follow WARNINGS could result in
unintentional activation of the system or could render the system inoperative. Either of these two
conditions may result in severe injury.
• If the air bag system and another vehicle system both need repair, Suzuki recommends that the air
bag system be repaired first, to help avoid unintended air bag system activation.
• Do not modify the steering wheel, instrument panel or any other air bag system component (on or
around air bag system components or wiring). Modifications can adversely affect air bag system
performance and lead to injury.
• If the vehicle will be exposed to temperatures over 93°C (200°F) (for example, during a paint baking
process), remove the air bag system components beforehand to avoid component damage or unintended activation.
The circle with a slash in this manual means “Do not do this” or “Do not let this happen”.
Foreword
This SUPPLEMENTARY SERVICE MANUAL is a supplement to Jimny (SN413) SERVICE MANUAL. It has
been prepared exclusively for the following applicable model.
Applicable model: Jimny with K9K diesel engine (SN415D)
It describes only different service information of the above applicable model as compared with Jimny (SN413)
SERVICE MANUAL. Therefore, whenever servicing the above applicable model, consult this supplement first.
And for any section, item or description not found in this supplement, refer to the related service manuals below.
When replacing parts or servicing by disassembling, it is recommended to use SUZUKI genuine parts, tools and
service materials (lubricant, sealants, etc.) as specified in each description.
All information, illustrations and specifications contained in this literature are based on the latest product information available at the time of publication approval. And used as the main subject of description is the vehicle of
standard specifications among others. Therefore, note that illustrations may differ from the vehicle being actually
serviced.
The right is reserved to make changes at any time without notice.
NOTE:
“SUZUKI Dealers” means Authorized SUZUKI Service Workshop (in Europe).
RELATED MANUAL:
Manual Name
Jimny (SN413) SERVICE MANUAL
Jimny (SN413/SN415D) WIRING DIAGRAM MANUAL
© COPYRIGHT SUZUKI MOTOR CORPORATION 2004
Manual No.
99500-81A10-01E
99512-81A30-015
TABLE OF CONTENTS
GENERAL INFORMATION
HEATING AND AIR CONDITIONING
STEERING, SUSPENSION, WHEELS AND
TIRES
DRIVE SHAFT AND PROPELLER SHAFT
BRAKE SYSTEM
ENGINE
TRANSMISSION, CLUTCH AND
DIFFERENTIAL
ELECTRICAL SYSTEM
General Information
Maintenance and Lubrication
Heater and Ventilation
Air Conditioning (Optional)
Steering, Suspension, Wheels and Tires
Front Wheel Alignment
Power Steering (P/S) System (if equipped)
Steering Wheel and Column
Front Suspension
Rear Suspension
Wheels and Tires
Propeller Shafts
Brakes
Antilock Brake System (ABS)
Engine General Information and Diagnosis (K9K Engine)
Engine Mechanical (K9K Engine)
Engine Cooling (K9K Engine)
Engine Fuel (K9K Engine)
Engine and Emission Control System (K9K Engine)
Cranking System (K9K Engine)
Charging System (K9K Engine)
Exhaust System (K9K Engine)
Manual Transmission
Clutch
Transfer
Front Differential
Rear Differential
Body Electrical System
Immobilizer Control System
BODY SERVICE
RESTRAINT SYSTEM
Restraint System
Air Bag System
0A
0B
1A
1B
3
3A
3B1
3C
3D
3E
3F
4B
5
5E
6-2
6A2
6B2
6C2
6E2
6G2
6H2
6K2
7A2
7C2
7D2
7E
7F
8
8G2
9
10
10B2
NOTE:
For the screen toned sections in the above table, refer to the same section of the Related Manuals
mentioned in FOREWORD of this manual.
0A
0B
1A
1B
3
3A
3B1
3C
3D
3E
3F
4B
5
5E
6-2
6A2
6B2
6C2
6E2
6G2
6H2
6K2
7A2
7C2
7D2
7E
7F
8
8G2
9
10
10B2
GENERAL INFORMATION 0A-1
SECTION 0A
GENERAL INFORMATION
NOTE:
For the items with asterisk (*) in the “CONTENTS” below, refer to the same section of the Service Manual mentioned in “FOREWORD” of this Manual.
0A
6F2
6G
6H
6K
7A
7A1
7B1
7C1
7D
CONTENTS
7E
How to Use This Manual....................................... *
Identification Information...............................0A-9 7F
Precautions......................................................0A-2
Vehicle Identification Number ....................... 0A-9
Engine Identification Number........................ 0A-9
Precaution for Vehicles Equipped with a
8A
Supplemental Restraint (Air Bag) System.....0A-2
Warning, Caution and Information
Diagnosis...................................................0A-2
Labels.............................................................0A-10 8B
Servicing and handling ..............................0A-3
Vehicle Lifting Points ........................................... * 8C
General Precautions .....................................0A-6
When Using Frame Contact Hoist ...................... *
Precautions For Electrical Circuit Service ........... *
When Using Floor Jack....................................... *
Electrical Circuit Inspection Procedure................ *
Abbreviations May Be Used In This
Open circuit check........................................... *
Manual............................................................0A-11
Short circuit check (wire harness to
Abbreviations .............................................. 0A-11
ground) ............................................................ *
Fasteners
Information ..................................0A-14
Intermittent and Poor Connection ....................... *
Metric Fasteners ......................................... 0A-14
Precaution For Installing Mobile
Fastener Strength Identification .......................... *
Communication Equipment ................................. *
Standard Tightening Torque ............................... *
0A-2 GENERAL INFORMATION
Precautions
Precaution for Vehicles Equipped with a Supplemental Restraint (Air Bag) System
WARNING:
6
2
7
4
5
3
1
8
8
• The configuration of air bag system parts are as shown
in the figure. When it is necessary to service (remove,
reinstall and inspect) these parts, be sure to follow
procedures described in Section 10B. Failure to follow
proper procedures could result in possible air bag system activation, personal injury, damage to parts or air
bag system being unable to activate when necessary.
• If the air bag system and another vehicle system both
need repair, SUZUKI recommends that the air bag system be repaired first, to help avoid unintended air bag
system activation.
• Do not modify the steering wheel, dashboard, or any
other air bag system components. Modifications can
adversely affect air bag system performance and lead
to injury.
• If the vehicle will be exposed to temperatures over
93°C (200°F) (for example, during a paint baking process), remove the air bag system components beforehand to avoid component damage or unintended air
bag system activation.
1. SDM
5. DLC
2. Driver air bag (inflator) module
6. Forward sensor
3. Passenger air bag (inflator) module
7. Contact coil
4. Air bag wire harness (in instrument panel
wire harness, main wire harness and floor
wire harness)
8. Seat belt pretensioner (if equipped)
Diagnosis
• When troubleshooting air bag system, be sure to follow “Air
Bag Diagnostic System Check” in Section 10B. Bypassing
these procedures may result in extended diagnostic time,
incorrect diagnosis, and incorrect parts replacement.
• Never use electrical test equipment other than that specified
in this manual.
WARNING:
Never attempt to measure the resistance of the air bag
(inflator) modules (driver and passenger) and seat belt
pretensioners (driver and passenger). It is very dangerous as the electric current from the tester may deploy the
air bag or activate the pretensioner.
GENERAL INFORMATION 0A-3
Servicing and handling
WARNING:
Many of service procedures require disconnection of “Air
Bag” fuse and all air bag (inflator) module(s) from initiator circuit to avoid an accidental deployment.
Driver and Passenger Air Bag (Inflator) Modules
• For handling and storage of a live air bag (inflator)
module, select a place where the ambient temperature
below 65°C (150°F), without high humidity and away
from electric noise.
• When carrying a live air bag (inflator) module, make
sure the bag opening is pointed away from you. In case
of an accidental deployment, the bag will then deploy
with minimal chance of injury. Never carry the air bag
(inflator) module by the wires or connector on the
underside of the module. When placing a live air bag
(inflator) module on a bench or other surface, always
face the bag up, away from the surface. As the live passenger air bag (inflator) module must be placed with its
bag (trim cover) facing up, place it on the workbench
with a slit (1) or use the workbench vise (2) to hold it
securely at its lower mounting bracket (3). This is necessary so that a free space is provided to allow the air
bag to expand in the unlikely event of accidental
deployment. Otherwise, personal injury may result.
• Never dispose of live (undeployed) air bag (inflator)
modules (driver and passenger). If disposal is necessary, be sure to deploy them according to deployment
procedures described in Section 10B before disposal.
• The air bag (inflator) module immediately after deployment is very hot. Wait for at least half an hour to cool it
off before proceeding the work.
• After an air bag (inflator) module has been deployed,
the surface of the air bag may contain a powdery residue. This powder consists primarily of cornstarch
(used to lubricate the bag as it inflates) and by-products of the chemical reaction. As with many service
procedures, gloves and safety glasses should be worn.
[A]: Always Carry Air Bag (Inflator) Module With Trim Cover (Air Bag Opening) Away from
Body.
[B]: Always Place Air Bag (Inflator) Module On Workbench With Trim Cover
(Air Bag Opening) Up, Away From Loose Objects.
0A-4 GENERAL INFORMATION
WARNING:
SDM
• During service procedures, be very careful when handling a Sensing and Diagnostic Module (SDM).
Never strike or jar the SDM.
Never power up the air bag system when the SDM is not rigidly attached to the vehicle. All SDM and
mounting bracket fasteners must be carefully torqued and the arrow must be pointing toward the
front of the vehicle to ensure proper operation of the air bag system.
The SDM could be activated when powered while not rigidly attached to the vehicle which could
cause deployment and result in personal injury.
WARNING:
Driver and Passenger Seat Belt Pretensioners (If
equipped)
• For handling and storage of a live seat belt pretensioner, select a place where the ambient temperature
below 65°C (150°F), without high humidity and away
from electric noise.
• Never carry seat belt pretensioner by wire or connector
of pretensioner. When placing a live seat belt pretensioner on the workbench or some place like that, be
sure not to lay it with its exhaust hole (1) provided side
facing down. It is also prohibited to put something on
its face with an exhaust hole (1) or to put a seat belt
pretensioner on top of another. Otherwise, personal
injury may result.
• Never dispose of live (inactivated) seat belt pretensioners (driver and passenger). If disposal is necessary, be
sure to activate them according to activation procedures described in Section 10B before disposal.
• The seat belt pretensioner immediately after activation
is very hot. Wait for at least half an hour to cool it off
before proceeding the work.
• With many service procedures, gloves and safety
glasses should be worn to prevent any possible irritation of the skin or eyes.
GENERAL INFORMATION 0A-5
CAUTION:
• Even when the accident was light enough not to cause air bags to activate, be sure to inspect system parts and other related parts according to instructions under “Repair and Inspection Required
after an Accident” in Section 10B.
• When servicing parts other than air bag system, if shocks may be applied to air bag system component parts, remove those parts beforehand.
• When handling the air bag (inflator) modules (driver and passenger), seat belt pretensioners (driver
and passenger), forward sensor or SDM, be careful not to drop it or apply an impact to it. If an
excessive impact was applied (e.g., dropped from a height of 90 cm (3 feet) or more), never attempt
disassembly or repair but replace it with a new one.
• When grease, cleaning agent, oil, water, etc. has got onto air bag (inflator) modules (driver and passenger) or seat belt pretensioners (drive and passenger), wipe off immediately with a dry cloth.
• Air bag wire harness can be identified easily as it is covered with a yellow protection tube. Be very
careful when handling it.
• When an open in air bag wire harness, damaged wire harness, connector or terminal is found,
replace wire harness, connectors and terminals as an assembly.
• Do not apply power to the air bag system unless all components are connected or a diagnostic
chart requests it, as this will set a diagnostic trouble code.
• Never use air bag system component parts from another vehicle.
• When using electric welding, be sure to disconnect air bag (inflator) module connectors (driver and
passenger) and seat belt pretensioner connectors (driver and passenger) respectively.
• Never expose air bag system component parts directly to hot air (drying or baking the vehicle after
painting) or flames.
• WARNING / CAUTION labels are attached on each part of air bag system components. Be sure to
follow the instructions.
• After vehicle is completely repaired, perform “Air Bag Diagnostic System Check” in Section 10B.
0A-6 GENERAL INFORMATION
General Precautions
The WARNING and CAUTION below describe some general precautions that you should observe when servicing a vehicle. These general precautions apply to many of the service procedures described in this manual, and
they will not necessarily be repeated with each procedure to which they apply.
WARNING:
• Whenever raising a vehicle for service, be sure to follow the instructions under “Vehicle Lifting
Points” in this section.
• When it is necessary to do service work with the engine running, make sure that the parking brake
is set fully and the transmission is in Neutral (for manual transmission vehicles) or Park (for automatic transmission vehicles), Keep hands, hair, clothing, tools, etc. away from the fan and belts
when the engine is running.
• When it is necessary to run the engine indoors, make sure that the exhaust gas is forced outdoors.
• Do not perform service work in areas where combustible materials can come in contact with a hot
exhaust system. When working with toxic or flammable materials (such as gasoline and refrigerant), make sure that the area you work in is well-ventilated.
• To avoid getting burned, keep away from hot metal parts such as the radiator, exhaust manifold,
tailpipe, muffler, etc.
• New and used engine oil can be hazardous. Children and pets may be harmed by swallowing new or
used oil. Keep new and used oil and used engine oil filters away from children and pets.
Continuous contact with used engine oil has been found to cause [skin] cancer in laboratory animals. Brief contact with used oil may irritate skin. To minimize your exposure to used engine oil,
wear a long-sleeve shirt and moisture-proof gloves (such as dish washing gloves) when changing
engine oil. If engine oil contacts your skin, wash thoroughly with soap and water. Launder any
clothing or rags if wet with oil, recycle or properly dispose of used oil and filters.
• Make sure the bonnet is fully closed and latched before driving. If it is not, it can fly up unexpectedly
during driving, obstructing your view and resulting in an accident.
• When washing vehicle, follow “washing” instruction
described in owner’s manual. Especially, to avoid damaging engine components, do not use pressurized water
for cleaning in engine compartment.
• Before starting any service work, cover fenders, seats
and any other parts that are likely to get scratched or
stained during servicing. Also, be aware that what you
wear (e.g, buttons) may cause damage to the vehicle’s
finish.
• When performing service to electrical parts that does
not require use of battery power, disconnect the negative cable of the battery.
• When disconnecting the battery negative cable, record
displayed contents of clock and audio system before
disconnecting and reset them as before after connecting.
GENERAL INFORMATION 0A-7
• When removing the battery, be sure to disconnect the
negative cable first and then the positive cable. When
reconnecting the battery, connect the positive cable first
and then the negative cable, and replace the terminal
cover.
• When removing parts that are to be reused, be sure to
keep them arranged in an orderly manner so that they
may be reinstalled in the proper order and position.
• Whenever you use oil seals, gaskets, packing, O-rings,
locking washers, split pins, self-locking nuts, and certain other parts as specified, be sure to use new ones.
Also, before installing new gaskets, packing, etc., be
sure to remove any residual material from the mating
surfaces.
• Make sure that all parts used in reassembly are perfectly
clean.
• When use of a certain type of lubricant, bond or sealant
is specified, be sure to use the specified type.
“A”: Sealant 99000-31250
• Be sure to use special tools when instructed.
Special tool
(A): 09917-98221
(B): 09916-58210
0A-8 GENERAL INFORMATION
• When disconnecting vacuum hoses, attach a tag
describing the correct installation positions so that the
hoses can be reinstalled correctly.
• After servicing fuel, oil, coolant, vacuum, exhaust or
brake systems, check all lines related to the system for
leaks.
• For vehicles equipped with diesel engine, never disconnect fuel high-pressure line between injection pump and
injectors under pressure, or fuel can be sprayed out
under pressure.
Be sure to confirm that fuel high-pressure line is not
under pressure referring to “Fuel pressure relief confirmation procedure” in section 6E2 before disconnecting.
If it is under pressure, wait till it is not under pressure.
• When performing a work that produces a heat exceeding
80°C (176°F) in the vicinity of the electrical parts, remove
the heat sensitive electrical part(s) beforehand.
• Use care not to expose connectors and electrical parts
to water which will be a cause of a trouble.
GENERAL INFORMATION 0A-9
• Always be careful not to handle electrical parts (computer, relay, etc.) in a rough manner or drop them.
Identification Information
Vehicle Identification Number
The vehicle identification number is punched on the chassis
inside the tire housing on the right rear side and it is also on the
left side of instrument panel depending on the vehicle specification.
1. Right rear tire
Engine Identification Number
The number is punched on the cylinder block.
K9KXXXX
XXXXXXX
Engine type (K9K engine)
Serial number
(Engine fabrication number)
0A-10 GENERAL INFORMATION
Warning, Caution and Information Labels
The figure below shows main labels among others that are attached to vehicle component parts.
When servicing and handling parts, refer to WARNING / CAUTION instructions printed on labels.
If any WARNING / CAUTION label is found stained or damaged, clean or replace it as necessary.
NOTE:
Air bag CAUTION / WARNING labels are attached on the vehicle equipped with air bag system only.
1. Air bag label on sun visor
3. Engine cooling fan label
2. Degassing tank cap label
1. Air bag label on driver air bag (inflator) module
4. Air bag label on SDM
2. Air bag label on contact coil and combination
switch assembly
5. Air bag label on passenger air bag (inflator) module
3. Air bag label on steering column
6. Seat belt pretensioner label on retractor
7. Child seat label (if equipped)
GENERAL INFORMATION 0A-11
Abbreviations May Be Used In This Manual
Abbreviations
ABS
ATDC
API
ATF
ALR
AC
A
A/T
A/C
ABDC
A/F
A-ELR
Anti-lock Brake System
After Top Dead Center
American Petroleum Institute
Automatic Transmission Fluid
Automatic Locking Retractor
Alternating Current
Automatic Transmission
Air Conditioning
After Bottom Dead Center
Air Fuel Mixture Ratio
Automatic-Emergency
Locking Retractor
B+
B BTDC
BBDC
Battery Positive Voltage
Before Top Dead Center
Before Bottom Dead Center
CKT
CKP sensor
CMP Sensor
C
CO
CPP Switch
CPU
CRS
DC
DLC
D DOHC
DOJ
DRL
DTC
Circuit
Crankshaft Position Sensor
Camshaft Position Sensor
(Crank Angle Sensor, CAS)
Carbon Monoxide
Clutch Pedal Position Switch
(Clutch Switch, Clutch Start
Switch)
Central Processing Unit
Child Restraint System
Direct Current
Data Link Connector
(Assembly Line Diag. Link, ALDL,
Serial Data Link, SDL)
Double Over Head Camshaft
Double Offset Joint
Daytime Running Light
Diagnostic Trouble Code
(Diagnostic Code)
Electronic Brake Control Module,
ABS Control Module
Electronic Brake Force Distribution
EBD
Engine Control Module
ECM
Engine Coolant Temperature
ECT Sensor
Sensor (Water Temp. Sensor,
WTS)
Exhaust Gas Recirculation
EGR
EGRT Sensor EGR Temperature Sensor
(Recirculated Exhaust Gas Temp.
E
Sensor, REGTS)
Early Fuel Evaporation
EFE Heater
Heater (Positive Temperature
Coefficient, PTC Heater)
Emergency Locking Retractor
ELR
Electronic Power Steering
EPS
Evaporative Emission
EVAP
EVAP Canister Evaporative Emission Canister
(Charcoal Canister)
F 4WD
4 Wheel Drive
GEN
Generator
G
GND
Ground
EBCM
H
HC
HO2S
Hydrocarbons
Heated Oxygen Sensor
IAC Valve
Idle Air Control Valve (Idle Speed
Control Solenoid Valve, ISC
Solenoid Valve)
Intake Air Temperature Sensor
(Air temperature Sensor, ATS)
Immobilizer Control Module
Ignition
Idle Speed Control Actuator
(Motor)
IAT Sensor
I
ICM
IG
ISC Actuator
0A-12 GENERAL INFORMATION
L
LH
LSPV
MAF Sensor
MAP Sensor
M
Max
MFI
Min
MIL
M/T
N NOx
OBD
O O/D
OHC
O2S
PNP
P/S
PSP Switch
P
PCM
PCV
PPS
R RH
SAE
SDM
S
SFI
SOHC
SOI
Left Hand
TBI
Load Sensing Proportioning Valve
TCC
Mass Air Flow Sensor
TCM
(Air Flow Sensor, AFS, Air Flow
Meter, AFM)
Manifold Absolute Pressure
TP Sensor
Sensor (Pressure Sensor, PS)
T
TVV
Maximum
Multiport Fuel Injection
(Multipoint Fuel Injection)
Minimum
TWC
Malfunction Indicator Lamp
(“CHECK ENGINE” Light)
2WD
Manual Transmission
VIN
Nitrogen Oxides
V VSS
VVT
On-Board Diagnostic System
WU-OC
(Self-Diagnosis Function)
W
Overdrive
WU-TWC
Over Head Camshaft
Oxygen Sensor
Park/Neutral Position
Power Steering
Power Steering Pressure Switch
(P/S Pressure Switch)
Powertrain Control Module
Positive Crankcase Ventilation
Pedal Position Sensor
Right Hand
Society of Automotive Engineers
Sensing and Diagnostic Module
(Air bag controller, Air bag control
module)
Sequential Multiport Fuel Injection
Single Over Head Camshaft
Start of Injection
Throttle Body Fuel Injection
(Single-Point Fuel Injection, SPI)
Torque Converter Clutch
Transmission Control Module
(A/T Controller, A/T Control Module)
Throttle Position Sensor
Thermal Vacuum Valve
(Thermal Vacuum Switching Valve,
TVSV, Bimetal Vacuum Switching
Valve, BVSV)
Three Way Catalytic Converter
(Three Way Catalyst)
2 Wheel Drive
Vehicle Identification Number
Vehicle Speed Sensor
Variable Valve Timing
Warm Up Oxidation Catalytic
Converter
Warm Up Three Way Catalytic
Converter
GENERAL INFORMATION 0A-13
Symbols
SYMBOL
DEFINITION
Tightening torque
SYMBOL
DEFINITION
Apply SUZUKI BOND NO. 1216B
99000-31230
Apply oil (engine, transmission, transfer, differential)
Apply SILICONE SEALANT
99000-31120
Apply fluid (brake, power steering or
automatic transmission fluid)
Apply SEALING COMPOUND 366E
99000-31090
Apply SUZUKI SUPER GREASE A
99000-25010
Apply SUZUKI SUPER GREASE C
99000-25030
Apply THREAD LOCK 1322
99000-32110
Apply SUZUKI SUPER GREASE E
99000-25050
Apply THREAD LOCK 1333B
99000-32020
Apply SUZUKI SUPER GREASE H
99000-25120
Apply THREAD LOCK 1342
99000-32050
Apply SUZUKI SUPER GREASE I
99000-25210
Apply SUZUKI BOND NO. 1215
99000-31110
Do not reuse.
Apply SUZUKI BOND NO. 1207F
99000-31250
Note on reassembly
Wire Color Symbols
Symbol
B
Bl
Br
G
Gr
Lbl
Lg
BLK
BLU
BRN
GRN
GRY
LT BLU
LT GRN
Wire Color
Black
Blue
Brown
Green
Gray
Light blue
Light green
Symbol
O, Or
R
W
Y
P
V
ORN
RED
WHT
YEL
PNK
PPL
Wire Color
Orange
Red
White
Yellow
Pink
Violet
There are two kinds of colored wire used in this vehicle. One is
single-colored wire and the other is dual-colored (striped) wire.
The single-colored wire uses only one color symbol (i.e. “GRN”).
The dual-colored wire uses two color symbols (i.e. “GRN/YEL”).
The first symbol represents the base color of the wire (“GRN” in
the figure) and the second symbol represents the color of the
stripe (“YEL” in the figure).
0A-14 GENERAL INFORMATION
Fasteners Information
Metric Fasteners
Most of the fasteners used for this vehicle are JIS-defined and
ISO-defined metric fasteners. When replacing any fasteners, it is
most important that replacement fasteners be the correct diameter, thread pitch and strength.
CAUTION:
Even when the nominal diameter (1) of thread is the
same, the thread pitch (2) or the width across flats (3)
may vary between ISO and JIS. Refer to JIS-TO-ISO Main
Fasteners Comparison Table below for the difference.
Installing a mismatched bolt or nut will cause damage to
the thread.
Before installing, check the thread pitch for correct
matching and then tighten it by hand temporarily. If it is
tight, recheck the thread pitch.
JIS-TO-ISO Main Fasteners Comparison Table
JIS
ISO
Thread pitch
Width across flats
Thread pitch
Width across flats
M6
1.0
10
1.0
10
Nominal diameter
M8 M10 M12
1.25 1.25 1.25
12
14
17
1.25 1.5 1.5
13
16
18
M14
1.5
19
1.5
21
MAINTENANCE AND LUBRICATION 0B-1
SECTION 0B
6F1
0B
MAINTENANCE AND LUBRICATION
6G
6H
6K
For vehicles equipped with a Supplemental Restraint (Air Bag) System:
• Service on and around the air bag system components or wiring must be performed only by an
authorized SUZUKI dealer. Refer to “Air Bag System Components and Wiring Location View” under
“General Description” in air bag system section in order to confirm whether you are performing service on or near the air bag system components or wiring. Please observe all WARNINGS and “Service Precautions” under “On-Vehicle Service” in air bag system section before performing service
on or around the air bag system components or wiring. Failure to follow WARNINGS could result in
unintentional activation of the system or could render the system inoperative. Either of these two
conditions may result in severe injury.
• Technical service work must be started at least 90 seconds after the ignition switch is turned to the
“LOCK” position and the negative cable is disconnected from the battery. Otherwise, the system
may be activated by reserve energy in the Sensing and Diagnostic Module (SDM).
7A
7A1
7B1
7C1
7D
7E
7F
WARNING:
NOTE:
For the items with asterisk (*) in the “CONTENTS” below, refer to the same section of the Service Manual mentioned in “FOREWORD” of this Manual.
CONTENTS
Maintenance Schedule ..................................
Maintenance Schedule Under Normal
Driving Conditions ........................................
Maintenance Recommended Under
Severe Driving Conditions............................
Maintenance Service......................................
Engine ..........................................................
Drive belt ..................................................
Camshaft timing belt and tensioner..........
Engine oil and filter...................................
Engine coolant..........................................
Exhaust system ........................................
Fuel System .................................................
Air cleaner filter ........................................
Fuel lines and connections.......................
Fuel filter...................................................
Water Draining of Fuel Filter ........................
Fuel tank...................................................
Chassis and Body ........................................
0B-2
0B-2
0B-3
0B-4
0B-4
0B-4
0B-4
0B-5
0B-6
0B-7
0B-7
0B-7
0B-8
0B-8
0B-8
0B-8
0B-9
Clutch ....................................................... 0B-9
Brake discs and pads............................... 0B-9
Brake drums and shoes ................................. *
Brake hoses and pipes................................... *
Brake fluid ...................................................... *
Parking brake lever and cable........................ *
Tires/wheels ................................................... *
Suspension system ........................................ *
Propeller shafts .............................................. *
Manual transmission oil.......................... 0B-10
Transfer and differential oil..................... 0B-10
Steering system ............................................. *
Steering knuckle seal ..................................... *
Power steering (P/S) system
(if equipped) ........................................... 0B-11
All hinges, latches and locks .......................... *
Final Inspection.................................................... *
Recommended Fluids and Lubricants....... 0B-11
8A
8B
8C
8D
8E
9
0B-2 MAINTENANCE AND LUBRICATION
Maintenance Schedule
Maintenance Schedule Under Normal Driving Conditions
NOTE:
• This interval should be judged by odometer reading or months, whichever comes first.
• This table includes service as scheduled up to 90,000 km (54,000 miles) mileage. Beyond 90,000 km
(54,000 miles), carry out the same services at the same intervals respectively.
Interval
Km (x 1,000)
Miles (x 1,000)
Months
ENGINE
Engine accessory drive belt
Camshaft timing belt and tensioner
Engine oil and oil filter
*1
Engine coolant
Exhaust system
FUEL SYSTEM
Air cleaner filter
Fuel lines and connections
Fuel filter
Fuel tank
CHASSIS AND BODY
Clutch (fluid leakage, level)
Brake discs and pads (thickness, wear, damage)
Brake drums and shoes (wear, damage)
Brake hoses and pipes (leakage, damage, clamp)
Brake fluid
Brake lever and cable (damage, stroke, operation)
Tires (wear, damage, rotation)
Wheel discs (damage)
Suspension system (tightness, damage, rattle, breakage)
Propeller shafts
Manual transmission oil (leakage, level) (I: 1st 15,000 km only)
Transfer oil (leakage, level)
Differential oil (leakage, level) (R: 1st 15,000 km only)
Steering system (tightness, damage, breakage, rattle)
Power steering (if equipped)
All latches, hinges and locks
15
9
12
30
18
24
45
27
36
60
36
48
75
45
60
90
54
72
–
–
–
–
–
–
–
–
R
R
–
–
R
R
R
R
R
R
–
–
R
I
–
–
R
I
–
–
R
I
I
I
R
I
I
R
–
I
–
I
–
I
–
–
R
–
–
R
Drain water every 15,000 km or 9,000 miles
–
–
I
–
–
I
–
I
–
I
–
I
I
I
I
I
I
I
–
I
–
I
–
I
–
I
–
I
–
I
–
R
–
R
–
R
Inspect at first 15,000 km (9,000 miles) only.
I
I
I
I
I
I
I
I
I
I
I
I
–
I
–
I
–
I
–
–
I
–
–
I
I
–
R
–
–
R
I
–
I
–
I
–
R or I
–
I
–
I
–
–
I
–
I
–
I
I
I
I
I
I
I
–
I
–
I
–
I
NOTE:
“R”: Replace or change
“I”: Inspect and correct, replace or lubricate if necessary
• Some maintenance items are required to be serviced at times other than the regular maintenance
times shown at the top of above table. These items can be serviced at an earlier service opportunity
according to customer’s maintenance convenience. Their next maintenance service should be done
within the specified period.
• *1: Inspect every 2,000 km (1,200 miles) until mileage of 5,000 km(3,000 miles)
MAINTENANCE AND LUBRICATION 0B-3
Maintenance Recommended Under Severe Driving Conditions
If the vehicle is usually used under the conditions corresponding to any severe condition code given below, it is
recommended that applicable maintenance operation be performed at the particular interval as shown in the following table.
Severe condition code
A : Repeated short trips
B : Driving on rough and/or muddy roads
C : Driving on dusty roads
D : Driving in extremely cold weather and/or salted roads
E : Repeated short trips in extremely cold weather
F : Leaded fuel use
G:–––––
H: Trailer towing (if admitted)
Severe
Condition Code
Maintenance
Maintenance
Operation
I
–BCD––––
Engine accessory drive belt
R
A–CDE––H
Engine oil and oil filter
R
–B––––––
Exhaust pipe mountings
I
––C–––––
Air cleaner filter *1
–BCD–––H
Wheel bearing
I
–B––––––
Suspension bolts and nuts
T
–B–DE––H
Propeller shafts
I
–B––E––H
Manual transmission,
transfer and differential oil
R
–BCD––––
Steering knuckle seal
I
I
R
NOTE:
•
•
•
•
“I”: Inspect and correct, replace or lubricate if necessary
“R”: Replace or change
“T”: Tighten to the specified torque
*1: Inspect or replace more frequently if necessary
Maintenance Interval
Every 15,000 km
(9,000 miles) or 12 months
Every 45,000 km
(27,000 miles) or 36 months
Every 5,000 km (3,000 miles) or 4 months
Every 15,000 km
(9,000 miles) or 12 months
Every 2,500 km (1,500 miles)
Every 30,000 km
(18,000 miles) or 24 months
Every 15,000 km
(9,000 miles) or 12 months
Every 15,000 km
(9,000 miles) or 12 months
Every 15,000 km
(9,000 miles) or 12 months
First time only:
15,000 km (9,000 miles) or 12 months
Second time and after: Every 30,000 km
(18,000 miles) or 24 months reckoning from
0 km (0 mile) or 0 month
Every 15,000 km
(9,000 miles) or 12 months
0B-4 MAINTENANCE AND LUBRICATION
Maintenance Service
Engine
Drive belt
WARNING:
All inspection and replacement are to be performed with
ENGINE NOT RUNNING.
Engine Accessory Drive Belt Inspection
Inspect belt for cracks, cuts, deformation, wear, tension and
cleanliness referring to “Generator Drive Belt Inspection” in Section 6H2. If any defect exists, replace.
Replacement
Replace belt with new one referring to “Generator Drive Belt
Removal and Installation” in Section 6H2.
Camshaft timing belt and tensioner
Replacement
Replace camshaft timing belt (1) and tensioner (2) with new ones
referring to “Timing Belt and Belt Tensioner Removal and Installation” in Section 6A2.
MAINTENANCE AND LUBRICATION 0B-5
Engine oil and filter
Change
WARNING:
• New and used engine oil can be hazardous.
Be sure to read “WARNING” in General Precaution in
Section 0A and observe what in written there.
• Step 1) – 7) outlined below must be performed with
ENGINE NOT RUNNING. For step 8), be sure to have
adequate ventilation while engine is running.
Before draining engine oil, check engine for oil leakage. If any evidence of leakage is found, make sure to correct defective part
before proceeding to the following work.
1) Drain engine oil by removing drain plug.
2) After draining oil, wipe drain plug clean. Reinstall drain plug,
and tighten it securely as specified below.
Tightening torque
(a): 35 N·m (3.5 kg-m, 25.5 lb-ft)
3) Loosen oil filter (1) by using oil filter wrench (special tool).
Special tool
(A): 09915-46510
NOTE:
Before fitting new oil filter, be sure to oil its O-ring. Use
engine oil for this purpose.
4) Screw new filter on oil filter stand by hand until the filter
O-ring contacts the mounting surface.
CAUTION:
To tighten oil filter properly, it is important to accurately
identify the position at which filter O-ring first contacts
the mounting surface.
0B-6 MAINTENANCE AND LUBRICATION
5) Tighten the filter (1) 3/4 turn from the point of contact with
the mounting surface using an oil filter wrench (special tool).
Special tool
(A): 09915-46510
[A]
10W-40, 10W-50
5W-40, 5W-50
0W-40
o
C -30
o
F -22
-20
-4
-10
14
0
32
10
50
20
68
30
86
40
104
6) Replenish oil until oil level is brought to FULL level mark on
dipstick. (about 4.0 liters (7.0 lmp pt.)). The filler inlet is at the
top of the cylinder head cover.
Use engine oil of ACEA standard B3/B4 grade.
Select the appropriate oil viscosity according to the proper
engine oil viscosity chart [A].
However, it is recommended to use 0W-40 oil under ambient
temperatures below –15 °C (5 °F)
NOTE:
Note that the amount of oil required when actually changing oil may somewhat differ from the data depending on
various conditions (temperature, viscosity, etc.)
7) Check oil filter and drain plug for oil leakage.
8) Start engine and run it for three minutes. Stop it and wait five
minutes before checking oil level. Add oil, as necessary, to
bring oil level to FULL level mark (1) on oil level gauge (3).
2. Low level mark
Inspection
1) Check engine for oil leakage. If any evidence of leakage is
found, repair defective part.
2) Check engine oil for level according to step 8) of “Engine Oil
and filter change” in this section.
Engine coolant
Change
Change engine coolant referring to “Cooling System Flush and
Refill” in Section 6B2.
MAINTENANCE AND LUBRICATION 0B-7
Exhaust system
Inspection
WARNING:
To avoid danger of being burned, do not touch exhaust
system when it is still hot. Any service on exhaust system should be performed when it is cool.
Check exhaust system for loose, damage, deterioration, leakage,
etc. referring to “Maintenance” in Section 6K2.
Fuel System
Air cleaner filter
Inspection
1
1) Remove air cleaner case clamps (1).
2) Take cleaner filter out of air cleaner case.
1
3) Check air cleaner filter for dirt. Replace excessively dirty filter.
4) Blow off dust by compressed air from air outlet side of filter.
5) Install air cleaner filter into case.
6) Install air cleaner case cap and clamp it securely.
Replacement
Replace air cleaner filter with new one according to steps 1), 2)
and 5), 6) of inspection procedure.
0B-8 MAINTENANCE AND LUBRICATION
Fuel lines and connections
Inspection
1) Visually inspect fuel lines and connections for evidence of
fuel leakage, hose cracking and damage. Make sure all
clamps are secure.
Repair leaky joints, if any.
Replace hoses that are suspected of being cracked.
Fuel filter
Replacement
WARNING:
This work must be performed in a well ventilated area
and away from any open flames (such as gas hot water
heaters).
Replace fuel filter (1) with new one periodically, referring to “Fuel
Filter Removal and Installation” in Section 6C2.
1
Water Draining of Fuel Filter
Bleed fuel filter of water referring to “Water Draining of Fuel Filter”
in Section 6C2.
Fuel tank
Inspection
Check fuel tank for damage, cracks, fuel leakage, corrosion and
tank bolts looseness.
If a problem is found, repair or replace.
MAINTENANCE AND LUBRICATION 0B-9
Chassis and Body
Clutch
Inspection
1) Check system for evidence of fluid leakage.
Repair leaky point if any.
2) Check reservoir for fluid level referring to “Fluid Level Check”
in Section 7C2.
Brake discs and pads
Inspection
1) Remove wheel and caliper but don’t disconnect brake hose
from caliper.
2) Check front disc brake pads and discs for excessive wear,
damage and deflection. Replace parts as necessary. For
details, refer to “Brake Pad” and “Brake Disc” in Section 5.
Be sure to torque caliper pin bolts to specification.
0B-10 MAINTENANCE AND LUBRICATION
Manual transmission oil
Inspection
1) Inspect transmission case for evidence of oil leakage.
Repair leaky point if any.
2) Make sure that vehicle is placed level for oil level check.
3) Remove level plug (1) of transmission.
4) Check oil level.
Oil level can be checked roughly by means of level plug hole.
That is, if oil flows out of level plug hole or if oil level is found
up to hole when level plug is removed, oil is properly filled.
If oil is found insufficient, pour specified amount of specified
oil.
5) Tighten level plug to specified torque.
Refer to “Manual Transmission Oil Change” in Section 7A2
for installation and tightening torque.
Change
Change transmission oil with new specified oil referring to “Manual Transmission Oil Change” in Section 7A2.
Transfer and differential oil
Inspection
1) Check transfer case and differential for evidence of oil leakage.
Repair leaky point if any.
2) Make sure that vehicle is placed level for oil level check.
3) Remove level plug (1) of transfer and differentials (front and
rear) and check oil level.
Oil level can be checked roughly by means of level plug hole.
That is, if oil flows out of level plug hole or if oil level is found
up to hole when level plug is removed, oil is properly filled.
If oil is found insufficient, pour specified amount of specified
oil.
[A]: Transfer
[B]: Front differential
[C]: Rear differential
2. Drain plug (Apply sealant)
CAUTION:
Hypoid gear oil must be used for differential.
4) Tighten level plug to specified torque.
Refer to “Transfer Oil Change” in Section 7D2 and “Oil
Change” in Section 7E or 7F for tightening torque.
Change
Change transfer oil and differentials oil with new specified oil
referring to “Transfer Oil Change” in Section 7D2 and “Oil
Change” in Section 7E or 7F.
MAINTENANCE AND LUBRICATION 0B-11
Power steering (P/S) system (if equipped)
Inspection
1) Visually check power steering system for fluid leakage and
hose for damage and deterioration.
Repair or replace defective parts, if any.
2) With engine stopped, check fluid level indicated on fluid tank
(1), which should be between “UPPER” and “LOWER”
marks. If it is lower than “LOWER”, fill fluid up to “UPPER”
mark.
1
NOTE:
• Be sure to use an equivalent of DEXRON®-II,
DEXRON®-IIE or DEXRON®-III for P/S fluid.
• Fluid level should be checked when fluid is cool.
3) Visually check pump drive belt for cracks and wear.
4) Check belt for tension, referring to “Drive Belt” in this section.
If necessary, have belt adjusted or replaced.
Recommended Fluids and Lubricants
Engine oil
Engine coolant
(Ethylene glycol base coolant)
Brake fluid
Manual transmission oil
Transfer oil
Differential oil (front & rear)
Power steering fluid
Steering knuckle seal
Door hinges
Hood latch assembly
Key lock cylinder
Refer to “Engine Oil and Oil Filter” in this section for engine oil grade and
viscosity.
“Antifreeze/Anticorrosion coolant”
DOT 3
Refer to “Manual Transmission Oil Change” in Section 7A2.
Refer to “Transfer Oil Change” in Section 7D2.
Refer to “Oil Change” in Section 7E and 7F.
An equivalent of DEXRON®-II, DEXRON®-IIE or DEXRON®-III
Water resistance chassis grease
(SUZUKI SUPER GREASE A 99000-25010)
Engine oil or water resistance chassis grease
Spray lubricant
0B-12 MAINTENANCE AND LUBRICATION
HEATER AND VENTILATION 1A-1
SECTION 1A
HEATER AND VENTILATION
6F1
6G
1A
6K
6K
WARNING:
For vehicles equipped with a Supplement Restraint (Air Bag) System
• Service on and around the air bag system components or wiring must be performed only by an
authorized SUZUKI dealer. Refer to “Air Bag System Components and Wiring Location View” under
“General Description” in Section 10B in order to confirm whether you are performing service on or
near the air bag system components or wiring. Please observe all WARNINGS and “Service Precautions” under “On-Vehicle Service” in Section 10B before performing service on or around the air
bag system components or wiring. Failure to follow WARNINGS could result in unintentional activation of the system or could render the system inoperative. Either or these two conditions may result
in severe injury.
• Technical service work must be started at least 90 seconds after the ignition switch is turned to the
“LOCK” position and the negative cable is disconnected from the battery. Otherwise, the system
may be activated by reserve energy in the Sensing and Diagnostic Module (SDM).
NOTE:
For the items with asterisk (*) the “CONTENTS” below, refer to the same section of the Service Manual
mentioned in “FOREWORD” of this manual.
CONTENTS
General Description ........................................1A-2
Additional Heater Assembly ..........................1A-3
Diagnosis .........................................................1A-4
Diagnosis Table ............................................1A-4
Wiring Circuit .................................................1A-5
On Vehicle Service..........................................1A-6
Heater Blower Motor .......................................... *
Heater Blower Resistor ...................................... *
Heater Control Lever Assembly ......................... *
Heater Blower Fan Switch ................................. *
Heater Unit/Boost Ventilation........................ 1A-6
Additional Heater Assembly.......................... 1A-7
Additional Heater Relays .............................. 1A-9
7A
7A1
7B1
7C1
7D
7E
7F
8A
8B
8C
8D
8E
9
10
10A
10B
1A-2 HEATER AND VENTILATION
General Description
The heater, an in and out air selectable-type hot water heater, is so constructed that it is possible to assure an
agreeable ventilation at all times by providing the ventilator air outlets at the center and both sides (right and left)
of the instrument panel, the hot air outlet at a place close to the feet of front passengers, and the defroster air
outlets at places, right and left, along the windshield glass.
The heater and ventilation consist of following parts.
1. Side ventilator outlet
6. Ventilator duct
2. Side defroster outlet
7. Control lever
12. Air damper
3. Center ventilator outlet
8. Heater blower motor
13. Air inlet box
9. Heater blower resistor
14. Air resistance board
4. Heater unit
5. Defroster duct
10. Heater blower fan switch
11. Heater core
a. To additional heater assembly
HEATER AND VENTILATION 1A-3
Additional Heater Assembly
The heat of the engine coolant is used to warm up air through the heater core so that the warmed air is blown
into the inside of the vehicle. The engine coolant temperature increases slower in diesel engine; therefore, air
through the heater core cannot be warmed up sufficiently.
To improve the warming performance, the vehicle is equipped with the additional heater assembly (1). After its
activation by ECM, the engine coolant is warmed up additionally and more heat is added to air through the
heater core. It is not activated during pre/post heating by glow plug. Not during pre/post heating by glow plug, it
is activated on the following conditions.
• Ten seconds have passed after the engine start.
• The battery voltage is more than 12.2 V.
• The engine speed is more than 700 rpm.
• The engine coolant and the intake air temperature is as shown in the graph below.
80
70
60
50
[A]
[C]
40
[D]
30
20
10
0
0
5
10
15
[B]
1
[A]: Engine coolant temperature (°C)
[C]: ON
[B]: Intake air temperature (°C)
[D]: OFF
20
25
1A-4 HEATER AND VENTILATION
Diagnosis
Diagnosis Table
Condition
Possible Cause
Fuse blown
Heater blower motor
does not work even
Heater blower resistor faulty
when its switch is ON. Heater blower fan switch faulty
Heater blower motor faulty
Wiring or grounding faulty
Incorrect temperature Control cable broken or binding
output
Temperature control lever faulty
Control cable clamp position is faulty
Air damper broken
Air ducts clogged
Heater core leaking or clogged
Heater hoses leaking or clogged
Control cable broken or binding
When mode control
lever is changed, air
Mode control lever faulty
outlet port is not
Control cable clamp position is faulty
changed.
Air damper broken
Air ducts leaking on clogged
Heating performance Wiring or grounding for additional heater
is poor.
assembly faulty
Additional heater fuses blown
Additional heater relays faulty
Additional heater assembly faulty
ECM faulty
Correction
Replace fuse to check for short.
Check heater blower resistor.
Check heater blower fan switch.
Replace heater blower motor.
Repair as necessary.
Check control cable.
Check temperature control lever.
Check and adjust.
Repair air damper.
Repair air ducts.
Replace heater core.
Replace heater hoses.
Check control cable.
Check mode control lever.
Check and adjust.
Repair air damper.
Repair air ducts.
Repair as necessary.
Replace additional heater fuses to
check for short.
Check additional heater relays.
Check additional heater assembly.
Check ECM.
HEATER AND VENTILATION 1A-5
Wiring Circuit
15
16
17
18
7
BLU/WHT
19
2
4
1
22
BLK/YEL
21 20
BLU/YEL
BLU
23
24
25
5
BLU
LT GRN
6
3
RED/BLK
RED/YEL
YEL/BLU
BLK
14
C48-24
C48-29
E17-2
BLU/BLK
BLK/RED
BLK/RED
BLK/BLU
8
11
YEL/BLK
BLK/RED
RED/WHT
C48-15
E17-2
9
12
YEL/RED
BLK/RED
RED
C48-16
E17-2
10
13
YEL/RED
C48-16
1. Battery
10. Additional heater relay No.3
19. “ADDITIONAL HEATER CIRCUIT” fuse (120 A)
2. Ignition switch
11. Additional heater No.1
20. “ADDITIONAL HEATER No.1” fuse (50 A)
3. Main relay
12. Additional heater No.2
21. “ADDITIONAL HEATER No.2” fuse (50 A)
4. Heater blower resistor
13. Additional heater No.3
22. “ADDITIONAL HEATER No.3” fuse (50 A)
5. Heater blower motor
14. ECM
23. “TAIL” fuse (10 A)
6. Lighting switch
15. Fuse (80 A)
24. “WIPER-WASHER” fuse (15 A)
7. Heater control lever assembly
16. Fuse (30 A)
25. “HEATER” fuse (20 A)
8. Additional heater relay No.1
17. Fuse (60 A)
9. Additional heater relay No.2
18. Fuse (60 A)
1A-6 HEATER AND VENTILATION
On Vehicle Service
Heater Unit/Boost Ventilation
Removal
1) Disconnect negative (–) cable at battery.
2) If equipped with air bag system, disable air bag system referring to “Disabling Air Bag System” in Section 10B.
3) Drain engine coolant, and then disconnect water hoses (1)
from heater joints (2).
2
1
4) Remove right heater joint (1) from heater core pipe by
unlocking two locks (2) of retainer (color: blue) for heater
joint.
2
NOTE:
1
• To unlock two locks of retainer, plier as shown in figure
is useful.
• After removal of heater joint, retainer (3) should be left
at heater core pipe (4). Therefore, do not try to remove
heater joint with retainer.
5) Remove retainer for heater joint from heater core pipe.
3
4
6) Remove instrument panel referring to “Instrument Panel” in
Section 9.
7) Remove bolts, nuts, and screws as shown figure.
8) Remove heater unit (1).
HEATER AND VENTILATION 1A-7
Installation
Install heater unit by reversing removal procedure noting the following items.
• When installing each part, be careful not to catch any cable
or wiring harness.
• Adjust control cable referring to “Heater Control Lever
Assembly” in this section.
• Fill engine coolant to radiator referring to “Cooling Replacement” in Section 6B2.
• If equipped with air bag system, enable air bag system referring to “Enabling Air Bag System” in Section 10B.
CAUTION:
When the heater unit is disassembled and reassembled,
locking force of the heater case lock may reduce. In such
a case, tighten the heater case with a tapping screw of
M4×L16 (1) as shown in the figure, or air may leak from
its joint section.
Additional Heater Assembly
Inspection
1) Disconnect negative cable at battery.
2) Disconnect additional heater plug wires.
3) Check resistance between additional heater plug and vehicle
body ground. If resistance is out of specification, replace
additional heater assembly with new one.
Additional heater plug resistance
0.55 – 0.65 Ω at 20°C, 68°F
Removal
1) Disconnect negative cable at battery.
2) Disconnect west gate actuator hose (1), IAT sensor connector (2) and boost pressure sensor (3) connector.
3) Remove turbocharger outlet air pipe (4) with outlet air hose
No.2 (5).
5
3
4
2
1
1A-8 HEATER AND VENTILATION
4) Drain cooling system referring to “Cooling Replacement” in
Section 6B2.
2
5) Disconnect additional heater plug wires (1) and heater hoses
(2) from additional heater assembly (3).
6) Remove additional heater assembly from its bracket.
1
2
3
Installation
Reverse the removal procedure for installation noting the followings.
• Tighten additional heater plug wire nuts to specified torque.
(a)
Tightening torque
Additional heater plug wire nut
(a): Less than 4 N·m (0.4 kg-m, 3.0 lb-ft)
• Refill cooling system referring to “Cooling Replacement” in
Section 6B2.
• Check cooling system leakage referring to “Engine Cooling
System Inspection and Service” in Section 6B2.
HEATER AND VENTILATION 1A-9
Additional Heater Relays
Inspection
1) Disconnect negative cable at battery.
2
1
2) Remove additional heater relay No.1 (1), No.2 (2) or No.3 (3)
from relay connector located under instrument panel at the
passenger seat side.
3
3) Check that there is no continuity between terminal “c” and
“d”. If there is continuity, replace relay with new one.
4) Connect battery positive (+) terminal to terminal “b” of relay and
battery negative (–) terminal “a” of relay. Then, check continuity
between terminal “c” and “d”. If there is no continuity when battery is connected to relay, replace relay with new one.
1A-10 HEATER AND VENTILATION
AIR CONDITIONING (OPTIONAL) 1B-1
SECTION 1B
AIR CONDITIONING (OPTIONAL)
6F1
6F2
1B
WARNING:
For vehicles equipped with a Supplemental Restraint (Air Bag) System:
• Service on and around the air bag system components or wiring must be performed only by an
authorized SUZUKI dealer. Refer to “Air Bag System Components and Wiring Location View” under
“General Description” in air bag system section in order to confirm whether you are performing service on or near the air bag system components or wiring. Please observe all WARNINGS and “Service Precautions” under “On-Vehicle Service” in air bag system section before performing service
on or around the air bag system components or wiring. Failure to follow WARNINGS could result in
unintentional activation of the system or could render the system inoperative. Either of these two
conditions may result in severe injury.
• Technical service work must be started at least 90 seconds after the ignition switch is turned to the
“LOCK” position and the negative cable is disconnected from the battery. Otherwise, the system
may be activated by reserve energy in the Sensing and Diagnostic Module (SDM).
CAUTION:
The air conditioning system of this vehicle uses refrigerant HFC-134a (R-134a).
None of refrigerant, compressor oil and component parts is interchangeable between two types of
A/C: one using refrigerant HFC-134a (R-134a) and the other using refrigerant CFC-12 (R-12).
Be sure to check which refrigerant is used before any service work including inspection and maintenance. For identification between these two types, refer to “Refrigerant Type” in this section.
When replenishing or changing refrigerant and compressor oil and when replacing parts, make sure
that the material or the part to be used is appropriate to the A/C installed in the vehicle being serviced.
Use of incorrect one will result in leakage of refrigerant, damage in parts or other faulty condition.
NOTE:
For the items with asterisk (*) in the “CONTENTS” below, refer to the same section of the Service Manual mentioned in “FOREWORD” of this manual.
CONTENTS
General Description ....................................... 1B-3
Major Components and Location ................. 1B-3
Refrigerant Circulation ....................................... *
Refrigerant Type ................................................ *
Diagnosis ........................................................ 1B-4
General Diagnosis Table.............................. 1B-4
Abnormal Noise Diagnosis ................................. *
Abnormal noise from compressor .................. *
Abnormal noise from magnetic clutch ............ *
Abnormal noise from tubing ........................... *
Abnormal noise from condenser .................... *
Abnormal noise from crankshaft pulley .......... *
Abnormal noise from tension pulley ............... *
Abnormal noise from A/C evaporator ............. *
Abnormal noise from blower fan motor .......... *
Quick Checking of Refrigerant Charge............... *
Performance Diagnosis...................................... *
Performance diagnosis table.......................... *
Detail diagnosis table (Ambient
temperature at 30°C (86°F)) .......................... *
Compressor Drive Belt................................. 1B-6
Electronical Diagnosis .................................. 1B-7
Wiring Diagram ............................................ 1B-7
Refrigerant Recovery, Evacuating and
Charging ............................................................... *
Operation Procedure for Refrigerant
Charging ............................................................ *
Recovery............................................................ *
Replenishing Compressor Oil ............................ *
Evacuating ......................................................... *
Evacuating procedure .................................... *
7A
7A1
7B1
7C1
7D
7E
7F
8A
8B
8C
8D
8E
9
10
10A
10B
1B-2 AIR CONDITIONING (OPTIONAL)
Charging ............................................................ *
Charging procedure ....................................... *
Removing Manifold Gauge Set .......................... *
Leak Test ........................................................... *
On-Vehicle Service ........................................ 1B-9
Service Precaution....................................... 1B-9
Refrigerant line......................................... 1B-9
Handling refrigerant HFC-134a (R-134a)....... *
Condenser Assembly................................. 1B-10
Receiver/Dryer ........................................... 1B-11
Condenser Cooling Fan Assembly ............ 1B-11
Cooling Unit (Evaporator) .......................... 1B-12
A/C Evaporator Temperature Sensor ........ 1B-14
Expansion Valve ................................................. *
Refrigerant Pressure Sensor ..................... 1B-16
A/C Switch .......................................................... *
Condenser Cooling Fan Motor Relay ........ 1B-17
Compressor Relay and A/C Relay............. 1B-17
Compressor ............................................... 1B-17
Magnet Clutch............................................ 1B-19
Lip Seal...................................................... 1B-23
Relief Valve................................................ 1B-25
Tightening Torque Specification................ 1B-26
Required Service Materials......................... 1B-26
Special Tools ............................................... 1B-26
AIR CONDITIONING (OPTIONAL) 1B-3
General Description
Major Components and Location
1. Cooling unit
2. A/C evaporator
9. Fresh air
17. Liquid pipe No.1
10. Recirculation air
18. Discharge hose
3. Expansion valve
11. Defroster air
19. Cooling unit inlet pipe
4. Heater unit
12. Demister air
20. Low pressure service valve
5. Refrigerant pressure sensor
13. Ventilation air
21. High pressure service valve
6. Receiver/dryer
14. Foot air
22. Heater core
7. Condenser assembly
15. Liquid pipe No.2
8. Compressor
16. Suction hose
1B-4 AIR CONDITIONING (OPTIONAL)
Diagnosis
General Diagnosis Table
Condition
Possible Cause
Cool air doesn’t come No refrigerant
out. (A/C system
Fuse blown
doesn’t operate.)
A/C switch faulty
Heater blower fan switch faulty
Correction
Perform recover, evacuation and charging.
Check fuses in main and circuit fuse
boxes, and check short circuit to ground.
Check A/C switch.
Check heater blower fan switch referring to
Section 1A.
A/C evaporator temperature sensor
Check A/C evaporator temperature senfaulty
sor.
Refrigerant pressure sensor faulty
Check refrigerant pressure sensor.
Wiring or grounding faulty
Repair as necessary.
ECT sensor faulty
Check ECT sensor referring to Section
6E2.
ECM and its circuit faulty
Check ECM and its circuit referring to Section 6E2.
Check ECM and its circuit referring to SecCool air doesn’t come ECM faulty
tion 6E2.
out. (A/C compressor
doesn’t operate.)
Thermal switch faulty
Check thermal switch.
Magnet clutch faulty
Check magnet clutch.
Compressor drive belt loosen or broken Adjust or replace drive belt.
Compressor relay faulty
Check compressor relay.
Compressor faulty
Check compressor.
Check fuses in main fuse box, and check
Cool air doesn’t come Fuse blown
short circuit to ground.
out. (A/C condenser
cooling fan motor
Wiring or grounding faulty
Repair as necessary.
doesn’t operate.)
Condenser cooling fan motor relays
Check condenser cooling fan motor relays.
faulty
Condenser cooling fan motor faulty
Check condenser cooling fan motor.
Check fuses in main and circuit fuse
Cool air doesn’t come Fuse blown
boxes, and check short circuit to ground.
out. (Heater blower
motor doesn’t operHeater blower resistor faulty
Check heater blower resistor referring to
ate.)
Section 1A.
Heater blower fan switch faulty
Check heater blower fan switch referring to
Section 1A.
Wiring or grounding faulty
Repair as necessary.
Heater blower motor faulty
Check heater blower motor referring to
Section 1A.
AIR CONDITIONING (OPTIONAL) 1B-5
Condition
Possible Cause
Cool air doesn’t come Insufficient or excessive charge of
out. (A/C system nor- refrigerant
mally operates.)
Condenser clogged
A/C evaporator clogged or frosted
Correction
Check charge of refrigerant and system for
leaks.
Check condenser.
Check A/C evaporator and A/C evaporator
thermistor.
A/C evaporator temperature sensor
Check A/C evaporator temperature senfaulty
sor.
Expansion valve faulty
Check expansion valve.
Receiver/dryer clogged
Check receiver/dryer.
Compressor drive belt loosen or broken Adjust or replace drive belt.
Magnetic clutch faulty
Check magnetic clutch.
Compressor faulty
Check compressor.
Air in A/C system
Replace receiver/dryer, and perform evacuation and charging.
Air leaking from cooling unit or air duct Repair as necessary.
Heater and ventilation system faulty
Check air inlet box (cooling unit), heater
control lever assembly and heater unit
referring to Section 1A.
Heater blower motor faulty
Check heater blower motor referring to
Section 1A.
Excessive compressor oil existing in
Pull out compressor oil in A/C system cirA/C system
cuit, and replace compressor.
Cool air doesn’t come Wiring or grounding faulty
Repair as necessary.
out only intermittently. Expansion valve faulty
Check expansion valve.
Excessive moisture in A/C system
Replace receiver/dryer, and perform evacuation and charging.
Magnetic clutch faulty
Check magnetic clutch.
Excessive charge of refrigerant
Check charge of refrigerant.
Thermal switch faulty
Check thermal switch.
Cool air comes out
Condenser clogged
Check A/C condenser.
only at high speed.
Insufficient charge of refrigerant
Check charge of refrigerant.
Air in A/C system
Replace receiver/dryer, and perform evacuation and charging.
Compressor drive belt loosen or broken Adjust or replace drive belt.
Compressor faulty
Check compressor.
Check charge refrigerant.
Cool air doesn’t come Excessive charge of refrigerant
out only at high
A/C evaporator frosted
Check A/C evaporator and A/C evaporator
speed.
temperature sensor.
Velocity of cooled air A/C evaporator clogged or frosted
Check A/C evaporator and A/C evaporator
is insufficient.
temperature sensor.
Air leaking from cooling unit or air duct Repair as necessary.
Heater blower motor faulty
Check heater blower motor referring to
Section 1A.
Wiring or grounding faulty
Repair as necessary.
1B-6 AIR CONDITIONING (OPTIONAL)
Compressor Drive Belt
Inspection
Refer to “Generator Drive Belt Inspection” in Section 6H2.
Removal
Refer to “Generator Drive Belt Removal and Installation” in Section 6H2.
Installation
Refer to “Generator Drive Belt Removal and Installation” in Section 6H2.
AIR CONDITIONING (OPTIONAL) 1B-7
Electronical Diagnosis
Wiring Diagram
24
25
26
27
29
28
7
4
2
30
BLU/WHT
BLU/YEL
36
1
33 32 31
BLU
34 35
BLK/YEL
37
5
LT GRN
BLU
6
3
RED/BLK
RED/YEL
YEL/BLU
8
BLK/WHT
BLU/RED
GRN/BLK
9
BLK
23
GRN/WHT C48-11
BLK/WHT
C48-24
C48-29
E17-2
BLU/BLK
BLK/RED
BLK/RED
BLK/BLU
13
10
YEL/BLK C48-15
BLK/RED
RED/WHT
E17-2
14
11
YEL/RED C48-16
BLK/RED
RED
E17-2
15
12
YEL/RED C48-16
16
GRN/RED
C48-3
BRN/WHT
LT GRN/RED
C48-27
C48-9
BRN
BRN
17
18
GRN
BRN
19
BLK/BLU
BLK/RED
E17-16
C48-20
GRN/BLK
22
GRN/WHT
GRN/GRN
21
20
BLK
BLK
BLK/YEL
C48-14
1B-8 AIR CONDITIONING (OPTIONAL)
1. Battery
14. Additional heater relay No.2
27. Fuse (30 A)
2. Ignition switch
15. Additional heater relay No.3
28. Fuse (60 A)
3. Main relay
16. Refrigerant pressure sensor
29. Fuse (60 A)
4. Heater blower resistor
17. Compressor relay
30. “ADDITIONAL HEATER CIRCUIT” fuse (120 A)
5. Heater blower motor
18. Compressor
31. “ADDITIONAL HEATER No.1” fuse (50 A)
6. Lighting switch
19. Condenser cooling fan motor relay No.1
32. “ADDITIONAL HEATER No.2” fuse (50 A)
7. Heater control lever assembly
20. Condenser cooling fan motor relay No.2
33. “ADDITIONAL HEATER No.3” fuse (50 A)
8. A/C evaporator temperature sensor
21. Condenser cooling fan motor relay No.3
34. “TAIL” fuse (10 A)
9. A/C relay
22. Condenser cooling fan motor
35. “WIPER-WASHER” fuse (15 A)
10. Additional heater No.1
23. ECM
36. “IG-COIL METER” fuse (15 A)
11. Additional heater No.2
24. Fuse (80 A)
37. “HEATER” fuse (20 A)
12. Additional heater No.3
25. Fuse (30 A)
13. Additional heater relay No.1
26. Fuse (15 A)
AIR CONDITIONING (OPTIONAL) 1B-9
On-Vehicle Service
Service Precaution
When servicing air conditioning system, note the following instructions.
Refrigerant line
1
6
5
2
3
7
4
1. Cooling unit inlet pipe:
Apply compressor oil to O-ring.
4. Liquid pipe No.1:
Apply compressor oil to O-ring.
2. Suction hose:
Apply compressor oil to O-ring.
5. Liquid pipe No.2:
Apply compressor oil to O-ring.
3. Discharge hose:
Apply compressor oil to O-ring.
6. Expansion valve:
Apply compressor oil to O-ring.
7. Refrigerant pressure sensor:
Apply compressor oil to O-ring.
• Never use heat for bending pipes. When bending a pipe, try to make its bending radius as slight as possible.
• Keep internal parts of air conditioning free from moisture and dirt. When disconnecting any line from system,
install a blind plug or cap to the fitting immediately.
• When connecting hoses and pipes, apply a few drops of compressor oil to seats of coupling nuts and O-ring.
• When tightening or loosening a fitting, use two wrenches, one for turning and the other for support.
• Tighten flared nuts by the following specified torque.
Tightening torque (Flared Nut Used for)
8 mm pipe: 13 N·m (1.3 kg-m, 9.5 lb-ft)
12 mm pipe: 23 N·m (2.3 kg-m, 17.0 lb-ft)
14.5 mm pipe: 33 N·m (3.3 kg-m, 24.0 lb-ft)
• Route drain hose so that drained water does not make any contact to vehicle components.
• Before evacuating and charging refrigerant, replenish specified amount of compressor oil to compressor
suction side by referring to “Replenishing Compressor Oil” in this section.
1B-10 AIR CONDITIONING (OPTIONAL)
Condenser Assembly
CAUTION:
Do not damage condenser fins. If condenser fin is bent,
straighten it by using flat head screwdriver or pair of pliers.
Inspection
Check the following.
• Check clog of condenser fins.
If any clogs are found, condenser fins should be washed
with water and should be dried with compressed air.
• Check condenser fins for leakage and breakage.
If any abnormality is found, repair or replace condenser.
• Check condenser fittings for leakage.
If any abnormality is found, repair or replace condenser.
Removal
1) Disconnect negative (–) cable at battery.
2) Recover refrigerant from A/C system by referring to “Recovery” in this section.
NOTE:
The amount of removed compressor oil must be measured for replenishing compressor oil.
3) Remove front bumper.
4) Remove radiator referring to “Radiator Removal and Installation” in 6B2.
4
3
5
1
5
5) Remove two bolts (1) of liquid pipe (2) and discharge hose
(3), and then disconnect liquid pipe and discharge hose from
condenser (4).
6) Remove four bolts (5) of condenser.
7) Remove condenser by pulling it out upward.
5
5
2
1
Installation
Reverse removal procedure to install condenser noting the following instructions.
• Replenish specified amount of compressor oil to compressor
suction side by referring to “Replenishing Compressor Oil” in
this section.
• Evacuate and charge refrigerant by referring to “Evacuating”
and “Charging” in this section.
AIR CONDITIONING (OPTIONAL) 1B-11
Receiver/Dryer
Removal
1) Recover refrigerant from A/C system by referring to “Recovery” in this section.
NOTE:
The amount of removed compressor oil must be measured for replenishing compressor oil.
2) Remove front bumper.
3) Remove two bolts of liquid pipes, and then disconnect liquid
pipes from receiver/dryer.
1
4) Remove two bracket bolts (1).
5) Remove receiver/dryer with its bracket by pulling it out
upward.
6) Remove bracket from receiver dryer.
Installation
Reverse removal procedure to install receiver/dryer noting the following instructions.
• Replenish specified amount of compressor oil to compressor
suction side by referring to “Replenishing Compressor Oil” in
this section.
• Evacuate and charge refrigerant by referring to “Evacuating”
and “Charging” in this section.
Condenser Cooling Fan Assembly
Inspection
Refer to “Radiator Cooling Fan Inspection” in Section 6B2.
Removal
Refer to “Radiator Cooling Fan Removal and Installation” in Section 6B2.
Installation
Refer to “Radiator Cooling Fan Removal and Installation” in Section 6B2.
1B-12 AIR CONDITIONING (OPTIONAL)
Cooling Unit (Evaporator)
CAUTION:
Be careful not to damage A/C evaporator fins. If A/C evaporator fin is bent, straighten A/C evaporator
fin by using flat head screwdriver or pair of pliers.
1
1
2
3
4
5
9
6
7
8
10
11
1
12
13
1
14
15
1. Packing
5. Upper case
2. Link
6. Thermister clamp
10. Air inlet door
9. O-ring
14. Filter cover
13. Lower case
3. A/C evaporator temperature sensor
7. Evaporator
11. Evaporator lower packing
15. Drain hose
4. Clamp case
8. Expansion valve
12. Control cable clamp
AIR CONDITIONING (OPTIONAL) 1B-13
Removal
1) Disconnect negative (–) cable at battery.
2) Recover refrigerant from A/C system by referring to “Recovery” in this section.
NOTE:
The amount of removed compressor oil must be measured for replenishing compressor oil.
3) Drain engine coolant, and then disconnect heater hoses
from heater unit referring to “Heater Unit/Boost Ventilation” in
Section 1A.
4) Disable air bag system referring to “Disabling Air Bag System” in Section 10B (if equipped).
5) Remove attaching bolt (1).
6) Disconnect suction hose (2) and liquid pipe (3) from expansion valve (4).
4
3
1
2
7) Remove instrument panel referring to “Instrument Panel” in
Section 9.
8) Remove cooling unit (1) with heater unit (2) from vehicle
body.
9) Separate cooling unit (1) from heater unit (2).
Inspection
Check the followings.
• Check clog of A/C evaporator fins.
If any clogs are found, A/C evaporator fins should be
washed with water, and should be dried with compressed air.
• Check A/C evaporator fins for leakage and breakage.
If any abnormality is found, repair or replace A/C evaporator.
• Check A/C evaporator fittings for leakage.
If any abnormality is found, repair or replace A/C evaporator.
1B-14 AIR CONDITIONING (OPTIONAL)
Installation
Reverse removal procedure to install cooling unit, and then noting
the following instructions.
• If A/C evaporator thermistor is removed, its should be reinstalled in original position.
1
• Install packing (1) uniformly to installation hole.
• Replenish specified amount of compressor oil to compressor
suction side by referring to “Replenishing Compressor Oil” in
this section.
• Evacuate and charge refrigerant by referring to “Evacuating”
and “Charging” in this section.
• Adjust mode control cable, temperature control cable and
fresh air control cable by referring to “Heater Control Lever
Assembly” in Section 1A.
• Enable air bag system referring to “Enable Air Bag System”
in Section 10B. (if equipped)
• Fill engine coolant to radiator referring to “Radiator Cooling
Fan Removal and Installation” in Section 6B2.
A/C Evaporator Temperature Sensor
Inspection
1) Remove A/C evaporator temperature sensor (1) from cooling
unit referring to “Cooling Unit (Evaporator)” in this section.
2) Put temperature sensing part (1) of A/C evaporator temperature sensor into iced water whose temperature is below 4°C
(39.2°F).
1
AIR CONDITIONING (OPTIONAL) 1B-15
3
2
1
[A]
[B]
[C]
[D]
˚C (˚F)
3) Connect battery positive terminal (+) to terminal (2) of A/C
evaporator temperature sensor connector.
4) Connect battery negative terminal (–) to terminal (3) of A/C
evaporator thermistor connector.
5) Keep battery terminals connected to A/C evaporator temperature sensor connector, and then check for continuity
between terminal (1) and (3). If there is continuity, replace A/
C evaporator temperature sensor with new one.
6) Pull temperature sensing part of A/C evaporator temperature
sensor out of iced water and expose it to the air whose temperature is more than 5°C (41°F).
7) Keep battery terminals connected to A/C evaporator temperature sensor connector, and then check for continuity
between terminal (1) and (3). If there is no continuity, replace
A/C evaporator temperature sensor with new one.
[A]: ON
[B]: OFF
[C]: Approximately 4°C (39.2°F)
[D]: Approximately 5°C (41°F)
1B-16 AIR CONDITIONING (OPTIONAL)
Refrigerant Pressure Sensor
Removal
1)
2)
3)
4)
Recover refrigerant referring to “Recovery” in this section.
Disconnect negative (–) cable at battery.
Disconnect refrigerant pressure sensor connector.
Remove refrigerant pressure sensor from pipe.
Installation
Reverse removal procedure noting the following points.
• Apply compressor oil to refrigerant pressure sensor O-ring.
• Perform evacuation, and then charge refrigerant referring to
“Evacuating” and “Charging” in this section.
Tightening torque
Refrigerant pressure sensor: 9.0 N·m (0.9 kg-m, 6.5 lb-ft)
Inspection
1) Connect manifold gauge to A/C system, and then operate A/
C system.
2) Check output voltage for refrigerant pressure sensor (1)
between GRY and BRN/WHT wire terminals, and then compare measured voltage with specified voltage in graph.
If it does not show such characteristic as shown in graph,
replace refrigerant pressure sensor with new one.
1
(V)
4.5
3.6
0.42
180
2600
3300 (kPa)
AIR CONDITIONING (OPTIONAL) 1B-17
Condenser Cooling Fan Motor Relay
Inspection
Refer to “Main Relay and Radiator Fan Relay No.1, No.2, No.3
Inspection” in Section 6E2.
Compressor Relay and A/C Relay
Inspection
1) Check that there is no continuity between terminal “c” and
“d”. If there is continuity, replace relay with new one.
2) Connect battery positive (+) terminal to terminal “b” of relay
and battery negative (–) terminal “a” of relay. Then, check for
continuity between terminal “c” and “d”. If there is no continuity when battery is connected to relay, replace relay with new
one.
1. Compressor relay
2. A/C relay
Compressor
Removal
1) Run engine at idle speed with air conditioning ON for 10 minutes. Then, stop the engine.
2) Disconnect negative (–) cable at battery.
3) Recover refrigerant from A/C system by referring to “Recovery” in this section.
NOTE:
The amount of removed compressor oil must be measured for replenishing compressor oil.
4) Remove generator referring to “Generator Removal and
Installation” in Section 6H2.
1
3
2
5) Disconnect magnet clutch coil lead wire (1) and thermal
switch lead wire (2).
6) Disengage harness clip (3) from ECM bracket.
1B-18 AIR CONDITIONING (OPTIONAL)
7) Hoist vehicle.
8) Remove two compressor mounting bolts (1).
1
3
1
9) Disconnect discharge hose (1) and suction hose (2) by
removing their bolts, and then remove one compressor
mounting bolt (3).
NOTE:
2
Cap open fittings immediately to keep moisture out of
system.
10) Remove compressor from its bracket by pulling it out
upward.
NOTE:
Be careful not to spill compressor oil during removal.
Installation
Reverse removal procedure for installation, and then noting the
following instructions.
• Replenish specified amount of compressor oil to compressor
suction side by referring to “Replenishing Compressor Oil” in
this section.
• Evacuate and charge system by referring to “Recovery” in
this section.
• Adjust drive belt tension by referring to “Compressor Drive
Belt” in this section.
• Tighten compressor mounting bolts to the specified torque.
Tightening torque
Compressor mounting bolt: 28 N·m (2.8 kg-m, 20.5 lb-ft)
AIR CONDITIONING (OPTIONAL) 1B-19
Magnet Clutch
“d”
10 N·m (1.0 kg-m)
10
10
23 N·m (2.3 kg-m)
“c”
9
7
“e”
11
“b”
12 N·m (1.2 kg-m)
9 N·m (0.9 kg-m)
8
4
5
4
6
3
1
“a”
2
14 N·m (1.4 kg-m)
1. Washer
7. Front head
b. Front head bolt
: Tighten bolt “c” first, and then “b”.
2. Magnet clutch plate
8. Bolt
c. Front head bolt
: Tighten bolt “c” first, and then “b”.
9. Lip seal
d. Relief Valve
3. Shim
4. Circlip
10. O-ring
5. Magnet clutch pulley
11. Compressor body assembly
6. Magnet clutch coil
a. Magnet clutch plate bolt
e. Thermal switch
Tightening torque
Do not reuse.
1B-20 AIR CONDITIONING (OPTIONAL)
Inspection
• Check magnet clutch plate and magnet clutch pulley for
leaks of compressor oil.
• Check bearing of magnet clutch pulley for noise, wear and
grease leakage.
• Measure resistance of magnet clutch coil (1) between magnet clutch coil lead wire (2) and compressor body assembly.
If measured resistance is not within tolerance, replace magnet clutch coil.
Magnet Clutch coil resistance
: 3.6 – 4.0 Ω at 20 °C (68 °F)
• Check thermal switch (1) for continuity using ohmmeter.
If there is no continuity, replace thermal switch with new one.
Tightening torque
Thermal switch (a): 12 N·m (1.2 kg-m, 9.0 lb-ft)
Removal
1) Remove compressor from vehicle referring to “Compressor”
in this section.
2) Fix magnet clutch plate (1) with special tool, and remove
magnet clutch plate bolt (2) and washer (3).
Special tool
(A): 09991-06020
3) Remove magnet clutch plate (1) using special tool.
Special tool
(A): 09991-06030
AIR CONDITIONING (OPTIONAL) 1B-21
4) Remove circlip (1) using special tool.
Special tool
(A): 09900-06107
5) Remove a bolt for magnet clutch coil lead wire clamp, and
disconnect magnet clutch lead wire.
6) Remove magnet clutch pulley (1) by using a puller (2).
NOTE:
Put rag between magnet clutch pulley and puller not to
damage magnet clutch pulley.
7) Remove circlip (1) using special tool.
Special tool
(A): 09900-06107
8) Remove magnet clutch coil (2) from compressor body
assembly (3).
Installation
1) Install magnet clutch coil (1).
NOTE:
Protrusion on underside of magnet clutch coil (1) must
match hole on compressor body assembly (2).
2) Install new circlip (3) to proper direction as shown using special tool.
Special tool
(A): 09900-06107
1B-22 AIR CONDITIONING (OPTIONAL)
3) Install magnet clutch pulley.
a) Set magnet clutch horizontally over magnet clutch pulley
installation boss.
b) Place special tool onto bearing of magnet clutch pulley by
ensuring that edge of special tool rests only on inner race of
bearing.
Special tool
(A): 09991-06010
c) Press down special tool to arrow direction till it stops.
4) Install new circlip (1) using special tool.
Special tool
(A): 09900-06107
CAUTION:
Be careful not to scratch bearing seal.
5) Tighten new magnet clutch plate bolt (1) with new washer (2)
as specified torque.
Tightening torque
Magnet clutch plate bolt
(a): 14 N·m (1.4 kg-m, 10.5 lb-ft)
Special tool
(A): 09991-06020
AIR CONDITIONING (OPTIONAL) 1B-23
3
1
2
6) Adjust clearance between magnet clutch plate (1) and magnet clutch pulley by putting shim(s) on compressor shaft. To
measure the clearance, perform the following steps.
a) Put compressor in a vise (2).
b) Set dial gauge (3) on magnet clutch plate, and then adjust
its pointer at 0.
c) Connect battery positive terminal (+) to magnet clutch coil
lead wire.
d) Connect battery negative terminal (–) to compressor body
assembly. (At this point, magnet clutch plate and magnet
clutch pulley are kept in contact.)
e) Disconnect battery negative terminal (–) to compressor
body assembly. (At this point, magnet clutch plate and magnet clutch pulley are not in contact.)
f) Read stroke of magnet clutch plate from dial gauge by performing step d) and e) repeatedly. (Stroke of magnet clutch
plate is clearance between magnet clutch plate and magnet
clutch pulley.)
Standard clearance between magnet clutch plate and
magnet clutch plate:
0.3 – 0.6 mm (0.012 – 0.024 in.)
Lip Seal
Removal
1) Remove magnet clutch assembly referring to “Magnet
Clutch” in this section.
2) Remove ten front head mounting bolts.
1. Front head
3) Remove front head (1) by pushing compressor shaft (2).
CAUTION:
• Do not remove inner parts (3) from compressor body
assembly (4).
• Do not leave any dust between front head and compressor body assembly.
4) Remove O-ring (5).
1B-24 AIR CONDITIONING (OPTIONAL)
5) Remove lip seal from front head (1) using special tool.
If it is hard to remove lip seal, fix front head with soft plates
on vise (2) and use sliding hammer (3) as shown.
1
2
3
Installation
1) Press-fit new lip seal (1) into front head (2) using special
tool.
Special tool
(A): 09991-06050
CAUTION:
Do not reuse lip seal (1) once removed from compressor.
2) Apply compressor oil to surface of special tool, and then
place it on compressor shaft (1).
Special tool
(A): 09991-06040
3) Install new O-ring (1) to compressor body assembly (2).
4) Apply compressor oil to lip seal and O-ring (1).
5) Install front head (3) to compressor body assembly (2).
Special tool
(A): 09991-06040
AIR CONDITIONING (OPTIONAL) 1B-25
6) Tighter new bolts (a) with new washers to specified torque,
and then tighten new bolts (b) to specified torque.
Tightening torque
Front heat bolts
(a): 9 N·m (0.9 kg-m, 6.5 lb-ft)
(b): 23 N·m (2.3 kg-m, 17.0 lb-ft)
Relief Valve
Inspection
1
1) Operate A/C system.
2) Check if there is any refrigerant leakage from relief valve (1)
using special tool.
3) If there is any refrigerant leakage, replace O-ring with new
one. If refrigerant still leaks, replace relief valve with new
one.
Special tool
(A): 09990-86011
A
Removal
1) Recover refrigerant referring to “Recovery” in this section.
2) Remove compressor from vehicle referring to “Compressor”
in this section.
3) Remove relief valve with O-ring.
Installation
1) Apply compressor oil to new O-ring, and then install relief
valve with the O-ring.
Tightening torque
Relief valve: 10 N·m (1.0 kg-m, 7.5 lb-ft)
2) Install compressor to vehicle referring to “Compressor” in
this section.
3) Perform evacuating, and then charge refrigerant referring to
“Evacuating” and “Charging” in this section.
1B-26 AIR CONDITIONING (OPTIONAL)
Tightening Torque Specification
Fastening part
N•m
13
23
33
9
14
9
23
10
12
28
Refrigerant 8 mm pipe (0.31 in.)
Refrigerant 12 mm pipe (0.47 in.)
Refrigerant 14.5 mm pipe (0.57 in.)
Refrigerant pressure sensor
Magnet clutch plate bolt
Front head bolt (5 mm)
Front head bolt (8 mm)
Relief valve
Thermal switch
Compressor mounting bolt
Tightening torque
kg-m
1.3
2.3
3.3
0.9
1.4
0.9
2.3
1.0
1.2
2.8
lb-ft
9.5
17.0
24.0
6.5
10.5
6.5
17.0
7.5
9.0
20.5
Required Service Materials
Material
Compressor oil
(Refrigerant oil)
Recommended SUZUKI product
(Part Number)
COMPRESSOR OIL RS20 (150 cc)
99000-99088-00D0
Use
• O-ring
• Each component
Special Tools
09900-06107
Snap ring pliers
(Open type)
09991-06010
Magnet clutch pulley
installer
09991-06020
Armature plate spanner
09991-06030
Armature plate remover
09991-06040
Lip type seal protector
09991-06050
Lip type seal installer
09921-26020
Bearing remover
09990-86011
Gas leak detector
POWER STEERING (P/S) SYSTEM (If equipped) 3B1-1
SECTION 3B1
POWER STEERING (P/S) SYSTEM
(If equipped)
6F1
6F2
6G
6H
6K
3B1
WARNING:
For vehicles equipped with Supplemental Restraint (Air Bag) System:
• Service on and around the air bag system components or wiring must be performed only by an
authorized SUZUKI dealer. Refer to “Air Bag System Components and Wiring Location View” under
“General Description” in air bag system section in order to confirm whether you are performing service on or near the air bag system components or wiring. Please observe all WARNINGS and “Service Precautions” under “On-Vehicle Service” in air bag system section before performing service
on or around the air bag system components or wiring. Failure to follow WARNINGS could result in
unintentional activation of the system or could render the system inoperative. Either of these two
conditions may result in severe injury.
• Technical service work must be started at least 90 seconds after the ignition switch is turned to the
“LOCK” position and negative cable is disconnected from the battery. Otherwise, the system may
be activated by reserve energy in the Sensing and Diagnostic Module (SDM).
7D
7D
7E
7F
7E
7F
8A
8B
8C
8D
8E
9
NOTE:
• For the items with asterisk (*) in the “CONTENTS” below, refer to the same section of the Service
Manual mentioned in “FOREWORD” of this manual.
• All steering gear fasteners are important attaching parts in that they could affect the performance of
vital parts and systems, and/or could result in major repair expense. They must be replaced with
one of the same part number or with an equivalent part if replacement becomes necessary. Do not
use a replacement part of lesser quality or substitute design. Torque values must be used as specified during reassembly to assure proper retention of these parts.
CONTENTS
General Description ......................................3B1-2
Diagnosis .......................................................3B1-3
Diagnosis Table ..........................................3B1-3
Steering Wheel Play Check ................................ *
Steering Force Check ......................................... *
Power Steering Belt Check .........................3B1-5
Power Steering Fluid Level Check ..............3B1-5
Power Steering Fluid Leakage Check .........3B1-6
Air Bleeding Procedure ....................................... *
Hydraulic Pressure In P/S Circuit Check.....3B1-6
On-Vehicle Service .......................................3B1-8
Power Steering System Components ......... 3B1-8
Power Steering Belt .................................... 3B1-9
Power Steering (P/S) Pump........................ 3B1-9
Power Steering (P/S) Gear Box .......................... *
Tightening Torque Specifications .............3B1-10
Required Service Materials ........................3B1-10
Special Tools...............................................3B1-10
10
10A
10B
3B1-2 POWER STEERING (P/S) SYSTEM (If equipped)
General Description
The power steering system in this vehicle reduces the driver’s effort needed in turning the steering wheel by utilizing the hydraulic pressure generated by the power steering (P/S) pump which is driven by the engine. It is an
integral type with the mechanical gear unit, hydraulic pressure cylinder unit and control valve unit all housed in
the gear box.
2
3
1
1. Steering gear box
2. Power steering (P/S) pump
1. Power steering gear box
3. Spool valve
2. Control valve section
4. Power steering (P/S) pump
3. P/S fluid reservoir
5. P/S fluid reservoir
POWER STEERING (P/S) SYSTEM (If equipped) 3B1-3
Diagnosis
Diagnosis Table
Condition
Steering wheel feels
heavy
(at low speed)
Steering wheel feels
heavy momentarily
when turning it to the
left or right.
Possible Cause
Fluid deteriorated, low viscosity, different type of
fluid mixed
Pipes or hoses deformed, air entering through
joint
Insufficient air bleeding from piping
Belt worn, lacking in tension
Tire inflation pressure too low
Wheel alignment out of adjustment
Steering wheel installed improperly (twisted)
Hydraulic pressure failing to rise (See NOTE
“A”.)
Slow hydraulic pressure rise (See NOTE “A”.)
Air drawn in due to insufficient amount of fluid
Slipping belt
Correction
Change fluid.
Correct or replace.
Bleed air.
Replace belt.
Inflate tire.
Adjust front wheel alignment.
Install steering wheel correctly.
Replace pump assembly.
Add fluid and bleed air.
Replace belt.
NOTE:
• “A”: Be sure to warm up engine fully before performing this check. Pump vanes are sometimes hard
to come out where temperature is low.
Condition
Possible Cause
Steering wheel returns Dust or foreign object mixed in fluid
slowly from turns.
Deformed pipes or hoses
(See NOTE “C”.)
Steering column installed improperly
Wheel alignment maladjusted
Linkage or joints not operating smoothly
Low or uneven tire inflation pressure
Vehicle pulls to one
side during straight
Wheel alignment maladjusted
driving.
Defective spool valve
Steering wheel play is Loose steering shaft nut
large and vehicle wan- Loose linkage or joint
ders.
Loose gear box fixing bolt
Front wheel bearing worn
Fluid leakage
Loose joints of hydraulic pressure pipes and
hoses
Deformed or damaged pipes or hoses
Gear box
Correction
Change fluid.
Correct or replace.
Install correctly.
Adjust.
Correct.
Inflate tire(s) as necessary.
Adjust.
Replace gear box assembly.
Retighten.
Retighten.
Retighten.
Replace.
Retighten.
Correct or replace.
Replace gear box assembly.
3B1-4 POWER STEERING (P/S) SYSTEM (If equipped)
Condition
Abnormal noise
(See NOTE “D”.)
Possible Cause
Air drawn in due to insufficient fluid
Air drawn in through pipe or hose joints
Belt slipping (loose)
Worn belt
Loose steering linkage
Loose gear box fixing bolt
Loose pitman arm
Pipes or hoses in contact with chassis
Defective pump vane
Malfunction of flow control valve
Defective pump shaft bearing
Correction
Replenish fluid.
Retighten or replace.
Replace belt.
Replace belt.
Retighten.
Retighten.
Retighten.
Correct.
Replace pump assembly.
Replace gear box assembly.
Replace pump assembly.
NOTE:
• “C”: Turn steering wheel 90° at 35 km/h (22 mile/h) and let it free. If it returns more than 60° then, it
is normal.
• “D”: Some hissing noise may be heard through steering column when turning steering wheel with
vehicle halted. It is from operation of the valve in the gear box and indicates nothing abnormal.
POWER STEERING (P/S) SYSTEM (If equipped) 3B1-5
Power Steering Belt Check
INSPECTION
Inspect belt for damage, deterioration, properly fitted in pulley
groove and tension referring to “Generator Drive Belt Inspection”
in Section 6H2.
Power Steering Fluid Level Check
CAUTION:
• Make sure to use an equivalent of DEXRON®-II,
DEXRON®-IIE or DEXRON®-III for P/S fluid.
• Fluid level should be checked when fluid is cool before
starting engine.
With engine stopped check fluid level indicated on P/S fluid reservoir (1), which should be between UPPER and LOWER marks. If
it is lower than lower limit (LOWER), replenish fluid up to upper
limit (UPPER) mark.
1
3B1-6 POWER STEERING (P/S) SYSTEM (If equipped)
Power Steering Fluid Leakage Check
Start engine and turn steering wheel fully to the right and left so that maximum hydraulic pressure is applied to
system. Then visually check gear box, P/S pump and P/S fluid reservoir respectively and each joint of hydraulic
pressure piping for leakage. During this check, however, never keep steering wheel turned fully for longer than
10 seconds.
Hydraulic Pressure In P/S Circuit Check
3
(A)
2
4
(B)
5
1) Clean where pipe is connected thoroughly, then disconnect
high pressure hose from high pressure pipe connector and
connect oil pressure gauge (special tool) as shown.
Special tool
(A): 09915-77412
(B): 09915-77420
1. To gear box
4. Union bolt
2. Attachment
5. Pressure hose
3. Washer
1
2) Bleed air.
POWER STEERING (P/S) SYSTEM (If equipped) 3B1-7
1
3) With engine running at idling speed, keep turning steering
wheel to the right and left till fluid in P/S fluid reservoir is
warmed to 50 to 60 °C (122 – 140 °F).
1. Thermometer
4) Back pressure check
With engine running at idling speed and hands off from
steering wheel, check hydraulic pressure.
If back pressure exceeds 350 kPa (3.5 kg/cm2, 50 psi),
check control valve and pipes for obstruction.
Back pressure: 350 kPa (3.5 kg/cm2, 50 psi)
1. P/S fluid reservoir
5. Low pressure side
2. P/S pump
6. High pressure side
3. Steering gear box
7. Valve (open)
4. Oil pump pressure gauge
5) Relief pressure check
CAUTION:
• Be sure not to keep gauge valve closed for longer than
10 seconds.
• Never keep steering wheel turned fully for longer than
10 seconds.
a) Increase engine speed to about 1,500 to 1,600 rpm.
Close valve (6) gradually while watching pressure increase
indicated on gauge (4) and take reading of relief pressure
(maximum hydraulic pressure).
If relief pressure is not as specified, replace P/S pump.
Relief pressure
8,400 – 9,100 kPa (85 – 92 kg/cm2, 1208 – 1308 psi)
1. P/S fluid reservoir
3. Steering gear box
2. P/S pump
5. High pressure side
3B1-8 POWER STEERING (P/S) SYSTEM (If equipped)
b) Next, open gauge valve (6) fully and increase engine speed
to about 1,500 to 1,600 r/min. Then turn steering wheel to
the left or right fully and take reading of relief pressure.
If lower than 8,400 kPa (85 kg/cm2, 1208 psi), failure in
steering gear.
Relief pressure
8,400 – 9,100 kPa (85 – 92 kg/cm2, 1208 – 1308 psi)
1. P/S fluid reservoir
4. Oil pressure gauge
2. P/S pump
5. High pressure side
3. Steering gear box
On-Vehicle Service
Power Steering System Components
28 N·m (2.8 kg-m)
28 N·m (2.8 kg-m)
35 N·m (3.5 kg-m)
1
4
3
5
28 N·m (2.8 kg-m)
28 N·m (2.8 kg-m)
11 N·m (1.1 kg-m)
2
6
25 N·m (2.5 kg-m)
1. Power steering (P/S) pump
3. Steering gear box
5. High pressure hose / pipe
2. P/S fluid reservoir
4. Suction hose
6. Low pressure hose / pipe
25 N·m (2.5 kg-m)
POWER STEERING (P/S) SYSTEM (If equipped) 3B1-9
Power Steering Belt
For removal and installation of power steering belt, refer to “Generator Drive Belt Removal and Installation” in Section 6H2.
Power Steering (P/S) Pump
REMOVAL
1) Take out fluid in P/S fluid reservoir with syringe or such.
2) Remove P/S belt referring to “Generator Drive Belt Removal
and Installation” in Section 6H2.
3) Disconnect high pressure hose and low pressure hose.
3
4) Remove P/S pump (1) removing 4 mounting bolts (3).
2
CAUTION:
• Clean couplers at intake and discharge ports completely before disconnection.
• Plug ports of removed pump to prevent dust and any
foreign object from entering.
1
3
2. P/S pump bracket
INSTALLATION
CAUTION:
After installation, fill A/T fluid (an equivalent to
DEXRON®-II, DEXRON®-IIE or DEXRON®-III) and be sure
to bleed air referring to “Air Bleeding Procedure” in this
section.
Install components in reverse order of removal procedure noting
the following points.
• Tighten each bolt as specified below.
(a)
(a)
(b)
Tightening torque
Oil pump mounting bolts
(a): 28 N·m (2.8 kg-m, 20.0 lb-ft)
Oil pump high pressure flare nut
(b): 28 N·m (2.8 kg-m, 20.0 lb-ft)
• Install P/S belt referring to “Generator Drive Belt Removal
and Installation” in Section 6H2.
3B1-10 POWER STEERING (P/S) SYSTEM (If equipped)
Tightening Torque Specifications
Fastening part
Tightening torque
kg-m
2.8
2.8
N•m
28
28
Oil pump mounting bolt
Oil pump high pressure flare nut
lb-ft
20.0
20.0
Required Service Materials
Recommended SUZUKI product
(Part Number)
Material
Power steering
fluid
An equivalent of DEXRON®-II,
DEXRON®-IIE or DEXRON®-III.
Use
• To fill P/S fluid reservoir
• Parts lubrication when installing
Special Tools
09915-77412
Oil pressure gauge
09915-77420
Oil pressure gauge
attachment & hose set
09944-18211
Torque check socket
09945-35010
Air bleeding hose set
STEERING WHEEL AND COLUMN 3C-1
SECTION 3C
STEERING WHEEL AND COLUMN
WARNING:
For vehicles equipped with Supplemental Restraint (Air Bag) System:
• Service on and around the air bag system components or wiring must be performed only by an
authorized SUZUKI dealer. Please observe all WARNINGS and “Service Precautions” under “OnVehicle Service” in air bag system section before performing service on or around the air bag system components or wiring. Failure to follow WARNINGS could result in unintentional activation of
the system or could render the system inoperative. Either of these two conditions may result in
severe injury.
• The procedures in this section must be followed in the order listed to temporarily disable the air bag
system and prevent false diagnostic codes from setting. Failure to follow procedures could result in
possible air bag system activation, personal injury or otherwise unneeded air bag system repairs.
CAUTION:
When fasteners are removed, always reinstall them at the same location from which they were
removed. If a fastener needs to be replaced, use the correct part number fastener for that application.
If the correct part number fastener is not available, a fastener of equal size and strength (or stronger)
may be used. Fasteners that are not reused, and those requiring thread-locking compound, will be
called out. The correct torque value must be used when installing fasteners that require it. If the above
procedures are not followed, parts or system damage could result.
NOTE:
For the items with asterisk (*) in the “CONTENTS” below, refer to the same section of the Service Manual mentioned in FOREWORD of this manual.
CONTENTS
General Description ............................................. *
Diagnosis .............................................................. *
Inspection and Repair Required
After Accident ..................................................... *
On-Vehicle Service............................................... *
Service Precautions (For Vehicle with
Air Bag System) ................................................. *
Diagnosis and servicing ................................. *
Enabling air bag system ................................. *
Handling and storage ..................................... *
Disposal........................................................... *
Drive Air Bag (Inflator) Module (For Vehicle
with Air Bag System) .......................................... *
Steering Wheel................................................... *
Centering contact coil (for vehicle with
air bag system)............................................... *
Combination Switch (For Vehicle without
Air Bag System)/Contact Coil and
Combination Switch Assembly (For Vehicle
with Air Bag System).......................................... *
Steering Column Assembly................................ *
Steering Lock Assembly
(Ignition Switch) .................................................. *
Steering Lower Shaft ......................................... *
Checking Steering Column for
Accident Damage........................................... 3C-2
Tightening Torque Specifications ...................... *
Required Service Material ................................... *
Special Tool.......................................................... *
6F1
6F2
6G
6H
6K
7A
3C
7E
7E
7F
7F
8A
8B
8C
8D
8E
9
10
10A
10B
3C-2 STEERING WHEEL AND COLUMN
Checking Steering Column for Accident Damage
NOTE:
Vehicles involved in accidents resulting in body damage, where steering column has been impacted
(or air bag deployed) may have a damaged or misaligned steering column.
CHECKING PROCEDURE
1) Check that two capsules (1) are attached to steering column
bracket (2) securely. Check clearance between capsules (1)
and steering column bracket (2). Clearance should be 0.0
mm (0.0 in.) on both sides.
If found loose or clearance, replace steering column assembly.
2) Take measurement “a” as shown.
If it is shorter than specified length, replace column assembly (1) with new one.
Steering column assembly length
“a”: 733.2 – 734.8 mm (28.87 – 28.93 in.)
3) Check if steering lower shaft (1) is within specified length.
If it is out of specified length, replace it with new one.
Steering lower shaft length
“b”: 431.2 – 433.2 mm (16.98 – 17.05 in.)
4) Check steering column lower seal (1) for breakage or deformation.
If found defective, replace.
STEERING WHEEL AND COLUMN 3C-3
5) Check steering shaft joints and shaft for any damages such
as crack, breakage, malfunction or excessive play.
If anything is found faulty, replace as lower joint assembly or
column assembly.
6) Check steering shaft for smooth rotation.
If found defective, replace as column assembly.
7) Check steering shaft and column for bend, cracks or deformation.
If found defective, replace.
3C-4 STEERING WHEEL AND COLUMN
FRONT SUSPENSION 3D-1
SECTION 3D
FRONT SUSPENSION
6F1
6F2
6G
1A
6K
WARNING:
For lifting point of vehicle, refer to “Vehicle Lifting Points” in Section 0A.
7A
7A1
NOTE:
3D
• All front suspension fasteners are an important attaching part in that it could affect the performance
of vital parts and systems, and/or could result in major repair expense. They must be replaced with
one of the same part number or with an equivalent part if replacement becomes necessary. Do not
use a replacement part of lesser quality or substitute design. Torque values must be used as specified during reassembly to assure proper retention of this part.
• Never attempt to heat, quench or straighten any front suspension part. Replace it with a new part or
damage to the part may result.
• For the items with asterisk (*) in the “CONTENTS” below, refer to the same section of the Service
Manual mentioned in “FOREWORD” of this Manual.
CONTENTS
General Description ....................................... 3D-2
4WD Control System.................................... 3D-2
Diagnosis ........................................................ 3D-7
Diagnosis Table ........................................... 3D-7
4WD Controller and its Circuit Check........... 3D-9
4WD Control System Check ...................... 3D-10
Stabilizer bar / bushing check ........................ *
Shock Absorber and/or Coil Spring Check......... *
Leading Arm / Lateral Rod / Steering
Knuckle Check ................................................... *
Leading Arm Bushing / Lateral Rod
Bushing Check ................................................... *
Kingpin / Kingpin Bearing Check........................ *
Barfield Joint Check ........................................... *
Steering Knuckle Seal Check............................. *
Wheel Disc, Nut and Bearing Check .................. *
7F
7F
8A
8A
8B
8C
8D
8E
9
On-Vehicle Service ...................................... 3D-13
Stabilizer Bar / Bushings............................ 3D-13 10
Front Shock Absorber ........................................ * 10A
Coil Spring ......................................................... * 10B
Bump Stopper and Spring Upper Seat .............. *
Wheel Hub / Bearing / Oil Seal .......................... *
Steering Knuckle / Wheel Spindle...................... *
Front Axle Shaft / Oil Seal / Kingpin
Bearing Outer Race ........................................... *
Steering Knuckle Seal........................................ *
Lateral Rod ........................................................ *
Leading Arm / Bushing............................... 3D-14
Front Axle Housing ............................................ *
Tightening Torque Specifications ...................... *
Required Service Material ................................... *
Special Tool.................................................. 3D-16
3D-2 FRONT SUSPENSION
General Description
4WD Control System
The 4WD control system consists of a 4WD switch, a vacuum switch, vacuum pump, two vacuum switching
valves (VSV1 and VSV2) and air locking hub assemblies.
The 4WD controller controls locking or unlocking of the air locking hub according to operation of the transfer shift
control lever.
Vacuum generated by vacuum pump passes through the vacuum control valve which regulate vacuum pressure.
According to signals from the 4WD switch, the 4WD controller activates VSV1 (for unlocking) or VSV2 (for locking) to apply vacuum from vacuum pump so that the front axle and the wheel hub are disengaged or engaged.
11
5
8
3
9
7
4
6
10
2
1
1. Air locking hub assembly
4. Vacuum control valve
7. VSV2
10. 4WD switch
2. Wheel spindle
5. Vacuum switch
8. 4WD controller
11. 4WD indicator light
3. Vacuum pump with generator
6. VSV1
9. Transfer
FRONT SUSPENSION 3D-3
System Circuit
1
5
IG1
A9
BRN
2
YEL/RED
6
BLK
A1
A7
BLU/BLK
GRY/BLK
3
7
GRY
A6
YEL/RED
A10
BLK
A2
IG1
9
4
10
8
GRY/RED
BLU
A3
IG1
A5
BLK
11
A10 A9 A8 A7 A6 A5 A4 A3 A2 A1
[A]
[B]
[C]
[E]
6
[D]
[D]
[G]
[F]
2
[I]
[G]
3
[F]
[F]
[E]
7
[D]
[D]
[H]
[E]
4
[D]
[D]
[A]: Operation
[F]: CLOSE
2. VSV1
7. Vacuum switch
[B]: 2WD → 4WD
[G]: OPEN
3. VSV2
8. IG switch
[C]: 4WD → 2WD
[H]: 5 sec.
4. 4WD indicator lamp
9. Main fuse
[D]: OFF
[I]: 10 sec.
5. ECM
10. IG fuse
[E]: ON
1. 4WD controller
6. 4WD switch
11. Coupler of 4WD controller
3D-4 FRONT SUSPENSION
Components and Functions
Component
4WD switch
4WD controller
VSV1
VSV2
Vacuum switch
“4WD” indicator lamp
Vacuum pump
Vacuum control valve
Function
When the transfer shift lever is shifted to 4L or 4H position from 2H, this switch
turns ON and cause the 4WD control system to turn ON.
When the 4WD switch turns on, the 4WD controller activates VSV2 to lock the
air locking hubs and when it receives an “ON” signal from the vacuum switch, it
makes VSV2 to complete operation within 5 seconds and causes the 4WD indicator light to light up.
If vacuum in the vacuum circuit fails to reach the specified level due to a leakage
in the vacuum circuit (when no “ON” signal is inputted from the vacuum switch),
the 4WD controller stops operation of VSV2 in 15 seconds and makes the 4WD
indicator light to flash to warn occurrence of a trouble.
When the 4WD switch turns off, the 4WD controller activates VSV1 for 10 seconds to unlock the hubs and at the same time makes the 4WD indicator light
turn off.
VSV1 operates according to the signal from the 4WD controller. When it is activated, the port opens and vacuum is applied through the vacuum circuit to
unlock to the slide gear in the air locking hub. As a result, the air locking hubs
are unlocked.
VSV2 operates according to the signal from the 4WD controller. When it is activated, the port opens and vacuum is applied through the vacuum circuit to lock
to the slide gear in the air locking hub. As a result, the air locking hubs are
locked.
When VSV2 receives the “ON” signal from 4WD switch, vacuum is applied
through its circuit to the vacuum switch. The vacuum switch turns on when it
detects vacuum exceeding –36kpa (–5.22psi).
It lights up when 4WD control system is in the 4WD mode.
It flashes to warn that locking hub operation has not completed (4WD control
system fails to shift 4WD).
This vacuum pump is installed in the generator, and driven with the engine
through the generator drive belt. 4WD control system and brake booster operate by the vacuum made with the vacuum pump.
The vacuum made with the vacuum pump is adjusted to appropriate vacuum.
As a result, 4WD control system is prevented being damaged by excessive vacuum.
FRONT SUSPENSION 3D-5
Operation
2WD → 4WD
When the transfer shift control lever is shifted from the 2WD (2H) position to the 4WD (4H or 4L) position, a 4WD
“ON” signal is transmitted to the 4WD controller which then activates VSV2 to apply vacuum from vacuum pump
to the chamber “B” in the hub housing.
When vacuum is applied, the slide gear is separated from the magnet, moves toward the center of the vehicle
body and gets engaged with the outer gear. In this way, the front axle shaft and the front wheel hub rotate as one
unit.
If vacuum in the circuit fails to reach –36kpa (–5.22psi) within 15 seconds after operation of VSV2 due to such
trouble as a hole in the vacuum pipe, the slide gear does not operate and the 4WD indicator light flashes to warn
that the hub is unlocked.
1. ECM
7. To vacuum pump
13. Piston A
2. 4WD controller
8. Vacuum control valve
14. Magnet
19. Slide gear
20. Wheel hub
3. 4WD indicator lamp
9. VSV1
15. Housing
21. Spindle
4. 4WD switch
10. VSV2
16. Spring
22. Front axle shaft
5. Vacuum switch
11. Outer gear
17. Diaphragm
23. To opposite side
6. Engine speed signal
12. Chamber B
18. Sleeve
A: Vacuum circuit
3D-6 FRONT SUSPENSION
4WD → 2WD
When the transfer shift control lever is shifted from the 4WD (4H or 4L) to the 2WD (2H) position, the 4WD controller activates VSV1 and the vacuum from vacuum pump is applied to the chamber “A” in the hub housing. As
the slide gear is shifted to the wheel side by the vacuum force and disengaged from the outer gear, rotation of
the front wheel hub is not transmitted to the front axle shaft.
1. EPI & A/C controller
7. To vacuum pump
13. Magnet
2. 4WD controller
8. Vacuum control valve
14. Housing
19. Slide gear
20. Wheel hub
3. 4WD indicator lamp
9. VSV1
15. Chamber A
21. Spindle
4. 4WD switch
10. VSV2
16. Spring
22. Front axle shaft
5. Vacuum switch
11. Outer gear
17. Diaphragm
23. To opposite side
6. Engine speed signal
12. Piston A
18. Sleeve
A: Vacuum circuit
FRONT SUSPENSION 3D-7
Diagnosis
Diagnosis Table
For description not found in the table below, refer to “Diagnosis Table” in Section 3.
4WD Control System
Condition
4WD Indicator light
flashing
2WD/4WD switching
error
Possible Cause
• Hub locking procedure error
•
•
•
•
•
•
•
•
•
Defective VSV2
Defective vacuum switch
Defective vacuum control valve
Air leak from vacuum circuit
Clogged vacuum hose or pipe
Defective vacuum pump
Faulty 4WD controller
Defective air locking hub assembly
Abnormality in 4WD control system
•
•
•
•
Air leakage from vacuum circuit
Clogged vacuum hose or pipe
Defective vacuum control valve
Defective vacuum pump
Correction
Shift transfer shift control lever
2WD → 4WD once again
Replace
Replace
Replace
Check and repair
Replace
Check and replace
Check and replace
Replace
Inspect referring to “4WD Control
System Diagnostic Flow Table”
Check and replace
Replace
Replace
Check and replace
4WD Control System Diagnostic Flow Table
Before performing the trouble diagnosis, check that the air locking hub assemblies are in good condition and
there is no air leakage from vacuum hoses and vacuum pipe. Refer to “4WD Control System Check” in this section for air leakage.
[NOTES ON SYSTEM CIRCUIT INSPECTION]
• Be sure to read “Precautions for Electrical Circuit Service” in Section 0A before circuit inspection and
observe what is written there.
• For system circuit, refer to the figure of “System Circuit” in this section.
Step
Action
Yes
Go to Step 2.
1
Check ground circuit.
1) Disconnect coupler from 4WD controller
with ignition switch OFF.
2) Check for proper connection to 4WD controller at all terminals.
3) If OK, check continuity between A5 terminal
and body ground.
Is there continuity between A5 terminal and
body ground?
Go to Step 3.
2
Check power circuit.
1) Disconnect coupler from 4WD controller.
2) Turn ignition switch ON.
3) Check voltage between A10 terminal and
ground.
Is it 10 – 14 V?
No
“BLK” wire is open.
“YEL/RED” circuit is open
or short to ground.
3D-8 FRONT SUSPENSION
Step
Action
3
Check 4WD switch circuit.
1) Connect coupler to 4WD controller.
2) Turn ignition switch ON and check voltage
between A7 terminal and ground.
Transfer lever is in 2H: about 10 – 14 V
Transfer lever is in 4L or 4H: about 0 V
Is check result satisfactory?
Yes
Go to Step 4.
4
Go to Step 5.
Check VSV1 circuit.
1) Turn ignition switch ON.
2) Check voltage between A1 terminal and
ground.
Is it 10 – 14 V when transfer lever is in 4H or 4L
range and about 0 V for 10 seconds after it is
shifted to 2H range?
5
Go to Step 6.
Check VSV2 circuit.
1) Turn ignition switch ON.
2) Check voltage between A2 terminal and
ground.
Is it 10 – 14 V when transfer lever is in 2H range
and about 0 V for 5 seconds after it is shifted to
4H or 4L range?
6
Go to Step 7.
Check vacuum switch circuit.
1) Turn ignition switch ON (stating engine).
2) Check voltage between A6 terminal and
ground.
Is it 10 – 14 V when transfer lever is in 2H range
and about 0 V for 5 seconds after it is shifted to
4H or 4L range?
7
Substitute a known-good
Check 4WD indicator light circuit.
4WD controller and
1) Turn ignition switch ON.
recheck.
2) Check voltage between A3 terminal and
ground.
Is it 10 – 14 V when transfer lever is in 2H range
and about 0 V within 15 seconds after it is
shifted to 4H or 4L range?
No
Check 4WD switch (refer
to “4WD Switch” in Section 7D), “BLU/BLK” and
“BLK” circuits of 4WD
switch.
If OK, substitute a knowngood 4WD controller and
recheck.
Check VSV1 (refer to
“4WD Control System
Check” in this section),
“YEL/RED” and “GRY/
BLK” circuits of VSV1.
If OK, substitute a knowngood 4WD controller and
recheck.
Check VSV2 (refer to
“4WD Control System
Check” in this section),
“YEL/RED” and “GRY/
RED” circuits of VSV2.
If OK, substitute a knowngood 4WD controller and
recheck.
Check vacuum switch
(refer to “4WD Control
System Check” in this
section), “GRY” and “BLK”
circuits of vacuum switch.
If OK, substitute a knowngood 4WD controller and
recheck.
Check “BLU” circuit
(including indicator light
and combination meter
refer to “Combination
Meter” in Section 8).
If OK, substitute a knowngood 4WD controller and
recheck.
FRONT SUSPENSION 3D-9
4WD Controller and its Circuit Check
Voltage Check
Check for input or output voltage of 4WD controller (1) (voltage
between each circuit and body ground) with 4WD controller connector connected and ignition switch turned START (engine run).
CAUTION:
• Disable air bag system (if equipped with Air Bag), refer
to “Disabling Air Bag System” in Section 10B.
• This check must be carried out in a well-ventilated
place.
Terminal
Circuit
A1
VSV1
A2
VSV2
A4
A5
4WD indicator
lamp
–
Ground
A6
Vacuum switch
A7
4WD switch
A8
–
A9
ECM
A10
Ignition switch
A3
*: With engine running
Normal Voltage
Condition
10 seconds after transfer shift conabout 0 V
trol lever: 4WD → 2WD
10 – 14 V
Transfer shift control lever: 4WD
5 seconds after transfer shift control
*about 0 V
lever: 2WD → 4WD
10 – 14 V
Transfer shift control lever: 2WD
*about 0 V
Transfer shift control lever: 4WD
10 – 14 V
Transfer shift control lever: 2WD
–
–
about 0 V
any time
5 seconds after transfer shift control
*about 0 V
lever: 2WD → 4WD
10 – 14 V
Other than above
about 0 V
Transfer shift control lever: 4WD
10 – 14 V
Transfer shift control lever: 2WD
–
–
0–1V
IG: ON
Voltage varies according to engine speed.
10 – 14 V
IG: ON
3D-10 FRONT SUSPENSION
4WD Control System Check
Air Locking Hub
1) Start engine and shift transfer shift control lever to 2H position.
2) Connect vacuum pump gauge (special tool) to the spindle
hose (2) which is disconnected from upper side pipe as
shown. Apply vacuum and check operating sound from air
locking hub (1).
If there is not operating sound, replace air locking hub
assembly.
Vacuum specification
Lower than –40 kPa (–5.70 Psi)
Special tool
(A): 09917-47011
3) Connect hose, then start engine and shift transfer shift control lever to 4H or 4L position.
4) Connect vacuum pump gauge to the spindle hose (2) disconnected from lower side pipe.
Apply vacuum and check operating sound from air locking
hub (1).
If there is no operating sound, replace air locking hub
assembly.
Vacuum specification
Lower than –40 kPa (–5.70 Psi)
Special tool
(A): 09917-47011
VSV1 and VSV2
1) Disconnect coupler from VSV1 (1) (VSV2) (2) and check
resistance between two terminals of VSV1 (1) (VSV2) (2).
If resistance is out of specification, replace.
Resistance of VSV1 and VSV2
: 33 – 39 Ω
FRONT SUSPENSION 3D-11
2) Blow air from B and check that air comes out of C.
If found faulty, replace.
3) Connect 12 V-battery to VSV1 (VSV2) terminals and check
continuity between A and B.
Blow air from B and check that air comes out of A.
If found faulty, replace.
Vacuum Switch
1) Disconnect coupler from vacuum switch and check resistance between two terminals of vacuum switch.
If resistance is out of specification, replace.
Resistance of vacuum switch
: More than 1 MΩ
2) Connect vacuum pump gauge and apply vacuum lower than
–40 kPa (–5.70 Psi), then check resistance between terminals of vacuum switch.
If resistance is out of specification, replace.
Vacuum switch resistance
: Less than 0.8 Ω
(A)
Special tool
(A): 09917-47011
4WD Switch
Refer to “4WD Switch” in Section 7D.
Vacuum Hose / Pipe
Inspect vacuum hoses for leaks or cracks, vacuum pipes for
cracks, dents or corrosion. If defective, replace.
3D-12 FRONT SUSPENSION
Vacuum Pump
Refer to “Vacuum Pump” in Section 6H.
Vacuum Control Valve
1) Remove vacuum control valve.
2) Connect vacuum pump gauge to A pipe of vacuum control
valve and vacuum gauge to B pipe of vacuum control valve.
3) Apply vacuum lower than –60 kPa (–8.70 Psi), then check
vacuum applied to B pipe of vacuum, control valve.
If vacuum is out of specification, replace.
(B)
1
(A)
(C)
A: Pipe to vacuum pump
B: Pipe to vacuum switching valve
Vacuum specification applied to B pipe when applying –60
kPa to A pipe
–50 – –54 kPa (–7.25 – –7.83 Psi)
B
A
Special tool
(A): 09917-47011
(B): 09915-67311
(C): 09918-08210
FRONT SUSPENSION 3D-13
On-Vehicle Service
Stabilizer Bar / Bushings
Removal
1) Hoist vehicle.
2) Remove front bumper.
3) Disconnect stabilizer ball joints (right & left) (1) from front
axle housing (2).
1
1
4) Remove stabilizer bar mount bush bracket bolts (1).
5) Remove stabilizer bar with its ball joint.
6) Disconnect stabilizer ball joints (right & left) from its bar.
Installation
1) Connect stabilizer ball joints (right & left) to its bar.
3D-14 FRONT SUSPENSION
NOTE:
For correct installation of stabilizer bar, side-to-side, be
sure that stopper ring (1) on stabilizer bar aligns with
mount bush, both right and left, as shown.
2) When installing stabilizer, loosely assemble all components
while insuring that stabilizer is centered, side-to-side.
3) Tighten stabilizer bracket bolts (2) and stabilizer ball joint
nuts to specified torque.
NOTE:
Tighten stabilizer mount bracket bolts (2) with vehicle
hoisted a little in non-load condition.
Tightening torque
Stabilizer mount bracket bolts
(a): 20 N·m (2.0 kg-m, 14.5 lb-ft)
Stabilizer ball joint nuts
(b): 50 N·m (5.0 kg-m, 36.5 lb-ft)
3. Stabilizer ball joint
4. Front axle housing
4) Install front bumper.
5) Lower hoist.
Leading Arm / Bushing
Removal
1) Hoist vehicle.
2) Support front axle housing by using floor jack.
3) Remove shock absorber lower mounting bolt, refer to “Front
Shock Absorber” in this section.
4) Remove mounting bolts and leading arm (1).
FRONT SUSPENSION 3D-15
5) Remove bushings by using hydraulic press and special tools.
Special tool
(A): 09924-74510
(B): 09951-16030
(C): 09951-26010
Installation
1) Install bushings (1) by using hydraulic press and special
tools, noting the following point.
• Install bushings (1) so that either face of bushing are aligned
with housing edge of leading arm (2), also the length
between the aligned side end of bushing and leading arm (2)
are within specification below.
Special tool
(A): 09913-85210
(B): 09951-26010
Specification for leading arm bushing protrusion
“a”: 8.5 – 10.5 mm (0.33 – 0.41 in.)
“b”: 6.0 – 9.0 mm (0.24 – 0.35 in.)
2) Install leading arm (1) to vehicle body and axle housing,
referring to figure for proper installing direction of bolts.
Nuts should not be tightened.
3) Install shock absorber lower mounting bolt, refer to “Front
Shock Absorber” in this section.
4) Lower hoist and with vehicle in non-loaded condition, tighten
nuts of leading arm to specified torque.
Tightening torque
Leading arm nuts
(a): 90 N·m (9.0 kg-m, 65.0 lb-ft)
2. Body outside
[A]: Front
[B]: Rear
3D-16 FRONT SUSPENSION
Special Tool
09917-47011
Vacuum pump gauge
09915-67311
Vacuum gauge
09918-08210
09913-50121
Vacuum gauge hose joint Oil seal remover
09913-65210
Tie rod end remover
09913-75520
Bearing installer
09951-76010
Bearing installer
09924-74510
Bearing installer handle
09942-15511
09943-35511 or 0994335512
Brake drum remover
09944-66010
09944-68510
Wheel hub / knuckle oil
seal installer
Bearing installer attachment
09944-77020
Ring nut wrench
09944-78210
Bearing installer support
09917-88210
Valve guide installer
attachment
Sliding hammer
09951-16050
Wheel bearing tightening
tool
FRONT SUSPENSION 3D-17
09916-58210
Valve guide installer handle
09922-55131
Bearing installer
09951-16030
Bush remover
09951-26010
Bush remover plate
09944-66020
Bearing installer
09913-85210
Oil seal installer
3D-18 FRONT SUSPENSION
REAR SUSPENSION 3E-1
SECTION 3E
REAR SUSPENSION
6F1
6F2
6G
1A
6K
WARNING:
For lifting point of vehicle, refer to “Vehicle Lifting Points” in Section 0A.
NOTE:
• All suspension fasteners are an important attaching part in that it could affect the performance of
vital parts and systems, and/or could result in major repair expense. They must be replaced with
one of the same part number or with an equivalent part if replacement becomes necessary. Do not
use a replacement part of lesser quality or substitute design. Torque values must be used as specified during reassembly to assure proper retention of this part.
• Never attempt to heat, quench or straighten any suspension part. Replace it with a new part, or
damage to the part may result.
• For the items with asterisk (*) in the “CONTENTS” below, refer to the same section of the Service
Manual mentioned in “FOREWORD” of this manual.
7A
7A1
7B1
3E
8A
8B
8A
8B
8C
8D
8E
CONTENTS
General Description ....................................... 3E-2
Diagnosis .............................................................. *
Diagnosis Table ................................................. *
Rear Shock Absorber Check.............................. *
Trailing Arm, Lateral Rod, Axle Housing
and Coil Spring Check ....................................... *
Trailing Arm and Lateral Rod Bush Check ......... *
Rear Suspension Fasteners............................... *
Bearing Retainer and Axle Shaft Oil Seal
Check ................................................................. *
Bump Stopper and Spring Rubber Seat
Check ................................................................. *
Wheel Disc, Nut and Bearing Check .................. *
9
On-Vehicle Service ........................................ 3E-3
Rear Shock Absorber......................................... * 10
Coil Spring ......................................................... *
10A
Bump Stopper .................................................... *
Lateral Rod .................................................. 3E-3 10B
Trailing Arm / Bushing........................................ *
Rear Axle Shaft and Wheel Bearing .................. *
Rear Axle Shaft Inner Oil Seal ........................... *
Rear Axle Housing ....................................... 3E-4
Tightening Torque Specifications ...................... *
Required Service Materials ................................. *
Special Tools........................................................ *
3E-2 REAR SUSPENSION
General Description
1. Rear axle housing
4. Bearing oil seal
7. Brake drum
10. Bump stopper
Tightening torque
2. Rear wheel bearing
5. Oil seal protector
8. Rear axle shaft
11. Coil spring
Do not reuse.
3. Bearing retainer ring
6. Lateral rod
9. Shock absorber
12. Trailing arm
REAR SUSPENSION 3E-3
On-Vehicle Service
Lateral Rod
Removal
1) Hoist vehicle.
2) Remove lateral rod mounting bolts (2) and nut (3).
3) Remove lateral rod (1).
Installation
1) Install lateral rod to vehicle body and rear axle housing.
Tighten bolt and nut temporarily by hand.
2) Lower hoist and with vehicle in non-loaded condition, tighten
lateral rod bolt and nut to specified torque.
Tightening torque
Lateral rod bolt and nut
(a): 90 N·m (9.0 kg-m, 65.0 lb-ft)
3E-4 REAR SUSPENSION
Rear Axle Housing
Removal
1) Hoist vehicle and remove wheels.
2) Remove rear axle shafts (right & left), refer to “Rear Axle
Shaft and Wheel Bearing” in this section.
3) Disconnect brake pipe (3) from flexible hose (1) and remove
E-ring (2).
4) Remove brake pipe clamps and pipes from axle housing.
5) For jobs hereafter, support rear axle housing (2) by using
floor jack (1) under axle housing (2).
6) Remove LSPV stay from axle housing (if equipped with
LSPV).
7) Before removing propeller shaft (2), give match marks (1) on
joint flange and propeller shaft (2) as shown.
Remove propeller shaft (2).
8) Remove differential carrier assembly (3).
9) Remove lateral rod (1).
REAR SUSPENSION 3E-5
10) Loosen rear mounting nuts (right & left) of trailing arm (2) but
don’t remove bolt.
11) Remove shock absorbers (1) (right & left) lower mounting
bolt.
12) Lower floor jack until tension of suspension coil spring
becomes a little loose and remove rear mount bolts of trailing
arm.
13) Lower rear axle housing gradually.
14) Remove axle housing.
Installation
Install removed parts in reverse order of removal, noting the following.
1) Place rear axle housing (1) on floor jack. Then install trailing
arms (2) rear mounting bolts (right & left) in proper direction
as shown. At this time, mount nuts but don’t tighten them.
3. Out side
4. Body center
2) Install coil spring (2) (right & left) on spring seat (1) of axle
housing and raise axle housing.
NOTE:
• Upper and lower diameters of coil spring (2) are different. Bring larger diameter end at bottom and set its
open end in place on spring seat (1).
• When seating coil spring (2), mate spring end with
stepped part (3) of rear axle spring seat (1) as shown.
A: Upper side (small dia.)
B: Lower side (large dia.)
3E-6 REAR SUSPENSION
3) Install lower part of shock absorber (1) to right and left sides
of axle housing and tighten bolts (2) temporarily by hand.
4) Install lateral rod (1) and install bolts in proper direction as
shown.
At this time, mount bolt and nut but don’t tighten them.
5) Clean mating surfaces of axle housing (1) and differential
carrier and apply sealant to housing side.
“A”: Sealant 99000-31110
6) Install differential carrier assembly (3) to axle housing and
tighten carrier bolts to specified torque.
Tightening torque
Rear differential carrier bolts
(a): 23 N·m (2.3 kg-m, 17.0 lb-ft)
7) Install propeller shaft (2) to joint flange aligning match marks
(1) and tighten flange bolts to specified torque.
Tightening torque
Rear propeller shaft bolts
(b): 50 N·m (5.0 kg-m, 36.5 lb-ft)
8) Install LSPV stay to axle housing and adjust LSPV stay position, referring to “LSPV Assembly Inspection and Adjustment” in Section 5 (if equipped with LSPV).
9) Remove floor jack from axle housing.
10) Connect brake pipes and parking brake cable onto axle
housing and clamp them securely.
For clamping positions, refer to “Rear Brake Hose / Pipe”
and “Parking Brake Cable” in Section 5.
REAR SUSPENSION 3E-7
11) Connect brake flexible hose (2) to bracket on axle housing
and secure it with E-ring (1).
12) Connect brake pipe to brake flexible hose and tighten brake
pipe flare nut to specified torque.
Tightening torque
Brake pipe flare nut
(a): 16 N·m (1.6 kg-m, 11.5 lb-ft)
13) Clean mating surface of axle housing (2) (right & left) with
brake back plate and apply sealant as shown.
“B”: Sealant 99000-31090
14) Apply grease to axle shaft oil seals lip (1) (right & left) as
shown.
“A”: Grease 99000-25010
15) Install rear axle shafts, brake shoes, brake drums and
wheels. For details, refer to “Rear Axle Shaft and Wheel
Bearing” in this section.
16) Lower hoist.
17) Tighten right and left trailing arm nuts and shock absorber
lower bolts to specified torque.
Tighten lateral rod bolt and nut to specified torque.
NOTE:
When tightening these bolts and nuts, be sure that vehicle is off hoist and in non loaded condition.
Tightening torque
Trailing arm nuts and lateral rod bolt and nut
(a): 90 N·m (9.0 kg-m, 65.0 lb-ft)
Shock absorber lower bolts
(b): 85 N·m (8.5 kg-m, 61.5 lb-ft)
18) Check to ensure that brake drum is free from dragging and
proper braking is obtained.
19) Perform brake test (foot brake and parking brake). (For brake
test, see Section 5.)
20) Check each installed part for oil leakage.
1. Shock absorber
2. Trailing arm
3. Lateral rod
3E-8 REAR SUSPENSION
BRAKES 5-1
SECTION 5
BRAKES
WARNING:
For lifting point of vehicle, refer to “Vehicle Lifting Points” in Section 0A.
WARNING:
For vehicles equipped with a Supplement Restraint (Air Bag) System:
• Service on and around the air bag system components or wiring must be performed only by an
authorized SUZUKI dealer. Refer to “Air Bag System Components and Wiring Location View” under
“General Description” in air bag system section in order to confirm whether you are performing service on or near the air bag system components or wiring. Please observe all WARNINGS and “Service Precautions” under “On-Vehicle Service” in air bag system section before performing service
on or around the air bag system components or wiring. Failure to follow WARNINGS could result in
unintentional activation of the system or could render the system inoperative. Either of these two
conditions may result in severe injury.
• Technical service work must be started at least 90 seconds after the ignition switch is turned to the
“LOCK” position and the negative cable is disconnected from the battery. Otherwise, the system
may be activated by reserve energy in the Sensing and Diagnostic Module (SDM).
6F1
6F2
6G
6H
6K
7A
7A1
7B1
7C1
7D
7E
5
9
10
10A
10B
9
NOTE:
• When inspecting and servicing vehicle equipped with ABS, be sure to refer to section 5E first.
• All brake fasteners are important attaching parts in that they could affect the performance of vital
parts and systems, and/or could result in major repair expense. They must be replaced with one of
same part number or with an equivalent part if replacement becomes necessary. Do not use a
replacement part of lesser quality or substitute design. Torque values must be used as specified
during reassembly to assure proper retention of all parts. There is to be no welding as it may result
in extensive damage and weakening of the metal.
• For the items with asterisk (*) in the “CONTENTS” below, refer to the same section of the Service
Manual mentioned in “FOREWORD” of this Manual.
CONTENTS
General Description ......................................... 5-3
Diagnosis .......................................................... 5-4
Road Testing Brakes.......................................... *
Brake Fluid Leaks .............................................. *
Substandard or Contaminated Brake Fluid ........ *
Diagnosis Table ................................................. *
Brake Pedal Free Height Adjustment ................. *
Brake Pedal Play Check .................................... *
Stop Light Switch Adjustment ........................ 5-4
Excessive Pedal Travel Check........................... *
Front Brake Disc Check ..................................... *
Front Brake Pad Check ...................................... *
Rear Brake Shoe Check .................................... *
Master Cylinder and Brake Fluid Level
Check ................................................................. *
Rear Drum Brake Shoe Adjustment................... *
Parking Brake Inspection and Adjustment ......... *
Booster Operation Check................................... *
Fluid Pressure Test
(If Equipped with LSPV)..................................... *
On-Vehicle Service .......................................... 5-4
Air Bleeding of Brake System ........................ 5-4
Brake Hose and Pipe Inspection........................ *
Front Disc Brake ............................................ 5-7
Brake pad................................................... 5-8
Caliper assembly...................................... 5-10
Brake disc ................................................ 5-14
Rear Brake......................................................... *
Brake drum..................................................... *
Brake shoe ..................................................... *
10
10A
10B
5-2 BRAKES
Wheel cylinder................................................ *
Brake back plate ............................................ *
Master Cylinder............................................ 5-17
Master cylinder reservoir.......................... 5-17
Master cylinder assembly......................... 5-19
Master cylinder............................................... *
Fill reservoir.................................................... *
LSPV (Load Sensing Proportioning Valve)
Assembly (If Equipped)...................................... *
LSPV assembly.............................................. *
P (Proportioning) Valve...................................... *
Brake Booster .................................................... *
Inspection and adjustment .............................. *
Brake Hose / Pipe......................................... 5-21
Front brake hose / pipe ............................. 5-21
Rear brake hose / pipe.............................. 5-22
Parking Brake Lever/Cable................................. *
Parking brake lever ......................................... *
Parking brake cable ........................................ *
Tightening Torque Specifications................. 5-24
Required Service Material.............................. 5-24
Special Tool .................................................... 5-25
BRAKES 5-3
General Description
When the foot brake pedal is depressed, hydraulic pressure is developed in the master cylinder to actuate pistons (two in front and four in rear).
The master cylinder is a tandem master cylinder. Three (or two) brake pipes are connected to the master cylinder and they make two independent circuits. One connects front brakes (right and left) and the other connects
rear brakes (right and left).
The load sensing proportioning valve (LSPV) or the proportioning and bypass (P & B) valve is included in these
circuits between the master cylinder and the rear brake.
In this brake system, the disc brake type is used for the front wheel brake and a drum brake type (leading / trailing shoes) for the rear wheel brake.
The parking brake system is mechanical. It applies brake force to only rear wheels by means of the cable and
mechanical linkage system. The same brake shoes are used for both parking and foot brakes.
NOTE:
The figures shows left-hand steering vehicle.
WARNING:
If any hydraulic component is removed or brake line disconnected, bleed the brake system. The
torque values specified are for dry, unlubricated fasteners.
[A]
3
F
2
1
[B]
2
F
4
5
1
[A] : Vehicle with LSPV
1. Master cylinder
3. LSPV (Load Sensing Proportioning valve)
5. Hydraulic Unit
[B] : Vehicle with ABS
2. 5-way joint (4-way joint)
4. P & B valve
F: Forward
5-4 BRAKES
Diagnosis
Stop Light Switch Adjustment
Adjustment should be made as follows when installing switch. Pull
up brake pedal toward you and while holding it there, adjust
switch position so that clearance between end of thread and
brake pedal is as specified. Then adjust stop light switch assembly position and lock it by turning clockwise.
Clearance between brake pedal and stop light switch
“a”: 0.5 – 1.5 mm (0.02 – 0.06 in.)
“a”
On-Vehicle Service
Air Bleeding of Brake System
CAUTION:
Brake fluid is extremely damaging to paint. If fluid should
accidentally touch painted surface, immediately wipe
fluid from paint and clean painted surface.
Bleeding operation is necessary to remove air whenever it
entered hydraulic brake system.
Hydraulic lines of brake system consists of two separate lines,
one for front wheel brakes and the other for rear wheel brakes. Air
bleeding is necessary at right and left front wheel brakes, left rear
wheel brake and LSPV (if equipped), i.e. 3 (4 for vehicle with
LSPV) places in all.
Be sure to bleed air of brake system according to following procedure when its oil hydraulic circuit has been disconnected.
1) Fill master cylinder reservoir with brake fluid and keep at
least one-half full of fluid during bleeding operation.
BRAKES 5-5
2) Remove bleeder plug cap (1).
Attach a vinyl tube (2) to bleeder plug, and insert the other
end into container (3).
3) Depress brake pedal several times, and then while holding it
depressed, loosen bleeder plug about one-third to one-half
turn.
4) When fluid pressure in the cylinder is almost depleted,
retighten bleeder plug.
5) Repeat this operation until there are no more air bubbles in
hydraulic line.
6) When bubbles stop, depress and hold brake pedal and
tighten bleeder plug.
Tightening torque
Front caliper bleeder plug
(b): 8.5 N·m (0.85 kg-m, 6.5 lb-ft)
Rear wheel cylinder and LSPV bleeder plug
(c): 8 N·m (0.8 kg-m, 6.0 lb-ft)
7) Then attach bleeder plug cap.
8) After completing bleeding operation, apply fluid pressure to
pipe line and check for leakage.
5-6 BRAKES
9) Replenish fluid into reservoir up to specified level.
10) Check brake pedal for “sponginess”. If found spongy, repeat
entire procedure of bleeding.
BRAKES 5-7
Front Disc Brake
2
3
8.5 N·m (0.85 kg-m)
4
1
27 N·m (2.7 kg-m)
5
7
6
10
8
9
85 N·m (8.5 kg-m)
15
14
11
12
13
50 N·m (5.0 kg-m)
1. Caliper pin bolt
10. Disk brake piston
: Apply brake fluid to contact surface of cylinder
2. Bleeder plug cap
11. Piston seal
: Apply brake fluid to all around part of piston seal
3. Bleeder plug
12. Cylinder boot
4. Disk brake caliper
13. Disk brake pad
: For right side brake, install pad with wear indicator to
vehicle center side
5. Slide pin
: Apply rubber grease (included in spare parts) to pin outer surface
14. Anti noise shim
6. Boot
15. Brake disk
7. Pad spring
Tightening torque
8. Brake caliper carrier
Do not reuse.
9. Carrier bolt
5-8 BRAKES
Brake pad
Removal
1) Hoist vehicle and remove wheel.
2) Remove caliper pin bolts (2).
1. Caliper
3. Disc
3) Remove caliper (1) from caliper carrier.
NOTE:
Hang removed caliper (1) with a wire hook (2) or the like
so as to prevent brake hose from bending and twisting
excessively or being pulled.
Don’t operate brake pedal with pads (3) removed.
4) Remove pads (3).
Inspection
Check pad lining for wear. When wear exceeds limit, replace with
new one.
CAUTION:
Never polish pad lining with sandpaper. If lining is polished with sandpaper, hard particles of sandpaper will be
deposited in lining and may damage disc. When pad lining requires correction, replace it with a new one.
Brake pad thickness (lining)
Standard: 10 mm (0.39 in.)
Limit: 2 mm (0.08 in.)
NOTE:
When pads are removed, visually inspect caliper for
brake fluid leak. Correct leaky point, if any.
BRAKES 5-9
Installation
NOTE:
See NOTE at the beginning of this section.
1) Set brake pad springs (1) and shim (2) and install brake pads
(3).
NOTE:
For right side brake, install pad with wear indicator (4) to
vehicle center side.
2) Install caliper and torque caliper pin bolts (1) to specification.
NOTE:
Make sure that boots are fit into groove securely.
Tightening torque
Brake caliper pin bolts
(a): 27 N·m (2.7 kg-m, 19.5 Ib-ft)
3) Install wheel and torque front wheel nuts to specification.
Tightening torque
Wheel nuts
(a): 95 N·m (9.5 kg-m, 69.0 lb-ft)
4) Upon completion of installation, perform brake test.
5-10 BRAKES
Caliper assembly
Removal
1) Hoist vehicle and remove wheel.
2) Remove brake flexible hose mounting bolt from caliper. As
this will allow fluid to flow out of hose, have a container ready
beforehand.
3) Remove caliper pin bolts.
4) Remove caliper from carrier.
Disassembly
1) Before disassembly, clean all around caliper with brake fluid.
2) Blow compressed air into cylinder through bolt hole where
flexible hose was fitted. With this air pressure, piston can be
pushed out of cylinder.
WARNING:
Do not apply too highly compressed air which will cause
piston to jump out of cylinder. Place a cloth (1) to prevent
piston from damage. It should be taken out gradually
with moderately compressed air. Do not place your fingers in front of piston when using compressed air.
3) Remove piston boot (1) prying it with a metal tool (2) (no
sharp edge).
CAUTION:
Be careful not to damage inside (bore side) of cylinder.
4) Remove piston seal using a thin blade like a thickness
gauge, etc.
CAUTION:
Be careful not to damage inside (bore side) of cylinder.
5) Remove bleeder plug and cap from caliper.
BRAKES 5-11
Inspection
Cylinder slide pin / Pin cylinder
Check slide pin for smooth movement as shown in the figure.
If it is found faulty, correct or replace. Apply rubber grease to slide
pin outer surface.
“A”: Rubber grease
Bush dust boot and cylinder boot
Check boots for breakage, crack and damage. If defective,
replace.
Piston seal
Excessive or uneven wear of pad lining may indicate unsmooth
return of the piston. In such a case, replace rubber seal.
5-12 BRAKES
Assembly
Assemble parts in reverse order of disassembly, observing the following instructions.
CAUTION:
• Wash each part cleanly before installation in the same
fluid as the one used in master cylinder reservoir.
• Never use other fluid or thinner.
• Before installing piston and piston seal to cylinder,
apply brake fluid to them.
• After reassembling brake lines, bleed air from them.
• Install a new piston seal into groove in cylinder
securely making sure that it is not twisted.
• Before installing caliper to carrier, install slide pin with
grease applied into caliper carrier hole and check for
its smooth movement in thrust direction.
“A”: Rubber grease
1
1) Install piston seal to caliper referring to the following instructions.
• Piston seal is used to seal piston and cylinder and to adjust
clearance between pad and disc.
• Replace with a new one at every overhaul.
• Fit piston seal (1) into groove in cylinder taking care not to
twist it.
2) Before inserting piston (2) into cylinder, install new boot (1)
onto piston (2) as shown.
“A”: 1-grooved side directed inside (cylinder side)
“B”: 2-grooved side directed pad side
3. Cylinder
4. Piston seal
BRAKES 5-13
3) Fit boot as it is in figure into boot groove in cylinder with fingers.
4) Insert piston into cylinder by hand and fit boot in boot groove
in piston.
5) To confirm that boot is fitted in its groove in cylinder properly,
pull piston out of cylinder a little but do not take it all out.
NOTE:
Boot’s face “B” should be at the same level from cylinder’s face “A” all around.
6) Insert piston into cylinder by hand.
Installation
1) Apply grease to slide pin, then install caliper to caliper carrier.
2) Torque caliper pin bolts (1) to specification.
NOTE:
Make sure that slide pin boots are fit into groove
securely.
Tightening torque
Brake caliper pin bolts
(a): 27 N·m (2.7 kg-m, 19.5 lb-ft)
5-14 BRAKES
3) Install brake flexible hose (4) as shown and torque hose
mounting bolt (3) to specification.
Tightening torque
Front brake flexible hose bolt
(a): 23 N·m (2.3 kg-m, 17.0 lb-ft)
WARNING:
Make sure that flexible hose is not twisted when tightening joint bolt. If it is twisted, reconnect it using care not to
twist it.
1. Brake caliper
2. Washer
4) Install wheel and torque wheel nuts to specification.
Tightening torque
Wheel nuts: 95 N·m (9.5 kg-m, 69.0 lb-ft)
5) After completing installation, fill reservoir with brake fluid and
bleed brake system referring to “Air Bleeding of Bleeding
Brake System” in this section. Perform brake test and check
each installed part for oil leakage.
Brake disc
Removal
1) Hoist vehicle and remove wheel.
2) Remove caliper assembly by loosening carrier bolts (2 pcs).
CAUTION:
During removal, be careful not to damage brake flexible
hose and not to depress brake pedal.
NOTE:
Hang removed caliper with a wire hook or the like so as
to prevent brake hose from bending and twisting excessively or being pulled.
Don’t operate brake pedal with brake pads removed.
3) Pull brake disc off by using 8 mm bolts (1) (2 pcs).
BRAKES 5-15
Inspection
Check disc surface for scratches in wearing parts. Scratches on
disc surface noticed at the time of specified inspection or replacement are normal and disc is not defective unless they are serious.
But when there are deep scratches or scratches all over disc surface, replace it. When only one side is scratched, polish and correct that side.
Brake disc thickness “a”
Standard: 17.0 mm (0.67 in.)
Limit: 15.0 mm (0.59 in.)
Use wheel nuts (1) and suitable plain washers (2) to hold the disc
securely against the hub, then mount a dial indicator as shown
and measure the runout at 10 mm (0.39 in.) from the outer edge
of the disc.
Disk deflection
Limit: 0.15 mm (0.006 in.)
NOTE:
Check front wheel bearing for looseness before measurement.
Installation
NOTE:
See NOTE at the beginning of this section.
1) Install disc to wheel hub.
2) Install caliper assembly to steering knuckle.
3) Torque caliper carrier bolts to specification.
Tightening torque
Brake caliper carrier bolts
(a): 85 N·m (8.5 kg-m, 61.5 lb-ft)
5-16 BRAKES
4) Install wheel and torque front wheel nuts to specification.
Tightening torque
Wheel nuts
(a): 95 N·m (9.5 kg-m, 69.0 lb-ft)
5) Upon completion of installation, perform brake test.
Check for Front Brake After Installation
Mount tires and make certain that they rotate smoothly, with a
force of less than 3.0 kg (6.6 Ib).
NOTE:
For above check the following must be observed.
• Jack up front wheels, both right and left, off the
ground.
• Shift transfer shift lever to 2H (rear wheel) position (if
equipped) and start engine for a few seconds then
stop.
• Side figure shows outer periphery of tire.
• Be careful not to depress brake pedal when checking
tire for rotation.
If tire rotation is heavy, check the following:
• Piston, piston seal and cylinder slide bush of caliper for
installation.
• Wheel bearings for breakage.
• Disc for flatness (Improper flatness brings disc into contact
with lining during rotation and makes rotation heavy).
To check this, measure disc deflection.
1. String
2. Spring measure
BRAKES 5-17
Master Cylinder
Master cylinder reservoir
Removal
1) Disconnect reservoir lead wire at coupler.
2) Clean outside of reservoir (1).
3) Take out fluid with syringe or such.
4) Loosen clamp (3) and disconnect clutch reservoir hose (4)
from reservoir.
5) Remove reservoir connector pin (2) by using special tool.
1
(A)
Special tool
(A): 09922-85811
4
2
3
6) Remove reservoir (1).
CAUTION:
Brake fluid is extremely damaging to paint.
Do not allow brake fluid to get on painted surfaces.
2. Connector pin
3. Grommets
5-18 BRAKES
Installation
NOTE:
See NOTE at the beginning of this section.
1) When using new grommets, lubricate them with the same
fluid as the one to fill reservoir with. Then press-fit grommets
to master cylinder. Grommets must be seated in place.
2) Install reservoir (1) and drive in reservoir pin (2).
NOTE:
Drive in reservoir pin (2) till both of its ends at the right
and left of reservoir (1) become the same length.
3) Connect clutch reservoir hose to reservoir and tighten clamp
securely.
2
CAUTION:
If clamp is rusty, deformed or loose, replace it with a new
one.
1
4) Connect reservoir lead wire.
5) Fill reservoir (1) with specified fluid.
6) Upon completion of installation, check for fluid leakage.
2. Cap
BRAKES 5-19
Master cylinder assembly
Removal
1) Disconnect reservoir lead wire at coupler.
2) Clean around reservoir cap (1) and take out fluid with
syringe or such.
3) Loosen clamp and disconnect clutch reservoir hose from
reservoir (2).
4) Disconnect brake pipes (4) from master cylinder (3).
1
CAUTION:
Brake fluid is extremely damaging to paint.
Do not allow brake fluid to get on painted surfaces.
5) Remove master cylinder attaching nuts (5).
6) Remove master cylinder (3).
4
2
3
5
Installation
NOTE:
• See NOTE at the beginning of this section.
• Check clearance between booster piston rod and primary.
1) Install master cylinder as shown and torque attaching nuts to
specification.
Tightening torque
Master cylinder nuts
(a): 13 N·m (1.3 kg-m, 9.5 Ib-ft)
2) Attach hydraulic lines and torque flare nuts to specification.
Tightening torque
Brake pipe flare nuts
(b): 16 N·m (1.6 kg-m, 12.0 lb-ft)
3) Connect clutch reservoir hose to reservoir and tighten clamp
securely.
(b)
(a)
CAUTION:
If clamp is rusty, deformed or loose, replace it with a new
one.
4) Connect reservoir lead wire.
5) Fill reservoir with specified brake fluid.
5-20 BRAKES
6) After installing, bleed air from system (refer to “Air Bleeding
of Brake System” in this section) and check brake pedal
height and play.
7) Perform brake test and check each installed part for fluid
leakage.
BRAKES 5-21
Brake Hose / Pipe
Front brake hose / pipe
For left-hand steering vehicle
[A] : For vehicle without ABS
X: View X
4. Hose bolt
10. Hose bracket
[B] : For vehicle with ABS
Y: View Y
5. Brake caliper
11. To front right brake caliper
F: Front side
Z: View Z
6. 4 way joint
12. To front left brake caliper
R: Right side
1. E-ring
7. 5 way joint
13. To rear brake
T: Top side
2. Flexible hose
8. ABS hydraulic unit / control module
assembly
a-i: Clamp
3. Hose washer
9. P & B (proportioning & bypass) valve
W: View W
Tightening torque
5-22 BRAKES
Removal
1) Raise, suitably support vehicle. Remove wheel if necessary.
2) Clean dirt and foreign material from both hose end or pipe end fittings.
3) Drain brake fluid in reservoir.
CAUTION:
Do not allow brake fluid to get on painted surface.
Painted surface will be damaged by brake fluid, flush it with water immediately if any fluid is spilled.
4) Remove brake hose and pipe.
Installation
1) Install brake hose and pipe by reversing removal procedure, noting the following points.
For installation, make sure that steering wheel is in straightforward position and hose has no twist or kink.
Check to make sure that hose doesn’t contact any part of suspension, both in extreme right and extreme left
turn conditions. If it does at any point, remove and correct. Fill and maintain brake fluid level in reservoir.
Bleed brake system.
2) Bleed brake system. Refer to “Air Bleeding of Brake System” in this section.
3) Perform brake test and check installed part for fluid leakage.
Rear brake hose / pipe
Removal
1) Raise, suitably support vehicle. Remove wheel if necessary.
2) Clean dirt and foreign material from both hose end or pipe end fittings.
3) Drain brake fluid in reservoir.
CAUTION:
Do not allow brake fluid to get on painted surface.
Painted surface will be damaged by brake fluid, flush it with water immediately if any fluid is spilled.
4) Remove brake hose and pipe.
Installation
1) Install brake hose and pipe by reversing removal procedure, noting the following points.
Fill and maintain brake fluid level in reservoir.
2) Bleed brake system referring to “Air Bleeding of Brake System” in this section.
3) Perform brake test and check each installed part for fluid leakage.
CAUTION:
•
•
•
•
Position clamps to white marks on two brake pipes.
Be sure to obtain more than 3 mm (0.118 in.) clearance between axle housing and brake pipe.
Install clamps properly referring to figure below and tighten bolts.
When installing hose, make sure that it has no twist or kink.
BRAKES 5-23
[A]: For vehicle without ABS
1. Clamp
[B]: For vehicle with ABS
2. Rear axle housing
7. To rear brake or LSPV (if equipped)
3. Rear wheel cylinder
8. Brake pipe (vehicle with LSPV)
F: Front side
R: Right side
4. LSPV (if equipped)
T: Top side
5. Fuel tank
6. To master cylinder
a-g: Clamp
Tightening torque
5-24 BRAKES
Tightening Torque Specifications
Fastening part
Brake caliper carrier bolt
Brake caliper pin bolt
Front brake flexible hose bolt
Rear brake back plate nut
Master cylinder nut
Booster nut
Brake pipe 5-way 4-way joint bolt
Brake pipe flare nut
LSPV bolt / P valve bolt
Front caliper
Brake bleeder plug
Rear wheel cylinder, LSPV
Wheel nut
Hose bracket bolt
Booster clevis nut
Parking brake lever bolt
Wheel cylinder mounting bolt
Piston stopper bolt
LSPV adjust bolt
N•m
85
27
23
23
13
13
11
16
25
8.5
8
95
11
25
23
9
10
25
Tightening torque
kg-m
8.5
2.7
2.3
2.3
1.3
1.3
1.1
1.6
2.5
0.85
0.8
9.5
1.1
2.5
2.3
0.9
1.0
2.5
lb-ft
61.5
19.5
17.0
17.0
9.5
9.5
8.0
12.0
18.0
6.5
6.0
69.0
8.0
18.0
17.0
6.5
7.5
18.0
Required Service Material
Material
Brake fluid
Water tight sealant
Sealant
Rubber grease
Recommended SUZUKI products
Use
• To fill master cylinder reservoir.
Indicated on reservoir tank cap or
described in owner’s manual of vehi- • To clean and apply to inner parts of master
cylinder caliper and wheel cylinder when they
cle
are disassembled.
SEALING COMPOUND 366E
• To apply to mating surfaces of brake back
99000-31090
plate and rear wheel cylinder.
SUZUKI BOND NO. 1215
• To apply to mating surfaces of brake back
99000-31110
plate and rear axle housing.
• To apply to mating surfaces of brake back
plate and rear wheel bearing retainer.
Use rubber grease included in spare • To apply to slide pin of brake caliper carrier.
parts or whose viscosity varies very
little even at –40 °C (–40 °F).
BRAKES 5-25
Special Tool
09900-20205
Micrometer (0 – 25 mm)
09900-20607
Dial gauge (1/1000 mm)
09900-20701
Magnetic stand
09956-02210
Brake circuit plug
09922-85811
09942-15511
09950-78220
Connector pin remover
Sliding hammer
09943-35511 or 0994335512
Brake drum remover
(Front wheel hub
remover)
09956-02311
Fluid pressure gauge
55473-82030
Air bleeder plug
09950-96010
09952-16010
Booster piston rod gauge Booster piston rod
adjuster
Flare nut wrench (10 mm)
5-26 BRAKES
ENGINE GENERAL INFORMATION AND DIAGNOSIS (K9K ENGINE) 6-2-1
SECTION 6-2
ENGINE GENERAL INFORMATION AND
DIAGNOSIS
(K9K ENGINE)
WARNING:
For vehicles equipped with a Supplemental Restraint (Air Bag) System:
• Service on and around the air bag system components or wiring must be performed only by an
authorized SUZUKI dealer. Refer to “Air Bag System Components and Wiring Location View” under
“General Description” in air bag system section in order to confirm whether you are performing service on or near the air bag system components or wiring. Please observe all WARNINGS and “Precautions” under “On-Vehicle Service” in air bag system section before performing service on or
around the air bag system components or wiring. Failure to follow WARNINGS could result in unintentional activation of the system or could render the system inoperative. Either of these two conditions may result in severe injury.
• Technical service work must be started at least 90 seconds after the ignition switch is turned to the
“LOCK” position and the negative cable is disconnected from the battery. Otherwise, the system
may be activated by reserve energy in the Sensing and Diagnostic Module (SDM).
CONTENTS
General Information ....................................... 6-2-3
Statement of Cleanliness and Care ............. 6-2-3
General Information on Engine Service ....... 6-2-3
Precaution on fuel system service............ 6-2-4
Fuel pressure relief confirmation
procedure ................................................. 6-2-4
Fuel leakage check procedure ................. 6-2-4
Engine Diagnosis ........................................... 6-2-5
General Description ..................................... 6-2-5
On-Board Diagnostic System ....................... 6-2-5
Precaution in Diagnosing Trouble ................ 6-2-7
Engine Diagnostic Flow Table...................... 6-2-9
Diagnostic step details ........................... 6-2-11
Diagnostic Trouble Code (DTC) Check...... 6-2-12
Diagnostic Trouble Code (DTC)
Clearance ................................................... 6-2-12
Diagnostic Trouble Code (DTC) Table ....... 6-2-13
Indicator lamp operation table .................... 6-2-15
Visual Inspection ........................................ 6-2-18
Engine Basic Check ................................... 6-2-19
Fault Finding – Fault Interpretation ............ 6-2-20
DTC P0070 External air temperature
sensor circuit malfunction....................... 6-2-20
DTC P0087 Fuel rail/system pressure
too low .................................................... 6-2-21
DTC P0089 Fuel pressure regulator
performance problem ............................. 6-2-22
DTC P0110 Intake air temperature
circuit malfunction .................................. 6-2-23
DTC P0115 Engine coolant
temperature circuit malfunction .............. 6-2-24
DTC P0180 Fuel temperature sensor
circuit malfunction .................................. 6-2-25
DTC P0190 Fuel pressure sensor
circuit malfunction .................................. 6-2-26
DTC P0200 Injector circuit ..................... 6-2-27
DTC P0201 Injector circuit malfunction –
cylinder 1................................................ 6-2-29
DTC P0202 Injector circuit malfunction –
cylinder 2................................................ 6-2-30
DTC P0203 Injector circuit malfunction –
cylinder 3................................................ 6-2-31
DTC P0204 Injector circuit malfunction –
cylinder 4................................................ 6-2-32
DTC P0225 Pedal position sensor 1
circuit...................................................... 6-2-33
DTC P0231 Fuel pump secondary
circuit low ............................................... 6-2-35
DTC P0235 Turbo pressure sensor
circuit malfunction .................................. 6-2-36
DTC P0301 Cylinder 1 misfire
detected ................................................. 6-2-38
DTC P0302 Cylinder 2 misfire
detected ................................................. 6-2-39
6F1
6F2
7A
7A1
7B1
7C1
7D
7E
7F
6-2
8B
8C
8D
8E
9
10
10A
10B
6-2-2 ENGINE GENERAL INFORMATION AND DIAGNOSIS (K9K ENGINE)
DTC P0303 Cylinder 3 misfire
detected ................................................. 6-2-40
DTC P0304 Cylinder 4 misfire
detected ................................................. 6-2-41
DTC P0325 Knock sensor circuit
malfunction............................................. 6-2-42
DTC P0335 Crankshaft position sensor
circuit malfunction .................................. 6-2-43
DTC P0340 Camshaft position sensor
circuit malfunction .................................. 6-2-44
DTC P0380 Glow plug/heater circuit
malfunction............................................. 6-2-45
DTC P0670 Glow plug module control
circuit...................................................... 6-2-45
DTC P0382 Glow plug/heater circuit B
malfunction............................................. 6-2-46
DTC P0400 Exhaust gas recirculation
flow malfunction ..................................... 6-2-47
DTC P2413 Exhaust gas recirculation
system performance............................... 6-2-47
DTC P0402 Exhaust gas recirculation
flow excessive detected ......................... 6-2-48
DTC P0403 Exhaust gas recirculation
control circuit .......................................... 6-2-48
DTC P0409 Exhaust gas recirculation
sensor circuit .......................................... 6-2-49
DTC P0487 Exhaust gas recirculation
throttle position control circuit................. 6-2-49
DTC P0480 Radiator cooling fan low
speed control system malfunction.......... 6-2-50
DTC P0481 Radiator cooling fan high
speed control system malfunction.......... 6-2-51
DTC P0500 Vehicle speed sensor
circuit malfunction .................................. 6-2-52
DTC P0513 Incorrect immobilizer
key.......................................................... 6-2-53
DTC P0530 A/C refrigerant pressure
sensor circuit malfunction....................... 6-2-54
DTC P0560 System voltage................... 6-2-55
DTC P0604 Control module internal
fail........................................................... 6-2-56
DTC P0605 Control module program
error........................................................ 6-2-57
DTC P0606 Control module program
error........................................................ 6-2-57
DTC P0608 Sensor supply circuit 1
fail........................................................... 6-2-59
DTC P0609 Sensor supply circuit 2
fail........................................................... 6-2-60
DTC P0651 Sensor reference voltage
circuit/open............................................. 6-2-60
DTC P0645 A/C compressor relay
control circuit malfunction....................... 6-2-61
DTC P0685 Main relay control circuit
malfunction............................................. 6-2-62
DTC P103D A/C signal circuit
malfunction .............................................6-2-63
DTC P1641 Additional heater relay
circuit 1 ...................................................6-2-64
DTC P1643 Additional heater relay
circuit 2 ...................................................6-2-65
DTC P2120 Pedal position sensor 2
circuit ......................................................6-2-66
DTC P2226 Barometric pressure circuit
malfunction .............................................6-2-68
Fault Finding – Customer Complaints ........6-2-69
Table 1 No dialogue with the ECM .........6-2-70
Table 2 The engine does not start ..........6-2-71
Table 3 The engine starts with difficulty
or starts then stalls..................................6-2-72
Table 4 Starting difficult with warm
engine .....................................................6-2-73
Table 5 Rough idle speed
(pumping)................................................6-2-74
Table 6 Idle speed too high/too low ........6-2-75
Table 7 Unexpected acceleration/
deceleration and engine stalling .............6-2-76
Table 8 Response fault ...........................6-2-77
Table 9 Engine stop/stalling....................6-2-78
Table 10 Engine jerking ..........................6-2-79
Table 11 Lack of power...........................6-2-80
Table 12 Too much power ......................6-2-81
Table 13 Excessive consumption ...........6-2-82
Table 14 Overspeed when lifting off
accelerator or changing gear ..................6-2-83
Table 15 Engine dies on pulling
away .......................................................6-2-84
Table 16 The engine does not stop ........6-2-85
Table 17 Clanking engine, noisy
engine .....................................................6-2-86
Table 18 Squalling noise.........................6-2-87
Table 19 Various mechanical
noises .....................................................6-2-88
Table 20 Exhaust odours ........................6-2-89
Table 21 Diesel odours ...........................6-2-90
Table 22 Blue, white or black smoke ......6-2-91
Table 23 Blue, black or white smoke
when accelerating ...................................6-2-92
Fault Finding – Tests ..................................6-2-93
Test 1: Low Pressure Circuit Check........6-2-94
Test 2: Electrical Circuit Check ...............6-2-94
Test 3: Injector Check .............................6-2-95
Test 4: Parameter Check ........................6-2-95
Test 5: Air Inlet Circuit Check .................6-2-95
Test 6: ECM Check.................................6-2-95
Test 7 High Pressure Pump Check.........6-2-96
Test 8: Diesel filter check........................6-2-96
Special Tool ..................................................6-2-97
ENGINE GENERAL INFORMATION AND DIAGNOSIS (K9K ENGINE) 6-2-3
General Information
Statement of Cleanliness and Care
1
2
3
4
An automobile engine is a combination of many machined,
honed, polished and lapped surfaces with tolerances that are
measured in the thousands of an millimeter (ten thousands of
inch). Accordingly, when any internal engine parts are serviced,
care and cleanliness are important. Throughout this section, it
should be understood that proper cleaning and protection of
machined surfaces and friction areas is part of the repair procedure. This is considered standard shop practice even if not specifically stated.
• A liberal coating of engine oil should be applied to friction
areas during assembly to protect and lubricate the surface
on initial operation.
• Whenever valve train components, pistons, piston rings, connecting rods, rod bearings and crankshaft journal bearings
are removed for service, they should be retained in order. At
the time of installation, they should be installed in the same
locations and with the same mating surfaces as when
removed.
• Battery cables should be disconnected before any major
work is performed on the engine. Failure to disconnect
cables may result in damage to wire harness or other electrical parts.
• Throughout this manual, the four cylinders of the engine are
identified by numbers: No.1 (1), No.2 (2), No.3 (3) and No.4
(4) as counted from flywheel side to crankshaft pulley side.
General Information on Engine Service
The following information on engine service should be noted
carefully, as it is important in preventing damage, and in contributing to reliable engine performance.
• When raising or supporting engine for any reason, do not
use a jack under oil pan. Due to small clearance between oil
pan and oil pump strainer, jacking against oil pan may cause
it to be bent against strainer resulting in damaged oil pick-up
unit.
• It should be kept in mind, while working on engine, that 12volt electrical system is capable of violent and damaging
short circuits. When performing any work where electrical
terminals could possibly be grounded, ground cable of the
battery should be disconnected at battery.
• Any time the air cleaner, air cleaner outlet hose, turbocharger, intercooler, intercooler outlet hose, or intake manifold is removed, the intake opening should be covered. This
will protect against accidental entrance of foreign material
which could follow intake passage into cylinder and cause
extensive damage when engine is started.
6-2-4 ENGINE GENERAL INFORMATION AND DIAGNOSIS (K9K ENGINE)
Precaution on fuel system service
• Work must be done with no smoking, in a well-ventilated
area and away from any open flames.
• A small amount of fuel may be released after fuel line is disconnected.
In order to reduce the chance of personal injury, cover fitting
to be disconnected with a shop cloth. Put that cloth in an
approved container when disconnection is completed.
• Never run engine with main relay disconnected when engine
and exhaust system are hot.
• Fuel or fuel vapor hose connection varies with each type of
pipe. When reconnecting fuel or fuel vapor hose, be sure to
connect and clamp each hose correctly referring to the figure.
After connecting, make sure that it has no twist or kink.
[A]: With short pipe, fit hose as far as it reaches pipe joint as shown.
[B]: With following type pipe, fit hose as far as its peripheral projection as shown.
[C]: With bent pipe, fit hose as its bent part as shown or till pipe is about 20 to 30 mm
(0.79 – 1.18 in.) into the hose.
[D]: With straight pipe, fit hose till pipe is, about 20 to 30 mm (0.79 – 1.18 in.) into the hose.
1. Hose
2. Pipe
3. Clamp
4. Clamp securely at a position 3 to 7 mm (0.12 – 0.27 in.) from hose end.
5. 20 to 30 mm (0.79 – 1.18 in.)
• Before starting any service on fuel system, refer to “Precautions in Fuel Delivery System” in Section 6E2.
• When installing fuel filter union bolt or plug bolt, always use
new gasket and tighten it to specified torque.
• When installing injector, fuel feed pipe or fuel pressure regulator, lubricate its O-ring with spindle oil or fuel.
• When connecting fuel pipe flare nut, first tighten flare nut by
hand and then tighten it to specified torque, using back-up
wrench.
Fuel pressure relief confirmation procedure
The fuel system installed on the engine injects the high pressure
fuel into the engine. Therefore, before starting fuel system service, confirm that fuel high pressure line is not under pressure
referring to “Fuel Pressure Relief Confirmation Procedure” in Section 6E2.
Fuel leakage check procedure
After performing any service on fuel system, refer to “Fuel Leakage Check” in Section 6E2 to see if there is any fuel leakage.
ENGINE GENERAL INFORMATION AND DIAGNOSIS (K9K ENGINE) 6-2-5
Engine Diagnosis
General Description
The engine and emission control system in this vehicle are controlled by ECM. ECM has an On-Board Diagnostic system which detects a malfunction in this system and abnormality of those parts that influence the engine
exhaust emission. When diagnosing engine troubles, be sure to have full understanding of the outline of “OnBoard Diagnostic System” and each item in “Precaution in Diagnosing Trouble” and execute diagnosis according to “Engine Diagnostic Flow Table” in this section.
There is a close relationship between the engine mechanical, engine cooling system, exhaust system, etc. and
the engine and emission control system in their structure and operation. In case of an engine trouble, even when
the warning light (MIL, injection warning light, and/or red stop warning light) doesn’t turn ON, it should be diagnosed according to this flow table.
On-Board Diagnostic System
ECM in this vehicle has the following functions.
2
3
1
• When the ignition switch is turned ON with the engine at a
stop, MIL (1), injection warning light (gravity 1 fault) (2) and/
or red stop warning light (gravity 2 fault) (3) turns ON to
check the warning lights and its circuit.
• When ECM detects a malfunction which gives an adverse
effect to vehicle emission while the engine is running, it
makes the malfunction indicator lamp in the meter cluster of
the instrument panel turn ON and stores the malfunction
area in its memory.
• When a malfunction is detected, a malfunction in some
areas in the system and driving cycles then are stored in
ECM memory (For the details, refer to description on “Indicator Lamp Operation Table” in this section.)
6-2-6 ENGINE GENERAL INFORMATION AND DIAGNOSIS (K9K ENGINE)
Warm-Up Cycle
A “warm-up cycle” means sufficient vehicle operation such that
the coolant temperature has risen by at least 22 °C (40 °F) from
engine starting and reaches a minimum temperature of 70 °C
(160 °F).
Driving Cycle
A “driving cycle” consists of two parts, engine startup and engine
shutoff.
3 Driving Cycle Detection Logic
The malfunction detected in the first driving cycle is stored in
ECM memory (in the form of pending DTC) but the malfunction
indicator lamp does not light at this time. It does not light up at the
second detection of same malfunction also in the next driving
cycle. It lights up at the third detection of same malfunction also in
the third driving cycle.
Pending Diagnostic Trouble Code (DTC)
Pending DTC means a DTC detected and stored temporarily at
first or second driving cycle of the DTC which is detected in the 3
driving cycle detection logic.
Data Link Connector (DLC)
DLC (1) is in compliance with SAE J1962 in its installation position, the shape of connector and pin assignment.
2
16
8
15 14 13
12 11 10
9
7
4
1
6
5
3
5
1
3
4
2
K line (3) of ISO 9141 is used for SUZUKI scan tool to communication with ECM, ABS control module and immobilizer control
module.
2. B+
4. ECM ground
5. Body ground
ENGINE GENERAL INFORMATION AND DIAGNOSIS (K9K ENGINE) 6-2-7
Precaution in Diagnosing Trouble
• Don’t disconnect couplers from ECM, battery cable from battery, ECM ground wire harness from engine or
main fuse before confirming diagnostic information (DTC) stored in ECM memory.
• Diagnostic information stored in ECM memory can be cleared as well as checked by using SUZUKI scan
tool. Before using scan tool, read its Operator’s (Instruction) Manual carefully to have good understanding as
to what functions are available and how to use it.
• Be sure to read “Precautions for Electrical Circuit Service” in Section 0A before inspection and observe what
is written there.
• For the connector number and the terminal number described in fault finding procedure, refer to “Wiring Diagram Manual” described in FOREWORD of this manual.
• Fuel injector calibration code registration
If fuel injector is replaced, register fuel injector calibration code into ECM by performing procedure described
in “ECM Registration” of Section 6E2.
• Replacement of the ECM
Before replacement of the ECM, save the data of vehicle specification (injector calibration code and vehicle
configurations (equipment such as additional heater plug and air conditioning)) into SUZUKI scan tool from
ECM according to procedure described in “ECM Registration” of Section 6E2.
• ECM substitution
– The data of immobilizer control system registered with ECM cannot be reprogrammed. Therefore, check
for engine control system can not be performed using known-good ECM installed in other normal vehicle.
– In case that new ECM, on which the data of immobilizer control system is not programmed, is used for
inspecting the engine control system, the ECM cannot be used for the other vehicles because the data of
immobilizer control system registered with the ECM cannot be reprogrammed.
6-2-8 ENGINE GENERAL INFORMATION AND DIAGNOSIS (K9K ENGINE)
Malfunction Indicator Lamp (MIL) Check
Malfunction indicator lamp (1) signals an antipollution system failure.
Check that it lights up for 3 seconds after the ignition switch is
turned on, and then it goes off (automatic test procedure).
If light remains ON after an automatic test procedure, go to “Diagnostic Trouble Code (DTC) Check” in this section.
After the ignition switch is turned on, if light does not light up or
remains ON, check that malfunction indicator lamp circuit.
Glow Indicator Light and Injection Warning Light (Gravity
1 Fault) Check
This light serves to indicate that the glow plugs are working and to
signal system failures.
• Glow plug indicator light (2):
Check that it lights while glow plugs are operating.
• Injection warning light (3):
Check that it lights up for 3 seconds after the ignition switch
is turned on, and then it goes off (automatic test procedure).
If lights (glow indicator light and injection warning light) remain
ON after end of the preheating period and an automatic test procedure, go to “Diagnostic Trouble Code (DTC) Check” in this section.
After the ignition switch is turned on, if lights (glow indicator light
and injection warning light) does not light up or remains ON,
check that glow indicator light circuit or injection warning light
(gravity 1 fault) circuit.
Red Stop Warning Light (Gravity 2 Fault) Check
Red stop warning light (4) serves to indicate proper functioning
and to signal system failures.
Check that it lights up for 3 seconds after the ignition switch is
turned on, and then it goes off (automatic test procedure).
If light remains ON after an automatic test procedure, go to “Diagnostic Trouble Code (DTC) Check” in this section.
After the ignition switch is turned on, if light does not light up or
remains ON, check that red stop warning light (gravity 2 fault) circuit.
ENGINE GENERAL INFORMATION AND DIAGNOSIS (K9K ENGINE) 6-2-9
Engine Diagnostic Flow Table
Numbers of each step correspond to the numbers of the items after this table.
Refer to “Diagnostic Step Details” following this table for the details of each step.
Step
Action
1
Customer Complaint Analysis
Perform customer complaint analysis.
Was customer complaint analysis performed?
Visual Inspection
2
Perform visual inspection referring to “Visual
Inspection” in this section.
Is there any faulty condition?
3
Diagnostic Trouble Code Check and Record
and clearance
Check for DTC referring to “Diagnostic Step
Details”.
Is there any DTC(s)?
4
5
6
7
8
Engine Basic Check and Fault Finding – Customer Complaints
Check and repair according to “Engine Basic
Check” and “Fault Finding – Customer Complaints” in this section.
Is there any faulty condition?
Recheck DTC
Recheck DTC referring to “Diagnostic Step
Details”.
Is there any DTC(s)?
Troubleshooting for DTC
Check and repair according to applicable DTC
diagnostic flow table in this section.
Is there any faulty condition?
Check for intermittent problems
Check for intermittent problems referring to
“Diagnostic Step Details”.
Is there any faulty condition?
Final Confirmation Test
1) Clear DTC if any.
2) Perform final confirmation test referring to
“Diagnostic Step Details”.
3) Is there any problem symptom, DTC or
abnormal condition?
Yes
Go to Step 2.
No
Perform customer complaint analysis.
Repair or replace malfunction part and then go
to Step 3.
Go to Step 3.
1) Record and clear DTC Go to Step 4.
referring to “Diagnostic Trouble Code
(DTC) Clearance” in
this section.
2) Go to Step 5.
Repair or replace malGo to Step 8.
function part and then go
to Step 8.
Go to Step 6.
Go to Step 7.
Repair or replace malfunction part and then go
to Step 8.
Go to Step 7.
Repair or replace malfunction part and then go
to Step 8.
Go to Step 8.
Go to Step 5.
End.
6-2-10 ENGINE GENERAL INFORMATION AND DIAGNOSIS (K9K ENGINE)
Customer Problem Inspection Form (Example)
NOTE:
The above form is standard sample. It should be modified according to conditions characteristic of
each market.
ENGINE GENERAL INFORMATION AND DIAGNOSIS (K9K ENGINE) 6-2-11
Diagnostic step details
1. Customer Complaint Analysis
Record details of the problem (failure, complaint) and how it occurred as described by the customer. For this
purpose, use of such an inspection form will facilitate collecting information to the point required for proper analysis and diagnosis.
2. Visual Inspection
As a preliminary step, be sure to perform visual check of the items that support proper function of the engine
referring to “Visual Inspection” in this section.
3. Diagnostic Trouble Code (DTC) Check, Record and Clearance
First, check DTC, referring to “Diagnostic Trouble Code (DTC) Check” in this section. If DTC is indicated, record
and clear DTC by referring to “Diagnostic Trouble Code (DTC) Clearance” in this section.
Attempt to diagnose a trouble based on DTC in this step only or failure to clear the DTC in this step will lead to
incorrect diagnosis, trouble diagnosis of a normal circuit or difficulty in troubleshooting.
4. Engine Basic Check and Fault Finding – Customer Complaints
Perform basic engine check according to the “Engine Basic Check” in this section first. When the end of the flow
table has been reached, check the parts of the system suspected as a possible cause referring to “Fault Finding
– Customer Complaints” in this section and based on symptoms appearing on the vehicle (symptoms obtained
through steps of customer complaint analysis, trouble symptom confirmation and/or basic engine check) and
repair or replace faulty parts, if any.
5. Recheck DTC
Refer to “Diagnostic Trouble Code (DTC) Check” in this section for checking procedure.
6. Troubleshooting for DTC (See each DTC Diag. Flow Table)
Based on the DTC indicated in Step 5 and referring to the applicable DTC diag. flow table in this section, locate
the cause of the trouble, namely in a sensor, switch, wire harness, connector, actuator, ECM or other part and
repair or replace faulty parts.
7. Check for Intermittent Problem
Check parts where an intermittent trouble is easy to occur (e.g., wire harness, connector, etc.), referring to
“Intermittent and Poor Connection” in Section 0A and related circuit of DTC recorded in Step 5.
8. Final Confirmation Test
Confirm that the problem symptom has gone and the engine is free from any abnormal conditions. If what has
been repaired is related to the DTC, clear the DTC once and then recheck DTC and confirm that no DTC is indicated.
6-2-12 ENGINE GENERAL INFORMATION AND DIAGNOSIS (K9K ENGINE)
Diagnostic Trouble Code (DTC) Check
1) Prepare SUZUKI scan tool.
2) Connect it to data link connector (DLC) (1) located on underside of instrument panel at driver’s seat side.
Special tool
(A): SUZUKI scan tool
1
(A)
3) Turn ignition switch ON.
4) Read DTC according to instructions displayed on scan tool
and print them or write them down. Refer to scan tool operator’s manual for further details.
If communication between scan tool and ECM is not possible, check if scan tool is communicable by connecting it to
ECM in another vehicle. If communication is possible in this
case, scan tool is in good condition. Then check data link
connector and serial data line (circuit) in the vehicle with
which communication was not possible.
5) After completing the check, turn ignition switch off and disconnect scan tool from data link connector.
Diagnostic Trouble Code (DTC) Clearance
1) Connect SUZUKI scan tool to data link connector in the
same manner as when making this connection for Diagnostic
Trouble Code (DTC) Check.
2) Turn ignition switch OFF and then ON (but engine at stop).
3) Erase DTC according to instructions displayed on scan tool.
Refer to scan tool operator’s manual for further details.
4) After completing the clearance, turn ignition switch OFF and
disconnect scan tool from data link connector.
ENGINE GENERAL INFORMATION AND DIAGNOSIS (K9K ENGINE) 6-2-13
Diagnostic Trouble Code (DTC) Table
DTC No. DTC No.
(Generic (SUZUKI
scan tool) scan tool)
P0070
P0070
–
P0087
P0089
P0089
P0110
P0110
P0115
P0115
P0180
P0180
P0190
P0190
P0200
P0200
P0201
P0201
P0202
P0202
P0203
P0203
P0204
P0204
P0225
P0225
P0231
P0231
P0235
P0235
P0301
P0301
P0302
P0302
P0303
P0303
P0304
P0304
–
P0325
–
P0335
P0340
P0340
P0670
P0380
Detecting Item
External Air Temperature Sensor Circuit Malfunction
Fuel Rail/System Pressure Too
Low
Fuel Pressure Regulator Performance Problem
Intake Air Temperature Circuit
Malfunction
Engine Coolant Temperature
Circuit Malfunction
Fuel Temperature Sensor Circuit Malfunction
Fuel Pressure Sensor Circuit
Malfunction
Injector Circuit
Injector Circuit Malfunction –
Cylinder 1
Injector Circuit Malfunction –
Cylinder 2
Injector Circuit Malfunction –
Cylinder 3
Injector Circuit Malfunction –
Cylinder 4
Pedal Position Sensor 1 Circuit
Fuel Pump Secondary Circuit
Low
Turbo Pressure Sensor Circuit
Malfunction
Cylinder 1 Misfire Detected
Cylinder 2 Misfire Detected
Cylinder 3 Misfire Detected
Cylinder 4 Misfire Detected
Knock Sensor Circuit Malfunction
Crankshaft Position Sensor Circuit Malfunction
Camshaft Position Sensor Circuit Malfunction
Glow Plug Module Control Circuit
Detecting Condition
(DTC will set when detecting:)
External air temperature sensor signal low or high
input
Fuel flow actuator control signal circuit low or high
input
Fuel pressure regulator control signal low or high
input
Intake air temperature sensor signal low or high
input
Engine coolant temperature sensor signal low or
high input
Fuel temperature sensor signal low or high input
• Fuel pressure sensor signal low or high input
• Poor performance of fuel pressure sensor
Fuel injector control signal low or high input
Fuel injector No.1 control signal circuit open
Fuel injector No.2 control signal circuit open
Fuel injector No.3 control signal circuit open
Fuel injector No.4 control signal circuit open
Pedal position sensor 1 signal low or high input
Fuel flow actuator control signal circuit open or short
Turbo pressure sensor signal low or high input
Detection of engine speed fluctuation (problem on
cylinder No.1)
Detection of engine speed fluctuation (problem on
cylinder No.2)
Detection of engine speed fluctuation (problem on
cylinder No.3)
Detection of engine speed fluctuation (problem on
cylinder No.4)
Knock sensor signal circuit low or high input
Crankshaft position sensor signal not inputted or
incorrect signal inputted
Camshaft position sensor signal not inputted or
inconsistent signal inputted
Detects an error of pre-heating control or glow plug
failure
6-2-14 ENGINE GENERAL INFORMATION AND DIAGNOSIS (K9K ENGINE)
DTC No. DTC No.
(Generic (SUZUKI
scan tool) scan tool)
P0382
P0382
P0400
P0400
P2413
P0402
P0403
P0403
P0409
P0409
P0487
–
P0480
–
P0481
–
P0500
–
P0513
–
P0530
–
–
P0605
–
P0560
P0604
P0606
P0608
P0651
P0609
–
P0645
P0685
P0685
–
P103D
–
P1641
–
P1642
P2120
P2120
P2226
P2226
Detecting Item
Glow Plug / Heater Circuit B
Malfunction
Exhaust Gas Recirculation Flow
Malfunction
Exhaust Gas Recirculation System Performance
Exhaust Gas Recirculation Flow
Excessive Detected
Exhaust Gas Recirculation Control Circuit
Exhaust Gas Recirculation Sensor Circuit
Exhaust Gas Recirculation
Throttle Position Control Circuit
Radiator Cooling Fan Low
Speed Control System Malfunction
Radiator Cooling Fan High
Speed Control System Malfunction
Vehicle Speed Sensor Circuit
Malfunction
Incorrect Immobilizer Key
A/C Pressure Sensor Circuit
Malfunction
System Voltage
Control Module Internal Fail
Control Module Program Error
Sensor Supply Circuit 1 Fail
Sensor Reference Voltage Circuit/Open
A/C Relay Control Circuit
Main Relay Control Circuit Malfunction
A/C Signal Circuit Malfunction
Additional Heater Relay Circuit
1
Additional Heater Relay Circuit
2
Pedal Position Sensor 2 Circuit
Barometric Pressure Circuit
Detecting Condition
(DTC will set when detecting:)
Pre / post-heating control signal low or high input
Excessive or insufficient EGR flow
Poor performance of EGR valve
EGR valve actuator circuit shorted to ground circuit
EGR valve actuator circuit open or shorted to power
circuit
EGR valve position sensor signal low or high input
EGR valve position sensor circuit open or short
Radiator low speed cooling fan control circuit low or
high input
Radiator high speed cooling fan control circuit low
or high input
Vehicle speed sensor signal not inputted or incorrect signal inputted
Communication error with immobilizer control module
A/C pressure sensor signal circuit low or high input
Power supply low or high input
Engine control module internal faulty (system error)
Engine control module internal faulty (system error)
Poor performance of ECM
Sensor power supply circuit low or high input
A/C relay signal circuit low or high input
Main relay control signal low or high input
A/C signal circuit low or high input
Additional heater relay 1 signal circuit low or high
input
Additional heater relay 2 signal circuit low or high
input
Pedal position sensor 2 signal low or high input
Barometric pressure is lower or higher than specification
ENGINE GENERAL INFORMATION AND DIAGNOSIS (K9K ENGINE) 6-2-15
Indicator lamp operation table
DTC No. DTC No.
(Generic (SUZUKI
scan
scan
tool)
tool)
P0070
–
P0089
P0110
P0115
P0180
P0190
P0200
P0201
P0202
P0203
P0204
P0225
P0231
P0235
P0301
P0302
P0303
P0304
–
Detecting Item
External Air TemperaP0070
ture Sensor Circuit
(DF022)
Malfunction
P0087 Fuel Rail/System Pres(DF247) sure Too Low
Fuel Pressure RegulaP0089
tor Performance Prob(DF137)
lem
P0110 Intake Air Tempera(DF128) ture Circuit Malfunction
Engine Coolant TemP0115
perature Circuit Mal(DF002)
function
P0180 Fuel Temperature Sen(DF021) sor Circuit Malfunction
P0190 Fuel Pressure Sensor
(DF117) Circuit Malfunction
P0200
Injector Circuit
(DF136)
P0201 Injector Circuit Mal(DF099) function – Cylinder 1
P0202 Injector Circuit Mal(DF100) function – Cylinder 2
P0203 Injector Circuit Mal(DF101) function – Cylinder 3
P0204 Injector Circuit Mal(DF102) function – Cylinder 4
P0225 Pedal Position Sensor
(DF071) 1 Circuit
P0231 Fuel Pump Secondary
(DF126) Circuit Low
P0235 Turbo Pressure Sen(DF115) sor Circuit Malfunction
P0301 Cylinder 1 Misfire
(DF130) Detected
P0302 Cylinder 2 Misfire
(DF131) Detected
P0303 Cylinder 3 Misfire
(DF132) Detected
P0304 Cylinder 4 Misfire
(DF133) Detected
P0325 Knock Sensor Circuit
(DF134) Malfunction
Red Stop
Malfunction
Injection
Glow IndiWarning Light
Indicator
Warning Light
cator light
Lamp (MIL)
(Gravity 1 Fault) (Gravity 2 Fault)
–
–
–
–
–
1 driving
cycle
1 driving cycle
1 driving cycle
–
1 driving
cycle
1 driving cycle
1 driving cycle
–
–
–
–
–
–
–
–
–
–
–
–
1 driving cycle
1 driving cycle
1 driving cycle
–
1 driving cycle
–
1 driving cycle
–
1 driving cycle
–
1 driving cycle
–
1 driving cycle
–
1 driving cycle
1 driving cycle
*1 driving cycle
–
1 driving cycle
–
1 driving cycle
–
1 driving cycle
–
1 driving cycle
–
–
–
–
–
*3 driving
cycles
*3 driving
cycles
*3 driving
cycles
*3 driving
cycles
–
–
–
–
–
–
–
–
1 driving
cycle
1 driving
cycle
1 driving
cycle
1 driving
cycle
1 driving
cycle
1 driving
cycle
1 driving
cycle
1 driving
cycle
*1 driving
cycle
1 driving
cycle
1 driving
cycle
1 driving
cycle
1 driving
cycle
–
6-2-16 ENGINE GENERAL INFORMATION AND DIAGNOSIS (K9K ENGINE)
DTC No. DTC No.
(Generic (SUZUKI
scan
scan
tool)
tool)
P0335
P0340
P0670
P0382
P0400
P2413
P0402
P0403
P0409
P0487
–
–
P0500
–
–
–
–
P0605
–
Detecting Item
Crankshaft Position
P0335
Sensor Circuit Mal(DF023)
function
Camshaft Position
P0340
Sensor Circuit Mal(DF116)
function
P0380 Glow Plug Module
(DF061) Control Circuit
P0382 Glow Plug / Heater Cir(DF045) cuit B Malfunction
Exhaust Gas Recirculation Flow Malfunction
P0400
Exhaust Gas Recircu(DF163)
lation System Performance
Exhaust Gas Recirculation Flow Excessive
P0403
Detected
(DF027)
Exhaust Gas Recirculation Control Circuit
Exhaust Gas Recirculation Sensor Circuit
P0409
Exhaust Gas Recircu(DF084)
lation Throttle Position
Control Circuit
Radiator Cooling Fan
P0480
Low Speed Control
(DF048)
System Malfunction
Radiator Cooling Fan
P0481
High Speed Control
(DF049)
System Malfunction
P0500 Vehicle Speed Sensor
(DF004) Circuit Malfunction
P0513 Incorrect Immobilizer
(DF015) Key
P0530 A/C Pressure Sensor
(DF113) Circuit Malfunction
P0560
System Voltage
(DF012)
P0604 Control Module Inter(DF093) nal Fail
P0606 Control Module Pro(DF001) gram Error
P0608 Sensor Supply Circuit
(DF091) 1 Fail
Malfunction
Injection
Red Stop
Glow IndiIndicator
Warning Light
Warning Light
cator light
Lamp (MIL)
(Gravity 1 Fault) (Gravity 2 Fault)
–
*1 driving
cycle
*1 driving cycle
*1 driving cycle
–
–
–
–
–
–
–
–
–
–
–
–
–
1 driving
cycle
1 driving cycle
–
*3 driving
cycles
1 driving
cycle
1 driving cycle
–
*3 driving
cycles
1 driving
cycle
1 driving cycle
–
–
–
–
–
–
1 driving
cycle
1 driving cycle
–
*3 driving
cycles
1 driving
cycle
1 driving cycle
–
–
–
–
–
–
–
–
–
–
–
–
–
–
–
–
–
–
–
–
–
–
–
–
–
1 driving cycle
1 driving cycle
*1 driving cycle
*1 driving cycle
1 driving cycle
1 driving cycle
–
*3 driving
cycles
–
1 driving
cycle
*1 driving
cycle
1 driving
cycle
ENGINE GENERAL INFORMATION AND DIAGNOSIS (K9K ENGINE) 6-2-17
DTC No. DTC No.
(Generic (SUZUKI
scan
scan
tool)
tool)
P0609
P0651
(DF092)
P0645
–
(DF111)
P0685
P0685
(DF125)
P103D
–
(DF052)
P1641
–
(DF124)
P1642
–
(DF123)
P2120
P2120
(DF073)
P2226
P2226
(DF024)
Detecting Item
Sensor Reference
Voltage Circuit/Open
A/C Relay Control Circuit
Main Relay Control
Circuit Malfunction
A/C Signal Circuit Malfunction
Additional Heater
Relay Circuit 1
Additional Heater
Relay Circuit 2
Pedal Position Sensor
2 Circuit
Barometric Pressure
Circuit
Malfunction
Injection
Red Stop
Glow IndiIndicator
Warning Light
Warning Light
cator light
Lamp (MIL)
(Gravity 1 Fault) (Gravity 2 Fault)
–
1 driving
cycle
1 driving cycle
–
–
–
–
–
–
–
–
–
–
–
–
–
–
–
–
–
–
–
–
–
–
1 driving
cycle
1 driving cycle
–
–
–
–
–
NOTE:
• For indicator/warning light operation of items with *, refer to corresponding Faulty Finding – Fault
Interpretation in this section.
• “–” marked in above table indicates that indicator/warning light does not light.
• DTC in ( ) is only reference No. and not readable with SUZUKI scan tool.
6-2-18 ENGINE GENERAL INFORMATION AND DIAGNOSIS (K9K ENGINE)
Visual Inspection
Visually check the following parts and systems.
INSPECTION ITEM
Engine oil - - - - - level, leakage
Engine coolant - - - - - level, leakage
Fuel - - - - - level, leakage
Air cleaner element - - - - - dirt, clogging
Battery - - - - - fluid level, corrosion of terminal
Drive belt - - - - - tension, damage
Vacuum hoses of air intake system - - - - - disconnection, looseness,
deterioration, bend
Connectors of electric wire harness - - - disconnection, friction
Fuses - - - - - burning
Parts - - - - - installation, bolt - - - - - looseness
Parts - - - - - deformation
Other parts that can be checked visually
Also add the following items at engine start, if possible.
Malfunction indicator lamp operation
Glow plug indicator light and injection warning light operation
Red stop warning light
Charge warning lamp operation
Engine oil pressure warning lamp operation
Engine coolant temperature meter operation
Fuel level meter operation
Abnormal air being inhaled from air intake system
Exhaust system - - - - - leakage of exhaust gas, noise
Other parts that can be checked visually
REFERRING SECTION
Section 0B
Section 0B
Section 0B
Section 0B
Section 0B
Check that malfunction indicator lamp
circuit.
Check that glow plug indicator light and
injection warning light circuit.
Check that red stop warning light circuit.
Section 6H2
Section 8
Section 8
Section 8
ENGINE GENERAL INFORMATION AND DIAGNOSIS (K9K ENGINE) 6-2-19
Engine Basic Check
This check is very important for troubleshooting when ECM has detected no DTC and no abnormality has been
found in visual inspection.
Follow the flow table carefully.
Step
Action
Check battery voltage.
1
Is it 11 V or more?
Is engine cranked?
2
3
4
5
Yes
Go to Step 2.
Go to Step 3
Does engine start?
Go to Step 4.
Was the trouble symptom able to be confirmed? Go to the corresponding
item(s) in “Fault FindingCustomer Complaints” in
this section.
Check immobilizer system referring to “DiagGo to the corresponding
nostic Flow Table” in Section 8G2.
item(s) in “Fault FindingIs it in good condition?
Customer Complaints” in
this section.
No
Go to “Diagnosis” in Section 6H2.
Go to “Diagnosis” in Section 6G2.
Go to Step 5.
Go to Step 7 of “Engine
Diagnosis Flow Table” in
this section.
Repair malfunction part.
6-2-20 ENGINE GENERAL INFORMATION AND DIAGNOSIS (K9K ENGINE)
Fault Finding – Fault Interpretation
DTC P0070 External air temperature sensor circuit malfunction
Detecting Condition
• CC0: Short circuit to earth
• CO1: Open circuit or short circuit to + 12 volt
Troubleshooting
Check the connection and condition of the external air temperature sensor connector.
Repair if necessary.
Check the connection and condition of the ECM C47 connector.
Repair if necessary.
Measure resistance of the external air temperature sensor, if it is not approximately 2051 Ω ± 120 Ω at 25°C
replace the external air temperature sensor.
Check the insulation, continuity and absence of interference resistance of the connections:
• Between “LT GRN/YEL” wire of external air temperature sensor connector and C47-19 terminal of ECM connector
• Between “LT GRN/RED” wire of external air temperature sensor connector and C47-29 terminal of ECM
connector
Repair if necessary.
After Repair
Deal with any faults detected by SUZUKI scan tool.
Clear the DTC.
Carry out a road test followed by another check with the SUZUKI scan tool.
ENGINE GENERAL INFORMATION AND DIAGNOSIS (K9K ENGINE) 6-2-21
DTC P0087 Fuel rail/system pressure too low
NOTE:
• This DTC indicated only with SUZUKI scan tool.
• Fault finding procedure application conditions for stored fault:
The fault is declared present with the engine running.
Troubleshooting
Check the connection and condition of the fuel flow actuator connector.
Repair if necessary.
Measure the resistance of the fuel flow actuator, if it is not approximately 5.3 Ω ± 0.5 Ω at 20°C, replace the
fuel flow actuator.
Check the connection and condition of the ECM C47 connector.
Repair if necessary.
Check the insulation, continuity and absence of interference resistance of the connection:
• Between C47-7 terminal of ECM connector and “GRN/BLK” wire of fuel flow actuator
Repair if necessary.
Check for fuel in the tank.
Carry out Test 1: Low Pressure Circuit Check in this section.
Repair if necessary.
If the fault persists, carry out “Test 7: High Pressure Pump Check” in this section.
After Repair
Deal with any faults detected by SUZUKI scan tool.
Clear the DTC.
Carry out a road test followed by another check with the SUZUKI scan tool.
6-2-22 ENGINE GENERAL INFORMATION AND DIAGNOSIS (K9K ENGINE)
DTC P0089 Fuel pressure regulator performance problem
NOTE:
• Priority when dealing with a number of faults:
If DTC P0089 and either one of DTC P0180 or P0190 are present, deal with DTC P180 Fuel Temperature Sensor Circuit Malfunction or DTC P0190 Fuel Pressure Sensor Circuit Malfunction first.
• Fault finding procedure application conditions for stored fault:
The fault is declared present with the engine running.
Detecting Condition
•
•
•
•
•
•
•
•
D1: Pressure < minimum
D2: Pressure > maximum
D3: < Minimum threshold
D4: > Maximum threshold
D5: High flow current < minimum
D6: High flow current > maximum
D7: Low flow current < minimum
D8: Low flow current > maximum
Troubleshooting for D4: > Maximum threshold, D6: High flow current > maximum and D8: Low flow
current > maximum
Check the connection and condition of the fuel flow actuator connector.
Repair if necessary.
Measure the resistance of the fuel flow actuator, if it is not approximately 5.3 Ω ± 0.5. at 20°C, replace the fuel
flow actuator.
Check the connection and condition of the ECM C47 connector.
Repair if necessary.
Check the insulation, continuity and absence of interference resistance of the connection:
• Between C47-7 terminal of ECM connector and “GRN/BLK” wire of fuel flow actuator
Repair if necessary.
Check for fuel in the tank.
Carry out Test 1: Low Pressure Circuit Check in this section.
Troubleshooting for D1: Pressure < minimum, D2: Pressure > maximum, D3: < Minimum threshold,
D5: High flow current < minimum and D7: Low flow current < minimum
Check for fuel in the tank.
Carry out “Test 1: Low Pressure Circuit Check” in this section.
Carry out “Test 7: High Pressure Pump Check” in this section.
After Repair
Deal with any faults detected by SUZUKI scan tool.
Clear the DTC.
Carry out a road test followed by another check with the SUZUKI scan tool.
ENGINE GENERAL INFORMATION AND DIAGNOSIS (K9K ENGINE) 6-2-23
DTC P0110 Intake air temperature circuit malfunction
Detecting Condition
• CC0: Short circuit to earth
• CO1: Open circuit or short circuit to + 12 volt
Troubleshooting
Check the connection and condition of the intake air temperature sensor connector.
Repair if necessary.
Check the connection and condition of the ECM C47 connector.
Repair if necessary.
Measure the resistance of the intake air temperature sensor, if it is not approximately 2051 Ω ± 120 Ω at 25°C
replace the intake air temperature sensor.
Check for insulation, continuity and absence of interference resistance of the connections:
• “LT GRN” wire of intake air temperature sensor connector and C47-20 terminal of ECM connector
• “LT GRN/WHT” wire of intake air temperature sensor connector and C47-30 terminal of ECM connector
Repair if necessary.
After Repair
Deal with any faults detected by SUZUKI scan tool.
Clear the DTC.
Carry out a road test followed by another check with the SUZUKI scan tool.
6-2-24 ENGINE GENERAL INFORMATION AND DIAGNOSIS (K9K ENGINE)
DTC P0115 Engine coolant temperature circuit malfunction
NOTE:
• If DTC P0115 is detected, radiator cooling fan motor operation is present.
• The preheating time is 15 seconds.
Detecting Condition
• CC0: Short circuit to earth
• CO1: Open circuit or short circuit to + 12 volt
Troubleshooting
Check the connection and condition of the coolant temperature sensor connector.
Repair it if necessary.
Check the connection and condition of the ECM C47 connector.
Repair if necessary.
Measure the resistance between C19-1 and C19-4 terminals of the coolant temperature sensor, if it is not
approximately 2252 Ω ± 112.16 Ω at 25°C, replace the coolant temperature sensor.
Check the insulation, continuity and absence of interference resistance of the connections:
• Between “BLU/WHT” wire of engine coolant temperature sensor connector and C47-31 terminal of ECM
connector
• Between “ORN/BLK” wire of engine coolant temperature sensor connector and C47-21 terminal of ECM
connector
Repair if necessary.
After Repair
Deal with any faults detected by SUZUKI scan tool.
Clear the DTC.
Carry out a road test followed by another check with the SUZUKI scan tool.
ENGINE GENERAL INFORMATION AND DIAGNOSIS (K9K ENGINE) 6-2-25
DTC P0180 Fuel temperature sensor circuit malfunction
Detecting Condition
• CC0: Short circuit to earth
• CO1: Open circuit or short circuit to + 12 volt
Troubleshooting
Check the connection and condition of the fuel temperature sensor connector.
Repair if necessary.
Check the connection and condition of the ECM C47 connector.
Repair if necessary.
Measure the resistance of the fuel temperature sensor, if it is not approximately 2.2 KΩ at 25°C, replace the
fuel temperature sensor.
Check the insulation, continuity and absence of interference resistance of the connections:
• Between “BLK/YEL” wire of fuel temperature sensor connector and C47-22 terminal of ECM connector
• Between “PNK” wire of fuel temperature sensor connector and C47-32 terminal of ECM connector
Repair if necessary.
After Repair
Deal with any faults detected by SUZUKI scan tool.
Clear the DTC.
Carry out a road test followed by another check with the SUZUKI scan tool.
6-2-26 ENGINE GENERAL INFORMATION AND DIAGNOSIS (K9K ENGINE)
DTC P0190 Fuel pressure sensor circuit malfunction
NOTE:
• Priority when dealing with a number of faults:
If DTC P0190 and either one of DTC P0608, DTC P0609 or DTC P0651 are detected, deal with DTC
P0608 Sensor Supply Circuit 1 Fail, DTC P0609 Sensor Supply Circuit 2 Fail or P0651 Sensor Reference Voltage Circuit/Open first.
• Fault finding procedure application conditions for stored fault:
The fault is declared present after the engine started.
• If DTC P0190 is detected, the engine stops and impossible to restart.
Detecting Condition
•
•
•
•
•
D1: Consistency
D2: Maximum threshold
D3: Minimum threshold
CC0: Short circuit to ground
CO1: Open circuit or short circuit to + 12 volt
Troubleshooting
Check the connection and condition of the connector of the fuel pressure sensor.
Repair if necessary.
Check the connection and condition of ECM C47 connector.
Repair if necessary.
Check for insulation, continuity and absence of interference resistance of the connections:
• Between “ORN” wire of fuel pressure sensor connector and C47-15 terminal of ECM connector
• Between “RED/BLK” wire of fuel pressure sensor connector and C47-25 terminal of ECM connector
• Between “BLK” wire of fuel pressure sensor connector and C47-35 terminal of ECM connector
Repair if necessary.
If the fault persists, replace the rail.
After Repair
Deal with any faults detected by SUZUKI scan tool.
Clear the DTC.
Carry out a road test followed by another check with the SUZUKI scan tool.
ENGINE GENERAL INFORMATION AND DIAGNOSIS (K9K ENGINE) 6-2-27
DTC P0200 Injector circuit
NOTE:
• Conditions for applying the fault finding procedure to the fault stored:
Fault declared present, engine at idle speed.
• Priority when dealing with a number of faults:
If DTC P0200 and either one of DTC P0201, DTC P0202, DTC P0203 or DTC P0204 are detected, the
fault finding procedure remains the same, but the faulty injector has to be identified.
Detecting Condition
• CC1: Short circuit to + 12 volts
• CC0: Short circuit to earth
Troubleshooting
Switch off the ignition and check the connection and condition of the injector connectors.
Repair if necessary.
Switch off the ignition, disconnect the injectors (or the injector identified by DTC P0201, DTC P0202, DTC
P0203 or DTC P0204) and switch the ignition back on.
Check DTC.
If DTC P0200 is detected, carry out troubleshooting for detected DTC P0200.
If DTC P0200 is not detected, carry out troubleshooting for not detected DTC P0200.
Troubleshooting for detected DTC P0200
The injectors are not faulty.
Check the condition and connection of the ECM C47 connector.
Repair if necessary.
Check for insulation, continuity and absence of interference resistance of the connections:
• Between C47-48 terminal of ECM connector and “BLK/YEL” wire of injector No.1 connector
• Between C47-47 terminal of ECM connector and “BLU/YEL” wire of injector No.1 connector
• Between C47-42 terminal of ECM connector and “BLK/ORN” wire of injector No.2 connector
• Between C47-41 terminal of ECM connector and “BLU/ORN” wire of injector No.2 connector
• Between C47-46 terminal of ECM connector and “BLK/WHT” wire of injector No.3 connector
• Between C47-45 terminal of ECM connector and “BLU/WHT” wire of injector No.3 connector
• Between C47-44 terminal of ECM connector and “BLK/RED” wire of injector No.4 connector
• Between C47-43 terminal of ECM connector and “BLU/RED” wire of injector No.4 connector
Repair if necessary.
6-2-28 ENGINE GENERAL INFORMATION AND DIAGNOSIS (K9K ENGINE)
Troubleshooting for not detected DTC P0200
Injector(s) fault.
Replace the injector, identified by DTC P0201 to DTC P0204 if detected.
If none of the faults identifying the faulty injector circuit are detected.
• Switch off the ignition
• Reconnect one of the four injectors
• Switch the back on, if the fault reappears as detected, replace the reconnected injector.
Carry out the same procedure for the remaining injectors.
After Repair
Deal with any faults detected by SUZUKI scan tool.
Clear the DTC.
Carry out a road test followed by another check with the SUZUKI scan tool.
ENGINE GENERAL INFORMATION AND DIAGNOSIS (K9K ENGINE) 6-2-29
DTC P0201 Injector circuit malfunction – cylinder 1
NOTE:
• Cylinder number is counted from flywheel side.
• Fault finding procedure application conditions for stored fault:
Fault declared present: engine at idle speed.
• If DTC P0201 (CO: open circuit or CC: short circuit) is detected, malfunction indicator lamp (MIL)
lights up.
Detecting Condition
Using SUZUKI scan tool
• CO: Open circuit
• CC: Short circuit
• D1: At minimum stop
Not using SUZUKI scan tool
• CO: Open circuit
• CC: Short circuit
Troubleshooting
Switch off the ignition and wait 15 seconds.
Check the connection and condition of the injector connector.
Repair if necessary.
Check the continuity between the injector two terminals using a multimeter.
Replace the injector if necessary.
Check that the injector winding has not short circuit with a multimeter.
Replace the injector if necessary.
Check the connection and condition of the ECM C47 connector.
Repair if necessary.
Check for continuity and absence of interference resistance of the connections:
• Between C47-48 terminal of ECM connector and “BLK/YEL” wire of injector No.1 connector
• Between C47-47 terminal of ECM connector and “BLU/YEL” wire of injector No.1 connector
Repair if necessary.
Check for insulation of the two lines:
• Between C47-48 terminal and C47-47 terminal of ECM connector
Repair if necessary.
Turn the ignition key to lock position, start the engine and check if the fault is stored.
Replace the injector if the fault is stored.
After Repair
Deal with any faults detected by SUZUKI scan tool.
Clear the DTC.
Carry out a road test followed by another check with the SUZUKI scan tool.
6-2-30 ENGINE GENERAL INFORMATION AND DIAGNOSIS (K9K ENGINE)
DTC P0202 Injector circuit malfunction – cylinder 2
NOTE:
• Cylinder number is counted from flywheel side.
• Fault finding procedure application conditions for stored fault:
Fault declared present: engine at idle speed.
• If DTC P0202 (CO: open circuit or CC: short circuit) is detected, malfunction indicator lamp (MIL)
lights up.
Detecting Condition
Using SUZUKI scan tool
• CO: Open circuit
• CC: Short circuit
• D1: At minimum stop
Not using SUZUKI scan tool
• CO: Open circuit
• CC: Short circuit
Troubleshooting
Switch off the ignition and wait 15 seconds.
Check the connection and condition of the injector connector.
Repair if necessary.
Check the continuity between the injector two terminals using a multimeter.
Replace the injector if necessary.
Check that the injector winding has not short circuit with a multimeter.
Replace the injector if necessary.
Check the connection and condition of the ECM C47 connector.
Repair if necessary.
Check for continuity and absence of interference resistance of the connections:
• Between C47-42 terminal of ECM connector and “BLK/ORN” wire of injector No.2 connector
• Between C47-41 terminal of ECM connector and “BLU/ORN” wire of injector No.2 connector
Repair if necessary.
Check for insulation of the two lines:
• Between C47-42 terminal and C47-41 terminal of ECM connector
Repair if necessary.
Turn the ignition key to lock position start the engine and check if the fault is stored.
Replace the injector if the fault is stored.
After Repair
Deal with any faults detected by SUZUKI scan tool.
Clear the DTC.
Carry out a road test followed by another check with the SUZUKI scan tool.
ENGINE GENERAL INFORMATION AND DIAGNOSIS (K9K ENGINE) 6-2-31
DTC P0203 Injector circuit malfunction – cylinder 3
NOTE:
• Cylinder number is counted from flywheel side.
• Fault finding procedure application conditions for stored fault:
Fault declared present: engine at idle speed.
• If DTC P0203 (CO: open circuit or CC: short circuit) is detected, malfunction indicator lamp (MIL)
lights up.
Detecting Condition
Using SUZUKI scan tool
• CO: Open circuit
• CC: Short circuit
• D1: At minimum stop
Not using SUZUKI scan tool
• CO: Open circuit
• CC: Short circuit
Troubleshooting
Switch off the ignition and wait 15 seconds.
Check the connection and condition of the injector connector.
Repair if necessary.
Check the continuity between the injector two terminals using a multimeter.
Replace the injector if necessary.
Check that the injector winding has not short circuit with a multimeter.
Replace the injector if necessary.
Check the connection and condition of the ECM C47 connector.
Repair if necessary.
Check the continuity and absence of interference resistance of the connections:
• Between C47-46 terminal of ECM connector and “BLK/WHT” wire of injector No.3 connector
• Between C47-45 terminal of ECM connector and “BLU/WHT” wire of injector No.3 connector
Repair if necessary.
Check for insulation of the two lines:
• Between C47-46 terminal and C47-45 terminal of ECM connector
Repair if necessary.
Turn the ignition key to lock position, start the engine and check if the fault is stored.
Replace the injector if the fault is stored.
After Repair
Deal with any faults detected by SUZUKI scan tool.
Clear the DTC.
Carry out a road test followed by another check with the SUZUKI scan tool.
6-2-32 ENGINE GENERAL INFORMATION AND DIAGNOSIS (K9K ENGINE)
DTC P0204 Injector circuit malfunction – cylinder 4
NOTE:
• Cylinder number is counted from flywheel side.
• Fault finding procedure application conditions for stored fault:
Fault declared present: engine at idle speed.
• If DTC P0204 (CO: open circuit or CC: short circuit) is detected, malfunction indicator lamp (MIL)
lights up.
Detecting Condition
Using SUZUKI scan tool
• CO: Open circuit
• CC: Short circuit
• D1: At minimum stop
Not using SUZUKI scan tool
• CO: Open circuit
• CC: Short circuit
Troubleshooting
Switch off the ignition and wait 15 seconds.
Check the connection and condition of the injector connector.
Repair if necessary.
Check the continuity between the injector two terminals using a multimeter.
Replace the injector if necessary.
Check that the injector winding has not short circuit with a multimeter.
Replace the injector if necessary.
Check the connection and condition of the ECM C47 connector.
Repair if necessary.
Check for continuity and absence of interference resistance of the connections:
• Between C47-44 terminal of ECM connector and “BLK/RED” wire of injector No.4 connector
• Between C47-43 terminal of ECM connector and “BLU/RED” wire of injector No.4 connector
Repair if necessary.
Check for insulation of the two lines:
• Between C47-44 terminal and C47-43 terminal of ECM connector
Repair if necessary.
Turn the ignition key to lock position, start the engine and check if the fault is stored.
Replace the injector if the fault is stored.
After Repair
Deal with any faults detected by SUZUKI scan tool.
Clear the DTC.
Carry out a road test followed by another check with the SUZUKI scan tool.
ENGINE GENERAL INFORMATION AND DIAGNOSIS (K9K ENGINE) 6-2-33
DTC P0225 Pedal position sensor 1 circuit
NOTE:
• Priority when dealing with a number of faults:
• If DTC P0225 and either one of DTC P0608, DTC P0609 or DTC P0651 are detected, deal with DTC
P0608 Sensor Supply Circuit 1 Fail, DTC P0609 Sensor Supply Circuit 2 Fail or P0651 Sensor Reference Voltage Circuit/Open first.
• If DTC P0225 is detected, engine speed maintained above 1000 rpm
• If DTC P0225 and DTC P2120 are detected, engine speed fixed at 1300 rpm
• Be aware that DTC P0225 (D3: jammed component) may be detected when the brake pedal and
accelerator pedal are depressed at the same time (heel and toe) during sports style driving.
Detecting Condition
Using SUZUKI scan tool
• D1: Consistency
• D2: No signal
• D3: Jammed component
• CO0: Open circuit or short circuit to ground
• CC1: Open circuit or short circuit to +12 volt
Not using SUZUKI scan tool
• D1: Consistency
• D2: No signal
• CO0: Open circuit or short circuit to ground
• CC1: Open circuit or short circuit to +12 volt
Troubleshooting for D1: Consistency
Disconnect the ECM E17 connector and the pedal position sensor connector.
Check for insulation between E17-3 terminal and E17-21 terminal of ECM connector
Repair if necessary.
Troubleshooting for CO0: Open circuit or short circuit to ground, CC1: Open circuit or short circuit
to +12 volt or D2: No signal
Check the connection and condition of the pedal position sensor connector.
Repair if necessary.
Check the connection and condition of the ECM E17 connector.
Repair if necessary.
Measure the resistance between E97-3 terminal and E97-5 terminal of pedal position sensor.
If it is not approximately 0.67 – 1.69 KΩ, replace the pedal position sensor.
Check for insulation, continuity and absence of interference resistance of the connections:
• Between “BRN/WHT” wire of pedal position sensor connector and E17-4 terminal of ECM connector
• Between “WHT/RED” wire of pedal position sensor connector and E17-3 terminal of ECM connector
• Between “RED” wire of pedal position sensor connector and E17-5 terminal of ECM connector
Repair if necessary.
Disconnect the ECM E17 connector and the pedal position sensor connector.
Check for insulation between E17-3 terminal and E17-21 terminal of ECM connector
Repair if necessary.
If the fault persists, replace the pedal position sensor.
6-2-34 ENGINE GENERAL INFORMATION AND DIAGNOSIS (K9K ENGINE)
Troubleshooting for D3: Jammed component
Check that the accelerator pedal is not jammed with data list parameter (accelerator pedal position) by using
scan tool.
Replace the pedal position sensor if necessary.
Check that the brake pedal is not jammed with data list parameter (brake pedal) by using scan tool.
Replace the brake light switch if necessary.
Warn the customer that “heel and toe” sports driving (brake and accelerator pedal depressed) can bring out a
fault and activate instrument panel warning lights.
After Repair
Deal with any faults detected by SUZUKI scan tool.
Clear the DTC.
Carry out a road test followed by another check with the SUZUKI scan tool.
ENGINE GENERAL INFORMATION AND DIAGNOSIS (K9K ENGINE) 6-2-35
DTC P0231 Fuel pump secondary circuit low
NOTE:
If DTC P0231 is detected, the fuel flow actuator is fully opened (leading to engine rattling) and the
engine is stopped to prevent it from racing.
Detecting Condition
• CO0: Open circuit or short circuit to ground
• CO1: Short circuit to + 12 volt
Troubleshooting
Check the condition and connection of the flow actuator connector.
Repair if necessary.
Check the connection and condition of the ECM C47 connector.
Repair if necessary.
Measure the resistance between terminals of the flow actuator, if it is not approximately 5.3 Ω ± 0.5 at 20°C,
replace the actuator.
Check for insulation, continuity and absence of interference resistance of the connection:
• Between C47-7 terminal of ECM connector and “GRN/BLK” wire of flow actuator connector
Repair if necessary.
After Repair
Deal with any faults detected by SUZUKI scan tool.
Clear the DTC.
Carry out a road test followed by another check with the SUZUKI scan tool.
6-2-36 ENGINE GENERAL INFORMATION AND DIAGNOSIS (K9K ENGINE)
DTC P0235 Turbo pressure sensor circuit malfunction
NOTE:
• If DTC P0235 and either one of DTC P0608, DTC P0609 or DTC P0651 are detected, deal with DTC
P0608 Sensor Supply Circuit 1 Fail, DTC P0609 Sensor Supply Circuit 2 Fail or P0651 Sensor Reference Voltage Circuit/Open first.
• If DTC P0235 (D5: consistency) is detected, injection warning light (gravity 1 fault) lights up.
Detecting Condition
•
•
•
•
•
•
•
D1: < Minimum threshold
D2: > Maximum threshold
D3: Permanent low signal
D4: Permanent high signal
D5: Consistency
D6: At minimum stop
D7: At maximum stop
Troubleshooting for D1: <Minimum threshold, D2:> Maximum threshold, D3: Permanent low signal
and D4: Permanent high signal
Check the connection and condition of the turbo pressure sensor connector.
Repair if necessary.
Check the connection and condition of the ECM C47 connector.
Repair if necessary.
Check for insulation, continuity and absence of interference resistance of the connections:
• Between “LT GRN/RED” wire of turbo pressure sensor connector and C47-36 terminal of ECM connector
• Between “GRY/RED” wire of turbo pressure sensor connector and C47-26 terminal of ECM connector
• Between “ORN” wire of turbo pressure sensor connector and C47-16 terminal of ECM connector
Repair if necessary.
Troubleshooting for D5: Consistency
Visually check that the turbocharger circuit sealing.
Repair if necessary.
Remove the air supply ducts and check that they are not blocked.
Repair if necessary.
With engine stationary, check the consistency between the atmospheric pressure and inlet manifold vacuum.
With the engine stopped, the pressure should be approximately the same between the two sensors.
Replace the turbo pressure sensor if necessary.
ENGINE GENERAL INFORMATION AND DIAGNOSIS (K9K ENGINE) 6-2-37
Troubleshooting for D6: At minimum stop and D7: At maximum stop
Visually check that the turbocharger circuit sealing.
Repair if necessary.
Remove the air supply ducts and check that they are not blocked.
Repair if necessary.
Check the condition of the turbo pressure sensor connector and replace it if necessary.
With engine stationary, check the consistency between the atmospheric pressure and inlet manifold vacuum.
With the engine stopped, the pressure should be approximately the same between the two sensors.
Replace the turbo pressure sensor if necessary.
Check the turbocharger (wastegate pneumatic actuation circuit).
Repair if necessary.
After Repair
Deal with any faults detected by SUZUKI scan tool.
Clear the DTC.
Carry out a road test followed by another check with the SUZUKI scan tool.
6-2-38 ENGINE GENERAL INFORMATION AND DIAGNOSIS (K9K ENGINE)
DTC P0301 Cylinder 1 misfire detected
NOTE:
• Cylinder number is counted from flywheel side.
• Fault finding procedure application conditions for stored fault:
Fault declared present, engine at idle speed.
• Priority when dealing with a number of faults:
– If DTC P0201 (CO: open circuit or CC: short circuit) and DTC P0301 are detected, deal first with
fault DTC P0201 Injector Circuit Malfunction – Cylinder 1.
– If DTC P0089 (D1: pressure < minimum, D2: pressure > maximum or D7: low flow current < minimum) and DTC P0301 are detected, deal with fault DTC P0089 Fuel Pressure Regulator Performance Problem first.
Troubleshooting
Check the engine compression.
Repair if necessary
Check the valve clearances and adjust them if necessary.
Check the air inlet conduits and the EGR valve and clean them if necessary.
Replace the injector.
After Repair
Deal with any faults detected by SUZUKI scan tool.
Clear the DTC.
Carry out a road test followed by another check with the SUZUKI scan tool.
ENGINE GENERAL INFORMATION AND DIAGNOSIS (K9K ENGINE) 6-2-39
DTC P0302 Cylinder 2 misfire detected
NOTE:
• Cylinder number is counted from flywheel side.
• Fault finding procedure application conditions for stored fault:
Fault declared present, engine at idle speed.
• Priority when dealing with a number of faults:
– If DTC P0202 (CO: open circuit or CC: short circuit) and DTC P0302 are detected, deal first with
fault DTC P0202 Injector Circuit Malfunction – Cylinder 2.
– If DTC P0089 (D1: pressure < minimum, D2: pressure > maximum or D7: low flow current < minimum) and DTC P0302 are detected, deal with fault DTC P0089 Fuel Pressure Regulator Performance Problem first.
Troubleshooting
Check the engine compression.
Repair if necessary
Check the valve clearances and adjust them if necessary.
Check the air inlet conduits and the EGR valve and clean them if necessary.
Replace the injector.
After Repair
Deal with any faults detected by SUZUKI scan tool.
Clear the DTC.
Carry out a road test followed by another check with the SUZUKI scan tool.
6-2-40 ENGINE GENERAL INFORMATION AND DIAGNOSIS (K9K ENGINE)
DTC P0303 Cylinder 3 misfire detected
NOTE:
• Cylinder number is counted from flywheel side.
• Fault finding procedure application conditions for stored fault:
Fault declared present, engine at idle speed.
• Priority when dealing with a number of faults:
– If DTC P0203 (CO: open circuit or CC: short circuit) and DTC P0303 are detected, deal first with
fault DTC P0203 Injector Circuit Malfunction – Cylinder 3.
– If DTC P0089 (D1: pressure < minimum, D2: pressure > maximum or D7: low flow current < minimum) and DTC P0303 are detected, deal with fault DTC P0089 Fuel Pressure Regulator Performance Problem first.
Troubleshooting
Check the engine compression.
Repair if necessary
Check the valve clearances and adjust them if necessary.
Check the air inlet conduits and the EGR valve and clean them if necessary.
Replace the injector.
After Repair
Deal with any faults detected by SUZUKI scan tool.
Clear the DTC.
Carry out a road test followed by another check with the SUZUKI scan tool.
ENGINE GENERAL INFORMATION AND DIAGNOSIS (K9K ENGINE) 6-2-41
DTC P0304 Cylinder 4 misfire detected
NOTE:
• Cylinder number is counted from flywheel side.
• Fault finding procedure application conditions for stored fault:
Fault declared present, engine at idle speed.
• Priority when dealing with a number of faults:
– If DTC P0204 (CO: open circuit or CC: short circuit) and DTC P0304 are detected, deal first with
fault DTC P0204 Injector Circuit Malfunction – Cylinder 4.
– If DTC P0089 (D1: pressure < minimum, D2: pressure > maximum or D7: low flow current < minimum) and DTC P0304 are detected, deal with fault DTC P0089 Fuel Pressure Regulator Performance Problem first.
Troubleshooting
Check the engine compression.
Repair if necessary
Check the valve clearances and adjust them if necessary.
Check the air inlet conduits and the EGR valve and clean them if necessary.
Replace the injector.
After Repair
Deal with any faults detected by SUZUKI scan tool.
Clear the DTC.
Carry out a road test followed by another check with the SUZUKI scan tool.
6-2-42 ENGINE GENERAL INFORMATION AND DIAGNOSIS (K9K ENGINE)
DTC P0325 Knock sensor circuit malfunction
NOTE:
• This DTC indicated only with SUZUKI scan tool.
• Fault finding procedure application conditions for stored fault:
The fault is declared present with the engine idling.
• Priority when dealing with a number of faults:
If there is a combination of faults DTC P0325, P0115, P0180 and P2226 are detected, deal with faults
P0115 Engine Coolant Temperature Circuit Malfunction, P0180 Fuel Temperature Sensor Circuit
Malfunction, and P2226 Barometric Pressure Circuit first.
A fault on there sensors could lead to incorrect fault finding of the knock sensor.
Troubleshooting
Check the connection and condition of the knock sensor connector.
Repair if necessary.
Check the connection and condition of the ECM C47 connector and the sensor shielding on C47-9.
Repair if necessary.
Check for insulation, continuity and absence of interference resistance of the connections:
• Between “BLK” wire of knock sensor connector and C47-13 terminal of ECM connector
• Between “WHT” wire of knock sensor connector and C47-12 terminal of ECM connector
Repair if necessary.
Check that the fuel injector calibration codes are correctly entered on the ECM.
Check that the knock sensor is secure on the engine.
After retightening the knock sensor.
Clear DTC.
Carry out a road test followed by another check with the SUZUKI scan tool.
If the fault persists, replace the knock sensor.
After Repair
Deal with any faults detected by SUZUKI scan tool.
Clear the DTC.
Carry out a road test followed by another check with the SUZUKI scan tool.
ENGINE GENERAL INFORMATION AND DIAGNOSIS (K9K ENGINE) 6-2-43
DTC P0335 Crankshaft position sensor circuit malfunction
NOTE:
• This DTC indicated only with SUZUKI scan tool.
• If DTC P0335 (D1: consistency, D2: no tooth signal, D3: too many additional teeth or D6: too many
teeth missing) is detected, the engine will stop and injection warning light (gravity 1 fault) and red
stop warning light (gravity 2 fault) will light up.
• If DTC P0335 (D4: teeth missing or D5: additional teeth) 75 % engine performance, the warning light
will not light up.
Detecting Condition
•
•
•
•
•
•
D1:Consistency
D2: No tooth signal
D3: Too many additional teeth
D4: Teeth missing
D5: Additional teeth
D6: Too many teeth missing
Troubleshooting
Check the connection and condition of the crankshaft position sensor connector and repair if necessary.
Ensure the sensor is correctly fitted on the engine.
Check the connection and condition of the ECM C47 connector.
Repair if necessary.
Measure the resistance of the crankshaft position sensor, if it is not approximately 760 Ω replace the crankshaft position sensor.
Check the insulation, continuity and absence of interference resistance of the connections:
• Between “BLU” wire of crankshaft position sensor connector and C47-23 terminal of ECM connector
• Between “PNK” wire of crankshaft position sensor connector and C47-33 terminal of ECM connector
Repair if necessary.
Check that the flywheel ring gear is not faulty (missing teeth).
After Repair
Deal with any faults detected by SUZUKI scan tool.
Clear the DTC.
Carry out a road test followed by another check with the SUZUKI scan tool.
6-2-44 ENGINE GENERAL INFORMATION AND DIAGNOSIS (K9K ENGINE)
DTC P0340 Camshaft position sensor circuit malfunction
NOTE:
Fault finding procedure application conditions for stored fault:
The fault is declared present when the engine under the started or idling.
Detecting Condition
• D1: Consistency
• D2: No signal
Troubleshooting
Check the connection and condition of the camshaft position sensor connector.
Repair if necessary.
Check the connection and condition of the ECM C47 connector.
Repair if necessary.
Check for the + 12 V after ignition feed on “BLK/RED” wire of camshaft position sensor connector.
Repair if necessary.
Check the insulation, continuity and absence of interference resistance of the connections:
• Between “YEL” wire of camshaft position sensor connector and C47-24 terminal of ECM connector
• Between “GRN” wire of camshaft position sensor connector and C47-34 terminal of ECM connector
If necessary, replace the sensor.
Check the timing gear setting referring to “Timing Belt Removal and Installation” in Section 6A2.
After Repair
Deal with any faults detected by SUZUKI scan tool.
Clear the DTC.
Carry out a road test followed by another check with the SUZUKI scan tool.
ENGINE GENERAL INFORMATION AND DIAGNOSIS (K9K ENGINE) 6-2-45
DTC P0380 Glow plug/heater circuit malfunction
DTC P0670 Glow plug module control circuit
NOTE:
• DTC P0380 indicated only with SUZUKI scan tool.
• DTC P0670 indicated only with generic scan tool.
Detecting Condition
• CO: Open circuit
Troubleshooting
Check the condition and connection of the pre-heating unit connector.
Repair if necessary.
Check the condition and connection of the glow plug connectors.
Repair if necessary.
Check the condition and connection of the ECM C48 connector.
Repair if necessary.
Measure the resistance of each glow plug. The resistance must be less than 2 Ω.
If not, replace the faulty plug(s).
Check for insulation, continuity and absence of interference resistance of the connection:
• C48-18 terminal of ECM connector and “BLU” wire of pre-heating unit connector
Repair if necessary.
After Repair
Deal with any faults detected by SUZUKI scan tool.
Clear the DTC.
Carry out a road test followed by another check with the SUZUKI scan tool.
6-2-46 ENGINE GENERAL INFORMATION AND DIAGNOSIS (K9K ENGINE)
DTC P0382 Glow plug/heater circuit B malfunction
NOTE:
If DTC P0382 is detected, starting difficult (or impossible when cold).
Detecting Condition
• CO0: Open circuit or short circuit to ground
• CC1: Short circuit to +12 volt
Troubleshooting
Check the condition and connection of the pre-heating unit connector.
Repair it if necessary.
Check the condition and condition of the ECM C48 connector.
Repair if necessary.
Check for insulation, continuity and absence of interference resistance of the connections:
• “BLK/RED” wire of pre-heating unit for power supply circuit
• Between “BRN/WHT” wire of pre-heating unit connector and C48-10 terminal of ECM connector
• Between “BLU” wire of pre-heating unit connector and C48-18 terminal of ECM connector
Repair if necessary.
If the connections are correctly, check the pre-heating unit working properly.
After Repair
Deal with any faults detected by SUZUKI scan tool.
Clear the DTC.
Carry out a road test followed by another check with the SUZUKI scan tool.
ENGINE GENERAL INFORMATION AND DIAGNOSIS (K9K ENGINE) 6-2-47
DTC P0400 Exhaust gas recirculation flow malfunction
DTC P2413 Exhaust gas recirculation system performance
NOTE:
• DTC P2413 indicated only with generic scan tool.
• Fault finding procedure application conditions for stored fault:
The fault is declared present with the engine idling.
• If DTC P0400 or DTC P2413 is detected, engine instability may even lead to stalling.
Starting difficult or even impossible when cold.
• If DTC P0400 or DTC P2413 (D5: component stuck) is detected, malfunction indicator lamp (MIL)
lights up.
Detecting Condition
Using SUZUKI scan tool
DTC P0400
• D1: Parameter at limit minimum
• D2: Parameter at limit maximum
• D3: Inconsistency
• D4: Above maximum threshold
• D5: Component stuck
Not using SUZUKI scan tool
DTC P0400
• D1: Parameter at limit minimum
• D2: Parameter at limit maximum
• D3: Inconsistency
• D4: Above maximum threshold
DTC P2413
• D5: Component stuck
Troubleshooting
Check the connection and condition of the EGR valve connector.
Repair if necessary.
Check the condition of the ECM C47 connector.
Repair if necessary.
Measure the resistance at the EGR valve terminal
• Approximately 4 KΩ ± 1.6 KΩ at 20°C between C46-1 terminal and C46-2 terminal of EGR valve
• Approximately 1 KΩ ± 0.5 KΩ at 20°C between C46-2 terminal and C46-3 terminal of EGR valve
If it is not, replace the EGR valve.
Check for the 12 V after ignition feed on “BLK/RED” wire of EGR valve connector.
Check for insulation, continuity and absence of interference resistance of the connections:
• EGR valve “BLK/RED” wire for power supply circuit
• Between C47-6 terminal of ECM connector and “GRY” wire of EGR valve connector
Repair if necessary.
If D3: Inconsistency, D4: Above maximum threshold or D5: Component stuck:
Remove the EGR valve.
Check that there are no foreign bodies (scale…) that could jam the valve.
Remove any foreign bodies and clean the EGR valve.
Refit the EGR valve.
Clear DTC.
Carry out a road test followed by another check with the SUZUKI scan tool.
After Repair
Deal with any faults detected by SUZUKI scan tool.
Clear the DTC.
Carry out a road test followed by another check with the SUZUKI scan tool.
6-2-48 ENGINE GENERAL INFORMATION AND DIAGNOSIS (K9K ENGINE)
DTC P0402 Exhaust gas recirculation flow excessive detected
DTC P0403 Exhaust gas recirculation control circuit
NOTE:
• DTC P0402 indicated only with generic scan tool.
• Fault finding procedure application conditions for stored fault:
The fault is declared present with the engine idling.
• If DTC P0402 or DTC P0403 (CO0: open circuit or short circuit to ground) is detected, malfunction
indicator lamp (MIL) lights up.
Detecting Condition
Using SUZUKI scan tool
DTC P0403
• CO0: Open circuit or short circuit to ground
• CC1: Short circuit to + 12 volt
Not using SUZUKI scan tool
DTC P0402
• CO0: Open circuit or short circuit to ground
DTC P0403
• CC1: Short circuit to + 12 volt
Troubleshooting
Check the connection and condition of the EGR valve connector.
Repair if necessary.
Check the connection and condition of the ECM C47 connector.
Repair if necessary.
Measure the resistance between C46-4 and C46-6 terminals of the EGR valve, if it is not approximately 8 Ω ±
0.5 Ω at 25°C replace the EGR valve.
Check for insulation between C46-4 terminal of EGR valve and EGR valve body.
If the insulation is not correct, replace EGR valve.
Check for insulation, continuity and absence of interference resistance of the connections:
• EGR valve connector C46-4 for power supply circuit
• Between “GRY” wire of EGR valve connector and C47-6 terminal of ECM connector
Repair if necessary.
After Repair
Deal with any faults detected by SUZUKI scan tool.
Clear the DTC.
Carry out a road test followed by another check with the SUZUKI scan tool.
ENGINE GENERAL INFORMATION AND DIAGNOSIS (K9K ENGINE) 6-2-49
DTC P0409 Exhaust gas recirculation sensor circuit
DTC P0487 Exhaust gas recirculation throttle position control circuit
NOTE:
• DTC P0487 indicated only with generic scan tool.
• Priority when dealing with a number of faults:
If DTC P0409 or DTC P0487 and either one of DTC P0608, DTC P0609 or DTC P0651 are detected,
deal with DTC P0608 Sensor Supply Circuit 1 Fail, DTC P0609 Sensor Supply Circuit 2 Fail or P0651
Sensor Reference Voltage Circuit/Open first.
• Fault finding procedure application conditions for stored fault:
The fault is declared present after the engine is started.
• If DTC P0409 or DTC P0487 (CC0: open circuit or short circuit to ground or CC1: open circuit or
short circuit to + 12 volts) is detected, malfunction indicator lamp (MIL) lights up.
Detecting Condition
Using SUZUKI scan tool
DTC P0409
• D1: < Minimum threshold
• D2: > Maximum threshold
• CC0: Open circuit or short circuit to ground
• CC1: Open circuit or short circuit to + 12 volt
Not using SUZUKI scan tool
DTC P0409
• D1: < Minimum threshold
• D2: > Maximum threshold
DTC P0487
• CC0: Open circuit or short circuit to ground
• CC1: Open circuit or short circuit to + 12 volt
Troubleshooting
Check the condition and condition of the EGR valve connector.
Repair if necessary.
Check the condition of the ECM C47 connector.
Repair if necessary.
Measure the resistance at the EGR valve terminal
• Approximately 4 KΩ ± 1.6 KΩ at 20°C between C46-1 terminal and C46-2 terminal of EGR valve
• Approximately 1 KΩ ± 0.5 KΩ at 20°C between C46-2 terminal and C46-3 terminal of EGR valve
If it is not, replace the EGR valve.
Check for insulation, continuity and absence of interference resistance of the connections:
• Between “RED/WHT” wire of EGR valve connector and C47-17 terminal of ECM connector
• Between “RED/YEL” wire of EGR valve connector and C47-27 terminal of ECM connector
• Between “GRN/RED” wire of EGR valve connector and C47-37 terminal of ECM connector
Repair if necessary.
After Repair
Deal with any faults detected by SUZUKI scan tool.
Clear the DTC.
Carry out a road test followed by another check with the SUZUKI scan tool.
6-2-50 ENGINE GENERAL INFORMATION AND DIAGNOSIS (K9K ENGINE)
DTC P0480 Radiator cooling fan low speed control system malfunction
NOTE:
This DTC indicated only with SUZUKI scan tool.
Detecting Condition
• CO0: Open circuit or short circuit to ground
• CC1: Short circuit to + 12 volt
Troubleshooting
Check the condition and connection of the radiator fan relay No.2.
Repair if necessary.
Check the condition and connection of the ECM C48 connector.
Repair if necessary.
Check for insulation, continuity and absence of interference resistance of the connections:
• Between C48-20 terminal of ECM connector and “BLK/BLU” wire of radiator fan relay No.2 socket
With the ignition on, check for the presence of 12 volts supply on “BLK/RED” wire and “GRN” wire of radiator
fan relay No.2 socket.
Repair if necessary.
After Repair
Deal with any faults detected by SUZUKI scan tool.
Clear the DTC.
Carry out a road test followed by another check with the SUZUKI scan tool.
ENGINE GENERAL INFORMATION AND DIAGNOSIS (K9K ENGINE) 6-2-51
DTC P0481 Radiator cooling fan high speed control system malfunction
NOTE:
This DTC indicated only with SUZUKI scan tool.
Detecting Condition
• CO0: Open circuit or short circuit to ground
• CC1: Short circuit to + 12 volt
Troubleshooting
Check the condition and connection of the radiator fan relay No.1 and No.3.
Repair if necessary.
Check the condition and connection of the ECM C48 connector.
Repair if necessary.
Check for insulation, continuity and absence of interference resistance of the connections:
• Between C48-14 terminal of ECM connector and “BLK/YEL” wire of radiator fan relay No.1 socket
• Between C48-14 terminal of ECM connector and “BLK/YEL” wire of radiator fan relay No.3 socket
With the ignition on, check for the presence of 12 volts supply on “GRN/BLK” wires of radiator fan relay No.1
and No.3 sockets.
Repair if necessary.
After Repair
Deal with any faults detected by SUZUKI scan tool.
Clear the DTC.
Carry out a road test followed by another check with the SUZUKI scan tool.
6-2-52 ENGINE GENERAL INFORMATION AND DIAGNOSIS (K9K ENGINE)
DTC P0500 Vehicle speed sensor circuit malfunction
NOTE:
This DTC indicated only with SUZUKI scan tool.
Detecting Condition
• D1: Consistency
• D2: No signal
Troubleshooting
Check the condition and connection of the vehicle speed sensor connector.
Repair if necessary.
Check the connection and condition of the ECM C48 connector.
Repair if necessary.
Check the continuity and absence of interference resistance of the connections:
• Vehicle speed sensor “BLK/ORN” wire for power supply circuit
• Vehicle speed sensor “BLU/BLK” wire for ground circuit
Repair if necessary.
Check for insulation form the +12 volt feed on the connection:
• Between “YEL/GRN” wire of vehicle speed sensor connector and C48-23 terminal of ECM connector
Repair if necessary.
After Repair
Deal with any faults detected by SUZUKI scan tool.
Clear the DTC.
Carry out a road test followed by another check with the SUZUKI scan tool.
ENGINE GENERAL INFORMATION AND DIAGNOSIS (K9K ENGINE) 6-2-53
DTC P0513 Incorrect immobilizer key
NOTE:
This DTC indicated only with SUZUKI scan tool.
Troubleshooting
Check the connection and condition of the ECM E17 connector.
Repair if necessary.
Check the connection and condition of the immobilizer control module connector.
Repair if necessary.
Check for insulation, continuity and absence of interference resistance of the connections:
• Between E17-15 terminal of ECM connector and G46-15 terminal of immobilizer control module connector
Repair if necessary.
After Repair
Deal with any faults detected by SUZUKI scan tool.
Clear the DTC.
Carry out a road test followed by another check with the SUZUKI scan tool.
6-2-54 ENGINE GENERAL INFORMATION AND DIAGNOSIS (K9K ENGINE)
DTC P0530 A/C refrigerant pressure sensor circuit malfunction
NOTE:
• This DTC indicated only with SUZUKI scan tool.
• Fault finding procedure application conditions for stored fault:
The fault is declared present with the engine idling and air conditioning operating one vehicle
equipped with air conditioning system.
• Priority when dealing with a number of faults:
If DTC P0530 and either one of DTC P0608 or DTC P0609 are detected, deal with DTC P0608 Sensor
Supply Circuit 1 Fail, DTC P0609 Sensor Supply Circuit 2 Fail first.
Detecting Condition
• CO1: Open circuit or short circuit to + 12 volt
• CC0: Short circuit to ground
Troubleshooting
Check the connection and condition of the A/C pressure sensor.
Repair if necessary.
Check the connection and condition of the ECM C48 connector.
Repair if necessary.
Check for insulation, continuity and absence of interference resistance of the connections:
• Between “GRN/RED” wire of A/C pressure sensor connector and C48-3 terminal of ECM connector
• Between “LT GRN/RED” wire of A/C pressure sensor connector and C48-9 terminal of ECM connector
• Between “BRN/WHT” wire of A/C pressure sensor connector and C48-27 terminal of ECM connector
Repair if necessary.
After Repair
Deal with any faults detected by SUZUKI scan tool.
Clear the DTC.
Carry out a road test followed by another check with the SUZUKI scan tool.
ENGINE GENERAL INFORMATION AND DIAGNOSIS (K9K ENGINE) 6-2-55
DTC P0560 System voltage
NOTE:
• This DTC indicated only with SUZUKI scan tool.
• Fault finding procedure application conditions for stored fault:
The fault is declared present with the engine running at over 1000 rpm.
Detecting Condition
• D1: < Minimum threshold
• D2: > Maximum threshold
Troubleshooting
Measure the battery voltage when the ignition is switched on.
If the battery voltage is less than 10V recharge the battery.
Check the connection and condition of the battery terminals.
Repair if necessary.
Check the vehicle's charge circuit.
Repair if necessary.
Check the connection and condition of the ECM E17 connector.
Repair if necessary.
Check the insulation, continuity and absence of interference resistance of the connections:
• ECM E17-11 terminal for power supply circuit
• Between C48-31 terminal of ECM connector and vehicle body ground
• Between C48-32 terminal of ECM connector and vehicle body ground
Repair if necessary.
After Repair
Deal with any faults detected by SUZUKI scan tool.
Clear the DTC.
Carry out a road test followed by another check with the SUZUKI scan tool.
6-2-56 ENGINE GENERAL INFORMATION AND DIAGNOSIS (K9K ENGINE)
DTC P0604 Control module internal fail
NOTE:
• This DTC indicated only with SUZUKI scan tool.
• Fault finding procedure application conditions for stored fault:
The fault is declared present with the engine idling.
• If DTC P0604 is detected, engine stopped and restarting is impossible.
Detecting Condition
• D1: RAM memory integrity
Troubleshooting
Replace the ECM.
After Repair
Deal with any faults detected by SUZUKI scan tool.
Clear the DTC.
Carry out a road test followed by another check with the SUZUKI scan tool.
ENGINE GENERAL INFORMATION AND DIAGNOSIS (K9K ENGINE) 6-2-57
DTC P0605 Control module program error
DTC P0606 Control module program error
NOTE:
• DTC P0605 indicated only with generic scan tool.
• DTC P0606 indicated only with SUZUKI scan tool.
• If DTC P0606 or P0605 (D3: read EEPROM memory) is detected, malfunction indicator lamp (MIL)
lights up.
• If DTC P0605 or DTC P0606 is detected, engine shuts off and injection warning light (gravity 1 fault)
and red stop warning light (gravity 2 fault) lights up or engine runs noisily at 1300 rpm and injection
warning light (gravity 1 fault) light up.
Detecting Condition
Using SUZUKI scan tool
DTC P0606
• D1: Analogue converter
• D2: Write to EEPROM memory
• D3: Read EEPROM memory
• D4: Injection calibration data
• D5: Memory auto-test
• D6: Watchdog not refreshed
• D7: Interference on the injector control line
• D8: Watchdog activation
Not using SUZUKI scan tool
DTC P0605
• D3: Read EEPROM memory
Troubleshooting for D7: Interference on the injector control line
Check the connection and condition of the ECM C47 connector.
Repair it if necessary.
Check the insulation, continuity and absence of interference resistance of the connections:
• Between C47-48 terminal of ECM connector and “BLK/YEL” wire of injector No.1 connector
• Between C47-47 terminal of ECM connector and “BLU/YEL” wire of injector No.1 connector
• Between C47-42 terminal of ECM connector and “BLK/ORN” wire of injector No.2 connector
• Between C47-41 terminal of ECM connector and “BLU/ORN” wire of injector No.2 connector
• Between C47-46 terminal of ECM connector and “BLK/WHT” wire of injector No.3 connector
• Between C47-45 terminal of ECM connector and “BLU/WHT” wire of injector No.3 connector
• Between C47-44 terminal of ECM connector and “BLK/RED” wire of injector No.4 connector
• Between C47-43 terminal of ECM connector and “BLU/RED” wire of injector No.4 connector
Repair if necessary.
Troubleshooting for D4: Injector calibration data
Check that the registered injector calibration code matches the injectors. If not write the injector calibration
code (refer to “ECM Registration” in Section 6E2).
If injector calibration code corresponds correctly to the injectors, replace the ECM.
Troubleshooting for D1: Analogue converter, D5: Memory auto-test, D6: Watchdog not refreshed
and D8: Watchdog activation
Replace the ECM
6-2-58 ENGINE GENERAL INFORMATION AND DIAGNOSIS (K9K ENGINE)
Troubleshooting for D2: Write to EEPROM memory and D3: Read EEPROM memory
Deal with any faults detected by SUZUKI scan tool
Clear the DTC referring to “Diagnostic Trouble Code (DTC) Clearance” in this section.
Switch off the ignition and wait 30 seconds.
Switch the ignition back on, carry out another check with the SUZUKI scan tool, and if the incident persists
clear the DTC again.
If the fault persists, replace the ECM.
After Repair
Deal with any faults detected by SUZUKI scan tool.
Clear the DTC.
Carry out a road test followed by another check with the SUZUKI scan tool.
ENGINE GENERAL INFORMATION AND DIAGNOSIS (K9K ENGINE) 6-2-59
DTC P0608 Sensor supply circuit 1 fail
NOTE:
• This DTC indicated only with SUZUKI scan tool.
• Priority when dealing with a number of faults:
If DTC P0608 and either one of DTC P0190, DTC P0225, DTC P0235, DTC P0409 or DTC P0530 are
detected, deal with DTC P0608 Sensor Supply Circuit 1 Fail first.
• If DTC P0608 is detected, engine stopped and starting impossible.
Detecting Condition
• CC0: Short circuit to ground
• CO1: Open circuit or short circuit to + 12 volt
Troubleshooting
Check the condition and connection of all the sensor connectors as follows:
• A/C pressure sensor
• Turbo pressure sensor
• Fuel pressure sensor
• Pedal position sensor
• EGR valve
Repair if necessary.
Check the condition and connection of ECM connectors E17, C47 and C48.
Repair if necessary.
To locate any internal fault in one of the sensors with a 5 V supply (short circuit), disconnect earth of the sensors on the list above.
Clear DTC and recheck DTC.
If the faulty sensor is located, check its connections and that it is in order.
If necessary replace the sensor.
Check the insulation, continuity and absence of interference resistance of the connections:
• Between C48-3 terminal of ECM connector and “GRN/RED” wire of A/C pressure sensor
• Between C47-16 terminal of ECM connector and “ORN” wire of turbo pressure sensor
• Between C47-15 terminal of ECM connector and “ORN” wire of fuel pressure sensor
• Between E17-4 terminal of ECM connector and “BRN/WHT” wire of pedal position sensor
• Between C47-17 terminal of ECM connector and “RED/WHT” wire of EGR valve
Repair if necessary.
If the fault persists, apply the fault finding procedure for each sensor with a 5 V supply.
After Repair
Deal with any faults detected by SUZUKI scan tool.
Clear the DTC.
Carry out a road test followed by another check with the SUZUKI scan tool.
6-2-60 ENGINE GENERAL INFORMATION AND DIAGNOSIS (K9K ENGINE)
DTC P0609 Sensor supply circuit 2 fail
DTC P0651 Sensor reference voltage circuit/open
NOTE:
• DTC P0609 indicated only with SUZUKI scan tool.
• DTC P0651 indicated only with generic scan tool.
• If DTC P0609 or DTC P0651 is detected, engine speed maintained at 1000 rpm and engine performance reduced to 75%.
Detecting Condition
• CC0: Short circuit to ground
• CO1: Open circuit or short circuit to + 12 volt
Troubleshooting for CC0: short circuit to ground
Check the connection and condition of the pedal position sensor connector.
Repair if necessary.
Check the condition of the ECM E17connector.
Repair if necessary.
For “RED/WHT” wire of pedal position sensor connector check for the + 5 V after ignition feed on “RED” wire of
pedal position sensor connector.
Repair if necessary.
Check for insulation from ground on the following connection:
• Between “RED” wire of pedal position sensor connector and E17-15 terminal of ECM connector
Repair if necessary.
Troubleshooting for CO1: open circuit or short circuit to + 12 volt
Check the connection and condition of the pedal position sensor connector.
Repair if necessary.
Check the condition of the ECM E17connector.
Repair if necessary.
For “RED/WHT” wire of pedal position sensor connector check for the + 5 V after ignition feed on “RED” wire of
pedal position sensor connector.
Repair if necessary.
Disconnect the ECM E17 connector and the pedal position sensor connector.
Check for insulation on E17-15 terminal and E17-21 terminal of ECM connector
Repair if necessary.
Check the continuity of the connections:
• “RED/WHT” wire of pedal position sensor connector and E17-15 terminal of ECM connector
• “PNK/BLK” wire of pedal position sensor connector and E17-27 terminal of ECM connector
Repair if necessary.
After repair
Deal with any faults detected by SUZUKI scan tool.
Clear the DTC.
Carry out a road test followed by another check with the SUZUKI scan tool.
ENGINE GENERAL INFORMATION AND DIAGNOSIS (K9K ENGINE) 6-2-61
DTC P0645 A/C compressor relay control circuit malfunction
NOTE:
This DTC indicated only with SUZUKI scan tool.
Detecting Condition
• CO0: Open circuit or short circuit to ground
• CC1: Short circuit to + 12 volt
Troubleshooting
Check the connection and condition of the A/C compressor relay.
Repair if necessary.
Check the connection and condition of the ECM E17 connector.
Repair if necessary.
Check for insulation, continuity and absence of interference resistance of the connections:
• Between C55-1 wire of A/C compressor relay socket and E17-16 terminal of ECM connector
Repair if necessary.
After Repair
Deal with any faults detected by SUZUKI scan tool.
Clear the DTC.
Carry out a road test followed by another check with the SUZUKI scan tool.
6-2-62 ENGINE GENERAL INFORMATION AND DIAGNOSIS (K9K ENGINE)
DTC P0685 Main relay control circuit malfunction
Detecting Condition
Using SUZUKI scan tool
• D1: Relay cut-off too soon
• D2: Relay cut-off too late
Not using SUZUKI scan tool
• D1: Relay cut-off too soon
Troubleshooting
Check the main relay supply fuse in the engine compartment: (fuse F1).
Replace the fuse if necessary.
Check the connection and condition and connection of the main relay socket.
Repair if necessary.
Check the condition and connection of the ECM C48 connector.
Repair if necessary.
Check for insulation, continuity and absence of interference resistance of the connections:
• Between F1 fuse output and “BLK/YEL” wire of main relay socket terminal
• Between “BLU/BLK” wire of main relay socket and C48-24 terminal of ECM connector
• Between “BLK/RED” wire of main relay socket and C48-30 terminal of ECM connector
• Between “BLK/RED” wire of main relay socket and C48-29 terminal of ECM connector
• Between C48-31 terminal of ECM connector and vehicle body ground
Repair if necessary.
If the fault persists, replace the main relay.
After Repair
Deal with any faults detected by SUZUKI scan tool.
Clear the DTC.
Carry out a road test followed by another check with the SUZUKI scan tool.
ENGINE GENERAL INFORMATION AND DIAGNOSIS (K9K ENGINE) 6-2-63
DTC P103D A/C signal circuit malfunction
NOTE:
• This DTC indicated only with SUZUKI scan tool.
• Fault finding procedure application conditions for stored fault:
The fault is declared present with the engine idling, and air conditioning either activated or off.
Detecting Condition
• D1: Consistency
• D2: Permanent low level
• D3: Permanent high level
Troubleshooting
Check the connection and condition of the ECM C48 connector.
Repair if necessary.
Check the connection and condition of the A/C relay.
Repair if necessary.
Check for insulation, continuity and absence of interference resistance of the connections:
• Between C52-4 wire of A/C relay socket and C48-11 terminal of ECM connector
Repair if necessary.
If the incident persists, consult the air conditioning fault finding procedure.
After Repair
Deal with any faults detected by SUZUKI scan tool.
Clear the DTC.
Carry out a road test followed by another check with the SUZUKI scan tool.
6-2-64 ENGINE GENERAL INFORMATION AND DIAGNOSIS (K9K ENGINE)
DTC P1641 Additional heater relay circuit 1
NOTE:
This DTC indicated only with SUZUKI scan tool.
Detecting Condition
• CO0: Open circuit or short circuit to ground
• CC1: Short circuit to + 12 volt
Troubleshooting
Check the condition and connection of the additional heater relay No.1 socket.
Repair if necessary.
Check the condition of the ECM C48 connector.
Repair if necessary.
Check the insulation, continuity and absence of interference resistance of the connections:
• Between C48-15 terminal of ECM connector and “YEL/BLK” wire of additional heater relay No.1 socket
With the ignition on, check for the 12 V supply on “BLK/RED” wire and “BLK/BLU” wire of additional heater
relay No.1 socket.
Repair if necessary.
If the fault persists, replace the relay.
After Repair
Deal with any faults detected by SUZUKI scan tool.
Clear the DTC.
Carry out a road test followed by another check with the SUZUKI scan tool.
ENGINE GENERAL INFORMATION AND DIAGNOSIS (K9K ENGINE) 6-2-65
DTC P1643 Additional heater relay circuit 2
NOTE:
This DTC indicated only with SUZUKI scan tool.
Detecting Condition
• CO0: Open circuit or short circuit to ground
• CC1: Short circuit to + 12 volt
Troubleshooting
Check the condition and connection of the additional heater relay No.2 and No.3 socket.
Repair if necessary.
Check the condition of the ECM C48 connector.
Repair if necessary.
Check the insulation, continuity and absence of interference resistance of the connections:
• Between C48-16 terminal of ECM connector and “YEL/RED” wire of additional heater relay No.2 socket
• Between C48-16 terminal of ECM connector and “YEL/RED” wire of additional heater relay No.3 socket
With the ignition on, check for the 12 volts supply the following terminals:
• Between “BLK/RED” wire of additional heater relay No.2 socket and vehicle body ground
• Between “RED/WHT” wire of additional heater relay No.2 socket and vehicle body ground
• Between “BLK/RED” wire of additional heater relay No.3 socket and vehicle body ground
• Between “RED” wire of additional heater relay No.3 socket and vehicle body ground.
Repair if necessary.
If the fault persists, replace the relay.
After Repair
Deal with any faults detected by SUZUKI scan tool.
Clear the DTC.
Carry out a road test followed by another check with the SUZUKI scan tool.
6-2-66 ENGINE GENERAL INFORMATION AND DIAGNOSIS (K9K ENGINE)
DTC P2120 Pedal position sensor 2 circuit
NOTE:
• Priority when dealing with a number of faults:
If DTC P2120 and either one of DTC P0608, DTC P0609 or DTC P0651 are detected, deal with DTC
P0608 Sensor Supply Circuit 1 Fail, DTC P0609 Sensor Supply Circuit 2 Fail or P0651 Sensor Reference Voltage Circuit/Open first.
• If DTC P2120 is detected, engine speed maintained above 1000 rpm.
• If DTC P2120 and DTC P0225 are detected, engine speed fixed at 1300 rpm.
Detecting Condition
• CC0: Open circuit or short circuit to ground
• CC1: Short circuit to + 12 volt
Troubleshooting for CO0: open circuit or short circuit to ground
Check the connection and condition of the pedal position sensor connector
Repair if necessary.
Check the connection and condition of the ECM E17 connector
Repair if necessary.
Measure the resistance at the pedal position sensor terminals:
• Between E97-6 terminal and E97-2 terminal of pedal position sensor
If it is not approximately 1.17 – 2.43 KΩ, replace the pedal position sensor.
Disconnect the ECM E17 connector and the pedal position sensor connector.
Check the insulation from earth on E17-21 terminal of ECM connector.
Repair if necessary.
Check the continuity of the connection:
• Between “RED/YEL” wire of pedal position sensor connector and E17-21 terminal of ECM connector
Repair if necessary.
If the fault persists, replace the pedal position sensor.
ENGINE GENERAL INFORMATION AND DIAGNOSIS (K9K ENGINE) 6-2-67
Troubleshooting for CC1: short circuit to + 12 volt
Check the connection and condition of the pedal position sensor connector
Repair if necessary.
Check the connection and condition of the ECM E17 connector
Repair if necessary.
Measure the resistance at the pedal position sensor terminals:
• Between E97-6 terminal and E97-2 terminal of pedal position sensor
If it is not approximately 1.17 – 2.43 KΩ, replace the pedal position sensor.
Disconnect the ECM E17 connector and the pedal position sensor connector.
Check the insulation from the 12 V feed on E17-15 terminal and E17-21 terminal of ECM connector.
Repair if necessary.
Check the continuity of the connections:
• Between “RED/YEL” wire of pedal position sensor connector and E17-21 terminal of ECM connector
• Between “RED/WHT” wire of pedal position sensor connector and E17-15 terminal of ECM connector
• Between “PNK/BLK” wire of pedal position sensor connector and E17-27 terminal of ECM connector
Repair if necessary.
Disconnect E17 connector from the ECM and the connector from the pedal position sensor.
Check for insulation between E17-15 terminal and E17-21 terminal of ECM connector.
Repair if necessary.
If the fault persists, replace the pedal position sensor.
After Repair
Deal with any faults detected by SUZUKI scan tool.
Clear the DTC.
Carry out a road test followed by another check with the SUZUKI scan tool.
6-2-68 ENGINE GENERAL INFORMATION AND DIAGNOSIS (K9K ENGINE)
DTC P2226 Barometric pressure circuit malfunction
Detecting Condition
• CC1: Short circuit to +12 volts
• CC0: Open circuit or short circuit to ground
Troubleshooting
Replace the ECM
After Repair
Deal with any faults detected by SUZUKI scan tool.
Clear the DTC.
Carry out a road test followed by another check with the SUZUKI scan tool.
ENGINE GENERAL INFORMATION AND DIAGNOSIS (K9K ENGINE) 6-2-69
Fault Finding – Customer Complaints
NOTE:
Only consult this customer complaint after a complete check using the scan tool.
Symptom
Condition
No communication with the ECM Not communication scan tool and ECM
The engine does not start
The engine starts with difficulty or starts then
Starting fault
stalls
Starting difficult with warm engine
Rough idle speed (pumping)
Idle speed fault
Idle speed too high or too low
Unexpected acceleration/deceleration and
engine stalling
Response fault
Engine stop (timing)
Behaviour while driving
Engine jerking
Lack of power
Too much power
Excessive consumption
Overspeed when lifting off acceleration or changing gear
Road holding
Engine dies when pulling away
The engine does not stop
Clanking engine, noisy engine
Squalling noise
Varied mechanical noise
Noise, odours or smoke
Exhaust odours
Diesel odours
Blue, white or black smoke
Smoke (blue, white or black) on acceleration
Referring Table
Refer to Table 1
Refer to Table 2
Refer to Table 3
Refer to Table 4
Refer to Table 5
Refer to Table 6
Refer to Table 7
Refer to Table 8
Refer to Table 9
Refer to Table 10
Refer to Table 11
Refer to Table 12
Refer to Table 13
Refer to Table 14
Refer to Table 15
Refer to Table 16
Refer to Table 17
Refer to Table 18
Refer to Table 19
Refer to Table 20
Refer to Table 21
Refer to Table 22
Refer to Table 23
6-2-70 ENGINE GENERAL INFORMATION AND DIAGNOSIS (K9K ENGINE)
Table 1 No dialogue with the ECM
Troubleshooting
Try the scan tool on another vehicle.
Check the ECM earth point.
Check:
• Check the connection between the scan tool and the data link connector
• Check the main and circuit fuses
Check the voltage (12 volts) between the following terminals (ignition switch turned ON):
• Between “WHT” wire and “BLK” wire of data link connector
• Between “WHT” wire and “BLK/ORN” wire of data link connector
Repair if necessary.
Check the insulation, continuity and absence of interference resistance of the connections:
• Between C48-29 terminal of ECM connector and “BLK/RED” wire of main relay socket
• Between C48-30 terminal of ECM connector and “BLK/RED” wire of main relay socket
• Between E17-11 terminal of ECM connector and circuit fuse socket terminal
• Between C48-24 terminal of ECM connector and “BLU/BLK” wire of main relay socket (relay control)
• Between C48-31 terminal of ECM connector and vehicle body ground
• Between C48-32 terminal of ECM connector and vehicle body ground
• Between E17-31 terminal of ECM connector and “PNK/GRN” wire of data link connector (K-line)
Repair if necessary.
ENGINE GENERAL INFORMATION AND DIAGNOSIS (K9K ENGINE) 6-2-71
Table 2 The engine does not start
Troubleshooting
Step
Action
1
Check that the fuel tank is correctly filled and
that the fuel type is suitable.
Is the fuel type suitable and the tank correctly
filled?
2
Is the starter motor working properly?
3
4
5
6
7
8
Yes
Go to Step 2.
No
Refill the fuel tank correctly.
Go to Step 3.
Carry out the required
repairs.
Carry out the required
repairs.
Check the following:
Go to Step 4.
• Check the low pressure circuit referring to
“Test 1: Low Pressure Circuit Check” in this
section
• Check for leaks in the high pressure circuit
• Check the electrical circuit referring to “Test
2: Electrical Circuit Check” in this section
• Check the engine parameters referring to
“Test 4: Parameter Check” in this section
• Check the air inlet circuit referring to “Test 5:
Air Inlet Circuit Check” in this section
Is it in good condition?
Is the fuel flow actuator blocked?
Carry out the required
repairs.
Is the engine wiring harness cut off or jammed? Carry out the required
repairs.
Check that the glow plugs are working properly. Replace the glow plugs.
Is the glow plug resistance above 1 Ω?
Are the compressions correct?
Go to Step 8.
Check the injectors referring to “Test 3: Injector End of fault finding.
Check” in this section.
• Check the injection pump referring to “Test
7: High Pressure Pump Check” in this section
• Check the ECM referring to “Test 6: ECM
Check” in this section
Is it in good condition?
Go to Step 5.
Go to Step 6.
Go to Step 7.
Carry out the required
repairs.
Carry out the required
repairs.
6-2-72 ENGINE GENERAL INFORMATION AND DIAGNOSIS (K9K ENGINE)
Table 3 The engine starts with difficulty or starts then stalls
Troubleshooting
Step
Action
Yes
1
Check that the fuel tank is correctly filled and
Go to Step 2.
that the fuel type is suitable.
Is the fuel type suitable and the tank correctly
filled?
2
Check the following:
Go to Step 3.
• Check the low pressure circuit referring to
“Test 1: Low Pressure Circuit Check” in this
section
• Check for leaks in the high pressure circuit
• Check the electrical circuit referring to “Test
2: Electrical Circuit Check” in this section
• Check the engine parameters referring to
“Test 4: Parameter Check” in this section
• Check the air inlet circuit referring to “Test 5:
Air Inlet Circuit Check” in this section
Is it in good condition?
3
Is the fuel flow actuator blocked?
Carry out the required
repairs.
4
Is the engine oil level correct?
Go to Step 5.
5
Is the catalytic converter sealed off or damReplace the catalytic conaged?
verter.
6
Is the engine wiring harness cut off or jammed? Carry out the required
repairs.
7
Check that the glow plugs are working properly. Replace the glow plug.
Is the glow plug resistance over 1 Ω?
8
Are the compressions correct?
Go to Step 9.
9
Check the following:
End of fault finding.
• Check the injectors referring to “Test 3:
Injector Check” in this section
• Check the ECM referring to “Test 6: ECM
Check” in this section
Is it in good condition?
No
Refill the fuel tank correctly.
Carry out the required
repairs.
Go to Step 4.
Top up the oil.
Go to Step 6.
Go to Step 7.
Go to Step 8.
Carry out the required
repairs.
Carry out the required
repairs.
ENGINE GENERAL INFORMATION AND DIAGNOSIS (K9K ENGINE) 6-2-73
Table 4 Starting difficult with warm engine
Troubleshooting
Step
Action
Yes
1
Check the following:
Go to Step 2.
• Check the low pressure circuit referring to
“Test 1: Low Pressure Circuit Check” in this
section
• Check the injectors referring to “Test 3:
Injector Check” in this section
• Check the engine parameters referring to
“Test 4: Parameter Check” in this section
• Check the air inlet circuit referring to “Test 5:
Air Inlet Circuit Check” in this section
Is it in good condition?
2
Is the fuel flow actuator blocked?
Carry out the required
repairs.
3
Are the compressions correct?
Go to Step 4.
4
5
Is the engine wiring harness cut off or jammed? Carry out the required
repairs.
Check the ECM referring to “Test 6: ECM
End of fault finding.
Check” in this section
Is it in good condition?
No
Carry out the required
repairs.
Go to Step 3.
Carry out the required
repairs.
Go to Step 5.
Carry out the required
repairs.
6-2-74 ENGINE GENERAL INFORMATION AND DIAGNOSIS (K9K ENGINE)
Table 5 Rough idle speed (pumping)
Troubleshooting
Step
Action
Yes
1
Check the following:
Go to Step 2.
• Check the low pressure circuit referring to
“Test 1: Low Pressure Circuit Check” in this
section
• Check the engine parameters referring to
“Test 4: Parameter Check” in this section
Is it in good condition?
2
Is the engine wiring harness cut off or jammed? Carry out the required
repairs.
3
Is the fuel flow actuator blocked?
Carry out the required
repairs.
4
Check for leaks in the high pressure circuit.
Go to Step 5.
Is it in good condition?
5
Check that the glow plugs are working properly. Replace the glow plug.
Is the glow plug resistance over 1 Ω?
6
Are the compressions correct?
Go to Step 7.
7
Check the following:
End of fault finding.
• Check the injectors referring to “Injector
Check” in this section
• Check the injection pump referring to “Test
7: High Pressure Pump Check” in this section
Is it in good condition?
No
Carry out the required
repairs.
Go to Step 3.
Go to Step 4.
Carry out the required
repairs.
Go to Step 6.
Carry out the required
repairs.
Carry out the required
repairs.
ENGINE GENERAL INFORMATION AND DIAGNOSIS (K9K ENGINE) 6-2-75
Table 6 Idle speed too high/too low
Troubleshooting
Step
Action
Yes
1
Check the following:
Go to Step 2.
• Check the electrical circuit referring to “Test
2: Electrical Circuit Check” in this section
• Check the engine parameters referring to
“Test 4: Parameter Check” in this section
Is it in good condition?
2
Is the clutch linkage correct?
Go to Step 3.
3
Check the ECM referring to “Test 6: ECM
Check” in this section
Is it in good condition?
End of fault finding.
No
Carry out the required
repairs.
Carry out the required
repairs.
Carry out the required
repairs.
6-2-76 ENGINE GENERAL INFORMATION AND DIAGNOSIS (K9K ENGINE)
Table 7 Unexpected acceleration/deceleration and engine stalling
Troubleshooting
Step
Action
Yes
1
Check the following:
Go to Step 2.
• Check the engine parameters referring to
“Test 4: Parameter Check” in this section
• Check the air inlet circuit referring to “Test 5:
Air Inlet Circuit Check” in this section
Is it in good condition?
2
Is the engine wiring harness cut off or jammed? Carry out the required
repairs.
3
Check the injectors referring to “Test 3: Injector Go to Step 4.
Check” in this section
Is it in good condition?
4
Check that the engine has not aspirated its oil Carry out the required
(engine stalls).
repairs.
5
Check the ECM referring to “Test 6: ECM
End of fault finding.
Check” in this section
Is it in good condition?
No
Carry out the required
repairs.
Go to Step 3.
Carry out the required
repairs.
Go to Step 5.
Carry out the required
repairs.
ENGINE GENERAL INFORMATION AND DIAGNOSIS (K9K ENGINE) 6-2-77
Table 8 Response fault
Troubleshooting
Step
Action
1
Check the following:
• Check the engine parameters referring to
“Test 4: Parameter Check” in this section
• Check the air inlet circuit referring to “Test 5:
Air Inlet Circuit Check” in this section
Is it in good condition?
2
Check that the turbocharger is working properly.
Is the turbocharger correct?
3
Check the low pressure circuit referring to “Test
1: Low Pressure Circuit Check” in this section
Is it in good condition?
4
Are the compressions correct?
5
6
Yes
Go to Step 2.
No
Carry out the required
repairs.
Go to Step 3.
Carry out the required
repairs.
Go to Step 4.
Carry out the required
repairs.
Go to Step 5.
Carry out the required
repairs.
Carry out the required
repairs.
Carry out the required
repairs.
Check for leaks in the high pressure circuit.
Go to Step 6.
Is it in good condition?
Check the following:
End of fault finding.
• Check the injectors referring to “Test 3:
Injector Check” in this section
• Check the ECM referring to “Test 6: ECM
Check” in this section
Is it in good condition?
6-2-78 ENGINE GENERAL INFORMATION AND DIAGNOSIS (K9K ENGINE)
Table 9 Engine stop/stalling
Troubleshooting
Step
Action
Yes
1
Check that the fuel tank is correctly filled and
Go to Step 2.
that the fuel type is suitable.
Is the fuel type suitable and the tank correctly
filled?
2
Check the following:
Go to Step 3.
• Check the low pressure circuit referring to
“Test 1: Low Pressure Circuit Check” in this
section
• Check for leaks in the high pressure circuit
• Check the electrical circuit referring to “Test
2: Electrical Circuit Check” in this section
• Check the engine parameters referring to
“Test 4: Parameter Check” in this section
• Check the air inlet circuit referring to “Test 5:
Air Inlet Circuit Check” in this section
Is it in good condition?
3
Is the fuel flow actuator blocked?
Carry out the required
repairs.
4
Is the engine wiring harness cut off or jammed? Carry out the required
repairs.
5
Is the catalytic converter sealed off or damReplace the catalytic conaged?
verter.
6
Check that the engine has not aspirated its oil Carry out the required
(engine stalls).
repairs.
7
Check the following:
End of fault finding.
• Check the injection pump referring to “Test
7: High Pressure Pump Check” in this section.
• Check the ECM referring to “Test 6: ECM
Check” in this section.
Is it good condition?
No
Refill the fuel tank correctly.
Carry out the required
repairs.
Go to Step 4.
Go to Step 5.
Go to Step 6.
Go to Step 7.
Carry out the required
repairs.
ENGINE GENERAL INFORMATION AND DIAGNOSIS (K9K ENGINE) 6-2-79
Table 10 Engine jerking
Troubleshooting
Step
Action
Yes
1
Check that the fuel tank is correctly filled and
Go to Step 2.
that the fuel type is suitable.
Is the fuel type suitable and the tank correctly
filled?
2
Check the following:
Go to Step 3.
• Check the low pressure circuit referring to
“Test 1: Low Pressure Circuit Check” in this
section
• Check the engine parameters referring to
“Test 4: Parameter Check” in this section
Is it in good condition?
3
Is the engine wiring harness cut off or jammed? Carry out the required
repairs.
4
Check that the glow plugs are working properly. Replace the glow plug.
Is the glow plug resistance over 1 Ω?
5
Are the compressions correct?
Go to Step 6.
6
Is the valve clearance properly adjusted?
Go to Step 7.
7
Check the following:
End of fault finding.
• Check the injection pump referring to “Test
7: High Pressure Pump Check” in this section
• Check the ECM referring to “Test 6: ECM
Check” in this section
Is it in good condition?
No
Refill the fuel tank correctly.
Carry out the required
repairs.
Go to Step 4.
Go to Step 5.
Carry out the required
repairs.
Make the necessary
adjustments.
Carry out the required
repairs.
6-2-80 ENGINE GENERAL INFORMATION AND DIAGNOSIS (K9K ENGINE)
Table 11 Lack of power
Troubleshooting
Step
Action
1
Check the following:
• Check the engine parameters referring to
“Test 4: Parameter Check” in this section
• Check the air inlet circuit referring to “Test 5:
Air Inlet Circuit Check” in this section
Is it in good condition?
2
Is the engine oil level correct?
3
Is the catalytic converter sealed off or damaged?
4
Check that the turbocharger is working properly.
Is the turbocharger correct?
5
Check the following:
• Check the low pressure circuit referring to
“Test 1: Low Pressure Circuit Check” in this
section
• Check the injectors referring to “Test 3:
Injector Check” in this section
Is it in good condition?
6
Are the compressions correct?
7
Is the valve clearance properly adjusted?
Yes
Go to Step 2.
No
Carry out the required
repairs.
Go to Step 3.
Top up the oil.
Replace the catalytic con- Go to Step 4.
verter.
Go to Step 5.
Carry out the required
repairs.
Go to Step 6.
Carry out the required
repairs.
Go to Step 7.
Carry out the required
repairs.
Make the necessary
adjustments.
End of fault finding.
ENGINE GENERAL INFORMATION AND DIAGNOSIS (K9K ENGINE) 6-2-81
Table 12 Too much power
Troubleshooting
Step
Action
1
Check the following:
• Check the engine parameters referring to
“Test 4: Parameter Check” in this section
• Check the air inlet circuit referring to “Test 5:
Air Inlet Circuit Check” in this section
Is it in good condition?
2
Check that the engine has not aspirated its oil
(engine stalls).
3
Check the following:
• Check the injectors referring to “Test 3:
Injector Check” in this section
• Check the ECM referring to “Test 6: ECM
Check” in this section
Is it in good condition?
Yes
Go to Step 2.
No
Carry out the required
repairs.
Carry out the required
repairs.
End of fault finding.
Go to Step 3.
Carry out the required
repairs.
6-2-82 ENGINE GENERAL INFORMATION AND DIAGNOSIS (K9K ENGINE)
Table 13 Excessive consumption
Troubleshooting
Step
Action
Yes
1
Check the low pressure circuit referring to “Test Go to Step 2.
1: Low Pressure Circuit Check” in this section
Is it in good condition?
2
Does the fuel flow actuator have a leak?
Carry out the required
repairs.
3
Is the fuel temperature sensor leaking?
Replace the fuel temperature sensor.
4
Check the following:
Go to Step 5.
• Check the injectors referring to “Test 3:
Injector Check” in this section
• Check for leaks in the high pressure circuit
• Check the engine parameters referring to
“Test 4: Parameter Check” in this section
• Check the air inlet circuit referring to “Test 5:
Air Inlet Circuit Check” in this section
Is it in good condition?
5
Is the engine oil level correct?
Go to Step 6.
6
Is the catalytic converter clogged or damaged? Replace the catalytic converter.
7
Check that the turbocharger is working propGo to Step 8.
erly.
Is the turbocharger correct?
8
Are the compressions correct?
Go to Step 9.
9
Check the ECM referring to “Test 6: ECM
Check” in this section.
Is it in good condition?
End of fault finding.
No
Carry out the required
repairs.
Go to Step 3.
Go to Step 4.
Carry out the required
repairs.
Top up the oil.
Go to Step 7.
Carry out the required
repairs.
Carry out the required
repairs.
Carry out the required
repairs.
ENGINE GENERAL INFORMATION AND DIAGNOSIS (K9K ENGINE) 6-2-83
Table 14 Overspeed when lifting off accelerator or changing gear
Troubleshooting
Step
Action
Yes
1
Check the engine parameters referring to “Test Go to Step 2.
4: Parameter Check” in this section.
Is it in good condition?
2
Is the engine wiring harness cut or pinched?
Carry out the required
repairs.
3
Is the clutch linkage properly adjusted?
Go to Step 4.
4
5
6
Check that the engine has not aspirated its oil
(engine stalls).
Check that the turbocharger is working properly.
Is the turbocharger correct?
Check the following:
• Check the injectors referring to “Test 3:
Injector Check” in this section
• Check the ECM referring to “Test 6: ECM
Check” in this section.
Is it in good condition?
Carry out the required
repairs.
Go to Step 6.
End of fault finding.
No
Carry out the required
repairs.
Go to Step 3.
Carry out the required
repairs.
Go to Step 5.
Carry out the required
repairs.
Carry out the required
repairs.
6-2-84 ENGINE GENERAL INFORMATION AND DIAGNOSIS (K9K ENGINE)
Table 15 Engine dies on pulling away
Troubleshooting
Step
Action
Yes
1
Check the following:
Go to Step 2.
• Check the low pressure circuit referring to
“Test 1: Low Pressure Circuit Check” in this
section
• Check the engine parameters referring to
“Test 4: Parameter Check” in this section
• Check the air inlet circuit referring to “Test 5:
Air Inlet Circuit Check” in this section
Is it in good condition?
2
Is the catalytic converter clogged or damaged? Replace the catalytic converter.
3
Is the clutch linkage properly adjusted?
Go to Step 4.
5
Is the engine wiring harness cut or pinched?
6
Is the fuel flow actuator blocked?
7
Check the ECM referring to “Test 6: ECM
Check” in this section
Is it in good condition?
Carry out the required
repairs.
Carry out the required
repairs.
End of fault finding.
No
Carry out the required
repairs.
Go to Step 3.
Carry out the required
repairs.
Go to Step 6.
Go to Step 7.
Carry out the required
repairs.
ENGINE GENERAL INFORMATION AND DIAGNOSIS (K9K ENGINE) 6-2-85
Table 16 The engine does not stop
Troubleshooting
Step
Action
1
Check the engine parameters referring to “Test
4: Parameter Check” in this section.
Is it in good condition?
2
Check that the engine has not aspirated its oil
(engine stalls).
3
Check the ECM referring to “Test 6: ECM
Check” in this section.
Is it in good condition?
Yes
Go to Step 2.
No
Carry out the required
repairs.
Carry out the required
repairs.
End of fault finding.
Go to Step 3.
Carry out the required
repairs.
6-2-86 ENGINE GENERAL INFORMATION AND DIAGNOSIS (K9K ENGINE)
Table 17 Clanking engine, noisy engine
Troubleshooting
Step
Action
Yes
1
Check the following:
Go to Step 2.
• Check the engine parameters referring to
“Test 4: Parameter Check” in this section
• Check the air inlet circuit referring to “Test 5:
Air Inlet Circuit Check” in this section
Is it in good condition?
2
Check that the glow plugs are working properly. Replace the glow plug.
Is the glow plug resistance above 1 Ω?
3
Are the compressions correct?
Go to Step 4.
4
Check the following:
End of fault finding.
• Check the low pressure circuit referring to
“Test 1: Low Pressure Circuit Check” in this
section
• Check the injectors referring to “Test 3:
Injector Check” in this section
Is it in good condition?
No
Carry out the required
repairs.
Go to Step 3.
Carry out the required
repairs.
Carry out the required
repairs.
ENGINE GENERAL INFORMATION AND DIAGNOSIS (K9K ENGINE) 6-2-87
Table 18 Squalling noise
Troubleshooting
Step
Action
Yes
1
Check the engine parameters referring to “Test Go to Step 2.
4: Parameter Check” in this section
Is it in good condition?
2
Is the engine wiring harness cut or pinched?
Carry out the required
repairs.
3
Is the fuel flow actuator blocked?
Carry out the required
repairs.
4
Check the ECM referring to “Test 6: ECM
End of fault finding.
Check” in this section
Is it in good condition?
No
Carry out the required
repairs.
Go to Step 3.
Go to Step 4
Carry out the required
repairs.
6-2-88 ENGINE GENERAL INFORMATION AND DIAGNOSIS (K9K ENGINE)
Table 19 Various mechanical noises
Troubleshooting
Step
Action
1
Check that the injectors are not making a buzzing noise (injector discharge).
2
Are the mounting clips on the injector pipes broken or missing?
3
Check the engine parameters referring to “Test
4: Parameter Check” in this section
Is it in good condition?
4
Is the catalytic converter clogged or damaged?
5
6
7
8
Yes
Carry out the required
repairs.
Carry out the required
repairs.
Go to Step 4.
No
Go to Step 2.
Go to Step 3.
Carry out the required
repairs.
Replace the catalytic con- Go to Step 5.
verter.
Check the following:
Go to Step 6.
Carry out the required
• Check the injectors referring to “Test 3:
repairs.
Injector Check” in this section
• Check the air inlet circuit referring to “Test 5:
Air Inlet Circuit Check” in this section
Is it in good condition?
Is the clutch linkage properly adjusted?
Go to Step 7.
Carry out the required
repairs.
Check that the turbocharger is working propGo to Step 8.
Carry out the required
erly.
repairs.
Is the turbocharger correct?
Is the valve clearance properly adjusted?
End of fault finding.
Make the necessary
adjustments.
ENGINE GENERAL INFORMATION AND DIAGNOSIS (K9K ENGINE) 6-2-89
Table 20 Exhaust odours
Troubleshooting
Step
Action
1
Check the following:
• Check the engine parameters referring to
“Test 4: Parameter Check” in this section
• Check the air inlet circuit referring to “Test 5:
Air Inlet Circuit Check” in this section
Is it in good condition?
2
Check that the engine has not aspirated its oil
(engine stalls).
3
Check that the turbocharger is working properly.
Is the turbocharger correct?
4
Is the engine oil level correct?
5
Is the catalytic converter clogged or damaged?
6
Yes
Go to Step 2.
No
Carry out the required
repairs.
Carry out the required
repairs.
Go to Step 4.
Go to Step 3.
Carry out the required
repairs.
Go to Step 5.
Top up the oil.
Replace the catalytic con- Go to Step 6.
verter.
Check the following:
End of fault finding.
Carry out the required
• Check the injectors referring to “Test 3:
repairs.
Injector Check” in this section
• Check the ECM referring to “Test 6: ECM
Check” in this section
Is it in good condition?
6-2-90 ENGINE GENERAL INFORMATION AND DIAGNOSIS (K9K ENGINE)
Table 21 Diesel odours
Troubleshooting
Step
Action
Yes
1
Check the low pressure circuit referring to “Test Go to Step 2.
1: Low Pressure Circuit Check” in this section.
Is it in good condition?
2
Is the fuel flow actuator leaking?
Carry out the required
repairs.
3
Is the fuel temperature sensor leaking?
Replace the fuel temperature sensor.
4
Check the following:
End of fault finding.
• Check the injectors referring to “Test 3:
Injector Check” in this section
• Check for leaks in the high pressure circuit
Is it in good condition?
No
Carry out the required
repairs.
Go to Step 3.
Go to Step 4.
Carry out the required
repairs.
ENGINE GENERAL INFORMATION AND DIAGNOSIS (K9K ENGINE) 6-2-91
Table 22 Blue, white or black smoke
Troubleshooting
Step
Action
Yes
1
Check the following:
Go to Step 2.
• Check the engine parameters referring to
“Test 4: Parameter Check” in this section
• Check the air inlet circuit referring to “Test 5:
Air Inlet Circuit Check” in this section
Is it in good condition?
2
Is the fuel flow actuator blocked?
Carry out the required
repairs.
3
Is the engine oil level correct?
Go to Step 4.
4
Check the low pressure circuit referring to “Test Go to Step 5.
1: Low Pressure Circuit Check” in this section
Is it in good condition?
5
Is the catalytic converter clogged or damaged? Replace the catalytic converter.
6
Check that the engine has not aspirated its oil Carry out the required
(engine stalls).
repairs.
7
Check that the glow plugs are working properly. Replace the glow plugs.
Is the glow plug resistance above 1 Ω?
8
Are the compressions correct?
Go to Step 9.
9
Check the injectors referring to “Test 3: Injector End of fault finding.
Check” in this section
Is it in good condition?
No
Carry out the required
repairs.
Go to Step 3.
Top up the oil.
Carry out the required
repairs.
Go to Step 6.
Go to Step 7.
Go to Step 8.
Carry out the required
repairs.
Carry out the required
repairs.
6-2-92 ENGINE GENERAL INFORMATION AND DIAGNOSIS (K9K ENGINE)
Table 23 Blue, black or white smoke when accelerating
Troubleshooting
Step
Action
1
Check the following:
• Check the engine parameters referring to
“Test 4: Parameter Check” in this section
• Check the air inlet circuit referring to “Test 5:
Air Inlet Circuit Check” in this section
Is it in good condition?
2
Check the low pressure circuit referring to “Test
1: Low Pressure Circuit Check” in this section.
Is it in good condition?
3
Is the engine oil level correct?
4
Check that the turbocharger is working properly.
Is the turbocharger correct?
5
Is the catalytic converter clogged or damaged?
6
7
8
9
10
11
Yes
Go to Step 2.
No
Carry out the required
repairs.
Go to Step 3.
Carry out the required
repairs.
Go to Step 4.
Go to Step 5.
Top up the oil.
Carry out the required
repairs.
Replace the catalytic con- Go to Step 6.
verter.
Check that the engine has not aspirated its oil Carry out the required
Go to Step 7.
(engine stalls).
repairs.
Check that the glow plugs are working properly. Replace the glow plugs.
Go to Step 8.
Is the glow plug resistance above 1 Ω?
Are the compressions correct?
Go to Step 9.
Carry out the required
repairs.
Check for leaks in the high pressure circuit
Go to Step 10.
Carry out the required
Is it in good condition?
repairs.
Is the engine wiring harness cut or pinched?
Carry out the required
Go to Step 11.
repairs.
Check the following:
End of fault finding.
Carry out the required
• Check the injectors referring to “Test 3:
repairs.
Injector Check” in this section
• Check the ECM referring to “Test 6: ECM
Check” in this section
Is it in good condition?
ENGINE GENERAL INFORMATION AND DIAGNOSIS (K9K ENGINE) 6-2-93
Fault Finding – Tests
Some specific checks are grouped together into tests and are performed as required in the various fault finding
tables or when interpreting faults.
Test 1: Low pressure circuit check
Test 2: Electrical circuit check
Test 3: Injector check
Test 4: Parameter check
Test 5: Air inlet circuit check
Test 6: ECM check
Test 7: High pressure pump check
Test 8: Diesel filter check
6-2-94 ENGINE GENERAL INFORMATION AND DIAGNOSIS (K9K ENGINE)
Test 1: Low Pressure Circuit Check
Step
Action
1
Check the conformity of the low pressure circuit
connections.
Are the low pressure circuit connections in
order?
2
Check the condition of the priming pump, and
that it is working properly.
Look for leaks on the unions.
Are there leaks in the hoses and unions?
3
Check for air bubbles in the diesel fuel.
Are there any air bubbles in the low pressure
circuit?
Yes
Go to Step 2.
No
Carry out the required
repairs.
Carry out the required
repairs.
Go to Step 3.
Low pressure circuit corBleed the low pressure
rect.
circuit.
Place a container under
the filter:
• Disconnect the leak
return hose from the filter and cap the filter.
• Pump with the priming
pump until there is no
air left.
• Reconnect the return
hose immediately.
Test 2: Electrical Circuit Check
Step
Action
1
Check the battery charge and that the alternator is working properly.
Is the charge circuit correct?
2
Check the fuses.
Are the fuses correct?
3
Check that the main relay is working properly.
Is the main relay working properly?
4
Check the engine earths.
Are the engine earths correct?
Yes
Go to Step 2.
No
Carry out the required
repairs.
Go to Step 3.
Go to Step 4.
Carry out the required
repairs.
Replace the relay.
The electrical circuit is
correct.
Carry out the required
repairs.
ENGINE GENERAL INFORMATION AND DIAGNOSIS (K9K ENGINE) 6-2-95
Test 3: Injector Check
Step
Action
1
Make a visual inspection around the injectors.
Is there diesel fuel around the injectors?
2
Yes
No
Locate the source of leak Go to Step 2.
and carry out the required
repairs.
Replace faulty injector.
Disconnect connector from cylinder No. 1 injec- Reconnect connector
from cylinder No. 1 injector.
tor.
Is there a noticeable change in engine noise?
Carry out the same test
on the other cylinders to
identify a possible suspected injector.
Test 4: Parameter Check
Step
Action
Yes
No
1
Use the SUZUKI scan tool to check that injector Check that the “Data List” Use the SUZUKI scan tool
value (parameter) is con- to program injector calicalibration code corresponds to the injectors.
bration code into the
sistent.
Is injector calibration code correctly filled in?
memory, paying attention
to the cylinder numbers.
Test 5: Air Inlet Circuit Check
Step
Action
1
Check for the presence of a leak/intake of air.
Presence of a leak/intake of air.
2
Check the condition of the air filter.
Air filter correct?
3
Check that the intake manifold is not obstructed
(dirty).
Is the intake manifold blocked?
Yes
Carry out the required
repairs.
Go to Step 3.
No
Go to Step 2.
Replace the air filter.
Clean the intake manifold. Air circuit correct.
Test 6: ECM Check
Step
Action
Yes
Lock the connectors cor1
Check the condition of the ECM connections
(for bent pin, signs of oxidation, silicone, etc.). rectly.
Check that the ECM connectors are locked correctly.
Are the connectors poorly locked?
No
ECM correct.
6-2-96 ENGINE GENERAL INFORMATION AND DIAGNOSIS (K9K ENGINE)
Test 7 High Pressure Pump Check
NOTE:
It is useless and dangerous to engage the starter motor for more than 5 seconds.
Step
Action
Yes
1
It is possible to check the injection pump capac- Injection pump correct.
ity by carrying out the following procedure:
• Disconnect the fuel flow actuator connector
• Disconnect connector from the four injectors
• Connect the SUZUKI scan tool and check the
rail pressure parameter
• Run the starter motor for 5 seconds
• Read the maximum rail pressure value
Does the rail pressure greater than 1050 bar?
No
Check the diesel filter
referring to “Test 8 Diesel
Filter Check” in this section.
Test 8: Diesel filter check
Step
Action
1
Check the conformity of the diesel filter.
Is the diesel filter in order?
2
With ignition switch off, analyze the diesel fuel
in the diesel filter.
• Disconnect the supply and return hoses from
the filter.
• Immediately block the filter inlets/outlets with
the appropriate caps.
• Remove the filter from its bracket and shake
it well, keeping the caps in place and empty
the contents of the filter into glass container
by lifting up a protective cap and undoing the
bleed screw.
Can you see at bottom of the container a
deposit of black particles?
3
Pass a magnet beneath the container to collect
only all the metal particles.
Take the magnet away from the container.
Do the particles collected using the magnet
cover a surface area greater than 1 cm2.
Yes
Go to Step 2.
No
Replace the filter.
Go to Step 3.
Diesel filter correct.
Repair or replace the
entire injection system.
Diesel filter correct.
ENGINE GENERAL INFORMATION AND DIAGNOSIS (K9K ENGINE) 6-2-97
Special Tool
Tech 2 kit (SUZUKI scan tool)
(See NOTE)
NOTE:
This kit includes the following items.
1. Tech 2, 2. PCMCIA card, 3. DLC cable, 4. SAE 16/19 adapter, 5. Cigarette cable,
6. DLC loopback adapter, 7. Battery power cable, 8. RS232 cable, 9. RS232 adapter,
10. RS232 loopback connector, 11. Storage case, 12. Power supply
6-2-98 ENGINE GENERAL INFORMATION AND DIAGNOSIS (K9K ENGINE)
ENGINE MECHANICAL (K9K ENGINE) 6A2-1
SECTION 6A2
ENGINE MECHANICAL
(K9K ENGINE)
WARNING:
For vehicles equipped with a Supplemental Restraint (Air Bag) System:
• Service on and around the air bag system components or wiring must be performed only by an
authorized SUZUKI dealer. Refer to “Air Bag System Components and Wiring Location View” under
“General Description” in air bag system section in order to confirm whether you are performing service on or near the air bag system components or wiring. Please observe all WARNINGs and “Service Precautions” under “On-Vehicle Service” in air bag system section before performing service
on or around the air bag system components or wiring. Failure to follow WARNINGs could result in
unintentional activation of the system or could render the system inoperative. Either of these two
conditions may result in severe injury.
• Technical service work must be started at least 90 seconds after the ignition switch is turned to the
“LOCK” position and the negative cable is disconnected from the battery. Otherwise, the system
may be activated by reserve energy in the Sensing and Diagnostic Module (SDM).
CAUTION:
Be sure to read “Precaution” in Section 6E2 before disconnecting fuel line or removing fuel system
part(s). Failure to follow “Precautions” could result unneeded fuel system repairs.
CONTENTS
Diagnosis Information and Procedure ........6A2-3
Diagnosis Table ..........................................6A2-3
Compression Check ....................................6A2-3
Oil Pressure Check .....................................6A2-4
Valve Lash (Clearance)...............................6A2-6
Measurement of valve lash
(clearance) ..............................................6A2-6
Replacement of tappet ............................6A2-6
Repair Instructions .......................................6A2-8
Air Cleaner Element Removal and
Installation ...................................................6A2-8
Air Cleaner Element Inspection and
Cleaning ......................................................6A2-8
Air Cleaner Assembly Removal and
Installation ...................................................6A2-8
Cylinder Head Cover Components..............6A2-9
Cylinder Head Cover Removal and
Installation ...................................................6A2-9
Oil Pressure Switch Removal and
Installation .................................................6A2-11
Heat Exchanger Removal and
Installation .................................................6A2-11
EGR Valve and Intake Pipe
Components ..............................................6A2-13
EGR Valve and Intake Pipe
Removal and Installation........................... 6A2-13
EGR Valve and Intake Pipe Inspection..... 6A2-16
Turbocharger Components ....................... 6A2-17
Turbocharger Removal and Installation .... 6A2-18
Turbocharger Inspection ........................... 6A2-20
Exhaust Manifold Components ................. 6A2-20
Exhaust Manifold Removal and
Installation................................................. 6A2-21
Oil Pan and Oil Pump Strainer
Components.............................................. 6A2-22
Oil Pan and Oil Pump Strainer
Removal and Installation........................... 6A2-23
Engine Assembly Removal and
Installation................................................. 6A2-27
Timing Belt and Belt Tensioner
Components.............................................. 6A2-30
Timing Belt and Belt Tensioner
Removal and Installation........................... 6A2-31
Timing Belt and Belt Tensioner
Inspection.................................................. 6A2-38
Oil Pump and Oil Pump Chain
Components.............................................. 6A2-39
Oil Pump and Oil Pump Chain
Removal and Installation........................... 6A2-40
6A2
6A2-2 ENGINE MECHANICAL (K9K ENGINE)
Oil Pump and Oil Pump Chain
Inspection.................................................. 6A2-42
Camshaft and Tappet Components .......... 6A2-43
Camshaft and Tappet Removal and
Installation................................................. 6A2-44
Camshaft and Tappet Inspection .............. 6A2-48
Valves and Cylinder Head Components ... 6A2-52
Valves and Cylinder Head Assembly
Removal and Installation........................... 6A2-52
Valves and Cylinder Head Assembly
Inspection.................................................. 6A2-55
Valves and Cylinder Head Assembly
Disassembly and Reassembly.................. 6A2-55
Valves and Cylinder Head Components
Inspection.................................................. 6A2-58
Pistons, Piston Rings, Connecting Rods
and Cylinders Components....................... 6A2-61
Pistons, Piston Rings, Connecting Rods
and Cylinders Removal and Installation ... 6A2-62
Pistons, Piston Rings, Connecting Rods
and Cylinders Disassembly and
Reassembly .............................................. 6A2-64
Pistons, Piston Rings, Connecting Rods
and Cylinders Inspection .......................... 6A2-66
Main Bearings, Crankshaft and Cylinder
Block Components.................................... 6A2-71
Main Bearings, Crankshaft and Cylinder
Block Removal and Installation................. 6A2-71
Main Bearings, Crankshaft and Cylinder
Block Inspection........................................ 6A2-78
Required Service Material.......................... 6A2-81
Tightening Torque Specifications............. 6A2-81
Special Tool ................................................ 6A2-83
ENGINE MECHANICAL (K9K ENGINE) 6A2-3
Diagnosis Information and Procedure
Diagnosis Table
Refer to “Fault Finding-Customer Complaints” in Section 6-2.
Compression Check
Check compression pressure on all 4 cylinders as follows:
1) Warm up engine.
2) Stop engine after warming up.
NOTE:
After warming up engine, place transmission gear shift
lever in “Neutral” and set parking brake and block drive
wheels.
3) Disconnect negative (–) cable at battery.
4) Remove injector cover (1).
5) Remove all glow plugs referring to “Glow Plug Removal and
Installation” in Section 6E2.
6) Disconnect ECM connectors.
1
7) Install special tool (dummy heater plug) into glow plug hole.
(B)
Special tool
(A): 09917-78120
(B): 09912-57821
8) Connect negative (–) cable at battery.
(A)
9) Disengage clutch (1) (to lighten starting load on engine).
10) Crank engine with fully charged battery and read highest
pressure on compression gauge.
Compression pressure specification
Max. difference between any two cylinders:
300 kPa (3.0 kg/cm2, 42.6 psi)
11) Carry out steps 7) to 10) on each cylinder to obtain 4 readings.
12) Disconnect negative (–) cable at battery.
13) After checking, install glow plugs referring to “Glow Plug
Removal and Installation” in Section 6E2.
6A2-4 ENGINE MECHANICAL (K9K ENGINE)
1
14) Install injector cover (1).
15) Connect ECM connector.
16) Connect negative (–) cable at battery.
Oil Pressure Check
WARNING:
To avoid danger of being burned, do not touch exhaust
manifold when exhaust system is hot.
1) Prior to checking oil pressure, check the following items.
• Oil level in oil pan.
If oil level is low, add oil up to Full level mark (1) on oil level
gauge (3).
• Oil quality.
If oil is discolored, or deteriorated, change it.
For particular oil to be used, refer to “Engine Oil and Filter” in
Section 0B.
• Oil leaks.
If leak is found, repair it.
2. Low level mark
2) Detach degassing tank from its bracket.
3) Disconnect oil pressure switch connector (1) and remove oil
pressure switch (2) from cylinder block.
2
1
ENGINE MECHANICAL (K9K ENGINE) 6A2-5
4) Install special tools (Oil pressure gauge) to vacated threaded
hole.
CAUTION:
(A)
(C)
(B)
Be careful not to make special tool touch exhaust manifold when installing because exhaust manifold becomes
very hot.
Special tool
(A): 09915-77311
(B): 09915-77420
(C): 09915-77430
5) Start engine and warm it up to normal operating temperature.
NOTE:
Be sure to place transmission gear shift lever in “Neutral” and set parking brake and block drive wheels.
6) After warming up, measure oil pressure.
Oil pressure specification:
100 – 140 kPa (1.0 – 1.4 kg/cm2, 14.2 – 20.0 psi) at idle
speed
330 – 370 kPa (3.3 – 3.7 kg/cm2, 46.9 – 52.5 psi) at 3,000
rpm
7) Stop engine and remove oil pressure gauge and attachment.
8) Before reinstalling oil pressure switch (1) and tighten switch
to specified torque.
Tightening torque
Oil pressure switch (a): 25 N·m (2.5 kg-m, 18.0 lb-ft)
1, (a)
2
9) Connect oil pressure switch coupler (2).
10) Install degassing tank to its bracket.
11) Start engine and check oil pressure switch for oil leakage.
If oil leakage is found, repair it.
6A2-6 ENGINE MECHANICAL (K9K ENGINE)
Valve Lash (Clearance)
Measurement of valve lash (clearance)
1) Disconnect negative (–) cable at battery.
2) Remove cylinder head cover referring to “Cylinder Head
Cover Removal and Installation” in this section.
1
"1" "2" "3" "4" "5"
"6" "7" "8"
3) Turn crankshaft pulley clockwise until cam lobes become
perpendicular to tappet faces at valves “1” and “6” as shown
in figure.
4) Measure valve lashes with thickness gauge (1) according to
the following procedure.
a) Check valve lashes at valves “1” and “6”.
b) Turn camshaft by 90° (by turning crankshaft with wrench).
c) Make sure that cam lobes are perpendicular to tappet faces
at valves to be checked (in this case, “5” and “8”), if not,
adjust it by turning crankshaft. Check valve lashes.
d) In the same manner as b) - c), check valve lashes at valves
“4” and “7”.
e) In the same manner as b) - c), check valve lashes at valves
“2” and “3”.
If valve lash (clearance) is out of specification, record valve lash
(clearance) and adjust it to specification by replacing tappet.
Refer to “Replacement of tappet” under “Valve Lash (Clearance)”
in this section.
Valve lash (clearance) specification
Intake
Exhaust
When cold
0.125 – 0.250 mm (0.00493 – 0.00984 in.)
0.325 – 0.450 mm (0.01280 – 0.01771 in.)
Replacement of tappet
1) Measure valve lashes referring to “Measurement of Valve
Lash (Clearance)” under “Valve Lash (Clearance)” in this
section.
2) Remove tappet referring to “Camshaft and Tappet” in this
section.
3) Using micrometer, measure the thickness of the removed
tappet, and determine replacement tappet by calculating the
thickness of new tappet with the following formula and table.
Intake side
A = B + C – 0.1875 mm (0.007382 in.)
Exhaust side
A = B + C – 0.3875 mm (0.015256 in.)
A: Thickness of new tappet
B: Thickness of removed tappet
C: Measured valve lash (clearance)
ENGINE MECHANICAL (K9K ENGINE) 6A2-7
Example of intake side:
When thickness of removed tappet is 7.8875 mm (0.310531 in.),
and measured valve lash (clearance) is 0.200 mm (0.00787 in.).
A = 7.8875 mm (0.310531 in.) + 0.200 mm (0.00787 in.) – 0.1875
mm (0.007382 in.) = 7.900 mm (0.31102 in.)
Calculated thickness of new tappet = 7.900 mm (0.31102 in.)
4) Select new tappet (1) with a thickness as close as possible
to calculated value.
Available new tappets
2
1
Thickness
mm (in.)
7.550 mm (0.29724 in.)
7.575 mm (0.29823 in.)
7.600 mm (0.29921 in.)
7.625 mm (0.30020 in.)
7.650 mm (0.30118 in.)
7.675 mm (0.30217 in.)
7.700 mm (0.30315 in.)
7.725 mm (0.30413 in.)
7.750 mm (0.30512 in.)
7.775 mm (0.30610 in.)
7.800 mm (0.30709 in.)
7.825 mm (0.30807 in.)
7.850 mm (0.30906 in.)
Thickness
mm (in.)
7.875 mm (0.31004 in.)
7.900 mm (0.31102 in.)
7.925 mm (0.31201 in.)
7.950 mm (0.31299 in.)
7.975 mm (0.31398 in.)
8.000 mm (0.31496 in.)
8.025 mm (0.31595 in.)
8.050 mm (0.31693 in.)
8.075 mm (0.31791 in.)
8.100 mm (0.31890 in.)
8.125 mm (0.31988 in.)
8.150 mm (0.32087 in.)
2. Tappet thickness
5) Install new tappet and camshaft referring to “Camshaft and
Tappet Removal and Installation” in this section.
6) Measure valve lashes again referring to “Measurement of
Valve Lash (Clearance)” under “Valve Lash (Clearance)” in
this section.
7) Install cylinder head cover referring to “Cylinder Head Cover
Removal and Installation” in this section.
6A2-8 ENGINE MECHANICAL (K9K ENGINE)
Repair Instructions
Air Cleaner Element Removal and Installation
Removal
1) Open air cleaner case (2) unhooking its clamps (1).
2) Remove air cleaner element from case.
1
Installation
2
Reverse removal procedure for installation.
1
Air Cleaner Element Inspection and Cleaning
Inspection
Check element for dirt. Replace if excessively dirty element.
Cleaning
When cleaning element, blow off dust by compressed air from air
outlet side of element (i.e., the side facing up when installed in air
cleaner case.
Air Cleaner Assembly Removal and Installation
Removal
1) Disconnect negative (–) cable at battery.
1
3
2
2) Disconnect IAT sensor No.1 connector (1).
3) Disconnect air cleaner outlet hose (2) from air cleaner
assembly (3).
4) Remove air cleaner assembly from vehicle.
ENGINE MECHANICAL (K9K ENGINE) 6A2-9
Installation
Reverse removal procedure for installation noting the followings.
• Tighten air cleaner outlet hose clamp (1) to specified torque.
Tightening torque
Air cleaner outlet hose clamp (a):
2.0 N·m (0.2 kg-m, 1.5 lb-ft)
1, (a)
Cylinder Head Cover Components
1
2
4
3
1. Cylinder head cover bolt
: Tighten 12 N·m (1.2 kg-m, 9.0 lb-ft) by
the specified procedure.
3. Cylinder head cover gasket
Tightening torque
2. Cylinder head cover
4. Cylinder head
: Apply sealant Loctite 518® referring to “Installation” under
“Cylinder Head Cover Removal and Installation”.
Do not reuse.
Cylinder Head Cover Removal and Installation
Removal
1) Disconnect negative (–) cable at battery.
2) Remove drive belt referring to “Generator Drive Belt
Removal and Installation” in Section 6H2.
6A2-10 ENGINE MECHANICAL (K9K ENGINE)
2
1
3
“1”
“5”
“7”
“3”
“2”
“6”
“8”
“4”
3) Remove injector cover (1), generator upper bracket (2), timing belt upper cover (3) and injector return hose cover .
4) Disconnect breather hose from cylinder head cover.
5) Loosen cylinder head cover bolts in such order (“1” to “8”) as
shown in the figure and remove them.
6) Remove cylinder head cover (1).
1
Installation
“A”
1) Remove oil, old sealant and dust from sealing surfaces. After
cleaning, apply sealant “A” to cylinder head sealing surface
area as shown in the figure.
“A”: Loctite 518®
“a”: 2 mm (0.08 in.)
“a”
“A”
“A”
“8”, (a)
“7”, (a)
“4”, (a)
“3”, (a)
“2”, (a)
“1”, (a)
“6”, (a)
“5”, (a)
2) Install cylinder head cover to cylinder head as follows.
a) Fit cylinder head cover to cylinder head with new gasket.
b) Tighten cylinder head cover bolts temporarily by hand.
c) Tighten cylinder head cover bolts specified torque by
numerical order as shown in figure.
Tightening torque
Cylinder head cover bolt (a):
Tighten 12 N·m (1.2 kg-m, 9.0 lb-ft) by the specified procedure
3) Connect breather hose to cylinder head cover.
ENGINE MECHANICAL (K9K ENGINE) 6A2-11
3
(a)
2
1
4) Install injector return hose cover, timing belt upper cover (1),
generator upper bracket (2) and injector cover (3).
Tightening torque
Generator upper bracket bolt (a):
40 N·m (4.0 kg-m, 29.0 lb-ft)
5) Install drive belt referring to “Generator Drive Belt Removal
and Installation” in Section 6H2.
6) Connect negative (–) cable at battery.
Oil Pressure Switch Removal and Installation
Removal
1) Detach degassing tank from its bracket.
2) Disconnect oil pressure switch connector (1).
3) Remove oil pressure switch (2).
2
1
Installation
1) Install oil pressure switch (1) with new gasket.
2) Tighten oil pressure switch (1) to specified torque.
Tightening torque
Oil pressure switch (a): 25 N·m (2.5 kg-m, 18.0 lb-ft)
1, (a)
2
3) Connect oil pressure switch connector (2).
4) Install degassing tank to its bracket.
5) Start engine and check for oil leakage.
Heat Exchanger Removal and Installation
Removal
1) Drain engine coolant referring to “Coolant Replacement” in
Section 6B2.
2) Detach degassing tank from its bracket.
6A2-12 ENGINE MECHANICAL (K9K ENGINE)
3) Remove oil filter unit bracket (1).
4) Disconnect heat exchanger hoses (1), and remove heat
exchanger (2).
Installation
1) Install heat exchanger (1) with new gasket at specified position with which heat exchanger hoses (2) do not interfere in
vacuum pump oil return hose and radiator outlet hose.
Tightening torque
Heat exchanger bolt (a): 45 N·m (4.5 kg-m, 32.5 lb-ft)
2) Connect heat exchanger hoses to heat exchanger.
3) Install oil filter unit bracket (1) with new gasket.
NOTE:
Be sure to align lug (2) of oil filter unit bracket (1) with
hole (3) of heat exchanger (4).
Tightening torque
Oil filter unit bracket bolt (a): 45 N·m (4.5 kg-m, 32.5 lb-ft)
4) Install degassing tank to its bracket.
5) Fill engine coolant referring to “Coolant Replacement” in section 6B2.
6) Check engine oil level referring to “Engine Oil and Filter” in
Section 0B.
7) Check to make sure that there is no oil leakage and coolant
leakage at each connection.
ENGINE MECHANICAL (K9K ENGINE) 6A2-13
EGR Valve and Intake Pipe Components
1
3
4
2
21 N·m (2.1 kg-m)
3
5
6
12
8
11
7
21 N·m (2.1 kg-m)
10
1. EGR valve body
5. Gasket
9. EGR valve bolt
2. EGR valve body bolt
6. EGR valve
10. Intake pipe bolt
3. O-ring
: Apply engine oil.
7. EGR valve heat shield
11. EGR pipe
4. Intake pipe
8. EGR valve nut
12. EGR pipe clamp
12 N·m (1.2 kg-m)
9
12 N·m (1.2 kg-m)
Tightening torque
Do not reuse.
EGR Valve and Intake Pipe Removal and
Installation
Removal
1) Disconnect negative (–) cable at battery.
6
2
1
7
8
3
4
5
2)
3)
4)
5)
6)
7)
Disconnect connector (1) from EGR valve (2).
Remove air intake pipe bolt (3).
Disconnect hose (4) from oil vapor recirculation valve (5).
Remove EGR valve nuts (6) and bolt (7).
Remove oil vapor pipe and heat shield (8) from EGR valve.
Remove EGR valve and its gasket from EGR unit.
6A2-14 ENGINE MECHANICAL (K9K ENGINE)
1
8) Remove turbocharger outlet hose No.2 (1).
1
9) Remove intake pipe (1).
10) Remove EGR pipe after unclamping its clamp by special
tool.
1
Special tool
(A): 09910-68110
2
1
(A)
1
11) Remove EGR valve body (1) from cylinder head.
ENGINE MECHANICAL (K9K ENGINE) 6A2-15
Installation
1
1) Install EGR valve body (1) to cylinder head.
Tightening torque
EGR valve body bolt (a):
21 N·m (2.1 kg-m, 15.5 lb-ft)
(a)
1
2) Install turbocharger outlet hose No2.
3) Install EGR pipe (2) clamping new clamp (1) by special tool.
1
Special tool
(A): 09910-68110
2
1
(A)
1
(a)
3
4) Connect hose (2) to oil vapor recirculation valve.
5) Apply engine oil to O-ring, and install EGR valve (1), EGR
valve heat shield (4) and intake pipe (3) with new gasket and
new O-ring.
Tightening torque
EGR valve bolt and nut (a):
12 N·m (1.2 kg-m, 9.0 lb-ft)
Intake pipe bolt (b): 21 N·m (2.1 kg-m, 15.5 lb-ft)
4
2
(b)
6A2-16 ENGINE MECHANICAL (K9K ENGINE)
EGR Valve and Intake Pipe Inspection
EGR valve body
Check inside (1) of EGR valve body (2) for wear or damaged.
2
EGR stepper motor
1
Refer to “EGR Valve Inspection” in Section 6E2.
ENGINE MECHANICAL (K9K ENGINE) 6A2-17
Turbocharger Components
WARNING:
To avoid danger of being burned, do not service exhaust system while it is still hot. Service should be
performed after system cools down.
16
15 N·m (1.5 kg-m)
13
15
23 N·m (2.3 kg-m)
14
1
8
7
2
26 N·m (2.6 kg-m)
5
9
26 N·m (2.6 kg-m)
3
11
10
12
4
6
12 N·m (1.2 kg-m)
13
1. Turbocharger outlet
7. Turbocharger
13. O-ring
: Apply engine oil.
2. Turbocharger outlet nut
8. Exhaust manifold
14. Lubrication pipe
3. Turbocharger bracket bolt
: Tighten 21 N·m (2.1 kg-m, 15.5 lb-ft) by
the specified procedure.
9. Clamp
15. Lubrication pipe union bolt No.1
4. Turbocharger bracket
10. Air cleaner outlet pipe
5. Turbocharger nut
11. Gasket
16. Lubrication pipe union bolt No.2
Tightening torque
6. Return pipe bolt
12. Turbocharger oil return pipe
Do not reuse.
6A2-18 ENGINE MECHANICAL (K9K ENGINE)
Turbocharger Removal and Installation
WARNING:
To avoid danger of being burned, do not service exhaust
system while it is still hot. Service should be performed
after system cools down.
Removal
1) Disconnect negative (–) cable at battery.
2) Remove air cleaner assembly referring to “Air Cleaner
Assembly Removal and Installation” in this section.
3) Remove air cleaner outlet pipe (1) and hose (2).
4) Remove turbocharger outlet hose No.1 (3) from turbocharger.
5) Remove exhaust pipe referring to “Exhaust System Components” in Section 6K2.
3
1
2
6
5
3
6) Remove lubrication pipe (1) and turbocharger oil return pipe
(2).
7) Remove turbocharger outlet (3) and turbocharger bracket
(4).
8) Remove turbocharger (5) from exhaust manifold (6).
2
1
4
Installation
1) Clean mating surfaces of turbocharger, catalytic converter
and exhaust manifold.
ENGINE MECHANICAL (K9K ENGINE) 6A2-19
2) Install turbocharger (1) to exhaust manifold (2).
Tightening torque
Turbocharger nut (a): 26 N·m (2.6 kg-m, 19.0 lb-ft)
3) Apply engine oil to O-rings, and install lubrication pipe (3)
and turbocharger oil return pipe (4) with new O-ring.
2
(a)
1
(c)
(d)
(b)
5
Tightening torque
Lubrication pipe union bolt No.2 (b):
23 N·m (2.3 kg-m, 17.0 lb-ft)
Lubrication pipe union bolt N0.1 (c):
15 N·m (1.5 kg-m, 11.0 lb-ft)
Lubrication pipe stiffener bolt (d):
12 N·m (1.2 kg-m, 9.0 lb-ft)
Turbocharger oil return pipe bolt (e):
12 N·m (1.2 kg-m, 9.0 lb-ft)
4) Install turbocharger outlet (5).
4
3
(f)
6
7, (g)
8, (g)
Tightening torque
Turbocharger outlet nut (f): 26 N·m (2.6 kg-m, 19.0 lb-ft)
(e)
5) Install turbocharger bracket (6) as follows.
a) Temporarily tighten bracket bolt No.1 and No.2 (7 and 8).
b) Tighten bracket bolt No.1 (7) first, and then tighten bracket
bolt No.2 (8) to specified torque.
Tightening torque
Turbocharger bracket bolt (g):
Tighten 21 N·m (2.1kg-m, 15.5 lb-ft) by the specified procedure
6) Install exhaust pipe referring to “Exhaust System Components” in Section 6K2.
1
7) Install turbocharger outlet hose No.1 (1) to turbocharger.
8) Install air cleaner outlet hose (2) and pipe (3) to turbocharger.
Tightening torque
Air cleaner outlet hose clamp:
2.0 N·m (0.2 kg-m, 1.5 lb-ft)
Air cleaner outlet pipe clamp:
2.0 N·m (0.2 kg-m, 1.5 lb-ft)
2
3
9) Install air cleaner assembly referring to “Air Cleaner Assembly Removal and Installation” in this section.
10) Connect negative (–) cable at battery.
11) Using SUZUKI scan tool, cut fuel injection referring to “Operation Manual”.
12) Crank engine for 15 seconds in order to lubricate turbocharger.
13) Check to make sure that there is no oil leakage and exhaust
gas leakage at each connection.
6A2-20 ENGINE MECHANICAL (K9K ENGINE)
Turbocharger Inspection
Rotate turbine shaft (1) by hand and verify that it turns smoothly
without any abnormal noise and excessive runout.
If a malfunction is found, replace the turbocharger.
1
Exhaust Manifold Components
WARNING:
To avoid danger of being burned, do not service exhaust system while it is still hot. Service should be
performed after system cools down.
2
1
3
1. Exhaust manifold
2. Exhaust manifold gasket
3. Exhaust manifold nut
: Tighten 26 N·m (2.6 kg-m, 19.0 lb-ft) by the specified procedure.
Tightening torque
Do not reuse.
ENGINE MECHANICAL (K9K ENGINE) 6A2-21
Exhaust Manifold Removal and Installation
WARNING:
To avoid danger of being burned, do not service exhaust
system while it is still hot. Service should be performed
after system cools down.
Removal
1) Disconnect negative (–) cable at battery.
2) Remove turbocharger assembly referring to “Turbocharger
Removal and Installation” in this section.
3) Remove EGR pipe referring to “EGR Valve and Intake Pipe”
in this section.
4) Loosen exhaust manifold nuts in numerical order (“1” to “8”)
evenly as indicated in the figure, and remove them.
5) Remove exhaust manifold (1) from cylinder head (2).
Installation
1) Install exhaust manifold (1) to cylinder head (2) as follows.
a) Fit exhaust manifold to cylinder head with new gasket.
b) Tighten exhaust manifold nuts temporarily by hand.
c) Tighten exhaust manifold nuts specified torque by numerical order as shown in figure.
Tightening torque
Exhaust manifold nut (a):
Tighten 26 N·m (2.6 kg-m, 19.0 lb-ft) by the specified procedure
2) Install EGR pipe referring to “EGR Valve and Intake Pipe
Removal and Installation” in this section.
3) Install turbocharger assembly referring to “Turbocharger
Removal and Installation” in this section.
4) Connect negative (–) cable at battery.
5) Check to make sure that there is no oil leakage and exhaust
gas leakage at each connection.
6A2-22 ENGINE MECHANICAL (K9K ENGINE)
Oil Pan and Oil Pump Strainer Components
15
21 N·m (2.1 kg-m)
1
2
8 N·m (0.8 kg-m)
4
3
14
6
7
16
6
8
12 N·m (1.2 kg-m)
5
9
10
12
11
13
35 N·m (3.5 kg-m)
1. Upper oil pan gasket
8. Oil pump strainer bolt
15. Level gage tube nut
2. Oil pan baffle plate bolt
9. Lower oil pan gasket
16. Level gage tube
3. Oil pan baffle plate
10. Lower oil pan
Tightening torque
4. Upper oil pan
: Apply sealant RHODORSEAL 5661® referring to “Installation” under “Oil Pan and Oil Pump Strainer Removal and
Installation”.
11. Lower oil pan bolt
: Tighten 12 N·m (1.2 kg-m, 9.0 lb-ft)
by the specified procedure.
Do not reuse.
5. Upper oil pan bolt
: Tighten 6 N·m (0.6 kg-m, 4.5 lb-ft) and 16 N·m (1.6 kg-m,
12.0 lb-ft) by the specified procedure.
12. Engine oil drain plug gasket
6. O-ring
: Apply engine oil.
13. Engine oil drain plug
7. Oil pump strainer
14. Level gauge
ENGINE MECHANICAL (K9K ENGINE) 6A2-23
Oil Pan and Oil Pump Strainer Removal and
Installation
Removal
1) Disconnect negative (–) cable at battery.
2) Drain engine oil referring to “Engine Oil and Filter Change” in
Section 0B.
3) Remove engine hood after disconnecting windshield washer
hose.
4) Remove oil level gauge.
5) Remove clutch operating cylinder referring to “Transmission
Dismounting and Remounting” in Section 7A2.
6) To facilitate and ensure removal of oil pan, increase clearance between engine and vehicle body according to the following procedures.
a) Install lifting device (1).
b) Remove engine mounting nuts (2).
c) Hoist engine 15 – 20 mm (0.6 – 0.8 in.).
1
CAUTION:
Do not hoist engine more than instructed above. That
may cause trouble to engine or transmission.
d) Remove engine left mounting (3).
7) Remove transmission to engine bolts (4).
4
2
4
2
2
3
1
1
8) Remove engine mounting bracket bolts (1).
9) Remove accessory bracket bolt (2).
2
6A2-24 ENGINE MECHANICAL (K9K ENGINE)
“19”
“17”
“15” “13” “11” “9”
“7”
“5”
“3”
“21”
“1”
10) Loosen lower oil pan bolts in numerical order (“1” to “22”) as
shown in figure, and remove them.
11) Remove lower oil pan from upper oil pan.
“2”
“22”
“4”
“20”
“18”
“16” “14”
“12”
“8”
“10”
“6”
12) Remove oil pump strainer (1) from upper oil pan (2).
1
2
“13”
“11”
“17”
“9”
“15”
“7”
“5”
“3”
“1”
“19”
13) Loosen upper oil pan bolts in numerical order (“1” to “20”) as
shown in figure, and remove them.
14) Remove upper oil pan from cylinder block.
“20”
“12”
“18”
“14”
“16”
“10”
“2”
“6”
“8”
“4”
1
15) Remove oil pan baffle plate (1) from upper oil pan.
ENGINE MECHANICAL (K9K ENGINE) 6A2-25
Installation
1) Clean sealing surfaces on cylinder block, upper oil pan and
lower oil pan.
2) Clean Inside of oil pan and oil pump strainer screen (1).
1
3) Install oil pan baffle plate to upper oil pan.
1
Tightening torque
Oil pan baffle plate bolt (a): 8 N·m (0.8 kg-m, 6.0 lb-ft)
(a)
4) Apply sealant “A” to cylinder block and gasket holder sealing
surface area as shown in the figure.
[A]
“A”: RHODORSEAL 5661®
[A]: Crankshaft pulley side
“A”
[B]: Flywheel side
“a”: 5 mm (0.20 in.)
“b”: 7 mm (0.27 in.)
“a”
“A”
“b”
“A”
“A”
[B]
“a”
“A”
“A”
6A2-26 ENGINE MECHANICAL (K9K ENGINE)
“10”
“8”
“12”
“6”
“14” “16”
“18”
“20”
“4”
“2”
“1”, (a)
“3”
“9”
“7”
“11” “5”
“13” “15”
“19”
“17”
(a)
5) Install upper oil pan to cylinder block as follows.
a) Fit upper oil pan to cylinder block with new gasket.
b) Tighten upper oil pan bolts temporarily by hand.
c) Tighten upper oil pan bolts (“1” to “8”) to 6 N·m (0.6 kg-m,
4.5 lb-ft) according to numerical order in figure.
d) Tighten upper oil pan bolts (“1” to “8”) to 16 N·m (1.6 kg-m,
12.0 lb-ft) by numerical order as shown in figure.
e) Tighten upper oil pan bolts (“9” to “20”) to 6 N·m (0.6 kg-m,
4.5 lb-ft) according to numerical order in figure.
f) Tighten upper oil pan bolts (“9” to “20”) to 16 N·m (1.6 kg-m,
12.0 lb-ft) by numerical order as shown in figure.
Tightening torque
Upper oil pan bolt (a):
Tighten 6 N·m (0.6 kg-m, 4.5 lb-ft) and 16 N·m (1.6 kg-m,
12.0 lb-ft) by the specified procedure
6) Apply engine oil to O-ring, and install oil pump strainer (1) to
upper oil pan (2) with new O-ring.
Tightening torque
Oil pump strainer bolt (a): 12 N·m (1.2 kg-m, 9.0 lb-ft)
2
“4”
“6”
1
“8” “10” “12” “14” “16” “18”
“20”
“2”
“22”
“21”
“1”, (a)
“19”
“3”
“5”
“7”
“9”
“11”
“13”
“15”
“17”
7) Install lower oil pan to upper oil pan as follows.
a) Fit lower oil pan (1) to upper oil pan.
b) Tighten lower oil pan bolts temporarily by hand.
c) Tighten lower oil pan bolts to specified torque by numerical
order as shown in figure.
Tightening torque
Lower oil pan bolt (a):
Tighten12 N·m (1.2 kg-m, 9.0 lb-ft) by the specified procedure
8) Install engine mounting bracket bolts (1).
1, (a)
Tightening torque
Engine mounting bracket bolt (a):
40 N·m (4.0 kg-m, 29.0 lb-ft)
9) Install accessory bracket bolt (2).
Tightening torque
Accessory bracket bolt (b):
28 N·m (2.8 kg-m, 20.5 lb-ft)
1, (a)
2, (b)
ENGINE MECHANICAL (K9K ENGINE) 6A2-27
10) Install engine to vehicle as follows.
a) Install engine left mounting (1).
b) Lower engine.
c) Tighten engine mounting nuts (2) to specified torque.
5, (c)
2, (a)
5, (c)
Tightening torque
Engine mounting nut (a):
55 N·m (5.5 kg-m, 40.0 lb-ft)
d) Remove lifting device (3).
11) Install drain plug (4) to oil pan with new gasket.
Tightening torque
Engine oil drain plug (b): 35 N·m (3.5 kg-m, 25.5 lb-ft)
4, (b)
2, (a)
1
2, (a)
12) Install transmission to engine bolts (5).
3
Tightening torque
Transmission to engine bolt (c):
55 N·m (5.5 kg-m, 40.0 lb-ft)
13) Apply engine oil to O-ring (1), and install oil level gauge with
new O-ring.
(a)
1
Tightening torque
Oil level gauge nut (a): 21 N·m (2.1 kg-m, 15.5 lb-ft)
14) Install clutch operating cylinder referring to “Clutch Operating
Cylinder Removal and Installation” in Section 7C2.
15) Refill engine oil referring to “Engine Oil and Filter” in Section
0B.
16) Connect negative (–) cable at battery.
17) Check to make sure that there is no oil leakage at each connection.
Engine Assembly Removal and Installation
Removal
1) Disconnect positive (+) and negative (–) cable at battery.
2) Remove engine hood after disconnecting windshield washer
hose.
3) Remove air cleaner hose and pipe.
4) Remove radiator referring to “Radiator Removal and Installation” in Section 6B2.
5) Detach main fuse/relay box from its bracket.
6) Drain engine coolant referring to “Coolant Replacement” in
section 6B2.
6A2-28 ENGINE MECHANICAL (K9K ENGINE)
7) Remove degassing tank referring to “Radiator Removal and
Installation” in Section 6B2.
8) Remove fuel filter referring to “Fuel Filter Removal and
Installation” in Section 6C2.
9) Disconnect discharge hose pipe from A/C compressor referring to “Major Components and Location” in section 1B.
10) Remove transmission referring to “Transmission Dismounting and Remounting” in Section 7A2.
11) Remove starting motor referring to “Starting Motor Dismounting and Remounting” in Section 6G2.
10
7
3
8
4
12
13
2
5
9
6
1
11
12) Disconnect the following electric wires, and then release wire
harnesses from clamps.
• ECM connectors (1)
• IAT sensor No.1 connector (2)
• Main fuse box connectors (3 and 4)
• Engine harness to main harness connector (5)
• Magnet clutch connector (6) of A/C compressor
• Supplementary fuse box connector (7)
• Battery to main harness connector (8)
• Pre-heating unit connector (9)
• Ground terminal (10 and 11)
13) Disconnect the following hoses.
• Brake booster hose (12) and air lock hub hose (13) from vacuum pump
• Heater inlet hose No. 1 from thermo plunger
• Radiator upper hose from thermostat assembly
• Heater outlet hose from heater core
14) With hose connected, detach power steering pump from its
bracket.
15) Drain engine oil, if necessary.
ENGINE MECHANICAL (K9K ENGINE) 6A2-29
16) Install lifting device (1).
17) Remove engine mounting nuts (2).
18) Before lifting engine, check to ensure all hoses, electric wires
and cables are disconnected from engine.
19) Remove engine assembly from vehicle.
1
2
2
Installation
CAUTION:
Before installing intake air pressure sensor hose,
degrease connect part of hose and intercooler outlet
hose. Otherwise hose may become detached and cause
turbo system failure.
Reverse removal procedure for installation noting the following.
• Tighten engine mounting nuts (1) to specified torque.
Tightening torque
Engine mounting nut (a):
55 N·m (5.5 kg-m, 40.0 lb-ft)
1, (a)
1, (a)
• Install transmission assembly referring to “Transmission Dismounting and Remounting” in Section 7A2.
• Check to ensure that all removed parts are back in place.
Reinstall any necessary parts which have not been reinstalled.
• Refill engine oil referring to “Engine Oil and Filter” in Section
0B.
• Refill cooling system referring to “Coolant Replacement” in
Section 6B2.
• After connecting discharge hose pipe to A/C compressor,
charge A/C system referring to “Charging Procedure” in Section 1B.
6A2-30 ENGINE MECHANICAL (K9K ENGINE)
• Check to make sure that there is no fuel leakage, oil leakage,
coolant leakage, refrigerant and exhaust gas leakage at
each connection.
Timing Belt and Belt Tensioner Components
1
10
2
9
13
21 N·m (2.1 kg-m)
11
8
27 N·m (2.7 kg-m)
12
9 N·m (0.9 kg-m)
14
3
15
8 N·m (0.8 kg-m)
7
6
5
4
1. Timing belt upper cover
7. Crankshaft pulley
13. Generator upper bracket support
bolt
2. Generator upper bracket support
8. Timing belt tensioner bolt
14. CMP sensor
3. Timing belt lower cover
9. Timing belt tensioner
15. CMP sensor bolt
4. Crankshaft pulley bolt
: Tighten 120 N·m (12.0 kg-m, 87.0 lb-ft) and 95° by
the specified procedure.
10. Timing belt
5. Washer
11. Timing belt inner cover
6. Crankshaft pulley
12. Timing belt inner cover bolt
Tightening torque
ENGINE MECHANICAL (K9K ENGINE) 6A2-31
Timing Belt and Belt Tensioner Removal and
Installation
Removal
1) Remove engine assembly from vehicle referring to “Engine
Assembly Removal and Installation” in this section.
2
1
2) Remove injector cover (1) and generator upper bracket (2).
3) Remove timing belt upper cover (1) after unhooking its tabs
(2).
4) Remove CMP sensor (3).
5) Remove timing belt lower cover (1) after unhooking its tabs
(3) and removing its plastic bolt (2).
6) Remove generator upper bracket support (1) from cylinder
head.
6A2-32 ENGINE MECHANICAL (K9K ENGINE)
7) Remove TDC pin cap (1).
8) Turn crankshaft pulley clockwise, and stop it just before
aligning hole (1) of camshaft timing belt pulley (2) matches
with hole (3) of cylinder head.
9) Insert special tool (A) into TDC pin hole as shown in figure.
Special tool
(A): 09919-58110
10) Turn crankshaft pulley clockwise until crankshaft touches
special tool (A).
11) Check that special tool (B) inserts holes of timing belt pulley
and cylinder head smoothly.
Special tool
(B): 09919-58120
ENGINE MECHANICAL (K9K ENGINE) 6A2-33
12) Loosen crankshaft pulley bolt as follows.
a) Lock flywheel using special tool (C).
Special tool
(C): 09916-98110
b) Remove special tools (A) and (B).
c) Loosen crankshaft pulley bolt, and remove crank shaft pulley.
d) Remove special tool (C).
e) Insert special tools (A) and (B) to removed positions at step
b).
13) Loosen timing belt tensioner bolt (2).
14) Remove timing belt (1).
15) Remove timing belt tensioner (5), timing belt pulley and timing belt inner cover (4), if necessary.
Installation
1) Clean mating surface of oil pump pulley, crankshaft timing
belt pulley and crankshaft accessory belt pulley.
2) Confirm that special tool (A) and (B) is installed to cylinder
block and cylinder head. If special tool(s) is removed, install
special tool(s) referring to “Pistons, Piston Rings, Connecting
Rods and Cylinders Removal and Installation” in this section
or “Camshaft and Tappet Removal and Installation” in this
section.
Special tool
(A): 09919-58110
(B): 09919-58120
6A2-34 ENGINE MECHANICAL (K9K ENGINE)
3) Install timing belt inner cover (1), timing belt pulley (2) and
timing belt tensioner (3), if necessary.
CAUTION:
Install timing belt pulley so that boss side (6) may come
to the gasket holder plate side.
NOTE:
Be sure to position peg (5) of timing belt tensioner (3) to
groove (4) of cylinder block precisely.
Tightening torque
Timing belt inner cover bolt: 9 N·m (0.9 kg-m, 7.0 lb-ft)
[A]: Gasket holder plate side
4) Install timing belt (1) aligning its matching lines (2) with
matching marks (3) of camshaft pulley (4) and high pressure
pump pulley (5).
NOTE:
• Be sure to install timing belt to proper direction as
shown in figure.
• Timing belt has 18 teeth between its matching lines.
5) Using hexagon wrench, align movable index (1) of timing belt
tensioner (2) to specified position as shown in figure by turning timing belt tensioner counterclockwise. And then, tighten
timing belt tensioner bolt to specified torque.
2
1
Tightening torque
Timing belt tensioner bolt (a): 27 N·m (2.7 kg-m, 19.5 lb-ft)
ENGINE MECHANICAL (K9K ENGINE) 6A2-35
6) Install crankshaft pulley as follows.
a) Lock flywheel using special tool (C).
Special tooll
(C): 09916-98110
b) Install crankshaft pulley and tighten its bolt as follows.
i) Tighten crankshaft pulley bolt to 120 N·m (12.0 kg-m, 87.0
lb-ft).
ii) Retighten crankshaft pulley bolt to 95°.
Tightening torque
Crankshaft pulley bolt (a):
Tighten 120 N·m (12.0 kg-m, 87.0 lb-ft) and 95° by the
specified procedure
7) Remove special tools (A), (B) and (C).
8) Turn crankshaft two revolutions clockwise, and stop it just
before aligning hole (1) of camshaft timing belt pulley (2)
matches with hole (3) of cylinder head.
9) Insert special tool (A) into TDC pin hole as shown in figure.
Special tool
(A): 09919-58110
10) Turn crankshaft pulley clockwise until crankshaft touches
special tool (A).
6A2-36 ENGINE MECHANICAL (K9K ENGINE)
11) Check that special tool (B) inserts holes of timing belt pulley
and cylinder head smoothly.
Special tool
(B): 09919-58120
12) Check that there are 18 teeth between matching marks (1) of
camshaft pulley (2) and high pressure pump pulley (3).
If not, remove timing belt and return to step 3).
13) Loosen timing belt tensioner bolt (1) while holding timing belt
tensioner by hexagon wrench, and then gradually bring movable index (3) to center of timing window (2) turning timing
belt tensioner clockwise. And then, tighten timing belt tensioner bolt (1) as specified torque.
Tightening torque
Timing belt tensioner bolt (a): 25 N·m (2.5 kg-m, 18.0 lb-ft)
14) Apply sealant “A” to thread of TDC pin cap (1), and tighten
TDC pin cap as specified torque.
Tightening torque
TDC pin cap (a): 20 N·m (2.0 kg-m, 14.5 lb-ft)
“A”: RHODORSEAL 5661®
15) Install generator upper bracket support (1).
Tightening torque
Generator upper bracket support bolt (a):
21 N·m (2.1 kg-m, 15.5 lb-ft)
ENGINE MECHANICAL (K9K ENGINE) 6A2-37
16) Install timing belt lower cover (1) hooking its tabs (2), and
install its plastic bolt (3).
NOTE:
When installing timing belt lower cover, position its tab
(4) into hole (5) of inner timing cover.
17) Install timing belt upper cover (1) hooking its tabs (2).
18) Install CMP sensor (3).
Tightening torque
CMP sensor bolt:
8 N·m (0.8 kg-m, 6.0 lb-ft)
(a)
2
19) Install generator upper bracket (1) and injector cover (2).
Tightening torque
Generator upper bracket bolt (a):
40 N·m (4.0 kg-m, 29.0 lb-ft)
20) Install engine assembly to vehicle referring to “Engine
Assembly Removal and Installation” in this section.
1
6A2-38 ENGINE MECHANICAL (K9K ENGINE)
Timing Belt and Belt Tensioner Inspection
• Inspect timing belt for wear or crack.
Replace it as necessary.
• Inspect timing belt tensioner and roller for smooth rotation.
Replace it as necessary.
ENGINE MECHANICAL (K9K ENGINE) 6A2-39
Oil Pump and Oil Pump Chain Components
CAUTION:
Never disassemble oil pump. Disassembly will spoil its original function. If faulty condition is found,
replace it with new one.
1
2
3
4
5
7
6
8
25 N·m (2.5 kg-m)
1. Oil pump drive sprocket
5. Gasket holder plate oil seal
: Apply engine oil to oil seal lip.
Tightening Torque
2. Oil pump chain
: Apply engine oil to sliding surface.
6. Gasket holder plate bolt
: Tighten 11 N·m (1.1 kg-m, 8.0 lb-ft) by the specified procedure.
Do not reuse.
3. Gasket
7. Oil pump assembly
: Never disassemble oil pump assembly
4. Gasket holder plate
8. Oil pump assembly bolt
6A2-40 ENGINE MECHANICAL (K9K ENGINE)
Oil Pump and Oil Pump Chain Removal and
Installation
Removal
1) Remove engine assembly from vehicle referring to “Engine
Assembly Removal and Installation” in this section.
2) Remove upper oil pan referring to “Oil Pan and Oil Pump
Strainer Removal and Installation” in this section.
3) Remove oil pump (1) from cylinder block.
4) Remove timing belt referring to “Timing Belt and Belt Tensioner Removal and Installation” in this section.
5) Remove gasket holder plate (1).
6) Remove gasket holder plate oil seal (2).
7) Remove oil pump chain (1) and oil pump drive sprocket (2).
Installation
1) Install oil pump (1), oil pump chain (2) and oil pump drive
sprocket all together.
Tighten oil pump bolts to specified torque.
Tightening torque
Oil pump bolt (a): 25 N·m (2.5 kg-m, 18.0 lb-ft)
ENGINE MECHANICAL (K9K ENGINE) 6A2-41
2) Install gasket holder plate (1) to cylinder block with new gasket.
a) Tighten gasket holder plate bolts (“1” and “6”) to 11 N·m
(1.1 kg-m, 8.0 lb-ft).
b) Tighten gasket holder plate bolts (“2”, “3”, “4” and “5”) to 11
N·m (1.1 kg-m, 8.0 lb-ft).
Tightening torque
Gasket holder plate bolt (a):
Tighten 11 N·m (1.1 kg-m, 8.0 lb-ft) by the specified procedure
3) Install upper oil pan and lower oil pan referring to “Oil Pan
and Oil Pump strainer Removal and Installation” in this section.
4) Install new gasket holder plate oil seal (1) to gasket holder
plate using special tool as follows.
1
2
CAUTION:
(A)
(B)
3
4
5
Do not touch oil seal (1) so that it is extremely fragile.
Whenever installing new oil seal, it must be installed
using special tool (A), (B) and protector (2) supplied with
new oil seal. If it doesn’t follow the above-mentioned service, it may cause oil leak from oil seal.
Special tool
(A): 09911-98130
(B): 09911-98140
3. Bolt
4. Spacer
5. Installer
6
6. Nut
7. Not necessary.
7
6A2-42 ENGINE MECHANICAL (K9K ENGINE)
a)
b)
c)
d)
Install bolt (1) and spacer (2) of special tool to crankshaft.
Install protector (7) together with new oil seal (3) to spacer.
Install oil seal installer (4) of special tool to bolt (1).
Tighten nut (5) of special tool until oil seal installer (4)
comes into contact with gasket holder plate (6).
e) Remove special tool and protector.
5) Install timing belt referring to “Timing Belt and Belt Tensioner
Removal and Installation” in this section.
6) Install engine assembly to vehicle referring to “Engine
Assembly Removal and Installation” in this section.
Oil Pump and Oil Pump Chain Inspection
• Check rotor and oil pump cases for excessive wear or damage.
If any malcondition is found, replace oil pump assembly.
• Check teeth of oil pump drive sprocket for wear or damage.
If any malcondition is found, replace oil pump drive sprocket.
• Check teeth of oil pump sprocket for wear or damage.
If any malcondition is found, replace oil pump assembly.
ENGINE MECHANICAL (K9K ENGINE) 6A2-43
• Check oil pump chain for wear or damage.
If any malcondition is found, replace oil pump chain.
Camshaft and Tappet Components
12
16 N·m (1.6 kg-m)
11
10
2
2
9
1
8
2
10
3
6
5
4
7
1. Camshaft housing bolt
: Tighten 10 N·m (1.0 kg-m, 7.5 lb-ft)
by the specified procedure.
6. Camshaft pulley
11. Vacuum pump oil hose
2. Camshaft housing
: Apply engine oil to sliding surface
7. Camshaft pulley nut
: Tighten 30 N·m (3.0 kg-m, 22.0 lb-ft)
and 85° by the specified procedure.
12. Vacuum pump oil hose union bolt
3. Camshaft
: Apply engine oil to sliding surface
8. Camshaft cover
Tightening torque
4. Tappet
: Apply engine oil around tappet.
9. Camshaft cover bolt
: Tighten 5 N·m (0.5 kg-m, 4.0 lb-ft)
and 12 N·m (1.2 kg-m, 9.0 lb-ft).
Do not reuse.
5. Camshaft oil seal
:Apply engine oil to oil seal lip.
10. Gasket
6A2-44 ENGINE MECHANICAL (K9K ENGINE)
Camshaft and Tappet Removal and Installation
Removal
1) Remove engine assembly from vehicle referring to “Engine
Assembly Removal and Installation” in this section.
2) Remove timing belt referring to “Timing Belt and Tensioner
Removal and Installation” in this section.
3) Remove special tool (A).
Special tool
(A): 09919-58120
4) Remove camshaft pulley as follows.
a) Fix camshaft pulley using special tool.
(A)
Special tool
(A): 09917-68221
b) Loosen camshaft pulley nut, and remove camshaft pulley.
5) Remove cylinder head cover referring to “Cylinder Head
Cover Removal and Installation” in this section.
6) Disconnect vacuum pump oil hose (1) from camshaft cover
(2).
7) Remove camshaft cover (2).
2
1
"10"
"11"
"6"
"7"
"2"
"3"
"1"
"4"
"5"
"9"
"8"
"12"
8) Loosen camshaft housing bolts in numerical order (“1” to
“12”) as indicated in the figure, and remove them.
9) Remove camshaft housing and camshaft from cylinder head.
ENGINE MECHANICAL (K9K ENGINE) 6A2-45
10) Remove tappet (1) from cylinder head.
CAUTION:
Note original position in which each tappet was installed
when valve lash (clearance) adjustment is not necessary.
If each tappet is not installed to original position, engine
will spoil its original performance.
1
Installation
1) Apply engine oil around tappet (1), and then install it to cylinder head.
1
2) Remove oil, old sealant and dust from sealing surfaces. After
cleaning, apply sealant “A” to cylinder head (1) sealing surface area as shown in figure.
“A”: Loctite 5181®
“a”: 1 mm (0.04 in.)
3) Install camshaft to cylinder head as follows.
a) Direct key groove (2) upward by turning crankshaft (1)
clockwise.
2
1
6A2-46 ENGINE MECHANICAL (K9K ENGINE)
b) Fit camshaft pulley with camshaft aligning key (3) of camshaft pulley to key groove (4) of camshaft, and then tighten
camshaft pulley nut to temporary.
c) Apply engine oil to sliding surface of each camshaft and
camshaft journal.
2
4
1
3
d) Fit camshaft to cylinder head and install special tool into
holes of timing belt pulley (1) and cylinder head as shown in
figure.
Special tool
(A): 09919-58120
"3", (a) "7", (a)
"2", (a)
"11", (a) "12", (a)
"6", (a) "10", (a)
"8", (a) "4", (a)
"9", (a) "5", (a)
"1", (a)
4) Install camshaft housing to cylinder head as follows.
a) Fit camshaft housing to cylinder head in specified position
as shown.
b) Tighten camshaft housing bolts temporarily by hand.
c) Tighten camshaft housing bolts in numerical order as indicated in figure a little at a time till they are tightened to
specified torque.
Tightening torque
Camshaft housing bolt (a):
Tighten 10 N·m (1.0 kg-m, 7.5 lb-ft) by the specified procedure
5) Install camshaft cover (1) with new gasket.
(b)
Tightening torque
Camshaft cover bolt (b):
Tighten 5 N·m (0.5 kg-m, 4.0 lb-ft) and 12 N·m (1.2 kg-m,
9.0 lb-ft)
6) Connect vacuum pump oil hose (2) to rear camshaft (1)
cover with new gasket.
1
2
(c)
Tightening torque
Vacuum pump oil hose union bolt (c):
16 N·m (1.6 kg-m, 12.0 lb-ft)
7) Remove camshaft pulley and special tool.
ENGINE MECHANICAL (K9K ENGINE) 6A2-47
8) Install protector (2) together with new oil seal (1) using special tool with plastic hammer until special tool comes into
contact with cylinder head
CAUTION:
Do not touch oil seal (1) so that it is extremely fragile.
Whenever installing new oil seal, it must be installed
using special tool (A) and protector (2) supplied with new
oil seal. If it doesn’t follow the above-mentioned service,
it may cause oil leak from oil seal.
Special tool
(A): 09911-98120
9) Install cylinder head cover referring to “Cylinder Head Cover
Removal and Installation” in this section.
10) Install camshaft pulley (1) to camshaft (2) as follows.
a) Fit camshaft pulley with camshaft aligning key (3) of camshaft pulley to key groove (4) of camshaft.
1
4
2
3
b) Fix camshaft pulley using special tool.
(a)
(A)
Special tool
(A): 09917-68221
c) Tighten new camshaft pulley nut to 30 N·m (3.0 kg-m, 22.0
lb-ft).
d) Retighten camshaft pulley nut 85°.
Tightening torque
Camshaft pulley nut (a):
Tighten 30 N·m (3.0 kg-m, 22.0 lb-ft) and 85° by the specified procedure
11) Install special tool into timing belt pulley (1) and cylinder
head hole.
Special tool
(A): 09919-58120
12) Install timing belt referring to “Timing Belt and Tensioner
Removal and Installation” in this section.
13) Check valve lash (clearance) referring to “Valve Lash (Clearance)” in this section.
14) Install engine assembly to vehicle referring to “Engine
Assembly Removal and Installation” in this section.
6A2-48 ENGINE MECHANICAL (K9K ENGINE)
Camshaft and Tappet Inspection
Camshaft
• Check teeth of sprocket for wear or damage.
• Check journals and cam faces for wear or damage.
If any malcondition is found, replace camshaft.
• Using a micrometer, measure cam height “a”. If measured
height is out of specification, replace camshaft.
Cam height “a”
In: 43.985 – 44.045 mm (1.73170 – 1.73405 in.)
Ex: 44.565 – 44.625 mm (1.75453 – 1.75688 in.)
Camshaft Journal Wear
• Check camshaft journals and camshaft housings for pitting,
scratches, wear or damage.
If any malcondition is found, replace camshaft or cylinder
head with housing. Never replace cylinder head without
replacing housings.
• Check clearance between camshaft and camshaft journal
using gauging plastic as follows.
NOTE:
Do not rotate camshaft while gauging plastic is installed.
a)
b)
c)
d)
Clean housings and camshaft journals.
Remove all tappets.
Install camshaft to cylinder head.
Place a piece of gauging plastic to full width of journal of
camshaft (parallel to camshaft).
ENGINE MECHANICAL (K9K ENGINE) 6A2-49
"3", (a) "7", (a)
"2", (a)
"11", (a) "12", (a)
"6", (a) "10", (a)
"8", (a) "4", (a)
"9", (a) "5", (a)
"1", (a)
e) Install camshaft housing to cylinder head as follows.
i) Fit camshaft housing to cylinder head.
ii) Tighten camshaft housing bolts temporarily by hand.
iii) Tighten camshaft housing bolts in numerical order as indicated in figure a little at a time till they are tightened to
specified torque.
Tightening torque
Camshaft housing bolt (a):
Tighten 10 N·m (1.0 kg-m, 7.5 lb-ft) by the specified procedure
f) Remove housing, and using scale (2) on gauging plastic (1)
envelop, measure gauging plastic width at its widest point.
Camshaft journal clearance:
0.049 – 0.171 mm (0.00193 – 0.00673 in.)
g) If measured camshaft journal clearance exceeds limit, measure journal (housing) bore and outside diameter of camshaft journal. Replace camshaft or cylinder head assembly
whichever the difference from specification is greater.
Camshaft journal outside diameter [A]
No.6: 27.979 – 27.999 mm (1.10154 – 1.10232 in.)
Other: 24.979 – 24.999 mm (0.9835 – 0.98421 in.)
Camshaft journal bore diameter [B]
No.6: 28.040 – 28.060 mm (1.10394 – 1.10472 in.)
Other: 25.040 – 25.060 mm (0.98583 – 0.98661 in.)
6A2-50 ENGINE MECHANICAL (K9K ENGINE)
Camshaft Thrust Play
1) Clean housings and camshaft journals.
2) Remove all tappets.
3) Remove all valves referring to “Valves and Cylinder Head” in
this section.
4) Install camshaft to cylinder head.
"3", (a) "7", (a)
"2", (a)
"11", (a) "12", (a)
"6", (a) "10", (a)
"8", (a) "4", (a)
"9", (a) "5", (a)
"1", (a)
5) Install camshaft housing to cylinder head as follows.
a) Fit camshaft housing to cylinder head.
b) Tighten camshaft housing bolts temporarily by hand.
c) Tighten camshaft housing bolts in numerical order as indicated in figure a little at a time till they are tightened to
specified torque.
Tightening torque
Camshaft housing bolt (a):
Tighten 10 N·m (1.0 kg-m, 7.5 lb-ft) by the specified procedure
6) Measure camshaft thrust play using special tool and dial
gauge (1) as shown in figure.
If measured thrust play out of its specification, replace camshaft or cylinder head.
Special tool
(A): 09917-68110
Camshaft thrust play:
0.080 – 0.178 mm (0.00315 – 0.00700 in.)
Wear of Tappet
• Check tappet for pitting, scratches or damage.
If any malcondition is found, replace.
ENGINE MECHANICAL (K9K ENGINE) 6A2-51
• Measure cylinder head bore and tappet outside diameter to
determine cylinder head-to-tappet clearance. If clearance
exceeds specification, replace tappet or cylinder head.
Cylinder head to tappet clearance:
0.015 – 0.075 mm (0.00059 – 0.00295 in.)
Tappet outside diameter [A]:
34.965 – 34.985 mm (1.37658 – 1.37736 in.)
Cylinder head tappet bore [B]:
35.000 – 35.040 mm (1.37796 – 1.37952 in.)
6A2-52 ENGINE MECHANICAL (K9K ENGINE)
Valves and Cylinder Head Components
7
1
2
3
9
4
8
10
11
5
6
1. Valve cotter
6. Exhaust valve
2. Valve spring retainer
7. Cylinder head bolt
: Tighten 25 N·m (2.5 kg-m, 18.0 lb-ft) and 255° by
the specified procedure.
Tightening Torque
3. Valve spring
8. Cylinder head gasket
Apply engine oil to sliding surface of each parts.
4. Valve stem seal
9. Cylinder head
Do not reuse.
5. Intake valve
11. Cylinder block
10. Knock pin
Valves and Cylinder Head Assembly Removal
and Installation
Removal
1) Remove engine assembly from vehicle referring to “Engine
Assembly Removal and Installation” in this section.
2) Remove exhaust manifold referring to “Exhaust Manifold
Removal and Installation” in this section.
3) Remove camshaft from cylinder head referring to “Camshaft
and Tappet Removal and Installation” in this section.
ENGINE MECHANICAL (K9K ENGINE) 6A2-53
4) Remove EGR body and intake pipe referring to “EGR Body
and Intake Pipe Removal and Installation” in this section.
5) Remove thermostat assembly referring to “Thermostat
Assembly Removal and Installation” in Section 6B2.
6) Remove injection pump referring to “Injection Pump Removal
and Installation” in Section 6E2.
7) Remove common rail referring to “Common rail (High Pressure Fuel Injection Rail) Removal and Installation” in Section
6E2.
8) Remove fuel injector referring to “Fuel Injector Removal and
Installation” in Section 6E2.
9) Remove generator and generator upper bracket referring to
“Generator Dismounting and Remounting” in Section 6H2.
10) Remove grow plugs referring to “Grow Plug Removal and
Installation” in Section 6-2.
11) Loosen cylinder head bolts in numerical order as indicated in
figure, and remove them.
12) Check all around cylinder head for any other parts required
to be removed or disconnected and remove or disconnect
whatever necessary.
Installation
1) Clean mating surface of cylinder head and cylinder block.
Remove oil, old gasket and dust from mating surface.
2) Install knock pins (1) to cylinder block.
3) Install new cylinder head gasket (2) to cylinder block.
1
2
1
6A2-54 ENGINE MECHANICAL (K9K ENGINE)
4) Tighten new cylinder head bolts gradually as follows.
NOTE:
Do not oil cylinder head bolt.
a) Tighten all bolts to 25 N·m (2.5 kg-m, 18.0 lb-ft) according
to numerical order in figure.
b) Retighten all bolts 255° according to numerical order in figure.
Tightening torque
Cylinder head bolt (a):
Tighten 25 N·m (2.5 kg-m, 18.0 lb-ft) and 255° by the specified procedure
5) Install grow plugs referring to “Grow Plug Removal and
Installation” in Section 6-2.
6) Install generator and generator upper bracket referring to
“Generator Dismounting and Remounting” in Section 6H2.
7) Install fuel injector referring to “Fuel Injector Removal and
Installation” in Section 6E2.
8) Install common rail referring to “Common Rail (High Pressure Fuel Injection Rail) Removal and Installation” in Section
6E2.
9) Install injection pump referring to “Injection Pump Removal
and Installation” in Section 6E2.
10) Install thermostat referring to “Thermostat Assembly
Removal and Installation” in Section 6B2.
11) Install EGR body and intake pipe referring to “EGR Body and
Intake Pipe Removal and Installation” in this section.
12) Install tappet and camshaft to cylinder head referring to
“Camshaft and Tappet Removal and Installation” in this section.
13) Install exhaust manifold referring to “Exhaust Manifold
Removal and Installation” in this section.
14) Install engine assembly to vehicle referring to “Engine
Assembly Removal and Installation” in this section.
ENGINE MECHANICAL (K9K ENGINE) 6A2-55
Valves and Cylinder Head Assembly Inspection
Valve Protrusion
1) Clean valve face and then measure protrusion of each valve
using special tool and dial gauge as shown in figure.
If average is out of specification, grind valve seat and then
lap valve on seat.
Special tool
(A): 09910-26510/OUT 0000005
(A)
2
3
Valve protrusion
Intake and exhaust valve protrusion
“a”: –0.07 to 0.07 mm (–0.0027 to 0.0027 in.)
2. Intake valve
3. Exhaust valve
Valves and Cylinder Head Assembly Disassembly and Reassembly
Disassembly
1) Using special tool (A) and (B), compress valve springs and
then remove valve cotters (1) using special tool (C) as shown
in figure.
Special tool
(A): 09916-14510
(B): 09916-14521
(C): 09916-84511
2) Release special tool, and remove spring retainer and valve
spring.
3) Remove valve from combustion chamber side.
4) Measure stem seal height in order to install stem seal in
specified position as follows.
a) Fit pushrod (1) of special tool on valve stem seal.
b) Fit guide tube (2) of special tool over pushrod (1) until guide
tube comes into contact with cylinder head, and lock pushrod with screw (3).
c) Remove special tool.
Special tool
(A): 09916-58130
6A2-56 ENGINE MECHANICAL (K9K ENGINE)
(A)
5) Remove stem seal from valve stem using special tool.
Special tool
(A): 09916-48110
1
Reassembly
1) Apply engine oil to valve guide bore and valve stem, and
install valve to valve guide.
2) Install special tool to valve stem in order to prevent stem seal
from damage, and install stem seal to valve stem.
NOTE:
Be sure to remove special tool after installing stem seal.
Special tool
(A): 09916-58130
ENGINE MECHANICAL (K9K ENGINE) 6A2-57
3) Press into stem seal to valve stem in specified position as
follows.
a) Place special tool which is measured stem seal height in
removal procedure on valve stem seal.
Special tool
(A): 09916-58130
b) Press into stem seal tapping top of special tool by hand
until special tool touches cylinder head.
CAUTION:
Do not tap special tool by hammer.
It may result in misinstalling of stem seal and damage of
special tool.
NOTE:
Do not lubricate the valve stem seal before fitting then.
4) Install valve spring and spring retainer.
5) Using special tool (A) and (B), compress valve spring. And,
fit two valve cotters (1) into groove in valve stem using special tool (C) as shown in figure.
Special tool
(A): 09916-14510
(B): 09916-14521
(C): 09916-84511
6A2-58 ENGINE MECHANICAL (K9K ENGINE)
Valves and Cylinder Head Components
Inspection
Valve Guides
• Using a micrometer and bore gauge, take diameter readings
on valve stems and guides to check stem-to-guide clearance. Be sure to take reading at more than one place along
the length of each stem and guide.
If clearance exceeds specification, replace valve and valve
guide.
Valve stem-to-guide clearance
In: 0.015 – 0.049 mm (0.00059 – 0.00192 in.)
Ex: 0.029 – 0.063 mm (0.00115 – 0.00248 in.)
Valve stem diameter [A]
In: 5.969 – 5.985 mm (0.23500 – 0.23562 in)
Ex: 5.955 – 5.971 mm (0.23445 – 0.23507 in.)
Valve guide bore [B]
In and Ex: 6.000 – 6.018 mm (0.23622 – 0.23692 in.)
Valves
• Remove all carbon from valves.
• Inspect each valve for wear, burn or distortion at its face and
stem end, as necessary, replace it.
• Measure length “a” of valve.
If measured length is out of specification, replace valve.
Valve length “a”
In: 100.73 – 101.17 mm (3.9658 – 3.9830 in.)
Ex: 100.53 – 100.97 mm (3.9579 – 3.9751 in.)
"a"
"b"
• Measure diameter “b” of valve.
If measured diameter is out of specification, replace valve.
Valve head diameter “b”
In: 33.38 – 33.62 mm (1.3142 – 1.3236 in.)
Ex: 28.88 – 29.12 mm (1.1370 – 1.1464 in.)
ENGINE MECHANICAL (K9K ENGINE) 6A2-59
• Valve seat repair:
A valve seat not producing a uniform contact with its valve or
showing width of seating contact that is out of specified
range must be repaired by regrinding or by cutting and
regrinding and finished by lapping.
a) Valve Seat: Use valve seat cutters (1) to make a cut as
illustrated in figure.
Seat width
“a”: 1.8 mm (0.071 in.)
Seat angle
“b”: 89° 30’
b) Valve Lapping: Lap valve on seat in two steps, first with
coarse size lapping compound applied to face and the second with fine-size compound, each time using valve lapper
according to usual lapping method.
Cylinder Head
• Remove all carbon deposits from combustion chambers.
NOTE:
Do not use any sharp-edged tool to scrape off carbon
deposits. Be careful not to scuff or nick metal surfaces
when decarboning. The same applies to valves and valve
seats, too.
• Check cylinder head for cracks on intake and exhaust ports,
combustion chambers, and head surface.
Using a straightedge and thickness gauge, check flatness of
gasketed surface at a total of 2 locations. If distortion limit,
given below, is exceeded, replace cylinder head.
Limit of distortion for surface of cylinder head piston side:
0.05 mm (0.00197 in.)
6A2-60 ENGINE MECHANICAL (K9K ENGINE)
• Distortion of manifold seating faces:
Check seating faces of cylinder head for manifolds, using a
straightedge and thickness gauge, in order to determine
whether these faces should be corrected or cylinder head
replaced.
Limit of distortion for surface of cylinder head exhaust:
manifolds sides
0.2 mm (0.008 in.)
• Measure cylinder head height “a”.
If measured height is below its specification, replace cylinder
head.
Cylinder head height
“a”: 127 mm (5.00 in.)
Valve Springs
• Referring to data given below, check to be sure that each
spring is in sound condition, free of any evidence of breakage or weakening. Remember, weakened valve springs can
cause chatter, not to mention possibility of reducing power
output due to gas leakage caused by decreased seating
pressure.
Valve spring free length (In and Ex) “a”:
43.31 mm (1.7051 in.)
Valve spring preload (In and Ex):
23 N (2.3 kg) for 33.80 mm (5.0 lb/ 1.3307 in.)
50 N (5.0 kg) for 24.80 mm (11.0 lb/ 0.9764 in.)
Max. Valve Lift
1) Install valve, tappet and camshaft referring to “Install” under
“Valves and cylinder Head Removal and Installation” in this
section.
ENGINE MECHANICAL (K9K ENGINE) 6A2-61
2) Measure valve lift using dial gauge as shown in figure.
If measured valve lift is found to exceed its limit, adjust valve
lash (clearance) referring to “Valve Lash (Clearance)” in this
section.
(A)
Special tool
(A): 09910-26510/OUT 0000005
2
Max. valve lift
In: 8.015 mm (0.31555 in.)
Ex: 8.595 mm (0.33839 in.)
3
Pistons, Piston Rings, Connecting Rods and Cylinders Components
CAUTION:
Connecting rod and connecting rod bearing must be replaced as a set when either replacement
becomes necessary.
7
1
2
3
8
4
5
6
9
10
1. Top ring
5. Piston pin
9. Connecting rod bearing cap
2. 2nd ring
6. Piston pin circlip
3. Oil ring
7. Connecting rod
Tightening Torque
4. Piston
8. Connecting rod bearing
Apply engine oil to sliding surface of each
parts.
10. Connecting rod bearing cap bolt
: Tighten 20 N·m (20 kg-m, 14.5 lb-ft) and 45°
by the specified.
Do not reuse.
6A2-62 ENGINE MECHANICAL (K9K ENGINE)
Pistons, Piston Rings, Connecting Rods and
Cylinders Removal and Installation
CAUTION:
Connecting rod and connecting rod bearing must be
replaced as a set when either replacement becomes necessary.
Removal
1) Remove engine assembly from vehicle referring to “Engine
Assembly Removal and Installation” in this section.
2) Remove cylinder head referring to “Valves and Cylinder
Head Removal and Installation” in this section.
3) Remove upper oil pan referring to “Oil Pan and Oil Pump
Strainer Removal and Installation” in this section.
4) Remove oil pump referring to “Oil Pump and Oil Pump Chain
Removal and Installation” in this section.
5) Remove special tool (A).
Special tool
(A): 09919-58110
6) Mark cylinder number on all pistons, connecting rods (1) and
rod bearing caps (2) using silver pencil or quick drying paint
(3) for installation.
7) Remove connecting rod bearing caps.
8) Decarbon top of cylinder bore before removing piston from
cylinder.
9) Push piston and connecting rod assembly out through the
top of cylinder bore.
Installation
NOTE:
• All parts to be installed must be perfectly clean.
• Main bearings, main bearing caps, connecting rods,
connecting rod bearings, rod bearing caps, pistons
and piston rings are in combination sets. Do not disturb such combination and make sure that each part
goes back to where it came from, when installing.
ENGINE MECHANICAL (K9K ENGINE) 6A2-63
1) Apply engine oil to pistons, rings, cylinder walls, connecting
rod bearings and crankpins.
NOTE:
Do not apply oil between connecting rod and bearing or
between bearing cap and bearing.
2) When installing piston and connecting rod assembly into cylinder bore, point arrow mark (1) on piston head to flywheel
side (2).
3) Install piston and connecting rod assembly into cylinder bore
matching cylinder number marked in removal. Use special
tool (Piston ring compressor) to compress rings. Guide connecting rod into place on crankshaft.
Using a hammer handle, tap piston head to install piston into
bore. Hold ring compressor firmly against cylinder block until
all piston rings have entered cylinder bore.
Special tool
(A): 09916-77310
4) Install bearing cap (1) to applicable cylinder matching cylinder number marked in removal.
a) Tighten all cap bolts (2) to 20 N·m (2.0 kg-m, 14.5 lb-ft).
b) Retighten them by turning through 45°.
Tightening torque
Connecting rod bearing cap bolt (a):
Tighten 20 N·m (2.0 kg-m, 14.5 lb-ft) and 45° by the specified procedure
5) Insert special tool into TDC pin hole as shown in figure.
And turn crankshaft clockwise until crankshaft touches special tool.
Special tool
(A): 09919-58110
6) Install oil pump referring to “Oil Pump and Oil Pump Chain
Removal and Installation” in this section.
7) Install oil pan and oil level gauge referring to “Oil pan and Oil
Pump Strainer Removal and Installation” in this section.
6A2-64 ENGINE MECHANICAL (K9K ENGINE)
8) Install cylinder head referring to “Valves and Cylinder Head
Removal and Installation” in this section.
9) Install engine assembly to vehicle referring to “Engine
Assembly Removal and Installation” in this section.
Pistons, Piston Rings, Connecting Rods and
Cylinders Disassembly and Reassembly
Disassembly
1) Using piston ring expander, remove top and 2nd compression rings and oil ring from piston.
2) Remove piston pin from connecting rod as follows.
a) Using flat head screw driver (2) or the like, remove piston
pin circlips (1) as shown.
b) Remove piston pin (1) from piston (2).
Reassembly
NOTE:
Whenever piston is replaced, select applicable piston
referring to “Selection of Piston” under “Pistons, Piston
Rings, Connecting Rods and Cylinder Inspection” in this
section.
1) Clean carbon from piston head and ring grooves using a
suitable tool.
ENGINE MECHANICAL (K9K ENGINE) 6A2-65
2) Install connecting rod bearings (3) to connecting rod (1) and
bearing cap (2) as follows.
a) Distinguish connecting rod bearing between connecting rod
side connecting rod bearing and bearing side connecting
rod bearing (4) measuring its width before installing.
Connecting rod side connecting rod bearing width “a”:
20.500 – 20.750 mm (0.80709 – 0.81692 in.)
Bearing cap side connecting rod bearing width “b”:
17.500 – 17.750 mm (0.68898 – 0.69881 in.)
b) Install special tool (B) to special tool (A).
NOTE:
Be sure to install special tool (B) to specified direction as
shown.
Special tool
(A): 09913-98110
(B): 09913-88110
1. Mark “B”
c) Install connecting rod (1) and connecting rod bearing to
special tool (A and B) as shown.
d) Install connecting rod bearing to connecting rod pushing
special tool (B) as shown.
e) Install special tool (B) to special tool (A).
NOTE:
Be sure to install special tool (B) to specified direction as
shown.
Special tool
(A): 09913-98110
(B): 09913-88110
f) Install bearing cap (2) and connecting rod bearing to special tool (A and B) as shown.
g) Install connecting rod bearing to bearing cap pushing special tool (B) as shown.
1. Mark “A”
6A2-66 ENGINE MECHANICAL (K9K ENGINE)
3) Install piston pin to piston and connecting rod as follows.
a) After applying engine oil to piston pin and piston pin holes
in piston and connecting rod, fit connecting rod to piston so
that flat part (2) of connecting rod bearing and arrow mark
(1) come on the same side, and insert piston pin to piston
and connecting rod.
b) Install piston pin circlips.
c) Position opening of piston pin circlip to opposite side of
removal and fitting channel (4).
5. Flywheel side
4) Install piston rings to piston noting the following.
NOTE:
• As indicated in figure, 1st and 2nd rings have “TOP”
mark respectively. When installing these piston rings
to piston, direct marked side of each ring toward top of
piston.
• 1st ring (1) differs from 2nd ring (2) in thickness and
shape.
Distinguish 1st ring from 2nd ring by referring to figure.
• When installing oil ring, install spiral ring (3) first and
then rail (4).
Pistons, Piston Rings, Connecting Rods and
Cylinders Inspection
Cylinders
• Inspect cylinder walls for scratches, roughness or ridges
which indicate excessive wear. If cylinder bore is very rough,
deeply scratched or ridged, replace cylinder block.
Pistons
• Inspect piston for faults, cracks or other damaged.
Damaged or faulty piston should be replaced.
• Piston diameter:
As indicated in figure, piston diameter should be measured
at a position “a” from piston top in the direction perpendicular
to piston pin.
Piston diameter specification:
75.933 – 75.947 mm (2.98949 – 2.99003 in.)
“a”: 56.0 mm (2.205 in.)
ENGINE MECHANICAL (K9K ENGINE) 6A2-67
Piston Pin
• Check piston pin, connecting rod small end bore and piston
bore for wear or damage, paying particular attention to condition of small end bore bush. If pin, connecting rod small
end bore or piston bore is badly worn or damaged, replace
pin, connecting rod and/or piston.
• Piston pin clearance:
Check piston pin clearance in small end and piston. Replace
connecting rod and/or piston if its small-end is badly worn or
damaged or if measured clearance out of specification.
Clearance between small-end and piston pin:
0.013 – 0.030 mm (0.00052 – 0.00118 in.)
Small-end bore for connecting rod:
26.013 – 26.025 mm (1.02414 – 1.02460 in.)
Piston pin outside diameter:
25.995 – 26.000 mm (1.02343 – 1.02362 in.)
Piston Rings
• Piston ring end gap
To measure end gap, insert piston ring (1) into cylinder bore
and then measure the gap by using thickness gauge (2).
If measured gap is out of specification, replace ring.
NOTE:
Decarbonize and clean top of cylinder bore before inserting piston ring.
Piston ring end gap
Top ring: 0.20 – 0.35 mm (0.0079 – 0.0137 in.)
2nd ring: 0.70 – 0.90 mm (0.0276 – 0.0354 in.)
Oil ring: 0.25 – 0.50 mm (0.0099 – 0.0196 in.)
• Piston ring thickness
Measure piston ring thickness. If measured thickness is out
of specification, replace piston ring.
Piston ring thickness
Top ring: 1.97 – 1.99 mm (0.0776 – 0.0783 in.)
2nd ring: 1.97 – 1.99 mm (0.0776 – 0.0783 in.)
Oil ring: 2.47 – 2.49 mm (0.0973 – 0.0980 in.)
6A2-68 ENGINE MECHANICAL (K9K ENGINE)
Connecting Rod
• Connecting rod big end bore and length.
a) Install bearing cap (2) to connecting rod (1).
b) Measure connecting rod big end bore and length.
If measured bore and length is out of specification, replace
connecting rod.
1
“b”
Big end bore “a”:
47.610 – 47.628 mm (1.87441 – 1.87511 in.)
2
“a”
Connecting rod length “b”:
170.56 – 170.57 mm (6.7150 – 6.7153 in.)
• Connecting rod big end thrust play
a) Install connecting rod referring to “Installation” under “Pistons, Piston Rings, Connecting rods and Cylinders” in this
section.
b) Check big-end of connecting rod for thrust play with rod
fitted and connected to its crank pin in the normal manner.
If measured thrust play is out of specification, replace
connecting rod.
Connecting rod big end thrust play:
0.205 – 0.467 mm (0.00807 – 0.01838 in.)
Crank Pin and Connecting Rod Bearings
• Inspect crank pin for uneven wear or damage. Measure
crank pin for crank pin diameter using a micrometer. If crank
pin is damaged or crank pin diameter is out of specification,
replace crankshaft.
Crank pin diameter:
43.960 – 43.980 mm (1.73071 – 1.73150 in.)
• Rod bearing:
Inspect bearing shells for signs of fusion, pitting, burn or flaking and observe contact pattern. Bearing shells found in
defective condition must be replaced.
ENGINE MECHANICAL (K9K ENGINE) 6A2-69
• Rod bearing clearance:
NOTE:
Do not rotate crankshaft while gauging plastic is
installed.
a) Before checking bearing clearance, clean bearing and
crank pin.
b) Install bearing in connecting rod and bearing cap referring
to “Reassembly” under “Pistons, Piston Rings, Connecting
Rods and Cylinders Disassembly and Reassembly” in this
section.
c) Place a piece of gauging plastic (1) to full width of crank pin
as contacted by bearing (parallel to crankshaft), avoiding oil
hole.
d) Install connecting rod and bearing cap referring to “Installation” under “Pistons, Piston Rings, Connecting rods and
Cylinders” in this section.
e) Using a scale (1) on gauging plastic (2) envelope, measure
gauging plastic width at the widest point (clearance) after
removing cap.
If clearance is out of specification, use a new bearing and
remeasure clearance.
Connecting rod bearing clearance:
0.010 – 0.064 mm (0.0004 – 0.0025 in.)
Selection of Piston
1) Install piston and connecting rod referring to “Installation”
under “Pistons, Piston Rings, Connecting rods and Cylinders” in this section.
2) Using special tool and dial gauge, measure piston protrusion
at specified measurement position (2) as shown in figure
when piston (1) reaches top dead center. Repeat this procedure with each piston.
If piston protrusion is out of specification, proceed to next
step.
1
Piston protrusion “a”:
0.75 – 0.81 mm (0.0295 – 0.0319 in.)
2
3) Check connecting rod length referring to “Connecting Rod”
under “Piston, Piston Rings, Connecting Rod and Cylinders
Inspection” in this section.
If connecting rod is normal, proceed to next step.
6A2-70 ENGINE MECHANICAL (K9K ENGINE)
1
d
c
b
4) Replace piston (1) as follows in order to adjust piston protrusion to specified value.
a) Remove piston, and measure the following specification.
• Piston pin diameter “b”
• Distance “c” between top of piston and top of piston pin hole
b) Obtain distance “d” between top of piston and center of piston pin hole by the following equation.
“d”= “b”/2 + “c”
c) Using measured piston protrusion “a” at step 2), obtain
adjusting distance “e’” by the following equation.
“e’” = “d” + 0.78 mm (0.0307 in.) - “a”
Example:
When distance “d” of removed piston is 41.647 mm (1.63965 in.),
and measured piston protrusion “a” is 0.70 mm (0.0276 in.).
Calculated adjusting distance “e” = 41.647 mm (1.63965 in.) +
0.78 mm (0.0307 in.) – 0.70 mm (0.0276 in.) = 41.727 mm
(1.64280 in.)
d) Select new piston so that distance “e” is within range of distance “d” of new piston.
Available new piston class
Piston class
(1)
K
L
M
N
P
Distance “d”
41.647 – 41.687 mm (1.63965 – 1.64122 in.)
41.689 – 41.729 mm (1.64130 – 1.64287 in.)
41.731 – 41.771 mm (1.64296 – 1.64452 in.)
41.773 – 41.813 mm (1.64461 – 1.64618 in.)
41.815 – 41.855 mm (1.64626 – 1.64783 in.)
NOTE:
• Piston class (1) is marked on piston top as shown in
figure.
• Supplied piston is only K, L, M and N classes.
If selected piston is P class, N class piston must be
installed as a replacement.
e) Replace removed piston to selected piston.
f) Check piston protrusion, again.
ENGINE MECHANICAL (K9K ENGINE) 6A2-71
Main Bearings, Crankshaft and Cylinder Block Components
1
3
4
5
8
2
5
6
7
1. Cylinder block
: Apply sealant RHODORSEAL 5661® referring to “Installation” under “Main Bearings, Crankshaft and Cylinder Block
Removal and Installation”.
5. Main bearing
: Apply engine oil to bearing inside
surfaces.
Tightening Torque
2. Crankshaft
: Apply engine oil to sliding surface.
6. Main bearing cap
Do not reuse.
3. Thrust bearing
: Apply engine oil to sliding surface.
7. Main bearing cap bolt
: Tighten 25 N·m (2.5 kg-m, 18.0 lb-ft)
and 47° by the specified.
4. Flywheel side crankshaft oil seal
: Apply engine oil to oil seal lip.
8. Oil jet
Main Bearings, Crankshaft and Cylinder
Block Removal and Installation
Removal
1) Remove engine assembly from vehicle referring to “Engine
Assembly Removal and Installation” in this section.
6A2-72 ENGINE MECHANICAL (K9K ENGINE)
2) Remove oil pan and oil pump strainer referring to “Oil Pan
and Oil Pump Strainer Removal and Installation” in this section.
3) Remove exhaust manifold referring to “Exhaust Manifold
Removal and Installation” in this section.
4) Remove cylinder head cover referring to “Cylinder Head
Cover Removal and Installation” in this section.
5) Remove timing belt, belt tensioner, crankshaft pulley and timing belt cover referring to “Timing Belt and Belt Tensioner
Removal and Installation” in this section.
6) Remove heat exchanger referring to “Heat Exchanger
Removal and Installation” in this section.
7) Remove oil pump, oil pump drive sprocket and gasket holder
plate referring to “Oil Pump Removal and Installation” in this
section.
8) Remove power steering pump referring to “Power Steering
(P/S) Pump” in Section 3B1.
9) Remove camshaft referring to “Camshaft and Tappet
Removal and Installation” in this section.
10) Remove cylinder head assembly referring to “Valve and Cylinder Head Removal and Installation” in this section.
11) Remove piston and connection rod referring to “Piston, Piston Rings, Connecting Rods, Connecting Rods and Cylinders Removal and Installation” in this section.
12) Remove clutch cover, clutch disc and flywheel referring to
“Clutch Cover, Clutch Disc, Flywheel and Release Bearing
Removal and Installation” in Section 7C2.
13) Loosen crankshaft bearing cap bolts in such order as indicated in figure a little at a time, and remove bearing caps.
14) Remove crankshaft from cylinder block.
15) Remove flywheel side crankshaft oil seal from crankshaft.
1
16) Remove main bearings (1) and thrust bearings (2).
2
ENGINE MECHANICAL (K9K ENGINE) 6A2-73
17) Remove oil jet as follows, if necessary.
a) Pack rag into cylinder to prevent swarf from entering.
b) Remove spring stop (1) and spring (2) using 7 mm (0.28
in.) diameter drill (4).
CAUTION:
Do not remove ball (3) to prevent swarf from entering
cooling circuit.
c) Desorb swarf from cylinder and oil jet.
d) Install special tool (A) to drilled hole of oil jet (1).
e) Remove oil jet from cylinder using special tools (A and B).
Special tool
(A): 09916-48120
(B): 09916-58120
Installation
NOTE:
• Whenever crankshaft and cylinder block replaced,
select applicable piston referring to “Selection of Piston” under “Pistons, Piston Rings, Connecting Rods
and Cylinder Inspection” in this section.
• All parts to be installed must be perfectly clean.
• Be sure to apply oil to crankshaft journals, main bearings and thrust bearings.
• Main bearings, main bearing caps, connecting rods,
connecting rod bearings, rod bearing caps, pistons
and piston rings are in combination sets. Do not disturb such combination and make sure that each part
goes back to where it came from, when installing.
6A2-74 ENGINE MECHANICAL (K9K ENGINE)
1) Using special tool, install oil jet to cylinder block as follows, if
removed.
Special tool
(A): 09916-58110
1. Oil jet No.1
2. Oil jet No.2
3. Oil jet No.3
4. Oil jet No.4
5. Flywheel side
6. Push rod
7. Plate
8. Guide rod
9. Plate bolt
a) Install plate (1) to cylinder block tightening plate bolts (2) by
hand.
b) Install guide rod (3) to plate aligning guide rod end with oil
jet hole.
c) Tighten plate bolts, and remove guide rod.
[A]: Oil jet No.2 and 4
[B]: Oil jet No.1 and 3
d) Insert oil jet (1) into push rod (2) facing oil jet with center of
cylinder.
e) Using hammer, tap push rod until push rod (1) comes into
contact with plate (2).
f) Remove special tool.
[A]: Oil jet No.2 and 4
[B]: Oil jet No.1 and 3
ENGINE MECHANICAL (K9K ENGINE) 6A2-75
2) Using special tool, install main bearing to cylinder block and
bearing cap as follows.
NOTE:
One of two halves of main bearing has oil groove. Install
main bearing with oil grove to cylinder block, and the
other one without oil groove to bearing cap.
Special tool
(A): 09913-78110
a) Install special tool (A) to cylinder block.
b) Fit main bearing (1) in special tool (A) as shown, and then
press at “a” until main bearing is touched at “b”.
c) Install special tool (A) to bearing cap (1).
d) Fit main bearing (1) in special tool (A) as shown, and then
press at “a” until main bearing is touched at “b”.
6A2-76 ENGINE MECHANICAL (K9K ENGINE)
1
3) Install thrust bearings (1) to center of crankshaft journal facing its oil groove (2) to outside.
4) Install crankshaft to cylinder block.
2
5) Apply sealant to cylinder block as shown in figure.
“A”: RHODORSEAL 5661®
“a”: 4 mm (0.16 in.)
6) Install main bearing caps in proper position matching cylinder number marked in removal.
7) Tighten main bearing cap bolts as follows.
a) Tighten bolts to 25 N·m (2.5 kg-m, 18.0 lb-ft).
b) Retighten them by turning through 47°.
Tightening torque
Crankshaft main bearing cap bolt (a):
Tighten 25 N·m (2.5 kg-m, 18.0 lb-ft) and 47° by the specified procedure
NOTE:
After tightening cap bolts, check to be sure that crankshaft rotates smoothly.
3
(A)
8) Using special tool, install flywheel side oil seal as follows.
2
CAUTION:
1
4
Do not touch oil seal so that it is extremely fragile. Whenever installing new oil seal, it must be installed using
special tool (A) and protector supplied with new oil seal.
If it doesn’t follow the above-mentioned service, it may
cause oil leak from oil seal.
Special tool
(A): 09911-98110
1. Fitting
2. Installer
3. Nut
4. Screw
ENGINE MECHANICAL (K9K ENGINE) 6A2-77
a) Install fitting (1) and screw (2) to crankshaft.
b) Install protector (4) together with new oil seal (1) to fitting by
tightening nut (2) until installer (3) comes into contact with
cylinder block.
c) Remove special tool and protector.
9) Install piston and connecting rod referring to “Piston, Piston
Rings, Connecting Rods and Cylinders Removal and Installation” in this section.
10) Install oil pump, oil pump drive sprocket and gasket holder
plate referring to “Oil Pump Removal and Installation” in this
section.
11) Install oil pan and oil pump strainer referring to “Oil Pan and
Oil Pump Strainer Removal and Installation” in this section.
12) Install cylinder head assembly referring to “Valve and Cylinder Head Removal and Installation” in this section.
13) Install camshaft referring to “Camshaft and Valve Tappet
Removal and Installation” in this section.
14) Install timing belt, belt tensioner, crankshaft timing sprocket
and timing belt cover referring to “Timing Belt and Belt Tensioner Removal and Installation” in this section.
15) Install cylinder head cover referring to “Cylinder Head Cover
Removal and Installation” in this section.
16) Install flywheel referring to “Clutch Cover, Clutch Disc, Flywheel and Release Bearing Removal and Installation” in
Section 7C2.
17) Install exhaust manifold referring to “Exhaust Manifold
Removal and Installation” in this section.
18) Install turbocharger referring to Turbocharger Removal and
Installation” in this section.
19) Install clutch to flywheel referring to “Clutch Cover, Clutch
Disc, Flywheel and Release Bearing Removal and Installation” in Section 7C2.
6A2-78 ENGINE MECHANICAL (K9K ENGINE)
20) Install engine mounting brackets.
(a)
(c)
(c)
(b)
Tightening torque
Engine right mounting nut (a):
55 N·m (5.5 kg-m, 40.0 lb-ft)
Engine left mounting nut (b):
40 N·m (4.0 kg-m, 29.0 lb-ft)
Engine side mounting bracket bolt (c):
40 N·m (4.0 kg-m, 29.0 lb-ft)
21) Install engine assembly to vehicle referring to “Engine
Assembly” in this section.
(c)
Main Bearings, Crankshaft and Cylinder
Block Inspection
Crankshaft Thrust Play
1) Install main bearing, thrust bearing, crankshaft and main
bearing cap referring to “Main Bearings, Crankshaft and Cylinder Block Removal and Installation” in this section.
2) Use a dial gauge to read displacement in axial (thrust) direction of crankshaft.
If measured value is out of specification, replace thrust bearing.
Crankshaft thrust play
New thrust bearing:
0.045 – 0.252 mm (0.00178 – 0.00992 in.)
Reused thrust bearing:
0.045 – 0.852 mm (0.00178 – 0.03354 in.)
Crankshaft
Crankshaft journal
• Inspect crankshaft journal for uneven wear or damage. Measure crankshaft journal diameter using a micrometer. If
crankshaft journal is damaged or diameter is out of specification, replace crankshaft.
Crankshaft journal diameter:
47.990 – 48.010 (1.88937 – 1.89015 in.)
ENGINE MECHANICAL (K9K ENGINE) 6A2-79
Crankshaft journal bore
• Inspect crankshaft journal bore for uneven wear or damage.
Measure crankshaft journal bore. If crankshaft journal bore is
damaged or diameter is out of specification, replace cylinder
block.
Crankshaft journal bore diameter “a”:
51.936 – 51.949 mm (2.04473 – 2.04523 in.)
Main Bearing
• Inspect bearing shells for signs of fusion, pitting, burn or flaking and observe contact pattern. Bearing shells found in
defective condition must be replaced.
Main bearing thickness “a”:
1.949 – 1.959 mm (0.07674 – 0.07712 in.)
6A2-80 ENGINE MECHANICAL (K9K ENGINE)
Main bearing clearance
NOTE:
Do not rotate crankshaft while gauging plastic is
installed.
1) Before checking bearing clearance, clean bearing and crankshaft journal.
2) Install bearing to cylinder block and main bearing cap referring to “Main Bearings, Crankshaft and Cylinder Block
Removal and Installation” in this section.
3) Place a piece of gauging plastic (1) to full width of crankshaft
journal as contacted by bearing (parallel to crankshaft),
avoiding oil hole.
4) Install main bearing cap referring to “Main Bearings, Crankshaft and Cylinder Block Removal and Installation” in this
section.
5) Remove cap and using a scale (1) on gauging plastic (2)
envelope, measure gauging plastic width at the widest point
(clearance).
If clearance is out of specification, use a new bearing and
remeasure clearance.
Crankshaft journal clearance:
0.027 – 0.054 mm (0.00107 – 0.00213 in.)
Visual inspection
Check bearings for pitting, scratches, wear or damage.
If any malcondition is found, replace both upper and lower halves.
Never replace one half without replacing the other half.
Cylinder Block
Distortion of gasketed surface
• Using straightedge and thickness gauge, check gasketed
surface for distortion.
If flatness exceeds its limit, replace cylinder block.
Cylinder block flatness
Limit: 0.03 mm (0.0012 in.)
ENGINE MECHANICAL (K9K ENGINE) 6A2-81
Required Service Material
Recommended SUZUKI product or specification
Use
Loctite 518®
• To apply mating surface of cylinder head and cylinder head cover.
RHODORSEAL 5661®
• To apply mating surfaces of cylinder block, gasket
holder plate and upper oil pan.
• To apply mating surface of cylinder block and main
bearing cap.
• To apply mating surfaces of TDC pin and pin hole.
Loctite 5181®
• To apply mating surfaces of cylinder head and camshaft housing.
Tightening Torque Specifications
Fastening part
Oil pressure switch
Air cleaner outlet hose clamp
Cylinder head cover bolt
Generator upper bracket bolt
Oil pressure switch
Heat exchanger bolt
Oil filter unit bracket bolt
EGR valve body bolt
EGR valve bolt and nut
Intake pipe bolt
Turbocharger nut
Lubrication pipe union bolt No.2
Lubrication pipe union bolt N0.1
Lubrication pipe stiffener bolt
Turbocharger oil return pipe bolt
Turbocharger outlet nut
Turbocharger bracket bolt
Air cleaner outlet hose clamp
Air cleaner outlet pipe clamp
Exhaust manifold nut
Oil pan baffle plate bolt
Upper oil pan bolt
Oil pump strainer bolt
Lower oil pan bolt
Tightening torque
N•m
kg-m
lb-ft
25
2.5
18.0
2.0
0.2
1.5
Tighten 12 N·m (1.2 kg-m, 9.0 lb-ft) by the
specified procedure
40
4.0
29.0
25
2.5
18.0
45
4.5
32.5
45
4.5
32.5
21
2.1
15.5
12
1.2
9.0
21
2.1
15.5
26
2.6
19.0
23
2.3
17.0
15
1.5
11.0
12
1.2
9.0
12
1.2
9.0
26
2.6
19.0
Tighten 21 N·m (2.1kg-m, 15.5 lb-ft) by the
specified procedure
2.0
0.2
1.5
2.0
0.2
1.5
Tighten 26 N·m (2.6 kg-m, 19.0 lb-ft) by the
specified procedure
8
0.8
6.0
Tighten 6 N·m (0.6 kg-m, 4.5 lb-ft) and 16
N·m (1.6 kg-m, 12.0 lb-ft) by the specified
procedure
12
1.2
9.0
Tighten12 N·m (1.2 kg-m, 9.0 lb-ft) by the
specified procedure
6A2-82 ENGINE MECHANICAL (K9K ENGINE)
Fastening part
Engine mounting bracket bolt
Accessory bracket bolt
Engine mounting nut
Engine oil drain plug
Transmission to engine bolt
Oil level gauge nut
Engine mounting nut
Timing belt tensioner bolt
Crankshaft pulley bolt
Timing belt inner cover bolt
Timing belt tensioner bolt
TDC pin cap
Generator upper bracket support bolt
CMP sensor bolt
Generator upper bracket bolt
Oil pump bolt
Gasket holder plate bolt
Camshaft housing bolt
Camshaft cover bolt
Vacuum pump oil hose union bolt
Camshaft pulley nut
Cylinder head bolt
Connecting rod bearing cap bolt
Crankshaft main bearing cap bolt
Engine right mounting nut
Engine left mounting nut
Engine side mounting bracket bolt
Tightening torque
N•m
kg-m
lb-ft
40
4.0
29.0
28
2.8
20.5
55
5.5
40.0
35
3.5
25.5
55
5.5
40.0
21
2.1
15.5
55
5.5
40.0
25
2.5
18.0
Tighten 120 N·m (12.0 kg-m, 87.0 lb-ft) and
95° by the specified procedure
9
0.9
7.0
27
2.7
19.5
20
2.0
14.5
21
2.1
15.5
8
0.8
6.0
40
4.0
29.0
25
2.5
18.0
Tighten 11 N·m (1.1 kg-m, 8.0 lb-ft) by the
specified procedure
Tighten 10 N·m (1.0 kg-m, 7.5 lb-ft) by the
specified procedure
Tighten 5 N·m (0.5 kg-m, 4.0 lb-ft) and 12
N·m (1.2 kg-m, 9.0 lb-ft)
16
1.6
12.0
Tighten 30 N·m (3.0 kg-m, 22.0 lb-ft) and 85°
by the specified procedure
Tighten 25 N·m (2.5 kg-m, 18.0 lb-ft) and
255° by the specified
Tighten 20 N·m (2.0 kg-m, 14.5 lb-ft) and 45°
by the specified procedure
Tighten 25 N·m (2.5 kg-m, 18.0 lb-ft) and 47°
by the specified procedure
55
5.5
40.0
40
4.0
29.0
40
4.0
29.0
ENGINE MECHANICAL (K9K ENGINE) 6A2-83
Special Tool
09917-78120
Dummy heater plug
09915-77311
Oil pressure gauge
09915-77420
Oil pressure gauge hose
09915-77430
Oil pressure gauge attachment
09910-68110 (Mot. 1567)
EGR pipe clamp pliers
09919-58110 (Mot. 1489)
TDC setting pin
09919-58120 (Mot. 1430)
Set of top dead center pins
09916-98110 (Mot. 582-01)
Flywheel locking tool
09911-98130 (Mot. 1714)
Stud M14
09911-98140 (Mot. 1586)
Crankshaft oil seal fitting
09917-68221
Camshaft lock holder
09917-68110 (Mot. 588)
Cylinder liner flange
09911-98120 (Mot. 1632)
Camshaft oil seal fitting
09910-26510/OUT 0000005
Dial gauge support
09916-14510
Valve lifter
09916-14521
Valve lifter attachment
6A2-84 ENGINE MECHANICAL (K9K ENGINE)
09916-84511
Forceps
09916-58130 (Mot. 1511-01)
Valve stem seal fitting
09916-48110 (Mot. 1335)
Valve stem seal pliers
09913-98110 (Mot. 1492)
Connecting rod bearing fitting
09913-88110 (Mot. 1492-3)
Connecting rod bearing
adapter
09916-77310
Piston ring compressor
09916-48120 (Mot. 1485-01)
Oil jet remover
09916-58120 (Emb. 880)
Inertia extractor
09916-58110 (Mot. 1494)
Oil jet installer
09913-78110 (Mot. 1493-01)
Main bearing fitting
09911-98110 (Mot. 1585)
Crankshaft oil seal fitting
09912-57821
Compression gauge
ENGINE COOLING (K9K ENGINE) 6B2-1
SECTION 6B2
6-3
6E3
ENGINE COOLING
(K9K ENGINE)
6C3
6E3
6G3
6H3
WARNING:
6K3
For vehicles equipped with a Supplemental Restraint (Air Bag) System:
• Service on and around the air bag system components or wiring must be performed only by an
authorized SUZUKI dealer. Refer to “Air Bag System Components and Wiring Location View” under
“General Description” in air bag system section in order to confirm whether you are performing service on or near the air bag system components or wiring. Please observe all WARNINGS and “Service Precautions” under “On-Vehicle Service” in air bag system section before performing service
on or around the air bag system components or wiring. Failure to follow WARNINGS could result in
unintentional activation of the system or could render the system inoperative. Either of these two
conditions may result in severe injury.
• Technical service work must be started at least 90 seconds after the ignition switch is turned to the
“LOCK” position and the negative cable is disconnected from the battery. Otherwise, the system
may be activated by reserve energy in the Sensing and Diagnostic Module (SDM).
CONTENTS
General Description ......................................6B2-2
Cooling System Circulation .........................6B2-2
Degassing Tank ..........................................6B2-2
Water Pump ................................................6B2-3
Thermostat ..................................................6B2-3
ECT sensor .................................................6B2-3
Radiator Cooling Fan ..................................6B2-3
Diagnosis .......................................................6B2-4
Maintenance ..................................................6B2-5
Coolant........................................................6B2-5
Coolant Level Check ...................................6B2-6
Engine Cooling System Inspection and
Service ........................................................6B2-6
Coolant Replacement..................................6B2-8
On-Vehicle Service......................................6B2-11
Cooling System Component .....................6B2-11
Cooling Water Pipes or Hoses Removal
and Installation ..........................................6B2-12
Thermostat Assembly Removal and
Installation .................................................6B2-12
Engine Coolant Temperature Sensor
(ECT Sensor) Removal and Installation.... 6B2-13
Engine Coolant Temperature Sensor
(ECT Sensor) Inspection........................... 6B2-13
Radiator Cooling Fan Removal and
Installation................................................. 6B2-13
Radiator Cooling Fan motor On-Vehicle
Inspection.................................................. 6B2-14
Radiator Cooling Fan Disassembly and
Reassembly .............................................. 6B2-15
Radiator Cooling Fan Relay Inspection .... 6B2-16
Radiator Removal and Installation ............ 6B2-16
Radiator Inspection ................................... 6B2-17
Water Pump Removal and Installation...... 6B2-17
Water Pump Inspection............................. 6B2-18
Required Service Material ..........................6B2-19
Tightening Torque Specification ...............6B2-19
6B2
6B2-2 ENGINE COOLING (K9K ENGINE)
General Description
The cooling system consists of the degassing tank cap, radiator, degassing tank, hoses, water pump, radiator
cooling fan and thermostat assembly. The radiator is of tube-and-fin type.
Cooling System Circulation
[A]
4
[B]
1
1
2
2
3
4
5
6
3
5
7
7
8
8
9
9
10
6
10
[A]: When thermostat is close
2. Thermo plunger
5. Cylinder block and cylinder head
8. Degassing tank
[B]: When thermostat is open
3. Thermostat
6. Radiator
9. Heat exchanger
4. Air bleed plug
7. Degassing tank cap
1. Heater
10. Water pump
Degassing Tank
2
3
4
1
The degassing tank (1) consists of a “see-through” plastic tank, a
hose and a degassing tank cap (2).
During operation, the coolant circulates inside the degassing tank
constantly under pressure. As the coolant warms up and
expands, the coolant level in the degassing tank rises. On the
other hand, it lowers as the coolant cools down and contracts.
When the pressure applied to the inside of the degassing tank
constantly exceeds the specified value, the pressure is relieved
through the degassing tank cap.
Therefore, cooling level should be between “MAXI” (3) and “MINI”
(4) marks on the degassing tank.
ENGINE COOLING (K9K ENGINE) 6B2-3
Water Pump
The centrifugal type water pump is used in the cooling system.
The water pump is driven by timing belt, and it can not be disassembled.
Thermostat
The thermostat is installed to the thermostat assembly, and the
thermostat assembly can not be disassembled.
A wax pellet type thermostat is used in the coolant outlet passage
to control the flow of the engine coolant, to provide fast engine
warm up and to regulate coolant temperatures.
A wax pellet element is hermetically contained in a metal case,
and expands when heated and contracts when cooled.
When the pellet is heated and expands, the valve is opened.
As the pellet is cooled, the valve is closed by the spring.
Thus, the valve remains closed while the coolant is cold, preventing circulation of coolant through the radiator.
At this point, coolant is allowed to circulate only throughout the
engine to warm it quickly and evenly.
As the engine warms, the pellet expands and the thermostat
valve opens, permitting coolant to flow through the radiator.
ECT sensor
ECT sensor is installed to thermostat assembly.
For details, refer to “Engine Coolant Temperature Sensor (ECT
Sensor) Removal and Installation” and “Engine Coolant Temperature Sensor (ECT Sensor) Inspection” in Section 6E2
Radiator Cooling Fan
The radiator cooling fan is driven by electric motor, and the motor
activates by ECM.
WARNING:
Keep hands, tools and clothing away from engine cooling fan to help prevent personal injury. This fan is electric and can come on whether or not the engine is
running.
The fan can start automatically in response to the relays
with the ignition switch in the “ON” position.
6B2-4 ENGINE COOLING (K9K ENGINE)
Diagnosis
Condition
Possible Cause
Loose or broken timing belt
Engine overheats
(It is in case that radia- Not enough coolant
tor cooling fan operates)
Faulty thermostat
Faulty water pump
Dirty or bent radiator fins
Coolant leakage on cooling system
Clogged radiator
Faulty degassing tank cap
Dragging brakes
Slipping clutch
Poor charge battery
Poor generation generator
ECT sensor faulty
Radiator cooling fan relay faulty
ECM faulty
Wiring or grounding faulty
Equipped with too much electric load part(s)
Radiator cooling fan motor faulty
Fuse blown
Engine overheats
(It is in case that radiator cooling fan won’t
Radiator cooling fan relay
operates)
ECT sensor faulty
Radiator cooling fan motor faulty
Wiring or grounding faulty
ECM faulty
Correction
Adjust or replace.
Check coolant level and add as
necessary.
Replace.
Replace.
Clean or remedy.
Repair.
Check and replace radiator as necessary.
Replace.
Adjust brake.
Adjust or replace.
Check and replace as necessary.
Check and repair.
Check and replace as necessary.
Check and replace as necessary.
Check and replace as necessary.
Repair and necessary.
Dismount.
Check and replace as necessary.
Check fuse of relay/fuse box and
check for short circuit to ground.
Check and replace as necessary.
Check and replace as necessary.
Check and replace as necessary.
Repair as necessary
Check and replace as necessary.
ENGINE COOLING (K9K ENGINE) 6B2-5
Maintenance
WARNING:
• Keep hands, tools and clothing away from radiator cooling fan to help prevent personal injury. This
fan is electric and can turn on whether engine is running or not. The fan can start automatically in
response to ECM with ignition switch turned on.
• To help avoid danger of being burned, do nut remove degassing tank cap while engine and radiator
are still hot.
Scalding fluid and steam can be blown out under pressure if cap is taken off too soon.
Coolant
When the system cools down, the coolant is drawn back into the radiator.
The cooling system has been filled at the factory with a quality coolant that is a 50/50 mixture of water and ethylene glycol antifreeze.
This 50/50 mixture coolant solution provides freezing protection to –36 °C (–33 °F).
• Maintain cooling system freeze protection at –36 °C (–33 °F) to ensure protection against corrosion and loss
of coolant from boiling.
This should be done even if freezing temperatures are not expected.
• Add ethylene glycol base coolant when coolant has to be added because of coolant loss or to provide added
protection against freezing at temperature lower than –36 °C (–33 °F).
Anti-freeze proportioning chart
Freezing temperature
Antifreeze/Anticorrosion coolant concentration
Ratio of compound to cooling water
°C
°F
%
Itr.
US pt.
Imp pt.
–36
–33
50
3.5/3.5
6.16/6.16
7.40/7.40
Coolant capacity
: 7 liters (12.32/14.79 US/Imp pt.)
NOTE:
• Alcohol or methanol base coolant or plain water alone should not be used in cooling system at any
time as damage to cooling system could occur.
• Coolant must be mixed with demineraled water or distilled water.
6B2-6 ENGINE COOLING (K9K ENGINE)
Coolant Level Check
Coolant Level
WARNING:
To help avoid danger of being burned, do not remove
degassing tank cap while engine and radiator are still
hot.
Scalding fluid and steam can be blown out under pressure if cap is taken off too soon.
4
2
3
1
To check level, look at “see-through” degassing tank.
When engine is cool, check coolant level in degassing tank (1).
A normal coolant level should be between “MAXI” level mark (2)
and “MINI” level mark (3) on degassing tank.
If coolant level is below “MINI” level mark (3), remove degassing
tank cap (4) and add proper coolant to degassing tank (1) to bring
coolant level up to “MAXI” level mark (2). Then, reinstall cap.
NOTE:
If proper quality antifreeze is used, there is no need to
add extra inhibitors or additives that claim to improve
system.
They may be harmful to proper operation of system, and
are unnecessary expense.
Engine Cooling System Inspection and Service
WARNING:
To help avoid danger of being burned, do not remove
degassing tank cap while engine and radiator are still
hot.
Scalding fluid and steam can be blown out under pressure if cap is taken off too soon.
Cooling system should be serviced as follows.
1) Check cooling system for leakage or damage.
2) Wash degassing tank cap with clean water by removing
degassing tank cap when engine is cold.
3) Check coolant for proper level and freeze protection.
ENGINE COOLING (K9K ENGINE) 6B2-7
4) Using pressure tester (1), check system and degassing tank
cap (2) for proper pressure holding capacity.
If replacement of cap is required, use proper cap for this
vehicle.
1
2
Cooling system and degassing tank cap holding pressure
for inspection
: 120 kPa (1.1 kg/cm2, 17.0 psi)
5) Inspect all hoses.
Replace hoses whenever cracked, swollen or otherwise
deteriorated.
6) Clean frontal area of radiator core.
6B2-8 ENGINE COOLING (K9K ENGINE)
Coolant Replacement
WARNING:
To help avoid danger of being burned, do not remove
degassing tank cap while engine and radiator are still
hot. Scalding fluid and steam can be blown out under
pressure if cap is taken off too soon.
NOTE:
For detail of coolant specification, refer to “Coolant” in
this section.
Coolant Draining
1) Remove degassing tank cap (1) by turning it counterclockwise slowly in order to release any pressure.
2) Drain coolant from radiator drain plug (2).
3) Check drained coolant for contaminants such as rust, corrosion or discoloration.
If coolant is contaminated any one or coolant replacement is
necessary, flush cooling system referring to “Cooling System
Flushing” under “Coolant Replacement” in this section.
ENGINE COOLING (K9K ENGINE) 6B2-9
Coolant Refilling
1) Close radiator drain plug.
2) Loosen air ventilation bolt (1) on thermostat assembly (2)
without removing.
3) Fill degassing tank with coolant until coolant flow out from air
ventilation bolt, and then tighten air ventilation bolt.
4) Fill degassing tank with coolant up to “MAXI” level mark (3).
5) Install degassing tank cap.
6) Run engine as follows in order to bleed air remained in
engine and radiator.
a) Run engine at 1500 rpm until upper radiator hose is hot.
b) Depress accelerator pedal up to engine at 3500 rpm 4
times.
c) Run engine at 2000 rpm for 20 minutes.
d) Depress accelerator pedal up to engine at 3500 rpm 4
times.
NOTE:
If coolant level comes lower than “MINI” level mark (4)
during this step, perform the following procedures.
a) Stop engine and wait until engine is cooled.
b) Fill degassing tank with coolant up to “MAXI” level
mark.
c) Repeat step 6) again.
7) Stop engine and wait until engine is cooled.
8) Fill degassing tank with coolant up to “MAXI” level mark (3).
6B2-10 ENGINE COOLING (K9K ENGINE)
Cooling System Flushing
1) Drain coolant from cooling system referring to “Coolant
draining” under “Coolant Replacement” in this section.
2) Close radiator drain plug.
1
2
3
4
3) Loosen air ventilation bolt (1) on thermostat assembly (2)
without removing.
4) Fill degassing tank with water until water flow out from air
ventilation bolt, and then tighten air ventilation bolt.
5) Fill degassing tank with water up to “MAXI” level mark (4).
6) Install degassing tank cap (3).
7) Run engine until upper radiator hose is hot (this shows that
thermostat is open and coolant is flowing through system).
8) Wait until engine is cooled, and drain water from cooling system.
9) Repeat Steps 2) to 8) several times until drained liquid is
nearly colorless.
10) Refill cooling system with coolant referring to “Coolant Refilling” under “Coolant Replacement” in this section.
ENGINE COOLING (K9K ENGINE) 6B2-11
On-Vehicle Service
CAUTION:
• Check to make sure that engine coolant temperature is cold before removing any part of cooling
system.
• Also be sure to disconnect negative (–) cable from battery terminal before removing any part.
Cooling System Component
1. Radiator
2. Hose clip
: Be sure to position clip in specified direction
as shown in figure.
9. Radiator outlet hose No.2
17. Heater outlet hose
10. Radiator outlet pipe No.2
18. Ventilation hose (engine to 3-way joint)
3. Radiator cooling fan assembly
11. Degassing tank cap
19. Ventilation hose (radiator to 3-way joint)
4. Radiator inlet hose No.1
12. Degassing tank
20. 3-way joint
5. Radiator inlet pipe
13. Thermostat assembly
21. Ventilation hose (3-way joint to degassing tank)
6. Radiator inlet hose No.2
14. Heater inlet hose No.1
22. Degassing tank outlet hose
7. Radiator outlet hose No.1
15. Thermo plunger
8. Radiator outlet pipe No.1
16. Heater inlet hose No.2
6B2-12 ENGINE COOLING (K9K ENGINE)
Cooling Water Pipes or Hoses Removal and
Installation
Removal
1) Drain coolant from cooling system referring to “Coolant
Replacement” in this section.
2) To remove water pipes or hoses, loosen screw on each pipe
or hose clip and pull hose end off.
Installation
Reverse removal order for installation noting the following.
• Connect each clip to proper direction securely referring to
“Cooling System Component” in this section.
• Refill cooling system with coolant referring to “Coolant
Replacement” in this section.
Thermostat Assembly Removal and Installation
CAUTION:
Do not disassemble thermostat assembly. Disassembly
will spoil it original function. If any malcondition is found
in thermostat assembly, replace it as assembly.
Removal
1) Drain coolant from cooling system referring to “Coolant
Replacement” in this section.
2) Disconnect radiator inlet hose No.1 (1), heater hose (2) and
degassing tank hose (3).
3) Remove thermostat assembly (4) from cylinder head.
Installation
1) Install thermostat assembly (1) to cylinder head with new Oring.
Then, tighten thermostat assembly bolts to specified torque.
Tightening torque
Thermostat assembly bolt
(a): 10 N·m (1.0 kg-m, 7.5 lb-ft)
2) Connect radiator inlet hose No.1 (2), heater hose (3) and
degassing tank hose (4).
3) Refill cooling system with coolant referring to “Coolant
Replacement” in this section.
ENGINE COOLING (K9K ENGINE) 6B2-13
Engine Coolant Temperature Sensor (ECT
Sensor) Removal and Installation
Refer to “Engine Coolant Temperature Sensor (ECT Sensor)
Removal and Installation” in Section 6E2.
Engine Coolant Temperature Sensor (ECT
Sensor) Inspection
Refer to “Engine Coolant Temperature Sensor (ECT Sensor)” in
Section 6E2.
Radiator Cooling Fan Removal and Installation
NOTE:
Do not disassemble radiator cooling fan.
If any repair is required on fan, replace it as assembly.
Removal
1) Disconnect negative (–) cable at battery.
1
2) Remove engine hanger (1) and accessory belt cover (2).
3) Recovery refrigerant from A/C system referring to “Recovery” in Section 1B.
4) Remove A/C suction pipe and condenser outlet pipe referring to “Major Components and Location” in Section 1B.
5) Detach P/S reservoir from its bracket.
6) Drain coolant from cooling system referring to “Coolant
Replacement” in this section.
7) Disconnect radiator upper hose No.2 and degassing hose
from radiator.
2
2
8) Disconnect cooling fan motor connector (1).
9) Remove radiator cooling fan (2).
1
6B2-14 ENGINE COOLING (K9K ENGINE)
Installation
2
1) Install radiator cooling fan(2).
2) Connect cooling fan motor connector (1).
3) Connect radiator upper hose No.2 and degassing hose to
radiator.
4) Install P/S tank to its bracket.
5) Install A/C suction pipe and condenser outlet pipe referring
to “Major Components and Location” in Section 1B.
1
6) Install engine hanger (1) and accessory belt cover (2).
1
Tightening torque
Engine hanger bolt (a): 23 N·m (2.3 kg-m, 17.0 lb-ft)
2
7) Connect negative (–) cable at battery.
8) Refill cooling system with coolant referring to “Coolant
Replacement” in this section.
9) Recharge A/C system with refrigerant referring to “Operation
Procedure for Refrigerant Charging” in Section 1B.
10) Check to make sure that there is no coolant leakage and A/C
refrigerant leakage at each connection.
Radiator Cooling Fan motor On-Vehicle
Inspection
Inspection
1) Check low speed operation of radiator cooling fan as follows.
a) Connect battery to fan motor coupler as shown in figure.
b) Check that radiator cooling fan rotates smoothly and
ammeter indicates specified current.
If any abnormality is found, replace radiator cooling fan
motor.
Radiator cooling fan motor specified current at 12 V
: 15.0 A maximum
2) Check high speed operation of radiator cooling fan as follows.
a) Connect battery to fan motor coupler as shown in figure.
b) Check that radiator cooling fan rotates smoothly and
ammeter indicates specified current.
If any abnormality is found, replace radiator cooling fan
motor.
Radiator cooling fan motor specified current at 12 V
: 20.0 A maximum
ENGINE COOLING (K9K ENGINE) 6B2-15
Radiator Cooling Fan Disassembly and Reassembly
Disassembly
1) Remove fan (1) from cooling fan motor (2).
2) Remove fan motor (2) from cooling fan guide (3).
1
3
2
Reassembly
(b)
Reverse disassembly procedures for reassembly noting following.
Tightening torque
Cooling fan motor bolt (a): 4 N·m (0.4 kg-m, 3.0 lb-ft)
Tightening torque
Fan nut (b): 6 N·m (0.6 kg-m, 4.5 lb-ft)
(a)
6B2-16 ENGINE COOLING (K9K ENGINE)
Radiator Cooling Fan Relay Inspection
Inspection
1) Disconnect negative (–) cable at battery.
2) Remove radiator cooling fan relay No.1 (1), No.2 (2) and/or
No.3 (3) from relay box.
3) Check radiator cooling fan relay as follow.
a) Check that there is no continuity between terminal “c” and
“d”.
If there is continuity, replace relay.
b) Connect battery positive (+) terminal to terminal “b” of relay.
Connect battery negative (–) terminal “a” of relay.
Check continuity between terminal “c” and “d”.
If there is no continuity when relay is connected to the battery, replace relay.
Radiator Removal and Installation
Removal
1) Remove radiator cooling fan assembly referring to “Radiator
Cooling Fan Removal and Installation” in this section.
2) Disconnect radiator inlet hose No.1 from radiator.
3) Remove radiator after removing two mounting bolts (1).
ENGINE COOLING (K9K ENGINE) 6B2-17
Installation
Reverse removal procedure for installation noting the following.
• Tighten radiator mounting bolts (1) by the specified torque
Tightening torque
Radiator mounting bolt (a): 11 N·m (1.1 kg-m, 8.0 lb-ft)
• Refill cooling system with coolant referring to “Coolant
Replacement” in this section.
• Recharge A/C system with refrigerant referring to “Operation
Procedure for Refrigerant Charging” in Section 1B.
• Check to make sure that there is no coolant leakage and A/C
refrigerant leakage at each connection.
Radiator Inspection
Inspection
If the water side of the radiator is found excessively rusted or covered with scales, clean it by flushing with the radiator cleaner
compound.
This flushing should be carried out at regular intervals for scale or
rust formation advances with time even where a recommended
type of coolant is used. Periodical flushing will prove more economical.
Inspect the radiator cores and straighten the flattened or bent fins,
if any. Clean the cores, removing road grimes and trashes.
Excessive rust or scale formation on the wet side of the radiator
lowers the cooling efficiency.
Flattened or bent fins obstruct the flow of air through the core to
impede heat dissipation.
Water Pump Removal and Installation
NOTE:
Do not disassemble water pump.
If any repair is required on pump, replace it as assembly.
Removal
1) Remove engine assembly referring to “Engine Assembly
Removal and Installation” in Section 6A2.
2) Remove timing belt referring to “Timing Belt and Belt Tensioner Removal and Installation” in Section 6A2.
6B2-18 ENGINE COOLING (K9K ENGINE)
3) Remove water pump (1) from cylinder block.
Installation
1) Install water pump (1) to cylinder block with new gasket, and
tighten water pump bolts (2) specified torque after applying
specified sealant.
“A”: LOCTITE FRENETANCH
Tightening torque
Water pump bolt (a): 11 N·m (1.1 kg-m, 8.0 lb-ft)
2) Install timing belt referring to “Timing Belt and Belt Tensioner
Removal and Installation” in Section 6A2.
3) Install engine assembly referring to “Engine Assembly
Removal and Installation” in Section 6A2.
Water Pump Inspection
Inspection
• Rotate water pump (1) by hand to check for smooth operation.
If pump does not rotate smoothly or makes an abnormal
noise, replace it.
ENGINE COOLING (K9K ENGINE) 6B2-19
Required Service Material
Recommended SUZUKI product
(Part Number)
Material
Ethylene glycol base
coolant (Anti-freeze /
Anti-corrosion coolant)
Sealant
–
LOCTITE FRENETANCH
Use
Additive to engine cooling system for improving
cooling efficiency and for protection against
rusting.
To apply to water pump bolt.
Tightening Torque Specification
Fastening part
Thermostat assembly bolt
Engine hanger bolt
Radiator mounting bolt
Water pump bolt
N•m
10
23
11
11
Tightening torque
kg-m
1.0
2.3
1.1
1.1
lb-ft
7.5
17.0
8.0
8.0
6B2-20 ENGINE COOLING (K9K ENGINE)
ENGINE FUEL (K9K ENGINE) 6C2-1
SECTION 6C2
6-3
6A3
ENGINE FUEL
(K9K ENGINE)
6G3
6E3
6G3
6H3
WARNING:
6K3
For vehicles equipped with a Supplemental Restraint (Air Bag) System:
• Service on and around the air bag system components or wiring must be performed only by an
authorized SUZUKI dealer. Refer to “Air Bag System Components and Wiring Location View” under
“General Description” in air bag system section in order to confirm whether you are performing service on or near the air bag system components or wiring. Please observe all WARNINGS and “Service Precautions” under “On-Vehicle Service” in air bag system section before performing service
on or around the air bag system components or wiring. Failure to follow WARNINGS could result in
unintentional activation of the system or could render the system inoperative. Either of these two
conditions may result in severe injury.
• Technical service work must be started at least 90 seconds after the ignition switch is turned to the
“LOCK” position and the negative cable is disconnected from the battery. Otherwise, the system
may be activated by reserve energy in the Sensing and Diagnostic Module (SDM).
CONTENTS
General Description ..................................... 6C2-1
On-Vehicle Service....................................... 6C2-2
Fuel System Components .......................... 6C2-2
Precautions ................................................ 6C2-3
Water Draining of Fuel Filter ...................... 6C2-4
Air Bleeding of Fuel System ....................... 6C2-4
Fuel Line Inspection ................................... 6C2-4
Fuel Filler Cap Inspection .......................... 6C2-4
Fuel Tank Components .............................. 6C2-5
Fuel Tank Removal and Installation ........... 6C2-6
Fuel Tank Inspection.................................. 6C2-8
Fuel Tank Purging Procedure .................... 6C2-8
Fuel Level Gauge Assembly Removal
and Installation........................................... 6C2-9
Fuel Pipe Removal and Installation ......... 6C2-10
Fuel Level Gauge Inspection ................... 6C2-12
Fuel Filter Removal and Installation......... 6C2-12
Special Tool................................................ 6C2-13
Tightening Torque Specification .............. 6C2-13
General Description
The main components of the fuel system are fuel tank, fuel level gauge, priming pump, high pressure fuel pump
and fuel filter and it includes fuel feed line, fuel vapor line and fuel return line.
6C2
6C2-2 ENGINE FUEL (K9K ENGINE)
On-Vehicle Service
CAUTION:
• Do not expose removed fuel parts to dust. Keep them always clean.
• Be sure to read “Precautions in Fuel Delivery System” in Section 6E2 before disconnecting fuel line
or removing fuel system part(s).
Failure to follow its instruction could result unneeded fuel system repairs.
Fuel System Components
“A”: View A
4. Fuel level gauge assembly bolt
8. Fuel feed hose No.2
12. Fuel filter
1. Fuel level gauge
5. Fuel tank
9. Priming pump
13. Fuel return hose No.2
2. Fuel level gauge plate gasket
6. Fuel feed line
10. Fuel feed hose No.1
Tightening torque
3. Fuel level gauge plate
7. Fuel return line
11. Fuel return hose No.1
Do not reuse.
ENGINE FUEL (K9K ENGINE) 6C2-3
Precautions
CAUTION:
• Do not expose removed fuel parts to dust. Keep them
always clean.
• Be sure to read “Precautions in Fuel Delivery System”
in Section 6E2 before disconnecting fuel line or removing fuel system part(s).
Failure to follow its instruction could result unneeded
fuel system repairs.
WARNING:
Before attempting service of any type on fuel system, the
following should be always observed in order to reduce
the risk or fire and personal injury.
• Disconnect negative (–) cable at battery.
• Do not smoke, and place no smoking signs near work
area.
• Be sure to have CO2 fire extinguisher handy.
• Be sure to perform work in a well-ventilated area and
away from any open flames (such as gas hot heater).
• Wear safety glasses.
• To relieve fuel vapor pressure in fuel tank, remove fuel
filler cap from fuel filler neck and then reinstall it.
• A small amount of fuel may be released after the fuel
line is disconnected. In order to reduce the chance of
personal injury, cover the fitting to be disconnected
with a shop cloth. Be sure to put that cloth in an
approved container when disconnection is completed.
• Note that fuel hose connection varies with each type of
pipe. Be sure to connect and clamp each hose correctly referring to the figure.
[A]: With short pipe, fit hose as far as it reaches pipe joint as shown.
[B]: With the following type pipe, fit hose as far as its peripheral projection as shown.
[C]: With bent pipe, fit hose as far as its bent part as shown or till depth “b”.
[D]: With straight pipe, fit hose till depth “b”.
[E]: With red marked pipe, fit hose end reaches red mark on pipe.
[F]: For fuel tank filler hose, insert it to spool or welding-bead.
1. Pipe
2. Hose
3. Clamp
4. Red mark
“a”: Clamp securely at a position 3 – 7 mm (0.12 – 0.27 in.) from hose end.
“b”: 25 – 30 mm (0.79 – 1.18 in.)
“c”: 0 – 5 mm (0 – 0.19 in.)
“d”: 5 – 12 mm (0.2 – 0.47 in)
“e”: 40 mm (1.57 in)
6C2-4 ENGINE FUEL (K9K ENGINE)
Water Draining of Fuel Filter
1) Disconnect negative (–) cable at battery.
2) Place container under bleed screw (1).
3) Pump priming pump (2) several times until fuel flow out from
bleed screw in order to drain water from fuel filter.
4) Tighten bleed screw.
5) Connect negative (–) cable at battery.
2
1
Air Bleeding of Fuel System
Air bleeding must be carried out when fuel system has been disassembled or when vehicle ran out of fuel.
Pump priming pump (1) 20 times or more, and then check engine
starts.
1
Fuel Line Inspection
Visually inspect fuel lines for evidence of fuel leakage, hose crack
and deterioration, or damage.
Make sure all clamps are secure.
Replace parts as needed.
Fuel Filler Cap Inspection
Remove cap (1), and check gasket for even filler neck imprint, and
deterioration or any damage. If gasket (2) is in malcondition,
replace cap.
CAUTION:
If cap requires replacement, only a cap with the same features should be used. Failure to use correct cap can
result in critical malfunction of system.
ENGINE FUEL (K9K ENGINE) 6C2-5
Fuel Tank Components
[A]: Detail: A
2. Fuel level gauge
6. Fuel return line
10. Fuel hose clamp
[B]: Detail: B
3. Breather hose
7. Fuel vapor line
11. Fuel filler hose
[C]: Detail: C
4. Fuel filler cap
8. Fuel filler neck
1. Fuel tank
5. Fuel feed line
9. Fuel tank mounting bolt
Tightening torque
6C2-6 ENGINE FUEL (K9K ENGINE)
Fuel Tank Removal and Installation
Removal
WARNING:
• Before starting the following procedure, be sure to
observe “Precautions in Fuel Delivery System” in Section 6E2.
• Keep fuel tank horizontally and stably when removing
it. Fuel may come out if tank is tilted. Also, fuel tank
may drop and cause personal injury.
1) Disconnect negative (–) cable at battery.
2) Remove fuel filler cap.
3) Insert hose of a hand operated pump into fuel filler hose (1)
and drain fuel in space “a” in the figure (drain fuel through it
till fuel stops).
CAUTION:
Do not force hose of a hand operated pump into fuel
tank. Doing so can damage inlet valve (2).
4) Hoist vehicle.
5) Remove exhaust center pipe referring to “Components” in
Section 6K2 and rear propeller shaft referring to “Propeller
Shafts” in Section 4B.
6) Remove fuel tank filler hose protector.
Disconnect filler hose, vapor hose and breather hose from
fuel filler neck.
7) With fuel tank supported on a jack, remove fuel tank bolts.
8) Lower fuel tank a little and hold it. Unclamp fuel hoses and
disconnect them from fuel level gauge (1).
When disconnecting joints of fuel feed line and return line
from pipe, unlock joint by inserting special tool between pipe
(3) and joint lock first.
Special tool
(A): 09919-47020
9) Disconnect fuel level gauge connector (6) from fuel level
gauge.
2. Quick joint
4. Insert special tool
5. Disconnect joint
ENGINE FUEL (K9K ENGINE) 6C2-7
10) Remove fuel tank (1) from vehicle. Remove fuel tank protector (3) and inlet valve (2) as necessary.
Installation
1) Install fuel level gauge (1) to fuel tank referring to “Fuel Level
Gauge Assembly Removal and Installation” in Section.
Install protector to fuel tank.
2) Install inlet valve to fuel tank.
If deformed or damaged in any other way, replace with a new
one.
3) Connect fuel filler and breather hoses to fuel tank and vapor
hose to fuel level gauge. Clamp them securely.
4) Lift up fuel tank on jack.
Connect fuel feed hose (4) and return hose (3) to pipes as
shown in figure and clamp them securely.
CAUTION:
When connecting joint, clean outside surfaces of pipe
where joint is to be inserted, push joint into pipe till joint
lock clicks and check to ensure that pipes are connected
securely, or fuel leak may occur.
5) Connect fuel level gauge connector (5).
2. Quick joint
6) Install fuel tank to vehicle.
Tightening torque
Fuel tank mounting bolt: 23 N·m (2.3kg-m, 17.0 lb-ft)
7) Connect fuel filler hose and breather hose to fuel filler neck.
Connect fuel vapor hose to pipe. Clamp them securely.
8) Install fuel filler hose protector.
6C2-8 ENGINE FUEL (K9K ENGINE)
Fuel Tank Inspection
After removing fuel tank, check hoses and pipes connected to fuel
tank for leaks, loose connections, deterioration or damage. Also
check fuel level gauge gaskets for leaks, visually inspect fuel tank
for leaks and damage.
Replace any damaged or malconditioned parts.
Check fuel tank inlet valve (1) for the following.
• Damage
• Smooth opening and closing
If any damage or malfunction is found, replace.
Fuel Tank Purging Procedure
WARNING:
This purging procedure will not remove all fuel vapor.
Do not attempt any repair on tank using heat of flame as
an explosion resulting in personal injury could occur.
CAUTION:
Never remain water in fuel tank after washing, or fuel
tank inside will get corrosion.
1) After removing fuel tank, remove all hoses, pipes and fuel
pump assembly from fuel tank.
2) Drain all remaining fuel from tank.
3) Place fuel tank to flushing area.
4) Fill tank with warm water or tap water, and agitate vigorously
and drain. Repeat this washing until inside of tank is clean.
Replace tank if its inside is rusty.
5) Completely flush out remaining water after washing.
ENGINE FUEL (K9K ENGINE) 6C2-9
Fuel Level Gauge Assembly Removal and
Installation
WARNING:
Before starting the following procedure, be sure to
observe “Precautions” in this section.
CAUTION:
Do not disassemble fuel level gauge assembly. Disassembly will spoil its original performance.
Removal
1) Remove fuel tank from vehicle referring to “Fuel Tank
Removal and Installation” in this section.
2) Remove fuel level gauge (1) from fuel tank (2).
Installation
CAUTION:
When connecting joint, clean outside surface of pipe
where joint is to be inserted, push joint into pipe till joint
lock clicks and check to ensure that pipes are connected
securely, or fuel leak may occur.
1) Clean mating surfaces of fuel level gauge (1) and fuel tank.
2) Install new gasket (2) and plate (3) to fuel level gauge (1),
and then install fuel level gauge to fuel tank.
Tightening torque
Fuel level gauge bolt (a): 10.5 N·m (1.05 kg-m, 7.5 lb-ft)
3) Install fuel tank to vehicle referring to “Fuel Tank Removal
and Installation” in this section.
6C2-10 ENGINE FUEL (K9K ENGINE)
Fuel Pipe Removal and Installation
WARNING:
• Before starting the following procedure, be sure to
observe “Precautions” in this section.
• A small amount of fuel may be released after the fuel
hose is disconnected. In order to reduce the chance of
personal injury, cover the hose and pipe to be disconnected with a shop cloth. Be sure to put that cloth in an
approved container when disconnection is completed.
Removal
1) Remove fuel tank referring to “Fuel Tank Removal and Installation” in this section.
2) Remove transfer referring to “Transfer Assembly Dismounting and Remounting” in Section 7D2.
3) Remove transmission referring to “Transmission Dismounting and Remounting” in Section 7A2.
2
1
4) With pipe connected, detach brake pipe joint (1) from frame
(if equipped).
5) Remove vacuum pipe (2) and hoses (3).
3
6) Disconnect right side parking brake cable (1) from equalizer
(2) and bracket (3).
7) Disconnect fuel level gauge connector (1).
2
1
3
ENGINE FUEL (K9K ENGINE) 6C2-11
8) Remove LSPV bracket from (1) axle housing (2), if equipped.
9) Remove fuel return pipe and fuel feed pipe.
1
2
Installation
Reverse removal procedure for installation noting the following
points.
• Tighten brake pipe joint bolt (1) to specified torque.
1, (a)
Tightening torque
Brake pipe joint bolt (a):
11 N·m (1.1 kg-m, 8.0 lb-ft)
• Tighten LSPV bracket bolt to specified torque, if removed.
(a)
Tightening torque
LSPV bracket bolt (a):
25 N·m (2.5 kg-m, 18.0 lb-ft)
• After installation, check fuel pipes for damage, crack, deformation and contacting other parts.
• Bleed air in fuel system referring to “Air Bleeding of Fuel
System” in this section.
• Check to make sure that there is no fuel leakage at each
connection.
6C2-12 ENGINE FUEL (K9K ENGINE)
Fuel Level Gauge Inspection
Refer to “Fuel Sender Gauge” in Section 8.
Fuel Filter Removal and Installation
NOTE:
Fuel filter can not disassemble.
Replace fuel filter as an assembly, if necessary.
Removal
1) Disconnect negative (–) cable at battery.
1
3
2
2) Pull out fuel hoses (1) with pushing lock button (2).
3) Install plugs (special tool) to openings of fuel filter (3) and
fuel hose (1) in order to prevent its internal parts from dust.
For detail referring to “Precaution in Fuel Delivery System” in
Section 6E2.
4) Remove fuel filter (3) from its bracket.
1
Installation
Reverse removal procedure for installation noting the following.
• Bleed air in system referring to “Air Bleeding Procedure” in
this section.
• Start engine and check that there are no fuel leakage.
ENGINE FUEL (K9K ENGINE) 6C2-13
Special Tool
09919-47020
Quick joint remover
Tightening Torque Specification
Fastening part
Fuel level gauge bolt
Fuel tank bolt
Brake pipe joint bolt
LSPV bracket bolt
N•m
10.5
23
11
25
Tightening torque
kg-m
1.05
2.3
1.1
2.5
lb-ft
7.5
17.0
8.0
18.0
6C2-14 ENGINE FUEL (K9K ENGINE)
ENGINE AND EMISSION CONTROL SYSTEM (K9K ENGINE) 6E2-1
SECTION 6E2
6-3
6A3
ENGINE AND EMISSION CONTROL SYSTEM
(K9K ENGINE)
6B3
6C3
6H3
6G3
6H3
WARNING:
6K3
For vehicles equipped with a Supplemental Restraint (Air Bag) System:
• Service on and around the air bag system components or wiring must be performed only by an
authorized SUZUKI dealer. Refer to “System Components and Wiring Location View and Connectors” under “General Description” in Section 10B in order to confirm whether you are performing
service on or near the air bag system components or wiring. Please observe all WARNINGS and
“Service Precautions” under “On-Vehicle Service” in Section 10B before performing service on or
around the air bag system components or wiring. Failure to follow WARNINGS could result in unintentional activation of the system or could render the system inoperative. Either of these two conditions may result in severe injury.
• Technical service work must be started at least 90 seconds after the ignition switch is turned to the
“LOCK” position and the negative cable is disconnected from the battery. Otherwise, the system
may be activated by reserve energy in the Sensing and Diagnostic Module (SDM).
CONTENTS
General Description ..................................... 6E2-3
System Diagram......................................... 6E2-3
Electronic Control System .......................... 6E2-4
System wiring diagram ........................... 6E2-4
System location diagram ........................ 6E2-7
Air Intake System ....................................... 6E2-8
Fuel Delivery System ................................. 6E2-9
On-Vehicle Service..................................... 6E2-10
Idle Speed Inspection............................... 6E2-10
Fuel Delivery System ............................... 6E2-11
Precautions in fuel delivery
system .................................................. 6E2-11
Fuel delivery system components ........ 6E2-14
Fuel pressure relief confirmation
procedure ............................................. 6E2-15
Fuel leakage check .............................. 6E2-15
High pressure pipes removal and
installation ............................................ 6E2-15
Fuel injector on-vehicle inspection ....... 6E2-21
Fuel injector removal and
installation ............................................ 6E2-21
Common rail (High pressure fuel
injection rail) removal and
installation ............................................ 6E2-23
Injection pump removal and
installation ............................................ 6E2-24
Venturi removal and installation ........... 6E2-26
Electronic Control System ........................ 6E2-27
Engine control module (ECM) removal
and installation .....................................
ECM registration ..................................
Glow plug removal and installation ......
Glow plug inspection ............................
PPS (accelerator pedal position
sensor) removal and installation ..........
PPS (accelerator pedal position
sensor) inspection ................................
Fuel temperature sensor removal and
installation ............................................
Fuel temperature sensor
inspection .............................................
Fuel flow actuator removal and
installation ............................................
Fuel flow actuator inspection................
Engine coolant temperature sensor
(ECT sensor) removal and
installation ............................................
Engine coolant temperature sensor
(ECT sensor) inspection.......................
Camshaft position sensor
(CMP sensor) removal and
installation ............................................
Crankshaft position (CKP) sensor
(engine speed sensor) removal and
installation ............................................
Crankshaft position (CKP) sensor
(engine speed sensor) inspection ........
6E2-27
6E2-28
6E2-29
6E2-29
6E2-30
6E2-31
6E2-32
6E2-33
6E2-33
6E2-35
6E2-35
6E2-36
6E2-36
6E2-37
6E2-38
6E2
6E2-2 ENGINE AND EMISSION CONTROL SYSTEM (K9K ENGINE)
External air temperature sensor
removal and installation .......................
External air temperature sensor
inspection .............................................
Intake air temperature (IAT) sensor
removal and installation .......................
Intake air temperature (IAT) sensor
inspection .............................................
Boost pressure sensor removal and
installation ............................................
Boost pressure sensor inspection ........
Radiator fan control system
inspection .............................................
6E2-38
6E2-39
6E2-40
6E2-40
6E2-41
6E2-41
6E2-41
Main relay and radiator fan relay
inspection.............................................
Pre-heating unit removal and
installation ............................................
Knock sensor removal and
installation ............................................
EGR valve removal and
installation ............................................
EGR valve inspection...........................
Tightening Torque Specification..............
Special Tool ...............................................
6E2-42
6E2-42
6E2-43
6E2-44
6E2-44
6E2-45
6E2-45
ENGINE AND EMISSION CONTROL SYSTEM (K9K ENGINE) 6E2-3
General Description
System Diagram
26
3
24
1
2
26
26
4
25
8
22
26
27
23
26
15
22
16
9
10
26
26
13
14
26
26
26
17
26
18
26
11
12
7
19
23
26
26
5
6
20
21
1. Air Cleaner
10. Glow plug
2. External air temperature sensor
11. ECT sensor
19. Fuel filter
20. Priming pump
3. Turbocharger
12. CKP sensor (Engine speed sensor)
21. Fuel tank
4. IAT sensor
13. Fuel injector
22. Fuel feed line
5. PPS (accelerator pedal position sensor)
14. Fuel temperature sensor
23. Fuel return line
6. Brake lamp switch
15. Fuel pressure sensor
24. Waste gate actuator
7. Knock sensor
16. EGR valve
25. Catalytic converter
8. Boost pressure sensor
17. Injection pump
26. To ECM
9. CMP sensor
18. Fuel flow actuator
27. Common rail (High pressure fuel injection rail)
6E2-4 ENGINE AND EMISSION CONTROL SYSTEM (K9K ENGINE)
Electronic Control System
System wiring diagram
19
1
2
GRN/RED
LT GRN/RED
BRN/WHT
C48-3
C48-9
C48-27
PPL
C48-23
13
BLU
PNK
C47-23
C47-33
ORN
RED/BLK
BLK
C47-15
C47-25
C47-35
5
BLK/YEL
PNK
C47-22
C47-32
6
WHT
BLK
C47-9
C47-12
C47-13
ORN
GRY/RED
LT GRN/RED
C47-16
C47-26
C47-36
LT GRN/YEL
LT GRN/RED
C47-19
C47-29
3
4
7
20
E17-28
GRN/WHT
E17-14
GRN/YEL
E17-13
WHT/RED
E17-12
WHT/BLK
E17-9
PLL/YEL
LT GRN
LT GRN/WHT
C47-20
C47-30
ORN/BLK
BLU/WHT
C47-21
C47-31
24
25
27
28
30
C48-11
GRN/WHT
E17-11
BLK/WHT
IG1
29
IG2
31
BRN
BRN
32
C48-20
9
21
23
26
E17-16
8
22
33
BLK/BLU
GRN
L+
34
H+
49
10
35
C48-14
BLK/YEL
C47-24
C47-34
YEL
BRN
13
11
12
PNK/GRN
E17-31
PPL/WHT
E17-25
36
C47-7
GRN/BLK
37
C47-17
C47-27
C47-37
C47-6
RED/WHT
RED/YEL
GRN/RED
GRY
38
BLK/RED
39
13
BRN
E17-19
C48-15
YEL/BLK
42
BLK/BLU
40
BRN/WHT
WHT/RED
RED
RED/WHT
RED/YEL
PNK/BLK
E17-4
E17-3
E17-5
E17-15
E17-21
E17-27
15
BLK/YEL
BLU/YEL
C47-48
C47-47
16
BLK/ORN
BLU/ORN
C47-42
C47-41
17
BLK/WHT
BLU/WHT
C47-46
C47-45
18
BLK/RED
BLU/RED
C47-44
C47-43
14
C48-16 YEL/RED
42
RED/WHT
41
42
RED
43
C48-24
E17-2
C48-29
C48-30
C48-10
C48-18
BLU/BLK
BLK/RED
BLK/RED
BLK/RED
BRN/WHT
BLU
45
C48-31
C48-32
BLK
BLK
BLK/YEL
WHT
WHT/BLK
WHT/GRN
WHT/BLU
: 47
: 48
44
46
ENGINE AND EMISSION CONTROL SYSTEM (K9K ENGINE) 6E2-5
1. A/C pressure sensor (if equipped)
18. Fuel injector No.4
35. Radiator fan relay No.3
2. VSS
19. ECM
36. CMP sensor
3. CKP sensor
20. Brake (stop) lamp switch
37. Fuel flow actuator
4. Fuel pressure sensor
21. Brake lamp
38. EGR valve
5. Fuel temperature sensor
22. Glow lamp
39. Additional heater relay No.1
6. Knock sensor
23. Injection warning light (gravity 1 warning light)
40. Additional heater relay No.2
7. Boost pressure sensor
24. Red stop warning light (gravity 2 warning light)
41. Additional heater relay No.3
8. External air temperature sensor
25. Malfunction indicator lamp (MIL)
42. Additional heater plug
9. IAT sensor
26. Heater fan motor
43. Main relay
10. ECT sensor
27. Heater fan and rear defogger switch
44. Pre-heating unit
11. Data link connector
28. A/C evaporator thermister (if equipped)
45. Glow plug
12. Immobilizer control module
29. Ignition switch
46. Battery
13. Combination meter
30. A/C relay (if equipped)
47. Body ground
14. PPS (Accelerator pedal position sensor)
31. Compressor relay
48. ngine ground
15. Fuel injector No.1
32. A/C compressor (if equipped)
49. Radiator fan motor
16. Fuel injector No.2
33. Radiator fan relay No.1
17. Fuel injector No.3
34. Radiator fan relay No.2
6E2-6 ENGINE AND EMISSION CONTROL SYSTEM (K9K ENGINE)
ECM Connector (Terminal Arrangement Viewed from Harness Side)
C48
26 25
TERMINAL
6 5 4 3 2 1
18 17 16 15 14 13 12 11 10 9
2 1
14 13 12 11 10 9
2 1
28 27 26 25 24 23 22 21 20 19
38 37 36 35 34 33 32 31 30 29
4 3
4 3
6 5
20 19 18 17 16 15
26 25 24 23 22 21
32 31
48 47 46 45 44 43 42 41 40 39
8 7
32 31 30 29 28 27
8 7
24 23 22 21 20 19
CIRCUIT
TERMINAL
–
CIRCUIT
6
EGR valve output
Fuel flow actuator output
2
Main power supply
7
3
PPS 1 signal
8
4
Power source for PPS 1
9
5
Ground for PPS 1
10
6 5
TERMINAL
C47
–
CIRCUIT
47
Fuel injector No.1 output (low side)
48
Fuel injector No.1 output (high side)
1
Ground of shield wire for knock sensor
–
2
–
3
–
–
Power source for A/C pressure sensor
6
–
11
4
–
7
–
12
Knock sensor signal
5
–
8
–
13
Ground for knock sensor
6
–
7
–
9
Malfunction indicator lamp
14
–
10
–
15
Power source for fuel pressure sensor
8
11
Ignition switch signal
16
Power source for boost pressure sensor
9
A/C pressure sensor signal
12
Red stop warning light (gravity 2 warning light)
17
EGR valve output
10
Pre-heating unit diagnosis input
11
A/C relay signal
13
Injection warning light (gravity 1 warning
light)
19
External air temperature sensor signal
12
20
AT sensor signal
13
14
Glow lamp
21
ECT sensor signal
14
Radiator fan relay No.2 output
15
Power source for PPS 2
22
Fuel temperature sensor signal
15
Additional heater relay No.1 output
16
Compressor relay output
23
CKP sensor signal
16
Additional heater relay No.2 output
18
–
C48
17
–
24
CMP sensor signal
18
–
25
Fuel pressure sensor signal
18
19
Engine revolution signal for combination
meter
26
Boost pressure sensor signal
19
27
EGR valve output
20
–
20
21
PPS 2 signal
C47
–
–
–
17
28
–
21
29
Ground for external air temperature sensor
22
–
Pre-heating unit output
–
Radiator fan relay No.1 output
–
–
22
–
30
Ground for IAT sensor
23
VSS signal
23
–
31
Ground for ECT sensor
24
Main relay output
24
–
32
Ground for fuel temperature sensor
25
33
Ground for CKP sensor
26
34
Ground for CMP sensor
27
25
Immobilizer control module input
26
–
–
–
Ground for A/C pressure sensor
27
Ground for PPS 2
35
Ground for fuel pressure sensor
28
28
Brake lamp switch
36
Ground for boost pressure sensor
29
Main power supply
–
EGR valve output
29
–
37
30
Main power supply
30
–
38
–
31
Ground for ECM
39
–
32
Ground for ECM
40
–
31
C47
E17
28 27 12 11 10 9 8 7
30 29 18 17 16 15 14 13
1
E17
C47
Serial communication line of data link
connector 12 V
32
–
41
Fuel injector No.2 output (low side)
1
–
42
Fuel injector No.2 output (high side)
2
–
43
Fuel injector No.4 output (low side)
3
–
44
Fuel injector No.4 output (high side)
4
–
45
Fuel injector No.3 output (low side)
5
–
46
Fuel injector No.3 output (high side)
ENGINE AND EMISSION CONTROL SYSTEM (K9K ENGINE) 6E2-7
System location diagram
e
7
d
f
B
9
c
p
15
j
r
i
E
6
4
1
13
5
q
2
8
11
D
o
a
h
b
q
14
l
g
C
m
12
n
k
A
10
3
INFORMATION SENSORS
CONTROLLED DEVICES
OTHERS
1. Boost pressure sensor
a: Fuel injector
2. Fuel pressure sensor
b: Fuel flow actuator
B: Data link connector
3. CMP sensor
c: Malfunction indicator lamp
C: Pre-heating unit
4. CKP sensor
d: Gravity 1 warning light (injection warning light)
D: Main fuse box
5. ECT sensor
e: Glow lamp
E: Circuit fuse box
6. PPS (accelerator position sensor)
f: Gravity 2 warning light (red stop warning light)
7. VSS
g: A/C relay (if equipped)
8. Knock sensor
h: A/C compressor relay (if equipped)
9. Immobilizer control module
i: Additional heater plug
10. A/C pressure sensor
j: Additional heater relay No.1
11. IAT sensor
k: Radiator fan relay No.1 (low)
12. Fuel temperature sensor
13. Brake lamp switch
l: Radiator fan relay No.2 (high)
m: Radiator fan relay No.3 (high)
14. External air temperature sensor
n: Main relay
15. A/C evaporator thermister
o: EGR valve
p: Additional heater relay No.2
q: Glow plug
r: Additional heater relay No.3
A: ECM
6E2-8 ENGINE AND EMISSION CONTROL SYSTEM (K9K ENGINE)
Air Intake System
4
1
3
2
9
5
7
8
6
1. Air cleaner
4. Turbocharger
2. External air temperature sensor
5. IAT sensor
7. Boost pressure sensor
8. Exhaust manifold
3. Air cleaner outlet hose
6. EGR valve
9. Oil vapor recirculation valve
ENGINE AND EMISSION CONTROL SYSTEM (K9K ENGINE) 6E2-9
Fuel Delivery System
9
4
5
8
3
6
2
7
1
: [A]
: [B]
1. Fuel tank
6. Common rail (High pressure fuel injection rail)
[A]: Fuel feed line
2. Priming pump
7. Fuel injector
[B]: Fuel return line
3. Fuel filter
8. Fuel flow actuator
4. Fuel temperature sensor
9. Venturi
5. Injection pump
6E2-10 ENGINE AND EMISSION CONTROL SYSTEM (K9K ENGINE)
On-Vehicle Service
Idle Speed Inspection
1) Shift transmission into Neutral.
2) Start engine and warm it up to normal operating temperature.
3) Turn all electrical loads off.
4) Using SUZUKI scan tool, verify that idle speed is within
specification.
Engine speed: 730 – 880 rpm
5) If not, refer to “Table 5 Rough Idle Speed (Pumping)” or
“Table 6 Idle Speed Too High or Too Low” in Section 6-2.
ENGINE AND EMISSION CONTROL SYSTEM (K9K ENGINE) 6E2-11
Fuel Delivery System
WARNING:
• Fuel vapor is hazardous. It can very easily ignite, causing serious injury and damage. Always keep
sparks and flames away from fuel. Fuel line spills and leaks are dangerous. Fuel can ignite and
cause serious injuries or death and damage.
• Fuel can also irritate skin and eyes. To prevent this, always complete the following “Precautions”.
• Never disconnect fuel high-pressure line between injection pump and injectors under pressure, or
fuel can be sprayed out under pressure.
Be sure to confirm that fuel high-pressure line is not under pressure referring “Fuel pressure relief
confirmation procedure” in section 6E2 before disconnecting. If it is under pressure, wait till it is
not under pressure.
CAUTION:
Before servicing the fuel delivery system, read all contents described in “Precautions in Fuel Delivery
System”; otherwise not only the fuel delivery system but also the engine might be damaged.
Precautions in fuel delivery system
• The system is very sensitive to contamination. The risks caused by the introduction of contamination are:
– damage or destruction of the high pressure injection system and the engine.
– seizing or leaking of a component.
• When servicing on the high pressure direct injection system, must be performed under very clean conditions. This means that no impurities (particles a few microns in side) get into the system during dismantling
or into the circuits via the fuel unions.
• The cleanliness principle must be applied from the filter to the injectors.
• Contamination is caused by:
– metal or plastic chips,
– paint,
– fibres: boxes, brushes, paper, clothing, cloths,
– foreign bodies such as hair,
– ambient air,
– etc.
• It is not possible to clean the engine using a high pressure washer because of the risk of damaging connections. In addition, moisture may collect in the connectors and create electrical connection problems.
• The system can inject the diesel into the engine at a pressure up to 1400 bars. Before carrying out any work,
check that the injector rail is not under pressure and that the fuel temperature is not too high.
6E2-12 ENGINE AND EMISSION CONTROL SYSTEM (K9K ENGINE)
Instructions to be Followed Before Any Work is Carried out on The Injection System
• Ensure that you have the plugs (1) for the unions to be opened. Plugs are to be used once only. After use,
they must be thrown away (once used they are soiled and cleaning is not sufficient to make them reusable).
Unused plugs must be thrown away.
1. Plug (Cap set available as a spare part: parts number 15733-84A00)
Do not reuse.
ENGINE AND EMISSION CONTROL SYSTEM (K9K ENGINE) 6E2-13
• Ensure that you have hermetically resealable plastic bags for storing removed parts. Stored parts will therefore be less subject to the risk of impurities. The bags must be used only once, and after use they must be
thrown away.
• Make sure that lint-free towelettes. The use of a normal cloth or paper for cleaning purposes is forbidden.
These are not lint-free and may contaminate the fuel circuit of the system. Each lint-free cloth should only be
used once.
Instructions to be Followed Before Opening The Fuel Circuit
•
•
•
•
For each operation, use new thinner (used thinner contains impurities). Pour it into a clean receptacle.
For each operation, use a clean brush which is in good condition (the brush must not shed its bristles).
Use a brush and thinners to clean the connections to be opened.
Blow compressed air over the cleaned parts (tools, cleaned the same way as the parts, connections and
injection system zone). Check that no bristles remain adhered.
• Wash your hands before and during the operation if necessary.
• When wearing leather protective gloves, cover these with latex gloves.
Instructions to be Followed During The Operation
• As soon as the circuit is open, all openings must be plugged to prevent impurities from entering the system
by using plug (available as a spare part). They must not, under any circumstances, be reused.
• Close the hermetically sealed bag, even if it has to be reopened shortly afterwards. Ambient air carries contamination.
• All components of the injection system that are removed must be stored in a hermetically sealed plastic bag
once the plugs have been inserted.
• The use of a brush, thinner, bellows, sponge or normal cloth is strictly forbidden once the circuit has been
opened.
These items are likely to allow impurities to enter the system.
• A new component replacing an old one must not be removed from its packaging until it is to be fitted to the
vehicle.
6E2-14 ENGINE AND EMISSION CONTROL SYSTEM (K9K ENGINE)
Fuel delivery system components
7
38 N·m
(3.8 kg-m)
6
38 N·m (3.8 kg-m)
6
1
17
7
7
1
10
12
15 N·m
(1.5 kg-m)
13
5
2
8
28 N·m
(2.8 kg-m)
19
21
18
4
9
15
3
5.5 N·m (0.55 kg-m)
16
14
11
20
5.5 N·m
(0.55 kg-m)
6
1. Fuel return hose
28 N·m (2.8 kg-m)
7. Clip
38 N·m (3.8 kg-m)
13. Fuel flow actuator
: Apply oil (spare parts) to O-ring.
19. Priming pump
2. Fuel injector
8. Common rail
14. Fuel flow actuator bolt
20. To fuel feed pipe
3. Sealing washer
9. Common rail nut
15. Venturi
: Apply oil (spare parts) to O-ring.
21. To fuel return pipe
4. Fuel injector bracket
10. Fuel pressure sensor
: It is not possible to remove fuel
pressure sensor from common rail.
16. Venturi bolt
: Tightening torque
5. Fuel injector bolt
11. Injection pump
17. Fuel feed hose
: Do not reuse.
6. High pressure pipe
:Apply oil (included in spare parts
kit) to all around thread part of
union nut.
12. Fuel temperature sensor
: Apply oil (spare parts) to O-ring.
18. Fuel filter
ENGINE AND EMISSION CONTROL SYSTEM (K9K ENGINE) 6E2-15
Fuel pressure relief confirmation procedure
1) Check that engine is cold.
2) Connect SUZUKI scan tool to DLC (1) with ignition switch
turned OFF.
Special tool
(A): SUZUKI scan tool
1
(A)
3) Turn ON ignition switch.
4) Confirm that fuel high-pressure line is not under pressure by
using SUZUKI scan tool.
Fuel leakage check
1)
2)
3)
4)
Prime fuel line using priming pump (1).
Check for fuel leakage of low pressure circuit.
Start engine and run it at idle speed for about 10 seconds.
Stop engine and then check for fuel leakage in each part,
which was serviced.
5) Start engine and run it at 4000 r/min. for about 10 seconds.
6) Stop engine and then check for fuel leakage in each part,
which was serviced.
1
High pressure pipes removal and installation
Removal
1) Check that engine is cold and fuel pressure is not under
pressure referring to “Fuel Pressure Relief Confirmation Procedure” in this section.
2) Disconnect negative cable at battery.
2
1
3) Remove oil level gauge guide (1) and engine harness clamp
bracket (2).
6E2-16 ENGINE AND EMISSION CONTROL SYSTEM (K9K ENGINE)
4) Loosen common rail nuts (1) a few turns.
1
5) Remove injector cover and injector return hose cover (1).
6) Remove clip (2) connecting high pressure pipes.
1
2
2
7) Remove high pressure pipes as follows.
(A)
a) For fuel injector – common rail pipe
i) Loosen union nut of fuel injector side (1).
ii) Loosen union nut of common rail side (2).
1
CAUTION:
4
2
3
When loosing union nut of fuel injector side, hold fuel
injector with wrench (3) as shown.
Do not damage fuel return pipe (4) of fuel injector.
Special tool
(A): 09911-78110
(A)
iii) Move union nut (1) along pipe keeping flange part (2) in
contact with taper (3).
1
2
3
ENGINE AND EMISSION CONTROL SYSTEM (K9K ENGINE) 6E2-17
b) For injection pump – common rail pipe
(A)
i) Loosen union nut of injection pump side (1).
ii) Loosen union nut of common rail side (2).
1
Special tool
(A): 09911-78110
2
(A)
iii) Move union nut (1) along pipe keeping flange part (2) in
contact with taper (3).
1
2
3
8) Plug all joint part of disconnected fuel injection circuit with
cap available as a spare part to prevent them from entering
dust. (Refer to “Precautions in Fuel Delivery System” in this
section for parts number and handling).
6E2-18 ENGINE AND EMISSION CONTROL SYSTEM (K9K ENGINE)
Installation
CAUTION:
Do not reuse high pressure pipe because it has the possibility that fuel leaks out.
CAUTION:
In case of using extension special tool combined with
torque wrench, reading value of torque wrench is smaller
than specified tightening torque. When using extension
special tool, reading value should be calculated according to below formula.
L1
L
(A)
1
Tightening torque formula
M = T x L/(L + L1)
M: Reading value using extension special tool
T: Specified tightening torque
L: Length of torque wrench
L1: Length of special tool
NOTE:
• Fit injection pump – common rail pipe before common
rail - fuel injector pipes.
• Before installing new high pressure pipe, move union
nuts of pipe then apply oil (1) (included in spare parts
kit) to all around thread part of union nut.
1) Remove high pressure pipes as follows.
a) For fuel injector – common rail pipe
i) Remove plugs (dust preventing cap) from common rail
outlet and fuel injector inlet.
ii) Insert high pressure pipe flange part (1) into taper (2) of
fuel injector inlet.
iii) Insert high pressure pipe flange part (1) into taper (2) of
common rail outlet.
1
2
ENGINE AND EMISSION CONTROL SYSTEM (K9K ENGINE) 6E2-19
iv) Tighten fuel injector union nut (1) then common rail union
nut (2) by hand.
v) Install new clip (3) to high pressure pipes.
vi) Tighten fuel injector union nut then common rail union nut
to specified torque using special tool.
(A)
1, (a)
CAUTION:
3
5
4
2, (a)
• Do not touch pipes with wrench when tightening union
nuts.
• When tightening union nut of fuel injector side, hold
fuel injector with wrench (4) as shown.
• Do not damage fuel return pipe (5) of fuel injector.
Special tool
(A): 09911-78110
Tightening torque
High pressure pipe union nut
(a): 40 N·m (4.0 kg-m, 29.0 lb-ft) (See NOTE below.)
(A)
NOTE:
In case of using extension special tool combined with
torque wrench, reading torque depends on the length of
the torque wrench.
Therefore, calculate reading torque by using “Tightening
Torque Formula” described earlier in this installation procedure.
b) For injection pump – common rail pipe
i) Remove plugs (dust prevent cap) from common rail outlet
and fuel injector inlet.
ii) Insert high pressure pipe flange part (1) into taper (2) of
fuel injector inlet.
iii) Insert high pressure pipe flange part (1) into taper (2) of
common rail outlet.
1
2
6E2-20 ENGINE AND EMISSION CONTROL SYSTEM (K9K ENGINE)
(A)
iv) Tighten common rail union nut (1) then injection pump
union nut (2) by hand.
v) Tighten common rail union nut then injection pump union
nut to specified torque using special tool.
2, (a)
CAUTION:
Do not touch pipes with wrench when tightening union
nuts.
Special tool
(A): 09911-78110
Tightening torque
High pressure pipe union nut
(a): 40 N·m (4.0 kg-m, 29.0 lb-ft) (See NOTE below.)
1, (a)
(A)
NOTE:
In case of using extension special tool combined with
torque wrench, reading torque depends on the length of
the torque wrench.
Therefore, calculate reading torque by using “Tightening
Torque Formula” described earlier in this installation procedure.
2) Tighten common rail nuts to specified torque.
Tightening torque
Common rail nut
(a): 28 N·m (2.8 kg-m, 20.5 lb-ft)
(a)
1
3) Install engine harness clamp bracket (1) and oil level gauge
guide (2).
Tighten oil level gauge guide nuts to specified torque.
Tightening torque
Oil level gauge guide nut
(a): 21 N·m (2.1 kg-m, 15.5 lb-ft)
2
ENGINE AND EMISSION CONTROL SYSTEM (K9K ENGINE) 6E2-21
4) Install injector return hose cover (1) and injector cover.
1
5) Connect negative cable to battery.
6) Check fuel leakage referring to “Fuel Leakage Check” in this
section.
Fuel injector on-vehicle inspection
Using sound scope or such, check operating sound of injector
when engine is running or cranking.
Cycle of operating sound should vary according to engine speed.
If no sound or an unusual sound is heard, confirm that check
result of each step is in good condition referring to “DTC P0200
Injector Circuit” in Section 6-2.
If injector circuit is in good condition, replace fuel injector referring
to “Fuel Injector Removal and Installation” in this section.
Fuel injector removal and installation
NOTE:
The calibration code (1) is the code that is given to each
fuel injector, and it represents the performance characteristics of the fuel injector. It is registered in ECM, and
ECM controls fuel injection according to the performance
characteristics of the fuel injector. Therefore, after
removing fuel injectors, be sure to install them as they
were. In case that the fuel injectors were replaced with
new ones, be sure to register each calibration code in
ECM referring to “ECM Registration” in this section. If it
is not registered correctly, DTC is stored in ECM and
warning light is turned ON. Also calibration codes registration in ECM can be checked by SUZUKI scan tool.
6E2-22 ENGINE AND EMISSION CONTROL SYSTEM (K9K ENGINE)
Removal
1) Check that engine is cold and fuel pressure is not under
pressure referring to “Fuel Pressure Relief Confirmation Procedure” in this section.
2) Disconnect negative cable at battery.
3) Remove injector cover and injector return hose cover (1).
4) Disconnect fuel injector connector (2).
5) Disconnect return hose (3) from fuel injector.
1
3
2
6) Plug fuel return pipe of fuel injector with cap available as a
spare part to prevent them from entering dust. (Refer to “Precautions in Fuel Delivery System” in this section for parts
number and handling.)
7) Remove high pressure pipe referring to “High Pressure
Pipes Removal and Installation” in this section.
1
8) Remove fuel injector (1) from cylinder head.
9) Remove searing washer from cylinder head hole.
10) Plug fuel injector nozzle with cap available as a spare part to
prevent them from entering dust. (Refer to “Precautions in
Fuel Delivery System” in this section for parts number and
handling.)
ENGINE AND EMISSION CONTROL SYSTEM (K9K ENGINE) 6E2-23
Installation
1) Clean fuel injector installing hole of cylinder head, fuel injector body and fuel injector bracket using a lint-free cloth
dipped in clean solvent.
2) Remove plug (dust preventing cap) (1) from fuel injector nozzle.
3) Install new searing washer to cylinder head.
4) Install fuel injector to cylinder head.
Tighten fuel injector bracket bolt to specified torque.
(a)
Tightening torque
Fuel injector bracket bolt
(a): 28 N·m (2.8 kg-m, 20.5 lb-ft)
1
5) Install new high pressure pipe referring to “High Pressure
Pipes Removal and Installation” in this section.
6) Remove plug (dust preventing cap) (1) from fuel return pipe
of fuel injector.
1
7) Connect return hose (3) to fuel injector.
8) Connect fuel injector connector (2).
9) Install return hose cover (1) and high pressure pipe cover.
1
2
3
10) Connect negative cable to battery.
11) Check fuel leakage referring to “Fuel Leakage Check” in this
section.
Common rail (High pressure fuel injection rail)
removal and installation
CAUTION:
Never remove fuel pressure sensor from common rail
because this may cause fuel circuit contamination problems. If fuel pressure sensor fails, common rail and all
high pressure pipes must be replaced.
6E2-24 ENGINE AND EMISSION CONTROL SYSTEM (K9K ENGINE)
Removal
1) Check that engine is cold and fuel pressure is not under
pressure referring to “Fuel Pressure Relief Confirmation Procedure” in this section.
2) Disconnect negative cable at battery.
3) Remove all high pressure pipes (1) referring to “High Pressure Pipes Removal and Installation” in this section.
4) Disconnect connector from fuel pressure sensor (2).
5) Remove common rail (3).
1
2
3
Installation
1) Install common rail and tighten nuts (1) temporarily by hand.
1
1
2) Install new high pressure pipes and then tighten common rail
nut referring to “High Pressure Pipes Removal and Installation” in this section.
3) Connect connector to fuel pressure sensor.
4) Connect negative cable to battery.
5) Check fuel leakage referring to “Fuel Leakage Check” in this
section.
Injection pump removal and installation
CAUTION:
It is strictly forbidden to remove any injection pump pulley marked number 070 575 from pump. If the pump is
being replaced, the pump must be replaced with pulley
as a set.
ENGINE AND EMISSION CONTROL SYSTEM (K9K ENGINE) 6E2-25
Removal
1) Check that engine is cold and fuel pressure is not under
pressure referring to “Fuel Pressure Relief Confirmation Procedure” in this section.
2) Disconnect negative cable at battery.
3) Remove timing belt referring to “Timing Belt and Belt Tensioner Removal and Installation” in Section 6A2.
4
3
2
1
4) Disconnect connectors from fuel flow actuator (1) and fuel
temperature sensor (2).
5) Disconnect fuel feed hose (3) and fuel return hoses (4) from
injection pump.
6) Remove high pressure pipe (5) referring to “High Pressure
Pipes Removal and Installation” in this section.
5
7) Plug all joint part of disconnected fuel injection circuit with
cap available as a spare part to prevent them from entering
dust. (Refer to “Precautions in Fuel Delivery System” in this
section for parts number and handling.)
8) Remove injection pump (1) from cylinder head by removing
3 bolts (2).
Installation
Reverse removal procedure for installation noting the following.
• Tighten injection pump bolts to specified torque.
(a)
Tightening torque
Injection pump bolt (a): 21 N·m (2.1 kg-m, 15.5 lb-ft)
(a)
• Install new high pressure pipe referring to “High Pressure
Pipes Removal and Installation” in this section.
• Install timing belt referring to “Timing Belt and Belt Tensioner
Removal and Installation” in Section 6A2.
• Check fuel leakage referring to “Fuel Leakage Check” in this
section.
6E2-26 ENGINE AND EMISSION CONTROL SYSTEM (K9K ENGINE)
Venturi removal and installation
Removal
1) Check that engine is cold and fuel pressure is not under
pressure referring to “Fuel Pressure Relief Confirmation Procedure” in this section.
2) Disconnect return hoses (1) from venturi (2) on injection
pump.
3) Plug disconnected hose and venturi on injection pump with
cap available as a spare part to prevent them from entering
dust. (Refer to “Precautions in Fuel Delivery System” in this
section for parts number and handling.)
4) Remove venturi from injection pump.
Installation
Reverse removal procedure for installation noting the following.
• Apply oil (spare parts) to O-ring (1) of venturi.
• Be careful not to damage O-ring when installing venturi.
1
• Tighten venturi bolt to specified torque.
Tightening torque
Venturi bolt (a): 5.5 N·m (0.55 kg-m, 4.0 lb-ft)
(a)
• Check fuel leakage referring to “Fuel Leakage Check” in this
section.
ENGINE AND EMISSION CONTROL SYSTEM (K9K ENGINE) 6E2-27
Electronic Control System
Engine control module (ECM) removal and installation
CAUTION:
As ECM consists of precision parts, be careful not to
expose it to excessive shock.
Removal
NOTE:
When ECM is replaced, register vehicle specification
(injector calibration code and equipment such as additional heater plug and air conditioning) into ECM referring to “ECM Registration” in this section.
1) Disconnect negative cable at battery.
2) Detach pre-heating unit (1), relay box (2) and harness connectors (3) from ECM bracket.
3) Disconnect ground wire harness (4) from vehicle body.
4
2
3
1
“C48”
4) Disconnect connectors from ECM in order of “E17”, “C47”
and “C48” as follows.
a) Push lock (1) to release locking of lock lever (2).
b) Turn the lock lever to arrow direction until it stops.
“C47”
“E17”
2
2
1
5) Remove ECM (1) from ECM bracket (2).
2
1
Installation
Reverse removal procedure for installation.
6E2-28 ENGINE AND EMISSION CONTROL SYSTEM (K9K ENGINE)
ECM registration
The following vehicle information is registered in ECM.
• Fuel injector calibration codes
• Immobilizer control module/ECM code
• Vehicle configurations (equipment such as additional heater plug and air conditioning)
If ECM is replaced, this information save to be registered into the new ECM.
If one or more fuel injector(s) is replaced, register each fuel injector calibration code(s) into the ECM, which is
currently in use.
NOTE:
The immobilizer control module/ECM code registered in ECM cannot be erased or overwritten. If it is
necessary to change the code (i.e. loss of ignition key and etc.), replace a ECM and a pair of keys as a
set.
Registration Table
Replacement part
ECM
Fuel injector(s)
Register data
Reference
Go to “Registration Procedure for
• Fuel injector calibration codes
the ECM”.
• Immobilizer control module/ECM code
• Vehicle configurations (equipment such as
additional heater plug and air conditioning)
• Fuel injector calibration code
Go to “Registration Procedure for
the Fuel Injector calibration code”.
Registration Procedure for the ECM
1) Using SUZUKI scan tool, read and save the fuel injector calibration code from ECM into SUZUKI scan tool
(Refer to “Tech 2 Operator’s Manual”).
NOTE:
If the fuel injector calibration code can not be read out using SUZUKI scan tool, register the fuel injector calibration code of each fuel injector manually into ECM after replacing the ECM by reading the
fuel injector calibration code on each fuel injector by using SUZUKI scan tool (Refer to “Tech 2 Operator’s Manual”).
2) Replace ECM referring to “ECM Removal and Installation” in this section.
3) Register the fuel injector calibration code into ECM from SUZUKI scan tool (Refer to “Tech 2 Operator’s
Manual”).
4) Using SUZUKI scan tool, perform the “Static / Auto Configuration Test” referring to “Tech 2 Operator’s Manual” for configurations registration procedure.
Registration Procedure for the Fuel Injector calibration code
After one or more fuel injector(s) is replaced, register the fuel injector calibration code of each fuel injector manually, by reading the fuel injector calibration code on each fuel injector by using SUZUKI scan tool (Refer to
“Tech 2 Operator’s Manual”).
ENGINE AND EMISSION CONTROL SYSTEM (K9K ENGINE) 6E2-29
Glow plug removal and installation
Removal
CAUTION:
• Do not damage heating section of the glow plug.
• Do not use glow plug that has been dropped.
• When removing glow plug, first loosen it with a tool so
that one or more screw threads remain engaged, then
loosen and remove by hand.
1) Disconnect negative (–) cable at battery.
2) Remove injection cover.
3) Pull off glow plug wires (1).
4) Clean outside of glow plug to avoid any dirt entering cylinder
head.
5) Remove glow plugs (2) from cylinder head.
Installation
For installation, reverse removal procedure noting the following.
• Tightening glow plug (1) to specified torque.
Tightening torque
Glow plug (a): 15 N·m (1.5 kg-m, 11.0 lb-ft)
• Connect glow plug wires (2) securely.
Glow plug inspection
1) Disconnect negative cable at battery.
2) Remove injection cover.
3) Disconnect glow plug wires.
4) Check resistance between glow plug and engine ground.
If resistance is out of specification, replace glow plug.
Glow plug resistance
Less than 1 Ω
6E2-30 ENGINE AND EMISSION CONTROL SYSTEM (K9K ENGINE)
PPS (accelerator pedal position sensor) removal and
installation
Removal
1) Disconnect negative cable at battery.
2
1
3
2) Disconnect connector (1) from pedal position sensor by pulling the lock lever (2).
3) Remove accelerator pedal assembly from accelerator pedal
bracket.
Installation
Reverse removal procedure for installation noting the followings.
(a)
• Connect accelerator pedal position sensor connector
securely.
• Tighten accelerator pedal assembly mounting bolts to specified torque.
Tightening torque
Accelerator pedal mounting bolt
(a): 10 N·m (1.0 kg-m, 7.5 lb-ft)
ENGINE AND EMISSION CONTROL SYSTEM (K9K ENGINE) 6E2-31
PPS (accelerator pedal position sensor) inspection
1) Disconnect negative cable at battery.
2) Remove accelerator pedal assembly referring to “PPS
(Accelerator Pedal Position Sensor) Removal and Installation” in this section.
3) Using ohmmeter, check resistance between terminals under
each condition given in table below.
If check result is not satisfactory, replace accelerator pedal
assembly.
1
2
3 4 5 6
Pedal position sensor resistance
TERMINALS
Between 3 and 5
terminals
PPS 1
[A]
Between 4 and 5
terminals
3
Between 2 and 6
terminals
4
5
PPS 2
[B]
Between 1 and 6
terminals
2
1
6
RESISTANCE
0.67 – 1.69 kΩ
1.134 – 1.018 kΩ, varying
according to accelerator
pedal depressing.
1.17 – 2.48 kΩ
1.100 – 1.796 kΩ, varying
according to accelerator
pedal depressing.
[A]: PPS 1
[B]: PPS 2
1. Output voltage terminal (PPS 2)
2. Reference voltage terminal (PPS 2)
3. Reference voltage terminal (PPS 1)
4. Output voltage terminal (PPS 1)
5. Ground terminal (PPS 1)
6. Ground terminal (PPS 2)
4) Connect pedal position sensor connector securely.
5) Connect negative cable to battery.
6E2-32 ENGINE AND EMISSION CONTROL SYSTEM (K9K ENGINE)
Fuel temperature sensor removal and installation
Removal
1) Check that engine is cold and fuel pressure is not under
pressure referring to “Fuel Pressure Relief Confirmation Procedure” in this section.
2) Disconnect negative cable at battery.
2
1
3) Disconnect fuel temperature sensor connector (1).
4) Remove fuel temperature sensor (2) from injection pump.
Installation
1) Apply oil (spare parts) to O-ring (1) of fuel temperature sensor.
1
2) Install fuel temperature sensor (2) to injection pump.
Tighten fuel temperature sensor to specified torque.
2, (a)
1
CAUTION:
Be careful not to damage O-ring when installing fuel temperature sensor.
Tightening torque
Fuel temperature sensor
(a): 15 N·m (1.5 kg-m, 11.0 lb-ft)
3) Connect fuel temperature sensor connector (1).
4) Connect negative cable to battery.
5) Check fuel leakage referring to “Fuel Leakage Check” in this
section.
ENGINE AND EMISSION CONTROL SYSTEM (K9K ENGINE) 6E2-33
Fuel temperature sensor inspection
1) Remove fuel temperature sensor referring to “Fuel Temperature Sensor removal and Installation” in this section.
2) Check for resistance between fuel temperature sensor terminals.
If resistance is not as specified, replace fuel temperature
sensor.
Fuel temperature sensor resistance
1.76 – 2.64 kΩ at 25°C (77°F)
Fuel flow actuator removal and installation
Removal
1) Check that engine is cold and fuel pressure is not under
pressure referring to “Fuel Pressure Relief Confirmation Procedure” in this section.
2) Disconnect negative cable at battery.
4
1
2
3) Remove injection cover and injector return hose cover (1).
4) Disconnect fuel injector connectors (2) and glow plug connectors (3) of No.3 and No.4 cylinders.
5) Remove high pressure pipe (4) of No.4 cylinder referring to
“High Pressure Pipes Removal and Installation” in this section.
3
6) Disconnect return hose (1) from venturi (2) on injection
pump.
7) Plug disconnected hose and venturi of injection pump with
cap available as a spare part to prevent them from entering
dust. (Refer to “Precautions in Fuel Delivery System” in this
section for parts number and handling.)
6E2-34 ENGINE AND EMISSION CONTROL SYSTEM (K9K ENGINE)
8) Disconnect connectors from fuel temperature sensor (1) and
fuel flow actuator (2).
9) Remove fuel flow actuator screws (3).
10) Pull out fuel flow actuator by hand using small successive
turns.
1
CAUTION:
3
3
2
Do not use fuel flow actuator connector as a lever arm
when turning fuel flow actuator.
Installation
For installation, reverse removal procedure noting the following.
• Do not apply to O-rings of fuel flow actuator with grease or
used diesel oil. Apply oil (spare parts) to O-ring of fuel flow
actuator.
• Tighten fuel flow actuator bolts to specified torque.
Tightening torque
Fuel flow actuator bolt
(a): 5.5 N·m (0.55 kg-m, 4.0 lb-ft)
(a)
(a)
• Use new high pressure pipe of No.4 cylinder referring to
“High Pressure Pipes Removal and Installation” in this section.
• Check fuel leakage referring to “Fuel Leakage Check” in this
section.
ENGINE AND EMISSION CONTROL SYSTEM (K9K ENGINE) 6E2-35
Fuel flow actuator inspection
Check resistance between terminals of fuel flow actuator.
If resistance is out of specification, replace fuel flow actuator
referring to “Fuel Flow Actuator Removal and Installation” in this
section.
Fuel flow actuator resistance
4.8 – 5.8 Ω at 20°C, 68°F
Engine coolant temperature sensor (ECT sensor)
removal and installation
Removal
1) Disconnect negative cable at battery.
2) Drain cooling system.
3) Disconnect ECT sensor connector (1) with unlocked connector lock.
1
4) Remove ECT sensor (1) from thermostat assembly by
removing clip (2).
1
2
Installation
Reverse removal procedure for installation noting the following.
• Check ECT sensor O-ring for damage.
If malfunction is found, replace ECT sensor.
• Refill cooling system referring to “Cooling System Refill” in
Section 6B2.
• Check cooling system leakage referring to “Cooling System
Service” in Section 6B2.
6E2-36 ENGINE AND EMISSION CONTROL SYSTEM (K9K ENGINE)
Engine coolant temperature sensor (ECT sensor)
inspection
1) Remove ECT sensor referring to “Engine Coolant Temperature Sensor (ECT Sensor)” in this section.
2) Immerse temperature sensing part of ECT sensor in water
and measure resistance between sensor terminal (1) and (2)
while heating water gradually.
If measured resistance doesn’t shown such characteristic as
shown, replace ECT sensor.
ECT sensor resistance
Water temperature °C (°F)
25 (77)
50 (122)
80 (176)
Resistance (kΩ)
2.140 – 2.364
0.770 – 0.850
0.272 – 0.288
[A]: Resistance
[B]: Temperature
Camshaft position sensor (CMP sensor) removal and
installation
Removal
1) Disconnect negative cable at battery.
2) Disconnect CMP sensor connector (2).
3) Remove CMP sensor (1) from generator upper bracket support.
1
2
ENGINE AND EMISSION CONTROL SYSTEM (K9K ENGINE) 6E2-37
Installation
Reverse removal procedure for installation.
• Clean CMP sensor and protrusion of injection pump pulley
before installation.
Crankshaft position (CKP) sensor (engine speed sensor) removal and installation
Removal
1) Disconnect negative cable at battery.
2
1
2) Detach fuel filter and loosen CKP sensor left side bolt (1).
3) Hoist vehicle.
4) Remove CKP sensor (2) from transmission case by removing CKP sensor bolts.
5) Disconnect CKP sensor connector.
Installation
Reverse removal procedure for installation noting the following.
• Clean CKP sensor and sensor rotor teeth before installation.
• Tighten CKP sensor bolts to specified torque.
Tightening torque
CKP sensor bolt (a): 8 N·m (0.8 kg-m, 6.0 lb-ft)
(a)
6E2-38 ENGINE AND EMISSION CONTROL SYSTEM (K9K ENGINE)
Crankshaft position (CKP) sensor (engine speed sensor) inspection
1) Remove CKP sensor referring to “Crankshaft Position (CKP)
Sensor (Engine Speed Sensor) Inspection” in this section.
2) Check that CKP sensor (1) and sensor rotor tooth (2) are
free from any metal particles and damage.
3) Check that resistance between terminals of CKP sensor is
within specification.
If resistance is not as specified, replace CKP sensor.
CKP sensor resistance
608 – 912 Ω at 20°C, 68°F
External air temperature sensor removal and installation
Removal
1) Disconnect negative cable at battery.
1
2
2
2) Disconnect external air temperature sensor connector (1).
3) Open air cleaner case.
4) Pull out external air temperature sensor from air cleaner
case with pushing lock (2) of sensor.
ENGINE AND EMISSION CONTROL SYSTEM (K9K ENGINE) 6E2-39
Installation
1) Clean mating surfaces of external air temperature sensor
and air cleaner case.
2) Install external air temperature sensor to air cleaner case
securely.
3) Install air cleaner case.
4) Connect external air temperature sensor connector securely.
5) Connect negative cable to battery.
External air temperature sensor inspection
1) Remove external air temperature sensor from air cleaner
case referring to “External Air Temperature Sensor Removal
and Installation” in this section.
1
2
3
2) Check external air temperature sensor O-ring (1) for damage.
If malfunction is found, replace external air temperature sensor.
3) Blow hot air to temperature sensing part (2) of external air
temperature sensor using hot air drier (3) and measure
resistance between sensor terminals while heating air gradually.
If measured resistance does not show such characteristic as
shown, replace external air temperature sensor.
CAUTION:
Do not heat up external air temperature sensor more than
100°C (212°F). Otherwise, external air temperature sensor is damaged.
[A]
External air temperature sensor resistance
1.93 - 2.17
0.77 - 0.85
0.30 - 0.32
0
32
25
77
50
122
80 (ºC)
176 (ºF)
Temperature °C (°F)
25 (77)
50 (122)
80 (176)
[B]
[A]: Resistance
[B]: Temperature
Resistance (kΩ)
1.93 – 2.17
0.77 – 0.85
0.30 – 0.32
6E2-40 ENGINE AND EMISSION CONTROL SYSTEM (K9K ENGINE)
Intake air temperature (IAT) sensor removal and
installation
Removal
1) Disconnect negative cable at battery.
3
2) Disconnect west gate actuator hose (1), IAT sensor (2) and
boost pressure sensor (3) connectors.
3) Remove turbocharger outlet air pipe (5).
4) Pull out IAT sensor from turbocharger outlet air pipe with
pushing lock (4) of IAT sensor.
2
5
4
4
1
Installation
1) Clean mating surfaces of IAT sensor and turbocharger outlet
air pipe.
2) Install IAT sensor to turbocharger outlet air pipe securely.
3) Install turbocharger outlet air pipe.
4) Connect waste gate actuator hose, IAT sensor and boost
pressure sensor connectors securely.
5) Connect negative cable to battery.
Intake air temperature (IAT) sensor inspection
1) Remove IAT sensor from turbocharger outlet air pipe referring to “Intake Air Temperature (IAT) Sensor Removal and
Installation” in this section.
Structure of IAT sensor is the same as that of external air
temperature sensor.
2) Check sensor O-ring and sensor resistance using the same
procedure as that for external air temperature sensor referring to “External Air Temperature Sensor Inspection” in this
section.
ENGINE AND EMISSION CONTROL SYSTEM (K9K ENGINE) 6E2-41
Boost pressure sensor removal and installation
Removal
1) Disconnect negative cable at battery.
2) Disconnect connector and hose from boost pressure sensor
(1).
3) Remove boost pressure sensor from turbocharger outlet air
pipe.
1
Installation
Reverse removal procedure for installation.
Boost pressure sensor inspection
1) Remove boost pressure sensor from turbocharger outlet air
pipe referring to “Boost Pressure Sensor Removal and
Installation” in this section.
1
2
3
2) Using ohmmeter, check resistance between terminals in
table below.
If check result is not satisfactory, replace boost pressure
sensor.
Boost pressure sensor resistance
Terminals
Between 1 and 2 terminals
Between 1 and 3 terminals
Between 2 and 3 terminals
Resistance
Approx 3.936 kΩ
Approx 5.39 kΩ
Approx 5.77 kΩ
Radiator fan control system inspection
WARNING:
Keep hands, tools, and clothing away from engine cooling fan to help prevent personal injury. This fan is electric
and can come on whether or not the engine is running.
The fan can start automatically in response to the ECT
sensor with the ignition switch in the “ON” position.
Check system for operation referring to “Conformity check at
Engine Running” in Section 6-2.
If radiator fan fails to operate properly, check relay, radiator fan
and electrical circuit.
6E2-42 ENGINE AND EMISSION CONTROL SYSTEM (K9K ENGINE)
Main relay and radiator fan relay inspection
1) Disconnect negative cable at battery.
2) Remove main relay (1), radiator fan relay No.1 (2), No.2 (3)
or No.3 (4) from relay connector.
3
2
4
1
3) Check that there is no continuity between terminal “c” and
“d”.
If there is continuity, replace relay.
4) Connect battery positive (+) terminal to terminal “b” of relay.
Connect battery negative (–) terminal “a” of relay.
Check continuity between terminal “c” and “d”.
If there is no continuity when relay is connected to the battery,
replace relay.
Pre-heating unit removal and installation
Removal
1) Disconnect negative cable at battery.
2) Disconnect pre-heating unit connector (1).
3) Remove pre-heating unit (2) from bracket.
1
2
Installation
Reverse removal procedure for installation.
ENGINE AND EMISSION CONTROL SYSTEM (K9K ENGINE) 6E2-43
Knock sensor removal and installation
Removal
1) Check that engine is cold and fuel pressure is not under
pressure referring to “Fuel Pressure Relief Confirmation Procedure” in this section.
2) Disconnect negative cable at battery.
3) Drain coolant referring to “Coolant Replacement” in Section
6B2.
4) Remove injection pump to common rail high pressure pipe
referring to “High Pressure Pipes Removal and Installation”
in this section.
5) Remove water pipe (1).
6) Disconnect knock sensor connector (2).
7) Remove knock sensor (3) from cylinder block.
3
2
1
Installation
Reverse removal procedure noting the following.
• Check O-ring of water pipe for damage and replace if necessary.
• Tighten knock sensor (1) to specified torque.
Tightening torque
Knock sensor (a): 20 N·m (2.0 kg-m, 14.5 lb-ft)
1, (a)
• Refill coolant referring to “Coolant Replacement” in Section
6B2.
• Install high pressure pipe referring to “High Pressure Pipes
Removal and Installation” in this section.
6E2-44 ENGINE AND EMISSION CONTROL SYSTEM (K9K ENGINE)
EGR valve removal and installation
For removal and installation procedure of EGR valve, refer to
“EGR Valve and Intake Pipe Removal and Installation” in Section
6A2.
EGR valve inspection
Check resistance between following terminals of EGR valve in
each pair.
If resistance is out of specification, replace EGR valve.
EGR valve resistance
Terminal
Between 1 and 5 terminals
Between 4 and 6 terminals
Between 2 and 4 terminals
Resistance
7.5 – 8.5 Ω at 25°C, 77°F
0.5 – 1.5 kΩ at 20°C, 68°F
2.4 – 5.6 kΩ at 20°C, 68°F
ENGINE AND EMISSION CONTROL SYSTEM (K9K ENGINE) 6E2-45
Tightening Torque Specification
Fastening part
N•m
38
28
21
28
21
5.5
15
10
15
5.5
8
3
20
12
21
21
High pressure pipe union nut
Common rail nut
Oil level gauge guide nut
Fuel injector bracket bolt
Injection pump bolt
Venturi bolt
Glow plug
Accelerator pedal mounting bolt
Fuel temperature sensor
Fuel flow actuator bolt
CKP sensor bolt
Additional heater plug wire nut
Knock sensor
EGR valve bolt and nut
Air inlet metal tube bolt
EGR unit bolt
Tightening torque
kg-m
3.8
2.8
2.1
2.8
2.1
0.55
1.5
1.0
1.5
0.55
0.8
0.3
2.0
1.2
2.1
2.1
Special Tool
Tech 2 kit (SUZUKI scan tool)
(See NOTE)
09911-78110
Crowfoot ratchet ends
NOTE:
This kit includes the following items.
1. Tech 2, 2. PCMCIA card, 3. DLC cable, 4. SAE 16/19 adapter, 5. Cigarette cable,
6. DLC loopback adapter, 7. Battery power cable, 8. RS232 cable, 9. RS232 adapter,
10. RS232 loopback connector, 11. Storage case, 12. Power supply
lb-ft
28.0
20.5
15.5
20.5
15.5
4.0
11.0
7.5
11.0
4.0
6.0
2.5
14.5
9.0
15.5
15.5
6E2-46 ENGINE AND EMISSION CONTROL SYSTEM (K9K ENGINE)
CRANKING SYSTEM (K9K ENGINE) 6G2-1
SECTION 6G2
6-3
6A3
CRANKING SYSTEM
(K9K ENGINE)
6B3
6C3
6E3
6H3
WARNING:
For vehicles equipped with a Supplemental Restraint (Air Bag) System:
• Service on and around the air bag system components or wiring must be performed only by an
authorized SUZUKI dealer. Refer to “System Components and Wiring Location View and Connections” under “General Description” in Section 10B in order to confirm whether you are performing
service on or near the air bag system components or wiring. Please observe all WARNINGS and
“Service Precautions” under “On-Vehicle Service” in Section 10B before performing service on or
around the air bag system components or wiring. Failure to follow WARNINGS could result in unintentional activation of the system or could render the system inoperative. Either of these two conditions may result in severe injury.
• Technical service work must be started at least 90 seconds after the ignition switch is turned to the
“LOCK” position and the negative cable is disconnected from the battery. Otherwise, the system
may be activated by reserve energy in the Sensing and Diagnostic Module (SDM).
6K3
6G2
CONTENTS
General Description ..................................... 6G2-2
Cranking System Circuit Diagram .............. 6G2-2
Diagnosis ...................................................... 6G2-2
Cranking System Symptom Diagnosis ....... 6G2-2
Cranking System Test ................................ 6G2-4
Pull-in test............................................... 6G2-4
Hold-in test ............................................. 6G2-4
Plunger and pinion return test ................ 6G2-4
No-load performance test........................6G2-5
ON-Vehicle Service .......................................6G2-6
Starting Motor Dismounting and
Remounting.................................................6G2-6
Dismounting ............................................6G2-6
Remounting.............................................6G2-6
Tightening Torque Specification .................6G2-6
6G2-2 CRANKING SYSTEM (K9K ENGINE)
General Description
Cranking System Circuit Diagram
1. Pinion drive lever
5. Plunger
2. Pinion & Over-running clutch
6. Magnetic switch contacts
9. Ignition & Starter switch
3. Magnetic switch
7. Pull-in coil
4. Hold-in coil
8. Starting motor
10. Battery
Diagnosis
Cranking System Symptom Diagnosis
Possible symptoms due to starting system trouble would be as follows:
• Starting motor does not run (or runs slowly)
• Starting motor runs but fails to crank engine
• Abnormal noise is heard
Proper diagnosis must be made to determine exactly where the cause of each trouble lies.....in battery, wiring
harness, (including starting motor switch), starting motor or engine.
Do not remove motor just because starting motor does not run. Check following items and narrow down scope
of possible causes.
1) Condition of trouble
2) Tightness of battery terminals (including ground cable connection on engine side) and starting motor terminals
3) Discharge of battery
4) Mounting of starting motor
CRANKING SYSTEM (K9K ENGINE) 6G2-3
Condition
Possible Cause
Battery run down
Motor not running
(No operating sound of Battery voltage too low due to battery deterioramagnetic switch)
tion
Poor contact in battery terminal connection
Loose grounding cable connection
Fuse set loose or blown off
Poor contacting action of ignition switch and magnetic switch
Lead wire coupler loose in place
Open-circuit between ignition switch and magnetic
switch
Open-circuit in pull-in coil
Brushes are seating poorly or worn down
Poor sliding of plunger and/or pinion
Battery run down
Motor not running
(Operating sound of
Battery voltage too low due to battery deterioramagnetic switch
tion
heard)
Loose battery cable connections
Burnt main contact point, or poor contacting action
of magnetic switch
Brushes are seating poorly or worn down
Weakened brush spring
Burnt commutator
Layer short-circuit of armature
Crankshaft rotation obstructed
Starting motor running Insufficient contact of magnetic switch main contacts
but too slow (small
torque) (If battery and Layer short-circuit of armature
wiring are satisfactory, Disconnected, burnt or worn commutator
inspect starting motor) Worn brushes
Weakened brush springs
Burnt or abnormally worn end bush
Worn pinion tip
Starting motor running, but not cranking Poor sliding of over-running clutch
engine
Over-running clutch slipping
Worn teeth of ring gear
Noise
Abnormally worn bush
Worn pinion or worn teeth of ring gear
Starting motor does
not stop running
Correction
Recharge battery.
Replace battery.
Retighten or replace.
Retighten.
Tighten or replace.
Replace.
Retighten.
Repair.
Replace starting motor.
Replace starting motor.
Replace starting motor.
Recharge battery.
Replace battery.
Retighten.
Replace starting motor.
Replace starting motor.
Replace starting motor.
Replace starting motor.
Replace starting motor.
Repair.
Replace starting motor.
Replace starting motor.
Replace starting motor.
Replace starting motor.
Replace starting motor.
Replace starting motor.
Replace starting motor.
Replace starting motor.
Replace starting motor.
Replace flywheel.
Replace starting motor.
Replace starting motor or flyweel.
Poor sliding of pinion (failure in return movement) Replace starting motor.
Worn internal or planetary gear teeth
Replace starting motor.
Lack of oil in each part
Replace starting motor.
Fused contact points of magnetic switch
Replace starting motor.
Short-circuit between turns of magnetic switch coil Replace starting motor.
(layer short-circuit)
Failure of returning action in ignition switch
Replace.
6G2-4 CRANKING SYSTEM (K9K ENGINE)
Cranking System Test
CAUTION:
Each test must be performed within 3 – 5 seconds to
avoid coil from burning.
Pull-in test
Connect battery to magnetic switch as shown.
Check that plunger and pinion move outward.
If plunger and pinion don’t move, replace starting motor.
1
3
2
NOTE:
Before testing, disconnect lead wire (3) from terminal M
(2).
1. Terminal “S”
Hold-in test
While connected as above with plunger out, disconnect negative
lead from terminal “M”.
Check that plunger and pinion remain out.
If plunger and pinion return inward, replace starting motor.
Plunger and pinion return test
Disconnect negative lead from starting motor body.
Check that plunger and pinion return inward.
If plunger and pinion don’t return, replace starting motor.
CRANKING SYSTEM (K9K ENGINE) 6G2-5
No-load performance test
1
2
Connect lead wire (1) to terminal M (2).
Connect battery to starting motor as shown.
Check that starting motor rotates smoothly and steadily with pinion moving out.
If check result is not satisfactory, replace starting motor.
6G2-6 CRANKING SYSTEM (K9K ENGINE)
ON-Vehicle Service
Starting Motor Dismounting and Remounting
4
45 N·m (4.5 kg-m)
2
3
1
5
1. Starting motor
3. Battery cable nut
2. Magnetic switch lead wire nut
4. Starting motor mount bolt
5. Starting motor heat protector
Tightening torque
Dismounting
1)
2)
3)
4)
5)
6)
Disconnect negative cable at battery.
Remove exhaust No.1 pipe refer to “Exhaust No.1 Pipe Removal and Installation” in Section 6K2.
Remove starting motor heat protector.
Disconnect magnetic switch lead wire and battery cable from starting motor terminals.
Remove starting motor mount bolt
Remove starting motor.
Remounting
Reverse the dismounting procedure noting the following.
• Tighten starting motor mount bolts to specified torque.
Tightening torque
Starting motor mount bolt: 45 N·m (4.5 kg-m, 33.0 lb-ft)
Tightening Torque Specification
Fastening part
Starting motor mount bolt
N•m
45
Tightening torque
kg-m
4.5
lb-ft
33.0
CHARGING SYSTEM (K9K ENGINE) 6H2-1
SECTION 6H2
6-3
6A3
CHARGING SYSTEM
(K9K ENGINE)
WARNING:
6B3
6C3
6E3
6G3
6K3
For vehicles equipped with a Supplemental Restraint (Air Bag) System:
• Service on and around the air bag system components or wiring must be performed only by an
authorized SUZUKI dealer. Refer to “System Components and Wiring Location View and Connectors” under “General Description” in Section 10B in order to confirm whether you are performing
service on or near the air bag system components or wiring. Please observe all WARNINGS and
“Service Precautions” under “On-Vehicle Service” in Section 10B before performing service on or
around the air bag system components or wiring. Failure to follow WARNINGS could result in unintentional activation of the system or could render the system inoperative. Either of these two conditions may result in severe injury.
• Technical service work must be started at least 90 seconds after the ignition switch is turned to the
“LOCK” position and the negative cable is disconnected from the battery. Otherwise, the system
may be activated by reserve energy in the Sensing and Diagnostic Module (SDM).
6H2
CONTENTS
General Description ......................................6H2-2
Battery Description ......................................6H2-2
Carrier and hold-down.............................6H2-2
Electrolyte freezing..................................6H2-2
Sulfation ..................................................6H2-2
Built-in indicator (if equipped)..................6H2-2
Care of battery.........................................6H2-3
Generator Description .................................6H2-4
Diagnosis .......................................................6H2-5
Battery Inspection .......................................6H2-5
Visual inspection .....................................6H2-5
Generator Symptom Diagnosis ...................6H2-5
Charging indicator lamp operation ..........6H2-5
Undercharged battery..............................6H2-6
On-Vehicle Service........................................6H2-7
Jump Starting in Case of Emergency..........6H2-7
With auxiliary (booster) battery................6H2-7
With charging equipment.........................6H2-7
Battery Dismounting and Remounting ........6H2-8
Dismounting ............................................6H2-8
Handling ..................................................6H2-8
Remounting.............................................6H2-8
Generator Drive Belt Tensioner
Components................................................6H2-9
Generator Drive Belt Removal and
Installation.................................................6H2-10
Generator Drive Belt Inspection................6H2-10
Vacuum Pump Inspection .........................6H2-10
Generator Dismounting and
Remounting...............................................6H2-11
Specification................................................6H2-12
Battery.......................................................6H2-12
Generator..................................................6H2-12
Tightening Torque Specification ...............6H2-12
Special Tools...............................................6H2-12
6H2-2 CHARGING SYSTEM (K9K ENGINE)
General Description
Battery Description
The battery has three major functions in the electrical system.
• It is a source of electrical energy for cranking the engine.
• It acts as a voltage stabilizer for the electrical system.
• It can, for a limited time, provide energy when the electrical load exceeds the output of the generator.
Carrier and hold-down
The battery carrier should be in good condition so that it will support the battery securely and keep it level.
Before installing the battery, the battery carrier and hold-down clamp should be clean and free from corrosion
and make certain there are no parts in carrier.
To prevent the battery from shaking in its carrier, the hold-down bolts should be tight enough but not over-tightened.
Electrolyte freezing
The freezing point of electrolyte depends on its specific gravity. Since freezing may ruin a battery, it should be
protected against freezing by keeping it in a fully charged condition. If a battery is frozen accidentally, it should
not be charged until it is warmed.
Sulfation
If the battery is allowed to stand for a long period in discharged condition, the lead sulfate becomes converted
into a hard, crystalline substance, which will not easily turn back to the active material again during the subsequent recharging. “Sulfation” means the result as well as the process of that reaction. Such a battery can be
revived by very slow charging and may be restored to usable condition but its capacity is lower than before.
Built-in indicator (if equipped)
The battery has a built-in temperature compensated indicator at the top of the battery. This indicator is to be
used with the following diagnostic procedure. When checking the indicator, make sure that the battery has a
clean top. A light may be needed in some poorly-lit areas.
Three types of indication available under normal operation are as
follows.
• Green Dot
Battery is sufficiently charged for testing.
• Dark
Battery must be charged before testing.
If there is a cranking complaint, battery should be tested as
described in Diagnosis section. Charging and electrical systems should also be checked at this time.
• Clear or Light Yellow
This means that fluid level is below the bottom of hydrometer. Its possible cause is excessive or prolonged charging, a
broken case, excessive tipping or normal battery deterioration. When the battery is found in such condition, it is possible that high charging voltage is caused by the faulty
charging system and therefore, charging and electrical systems need to be checked. If there is a trouble in cranking and
its cause lies in the battery, it should be replaced.
CHARGING SYSTEM (K9K ENGINE) 6H2-3
Care of battery
WARNING:
• Never expose battery to open flame or electric spark because of battery generate gas which is flammable and explosive.
• Do not allow battery fluid to contact eyes, skin, fabrics, or painted surfaces as fluid is a corrosive
acid. Flush any contacted area with water immediately and thoroughly.
• Batteries should always be kept out of reach of children.
1)
•
•
•
•
The battery is a very reliable component, but needs periodical attentions.
Keep the battery carrier clean
Prevent rust formation on the terminal posts
Keep the electrolyte up to the upper level uniformly in all cells.
When keeping battery on vehicle over a long period of time, follow instructions given below.
– Weekly, start the engine and run it until it reaches normal operating temperature with engine speed of
2000 to 3000 rpm. Make sure all electric switches are off before storing the vehicle.
– Recharge the battery twice a month to prevent it from discharging excessively. This is especially important
when ambient temperature is low.
The battery discharges even when it is not used, while vehicles are being stored. Battery electrolyte can
freeze and battery case can crack at cold ambient condition if battery is not properly charged.
2) Keep the battery cable connections clean.
The cable connections, particularly at the positive (+) terminal post, tend to become corroded. The product
of corrosion, or rust, on the mating faces of conductors resists the flow of current.
Clean the terminals and fittings periodically to ensure good metal-to-metal contact, and grease the connections after each cleaning to protect them against rusting.
3) Be always in the know as to the state of charge of the battery. The simplest way to tell the state of charge is
to carry out a hydrometer test. The hydrometer is an instrument for measuring the specific gravity (S.G.) of
the battery electrolyte. The S.G. of the electrolyte is indicative of the state of charge.
6H2-4 CHARGING SYSTEM (K9K ENGINE)
Generator Description
The generator is a small and high performance type with an IC regulator incorporated.
The internal components are connected electrically as shown below figure.
The generator features are as follows:
• Solid state regulator is mounted inside the generator.
• All regulator components are enclosed into a solid mold.
• This unit along with the brush holder assembly is attached to the rear housing.
• The IC regulator uses integrated circuits and controls the voltage produced by the generator, and the voltage
setting cannot be adjusted.
• The generator rotor bearings contain enough grease to eliminate the need for periodic lubrication. Two
brushes carry current through the two slip rings to the field coil mounted on the rotor, and under normal conditions will provide long period of attention-free service.
• The stator windings are assembled on the inside of a laminated core that forms part of the generator frame.
B
3
W
1
4
I
5
2
1. Generator with regulator assembly
3. Ignition switch
2. Charge indicator light
4. Battery
5. Load
4
3
1
5
2
1. Pulley
3. “B” terminal
2. Ground
4. “I” terminal
5. “W” terminal
CHARGING SYSTEM (K9K ENGINE) 6H2-5
Diagnosis
Battery Inspection
Visual inspection
Check for obvious damage, such as cracked or broken case or
cover, that could permit loss of electrolyte. If obvious damage is
noted, replace battery. Determine cause of damage and correct
as needed.
Generator Symptom Diagnosis
CAUTION:
• Do not connect any load between I and E.
• When connecting charger or booster battery to vehicle
battery, refer to “Jump starting in case of emergency”
in this section.
I
B
W
E
Trouble in charging system will show up as one or more of the following conditions:
1) Faulty indicator lamp operation.
2) An undercharged battery as evidenced by slow cranking or
indicator dark.
3) An overcharged battery as evidenced by excessive spewing
of electrolyte from vents.
Noise from generator may be caused by loose drive pulley, loose
mounting bolts, worn or dirty bearings, defective diode, or defective stator.
B: Generator output (Battery terminal)
E: Ground
I: Lamp terminal
Charging indicator lamp operation
Condition
Charge light does not
light with ignition ON
and engine off
Possible Cause
Fuse blown
Light burned out
Wiring connection loose
IC regulator or field coil faulty
Charge light does not go Drive belt loose or worn
out with engine running IC regulator or generator faulty
(battery requires freWiring faulty
quent recharging)
Noise from radio
Condenser faulty
Correction
Check fuse.
Replace light.
Tighten loose connection.
Replace generator.
Replace drive belt.
Check charging system.
Repair wiring.
Replace generator.
6H2-6 CHARGING SYSTEM (K9K ENGINE)
Undercharged battery
This condition, as evidenced by slow cranking or low specific
gravity can be caused by one or more of the following conditions
even though indicator lamp may be operating normal.
Following procedure also applies to cars with voltmeter and
ammeter.
• Make sure that undercharged condition has not been caused
by accessories left on for extended period of time.
• Check drive belt for proper tension.
• If battery defect is suspected, refer to “Battery Description” in
this section.
• Inspect wiring for defects. Check all connections for tightness and cleanliness, battery cable connections at battery,
starting motor and ignition ground cable.
CHARGING SYSTEM (K9K ENGINE) 6H2-7
On-Vehicle Service
Jump Starting in Case of Emergency
With auxiliary (booster) battery
CAUTION:
If vehicle is manual transmission model and has a catalytic converter, do not push or tow it to start.
Damage to its emission system and/or to other parts may result.
Both booster and discharged battery should be treated carefully when using jumper cables. Follow procedure
outlined below, being careful not to cause sparks.
WARNING:
• Departure from these conditions or procedure described below could result in:
– Serious personal injury (particularly to eyes) or property damage from such causes as battery
explosion, battery acid, or electrical burns.
– Damage to electronic components of either vehicle.
• Remove rings, watches, and other jewelry. Wear approved eye protection.
• Be careful so that metal tools or jumper cables do not contact positive battery terminal (or metal in
contact with it) and any other metal on vehicle, because a short circuit could occur.
WARNING:
Do not connect negative cable directly to negative terminal of dead battery.
1) Set parking brake and place NEUTRAL on manual transmission. Turn off ignition, turn off lights and all other
electrical loads.
2) Check electrolyte level. If it is below low level line, add distilled water.
3) Attach end of one jumper cable to positive terminal of booster battery and the other end of the same cable to
positive terminal of discharged battery. (Use 12-volt battery only to jump start engine).
4) Attach one end of the remaining negative cable to negative terminal of booster battery, and the other end to
a solid engine ground (such as exhaust manifold) at least 45 cm (18 in.) away from battery of vehicle being
started.
5) Start engine of vehicle with booster battery and turn off electrical accessories. Then Start engine of the vehicle with discharged battery.
6) Disconnect jumper cables in the exact reverse order.
With charging equipment
CAUTION:
When jump starting engine with charging equipment, be sure equipment used is 12-volt and negative
ground. Do not use 24-volt charging equipment. Using such equipment can cause serious damage to
electrical system or electronic parts.
6H2-8 CHARGING SYSTEM (K9K ENGINE)
Battery Dismounting and Remounting
Dismounting
2
5
3
1)
2)
3)
4)
Disconnect negative cable (1).
Disconnect positive cable (2).
Remove retainer (3).
Remove battery (4).
5. Body ground bolt
1
4
Handling
When handling battery, following safety precautions should be followed:
• Hydrogen gas is produced by battery. A flame or spark near
battery may cause the gas to ignite.
• Battery fluid is highly acidic. Avoid spilling on clothing or
other fabric. Any spilled electrolyte should be flushed with
large quantity of water and cleaned immediately.
Remounting
1) Reverse removal procedure.
2) Torque battery cables to specification.
NOTE:
Check to be sure that ground cable has enough clearance to hood panel by terminal.
CHARGING SYSTEM (K9K ENGINE) 6H2-9
Generator Drive Belt Tensioner Components
8
4
1
9
40 N·m (4.0 kg-m)
5
9
2
40 N·m (4.0 kg-m)
3
6
10
28 N·m (2.8 kg-m)
7
1. Drive belt
5. Idler pulley No.1 bolt
2. Auto tensioner
6. Idler pulley No.2
3. Auto tensioner bolt
7. Idler pulley No.3 bolt
4. Idler pulley No.1
8. Accessary mounting bracket
9. Accessary mounting bracket No.1 bolts
10. Accessary mounting bracket No.2 bolt
Tightening torque
6H2-10 CHARGING SYSTEM (K9K ENGINE)
Generator Drive Belt Removal and Installation
Removal
1) Disconnect negative (-) cable at battery.
2) Remove generator cover.
[A]
7
3) Remove drive belt (2) while turning tensioner (1) counter
clockwise until stopping.
Installation
2
5
Reverse removal procedure.
6
3. Power steering pump pulley
4. Crankshaft pulley
5. Idler pulley No.1
3
8
4
6. Idler pulley No.2
7. Generator Pulley
1
8. A/C compressor pulley
[A]: with A/C
[B]: without A/C
[B]
7
2
5
1
3
4
6
Generator Drive Belt Inspection
• Check drive belt for wear and cracks, and replace as
required.
Vacuum Pump Inspection
A
Install a Vacuum pump gauge to the vacuum circuit as shown in
the figure and measure vacuum.
B
–75kPa (–10.9 psi) or more (keep for 20 seconds at engine
speed 1,500 rpm first)
–85kPa (–12.3 psi) or more (keep for 20 seconds at engine
speed 3,000 rpm first)
Special tool
(A): 09915-67311
(B): 09918-08210
CHARGING SYSTEM (K9K ENGINE) 6H2-11
Generator Dismounting and Remounting
1) Disconnect negative cable at battery.
2) Dismount in order as shown in the figure.
3) Reverse dismounting procedure for remounting.
6
7
10 N·m (1.0 kg-m)
4
8
3
6
10
14
1
9
2
13
11
5
12
28 N·m (2.8 kg-m)
1. Generator cover
6. Vacuum hose
11. A/C receiver/dryer bolts (If Equipped)
2. Drive belt
7. “B” terminal nut
12. Generator bolts
3. Generator upper bracket
8. “B” terminal wire
13. Generator
4. Generator upper bracket bolts
9. Oil hose
14. Vacuum pump
5. Idler pulley No.2
10. Connector
Tightening torque
6H2-12 CHARGING SYSTEM (K9K ENGINE)
Specification
Battery
Battery type
Nominal output
Rated capacity
75D23L
12 V
54 Ah/5 h
Generator
Generator Type
Rated voltage
Nominal output
Polarity
Rotation
100 A type
12 V
100 A
Negative ground
Clockwise viewed from pulley side
Tightening Torque Specification
Fastening part
N•m
28
10
40
28
Generator bolts
“B” terminal bolt
Accessary mounting bracket No.1 bolts
Accessary mounting bracket No.2 bolt
Special Tools
09915-67311
Vacuum gauge
09918-08210
Vacuum hose joint
Tightening torque
kg-m
2.8
1.0
4.0
2.8
lb-ft
20.0
7.0
29.0
20.0
EXHAUST SYSTEM (K9K ENGINE) 6K2-1
SECTION 6K2
6-3
6A3
EXHAUST SYSTEM
(K9K ENGINE)
6B3
6C3
6E3
6G3
CONTENTS
General Description ......................................6K2-2
Maintenance ..................................................6K2-2
On-Vehicle Service........................................6K2-3
Exhaust System Components .....................6K2-3
Exhaust Manifold Removal and
Installation................................................... 6K2-4
Exhaust Manifold Inspection ....................... 6K2-4
Exhaust Pipe Removal and Installation ...... 6K2-4
Tightening Torque Specification .................6K2-4
6K2
6K2-2 EXHAUST SYSTEM (K9K ENGINE)
General Description
The exhaust system consists of an exhaust manifold, a turbo charger, exhaust pipe, a muffler and seal, gasket
and etc.
The oxidation catalytic converter is included in exhaust pipe. It is an emission control device added to the
exhaust system to lower the levels of Hydrocarbon (HC) and Carbon Monoxide (CO) pollutants in the exhaust
gas.
Maintenance
WARNING:
To avoid the danger of being burned, do not touch the
exhaust system when the system is hot. Any service on
the exhaust system should be performed when the system is cool.
At every interval of periodic maintenance service, and when vehicle is raised for other service, check exhaust system as follows:
• Check rubber mountings (1) for damage, deterioration, and
out of position.
• Check exhaust system for leakage, loose connection, dent
and damage.
• If bolts or nuts are loosened, tighten them to specified torque
referring to “Exhaust System Components” in this section.
• Check nearby body areas damaged, missing, or mispositioned part, open seam, hole connection or any other defect
which could permit exhaust fumes to seep into vehicle.
• Make sure that exhaust system components have enough
clearance from underbody to avoid overheating and possible
damage to passenger compartment carpet.
• Any defect should be fixed at once.
EXHAUST SYSTEM (K9K ENGINE) 6K2-3
On-Vehicle Service
Exhaust System Components
WARNING:
To avoid the danger of being burned, do not touch the exhaust system when the system is hot. Any
service on the exhaust system should be performed when the system is cool.
9
10
8
6
50 N·m (5.0 kg-m)
11
50 N·m (5.0 kg-m)
1
5
7
1
4
23 N·m (2.3 kg-m)
1
5
5
2
6.5 N·m (0.65 kg-m)
5
1. Seal ring
5. Mounting No.1
3
8
9
9. Mounting No.3
2. Exhaust pipe stud bolt
6. Center pipe bolt
10. Muffler
3. Exhaust pipe
7. Center pipe
11. Muffler nut
4. Exhaust pipe nut
8. Mounting No.2
Tightening torque
Do not reuse.
6K2-4 EXHAUST SYSTEM (K9K ENGINE)
Exhaust Manifold Removal and Installation
Removal and installation
Refer to “Exhaust Manifold Removal and Installation” in Section 6A2.
Exhaust Manifold Inspection
Check gasket and seal for deterioration or damage.
Replace them as necessary.
Exhaust Pipe Removal and Installation
CAUTION:
Exhaust pipe have oxidation catalytic converter in it, it should not be exposed to any impulse.
Be careful not to drop it or hit it against something.
Removal and installation
For replacement of exhaust pipe, be sure to hoist vehicle and observe “Warning” under “Maintenance” in this
section and the following.
• Tighten bolts and nuts to specified torque when reassembling referring to “Exhaust System Components” in
this section.
• After installation, start engine and check each joint of exhaust system for leakage.
Tightening Torque Specification
Fastening part
Exhaust pipe stud bolt
Exhaust pipe nut
Center pipe bolt
Muffler nut
N•m
6.5
23
50
50
Tightening torque
kg-m
0.65
2.3
5.0
5.0
lb-ft
4.5
17.0
36.5
36.5
MANUAL TRANSMISSION 7A2-1
SECTION 7A2
MANUAL TRANSMISSION
WARNING:
For vehicles equipped with a Supplemental Restraint (Air Bag) System:
• Service on and around the air bag system components or wiring must be performed only by an
authorized SUZUKI dealer. Refer to “Air Bag System Components and Wiring Location View” under
“General Description” in air bag system section in order to confirm whether you are performing service on or near the air bag system components or wiring. Please observe all WARNINGS and “Service Precautions” under “On-Vehicle Service” in air bag system section before performing service
on or around the air bag system components or wiring. Failure to follow WARNINGS could result in
unintentional activation of the system or could render the system inoperative. Either of these two
conditions may result in severe injury.
• Technical service work must be started at least 90 seconds after the ignition switch is turned to the
“LOCK” position and the negative cable is disconnected from the battery. Otherwise, the system
may be activated by reserve energy in the Sensing and Diagnostic Module (SDM).
CONTENTS
General Description ......................................7A2-2
Transmission Components .........................7A2-2
On-Vehicle Service........................................7A2-3
Manual Transmission Oil Change ...............7A2-3
Extension Case Oil Seal Replacement .......7A2-4
Gear Shift Control Lever Assembly
Components ................................................7A2-5
Gear Shift Control Lever Assembly
Removal and Installation .............................7A2-6
Gear Shift Control Lever Assembly
Disassembly and Reassembly ....................7A2-7
Gear Shift Control Lever Assembly
Inspection ....................................................7A2-7
Unit Repair Overhaul ....................................7A2-8
Manual Transmission Unit Components .....7A2-8
Transmission Unit Dismounting and
Remounting .................................................7A2-9
Gear Shift Lever Case Assembly
Components ..............................................7A2-11
Gear Shift Lever Case Assembly
Removal and Installation ...........................7A2-12
Gear Shift Lever Case Assembly
Disassembly and Reassembly ..................7A2-13
Back Up Lamp Switch Removal and
Installation .................................................7A2-14
Back Up Lamp Switch Inspection ............. 7A2-14
Manual Transmission Assembly
7A2
Components.............................................. 7A2-15
Manual Transmission Assembly
Disassembly and Reassembly.................. 7A2-16
Locating Spring Inspection........................ 7A2-21
Front Case Disassembly and Assembly ... 7A2-22
Gear Shift Shaft and Fork Components.... 7A2-23
Gear Shift Fork Inspection ........................ 7A2-23
Input Shaft, Countershaft and
Output Shaft Components ........................ 7A2-24
Input Shaft Assembly Disassembly
and Reassembly ....................................... 7A2-25
Input Shaft Assembly Inspection............... 7A2-28
Countershaft Assembly Disassembly
and Reassembly ....................................... 7A2-28
Countershaft Assembly Inspection ........... 7A2-31
Output Shaft Assembly Disassembly
and Reassembly ....................................... 7A2-31
Output Shaft Assembly Inspection............ 7A2-32
Tightening Torque Specification ...............7A2-32
Required Service Material ..........................7A2-33
Special Tool.................................................7A2-34
7A2-2 MANUAL TRANSMISSION
General Description
Transmission Components
1. Low gear shift inverse lever
2. Low speed gear shift fork
9. Reverse shaft
10. 4th gear
17. 5th speed synchronizer hub
18. Countershaft
3. High speed gear shift fork
11. High speed synchronizer hub
19. 2nd gear
4. Low speed gear shift shaft
12. 3rd gear
20. Transmission rear case
5. 5th & reverse gear shift fork
13. Gear shift shaft
21. Low speed synchronizer hub
6. Input shaft
14. Output shaft gear
22. 1st gear
7. Transmission front case
15. Extension case
23. Reverse gear
8. Reverse idler gear
16. Output shaft
MANUAL TRANSMISSION 7A2-3
On-Vehicle Service
CAUTION:
Do not reuse O-ring, circlip, spring pin, E-ring, oil seal,
gasket, self locking nut and specified parts. Reuse of it
can result in trouble.
Manual Transmission Oil Change
1) Before changing or inspecting oil, be sure to stop engine and
lift vehicle horizontally.
2) With vehicle lifted up, check oil level and leakage.
If leakage exists, correct it.
3) Drain old oil and fill new specified oil by specified amount (up
to level hole).
4) Apply sealant to thread of drain plug (1) and level / filler plug
(2) and torque them as specified below.
“A”: Sealant 99000-31260
Tightening torque
Transmission oil level / filler and drain plugs
(a): 23 N·m (2.3 kg-m, 17.0 lb-ft)
NOTE:
• It is highly recommended to use API GL-4 75W-90 gear
oil.
• Whenever vehicle is hoisted for any other service work
than oil change, also be sure to check for oil leakage.
Transmission oil
: API GL-4
For SAE classification, refer to viscosity chart [A] in the
figure.
Transmission oil capacity
: 1.9 liters (4.1/3.3 US/lmp. pt)
7A2-4 MANUAL TRANSMISSION
Extension Case Oil Seal Replacement
Replacement
1) Drain transmission oil referring to “Manual Transmission Oil
Change” in this section.
2) Remove gear shift control lever referring to “Gear Shift Control Lever Assembly Removal and Installation” in this section.
3) Remove propeller shaft No.1 referring to “Propeller Shafts” in
Section 4B.
4) Support transmission with transmission jack.
5) Remove rear mounting bracket (1).
6) Remove gear shift control arm (2).
2
1
7) Remove extension case oil seal (1) using special tool.
Special tool
(A): 09913-50121
(A)
1
(A)
1, “A”
8) Install extension case oil seal (1) to extension case with its
spring side inward.
Use special tool and hammer for installation and apply
grease to oil seal lip.
“A”: Grease 99000-25010
Special tool
(A): 09913-85210
9) Install gear shift control arm.
10) Install rear mounting bracket.
11) Install propeller shaft No.1 referring to “Propeller Shafts” in
Section 4B.
12) Install gear shift control lever referring to “Gear Shift Control
Lever Assembly Removal and Installation” in this section.
13) Fill transmission with oil referring to “Manual Transmission
Oil Change” in this section.
MANUAL TRANSMISSION 7A2-5
Gear Shift Control Lever Assembly Components
1
5
2
6
3
15
23 N·m (2.3 kg-m)
4
16
3.5 N·m (0.35 kg-m)
7
9
17
8
23 N·m (2.3 kg-m)
A
10
11
12
18
13
19
20
A
21
14
A
A
3.5 N·m (0.35 kg-m)
A
24
26
25
23
22
23 N·m (2.3 kg-m)
7A2-6 MANUAL TRANSMISSION
1. Gear shift knob
10. Gear shift lever No.4 boot
19. Gear shift control shaft bush
: Apply grease 99000-25010 to bush.
2. Gear shift control lever
11. Gear shift stopper plate
20. Gear shift control joint washer
: Apply grease 99000-25010 to washer.
3. Gear shift control boot cover
12. Gear shift control joint bush
21. Gear shift control joint nut
4. Gear shift lever No. 1 boot
13. Gear shift control joint
: Apply grease 99000-25010 to connected part.
22. Shift lever No.1 nut
5. Gear shift lever No. 3 boot
14. Gear shift control shaft
: Apply grease 99000-25010 to connected part.
23. Shift lever No.1 washer
6. Gear shift lever No. 2 boot
15. Gear shift control boot cover bolt
24. Joint inner bush
7. Gear shift lever case cover
16. Gear shift control boot plate nut
25. Joint outer bush
8. Gear shift control arm
: Apply grease 99000-25010 to arm
inside.
17. Shift lever No.2 bolt
26. Shift lever No.1 bolt
9. Gear shift control boot plate
18. Gear shift control joint bolt
Tightening torque
Gear Shift Control Lever Assembly Removal
and Installation
Removal
1) Remove console box.
2) Remove gear shift control boot cover (1) from floor panel and
gear shift lever No.1 boot (2).
2
1
3) Remove gear shift control lever (2) while pushing and turning
gear shift lever case cover (1) counterclockwise.
4) Drain transmission oil referring to “Manual Transmission Oil
Change” in this section.
5) Remove exhaust pipe referring to “Exhaust Pipe” in Section
6K2.
6) Remove propeller shaft No.1 and No.2 referring to “Propeller
Shafts” in Section 4B.
7) Remove gear shift control arm assembly (1).
2. Shift lever No.1 bolt
3. Shift lever No.2 bolts
MANUAL TRANSMISSION 7A2-7
Installation
Reverse removal procedure for installation noting the following.
• Tighten bolts and nut to specified torque as follows.
Tightening torque
Gear shift control boot cover bolt
(a): 23 N·m (2.3 kg-m, 17.0 lb-ft)
Shift lever No.1 nut
(b): 23 N·m (2.3 kg-m, 17.0 lb-ft)
Shift lever No.2 bolt
(c): 23 N·m (2.3 kg-m, 17.0 lb-ft)
Gear Shift Control Lever Assembly Disassembly and Reassembly
Disassembly and reassembly component parts referring to “Gear
Shift Control Lever Assembly Components” in this section.
Gear Shift Control Lever Assembly Inspection
• Check that gear shift control lever moves smoothly without
abnormal noise.
• Check bushes and boot for damage and deterioration.
• If abnormality is found, replace or repair it.
7A2-8 MANUAL TRANSMISSION
Unit Repair Overhaul
Manual Transmission Unit Components
12
11
14
23 N·m (2.3 kg-m)
23 N·m (2.3 kg-m)
15
4
25 N·m (2.5 kg-m)
16
25 N·m (2.5 kg-m)
13
17
3
8
5
8.5 N·m (0.85 kg-m)
6
1
10
23 N·m (2.3 kg-m)
9
18
7
55 N·m (5.5 kg-m)
50 N·m (5.0 kg-m)
2
1. Transmission
8. CKP sensor bolt
15. Rear mounting bracket bolt
2. Clutch operating cylinder
9. Transmission hook
16. Rear mounting bracket nut
3. CKP sensor
10. Transmission hook bolt
17. Rear mounting bolt
4. Gear shift control lever assembly
11. Shift lever No.2 bolt
18. Transmission case bolt
5. Rear mounting bracket
12. Shift lever No.1 bolt
Tightening torque
6. Rear mounting
13. Shift lever No.1 washer
7. Clutch operating cylinder bolt
14. Shift lever No.1 nut
25 N·m (2.5 kg-m)
MANUAL TRANSMISSION 7A2-9
Transmission Unit Dismounting and
Remounting
Dismounting
1) Disconnect negative cable at battery.
2) Remove gear shift control lever referring to “Gear Shift Control Lever Assembly Removal and Installation” in this section.
3) Remove CKP sensor referring to “Crankshaft Position (CKP)
Sensor (Engine Speed Sensor) Removal and Installation” in
Section 6E2.
4) Remove propeller shaft No.1 and No.2 referring to “Propeller
Shafts” in Section 4B.
5) Remove exhaust pipe referring to “Exhaust Pipe” in Section
6K2.
6) Remove starting motor from transmission case referring to
“Starting Motor Dismounting and Remounting” in Section
6G2.
7) Remove clutch operating cylinder (1) referring to “Clutch
Operating Cylinder Removal and Installation” in Section 7C2.
1
8) Disconnect back up lamp switch coupler (1).
9) Undo wiring harness clamp.
10) Support transmission with transmission jack.
1
2
1
11)
12)
13)
14)
Remove rear mounting bracket (1).
Remove gear shift control arm (2).
Remove transmission to engine bolts and nut.
Pull transmission out so as to disconnect input shaft from
clutch disc, and then lower it.
7A2-10 MANUAL TRANSMISSION
Remounting
Reverse dismounting procedure for remounting noting the following.
• Install clutch operating cylinder referring to “Clutch Operating
Cylinder Removal and Installation” in Section 7C2.
• Tightening bolts and nuts to specified torque referring to
“Manual Transmission Unit Components” in this section.
• Set wiring harness clamps securely.
• Fill transmission with oil as specified referring to “Manual
Transmission Oil Change” in this section.
• Connect battery and check function of engine, clutch and
transmission.
MANUAL TRANSMISSION 7A2-11
Gear Shift Lever Case Assembly Components
6
9
7
A
8
10
23 N·m (2.3 kg-m)
1322
1
OIL
13
14
A
OIL
15
2
11
12
A
16
16
17
1322
23 N·m (2.3 kg-m)
3
4
18
5
1. Gear shift shaft
8. Gear shift locating retainer
15. Gear shift lever case bolt
: Apply thread lock 99000-32110 to bolt thread.
2. Gear shift case
9. Gear shift locating spring
: Apply grease 99000-25010 to spring.
16. Knock pin
3. Gear shift & select arm
10. Gear shift locating ball
: Apply grease 99000-25010 to ball.
17. Gear shift stop bolt
: Apply thread lock 99000-32110 to bolt thread.
4. Gear shift interlock plate
11. Gear shift shaft boot
18. Gear select return spring
5. Reverse gear shift limit plate
12. Gear shift shaft oil seal
: Apply grease 99000-25010 to seal lip.
Tightening torque
6. Gear shift arm inner pin
13. Gear shift case bush
Do not reuse.
7. Gear shift arm outer pin
14. Gear shift case plug
Apply transmission oil.
7A2-12 MANUAL TRANSMISSION
Gear Shift Lever Case Assembly Removal and
Installation
Removal
1) Dismount transmission referring to “Transmission Unit Dismounting and Remounting” in this section.
2) Remove gear shift lever case assembly (1) from transmission rear case.
1
Installation
1) Clean mating surface of both rear case and gear shift lever
case (2), and uniformly apply sealant to lever case as shown
in figure.
1, (a), “B”
“A”: Sealant 99000-31260
2) Install lever case with sealant to rear case and apply thread
lock cement to lever case bolts (1), then tighten them to
specified torque.
“B”: Thread lock cement 99000-32110
Tightening torque
Gear shift lever case bolt (a): 23 N·m (2.3 kg-m, 17.0 lb-ft)
“A”
2
3) Remount transmission referring to “Transmission Unit Dismounting and Remounting” in this section.
MANUAL TRANSMISSION 7A2-13
Gear Shift Lever Case Assembly Disassembly
and Reassembly
Disassembly
1) Remove gear shift case plug.
2) Drive out gear shift arm pin using special tool, and then disassemble components parts.
(A)
CAUTION:
Be careful to disconnect gear shift shaft from gear shift
lever case so that gear shift locating ball and gear shift
locating spring may be jumped out.
Special tool
(A): 09925-78210
Reassembly
1) Install new gear shift shaft oil seal (1) to gear shift lever case
using special tool.
(A)
1
Special tool
(A): 09923-46020
2) Assemble components parts referring to “Gear Shift Lever
Case Assembly Components” in this section.
(A)
“b”
2
1
“a”
3) Set new gear shift arm inner pin (1) and outer pin (2) facing
each gap (“a”, “b”) as shown in figure.
Drive them in using special tool.
Special tool
(A): 09925-78210
7A2-14 MANUAL TRANSMISSION
Back Up Lamp Switch Removal and Installation
Removal
1) Dismount transmission referring to “Transmission Unit Dismounting and Remounting” in this section.
2) Remove back up lamp switch (1).
1
Installation
1) Apply oil to new O-ring (1) and tighten back up lamp switch
(2) to specified torque.
1
2, (a)
Tightening torque
Back up lamp switch (a): 23 N·m (2.3 kg-m, 17.0 lb-ft)
2) Remount transmission referring to “Transmission Unit Dismounting and Remounting” in this section.
Back Up Lamp Switch Inspection
Check back up lamp switch for function using ohmmeter.
Switch ON (Push): Continuity
Switch OFF (Release): No continuity
MANUAL TRANSMISSION 7A2-15
Manual Transmission Assembly Components
5
3
6
9
A
23 N·m (2.3 kgf-m)
23 N·m (2.3 kgf-m)
10
33
7
OIL
32
31
4
30
1217G
27
29
1322
23 N·m
(2.3 kgf-m)
OIL
18
8
11
19
23 N·m
(2.3 kgf-m)
12
2
1217G
20
14
1322
23 N·m
(2.3 kgf-m)
23 21
28
1217G
23 N·m
(2.3 kgf-m)
23 N·m (2.3 kgf-m)
15
13
22
A
25
26
16
1
1217G
17
24
1322
23 N·m
(2.3 kgf-m)
7A2-16 MANUAL TRANSMISSION
1. Transmission front case
: Apply sealant 99000-31260 to mating surface
of front case and rear case.
13. Input shaft oil seal
: Apply grease 99000-25010 to oil seal lip.
25. Reverse gear shaft washer
2. Transmission rear case
: Apply sealant 99000-31260 to mating surface
of rear case and extension case.
14. 5th gear shift inverse lever bolt
: Apply thread lock 99000-32110 to all
around thread part of bolt.
26. Reverse idler gear
3. Extension case
15. Low gear shift inverse lever
27. Countershaft shim
4. Gear shift lever case assembly
: Apply sealant 99000-31260 to mating surface
of rear case and gear shift lever case assembly.
16. Reverse gear shift lever
28. Input shaft & countershaft assembly
5. Extension oil seal
: Apply grease 99000-25010 to oil seal lip.
17. Reverse shift locating
29. 5th speed synchronizer lever
6. Extension case bolt
18. O-ring
30. 5th speed synchronizer sleeve
7. Knock pin
19. Back up lamp switch
31. 5th speed synchronizer ring
8. Gear shift lever case bolt
: Apply thread lock 99000-32110 to all around
thread part of bolt.
20. Oil filler plug
: Apply sealant 99000-31260 to all around
thread part of bolt.
32. Input shaft needle bearing
9. Oil hole plug
21. Transmission case bolt
33. Output shaft assembly
10. Oil hole gasket
22. Reverse gear shaft
Tightening torque
11. Oil gutter
23. Reverse shaft bolt washer
Do not reuse.
12. Knock pin
24. Reverse shaft bolt
: Apply thread lock 99000-32110 to all
around thread part of bolt.
Apply transmission oil.
Manual Transmission Assembly Disassembly
and Reassembly
Disassembly
1) Remove clutch release bearing and release fork referring to
“Clutch Cover, Clutch Disc, Flywheel and Release Bearing
Removal and Installation” in Section 7C2.
2) Remove gear shift lever case assembly referring to “Gear
Shift Lever Case Assembly Removal and Installation” in this
section.
3) Remove extension case.
4) Remove output shaft assembly.
2
5) Remove reverse shaft bolt (1) and back up lamp switch (2).
1
1
6) Remove gear shift locating bolts (1), then take out locating
springs and gear shift shaft balls.
7) Remove rear to front case bolts (2), then separate rear case
from front case tapping front case flange with plastic hammer.
8) Remove oil gutter.
2
2
1
MANUAL TRANSMISSION 7A2-17
9) Remove reverse shaft assembly (1).
10) Remove 5th gear shift inverse lever (4).
11) Remove low speed gear shift shaft (2) and 5th & reverse
gear shift fork (3).
12) Remove input shaft needle bearing, 5th speed synchronizer
ring, 5th speed synchronizer levers and 5th speed synchronizer sleeve.
3
2
1
4
13) Remove input shaft front bearing circlip (1) from case using
special tool.
Special tool
(A): 09900-06106
(A)
1
4
14) Remove input shaft assembly (1), countershaft assembly (2),
high speed gear shift fork (3) and low speed gear shift fork
(4) as assembly from front case (5) tapping input shaft end
by plastic hammer lightly.
3
1
2
5
Reassembly
4
1) Assemble input shaft assembly (1), countershaft assembly
(2), high speed gear shift fork (3) and low speed gear shift
fork (4), then install them all together into front case (5).
3
1
CAUTION:
Take care not to damage oil seal lip by input shaft, or oil
leakage may take place.
2
5
7A2-18 MANUAL TRANSMISSION
2) Install input shaft front bearing circlip (1) using special tool.
Special tool
(A): 09900-06106
(A)
1
3) Install low speed gear shift shaft (1) and 5th gear shift
inverse lever (2) and tighten with bolt (3) to which thread lock
cement has been applied.
1
“A”: Thread lock cement 99000-32110
Tightening torque
5th gear shift inverse lever bolt
(a): 23 N·m (2.3 kg-m, 17.0 lb-ft)
2
3, (a), “A”
2
4) Fit 5th & reverse gear shift fork (1) to 5th speed synchronizer
sleeve (2), and install them into input shaft and front case in
specified direction as shown in figure.
A
1
A: Chamfered side
3
“B”
4
2
1
“A”
5) Set reverse idler gear (1), reverse gear shift lever (2) and
reverse gear shaft washer (4), insert reverse gear shaft (3)
into case through idler gear and then align hole “B” in shaft
with protrusion “A” in case.
6) Install oil gutter
MANUAL TRANSMISSION 7A2-19
“A”
1
“A”
2
1
7) Install 5th speed synchronizer levers and 5th speed synchronizer ring as follows.
a) Fit 5th speed synchronizer levers (1) to hub (2) aligning protrusion “A” of 5th speed synchronizer levers with groove of
hub.
b) Install synchronizer ring (1) to hub (2) in specified direction
as shown in figure.
2
8) Clean mating surfaces of both front and rear cases, and uniformly apply sealant to front case (3) as shown in figure.
“A”: Sealant 99000-31260
9) Tighten case bolts (1) to specified torque.
Tightening torque
Transmission case bolt (b): 23 N·m (2.3 kg-m, 17.0 lb-ft)
10) Apply thread lock cement to reverse shaft bolt (2), and
tighten it.
“B”: Thread lock cement 99000-32110
Tightening torque
Reverse shaft bolt (a): 23 N·m (2.3 kg-m, 17.0 lb-ft)
11) Install back up lamp switch (4) referring to “Back Up Lamp
Switch Removal and Installation” in this section.
7A2-20 MANUAL TRANSMISSION
2, “A”
1, “A”
3, “B”, (a)
12) Apply grease to gear shift shaft balls (1) and locating springs
(2), then install them.
Apply thread lock cement to gear shift locating bolts (3), and
then tighten them.
“A”: Grease 99000-25010
“B”: Thread lock cement 99000-32110
1, “A”
2, “A”
3, “B”, (a)
Tightening torque
Gear shift locating bolt (a): 23 N·m (2.3 kg-m, 17.0 lb-ft)
13) Install output shaft into rear case.
14) Select a countershaft shim and output shaft shim as follows.
a) Measure depth “a” from mating surface of extension case
(1) to face processed for installation of countershaft rear
bearing (2) and measure depth “c” from mating surface of
extension case to face processed for installation of output
shaft rear bearing (4) using vernier caliper
b) Measure height “b” from mating surface of rear case (3) to
countershaft rear bearing (2) and measure height “d” from
mating surface of rear case (3) to output shaft rear bearing
(4) using vernier caliper.
c) Calculate “a” – “b” and “c” – “d”, and select a shim according to the following table.
Countershaft shim selection table
Clearance “a” – “b”
1.15 – 1.24 mm (0.045 – 0.048 in.)
1.25 – 1.34 mm (0.049 – 0.052 in.)
1.35 – 1.44 mm (0.053 – 0.056 in.)
1.45 – 1.54 mm (0.057 – 0.060 in.)
1.55 – 1.64 mm (0.061 – 0.064 in.)
1.65 – 1.74 mm (0.065 – 0.068 in.)
1.75 – 1.84 mm (0.069 – 0.072 in.)
1.85 – 1.94 mm (0.073 – 0.076 in.)
1.95 – 2.04 mm (0.077 – 0.080 in.)
2.05 – 2.14 mm (0.081 – 0.084 in.)
2.15 – 2.24 mm (0.085 – 0.088 in.)
Thickness of countershaft shim
0.90 mm (0.035 in.)
1.00 mm (0.039 in.)
1.10 mm (0.043 in.)
1.20 mm (0.047 in.)
1.30 mm (0.051 in.)
1.40 mm (0.055 in.)
1.50 mm (0.059 in.)
1.60 mm (0.063 in.)
1.70 mm (0.067 in.)
1.80 mm (0.071 in.)
1.90 (0.90 + 1.00) mm
(0.075 (0.035 + 0.039) in.)
MANUAL TRANSMISSION 7A2-21
Output shaft shim selection table
Clearance “c” – “d”
0 – 0.09 mm (0 – 0.004 in.)
0.10 – 0.19 mm (0.004 – 0.007 in.)
0.20 – 0.29 mm (0.008 – 0.011 in.)
0.30 – 0.39 mm (0.012 – 0.015 in.)
0.40 – 0.49 mm (0.016 – 0.019 in.)
0.50 – 0.59 mm (0.020 – 0.023 in.)
0.60 – 0.69 mm (0.024 – 0.027 in.)
0.70 – 0.79 mm (0.028 – 0.031 in.)
Thickness of countershaft shim
–
0.10 mm (0.004 in.)
0.20 mm (0.008 in.)
0.30 mm (0.012 in.)
0.40 mm (0.016 in.)
0.50 (0.20 + 0.30) mm
(0.020 (0.008 + 0.012) in.)
0.60 (0.20 + 0.40) mm
(0.024 (0.008 + 0.016) in.)
0.70 (0.30 + 0.40) mm
(0.028 (0.012 + 0.016) in.)
15) Install selected countershaft shim and output shaft shim to
extension case.
16) Clean mating surface of both rear case (1) and extension
case, and uniformly apply sealant to rear case as shown in
figure.
“A”: Sealant 99000-31260
17) Tighten case bolts (2) to specified torque.
Tightening torque
Extension case bolt (a): 23 N·m (2.3 kg-m, 17.0 lb-ft)
18) Install gear shift lever case assembly (3) referring to “Gear
Shift Lever Case Assembly Removal and Installation” in this
section.
19) Install clutch release bearing and release fork referring to
“Clutch Cover, Clutch Disc, Flywheel and Release Bearing
Removal and Installation” in Section 7C2.
Locating Spring Inspection
Check locating springs for deterioration and replace with new
ones if necessary.
Locating spring free length
Standard: 44.6 mm (1.756 in.)
Service limit: 40.1 mm (1.579 in.)
7A2-22 MANUAL TRANSMISSION
Front Case Disassembly and Assembly
Disassembly
(B)
1) Pull out input shaft oil seal (1) using special tools, if necessary.
Special tool
(A): 09941-64511
(B): 09930-30104
(A)
1
Assembly
(A)
1) Install input shaft oil seal to front case with its spring side facing upward.
use special tool and hammer for installation and apply
grease to oil seal lip.
: Grease 99000-25010
Special tool
(A): 09913-76010
MANUAL TRANSMISSION 7A2-23
Gear Shift Shaft and Fork Components
5
23 N·m (2.3 kg-m)
1322
1
6
A
7
A
2
6
5
1322
23 N·m (2.3 kg-m)
7
5
6
A
1322
A
23 N·m
(2.3 kg-m)
3
A
A
7
8
5
1322
23 N·m (2.3 kg-m)
6
A
8
4
7
A
8
1. Low speed gear shift shaft
4. Low speed gear shift fork
7. Gear shift shaft ball
: Apply grease 99000-25010 to ball.
2. High speed gear shift fork
5. Gear shift locating bolt
: Apply thread lock 99000-32110 to bolt thread.
8. Gear shift shaft bush
3. 5th & reverse gear shift fork
: Never disassemble.
6. Gear shift locating spring
: Apply grease 99000-25010 to spring.
Tightening torque
Gear Shift Fork Inspection
1) Using feeler gauge, check clearance between fork (1) and
sleeve (2) and replace those parts if it exceeds limit below.
NOTE:
For correct judgement of parts replacement, carefully
inspect contact portion of fork and sleeve.
Clearance between fork and sleeve
Service limit “a”: 1.0 mm (0.039 in.)
2) Insert each gear shift shaft into case and check that it moves
smoothly. If it doesn’t, correct using oilstone, reamer or the
like.
7A2-24 MANUAL TRANSMISSION
Input Shaft, Countershaft and Output Shaft Components
OIL
6
[A]
5
4
3
16
15
1
210 N·m
(21.0 kg-m)
OIL
2
17
14
13
8
9
12
11
21
10
22
20
9
8
19
7
29
30
[B]
33
18
32
30
29
28
23
27
210 N·m
(21.0 kg-m)
25
31
OIL
[C]
26
37
24
36
35
OIL
34
MANUAL TRANSMISSION 7A2-25
[A]: Input shaft assembly
13. 3rd gear
28. 1st gear
[B]: Output shaft assembly
14. 5th speed synchronizer hub
29. Low speed synchronizer ring
15. High speed gear needle bearing
30. Low speed synchronizer spring
[C]: Countershaft assembly
1. Snap ring
16. Input shaft 3rd gear bush
31. Low speed synchronizer key
2. Input shaft front bearing
17. Input shaft 5th hub nut
32. Low speed synchronizer hub
3. Input shaft front bearing circlip
18. Output shaft
33. Low speed synchronizer sleeve
4. Input shaft
19. Output shaft front bearing
34. Countershaft gear needle bearing
5. Input shaft union
20. Output shaft gear
35. 2nd gear
6. High speed gear needle bearing
21. Output shaft rear bearing
36. Countershaft
7. 4th gear
22. Output shaft rear snap ring
37. Countershaft rear bearing
8. High speed synchronizer ring
23. Countershaft front bearing nut
Tightening torque
9. High speed synchronizer spring
24. Countershaft front bearing
Do not reuse.
10. High speed synchronizer sleeve
25. Countershaft reverse gear
Apply transmission oil.
11. High speed synchronizer key
26. Countershaft low needle bush
12. High speed synchronizer hub
27. Countershaft gear needle bearing
Input Shaft Assembly Disassembly and Reassembly
Disassembly
1) Remove snap ring.
2) Remove input shaft front bearing (1) using bearing puller and
press, and then remove input shaft front bearing circlip.
3) Remove input shaft union.
1
4) Hold part of reverse gear of input shaft assembly (1) with
vise (2) through woodblock (4), remove input shaft 5th hub
nut (3).
3
4
2
5) Apply bearing puller to 4th gear (1), and drive out 5th speed
synchronizer hub (2), 3rd gear (3), high speed gear needle
bearings, 3rd gear bush, high speed synchronizer assembly
(4) and 4th gear all at once from input shaft using metal stick
(5) and press.
5
2
3
4
1
CAUTION:
To avoid gear teeth from being damaged, support 4th
gear at flat side of bearing puller.
7A2-26 MANUAL TRANSMISSION
Reassembly
1) Clean all components thoroughly, inspect them for any
abnormality and replace with new ones as necessary.
2) To ensure lubrication, air blow oil holes (1) and make sure
that they are free from any obstruction.
(A)
1
3) Drive in input shaft front bearing (1) to input shaft using special tool and hammer and then install snap ring.
Special tool
(A): 09940-51710
2
NOTE:
Input shaft front bearing circlip (2) must be installed
before input shaft front bearing is installed.
4) Apply oil to high speed gear needle bearing, and then install
needle bearing to input shaft.
Install 4th gear and high speed synchronizer ring.
5) Assemble synchronizer sleeve (4) and hub (3) as follows.
a) Fit high speed synchronizer sleeve to hub in specified
direction as shown in figure.
b) Insert 3 keys (2) to hub.
c) Set springs (1) at specified position as shown in figure.
Synchronizer key installation position
:A=B
[A]: 4th gear side
C: Key way
D: Projecting end
5. 4th gear
MANUAL TRANSMISSION 7A2-27
6) Drive in high speed synchronizer assembly (1) using special
tool and hammer.
(A)
NOTE:
• While press-fitting sleeve &hub, make sure that synchronizer ring key slots (2) are aligned with keys in
sleeve & hub assembly.
• Check free rotation of 4th gear after press fitting sleeve
& hub assembly.
1
2
Special tool
(A): 09913-84510
7) Apply oil to high speed gear needle bearing, and then install
3rd gear bush (1), high speed gear needle bearing (2) and
3rd gear (3).
4. 4th gear
8) Press-fit 5th speed synchronizer hub (1) using special tool
and hammer.
(A)
1
Special tool
(A): 09913-84510
9) Tighten input shaft 5th hub nut to specified torque in the
same manner as step 4) of “Disassembly” in “Input Shaft
Assembly Disassembly and Reassembly” in this section.
Tightening torque
Input shaft 5th hub nut: 210 N·m (21.0 kg-m, 152.0 lb-ft)
2
1
10) Caulk input shaft 5th hub nut (2) using caulking tool.
11) Drive in new input shaft union (1) using puller and hydraulic
press.
7A2-28 MANUAL TRANSMISSION
Input Shaft Assembly Inspection
Check clearance “a” between ring (2) and gear (1), each chamfered teeth of gear, ring and sleeve, then determine parts replacement.
Clearance between synchronizer ring and gear
Standard “a”: 1.0 – 1.4 mm (0.039 – 0.055 in.)
Service limit “a”: 0.5 mm (0.019 in.)
Countershaft Assembly Disassembly and
Reassembly
Disassembly
1) Remove countershaft rear bearing (1) using bearing puller,
metal stick (2) and hydraulic press.
2) Remove countershaft front bearing nut in the same manner
as step 4) of “Disassembly” in “Input Shaft Assembly Disassembly and Reassembly” in this section.
2
1
6
3
2
4
5
1
3) Apply bearing puller to 2nd gear (1), and drive out
countershaft front bearing (2), countershaft reverse gear (3),
1st gear (4), countershaft gear needle bearings, countershaft
low needle bearing, low speed synchronizer assembly (5)
and 2nd gear all at once from countershaft using metal stick
(6) and hydraulic press.
CAUTION:
To avoid gear teeth from being damaged, support 2nd
gear at flat side of bearing puller.
MANUAL TRANSMISSION 7A2-29
Reassembly
1) Clean all components thoroughly, inspect them for any
abnormality and replace with new ones as necessary.
2) To ensure lubrication, air blow oil holes (1) and make sure
that they are free from any obstruction.
3) Drive in countershaft rear bearing (1) using special tool and
hammer.
(A)
1
Special tool
(A): 09913-84510
4) Apply oil to countershaft gear needle bearing, and then
install needle bearing and 2nd gear.
5) Assemble synchronizer sleeve (4) and hub (3) as follows.
a) Fit low speed synchronizer sleeve to hub in specified direction as shown in figure.
b) Insert 3 keys (2) to hub.
c) Set springs (1) at specified position as shown in figure.
Synchronizer key installation position
:A=B
[A]: 1st gear side
C: Key way
D: Chamfered side
5. 2nd gear
7A2-30 MANUAL TRANSMISSION
6) Drive in low speed synchronizer assembly (1) using special
tool and hammer.
(A)
NOTE:
1
2
• While press-fitting sleeve & hub, make sure that synchronizer ring key slots (2) are aligned with keys in
sleeve & hub assembly.
• Check free rotation of 2nd gear after press-fitting
sleeve & hub assembly.
Special tool
(A): 09913-84510
(A)
2
1
7) Install countershaft gear needle bearing, and then countershaft low needle bush, needle bearing and 1st gear (1) to
countershaft.
8) Press-fit countershaft reverse gear (2) using special tool and
hammer.
Special tool
(A): 09913-80113
9) Press-fit countershaft front bearing (1) using special tool and
hammer.
Special tool
(A): 09913-84510
(A)
1
10) Hold countershaft with vise through woodblock, tighten countershaft front bearing nut to specified torque.
Tightening torque
Countershaft front bearing nut
: 210 N·m (21.0 kg-m, 152.0 lb-ft)
CAUTION:
Do not hold spline, gear teeth or abrasived surface of
shaft with vise, otherwise shaft may be damaged.
11) Caulk countershaft front bearing nut using caulking tool and
hammer.
MANUAL TRANSMISSION 7A2-31
Countershaft Assembly Inspection
Check clearance “a” between ring (2) and gear (1), each chamfered teeth of gear, ring and sleeve, then determine parts replacement.
Clearance between synchronizer ring and gear
Standard “a”: 1.0 – 1.4 mm (0.039 – 0.055 in.)
Service limit “a”: 0.5 mm (0.019 in.)
Output Shaft Assembly Disassembly and
Reassembly
Disassembly
1) Remove output shaft rear snap ring.
2) Apply bearing puller to output shaft front bearing (1), and
drive out output shaft front bearing, output shaft gear (2) and
output shaft rear bearing (3) all at once from output shaft
using press.
3
2
1
Reassembly
1) Clean all components thoroughly, inspect them for any
abnormality and replace with new ones as necessary.
2) Drive in output shaft front bearing (1), output shaft gear (2)
and output shaft rear bearing (3) using special tool and hammer.
(A)
Special tool
(A): 09940-51710
3
2
1
3) Install output shaft rear snap ring.
7A2-32 MANUAL TRANSMISSION
Output Shaft Assembly Inspection
Check clearance “a” between ring (2) and output shaft (1), each
chamfered teeth of gear, ring and sleeve, then determine parts
replacement.
Clearance between synchronizer ring and output shaft
Standard “a”: 1.0 – 1.4 mm (0.039 – 0.055 in.)
Service limit “a”: 0.5 mm (0.019 in.)
Tightening Torque Specification
Fastening part
Transmission oil level / filler and drain plugs
Gear shift control boot cover bolt
Shift lever No.1 nut
Shift lever No.2 bolt
Back up lamp switch
Reverse shaft bolt
Gear shift locating bolt
Extension case bolt
Gear shift lever case bolt
5th gear shift inverse lever bolt
Input shaft 5th hub nut
Countershaft front bearing nut
Transmission to engine bolt
Gear shift control joint nut
Gear shift control boot plate nut
Gear shift stop bolt
Oil hole plug
Clutch operating cylinder bolt
Transmission hook bolt
CKP sensor bolt
Rear mounting bracket bolt
Rear mounting bracket nut
Rear mounting bolt
Transmission case bolt
N•m
23
23
23
23
23
23
23
23
23
23
210
210
55
3.5
3.5
23
23
50
23
8.5
25
25
25
23
Tightening torque
kg-m
2.3
2.3
2.3
2.3
2.3
2.3
2.3
2.3
2.3
2.3
21.0
21.0
5.5
0.35
0.35
2.3
2.3
5.0
2.3
0.85
2.5
2.5
2.5
2.3
lb-ft
17.0
17.0
17.0
17.0
17.0
17.0
17.0
17.0
17.0
17.0
152.0
152.0
39.5
2.5
2.5
17.0
17.0
36.0
17.0
6.0
18.0
18.0
18.0
17.0
MANUAL TRANSMISSION 7A2-33
Required Service Material
Material
Lithium grease
Sealant
Recommended SUZUKI product
(Part Number)
SUZUKI SUPER GREASE A
(99000-25010)
SUZUKI BOND NO.1217G
(99000-31260)
Use
•
•
•
•
•
•
•
•
•
•
•
Thread lock cement
THREAD LOCK 1322
(99000-32110)
•
•
•
•
•
Oil seal lips
Locating springs
Gear shift shaft balls
Gear shift control arm
Gear shift control shaft bush
Gear shift control joint washer
Gear shift control shaft
Oil drain plug and filler / level plug
Mating surface of transmission front
case
Mating surface of transmission rear
case
Mating surface of gear shift lever
case
Reverse shaft bolt
5th gear shift inverse lever bolt
Locating bolt
Gear shift stop bolt
Gear shift lever case bolt
7A2-34 MANUAL TRANSMISSION
Special Tool
09900-06106
Snap ring remover
09913-50121-000
Oil seal remover
09913-76010-000
Differential bearing race
installer
09913-80113
Bearing puller
09913-84510
Bearing installer
09913-85210-000
Bearing pulling holder
09923-46020
Joint pipe
09925-78210
Spring pin remover
6 mm (0.24 in.)
09930-30104
Sliding shaft
09940-51710-000
Bearing installer
09941-64511
Bearing remover
CLUTCH 7C2-1
SECTION 7C2
6F1
6F2
6G
6H
6K
CLUTCH
CONTENTS
General Description ..................................... 7C2-2
Diagnosis ...................................................... 7C2-3
Diagnosis Table ......................................... 7C2-3
Clutch Pedal Inspection ............................. 7C2-4
Clutch Fluid Level Check ........................... 7C2-4
On-Vehicle Service....................................... 7C2-5
Clutch Fluid Pipe and Hose Components .. 7C2-5
Clutch Fluid Pipe and Hose Removal and
Installation .................................................. 7C2-6
Clutch Fluid Pipe and Hose Inspection ...... 7C2-7
Clutch Master Cylinder Removal and
Installation .................................................. 7C2-7
Clutch Operating Cylinder Removal and
Installation .................................................. 7C2-9
Unit Repair Overhaul ................................. 7C2-10
Clutch Master Cylinder Components........ 7C2-10
Clutch Master Cylinder Disassembly and
Assembly.................................................. 7C2-11
Clutch Master Cylinder Inspection ...........
Clutch Operating Cylinder Components ..
Clutch Operating Cylinder Disassembly
and Assembly ..........................................
Clutch Operating Cylinder Inspection ......
Clutch Pedal and Clutch Pedal Bracket
Components.............................................
Clutch Cover, Clutch Disc, Flywheel and
Release Bearing Components .................
Clutch Cover, Clutch Disc, Flywheel and
Release Bearing Removal and
Installation................................................
Clutch Cover, Clutch Disc, Flywheel and
Release Bearing Inspection .....................
Tightening Torque Specification ..............
Required Service Material .........................
Special Tool................................................
7A1
7C2-12
7B1
7C2-12
7C1
7C2-13 8B
7C2-14 8C
8D
7C2-14
8B
7C2-15 8A
8B
8C
7C2-16 8D
7C2-18 8E
7C2-19
7C2-19
7C2-19
9
10
7C2
10B
7E
7C2-2 CLUTCH
General Description
The clutch is a diaphragm-spring clutch of a dry single disc type. The diaphragm spring is of a taperingfinger
type, which is a solid ring in the outer diameter part, with a series of tapering fingers pointing inward. The disc,
carrying four torsional coil springs, is slidably mounted on the transmission input shaft with a serration fit.
The clutch cover is secured to the flywheel, and carries the diaphragm spring in such a way that the peripheral
edge of the spring pushes on the pressure plate against the flywheel with the disc in between, when the clutch
release bearing is held back: This is the engaged condition of the clutch.
Depressing the clutch pedal causes the release bearing to advance and push on the tips of the tapering fingers
of the diaphragm spring. When this happens, the diaphragm spring pulls the pressure plate away from the flywheel, thereby interrupting the flow of drive from flywheel through clutch disc to transmission input shaft.
1. Crankshaft
6. Diaphragm spring
2. Flywheel
7. Release bearing
12. Release fork
3. Clutch disc
8. Input shaft bearing
13. Clutch release fork support
4. Pressure plate
5. Clutch cover
9. Input shaft
10. Clutch operating cylinder
11. Clutch release fork clip
CLUTCH 7C2-3
Diagnosis
Diagnosis Table
Condition
Slipping clutch
Possible Cause
Improper clutch pedal free travel.
Worn or oily clutch disc facing.
Warped disc, pressure plate or flywheel surface.
Dragging clutch
Clutch vibration
Weakened diaphragm spring.
Master cylinder piston or seal cup not returning.
Improper clutch pedal free travel.
Weakened diaphragm spring, or worn spring tip.
Rusted input shaft splines.
Damaged or worn splines of transaxle input shaft.
Excessively wobbly clutch disc.
Clutch facings broken or dirty with oil.
Fluid leakage.
Glazed (glass-like) clutch facings.
Clutch facings dirty with oil.
Release bearing slides unsmoothly.
Wobbly clutch disc, or poor facing contact.
Weakened torsion springs in clutch disc.
Clutch disc rivets loose.
Distorted pressure plate or flywheel surface.
Weakened or loosened engine mounting bolt or nut.
Noisy clutch
Grabbing clutch
Worn or broken release bearing.
Input shaft front bearing worn down.
Excessive rattle of clutch disc hub.
Cracked clutch disc.
Pressure plate and diaphragm spring rattling.
Clutch disc facings soaked with oil.
Clutch disc facings excessively worn.
Rivet heads showing out of facing.
Weakened torsion springs.
Correction
Replace clevis pin or clutch
pedal arm.
Replace disc.
Replace disc, clutch cover or
flywheel.
Replace clutch cover.
Repair master cylinder.
Replace clevis pin or clutch
pedal arm.
Replace clutch cover.
Lubricate.
Replace input shaft.
Replace disc.
Replace disc.
Repair or replace.
Repair or replace disc.
Replace disc.
Lubricate.
Replace disc.
Replace disc.
Replace disc.
Replace clutch cover or flywheel.
Retighten or replace mounting.
Replace release bearing.
Replace input shaft bearing.
Replace disc.
Replace disc.
Replace clutch cover.
Replace disc.
Replace disc.
Replace disc.
Replace disc.
7C2-4 CLUTCH
Clutch Pedal Inspection
Clutch pedal free travel “A”
1) Depress clutch pedal (1), stop the moment clutch resistance
is felt, and measure how much pedal has moved (clutch
pedal free travel) as represented by “A” in the figure. Then
check its conformance to specification shown below.
Clutch pedal free travel
“A”: 10 – 15 mm (0.39 – 0.59 in.)
2) If “A” is not within specification, check pedal arm (2) and
master cylinder (3) and replace defective part.
Cylinder push rod play “B”
1) Press clutch pedal (1) gradually with finger, stop when slight
increase of resistance is felt and measure how much pedal
has moved (push rod play) as represented by “B” as shown.
Then check its conformance to below specification.
Push rod play
“B”: Max. 3 mm (0.12 in.)
2) If “B” is not within specification, replace clevis pin (4) or
pedal arm (2).
Clutch release margin “C”
1) Pull up parking brake fully and block wheels.
2) Start engine and keep engine at idle with neutral gear position.
3) Without clutch pedal (1) depressed, be slow to shift the shift
lever to reverse position until transaxle emits gear contact
noise.
4) Be slow to depress clutch pedal (1), and at gear contact
noise died position (release point (4)) stop depressing.
5) Measure distance between release point (4) and full stroke
point (3) on clutch pedal (1) which is shown by “C” in the figure.
Clutch release margin
“C”: 17 mm (0.67 in.) or more
6) If “C” is not within specification, it is possible that air is
trapped in this system. If suspected so, bleed air.
Upon completion of above inspection and adjustment, start
engine and check clutch for proper operation.
Clutch Fluid Level Check
Refer to “Master Cylinder and Brake Fluid Level Check” in
Section 5.
CLUTCH 7C2-5
On-Vehicle Service
CAUTION:
• Do not allow fluid to get on painted surface.
• Do not use shock absorber fluid or any other fluid which contains mineral oil. Do not use a container which has been used for mineral oil or a container which is wet from water. Mineral oil will
cause swelling and distortion of rubber parts in hydraulic brake system and water mixed into brake
fluid will lower fluid boiling point. Keep all fluid containers capped to prevent contamination.
Clutch Fluid Pipe and Hose Components
1
6
16 N·m (1.6 kg-m)
2
6
4
3
5
23 N·m (2.3 kg-m)
1. Clutch master cylinder
5. Union bolt
2. Pipe
6. Clutch pipe flare nut
3. Hose
Tightening torque
4. Clutch operating cylinder
16 N·m (1.6 kg-m)
7C2-6 CLUTCH
Clutch Fluid Pipe and Hose Removal and
Installation
Removal
1) Remove dust and dirt from each joint of hose and pipe to be
disconnected and clean around reservoir cap.
2) Take out fluid with syringe or such from brake master cylinder reservoir.
3) Disconnect fluid pipe (1) from hose (2).
NOTE:
To disconnect pipe (1) from hose (2), separate them by
using flare nut wrench (4) and spanner (3) so as not to
kink them.
Installation
Reverse removal procedure for installation, noting the following
instruction.
CAUTION:
Do not allow pipe and hose to contact hard against vehicle body or other parts.
• Install each clamp securely.
• For installation angle of hose, refer to “Clutch Fluid Pipe and
Hose Components” in this section.
• Install E-ring securely as shown.
• Tighten clutch pipe flare nut (4) by using flare nut wrench
and back up wrench.
• Tighten union bolt (5).
Tightening torque
Clutch pipe flare nut (a): 16 N·m (1.6 kg-m, 11.5 Ib-ft)
Union bolt (b): 23 N·m (2.3 kg-m, 17.0 Ib-ft)
• After installation, bleed air from system. (Refer to “Air Bleeding of Brake System” in Section 5.)
• Check fluid leakage.
• Add fluid to MAX level of reservoir.
1. E-ring
2. Hose
3. Pipe
CLUTCH 7C2-7
Clutch Fluid Pipe and Hose Inspection
Check pipe (1) and hose (2) for dent, kink, crack, dirt and dust.
Replace if check result is not satisfactory.
Clutch Master Cylinder Removal and Installation
Removal
1) Clean around reservoir cap and take out fluid with syringe or
such from brake master cylinder reservoir.
10
6
1
8
9
2
4
7
5
3
2) Remove clevis master cylinder clip (1) and master cylinder
pin (2).
3) Disconnect clutch reservoir hose (8).
4) Disconnect fluid pipe (3) from master cylinder assembly (4)
by loosing flare nut (5).
5) Remove master cylinder nut (6) and bolt (7).
6) Remove master cylinder assembly (4) and gasket (10).
9. Clamp
7C2-8 CLUTCH
Installation
1) Install master cylinder assembly (1) and new gasket (9) to
dash panel.
NOTE:
Do not reuse gasket.
2) Tighten master cylinder nut (3) and bolt (4) to specified
torque.
9
3, (a)
6
7
8
5, “A”
1
4, (a)
2, (b)
Tightening torque
Clutch master cylinder nut and bolt
(a): 13 N·m (1.3 kg-m, 9.5 lb-ft)
3) Connect fluid pipe and tighten flare nut (2) to specified
torque.
Tightening torque
Clutch pipe flare nut
(b): 16 N·m (1.6 kg-m, 11.5 lb-ft)
4) Connect clutch reservoir hose (7).
5) Apply grease to master cylinder pin (5) and install master
cylinder pin.
“A”: Grease 99000-25010
6) Install master cylinder clip (6).
7) Fill brake master cylinder reservoir with specified brake fluid
and check fluid leakage.
8. Clamp
8) For procedure of air bleeding, refer to “Air Bleeding of Brake
System” in Section 5.
9) Check clutch pedal free travel and clutch release margin.
(Refer to “Clutch Pedal Inspection” in this section.)
CLUTCH 7C2-9
Clutch Operating Cylinder Removal and
Installation
Removal
1) Clean around master cylinder reservoir cap and take out
fluid with syringe or such from brake master cylinder reservoir.
2) Disconnect fluid hose (4) from clutch operating cylinder by
loosing union bolt (3).
3) Remove clutch operating cylinder assembly (1).
4
2. Gasket
3
2
1
Installation
1) Apply small amount of grease to rod tip.
NOTE:
Do not allow any grease to be on boot.
“A”: Grease 99000-25010
2) Install clutch operating cylinder assembly (1) and tighten
clutch operating cylinder bolts (2) to specified torque.
4
Tightening torque
Clutch operating cylinder bolt
(a): 50 N·m (5.0 kg-m, 36.5 lb-ft)
2, (a)
3) Connect clutch fluid hose (4) and tighten union bolt (3) to
specified torque.
Tightening torque
Union bolt (b): 23 N·m (2.3 kg-m, 17.0 lb-ft)
3, (b)
5
1
NOTE:
Do not reuse gaskets (5).
7C2-10 CLUTCH
4) Fill brake master cylinder reservoir with specified brake fluid
and check for fluid leakage.
5) For procedure of air bleeding, refer to “Air Bleeding of Brake
System” in Section 5.
6) Check clutch pedal free travel and clutch release margin.
(Refer to “Clutch Pedal Inspection” in this section.)
Unit Repair Overhaul
Clutch Master Cylinder Components
9
3
8
7
2
4
6
5
1
1. Cylinder
4. Spring pin
7. Circlip
Do not reuse.
2. Reservoir seal
5. Seat gasket
8. Boot
Apply brake fluid.
3. Nipple
6. Piston assembly
9. Push rod assembly
: Apply grease 99000-25100 to spheral end of push rod.
: Never disassemble.
CLUTCH 7C2-11
Clutch Master Cylinder Disassembly and
Assembly
Disassembly
CAUTION:
Never disassemble push rod assembly, disassembling
will affect original performance of clutch system.
1) Remove circlip (1) with push rod (2) pushed in.
2) Blow compressed air gradually into hole for pipe connection
to remove piston assembly (1), using care to prevent it from
jumping out.
1
Reassembly
NOTE:
Before installation, wash each part in specified brake
fluid.
1) Perform “Clutch Master Cylinder Inspection” in this section.
2) Apply brake fluid to piston assembly and inside of cylinder
body.
3) Install piston assembly into cylinder.
4) Apply grease to spheral end of push rod, and then install
circlip (1) with push rod (2) pushed in.
: Grease 99000-25100
7C2-12 CLUTCH
Clutch Master Cylinder Inspection
Inspect all disassembled parts for wear or damage, and replace
parts if necessary.
NOTE:
• Wash disassembled parts with brake fluid.
• Do not reuse piston assembly and circlip.
Inspect cylinder bore for scoring or corrosion.
It is best to replace corroded cylinder. Corrosion can be identified
as pits or excessive roughness.
NOTE:
• Polishing bore of cylinder with cast aluminum body
with anything abrasive is prohibited, as damage to cylinder bore may occur.
• Do not use a cloth to dry cylinder, as lint from cloth
cannot be kept away from cylinder bore surfaces.
Rinse cylinder in clean brake fluid. Shake excess rinsing fluid
from cylinder.
Clutch Operating Cylinder Components
5
FLD
4
3
FLD
2
1
1. Boot
4. Return spring
2. Push rod
: Apply grease 99000-25100 to piston side spheral end of push rod.
5. Cylinder
3. Piston assembly
Do not reuse.
Apply brake fluid.
CLUTCH 7C2-13
Clutch Operating Cylinder Disassembly and
Assembly
Disassembly
1) Remove boot and then push rod.
2) Remove piston (2) by blowing compressed air into bolt hole
(1) where hose was connected, using care to prevent it from
jumping out.
Reassembly
NOTE:
Before installation, wash each part in specified brake
fluid.
1) Perform “Clutch Operating Cylinder Inspection” in this section.
2) Apply brake fluid to piston assembly and inside of cylinder.
3) Install piston assembly (1) into cylinder. When inserting it, be
careful not to cause damage to lip of piston cup (2).
4) Apply grease to piston side spheral end of push rod, and
then install boot and push rod.
: Grease 99000-25100
7C2-14 CLUTCH
Clutch Operating Cylinder Inspection
Inspect all disassembled parts for wear or damage, and replace
parts if necessary.
NOTE:
• Wash disassembled parts with brake fluid.
• Do not reuse piston assembly.
Inspect cylinder bore for scoring or corrosion.
It is best to replace corroded cylinder. Corrosion can be identified
as pits or excessive roughness.
NOTE:
• Polishing bore of cylinder with anything abrasive is
prohibited, as damage to cylinder bore may occur.
• Do not use a cloth to dry cylinder, as lint from cloth
cannot be kept away from cylinder bore surfaces.
Rinse cylinder in clean brake fluid. Shake excess rinsing fluid
from cylinder.
Clutch Pedal and Clutch Pedal Bracket Components
2
1
A
4
3
23 N·m (2.3 kg-m)
A
11
8
5.5 N·m (0.55 kg-m)
3
A
5
9
12
10
6
13
17 N·m
(1.7 kg-m)
7
1. Pedal bracket
6. Clutch pedal shaft arm nut
11. Clutch pedal
2. Clutch pedal spring
: Apply grease 99000-25010 to spring inside.
7. Clutch pedal lever
12. Clutch pedal stop cushion
3. Clutch bush
: Apply grease 99000-25010 to bush all surface.
8. Clutch pedal free height nut
13. Pedal pad
4. Bracket nut
9. Clutch pedal free height bolt
5. Clutch pedal shaft arm bolt
10 Clutch pedal return cushion
Tightening torque
CLUTCH 7C2-15
Clutch Cover, Clutch Disc, Flywheel and Release Bearing Components
7
A
1
2
15 N·m (1.5 kg-m)
5
29 N·m
(2.9 kg-m)
3
9
6
4
A
8
10
53 N·m (5.3 kg-m)
1. Clutch cover
5. Clutch release fork support
2. Clutch cover bolt
6. Clutch release fork clip
3. Clutch disc
7. Release bearing
: Apply grease 99000-25010 to release
bearing inner surface.
4. Release fork
: Apply grease 99000-25010 to contact part with
clutch release bearing and contact part with clutch
release fork support.
8. Clutch release fork boot
Tightening torque
9. Flywheel
10. Flywheel bolt
7C2-16 CLUTCH
Clutch Cover, Clutch Disc, Flywheel and
Release Bearing Removal and Installation
Removal
1) Dismount transmission assembly referring to “Transmission
Unit Dismounting and Remounting” in Section 7A2.
2) Hold flywheel with special tool and remove clutch cover bolts
(1) and take off clutch cover (2) and disc.
Special tool
(A): 09916-98110
3) Hold flywheel (1) with special tool and remove flywheel bolts
(2) and take off flywheel.
Special tool
(A): 09916-98110
4) Remove input shaft bearing from crankshaft by hand, if necessary.
5) Remove release bearing (1) and clutch release fork (2).
1
2
Installation
NOTE:
Before assembling, make sure that flywheel surface and
pressure plate surface have been cleaned and dried thoroughly.
CLUTCH 7C2-17
1) Apply grease to release bearing (1) inner surface and
release fork (2).
“A”: Grease 99000-25010
2) Install input shaft bearing to crankshaft.
3) Install flywheel (1) to crankshaft and tighten bolts (2) to specified torque.
Special tool
(A): 09916-98110
Tightening torque
Flywheel bolt
(a): 53 N·m (5.3 kg-m, 38.5 lb-ft)
4) Using special tool, install clutch disc and clutch cover (1).
Tighten clutch cover bolts (2) to specification using special
tool.
NOTE:
• While tightening clutch cover bolts, compress clutch
disc with special tool (A) by hand so that disc centered.
• Tighten cover bolts little by little evenly in diagonal
order.
Special tool
(A): 09923-36320
(B): 09916-98110
Tightening torque
Clutch cover bolt
(a): 15 N·m (1.5 kg-m, 11.0 lb-ft)
1
“A”
2
5) Install release bearing (1) and clutch release fork (2).
6) Slightly apply grease to input shaft. Then join transmission
with engine. Refer to “Transmission Unit Dismounting and
Remounting” in Section 7A2.
“A”: Grease 99000-25210
7C2-18 CLUTCH
Clutch Cover, Clutch Disc, Flywheel and
Release Bearing Inspection
Input shaft bearing
Check bearing for smooth rotation and replace it if abnormality is
found.
Clutch disc
Measure depth of rivet head depression, i.e. distance between
rivet head and facing surface.
If depression is found to have reached service limit at any of rivet
holes (2), replace clutch disc assembly (1).
Rivet head depth
Standard: 1.4 mm (0.055 in.)
Limit: 0.3 mm or less (0.012 in. or less)
Clutch cover
1) Check diaphragm spring for abnormal wear or damage.
2) Inspect pressure plate for wear or heat spots.
3) If abnormality is found, replace it as assembly.
Do not disassemble it into diaphragm and pressure plate.
Flywheel
Check surface contacting clutch disc for abnormal wear or heat
spots. Replace or repair as required.
Release bearing
1) Check clutch release bearing for smooth rotation.
2) Inspect smoothness of release bearing retaining portion of
transaxle case and correct or replace right case as necessary.
CAUTION:
Do not wash release bearing. Washing may cause grease
leakage and consequential bearing damage.
CLUTCH 7C2-19
Tightening Torque Specification
Fastening part
N•m
53
15
16
23
13
16
50
23
17
13
23
5.5
Flywheel bolt
Clutch cover bolt
Clutch pipe flare nut
Union bolt
Clutch master cylinder nut and bolt
Clutch pipe flare nut
Clutch operating cylinder bolt
Pedal bracket nut
Clutch pedal shaft arm nut
Brake master cylinder nut
Bracket nut
Clutch pedal free height nut
Tightening torque
kg-m
5.3
1.5
1.6
2.3
1.3
1.6
5.0
2.3
1.7
1.3
2.3
0.55
Required Service Material
Material
Lithium grease
Recommended SUZUKI product
(Part Number)
SUZUKI SUPER GREASE A
(99000-25010)
SUZUKI SUPER GREASE I
(99000-25210)
Special Tool
09916-98110
(Mot. 582-01)
Flywheel locking tool.
09923-36320
Clutch center guide
Use
•
•
•
•
•
Clutch operating cylinder.
Master cylinder pin.
Release fork.
Inside of release bearing.
Input shaft spline.
lb-ft
38.5
11.0
11.5
17.0
9.5
11.5
36.5
17.0
12.5
9.5
17.0
4.0
7C2-20 CLUTCH
TRANSFER 7D2-1
SECTION 7D2
6F1
6F2
6G
6H
6K
TRANSFER
CONTENTS
General Description ..................................... 7D2-2
Transfer Cross Selection Diagram ............. 7D2-2
Transfer Description ................................... 7D2-3
Gear Shift Control System Operation......... 7D2-3
Diagnosis ...................................................... 7D2-4
Transfer Diagnosis ..................................... 7D2-4
On-Vehicle Service....................................... 7D2-5
Transfer Gear Oil Change .......................... 7D2-5
4WD Switch Removal and Installation ....... 7D2-5
4WD Switch Inspection .............................. 7D2-6
VSS Removal and Installation.................... 7D2-6
Transfer Assembly Mounting
Components ............................................... 7D2-7
Transfer Assembly Dismounting and
Remounting ................................................ 7D2-8
Unit Repair Overhaul ................................. 7D2-10
Transfer Unit Components ....................... 7D2-10
Transfer Case Component ................... 7D2-10
Transfer Gear Component ................... 7D2-11
Transfer Shift Shaft Component........... 7D2-12
Transfer Shift Lever Component .......... 7D2-13
Transfer Unit Disassembly and
Reassembly ............................................. 7D2-14
Transfer Inspection .................................. 7D2-25
7A
7A1
Front Case Assembly Disassembly and
7B1
Reassembly ............................................. 7D2-26
7C1
Rear Case Assembly Disassembly and
Reassembly ............................................. 7D2-28
Transfer Input Shaft Assembly
8D
Disassembly and Reassembly................. 7D2-29 8E
Transfer Counter Gear Assembly
Disassembly and Reassembly................. 7D2-30
9
Reduction Shift Shaft Assembly
Disassembly and Reassembly................. 7D2-30 8B
Reduction Shift Shaft Assembly
8C
Inspection................................................. 7D2-31 8D
Front Drive Shift Shaft Assembly
Disassembly and Reassembly................. 7D2-31 8E
Front Drive Shift Shaft Assembly
Inspection.................................................
Transfer Output Rear Shaft Assembly
Disassembly and Reassembly.................
Transfer Output Front Shaft Assembly
Disassembly and Reassembly.................
Output Shaft Snap Ring Adjustment ........
Tightening Torque Specification ..............
Required Service Material .........................
Special Tool................................................
7D2-31
7D2-32
9
10
7D2-33 10A
7D2-34 7D2
7D2-35
7D2-35 7F
7D2-36
8A
7D2-2 TRANSFER
General Description
Transfer Cross Selection Diagram
[A]: View A
1. Input shaft
8. Output low gear
9. Reduction clutch sleeve
16. Front drive clutch hub
17. Output front flange (without dynamic damper)
2. Drive chain
10. Steel ball
18. Input front flange (without dynamic damper)
3. Output front shaft
11. Key spring
19. Reduction shift shaft
4. Counter gear
12. High & low shift fork
20. Front drive shift shaft
5. Front drive gear shift fork
13. Sprocket output gear
21. Shift control lever
6. Front drive clutch hub sleeve
14. VSS rotor
22. Front case
7. Synchronizer ring
15. Output rear shaft
23. Rear case
TRANSFER 7D2-3
Transfer Description
The aluminum transfer case directly connected to the back of the transmission contains an input shaft, counter
gear, output rear shaft, output front shaft, drive chain, reduction shift shaft, high & low shift shaft and their
accompanying gears, hubs, sleeves, synchronizer ring, fork, etc.
The transfer has such a selective mechanism as to enable the shift control lever to make the following selections.
• 2WD (high speed only) or 4WD (high or low speed)
• High speed (direct connection) or low speed (speed reduction by counter gear)
With a synchronizer installed to the front drive clutch hub sleeve, it is possible to change the shift position
between the 2H (2WD high) position and the 4H (4WD high) position even while running.
The front drive gear shift fork has the shift fork spring to make a smooth shift from the 4H (4WD high) position to
the 2H (2WD high) position.
The case has an oil receiver and a oil protect plate to provide proper lubrication even under the strict conditions
of use.
Gear Shift Control System Operation
2H (2WD High) Position
The driving force from the input shaft is transmitted to the sprocket output gear through the drive chain. As the
sprocket output gear and the rear output shaft are engaged via reduction clutch sleeve. At this time, the driving
force transmitted from the input shaft rotates the transfer rear output shaft at the same speed as the input shift
shaft.
On the other hand, as the rear output shaft and the front output shaft are not engaged with the front drive clutch
hub sleeve, the driving force is not transmitted to the front output shaft.
4H (4WD High) Position
When the transfer shift control lever is shifted from the 2H position to the 4H position, the front drive shift shaft
shifts the front drive gear shift fork, and the front drive clutch hub and the output front shaft are engaged via front
drive clutch hub sleeve.
At this time, the driving force from the output rear shaft is transmitted to the transfer front output shaft.
The driving force from the input shaft is transmitted to the output rear shaft, as in the case of 2H (2WD high)
position.
4L (4WD Low) Position
When the transfer shift control lever is shifted from the 4H position to the 4L position by pushing it down, the
reduction shift shaft shifts high & low shift fork, and the output low gear and the output rear shaft are engaged
via reduction clutch sleeve.
At this time, the driving force from the input shaft is transmitted to the output rear shaft and the output front shaft
through the counter gear with the speed reduced.
7D2-4 TRANSFER
Diagnosis
Transfer Diagnosis
Condition
Gear slipping out of mesh
•
•
•
•
•
•
Gears refusing to disengage •
•
Hard shifting
•
•
•
Noise
•
•
•
•
Possible Cause
Worn shift fork shaft
Worn shift fork or sleeve
Weak or damaged locating spring
Worn bearings on input shaft or output shaft
Worn chamfered tooth on sleeve or gear
Worn synchronizer ring
Distorted shift shaft or shift fork
Weakened or broken synchronizer spring
Inadequate or insufficient lubricant
Worn chamfered tooth on sleeve or gear
Distorted shift shaft
Inadequate or insufficient lubricant
Damaged or worn bearing (s)
Damaged or worn gear (s)
Damaged or worn chamfered tooth on sleeve
or gear
Correction
Replace.
Replace.
Replace.
Replace.
Replace sleeve and gear.
Replace.
Replace.
Replace.
Replenish.
Replace sleeve and gear.
Replace.
Replenish.
Replace.
Replace.
Replace.
TRANSFER 7D2-5
On-Vehicle Service
Transfer Gear Oil Change
1) Before changing or inspecting oil, be sure to stop engine and
lift vehicle horizontally.
2) With vehicle lifted up, check oil level and leakage. If leakage
exists, correct or repair it.
3) Drain old oil, tighten new drain plug (1) to specified torque
and fill new specified oil as shown below by specified amount
(roughly up to level hole).
Tightening torque
Oil drain plug (a): 23 N·m (2.3 kg-m, 17.0 lb-ft)
NOTE:
• It is highly recommended to use SAE 75W-90 gear oil.
• Whenever vehicle is hoisted for any other service work
than oil change, also be sure to check for oil leakage.
Gear oil:
API GL-4
For oil viscosity, refer to the chart [A].
Oil capacity: 1.2 liters (2.5/2.1 US/lmp. pt)
4) Tighten new level / filler plug (2) to specified torque.
Tightening torque
Oil level / filler plug (b): 23 N·m (2.3 kg-m, 17.0 lb-ft)
4WD Switch Removal and Installation
Removal
1) Disconnect negative (–) cable at battery.
2) Hoist vehicle.
3) Disconnect 4WD switch coupler.
4) Remove 4WD switch (1) from transfer assembly.
1
7D2-6 TRANSFER
Installation
1) Install 4WD switch (1) to transfer assembly.
Tightening torque
4WD switch (a): 19 N·m (1.9 kg-m, 14.0 lb-ft)
2) Connect 4WD switch coupler.
3) Connect negative (–) cable at battery.
1, (a)
4WD Switch Inspection
1) Hoist vehicle.
2) Disconnect 4WD switch coupler (1).
1
3) Check continuity between two terminals of 4WD switch in
each transfer position.
If check result is out of specification, replace 4WD switch.
4WD switch specification
Transfer position
2H
4H and 4L
Not continuity
Continuity
4) Connect 4WD switch coupler.
VSS Removal and Installation
Removal
1
1)
2)
3)
4)
Disconnect negative (–) cable at battery.
Hoist vehicle.
Disconnect VSS coupler (1).
Remove VSS (2) from transfer assembly.
TRANSFER 7D2-7
Installation
(a)
1) Install VSS (1) with new O-ring to transfer assembly.
1
2
Tightening torque
VSS bolt (a): 5 N·m (0.5 kg-m, 3.5 lb-ft)
2) Connect VSS coupler (2).
3) Connect negative (–) cable at battery.
Transfer Assembly Mounting Components
6
30 N·m (3.0 kg-m)
7
5
23 N·m (2.3 kg-m)
2
6
1
30 N·m (3.0 kg-m)
4
6
30 N·m
(3.0 kg-m)
3
6
30 N·m (3.0 kg-m)
4
6
30 N·m (3.0 kg-m)
7
5
23 N·m
(2.3 kg-m)
4
6
1. Transfer assembly
4. Mounting
2. Mounting left bracket
5. Transfer mounting bracket bolt
3. Mounting right bracket
6. Transfer mounting nut
7. Clamp
Tightening torque
30 N·m (3.0 kg-m)
7D2-8 TRANSFER
Transfer Assembly Dismounting and
Remounting
Dismounting
1) Disconnect negative (–) cable at battery.
2) Remove transfer shift knob (1) by removing screw (2).
3) Drain transfer oil referring to “Transfer Gear Oil Change” in
this section.
4) Remove exhaust pipe (1).
5) Remove front and rear propeller shaft referring to “Propeller
Shafts” in Section 4B.
1
3
1
2
6) Disconnect 4WD switch wire at coupler (1) and unclamp harness.
7) Disconnect VSS coupler.
2. VSS
3. Clamp
8) With transfer supported on jack, remove 3 mounting nuts (1),
and then mounting right bracket (2) from transfer.
9) Remove transfer with mounting left bracket (3) from vehicle
body.
10) Remove mounting left bracket from transfer.
4. Mounting
TRANSFER 7D2-9
Remounting
Reverse dismounting procedure for remounting noting the following.
• Tighten bolts and nuts to specified torque.
Tightening torque
Transfer mounting nut
(a): 30 N·m (3.0 kg-m, 22.0 lb-ft)
• Set each clamp for wiring securely.
• Connect couplers to VSS and 4WD switch securely.
• Refill transfer gear oil referring to “Transfer Gear Oil Change”
in this section.
• Install front and rear propeller shaft referring to “Propeller
Shafts” in Section 4B.
• Install exhaust pipe referring to “Exhaust Component” in
Section 6K2.
• Install shift knob.
• Connect battery negative (–) terminal to battery.
7D2-10 TRANSFER
Unit Repair Overhaul
Transfer Unit Components
Transfer Case Component
14
5 N·m (0.5 kg-m)
9
23 N·m (2.3 kg-m)
11
5
18 N·m (1.8 kg-m)
6
18 N·m (1.8 kg-m)
12
2
1
4
15
17
16
7
8
25 N·m (2.5 kg-m)
23 N·m (2.3 kg-m)
5
[A]
5
10
19 N·m (1.9 kg-m)
6
5
15
6
6
3
18.2 N·m (1.82 kg-m)
13
5
7
25 N·m (2.5 kg-m)
5
5
5
6
[A]: Transfer case bolt location
1. Front case
2. Plug
7. Locating spring bolt
14. Transfer oil protect plate bolt
8. Oil drain plug
15. Steel ball
9. Oil level / filler plug
16. Locating spring (23.7 mm (0.93 in.))
3. Locating plug
10. 4WD switch
4. Rear case
11. Oil receiver
17. Locating spring (42.0 mm (1.65 in.))
Tightening torque
5. Transfer case bolt (short)
12. Oil protect plate
Do not reuse.
6. Transfer case bolt (long)
13. Front drive shift shaft pin
TRANSFER 7D2-11
Transfer Gear Component
36
OIL
35
34
130 N·m (13.0 kg-m)
33
32
OIL
1
A
31
1
27
OIL
30
26
130 N·m (13.0 kg-m)
A
29
OIL
25
OIL
28
5
20
21
23
A
OIL
22
19
OIL
OIL
22
OIL
24
18
10
17
OIL
16
OIL
15
OIL
8
14
OIL
12
OIL
13
9
7
2
6
130 N·m (13.0 kg-m)
OIL
1
10
11
5
3
OIL
4
A
1. Flange nut
14. Output shaft snap ring
27. Rear flange (with dynamic
damper)
2. Output front flange (without dynamic
damper)
15. Output front shaft bearing
28. Counter gear No.1 bearing
3. Front case No.1 oil seal
: Apply grease 99000-25010 to oil seal lip.
16. Output low gear
29. Counter gear
4. Front case No.1 bearing
17. Output rear shaft No.1 bearing
30. Counter gear No.2 bearing
5. Circlip
18. Output rear shaft
31. Input front flange (without dynamic
damper)
6. Output front shaft bearing
19. O-ring
: Apply grease 99000-25010 to all around
surface.
32. Front case No.2 oil seal
: Apply grease 99000-25010 to oil
seal lip.
7. Output front shaft
20. Reduction clutch sleeve
33. Front case No.2 bearing
8. Front drive clutch hub
21. Output rear shaft No.2 bearing
34. Input shaft
22. Sprocket output gear bearing
35. Input shaft bearing
10. Steel ball
9. Key spring
23. Sprocket output gear
36. Drive chain
11. Key
24. VSS rotor
Do not reuse.
12. Front drive clutch hub sleeve
25. Rear case bearing
Tightening torque
13. Synchronizer ring
26. Rear case oil seal
: Apply grease 99000-25010 to oil seal lip.
Apply transfer gear oil
7D2-12 TRANSFER
Transfer Shift Shaft Component
2
1
3
4
9
6
10
25 N·m (2.5 kg-m)
5
8
7
6
1. Reduction shift shaft
5. Front drive gear shift fork
2. High & low shift fork
6. Snap ring
9. Straight pin
3. Spring pin
7. Washer
Do not reuse.
4. Front drive shift shaft
8. Shift fork spring
Tightening torque
10. Locating spring bolt
TRANSFER 7D2-13
Transfer Shift Lever Component
2
1
11
3
4
7
6
5
18 N·m (1.8 kg-m)
12
8
9
13
10
14
1. Shift knob
6. Retainer
11. Boot cover
2. Shift knob screw
7. Shift control lever
12. Shift control lever boot
3. Transfer shift lever
8. Bush
13. Lever sheet
4. Boot
9. Shift lever cap
14. Shift control lever silencer
5. Retainer bolt
10. Spring
Tightening torque
7D2-14 TRANSFER
Transfer Unit Disassembly and Reassembly
Disassembly
2
1
1) Adjust shift control lever (3) to 4H position.
2) Slide boot (2) to upward, and then remove retainer bolts (1).
3) Remove shift control lever (3), spring (4) and shift lever cap
(5).
3
5
4
4) Remove 4WD switch (1) and take out steel ball (2).
2
1
5) Remove locating spring bolts (1) and take out locating
springs (2) and steel balls (3).
1
2
3
TRANSFER 7D2-15
6) Remove VSS (1) from transfer.
1
7) Remove rear flange (with dynamic damper). To lock flange,
use special tool. With flange locked, remove flange nut (1).
Special tool
(A): 09930-40113
(A)
1
8) Remove 11 rear case bolts, and then separate front and rear
cases using special tool.
NOTE:
To separate cases, use special tool at 2 points in turn and
make opening wider evenly.
Special tool
(A): 09912-34501
(A)
9) Pull out VSS rotor (1) and steel ball.
7D2-16 TRANSFER
10) Remove front flanges (without dynamic damper) (2). To lock
flange, use special tool.
With flange locked, remove flange nut (1).
Special tool
(A): 09930-40113
11) Remove drive chain (2), input shaft (1), thrust bearing (4)
and sprocket output gear (3) as an assembly.
2
3
4
1
12) Remove needle roller bearings (1) and thrust bearing (2).
1
2
13) Remove counter gear assembly (1) from front case.
1
TRANSFER 7D2-17
14) Shift front drive shift shaft (1) and reduction shift shaft (2) to
4H position as shown in figure.
15) Disconnect reduction shift shaft assembly with reduction
clutch sleeve (3).
1
2
2
1
3
16) Remove straight pin (1) and locating spring bolt (3) from front
case (2) as shown in figure.
2
1
3
3
1
2
1
17) Remove output rear shaft assembly (1) with front drive shift
shaft assembly (2).
7D2-18 TRANSFER
18) Remove front drive shift shaft pin (1) and locating spring bolt
(3) from front case (2).
2
1
3
1
19) Remove needle roller bearing (1) and synchronizer ring (2)
from front case (3).
2
3
20) Remove output front shaft assembly (1) from front case (2).
1
2
Reassembly
1) Install output front shaft to front case.
2) Install output front flange (without dynamic damper), tighten
new flange nut with flange locked by special tool.
Special tool
(A): 09930-40113
Tightening torque
Flange nut (a): 130 N·m (13.0 kg-m, 94 lb-ft)
TRANSFER 7D2-19
3) Caulk flange nut (1).
CAUTION:
Be sure to caulk flange nut on the output front shaft
groove securely as shown in figure.
If not, it may cause for loosening flange nut.
“a”: 3.8 mm (0.15 in.) or more
1
4) Apply transfer gear oil to needle roller bearing (1) and synchronizer ring (2), and then install them to output front shaft.
2
5) Put in front drive shift shaft pin (1) to front case (2).
6) Tighten new locating spring bolt (3) to specified torque.
Tightening torque
Locating spring bolt (a): 25 N·m (2.5 kg-m, 18.0 lb-ft)
2
1
3, “A”
1
3, (a)
7) Install output rear shaft assembly (1) with front drive shift
shaft (2) to front case (4).
2
4
NOTE:
Make sure that cutout side of output rear shaft is aligned
with front drive shift shaft pin.
8) Apply grease to new O-ring (3), and then install it to output
rear shaft (1).
“A”: Grease 99000-25010
7D2-20 TRANSFER
9) Shift front drive shift shaft (1) to 4H position as shown in figure.
10) Put in straight pin (4) from bolt hole until straight pin comes
into contact with front drive shift shaft as shown in figure.
11) Tighten new locating spring bolt (3) to specified torque.
2
4
3, (a)
Tightening torque
Locating spring bolt (a): 25 N·m (2.5 kg-m, 18.0 lb-ft)
1
2. Front case
2
3, (a)
4
12) Install reduction shift shaft assembly (1) with reduction clutch
sleeve (2) to front case (3).
1
2
NOTE:
3
Be sure to install clutch sleeve (2) to proper direction as
shown in figure.
2
13) Install counter gear assembly (1) to front case (2).
1
3
2
2
14) Apply transfer gear oil to thrust bearing (1) and needle roller
bearing (2), and then install them to output rear shaft (3).
1
NOTE:
Be sure to install thrust bearing (1) to proper direction as
shown in figure.
1
TRANSFER 7D2-21
15) Install input shaft (1), sprocket output gear (2) and drive
chain (3) as an assembly to front case.
3
2
1
16) Apply transfer gear oil to thrust bearing (1), and then install
thrust bearing (1) and steel ball (2) to output rear shaft (3).
3
1
1
NOTE:
Be sure to install thrust bearing (1) to proper direction as
shown in figure.
17) Install VSS rotor (4) to output shaft aligning its slot (5) with
steel ball.
2
4
NOTE:
Turn VSS rotor, and check to rotate together with output
rear shaft.
5
18) After cleaning mating surfaces of both cases, coat mating
surface of front case with sealant evenly and put it over rear
case.
“A”: Sealant 99000-31260
Sealant amount
Diameter “a”: 1.2 mm (0.05 in.)
19) Align front case and rear case, then install rear flange (with
dynamic damper), tighten new flange nut (1) with flange
locked by special tool.
Special tool
(A): 09930-40113
Tightening torque
Flange nut (a): 130 N·m (13.0 kg-m, 94.0 lb-ft)
7D2-22 TRANSFER
20) Caulk flange nut (1).
CAUTION:
Be sure to caulk flange nut on the output rear shaft
groove securely as shown in figure.
If not, it may cause for loosening flange nut.
“a”: 3.8 mm (0.15 in.) or more
21) Tighten 11 case bolts.
3
2, (a)
1, (a)
Tightening torque
Transfer case bolt (a): 18 N·m (1.8 kg-m, 13.0 lb-ft)
1. Long bolt
1, (a)
2. Short bolt
3. Clamp
3
2, (a)
1, (a)
2, (a)
1
22) Install VSS (1) with new O-ring.
Tightening torque
VSS bolt (a): 5 N·m (0.5 kg-m, 3.5 lb-ft)
(a)
23) Install input front flange (without dynamic damper), tighten
new flange nut (1) with flange locked by special tool.
Special tool
(A): 09930-40113
Tightening torque
Flange nut (a): 130 N·m (13.0 kg-m, 94.0 lb-ft)
TRANSFER 7D2-23
24) Caulk flange nut (1).
CAUTION:
Be sure to caulk flange nut on the input shaft groove
securely as shown in figure.
If not, it may cause for loosening flange nut.
“a”: 3.8 mm (0.15 in.) or more
25) Install steel ball (2) and 4WD switch (1).
Tightening torque
4WD switch (a): 19 N·m (1.9 kg-m, 14.0 lb-ft)
2
1, (a)
26) Install steel balls (3), locating springs (2) and new locating
spring bolts (1).
1
2
3
Tightening torque
Locating spring bolt (a): 25 N·m (2.5 kg-m, 18.0 lb-ft)
7D2-24 TRANSFER
27) Set front drive shift shaft (2) and reduction shift shaft (3) at
4H shift position as shown in figure.
28) Install shift control lever (1) through spring (4) and cap (5)
and fit boot (6) to front case, and tighten new retainer bolts
(7).
3
Tightening torque
Retainer bolt (a): 18 N·m (1.8 kg-m, 13.0 lb-ft)
2
6
7, (a)
1
5
4
TRANSFER 7D2-25
Transfer Inspection
• Check each bearing for smooth rotation.
If found abnormal, replace.
• Check needle bearing and bearing contacting surface for
damage. Replace as required.
• Check each spring for distortion or breakage and change it
with new one as necessary.
Locating spring (short) free length “a”:
23.7 mm (0.933 in.)
Locating spring (long) free length “a”:
42.0 mm (1.654 in.)
• Check drive chain and sprockets for abnormal wear or damage. Replace as required.
• Check oil seal for leakage and its lip for excessive hardness.
If either is found, replace.
Also, check corresponding surface of shaft where oil seal lip
contacts. Correct or replace as necessary.
• Check clearance “a” between synchronizer ring and output
front shaft, protruding portion width “b” in synchronizer ring
and each chamfered tooth of gear and synchronizer ring and
synchronizer ring and replace with new one, if necessary.
Also, check gear tooth.
If protruding portion “b” is out of specification, replace synchronizer ring.
Clearance “a” between synchronizer ring and output front
shaft
Standard: 0.83 – 1.53 mm (0.033 – 0.060 in.)
Service limit: 0.6 mm (0.024 in.)
Protruding portion width “b”:
7.2 – 7.4 mm (0.284 – 0.291 in.)
7D2-26 TRANSFER
Front Case Assembly Disassembly and Reassembly
CAUTION:
Pave waste cloth under case in order to prevent mating
surface from damage.
Disassembly
1) By using special tool, remove front case No.1 oil seal (1) and
front case No.2 oil seal (2) from front case.
Special tool
(A): 09913-50121
2) Remove circlip, and then remove front case No.1 bearing (3)
from front case using special tool and hydraulic press (1).
Special tool
(A): 09913-75830
3) Remove front case No.2 bearing (2) from front case using
special tool and hydraulic press (1).
Special tool
(A): 09913-75830
4) Remove oil protect plate (1) and oil receiver (2) from front
case, if necessary.
1
2
Reassembly
1) Install front case No.1 bearing (1) and front case No.2 bearing (2) to front case using special tools and hammer.
Special tool
(A): 09913-75810
(B): 09944-66020
TRANSFER 7D2-27
2) Fix front case No.1 bearing with new circlip (1) using special
tool.
Special tool
(A): 09900-06108
3) By using special tool and hummer, install front case No.1 oil
seal (1) and front case No.2 oil seal (2) to front case at specified position as shown in figure. Apply grease to each oil
seal lip.
Special tool
(A): 09913-75810
“A”: Grease 99000-25010
Transfer front case oil seal installing position
“a”: 38.2 – 39.2 mm (1.50 – 1.54 in.)
“b”: 164.3 – 165.3 mm (6.47 – 6.51 in.)
3. Front case No.1 bearing
4. Front case No.2 bearing
5. Circlip
4) Install transfer oil protect plate (1) and transfer oil receiver (2)
to front case.
1
3, (a)
2
3, (a)
Tightening torque
Transfer oil protect plate bolt
(a): 5 N·m (0.5 kg-m, 3.5 lb-ft)
3. Transfer oil protect plate bolt
7D2-28 TRANSFER
Rear Case Assembly Disassembly and Reassembly
CAUTION:
Pave waste cloth under case in order to prevent mating
surface from damage.
Disassembly
1) Remove rear case oil seal from rear case using special tool.
Special tool
(A): 09913-50121
2) Remove circlip (1) using special tool (A), and then remove
rear case bearing (2) using special tool (B).
Special tool
(A): 09900-06108
(B): 09913-75830
Reassembly
1) Install rear case bearing to rear case (1) using special tool
and hammer, and fix it with new circlip.
Special tool
(A): 09913-75810
(B): 09944-66020
TRANSFER 7D2-29
2) Using special tool and hammer, install rear case oil seal (1)
to rear case at specified position. Apply grease to oil seal lip.
Special tool
(A): 09913-75810
“A”: Grease 99000-25010
Transfer rear case oil seal installing position
“a”: 83.9 – 84.9 mm (3.30 – 3.34 in.)
2. Rear case bearing
3. Circlip
Transfer Input Shaft Assembly Disassembly
and Reassembly
Disassembly
(A)
1) Pull out input shaft bearing (1) from input shaft using special
tool.
Special tool
(A): 09913-60910
1
Reassembly
1) Press fit input shaft bearing (1) to input shaft using bearing
puller (2) and hydraulic press (3).
CAUTION:
Be sure to fit bearing puller at inner race of bearing in
order to prevent bearing from damage.
7D2-30 TRANSFER
Transfer Counter Gear Assembly Disassembly and Reassembly
Disassembly
1) Pull out counter gear bearings (1) using special tool.
(A)
Special tool
(A): 09913-60910
1
Reassembly
1) Press fit counter gear bearings (1) to counter gear respectively using special tool and hydraulic press.
(A)
Special tool
(A): 09913-70123
1
Reduction Shift Shaft Assembly Disassembly
and Reassembly
Disassembly
1) Push spring pin using special tool.
2
Special tool
(A): 09900-06108
2
1
(A)
CAUTION:
Support reduction shift shaft (1) with wood blocks (2) as
shown in figure in order to prevent it from damage.
3
2) Remove high & low shift fork (3) from reduction shift shaft.
Reassembly
Reverse disassembly procedure for reassembly noting the following point.
• Push spring pin until it becomes flush with high & low shift
fork surface.
TRANSFER 7D2-31
Reduction Shift Shaft Assembly Inspection
• Using feeler gauge, check clearance between high & low
shift fork (1) and reduction clutch sleeve (2).
If clearance “a” is out of specification, replace reduction
clutch sleeve and high & low shift fork.
Clearance Between Reduction Clutch Sleeve and High &
Low Shift Fork “a”: 0.1 – 0.4 mm (0.004 – 0.015 in.)
Front Drive Shift Shaft Assembly Disassembly and Reassembly
Disassembly
1) Remove snap rings (1), front drive gear shift fork (2), spring
(3) and washer (4) from drive shift shaft (5).
5
1
2
3
1
Reassembly
Reverse disassembly procedure for reassembly noting the following point.
• Apply transfer gear oil to sliding part.
• Confirm that snap ring is installed in groove securely.
4
Front Drive Shift Shaft Assembly Inspection
• Using feeler gauge, check clearance between front drive
gear shift fork (1) and front drive clutch hub sleeve (2).
If clearance “a” is out of specification, replace front drive
clutch hub sleeve and front drive gear shift fork.
Clearance Between Front Drive Clutch Hub Sleeve and
Front Drive Gear Shift Fork “a”:
0.15 – 0.35 mm (0.006 – 0.013 in.)
7D2-32 TRANSFER
Transfer Output Rear Shaft Assembly Disassembly and Reassembly
Disassembly
1) Pull out front drive clutch hub sleeve (1) from front drive
clutch hub (2) gradually with holding down steel balls (3) in
order to prevent steel balls and springs (4) from jumping out.
2) Remove snap ring (6) from output rear shaft.
5. Key
2
4
1
6
2
3
5
3) Drive out output low gear (1) from output rear shaft (2) using
bearing puller (3) and hydraulic press (4).
4
1
CAUTION:
To avoid gear teeth from being damaged, support it at flat
side of bearing puller.
3
4) Remove output low gear (1) and needle roller bearing (2)
from output rear shaft (3).
1
2
3
TRANSFER 7D2-33
Reassembly
NOTE:
Install front drive clutch hub and front drive clutch hub
sleeve, and check to move smoothly.
1) Press fit front drive clutch hub (1) using special tool, bearing
puller (2) and hydraulic press (3).
Special tool
(A): 09913-70123
3
(A)
CAUTION:
1
To avoid gear teeth from being damaged, support it at flat
side of bearing puller.
1
2
NOTE:
Be sure to install front drive clutch hub (1) to proper
direction as shown in figure.
2) Install front drive clutch hub sleeve (2), and then install steel
balls (4), key springs (3) and keys (5).
NOTE:
Be sure to install front drive clutch hub sleeve (2) to
proper direction as shown in figure.
2
3
4
5
1
2
3) Install applicable output shaft snap ring (1) according to
“Output Shaft Snap Ring Adjustment” in this section.
NOTE:
After assembly check that each gear moves smoothly.
Transfer Output Front Shaft Assembly Disassembly and Reassembly
Disassembly
1) Pull out output front shaft bearing (1) using bearing puller (2)
and hydraulic press (3).
7D2-34 TRANSFER
Reassembly
1) By using special tools and hydraulic press, install output front
shaft bearing (1) to output front shaft.
Special tool
(A): 09913-75520
(B): 09940-53111
Output Shaft Snap Ring Adjustment
1) Install removed output shaft snap ring to output shaft.
2) Measure clearance “a” between snap ring (1) and end face
of output rear shaft (2).
3) Remove snap ring, and then measure removed snap ring
thickness “b”.
4) Obtain adjusting snap ring thickness “c” by the following
equation.
“c” = “a” + “b” – 0.05 mm (0.002 in.)
5) Select snap ring with a thickness nearest calculated snap
ring thickness “c” by the following.
6) Install selected snap ring to output shaft.
7) Check clearance “a” between snap ring and end face of output rear shaft, again. If it is more than 0.11 mm (0.004 in.),
repeat step 2) through 7).
Available snap ring thickness
Identification mark
0
1
2
3
4
5
6
7
8
3. Front drive clutch hub
Thickness
2.30 mm (0.091 in.)
2.36 mm (0.093 in.)
2.42 mm (0.095 in.)
2.48 mm (0.098 in.)
2.54 mm (0.100 in.)
2.60 mm (0.102 in.)
2.12 mm (0.083 in.)
2.18 mm (0.086 in.)
2.24 mm (0.088 in.)
TRANSFER 7D2-35
Tightening Torque Specification
Fastening part
Oil filler / level and drain plug
Transfer mounting nut
Transfer mounting bracket bolt
Propeller shaft bolt
Flange nut
Transfer case bolt
4WD switch
Locating spring bolt
Retainer bolt
VSS bolt
Transfer oil protect plat bolt
Locating plug
N•m
23
30
23
50
130
18
19
25
18
5
5
18.2
Tightening torque
kg-m
2.3
3.0
2.3
5.0
13.0
1.8
1.9
2.5
1.8
0.5
0.5
1.82
lb-ft
17.0
22.0
17.0
36.5
94.0
13.0
14.0
18.0
13.0
3.5
3.5
13.0
Required Service Material
Material
Lithium grease
Sealant
Recommended SUZUKI products
(Part Number)
SUZUKI SUPER GREASE A
(99000-25010)
SUZUKI BOND NO. 1217G
(99000-31260)
Use
• Oil seal lip
• O-ring
• Mating surface of front case
7D2-36 TRANSFER
Special Tool
09900-06108
Snap ring plier
(Closing type)
09912-34510
Separator
09913-50121
Oil seal remover
09913-60910
Bearing puller
09913-65135
Bearing puller
09913-75520
Bearing installer
09913-75810
Bearing installer
09913-75830
Bearing installer
09922-85811
Pin remover
09930-40113
Flange holder
09940-53111
Differential side
bearing installer
09944-66020
Bearing installer
BODY ELECTRICAL SYSTEM 8-1
SECTION 8
BODY ELECTRICAL SYSTEM
WARNING:
For vehicles equipped with Supplement Restraint (Air Bag) System:
• Service on and around the air bag system components or wiring must be performed only by an
authorized SUZUKI dealer. Refer to “Air Bag System Components and Wiring Location View” under
“General Description” in air bag system section in order to confirm whether you are performing service on or near the air bag system components or wiring. Please observe all WARNINGS and “Service Precautions” under “On-Vehicle Service” in air bag system section before performing service
on or around the air bag system components or wiring. Failure to follow WARNINGS could result in
unintentional activation of the system or could render the system inoperative. Either of these two
conditions may result in severe injury.
• Technical service work must be started at least 90 seconds after the ignition switch is turned to the
“LOCK” position and the negative cable is disconnected from the battery. Otherwise, the system
may be activated by reserve energy in the Sensing and Diagnostic Module (SDM).
NOTE:
6F1
6F2
6G
6H
6K
7A
7A1
7B1
7C1
7D
7E
7F
8A
9
8E
For the items with asterisk (*) in the “CONTENTS” below, refer to the same section of the Service Manual mentioned in “FOREWORD” of this manual.
CONTENTS
Diagnosis ........................................................... 8-3
Headlight ............................................................. *
Headlights with Leveling System
(If Equipped)........................................................ *
Rear Fog Light (If Equipped) ............................... *
Turn Signal and Hazard Warning Lights ............. *
Clearance, Tail and License Plate Lights ............ *
Back-up Light ...................................................... *
Brake Lights ........................................................ *
Tachometer and ECM ......................................... *
Speedometer and VSS ....................................... *
Fuel Meter and Fuel Gauge Unit ......................... *
Engine Coolant Temp. (ECT) Meter and ECT
Sensor ................................................................. *
Oil Pressure Light................................................ *
Brake and Parking Brake Warning Light ......... 8-3
Rear Window Defogger (If Equipped) ................. *
Front Wiper and Washer ..................................... *
Rear wiper and washer (If equipped) .................. *
Power Window Control System
(If Equipped)........................................................ *
Power Door Lock System (If Equipped) .............. *
Power Door Mirror Control System ..................... *
Door Mirror Heater (If Equipped)......................... *
Front Seat Heater (If Equipped) .......................... *
Cigarette Lighter.................................................. *
Interior Lights ...................................................... *
9
10
10A
10B
On-Vehicle Service ........................................... 8-4
Headlight............................................................. *
Headlight switch .............................................. *
Headlight ......................................................... * 8
Bulb replacement ............................................ *
Headlight aiming adjustment with
screen ............................................................. * 10B
Headlights with Leveling System
8D
(If Equipped) ....................................................... *
Leveling switch................................................ *
Leveling actuator............................................. *
Turn Signal and Hazard Warning Lights
System ............................................................ 8-4
Turn signal and hazard warning lights
system circuit inspection ............................. 8-4
Turn signal light switch.................................... *
Hazard switch.................................................. *
Stop (Brake) Lamp.......................................... 8-5
Stop (brake) lamp switch............................. 8-5
Rear Fog Light (If Equipped)............................... *
Rear fog light switch........................................ *
Ignition Switch..................................................... *
Combination Meter.......................................... 8-6
Fuel level meter............................................... *
Fuel sender gauge ...................................... 8-8
Engine Coolant Temperature Meter and
Sensor Unit ..................................................... 8-8
8-2 BODY ELECTRICAL SYSTEM
Engine coolant temperature meter.................. *
Engine coolant temperature sensor ............ 8-8
Oil Pressure Warning Light ............................. 8-9
Oil pressure switch...................................... 8-9
Brake and Parking Brake Warning Light......... 8-9
Brake fluid level switch.................................... *
Parking brake switch ....................................... *
Indicator controller
(for brake warning light) .............................. 8-9
Brake vacuum switch ................................ 8-10
Rear Window Defogger....................................... *
Defogger switch .............................................. *
Defogger wire.................................................. *
Wiper and Washer ........................................ 8-10
Front wiper/washer switch............................... *
Wiper motor..................................................... *
Washer pump............................................ 8-11
Rear Wiper and Washer ..................................... *
Wiper and washer switch ................................ *
Rear wiper motor............................................. *
Rear wiper intermittent relay ........................... *
Power Window Control System
(If Equipped) ....................................................... *
Breaker ............................................................*
Power window main switch ..............................*
Power Door Lock System (If Equipped).........8-12
Power door lock system component
location ............................................................*
Power door lock system operation
inspection.........................................................*
Power door lock system circuit
inspection...................................................8-12
Driver side key cylinder switch.........................*
Power door lock actuator .................................*
Door switch ......................................................*
Power Door Mirror Control System
(If Equipped) ........................................................*
Mirror switch.....................................................*
Door mirror actuator.........................................*
Door Mirror Heater (If Equipped) .........................*
Mirror heater switch .........................................*
Mirror heater (if equipped) ...............................*
Front Seat Heater (If Equipped)...........................*
Seat heater switch (driver and
passenger side) ...............................................*
Seat heater wire...............................................*
BODY ELECTRICAL SYSTEM 8-3
Diagnosis
Brake and Parking Brake Warning Light
Condition
Possible Cause
Bulb in combination meter blown
Brake warning light
does not light up
“Meter” fuse blown
when brake fluid level
is low and/or parking Printed wiring circuit in combination meter
brake is pulled up
Brake fluid level switch faulty
Parking brake switch faulty
Brake warning light
does not light up
when cranking engine
(when ignition switch
is at ST position)
Brake warning light
does not light up for 1
– 3 sec. after ignition
switch ON
Wiring or grounding faulty
Ignition switch faulty
Wiring or grounding faulty
Printed wiring circuit in combination meter
Bulb in combination meter blown
“Meter” fuse blown
Printed wiring circuit in combination meter
Indicator controller faulty
Brake warning light
stays ON
Wiring or grounding faulty
Brake fluid level switch faulty
Parking brake switch faulty
Indicator controller faulty
Wiring or grounding faulty
Printed wiring circuit in combination meter
Brake vacuum switch faulty
Poor vacuum pressure
Correction
Check bulb.
After checking short circuit, replace
fuse.
Check printed wiring circuit in combination meter.
Check brake fluid level switch referring to “Brake Fluid Level Switch” in
this section.
Check parking brake switch referring to “Parking Brake Switch” in
this section.
Repair circuit.
Check ignition switch referring to
“Ignition Switch” in this section.
Repair circuit.
Check printed wiring circuit in combination meter.
Check bulb.
After checking short circuit, replace
fuse.
Check printed wiring circuit in combination meter.
Check indicator controller referring
to “Indicator Controller (For Brake
Warning Light)” in this section.
Repair circuit.
Check brake fluid level switch referring to “Brake Fluid Level Switch” in
this section.
Check parking brake switch referring to “Parking Brake Switch” in
this section.
Check indicator controller referring
to “Indicator Controller (For Brake
Warning Light)” in this section.
Repair circuit.
Check printed wiring circuit in combination meter.
Check brake vacuum switch referring to “Brake Vacuum Switch” in
this section.
Check vacuum circuit and vacuum
pump referring to “Vacuum Pump
Inspection” in Section 6H2.
8-4 BODY ELECTRICAL SYSTEM
On-Vehicle Service
Turn Signal and Hazard Warning Lights System
Turn signal and hazard warning lights system circuit
inspection
1) Disconnect negative (–) cable from battery.
2) Disconnect turn signal and hazard warning relay (1) connector.
1
3) Connect negative (–) cable to battery.
4) Confirm that right or left side turn signal light turn on when
connect “4” terminal to “2” or “3” terminal with service wire.
If turn signal light does not turn on, check bulb or repair
applicable circuit.
3
8
6
7
2
1
5
4
3
8
7
6
1. Turn signal and hazard warning relay connector viewed from
harness side
1
2
1
5
4
1
5) Check that voltage and continuity between the following terminals and body ground are specifications under each condition.
If check result is not as specified, repair applicable circuit.
If check result is OK, replace turn signal and hazard warning
relay and recheck.
V
1. Turn signal and hazard warning relay connector viewed from
harness side
BODY ELECTRICAL SYSTEM 8-5
Terminal
Circuit
Specification
Condition
10 – 14 V
Ignition switch is ON position.
0–1V
Ignition switch is OFF position.
1
Ignition switch circuit
4
Power supply for turn signal and hazard
warning lights
5
Right side turn signal light switch circuit
6
Left side turn signal light switch circuit
7
Ground
8
Hazard warning switch circuits
10 – 14 V
–
Continuity
Turn signal light switch is R position.
No continuity Turn signal light switch is N or L position.
Continuity
Turn signal light switch is L position.
Turn signal light switch is N or R posiNo continuity
tion.
0–1V
–
Continuity
Hazard warning switch is ON position.
No continuity Hazard warning switch is OFF position.
Stop (Brake) Lamp
Stop (brake) lamp switch
Inspection
Check stop (brake) lamp switch for continuity as shown below.
If check result is not as specified, replace switch.
a
b
Terminal
Shaft condition
FREE
PUSH
a
b
8-6 BODY ELECTRICAL SYSTEM
Combination Meter
1. Tachometer
7. Glow indicator light
13. High beam light
2. Speedometer
8. MIL
14. Oil pressure warning light
3. Fuel lever meter
9. Turn signal pilot light (RH)
4. Water temperature meter
15. Charge warning light
10. AIR BAG warning light
16. Brake warning light
5. Turn signal pilot light (LH)
11. Injection warning light (gravity 1 warning light)
17. ABS warning light (if equipped)
6. 4WD indicator
12. Red stop warning light (gravity 2 warning light)
COMBINATION METER INTERNAL CIRCUITS AND COUPLERS
NOTE:
Terminal arrangement of coupler viewed from harness side.
1. Speedometer
4. Engine coolant temp. meter
2. Tachometer
5. Buzzer
[A]: Connector K
[B]: Connector L
3. Fuel meter
6. If equipped
[C]: Connector M
BODY ELECTRICAL SYSTEM 8-7
Terminal K
K-1
K-2
K-3
K-4
K-5
K-6
K-7
K-8
K-9
K-10
K-11
K-12
K-13
K-14
K-15
K-16
Wire Color
BLU/GRN
YEL/RED
YEL/WHT
BLK/ORN
–
RED/BLU
BLK/RED
BRN
PPL/RED
RED BLK
RED/BLK
WHT/RED
YEL/BLU
–
BLU
BLU
Terminal L
L-1
L-2
L-3
L-4
L-5
L-6
L-7
L-8
L-9
L-10
L-11
L-12
L-13
Wire Color
GRN/RED
RED
YEL/GRN
–
WHT/BLU
BLK/YEL
RED/YEL
WHT
BLK
–
PPL/YEL
BLK
GRN/YEL
Terminal M
M-1
M-2
M-3
M-4
M-5
M-6
M-7
M-8
M-9
M-10
Wire Color
–
–
–
–
–
–
–
GRN/YEL
WHT/RED
WHT/BLK
Circuit
To ignition switch
To fuel level gauge
To ECT sensor
To ground
–
To ABS control module (if equipped)
To ignition switch
To ECM
To ignition switch
To brake fluid level switch and brake vacuum switch
To parking brake switch and indicator controller
To generator
To oil pressure switch
–
To SDM
To 4WD control module
Circuit
To combination switch (turn L)
To combination switch (dimmer switch)
To VSS
–
To main fuse
To door switch
To combination switch (dimmer switch)
To main fuse
To ground
–
To ECM
To ground
To combination switch (turn R)
Circuit
–
–
–
–
–
–
–
To ECM
To ECM
To ECM
8-8 BODY ELECTRICAL SYSTEM
Removal
1) Disconnect negative cable at battery.
2) Loosen steering column mounting bolts and nuts referring to
“Steering Column Assembly” in Section 3C.
3) Remove meter cluster panel (2).
4) Remove combination meter (1).
5) Disconnect couplers from combination meter.
Installation
Reverse removal procedure for installation.
Fuel sender gauge
Inspection
1) Remove fuel level gauge assembly referring to “Fuel Level
Gauge Assembly Removal and Installation” in Section 6C2.
2) Use an ohmmeter to confirm that resistance of sender gauge
unit changes with change of float position. If the measured
value is out of specification, replace.
Fuel sender gauge specification
Float Position
Full Upper “a”
87.2 mm (3.60 in.)
Middle (1/2) “b”
150.0 mm (5.91 in.)
Full Lower “c”
254.6 mm (10.02 in.)
Resistance (Ω)
2–4
29.5 – 35.5
119 – 121
1. Fuel level gauge “+” terminal
2. Fuel level gauge “–” terminal
3. Float
Engine Coolant Temperature Meter and Sensor Unit
Engine coolant temperature sensor
Removal/Installation/Inspection
Refer to “Engine Coolant Temperature Sensor (ECT Sensor)
Removal and Installation” in Section 6E2.
BODY ELECTRICAL SYSTEM 8-9
Oil Pressure Warning Light
Oil pressure switch
Inspection
Use an ohmmeter to check switch continuity.
Oil pressure switch specification
During Engine Running: No continuity (∞ Ω)
At Engine Stop: Continuity (0 Ω)
1. Oil pressure switch
2. Cylinder block
Removal and Installation
Refer to “Oil Pressure Switch Removal and Installation” in Section
6A2.
Brake and Parking Brake Warning Light
Indicator controller (for brake warning light)
Inspection
1) Remove glove box.
2) Check voltage between terminal wire (1) and (3).
If voltage is not as specified, check relative wiring circuit to
open or short.
If voltage is specified, go to next step.
4
Ignition switch ON: 10 – 14 V
3) Check voltage between terminal wire (2) and ground.
If voltage is not as specified, replace controller.
[B]
High
Low
0.7 - 3.3 sec.
[A]
1
[C]
2
ON
OFF
[A]: View from harness side
[B]: Voltage between “2” and ground
3
[C]: Ignition switch
4.
Indicator controller
8-10 BODY ELECTRICAL SYSTEM
Brake vacuum switch
Inspection
Use an ohmmeter to check switch continuity.
Brake vacuum switch specification
Atmosphere pressure: Continuity (0 Ω)
Vacuum lower than –27.0 kPa (38 Psi): No continuity (∞ Ω)
If continuity is not as specified, replace master cylinder booster
assemby including brake vacuum switch.
1. Brake vacuum switch
2. Body earth
Wiper and Washer
[A]: Front wiper
1. Wiper blade
4. Front washer pump
7. Washer inlet pipe
[B]: Rear wiper
2. Wiper arm
5. Rear washer pump
8. Washer hose
[C]: Washer
3. Wiper motor
6. Washer tank
9. Washer nozzle
10. Wiper link
BODY ELECTRICAL SYSTEM 8-11
Washer pump
Removal
1) Disconnect negative (–) cable at battery.
2) Remove front left side fender lining.
3) Remove washer tank fitting nuts (1) and clip.
4) Turn washer inlet pipe (2) to the arrow direction (3), and then
pull it out.
1
3
2
1
5) Disconnect pump lead wire connector, hoses and side turn
signal lamp connector.
6) Remove washer tank.
7) Remove washer pump from washer tank (1).
1
2. Front washer pump
3. Rear washer pump
3
2
Inspection
Connect battery (+) and (–) terminals to pump (+) and (–) terminals respectively to check pumping rate.
Check for both front and rear washer pump.
Pumping Rate
Front washer pump
: more than 1.0 l/min (2.1 US pt./min, 1.76 Imp pt./min)
Rear washer pump
: more than 1.0 l/min (2.1 US pt./min, 1.76 Imp pt./min)
Installation
Reverse removal procedure for installation.
8-12 BODY ELECTRICAL SYSTEM
Power Door Lock System (If Equipped)
Power door lock system circuit inspection
1) Disconnect negative (–) cable at battery.
[A]
5 4
12 11 10 9
3
2 1
8
7 6
1
2) Disconnect door lock controller coupler (1).
3) Confirm that all doors are unlocked. Connect battery positive
(+) and negative (–) terminals to door lock controller coupler
terminals and check power door lock operation as follows.
If it does not operate as specified, repair applicable circuit or
check actuator. If it operates as specified, go to next step.
Power door lock operation for vehicle:
Step
[B]
TERMINAL
10
OPERATION
11
1
UNLOCK
2
LOCK
LOCK
UNLOCK
[A]: Step 1: Lock operation check
5 4
12 11 10 9
3
2 1
8
7 6
[B]: Step 2: Unlock operation check
1
1. Power door lock controller coupler viewed
from harness side
4) Connect negative (–) cable to battery.
5 4
12 11 10 9
3
2 1
8
7 6
V
1
5) Check that the voltage and continuity between the following
terminals and body ground are specifications under each
conditions.
If check result is not as specified, repair circuit.
If check result is OK, recheck power door lock system as follows.
a) Substitute a known-good door lock controller.
b) Recheck power door lock system circuit.
1: Power door lock controller coupler viewed
from harness side
BODY ELECTRICAL SYSTEM 8-13
Terminal
Circuit
7
Main power supply
8
9
12
Specification
Condition
10 – 14 V
–
Driver side door knob switch is lock
Continuity
position.
Driver side door knob switch lock signal
circuit
Driver side door knob switch is unlock
No continuity
position.
Driver side door knob switch is unlock
Continuity
position.
Driver side door knob switch unlock signal circuit
Driver side door knob switch is lock
No continuity
position.
Ground
0–1V
–
8-14 BODY ELECTRICAL SYSTEM
IMMOBILIZER CONTROL SYSTEM 8G2-1
SECTION 8G2
6E1
IMMOBILIZER CONTROL SYSTEM
WARNING:
For vehicles equipped with a Supplemental Restraint (Air Bag) System:
• Service on and around the air bag system components or wiring must be performed only by an
authorized SUZUKI dealer. Refer to “Air Bag System Components and Wiring Location View” under
“General Description” in air bag section in order to confirm whether you are performing service on
or near the air bag system components or wiring. Please observe all WARNINGs and “Service Precautions” under “On-Vehicle Service” in air bag system section before performing service on or
around the air bag system components or wiring. Failure to follow WARNINGs could result in unintentional activation of the system or could render the system inoperative.
Either of these two conditions may result in severe injury.
• Technical service work must be started at least 90 seconds after the ignition switch is turned to the
“LOCK” position and the negative cable is disconnected from the battery. Otherwise, the system
may be activated by reserve energy in the Sensing and Diagnostic Module (SDM).
7A2
7B
CONTENTS
General Description ..................................... 8G2-2
Immobilizer Control System Description .... 8G2-2
Immobilizer Control System Wiring Circuit
Diagram...................................................... 8G2-2
Immobilizer Control System Components
Location...................................................... 8G2-3
On-Board Diagnostic System
Description ................................................. 8G2-3
Diagnosis ...................................................... 8G2-4
Precautions in Diagnosing Troubles .......... 8G2-4
Precautions for Replacing ECM or Immobilizer
Control Module ........................................... 8G2-4
Diagnostic Flow Table ................................ 8G2-5
Diagnostic Trouble Code (DTC) Check...... 8G2-6
Diagnostic Trouble Code (DTC)
Clearance ................................................... 8G2-6
Diagnostic Trouble Code (DTC) Table ....... 8G2-7
Scan Tool Data .......................................... 8G2-7
Inspection of Immobilizer Control Module
and Its Circuits ........................................... 8G2-8
DTC 16: Communication Line Between
Immobilizer Control Module and Coil
Antenna Shorted to Ground Circuit or
Open ........................................................ 8G2-10
DTC 21: Communication Line Between
Immobilizer Control Module and Coil
Antenna Shorted to Power Circuit.............8G2-12
DTC 70: Immobilizer Control Module
Internal Failure ..........................................8G2-12
General Troubleshooting of Immobilizer
Control System .........................................8G2-13
On-vehicle Service......................................8G2-15
Precautions in Handling Immobilizer
Control System .........................................8G2-15
Immobilizer Control Module Removal
and Installation..........................................8G2-15
Coil Antenna Removal and Installation .....8G2-16
Coil Antenna Inspection ............................8G2-16
Registration Procedure of Immobilizer
Control System Components ....................8G2-17
Procedure to register ignition key..........8G2-17
Procedure after Immobilizer Control
Module replacement..............................8G2-17
Procedure for ECM replacement...........8G2-17
Special Tools...............................................8G2-18
8C1
8C1
9
8G2
8G2-2 IMMOBILIZER CONTROL SYSTEM
General Description
Immobilizer Control System Description
The immobilizer control system is an anti-theft device that immobilizes the vehicle. It stops the engine from
working and prevents the vehicle from being stolen. It mainly consists of the following components.
• Engine Control Module (ECM)
• Immobilizer Control Module
• Coil antenna
• Ignition key with the built-in transponder
The transponder code is in the built-in transponder in the ignition key. And, it is registered with Immobilizer Control Module. Basically, when the transponder code in the built-in transponder does not match with the one registered with Immobilizer Control Module, ECM stops the operation of the fuel injector so as not to start up the
engine. Otherwise, when Immobilizer Control Module detects some trouble with the immobilizer control system,
ECM does the same operation.
Immobilizer Control System Wiring Circuit Diagram
7
BLK/YEL
BLK/RED
C48-29
BLU/BLK
C48-24
BLK/WHT
E17-11
E17-31
PNK/GRN
8
C48-31
6
3
A
WHT
C48-32
E17-25
BLK/WHT
11
BLK
PPL/WHT
4
BLK
G46-15
G46-12
5
30A
2
WHT
A
60A 60A
2
BLK/WHT
G46-16
9
WHT
PNK/GRN
G46-13
BLK/ORN
G46-18
2
G46-11
G46-17
BLK
BLU
1
80A
G47-2
10
WHT
G47-4
G47-1
BLK
1. Battery
5. “DOME” fuse (15 A)
2. Fuse
6. Ignition switch
10. Coil antenna
9. Immobilizer Control Module
3. “IG-COIL METER” fuse (15 A)
7. Main relay
11. Data link connector (DLC)
4. “IMMOBI” fuse (10 A)
8. ECM
IMMOBILIZER CONTROL SYSTEM 8G2-3
Immobilizer Control System Components Location
[A]
[B]
1
3
4
2
5
[A]: Engine room
1. ECM
3. Coil antenna
[B]: Inside of a vehicle
2. Immobilizer Control Module
4. Data link connector (DLC)
5. Ignition key
On-Board Diagnostic System Description
Immobilizer Control Module diagnoses if there is any trouble with
the immobilizer control system. In detail, Immobilizer Control
Module diagnoses if a communication line between Immobilizer
Control Module and coil antenna is normal. When Immobilizer
Control Module detects any trouble with the line, ECM stops the
operation of the fuel injector. The diagnostic information is stored
as the diagnostic trouble code (DTC) in Immobilizer Control Module. To read the diagnostic information, use SUZUKI scan tool
referring to “Diagnostic Trouble Code (DTC) Check” in this section.
8G2-4 IMMOBILIZER CONTROL SYSTEM
Diagnosis
Immobilizer Control Module has on-board diagnostic system. Investigate what the trouble is by referring to
“Diagnostic Flow Table” and “Diagnostic Trouble Code (DTC) Check” in this section.
Precautions in Diagnosing Troubles
• Before confirming diagnostic trouble code (DTC), do not disconnect connector from Immobilizer Control
Module, battery cable from battery, ground wire harness or main fuse.
Such disconnection will erase DTC stored in Immobilizer Control Module.
• DTC stored in Immobilizer Control Module memory can be cleared as well as checked by using SUZUKI
scan tool. Before using SUZUKI scan tool, read its operator’s manual carefully to know what functions are
available and how to use it.
• Be sure to read “Precautions for Electrical Circuit Service” in Section 0A before inspection and observe what
is written there.
• The data of immobilizer control system is registered with ECM. The data cannot be reprogrammed and is
peculiar to each vehicle. Therefore, check for immobilizer control system using the known-good ECM
equipped with another vehicle cannot be performed.
Precautions for Replacing ECM or Immobilizer Control Module
• When Immobilizer Control Module is replaced, including when replaced because rechecking by using a
known-good Immobilizer Control Module is necessary during trouble diagnosis, ignition keys must be registered with the known-good Immobilizer Control Module by performing procedure described in “Procedure
After Immobilizer Control Module Replacement” in this section.
• Before replacing ECM, be sure to read “ECM Registration” and “Engine Control Module (ECM) Removal and
Installation” carefully in Section 6E2. And then, follow the instructions described in them.
IMMOBILIZER CONTROL SYSTEM 8G2-5
Diagnostic Flow Table
Perform the flowchart below when the engine can not be started up.
Step
Action
1
Check if any diagnostic trouble code (DTC) is
detected in ECM referring to “DTC Check” in
Section 6-2.
Is any DTC detected?
2
3
4
Yes
No
Go to Step 2.
Perform troubleshooting
referring to the corresponding flowchart in
Section 6-2, and then
start engine. If engine
does not start, go to Step
2.
Go to Step 3.
Perform troubleshooting
Check if any diagnostic trouble code (DTC) is
referring to the corredetected in Immobilizer Control Module referring to “Diagnostic Trouble Code (DTC) Check” sponding flowchart in this
section, and then start
in this section.
engine. If engine does not
Is any DTC detected?
start, go to Step 3.
Use ignition key with builtCheck if transponder code is detected by Immo- Go to Step 4.
in transponder, which is
bilizer Control Module using “Data List” mode of
registered with Immobidiagnostic software for SUZUKI scan tool.
lizer Control Module.
NOTE:
Then, start engine. If
To know the definitions of SUZUKI scan tool
engine does not start, go
data, refer to “Scan Tool Data” in this secto Step 4.
tion.
Is transponder code detected by Immobilizer
Control Module?
Perform “General Trouble- Use ignition key with builtCheck if transponder code in ignition key is
in transponder, which is
matched with the one registered with Immobi- shooting of Immobilizer
registered with Immobilizer Control Module by using “Data List” mode Control System” in this
lizer Control Module. Othsection, and then start
of diagnostic software for SUZUKI scan tool.
engine. If engine does not erwise, register new
NOTE:
To know the definitions of SUZUKI scan tool start, go to “Engine Diag- ignition keys with Immobidata, refer to “Scan Tool Data” in this sec- nostic Flow Table” in Sec- lizer Control Module referring to “Procedure to
tion 6-2.
tion.
Register Ignition Key” in
Is transponder code matched with the one of
this section.
registered in Immobilizer Control Module?
Then, start engine. If
engine does not start, go
to “Engine Diagnostic
Flow Table” in Section 62.
8G2-6 IMMOBILIZER CONTROL SYSTEM
Diagnostic Trouble Code (DTC) Check
1) Prepare SUZUKI scan tool.
2) With ignition switch OFF position, connect SUZUKI scan tool
to data link connector (DLC) (1) located under instrument
panel at driver's seat side.
Special tool
(A): SUZUKI scan tool
1
(A)
3) Turn ignition switch to ON position.
4) Read DTC according to instructions displayed on SUZUKI
scan tool.
If communication between SUZUKI scan tool and Immobilizer Control Module can not be established, check if
SUZUKI scan tool is communicable it to immobilizer control
system of another vehicle. If communication is established,
SUZUKI scan tool is in good condition. Then, check DLC and
serial data line (circuit) in the vehicle with which communication can not be established.
5) After completing the check, turn ignition switch to OFF position, and then disconnect SUZUKI scan tool from DLC.
Diagnostic Trouble Code (DTC) Clearance
1) Connect SUZUKI scan tool to data link connector (DLC)
located under instrument panel at driver’s seat side.
2) Turn ignition switch to ON position.
3) Clear DTC according to instructions displayed on SUZUKI
scan tool.
4) After completing the clearance, turn ignition switch to OFF
position, and then disconnect SUZUKI scan tool from DLC.
IMMOBILIZER CONTROL SYSTEM 8G2-7
Diagnostic Trouble Code (DTC) Table
DTC No.
16
21
70
Detected Item
Communication line between Immobilizer
Control Module and coil antenna shorted to
ground circuit or open
Communication line between Immobilizer
Control Module and coil antenna shorted to
power circuit
Immobilizer Control Module internal failure
Detecting Condition
Communication line between Immobilizer Control Module and coil antenna is shorted to
ground circuit or open.
Communication line between Immobilizer Control Module and coil antenna is shorted to power
circuit.
Some internal failure has occurred in Immobilizer Control Module.
Scan Tool Data
As the data value given below are standard values estimated on the basis of values obtained from the normally
operating vehicles by using SUZUKI scan tool, use them as reference values. Even when the vehicle is in good
condition, there may be cases where the checked value does not fall within normal conditions and reference values. Therefore, judgement as abnormal should not be made by checking with there data alone.
Also, conditions in the table below that can be checked by SUZUKI scan tool are those detected by Immobilizer
Control Module and output from Immobilizer Control Module as commands.
Scan Tool Data
IGNITION SWITCH
TRANSPONDER
TRANS CODE
SYSTEM
LEARNING MODE
TRANS CODE REG
Vehicle Condition
Ignition switch at ON position
Ignition switch at ON position
Ignition switch at ON position
Ignition switch at ON position
Ignition switch at ON position
Ignition switch at ON position
Normal Condition/
Reference Values
ON
DETECTED
MATCHED
UNPROTECTED
LOCKED
RGSTD
Scan Tool Data Definitions
IGNITION SWITCH
ON: Ignition switch at ON position
OFF: Ignition switch at OFF position
TRANSPONDER
DETECTED: Transponder code in ignition key is detected by Immobilizer Control Module.
NOT DETECTED: Transponder code in ignition key is not detected by Immobilizer Control Module.
TRANS CODE
MATCHED: Transponder code in ignition key matches with the one registered with Immobilizer Control Module.
NOT MATCHED: Transponder code in ignition key does not match with the one registered with Immobilizer Control Module.
SYSTEM
PROTECTED: The immobilizer control system is protecting the engine not to be started up. Therefore, the
engine can not be started up.
UNPROTECTED: The immobilizer control system is allowing the engine to be started up. Therefore, the engine
can be started up.
8G2-8 IMMOBILIZER CONTROL SYSTEM
LEARNING MODE
LOCKED: Registration of ignition key with Immobilizer Control Module is not allowed.
UNLOCKED: Registration of ignition key with Immobilizer Control Module is allowed.
TRANS CODE REG
NOT RGSTD: The transponder code is not registered with Immobilizer Control Module.
RGSTD: The transponder code is registered with Immobilizer Control Module.
Inspection of Immobilizer Control Module and Its Circuits
Voltage Inspection
G46
1
2
Immobilizer Control Module (1) can be checked at wiring connector (2) by measuring voltage.
CAUTION:
Immobilizer Control Module can not be checked by itself. It is strictly prohibited to connect voltmeter
or ohmmeter to Immobilizer Control Module with coupler disconnected from it.
NOTE:
As the battery voltage affects each terminal voltage, confirm that it is 11 V or more when ignition
switch is turned to ON position.
IMMOBILIZER CONTROL SYSTEM 8G2-9
Connector
Terminal
11
BLU
Circuit
Normal
Voltage
Communication line between
coil antenna and Immobilizer
Control Module
About 12.0 V
Serial data line for SUZUKI
12 PNK/GRN
scan tool
About 12.0 V
0.0 V
G46
13 PNK/GRN
15
16
17
18
Serial data line for SUZUKI
scan tool
Communication line between
PPL/WHT ECM and Immobilizer Control Module
BLK/WHT Ignition switch signal
BLK
WHT
Ground
Power supply
Reference waveform
Measurement terminal
Oscilloscope settings
CH1: G46-15 to G46-17
CH1: 5 V/DIV
TIME: 100 ms/DIV
Measurement condition Ignition switch at ON position
About 12.0 V
0.0 V
See reference
waveform
below.
0.0 V
About 12.0 V
0.0 V
0.0 V
12.0 V
Condition
Always
Ignition switch at ON position
and SUZUKI scan tool connected to data link connector
Ignition switch at OFF position
Ignition switch at ON position
and SUZUKI scan tool connected to data link connector
Ignition switch at OFF position
Ignition switch at ON position
Ignition switch at OFF position
Ignition switch at ON position
Ignition switch at OFF position
Always
Always
8G2-10 IMMOBILIZER CONTROL SYSTEM
DTC 16: Communication Line Between Immobilizer Control Module and Coil
Antenna Shorted to Ground Circuit or Open
DTC Detecting Condition and Trouble Area
•
•
•
•
•
•
•
•
DTC Detecting Condition
Shorted to ground circuit or open in communication
line between Immobilizer Control Module and coil
antenna
Related fuse(s) blown
Power circuit for coil antenna faulty
Ground circuit for coil antenna faulty
Poor connection at Immobilizer Control Module
connector
Poor connection at coil antenna connector
Coil antenna faulty
Immobilizer Control Module faulty
•
•
•
•
•
•
•
•
Trouble Area
Communication line between Immobilizer Control
Module and coil antenna
Related fuse(s)
Power circuit for coil antenna
Ground circuit for coil antenna
Connection at Immobilizer Control Module connector
Connection at coil antenna connector
Coil antenna
Immobilizer control Module
Troubleshooting
Step
Action
1
Fuse check
1) Check if any related fuse is blown.
Is any fuse blown?
2
Check for poor connection of communication
line between Immobilizer Control Module and
coil antenna
1) Disconnect Immobilizer Control Module
connector referring to “Immobilizer Control
Module Removal and Installation” in this
section.
2) Disconnect coil antenna connector referring to “Coil Antenna Removal and Installation” in this section.
3) Check if wire connections are normal at
“G46-11” wire terminal at Immobilizer Control Module connector and “G47-2” wire terminal at coil antenna connector.
Is each wire connection normal?
3
Check for short to ground circuit in communication line between Immobilizer Control Module
and coil antenna
1) Check resistance between “G46-11” wire
terminal at Immobilizer Control Module connector and body ground.
Is resistance more than 1 MΩ?
Yes
Replace blown fuse(s)
with new one(s).
No
Go to Step 2.
Go to Step 3.
Repair poor connection(s).
Go to Step 4.
Repair short to ground circuit in communication line
between Immobilizer Control Module and coil
antenna.
IMMOBILIZER CONTROL SYSTEM 8G2-11
Step
Action
4
Check for open in communication line between
Immobilizer Control Module and coil antenna
1) Check resistance between “G46-11” wire
terminal at Immobilizer Control Module connector and “G47-2” wire terminal at coil
antenna connector.
Is resistance infinite?
5
Check for power circuit for coil antenna
1) Connect connector to coil antenna.
2) With ignition switch at ON position, check
voltage between “G47-4” wire terminal at
coil antenna connector and body ground.
Is it about 12 V?
6
Check for ground circuit for coil antenna
1) With ignition switch at ON position, check
voltage between “G47-1” terminal at wire
terminal at coil antenna connector and body
ground.
Is it 0 V?
7
Coil antenna check
1) Remove coil antenna referring to “Coil
Antenna Removal and Installation” in this
section.
2) Inspect coil antenna referring to “Coil
Antenna Inspection” in this section.
Is it normal?
Yes
No
Repair open in communi- Go to Step 5.
cation line between Immobilizer Control Module and
coil antenna.
Go to Step 6.
Repair open in power circuit.
Go to Step 7.
Repair open in ground circuit.
Replace Immobilizer Con- Replace coil antenna with
trol Module with new one new one.
referring to “Immobilizer
Control Module Removal
and Installation” in this
section. And then, perform key registration referring to “Procedure after
Immobilizer Control module Replacement” in this
section.
8G2-12 IMMOBILIZER CONTROL SYSTEM
DTC 21: Communication Line Between Immobilizer Control Module and Coil
Antenna Shorted to Power Circuit
DTC Detecting Condition and Trouble Area
DTC Detecting Condition
Trouble Area
Short to power circuit in communication line between Communication line between Immobilizer Control ModImmobilizer Control Module and coil antenna
ule and coil antenna
Troubleshooting
Step
Action
1
Check for short to power circuit in communication line between Immobilizer Control Module
and coil antenna
1) With ignition switch at ON position, check
voltage between “G46-11” wire terminal at
Immobilizer Control Module and body
ground.
Is it more than 12 V?
2
Coil antenna check
1) Remove coil antenna referring to “Coil
Antenna Removal and Installation” in this
section.
2) Inspect coil antenna referring to “Coil
Antenna Inspection” in this section.
Is it normal?
Yes
No
Repair short to power cir- Go to Step 2.
cuit in communication line
between Immobilizer Control Module and coil
antenna.
Replace Immobilizer Con- Replace coil antenna with
trol Module with new one new one.
referring to “Immobilizer
Control Module Removal
and Installation” in this
section. And then, perform key registration referring to “Procedure after
Immobilizer Control module Replacement” in this
section.
DTC 70: Immobilizer Control Module Internal Failure
DTC Detecting Condition and Trouble Area
DTC Detecting Condition
Internal fault in Immobilizer Control Module
Trouble Area
Immobilizer Control Module
Troubleshooting
1) Replace Immobilizer Control Module with new one referring to “Immobilizer Control Module Removal and
Installation” in this section.
2) Register ignition key(s) with Immobilizer control Module referring to “Procedure to Register Ignition Key” in
this section.
IMMOBILIZER CONTROL SYSTEM 8G2-13
General Troubleshooting of Immobilizer Control System
This troubleshooting has to performed in case that any DTC is not detected by Immobilizer Control Module and
the engine cannot be started up.
Possible Causes
•
•
•
•
•
•
•
•
•
Open or short circuit in communication line between Immobilizer Control Module and ECM
Related fuse(s) blown
Ground circuit for coil antenna faulty
Power circuit for Immobilizer Control Module faulty
Ground circuit for Immobilizer Control Module faulty
Poor connection at Immobilizer Control Module connector
Poor connection at ECM connector
Internal fault of Immobilizer Control Module
Internal fault of ECM
Troubleshooting
Step
Action
1
Does “Diagnostic Flow Table” in this section
performed?
2
Fuse Check
1) Check if any related fuse is blown.
Is any fuse blown?
3
Check for poor connection of communication
line between Immobilizer Control Module and
ECM
1) Disconnect Immobilizer Control Module
connector referring to “Immobilizer Control
Module Removal and Installation” in this
section.
2) Disconnect ECM connectors referring to
“Engine Control Module (ECM) Removal
and Installation” in Section 6E2.
3) Check if wire connections are normal at
“G46-15” wire terminal at Immobilizer Control Module connector and “E17-25” wire
terminal at ECM connector
Is each wire connection normal?
4
Check for short to power circuit in communication line between Immobilizer Control Module
and ECM
1) Connect Immobilizer Control Module and
ECM connectors.
2) With ignition switch at ON position, check
voltage between “E17-25” wire terminal at
ECM connector and body ground.
Is it about 12 V?
Yes
Go to Step 2.
Replace blown fuse(s)
with new one(s).
Go to Step 4.
No
Perform “Diagnostic Flow
Table” in this section.
Go to Step 3.
Repair poor connection(s).
Repair short to power cir- Go to Step 5.
cuit in communication line
between Immobilizer Control Module and ECM.
8G2-14 IMMOBILIZER CONTROL SYSTEM
Step
Action
5
Check for short to ground circuit in communication line between Immobilizer Control Module
and ECM
1) Disconnect Immobilizer Control Module and
ECM connectors.
2) Check resistance between “G46-15” wire
terminal at Immobilizer Control Module connector and body ground.
Is resistance more than 1 MΩ?
6
Check for power circuit for coil antenna
1) With ignition switch at ON position, check
voltage between “G47-4” wire terminal at
coil antenna connector and body ground.
Is it about 12 V?
7
Check for power circuit for Immobilizer Control
Module
1) With ignition switch at ON position, check
voltage between “G46-18” wire terminal at
Immobilizer Control Module connector and
body ground.
Is it about 12 V?
8
Check for ground circuit for Immobilizer Control
Module
1) With ignition switch at ON position, check
voltage between “G46-17” wire terminal at
Immobilizer Control Module connector and
body ground.
Is it 0 V?
9
Check for open in communication line between
Immobilizer Control Module and ECM
1) Check resistance between “G46-15” wire
terminal at Immobilizer Control Module connector and “E17-25” wire terminal at ECM
connector.
Is resistance infinite?
10 Check for fault of Immobilizer Control Module
1) Perform voltage check referring to “Inspection of Immobilizer Control Module and Its
Circuits” in this section.
Is each terminal voltage normal?
Yes
Go to Step 6.
No
Repair short to ground circuit in communication line
between Immobilizer Control Module and ECM.
Go to Step 7.
Repair open in power circuit.
Go to Step 8.
Repair open in ground circuit, and then start
engine. If engine does not
start, go to Step 9.
Go to Step 9.
Repair open in ground circuit.
Repair open in communi- Go to Step 10.
cation line between Immobilizer Control Module and
ECM.
Replace Immobilizer ConPerform “Procedure for
ECM Replacement in this trol Module with new one
referring to “Immobilizer
section.
Control Module Removal
and Installation” in this
section. And then, perform key registration referring to “Procedure after
Immobilizer Control Module Replacement” in this
section.
IMMOBILIZER CONTROL SYSTEM 8G2-15
On-vehicle Service
Precautions in Handling Immobilizer Control
System
• Do not turn ignition switch to ON position with ignition key
with built-in transponder put together with another one or
placed quite close to another one. Or, the system may detect
abnormal condition and prevent engine from running.
• Do not turn ignition switch to ON position by using ignition
key with built-in transponder with any type of metal wound
(1) around its grip (housing) or in contact with it. Or, the system may detect abnormal condition and prevent engine from
starting.
• Do not leave ignition key with built-in transponder where high
temperature is anticipated. High temperature will cause transponder in ignition key to be abnormal or damaged.
• Do not turn ignition switch to ON position (II) with a radio
antenna (2) placed near coil antenna or its harness to Immobilizer Control Module. Or, the system may detect abnormal
condition and prevent engine from starting.
Immobilizer Control Module Removal and
Installation
Removal
1) Disconnect negative (–) cable at battery.
2) Disable air bag system referring to “Disabling Air Bag System” in section 10B.
3) Remove glove box from instrument panel.
2
3
3
4) Remove a connector (1) from Immobilizer Control Module
(2).
5) Remove two screws (3), and then remove Immobilizer Control Module from vehicle body.
1
Installation
Reverse removal procedure noting the following instruction.
• Enable air bag system referring to “Enabling Air Bag System”
in Section 10B.
8G2-16 IMMOBILIZER CONTROL SYSTEM
Coil Antenna Removal and Installation
Removal
1) Disconnect negative (–) cable at battery.
2) Disable air bag system referring to “Disabling Air Bag System” in section 10B.
3) Remove driver air bag (inflator) module referring to “Driver
Air Bag (inflator) module (for Vehicle with Air Bag System)” in
Section 3C.
4) Remove steering wheel referring to “Steering Wheel” in Section 3C.
5) Remove steering hole cover.
6) Remove steering column upper and lower covers.
7) Remove contact coil and combination switch referring to
“Combination Switch (for Vehicle without Air Bag System)/
Contact Coil and Combination Switch Assembly (for Vehicle
with Air Bag System)” in Section 3C.
8) Remove connector (1) from coil antenna (2), and then
remove coil antenna from steering lock assembly.
1
2
Installation
Reverse removal procedure noting the following instruction.
• Enable air bag system referring to “Enabling Air Bag System”
in Section 10B.
Coil Antenna Inspection
Inspection
3
2
1
1) Check for continuity between “WHT” (2) and “BLU” (1) terminals by connecting tester’s positive prove to “WHT” terminal
and negative prove to “BLU” terminal. If there is no continuity, replace coil antenna with new one. Otherwise, go to the
next step.
2) Check for continuity between “BLU” (1) and “BLK” (3) terminals by connecting tester’s positive prove to “BLU” terminal
and negative prove to “BLK” terminal. If there is no continuity,
replace coil antenna with new one. Otherwise, go to the next
step.
3) Check for continuity between “WHT” (2) and “BLK” (3) terminals by connecting tester’s positive prove to “WHT” terminal
and negative prove to “BLK” terminal. If there is no continuity,
replace coil antenna with new one.
IMMOBILIZER CONTROL SYSTEM 8G2-17
Registration Procedure of Immobilizer Control System Components
When replacing ignition key, Immobilizer Control Module, and/or
ECM, perform the following procedures.
Procedure to register ignition key
1) Register ignition keys with built-in transponder with Immobilizer Control Module performing “Immobilizer Key Coding”
mode of diagnostic software for SUZUKI scan tool. For your
details, refer to “SUZUKI Tech2 Operator’s Manual”.
NOTE:
Maximum two ignition keys with built-in transponder can
be registered with Immobilizer Control Module. And,
each transponder code has to be same. Therefore, if one
of two keys already registered with Immobilizer Control
Module is lost or broken and if you would like to register
one new key, it is not possible to register it with Immobilizer Control Module. If you would like to have two keys
registered with Immobilizer Control Module, register two
new keys with Immobilizer Control Module.
2) Replace ECM with new one referring to “Procedure for ECM
Replacement” in this section.
NOTE:
Immobilizer control system data is registered with ECM.
The code is calculated by using the transponder code in
the ignition key and cannot be rewritten. Therefore, ECM
has to be replaced with new one when registering new
ignition key with Immobilizer Control Module.
Procedure after Immobilizer Control Module replacement
Register ignition keys with built-in transponder with Immobilizer
Control Module performing “Immobilizer Key Coding” mode of
diagnostic software for SUZUKI scan tool. For your details, refer
to “SUZUKI Tech2 Operator’s Manual”.
Procedure for ECM replacement
The following data are registered with ECM.
• Fuel injector calibration codes
• Immobilizer control system data
• Vehicle configurations
When ECM is replaced with new one, the above data have to be
registered with the new one. The registration procedure is
described in “ECM Registration” in Section 6E2. Therefore, perform “ECM Registration” in Section 6E2.
8G2-18 IMMOBILIZER CONTROL SYSTEM
Special Tools
Tech 2 kit (SUZUKI scan tool)
See NOTE below.
NOTE:
This kit includes the following items.
1. Tech 2, 2. PCMCIA card, 3. DLC cable, 4. SAE 16/19 adapter, 5. Cigarette cable,
6. DLC loopback adapter, 7. Battery power cable, 8. RS232 cable, 9. RS232 adapter,
10. RS232 loopback connector, 11. Storage case, 12. Power supply
BODY SERVICE 9-1
SECTION 9
BODY SERVICE
WARNING:
For vehicles equipped with Supplemental Restraint (Air Bag) System:
• Service on and around the air bag system components or wiring must be performed only by an
authorized SUZUKI dealer. Refer to “Air Bag System Components and Wiring Location View” under
“General Description” in air bag system section in order to confirm whether you are performing service on or near the air bag system components or wiring. Please observe all WARNINGS and “Service Precautions” under “On-Vehicle Service” in air bag system section before performing service
on or around the air bag system components or wiring. Failure to follow WARNINGS could result in
unintentional activation of the system or could render the system inoperative. Either of these two
conditions may result in severe injury.
• Technical service work must be started at least 90 seconds after the ignition switch is turned to the
“LOCK” position and the negative cable is disconnected from the battery. Otherwise, the system
may be activated by reserve energy in the Sensing and Diagnostic Module (SDM).
• When servicing vehicle body, if shock may be applied to air bag system component parts, remove
those parts beforehand. (Refer to Section 10B.)
6F1
6F2
6G
6H
6K
7A
7A1
7B1
7C1
7D
7E
7F
8A
8B
8C
8D
10A
10B
NOTE:
• Fasteners are important attaching parts in that they could affect the performance of vital components and systems, and/or could result in major repair expense. They must be replaced with one of
the same part number of with an equivalent part if replacement becomes necessary.
Do not use a replacement part of lesser quality or substitute a design. Torque values must be used
as specified during reassembly to assure proper retention of these parts.
• For the items with asterisk (*) in the “CONTENTS” below, refer to the same section of the service
Manual mentioned in “FOREWORD” of this manual.
10A
10B
10A
10B
9
CONTENTS
Glass and Windows .............................................. *
Front Door Glass ................................................. *
Front Door Window Regulator............................. *
Windowshield ...................................................... *
Quarter Window .................................................. *
Back Door Glass ................................................. *
Body Structure .................................................. 9-2
Front Door Assembly .......................................... *
Back Door Assembly ........................................... *
Under Body Dimensions ................................. 9-2
Body Dimensions ................................................ *
Instrumentation and Driver Information ............. *
Instrument Panel ................................................. *
Seats ...................................................................... *
Front Seat ........................................................... *
Rear Seat............................................................ *
Paint and Coatings ............................................... *
Anti-Corrosion Treatment.................................... *
Metal Replacement Parts Finishing .................... *
Security and Locks ............................................... *
Front Door Lock Assembly.................................. *
Back Door Lock Assembly .................................. *
Exterior and Interior Trim..................................... *
Splash Guard ...................................................... *
Roof Rail (If Equipped)........................................ *
Tightening Torque Specification ......................... *
9-2 BODY SERVICE
Body Structure
Under Body Dimensions
a, a’. 1st mounting installation hole
b. Lateral rod rear section installation hole
c, c’. Engine mounting installation hole
f, f’. Front suspension arm installation hole
g, g’. Zig hole
h, h’. Rear suspension arm installation hole
k. Lateral rod front section installation hole
l, l’. 4th mounting installation hole
“A”: Standard line
d, d’. Front shock absorber installation hole
i, i’. 3rd mounting installation hole
“B”: Standard line
e, e’. 2nd mounting installation hole
j, j’. Rear shock absorber installation hole
“C”: Standard line
BODY SERVICE 9-3
Projection Dimension
Measurement
Position
a
b
c
d
e
f
g
h
i
j
k
l
Length from line “A”
mm (in.)
0 (0)
285 (11.22)
379 (14.92)
532 (20.94)
920 (36.22)
1025 (40.35)
1215 (47.83)
1900 (74.80)
2098 (82.60)
2719 (107.05)
2765 (108.86)
3065 (120.67)
Length from line “B”
mm (in.)
367 (14.45)
156 (6.14)
312 (12.28)
368 (14.49)
113 (4.45)
0 (0)
36 (1.42)
16 (0.63)
182 (7.17)
370 (14.57)
101 (3.98)
325 (12.80)
Length from line “C”
mm (in.)
425 (16.73)
395 (15.55)
242 (9.53)
390 (15.35)
520 (20.47)
356 (14.02)
355 (13.98)
481 (18.94)
553 (21.77)
226 (8.90)
481 (18.94)
523 (20.59)
Measurement Dimension
Measurement
Position
a – a’
a – e’
a–e
b – e’
b–e
c – c’
d – d’
d – e’
d–e
e – e’
e–f
e–g
e–i
f – e’
f – f’
Length
mm (in.)
850 (33.46)
1343 (52.87)
959 (37.76)
649 (25.55)
1115 (43.90)
495 (19.49)
780 (30.71)
1022 (40.24)
482 (18.98)
1040 (40.94)
225 (8.86)
347 (13.66)
1180 (46.46)
889 (35.00)
712 (28.03)
Measurement
Position
g – e’
g – g’
h – h’
h – i’
h–i
i – i’
i–j
i–k
i – e’
j – i’
k – i’
j – j’
l–i
l – i’
l – l’
Length
mm (in.)
927 (36.50)
710 (27.95)
962 (37.87)
1066 (41.97)
268 (10.55)
1106 (43.54)
727 (28.62)
676 (26.61)
1595 (62.80)
1014 (39.92)
1233 (48.54)
452 (17.80)
978 (38.50)
1454 (57.24)
1046 (41.18)
9-4 BODY SERVICE
AIR BAG SYSTEM 10B2-1
SECTION 10B2
AIR BAG SYSTEM
WARNING:
• Service on or around the air bag system components or wiring must be performed only by an
authorized SUZUKI dealer. Please observe all WARNINGS and “Service Precautions” under “OnVehicle Service” in this section before performing service on or around the air bag system components or wiring. Failure to follow WARNINGS could result in unintended activation of the system or
could render the system inoperative. Either of these two conditions may result in severe injury.
• The procedures in this section must be followed in the order listed to disable the air bag system
temporarily and prevent false diagnostic trouble codes from setting. Failure to follow procedures
could result in possible activation of the air bag system, personal injury or otherwise unneeded air
bag system repairs.
CAUTION:
When fasteners are removed, always reinstall them at the same location from which they were
removed. If a fastener needs to be replaced, use the correct part number fastener for that application.
If the correct part number fastener is not available, a fastener of equal size and strength (or stronger)
may be used. Fasteners that are not reused, and those requiring thread-locking compound, will be
called out. The correct torque value must be used when installing fasteners that require it. If the above
conditions are not followed, parts or system damage could result.
6F1
6F2
6G
6H
6K
7A
7A1
7B1
7C1
7D
7E
7F
8A
8B
8C
8D
8E
9
NOTE:
For the items with asterisk (*) in the “CONTENTS” below, refer to the same section of the Service Manual mentioned in “FOREWORD” of this manual.
CONTENTS
General Description ....................................10B2-3
System Components and Wiring
Location View and Connectors .................10B2-3
System Wiring Diagram.............................10B2-4
Diagnosis .....................................................10B2-5
Diagnostic Trouble Code (DTC) .......................... *
Use of Special Tool ............................................. *
Intermittents and Poor Connections .................... *
Air Bag Diagnostic System Check....................... *
Air Bag Diagnostic System Check Flow
Table ................................................................... *
DTC Check.......................................................... *
DTC Clearance ................................................... *
DTC Table .................................................10B2-5
“AIR BAG” Warning Lamp Circuit Trouble
Diagnosis Table .................................................. *
“AIR BAG” warning lamp comes on
steady.............................................................. *
“AIR BAG” warning lamp does not
come on........................................................... *
“AIR BAG” warning lamp flashes .................... *
10B2
“AIR BAG” warning lamp can not
indicate flashing .............................................. *
SDM Serial Data Circuit Trouble
Diagnosis Table .................................................. *
DTC B1015 – Passenger Air Bag Initiator
Circuit Resistance High....................................... *
DTC B1016 – Passenger Air Bag Initiator
Circuit Resistance Low ....................................... *
DTC B1018 – Passenger Air Bag Initiator
Circuit Short to Ground ....................................... *
DTC B1019 – Passenger Air Bag Initiator
Circuit Short to Power Circuit.............................. *
DTC B1021 – Driver Air Bag Initiator
Circuit Resistance High....................................... *
DTC B1022 – Driver Air Bag Initiator
Circuit Resistance Low ....................................... *
DTC B1024 – Driver Air Bag Initiator
Circuit Short to Ground ....................................... *
DTC B1025 – Driver Air Bag Initiator
Circuit Short to Power Circuit.............................. *
10B2-2 AIR BAG SYSTEM
DTC B1032 – Power Source Voltage
Low ..................................................................... *
DTC B1035 – Forward Sensor Circuit
Open or Short to Power Circuit ................. 10B2-7
DTC B1036 – Forward Sensor Circuit
Short Between Two Wires or Short to
Ground ...................................................... 10B2-7
DTC B1041 – Driver Pretensioner Initiator
Circuit Resistance High....................................... *
DTC B1042 – Driver Pretensioner Initiator
Circuit Resistance Low ....................................... *
DTC B1043 – Driver Pretensioner Initiator
Circuit Short to Ground ....................................... *
DTC B1044 – Driver Pretensioner Initiator
Circuit Short to Power Circuit.............................. *
DTC B1045 – Passenger Pretensioner
Initiator Circuit Resistance High.......................... *
DTC B1046 – Passenger Pretensioner
Initiator Circuit Resistance Low........................... *
DTC B1047 – Passenger Pretensioner
Initiator Circuit Short to Ground .......................... *
DTC B1048 – Passenger Pretensioner
Initiator Circuit Short to Power Circuit ................. *
DTC B1051 – Frontal Crash Detected
(System Activation Command Outputted)........... *
DTC B1071 – Internal SDM Fault ....................... *
DTC B1013 – System Specifications
Different from SDM Specifications ...................... *
On-vehicle Service....................................10B2-10
Service Precautions ............................................ *
Service and diagnosis ..................................... *
Disabling air bag system..................................*
Enabling air bag system...................................*
Handling and storage.......................................*
Disposal ...........................................................*
Air bag wire harness and connector in
instrument panel harness, floor
harness and pretensioner harness ..... 10B2-10
Repairs and Inspections Required after
an Accident ............................................. 10B2-10
Accident with Deployment / Activation Component Replacement ....................... 10B2-10
Accident with or without Deployment /
Activation - Component Inspections ....... 10B2-11
Forward Sensor ...................................... 10B2-13
SDM.....................................................................*
Passenger Air Bag (Inflator) Module....................*
Driver Air Bag (Inflator) Module ...........................*
Contact Coil and Combination Switch
Assembly .............................................................*
Seat Belt Pretensioner.........................................*
Air Bag (Inflator) Module and Seat Belt
Pretensioner Disposal...........................................*
Deployment / Activation Outside of
Vehicle .................................................................*
Deployment / Activation Inside Vehicle................*
Deployed Air Bag (Inflator) Module and
Activated Seat Belt Pretensioner
Disposal ...............................................................*
Tightening Torque Specification............. 10B2-15
Special Tool ...........................................................*
AIR BAG SYSTEM 10B2-3
General Description
System Components and Wiring Location View and Connectors
1. Air bag harness in instrument panel harness
2. Air bag harness in floor harness
3. Air bag harness in seat belt pretensioner harness
8. Passenger air bag (inflator) module
9. SDM
10. Seat belt pretensioner (retractor assembly)
4. “Air bag” monitor coupler
11. Ground for air bag system
5. DLC
12. “AIR BAG” fuse in circuit fuse box
6. Contact coil assembly
13. Forward sensor
7. Driver air bag (inflator) module
10B2-4 AIR BAG SYSTEM
System Wiring Diagram
15
BLK/BLU
1
“G60”
6
4
“G69”
“G61”
“G70”
17
16
BLU
BLK/RED
G60-2
G60-10
GRN/RED
BLU
GRN
YEL
2
7
9
“G24”
5
8
G60-9
L1
3
WHT
L2
“G62”
BLU/RED
G60-4
G60-7
YEL/RED
5V
18
BLK
G60-8
BLK/ORN
PPL
13
YEL
G60-15
“L33”
12 V
10
“Q09”
“G63”
PNK/GRN
G60-14
G60-12
PNK
BRN
YEL
WHT
LT GRN
YEL/RED
BRN
PNK
LT GRN
WHT
“Q10”
19
5V
G60-11
RED
RED
BLU/YEL
BLU/YEL
G60-1
20
21
“E105”
“E98”
“G78”
BLK
G60-13
G60-5
G60-17
G60-6
YEL
YEL/RED
14
[A]:
“G41”
“G60”
[A]: Shorting bar
8. Data link connector (DLC)
1. To main fuse box
“L31”
“Q07”
“Q08”
16. Contact coil assembly
9. To circuit fuse box
2. Ignition switch
“L30”
17. Driver air bag (inflator) module
10. Ground on body
18. Passenger air bag (inflator) module
3. Circuit fuse box
11. Ground on engine block
19. Driver seat belt pretensioner
4. “METER” fuse
12. To ECM, TCM and ABS control module (if equipped)
20. Passenger seat belt pretensioner
5. “AIR BAG” fuse
13. “AIR BAG” monitor coupler
21. Forward sensor
6. “AIR BAG” warning lamp in combination meter
14. Ground for air bag system
7. Connection detection pin
15.
SDM
TERMINAL ARRANGEMENT OF SDM CONNECTOR “G60” VIEWED FROM HARNESS SIDE
1. SDM connector “G60”
SDM connector “G60” terminal description
TERMINAL
G60-1
G60-2
G60-3
G60-4
G60-5
G60-6
CIRCUIT
Forward sensor
High
“AIR BAG” warning lamp
–
Ignition switch (power source)
Passenger pretensioner
High
Low
TERMINAL
G60-11
G60-12
G60-13
G60-14
G60-15
G60-16
CIRCUIT
Driver pretensioner
Forward sensor
Data link connector (DLC)
Diagnosis switch
–
Low
High
Low
AIR BAG SYSTEM 10B2-5
G60-7
G60-8
G60-9
G60-10
Passenger air bag (inflator)
module
Driver air bag (inflator)
module
High
Low
Low
High
G60-17
G60-18
G60-19
G60-20
Ground
–
–
–
Diagnosis
WARNING:
To avoid deployment when troubleshooting the air bag system, do not use electrical test equipment
such as a battery powered or AC powered voltmeter, ohmmeter, etc., or any type of electrical equipment other than that specified in this manual. Do not use a non-powered probe type tester.
Instructions in this manual must be followed carefully, otherwise personal injury may result.
DTC Table
DTC
“AIR BAG” warning lamp
flashing pattern
NO.
MODE
Diagnosis
–
12
Normal
B1015
15
Resistance high
B1016
16
B1018
18
B1019
19
Short to power circuit
B1021
21
Resistance high
B1022
22
B1024
24
B1025
25
B1032
32
B1035
35
B1036
36
B1041
41
Resistance high
B1042
42
B1043
43
Driver preten- Resistance low
sioner circuit Short to ground
B1044
44
Passenger air
bag circuit
Driver air bag
circuit
–
Resistance low
Short to ground
Resistance low
Short to ground
Short to power circuit
Power source
Too low
voltage
Open or short to power circuit
Forward senShort between two wires or
sor circuit
short to ground
Short to power circuit
Diagnose trouble
according to
diagnostic flow
table corresponding to
each code No.
10B2-6 AIR BAG SYSTEM
DTC
“AIR BAG” warning lamp
flashing pattern
NO.
MODE
B1045
45
B1046
46
B1047
47
B1048
48
B1051
51
B1071
71
B1013
13
Diagnosis
Resistance high
Passenger
pretensioner
circuit
Resistance low
Short to ground
Short to power circuit
SDM
Frontal crash detected
Internal fault
SDM
Diagnose trouble
according to
diagnostic flow
table corresponding to
each code No.
Specifications different
between air bag system and
SDM
NOTE:
• When 2 or more codes are indicated, the lowest numbered code will appear first.
• Current DTC and history DTC can be identified by lighting and flashing of “AIR BAG” warning lamp
as follows. However, if a multiple number of DTC’s are set an even one of them is a current DTC,
“AIR BAG” warning lamp remains on after ignition switch is turned ON. Therefore, it is not possible
to identify any of them as to whether it is a current one or a history one. (But use of SUZUKI scan
tool will make identification possible.)
“AIR BAG” warning lamp after
ignition switch ON
“AIR BAG” warning lamp when
grounding diagnosis switch
Current DTC is set.
(Abnormality exists at present.)
History DTC is set only.
(Faulty condition occurred once
in the past but normal condition
is restored at present.)
Flashing 6 times and turns on.
Flashing 6 times and turns off.
Current DTC is displayed.
History DTC is displayed.
AIR BAG SYSTEM 10B2-7
DTC B1035 – Forward Sensor Circuit Open or Short to Power Circuit
DTC B1036 – Forward Sensor Circuit Short Between Two Wires or Short to
Ground
WIRING DIAGRAM
5V
1
RED
RED
BLU/YEL
BLU/YEL
“E105” “E98”
2
G60-1
G60-13
“G78”
BLK
G60-17
3
“G60”
1. Forward sensor
3. Ground for air bag system
2. SDM
CAUTION:
• Be sure to perform “Air Bag Diagnostic System Check” in this section before starting diagnosis
according to flow table.
• When measurement of resistance or voltage is required in this table, use a specified digital multimeter described in “Special Tool” in this section along with a correct terminal adapter from special
tool (Connector test adapter kit).
• When a check for proper connection is required, refer to “Intermittent and Poor Connections” in
this section.
• If there is open circuit in the air bag wire harness, connector or terminal is found damaged, replace
the wire harness, connector and terminal as an assembly.
DTC WILL SET WHEN
DTC B1035:
The voltage measured at forward sensor circuit (terminal G60-1) is above a specified value for specified time.
DTC B1036:
The voltage measured at forward sensor circuit (terminal G60-1) is below a specified value for specified time.
TABLE TEST DESCRIPTION
DTC B1035:
STEP 1: Check whether malfunction is in forward sensor.
STEP 2: Check if forward sensor circuit is open.
STEP 3: Check if forward sensor circuit is shorted to power circuit.
DTC B1036:
STEP 1: Check whether malfunction is in forward sensor.
STEP 2: Check if forward sensor circuit is shorted between two wires.
STEP 3: Check if forward sensor circuit is shorted to ground.
10B2-8 AIR BAG SYSTEM
DIAGNOSTIC FLOW TABLE
DTC B1035: FORWARD SENSOR CIRCUIT OPEN OR SHORT TO POWER CIRCUIT
Step
1
2
3
Action
1) Ignition switch OFF.
2) Disconnect driver air bag (inflator) module
connector, passenger air bag (inflator) module
connector, driver pretensioner module connector, and passenger pretensioner module
connector.
3) Disconnect forward sensor connector.
4) Check proper connection to forward sensor
connector at “RED” and “BLU/YEL” terminals.
5) If OK then measure resistance between terminals of forward sensor.
Is resistance 738 – 902 Ω?
1) Reconnect forward sensor connector.
2) Disconnect SDM connector “G60”.
3) Check proper connection to SDM connector at
terminals “G60-1” and “G60-13”.
4) If OK then measure resistance between terminals “G60-1” and “G60-13”.
Is resistance 738 – 902 Ω?
1) Disconnect forward sensor connector.
2) Measure voltage from “G60-1” terminal to
body ground and “G60-13” terminal to body
ground.
With ignition switch ON, are they 1V or less?
Yes
Go to step 2.
No
Replace forward sensor.
Go to step 3.
Repair high resistance or
open in “RED” and “BLU/
YEL” wire circuit
(between forward sensor and SDM).
Substitute a known-good Repair short from “RED”
SDM and recheck.
or “BLU/YEL” wire circuit
(between forward sensor and SDM) to power
circuit.
[A] Fig. for STEP 1 / [B] Fig. for STEP 2 / [C] Fig. for STEP 3
[A]
[B]
[C]
“G60-1”
“G60-1”
(A)
“G60-13”
(A)
Special tool
(A): 09932-76010
NOTE:
Upon completion of inspection and repair work, perform the following items.
• Reconnect all air bag system components, ensure all components are properly mounted.
• Clear diagnostic trouble codes referring to “DTC Clearance” in this section, if any.
• Repeat “Air Bag Diagnostic System Check” in this section to confirm that the trouble has been corrected.
AIR BAG SYSTEM 10B2-9
DTC B1036: FORWARD SENSOR CIRCUIT SHORT BETWEEN TWO WIRES OR SHORT TO GROUND
Step
1
2
3
Action
1) Ignition switch OFF.
2) Disconnect driver air bag (inflator) module
connector, passenger air bag (inflator) module connector, driver pretensioner module
connector, and passenger pretensioner
module connector.
3) Disconnect forward sensor connector.
4) Check proper connection to forward sensor
connector at “RED” and “BLU/YEL” terminals.
5) If OK then measure resistance between terminals of forward sensor.
Is resistance 738 – 902 Ω?
1) Disconnect SDM connector “G60”.
2) Check proper connection to SDM connector
at terminals “G60-1” and “G60-13”.
3) If OK then measure resistance between terminals “G60-1” and “G60-13”.
Is resistance infinity?
1) Measure resistance between “G60-1” terminal and body ground, “G60-13” terminal and
body ground.
Are resistances infinity?
Yes
Go to step 2.
No
Replace forward sensor.
Go to step 3.
Repair short from “RED”
wire circuit (between forward sensor and SDM) to
“BLU/YEL” wire circuit
(between forward sensor
and SDM).
Repair short from “RED”
or “BLU/YEL” wire circuit
(between forward sensor
and SDM) to ground.
Substitute a known-good
SDM and recheck.
[A] Fig. for STEP 1 / [B] Fig. for STEP 2 / [C] Fig. for STEP 3
[A]
[B]
[C]
“G60-1”
“G60-1”
(A)
“G60-13”
(A)
Special tool
(A): 09932-76010
NOTE:
Upon completion of inspection and repair work, perform the following items.
• Reconnect all air bag system components, ensure all components are properly mounted.
• Clear diagnostic trouble codes referring to “DTC Clearance” in this section, if any.
• Repeat “Air Bag Diagnostic System Check” in this section to confirm that the trouble has been corrected.
10B2-10 AIR BAG SYSTEM
On-vehicle Service
Air bag wire harness and connector in instrument
panel harness, floor harness and pretensioner harness
2
1
Air bag wire harness (1) is included in instrument panel harness,
main harness floor harness and pretensioner harness. The air
bag wire harness (1) can be identified easily as it is covered with
a yellow protection tube and it has yellow connectors. Be very
careful when handling it.
• When an open in air bag wire harness (1), damaged wire
harness, connector or terminal is found, replace wire harness, connectors and terminals as an assembly.
• When installing it, be careful so that the air bag wire harness
(1) is not caught or does not interfere with other parts.
• Make sure all air bag system grounding point (2) is clean and
ground is securely fastened for optimum metal-to-metal contact. Poor grounding can cause intermittent problems that
are difficult to diagnose.
Repairs and Inspections Required after an Accident
CAUTION:
• All air bag system components, including the electrical harness (component mounting points),
must be inspected after an accident. If any components are damaged or bent, they must be replaced
even if air bag system activation did not occur.
• Never use air bag system parts from another vehicle.
• Do not attempt to service the parts below. Service of these parts is by replacement only.
– Driver / Passenger air bag (inflator) module, Driver / Passenger seat belt pretensioner
– SDM
– Forward sensor
– Contact coil and combination switch assembly
– Air bag wire harness in instrument panel harness, floor harness and pretensioner harness.
• Proper operation of the air bag system requires that any repairs to the vehicle structure return it to
its original production configuration.
CAUTION:
After detecting one time of such collision as to meet deployment conditions, the SDM must not be
used. Refer to “Air Bag Diagnostic System Check” in this section when checking the SDM.
Accident with Deployment / Activation - Component Replacement
The following components must be replaced.
• Driver and passenger air bag (inflator) modules
• Driver and passenger seat belt pretensioners
• SDM
• Forward sensor
AIR BAG SYSTEM 10B2-11
Accident with or without Deployment / Activation - Component Inspections
Certain air bag system components must be inspected after any
crash, whether the air bag system activated or not.
Those components are:
• Steering column and shaft joints
– Check for length, damage and bend according to “Checking
Steering Column for Accident Damage” in Section 3C.
If any faulty condition is found in above checks, replace faulty
part.
• Steering column bracket and capsules
– Check for damage and bent.
If any faulty condition is found in above checks, replace faulty
part.
• Steering wheel and driver air bag (inflator) module
– Check for damage or air bag (inflator) module fitness.
– Check trim cover (pad surface) for cracks.
– Check wire harness and connector for damage or tightness.
If any faulty condition is found in above checks, replace faulty
part.
• Contact coil and combination switch assembly
– Check wire harness and connectors for damage or tightness.
– Check contact coil case for damage.
If any faulty condition is found in above checks, replace.
• SDM and SDM plate
– Check for external damage such as deformation, scratch,
crack, peeled paint, etc.
– Check that SDM cannot be installed properly due to a
cause in itself. (There is a gap between SDM and SDM
plate, or it cannot be fixed securely.)
– Check that connector or lead wire of SDM has a scorching,
melting or damage.
– Check that connector is connected securely or locked.
– Check SDM connector and terminals for tightness.
– Check SDM sets a diagnostic trouble code referring to
“DTC Check” in this section, and the diagnostic table leads
to a malfunctioning SDM.
If any faulty condition is found in above checks, replace.
10B2-12 AIR BAG SYSTEM
• Instrument panel member and reinforcement
– Check for any distortion, bending, cracking or other damage.
If any faulty condition is found in above checks, replace.
• Forward sensor
– Check sensor (1), sensor bracket (2), and front panel (4) for
damage bend or rust.
– Check that connector (3) or lead wire (5) of forward sensor
has a scorching, melting or damage.
If any faulty condition is found in above checks, replace.
4
2
3
1
5
• Passenger air bag (inflator) module
– Check for dents, cracks, damage or fitness.
– Check trim cover for cracks or deformities.
– Check harness and connector for damage or tightness.
If any faulty condition is found in above checks, replace.
• Air bag wire harness and connections
– Check for damages, deformities or poor connections referring to “Intermittents and Poor Connections” in this section.
– Check wire harness clamps for tightness.
If any faulty condition is found, correct or replace.
• Seat belt pretensioner
– Check for dents, cracks, damage or fitness
– Check harness and connector for damage or tightness.
If any faulty condition is found in above checks, replace.
• Seat belts and mounting points
– Refer to “Front Seat Belt” in Section 10.
• “AIR BAG” warning lamp
– After vehicle is completely repaired, perform “Air Bag Diagnostic System Check” in this section.
AIR BAG SYSTEM 10B2-13
Forward Sensor
WARNING:
During service procedures, be very careful when handling a sensor.
• Never strike or jar a sensor.
• Under some circumstances, it could cause improper
operation of the air bag system. A sensor and mounting bracket bolts must be carefully torqued to assure
proper operation.
REMOVAL
1) Disconnect negative cable at battery.
2) Disable air bag system. Refer to “Disabling Air Bag System”
in this section.
3) Remove front bumper referring to “Front Bumper” in
Section 9.
4) Disconnect forward sensor connector sliding connector outer
(1) as shown.
1
1
5) Remove forward sensor bolts (1), and forward sensor (2)
from front panel (3).
3
1
2
10B2-14 AIR BAG SYSTEM
INSPECTION
CAUTION:
• Never disassemble forward sensor.
• Sensor should be replaced when it was dropped from a
height of 90 cm (3 ft) or more.
• Check sensor (1) and its bracket (2) for dents, cracks, deformation or rust.
• Check sensor connector (sensor side and harness side) or
lock mechanism for damage or crack.
• Check connector terminals for bent, corrosion or rust.
• Check sensor for resistance.
1
Sensor resistance: 738 – 902 Ω
2
INSTALLATION
CAUTION:
Proper operation of forward sensor requires sensor be
rigidly attached to vehicle structure and that the arrow on
sensor be pointing toward the front of the vehicle.
1) Check that none of following faulty conditions exists.
• Bend or deformity of sensor bracket (1) and front panel.
• Foreign matter on mating surfaces of sensor bracket (1) and
front panel or excessive rust.
1
2) Apply thread lock cement to mounting bolts thread. Install
forward sensor (1) on front panel (2) and tighten mounting
bolts (3) to specified torque.
“A”: Thread lock cement “1332B” 99000-32100
Tightening torque
(a): 9 N·m (0.9 kg-m, 6.5 lb-ft)
3
1
2
AIR BAG SYSTEM 10B2-15
3) Connect forward sensor connector pushing connector inner
(1) as shown.
1
1
4) Install front bumper referring to “Front bumper” in Section 9.
5) Connect negative cable at battery.
6) Enable air bag system. Refer to “Enabling Air Bag System” in
this section.
Tightening Torque Specification
Fastening part
SDM mounting bolt
Passenger air bag (inflator) module bolt
Forward sensor mounting bolt
N•m
6
23
9
Tightening torque
kg-m
0.6
2.3
0.9
lb-ft
4.5
16.5
6.5
10B2-16 AIR BAG SYSTEM
Prepared by
1st Ed. March, 2004
558