1
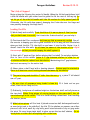
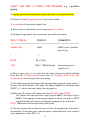
Table of Contents
The LiteLid Support
Loading the Kiln
Venting
…………………………………………………………………………….........2
…………………………………………………………………….…...............2 – 3
.….……………………………………………………………………………………………………….3
To Start Kiln
…………………………………………………………………………………………………4
Firing Completion
………………………………………………………………………………………….4
When Can You Unload the Kiln?
Vacuuming the Kiln
……………………………………………………………………………………….5
Vacuuming Digital Kilns
Bisque Firing the Kiln
……………………………………………………..…........5
……………………………………………………………………………….5
……….………………………………………………………………………….6
Bisque / Cone Fire Program, e.g., cone 06 …………….…………………………………….7
Cone 06 Bisque Firing Program Review …………………………………………………………8
Glaze / Cone Fire Program, e.g. cone 10 ………………………………….…………………..9
Cone 10 Glaze Firing Program Review ……………….………..……………………………..10
Select and Fire a Stored User Program, e.g., crystalline glazing.......……11
Crystalline Glaze Firing User 1 Program Review
…….……………………………12
Ramp Hold Program, e.g., crystalline glaze firing user 1 program ..........13
1
Paragon Guidelines
Revised 9-14-13
The LiteLid Support
Begin raising the lid using the center lid handle. When the lid feels weightless, hold
a side lid handle with your other hand to guide the lid the rest of the way up. Do
not let go of the side lid handle until the lid reaches its fully opened position.
Otherwise, the lid could slam upward, damaging the firebricks near the hinge and
even possibly damaging the hinge itself.
Loading the Kiln
1) Work slowly and carefully. Treat the kiln as if it were a piece of fine furniture
that you don’t want to scratch. Don’t touch the firebrick walls if you can help it.
2) Check each shelf for cracks and don’t use any that are severely cracked. One of
the secrets to keeping your kiln in good condition is in the way you hold the shelves
when you load the kiln. Tilt the shelf as you lower it into the kiln. Center it so it
doesn’t touch the kiln walls. At all times, be aware of the location of the digital
thermocouple so that you avoid bumping the shelf against it.
3) Start with 1” posts on floor before placing the first shelf. Do not place shelves
face to face at the middle. Leave a 1” gap between shelves to allow for air
circulation and better radiant heat distribution. Maintaining this 1” gap between
shelves is necessary for the entire load.
4) Never place a shelf level with a heating element. Shelves must be stacked so
there is at least one row of heating elements between any two shelves
5) The posts being used should be 1” taller than the ware, e.g., a piece 3” tall should
use a 4” post.
6) Be sure that all greenware being loaded is bone dry. If it feels cool on your
cheek, then it’s not ready to fire.
7) Ordinarily, load pieces of medium height on the bottom shelf and tall pieces on
the top shelf. When firing pieces of varying heights on the same shelf, the tall
pieces should go in the center. This is to avoid blocking radiant heat from reaching
the shorter pieces.
8) Wide bottom pieces will fire best if placed across two half shelves positioned at
an even height and in the middle of the kiln. If the shelves are uneven, use either
pieces of soft brick, small dry clay balls, pencil-sized strands of clay or grog under
the ware. Or use a large single shelf to place across the two half shelves. Do not
stack plates or other work on anything with a wide base.
2
9) Elevating large tiles & slabs will allow air and heat to circulate around them for
even heating and also so moisture can escape, thereby reducing tile warpage and
cracking. If you choose to do so, use supports placed 1” in from the edge at the
four corners of the slab. Any tiles or slabs that are larger than 6” x 6” should use
five supports: 1” in from each corner and one in the middle. Grog is also a proven
theory to help aid with movement due to expansion and contraction if the slab is
placed directly on the shelf. Do not stack tiles or slabs, or place other work on top
of them.
10) Heavy bottom pieces or thick ware should be placed in the center of the kiln,
away from the elements. If it’s possible to do so, they should also be elevated on
pieces of soft brick or 1” posts to allow moisture to escape from the bottom.
11) Keep all ware at least 1” away from a heating element. If ware extends closer
than 1” to a wall, place it between rows of elements.
12) Keep all ware and kiln shelves at least 1” away from the side, top and bottom of
the end of the digital thermocouple. However, HPG members prefer to stack below
and above the blue marked section around the thermocouple.
13) Make sure at least one element groove is between the top shelf and the top of
your kiln. The top of ware should be at least 1” lower than the lid.
14) Do not leave lid standing open, close lid gently at the end of loading or use the
Prop-R-Vent until ready to fire. Using the Prop-R-Vent displaces the stress from
the cover being open to the frame. Using a post or brick to prop the cover
displaces the stress to the cover itself.
15) The lid is made up of soft brick and is only held together by the metal band
that surrounds the lid. Never place anything on top of the lid.
16) Each kiln has a folder which contains a “Paragon Firing Record” form.
Please document all activity.
17) As a courtesy, if you break someone’s work while loading or unloading (or at
anytime), leave a note of apology with your name.
Venting
Firing the ware too fast and with insufficient venting causes more problems than
any other firing practice. The Orton Vent Master Fan used with our downdraft
vent design requires that the lid be closed and the peephole plugs inserted
throughout the firing.
3
To Start Kiln
1) Never fire the two kilns at the same time. If the Prop-R-Vent is in use, close the
cover, plug peep holes and turn on the Orton Vent Master Fan. Timers for the fans
have been installed and will shut off automatically. Instructions for the timers are
located by the electrical outlet plug in switch.
3) Move the lever on the shut off box to the “on” position. Wait until both “Idle”
and “Kiln Temperature” flash on the display panel before proceeding. From this
point, you can access either the CONE-FIRE PROGRAM, (on page 7 for bisque or on
page 9 for glaze) or the RAMP-HOLD PROGRAM, (on page 13).
4) Before every firing, it is critical that the “PROGRAM REVIEW” is double
checked. Whoever starts the kiln is responsible for double checking the
“PROGRAM REVIEW” (press key #6) to ensure the current program is correct.
5) Each kiln has a folder which contains a “Paragon Firing Record”. Please document
all activity.
Firing Completion
Keep a record of every firing by using the “Paragon Firing Record”. After the kiln
has fired to completion, the display will flash “CPLT” along with the length of the
firing time, the temperature reached and the present temperature inside the kiln:
1) Record the length of the firing time and the temperature reached.
2) Press the “Stop/Back” button to end the present program.
3) Press “Firing Cost” (#8 on key board), to view and record the kilowatts used.
(Only kiln #2 has this feature)
4) After recording all the information from the program, move the lever on the
shut off box to the “off” position.
5) After the kiln has completed the firing and shut off, leave the Orton Vent
Master Fan on for at least another 30 minutes. This is because even though the
ware has fired to temperature, it still releases fumes.
6) Place ceramic plaque, “COOLING” DON’T OPEN YET on kiln.
4
When Can You Unload the Kiln?
Refer To: “Paragon Ceramic Kiln Instruction and Service Manual”
page 4, column 2, point #5:
Do not open the lid until kiln has cooled to room temperature and all switches
are off
page 5, column 1, point #2:
Do not remove the ware from the kiln until the kiln has cooled to room
temperature.
1) Move the lever on the shut off box to the “on” position. Wait until both “Idle”
and “Kiln Temperature” flash on the display panel. When the kiln has cooled to room
temperature, (+/-80º) move the lever on the shut off box to the “off” position
before proceeding.
2) Open the lid by following the procedure outlined in The LiteLid Support on page
one. Do not leave lid standing open, close lid gently at the end of unloading.
3) Anything of importance should be documented on the “Paragon Firing Record”
form, e.g. incorrect loading, explosions, faulty firing, PF2 flashing on the display or
any and all error messages, etc.
Vacuuming the Kiln
Wear a mask to avoid breathing brick dust. Check all holes on top of kiln cover and
bottom of floor to make sure it’s clear of all debris. Use a vacuum cleaner with a
soft brush nozzle to remove brick dust from inside the kiln, starting from the
inner surface of the kiln lid and working your way to the bottom. Vacuuming the
element grooves is essential if anything has exploded inside the kiln. Pieces of
greenware and brick dust that lodge inside the grooves can burn out an element.
Document all activity on the “Paragon Firing Record” form by filling out the section
for vacuuming the kiln.
Vacuuming Digital Kilns
Check to make sure that the lever on the shut off box is in the “off” position
before vacuuming. A static electric charge can build up on the vacuum hose
especially in dry weather. Static electricity can damage electronics. Keep the
vacuum away from the digital controller, the switch box, and the thermocouple tip
that extends into the firing chamber.
5
BISQUE FIRING THE KILN
The Stages of Firing
A fast greenware firing does not save time, energy or money if it causes
explosions, glaze crazing, pinholes or cratering. The thicker the ware and the more
densely packed the kiln, the slower the kiln must fire to insure that the heat
reaches all of the ware. Pieces that have thin and thick areas must also be fired
slowly to allow the thick areas to catch up in temperature with the thin areas.
Stage One: Water Smoking – Up to 800-900ºF
All clays contain both physical and chemical water. As the water heats, it expands
and is pushed out of the clay. This is called water smoking. Fast firing during this
stage can lead to disaster. Water boiling inside the clay will explode, damaging not
only the ware but also the walls of the kiln. Maintain temperature at 200ºF or
lower during water smoking, and vent the kiln so that the water can escape. The
temperature for the pre-heat stage of the firing is programmed by the
manufacture for 200ºF.
Stage Two: Dehydration and Quartz Inversion-900º-1100ºF
At around 1060ºF, the clay goes through quartz inversion, which is the point at
which the silica in the clay expands. Through 900º-1100ºF, the molecular water
must exit the clay slowly, especially if the clay pieces are large.
Stage Three: Oxidation-500º-2000ºF
Impurities burn out of the clay from the very beginning of the firing, but
especially during the Oxidation stage. The ware must be heated slowly to give
impurities, such as carbon, enough time to become gases and combine with oxygen,
The thicker the ware and the heavier the load, the slower the ware must be fired.
As the clay reaches higher temperatures, the components of the clay fuse
together, sealing the clay surface. At this point, remaining carbon and other
impurities become trapped inside the ware. The trapped gases expand beneath the
surface, bloating and cracking the ware.
Glaze pinholes, bubbles, crazing and peeling are often cause by gases that had not
burned out fully in the greenware firing. These gases are pushed to the surface
during the glaze firing.
The preferred bisque temperature at HPG is Cone 06 (1828ºF).
Pre-heat and Firing Speed
An 8 HR pre-heat at “STD” firing speed has proven to be the most successful
firing schedule to follow.
6
BISQUE / CONE FIRE PROGRAM, e.g., cone 06
1) Cone fire programming will only be done by the kiln chair or a trained individual.
2) Any errors made with programming will default to a “FAST” firing speed setting.
Greenware will not survive when bisque fired “FAST.”
KEYS TO PRESS
DISPLAY
COMMENTS
1 CONE FIRE
CONE
Enter the cone number
(e. g. 06)
06
06
Cone Temperature
ENTER
SPD
Enter the firing speed
2 (MED)
STD
Standard firing speed
ENTER
PRHT
Enter Pre-heat time
08.00
08.00
Pre-heat time
ENTER
HOLD
Enter hold time
00.00
00.00
ENTER
COOL
00.00
00.00
______________________________________________________________
ENTER
Enter slow cooling rate
IDLE & TEMP (flashing)
Kiln is now ready to fire
3) Before every firing, it is critical that the values entered are double checked.
Press key #6, (“Program Review”) and refer to Cone 06 Bisque Firing Program
Review on next page before proceeding. The check list for the bisque firing
sequence will also be posted on the kiln controller for easy viewing.
7
CONE 06 BISQUE FIRING PROGRAM REVIEW
The display should read:
DELA
00.00
CONE
06
1828
STD
PRHT
08.00
HOLD
00.00
COOL
00.00
IDLE & TEMP (flashing)
KEYS TO PRESS
DISPLAY
COMMENTS
ENTER/ START
START
Kiln is now firing
______________________________________________________________
8
GLAZE / CONE FIRE PROGRAM, e.g. cone 10
1) Program operation will only be done by the kiln chair or a trained individual.
2) Follow all of the “Paragon Guidelines” previously outlined.
3) Vacuum the kiln before each glaze firing.
4) Be sure that the kiln shelves you are using are silicon carbide.
5) Cone 10 glaze firings will take place in February, May, August and November.
6) All glaze firings require three cone packs: top, middle and bottom
KEYS TO PRESS
DISPLAY
COMMENTS
______________________________________________________________
1 CONE FIRE
CONE
Enter the cone number
(e. g. 10)
10
10
Cone Temperature
ENTER
SPD
Enter the firing speed
2 (MED)
STD
Standard firing speed
ENTER
PRHT
Enter Pre-heat time
00.00
00.00
Pre-heat time
ENTER
HOLD
Enter hold time
00.00
00.00
ENTER
COOL
00.00
00.00
ENTER
Enter slow cooling rate
IDLE / TEMP (flashing)
Kiln is now ready to fire
7) Before every firing, it is critical that the values entered are double checked.
Press key #6, (“Program Review”) and refer to Cone 10 Glaze Firing Program Review
on next page before proceeding.
9
CONE 10 GLAZE FIRING PROGRAM REVIEW
The display should read:
DELA
00.00
CONE
10
2345
STD
PRHT
00.00
HOLD
00.00
COOL
00.00
IDLE / TEMP (flashing)
KEYS TO PRESS
DISPLAY
COMMENTS
ENTER/ START
START
Kiln is now firing
______________________________________________________________
10
SELECT AND FIRE A STORED USER PROGRAM, e.g., crystalline
glazing
1) Program operation will only be done by the kiln chair or a trained individual.
2) Follow all of the “Paragon Guidelines” previously outlined.
3) Vacuum the kiln before each glaze firing.
4) Be sure that the kiln shelves you are using are silicon carbide.
5) All glaze firings require three cone packs: top, middle and bottom
KEYS TO PRESS
DISPLAY
COMMENTS
______________________________________________________________
4 RAMP HOLD
1
ENTER
STOP
USER
USER 1 is for crystalline
glaze firing
1
RA 1 / FULL
IDLE / TEMP (flashing)
Selected program is
ready to fire
6) Before every firing, it is critical that the values entered are double checked.
Press key #6, (“Program Review”) and refer to Crystalline Glaze Firing User
Program Review on next page before proceeding.
7) The middle cone pack should be visible through middle peep hole. After about 4–
5 hours, cone 10 will bend to a 90º angle. The display temperature will show around
2300ºF (+/-). Watch the cone closely from this point on.
8) When cone 10 reaches a 90º angle, press key #9 (SKIP), then ENTER:
This feature will allow the kiln to stop firing in RAMP 1 and begin firing in
RAMP 2. This segment of the program allows the kiln to cool down to 1910ºF
in approximately half-an-hour and hold this temperature for 4.30 hours.
NOTE: Temperature will fluctuate during HOLD time
9) The user program will end here and turn off the kiln automatically. Allow kiln to
cool naturally. Do not open cover, take out peeps or unload kiln until it has cooled to
room temperature, about 80ºF (+/-).
11
Crystalline Glaze Firing User 1 Program Review
The display should read:
USER 1
DELA
00.00
RA 1
9999 / FULL
F1
2345
HD 1
00.00
RA 2
9999 / FULL
F2
1910
HD 2
04.30
IDLE / TEMP (flashing)
KEYS TO PRESS
DISPLAY
COMMENTS
______________________________________________________________
ENTER / START
START
12
Kiln is now firing
RAMP HOLD PROGRAM, e.g., crystalline glaze firing user 1 program
1) Program operation will only be done by the kiln chair or a trained individual.
KEYS TO PRESS
DISPLAY
4 RAMP HOLD
USER
COMMENTS
______________________________________________________________
1
ENTER
9999/FULL
1
Crystalline Glaze Firing
RA 1
Enter temperature rate
for Ramp 1
9999 / FULL
ENTER
F1
2345
2345
ENTER
HD 1
00.00
00.00
ENTER
RA 2
9999/FULL
Enter target temperature
for Ramp 1
Hold time for Ramp 1
Enter temperature rate
of Ramp 2
9999 / FULL
ENTER
F2
1910
1910
ENTER
HD 2
04.30
04.30
ENTER
RA 3
00.00
00.00
ENTER
Enter program number
Enter target temperature
for Ramp 2
Hold time for Ramp 2
Ramp 3
IDLE / TEMP (flashing)
13
END USER 1 PROGRAM