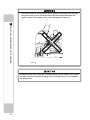
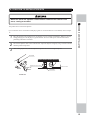
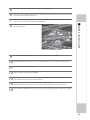
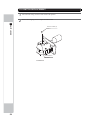
1
OWNER'S MANUAL
IMPORTANT
• Before using this product, read this manual carefully to understand the
contents herein stated.
• After reading this manual, be sure to keep it near the product or in a
convenient place for easy reference when necessary.
WARRANTIES
GAME WARRANTY POLICY
Your new SEGA PRODUCT is covered for a period of ninety (90) days from the date of the shipment.
This certifies that all Printed Circuit boards, power supplies and monitors are to be free of defects in
workmanship or materials under normal operating conditions.
This also certifies that all Interactive Control Assemblies are to be free from defects in workmanship
and materials under normal operating conditions. No other product in this machine is hereby covered.
Sellers sole liability in the event a warranted part described above fails shall be, at its option, to replace
or repair the defective part during the warranty period. For warranty claims, contact your SEGA Distributor.
Should the seller determine, by inspection that the problem was caused by accident, misuse, neglect,
alteration, improper repair, installation or testing, the warranty offered will be null and void.
Under no circumstances is the seller responsible for any loss of profits, loss of use, or other damages.
This shall be the exclusive written Warranty of the original purchaser expressed in lieu of all other warranties
expressed or implied. Under no circumstances shall it extend beyond the period of time listed above.
PARTS WARRANTY POLICY
Sega Amusements USA, Inc. warrants all parts to be free from defective materials and workmanship for a
period of thirty (30) days from Sega Amusements USA, Inc. invoice date unless otherwise specified in
writing by Sega Amusements USA, Inc.
This limited warranty is invalid for any part that upon examination, is deemed to have been subject to
misuse, improper repair or installation, neglect or violation of specification or other instructions published
by Sega Amusements USA, Inc. There are no additional warranties described above.
The limited warranties described above shall be in lieu of any other warranty, express or implied, including
but not limited to any implied warranty of merchantability or fitness for a particular purpose.
BEFORE USING THE PRODUCT, BE SURE TO READ THE FOLLOWING:
To maintain safety:
To ensure the safe operation of this product, be sure to read the following before usage.
The following instructions are intended for the users, operators and the personnel in charge of the
operation of the product. After carefully reading and sufficiently understanding the warning
displays and cautions, handle the product appropriately. Be sure to keep this manual close to the
product or in a convenient place for future reference.
Herein, explanations which require special attention are enclosed with dual lines. Depending on
the potentially hazardous degrees, the terms of DANGER, WARNING, CAUTION, etc. are used.
Be sure to understand the contents of the displays before reading the text.
Indicates that mishandling the
product by disregarding this
pictograph will cause severe
injury or death.
Indicates that mishandling the
product by disregarding this
caution will cause a slight
hazardous situation which can
result in personal injury and/or
material damage.
Indicates that mishandling the
product by disregarding this
warning will cause a potentially
hazardous situation which can
result in death or serious injury.
For the safe usage of the product, the following pictographs are used:
Indicates "HANDLE WITH CARE." In order to protect the human body and
equipment, this display is attached to places where the Owner's Manual, Serviceman
Manual and/or Service Manual should be referred to.
Indicates a "Protective Earth Terminal." Before operating the equipment, be sure to
connect it to the Ground.
(The step may be omitted for products in which a power cord with earth is used.)
❍ Perform work in accordance with the instructions herein stated.
Instructions for work are explained by paying attention to the aspect of accident prevention.
Failing to perform work as per the instructions can cause accidents. In the case where only
those who have technical expertise should perform the work to avoid hazardous situation, the
instructions herein state that the site maintenance personnel should perform such work.
❍ Be sure to turn off the power before working on the machine.
To prevent an electric shock, be sure to turn off the power before carrying out any work that
requires direct contact with the interior of the product. If the work is to be performed in the
power-on status, the Instruction Manual herein always states to that effect.
❍ Be sure to ground the Earth Terminal.
(This is not required in the case where a power cord with earth is used.)
This product is equipped with the Earth Terminal. When installing the product, connect the
Earth Terminal to the "accurately grounded indoor earth terminal" by using an earth wire.
Unless the product is grounded appropriately, the user can be subject to an electric shock.
After performing repair, etc. for the control equipment, ensure that the Earth Wire is firmly
connected to the control equipment.
❍ Ensure that the Power Supply used is equipped with an Earth Leakage Breaker.
This product does not incorporate the Earth Leakage Breaker. Using a power supply which is
not equipped with the Earth Leakage Breaker can cause a fire when earth leakage occurs.
❍ Be sure to use fuses which meet the specified rating.
(Only for the machines which use fuses.)
Using fuses exceeding the specified rating can cause a fire and an electric shock.
❍ Specification changes (removal of equipment, conversion and addition) not
designated by SEGA are not allowed.
The parts of the product include warning labels for safety, covers for personal protection, etc.
It is very hazardous to operate the product by removing parts and/or modifying the circuits.
Should doors, lids and protective parts be damaged or lost, refrain from operating the product,
and contact where the product was purchased from or the office herein stated.
SEGA shall not be held responsible for any accidents, compensation for damage to a third
party, resulting from the specifications not designated by SEGA.
❍ Ensure that the product meets the requirements of appropriate Electrical
Specifications.
Before installing the product, check for Electrical Specifications. SEGA products have a
nameplate on which Electrical Specifications are described. Ensure that the product is
compatible with the power supply voltage and frequency requirements of the location. Using
any Electrical Specifications different from the designated Specifications can cause a fire and
an electric shock.
❍ Install and operate the product in places where appropriate lighting is
available, allowing warning labels to be clearly read.
To ensure safety for the customers, labels and printed instructions describing potentially
hazardous situations are applied to places where accidents can be caused. Ensure that where
the product is operated has sufficient lighting allowing the warnings to be read. If any label is
peeled off, apply it again immediately. Please place an order with where the product was
purchased from or the office herein stated.
❍ When handling the monitor, be very careful.
(Applies only to the product with a monitor.)
Some of the monitor (TV) parts are subject to high tension voltage. Even after turning off the
power, some portions are still subject to high tension voltage sometimes. Monitor repair and
replacement should be performed only by those technical personnel who have knowledge of
electricity and technical expertise.
❍ Be sure to adjust the monitor/projector properly.
(Applies only to the product with a monitor/projector.)
Do not operate the product leaving on-screen flickering or blurring as it is. Using the product
with the monitor/projector not properly adjusted may cause dizziness or a headache to an
operator, a player, or the customers.
❍ When transporting or reselling this product, be sure to attach this manual to
the product.
In the case where commercially available monitors and printers are used in this product, only
the contents relating to this product are explained herein. Some commercially available
equipment has functions and reactions not stated in this manual. Read this manual together
with the specific Instruction Manual of such equipment.
* Descriptions herein contained may be subject to improvement changes without notice.
* The contents described herein are fully prepared with due care. However, should any
question arise or errors be found, please contact SEGA.
INSPECTIONS IMMEDIATELY AFTER TRANSPORTING THE PRODUCT TO THE LOCATION
Normally, at the time of shipment, SEGA products are in a status allowing for usage immediately
after transporting to the location. Nevertheless, an irregular situation may occur during
transportation. Before turning on the power, check the following points to ensure that the product
has been transported in a satisfactory status.
❐ Are there any dented portions or defects (cuts, etc.) on the external surfaces of the cabinet?
❐ Are Casters and Adjusters damaged?
❐ Do the power supply voltage and frequency requirements meet with those of the location?
❐ Are all wiring connectors correctly and securely connected? Unless connected in the correct
way, connector connections can not be made accurately. Do not insert connectors forcibly.
❐ Do power cords have cuts and dents?
❐ Do the fuses used meet specified ratings? Is the Circuit Protector in an energized status?
❐ Are all accessories available?
❐ Can all Doors and Lids be opened with the Accessory Keys? Can Doors and Lids be firmly
closed?
TABLE OF CONTENTS
BEFORE USING THE PRODUCT, BE SURE TO READ THE FOLLOWING:
INTRODUCTION ................................................................................................ iv
1 HANDLING PRECAUTIONS ......................................................................... 1
2 PRECAUTIONS REGARDING INSTALLATION LOCATION ........................ 5
2-1 LIMITATIONS OF USAGE ................................................................................................5
2-2 OPERATION AREA ..........................................................................................................6
TABLE OF CONTENTS
TABLE OF CONTENTS ....................................................................................... i
3 PRECAUTIONS REGARDING PRODUCT OPERATION ............................. 7
4 PART DESCRIPTIONS ................................................................................ 11
5 ACCESSORIES ........................................................................................... 12
6 ASSSEMBLY AND INSTALLATION ............................................................ 15
6-1 FIXATION TO INSTALLATION SITE ..............................................................................18
6-2 TURNING ON THE POWER (SOFTWARE INSTALLATION) ........................................17
6-3 CHECKING ASSEMBLY (SETUP) .................................................................................22
7
PRECAUTIONS WHEN MOVING THE MACHINE ...........................................................................25
8
GAME DESCRIPTION ......................................................................................................................27
8-1 GAME OVERVIEW .........................................................................................................27
8-2 GAME FLOW ..................................................................................................................29
8-3 MODE OVERVIEW .........................................................................................................32
8-3-1 MULTI PLAYER GAME .........................................................................................32
8-3-2 SINGLE PLAYER GAME.......................................................................................32
8-4 PASSWORDS .................................................................................................................33
8-5 TIME RELEASE..............................................................................................................34
i
9 TEST MODE ................................................................................................ 35
9-1 SWITCH UNIT AND COIN METER ................................................................................36
9-2 SYSTEM TEST MODE ...................................................................................................38
TABLE OF CONTENTS
9-3 GAME TEST MODE .......................................................................................................39
9-3-1 GAME TEST MODE Menu ....................................................................................39
9-3-2 INPUT TEST ..........................................................................................................40
9-3-3 OUTPUT TEST ......................................................................................................41
9-3-4 FORCE FEEDBACK .............................................................................................42
9-3-5 INPUT ASSIGNMENTS .........................................................................................43
9-3-6 GAME ASSIGNMENTS .........................................................................................47
9-3-7 BOOKKEEPING ....................................................................................................49
9-3-8 BACKUP DATA CLEAR ........................................................................................51
10 CONTROL PANEL (HANDLE MECHA) ...................................................... 52
10-1 REMOVING THE CONTROL PANEL ...........................................................................53
10-2 ADJUSTING/REPLACING THE VOLUME ...................................................................54
10-3 GREASING ...................................................................................................................56
11 SHIFT LEVER .............................................................................................. 57
11-1 REMOVING THE SHIFT LEVER ..................................................................................57
11-2 SWITCH REPLACEMENT ............................................................................................58
12 ACCELERATOR & BRAKE ......................................................................... 59
12-1 VOLUME ADJUSTMENT AND REPLACEMENT ........................................................60
12-2 GREASING ...................................................................................................................62
13
MONITOR ..........................................................................................................................................63
13-1 CAUTIONS AND WARNINGS CONCERNING
THE SAFETY FOR HANDLING THE MONITORS ......................................................63
13-2 CLEANING THE CRT SURFACES ..............................................................................66
13-3 ADJUSTMENT PROCEDURE ......................................................................................67
14 FLUORESCENT LIGHT/OTHER LAMPS REPLACEMENT.............................................................69
15 PERIODIC INSPECTION ..................................................................................................................73
16 TROUBLESHOOTING ......................................................................................................................75
16-1 TROUBLESHOOTING (WHEN NO ERROR MESSAGE IS SHOWN).........................75
16-2 ERROR MESSAGES ....................................................................................................79
17 GAME BOARD ..................................................................................................................................81
17-1 REMOVING THE LINDBERGH ....................................................................................81
17-2 COMPOSITION OF THE GAME BOARD.....................................................................83
ii
18 COMMUNICATION PLAY ............................................................................ 84
18-1 INSTALLATION PRECAUTIONS .................................................................................84
18-2 CONNECTING THE COMMUNICATION CABLE ........................................................86
18-3 NETWORK PLAY SETTINGS ......................................................................................87
18-4 NETWORK PLAY PRECAUTIONS ..............................................................................88
20 PARTS LIST ................................................................................................. 90
21 WIRE COLOR CODE TABLE .................................................................... 102
22 WIRING DIAGRAM .................................................................................... 103
TABLE OF CONTENTS
19 DESIGN-RELATED PARTS ......................................................................... 89
iii
INTRODUCTION
This manual is intended to provide detailed descriptions together with all the necessary information covering the
general operation of electronic assemblies, electro-mechanicals, servicing control, spare parts, etc. for the product,
“SEGA-RaceTV.”
INTRODUCTION
This manual is intended for the owners, personnel and managers in charge of operation of the product.
Operate the product after carefully reading and sufficiently understanding the instructions.
In the unlikely event that the product does not function correctly, DO NOT allow anyone other than a technician
to touch the internal system. Turn off the power to the machine, making sure to unplug the electrical cord from the
outlet, and contact the office listed below or the point of purchase for this product.
Use of this product is unlikely to cause physical injuries or damage to property. However, points that require special
attention are indicated by bold text, the word “IMPORTANT” and the symbol below.
Indicates important information that, if ignored, may result in the mishandling of
the product and cause faulty operation or damage to the product.
Sega Amusements U.S.A., Inc.
800 Arthur Avenue, Elk Grove Village, IL 60007-5215, U.S.A.
TEL:
TOLL FREE:
FAX:
1-847-364-9787
1-888-877-2669
1-847-427-1065
Dimensions:
SPECIFICATIONS
Unit : 36.5” [Width] x 69.1” [Depth] x 74.5” [Height]
Weight:
Unit : 562.2 lbs.
Power, maximum current: 540 W, 4.5 A (AC 120 V, 60 Hz)
Monitor:
29 Type Color Monitor
NOTE: The contents herein described are subject to change without notice.
iv
Definition of 'Site Maintenance Personnel or Other Qualified Individuals'
Parts replacement, maintenance inspections and troubleshooting should be carried out by site maintenance personnel
or other qualified professionals. This manual includes directions for potentially dangerous procedures which should
only be carried out by professionals with the appropriate specialized knowledge.
INTRODUCTION
Procedures not described in this manual or marked as 'to be carried out by site
maintenance personnel or other qualified professionals' should not be carried
out by personnel without the necessary skill or technology. Work carried out by
unqualified persons may cause serious accidents, including electrocution.
The site maintenance personnel or other qualified professionals mentioned in this manual are defined as follows:
Site maintenance personnel:
Individuals with experience in maintaining amusement equipment, vending machines, etc., working under the
supervision of the owner/operator of this product to maintain machines within amusement facilities or similar
premises by carrying out everyday procedures such as assembly, maintenance inspections, and replacement of units/
expendable parts.
Activities to be carried out by site maintenance personnel:
Amusement equipment/vending machine assembly, maintenance inspection and replacement of units/expendable
parts.
Other qualified professionals:
Persons employed by amusement equipment manufacturers, or involved in design, production, testing or
maintenance of amusement equipment. The individual should have either graduated from technical school or hold
similar qualifications in electrical/electronics/mechanical engineering.
Activities to be carried out by other qualified professionals:
Amusement equipment/vending machine assembly, repair/adjustment of electrical/electronic/mechanical parts.
v
1 HANDLING PRECAUTIONS
When installing or inspecting the machine, be very careful of the following points and pay attention to ensure that
the player can enjoy the game safely.
Non-compliance with the following points or inappropriate handling running counter to the cautionary matters
herein stated can cause personal injury or damage to the machine.
1
• To avoid an electric shock or short circuit, do not plug in or unplug quickly.
• To avoid an electric shock, do not plug in or unplug with a wet hand.
• Do not expose power cords or earth wires on the surface, (floor, passage,
etc.). If exposed, the power cords and earth wires are susceptible to damage.
Damaged cords and wires can cause an electric shock or short circuit.
HANDLING PRECAUTIONS
• Before performing work, be sure to turn the power off. Performing the work
without turning the power off can cause an electric shock or short circuit. In the
case work should be performed in the status of power on, this manual always
states to that effect.
• To avoid causing a fire or an electric shock, do not put things on or damage the
power cords.
• When or after installing the product, do not unnecessarily pull the power cord. If
damaged, the power cord can cause a fire or an electric shock.
• In case the power cord is damaged, ask for a replacement through where the
product was purchased from or the office herein stated. Using the cord as is
damaged can cause fire, an electric shock or leakage.
• Be sure to perform grounding appropriately. Inappropriate grounding can
cause an electric shock.
• Be sure to use fuses meeting the specified rating. Using fuses other than the
specified rating can cause a fire or an electric shock.
• Be sure that connections such as IC BD are made properly. Insufficient insertion
can cause an electric shock.
• Specification changes, removal of equipment, conversion and/or addition, not
designated by SEGA are not permitted.
-Failure to observe this may cause a fire or an electric shock. Non-compliance
with this instruction can have a bad influence upon physical conditions of the
players or the onlookers, or result in injury during play.
-SEGA shall not be held responsible for damage, compensation for damage to a
third party, caused by specification changes not designated by SEGA.
• Do not perform any work or change parts not listed in this manual. Doing so may
lead to an accident.
If you need to perform any work not listed in this manual, request work from the
office indicated in this manual or the point of purchase, or inquires for details.
• Be sure to perform periodic maintenance inspections herein stated.
1
• For the IC board circuit inspections, only the logic tester is allowed. The use of a
multiple-purpose tester is not permitted, so be careful in this regard.
1
HANDLING PRECAUTIONS
2
• When cleaning the CRT surfaces, use a soft and dry cloth. Do not apply
chemicals such as thinner, benzene, etc.
• Static electricity from your body may damage some electronics devices on the
IC board. Before handling the IC board, touch a grounded metallic surface so
that the static electricity can be discharged.
• Some parts are not designed and manufactured specifically for this game
machine. The manufacturers may discontinue, or change the specifications of
such general-purpose parts. If this is the case, SEGA cannot repair or replace a
failed game machine whether or not a warranty period has expired.
CONCERNING THE STICKER DISPLAY
This SEGA product has warning displays on stickers,
labels and/or printed instructions adhered/attached to or
incorporated in the places where a potentially hazardous
situation could arise. The warning displays are intended
for accident prevention for customers and for avoiding
hazardous situations relating to maintenance and
servicing work. Some portions of the cabinet contain
high voltage and may cause accidents if touched. When
performing maintenance, be very careful of the warning
displays. It is especially important that any complex
repair and replacement work not mentioned herein
should be performed by those technical personnel who
have knowledge of electricity and technical expertise.
In order to prevent accidents, caution any customer
ignoring the warnings to cease and desist immediately.
1
HANDLING PRECAUTIONS
This SEGA product has stickers attached describing
the product manufacture No. (Serial No.) and Electrical
Specifications. It also has a Sticker describing where to
contact for repair and for purchasing parts.
When inquiring about or asking for repairs, mention
the Serial No. and Name of Machine indicated on
the Sticker. The Serial Number indicates the product
register. Identical machines could have different
parts depending on the date of production. Also,
improvements and modifications might have been made
after the publication of this manual. In order to ensure
you order the correct parts, mention the Serial No. when
contacting the applicable places.
CONCERNING WARNING DISPLAYS
3
SEE A
1
HANDLING PRECAUTIONS
4
SEE A
2 PRECAUTIONS REGARDING INSTALLATION LOCATION
This product is an indoor game machine. Do not install it outside. Even indoors,
avoid installing in places mentioned below so as not to cause a fire, electric
shock, injury and/or malfunction.
- Places subject to direct sunlight, or places subject to high temperatures in the
proximity of heating units, etc.
- Places filled with inflammable gas or vicinity of highly inflammable/volatile
chemicals or hazardous matter.
- Dusty places.
- Sloped surfaces.
- Places subject to any type of violent impact.
- Vicinity of anti-disaster facilities such as fire exits and fire extinguishers.
- Areas where the temperature exceeds the applicable temperature (ambient
temperature) range of 5 to 30 degrees centigrade.
2-1 LIMITATIONS OF USAGE
PRECAUTIONS REGARDING INSTALLATION LOCATION
- Places subject to rain or water leakage, or places subject to high humidity in
the proximity of an indoor swimming pool and/or shower, etc.
2
• Be sure to check the Electrical Specifications. Ensure that this product
is compatible with the location's power supply, voltage, and frequency
requirements. A plate describing Electrical Specifications is attached to the
product. Non-compliance with the Electrical Specifications can cause a fire
and electric shock.
• This product requires a breaker and earth mechanism as part of the location
facilities. Using the product without these can cause a fire and electric shock.
• Ensure that the indoor wiring for the power supply is rated at 15 A or higher
(AC single phase 100 V ~ 120 V area). Non-compliance with the Electrical
Specifications can cause a fire and electric shock.
• Be sure to use an independent power supply equipped with an earth leakage
breaker. Using a power supply without an earth leakage breaker can cause an
outbreak of fire if a power surge occurs.
• Putting many loads on one electrical outlet can cause generation of heat and a
fire resulting from overload.
• When using an extension cord, ensure that the cord is rated at 15 A or higher
(AC 100 V ~ 120 V area). Using a cord rated lower than the specified rating can
cause a fire and electric shock.
5
2-2 OPERATION AREA
2
PRECAUTIONS REGARDING INSTALLATION LOCATION
6
• For safe operation, use and operate this product in an area measuring at least
1.67 m (65.7 in) in width and 2.3 m (90.6 in) in depth. The area prescribed in this
manual is absolutely necessary, for if one should fall over and hit their head
against something, there could be a serious accident.
• Be sure to provide sufficient space specified in this manual. Do not allow objects
to block the ventilation ports. It can cause generation of heat and a fire.
• SEGA shall not be held responsible for damage or compensation for damage to
a third party, resulting from the failure to observe this instruction.
• If the machine does not fit through the entryway to the installation location, do
not disassemble it without first consulting the instructions. The machine should
only be disassembled in accordance with the instructions listed in this manual;
do not attempt to disassemble it in any other way. This may cause electric
shock or short circuits.
To install this product, the entrance must be at least 1 m in width and 1.8 m in height.
3 PRECAUTIONS REGARDING PRODUCT OPERATION
To avoid injury and trouble, be sure to pay attention to the behavior of visitors and players.
BEFORE OPERATION
3
• To ensure maximum safety for the players and the customers, ensure that where
the product is operated has sufficient lighting to allow any warnings to be read.
Operation under insufficient lighting can cause bodily contact with each other,
hitting accident, and/or trouble between customers.
• Be sure to perform appropriate adjustment of the monitor (projector). For
operation of this machine, do not leave monitor's flickering or deviation as
is. Failure to observe this can have a bad influence upon the players' or the
customers' physical conditions.
• It is suggested to ensure a space allowing the players who feel sick while
playing the game to take a rest.
• Check if all of the adjusters are in contact with the surface. If they are not, the
Cabinet can move and cause an accident.
PRECAUTIONS REGARDING PRODUCT OPERATION
In order to avoid accidents, check the following before starting the operation:
Ensure that all of the
anti tip brackets are
in contact with the floor.
3 FIG. 01
Ensure that all of the adjusters
are in contact with the floor.
7
• Do not put any heavy item on this product. Placing any heavy item on the
product can cause a falling down accident or parts damage.
• Do not climb on the product. Climbing on the product can cause falling down
accidents. To check the top portion of the product, use a step ladder.
3
PRECAUTIONS REGARDING PRODUCT OPERATION
8
• To avoid electric shock, check to see if door & cover parts are damaged or
omitted.
• To avoid electric shock, short circuit and/or parts damage, do not put the
following items on or in the periphery of the product. Flower vases, flowerpots,
cups, water tanks, cosmetics, and receptacles/containers/vessels containing
chemicals and water.
• During daily cleaning, be sure to check the surface of the steering wheel, gear
shifter, and other parts that the player touches with his hands for damage,
cracks, or loose screws. If a player uses the machine while it is damaged,
cracked, or has a loose screw, the player may become injured.
• During daily cleaning, be sure to check the seat for any abnormality, wetness,
etc. Failure to do this may result in deliberate tampering or negligence being
left undetected.
• To avoid injury, be sure to provide sufficient space by considering the potentially
crowded situation at the installation location. Insufficient installation space can
cause making bodily contact with each other, hitting accidents, and/or trouble
between customers.
DURING OPERATION (PAYING ATTENTION TO CUSTOMERS)
• For safety reasons, do not allow any of the following people to play the game.
- Those who need assistance such as the use of an apparatus when walking.
- Those who have high blood pressure or a heart problem.
3
- Those who have experienced muscle convulsion or loss of consciousness when
playing video games, etc.
PRECAUTIONS REGARDING PRODUCT OPERATION
- Those who have neck or spinal cord problems.
- Those who are intoxicated or under the influence of drugs.
- Pregnant women.
- Persons susceptible to motion sickness.
- Persons who disregard the product's warning displays.
• Even players who have never been adversely affected by light stimulus might
experience dizziness or headache depending on their physical condition when
playing the game. Small children are especially likely to experience these
symptoms. Caution guardians of small children to keep watch on their children
during play.
• Instruct those who feel sick during play to have a medical examination.
• To avoid injury from falls and electric shocks due to spilled drinks, instruct the
player not to place heavy items or drinks on the product.
• To avoid electric shocks and short circuits, do not allow customers to put
hands and fingers or extraneous matter in the openings of the product or small
openings in or around the doors.
• To avoid falls and resulting injury, immediately stop the customer from leaning
against or climbing on the product, etc.
• To avoid electric shock and short circuit, do not allow customers to unplug the
power plug without a justifiable reason.
• This game is for one player only. If two or more customers attempt to sit in the
seat and play at the same time, it may results in players falling over, falling off,
or catching body parts in the ride.
• Persons other than the player should not be allowed to touch the controls during
play. They may brush against or collide with the controls or the player, possibly
resulting in accidents.
3 FIG. 02
9
• Customers should be warned not to place children on their laps while they play
the game. Doing so may cause the child to become trapped between the
player and the control panel and/or cause the machine to tip over.
3
PRECAUTIONS REGARDING PRODUCT OPERATION
3 FIG. 03
Immediately stop such violent acts as hitting and kicking the product. Such violent
acts can cause parts damage or falling down, resulting in injury due to fragments
and falling down.
10
4 PART DESCRIPTIONS
4
PARTS DESCRIPTIONS
4 FIG. 02 Rear View
11
5 ACCESSORIES
Confirm that the accessories listed in the table below are present when setting up the product. Accessories marked
“Spare” in the note column are consumable items but included as spares.
5 TABLE 01
5
ACCESSORIES
OWNER’S MANUAL
542-30-300 (1)
This manual
AC CABLE (Power Code)
99-00-017 (1)
COMMUNICATION CABLE 5m
5 TABLE 02 SOFTWARE KIT XKT-1675-D -EX1 <USA>
DVD SOFTWARE KIT (1)
KEY CHIP (1)
CUSION SPONGE
601-11137 (1)
Disc Protector
DVD-ROM DISC (1)
DISC CASE (1)
When you order the DVD-ROM disc only, specify the part number 610-0726-0044 (DVD SOFT RTV).
NOTE; The game software has been pre-installed in the main PCB and the
key chip has been pre-set to the main PCB.
Please use the DVD software, only when necessary for some reason
such as replacing the main PCB.
However to install the software, the DVD DRIVE and USB(mini type)
cabele need to be prepared separately.
Those are not included in the unit and available separately at SEGA.
12
6 ASSEMBLY AND INSTALLATION
• Perform assembly work by following the procedure herein stated. Failure to
comply with the instructions can cause electric shock.
• When assembling, more than one person is required. Depending on the
assembly work, there are some cases in which working by one person alone
can cause personal injury or parts damage.
• Ensure that connectors are properly connected. Improper connections can
cause electric shock.
• This work should be carried out by the site maintenance personnel or other
qualified professionals. Work performed by non-technical personnel can cause
a severe accident such as electric shock. Failing to comply with this instruction
can cause a severe accident such as electric shock to the player during
operation. If no one with proper technological expertise is available, request
service from the office indicated in this document or the point of purchase so as
to ensure safety.
6
ASSEMBLY AND INSTALLATION
• Perform assembling as per this manual. Since this is a complex machine,
incorrect assembling can cause an electric shock, machine damage and/or
improper functioning as per specified performance.
• Provide sufficient space so that assembling can be performed. Performing
work in places with narrow space or low ceiling may cause an accident and
assembly work to be difficult.
• To perform work safely and avoid serious accident such as the cabinet falling
down, do not perform work in places where step-like grade differences, a ditch,
or slope exist.
• Be careful not to damage the wires. Damaged wires may cause electric shock
or short circuit or present a risk of fire.
• Do not leave power cords, ground wires, or network cables exposed in areas
of heavy foot traffic. Doing so may cause them to become damaged, possibly
resulting in electric shock and/or short circuits. When laying wiring across the
floor, always use safety covers to protect the wires.
• The power cord for this product has a ground terminal. Make sure to use this
ground terminal when plugging it in to an indoor outlet. Failure to properly
ground the product could lead to electrocution. It can also lead to malfunction.
13
• When opening/closing, attaching/removing doors or lids, be careful that your
hand or finger does not get caught in anything.
6
• To perform the operation safely and accurately you must use a safe, steady
footstool or stepladder. Working without this may lead to a fall and possible
injury.
ASSEMBLY AND INSTALLATION
• Wear appropriate work clothing so that work can be performed safely. Use
gloves and safety shoes to prevent accidents or injuries.
• When installing a wire protection cover over a floor, use a material shaped
so that no one passing by will stumble over it. Using a material that could be
stumbled over might lead to an accidental fall.
• Handle plastic parts with care. Excessive weight or pressure may cause them to
break and the broken pieces may cause injury.
When carrying out the assembling and installation, follow the following 6-item sequence.
6-1 Fixation to installation site
6-2 Turning on the power (Software Installation)
6-3 Checking assembly (Setup)
Tools necessary for work
24mm
Spanner with measuring distance of 24 mm to opposite side (for M16 hexagon bolts)
14
6-1 FIXATION TO INSTALLATION SITE
Make sure that all the adjusters contact the floor. Otherwise the cabinet could
move, causing an accident.
6
Up to 4 machines can be connected for multi-player games. If several machines are to be installed, refer to Chapter
19.
1
Move the product to the installation site. See Chapter 19 for an example of installation. Make sure to leave
enough passage space for the player to get into the seat. Also leave some space on the back lid side for
performing maintenance work later.
2
3
Have all the adjusters make contact with the floor. Adjust the adjuster’s height by using a wrench so that the
machine position is kept level.
After making adjustment, fasten the adjuster nut upward and secure the height of adjuster.
ASSEMBLY AND INSTALLATION
This product has 4 casters and 4 adjusters.
ADJUSTER
CASTER
Tighten nut upwards.
About 5 mm
ADJUSTER
6-2 FIG. 02
15
4
Attach the anti tip brackets to the left and right sides. Remove the 2 hexagon bolts from each side. These
will be used to fasten the anti tip brackets.
6
ASSEMBLY AND INSTALLATION
6-2 FIG. 03
1,670 mm (65.7 in)
928 mm (36.5 in)
150 mm (5.9 in)
6-2 FIG. 05
16
2,300 mm (90.6 in)
VENTILATION SPACE 200 mm (7.9 in)
700 mm (27.6 in) over
Provide ventilation space for the ventilation opening.
Allow more than 70 cm (approx. 28 in) of space for
customer traffic.
6-2 TURNING ON THE POWER (SOFTWARE INSTALLATION)
The software installation is not necessary for this game, as it is pre-installed into the
main PCB. Please refer to the following section, only when necessary.
• The following explanation assumes that the product has been assembled
properly as explained above. If there is an error or if the product operates in a
manner other than as indicated below, cut off the power supply immediately.
Failure to do so may result in a fire or electrical shock.
• If you look directly at the laser beam in the DVD DRIVE, you could suffer vision
impairment. Do not look inside the DVD DRIVE.
6
ASSEMBLY AND INSTALLATION
• Be careful not to damage the DVD wire by getting it caught between objects,
etc. Doing so may cause a short circuit or fire.
• Do not use or store the DVD DRIVE or DVD wire in any of the following locations,
as this may result in serious damage.
[Do not use or store in these locations]
- Anywhere which may vibrate or shock the equipment
- In direct sunlight
- In damp or dusty places
- In places with a sharp change in temperature
- Close to anything that gives off heat (a heater, etc.)
- Close to anything with a strong magnetic field (magnets, monitor, speakers,
radio, etc.)
- Anywhere that is likely to get wet (kitchen, etc.)
- Anywhere with a slope or incline
- Anywhere with corrosive gas in the air (chlorine, hydrogen sulfide, ammonia,
sulfur dioxide, etc.)
- Anywhere with strong static electricity
[Do not use in these locations]
- Close to anything that is highly retentive of heat (carpet, sponge, cardboard,
etc.)
- Anywhere that blocks the DVD DRIVE air vent.
• The DVD DRIVE is a delicate piece of equipment. Avoid the following.
- Dropping or shaking it violently.
- Getting water or other liquids on it, or placing small items on top of it.
- Placing large or heavy items on top of it.
- Drinking or smoking close to the DVD DRIVE.
• Do not turn off the power to the DVD DRIVE when its access lamp is on or
flashing, as this could cause damage to the device.
17
• Do not allow any foreign materials, such as liquids, metals or smoke inside the
DVD DRIVE.
• Use a soft, dry cloth to wipe off any dirt or marks on the DVD DRIVE.
6
ASSEMBLY AND INSTALLATION
18
- If you need to use a cleaning agent, always use a “neutral” agent diluted in
water.
- Never use products or cleaning agents containing benzene, alcohol, thinners,
etc.
• Do not touch the lens inside the DVD DRIVE. Doing so may prevent it from
reading accurately.
• The chip components on IC boards can be damaged by electrostatic discharge
from the human body. Before handling an IC board, always neutralize any static
charge in the body by touching a grounded metal surface.
• Some parts are not designed and manufactured specifically for the kit. The
manufacturers may discontinue, or change the specifications of such general
purpose parts. If this is the case, SEGA cannot repair or replace a failed kit
whether or not a warranty period has expired.
Handling the DVD-ROM Disc
• Do not use a DVD-ROM with a damaged front. This
may cause a malfunction.
6
• Do not get fingerprints or dust particles on the disc.
Contaminated discs may lower audio and video
quality, and may result in read malfunctions.
• When cleaning the disc, do not use volatile
chemicals (benzene, thinner, etc.), cleaning
sprays, or antistatic agents.
Wipe the disc with a soft cloth,
working from the center outwards.
6-5 FIG. 01
• Do not use a cracked, warped, or damaged disc. Do not attach papers or seals
onto the disc to avoid scratching it. Do not use a disc with signs of peeled seals,
tape, etc. If such a disc is placed in the DVD-ROM DRIVE, malfunctions, such as
the inability to remove the disc from the drive, may result.
ASSEMBLY AND INSTALLATION
• Insert the DVD-ROM into the DVD DRIVE with the
label facing upwards.
• When cleaning a heavily contaminated disc, use a clean cloth that has been
soaked in water and squeezed. After wiping, remove any remaining moisture
with a clean, dry cloth.
• How to Hold a Disc
When handling a disc, be careful not to contaminate it with your fingerprints.
With both hands:
Put your thumbs and forefingers on
4 opposite sides of the disc.
With one hand:
Insert your forefinger into the center hole,
while placing your thumb and middle finger
on opposite sides of the disc.
6-5 FIG. 02
6-5 FIG. 03
• The software is not installed on the game board (LINDBERGH) when the power
supply is engaged, so the “Error 22” message is not a malfunction. However,
if there is another error display, or if there is no video output at all, there might
have been an error in product assembly, wiring connections might be faulty, or
the LINDBERGH might not be functioning properly.
• After the power supply is engaged, wait for “Error 22” message to be displayed.
If the product is indiscriminately operated in any way beforehand, there could
be unexpected problems or malfunctions, as well as damage to parts.
• Once “Error 22” is displayed, set the DVD-ROM in the DVD DRIVE and re-engage
the power supply. Installation takes place.
19
• After the power supply is engaged, the DVD DRIVE tray will not come out
for about 30 seconds even if you press the switch. This is due to DVD DRIVE
initialization.
6
ASSEMBLY AND INSTALLATION
• The DVD DRIVE tray can come out or return only while the power supply is
engaged. The tray cannot be opened or closed while the power is off.
• Even after the software has been installed, store the DVD software kit, DVD DRIVE
and DVD wire in a secure location.
• If for any reason installation cannot be completed, an error is displayed. Refer
to the LINDBERGH service manual and take corrective action.
Take out the DVD software kit provided.
1
2
3
Turn on the MAIN POWER switch on the AC unit.
The LINDBERGH startup image appears on the screen. However, it does take several minutes for the
projector image to become visible. Wait for at least one minute. An error will occur. Check to see if it is
“Error 22.” If it is “Error 22,” proceed to the next operation. If it is not “Error 22,” take corrective measures
as indicated in the LINDBERGH service manual.
CASE LID
Remove 1 urea (resin-head) screw, and then
remove DVD DRIVE case lid.
6-5 FIG. 04
4
Press the DVD DRIVE switch. The DVD DRIVE
tray comes out. Set the DVD from the DVD
software kit into the tray. Always have the DVD
label side facing upward.
6-5 FIG. 05
20
Press the DVD DRIVE switch and the tray returns to its original position.
Reset power. Turn the MAIN POWER switch to OFF, wait for at least 10 minutes, and then turn the switch
to ON. Wait until the projector lamp cools.
Software installs automatically from the DVD to the LINDBERGH. In some cases, it may take as long as
30 minutes for the software to install to the LINDBERGH.
6
After the software installation, the game image
appears automatically.
ASSEMBLY AND INSTALLATION
5
6
7
8
6-5 FIG. 06 ADVERTISE SCREEN
9
10
11
12
13
14
15
Press the DVD DRIVE switch to have the tray come out, and then remove the DVD.
Press the DVD DRIVE switch to have the tray return. When the power is cut off the tray will not move.
Set the MAIN POWER switch to OFF.
Remove 2 DVD wires from the DVD DRIVE.
Refer to steps 1-13 in “6-3 ATTACHING DVD DRIVE AND KEY CHIP” and follow the steps in reverse
order to detach the DVD wire (2 m) from the cabinet.
Attach DVD DRIVE case lid and fasten it with 1 urea (resin-head) screw.
Store DVD DRIVE and DVD software kit at a location where there is no dust or cigarette smoke.
Turn on the MAIN POWER switch on the AC unit. When the game image appears, installation is complete.
21
6-6 CHECKING ASSEMBLY (SETUP)
Checking Assembly
In the TEST MODE, ensure that the assembly has been made correctly and IC BD. is satisfactory (refer to Chapter 9).
Refer to the LINDBERGH Service Manual for details on SYSTEM TEST MODE and “9-3 GAME TEST MODE”
for details on GAME TEST MODE.
6
ASSEMBLY AND INSTALLATION
(1) C.R.T. TEST
In the TEST mode menu, selecting C.R.T. TEST allows the screen (on which the monitor is tested) to be displayed.
Although the monitor adjustments have been made at the time of shipment from the factory, make needed by
watching the test mode screen. If it is necessary, adjust the monitor by referring to Chapter 14.
MONITOR TEST
MONITOR TEST
1/2
1
2/2
32
PRESS TEST TO NEXT
PRESS TEST TO EXIT
6-6 FIG. 01
6-6 FIG. 02
(2) INPUT TEST
Selecting the INPUT TEST on the game test mode menu screen (on which each switch is tested) to be displayed.
Press each switch. If the display beside each switch indicates “ON”, the switch and wiring connections are
satisfactory.
INPUT TEST
STEERING
GAS
BRAKE
GEAR POSITION
START
VIEW CHANGE
BOOST
SERVICE
TEST
00H
00H
00H
N
OFF
OFF
OFF
OFF
OFF
PRESS TEST AND SERVICE BUTTON TO EXIT
6-6 FIG. 03
22
(3) OUTPUT TEST
Select OUTPUT TEST from the menu in the test mode to cause the screen (on which each lamp is tested) to appear.
Ensure that lamp light up satisfactorily.
OUTPUT TEST
OFF
OFF
OFF
OFF
OFF
OFF
OFF
SELECT WITH SERVICE BUTTON
AND PRESS TEST BUTTON
6-6 FIG. 04
6
ASSEMBLY AND INSTALLATION
START BUTTON
VIEW CHANGE BUTTON
BOOST BUTTON
RED LAMP 1
RED LAMP 2
BLUE LAMP 1
BLUE LAMP 2
-> EXIT
(4) SPEAKER TEST
Check to make sure the speakers are functioning properly using the SPEAKER TEST in SYSTEM TEST MODE.
This product makes use of the speakers as shown below. Set the RIGHT SPEAKER and LEFT SPEAKER to “ON”
and check to make sure that there is sound output.
6-6 TABLE 01
SPEAKER
SETTING
RIGHT SPEAKER
ON
LEFT SPEAKER
ON
REAR RIGHT SPEAKER
OFF
REAR LEFT SPEAKER
OFF
CENTER SPEAKER
OFF
WOOFER SPEAKER
OFF
Perform the above inspections also at the time of monthly inspection.
23
SETTINGS AT TIME OF INSTALLATION
6
ASSEMBLY AND INSTALLATION
When 2 or more game machines are to be installed, use the GAME TEST MODE to
set the seat number for the cabinet and perform the settings for in-house matchups.
Using TEST MODE, set, adjust and confirm the settings shown below. Refer to the LINDBERGH Service Manual
for details on SYSTEM TEST MODE and “9-3 GAME TEST MODE” for details on GAME TEST MODE.
● Perform the following settings in SYSTEM TEST MODE:
COIN ASSIGNMENTS
Set up the coin settings under COIN ASSIGNMENTS.
COIN CHUTE TYPE
SERVICE TYPE
COMMON
COMMON
NETWORK SETTING
Select the MAIN NETWORK and set up in the following manner:
DHCP
DISABLE
There is no need to set a specific value for the IP address. Leave the displayed IP
address as is and exit the settings.
24
7 PRECAUTIONS WHEN MOVING THE MACHINE
• Do not push the cabinet from the left/right when attempting to move the unit.
Pushing from the sides may cause the unit to tip and result in injury and damage
to parts.
Do not push on any parts made of glass (e. g. CRT screen) or plastic, as these parts
may break and result in bodily injury.
Do not push the cabinet from
the left/right direction.
7
PRECAUTIONS WHEN MOVING THE MACHINE
• Always disconnect the power cable before moving the product. If it is moved
with the power cable connected, the cable could be damaged, causing fire or
electric shock.
Do not push on the slanted portion.
7 FIG. 01
25
Remove the anti tip brackets
from both sides.
7
PRECAUTIONS WHEN MOVING THE MACHINE
26
Ground the casters.
8 GAME DESCRIPTION
8-1 GAME OVERVIEW
The game is a car racing game with two different game modes: “Multi Player Game” and “Single Player Game”.
A wide variety of real time action based on players’ actions make the race all the more exciting. Players can push the
BOOST button to rapidly accelerate. They can also dress up their cars by entering a password.
8
GAME DESCRIPTION
Car Selection (alphabetical order)
Chevrolet(R)
Camaro(R) Concept Convertible
Corvette(R) Stingray(TM) Convertible
Chrysler(R)
Prowler(TM)
Ford
Mustang GT Convertible
Mazda
Roadster RS
Mercury
1949 Convertible
*TIME RELEASE (see 8-5)
Mitsubishi
Eclipse Spyder GT
Plymouth(R)
Hemi(R) Cuda Convertible
RUF
RK Spyder
Race Course
All courses are based on laps. The number of laps can be set to 3 or 4.
Course
Laps
Time of day
JAKE’s WORLD
Counter-clockwise
Day
SLIP CIRCUIT
Counter-clockwise
Night
SUNSHINE COAST
Counter-clockwise
Day
RUMBLING VOLCANO
Clockwise
Evening
RTV ARENA
*TIME RELEASE (see 8-5)
Counter-clockwise
Morning
27
Race Screen
(3rd person view)
8
GAME DESCRIPTION
8-1 FIG. 01
28
8-2 GAME FLOW
(1) Advertise (Stand-by), Movie Screens
Insert coins until you have enough credits. The game will
then start automatically.
A message will be displayed prompting you to insert
additional coins if you do not have enough credits.
8
GAME DESCRIPTION
8-2 FIG. 01
(2) MODE SELECT Screen
Select the one of two game modes by turning the steering
wheel to the left or right.
If COMMUNICATION PLAY is not enabled, the MULTI
PLAYER option will be darkened and cannot be selected.
8-2 FIG. 02
MULTI PLAYER
Play against other players in the amusement facility
SINGLE PLAYER
Play to complete all 3 stages.
(3) CAR SELECT Screen
Select your car by turning the steering wheel left or right
and choose automatic or manual transmission by moving
the shift lever up or down.
Push the VIEW CHANGE button to go to the
PASSWORD INPUT screen.
8-2 FIG. 03
29
(4) DRIVER SELECT Screen
Select your driver by turning the steering wheel to the left
or right. The color of the car will change depending on the
driver selected.
Each driver has his or her own ending movie.
8
GAME DESCRIPTION
8-2 FIG. 04
(5) COURSE SELECT Screen
Select the course by turning the steering wheel to the left
or right.
In COMMUNICATION PLAY, the course is selected by
popular vote. If there is a draw, the earliest selected course
will be used.
8-2 FIG. 05
(6) CONTINUE
In SINGLE PLAYER mode, you will be given the option
to continue if you do not finish the race in or above the
regulation finishing place.
If you insert the necessary number of coins and select
“YES,” you will be able to try the course again.
When you continue with a course on the 1st or 2nd stage,
the regulation finishing place for moving on to the next
stage will be lowered by one (5th place being the lowest).
On the final stage, you cannot win unless you place 1st, no
8-2 FIG. 06
matter how many times you continue.
30
(7) CUSTOM CAR Screen
You will be issued a password after you play in SINGLE
PLAYER mode without a password and after you clear all
3 stages in SINGLE PLAYER mode.
NOTE: Passwords are not issued in MULTI PLAYER
mode.
8
(8) NAME ENTRY Screen
GAME DESCRIPTION
8-2 FIG. 07
You will be able to enter your name if you make it into the
top ranks within the total time of one of the courses that
are available in SINGLE PLAYER mode.
Your name (3 alphanumeric characters) will be displayed
in the rankings during the advertise display.
8-2 FIG. 08
(9) GAME OVER
The GAME OVER screen is displayed after playing in
MULTI PLAYER or SINGLE PLAYER mode.
8-2 FIG. 09
31
8-3 MODE OVERVIEW
8-3-1 MULTI PLAYER GAME
Game Content & Rules
8
GAME DESCRIPTION
In this mode, players on machines in the same amusement facility can play against each other. Up to 4 machines can
be used for COMMUNICATION PLAY, for a total number of 8 players when the CPU players are included. The
game lasts for one race, regardless of ranking, and no passwords are issued. Once someone passes a checkpoint, all
the players will be given extra time. The first player to cross the finish line or the player in the lead when the time
expires is declared the winner.
If there are no competition players available, the game will default to SINGLE PLAYER mode. Races already in
progress on other cabinets cannot be joined.
8-3-2 SINGLE PLAYER GAME
Game Content & Rules
In this mode, the player attempts to complete all 3 stages. There are 8 players, including the CPU players, in the
race, and the player can continue on to the next stage when successfully making a regulation finishing place.
(Regulation Finishing Place)
- 1st stage: 3rd place or higher
- 2nd stage: 2nd place or higher
After a 1st place finish in the final stage, the ending movie will be played, and a dress up password will be issued.
NOTE: If the dress up level is at MAX, no password will be issued.
If the 1st stage is selected on the COURSE SELECT screen, the 2nd and final stages will be selected automatically.
Once a checkpoint is passed, the remaining time will increase. The time remaining at stage completion will be added
to the remaining time for the next stage.
32
8-4 PASSWORDS
In SINGLE PLAYER mode, if any of the following conditions are met a password will be issued after the game is
finished.
- The player completes the game without any dressing up, regardless of whether a stage was cleared or not.
- The dress up level is not at MAX and all 3 stages have been cleared.
The dress up car can be used in MULTI PLAYER or SINGLE PLAYER mode by entering the password during car
selection.
8
GAME DESCRIPTION
A password consists of 4 letters and includes the following information:
- Car
- Driver (car color)
- AT / MT
- Dress up level (indicated by the number of stars)
8-4 FIG. 01
NOTE: There are also special passwords that are not issued for regular games.
These passwords are planned to be introduced one by one on the official website.
33
8-5 TIME RELEASE
When the power is turned on after the date designated in the cabinet’s built-in calendar, the following will be added
to the available options:
- Car:
Mercury 1949 Convertible
- Driver: Jake Paterson
- Course: RTV ARENA
8
GAME DESCRIPTION
Passwords for the newly available car and driver will become active, and the ranking for the newly added course
will be displayed in the advertise loop.
For a period of one month after the TIME RELEASE, an announcement will be shown in the advertise demo, and an
icon reading “NEW” will be displayed next to the applicable items.
8-5 FIG. 02
8-5 FIG. 01
34
9 TEST MODE
Perform periodic tests and data checks using the TEST and SERVICE buttons inside the cabinet. Follow the
instructions in this chapter to conduct checks when the game machine is first installed, when money is being
collected, or when the game machine does not operate properly.
For this reason, the product’s Test Mode consists of two modes: a System Test Mode for systems in which coin
settings, for instance, are made for products that use the same system, and the Game Test Mode for setting of
difficulty level, etc., and for input/output test of operational units used exclusively with this product.
9
TEST MODE
Shown below are the tests and screens to be used for different problems.
This product uses a LINDBERGH game board and a DVD DRIVE. In the system, a different game can be played by
putting a different DVD ROM in the DVD DRIVE.
9 TABLE 01 EXPLANATION OF TEST MODE
ITEMS
INSTALLATION OF MACHINE
DESCRIPTION
1. Check to ensure each is the standard
setting at shipment.
S/M Chapter 4
2.
S/M Chapter 4,
6-6, 9-3-2, 9-3-5
Check each Input equipment in the
INPUT TEST mode.
3. Check each Output equipment in the
OUTPUT TEST mode.
PERIODIC SERVICING
REFERENCE
SECTIONS
S/M Chapter 4,
6-6, 9-3-3
Periodically perform the following:
1. Ascertain each setting.
S/M Chapter 4,
6-6, 9-3-4, 9-3-5, 9-3-6
2. To test each Input equipment in the
INPUT TEST mode.
S/M Chapter 4,
6-6, 9-3-2, 9-3-5
3. To test each Output equipment in the
OUTPUT TEST mode.
S/M Chapter 4,
6-6, 9-3-3
1. To check each Input equipment in the
INPUT TEST mode.
S/M Chapter 4,
6-6, 9-3-2, 9-3-5
2. Adjust or replace each Input equipment.
Chapter 10, 11, 12
MONITOR
In the Monitor Adjustment mode, check to
see if Monitor (Projector) adjustments are
appropriate.
S/M Chapter 4,
6-6, 14
IC BOARD
1. Information Display Screen
S/M Chapter 4
2. SPEAKER TEST
S/M Chapter 4
Check such data as game play time and
histogram to adjust the difficulty level, etc.
9-3-7
CONTROL SYSTEM
DATA CHECK
NOTE:“ S/M” in the table denotes LINDBERGH service manual, which is provided separately.
35
9-1 SWITCH UNIT AND COIN METER
Never touch places other than those specified. Touching places not specified can
cause electric shock and short circuit accidents.
9
TEST MODE
Be careful that a finger or hand does not get caught when opening/closing the
coin chute door.
• When you enter the Test Mode, fractional coin and bonus adder data is erased.
• Adjust the sound to the optimum volume, taking into consideration the
environmental requirements of the installation location.
• Removing the Coin Meter circuitry renders the game inoperable.
SWITCH UNIT
Open the coin chute door, and the switch unit shown will appear.
The functioning of each SW is as follows:
SERVICE BUTTON
(NOT USED)
TEST BUTTON
SOUND VOLUME SWITCH
(NOT USED)
TEST BUTTON (TEST):
For the handling of the test button, refer to the following pages.
SERVICE BUTTON (SERVICE):
Gives credits without registering on the coin meter.
SOUND VOLUME SWITCH (VOLUME): Adjusts sound volume for all of the machines' speakers.
DEMAGNETIZER BUTTON (DEMAG):
36
This button is not used for this game.
The demagnetizer button is located on the CRT adjust panel.
Please refer to the section 14-3 hereinafter described.
Eliminates the on-screen color unevenness due to magnetization
of CRT. First use this SW before performing the monitor's color
adjustment.
COIN METER
Open the Coin Door by using the key to have the Coin Meter appear.
9
TEST MODE
37
9-2 SYSTEM TEST MODE
• Refer to BOOKKEEPING in GAME TEST MODE for this product’s data.
9
TEST MODE
• Adjust for an appropriate sound volume in consideration of the installation site.
• If the coin meter circuit is removed, play cannot be executed.
• Read the LINDBERGH service manual included with the product for details
about System Test Mode. However, the settings for this product should follow the
specifications in this manual.
In the SYSTEM TEST MODE, LINDBERGH board functioning can be checked, the monitor adjusted, and the coin
setting performed. Refer to LINDBERGH service manual for the details.
Note that the settings of the following items need to be performed in accordance with the instruction given.
COIN ASSIGNMENTS
COIN CHUTE TYPE:
SERVICE TYPE:
COMMON
COMMON
NETWORK SETTING
MAIN NETWORK
DHCP:
DISABLE
NOTE: An IP address will be shown, but there is no need to change it.
38
9-3 GAME TEST MODE
• Do not configure the game in ways not described in this text. It is possible that
the game will not function properly.
9
TEST MODE
• When changing the game configuration, changes will not take effect until the
Game Test Mode properly after configuration changes. Be sure to exit the Game
Test Mode properly after configuration changes.
9-3-1 GAME TEST MODE Menu
Select GAME TEST MODE from the System Menu screen to display the Game Test Menu screen.
GAME TEST MODE
INPUT TEST
OUTPUT TEST
FORCE FEEDBACK
INPUT ASSIGNMENTS
GAME ASSIGNMENTS
BOOKKEEPING
BACKUP DATA CLEAR
->
EXIT
SELECT WITH SERVICE BUTTON
AND PRESS TEST BUTTON
9-3-1 FIG. 01
Use the SERVICE Button to move the cursor to the desired test item.
Press the TEST Button to enter the selected item.
9-3-2
9-3-3
9-3-4
9-3-5
9-3-6
9-3-7
9-3-8
INPUT TEST:
OUTPUT TEST:
FORCE FEEDBACK:
INPUT ASSIGNMENTS:
GAME ASSIGNMENTS :
BOOKKEEPING:
BACKUP DATA CLEAR:
EXIT:
Test each input
Test each output
Set the STEERING resistance
Adjust input settings
Adjust game settings
View game backup data
Clear game backup data
Go back to the System Test Menu
Move the cursor to EXIT and press the TEST Button to return to the System Menu screen.
39
9-3-2 INPUT TEST
Select INPUT TEST to display the following screen and check the status of input devices.
This test should be used periodically to check that each input device is functioning correctly.
INPUT TEST
STEERING
GAS
BRAKE
GEAR POSITION
START
VIEW CHANGE
BOOST
SERVICE
TEST
9
TEST MODE
00H
00H
00H
N
OFF
OFF
OFF
OFF
OFF
PRESS TEST AND SERVICE BUTTON TO EXIT
9-3-2 FIG. 01
Test the STEERING, GAS and BRAKE controls to ensure that they are functioning properly and that the parameters
change smoothly as each input device is operated.
Display N, UP and DOWN using the GEAR POSITION. N should display there is no control input. Verify that both
UP and DOWN display in sync with the position of the gear shifter.
Other controls are working properly if the OFF display changes to ON when operating the corresponding input
device.
Press the SERVICE and TEST Buttons simultaneously to return to the Game Test Menu Screen.
STEERING
GEAR POSITION
BOOST
START
TEST
VIEW CHANGE
BRAKE
9-3-2 FIG. 02
40
SERVICE
GAS
NOT USED
9-3-3 OUTPUT TEST
Select OUTPUT TEST to display the following screen and check the status of each lamp.
This test should be used periodically to check that the lamps are functioning correctly.
OUTPUT TEST
9
OFF
OFF
OFF
OFF
OFF
OFF
OFF
TEST MODE
START BUTTON
VIEW CHANGE BUTTON
BOOST BUTTON
RED LAMP 1
RED LAMP 2
BLUE LAMP 1
BLUE LAMP 2
-> EXIT
SELECT WITH SERVICE BUTTON
AND PRESS TEST BUTTON
9-3-3 FIG. 01
If you press the TEST button after placing the arrow beside an item, the status will be switched to “ON,” and the
corresponding button and lamp will come on. Pressing the TEST button again will switch the status back to “OFF,”
and the lamp will go out.
RED LAMPS are inside the billboard box. Refer to 9-3-3 FIG. 02.
RED LAMP2
RED LAMP1
9-3-3 FIG. 02
Move the cursor to EXIT and press the TEST button to return to the Game Test Menu Screen.
41
9-3-4 FORCE FEEDBACK
9
When you select “FORCE FEEDBACK”, a connection test runs and the STEERING
rotates.
Make sure that no one is touching the STEERING before running these tests as
contact may cause injury.
TEST MODE
After the check is completed, the following FORCE FEEDBACK screen will appear, and you will be able to set the
level of STEERING resistance.
FORCE FEEDBACK
(MIN 0 : MAX 10 : DEFAULT 4)
FORCE= XX
UP
DOWN
FORCE TEST (FORCE= 4)
CENTER
OFF
RIGHT
OFF
LEFT
OFF
->
EXIT
SELECT WITH SERVICE BUTTON
AND PRESS TEST BUTTON
9-3-4 FIG. 01
● FORCE:
Set the STEERING resistance. The ** indicates the current resistance setting.
The smaller the value, the weaker the resistance; the larger the value, the stronger the
resistance.
(Minimum value is 0; the maximum value is 10. The default setting is 4.)
Move the cursor to UP or DOWN and press the TEST Button to change the value.
● FORCE TEST:
Verifies the STEERING motor is working properly.
Toggle between OFF and ON by aligning to CENTER and pressing the TEST Button.
The STEERING will rotate and stop in the center position. Pressing the SERVICE Button
moves the cursor to the next menu item and CENTER changes to OFF. Control of the
STEERING is then released.
When the RIGHT menu item is ON, the STEERING rotates to the right as far as possible
and then stops. Press the SERVICE Button again to turn it OFF and release control of the
STEERING.
When the LEFT menu item is ON, the STEERING rotates to the left as far as possible and then
stops. Press the SERVICE Button again to turn it OFF and release control of the STEERING.
Move the cursor to EXIT and press the TEST Button to return to the Game Test Menu Screen.
42
9-3-5 INPUT ASSIGNMENTS
Select INPUT ASSIGNMENTS to display the following screen.
INPUT ASSIGNMENTS
->
: XX
EXIT
SELECT WITH SERVICE BUTTON
AND PRESS TEST BUTTON
9
TEST MODE
STEERING
GAS ADJUSTMENTS
BRAKE ADJUSTMENTS
9-3-5 FIG. 01
● STEERING:
● GAS PEDAL, BRAKE PEDAL:
Adjust the centering of the STEERING control.
Adjust the GAS and BRAKE pedals.
Move the cursor to EXIT and press the TEST Button to return to the Game Test Menu Screen.
43
STEERING
Make adjustments to STEERING.
Press the TEST Button to display the following screen.
STEER ADJUSTMENTS
9
TEST MODE
(MIN -40 : MAX 40 : DEFAULT 0)
STEERING = XXX
RIGHT
LEFT
->
^
CENTER
EXIT
SELECT WITH SERVICE BUTTON
AND PRESS TEST BUTTON
9-3-5 FIG. 02
Center the STEERING. When the “○” displayed is not exactly aligned with the “^” mark above CENTER, use the
cursor to select RIGHT or LEFT and move the “○”until it is displayed directly above the “^” mark.
Move the cursor to RIGHT and press the TEST Button to move the “0” to the right. Each time you press the TEST
Button, “0” moves slightly to the right.
Move the cursor to LEFT and press the TEST Button to move the “0” to the left. Each time you press the TEST
Button, “0” moves slightly to the left.
Move the cursor to EXIT and press the TEST Button to return to the INPUT ASSIGNMENTS Screen.
44
GAS ADJUSTMENTS
Make adjustments to GAS.
Press the TEST Button to display the following screen.
GAS ADJUSTMENTS
9
TEST MODE
0
^
MIN
FIRST, STEP ON THE GAS FULLY,
AND RELEASE IT
-> RESET
EXIT
MAX
V
SELECT WITH SERVICE BUTTON
AND PRESS TEST BUTTON
9-3-5 FIG. 03
Set the MAX position by stepping on the GAS pedal. The “MAX” display moves to the right depending on how
hard the pedal is pressed.
Entering GAS ADJUSTMENTS without having the GAS pedal pressed down automatically sets the MIN position.
NOTE: If you enter GAS ADJUSTMENTS with the GAS pedal pressed down, set the MIN position by releasing the
GAS pedal. The ˝MIN˝ display moves to the left depending on how much the pedal is released.
Move the cursor to RESET and press the TEST Button to reset MAX and MIN.
Move the cursor to EXIT and press the TEST Button to return to the INPUT ASSIGNMENTS Screen.
45
BRAKE ADJUSTMENTS
Make adjustments to BRAKE.
Press the TEST Button to display the following screen.
BRAKE ADJUSTMENTS
9
TEST MODE
0
^
MIN
FIRST, STEP ON THE BRAKE FULLY,
AND RELEASE IT
-> RESET
EXIT
MAX
V
SELECT WITH SERVICE BUTTON
AND PRESS TEST BUTTON
9-3-5 FIG. 04
Set the MAX position by stepping on the BRAKE pedal. The “MAX” display moves to the right depending on how
hard the pedal is pressed.
Entering BRAKE ADJUSTMENTS without having the BRAKE pedal pressed down automatically sets the MIN
position.
NOTE: If you enter BRAKE ADJUSTMENTS with the BRAKE pedal pressed down, set the MIN position by
releasing the BRAKE pedal. The ˝MIN˝ display moves to the left depending on how much the pedal is
released.
Move the cursor to RESET and press the TEST Button to reset MAX and MIN.
Move the cursor to EXIT and press the TEST Button to return to the INPUT ASSIGNMENTS Screen.
46
9-3-6 GAME ASSIGNMENTS
Select GAME ASSIGNMENTS to display the following screen.
GAME ASSIGNMETNS
->
XXX
NORMAL
ON
ON
HIGH
3
1
LOW
KM/H
OFF
9
TEST MODE
CABINET ID
GAME DIFFICULTY
CONTINUE
ADVERTISE SOUND
COMMENTARY VOLUME
NUM OF LAPS
HEAT
DRESS CODE
SPEEDOMETER
CASUAL USER MODE
DEFAULT SETTING
EXIT
9-3-6 FIG. 01
● CABINET ID:
This setting assigns a seat number to the cabinet for use in “Multi Player Game”.
You may select one of the following settings: NO DEFINED, 1(MAIN), 2, 3 or 4.
When setting up cabinets for Multi Player Game, assign each cabinet the number
from “1”. (Make sure they are not assigned the same number).
Set to NO DEFINED if you do not need to set the cabinet up for Multi Player
Game.
During COMMUNICATION PLAY, the difficulty level and other settings will
be taken from the game machine with the CABINET ID of “1.” When changes
are made to settings on a machine other than CABINET ID “1”, that machine
will follow those settings.
● GAME DIFFICULTY:
Set the level of difficulty for the game.
You may select one of 3 different levels of difficulty: EASY, NORMAL, HARD.
● CONTINUE:
ON:
OFF:
Enable/Disable Continue function.
Enables Continue.
Disable Continue.
● ADVERTISE SOUND:
ON:
OFF:
Turn sound on the Advertise Screen on and off.
Sound is played on the Advertise Screen.
Sound is not played on the Advertise Screen (except when inserting coins).
● COMMENTARY VOLUME:
Adjust the volume for the race commentary.
You may select one of the 3 levels of difficulty: LOW, NORMAL, HIGH.
● NUM OF LAPS:
Set the number of laps.
Indicates the number of laps.
3, 4:
● HEAT:
0, 1, 2:
Set the assistance level for COMMUNICATION PLAY.
A setting of “0” gives no assistance, while a setting of “2” provides maximum
assistance.
47
● DRESS CODE:
LOW:
HIGH:
● SPEEDOMETER:
KM/H:
MPH:
9
Switches the level of female appearances in the game.
All screens and movies will be displayed.
The advertise movie will be cut.
Driver selection will be cut.
(Player will not be able to select car and driver.)
The ending movie will be cut.
TEST MODE
Set the SPEEDOMETER display.
Shows the speed in kilometers per hour.
Shows the speed in miles per hour.
● CASUAL USER MODE:
OFF:
ON:
Set the difficulty level of vehicle handling.
Normal level.
Level of difficulty adjusted for casual users.
- The turn performance and ease of drifting are increased.
- The game will provide extra assistance to prevent vehicle control loss.
- The CPU vehicles’ performances are adjusted.
- The BOOST GAUGE will be full when the race begins.
- When AT is selected, the gears will not respond to the shift lever.
- 5 seconds are added to the wait time.
● DEFAULT SETTING:
Returns all items under GAME ASSIGNMENTS to their default values.
Move the cursor to EXIT and press the TEST Button to return to the Game Test Menu Screen.
48
9-3-7 BOOKKEEPING
Select BOOKKEEPING to display the following screens of operating status data.
BOOKKEEPING 1/2
0
0
0
COIN CREDITS
SERVICE CREDITS
TOTAL CREDITS
0
0
0
NUMBER OF GAMES
SINGLE PLAY
MULTI PLAY
0
0
0
TOTAL TIME
PLAY TIME
AVERAGE PLAY TIME
LONGEST PLAY TIME
SHORTEST PLAY TIME
BACKUP CLEAR TIME
00D 00H 00M 00S
00D 00H 00M 00S
00M 00S
00M 00S
00M 00S
2008/02/01 XX : XX : XX
9
TEST MODE
COIN 1
COIN 2
TOTAL COINS
PRESS TEST BUTTON TO CONTINUE
9-3-7 FIG. 01 BOOKKEEPING 1/2
View the number of credits inserted.
● COIN 1:
The number of coins inserted in COIN CHUTE 1
● COIN 2:
The number of coins inserted in COIN CHUTE 2
● TOTAL COINS:
The total number of coins inserted
● COIN CREDITS:
The total number of coins inserted
● SERVICE CREDITS:
The number of credits added by the SERVICE Button
● TOTAL CREDITS:
The total number of credits
View the number of times the game has been played.
● NUMBER OF GAMES:
The total number of games played
● SINGLE PLAY:
The total number of Single Player Game played
● MULTI PLAY:
The total number of Multi Player Game played
View gameplay times.
● TOTAL TIME:
● PLAY TIME:
● AVERAGE PLAY TIME:
● LONGEST PLAY TIME:
● SHORTEST PLAY TIME:
The total time
The total play time
The average play time
The longest play time
The shortest playtime
You can check the date and time when the BACKUP DATA CLEAR option was executed.
● BACKUP CLEAR TIME: Date and time when backup was cleared last.
Press the TEST Button to move to the screen 2/2 of BOOKKEEPING.
49
BOOKKEEPING 2/2
TIME HISTOGRAM
9
TEST MODE
00M00S
01M00S
02M00S
02M30S
03M00S
03M30S
04M00S
04M30S
05M00S
05M30S
06M00S
06M30S
07M00S
07M30S
08M00S
08M30S
09M00S
09M30S
10M00S
15M00S
20M00S
25M00S
OVER
-
00M59S
01M59S
02M29S
02M59S
03M29S
03M59S
04M29S
04M59S
05M29S
05M59S
06M29S
06M59S
07M29S
07M59S
08M29S
08M59S
09M29S
09M59S
14M59S
19M59S
24M59S
29M59S
30M
TOTAL
0
0
0
0
0
0
0
0
0
0
0
0
0
0
0
0
0
0
0
0
0
0
0
PRESS TEST BUTTON TO EXIT
9-3-7 FIG. 02 BOOKKEEPING 2/2
Display the number of plays by time length category.
● TIME HISTOGRAM:
List of play times
Press the TEST Button to return to the Game Test Menu Screen.
50
RATIO
0%
0%
0%
0%
0%
0%
0%
0%
0%
0%
0%
0%
0%
0%
0%
0%
0%
0%
0%
0%
0%
0%
0%
9-3-8 BACKUP DATA CLEAR
Select BACKUP DATA CLEAR to display the following screen.
BACKUP DATA CLEAR
->
SELECT WITH SERVICE BUTTON
AND PRESS TEST BUTTON
9
TEST MODE
YES(CLEAR)
NO(CANCEL)
9-3-8 FIG. 01
This screen allows you to clear backup data. Use the cursor to select YES or NO.
● YES:
● NO:
Clear all data in BOOKKEEPING, ranking data and credit data.
Go back to the menu screen without clearing data.
BACKUP DATA CLEAR
->
COMPLETED
NO(CANCEL)
SELECT WITH SERVICE BUTTON
AND PRESS TEST BUTTON
9-3-8 FIG. 02
Select YES and press the TEST Button to clear all data in BOOKKEEPING, ranking data and credit data. Clearing
data does not affect other game settings.
When the data has been cleared, the screen displays “COMPLETED”.
Press the TEST Button again to return to the Game Test Menu Screen.
51
10 CONTROL PANEL (HANDLE MECHA)
• In order to prevent an electric shock and short circuit, be sure to turn power off
before performing work by touching the interior parts of the product.
10
CONTROL PANEL (HANDLE MECHA)
• Be careful not to damage the wires. Damaged wires may cause electric shock
or short circuit or present a fire risk.
• Do not touch undesignated places. Touching places not designated can cause
electric shock or short circuit.
• This work should be performed by the site maintenance individual or other
skilled professional. Performing work by non-technical personnel can cause
electric shock hazard.
• Do not perform work other than those specified in this Manual in order to
prevent accidents during performing work and operation after performing work.
Performing work not specified in this Manual may require special training for this
product. If performing work other than those stated in this manual is required for
repair, contact the offices herein stated in this manual or where you purchased
the product from and ask for repair or inquire how to repair.
• Be very careful when soldering. Handling a soldering iron carelessly may result
in a fire or a burn.
• Be extremely careful when heating the heat-shrinkable tube. Failure to do so
may result in a fire or burns.
• Immediately after the game is finished, the motor may still be very hot.
When performing the removal work, wait until the motor cools off.
• This unit is a heavy item weighing approximately 20kg (44.1 lb). Therefore, be
very careful when performing the work. Use plural workers.
• Exercise extreme caution when handling the internal parts of the Control Panel.
Watch out for damage, warping and loss. The loss of just one piece may result in
damage to or lead to faulty operation of the entire unit.
• Be careful that your fingers do not get caught when opening and closing the
control panel, adjusting the VR bracket, or performing other maintenance tasks.
• When securing the plastic-made parts, do not excessively fasten screws and
nuts. Failure to observe this may damage the parts and cause injury due to
fragments resulting from damage.
• Do not touch the steering wheel when switching on the unit. The steering wheel
undergoes automatic initialization after the unit is switched on.
52
Be sure to perform volume's move value setting in the INPUT ASSIGNMENTS in the
Game Test Mode after replacing or adjusting the Volume.
10-1 REMOVING THE CONTROL PANEL
A 5 mm hexagonal wrench is required for the following procedure.
1
2
3
4
5
Turn off the power.
10
CONTROL PANEL (HANDLE MECHA)
In cases the Steering operability is poor and the adjustment of VOLUME SETTING in the TEST mode has no effect,
the causes may be the volume gear's mesh failure and or volume malfunctioning.
Adjust volume gear mesh or replace the volume as per the following procedure.
In this product, when the steering wheel is moved fully left/right, if the volume shaft is rotating within the movable
range, the volume is not feared to be damaged.
Secure the volume in the manner the volume shaft is oriented as shown and the gears are appropriately engaged
when the steering wheel is in the centering position allowing the car to go straight forward.
Remove 4 screws from both sides of the Control Panel’s front part.
Remove 2 screws from underside of the Control Panel.
Wiring connectors are connected inside the Control Panel. Be careful not to damage any of the wiring, and
carefully pull out the Control Panel.
Unplug the wiring connectors.
4 SCREWS FROM BOTH SIDES AND 2 SCREWS FROM
UNDERSIDE (TOTAL 6 SCREWS)
10-1 FIG. 01
53
10-2 ADJUSTING/REPLACING THE VOLUME
ADJUSTMENT PROCEDURE
10
CONTROL PANEL (HANDLE MECHA)
1
2
3
4
Loosen the 2 screws that secure the VR Bracket and move the VR Bracket to adjust the angle and condition
of the gear alignment.
Keeping the handle straight, align the gears so that the direction of the D Cut side of the V.R. Shaft matches
that shown in the diagram.
Tighten the 2 screws and secure the VR Bracket.
Check to make sure the value on the Input Test screen is within the range 80H ± 8H when the steering unit
is in the straight position.
“D” CUT SIDE
VR BRACKET
VOLUME
220-5753, 220-5484
SCREW (2)
M4x8, w/flat & spring washers
10-2 FIG. 01
54
REPLACEMENT PROCEDURE
This procedure requires the following tools: Phillips screwdriver for the M4 screws, 1.5 mm hexagonal wrench,
11-12 mm monkey wrench, nipper, cutter, wire stripper, soldering iron, industrial dryer and heat-shrinkable tube.
Remove the connectors.
10
Remove the 2 screws securing the VR Bracket and remove the entire Bracket and V.R.
Loosen the 2 hexagon socket screws on the Gear Holder and remove the Gear Holder.
Remove the nut securing the VR Bracket, then separate the Volume from the VR Bracket and replace it.
Check to make sure the value on the Input Test screen is within the range 80H ± 8H when the steering unit
is in the straight position.
NUT
VR BRACKET
CONTROL PANEL (HANDLE MECHA)
1
2
3
4
5
GEAR HOLDER
VOLUME
220-5484
220-5753
HEXAGON SOCKET SCREW
FLAT WASHER
M3x8
SPRING WASHER
10-2 FIG. 02
55
10-3 GREASING
10
• Be sure to use the designated grease. Using undesignated grease can cause
parts damage.
CONTROL PANEL (HANDLE MECHA)
• Do not apply grease to locations other than as specified. Doing so may create
a risk of operational problems and deterioration of parts.
• The designated periods for greasing serve only as a guide. Whenever there are
squeaks or other anomalies, apply grease at designated locations.
Use spray grease once every three months to grease up the gear mesh portion of the constituent parts.
Use "Grease Mate" (part number 090-0066) for the spray grease.
V.R. GEAR MESH PORTION
10-3 FIG. 01
56
11 SHIFT LEVER
In the Test Mode, if the SHIFT LEVER's SW can not be inputted satisfactorily, replace the Switch.
When performing the work, remove the Shift Lever Unit.
• Be careful not to damage the wires. Damaged wires may cause an electric
shock, short circuit or present a risk of fire.
11
SHIFT LEVER
• When working with the product, be sure to turn the power off. Working with the
power on may cause an electric shock or short circuit.
11-1 REMOVING THE SHIFT LEVER
1
2
3
4
5
Turn the power off.
Remove 4 screws to lift the Shift Lever Unit.
Disconnect the connector to remove the Shift Lever Unit.
When reinstalling, follow the procedure opposite as when removing. At this time, ensure that "DOWN"
display appears on the upper part as shown.
After reinstalling, be sure to check INPUT TEST in the Game Test mode.
DOWN
4 SCREWS
11-1 FIG. 01
57
11-2 SWITCH REPLACEMENT
1
2
Disconnect the wiring connector of the switch to be replaced.
Remove the 2 tapping screws to replace the Microswitch.
11
SHIFT LEVER
TAPPING SCREW (2)
M3x16
MICROSWITCH
509-5704
11-2 FIG. 01
58
12 ACCELERATOR & BRAKE
• Be careful not to damage the wires. Damaged wires may cause electric shock
or short circuit or present a risk of fire.
• Do not touch undesignated places. Touching places not designated can cause
electric shock or short circuit.
• This work should be performed by site maintenance personnel or other skilled
professionals. Work performed by non-technical personnel can cause a severe
accident such as an electric shock.
• To prevent accidents while working or while operating the product after it has
been installed, be sure not to conduct any procedures other than those given in
this manual. If a procedure not given in this manual is required, request service
from the office given in this manual or from the point of purchase.
12
ACCELERATOR & BRAKE
• Always disengage the power before beginning work. Otherwise there could
be an electric shock or short circuit. Note that when using TEST mode there will
be electricity running through the machine. Do not touch any parts that are not
specified in these directions.
Do not touch the steering wheel when switching on the unit. The steering wheel
undergoes automatic initialization after the unit is switched on.
Be sure to perform volume's move value setting in the INPUT ASSIGNMENTS in the
Game Test Mode after replacing or adjusting the Volume.
When the accelerator and brake pedal do not operate properly, either the volume attachment position must be
adjusted, or the volume must be replaced. Also, the gear alignment position and spring should be greased once every
three months.
59
12-1 VOLUME ADJUSTMENT AND REPLACEMENT
12
ACCELERATOR & BRAKE
The appropriate value for acceleration volume is under 30H when released and over C0H when stepped on.
The appropriate value for brake volume is under 30H when released and over C0H when stepped on.
Check Volume values in the TEST mode.
Since work is performed inside the energized cabinet, be very careful so as not to touch undesignated places.
Touching places not specified can cause electric shock or short circuit.
The following tools are required for the operations below: Phillips screwdrivers for M4 and M5, hexagon wrench
with measuring distance of 1.5 mm, and thread sealant.
ADJUSTING PROCEDURE
1
2
Turn off the power.
Remove two truss screws, and remove the front cover of
the accelerator and brake.
TRUSS SCREW (2)
M4x8, chrome
FRONT COVER
12-1 FIG. 01
3
Loosen the screw that secures the potentiobase,
and adjust the volume values by moving the base.
SCREW
M5x8, w/flat & spring washers
POTENTIOBASE
VOLUME
220-5484
220-5753
12-1 FIG. 02
60
4
5
6
Fasten the potentiobase.
On the INPUT ASSIGNMENTS Screen in the Game Test Mode, set the volume values.
Confirm that the values change smoothly by operating the pedal.
REPLACING THE VOLUME
1
2
Turn off the power.
Remove two screws, and remove the potentiocover.
TRUSS SCREW (2)
M4x8
12
ACCELERATOR & BRAKE
POTENTIOCOVER
POTENTIOBASE
12-1 FIG. 03
3
4
5
6
7
8
Undo the connector of the volume to be replaced.
Remove the screw that fastens the potentiobase.
With the volume still attached, remove the potentiobase.
Remove the base and the gears, and replace the volume. When attaching the volume, use the thread locker.
After replacement, set the volume as described in the “Adjusting Procedure” section above.
After adjusting the setting, confirm that the values change smoothly by operating the pedal.
61
12-2 GREASING
12
Be sure to use the designated grease. Using undesignated grease can cause parts
damage.
ACCELERATOR & BRAKE
Grease the spring and gear alignment area once every three months.
Use GREASE MATE (PART No. 090-0066) as spray grease.
Greasing
12-2 FIG. 01
62
13 MONITOR
13-1 CAUTIONS AND WARNINGS CONCERNING THE SAFETY FOR HANDLING THE MONITORS
Before handling the monitors, be sure to read the following explanations and comply with the caution/warning
instructions given below. Note that the caution/warning symbol marks and letters are used in the instructions.
Indicates that handling the monitors by disregarding this caution may cause a potentially
hazardous situation, which could result in personal injury and or material damage.
13
MONITOR
Indicates that handling the monitors erroneously by disregarding this warning may cause a
potentially hazardous situation, which could result in death or serious injury.
Indicates that access to a specific part of the equipment is forbidden.
Indicates the instruction to disconnect a power connector or to unplug.
• When performing such work as installing and removing the monitor, inserting
and disconnecting the external connectors to and from monitor interior and the
monitor, be sure to disconnect the power connector (plug) before starting the
work. Proceeding the work without following this instruction can cause electric
shock or malfunctioning.
• Using the monitor by converting it without obtaining a prior permission is not
allowed. SEGA shall not be liable for any malfunctioning and accident caused
by said conversion.
• Primary side and Secondary side
The monitor's circuit which is divided into the Primary side and Secondary side,
is electrically isolated. Do not touch the primary side, or do not touch both the
primary side and the secondary side simultaneously. Failing to observe the
instruction can cause electric shock and this is very dangerous. When making
monitor adjustments, use a nonconductive driver and make adjustment without
touching any part other than the Adjustment V. R. and knob. Also, be sure not to
cause a short-circuit to the Primary side and Secondary side. If short-circuited, it
can cause electric shock or malfunctioning, which is very dangerous.
SECONDARY SIDE
(Chassis, CRT)
PRIMARY SIDE
14-1 FIG. 01
63
• High-tension Voltage
Some of the parts inside monitor are subject to high-tension voltage in excess
of 20,000 volts and very dangerous. Therefore, do not touch the monitor interior.
Should soldering & paper wastes, etc. be mixed in the monitor interior, turn the
power off so as not to cause malfunctioning or fire hazard.
13
MONITOR
ANODE CAP
ANODE LEAD
Approx. 29kV
DEMAGNETIZER
COIL
PRIMARY SIDE
DEMAGNETIZER
COIL
MAIN BD
FOCUS LEAD
(black)
Approx. 10kV
SECONDARY SIDE
(Chassis, sheet metal work, CRT, etc.)
Disconnect or
unplug
REAR PART
NECK PCB
Approx.
10kV
FBT Approx. 29kV
14-1 FIG. 02
• Connecting the CRT and PCB
For combining the CRT and PCB, use the specified part No. to maintain the
status of adjustments made at the factory. The anode of the CRT itself will be
accumulatively charged as time elapses, generating high-tension voltage
which is very dangerous. The monitor should be used with the Chassis, CRT and
PCB assembled. When repair, etc. is required at the time of malfunctioning,
be sure to send it in an "as is assembled" condition. If these are disassembled,
what's charged to said high tension voltage can be discharged, causing
a very hazardous situation. Therefore, under no circumstances should it be
disassembled.
• Static Electricity
Touching the CRT surface sometimes causes you to slightly feel electricity. This is
because the CRT surfaces are subject to static and will not adversely affect the
human body.
• Installation and removal
Ensure that the Demagnetizer Coil, FBT (Fly-Back Transformer), Anode Lead and
Focus Lead are not positioned close to the sheet metal work's sharp edges, etc.
and avoid damaging the insulated portions so as not to cause electric shock
and malfunctioning. (For the name of parts, refer to the above Figures).
64
For the purpose of static prevention, special coating is applied to the CRT face
of this product. To protect the coating, pay attention to the following points.
Damaging the coating film can cause electric shock to the customers.
• Do not apply or rub with a hard item (a rod with pointed edge, pen, etc.) to or
on the CRT surfaces.
• Do not remove aluminum foils from the CRT corners. Removing the aluminum
foils can cause static prevention effects to be lowered.
13
MONITOR
• Avoid applying stickers, seals, etc. on the CRT face.
ALUMINUM HOIL
14-1 FIG. 03
65
13-2 CLEANING THE CRT SURFACES
13
Static preventive coating is applied to the CRT surfaces. When cleaning, pay
attention to the following points. Peeling off of static preventive coat can cause
electric shock.
MONITOR
• Remove smears by using a dry, soft cloth (flannels, etc.). Do not use a coarse
gauze, etc.
• For smear removing solvent, alcohol (ethanol) is recommended. When using
chemical detergent, be sure to follow instructions below:
- Dilute chemical detergent with water and dip a soft cloth in and then thoroughly
wring it to wipe smears off.
- Do not use a chemical detergent containing an abradant, powder or bleaching
agent.
- Do not use alkaline chemical detergents such as "glass cleaner" available on
the market or solvents such as thinner, etc.
• Do not rub or scratch the CRT face with hard items such as brushes, scrub brush,
etc.
Clean the CRT surfaces once a week. When cleaning, pay attention to the above caution so that the antistatic coating
will not come off.
66
13-3 ADJUSTMENT PROCEDURE
• Be sure to perform appropriate adjustment of the monitor (projector). For
operation of this machine, do not leave monitor's flickering or deviation as
is. Failure to observe this can cause to worsen the players' or the customers'
physical conditions.
13
MONITOR
• Monitor adjustments have been made at the time of shipment. Therefore, do
not make further adjustment without a justifiable reason. Adjusting the monitor
which contains high tension parts is dangerous work. Also, an erroneous
adjustment can cause deviated synchronization and image fault, resulting in
malfunctioning.
• Do not touch undesignated places. Touching places not designated can cause
electric shock or short circuit.
To make monitor adjustment, take off back cover removing 11 screws.
The adjustment board appears when the back cover is open.
67
This product’s monitor is SANWA 29PFX (Sega part#: 99-60-718). For adjustment method, carefully read and
carry out the following. With this product, the hue of each color cannot be adjusted.
There are 4 buttons to operate the adjustment.
Pressing FUNCTION button displays the menu screen.
13
MONITOR
CONT
: adjusts image contrast.
With the UP button, it becomes deep and becomes light with the DOWN button.
BRIT
: adjusts the on-screen image brightness.
With the UP button, it becomes bright and becomes dark with the DOWN button.
HSIZ
: adjusts the horizontal image size.
With the UP button, it becomes large and becomes small with the DOWN button.
HPOS
: adjusts the horizontal image's position.
With the UP button, it moves to the left and moves to the right with the DOWN button.
VSIZ
: adjusts the vertical image size.
With the UP button, it becomes large and becomes small with the DOWN button.
VPOS
: adjusts the vertical image's position.
With the UP button, it moves upwards and moves downwards with the DOWN button.
-
68
When pressing the DEGAUSS button, degaussing is performed.
Once degaussed, it takes 30 minutes or longer to have degaussing function agai.
14 FLUORESCENT LIGHT/OTHER LAMPS REPLACEMENT
• When working with the product, be sure to turn the power off. Working with the
power on may cause an electric shock or short circuit.
• Be sure to use lamps of the designated rating. Using lamps of undesignated
rating can cause a fire or malfunctioning.
• There is the danger of short circuits or smoke generation due to deterioration
of insulation in lighting fixtures resulting from age deterioration. Check for
anomalies such as the following: Does it smell like something is burning? Is there
socket discoloration? Are any lamps being replaced frequently? Do lamps not
go on properly?
• Be careful when handling the plastic parts. Failure to observe this may cause
injury or damage due to fragments, etc.
• Do not attempt to replace billboard fluorescent lamps while standing on the
base. If you should misstep while working, you could stumble or fall down.
14
FLUORESCENT LIGHT/OTHER LAMPS REPLACEMENT
• You may get burned by a hot fluorescent lamp or other lamps. Pay full attention
to the lamps when performing the work.
Billboard Fluorescent Light
1
2
Turn off the power.
Remove the 4 screws then remove the front billboard plate.
69
3
Remove a clamp taking a screw out and remove a red CCFL from each left and right side.
4
Remove the back marquee plate and replace the fluorescent light and glow lamp.
14
FLUORESCENT LIGHT/OTHER LAMPS REPLACEMENT
70
Start Button Lamp, View Change Button Lamp
1
Turn off the power.
14
Remove 4 screws.
3
Remove the Switch Plate. The Switch Plate contains wiring connections. Disconnect the connector, taking
care not to damage the wiring.
4 SCREWS
FLUORESCENT LIGHT/OTHER LAMPS REPLACEMENT
2
Disconnect the connector.
SWITCH PLATE
71
4
There is a metal fitting at the base of the buttons on the Button Plate. Rotate this metal fitting to unlock it,
then remove the printed circuit board from the Button Plate.
BUTTON PLATE
14
FLUORESCENT LIGHT/OTHER LAMPS REPLACEMENT
Unlock.
5
PRINTED CIRCUIT BOARD
Press and turn the lamp counter-clockwise to remove it.
LAMP 6.3V 1W
390-5445-01
72
15 PERIODIC INSPECTION
The items listed below require periodic check and maintenance to retain the performance of this machine and to
ensure safe business operation.
When handling the controller, the player will be in direct contact with it. In order to always allow the player to enjoy
the game, be sure to clean it regularly. Also, it is advisable to provide wet tissue, etc. available for player use.
15
• Never use a water jet, etc. to clean the inside and outside of the cabinet. If
wetness occurs for any reason, do not use the product until it has completely
dried.
PERIODIC INSPECTION
• Once a year, check to see if power cords are damaged, the plug is securely
inserted, dust is accumulated between the socket outlet and the power plug,
etc. Using the product with accumulated dust in the interior may cause fire or
electric shock.
• Once a year, request the office shown on this manual or the dealer from whom
the product was originally purchased to perform the internal cleaning. Using the
product with accumulated dust in the interior may cause fire or other accidents.
Note that you are liable for the cost of cleaning the interior parts.
• There is the danger of accidents involving electrical shorts circuits or fire caused
by factors such as the deterioration of insulation in electrical and electronic
equipment over time. Check that there are no abnormalities such as odors from
burning.
16 TABLE 01 PERIODIC INSPECTION TABLE
ITEMS
DESCRIPTION
PERIOD
REFERENCE
CABINET
Confirm that adjusters contact floor
Daily
3
CONTROL PANEL
Volume inspection
Monthly
9, 10
Gear alignment inspection
Every 3 months
10-2
SHIFT LEVER
ACCELERATOR & BRAKE
MONITOR
COIN CHUTE DOOR
Greasing
Every 3 months
10-3
Switch inspection
Monthly
9, 11
Greasing
Every 3 months
11-3
Volume inspection
Monthly
9, 12
Gear and spring potion greasing
Every 3 months
12-2
Screen cleaning
Weekly
14-2
Confirm settings
Monthly or when
moving
6, 9, 14
Coin switch inspection
Monthly
9
Coin insertion test
Monthly
13
Selector cleaning
Every 3 months
13
SEAT
Greasing to the seat rail
Every 3 months
16 FIG. 01
GAME BD
Memory Test
Monthly
9
Confirm settings
Monthly
9
POWER CABLES
Inspection, Cleaning
1 year
As above
INTERIOR
Cleaning
1 year
As above
CABINET SURFACES
Cleaning
As appropriate
Next page
73
Cleaning the Cabinet Surfaces
15
PERIODIC INSPECTION
74
When the cabinet surfaces are badly soiled, remove stains with a soft cloth dipped in water or diluted (with water)
chemical detergent and squeezed dry. To avoid damaging surface finish, do not use such solvents as thinner, benzine,
etc. other than ethyl alcohol, or abrasives, bleaching agent and chemical dustcloth.
Some general-purpose household, kitchen and furniture cleaning products may contain strong solvents that degrade
plastic components, coatings, and print. Before using any cleaning product, read the product's cautionary notes
carefully and test the product first on a small area that is not highly visible.
Seat (Greasing to Seat Rail Portion)
Move the Seat to the rearmost position and apply spray greasing to the portion shown at the right once every 3
months by using NOK KLUBER L60 or GREASE MATE SEGA PART No. 090-0066.
After greasing, move the Seat a few times forward and backward so as to allow the grease to be applied all over
uniformly.
Be sure to wipe grease which attaches to the surfaces of the PROTECT RUBBER on the Seat Rail, or any excess
grease.
16 TROUBLESHOOTING
16-1 TROUBLESHOOTING (WHEN NO ERROR MESSAGE IS SHOWN)
• Be careful so as not to damage wirings. Damaged wiring can cause electric
shock or short circuit.
• After removing the cause of the functioning of the Circuit Protector, reinstate the
Circuit Protector. Depending on the cause of the functioning, using the Circuit
Protector as is without removing the cause can cause generation of heat and
fire hazard.
16
TROUBLE SHOOTING
• In order to prevent electric shock and short circuit, be sure to turn power off
before performing work.
• In the event that a problem cannot be resolved by employing the procedures
listed in this Manual, be sure to request service from the office shown on
this Manual or the dealer from whom the product was originally purchased.
Attempts to employ procedures other than those specified in this Manual can
cause electrical shock, shorting, or fire.
• In the event of a problem that is not described here, be sure to contact the
office shown on this Manual or the dealer from whom the product was originally
purchased. Careless attempts at repair can result in electrical shock, shorting,
or fire.
If a problem occurs, first check to make sure that the wiring connectors are properly connected.
17 TABLE 01
PROBLEM
When the main SW is
turned ON, the machine
is not activated.
Fluorescent lamp inside
FL box doesn’t light up.
Sound is not emitted.
CAUSE
COUNTERMEASURES
The power is not ON.
Firmly insert the plug into the outlet.
Incorrect power source/voltage.
Make sure that the power supply/voltage
are correct.
The Circuit Protector functioned due
to momentary overcurrent.
After eliminating the cause of overload,
have the Circuit Protector of the AC Unit
restored. <6-6, See 17 FIG. 01.>
The fuse of the connect board
was blown out due to momentary
overcurrent.
After eliminating the cause of overload,
replace the specified rating fuse.
<17 FIG. 01>
Connector connection fault.
Check connector connections between
the Cabinet and the FL box.
Fluorescent lamp and glow lamp need
replacement.
Replace the fluorescent lamp and the
glow lamp. <See Chapter 15.>
Sound volume adjustment is not
correct.
Adjust the Switch Unit’s sound
adjustment volume. <See Chapter 9.>
Faulty connections for various
connectors.
Check the connections for the game
board, amp, speakers and Volume
connectors.
Malfunctioning BD, amp and speaker.
Perform Sound Test. <See System Test
Mode in LINDBERGH Service Manual.>
75
Sounds are emitted and
the lamps are lit, but the
screen is black.
16
TROUBLESHOOTING
Faulty connections for the visual
signal connector or the monitor power
connector.
Check the connections for the monitor
and game board connectors.
Broken monitor.
Contact the company from whom the unit
was purchased.
Irregular/uneven colors
on the monitor screen.
Magnetization to the CRT.
Press the Demagnetization switch on the
switch unit. <See Chapter 9.>
Colors on the monitor
screen are strange.
Faulty connection for the visual signal
connector.
Check the visual signal connector
connection and make sure it is secured
properly.
Screen adjustment is not appropriate.
Make adjustment appropriately.
<See Chapter 14.>
The on-screen image
sways and/or shrinks.
The power source and voltage are no
correct.
Make sure that the power supply and
voltage are correct.
Does not accept input
from any switch or
volume.
Faulty connector connections.
Check the connection for the I/O Board
and Cabinet connector.
Does not accept input
from the Shift Lever.
Faulty connector connections.
Check the connections for the connectors
in the Control Panel and between the
Control Panel and the Cabinet.
Broken Microswitch.
Replace the Microswitch.
<Microswitch 509-5704>
Incomplete power on check.
Power on and verify that the power on
check completes properly.
<See Section 6-5.>
Deviation of the volume value.
Adjust the volume value in the Test
Mode. <See Chapter 9.>
Volume gear engagement fault.
Adjust the engagement of the gear.
<See Chapter 9, 10.>
Steering (Servomotor)
response is incorrect.
No response from
Steering (Servomotor).
Steering (Servomotor)
is weak in its force
feedback.
76
Check the power for the I/O Board.
Volume malfunctioning.
Replace the volume. <See Chapter 10.>
Detached wires.
Check for faulty wire connections around
moving parts.
When replacing wires, secure them so
that they do not touch any moving parts.
Failure of power-on checking
procedure.
Reconnect the power and complete a
power-on checking procedure.
<See Section 6-6.>
Faulty connector connections.
Check the connections for the connectors
between the Game Board and Servodriver
and between the Servodriver and the
Servomotor.
Thermal element in the Servodriver is
operating.
Occurs when the internal temperature
reaches 70°C (158°F) and corrects
automatically when the unit cools.
Momentary overload caused a fuse on
the Servodriver to blow.
Contact the company from whom the unit
was purchased.
Aging of the force feedback
mechanism.
Reset in the Test Mode. <See Chapter 9.>
The accelerator or
brake does not perform
appropriately.
Adjust the volume value in the Test
Mode. <See Chapter 9.>
Faulty Volume attachment or adjust
gear alignment.
Adjust the volume attachment and verify
in Test Mode. <See Chapter 9, 12.>
Faulty connector connection.
Check the connections for the accelerator
and brake connectors and the connectors
between the accelerator, brake and
cabinet.
Failure of the volume.
Replace the volume. <See Chapter 12.>
Start button and View
Change button input
does not work and they
do not flash.
Faulty connector connections.
Check the connections for the connectors
between the I/O Board, the cabinet and
the control panel and those inside the
control panel.
Start button and View
Change button input
works, but they do not
flash.
Unverified settings or operation.
The Start button only flashes when Free
Play is set. Check the operation in Test
Mode. <See Chapter 9.>
The lamp is burnt out.
Replace the lamp. <See Chapter 15.>
Failure of the network
play.
Network play is wrongly set.
Reset correctly. <See Chapter 9, 19.>
Communication cables are
disconnected.
Communication cables are wrongly
connected.
Reconnect the cables. <See Chapter 19.>
Damage of communication cables.
Reconnect the cables correctly.
Replace the cables. Contact the company
from whom the unit was purchased.
16
TROUBLE SHOOTING
Incorrect volume setting.
77
Replacing Fuses
16
• In case fuse replacements other than those stated in this manual are necessary,
contact where you purchased the product from for inquiries regarding this
matter.
TROUBLESHOOTING
• In order to prevent an electric shock, be sure to turn power off and unplug from
the socket outlet before performing work by touching the internal parts of the
product.
• Be careful so as not to damage wirings. Damaged wiring can cause electric
shock and short circuit accidents.
• Be sure to use fuses meeting specified rating. Using fuses exceeding the
specified rating can cause fire and electric shock accidents.
• After eliminating the cause of the blowing of fuse, replace the fuse. Depending
on the cause of fuse blowing, continued use with the fuse as is blown can cause
generation of heat and fire hazard.
Fuses are located on the AC power plate on the back of the cabinet and on the transformer inside upper back lid..
78
16-2 ERROR MESSAGES
This product displays the following messages when it detects an error. Read the error description and follow
the steps indicated. Refer to the LINDBERGH Service Manual for details on error messages displayed with the
LINDBERGH logo.
The I/O board and the LINDBERGH have been disconnected.
Check to make sure the I/O board and the LINDBERGH are properly connected.
Error 12
JVS I/O board does not fulfill the game spec.
The number of I/O boards are not sufficient to run the application.
Check to make sure the I/O board and the LINDBERGH are properly connected.
16
TROUBLE SHOOTING
Error 11
JVS I/O board is not connected to main board.
Error 15
Game Program Not Found.
The key chip intended for the application is not connected or is loose.
Check to make sure the key chip and the LINDBERGH are properly connected.
Error 1000
Network is Disconnected.
Communication has been broken.
This occurs when the packet does not arrive in a specific amount of time.
Check to make sure the network devices of all the cabinets are properly connected.
See the NOTE below.
Error 1001
MAIN-Cabinet Not Found.
The main cabinet (CABINET ID 1) was not found when the application was started or a timeout occurred
while waiting for communication. Communication will time out after approximately 2 minutes.
- In GAME TEST mode, check to make sure the main cabinet (CABINET ID 1) is properly set up.
- In the case of a time out, turn the power to all the connected cabinets off and then on again.
Error 1002
SUB-Cabinet Not Found.
The sub cabinets (CABINET ID 2-4) were not found when the application was started or a timeout occurred
while waiting for communication. Communication will time out after approximately 2 minutes.
- In GAME TEST mode, check to make sure the sub cabinets (CABINET ID 2-4) are properly set up.
- In the case of a time out, turn the power to all the connected cabinets off and then on again.
79
Error 1003
Same CabinetID Found.
The connected cabinets have the same CABINET ID.
In GAME TEST mode, set the CABINET IDs making sure that they are all different.
16
Error 1004
Network has not been initialized.
TROUBLESHOOTING
The network has not been initialized.
Check to make sure the network device on the LINDBERGH is functioning properly.
Error 1005
Network cannot use.
The network cannot be used.
Check to make sure the network device on the LINDBERGH is functioning properly.
NOTE: This game is set up so that if one cabinet comes up with the message, ″Error 1000 Network is
Disconnected,″ the same message will appear on all the other cabinets as well. To recover the connection,
check the network devices connecting the cabinets, and then turn the power off to all the cabinets showing
the error and then on again.
80
17 GAME BOARD
• In order to prevent electric shock and short circuit hazards, be sure to turn
power off before performing work.
• When replacing or repairing the game board and then returning it to the
cabinet, be sure to reconnect all the connectors correctly. Improper connection
may cause electric shock, short circuit or fire.
• When connecting the connector, check the orientation carefully and connect
securely. The connector must be connected in the proper direction. If it is
connected in the wrong direction or indiscriminately at an incline so that a load
is applied, the connector or its terminal pins could break, causing a short circuit
or fire.
17
GAME BOARD
• Be careful not to damage the wires. Damaged wires may cause electric shock
or short circuit or present a fire risk.
• No connectors other than those connected on the game board when first
delivered can be used b this product. Do not connect any other wires to any of
the unused connections. This may lead to the generation of heat, smoke or burn
outs.
In this product, setting changes are made during the test mode. The game board
need not be operated. Use the game board, etc. as is with the same setting made
at the time of shipment so as not to cause electric shock and malfunctioning.
17-1 REMOVING THE LINDBERGH
1
2
Turn off the power.
Remove 2 truss screws and pull out the PCB base..
81
3
Remove all connectors connecting to the game board.
4
Remove 4 screws and remove the game board.
17
GAME BOARD
82
17-2 COMPOSITION OF THE GAME BOARD
• The game board becomes the game board for this product once the key chip
is inserted.
ASSY CASE LBG L 1GB RTV (844-0019D-01) <USA>
GAME BOARD
• The DIP SW (dip switches on the board must be set as specified below. If set
incorrectly for this product, an error will be displayed and the game will not run.
17
BOARD NUMBER STICKER
DIP SW
KEY CHIP
18-2 FIG. 01
DIP SW Setting
Use this product with the DIP SW settings shown in the figure below.
18-2 FIG. 02
83
18 COMMUNICATION PLAY
For this game, up to 4 machines can be connected to allow up to 4 players to play simultaneously. In this instance,
connecting the communication cable and setting for the communication play are required.
18-1 INSTALLATION PRECAUTIONS
18
COMMUNICATION PLAY
• Before starting to work, ensure that the Power SW is OFF. Failure to observe this
can cause electric shock or short circuit.
• Use care so as not to damage wirings. Damaged wiring can cause electric
shock or short circuit.
• Do not touch undesignated places. Touching places not designated can cause
electric shock or short circuit.
• The work described below should be carried out by the site maintenance
personnel or other qualified professional. Work carried out by personnel without
the necessary skill or technology can cause accident.
• To perform work safely and avoid serious accident such as the cabinet falling
down, do not perform work in places where step-like grade differences, a ditch,
or slope exist.
• To prevent accidents while working or while operating the product after it
has been installed, be sure not to conduct any procedures other than those
given in this manual. There are cases in which procedures not covered in this
manual require special tools and skills. If a procedure not given in this manual is
required, request service from the office given in this manual or from the point of
purchase.
• To perform work safely, be sure to secure the space corresponding to number
of machines to be linked. Failure to observe this can cause accident.
• To avoid accidents, use a cable cover that will not cause patrons to trip when
laying network cables in areas of heavy foot traffic.
• To prevent accidents and acts of vandalism, cover the network cables with the
strongest cover possible.
Since 2 or more machines are to be linked, sufficient power corresponding to the number of machines used need to
be supplied. Note that as a standard, the per machine capacity should be 7 A for the 100-120 V area.
84
Distance between Machines
The maximum distance between the game machines depends on the length of the cables connecting them, but make
sure the units are separated from each other by at least 70 cm (27.6 in) so that players can pass between them. Do
not install more than the designated number shown in the layout diagram.
18
COMMUNICATION PLAY
700 mm (27.6 in)
700 mm (27.6 in)
700 mm (27.6 in)
200 mm (7.9 in)
200 mm (7.9 in)
200 mm (7.9 in)
19-1 FIG. 01
85
18-2 CONNECTING THE COMMUNICATION CABLE
This game can be linked up to 4 units.
(For 2 units link play)
The LAN ports on the game boards in both unit must be connected with network (LAN) cable.
18
COMMUNICATION PLAY
86
(For 3 or more units link play)
The hub is necessary to enable 3 or more units link play, but it is not included in the unit.
It must be prepared separately. (It is available at SEGA as an optional part (part#: 601-11351), if necessary)
Then the LAN port on the game board in each unit must be connected to the hub with network (LAN) cable.
18-3 NETWORK PLAY SETTINGS
Each of the linked machines must be set up for network play. If the machines are not set up correctly, network play
will not be possible.
For this game, up to 4 machines can be connected to allow up to 4 players to play simultaneously.
Turn on the power on each machine to be used in network play.
18
Cause all of the machines to enter the Test Mode.
Select the GAME TEST MODE and press the Test button to display the GAME TEST MENU screen.
Select the GAME ASSIGNMENTS in the GAME TEST MENU screen and press the Test button.
COMMUNICATION PLAY
1
2
3
4
GAME ASSIGNMENTS
CABINET ID
GAME DIFFICULTY
CONTINUE
ADVERTISE SOUND
COMMENTARY VOLUME
NUM OF LAPS
HEAT
DRESS CODE
SPEEDOMETER
CASUAL USER MODE
->
XXX
NORMAL
ON
ON
HIGH
3
1
LOW
KM/H
OFF
DEFAULT SETTING
EXIT
19-3 FIG01 GAME ASSIGNMENTS Screen
5
6
Perform the CABINET ID setting. Set the different ID number to each machine. Be sure to assign one of
them with the ID number of “1.”
Cause all of the machines to exit from the TEST MODE. Always select EXIT in the SYSTEM TEST
MENU screen.
87
18-4 NETWORK PLAY PRECAUTIONS
18
COMMUNICATION PLAY
88
• In network play, difficulty level and other settings are made from CABINET ID
Number 1. Changing the settings at CABINET ID Number 1 also changes the
settings for other units.
• If one of the units attached for network play enters Test Mode, the other unit will
display the Error screen.
• Even when units are connected for network play, each seat, each game may
be given different cost settings. Incorrect cost settings may cause budget
balancing problems.
The operation of a unit when connected to other units for network play is different than that of a stand-alone unit.
Administration of network units should be handled carefully.
Entering Test Mode will cause any other machines set up for network play to display the Error screen. When
customers are playing the game, do not enter Test Mode on any network play-enabled machine.
19 DESIGN-RELATED PARTS
For the warning display stickers, refer to Chapter 1.
19
DESIGN-RELATED PARTS
DESIGN PL SPEED MTR
RTV-2004-CX
DESIGN PL OIL MTR
RTV-2004-AX
DESIGN PL TACO MTR
RTV-2004-BX
89
20 PARTS LIST
(CABINET PARTS)
20
PARTS LIST
90
(INSIDE ELECTRIC COMPONENTS)
MARQUEE BOX
20
PARTS LIST
COIN BOX
91
INSIDE THE CABINET BACK LOWER PORTION
20
PARTS LIST
INSIDE THE CABINET BACK UPPER PORTION
92
ASSY ACCEL&BRAKE (SPG-2200-01)
(D-1/2)
20
PARTS LIST
93
ASSY ACCEL&BRAKE (SPG-2200-01)
ITEM NO.
20
PARTS LIST
94
PART NO.
DESCRIPTION
1
2
3
4
5
6
7
8
9
10
11
12
13
14
15
16
17
19
20
21
SPG-2201
SPG-2202
SPG-2203
SPG-2204
SPG-2205
SPG-2206
SPG-2207
SPG-2208
SPG-2209
SPG-2210
SPG-2211
SPG-2212
SPG-2213X
SPG-2214
SPG-2215
SPG-2216
SPG-2217
SPG-2219
SPG-2220
SPG-2221
BASE
ACCEL PEDAL
BRAKE PEDAL
ACCEL SPRING
BRAKE SPRING
SHAFT
ACCEL GEAR
BRAKE GEAR
NEUTRAL STOPPER
VR PLATE ACCEL
VR PLATE BRAKE
AMPL GEAR
GEAR SHAFT
STOPPER
RUBBER CUSHION
COVER
VR COVER
GEAR STAY
WSHR
NEUTRAL STOPPER D
101
102
102
104
105
106
100-5263
220-5484
220-5753
601-7944
310-5029-F15
280-0419
BEARING 12(OILES 80F-1212)
VOL CONT B-5K OHM
VOL CONT B-5K OHM (TOCOS)
GEAR 15
SUMITUBE F F15MM
HARNESS LUG
201
202
203
204
205
206
207
208
209
210
028-A00304-P
020-000520-0Z
000-P00420
000-P00512-W
000-T00408-0C
FAS-450005
000-P00405
FAS-000001
050-H00500
060-F00400
SET SCR HEX SKT CUP P M3x4
HEX SKT H CAP SCR BLK M5x20
M SCR PH M4x20
M SCR PH W/FS M5x12
M SCR TH CRM M4x8
SPR PIN BLK OZ 6x10
M SCR PH M4x5
M SCR TH CRM M3x6
HEX NUT M5
FLT WSHR M4
301
600-6840-01
WIRE HARN ACCEL&BRAKE YL
(D-2/2)
NOTE
ASSY SPEAKER L
20
PARTS LIST
ITEM NO.
PART NO.
DESCRIPTION
1
542-50-104
SPEAKER HOLD DOWN METAL
101
130-5156-02
SPEAKER BOX 8OHM 20W VA1 YL
NOTE
95
ASSY SPEAKER R
20
PARTS LIST
ITEM NO.
96
PART NO.
DESCRIPTION
1
542-50-104
SPEAKER HOLD DOWN METAL
101
130-5156-02
SPEAKER BOX 8OHM 20W VA1 YL
NOTE
ASSY CONTROL PANEL
(D-1/2)
20
PARTS LIST
Fastening Torque
20N•m
NOTE: Screw components must be coated with thread
sealant.
97
ASSY CONTROL PANEL
ITEM NO.
20
PARTS LIST
98
(D-2/2)
PART NO.
DESCRIPTION
1
2
3
4
5
6
7
8
9
10
RTV-2100
RTV-2500
542-50-109
RTV-2002
RTV-2003
RTV-2004
SPG-2001X
DYN-1209X
SPG-2002
DYN-1223X
ASSY SW PLATE
ASSY HANDLE MECHA
CONTROL BRACKET (STEERING)
SHIFT BASE
SHIFT COVER UPPER
CONTROL PANEL COVER
STEERING WHEEL
HANDLE COLLAR
STEERING EMBLEM
SHIFT COVER B
101
102
610-0408-01
509-6175
UP/DOWN SHIFTER AL YL
SW OBSA-60UMQ/BOOST RTV
NOTE
ASSY SW PLATE
20
PARTS LIST
NOTE: When attaching the STICKER, line it up with the hole.
ITEM NO.
PART NO.
DESCRIPTION
1
2
3
RTV-2101
ORT-2101
171-6478B
STICKER START/VIEW
BUTTON PLATE
PC BD LIGHTING SWX5
212-5205-12
509-5560-Y-91
509-5561-R-91
CONN JST M 12P RTA
PB SW W/L 6V 1L Y ROHS
PB SW W/L 6V 5L R ROHS
101
102
103
NOTE
99
ASSY HANDLE MECHA (RTV-2500)
20
PARTS LIST
GREASING
NOTES:
1: Screw components must be coated with thread
sealant.
(Except for the U NUT)
2: Fastening Torque: M3: 0.74N • m M4: 1.8N • m
M6: 5.6N • m M8: 17.4N • m (8): 20.0N • m
3: The motor shaft should be installed in a position
such that, when the steering wheel shaft is
centered, the key structure surface comes to ±45
degrees from the top.
4: Timing Belt S5M Initial Tension 95~165[N]
Span=130[mm] Belt width=15[mm]
Unit weight=0.034[kg/(10mm width x 1m length)]
(Mitsuboshi Belting Ltd.)
Unit weight=0.039[kg/(10mm width x 1m length)]
(Bando Chemical Industries, Ltd.)
100
(D-1/2)
ASSY HANDLE MECHA (RTV-2500)
PART NO.
DESCRIPTION
1
2
3
4
5
6
7
8
9
10
11
12
13
14
15
ORA-2501
SPG-2502
ORA-2502
SPG-2504
SPG-2505
ORA-2503
ORA-2504
ORA-2505
ORA-2506
SPG-2453
DYN-1270
SLC-1130
ORA-2507
253-5592
253-5593
HANDLE BASE
BASE LID
HANDLE SHAFT
PULLEY 20 S5M
PULLEY 60 S5M
MOTOR BRKT
VR BRKT
STOPPER BOLT
STOPPER RUBBER
KEY 4x4x40
STOPPER KEY
ADJUST RING
MOTOR SHAFT COLLAR
MOTOR INSULATOR A
MOTOR INSULATOR B
101
102
103
104
105
106
107
107
108
350-5805-02
100-5112
601-8966
601-6172
601-6959
601-9173
220-5484
220-5753
310-5029-F20
SERVO MOTOR W/FG SIDE TYPE
BEARING 17 (NSK 6003ZZ)
GEAR HOLDER
GEAR 48
GEAR 64
TIMING BELT (150 S5M 475)
VOL CONT B-5K OHM
VOL CONT B-5K OHM (TOCOS)
SUMITUBE F F 20MM
201
202
203
204
205
206
207
208
209
210
211
212
213
214
028-A00408-P
028-A00308-P
065-S012S0-Z
065-S020S0-Z
000-P00408-W
000-P00412-W
030-000612-S
060-F00600
050-U00600
030-000840-S
068-852216
060-S01200
012-P00412
FAS-650023
SET SCR HEX SKT CUP P M4x8
SET SCR HEX SKT CUP P M3x8
STP RING BLK OZ S12
STP RING BLK OZ S20
M SCR PH W/FS M4x8
M SCR PH W/FS M4x12
HEX BLT W/S M6x12
FLT WSHR M6
U NUT M6
HEX BLT W/S M8x40
FLT WSHR 8.5-22x1.6
SPR WSHR M12
TAP SCR #2 PH 4x12
WAVE WSHR 26.4-34.2x0.3
301
600-6866-01
WIRE HARN ASSY HANDLE MECHA VR
NOTE
20
PARTS LIST
ITEM NO.
(D-2/2)
101
21 WIRE COLOR CODE TABLE
The DC power wire color for this product is different from previous SEGA titles.
Working from the previous wire colors will create a high risk of fire.
21
WIRE COLOR CODE TABLE
The color codes for the wires used in the diagrams in the following chapter are as follows.
A
B
C
D
E
PINK
SKY BLUE
BROWN
PURPLE
LIGHT GREEN
Wires other than those of any of the above 5 single colors will be displayed by 2 alphanumeric characters.
1
2
3
4
5
7
8
9
RED
BLUE
YELLOW
GREEN
WHITE
ORANGE
BLACK
GRAY
If the right-hand side numeral of the code is 0, then the wire will be of a single color shown by the left-hand side
numeral (see the above).
Note 1:
If the right-hand side numeral is not 0, that particular wire has a spiral color code. The left-hand side
character shows the base color and the right-hand side one, the spiral color.
<Example> 51………WHITE/RED
RED
Note 2:
The character following the wire color code indicates the size of the wire.
U:
K:
L:
None:
102
WHITE
AWG16
AWG18
AWG20
AWG22
6
5
4
3
50L
RTV-60020USA
80L
2
SANWA29PFX
99-60-718
EARTH
WH(YL)
D
EARTH
M
EARTH
STEERING WHEEL
(SEVO MOTOR)
ENCODER
P C
80L
1
50L
2
80L
3
50L
4
WH(VL)
RTV-60018
542-60-005
99-60-688
532-60-615-1
99-60-719
SW REGU ATX FOR LINDBERGH
PANEL
VIDEO C P
80L
AC120V 1
2
50L
AC120V 3
WH(U-P)
RGB
D-SUB15P
VIDEO OUT1
43K
7 DEMAG
8 DEMAG
WH(U-P)
PANEL
MOLEX
3P
99-00-001
WH(YL)
1
20
20
P C
1
2
A
10
50
20
50
40
50
80
50
40(SH)
P C
1
2
3
4
5
6
7
8
9
10
11
12
P C
1
2
3
4
5
6
20
20
40
50
80
10K
P C
1
2
3
4
20
20
AC 120V
C P
1
2
3
AC 120V
80K
50K
A
ORANGE
WHITE
GREEN
YELLOW
BLUE
RED
7
5
4
3
2
1
B
BLACK
8
A
9
E
D
C
B
GRAY
LIGHT GREEN
PURPLE
BROWN
SKY BLUE
PINK
C P
1
2
3
4
5
6
7
8
C P
1
2
3
4
5
6
7
8
AWG16 UL1015
AWG18 UL1015
AWG20 UL1007
AWG22 UL1007
U
K
L
C
EARTH WIRE
43
WHITE
542-60-007
VIDEO OUT1
RGB
D-SUB15P
10
10
10
30
30
80
80
80
80
80
MOLEX
GND
GND
GND
GND
GND
GND
GND
+12V
+12V 9
+12V 10
+5V 11
+5V 12
+5V 13
+3.3V 14
50L
80L
RTV-60040USA
RTV-60039USA
80L
80L
80L
80L
50L
50L
50L
50L
542-60-005
C
A
1
10
2
50
3
20
4
50
5
40
6
50
7
80
8
50
9
40(SH)
10
WH(SM)
AP
10
50
20
50
40
50
80
50
40(SH)
542-60-007
99-60-900
80L
F
5V
GND
RX
TX
GND
50L
VH 8P
CN4
1
2
3
4
5
6
7
8
WH(VL)
5V
INC A
INC/A
INC B
INC/B
DRG Z
DRG/Z
SERMO S1
SERMO S1
SG
1
2
3
4
5
6
FG
SAG
AC100V(T)
AC100V(T)
AC100V(R)
AC100V(R)
VH 7P
1
2
3
4
5
6
7
VH 3P
1
2
3
C P
1
2
3
4
5
6
7
8
10
10
30
30
80
80
80
80
RCA RED
AUDIO R
RCA WHITE
AUDIO L
10
10
30
30
80
80
80
80
USB A
542-60-001
43K
43K
BK
AK
E
515-60-682
91
RTV-60014USA
95
AK
BK
RTV-60047
43K
99-60-221
TRANS
FOMER
AC120V IN
AC100V OUT
SAG
EARTH
RTV-60012
WH(VL)
40
30
20
10
80
SH
MOTOR(FG)
MOTOR(FG)
844-0019D-92-11
ASSY CASE LBG 1GB RTV
D
99-60-900
E
542-60-006
CN5
838-14592-01
MOTOR(V) SERVO MOTER
DRIVE BD SER EMI
MOTOR(W)
MOTOR(U)
NH10P
CN1
1
2
3
4
5
6
7
8
9
10
TX+
TXRX+
RXGND
PH 5P
GND
CN1
PH 6P
CN2
838-14578
CONVERT BD
RS232C/RS422
1
2
3
4
5
10K
80
50
40
A
10
50
20
50
40
50
80
50
40(SH)
WH(VL)
RTV-60007USA
10
80
50
10
SH
542-60-005
CO M1
FUSE 8A
WH(VL)
50L
P C
1
2
3
80L
P C
1
2
3
D
SHD
RTV-60006USA
80
532-60-604-1
C P
1
2
AC120V
80L
50L
1
2
3
4
5
6
7
8
N 50K
E 43K
L 80K
DRIVE BD
D-SUB 9P
80L
50L
SG
80%
SG
60%
TXD+
TXDRXD+
RXD-
NH 8P
CN2
50L
AC120V
NOIZE
FILTER
MOLEX
WHITE
MOLEX
WH TI E
91
AC120V
50L
AC120V
99-00-014
AC120V 3
WH(YL)
18
C P
BROWN(UL1007 AWG16) P C1
+3.3V 1
+3.3V
BROWN(UL1007 AWG16)
2 +3.3V
+3.3V 2
BLACK(UL1007 AWG16)
3 GND
GND 3
RED(UL1007 AWG16)
4 +5V
+5V 4
BLACK(UL1007 AWG16)
5 GND
GND 5
RED(UL1007 AWG16)
6 +5V
+5V 6
BLACK(UL1007 AWG16)
7 GND
GND 7
95
8 PWR_OK
PWR_OK 8
PINK(UL1007 AWG18)
9 +5SB
+5SB 9
YELLOW(UL1007 AWG16)
+12V 10 YELLOW(UL1007 AWG16) 10 +12V
11
+12V 11
BROWN(UL1007 AWG16) 12 +12V
+3.3V 12
+3.3V
BROWN(UL1007 AWG16)
13 +3.3V
+3.3V 13
BLUE(UL1007 AWG18)
14 -12V
-12V 14
BLACK(UL1007 AWG16)
15 GND
GND 15
45
16 PS_ON#
PS_ON# 16
BLACK(UL1007 AWG16)
17 GND
GND 17
BLACK(UL1007 AWG16)
18 GND
GND 18
B
L
C
1
0
A
A
K
(
U
L
0
7
W
G
1
6
)
19 GND
GND 19
20
20
RED(UL1007 AWG16)
21 +5V
+5V 21
RED(UL1007 AWG16)
22 +5V
+5V 22
RED(UL1007 AWG16)
23 +5V
+5V 23
BLACK(UL1007 AWG16)
24 GND
GND 24
MOLEX
MOLEX
WHITE
WHITE
C P
YELLOW(UL1007 AWG16) P C1
+12V
YELLOW(UL1007 AWG16)
2 +12V
RED(UL1007 AWG16)
3 +5V
YELLOW(UL1007 AWG16)
4 +12V
RED(UL1007 AWG16)
5 +5V
YELLOW(UL1007 AWG16)
6 +12V
RED(UL1007 AWG16)
7 +5V
YELLOW(UL1007 AWG16)
8
ORANGE(UL1007 AWG16) 9 +12V
+3.3VRS
BLACK(UL1007 AWG16)
10 +5SB
BLACK(UL1007 AWG16)
11 GND
BLACK(UL1007 AWG16)
12 GND
BLACK(UL1007 AWG16)
13 GND
BLACK(UL1007 AWG16)
14 GND
BLACK(UL1007 AWG16)
15 GND
BLACK(UL1007 AWG16)
16 GND
BLACK(UL1007 AWG16)
17 GND
BLACK(UL1007 AWG16)
18 GND
+12V 1
+12V 2
+5V 3
+12V 4
+5V 5
+12V 6
+5V 7
+12V 8
+3.3VRS 9
GND 10
GND 11
GND 12
GND 13
GND 14
GND 15
GND 16
GND 17
95
95
10
20
30
40
P C
40
1
30
2
20
3
10
4
80
5
6 SH
7
WH(SM)
40
30
20
10
80
SH
542-60-009
WH(YL)
F
AUDIO L
GND
GND
24V
24V
10
18
78
A8
B8
C8
E
30
30
83
80
80
80
80
80
80
15
E5
94
C5
93
A5
91
B5
92
25
71
D
32
10
10
10
10
SEGA AMUSEMENT USA
RA60P
1
2
3
4
5
6
7
8
9
10
11
12
13
14
15
16
17
19
20
21
22
23
24
25
26
28
41
43
45
46
49
50
51
52
53
54
55
56
59
60
RTV-60011USA
RTV-60008USA
RCA RED
AUDIO R
RCA WHITE
+EXV
+EXV
+5V
38 1 AVCC
+5V
40 3 STEERING
+5V
58 5 AGND
+5V
38 7 AVCC
+5V
20 9 GAS
+5V
58 11 AGND
GND
38 13 AVCC
GND
90 15 BRAKE
GND
58 17 AGND
GND
GND
RA26P
GND
10 1 +5V
GND
10 2 +5V
GND
80 3 GND
STRAT
80 4 GND
VIEW 3
SHIFT3
NH 4P
VIEW 2
30 1 +12V
SHIFT2
30 2 +12V
VIEW 0
3
SHIFT0
80 4 GND
VIEW 1
80 5 GND
SHIFT1
NH 5P
BOOST
1P SERVICE
80 3 GND
TEST
SW
5
COIN 1
45 6 CCFL
COIN 2
7
METER 1
85 8 CCFL
METER 2
RA20P
START LAMP
BOOST LAMP
VIEW 1 LAMP
VIEW 2 LAMP
VIEW 3 LAMP
VIEW 4 LAMP
+12V
+12V
USB A
1
2
3
4
5
6
3.3V
GND
VOL
F
DESCRIPTION
1
2
3
G
RE
WH
SHD
30
80
I
CCFL RED L
+12V
+12V
GND
GND
C P
1
2
3
4
18
G
DIADRAM No.
WH(SM)
1/2
+5V
START LAMP
VIEW 0 LAMP
VIEW 1 LAMP
VIEW 2 LAMP
VIEW 3 LAMP
STRAT
VIEW 0
N
VIEW 1
VIEW 2
VIEW 3
GND
SHIFT0
SHIFT1
SHIFT2
SHIFT3
GND
10 1C
18 2
A8 3
B8 4
C8 5
E 6
15 7
A5 8
B5 9
C5 10
E5 11
80 12
91 13
92 14
93 15
94 16
80 17
WH(YL)
P
AVCC
GAS
AGND
AVCC
BRAKE
AGND
E
L
J
G
38 1
20 2
58 3
38 4
90 5
58 6
C P
1
AVCC
2
STEERING
3
AGND
WH(YL)
38
40
58
K
+12V
BOOST LAMP
BOOST
GND
WH(SM)
30
78
25
80
CCFL RED R
WH(SM)
85
C P
1
2
3
4
6
WH(YL)
5
C P
30 1
30 2
80 3
80 4
45
+5V
METER
GND
WH(SM)
RE
WH
+12V
GND
3.3V
GND
VOL
DEMAG
DEMAG
TEST
SERVICE
GND
+5V
COIN
SPEAKER L+
SPEAKER LSPEAKER R+
SPEAKER RWH(YL)
C P
1
2
3
4
C P
1
2
3
4
SHD
5
20 6
20 7
D 8
71 9
80 10
10 11
32 12
13
80 14
15
10 16
83 17
18
70L
90L
20L
40L
RTV-60002USA
VH 4P
1
2
3
4
NH 3P
SPEAKER L+
SPEAKER LSPEAKER R+
SPEAKER R-
VH 6P
80L
80L
DL
DL
400-5421-05024
VH 5P
SW REGU LCA50S-24
542-60-002
RTV-60009USA
91
RTV-60005USA 95
SEGA RACETV
C P
1
SH2
SH
3
SH4
SH
5
6
WH(SM)
91
80
C P
80 1
400-5421-05012
80L
1
2
3
4
5
VH 4P
GND
GND
12V
12V
1
2
3
4
80×2
80
30
30
VH 5P
SW REGU LCA50S-12
80L
AC120V
1
2
3
4
5
VH 4P
GND
GND
24V
24V
1
2
3
4
RTV-60004USA 80L
80L
DL
DL
837-14572
I/O CONTROL BD 3 FOR JVS COM
C
838-14515-A0191
EARTH
SOUND AMP ANALOG IN
B
542-60-002
WIRING DIAGRAM
A
22
103
6
5
4
3
2
1
6
5
4
3
2
L
M
AVCC
GAS
AGND
AVCC
BRAKE
AGND
80
30
78
25
80
1
1
2
3
2
3
B
8
7
5
4
3
2
1
ASSY SPEAKER R
130-5156-02
ASSY SPEAKER L
130-5156-02
C
BLACK
ORANGE
WHITE
GREEN
YELLOW
BLUE
RED
E
D
C
B
A
9
LIGHT GREEN
PURPLE
BROWN
SKY BLUE
PINK
GRAY
AWG16 UL1015
AWG18 UL1015
AWG20 UL1007
AWG22 UL1007
U
K
L
C
EARTH WIRE
43
610-0408-01
91 C P GR
BK
1
UP
92
BKx2
BL
2
DOWN
3
80
BK
4
RTV-60033USA
10 P C 10
10
1 +5V
1
18
18
18
2 START LAMP
2
A8
A8
A8
3 VIEW 0 LAMP
3
B8
B8
B8
4 VIEW 1 LAMP
4
C8
C8
C8
5 VIEW 2 LAMP
5
E
E
E
6 VIEW 3 LAMP
6
15
15
15
7 STRAT
7
A5
A5
A5
8 VIEW 0
8
B5
B5
B5
9
9
C5
C5
C5 10 VIEW 1
10
E5
E5
E5 11 VIEW 2
11
VIEW 3
80
80
80
12 GND
12
WH(SM)
NH12P
RTV-2100
ASSY SW PLATE
+12V
BOOST LAMP
BOOST
GND
509-6175
NH 4P
SW OBSA-60UMQ/
BOOST RTV
1
2
3
4
RTV-60028
38 C P A
1
90
90
2
58
C
3
4
WH(YL)
WH(YL)
38 C P A
1
20
20
2
58
C
3
SPG-2200-01
ASSY ACCEL&BRAKE
C P A 600-6866-01
RTV-60037 38 1
40
40 2
2
C
58 3
1 3
WH(YL)
RTV-60025USA
CP
20L 1
40L 2
WH(YL)
CP
70L 1
90L 2
WH(YL)
STEERING WHEEL
(5K POT)
RTV-60031USA
PC
1 30 RTV-60036
2 78
3 25
4 80
WH(SM)
WH(SM)
15
16
17
18
C P 10
1
18
2
A8
3
B8
4
C8
5
E
6
15
7
A5
8
B5
9
C5
10
E5
11
80
12
91
13
92
14
38
1
20
2
58
3
38
4
90
5
58
6
WH(YL)
A
+12V
BOOST LAMP
BOOST
GND
+5V
START LAMP
VIEW 0 LAMP
VIEW 1 LAMP
VIEW 2 LAMP
VIEW 3 LAMP
STRAT
VIEW 0
N
VIEW 1
VIEW 2
VIEW 3
GND
SHIFT0
SHIFT1
SHIFT2
SHIFT3
GND
E
CP
70L
1
90L
2
20L
3
40L
4
WH(YL)
CP
38
AVCC 1
40
STEERING 2
58
AGND 3
WH(YL)
SPEAKER L+
SPEAKER LSPEAKER R+
SPEAKER R-
NoAs ign 72
G
B
NoAs ign 73
1
VR1
104
K
J
D
D
WH(SM)
+5V
METER
GND
13
80
14
15
10
16
83
17
18
P C 30
1
+12V
80
2
GND
RE
3
3.3V
WH
GND 4 SHD
5
VOL
DEMAG 6 20
20
DEMAG 7
D
TEST 8 71
SERVICE 9 80
GND 10 10
+5V 11 32
COIN 12
F
30
80
XH 2P
1
2
99-60-129
FL 15W
SHD
RE
WH
80
80
80
C P 50L
1
2
80L
3
WH(VL)
WH(SM)
15
16
17
18
RE
13
WH
14
SHD
80 10
80 11
80 12
CP
1 30
2 10
3 10
D
4
5 71
6 32
7
83
83 8
9
20 P C 20
1
20 2 20
WH(YL)
30
10
10
D
71
32
E
30(AWG24)
40(AWG24)
80(AWG24)
30(AWG24)
50(AWG24)
80(AWG24)
NH 3P
1
2
3
NH 3P
1
2
3
99-60-155
CCFL INVERTER
E
RTV-60045USA
CP
30 1 30(AWG24)
30 2 30(AWG24)
3
4
80 5 80(AWG24)
80 6 80(AWG24)
7
8
9
45 10 40(AWG24)
11
85 12 50(SWG24)
WH(YL)
RTV-60043USA
RTV-60032USA
P C AL
AC 120V
1
2
3 BL
AC 120V
MOLEX
3P
WH(SM)
C P 30
1
30
2
I
80
3
80
4
5
6
WH(YL)
CP
1
45
CCFL RED L 2
3
85
CCFL RED R 4
+12V
+12V
GND
GND
D
RTV-60038USA
542-60-003
542-60-003
99-60-156
RED CCFL
99-60-156
RED CCFL
(OPTION)
MARS DBA
AE2451 U3E(99-70-178)
or AE2451 U5E(99-70-167)
L
SEGA AMUSEMENT USA
32
80
1
2
3
4
5
6
7
8
9
C P
542-60-004
COIN #1
99-70-160
10
80 COIN METER
999990
1 DEMAG
838-14801
2 DEMAG SW BD 4 BUTTON&C VOL
3 VCC
4 VOL
5 GND
6 TEST
7 SERVICE 1 DEMAG SERVICE 1
8 SERVICE 2
9 GND
NH 9P
VOL
SERVICE 2
TEST
(CN2)
BH 2P
1
2
BH 2P
1
2
F
99-60-154
BLUE CCFL
F
DESCRIPTION
SEGA RACETV
C P 10
10 1
32
32
2
80
3
WH(YL)
3
4
P
30 C
1
80 2
WH(YL)
10 C P 10
1
83 2 80
80
20
20
SHD
WH
RE
D
71
838-14795
CCFL INV ELEVAM
S-12707CF-8M
838-14795
CCFL INV ELEVAM
S-12707CF-8M
XH 4P
1
2
3
4
WIRING DIAGRAM
A
22
G
G
2/2
DIADRAM No.
6
5
4
3
2
1
542-30-300
1ST PRINTING FEB. 2008
SEGA AMUSEMENTS U.S.A., INC.
800 ARTHUR AVENUE, ELK GROVE VILLAGE, IL 60007-5215
Phone: 888-877-2669 Facsimile: 847-427-1065
WEB: WWW.SAU.SEGA.COM
© SEGA
All manufacturers, cars, names, brands and associated imagery featured in this game are trademarks and/or
copyrighted materials of their respective owners. All rights reserved.