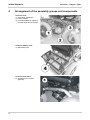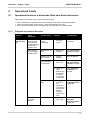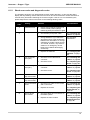
1
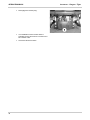
Invacare ® Dragon
Invacare ® Tiger
SERVICE INSTRUCTIONS
Edition: 09.07.2013
®
Invacare - Dragon / Tiger
SERVICE MANUAL
These instructions contain information about:
Testing work
Repair Instructions
This manual is part of the instructions for use.
Service addresses
Invacare Austria GmbH
(:
+43 6232 5 53 50
Herzog Odilostrasse 101
Fax:
A-5310 Mondsee
@:
+43 6232 5 53 54
Austria
WWW:
Invacare n.v.
(:
+32 (0)50 83 10 10
Autobaan 22
Fax:
+32 (0)50 83 10 11
B-8210 Loppem (Brugge)
@:
Belgium
WWW:
Invacare AG
(:
+41 (0)61487 70 80
Benkenstraße 260
Fax:
+41 (0)61487 70 81
CH-4108 Witterswil
@:
Switzerland
WWW:
Invacare Aquatec GmbH
(
Alemannenstraße 10
Fax
88316 Isny
@:
Deutschland
WWW:
Invacare A/S
( (Kundeservice):
+45 (0)36 90 00 00
Sdr. Ringvej 37
Fax (Kundeservice):
+45 (0)36 90 00 01
DK-2605 Brøndby
@:
Danmark
WWW:
Invacare® SA
(:
+34 (0)972 49 32 00
c/ Areny s/n
Fax:
+34 (0)972 49 32 20
Polígon Industrial de Celrà
@:
E-17460 Celrà (Girona)
WWW:
[email protected]
www.invacare.at
[email protected]
www.invacare.be
[email protected]
www.invacare.ch
+49 (0)7562 70 00
+49 (0)7562 7 00 66
[email protected]
www.invacare-aquatec.de
[email protected]
www.invacare.dk
[email protected]
www.invacare.es
ESPAÑA
Invacare® Poirier SAS
2
(:
Route de St Roch
Fax:
F-37230 Fondettes
@:
France
WWW:
+33 (0)247 62 64 66
+33 (0)247 42 12 24
[email protected]
www.invacare.fr
Invacare ® - Dragon / Tiger
SERVICE MANUAL
Invacare® Ltd
( (Customer services):
+44 (0)1656 77 62 22
Pencoed Technology Park
Fax (Customer services):
+44 (0)1656 77 62 20
Pencoed
@:
Bridgend CF35 5HZ
WWW:
[email protected]
www.invacare.co.uk
United Kingdom
Invacare Mecc San s.r.l.
(:
+39 0445 38 00 59
Via dei Pini, 62
Fax:
+39 0445 38 00 34
I - 36016 Thiene (VI)
@:
Italia
WWW:
Invacare Ireland Ltd.
(:
+353 18 10 70 84
Unit 5 Seatown Business Campus
Fax:
+353 18 10 70 85
Seatown Rd, Swords
@:
County Dublin
WWW:
[email protected]
www.invacare.it
[email protected]
www.invacare.ie
Ireland
Invacare® AS
( (Kundeservice):
+47 (0)22 57 95 00
Grensesvingen 9
Fax (Kundeservice):
+47 (0)22 57 95 01
Postboks 6230
@:
[email protected]
Etterstad
@:
[email protected]
N-0603 Oslo
WWW:
www.invacare.no
Norge
Invacare® B.V.
(:
+31 (0)318 69 57 57
Celsiusstraat 46
Fax:
+31 (0)318 69 57 58
NL-6716 BZ Ede
@:
[email protected]
Nederland
@:
[email protected]
WWW:
www.invacare.nl
Invacare Lda
(:
+351 225 10 59 46
Rua Estrada Velha, 949
(:
+351 225 10 59 47
P-4465-784 Leça do Balio
Fax:
+351 225 10 57 39
Portugal
@:
WWW:
[email protected]
www.invacare.pt
3
®
Invacare - Dragon / Tiger
SERVICE MANUAL
Återförsäljare:
( (Kundtjänst):
Invacare® AB
Fax (Kundtjänst):
Fagerstagatan 9
@:
[email protected]
S-163 91 Spånga
@:
[email protected]
Sverige
WWW:
Tillverkare:
MÖLNDAL
Invacare® Deutschland GmbH
(:
+46 (0)31 86 36 00
Kleiststraße 49
Fax:
+46 (0)31 86 36 06
D-32457 Porta Westfalica
@:
+46 (0)8 761 70 90
+46 (0)8 761 81 08
www.invacare.se
[email protected]
Deutschland
LANDSKRONA
(:
+46 (0)418 2 85 40
Fax:
+46 (0)418 1 80 89
@:
[email protected]
OSKARSHAMN
Eastern
european
countries
European Distributor
Organisation (EDO)
Kleiststraße 49
D-32457 Porta Westfalica
Deutschland
4
(:
+46 (0)491 1 01 40
Fax:
+46 (0)491 1 01 80
@:
[email protected]
(
+49 (0)5731 75 45 40
Fax
+49 (0)5731 75 45 41
@:
WWW:
[email protected]
www.invacare.de
Invacare ® - Dragon / Tiger
SERVICE MANUAL
Table of Contents
Chapter
Page
TABLE OF CONTENTS
5
1
7
INTRODUCTION
1.1
General information
7
1.2
Notes on transport
7
1.3
Definition and representation of information and safety information in this manual
8
1.4
Hazard symbols and symbols used
9
1.5
Images in this manual
2
SAFETY AND FITTING INSTRUCTIONS
10
11
2.1
Before any inspection or repair work
11
2.2
Personal safety equipment
11
2.3
General safety information and information about fitting / removal
11
3
TIGHTENING TORQUES
13
4
ARRANGEMENT OF THE ASSEMBLY GROUPS AND COMPONENTS
14
5
SERVICE PLAN (1X ANNUALLY)
15
6
OPERATIONAL FAULTS
17
6.1
6.1.1
6.1.2
7
Operational faults on a wheelchair fitted with Shark electronics
Diagnosis of actuation disorders
Shark error codes and diagnostic codes
REPAIR WORK
17
17
19
21
7.1
General warning information on installation work
21
7.2
Replacing the motor
21
7.3
Replacing the Shark Electronics
25
7.4
Updating the driving program
27
7.5
7.5.1
7.5.2
Changing the batteries
Removing the batteries
How to handle damaged batteries correctly
28
29
30
5
SERVICE MANUAL
®
Invacare - Dragon / Tiger
7.6
Checking and replacing the main fuse
31
7.7
Checking the cables
33
7.8
Replacing the Shark Remote
35
7.9
7.9.1
7.9.2
Operating hours counter
Replacing the operating hours counter
Replacing the connecting cable of the operating hours counter
37
37
39
7.10
Replacing the steering head bearings on the steering wheels
41
7.11
Repairing a flat tyre
7.11.1
Repairing the rear tyre (wheel size 12½ x 2¼")
7.11.2
Repairing a flat tyre (wheel size 220/120 x 50)
43
43
45
7.12
47
Replacing a drive wheel
7.13
Adjusting the seat angle/seat height
7.13.1
Adjustment tables
49
51
7.14
Replacing the safety belt
54
7.15
Testing an actuator motor
54
6
Invacare ® - Dragon / Tiger
1
Introduction
1.1
General information
1.2
SERVICE MANUAL
·
Service and maintenance work must be carried out taking this service manual into account.
·
It is imperative that you observe safety information.
·
Information about operation or about general maintenance and care work on the mobility aid
should be taken from the operating manual.
·
You can find information about ordering spare parts in the spare parts catalogue.
·
Only use original Invacare® spare parts. The guarantee will become invalid if other spare parts
are used!
·
We reserve the right to make any alterations on the grounds of technical improvements.
·
The mobility aid may only be maintained and overhauled by qualified personnel.
·
The minimum requirement for service technicians is suitable training, such as in the cycle or
orthopaedic mechanics fields, or sufficiently long-term job experience.
- Experience in the use of electrical measuring equipment (multimeters) is also a requirement.
- Special Invacare® training is recommended.
·
Alterations to the mobility aid which occur as a result of incorrectly or improperly executed
maintenance or overhaul work lead to the exclusion of all liability on the side of INVACARE.
·
If you have any problems or questions please contact Invacare® Service.
Notes on transport
·
If the mobility aid has to be shipped back to the manufacturer for major repairs, you should
always use the original packaging for transport.
·
Please attach a precise description of the fault.
7
SERVICE MANUAL
1.3
®
Invacare - Dragon / Tiger
Definition and representation of information and safety
information in this manual
Different types of information and signal words are used throughout this manual.
HAZARD!
The signal word "HAZARD!" refers to immediate hazards.
· The following lines in italics refer to actions which serve to avoid such hazards.
WARNING!
The signal word "WARNING!" refers to possibly-occurring hazards which can lead to
death or serious injuries if they are not avoided.
· The following lines in italics refer to actions which serve to avoid such hazards.
ATTENTION!
The signal word "ATTENTION!" refers to possibly-occurring hazards which can lead to
minor injuries and/or material damage if they are not avoided.
· The following lines in italics refer to actions which serve to avoid such hazards.
CAUTION!
The signal word "CAUTION!" refers to hazards which could lead to material damage if they
are not avoided.
· The following lines in italics refer to actions which serve to avoid such hazards.
Note
The signal word "Note" is used to denote general information which simplifies the handling of
your product and refers to special functions.
8
Invacare ® - Dragon / Tiger
1.4
SERVICE MANUAL
Hazard symbols and symbols used
Different types of hazard symbols and symbols are used throughout this manual.
General hazards
This symbol warns you of general hazards!
· Always follow the instructions to avoid injury to the user or damage to the product!
BURN HAZARD!
This symbol warns you of the danger of chemical burns, for example due to the discharge
of battery acids!
· Always follow the instructions to avoid injury to the user or damage to the product!
DANGER OF CRUSHING!
This symbol warns you of crushing hazards due to inattentive working with heavy
components.
· Always follow the instructions to avoid injury to the user or damage to the product!
EXPLOSION HAZARD!
This symbol warns you of an explosion hazard, which can be caused by excessive tyre
pressure in a pneumatic tyre.
· Always follow the instructions to avoid injury to the user or damage to the product!
Wear safety shoes
The symbol refers to the requirement for wearing safety shoes.
· Wear standardised safety shoes during all work.
Wear eye protection
This symbol refers to the requirement for wearing eye protection, for example when
working with batteries.
· Wear eye protection when this symbol is shown.
Wear safety gloves
This symbol refers to the requirement for wearing safety gloves, for example when
working with batteries.
· Wear safety gloves when this symbol is shown.
Note
This symbol identifies general information which is intended to simplify working with your product
and which refers to special functions.
Requirements:
· This symbol identifies a list of various tools, components and items which you will need in
order to carry out certain work. Please do not attempt to carry out the work if you do not have
the listed tools available.
Always dispose used or damaged batteries correctly
The symbol refers to information for the correct disposal of used or damaged batteries.
9
SERVICE MANUAL
1.5
®
Invacare - Dragon / Tiger
Images in this manual
The detailed images in this manual are given digits to identify various components. Component
numbers in text and operational instructions always relate to the image directly above.
10
Invacare ® - Dragon / Tiger
2
SERVICE MANUAL
Safety and fitting instructions
These safety instructions are intended to prevent accidents at work, and it is imperative that they
are observed.
2.1
2.2
Before any inspection or repair work
·
Read and observe this repair manual and the associated operating manual!
·
Observe the minimum requirements for carrying out the work (see chapter entitled „General
information)!
Personal safety equipment
Safety shoes
The mobility device, and some of its components, are very heavy. These parts can result
in injuries to the feet if they are allowed to drop.
· Wear standardised safety shoes during all work.
Eye protection
It is possible that battery acid can be discharged when working on defective batteries or
when handling batteries improperly.
· Always wear eye protection when working on any defective or possibly defective batteries.
Safety gloves
It is possible that battery acid can be discharged when working on defective batteries or
when handling batteries improperly.
· Always wear acid-proof safety gloves when working on any defective or possibly defective
batteries.
2.3
General safety information and information about fitting / removal
WARNING! Danger of crushing!
Various components such as the drive unit, batteries, seat etc are very heavy. This results
in injury hazards to your hands!
· Please note the high weight of some components! This applies especially to the removal of
drive units, batteries and the seat.
WARNING!
Injury hazard if the vehicle starts moving unintentionally during repair work!
· Switch the power supply off (ON/OFF key)!
· Engage the drive!
· Before raising the vehicle, secure the wheels by blocking them with wedges!
ATTENTION!
Fire and burn hazard due to electrical short-circuit!
· The mobility device must be completely switched off before removal of voltage-carrying
components! To do this, remove the batteries.
· Avoid short-circuiting the contacts when carrying out measurements on voltage-carrying
components!
11
SERVICE MANUAL
®
Invacare - Dragon / Tiger
CAUTION!
Danger of burns from hot surfaces on the motor!
· Allow the motors to cool down before commencing work on them.
ATTENTION!
Injury hazard and danger of damage to vehicle due to improper or incomplete
maintenance work!
· Use only undamaged tools in good condition.
· Some moving parts are mounted in sockets with PTFE coating (Teflon™). Never grease these
sockets!
· Never use "normal" nuts instead of self-locking nuts.
· Always use correctly-dimensioned washers and spacers
· When reassembling, always replace any cable ties which were cut during dismantling.
· After completing your work / before renewed start-up of the mobility device, check all
connections for tight fitting.
· After completing your work / before renewed start-up of the mobility device, check all parts for
correct locking.
· Only operate the vehicle with the approved tyre pressures (see technical data).
· Check all electrical components for correct function. Please note that incorrect polarity can
result in damage to the electronics.
· Always carry out a trial run at the end of your work.
Note
Mark all current settings for the mobility aid (seat, armrests, backrest etc.), and the associated
cable connecting plugs, before dismantling. This makes reassembly easier.
All plugs are fitted with mechanical safety devices which prevent release of the connecting plugs
during operation. To release the connecting plugs the safety devices must be pressed in. When
reassembling ensure that these safety devices are correctly engaged.
WARNING!
Any changes to the drive program can affect the driving characteristics and the tipping
stability of the vehicle!
· Changes to the drive program may only be carried out by trained Invacare® specialist
dealers!
· Invacare® supplies all mobility aids with a standard drive program ex-works. Invacare® can
only give a warranty for safe vehicle driving behaviour - especially tipping stability - for this
standard drive program!
12
Invacare ® - Dragon / Tiger
3
SERVICE MANUAL
Tightening torques
The tightening torques stated in the following list are based on the thread diameter for the nuts and
bolts for which no specific values have been determined. All values assume dry and de-greased
threads.
Thread
M4
M5
M6
M8
M10
M12
Tightening torque
in Nm ±10%
3 Nm
6 Nm
10 Nm
25 Nm
49 Nm
80 Nm
M14
M16
120 Nm 180 Nm
CAUTION!
Damage can be caused to the mobility device due to improperly tightened screws, nuts or
plastic connections.
· Always tighten screws, nuts etc. to the stated tightening torque.
· Only tighten screws or nuts which are not listed here finger tight.
13
SERVICE MANUAL
4
Arrangement of the assembly groups and components
Under the seat:
1) Decoupling mechanism
2) Power module
3) Perforated plates for adjusting
the seat height and seat angle
Under the battery cover
4) Main battery fuse
Under the seat frame
5) Operating hours counter
(optional)
14
®
Invacare - Dragon / Tiger
Invacare ® - Dragon / Tiger
5
SERVICE MANUAL
Service plan (1x annually)
Component
Armrests and
side panels
Seat unit / seat
angle
adjustment
Backrest unit
mechanical
Backrest unit
electrical (if
installed)
Check
Action
· Armrest damage
and fastening
· Side panel
damage and fixing
· Cushion
· Check seat angle
adjustment
· Tighten screws, replace
padding if damaged
· Tighten screws, replace
side panels if damaged
· Replace covers /
upholstery if damaged
· Replace parts if
damaged
· Replace parts if
damaged
· Tighten screws
· Replace cable or motor if
necessary
· Damage and
seams
· Fixing
· Check cabling
· Check function
· Check fixings,
· Tighten screws, replace
welded seams and
components
battery box
· Check drive
· Adjust, replace wheel
Wheel
wheels for tight fit
hubs
suspension and
and side play
wheels
Notes
ü
Frame (chassis)
/ battery box
· Check steering
· Replace wheels, wheel
wheels for tight fit,
fork or wheel bearings
float, side play and
correct torque (15
Nm +/- 1.5 Nm)
· Pneumatic tyres (if · Repair or replace if
available)
damaged
Drive units,
disengager
Legrests
Electrical
footrests (if
installed)
Lighting (if
installed)
Batteries
See "Replacing a
drive wheel" on
page 47
See "Replacing
the steering head
bearings on the
steering wheels"
on page 41
See "Repairing a
flat tyre" on page
43
· Check functions in · Replace motor if
drive and push
necessary
modes
· Tighten screws / nuts,
· Check disengager
adjust or replace if
necessary
· Check welded
· Tighten, replace if
seams,
necessary
interlocking,
screws, footplates
· Check cabling
· Replace cable if
necessary
· Check contacts
· Check functions
· Check cabling
· Check function
· Replace bulbs or cables
if necessary
· Check batteries
for damage
· Replace batteries if
necessary
· Check battery
charge
· Charge batteries
See "Changing the
batteries" on page
28
See User Manual
15
®
Invacare - Dragon / Tiger
SERVICE MANUAL
Component
Remote /
electronics
Driving
Programme
16
Check
Action
· Check contacts
and terminals for
corrosion
· Clean contacts and
terminals
· Remote,
status display
blinking
· Fixing
· Cable, connecting
plug
· Joystick function
· Power supply
· Check the
programme
version of the
driving electronics.
Is there a newer
version available?
·
·
·
·
·
Notes
See "Changing the
batteries" on page
28 for safety
information when
handling batteries
Evaluate flash code
Tighten, replace
Replace
Replace joystick
Replace cable, connector
plug or console
· Update the software.
See "Updating the
driving program"
on page 27
ü
Invacare ® - Dragon / Tiger
SERVICE MANUAL
6
Operational Faults
6.1
Operational faults on a wheelchair fitted with Shark electronics
Please proceed as follows in the event of operational faults:
· First of all analyse the possible cause of the disorder on the basis of the following tables.
· Check the status display on the remote. Analyse the flashing error code.
· Carry out the necessary checks and repairs as recommended in the following table.
6.1.1
Diagnosis of actuation disorders
Problem
Other
Symptoms
Possible Cause
Solution
Documentation
Wheelchair
will not start
up
Status display
on the remote
illuminated as
normal and does
not indicate a
disorder code
Actuation motors
may be
disengaged
· Clutch in
actuation
motors
See operating
instructions
Status display
on the remote is
not illuminated
Batteries may be
faulty
· Replace the
batteries
See "Changing the
batteries" on page
28
Batteries may be
almost empty
· Charge
batteries
See User Manual
Power supply to
the remote may
be interrupted
· Check the
main fuse
See "Checking
and replacing the
main fuse" on page
31
· Check the
cable
between the
modules for
any loose
connections
or damage
Siehe "Checking
the cables" on
page 33
Remote may be
faulty
· Change the
remote on
the
wheelchair
to be able to
exclude the
remote
being the
cause of the
fault.
See "Replacing
the Shark Remote"
on page 35
Various causes
· Analyse
error code
See "Shark error
codes and
diagnostic codes"
on page 19
Status display
on remote
flashing
17
®
Invacare - Dragon / Tiger
SERVICE MANUAL
Problem
Other
Symptoms
Possible Cause
Wheelchair
jerky in drive
operation
None
Batteries may be
faulty (instable
voltage)
Actuation
motor(s) may be
faulty
Batteries not
being
charged
Wheelchair
drives too
slowly
18
Solution
· Replace the
batteries
· Replace
motor(s)
None
Batteries may be
faulty
· Replace
batteries
LEDs flashing
on charger
Charger may be
faulty
· Replace
charger
None
Batteries may be
faulty
· Replace
batteries
Documentation
See "Changing the
batteries" on page
28
See "Replacing
the motor" on page
21
See "Changing the
batteries" on page
28
See operating
instructions for
battery charger
See "Changing the
batteries" on page
28
Invacare ® - Dragon / Tiger
6.1.2
SERVICE MANUAL
Shark error codes and diagnostic codes
The actuation electronics can automatically remedy certain disorders. In this case the status
display will stop flashing. Please switch the remote on and off several times. Please wait about 5
seconds every time before switching the remote on again. If the error is not remedied by this,
please diagnose the cause on the basis on the following flashing codes.
Flashing
Code
Meaning
Solution
1
Operational error
·
Please ensure that the joystick is in
neutral central position (simply
release joystick) and switch on again.
2
Battery error
·
Check battery and power cable.
See "Checking the
cables" on page 33
·
Charge batteries. If you switch the
wheelchair off for a few minutes the
batteries are often able to re-charge
sufficiently to enable a short journey.
You should, however, only use this
solution in an emergency as this
leads to the batteries discharging
excessively.
See operating
instructions
·
Replace the batteries
See "Changing the
batteries" on page
28
·
Check the motor cable and Uconnector.
See "Checking the
cables" on page 33
·
Check the motor.
See "Replacing the
motor" on page 21
·
Check the motor cable and Uconnector.
See "Checking the
cables" on page 33
·
Check the motor.
See "Replacing the
motor" on page 21
3
4
Error on the left
motor (M2)
Error on the right
motor (M1)
Documentation
5
Fault on the left
(M2) motor brake
·
Check cable and connector.
See "Checking the
cables" on page 33
6
Fault on the right
(M1) motor brake
·
Check cable and connector.
See "Checking the
cables" on page 33
7
Fault on the Shark
remote
·
Check the bus cable on the remote
and U-connector.
See "Checking the
cables" on page 33
·
Replace the remote.
See "Replacing the
Shark Remote" on
page 35
·
Check all cables and connectors on
the Shark system.
See "Checking the
cables" on page 33
·
Replace the main module.
See "Replacing the
Shark Electronics"
on page 25
8
Fault on Shark
main module
19
®
Invacare - Dragon / Tiger
SERVICE MANUAL
Flashing
Code
Meaning
Solution
Documentation
Communication
error on the Shark
system
·
Check all cables and connectors on
the Shark system.
See "Checking the
cables" on page 33
·
Replace the remote.
See "Replacing the
Shark Remote" on
page 35
10
Unknown error
·
Check all cables and U-connectors.
See "Checking the
cables" on page 33
11
Incompatible
remote
·
An incorrect remote has been
connected. Ensure that main module
and remote code are concordant.
See "Replacing the
Shark Remote" on
page 35
9
See "Replacing the
Shark Electronics"
on page 25
20
Invacare ® - Dragon / Tiger
7
Repair Work
7.1
General warning information on installation work
SERVICE MANUAL
CAUTION!
Danger of damage to vehicle! Collisions can be caused if the adjusting washers are
removed during fitting work to the drive wheels!
Adjusting washers are often fitted between the drive shaft and the wheel hub to even out
tolerances. If these adjusting washers are removed and not replaced again, collisions can be
caused!
· Always replace the adjusting washers exactly as they were before you started dismantling!
7.2
Replacing the motor
ATTENTION: Danger of crushing to the hands and feet by the weight of the wheelchair!
· Pay attention to the hand and feet.
· Use proper lifting techniques.
ATTENTION: Injury hazard caused by uncontrolled movement of the mobility device!
· Switch the power supply off (ON/OFF key).
· Engage the drive.
· Before raising the vehicle, secure the wheels by blocking them with wedges.
· Prevent the mobility device tipping by propping it up on a wooden block which is long and wide
enough under the battery case! If the wooden block is too short or too high, the mobility device
can still tip!
WARNING!
Fire and burns hazard if battery terminal is bypassed!
· Please take great care to ensure that the battery terminals are never short-circuited with tools
or mechanical mobility device parts!
· Ensure that the battery terminal caps have been replaced if you are not working on the battery
terminals.
Pre-requisites:
· Small, flat screwdriver
· 5 mm Allen key
· 8 mm Allen key
· 11 mm open-ended spanner
· 19 mm open-ended spanner
· Aglet, diameter 2.5 mm (for knocking the splint out of the decoupling leverage)
· Small hammer
· Edge cutter
· Cable binder
· Wooden chock (approx. 12 x 12 x 30 cm) for jacking up the vehicle
Note
Please take care of the small parts and observe the sequence in which the component parts are
installed. Please set them out in an orderly fashion so that they can be installed again easily in
the correct sequence.
21
SERVICE MANUAL
22
·
Jack up the vehicle using the wooden chock.
·
Loosen the socket head screw (1) using a
5 mm Allen key.
·
Remove the screw and the hub cap.
·
Pull the complete wheel from the wheel hub.
·
Remove the battery cover.
·
Pull off the battery pole caps and push back
to gain access to the battery poles.
·
Loosen the battery pole clips with the 11 mm
open-ended spanner.
·
Remove the batteries.
®
Invacare - Dragon / Tiger
Invacare ® - Dragon / Tiger
·
In order to remove the motor, the front
decoupling rod connection (1) must be
disconnected. Release the retaining ring (1)
using the small, flat screwdriver and pull out.
·
Unscrew handwheels (screws) (1) on both
sides of the panelling for the electronics.
·
Remove the panelling for the electronics.
·
Pull the motor plug on the motor to be
replaced out of the electronics.
·
The motor cable is secured to the frame with
a cable binder. Use the edge cutter to cut
through the cable binder.
·
Loosen the motor suspension (1) using the
8 mm Allen key and the 19 mm open-ended
spanner and remove.
·
Remove the motor from the suspension in a
downward direction.
SERVICE MANUAL
23
SERVICE MANUAL
·
Loosen the four screws (1) on the motor
suspension and remove.
·
Use the aglet and the hammer to carefully
knock the splint (2) out of the decoupling
leverage (1).
·
Remove the decoupling leverage (1)
together with the decoupling rod (cannot be
seen in the picture on the right) from the old
motor.
®
Invacare - Dragon / Tiger
CAUTION!
Damage to the motor is possible!
· Only apply moderate pressure to the decoupling lever when fitting to the metal rod on the new
motor.
· Do not use a hammer!
Note
The simplest way to install the decoupling lever is to do this before the motor and other parts are
assembled together.
24
·
Carefully press the decoupling leverage (1)
onto the rod (2) protruding from the new
motor.
·
Press the splint (3) in.
·
The motor is installed in the reverse order.
·
Secure the motor cable by means of a new
cable binder.
Invacare ® - Dragon / Tiger
7.3
SERVICE MANUAL
Replacing the Shark Electronics
Pre-requisites:
· Phillips screwdriver
· To modify a drive program you will need: Programming software or a Handheld Programmer
and the Installation Manual of the Shark Electronics (Part Number 1436160), available from
Invacare®.
Note
All electronic modules are supplied with a standard drive program. If the driving program has been
customised, then you will have to perform this customisation again, after installing the new
electronic module.
WARNING!
Every alteration to the drive program can influence vehicle handling and the tipping
stability of the wheelchair!
· Alterations to the drive program must only be carried out by trained Invacare®-dealers!
· Invacare® can only assume a warranty for the safe vehicle handling of the wheelchair – in
particular tipping stability - for unaltered standard drive programs!
·
Unscrew the handwheels (screws) (1) on
both sides of the panelling for the
electronics.
·
Remove the electronic panelling.
·
Disengage all the plugs (1) on the electronic
module.
25
SERVICE MANUAL
26
·
Remove the screws (1) on both sides of the
power module.
·
Pull out the module.
·
Installation of the electronics is carried out in
the reverse order.
·
Update the software, in case a newer
version is available.
·
Customise the driving program with the
programming software, if required.
·
Check all vehicle functions.
®
Invacare - Dragon / Tiger
Invacare ® - Dragon / Tiger
7.4
SERVICE MANUAL
Updating the driving program
The driving programs for electric wheelchairs are continually updated and improved by Invacare®.
For this reason, you should check whether the version number is still up to date each time a
wheelchair comes in for repairs, and also during regular inspections.
If a newer version is available, the driving program must be updated. The procedure for updating
the driving program is described in the user manual of the Wizard software.
Note
The electronic system is supplied with a standard drive program. If the driving program has been
customised, you have to perform this customisation again, after installing the new driving
program.
WARNING!
Every alteration to the drive program can influence vehicle handling and the tipping
stability of the wheelchair!
· Alterations to the drive program must only be carried out by trained Invacare®-dealers!
· Invacare® can only assume a warranty for the safe vehicle handling of the wheelchair – in
particular tipping stability - for unaltered standard drive programs!
Pre-requisites:
· Dynamic® Wizard software
· User manual for the Wizard software
· For further information on other requirements - such as the minimum system configuration of
the PC to be used for programming, necessary programming cables - see the user manual of
the Wizard software. You find the latest version of the user manual in the download area on
http://www.dynamiccontrols.com/.
27
SERVICE MANUAL
7.5
®
Invacare - Dragon / Tiger
Changing the batteries
ATTENTION:
Injury hazard and possible material damages if batteries are handled improperly!
· The installation of new batteries may only be carried out by authorised specialists.
· Observe the warning information on the batteries.
· Only use battery versions stated in the specifications.
ATTENTION:
Fire and burns hazard if battery terminal is bypassed!
· Please take great care to ensure that the battery terminals are never short-circuited with tools
or mechanical mobility device parts!
· Ensure that the battery terminal caps have been replaced if you are not working on the battery
terminals.
ATTENTION: Danger of crushing!
The batteries are extremely heavy. This results in injury hazards to your hands.
· Bear in mind that the batteries are sometimes very heavy!
· Please handle the batteries with care.
WARNING: BURN HAZARD!
Injury hazard due to discharged acid.
· Always wear acid-proof protective gloves when handling batteries.
· Always wear protective goggles when handling batteries.
What to do if acid is discharged:
· Always take clothing which has been soiled by or dipped in acid off immediately!
· Rinse any areas of your skin which has come into contact with battery acid off immediately
with plenty of water!
If contact with eyes is made:
· Rinse the affected eye under running water for several minutes! You should also consult an
eye specialist immediately afterwards!
28
Invacare ® - Dragon / Tiger
7.5.1
SERVICE MANUAL
Removing the batteries
ATTENTION:
Fire and burns hazard if battery terminal is bypassed!
· Please take great care to ensure that the battery terminals are never short-circuited with tools
or mechanical mobility device parts!
· Ensure that the battery terminal caps have been replaced if you are not working on the battery
terminals.
ATTENTION: Danger of crushing!
The batteries are extremely heavy. This results in injury hazards to your hands.
· Bear in mind that the batteries are sometimes very heavy!
· Please handle the batteries with care.
Requirements:
· Open-end spanner 11 mm
·
Remove the battery cover.
·
Pull the battery pole caps (1) upward and push back in
order to reach the battery poles.
·
Use the open-ended spanner to loosen the battery pole
clamps.
·
Remove the batteries to the rear.
29
SERVICE MANUAL
7.5.2
®
Invacare - Dragon / Tiger
How to handle damaged batteries correctly
WARNING: BURN HAZARD!
Injury hazard due to discharged acid.
· Always wear acid-proof protective gloves when handling batteries.
· Always wear protective goggles when handling batteries.
What to do if acid is discharged:
· Always take clothing which has been soiled by or dipped in acid off immediately!
· Rinse any areas of your skin which has come into contact with battery acid off immediately
with plenty of water!
If contact with eyes is made:
· Rinse the affected eye under running water for several minutes! You should also consult an
eye specialist immediately afterwards!
Requirements:
· Safety goggles
· Acid-resistant gloves
· Acid-resistant receptacle for transportation
·
Always wear appropriate safety clothing when handling damaged batteries.
·
Place damaged batteries in an acid-resistant receptacle immediately after removing them.
·
Only ever transport damaged batteries in an appropriate acid-resistant receptacle.
·
Wash all objects that have come into contact with acid with lots of water.
Always dispose used or damaged batteries correctly
Used and damaged batteries will be taken back by your medical equipment supplier or
Invacare®.
30
Invacare ® - Dragon / Tiger
7.6
SERVICE MANUAL
Checking and replacing the main fuse
CAUTION: Fire hazard!
A short circuit can cause extremely high currents which can result in spark formation and
fire!
· Always use an original strip fuse with the approved amperage.
· If the main fuse has blown, first rectify the cause before fitting a new one.
CAUTION: Fire hazard!
Fitting the incorrect strip fuse causes a fire hazard!
· Only ever assemble the fuse in the order shown in the
illustration at right!
· Always tighten nuts to between 3.3 and 3.5 Nm!
Until 03.2004
After 03.2004
1. Fuse
1. Fuse
2. Fuse compartment
2. Fuse compartment
3. Washer
3. Nut DIN 6923
4. Nut M5
Pre-requisites:
· 8mm open-ended spanner
· 40A strip fuse
Information
If the fuse holder is damaged this can be replaced completely together with the battery cables.
·
Remove the battery cover.
31
SERVICE MANUAL
32
·
The fuse holder of the Shark electronic
system is located on top of the batteries (1).
·
Open the fuse holder cover.
·
If the strip fuse has blown, determine the
cause of the fault and remedy if necessary.
The main fuse should only be replaced when
the fault has been remedied.
·
Use the 8mm open-ended spanner to
unscrew the nuts (2) on the strip fuse.
·
Replace the strip fuse.
·
Installation is carried out in the reverse
order.
·
Check all vehicle functions.
®
Invacare - Dragon / Tiger
Invacare ® - Dragon / Tiger
7.7
SERVICE MANUAL
Checking the cables
·
Unscrew the handwheels (screws) (1) on
both sides of the panelling for the
electronics.
·
Remove the panelling for the electronics.
·
Check all cables for visible damage and
crushing. Replace damaged cables.
·
Pull on each plug (1) carefully. It must not
come out of the socket.
·
If a plug is loose, apply slight pressure to
push the plug into the socket. It must lock in
place.
·
Check whether the plug is now fitted firmly
inside the socket. If not, please repeat the
preceding work step.
·
Remove the battery cover.
·
Check the battery cables (1) for visible
damage and crushing. Replace damaged
cables.
33
SERVICE MANUAL
34
·
Re-install the panelling for the electronics
and the battery cover.
·
Check all vehicle functions.
®
Invacare - Dragon / Tiger
Invacare ® - Dragon / Tiger
7.8
SERVICE MANUAL
Replacing the Shark Remote
Pre-requisites:
· 3 mm Allen key
·
Switch off the remote.
·
Loosen the wing screw (1).
·
Pull the remote out of the guide together with
the remote holder.
·
Use the Allen key to unscrew both
screws (1) on the remote holder.
·
Unscrew the handwheels (screws) (1) on
both sides of the panelling for the
electronics.
·
Remove the panelling for the electronics.
35
SERVICE MANUAL
36
·
Disengage the remote plug.
·
The installation of the remote and the
panelling for the electronics is carried out in
the reverse order.
·
Check all vehicle functions.
®
Invacare - Dragon / Tiger
Invacare ® - Dragon / Tiger
7.9
Operating hours counter
7.9.1
Replacing the operating hours counter
SERVICE MANUAL
Requirements:
· Philipps screwdriver, size 2
· 10 mm open-end wrench
·
Switch off the electronics.
·
Remove the legrests.
·
Loosen and remove the thumb screws (1) on
both sides of the electronics cover.
·
Remove the electronics cover.
The operating hours counter is attached to the
frame with a Velcro strip.
·
Disconnect the cable of the operating hours
counter from the drive motor.
·
Pull the operating hours counter off of the
frame.
·
Turn the operating hours counter over.
·
Loosen and remove the four Philipps head
screws of the casing.
·
Disconnect the plugs (+) & (-).
·
Remove the nut (4) including the locking
washer.
·
Pull the operating hours counter (6) forwards
out of the casing (1). Pay attention to the
mounting bracket (5) and the retaining frame
(7).
·
Replace the operating hours counter.
37
SERVICE MANUAL
®
Invacare - Dragon / Tiger
CAUTION!
Property damage can result if the counter is incorrectly connected. If the plus and minus
wires are connected the wrong way, it will damage the electronic components of the
operating hours counter.
· Make sure the cable is connected correctly.
·
The operating hours counter is installed in
reverse order.
·
Connect the plug on the blue wire (-) to the
pin on the operating hours counter which is
marked with a “minus” symbol.
·
Connect the plug on the brown wire (+) to
the pin on the operating hours counter which
is marked with a “plus” symbol.
The brown wire is additionally marked with a
yellow sleeve with a “plus” symbol on it.
38
·
Close the casing and reattach it to the
wheelchair with the Velcro fastening.
·
Reinstall all remaining components in
reverse order.
Invacare ® - Dragon / Tiger
7.9.2
SERVICE MANUAL
Replacing the connecting cable of the operating hours counter
Requirements:
· Philipps screwdriver, size 2
· Side cutters
· Cable ties
·
Switch the electronics OFF.
·
Remove the legrests.
·
Loosen and remove the thumb screws (1) on
both sides of the electronics cover.
·
Remove the electronics cover.
The operating hours counter is attached to the
frame with a Velcro strip.
·
Disconnect the cable of the operating hours
counter from the drive motor.
·
Pull the operating hours counter off of the
frame.
·
Turn the operating hours counter over.
·
Loosen and remove the four Philipps head
screws of the casing.
·
Disconnect the plugs (+) & (-).
·
Remove the cable binder.
·
Carefully pull the cable (2) of the operating
hours counter out of the casing (1).
·
Replace the operating hours counter cable.
39
SERVICE MANUAL
®
Invacare - Dragon / Tiger
CAUTION!
Property damage can result if the counter is incorrectly connected. If the plus and minus
wires are connected the wrong way, it will damage the electronic components of the
operating hours counter.
· Make sure the cable is connected correctly.
·
The cable of the operating hours counter is
installed in reverse order.
·
Connect the plug on the blue wire (-) to the
pin on the operating hours counter which is
marked with a “minus” symbol.
·
Connect the plug on the brown wire (+) to
the pin on the operating hours counter which
is marked with a “plus” symbol.
The brown wire is additionally marked with a
yellow sleeve with a “plus” symbol on it.
40
·
Secure the cable with a cable tie (3), thereby
protecting it from being pulled off
unintentionally.
·
Close the casing and reattach it to the
wheelchair with the Velcro fastening.
·
Reinstall all remaining components in
reverse order.
Invacare ® - Dragon / Tiger
7.10
SERVICE MANUAL
Replacing the steering head bearings on the steering wheels
ATTENTION: Danger of crushing to the hands and feet by the weight of the wheelchair!
· Pay attention to the hand and feet.
· Use proper lifting techniques.
CAUTION: Injury hazard caused by uncontrolled movement of the mobility device!
· Switch the power supply off (ON/OFF key).
· Engage the drive.
· Before raising the vehicle, secure the wheels by blocking them with wedges.
CAUTION!
Incorrect reassembly can damage the bearings and cause the steering wheels to fall out!
The single-row angular ball bearing rings are not identical on both sides! There is only one correct
way to insert them!
· Follow the assembly instructions precisely!
Required parts/tools:
· 19 mm socket wrench
· Torque spanner
· Large screwdriver, flat
· Wooden chock (approx. 12 x 12 x 30 cm) for jacking up the vehicle
·
Use the wooden chock (1) to jack up the
wheelchair on the side on which the ball
bearings are to be replaced.
·
Carefully remove the plastic cap (1) using
the large screwdriver.
41
SERVICE MANUAL
·
Use the socket wrench to loosen and
remove the 19 mm nut. Hold the wheel in
such a way that it is not able to rotate when
the nut is removed.
·
Pull the steering head shaft downward and
out of the steering head tube.
·
Remove the shim and the ball race from the
head of the tube. The other ball race should
be on the shaft.
IMPORTANT ASSEMBLY INFORMATION!
The illustrations show the wide edge on the outside of the ball
race (A) and the narrow edge on the inside (B).
The bearings must always be installed in such a way that the
narrow edges are facing each other (inside). The steering head
bolt and the nut must always press against the wide outside
edges. The bearings would otherwise be pressed apart by the bolt
pressure.
The steering wheels should be able to rotate freely after
assembly, but there must not be any clearance on the bearings.
42
·
Tighten the nut primarily to 20 Nm +/- 2 Nm.
·
Slacken the nut slightly.
·
Re-tighten to 15 Nm +/- 1.5 Nm.
®
Invacare - Dragon / Tiger
Invacare ® - Dragon / Tiger
7.11
SERVICE MANUAL
Repairing a flat tyre
WARNUNG: Injury hazard if the vehicle starts moving unintentionally during repair work.
· Switch the power supply off (ON/OFF key).
· Engage the drive.
· Before raising the vehicle, secure the wheels by blocking them with wedges.
ATTENTION: Danger of crushing to the hands and feet by the weight of the wheelchair!
· Pay attention to the hand and feet.
· Use proper lifting techniques.
7.11.1 Repairing the rear tyre (wheel size 12½ x 2¼")
Pre-requisites:
· Torque wrench with
- Allen key Bit 5 mm
- Torx Bit R40
· Mounting kit
· Wooden block (approx.12 x 12x 30 cm for propping up vehicle)
· Repair kit for tyre repair or a new inner tube.
· Talcum powder
Dismantling the wheel:
·
Lift the vehicle up and place a wooden block
underneath it to keep it in a raised position.
·
Remove the four countersunk head screws
TX40 (1) using the Torx bit.
·
Pull the wheel from the hub.
43
SERVICE MANUAL
®
Invacare - Dragon / Tiger
Repairing the tyre
ATTENTION: Explosion hazard!
The wheel will explode if you do not let the air out of the tyre before removing the wheel
rim!
· Always allow the air to escape completely from the wheel before you remove the rim.
·
Remove the valve cap.
·
Exhaust the air from the tyre by pressing the spring
pin in the valve.
·
Remove the 5 cylinder head bolts (reverse side of the
wheel, 2) using the Allen key.
·
Remove the rim halves from the tyre.
·
Remove the inner tube from the tyre.
·
Repair inner tube and replace, or insert new.
Note
If the old inner tube is to be repaired and re-used, and has become wet during repair, you can
make replacement easier by sprinkling the inner tube with a little talcum powder.
Note
Refit the wheel in reverse order. Please ensure that the wheel is re-fitted on the same side and in
the same running direction as removed.
· Re-insert the rim halves into the tyre.
· Pump a little air into the tyre.
· Insert the socket head screws into the rim and tighten the screws to 10 Nm.
Make sure the inner tube is not crushed between the two rim halves.
· Make sure that the tyre is situated directly on the rim.
· Inflate the tyre to the recommended pressure.
· Check that the tyre is still situated directly and correctly on the rim.
· Screw the valve cap back on.
Installing the wheel:
ATTENTION! Danger of injury if the wheels come off.
If the drive wheels are insufficiently attached during assembly, they can come off during
driving.
· Tighten the TX40 countersunk screws to 30 Nm when mounting the drive wheels.
· Always use new screws with undamaged coating.
· Re-install the wheel.
44
Invacare ® - Dragon / Tiger
SERVICE MANUAL
7.11.2 Repairing a flat tyre (wheel size 220/120 x 50)
Pre-requisites:
· 13 mm socket wrench
· 12 mm socket wrench
· Repair kit for inner tube tires or a new inner tube
· Talcum powder
Removing the wheel
ATTENTION! Danger of crushing to the hands and feet by the weight of the wheelchair!
· Pay attention to the hand and feet.
· Use proper lifting techniques.
·
Jack up the vehicle (place a wooden wedge under
the frame).
·
Loosen and remove the screw (1) using the 12 mm
socket wrench on the outside and the 13 mm socket
wrench on the inside (to counter).
·
Pull the wheel from the fork
NOTE
Installation is carried out in reverse order. Please ensure that the wheel is re-fitted on the same
side and in the same running direction as removed.
45
SERVICE MANUAL
®
Invacare - Dragon / Tiger
Repairing a flat tyre
ATTENTION: Explosion hazard!
There is considerable pressure in the tyre. Danger of injury! Parts can be thrown out and
injure you if you do not evacuate all the air from the tyre.
· Press the release pin in the valve inwards and evacuate all the air from the tyre.
·
Unscrew the valve cap.
·
Exhaust the air from the tyre by pressing the spring
pin in the valve.
·
Loosen and remove the four screws (1) using the 12
mm socket wrench on the outside and the 13 mm
socket wrench on the inside (to counter).
·
Remove the tire with the inner tube from the rim
halves.
·
Repair the tube and re-fit or fit new tube
Note
If the old inner-tube is to be repaired and re-fitted and has become wet during repair work,
powdering the hose with some talcum powder can simplify the fitting procedure.
46
·
Re-insert the rim halves into the tire from the outside.
·
Pump a little air into the inner tube.
·
Re-position the screws and screw rim together tightly. Make sure the
inner tube does not get pinched between the rims halves!
·
Check the exact fit of the shoe.
·
Inflate the tyre to the prescribed air pressure.
·
Re-check the exact fit of the shoe.
·
Screw on the valve cap.
·
Re-install the wheel.
Invacare ® - Dragon / Tiger
7.12
SERVICE MANUAL
Replacing a drive wheel
ATTENTION: Danger of crushing to the hands and feet by the weight of the wheelchair!
· Pay attention to the hand and feet.
· Use proper lifting techniques.
WARNING: Injury hazard caused by uncontrolled movement of the mobility device!
· Switch the power supply off (ON/OFF key).
· Engage the drive.
· Before raising the vehicle, secure the wheels by blocking them with wedges.
· Prevent the mobility device tipping by propping it up on a wooden block which is long and wide
enough under the battery case! If the wooden block is too short or too high, the mobility device
can still tip!
Required parts/tools:
· Torx Bit TX40 spanner
· Mounting kit
· Wooden chock (approx. 12 x 12 x 30 cm) for jacking up the vehicle.
Note
Please take care of the small parts and observe the sequence in which the component parts are
installed. Please set them out in an orderly fashion so that they can be installed again easily in the
correct sequence.
·
Jack up the vehicle using the wooden chock
(1).
·
Loosen the 4 screws fastening the wheel (1)
using the Torx Bit TX40.
·
Remove the wheel from the hub.
47
SERVICE MANUAL
®
Invacare - Dragon / Tiger
ATTENTION: Danger of injury if the wheels come off!
If the drive wheels are insufficiently attached during assembly, they can come off during
driving.
· Tighten the TX40 countersunk screws to 30 Nm when mounting the drive wheels.
· Always use new screws with undamaged coating.
Note
Please ensure that the wheel is re-fitted on the same side and in the same running direction as
removed.
·
48
Refit the wheel in reverse order.
Invacare ® - Dragon / Tiger
7.13
SERVICE MANUAL
Adjusting the seat angle/seat height
There are three perforated plates under the seat for adjusting the seat angle and the seat height.
These perforated plates, in connection with the adjustable rear holding plates, result in a multitude
of different adjustment possibilities.
The adjustable range of the seat height (at 0° seat angle) is 42.5 cm to 50 cm. The adjustable
range of the seat angle is -12° to 22°. Please observe: The higher the seat adjustment, the smaller
the adjustable range of the seat angle!
Pre-requisites:
· 5 mm Allen key
· 6 mm Allen key
· 13 mm open-ended spanner
· Torque spanner
· Loctite (medium-hard)
·
The picture on the right shows the position of
the perforated plates (1) and the fastening
screws on the holding plates (2) for adjusting
the seat height and the seat angle.
The picture on the right shows the front perforated
plates. The approach is similar for the rear
perforated plates. To adjust the front perforated
plates a 13 mm open-ended spanner is required in
addition to the 5 mm Allen key.
·
To adjust the seat height/seat angle loosen
the screw (1) with the spanners and pull out.
·
Set the perforated plates to the desired
height/angle.
·
Apply the Loctite to the screw, re-insert the
screw and tighten to 40 Nm using the
spanners.
49
SERVICE MANUAL
The seat height and seat angle can also be adjusted
via the rear holding plates.
·
Loosen the rear fastening screw on one side (in
threaded bush 1) so that the holding plate can be
swivelled upward or downward.
·
Loosen the front fastening screw and remove
(depending on the position the screw is either in
threaded bush 2 or 3).
·
Repeat the procedure on the other side.
·
Low adjustment = Hole combination 1 and 2.
·
High adjustment = Hole combination 1 and 3.
·
Apply the Loctite to the screw, re-position the
screws and tighten to 25 Nm +/- 3 Nm.
The rear swivelling perforated plates have five
positions. In the illustration on the right these are
marked by the letters A to E.
If the holding plates are in the low position (see above),
all five positions can be used.
Only positions B, C, D and E are possible in the high
position. In position A there would be a collision
between the holding plate and the seat frame.
This results in the following seat heights:
Holding plate in the low position:
Position of the perforated plate / seat height:
·
·
·
·
·
A / 42.5 cm
B / 44 cm
C / 44 cm
D / 45 cm
E / 45.5 cm
Holding plate in the high position:
Position of the perforated plate / seat height:
·
·
·
·
50
B / 49 cm (at a seat angle of 6°)
C / 47 cm
D / 48 cm
E / 50 cm
®
Invacare - Dragon / Tiger
Invacare ® - Dragon / Tiger
SERVICE MANUAL
7.13.1 Adjustment tables
All combination possibilities of the perforated plates are shown in the following tables. These values
refer to a seat frame that has been secured in the second drill hole from the front.
The measurements were carried out as follows:
·
Adjust the rear swivelling perforated plates (hole A to E)
·
Move the front perforated plate to the lowest possible position.
·
Change the seat angle and the seat height via the front perforated plate.
7.13.1.1 Table 1
The first table refers to the rear holding plates in the low
position (see illustration on the right).
Position of the rear swivelling
perforated plates
A
B
C
Seat angle in °
Seat height in cm
0
2
3
5
7
8
9
10
11
13
-2
0
1
3
5
6
7
8
9
11
12
14
15
18
-5
-3
-1
0
42.5
43.5
44.5
45.5
47
47.5
48
49
50
51
42.5
43.5
44.5
45.5
47
47.5
48
48.5
50
51
51.5
52.5
53.5
55
41.5
42.5
43.5
44
51
®
Invacare - Dragon / Tiger
SERVICE MANUAL
Position of the rear swivelling
perforated plates
D
E
52
Seat angle in °
Seat height in cm
1
3
4
5
6
7
9
10
12
13
16
17
22
-8
-6
-4
-3
-2
0
1
2
3
4
6
7
8
10
12
14
16
20
-11
-10
-7
-5
-4
-3
-1
0
1
2
3
4
6
7
9
10
13
14
18
45.5
46.5
47
47.5
48.5
49.5
50.5
51
52
53
55
56
58
39.5
41
42
43
44
45
46
46.5
47.5
48
49
50
50.5
51.5
53
54.5
55.5
57.5
38.5
39.5
41
42
43
43.5
44.5
45.5
46.5
47
47.5
48.5
49.5
50
51
52
54
55
57
Invacare ® - Dragon / Tiger
SERVICE MANUAL
7.13.1.2 Table 2
The second table refers to the rear holding plates in the
high position (see illustration on the right).
Position of the rear swivelling
perforated plates
B
C
D
E
Seat angle in °
Seat height in cm
6
8
10
14
-5
-3
0
2
5
7
11
-10
-7
-5
-3
0
3
5
9
-12
-8
-7
-5
-3
1
2
6
49
50.5
52
54.5
44
45
46.5
48
50
51.5
54
42
43.5
44.5
46
48
50
51
54
42
44
45
46
48
50
51
54
53
SERVICE MANUAL
7.14
®
Invacare - Dragon / Tiger
Replacing the safety belt
Requirements:
· 10 mm socket spanner
· 4 mm Allen key
Dismantling the safety belt:
·
Remove the plastic cap (5).
·
Loosen the bolt (3) and the associated nut (in the figure this is covered) with a 4 mm Allen key
and a 10 mm socket spanner.
·
Remove the nut incl. the washer.
·
Remove the screw incl. the safety belt, the washer (2) and the washer arranged behind.
Note
Another nut is fixed between the two washers (2) and (4) as a spacer so that the belt mounting
can rotate freely.
·
Replace the safety belt (1).
Refitting the safety belt:
·
7.15
Refit the parts in reverse order.
Testing an actuator motor
Required parts/tools:
· Multimeter
·
54
The electric resistance of the adjustment motor is to be checked at the connection assembly.
In case this is close to infinite, the motor is probably burnt out. If it is less than 1W, the motor
has short-circuited. In either case the motor must be replaced.