1
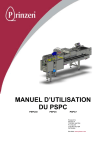
Users manual
PSPC 30
Prinzen Machines
Users manual
Prinzen Machines BV Aalten – The Netherlands
All rights reserved.
Information provided by Prinzen Machines BV may not, in part or in whole, be copied, archived and/or
published in any way, without written permission of Prinzen Machines BV.
All information provided regarding construction, materials and production methods is based on general
information available at the time of printing. Please note that specifications found herein are subject to
change at any time.
The information provided is valid for the standard design of the product. Prinzen Machines BV accept no
responsibility for any damage caused by parts of the machine which differ from the standard design of the
product.
Prinzen Machines BV accept no responsibility for errors or incorrect information found in this publication or
indeed the consequences of these errors.
E121
1
Prinzen Machines
Users manual
INDEX
INDEX.....................................................................................................................................................2
PREFACE ..............................................................................................................................................3
1 INTRODUCTION ................................................................................................................................. 4
1.1 Aim and function of the PSPC. ...................................................................................................... 4
1.2 Standard version. ............................................................................................................................ 4
1.3 Options. ............................................................................................................................................ 4
1.4 External machine components. ....................................................................................................4
2 SAFETY NOTES ................................................................................................................................. 5
2.1 Permitted use................................................................................................................................... 5
2.2 General safety notes. ...................................................................................................................... 5
2.3 Specific safety notes for the PSPC packing machine ................................................................. 7
2.4 Emergency stop............................................................................................................................. 8
2.5 Cleaning. .........................................................................................................................................8
3 OPERATION ..................................................................................................................................... 9
3.1 Working Operation. ....................................................................................................................... 9
3.2 Operation...................................................................................................................................... 10
3.2.1 Starting the machine ................................................................................................................ 11
3.2.2. Stopping the machine ............................................................................................................. 11
3.2.3 Working with the machine........................................................................................................12
4 INSTALLATION ............................................................................................................................... 13
4.1 Installation checklist ....................................................................................................................13
5 MAINTENANCE NOTES ................................................................................................................ 13
5.1 General. ........................................................................................................................................ 13
5.2 Daily maintenance. ...................................................................................................................... 14
5.3 Weekly maintenance. .................................................................................................................. 14
5.4 Monthly maintenance.................................................................................................................. 14
5.5 Half-yearly maintenance. ............................................................................................................ 14
5.6 Maintenance notes. ..................................................................................................................... 17
5.7 Environment................................................................................................................................. 17
5.8 Environment consequences. ......................................................................................................17
6 ADJUSTMENTS.............................................................................................................................. 17
6.1 General. ........................................................................................................................................ 17
6.2 Electrical: Main control box. .......................................................................................................18
7 SPECIFICATIONS .......................................................................................................................... 19
7.1 Machine specifications. .............................................................................................................. 19
7.2 Electrical specifications. ............................................................................................................ 19
7.3 Air supply specifications. ........................................................................................................... 19
7.4 Physical requirements. ............................................................................................................... 19
7.5 Directives and standards used: ..................................................................................................19
EG EXPLANATION OF AGREEMENT ...............................................................................................22
E121
2
Prinzen Machines
Users manual
PREFACE
About this document.
This document intended as a reference book, for users, to work with the machine which is represented
on the cover of this document.
Keep this manual in a permanent place, close to the machine. If the manual is lost or damaged, order
a new copy as soon as possible.
The manual gives information about safety, technical specifications, operating instructions and
maintenance. Before operating the machine, you should read this manual and be aware of all
information printed therein.
The Prinzen PSPC has been carefully developed and has CE approval. Modifications to this machine
or it’s component parts will negate this approval and therefore are not permitted.
The machine has been thoroughly inspected before shipping.
Each machine has a unique registration number which is printed on the machine tag. When contacting
a service engineer or dealer, Please have this number available.
Prinzen Machines BV is not responsible for any damage or injury caused by neglecting to follow the
instructions provided in this manual.
Directions for use.
All users of the machine or anyone near the machine, should be aware of the contents of this manual.
Management should instruct all personnel with reference to machine operation & safety procedures
using this manual.
Never change the sequence of procedures.
This manual must be accessible to all personnel using or in close proximity to the machine at all times.
E121
3
Prinzen Machines
Users manual
1 INTRODUCTION
1.1 Aim and function of the PSPC.
The PSPC packer has been developed to pack a random supply of eggs from the egg infeed belt into
30 cell packaging. This may be either plastic or cardboard trays with a capacity of 30 eggs in a pattern
of 5 x 6. The eggs are packed points down into the packaging.
1.2 Standard version.
The standard version of the PSPC is constructed with the following parts:
•
•
Mainframe with peak absorber, roller transport, cup conveyor and control unit.
Output conveyor incl. denester for 30 cell trays
1.3 Options.
The following options are available for the PSPC:
• Infeed extension
• tray stacker
Specifications regarding the above options are available at your local Prinzen dealer.
1.4 External machine components.
The following items are not considered to be part of the machine.
•
•
•
•
•
E121
Electrical supply.
Connection to the electricity supply.
Compressed air supply. (if applicable).
Connection to the air supply. (if applicable).
Stamping tool
4
Prinzen Machines
Users manual
2 SAFETY NOTES
The following safety notes concern the standard version of the PSPC. The safety notes concerning
the options and extensions etc. are represented in their respective manuals.
2.1 Permitted use.
The PSPC has been developed for packing eggs into specific packaging. Any other use of the
machine is not permitted.
2.2 General safety notes.
2.2.1
Caution!
Read the user manual of this packing machine before using, & be fully aware of
the function of all switches.
2.2.2
Caution!
To prevent accidents or personal injury during maintenance works;
1.Switch off the main switch and push the emergency stop button
2.Isolate the external mains supply to the machine.
3.Install a sign “out of use” in a clearly visible position on the machine.
2.2.3
Caution!
To prevent accidents or personal injury during trolley movements;
• Make sure no one is near whilst moving trolleys.
• Warn bystanders to keep clear.
2.2.4.
Caution! To prevent accidents or personal injury.
The emergency stop circuit must be tested every week.
2.2.5
Caution! To prevent accidents or personal injury.
Never move or disable the proximity switches and photocells & other safety devices
2.2.6
Caution! To prevent accidents or personal injury.
Operators should ensure that close-fitting apparel is worn & a hair-net used to prevent hair and
clothing being caught in the machine.
2.2.7
Caution! Danger for injury by electrical voltage.
Injury & danger of death may occur when the electrical voltage does not conform to the type plate of
the machine, or when the cable diameter, fuses and earth connection are not according to local
regulations that may apply or when not installed by a qualified electrician.
E121
5
Prinzen Machines
Users manual
2.2.8
Caution! To prevent accidents or personal injury.
Make sure that there is sufficient light around the machine.
.
2.2.9
Caution! To prevent accidents or personal injury.
Make sure that maintenance and service work is carried out by skilled personel.
2.2.10
Caution! To prevent accidents or personal injury.
The machine is NOT operated by ;
• Persons younger than 16 years. (Age laws may differ from country to country)
• Untrained personnel.
• Incompetent persons who would not understand the possible dangers of the machine.
2.2.11
Caution! To prevent accidents or personal injury.
Operators must be aware of all information contained within the manual & should adhere to all
instructions & safety information given when operating the machine. All safety notes & operating
instructions should be given to any new user of the machine.
2.2.12
Caution! To prevent accidents or personal injury.
Keep children and incompetent persons away from the machine.
2.2.13
Caution! To prevent accidents or personal injury, due to falling or slipping.
Make sure that the machine and the area around the machine is cleaned regularly, is free of obstacles
and that production materials do not cause an obstruction for working or servicing the machine.
2.2.14
Caution! To prevent accidents or personal injury.
Make sure that all warning signs are legible and are not damaged or removed.
Keep the pictograms clean and, if unclear or illegible, replace them.
2.2.15
Caution!
Only use genuine “Prinzen Machines” or CE-certified parts for replacement.
2.2.16
Caution! To prevent accidents or personal injury.
Use the machine only for the purpose as described in section 1 of this manual.
2.2.17
Caution! Danger of injury by fire or short-circuit.
With using an extension cable, make sure that the cable diameter in relation to the length of
cable is correct. If unsure, ask your local installer.
Make sure that the cable is completely unrolled.
2.2.18
The user determines the limits of “working safely” with the machine.
Do not take any risks.
Be especially cautious at time of machine failure, always stop the machine first ,push the
emergency stop button, switch off the main switch and wait until the machine has come to a
complete stop before correcting the failure.
E121
6
Prinzen Machines
Users manual
2.3 Specific safety notes for the PSPC packing machine
2.3.1 Inputconveyor
Caution! Danger of serious injury by jamming between;
The input conveyor and the gates
The input conveyor and the moving gate fingers
The input conveyor and roller conveyor
The drive tooth wheels off the input conveyor
Keep clear of this area when machine is running .
2.3.2 Roller conveyor
Caution! Danger of serious injury by jamming between;
The roller conveyor and cup conveyor
The roller conveyor and drive surface
The roller conveyor and turning disc shaft
Keep clear of this area when machine is running .
2.3.3 Cupconveyor
Caution! Danger of serious injury by jamming between;
The cupconveyor and the guideshafts.
Keep clear of this area when machine is running .
2.3.4
Stampingunit
Caution! Danger of serious injury by jamming between;
The motor drive and driveshaft
The stamping tool and machine frame
The stamping tool and cup conveyor
Keep clear of this area when machine is running .
2.3.5
Drivesystem, cupconveyor and rollerconveyor.
Caution! Danger of serious injury by jamming between;
The drive system with tooth wheels ,sprockets and chain
for driving the cup conveyor and roller conveyor.
Keep clear of this area when machine is running .
After maintenance ensure all guards and protective covers are correctly fitted.
2.3.6
Transferarm
Caution! Danger of serious injury by jamming between;
The transfer arm and machine frame
The transfer arm and cup conveyor
The transfer arm and output conveyor
Keep clear of this area when machine is running
2.3.7
Denester
Caution! Danger of serious injury by jamming between;
The denester frame and machine frame
The drive off the denester
Tooth wheels of the denester drive
Keep clear of this area when machine is running.
After maintenance ensure all guards and protective covers are correctly fitted.
E121
7
Prinzen Machines
Users manual
2.3.8 Outputconveyor
Caution! Danger of serious injury by jamming between;
The driverdisc and frame
Keep clear of this area when machine is running.
2.3.9
Caution! Before starting maintenance:
1
Read user manual first.
2
Switch main switch to off position
3
Push an Emergency stop
4
Place an instruction “Maintenance –out of use” on the main panel.
The warning signs above have been placed on your machine.
Learn and understand the meaning of these signs.
2.4 Emergency stop
To stop the machine in case of emergency, the machine has an emergency stop button on the main
control box. The emergency stop button can be recognized by its red colour.
When the emergency stop button is pressed, the machine stops immediately. The button stays
mechanically locked so that the machine can not restart until it is considered safe to do so.
When the problem is resolved, the emergency stop button may be released by turning it to the right.
The start-up procedure is described in the operating instructions.
The emergency stop button may also be used if the machine suddenly develops a fault.
Recommendations:
•
•
•
New operators should have some practical experience using the emergency stop & the startup procedure.
The emergency stop should be tested regularly.
Do not de-activate the emergency stop button when it is not certain why and by whom it was
activated.
2.5 Cleaning.
The PSPC may be cleaned with water. Make sure that the main switch is in the off position before
cleaning. (see section 5: maintenance)
E121
8
Prinzen Machines
Users manual
3 OPERATION
3.1 Working Operation.
Main frame:
The eggs roll from the egg collection belts onto the input conveyor(01) where the eggs may be
graded. On this belt, oversized, misshapen, cracked or dirty eggs should be manually rejected. The
eggs run into the gates where they are detected by photocells(06). When all gates have detected
eggs, the rollers will move one step forwards. The rollers are so shaped as to orient each egg with the
pointed end to each side of the roller when moving forward.
As the eggs reach the cups(03), each egg is gently turned and allowed to enter the cup points down. If
an egg blocks the cup detection photocell(07) (mounted in between the rollers & the cup conveyor)
the machine will stop. An alarm status will appear on the counter system LCD . The cup conveyor is
in synchronization with the roller conveyor and will move forwards until the “transfer photocell”(08)
detects the first line of eggs. The eggs are lifted by vacuum with the transfer lever and are taken to
the output conveyor where a tray is waiting. A positive airflow is given to the vacuum lifter and the
eggs are released. As the transfer photocell is cleared, the cups move forwards once more.
Output Conveyor:
The automatic denester(04) will set a tray onto the output conveyor every time the photocell “start
denester”(09) is uncovered. The tray moves forwards until it reaches the stopper(10). When the
photocell “tray present” detects a tray, the transfer arm will be enabled & will operate when filled cups
have arrived at the correct position.
When the transfer arm has placed the eggs into the waiting tray, the stopper will be activated, so that
the full tray may move forward whilst the empty trays are blocked. When the photocell “tray
present”(10) is not blocked, the stopper will be released & an empty tray may once again move up to
the stopper.
.
E121
9
Prinzen Machines
Users manual
3.2 Operation.
All operators of the machine, must be familiar with the safety procedures from section 2 of this
manual. This section is meant for operators as described in section 2.4.
Operating activities which are not found in this section may only be carried out by service personnel.
Operating instructions for optional equipment are explained in the relevant sections.
The control panel contains the following:•
•
•
•
Start and stop pushbuttons
Selector switch - “clear”
Emergency stop button
Operators display
The selector switch "denester" found near the denester has 3 positions :
"inch" the denester is working manual.
"off" denester off, the denester is not working.
"on" denester on, the denester is working automatic.
DENESTER
INCH OFF ON
The selector switch "stamping" has 2 positions :
"0" stamping off, the stamping is not working.
"1" stamping on, the stamping is working.
STAMPING
0
1
E121
10
Prinzen Machines
3.2.1 Starting the machine
Before starting the machine, Ensure
that no one is working on the
machine and that it is safe to start.
Users manual
Switch main
switch on (1-On)
Press start
Light on start
button off
No
Check emergency
stop push buttons
Yes
Press start
Self test Transfer arm to initial
position
cups to initial position
stacker* to initial
position automatically
Self test
OK
No
Transfer arm
Cups
Stacker*
Move to initial position
automatically
Yes
Press start
* stacker if applicable
Machine running
3.2.2. Stopping the machine
Machine running
Selector switch clear
overrules egg detection
photocells. The rollers en
cups make a continuous step
movement. This function is
used to clear the last eggs
from the machine.
Selector switch
clear
To position 1
Last
eggs
packed
No
Yes
Press stop
All
movements
stopped
No
Yes
Switch main
switch off (0-Off)
Machine off
E121
11
Prinzen Machines
Users manual
3.2.3 Working with the machine
a. denester
Before starting the machine, the denester has to be filled with trays.
1. Turn the selector switch on the denester control box to the left (manual position).
2. Place a stack of trays into the denester bunker (tray handgrips to the side).
3. Turn the denester to automatic by turning the switch to the right.
When the trays in the stack are packed tightly into each other you may have to knock the stack to
loosen the trays before filling the bunker.
Note. Moving the selector switch to the “inch” position the denester can be operated in steps.
b. starting and stopping
By pushing the white start button, the infeed belt & egg collecting belts will run. The machine will then
work as described at 3.1.
When the black stop button is pushed, the machine will stop, after all cycle stop positions are
achieved.
c. possible faults.
If a fault should occur on the machine, the display will show the corresponding alarm message:
Egg not lifted by suction box
One or more eggs have stayed behind in
cups after transfer movement.
Stopped at transfer
Egg not positioned in cup right at the
transfer
Denester fault – no tray out
Denester has not denested correctly
Conveyor full
The output conveyor is full of trays
No tray present
Emergency stop – unlock button
and press start
There is no tray at transfer position.
An emergency stop button has been
pushed. See par. 2.4 Unlock button and
press start
Denester off
Denester switch is not in “auto"
position
Transfer fault
The movement of the transfer arm
has not finished in a certain time- See
service manual
Stacker fault- press start for retry
Check cup detection/flaps – then
press start
Stacker (if applicable) has not finished
initial movement correctly-See service
manual
Mill is not adjusted correctly, is
defective or dirty.
After the cause off the interruption has been rectified press start to continue.
d. Other functions
Egg transport.
Two pressure switches are mounted on both sides of the input conveyor. When the machine is
running (input conveyor running), the egg collecting belts will automatically start(if connection to egg
collection system is made).As soon as one of the pressure switches are being pushed by eggs for a
certain time, the egg collecting belts will come to a stop. After both pressure switches are clear for a
E121
12
Prinzen Machines
Users manual
certain time, the egg collecting belts will start automatically again. Both times are adjustable (see
service manual).
4 INSTALLATION
4.1 Installation checklist
1) Before removal from shipping pallet, check for signs of shipping damage. Report at once to
Prinzen Machines if found.
2) Remove from pallet.
3) Using the lifter trolley to position main frame to egg collection belt/s.
4) Set the height of the infeed table to be approx. 5mm below the discharge point of the belt
transfer plate. At this stage it is best to run the collection belt with a few eggs to ensure that
the transfer is satisfactory.
5) Level the machine. Re-check the transfer dynamically before moving on.
6) Connect the cables to the main panel. Connect every wire according to the electric schematic.
7) Place the output conveyor in position.
8) Remove transfer arm support (wood)
9) Arrange for the electric supply to be connected.*
10) Switch on the electrical supply.
11) Start the machine according to par 3.2.1.
12) Check for the correct direction of the input belt. If the direction is incorrect: isolate the electric
supply at the external source. Exchange the wires going into terminals L1 & L2. with each
other.
13) Repeat steps 9 through 10.
14) Remove cable tie from motor protection switch Q3 and push black button.
15) Re-route the conveyor cables and fix with cable ties.
16) Arrange for the egg collection belt control cable is connected to terminals according to
electrical schematic.
17) Check the entire machine for loose set screws and fixing bolts etc.
* note; the electrical supply connection must be made by an approved electrician, according to
local regulations.
5 MAINTENANCE NOTES
5.1 General.
To extend the useful life of the machine it is necessary to maintain the machine correctly.
Neglecting the correct maintenance procedures may lead to damage or accidents. Prinzen Machines
BV will not be held responsible for such accidents.
Maintenance may only be carried out by trained service personnel. Such personnel should be aware
of the following:-
E121
13
Prinzen Machines
Users manual
• Consult the manual before work commences .
• Turn the main switch off and push in the emergency button.
• If working under the machine or out of view, always lock the main switch with a padlock.
When the maintenance work is complete, ensure the following :•
•
•
•
All fasteners are secure.
All tools & cleaning cloths etc. are removed from the machine.
All guarding is securely in place.
The machine is tested before handing over to operation personnel.
By following the above points, dangerous situations may be prevented.
In principle, the machine may be cleaned with water. But one should take note that electrical &
pneumatic components are not subjected to prolonged exposure to liquids.
• Never use high pressure water on the main control box, plastic (breakable) parts, bearings or
electrical components. Prinzen Machines BV will not be responsible for damage caused by
careless cleaning of the machine.
• Always turn the main switch to the off position when cleaning any part of the machine.
• After cleaning the machine with water, all bearings and chains should be lightly oiled.
5.2 Daily maintenance.
• After turning off the machine, all dirt, grease and feathers should be removed from the machine.
• Clean the drip trays with water.
• Clean the input conveyor with a moist cloth.
5.3 Weekly maintenance.
• Clean the shafts of the cups and, when necessary, Apply Teflon spray. Use food grade specified
lubricants.
• Check the emergency stop procedure. Push the emergency button. The white light on the reset
switch should light.
5.4 Monthly maintenance.
• Oil all chains. There are five chains on the machine. These are:
2 cup conveyor chains(no. 1).
2 roller conveyor chains(no. 2).
1 main drive chain (behind cover)(no. 3).
If sufficient oil is present, do not re-apply further oil. The rollers &
roller drive section should remain free of oil or grease to prevent
product contamination.
fig. 5.4
• Clean the suction unit by loosening the four bolts and remove the unit from the machine. Then
clean the unit with air pistol. Always wear eye protection when using compressed air.(no. 5)
• Check legibility of all warning signs and clean or replace as necessary.
• Oil the denester guides(no. 4) and guides(fig. 5.4)
• Clean the fans of all motors using air pistol.
• Check the filter of the vacuum pump and replace if necessary (no.6)
• Spray rollers with silicone spray.
5.5 Half-yearly maintenance.
• Check the tension of the output conveyor belts
• Check the tension of the infeed belt
14
E121
fig. 5.5
Prinzen Machines
Users manual
• Check the main drive chain for wear. If the yellow part on the tensioner (fig 5.5) gets visible, the
chain should be replaced.
• Check all bearings for play
• Check entire machine for loose parts, bolts, nuts etc.
E121
15
E121
6 Vacuum
filter
4 Oil
3 Oil
5
1 Oil
2 Oil
Prinzen Machines
Users manual
16
Prinzen Machines
Users manual
5.6 Maintenance notes.
• All motors are provided with life time lubrication, and require no maintenance.
• All bearings are “sealed for life” & require no lubrication.
Repair and/or change of parts:
• During warranty period, repairs may only be executed by Prinzen Machines BV or service personal
provided by Prinzen Machines BV.
• All parts replaced must be of at least the same specification as the original parts.
• All parts should be ordered from Prinzen Machines BV or your local Prinzen dealer.
5.7 Environment.
Residues of oil and other lubrication, oilcloths and cleaning fluids must be discharged as chemical
waste.
5.8 Environment consequences.
The life expectancy of the machine depends on the amount of maintenance given, running hours and
other environmental conditions.
Dismantling & disposal of the machine must be carried out by a suitable disposal company which has
the required licenses and/or permits for the state or country concerned. Dismantled materials should
be sorted for disposal according to local rules and regulations that may apply.
Separate all materials like oil and lubrication fluids and discharge them as chemical waste.
6 ADJUSTMENTS
6.1 General.
Neglecting to follow the correct adjustment directions, may lead to machine damage or personal
injury. Prinzen Machines BV is not responsible for any such damage or injury incurred in this way.
Maintenance may only be carried out by trained service personnel. Such personnel should be aware
of the following:
•
•
•
Consult the manual before work commences .
Turn the main switch off and push in the emergency button.
If working under the machine or out of view, always lock the main switch with a padlock.
When the maintenance work is complete, ensure the following;
•
•
•
•
All fasteners are secure.
All tools & cleaning cloths etc. are removed from the machine.
All guarding is securely in place before starting the machine.
Test the machine before handing over to operation personnel.
By following these guidelines, dangerous situations and/or machine damage may be prevented.
Repair and/or change of parts:
• During warranty period, repairs may only be executed by Prinzen Machines BV or service personal
provided by Prinzen Machines BV.
• All parts replaced must be of at least the same specification as the original parts
• All parts should be ordered from Prinzen Machines BV or your local Prinzen dealer.
E121
17
Prinzen Machines
Users manual
6.2 Electrical: Main control box.
Isolate the external supply before working inside the control panel!
• Warning : After switching off the main switch, the panel will remain “Live” for approx. one
minute. The frequency controller may hold a high voltage charge during this time.
Therefore, do not touch any part within the panel whilst the frequency control display is lit.
• Several parts maintain voltage even if the main switch is turned off.
• Work inside the control box may only be undertaken by skilled service personnel.
Contrary to the above, the following actions may be executed without switching off the voltage:
• Resetting of motor safety switches (F1-F3).
Never operate the machine with electrical safety devices disabled or guarding removed.
The construction of the main control box may vary and is dependant on optional equipment fitted
(stacker, stamping device etc.). For the exact version refer to the appendix of the electrical diagrams.
The figure below shows a general view of the control box.
Safety devices inside the controlpanel;
• F10 Circuit breaker control circuit*
• F4 Circuit breaker inverters*
• F1 Motor protection switch Vacuum pump
• F2 Motor protection switch input conveyor
• F3 Motor protection switch output conveyor
• F18 fuse inputs (sensors, etc..), PLC
• F19 fuse outputs (valves, clutch, etc..)
2Ampere/slow
6,3Ampere/slow
* Machines running on a single phase system (CSA panel) have fuses on this position.
E121
18
Prinzen Machines
Users manual
7 SPECIFICATIONS
7.1 Machine specifications.
Capacity:
Size:
Weight:
Max 24.000 eggs per hour (continuously filled gates).
Dependant on the machine type layout.
±650 kg (dependant on options fitted).
7.2 Electrical specifications.
Voltage:
Supply :
Frequency:
Power:
Max current:
Pre fuse:
Note:
Control voltage:
400V +10% -6% (standard, different voltages are possible on request)
3 phase, Earth & Neutral (standard, single phase is possible on request)
50Hz (standard, 60Hz is possible on request)
1,5 kW
6 Amp
16 Amp Type: slow
In case of earth leakage protection, a leakage current of minimum 200 mA
should be used. (specified for use with an inverter).
24VDC
7.3 Air supply specifications.
For the standard version, compressed air is not required. If compressed air is required for options
fitted, it should have the following :
Pressure:
Capacity:
6-10 bar regulated. (8 bar recommended)
11 liters/minute minimum.
The air should be clean, dry and oil-free. Poor quality air will adversely affect certain components.
7.4 Physical requirements.
Ambient working temperature: +10 to +30° Celsius
During transport:
0° to 45° Celsius
The machine is not suitable for outdoor use.
The machine is not suitable for use in surroundings containing items having a high flash point or of an
explosive nature.
7.5 Directives and standards used:
The machine is provided with a CE-standard. This means that the machine comes up to European
directives and standards concerning safety and health issues. The standards and directives are
explained below.
E121
19
Prinzen Machines
Users manual
Spare part list
1
2
3
4
5
6
7
8
9
10
11
12
13
Description
Cup
Suction cup
fuse 2A slow 5x20mm
fuse 2A slow 6x35mm
fuse 6,3A slow 5x20mm
fuse 6,3A slow 6x35mm
Fuse 6A slow 10x38mm
Fuse 2A slow 10x38mm
Vacuum filter
Photocell transmitter
Photocell receiver
Photocell
Proximity switch
Lamp bulb
Oil
14
Silicon spray
15
16
17
18
bearing
bearing
bearing
Vacuum tube
E121
Type
Single phase system(CSA) only
Single phase system(CSA) only
Single phase system(CSA) only
Single phase system(CSA) only
ET5505 1384
ET5505PPAP 1384
PA18CSD04PASA
E2E2 X5MB1 5MTR
BA9S 30V-2W
(Klüber) Food grade oil type 4
UH1-1500 spray
(Shell) Cassida Chain Oil 1000
(Interflon) Fin Food Lube
(Klüber) Unisilkon food grade
(Shell) Silicone Fluid
ASPFL 204
6204 2Z
626 2Z
PU 61021(25mm)
Article code
220 070 001
350 010 001
800 040 104
800 040 150
800 040 107
800 040 151
800 040 153
800 040 152
780 030 030
800 010 038
800 010 037
800 010 019
800 010 020
800 030 451
105 010 007
……
……
105 010 025
……
700 050 014
700 050 023
700 050 009
500 011 016
20
Prinzen Machines
E121
Users manual
21
Prinzen Machines
Users manual
EG EXPLANATION OF AGREEMENT
Concerning the machine standards:
Prinzen Machines B.V.
Tweede Broekdijk 7
7122LB Aalten, Nederlands
Phone: +31 (0)543 476251
Fax: +31 (0)543 476205
Declares on their responsibility:
1-
We are the manufacturer of the egg packing machine:
Brand:
Type:
Serial number:
Prinzen
PSPC
On which this agreement relates:
2-
The machine is developed in agreement with the demands of the machine standard
98/37/EEG (most recent).
3-
The machine meets the requirements of the demands of the following EG-standards:
The Low voltage standard 73/23/EEG.(most recent)
The EMC-standards 89/336/EEG. (most recent)
4-
The machine is developed and constructed according the European Standard:
EN 60204-1:1993
Electrical equipment is of industrial machines.
Signed in
Date:
Aalten
Signed by: L. Prinzen
E121
22