1
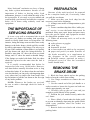
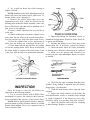
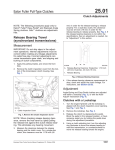
HOW - TO SERVICING DRUM BRAKES Tool And Material Checklist Brake Cleaner Clean Rags Wheel Chocks Jack and Jack Stands Wire Brush Lubricant Brake Adjusting Tool Asbestos-proof Face Mask or Particle Mask Vacuum Cleaner with HEPA Filter Attachment Wheel Cylinder Clamp Brake Spring Tool Pliers Brake Shoes Assorted Screwdrivers Safety Glasses or Goggles * This How-To Guide is designed as a general overview of a vehicle repair procedure. You should always refer to a service manual designed for your vehicle for detailed instructions. incorrect procedure. Parts Plus assumes no liability for an PREPARATION Most “backyard” mechanics are leery of doing any brake system maintenance because of the Because of the work involved, be prepared importance of brakes to driving safety. Such maintenance, however, is well within the range of the to do a complete brake job, if necessary, when do-it-yourselfer. If you study a service manual and you pull the rear drums. 1. Make sure that your local shop has the work carefully, you can easily and safely do a complete necessary parts before beginning. brake job at home using ordinary tools and 2. Arrange some means of transportation to pick equipment. up the parts. 3. Locate a machine shop that offers “while-youwait” service, in case the brake drums must be machined. Many auto repair shops and parts stores have the special lathes and equipment needed It is not a very safe or economical idea to wait for doing brake machine work. until your car’s brakes are making loud squealing 4. Gather all necessary tools, as well as the sounds to finally think about servicing them. For following items: instance, letting the linings wear too thin causes costly z safety glasses or goggles damage to the brake drums, which could be avoided z clean rags by timely replacement of the linings. The only way to z denatured alcohol be sure of the condition of drum brakes is to regularly z a clean surface (on which to lay out parts) pull the drums and check the lining thickness. It z paper and pencil (to make sketches of should be more than 1/8" above the rivets on riveted t h e b r a k e a s s e m b l y, a s a s u p p l e m e n t t o linings, and 1/8" above the metal on bonded linings. the diagrams in the service manual) If the linings are soaked with brake fluid, the shoes z Polaroid camera—optional (to make a should be replaced at the same time the leak is foolproof record of how the assembled repaired. brake should look) It is usually recommended that brakes be inspected at least every 10,000 miles. However, rear drum brakes normally last about twice as long as front disc brakes. If you know when the rear brakes were last checked, you can get by with inspecting them 1. Block the front wheels and set the parking every other time you inspect the front brakes. But do not hesitate to pull the rear drums at the first sign brake to keep the vehicle from rolling. 2. Use a large screwdriver to remove the rear of any brake problem. NOTE: Whenever the brakes are serviced, wheel covers. 3. Use the wrench end of the jack handle as a be sure to make a thorough check for leaks in socket wrench to loosen the lug nuts on both rear the system. wheels approximately one turn. 4. Carefully jack up the car’s rear end just enough to get the wheels off the ground. 5. Position the jack stands securely under the car’s frame. 6. Place a block of wood under the brake pedal to prevent accidentally depressing the pedal (which could cause problems when the brakes are disassembled). 7. Remove both rear wheels and release the parking brake. THE IMPORTANCE OF SERVICING BRAKES REMOVING THE BRAKE DRUM 8. Try to pull the drum free while rotating it slightly forward. NOTE: Sometimes the brake adjustment must be backed off before the drums can be pulled free. To do this, follow steps 9 through 12. 9. Remove the rubber plugs that cover the adjustment access slots, which are located on the backing plate behind the brake assembly. Some cars have a filled access slot that must be punched out to gain access to the adjuster. 10. Insert a brake adjusting tool or screwdriver in the slot. 11. While holding the automatic adjuster lever away from the star wheel with a small screwdriver, turn the adjuster up until the drum turns freely. 12. Give the adjuster four or five good turns to make sure the brakes are completely backed off. 13. If the drum still will not pull free, try backing off on the parking brake cable. Keep in mind that the drum might be rusted to the wheel hub; if this is the case, seek the help of a professional mechanic. INSPECTION Once the drum is removed, the brakes are inspected in the following manner: 1. Use a vacuum cleaner with a HEPA filter attachment to remove the asbestos dust from the brake assembly and interior of the brake drum. NOTE: Wear a special particle mask or asbestosproof facemask to do this, because asbestos is a health hazard when inhaled. Never use compressed air to remove asbestos dust. 2. Inspect the linings for looseness, cracks, or imbedded foreign matter. Watch for brake fluid, oil, or grease on the linings. 3. Measure the linings to see if they have worn thinner than 1/8". If necessary, replace the linings. 4. Check the brake shoes for cracks, distortion, or broken parts. Defective shoes must be replaced. 5. Make sure all springs and fasteners are securely in place and undamaged. Repair or replace as needed. 6. Check for any signs of leakage from the wheel cylinder. If any leakage is apparent, have the brakes inspected by a professional. 7. Clean the brake drums with a soap and water solution. 8. Inspect the inside surfaces of the drums for heat discoloration, cracks, or scratches large enough to catch a fingernail. If the drums are worn, they should be taken to a machine shop and “turned.” 9. Check the flexible brake hoses for crimping or other damage. Replace as needed. REMOVING BRAKE LININGS It is a good idea to work on one brake at a time. This way, you can use the properly assembled brake as reference. 1. Use a wheel cylinder clamp to hold the wheel cylinder pistons in place while removing the brake shoe return springs. 2. Make a sketch showing how the brake shoe springs are secured to aid in reassembly. Note the different coil diameter of the springs. 3. Remove the two brake shoe return springs using a brake spring tool. 4. Use pliers to remove the cable, tension spring, and self-adjusting lever bf the self-adjusting brake mechanism (if the car is so equipped). 5. Remove the brake shoe hold-down springs. Press against the head of the hold-down pin at the rear of the backing plate with your finger, then compress the hold-down spring with a pliers or brake hold-down spring tool. Turn the cup to remove it from the pin. 6. Remove the parking brake cable. Slip it up and out of the lever bracket that is attached to the larger brake shoe. 7. Sketch the star wheel adjusting mechanism, noting the location of the star wheel in reference to the brake shoes. The star will be closer to one shoe than the other. 8. Remove the entire brake shoe assembly from the backing plate. The primary and secondary shoes, star adjuster, and connecting spring should come out as a unit. 9. Disconnect the spring and star wheel adjuster from the brake shoes. INSTALLING BRAKE LININGS Non-asbestos brake linings are available for use on most vehicles made today. When replacement linings are needed, it is wise to install good-quality brake shoes as well. While relined shoes are a little less expensive, the brakes are only as good as their linings. 1. Clean the backing plate with a wire brush and wipe off any grease on the backing plate bosses and surrounding areas. 2. Inspect the backing plate for damage. If the bosses are deeply grooved, replace the backing plate. Make sure that the anchor bolt is tight. 3. Apply a light coat of brake lubricant to the bosses and all areas that will have metal-to-metal contact. 4. Clean the star wheel adjuster. Check for broken teeth or any other signs of damage, then lubricate at both ends. 5. Install the adjuster connecting spring on the primary and secondary shoes. 6. Install the star wheel adjuster in its previous position. (Refer to the sketch if necessary.) 7. Expand both shoes to form a circle. Position the assembly on the backing plate so that the anchor will hold the shoes in place when they are released. 8. Install the hold-down spring pins through the backing plate and shoes. 9. Install the spring assemblies over the pins, using pliers or a brake spring tool. 10. Install the emergency brake lever on the larger shoe. 20. Put the tires back on, then take the vehicle for a test drive. If there are no unusual noises and the braking action is good, the job is finished. NOTE: Always take it easy on new linings for the first couple hundred miles to give them a chance to wear in. 11. Before reconnecting the parking brake cable, make sure that it is free by applying and releasing it; the cable should return to its normal position. 12. If not, disconnect the opposite end of the cable from the front parking brake cable. Clean and lubricate the front of the rear cable, then pull the lever and cable out of the braking plate and clean and lubricate the rear portion. 13. Pull the cable forward and connect the front cable, then attach the parking brake lever to the replacement secondary shoe. 14. Reinstall the cable, tension spring, and selfadjusting lever of the self-adjusting brake mechanism (if the car is so equipped). 15. Use a brake hold-down spring tool to reinstall the two brake shoe return springs. 16. Grasping the shoe nearest the star adjuster, move the shoes back and forth to make sure that they are free to assume a normal position during operation. 17. Check the operation of the automatic star adjuster; the shoes should expand when the adjuster cable is pulled or released. Repeat on the other wheel. 18. Once the brake drums have been replaced, adjust the parking brake by releasing it and turning the cable-adjusting nut clockwise until the rear wheels turn freely. 19. Have someone operate the pedal while you spin both drums by hand to be sure the brakes work. ADJUSTING BRAKES New brakes need to be adjusted several times as they wear in. While the self-adjusters normally handle this when the car is driven in reverse and when the brakes are applied, it is a good idea to perform the initial adjustment manually; this is considered standard procedure by most professional mechanics. To do this, use a brake adjusting tool or screwdriver as explained earlier. With the parking brake off, turn the adjusting wheel until the brake tightens up all the way. Then back off the adjustment until the wheel turns freely. Be sure to back off both brakes the same amount to equalize them.