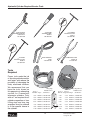
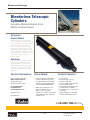
1
Mobile Cylinder Div.
Standard Telescopic Service Manual
Catalog HY18-0008/US Rev B
WARNING - USER RESPONSIBILITY
FAILURE OR IMPROPER SELECTION OR IMPROPER USE OF THE PRODUCTS DESCRIBED
HEREIN OR RELATED ITEMS CAN CAUSE DEATH, PERSONAL INJURY AND PROPERTY
DAMAGE.
This document and other information from Parker-Hannifin Corporation, its subsidiaries and authorized distributors provide product or system options for further investigation by users having
technical expertise.
The user, through its own analysis and testing, is solely responsible for making the final selection of the system and components and assuring that all performance, endurance, maintenance, safety and warning requirements of the application are met. The user must analyze all
aspects of the application, follow applicable industry standards, and follow the information
concerning the product in the current product catalog and in any other materials provided from
Parker or its subsidiaries or authorized distributors.
To the extent that Parker or its subsidiaries or authorized distributors provide component or
system options based upon data or specifications provided by the user, the user is responsible
for determining that such data and specifications are suitable and sufficient for all applications
and reasonably foreseeable uses of the components or systems.
Offer of Sale
The items described in this document are hereby offered for sale by Parker Hannifin Corporation, its subsidiaries or its authorized distributors. This offer and its acceptance are governed
by the provisions stated in the "Offer of Sale".
© Copyright 2009, Parker Hannifin Corporation, All Rights Reserved
2
Parker Hannifin Corporation
Mobile Cylinder Division
Youngstown, OH
Table of Contents
Safety Precautions for Single-Acting Telescopic Cylinders .........................4-5
Safety Precautions for Double-Acting Telescopic Cylinders........................6-7
General Information .........................................................................................8-9
Service Parts and Required Tools ...............................................................10-12
Normal Maintenance Items ............................................................................... 13
Telescopic Cylinder Disassembly ...............................................................14-15
Telescopic Cylinder Asssembly ..................................................................16-17
Telescopic Cylinder Operation ....................................................................18-21
Standard Test Procedure .................................................................................. 22
Storage and Installation .................................................................................... 23
Bleederless Telescopic ................................................................................24-25
Hydraulic Oil Recommendations ..................................................................... 26
Troubleshooting Hints..................................................................................27-31
Parker Safety Guidelines .................................................................................. 32
Offer of Sale ....................................................................................................... 33
3
Parker Hannifin Corporation
Mobile Cylinder Division
Youngstown, OH
Safety Precautions for Single-Acting Telescopic Cylinders
WARNING!
Telescopic cylinders commonly installed on dumping vehicles are devices intended to
provide only a lifting force. The cylinder is not a structural member, and is not designed
for, nor intended to provide stability to the dumping vehicle. Rollover or lateral tilt can
cause the cylinder to bend, buldge or separate causing the dump body to drop suddenly,
resulting in severe injury or death and/or damage to the unit and cylinder, if the following
warnings are not observed.
Hydraulic cylinders are not to be used as a stabilizer on a dump body or dump trailer. The hydraulic cylinder will not
prevent the dump body or trailer from rollover or lateral tilt. The cylinder is strictly a lifting device and is not a structural
member of the unit. Cylinders are not to be used as a means of stabilizing the unit.
The hydraulic cylinder mounted in the unit should be free to find its own trajectory line of extension, free of any lateral
loading of the plungers. Misalignment of the top or bottom mountings, or mounting pins too tight, may cause scoring
of the plungers, leaking, or improper sequencing which could cause the unit to upset.
The hydraulic cylinder will not withstand lateral or side pressure when the unit is leaning. Only activate the cylinder
when the tractor and trailer are in a straight line (not jack-knifed). A jackknife position of the tractor with the trailer
is not recommended when dumping. In a jackknifed position, the upper coupler pivots on bearings, contributing
nothing to dump stability. When the tractor and trailer are straight, the coupler bearings are normally 34 inches apart,
assisting in stabilizing the dump.
Do not activate the cylinder while on unlevel or soft ground, or during heavy crosswinds. Doing so may cause the unit
to upset. Uneven terrain, causing the trailer wheels to be 3 1/2 inches to 4 inches higher than the other side, puts
the top of the body 12 inches to 14 inches off center when the cylinder is fully extended. On fresh fill, loaded trailer
wheels may sink on one side, again setting up potential tip over. On road construction, the crown is also critical on
spread application, as in dumping on a slope. A 4 inch plus, height differential of wheels on an axle 8 feet wide, is
another rollover potential. Do not attempt dumping operations in high gusty wind conditions. If possible, raise the
dump body directly into the wind.
A blown tire or a severely under inflated tire can cause dump instability, when dumping. Always check tires visually
for cuts or punctures by nails and metal. Make sure all tires are inflated properly. Proper tire inflation also improves
wear and fuel economy.
Do not activate the cylinder while personnel or equipment are alongside or behind the dump body or trailer.
A hung load is commodity that does not discharge when a dump body is raised to an elevated position. This condition
exists due to surface adhesion between the commodity and the interior of the dump body. To avoid a tip over due
to a hung load, the driver should be warned by an observer or be aware of the material’s moisture content, if this
condition exists, immediately lower the dump body.
The operator should stay at the controls during the entire dumping operation. An operator who fails to stay at the
controls will never control the body when it starts to lean over for a tip over. If a problem exists, and the body starts to
lean, the operator should immediately lower the dump body or trailer and check and remedy any potential problems,
then resume dumping the load. It is important to slowly position the cylinder control valve into the hold position to
avoid subjecting the cylinder to a high pressure.
Do not overload the unit. The load must be distributed evenly during loading or unloading to avoid rollover and lateral
tilt. Loads stuck while the cylinder is partially or completely extended increases the hazard of rollover and lateral tilt.
Lower the dump body or trailer entirely with the cylinder control valve partially open (avoid lowering the dump body
or trailer with the cylinder control valve completely open). Then unload the dump body or trailer manually or with an
alternative mechanical aid.
Overloading is a very common occurrence that aggravates all the above conditions that cause a tip over.
4
Parker Hannifin Corporation
Mobile Cylinder Division
Youngstown, OH
Safety Precautions for Single-Acting Telescopic Cylinders
WARNING!
Shock pressure can cause severe injury or death and/or damage to the unit and
cylinder.
Do not use the cylinder to loosen loads stuck in the dump body or trailer. Lower the dump body or trailer entirely
with the cylinder control valve partially open (avoid lowering the dump body or trailer with the cylinder control valve
completely open). Then unload the dump body or trailer manually or with an alternative mechanical aid.
Humping is a rapid acceleration / deceleration method used to loosen a hung load from a trailer. If the load is off
center and the trailer is moved, a tip over may occur. Also, serious damage to the hoist may occur if an extreme
humping motion is used to get a sticky load out of the body.
Do not move the truck and jam the brakes while the cylinder is partially or fully extended to loosen loads stuck in the
dump body or trailer. Pulling forward (or backing up) and hitting the brakes, or lowering the body part way and then
quickly engaging the valve in the “HOLD” or “RAISE” position will cause a tremendous pressure spike. This pressure
spike may bulge or split one of the larger stages of the cylinder. Lower the dump body or trailer entirely with the
cylinder control valve partially open (avoid lowering the dump body or trailer with the cylinder control valve completely
open). Then unload the dump body or trailer manually or with an alternative mechanical aid.
Do not move the truck until the dump body or trailer is lowered completely.
WARNING!
Over pressurizing the cylinder can cause severe injury or death and/or damage to the unit
and cylinder.
Do not operate a cylinder at pressures above factory recommended operating pressures (Normally 2,000 P.S.I.
unless otherwise approved).
WARNING!
Worn or damaged hydraulic hoses can cause severe injury or death and/or damage to the
unit and cylinder.
Hydraulic hoses should be checked regularly and replaced if worn out or damaged.
NOTICE!
Do not drive the unit while the P.T.O. or hydraulic pump is engaged.
The hydraulic oil should be checked and changed regularly to avoid contamination leading to internal cylinder
damage.
A damp to light film of oil on each plunger indicates a good cylinder operation. A small accumulation of oil may be
noticed on the plunger at the head nuts after many cycles. This should not be mistaken for packing leakage.
Cylinder should be free of entrapped air. It is advisable to bleed air from the cylinder weekly to free entrapped air.
This will result in a smoother operation.
The cylinder should float in the pin mountings. The cylinder should be installed with 1/8" to 3/16" of clearance between
the pin and the pin hole if the mounting eye is wider than 5", or with 1/16" to 1/8" clearance if the mounting eye is
less than 5" wide. There should be a clearance of 1/8" to 1/4" per side on eyes less than 5" wide and 1/4" to 1/2"
clearance per side on eyes in excess of 5" wide. This is to allow the body to sway slightly while dumping, without
putting a side load on the cylinder. The cylinder plunger or one of the sleeves should be extended a minimum of 1/4"
when the dump body is in the down position.
The cylinder end mounts should be lubricated regularly.
5
Parker Hannifin Corporation
Mobile Cylinder Division
Youngstown, OH
Safety Precautions for Double-Acting Telescopic Cylinders
WARNING!
Rollover or lateral tilt can cause severe injury or death and/or damage to the unit and
cylinder.
The hydraulic cylinder will not prevent the unit from rollover or lateral tilt. The cylinder is strictly a lifting device and
is not a structural member of the unit. Cylinders are not to be used as a means of stabilizing the unit.
The hydraulic cylinder mounted in the unit should be free to find its own trajectory line of extension and retraction so
as not to cause improper sequencing and excessive wear to the plungers and internal components. Misalignment
could cause the unit to upset. On longer stroke cylinders mounted horizontally, supports should be added to the
center of the extended cylinder to increase the column strength of the cylinder.
The hydraulic cylinder will not withstand lateral pressure when the unit is leaning. Only activate the cylinder when the
tractor and trailer are in a straight line (not jack-knifed). Do not activate the cylinder while on unlevel or soft ground,
or during heavy crosswinds. Doing so may cause the unit to upset.
Do not activate the cylinder while personnel or equipment are alongside or behind the unit.
On roll-off units, lower the container with the control valve partially open (avoid lowering the container with the control
valve completely open) to prevent pressure build-up in the reeving cylinders as gravity pulls the container to the
ground.
WARNING!
Shock pressure can cause severe injury or death and/or damage to the unit and
cylinder.
A double-acting telescopic cylinder should be fully retracted when not in use.
Do not extend the cylinder until it has been fully retracted. A partially extended cylinder with pressure relieved may
drift out of position. This can happen if a cylinder experiences vibration, such as an ejector or push out cylinder does
in a refuse body. If this happens and the cylinder is then extended, the out of position plunger or sleeves will rapidly
reposition themselves and possibly cause high pressure oil to be trapped on the retract side of the cylinder. This
could cause a stage / sleeve to bulge and or the packing and bearings to be blown out from under a head nut.
On roll-off units, do not pull a container onto the hoist until the lift cylinder(s) are completely extended. If the lift cylinders
are not completely extended when a container is being pulled onto the hoist, the lift cylinders may be pulled open by
the weight of the load. Then as the container is pulled over center, the cylinders will be forced closed until they hit the
column of oil inside the cylinders causing a sudden pressure surge. If the lift cylinders are pulled open by the load,
they should be extended with the control valve to fill them with oil before pulling the container on the rest of the way.
Care should be taken if moving roll-off unit with tilt cylinders extended, avoiding sudden stops or jolts.
On roll-off units, care must be taken if a unit is moved with the lift cylinders extended. Avoid sudden stops or jolts.
On roll-off units dropping off a loaded container, feather control valve to avoid any pressure surges in the reeving /
cable cylinders as gravity pulls the container to the ground.
On roll-off units, if the container is not evenly loaded and is heavy on one side, the lift cylinders may mis-stage. When
the plunger / sleeves attempt to correct themselves, there may be a sudden pressure surge, possibly damaging the
cylinder.
Check the cylinder operation to ensure the plungers extend in sequence with the largest diameter plunger moving
first, then the next largest, etc. When retracting, the smallest plunger should move first, then the next smallest, etc.
Mis-staging could cause the unit to upset and/or damage the cylinder due to excessive pressure build-up.
6
Parker Hannifin Corporation
Mobile Cylinder Division
Youngstown, OH
Safety Precautions for Double-Acting Telescopic Cylinders
WARNING!
Over pressurizing the cylinder can cause severe injury or death and/or damage to the unit
and cylinder.
Do not operate a cylinder at pressures above factory recommended operating pressures (Normally 2,000 P.S.I.
unless otherwise approved).
Hydraulic hoses should be checked regularly and replaced if worn out or damaged.
NOTICE!
Do not operate a packer / ejector cylinder with a misaligned blade. If the packer / ejector blade is bent, damaged, or
if the blade slide shoes or guide track assembly are worn out, this can cause excessive side loading to the cylinder
damaging it internally or bending a plunger or sleeve.
If the hydraulic system uses quick disconnects (such as on a transfer trailer) or holding / lock type valves, make sure
they are properly connected. If not, oil may become trapped in the cylinder causing an excessive pressure build up
and damage to the cylinder. This is particularly true if there is a blockage on the retract side of the cylinder and the
cylinder is then extended. This could internally intensify the pressure 10 times or more inside the cylinder. (Example;
The pump develops 2,000 P.S.I. trying to extend the cylinder, oil pressure trapped on the retract side of the cylinder
could see 20,000 P.S.I.)
A double-acting telescopic cylinder normally requires at least 15 G.P.M. oil flow to retract properly. Make sure the
hydraulic pump is developing the required flow.
Most double-acting telescopic cylinders will self bleed themselves of air. Upon installation of a new cylinder this will
require cycling the cylinder approximately 10 times to the complete extend and retract positions with no load against
it. Check to make sure stages sequence properly. When extending, the largest stage should move first then the next
largest, etc. and when retracting, the smallest should move first then the next smallest, etc.
The hydraulic oil should be checked and changed regularly to avoid contamination leading to internal cylinder
damage.
Grease the pin mountings regularly.
WARNING!
Before working on a telescopic cylinder mounted on a truck or trailer unit, use supports
or holding devices that will absolutely prevent the body from accidentally lowering. Place
control valve in the “LOWER” position to assure that all pressure has been relieved from
the cylinder.
7
Parker Hannifin Corporation
Mobile Cylinder Division
Youngstown, OH
Hydraulic Cylinder Model Number Coding
The code and model numbers of a Parker (Commercial Hydraulics) Cylinder are references
to its size and type. Using these numbers when ordering or inquiring greatly facilitates
accurate understanding.
The following are examples of Parker Mobile Cylinder code and model numbers.
1. S = Single-acting Telescopic or Displacement Cylinder
(Commercial has also used SA, SF, and H as a prefix)
SD = Double-acting Telescopic Cylinder
D = Double-acting Piston Rod Cylinder
2.
= Nominal O.D. of the largest moving stage on
Single-acting and Double-acting Telescopic cylinders
or the
Nominal Bore of Double-acting Piston Rod Cylinders
3.
= Number of moving stages or sleeves in a Telescopic Cylinder
4.
= Mounting option on the body or base end of cylinder
5.
= Mounting option on the rod or plunger end of cylinder
6.
= Modification or design variation of the cylinder
7.
= Length of cylinder stroke in inches
OUR DESIGN ADVANTAGES INCLUDE:
while making service procedures easier.
* Wave springs and chevron packing for self-compensating seals.
* Hytrel rod wipers that resist higher temperatures without
extrusion.
* Positive manual air bleeder prevents cavitation and “mushy”
cylinder action. NOW BLEEDERLESS
* Cast steel mountings offer dependable strength. Pin-eye and
rod-end are welded into a single unit.
* Longer sleeve overlap for improved stability and higher
column loading.
* Nylon tipped set screws that conform to the shape of the
packing nut threads. It is nearly impossible for the packing nut
to back off accidentally.
* Snap-on, glass-filled bearings that absorb contaminants
without damaging cylinder walls.
* Threaded steel stop rings for easier servicing and more
reliable stopping action.
* External packing nuts give added support to the tube exterior
8
Parker Hannifin Corporation
Mobile Cylinder Division
Youngstown, OH
Hydraulic Cylinder Load & Displacements
“ S” SERIES SINGLE-ACTING, SINGLE & MULTIPLE STAGE CYLINDERS
Sleeve or Plunger O.D.
(in inches)
Effective Area
in square inches
Load Capactity
lbs @ 2000 p.s.i.
Displacement per inch
of stroke in gallons *
1.75"
2.41"
4,811
0.010
2.75"
5.94"
11,880
0.026
3.75"
11.04"
22,089
0.048
4.75"
17.72"
35,441
0.077
5.75"
25.97"
51,935
0.112
6.75"
35.78"
71,570
0.155
7.90"
49.02"
98,034
0.212
9.38"
69.03"
138,059
0.299
10.75"
90.76"
181,526
0.393
12.50"
122.72"
245,438
0.531
14.00"
153.94"
307,877
0.666
“ SD” SERIES DOUBLE-ACTING, MULTIPLE STAGE CYLINDER
Displacement
Displacement
Sleeve or Bore of Main Effective area Effective area Load capacity Load capacity per inch of stroke per inch of stroke
lbs @ 2000
lbs @ 2000
(sq. inches) (sq. inches)
Plunger O.D. or Sleeve
(in gallons)*
(in gallons)*
p.s.i. extending p.s.i. retracting
to retract
to extend
(in inches)
(in inches)
to retract
to extend
1.75"
2.25"
3.98"
1.57"
7,952
3,142
0.017
0.007
2.75"
3.25"
8.29"
2.35"
16,592
4,712
0.036
0.010
3.75"
4.25"
14.18"
3.14"
28,372
6,283
0.061
0.014
4.75"
5.25"
21.64"
3.92"
43,296
7,854
0.094
0.017
5.75"
6.25"
30.68"
4.71"
61,360
9,426
0.133
0.020
6.75"
7.25"
41.28"
5.49"
82,564
10,994
0.179
0.024
7.90"
8.44"
55.68"
6.97"
111,360
13,946
0.242
0.030
9.38"
9.88"
76.59"
7.56"
153,180
15,120
0.332
0.033
10.75"
11.50"
103.87"
13.11"
207,738
26,213
0.450
0.057
12.50"
13.00"
132.73"
10.01"
265,465
20,028
0.575
0.043
14.00"
14.50"
165.13"
11.19"
330,261
22,384
0.715
0.048
Note: The Effective area to RETRACT a Standard “SD” series double acting multiple stage cylinder is the
effective area of the PLUNGER (plunger bore area minus the plunger O.D. area).
Example: Retract force for a SD94CC-8-190 (which has 5.75” O.D. plunger and fits in 6.25” bore) would be 9,426 lbs
@ 2,000 psi, based on a 4.71 sq. in. effective area.
To calculate effective area in square inches: Multiply diameter times diameter times .78
Example: 5 dia. x 5 dia. = 25 x .78 = 19.63 Square inches of area
To calculate load capacity / cylinder force: Multiply effective area times operating pressure (psi)
Example: 19.63 Square inches x 1750 P.S.I = 34,361 lbs of force
To calculate the required gallons of fluid to extend a cylinder:
Add each “Displacement per inch of stroke” (from chart) for the required sleeve sizes.
Divide this total by the number of moving sleeves, then multiply that total by the desired cylinder stroke.
Note: The “Gallons required to extend” does not include the necessary fluid to fill an empty cylinder.
Example: Required fluid to extend a S83DC-40-134 single-acting telescopic cylinder with following stage sizes:
5.75" O.D.= .112
6.75" O.D.= .155
7.90" O.D.= .210
.477
.447 ÷ 3 = .159 gallons per inch of stroke
.159 gallons per inch x 134" of stroke = 21.31 gallons to extend cylinder
9
Parker Hannifin Corporation
Mobile Cylinder Division
Youngstown, OH
Genuine Replacement Service Parts
Steel External
Headnut
Piston Bearings
Double Acting Cylinders
Beveled
Overlap Collar
Cast Iron
Piston Rings
for Double Acting Cylinders
Beveled
Threaded
Stop Ring
Stage
Sleeve
Non Beveled
Overlap Collar
Piston Bearings
Single Acting Cylinders
Gland Bearing
Ring
Vee-Packing
Assembly
Vee-Packing
Wiper
Wave Spring
Shims
Ring
Non Beveled
Threaded
Stop Ring
Bronze Internal
Headnut
Note: Do not use a Beveled Threaded Stop Ring with a Non-Beveled Overlap Collar or vice-versa.
Bronze internal headnuts are used on both single and double acting telescopic cylinders.
Following are service parts used on STANDARD DESIGN COMMERCIAL cylinders
Note: Commercial Hydraulics manufactures many different types and designs of cylinders. If you
are not sure of service parts required please refer to the Cylinder Assembly print.
Description
2.75" Stage
3.75" Stage
4.75" Stage
5.75" Stage
6.75" Stage
7.905" Stage
9.375" Stage
Vee-Packing Assembly
with Shims
375-9009-017 375-9009-034 375-9009-018 375-9009-019 375-9009-020 375-9009-021 375-9009-022
AJ3009-27
AJ3009-37
AJ3009-47
AJ3009-57
AJ3009-67
AJ3009-79
AJ3009-93
Wiper Ring
375-9026-136 375-9026-137 375-9026-138 375-9026-139 375-9026-140 375-9026-141 375-9026-142
Gland Bearing
Glass Filled Nylon
391-2682-001 391-2682-002 391-2682-003 391-2682-004 391-2682-005 391-2682-006 391-2682-007
J1003-1-1
J1003-1-2
J1003-1-3
J1003-1-4
J1003-1-5
J1003-1-6
J1003-1-7
Gland Bearing
Bronze
375-9003-064 375-9003-044 375-9003-045 375-9003-046 375-9003-063 375-9003-041 375-9003-066
AH1003-27
AH1003-37
AH1003-47
AH1003-57
AH1003-67
AH1003-79
AH1003-93
Wave Spring
391-3581-320 391-3581-300 391-3581-301 391-3581-302 391-3581-303 391-3581-304 391-3581-310
P1327-27
P1327-37
P1327-47
P1327-57
P1327-67
P1327-79
P1327-93
Threaded Stop
Non-Beveled
375-4020-001 375-3020-002 375-6020-002 375-5020-001 375-7020-001 375-8020-001 375-9020-001
F4020
F3020
F6020
F5020
F7020
F8020
F9020
Threaded Stop
Beveled
375-3020-110 375-3020-111 375-3020-112 375-3020-113 375-3020-114 375-3020-120 375-3020-119
AG3020-1-27 AG3020-1-37 AG3020-1-47 AG3020-1-57 AG3020-1-67 AG3020-2-79 AG3020-2-93
Piston Bearing
Glass Filled Nylon
391-2684-123 391-2684-069 391-2684-070 391-2684-071 391-2684-072 391-2684-073 391-2684-098
U3023-32
U3023-42
U3023-52
U3023-62
U3023-72
U3023-84
U3023-98
Piston Bearing
Bronze
N/A
375-9023-079 375-9023-038 375-9023-039 375-9023-040 375-9023-041 375-9023-042
AM3023-42
AM3023-52
AM3023-62
AM3023-72
AM3023-84
AM3023-98
Cast Iron
Piston Ring
391-2683-010 391-2683-014 391-2683-019 391-2683-024 391-2683-029 391-2683-034 391-2683-042
X78-3.25-1
X78-4.25
X78-5.25
X78-6.25
X78-7.25
X78-8.437
X78-9.88
Steel External
Headnut
391-1470-162 391-1470-163 391-1470-164 391-1470-165 391-1470-166 391-1470-167 391-1470-177
YA3011-27
YA3011-37
YA3011-47
YA3011-57
YA3011-67
YA3011-79
YA3011-93
Bronze Internal
Headnut
391-1470-079 391-1470-070 391-1470-071 391-1470-072 391-1470-073 391-1470-074 391-1470-075
MA3011-27
MA3011-37
MA3011-47
MA3011-57
MA3011-67
MA3011-79
MA3011-93
10
Parker Hannifin Corporation
Mobile Cylinder Division
Youngstown, OH
Genuine Replacement ServiceRepair Kits
Repair Kits
For Standard Parker (Commercial) Single-acting, Dump Body Cylinders.
Parker's genuine replacement parts are available in kits to rebuild or repack our dump body
cylinders. These parts are the same as originally installed.
As with all hydraulic repairs, be sure your shop is properly equipped and that the work area is
clean.
Rebuilding kits consist of:
1. Wiper Rings
5. Piston Bearings
2. Packing Assemblies
6. Set Screws
3. Gland Bearing Rings
7. Nylon Balls
4. Wave Springs
Repacking kits consist of:
1. Wiper Rings
2. Packing Assemblies
Ordering Information
Please order by part number
Cylinder Model
Rebuild Kit Number
Repack Kit Number
S53 Series
A300-253
375-1804-017
A300-11
391-1804-020
S62 Series
A300-256
375-1804-020
A300-262
375-1804-026
S63 Series
A300-254
375-1804-018
A300-104
391-1804-109
S64 Series
A300-257
375-1804-021
A300-230
391-1804-237
S73 Series
A300-255
375-1804-019
A300-238
375-1804-002
S74 Series
A300-258
375-1804-022
A300-239
375-1804-003
S84 Series
A300-259
375-1804-023
A300-49
391-1804-054
S85 Series
A300-260
375-1804-024
A300-22
391-1804-060
S95 Series
A300-261
375-1804-025
A300-240
375-1804-004
Cylinder Packing Installation
Remove shims from packing set and measure packing
height under finger pressure. Add one shim for each
1/32” that the packing measures under 1-1/8”. Measure depth to top of stop ring from top of tube. This
dimension should be 2-1/4”, however, it may vary slightly
due to seating of the stop ring. Add one shim to the
packing set for every 1/32” that this dimension measures
over 2-1/4” or remove one shim from the packing set for
every 1/32” that this dimension measures under 2-1/4”.
Install wave spring with gap edge against top of the
cylinder stop ring. Soak packing in hydraulic oil for a few
minutes. (Check bottom adapter. Only hard type can be
used with the wave spring). Install packing, one ring at
a time, in the proper sequence as shown in the sketch.
Note: The soft, low pressure ring must be in the second
position from the pressure side. Installed packing height
need not be checked because wave spring will vary this
dimension. Installation of bearing and packing nut will
compress wave spring for proper packing pre-load. Pull
down tight against tube.
Set Screw
(remove before backing
off packing nut)
2 1/4"
Working
Height 1/8"
1 1/8"
Packing Nut
1"
Nylon Ball
Wiper
Stop Ring
Wave Spring
Hard Bottom Adaptor
11
Bearing Ring
Vee-Packing
Shims
Vee-Packing
Assembly
Low Pressure Ring
Parker Hannifin Corporation
Mobile Cylinder Division
Youngstown, OH
Hydraulic Cylinder Required Service Tools
ADJUSTABLE
SPANNER WRENCH
G3067-84K-4
376-3067-006
CHEVRON
ASSEMBLY TOOL
M3067-2
376-9067-001
CYLINDER
BEARING PULLER
M3067-4
376-3067-001
STRAP WRENCH
P3067
376-9067-002
CYLINDER
PACKING PULLER
V3067-1
376-9067-003
PISTON RING PLIER
M3067-3K
376-3067-015
Tools
Required
Lifting Ring
BC3067 Series
4 3/4" BC3067-2, 376-3067-009
5 3/4" BC3067-3, 376-3067-010
6 3/4" BC3067-4, 376-3067-011
7 7/8" BC3067-5, 376-3067-012
9 3/8" BC3067-6, 376-3067-013
11 1/8" BC3067-7, 376-3067-014
12
Sleeve or Sleeve or
Main I.D. Plunger O.D. Eng #
SLEEVE OR PLUNGER
3 3/4" BC3067-1, 376-3067-008
WRENCH
, Part Number
Stop Ring Wrench
BA3067 Series
STOP RING
Sleeve or
Main O.D. Eng #
SLEEVE OR MAIN BARREL
Proper tools make the job
of servicing cylinders easier
and faster and reduce the
possibility of damaging the
finely machined surfaces.
We recommend that you
have the tools shown on
this page prior to attempting
ser vice on Commercial
telescopic cylinders. Tools
with an * are required for all
cylinders regardless of size.
Lifting rings and stop ring
wrenches must be ordered
to fit the specific sleeve in
the cylinder.
I.D.
O.D.
, Part Number
3 1/4"
2 3/4"
BA3067-1, 376-6067-047
4 1/4"
3 3/4"
BA3067-2, 376-6067-048
5 1/4"
4 3/4"
BA3067-3, 376-6067-049
6 1/4"
5 3/4"
BA3067-4, 376-6067-050
7 1/4"
6 3/4"
BA3067-5, 376-6067-051
8 7/16"
7 7/8"
BA3067-6, 376-6067-052
9 7/8"
9 3/8"
BA3067-7, 376-6067-053
Parker Hannifin Corporation
Mobile Cylinder Division
Youngstown, OH
Normal Maintenance Items
Packing, wipers and bushings are considered normal maintenance or service items. These
items are subject to contamination from external and internal foreign materials, many of which
are abrasive in nature, causing abnormal wear or damage to the parts, to the extent that replacements are required.
WARNING!!
Before working on a telescopic cylinder mounted on a truck or trailer unit, use supports
or holding devices that will absolutely prevent the body from accidentally lowering. Place
control valve in the “Lower” position to assure that all pressure has been relieved from
the cylinder.
Because of our self-compensating Packing design, Standard Parker / Commercial
Cylinders require no packing adjustment. For Parker Packing Assembly Installation Procedure see Service Repair Kit Page.
Procedure for Adjusting Telescopic Cylinder Head Nuts.
(For Cylinder designs using no Wave Springs and/or no U-Seals)
1.Loosen set screw (or set screws) in head nut that holds in packing of leaking stage.
2.Lightly tap head nut around circumference with a hammer.
3.Back head nut off 1/2 to 1 full turn using a spanner or chain wrench.
(Note: If stage rotates when head nut is turned, hold stage with a strap wrench.)
4.Cycle cylinder 2 to 3 times to reset chevron vee packing.
5.Retighten head nut approximately 1/2 turn further than it was when it was loosened.
6.Tighten set screws.
Procedure for Mis-Staging or Mis-Sequencing Cylinder.
1. Loosen set screws in head nut that holds in packing which fits over stage that is sticking.
2. Lightly tap head nut around circumference with a hammer.
3. Back head nut off 1/2 turn using a spanner or chain wrench.
4. Cycle cylinder, if cylinder still mis-stages, back head nut off another 1/2 turn.
5. Cycle cylinder, if cylinder still mis-stages, tighten the head nut of the next stage that is extending.
6. Tighten set screws.
Bleeding Air from Single-Acting Telescopic Cylinders.
For smooth operation of these cylinders, it is advisable to bleed the air from the cylinder weekly.
Manual bleeding is accomplished by:
1. Empty the dump body of any material.
2. Remove the cover plate from the dog house of the dump body to access the bleeder valve.
3. Fully extend the cylinder, raising the EMPTY dump bed.
4. Lower the dump to within 1 foot from resting on the frame.
5. With the fingers, turn the bleeder valve in a counterclockwise direction. This opens the valve
and allows the air to escape from the cylinder.
6. When a steady stream of oil comes from the bleeder, turn the valve in a clockwise direction
until it is closed.
If these procedures fail to correct the problem, please contact an
Authorized Service Center for Instructions.
13
Parker Hannifin Corporation
Mobile Cylinder Division
Youngstown, OH
Telescopic Cylinder Disassembly
Start Disassembly…
Open the air release valve (if equipped), remove the port pipe plugs and drain all of the oil out
of the cylinder.
We recommend draining the oil from the cylinder before hoisting it to the vertical work stand
position. It is easiest to drain oil when the cylinder is in a horizontal position and with the port down
and open. Rotate the last plunger so the bleeder hole is on top and open. If
you don’t drain the oil, oil will squirt out as each tube is removed.
Step 2 …
Firmly secure the cylinder in place with the rod end up to a sturdy workbench
or a suitable stand that has access to an overhead crane.
Step 3 …
Remove the grease fitting and air release valve with an open end wrench or
an adjustable crescent wrench.
Step 4 …
Remove pipe plugs on double-acting telescopic cylinders with an adjustable
crescent wrench.
Step 5 …
Clean head nut thread area, spray with WD-40 (penetrating oil).
Step 6 …
Remove set screws from all packing nuts with a 1/8" Allen wrench.
Step 7 …
Remove all packing nuts with adjustable spanner
wrench, G3067-84K-4, Starting with the smallest thru the
largest.
If the nut will not move, a sharp rap with a blunt chisel or
rod may be required to jar the nut loose. If using a punch to
break loose head nut, be careful not to damage threads.
Step 8 …
Remove and discard old nylon slugs, which were in packing nuts.
Step 9 …
Remove the wiper seal from the packing nut. Discard the old wiper seal.
Step 10 …
14
Parker Hannifin Corporation
Mobile Cylinder Division
Youngstown, OH
Telescopic Cylinder Disassembly
Clean the thread and bearing area with a solvent and a clean,
lintless rag.
Step 11 …
Remove all bearing rings with two bearing ring pullers M30674.
Step 12 …
Remove all packing with packing puller V3067-1.
Or extend the plunger or sleeve out about one foot. Wrap
masking tape around a clean area on the plunger or sleeve.
Push plunger or sleeve back into and past the packing and pull
out. Packing will usually pop out, if not, repeat the process.
Step 13 …
Remove wave spring from packing recess with a narrow
screwdriver.
Step 14 …
Remove stop rings from all stages with stop ring wrenches
BA3067 series. If the stop ring will not move, a sharp rap may
be required to jar the ring loose. If the sleeve containing the
stop ring turns during removal, it should be held with a nylon
strap wrench P3067.
Step 15 …
Removal of the plunger or sleeve will lift out the stop ring and
expose the piston bearing ring. Use lifting ring tool series BC3067 to lift out the
sleeves.
Step 16 …
Remove piston bearing ring by hand.
Step 17 …
Remove piston rings on double-acting cylinders with piston ring plier M3067-3K and remove piston
bearing ring or rings by hand.
Step 18 …
Repeat with remaining sleeves
15
Parker Hannifin Corporation
Mobile Cylinder Division
Youngstown, OH
Telescopic Cylinder Asssembly
Assembly…
All bores in the packing area and plunger outside diameters must be free of tool marks and
scratches. Polish with a fine paper, crocus cloth or a Scotch Brite pad. All parts should be clean
and free of any contamination.
Start Assembly…
Starting with the largest sleeve,
Assemble piston bearings to all sleeves and plunger by hand.
Note; use bronze piston bearing on largest sleeve if piston passes port.
Assemble piston rings on double-acting cylinders using piston ring pliers
M3067-3K.
Note; stagger cast iron piston rings.
Next, lubricate the piston bearing with grease.
Step 2…
Place the sleeve into the assembly using the proper lifting ring in the BC3067
series.
Step 3…
Lubricate the stop ring with grease and slide it onto the sleeve with its wrench
holes up.
Slide threaded stop ring onto the sleeve and lower into the assembly.
Thread the stop ring into the assembly with the proper stop ring wrench in
the BA3067 series. Turn the stop ring wrench counter-clockwise slowly for
several turns, until a subtle “click” is heard or a slight settling of the wrench
is felt. This indicates that the start points of the internal and external threads
are aligned for engagement.
Next, turn the wrench clockwise until the stop ring bottoms out.
Bottom out stop ring with a sharp rap. If sleeve turns during assembly, it must
be held with strap wrench P3067.
Measure stop ring depth. The stop ring should bottom out at a depth of 2
¼”.
Note; Check if Beveled or Non-beveled Stop Rings and Overlap Collars. Do not
use a Beveled Stop Ring with Non-Beveled Overlap Collar or visa versa.
Step 4…
Install wave spring with gap edge against top of the cylinder stop ring.
16
Parker Hannifin Corporation
Mobile Cylinder Division
Youngstown, OH
Telescopic Cylinder Asssembly
Step 5…
Remove shims from packing set and measure packing
height under finger pressure. Add one shim for each 1/32”
that the packing measures under 1-1/8”. Measure depth
to top of stop ring from top of tube. This dimension should
be 2-1/4”, however, it may vary slightly due to seating of
the stop ring. Add one shim to the packing set for every
1/32” that this dimension measures over 2-1/4” or remove
one shim from the packing set for every 1/32” that this
dimension measures under 2-1/4”.
Set Screw
(remove before backing
off packing nut)
2 1/4"
Working
Height 1/8"
1 1/8"
Packing Nut
1"
Nylon Ball
Wiper
Bearing Ring
Vee-Packing
Shims
Vee-Packing
Assembly
Stop Ring
Wave Spring
Hard Bottom Adaptor
Low Pressure Ring
Step 6…
Soak packing in hydraulic oil for a few minutes. (Check bottom adapter. Only
hard type can be used with the wave spring). Install packing, one ring at a time,
in the proper sequence as shown in the sketch. Note: The soft, low pressure
ring must be in the second position from the pressure side. Installed packing
height need not be checked because wave spring will vary this dimension.
Installation of bearing and packing nut will compress wave spring for proper
packing pre-load. Pull down tight against tube.
Step 7…
Install gland bearing ring with tapped holes showing.
Step 8…
Install new wiper seals in all packing nuts.
Step 9…
Apply anti-seize compound to the sleeve threads.
Step 10…
Install packing nut and tighten with the adjustable spanner wrench G306784K-4, if packing height is proper packing nut will bottom out.
Step 11…
Repeat steps 1 through 10 for remaining sleeves and plunger.
Step 12…
Install new nylon balls and set screws into all packing nuts and tighten with
1/8" Allen wrench.
Step 13…
Install air release or pipe plugs as applicable.
17
Parker Hannifin Corporation
Mobile Cylinder Division
Youngstown, OH
Single Acting Telescopic Cylinder Operation
Extending
Bottom Port
A
Top Port
To Extend:
High pressure oil from the
pump is directed by the control
valve through the port (A) to fill
the cylinder. Any air in the system is trapped in the end of the
cylinder (B) and may be bled off
through the bleeder valve (C).
C
F
G
D
B
FORCE
E
Generally, bleeding is only necessary on initial start up or if air has been allowed to enter the
system (Note: the bleeder valve must be located at the highest part of the cylinder).
Oil pushes on the bottom of the sleeve or plunger forcing (F) it to move out. The outside diameter or sealing area of the moving sleeve or plunger (D) determines the effective area.
A
Bottom Port
Top Port
As the sleeve or
plunger moves out,
the oil trapped between (E) the sleeve
F
or plunger wall is reD
B
FORCE
leased through transfer holes (G) which are
drilled in the sleeve or
plunger.
Under normal operating conditions the largest diameter moving sleeve extends first, then the
next largest sleeve, etc.
A
C
Bottom Port
Top Port
C
F
G
D
FORCE
B
E
So at a given PSI (pressure) and GPM (gallons per min.) the cylinder will develop less force
and increase in speed as it changes to the next moving stage.
A
Bottom Port
Top Port
C
F
D
FORCE
18
B
Parker Hannifin Corporation
Mobile Cylinder Division
Youngstown, OH
Single Acting Telescopic Cylinder Operation
Retracting
A
Bottom Port
Top Port
F
FORCE
To Retract:
A single acting cylinder must be retracted by gravity or mechanical means (F).
A
Bottom Port
Top Port
F
FORCE
Under normal operating conditions the plunger or smallest diameter sleeve is pushed closed
first, forcing oil out through port (A), then the next smallest, etc.
A
Bottom Port
Top Port
F
FORCE
Note: If the top port is used, the speed of the cylinder may be reduced because of the oil flow
restriction as the oil passes thru the transfer holes (G).
A
Bottom Port
Top Port
Equip your vehicle with
TM
F
G
FORCE
19
Commercial
Hydraulics
the world’s best
hydraulic cylinders
Parker Hannifin Corporation
Mobile Cylinder Division
Youngstown, OH
Double Acting Telescopic Cylinder Operation
Extending
Stop Ring
C
To Extend:
High pressure oil is
directed by the control valve
into port A. The oil passes
through the transfer tube in
the rod to the base of the
cylinder.
A
F
FORCE
B
The pressure acts on the effective area (area of the largest piston) and extends all stages
to the first stop ring. The next stage then begins to extend.
Stop Ring
C
A
F
FORCE
B
The effective area of each stage is figured from the inside diameter of the next largest stage.
Each stage extends in its turn to the stop ring. So at a given PSI (pressure) and GPM (gallons
per min.) the cylinder will develop less force and increase in speed as it changes to the next
moving stage.
Stop Ring
A
C
F
FORCE
B
Oil trapped between the sleeves escapes through holes (C) in each sleeve and returns to
the tank through port B.
Stop Ring
Stop Ring
A
F
FORCE
B
20
Parker Hannifin Corporation
Mobile Cylinder Division
Youngstown, OH
Double Acting Telescopic Cylinder Operation
Retracting
Stop Ring
Stop Ring
A
C
D
B
To Retract:
High pressure oil is directed by the control valve into port B. The pressure is applied to the
effective area (D) of the plunger which retracts first. Each stage from the smallest to the largest
Stop Ring
A
FORCE
C
FORCE
D
B
retracts in its turn, however, THE EFFECTIVE AREA FOR RETRACTING EACH STAGE IS THE
AREA (D) OF THE PLUNGER.
Stop Ring
C
A
FORCE
FORCE
D
B
Oil inside the cylinder is forced out of port A. Because of the area differential, the flow into
port B must be multiplied by this differential to determine the flow out of port A. It may be necessary to install a dump-to-tank valve to speed up the retracting cycle.
Stop Ring
C
A
FORCE
Equip your vehicle with
FORCE
TM
Commercial
Hydraulics
the world’s best
hydraulic cylinders
FORCE
FORCE
B
21
Parker Hannifin Corporation
Mobile Cylinder Division
Youngstown, OH
Standard Test Procedure for Hydraulic Cylinders
1) Function Test
Once the Cylinder is placed on the test stand and hydraulic lines attached, the cylinder will be
cycled its full stroke a minimum of three (3) full cycles.
The cylinder will be rejected if it functions erratically. Erratic function is excessive chatter,
slapstrick, stalling and uncorrectable misstaging.
2) Proof Pressure Test
After the function test is performed the cylinder will be extended fully and pressure held for a
minimum of thirty (30) seconds. This pressure will be 2500 psi or a pressure indicated on the
assembly print. The cylinder will be rejected for external leakage or structural deformation.
If the cylinder is double acting, it will be fully retracted and pressure held for a minimum of
thirty (30) seconds. The pressure will be 2500 psi or a pressure indicated on the assembly
print. The cylinder will be rejected for external leakage or structural deformation.
3) Internal Bypass Test
This test will be performed on all double acting cylinders and can be done in conjunction with the
Proof Pressure Test. The cylinder will be fully extended and pressure held at 2500 psi. The
retract line will be removed and piston seal bypass will be determined by the flow out of this
cylinder port. Excessive bypass will be a cause for cylinder rejection. The cylinder will be fully
retracted and pressure held at 2500 psi. The extend line will be removed and the piston
bypass will be determined by the flow out of this cylinder port. The cylinder will be rejected for
excessive flow. When making this test the hydraulic line should be completely removed from
the cylinder port,
and the open line from the valve should be plugged or capped since a slight
back pressure in the tank return line would spill oil from the line if not plugged.
Pass/Fail criteria if not noted on Assembly drawing is as follows:
Cast Iron Rings Normal Maximum leakage 1 GPM.
Bypass = 1/2 cubic inch per inch of bore diameter per minute.
Extend bypass would be 1/2 cubic inch per inch of plunger piston ring OD
per minute.
Retract bypass would be 1/2 cubic inch per inch of piston ring OD per minute
of each stage added together.
Example SD73 Series;
Extend bypass; 1/2 x 5.25 = 2.62 cubic in / min.
Retract bypass; (1/2 x 7.25) + (1/2 x 6.25) + (1/2 x 5.25) = 9.38 cubic in / min.
Soft Seals
Maximum leakage 5 drops per minute.
Please Note
Before Installing a New Cylinder in an old application
Has the problem been corrected that caused the original cylinder to fail?
Is the hydraulic fluid clean of all contamination, water, and entrapped air?
Are the hydraulic system relief valve pressures set and operating properly?
Is the mechanism or unit the cylinder is operating in good mechanical condition?
22
Parker Hannifin Corporation
Mobile Cylinder Division
Youngstown, OH
Storage and Installation
STORAGE
It pays to keep spare hydraulic cylinders on hand for use when you need them. But, you must know and follow
these recommended storage practices or the cylinders can be ruined. Hydraulic cylinders, though often large and
unwieldy, are precision machines with finely finished parts and close tolerances. And they’re expensive. So handle
them with care.
For optimum storage life, hydraulic cylinders should be kept in an environment that is protected from excessive
moisture and temperature extremes. A hot, dry dessert climate with cold nights, for example, must be accommodated
when choosing the storage area. Daytime heat quickly bakes oil out of sealing materials, which causes leaks and
rapid wear when the cylinder is placed in service. Cooling at night causes water condensation and corrosion damage
to wear surfaces. Storage areas that allow exposure to rain, snow and extreme cold must like wise be avoided.
It‘s best to store cylinders indoors if possible. But indoors or out, be sure that plugs or closures are properly
installed in all ports to keep out moisture and dirt. However, overtightening of port plugs should be avoided. Widely
varying temperatures and tightly closed ports may cause pressure inside the cylinder to build up to the point where
the piston moves far enough to expose the rod to corrosion or contamination. Try to choose a storage location where
the cylinders are protected from physical damage. Even a little ding from a falling bar or forklift tine can cause trouble
later.
Cylinders, Particularly large ones, should be stored closed in a vertical position with the rod end down. Be sure
they’re blocked securely to keep them from toppling. Storing with the rod ends down keeps oil on the seals, which
protects them from drying out. This is more critical with fabric and butyl seals than with urethane sealing materials.
Storing single-acting cylinders with the rod end up can cause port closures to pop open and leak, exposing the
sleeves to corrosion damage and contamination. Storing with the rod end down also discourages the temptation
to lift a cylinder by the rod eye – a dangerous practice. If horizontal storage cannot be avoided, the rod or cylinder
should be rolled into a new position every two months or so to prevent drying, distortion and deterioration of the
seals. Don’t forget that a cylinder can be a major source of contamination. A small scratch or nick on the sleeve will
quickly shred packing and contaminate the system. Store cylinders carefully and keep them clean.
The following procedures should be followed in order to prevent oxidation and maintain the surfaces of a mounted
hydraulic cylinder during idle periods. These idle periods may include; inventory units, demo units, out of service
units, etc.
· All machined surfaces left expose should be coated with a light film of grease, if not oxidation will occur.
· If oxidation is present, apply a light coat of oil to the surfaces.
· Buff surfaces with 320 or 400 grit sandpaper. Do not buff surfaces up and down the length, buff only around the
circumference.
· If after buffing, the surfaces show evidence of oxidation damage i.e., pitting, the cylinder should be inspected
by an authorized service center for evaluation.
· Operation of a hydraulic cylinder with surface damage will shorten the longevity and preclude any warranty
express or implied.
INSTALLATION
·Cleanliness is an important consideration, and Parker cylinders are shipped with the ports plugged to protect
them from contaminants entering the ports. These plugs should not be removed until the piping is to be installed.
Before making the connection to the cylinder ports, the piping should be thoroughly cleaned to remove all chips
or burrs which might have resulted from threading or flaring operations. One small foreign particle can cause
premature failure of the cylinder or other hydraulic system components. If oxidation is present, apply a light coat
of oil to the surfaces.
· Proper alignment of the cylinder piston rod and its mating component on the machine should be checked in
both the extended and retracted positions. Improper alignment will result in excessive rod gland and/or cylinder
bore wear.
· Cylinders operating in an environment where air drying material are present such as fast- drying chemicals,
paint, or welding splatter, or other hazardous conditions such as excessive heat, should have shields installed to
prevent damage to the piston rod and piston rod seals.
23
Parker Hannifin Corporation
Mobile Cylinder Division
Youngstown, OH
Bleederless Telescopic
Bleederless Telescopic
Cylinders
Innovative Mobile Solutions From
Mobile Cylinder Division
Customer
Unmet Need:
Bleeding cylinders is a tough dirty job
for the dump truck and trailer industry.
No one really wants to bleed the cylinder
because it is a dirty, dangerous, and
environmentally hazardous job as the
mechanic must climb in and out of the
dump bed to adjust the bleeder screw.
Failure to bleed the cylinder will result in
early cylinder failure in addition to cylinder
mis-staging, and excessive costly
hydraulic repairs.
Solution:
Parker has developed a special bleed
system that is incorporated into the
cylinder that allows air to bleed every
time the dump bed goes up and down.
This keeps the cylinder free of air and
as a result the bleeding of oil and air is
eliminated.
Contact Information:
Value Added:
Product Features:
1BSLFS)BOOJàO$PSQPSBUJPO
Mobile Cylinder Division
-PHBO"WFOVF
:PVOHTUPXO0IJP
r 'MFFUTVTJOH1BSLFSTIJHIRVBMJUZ
DZMJOEFSTXJMMCFOFàUCZTBWJOH
UIFMBCPSDIBSHFTGSPNCMFFEJOH
DZMJOEFSTUISPVHIPVUUIFMJGFUJNF
PGUIF%VNQ#FE
r
r
r
r
r
r
phone 800 848 5575
fax 800 694 3392
[email protected]
XXXQBSLFSDPN
HY18-0027/US
r 0&.TTBWFBNJOJNVNPG
HBMMPOPGIZESBVMJDPJMUP HBMMPOTPGPJMPOuBOEu
DZMJOEFST'PSBUSBJMFSNBOVGBDUVSFr
TFMMJOHBZFBSUIJTXPVMETBWF
BZFBS
24
/PBJSUPCMFFE
/PTQFFEZESZUPTXFFQ
/P&1"UPEFBMXJUI
/PNPSFDMJNCJOHJOUPEJSUZCFET
'FXFSIZESBVMJDSFQBJST
$PNQMFUFMZJOUFSDIBOHFBCMFXJUI
BMMNBOVGBDUVSFrTDZMJOEFST
r 4J[F3BOHFGSPNuUPUIFMBSHFTU
uDZMJOEFST
r 3FEVDFEXFJHIUPWFSTUBOEBSE
DZMJOEFSTXJUICMFFEFSTDSFXT
Parker Hannifin Corporation
Mobile Cylinder Division
Youngstown, OH
Bleederless Telescopic Purging Tag
PARKER
Bleederless Design Cylinder
Air Purging Procedure
1. This cylinder is designed to automatically purge
any trapped air from installation.
2. Once the cylinder is mounted to the vehicle and the
hydraulic system is connected, purge the air by
cycling the cylinder to full extension 2-3 times.
3. If air is still present as noted by the cylinder
exhibiting a mushy, erratic bouncing action, repeat
the cycling of the cylinder to full extension
2-3 times.
4. If the condition continues, check all hydraulic
connections for tightness before repeating.
5. Contact Parker Customer Service @ 330-480-8431,
800-848-5575 if problem persists.
375 9078 086
Parker-Hannifin Corp.
Mobile Cylinder Division
Youngstown, OH 44501
USA
25
Parker Hannifin Corporation
Mobile Cylinder Division
Youngstown, OH
Hydraulic Oil Recommendations
All cylinder parts, with the exception of a few items, are lubricated by the hydraulic oil in the
circuit. Particular attention must be paid to keep the oil in the circuit clean. Whenever there is
a hydraulic component failure (cylinder, pump, valve), and there is a reason to feel that metal
particles may be in the system, the oil must be drained, the entire system flushed clean, and any
filter screens thoroughly cleaned or replaced. New oil should be supplied for the entire system.
Oil suitable and recommended for use in circuits involving Commercial cylinders should meet the
following specifications:
These suggestions are intended as a guide only.
Obtain your final oil recommendations from your oil supplier.
Viscosity Recommendations:
Optimum operating viscosity is considered to be about 100 SSU.
* 50 SSU minimum @ operating temperature
7500 SSU maximum @ starting temperature
* 150 to 225 SSU @ 100o F. (37.8o C.) (generally)
44 to 48 SSU @ 210o F. (98.9o C.) (generally)
Approximate SSU at . . .
Oil
Grade
100 O F.
(37.8O C.)
210 O F.
(98.9O C.)
SAE 10
150
43
SAE 20
330
51
Normal Temperatures:
0o F. (-18o C.) to 100o F. (37.8o C.) ambient
100o F. (37.8o C.) to 180o F. (82.2o C.) system
Other Desirable Properties:
Viscosity Index: 90 minimum
Aniline point: 175 minimum
Be sure the oil you use is recommended for
the temperature you expect to encounter.
Additives Usually Recommended:
Rust and Oxidation (R & O) Inhibitors
Foam Depressant
Other Desirable Characteristics:
Stability of physical and chemical characteristics.
High demulsibility (low emulsibility) for separation of water, air and contaminants.
Resistant to the formation of gums, sludges, acids, tars and varnishes.
High lubricity and film strength.
General Recommendations:
A good quality hydraulic oil conforming to the characteristics listed above is essential to the satisfactory performance
and long life of any hydraulic system.
Oil should be changed on regular schedules in accordance with the manufactures recommendations and the system
periodically flushed.
Oil operating temperature should not exceed 200o F. (93o C.) with a maximum of 180o F. (82o C.) generally recommended. 120o F. to 140o F. (50o C. to 60o C.) is generally considered optimum. High temperatures result in rapid oil
deterioration and may point out a need for an oil cooler or a larger reservoir. The nearer to optimum temperature,
the longer the service life of the oil and the hydraulic components.
Reservoir size should be large enough to hold and cool all the fluid a system will need, yet it should not be wastefully large. Minimum required capacity can vary anywhere between 1 and 3 times pump output. The reservoir must
be able to hold all of the fluid displaced by retracted cylinders when the system is not operating, yet provide space
for expansion and foaming.
Oil poured into the reservoir should pass through a 100 mesh screen. Pour only clean oil from clean containers into
the reservoir.
Never use Crank Case Drainings, Kerosene, Fuel Oil, or any Non-Lubricating Fluid, such as Water.
26
Parker Hannifin Corporation
Mobile Cylinder Division
Youngstown, OH
Troubleshooting Hints
System Inoperative:
1. Insufficient or No fluid in system.
Refill system with proper grade and type of fluid.
Filter new oil being added as recommended.
Refill oil reservoir with cylinders in closed position.
If refilled while cylinders are extended the reservoir
may over flow when or as the cylinders retract.
Check for leaks.
2. Pump is not engaged.
Is pump shaft turning?
Check if PTO (power take off) is engaged.
Variable control mechanism out of adjustment.
Adjust to machine service manual specifications.
3. Slipping or broken pump drive.
Check pump drive mechanism (drive key, flex
coupler) for damage.
Check for proper alignment or tension.
4. Pump inlet line plugged.
Drain oil and replace filter or filter element.
Check for clogged oil strainers.
Oil lines dirty or collapsed.
Check if correct inlet hose is used, inner liner may
be collapsed.
Never use a pressure type hose as a pump inlet
suction hose.
Check if supply shut off or gate valve is closed.
Check in reservoir for other possible obstructions.
5. Pump speed too slow.
Check minimum drive speed.
May be too slow to prime pump.
6. Wrong fluid in system.
Oil viscosity too heavy for pump to pick up a prime.
Drain complete system. Add new fluid of proper
viscosity.
7. Air leaks at intake. Pump not priming.
Circuit must be tested at inlet connections.
At pump intake piping joints, test by pouring oil on
joints while listening for a change in sound of
operation.
Determine where air is being drawn into line connection and tighten.
At pump shaft, Test by pouring oil on shaft seal
while listening for a change in sound of operation.
Follow manufacturer’s recommendation when
changing seals.
Air drawn in through intake pipe opening.
Check to be certain suction and return lines are
well below oil level in reservoir. Add oil to reservoir
if necessary.
7. Worn or dirty pump.
Clean, repair or replace.
Check alignment.
Check for contaminated oil.
Drain and flush system.
8. Pump driven in wrong direction of rotation.
Most pump assemblies will have an arrow showing
correct rotation.
On gear type pumps, the pressure port / output will
be on the side where the gears come together and
mesh.
Check to assure correct pump rotation was applied
during assembly.
9. Leakage.
Check all components, particularly the relief valve
for proper settings.
Refer to technical manuals.
10. Broken or badly worn components (pump,
valves, cylinders, etc.).
Examine and test for internal or external leakage.
Analyze the conditions that brought on the failure
and correct them.
Repair or replace the faulty components according
to technical manual specifications.
11. Excessive load.
Check unit specifications for load limits.
System Develops No Pressure:
1. Pump not delivering fluid.
Follow the remedies mentioned above.
2. Incorrect valve position or setting.
Check and engage valve.
Install pressure gauge and adjust to correct pressure.
3. Vanes in vane pump sticking.
Check for burrs or metal particles that might hold
vanes in their slots.
Repair or replace if necessary.
Clean system if contaminants are found.
4. Fluid recirculating back to reservoir and not
going to functions.
Mechanical failure of some other part of the system,
especially a relief valve.
If contamination is involved, clean and refill with
proper fluid.
5. Piston pump or valve broken, or stuck open
allowing fluid to return to inlet side.
Disassemble the pump, determine the cause and
correct it.
Repair according to technical manual instructions.
System Operates Erratically:
1. Air in system.
Check suction side for leaks. Repair.
2. Cold oil.
Allow ample warm-up period.
Operate only at recommended operating temperature
ranges.
3. Wrong fluid viscosity.
Oil viscosity too heavy.
Drain complete system. Add new fluid of proper
viscosity.
4. Pump speed too slow.
Increase engine speed.
Check manual for recommendations.
5. Dirty or damaged components.
Clean or repair as necessary.
6. Restriction in filters or lines.
Clean and/or replace elements or lines.
7. Internal pump parts are sticking.
Dismantle and repair according to technical manual
instructions.
Look for burrs on parts or metal particles in fluid.
If contaminants are the cause, clean and refill with
proper fluid.
8. Distance between internal parts has increased
due to wear.
Dismantle and repair.
If wear is abnormal, determine the cause by checking the operation and maintenance records as well
as by examining the pump and system.
27
Parker Hannifin Corporation
Mobile Cylinder Division
Youngstown, OH
Troubleshooting Hints
System Operates Slowly:
1. Oil viscosity too high, cold oil.
Allow oil to warm up before operating machine.
2. Low pump drive speed.
Increase engine speed (check manual for recomendations).
If clutch or belt-driven, check for proper tension.
3. Low oil level.
Check reservoir and add oil as necessary.
4. Air in system.
Check suction side for leaks. repair.
5. Badly worn pump, valves, cylinders, etc.
Repair or replace as needed.
6. Restriction in filters or lines.
Clean and/or replace elements or lines.
7. Improper adjustments.
Check orifices, relief, unloading, flow control valve etc.
Adjust per manual.
8. Oil leaks.
Tighten fittings, replace seals or damaged lines.
System Operates Too Fast:
1. Wrong size or incorrectly adjusted restrictor or
flow control.
Replace or adjust as necessary.
2. Engine running too fast.
Reduce engine speed.
Overheating of Oil in System:
1. Oil passing thru relief valve for excessive time.
Return control valve to neutral when not in use.
System stalling under load, etc.
Fluid viscosity too high.
2. Relief or unloading valve set too high.
Install pressure gauge and adjust to correct pressure.
3. Incorrect oil, low oil, dirty oil.
Use recommended oil, fill reservoir, clean oil, replace
filter element.
4. Engine running too fast.
Reduce engine speed.
5. Excessive component internal leakage.
Check stall leakage past pump, valve, motor, cylinder
or other components.
Repair or replace component as necessary.
6. Restriction in filters or lines.
Check if line I.D.’s are too small causing high velocity.
Check if valvings too small, causing high velocity.
Clean and/or replace elements or lines.
7. Malfunctioning oil cooler / heat exchanger.
Check if water is shut off, if water cooled.
Check for clogging.
Clean repair.
8. Insufficient heat radiation.
Check for proper air circulation around reservoir.
Ambient temperature too high for system design.
Clean dirt and mud from reservoir and components.
9. Reservoir sized too small.
Increase reservoir size.
Add oil cooler or heat exchanger.
10. Reservoir assembled without or insufficient
baffling.
Add baffling to allow fluid time to cool.
Foaming of Oil:
1. Incorrect oil, low oil, dirty oil.
Replace, clean or add as needed.
2. Air leaks.
Check suction line and component seals for suction
leaks. Repair or replace.
3. Return of tank line not below fluid level.
Repair or replace.
4. Inadequate baffles in reservoir.
5. Lack of anti-foaming additives in oil.
Replace fluid with proper grade.
Noisy Pump:
1. Air leak in intake, or air is being drawn through
the inlet line.
Repair or make sure the inlet line is submerged in
fluid in the reservoir.
To check for leaks, pour fliud around the joints and
listen for a change in sound of operation.
2. Low oil level, incorrect oil, foamy oil.
Check if oil viscosity too high or operating temperature
too low.
Replace, clean or add proper grade and type of fluid
as needed.
With rare exception all return lines should be below
fluid level in reservoir
3. Pump inlet line or inlet screen is restricted or
clogged.
Clean or replace as needed.
4. Reservoir breather vent clogged.
Clean or replace as needed.
5. Worn or damaged pump.
Check and correct cause of parts failure.
Repair or replace as needed.
6. Pump speed too fast.
Operate pump within recommended speed.
7. Drive coupling mis-aligned.
Align unit and check condition of seals and bearings.
Misalignment will cause wear and subsequent high
noise level in operation.
8. Relief or unloading valve set too high.
Use reliable gauge to check operating pressure.
Relief valve may have been set too high with a
damaged pressure gauge.
Check unloading devices to see that they are
properly controlling the pump delivery.
Excessive Pump Wear:
1. Abrasive contaminants or sludge in the fluid.
Check for the cause of contaminants.
Replace or repair worn parts according to service
manual.
Install or change fluid filter.
Replace fluid with recommended grade and quality.
2. Viscosity of fluid too low or too high.
Replace fluid with proper grade and type.
3. Sustained high pressure above maximum pump
rating.
Check for possible relief valve malfunction or other
parts failure.
4. Air leaks or restriction in system causing
cavitation.
Eliminate any leaks in system.
5. Drive shaft misaligned.
Check and correct according to technical manual
specifications.
28
Parker Hannifin Corporation
Mobile Cylinder Division
Youngstown, OH
Troubleshooting Hints
Leaky Pump or Motor:
1. Damaged or worn shaft seal.
Check and replace.
Check for misalignment.
Check that chemicals in fluid are not destroying
packing or seals
2. Loose or damaged parts.
Tighten or replace.
Internal Pump Parts Breakage:
1. Excessive pressure above maximum limits for
pump.
Check for parts malfunction and cause.
Repair according to machine technical manual.
2. Seizure due to lack of fluid.
Check reservoir fluid level, as well as fluid inlet line
for restriction.
Check for plugged inlet filter or strainer.
3. Abrasive contaminants in fluid are getting past
the filter.
Check for plugged inlet filter or strainer.
Check for malfunctioning filter bypass valve.
4. Excessive torquing of housing bolts.
Replace damaged parts.
Torque to proper specifications.
Load Drops with Control Valve in Neutral:
1. Leaking cylinder seals or fittings.
Replace worn parts.
2. Control valve not centering when released.
Check linkage.
Check spool for binding.
Control Valve Sticking (Binding):
1. Valve linkage misaligned.
Repair.
2. Tie-bolts too tight (stack valves).
Loosen and retighten as necessery.
3. Valve damaged.
Repair or replace.
Control Valve Leaks:
1. Tie-bolts too loose (stack valves).
Tighten as necessery.
2. Seals damaged or worn.
Replace.
Relief Valve Noisy:
1. Relief valve setting too close to operating pressure.
Install pressure gauge and adjust to correct pressure.
2. Worn or scored poppet and seat.
Replace.
3. Spring in relief valve broken.
Replace spring and adjust to correct pressure.
Cylinder Seal Leakage:
1. Slow, Uniform Leakage:
A. Poor low-pressure sealability (especially if a lip seal).
B. Too little initial interference (if squeeze-type seal).
C. Loss of interference or squeeze due to wear or
compression set.
D. Seal shrinkage after installation (possibly chemically induced, or a result of leaching of plasticizers
by solvent action).
E. Possible omission or failure of static seal(s).
F. Microscopic debris lodges under seal lip (lint, fiber, etc.).
G. Scored lip due to passage of sharp particle under
seal, leaving cut or nick.
H. Seal lip is nicked or cut during installation (note
whether leak star ts immediately after seal
installation).
I. Non-repetitive overheating hardens compound
(which loses its ability to conform to dynamic
surface deviations).
J. Off-center alignment puts all clearance on one
side, all compression on the other (due to bearing
wear, excessive side loads, etc.).
K. Check static surfaces of dynamic seal (groove
surfaces). They may have problems F, G, or H
hidden from view, and without self-cleaning
tendency.
2. Gradually Increasing Leakage:
A. Progressive wear.
B. Increasing compression set.
C. Progressive tear or erosion from initial nick.
D. Fine score mark on dynamic surface progressively
abrades seal lip.
3. Sudden Copious Leakage:
A. Extruded seal.
B. Torn seal lip (see 1-D, -E, -F, -G, -H, & -I, and
2-D).
C. Twisted seal.
D. Dramatic bearing failure due to excessive side load,
shock, etc.
E. Spiral failure.
F. Massive infusion of contamination (due to incorrect
fluid added to system, or to upstream introduction
of dirt or wear debris).
G. Slow rod leakage builds up behind tight wiper, then
dumps . . . giving appearance of catastrophic seal
failure. If leak rate continues, look for slow leak or
erratic leak causes. If high leak rate continues,
look for true catastrophic leak origin.
H. Reverse-pressue blowout of piston seal due to
pressure trap or failure of opposed seal.
4. Erratic (start-stop) Leakage:
A. Cold start-up shrinks seal; friction/fluid heating
restores size.
B. Intermittent eccentric loading.
C. Fibrous contamination working its way past seal lips.
D. Unstable seal (twists and returns, cocks, etc.)
usually caused by shock loading.
E. Rod seal leaks slowly, tight wiper periodically
dumps accumulated leakage (see 3-G).
F. Fluid viscosity changes as temperature cycles (e.g.,
forklift truck alternately entering and leaving cold
storage area).
5. Stick-slip Operation:
A. Worn-away, low friction surface treatment.
B. Breakdown of fluid lubricity due to contamination
or deterioration of fluid.
C. Viscosity change due to temperature.
D. Excessive burnishing of dynamic surface to finer
finish destroys ability of surface to maintain lube
film (e.g., may go from 12 RMS to 4 RMS).
6. Seizing:
A. Seal and bearing swell due to incompatible fluid and
compound (possibly running hotter than temperature
at which fluid is compatible).
B. Thermal expansion of compound.
C. Pressure trap between dual squeeze seals or
incorrectly installed lip seals.
D. Wedging of seal or backup device into extrusion
gap (if used, it is usually the backup device that
extrudes).
29
Parker Hannifin Corporation
Mobile Cylinder Division
Youngstown, OH
Troubleshooting Hints
E. In low-pressure systems, shock or other factors
cock, cant or misorient the seals in grooves.
F. Bent rod, cocked head, etc.
7. Scored Rod or Ram:
A. Internally generated contamination.
B. Externally introduced rod dirt, dirty makeup or
disassembly/ reassembly dirt.
C. Misoriented exclusion devices (wiper/scraper);
eccentric installation.
D. Misaligned (eccentric) loads cock ram into metalto-metal contact with head.
E. Wiper in vertical ram forms catch-all pocket.
8. Drift:
A. Inspect valve for leakage and full closure before
disassembly. (disconnect return line on valve and
inspect visually for leakage).
B. See problems 1 and 2 as applied to piston seals.
C. Misapplied cast-iron rings in a “hold” cylinder (right
ring in the wrong job).
D. In “retract-mode” creep, check rod seal as well as
piston seal.
E. Static internal seal may provide leakage path past
piston.
9. Increasing Cylinder Drag:
A. Seal swell caused by improper (incompatible)
installation lubricant (e.g., EPR seal lubed with
petro-based grease or oil).
B. Packing of contaminants into wiper groove of
vertical ram.
C. Thermal expansion of bearings and/or seals.
D. Apparent drag increase due to undetected flow
restriction in supply or return line . . . or bypassing
of pressure though improperly closing valve . . . or
obstructed check valve, etc.
E. Cocked or twisted seal bypassing fluid and
wedging into extrusion gap.
10. Increasing Cylinder/Rod Temperature:
A. See causes for problem 9. In their earlier stages,
these problems may appear as hotter-running
cylinders.
B. Internal leakage “throttling” past seal can cause
rapid heating.
C. Decreased lubricity of fluid can boost friction and
heating (hotter fluid has lower viscosity, etc.).
Contaminated or deteriorated fluid can cause same
cycle.
D. Diluted fluid can boost friction, etc.
E. Condensation in reservoirs can emulsify or hit
cylinder as slugs of fluid with near-zero lubricity.
Also, hot water can swell compounds such as
urethanes, increasing friction.
11. Telescopic sleeve undersized, out of round or
bulged.
A. Check with micrometers to see if sleeve/tube is
with-in specifications.
Cylinder will not Operate or Move:
1. Pump or PTO is not engaged, system not
receiving fluid.
Engage pump, correct pump flow problem.
2. Control valve not engaged.
Engage valve, check for linkage alignment and damage.
3. Pressure too low.
Check pressure at cylinder to make sure it is to
circuit requirements.
4. Cylinder bypassing internally.
Check for internal scoring, damaged or worn seals,
internal cracks.
5. Cylinder overloaded for rated capacity.
Reduce load.
6. Cylinder too small or not rated for application.
Install correct cylinder.
7. Piston rod broken at piston end.
Disassemble and replace piston rod.
8. Hose quick disconnect not attached.
Check if hose quick disconnect is connected properly.
Cylinder not Holding Load or Drifts:
1. Cylinder bypassing internally.
Check for internal scoring, damaged or worn seals,
internal cracks.
Pressurize one side of cylinder and disconnect fluid
line at opposite port. Observe leakage. One to three
cubic inches per minute is considered normal for
piston rings. Virtually no leak with soft seals on piston.
Replace cylinder barrel or seals as required.
2. Other circuit leaks.
Check for leaks thru operating valve and correct.
Correct leaks in connecting lines.
3. Incorrect Valving.
Open center valve with conventional single rod
cylinder will creep if restriction on tank port is sufficiently
high. Use tandem type valve spool configuration or spool
with pump dumped through one cylinder port with the
other blocked.
Closed center valve can cause similar results except
creep will be according to amount of clearance flow in
the valve. Proper notching of valve spool can prevent
building up pressure in cylinder lines between cycles.
Spools with pressure blocked and cylinder ports
completely relaxed will also prevent drift if no moving
element is not affected by gravity or vibration.
Pilot operated check valves can positively lock fluid
in cylinder lines. Care must be exercised to insure
adequate pilot pressure when rod differential may
cause intensification.
Cylinder operates erratically or chatters:
1. Telescopic cylinder sleeves mistaging.
Check for tight seals or bearings.
2. Excessive friction due to damaged or improper /
misaligned mounting.
Repair or replace as needed.
3. Cylinder sized too close to load requirements.
Reduce load or install larger cylinder.
4. Large difference between static and kinetic friction.
Install speed control valves to provide back pressure
to control stroke.
Oil Spilling Out of Tank:
1. Oil is foaming.
(Refer to Foaming of Oil section)
2. Oil reservoir filled while cylinders were extended.
Fill while cylinders in the retract or closed position.
Foreign Matter Sources in the Circuit:
1. Pipe scale not properly removed.
Lines need cleaned and flushed before installation.
2. Sealing compound (pipe dope, teflon tape)
allowed to get inside fittings.
Use care when applying sealants.
3. Improperly screened fill pipes and air breathers.
Repair or replace as required.
30
Parker Hannifin Corporation
Mobile Cylinder Division
Youngstown, OH
Troubleshooting Hints
4. Burrs inside piping components.
Deburr before installation.
5. Tag ends of packing coming loose.
Check if packing is system compatible.
Replace packing.
6. Seal extrusions from pressure higher than
compatible with the seal or gasket.
Replace seal or gasket with compatible item.
7. Human element.
Not protecting components while being repaired.
Repaired components not properly protected while
stored. (Rust and other contaminants.)
Lines left open and unprotected.
8. Wipers or boots damage or not provided.
Check cylinders or rams.
Add or replace where necessary.
Preventing repeat failures:
When a hydraulic system (pump or cylinder or other
major component) has a failure, implementing this 13-step
checklist can help prevent repeat failures.
1. Determine cause of failure.
11. Connect lines to rod end of cylinders. Again, check
oil level and add new oil as required.
12. Operate all cylinders and motors alternately for 30
minutes at normal operating speed.
13. Change filter element, check oil level and add oil as
needed.
The above procedure, if followed, will allow you to install a new pump or cylinder with confidence, knowing that
you’ll get satisfactory life. Cutting short these steps can
cause premature hydraulic component failure; a pump,
nor a cylinder will run long on a contaminated system.
In nearly all cases, a replacement component will fail in
a shorter time than the original preceding it unless the
system is thoroughly cleaned.
In addition, to ensure good service from your equipment, the hydraulic system must be properly maintained,
including frequent oil level checks, daily inspection for
leaks, filter element and oil changes at recommended
intervals (using correct filters and recommended grade
of oil), and finally, practicing good operating techniques.
2. Eliminate cause of failure.
3. Retract all cylinders and drain tank.
4. Flush tank. Using diesel fuel under pressure, flush
tank thoroughly and wipe with clean cloths.
5. Install new filter elements.
A. Check to make sure filter is 10 microns or better.
B. If machine does not have filtration, install a 10
micron filter on the return line.
6. Install new component.
7. Fill the tank with new oil.
A. Be sure recommended oil is used.
B. NOTE; You’re filling the system, not just the oil
supply tank. Pump failure due to lack of oil can
result if filling is not done correctly.
Keep a close check on the oil level as you complete
the following steps.
8. Disconnect all lines to cylinders and/or motors at the
cylinder or motor. Be sure all implements are securely
blocked and all accumulators are bled before disconnecting lines. NOTE; It may be necessary to remove,
inspect, and flush the fittings that are connected to
the pump, valves, and/or cylinders to remove any foreign objects that may have become lodged or stuck
inside them.
9. Activate each circuit by moving control valve handle
so lines are flushed with new oil. This flushes the
lines and valves from pump to all cylinders and motors.
Be sure to check oil level, and add new oil if necessary.
10. Connect lines to blind end of cylinders and all fluid
motors. Leave rod end disconnected and with engine
at one-fourth throttle, activate circuits slowly until
cylinder bottoms out. New oil will be put in the blind
end of the cylinder and old dirty oil flushed out the
rod end. Do this for all cylinders on the machine.
31
Parker Hannifin Corporation
Mobile Cylinder Division
Youngstown, OH
Safety Guidelines for
Mobile Cylinder Division Products
Parker Safety Guide for Selecting and Using Hydraulic Cylinders and Their
Accessories
WARNING:
FAILURE OR IMPROPER SELECTION OR IMPROPER USE OF CYLINDERS AND THEIR
RELATED ACCESSORIES CAN CAUSE DEATH, PERSONAL INJURY AND PROPERTY DAMAGE.
Before selecting or using Parker cylinders or related accessories, it is important that you read, understand and follow the
following safety information.
tion in the selection of piston rod diameter, which must be followed in
order to avoid possible buckling.
Piston rods are not normally designed to absorb bending moments or
loads which are perpendicular to the axis of piston rod motion. These
additional loads can cause the piston rod to fail. If these types of
additional loads are expected to be imposed on the piston rod, their
magnitude should be made known to our engineering department.
User Responsibility
Due to very wide variety of cylinder applications and cylinder operating conditions, Parker does not warrant that any particular cylinder
is suitable for any specific application. This safety guide does not
analyze all technical parameters that must be considered in selecting a product. The hydraulic and pneumatic cylinders outlined in
this catalog are designed to Parker’s design guide lines and do not
necessarily meet the design guide lines of other agencies such as
American Bureau of Shipping, ASME Pressure Vessel Code etc. The
user, through its own analysis and testing, is solely responsible for:
The cylinder user should always make sure that the piston rod is
securely attached to the machine member.
Cushions
Cushions are devices internal to the cylinder to slow the piston and
rod assembly down at the end of the stroke. It is suggested they be
used to reduce piston impact at the end of the cylinder stroke when
the cylinder is expected to move at relatively high velocity.
Making the final selection of the cylinders and related accessories.
Determining if the cylinders are required to meet specific design
requirements as required by the Agency(s) or industry standards
covering the design of the user’s equipment.
Cylinder cushions are normally designed to absorb the energy of a
linear applied load. A rotating mass has considerably more energy
than the same mass moving in a linear mode. Cushioning for a rotating mass application should be review by our engineering department.
Assuring that the user’s requirements are met, OSHA requirements are met, and safety guidelines from the applicable agencies such as but not limited to ANSI are followed and that the use
presents no health or safety hazards.
Cylinder Mountings
Some cylinder mounting configurations may have certain limitations
such as but not limited to minimum stroke for side or foot mounting
cylinders or pressure de-ratings for certain flange mounts. Carefully
review the catalog for these types of restrictions.
Providing all appropriate health and safety warnings on the equipment on which the cylinders are used.
Seals
The seals for the product lines shown in this catalogue are intended
for mineral base hydraulic fluids and for the operating temperatures
ranges as indicated. The operation of these products with other fluids
or at other operating temperatures must be brought to the attention of
our engineering department so that proper seals for intended operation may be selected.
Always mount cylinders using the largest possible high tensile alloy
steel socket head cap screws that can fit in the cylinder mounting
holes and torque them to the manufacturer’s recommendations for
their size.
Port Fittings
Hydraulic cylinders applied with meter out or deceleration circuits are
subject to intensified pressure at piston rod end.
The application of cylinders may allow fluids such as cutting fluids,
wash down fluids etc. to come in contact with the external area of
the cylinder. These fluids may attack the piston rod wiper and or the
primary seal and must be taken into account when selecting and
specifying seal compounds.
The rod end pressure is approximately equal to:
operating pressure x effective cap end area
effective rod end piston area
Dynamic seals will wear. The rate of wear will depend on many operating factors. Wear can be rapid if a cylinder is mis-aligned or if the
cylinder has been improperly serviced. The user must take seal wear
into consideration in the application of cylinders.
Contact your connector supplier for the pressure rating of individual
connectors.
Cylinder Modifications or Repairs
Cylinders as shipped from the factory are not to be disassembled and
or modified. If cylinders require modifications, these modifications
must be done at Parker locations or by Parker certified facilities. The
Mobile Cylinder Division Engineering Department must be notified in
the event of a mechanical fracture or permanent deformation of any
cylinder component (excluding seals). This includes a broken piston
rod, mounting accessory or any other cylinder component. This
notification should include all operation and application details. This
information will be used to provide an engineered repair that will prevent recurrence of the failure. It is allowed to disassemble cylinders
for the purpose of replacing seals or seal assemblies.
Piston Rods
Possible consequences of piston rod failure or separation of the
piston rod from the piston include, but are not limited to are:
Piston rod and or attached load thrown off at high speed.
High velocity fluid discharge.
Piston rod extending when pressure is applied in the piston retract
mode.
Piston rods or machine members attached to the piston rod may
move suddenly and without warning as a consequence of other conditions occurring to the machine such as, but not limited to:
Unexpected detachment of the machine member from the piston
rod.
Failure of the pressurized fluid delivery system (hoses, fittings,
valves, pumps, compressors) which maintain cylinder position.
Catastrophic cylinder seal failure leading to sudden loss of pressurized fluid.
Failure of the machine control system.
Part of selecting cylinders for a specific operation involves the proper
selection of the piston rod diameter. This catalogue contains informa-
32
Parker Hannifin Corporation
Mobile Cylinder Division
Youngstown, OH
Offer of Sale
The items described in this document and other documents and descriptions provided by Parker Hannifin Corporation, its subsidiaries and its authorized distributors (“Seller”) are hereby offered for sale at prices to be established by Seller. This offer and its acceptance by any customer (“Buyer”) shall be governed by all
of the following Terms and Conditions. Buyer’s order for any item described in its document, when communicated to Seller verbally, or in writing, shall constitute
acceptance of this offer. All goods or work described will be referred to as “Products”.
1. Terms and Conditions. Seller’s willingness to offer Products, or accept an order
for Products, to or from Buyer is expressly conditioned on Buyer’s assent to these
Terms and Conditions and to the terms and conditions found on-line at www.parker.
com/saleterms/. Seller objects to any contrary or additional term or condition of
Buyer’s order or any other document issued by Buyer.
2. Price Adjustments; Payments. Prices stated on the reverse side or preceding
pages of this document are valid for 30 days. After 30 days, Seller may change prices
to reflect any increase in its costs resulting from state, federal or local legislation, price
increases from its suppliers, or any change in the rate, charge, or classification of any
carrier. The prices stated on the reverse or preceding pages of this document do not
include any sales, use, or other taxes unless so stated specifically. Unless otherwise
specified by Seller, all prices are F.O.B. Seller's facility, and payment is due 30 days
from the date of invoice. After 30 days, Buyer shall pay interest on any unpaid invoices
at the rate of 1.5% per month or the maximum allowable rate under applicable law.
3. Delivery Dates; Title and Risk; Shipment. All delivery dates are approximate and
Seller shall not be responsible for any damages resulting from any delay. Regardless
of the manner of shipment, title to any products and risk of loss or damage shall pass
to Buyer upon tender to the carrier at Seller's facility (i.e., when it’s on the truck, it’s
yours). Unless otherwise stated, Seller may exercise its judgment in choosing the
carrier and means of delivery. No deferment of shipment at Buyers' request beyond
the respective dates indicated will be made except on terms that will indemnify,
defend and hold Seller harmless against all loss and additional expense. Buyer shall
be responsible for any additional shipping charges incurred by Seller due to Buyer’s
changes in shipping, product specifications or in accordance with Section 13, herein.
4. Warranty. Seller warrants that the Products sold hereunder shall be free from defects in material or workmanship for a period of eighteen months from the date of delivery to Buyer. The prices charged for Seller's products are based upon the exclusive
limited warranty stated above, and upon the following disclaimer: DISCLAIMER OF
WARRANTY: THIS WARRANTY COMPRISES THE SOLE AND ENTIRE WARRANTY PERTAINING TO PRODUCTS PROVIDED HEREUNDER. SELLER DISCLAIMS
ALL OTHER WARRANTIES, EXPRESS AND IMPLIED, INCLUDING MERCHANTABILITY AND FITNESS FOR A PARTICULAR PURPOSE.
5. Claims; Commencement of Actions. Buyer shall promptly inspect all Products
upon delivery. No claims for shortages will be allowed unless reported to the Seller
within 10 days of delivery. No other claims against Seller will be allowed unless asserted in writing within 60 days after delivery or, in the case of an alleged breach of
warranty, within 30 days after the date within the warranty period on which the defect
is or should have been discovered by Buyer. Any action based upon breach of this
agreement or upon any other claim arising out of this sale (other than an action by
Seller for any amount due to Seller from Buyer) must be commenced within thirteen
months from the date of tender of delivery by Seller or, for a cause of action based
upon an alleged breach of warranty, within thirteen months from the date within the
warranty period on which the defect is or should have been discovered by Buyer.
6. LIMITATION OF LIABILITY. UPON NOTIFICATION, SELLER WILL, AT ITS
OPTION, REPAIR OR REPLACE A DEFECTIVE PRODUCT, OR REFUND THE PURCHASE PRICE. IN NO EVENT SHALL SELLER BE LIABLE TO BUYER FOR ANY
SPECIAL, INDIRECT, INCIDENTAL OR CONSEQUENTIAL DAMAGES ARISING
OUT OF, OR AS THE RESULT OF, THE SALE, DELIVERY, NON-DELIVERY, SERVICING, USE OR LOSS OF USE OF THE PRODUCTS OR ANY PART THEREOF,
OR FOR ANY CHARGES OR EXPENSES OF ANY NATURE INCURRED WITHOUT
SELLER'S WRITTEN CONSENT, EVEN IF SELLER HAS BEEN NEGLIGENT,
WHETHER IN CONTRACT, TORT OR OTHER LEGAL THEORY. IN NO EVENT
SHALL SELLER'S LIABILITY UNDER ANY CLAIM MADE BY BUYER EXCEED
THE PURCHASE PRICE OF THE PRODUCTS.
7. Contingencies. Seller shall not be liable for any default or delay in performance if
caused by circumstances beyond the reasonable control of Seller.
8. User Responsibility. The user, through its own analysis and testing, is solely responsible for making the final selection of the system and Product and assuring that
all performance, endurance, maintenance, safety and warning requirements of the
application are met. The user must analyze all aspects of the application and follow
applicable industry standards and Product information. If Seller provides Product or
system options, the user is responsible for determining that such data and specifications are suitable and sufficient for all applications and reasonably foreseeable uses
of the Products or systems.
9. Loss to Buyer's Property. Any designs, tools, patterns, materials, drawings,
confidential information or equipment furnished by Buyer or any other items which
become Buyer's property, may be considered obsolete and may be destroyed by
Seller after two consecutive years have elapsed without Buyer placing an order for
the items which are manufactured using such property. Seller shall not be responsible
for any loss or damage to such property while it is in Seller's possession or control.
10. Special Tooling. A tooling charge may be imposed for any special tooling,
including without limitation, dies, fixtures, molds and patterns, acquired to manufacture
Products. Such special tooling shall be and remain Seller's property notwithstanding payment of any charges by Buyer. In no event will Buyer acquire any interest in
apparatus belonging to Seller which is utilized in the manufacture of the Products,
even if such apparatus has been specially converted or adapted for such manufacture
and notwithstanding any charges paid by Buyer. Unless otherwise agreed, Seller shall
have the right to alter, discard or otherwise dispose of any special tooling or other
property in its sole discretion at any time.
11. Buyer's Obligation; Rights of Seller. To secure payment of all sums due
or otherwise, Seller shall retain a security interest in the goods delivered and this
agreement shall be deemed a Security Agreement under the Uniform Commercial
Code. Buyer authorizes Seller as its attorney to execute and file on Buyer's behalf
all documents Seller deems necessary to perfect its security interest. Seller shall
have a security interest in, and lien upon, any property of Buyer in Seller's possession as security for the payment of any amounts owed to Seller by Buyer.
12. Improper use and Indemnity. Buyer shall indemnify, defend, and hold Seller
harmless from any claim, liability, damages, lawsuits, and costs (including attorney
fees), whether for personal injury, property damage, patent, trademark or copyright
infringement or any other claim, brought by or incurred by Buyer, Buyer’s employees, or any other person, arising out of: (a) improper selection, improper application
or other misuse of Products purchased by Buyer from Seller; (b) any act or omission, negligent or otherwise, of Buyer; (c) Seller’s use of patterns, plans, drawings,
or specifications furnished by Buyer to manufacture Product; or (d) Buyer’s failure
to comply with these terms and conditions. Seller shall not indemnify Buyer under
any circumstance except as otherwise provided.
13. Cancellations and Changes. Orders shall not be subject to cancellation or
change by Buyer for any reason, except with Seller's written consent and upon
terms that will indemnify, defend and hold Seller harmless against all direct,
incidental and consequential loss or damage. Seller may change product features,
specifications, designs and availability with notice to Buyer.
14. Limitation on Assignment. Buyer may not assign its rights or obligations
under this agreement without the prior written consent of Seller.
15. Entire Agreement. This agreement contains the entire agreement between
the Buyer and Seller and constitutes the final, complete and exclusive expression
of the terms of the agreement. All prior or contemporaneous written or oral agreements or negotiations with respect to the subject matter are herein merged.
16. Waiver and Severability. Failure to enforce any provision of this agreement
will not waive that provision nor will any such failure prejudice Seller’s right to
enforce that provision in the future. Invalidation of any provision of this agreement
by legislation or other rule of law shall not invalidate any other provision herein. The
remaining provisions of this agreement will remain in full force and effect.
17. Termination. This agreement may be terminated by Seller for any reason
and at any time by giving Buyer thirty (30) days written notice of termination. In
addition, Seller may by written notice immediately terminate this agreement for
the following: (a) Buyer commits a breach of any provision of this agreement (b)
the appointment of a trustee, receiver or custodian for all or any part of Buyer’s
property (c) the filing of a petition for relief in bankruptcy of the other Party on its
own behalf, or by a third party (d) an assignment for the benefit of creditors, or (e)
the dissolution or liquidation of the Buyer.
18. Governing Law. This agreement and the sale and delivery of all Products
hereunder shall be deemed to have taken place in and shall be governed and
construed in accordance with the laws of the State of Ohio, as applicable to
contracts executed and wholly performed therein and without regard to conflicts of
laws principles. Buyer irrevocably agrees and consents to the exclusive jurisdiction
and venue of the courts of Cuyahoga County, Ohio with respect to any dispute,
controversy or claim arising out of or relating to this agreement. Disputes between
the parties shall not be settled by arbitration unless, after a dispute has arisen, both
parties expressly agree in writing to arbitrate the dispute.
19. Indemnity for Infringement of Intellectual Property Rights. Seller shall
have no liability for infringement of any patents, trademarks, copyrights, trade
dress, trade secrets or similar rights except as provided in this Section. Seller will
defend and indemnify Buyer against allegations of infringement of U.S. patents,
U.S. trademarks, copyrights, trade dress and trade secrets (“Intellectual Property
Rights”). Seller will defend at its expense and will pay the cost of any settlement or
damages awarded in an action brought against Buyer based on an allegation that
a Product sold pursuant to this Agreement infringes the Intellectual Property Rights
of a third party. Seller's obligation to defend and indemnify Buyer is contingent on
Buyer notifying Seller within ten (10) days after Buyer becomes aware of such
allegations of infringement, and Seller having sole control over the defense of any
allegations or actions including all negotiations for settlement or compromise. If a
Product is subject to a claim that it infringes the Intellectual Property Rights of a
third party, Seller may, at its sole expense and option, procure for Buyer the right to
continue using the Product, replace or modify the Product so as to make it noninfringing, or offer to accept return of the Product and return the purchase price less
a reasonable allowance for depreciation. Notwithstanding the foregoing, Seller shall
have no liability for claims of infringement based on information provided by Buyer,
or directed to Products delivered hereunder for which the designs are specified in
whole or part by Buyer, or infringements resulting from the modification, combination or use in a system of any Product sold hereunder. The foregoing provisions of
this Section shall constitute Seller's sole and exclusive liability and Buyer's sole and
exclusive remedy for infringement of Intellectual Property Rights.
20. Taxes. Unless otherwise indicated, all prices and charges are exclusive of
excise, sales, use, property, occupational or like taxes which may be imposed by
any taxing authority upon the manufacture, sale or delivery of Products.
21. Equal Opportunity Clause. For the performance of government contracts
and where dollar value of the Products exceed $10,000, the equal employment opportunity clauses in Executive Order 11246, VEVRAA, and 41 C.F.R. §§ 60-1.4(a),
60-741.5(a), and 60-250.4, are hereby incorporated.
1/09
33
Parker Hannifin Corporation
Mobile Cylinder Division
Youngstown, OH
Notes
34
Parker Hannifin Corporation
Mobile Cylinder Division
Youngstown, OH
Parker Hannifin Corporation
6035 Parkland Blvd.
Cleveland, Ohio 44124-4141
Telephone: (216) 896-3000
Fax: (216) 896-4000
www.parker.com
About Parker Hannifin Corporation
Parker Hannifin is a leading global motion-control
company dedicated to delivering premier customer
service. A Fortune 500 corporation listed on the New
York Stock Exchange (PH), our components and systems comprise over 1,400 product lines that control motion in some 1,000 industrial and aerospace markets.
Parker is the only manufacturer to offer its customers a
choice of hydraulic, pneumatic, and electromechanical
motion-control solutions. Our
Company has the largest distribution network in
its field, with over 7,500 distributors serving nearly
400,000 customers worldwide.
Parker Hannifin Corporation
Parker’s Charter
To be a leading worldwide manufacturer of components and systems for the builders and users of durable
goods. More specifically, we will design, market and
manufacture products controlling motion, flow and pressure. We will achieve profitable growth through premier
customer service.
Product Information
North American customers seeking product information, the location of a nearby distributor, or repair
services will receive prompt attention by calling the
Parker Product Information Center at our toll-free
number: 1-800-C-PARKER (1-800-272-7537). In Europe, call 00800-C-PARKER-H (00800-2727-5374).
The Aerospace Group
is a leader in the development,
design, manufacture and servicing of control systems and
components for aerospace and
related high-technology markets, while achieving growth
through premier customer
service.
The Climate & Industrial
Controls Group
designs, manufactures and
markets system-control and
fluid-handling components
and systems to refrigeration,
air-conditioning and industrial
customers worldwide.
The Fluid Connectors Group
designs, manufactures and
markets rigid and flexible connectors, and associated products used in pneumatic and
fluid systems.
The Seal Group designs,
manufactures and distributes
industrial and commercial sealing devices and related
products by providing
superior quality and total
customer satisfaction.
The Hydraulics Group
designs, produces and markets a full spectrum of hydraulic components and systems to
builders and users of industrial
and mobile machinery and
equipment.
The Filtration Group
designs, manufactures and
markets quality filtration and
clarification products, providing
customers with the best value,
quality, technical support, and
global availability.
The Automation Group is a
leading supplier of pneumatic
and electromechanical components and systems to automation customers worldwide.
The Instrumentation Group
is a global leader in the design,
manufacture and distribution of
high-quality critical flow components for worldwide process
instrumentation, ultra-highpurity, medical and analytical
applications.
35
Parker Hannifin Corporation
Mobile Cylinder Division
Youngstown, OH
Catalog HY18-0008/US Rev B 2M, 04/09
Parker Hannifin Corporation
Mobile Cylinder Div.
P.O. Box 239
Youngstown, OH 44501-0239
phone (330) 480-8431
fax (330) 480-8432
www.parker.com
Your Local Authorized Parker Distributor