Download Drum Brake Inspection, Maintenance, and Service Drum Brake
Transcript
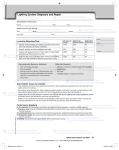
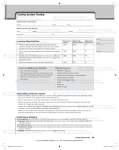
Drum Brake Inspection, Maintenance, and Service Student/intern information: Name Date Class Vehicle used for this activity: Year Make Odometer Model VIN Time off Learning Objective/Task CDX Tasksheet Number 2008 NATEF Reference Number 2008 NATEF Priority Level • Diagnose poor stopping, noise, vibration, pulling, grabbing, dragging, or pedal pulsation concerns; determine necessary action. C706 5C1 P-1 • Remove, clean, inspect, and measure brake drums; determine necessary action. C800 5C2 P-1 • Refinish brake drum; measure final drum diameter. C626 5C3 P-1 • Remove, clean, and inspect brake shoes, springs, pins, clips, levers, adjusters/self-adjusters, other related brake hardware, and backing support plates; lubricate and reassemble. C248 5C4 P-1 • Inspect and install wheel cylinders. C707 5C5 P-2 • Pre-adjust brake shoes and parking brake; install brake drums or drum/hub assemblies and wheel bearings. C801 5C6 P-2 • Install wheel, torque lug nuts, and make final checks and adjustments. C251 5C7 P-1 Recommended Resource Materials Materials Required • CDX Automotive program • CDX eTextbook • Technical service bulletins, shop manuals, and any other information applicable to the specific vehicle or components you are working on • Class notes • Vehicle with drum brake concern • Manufacturer-specific tools depending on the concern • Vehicle lifting equipment • Asbestos removal equipment • Drum brake micrometer • Brake spring tools • Micrometer or dial caliper • Flare nut wrench to fit brake line fitting • Brake spoon Time on Total time Some Safety Issues to Consider © Jones and Bartlett Publishers, LLC • Diagnosis of this fault may require test driving the vehicle on the school grounds or on a hoist, both of which carry severe risks. Attempt this task only with full permission from your supervisor/instructor and follow all the guidelines exactly. • Caution: Brake dust may contain asbestos, which has been determined to cause cancer when inhaled or ingested. Treat all brake dust as if it contains asbestos and use OSHA-approved asbestos removal equipment. Do not allow brake dust to become airborne by using anything that would disturb the dust. Also, wear protective gloves during this procedure and dispose of or clean them in an approved manner. • Lifting equipment such as vehicle jacks and stands, vehicle hoists, and engine hoists are important tools that increase productivity and make the job easier. However, they can also cause severe injury or death if used improperly. Make sure you follow the manufacturer’s operation procedures. Also make sure you have your supervisor/instructor’s permission to use any particular type of lifting equipment. Drum Brake Inspection, Maintenance, and Service 33 © Jones and Bartlett Publishers, LLC. NOT FOR SALE OR DISTRIBUTION. 85079_CH07_033_038.pdf 33 11/24/09 3:23 PM • Always wear the correct protective eyewear and clothing and use the appropriate safety equipment, as well as fender covers, seat protectors, and floor mat protectors. • Make sure you understand and observe all legislative and personal safety procedures when carrying out practical assignments. If you are unsure of what these are, ask your supervisor/instructor. Performance Standard 0—No exposure: No information or practice provided during the program; complete training required 1—Exposure only: General information provided with no practice time; close supervision needed; additional training required 2—Limited practice: Has practiced job during training program; additional training required to develop skill 3—Moderately skilled: Has performed job independently during training program; limited additional training may be required 4—Skilled: Can perform job independently with no additional training TASK Diagnose poor stopping, noise, vibration, pulling, grabbing, dragging, Total time or pedal pulsation concerns; determine necessary action. C706 5C1 1. List the drum brake-related customer complaint/concern: Time on Time off 2. Research the description and operation of the brake system for this vehicle in the appropriate service manual. Also research the drum brake diagnostic procedure and removal/installation procedures. a. List the possible cause/s of the complaint/concern: b. c. d. e. f. g. Maximum drum diameter: _________________________ in/mm Maximum drum out-of-round: ________________________ in/mm Minimum lining thickness: (Primary) _________ in/mm (Secondary) _________ in/mm Parking brake adjustment specification: _______________________________ Lug nut torque: ___________________ ft-lbs/Nm Draw lug nut torque pattern: 3. With instructor permission, test drive the vehicle to verify the concern. Be sure to follow all shop policies regarding test drives. List your observations: The rest of this task is performed at the end of the drum brake service. Please refer to page 38 for the completion of this task. C800 5C2 1. Remove the brake drum following the service manual procedure, being careful not to disturb any brake dust. Clean the brake drum using equipment/procedures for dealing with asbestos/dust. 2. Inspect the drum. a. Measure and record the diameter: __________________________ in/mm b. Measure and record the amount of out-of-round: _________________________ in/mm Total time Time on Time off NOTEMeasure in at least three places equally spaced around the drum. 34 © Jones and Bartlett Publishers, LLC TASK Remove, clean, inspect, and measure brake drums; determine necessary action. Drum Brake Inspection, Maintenance, and Service © Jones and Bartlett Publishers, LLC. NOT FOR SALE OR DISTRIBUTION. 85079_CH07_033_038.pdf 34 11/24/09 3:23 PM c. Hot spots? Yes/No (Circle one) d. Cracks? Yes/No (Circle one) e. Other defects? List if found: 3. Based on your observations/measurements, determine any necessary action/s: 4. Have your supervisor/instructor verify satisfactory completion of this procedure, any observations found, and any necessary action/s recommended. Performance Rating CDX Tasksheet Number: C800 2008 NATEF Reference Number: 5C2 ❏ ❏ ❏ ❏ ❏ 0 1 2 3 4 Supervisor/instructor signature Date TASK Refinish brake drum; measure final drum diameter. 1. 2. 3. 4. C626 5C3 Using the correct equipment and procedure, refinish the brake drum to within allowable tolerances. Measure the final drum diameter and note your findings here: ___________________ in/mm Calculate the amount of material removed from the surface of the drum: ____________ in/mm Does the drum meet specifications to be safely put back into service? Yes/No (Circle one) a. Why or why not? Time off Time on Total time 5. Have your supervisor/instructor verify satisfactory completion of this procedure, any observations found, and any necessary action/s recommended. Performance Rating CDX Tasksheet Number: C626 2008 NATEF Reference Number: 5C3 ❏ ❏ ❏ ❏ ❏ 0 1 2 3 4 Supervisor/instructor signature Date TASK Remove, clean, and inspect brake shoes, springs, pins, clips, levers, Time off adjusters/self-adjusters, other related brake hardware, and backing support plates; lubricate and reassemble. © Jones and Bartlett Publishers, LLC C248 5C4 1. Clean brake shoes, hardware, and backing plates using equipment and procedures for dealing with asbestos/dust. 2. Disassemble the brake shoes and hardware from the backing plate, being careful not to lose any parts and remembering how they go back together. a. Measure lining thickness: (Primary) ________ in/mm, (Secondary) ________ in/mm b. Inspect and clean hardware: i. Springs: Damaged/Missing/Weak/OK (Circle one) ii. Pins: Damaged/Missing/OK (Circle one) Drum Brake Inspection, Maintenance, and Service Time on Total time 35 © Jones and Bartlett Publishers, LLC. NOT FOR SALE OR DISTRIBUTION. 85079_CH07_033_038.pdf 35 11/24/09 3:23 PM iii. Levers and adjusters: Damaged/Missing/OK (Circle one) iv. Backing plate: Damaged/Worn/OK (Circle one) v. Other hardware: Damaged/Missing/OK (Circle one) 3. Determine any necessary action/s: 4. Have your instructor initial to verify condition of hardware: ___________ The rest of this task is performed at the end of the drum brake service. Please refer to page 37 for the completion of this task. TASK Inspect and install wheel cylinders. C707 5C5 1. Remove the wheel cylinder following the service manual procedure to prepare for inspection. NOTETo prevent twisting the brake line, it is common practice to loosen the brake line fitting before Total time Time on unbolting the wheel cylinder. Time off 2. Disassemble, clean, and inspect the wheel cylinder for damage, wear, or missing pieces. a. Bore: Damaged/OK (Circle one) b. Pistons: Damaged/Missing/OK (Circle one) c. Seals: Damaged/Missing/OK (Circle one) d. Dust boots: Damaged/Missing/OK (Circle one) e. Spring/s: Damaged/Missing/OK (Circle one) 3. List any necessary action/s: 4. Have your supervisor/instructor inspect the disassembled wheel cylinder and determine whether it can be rebuilt or whether it needs to be replaced: a. Rebuild/Replace (Circle one, then initial) _____________________ 5. If the wheel cylinder can be reused, rebuild it, preferably with new seals and dust boots. 6. Reinstall the wheel cylinder on the backing plate. NOTEIt is usually best to start the brake line fitting into the wheel cylinder before bolting the cylinder down. This will allow the threads of the brake line fitting to align with the threads in the wheel cylinder, preventing cross-threading of the parts. Performance Rating CDX Tasksheet Number: C707 2008 NATEF Reference Number: 5C5 ❏ ❏ ❏ ❏ ❏ 0 1 2 3 4 Supervisor/instructor signature Date © Jones and Bartlett Publishers, LLC 7. Have your supervisor/instructor verify satisfactory completion of this procedure, any observations found, and any necessary action/s recommended. 36 Drum Brake Inspection, Maintenance, and Service © Jones and Bartlett Publishers, LLC. NOT FOR SALE OR DISTRIBUTION. 85079_CH07_033_038.pdf 36 11/24/09 3:23 PM TASK C248/5C4 Continued Remove, clean, and inspect brake shoes, springs, pins, clips, levers, adjusters/self-adjusters, other related brake hardware, and backing support plates; lubricate and reassemble (from page 35–36). Time off Time on NOTEMany vehicles use a primary shoe toward the front of the vehicle and a secondary shoe toward the rear of the vehicle. Refer to the manufacturer’s specifications to install the shoes, springs, and hardware correctly. 5. 6. 7. 8. Total time Following the manufacturer’s procedure, reassemble the brake assembly (shoes, springs, and hardware). Are the springs seated correctly? Yes/No (Circle one) Does the self-adjuster operate properly? Yes/No (Circle one) List any necessary action/s: 9. Have your supervisor/instructor verify satisfactory completion of this procedure, any observations found, and any necessary action/s recommended. Performance Rating CDX Tasksheet Number: C248 2008 NATEF Reference Number: 5C4 ❏ ❏ ❏ ❏ ❏ 0 1 2 3 4 Supervisor/instructor signature Date Time off TASK Pre-adjust brake shoes and parking brake, install brake drums or drum/hub assemblies and wheel bearings. C801 5C6 1. If this vehicle uses serviceable wheel bearings, see the “Wheel Bearing Service” (page 55) tasksheet and clean, inspect, service, reinstall, and adjust them according to manufacturer’s procedure. 2. Install the brake drum. a. Does the brake drum turn without excessive drag? Yes/No (Circle one) b. If equipped with adjustable wheel bearings, are they adjusted properly? Yes/No (Circle one) Time on Total time NOTEThe brakes may need air bled out of the wheel cylinders if they were removed from the vehicle. If they were, consider bleeding all wheel cylinders once all drums and calipers are back in place. Failure to have all drums and calipers installed could cause damage to the wheel cylinders, calipers, brake shoes, and pads. Ask your instructor if you are unclear about this. 3. Have your supervisor/instructor verify satisfactory completion of this procedure, any observations found, and any necessary action/s recommended. © Jones and Bartlett Publishers, LLC Performance Rating CDX Tasksheet Number: C801 2008 NATEF Reference Number: 5C6 ❏ ❏ ❏ ❏ ❏ 0 1 2 3 4 Supervisor/instructor signature Date Drum Brake Inspection, Maintenance, and Service 37 © Jones and Bartlett Publishers, LLC. NOT FOR SALE OR DISTRIBUTION. 85079_CH07_033_038.pdf 37 11/24/09 3:23 PM TASK Install wheel, torque lug nuts, and make final checks and adjustments. C251 5C7 Total time 1. Draw the lug nut torque pattern for this vehicle: Time on 2. Install the wheel/s, place lug nuts on studs with the proper side facing the wheel, and torque them to proper torque. Time off NOTEIf in doubt about which way the nuts should face, ask your instructor. 3. What torque did you tighten the lug nuts to? __________________________ ft-lbs/Nm 4. Reinstall any wheel covers that have been removed. 5. Check to see that the brake master cylinder has the proper amount of brake fluid in it. a. Is it at the proper level? Yes/No (Circle one) b. If no, refill with the proper fluid. 6. Check the backing plates for any leaks or loose fasteners. 7. Have your supervisor/instructor feel brake pedal application and determine whether a test drive is necessary to final adjust brakes and verify satisfactory operation of brakes. Performance Rating CDX Tasksheet Number: C251 2008 NATEF Reference Number: 5C7 ❏ ❏ ❏ ❏ ❏ 0 1 2 3 4 Supervisor/instructor signature Date TASK C706/5C1 Continued Diagnose poor stopping, noise, vibration, pulling, grabbing, Total time dragging or pedal pulsation concerns; determine necessary action (from page 34). 4. Reflecting back on this job, list the causes of the customer concern as listed at the beginning of this tasksheet: Time on Time off 5. Document the correction/s required to fix the customer concern: 6. Did you repair the vehicle? Yes/No (Circle one) 7. List any additional necessary action/s: Performance Rating CDX Tasksheet Number: C706 2008 NATEF Reference Number: 5C1 ❏ ❏ ❏ ❏ ❏ 0 1 2 3 4 Supervisor/instructor signature Date © Jones and Bartlett Publishers, LLC 8. Have your supervisor/instructor verify satisfactory completion of this procedure, any observations found, and any necessary action/s recommended. 38 Drum Brake Inspection, Maintenance, and Service © Jones and Bartlett Publishers, LLC. NOT FOR SALE OR DISTRIBUTION. 85079_CH07_033_038.pdf 38 11/24/09 3:23 PM


