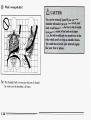
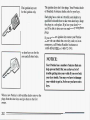
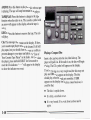
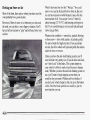
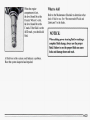
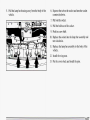
1
1995
1995 Pontiac Grand Prix Owner’s Manual
Seats and Restraint Systems
......F.-c-.,.
...............................................
1-1
This section tells you how to use your seats and safety belts properly.
It also explains the “SRS” system.
...............................................................
Comfort Controls and Audio Systems ..................................................
Features and Controls
2-1
This section explainshow to start and operate your Pontiac.
3-1
This section tells youhow to adjust the ventilation and comfort controls and
how to operate your
audio system.
...........................................................
...............................................................
YourDrivingandtheRoad
4-1
Here you’ll find helpful information and tips about the road
and how to drive under different conditions.
ProblernsontheRoad
5-1
This section tells you what to
do if you have a problem while driving, suchas a flat tire or engine
overheating, etc.
.......................................................
Here the manual tells you
how to keep your Pontiac running properly and looking good.
Maintenanceschedule ...............................................................
to use.
This section tells you when to perform vehicle maintenance and what fluids and lubricants
CustomerAssistanceInformation .....................................................
Service and AppearanceCare..
6-1
7-1
8-1
This section tellsyou how to contact Pontiac for assistance and
how to get service publications.
It also gives you information on “Reporting Safety Defects” on page
8-4.
Index
.............................................................................
9-1
Here’s an alphabetical listingof almost every subject in this manual.You can use it to quickly find
something you want to read.
i
-
we support voluntary
technician certification.
GM
GENERAL MOTORS,GM and the GM Emblem,
PONTIAC and the PONTIAC Emblem are registered
trademarks of General Motors Corporation.
This manual includes the latest information
at the timeit
was printed.We reserve the right to make changes in the
product after that time without further notice. For
vehicles first sold in Canada, substitute the name
“General Motorsof Canada Limited” for Pontiac
Division wheneverit appears in this manual.
Please keep this manualin your Pontiac, so it will be
there if you ever needit when you’re on the road.
If you
sell the vehicle, please leave this manual itinso the new
owner can use it.
Litho in U.S.A.
Part No. 10280073 A Second Edition
ii
WE SUPPORT
VOLUNTARY TECHNICIAN
CERTIFICATION THROUGH
National Institute for
AUTOMOTIVE
SERVICE
EXCELLENCE
For Canadian OwnersWho Prefer a
French Language Manual
Aux proprietaires canadiens:Vous pouvez vous procurer
un exemplairede ceguide en fraqais chez votre
concessionaire ou auDGN Marketing Services Ltd.,
1500 Bonhill Rd., Mississauga, Ontario L5T1C7.
@Copyright General Motors Corporation 1994
All Rights Reserved
How to Use This Manual
Many people read their owner’s manual from beginning
to end when they first receive their new vehicle. This
will help you learn about the features and controls for
your vehicle. In this manual, you’ll find that pictures
and words worktogether to explain things quickly.
/!\ C A l JTIONr
rhese mean thereis something that
ould hurt youor other people.
Index
A good place to look for what you needis the Index in
the back of the manual. It’s an alphabetical list of all
that’s in themanual, and the page number where you’ll
find it.
Safety Warnings andSymbols
You will find a number of safety cautions in this book.
We use a box with gray background and
the word
CAUTION to tell you about things that could hurt you if
you were to ignore the warning.
In the gray caution area, wetell you what the hazard is.
Then we tell you what to do to help avoid or reduce the
hazard. Please read these cautions.-If you don’t, you or
others could be hurt.
You will also find a circle with a slash through it in t h i s
book.
This safety symbol means
“Don’t,’’ “Don’tdo this,” or
“Don’t let this happen.”
iii
Vehicle Damage Warnings
Also, inthis book youwill find these notices:
NOTICE:
These mean thereis something that
could damage your _ _ le.
1.
iv
In the notice area, we tell you about something thatcan
damage your vehicle. Manytimes, this damage would
not be covered by your warranty, and
it could be costly.
But the notice will tell you what to do to help avoidthe
damage.
When you readother manuals, you might see
CAUTION and NOTICE warnings in different colors
or in different words.
You’ll also see warning labels on your vehicle. They use
yellow for cautions, blue for notices and the words
CAUTION or NOTICE.
These symbols
are used on
warning and
indicator lights:
Vehicle Symbols
These are some of the symbols you mayfind on your vehicle.
For example,
these symbols
are used on an
original battery;
CAUTION
POSSIBLE
INJURY
A
These symbols
have to do with
your lights:
These symbols
are important
for you and
your passengers
whenever your
vehicle is
driven:
WINDSHIELD
WIPER
DOOR LOCK
UNLOCK
PROTECT
EYES BY
SHIELDING
TURN
SIGNALS
BRAKE
WINDSHIELD
DEFROSTER
RADIATOR
COOLANT
SPARK OR
FLAME
COULD
EXPLODE
BATTERY
,\I/,
FOG LAMPS
VENTILATING
a+
FAN
w*
=o
=
$0
RADIO
VOLUME
(0)
a
FUEL
S
HIGH
LAMPSoR
BEAM
F-
FUSE
k
BATTERY
CHARGING
SYSTEM
WINDOW
DEFOGGER
AVOID
SPARKS OR
FLAMES
ENGINE
COOLANT
TEMP
RELEASE
e
FASTEN
SEAT
BELTS
CAUSTIC
BATTERY
ACID COULD
CAUSE
BURNS
These symbols
are 011 some of
your controls:
Here are some
other symbols
you may see:
ENGINE OIL
PRESSURE W
TEMP
ANTI-LOCK
BRAKE
b
ak
33
CONDITIONING
AIR
RELEASE
TRUNK
ru
LIGHTER
m
t
&
OIL
(@)
SPEAKER
b
V
NOTES
vi
v
Section 1 Seats and Restraint Systems
Here you’ll find information about the seatsin your
Pontiac and howto use your safety belts properly.
You
can also learn aboutsome things you shouldnot do with
air bags and safety belts.
Seats and Seat Controls
This section tells youhow to adjust the seats and
explains reclining seatbacks and head restraints.
Manual Front Seat
Lift the bar under the frontof the sea.t tounlock it. Slide
the seat to where you want
it and release the bar.Try to
move the seat with your body to be sure
the seat is
locked in place.
1-1
Power Seat (Option)
Reclining Front Seatbacks
FRONT (A): Raise the front of the seat by holding the Lift the lever to release the seatback, then move the
switch up. Hold the switchdown to lower the frontof
seatback to whereyou want it. Release the lever to lock
the seatbackin place. pull up on the lever without pushing
the seat.
on the seatback, and the seatback will move farward.
CENTER (B): Move the seat forwardor back by
holding the controlto the front or back. Raise or lower
the seat by holding the control or
updown.
REAR (C):Raise the rear of the seat by holding the
switch up. Hold the switch downto lower the rear of the
seat.
1-2
I
2-Door Models
But don’t have a seatback reclined
if your vehicle is moving.
4-DOOr Models
1-3
Seatback Latches (2-Door Models)
The front seat folds forward
to let people getinto the
back seat.Your seatback
will move back andforth
freely, unless you come
to a
sudden stop. Thenit will
lock in place.
Head Restraints
Slide the headrestraint up or downso that the topof the
restraint is closest to the top of your ears.This position
reduces the chance of a neck injury in a crash.
1-4
~r your vehicle is parked going downa fairly steep hill,
the seatbackmay not fold without somehelp from you.
To fold the locked seatbackforward, push the seatback
toward therear as you lift this latch. Thenthe seatback
will fold forward. The latch must be downfor the seat to
work properly.
Safety Belts: They’re for Everyone
This part of the manual tells you how to use safety belts
properly. It also tells you some things you should notdo
with safety belts.
Your vehicle has a light that
comes on as a reminderto
buckle up. (See “Safety Belt
Reminder Light” in the
Index.)
And it explains the Supplemental Restraint System, or
“air bag” system.
In many states and Canadian provinces, the law says
to
wear safety belts. Here’s why:They work.
You never know if you’ll be in a crash.If you do have a
crash, you don’tknow if it will be a bad one.
A few crashes are mild, and some crashescan be so
serious that even buckled up a person wouldn’t survive.
But most crashesare in between. In manyof them,
people who buckle up can survive and sometimes walk
away. Without belts they could have been badly hurt
or
killed.
After more than25 years of safety belts in vehicles,
the facts are clear. In most crashes buckling up does
matter ... a lot!
1-5
Why Safety Belts Work
When you ride in or on anything, you go as fast as it
goes.
Put someoneon it.
Take the simplest vehicle. Suppose it’sjust a seat on
wheels.
1-6
Get it up to speed. Then stop the vehicle.The rider
doesn't stop.
The person keeps going until stoppedby something.
In a real vehicle, it could be the windshield
...
1-7
or the instrument panel
...
or the safetybelts!
down as the vehicledoes.
With safety belts, you slow
You get more timeto stop. You stop over more distance,
and your strongest bones take theforces. That’s why
safety belts make such good
sense.
..
c
$,/;
1
...?j
,
:!;+‘it
,
.:r
:<*’
. .
-
Here Are Questions Many People Ask
About Safety Belts-- and the Answers
@’ Won’t I be trapped in the vehicle after an
accident ifI’m wearing a safety belt?
A:
You could be -- whether you’re wearing a safety
belt ornot. But you can unbuckle a safety belt,
even if you’re upside down. And yourchance of
being conscious during and after an accident, so
you can unbuckle and get out, ismuch greater if
you are belted.
&= Why don’t they just put in air bagsso people
won’t have to wear safety belts?
A:
@
a
I-’ma good driver, andI never drive farfrom
home, why shouldI wear safety belts?
. I f
,
A’: You may be an excellent driver, butif you’re in an
accident -- even one that isn’t your fault -- you and
your passengers can be hurt. Being a good driver
doesn’t protect you from things beyond your
control, such as bad drivers.
Most accidents occur within 25 miles (40 km)of
home. And the greatest number of serious injuries
and deaths occur at speeds of less than 40 mph
(65 km/h).
Safety belts are for everyone.
Air bags are in many vehicles today and will be
in more of them in the future.But they are
supplemental systems only; so they work with
safety belts -- not instead of them. Every air bag
system ever offered for salehas required the use of
safety belts. Even if you’re in a vehicle that has air
bags, you still have to buckle up to get the most
protection. That’s true not only in frontalcollisions,
but especially in side and other collisions.
1-9
How to Wear Safety BeltsProperly
Driver Position (2-Door Models)
Adults
This part describes the driver’s restraint system. If you
have a four-door model, see “Driver Position (4-DOOr
Models)” later in this section.
This part is only for people of adult size.
Be awarethat there are special t h g s to know about
safety belts and children. And there are different rules
for smaller children and babies.
If a child will beriding
in your Pontiac,see the part of this manual called
“Children.” Follow thoserules for everyone’s
protection.
First, you’ll wantto know which restraint systems your
vehcle has.
We’ll start with the driver position.
1-10
Lap-Shoulder Belt (2-Door Models)
The driver has a lap-shoulder belt. Here’s howto wear it
properly.
1. Close and lock the door.
2. Adjust the seat(to see how, see “Seats” in the Index)
so you can sit up straight.
I
3. Pick up the latch plate and pull the belt across you.
Don’t let it get twisted.
4. Push the latch plate into the buckle until it clicks.
Pull up on the latch plate to make sure it issecure. If
the belt isn’t long enough, see “Safety Belt
Extender’’ at theend of this section.
Make sure the release buttonon the buckle is
positioned so you would be able to unbuckle the
safety belt quickly if you ever hadto.
The lap part of the belt shouldbe worn low and snugon
the hips,just touching the thighs. In a crash, this applies
force to the strong pelvic bones. And you’d
be less likely
to slide under the lap belt.If you slid underit, the belt
would apply force at your abdomen. This could cause
serious or even fatal injuries. The shoulder belt should g
over the shoulder and across the chest. These parts
of the
body are best ableto take belt restraining forces.
The safety belt locks if there’s a sudden stop or
crash.
1-11
@
What’s wrong with this?
A:
The shoulder beltis too loose. It won’t give nearly
as much protection thisway.
1-12
What’s wrong with this?
1-13
&.. What's wrong with this?
I
A:
The shoulder belt is worn under the arm. It should
be worn over the shoulder at all times.
1-14
Q:
What’s wrong with this?
A:
The belt is twisted acfQss the body.
1-15
To unlatch the belt, just push the buttonon the buckle,
The belt should go back out of the way.
Driver Position (4-Door Models)
This part describes the driver’s restraint system. If you
have a two-door model, see “Driver Position (2-Door
Models)’’ earlier in this section.
Lap-Shoulder Belt (4-Door Models)
The driver has a lap-shoulder belt. Here’s howto wear it
properly.
1. Close and lock the door.
2. Adjust the seat (to see how, see “Seats” in the Index)
so you can sit up straight.
I
Before you close the door, be sure the belt is out of the
way. If you slam the door on it, you can damage both the
belt and your vehicle.
1-16
4. Push the latch plate into the buckle until it clicks.
Pull up on the latch plate to make sure is
it secure. If
the belt isn’t long enough,see “Safety Belt
Extender” at the endof this section.
Make sure the release button
on the buckle is
positioned so you would be ableto unbuckle the
safety belt quicklyif you ever had to.
3. Pick up the latch plate and pull the belt across you.
Don’t let it get twisted.
The shoulder belt may lock if you pull the belt across
you very quickly.If this happens, let the belt go back
slightly to unlock it. Then pull the belt across you
more slowly.
5. To make the lap part tight, pull down on the buckle
end of the belt as you pull up on the shoulder belt.
1-17
The lap part of the belt should be worn low and snug on
the hips, just touching thethighs. In a crash, this applies
force to the strong pelvic bones. Andyou'd be less
likely to slide under the lap belt.If you slid underit, the
belt would applyforce at your abdomen.This could
cause serious or even fatal injuries. The shoulder belt
should go over the shoulder andacross the chest. These
parts of the body are best ableto take belt restraining
forces.
,
1-18
.A
The safety belt locksif there's a sudden stop or crash, or
if you pull the belt very quickly out of the retractor.
What’s wrong with this?
A:
The shoulder belt is too loose. It won’t give nearly
as much protection this way.
1-19
@
What’s wrong with this?
L
A:
I
1
I
I
I
I
I
The belt is buckled in the wrong place.
1-20
What's wrong with this?
I'
A:
The shoulder belt is worn under the arm. It should
be worn over the shoulder atall times.
1-21
What’s wrong with this?
A:
The belt is twisted across the body.
1-22
To unlatch the belt,just push the button on the buckle.
The belt should go backout of the way.
Supplemental Restraint System (SRS)
This part explains the Supplemental RestraintSystem
(SRS), or air bag system.
Your Pontiac has twoair bags -- one air bag for the
driver and another air bag for the right front passenger.
Here are the most important things to know about the a
bag system:
Before you close the door, be
sure the belt is out of the
way. If you slam the door on it, you can damage both the
belt and your vehicle.
There is an air bag readiness
light on the instrument
panel, which shows SRS
AIR BAG or the air bag
symbol.
The system checks theair bag’s electrical systemfor
malfunctions. The light tellsyou if there is an electrical
problem. See “Air Bag Readiness Light” in the Index
for more information.
1-24
How the Air Bag System Works
Where is the air bag?
The driver’s air bagis in the middle of the steering
wheel. The right front passenger’s air bag is in the
instrument panel on the passenger’s
side.
1-25
In any particular crash,no one can say whether an air
bag should have inflated simply because
of the damage
to a vehicle or because of what the repair costs were.
Inflation is determined by the
angle of the impact and
the vehicle’s deceleration. Vehicle damage
is only one
indication of this.
What makes anair bag inflate?
When should an air bag inflate?
The air bagis designed to inflate in moderateto severe
frontal or near-frontal crashes. The air bag will inflate
only if the impact speedis above the system’s designed
“threshold level.”If your vehicle goes straightinto a
wall that doesn’t move
or deform, the threshold level
is
about 9 to 15 mph (14 to 24 lufl/h). The threshold level
can vary, however, with specific vehicle design,so that
it can be somewhat above or below
this range. If your
vehicle strikes something that will move
or deform, such
as a parked car, the threshold level will be higher.
The
air bag is not designed to inflate in rollovers, side
impacts, or rear impacts, because inflation would not
help the occupant.
1-26
,
In a frontalor near-frontal impact of sufficient severity,
the air bag sensing system detects that the vehicle
is
suddenly stopping as a result of a crash.
The sensing
system triggersa chemical reactionof the sodium azide
sealed in the inflator.The reaction produces nitrogen
gas, which inflates the air bag.
The inflator, air bag, and
related hardwareare all partof the air bag modules
packed insidethe steering wheel andin the instrument
panel in front of the rightfront passenger.
How does an air bag restrain?
In moderate to severe frontal
or near-frontal collisions,
even belted occupants can contact the steering wheel
or
the instrument panel.The air bag supplements the
protection providedby safety belts. Air bags distribute
the force of the impact more evenly over the occupant’s
upper body, stopping the occupant more gradually. But
air bags would not help you in many types of collisions,
including rollovers and rear and side impacts, primarily
because an occupant’s motion
is not toward the air bag.
Air bags should never be regarded as a n y h n g more
than a supplement to safety belts, and then only in
moderate to severe frontalor near-frontal collisions.
What will you see after an air bag inflaters?
After the air bag inflates, it quickly deflates. This occurs
so quickly that some people may not even realize the air
bag inflated. Some components of the air bag module in
the steering wheel hub for the driver’s air bag, or the
instrument panel for theright front passenger’s bag, will
be hot for a short time, but the part of the bag that comes
into contact with youwill not be hot to the touch. There
will be some smoke and dust coming from vents in the
deflated air bags. Air bag inflation will not prevent the
driver from seeing or from being
able to steer the
vehicle, nor will it stoppeople from leaving the vehicle.
In many crashes severe enough to inflate an air bag,
windshields are broken byvehicle deformation.
Additional windshield breakage may also occur fi-om the
right front pas.senges air bag.
The air bags are designed to inflate only once. After
they inflate, you’ll need some new parts for your air
bag system. If you don’tget them, the air bag system
won’t be there to help protect you in another crash.
A new system will include air bag modulesand
possibly other parts. The service manual for your
vehicle covers the need to replace other parts.
1 3’1
Your vehicle is equipped with a alagnostic module,
which records information aboutthe alia bag system,
The module recordsMormation about the readiness
of the system, when the sensors are activated and
driver’s safety beltusage at deployment.
Let only qualified technicians work on your air bag
system. Improperservice can mean that your air bag
system won’t work properly.See your dealerfor
service.
Sewicing Your Air Bag-Equipped Pontiac
Air bags affect how your Pontiac shouldbe serviced.
There are parts of the air bag systemin several places
around your vehicle.You don’t want the system to
inflate while someone is working on your vehicle.Your
Pontiac dealer andthe 1995 Grand PrixService Manual
have information about servicing
your vehicle and the
air bag system.To purchase a service manual, see
“Service Publications’’in the Index.
The air bag system does not need
regular maintenance.
NOTICE:
If you damage the cover for the driver’s or the
right frontpassenger’s air bag, they may not
work properly. You may have to replace the
air
bag module in the steering wheel
or both theair
bag module and the instrument panel for the
right frontpassenger’s air bag. Do not openor
break theair bag covers.
1-28
Safety Belt Use During Pregnancy
Safety belts work for everyone, including pregnant
women. Like all occupants, they are more likely to be
seriously injured if they don’t wear safetybelts.
A pregnant woman should weara lap-shoulder belt, and
the lap portion should be wornas low as possible
throughout the pregnancy.
The best way to protectthe fetus is to protect the
mother. When a safety beltis worn properly,it’s more
likely that the fetus won’t be hurtin a crash. For
pregnant women, asfor anyone, the key to making
safety belts effective is wearing them properly.
Right Front Passenger Position
The right front passenger’s safety belt worksthe same
way as the driver’s safety belt. See “Driver Position,’’
earlier in this section.
On four-door models, when the shoulder beltis pulled
out all the way,it will lock. If it does, let it go back all
the way andstart again.
Center Passenger Position
Lap Belt
If your vehicle hasa bench seat, someone cansit in the
center position.
1-29
To make the belt shorter, pull its
free end as shown until
the belt is snug.
When you sitin a center seating position, you have a lap
safety belt, which has no retractor.
To make the belt
longer, tilt the latch plate and pull
it along the belt.
Buckle, position and releaseit the sameway as the lap
part of a lap-shoulder belt. If the belt isn’t long enough,
see “Safety Belt Extender’’ at the end
of this section.
Make sure the release button on the buckle
is positioned
so you would be able to unbuckle the safety belt quickly
if you ever had to.
1-30
Rear Seat Passengers
It‘s very important for rear seat passengers to buckle up!
Accident statistics show that unbelted people in’ther e a
seat are hurt more often in crashes than those who are
wearing safety belts.
Rear passengers who aren’t safety belted can be thrown
out of the vehicle in a crash. And they can strike others
in the vehicle who are wearing safety belts.
Rear Seat Outside Passenger Positions
U
Lap-Shoulder Belt
The positions next to the windows have lap-shoulder
belts. Here’s how to wear one properly.
1. Pick up the latch plate and pull the belt across you.
Don’t let it get twisted.
The shoulder belt may lock if you pullthe belt across
you very quickly. If this happens, let the beltgo back
slightly to unlock it. Then pull the belt across you
more slowly.
1-31
2. Push the latch plate into the buckle until it clicks.
Pull up on thelatch plate to make sure it is secure.
When the shoulderbelt is pulled out all the way, 11
will lock. If it does, let it go back all the way and
start again. If the beltis not long enough, see “Safety
Belt Extender”at the end of this section. Make sure
the release button onthe buckle is positioned so you
would be able tounbuckle the safety belt quicklyif
you ever had to.
3. To make the lap part tight, pull down on the buckle
end of the belt as you
pull up on the shoulder part.
1-32
The lap part of the belt should be wornlow and snug on
the hips,just touching the thighs. Ina crash, this applies
force to the strong pelvic bones. Andyou'd be less likely
to slide under the lap belt.
If you slid under it, the belt
would apply forceat your abdomen. This could cause
serious or even fatal injuries. The shoulder belt should go
over the shoulderand across the chest. These partsof the
body are best able to take belt restraining forces.
The safety belt locks if there's a sudden stop or a crash,
or if you pull the belt very quickly out of the retractor.
To unlatch the belt, just push the button on the buckle.
1-33
Rear Safety Belt ComfortGuides
for Children and Small Adults
@-DoorModels)
Four-door modelsmay have rear shoulder belt
comfort guides.
This feature will provide added comfort
for children who have
outgrown child restraints andfor small adults. The comfort
guides pull the shoulder beltsaway from the neck and head.
There is one guide for each outside passenger position in
the rear seat. You will find them tuckedin between the
1-34
seatback and theinterior body, about halfzway down the
edge of the seatback. Hereis -howyou should install the
comfort guides on the shoulderbelts:
1. Pull the elastic cord out from between the edgeof
the seatback and the interior body to remove the
guide from its storageclip.
2. Slide the guide under and past the belt. The elastic
cord must be under the belt. Then, place the guide
over the belt, and insert the two edges of the belt into
the slots of the guide.
3. Be sure that thebelt is not twisted and it lies flat.
The elastic cord must be under the belt and the
guide on top.
4. Buckle the belt around the child, and make sure that
the lap belt and the shoulder belt are secured properly
Make sure that the shoulder belt crosses the shoulder.
See “Safety Belts, Rear Seat Passengers’’
in the Index.
To remove and store the comfort guides,just perform
these steps in reverse order. Squeeze the belt edges
together so that you can take them outfrom the guides.
Pull the guide upward to expose its storageclip, and
then slide the guide onto theclip. Rotate the guide and
clip inward and in between the seatback and the interior
body, leaving only theloop of elastic cord exposed.
1-35
Children
Everyone in a vehicle needs protection! That includes
infants and all children smaller than adult size. In fact,
the law in every statein the United States and in every
Canadian province sayschildren up to some age must be
restrained while ina vehicle..
1-36
Smaller Children and Babies
1-37
Child Restraints
Be sureto follow the instructions for the restraint. You
may find these instructionson the restraint itselfor in a
booklet, or both. These restraints usethe belt system in
your vehicle, but thechild also has tobe secured within
of personal injury.
the restraint to help reduce the chance
The instructions that comewith the infant or child
restraint will show you how to do that,
Where to Put the Restraint
Accident statistics show that children are safer
i€ they
are restrained in the rear rather than the front seat.
We at
General Motors therefore recommendthat you put your
child restraintin the rear seat.Never put a rear-facing
child restraint in the front passenger seat. Here’s why:
Wherever you install it, be sure to secure the child
restraint properly.
Keep in mind that an unsecured child restraint
can move
around ina collision or sudden stop and injure people in
the vehicle. Be sure to properly secure any child
restraint in your vehicle-- even when no childis in it.
1-38
Top Strap
Your dealer can obtain thehardware kit and install it for
you, or you may install it yourself using theinstructions
provided in the kit.
Use the tetherhardware kit available from the dealer.
The hardware and installationinstructions were
specifically designedfor this vehicle.
Securing a Child Restraint in aRear
Outside Seat Position
If your childrestraint has a top strap,it should be
anchored. If you need to have an anchor installed, you
can ask your Pontiac dealerto put it in for you. If you
want to install an anchor yourself, your dealer can tell
you how to do it.
For cars first sold in Canada, child restraints with a top
strap must be anchored according to Canadian Law.
You’ll be using the lap-shoulderbelt. See the earlier part
about the topstrap if the child restraint hasone.
1 . Put the restraint on the seat. Follow the instructions
for the child restraint.
2. Secure the child in the child restraint as the
instructions say.
3. Pick up the latch plate, and run thelap and shoulder
portions of the vehicle’s safety belt through
or
1-39
around the restraint.The child restraint instructions
will show you how.
If the shoulder beltgoes in front of the child's face or
neck, put it behind thechild restraint.
4. Buckle the belt.Make sure the release button is
positioned so you would be ableto unbuckle the
safety belt quicklyif you ever had to.
1-40
5. Pull the rest of the shoulder belt all theway out of
the retractor to set the lock.
6. To tighten the belt, feed the shoulder beltinto the
retractor while you push down on the child restraint.
Securing a Child Restraint in the Center
Rear Seat Position
n
U
You’ll be using thelap belt.
7. Push and pull the child restraint in different
directions to be sure it is secure.
To remove the child restraint,just unbuckle the vehicle’s
safety belt and letit goback all the way.The safety belt
will move freely again andbe ready to work for an adult
or larger child passenger.
1-41
See the earlier part about the top strap if the child
restraint has one.
1. Make the beltas long as possible by tilting the latch
plate and pulling italong the belt.
2. Put the restraint on theseat. Follow the instructions
for the child restraint.
1-42
3. Secure the child in the child restraint as the
instructions say.
4. Run the vehicle’s safetybelt through or around the
restraint, The child restraint instructions willshow
you how.
5. Buckle the belt. Makesure the release button is
positioned so you would be able to unbuckle the
safety belt quickly if you ever had to.
6 . To tighten the belt, pull its free end while you push
down on the child restraint.
7. Push and pull the child restraint in different
directions to be sure it is secure. If the child restraint
isn’t secure, turnthe latch plate over andbuckle it
again. Then see if it is secure. If it isn’t, secure the
restraint in a different place in the vehicle and
contact the child restraint maker
for their advice
about how to attach the child restraint properly.
To remove the child restraint,just unbuckle the vehicle’s
safety belt. It will be readyto work for anadult or larger
child passenger.
Securing a Child Restraint in the Right
Front Seat Position@Door Models)
i‘;
I
I
!;
i1
I
VL
If you have a two-door model, see “Securing
a Child
Restraint in the Right Front
Seat Position (2-Door
Models)” later in this section.
Your vehicle has a right front passenger
air bag. Never
put a rear-facing child restraint in this seat. Here’s why:
1-43
You’ll be using the lap-shoulder belt. See the earlier part
about the top strap if the child restraint has one.
1. Because your vehiclehas a right front passenger air
bag, always move theseat as far back as it will go
before securinga forward-facing child restraint. (See
“Seats” in the Index.)
2. Put the restraint on the seat. Follow the instructions
for the child restraint.
3. Secure the child inthe child restraint as the
instructions say.
4. Pick up the latch plate, and run the lap and shoulder
or
portions of the vehicle’s safety belt through
around the restraint. The child restraint instructions
will show you how.
If the shoulder belt goesin frontof the child’s face or
neck, putit behind thechild restraint.
5. Buckle the belt.
Make sure the release button is positionedso you
would be able to unbucklethe safety beltquickly if
you ever had to.
1-44
6. Pull the rest of the shoulder belt all the way outof
the retractor to set the lock.
7. To tighten the belt, feed the shoulderbelt back into
the retractor while you push down on the child
restraint.
8. Push and pull the child restraint in different
directions to be sure it is secure.
To remove the child restraint,just unbuckle the vehicle’s
safety belt and let it go back all the way.
The safety belt will movefreely again andbe ready to
work for an adult or larger child passenger.
1-45
Securing a Child Restraintin the Right
Front Seat Position (2-Door Models)
U
If you have a four-door model, see “Securing a Child
Restraint in the Right FrontSeat Position @-Door
Models)” earlier in this section.
Your vehicle has a right front passenger air bag. Never
put a rear-facing child restraint in this seat. Here’s why:
1-46
To use a child restraint here, you will need a special
infantkhild seat attaching belt and the hardware that
goes with it. See the earlier part about the top strap
if the
child restraint has one.
Your dealer can order the belt and attaching hardware
and install the hardware for you. It’s free.
The special
belt is GM Part No. 12340286. Your dealer can find the
part number for the correct attaching hardware in the
accessory section of the GM Parts Catalog.
Once the special hardware is installed, please follow
the
instructions with it and these steps:
1. Because your vehicle has a rightfront passenger air
bag, always move the seat as far back itaswill go
before securing a forward-facing child restraint. (See
“Seats” in the Index.)
1-47
2, Snag one hook of the infantkhild seat attaching belt
near the floor at the door side of the seat.
3. Put the belt’s special latch plate into the vehicle’s
safety belt buckle.
4. You can make the belt longer by tilting the buckle
and pulling it along the belt.
7. Run the belt through or around the child restraint.
The child restraint instructions will show you how.
8. Put the hook on thefree end through the slot in the
latch plate.
5. Put the restraint on the seat. Follow the instructions
for the child restraint.
6. Secure the child in the child restraint as the
instructions say.
1-49
9. To make it tight, pull the beltwhile you push down
on the child restraint. If the belt won’t stay tight,
switch it end for end.
directions to be sure it is secure.
To remove the child seat restraint;
1. Push the button on the safety belt buckle and remove
on the
the special latch plate. Leave the latch plate
special belt.
2. Push the spring on the hook near thedoor and
remove the special belt.
3. Put the belt away in a safe place in your vehicle, so it
won’t fly around in a crash and injure someone.
1-50
Larger Children
If you have the choice, a child should sit nextto a
window so the child can wear a lap-shoulder belt and
get the additional restrai.nta shoulder belt can provide.
Accident statistics show that childrenare safer if they
are restrained in the rear seat. But they needto use the
sa€ety belts properly.
Children who aren’t buckledup can be thrown out in
a crash.
Children who aren’t buckled up can strike other
people who are.
Children who have outgrown childrestraints should
wear the vehicle’s safetybelts.
1-51
1-52
Q:
What if a child is wearing a lap-shoulder belt,
but the childis BO small that the shoulder belt
is
very close tothe child’s face or neck?
A:
Move the child towardthe center of the vehicle, but
be sure that the shoulderbelt still is on the child’s
shoulder, so that in a crash the child’s upper body
If the
would have the restraint that belts provide.
child is sitting in a rearseat outside position, see
“Rear Safety Belt Comfort Guides”
in the Index.
If the child isso small that the shoulder belt
is still
very close to the child’sface or neck,you might
want to place the child in the center
seat position,
the one that has only lap
a belt.
Wherever the child sits, the
lap portion of the belt
should beworn low and snug on the hips,
just touching
the child’s thighs. This applies belt force to the child’s
pelvic bones in a crash.
1-53
Safety Belt Extender
. If the vehicle’s safety belt will fasten around you, you.
RepIacing Seat and Restraint System
Parts After a Crash
should useit.
If you’ve hada crash, do you need newbelts?
But if a safety belt isn’tlong enough to fasten, your
dealer will order you an extender. It’sfree. When you go
in to order it,take the heaviest coat you will wear,so the
extender will be long
enough for you. The extender will
be just for you, andjust forthe seat in your vehiclethat
you choose. Don’t letsomeone else use it, and use it
only for the seat it is made tofit. To wear it, just attach it
to the regular safety belt.
After a very minorcollision, nothing maybe necessary.
But if the belts werestretched, as they would beif worn
during a more severecrash, then you need new belts.
Checking Your Restraint Systems
Now and then, makesure all your belts, buckles, latch
plates, retractors, anchorages and reminder systems are
working properly. Look for any other looseor damaged
restraint system parts. If you see anything that might
keep a restraint systemfrom doing its job,have it
repaired.
Torn or frayed belts may not protect you in a crash.
They can rip apart under impactforces. If a belt is torn
or frayed, get a new one right away.
1-54
If belts arecut or damaged, replace them. Collision
damage also may mean you will need tohave safety belt
or seat parts repairedor replaced. New parts and repairs
may be necessary even if
the belt wasn’t being used at
the time of the collision.
v
Section 2 FeaturesandControls
Here you can learn about the many standard and
optional features on your Pontiac, and informationon
starting, shifting and bralung.Also explained are the
instrument panel and the warning systems that tell you
if
everything is working properly -- and what todo if you
have a problem.
Keys
2-1
The ignition keys are
for the ignition only.
The ignition keys don’t haveplugs. Your Pontiac dealer
or Roadside Assistance has the code
for your keys.
Each plug hasa code on it that tells yourdealer or a
qualified locksmith how to make extra door keys. Keep
the plugsin a safe place.If you lose your doorkeys,
you’ll be able to
have new ones made easily using these
plugs.
If you need a new ignition key, contact your Pontiac
dealer who can obtain thecorrect key code, or,in an
emergency, call Pontiac Roadside Assistance at
1-800-ROADSIDD or 1-800-762-3743.
The door keys arefor the
doors and all other locks.
NOTICE:
Your Pontiac has a number of features that
can
help prevent theft. But you
can have a lot of
trouble getting into your vehicle if you ever lock
your keys inside.You may even have to damage
your vehicle to get
in.So be sure you have extra
keys.
When a new Pontiacis delivered, the dealer removes the
plugs from the door keysand gives themto the first
owner.
Door Locks
There are several ways to lock and unlock your vehicle.
From the outside, use yourdoor key or Remote Lock
Control, if your vehiclehas this option.
2-3
Automatic Door Locks
Just close your doors and turn on the ignition. All of the
doors will lock when you moveyour shift lever out of
PARK (P) or NEUTRaL (N). All doors will unlock
automatically whenthe ignition is turned off.
If someone needsto get out while the vehicle is running,
have that person use
the manual or power lock. When
the door is closed again, it will lock automatically
as long as theshift lever is out of PARK (P)or
NEUTRAL (N) andthe ignition is on. Note that the
door must be opened, thenclosed, or the door will not
automatically relock.
From the inside, slide the lever back to lock the door.To
unlock, slide the lever forward.
Power Door Locks
Press the power door lockswitch to lock or unlock all
doors.
On four-door models, the reardoors do not have power
door lock switches. The lever on each rear door works
only that door’s lock.It won’t lockor unlock all the
doors.
2-4
If you don’t want the doors to unlock automatically
when you turn the ignition off, you can remove the Lock
Control fuse in the instrument panelfuse block. See
“Fuses and Circuit Breakers” in theIndex.
Leaving Your Vehicle
If you are leaving the vehicle, take yourkeys, open your
door andset the locks from inside. Then getout and
close the door.
Remote Lock Control (Option)
Should interference to this system occur, try this:
If your Pontiac has this option, you can lock and unlock
your doors or unlock your trunk from up to 30 feet (9 m)
away using the key chain transmitter supplied with your
vehicle.
0
Check to determine if battery replacement
is
necessary. See the instructions on battery
replacement.
0
Check the distance.You may be toofar from your
vehicle. This product has a maximum range.
Your Remote Lock Control operates on a radio
frequency subject to Federal Communications
Commission (FCC) Rules.
This device complies with Part15 of the FCC Rules.
Operation is subject tothe following two conditions:
(1) This device may not cause harmful interference, and
( 2 ) This device must accept any interference received.
including interference that may cause undesired
operation.
a Check the location. Other vehicles
or objects may be
blocking the signal.
0
See your Pontiac dealeror a qualified technicianfor
service.
an
Changes or modifications to this system by other than
authorized service facility could void authorization
to
use this equipment.
2-5
Operation
Matching ab-ansmitter(s) To Your Vehicle
Press UNLOCK once to
unlock the driver’s door.
Press UNLOCK again
within five seconds to
unlock all the doors.The
interior lamps willcome on
(see ‘‘Sustained Interior
Illumination” in the Index
for more details).
To lock all doors, press DOOR. To unlock the tmnk,
press the trunk symbol on the transmitter. The trunk will
only unlockif your transaxleis in PARK (P) and your
ignition is in LOCK, OFF or ACC.
2-6
Each key chain transmitteris coded to prevent another
transmitter from unlocking your vehicle.
If a transmitter
is lost or stolen,a replacement can be purchased
through
your dealer. Rememberto bring any remaining
transmitters with you when you go to your dealer. When
the dealer matchesthe replacement transmitter to your
vehicle, the remainingtransmitters must also be
matched. Once the newtransmitter is coded, thelost
your vehicle.
transmitter will not unlock
You can match a transmitter to as many different
vehicles as you own, provided they are equipped with
exactly the same model system. (General Motors offers
several different modelsof these systems ontheir
vehicles.) Each vehicle can have only two transmitters
matched to it.
See your dealer to match transmitters to another vehicle.
Battery Replacement
To replace your batteries:
Under normal use, the batteries in your key chain
transmitter should last abouttwo years.
1. 1nse.da flat object like a dime into the slot onthe
back of the transmitter. Gentlypry apart the front
and back.
You can tell the batteries are weak if the transmitter
won’t work at the normalrange in anylocation. If you
have to get close to your vehicle before the transmitter
works, it’s probably time to change the batteries.
2. Gently pry the batteries out of the transmitter.
3. Put the new batteries into the transmitter as shown
on the transmitter. Use Duracell@batteries, type
DL20 16, or equivalent.
4. Put the two halves back together. Makesure the
halves are together tightly so water won’t get in.
5. Test the transmitter.
2-7
Trunk Lock
Remote Trunk Release (Option)
Press the buttonbehind the
glove box door to unlock
the trunk from inside your
vehicle. Your transaxle shift
lever must be inPARK (P).
Remember that your trunk
can be opened at any time
using this lock release. Be sure to lock yourdoors.
2-8
Glove Box
Use the door key to lock and unlock theglove box. To
open, lift the latch.
2-9
Theft
Parking at Night
Vehicle theftis big business, especially in some cities.
Although your Pontiac has
a number of theft deterrent
features, we know that nothing we put on
it can make it
impossible to steal. However, there are ways you can
help.
Park in a lighted spot, close all windows andlock your
vehicle. Rememberto keep your valuablesout of sight.
Put them ina storage area,or take them with you.
Key in the Ignition
If you walk awayfrom your vehicle with the keys
inside, it’s an easy targetfor joy riders or professional
thieves -- so don’t do it.
When you park yourPontiac and open the driver’s door,
you’ll hear a chime reminding you to remove your key
from theignition and takeit with you. Always do this.
Your steering wheelwill be locked, andso will your
ignition and transaxle. And remember
to lock the doors.
2-10
Parking Lots
If you parkin a lot where someone will be watching
your vehicle, it’s best tolock it up and take yourkeys.
But what if you have to
leave your ignition key? What if
you have to leave something valuable in your vehicle?
0
Put your valuablesin a storage area, like your trunk
or glove box.
0
Lock the glove box.
0
Lock all the doors except the driver’s.
0
Then take the door key with you.
Clean and dry the key. Wait about
three minutes and try
again. The security light may remain on during this
Your vehicle is equipped
time. If the starter still won’t work, and the key appears
to be clean and dry, wait about three minutes and try
with the PASS-Key@II
another ignition key. At this time, you may also want
to
(Personalized Automotive
check the fuse (see “Fuses andCircuit Breakers” in the
Security System) theft
Index). If the starter won’t work with the other key, your
deterrent system.
vehicle
needs service. If your vehicle doesstart, the first
PASS-Key@IIis a passive
ignition key maybe faulty. See your Pontiac dealer or a
theft deterrent system. This
locksmith who can service the PASS-Key@II.
means you don’t have todo
anything different to arm or
If you accidentally use a key that has a damaged or
disarm the system.
missing resistor pellet, the starter won’t work, and the
SECURITY light will flash. But you don’t haveto wait
It works when youinsert or remove the key from the
three
minutes before trying another ignition key.
ignition. PASS-Key@II uses aresistor pellet in the
ignition key that matches a decoder
in your vehicle.
See your Pontiac dealer or a locksmith who can service
the PASS-Key@IIto have a new key made.
When the PASS-Key@II system senses that someone is
using the wrong key, it shuts down the vehicle’s starter andIf you’re ever driving and the SECURITY light comes on
fuel systems. For about three minutes, the starter won’t
if you turn it off.
you will be able to restart your engine
work and fuel won’t goto the engine. If someone tries to
Your PASS-Key% system, however, is not working
start your vehicle again or uses another key during this
properly and must be serviced by your Pontiac dealer.
time, the vehicle will not start. This discourages someone
Your vehicle is not protected by the PASS-Key% system.
from randomly trying different keys with different resistor If you lose or damage a PASS-Key@II ignition key, see
pellets in an attempt to make a match.
your Pontiac dealer or a locksmith who can service
The ignition key must be clean and dry before it’s
PASS-Key@IIto have a new key made. In an
inserted in the ignition or the engine may not start.
If the
emergency, call the Pontiac Roadside Assistance
engine does not start and the
SECURITY light is on, the
Program at 1-800-ROADSIB or 1-800-762-3743.
key may be dirty or wet. Turn the ignition off.
2-11
New Vehicle “Break-In”
Ignition Switch
NOTICE:
Your modern Pontiacdoesn’t need an elaborate
“break-in.” But it will perform better in the
long
run if you follow these guidelines:
Don’t drive at any one
speed fast or
500 miles (804 km).
slow for the first
Don’t make full-throttle starts.
Avoid making hard stops for the first
200 miles (322 km) or so. During this time
your new brake linings aren’tyet broken
in. Hard stops with new linings can mean
premature wear and earlier replacement.
Follow this “breaking-in” guideline every
time you get new brake linings.
Don’t tow a trailer during “break-in.”See
“Towing a ”railer’’ in the Index for more
information.
--
2-12
--
With the ignition key in the ignition switch, you
can turn
the switch tofive positions:
ACC (A): This position lets you use thingslike the
radio and windshield wipers when the engine
is off. To
use ACC, push in the key and turn
it toward you. Your
steering wheel will stay locked.
LOCK: Before you put the keyinto the ignition switch,
the switch is in LOCK. It’s also the only position in
which you can removeyour key. This position locks
your ignition, steering wheel and transaxle. It’s a
theft-deterrent feature.
OFF (B):This position lets you turn off the engine but
still turn the steering wheel. It doesn’t lock the steering
wheel like LOCK. Use OFF if you must have your
vehicle pushed or towed.
RUN (C): This position is where the key returns after
you start your vehicle. With the engine
off, you can use
RUN to displaysome of your warning and indicator
lights.
START (D): This position starts your engine.
A warning chime will sound if you open the driver’s
door when the ignitionis in OFF, LOCK or ACC and
the key is in the ignition.
NOTICE:
If your key seemsstuck inLOCK and you can’t
turn it, besure itis all the way
in. If it is, then
turn the steering
wheel leftand rightwhile you
turn the key hard. But turn key
the only with
your hand. Using a tool to force it could break
the key or the ignition
switch. If none of this
works, then yourvehicle needs service.
Starting Your Engine
Move your shift lever to
PARK (P) or NEUTRAL (N).
Your engine won’t start in any other position
-- that’s a
safety feature. To restart when you’re already moving,
use NEUTRAL (N) only.
NOTICE:
Don’t try to shift to
PARK (P) if your Pontiac is
moving. If you do, you could damage the
transaxle. Shift toPARK (P) only when your
vehicle is stopped.
2-13
To start yourengine:
1. Without pushing the accelerator pedal, turn your
ignition key to START. When the engine starts, let
go of the key. The idle speed willgo down as your
engine gets warm.
NOTICE:
Holding your key in
START for longer than
15 seconds at a time will cause your battery to
be drained muchsooner. And theexcessive heat
can damage your starter
motor.
2. If your engine won’tstart (or starts but then stops),
it could be flooded with too much gasoline. Try
pushing your acceleratorpedal all the way to the
floor and holdingit there as you holdthe key in
START for about three seconds.If the vehiclestarts
briefly but then stopsagain, do the same thing, but
this time keep the pedal downfor fiveor six seconds.
This clears the extra gasoline from the engine.
2-14
Your engine is designed to workwith the
electronics in your vehicle. If’you add electrical
parts or accessories, youcould change the way the
fuel injection system operates. Before
adding
electrical equipment, check with yourdealer. If you
don’t, your engine might not perform properly.
If you ever have to have your
vehicle towed, see
the partof this manual that tells
how to do it
Driving Through Deep Standing
Water
NOTICE:
If you drive too quicklythrough deep puddles
or standingwater, water cancome in through
your engine’s air intake and badly damage your
engine. Never drive through water that
is slightly
lower than the underbodyof your vehicle. If you
can’t avoid deep puddlesor standing water, drive
through themvery slowly.
Engine Coolant Heater (Option)
In verycold weather, 0 O F (- 18 O C) or colder, the engine
coolant heater can help. You’ll get easier starting and
better fuel economy during engine warm-up. Usually,
the coolant heater should be pluggedin a minimum of
four hours priorto starting your vehicle.
To use the coolant heater:
1. Turn off the engine.
2. Open the hood and unwrap the electrical cord.
3. Plug it into a normal, grounded 110-volt outlet.
NOTICE:
After you’ve used the coolant heater, besure to
store the cord as it was before to keep it away
from moving engine parts. If you don’t, it could
be damaged.
How long should youkeep the coolant heater plugged
in? Theanswer depends on the weather, the kind of oil
you have, and someother things. Instead of trying to list
everything here, we ask that youcontact your Pontiac
dealer in the area where you’ll be parking your vehicle.
The dealer can give you the best advice for that
particular area.
2-15
Automatic Transaxle
Your automatic transaxle mayhave a shiftlever on the
steering column or on the console between the seats.
Maximum engine speedis limited on automatic
transaxle vehicles, when you’re in
PARK (P) or
NEUTRAL (N), to protect driveline components from
improper operation.
There are several different positionsfor your shift lever.
2-16
PARK (P):This locks your front wheels, It’s the best
your
position to use when you start your engine because
vehicle can’t move easily.
Make sure the shift lever is fully into
PARK Cp)
range before starting the engine.
Your Pontiac has a
brake-transaxle sWt interlock. You must fully apply
your regular brakes before you can shift from
PARK ‘(I?)
when the ignition is in RUN. If you cannot shift outof
PARK (P), ease pressure on theshift lever by pushing it
all the way into PARK (9) while keeping the brake pedal
a
pushed down. Release the shift lever button if you have
console shift. Then move theshift lever outof PARK (P),
being sure to press the shift lever button if you have
a
console shift. See “Shifting Out
of PARK (P)” in
the Index.
NEUTRAL (N): In this position, your engine
doesn’t connect with the wheels. To restart when you’re
already moving, use NEUTRAL (N) only. Also, use
NEUTRAL (N) when your vehicleis being towed.
REVERSE (R):Use this gear to back up.
NOTICE:
Shifting to REVERSE (R) while your vehicle
is
moving forward could damage your transaxle.
Shift to REVERSE (R) only after your vehicle is
stopped.
To rock your vehicle back and forth to get out of snow,
ice or sand without damaging your transaxle, see
“Stuck: In Sand, Mud, Ice or Snow” in the Index.
NOTICE:
Damage to your transaxle caused by shifting out
of PARK (P) or NEUTRAL (N) with the engine
racing isn’t covered by your warranty.
2-17
DRIVE 0):
This position is for normal driving.
If you vehicle has overdrive, DRIVE (D) is the
overdrive position. If you need more powerfor passing,
and you’re:
Going less than 35 mph (55 km/h), push your
accelerator pedal about halfway down.
THIRD (3): You have this position if your vehicle has
overdrive. THIRD (3) is like DRIVE (D), but you never
go into overdrive.
Here are some times you might
choose THIRD (3)
instead of DRIVE (D):
0
When driving on hilly, winding roads.
Going about 35 mph (55 km/h) or more, push the
accelerator pedalall the way down.
When towing a trailer, so there is less shifting
between gears.
You’ll shift down to the next gear and have more
power.
When going down a steep hill.
I NOTICE:
If your vehicle seems to start up rather
slowly, or
if it seems notto shift gears as
you go faster,
something maybe wrong witha transaxle system
sensor. If you drive very far that
way, your
vehicle can be damaged. So, if this happens, have
your vehicle serviced right away. Until then,you
can use SECOND (2) when you are drivingless
than 35 mph (55 km/h) and DRIVE (D) for
higher speeds.
2-18
SECOND (2): This position gives you more power but
lower fuel economy. You can use SECOND ( 2 ) on hills.
It can help control your speed as yougo down steep
mountain roads, but then you wouldalso want to use
your brakes off andon.
FIRST (1): This position gives you even more power
(but lower fuel economy) than SECOND (2). You can
use it on very steep hills, or in deep snowor mud. If the
shift lever is put in FIRST (l),the transaxle won’t shift
into first gear until the vehicle is going slowly enough.
NOTICE:
NOTICE:
Don’t drive in SECOND(2) for more than
5 miles (8 km), or atspeeds over55 mph
(88 km/h), or you can damage your transaxle.
Use DRIVE (D) or THIRD (3) as much as
possible.
Don’t shift intoSECOND (2) unless you are going
slower than 65 mph (105 km/h), or you can
damage yourengine.
If your frontwheels can’t rotate, don’ttry to
drive. This mighthappen if you were stuck in
very deepsand or mud or were up againsta solid
object. You could damage your transaxle.
Also, if you stop when going uphill, don’t hold
your vehicle there withonly the accelerator
pedal. This could overheatand damage the
transaxle. Use your brakes or shift into
PARK (P)
to hold your vehicle in position on hill.
a
2-19
Second-Gear Start (Option)
Your vehicle may be
equipped with a
Second-Gear Start feature.
The button is below the
lamp controls.
Press 2ND GEAR START to provide more traction
when you are startingon ice or other slippery surfaces.
The transaxle will be in second gear whenthe vehicle
begins to move. After starting in second gear, the
vehicle will upshift normally.
2-20
The SECOND GEAR
START light on the
instrument cluster will
come on when thisfeature
is active.
This feature is only for improved traction when the road
surface is slippery andis not intended for continuous
use. Press the switchto turn off the feature. Leave the
switch off for normal road conditions.
Parking Brake
The parking brake uses the brakes on the rear wheels.
To set the parking brake,
hold the regular brake pedal
down with your right foot.
Push down the parking
brake pedal with your left
foot.
NOTICE:
Driving with the parking brakeon can cause
your rear brakes to overheat. You may have to
replace them, and youcould also damage other
parts of your vehicle.
If you are towing a trailer and are parking on any hill,
see “Towing a Trailer” in the Index. That sectionshows
what to do first to keep the trailer from moving.
To release the parking brake, holdthe regular brake
pedal down withyour right foot and push the parking
brake pedal withyour left foot. When you lift your left
foot, the parking brake pedal will follow
it to the
released position.
2-21
Shifting Into PARK (P)
Pull the lever toward
you.
Move the lever up as far
as it will go.
Column Shift
1, Hold the brake pedal down with your right foot and
set the parking brake.
?. Move the shift lever into PARK (P) position
like this:
3. Move the ignition key toLOCK.
4. Remove the key and takeit with you. If you can
walk away from your vehicle with the ignition key
in your hand, your vehicleis in PARK (P).
Console Shift
1. Hold the brake pedal down with your right foot
and
set the parking brake.
Leaving Your Vehicle With the Engine
Running
2. Move the shift lever into PARK (P) position like
this:
Hold in the buttonon the
lever, and push thelever all
the way toward thefront of
your vehicle.
3. Move the ignition key to LOCK.
4. Remove the key andtake it with you. If you can
walk away from your vehicle with the ignition key
in yourhand, your vehicle is in PARK (P).
If you haveto leave your vehicle with the engine
running, be sure your vehicleis in PARK (P) and your
parking brake is firmly set before you leave
it. After
you’ve moved the shift lever into the PARK(P)
position, hold the regular brake pedal down. Then, see
if you can move the shift lever away
from PARK (P)
without first pulling it toward you (or,if you have. a
console shift lever, without first pushing the button).If
you can, it means that the shiftlever wasn’t fully locked
into PARK (P).
2-23
Torque Lock
Shifting Out of PARK (P)
If you are parking on a hill and you don’tshift your
transaxle into PARK (P) properly, the weight of the
vehicle may put to@ much
force on the parking pawlin
the transaxle. You may find it difficult to pull the shift
lever out of PARK (P). This is called “torque lock.”To
prevent torquelock, set the parking brake and then
shift
into PARK (P) properly before you leavethe driver’s
seat. To find out how, see “Shifting Into PARK (P)” in
the Index.
Your Pontiac has a brake-transaxle shift interlock. You
must fully apply your regular brakes before you can
shift from PARK (P) when the ignition is in RUN. See
“Automatic Transaxle” in the
Index.
When you are ready to drive, move the shift lever out of
PARK (P) before you release the parking brake.
If “torque lock” does occur, you may need to have
another vehicle push yours a little uphill totake some of
the pressure from the transaxle, so you can pull the shift
lever out of PARK (P).
lr you cannot shift outof PARK (P), ease pressure on
the shiftlever by pushing itall the way into PARK (P)
while keeping the brake pedal pushed down. Release the
shift lever button if you have a console shift. Then move
the shift lever outof PARK (P), being sureto press the
shift lever button if you havea console shift.
If you ever hold the brake pedal down but
still can’t
shift out of PARK (P), try this:
1. Turn the key to OFF.
2. Apply and hold the brake until theend of Step 4.
3. Shift to NEUTRAL (N).
4. Start the vehicle and shift to the drive gear you want.
5. Have the vehiclefixed as soon as you can.
2-24
Parking Over Things That Burn
Engine Exhaust
2-25
Running Your Engine WhiIe You’re
Parked
It’s better not to park with the engine running. Butif you
ever have to, here are some things to h o w .
Follow the proper steps to besure your vehiclewon’t
move. See “Shifting Into PARK (P)” in the Index.
If you areparking on a hill and if you’re pullinga
trailer, also see “Towing a Trailer” in the Index.
2-26
Power Windows
The driver’s window switch has an auto-down feature.
This switch is labeledAUTO. Tap the rearof the switch,
and the driver’s window will open a small amount.
If
the rear of the switchis pressed all theway down and
released, the window willgo all the way down.
To stop the window whileit is lowering, press the front
of the switch.To raise the window, press and hold the
front of the switch.
also
On four-door models, the driver’s window controls
include a lock-out switch. Press
LOCK OUT to stop
front and rear passengersfrom using their window
switches. The driver can still control all the windows
with thelock on. PushLOCK OUT again for normal
window operation. When the orange band on the switch
is showing, the passengers can operate their windows.
of the
Switches on the driver’s door armrest control each
windows when the ignitionis on. In addition, each
passenger door has a switch
for its own window.
Horn
Press either horn symbolon your steering wheelto
sound the horn.
2-27
Tilt Steering Wheel
Turn Signal/Multifunction Lever
A tilt steering wheel allows
you to adjust the steering
wheel before youdrive. You
can also raise it to the
highest level to give your
legs more room when you
exit and enter the vehicle.
To tilt the wheel, hold the
steering wheel and pull the
lever. Move the steering wheelto a comfortablelevel,
then release the lever to lock the wheel inplace.
The lever on theleft side of the steering column
includes your:
Turn Signal and Lane Change Indicator
Headlamp HigWLow Beam
WindshieldWipers
WindshieldWasher
0
2-28
CruiseControl(Option)
Turn Signal and LaneChange Indicator
The turn signal has two upward (for right) and two
downward (for left) positions. These positic allow you
to signal a turn or a lane change.
To signal a turn, move the lever all the way up or down.
When the turn is finished, the lever will return
automatically.
As you signal a turn or a lane change, if the arrows don’t
flash but just stay on, a signal bulb may be burnedout
and otherdrivers won’t see your turn signal.
If a bulb is burned out, replace it to help avoid an
accident. If the green mows don’t go on at all when you
signal a turn, check the fuse (see “Fuses and Circuit
Breakers” in the Index) and for burned-out bulbs.
r
l
WOW
A green arrow on the
instrument panel will flash
in the direction of the turn
or lane change.
To signal a lane change, just raise or lower the lever
until the green arrow starts to flash. Hold it there until
you complete your lane change. The lever will return by
itself when you release it.
A chime will sound if youleave your turn signal on for
more than 1/2 mile (0.8 km).
Headlamp Highbow Beam
1
To change your headlamps
from low beam to high
beam, or high to low, pull
the multifunctionlever all
the way toward you.Then
release it. When the high
beams are on, a blue light
on the instrument panel also
will be on.
2-29
Windshield Wipers
You control the windshield
wipers by turning the band
marked WIPER. For a
single wiping cycle, turn the
band to MIST. Holdit there
until the wipers start, then
let go. The wipers will stop
after one cycle. If you want
more cycles, hold the band
on MIST longer.
For steady wiping at low speed, turn the bandLO.
to For
high-speed wiping, turn the band further, to HI.To stop
the wipers, turn the band
to OFF.
You can set the wiper speed
for a longor short delay
between wipes. This canbe very useful in light rain
or
snow. Turn the band to choose the delay time.
The
closer to LO, the shorter the delay.
Be sure to clearice and snow from the wiper blades
before using them. If they’re frozen to the windshield,
carefully loosen or thaw them.
If your bladesdo become
damaged, get new bladesor blade inserts.
2-30
Heavy snow or ice can overload your wipers. A circuit
breaker will stopthem until the motorc001.s. Clear away
snow or ice to prevent an overload.
Windshield Washer
word PUSH on it. To spray
washer fluid on the
windshield, push the paddle.
The wipers willrun for
several sweeps and then
either stop or returnto your
preset speed.
NOTICE:
0
0
When using concentrated washer fluid,
follow the manufacturer’s instructions for
adding water.
Don’t mix water with ready-to-use washer
fluid. Water can cause the solution to freeze
and damage your washer fluid tank and
other partsof the washersystem. Also,
water doesn’t clean as well as washer fluid.
Fill your washer fluid tank
only 314 full
when it’s very cold. This allows for
expansion, which could damage the tank
if it is completely full.
Don’t use radiator antifreeze in your
windshield washer. It can damage your
paint.
Cruise Control (Option)
With cruise control, you can maintain a speedof about
25 mph (40 k m h ) or more without keeping yourfoot on
the accelerator.This can really helpon long trips. Cruise
control does not work at speeds below about25 mph
(40 W h ) .
When you apply your brakes, the cruise control shuts off.
2-31
To Set CruiseControl
To Resume a Set Speed
1. Move the cruise control switch to ON.
Suppose you set your cruise control at a desired speed
and then you applythe brake. This, of course, shuts off
the cruise control. But you don’t need toreset it.
2. Get up to the speed you want.
3. Push in the SET button
at the end of the lever
and release it.
To Increase Speed While UsingCruise Control
4. Take your foot off the
There are two ways to go to a higher speed. Here’s the
first:
accelerator pedal.
1. Use the accelerator pedal toget to the higherspeed.
2. Push in the SET button, then release the button and
the acceleratorpedal. You’ll now cruise at the higher
speed.
2-32
Here’s the second way to go to a higher speed:
Passing Another Vehicle While Using Cruise Control
0
Move the cruise switch from ON to WA. Hold it
there until you get up to the speed you want, and
then release the switch.
Use the accelerator pedal toincrease your speed. When
you take your foot off the pedal, your vehicle will slow
down to the cruise control speed you set earlier.
0
To increase your speed in very small amounts, move
the switch to WA for less than half a second and then
release it. Each time you do this,your vehicle will go
1 mph (1.6 km/h) faster.
Using Cruise Control on Hills
The accelerate feature will only work after you set the
the cruise control speed by pushing the SET button.
To Reduce Speed While Using Cruise Control
There are two ways toreduce your speed while using
cruise control:
0
Push in the SET button until you reach the lower
speed youwant, then release it.
0
To slow down in very small amounts, push the SET
button for less than half a second. Each time you do
this, you’ll go 1 mph (1.6 km/h) slower.
How well yourcruise control will work onhills depends
upon your speed, load and the steepness of the hills.
When going upsteep hills, you may have to step on the
accelerator pedal to maintain your speed. When going
downhill, you may haveto brake or shift to a lower gear
to keep your speed down.Of course, applying the brake
takes you outof cruise control. Many drivers find this to
be too much trouble and don’t usecruise control on
steep hills.
2-33
To Get Out of Cruise Control
Lamps
There are two ways toturn off the cruise control:
The lamp controls are on the instrument panel. They
control these systems:
Step lightly on the brake pedal; OR
Move the cruise switch
to OFF.
To Erase Cruise Speed Memory
When you turn off the cruise control or the ignition, or
shift into PARK (P) or NEUTRAL (N), your cruise
control set speed memory is erased.
2-34
0
Headlamps
0
Taillamps
0
Parking Lamps
0
License Lamps
0
Sidemarker Lamps
0
Instrument Panel Lamps
0
Courtesy Lamps
0
Fog Lamps
Fog Lamps
1
To turn the fog lamps on, press the top
of the fog lamp
switch (C). Press the bottomof the switch to turn the fog
lamps off. Your parking lamps must be on, or your fog
lamps won't come on.
~
I
The fog lamps will go off whenever you changeto
high-beam headlamps. When you returnto low beams,
thefoglampswill come onagain.
InstrumentPanelLamps
You can brighten or dim the instrument panel lampsby
moving the PANELdial. If you turn thedial all the way
up, your courtesy orinterior lamps will comeon.
Turn the knobto LAMPS (B) to turn on the headlamps
and other operating lamps.
Turn the knob to PARK (A) to turn on the parking and
other operating lamps withoutthe headlamps.
Turn the knob toOFF to turn off the lamps.
A warning chime will sound when you turn the ignition
switch to OFF, LOCK or ACC with the lampson.
Daytime Running Lamps (Canada Only)
Daytime Running Lamps (DRL) can makeit easier for
others to see thefront of your vehicle during the day.
DRL can be helpful in many different driving
conditions, but they can be especially helpful in the
short periods after dawn and before sunset.
A light sensor on topof the instrument panel makes the
DRL work, so be sure it isn't covered.
2-35
The D l U system will make your low-beam headlamps
come on at a reduced brightness when:
0
The ignition is on,
The headlamp switch is off, and
The parking brake is released.
When theDRL are on, only your low-beam headlamps
will be on.The taillamps, sidemarker and other lamps
won’t be on. Your instrument I
won’t be lit up
either.
.--
Interior Lamps
When any door is opened, several lamps come on.
These
lamps are courtesy lamps. They make
it easy for you to
enter and leave your vehicle.
You can also turn these
larnps on by moving the PANEL dial all the way up.
Some of the lamps have switchesso you can turn them
on, even when the doors
are closed. These lamps are
reading lamps.To avoid draining your battery, be sure to
turn off all reading lamps when leaving your
vehxle.
Battery Saver
When it’s dark enough outside, your low-beam
headlamps will change to full brightness.
The other
Your vehicle has a feature to help prevent you
from
lamps that come on with your headlamps will also comedraining the battery,in case you accidentally leave the
on.
courtesy lampson. If you leave the PANEL dial turned
When it’s bright enough outside, the regular lamps will all the way up,or if you leave a door open, the lamps
will automatically turnoff after 10 minutes if the
go out, and your low-beam headlamps change
to the
ignition is off.
reduced brightness of DRL.
To idle your vehicle with theD l U off, set the parking
brake while the ignitionis in OFF or LOCK. Then start
your vehicle.The DRL will stay off untilyou release the
parking brake.
As with any vehicle, you should turnon the regular
headlamp system any time you need it.
2-36
This feature will not turn
off the reading lamps, only the
lamps controlledby the PANEL dial. Be sure toturn off
any reading lamps using the switch before you leave the
vehicle.
Sustained Interior Illumination
Rearview Mirror ReadingLamps
Your courtesy lamps willcome on and stay on for a set
time whenever you:
Open a door.
Press UNLOCK on the Remote Lock Control
(if equipped).
Press DOOR on the Remote Lock Control
(if equipped).
If you open a door, the lamps will stay on while it’s open
and then turnoff automatically about 18 seconds after
you close it. If you don’t opena door, the lamps will
turn off after about 18 seconds, unless you pressed
UNLOCK on the RemoteLock Control. If you pressed
UNLOCK and don’t opena door, the lamps will turn off
after about 55 seconds.
These lampsgo on when you open the doors. When the
Sustained interior illumination includes a feature called doors are closed, turn them on and off with the switches
theater dimming. With theater dimming, the lamps don’t
just turn off at the end of the delay time. Instead, they
slowly dim during the delay time until they
go out. The
delay time is cancelled if you turn the ignition key to
RUN or START, so the lamps willgo out right away.
When the ignition is on, Sustained Interior Illuminationis
inactive, which means the courtesy lamps won’t come
on.
2-37
Roof Console Reading Lamps (Option)
Dome Lamp
These lampsare part of the optional roof console. They
will go on when you open thedoors. When the doorsare
closed, push the buttonto turn the lamp on and off.
The dome lamp willgo on when you open the doors.
Next to the dome lamp are two reading lamps.
Turn
them on using the switches.
Rear Reading Lamps
These lampsare near each passenger door. They will
go
on when you open thedoors. When the doorsare closed,
move the switch to turn thelamp on and off.
2-38
Mirrors
Manual Outside Mirrors
Adjust all themirrors so you can see clearly when you
are sitting in a comfortable &iying position.
Adjust the right mirror by hand. To adjust the left
mirror, move theknob in the direction you want to move
the mirror.
Inside Daymight Rearview Mirror
Power Outside Mirrors (Option)
The electric mirror control
is near the driver’s window.
Turn the control to the left
to adjust the left mirror or to
the right toadjust the right
mirror. Then move the
control in the direction you
want to move the mirror.
To reduGe glm from lamps behind you, move the leva
to the night position.
2-39
Convex Outside Mirror
Convenience Net (Option)
Your passenger’s side mirroris G O ~ V ~ X .
A convex mirror’s surface is curved so you can see more
from the driver’sseat.
t
Your vehicle may have a convenience net. You’ll see it
on the back wallof the trunk.
2-40
Put small loads,like grocery bags, behind the net.It can
help keep them from falling over during sharp turnsor
quick starts and stops.
The net isn’t for larger, heavier loads.Store them in the
trunk as far forward as you can.
You can unhook the netso that it will lie flat when
you’re not usingit. On two-door models, push the net
down and hookit under the plastic hooks.
Storage and Compartments
Storage Armrest
To use the storage area,fold down the armrest. Press the
latch on the front edge and pull up.If you have a
cupholder, flip it forward to useit.
You may also have an armrest in the rear. It hasa
storage areafor small items.
To open the storage area, press the latch on the front
edge and pull up.The console has a cupholder, cassette
tape storage and a coinholder.
2-41
n u n k Access Panel
Accessory Outlet
If you have split rear seats,
you may have a trunk
access panelfor storing long
objects that maynot fit
completely in your trunk,
like skis. Pull your rear
armrest down, then pull the
latch on the trunk access
panel.
2-42
If your vehicle hasa center console, you havea 12-volt
outlet. It is on the passenger side, near the floor. Open
the cover to use the outlet.
I NOTICE:
Adding some electrical equipment to your vehicle
can damage it or keep other things from working
as they should. This wouldn’t be covered by your
warranty. Check with your dealer before adding
electrical equipment and never use anything
requiring more than20 amps.
Sun Visors
Sunroof (Option)
To block out glare, you can swing down the visors. You
can also move them from side to side.
Visor Vanity Mirrors
Open thecover to expose the vanity mirror. If your
vehicle has the optional lighted vanity mirrors, the
lamps come on when you open the cover,
Your sunroof includes a sliding glass panel andsliding
a
sunshade. The switchworks only when the ignition is on.
2-43
To opentheglasspanelandsunshade,presstherear
of
the switch. Letgo of the switch to stopthe panel in any
position. Press the front of the switch to close the glass
Ashtrays and Lighter
Center Front Ashtray
panel. The sunshade can only be closed by hand.
The center front ashtraymay be on the instrument panel
TOopen the rear vent, press the front of the switch when or
on the console. To remove the console ashtray, open
the sunroof is closed. Open the sunshade by hand. Press the lid and
lift out the ashtray using the snuffer.
the rearof the switch toclose the vent.
The sunroof glass panel cannotbe opened or closedif
your vehicle has an electrical failure.
For the instrument panel ashtray, open
it, push down on
the locking tab and pull
out the ashtray.
2-44
Cigarette Lighter
Rear Ashtrays
To remove the rear console
ashtray, openit, push down
on the snuffer and pull the
ashtray out of the console.
To remove the rear door
ashtray, open and pull up on
the ashtray door.
To use the lighter,just push it inall the way andlet go.
When it’s ready,it will pop back by itself.
NOTICE:
Don’t hold a cigarette lighter in with
your hand
while itis heating. If you do, it won’t be able to
back away from the heating element when
it’s
ready. That can make it overheat, damaging the
lighter and the heating
element.
L
I NOTICE:
Don’t put papers and other things that burn into
your ashtrays.If you do, cigarettes or other
smoking materialscould setthem on fire, causing
damage.
Instrument Panel-- Your Information System
3.1L United States Version Shown, OthersSimilar
Your instrument cluster is designed to let you know at a glance howyour vehicle is running. You’ll know how
fast
you’re going, about how muchfuel is in your tank and many other things you need
to drive safely and economically.
2-46
Speedometer/Odometer
Tachometer
Your speedometer lets you see your speed in both miles
(km/h). Your
per hour (mph) and kilometers per hour
odometer shows how far your vehicle has been driven in
either miles (usedin the United States) or in kilometers
(used in Canada).
If you see
Your Pontiac has a tamper-resistant odometer.
silver lines between the numbers, you’ll know someone
has probably tampered withit and the numbers may not
be true.
You may wonder what happensif your vehicle needs a
new odometer installed.If the new one can be set to the
mileage total of the old odometer, then
it must be. Butif
it can’t, then it’s setat zero and a label must
be put on
the driver’s door to show the old mileage reading when
the new odometer was installed.
II
RPM x h o
LJ
r n
3.1L Shown, 3.4L Similar
Trip Odo~ der
The tachometer displays the engine speed in thousands
of revolutions per minute (rpm).
Your trip odometer tells how far you
have driven since
you last resetit. To set it to zero, press theRESET
button on the right sideof the instrument cluster.
I NOTICE:
Do not operate the engine with the tachometer in
the red area,or engine damage may occur.
2-47
Warning Lights, Gages and
Indicators
This part describes the warninglights and gages that
may be on your vehicle.The pictures will help you
locate them.
Warning lights and gages cansignal that somethingis
wrong beforeit becomes serious enough to cause an
expensive repair or replacement. Paying attentionto
your waminglights and gages couldalso save you or
others from injury.
Warning lights come on whenthere may be or is a
problem with oneof your vehicle’sfunctions. As you
will see in the details on the next few pages, some
warning lights come on briefly when youstart the
engine just to let you know they’re working. If you are
familiar with this section, you should not be alarmed
when this happens.
2-48
Gages canindicate when there may be or is a problem
with one of your vehicle’s functions. Often gages
and
warning lights work together to let you know when
there’s a problem with your vehicle.
When one of the warninglights comes on and stays on
when you aredriving, or when one of the gages shows
there may bea problem, check the section that tellsyou
what to do about it. Please follow this manual’s ac~xe.
Waiting to do repairs can be costly -- and even
dangerous. So please get to know your warninglights
and gages. They’rea big help.
Low Fuel Light
Fuel Gage
Your fuel gage tells you
about how muchfuel you
have left when the ignition
is on. When the indicator
nears EMPTY (E), you still
have a littlefuel left, but
you should get more soon.
If your fuel is low, a light
will come on and stayon
until you add fuel.It will
also come on for a few
seconds when you first turn
to
on the ignition as a check
show you it’s working. it
If
doesn’t come on then, have
it fixed.
Here are some things owners ask about.
All these
situations are normal and do not show a problem with
your fuel gage:
At the service station, thepump shuts off before the
gage reads FULL (F).
It takes a little more or less fuel tofill up than the gage
indicated. For example, the gage may have indicated
the tank was halffull, but it actually took a little more
or less than half the tank’s capacity to fill it.
The gage moves a little when you turn a corner or
speed up.
2-49
Charging System Light
Safety BeltReminder Light
When the keyis turned to
RUN or START, a chime
The charging system light
will come on briefly when
you turn on the ignition, as
a check to, show you it’s
working. Thenit should go
out.
will comeon for about eight
seconds to remind people to
fasten their safety belts,
unless the driver’s safety
belt is already buckled.
IIf it stays on,or comes on while you are driving, you
The safety belt light will also come on and stay on until
may have a problem with the charging system. It could the driver’s beltis buckled.
indicate that you have a loose drive belt
or another
electrical problem. Haveit checked right away. Driving
while this lightis on could drain your battery.
If you must drive a short distance with the light on, be
certain to turn off all your accessories, such as the radio
and air conditioner.
Air Bag Readiness Light
There is an air bag readiness light on the instrument
panel, which shows SRS AIR BAG or the airorbag
symbol. The system checks the air bag’s electrical
system for malfunctions. The light tells if
you there is an
electrical problem. The system check includes the air
bag sensors and modules, the wiring and the diagnostic
module. For more information on the air bag system, see
“Air Bag”in theIndex.
You will see this light flash
for a few seconds when you
turn yourignition to RUN
START. Then the light
should go out. This means
the system is ready.
If the air bag readiness light doesn’t come on when you
start your vehicle, or stays on, or comes on when you
are driving, your air bag system may not work properly.
Have yourvehicle serviced right away.
2-51
Brake System Warning Light
Your Pontiac’s hydraulic
brake systemis divided into
two parts. If one part isn’t
working, the other part can
still work and stop you. For
good braking, though, you
need both parts working
well.
If the lightis still on, or if the
It may take longer to stop.
is flashing, have
anti-lock brake system warning light
the vehicle towed for service. (See “Anti-Lock Brake
System Warning Light” and “Towing Your Vehicle” in
the Index.)
I
If the warning light comes on, there could be a brake
problem. Have your brake system inspected right away.
This light should comeon briefly as you start the
vehicle. If it doesn’t come on then, have
it fixed so it
will be ready to warn you
if there’s a problem.
The brake system warning light will also come on when
If the light comes on while you are driving, pull
off the
you set your parking brake, and
it will stay on if your
road and stop carefully.You may notice that the pedalis
parking brake doesn’t release fully.
If it stays on after
harder to push. Or, the pedal may go closer to the floor. your parking brakeis fully released,it means you have a
brake problem.
2-52
Anti-Lock Brake System Warning Light
(Option)
2 8 0 10
0
RPM x1000
With the anti-lock brake
system, this light will come
on when youstart your
engine and it will stay on
for threeseconds. That’s
normal. If the light doesn’t
come on, have it fixed so it
will be ready to warn you if
there is a problem.
If the light flashes when you’re driving, you don’t have
anti-lock brakes and there could be a problem with your
regular brakes. Pull off the road and stop carefully. You
may notice that the pedal is harder to push. Or, the pedal
may go closer ‘to the floor.It may take longer to stop.
Have the vehicle towed for service. (See “Towing Your
Vehicle” inthe Index.)
If the anti-lock brake system warning light stays on
longer than normal after you’ve started your engine, turn
the ignition off. Or, if the light comes on and stayson
when you’re driving, stop as soon as possible and turn
the ignition off. Then start the engine again to reset the
system. If the light still stays on, or comes on again
while you’re driving, your Pontiac needsservice. If the
light is on but not flashing and the regular brake system
warning light isn’t on, you still have brakes, but you
don’t have anti-lock brakes.
2-53
Anti-Lock Brake System Active Light
(Option)
When your anti-lock system
is adjusting brake pressure
to help avoid a braking skid,
the LOW TRAC light will
come on.
Slippery road conditions will exist if this light comes on,
so adjust your driving accordingly.The light will stay on
for a few secondsafter the system stops adjusting brake
pressure.
The LOW TRAC light also comes on briefly, asa bulb
check, when the engine is started. If the light doesn’t
come on then, have it fixed so it will be there totell you
when the system is active.
2-54
Engine Coolant Temperature Light
4 b 100
-k
This light tells you that
your engine coolant has
overheated or your radiator
cooling fan is not working.
If you have been operating your vehicle under normal
driving conditions, you should pull off the road, stop
your vehicle and turn off the
engine as soonas possible.
Hot Coolant Can Burn You Badly!
In “Problems on the Road,”this manual shows whatto
do. See “Engine Overheating’’ in the Index.
En.gine Coolant Temperature Gage
You have a gage that
shows the engine coolant
temperature. If the gage
pointer moves into the red
area, your engine is too hot!
I
I
I
Low Coolant Warning Light
If this light comes on, your
system is low on coolant
and the engine may
overheat. See “Engine
Coolant” in the Index and
have your vehicle serviced
as soon as you can.
I
That reading means the same thing as the warninglight.
It means that your engine coolant has overheated. If you
have beenoperating your vehicle under normal driving
conditions, you should pulloff the road, stop your
vehicle and turn off the engine as soon as possible.
Hot Coolant Can Burn You Badly!
In “Problems on the Road,” this manual shows what to
do. See“Engine Overheating” in the Index.
2-55
Malfunction Indicator Lamp
(Service Engine Soon Light)
A computer monitors
operation of your fuel,
ignition and emission
control systems. This light
should come on when the
ignition is on, but the
engine is not running,as a
check to show youit is
working.
2-56
If it does not come on at all, have
it fixed right away.If
it stays on,or it comes on while you are driving, the
computer is indicating that you have a problem.
You
should take your vehicle in
for service soon.
NOTICE:
If you keep driving your vehicle with this light
on, after a while the emission controls won’t
work as well, your fuel economy won’tas
begood
and your engine may not run as smoothly. This
by your
could leadto costly repairs not covered
warranty.
Oil Warning Light
0
If you have a problem with
your oil, thislight may stay
on after you start your
engine, or come on when
you are driving.
This indicates that oil isnot going through yourengine
quickly enoughto keep it lubricated. The engine could
be low on oil or could have some other oil problem.
Have it fixed right away.
The oil light could also come on in three other
situations:
0
When the ignition is on but the engineis not running,
the light will come on as a test to show you
it is
working, but thelight will go out when you turn the
ignition to START. If it doesn’t come on with the
ignition on, you may have a problem with thefuse or
bulb. Have it fixed right away.
Sometimes when the engineis idling at a stop, the
light may blinkon and off. This is normal.
If you make a hard stop, the light maycome on for a
moment. This is normal.
NOTICE:
Damage to your enginefrom neglected oil
problems can be costly and
is not covered by your
warranty.
2-57
Low Oil Level Light
Security Light
Your engine is equipped
with an oil level monitoring
system. When the ignition
key is turned on, the LOW
OIL LEVEL light will
briefly flash. If the light
does not flash, haveit fixed
so it will be ready to warn
you if there’s a problem.
If the light stays on, stop
the vehicle on a level surface
and turn the engineoff. Check the oillevel using the
engine oil dipstick. (See “Engine Oil” in the Index.)
If‘the light does not flash, have the low oil level sensor
system repaired SO it will be ready to warn you if there’s
a
problem.
The oil level monitoring system only checks
oil level
during the brief period between keyon and engine
crank. It does not monitor engineoil level when the
engine is running. Additionally, anoil level checkis
only performedif the engine has been turned
off for a
considerable period of time, allowing the oil normally
in
circulation to drain back into the oil pan.
2-58
This light willcome on
when you turn the key
to
START and stay on until the
vehicle starts. It will also
come on and stay on if your
key is too dirty or wet for
the PASS-Key@II system to
read the resistor pellet.
If the resistor pelletis damaged or missing, the light will
flash.
If you’re driving and the light comes on and remains on,
your PASS,Key~II system is not working properly.
Your vehicle is not protected by
and you
should see your dealer.
Trip Calculator (Option)
W E L USED: Shows the total amount of fuel used
since you last reset this mode. The amount can be
displayed in gallons or liters.
RANGE: Shows how muchfarther you can travel with
L
When you start your engine, the trip calculator will
display a mode. A lighted arrow shows which modeis
displayed.
INST ECON: Shows your fuel economy when you
select this mode. This display will update every second
and cannot be reset.
the fuel you have before refueling. If there is less than
one-eighth of a tank, LOF’UEL will bedisplayed. If the
fuel level is low enough, LOFUEL will show on the
display in all modes. The message will flash for
60 seconds and then stay on
until you add more fuel.
You can’t reset RANGE mode. Range is updated
automatically when you reset AVG ECON.
‘EXT TEMP:Shows the temperature outside your
vehicle. Temperature can be displayed in Fahrenheit or
Celsius. This mode can’t be reset.
TRIP: Shows howfar you’ve driven since youlast reset
this mode.
ELAPSED TIME:Shows how much time has passed
with the engine running since you last reset this mode.
AVG ECON: Shows your average fuel economy since
you last reset this mode.
AVG SPEED: Shows your average speed since you
last resetthis mode. It counts only the time the engine
is running. The disp1.a~will be updated every three
seconds until you select another mode.
2-59
Control Buttons
The trip calculatorhas three buttons that controlits
functions.
MODE: Press this buttonto change the mode being
displayed.
EM: Press this buttonto change the display from
English to metric unitsor metric to English.
RESET Press this button forone second to reset the
mode displayed.If you push and hold RESETfor more
than five seconds, all the modes will reset.
You can’t
reset INST ECON, RANGEor EXT TEMP.
Head-Up Display (Option)
If you have the Head-Up
Display (HUD), you can see
the speedometer reading, in
English or metric units,
displayed “through” the
windshield.
2-60
The HUD also shows these lights when they are
lit on
the instrument panel:
Turn Signal Indicators
0
High-Beam Indicator Symbol
Low Fuel Symbol
0
OilWarningSymbol
0
CoolantTemperatureSymbol
ChargingSystemSymbol
When you sit straight in your seat, the HUD image will
appear straight ahead near the front bumper.
When the ignition key is turnedto RUN, all possible
HUD images will come on. Then the Head-Up Display
will operate normally.
NOTICE:
Although theHUD image appears to be near the
front of the vehicle, do not
use it as a parking aid.
The HUD was not designed for that purpose.
If
you try to use it that way, such
as in a parking
lot, you may misjudge distance and run into
something.
‘Toadjust the HUD so you can see it properly:
1. Start your engine and
turn the HUD dial all
the way up.
If the sun comes out,it becomes cloudy, or if you turn
on your headlamps, you may need to adjustthe HUD
brightness again, Polarizing sunglasses could make the
HUD image harder to see.
When the headlamps are off, the HUD image will
be at a preset daytime brightness.
When the headlamps are on, the HUD image
brightness is controlled by thed i m e r control.
2. Adjust your seat,if necessary, to a comfortable
position.
of the IMAGE switch until the HUD image
3. Press the top
stops moving. Then press the bottom of the switch until
the image is as low as possible but in full view.
speedometer from English
to metric or metric to
English. If you don’t have
the trip calculator, you can’t
1 change the display.
4. Turn the HUD dial down until the HUD
image is no
brighter than necessary.To turn the HUD off, turn
the HUD dial all the way down.
2-61
Care of the Head-Up Display
If YOUCan’t See the HUD Image When the Ignition
Is On
Is anything covering the HUDunit?
Is the HUD dimmer setting bright enough?
Is the HUD image adjusted to the proper height?
Still no HUD image? Check the fuse in theI/P
Electronics position in the instrument panel
fuse
block. See “Fuses andCircuit Breakers” in the
Index.
Clean the inside of the windshield as needed to remove
any dirt or film that reduces the sharpness or clarity of
the HUD image.
To clean the HUD, spray household glasscleaner on a
soft, clean cloth. Wipe the HUDlens gently, thendry it.
Do not spray cleaner directly on
the lens because the
cleaner could leakinto the unit.
2-62
If the HUD Image Is Not Clear
Is the HUD image too bright?
0 Are the windshield and HUD lens clean?
Your windshield is part of the HUD system. If you
ever have to havea new windshield, be sureto get one
designed for HUD. If you don’t, the HUD image may
look blurred and outof focus.
NOTES
1
.
..
. .
. ..
.
2-63
NOTES
2-64
7
Section 3 ComfortControlsand Audio Systems
In this section you’ll find out how to operate the comfort
control systems and audio systems offered with your
Pontiac. Be sure to read about theparticular system
supplied with your vehicle.
Air Conditioning with Electronic
Controls
System Controls
Fan Knob
The left knob selects the forceof air you want. To turn
the fan off, turn theknob to OFF. The fan must be on to
run the air conditioning compressor.
Temperature Knor,
The center knob changes the temperature of the
air
coming through the system. Turn this knob toward red
(clockwise) for warmer air. Turnit toward blue
(counterclockwise) for cooler air.
With this system, you can control the heating, cooling
and ventilation in your vehicle. The system works best if
you keep your windows closed while using
it.
3-1
Mode Knob
The right knob hasseveral settings to control the
direction of air flow. For each setting, set the
temperature to a comfortable setting.
MAX: This setting recirculates much of the air inside
your vehicle and sends
it through the instrument panel
outlets. The air conditioning compressor will run
automatically inthis setting unless theoutside
temperature is below 40°F (4.5"C).(Even when the
compressor is running, youcan control the temperature.)
-be
/.I
VENT This setting brings in outside air and
directs it through the instrument panel outlets.
+e
+
BI-LEVEL:'
This setting brings in outside air and
directs it two ways. Half of theair is directed through
the instrument paneloutlets. Most of the remaining air is
directed through the floor ducts and
a little to the defrost
and side window vents.
FLOOR: This setting sends most of the air
through the ducts near the floor.
The rest comes outof
the defroster and side window vents.
3-2
%
+)d
DEFOG: This setting allows halfof the air to go
to thefloor ducts andhalf to the defroster and side
window vents.
9DEFROST: This setting directs most of the air
through the defroster andside window vents. Someof
the air goes to the
floor ducts. The air conditioning
compressor will run automatically
in this setting unless
the outside temperatureis below 40°F (4.5"C). (Even
when the compressoris running, you cancontrol the
temperature.)
Air Conditioning Compressor Button
Press the A/C button to operate the air conditioning
compressor. The indicator light above the button will
glow when the button is pressed. You don't have to
press the button to run the compressorMAX
in or
DEFROST.
Air Conditioning
Heating
On very hot days, open the windows long enough to
let hot inside air escape. This reduces the time the
compressor has to run, which shouldhelp fuel economy.
On cold days useFLOOR with the temperature knob all
the way inthe red area. The system will bringin outside
air, heat it and send it to the floor ducts.
For quick cool-down on very hotdays, use MAX with
the temperature knob all theway in the blue area. If this
setting is used for long periods of time, theair in your
vehicle maybecome too dry.
If your vehicle has an engine coolant heater, youcan use
it to help your system provide warm air faster when it’s
cold outside (0°F (-lS0C)or lower). An engine coolant
heater warms the coolant your engine and heating
system use to provide heat. See “Engine Coolant
Heater” in the Index.
VENT with the
For normal cooling on hot days, use
A/C button
temperature h o b in the blue area and the
pushed in. The system will bring in outside
air and cool it.
On cool but sunny days, the sun may warm your upper
body, but your lower body may notbe warm enough.
You can use BI-LEVEL with the temperature knob in
the middle and the A/C button pushed in. Thesystem
will bring in outside air and direct it to your upper body,
while sending slightly warmed air to your lower body.
You may notice this temperature difference more at
some times thanothers.
Ventilation
For mild outside temperatures when little heating or
cooling is needed, use VENTto direct outside air
through your vehicle.Your vehicle also has the
flow-through ventilation system described later in this
section.
Defogging and Defrosting Windows
Your system has twosettings for clearing the front and
side windows. To defrost the windows quickly, use
DEFROST withthe temperature knob all the way in the
red area. To warm passengers while keeping the
windows clean, use DEFOG.
3-3
Rear Window Defogger
The rear window defogger
uses a warming grid to
remove fog from the rear
window. Press the buttonto
turn the defogger on. It will
turn itself off after about 10
minutes.
Flow-Through Ventilation System
Your vehicle’s flow-through ventilation system supplies
outside airinto the vehicle whenit is moving. Outside
air will also enterthe vehicle when the air conditioning
fan is running.
Ventilation Tips
Keep the hood and front air inlet
free of ice, snow or
any other obstruction, such as leaves. The heater and
defroster will workfar better, reducing the chance
of
fogging the inside of your windows.
When you enter a vehiclein cold weather, adjust the
mode knob toFLOOR and the fan to the highest
speed for a few moments before driving off.
This
helps clear the intake ducts of snow and moisture
and reduces the chance
of fogging the inside of your
windows.
If you turn it on again,the defogger will only run for
about five minutes before turning
off. You can also turn it
off by turningoff the ignition or pressing the button again.
Do not attach anything like a temporary vehicle license
or decal across the defogger grid.
0
NOTICE:
Don’t use a razor blade or something else sharp
on the insideof the rear window.If you do, you
could cut or damage the warming grid, and the
repairs wouldn’t be covered by your warranty.
3-4
Keep the air path under the front seats clear
of
objects. This helpsair to circulate throughout your
vehicle.
Audio Systems
Your Delco@audio system has been designedto operate
easily and give yearsof listening pleasure. You will get
the most enjoyment out of it if you acquaint yourself
with it first. Find out what your Delco@system can
do and how to operate allits controls, to be sure you’re
getting the most out of the advanced engineering that
went into it.
Setting theClock
Radio Without Cassette Tape
or Compact Disc Player
1. With the ignition on, press SET.SET will appear on
the display for five seconds.
AM/FM Stereo Radio
Playing the Radio
2. Press and hold theup arrow on the SEEK button
until the correct minute appears.
Turn the VOLUME knob to turn the system
on or off.
on the SEEK button
3. Press and hold the down arrow
until the correct hour appears.
volume. Turnit counterclockwise to decrease volume.
Radio with CassetteTape or Compact Disc Player
1. Press and hold HR until the correct hour appears.
VOLUME: Turn this knob clockwise to increase
RCL: Press upperknob briefly to recall the station
being played or the clock display.
2. Press and hold MIN until the correct minute appears.
3-5
Pinding a Station
AM/FM: Press the lower knob to get AM or F M .The
display shows your selection.
T
U
N
E
: Turn the lower knob to choose radio stations.
SEEK: Press the upor down mow to go to the next
higher orlower station.
Presets: The four pushbuttons let you return to your
favorite stations. You can set up to 14 stations (7 AM
and 7 FM).
1. Press A" to select the band.
2. Find the station you want.
3. Press SET until the word SET appears on the
display.
4. Press and hold oneof the four numbered buttons, or
press and holdtwo side-by-side buttons.
5. The soundwill mute. When it returns, release the
buttons.
Whenever you press that numbered button
or pair of
buttons, the station youset will return.
3-6
Setting the Tone
BASS: Slide the lever upor:down to increase or
position is a detent.
decrease bass. The middle
TREB: Slide the lever up or down to increase or
decrease treble. The middle position
is a detent. If a
want to decrease
station is weak or noisy, you may
treble.
Adjusting the Speakers
BAL: Turn the control behind the upper knob to move
the sound to the
left or right speakers. The middle
position is a detent and balances the speakers.
FADE: Turn the control behind the lower knob to move
the sound to the front or rear speakers. The middle
position is a detent and balances the speakers.
Optional AM/F” Stereo Radios
SEEK: Press the upor down arrow to go to the next
higher or lower station.
If your Pontiac has a radio with a cassette tape player,
a compact disc player or a graphic equalizer, the
instructions below will explain how to usethe radio.
For other features, see the instructions for the feature
your radio has.
Presets: The six pushbuttons let you return to your
favorite stations. You can set up to18 stations (6 AM,
6 FM1 and 6 FM2).
1. Press AMRM to select the band.
Playing the Radio
2. Find the station you want.
Push POWER to turn the system on or off.
3. Press and holdone of the six numbered butt
VOL: Turn thisknob clockwise to increase volume.
Turn it counterclockwise to decrease volume.
RECALL: Press this button briefly to recall the station
being played or the clock display. If you press the button
when the ignition is off, the clock will show for a few
seconds.
4. The sound will mute. When it returns and SET
appears on thedisplay, release the button.
Finding a Station
S.
Whenever youpress that numbered button, the station
you set willreturn.
Adjusting the Speakers
BAL: Press this knob lightly so it extends. Turn the
AMm:Press this button to get AM, FMl or FM2.
knob to move the sound tothe left or right speakers. The
middle position is a detent and balances the speakers.
TUNE: Press this knob lightly so it extends. Turn it to
choose radio stations. Push the knob back in when
you’re not usingit.
FADE: Press the knob lightly so it extends. Turn the
knob to move the sound to the front or rear speakers.
The middle positionis a detent and balances the
speakers.
The display shows your selection.
Push the knob back in whenyou’re not usingit.
3-7
Setting theTone
BASS: Slide the lever rightor left to increase or
decrease bass. The middle position
is a detent.
TREBLE: Slide the lever rightor left to increase or
decrease treble.The middle positionis a detent.If a
station is weak or noisy, you may want
to decrease
treble.
Using the Graphic Equalizer
The equalizer allows you to adjust seven separate
frequencies of sound to your taste, instead
of just bass
and treble. Start with the levers in their middle positions.
Move a lever up to emphasize a frequency or down to
de-emphasize it.
Playing a Cassette Tape
The longer side with the tape visible should face to the
right. If the radio is on, the tape will begin playing. If
you hear nothingor hear a garbled sound, the tape may
not be in squarely. Press EJECT to remove the tape and
start over.
While the tape is playing, use the VOL, FADE, BAL,
TREBLE, BASS and the graphic equalizer controls just
as you do for theradio. Other controls may have
different functions when a tape is inserted. The display
will show a cassette symbol and an arrow to show which
side of the tape is playing.
Your tape bias is set automatically.
Press this button to search for the previous
selection on the tape. Your tape must have at least fow
seconds of silence between each selection for PREV to
work.
NEXT: Press this button to go to the next selection on
the tape. Your tape must have at leastfour seconds of
silence between each selection for NEXT to work.
The SEEK down and uparrows will also find the
previous and next selections on the tape.
REV: Press this button to reverse the tape rapidly. Press
it again to return to playing speed. The radio will play
while the tape reverses. Use TUNE or SEEK to change
the radio station.
FWD: Press this button to advance quickly to another
part of the tape. Press the button againto return to
playing speed. The radio will playwhile the tape
advances. Use TUNE or SEEK to change the radio
station.
PROG: Press this buttonto change the side of the tape
that is playing.
00: Press this button to reduce background noise on
Dolby@encoded tapes.
Dolby@B Noise Reduction manufactured underlicense
from Dolby Laboratories Licensing Corporation.
“Dolby” and the On@
symbol are trademarks of Dolby
Laboratories Licensing Corporation.
3-9
AM/F”: Press this buttonto play the radio whena tape
is playing. The tape will stop but remain in the player.
TAPE/PLAY: Press this button to change the
to tape
function when the radio
is on. The cassette symbol with
an mow will appearon the display when the tapeis
active.
EJECT: Press this buttonto remove the tape.The radio
will play.
Cln: This message may appear on the display.
If it does,
It will still
your cassette tape player needs to be cleaned.
play tapes, but you should clean
it as soon as possible to
prevent damageto your tapes and player.See “Care of
Your Cassette Tape Player”in the Index. After you clean
the player, press and hold
EJECT for five seconds to
reset the Cln indicator.“- - -” will appear in the display
to show the indicator was reset.
Playing a Compact Disc
Insert a disc partway into the slot, label side up. The
player will pullit in. If the radiois on, the disc will begin
playing. The CD symbolwill appear on the display.
If you’re driving on a very rough road, the disc may not
play and ERR may appear on the display.
The disc
should play when the road gets smoother.
If ERR
appears on the display and the disc comes back out,
it
could be that:
0
The disc is upside down.
0
It is dirty, scratched or wet.
It is very humid. If so, wait about an hour and try
again.
3-10
REV: Press and holdthis button to return to a passage
RECALL: Press this button to see which trackis
playing. Press it again within five seconds to see how
long it has been playing(elapsed time). Press it again to
return to time, or let the display return automatically.
quickly. The display will showelapsed time.
FWD: Press and holdthis button to advance to a
passage quickly. The display will show elapsed time.
RBM: Press this button to hear the tracks random
in
order. Press it again to turn off random play.
A M / F M : Press this button to play the radio when a disc
is playing. The disc will stopbut remain in the player.
CDPLAY: Press this button to change to the disc
function when the radio is on. The disc will start playing
at the point where it was stopped. The CD symboland
CD will appear on the display when the disc is active.
EJECT: Press this button to remove the disc. The radio
will play if it is on.
PREV: Press this button to go to the start of the current
THEFTLOCK
track, if more than eight seconds ha.ve played.If you
hold the button or press it more than once, the player
will continue moving backor forward through the disc.
Your system has this feature if it shows THEFTLOCK
on its face. THEFTLOCK is a theft-deterrent feature
that can be used or ignored. If you ignore it, your system
will play normally. If you use
it, your system can’t be
turned on if it is stolen because it locks anytime battery
power is removed. To unlock it, a code must be entered.
These instructions will tell you how toenter a code into
your system. Theyalso tell you how to unlock the
system with yourcode and how to shutoff the
THEFTLOCK system.
NEXT: Press this button to go to the next track. If you
hold the button or press it more thanonce, the player
will continue moving forward through the disc.
The SEEK down andup arrows will also find the
previous and next selections on the tape.
3-11
Entering a Code
1. Write down any numberfrom 000 to 1999.This is
your code.
2. Turn the ignition to ACCor RUN.
3. Turn the radio off.
4. Press the 1 and 4 preset buttons at the same time and
hold until “- - -” shows-onthe display.
You now have only 15 seconds between each of the
following steps.
5. Press MIN and“000”will appear on the display.
6. Press MIN again andhold until the last two digits of
your code appear.
7. Press and holdH R until the first digit or digits of
your code appear.
8. Press A” after you make sure the code matches
the oneyou wrote down. “rEP” will appear on the
display, meaning you should repeat Steps5 through 7.
9. After you repeat thesteps, press A ” . SEC
should appear onthe display, meaning your system
is
secured. If your ignition is off, the THEmZOCK
indicator light on the radioface will flash.
Store the paper with your code written on ita in
safe
place (not in your vehicle).
3-12
Unlocking the System
If battery poweris removed €or any reason, LOC will
appear on the display when poweris reapplied. You will
need toenter your code to unlock the system.You have
only 15 seconds between eachof the following steps.
1. Turn the ignition on. LOC will appear on the display.
2. Press MIN and “000” will appear on the display.
3. Press MIN again and holduntil the last two digits of
your code appear.
4. Press and holdHR until the first digit or digits of
your code appear.
5. Press AM/FM after you makesure the code matches
the one you wrote down.SEC should appear onthe
display, meaning you can now use your system,
and.
it is secured. If LOC appears, you entered the wrong
code and the system is still locked.
If you enter the wrong code eight times, InOP will
appear on the display.You will have to wait an hour
with the ignition on before you can try again. When you
try again, you will only have
three chances toenter the
correct code before InOP appears.
If you lose or forget yourcode and cannot unlock the
system, contact you dealer.
Disabling THEFTLOCK
Understanding Radio Reception
If you want to turn off THEFTLOCK, you will
neea to
enter your code. If you lose orforget your code, see
your dealer.
F M Stereo
1. Turn the ignition on and the radio off.
2. Press the 1 and 4 preset buttons at the same time and
hold until SEC shows onthe display.
You now have only 1.5seconds between each of the
following steps.
3. Press MIN and “000” will appear on the display.
4. Press MIN again and holduntil the last two digits of
your code appear.
FM Stereo will give you thebest sound, but mVr signals
will reach only about10 to 40 miles (16 to 65 km). Tall
buildings or hills can interfere with FM signals, causing
the sound to come and go.
I
AM
The range for most AM stations is greater thanfor F M ,
especially at night.The longer range, however, can
cause stations to interfere with each other. AM can also
pick up noise fromthings like storms and powerlines.
To lower this noise, try reducing the treble level.
5. Press and hold HR until the first digit or digits of
your code appear.
6. Press AMEM after you make sure the code matches
the one you wrote down.“- - -” should appear on the
display, meaning yoursystem is unsecured. If SEC
appears, you entered the wrong code and the system
is still secured.
3-13
Tips About Your Audio System
Hearing damage from loud noiseis almost undetectable
until it is too late. Your hearing can adapt to higher
volumes df sound. Sound that seems normal can
be loud
and hannful to your hearing. Take precautionsby
adjusting the volumecontrol on your radio toa safe
sound level before your hearingadapts to it.
To help avoid hearingloss or damage:
Adjust the volumecontrol to the lowest setting.
Increase volume slowly untilyou hear comfortably
and clearly.
I NOTICE:
Before you add any sound equipment to your
vehicle -- like a tapeplayer, CB radio, mobile
telephone or two-way radio be sure you can
add whatyou want. If you can, it’s very
important to do it properly.
Added sound
of
equipment may interfere with the operation
your vehicle’s engine, Delco@radio or other
systems, and even damage them. And, your
vehicle’s systems may interfere with the
been
operation of sound equipment that has
added improperly.
So, before adding sound equipment,
check with
your retailer andbe sure to check Federal rules
covering mobile radio and telephone
units.
-
Care of Your Cassette Tape Player
A tape player thatis not cleaned regularlyis subject to
or damaging
reduced sound quality, ruining the cassette,
the mechanism. Tape cassettes that
are not properly
stored in their plastic cases away
from contaminants,
direct sunlight, and extreme heat may not operate
properly and couldcause premature failure of the tape
player.
50 hours
Your tape player should be cleaned with every
of use to provide optimum performance.Your radio may
display Clnto indicate that youhave used your tape
player for 50 hours without resetting the tape clean
timer. If you notice a reduction in sound quality,
regardless of when the tape player was
last cleaned, try
playing a different cassetteto see if the tape or the tape
player is at fault. If the second cassette results in no
improvement in sound quality, try cleaning the tape
player.
of an added featurein the tape player that detects broken
tapes. If an error occurs, you will need to insert the
cleaning cassette at least three times to thoroughly clean
the tape player.
You may prefer to use a non-scrubbing action, wet-type
cleaner. This type of cleaner uses a fabric belt to clean
the tape head.This type of cleaner cassette will not
cause an error, butit may not clean the tape player as
thoroughly as the scrubbing type cleaner.
A scrubbing action cleaneris available through your
dealer (GM Part No. 12344600).
Cassettes are subject to wear and the sound quality may
degrade over time. Always verify that the cassette tape
is in good condition and the tape player
is clean before
obtaining service on your tape player.
Care of Your Compact Discs
Handle discs carefully. Store them in their original cases
or other protective cases and away
from direct sunlight
and dust. If the surface
of a disc is soiled, dampen a
clean, soft clothin a mild, neutral detergent solution and
clean it, wiping from the center to the edge.
Proper tape player cleaning should be
done with a
scrubbing action, nonabrasive cleaner cassette. This
is a
wet-type cleaning system that uses a cleaning cassette
with pads which scrub the tape head as the hubs
of the
cleaner cassette turn.To properly clean your tape player,
follow the instructions with the cleaning cassette. If you Be sure never to touch the signal surface when handling
discs. Pick up discsby grasping the outer edgesor the
use this typeof cleaner, the radio may display an error
edge
of the hole and the outer edge.
and eject the cartridge.This is normal and is the result
3-15
Fixed Mast Antenna
The fixed mast antenna can withstand most
car washes
without being damaged. If the mast should ever become
slightly bent, you canstraighten it out by hand. If the
mast is badly bent, as it might be by vandals, you should
replace it.
Check every once in a while to be surethe mast is still
tightened to the fender.
Power Antenna Mast Care
Your power antenna willlook its best and work wellif
it’s cleanedfrom time to time. TOclean the antenna
mast:
1. Turn on the ignition and radio to raise the antenna.
2. Dampen a clean cloth with mineral spirits or
equivalent solvent.
3. Wipe
dirt.
Don’t lubricate the power antenna. Lubrication
could damage it.
1 NOTICE:
Before entering an automatic car
wash, turn off
your radio to make the power antenna
go down.
This will prevent the mast from
possibly getting
damaged. If the antenna
does not go down when
off, it may be damaged or
you turn the radio
need to be cleaned. In either case, lower the
antenna by hand by carefully pressing the
antenna down.
.e cloth over the mast sections, removing any
4. Wipe dry with a clean cloth.
5. Make the antenna go up and downby turning the
radio or ignition off and on.
6. Then repeat if necessary.
3-16
I NOTICE:
If the mast portionof your antennais damaged, you can
easily replace it. See your retailer for a replacement kit
and follow the instructions in the kit.
Steering Wheel Touch Controls
(Option)
VOLUME: Press the upor down arrows to increase or
decrease volume.
PLAY: Press to play the CD or cassette insteadof the
radio.
MUTE: Press to silence the system. Press again to turn
on the sound.
SEEK: Press the upor down arrows to tune to the next
or previous radio station. If a tape or compact disc
is
playing, the player will advanceor rewind.
PRESET Press to play a station you have programmed
on the radio preset buttons.
AM FM: Press to chooseAM, FM1 or FM2. If a tape or
compact disc is playing, it will stop and the radio will
You can control certain audio system functions using the Playbuttons on your steering wheel.
3-17
NOTES
3-18
Section 4 Your Driving and the Road
Defensive Driving
The best advice anyone can give about driving is: Drive
defensively.
Please start with a very important safety device in your
Pontiac: Buckle up.(See “Safety Belts” in the Index.)
Defensive driving really means “be readyfor anything.”
On city streets, rural roads, or freeways, it means
“always expect the unexpected.”
Assume thatpedestrians or other drivers are going to be
careless and make mistakes.Anticipate what they might
do. Be ready for their mistakes.
Here you’ll find information about driving on different
kinds of roads and in varying weather
conditions. We’ve
also included many other useful tips on driving.
Rear-end collisions are about the most preventable of
accidents. Yet they are common. Allow enough
following distance. It’s the best defensive driving
maneuver, in both city and rural driving. You never
know when thevehicle in front of you is going to brake
or turn suddenly.
4-1
Drunken Driving
Death andinjury associated withdrinking and driving is
a national tragedy. It’s the number one contributor to the
highway deathtoll, claiming thousandsof victims every
year.
The obvious way to solve thisbghway safety problem
is for people neverto drink alcohol and then drive. But
what if people do? How muchis “too much” if the
driver plans todrive? It’s a lot less than many might
think. Althoughit depends on each personand situation,
here is some general information on the problem.
Alcohol affects four things that
anyone needs to drive a
vehicle:
The Blood Alcohol Concentration (BAC)
of someone
who is drinking depends upon four things:
Judgment
0
How much alcohol consumed
MuscularCoordination
0
The drinker’s body weight
Vision
0
The amount of food that is consumed before and
during drinking
Attentiveness
Police records show thatalmost half of all motor
vehicle-related deathsinvolve alcohol. In most cases,
these deaths are the result of someone who was drinking
and driving. In recent years, some 18,000 annual motor
vehicle-related deaths have been associated
with the use
of alcohol, with more than300,000 people injured.
Many adults -- by some estimates, nearly half the adult
population -- choose never to drink alcohol,so they
never drive after drinking. For persons under
2 1, it’s
against the law in every U.S. state to drink alcohol.
There are good medical, psychological and
developmental reasonsfor these laws.
The length of time it .has taken thedrinker to
consume the alcohol
According tothe American Medical Association, a
180-pound (82 kg) person whodrinks three 12-ounce
(355 ml) bottlesof beer inan hour will endup with a
BAC of about 0.06 percent. The person would reach the
same BACby drinking three 4-ounce(120 ml) glasses
of wine or three mixeddrinks if each had 1- 1/2 ounces
(45 ml) of a liquor like whiskey, gin or vodka.
woman generally will reach a higher BAC level than a
man of her same body weight when each has the same
number of drinks.
The law in manyU.S. states sets the legal limit at a BAC
of 0.10 percent. In a growing numberof U.S. states, and
throughout Canada, the limit is 0.08 percent. In some
other countries it’s even lower.
The BAC limit for all
commercial drivers in the U.S. is 0.04 percent.
The BAC willbe over 0.10 percent after three to six
drinks (in onehour). Of course, as we’ve seen, it
depends on how much alcohol is in the
drinks, and how
quickly the person drinks them.
It’s the amountof alcohol that counts.For example, if
the same person drank three double martinis(3 ounces
or 90 ml of liquor each) within an hour, the person’s
BAC would be closeto 0.12 percent. A person who
consumes foodjust before or during drinking will have a
somewhat lower BAC level.
There is a gender difference, too. Women generally have
a lower relative percentage of body water than men.
Since alcohol is carried in body water, this means that a
But the abilityto drive is affected well below a BAC
of 0.10 percent. Research shows that the driving
skills
of many peopleare impaired at a BAC approaching
0.05 percent, and that the effectsare worse at night. All
drivers are impaired at BAC levels above 0.05 percent.
Statistics show that the chance of beingin a collision
increases sharply for drivers who have a BAGof
0.05 percent or above. Adriver with a BAClevel of
0.06 percent has doubledhis or her chanceof having
a collision. At a BAC level of 0.10 percent, the chance
of this driver having a collision is twelve times greater;
at a level of 0.15 percent, the chance is twenty-five
times greater!
4-3
The body takesabout an hour to rid itselfof the alcohol
in one drink. No amount of coffee or number of cold
‘‘I’llbe careful” isn’t the
showers will speed that up.
right answer. What if there’s an emergency,a need to
take sudden action,as when a child darts into the street?
A person with evena moderate BAC might not beable
to react quickly enough toavoid the collision.
There’s somethingelse about drinking and driving that
many people don’t know.
Medical research shows that
alcohol in a person’s system can make crash injuries
worse, especially injuries to the brain, spinal cord or
heart. This means that when anyone who has been
drinking -- driver or passenger -- is in a crash, that
person’s chance of being killed or permanently disabled
is higher than if the person had not been drinking.
4-4
Control of a Vehicle
Braking
You have three systems that make your vehicle
go where
you want it to go. They are the brakes, the steering and
the accelerator. All three systems have to
do their work
at the places where the tires meet the road.
Braking action involvesperception time and reaction
time.
First, you have to decide to push on the brake pedal.
That’s perception time. Then you haveto bring up your
foot and do it. That’s reaction time.
Average reaction time is about 3/4 of a second. But
that’s only an average.It might be less withone driver
and as long as twoor three seconds or more with
another. Age, physical condition, alertness, coordination,
and eyesight all play a part.So do alcohol, drugs and
frustration. But even in3/4 of a second, a vehicle
travels 66 feet (20 m).
moving at 60 mph (100 km/h)
That could be a lot of distance
in an emergency,so
keeping enough space between your vehicle and others
is important.
And, of course, actual stopping distances vary greatly
with the surface of the road (whether it’s pavement
or
gravel); the conditionof the road (wet, dry,icy); tire
tread; and the conditionof your brakes.
Sometimes, as when you’re drivingon snow or ice, it’s
easy to ask more of those control systems than the tires
and road can provide.. That means you canlose control
of your vehicle.
4-5
Avoid needless heavy braking.Some people drive
in spurts -- heavy acceleration followed by heavy
braking -- rather than keeping pace with traffic. This
is a mistake.Your brakes may not have time to cool
between hard stops.Your brakes will wear out much
faster if you do a lot of heavy braking.
If you keep pace
with the traffic and allow realistic following distances,
you will eliminate a lot
of unnecessary braking. That
means better braking and longer brake life.
If your engine ever stops while you’re driving, brake
normally but don’t pump your brakes. If you do, the
pedal may get harderto push down.If your engine
stops, you willstill have some power brake assist. But
you will useit when you brake. Once the power assist
is
used up, it may take longerto stop and the brake pedal
will be harder to push.
4-6
Bnti-Lock Brakes (Option)
:f your Pontiac has anti-lock brakes (ABS),
it has an
dvanced electronic braking system that will
help
Irevent a braking skid.
If your vehicle has anti-lock brakes, the brake pedal will
;ay so.
I
2 6 0 L
0
0
R pM x1000
And this light on the
instrument panel willcome
on briefly when you start
your vehicle.
When you start your vehicle, or when you beginto drive
away, you may hear a momentary motor orclicking
noise. And you may even notice that your brake pedal
moves a little while this is going on. This is the ABS
system testing itself. If there’s a problem with the
anti-lock brake system, the anti-lock brake system
warning light will stay on orflash.
See “Anti-Lock Brake System Warning Light” in the
Index.
is wet.
Here’s how anti-lock works. Let’s say the road
You’re driving safely. Suddenly an animal
jumps out in
front of you.
ABS.
You slam on the brakes. Here’s what happens with
A computer senses that wheelsare slowing down. If one
of the wheelsis about to stop rolling, the computer will
separately work the brakes ateach front wheel and at the
rear wheels.
~~
4-7
The anti-lock system can changethe brake pressure
The computer is
faster than any driver could.
programmed to make the most of available tire and
road conditions.
As you brake, your computer keeps receiving updates on
wheel speed and controlsbraking pressure accordingly.
Remember: Anti-lock doesn’t change the time
you need
to get your foot up to the brake pedal.
If you get too
close to the vehicle in front
of you, you won’t have time
to apply your brakes if that vehicle suddenly slows or
stops. Always leave enough room up ahead to stop, even
though you have anti-lock brakes.
To Use Anti-Lock
Don’t pump the brakes. Just hold the brake pedal down
and let anti-lock workfor you. You may feel the system
working, or you may notice some noise, but this
is
normal. When your anti-lock system is adjusting brake
pressure to help avoid a braking skid, LOW
the TRAC
light will come on.See “Anti-Lock Brake System
Active Light” in the Index.
You can steer aroundthe obstacle while braking hard.
4-8
Braking in Emergencies
Steering
At some time, nearly every driver gets into a situation
that requires hard braking.
Power Steering
If you have anti-lock, you can steer and brake at the
same time. However,if you don’t haveanti-lock, your
first reaction -- to hit the brake pedal hard and holdit
down -- may be the wrong thing to do. Your wheels can
stop rolling. Once they do, the vehicle can’t respond to
your steering. Momentum will carry it in whatever
direction it was headed whenthe wheels stoppedrolling.
That could be offthe road, into the very thing you were
trying to avoid, or into traffic.
If you don’t have anti-lock, use a “squeeze” braking
technique. This will give you maximum braking while
maintaining steering control. You do this by pushing on
the brake pedal with steadily increasing pressure.
In an emergency you will probably want to “squeeze”
the brakes hard without locking the wheels. If you hear
or feel thewheels sliding, ease off the brake pedal. This
will help you retainsteering control. (If you do have
anti-lock, it’s different: see “Anti-Lock Brakes’’ in the
Index.)
In many emergencies, steering can helpyou more than
even the very best braking.
If you lose power steering assist because the engine
stops or the system is not functioning, you can steer but
it will take much more effort.
Steering Tips
Driving onCurves
It’s importantto take curves at a reasonable speed.
A lot of the “driver lost control” accidents mentioned on
the news happen oncurves. Here’s why:
Experienced driver or beginner, each of us is subject to
the same lawsof physics when driving oncurves. The
traction of the tires against the road surface makes it
possible for the vehicle to change its path when you turn
the front wheels. If there’s notraction, inertia will keep
the vehicle going in the samedirection. If you’ve ever
tried to steer a vehicle on wet ice, you’ll understand this.
The traction you can get in a curve depends on the
condition of your tires and the road surface, the angle
at which the curve is banked, and yourspeed. While
you’re in a curve, speed is the one factor you can
control.
4-9
Suppose you’re steering througha sharp curve.
Then you suddenly applythe brakes. Both control
systems -- steering and braking-- have to do their
work where the tires meet the road. Unless you have
four-wheel anti-lock brakes, adding the hard braking can
demand too much of those places.
You can lose control.
The same thing can happenif you’re steering through a
sharp curve and you suddenly accelerate. Those two
control systems -- steering and acceleration-- can
overwhelm those places where the tires meet the road
and make you lose control.
Steering in Emergencies
There are times when steering canbe more effective
than braking. For example, you come overhilla and
find a truck stoppedin your lane,or a car suddenly pulls
out from nowhere, or a child darts out from between
parked cars and stops right front
in of you. You can
avoid these problems by braking
-- if you can stopin
time. But sometimes you can’t; there isn’t room. That’s
the timefor evasive action-- steering around the
problem.
Your Pontiac can perform very well in emergencies
like
What should youdo if this ever happens? Ease up
on the
-- but, unless you have
these. First apply your brakes
brake or accelerator pedal, steer the vehicle the way you anti-lock, not enough to lock your wheels. (See
want it to go, and slow down.
“Braking in Emergencies” earlier inthis section.) It is
better to remove as much speed as you can from
a
Speed limit signs near curves warn that you should
possible collision. Then steer around the problem, to the
adjust your speed.Of course, the posted speeds are
based on good weather and road conditions. Under less left or right dependingon the space available.
favorable conditions you’ll want to
go slower.
An emergencylike this requires close attention and a
quick decision.If you are holding the steering wheel at
If you need to reduce your speed as you approach a
the
recommended9 and 3 o’clock positions, you can
curve, do itbefore you enter the curve, while your front
turn it a full 180 degrees very quickly without removing
wheels are straight ahead.
either hand. But you have to act fast, steer quickly, and
Try to adjust your speedso you can “drive” through the
just as quickly straighten the wheel once
you have
curve. Maintain a reasonable, steady speed. Wait
to
avoided the object.
accelerate until you are out of the curve, and then
accelerate gentlyinto the straightaway.
4-10
Off-Road Recovery
You may find sometime thatyour right wheels have
dropped off theedge of a road onto the shoulder while
you’re driving.
If the level of the shoulderis only slightly below the
pavement, recovery should be fairly easy.Ease off the
accelerator and then,if there is nothingin the way, steer
so that your vehicle straddles the edge
of the pavement.
You can turn the steering wheel up to
1/4 turn until the
right front tire contacts the pavement edge. Then turn
your steering wheelto go straight down the roadway.
The fact that such emergency situations are always
possible is a good reason to practice defensive driving at
all times and wear safety belts properly.
4-11
Passing
The driver of a vehicle about to pass another ona
two-lane highway waitsfor justthe right moment,
accelerates, moves aroundthe vehicle ahead, then goes
back into the right lane again.A simple maneuver?
Not necessarily! Passing another vehicle on a two-lane
highway is a potentially dangerous move, since the
passing vehicle occupiesthe same lane as oncoming
traffic for several seconds. A miscalculation, an error in
judgment, or a brief surrender to frustration or anger can
suddenly put the passing
driver face to face with the
worst of all traffic accidents-- the head-on collision.
s o here are some tips for passing:
e “Drive ahead.” Look down the road, to the sides, and
to crossroads for situations that might affect your
passing patterns.If you have any doubt whatsoever
about making a successful pass, wait fora better time.
e Watch for trafk signs, pavement markings, and lines.
If you can see a sign up ahead that might indicate
a
turn or an intersection, delay your pass.A broken
center line usually indicates it’sall right to pass
(providing the road aheadis clear). Never crossa solid
line on your side of the lane or
a double solid line,
even if the road seems empty of approaching
traffk.
4-12
e Do not get too close to the vehicle you want to pass
while you’re awaitingan opportunity. For one thing,
following too closely reduces your
area of vision,
especially if you’re followinga larger vehicle. Also,
you won’t haveadequate space if the vehicle ahead
suddenly slowsor stops. Keep backa reasonable
distance.
e When it lookslike a chance to passis coming up,
start to accelerate but stayin the right lane and don’t
get too close. Time yourmove so you will be
increasing speed asthe time comes to move into the
other lane. If the way is clear to pass, you will have a
“running start” that more than makes upfor the
distance you would lose by dropping back. Andif
something happens tocause you to cancel your pass,
you need only slow down and
drop back again and
wait for another opportunity.
If other cars are lined up to pass a slow vehicle, wait
your turn.But take care that someone isn’t trying
to
pass you as you pull
out to pass the slow vehicle.
Remember to glance over your shoulder and check
the blind spot.
0
Check your mirrors, glance over your shoulder, and
start your left lane change signal before moving out
of the right lane to pass. When you are
far enough
ahead of the passed vehicle to see its frontin your
inside mirror, activate your right lane change signal
and move back into the right lane. (Remember that
your right outside mirror is convex. The vehicle you
just passed may seem to be
farther away from you
than it really is.)
Try not to pass more than one vehicle at a time on
two-lane roads. Reconsider before passing the next
vehicle.
Don’t overtake a slowly moving vehicle too rapidly.
Even though the brake lights arenot flashing, it may
be slowing down orstarting to turn.
If you’re being passed, make it easy for the
following driver to get aheadof you. Perhaps you
can ease a little to the right.
Loss of Control
Let’s review what drivingexperts say about what
happens when the three control systems (brakes, steering
and acceleration) don’t have enough friction where the
tires meet the road to do what the driver has asked.
In any emergency, don’tgive up. Keep trying tosteer
and constantly seekan escape route or area of less
danger.
Skidding
In a skid, a driver can lose control of the vehicle.
Defensive drivers avoid most skidsby taking reasonable
care suited to existing conditions, and by not
“overdriving” those conditions. But skids are always
possible.
The three types of skids correspond to your Pontiac’s
three control systems. In the braking skid your wheels
aren’t rolling. In the steering or cornering skid, too
much speed or steering in a curve causes tires toslip and
lose cornering force. And in theacceleration skid too
much throttle causes the driving wheels to spin.
A cornering skid and anacceleration skid are best
handled by easing your foot off the accelerator pedal.
4-13
If your vehiclestarts to slide, ease yourfoot off the
accelerator pedal and quicklysteer the way you want
the vehicle to go. If you start steering quickly enough,
your vehicle may straightenout. Always be readyfor a
second skid if it occurs.
control. Push the brake pedal down steadily when you
have to stop suddenly. As long as the wheels are rolling,
you will have steering control.
Driving at Night
Of course, traction is reduced when water, snow, ice,
gravel, or other materialis on the road. For safety, you’ll
want to slow down andadjust your drivingto these
conditions. It is importantto slow down on slippery
surfaces because stopping distance will
be longer and
vehicle control morelimited.
While driving on a surface with reduced traction, try
your best to avoid sudden steering, acceleration, or
braking (including engine braking by shifting
to a lower
gear). Any sudden changes could cause the tires
to
slide. You may not realize the surface is slippery until
your vehicleis skidding. Learnto recognize warning
clues -- such as enough water, ice or packed snow on
the road to make a “mirrored surface” -- and slow
down when you have any doubt.
Lf you have the anti-lock braking system, remember:It
helps avoid only the brakingskid. If you do not have
Night driving is more dangerous
than day driving. One
anti-lock, then in a braking
skid (where the wheelsare
reason
is
that
some
drivers
are
likely
to be impaired-- by
no longer rolling), release enough pressure on the brakes
alcohol or drugs, with night vision problems, or by
to get the wheels rolling again. This restores steering
fatigue.
4-14
Here are some tips on night driving.
a Drive defensively.
e Don’t drink anddrive,
a Adjust your inside rearview mirror
to reduce the
glare from headlamps behind you.
a Since you can’t see as well, you may need
to slow
down andkeep more space between you and other
vehicles.
a Slow down, especially on higher speed roads.
Your
headlamps can light up onlyso much road ahead.
e In remote areas, watchfor animals.
a If you’re tired, pull off the road in a safe place and
rest.
driving, don’t wear sunglasses at night. They may
cut
down on glarefrom headlamps, but they also make a lot
of things invisible.
You can be temporarily blinded by approaching
headlamps. It can take a second or two, or even several
seconds, for your eyesto readjust to the dark. When you
are faced with severe glare (asfrom a driver who
doesn’t lower the high beams,or a vehicle with
misaimed headlamps), slow down little.
a
Avoid staring
directly into the approaching headlamps.
Keep your windshield and all the glass on your vehicle
clean -- inside and out. Glare at nightis made much
worse by dirton the glass. Even theinside of the glass
can build up afilm caused by dust. Dirty glass makes
lights dazzle and flash more than clean glass would,
making the pupils of your eyes contract repeatedly.
Night Vision
Remember that your headlamps light
up far less of a
roadway when you are in a turn
or curve. Keep your
No one can see as well at night as in the daytime. But
as
eyes moving; that way, it’s easier
to pick out dimly
we get older these differences increase. A 50-year-old
lighted
objects.
Just
as
your
headlamps
should be
driver may requireat least twice as much light to see the
checked regularly for proper aim,so should your eyes
same thing at night as a 20-year-old.
be examined regularly.Some drivers suffer from night
What you do inthe daytime can also affect your night
blindness -- the inability to see indim light -- and aren’t
vision. For example, if you spend the day in bright
even awareof it.
sunshine you are wise to wear sunglasses.Your eyes will
have less trouble adjusting to night. But if you’re
4-15
Driving in the Rain
The heavier the rain,the harder it is to see. Even if your
windshield wiper blades are in good shape, a heavy rain
can make it harder to seeroad signs and traffic signals,
pavement markings, the edgeof the road, and even
people walking.
It’s wise to keep your wiping equipment in good shape
and keep your windshield washer tank filled. Replace
your windshield wiper inserts when they show signs of
streaking or missing areas on the windshield, or when
strips of rubber start to separatefrom the inserts.
Rain and wet roads can mean driving
trouble. On a wet
road you can’t stop, accelerateor turn as well because
your tire-to-road tractionisn’t as good ason dry roads.
And, if your tires don’t have much tread
left, you’ll get
even less traction. It’s always wiseto goslower and be
cautious if rain startsto fall while youare driving. The
surface mayget wet suddenly when your reflexes are
tuned for driving on dry pavement.
4-16
Driving too fast through large water puddles or even
going through some car washes can cause problems, too.
The water may affect yourbrakes. Try to avoid puddles.
But i€you can’t, try to slow downbefore you hit them.
Hydroplaning doesn’t happen often. But it can if your
tires haven’t much treador if the pressure in one or
more is low. It can happen if a lot of water is standing on
the road. If you can seereflections from trees, telephone
poles, or other vehicles, and raindrops “dimple” the
water’s surface, there could be hydroplaning.
Hydroplaning usually happens at higher speeds.There
just isn’t a hard andfast rule about hydroplaning. The
best advice is to slow down when it is raining.
Some Other Rainy Weather Tips
0
Turn on your low-beam headlamps-- not just your
parking lamps -- to help make you more visible to
others.
0
Besides slowing down, allowsome extra following
distance. And be especially careful when you pass
another vehicle. Allow yourself more
clear room
ahead, and be prepared to have your view restricted
by road spray.
0
Have good tires with proper tread depth. (See
“Tires” inthe Index.)
Hydroplaning
Hydroplaning is dangerous. So much water can build up
under yourtires that they can actually ride on the water.
This can happen ifthe road is wet enough and you’re
going fast enough. When your vehicle is hydroplaning,
it has little or no contact with the road.
4-17
City Driving
Here are ways to increase your safety in city driving:
Try to use the freeways that rim and crisscross most
the
large cities. You’ll save time and energy. (See
next part, “Freeway Driving.”)
0
One of the biggest problems with city streets is the
amount of traffic on them. You’ll want to watch out
for
what the other driversare doing and pay attentionto
traffic signals.
4-18
Treat a green light as a warning signal.A traffic light
is there because the corner
is busy enoughto need it.
When a lightturns green, andjust before you start to
move, check both ways
for vehicles that have not
cleared the intersectionor may be running the red
light.
Freeway Driving
The most important adviceon freeway driving is: Keep
up with traffic and keep to the right. Drive at the same
speed most of the other driversare driving. Too-fast or
too-slow driving breaksa smooth traffic flow. Treat the
left lane on a freeway as a passing lane.
At the entrance thereis usually a ramp that leads to the
freeway. If you have a clear viewof the freeway as you
drive along the entrance ramp, you should begin to
check traffic. Try to determine where you expectto
blend with the flow.Try to merge into the gap at close to
the prevailing speed.Switch on your turn signal, check
your mirrors and glanceover your shoulder as often as
necessary. Try to blend smoothly with the traffic flow.
Once youare on the freeway, adjust your speed
to the
posted limit or to the prevailing rate if it’s slower.
Stay
in the right lane unless you want to pass.
Before changing lanes, check your mirrors. Then use
your turn signal.
Mile for mile, freeways (also called thruways, parkways,
expressways, turnpikes, or superhighways) are the safest
of all roads. But they have their own special rules.
Just before you leave the lane, glance quickly
over your
shoulder to make sure there isn’t another vehicle in your
“blind” spot.
4-19
Once you are moving on the freeway, makecertain you
allow a reasonable following distance, Expect to move
slightly slowerat night.
When you wantto leave the freeway, moveto the proper
lane well in advance. If you m i s s your exit do not, under
any circumstances, stop and back up. Drive onto the
next exit.
The exit ramp can becurved, sometimes quite sharply.
The exit speed is usually posted.
Reduce your speed according to your speedometer, not
to your senseof motion. After driving for any distance
Is your vehicle readyfor a long trip? If you keep it
serviced and maintained, it’s readyto go. If it needs
service, have it done before starting out. Of course,
you’ll find experienced andable service experts in
Pontiac dealers all across North America. They’ll..be
ready and willingto help if you needit.
Here are some things youcan check before a trip:
e Windshield Washer Fluid:Is the reservoir full? Are
all windows clean inside and outside?
0
Wiper Blades: Are they in good shape?
0
at higher speeds, you may tend to think you are going
slower than you actually are.
Fuel, Engine Oil, Other Fluids: Have you checked
all levels?
0
Lamps: Are they all working? Arethe lenses clean?
Before Leavingon a Long Trip
0
Tires: They are vitally important to a safe,
trouble-free trip. Is the tread good enoughfor
long-distance driving? Are the tires all inflated to the
recommended pressure?
Make sure you’re ready. Try to be well rested. If you
must start when you’re not fresh -- such as after a day’s
work -- don’t planto make too many miles thatfirst part
of the journey. Wear comfortable clothing and shoes you
can easily drive in.
e Weather Forecasts:What’s the weatheroutlook
along yourroute? Should you delay yourtrip a short
time to avoid a major storm system?
0
4-20
Maps: Do you have up-to-date maps?
Highway Hypnosis
Hill and Mountain Roads
Is there actuallysuch a condition as “highway
hypnosis”? Or is it just plain falling asleep at the wheel?
Call it highway hypnosis,lack of awareness, or
whatever.
There is something about an easy stretchof road with
of the tires on the
the same scenery, along with the hum
road, the droneof the engine, and the rush
of the wind
against the vehicle that can make you sleepy. Don’titlet
happen to you!If it does, your vehicle can leave the
road in less than a second, and you could crash and be
injured.
What can youdo about highway hypnosis? First, be
aware thatit can happen.
Then here are some tips:
0
Make sure your vehicle is well ventilated, with a
comfortably cool interior.
0
Keep your eyes moving. Scan the road ahead and to
the sides. Check your rearview mirrors and your
instruments frequently.
0
If you get sleepy, pulloff the road into a rest, service,
or parking area and takea nap, get some exercise, or
both. For safety, treat drowsinesson the highway as
an emergency.
Driving on steep hills or mountains
is different from
driving in flat or rolling terrain.
4-21
If you drive regularlyin steep country, or 11 you re
planning to visit there,here are some tips that can make
your trips safer and moreenjoyable.
0
Keep your vehicle in good shape. Checkall fluid
levels andalso the brakes, tires,cooling system and
transaxle. Theseparts can work hard on mountain
roads.
Know how to go down hills. The most important
thing to know is this: let your engine do someof the
slowing down.Shift to a lower gear when you go
down a steep or long hill.
0
Know how to go uphill. You may want to shift down
to a lower gear. The lower gears help cool your engine
and transaxle, and youcan clirnb the hill better.
0
Stay in your own lane when driving on two-lane
roads inhills or mountains.Don’t swing wideor cut
across thecenter of the road. Driveat speeds that let
you stay in your own lane.
a As you go over the topof a hill, be alert. There coula
be something in your lane, like a stalled car or an
accident.
0
4-22
You may see highway signs on mountains thatwarn of
special problems. Examples are long grades, passing or
no-passing zones, a falling rocks area, or winding
roads. Be alert to these andtake appropriate action.
Winter Driving
Here are some tips for winter driving:
Have your Pontiac in good shapefor winter. Be sure
your engine coolant mixis correct.
You may want to put winter emergency supplies in
your trunk.
Include an ice scraper, a small brush or broom, a supply
of windshield washerfluid, a rag, some winter outer
clothing, a small shovel, a flashlight, a redcloth, and a
couple of reflective warning triangles. And, ifyou will
be driving under severe conditions, include a small bag
of sand, a pieceof old carpetor a coupleof burlap bags
to help provide traction.Be sure you properly secure
these items in your vehicle.
4-23
Driving on Snow or Ice
Most o€the time, those places where your tires meet the
road probablyhave good traction.
However, if thereis snow or ice between your tires and
the road, you can have a very slippery situation. You’ll
have a lot less tractionor “grip” and will need tobe very
careful.
What’s the worst time for this? “Wet ice,” Very cold
snow or ice can be slick and hard to drive on. But wet
ice can be even more troublebecause it may offer the
least tractionof all. You can get “wet ice” when it’s
about freezing (32OF; 0”G ) and freezing rain begins to
€all. Try to avoid drivingon wet ice until salt and sand
crews can get there.
Whatever the condition-- smooth ice, packed, blowing
or loose snow -- drive withcaution. Accelerate gently.
Try not to breakthe fragile traction. If you accelerate
too fast, the drive wheels will spin and polish
the surface
under the tires even more.
Unless you havethe anti-lock braking system, you’ll
want to brake very gently,too. (If you do haveanti-lock,
see “Anti-Lock” inthe Index. This system improves
your vehicle’s ability to make a hard stop ona slippery
road.) Whether you have the
anti-lock braking systemor
not, you’ll wantto begin stopping sooner than you
would on dry pavement. Without anti-lock
brakes, if
you feel your vehicle beginto slide, let up on the brakes
a little. Push the brake pedal down steadily to
get the
most traction you can.
4-24
Remember, unless you have anti-lock, if you brake so
hard that your wheels stop rolling, you’ll just slide.
Brake so your wheels always keep rolling and you can
If You’re Caught in a Blizzard
still steer.
Whatever your braking system, allow greater
following distance on any slippery road.
Watch/--’
for slippery spots. The road might be fine
until you hit a spot that’s covered withice. On an
otherwise clear road, ice patches may appear in
shaded areas where the sun can’t reach: around
clumps of trees, behind buildings, or under bridges.
Sometimes the surface of a curve or an overpass may
remain icy when the surrounding roads are clear. If
you see a patch of ice ahead of you, brakebefore you
are on it. Try not to brake while you’re actually on
the ice,and avoid sudden steering maneuvers.
If you are stopped by heavy snow, you could be ain
serious situation. You should probably stay with your
vehicle unless you know for sure that you are near help
and you can hike through the snow. Here are some
things to do to summon help andkeep yourself and your
passengers safe: Turn on your hazard flashers. Tie a red
4-25
cloth to your vehicle to alert police that you’ve been
stopped by the snow. Puton extra clothing or wrap a
blanket around you.If you have no blankets or extra
clothing, make body insulators from newspapers, burlap
bags, rags, floor mats-- anything you can wrap around
yourself or tuck under your clothing to keep warm.
You can run the engine to keep warm,
but be careful.
Run your engine only as long as you must. This
saves
fuel. When you runthe engine, makeit go a little faster
than just idle. Thatis, push the accelerator slightly.
This
uses lessfuel for the heat that you get and
it keeps the
battery charged.You will need a well-charged battery to
restart the vehicle, and possibly
for signaling later on
with your headlamps.Let the heater runfor awhile.
4-26
Then, shut theengine off and close the window almost
all the way to preserve the heat, Start the engine again
you feel really uncomfortable
and repeat this only when
from the cold. Butdo it as little as possible. Preserve the
h e 1 as long as you can. To help keep warm, you can get
out of the vehicle anddo sume fairly vigorous exercises
every half houror so until help comes.
The label tells you the propersize, speed rating and
recommended inflation pressuresfor the tires on your
vehicle. It also gives you important information about
the number of people that canbe in your vehicle and the
total weight you can carry. This weight is called the
of all
vehicle capacity weight and includes the weight
occupants, cargo and all nonfactory-installed options.
Loading Your Vehicle
MFD BY GENERAL MOTORS CORP
DATE GVWR GAWR FRT GAWR RR
TIRE-LOADING INFORMATION
OCCUPANTS
VEHICLE CAP. WT.
TOTAL
LBS.
KG
FRT. CTR. RR.
/bI
I
MAX. LOADING & GVWR SAME AS VEHICLE
CAPACITY
WEIGHT
XXX
COLD
TIRE
PRESSURE
SPEED
TIRE SIZE
PSI/KPa
RTG
FRT.
RR.
SPA.
IF TIRES ARE HOT, ADD 4PS1/28KPa
SEE OWNER’S MANUAL FOR ADDITIONAL
INFORMATiON
\
/
Two labels on your vehicle show how much weight
it
may properly carry.The Tire-Loading Information label
is on the rear edge of the driver’s dooron four-door
models and insidethe trunk lid on two-door models.
THIS VEHICLE CONFORMS TO ALL APPLICABLE U.S. FEDERAL MOTOR VEHICLE
SAFETY, BUMPER, AND THEFT PREVENTION
STANDARDS IN EFFECT ON THE DATE OF
MANUFACTURE SHOWN ABOVE.
The other label is the Certification label, found
on the
rear edge of the driver’s door. It tells you the
gross
weight capacity of your vehicle, called the GVWR (Gros
Vehicle Weight Rating). The GVWR includes the weight
of the vehicle, all occupants, fuel and cargo. Never
exceed the GVWR for your vehicle or the Gross
Axle
Weight Rating (GAWR)for either the front or rear axle.
4-27
If you do have a heavy load, spread it out. Don’t carry
more than 167 pounds (75 kg) in your trunk.
~
NOTICE:
~~
~
~~
1
Your warranty does not cover parts or
components that fail because of overloading.
If you put things inside your vehicle
-- like suitcases,
tools, packages or anything else-- they will go as fast as
the vehicle goes. If you have to stop or turn quickly, or
if there is a crash, they’ll keepgoing.
4-28
Towing a Trailer
Your vehicle can towa trailer. To identify what the
vehicle trailering capacity is for your vehicle, you
of the Trailer”
should read the information in “Weight
that appears later in this section. But trailering
is
different thanjust driving your vehicleby itself.
Trailering means changes in handling, durability, and
fuel economy. Successful, safe trailering takes correct
equipment, andit has to be used properly.
That’s the reasonfor this part. In it are many
time-tested, important trailering tips and safety rules.
Many of these are importantfor your safety and thatof
your passengers. So please read this section carefully
before you pull a trailer.
NOTICE:
Pulling a trailer improperly can damage your
vehicle and result in costly repairs not covered
by
your warranty.To pull a trailer correctly, follow
the advice in this part, and see your Pontiac
dealer for important information about towing
a
trailer with your vehicle.
Load-pulling components such as the engine, transaxle,
wheel assemblies, and tiresare forced to work harder
against the drag of the added weight.
The engine is
required to operate at relatively higher speeds and under
greater loads, generating extra heat. What’s more, the
trailer adds considerably to wind resistance, increasing
the pulling requirements.
4-29
If You Do DecideTo PulI A Trailer
Three important considerations have to do with weight:
If you do, here are some important points.
Weight of the Trailer
There are many different laws, including speed limit
restrictions, having to do with trailering. Make sure
your rig will belegal, not only where youlive but
also whereyou’ll be driving. A good source for this
infomation can be state or provincial police.
0
Consider using a sway control.
You can aska hitch dealer about swaycontrols.
0
0
0
Don’t tow a trailer at all during the first 1,000 miles
(1 600 km) your new vehicle is driven. Your engine,
axle or other parts could be damaged.
Then, during thefirst 500 miles (800 km) that you
tow a trailer, don’tdrive over 50 mph (80 km/h) and
don’t makestarts at full throttle. This helps your
engine and other partsof your vehicle wearin at the
heavier loads.
Obey speedlimit restrictions when towinga trailer.
Don’t drive faster than the maximum posted speed
for trailers (or no more than55 mph (90 krn/h)) to
save wear on your vehicle’s
parts.
4-30
How heavy cana trailer safely be?
It should never weigh more
than 1,000 pounds (450 kg).
But even thatcan be too heavy.
It depends on how you planto use your rig. For
example, speed, altitude, roadgrades, outside
temperature and how much your vehicle is used
to pull a
trailer are all important. And,it can also depend on any
special equipment that you
have on your vehicle.
You can ask your dealer
for our trailering information or
advice, or you can write usat Customer Assistance
Center, Pontiac Division, One
Pontiac Plaza, Pontiac,
MI 48340-2952.
In Canada, write to General Motorsof Canada Limited,
Customer Assistance Center,1908 Colonel SamDrive,
Oshawa, Ontario L1H 8P7.
Weight of the Trailer Tongue
The tongue load (A) of any trailer
is an important
weight to measure becauseit affects the total capacity
weight of your vehicle.The capacity weight includes the
curb weight of the velucle, anycargo you may carry in
it, and the people who willbe riding in the vehicle. And
if you will tow a trailer, you must subtract the tongue
load from your vehicle’s capacity weight because your
vehicle will be carrying that weight, too.
See “Loading
Your Vehicle” in the Indexfor more information about
your vehicle’s maximumload capacity.
If you’re using a “dead-weight” hitch, the trailer
tongue (A) should weigh 10% of the total loaded
trailer weight (B). If you have a “weight-distributing”
hitch, the trailer tongue(A) should weigh 12% of the
total loaded trailer weight(B).
After you’ve loaded your trailer, weigh the trailer and
are
then the tongue, separately, to see if the weights
proper. If they aren’t, you may be able to get them right
simply by moving some items around in the trailer.
Total Weighton Your Vehicle’s Tires
Be sure your vehicle’s tires are inflated
to the
recommended pressure for cold tires. You’ll find these
numbers on the Tire-Loading Information label (found
on the rear edge of the driver’s door
or on the inside of
the trunk lid)or see “Loading Your Vehicle” in the
Index. Then be sure you don’tgo over the GVW limit
for your vehicle, including the weight
of the trailer
tongue.
A
B
4-31
Hitches
Safety Chains
It’s important to have the correct hitch equipment.
Crosswinds, large trucks goingby, and roughroads are a
few reasons why you’ll need
the right hitch. Here are
some rulesto follow:
You should always attachchains between your vehicle
and your trailer. Cross the safety
chains under the tongue
of the trailer so that the tonguewill not drop to the road
if it becomes separated fromthe hitch. Instructions
about safetychains may be providedby the hitch
manufacturer or by thetrailer manufacturer. Follow the
manufacturer’s recommendationfor attaching safety
chains and do not attach them
to the bumper. Always
leave just enough slackso you can turn with yourrig.
And, never allow safetychains to drag on the ground.
0
Will you have to make any holes in the body of your
vehicle when youinstall a trailer hitch? If you do,
then be sure to seal the holes later when you remove
the hitch. If you don’tseal them, deadlycarbon
monoxide (CO) from your exhaustcan get into your
vehicle (see “Carbon Monoxide”in the Index). Dirt
and water can, too.
The bumpers on your vehicle are not intendedfor
hitches. Do not attach rental hitches or other
bumper-type hitches to them. Use onlya
frame-mounted hitch thatdoes not attachto the
bumper.
4-32
Trailer Brakes
Driving with a Trailer
Does your trailer have its own brakes? Be sure to read
and follow the instructions for the trailer brakes so
you’ll be able to install, adjust and maintain them
properly.
Towing a trailer requires a certain amount of experience.
Before setting out forthe open road, you’ll want to get
to know yourrig. Acquaint yourself with thefeel of
handling and braking withthe added weightof the
trailer. And always keep in mind that
the vehicle you are
driving is now a good deal longer and not nearlyas
responsive as yourvehicle is by itself.
0
If your vehicle has anti-lock brakes, do not try to tap
into your vehicle’sbrake system. If you do, both
brake systems won’t work well, orat all.
a Even if your vehicle doesn’t have anti-lock brakes,
don’t tapinto your vehicle’s brake system if the
trailer’s brake system will use more than 0.02 cubic
inch (0.3 cc) of fluid from your vehicle’s master
cylinder. If it does,both braking systems won’t work
well. You could evenlose your brakes.
0
Will the trailer brake parts take
3,000 psi (20 650 Wa)
of pressure? If not, the trailer brake system must not
be used with your vehicle.
0
If everything checks out this far, then make the brake
fluid tap at the upper rear master cylinder port. But
don’t usecopper tubing for this. If you do, itwill
bend and break off. Use steel brake tubing.
Before you start, check the trailer hitch and platform
(and attachments), safety chains, electrical connector,
lamps, tires and mirror adjustment. If the trailer has
electric brakes, start your vehicle andtrailer moving and
then apply the trailer brake controller by hand to be sure
the brakes are working. This lets you check your
electrical connection at the same time.
During your trip, check occasionally to besure that the
load is secure, and that the lamps and anytrailer brakes
are still working.
Following Distance
Stay atleast twice as far behind the vehicle aheadas you
would when driving yourvehicle without a trailer. This
can help you avoidsituations that require heavy braking
and suddenturns.
4-33
Passing
mrn Signals When Towing a Trailer
You’ll need more passing distanceup ahead when
a good deal
you’re towing a trailer. And, because you’re
When you tow a trailer, your vehicle has to have
a
different turn signal flasher and extra wiring.
The green
arrows on your instrument panel will flash whenever
you signal a turn or lane change. Properly hooked
up,
the trailer lamps will also flash, telling other drivers
you’re about to turn, change lanes
or stop.
longer, you’ll need to go
much farther beyond the
passed vehicle before you
can return to your lane.
Backing Up
Hold the bottomof the steering wheel withone hand.
to the left, just move that hand
Then, to move the trailer
to the left.To move the trailerto the right, move your
hand to the right. Always back
up slowly and, if
possible, have someone guide you.
Making Th-ns
I NOTICE:
Making very sharp turns while trailering could
cause the trailer to come in contact with the
vehicle. Your vehicle could be damaged. Avoid
making very sharp turns while trailering.
When you’re turning with a trailer, make wider turns than
normal. Do this so your trailer won’t strike soft shoulders,
curbs, road signs, trees, or other objects. Avoid jerky or
sudden maneuvers. Signal well in advance.
4-34
When towing a trailer, the green arrows on your
instrument panel will flash
for turns evenif the bulbs on
the trailer are burned out. Thus, you may thmk drivers
are not. It’s
behind you are seeing your signal when they
important to check occasionallyto be sure the trailer
bulbs are still working.
Driving OR Grades
Reduce speed and shift to a lower gear before you start
down a long or steep downgrade. If you don’t shift
down, you might have to use your brakesso much that
they would get hot and no longer work well.
On a long uphill grade, shift down andreduce your
speed to around 45 mph (70 km/h) to reduce the
possibility of engine and transaxle overheating.
If you have Overdrive, you may want todrive in
THIRD (3), instead of DRIVE (D).
Parking on Hills
You really should not park yourvehicle, with a trailer
attached, on a hill. If something goes wrong, yourrig
could start to move. People can be injured, and both
your vehicle and the trailer can be damaged.
But if you ever have to park your rig on a hill, here’s
how to do it:
1. Apply your regular brakes, but don’t shift into
PARK (P) yet.
2. Have someone place chocks under the trailer wheels.
3. When the wheel chocksare in place, release the
regular brakes until the chocks absorb the load.
4. Reapply the regular brakes. Then apply your parking
brake, and thenshift to PARK (P).
5. Release the regular brakes.
When You Are Ready to Leave After
Parking on a Hill
1. Apply your regular brakes and hold the pedal down
while you:
Start your engine;
0
0
Shift into a gear; and
Release the parking brake.
2. Let up on the brake pedal.
3. Drive slowly untilthe trailer is clear of the chocks.
4. Stop and have someonepick up and store the chocks.
Maintenance When Trailer Towing
Your vehicle will need service more often
when you’re
pulling a trailer. See the Maintenance Schedulefor more
on this. Things thatare especially important intrailer
operation are automatic transaxlefluid (don’t overfill),
engine oil, belt, cooling system, and brake adjustment.
Each of these is covered in this manual,and the Index
will help youfind them quickly.If you’re trailering, it’s
a good idea to review these sections beforeyou start
your trip.
Check periodically tosee that all hitch nuts and bolts are
tight.
Section 5 Problems on the Road
Here you'll find what to do about some problems that
can occur on the road.
Hazard Warning Flashers
Your hazard warning flashers let you warn others. They
also let police knowyou have a problem. Your front and
rear turn signal lamps will flash on and off.
Press the switch tomake
your front and rear turn
signal lamps flash on and
off. Your hazard warning
flashers work no matter
what position your key isin,
To turn off the flashers, press the switch again. When
the hazard warning flashers are on, your turn signals
won't work.
5-1
Other WarningDevices
If you c m y reflective triangles,you can set one up at
the sideof the road about300 feet (100 m) behind your
vehicle,
Jump Starting
If your battery hasrun down, you may want to use
another vehicle and some
jumper cables to start your
Pontiac. But please follow the steps below do
to it
safely.
NOTICE:
Ignoring these steps could result costly
in damage
to yourvehicle that wouldn’t be coveredby your
warranty. Trying to start your Pontiac
by
pushing orpulling won’t work, andit could
damage yourvehicle.
To Jump Start Your Pontiac
1. Check the other vehicle.It must have a 12-volt
battery with a negative ground system.
NOTICE:
If the othersystem isn’ta 12-volt system witha
negative ground, bothvehicles can be damaged.
5-2
2. Get the vehicles cbse enough so the jumper cables
can reach, but be sure the vehicles aren’t touching
each other. If they are, it could cause a ground
connection you don’t want.You wouldn’t be able to
start your Pontiac, and the bad grounding could
damage the electrical systems.
4.. Open the hoods and locate the batteries.
You could be injured if the vehicles roll. Set the
parking brake firmly on each vehicle. Put an
automatic transaxle in PARK (P) or a manual
transaxle in NEUTRAL (N).
3. Turn off the ignition on bothvehicles. Turn off all
lamps that aren’t needed, and radios. This will avoid
sparks and help save both batteries. And it could
save your radio!
NOTICE:
If you leave your radio
on, it couldbe badly
damaged. The repairs wouldn’tbe covered by
your warranty.
5 . Find the positive (+) and negative (-) terminals on
each battery. Your Pontiac has a remote positive (+)
jump starting terminal. The terminal is on the same
side of the engine compartment as your battery.
You
should always usethe remote positive (+) terminal
instead of the positive (+) terminal on your battery.
To uncover the remote positive (+) terminal, lift the
red plastic cap.
5-3
6. Check that the jumper cables don’t have loose or
missing insulation. If they do, YOU could get a shock,
The vehicles could be damaged, too.
Before you connect the cables, here are some basic
things you should know.Positive (+) will go to
positive (+) and negative(-) will go to negative (-)
or a metal engine part. Don’t connect (+) to (-), or
you’ll get a short that would damage the battery and
maybe other parts, too.
5-4
8. Don’t let the other end
touch metal. Connectit
to the positive(+)
terminal of the good
battery. Use a remote
positive (+) terminal if
the vehicle has one.
7. Connect the red positive(+) cable to the positive (+)
terminal of the vehicle with the dead battery. Use a
remote positive (+) terminal if the vehicle has one.
9. Now connect the black
negative (-) cable to the
(-)
good battery’s negative
terminal. Don’t let the
other end touchanything
until the next step.The
other endof the negative
cable doesn’t go to the
dead battery. It goes to a
heavy, unpainted, metal
part on the engine of the
vehicle with the dead
battery.
5-5
13.
10. Attach the cable at least18 inches (45 cm) away
from the dead battery, but not near engine parts that
move. The electrical connectionis just as good
there, but the chanceof sparks getting back to the
battery is much less.
11. Now start the vehicle with the good battery and run
the enginefor a while.
12. Try to start the vehicle with the dead battery.itIf
won’t start aftera few tries,it probably needs
service.
5-6
Remove the cables in reverse order
to prevent
electrical shorting. Takecare that they don’t touch
each other or any other metal.
A. Heavy Metal Engine Part
B. Good Battery
C. Dead Battery
Towing Your Vehicle
If your vehicle has been changed
or modified sinceit
was factory-new by adding aftermarket items like fog
lamps, aero skirting, or special tires and wheels, these
instructions and illustrations may not be correct.
Before you do anything, turn on the hazard warning
flashers.
When you call, tell the towing service:
That your vehicle cannot be towed from the front or
rear with sling-type equipment.
That your vehicle has front-wheel drive.
The make, model, and year of your vehicle.
Whether you can still move the shift lever.
If there was an accident, what was damaged.
Try to havea GM dealer ora professional towing service
tow your Pontiac. The usual towing equipment is:
When the towing service arrives, let the tow operator
know that this manual contains detailed towing
instructions and illustrations. The operator may want to
see them.
A. Sling-type Tow Truck
B. Wheel-lift Tow Truck
C. Car Carrier
~-
.
5-7
When your vehicleis being towed, havethe ignition
key off. The steering wheel shouldbe clamped ina
straight-ahead position, with a clamping device
designed for towing service. Donot use the vehicle’s
steering column lockfor this. The transaxle shouldbe
in NEUTRAL (N) and the parking brake released.
Don’t have your vehicle towedon the front wheels,
unless you must.If the vehicle must be towed on the
front wheels, don’tgo more than 35 mph (55 km/h) or
farther than 50 miles (80 km) or your transaxle will be
damaged. If these limits must beexceeded, then the
front wheels haveto be supported ona dolly.
5-8
Front Towing Hookups
Attach T-hook chains in
front of the wheels into the
side slots of the cradle on
both sides.
5-9
NOTICE:
Do not tow with sling-type
equipment or
fascialfog lamp damagewill occur.
Towing a vehicle over rough surfaces
could
vehicle
damage a vehicle. Damage can occur from
to groundor vehicle to wheel-lift equipment. To
help avoid damage, installa towing dolly and
raise thevehicle until adequate clearance
is
obtained between the ground and/orwheel-lift
equipment.
Do not attach winch cablesor J-hooks to
suspension components when using
car carrier
equipment. Always use T-hooks inserted in the
T-hook slots.
Use wheel liftor car carrier equipment. Additional
ramping maybe required for car carrier equipment. Use
safety chains and wheel straps.
5-10
Attach a separate safety
chain around the outboard
end of each lower control
arm.
Rear Towing Hookups
Attach T-hook chains into
the slotted holes in the
bottom of the floor pan
support rails just ahead of
the rear wheels on both
sides.
5-11
NOTICE:
Do not tow with sling-typeequipment or the rear
bumper valancewill be damaged.
Towing a vehicle over rough surfacescould
damage avehicle. Damage can occurfrom vehicle
to groundor vehicle to wheel-lift equipment. To
help avoid damage, install a towingdolly and raise
the vehicle until adequate clearanceis obtained
between the ground and/orwheel-lift equipment.
Do not attach winch cables or J-hooks to suspension
components when using car carrierequipment.
Always use T-hooksinserted in the T-hook slots.
Use wheellift or car carrier equipment. Additional
ramping maybe required for car carrier equipment. Use
safety chains and wheelstraps.
5-12
Attach a separate safety
chain around the outboard
end of each lowercontrol
arm.
Engine Overheating
You will find a coolant temperature gage and a warning
light about a hot engine on yourinstrument panel. See
“Engine Coolant Temperature Gage” and “Engine
Coolant Temperature WarningLight” in the Index. You
also have a low coolant light on your instrument panel.
See “Low Coolant Light” in the Index.
If Steam Is Coming From Your Engine
NOTICE:
If your engine catches fire because you keep
driving with no coolant, your vehicle can be
badly damaged. The costly repairs would not
be covered by your warranty.
If No Steam Is Coming From Your Engine
If you get theoverheat warning butsee or hear no
steam, the problem may not be tooserious. Sometimes
the engine can get a little too hot when you:
Climb a long hill on a hot day.
Stop after high speed driving.
Idle for long periods in traffic.
Tow a trailer.
5-13
If you get the overheat warning with no sign of steam,
try this for a minute or so:
1. Turn off your air conditioner.
2. Turn on your heater tofull hot at the highest fan
speed and open the window as necessary.
3. If you’re in a trafficjam, shift to NEUTRAL (N);
otherwise, shift to the highest gear while
driving -- DRIVE (D) or THIRD (3).
If you no longer have the overheat warning, you can
drive. Just to be safe, drive slower
for about ten minutes.
If the warning doesn’tcome back on, you can drive
normally.
If the warning continues, pull over, stop, and park your
vehicle right away.
If there’s still no sign of steam, you can idle the engine
for two or three minutes while you’re parked, to if
see
the warning stops. But then,
if you still have the
warning, turn ofSthe engine and get everyone out
of the vehicle until it cools down.
You may decide not to lift the hood but to get service
help right away.
5-14
3.1L L82 (Code M) Engine
When you decide it’s safe to lift the hood, here’s what
you’ll see:
A. Coolant Recovery Tank
B. Radiator Pressure Cap
C. Electric Engine Fans
3.4L L27 (Code X) Engine
The coolant level should be at orabove theCOLD mark.
If it isn't, you may have a leakin the radiator hoses,
heater hoses, radiator, water pump
or somewhere else in
the cooling system.
If the coolant inside the coolant recovery tankis boiling,
don't do anything else until it cools down.
5-15
How to Add Coolant to the Coolant
Recovery Tank
If you haven’t founda problem yet, but the coolant level
isn’t at theCOLD mark, adda 50/50 mixture of clean
water (preferably distilled) and a proper antifreezeat the
coolant recovery tank. (See“Engine Coolant” in the
Index for more information aboutthe proper coolant
mix.)
I
I
I
NOTICE:
Engine damage fromrunmng your engine
without coolantisn’t covered by your warranty.
If there seemsto be noleak, with the engine on check to
see if the electric engine fan(s) are running. If the engine
is overheating, both fan(s) should be running.If they
aren’t, your vehicle needsservice.
5-16
NOTICE:
In cold weather, water can kreeze and crack the
engine, radiator, heater core and other parts. Use
the recommended coolant.
When the coolantin the coolant recovery tankis at the
COLD mark, start your vehicle.
If the overheat warning continues, there’s
one more
thing you cantry. You can add the proper coolant mix
directly to the radiator, but besure the cooling systemis
cool before you do it.
5-17
5-18
How to Add Coolant to the Radiator
NOTICE:
Your engine has a specific radiator fill procedure.
Failure to follow this procedure could cause your
engine to overheat and be severely damaged.
i
2. Then keep turning the
pressure cap, but now
push down as you turn
it. Remove the pressure
cap.
1. You can remove the
radiator pressure cap
when the cooling
system, including the
radiator pressure cap and
upper radiator hose, is
no longer hot. TU^ the
pressure cap slowly to
the left until it first
stops. (Don’t press down
while turning the
pressure cap.)
If you heara hiss, wait for that to stop. A hiss means
there is still some pressure left.
5-19
3. After the engine cools, open the coolantair bleed
valve.
3.4L LQl (Code X) Engine
3.1L L82 (Code M) Engine
3.1L V6 (VIN Code M): There are two bleed valves.
One is located on the thermostat housing.The other is
located on the thermostat bypasstube.
5-20
3.4L V6 (VIN Code X): There are two bleed valves.
They are located on the thermostat housing and heater
inlet pipe.
Fill the radiator with the
proper mix, up to the
base of the filler neck,
If you see a stream of
coolant coming fi-om an
air bleed valve, close the
valve. Otherwise, close
the valves after the
radiatur is filled.
5. Rinse or wipe any spilled coolant from the engine
and compartment.
6. Then fill the coolant recovery tank to the COLD
mark.
7. Put the cap back on the coolant recovery tank, but
leave the radiator pressure cap off,
5-21
10. Then replace the
pressure cap. At any
time during this
procedure if coolant
begins to flow out of
the filler neck, reinstall
the pressurecap. Be
sure the arrowson the
pressure cap line up
like this.
8. Start the engine andlet it run until you can feel the
upper radiator hose getting
hot. Watch outfor the
engine fans.
9. By this time the coolant level inside the radiator
filler neck may be lower. If the level is lower, add
more of the proper mix through the filler neck until
the level reaches the base of the
filler neck.
5-22
11. Check the coolantin the recovery tank. The level in
the coolant recovery tank should be the
at HOT
mark when the engine is hot
or at the COLD mark
when the engineis cold.
If a Tire Goes Flat
Changing a Flat Tire
But if you should ever have a “blowout,” here are a-few
tips about what to expect and what to do:
If a front tire fails, the flat tire will create a drag that
pulls the vehicle toward thatside. Take your foot off the
accelerator pedal andgrip the steering wheel firmly.
Steer to maintain laneposition, then gently braketo a
stop well out of the traffic lane.
A rear blowout, particularly on a curve, acts much like a
skid and may require the same correctionyou’d use in a
skid. In any rear blowout, remove yourfoot from the
accelerator pedal. Get the vehicle under controlby
steering the way you want the vehicleto go. It may be
very bumpy and noisy, but you can still steer. Gently
brake to a stop, well off the roadif possible.
If a tire goes flat, the next part shows how to use your
jacking equipment to change a flat tire safely.
-
5-23
cover counterclockwise to
remove it. Then lift and
remove the cover.
Turn the wing nut
counterclockwise and
remove it. Then lift off the
spacer and remove the spare
tire.
5-24
If there is a wheel cover,
loosen the plastic nutcaps
with the wheel wrench.
They won’t come off. Then,
using the flat end of the
wheel wrench, pry along the
edge of the cover untilit
comes off. Be careful; the
edges may be sharp. Don’t
try to remove the cover with
your bare hands.
If your vehicle has wheel nut caps, remove them using
the wheel wrench.
Turn the nut holding thejack and wrench
counterclockwise and removeit. Then remove
the jack and wrench.
5-25
Turn the jack handle clockwise to raise the jack lift head
a few inches.
Position thejack under the
vehicle andraise the jack
lift head untilit fits firmly
into the notch in the
vehicle’s frame nearest the
flat tire.
Using the wheel wrench, loosen all the wheel nuts.
Don’t remove them yet.
5-26
Put the compact spare tire near you.
I
I NOTICE:
the vehicleto fall off the jack. Be sure to fit the
proper location before
jack lift head into the
raising your vehicle.
Raise the vehicleby turning thejack handle clockwise.
Raise the vehiclefar enough off the groundfor the spare
tire to fit under the vehicle. Remove all wheel nuts and
take off theflat tire.
5-27
Remove any rust or dirt from the wheelbolts, mounting
surfaces and spare wheel. Place the spare on the wheel
mounting surface.
Replace the wheel nutswith
the rounded endof the nuts
toward the wheel. Tighten
each nut by hand untilthe
wheel is held againstthe
hub.
5-28
Tighten the wheel nuts
firmly in a crisscross
sequence as shown.
Lower the vehicle by turning the
jack handle
counterclockwise, Lower the jack completely.
5-29
Don’t try to put the wheel coveron your compact spare
tire. It won‘t fit. Store the wheel cover in the trunk until
you have theflat tire repairedor replaced.
I NOTICE:
Wheel covers won’t fit
on your compact spare.If
you try to put a wheel cover
on your compact
spare, you could damage the cover or the spare.
After you’ve put the compact sparetire on your vehicle,
you’ll needto store the flat tire in your trunk. Use the
following procedure to secure theflat tire in the trunk.
Put the flat tire in the trunkso the side that faces out
when it is on the vehicle is facing down.
The full-size
tire will not fit down into the well. Placeit SO the front is
in the well and the rear out
is of the well.
Put the bolt through one of the wheel nut holes,
install
the retainer over the bolt, then
install the wing nut.Put
the spacer and nut next to the
tire in the well. Store the
cover as far forward as possible.
The compact spare is fortemporary use only.Replace
the compact spare tire with a full-size tire as soon as you
can. See “Compact Spare Tire” in the Index. See the
storage instructions label to replace your compact spare
into your trunk properly.
1. Nut
2. Cover
3. Wing Nut
4.
5.
6.
7.
Spacer
Tire
Wrench
Nut
8. Retainer
9. Jack
1.0. Bolt
5-31
Compact Spare Tire
Although the compact spare wasfully inflated when
your vehicle wasnew, it can lose air aftera time. Check
the inflation pressure regularly.It should be 60 psi
(420 kPa). Afterinstalling the compact spare on your
vehicle, you should stopas soon as possible and make
sure your spare tire is correctly inflated. The compact
spare is made to performwell at posted speed limits for
distances up to 3,000 miles (5-000km), so you can
finish your trip and have your full-size tire repaired or
replaced where you want.Of course, it’s best to replace
your spare with a full-size tire as soon as youcan. Your
spare will last longer andbe in good shape incase you
need it again.
NOTICE:
Don’t take your compact spare through an
automatic car wash with
guide rails.The
compact spare canget caught on therails. That
can damage the tire and
wheel, and maybe other
parts of your vehicle.
Don’t use your compact
spare on some other vehicle.
And don’t mix your compactspare or wh.ee1 withother
wheels or tires. They won’t
fit. Keep your spare and its
wheel together.
NOTICE:
Tire chainswon’t fit your compact spare.
Using
them will damage yourvehicle and destroy the
chains too. Don’t use tire chainson your compact
spare.
5-32
If You’re Stuck: In Sand, Mud, Ice or
Snow
What you don’t wantto do when your vehicle is stuckis
to spin your wheels toofast. The method known as
“rocking” can help you get out when you’re stuck, but
you must use caution.
NOTICE:
Spinning your wheels can destroy parts
of your
vehicle as well as the tires.If you spin the wheels
too fast while shifting your transaxle back and
forth, you can destroy your transaxle.
For information about using tire chains
on your vehicle.
see “Tire Chains”in the Index.
Rocking your vehicle to get
it out:
First, turn your steering wheel left and right. That will
clear the area around your front wheels.
Then shift back
and forth between REVERSE (R) and a forward gear,
spinning the wheels as 1.ittle as possible. Release the
accelerator pedal while you shift, and press lightly
on
the accelerator pedal when the transaxle
is in gear. If
that doesn’t get you out after a few tries, you may need
to be towed out.If you do need to be towed out, see
“Towing Your Vehicle” in the Index.
5-33
NOTES
5-34
Section 6 Service and Appearance Care
Here you will find information about the
care ofyourWehope
you’ll want to keep your GM vehicle all GM.
Pontiac. This sectionbeginswith service and fuel
GenuineGMpartshaveone
of thesemarks:
information, and thenit shows how to check important
fluid and lubricantlevels. There is also technical
information about your vehicle, anda part devoted to
its appearance care.
Service
Your Pontiac dealer knows your vehicle best and wants
you to be happy with it. We hope you’ll go to your
dealer for all your service nee& You’ll get genuine
GM parts and GM-trained and supportedservice people.
6-1
Doing Your Own Service Work
If you wantto do some of your ownservice work, you’ll
want to get the proper Pontiac Service Manual. It tells
you much more about howto service your Pontiac than
this manual can. To order the proper service manual,see
“Service Publications” in the Index.
Your vehicle has an air bag system.Before attempting to
do your own service work,see “Servicing Your Air
Bag-Equipped Pontiac”in the Index.
You should keep a record with all parts receipts andlist
the mileage and the date of any service work you
perform. See “Maintenance Record” in the Index.
I NOTICE:
If you try todo your ownservice work without
knowing enough about it, your
vehicle could be
damaged.
6-2
Fuel
Use regular unleaded gasoline rated at 87 octane or
higher. It should meet specifications ASTM D4814 i.n
the United States and CGSB 3 5 9 2 in Canada. These
hels should have the proper additives, so you should not
have to add anything to the fuel.
h the United States and Canada, it’s easy tobe sure you
get the right kind of gasoline (unlea.ded).You.’ll see
UNLEADED right on the pump. And only unleaded
nozzles will fit into your vehicle’s filler neck.
Be sure the posted octane is at least 87. If the octane is
less than 87, you may get a heavy knocking noise when
you drive. If it’s bad enough, it can damage yourengine.
Lf you’re using fuel rated at 87 octane or higher and you
still hear heavyhocking, your engine needs service.
But don’t worry if you hear a little pinging noise when
you’re accelerating or driving up a hill. That’s normal,
and you dan’t have to buy a higher octane fuel to get rid
of pinmg. It’s the heavy, constant knock that means
you have a problem.
What about gasoline with blendingmaterials that
contain oxygen (oxygenates), such as MTBE or alcohol?
MTBE is “methyl tertiary-butyl ether.” Fuel that is no
more than 15%MTBE is fine for your vehicle.
Ethanol is ethyl or grain alcohol. Properly-blended fuel
that is no more than 10%ethanol is fine foryour
vehicle.
Methanol is methyl or wood alcohol.
Fuel that is more than 5% methanol is bad for
your vehicle. Don’t use it. It can corrode metal
parts in your fuel system and also damage plastic
be
and rubber parts, That damage wouldn’t
covered under your warranty. And even5at
% or
less, there must be “cosolvents’’ and corrosion
preventers in this fuel to help avoid these
6-3
Gasolines for Cleaner Air
Fuels in Foreign Countries
Your use of gasoline with deposit control additives will If you plan on drivingin another country outside the
help prevent deposits from forming in your engine and U.S. or Canada, unleaded fuel may be hard to find.
Do
fuel system. That helps keep your engine in tune and
not use leaded gasoline.
If you use evenone tankful,
your emission control system working properly. It’s
your emission controls won’t work well atorall. With
good for your vehicle, and you’ll be doing your part forcontinuous use, spark plugs can get fouled, the exhaust
cleaner air.
system can corrode, andyour engine oil can deteriorate
quickly. Your vehicle’s oxygen sensor will be damaged.
Many gasolines are now blended with oxygenates.
General Motors recommends that you use gasolines with All of that means costly repairs that wouldn’t be covered
these blending materials, such as MTBE and ethanol. By by your warranty.
doing so, you can help clean the air, especially in those To check on fuel availability, ask an auto club,
or
parts of the country that have high carbon monoxide
contact a major oil company that does business in the
levels.
country where you’ll be driving.
In addition, some gasoline suppliersare now producing
You can also write usat the following addressfor
reformulated gasolines. These gasolinesare specially
advice. Just tellus where you’re going and give your
designed to reduce vehicle emissions. General Motors
Vehicle Identification Number(VIN).
recommends that you use reformulated gasoline.
By
General Motors Overseas Distribution Corporation
doing so, you can help clean the air, especially
in those
North American ExportSales (NAES)
parts of the country that have high ozone levels.
1908 ColonelSam Drive
You should ask your service station operators
if their
Oskawa, OntarioL1H 8P7
gasolines contain deposit control additives and
oxygenates, and if they have been reformulated
to
reduce vehicle emissions.
6-4
Filling Your Tank
The cap is behind a hinged dooron the left side of your
vehicle.
While refueling, hang the
cap inside thefuel door.
To take off the cap, turn it slowly to the left
(counterclockwise).
6-5
When you put the cap back on, turn it to the right until
you hear at least three clicks.
I NOTICE:
If you needa new cap, be sure to get the right
type. Your dealer can getone for you. If you get
the wrong type, it may not or
fithave proper
venting, and your fuel tank and emissions system
might be damaged.
Be careful not to spillgasoline. Clean gasoline from
painted surfaces as soon as possible. See “Cleaning the
Outside of Your Pontiac” in the Index.
6-6
Checking Things Under theHood
Hood Release
To open the hood, first pull
the handle inside the
vehicle.
Then go to the front of the
vehicle and release the
secondary hoodrelease. Lift
the hood.
Before closing the hood,be
sure all the filler caps are on
properly. Thenjust pull the
hood down andclose it
firmly.
6-7
I
a3
7
With the 3.1L L82 (Code M) engine, when you open the hood,
you’ll see:
1.Cap
Pressure
Radiator
7. Engine Oil Dipstick
2. Coolant
Engine
Reservoir
8. Automatic
Transaxle
Dipstick
Fluid
3. Power
Steering
Reservoir
Fluid
9. Reservoir
Brake
Fluid
alves
Bleed
4. Coolant
Cleaner
10. Air
servoir
Fluid
ndshield
Washer
11.5.Fans
Engine
Electric
6 . Engine Oil Fill Cap
6-8
'4
L ,
With the 3.4L LQI (Code X) engine, when you open the hood, you'll see:
1. Pressure
Radiator
Cap
Valves
7.Bleed
Coolant
2. Coolant
Engine
Reservoir
8. Automatic
Dipstick
Transaxle
Fluid
3. Power
Steering
Reservoir
Fluid
9. Reservoir
Brake
Fluid
FansEngine
4. Electric
10. Air Cleaner
Dipstick
5. Oil
Engine
1 1 . Windshield
Reservoir
Fluid
Washer
6. Engine Oil Fill Cap
6-9
Engine Oil
If the LOW OIL LEVEL
light on the instrument
-panel comes on, it means
you need to check your
engine oil level right away.
For more information, see
“Low Oil LevelLight” in
the Index.
I f
I 1
I
3.1L L82 (Code M) Engine
\
You should check your engine oil level regularly; this is
an added reminder.
It’s a good idea to check your engine oil every time you
get fuel. In order to get an accurate reading, the oil must
be warm and the vehicle must
be on level ground.
6-10
The engine oil dipstick handle is the yellow loop near
the front of the engine.
Turn off the engine and givethe oil a few minutesto
drain back into the oil pan. If you don’t,the oil dipstick
might not show the actuallevel.
When to Add Oil
If the oil is at or below the upper mark,then you’ll need
to add some oil. But you must use the right kind.
This
part explains what kindof oil to use. For crankcase
capacity, see “Capacitiesand Specifications” in the
Index.
NOTICE:
3.4L LQ1(Code X) Engine
TQCheck Engine Oi
Don’t add too much oil.
If your engine has
so much oil that the oiI level gets above the
cross-hatched area that shows the proper
operating range,your engine could be damaged.
Pull out the dipstick and cleanit with a paper towel or
cloth, then pushit back in all the way.Remove it again,
keeping the tip down, and check the level.
6-11
What Kind of Oil to Use
Oils of the proper qualityfor your vehiclecan be
The
identified by looking for the “Starburst” symbol.
“Starburst” symbol indicates that the oil has been
certified by the American Petroleum Institute (API), and
is preferred for use in your gasoline engine.
If you change your own
oil, be sure you use oil that
has the “Starburst” symbol
on the frontof the oil
container. If you have your
oil changed for you, be sure
the oil put into your engine
is American Petroleum
Institute certifiedfor
gasoline engines.
3.1L L82 (Code M) Engine 3.4L LQl (Code X) Engine
in the
Just fill itenough to put the level somewhere
proper operating range.Push the dipstick all the way
back in when you’re through.
You should also use the proper viscosity for
oil your
vehicle, as shown in the following chart:
6-12
~~
RECOMMENOED SAE VISCOSITY GRADE ENGINE OILS
FOR BEST FUEL ECONOMY AND COLD STARTING, SELECT THE L O W E i
SAE VISCOSITY GRADE OIL FOR THE EXPECTED TEMPERATURE RANGE.
LOOK
FOR THIS
SYMBOL
HOT
WEATHER
\
“F
“C
+loo-
+ 38
+BO-
+ 27
+ 60 -
+ 16
+40-
+fa
+ 20 -
-7
0-
As shown in thechart, SAE 5W-30 is bestfor your
vehicle. However, you can useSAE 1OW-30 if it’s going
to be 0°F (- 18 O C) or above. These numbers on anoil
container show its viscosity, or thickness. Do not use
other viscosity oils, such asSAE 20W-50.
~~
~
NOTICE:
\
Use only engineoil with the American Petroleum
Institute Certified For Gasoline Engines
“Starburst” symbol. Failure to use the proper oil
can result in engine damage not covered
by your
warranty.
GM Goodwrench@ oil (in Canada,GM Engine Oil)
meets all the requirementsfor your vehicle.
- la
I
h4
SAE 1OW-30
Engine Oil Additives
S l t ad-30
Don’t add anything to youroil. Your Pontiac dealer is
ready to advise if you think something should
be added.
PREFERRED
d
COLD
WEATHER
DO NOT USE SAE 2OW-50 OR ANY OTHER
GRADE OIL NOT RECOMMENDED
6-13
When to Change Engine OiI
What to Do with Used Oil
See if any one of these is true for you:
Did you know that used engine oil contains certain
elements that maybe unhealthy for your skin and could
even cause cancer? Don’t let used oil stay on your skin
for very long. Clean your skinand nails withsoap and
water, or a good hand cleaner. Washor properly throw
away clothingor rags containing used engineoil. (See
the manufacturer’s warnings aboutthe use and disposal
of oil products.)
Most trips are less than 5 to 10 miles (8 to 16 km).
This is particularly important when outside
temperatures are below freezing.
0
Most trips include extensive idling (such as frequent
driving in stop and go traffic).
Most trips are through dusty areas.
You frequently tow a trailer or use a carrier on top of
your vehicle.
If any one of these is true for your vehicle, then you
need to change your oil and filter every 3,000 miles
(5 000 km) or 3 months -- whichever comesfirst.
If none of them is true, change the oiland filter every
7,500 miles (12 500 km) or 12months -- whichever
comes first.
Engine Coolant Heater
An engine coolant heater can be a big helpif you have
to park outside in very cold weather,0°F (-18°C) or
colder. If your vehicle hasthis option, see “Engine
Coolant Heater” in the Index.
6-14
Used oil can be a real threatto the environment. If you
change your ownoil, be sure to drain all free-flowing oil
from thefilter before disposal. Don’t ever dispose
of oil
by putting it in the trash, pouring it on the ground,into
sewers, or into streams or bodiesof water. Instead,
recycle it by taking it to a place thatcollects used oil. If
you have a problem properly disposingof your used oil,
ask your dealer,a service station or a local recycling
center for help.
Air Cleaner
Full out the filter.Be sure to install the air filter and
install the cover tightly whenyou are finished.
To check or replace theair filter, remove the four screws
and pull off the cover.
Refer to the Maintenance Schedule to determine when to
replace the air filter.
See “Scheduled Maintenance Services”in the Index.
6-15
Automatic Transaxle Fluid
When to Check and Change
A good time to check your automatic transaxle fluid
level is when the engineoil is changed. Refer to the
Maintenance Schedule to determine when to change
your fluid. See “Scheduled Maintenance Services” in
the Index.
How to Check
~~~
NOTICE:
If the air cleaner isoff, a backfire can causea
damaging engine fire. And, dirt can easily get
into your engine, which will damage
it. Always
have theair cleaner in place when you’re driving.
6-16
Because this operation can be a little difficult, you may
choose to have this done at your Pontiac dealer Service
Department.
If you do it yourself, be sure to follow all the instructions
here, or you could get a false reading on the dipstick.
NOTICE:
Too much or too little fluidcan damage your
transaxle. Too much can mean that some
of the
fluid couldcome out and fall on
hot engineparts
or exhaust system parts, starting
a fire. Be sure to
get an accurate readingif you check your
transaxle fluid.
Wait at least30 minutes before checking the transaxle
fluid level if you have been driving:
0
Then, without shuttingoff the engine, follow these
steps:
When outside temperatures are above 90°F (32°C).
At high speed for quite a while.
In heavy traffic -- especially in hot weather.
While pulling a trailer.
To get the right reading, the fluid should be at normal
operating temperature, whichis 180°Fto 200°F
(82°C to 93°C).
Get the vehicle warmed up by driving 15
about
miles (24km)
when outside temperaturesare above 50°F (10°C). If it's
colder than 50°F (1O"C), you may have to drive longer.
To check thefluid level
3.1L L82 (Code M) Engine 3.4L LQl (Code X) Engine
Park your vehicle on a level place. Keep the engine
running.
1. The transaxle fluid dipstick handleis the red loop
near the back of the engine. Pull out the dipstick and
wipe it with a clean ragor paper towel.
With the parking brake applied, placethe shift lever
in PARK (P).
2. Push it back in all the way, wait three seconds and
then pullit back out again.
With your foot on the brake pedal, move the shift
lever through each gear range, pausing for about
three seconds in each range. Then, position the shift
lever in PARK (P).
Let the engine run atidle for three to five minutes.
6-17
How to Add Fluid
Refer tothe Maintenance Scheduleto determine what
kind of transaxle fluid to use. See “Recommended
Fluids andLubricants” in the Index.
If the fluid level is low, add only enough of the proper
fluid to bring thelevel into the cross-hatched area on the
dipstick.
1. Pull out the dipstick.
3.1L L82 (Code M) Engine 3.4L LQ 1 (Code X) Engine
3. Check both sidesof the dipstick, and readthe lower
level. The fluid level must be in the cross-hatched
area.
4. If the fluid level is in the acceptable range, push the
dipstick back in all theway.
6-18
2. Using a long-neck funnel, add enough fluid at the
dipstick hole to bringit to the proper level.
It doesn’t take muchfluid, generally less than a pint
(OSL). Don’t overfiZ1. We recommend you use onlyfluid
labeled DEXRON@-111,because fluid with that label is
made especiallyfor your automatic transaxle.Damage
caused byfluid other than DEXRON@-IIIis not covered
by your new vehicle warranty.
After adding fluid, recheck the fluid level as
described under“How to Check.”
When the correct fluid level is obtained, push the
dipstick back in all the way.
Engine Coolant
The following explains your cooling system and howto
add coolant whenit is low. If you have a problem with
engine overheating or if you need to add coolant to your
radiator, see “Engine Overheating”in the Index.
The proper coolant for your Pontiac will:
Give freezing protection down to -34°F (-37°C).
Give boiling protection up to 262°F (128“ C ) .
0
Protect against rust and corrosion.
Help keep the proper engine temperature.
0
Let the warning lights work as they should.
What toUse
clean water (preferably
Use a mixture of one-half
distilled) and one-half antifreeze that meets “GM
Specification 1825-M,” which won’t damage aluminum
parts. You can also use a recycled coolant conforming
to
GM Specification 1825-M with a complete coolant flush
and refill. Use GM Engine Coolant Supplement (sealer)
with any complete coolant flush and refill.If you use
this mixture, you don’t need to add anything else.
I NOTICE:
If you use an improper coolantmix, your engine
could overheat andbe badly damaged. The
repair cost wouldn’t be coveredby your
warranty. Too much water in the
mix can freeze
and crack the
engine, radiator, heater core and
other parts.
6-19
If this light comes on, it
means you’re lowon engine
Adding Coolant
coolant.
To Add Coolant
If you need more coolant, addthe proper mixat the
coolant recovery tank.
To Check Coolant
When your engineis cold, the coolant level should be at
the COLD mark or a little higher. When your engine is
warm, the level shouldbe up to the HOT mark or a little
higher.
6-20
Add coolant mix at the recoverytank, but be careful not
to spill it.
6-21
Radiator Pressure Cap
Power SteeringFluid
NOTICE:
Your radiator capis a 15 psi (105 kPa)
pressure-type cap and must be tightly installed
to prevent coolant loss and possible engine
on
damage from overheating. Be sure the arrows
the cap lineup with the overflow tube
on the
radiator filler neck.
When you replace yourradiator pressure cap, an A@
cap is recommended.
Thermostat
Engine coolant temperatureis controlled by a thermostat
in theengine coolant system. The thermostat stops the
flow of coolant through theradiator until the coolant
reaches a preset temperature.
When you replace your thermostat,an AC@thermostat
is recommended.
6-22
3.1L L82 (Code M) Engine 3.4L LQl (Code X) Engine
How To Check Power Steering Fluid
When the engine compartment is cool, unscrew the cap
and wipe the dipstick with a clean rag. Replace thecap
and completely tightenit. Then remove the cap again
and look at thefluid level on the dipstick.
What to Add
Refer to the Maintenance Schedule to determine what
kind of fluid to use. See “Recommended Fluids and
Lubricants” in the Index.
NOTICE:
When adding power steering fluid or making a
complete fluid change, always use the proper
fluid. Failureto use the proper fluid can cause
leaks and damage hoses and seals.
A fluid loss in this system could indicate a problem.
Have the system inspected and repaired.
6-23
Windshield Washer Fluid
What to Use
NOTICE:
When you need windshield washer fluid,
be sure to read
If you will be
the manufacturer’s instructions before use.
operating your vehicle in an area where the temperature
may fall below freezing, use a fluid that has sufficient
protection againstfreezing.
To Add
0
Open thecap labeled WASHER FLUID ONLY. Add
washer fluid until the tank is full.
6-24
When using concentrated washer fluid,
follow the manufacturer’s instructions for
adding water.
Don’t mix water with ready-to-use washer
fluid. Water can cause the
solution to freeze
and damage your washer fluid tank and
other partsof the washer system.Also,
water doesn’t cleanas well as washerfluid.
Fill your washer fluid tank only3/4 full
when it’s very cold. This allowsfor
expansion, which could damage the tank
if
it is completelyfull.
Don’t use radiator antifreeze in your
windshield washer. It can damage your
washer system and paint.
Your brake master cylinderis here. It is filled with
DOT-3 brake fluid.
fluid is leaking outof the brake system. Ifit is, you
should have your brake systemfixed, since a leak means
that sooner orlater your brakes won’t work well,or
won’t work at all.So, it isn’t a good idea to “topoff’
your brake fluid. Adding brake fluid won’t correct a
leak. If you add fluid when your linings are worn, then
you’ll have too much fluid when you get new brake
linings. You should add (or remove) brake fluid,as
necessary, only when workis done on the brake
hydraulic system.
There are only two reasons why the brake fluidlevel in
your master cylinder mightgo down. The first is that the
brake fluid goes down to an acceptable level during
normal brake lining wear. When newlinings are put in,
the fluid level goes back up. The other reason is that
When your brakefluid falls to a low level, your brake
warning light will come on. See “Brake System Warning
Light” in the Index.
Brakes
Brake Master Cylinder
6-25
What to Add
Brake Wear
When youdo need brake fluid, use only
DOT-3 brake
fluid -- such as Delco Supreme11 (GM Part
No. 1052535). Use new brake fluid from a sealed
container only, and always clean the brake fluid
reservoir cap before removing
it.
Your Pontiac has four-wheel disc brakes.
@
NOTICE:
@
0
Disc brake pads have built-in wear indicators that make
a high-pitched warning sound when the brake pads are
worn and new pads are needed.
The sound may come
and go or be heard all the time your vehicle
is moving
(except when you are pushing
on the brake pedal
firmly).
Don’t let someoneput in the wrong kind
of
fluid. For example, just a few drops of
mineral-based oil, such as engine oil, in
your brakesystem can damage brake
system parts so badly thatthey’ll have tobe
replaced.
Brake fluid can damage paint,
so be careful
not to spill brake fluid on your
vehicle. If
you do, wash it off immediately. See
“Appearance Care” in the
Index.
NOTICE:
Continuing to drive with worn-out brake pads
could result in costly brake
repair.
6-26
Some driving conditions or climates may cause a brake
squeal when the brakes are first applied or lightly
applied. This does not mean something is wrong with
your brakes.
Brake linings should always be replaced as complete
axle sets.
Brake Pedal Travel
See your dealer if the brake pedal does not returnto
normal height, or if there is a rapid increase in pedal
travel. This could be a sign of brake trouble.
Brake Adjustment
Every time you make a moderate brake stop, your disc
brakes adjust for wear. If you rarely make a moderate or
heavier stop, then your brakes might not
adjust correctly.
If you dnve in that way, then -- very carefully -- make
a few moderate brake stops about every 1,000 miles
(1 600 km), so your brakes will adjust properly.
Replacing Brake System Parts
The braking system on a modern vehicle is complex.
Its many parts have to be of top quality and work well
together if the vehicle is tohave really good braking.
Vehicles wedesign and test have top-quality GM brake
parts in them, as yourPontiac does when it is new.
When you replace parts of your braking system-- for
example, when your brake linings wear down and you
have to have new ones putin -- be sure you get new
genuine GM replacement parts. If you don’t, your
brakes mayno longer work properly.For example, if
someone puts in brakelinings that are wrong for your
vehicle, the balance between yourfront and rear brakes
can change -- for the worse. The braking performance
you’ve come to expect can change in many other ways if
someone putsin the wrong replacement brake parts.
6-27
Battery
Every new Pontiac has a Delco
Freedom’ battery. You
never have to add water to one
of these. When it’s time
for a new battery, we recommend a Delco Freedom@
battery, Getone that has the replacement number shown
on the original battery’s label.
6-28
Halogen Bulbs
Headlamp Aiming
Your vehicle has the55 x 135 mini-quad headlamp
system. These headlamps have horizontal and vertical
aim indicators. The aim has been pre-set at the factory
and should needno further adjustment.
If your vehicleis damaged in an accident and the
headlamp aim seems to be affected, see your Pontiac
dealer. Headlamps on damaged vehicles may require
recalibration of the horizontal aim by your Pontiac
dealer.
To check the aim, the vehicle should be properly
prepared as follows:
This section only appliesto two-door Pontiacs. If you
have a four-door Pontiac, see your dealer when your
headlamp aim needs to be checked or adjusted.
0
The vehicle must have all four tires
on a perfectly
level surface.
0
The vehicle should not have any snow, ice, or mud
attached to it.
0
There should not be any cargo or loading
of vehicle,
except it should have a full tank of gas andone
person or 160 pounds (75 kg) on the driver’s seat.
0
Tires should be properly inflated.
6-29
0
The horizontal indcator
should read“0.”
I NOTICE:
To make sure your headlamps are aimed
properly, read all the instructions before
beginning. Failure to follow these instructions
could cause damage to headlamp parts.
~
~
~~
State inspection stationswill allow a vertical readingof
plus 0.76 degrees or minus 0.76 degrees for the center of
the bubble.
6-30
It is recommended that the upper limit not exceed plus
0.4 degrees for the centerof the bubble. Otherdrivers
may flash their bright lights at you if your adjustmentis
much above plus0.4 degrees.
If you find that the headlamp aiming needs adjustment,
follow these steps:
Start with the horizontal ai.m+Don’t try to adjust the
vertical aim Fkrst.
3 , Check the vertical aim indicator.The bubble should
be centered on 0 (zero).
1 - 7
1. Check the horizontal aim indicator. The pointer
0 (zero).
should be lined up with
4. If the bubble isn’t on
0 (zero), turn the vertical
aiming screw to adjust
the aim.
2. If the pointer isn’t
at 0 (zero), turn the
horizontal aiming screw
to adjust theaim.
6-31
Bulb Replacement
2. Remove the screw at the
top of the headlamp
In this section you’llfind directions for changing the
bulbs in some of the lampson your Pontiac. See
“Replacement Bulbs”in the Index to find the type
of bulb you should use.
7
-
A
Headlamps (2-Door Models)
support panel. Loosen
the two screwsat the
bottom of the panel.
Loosen these two screws
until they are outof the
headlamp frame, but still
in the brackets onthe
headlamp assembly.
3. Carefully lift the headlamp assembly and support
panel.
1. Or
6-32
L
theheadlamp panel.
. .
6. Remove the Torx@
screws atthe end of the
aiming ring. The aiming
ring will swing openlike
a gate.
6
7. Remove the aiming ring. Place it face down on the
work surface with the aim indicator up.
4. Lift the plastic locking tabs on the electrical
connector and pullthe connector from the headlamp
socket.
Note which way the socket is pointing before
you disconnect it. You’ll need to install the
new headlamp so the socket points in the same
direction.
8. Check that the number on the new headlamp
matches the number on theheadlamp being replaced.
The letter onthe headlamp (U or L) must also match.
9. Put the new headlamp in position.
Make sure the socket points in the same direction
as it did with the oldheadlamp.
5. Set the headlamp assembly on a work surface with
the lens facing you.
6-33
10. Insert the tabs on the
aiming ring into the
12. Do not damage thevertical aiming bubble.
13. Plug the electrical connector into the headlamp
socket. Makesure the locking tabs snap ontothe
socket.
14. Put the headlamp assembly in position. Make sure
the two guide tabs dropinto their holes in the
headlamp support panel.
15. Tighten the two bottomscrews. Make sure the
guide tabs are still in place before tightening the
screws.
11. Holding the aiming ring closed, insert the screws at
the end of the ring. Tighten -the screws until the
aiming ring touches the plastic nuts on both the top
and bottom.
0
6-34
Da not overtighten.
16. Insert the top screw andtighten it.
17. Close the headlamp panel.
2. Turn the socket
counterclockwise until
it pops loose from the
housing.
Headlamps @-DoorModels)
3. Pull out the bulb socket.
4. Lift the plastic locking tab on the electrical
connector and pullthe connector from the bulb
socket.
1. Open the headlamp panel.
5 . Snap the electrical connector into a new bulb socket.
6. Replace the bulb socket into the housingand turn
clockwise.
7. Close the headlamp panel.
6-35
Front Lamp Ear (4-hor Models)
a
3. Remove the three wing nutsfrom the lamp bar on
the driver side.
1. Remove the four pins from the cover on the driver
side.
4. Remove the two wing nuts from the lamp bar on the
2. Remove the three pins from the coveron the
passenger side.
6-36
passenger side.
5. Pull the lamp bar housing away from the body of the
vehicle.
6. Squeeze the tab on the socket and turn the socket
counterclockwise.
7. Pull out the socket.
8. Pull the bulb out of the socket.
9. Push in a new bulb.
K
uw
10. Replace the socketinto the lamp bar assembly and
turn clockwise.
11. Replace thelamp bar assembly to the body ofthe
vehicle.
12. Install the wing nuts.
13. Put the covers back and install the pins.
6-37
Front Sidemarker (&Door Models)
1. Remove the screws and
pull the sidemarker
housing forward.
Front Turn Signal (2-Door Models)
45
L
-3A
2. Turn the socket
counterclockwise and
pull the socket out of the
housing.
3. Pull the bulb out of the socket.
4. f i s h in a new bulb.
5. Replace the socketinto the housing and turn
clockwise.
6 . Replace the housingto the vehicle.
7. Install the screws-
6-38
1. Remove the pins from the cover above the turn
signal lamps.
Turn the socket
counterclockwise
1/6-tum until itfeels
loose.
Front Turn Signal (4-Door Models)
I )
1. Remove the screws and
pull the turn signal
housing forward.
2. Turn the bulb socket
counterclockwise until
it pops loose fromthe
housing.
3. Pull out~thesocket.
4. Pull thebulb out of the socket.
5. Push in a new bulb.
6. Replace the socket into thehousing and turn
clockwise until it snaps in place.
7. Replace the cover and pins.
3. Pull out the bulb socket.
4. Lift the plastic locking tab on the electrical
connector and pull theconnector from the bulb
socket.
5. Snap the electrical connector into a new bulb socket.
6. Replace the bulb socket into the housing and turn
clockxvise.
7. Replace the housing to the vehicle.
8. Install the screws.
6-39
2. Remove the springclip
holding the bulbin the
housing and pull out the
bulb.
Fog Lamps (2-Door Models)
3. Disconnect the electrical connector from the bulb.
4. Connect the electrical connectorto a new bulb.
5. Replace the bulb in the housing and install the spring
clip.
1. Remove the two screws andpull the housing away
from the vehicle.
6-40
6. Replace the housing to the vehicle.
7. Install the screws.
2. Turn the bulb socket
counterclockwise until it
pops loose from the
housing.
Fog Lamps (&Door Models)
3. Pull out the bulb socket.
4. Lift the plastic locking tab onthe electrical
connector and pullthe connector from the bulb
socket.
1. Remove the pins from the cover above the fog
lamps.
5 . Snap the electrical connector into a new bulb socket.
6. Install the screws.
7. Replace the socket into the housing andturn
clockwise until it snaps in place.
8. Replace the cover and pins.
6-4 1
Center High-Mounted Stoplamp
(2-Door Models)
I)
3. Pull out the bulb.
4. Push in a new bulb.
5. Clip the bulb carrier back into place.
6. Replace the cover and screws.
1. Remove two screws andthe cover.
2. Unclip the bulb carrier and pull it out.
To remove the stoplamp lens to clean the
window, remove thetwo nuts on either side
of the housing.
6-42
3. Lift the tabs at the top
Center High-MountedStoplamp
(4-hor Models)
and bottom of the socket
and pull it from the
housing.
4. Pull out the bulb.
5. Push in a new bulb.
6. Push the socket back into the housing. Make sure the
tabs snap in place.
7. Replace the cover and screws.
1. Remove the two screws from thecover.
2. PulI down the cover.
6-43
2. If the socket hasa tab, squeeze it. Turn the socket
counterclockwise.
3. Pull out the socket.
4. Pull the bulbaut of the socket.
5. Push in a new bulb.
6. Replace the socket into the housing andturn
clockwise.
7. Reposition thecarpet and install the plasticretainers.
4. T m the socket
counterclockwise until
it pops loose from the
housing.
Rear Lamp Bar
5. Pull out the socket.
6 . Full the bulb out of the socket.
7 . Push in a new .bulb.
1. Remove the plastic retainers and pull the carpet
away from the rear of the trunk.
2. Remove the wing nuts.
3. Pull the housing away from the body of the vehicle.
8. Replace the socket into the housing and turn
clockwise.
9. Replace the housing to the body of the vehicle,
10. Install the wing nuts.
11. Reposition the carpet and install theplastic
retainers.
6-45
Windshield Wiper Blade
2. Lift the release clip with a screwdriver and pull the
blade off the wiper arrn.
3. Push the new wiperblade securely onto the wiper
arm.
6-46
Tires
Mation - Tire Pressure
The Tire-Loading Information label which is on the rear
edge of the driver’s door if you have a two-door or on
the inside of the trunk lid if you have a four-door shows
the correct inflation pressures for your tires, when
they’re cold. “Cold” means yourvehicle has been sitting
for at least three hours or driven no more than a mile.
NOTICE:
Don’t let anyonetell you that underinflationor
overinflation is all right. It’s not.
If your tires
don’t have enough air (underinflation) you can
get:
Toomuch flexing
Too much heat
Tireoverloading
Badwear
Bad handling
0 Bad fuel economy.
NOTICE: (Continued)
6-47
NOTICE: (Continued)
If your tires have too muchair (overinflation),
you can get:
0 Unusualwear
Badhandling
Roughride
0 Needless damage from road hazards.
P en to Check
Check your tiresonce a month or more.
,Don’tforget your compact spare tire. It should beat
60 psi (420 kPa).
How to Check
Use a good quality pocket-type gage to checktire
pressure. Simply looking atthe tires will not tell you the
pressure, especially if you
have radial tires -- which
may look properly inflated even if they’re underinflated.
If your tires have valve
caps, be sure to put them back
on. They help prevent leaks by keeping out
dirt and
moisture.
6-48
Tire Inspection and Rotation
Tires should beinspected every 6,000 to 8,000 miles
(10 000 to 13 000 km) for any signs of unusual wear.
If unusual wearis present, rotate your tiresas soon as
possible andcheck wheel alignment. Also check for
damaged tires or wheels. See “When It’s Timefor New
Tires” and “Wheel Replacement”
later in this section for
more information.
The purposeof regularrotation is to achieve more
uniform wearfor all tires on the vehicle. The first rotation
is the most important. See “Scheduled Maintenance
Services” in the Indexfor scheduled rotation intervals.
I
n
When rotating your tires, always use thecorrect rotation
pattern shown here.
When It’s Time forNew Tires
One way to tell when it’s
time for new tires is to
check the treadwear
indicators, which will
appear when your tires have
only 1/16 inch (1.6 mm) or
less of tread remaining.
Don’t include the compact spare tire in your tire rotation.
After the tires have been rotated, adjust the front and
rear inflation pressures as shown onthe Tire-Loading
Information label. Make certain that all wheel nuts are
properly tightened. See “Wheel Nut Torque” inthe
Index.
..
.
You need a new tire if
You can see the indicators at three or more places
around thetire.
You can see cord or fabric showing through the tire’s
rubber.
The tread or sidewall is cracked, cut or snagged deep
enough to show cord or fabric.
The tire has a bump, bulge or split.
0
The tire has a puncture, cut, or other damage that
can’t be repairedwell because of the size or location
of the damage.
6-49
Buying New Tires
To find out what kind andsize of tires you need, look at
the Tire-Loading Information label.
The tires installed on your vehicle when
it was new had
a Tire PerformanceCriteria Specification (TPC Spec)
number on each tire’ssidewall. When you get new tires,
get ones with thatsame TPC Spec number. That way,
your vehicle will continueto have tires thatare designed
to give proper endurance, handling, speed rating,
traction, ride and other things during normal
service
on your vehicle.If your tires have an all-season tread
design, the TPC number will be followed by an“MS”
(for mud and snow).
a
If you ever replace your tires with those not having
TPC Spec number, make sure theyare the same size,
load range, speed rating and construction type (bias,
bias-belted or radial) as youroriginal tires.
6-50
Uniform Tire Quality Grading
The following information relates to the system
developed by the United States National Highway
Traffic Safety Administration which grades tires
by
treadwear, traction and temperature performance.
(This applies onlyto vehicles sold in the UnitedStates.)
-
Treadwear
Temperature A, B, C
The treadwear grade is a comparative rating based on
the wear rate of the tire when testedunder controlled
conditions on a specified government test course. For
example, a tire graded 150 would wear one and a half
(1 1/2) times as well on the government course as a tire
graded 100. The relative performance of tires depends
upon the actual conditions of their use, however, and
may depart significantly from the norm due to variations
in driving habits, service practices and differences in
road characteristics and climate.
The temperature grades are A (the highest), B, and C,
representing the tire’s resistance to the generation of
heat and its ability to dissipate heat when tested under
controlled conditions on a specified indoor laboratory
test wheel. Sustained high temperature can cause the
material of the tire to degenerate and reduce tire life, and
excessive temperature can lead to sudden tire failure.
The grade C corresponds to a level of performance
which all passenger car tires must meet underthe
Federal Motor Vehicle SafetyStandard No. 109. Grades
B and A represent higher levels of performance onthe
laboratory test wheel than the minimum required by law.
Traction - A, B, C
The traction grades, from highest to lowest are: A, B,
and C. They represent the tire’s ability to stop onwet
pavement as measured under controlled conltions on
specified government test surfaces of asphalt and
concrete. A tire marked C may have poor traction
performance.
Warning: The traction grade assigned to this tire is based
on braking (straight-ahead) traction tests and does not
include cornering (turning) traction.
Warning: The temperature grade for this tire is
established for a tire that is properly inflated and not
overloaded. Excessive speed, underinflation, or
excessive loading, either separately or in combination,
can cause heat buildup and possible tire failure.
These grades are molded onthe sidewalls of passenger
car tires.
While the tires available as standard or optional
equipment on General Motors vehicles
may vary with
respect to these grades, all such tires meet General
Motors performance standards and have been approved
for use on General Motors vehicles. All passenger type
(P Metric) tires must conform to Federal safety
requirements in addition to these grades.
Wheel Replacement
Replace any wheel thatsis bent,cracked, or badly rusted
or corroded. If wheel nuts keep coming loose, the wheel,
wheel bolts, and wheel nuts should
be replaced. If the
wheel leaks air, replaceit (except some aluminum
wheels, whichcan sometimes be repaired). See your
Pontiac dealerif any of these conditions exist.
Wheel Alignment and Tire Balance
Your dealer will know the kind
of wheel you need.
The wheels on your vehicle were aligned and balanced
carefully at the factory togive you the longest tire life
and best overall performance.
Each new wheel should havethe same load carrying
capacity, diameter, width, offset, andbe mounted the
same way as the oneit replaces.
In most cases, you will not need to have your wheels If you need to replace any
of your wheels, wheel bolts,
aligned again. However,if you notice unusual tire wear
or wheel nuts, replace them only with new
GM original
or your vehicle pullingone way or the other, the
equipment parts. This way, you will be sure
to have the
alignment may need to be reset. If you notice your
right wheel, wheel bolts, and wheel nuts
for your
vehicle vibrating when drivingon a smooth road, your
Pontiac model.
wheels may need to be rebalanced.
6-52
Used Replacement Wheels
NOTICE:
The wrong wheel can also cause problems with
bearing life, brake cooling, speedometer/odometer
calibration, headlamp aim, bumper height, vehicle
ground clearance, and tire or tire chain clearance
to the body and chassis.
6-53
!
i
Tire Chains
Appearance Care
Remember, cleaning products can be haza )us, Some
NOTICE:
If your Pontiac hasP215/60R16 or P225/60R16
size tires, don’t use tire chains; they can damage
your vehicle.
If you have other tires, usetire chainsonly where
legal andonly when you must. Use only SAE
Class “S” type chains that are the proper
size for
your tires. Install them on the front tires and
tighten themas tightly as possible with the ends
securely fastened. Driveslowly and follow the
chain manufacturer’s instructions.
If you can
hear the chains contacting your
vehicle, stop and
retighten them. If the contactcontinues, slow
down untilit stops. Driving too fastor spinning
the wheels with chains on
will damage your
vehicle.
are toxic. Others can burst
into flame if you strike a
match or get them ona hot partof the vehicle.Some are
dangerous if you breathe their fumes in a closed space.
When you use anything froma container to clean your
Pontiac, be sure to followthe manufacturer’s warnings
and instructions. And always open your
doors or
windows when you’re cleaningthe inside.
Never use these toclean your vehicle:
Gasoline
Benzene
Naphtha
0
CarbonTetrachloride
0
Acetone
0
Paint Thinner
0
Turpentine
0
LacquerThinner
0
Nail Polish Remover
They can all be hazardous -- some more than
others -- and they can all damage your
vehicle, too.
Don’t use anyof these unless this manual says you can.
In many uses, these will damage your vehicle:
0
Using Foam-mpe Cleaner on Fabric
0
Vacuum and brush the area to remove anyloose dirt.
Alcohol
Laundry Soap
0
Always clean a whole trim panelor section. Mask
surrounding trim along stitch or welt lines.
Bleach
Reducing Agents
e Mix Multi-Purpose Powdered Cleaner following the
directions on the container label.
Cleaning theInside of Your Pontiac
0
Use suds only and apply witha clean sponge.
Use a vacuum cleaner often to get rid of dust and loose
dirt. Wipe vinyl or leather with a clean, damp cloth.
0
Don’t saturate the material.
0
Don’t rub it roughly.
Your Pontiac dealer has two GM cleaners, a
solvent-type spot lifterand a foam-type powdered
cleaner. Theywill clean normal spots and stains very
well. Do not use them on vinyl or leather.
0
As soon asyou’ve cleaned the section, use a sponge
to remove the suds.
0
Rinse the section with a clean, wet sponge.
0
Wipe off what’s left with a slightly damp paper towel
or cloth.
0
Then dry it immediately witha blow dryer or
a heat lamp.
Here are some cleaning tips:
0
0
Always read the instructions on the cleaner label.
Clean up stains as soon as you can -- before they set.
Use a clean cloth or sponge, and change to a clean area
if
are stubborn.
often. A soft brush may be used stains
Use solvent-type cleaners in a well-ventilated area
only. If you use them, don’t saturate the stain.ed area.
If a ring forms after spot cleaning, clean the entire
area immediately or itwill set.
NOTICE:
Be careful. A blow dryer ora heat lamp may
scorch the fabric.
0
Wipe with a clean cloth.
6-55
Using Solvent-Type Cleaner on Fabric
Special Cleaning Problems
First, see if you have to use solvent-type cleaner at all.
Greasy or Oily Stains
Some spots and stains will clean off better withjust
water and~mildsoap.
If you needto use a solvent:
0
Gently scrape excess soil from the trim material
with a clean, dull knife or scraper. Use verylittle
cleaner, light pressure and clean cloths (preferably
cheesecloth). Cleaning should start at the outside
of the stain, “feathering” toward the center. Keep
changing to a clean section of the cloth.
Stains caused by grease,oil, butter, margarine,shoe
polish, coffee with cream, chewing gum, cosmetic
creams, vegetableoils, wax crayon, tar and asphaltcan
be removed as follows:
0
Carefully scrape off excess stain.
Follow the solvent-type instructions described
earlier.
Shoe polish, wax crayon, tar and asphalt will stain if
left on a vehicle seatfabric. They shouldbe removed
as soon as possible.Be careful, because the cleaner
will dissolve them and may
cause them to spread.
When you clean a stain from fabric, immediately dry
the area with a blow dryer to help preventa cleaning
ring. (See the previousNOTICE.)
Non-Greasy Stains
Stains caused by catsup, coffee (black), egg, fruit, fruit
juice, milk, soft drinks, wine, vomit, urine and blood
can
be removed as follows:
0
Carefully scrape off excess stain, then sponge the
soiled area withcool water.
If a stain remains, follow the foam-type instructions
described earlier.
6-56
0
0
If an odor lingers after cleaning vomit or urine,
treat the area with a waterhaking soda solution:
1 teaspoon (5 ml) of baking soda to 1 cup (250 ml)
of lukewarm water.
Use a soft cloth with lukewarm water anda mild soap or
saddle soap.
For stubborn stains, use a GM vinyl/leather cleaner.
If needed, clean lightly with solvent-type cleaner.
Combination Stains
Stains caused by candy, ice cream, mayonnaise, chili
sauce and unknown stains can
be removed as follows:
Carefully scrape off excess stain, then clean with
cool water and allowto dry.
If a stain remains, clean it with solvent-type cleaner.
Cleaning Vinyl
Use warm water and a cleancloth.
0
ueaning Leather
Rub with a clean, damp cloth to remove dirt. You
may have to do it more than once.
0
Never use oils, varnishes, solvent-based or abrasive
cleaners, furniture polish or shoe polish on leather.
Soiled leather should be cleaned immediately.If dirt
is allowed to work into finish, it can harm the
leather.
Cleaning theTop of the Instrument Panel
Use only mildsoap and water to clean the top surfaces
of the instrument panel. Sprays containing silicones
or
waxes may cause annoying reflections in the windshield
and even make it difficult
to see through the windshield
under certainconditions.
Things like tar, asphalt and shoe polish willstain if
you don’t get them off quickly. Use a clean
cloth and
a GM vinylheather cleaner.
6-57
Care of Safety Belts
Keep belts clean and dry.
Cleaning the Outsideof the
Windshield and Wiper Blades
If the windshield is not clear after using the windshield
washer, or if the wiper bladechatters when running, wax
or other material may be on the blade or windshield.
Clean the outside of the windshield withGM
Windshield Cleaner, Bon-AmiPowder@(GM Part
No. 1050011).The windshield is clean if beads do
not form when you rinse it with water.
Glass
Glass should be cleanedoften. GM Glass Cleaner
(GM Part No. 1050427) or a liquid household glass
cleaner will remove normal tobacco smoke and
dust
films.
Don’t use abrasive cleaners onglass, because they may
cause scratches. Avoid placingdecals on the inside rear
window, since they mayhave to be scraped off later. If
abrasive cleaners are used on the inside of the rear
window, an electric defogger elementmay be damaged.
Any temporary license should not
be attached acrossthe
defogger grid.
6-58
Clean the blade by wiping vigorously witha cloth
soaked in full strength windshieldwasher solvent. Then
rinse the blade with water.
Wiper blades should be checked ona regular basis and
replaced when worn.
Weatherstrips
Silicone grease on weatherstrips will make them
last
longer, seal better, and notstick or squeak. Apply
silicone grease with a clean cloth at least every six
months. During verycold, damp weather more frequent
application may be required. (See “Recommended
Fluids and Lubricants” inthe Index.)
Cleaning the Outside of Your Pontiac
The paint finish on your vehicle provides beauty, depth
“ color, gloss retention and durability.
Washing Your VehicIe
The best way to preserve your vehicle’sfinish is to keep
it clean by washing it often with lukewarm orcold water.
Don’t washyour vehicle in the direct rays of the sun.
Don’t use strong soaps or chemical detergents. Use
liquid hand, dish or car washing (mild detergent) soaps.
Don’t use cleaning agents that are petroleum based, or
that contain acid or abrasives. All cleaning agents
should beflushed promptly and not allowedto dry on
the surface, or they could stain. Dry the finish with a
soft, clean chamois or a 100%cotton towel to avoid
surface scratches and water spotting.
High pressure car washes maycause water toenter your
vehicle.
Finish Care
Occasional waxing or rnildpolishing of your Pontiac by
hand may be necessaryto remove residue from the paint
finish. You can getGM approved cleaning products
from your dealer. (See “Appearance Care and Materials”
in the Index.)
Your Pontiac has a “basecoatklearcoat”paint finish.
The clearcoat gives more depthand gloss to the colored
basecoat. Always use waxes andpolishes that are
non-abrasive and madefor a basecoatklearcoat paint
finish.
I NOTICE:
Machine compounding or aggressive
polishing on
a basecoat/clearcoat paint
finish may dull the
finish or leave swirl marks.
Foreign materials such as calcium chloride and other
salts, ice melting agents, road oil and tar, tree sap, bird
droppings, chemicals from industrial chimneys, etc. can
damage your vehicle’sfinish if theyremain on painted
surfaces. Wash the vehicle as soon aspossible. If
necessary, use non-abrasive cleaners that are marked
safe for painted surfaces to remove foreign matter.
Exterior painted surfaces are subject to aging, weather
and chemical fallout that can take their toll over a period
of years. You can help to keep the paintfinish looking
new by keeping your Pontiac garaged or covered
whenever possible.
6-59
,
Aluminum Wheels (If So Equipped)
Tires
Your aluminum wheels havea protective coating similar
to the painted surface of your vehicle. Don’t use
strong
soaps, chemicals, chrome polish, abrasive cleaners or
abrasive cleaning brushes on them because you could
damage this coating. After rinsing thoroughly, a wax
may be applied.
To clean your tires, use a stiff brush with a tire cleaner.
NOTICE:
If you have aluminum wheels, don’t use an
automatic car wash that has hard silicon carbide
cleaning brushes.These brushes can take the
protective coatingoff your aluminum wheels.
When applyinga tire dressing always take careto wipe
off any overspray or splash from painted surfaces.
Petroleum-based products may damage
the paint finish.
Sheet Metal Damage
If your vehicle is damaged andrequires sheet metal
repair orreplacement, make sure the body repair shop
applies anti-corrosionmaterial to the parts repairedor
replaced to restore corrosion protection.
Finish Damage
Any stone chips, fractures or deep scratches in thefinish
should be repaired right away.
Bare metal will corrode
quickly and may developinto a major repair expense.
Minor chips and scratches canbe repaired with touch-up
materials available from yourdealer or other service
outlets. Larger areasof finish damage canbe corrected
in your dealer’s bodyand paint shop.
Chemical Paint Spotting
Underbody Maintenance
Some weather and atmospheric conditions CZUI create
Chemicals used for iceand snow removal and dust
a chemical fallout, Airborne pollutants can fall upon
control can collect on the underbody. If these are not
and attack painted surfaces on your vehicle.This
removed, accelerated corrosion (rust) can occur on the
damage can take two forms: blotchy, ringlet-shaped
underbody parts such as %el lines, frame,floor pan, and
discolorations, and small irregular dark spots etched
exhaust system even though they have corrosion
into the paint surface.
protection.
At least every spring, flush these materials from the
Although no defect in the paint job causes this, Pontiac
underbody with plain water. Clean any areas where mud will repair,
at no charge to the owner, the surfaces of
and other debris can collect. Dirt packed in closed areas new vehicles damaged by
this fallout condition within
12 months or 12,000miles (20 000 km) of purchase,
of the frame should be loosened before being flushed.
whichevercomes first.
Your dealer or an underbody vehicle washing system
can do this for you.
Fiberglass Springs
1 NOTICE:
I
Don’t use corrosive or acidic cleaning agents,
engine degreasers, aluminum cleaning agents or
other harsh solvents to clean fiberglass springs;
they’ll damage the springs.
6-61
Vehicle Identification Number (VIN)
Service Parts Identification Label
You’ll find this label on your spare tire cover. It’s very
helphl if you ever need to order parts. On this label is:
yoLlrvIN,
UXSMJ72675
4 -
--
1995
MODEL YEAR
~
the model designation,
Ictn)
ASSEMBLY
\ PLANT
This is the legalidentifier for your Pontiac. It appears on
a plate in the frontcorner of the instrument panel, on the
driver’s side. You can see it if you look through the
windshield from outside your vehicle. The VIN also
appears on the Vehicle Certification and Service Parts
labels and the certificates of title and registration.
Engine Identification
The eighth character in yourVIN is the engine code.
This code will help you identify your engine,
specifications, and replacement parts.
0
paint information, and
a list of all production options and special equipment.
Be sure that this label is not removedfrom the vehicle.
Add-on Electrical Equipment
I NOTICE:
Don’t add anything electrical toyour Pontiac
unless you check with your dealerfirst. Some
electrical equipmentcan damage your vehicle and
the damage wouldn’t be covered by your warranty.
Some add-on electrical equipmentcan keep other
components from working as they should.
Your vehicle has an air bag system. Before attempting to
add anything electrical to your Pontiac, see “Servicing
Your Air Bag-EquippedPontiac” in the Index.
6-63
Fuses and Circuit Breakers
Instrument PanelFuse Block
The wiring circuits in your vehicleare protected from
short circuits by a combination offuses, circuit breakers,
and fusible thermal links in the wiring itself. This
greatly reduces the chance offires caused by electrical
problems.
Some fuses are in a fuse
block on the passengerside
of the instrument panel.
Pull off the cover labeled
FUSES to expose thefuses.
Additional fusesare in the underhood electrical centers
on the right and left sides of the engine compartment.
Look at the silver-colored band
inside the fuse. If the
band is broken or melted, replace the
fuse. Be sure you
replace a bad fuse with
a new one of the identicalsize
and rating.
6-64
Circuit
Description
Breaker
C
Power
Windows
D
Power
Seats
Fuse
1
5
6
7
10
11
12
14
15
16
19
21
Description
CIGAR LIGHTER-- Instrument Panel Cigar
Lighter
HAZARD FLASHER
POWER ACCESSORY#2 -- SUIKOO~
Control Unit
LOCK CONTROL-- Door Lock Relay
YP ELECTRONICS BATTERY FEED -Chime Module, Electronic Brake Control
Module (EBCM),Theft Deterrent Module,
Radio, Radio Amplifier, Trip Computer
STARTER MOTOR
ANTI-THEFT -- Theft Deterrent Module
W A C BLOWER MOTOR-- Blower Motor
Relay
W A C #1-- Air Temperature Valve Motor, Trip
Computer, Daytime Running Lamps Module
(with D m ) , W A CControl Assembly,
Multifunction Lever Cruise Control Switch
REAR DEFOG -- W A C Control Assembly
Rear Window Defogger Switch
POWER ACCESSORY #1 -- Antenna
Relay, Power Mirror Switch, Door Lock
Switches, Door Handle Switches
AIR BAG -- Sensing and Diagnostic Module
@DM)
Fuse
23
24
28
29
30
32
33
37
38
39
Description
STOPLAMPS -- TCCBrake Switch
HVAC #2 -- HVAC Control Assembly,
Solenoid Box
CTSY LAMPS -- Vanity Mirrors, VP
Courtesy Lamps,I/P Compartment Lamp,
Trunk Courtesy Lamp, Header Courtesy and
Reading Lamp,US Lighted Rearview Mirror,
Dome and Reading Lamp, Quarter Courtesy
Lamps
WIPER -- Wiper Switch
TURN SIGNAL-- Turn Signal Flasher
POWER LOCKS-- Door Lock Relay
A B S -- Electronic Brake Control Module
(EBCM), A B S Relay
AUXILIARY POWER
RADIO -- Radio, Steering Wheel Radio
Switches
I/P ELECTRONICS IGNITION FEED-Headlamp Switch, Cruise Control Cut-Out
Switch, Sensing and Diagnostic Module
(SDM), TCCBrake Switch, Instrument
Cluster, Chime Module, Second Gear Start
Switch, Head-Up Display(HUD) Switch,
Daytime Running Lamps Module
(with D m )
6-65
Underhood Electrical Center
Side
-- P
-
.
er
-
on0
on0
ENGEMIS
F/INJN
ECM
IGN
TCC
ELEK IGN
13
1
Description
WCMPT REL Remote Trunk Release, Backup
Lamps
Fuse
\
ECM BAT
TCC
ENG EMIS
F/INJN
6-66
Powertrain Control Module
(PCM), Fuel Pump Switch, Fuel
Pump Relay,Fan Cont #1 Relay
Automatic Transaxle, Transaxle
Range Switch (VIN M only)
Fan Cont #2 Relay, N C CMPR
Relay (VIN M only)
Fuel Injectors
Fuse
ECM IGN
ELEK IGN
10
11
12
13
Description
Powertrain Control Module
(PCM), MassAir Flow WAF)
Sensor (VIN X only), EGR, CCP,
Oxygen Sensor, Vac. Can. Switch
Electronic Ignition (EI) Control
Module
YP Fuse Block
FAN CON" #1 Relay
Passenger Side Underhood
Electrical Center andUP Fuse
Blocks: Fuses 5, 14923 and 32
FAN CONT #2 Relay and I/P Fuse
Block Fuse 16, Power Seat Circuit
Breaker '2)"
Relay
14
15
16
17
18
Description
FUEL PUMP
AfC CMPR
FAN CONT #2 -- Secondary
Cooling Fan (Passenger Side)
FAN CON" #1-- P1-ima.r~
Coohg
Fan (Driver Side)
Ignition Switch Relay
6-67
Underhood Electrical Center-- Driver Side
on0
on0
FOG LPS PARKLPS
HORN
VAR PIS
I
l i
Fuse
Description
FOG LPS
Fog
Lamps
PARK LPS
Headlamp
Switch
HORN
Horn
Relay,
Underhood
Lamp
VAR PIS
EVO
6-68
Fuse
10
11
n
12
’I
13
Relay
14
15
16
Description
IGN SW2 -- I/P Fuse Block PWR
WDO and Circuit Breaker“D’;
Passenger Side Underhood
Electrical Center: TCC and ENG
EMIS Fuses
IGN SWl -- I/P Fuse Block:
Radio, Wiper, WAC, ABS and
Turn Signal Fuses; Passenger Side
Underhood Electrical Center:
F/IJN, ECM IGN and ELEK IGN
Fuses
HD LPS -- 30 Amp Circuit
Breaker to Headlamp Switch
A B S -- ABS Relay
Description
ABS -- Anti-lac- Brake Svstem
FOG LPS
HORN
Headlamp Wiring
Power Windows andOther Power Options
The headlamp wiring is protected by a circuit breaker in
the underhood electrical center. An electrical overload
will cause the lamps to go on and off, or insome cases
to remain off. If this happens, have your headlamp
system checked right away.
Circuit breakers in the fuse panel protect the power
windows and other power accessories. When thecurrent
load is too heavy,the circuit breaker opens and closes,
protecting the circuit until the problemis fixed.
Windshield Wipers
The windshield wiper motor is protected by a circuit
breaker and a fuse.If the motor overheats due to heavy
snow, etc., the wiper will stop until the motor cools. If
the overload is caused by someelectrical problem, have
it fixed.
6-69
Replacement Bulbs
I
I
Exterior.Lamps
Bulb-Number
Back-up ..................................
3057
Center High-MountedStop
Roof-Mounted ...........................
891T2
2355
Shelf-Mounted ............................
Fag
H3
2-DoorModels ............................
4-DoorModels ............................
881
Front Parking/Turn Signal
2-DoorModels ........................
3057NA
4-DoorModels ............................
889
Headlamp, High Beam
2-Door Models ...................... H4352 (U)
4-Door Models ...........................
9005
Headlamp. Low Beam
2-Door Models ...................... H435 1 (L)
4-DaorModels ...........................
9006
License Plate ................................
194
LightBar. Front ............................
3057
Light Bar Panel. Rear .........................
194
Sidemaker. Front
2-DoorModels . . . . . . . . . . . . . . . . . . . . . . . . . . . . . 24
4-DaorModels .......................... 24NA
Sidemmker. Rear .............................
194
Stop/'I'aW'hrn Signal ........................
3057
6-70
~-
Interior Lamps
Bulb Number
Ashtray ....................................
194
Center Instrument Cluster ............ 161. 194. 194R
Courtesy
Dome ....................................
561
Door ............................. 562or212-2
InstrumentPanel ...........................
194
Windshield Header ................. 562 or 212-2
194
GloveBox ..................................
Heater and Air Conditioning ......
Control T- 1.O.1T-. 5
High-BeamIndicator .........................
161
Instrument Cluster Indicator ................. PC 161
Luggage Compartment ........................
920
Reading
Dome .....................................
24
Inside Rearview Mirror ...................... 192
RearSeat .................................. 906
Windshield Header .................. 562 or 212-2
Turn SignalIndicator ......................
PC161
VisorVanity .................................
74
Capacities and Specifications
Automatic Transaxle
Pan Removal and Replacement . . . . . . . 4 quarts (3.8L)
After Complete Overhaul . . . . . . . . . . . . 7 quarts (6.7 L)
When drainingheplacing converter or auxiliary cooleq
more fluid may be needed.
Automatic Tkansaxle with Overdrive
Pan Removal and Replacement . . . . . . . 7 quarts (6.7L)
After Complete Overhaul . . . . . . . . . . . 10 quarts (9.5 L)
When drainingheplacing converter or auxiliary cooler,
more fluid may be needed.
Engine Specifications
Type . . . . . . . . . . . . . . . . . . . . . . . . . . . . . . . . . . . . . . . . . .
Displacement . . . . . . . . . . . . . . . . . . . . . . . . . . . . . . . . . . .
Compression Ratio . . . . . . . . . . . . . . . . . . . . . . . . . . . . . . .
Firingorder ....................................
ThermostatTemperature ..........................
ValveArrangement ..............................
Cooling System Including Reservoir
3.1L (Code M) . . . . . . . . . . . . . . . . 11.6 quarts (10.93 L)
3.4L (Code X) . . . . . . . . . . . . . . . . . 12.3 quarts (1 1.65 L)
Refrigerant (R-l34a), Air Conditioning"
............................ 2.0 pounds (0.91 kg)
Engine Crankcase
3.1L (Code M) . . . . . . . . . . . . . . . . . . . 4 quarts (3.8 L)*
3.4L (Code X) ....................
5 quarts (4.7 L)*
*Add 1/2 quurt (0.5 L) more when filter is changed.
Fuel Tank .....................
16.5 gallons (62.0 L)
*See "Air Conditioning Refrigerants'' later in this section.
3.1L (CodeM)
V6
191 CID (3.1L)
9.5: 1
1-2-3-4-5-6
195°F (91"C)
In-Head
3.4L (CodeX)
V6
207 CID (3.4L)
9.25: 1
1-2-3-4-5-6
195°F (91°C)
In-Head
6-71
Normal Maintenance ReplacementParts
Air Cleaner Filter
I
All Engines .............................
A1208C
Battery
525 CCA
3.1L(Code M) .........................
3.4L (Code M) .........................
690 CCA
Engine Oil Filter
PF47
3.1L (Code M) .............................
3.4L (CodeX) ..............................
PF5 1
PCV Valve
3.1L (Code M) ..........................
CV892C
CV895C
3.4L (Code X) ...........................
Radiator Cap
RC27
AllEngines ...............................
Spark Plugs
3.1L (Code M) ....................... oR44LTSM6
Gap: 0.060” (15 2 mm)
3.4L (Code X) .........................
oR42LTSM
Gap: 0.045” (1.14 mm)
Air Conditioning Refrigerants
Not all airconditioning refrigerants are the same. If
the air conditioning system
in your vehicle needs
refrigerant, be sure the proper refrigerant is used. If
you’re not sure, ask your Pontiac dealer.
For additional
information, see your “Warranty andOwner1Assistance
Information” booklet.
NOTES
6-73
NOTES
6-74
Section 7 Maintenance Schedule
Introduction
IMPORTANT:
Your Vehicle and the Environment
KEEP ENGINE OIL
AT THE PROPER
LEVEL AND CHANGE A I
RECOMMENDED
This section covers the maintenance required for your
Pontiac. Your vehicle needs these services to retain its
safety, dependability and emission control performance.
GM
protection
I
Proper vehicle maintenance not only helpsto keep your
vehicle in good working condition, but also helps the
environment. All recommended maintenance procedures
are important. Improper vehicle maintenance or the
removal of important components can significantly
affect the qualityof the air we breathe. Improper fluid
levels or even the wrong tire inflation can increase th
level of emissions from your vehicle.To help protect our
environment, and to help keep
your vehicle in good
condition, please maintain your vehicle properly.
Have youpurclzased the GM Protection Plan? The Plan
supplements your new vehicle warranties. Seeyour
Pontiac dealerf o r details.
7-1
How This Section is Organized
The remainder of this section is divided into five parts:
“Part A: Scheduled Maintenance Services”
shows
what to have done and how often.Some of these
services can becomplex, so unless you are technically
qualified and have the necessary equipment, you should
let your dealer’sservice department or another qualified
service center do these jobs.
If you are skilled enough todo some work on your
vehicle, you will probably wantto get the service
information GM publishes. You will find a list of
publications and how toget them in this manual. See
“Service Publications”in the Index.
7-2
“Part B: Owner Checks and Services”
tells you what
for fuel. It also
should be checked whenever you stop
explains what you can easily do to help keep your
vehicle in good condition.
“Part C :Periodic Maintenance Inspections”explains
important inspections that your Pontiac dealer’s service
department or anotherqualified service center should
perform.
“Part D: Recommended Fluids and Lubricants”
lists
some productsGM recommends to help keep your
vehicle properly maintained.These products, or their
equivalents, should be used whether you
do the work
yourself or have it done.
“Part E: Maintenance Record”provides a place for
you to recordthe maintenance performed on your
vehicle. Whenever any maintenance is performed, be
sure to writeit down in this part.This will help you
determine when your next maintenance should
be done.
In addition, it is a good idea to keep your maintenance
receipts. They maybe needed to qualify your vehicle
for
warranty repairs.
Part A: Scheduled Maintenance
Services
Using Your Maintenance Schedule
at Gen ~11 Motors
want to help you keep your
vehicle in good workmg condition. But we don’t know
exactly how you’ll drive it. You may drive very short
distances only a few times a week. Or you maydrive
long distances all the time in veryhot, dusty weather.
You may use your vehicle in making deliveries. Or you
may drive it to work, to do errands or in many other
ways.
we
The proper fluids and lubricants to use are listed in Part
D. Make sure whoever services your vehicle usesthese.
All parts should be replaced and all necessary
repairs
done before you or anyone eke drives the vehicle.
These schedules are for vehicles that:
~
Because of all the different ways peopleuse their GM
vehicles, maintenance needs vary. You may even need
more frequent checks and replacements than you’ll find
in the schedules in this section. So please read tlvs
section and note how youdrive. If you have any
questions on how tokeep your vehicle in good
condition, see your Pontiac dealer.
cany passengers and cargo within recommended
limits. You will find theselimits on your vehicle’s
Tire-Loading Information label. See “LoadingYour
Vehicle” in the Index.
are driven on reasonable road surfaces within legal
driving limits.
use the recommended unleaded fuel. See “Fuel” in
the Index.
Selecting the Right Schedule
First you’ll need to decide which of the two schedules
is right for your vehicle. Here’s how todecide which
schedule to follow:
This part tells you the maintenance services you should
have done and when you should schedule them. If you
go to your dealer for your service needs, you’ll know
that GM-trained and supported service people will
perform the work usinggenuine GM parts.
7-3
Maintenance Schedule
Schedule I Definition
Follow MaintenanceSchedule I if any one of these is
true for your vehicle:
0
0
Most trips are less than 5 to 10 miles (8 to 16 km).
This is particularly important when outside
temperatures are below freezing.
Most trips include extensive idling (such as frequent
driving in stop-and-go traffic).
0
Most trips are through dusty areas.
0
You frequently tow a trailer or use a carrier on top of
your vehicle.
Schedule I should also be followed if the vehicleis used
for delivery service, police, taxi, or other commercial
application.
=Schedule
I Intervals
Every 3,000 Miles (5 000 km) or3 Months,
Whichever Occurs First
Engine Oil and Filter Change
Every 6,000 Miles (10000 km) o r 6 months,
Whichever Occurs First
Chassis Lubrication
-
At 6,000 Miles (10 000 km) Then Every 12,000
Miles (25000 km)
Tire Rotation
Every 15,000 Miles(25 000 km)
Air Cleaner Filter Inspection, if driving
in dusty conditions
Every 30,000 Miles (50 000 km)
Air Cleaner Filter Replacement
Spark Plug Replacement
Spark Plug Wire Inspection
Fuel Tank, Cap and Lines Inspection
Engine Accessory Drive Belt Inspection (or every
24 months, whichever occurs first)
Cooling System Service (or every 24 months,
whichever occurs first)
Every 50,000 Miles (83 000 km)
Automatic Transaxle Service (severe conditions only)
At 60,000 Miles (100000 km) Then Every
15,000 Miles (25 000 km)
Camshaft Timing Belt Inspection (3.4L Code
X engine only)
-
7-4
Maintenance Schedule
1
Follow Schedule IT only if none of the conditions from
Schedule I is true.
Schedule I1 Intervals
Every 7,500 Miles(12 500 km)
Engine Oil and Filter Change (or every 12 months,
whichever occurs first)
Chassis Lubrication (or every 12 months, whichever
occurs first)
-
At 7,500 Miles (12 500 km) Then Every
15,000 Miles(25 000 km)
Tire Rotation
Every 30,000 Miles (50 000km)
Engine Accessory Drive Belt Inspection (or every
24 months, whichever occurs first)
Cooling System Service (or every 24 months,
whichever occurs first)
Spark Plug Replacement
Spark Plug Wire Inspection
Air Cleaner Filter Replacement
Fuel Tank, Cap and Lines Inspection
Every 50,000 Miles(83 000 knl)
Automatic Transaxle Service (severe conditions only)
At 60,000 Miles (100 000 km) - Then Every
15,000 Miles (25 000 km)
Camshaft Timing Belt Inspection(3.4L Code X
engine only)
7-5
I
,Maintenance Schedule I
I
3,000 Miles (5000 km)
The services shown in this schedule up to 100,008 miles
(166 000 km) should be performed after 100,000 miles
(166 000 km) at the same intervals.
0Change engine oil and filter (or every
3 months, whicheveroccurs first).
An Emission Control Service.
Footnotes
The U.S. Environmental Protection Agency or the
California Air Resources Boardhas determined thatthe
failure to perform this maintenanceitem will not nullify
the emission warranty or limit recall liability prior to the
completion of vehicle usefullife. We, however, urge that
all recommended maintenance services be performedat
the indicated intervals and the maintenance berecorded.
DATE
ACTUAL MILEAGE
SERVICED BY:
I
MaintenanceSchedule I
I
6,000 Miles (10 000 km)
Change engine oil and filter (or every
3 months, whichever occurs first).
An Emission Control Service.
9,000 Miles (15 000 km)
0Change engine oil and filter (or every
3 months, whichever occursfirst).
An Emission Control Sewice.
0Lubricate the shift linkage, parking brake
cable guides, underbody contact points and
linkage (or every 6 months, whichever
occurs first).
CI Rotate tires. See “Tire Inspection and
Rotation” in the Index for proper rotation
pattern and additional information.
€
ACTUAL MILEAGE SERVICED BY:
DATE
ACTUAL MILEAGE
-.-
-
._
=
~
-
SERVICED BY:
. x.-..
7-7
I
Maintenance Schedule I
I
12,000 Miles (20 000 km)
15,000 Miles (25 000 km)
0Change engine oil and filter (or every
0Change engine oil and filter (or even
3 months, whichever occurs first).
3 months, whichever occurs first).
An Emission Control Service.
An Emission Control Service.
[7 Lubricate the shift linkage, parking brake
cable guides, underbody contact pointsand
linkage (or every6 months, whichever
occurs first).
0Inspect air cleanerfilter if you are driving
in dusty conditions.Replace filter if
necessary. An Emission Control Service.
I
DATE
ACTUAL
MILEAGE
SERVICED
7-8
BY:
DATE
ACTUAL
MILEAGE
i
I
SERVICED BY:
I
Maintenance Schedule I
I
18,000 Miles (30 000 km)
21,000 Miles (35 000 km)
c]Change engine oil and filter (or every
3 months, whichever occurs first).
0Change engine oil and filter (or every
An Emission Control Sewice.
3 months, whichever occurs first).
An Emission Control Sewice.
0Lubricate the shift linkage, parking brake
cable guides, underbody contact points and
linkage (or every 6 months, whichever
occurs first).
0Rotate tires. See “Tire Inspection and
Rotation” in the Index for proper rotation
pattern and additional information.
DATE
ACTUAL MILEAGE
SERVICED BY:
DATE SERVICED
ACTUAL MILEAGE
BY:
7-9
-~
24,000 Miles (40 000 km)
Change engineoil and filter (or every
3 months, whicheveroccurs,first).
0Change engine oil and filter (or"every
3 months, whichever occurs first).
An Emission Control Service.
An Emission Control Service.
17Lubricate the shift linkage, parking
brake
cable guides, underbodycantact points and
linkage (or every 6 months, whichever
occurs first).
I
I
I
Maintenance Schedule I
30,000 Miles (50000 km)
0Change engine oil and filter (or every
3 months, whichever occurs first).
An Emission Control Service.
0Lubricate the shift linkage, parking brake
cable guides, underbody contact points and
linkage (or every 6 months, whichever
occurs first).
17 Inspect engine accessory drive belt (or
every 24 months, whichever occurs first).
An Emission Control Service.
0Drain, flush and refill cooling system (or
every 24 months, whichever occurs first).
See “Engine Coolant’’ in the Index for
what to use. Inspect hoses. Clean radiator,
condenser, pressure cap and neck. Pressure
test the cooling system and pressure cap.
0Replace spark plugs.An Emission
Control Service.
0Inspect spark plug wires.An Emission
Control Sewice.
3-
0Replace air cleaner filter. Replace filter
more often under dusty conditions.
An Emission Control Sewice.
0Inspect fuel tank, cap and lines for damage
or leaks. Inspect fuel cap gasket for any
damage. Replace parts as needed.
An Emission Control Service.
3-
0Rotate tires. See “Tire Inspection and
Rotation” in the Index for proper rotation
pattern and additional information.
DATE
ACTUAL
MILEAGE
SERVICED
BY:
An Emission Control Service.
7-11
D&TE.
ACTUAL MILXAGE
I
MaintenanceSchedule I
I
39,000 Miles (65 000 km)
42,000 Miles (70000 km)
0Change engine oil and filter (or every
17 Change engine oil and filter (or every
3 months, whichever occurs first).
3 months, whichever occurs first).
An Emission Control Service.
An Emission Control Service.
0Lubricate the shift linkage, parking brake
cable guides, underbody contact points and
linkage (or every 6 months, whichever
occurs first).
Rotate tires. See “Tire Inspection and
Rotation” in the Index for proper rotation
pattern and additionalinformation.
DATE SERVICED
ACTUAL MILEAGE
BY:
I
DATE
ACTUAL
MILEAGE
SERVICED
BY:
7-13
I Maintenance Schedule I 1
50,000 Miles (83 000 km)
51,000 Miles (85 000 km)
0Change automatic transaxle fluid and filter
17 Change engine oil and filter
if the vehicle is mainly driven under one or
more of these conditions:
- In heavy city traffic where the outside
temperature regularly reaches 90 O F
( 3 2 T ) or higher.
- In hilly or mountainous terrain.
- When doing frequent trailer towing.
- Uses such as found in taxi, police or
delivery service.
(orevery
3 months, whichever occurs first).
An Emission Co.ygrQJService.
Ifyou do not use your vehicle under any of these
conditions, the fluid andjcilter do not require
changing.
I
DATE
I
ACTUAL MILEAGE
ISERVICED
BXI
DATE
ACTUAL MILEAGE
SERVICED BY:
7-15
57,000 Miles (95 000 km)
Change engineail and filter (or every
3 months, whichever o,ccurs first).
An Emission ContmE Sewice.
DATE
SERVICD BY:
ACTUAL MILEAGE
.--
I
I
I
Maintenance Schedule.1 60,000 Miles (100 000 km)
0Change engine oil and filter (or every
3 months, whichever occurs first).
An Emission Control Service.
0Lubricate the shift linkage, parking brake cable
guides, underbody contact points and linkage
(or every 6 months, whichever occurs first).
0Inspect engine accessory drive belt (or
every 24 months, whichever occurs first).
An Emission Control Service.
Replace spark plugs.An Emission Control
Service.
0Inspect spark plug wires.An Emission Control
Service.
0Replace air cleaner filter. Replace filter
more often under dusty conditions.
An Emission Control Sewice.
CI Inspect fuel tank, cap and lines for damage
Inspect camshaft timing belt. An Emission
or leaks. Inspect fuel cap gasket for any
damage. Replace parts as needed.
Control Service.
An Emission Control Service.
0Drain, flush and refill cooling system (or
every 24 months, whichever occurs first).
See “Engine Coolant” in the Index for
what to use.Inspect hoses. Clean radiator,
condenser, pressure cap and neck. Pressure
test the cooling system and pressure cap.
An Emission Control Service.
7-17
1 I
I ’
1
I
Maintenance Schedule I
I
I
66,000 Miles (110 000 km)
63,000 Miles (105 000 km)
0Change engine oil and filter (or every
Change engineoil and filter (or every
3 months, whichever occurs first).
3 months, whicheveroccurs first).
An Emission Control Service.
An Emission Control Sewice.
Lubricate the shift linkage, parking brake
cable guides, underbody contact pointsand
linkage (or every 6 months, whichever
occurs first).
17 Rotate tires. See “Tire Inspectionand
Rotation” in the Index for proper rotation
pattern and additional information.
DATE SERVICED
ACTUAL MILEAGE
7-18
BY:
DATE
ACTUAL MILEAGE SERVICED BY:
I
I
Maintenance Schedule I
I
69,000 Miles (115 000 km)
72,000 Miles (120 000 km)
Cl Change engine oil and filter (or every
0Change engine oil and filter (or every
3 months, whichever occurs first).
3 months, whichever occurs first).
An Emission Control Service.
An Emission Control Service.
Lubricate the shift linkage, parking brake
cable guides, underbody contact pointsand
linkage (or every 6 months, whichever
occurs first).
DATE
-
ACTUAJ' MILEAGE
SERVICED BY:
I
DATE
ACTUAL
MILEAGE
SERVICED
BY:
7-19
I
Maintenance Schedule I
I
75,000 Miles (125 000 km)
78,000 Miles (130 000 km)
Cl Change engine oil and filter (or every
0Change engine oil and filter (or every
3 months, whichever occursfirst).
3 months, whichever occurs first).
An Emission Control Service.
An Emission Control Service.
0Inspect air cleanerfilter if you are driving
in dusty conditions.Replace filter if
necessary. An Emission Control Service.
Inspect camshaft timing belt.
An Emission
Control Service.
DATE
7-20
ACTUAL MILEAGE
SERVICED BY:
0Lubricate the shift linkage, parking brake
cable guides, underbody contact points and
linkage (or every 6 months, whichever
occurs first).
0Rotate tires. See “Tire Inspection and
Rotation” in the Index for proper rotation
pattern and additional information.
I Maintenance Schedule I I
81,000 Miles (135 000 km)
0Change engine oil and filter (or every
84,000 Miles (140 000 km)
3 months, whichever occurs first).
Change engine oil and filter (or every
3 months, whichever occursfirst).
An Emission Control Service.
An Emission Control Service.
0Lubricate the shift linkage, parking brake
cable guides, underbody contact points and
linkage (or every 6 months, whichever
occurs first).
DATE
ACTUAL MILEAGE SERVICED BY:
DATE
ACTUAL MILEAGE
SERVICED BY:
-7-21
1
Maintenance Schedule I
I
87,000 Miles (145 000 km)
90,000 Miles (150 000 km)
17 Change
Cl Change engineoil and filter (or every
engineoil and filter (or every
3 months, whichever occurs first).
An Emission Control Service.
3 months, whichever occurs first).
An Emission Control Service.
0Lubricate the shift linkage, parking brake
cable guides, underbody contact points and
linkage (or every 6 months, whichever
occurs first).
0Inspect engine accessorydrive belt (or
every 24 months, whichever occursfirst).
An Emission Control Service.
0Inspect camshaft timingbelt. An Emission
Control Service.
DATE
7-22
ACTUAL MILEAGE
SERVICED BY:
I Maintenance Schedule I I
0Drain, flush and refill cooling system (or
every 24 months, whichever occurs first).
See “Engine Coolant” in the Index for
what to use.Inspect hoses. Clean radiator,
condenser, pressure cap and neck. Pressure
test the cooling system and pressure cap.
An Emission Control Sewice.
hsplect fuel tank, cap and lines for damage
or leaks. Inspect fuel cap gasket for any
damage. Replace parts as needed.
An Emission Control Service. T
0Rotate tires. See “Tire Inspection and
Rotation” in the Indexfor proper rotation
pattern and additional mformation.
17 Replace spark plugs. An Emission Control
Service.
0Inspect spark plugwires. An Emission
Control Service. T
Replace air cleaner filter. Replace filter
more often under dusty conditions.
An Emission Control Service.
DATE
ACTUAL MILEAGE
SERVICED BY:
*
Maintenance Schedule 1
93,000 Miles (155.OOO km)
Change engine oil and €firer (M every
3 months, wbicheveroccurs first).
96,000 Miles (140 000 km)
I7 Change engineail and filter (or every
3 m-onths,whichever occurs first).
An Emission Control Service.
An Emissiun Control Service.
Lubricate the sbift linkage, parking brake
cable guides, underbody contact paints and
linkage (or every 6 months, whichever
occurs first).
DATE
ACTUAL
MILEAGE
1
I
I
MaintenanceSchedule I
I
99,000 Miles (165 000 km)
Cl Change engine oil and filter (or every
3 months, whichever occurs first).
An Emission Control Service.
100,000 Miles (166 000 km)
0Change automatic transaxle fluid and filter
if the vehicle is mainly driven underone or
more of these conditions:
- In heavy city traffic wherethe outside
temperature regularlyreaches 90 O F
(32O C) or higher.
- In hilly or mountainous terrain.
- When doing frequent trailer towing.
- Uses such as found in taxi, police or
delivery service.
If you do not use your vehicle under any of these
conditions, the fluid an.dfilterdo not require
changing.
DATE
ACTUAL MILEAGE SERVICED BY:
7-25
m m m
E i n t e n a n c e Scnedule I1
I
7,500 Miles (12 500 km)
The services shown inthis schedule up to 100,000 miles
(166 000 km)should be performed after 100,000 miles
(166 000 km)at the sameintervals.
0Change engineoil and filter (or every
Footnotes
0Lubricate the shift linkage, parkingbraKe
The U.S. Environmental Protection Agencyor the
California Air Resources Board has determined that the
failure to perform thismaintenance item will not nullify
the emission warrantyor limit recall liability prior to the
completion of vehicle useful life. We, however, urge that
all recommended maintenanceservices be performed at
the indicated intervals and the maintenance berecorded.
cable guides, underbody contact points and
linkage (or every 12 months, whichever
occurs first).
0Rotate tires. See “Tire Inspectionand
Rotation” in the Index for proper rotation
pattern and additional information.
12 months, whichever occurs first).
An Emission Control Service.
DATE
ACTUAL
MILEAGE
SERVICED
7-26
BY:
I
Maintenance Schedule I1
15,000 Miles (25 000 km)
22,500 Miles (37 500 km)
0Change engine oil and filter (or every
0Change engine oil and filter (or every
12 months, whichever occurs first).
12 months, whichever occurs first).
An Emission Control Service.
An Emission Control Service.
0Lubricate the shift linkage, parlung brake
cable guides, underbody contact points and
linkage (or every 12 months, whichever
occurs first).
DATE
ACTUAL MILEAGE
17 Lubricate the shiftlinkage, parking brake
cable guides, underbody contact points and
linkage (or every 12 months, whichever
occurs first).
Rotate tires. See “Tire Inspection and
Rotation” in the Index for proper rotation
pattern and additionalinformation.
SERVICED BY:
7-27
1
Maintenance Schedule I1
30,000 Miles (50 000 km)
0Change engineoil and filter (or every
12 months, whichever occursfirst).
An Emission Control Service.
0Replace sparkpl.ugS.An Emission
Control Service.
0Inspect spark plug wires.An Emission
0Lubricate the shift linkage, parking brake
Control Service. f
cable guides, underbodycontact points and
linkage (or every 12 months, whichever
occurs first).
0Inspect engine accessorydrive belt (or
every 24 months, whichever occursfirst).
Replace air cleaner filter.
An Emission
An Emission Control Service.
0Drain, flush and refill cooling system (or
every 24 months, whichever occursfirst).
See “Engine Coolant”in the Index for
what to use. Inspect hoses. Clean radiator,
condenser, pressurecap and neck. Pressure
test the cooling system and pressure cap.
An Emission Control Service.
Control Service.
0Inspect fuel tank, cap and lines for damage
or leaks. Inspectfuel cap gasket for any
damage. Replace parts as needed.
An Emission Control Service.
4
MaintenanceSchedule I1
I
37,500 Miles (62 500 km)
Change engine oil and filter (or every
12 months, whichever occursfirst).
45,000 Miles (75000 km)
El Change engine oil and filter (or every
12 months, whichever occurs first).
An Emission Control Service.
An Emission Control Service.
0Lubricate the shift linkage, parking brake
0Lubricate the shift linkage, parking brake
cable guides, underbody contact points and
linkage (or every 12 months, whichever
occurs first).
Rotate tires. See “Tire Inspection and
Rotation’’ in the Index for proper rotation
pattern and additional information.
cable guides, underbody contact points and
linkage (or every 12 months, whichever
occurs first).
DATE
DATE
ACTUAL MILEAGE
SERVICED BY:
ACTUAL MILEAGE
SERVICED BY:
7-29
50,000 Miles (83 000 km)
52,500 Miles (87500 km)
0Change automatic transaxle fluid andfilter
0Change engine oil andfilter (or every
if the vehicle is mainly driven under one or
12 months, whichever occurs first).
more of these conditions:
An Emission Control Service.
- In heavy city traffic where the outside
0Lubricate the shift linkage, parking brake
temperature regularly reaches90 O F
cable guides, underbody contact points and
(32°C) or higher.
linkage (or every 12 months, whichever
occurs first).
- In hilly or mountainous terrain.
0Rotate tires. See “Tire Inspection and
- When doing frequent trailer towing.
Rotation” in the Indexfor proper rotation
- Uses such as found in taxi, police or
pattern and additional information.
delivery service.
Ifyou do not use your vehicle
underany of these
conditions, thefluid andfilterdo not require
changing.
DATE
ACTUAL MILEAGE
DATE SERVICED
ACTUAL MILEAGE
SERVICED B Y
~
7-30
BY
MaintenanceSchedule I1
~
60,000 Miles (100 000 km)
0Change engine oil and filter (or every
12 months, whichever occurs first).
An Emission Control Service.
0Lubricate the shift linkage, parking brake
cable guides, underbody contact points and
linkage (or every 12 months, whichever
occurs first).
17 Inspect engine accessory drive belt (or
every 24 months, whichever occurs first).
An Emission Control Service.
Inspect camshaft timing belt.An Emission
Control Service.
test the cooling system andpressure cap.
An Emission Control Service.
0Replace sparkplugs. An Emission
Control Service.
0Inspect spark plug wires.An Emission
Control Service, tf‘
Replace air cleaner filter.An Emission
Control Service.
Inspect fuel tank, cap and lines for damage
or leaks. Inspect fuel cap gasket for any
damage. Replace parts as needed.
An Emission Control Service. -f-
0Drain, flush and refill cooling system (or
every 24 months, whichever occurs first).
See “Engine Coolant” in the Index for
what to use. Inspect hoses. Clean radiator,
condenser, pressure cap and neck. Pressure
DATE
ACTUAL MILEAGE SERVICED BY:
7-31
67,500 Miles (112 500km)
75,000 Miles (125 000 km)
c]Change engine oil and filter (or every
12 months, whichever occurs first).
Cl Change engine oil andfilter (or every
12 months, whicheveroccurs first).
An Emission Control Service.
An Emission Control Service.
0Lubricate the shift linkage, parking brake
0Lubricate the shift linkage, parking brake
cable guides, underbody contact points and
linkage (or every 12 months, whichever
occurs first).
0Rotate tires. See “Tire Inspection and
Rotation” in the Indexfor proper rotation
pattern and additional information.
cable guides, underbody contact points and
linkage (or every 12 months, whichever
occurs first).
0Inspect camshaft timing belt.An Emission
DATE
7-32
ACTUAL MILEAGE
SERVICED BY
Control Service.
DATE ACTUAL MILEAGE
SERVICED B Y
Maintenance ScheduleI1
82,500 Miles (137 500 km)
17 Change engine oil and filter (or
90,000 Miles (150 000 km)
every
12 months, whichever occurs first).
Change engine oil and filter (or every
12 months, whichever occursfirst).
An Emission Control Service.
An Emission Control Service.
0Lubricate the shift linkage, parking brake
Cl Lubricate the shift linkage, parking brake
cable guides, underbody contact points and
linkage (or every 12 months, whichever
occurs first).
0Rotate tires. See “Tire Inspection and
Rotation” in the Index for proper rotation
pattern and additional information.
cable guides, underbody contact points and
linkage (or every 12 months, whichever
occurs first).
0Inspect engine accessory drive belt (or
every 24 months, whichever occursfirst).
An Emission Control Service.
Inspect camshaft timing belt. An Emission
Control Service.
DATE
ACTUAL MILEAGE
SERVICED BY:
(Continued)
7-33
1IMaintenance Schedule I1
I
90,000 Miles (150 000 km) (Continued)
CI Drain, flush and refill cooling system (or
every 24 months, whichever occurs first).
See “Engine Coolant” in the Index
for
what to use. Inspect hoses. Clean radiator,
condenser, pressure cap and neck. Pressure
test the cooling system and pressure
cap.
0Inspect file1 tank, cap and lines for damage
or leaks. Inspect fuelcap gasket for any
damage. Replace parts as needed.
An Emission Control Service. 1-
An Emission Control Service.
0Replace spark plugs.An Emission
Control Service.
0Inspect spark plug wires.An Emission
Control Service. 7
0Replace air cleaner filter.An Emission
Control Service.
DATE
7-34
ACTUAL MILEAGE
SERVICED BY.
I
Maintenance Schedule I1
100,000 Miles (166 000 km)
97,500 Miles (162 500 km)
Change engine oil and filter (or every
12 months, whichever occurs first).
An Emission Control Service.
Lubricate the shift linkage, parking brake
cable guides, underbody contact points and
linkage (or every 12 months, whichever
occurs first).
0Rotate tires. See “Tire Inspection and
Rotation” in the Index for proper rotation
pattern and additional information.
Change automatic transaxle fluid and filter
if the vehicle is mainly driven under one or
more of these conditions:
- In heavy city traffic where the outside
temperature regularlyreaches 90 OF
(32°C) or higher.
- In hilly or mountainous terrain.
- When doing frequent trailer towing.
- Uses such as found in taxi, police or
delivery service.
If you do not use your vehicle under any of these
conditions, the fluid andfilterdo not require
changing.
DATE
ACTUAL
MILEAGE
SERVICED
BY:
DATE
AL-rUALMILEAGE SERVICED
BY:
7-35
Part B: Owner Checks and Services
Windshield Washer Fluid LeveI
Listed below are owner checks and services which
should be performedat the intervals specified to help
ensure the safety, dependability and emissioncontrol
performance of your vehicle.
Check the windshield washerfluid level in the
windshield washer tank and add
the proper fluid if
necessary. See “Windshield Washer Fluid” in
the
Index for further details.
Be sure any necessary repairs are completed once.
at
Whenever any fluids or lubricants are added to your
vehicle, make sure they are the proper ones,as shown
in Part D.
At Least Once a Month
At Each Fuel Fill
It is important for you or a service station attendant to
perform these underhood checksat eachfuel fill.
Tire Inflation
Check tire inflation. Make sure tires are inflated to the
pressures specified onthe Tire-Loading Information
label. See “Loading Your Vehicle” in the Index. See
“Tires” in the Index for further details.
Engine Oil Level
Check the engine oil level and add the proper
oil if
necessary. See “Engine Oil” in the hdex for further details.
Cassette Deck
Clean cassette deck. Cleaning should be done every
50 hours of tape play. See “Audio Systems”in the Index
for further details.
Engine Coolant Level
Check the engine coolant level and add the proper
coolant mix if necessary. See “Coolant” inthe Index
for further details.
Power Antenna
Clean power antenna mast.See “Audio Systems”in the
Index for further details.
7-36
At Least Once a Year
Key Lock Cylinders
Lubricate the key lock cylinders with the lubricant
specified in Part D.
Body Lubrication
Lubricate all all hinges and latches, including those for
the hood, rear compartment, glove box door,console
door and any folding seat hardware. Part D tells you
what to use. More frequent lubrication may be required
when exposed to a corrosive environment.
2. Firmly apply both the parking brake (see “Parking
Brake” in the Indexif necessary) and theregular
brake.
NOTE: Do not use the accelerator pedal, andbe
ready to turn offthe engine immediately if it starts.
3. Try to start the engine in each gear. The starter
should work only inPARK (P) or NEUTRAL (N).
If the starter works in any otherposition, your
vehicle needs service.
Brake-Transaxle Shift Interlock -- BTSI
Starter Switch
1. Before you start, be sure you have enough room
around thevehicle.
1. Before you start, be sure you have enough room
around the vehicle. It should be parked on a level
surface.
7-37
2. Firmly apply the parking brake (see “Parking Brake”
in theIndex if necessary).
Parking Brake andAutomatic Transaxle PARI( (F)
Mechanism Check
NOTE: Be ready to apply theregular brake
immediately if the vehicle begins to move.
3. With the engine off, turn the key to theRUN
position, but don’tstart the engine. Without applying
the regular brake, try to move the shift lever out of
PARK (P) with normaleffort. If the shift lever
moves out of PARK (P), your vehicle’sBTSI needs
service.
Steering Column Lock
While parked, and withthe parking brake set, try to turn
the keyto LOCK in each shiftlever position.
The key should turn to LOCK only when the shift
lever is inPARK (P).
Park on a fairly steep hill, with the vehiclefacing
downhill. Keeping your foot on the regular brake, set
the parking brake.
To check the parking brake: Withthe engine running
and transaxlein NEUTRAL (N), slowly remove foot
pressure from the regular brake pedal.Do this until
the vehicle is held by the parking brake only.
The key should comeout only in LOCK.
0
To check the PARK (P) mechanism’s holding ability:
Shift to PARK (P). Thenrelease all brakes.
Underbody Flushing
At least every spring, use plain water to flush any corrosive
materials fi-om the underbody. Take care to clean thoroughly
any areas wheremud and other debris can collect.
7-38
Part C: Periodic Maintenance
Inspections
Listed below are inspections and services which should
be performed at least twice a year (for instance, each
spring and fall).You should let your GM dealer’s
service department or other qualified service centerdo
these jobs. Make sure any necessary repairs
are
completed at once.
Restraint Systems
Now and then, make sure all your belts, buckles, latch
plates, retractors, anchorages and reminder systems
are
working properly. Look for any loose partsor damage.
If you see anything that might keep a restraint system
from doing itsjob, have it repaired.
Steering, Suspension and Front-WheelDrive Axle Boot and Seal Inspection
Inspect the front and rear suspension and steering
system for damaged, loose or missing parts, signsof
wear, or lack of lubrication. Inspect the power steering
lines and hosesfor proper hookup, binding, leaks,
cracks, chafing, etc. Clean and then inspect the drive
axle boot sealsfor damage, tears or leakage. Replace
seals if necessary.
Exhaust System Inspection
Inspect the complete exhaust system. Inspect the body
near the exhaust system. Look for broken, damaged,
missing or out-of-position parts as well as open seams,
holes, loose connections, or other conditions which
could cause a heat build-up in the floor pan or could le
exhaust fumes into the vehicle. See “Engine Exhaust” in
the Index.
Throttle Linkage Inspection
Inspect the throttle linkagefor interference or binding,
and for damaged or missing parts. Replace parts as
needed. Accelerator and cruise control cables should not
be lubricated.
Brake System Inspection
Inspect the complete system. Inspect brake lines and
hoses for proper hookup, binding, leaks, cracks, chafing,
etc. Inspect disc brake pads for wear and rotors
for
surface condition. Inspect other brake parts, including
calipers, parking brake, etc. Check parking brake
adjustment. You may need to have your brakes inspected
more often if your driving habits or conditions result in
frequent braking.
7-39
Part D: Recommended Fluids and
Lubricants
USAGE
FLUID/LUBRICANT
Engine Coolant
50/50 mixture of water (preferably
distilled) and good quality
ethylene glycol base antifreeze
(GM Part No. 1052753 or
equivalent) conforming to GM
Specification 1825M or approved
recycled coolant conforming to
GM Specification 1825M.
NOTE: Fluids andlubricants identified below by name,
part number orspecification may be obtained from your
GM dealer.
USAGE
FLUIDJLUBRICANT
Engine Oil
Engine oil with the American
Petroleum Institute Certified For
Gasoline Engines “Starburst”
symbol of the proper viscosity.To
determine the preferred viscosity
for your vehicle’sengine, see
“Engine Oil” inthe Index.
Coolant
Supplement
GM Part No. 3634621 or
equivalent with a complete flush
and refill.
Hydraulic Brake
System
Delco Supreme 1l@Brake Fluid
(GM Part No. 1052535 or
equivalent DOT-3 brake fluid).
Parking Brake
Guides
Chassis lubricant (GM Part
No. 1052497 or equivalent) or
lubricant meeting requirementsof
NLGI Grade 2, Category LB or
GC-LB.
USAGE
FLUID/LUBRICANT
USAGE
Power Steering
System
GM Hydraulic Power Steering
Fluid (GM Part No. 1052884 or
equivalent).
Hood Latch
Assembly
_____
Automatic
Transaxle
DEXRON@-111 Automatic
Transmission Fluid.
Key Lock
Cylinders
Lubricate with Multi-Purpose
Lubricant (GM PartNo. 12345120)
or syntheticS A E 5W-30
engine oil.
Automatic
Transaxle Shift
Linkage
Engine oil.
Chassis
Lubrication
Chassis lubricant (GM Part
No. 1052497 or equivalent) or
lubricant meeting requirements
of NLGI Grade 2, Category LB
or GC-LB.
~~
Windshield
Washer Solvent
GM Optikleen@Washer Solvent
(GM Part No. 1051515) or
equivalent.
F’LUID/LUBRICANT
a. Pivots and
Spring
Anchor
b. Release Pawl
a. Engine oil.
Hood and Door
Hinges, Fuel
Door Hinge and
Trunk Access
Panel Hinges
Engine oil or Lubriplate Lubricant
(GM Part No. 1050109).
Weatherstrip
Conditioning
Dielectric Silicone Grease (GM
Part No. 12345579 orequivalent).
b. Chassis lubricant (GM Part
No. 1052497 orequivalent) or
lubricant meeting requirements
of NLGI Grade 2, Category LB
or GC-LB.
See “Replacement Parts” in the Indexfor recommended
replacement filters, valves andspark plugs.
7-A1
Part E: Maintenanc Record
After the scheduled services are performed, record
the
date, odometer reading and who performed
the service
in the boxes providedafter the maintenance interval.
Any additional information from “Owner Checks and
Services” or “Periodic Maintenance” canbe added on
the following record pages.A h , you should retain all
maintenance receipts. Your owner informationportfolio
is a convenient dace to store them.
Maintenance Record
ODOMETER
SERVICED
READING
DATE
7-42
BY
MAINTENANCE
PERFORMED
Maintenance Record
7-43
Maintenance Record
~
~~
ODOMETER
DATE
7-44
READING
BY
MAINTENANCE PERFORMED SERVICED
Maintenance Record
I
I
I
I
I
7-45
DATE
ODOMETER
READING
SERVICED .BY
MAINTENANCE PEWORMED
7
Section 8 CustomerAssistanceInformation
Here you willfind out how to contact Pontiac if you
need assistance. This section also tells you how to obtain
service publications and how toreport any safety
defects.
This section includes information on: The Customer
Satisfaction Procedure, CustomerAssistance for
Hearing or Speech Impaired, BBB Auto Line Alternative Dispute Resolution Program, Reporting
Safety Defects, Roadside Assistance, and Service
Publications.
Customer Satisfaction Procedure
Your satisfaction and goodwill are important to your
dealer and Pontiac. Normally, any concern wi.th the sales
transaction or the operation of your vehiclewill be
resolved by your dealer’s Sales or Service Departments.
Sometimes, however, despite the bestintentions of all
concerned, misunderstandings can occur. If your
concern has not beenresolved to your satisfaction, the
following steps should betaken:
STEP ONE -- Discuss your concern witha member of
dealership management. Normally,concerns can be
quickly resolved at thatlevel. If the matter has already
been reviewed withthe Sales, Service, or Parts Manager,
contact the owner of the dealership or the General
Manager.
STEP TWO -- If after contacting a member of
dealership management, it appears your concerncannot
be resolved by thedealership without further help,
contact the Pontiac Customer AssistanceCenter by
calling 1-800-PM CARES. In Canada, contact GM of
Canada Customer Assistance Center in Oshawa by
calling 1-800-263-3777 (English) or 1-800-263-7854
(French).
In Mexico, call (525) 254-3777. In Puerto Rico, call
1-800-496-9992 (English) or 1-800-496-9993
(Spanish). In the U.S. Virgin Islands, call
1-800-496-9994. In other overseas locations, contact
GM North American ExportSales in Canada by calling
1-905-644-4112.
8-1
For prompt assistance, please have the following
information available to give the Customer Assistance
Representative:
0
Your name, address, home and business
telephone
I
numbers
0
Vehicle Identification Number (This is available
from the vehicle registration or title, or the plate at
the top left of the instrument panel andvisible
through the windshield.)
0
Dealership name and location
Vehicle delivery date and present mileage
Nature of concern
We encourage you to call the toll-free number listed
previously in orderto give your inquiry prompt
attention. However,if you wish towrite Pontiac, write
to:
United States
Pontiac Division
Customer Assistance Center
One Pontiac Plaza
Pontiac, MI 48340-2952
8-2
Canada
General Motors of Canada Limited
Customer AssistanceCentre 163-005
1908 Colonel Sam Drive
Oshawa, Ontario LlH 8P7
Refer to your Warranty and Owner Assistance
Information bookletfor addresses of Canadian and GM
Overseas offices.
When contacting Pontiac, please remember that your
concern will likely be resolved in the dealership, using
the dealership’s facilities, equipment and personnel.
That is why we suggest you follow Step One first if you
have a concern.
Customer Assistance for the Hearing
or Speech Impaired(TDD)
To assist customers whohave hearing difficulties,
Pontiac hasinstalled special TDD (Telecommunication
Devices for the Deaf) equipment at its Customer
Assistance Center.Any hearing or speech impaired
customer who has access
to a TDD or a conventional
teletypewriter (TTY) can communicate with Pontiac by
dialing: 1-800-TDD-PONT. (TDD users in Canada can
dial 1-800-263-3830.)
GM Participation in BBB AUTO
LINE - Alternative Dispute
Resolution Program*
*This program. m y not be available in all states, d e p m h g
on state law. Canadian owners refer toyour Warranty and
Owner Assistance M o m t i o n booklet. General Motors
to
reserves the right to change eligibility limitations and/or
discontinue its participation in this program.
Both Pontiac and yourPontiac dealer are committed to
making sure you are completely satisfied with your new
vehicle. Our experience has shown that, if a situation
arises where you feel your concern has not been
adequately addressed, the Customer Satisfaction
Procedure described earlier in this section is very
successful.
There may be instances where an impartial third-party
can assist in arriving at a solution to a disagreement
regarding vehicle repairs or interpretation of the New
Vehicle Limited Warranty.To assist in resolving these
disagreements, Pontiac voluntarily participates in BBB
AUTO LINE.
BBB AUTO LINE is an out-of-court program
administered by the Better Business Bureau system
to settle disputes between customers and automobile
manufacturers. This program is available free of charge
to customers who currently own or lease a GM vehicle.
If you are not satisfied after following the Customer
Satisfaction Procedure, you may contact the BBB using
the toll-free telephone number, or write them atthe
following address:
BBB AUTOLINE
Council of Better Business Bureaus
4200 Wilson Boulevard
Suite 800
Arlington, VA 22203
Telephone: 1-800-955-5 100
To file a claim, you will be asked toprovide your name
and address, your VehicleIdentification Number (VIN),
and a statement of the nature of your complaint.
Eligibility is limited by vehicle age and mileage, and
other factors.
8-3
We prefer you utilize the Customer Satisfaction
Procedure before you resort to AUTO LINE, but you
may contact the BBB at any time. The BBB will attempt
to resolve the complaintserving as an intermediary
between you and Pontiac.If this mediation is
unsuccessfid, an informal hearing will be scheduled
where eligible customers maypresent their case to an
impartial third-party arbitrator.
The arbitrator will make a decision which you may
accept or reject. If you accept the decision, GM will be
bound by that decision.The entire dispute resolution
procedure should ordinarilytake about forty daysfrom
the time you file a claim until a decision is made.
Some state laws may require you to use this program
before filing a claim with a state-run arbitration program
or in the courts. For further information, contact the
BBB at 1-800-955-5100 or the Pontiac Customer
Assistance Center at 1-800-PM CARES.
REPORTING SAFETY DEFECTS
TO THE UNITED STATES
GOVERNMENT
If you believe that your vehiclehas a defect which could
cause a crash or couldcause injury or death, you should
immediately inform the National Highway Traffic
Safety Administration (NHTSA),in addition to
notifying General Motors.
If NHTSA receivessimilar complaints, it may openan
investigation, and ifit finds that a safety defect exists in
a group of vehicles, it may ordera recall and remedy
campaign. However, NHTSA cannot become involved
in individual problems betweenyou, your dealer,or
General Motors.
To contact NHTSA, you may either call the Auto Safety
Hotline toll-free at 1-800-424-9393 (or 366-0123in the
Washington, D.C. area) or write to:
NHTSA, U.S. Department of Transportation
Washington, D.C. 20590
You can also obtain other information about motor
vehicle safetyfrom the Hotline.
8-4
REPORTING SAFETY DEFECTS
TO THE CANADIAN
GOVERNMENT
If you live in Canada, and you believe that yourvehicle
has a safety defect, you should immediately notify
Transport Canada, in addition to notifying General
Motors of Canada Limited. You may write to:
Transport Canada
Box 8880
Ottawa, Ontario K1G 352
REPORTING SAFETY DEFECTS
TO GENERAL MOTORS
In addition to notifying NHTSA (or Transport Canada)
in a situation like this, we certainly hope you'll no^
us. Please call us at 1-800-PM CARES, or write:
Pontiac Division
Customer Assistance Center
One Pontiac Plaza
Pontiac, MI 48340-2950
In Canada, please call us at 1-800-263-3777 (English)
or 1-800-263-7854 (French). Or, write:
General Motors of Canada Limited
Customer Assistance Center
1908 Colonel Sam Drive
Oshawa, Ontario LlH 8P7
Pontiac Roadside Assistance Program
Security While You Trave1
1-800-ROADSIDE 1-800-762-3743
As the proud ownerof a new Pontiac vehicle, you
are automatically enrolled in thePontiac Roadside
Assistance Program. This value-added service is
intended to provide you with peace of mind as you
drive in the city or travel the open road.
Pontiac's Roadside Assistance toll-free number is
staffed by a team of technically trained advisors who
are available 24 hours a day, 365 days a year.
We take anxiety out of uncertain situations by
providing minor repair information over the phone
or making arrangements to tow yourvehicle to the
nearest Pontiac dealer.
Canadian Roadside Assistance
Service Bulletins
Vehicles purchased in Canada havean extensive
Roadside Assistance program accessible from anywhere
in Canada or the United States. Please refer to the
separate brochure provided by the dealer
or call
1-800-268-6800 for emergency services.
Service bulletins covering varioussubjects are regularly
sent to all General Motorsdealerships. GM monitors
product performance in thefield. When service methods
are found which promote betterservice on GM vehicles,
bulletins are created to help the technician perform
better service. Service bulletins may involve any
number of vehicles. Some will describe inexpensive
service, others will describe expensiveservice. Some
will advise of new or unexpectedconditions, and others
may help avoidfuture costly repairs. Service bulletins
are meant for qualified technicians. In some cases they
refer to specialized tools, equipment and safety
procedures necessary to service the vehicle. Since these
bulletins are issued throughout the model year and
beyond, an index is required and published quarterlyto
help identify specific bulletins. Subscriptionsare
available. You can order an index atthe toll-free
numbers listed previously, or ask a GM
dealerhetailer to
see an index or individual bulletin.
Service and Owner Publications
Service manuals, service bulletins, owner’s manuals and
other service literature are available for purchase for all
current and many past model General Motors vehicles.
Toll-free telephone numbersfor ordering information:
United States 1-800-55 1-4123
Canada
1-800-668-5539
Service Manuals
Service manuals contain diagnostic and
repair
information for all chassis and body systems. They may
be useful for owners who wishto gain a greater
understanding of their vehicle. They are also useful for
owners with the appropriateskill level or training who
wish to perform “do-it-yourself’ service. These are
authentic General Motors service manuals meant
for
professional, qualified technicians.
Owner Publications
Owner’s manuals, warrantyfolders and various owner
assistance booklets provide owners with general
operation and maintenance information.
8-7
NOTES
!i'
Section 9 Index
ABS
.
. . . . . . . . . . . . . . . . . . . . . . . . . . . . . . . . . . . . . . . . . 4-6
2-42
AccessoryOutlet . . . . . . . . . . . . . . . . . . . . . . . . . . . . . . .
Adding
6- 18
Automatic Transaxle Fluid .....................
6-26
BrakeFluid .................................
ElectricalEquipment . . . . . . . . . . . . . . . 2-14,3-14, 6-63
6-20
Engine Coolant ...............................
6-12
Engineoil . . . . . . . . . . . . . . . . . . . . . . . . . . . . . . . . . .
6-23
Power Steering Fluid .........................
3-14
SoundEquipment ............................
6-24
Windshield Washer Fluid ......................
6-29
AimingHeadlamps . . . . . . . . . . . . . . . . . . . . . . . . . . . . .
1-23
AirBag . . . . . . . . . . . . . . . . . . . . . . . . . . . . . . . . . . . . . . .
1-26
How Does It Restrain .........................
1-25
How It Works . . . . . . . . . . . . . . . . . . . . . . . . . . . . . . .
Location ................................... l-28
ReadinessLight ........................
1-24,2-51
1-28
Servicing . . . . . . . . . . . . . . . . . . . . . . . . . . . . . . . . . . .
1-26
What Makes It Inflate .........................
What Will You See After It Inflates . . . . . . . . . . . . . . 1-27
1-26
When Should It Inflate ........................
Aircleaner . . . . . . . . . . . . . . . . . . . . . . . . . . . . . . . . . . . . 6-15
3-3
AirConditioning . . . . . . . . . . . . . . . . . . . . . . . . . . . . . . . .
6-72
Air Conditioning Refrigerants .....................
Air Conditioning with Electronic Controls . . . . . . . . . . . . 3-1
Alignment and Balance. Tires .....................
6-52
Aluminum Wheels. Cleaning ...................... 6-60
3-16
Antenna. Fixed Mast . . . . . . . . . . . . . . . . . . . . . . . . . . . .
3-16
Antenna. Power Mast Care .......................
6-19
Antifreeze . . . . . . . . . . . . . . . . . . . . . . . . . . . . . . . . . . . . .
Anti-Lock Brake System Active Light . . . . . . . . . . . . . . 2-54
Anti-Lock Brake System Warning Light . . . . . . . . . 2-53. 4.7
4-6
Anti-LockBrakes . . . . . . . . . . . . . . . . . . . . . . . . . . . . . . .
3-15
Anti-Theft Feature. Theftlock .....................
6-54
Appearancecare ...............................
6-62
Appearance Care and Materials ....................
Armrest.Storage . . . . . . . . . . . . . . . . . . . . . . . . . . . . . . .
2-41
2-44
Ashtrays. Front . . . . . . . . . . . . . . . . . . . . . . . . . . . . . . . . .
Ashtrays, Rear . . . . . . . . . . . . . . . . . . . . . . . . . . . . . . . . . 2-45
Audio System, Steering Wheel Touch Controls . . . . . . . 3-17
Audio Systems . . . . . . . . . . . . . . . . . . . . . . . . . . . . . . . . . . 3-5
Auto-Down Window . . . . . . . . . . . . . . . . . . . . . . . . . . . .
2-27
Automatic Door Locks . . . . . . . . . . . . . . . . . . . . . . . . . . . . 2-4
2-16
AutomaticTransaxle . . . . . . . . . . . . . . . . . . . . . . . . . . . .
2-19
First Gear (1) Position . . . . . . . . . . . . . . . . . . . . . . . .
Neutral (N) Position . . . . . . . . . . . . . . . . . . . . . . . . . . 2-17
2-18
Overdrive (D) Position . . . . . . . . . . . . . . . . . . . . . . . .
2-16. 7-38
Park (P) Position . . . . . . . . . . . . . . . . . . . . . . . .
Reverse (R) Position . . . . . . . . . . . . . . . . . . . . . . . . . .
2-17
2-19
Second Gear (2) Position ......................
9-1
Shifting ....................................
Third Gear (3) Position ........................
Automatic Transaxle Fluid........................
Adding ....................................
Checking ...................................
2- 16
2-18
6- 16
6-18
6-16
6-28
Battery ......................................
Charge Light ................................ 2-50
5-2
JumpStarting ................................
Replacement. Remote Lock Control. . . . . . . . . . . . . . . 2-7
2-36
Saver . . . . . . . . . . . . . . . . . . . . . . . . . . . . . . . . . . . . . .
5-2
Warnings ....................................
BBBAutoLine .................................
8-3
4-25
Blizzard ......................................
Brake
6-27
Adiustment .................................
6-26
Fliid. Adding ...............................
MasterCylinder .............................
6-25
2-21
Parking ....................................
6-27
PedalTravel ................................
6-27
System Parts, Replacing .......................
2-52
System Warning Light ........................
Trailer .....................................
4-33
2-24
Transaxle Shift Interlock .......................
Transaxle Shift Interlock, Maintenance . . . . . . . . . . . 7-37
Wear ......................................
6-26
Brakes, Anti-Lock ...............................
4-6
Braking . . . . . . . . . . . . . . . . . . . . . . . . . . . . . . . . . . . . . . . .
4-5
Braking, In Emergencies ..........................
4-9
2-12
Break-In, New Vehicle ..........................
BTSI (Brake Transaxle Shift Interlock) . . . . . . . . . . . . . . 2-24
BTSI (Brake Transaxle Shift InterIock). Maintenance . . 7-37
Bulb Replacement .............................. 6-70
..
11
Canada. Vehicles
Sold First
In .......................
Canadian Roadside Assistance ......................
8-7
6-71
Capacities and Specifications ......................
CarbonMonoxide ....................
2.25.4.26.4.32
Care of the Head-Up Display .....................
3-15
3-9
Cassette Tape Player .............................
Cassette Tape Player Care ........................
3-15
3-10
CDPlayer .....................................
Center Console .................................
2-41
Center High-Mounted Stoplamp Bulb Replacement . . . . 6-42
1-29
Center Passenger Position ........................
4-27
Certification Label ..............................
Chains,Safety .................................
4-32
Chains, Tire ...................................
6-54
Changing a Flat Tire .............................
5-23
2-50
Charging System Light ..........................
Checking Your Restraint Systems . . . . . . . . . . . . . . . . . . 1-54
Checking
6-16
Automatic Transaxle Fluid .....................
6-25
BrakeFluid .................................
6-20
Engine Coolant ..............................
EngineOil ..................................
6-11
6-22
Power Steering Fluid .........................
1-54
RestraintSystems ............................
6-7
Things Under the Hood .........................
Chemical Paint Spotting ..........................
6-61
ChildRestraints ................................
1-38
Securing in a Rear Outside Seat Position . . . . . . . . . . 1-39
Securing in the Center Rear Seat Position . . . . . . . . . 1-41
Securing in the Right Front Seat Position
1-46
(2-DoorModels) ...........................
Securing in the Right FrontSeat Position
1-43
(&DoorModels) ...........................
1-39
TopStrap ...................................
1-38
WheretoPut . . . . . . . . . . . . . . . . . . . . . . . . . . . . . . . .
2-45
CigaretteLighter . . . . . . . . . . . . . . . . . . . . . . . . . . . . . . .
Circuit Breaker. Power Windows and
6-69
Other Power Options ...........................
4- 18
City Driving . . . . . . . . . . . . . . . . . . . . . . . . . . . . . . . . . . .
Cleaner. Air . . . . . . . . . . . . . . . . . . . . . . . . . . . . . . . . . . . 6-15
Cleaning
6-60
AluminumWheels ...........................
6-55
Fabric .....................................
6-58
Glass ......................................
6-55
Inside ofYour Pontiac ........................
Leather . . . . . . . . . . . . . . . . . . . . . . . . . . . . . . . . . . . . 6-57
Outside of the Windshield and Wiper Blades. . . . . . . 6-58
6-59
Outside of Your Pontiac .......................
6-56
SpecialProblems ............................
Stains ......................................
6-56
Tires . . . . . . . . . . . . . . . . . . . . . . . . . . . . . . . . . . . . . . 6-60
6-57
Top of the Instrument Panel ....................
Vinyl . . . . . . . . . . . . . . . . . . . . . . . . . . . . . . . . . . . . . . 6-57
3-5
Clock, Setting the ................................
3-1
Comfort Controls ................................
Comfort Guides. Rear Safety Belt . . . . . . . . . . . . . . . . . . 1-34
3- 15
Compact Disc Care . . . . . . . . . . . . . . . . . . . . . . . . . . . . .
Compact Disc Player ............................
3 - 10
Compact Spare Tire .............................
5-32
2-59
Computer. Trip .................................
2-23
Console Shift Lever . . . . . . . . . . . . . . . . . . . . . . . . . . . . .
2-41
Console.Center ................................
4-5
Control of a Vehicle ..............................
Control. Loss Of . . . . . . . . . . . . . . . . . . . . . . . . . . . . . . . . 4-13
ConvenienceNet ...............................
2-40
Convex Outside Mirror ..........................
2-40
6-19
Coolant .......................................
Bleedvalves ................................
5-20
Heater, Engine .........................
2- 15, 6- 14
How to Add to the Coolant Recovery Tank . . . . . . . . 5-16
5-19
How to Add to the Radiator ....................
2-51
Temperature Gage . . . . . . . . . . . . . . . . . . . . . . . . . . . .
2-50
TemperatureLight . . . . . . . . . . . . . . . . . . . . . . . . . . .
5-16
Coolant Recovery Tank ..........................
5-14
CoolingSystem ................................
8-6
Courtesy Transportation ...........................
2-31
CruiseControl .................................
2-34
Erasing Speed Memory ........................
2-34
Getting Out Of ..............................
Passing Another Vehicle While Using . . . . . . . . . . . . 2-33
2-32
To Increase Speed ............................
ToReduceSpeed ............................ 2-33
To Resume a Set Speed ........................
2-32
2-32
ToSet . . . . . . . . . . . . . . . . . . . . . . . . . . . . . . . . . . . . .
2-33
UseonHills ................................
Cupholders . . . . . . . . . . . . . . . . . . . . . . . . . . . . . . . . . . . .
2-41
Customer Assistance for the Hearing or
8-2
SpeechImpaired ...............................
Customer Assistance Information . . . . . . . . . . . . . . . . . . . 8-1
Customer Satisfaction Procedure ....................
8-1
9-3
guage
Fabric Cleaning ...............................
6-55
6-6 1
Fiberglass Springs ..............................
6-5
FillingYowTa nk ................................
6-15
Filter, Air Cleaner ..............................
6-59
Finish Care ....................................
6-60
FinishDamage .................................
First Gear, Automatic Transaxle . . . . . . . . . . . . . . . . . . . 2-19
3-16
FixedMastAntenna .............................
5-1
Flashers, Hazard Warning .........................
5-23
Flat Tire, Changing .............................
6-71
Fluids and Lubricants ............................
6-40
Fog Lamp Bulb Replacement .....................
6-4
Foreign Countries, Fuel ...........................
Frangais,
................................. 11..
FreewayDriving ...............................
4-19
French
........................... 11..
Front Lamp Bar Bulb Replacement . . . . . . . . . . . . . . . . . 6-36
1-4
Front Seatback Latches ...........................
Front Sidemarker Bulb Replacement. . . . . . . . . . . . . . . . 6-38
. . . . . . . . . . . . . . . . 6-38
Front Turn Signal Bulb Replacement
Fuel . . . . . . . . . . . . . . . . . . . . . . . . . . . . . . . . . . . . . . . . . . 6-3
FillingYourTank .............................
6-5
Gage ......................................
2-49
In Foreign Countries ...........................
6-4
Fuses and Circuit Breakers .......................
6-64
2-16
GearPositions .................................
6-58
Glass.Cleaning ................................
2-9
GloveBox .....................................
3-8
Graphic Equalizer. Using ..........................
GVWR (Gross Vehicle Weight Rating) . . . . . . . . . . . . . . 4-27
6-28
Halogen Bulbs ................................
Hazard Warning Flashers ..........................
5-1
HeadRestraints .................................
1-4
2-60
Head-Up Display (HUD) .........................
HeadlampAiming ..............................
6-29
6-32
Headlamp Bulb Replacement......................
Headlamp High/Low Beam Changer . . . . . . . . . . . . . . . . 2-29
Headlamp,Wiring ..............................
6-69
2-34
Headlaps, Operation ...........................
Hearing or Speech Impaired, Customer Assistance. . . . . . 8-2
3-3
Heating ........................................
High-Beam Lamps, How to Change . . . . . . . . . . . . . . . . 2-29
4-21
Highway Hypnosis ..............................
4-21
Hill and Mountain Roads .........................
4-32
Hitches, Trailer .................................
Hood Release . . . . . . . . . . . . . . . . . . . . . . . . . . . . . . . . . . .
6-7
2-27
Horn . . . . . . . . . . . . . . . . . . . . . . . . . . . . . . . . . . . . . . . . .
2-60
HUD .........................................
Hydroplaning . . . . . . . . . . . . . . . . . . . . . . . . . . . . . . . . . .
4-17
G a g e . Engine Coolant Temperature . . . . . . . . . . . . . . . 2-55
Gasolines for Cleaner Air .........................
6-4
GAWR (Gross Axle Weight Rating) . . . . . . . . . . . . . . . . 4-27
.
.
.
. .
9-5
Ignition Key Positions ..........................
2-12
2- 12
Ignition Switch .................................
6-47
Inflation - Tire Pressure ..........................
Inside Daymight Rearview Mirror . . . . . . . . . . . . . . . . . 2-39
Inspections
7-39
BrakeSystem ...............................
7-39
Exhaust Systems .............................
7-39
Restraint Systems ............................
Steering. Suspension and Front-Wheel-Drive
7-39
Axle Boot and Seal .........................
ThrottleLinkage .............................
7-39
2-42
InstrumentPanel ...............................
Instrument Panel Intensity Control . . . . . . . . . . . . . . . . . 2-35
6-57
Instrument Panel, Cleaning .......................
2-36
Interior Lamps .................................
Jack, Tire ....................................
Jump Starting ...................................
5-24
5-2
K e y Lock Cylinders, Maintenance . . . . . . . . . . . . . . . . 7-37
2- 13
Key Reminder Warning ..........................
2-1
Keys ..........................................
L a m p , Dome .................................
Lamp, Malfunction Indicator ......................
Lamps ........................................
BatterySaver ...............................
Daytime Running ............................
Interior ....................................
9-6
2-38
2-56
2-34
2-36
2-35
2-36
2-35
OnReminder ................................
Panel ......................................
2-35
Sustained Interior Illumination . . . . . . . . . . . . . . . . . . 2-37
2-29
Lane Change Indicator ...........................
Larger Children. Safety Belt Use . . . . . . . . . . . . . . . . . . . 1-51
1-4
Latches, Front Seatback ...........................
2-4
Leaving Your Vehicle .............................
Leaving Your Vehicle with the Engine Running . . . . . . . 2-23
Lights
Air Bag Readiness ......................
1-24, 2-51
Anti-Lock Brake System Active . . . . . . . . . . . . . . . . 2-54
Anti-Lock Brake System Warning ........... 2-53, 4-7
Brake System Warning . . . . . . . . . . . . . . . . . . . . . . . . 2-52
2-50
Charging System .............................
Engine Coolant Temperature . . . . . . . . . . . . . . . . . . .2-54
2-55, 6-20
Low Coolant ...........................
2-49
LowFuel ...................................
Low Oil Level ..........................
2-58, 6- 11
Oil Warning ................................. 2-57
1-5, 2-50
Safety Belt Reminder .....................
Second Gear Start ............................
2-20
Security ....................................
2-58
Service Engine Soon. . . . . . . . . . . . . . . . . . . . . . . . . . 2-56
Lighter ....................................... 2-45
Loading YourVehicle ...........................
4-27
Locks
AutomaticDoor ..............................
2-4
Door .......................................
2-3
2-4
PowerDoor ..................................
7-38
Steering Column .............................
Torque .....................................
2-24
2-8
Trunk .......................................
2-27
Window ....................................
Loss of Control . . . . . . . . . . . . . . . . . . . . . . . . . . . . . . . . 4- 13
Low Coolant Warning Light . . . . . . . . . . . . . . . . . 2.55.6.20
2-49
LowFuelLight ................................
Low Oil Level Light .......................
2.58.6.11
2-54
Low Trac Light ................................
6-71
Lubricants and Fluids ............................
Lubrication.Body ..............................
7-37
Maintenance Record ...........................
7-42
7- 1
Maintenance Schedule ............................
Owner Checks and Services ....................
7-36
Periodic Maintenance Inspections . . . . . . . . . . . . . . .7-39
Recommended Fluids and Lubricants . . . . . . . . . . . . 7-40
7-6
Schedule1 ...................................
7-4
Schedule I Definition ..........................
ScheduleII . . . . . . . . . . . . . . . . . . . . . . . . . . . . . . . . . 7-26
7-5
Schedule II Definition ..........................
Scheduled Maintenance Services . . . . . . . . . . . . . . . . .7-3
Maintenance, Normal Replacement Parts . . . . . . . . . . . . 6-72
6-6 1
Maintenance, Underbody .........................
Maintenance, When Trailer Towing. . . . . . . . . . . . . . . . . 4-36
2-56
Malfunction Indicator Lamp ......................
Manual Front Seat . . . . . . . . . . . . . . . . . . . . . . . . . . . . . . . 1- 1
Manual Outside Mirror ..........................
2-39
Methanol (InFuel) ...............................
6-3
2-39
Mirrors .......................................
ConvexOutside .............................
2-40
2-35
Inside DayNight Rearview ....................
Manual Outside ..............................
2-39
2-39
Power Outside ...............................
VisorVanity ................................
2-43
Mode Buttons ...................................
ModeKnob ....................................
MTBE (In Fuel) .................................
3-5
3-2
6-3
Net, Convenience ..............................
2-40
Neutral Position, Automatic Transaxle . . . . . . . . . . . . . .2-17
2-12
New Vehicle Break-In ...........................
Nightvision ...................................
4-15
Odometer ....................................
2-47
2-47
Odometer, Trip .................................
4-11
Off-Road Recovery .............................
Oil
6-10
Engine . . . . . . . . . . . . . . . . . . . . . . . . . . . . . . . . . . . . .
Warning Light ............................... 2-57
Ordering
8-7
Owner Publications ............................
8-7
Service Bulletins ..............................
8-7
Service Manuals ..............................
2-42
Outlet, Accessory ...............................
Overdrive Position, Automatic Transaxle . . . . . . . . . . . . 2-18
Overheated Engine ..............................
5-13
7-36
Owner Checks and Services.......................
Owner Publications, Ordering ......................
8-7
P a i n t Spotting, Chemical ........................
6-61
PanelLamps ...................................
2-35
Panel, Trunk Access .............................
2-42
Park Position, Automatic Transaxle . . . . . . . . . . . . . . . . . 2-16
Park (P), Shifting Into ...........................
2-22
Park (P), Shifting Out Of .........................
2-24
9-7
Parking
2-10
AtNight ...................................
2-21
Brake ......................................
7-38
Brake Mechanism Check ......................
2-10
Lots .......................................
On Hills While Towing a Trailer . . . . . . . . . . . . . . . . 4-35
2-25
Over Things That Burn ........................
2- 11
PASS-Key I1 ..................................
4-12
Passing .......................................
Periodic Maintenance Inspections . . . . . . . . . . . . . . . . . . 7-39
3-16
Power Antenna Mast Care ........................
2-4
Power Door Locks ...............................
2-39
Power Outside Mirrors ...........................
Powerseat ..................................... l-2
Powersteering ..................................
4-9
Power Steering Fluid ............................
6-22
6-23
Adding ....................................
Checking ................................... 6-22
Power Windows ................................
2-27
1-29
Pregnancy, Use of Safety Belts ....................
Pressure, Tire ..................................
6-47
5-1
Problems on the Road ............................
8-7
Publications. Service and Owner ....................
Radiator .....................................
5- 19
Radiator Pressure Cap ............................
6-22
Radio Reception. Understanding . . . . . . . . . . . . . . . . . . . 3- 17
Radio. AMPM Stereo ............................
3-5
Rain. Driving In ................................
4- 16
9-8
Reading Lamps. Rear ............................
2-38
Reading Lamps. Rearview Mirror . . . . . . . . . . . . . . . . . .2-37
2-38
Reading Lamps. Roof Console ....................
Rear Lamp Bar Bulb Replacement . . . . . . . . . . . . . . . . . 6-45
Rear Reading Lamps ............................
2-38
Rear Safety Belt Comfort Guides . . . . . . . . . . . . . . . . . . 1-34
Rear Seat Outside Passenger Positions . . . . . . . . . . . . . . 1-31
3-4
Rear Window Defogger ...........................
Rearview Mirror. Inside Daymight . . . . . . . . . . . . . . . . . 2-39
1-2
Reclining Front Seatbacks .........................
Recommended Fluids and Lubricants . . . . . . . . . . . . . . . 7-40
6-72
Refrigerants. Air Conditioning ....................
2-5
Remote Lock Control .............................
Battery Replacement ...........................
2-7
2-6
MatchingTransmitters .........................
2-6
Operation ...................................
2-8
Remote Trunk Release ............................
6-70
ReplacementBulbs .............................
Replacement Parts ..............................
6-72
6-52
Replacement.Wheel ............................
Replacing Safety Belts ...........................
1-54
Replacing Seat and Restraint System Parts
Afteracrash ................................. l-54
8-5
Reporting Safety Defects ..........................
Restraints. Checking Your ........................
1-54
Restraints. Child ................................
1-38
1-4
Restraints. Head .................................
Restraints. Replacing Parts M e r a Crash . . . . . . . . . . . . 1-54
Reverse Position. Automatic Transaxle . . . . . . . . . . . . . . 2-17
Right Front Passenger Position ....................
Roadside Assistance ..............................
Roadside Assistance. Canadian .....................
Rocking YourVehicle ...........................
Roof Console Reading Lamps .....................
Rotation. Tire ..................................
1-29
8-5
8-7
5-33
2-38
6-48
safety Belt Extender ............................
1-54
Safety Belt Reminder Light . . . . . . . . . . . . . . . . . . . 1-5. 2-50
SafetyBelts . . . . . . . . . . . . . . . . . . . . . . . . . . . . . . . . . . . .
1-5
Adults . . . . . . . . . . . . . . . . . . . . . . . . . . . . . . . . . . . . .
1-10
Careof . . . . . . . . . . . . . . . . . . . . . . . . . . . . . . . . . . . . 6-58
Center Passenger Position......................
1-29
Driver Position . . . . . . . . . . . . . . . . . . . . . . . . . . . . . .
1- 10
Extender . . . . . . . . . . . . . . . . . . . . . . . . . . . . . . . . . . .
1-54
How to Wear Properly ........................
1-10
Incorrect Usage ....................
1-12. 1-19. 1-52
1-29
LapBelt . . . . . . . . . . . . . . . . . . . . . . . . . . . . . . . . . . .
Lap-Shoulder (2-Door Models) . . . . . . . . . . . . . . . . . 1-10
Lap-Shoulder (4-Door Models) . . . . . . . . . . . . . . . . . 1- 16
1-3 1
Lap-Shoulder Belt. Rear .......................
Questions Feople Ask ..........................
1-9
Rear Safety Belt Comfort Guides . . . . . . . . . . . . . . . . 1-34
Rear Seat Passengers . . . . . . . . . . . . . . . . . . . . . . . . .
1-31
Replacing After a Crash .......................
1-54
Right Front Passenger Position . . . . . . . . . . . . . . . . . . 1-29
Use by Children . . . . . . . . . . . . . . . . . . . . . . . . . . . . .
1-36
Use by Larger Children ........................
1-5 1
Use by Smaller Children and Babies . . . . . . . . . . . . . 1-36
Use During Pregnancy ........................
1-29
WhyTheyWork . . . . . . . . . . . . . . . . . . . . . . . . . . . . . .
1-6
4-32
Safety Chains . . . . . . . . . . . . . . . . . . . . . . . . . . . . . . . . . .
Safety Defects
8-5
Reporting to General Motors ....................
Reporting to the Canadian Government . . . . . . . . . . . . 8-5
Reporting to the United States Government
. . . . . . . . . 8-4
...
Safety Warnings and Symbols . . . . . . . . . . . . . . . . . . . . . . .
111
Scheduled Maintenance Services....................
7-3
Seats
1-1
Controls . . . . . . . . . . . . . . . . . . . . . . . . . . . . . . . . . . . . .
ManualFront ................................
1-1
Power ...................................... l-2
Reclining Front . . . . . . . . . . . . . . . . . . . . . . . . . . . . . . .
1-2
1-1
Restraint Systems And .........................
1-38
Securing a Child Restraint .....................
Second Gear. Automatic Transaxle . . . . . . . . . . . . . . . . . 2-19
2-20
Second-GearStart ...........................
Second-Gear Start Light .......................
2-20
2-58
SecurityLight ..................................
2-11
Security System (PASS-Key II)....................
6-1
Service . . . . . . . . . . . . . . . . . . . . . . . . . . . . . . . . . . . . . . . .
Service and Appearance Care ......................
6-1
8-7
Service and Owner Publications ....................
Service Bulletins. Ordering ........................
8-7
Service Engine Soon Light .......................
2-56
Service Manuals, Ordering . . . . . . . . . . . . . . . . . . . . . . . .
8-7
Service Parts Identification Label . . . . . . . . . . . . . . . . . . 6-63
Service Publications ..............................
8-7
Service Work, Doing YourOwn ....................
6-2
Servicing Your Air Bag-Equipped Pontiac . . . . . . . . . . . 1-28
6-60
Sheet Metal Damage . . . . . . . . . . . . . . . . . . . . . . . . . . . .
Shift Lever. Console . . . . . . . . . . . . . . . . . . . . . . . . . . . . .
2-23
Shift Lever. Steering Column .....................
2-22
2-22
Shifting Into Park (P) ............................
Shifting Out of Park (P). . . . . . . . . . . . . . . . . . . . . . . . . .2-24
2- 16
Shifting. Automatic Transaxle .....................
SignaLingTurns ................................
2-29
. . . . . . . . . . . . . . . . 4- 13
Skidding .....................
Snow, Driving On ..............................
4-24
3-14
Sound Equipment, Adding........................
5-32
Spare Tire, Compact .............................
6-7 1
Specifications Chart .............................
Speech or Hearing Impaired, Customer Assistance. . . . . . 8-2
Speedometer/Odometer ..........................
2-47
6-61
Springs, Fiberglass ..............................
6-56
Stains, Cleaning ................................
Start, Second-Gear ..............................
2-20
7-37
Starter Switch, Maintenance ......................
2- 13
Starting Your Engine ............................
Steam, If Coming From Your Engine . . . . . . . . . . . . . . . 5-13
Steering .......................................
4-9
Column Lock, Maintenance ....................
7-38
2-22
Column Shift Lever ..........................
InEmergencies ..............................
4-10
4-9
Power ......................................
2-28
Tiltwheel ..................................
4-9
Tips ........................................
3-17
Wheel Touch Controls ........................
Storage Armrest ................................ 2-41
Storage, Of Your Vehicle .........................
6-28
Stuck: IR Sand, Mud, Ice or Snow. . . . . . . . . . . . . . . . . . 5-33
Sunvisors ....................................
2-43
2-43
Sunroof .......................................
9-10
Supplemental Restraint System(SRS). . . . . . . . . . . . . . . 1-23
Sustained Interior Illumination . . . . . . . . . . . . . . . . 2.6.2.37
Symbols. Vehicle ..................................
v
Tachometer ..................................
2-47
6-44
Taillamps Bulb Replacement ......................
Tamper Resistant Odometer .......................
2-47
3-15
Tape Player Care ...............................
3-8
Tape Player. Cassette .............................
2-10
Theft .........................................
3-11
Theftlock Feature ...............................
6-22
Thermostat ....................................
Third Gear. Automatic Transaxle. . . . . . . . . . . . . . . . . . . 2-18
Tilt Steering Wheel ..............................
2-28
Time. Setting the ................................
3-5
Tires .........................................
6-46
6-52
Alignment and Balance ........................
6-50
BuyingNew ................................
Chains .....................................
6-54
Flat .......................................
5-23
Inflation ..................................... 6-47
6-48
Inspection and Rotation .......................
Loading . . . . . . . . . . . . . . . . . . . . . . . . . . . . . . . . . . . .4-27
5-32
Spare, Compact ..............................
Temperature ................................
6-51
Traction ....................................
6-51
6-51
Treadwear ..................................
6-50
Uniform Quality Grading ......................
6-49
Wear Indicators ..............................
6-52
WheelReplacement ..........................
When It’s Time for New .......................
6-49
valves. Coolant Air Bleed .......................
5-20
TopStrap .....................................
1-39
TorqueLock ...................................
2-24
Vehicle Damage Warnings ..........................
iv
5-29
Vehicle Identification Number (VIN) . . . . . . . . . . . . . . .6-63
Torque. WheelNut ..............................
4-29
Vehicle Loading ................................
4-27
Towing a Trailer ................................
5-7
6-28
Towing Your Vehicle .............................
VehicleStorage ................................
Trailer Tongue Weight ...........................
4-3 1
v
Vehicle Symbols ...................................
4-5
Vehicle. Control of A .............................
4-29
TrailerTowing .................................
2-4
Vehicle. Leaving Your ............................
4-33
Brakes .....................................
Canada in
Sold
Vehicles
4-35 First
........................ u..
Driving on Grades ............................
Driving with a Trailer .........................
4-33
Ventilation .....................................
3-3
4-32
Hitches ....................................
Ventilation System. Flow-Through . . . . . . . . . . . . . . . . . . 3-4
4-36
3-4
Maintenance ................................
VentilationTips .................................
VIN .........................................
6-63
4-35
Parking on Hills .............................
Vision.Night ..................................
4-15
SafetyChains ............................... 4-32
VisorVanity Mirrors ............................
2-43
Total Weight on Your Vehicle’s Tires . . . . . . . . . . . . . 4-31
2-43
Visors. Sun ....................................
4-34
Turnsignals ................................
4-30
Weight of a Trailer ...........................
6- 16
Transaxle Fluid. Automatie .......................
w a r n i n g Devices ...............................
5-2
Trip Computer .................................
2-59
.........................
5-1
Warning
Flashers.
Hazard
2-47
Trip Odometer .................................
.
.
.
.
.
.
.
.
.
.
.
.
.
.
.
2-48
Warning
Lights.
Gages
and
Indicators
4-20
Trip. Before Leaving on a Long....................
6-24
Washer Fluid. Windshield ........................
2-42
Tivnk Access Panel .............................
Washers.
Windshield
............................
2-30
TmnkLock .....................................
2-8
...........................
6-59
Washing
Your
Vehicle
Trunk Release. Remote ...........................
2-8
Water. Driving Through Deep Standing . . . . . . . . . . . . . 2-14
Turn Signal and Lane Change Indicator . . . . . . . . . . . . . 2-29
..................................
6-58
Weatherstrips
Turn SignaVMultifunction Lever . . . . . . . . . . . . . . . . . . .2-28
Wheel
Alignment
...............................
6-52
Turn Signals When Towing a Trailer................ 4-34
5-29
WheelNutTorque ..............................
6-52
Wheel Replacement .............................
Underbody Flushing ...........................
7-38
6-53
Wheel Replacement. Used ........................
WindowLock . . . . . . . . . . . . . . . . . . . . . . . . . . . . . . . . . .
2-27
Underbody Maintenance .........................
6-6 1
9-11
2-n Whdshield Wiper. Circuit Breaker ................. 6-69
mndoui. Auto-Down ............................
Windows.Power ...............................
2-27
Windshield
Wipers ..............................
2-30
Windshield Washer Fluid......................... 6-24
Winter
Driving ................................. 4-23
Wiring.
Headlamp ..............................
6-69
Windshield Washers ............................. 2-39
Windshield Wiper Blade Replacement .............. 6-46
Wrecker
Towing .................................
5-7
. . . . ....
1995