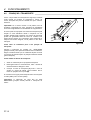
1
4129585-PT
Safety and Operation Manual
Manual de Segurança e de Funcionamento
Lightweight Fairway Mower
67945 – LF 3400™, Kubota V1305-E, 5 Gang, 2WD
67946 – LF 3400™, Kubota V1305-E, 5 Gang, 4WD
67947 – LF 3800™, Kubota V1505-E, 5 Gang, 2WD
67948 – LF 3800™, Kubota V1505-E, 5 Gang, 4WD
67949 – LF 3400™ Turbo, Kubota V1505-TE, 5 Gang, 4WD
67950 – LF 3800™ Turbo, Kubota V1505-TE, 5 Gang, 4WD
67951 – LF 3407™, Kubota V1305-E, 5 Gang, 2WD
67952 – LF 3407™, Kubota V1305-E, 5 Gang, 4WD
CONTENTS
CONTENTS
CONTENTS
SAFETY
1.1
Operating Safety . . . . . . . . . . . . . . . . . . . . . . 3
1.2
Important Safety Notes . . . . . . . . . . . . . . . . . 4
DECALS
CONTROLS
3.1
Icons . . . . . . . . . . . . . . . . . . . . . . . . . . . . . . . 6
3.2
Controls . . . . . . . . . . . . . . . . . . . . . . . . . . . . . 7
3.3
Control Panel . . . . . . . . . . . . . . . . . . . . . . . . 9
3.4
Operator Alerts . . . . . . . . . . . . . . . . . . . . . . 11
OPERATION
4.1
Daily Inspection . . . . . . . . . . . . . . . . . . . . . .12
4.2
Interlock System . . . . . . . . . . . . . . . . . . . . .12
4.3
Operating Procedures . . . . . . . . . . . . . . . . .13
4.4
Starting . . . . . . . . . . . . . . . . . . . . . . . . . . . .14
4.5
Stopping / Parking . . . . . . . . . . . . . . . . . . . .14
4.6
To Drive / Transport . . . . . . . . . . . . . . . . . . .15
4.7
Mowing . . . . . . . . . . . . . . . . . . . . . . . . . . . .15
4.8
Mowing Speed . . . . . . . . . . . . . . . . . . . . . . .16
4.9
Towing / Trailering . . . . . . . . . . . . . . . . . . . .16
4.10 Hillside Operation . . . . . . . . . . . . . . . . . . . .16
4.11 Daily Maintenance . . . . . . . . . . . . . . . . . . . .17
Proposition 65 Warning
Engine exhaust from this product
contains chemicals known to the State
of California to cause cancer, birth
defects, and other reproductive harm
© COPYRIGHT 2003, TEXTRON INC.
“All rights reserved, including the right to reproduce this book or portions thereof in any form”.
All information in this publication is based on information available at time of approval for printing. Jacobsen reserves the
right to make changes at any time without notice and without incurring any obligation.
LITHO IN U.S.A. 11-2003
GB-2
1
SAFETY
1
SAFETY
1.1
OPERATING SAFETY ______________________________________________________
! WARNING
EQUIPMENT OPERATED IMPROPERLY OR BY UNTRAINED PERSONNEL CAN BE DANGEROUS.
Familiarize yourself with the location and proper use of all controls. Inexperienced operator’s should receive
instruction from someone familiar with the equipment before being allowed to operate the machine.
1. Safety is dependent upon the awareness, concern
and prudence of those who operate or service the
equipment. Never allow minors to operate any
equipment.
8. Never operate equipment that has been modified,
does not meet factory specifications, or is without
decals, guards, shields, discharge deflectors or
other protective devices securely fastened in place.
2. It is your responsibility to read this manual and all
publications associated with this equipment (Parts
and Maintenance Manual, Engine Manual,
accessories and attachments). If the operator can
not read English it is the owner’s responsibility to
explain the material contained in this manual to
them.
9. Never disconnect or bypass any switch or interlock.
3. Learn the proper use of the machine, the location
and purpose of all the controls and gauges before
you operate the equipment. Working with unfamiliar
equipment can lead to accidents.
4. Never allow anyone to operate or service the
machine or its attachments without proper training
and instructions; or while under the influence of
alcohol or drugs.
5. Wear all the necessary protective clothing and
personal safety devices to protect your head, eyes,
ears, hands and feet. Operate the machine only in
daylight or in good artificial light.
6. Inspect the area where the equipment will be used.
Locate and remove all debris in the operating area
before using equipment. Beware of overhead
obstructions (low tree limbs, electrical wires, etc.)
and also underground obstacles (sprinklers, pipes,
tree roots, etc.) Enter a new area cautiously. Stay
alert for hidden hazards.
7. Never direct discharge of material toward
bystanders, nor allow anyone near the machine
while in operation. The owner/operator can prevent
and is responsible for injuries inflicted to
themselves, to bystanders and damage to property.
10. Carbon monoxide in the exhaust fumes can be fatal
when inhaled. Never operate the engine without
proper ventilation.
11. Fuel is highly flammable, handle with care.
12. Keep the engine clean. Allow the engine to cool
before storing and always remove the ignition key.
13. Disengage all drives and engage parking brake
before starting the engine (motor). Start the engine
only when sitting in operator’s seat, never while
standing beside the unit.
14. Equipment must comply with the latest federal,
state, and local requirements when driven or
transported on public roads.
15. Never use your hands to search for oil leaks.
Hydraulic fluid under pressure can penetrate the
skin and cause serious injury.
16. Operate the machine up and down the face of the
slopes (vertically), not across the face (horizontally).
17. To prevent tipping or loss of control, do not start or
stop suddenly; reduce speed when making sharp
turns. Use caution when changing direction on
slopes.
18. Keep legs, arms and body inside the seating
compartment while the vehicle is in motion.
This machine is to be operated and maintained as specified in this manual and is intended for the professional
maintenance of specialized turf grasses. It is not intended for use on rough terrain or long grasses.
GB-3
SAFETY
1.2
1
IMPORTANT SAFETY NOTES ________________________________________________
!
This safety alert symbol is used to alert you to potential hazards.
DANGER - Indicates an imminently hazardous situation which, if not avoided, WILL result in death or serious injury.
WARNING - Indicates a potentially hazardous situation which, if not avoided, COULD result in death or serious injury.
CAUTION - Indicates a potentially hazardous situation which, if not avoided, MAY result in minor or moderate injury and
property damage. It may also be used to alert against unsafe practices.
For pictoral clarity, some illustrations in this manual may show shields, guards or plates open or removed. Under no
circumstances should this equipment be operated without these devices securely fastened in place
! WARNING
The Interlock System on this tractor prevents the tractor from starting unless
the brake lever is engaged, mower switch is off and traction pedal is in
neutral. The system will stop the engine if the operator leaves the seat
without engaging the parking brake or setting the mower switch off.
NEVER operate tractor unless the Interlock System is working.
! WARNING
1. Before leaving the operator’s position for any reason:
a.
b.
c.
d.
e.
Return traction pedal to neutral.
Disengage all drives.
Lower all implements to the ground.
Engage parking brake.
Stop engine and remove the ignition key.
2. Keep hands, feet, hair and clothing away from moving parts. Wait for all
movement to stop before you clean, adjust or service the machine.
3. Keep the area of operation clear of all bystanders and pets.
4. Never carry passengers, unless a seat is provided for them.
5. Never operate mowing equipment without the discharge deflector
securely fastened in place.
By following all instructions in this manual, you will prolong the life of your machine and maintain its maximum efficiency.
Adjustments and maintenance should always be performed by a qualified technician.
If additional information or service is needed, contact your Authorized Jacobsen Dealer who is kept informed of the latest
methods to service this equipment and can provide prompt and efficient service. Use of other than original or authorized
Jacobsen parts and Accessories will void the warranty.
GB-4
2
DECALS
2
DECALS
Familiarize yourself with the decals they are critical to the safe operation of the machine.
REPLACE DAMAGED DECALS IMMEDIATELY.
!
! WARNING
1.
2.
3.
4.
5.
6.
7.
8.
ADVERTENCIA
1. Leer el manual del operador. No permitir que personas
no capacitadas para ello usen la maquina.
2. Mantener los escudos en su lugar y la tornilleria
debidamente fijada.
3. Antes de limpiar, ajustar o reparar este equipo,
desengranar todas los mandos, aplicar el freno de
estacionamiento y apagar el motor.
4. Mantener las manos, los pies y la ropa alejados de las
piezas en movimiento.
5. No viajar como pasajero ni llevar pasajeros en
maquinas sin asiento para ello.
6. Mantener a las demas personas alejadas.
7. Si no sabe leer ingles, solictarle a otra persona que le
lea y explique el contenido de las etiquetas y del
manual de le maquina.
Read operator’s manual.
Do not allow untrained
operators to use
machine.
Keep shields in place
and hardware securely
fastened.
Before you clean, adjust
or repair this equipment,
disengage all drives,
engage parking brake
and stop engine.
Keep hands, feet and
clothing away from
moving parts.
Never carry passengers.
Keep bystanders away.
Inspect hoses and fabric
covers daily. If worn or
damaged, replace with
original quality parts.
Do not use on slopes
greater than 22°
340623
! DANGER
To avoid injury when working with battery:
1. Always connect the black ground (-) cable last and
remove it first.
2. Keep sparks and flames away, and avoid contact
with acid.
To avoid injury when jumping battery:
1. Connect positive (+) terminal to positive (+)
terminal.
2. Connect negative (-) terminal on good battery to
frame of vehicle that has dead battery.
! DANGER
3001435
To prevent injury, disengage
all drives, engage parking
brake and stop engine before
working on machine or
emptying grass catchers.
! WARNING
361877
! WARNING
RADIATOR IS UNDER PRESSURE. REMOVE
CAP SLOWLY TO AVOID BODILY INJURY.
365956
GB-5
To prevent cuts use
socket wrench or Turf
Groomer® knob to
turn reel.
1000997
CONTROLS
3
3.1
3
CONTROLS
ICONS ___________________________________________________________________
Read Manual
Off
Hour Meter
Fuel
Mower Rotation
Engine
Run Start
Forward
(Cut)
Reverse
(Backlap)
Mowers
Lower
Raise
Parking Brake
Work Lights
Oil Level Switch
On
Off/Test
Engine Throttle
High
Low
Drive
2-WD
4-WD
Travel
Forward
Reverse
D
Warning Lights
Coolant
Temperature
Hydraulic Oil
Level
Engine Oil
Pressure
Glow
Plug
Hydraulic
Oil Filter
Battery
Charge
Cruise Control
Lock
Unlock
! WARNING
Never attempt to drive the tractor unless you have read the Safety and Operation Manual
and know how to operate all controls correctly.
Familiarize yourself with the icons shown above and what they represent. Learn the
location and purpose of all the controls and gauges before operating this tractor.
GB-6
3
CONTROLS
3.2
CONTROLS_______________________________________________________________
A. Steering Tilt Control
Pull lever up to release steering column. Tilt column up
or down to position desired. Release lever to lock
steering column in place.
CAUTION: Never adjust steering while trac-
!
tor is moving. Stop unit and set parking brake
before adjusting.
B. Parking Brake Lock/Release
To lock parking brake, hold brake pedal (C) down and
press lock (B1) until it engages. To disengage, press
brake pedal release (B2).
Note: The engine will automatically shut down if the
traction pedal is held down for more than 10 seconds
with the parking brake engaged.
H. Hydraulic Oil Cap/Dipstick
Fill to mark on dipstick using clean hydraulic fluid while
machine is cool. Do not overfill
I.
Fuel Cap
Fill fuel tank with No. 2 diesel fuel, minimum cetane
rating of 45. Section 4.11
J. Air Cleaner Indicator
Indicates condition of air cleaner on engine. Clean or
replace air filter when red band appears in clear window
of indicator. See Parts & Maintenance Maunal
K. Backlap Switch
The backlap switch allows the mowers to rotate in
reverse for backlapping.
Forward - For normal operation (mowing) the
switch must be set to the FORWARD (cut)
position.
C. Parking Brake
To engage parking brake press pedal down.
D. Mow Speed Stop
Limits forward speed while mowing. To operate at lower
travel speed while mowing, rotate lever so it contacts
stop screw (D1) on floor board when forward travel
pedal is pressed. To travel at full speed, set lever in
position shown (D3). Stop screw (D2) can be adjusted to
set specific mow speeds. See Parts & Maintenance
Manual.
D1
D3
LF002
D2
F
Mow Speed
Figure 3A
E. Forward Travel (Traction Pedal)
Press front of pedal down for forward travel. Release
pedal to slow tractor and stop.
F.
Reverse Travel (Traction Pedal)
Press rear of pedal down for reverse travel. Release
pedal to slow tractor and stop. Allow tractor to come to a
complete stop before reversing directions.
G. Seat Adjustment
Pull left side lever out to adjust seat froward or
backward. To adjust spring tension under seat turn
adjusting knob on front of seat.
GB-7
When backlapping the parking brake must be set and
backlap switch (K) must be set to reverse. See Parts &
Maintenance Maunal
L. Alarm
The alarm, along with the warning lights (N, Y), sounds
to alert the operator to conditions requiring immediate
attention. See Section 3.4.
M. Controller & Fuses
The controller is located under the rear hood directly
behind the operator’s seat. It is equipped with four
banks of LEDs to aid in monitoring and troubleshooting
the electrical system of the tractor. See Parts &
Maintenance Maunal
E
Transport Speed
Reverse - When backlapping the mower must be
operated in the reverse direction. Set switch to
the REVERSE (backlap) position.
Four spade type fuses are located next to the controller.
To replace fuses remove the front panel from the
controller.
!
CAUTION:
Service to the electrical system
must be performed by a trained technician.
Before replacing fuses turn tractor off and
remove key from ignition.
N. Hydraulic Oil Level Light
Alerts the operator of a low fluid level in hydraulic tank. This light operates in combination with
the alarm. See Section 3.4.
Note: The warning light will remain on as long as a low
oil level is detected. If the alarm sounds due to low oil
level, it can be disabled by turning switch (O) to OFF.
CONTROLS
A
B1
B2
C
D
E
F
G
H
I
J
K
L
M
N
O
P
Tilt Steering Lever
Parking Brake Lock
Parking Brake Release
Parking Brake
Mow Speed Stop
Traction Pedal - Forward
Traction Pedal - Reverse
Seat Adjustment
Hydraulic Oil Cap/Dipstick
Fuel Cap
Air Cleaner Indicator
Backlap Switch
Alarm
Controller / Fuses
Hyd. Oil Level Light
Hyd. Oil Level Switch
Mower Lift Lever
B1
C
Q
R
S
T
U
V
W
X
Y
Z
3
5 Gang Control Panel
Reel Switch
2 WD / 4 WD
Light Switch
Engine Throttle
Cruise Control (Option)
Ignition Switch
Hour Meter
Fuel Gauge
Warning Lights
Engine Coolant
Temperature
N
Z
O
X
P
Y
Q
W
R
D
V
E
U
F
T
S
B2
A
G
L
I
H
M
J
K
GB-8
3
CONTROLS
3.3
CONTROL PANEL _________________________________________________________
Z
N
O
X
Y
P
Q
W
R
V
U
S
T
Figure 3B
O. Low Oil Level Switch
This switch is used to test the alarm system or
disable the alarm after a low oil level has been
detected. Keep switch in its ON position when
starting and operating tractor. To test alarm, set switch
to OFF and turn ignition key to RUN. See Section 3.4.
P. Mower Lift lever
The mower lever raises and lowers the mowers and
operates in either automatic or manual mode. Push
lever forward to lower mowers, pull back to raise
mowers.
Manual Mode - Set mow switch (Q) in its OFF (down)
position. In this position all mowers will raise or lower
while pressure is applied to the lift lever.
Automatic Mode - Set mow switch (Q) in its ON (up)
position. In automatic mode the mowers will lower and
start automatically with a momentary forward movement
of the lift lever. In this mode mowers will only raise to a
GB-9
“crosscut” position with
movement of the lift lever.
a
momentary
backward
To raise mowers to their transport position, hold lever
until mowers are fully raised.
To raise mowers to their transport position, hold lever
until mowers are fully raised.
NOTE: While in an Automatic Mode lift or lower cycle,
that lasts approximately 3 seconds, moving the lift lever
in the opposite direction will turn all mowers off and
manual mode will start for the position selected.
Q. Reel Switch
The reel switch is a 2-position knob type switch used to
turns the mowers On or off. It also sets the mower lift
lever (P) in manual or automatic mode. Set mower
switch in its OFF (down) position when starting the
tractor.
R. 2 WD / 4 WD Switch
Sets tractor into two or four wheel drive.
CONTROLS
3
S. Lights
Controls operation of work lights.
T.
Engine Throttle
Controls engine speed. Run machine at full throttle
during normal machine operation.
U. Cruise Control (Option)
When switched ON the cruise control will lock the
traction pedal in its current position. Cruise will unlock
when switched OFF, or if parking brake is applied.
V. Ignition Switch
The ignition switch has three positions. OFF- RUN (ON)
- START. In the RUN (ON) position the controller
program is running and input and output circuits are
being monitored. See Section 4.4 and Parts &
Maintenance Maunal.
W. Hour Meter
Records engine operating hours. Use hour meter to
schedule periodic maintenance.
X. Fuel Gauge
Indicates current fuel level. Check fuel gauge daily
before starting machine.
Y. Warning Lights
Alerts the operator to conditions requiring immediate
action. See Section 3.4.
Z. Temperature Gauge
Indicates engine coolant temperature. Normal operating
temperature should be between 160° - 230°F (71°110°C). If temperature rises above 230° (110°F), alarm
will sound. See Section 3.4.
GB-10
3
CONTROLS
3.4
OPERATOR ALERTS _______________________________________________________
The electronic controller monitors vital machine systems. It
uses an audible alarm and warning lights to alert the
operator of conditions requiring immediate action. When an
alert occurs follow the general guidelines listed in the chart
below, and any specific actions outlined by the grounds
superintendent or service manager.
3
To test alarm system:
Turn ignition switch to RUN. All lights will come on for one
second or more and the alarm will sound briefly.
This system monitors:
1. Hydraulic fluid level
2. Engine oil pressure
3. Engine coolant temperature
4. Hydraulic oil filter
5. Battery voltage
6. Dual activation of brake and traction pedal.
2
1
4
5
LF004
Figure 3C
Alert
Action
1. Hydraulic fluid level - alarm
sounds and hydraulic fluid warning
light comes on. Hydraulic fluid is
below recommended level.
Stop tractor immediately, lower implements and shut off engine! Visually
inspect tractor for obvious signs of leaks around connections, hoses and
hydraulic components. Return tractor to service area for maintenance.
CAUTION: Hydraulic fluid is under pressure. Turn engine off and allow
fluid to cool before checking fluid level or adding oil to hydraulic tank.
2. Engine Oil Pressure - alarm
sounds and oil pressure light
comes on. Oil pressure low.
Stop tractor immediately, lower implements and shut off engine! Inspect oil
level in engine. If oil light remains on with oil at proper level, shut off engine and
tow or trailer tractor back to a service area. NEVER operate engine with oil light
on, severe damage to the engine can occur.
3. Engine Coolant Temperature
Alarm sounds. Engine coolant
temperature high.
Stop tractor immediately, lower implements and shut off engine! Remove
debris such as leaves and grass clippings that may be restricting air flow through
rear screen on hood and area between radiator and oil cooler. If engine
continues to run hot, return tractor to a service area.
CAUTION: Engine coolant is under pressure. Turn engine off and allow
fluid to cool before checking fluid level or adding coolant to radiator.
!
!
4. Hydraulic oil filter - Oil filter
warning light remains on.
Return tractor to a service area as soon as possible. Change hydraulic oil
filters.
5. Battery Voltage - Warning light
comes on.
Return tractor to a service area as soon as possible. Inspect battery and
battery charging system.
6. Driving with brake on - Alarm
Sounds
Disengage parking brake, or remove foot pressure from either pedal.
Continued operation with both brake and traction pedal depressed will cause
engine to stop in 10 - 60 seconds, depending on the order of pedal application.
GB-11
OPERATION
4
OPERATION
4.1
DAILY INSPECTION ________________________________________________________
2.
Check the fuel supply, radiator coolant level, crankcase
oil and air cleaner indicator. All fluids must be at the
full level mark with engine cold.
3.
Make sure all mowers are adjusted to the same cutting
height.
4.
Visually check tires for proper inflation.
5.
Test the interlock system.
! CAUTION
The daily inspection should be performed only when
the engine is off and all fluids are cold. Lower mowers
to the ground, engage the parking brake, Stop engine
and remove ignition key.
1.
Perform a visual inspection of the entire unit, look for
signs of wear, loose hardware, and missing or damaged
components. Check for fuel or oil leaks to ensure connections are tight and hoses and tubes are in good condition.
4.2
1.
Note: For more detailed maintenance information,
adjustments and maintenance/lube charts, see the
Parts & Maintenance manual.
Interlock System __________________________________________________________
The interlock system prevents the engine from starting
unless the parking brake is engaged, the traction pedal
is in neutral and the mower switch(es) is “OFF”. The
system also stops the engine if the operator leaves the
seat with the mower switch(es) “ON”, traction pedal out
of NEUTRAL, or parking brake “DISENGAGED”.
3.
Test 2: The engine must not start if the mower switch is
“ON”.
Never operate equipment with the Interlock System
disconnected or malfunctioning. Do not disconnect or
bypass any switch.
Test 3: The engine must not start if the parking brake is
“DISENGAGED”.
Test 4: The engine must not start if the traction pedal is
pressed.
Perform each of the following tests to insure the
interlock system is functioning properly. Stop the test
and have the system inspected and repaired if any of
the tests fail as listed below:
●
●
●
Refer to the chart below for each test and follow the
check (✔) marks across the chart. Shut engine off
between each test.
Test 1: Represents normal starting procedure. The
operator is seated, parking brake is engaged, the
operator’s feet are off the pedals, and the mower
switch(es) is ‘OFF”. The engine should start.
! WARNING
2.
4
Test 5: Start the engine in the normal manner then turn
mower switch “ON” and lift your weight off the seat. ★
the engine does not start in test 1;
the engine does start during tests 2,3 or 4;
the engine continues to run during tests 5 or 6.
Test 6: Start the engine in the normal manner then
disengage parking brake and lift your weight off the
seat. ★
Interlock System Check
Test
Operator
Seated
Yes
No
Parking
Brake
On
Traction Pedal
in Neutral
Off
Yes
1
✔
✔
✔
2
✔
✔
✔
3
✔
4
✔
5
✔
★
6
✔
★
✔
No
Mower
Switch
On
✔
✔
✔
✔
✔
Off
Yes
✔
✔
✔
✔
✔
Engine
Starts
No
✔
✔
✔
✔
✔
★
✔
✔
★
★ Lift your weight off seat. The cutting units must stop rotating within seven (7) seconds.
GB-12
4
OPERATION
4.3
OPERATING PROCEDURES_________________________________________________
! WARNING
A Rollover Protection Structure (ROPS) for this tractor is available as an optional accessory. Evaluate the terrain
and working conditions to determine if a ROPS is required. Seat belts must be worn whenever a ROPS is installed
on the tractor. Always keep seat belt snugly adjusted. DO NOT use seat belts on a tractor without a ROPS.
If a ROPS is installed and the tractor is overturning, hold onto the steering wheel. Do not attempt to jump out or
leave the seat.
! CAUTION
To prevent injury, always wear safety glasses, leather work shoes or boots, a hard hat, and ear protection.
1. Under no circumstances should the engine be
started without the operator seated on the tractor.
2. Do not operate tractor or attachments with loose,
damaged or missing components. Whenever
possible mow when grass is dry.
3. First mow in a test area to become thoroughly
familiar with the operation of the tractor and control
levers.
Never operate the reels unless they are mowing
grass. Heat will develop between the bedknife and
reel and damage the cutting edge.
4. Study the area to determine the best and safest
operating procedure. Consider the height of the
grass, type of terrain, and condition of the surface.
Each condition will require certain adjustments or
precautions.
5. Never direct discharge of material toward
bystanders, nor allow anyone near the machine
while in operation. The owner/operator is
responsible for injuries inflicted to bystanders and/or
damage to their property.
! CAUTION
Before mowing, pick up all debris such as rocks, toys
and wire which can be thrown by the machine. Enter a
new area cautiously. Always operate at speeds that
allow you to have complete control of the mower.
6. Use discretion when mowing near gravel areas
(roadway, parking areas, cart paths, etc.). Stones
discharged from the implement may cause serious
injuries to bystanders and/or damage the
equipment.
7. Always turn reel switch off to stop blades when not
mowing.
GB-13
8. Disengage the drive motors and raise the reels
when crossing paths or roadways. Look out for
traffic.
9. Stop and inspect the equipment for damage
immediately after striking an obstruction or if the
machine begins to vibrate abnormally. Have the
equipment repaired before resuming operation.
! WARNING
Before you clean, adjust, or repair this
equipment, always disengage all drives, lower
implements to the ground, engage parking brake,
stop engine and remove key from ignition switch
to prevent injuries.
10. Slow down and use extra care on hillsides. Read
Section 4.10. Use caution when operating near drop
offs.
11. Look behind and down before backing up to be sure
the path is clear. Use care when approaching blind
corners, shrubs, tress or other objects that may
obscure vision.
12. Never use your hands to clean cutting units. Use a
brush to remove grass clippings from blades.
Blades are extremely sharp and can cause serious
injuries.
OPERATION
4.4
STARTING________________________________________________________________
IMPORTANT: Do not use starting assist fluids. Use of
such fluids in the air intake system may be potentially
explosive or cause a “Runaway” engine condition and could
result in serious engine damage.
1.
Sit in operator’s seat, make sure the reel switch (Q) is
“OFF” (down) and the parking brake is engaged.
Remove feet from pedals. Always use the seat belt
when operating tractors equipped with a ROPS.
2.
Set throttle lever (T) to half throttle and check that
alarm switch (O) is “ON”.
3.
Turn ignition switch (V) to “ON” (
) position.
Allow engine to gradually become warm before
operating at high RPM.
N
O
Q
Y
Note: At this time the warning lights (N, Y) on the
instrument panel will come on. Check that lights are
operating.
4.
4
Wait until glow plug light goes out, then immediately
turn ignition key to “START” (
soon as engine starts.
) position. Release as
Note: Do not hold key in “START” position for more than
10 seconds at a time. After 10 seconds the starting
circuit will shutdown and must be reset by returning the
key to the OFF position.
Allow 30 seconds between start-up attempts to allow
time for engine starter motor to cool.
All warning lights should go off after engine starts.
V
T
LF003
Figure 4A
4.5
STOPPING / PARKING ______________________________________________________
To stop:
Remove your foot from traction pedal. Always engage
parking brake before leaving machine.
To park the tractor under normal conditions:
1.
Disengage the reel switch (Q) then raise and lock the
implements in the transport position and move away
from the area of operation.
2.
Select a flat and level area to park.
3.
a.
Release traction pedal to bring the tractor to a complete stop.
b.
Disengage all drives, lower implements to the
ground, reduce throttle to idle and allow engine to
operate at no load for a minute.
If an emergency arises and the tractor must be parked in the
area of operation, follow the guidelines outlined by the
grounds superintendent.
If the tractor is parked on an incline, chock or block the
wheels.
Engage parking brake, stop the engine and always
remove the ignition key.
GB-14
4
4.6
OPERATION
TO DRIVE / TRANSPORT____________________________________________________
Read and follow all safety notes contained in this manual
when driving or transporting tractor. When operating in
reverse look behind you to ensure you have a clear path.
3.
Place the transport bar (C) between the cylinder pivot
pin and the lift arm as shown. Secure bar in place with
pins (B).
Important: If this tractor is driven on public roads, it must
comply with federal, state and local ordinances. Contact
local authorities for
regulations and
equipment
requirements.
The operator has the option to transport in either 2-wheel
drive (2-WD) or 4-wheel drive (4-WD).
Important: The mow switch should be OFF (center position)
while transporting tractor.
The tractor can be equipped with transport bars to lock the
left and right, front mowers and wing wowers in their upright,
transport position. The transport bars can be stored behind
the operator’s seat. Use transport bars where required for
transporting machine over rough terrain, on public roads or
on trailers.
C
To raise mowers to their transport position:
Set mower switch to OFF (center position). Pull mower lever
back. Hold lever until mowers are up and lift arms are in their
fully raised (transport) position.
B
To install transport bars:
1.
Raise mowers to their transport position.
2.
Disengage all drives, engage parking brake and stop
engine.
LF005
4.7
Figure 4B
MOWING_________________________________________________________________
3.
Press mower lever forward momentarily to lower
mowers. Mowers will begin turning automatically when
cutting units have lowered.
4.
To lift mowers, pull mower lever back and release.
Mowers will stop turning and raise to their crosscut
position. To lift mowers to their transport position
continue to hold lever until mowers are completely
raised.
! WARNING
To prevent serious injuries, keep hands, feet and
clothing away from cutting unit when the blades are
moving.
NEVER use your hands to clean cutting units. Use a
brush to remove grass clippings from blades. Blades
can be sharp and could cause injuries.
Always mow with the engine at full throttle.
To clear obstructions from cutting unit, disengage reel
switch, engage parking brake, stop engine and
remove key from ignition switch then remove
obstruction.
IMPORTANT: To prevent damage to the mower and
bedknife never operate mowers when they are not cutting
grass. Excessive friction and heat will develop between the
mower and bedknife, and damage the cutting edge.
To mow:
To remove or install grass catchers:
1.
If transport bars are installed, remove them and return
them to their storage area.
1.
Place reel switch in OFF (down) position, lower mowers
to the ground, engage parking brake and stop engine.
2.
Set reel switch to its ON (Up) position. This also sets
the mower lever to automatic mode. See Mower Lift
Lever, page 8.
2.
Tilt the grass catcher body so the front edge clears the
mower frame and slide the catcher off or onto the
catcher frame.
GB-15
OPERATION
4.8
4
MOWING SPEED __________________________________________________________
Cutting quality is better at speeds well below the transport
speed of the tractor. An initial mow speed of 5 -6 MPH (8 -10
kph) is set at the factory and should be satisfactory for most
cutting conditions. Local turf conditions however may
respond better to a different speed. If an adjustment is
needed, refer to the Parts and Maintenance manual.
4.9
TOWING / TRAILERING _____________________________________________________
If the tractor experiences problems and must be shut down
and removed from the area, it should be loaded onto a trailer
for transport. If a trailer is not available, the unit can be
towed slowly short distances.
Before towing make sure cutting units are raised. If they
cannot be raised, remove them from the tractor.
Use care when loading and unloading tractor. Fasten tractor
to trailer to prevent tractor from rolling or shifting during
transport.
NOTE: Do not exceed 2 MPH (3.2 KPH) while towing. Long
distance towing is not recommended.
Close valve completely and replace cover after towing.
Before towing, open tow valve. The tow valve permits
moving the tractor without starting the engine and prevents
possible damage to hydraulic components.
A
Note: On machines equipped with four wheel drive (4WD)
the tractor will tow easier if the ignition is turned to RUN (do
not start engine) and the 4WD switch is set to 4WD.
The tow valve (A) is located on the hydraulic drive pump
beneath the operators seat. Remove cover from floor in front
of operator’s seat. To open valve, use a wrench or insert a
pin or small screw driver into the small hole in the valve
stem. Turn the valve counterclockwise one full turn.
LF006
Figure 4C
4.10 HILLSIDE OPERATION _____________________________________________________
! WARNING
To minimize the possibility of overturning, the safest
method for operating on hills and terraces is to travel up
and down the face of the slope (vertically), not across the
face (horizontally). Avoid unnecessary turns, travel at
reduced speeds, and stay alert for hidden hazards.
when operating on slopes, especially when the grass is wet.
Wet grass reduces traction and steering control.
1.
Always mow with the engine at full throttle but reduce
forward speed to maintain the proper cutting frequency.
2.
If the tractor tends to slide or the tires begin to “mark”
the turf, angle tractor into a less steep grade until
traction is regained or tire marking stops.
3.
If tractor continues to slide or mark the turf, the grade
is too steep for safe operation. Do not make another
attempt to climb, back down slowly.
4.
When descending a steep slope, always lower
implements to the ground to reduce the risk of tractor
overturning.
! CAUTION
Do not operate this tractor on slopes greater than
22°.
The tractor has been designed for good traction and stability
under normal mowing conditions; however, use caution
Correct tire pressure is essential for maximum traction. See
Parts & Maintenance Maunal
GB-16
4
OPERATION
4.11 DAILY MAINTENANCE _____________________________________________________
Important: For more detailed maintenance information,
adjustments and maintenance/lubrication charts, see the
Parts& Maintenance manual.
1. Park the tractor on a flat and level surface. Fully
lower the cutting units to the ground, engage parking
brake, stop the engine and remove the key from ignition switch.
2. Grease and lubricate all points if required. To
prevent fires, wash the cutting units and tractor after
each use.
a. Do not use high pressure spray.
b. Do not spray water directly at the instrument
panel, or any electrical components.
c.
Do not spray water into cooling air intake, or the
engine air intake.
Note: Do not wash a hot or running engine. Use
compressed air to clean the engine and radiator fins.
3. Fill the tractors fuel tank at the end of each
operating day to within 1 in., (25 mm) below the filler
neck.
Use clean fresh #2 diesel fuel. Minimum Cetane
Rating 45.
4. Handle fuel with care - it is highly flammable. Use
an approved container, the spout must fit inside the
fuel filler neck. Avoid using cans and funnels to
transfer fuel.
a. Never remove the fuel cap from the fuel tank, or
add fuel, when the engine is running or while the
engine is hot.
b. Do not smoke when handling fuel. Never fill or
drain the tank indoors.
c.
Never overfill or allow the tank to become empty.
Do not spill fuel. Clean any spilled fuel
immediately.
d. Never handle or store fuel containers near an
open flame or any device that may create sparks
and ignite the fuel or fuel vapors.
5. Store fuel according to local, state or federal
ordinances and recommendations from your fuel
supplier.
GB-17
! WARNING
To prevent serious injury from hot, high pressure
oil, never use your hands to check for oil leaks,
use paper or cardboard.
Hydraulic fluid escaping under pressure can have
sufficient force to penetrate skin. If fluid is injected
into the skin, it must be surgically removed within
a few hours by a doctor familiar with this form of
injury or gangrene may result.
6. Inspect hydraulic hoses and tubes daily. Look for
wet hoses or oil spots and replace worn or
damaged hoses and tubes before operating the
machine.
7. Check the engine oil and hydraulic oil at the start of
each day, before starting the engine. If the oil level
is low, remove the oil filler cap and add oil as
required. Do not overfill.
SUMÁRIO
SUMÁRIO
SUMÁRIO
SEGURANÇA
1.1
Segurança no funcionamento . . . . . . . . . . . . 3
1.2
Importantes instruções de segurança . . . . . . 4
CHAPAS DE AVISO
COMANDOS
3.1
Ícones . . . . . . . . . . . . . . . . . . . . . . . . . . . . . . 6
3.2
Comandos . . . . . . . . . . . . . . . . . . . . . . . . . . . 7
3.3
Painel de controlo . . . . . . . . . . . . . . . . . . . . . 9
3.4
Avisos para o condutor . . . . . . . . . . . . . . . . 11
FUNCIONAMENTO
4.1
Inspecção diária . . . . . . . . . . . . . . . . . . . . . .12
4.2
Sistema contactor . . . . . . . . . . . . . . . . . . . .12
4.3
Modo de utilização . . . . . . . . . . . . . . . . . . . .13
4.4
Arranque . . . . . . . . . . . . . . . . . . . . . . . . . . .14
4.5
Parar / Estacionar . . . . . . . . . . . . . . . . . . . .14
4.6
Condução / Transporte . . . . . . . . . . . . . . . .15
4.7
Corte . . . . . . . . . . . . . . . . . . . . . . . . . . . . . .16
4.8
Velocidade de corte . . . . . . . . . . . . . . . . . . .16
4.9
Rebocar / Carregamento num reboque . . . .17
4.10 Trabalho em encostas . . . . . . . . . . . . . . . . .17
4.11 Manutenção diária . . . . . . . . . . . . . . . . . . . .18
Aviso - Proposta 65
Os gases de escape provenientes do motor deste equipamento
contêm produtos químicos conhecidos no Estado da Califórnia
como podendo provocar cancro, mal formações em nascituros
ou outros danos na reprodução de indivíduos.
© COPYRIGHT 2003, TEXTRON INC.
“Reservados todos os direitos, incluindo o de reprodução deste livro ou de partes suas”.
Todas as informações contidas nesta publicação se baseiam em informações disponíveis na época da impressão. A
Jacobsen se reserva o direito de fazer modificações a qualquer tempo sem prévio aviso e sem ficar sujeita a qualquer
obrigação.
LITHO NOS EUA 11-2003
PT-2
1
SEGURANÇA
1
SEGURANÇA
1.1
SEGURANÇA NO FUNCIONAMENTO _________________________________________
! ATENÇÃO
O EQUIPAMENTO UTILIZADO INADEQUADAMENTO OU POR PESSOAL NÃO TREINADO PODE SER
PERIGOSO
Familiarize-se com a localização e com a utilização correcta de todos os comandos. Condutores sem experiência
devem receber formação de alguém que já conheça o equipamento antes de serem autorizados a conduzir a
máquina.
1.
A segurança depende da atenção, do cuidado e da
prudência das pessoas que conduzam ou prestem
assistência ao equipamento. Nunca permita que
menores conduzam o equipamento.
2.
É da sua responsabilidade ler este manual e todas as
publicações associadas a este equipamento (Manual
de Peças e Manutenção, Manual do Motor, acessórios
e equipamento complementar). Se o condutor não
souber Inglês, o proprietário é responsável pela
explicação do conteúdo deste manual.
3.
4.
5.
6.
7.
Aprenda a conduzir correctamente a máquina, a
localização e a finalidade de todos os comandos e
mostradores antes de trabalhar com o equipamento. O
trabalho com equipamentos mal conhecidos pode
provocar acidentes.
Nunca permita que alguém conduza ou repare a
máquina ou equipamentos sem possuir a formação
própria e instruções correctas, ou se estiver sob a
influência de drogas ou de álcool.
Use todo o vestuário de protecção necessário e
dispositivos de protecção pessoal para proteger a
cabeça, os olhos, os ouvidos, as mãos e os pés. Só
conduza a máquina à luz do dia ou com boa
iluminação artificial.
Inspeccione a área onde o equipamento vai ser usado.
Antes de começar a trabalhar com a máquina, recolha
todos os detritos que encontrar. Tenha cuidado com
obstáculos acima da cabeça (ramos de árvores a
pouca altura, cabos eléctricos, etc.) e também com
obstáculos no solo ou no subsolo (aspersores, tubos,
raízes de árvores, etc.). Seja sempre cauteloso numa
zona que desconheça. Esteja atento a perigos ocultos.
Nunca vire a descarga do material para pessoas
próximas nem permite que haja pessoas perto da
máquina durante o trabalho. O proprietário/condutor
pode evitar e é responsável por ferimentos a si
mesmo, a pessoas próximas e por danos materiais.
8.
Nunca trabalhe com equipamento que não se encontre
em perfeito estado de funcionamento ou que esteja
sem chapas de aviso, resguardos, painéis, deflectores
para descarga ou outros dispositivos de protecção
firmemente instalados.
9.
Nunca desligue nenhum interruptor nem faça ponte
sobre interruptores.
10. O monóxido de carbono nos gases de escape pode
ser mortal se for inalado. Nunca deixe o motor a
trabalhar sem ventilação adequada.
11. O combustível é altamente inflamável; manuseie-o
com cuidado.
12. Mantenha o motor limpo. Deixe o motor arrefecer
antes de guardar a máquina e retire sempre a chave
da ignição.
13. Desengate todos os accionamentos e puxe o travão
de estacionamento antes de ligar o motor. Ligue o
motor só depois de estar sentado no banco do
condutor e nunca enquanto estiver ao lado do
equipamento.
14. O equipamento tem de estar em conformidade com a
mais recente legislação nacional, regional e local ao
ser conduzido ou transportado na via pública.
15. Nunca use as mãos para procurar fugas de óleo. O
fluido hidráulico sob pressão pode penetrar na pele e
provocar ferimentos graves.
16. Em taludes e declives, conduza a máquina para cima
e para baixo (transversalmente) e não na horizontal.
17. Para evitar a capotagem ou perda de controlo, nunca
pare nem arranque bruscamente; reduza a velocidade
em curvas apertadas. Tenha cuidado em curvas
apertadas em declives.
18. Mantenha as pernas, os braços e o corpo no interior
da cabina durante a deslocação do veículo.
Esta máquina tem de ser conduzida e assistida como se indica neste manual e destina-se à manutenção de
relvados especializados por profissionais. Não é própria para terrenos grosseiros nem para erva alta.
PT-3
SEGURANÇA
1.2
1
IMPORTANTES INSTRUÇÕES DE SEGURANÇA ________________________________
!
Esta chamada de atenção de segurança é usado para assinalar perigos potenciais.
PERIGO - Indica uma situação de perigo iminente que, se não for evitada, PROVOCARÁ a morte ou ferimentos
graves.
ATENÇÃO - Indica uma situação potencialmente perigosa que, se não for evitada, PODE provocar a morte ou
ferimentos graves.
CUIDADO - Indica uma situação potencialmente perigosa que, se não for evitada, PODE provocar ferimentos
ligeiros a médios e danos materiais. Este símbolo também pode ser usado para avisar contra práticas perigosas.
Para maior clareza das gravuras, algumas ilustrações neste manual podem mostrar chapas, resguardos ou placas
abertas ou removidas. No entanto, em nenhumas circunstâncias poderá este equipamento ser conduzido sem esses
dispositivos firmemente instalados nos seus lugares.
! ATENÇÃO
O sistema contactor impede que o tractor arranque se o pedal dos travões não estiver activo,
se o interruptor do cortador de relva não estiver desligado e se o pedal de tracção não estiver
na posição neutra. O sistema fará parar a máquina se o condutor abandonar o seu assento
sem accionar o travão de estacionamento ou sem desligar o interruptor do cortador de relva.
NUNCA conduza o tractor se o sistema contactor não estiver a funcionar.
! ATENÇÃO
1.
Se, por qualquer razão, tiver de sair do posto de condução:
a.
b.
c.
d.
e.
Coloque o pedal de tracção na posição neutra.
Desengate todos os accionamentos.
Baixe todos os equipamentos para o chão.
Engate o travão de estacionamento.
Desligue o motor e retire a chave da ignição.
2.
Mantenha as mãos, os pés e o vestuário longe de peças em movimento.Espere que
todos os movimentos parem antes de limpar, afinar ou dar a assistência à máquina.
3.
Mantenha a área de trabalho livre de pessoas e animais.
4.
Nunca transporte passageiros se não houver banco apropriado.
5. Nunca trabalhe com equipamento de cortar a relva sem que o deflector de descarga
esteja firmemente instalado no seu lugar.
Se seguir todas as instruções deste manual, prolongará a vida da sua máquina e manterá o seu rendimento máximo.
Operações de afinação e de manutenção só devem ser executadas por um técnico qualificado.
Se precisar de informação ou assistência adicional, deverá entrar em contacto com o seu vendedor autorizado de
Jacobsen, que está informado sobre os métodos de assistência mais recentes a este equipamento e pode prestar
assistência rápida e eficaz. A utilização de peças e acessórios que não sejam originais ou autorizadas por
Jacobsen fazem anular a garantia.
PT-4
2
CHAPAS DE AVISO
2
CHAPAS DE AVISO
Familiarize-se com as chapas de aviso porque são de importância crítica para o funcionamento
seguro da máquina. SUBSTITUA IMEDIATAMENTE CHAPAS DE AVISO QUE APRESENTEM DANOS.
!
! ATENÇÃO
1.
2.
3.
4.
5.
6.
7.
8.
Leia o manual de utilização.
Utilizadores inexperientes não
deverão conduzir a máquina.
Mantenha os painéis de
protecção no local e os
equipamentos bem presos.
Antes de limpar, regular ou
reparar este equipamento,
desengate todos os
accionamentos, engate o travão
de estacionamento e desligue o
motor.
Mantenha as mãos, os pés e o
vestuário longe de peças em
movimento.
Nunca transporte passageiros.
Nunca permita a aproximação
de pessoas.
Inspeccione diariamente as
tubagens e os tecidos. Se
estiverem gastos ou
danificados, substitua-os por
peças originais de qualidade.
Não trabalhe em taludes com
inclinação superior a 22°.
1. Leer el manual del operador. No permitir que personas
no capacitadas para ello usen la maquina.
2. Mantener los escudos en su lugar y la tornilleria
debidamente fijada.
3. Antes de limpiar, ajustar o reparar este equipo,
desengranar todas los mandos, aplicar el freno de
estacionamiento y apagar el motor.
4. Mantener las manos, los pies y la ropa alejados de las
piezas en movimiento.
5. No viajar como pasajero ni llevar pasajeros en
maquinas sin asiento para ello.
6. Mantener a las demas personas alejadas.
7. Si no sabe leer ingles, solictarle a otra persona que le
lea y explique el contenido de las etiquetas y del
manual de le maquina.
340623
! PERIGO
Para evitar acidentes ao trabalhar com a bateria:
1. O cabo preto de massa ( - ) deve ser sempre o
último a ligar e o primeiro a retirar.
2. Evite chispas e chamas e evite o contacto com o
ácido.
Para evitar ferimentos ao ligar baterias:
! PERIGO
Para evitar ferimentos,
desengate todos os
accionamentos e engate o
travão de estacionamento
antes de fazer algum trabalho
na máquina ou antes de
esvaziar o colector de relva
cortada.
1. Ligue o terminal positivo ( + ) ao terminal positivo
( + ).
2. Ligue o terminal negativo ( - ) da bateria boa à
massa do veículo que tem a bateria gasta.
3001435
! ATENÇÃO
Para evitar ferimentos por
corte, use uma chave de
caixa ou Turf Groomer® para
rodar o rolo.
1000997
361877
! ATENÇÃO
O RADIADOR ENCONTRA-SE SOB PRESSÃO.
RETIRE A TAMPA LENTAMENTE PARA EVITAR
FERIMENTOS.
365956
PT-5
ADVERTENCIA
COMANDOS
3
3.1
3
COMANDOS
ÍCONES __________________________________________________________________
Leia o manual
Contador
de horas
Combustível
Motor
Desligado Marcha Arranque
Travão de
estacionamento
Faróis de trabalho
Rotação do cortador
Avanço
(Corte)
Recuo
(Inversão)
Cortadores
Descer
Subir
Interruptor do níve do óleo
Ligado
Desligado/
Teste
Borboleta do motor
Rápida
Lenta
Tracção
2 rodas
4x4
Marcha
Avanço
Recuo
D
Temperatura
do refrigerante
Nível do
óleo
hidráulico
Luzes de aviso
Pressão do
Vela de Filtro do
óleo do
incandesóleo
motor
cência hidráulico
Carga
da
bateria
Comando de cruzeiro
Fechar
Abrir
! ATENÇÃO
Nunca tente conduzir o tractor antes de ter lido o Manual de segurança e de utilização e de
saber como trabalhar correctamente com todos os comandos.
Comece por se familiarizar com os ícones acima indicados e com o que representam. Aprenda
a localização e a finalidade de todos os comandos e indicadores antes de trabalhar com este
tractor.
PT-6
3
COMANDOS
3.2
COMANDOS ______________________________________________________________
A. Volante inclinável
Puxe a alavanca para cima para soltar a coluna da
direcção. Incline a coluna para cima ou para baixo, para
a posição desejada. Solte a alavanca para fixar a
coluna da direcção no sítio pretendido.
!
CUIDADO: Nunca regule a coluna da
direcção com o tractor em marcha. Pare e puxe
o travão de estacionamento antes de proceder
a esse ajustamento.
B. Engate/desengate do travão de estacionamento
Para engatar o travão de estacionamento, carregue no
pedal dos travões (C) e carregue no bloqueio (B1) até
prender. Para desengatar, carregue no desengate do
pedal dos travões (B2).
Nota: O motor desligará automaticamente se o pedal
de tracção for mantido carregado durante mais de 10
segundos com o travão de estacionamento activado.
C. Travão de estacionamento
Para accionar o travão de estacionamento, carregue no
pedal a fundo.
D. Paragem da velocidade de corte
Limita a velocidade de avanço durante o corte da relva.
Para trabalhar a baixa velocidade durante o corte, rode
a alavanca de forma a ficar em contacto com o
parafuso de batente (D1) no pavimento, enquanto que o
pedal de marcha para a frente está a ser accionado.
Para deslocação a velocidade máxima, coloque a
alavanca na posição indicada em (D3). O parafuso de
batente (D2) pode ser regulado para velocidades de
corte específicas. Veja o Manual de Peças e de
Manutenção.
D3
D1
LF002
F
Velocidade de corte
Figura 3A
E. Deslocação para a frente (Pedal de tracção)
Carregue na parte da frente do pedal para avançar.
Solte para reduzir a velocidade tractor e para parar.
Deixe que tractor pare completamente antes de inverter
o sentido da marcha.
F.
PT-7
G. Regulação do banco
Puxe para fora a alavanca lateral para fazer avançar ou
recuar o banco. Para regular a tensão da mola por
baixo do banco, rode o manípulo de ajustamento na
parte da frente do banco.
H. Tampa/vareta do óleo hidráulico
Encha com fluido hidráulico limpo até ao traço de
marcação na vareta, com o motor ainda frio. Não encha
demasiado.
I.
Tampa depósito de combustível
Encha o reservatório com combustível diesel nº 2 com
um índice mínimo de cetano de 45. Secção 4.11.
J. Indicador do depurador de ar
Indica as condições do depurador do ar no motor.
Limpe ou substitua o filtro do ar logo que a fita vermelha
surja na janela do indicador. Veja o Manual de Peças e
de Manutenção.
K. Interruptor de inversão do sentido de rotação do
rolo
Este interruptor faz rodar os rolos em sentido inverso
para limpar ou afiar.
Avanço - Para funcionamento normal (corte),
este interruptor tem de se encontrar na posição
AVANÇO (corte).
Inversão - Ao inverter o sentido de rotação, o
rolo tem de ser comandado no sentido inverso.
Coloque o interruptor na posição INVERSÃO.
Com o rolo a rodar no sentido inverso, o travão de
estacionamento tem de estar activado e o interruptor de
inversão (K) têm de ser colocados em inversão. Veja o
Manual de Peças e de Manutenção.
L. Alarme
O alarme juntamente com as lâmpadas de aviso (N, Y)
alertam o condutor para condições que requeiram
atenção imediata. Veja a Secção 3.4.
D2
E
Velocidade de
transporte
Deixe que o tractor pare completamente antes de
inverter o sentido da marcha.
Pedal de inversão de marcha (Pedal de tracção)
Carregue na parte de trás do pedal para inverter o
sentido da marcha. Solte o pedal para abrandar e parar.
M. Controlador / fusíveis
O controlador está localizado por baixo da blindagem
traseira, directamente por trás do banco do condutor.
Está equipado com quatro bancos para LED para
ajudar a monitorização e a eliminação de avarias no
sistema eléctrico do tractor. Veja o Manual de Peças e
de Manutenção.
Quatro fusíveis estão localizados a seguir ao
controlador. Para substituir os fusíveis, retire o painel
da frente do controlador.
!
CUIDADO: Trabalhos de reparação no sistema eléctrica têm de ser realizados por um técnico experiente. Antes de substituir algum
fusível, desligue o tractor e retire a chave da
ignição.
COMANDOS
N. Lâmpada indicadora do nível de óleo hidráulico
Chama a atenção do condutor para um nível
baixo do fluido no reservatório hidráulico. Esta
lâmpada funciona em combinação com o
alarme. Veja a Secção 3.4.
A Volante inclinável
B1 Engate do travão de
estacionamento
B2 Desengate do travão de
estacionamento
C Travão de estacionamento
D Paragem da velocidade de corte
E Deslocação para a frente (Pedal de
tracção)
F Pedal de inversão de marcha
(Pedal de tracção)
G Regulação do banco
H Tampa/vareta do óleo hidráulico
I
Tampa depósito de combustível
J Indicador do depurador de ar
K Interruptor de inversão do sentido
de rotação do rolo
B1
C
L
M
N
O
P
Q
R
S
T
U
V
W
X
Y
Z
3
Nota: A lâmpada de aviso mantém-se acesa enquanto
que detectar um nível baixo do óleo. Se o alarme tocar
devido a baixo nível de óleo, pode ser desactivado
passando o interruptor (O) para DESLIGADO.
Alarme
Controlador / fusíveis
Lâmpada indicadora do nível de
óleo hidráulico
Interruptor do nível de óleo baixo
Alavanca de elevação dos
cortadores
Interruptor do cilindro de corte
Comutador 2 rodas motrizes / 4X4
Interruptor dos faróis
Borboleta do motor
Comando de cruzeiro (opção)
Interruptor de ignição
Contador de horas de serviço
Indicador do nível de combustível
Lâmpadas de aviso
Indicador da temperatura
D
Painel de controlo - 5 Gang
N
Z
O
X
P
Y
Q
W
R
V
E
U
F
T
S
B2
A
G
L
I
H
M
J
K
PT-8
3
COMANDOS
3.3
PAINEL DE CONTROLO ____________________________________________________
Z
N
O
X
Y
P
Q
W
R
V
U
S
T
Figura 3B
O. Interruptor do nível de óleo baixo
Este interruptor é usado para testar o sistema
de alarme ou desactivar o alarme depois de ter
sido detectado um nível baixo do óleo.
Mantenha o interruptor LIGADO ao arrancar e trabalhar
com o tractor. Para testar o alarme, coloque o
interruptor em DESLIGADO e rode a chave de ignição
para MARCHA. Veja a Secção 3.4.
P. Alavanca de elevação dos cortadores
A alavanca do cortador eleva e baixa as unidades de
corte e funciona em modo automático ou manual.
Pressione a alavanca para a frente para baixar as
unidades de corte, puxe-as para trás para as elevar.
Modo Manual: Desloque o interruptor de corte (Q) para
a sua posição DESLIGADO (baixa). Nesta posição,
todas as unidades de corte serão elevadas ou
rebaixadas conforme a pressão aplicada na alavanca
de elevação.
PT-9
Modo Automático: Desloque o interruptor de corte (Q)
para a sua posição LIGADO (elevada). No modo
automático, as unidades de corte estarão rebaixadas e
começarão a trabalhar imediatamente através de um
movimento momentâneo para a frente da alavanca de
elevação. No modo automático, as unidades de corte
apenas se elevarão para uma posição de “corte
cruzado” através de um movimento momentâneo para
trás da alavanca de elevação.
Para elevar as unidades de corte para a sua posição de
transporte, segure a alavanca até que as unidades de
corte estejam totalmente elevadas.
NOTA: Durante o ciclo de elevação ou rebaixamento do
Modo Automático, que dura aproximadamente três
segundos, a movimentação da alavanca de elevação
na direcção contrária desligará todas as unidades de
corte e o modo manual inicia-se a partir da posição
escolhida.
COMANDOS
3
Q. Interruptor do cilindro de corte
O interruptor do cilindro de corte é uma espécie de
maçaneta usada para ligar e desligar as unidades de
corte. Também coloca a alavanca de elevação do
cortador (P) em modo automático ou manual. Desloque
o interruptor de corte para a sua posição DESLIGADO
(baixa) ao arrancar com o tractor.
R. Comutador 2 rodas motrizes / 4X4
Selecciona o tractor para tracção a 2 ou 4 rodas.
S. Interruptor dos Faróis
Comando os faróis de trabalho.
T.
Borboleta do motor
Comando a velocidade do motor. Durante o
funcionamento normal, a máquina deve estar com a
borboleta no máximo.
U. Comando de cruzeiro (opção)
Quando LIGADO, o comando da velocidade de cruzeiro
fixa o pedal de tracção na posição em que se encontrar.
Este modo é desactivado quando for colocado em
DESLIGADO ou se for engatado o travão de
estacionamento.
V. Interruptor de ignição
Este interruptor tem três posições:DESLIGADOMARCHA (LIGADO)-ARRANQUE. Na posição
MARCHA (LIGADO), o programa do controlador fica
activo e os circuitos de entrada e de saída estão a
ser comandados. Veja a Secção 4.4 e o Manual de
Peças e de Manutenção.
W. Contador de horas de serviço
Regista as horas de funcionamento do motor. Use o
contador de horas para planear a manutenção
periódica.
X. Indicador do nível de combustível
Indica o nível do combustível no reservatório. Verifique
o nível diariamente antes de ligar a máquina.
Y. Lâmpadas de aviso
Alertam o condutor para condições que exijam acção
imediata. Veja a Secção 3.4.
Z. Indicador da temperatura
Indica a temperatura do refrigerante do motor. A
temperatura normal de serviço deve situar-se entre 71°
e 110° C. Se a temperatura ultrapassar 110° C ouve-se
um sinal de alarme. Veja a Secção 3.4.
PT-10
3
COMANDOS
3.4
AVISOS PARA O CONDUTOR ________________________________________________
O controlador electrónico monitoriza sistemas vitais da
máquina. Utiliza um alarme sonoro e lâmpadas de aviso
para alertar o condutor relativamente a situações que
exijam acção imediata. Logo que haja um sinal de aviso,
siga as indicações gerais referidas na tabela abaixo e
quaisquer outras acções específicas indicadas pelo chefe
local ou pelo director de serviços.
3
Para testar o sistema de alarme:
Ligue o interruptor da ignição para MARCHA. Todas as
lâmpadas acendem durante um segundo ou mais e o
alarme faz-se ouvir durante um breve espaço de tempo.
Este sistema monitoriza:
1. O nível do fluido hidráulico
2. A pressão do óleo do motor
3. A temperatura do refrigerante do motor
4. O filtro de óleo hidráulico
5. A tensão da bateria
6. Activação simultânea dos pedais de travão e de
aceleração.
2
1
4
5
LF004
Figura 3C
Aviso
Que fazer
1. Nível do fluido hidráulico - O
alarme faz-se ouvir e acende a
lâmpada de aviso do fluido
hidráulico. O fluido hidráulico
está
abaixo
no
nível
recomendado.
Pare o tractor imediatamente, desça os equipamentos e desligue o motor!
Faça uma inspecção visual ao tractor, procurando sinais de fugas à volta de uniões,
mangueiras e componentes hidráulicos. Leve o tractor de volta para a área de
assistência para manutenção.
CUIDADO: O fluido hidráulico está sob pressão. Desligue o motor e deixe o
fluido arrefecer antes de verificar o seu nível ou de adicionar óleo ao
reservatório do sistema hidráulico.
2. Pressão do óleo do motor O alarme faz-se ouvir e a
lâmpada da pressão do óleo
acende. Óleo com pressão
baixa.
Pare o tractor imediatamente, desça os equipamentos e desligue o motor!
Verifique o nível do óleo no motor. Se a lâmpada do óleo se mantiver acesa com o
óleo ao nível correcto, desligue o motor e reboque o tractor para uma área de
serviço. NUNCA ligue o motor com a lâmpada do óleo acesa porque o motor
sofreria danos graves.
3. Temperatura
do
refrigerante do motor. Ouve- -se
o alarme. A temperatura do
refrigerante do motor é
excessiva.
Pare o tractor imediatamente, desça os equipamentos e desligue o motor!
Retire folhas e relva cortada que possam tapar a passagem de ar pelo painel
traseiro na tampa e na área entre o radiador e o refrigerante do óleo. Se o motor
continuar demasiado quente, leve o tractor para uma área de serviço.
CUIDADO: O fluido refrigerante do motor está sob pressão. Desligue o motor
e deixe o fluido arrefecer antes de verificar o seu nível ou de adicionar fluido
refrigerante ao radiador.
4. Filtro do óleo hidráulico - A
luz de aviso do filtro do óleo
mantém-se acesa.
Leve o tractor a uma área de serviço o mais rapidamente possível. Mude os
filtros do óleo hidráulico.
5. Tensão da bateria lâmpada de aviso acende.
A
Leve o tractor a uma área de serviço o mais rapidamente possível. Inspeccione
a bateria e o sistema de carga da bateria.
6. Condução com o pedal do
travão accionado - Ouve-se
um alarme.
Desactive o travão de estacionamento ou alivie a pressão do pé sobre um ou o
outro pedal. A manutenção de ambos os pedais pressionados causará a paragem
do motor num intervalo de 10 a 60 segundos, dependendo da pressão sobre os
pedais.
PT-11
!
!
FUNCIONAMENTO
4
FUNCIONAMENTO
4.1
INSPECÇÃO DIÁRIA _______________________________________________________
2.
Verifique a alimentação de combustível, o nível do
refrigerante do radiador, o óleo da cambota e o
indicador de depurador de ar. Todos os fluidos têm de
se encontrar no traço de marcação “cheio” com o
motor frio.
3.
Certifique-se de que todos os dispositivos de corte
estão regulados para a mesma altura de corte.
4.
Verifique a pressão dos pneus.
5.
Faça um teste ao sistema de apoio ao condutor.
! CUIDADO
A inspecção diária só deve ser feita com o motor desligado
e depois de todos os fluidos estarem frios. Baixe os
cortadores para o chão, engate o travão de
estacionamento, desligue o motor e retire a chave da
ignição.
1.
Faça uma inspecção visual de todo o equipamento,
procure sinais de desgaste, peças soltas e
componentes danificados ou que faltem. Verifique se há
fugas de combustível ou de óleo, se as uniões estão
estanques e se as mangueiras e os tubos estão em
boas condições.
4.2
1.
Nota: Para informações mais detalhadas sobre
manutenção, afinações e gráficos de manutenção/
lubrificação, veja o Manual de Peças e Manutenção.
SISTEMA CONTACTOR _____________________________________________________
●
O sistema contactor impede que o motor arranque se o
travão de estacionamento não estiver engatado, se o
pedal da tracção não estiver na posição neutra e se o
comando do rolo de lâminas não estiver em
“DESLIGADO“. O sistema também faz parar o motor se
o condutor sair do seu assento com o comando do rolos
de lâminas em “LIGADO“, com os pedais de cortar ou
subir fora da posição “NEUTRA“ ou com o travão de
estacionamento “DESENGATADO“.
3.
! ATENÇÃO
Consulte a tabela abaixo para cada teste e siga as
marcas de verificação (4) ao longo da tabela. Entre um
teste e o seguinte, desligue o motor.
Teste 1: Representa o processo normal de arranque. O
condutor está sentado, o travão de estacionamento
está engatado, os pés do condutor estão fora dos
pedais e o comando do rolo de lâminas está
“DESLIGADO“. O motor deve poder arrancar.
Teste 3: O motor não deve poder arrancar se o travão
de estacionamento estiver “DESENGATADO“.
Teste 4: O motor não deverá pegar se o pedal do
acelerador estiver pressionado.
Execute cada um dos seguintes testes para verificar
se o sistema de apoio ao condutor está a funcionar
correctamente. Se falhar algum dos testes a seguir
indicados, pare o teste e mande inspeccionar e reparar
o sistema:
●
●
o motor continua durante os testes 5 ou 6.
Teste 2: O motor não deve poder arrancar se o
comando do rolo de lâminas estiver vLIGADO“.
Nunca trabalhe com o equipamento com o sistema
contactor desligado ou a funcionar mal. Nunca
desligue interruptores nem faça pontes.
2.
4
Teste 5: Arranque o motor da maneira habitual, LIGUE
o rolo de lâminas e levante-se do assento. ★
Teste 6: Arranque o motor da maneira habitual, solte o
travão de estacionamento e levante-se do assento. ★
o motor não arranca no teste 1;
o motor arranca durante os testes 2, 3 u 4;
Verificação do Sistema Contactor
Teste
Operador
sentado
Sim
Não
Travão de
Estacionamento
Engat.
Desengat.
Pedal de tracção
em neutro
Sim
1
✔
✔
✔
2
✔
✔
✔
3
✔
4
✔
5
✔
★
6
✔
★
✔
Não
Comando do rolo
Motor arranca
Ligado
Deslig.
Sim
✔
✔
✔
✔
✔
✔
✔
✔
✔
✔
Não
✔
✔
✔
✔
✔
✔
★
✔
★
★ Levante-se do banco. As unidades de corte têm de parar de rodar dentro de sete (7) segundos.
PT-12
4
FUNCIONAMENTO
4.3
MODO DE UTILIZAÇÃO ____________________________________________________
! ATENÇÃO
Para este tractor está disponível uma estrutura de protecção contra capotamento como acessório de opção. Sempre que
uma estrutura ROPS se encontre instalada no tractor, é preciso trabalhar com cintos de segurança. Mantenha sempre os
cintos de segurança bem justos. NÃO USE cintos de segurança num tractor sem ROPS.
Se um tractor equipado com ROPS capotar, agarre-se ao volante. Não tente saltar nem sair do banco.
! CUIDADO
Para contribuir para a prevenção de acidentes, use sempre óculos de segurança, sapatos ou botas de trabalho de couro,
um chapéu duro e protecção para os ouvidos.
1.
Em nenhumas circunstâncias deverá o motor poder
arrancar sem que o condutor esteja sentado no tractor.
2.
Não trabalhe com o tractor ou com acessórios se
houver componentes soltos, danificados ou em falta.
Sempre que possível, a relva só deve ser cortada
quando estiver seca.
3.
Comece por cortar a relva numa área de teste para se
familiarizar completamente com o funcionamento do
tractor e com as alavancas de comando.
Nunca deixe o rolo de lâminas a trabalhar se não
estiver a cortar relva porque haveria um atrito excessivo
e formação de calor entre a lâmina fixa e o rolo de
lâminas, o que danificaria a lâmina de corte.
4.
Estude a área para estabelecer a melhor e a mais
segura maneira de trabalhar. Verifique a altura da
relva, o tipo de terreno e o estado da superfície. Terão
de ser feitas afinações e tomadas precauções de
acordo com as condições de trabalho.
5.
Nunca descarregue o material para pessoas próximas
nem permita que alguém se mantenha perto da
máquina durante o trabalho. O proprietário/condutor
fica responsável pelos ferimentos causados a pessoas
próximas e/ou danos materiais na propriedade alheia.
! CUIDADO
Antes de começar a cortar a relva, recolha todos os
detritos tais como pedras, brinquedos e arames porque
podem ser atirados com violência pela máquina. Entre
numa zona nova sempre com cuidado. Trabalhe sempre
a velocidades que lhe permitam assegurar um controlo
total do cortador.
6.
Tenha cuidado ao cortar a relva junto de zonas com
gravilha (estrada, parques de estacionamento,
acessos para automóveis, etc.). As pedras projectadas
pelo equipamento podem provocar ferimentos graves
em pessoas próximas e/ou danificar o equipamento.
PT-13
7. Desligue sempre o interruptor dos cilindros de corte
para parar as lâminas quando não estiverem a ser
utilizadas.
8.
Desengate os motores de accionamento e levante os
rolos quando atravessar passeios ou estradas. Tenha
cuidado com o trânsito.
9.
Pare e inspeccione o equipamento quanto a danos
logo após tocar nalgum obstáculo ou se a máquina
começar a vibrar anormalmente. Mande reparar o
equipamento antes de voltar a trabalhar com ele.
! ATENÇÃO
Antes de limpar, afinar ou reparar este
equipamento, desligue sempre todos os comandos,
baixe os equipamentos para o chão, trave com o
travão de estaciona-mento, desligue o motor e retire
a chave da ignição para evitar ferimentos.
10. Em taludes, reduza a velocidade e redobre de
atenção. Leia a Secção 4.10. Seja muito cauteloso ao
trabalhar perto de valas.
11. Olhe para trás e para baixo antes de recuar para se
certificar de que o caminho está livre. Tenha cuidado
ao aproximar-se de cantos sem saída, arbustos,
vedações ou outros objectos que cortem a visão.
12. Nunca use as mãos para limpar as unidades de corte.
Use uma escova para remover a relva cortada das
lâminas. As lâminas são extremamente afiadas e
podem provocar ferimentos graves.
FUNCIONAMENTO
4.4
ARRANQUE ______________________________________________________________
IMPORTANTE: Não utilize fluidos para facilitar o
arranque. O uso desses produtos no colector de ar pode
ser potencialmente explosivo ou causar forte aceleração,
que provocaria sérios danos no motor.
1.
4
Todas as lâmpadas de aviso devem apagar logo que o
motor pegar.
Deixe que o motor aqueça gradualmente antes de
acelerar muito.
Sente-se no banco do condutor, assegure-se de que o
interruptor do cortador (Q) está “DESLIGADO“ (na
posição central) e de que o travão de estacionamento
está activo. Retire os pés dos pedais. Use sempre os
cintos de segurança quando conduzir tractores
equipados com um sistema ROPS.
2.
Regule alavanca da borboleta (T) para uma posição
intermédia e assegure-se de que o interruptor de
alarme (O) está “LIGADO“.
3.
Rode o interruptor de ignição (V) para a posição
“LIGADO“ ( ).
N
O
Q
Y
Nota: Nesta altura, as lâmpadas de aviso (N, Y) no
painel de instrumentos acendem. Verifique que as
lâmpadas estão em funcionamento.
4.
Aguarde até que a lâmpada da vela de incandescência
apagar; imediatamente a seguir, rode a chave de
ignição para a posição “ARRANQUE” (
chave logo que o motor pegar.
). Solte a
V
Nota: Não mantenha a chave de ignição na posição
“ARRANQUE” durante mais de 10 segundos de cada
vez. Ao fim de 10 segundos, o circuito de arranque é
cortado e tem de ser restabelecido, levando a chave de
novo para a posição “DESLIGADO“.
T
LF003
Deixe passar 30 segundos entre tentativas de arranque
para dar tempo ao motor de arranque para arrefecer.
4.5
Figura 4A
PARAR / ESTACIONAR _____________________________________________________
Para parar:
Levante o pé do pedal da tracção. O tractor trava
automaticamente quando o pedal da tracção regressa à
posição neutra.
Para estacionar o tractor em condições normais:
1.
Desengate o interruptor de corte (Q) e suba e fixe os
equipamentos na posição de transporte e saia da área
de trabalho.
2.
Escolha uma zona plana e horizontal para estacionar.
a.
Solte o pedal de tracção para o tractor parar completamente.
b.
Desengate todos os accionamentos, baixe os equipamentos para o chão, reduza a abertura da borboleta para abrandar e deixe o motor trabalhar sem
carga durante um minuto.
3.
Engate o travão de estacionamento, desligue o motor
e tire sempre a chave da ignição.
Se houver uma emergência e o tractor tiver de parar na
área de trabalho, siga os traços desenhados pela
pessoa encarregada da zona.
Se o tractor estiver estacionado num plano inclinado,
calce as rodas.
PT-14
4
4.6
FUNCIONAMENTO
CONDUÇÃO / TRANSPORTE _______________________________________________
Leia e cumpra todas as instruções de segurança contidas
neste manual ao conduzir ou transportar o tractor. Ao
recuar, olhe para trás para se certificar de que o caminho
está livre.
C
Importante: Se o tractor circular na via pública, tem de
obedecer à legislação em vigor. Contacte as autoridades
locais sobre regulamentos e necessidade de equipamentos.
O tractor pode ser equipado com barras de transporte para
fixação os rolos dianteiros direito e esquerdo na sua
posição elevada para transporte. As barras de transporte
podem ser guardadas atrás do banco do condutor. Use
essas barras sempre que necessário para transportar a
máquina em terreno irregular, na via pública ou em semireboques.
B
LF005
Figura 4B
Como subir os cortadores para a sua posição de
transporte:
Coloque o interruptor do cortador em
DESLIGADO
(posição central). Puxe para trás a alavanca dos cortadores.
Segure na alavanca até que os cortadores fiquem em cima
e os braços de subida fiquem na posição totalmente subida
(para transporte).
Como instalar as barras de transporte:
1.
Suba os cortadores para a posição de transporte.
2.
Desengate todos os accionamentos, solte o travão de
estacionamento e desligue o motor.
3.
Coloque a barra de transporte (C) entre o eixo do
cilindro e o braço de subida, como indicado. Fixe a
barra em posição com os pinos (B).
O condutor tem a opção para transporte tanto com tracção à
2 rodas (2WD) como em 4X4 (4WD).
Importante: O interruptor de corte tem de estar
DESLIGADO (posição central) durante o transporte do
tractor.
PT-15
FUNCIONAMENTO
4.7
CORTE __________________________________________________________________
4.
! ATENÇÃO
Para evitar ferimentos graves, mantenha as mãos, os
pés e o vestuário longe da unidade de corte quando as
lâminas estiverem em movimento.
NUNCA use as mãos para limpar as unidades de corte.
Use uma escova para limpar as lâminas. As lâminas são
extremamente afiadas e podem causar ferimentos
graves.
Para eliminar obstruções à unidade de corte, desligue o
interruptor dos cilindros de corte, accione o travão de
estacionamento e retire a chave da ignição, retirando
depois o obstáculo.
Para cortar a relva:
1.
Se as barras de transporte estiverem instaladas, retireas e guarde-as no local próprio.
2.
Desloque o interruptor do cortador para a sua posição
LIGADO (posição elevada). Este procedimento
também activa o modo automático da alavanca do
cortador. Consulte Alavanca de Elevação do Cortador,
na página 8.
3.
Empurre momentaneamente a alavanca do cortador
para a frente para descer os cortadores. Estes
começam automaticamente a rodar logo que os
cortadores ficarem descidas.
4.8
4
Para subir os cortadores, puxe a alavanca respectiva
para trás e solte. Os rolos deixam de rodar e sobem
para a posição de corte cruzado. Para subir os
cortador para a posição de transporte, continue a
segurar a alavanca até que os cortador fiquem
completamente subidos.
Corte a relva sempre com o motor com a borboleta no
máximo.
IMPORTANTE: Para evitar danos no rolo e na lâmina fixa,
nunca tenha os rolos em funcionamento se não estiverem a
cortar relva. Gera-se atrito e calor excessivos entre o rolo e
a lâmina fixa e os gumes são danificados.
Como retirar ou instalar apanhadores de relva:
1.
Coloque o interruptor do cortador em DESLIGADO
(posição baixa), desça os cortadores até ao chão, trave
com o travão de estacionamento e desligue o motor.
2.
Incline o corpo do apanhador de relva para que a
margem da frente se afaste do quadro do cortador e
faça deslizar o apanhador para fora ou para o quadro
do apanhador.
VELOCIDADE DE CORTE ___________________________________________________
A qualidade do corte é melhor a velocidades
consideravelmente inferiores à velocidade de transporte do
tractor. Uma velocidade inicial de corte de 8 a 10 km/h (5 a 6
milhas/h) vem já definida de fábrica e deve ser adequada e
satisfatória para a maior parte das condições de corte. No
entanto, as condições da relva podem exigir uma
velocidade diferente. Se for necessário qualquer regulação,
deve consultar o Manual de Peças e Manutenção.
PT-16
4
4.9
FUNCIONAMENTO
REBOCAR / CARREGAMENTO NUM REBOQUE ________________________________
Se o tractor tiver problemas e tiver de ser desligado e
retirado da área de trabalho, deve ser carregado num carroreboque para transporte. Se não houver um carro-reboque,
o tractor pode ser rebocado em curtas distâncias.
Tenha cuidado ao carregar ou ao descarregar o tractor. Fixe
o tractor ao reboque para evitar que o tractor se volte ou
seja deslocado durante o transporte.
Antes de rebocar, abra a válvula de reboque. Esta válvula
permite mover o tractor sem arrancar o motor e evita
possíveis danos a componentes hidráulicos.
Antes de rebocar, assegure-se de que as unidades de corte
estão subidas. Se não puderem ser subidas, retire-as do
tractor.
Fecha a válvula completamente e substitua a tampa depois
de proceder ao reboque.
NOTA: Não exceda a velocidade de 3,2 km/h durante o
trajecto de reboque. Não é recomendável rebocar durante
mais tempo.
Nota: Em máquinas equipadas com tracção à quatro rodas
(4X4), o tractor será rebocado mais facilmente se a ignição
for ligada para MARCHA (não ligue o motor) e se o
interruptor de 4X4 estiver em 4X4.
A
A válvula de reboque (A) está localizada na bomba de
accionamento por baixo da tampa do motor. Retire a
cobertura do chão diante do lugar do operador. Para abrir a
válvula, introduza um pino no orifício na válvula de reboque
e rode-a no sentido contrário ao do movimentos dos
ponteiros do relógio, mas não mais de uma volta completa.
LF006
Figura 4C
4.10 TRABALHO EM ENCOSTAS _________________________________________________
1.
Corte a relva sempre com o motor com a borboleta
totalmente aberta, mas reduza a velocidade de avanço
a fim de manter a frequência de corte correcta.
2.
Se o tractor tender para plissar e se os pneus
começarem a deixar sulcos na relva, coloque o tractor
num ângulo menos acentuado até que a tracção seja
restabelecida ou as rodas deixem de marcar.
3.
Se o tractor continuar a plissar ou a deixar sulcos na
relva, o ângulo é demasiado inclinado para um
trabalho seguro. Não faça outra tentativa de subida;
desça lentamente.
4.
Ao descer um talude muito inclinado, baixe sempre os
equipamentos para o chão para reduzir o risco de
capotamento.
! ATENÇÃO
Para reduzir o risco de capotar, a maneira mais segura
de trabalhar em encostas e terraços é subir e descer a
encosta (verticalmente) e não andar na horizontal. Evite
curvas desnecessárias, avance a velocidade reduzida e
esteja atento a perigos ocultos e a valas
! CUIDADO
Não trabalhe com este tractor em taludes de
inclinação superior a 22°.
O tractor foi desenhado e construído para uma boa tracção
e estabilidade em condições normais de corte de relva.
Deve haver muito cuidado ao trabalhar em taludes,
especialmente quando o terreno é irregular e a relva está
molhada. A relva molhada reduz a tracção e o controlo da
direcção.
PT-17
A pressão correcta dos pneus é essencial para uma tracção
máxima. Consultar o Manual de Peças e Manutenção.
FUNCIONAMENTO
4
4.11 MANUTENÇÃO DIÁRIA _____________________________________________________
Importante: Para informações mais detalhadas sobre
manutenção, ajustamentos e tabelas de manutenção/
lubrificação, consulte o Manual de Peças e Manutenção.
1.
2.
Para evitar ferimentos graves provocados por óleo
sob pressão, nunca use as mãos para verificar
fugas de óleo; use papel ou papelão.
Estacione o tractor numa superfície plana e horizontal.
Baixe totalmente os equipamentos até ao chão, engate
o travão de estacionamento, desligue o motor e retire a
chave da ignição.
O fluido hidráulico que escapar sob pressão pode
ter força suficiente para penetrar na pele. Se houver
injecção de fluido na pele, tem de ser
cirurgicamente removido no espaço de algumas
horas por um médico familiarizado com este tipo de
ferimento porque doutra forma pode gangrenar.
Aplique massa e lubrifique todos os pontos
necessários. Para evitar incêndio, lave as unidades de
corte e o tractor após cada utilização.
a.
Não use aspersores de alta pressão.
b.
Não lance água directamente para o painel dos
instrumentos nem para qualquer componente eléctrico.
c.
Não lance água para a entrada de ar de refrigeração nem para a entrada de ar para o motor.
Nota: Não lave o motor quente ou a trabalhar. Use ar
comprimido para limpar o motor e as lâminas do
radiador.
3.
! ATENÇÃO
6.
Inspeccione diariamente mangueiras e tubos. Procure
mangueiras molhadas ou manchas de óleo e antes de
trabalhar com a máquina substitua mangueiras e tubos
com danos ou sinais de desgaste.
7.
Verifique o óleo do motor e o óleo hidráulico no
princípio de cada dia de trabalho, antes de ligar o
motor. Se o nível do óleo for baixo, ateste com a
quantidade necessária. Não encha demasiadamente.
Encha o reservatório de combustível do tractor ao fim
de cada dia de trabalho até 2,5 cm abaixo do bordo.
Use gasóleo fresco #2 com um índice mínimo de
cetano de 45.
4.
5.
Manuseie o combustível com cuidado - é altamente
inflamável. Use um recipiente adequado cuja ponteira
penetre na entrada de depósito de combustível. Evite
usar latas e funis para trasfegar combustível.
a.
Nunca retire a tampa do depósito de combustível
nem meta combustível com o motor a trabalhar ou
enquanto estiver quente.
b.
Não fume ao manusear combustível. Nunca encha
nem esvazie o depósito em recinto fechado.
c.
Nunca encha o depósito demasiadamente nem
deixe que fique vazio. Não derrame combustível.
Limpe imediatamente qualquer derrame.
d.
Nunca manuseia nem guarde recipientes com combustível perto de chamas ou de qualquer aparelho
que possa lançar faíscas e incendiar o combustível
ou vapores seus.
Guarde o combustível de acordo com as
regulamentações locais e as recomendações do seu
fornecedor de combustível.
PT-18
Equipment from Jacobsen is built to exacting
standards ensured by ISO 9001 and ISO 14001
registration at all of our manufacturing locations.
A worldwide dealer network and factory trained
technicians backed by Textron Parts Xpress
provide reliable, high-quality product support.
Textron Golf, Turf & Specialty Products
PO Box 7708, Charlotte, NC 28241-7708
www.ttcsp.com