1
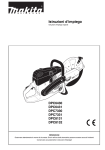
Istruzioni per installazione, uso e manutenzione
Installation, use and maintenance instructions
I
GB
Bruciatori di nafta
Heavy oil burners
Funzionamento bistadio
Two stage operation
CODICE - CODE
MODELLO - MODEL
TIPO - TYPE
3433200
RN 28
633 T1
3433300
RN 38
634 T1
3433400
RN 50
635 T1
3891500
Bag 40
3891501
Bag 50
2915585 4-98
I
GB
INDICE
DATI TECNICI . . . . . . . . . . . . . . . . . . . . . . . . . . . . . . . . . pagina
Imballo . . . . . . . . . . . . . . . . . . . . . . . . . . . . . . . . . . . . . . . . . . . . .
Ingombro . . . . . . . . . . . . . . . . . . . . . . . . . . . . . . . . . . . . . . . . . . .
Descrizione bruciatore . . . . . . . . . . . . . . . . . . . . . . . . . . . . . . . . .
Descrizione BAG . . . . . . . . . . . . . . . . . . . . . . . . . . . . . . . . . . . . .
Materiale a corredo . . . . . . . . . . . . . . . . . . . . . . . . . . . . . . . . . . .
Campi di lavoro. . . . . . . . . . . . . . . . . . . . . . . . . . . . . . . . . . . . . . .
3
4
4
4
5
5
6
CONTENTS
TECHNICAL DATA . . . . . . . . . . . . . . . . . . . . . . . . . . . . . . pagina
Packaging . . . . . . . . . . . . . . . . . . . . . . . . . . . . . . . . . . . . . . . . . . .
Max. dimensions . . . . . . . . . . . . . . . . . . . . . . . . . . . . . . . . . . . . . .
Burner description. . . . . . . . . . . . . . . . . . . . . . . . . . . . . . . . . . . . .
BAG description . . . . . . . . . . . . . . . . . . . . . . . . . . . . . . . . . . . . . .
Standard equipment . . . . . . . . . . . . . . . . . . . . . . . . . . . . . . . . . . .
Working Þelds . . . . . . . . . . . . . . . . . . . . . . . . . . . . . . . . . . . . . . . .
3
4
4
4
5
5
6
INSTALLAZIONE . . . . . . . . . . . . . . . . . . . . . . . . . . . . . . . . . . . . . 7
Piastra caldaia . . . . . . . . . . . . . . . . . . . . . . . . . . . . . . . . . . . . . . . 7
Lunghezza boccaglio . . . . . . . . . . . . . . . . . . . . . . . . . . . . . . . . . . 7
Fissaggio del bruciatore alla caldaia . . . . . . . . . . . . . . . . . . . . . . 7
Scelta degli ugelli per il 1° e 2° stadio . . . . . . . . . . . . . . . . . . . . . 7
Montaggio degli ugelli. . . . . . . . . . . . . . . . . . . . . . . . . . . . . . . . . . 7
Regolazione testa di combustione . . . . . . . . . . . . . . . . . . . . . . . . 8
Impianto idraulico . . . . . . . . . . . . . . . . . . . . . . . . . . . . . . . . . . . . . 8
Alimentazione combustibile . . . . . . . . . . . . . . . . . . . . . . . . . . . . . 8
Collegamenti idraulici . . . . . . . . . . . . . . . . . . . . . . . . . . . . . . . . . 10
BAG a sinistra del bruciatore . . . . . . . . . . . . . . . . . . . . . . . . . . . 10
Impianti elettrici . . . . . . . . . . . . . . . . . . . . . . . . . . . . . . . . . . . . . 11
Pompa . . . . . . . . . . . . . . . . . . . . . . . . . . . . . . . . . . . . . . . . . . . . 16
Innesco pompa. . . . . . . . . . . . . . . . . . . . . . . . . . . . . . . . . . . . . . 16
Temperatura di polverizzazione . . . . . . . . . . . . . . . . . . . . . . . . . 16
Termoregolatore . . . . . . . . . . . . . . . . . . . . . . . . . . . . . . . . . . . . . 17
Regolazione servomotore . . . . . . . . . . . . . . . . . . . . . . . . . . . . . 18
Accensione bruciatore . . . . . . . . . . . . . . . . . . . . . . . . . . . . . . . . 18
Funzionamento bruciatore . . . . . . . . . . . . . . . . . . . . . . . . . . . . . 19
Led Panel . . . . . . . . . . . . . . . . . . . . . . . . . . . . . . . . . . . . . . . . . . 19
VeriÞche e manutenzione . . . . . . . . . . . . . . . . . . . . . . . . . . . . . . 20
Funzionamento con olii ecologici . . . . . . . . . . . . . . . . . . . . . . . . 21
Kit precircolazione olii densi . . . . . . . . . . . . . . . . . . . . . . . . . . . . 21
Manutenzione gruppo valvole. . . . . . . . . . . . . . . . . . . . . . . . . . . 21
INSTALLATION . . . . . . . . . . . . . . . . . . . . . . . . . . . . . . . . . . . . . . 7
Boiler plate . . . . . . . . . . . . . . . . . . . . . . . . . . . . . . . . . . . . . . . . . . 7
Blast tube length . . . . . . . . . . . . . . . . . . . . . . . . . . . . . . . . . . . . . . 7
Securing the burner to the boiler. . . . . . . . . . . . . . . . . . . . . . . . . . 7
Choice of nozzles for 1st and 2nd stage . . . . . . . . . . . . . . . . . . . . 7
Nozzle assembly . . . . . . . . . . . . . . . . . . . . . . . . . . . . . . . . . . . . . . 7
Combustion head setting . . . . . . . . . . . . . . . . . . . . . . . . . . . . . . . 8
Hydraulic system. . . . . . . . . . . . . . . . . . . . . . . . . . . . . . . . . . . . . . 8
Fuel supply . . . . . . . . . . . . . . . . . . . . . . . . . . . . . . . . . . . . . . . . . . 8
Hydraulic connections . . . . . . . . . . . . . . . . . . . . . . . . . . . . . . . . . 10
BAG on left of burner . . . . . . . . . . . . . . . . . . . . . . . . . . . . . . . . . 10
Electrical systems . . . . . . . . . . . . . . . . . . . . . . . . . . . . . . . . . . . . 11
Pump. . . . . . . . . . . . . . . . . . . . . . . . . . . . . . . . . . . . . . . . . . . . . . 16
Pump priming . . . . . . . . . . . . . . . . . . . . . . . . . . . . . . . . . . . . . . . 16
Spray temperature . . . . . . . . . . . . . . . . . . . . . . . . . . . . . . . . . . . 16
Temperature controller . . . . . . . . . . . . . . . . . . . . . . . . . . . . . . . . 17
Servomotor adjustment . . . . . . . . . . . . . . . . . . . . . . . . . . . . . . . . 18
Burner ignition. . . . . . . . . . . . . . . . . . . . . . . . . . . . . . . . . . . . . . . 18
Burner operation . . . . . . . . . . . . . . . . . . . . . . . . . . . . . . . . . . . . . 19
Led Panel . . . . . . . . . . . . . . . . . . . . . . . . . . . . . . . . . . . . . . . . . . 19
Checks and maintenance . . . . . . . . . . . . . . . . . . . . . . . . . . . . . . 20
Operation with ecological oils . . . . . . . . . . . . . . . . . . . . . . . . . . . 21
Heavy oil pre-circulation kit . . . . . . . . . . . . . . . . . . . . . . . . . . . . . 21
Maintenance of valve unit . . . . . . . . . . . . . . . . . . . . . . . . . . . . . 21
Inconvenienti - Cause. . . . . . . . . . . . . . . . . . . . . . . . . . . . . . . . . 22
Troubleshooting (Fault - Causes) . . . . . . . . . . . . . . . . . . . . . . . . 23
NOTA.
In conformitˆ con la Direttiva Rendimento 92/42/CEE, lÕapplicazione del bruciatore alla caldaia, la regolazione e il collaudo,
devono essere eseguiti nellÕosservanza del manuale dÕistruzione
della caldaia stessa, compreso il controllo della concentrazione
di CO e CO2 nei fumi, della loro temperatura e di quella media
dellÕacqua della caldaia.
NOTE.
In conformity with EfÞciency Directive 92/42/EEC the application
of the burner on the boiler, adjustment and testing must be carried out observing the instruction manual of the boiler, including
veriÞcation of the CO and CO2 concentration in the ßue gases,
their temperatures and the average temperature of the water in
the boiler.
2
DATI TECNICI
I
MODELLO
TIPO
POTENZA (1)
PORTATA (1)
RN 28
stadio 2°
stadio 1°
kW
kg/h
kW
kg/h
COMBUSTIBILE
FUNZIONAMENTO
IMPIEGO STANDARD
TEMPERATURA ARIA COMBURENTE
ALIMENTAZIONE ELETTRICA
°C max
V
Hz
rpm
W
V
A
rpm
W
V
A
W
W max
MOTORE ELETTRICO VENTILATORE
MOTORE ELETTRICO POMPA
RISCALDATORI
POTENZA ELETTRICA ASSORBITA
GRADO DI PROTEZIONE
CONFORMITË DIRETTIVE CEE
RUMOROSITË (2)
(1)
(2)
dBA
RN 38
633 T1
634 T1
228 - 342
273 - 456
20 - 30
24 - 40
114 - 228
136 - 273
12 - 24
10 - 20
OLIO, viscositˆ max. a 50 °C: 150 cSt - 20 °E
¥ Intermittente (min. 1 arresto in 24 ore).
¥ Bistadio (alta e bassa Þamma).
Caldaie: ad acqua, a vapore, ad olio diatermico
60
230 - 400 con neutro ~ +/-10%
50 - trifase
2800
2800
250
450
220 - 240
220/240 - 380/415
2,1
2 - 1,2
1400
250
220/240 - 380/415
1,55
0,9
2800
4200
3800
5100
IP 44
89/336 - 73/23 - 89/392 - 92/42
68,0
70,0
RN 50
635 T1
342 - 570
30 - 50
171 - 342
15 - 30
2800
650
220/240 - 380/415
3,0 - 1,7
4200
5500
75,0
Condizioni di riferimento: Temperatura ambiente 20°C - Pressione barometrica 1000 mbar - Altitudine 100 m s.l.m.
Pressione sonora misurata in laboratorio combustione dal costruttore, con bruciatore funzionante su caldaia di prova, alla potenza massima.
TECHNICAL DATA
GB
MODEL
TYPE
OUTPUT (1)
DELIVERY (1)
RN 28
2nd stage
1st stage
kW
kg/h
kW
kg/h
FUEL
OPERATION
STANDARD APPLICATIONS
COMBUSTION AIR TEMPERATURE
ELECTRICAL SUPPLY
FAN ELECTRIC MOTOR
PUMP ELECTRIC MOTOR
HEATERS
ELECTRICAL CONSUMPTION
ELECTRICAL PROTECTION
CONFORMITY TO EEC DIRECTIVES
NOISE LEVELS (2)
(1)
(2)
°C max
V
Hz
rpm
W
V
A
rpm
W
V
A
W
W max
dBA
RN 38
633 T1
634 T1
228 - 342
273 - 456
20 - 30
24 - 40
114 - 228
136 - 273
12 - 24
10 - 20
OIL, viscosity max. at 50 °C: 150 cSt - 20 °E
¥ Intermittent (min. 1 stop in 24 hours).
¥ Two-stage (high and low ßame).
Boilers: water, steam, diathermic oil
60
230 - 400 with neutral ~ +/-10%
50 - three-phase
2800
2800
250
450
220 - 240
220/240 - 380/415
2.1
2 - 1.2
1400
250
220/240 - 380/415
1.55
0.9
2800
4200
3800
5100
IP 44
89/336 - 73/23 - 89/392 - 92/42
68.0
70.0
Reference conditions: Ambient temperature 20°C - Barometer pressure 1000 mbar - Altitude 100 m a.s.l.
Acoustic pressure measured in manufacturerÕs laboratory, with burner operating on test boiler at maximum output.
3
RN 50
635 T1
342 - 570
30 - 50
171 - 342
15 - 30
2800
650
220/240 - 380/415
3.0 - 1.7
4200
5500
75.0
IMBALLO - PACKAGING
INGOMBRO - MAX. DIMENSIONS
RN 28 - 38 - 50
Fig. 1
mm
Bag
Fig. 2
A
B
C
kg
mm
A
B
C
D
E
F
G
H
RN 28 - 38 - 50
1015 630 500
RN 28 - 38 - 50
476
474
468
265
166
352
52
730
Bag 40 - 50
824 859 394
Bag 40 - 50
680
763
780
276
324
650
-
-
DESCRIZIONE BRUCIATORE (Fig. 3)
BURNER DESCRIPTION (Fig. 3)
1
2
3
4
5
-
1
2
3
4
5
-
6
7
-
6
7
-
8
9
10
11
12
-
8
9
10
11
12
-
13 14 15 -
16 17 18 -
Testa di combustione
Vite per regolazione testa di combustione
Fotoresistenza per il controllo presenza Þamma
Vite per il Þssaggio ventilatore alla ßangia
Guide per apertura bruciatore ed ispezione alla testa di combustione
Servomotore serranda aria
Piastrina predisposta per ottenere 4 fori, utili al passaggio dei
cavi elettrici.
Presa di pressione ventilatore
Flangia per il Þssaggio alla caldaia
Visore Þamma
LED PANEL
Contattore motore e rel• termico con pulsante di sblocco
(RN 38 - RN 50)
Condensatore motore (RN 28)
Apparecchiatura elettrica con spia di blocco e pulsante di
sblocco
Due interruttori elettrici:
- uno per Òacceso-spento bruciatoreÓ;
- uno per Ò1° - 2° stadioÓ.
Prolunghe per guide 5)
Spine per il collegamento elettrico
Collettore
13 14 15 -
16 17 18 -
Fig. 3
4
Combustion head
Screw for combustion head adjustment
Photocell for ßame presence control
Screw for Þxing fan to ßange
Slide bars for opening the burner and inspecting the combustion head
Air damper servomotor
Plate designed to accept 4 drilled holes for routing electrical
cables.
Fan pressure test point
Boiler mounting ßange
Flame inspection window
LED PANEL
Motor contactor and thermal cut-out with reset button
(RN 38 - RN 50)
Motor capacitor (RN 28)
Control box with lock-out light and reset button
Two switches:
- Òburner off - onÓ
- Ò1st - 2nd stage operationÓ.
Extensions for slide bars 5)
Plugs for electrical connections
Manifold
Fig. 4
DESCRIZIONE BAG (Fig. 4)
BAG DESCRIPTION (Fig. 4)
1
2
3
1
2
3
4
5
6
7
8
9
10
11
12
13
14
15
16
17
18
19
20
21
22
23
24
25
26
27
28
29
30
31
32
- Manometro pressione anello di alimentazione
- Manometro pressione polverizzazione
- Resistenze autoregolanti di preriscaldo Þltro in aspirazione, Þltro in mandata, valvola e pompa
- Termostato di max.
- Termostato di min.
- Termostato di max. con pulsante di riarmo
- Pressostato controllo pressione anello con consenso funzionamento bruciatore (tarato a 1 bar)
- Motore pompa
- Vite regolazione pressione pompa
- Pompa
- Attacco pressione pompa (1/8Ó)
- Valvola normalmente aperta di prelavaggio
- Regolatore pressione anello
- Degasatore
- Valvola di scarico gas da degasatore, da tarare in funzione
della quantitˆ di gas in formazione sul degasatore (generalmente 1/4 giro • sufÞciente)
- Filtro a pettine in mandata
- Morsettiera
- Passacavi
- Presa di collegamento elettrico bag/bruciatore
- Contattore comando resistenze serbatoio
- Contattore con rel• termico comando motore pompa
- Termostato elettronico
- Trasformatore alimentazione termostato elettronico
- Termoresistenza Pt 100
- Ritorno dal bruciatore
- Mandata al bruciatore
- Valvola antigas
- Filtro a pettine in aspirazione pompa
- Mandata da anello di alimentazione (1Ó)
- Ritorno anello di alimentazione (3/4Ó)
- Serbatoio preriscaldatore
- Regolazione pressione prelavaggio (tarata in fabbrica a circa
10 bar)
MATERIALE A CORREDO
4
5
6
7
8
9
10
11
12
13
14
15
16
17
18
19
20
21
22
23
24
25
26
27
28
29
30
31
32
- Pressure gauge for fuel supply loop
- Atomising pressure gauge
- Self-controlling resistances for warming suction Þlter, delivery
Þlter, valve and pump
- High point thermostat
- Low point thermostat
- High point thermostat with reset push-button
- Loop pressure control switch with burner operation enable (set
at 1 bar)
- Pump motor
- Pump pressure adjustment screw
- Pump
- Pump pressure join (1/8Ó)
- Normally open pre-purge valve
- Loop pressure regulator
- Degassing unit
- Valve for gas release from degassing unit. Set according to
gas quantity in degassing unit (1/4 turn is usually sufÞcient)
- Comb-Þlter at delivery
- Terminal strip
- Fairleads
- Bag/burner electrical connection socket
- Contactor commanding tank heating elements
- Contactor with thermal relay commanding pump motor
- Electronic thermostat
- Transformer powering electronic thermostat
- Heating element Pt100
- Return from burner
- Delivery to burner
- Back pressure valve
- Comb-Þlter at pump suction
- Inlet from fuel supply loop (1Ó)
- Return to fuel supply loop (3/4Ó)
- Pre-heater
- Pre-purge pressure adjustment (factory set at about 10 bar)
N°
Tubi ßessibili per collegamento bruciatore/bag
2
STANDARD EQUIPMENT
N°
Hoses for burner/bag connection
2
Isolante per tubi ßessibili
1
Insulation for hoses
1
Schermo termico
1
Thermal insulation screen
1
4
Viti per Þssare la ßangia del bruciatore alla caldaia: M8 x 25
4
Screws to secure the burner ßange to the boiler: M8 x 25
Passacavi per collegamento elettrico (RN 28)
3
Fairleads for electrical connections (RN 28)
3
Passacavi per collegamento elettrico (RN 38 - RN 50)
4
Fairleads for electrical connections (RN 38 - RN 50)
4
Tubo per applicazione BAG sulla sinistra
1
Tube for installing BAG on left
1
Ugelli
2
Nozzles
2
Istruzione
1
Instruction boohlet
1
Catalogo ricambi
1
Spare parts list
1
5
pressione cam. comb. mbar
comb. chamb. pressure mbar
Fig. 5
CAMPI DI LAVORO (Fig. 5)
WORKING FIELDS (Fig. 5)
¥ La PORTATA del 1° stadio non deve scendere sotto i valori minimi
¥ 1st
stage DELIVERY must not fall below minimum values of the
working Þeld.
del campo di lavoro.
¥ La PORTATA del 2° stadio va scelta entro lÕarea A.
¥ 2nd stage DELIVERY must be selected in area A.
Il punto di lavoro si trova tracciando una verticale dalla portata desiderata ed una orizzontale dalla pressione corrispondente in camera
di combustione.
Attenzione:
il CAMPO DI LAVORO • stato ricavato alla temperatura ambiente di
20 °C, alla pressione barometrica di 1000 mbar (circa 100 m s.l.m.)
e con la testa di combustione regolata come indicato a pag. 8.
The work point may be found by plotting a vertical line from the
desired delivery and a horizontal line from the corresponding pressure in the combustion chamber.
Attention:
WORKING FIELDS were obtained at ambient temperature of 20°C,
and an atmospheric pressure of 1000 mbar (approx. 100 m above sea
level) and with the combustion head adjusted as shown on page 8.
Con olii densi, per ridurre lo sporcamento della caldaia, si consiglia un funzionamento prevalente in 2° stadio, perch• in 1° stadio:
- la temperatura dellÕolio allÕugello • pi• bassa rispetto al 2° stadio per minor combustibile in attraversamento (vedi pag. 26);
- lÕugello di primo stadio • decentrato;
- la pressione dellÕaria alla testa di combustione • bassa con
scarsa miscelazione aria/combustibile.
To reduce fouling the combustion head and boiler when using
dense oils, we suggest mainly 2nd stage operation, because with
the 1st stage:
- oil temperature on the nozzle is lower compared to that at the
2nd stage due to reduced fuel ßow (see page 26);
- 1st stage nozzle is off centre;
- air pressure on the combustion head is lower with improper
mixing between air and fuel.
Fig. 6
mm
RN 28 - 38 - 50
A
B
C
170 224 M 8
Fig. 7
6
INSTALLAZIONE
INSTALLATION
PIASTRA CALDAIA (Fig. 6)
BOILER PLATE (Fig. 6)
Forare la piastra di chiusura della camera di combustione come in
Fig. 6. La posizione dei fori Þlettati pu˜ essere tracciata utilizzando
lo schermo termico a corredo del bruciatore.
Drill the combustion chamber locking plate as shown in Fig. 6. The
position of the threaded holes can be marked using the thermal
screen supplied with the burner.
LUNGHEZZA BOCCAGLIO (Fig. 7)
BLAST TUBE LENGTH (Fig. 7)
Per le caldaie con giro dei fumi anteriore 10), o con camera ad inversione di Þamma, eseguire una protezione in materiale refrattario 8),
tra refrattario caldaia 9) e boccaglio 7).
La protezione deve consentire al boccaglio di essere estratto.
Per le caldaie con il frontale raffreddato ad acqua non • necessario il
rivestimento refrattario 8)-9), se non vi • espressa richiesta del
costruttore della caldaia.
The length L of the blast tube must be selected according to the indications provided by the manufacturer of the boiler, and in any case it must
be greater than the thickness of the boiler door complete with its fettling.
For boilers with front ßue passes 10) or ßame inversion chambers,
protective fettling in refractory material 8) must be inserted between
the boiler fettling 9) and the blast tube 7).
This protective fettling must not compromise the extraction of the
blast tube.
For boilers having a water-cooled front the refractory fettling 8)-9) is not
required unless it is expressly requested by the boiler manufacturer.
FISSAGGIO DEL BRUCIATORE ALLA CALDAIA (Fig. 7)
SECURING THE BURNER TO THE BOILER (Fig. 7)
La lunghezza L del boccaglio va scelta secondo le indicazioni del
costruttore della caldaia e, in ogni caso, deve essere maggiore dello
spessore della porta della caldaia, completa di refrattario.
Separate the front from the rear section as shown in Fig. 7.
- Remove the screws 2) from the two slide bars 3).
- Remove the screw 1) Þxing the burner 4) to the ßange 5).
- Withdraw the blast tube 7) complete with ßange 5) and slide bars 3).
Secure ßange 5) to the boiler plate interposing the supplied gasket
6). Use the 4 screws provided after having protected the thread with
antiscrufÞng products (high temperature grease, compounds, graphite). The burner-boiler seal must be airtight.
Separare la parte anteriore dalla parte posteriore come illustrato in
Fig. 7.
- Togliere le viti 2) dalle due guide 3).
- Togliere la vite 1) che Þssa il bruciatore 4) alla ßangia 5).
- SÞlare il boccaglio 7) completo di ßangia 5) e guide 3).
Fissare la ßangia 5) alla piastra della caldaia interponendo la guarnizione 6) data a corredo ed utilizzando le 4 viti pure date a corredo
dopo averne protetto la Þlettatura con prodotti antigrippanti (grasso
per alte temperature, compounds, graÞte). La tenuta bruciatore-caldaia deve essere ermetica.
CHOICE OF NOZZLES FOR 1ST AND 2ND STAGE
Both nozzles must be chosen from among those listed in Table of
Fig. 8.
The Þrst nozzle determines the delivery of the burner in the 1st
stage.
The second nozzle works together with the 1st nozzle to determine
the delivery of the burner in the 2nd stage.
SCELTA DEGLI UGELLI PER 1° E 2° STADIO
Entrambi gli ugelli vanno scelti tra quelli indicati nella tabella di Fig. 8.
Il primo ugello determina la portata del bruciatore in 1° stadio.
Il secondo ugello funziona assieme al primo ed entrambi determinano la portata del bruciatore in 2° stadio.
45°
kg/h (1)
20 bar
23 bar
25 bar
10,4
12,0
13,5
15,0
18,0
21,0
24,0
26,9
11,3
12,9
14,5
16,0
19,3
22,5
25,8
29,0
11,8
13,5
15,2
16,9
20,2
23,6
27,0
30,3
GPH
1,75
2,00
2,25
2,50
3,00
3,50
4,00
4,50
(1) olio/oil:
densitˆ/density 0,94 kg/dm3
viscositˆ/viscosity 7 cSt/110 °C
Fig. 8
Si consiglia lÕutilizzo di ugelli con angolo di polverizzazione di 45°;
tuttavia il bruciatore funziona correttamente anche con ugelli con
angolo di 60°. Generalmente i due ugelli sono di eguale portata.
NOTA. I due ugelli dati a corredo possono essere utilizzati quando
corrispondono alla portata richiesta. In caso contrario vanno sostituiti con altri due di portata adatta all'impianto.
We advise you to use nozzles with a 45° spray angle; however, the
burner will operate correctly also with 60° nozzles. The two nozzles
usually have equal deliveries.
NOTE. The two supplied nozzles may be used when they correspond to the required delivery, otherwise they are to be replaced
by others with a delivery suitable to the system.
MONTAGGIO DEGLI UGELLI (Fig. 8)
When the burner is still disassembled from the blast tube, Þt the
nozzle with the box spanner 1) (da 16 mm), after having removed
the plastic plugs 2), Þtting the spanner through the central hole in
the ßame stability disk 5). Do not use any sealing products such as
gaskets, sealing compound, or tape. Be careful to avoid damaging
the nozzle sealing seat. The nozzles must be screwed into place
tightly but not to the maximum torque value provided by the wrench.
The nozzle for the 1st stage of operation is the one lying beneath
the electrodes, Fig. 9.
Make sure that the electrodes are positioned as shown in Þg. 9.
Finally remount the burner 4)(Fig. 7) on the slide
bars 3) and slide it up to the ßange 5), keeping it
slightly raised to prevent the ßame stability disk
from pressing against the blast tube.
Tighten the screws 2) on the slide bars 3) and
screw 1) that attaches the burner to the ßange.
If it proves necessary to change a nozzle with the
burner already Þtted to the boiler, proceed as outlined below:
- install the extensions;
- back off screws 3) and remove disk 5);
- use spanner 4) to change the nozzles.
NOZZLE ASSEMBLY (Fig. 8)
Con il bruciatore separato dal boccaglio montare i due ugelli con la
chiave a tubo 1) (da 16 mm), dopo aver tolto i tappi in plastica 2),
passando dall'apertura centrale del disco di stabilitˆ Þamma 5).
Non usare prodotti per la tenuta: guarnizioni, nastro o sigillanti.
Fare attenzione di non ammaccare o incidere la sede di tenuta
dell'ugello. Il serraggio dell'ugello deve essere energico ma senza
raggiungere lo sforzo massimo consentito dalla chiave.
L'ugello di 1° stadio • quello sotto gli elettrodi d'accensione, Þg. 9.
Controllare che gli elettrodi siano posizionati come in Fig. 9.
Rimontare, inÞne, il bruciatore 4)(Fig. 7) sulle guide
3) e farlo scorrere Þno alla ßangia 5), tenendolo leggermente sollevato per evitare che il disco di stabilitˆ Þamma entri in contrasto con il boccaglio.
Avvitare le viti 2) sulle guide 3) e la vite 1) che Þssa
il bruciatore alla ßangia.
Per sostituire un ugello con bruciatore giˆ applicato alla caldaia, procedere come segue:
- montare le prolunghe;
- allentare le viti 3) e togliere il disco 5);
Fig. 9
- sostituire l'ugello con la chiave 4).
7
N° Tacche / Notches
Portata in 2° stadio kg/h
Delivery at 2nd stage kg/h
Fig. 10
Fig. 11
REGOLAZIONE TESTA DI COMBUSTIONE
COMBUSTION HEAD SETTING
La regolazione della testa di combustione dipende unicamente dalla
portata del bruciatore in 2° stadio, cio• dalla portata dei due ugelli
scelti a pag. 7.
Ruotare la vite 4)(Fig. 10) Þno a far collimare la tacca indicata nel
diagramma (Fig. 11) con il piano anteriore della ßangia 5)(Fig. 10).
The setting of the combustion head depends exclusively on the
delivery of the burner in the 2nd stage - in other words, the combined delivery of the two nozzles selected on page 7.
Turn screw 4)(Fig. 10) until the notch shown in diagram (Fig. 11) is
level with the front surface of ßange 5)(Fig. 10).
IMPIANTO IDRAULICO
HYDRAULIC SYSTEM
A cura dellÕinstallatore
The responsibility of the installer
Di serie su bruciatore e Bag
Standard for burner and Bag
Fig. 12
ALIMENTAZIONE COMBUSTIBILE (Fig. 12)
FUEL SUPPLY (Fig. 12)
¥ Impianto ad anello (impianto raccomandato)
Il circuito ad anello • costituito da un condotto che parte e torna in
cisterna nel quale una pompa ausiliaria fa scorrere il combustibile
sotto pressione. Se la pompa • troppo grande prevedere un by-pass
regolabile [il regolatore di pressione 13)(Fig. 4) potrebbe non ridurre
sufÞcientemente la pressione e danneggiare lÕorgano di tenuta della
pompa].
¥ The loop circuit (recommended system)
A loop circuit consists of a loop of piping departing from and returning to the tank with an auxiliary pump that circulates the fuel under
pressure. If the pump is too large, install and adjustable by-pass.
The pressure governor 13)(Fig.4) may not reduce pressure sufÞciently and could damage the pump seal.
8
LEGENDA (Fig. 12)
C - Cisterna (con pescante preriscaldato per viscositˆ > 7°E/50°C)
FA - Filtro anello 500 m (preriscaldato per viscositˆ > 7°E/50°C)
FD - Degasatore con Þltro autopulente da 300 m
FM - Filtro mandata autopulente da 100 m
MA - Manometro pressione anello di alimentazione
MM - Manometro pressione polverizzazione
P - Pompa alta pressione alimentazione bruciatore
PA - Pompa anello con by-pass (portata doppia rispetto alla
potenza installata)
PO - Pressostato di consenso pressione anello
PR - Preriscaldatore olio
RS - Resistenza di mantenimento
S - Saracinesche di esclusione
U1 - Ugello 1° stadio
U2 - Ugello 2° stadio
V - Valvola manuale di sÞato degasatore
VA - Valvola antigas
VS - Regolatore di pressione (taratura di fabbrica: 1,5 bar)
VP - Valvola (NA) di prelavaggio
V1 - Valvola 1° stadio
V2 - Valvola 2° stadio
VR - Valvola manuale regolazione pressione prelavaggio
KEY TO LAYOUT (Fig. 12)
C - Tank (with preheated suction device for viscosity > 7°E/50°C)
FA - Loop Þlter 500 m (pre-heated for viscosity > 7°E/50°C)
FD - Degassing unit with 300 m self-cleaning Þlter
FM - Self-cleaning 100 m delivery Þlter
MA - Fuel supply loop pressure gauge
MM - Atomisation pressure gauge
P - High pressure pump supplying fuel to burner
PA - Loop pump with by-pass (ßow rate double compared to rated
output)
PO - Loop pressure enable pressure switch
PR - Oil pre-heater
RS - Maintaining heating element
S - Shut-off gate
U1 - 1st stage nozzle
U2 - 2nd stage nozzle
V - Degassing unit breather valve (manual)
VA - Back pressure valve
VS - Pressure regulator (factory setting: 1.5 bar)
VP - Norm.open pre-purge valve (NO)
V1 - 1st stage valve
V2 - 2nd stage valve
VR - Pre-purge pressure adjustment valve (manual)
La pressione dellÕanello deve essere maggiore di 1 bar e non deve
superare 4 bar. Il pressostato 7)(Fig. 4) • tarato in fabbrica ad 1 bar
(taratura di consenso al funzionamento); per variare questa taratura
togliere il tappo sopra il pressostato ed agire sulla vite sottostante
(svitando si diminuisce, avvitando si aumenta).
Il pressostato • installato in aspirazione della pompa, quindi, oltre a
controllare la pressione dellÕanello, veriÞca anche lÕintasamento del
Þltro in aspirazione. Se il Þltro • intasato, la pressione dellÕanello
darebbe inizialmente il consenso, alla partenza della pompa si formerebbe una depressione che toglierebbe il consenso, il bruciatore
continuerebbe in questo modo Þno alla pulizia del Þltro.
Se la semplice rotazione della manopola 28)(Fig. 4) non • sufÞciente bisogna pulire il pacco Þltrante; se tutto • in ordine e si manifesta lÕinconveniente, bisogna aumentare la pressione dellÕanello: se
ci˜ non • possibile bisogna diminuire la regolazione di intervento del
pressostato 7)(Fig. 4).
Loop pressure must be over 1 bar and not exceed 4 bar. The pressure switch 7)(Fig.4) is factor set to 1 bar (setting enabling operation). To modify this setting, remove the plug on top of the pressure
switch and turn the screw underneath (anti-clockwise to reduce,
clockwise to increase).
The pressure switch is installed at the pump suction intake. Therefore, in addition to controlling loop pressure, it also checks the condition (degree of obstruction) of the suction Þlter. If the Þlter is clogged,
the pressure of the loop initially enables operation. However, in this
case, when the pump starts, a vacuum is created that disables operation, and the burner continues reacting in this way until the Þlter is
cleaned.
If turning the handle 28)(Fig.4) is insufÞcient, the Þlter unit must be
cleaned. If everything is in order, but the trouble continues, loop
pressure must be increased. If this is not possible, the pressure
switch 7)(Fig.4) tripping point must be reduced.
Note
¥ Eseguire le tubazioni dellÕanello con tubo ³ DN 25; per olio > 7°E/
50°C devono essere opportunamente coibentate e riscaldate.
¥ La pressione dellÕanello deve essere regolata in funzione della
temperatura e del tipo di olio; orientativamente 2 bar per olio con
viscositˆ Þno a 100 cSt, 3 bar per viscositˆ maggiori.
Notes
¥ For the loop tubing, use ³ DN 25 tube. For > 7°E/50°C oil, the
tubing must be appropriately insulated and heated.
¥ Loop pressure must be set according to the type of oil and its
temperature Ð as a guide-line, 2 bar for oil with viscosity up to
100cSt, and 3 bar for higher viscosity levels.
¥ Impianto a caduta
¥ Drop system
Utilizzabile solo per olii di bassa viscositˆ.
é indispensabile che sia assicurata lÕalimentazione al bruciatore.
Procedere come segue (riferimenti a Fig.4):
- collegare il tubo di alimentazione allÕattacco 29);
- collegare lÕattacco 30) con la parte superiore della cisterna: in
questo caso allentare di 3 giri la valvola 15); se non si porta
lÕattacco 30) in cisterna chiudere la valvola 15) ed aprirla periodicamente per scaricare eventuali formazioni di gas sul degasatore
(eseguire questa operazione a bruciatore in sosta);
- cortocircuitare il pressostato 7) (unire i due Þli sulla presa dello
stesso): non darebbe il consenso per mancanza di pressione,
sarebbe opportuno sostituirlo con un vacuometro (si ricorda che la
pompa non pu˜ superare una depressione massima di 4 m (35 cm
Hg).
This system can only be used for low viscosity oils.
Fuel supply to the burner must be assured.
Procedure (references are to Fig.4):
- connect the supply tube to the port 29);
- connect port 30) to the upper section of the tank Ð in this case,
back off valve 15) by three turns. If you do not connect port 30) to
the tank, shut valve 15) and open it periodically to discharge any
gas from the degassing unit (do this while the burner is idle);
- short-circuiting pressure switch 7) (by connecting two wires on its
socket) would not enable operation due to lack of pressure. We
advise you to replace the switch with a vacuum gauge (remember
that the pump cannot exceed a maximum vacuum value of 4 m (35
cm Hg).
9
Fig. 13
COLLEGAMENTI IDRAULICI (Fig. 13)
HYDRAULIC CONNECTIONS (Fig. 13)
Dopo aver collegato lÕanello di alimentazione collegare, mediante i
tubi ßessibili dati a corredo, bruciatore e BAG (utilizzando nastro di
teßon sul lato bruciatore), inserendo sugli stessi il tubo isolante dato
a corredo; • impossibile invertire la mandata con il ritorno perch• si
sono previste Þlettature differenti.
I tubi di collegamento bag/bruciatore sono tubi speciali per alta pressione e alta temperatura; si consiglia la loro sostituzione almeno
ogni due anni (con nafta densa e temperature maggiori di 140 °C si
consiglia la sostituzione ogni anno). Essi possono essere sostituiti
anche da tubazioni rigide; in tal caso • necessario proteggerle con
materiale termoisolante.
Le tubazioni rigide, inoltre, non permettono lÕapertura del bruciatore
sulle guide; in caso di manutenzione del bruciatore si rende quindi
necessario scollegarle.
LÕunitˆ di pompaggio e preriscaldo (BAG) pu˜ essere messa pi• lontano di quanto consentito delle tubazioni ßessibili date a corredo; in
tal caso realizzare delle prolunghe rigide sulla BAG e proteggerle
con materiale termoisolante (si ricorda che per ogni metro di allungamento si ha una riduzione di temperatura allÕugello di circa 8°C,
anche in caso di buon isolamento), aumentare di conseguenza la
temperatura impostata sul termostato elettronico.
Si sconsiglia di collocare la BAG ad una distanza dal bruciatore
superiore ai 2 metri.
After connecting the fuel supply loop, connect the burner and BAG,
using the supplied hoses and applying Teßon tape on the burner
side. Fit the supplied isolating tube on the hoses. The delivery and
return ports cannot be inverted, as different threads are used.
The burner-bag connection hoses are special tubes suitable for high
pressure and temperature. We advise you to replace them at least
every two years (if using dense heavy oil and operating at temperatures in excess of 140°C, replace every year). The hoses may be
replaced by rigid tubes Ð in this case, protect them with heat insulation material.
Furthermore, if rigid tubes are used, the burner cannot be opened
on the guides, therefore the guides have to dismantled for burner
maintenance.
The pumping and pre-heating unit (BAG) may be located further
than the supplied hoses would allow. To this end, Þt rigid extensions
on the BAG and protect them with heat insulation material (remember that there is a temperature drop of about 8°C for every extra
meter, even if insulation is efÞcient) and, as a result, increase the
temperature setting on the electronic thermostat.
You are recommended to locate the BAG not more than 2 meters
away from the burner.
Fig. 14
BAG A SINISTRA DEL BRUCIATORE (Fig. 14)
BAG ON LEFT OF BURNER (Fig. 14)
Il bruciatore • predisposto in fabbrica per BAG a destra, come illustrato in Fig. 13. Se si intende posizionare la BAG a sinistra del bruciatore, • necessario invertire il collettore e la posizione dei tubi posti
nella testa di combustione. Procedere nel modo seguente:
- svitare i due tubi dal collettore;
- togliere il collettore svitando le due viti 5) e Þssarlo a sinistra del
bruciatore, negli appositi fori posti sullo scudo anteriore;
- togliere i tubi 1) e 2) dai relativi raccordi posti sotto la testa di combustione;
- Þssare unÕestremitˆ del tubo 1) al collettore e lÕaltra estremitˆ al
raccordo di Þssaggio del tubo 2);
- Þssare unÕestremitˆ del tubo 3), dato a corredo, al collettore e
lÕaltra estremitˆ al raccordo rimasto libero;
- Þssare la piastrina di chiusura asole di passaggio tubi sul lato
opposto del frontone 5)(Fig. 7).
The burner is installed in the factory to accommodate the BAG on
the right, as shown in Fig.13. If you wish to place the BAG on the left
of the burner, reverse the manifold and the position of the tubes on
the combustion head. Procedure:
- unscrew the two tubes on the manifold;
- remove the manifold by unscrewing the two screws 5) and securing
it on the left of the burner, in the holes on the front guard;
- remove the tubes 1) and 2) from the relevant unions located under
the combustion head;
- secure one end of the tube 1) to the manifold and the other end to
the union securing tube 2);
- secure one end of the supplied tube 3) to the manifold and the
other end to the spare union;
- secure the plate for closing the tube through-slots on the opposite
side of the front section 5)(Fig. 7).
10
IMPIANTO ELETTRICO (eseguito in fabbrica)
ELECTRICAL
EQUIPMENT
(factory made)
I
IMPIANTO
ELETTRICO
ESEGUITO
RN 28 - BAG 40
Fig. 15
COLLEGAMENTO ELETTRICO (a cura dellÕinstallatore)
ELECTRICAL CONNECTION (Þeld made)
BAG 40
COLLEGAMENTO ELETTRICO (a cura dellÕinstallatore)
ELECTRICAL CONNECTION (Þeld made)
RN 28
Fig. 16
Fig. 17
11
IMPIANTO ELETTRICO (eseguito in fabbrica)
ELECTRICAL
EQUIPMENT
(factory made)
I
IMPIANTO
ELETTRICO
ESEGUITO
RN 38 - BAG 40
Fig. 18
COLLEGAMENTO ELETTRICO (a cura dellÕinstallatore)
ELECTRICAL CONNECTION (Þeld made)
BAG 40
COLLEGAMENTO ELETTRICO (a cura dellÕinstallatore)
ELECTRICAL CONNECTION (Þeld made)
RN 38
Fig. 19
Fig. 20
12
IMPIANTO ELETTRICO (eseguito in fabbrica)
ELECTRICAL
EQUIPMENT
(factory made)
I
IMPIANTO
ELETTRICO
ESEGUITO
RN 50 - BAG 50
Collegamento resistenze preriscaldatore
Pre-heater resistances connections
Fig. 21
COLLEGAMENTO ELETTRICO (a cura dellÕinstallatore)
ELECTRICAL CONNECTION (Þeld made)
BAG 50
COLLEGAMENTO ELETTRICO (a cura dellÕinstallatore)
ELECTRICAL CONNECTION (Þeld made)
RN 50
Fig. 23
230 V
Fig. 22
13
400 V
F
A
T10
T6
L
mm2
2,5
2,5
IMPIANTO ELETTRICO
ELECTRICAL SYSTEM
LEGENDA (Fig. 15 - 16 - 17 - 18 - 19 - 20 - 21 - 22 - 23)
C
- Condensatore
CMP
- Contattore motore pompa
CMV
- Contattore motore ventilatore
CR
- Contattore resistenze
RBO 522R - Apparecchiatura elettrica
F
- Soppressore
FR
- Fotoresistenza
h1
- Contaore di 1° stadio
h2
- Contaore di 2° stadio
IN
- Interruttore elettrico per arresto manuale bruciatore
I1
- Interruttore: Òbruciatore acceso-spentoÓ
I2
- Interruttore: Ò1° - 2° stadioÓ
MR
- Morsettiera resistenze
MV
- Motore ventilatore
MP
- Motore pompa
MPR
- Morsettiera preriscaldatore
PO
- Pressostato di consenso pressione anello
PR
- Serbatoio preriscaldatore
- Resistenza preriscaldatore
R1,2,3
KEY TO LAYOUTS (Fig. 15 - 16 - 17 - 18 - 19 - 20 - 21 - 22 - 23)
C
- Capacitor
CMP
- Pump motor contactor
CMV
- Fan motor contactor
CR
- Resistance contactor
RBO 522R - Control box
F
- Damper
FR
- Photoresistance
h1
- 1st stage hourcounter
h2
- 2nd stage hourcounter
IN
- Manual burner stop switch
I1
- Switch: Òburner on-offÓ
I2
- Switch: Ò1st - 2nd stageÓ
MR
- Resistance terminal strip
MV
- Fan motor
MP
- Pump motor
MPR
- Pre-heater terminal strip
PO
- Loop pressure enable pressure switch
PR
- Pre-heater
- Pre-heater resistance
R1,2,3
RS1,2,3,4
- Resistenza di mantenimento
RS1,2,3,4
- Maintaining heating element
RT
RT1
- Rel• termico motore ventilatore
- Rel• termico motore pompa
RT
RT1
- Fan motor thermal cut-out
- Pump motor thermal cut-out
S
SM
SO
T
TA
TB
TE
TL
-
S
SM
SO
T
TA
TB
TE
TL
-
Tm
TM
TMR
TP
TR
-
Tm
TM
TMR
TP
TR
-
TS
-
X
X4
X5
X7
XP
XP4
XP5
XP7
U
VP
V1
V2
-
TS
X
X4
X5
X7
XP
XP4
XP5
XP7
U
VP
V1
V2
-
Segnalazione di blocco a distanza
Servomotore
Sonda Pt 100
Trasformatore termoregolatore
Trasformatore dÕaccensione
Terra bruciatore
Termoregolatore
Telecomando di limite: ferma il bruciatore quando la
temperatura o la pressione in caldaia supera il valore
prestabilito
Termostato a contatto di minima
Termostato a contatto di massima
Termostato a contatto di massima a riarmo manuale
Terra preriscaldatore
Telecomando di regolazione: comanda 1° e 2° stadio
di funzionamento. Necessario solo nel funzionamento
bistadio.
Telecomando di sicurezza: interviene in caso di TL
guasto.
Spina di collegamento bruciatore/bag
Spina a 4 poli
Spina a 5 poli
Spina a 7 poli
Presa di collegamento bruciatore/bag
Presa a 4 poli
Presa a 5 poli
Presa a 7 poli
Led Panel
Elettrovalvola di prelavaggio
Elettrovalvola di 1° stadio
Elettrovalvola di 2° stadio
Remote lock-out signal
Servomotor
Sonde Pt 100
Temperature controller transformer
Ignition transformer
Burner ground (earth) connection
Temperature controller
Limit control device: this shuts down the burner when
the boiler temperature or pressure exceeds the setpoint value.
Minimum value contact thermostat
Maximum value contact thermostat
Maximum value contact thermostat with manual reset
Pre-heater ground (earth) connection
High-low mode control: this controls operating stages
1 and 2 and is necessary only for two-stage operation.
Safety control: this operates when TL is faulty.
Burner/Bag connection plug
4 pole plug
5 pole plug
7 pole plug
Burner/Bag connection socket
4 pole socket
5 pole socket
7 pole socket
Led Panel
Pre-purge solenoid-valve
1st stage solenoid valve
2nd stage solenoid valve
NOTE
For remote reset, connect a push-button switch (NO) between terminal 4 and neutral wire of the control box (terminals 15, 16, 17 and
18).
NOTA
Per avere lo sblocco a distanza collegare un pulsante (NA) fra il morsetto 4 e il neutro dellÕapparecchiatura (morsetti 15, 16, 17 e 18).
14
COLLEGAMENTI ELETTRICI (Fig. 13)
eseguiti dallÕinstallatore
Usare cavi ßessibili secondo norma EN 60 335-1:
¥ se sotto guaina di PVC almeno tipo H05 VV-F
¥ se sotto guaina di gomma almeno tipo H05 RR-F.
ELECTRICAL CONNECTIONS (Fig. 13)
set up by the installer
Use ßexible cables according to standard EN 60 335-1:
¥ if in PVC boot, use at least H05 VV-F
¥ if in rubber boot, use at least H05 RR-F.
Tutti i cavi da collegare alle spine 9)(Fig. 13) del bruciatore vanno
fatti passare dai passacavi forniti a corredo da inserire nei fori della
piastrina, dopo aver asportato il sottile diaframma che li chiude.
Sul retro della BAG sono predisposti i passacavi, per alimentazione
delle resistenze e del motore pompa.
Il cavo di collegamento 8)(Fig. 13) va Þssato su un foro della piastrina a lato e collegato sulla parte posteriore 19)(Fig. 4) della bag.
Route all the cables to be connected to the burner plug 9)(Fig.13)
through the supplied fairleads. Fit the fairleads into the plate holes,
after removing the thin diaphragm covering the holes.
Fairleads are located at the rear of the BAG, to route the heating element and pump motor power cables. Secure the connection cable
8)(Fig.13) to a hole of the plate at the side and connect it to the
upper section 19)(Fig.4) of the bag.
Esempio:
1 - Pg 11
2 - Pg 11
3 - Pg 9
4 - Pg 9
5 - Pg 13,5
6 - Pg 11
7 - Pg 11
Example:
1 - Pg 11
2 - Pg 11
3 - Pg 9
4 - Pg 9
5 - Pg 13,5
6 - Pg 11
7 - Pg 11
alimentazione trifase
alimentazione monofase
telecomando TL
telecomando TR
alimentazione resistenze
alimentazione motore pompa
bocchettone disponibile
REGOLAZIONE RELé TERMICO (Fig. 24)
Serve ad evitare la bruciatura del motore per un forte
aumento dell'assorbimento dovuto alla mancanza di
una fase.
¥ Se il motore • alimentato a stella, 400 V, il cursore
va posizionato sul "MIN".
¥ Se • alimentato a triangolo, 230 V, il cursore va
posizionato sul "MAX".
Se la scala del rel• termico non comprende l'assorbimento di targa del motore a 400 V, la protezione •
assicurata lo stesso.
Fig. 24
three-phase power supply
single-phase power supply
TL remote control device
TR remote control device
resistances supply
pump motor supply
spare fairlead
CALIBRATION OF THERMAL CUT-OUT (Fig. 24)
This is required to avoid motor burn-out in the event of
a signiÞcant increase in power absorption caused by
a missing phase.
¥ If the motor is star-powered, 400 V, the cursor
should be positioned to "MIN".
¥ If the motor is delta-powered, 230 V, the cursor
should be positioned to "MAX".
Even if the scale of the thermal cut-out does not
include rated motor absorption at 400 V, protection is
still ensured in any case.
NOTES
¥ The burner is factory set for two-stage operation and it must therefore be connected to the TR remote control device to command
valve V2. Alternatively, if single stage operation (on - off) is
required, instead of control device TR install a jumper lead
between terminals T6 and T8 of connector X4.
¥ The RN 38 - RN 50 burners and the BAG leave the factory preset
for 400 V power supply. If 230 V power supply is used, change the
motor connection from star to delta and change the setting of the
thermal cut-out as well.
¥ The RN 28 - RN 38 - RN 50 burners have been type-approved for
intermittent operation. This means they should compulsorily be
stopped at least once every 24 hours to enable the control box to
check its own efÞciency at start-up. Burner halts are normally provided for automatically by the boiler load control system. If this is
not the case, a time switch should be Þtted in series to IN to provide for burner shut-down at least once every 24 hours.
¥ In order to avoid pre-heater fusion owing to the glueing of the relevant contact maker, a second external contact maker can be
inserted which comes into action in the event the high point thermostat TMR is opened; connect the thermostatÕs coil to terminals
1 and N on the MPR terminal board.
NOTE
¥ Il bruciatore lascia la fabbrica predisposto per funzionamento
bistadio e quindi deve essere collegato il telecomando TR per il
comando della valvola V2. Se si desidera, invece, che il bruciatore
abbia un funzionamento monostadio (tutto - niente), inserire, in
sostituzione del telecomando TR, un ponte tra i morsetti T6 e T8
della spina X4
¥ I modelli RN 38 - RN 50 e la BAG lasciano la fabbrica previsti per
alimentazione elettrica 400 V. Se lÕalimentazione • 230 V cambiare il collegamento del motore (da stella a triangolo) e la taratura del rel• termico.
¥ I bruciatori RN 28 - RN 38 - RN 50 sono stati omologati per funzionamento intermittente. Ci˜ signiÞca che devono fermarsi "per
Norma" almeno 1 volta ogni 24 ore per permettere all'apparecchiatura elettrica di effettuare un controllo della propria efÞcienza
all'avviamento. Normalmente l'arresto del bruciatore viene assicurato dal telecomando della caldaia. Se cos“ non fosse • necessario applicare in serie a IN un interruttore orario che provveda
all'arresto del bruciatore almeno 1 volta ogni 24 ore.
¥ Per evitare fusioni al preriscaldatore, dovute allÕincollaggio del
relativo contattore, • possibile inserire un secondo contattore
esterno che interviene in caso di apertura del termostato di massima TMR; collegare la bobina di questÕultimo ai morsetti 1 e N
della morsettiera MPR.
WARNING:
Do not invert the neutral with the phase wire in the
electricity supply line.
ATTENZIONE:
Non invertire il neutro con la fase nella linea di alimentazione elettrica.
15
POMPA/PUMP
A
B
C
D
E
F
G
kg/h
bar
bar
cSt
°C
bar
bar
NR 4A
NR 6A
65
10 - 30
0,40
20 - 200
120
3
23
100
4 - 30
0,40
20 - 200
120
3
23
La pompa • predisposta per alimentazione
monotubo (by-pass aperto).
The pump is designed for single tube fuel
supply (by-pass open).
Fig. 25
POMPA (Fig. 25)
PUMP (Fig. 25)
1 2 3 4 5 ABCDEF G-
1 2 3 4 5 ABCDEF G-
Aspirazione/Attacco vacuometro
G 1/2Ó
Ritorno
G 1/2Ó
Attacco manometro
G 1/8Ó
Mandata
Regolazione pressione
Portata min. a 20 bar di pressione
Campo di pressione in mandata
Depressione max. in aspirazione
Campo di viscositˆ
Temperatura max. olio
Pressione max. in aspirazione e ritorno
Taratura pressione in fabbrica
Suction/Vacuum meter attachment
Return
Pressure gauge attachment
Delivery
Pressure adjustment
Min. delivery rate at 20 bar pressure
Delivery pressure range
Max. suction depression
Viscosity range
Oil max. temperature
Max. suction and return pressure
Pressure calibration in the factory
G 1/2Ó
G 1/2Ó
G 1/8Ó
INNESCO POMPA
PUMP PRIMING
La BAG viene fornita piena di combustibile, quindi con anello di alimentazione allacciato; non ci sono normalmente problemi per lÕinnesco della pompa.
VeriÞcare, premendo con un cacciavite sopra al teleruttore 21)(Fig. 4),
che il senso di rotazione corrisponda con il senso delle frecce poste
sul lato della BAG. Per eventuali difÞcoltˆ di innesco, togliere il tappo
dellÕattacco manometro 3)(Fig. 25), svitare di alcuni giri la valvola
15)(Fig. 4), far girare la pompa, come sopre descritto, Þno a quando il
combustibile fuoriesce dallÕattacco manometro. Se necessario, per
facilitare lÕinnesco, diminuire la pressione di regolazione (operazione
da fare con pompa anello funzionante).
The BAG is supplied Þlled with fuel, and the fuel supply loop is, therefore, connected. As a result, there are normally no pump priming
problems.
Press the top of the contactor 21)(Fig. 4) with a screwdriver to check
that the rotation direction matches that of the arrows on the side of the
BAG. If there are priming problems, remove the plug from pressure
gauge join 3)(Fig. 25), unscrew valve 15(Fig. 4) by a few turns, and
run the pump, as described above, until fuel ßows out of the pressure
gauge join. If necessary, to facilitate priming, reduce the set pressure
(this must be done while the loop pump is operating).
TEMPERATURA DI POLVERIZZAZIONE
The electronic thermostat, located on the BAG, controls, through a
temperature probe (Pt 100), the temperature of oil ßowing out of the
pre-heater.
Nozzle temperature, in consequence of losses in the route, is lower
than that read on the thermostat (this depends on the quantity of
burned fuel, on the ambient temperature and on the temperature set
on the termostat).
The diagram in Fig. 26 shows the temperature loss, depending on
the burned delivery; the diagram in Fig. 27 shows the temperature
recommended for the nozzle, depending on viscosity.
SPRAY TEMPERATURE
Viscositˆ a 50°C - Viscosity at 50°C
Perdita temperatura - Temperature loss °C
Il termostato elettronico posto sulla BAG regola, attraverso una termoresistenza (Pt 100), la temperatura dellÕolio in uscita dal preriscaldatore.
La temperatura allÕugello, a causa delle perdite durante il percorso, •
inferiore rispetto a quella letta sul display del termostato (tutto
dipende dalla quantitˆ di combustibile bruciato, dalla temperatura
ambiente e dalla temperatura impostata sul termostato).
Il diagramma di Fig. 26 indica la perdita di temperatura in funzione
della portata del bruciatore; il diagramma di Fig. 27 indica la temperatura consigliata allÕugello in funzione della viscositˆ.
Portata bruciatore - Burner delivery kg/h
Temperatura allÕugello - Nozzle temperature
Fig. 26
Fig. 27
16
Simbolo
Symbol
d2
LS1
LS2
HS1
HS2
Pb
It
dt
Ct
Fig. 28
rou
tun
Parametro
Parameter
differenziale
differential
set minimo 1
minimum set 1
set minimo 2
minimum set 2
set massimo 1
maximum set 1
set massimo 2
maximum set 2
banda proporzionale
proportional band
tempo integrale
integral time
tempo derivativo
derivative time
tempo di ciclo
cycle time
unitˆ di misura
unit of measurement
autotuning
Valori impostati
e consigliati
Set and
recommended
values
Campo di regolaz.
Adjustment range
-99 .............+600
°C
-10
-99 .............+600
°C
90
-99 .............+600
°C
-10
-99 .............+600
°C
170
-99 .............+600
°C
-10
1.................799
%
21
0.................999
s
120
0.................999
s
45
1.................500
s
13
°C - °F
-
°C
Y-n
-
n
TERMOREGOLATORE (Fig. 28)
TEMPERATURE CONTROLLER (Fig. 28)
La regolazione della temperatura dellÕolio combustibile • afÞdata ad
un termoregolatore avente le seguenti caratteristiche generali:
- alimentazione 12 V DC/AC;
- ingresso con sonda Pt 100;
- due uscite a rel•, OUT1 (ad azione PID) e OUT2 (ad azione ONOFF).
I parametri del regolatore vengono giˆ tarati in fabbrica; solo il valore
del SET 1 (temperatura di riscaldamento del combustibile) deve
essere regolato in funzione del tipo di combustibile (regolazione fatta
in fabbrica a 115°C).
A temperature controller with the following characteristics is used to
control fuel oil temperature:
- supply: 12 V DC/AC;
- input with probe Pt 100;
- two relay outputs, OUT1 (PID action) e OUT2 (ON-OFF action).
The parameters of the controller are factory set. The only value
requiring setting is the SET 1 (fuel heating temperature). It must be
set according to type of fuel (the factory setting is at 115°C).
KEY TO LAYOUT (Fig. 28)
1 - Display
2 - OUT1, led on: closed contact of the output relay (referring to
SET1, the set temperature)
3 - OUT2, led on: closed contact of the output relay (referring to
SET2, the temperature enabling burner start-up)
4 - Programming key
5 - Down-key
6 - Up-key
7 - Non-utilized key
LEGENDA (Fig. 28)
1 - Display
2 - OUT1, led acceso: contatto chiuso del rel• di uscita (relativo al
SET1, temperatura di regolazione)
3 - OUT2, led acceso: contatto chiuso del rel• di uscita (relativo al
SET2, temperatura di consenso al bruciatore di inizio fase di
avviamento)
4 - Tasto di programmazione
5 - Tasto per diminuzione del valore
6 - Tasto per aumento del valore
7 - Tasto non utilizzato
OPERATION
¥ At every power up, the controller executes the display and LEDs
test and goes into normal operating status, displaying the effective
temperature.
FUNZIONAMENTO
¥ Ad ogni alimentazione elettrica il regolatore esegue il test del
display e dei led e si porta al livello di normale funzionamento con
la visualizzazione del livello reale di temperatura.
¥ To modify the SET temperature values, brießy press key
¥ Per modiÞcare il valore di temperatura dei SET premere brevemente il tasto
P
: led
modify press the keys
and
.
: il led OUT1 lampeggerˆ e sul display verrˆ
In the SET1 situation, brießy press key
visualizzato il SET1 impostato. Per modiÞcarlo agire sui tasti
e
P
OUT1 will ßash and the SET1 value will be shown on display. To
P
: led OUT2 will ßash and
the SET2 value will be shown on display. This value automatically follows the SET1 setting (parameter factory set to -10°C with respect to
SET1 (e.g. SET1 = 115°C, corresponding SET2 = 105°C).
After this check, wait for 5 seconds without pressing the push-buttons - the controller goes into the work position automatically.
.
Nella situazione con il SET1 premere brevemente il tasto
P
: il
led OUT2 lampeggerˆ e sul display verrˆ visualizzato il SET2
impostato. Questo valore segue automaticamente la regolazione
del SET1 (parametro regolato in fabbrica a -10°C rispetto al SET1
(Esempio: SET1 = 115°C, relativo SET2 = 105°C).
Dopo questa veriÞca attendere 5 secondi senza premere i pulsanti: il regolatore si porta automaticamente nella posizione di
funzionamento.
17
IMPOSTAZIONE PARAMETRI DEL TERMOREGOLATORE
I parametri impostati in fabbrica e consigliati sono riportati nella
tabella di Fig. 28; se per motivi di staratura si rende necessario riprogrammarli, procedere come segue:
- premere e tenere premuto per 5 s il tasto
P
PROGRAMMING OF TEMPERATURE CONTROLLER PARAMETERS
Set and recommended values are shown in tab. of Fig. 28.
In the following the procedure is given in case of resetting is necessary:
: al rilascio, sul
- press key
display, verrˆ visualizzato il primo parametro;
- agendo con i tasti
e
si possono selezionare i vari para-
e contemporaneamente agire sui tasti
holding it down for about 5 seconds: when the key
- by pressing keys
metri;
- per modiÞcare tali parametri premere e mantenere premuto il tasto
P
P
is released the Þrst parameter will be shown on the display;
e
and
parameters can be selected;
- to modify these parameters press key
and, at the same time, press keys
.
P
and
, while hold it down,
.
- per uscire dal livello programmazione attendere 20 s senza premere i tasti.
- to exit the programming level, wait for 20 seconds without pressing
any key.
SEGNALAZIONE DI GUASTO
Sonda interrotta: sul display compare ÒEEEÓ .
Sonda in cortocircuito: sul display compare Ò- - - Ó .
ERROR SIGNALLING
Probe interruption: the display shows ÒE E E Ó.
Probe short-circuit: the display shows Ò- - - Ó .
I parametri SET2 e LS2, impostati a Ò-10Ó, determinano il valore
della temperatura di avviamento del bruciatore. Abbassando questi
parametri, ad esempio a Ò-20Ó, si anticipa lÕavviamento del bruciatore, da 105°C a 95°C.
Attenzione: in questo caso la temperatura del combustibile
allÕaccensione • pi• bassa.
The parameters SET2 and LS2, set to Ò-10Ó, determine the value of
the burnerÕs starting temperature. By lowering these temperatures,
for example to Ò-20Ó, the starting of the burner is brought forward,
from 105°C to 95°C.
Attention: in this case the temperature of the fuel at ignition is lower.
NOTE
The regulator enables a wide range of other functions.
For further details, consult our Technical Department.
NOTA
Il regolatore permette moltissime altre funzioni.
Per maggiori informazioni consultare i nostri UfÞci Tecnici.
Fig. 29
1
2
Spento - Off
1° stadio - 1st stage
Acceso - On
2° stadio - 2nd stage
Fig. 30
REGOLAZIONE SERVOMOTORE (Fig. 29)
SERVOMOTOR ADJUSTMENT (Fig. 29)
Camma I
Cam I
Regolata a 0° (posizione di serranda aria chiusa in
sosta)
Per avere una parziale apertura aumentare questa
regolazione.
Camma II
Regolata in fabbrica a 60°.
Regola la posizione della serranda aria in 2° stadio;
segue il servomotore solo in apertura. Per diminuire
lÕangolo passare in 1° stadio, diminuire lÕangolo e
ritornare in 2° stadio per veriÞcare lÕeffetto della regolazione.
Camma III
Regolata in fabbrica a 40°.
Consenso valvola di 2° stadio. Va regolata fra le
camme IV-V e II e deve sempre anticipare la camma II.
Camma IV-V Regolata in fabbrica a 20°.
Regola la posizione di 1° stadio e deve sempre anticipare le camme II e III. Segue il servomotore solo in
chiusura. Per aumentare lÕangolo passare in 2° stadio,
aumentare lÕangolo di taratura e ritornare in 1° stadio
per veriÞcare lÕeffetto della regolazione.
NOTA: Se, dalla posizione di 1° stadio, si aumenta
lÕangolo con bruciatore funzionante si ha lÕarresto del
bruciatore.
Cam II
Cam III
Cam IV-V
Set to 0° (air damper closed in shut-down position)
To open partially, increase this setting.
Factory set to 60°.
Controls the position of the air damper at the 2nd
stage - it follows the servomotor only when opening.
To reduce the angle, go to the 1st stage, reduce the
angle, and return to 2nd stage to check the effect of
your adjustment.
Factory set to 40°.
Enables the 2nd stage valve. Set it between cams IVV, so that it always anticipates cam II.
Factory set to 20°.
Controls the position of the 1st stage and must always
anticipate cams II and III. It follows the servomotor
only when closing. To increase the angle, go to the
2nd stage, increase the setting angle, and return to
1st stage to check the effect of your adjustment.
NOTE: If you increase the angle from the 1st stage
position while the burner is operating, the burner will
stop.
BURNER IGNITION
Close the control devices and set:
¥ switch 1)(Fig. 30) to Òburner ONÓ position;
¥ switch 2)(Fig. 30) to Ò1st STAGEÓ position.
Wait for pre-heating and correct burner start-up.
Once the burner is Þring adjust 1st stage combustion.
Go to the 2nd stage using switch 2)(Fig. 30) and adjust combustion.
Change several times from 1st to 2nd stage to check efÞciency.
ACCENSIONE BRUCIATORE
Chiudere la serie termostatica e mettere:
¥ lÕinterruttore 1)(Fig. 30) in posizione ÒACCESOÓ;
¥ lÕinterruttore 2)(Fig. 30) in posizione Ò1° STADIOÓ.
Attendere il preriscaldo ed il regolare avvio del bruciatore.
Ad accensione avvenuta regolare la combustione di 1° stadio.
Passare in 2° stadio agendo sullÕinterruttore 2)(Fig. 30) e regolare la
combustione.
Eseguire vari passaggi 1° - 2° stadio per veriÞcare il regolare funzionamento.
18
t1 - tempo consenso precircolazione
pre-circulation enable time
t2 - tempo consenso apparecchiatura
control box enable time
t3 - tempo preventilazione
pre-ventilation time
t4 - tempo di sicurezza e di consenso al 2°
stadio
safety time and time to enable 2nd
stage
Fig. 31
FUNZIONAMENTO BRUCIATORE (Fig. 31)
BURNER OPERATION (Fig. 31)
Alla chiusura del termostato, se il pressostato 7)(Fig. 4) dˆ il consenso per presenza di pressione, inizia la fase di riscaldamento.
Al raggiungimento della temperatura di 70°C impostata sul termostato di minima 4)(Fig. 4), (tempo t1), si avvia la pompa della BAG
ed inizia la fase di circolazione e di preriscaldo della nafta. Al raggiungimento della temperatura di SET 2 impostata sul termostato
elettronico si ha il consenso alla apparecchiatura del bruciatore ad
iniziare il ciclo (tempo t2), quindi parte il motore ed il trasformatore
dÕaccensione; dopo 20 ¸ 28 s (tempo t3) si apre la valvola di 1° stadio, dopo ulteriori 5 s (tempo t4), se tutto • regolare, si ha il consenso al 2° stadio, si spegne il trasformatore dÕaccensione e termina
il ciclo di avviamento.
When the thermostat closes, if the pressure switch 7)(Fig.4) enables
start-up because pressure is present, the heating stage begins.
When the temperature of 70°C, set on the low point thermostat
4)(Fig.4) is reached, (time t1), the BAG pump is started and the oil is
circulated and pre-heated. When the SET2 temperature set on the
electronic thermostat is reached, the burner control box is enabled to
start its cycle (time t2). Therefore, the motor and ignition transformer
also start. The 1st stage valve opens after 20 - 28 seconds (time t3).
After a further 5 seconds (time t4), if everything is functioning correctly, the 2nd stage is enabled, the ignition transformer is switched
off and the starting cycle ends.
Note
Notes
¥ Per mancata accensione si ha il blocco del bruciatore.
¥ Se in funzionamento la Þamma si spegne si ha ripetizione del
ciclo.
¥ Se durante la fase di preventilazione si ha un abbassamento della
temperatura dellÕolio > 10 °C rispetto al valore impostato di SET 1
del termostato elettronico, lÕapparecchiatura ripete il ciclo di avviamento ed attende il raggiungimento della temperatura.
¥ The burner is locked out if ignition fails.
¥ If the ßame is extinguished during operation, the cycle is repeated.
¥ If, during pre-ventilation, oil temperature falls by > 10°C compared
to SET 1 value of the electronic thermostat, the control box
repeats the starting cycle and waits for the set temperature to be
reached.
LED PANEL (Fig. 32)
LED PANEL (Fig. 32)
Fornisce 6 informazioni mediante lÕaccensione dei
led.
It provides 6 data signalled by illumination of the
leds.
SigniÞcato dei simboli:
Key to symbols:
= Tensione presente
= Power on
= Blocco motore ventilatore (rosso)
= Fan motor locked out (red)
= Blocco bruciatore (rosso)
= Burner lock-out (red)
= Funzionamento in 2° stadio
= 2nd stage operation
= Funzionamento in 1° stadio
= 1st stage operation
= Carico raggiunto (Stand-by)
= Set-point reached (Stand-by)
Fig. 32
19
Fig. 33
Fig. 34
VERIFICHE E MANUTENZIONE
CHECKS AND MAINTENANCE
Filtri
Girare periodicamente le manopole dei Þltri poste sulla BAG.
Almeno una volta allÕanno, estrarre il Þltro lamellare togliendo le 4
viti, scaricare le impuritˆ depositatesi sui cestelli togliendo i tappi
sottostanti e pulire il tutto con diluenti.
Quando il Þltro 16)(Fig. 4) • intasato, diminuisce la pressione letta
sul manometro 2)(Fig. 4); se con la rotazione della manopola del Þltro non ritorna al valore inizialmente impostato, si deve estrarre la
parte Þltrante e pulirla. Se la pressione rimane bassa, controllare la
pompa e la valvola di prelavaggio 12)(Fig. 4). QuestÕultima, con bruciatore funzionante, deve essere chiusa, impedendo ogni traÞlamento nel tubo di ritorno dal bruciatore dopo la fase di prelavaggio
(lentamente questo tubo deve raffreddarsi).
Filters
Turn the Þlter handles on the BAG periodically. At least once a year,
remove the laminate Þlter, by extracting the four screws, and remove
dirt from the baskets, by removing the plugs underneath and cleaning the whole unit with thinners.
When the Þlter 16)(Fig.4) is obstructed, the pressure readings on the
pressure gauge 2) (Fig.4) drops. If pressure does not return to the
original setting by turning the handle, remove the Þlter element and
clean it. If pressure is still low, check the pump and the pre-purge
valve 12)(Fig.4). The valve must be shut when the burner is operating, and prevent any leaks into the return tube from the burner after
pre-purging (this tube should cool slowly).
Fan
Check to make sure that no dust has accumulated inside the fan or
on its blades, as this condition will cause a reduction in the air ßow
rate and polluting combustion.
Ventilatore
VeriÞcare che allÕinterno del ventilatore e sulle pale della girante non
vi sia accumulo di polvere: riduce la portata dÕaria e causa, conseguentemente, combustione inquinante.
Combustion head
Make sure that all components of the combustion head are in good
condition, not deformed by high temperatures, free of deposits and
correctly positioned.
Testa di combustione
VeriÞcare che tutte le parti della testa di combustione siano integre,
non deformate dallÕalta temperatura, prive di incrostazioni e correttamente posizionate.
Nozzles
Do not clean the nozzles opening; do not even open them. Early
wear is typical of ecological oils.
Combustion must be checked after the nozzles have been changed.
Ugelli
Evitare di pulire il foro degli ugelli; si sconsiglia anche di aprirli. Con
olii ecologici lÕusura • molto precoce.
Il cambio degli ugelli richiede un controllo della combustione.
Photoresistance (Fig. 33)
Clean any dust off the glass. To remove the photocell 1)(Fig.33), pull
it Þrmly outward - it is pressure Þtted.
Fotoresistenza (Fig. 33)
Pulire il vetro da eventuale polvere. Per estrarre la fotoresistenza
1)(Fig. 33) tirarla energicamente verso lÕesterno; • inserita solo a
pressione.
Flame inspection window (Fig. 34)
Clean the ßame inspection window, when it is necessary.
Visore Þamma (Fig. 34)
Pulire il vetrino quando • necessario.
Flexible hoses
See page 10 for duration.
Tubi ßessibili
Per la durata vedere pag. 10.
Maintaining heating elements
The pump, suction Þlter, delivery Þlter, pre-purge valve and nozzle
unit are all heated by self-controlling heating elements.
If very dense oils are used, the pre-purge valve 12)(Fig.4) and the
nozzle unit valves must always be warm. Therefore, even during long
pauses, do not cut power to the burner, but stop the burner via the
set of thermostats. If power has to be switched off, restore it 1/2 hour
before start-up the burner.
Resistenze di mantenimento
Pompa, Þltro in aspirazione, Þltro in mandata, valvola di prelavaggio
e gruppo portaugelli sono riscaldati da resistenze autoregolanti.
Con olii densi, • molto importante che la valvola di prelavaggio
12)(Fig. 4) e le valvole poste sul gruppo portaugelli siano sempre
calde; quindi, anche durante soste prolungate, non togliere tensione
al bruciatore ma fermarlo dalla serie termostatica. Se • necessario
togliere tensione, ripristinarla 1/2 ora prima di accendere il bruciatore.
20
FUNZIONAMENTO CON OLII ECOLOGICI
OPERATION WITH ECOLOGICAL OILS
Questi bruciatori sono frutto di accurati studi che hanno permesso il
funzionamento anche con olii combustibili ecologici; olii che, in certe
condizioni di temperatura e velocitˆ, sono particolarmente aggressivi per organi importanti del bruciatore.
These burners were also designed to operate with ecological fuel
oils. At certain temperatures and speeds, these oils are particularly
aggressive on important burner components.
The following measures are essential when changing over from a
normal to an ecological fuel:
Il passaggio da olio combustibile normale a olio combustibile ecologico richiede obbligatoriamente:
¥
¥
¥
¥
¥
¥
svuotamento della cisterna dallÕolio combustibile normale;
pulizia della cisterna e della tubazione che porta il combustibile al
bruciatore;
applicazione di un Þltro, se giˆ non esiste, sul condotto di alimentazione del bruciatore con grado di Þltraggio 0,3 mm massimo.
empty normal fuel oil from the tank;
clean the tank and the supply tubes to the burner;
install a Þlter, if not already provided, on the burner fuel supply
tube, with Þltering capability of 0.3 mm max.
If the above measures are not taken, Riello declines all responsibility
for early wear or malfunctions of the burner.
In assenza di questi provvedimenti, la Riello declina ogni responsabilitˆ nel caso di precoce usura o malfunzionamento del bruciatore.
HEAVY OIL PRE-CIRCULATION KIT
This kit, by affecting the pre-heater and the pump of the BAG, enables a fuel temperature of around 70°C to be obtained with the
burner off.
Ask for Spare part code 3010174.
KIT PRECIRCOLAZIONE OLII DENSI
Questo kit, agendo sul preriscaldatore e sulla pompa della BAG,
permette di mantenere, a bruciatore spento, la temperatura del combustibile attorno ai 70°C.
Richiedere Ricambio cod. 3010174.
Fig. 35
MANUTENZIONE GRUPPO VALVOLE (Fig. 35)
MAINTENANCE OF VALVE UNIT (Fig. 35)
Il gruppo valvole • stato studiato in modo da poter essere rigenerato.
Per la rigenerazione chiedere Ricambio cod. 3012493.
The valve unit was designed to be regenerated. For regeneration,
ask for Spare part code 3012493.
Nota
I pistoncini con sfera 3) hanno solo la funzione di ridurre i gocciolamenti durante le soste per evaporazione dellÕolio presente nel corpo
polverizzatore.
Se, per mancanza di tenuta degli anelli 4), dellÕolio dovesse riempire
la camera retrostante dei pistoncini 3), sarebbe impedita lÕapertura.
é possibile, in caso di assoluta necessitˆ, funzionare, per breve
tempo, anche senza pistoncini.
Per lÕestrazione dei pistoncini procedere come segue:
- togliere i portaugelli 1), la vite con esagono incassato 2), sofÞare
con aria compressa attraverso il foro liberato dalla vite 2): in questo
modo vengono espulsi i pistoncini con sfera 3);
- rimontare i portaugelli 1) e la vite 2) con teßon per assicurare la
tenuta.
Note
The ball-pistons 3) reduce dripping caused by oil evaporation from
the atomising unit during pauses. These pistons have no other purpose.
If, due to lack of tightness of the rings 4), oil Þlls the chamber behind
the pistons 3), opening would not be possible. Operation for brief
periods without pistons is possible, but only if absolutely necessary.
Piston removal procedure:
- remove the nozzle holders 1), and the socket head screw 2), and
blow compressed air through the empty screw hole. This will eject
the ball-pistons 3);
- re-install the nozzle holders 1) and the screw 2) with Teßon to
ensure adequate tightness.
21
I
INCONVENIENTE
CAUSA PROBABILE
Non cÕ• preriscaldamento del combustibile
¥
¥
¥
¥
¥
¥
¥
Manca tensione
Collegamento elettrico bruciatore/bag staccato
Termostato di regolazione o di sicurezza aperto
Termostato di massima 5)(Fig. 4) guasto
Intervento termostato di massima a riarmo 6)(Fig. 4)
Teleruttore resistenze guasto
Pressostato olio 7)(Fig. 4) aperto per mancanza od insufÞciente pressione
anello
¥ Sonda Pt 100 o regolatore temperatura guasti
¥ Trasformatore termoregolatore guasto
Preriscaldamento insufÞciente
¥ Resistenze serbatoio interrotte
¥ Termostato elettronico mal regolato
Al raggiungimento della temperatura (~70°C) sul termostato di minima 4)(Fig. 4) la pompa non parte
¥
¥
¥
¥
Termostato di minima guasto (non dˆ il consenso)
Blocco rel• termico motore pompa
Teleruttore guasto
Pompa bloccata
Al raggiungimento della temperatura di SET2 il bruciatore non si avvia
¥
¥
¥
¥
Regolatore di temperatura guasto o con parametri sbagliati
Blocco rel• termico motore ventilatore
Condensatore guasto (RN 28)
Il servomotore guasto non si porta in 1° stadio
Il bruciatore si avvia e poi si arresta in blocco
¥ Fotoresistenza in cortocircuito
¥ Luce estranea, simulazione di Þamma
Il circuito idraulico non va in pressione con conseguente
blocco allÕaccensione
¥ Non chiude la valvola 12)(Fig. 4) (bobina interrotta, resistenza di preriscaldo
non funzionante)
Blocco allÕaccensione
¥
¥
¥
¥
¥
¥
¥
Il bruciatore non passa in 2° stadio
¥
¥
¥
¥
¥
Arresto in funzionamento
¥ Intervento pressostato olio 7)(Fig. 4)
¥ Intervento termostato di massima o di minima
Blocco in funzionamento con tentativo di riciclo
¥ Intervento rel• termici motore pompa o motore ventilatore (RN 38 - RN 50)
¥ Stacco Þamma per cattiva polverizzazione o per eccesso dÕaria
Sporcamento testa di combustione
¥
¥
¥
¥
¥
Ugello sporco o deformato
Elettrodi mal regolati
Cavi alta tensione difettosi
Trasformatore dÕaccensione guasto
Intervento rel• termico motore ventilatore
Elettrovalvola di 1° stadio sul portaugello non apre
TraÞlamento di combustibile dai pistoncini 3)(Fig. 35) che ne impedisce lÕapertura
¥ Fotoresistenza o apparecchiatura difettose
¥ Pressione o temperatura insufÞcienti
¥ Stacco Þamma per eccesso dÕaria
Termostato di 2° stadio aperto
Servomotore diffettoso o mal regolato
Camma III del servomotore mal posizionata
La valvola di 2° stadio sul portaugello non apre
TraÞlamento di combustibile dai pistoncini 3)(Fig. 35) che ne impedisce lÕapertura
Ugello sporco o deformato
Ugello con angolo di polverizzazione troppo grande (preferire i 45°)
Regolazione testa di combustione errata
Combustione in difetto dÕaria
Bassa temperatura nafta
22
GB
FAULT
PROBABLE CAUSE
No pre-heating of fuel
¥
¥
¥
¥
¥
¥
¥
¥
¥
No power
Burner/Bag disconnected from each other.
Adjustment or safety control device is open
Faulty high point thermostat 5)(Fig.4)
High point thermostat with reset push-button 6)(Fig.4) has operated
Heating elements contactor failed
Oil pressure switch 7)(Fig.4) open due to lack of or insufÞcient loop pressure
Faulty Pt 100 probe or temperature controller
Faulty temperature controller transformer
InsufÞcient pre-heating
¥ Tank heating elements interrupted
¥ Incorrectly set electronic thermostat
Pump not starting, when the temperature (approx.70°C)
is reached on the low point thermostat 4)(Fig.4).
¥
¥
¥
¥
Faulty low point thermostat (not enabling)
Pump motor thermal relay lock-out
Faulty contactor
Faulty pump
Burner not starting when SET2 temperature is reached.
¥
¥
¥
¥
Temperature controller either faulty or with incorrect parameters
Locked-out fan motor thermal relay
Faulty capacitor (RN28)
Faulty servomotor not going into 1st stage
Burner starting and then shutting down by lock-out.
¥ Short-circuited photocell
¥ Foreign light, ßame simulation
Hydraulic circuit not pressurising with consequent lockout at ignition.
¥ Valve 12)(Fig.4) not closing (coil interrupted, pre-heating element not operating)
Lock-out at ignition.
¥
¥
¥
¥
¥
¥
¥
¥
¥
¥
Dirty or misshapen nozzle
Incorrectly adjusted electrodes
Faulty high voltage cables
Faulty ignition transformer
Fan motor thermal relay tripped
1st stage solenoid-valve on nozzle holder not opening
Fuel leaking out of pistons 3)(Fig.35) preventing them from opening
Faulty photocell or control box
InsufÞcient pressure or temperature
Flame detachment due to excessive air
Burner not passing to 2nd stage
¥
¥
¥
¥
¥
2nd stage thermostat open
Faulty or incorrectly set servomotor
Servomotor cam III incorrectly positioned
2nd stage solenoid-valve on nozzle holder not opening
Fuel leaking out of pistons 3)(Fig.35) preventing them from opening
Shut down during operation.
¥ Oil pressure switch 7)(Þg.4) tripped
¥ High or low point thermostat tripped
Lock-out during operation and attempt to repeat the
cycle.
¥ Pump or fan motor thermal relays tripped (RN 38 - RN 50)
¥ Flame detachment due to poor atomising or excessive air
Dirty combustion head.
¥
¥
¥
¥
¥
Dirty or misshapen nozzle
Incorrect spray angle (45° preferable)
Incorrectly adjusted combustion head
InsufÞcient air for combustion
Low oil temperature
23
R.B.L. Riello Bruciatori Legnago s.p.a.
Via degli Alpini 1
I - 37045 Legnago (VR)
Tel.: +442 / 630111 Fax: +442 / 21980
Con riserva di modiÞche - Subject modiÞcations