1
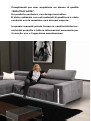
LIBRETTO PRODOTTO - CERTIFICATO DI QUALITÀ
PRODUCT HANDBOOK - CERTIFICATE OF QUALITY
Complimenti per aver acquistato un divano di qualità
“SEDUTA D’ARTE”.
Un prodotto esclusivo, con design innovativo.
È stato realizzato con soli materiali di qualità ed è stato
costruito con la massima cura da mani esperte.
In questo manuale potete trovare le caratteristiche tecniche del prodotto e tutte le informazioni necessarie per
il corretto uso e l’opportuna manutenzione.
2
COME COSTRUIAMO I NOSTRI DIVANI
Tutti i prodotti di marca Seduta d’Arte sono realizzati esclusivamente nei nostri stabilimenti, avendo quindi il pieno
controllo di ogni fase di lavorazione: dalla concia delle pelli
grezze al fusto e all’imbottitura, dal taglio e cucito, all’assemblaggio, all’imballaggio e, infine alla spedizione.
Tutto ciò avviene nel pieno rispetto dell’ambiente e della
sicurezza sui luoghi di lavoro, in ottemperanza alle più rigorose normative nazionali e comunitarie.
Ogni nostro prodotto, è realizzato a mano, con cura e passione artigianale, per questo motivo le misure riportate nelle
schede tecniche di questi mobili imbottiti sono da ritenersi
indicativi e pertanto non potranno essere prese in considerazione contestazioni ad esse inerenti.
In fase di produzione l’uso della tecnologia informatica consente a Seduta d’Arte di gestire la commessa in un’ottica
logistica di “just in time” attraverso un sistema che è in grado, in tempo reale, di monitorare ciascuna fase del ciclo di
lavorazione e di verificarne qualità e puntualità nei tempi di
consegna.
Prima di raggiungere le vostre abitazioni, è possibile che
il nostro divano abbia dovuto compiere un lungo trasporto
che può averne pregiudicato l’aspetto esteriore, una volta
sballato pertanto, potrebbero notarsi alcuni avvallamenti e
pieghe irregolari. Non c’è da preoccuparsi perché sono dovute al trasporto. I segni scompaiono dopo alcuni giorni di
utilizzo. Per velocizzare il processo di riassestamento basta
battere con le mani i cuscini modellando il rivestimento.
La garanzia dei nostri divani non risulta valida nel caso in
cui i prodotti siano smontati, modificati o riparati da persone
diverse da personale autorizzato da Seduta d’Arte. La garanzia altresì non sarà valida anche nel caso in cui sia stato
adottato un processo di manutenzione e pulizia della pelle
(o di qualunque altro rivestimento), non espressamente indicato in questo libretto o comunque non idoneo, che sia fatto
dal proprietario del divano o da chiunque da lui autorizzato.
Su questo libretto sono riportate le principali precauzioni
d’uso e di manutenzione da adottare, i danni che possono
essere derivati dalla mancata osservazione di dette regole
non sono da considerarsi difetti di fabbricazione imputabili
a Seduta d’Arte.
3
TELAIO
I telai da noi utilizzati sono ottenuti impiegando legname di
qualità che garantisce la solidità e quindi la resistenza dei
nostri divani alle sollecitazioni.
I materiali scelti vengono testati con l’intento di controllarne la resa in ogni condizione atmosferica e nel corso del
tempo. La struttura del telaio è completata da sospensioni
(cinghie) ad alta resistenza che, conservando nel tempo la
loro caratteristica elasticità, conferiscono con l’imbottitura
un ottimo comfort.
Avvertenze
Per conservare intatto nel tempo il telaio del vostro divano, basterà seguire le seguenti accortezze:
• evitare di sedersi sulla spalliera e sui braccioli;
• evitare di sollecitare il divano con urti violenti;
• evitare di spingere o strisciare il divano durante il suo
spostamento.
4
IMBOTTITURE
Relativamente alla struttura e alla linea estetica di ogni modello, utilizziamo tre diversi tipi di imbottiture:
• Poliuretano espanso
• Fibra di poliestere
• Piume d’oca
Rivestimento
Tramezza
Ovattato
Poliuretano
Masonite
Fibra di Poliestere o Poliuretano
Cinghie elastiche
per divano
Struttura in legno
Il poliuretano espanso giunge in blocchi di diversa densità.
La densità di ogni blocco è garantita da un certificato di
analisi chimica e viene testata periodicamente sottoponendo il poliuretano ad un certo numero di battute per verificarne la resistenza all’uso.
Le fibre di poliestere si presentano come fiocchi di filamenti di poliestere piuttosto sottili, tali da assicurare una
considerevole morbidezza.
I fiocchi, soffici e vaporosi, vengono utilizzati per imbottiture
di spalliere e braccioli del divano dove poggiano le parti più
delicate del corpo.
La piuma d’oca, sterilizzata e controllata, è un materiale
pregiato per la sua notevole morbidezza. Viene utilizzata nelle imbottiture di spalliere per esaltare il comfort del
prodotto. È un prodotto antistatico e sanitariamente sicuro
grazie agli innovativi processi di lavaggio e sterilizzazione.
Le piume d’oca possono essere all’occorrenza abbinate alla
fibra di poliestere di cui sopra, o ad un inserto di poliuretano
espanso per trovare il miglior connubio di comfort di tutti
questi materiali.
5
Uso e manutenzione
INFORMAZIONI SUL NUOVO DIVANO
I nostri divani non esigono una specifica manutenzione se
non quella legata alla ordinaria cura. Se dopo aver tolto l’imballo si notano alcuni avallamenti e pieghe irregolari, non c’è
da preoccuparsi perché sono dovute al trasporto. I segni
scompaiono dopo alcuni giorni di utilizzo. Per velocizzare
il processo di riassestamento basta battere con le mani i
cuscini modellando il rivestimento.
PRIMA DELLA MODELLATURA
DOPO LA MODELLATURA
È nomale che il rivestimento dei cuscini in piuma presenti
sempre delle pieghe ed appaia non uniforme. I cuscini vanno periodicamente battuti con la mano al fine di ricomporre
uniformemente l’imbottitura ed eliminare le pieghe.
6
Avvertenze
•Nei primi mesi di vita, le imbottiture in poliuretano
espanso spesso si ammorbidiscono per poi stabilizzarsi in modo definitivo; le prime volte che una persona si siede sollecita la seduta in modo da provocare la
rottura delle micro-celle di cui il poliuretano è composto. Tale rottura, del tutto naturale per questo tipo di
materiale, comporta un leggero ammorbidimento.
•É del tutto normale, inoltre, che la morbidezza di una
seduta/spalliera imbottita con poliuretano espanso si
rilevi diversa da quella di altri elementi del divano, in
funzione dello specifico uso a cui sono destinati.
Questo aspetto, in ogni caso, tenderà a scomparire
dopo i primi mesi di corretto utilizzo.
• Dopo l’assestamento naturale dell’imbottitura, potreb-
bero crearsi delle leggere pieghe sul rivestimento:
sono pieghe normali e dipendono dall’assestamento
che anche la pelle subisce durante i primi mesi di regolare utilizzo.
PRIMA DELL’USO
DOPO L’USO
I PIEDINI
I piedini, in quanto parte integrante del divano, vengono
attentamente disegnati e realizzati con materiali adatti ad
assicurare un ottimo effetto estetico. In alcuni modelli i piedini sono già montati in fase di produzione; in altri modelli,
invece, vengono imballati insieme al divano e montati solo
dopo il trasporto.
Avvertenze
• Evitare di aprire l’imballo del divano con oggetti ap-
puntiti e taglienti perché potrebbero danneggiare il
rivestimento.
7
• Stendere il foglio di cellophane sul pavimento e ca-
povolgere il divano sulla spalliera per il montaggio dei
piedini evitando di afferrarlo dai cuscini.
• Avvitare i piedini con forza. Per riposizionare il divano,
occorre alzarlo e farlo ruotare senza far leva sui piedini
per evitare di danneggiarli.
• I piedini in legno possono presentare alcune differenze
di tonalità e venature: si tratta di peculiarità naturali
del legno.
• Evitare di spostare il divano trascinandolo o alzandolo
dai braccioli: il giusto trasporto deve avvenire soltanto
sollevandolo dal fondo.
IL RIVESTIMENTO
Per i nostri divani utilizziamo i seguenti rivestimenti:
• Pelle
• Microfibra
• Tessuto
8
Cura del rivestimento in pelle
La pelle è un materiale nobile, resistente e prezioso che
dura nel tempo e migliora le sue qualità estetiche con il
passare degli anni. Grazie alla sua proprietà di elasticità e
soprattutto di traspirazione, si adatta alla temperatura corporea, avvolgendo con calore durante l’inverno e dando una
piacevole sensazione di freschezza in estate. Le pelli vengono selezionate nei luoghi d’origine e lavorate nelle migliori
concerie italiane.
Ogni manto presenta segni naturali in superficie che ne dimostrano l’autenticità: cicatrici, smagliature, rughe, punture
d’insetto, venature di colori e grane.
Sui divani in pelle, col tempo, potranno comparire grinze
o doppie pieghe: sono dovute alle naturali caratteristiche
della “vera pelle”.
9
10
Basso di fiore
Cicatrice chiusa
Differenza di grana
Differenza di tonalità
Puntura di insetti
Rughe
Smagliature
Venature
LE PELLI EASY LIVING (pigmentate)
Questa pelle, morbida e resistente, si presenta ricoperta da
un leggero strato protettivo che preserva la superficie dalle
macchie mantenendone inalterata la bellezza.
Sono pelli adatte ad arredare gli ambienti più frequentati
della casa.
PULIZIA DELLA PELLE EASY LIVING
• Spolverare periodicamente con un panno bianco, asciutto
e non abrasivo.
• Per le macchie di bibite, caffè, tè, latte, cioccolata, olio,
grassi, cosmetici, fondotinta: rimuovere rapidamente il liquido dalla superficie tamponando con un panno o carta
assorbente. In un secondo momento prendere un panno
pulito imbevuto di una soluzione d’acqua e sapone neutro
e strofinare in modo delicato dall’esterno verso l’interno
della macchia. Evitare di inzuppare la superficie della pelle e provvedere ad asciugarla subito con un panno pulito
(non va bene, invece, asciugare la pelle esponendola alla
luce diretta del sole o con l’asciugacapelli).
Attenzione! Solo acqua e sapone neutro sono adatti a
questa operazione; le sostanze detergenti aggressive
possono danneggiare irrimediabilmente la pelle, causando crepe e scolorimento.
11
Avvertenze
• Tenere il divano lontano (almeno 50 cm) da fonti di calore come
termosifoni o stufe.
•Per mantenere vivo il colore del rivestimento, evitare l’esposizione
diretta alla luce del sole o di lampade potenti.
IIIIIIIIII
IIII
I
IIIIIIIIIII
IIIIIIIIIIIII
I II
I III
IIIIIIIIIIII
IIII
• Ogni divano rivestito in pelle è unico, per cui, quando acquistate
un nuovo divano con rivestimento identico ad uno già in vostro
possesso, è possibile che tra i due si notino leggere differenze di
tonalità.
•Non lasciare giornali e/o riviste sul divano. L’inchiostro della carta
potrebbe essere assorbito dalla pelle.
•Evitare l’uso di indumenti e materiali che possono perdere il colore
(soprattutto i jeans) può essere assorbito dalla pelle.
•Evitare l’uso di indumenti e materiali che hanno borchie o parti in
metallo che possono danneggiare la pelle.
•La pelle è un materiale che ha bisogno di microumidità. Di tanto
in tanto nei giorni piovosi, aprire le finestre della stanza in cui si
trovano i divani.
•Utilizzare equamente tutti i posti di seduta dei divani e poltrone in
modo che possibilmente tutti abbiano una usura equilibrata.
12
LE PELLI NATURAL LIVING (semianiline ed aniline)
Queste pelli, morbide e vellutate, sono lavorate senza alterare le caratteristiche originarie dei manti. Differenze di
grana, cicatrici, rughe, venature, variazione nelle tonalità del
colore o qualsiasi altra traccia sono prova della assoluta genuinità e testimonianza del pregio del materiale.
PULIZIA DELLA PELLE NATURAL LIVING
• Spolverare periodicamente con un panno bianco pulito,
asciutto e non abrasivo.
• Per lo sporco secco: pulire delicatamente la superficie con
un panno asciutto, l’eccessivo strofinio può causare danni
al rivestimento.
• Per le macchie da sostanze solubili in acqua come bibite, caffè, tè, latte, marmellata: rimuovere rapidamente il
liquido dalla superficie tamponando con un panno bianco
non abrasivo o carta assorbente. In un secondo momento, con un panno inumidito con poca acqua, strofinare in
modo delicato dall’esterno verso l’interno della macchia.
Evitare di inzuppare la superficie della pelle e provvedere
ad asciugarla subito con un panno pulito (non va bene,
invece, asciugare la pelle esponendola alla luce diretta del
sole o con l’asciugacapelli).
• Per le macchie da sostanze grasse come olio, ketchup,
maionese, cioccolata: rimuovere in modo delicato la sostanza dalla superficie con carta assorbente, avendo cura
di non premere per evitare che lo sporco penetri nei pori
della pelle.
Con un panno pulito, imbevuto di una soluzione di sapone
neutro molto diluito, strofinare delicatamente dall’esterno
verso l’interno della macchia. Usare esclusivamente acqua e sapone neutro non colorato e asciugare subito con
un panno pulito.
13
Avvertenze
•Tenere il divano lontano (almeno 50 cm) da fonti di calore come termosifoni o stufe.
•Per mantenere vivo il colore del rivestimento, evitare
l’esposizione diretta alla luce del sole o di lampade potenti.
•Non lasciare giornali e/o riviste sul divano. L’inchiostro
della carta potrebbe essere assorbito dalla pelle.
•Evitare l’uso di indumenti e materiali che possono perdere il colore (soprattutto i jeans) può essere assorbito
dalla pelle.
•Evitare l’uso di indumenti e materiali che hanno borchie o parti in metallo che possono danneggiare la pelle.
•La pelle è un materiale che ha bisogno di microumidità. Di tanto in tanto nei giorni piovosi, aprire le finestre
della stanza in cui si trovano i divani.
•Utilizzare equamente tutti i posti di seduta dei divani e
poltrone in modo che possibilmente tutti abbiano una
usura equilibrata.
14
LA MICROFIBRA
É un rivestimento innovativo e moderno, piacevole al tatto
e facile da pulire.
La microfibra è trattata con una sostanza idrorepellente che
forma una protezione molecolare intorno alle fibre rendendola resistente alle macchie di grasso e liquidi.
Pulizia e cura della microfibra
Per mantenere la sua naturale freschezza, utilizzare una
semplice spazzola a setole morbide. La microfibra è facilissima da smacchiare, basta seguire alcuni semplici consigli.
•Succo di frutta, marmellata, gelatina, sciroppo, ketchup:
usare acqua tiepida, risciacquare tamponando con acqua
pulita.
•Sangue, uovo, feci, urina: usare acqua fredda, evitare
l’acqua calda che fa coagulare queste sostanze, risciacquare tamponando con acqua pulita.
•Liquori, alcolici, vino, birra, coca-cola e te: usare acqua
tiepida, se resta la chiazza di colore trattarla con succo di
limone e poi sciacquare bene.
•Matita copiativa, cacao, cioccolata, dolci alla crema e al
cioccolato, gelato e senape: usare acqua tiepida, risciacquare tamponando con acqua pulita.
•Aceto, gel per capelli, salsa di pomodoro, caffè con zucchero: usare succo di limone e poi ripassare con acqua
tiepida, risciacquare tamponando con acqua pulita.
•Cosmetici, profumo, lucido da scarpe, olio e grasso in generale, macchie d’erba e pennarelli: tamponare con alcool
etilico, poi risciacquare con acqua pulita. Per le macchie
d’erba e di pennarello che sono difficili da togliere, soprattutto nel colore chiaro, è necessario intervenire al più
presto, per evitare che diventino troppo secche.
•Chewing-gum e cera: mettere del ghiaccio in un sacchetto di plastica, quando la sostanza si è indurita rimuoverla
a pezzi, poi trattare con alcool etilico.
15
•Macchie resistenti: ripetere più volte i trattamenti descritti.
Anche le macchie non solubili in acqua richiedono spesso
di venire successivamente trattate con essa.
•Macchie vecchie di origine sconosciuta: trattare dapprima con acqua tiepida, poi risciacquare tamponando con
acqua pulita. Se si vede che la macchia comincia a sciogliersi con l’acqua, ripetere più volte il trattamento, lasciar
asciugare e, se necessario, trattare con alcool etilico.
TESSUTO
Selezioniamo per voi i migliori tessuti, resistenti alla trazione
e alla luce, e tali da garantire un rivestimento impeccabile
nel tempo. A secondo del tipo di tessuto, i nostri rivestimenti richiedono due diverse tipologie di lavaggio:
•Lavaggio a secco
•Lavaggio in acqua
Per le macchie d’olio si deve procedere rimuovendo il liquido delicatamente, tamponando con un panno assorbente e,
infine, smacchiando a secco (con percloroetilene).
Il lavaggio a secco è un’operazione che prevede la pulizia
del rivestimento mediante solventi organici. Se il rivestimento è sfoderabile, il lavaggio a secco comprende la pulitura,
il risciacquo e l’asciugatura e dopo il lavaggio è indispensabile stirare il rivestimento secondo le indicazioni riportate
sull’etichetta.
Per questo tipo di rivestimento lavabile a secco bisogna intervenire subito sulla macchia tamponando con un panno
morbido (o carta assorbente), pulito e non colorato.
Per le macchie d’olio si deve procedere rimuovendo il liquido delicatamente, tamponando con un panno assorbente e,
infine, smacchiando a secco (con percloroetilene).
Avvertenze
• Per il lavaggio a secco, suggeriamo di rivolgersi ad
una lavanderia specializzata.
• Prima di procedere con la smacchiatura a secco sarebbe consigliabile provare la risposta del tessuto in
un punto del rivestimento meno esposto alla vista.
16
Il lavaggio in acqua è un procedimento che prevede la pulizia in acqua del rivestimento in tessuto nel caso in cui questo sia possibile. Se il rivestimento è sfoderabile il lavaggio
in acqua comprende la pulitura, il risciacquo e l’asciugatura
e dopo il lavaggio è indispensabile stirare il rivestimento secondo le indicazioni riportate sull’etichetta. É consigliabile
pulire periodicamente con una spazzola a setole morbide
questo tipo di rivestimento lavabile in acqua.
Nel caso in cui si dovessero formare delle macchie di sporco bisogna ricordarsi sempre di pulire con un delicato movimento rotatorio che agisce dall’esterno della macchia
verso il suo interno. Quando l’unico modo per rimuovere il
segno di sporco è usare sostanze solventi, è importante non
versarle direttamente sulla macchia, ma bagnare un panno
pulito e procedere senza sfregare eccessivamente la parte.
Avvertenze
• Per il lavaggio in acqua del rivestimento, è necessario
prestare attenzione alla temperatura massima del lavaggio, riportata sull’etichetta del divano acquistato.
• Provare sempre il prodotto detergente in un punto nascosto del rivestimento, per assicurarsi che non sia
dannoso per il tessuto.
17
Pulizia del tessuto
•Liquori: tamponare con panno bianco non abrasivo o carta assorbente e rimuovere la macchia. Se la macchia persiste, lavare esclusivamente con schiuma di sapone neutro non colorato. In seguito smacchiare solo con alcool
denaturato diluito in acqua al 15%. Asciugare subito con
dell’aria calda usando un asciugacapelli facendo in modo
di dirigere il getto d’aria dall’esterno verso l’interno della
zona umida.
•Bibite/vino: tamponare con panno bianco non abrasivo o
carta assorbente e rimuovere la macchia. Se la macchia
persiste, smacchiare esclusivamente con aceto diluito in
acqua al 50%. Lavare solo con schiuma di sapone neutro
non colorato, infine tamponare la schiuma residua con un
panno umido d’acqua. Asciugare subito con dell’aria calda usando un asciugacapelli facendo in modo che il getto d’aria sia diretto dall’esterno verso l’interno della zona
umida.
•Burro, marmellata, nutella, senape, ketchup, cioccolato,
succo di frutta, caffè, tè: tamponare con panno bianco
non abrasivo o carta assorbente e rimuovere la macchia.
Successivamente, se la macchia persiste, lavare esclusivamente con schiuma di sapone neutro non colorato. Infine
tamponare la schiuma residua con un panno usando un
asciugacapelli, facendo in modo che il getto d’aria sia diretto dall’esterno verso l’interno della zona umida.
18
TABELLA CODICI E DESCRIZIONI MATERIALI
Codice
Descrizione
CO
COTONE
CA
CS
JU
LI
LY
ME
PA
PC
PL
PP
SE
VI
WA
WB
WG
WK
WL
WM
WO
WP
WS
YK
WV
CANAPA
CAPRA FINE
JUTA
LINO
LYCRA
METALLO
POLIAMID.
ACRILICA
POLIESTERE
POLIPROPILENICA
SETA
VISCOSA
ANGORA
CASTORO
VIGOGNA
CAMMELLO
LAMA
MOHAIR
LANA
ALPACA
CASHMERE
YAK
LANA VERGINE
19
Tabella simboli internazionali manutenzione e lavaggio
20
SFODERABILITÀ
Caratteristiche del prodotto
I divani e le poltrone Seduta d’Arte sfoderabili, sono realizzati in modo da consentirvi di rimuovere facilmente il rivestimento per poterlo lavare. La nostra attenzione verso il
cliente e l’eccellenza del servizio è confermata, anche per
questa linea, da tanti piccoli particolari:
• I tessuti sono stati scelti con cura affinché mantengano
inalterate le loro caratteristiche tecniche ed estetiche dopo
ripetuti lavaggi.
• I cuscini e la struttura del divano possono essere rivestiti con fodere che facilitano l’inserimento del rivestimento
esterno e ne consentono il comodo fissaggio con velcro e
cerniere.
istruzioni per svestire il divano
Fase 1
Se il vostro modello è dotato di barra in metallo di altri addobbi o accessori, rimuoverli o sganciarli.
Fase 2
Rimuovere tutti i cuscini, aprire le cerniere e sfoderarli.
21
Fase 3
Aprire la cerniera situata dietro la spalliera, se presente. Nel
caso in cui il divano sia dotato di piedini posizionati a filo
esterno, vanno smontati per sfilare il rivestimento.
Fase 4
Staccare il velcro, risvoltare il rivestimento lungo il perimetro
esterno del divano partendo dagli angoli e proteggerlo con il
nastro coprivelcro. Risvoltare il rivestimento con delicatezza
per non strappare le cuciture. Ripetere le stesse operazioni
per il perimetro interno del rivestimento.
Fase 5
Partendo degli angoli sfilare delicatamente il rivestimento
procedendo alternativamente, per alcuni centimetri, da un
lato all’altro del divano. Successivamente liberare completamente il sofà dal rivestimento.
22
Avvertenze
- Non rimuovere il nastro di protezione: esso dovrà essere
presente durante il lavaggio.
Soltanto quando il divano sarà nuovamente rivestito dovrà
essere rimosso e conservato accuratamente per i successivi lavaggi.
Istruzioni per vestire il divano
Fase 1
Per iniziare il montaggio del rivestimento, poggiare il rivestimento sulla spalliera e i braccioli, dopo aver aperto le
cerniere eventualmente presenti, sistemarlo in modo da
allineare le cuciture con gli spigoli del divano. Stendere il
rivestimento procedendo dalla spalliera verso la parte anteriore del divano fino a rivestirlo completamente. Chiudere
la cerniera.
Fase 2
Sistemare il rivestimento a filo dell’angolo fondo-spallierabracciolo,staccare il nastro e fissare il velcro. Sistemare il
rivestimento sulla parte anteriore della seduta in modo da
far coincidere il velcro con la giunzione tra due fodere.
23
Fase 3
Stendere il rivestimento sulle parti esterne del sofà, rimuovere il nastro e fissare il velcro lungo tutto il perimetro del
sofà rivoltandolo sotto base.
Fase 4
Se il piede è posizionato a filo, come in figura A, smontarlo
e inserire il rivestimento nel modo corretto. Rivestire i cuscini avendo cura di sistemare le imbottiture nel giusto verso.
La cucitura sulla fodera interna del cuscino deve trovarsi in
corrispondenza della cerniera del rivestimento (Fig. B). Assicurarsi che il cursore della cerniera sia inserito nell’apposito
alloggio (Fig. C). Nel caso in cui stiate rivestendo un divano
con più di due cuscini, posizionare prima i cuscini laterali e
successivamente quelli centrali.
24
LE FUNZIONI RELAX
Le poltrone e i divani con meccanismo manuale.
Alcuni dei nostri modelli possono essere dotati di un meccanismo reclinabile che permette di cambiare l’inclinazione
della spalliera, modificare l’assetto della seduta e portare le
gambe in posizione orizzontale.
Le poltrone ed i divani con funzione scorrevole “ZERO
WALL” (distanziati a pochi centimetri dal muro) possono essere reclinati senza scostarli dalle pareti della stanza: infatti,
mediante uno speciale meccanismo, durante l’apertura la
seduta e la spalliera si spostano in avanti.
Per questo motivo è possibile notare lievi differenze di allineamento dietro la spalliera.
Le poltrone girevoli, oltre alla funzione reclinabile dispongono anche della funzione dondolo che fa oscillare la poltrona
rispetto al suo asse verticale.
25
MODALITÀ D’USO
A seconda dei modelli variano le modalità di utilizzo delle
funzioni reclinabili.
Reclinabile con maniglia
Il meccanismo viene attivato mediante l’uso della maniglia
posta sulla parte esterna del bracciolo o di un tirante posto
tra il cuscino di seduta ed il bracciolo.
Tirando la maniglia o il tirante si apre immediatamente il
poggiapiedi.
Praticando col busto una pressione sulla spalliera, si fa reclinare la poltrona del tutto.
Per chiuderla è sufficiente spingere il busto in avanti e accompagnare con le gambe il poggiapiedi verso la posizione
iniziale.
APRIRE
CHIUDERE
TIRANTE INTERNO
26
POLTRONA CON FUNZIONE GIREVOLE
Questa funzione, dove presente, non richiede alcun dispositivo per essere attivata. Per far ruotare la poltrona basta poggiare i piedi sul pavimento e muoverli verso destra o verso
sinistra. É una funzione presente solo sulle poltrone.
POLTRONA CON FUNZIONE DONDOLO
Questa funzione si attiva spostando verso sinistra la leva
posta dietro la poltrona, oppure si avvia automaticamente
nel momento in cui si aziona la leva per l’apertura del meccanismo reclinabile. Per arrestare il dondolio basta spostare
la leva posta dietro la poltrona verso destra e, nello stesso
tempo, muovere delicatamente la spalliera per consentire
alle baionette di bloccaggio di trovare la corretta posizione
d’inserimento.
Avvertenze
• Per pulire le parti metalliche del meccanismo usare solo
un panno umido.
• Evitare che i bambini giochino con il meccanismo.
• Attivare il meccanismo solo se seduti in posizione corretta.
• Se il meccanismo durante il funzionamento dovesse
cigolare, bisogna semplicemente lubrificare le molle,
le cerniere e tutte le giunzioni con normali lubrificanti
spray disponibili in commercio.
• Sulle poltrone con dondolo evitare di sedersi sul bordo
anteriore, altrimenti la poltrona potrebbe toccare terra,
danneggiandosi.
• Non sedersi sulla pediera. Eccessive pressioni sulla pediera a meccanismo aperto possono piegare i leveraggi danneggiando il meccanismo.
• Non sedersi sui braccioli. I braccioli sono collegati ai
meccanismi. Una eccessiva pressione sui braccioli potrebbe portare ad una deformazione del meccanismo.
• Non appoggiarsi sulla spalliera a meccanica aperta
dalla parte posteriore del divano. Anche in questo caso
si potrebbero produrre danni permanenti ai leveraggi.
• Utilizzando il meccanismo relax la funzione dondolo
deve essere bloccata altrimenti diventa molto difficoltoso chiudere la meccanica.
27
LE POLTRONE E I DIVANI CON MECCANISMO ELETTRICO
Particolare
del telecomando
Particolare
del pulsante
Particolare
del pulsante interno
Alcuni dei nostri modelli sono dotati anche di un meccanismo elettrico che permette di modificare l’inclinazione della spalliera, di alzare il poggiapiedi e di cambiare l’assetto
della seduta.
Le poltrone e i divani sono dotati di funzione scorrevole
“ZERO WALL” (distanziati a pochi centimetri dal muro) che
consente di reclinare la spalliera senza spostarli dalle pareti della stanza: infatti, grazie ad uno speciale meccanismo,
durante l’apertura, la seduta e la spalliera si spostano avanti.
28
Avvertenze
• Per pulire le parti metalliche del meccanismo non utilizzare solventi ma solo un panno umido.
• Evitare che i bambini giochino con il meccanismo.
• Attivare il meccanismo solo se seduti in posizione corretta.
• Evitare di toccare le parti metalliche.
• Non usare il motore elettrico in fase di apertura e chiusura per più di un minuto in modo continuato. Quest’attività può bloccare il motore a causa di surriscaldamento.
Per sbloccare il motore lasciare raffreddare il sistema
per 5 minuti.
• Sbalzi di tensione possono bloccare il motore elettrico,
in tal caso si deve togliere la spina, attendere qualche
minuto e reinserirla nella presa.
• Prima di effettuare la pulizia o altri interventi assicurarsi
di aver tolto la spina elettrica.
• Non sedersi sulle pediere. Eccessive pressioni sulla pediera a meccanismo aperto possono piegare i leveraggi danneggiando il meccanismo.
• Non sedersi sui braccioli. I braccioli sono collegati ai
meccanismi. Una eccessiva pressione sui braccioli potrebbe portare ad una deformazione del meccanismo.
• Non appoggiarsi sulla spalliera a meccanica aperta dalla parte posteriore del divano. Anche in questo caso si
potrebbero produrre danni permanenti ai leveraggi.
I MODELLI CON LETTO
Tra i diversi modelli di divano alcuni possono diventare comodi letti.
Esistono più tipi di reti: a “due pieghe” elettrosaldata, a “due
pieghe trasformabile” elettrosaldata, e a “tre pieghe” ortopedica o elettrosaldata e rete pronto letto.
29
Modalità d’uso
Rete a “due pieghe” elettrosaldata
Prima di usare il divano con letto, togliere la linguetta in plastica che blocca la rete.
Per aprire la rete a due pieghe elettrosaldata eseguire poi le
seguenti operazioni:
1.Rimuovere i cuscini (ove necessario);
2.Alzare la rete prendendo la maniglia centrale e tirare verso l’esterno, facendo poggiare la barra di sostegno della
rete sul pavimento;
3.Afferrare dal centro la seconda barra di sostegno, sollevarla e accompagnarla fino al pavimento;
4.Per chiudere il letto, è sufficiente invertire l’ordine delle
operazioni.
Per la rete a due pieghe elettrosaldata viene utilizzato un
materasso a molle rivestito in policotone.
30
Modalità d’uso
Rete a “due pieghe” trasformabile
Se il divano è dotato di un letto, si prega di seguire i nostri
consigli per una corretta apertura e chiusura della rete.
Si consiglia l’uso del meccanismo solo a persone adulte.
Per aprire la rete a due pieghe trasformabile eseguire poi le
seguenti operazioni:
La cuscinatura non va tolta, il movimento si esegue in modo
semiautomatico con una semplice operazione.
1.Basta una piccola pressione sulla spalliera verso il basso,
la rete si solleva e si posiziona nel modo giusto portando
con se i cuscini di seduta che scompaiono sotto il materasso.
Avvertenze
• Per chiudere il letto, ripetere al contrario l’operazione
descritta.
a)
b)
c)
d)
31
Rete a “tre pieghe” ortopedica o elettrosaldata.
Per aprire la rete a tre pieghe effettuare le seguenti operazioni:
1.Rimuovere i cuscini (ove necessario);
2.Alzare la rete prendendo la maniglia centrale e tirare verso l’esterno;
3. Prendere la prima barra di sostegno dal centro, sollevarla
e portarla fino al pavimento;
4. Ripetere l’operazione per la seconda barra di sostegno;
5. Per chiudere il letto, è sufficiente invertire l’ordine delle
operazioni.
Per la rete a tre pieghe viene utilizzato un materasso in poliuretano espanso rivestito in cotone.
Avvertenze
• Per la pulizia delle parti metalliche usare solo un panno asciutto.
• Evitare che i bambini giochino con il meccanismo.
• Prima di richiudere la rete disfare il letto.
• Evitare di sedersi sull’estremità della rete.
• Non sedersi o salire in piedi sull’estremità della rete.
32
I MODELLI FUNZIONALI E COMPONIBILI.
Alcuni nostri modelli sono anche componibili e cioè permettono di comporre a piacere il divano a seconda di ogni personale
esigenza di spazio.
Il collegamento tra gli elementi è realizzato mediante agganci
metallici a congiunzione.
Istruzioni per il collegamento degli agganci a congiunzione
Il sistema di collegamento si avvale di un aggancio metallico,
montato su un elemento, che deve inserirsi nell’aggancio metallico dell’altro elemento.
Telina
Rivestimento
33
Montaggio
Allineare i pezzi, assicurandosi che gli agganci si infilino negli elementi di aggancio dell’elemento sinistro ed accostarli
fino a bloccarli.
Nell’ordine:
• Modulo 2 ad incastro su modulo1
• Modulo 3 ad incastro su modulo 2
• Modulo 4 ad incastro su modulo 3
Smontaggio
Sollevare ed allontanare l’elemento per permettere al gancio
di sfilarsi dall’alloggiamento.
Avvertenze
• Non sollevare e spostare il divano quando è ancora
agganciato.
• Ogni singolo pezzo componente una versione com-
pleta, salvo diversamente specificato, è rivestito nei
laterali con telina e non con il rivestimento che ricopre
il divano.
• Quando si uniscono delle versioni fisse e reclinabili si
potrà notare nella parte posteriore/inferiore del divano
componibile un disallineamento sino a circa tre centimetri.
34
DIVANI CON MECCANISMO POGGIATESTA.
Alcuni nostri modelli montano il meccanismo poggiatesta, che sollevandolo permette di appoggiare la testa dando maggiore comfort.
Avvertenze:
Non sollevare solo da uno dei due lati.
Sollevare impugnado con entrambe le mani
i due estremi, destro e sinistro del poggiatesta.
Sollevare dal centro del poggiatesta.
Non appoggiarsi e non sedersi sul poggiatesta.
Può accadere che il meccanismo del poggiatesta sembra che non funzioni correttamente,
in quanto provando ad alzarlo, “non mantiene” le posizioni intermedie.
Non preoccupatevi, il meccanismo non è
bloccato. Molto più semplicemente è successo che non è stato raggiunto correttamente il “finecorsa” del movimento. Infatti ciò
accade quando abbassandolo, non è stata
raggiunta esattamente la posizione “zero”. In
questo caso basterà fare una leggera pressione su tutta la superficie del poggiatesta,
quando questo è in posizione bassa, come
mostrato in figura, e il poggiatesta tornerà a
fermarsi anche nelle posizioni intermedie.
35
36
37
Our compliments for purchasing a quality “SEDUTA
D’ARTE” sofa. An exclusive product, with innovative
design. Created with quality materials, our product has
been made with the maximum care by experienced hands.
In this manual you can find the technical features of the
product and all the necessary information for proper
use and correct maintenance.
38
HOW WE PRODUCE OUR SOFAS
All branded Seduta d’Arte products are made exclusively in our plants, thus having full control of every stage of manufacture: from the tanning of raw hides to the
frame and fillings; from the cutting and sewing, assembling, to the packaging and the final stage of shipping.
All this takes place in the respect of environment and
the safety of workplace, in compliance with the most
rigorous national and community regulations.
Each product is hand made, with handcrafted care and
passion, for this reason all measurements specified in
the technical specification sheets of these upholstered
furniture are to be considered indicative and therefore
claim issues relating to these cannot be taken into account. During production stages the use of computer
technology enables “Seduta d’Arte” to manage the logistics perspective of “just in time” through a system
that is able, in real time to monitor each phase of the
processing cycle and verify the quality and timeliness of
delivery. Before reaching your home, it is possible that
our sofa has had to make a long journey, thus affecting
the appearance; once unpacked, therefore, you may notice a few hollows and irregular creases. Do not worry
as they are due to transport. The signs disappear after
a few days of use. To speed up the process of sorting
this out just fluff up the cushions and smooth up the covering with your hands modeling it. The warranty of our
sofas will be considered “Not Valid” in the case of products being disassembled, modified or repaired carried
out by anyone not authorized by our company “Seduta
d’Arte”. The warranty will also not be valid even in the
case of using a process of maintenance and cleaning
of the leather (or any other covering) not expressly stated in this product handbook, or otherwise unsuitable,
made by the owner of the sofa or any person authorized
by him.
In this booklet the main care and maintenance are to
be taken; damages that can derive From the failure of
observing these rules will not be considered as manufacturing faults attributable to Seduta d’Arte.
39
FRAMES
The frames we use are made of high-quality timber which
ensures the strength as well as the resistance of our sofas
to impact stress.
The materials chosen are tested with the intention to control
their resistance in all weather conditions and over time.
The frame structure is equipped with high-resistance webbing that keeps its characteristic elasticity over time, thus
ensuring the utmost comfort along with the fillings.
Warnings
To keep the frame of your sofa intact, please follow the
instructions below:
• do not sit on the backrest and armrests;
• do not hit the sofa violently;
• do not push or drag the sofa when moving it.
40
UPHOLSTERY
As for both the structure and aesthetic line of each model, we use three
different types of upholstery:
• Polyurethane foam
• Polyester fibre
• Feathers
Covering
Linings
Wadding
Polyurethane
Masonite
Polyester Fibres Or Polyurethane
Elastic Webbing
For Sofas
Wooden Frame
The blocks of polyurethane foam we use have different densities. The
density of each block is guaranteed by a certificate of chemical use.
The polyester fibre is made up of thin polyester filaments which are
processed in such a way as to ensure beautiful softness.
The flakes and fluffy flakes are used for filling backrests and armrests of
the sofa where the most delicate parts of the body are.
The goose feathers, sterilized and accurately controlled are a valuable
material for its remarkable softness. They are used in the padding of
back cushions to enhance the comfort of the product. They are antistatic and medically safe thanks to the innovative processes of washing
and sterilization. The goose feathers can be combined with an appropriate polyester fiber described above or a polyurethane foam insert
in order to find the best combination of comfort of all these materials.
41
Information On The New Sofa
Our sofas do not need specific maintenance other than ordinary care. If after removing the packaging you see some
hollows or irregular creases, do not worry, because they are
due to transport. All signs disappear after a few days of use.
To speed up the process of sorting this out just fluff up the
cushions and smooth up the covering with your hands modeling it.
BEFORE MOULDING
AFTER MOULDING
It is normal that the filling of feather cushions always show
folds and appear uneven.
The cushions should be regularly plumped by hand in order
to evenly reconstruct the filling and eliminate folds.
Warnings
•During the first three months, polyurethane foam
upholstery often softens and spreads out. It is normal
that the first time a person sits down on the sofa, the
micro-cells of the polyurethane foam are broken up
and will consequently soften up slightly.
•Furthermore, it is normal for the suppleness of a
polyurethane foam seat/backrest to be different from
other parts of the sofa due to the different use they are
used for.
These differences will disappear after the first months
of regular use.
42
• After the natural settling of the filling, some slight folds
may appear in the covering: this is normal and depends on the stretching of the covering during the first
months of regular use.
BEFORE USING
AFTER USING
FEET
Since the feet are an important part of the sofa they are
carefully designed and manufactured using appropriate materials to ensure a good aesthetic appearance.
In some models, feet are assembled during the production
phase; in other models, however, are packaged with the
sofa and assembled only after delivery.
Warnings
• Do not open the protecting cellophane that wraps the
sofa with sharp tools that may damage the coverings.
43
• Lay the cellophane on the floor and turn the sofa on its
back without grabbing the cushions.
• Screw feet on hand tight. To right the sofa, lift and turn
it without pulling on the feet, to avoid damaging them.
• Wooden feet can vary slightly in tone and grain: in keeping with natural wood characteristics.
• Avoid moving or lifting the sofa from the arms: handling
must be carried out only by lifting it from the bottom.
COVERINGS
For our sofas we use the following coverings:
• Leather
• Micro fibre
• Fabric
44
Maintenance of Leather Covering
Leather is a resistant high quality covering, a valuable and
long-lasting material whose aesthetic qualities improve over
the years.
Thanks to its elasticity and to its transpiration characteristics, it adapts to body temperature, feeling warm in the
winter and nice and cool in the summer. Leathers are selected in their places of origin and processed only in the
best Italian tanneries.
The surface of each hide shows natural marks revealing its
authenticity: scars, scratches, wrinkles, insect bites, veins,
colour differences and grain.
On leather sofas, over time, will appear wrinkles or double
folds: they are due to the natural characteristics of “genuine
leather”.
45
46
Low Flower
Closed Scar
Grain Difference
Tone Differences
Insect Bites
Wrinkles
Stretch Marks
Veins
“EASY LIVING” LEATHERS (pigmented)
This soft resistant leather is coated with a light film so as to
protect the surface from stains without altering its beauty.
These are suitable leathers to furnish the more busy environments of the house.
CLEANING PROTECTED LEATHER
• Dust the sofa periodically with a soft, dry and clean cloth.
• To remove stains of drinks, coffee, tea, milk, chocolate, oil,
fats, cosmetics, make-up etc quickly dab the surface with
a cloth or absorbent paper.
Then, dampen a clean cloth with a water solution or neutral soap and gently rub the stain from outer inwards. Do
not drench the leather surface and dry it immediately with
a clean cloth. (do not expose it to direct sunlight or use a
hairdryer).
Attention! Only water and neutral soap must be used for
cleaning: other substances may significantly damage
the leather by causing cracks and discolouring.
47
Warnings
• Keep the sofa at least 50 cm away from heaters or radiators.
• Exposure to sunlight or to powerful lamps cause fading.
IIIIIIIIII
IIII
I
IIIIIIIIIII
IIIIIIIIIIIII
I II
I III
IIIIIIIIIIII
IIII
• Each leather sofa is unique, therefore, if you buy a new sofa having
the same covering as the one you already have, some slight differences in shade may be noticeable.
• Do not leave newspapers or magazines on the suite. The ink of the
paper may be transferred to the leather of the sofa.
• Avoid the use of clothing and materials that can lose its color
(especially jeans) can be transferred to the leather of the sofa.
• Avoid the use of clothing and materials that have studs or metal
parts, they can damage the leather.
• Leather is a material that needs micro humidity. From time to time,
on rainy days, open the windows of the room where the sofas are.
• Use all sitting places of the sofas and chairs in the same way in
order to have a balance in wear.
48
“NATURAL LIVING” LEATHERS (semi anilines and anilines)
This soft velvety leather is processed without changing the
original characteristics of the skin.
Grain differences, scars, wrinkles, veins, variations in colour
or any other marks testify the authenticity and quality of the
leather.
CLEANING NATURAL LEATHER
• Dust the sofa periodically with a soft, dry and non abrasive
cloth.
• For dry stains: gently wipe the surface with a dry cloth.
Excessive rubbing may cause damage to the cover.
• For stains from water-soluble materials such as soft drinks, coffee, tea, milk, jam: quickly remove the liquid from
the surface with a non-abrasive white cloth or absorbent paper.
Afterwards dampen a cloth with some water and gently
rub the stain from outer inwards.
Do not drench the surface of the skin and immediately dry
it with a clean cloth (do not expose it to direct sunlight or
use a hair dryer).
• For greasy stains such as oil, ketchup, mayonnaise, chocolate: gently remove the excess from the surface with
some absorbent paper, do not press so to prevent dirt
from entering into the pores of the leather.
Gently rub the stain with a clean cloth using water and
neutral soap from outer inwards, and immediately dry it
with a clean cloth.
49
Warnings
• Keep your sofa away from heaters or radiators.
•To keep maintain the colour of the covering, avoid direct exposure to the sunlight or to powerful lamps .
•Each leather sofa is unique, therefore if you buy a new
sofa having the same covering as the one in your possession, some slight tone differences may be noticeable.
•For a deepener cleaning we recommend you consult
specialist companies but we cannot accept any claim
for poor results due to processes of maintenance and
cleaning not suitable to the type of leather.
•Dust the sofa periodically with a soft, dry and non
abrasive cloth.
• For dry stains: gently wipe the surface with a dry cloth.
Excessive rubbing may cause damage to the cover.
• For stains from water-soluble materials such as soft
drinks, coffee, tea, milk, jam: quickly remove the liquid
from the surface with a non-abrasive white cloth or absorbent paper. Afterwards dampen a cloth with some
water and gently rub the stain from outer inwards.
Do not drench the surface of the skin and immediately dry it with a clean cloth (do not expose it to direct
sunlight or use a hair dryer).
• For greasy stains such as oil, ketchup, mayonnaise,
chocolate: gently remove the excess from the surface
with some absorbent paper, do not press so to prevent
dirt from entering into the pores of the leather.
• Gently rub the stain with a clean cloth using water and
neutral soap from outer inwards, and immediately dry
it with a clean cloth.
50
MICRO-FIBRE
It is an innovative and modern covering, pleasant to the
touch and easy to clean.
Microfibre is processed with a water-repellent substance
providing molecular protection around the fibres, making it
resistant to greasy stains and liquids.
Cleaning and care of micro-fibre
To preserve its natural beauty, use a soft bristled brush. Microfibre is very easy to clean, just follow some simple
suggestions.
•Fruit juice, jam, jelly, syrup, ketchup: use lukewarm water
and rinse by dabbing with some clean water.
•Blood, egg, urine: use cold water. Avoid warm water as
it makes these substances coagulate. Rinse by dabbing
with cold water.
•Liquors, alcoholic beverage, wine, beer, coke and tea: use
lukewarm water, if the colour mark remains, treat it with
lemon juice and then rinse it well.
•Ink, cocoa, chocolate, cakes with cream or chocolate, ice
cream and mustard: use lukewarm water, rinse by dabbing with clean water.
•Vinegar, hair gel, tomato sauce, coffee with sugar: use lemon juice and then wipe with lukewarm water, rinse by
dabbing with cold water.
•Cosmetics, perfume, shoe polish, oil and grease in general, grass stains and felt tips: rub with ethyl alcohol, then
rinse with clean water. For grass stains and felt tips, which
are quite difficult to remove, especially on light colours,
it is necessary to react as quickly as possible in order to
prevent them from becoming too dry.
•Chewing-gum and wax: put a plastic bag full of ice on
the stain; when the material becomes hard remove the
pieces, then treat with ethyl alcohol.
51
•Resistant stains: repeat the above described treatments
as often as necessary.
Even stains that are not water soluble often require to be
treated afterwards with water.
•Old stains of unknown origin: first of all treat them with
lukewarm water, then rinse by dabbing them with cold
water. If the stain begins to dissolve with water, repeat the
treatment as often as necessary. Let it dry and, if necessary treat it with ethyl alcohol.
FABRIC
We choose the best fabrics for you, resistant to tearing and
to light, so as to guarantee a flawless covering over time.
According to the type of fabric, our coverings require two
different kinds of cleaning:
• Dry cleaning
• Washing
Greasy stains can be removed by dabbing the surface gently with absorbent paper and finally by dry cleaning using
perchloroethylene.
Dry cleaning must be carried out with organic detergents.
Dry cleaning of removable covering includes cleaning, rinsing and drying; after rinsing, iron the covering according to
the instructions written on the label.
For coverings that can be dry cleaned, it is necessary to
react by immediately dabbing with a soft, clean and colour
free cloth.
Warnings
• For dry cleaning, we suggest to use specialized laundry.
• Before dry cleaning, try the product on a hidden part
of the fabric.
52
Washing is only possible when the fabric is marked ‘washable’.
Washing of removable coverings includes cleaning, rinsing
and drying and after washing it is essential to iron the covering according to the instructions on the label.
It is recommended to periodically clean this kind of covering
with a soft-bristled brush.
In case of dirty stains, we recommend to clean by gently
rubbing the surface from outer inwards.
If the use of solvents is required, pour them onto a cloth
rather than directly on the stain and gently rub the surface.
Warnings
• Always check the maximum temperature indicated on
the sofa label for washing.
• Try the product on a hidden part of the covering which
is not visible to make sure that it does not damage the
fabric.
53
Fabric Cleaning
•Liquor: dab the surface with a non abrasive cloth or with
absorbent paper and remove the stain. If the stain persists, only clean it with colourless neutral soap foam.
Then remove the stain only with denatured alcohol diluted
15% with water. Immediately dry the wet area with a hairdryer from outwards in.
•Drinks/wine: dab the surface with a non abrasive white
cloth or with absorbent paper. If the stain persists, use
only 50% diluted vinegar. Only clean with colourless neutral soap foam and finally wipe the remaining foam off with
a damp cloth.
Dry immediately with a hairdryer, blowing from outer
inwards along the wet area.
•Butter, jam, chocolate, mustard, ketchup, fruit juice, coffee, tea: dab the surface with a non abrasive white cloth or
with absorbent paper and remove the stain.
If the stain persists, only clean it with colourless neutral
soap foam.
Finally, dab the remaining foam off with a damp cloth, using
a hairdryer from outwards in of the wet area.
54
CODE AND MATERIAL DESCRIPTIONS
Code
Description
CO
COTTON
CA
CS
JU
LI
LY
ME
PA
PC
PL
PP
SE
VI
WA
WB
WG
WK
WL
WM
WO
WP
WS
YK
WV
HEMP
FINE GOAT
JUTA
LINEN
LYCRA
METAL
POLYAMIDE
ACRYLIC
POLYESTER
POLYPROPYLENE
SILK
VISCOSE
ANGORA
BEAVER
VICUNA
CAMEL
LAMA
MOHAIR
WOOL
ALPACA
CASHMIRE
YAK
VIRGIN WOOL
55
International symbol table maintenance and cleaning
Gentle Hand Washing
Dry And Professional Cleaning
30° Washing (Delicates)
Do Not Dry Clean
60° Washing
Dry Clean With Trichlorethylene
Do Not Wash
Do Not Wash With Hypochlorite
Light Ironing Max. 100°
Wash With Hypochlorite
Medium Ironing Max. 150°
Dry Cleaning Needed
Hard Ironing Max. 200°
It Can Be Tumble-Dried
Iron With Steam
Do Not Tumble-Dry
Do Not Wring
Do Not Iron With Steam
Hang To Dry When Wet
Do Not Iron
Possible Colour Changes
On Printed Fabrics
Iron Inside Out
Fabric Remains Wavy
Even After Ironing
After Ironing 100%
Cotton Fabrics It Is Normal
For A Slightly Wavy Appearance
56
REMOVABILITY
Product Features
The Seduta d’Arte sofas are made with removable coverings so you can easily remove the cover in order to wash it.
Our attention to customer and service excellence is confirmed, even for this collection by many small details:
• The fabrics have been carefully chosen so after repeated
washing they maintain their technical and aesthetic characteristics.
• The cushions and carcass of the sofa can be covered with
linings that make more easier the dressing of the outside
covering and allows a comfortable fixing with velcro and
zippers.
Instructions to undress the sofa
Step 1
If your model has a metal bar or other decoration accessories, remove or unhook them.
Step 2
Remove all cushions, open the zippers and undress the
sofa.
57
Step 3
Open the zipper situated behind the back, if there is any.
In the case the sofa is supplied with legs fitted flush external, they must be taken away to remove the covering.
Step 4
Remove the Velcro and turn up the lining around the external perimeter of the sofa starting from the corners and protect it with the velcro tape. Turn carefully the covering right
side up in order to not rip up the stitching. Repeat the same
to the inner perimeter of the covering.
Step 5
Starting corners carefully and alternatively pull the cover for
a few centimeters from one side to the other of the sofa. Then take away the covering from the sofa.
58
Warnings
- Do not remove the protective tape: it needs to stay in place
during washing.
Only when the sofa is redressed then it can be carefully removed and stored as it is needed for future washes.
Instructions to redress the sofa
Step 1
To start the assembly of the covering, put it on the back and
arms of the sofa, after opening the zippers if there are any;
adjust hinges may be present, adjust it in order to align the
stitching with the edge of the sofa. Spread it starting from
the back of the
sofa to the front in order to cover it completely. Close the
zipper.
Step 2
Place the cover with the bottom-back-arm angle, remove
the tape and fix the velcro.
Place the cover on the front of the seat in order to join it together with the joining of the lining between the two covers.
59
Step 3
Spread the covering the outside of the sofa, remove the
tape and fix the velcro along the whole perimeter of the sofa
turning it underneath.
Step 4
If the foot is positioned as in Figure A, disassemble it and
insert the cover properly.
Cover the cushions, taking care of adjusting the padding in
the right direction. The stitching on the lining of the cushion
must be aligned with the zipper of the covering (Fig. B).
Make sure the cursor is inserted in the correct place (Fig. C).
In case you are covering a sofa with more than two cushions
place first the side ones and then the central ones.
60
RELAX FUNCTIONS
Relax armchairs and sofas are equipped with a manual system.
Some of our models are provided with a reclining mechanism that you change the tilt of the backrest, change the position of the seat and bring your legs to a horizontal position.
The armchairs and sofas fitted with the “ZERO WALL” sliding system (spaced a few inches from the wall) can be
reclined even if they are near the wall; in fact, while opening them, a special mechanism allows the seat and the
backrest to move forward.
For this reason you may notice slight differences in alignment behind the back.
In addition to the reclining system, swivelling armchairs are
equipped with a rocking system that makes the armchair
rotate around its vertical axis.
61
INSTRUCTIONS FOR USE
Reclining systems change according to different models.
Recliner with handle
The mechanism is activated by using the handle located on
the outside of the arm or a rod placed between the seat
cushion and the armrest.
By pulling the handle, the footrest immediately opens. Lean
your body on the backrest and the armchair will completely
recline.
To return to the upright position, push your body forward
and move the footrest to the starting position with your legs.
Armchairs and sofas fitted with the “ZERO WALL” sliding
system (spaced a few inches from the wall) can be reclined
even if they are near the wall; in fact, while opening them,
a special mechanism allows the seat and the backrest to
move forward.
OPEN
CLOSE
INNER TIE ROD
62
SWIVEL ARMCHAIR
This function, where present, does not require any device to
be activated. To rotate the chair just rest your feet on the floor
and move to the right or to the left. This function is only available on armchairs.
ROCKING ARMCHAIR
This function is activated by moving the lever situated
behind the armchair towards the left or it is automatically
activated by moving the handle to open the reclining mechanism. Stop the rocking mechanism by gently moving
the lever situated behind the armchair to the right and the
backrest at the same time so that the blocking mechanism
fits in properly.
Warnings
• Clean the metallic parts only with a damp cloth.
• Do not allow children to play with the mechanism.
• Start the mechanism only if you are sitting in the correct
position.
• Should the mechanism creak, oil the springs, hinges as
well as all joints with any common lubricant spray available on the market.
• Do not sit on the front edge of the rocking armchair
since it may touch the floor and break.
• Do not sit on the footboard. Excessive pressure can
bend the levers damaging the mechanism.
• Do not sit on the armrests. The arms are connected
to mechanisms. Excessive pressure on the arms could
lead to a deformed mechanism.
• Do not lean on the back when the mechanism is open.
Even in this case you could cause permanent damage
to the levers.
• When using relax mechanism the rocking function must
be blocked otherwise it becomes very difficult to close
the mechanics.
63
ELECTRICAL ARMCHAIRS AND SOFAS
Remote details
Push-button details
Particular
Internal Button
Some of our models are equipped with an electric mechanism which allows you to change the inclination of the
backrest, to lift the footrest and change the position of the
seat.
The armchairs and sofas fitted with the “ZERO WALL” sliding system (spaced a few inches from the wall) can be
reclined even if they are near the wall; in fact, while opening them, a special mechanism allows the seat and the
backrest to move forward.
64
Warnings
• Do not use detergents but only a damp cloth to clean
the metallic parts of the mechanism.
• Do not allow children to play with the mechanism.
• Start the mechanism only if you sitting in the correct
position.
• Do not touch the metallic parts.
• Do not use the electric motor during opening and closing for more than one minute continuously. This activity may block the engine due to overheating.
To unlock the engine, cool the system for 5 minutes.
• Power surges may block the electric motor. In this case
you must remove the plug, wait a few minutes then replace into the socket.
• Before cleaning or other interventions make sure the
plug has been removed.
• Do not sit on footboards. Excessive pressure may bend
the levers damaging the mechanism.
• Do not sit on the armrests. The arms are connected
to mechanisms. Excessive pressure on the arms could
lead to a deformation of the mechanism.
• Do not lean on the back when the mechanism is open.
Even in this case you could produce permanent damage to the levers.
SOFA BEDS
Some models are equipped with comfortable beds.
There are types of bedsprings: the “twofold” mesh, the
“twofold” convertible mesh and the “three fold” wooden
slats or mesh network ready for bed.
65
Instructions for Use
“Two folds” mesh
Before using the sofa bed, remove the plastic tab that locks
the bedsprings.
To open the “ twofold” bedsprings use the following instructions:
1. Remove the cushions from the seat (if necessary);
2. Raise the bedsprings by taking the middle handle and pull outward, resting the supporting bar on the floor;
3. Take the second supporting bar, lift it and pull down to the floor;
4. To close the bed, just reverse the order of operations.
For the “twofold” mesh bedsprings we use a spring mattress covered in poly
66
Instructions for use
“Two fold” convertible mesh
If the sofa is bed equipped, please follow our recommendations for proper opening and closing of the bedsprings.
We recommend the use of the mechanism to adults only.
To open the “twofold” convertible use the following instructions:
Operation is made with a simple movement, he cushions
should not be removed, the movement is made in a semiautomatic way with a simple operation.
1. Just a little pressure on the back down and the bedspring
is lifted and positioned correctly, bringing with it the seat
cushions that disappear under the mattress.
WARNINGS
• To close the bed, reverse the operation described.
a)
b)
c)
d)
67
Wooden slats or Mesh “Threefold” Bedsprings
To open the mesh, follow the instructions below:
1. Remove the cushions from the seat (if necessary);
2. Raise the bedsprings by taking the middle handle and
pull outward;
3. Take the second supporting bar, lift it and pull it down to
the floor;
4. Repeat the same operation for the second supporting
bar;
5. To close the bed, just reverse the order of operations.
For the “threefold” bedsprings we use a polyurethane
foam mattress with cotton covering.
Warnings
• To clean the metal parts using only a dry cloth.
• Do not let children close the bedsprings.
• Avoid sitting on the front edge of the bedsprings.
• Do not sit or to climb standing on the extremities of
the bedspring.
68
FUNCTIONAL AND MODULAR MODELS
Some of our models are also modular and allow to compose
the sofa as you like according to each personal space requirements.
The connection between the elements is achieved by metal
hooks conjunction
Instructions for connecting hooks
The connection system uses a metal hook, mounted on an
element that must fit in the coupling of another metallic part.
Lining
Covering
69
Mounting
Align the pieces, making sure the hooks fit into the coupling
elements of the left item and put them together to lock.
In order:
• Unit 2 joints on module 1
• Unit 3 joints on module 2
• Unit 4 joints on module 3
Disassembling:
Lift and remove the item to allow the hook to slip off from
the bay.
Warnings
• Do not lift or move the sofa until all joints have been
disassembled.
• Every single piece of the complete version unless
otherwise noted is covered with lining on the side and
not with the sofa covering.
• When stationary and reclining models are joined, a difference in level of about 3-cm may be noticed in the
back/lower part of the sofa unit.
70
SOFA MECHANISM WITH HEADREST
Some of our models are equipped with headrests which lifted up allow
you to rest your head giving greater comfort.
Warnings:
Do not raise just one of the two sides.
Lift with both hands gripping the two outsides, right and left of the headrest.
Lift the centre of the headrest.
Do not lean and not sit on the headrest
It may happen that the mechanism of the headrest seems to not work correctly, as, trying
to lift it up, it “does not maintain” the positions in between.
Do not worry, the mechanism is not locked. Simply, it happened that it did not properly
reach the “final limit” of the movement. In
fact, this happens when lowering it, it did not
exactly reach the position “zero”. In this case,
you just need to make a little pressure on the
entire surface of the headrest, while it is in its
low position, as shown in the picture, and the
headrest and will return and get locked in the
positions in between.
71
72
Seduta d’Arte srl
Via dell’Orzo, 32 - 70022 Altamura (Bari) - Italy
Tel. +39 080 3149600 - Fax +39 080 3160353
[email protected] - sedutadarte.it