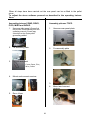
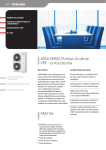
1
RIKA FUNK RAUMSENSOR
Bedienungs- und Montageanleitung
RIKA RADIO ROOM TEMPERATURE
SENSOR
Operating and assembly instructions
CAPTEUR RADIO DE TEMPÉRATURE
D´AMBIANCE RIKA
Notice de fonctionnement et de montage
SENSORE RADIO DI TEMPERATURA
AMBIENTE RIKA
Manuale
1
Seite 1 von 68
Deutsch
Seite 2
English
Page 19
Français
Page 36
Italiano
Pagina 53
Inhaltsverzeichnis
Montageanleitung…………………………………………………………………. 3
RIKA Funk-Raumtemperaturfühler
Öffnen und Erneuern der Batterien (Sender) .................................................. 6
Öffnen (Empfänger) ....................................................................................... 6
Erklärung und Funktion (Sender) ................................................................... 7
Erklärung und Funktion (Empfänger).............................................................. 8
Anschließen am Ofen..................................................................................... 9
Comfortfunktionen mit installiertem RIKA-Raumsensor
für Pelletöfen mit Tastendisplay. ....................................................................... 10
Einstellungen .................................................................................................... 11
- Wochenschaltzeit....................................................................................... 12
- Tagesschaltzeit.......................................................................................... 13
Bedienung des Ofens im gewählten Heizbetrieb................................................ 14
„HEAT“ Modus ............................................................................................. 14
„ROOM“ Modus ........................................................................................... 15
„AUTO“ Modus............................................................................................. 16
Für Pelletöfen mit Touchdisplay. ....................................................................... 18
ACHTUNG:
Das Design (die Optik) des Funkraumsensors kann Abweichungen zu den in der
Anleitung abgebildeten Teilen aufweisen.
Technische und optische Änderungen sowie Satz- und Druckfehler vorbehalten.
2
Montage des RIKA Funkraumtemperaturfühlers am Beispiel Pelletofen MEMO
(Empfänger) unter der Rückwand.
Die Montage des Empfängers an den Öfen COMO, PICO, REVO, MIRO, KAPO,
ROCO u. INDUO unter- scheidet sich von den Abbildungen aufgrund der
unterschiedlichen Aufnahmepositio- nen im Ofen. Die Bilder dazu finden Sie auf Seite
5.
Achtung:
Ihr Ofen muss ausgeschaltet und abgekühlt sein, ehe Tätigkeiten vorgenommen
werden.
Entsprechende Außerbetriebnahme des Gerätes aus den jeweiligen Betriebszuständen entnehmen Sie bitte aus Kapitel „Bedienung“.
Die unten beschriebenen Tätigkeiten nur dann vornehmen, wenn der Netzstecker des
Ofens aus der Steckdose gezogen ist.
Vorbereitung:
Zuerst wird die Rückwand des Pelletofen abgehoben und auf eine weiche Unterlage
(Decke usw.) gelegt.
Unterlage
Empfänger
D-Sub Stecker
Bei der Demontage der Rückwand auf die Kabel achten!
Als nächster Schritt die Rückwand für die Montage des Empfängers vorbereiten:
Punkt 1.
Bei dem untersten rechteckigen Ausschnitt alle Stege mit
einem Eisensägeblatt durchtrennen.
3
Punkt 2.
Mit einer kleinen Schlichtfeile die Stegreste vorsichtig
abfeilen.
Punkt 3.
Anschließend wird das mitgelieferte Montageblech an den
dafür vorgesehenen Stehbolzen mit vier Beilagscheiben
und Muttern M4 befestigt.
Es gibt hier unterschiedliche Befestigungsvarianten. Anstatt der Stehbolzen kann auch eine Montage mit SKSchraube und Einpressmutter vorkommen.
Punkt 4.
Nun wird das Kabel vom FunkraumtemperaturfühlerEmpfänger mit dem 15-poligen Stecker von innen durch
die Öffnung nach außen geführt.
Punkt 5.
Der Empfänger wird wie abgebildet in der Halterung eingeklemmt.
Punkt 6.
Nun wird der Stecker an der am oberen Ende befindlichen
D-Sub Kupplung angeschlossen und mit einem
Schraubendreher gesichert.
4
Wenn alle Punkte ausgeführt wurden, kann die Rückwand wieder am Pelletofen eingehängt werden.
Zum Einstellen der Ofensoftware, gehen Sie wie in der Bedienungsanleitung
beschrieben vor.
Montagebilder TOPO
Montagebilder COMO, PICO, REVO,
MIRO, KAPO, ROCO u. INDUO
1. Seitenwand (displayseitig) abschrauben
1.
Rückwand-Deckel abschrauben
2.
Montageblech befestigen
(Die Bilder zur Demontage der Seitenverkleidung
entnehmen Sie bitte der jeweiligen Bienungsanleitung.)
Bitte auf Display- und Erdungskabel achten!
2. Montageblech befestigen
3.
Rückwand ausschneiden
nur bei Type:
Como, Revo, Pico
Miro u. Induo
erforderlich!
4.
5.
Empfänger montieren
und anschließen
3.
4.
nur für Type Roco u.
Kapo
5
Empfänger montieren
und anschließen
Öffnen und Erneuern der Batterien
im RIKA Funk-Raumtemperaturfühler (Sender)
Öffnen des RIKA FunkRaumtemperaturfühler
(Empfänger)
Öffnen:
Öffnen:
Mit einem kleinen Schraubendreher
oder mit einem dafür geeigneten
Werkzeug die beiden Kunststoffnasen
nach innen drücken und die zwei
Hälften vorsichtig auseinander ziehen.
Die beiden Teile des Empfängers
vorsichtig auseinander ziehen.
Erneuern der Batterien:
Es sollten unbedingt Long Life Batterien verwendet werden! (Panasonic
Industrial Alkaline oder Varta Alkali
Mangan)
Achten Sie beim Einsetzen der neuen
Batterien auf die Übereinstimmung
des Plus und Minuspols.
Das Einstellen des DIP- Schalters ist
auf Seite 8 beschrieben.
6
Erklärung und Funktion des RIKA Funk-Raumtemperaturfühler (Sender)
Erklärung:
DIP-Schalter:
Die kleinen DIP-Schalter von 1-3
dienen zur Festlegung der Adressen.
Die Position der Schalter 1-3 am
Sender muss mit der Position der
Schalter 1-3 am Empfänger übereinstimmen. Sind zwei Sender mit der
gleichen Adresse im Empfangsbereich, blinkt die LED Anzeige am
Empfänger abwechselnd grün und rot.
Nach Beheben des Adressenfehlers
geht die Anzeige in den Normalmodus
über. (LED leuchtet grün.)
DIP-Schalter Nr. 4 erhöht die Senderleistung.
- Stellung OFF 1 mW.
- Stellung ON 10 mW.
Die Stellung On für DIP-Schalter
Nr. 4 verwendet man, wenn die
Entfernung vom Sender zum Empfänger zu groß ist, oder ein Hindernis (z.B. eine Wand) das Empfangsignal beeinflusst und die Leistung von 1 mW nicht mehr ausreicht.
7
Erklärung und Funktion des RIKA Funk-Raumtemperaturfühler (Empfänger)
löscht. Bei Öfen mit Touch-Display wird
die Fehlermeldung mit der „EnterTaste“quittiert.
Wird der Empfänger mit dem Ofen
verbunden, (im stromfreien Zustand)
so blinkt die LED Anzeige nach dem
Anschließen ans Stromnetz grün.
Der Ofen kann nun wieder in
Betrieb genommen werden. Tritt die
Fehlermeldung sofort nach dem Quittieren erneut auf, ist entweder die
Batterie im Sendeteil leer oder der
Funkraumsensor defekt.
Die Standardeinstellung kann beibehalten werden. Die DIP-Schalter
müssen nur in Sonderfällen modifiziert werden.
Spätestens nach 35 Sekunden muss
die Verbindung erkannt werden. Falls
nach einer Minute noch immer keine
Verbindung hergestellt ist, muss ein
Fehler vorliegen:
Falsche
DIP-Schalter-Einstellung,
leere Batterie, zu großer Abstand
(Sender – Empfänger) oder stark
störende Umgebung.
Achtung !
DIP-Schalter Nr. 4 zur Erhöhung der
Senderleistung in ON Position nur am
Sender aktiv.
DIP- Schalter Nr. 4 am Empfänger auf
ON dient zur Testausgabe, (Fix 25°C.)
und muss für einen geregelten Heizbetrieb auf OFF Position zurückgestellt werden.
Achtung:
Durch lokale Funknetze (z.B. WLAN)
können die Frequenzbereiche überlappen und zu Störungen auch während des Heizbetriebes führen.
Wird die Übertragung zwischen Sender und Empfänger über eine längere
Zeit gestört und kein Signal empfangen, so wird diese mit „ROOM SENSOR
SIGNAL
LOST”
bzw.
“RAUMFÜHLER
KEINE
VERBINDUNG” – bei Geräten mit
TouchDisplay, angezeigt und der
Ofen geht in den Abschalt- Zustand.
Mit der ON/OFF Taste (solange
gedrückt halten bis die Anzeige
„ROOM SENSOR SIGNAL LOST“
erlischt) wird die Fehlermeldung bei
Öfen
mit
TastenDisplay
ge-
DIP- Schalter 1-3 Adresse, muss mit
DIP- Schalter 1-3 am Sender übereinstimmen.
Die Farbe der LED Anzeige hängt von
der Batteriespannung ab:
Voll .................... grün
Fast leer ............ orange
Leer ................... rot
8
Anschließen des RIKA Funk-Raumtemperaturfühler am Ofen
Stecken Sie den Empfängerteil des
RIKA
Funk-Raumtemperaturfühlers
an der dafür vorgesehenen D-Sub
Kupplung an.
(Anschließen des RIKA Raumtemperaturfühlers nur im stromlosen Zustand des Ofens.)
Den D-Sub Stecker mit einem passenden Schraubendreher befestigen.
Der Ofen kann nun ans Netz angeschlossen werden.
9
Pelletöfen mit Tastendisplay
Comfortfunktionen mit installiertem RIKA-Raumsensor
Wechseln Sie zuerst von EASY auf
HEAT. Drücken Sie dazu die Menütaste
solange, bis die Anzeige HEAT am
Display erscheint.
nicht mehr Sie selbst bestimmen, dies
übernimmt abhängig von der im Raum
vorherrschenden Temperatur das RIKARaumthermostat für Sie.
Vorraussetzung für zusätzliche Comfortfunktionen ist die Installation des optional erhältlichen RIKA-Raumsensors.
Hier können Sie zwischen drei möglichen Betriebsarten (Modi) wählen:
- AUTO (Heizbetrieb in Kombination
von Raumsensor und Zeitprogramm)
Im „AUTO“ Modus haben Sie nun noch
zusätzlich die Möglichkeit, die eingestellte Wohlfühltemperatur zu zwei voreingestellten Tages- bzw. Wochenzeiten
automatisch abzurufen. In den Zeiträumen zwischen den Heizzeiten wird eine
von Ihnen einstellbare Absenktemperatur eingehalten.
- HEAT (manueller Heizbetrieb)
Dieser Modus entspricht dem Ihnen
bereits aus dem einfachen Heizbetrieb
bekannten „EASY“ Modus, in diesem
kann lediglich die Heizleistung des Ofens in 5er-Schritten gesteigert oder
gesenkt werden.
Die Heizleistung wird, ebenso wie im
"ROOM" Modus von der elektronischen
Steuerung vorgegeben.
- ROOM (Heizbetrieb mit Raumsensor)
Im „ROOM“ Modus wird die Heizleistung
von der elektronischen Steuerung vorgegeben und kann nicht verändert werden. Ob der Ofen jedoch heizt, müssen
Taste
blättern
Taste Anzeige
ändern
MODE
I/O
(+)/(-)
I/O
MENU
HEAT
ROOM
AUTO
ROOM
AUTO
HEAT
MODE
Die Wahl der gewünschten Betriebsart
treffen Sie im Menüpunkt „Mode“.
Beschreibung
Anzeige zum Eintritt in die Auswahlebene für den
Modus des Heizbetriebes
Anzeige des bisher eingestellten Heizbetriebes
(HEAT, ROOM oder AUTO)
Durch ein bzw. mehrmaliges Drücken der (+) bzw.
(-) Taste treffen sie die Auswahl des Heizbetriebes.
(HEAT, ROOM oder AUTO)
Hiermit wird der ausgewählte Heizbetrieb gespeichert.
Durch ein bzw. mehrmaliges Drücken der MENU
Taste gelangen Sie zurück in die Standardanzeige
10
Einstellungen
„AUTO“ Modus
Um Ihren Ofen im AUTO Modus betreiben zu können, müssen Sie die Zeitprogrammierung vornehmen.
- Einstellung des aktuellen Datums und der Tageszeit
Die Einstellungen bezüglich Datum und Zeit nehmen Sie im Menü TIME vor.
Taste
Taste Anzeige
blättern ändern
TIME
I/O
TIME
SET
I/O
10:02
+
11:02
11:03
MENU
DAY
01
(+)/(-)
DAY
31
MENU
MONTH
02
(+)/(-)
MONTH
06
MENU
YEAR
06
(+)/(-)
YEAR
07
MENU
MO
I/O
Menu
MENU
TIME
SET
TIME
SET
Beschreibung
Anzeige zum Eintritt in die Zeitprogrammierung
Anzeige zum Eintritt in die Zeitprogrammierung des
aktuellen Datums und der Tageszeit
Anzeige der Stunden und Minuten
Änderung der Stunden
Änderung der Minuten
Anzeige des Datums (Tag)
Durch ein bzw. mehrmaliges Drücken der (+) bzw. (-)
Taste können Sie den aktuellen Tag einstellen.
Anzeige des Datums (Monat).
Durch ein bzw. mehrmaliges Drücken der (+) bzw. (-)
Taste können Sie den aktuellen Monat einstellen.
Anzeige des Datums (Jahr).
Durch ein bzw. mehrmaliges Drücken der (+) bzw. (-)
Taste können Sie das aktuelle Jahr einstellen.
Zur Kontrolle wird Ihnen nun der aktuelle Wochentag
angezeigt. Sollte dieser nicht korrekt sein, ist Ihnen bei
der Datumseingabe ein Fehler unterlaufen.
War der angezeigte Wochentag korrekt, bestätigen Sie
die Datumseingabe mit der I/O Taste.
War der angezeigte Wochentag jedoch nicht korrekt,
wird durch Drücken der Taste MENU das Datum auf
den zuletzt gespeicherten Wert zurückgesetzt. Nun
muss das Datum noch einmal neu eingegeben werden.
Durch ein bzw. mehrmaliges Drücken der MENU Taste
gelangen Sie zurück in die Standardanzeige
11
- Einstellung der Tages- bzw. Wochenschaltzeiten
Die Einstellungen bezüglich Schaltzeiten nehmen Sie im Menü TIME vor.
- Wochenschaltzeit
Hier ist es Ihnen nun möglich, zwei für jeden Tag der Woche gleich geltende Schaltzeiten zu hinterlegen. Werksseitig sind bereits Schaltzeiten hinterlegt, diese können
jedoch beliebig durch Drücken der (+)/(-) Taste verändert werden.
Taste
Taste Anzeige
blättern ändern
TIME
I/O
TIME
SET
MENU
TIME
AUTO
I/O
DAY
(-)
WEEK
I/O
ON1
6:00
MENU
OFF1
12:00
MENU
ON2
14:00
MENU
OFF2
18:00
MENU
WEEK
MENU
TIME
AUTO
Beschreibung
Anzeige zum Eintritt in die Zeitprogrammierung
Anzeige zum Eintritt in die Zeitprogrammierung des
aktuellen Datums und der Tageszeit
Anzeige zum Eintritt in die Schaltzeitprogrammierung.
Durch Drücken der (+) Taste zurück zu DAY
Anzeige der ersten Startzeit
Anzeige - Ende der ersten Schaltzeit
Anzeige der zweiten Startzeit
Anzeige - Ende der zweiten Schaltzeit
Anzeige zum Eintritt in das Wochenschaltzeitprogramm
Durch Drücken der MENU Taste gelangen Sie zurück in
die Standardanzeige
Die Programmierung der Wochenschaltzeit wird automatisch in die Tagesschaltzeitprogrammierung übernommen. Achten Sie bitte beim Einprogrammieren der Schaltzeiten darauf, dass es zu keinen Überschneidungen der Heizzeiten kommt.
12
- Tagesschaltzeit
Hier ist es Ihnen nun möglich, für jeden Tag der Woche je zwei eigene Schaltzeiten
zu hinterlegen. Die eingegebene Tagesschaltzeit überregelt dann an diesem Tag die
Wochenprogrammierung. Werksseitig sind bereits Schaltzeiten hinterlegt, diese können jedoch beliebig durch Drücken der (+)/(-) Taste verändert werden.
Taste
Taste Anzeige
blättern ändern
TIME
I/O
TIME
SET
MENU
TIME
AUTO
I/O
DAY
I/O
MO
I/O
ON1
6:00
MENU
OFF1
12:00
MENU
ON2
14:00
MENU
OFF2
18:00
MENU
MO
MENU
TU
Beschreibung
Anzeige zum Eintritt in die Zeitprogrammierung
Anzeige zum Eintritt in die Zeitprogrammierung des
aktuellen Datums und der Tageszeit
Anzeige zum Eintritt in die Schaltzeitprogrammierung.
Anzeige zum Eintritt in das Tagesschaltzeitprogramm
Anzeige für den ersten Tag der Woche (Monday)
Anzeige der ersten Startzeit
Anzeige - Ende der ersten Schaltzeit
Anzeige der zweiten Startzeit
Anzeige - Ende der zweiten Schaltzeit
Anzeige für den ersten Tag der Woche (Monday)
Anzeige für den zweiten Tag der Woche (Tuesday)
Gehen Sie für jeden weiteren Wochentag in gleicher Weise vor bis SU (Sunday bzw.
Sonntag).
MENU
SU
MENU
MENU
DAY
TIME
AUTO
Anzeige zur Bestätigung der Programmierung des letzten
Tages der Woche
Anzeige zum Eintritt in das Tagesschaltzeitprogramm
Durch Drücken der MENU Taste gelangen Sie zurück in
die Standardanzeige
13
Bedienung des Ofens im gewählten Heizbetrieb
„HEAT“ Modus
- Gerät: ausgeschaltet
Taste Anzeige
HEAT
OFF
+
-
HEAT
45
HEAT
35
Beschreibung
Standardanzeige für ein ausgeschaltetes Gerät im „HEAT“
Modus.
Hier kann auch bei ausgeschaltetem Gerät die Leistung zwischen Einstellung 30 (minimale Leistung) und 100 (Nennwärmeleistung) auf und ab reguliert werden.
Durch Drücken der (+) Taste Steigerung der Leistung in 5erSchritten. (auf z.B. 35, 40, 45, usw.)
Durch Drücken der (-) Taste Senkung der Leistung in 5erSchritten.
- Gerät: starten
Taste Anzeige
I/O
IGNIT
START
HEAT
Beschreibung
Durch Drücken der I/O Taste startet das Gerät.
Dies wird Ihnen durch „IGNIT“ (Zündung) angezeigt, diese Anzeige wird nach erfolgter Zündung durch START abgelöst. Nach
Beendigung der Startphase erscheint im Display HEAT mit
Leistungsangabe.
Startvorgang abbrechen: Innerhalb der ersten Minute können
Sie die IGNIT-Phase abbrechen, in dem Sie die I/O-Taste so
lange gedrückt halten, bis die Anzeige IGNIT OFF erscheint.
Nach dem Loslassen folgt die Anzeige HEAT OFF. Wird der
Startvorgang erst nach einer Minute unterbrochen, läuft das
Startprogramm fertig ab, am Display wird jedoch bereits HEAT
OFF angezeigt. Gilt für alle Modi (HEAT, AUTO und ROOM).
- Gerät: eingeschaltet
Taste Anzeige
HEAT
40
+
HEAT
45
HEAT
40
Beschreibung
Standardanzeige für ein eingeschaltetes Gerät, im „HEAT“
Modus
Durch Drücken der (+) Taste Steigerung der Leistung in 5erSchritten.
Durch Drücken der (-) Taste Senkung der Leistung in 5erSchritten.
14
„ROOM“ Modus
- Gerät: ausgeschaltet
Taste Anzeige
ROOM
OFF
+
-
ROOM
25
ROOM
23
Beschreibung
Standardanzeige für ein ausgeschaltetes Gerät im „ROOM“
Modus.
Hier kann auch bei ausgeschaltetem Gerät die gewünschte
Raumtemperatur im Bereich von 5-28°C verstellt werden.
Durch Drücken der (+) Taste Steigerung der Temperatur um
1°C.
Durch Drücken der (-) Taste Senkung der Temperatur um 1°C.
- Gerät: starten
Taste Anzeige
I/O
IGNIT
START
ROOM
Beschreibung
Durch Drücken der I/O Taste startet das Gerät sofern die gewünschte Raumtemperatur noch nicht erreicht ist.
Dies wird Ihnen durch „IGNIT“ (Zündung) angezeigt, diese Anzeige wird nach erfolgter Zündung durch START abgelöst. Nach
Beendigung der Startphase erscheint im Display ROOM mit der
von Ihnen gewünschten Raumtemperatur.
- Gerät: eingeschaltet
Taste Anzeige
ROOM
23
+
ROOM
24
ROOM
22
Beschreibung
Standardanzeige für ein eingeschaltetes Gerät, im „ROOM“
Modus
Durch Drücken der (+) Taste Steigerung der Temperatur um
1°C.
Durch Drücken der (-) Taste Senkung der Temperatur um 1°C.
- Gerät: automatisch stoppen
Taste Anzeige
STOP
STANDBY
Beschreibung
Durch Erreichen der gewünschten Raumtemperatur stoppt das
Gerät automatisch und geht in die STANDBY (Bereitschaftsmodus) Stellung. Sobald die gewünschte Temperatur wieder unterschritten wird startet das Gerät erneut.
- Gerät: stoppen durch Drücken der I/O Taste
Taste Anzeige
I/O
STOP
ROOM
OFF
Beschreibung
Durch Drücken der I/O Taste erscheint kurz die Anzeige STOP
und wechselt danach auf ROOM OFF. Für einen neuerlichen
Start muss die I/O Taste gedrückt werden.
15
„AUTO“ Modus
- Gerät: ausgeschaltet
Raumtemperatureinstellung innerhalb der Schaltzeit
Taste
blättern
Taste Anzeige
ändern
AUTO
OFF
+
I/O
+
I/O
On – T
25
On – T
25
On – T
26
On – T
24
AUTO
OFF
Beschreibung
Standardanzeige für ein ausgeschaltetes Gerät im
„AUTO“ Modus.
Hier kann auch bei ausgeschaltetem Gerät die
gewünschte Raumtemperatur von 10-28°C eingestellt werden.
Mit der Plus(+)-Taste erscheint die Anzeige zum
Eintritt in die Raumtemperaturregelung.
Damit die gewünschte Raumtemperatur eingestellt
werden kann, muss die I/O Taste gedrückt werden.
Durch Drücken der (+) Taste Steigerung der Temperatur um 1°C.
Durch Drücken der (-) Taste Senkung der Temperatur um 1°C.
Hiermit wird die gewählte Raumtemperatur gespeichert.
Absenktemperatureinstellung zwischen den Schaltzeiten
Taste
blättern
Taste Anzeige
ändern
AUTO
OFF
I/O
+
I/O
Off – T
20
Off – T
20
Off – T
21
Off – T
19
AUTO
OFF
Beschreibung
Standardanzeige für ein ausgeschaltetes Gerät im
„AUTO“ Modus.
Hier kann auch bei ausgeschaltetem Gerät die
gewünschte Absenktemperatur im Bereich von 520°C eingestellt werden.
Mit der Minus(-)-Taste erscheint die Anzeige zum
Eintritt in die Absenktemperatur.
Damit die gewünschte Absenktemperatur eingestellt werden kann, muss die I/O Taste gedrückt
werden.
Durch Drücken der (+) Taste Steigerung der Temperatur um 1°C.
Durch Drücken der (-) Taste Senkung der Temperatur um 1°C.
Hiermit wird die gewählte Absenktemperatur gespeichert.
16
- Gerät: starten
Taste Anzeige
I/O
IGNIT
START
AUTO
Beschreibung
Durch Drücken der I/O Taste startet das Gerät sofern die gewünschte Raumtemperatur noch nicht erreicht ist und das Gerät
sich in einer aktuellen Schaltzeit befindet.
Dies wird Ihnen durch „IGNIT“ (Zündung) angezeigt, diese Anzeige wird nach erfolgter Zündung durch START abgelöst. Nach
Beendigung der Startphase erscheint im Display AUTO mit der
von Ihnen gewünschten Raumtemperatur.
- Gerät: eingeschaltet
Raumtemperatur- und Absenktemperatureinstellung erfolgt wie bei ausgeschaltetem
Gerät beschrieben.
- Gerät: automatisch stoppen
Taste Anzeige
STOP
STANDBY
Beschreibung
Durch Erreichen der gewünschten Raumtemperatur bzw. dem
Ende der programmierten Schaltzeit, stoppt das Gerät automatisch und geht in die STANDBY (Bereitschaftsmodus) Stellung.
Sobald die gewünschte Temperatur wieder unterschritten wird
oder eine neue Schaltzeit beginnt, startet das Gerät erneut.
- Gerät: stoppen durch Drücken der I/O-Taste
Taste Anzeige
I/O
STOP
AUTO
OFF
Beschreibung
Durch Drücken der I/O-Taste erscheint kurz die Anzeige STOP
und wechselt danach auf AUTO OFF.
Bitte um Beachtung:
Das Gerät startet nun nicht wieder automatisch, es muss wiederum durch Drücken der I/O-Taste gestartet werden.
17
Pelletofen mit Touchdisplay
Komfortmodus
Zusätzlich zur Raumptemperatur können
im Komfort-Modus auch Heizzeiten
genutzt werden. Dabei müssen im Menü
"Einstellungen" die Heizzeiten auf "EIN"
gestellt werden. Die Programmierung der
Heizzeiten entnehmen Sie bitte der
Ofenbedienungsanleitung.
Der Komfort-Modus kann nur mit einem
angeschlossenen
Raumsensor
angewählt (aktiviert) werden.
Nach Anschluss des Raumsensors wird
der Komfort-Modus farblich
hervorgehoben und am Bildschirmrand
rechts das Thermometer hell angezeigt.
Durch Drücken der Komfort-ModusTaste wird anstatt der Heizleistung in
Prozenten die Temperatur in C° zur
Auswahl angezeigt.
18
Contents
Assembly instructions ....................................................................................... 20
RIKA radio room temperature sensor
Open the sensor and fit new batteries (transmitter)............................................ 23
Open the sensor (receiver)............................................................................... 23
Explanation and functioning (transmitter) .......................................................... 24
Explanation and functioning (receiver) .............................................................. 25
Connection of the sensor to the stove ............................................................... 26
Comfort functions with installed RIKA room sensor
Pellet stove with buttons display ............................................................................. 27
Settings................................................................................................................... 28
- Weekly switching time ........................................................................... 29
- Daily switching time ............................................................................... 30
Operation of the stove in selected heating operation .......................................... 31
“HEAT” mode................................................................................................. 31
„ROOM“ mode ............................................................................................... 32
“AUTO” mode ................................................................................................ 33
Pellet stove with touch screen ................................................................................... 35
NOTE:
The design (visual appearance) of the wireless room sensor can deviate from the
parts shown in the instructions.
We reserve the right to make technical and optical changes and take no responsibility
for any setting and printing errors.
19
Assembly of the RIKA room temperature sensor demonstrated by the example
of the pellet stove MEMO
(Receiver) behind rear panel.
The assembly of the receiver for the stoves COMO, PICO, REVO, MIRO, KAPO,
ROCO u. INDUO distin- guishes itself from the illustrations in that the receptive
positions within the stove are different. You can find the corresponding pictures on
page 21.
Caution:
Your stove must be switched off and cooled down before any work is carried out.
Information about switching the device out of the respective operating condition can
be found in “Operation”.
Before carrying out the work below ensure that the mains plug of the stove is removed from the mains socket.
Preparation:
First remove the rear panel of the stove and place on a soft underlay (cover, etc.).
Underlay
Receiver
D sub-connector
Take care of the cable when removing the rear panel!
Then prepare the rear panel for the installation of the receiver:
Step 1.
Using a hacksaw remove the tabs of the lower rectangular
cut-out.
20
Step 2.
Carefully file off the residue with a small flat file.
Step 3.
Finally attach the supplied mounting plate to the pillar bolts
using four M4 nuts and washers.
Different kinds of fixation are possible here. Instead of using
studs, an assembly with hex screws and press nuts is also
possible.
Step 4.
Now feed the cable of the radio room temperature sensor
receiver with the 15 pin plug from the inside through the
opening to the outside.
Step 5.
The receiver is pressed into the holder as shown in the photograph.
Step 6.
Now connect the plug to the D sub-socket on the upper part
of the panel and tighten using a screwdriver.
21
When all steps have been carried out the rear panel can be re-fitted to the pellet
stove.
To adjust the stove software proceed as described in the operating instructions.
Assembly pictures COMO, REVO,
PICO, MIRO and INDUO
1. Unscrew side panel (Please find
Assembly pictures TOPO
1.
Unscrew rear panel plate
2.
Fix assembly plate
the pictures for dismantling from the
operating manual.) Please pay
attention to the display and
grounding cable!
2.
Fix assembly plate
3.
Cut out rear panel
Como, Revo, Pico,
Miro, Induo
4.
Mount and connect receiver
3.
4.
5.
Roco, Kapo
22
Mount and connect
receiver
Open the RIKA radio room temperature sensor and fit new batteries (transmitter)
Open the RIKA radio room temperature sensor
(receiver)
Open:
Open:
Using a small screwdriver or a suitable tool press the two plastic tabs
inwards and carefully pull the two
halves apart.
Carefully pull the two sections of the
receiver apart.
Fit new batteries:
Long Life batteries must be used!
(Panasonic Industrial Alkaline or Varta
Alkali Mangan)
Ensure the new batteries are fitted
with the correct polarity (+ and -).
Setting of the DIP switch is described
on page 25.
23
Explanation and functioning of the RIKA radio room temperature sensor
(transmitter)
Explanation:
DIP switch:
The small DIP-switches 1-3 are used
to set the addresses. The position of
switches 1- 3 on the transmitter must
match the position of switches 1-3 on
the receiver. If there are two transmitters with the same address in the
receive area, the LED indicator on the
receiver flashes green and red alternately. After removal of the address
error the indicator changes to normal
mode (LED illuminates green.)
DIP switch No. 4 increases the transmitter output.
-
24
Position Off 1 mW.
Position On 10 mW.
The On setting for DIP switch No.
4 is used, if the distance from the
transmitter to the receiver is too
great, or a barrier (e.g. a wall) affects the receive signal and the
output of 1 mW is no longer sufficient.
Explanation and functioning of the RIKA radio room temperature sensor (receiver)
SENSOR SIGNAL LOST" disap-
pears). For stoves with touch display the
If the receiver is connected to the
stove (with power off) the LED indicator flashes green on connection of
mains power.
error message is acknowledged by
pressing the "Enter" key.
You can now resume opera- tion of
the stove. If the same message
appears again immediately after acknowledging the error, it means that
either the battery in the transmitter is
flat or the wireless room sensor is
faulty.
The connection must be detected
after 35 seconds at the most. If no
connection has been made after one
minute, an error has occurred:
Incorrect DIP switch setting, discharged batteries, distance too great
(transmitter – receiver) or strong interference in the vicinity.
The standard setting can be retained. The DIP switch only has to
be changed in special circumstances.
Note:
Local wireless networks (e.g. WLAN)
can cause frequency ranges to overlap and result in malfunctions, even
during a heating procedure.
If transmission between the transmitter and receiver is disrupted for a
prolonged period and no signal is
received, this will be indicated by the
message "ROOM SENSOR SIGNAL
LOST" appearing in the display and
the stove will then shut down. The
error message can be deleted by
pressing the ON/OFF button (press
and hold until the message "ROOM
Caution!
DIP switch No. 4 for increasing the
transmitter output in ON position only
active on the transmitter.
The ON setting of DIP switch no. 4 on
the receiver is used for the test output
(fixed 25°C) and must be reset to the
OFF setting for a regulated heating
operation.
25
DIP switch 1-3 address, must match
DIP- switch 1-3 on the transmitter.
The colour of the LED depends on the
battery voltage:
Fully charged................... green
Partially discharged ......... orange
Discharged ...................... red
Connection of the RIKA radio room temperature sensor to the stove
Connect the receiver section of the
RIKA radio room temperature sensor
to the D sub-coupling provided.
(Ensure the current is switched off
when connecting the RIKA room temperature sensor to the stove.)
Use a suitable screwdriver to attach
the D sub plug.
The stove can now be connected to
the mains power.
26
Pellet stove with buttons display
Comfort functions with installed RIKA room sensor
Change from EASY to HEAT. Keep
pressing the Menu button until HEAT
appears in the display.
You do not need to worry about
whether the stove heats up or not, the
RIKA room thermostat takes care of
this depending on the prevailing temperature in the room.
A pre-condition for additional comfort
functions is the installation of the
optional RIKA room sensor.
You can choose between three possible operating modes:
- AUTO (Heating operation with
room sensor and time program
combined)
In “AUTO” mode you have the additional possibility of calling up the set
comfort temperature for two pre-set
days or weeks automatically. In the
time periods between the heating
times a low temperature that you set
is maintained.
- HEAT (Manual heating operation)
This mode corresponds to the EASY
mode that you already know from
basic operation, in which the heat
output of the stove can only be increased or decreased in steps of five
units.
The heat output of the stove is regulated by the electronic control (such
as in "ROOM" in the menu).
- ROOM (Heating operation with
room sensor
In “ROOM” mode the heat output of
the stove can not be changed and is
regulated by the electronic control.
Move
through
keys
Change Indicator
key
MODE
I/O
(+)/(-)
I/O
MENU
HEAT
ROOM
AUTO
ROOM
AUTO
HEAT
MODE
Selection of the required operating
mode is found in “Mode” in the menu.
Description
Indication of entry to the selection level for the
heating operation mode.
Indication of current heating operation.
(HEAT, ROOM or AUTO)
By pressing the (+) or (-) keys repeatedly you can
select the heating operation. (HEAT, ROOM or
AUTO)
This saves the selected heating operation.
By pressing the MENU key once or repeatedly you
return to the standard indication.
27
Settings
„AUTO“ mode settings
To operate your oven in the AUTO mode you must program it.
Setting of the current date and time.
The settings for date and time are entered using the TIME menu.
Change ndicator
Move
through key
keys
TIME
I/O
TIME
SET
I/O
10:02
+
11:02
11:03
MENU
DAY
01
(+)/(-) DAY
31
MENU
MONTH
02
(+)/(-) MONTH
06
MENU
YEAR
06
(+)/(-) YEAR
07
MENU
MO
I/O
Menu
MENU
TIME
SET
TIME
SET
Description
Indication for entry into time programming.
Indication for entry into time programming of the current
date and time.
Indication of hours and minutes
Change hours
Change minutes
Indication of date (day)
By pressing the “+” or”-“ keys repeatedly you can select
the current day.
Indication of date (Month).
By pressing the “+” or ”-“ keys repeatedly you can select
the current month.
Indication of date (Year)
By pressing the “+” or ”-“ keys repeatedly you can select
the current year.
As a check the current day is displayed. If this is not
correct you have made an error when entering the date.
If the displayed date is correct confirm the date input
with the I/O key.
If the displayed day was not correct press the MENU key
to return to the last saved date. The date must now be
re-entered.
By pressing the MENU key once or repeatedly you return to the standard indication.
28
- Setting of the daily and weekly switching times
The settings for switching times can be taken from the TIME menu.
- Weekly switching time
It is now possible for you to enter two similarly valid switching times for each day.
Several switching times have been set as default values; these can be changed if
required by pressing the (+)/(-) button.
Move
Change Indica- Description
through key
tor
keys
TIME
Indication for entry into time programming.
I/O
TIME
Indication for entry into time programming of the current
SET
date and time.
MENU
Indication for entry into switching time programming.
TIME
AUTO
I/O
DAY
(-)
WEEK Revert back to DAY by pressing the (+) button
I/O
Indication of first start time.
ON1
6:00
MENU
Indication – End of first start time.
OFF1
12:00
MENU
Indication of second start time.
ON2
14:00
MENU
Indication – End of second start time.
OFF2
18:00
MENU
WEEK Indication for entry into weekly switching time programming.
MENU
TIME
By pressing the MENU key you return to the standard
AUTO
indication.
Programming of the weekly switching time is carried out automatically by the daily
switching time programming. When programming the switching times please ensure
there are no overlaps between the heating times.
29
- Daily switching time
For each day of the week you can enter two own switching times. On a specific day
the daily switching time entered overrides the weekly programming. Several switching
times have been set as default values; these can be changed if required by pressing
the (+)/(-) button.
Move
Change Indicator Description
through keys key
I/O
MENU
I/O
I/O
I/O
MENU
MENU
MENU
MENU
MENU
TIME
TIME
SET
TIME
AUTO
DAY
MO
ON1
6:00
OFF1
12:00
ON2
14:00
OFF2
18:00
MO
TU
Indication for entry into time programming.
Indication for entry into time programming of the current date and time.
Indication for entry into switching time programming.
Indication for entry into the daily switching time program.
Indication of first day of week (MO).
Indication of first start time.
Indication – End of first start time.
Indication of second start time.
Indication – End of second start time.
Indication of first day of week (MO).
Indication of second day of week (TU).
Enter each day in the same way to SU (Sunday)
MENU
SU
MENU
DAY
MENU
TIME
AUTO
Indication for confirmation of programming of the last
day of the week.
Indication for entry into the daily switching time program.
By pressing the “+” or ”-“ keys you return to the standard indication.
30
Operation of the stove in selected heating operation
“HEAT” mode
- Device switched off
Key
Indicator
HEAT
OFF
+
HEAT
45
HEAT
35
-
Description
Standard indication for a switched off device in “HEAT” mode.
With the device switched off the output can be regulated up and
down between setting 30 (minimum output) and 100 (nominal
heat output).
Press the (+) key to increase output in steps of five units. (up 35,
40, 45, etc)
Press the (-) key to lower the output in steps of five units.
- Device start
Key
I/O
Indicator
IGNIT
START
HEAT
Description
Press I/O key to start device.
This is indicated by “IGNIT”. After the ignition period the indication changes to START. On termination of the start phase the
display shows “HEAT” with output.
Cancelling the start-up procedure: You can cancel the ignition
phase within the first minute by pressing and holding the I/O
button until IGNIT OFF appears in the display. When the button
is released HEAT OFF is displayed. If the start-up process is
interrupted after a minute, the start programme will complete its
cycle, however HEAT OFF appears in the display. This is applicable for all modes (HEAT, AUTO and ROOM).
- Device switched on
Key
+
-
Indicator
HEAT
40
HEAT
45
HEAT
40
Description
Standard indication for a switched on device in “HEAT” mode.
Press the (+) key to increase output in steps of five units.
Press the - key to decrease output in steps of five units.
31
„ROOM“ mode
- Device switched off
Key
Indicator
ROOM
OFF
+
ROOM
25
ROOM
23
-
Description
Standard indication for a switched off device in “ROOM” mode.
The required room temperature can be set within the range 5 –
28 °C even if the device is switched off.
Press the (+) key to increase the temperature by 1 °C.
Press the (-) key to decrease the temperature by 1 °C.
- Device start
Key
I/O
Indicator
IGNIT
START
ROOM
Description
Press I/O key to start the device so long as the required room
temperature has not been reached.
This is indicated by “IGNITE”. After the ignition period the indication changes to START. On termination of the start phase the
display shows “ROOM” with the room temperature that you
desire.
- Device switched on
Key
+
-
Indicator
ROOM
23
ROOM
24
ROOM
22
Description
Standard indication for a switched on device in “ROOM” mode.
Press the (+) key to increase temperature by 1 °C.
Press the (-) key to decrease temperature by 1 °C.
- Stop device automatically
Key
Indicator
STOP
STANDBY
Description
On reaching the required room temperature the device stops
automatically and enters the STANDBY mode. As soon as the
temperature falls below the required temperature the device restarts.
- Stop device by pressing the I/O key
Key
I/O
Indicator
STOP
ROOM
OFF
Description
On pressing the I/O key STOP appears briefly and then changes
to ROOM =FF. To re-start press the I/O key.
32
“AUTO” mode
Device switched off
Room temperature setting within the switching time
Move
through
keys
Change
key
Indicator
AUTO
OFF
+
I/O
+
I/O
On – T
25
On – T
25
On – T
26
On – T
24
AUTO
OFF
Description
Standard indication for a switched off device in
“AUTO” mode. The desired room temperature (between 10 and 28 °C) can also be set here when the
appliance is switched off.
Pressing the Plus(+) button displays the room temperature control function.
The I/O button must be pressed in order for the
desired room temperature to be set.
Press the (+) key to increase temperature by 1 °C.
Press the - key to decrease temperature by 1 °C.
This saves the selected room temperature.
Low temperature setting between the switching times
Move
through
keys
Change
key
Indicator
AUTO
OFF
I/O
+
I/O
Off – T
20
Off – T
20
Off – T
21
Off – T
19
AUTO
OFF
Description
Standard indication for a switched off device in
“AUTO” mode. The desired low temperature (between 5 and 20 °C) can also be set here when the
appliance is switched off.
Pressing the Minus(-) button displays the low temperature control function.
The I/O button must be pressed in order for the
desired low temperature to be set.
Press the (+) key to increase temperature by 1 °C.
Press the - key to decrease temperature by 1 °C.
This saves the selected low temperature.
33
- Start device
Key
I/O
Indicator
IGNIT
START
AUTO
Description
Press I/O key to start device so long as the required room temperature has not been reached and the device is in a current
switch time.
This is indicated by “IGNITE”. After the ignition period the indication changes to START. On termination of the start phase the
display shows “ROOM” with the room temperature that you
desire.
- Device switched on
The room temperature and low temperature are set in the same way as described for
the switched off appliance.
- Stop device automatically
Key
Indicator
STOP
STANDBY
Description
On reaching the required room temperature or the end of the
programmed switching time the device stops automatically and
enters the STANDBY mode. As soon as the temperature falls
below the desired setting or a new switching time begins, the
appliance will restart.
- Stop device by pressing the I/O key
Key
I/O
Indicator
STOP
AUTO
OFF
Description
On pressing the I/O key STOP appears and then changes to
AUTO OFF.
Please note:
The appliance will not restart automatically now; it must be
started-up by pressing the I/O button.
34
Pellet stove with touch screen
Comfort mode
In addition to room temperature the
heating times can be used in the comfort
mode. In this case, the “heating times”
must be set to "ON" in the menu. For
programming the heating times, please
see
the
stoves
manual.
The comfort mode can be selected only
with a connected room sensor.
After connecting the room sensor, the
comfort mode is highlighted and the
thermometer symbol is shown to the right
side of the screen.
After pressing the comfort mode
button the power selection will be
displayed in temperature instead
percentages.
35
Sommaire
Notice de motage………..……….…………………….…………………………37
Capteur radio de température d'ambiance RIKA
Ouverture et changement des piles (émetteur) ......................................... 40
Ouverture (récepteur)............................................................................... 40
Explication et fonctionnement (émetteur) .................................................. 41
Explication et fonctionnement (récepteur) ................................................. 42
Raccordement au poêle ........................................................................... 43
Poêle à pellet avec afficheur digital
Fonctions confort avec le capteur d'ambiance RIKA ....................................... 44
Réglage ........................................................................................................ 45
- Période d’enclenchement hebdomadaire ............................................... 46
- Période d’enclenchement journalière ..................................................... 47
Utilisation du poêle en mode de chauffage sélectionné ................................... 48
Mode « HEAT »........................................................................................ 48
Mode „ROOM“ ......................................................................................... 49
Mode „AUTO“ .......................................................................................... 50
Poêle à pellet avec écran tactile
Mode confort ............................................................................................... 52
ATTENTION :
Le design (l'optique) du thermostat d'ambiance radio peut diverger des illustrations fournies dans le présent document.
Toutes modifications techniques et visuelles, toutes erreurs typographiques et
coquilles réservées.
36
Montage du capteur radio de température ambiante RIKA sur un poêle à granulés bois MEMO
(Récepteur) sous la paroi arrière.
Comme indiqué sur les figures, le montage du capteur sur les poêles COMO, PICO,
REVO, MIRO, KAPO, ROCO u. INDUO diverge en raison des différentes positions
d'insertion dans le poêle. Les photos sont disponibles en page 37.
Attention :
Votre poêle doit être débranché et refroidi avant d'effectuer des manipulations.
Pour mettre hors service l’appareil à partir d’un état de fonctionnement donné, se
reporter au chapitre « Fonctionnement ».
Les activités décrites ci-dessous ne doivent être entreprises que si la fiche réseau du
four est retirée de la prise.
Préparation :
Il faut d’abord enlever la paroi arrière du poêle à granulés et la poser sur un support
mou (couvertures etc.).
Support
Récepteur
Fiche D-Sub
Lors du démontage de la paroi arrière, faites attention au câble !
Comme étape suivante, préparer la paroi arrière pour le montage du récepteur:
Point 1.
En cas de section inférieure à découper rectangulaire, couper tous les rebords avec une lame de scie métallique.
37
Point 2.
Enlever avec précaution les résidus de rebords avec une
petite lime douce
Point 3.
Ensuite, fixer aux boulons filetés prévus pour cela la plaque
de montage livrée avec quatre rondelles de calage et des
écrous M4.
Plusieurs variantes de fixation sont proposées ici. A la place
des goujons filetés, le montage peut s'effectuer avec une vis
à tête fraisée et un écrou serti.
Point 4.
Maintenant le câble avec la fiche à 15 pôles est guidé du
récepteur de la sonde radio de température ambiante
de l’intérieur vers l’extérieur par l'ouverture.
Point 5.
Insérer dans les montants le récepteur comme illustré.
Point 6.
Maintenant, la fiche est raccordée au coupleur D-Sub se
trouvant à l’extrémité supérieure et fixée avec un tourne vis.
38
Quand tous les points auront été effectués, la paroi arrière peut être à nouveau réinstallée dans le poêle à granulés.
Pour régler le logiciel du poêle, procédez comme décrit dans la notice de fonctionnement
Photos de montage COMO, REVO,
PICO, MIRO, INDUO
Dévisser la paroi latérale droite (Les
Photos de montage TOPO
1.
Dévisser le couvercle de la paroi
arrière
2.
Fixer la plaque de montage
images du démontage de l’habillage latéral
du modèle PICO figurent dans la notice
d’utilisation du poêle.) Merci de faire attention
au câble d’alimentation, ainsi qu’au câble de
l’afficheur !
1.
2.
Fixer la plaque de montage
3.
Couper la paroi arrière
Como, Revo, Pico,
Miro, Induo
4.
Monter et raccorder le capteur
3.
4.
5.
Roco, Kapo
39
Monter et raccorder
le capteur
Ouverture et changement des piles
du capteur radio de température
d’ambiance RIKA (émetteur)
Ouverture du capteur radio de température d’ambiance RIKA (récepteur)
Enfoncez les deux languettes en
plastique à l’aide d’un tournevis ou
d’un outil approprié et séparez les
deux moitiés avec précaution.
Détachez avec précaution les deux
parties du récepteur.
Changement des piles:
Il est instamment recommandé
d’utiliser des piles longue durée!
(Pile alcaline industrielle de Panasonic ou manganèse-alcaline de Varta)
Lorsque vous insérerez de nouvelles
piles, veillez à faire concorder les
pôles plus et moins.
Le réglage du commutateur DIP est
décrit en page 42.
40
Explication et fonctionnement du capteur radio de température d’ambiance
RIKA (émetteur)
Commutateur DIP:
Les petits commutateurs DIP 1-3
servent à déterminer les adresses. La
position des commutateurs 1-3 sur
l’émetteur doit concorder avec la
position des commutateurs 1-3 sur le
récepteur. Si deux émetteurs portent
la même adresse dans la zone de
réception, l’affichage LED du récepteur se mettra à clignoter en vert et
rouge en alternance. Après avoir
corrigé
l’erreur
de
l’adresse,
l’affichage passe en mode normal. (le
voyant LED devient vert.)
Le commutateur DIP n°4 augmente la
puissance de l’émetteur.
-
41
Position Off 1 mW.
Position On 10 mW.
On utilise la position On pour le
commutateur DIP n° 4 lorsque la
distance entre l’émetteur et le récepteur est trop importante ou
qu’un obstacle (un mur par
exemple) influe sur le signal de
réception et que la puissance de
1 mW ne suffit plus.
Explication et fonctionnement du capteur radio de température d’ambiance de
RIKA (récepteur)
« ROOM SENSOR SIGNAL LOST »
s’éteigne). Sur les poêles à écran tactile,
le message d’erreur s’acquitte avec la
touche « Entrée ».
Le poêle peut ensuite être remis en
service. La réapparition du message
d’erreur
immédiatement
après
l’acquittement indique que la batterie
est déchargée ou que le cap- teur
d’ambiance radio est défectueux.
Le réglage standard peut être
conservé. Les commutateurs DIP
ne doivent être modifiés que dans
des cas spéciaux.
Si le récepteur est connecté au poêle
(hors tension), l’affichage LED clignote en vert après le branchement
sur le secteur.
Le raccordement doit être reconnu au
bout de 35 secondes au plus tard. Si
le branchement n’est toujours pas
établi au bout d’une minute, c’est qu’il
y a une erreur:
le réglage du commutateur DIP est
erroné, les batteries sont vides, l’écart
entre l’émetteur et le récepteur est
trop grand ou les perturbations de
l’environnement sont trop fortes.
Attention!
Le commutateur DIP n°4 qui permet
d’augmenter
la
puissance
de
l’émetteur n’est activé que sur
l’émetteur en position ON.
Le commutateur n°4 sur le récepteur
doit être placé sur ON pour effectuer
un test (25°C.) et doit être repositionné sur OFF pour un chauffage
régulier.
Attention:
Des réseaux radio locaux (WLAN
p.ex.) peuvent recouvrir les zones de
fréquence et entraîner des perturbations pendant le chauffage.
En cas de perturbation prolongée de
la transmission entre l’émetteur et le
récepteur et en l’absence de réception
de signal, le message « ROOM SENSOR SIGNAL LOST » s’affiche et le
poêle est déconnecté. La touche
ON/OFF permet de supprimer le message d’erreur (maintenir la touche
enfoncée jusqu’à ce que l’affichage
Le commutateur DIP adresse 1-3 doit
concorder avec le commutateur DIP
1-3 sur l’émetteur.
La couleur du voyant LED dépend de
la charge de la pile:
Pleine ..................... vert
Presque vide .......... orange
Vide........................ rouge
42
Raccordement du capteur radio de température d’ambiance de RIKA au poêle
Branchez la partie récepteur du capteur radio de température d’ambiance
de RIKA au connecteur D-Sub prévu
à cet effet.
(Ne raccordez le capteur radio de
température d’ambiance de RIKA que
lorsque le poêle est hors tension.)
Fixez le connecteur D-Sub avec un
tourne-vis approprié.
Vous pouvez maintenant brancher le
poêle sur le secteur.
43
Poêle à pellet avec afficheur digital
Fonctions confort avec le capteur
d'ambiance RIKA
En mode «ROOM», il est également
possible d’augmenter ou de diminuer la
puissance du poêle par pas de 5. Ce
n’est plus vous cependant qui déterminez si le poêle doit chauffer ou non.
Le thermostat d’ambiance RIKA s’en
charge pour à votre place suivant la
température régnant dans la pièce.
Passer de EASY à HEAT. Pour cela,
maintenez la touche de menu enfoncée
jusqu'à ce que le message HEAT apparaisse à l'écran.
La condition sine qua none pour bénéficier des fonctions confort supplémentaires est l’installation du thermostat
d’ambiance RIKA disponible en option.
Vous pouvez ici sélectionner trois modes de service:
- AUTO (mode de chauffage combiné
à un capteur d’ambiance et à un programme de minuterie)
En mode «AUTO», vous avez en plus la
possibilité de mettre en place automatiquement la température confort à des
heures de la journée ou de la semaine
préréglées. Hors des périodes de chauffage, il sera observé une température
réduite que vous pourrez régler.
- HEAT (mode de chauffage manuel)
Ce mode correspond au mode «EASY»
que vous connaissez déjà du mode de
chauffage simple.
Dans ce mode, il est uniquement possible d’augmenter ou de diminuer la puissance du poêle par crans de 5%.
Comme en mode «ROOM», la puissance de chauffage est prescrite par la
commande électronique.
- ROOM (mode de chauffage avec
capteur d’ambiance)
Feuilleter Chan- Affichage
les tou- ger la
ches
touche
MODE
I/O
(+)/(-)
I/O
MENU
HEAT
ROOM
AUTO
ROOM
AUTO
HEAT
MODE
Vous pouvez sélectionner le mode désiré au point du menu «MODE».
Description
Affichage pour entrer au niveau de sélection du
mode de chauffage.
Affichage du mode de chauffage réglé jusqu’à
présent. (HEAT, ROOM ou AUTO)
En appuyant une ou plusieurs fois sur la touche (+)
ou (-), vous sélectionnez le mode de chauffage.
(HEAT, ROOM ou AUTO)
Vous pouvez enregistrer le mode de chauffage
sélectionné.
En appuyant une ou plusieurs fois sur la touche
MENU, vous revenez à l’affichage standard.
44
Réglage
Mode „AUTO“
Pour pouvoir faire fonctionner votre poêle en mode AUTO, vous devez procéder à la
programmation de la minuterie.
- Réglage de la date actuelle et de l’heure de la journée.
Vous pourrez procéder au réglage de la date et de l’heure dans le menu TIME.
Feuilleter
Changer Affichage Description
les touches la touche
TIME
Affichage pour entrer dans la programmation de
la minuterie.
I/O
TIME SET Affichage pour entrer dans la programmation de
la date et de l’heure actuelles.
I/O
10:02
Affichage des heures et des minutes
+
11:02
Modification des heures
11:03
Modification des minutes
MENU
Affichage de la date (jour)
DAY
01
(+)/(-)
DAY
En appuyant une ou plusieurs fois sur la touche
31
(+) ou (-), vous pouvez régler le jour actuel.
MENU
Affichage de la date (mois).
MONTH
02
(+)/(-)
MONTH
En appuyant une ou plusieurs fois sur la touche
06
(+) ou (-), vous pouvez régler le mois actuel.
MENU
Affichage de la date (année)
YEAR
06
(+)/(-)
YEAR
En appuyant une ou plusieurs fois sur la touche
07
(+) ou (-), vous pouvez régler l’année actuelle.
MENU
MO
Le jour de la semaine actuel vous est affiché à
des fins de contrôle. S’il n’est pas correct, une
erreur se sera glissée lorsque que vous avez
rentré la date.
I/O
TIME
Si le jour de la semaine affiché est correct,
SET
confirmez l’indication de la date avec la touche
I/O.
Menu
TIME
Si le jour de la semaine n’était pas correct, vous
SET
pouvez ramener la date à la dernière valeur
enregistrée en appuyant sur la touche MENU. Il
convient maintenant de rentrer une nouvelle
fois la date.
MENU
En appuyant une ou plusieurs fois sur la touche
MENU, vous revenez à l’affichage standard.
45
- Réglage des périodes d’enclenchement journalières ou hebdomadaires.
Vous pourrez effectuer les réglages des périodes d’enclenchement dans le menu
TIME.
- Période d’enclenchement hebdomadaire
Vous avez ici la possibilité de rentrer deux périodes d’enclenchement valables pour
chaque jour de la semaine. Les durées de commutation sont prédéfinies en usine. Il
est toutefois possible de les modifier avec la touche (+)/(-).
Feuilleter
Changer Affichage Description
les touches la touche
TIME
Affichage pour entrer dans la programmation de
la minuterie.
I/O
TIME
Affichage pour entrer dans la programmation de
SET
la date et de l’heure actuelles.
MENU
TIME
Affichage pour rentrer dans la programmation
AUTO
des périodes d’enclenchement.
I/O
DAY
(-)
WEEK
Appuyez sur la touche (+) pour revenir à DAY
I/O
On1
Affichage
de
la
première
période
6:00
d’enclenchement.
MENU
OFF1
Affichage – Fin de la première période
12:00
d’enclenchement.
MENU
On2
Affichage
de
la
deuxième
période
14:00
d’enclenchement.
MENU
OFF2
Affichage – Fin de la deuxième période
18:00
d’enclenchement.
MENU
WEEK
Affichage pour rentrer dans le programme des
périodes d’enclenchement hebdomadaires.
MENU
TIME
En appuyant sur la touche MENU, vous reAUTO
venez à l’affichage standard.
La programmation des périodes d’enclenchement hebdomadaires est automatiquement reprise dans la programmation des périodes de programmation journalières. En
programmant les durées de commutation, évitez tout chevauchement avec les durées
de chauffage.
46
- Période d’enclenchement journalière
Vous avez ici la possibilité de rentrer deux périodes d’enclenchement valables pour
chaque jour de la semaine. Le temps d’enclenchement journalier que vous aurez
indiqué surrégule pour cette journée la programmation hebdomadaire. Les durées de
commutation sont prédéfinies en usine. Il est toutefois possible de les modifier avec
la touche (+)/(-).
Feuilleter
Changer Affichage Description
les touches la touche
TIME
Affichage pour entrer dans la programmation de
la minuterie.
I/O
TIME
Affichage pour entrer dans la programmation de
SET
la date et de l’heure actuelles.
MENU
TIME
Affichage pour rentrer dans la programmation
AUTO
des périodes d’enclenchement.
I/O
DAY
Affichage pour rentrer dans le programme des
périodes d’enclenchement journalières.
I/O
MO
Affichage pour le premier jour de la semaine
(monday).
I/O
On1
Affichage
de
la
première
période
6:00
d’enclenchement.
MENU
OFF1
Affichage – Fin de la première période
12:00
d’enclenchement.
MENU
On2
Affichage
de
la
deuxième
période
14:00
d’enclenchement.
MENU
OFF2
Affichage – Fin de la deuxième période
18:00
d’enclenchement.
MENU
MO
Affichage pour le premier jour de la semaine
(Monday).
MENU
TU
Affichage pour le deuxième jour de la semaine
(Tuesday).
Procédez de la même manière pour chaque jour supplémentaire jusqu'à SU (Sunday
ou dimanche)
MENU
SU
MENU
DAY
MENU
TIME
AUTO
Affichage pour confirmer la programmation du
dernier jour de la semaine.
Affichage pour rentrer dans le programme des
périodes d’enclenchement journalières.
En appuyant sur la touche MENU, vous revenez à l’affichage standard.
47
Utilisation du poêle en mode de chauffage sélectionné
Mode « HEAT »
- Appareil éteint
Touche Affichage
HEAT
OFF
+
-
HEAT
45
HEAT
35
Description
Affichage standard de l’appareil éteint en mode «HEAT». Il est
possible ici d‘augmenter ou de baisser la puissance entre 30
(puissance calorifique minimale) et 100 (puissance calorifique
nominale) même l’appareil éteint.
En appuyant sur la touche (+), augmentation de la puissance
par pas de 5. (par exemple 35, 40, 45, etc.)
En appuyant sur la touche (-), diminution de la puissance par
pas de 5.
- Démarrage de l’appareil
Touche Affichage Description
I/O
IGNIT
L’appareil démarre en appuyant sur la touche I/O. Cela vous
START
est confirmé par l’affichage «IGNITE» (allumage). Cet afHEAT
fichage est suivi peu après par START. A la fin de la phase de
démarrage, il apparaît HEAT à l’écran avec une indication de
puissance.
Interrompre le démarrage : vous pouvez interrompre la phase
IGNIT lors de la première minute. Pour cela, maintenez la
touche I/O enfoncée jusqu'à ce que le message IGNIT OFF
s'affiche. Relâchez la touche, le message HEAT OFF apparaît.
Si le démarrage est interrompu après la première minute, le
démarrage se poursuit normalement même si le message
HEAT OFF apparaît à l'écran. Ceci vaut pour tous les modes
(HEAT, AUTO et ROOM).
- Appareil allumé
Touche Affichage
HEAT
40
+
HEAT
45
HEAT
40
Description
Affichage standard de l’appareil allumé en mode «HEAT».
En appuyant sur la touche (+), augmentation de la puissance
par pas de 5. (par exemple 35, 40, 45, etc.)
En appuyant sur la touche (-), diminution de la puissance par
pas de 5.
48
Mode „ROOM“
- Appareil éteint
Touche Affichage
ROOM
OFF
+
-
ROOM
25
ROOM
23
Description
Affichage standard de l’appareil éteint en mode «ROOM».
Il est possible ici de régler la température ambiante désirée
dans une plage de 5 à 28°C même l’appareil éteint.
En appuyant la touche (+), augmentation de la température de
1°C.
En appuyant la touche (-), diminution de la température de
1°C.
- Démarrage de l’appareil
Touche Affichage Description
I/O
IGNIT
L’appareil démarre en appuyant sur la touche I/O si la temSTART
pérature ambiante désirée n’est pas encore atteinte. Cela vous
ROOM
est confirmé par l’affichage «IGNITE» (allumage). Cet affichage est suivi peu après par START.
A la fin de la phase de démarrage, il apparaît ROOM à l’écran
avec la température ambiante désirée.
- Appareil allumé
Touche Affichage
ROOM
23
+
ROOM
24
ROOM
22
Description
Affichage standard de l’appareil allumé en mode «ROOM».
En appuyant la touche (+), augmentation de la température de
1°C.
En appuyant la touche (-), diminution de la température de
1°C.
- Appareil: arrêt automatique
Touche Affichage Description
STOP
L’appareil s’arrête automatiquement dès que la température
STANDBY ambiante désirée est atteinte et passe en position STANDBY
(mode en attente). Dès que la température passe au-dessous
de la valeur désirée, l’appareil se remet à marcher.
- Appareil: arrêt en appuyant sur la touche I/O
Touche Affichage Description
I/O
STOP
En appuyant sur la touche I/O, STOP apparaît brièvement à
ROOM
l’écran d’affichage pour passer tout de suite après sur ROOM
OFF
OFF. Pour un nouveau démarrage, il faut appuyer sur la touche I/O.
49
Mode „AUTO“
- Appareil éteint
Réglage de la température ambiante pendant la période d’enclenchement
Feuilleter
Changer Affichage Description
les touches la touche
Affichage pour un appareil éteint en mode
AUTO
OFF
«AUTO». Lorsque l'appareil est éteint, vous
pouvez ici régler la température ambiante souhaitée entre 10 et 28°C.
+
On – T
Appuyez sur la touche Plus (+) pour afficher le
25
message d'accès au réglage de la température
ambiante.
I/O
On – T
Vous devez appuyer sur la touche I/O pour
25
pouvoir régler la température ambiante de votre
choix.
+
On – T
En appuyant la touche (+), augmentation de la
26
puissance de 1°C.
On – T
En appuyant la touche (+), diminution de la
24
puissance de 1°C.
I/O
AUTO
La température ambiante sélectionnée est enOFF
registrée.
Diminution de la température entre les périodes d’enclenchement
Feuilleter
Changer Affichage Description
les touches la touche
AUTO
Affichage pour un appareil éteint en mode «AUOFF
TO». Vous pouvez ici également modifier la
température réduite dans une plage de 5 à 20°C
même si l’appareil est éteint.
Off – T
Appuyez sur la touche Moins (-) pour afficher le
20
message d'accès au réglage de la température
réduite.
I/O
Off – T
Vous devez appuyer sur la touche I/O pour
20
pouvoir régler la température réduite de votre
choix.
+
Off – T
En appuyant la touche (+), augmentation de la
21
puissance de 1°C.
Off – T
En appuyant la touche (+), diminution de la
19
puissance de 1°C.
I/O
AUTO
La température réduite sélectionnée est enregisOFF
trée.
50
- Démarrage de l’appareil
Touche Affichage
I/O
IGNIT
START
AUTO
Description
L’appareil démarre en appuyant sur la touche I/O si la température ambiante désirée n’est pas encore atteinte et que
l’appareil se trouve dans une période d’enclenchement actuelle. Cela vous est confirmé par l’affichage «IGNITE» (allumage). Cet affichage est suivi peu après par START. A la fin de
la phase de démarrage, il apparaît AUTO à l’écran avec la
température ambiante désirée.
- Appareil allumé
Le réglage de la température ambiante et de la température de confort s'effectue
comme pour l'appareil éteint.
- Appareil : arrêt automatique
Touche Affichage Description
STOP
L’appareil s’arrête automatiquement dès que la température
STANDBY ambiante désirée est atteinte ou à la fin de la période
d’enclenchement programmée et passe en position STANDBY
(mode en attente). Dès que la température réelle est inférieure
à la température souhaitée, une nouvelle période de chauffage
commence et l'appareil se remet en marche.
- Appareil: arrêt en appuyant sur la touche I/O
Touche Affichage
I/O
STOP
AUTO
OFF
Description
En appuyant sur la touche I/O, STOP apparaît brièvement à
l’écran d’affichage pour passer tout de suite après sur AUTO
OFF.
Attention :
L'appareil ne se remet pas en marche automatiquement, il
redémarre en appuyant sur la touche I/O.
51
Poêle à pellet avec écran tactile
Mode comfort
En plus de la température de la pièce,
des plages horaires peuvent être
utilisées en mode confort. Pour cela
vous devez aller dans le menu
„Paramètres“ et mettre les heures de
chauffe sur „ON“. Pour la programmation
des plages horaires, merci de vous
référer à la notice d’utilisation du poêle.
Le mode confort ne peut être uniquement
sélectionné (activé) que si le thermostat
est connecté.
Lors du branchement du thermostat, le
mode confort s’affiche en surbrillance, et
le thermomètre s’éclaire au bord de
l’écran à droite.
En pressant la touche Mode Confort,
le choix de la température en °C
s’affichera, au lieu de la puissance de
chauffe
en
pourcentage.
52
Indice
Montaggio ........................................................................................................... 54
Temperatura ambiente RIKA
Apertura e sostituzione delle batterie (trasmettitore)........................................ 57
Apertura del sensore (ricevitore)..................................................................... 57
Spiegazione e funzione (trasmettitore) ........................................................... 58
Spiegazione e funzione (ricevitore) ................................................................. 59
Collegamento al forno .................................................................................... 60
Stufa a pellet con display a tasti
Funzioni comfort con termostato RIKA integrato .................................................. 61
Impostazioni ........................................................................................................ 62
- Orario di azionamento settimanale ............................................................... 63
- Orario di azionamento quotidiano ................................................................. 64
Azionamento della stufa nella modalità di riscaldamento prescelta........................ 65
Modalità “HEAT” ............................................................................................. 65
Modalità „ROOM“ ............................................................................................... 66
Modalità „AUTO“ ............................................................................................ 67
Stufa a pellet con display touch
Modo comfort ...................................................................................................... 69
ATTENZIONE:
Il design (l'ottica) del sensore radio ambientale può presentare discordanze rispetto
alle parti raffigurate in queste istruzioni.
Con riserva di modifiche tecniche e visive ed errori di composizione o di stampa.
53
Montaggio del sensore radio di temperatura ambientale RIKA prendendo ad
esempio la stufa a pellet MEMO.
(Ricevitore) dietro la parete posteriore.
Il montaggio del ricevitore sulla stufa COMO, PICO, REVO, MIRO, KAPO, ROCO e.
INDUO si differenzia dalle immagini della MEMO per le diverse posizioni di
alloggiamento nella stufa. Le relative illustrazioni sono riportate alla pagina 53.
Attenzione:
La stufa deve essere disattivata e raffreddata prima di intraprendere qualsiasi operazione.
Per lo spegnimento dell’apparecchio dai relativi stati di esercizio consultare il capitolo
“Funzionamento”.
Eseguire gli interventi di seguito descritti solamente dopo aver tolto la spina della
stufa dalla presa di corrente.
Preparazione:
Innanzitutto occorre smontare la parete posteriore della stufa a pellet e adagiarla su
un appoggio morbido (una coperta o simili).
Appoggio
Ricevitore
Connettore D-Sub
Durante lo smontaggio della parete posteriore prestare attenzione ai cavi!
La fase successiva prevede la preparazione della parete posteriore per il montaggio del ricevitore:
Punto 1.
Rimuovere tutti i traversini del ritaglio rettangolare più in
basso utilizzando un seghetto per il ferro.
54
Punto 2.
Eliminare eventuali residui dei traversini utilizzando una
piccola lima.
Punto 3.
Successivamente la lamiera di montaggio fornita viene fissata sui perni filettati appositamente predisposti, utilizzando
due rondelle e dadi M4.
In questo caso sono disponibili diverse varianti di fissaggio.
Invece che con i perni filettati il montaggio può essere eseguito anche con vite a brugola e dado a pressione.
Punto 4.
Ora il cavo del sensore radio di temperatura ambiente ricevitore con il connettore a 15 poli viene condotto dall’interno
verso l’esterno attraverso l’apposita apertura.
Punto 5.
Il ricevitore viene fissato nel supporto come illustrato.
Punto 6.
Ora il connettore viene collegato alla presa D-Sub che si
trova sull’estremità superiore, e quindi fissato con un
cacciavite.
55
Dopo aver eseguito tutte le fasi è possibile rimontare la parete posteriore sulla stufa a
pellet.
Per la programmazione del software della stufa procedere come descritto nelle
istruzioni per l’uso.
Illustrazioni di montaggio COMO,
REVO, PICO, MIRO, INDUO
Svitare la parete laterale destra (Le
Illustrazioni di montaggio TOPO
1.
Svitare il coperchio parete
posteriore
2.
Fissare la lamiera di montaggio
immagini relative allo smontaggio del
rivestimento laterale del modello PICO sono
reperibili nelle istruzioni per l’uso della stufa.)
Ciò è un processo naturale e non
rappresenta un difetto.
1.
2.
Fissare la lamiera di montaggio
3.
Ritagliare la parete posteriore
Como, Revo, Pico,
Miro, Induo
4.
Montare e collegare il ricevitore
3.
4.
5.
Roco, Kapo
56
Montare e collegare
il ricevitore
Apertura e sostituzione delle batterie nel radio sensore della temperatura ambiente RIKA (trasmettitore)
Apertura del sensore della temperatura ambiente RIKA
(ricevitore)
Apertura:
Apertura:
Con un piccolo cacciavite oppure con
un piccolo attrezzo spingere i due
denti di plastica verso l’interno ed
aprire con cura le due metà.
Aprire con cura entrambi le metà del
ricevitore.
Sostituzione delle batterie:
Si devono usare assolutamente delle
batterie Long Life! (Alcaline industriali
Panasonic oppure alcaline manganese Varta)
Fare attenzione a rispettare la corretta
polarità +/- al momento di inserire le
nuove batterie.
L’impostazione dell’interruttore DIP è
descritta a pagina 59.
57
Spiegazione e funzione del radio sensore della temperatura ambiente RIKA
(trasmettitore)
I piccoli interruttori DIP da 1 a 3 servono a stabilire gli indirizzi. La posizione degli interruttori 1- 3 sul trasmettitore deve coincidere con quella
interruttori 1-3 sul ricevitore. Se due
trasmettitori si trovano con lo stesso
indirizzo nella zona di ricezione,
l’indicatore LED lampeggia sul ricevitore passando dal verde al rosso.
Dopo aver risolto l’errato indirizzo,
l’indicatore ritorna alla modalità normale. (Il LED diventa verde.)
Interruttore DIP:
L’interruttore DIP n° 4 aumenta la
potenza di trasmissione.
- Posizione Off 1 mW.
- Posizione On 10 mW.
La posizione On per l’interruttore
DIP n° 4 si utilizza se la distanza
del trasmettitore dal ricevitore è
troppo grande oppure se un ostacolo influisce (ad esempio una parete) sulla ricezione del segnale
rendendo insufficiente la potenza
di 1 mW.
58
Spiegazione e funzionamento del radio sensore della temperatura ambiente
RIKA (ricevitore)
SENSOR SIGNAL LOST" scompare) si
Se il ricevitore è collegato al forno
(non
alimentato
elettricamente),
l’indicatore LED verde lampeggia
dopo averlo collegato alla rete elettrica.
cancella il messaggio di errore. Per
evitare l’eventuale formazione di clinker si
consiglia di utilizzare la stufa
regolarmente anche a potenza alta
oppure di farla funzionare frequentemente
a legna, come previsto dal concetto di
stufa bicombustibile.
Il collegamento si deve riconoscere al
massimo dopo 35 secondi. Se dopo
un minuto on è stato realizzato ancora
alcun collegamento dovrà scattare
una
segnalazione
di
guasto:
l’impostazione errata dell’interruttore
DIP, le batterie scariche, la distanza
eccessiva (trasmettitore – ricevitore)
oppure l’ambiente fortemente disturbato.
Attenzione:
Possono verificarsi sovrapposizioni
dei campi di frequenza dovute a reti
radio locali (per es. WLAN), causando
guasti anche durante l'esercizio di
riscaldamento.
Se la trasmissione tra trasmettitore e
ricevitore resta disturbata per un periodo prolungato e non viene ricevuto
alcun segnale, questo fatto viene
segnalato con "ROOM SENSOR
SIGNAL LOST" e la stufa passa in
condizione di spegnimento. Con il
tasto ON/OFF (tenere premuto fino a
quando la visualizzazione "ROOM
59
La stufa può quindi essere rimessa
im- mediatamente in funzione. Se la
se- gnalazione di errore compare di
nuo- vo subito dopo il reset, significa
che la batteria nel trasmettitore è
scarica o che il sensore radio
ambientale è difettoso.
L’impostazione standard può restare intatta. Gli interruttori DIP devono essere modificati solo in caso di
emergenza.
Attenzione!
L’interruttore DIP n° 4 è attivo solo sul
trasmettitore per aumentare la potenza di trasmissione in posizione ON.
Il commutatore DIP n. 4 sul ricevitore
se impostato su ON serve per l'esecuzione del test, (Fix 25°C.) e per un
esercizio di riscaldamento regolato
deve essere ripristinato in posizione
OFF.
L’indirizzo dell’interruttore DIP 1-3
deve coincidere con l’interruttore DIP
1-3 sul trasmettitore.
Il colore dell’indicatore LED dipende
dalla tensione delle batterie:
Cariche ..................... verde
Quasi scariche.......... arancione
Scariche ................... rosso
Collegamento del radio sensore della temperatura ambiente RIKA al forno
Collegate l’elemento del ricevitore del
radio sensore della temperatura ambiente RIKA all’apposito attacco DSub.
(Collegamento del radio sensore della
temperatura ambiente RIKA solo se il
forno è staccato dalla rete elettrica.)
Fissare il connettore D-Sub con un
apposito cacciavite.
Adesso il forno può essere collegato
alla rete elettrica
60
Stufa a pellet con display a tasti
Funzioni comfort con termostato RIKA integrato
Passare innanzitutto da EASY a HEAT.
Per farlo, tenere premuto il tasto di Menu finché sul display compare la visualizzazione HEAT.
non è più necessario stabilire personalmente se la stufa deve riscaldare o
meno: lo decide il sensore ambientale
RIKA in base alla temperatura presente
nell’ambiente.
Requisito fondamentale per le funzioni
comfort aggiuntive è l’installazione del
termostato RIKA disponibile come optional.
Qui è possibile selezionare tre possibili
modalità di funzionamento (Modi):
- AUTO (modalità di riscaldamento in
combinazione con sensore ambientale e programma di temporizzazione)
Nella modalità “AUTO” si ha in aggiunta
la possibilità di richiamare la temperatura benessere impostata in due orari
quotidiani o settimanali preimpostati.
Negli intervalli tra i due tempi di riscaldamento viene mantenuta una temperatura minima impostata dall’utente.
- HEAT (modalità di riscaldamento
manuale)
Questa modalità corrisponde a quella
già conosciuta come Modalità di riscaldamento semplice “EASY”. In questa
modalità è possibile solamente aumentare o diminuire la potenza calorifica
della stufa ad intervalli di 5%.
Così come avviene nella modalità
“ROOM”, la potenza calorifica viene
impostata dal comando elettronico.
- ROOM (modalità di riscaldamento
con sensore ambientale)
Anche nella modalità “ROOM” è possibile aumentare o diminuire la potenza
calorifica della stufa ad intervalli di 5. Ma
Sfoglia
tasti
Modifica Display
tasto
MODE
I/O
(+)/(-)
I/O
MENU
HEAT
ROOM
AUTO
ROOM
AUTO
HEAT
MODE
La selezione della modalità di funzionamento desiderata avviene nel punto
di menu “Mode”.
Descrizione
Visualizzazione di entrata nel livello di selezione
per la modalità di riscaldamento.
Visualizzazione della modalità di riscaldamento
attualmente impostata.
(HEAT, ROOM o AUTO)
Premendo una o più volte il tasto (+) oppure (-) si
seleziona la modalità di riscaldamento.
(HEAT, ROOM o AUTO)
Con questo si salva la modalità di riscaldamento
selezionata.
Premendo una o più volte il tasto MENU si torna
alla visualizzazione standard.
61
Impostazioni
Modalità “AUTO”
Per fare funzionare la stufa nella modalità AUTO è necessario eseguire la programmazione oraria.
- Impostazione di data e ora attuali.
Le impostazioni relative a data e ora si eseguono nel menu TIME.
Sfoglia Modifica Display Descrizione
tasti
tasto
TIME
Visualizzazione di entrata nella programmazione oraria.
I/O
TIME
Visualizzazione di entrata nella programmazione oraria
SET
di data e ora attuali.
I/O
10:02
Visualizzazione di ore e minuti.
+
11:02
Modifica delle ore.
11:03
Modifica dei minuti.
MENU
Visualizzazione della data (giorno).
DAY
01
(+)/(-)
DAY
Premendo una o più volte il tasto (+) oppure (-) è pos31
sibile impostare il giorno attuale.
MENU
MONTH Visualizzazione della data (mese).
02
(+)/(-)
MONTH Premendo una o più volte il tasto (+) oppure (-) è pos06
sibile impostare il mese attuale.
MENU
Visualizzazione della data (anno).
YEAR
06
(+)/(-)
YEAR
Premendo una o più volte il tasto (+) oppure (-) è pos07
sibile impostare l’anno attuale.
MENU
MO
Per controllo viene ora visualizzato il giorno della settimana attuale.
Se questo non è corretto significa che si è verificato un
errore durante l’impostazione della data.
I/O
TIME
Se il giorno della settimana visualizzato era corretto, si
SET
conferma l’inserimento della data premendo il tasto I/O.
Menu
TIME
Se il giorno della settimana visualizzato non era corretSET
to, premendo il tasto MENU la data viene riportata
all’ultimo valore memorizzato. Ora occorre impostare di
nuovo la data.
MENU
Premendo una o più volte il tasto MENU si torna alla
visualizzazione standard.
62
- Impostazione degli orari di azionamento quotidiani o settimanali.
Le impostazioni relative agli orari di azionamento si eseguono nel menu TIME.
- Orario di azionamento settimanale
Qui ora è possibile impostare due orari di azionamento ugualmente validi per ogni
giorno della settimana. Di fabbrica sono già impostati degli orari di commutazione che
possono però essere modificati a piacere premendo il tasto (+)/(-).
Sfoglia Modifica Display
tasti
tasto
TIME
I/O
TIME
SET
MENU
TIME
AUTO
I/O
DAY
(-)
WEEK
I/O
On1
6:00
MENU
OFF1
12:00
MENU
On2
14:00
MENU
OFF2
18:00
MENU
WEEK
MENU
TIME
AUTO
Descrizione
Visualizzazione di entrata nella programmazione oraria.
Visualizzazione di entrata nella programmazione oraria
di data e ora attuali.
Visualizzazione di entrata nella programmazione degli
orari di azionamento.
Premendo il tasto (+) si torna a DAY
Visualizzazione del primo orario di avvio.
Visualizzazione – fine del primo orario di azionamento.
Visualizzazione del secondo orario di avvio.
Visualizzazione – fine del secondo orario di azionamento.
Visualizzazione di entrata nel programma di temporizzazione settimanale.
Premendo il tasto MENU si torna alla visualizzazione
standard.
La programmazione dell’orario di azionamento settimanale viene acquisita direttamente nella programmazione dell’orario di azionamento quotidiano. Quando si programmano i tempi di commutazione occorre fare attenzione che gli orari di azionamento non si sovrappongano.
63
- Orario di azionamento quotidiano
Qui ora è possibile impostare due orari di azionamento per ogni giorno della settimana. In questo giorno quindi l’orario di azionamento quotidiano impostato avrà la priorità sulla programmazione settimanale. Di fabbrica sono già impostati degli orari di
commutazione che possono però essere modificati a piacere premendo il tasto (+)/(-).
Sfoglia Modifica Display
tasti
tasto
TIME
I/O
TIME
SET
MENU
TIME
AUTO
I/O
DAY
I/O
MO
I/O
MENU
On1
6:00
OFF1
12:00
On2
14:00
OFF2
18:00
MO
MENU
TU
MENU
MENU
MENU
Descrizione
Visualizzazione di entrata nella programmazione oraria.
Visualizzazione di entrata nella programmazione oraria
di data e ora attuali.
Visualizzazione di entrata nella programmazione degli
orari di azionamento.
Visualizzazione di entrata nel programma di temporizzazione quotidiano.
Visualizzazione per il primo giorno della settimana
(Monday = lunedì).
Visualizzazione del primo orario di avvio.
Visualizzazione – fine del primo orario di azionamento.
Visualizzazione del secondo orario di avvio.
Visualizzazione – fine del secondo orario di azionamento.
Visualizzazione per il primo giorno della settimana
(Monday = lunedì).
Visualizzazione per il secondo giorno della settimana
(Tuesday = martedì).
Procedere allo stesso modo per ogni giorno della settimana fino a SU (Sunday ovvero domenica).
MENU
SU
MENU
DAY
MENU
TIME
AUTO
Visualizzazione per confermare la programmazione
dell’ultimo giorno della settimana (Sunday = domenica).
Visualizzazione di entrata nel programma di temporizzazione quotidiano.
Premendo il tasto MENU si torna alla visualizzazione
standard.
64
Azionamento della stufa nella modalità di riscaldamento prescelta
Modalità “HEAT”
- Apparecchio: spento
Tasto Display
HEAT
OFF
+
-
HEAT
45
HEAT
35
Descrizione
Visualizzazione standard per un apparecchio spento in modalità
“HEAT”. Qui è possibile aumentare o diminuire la potenza tra 30
(potenza calorifica minima) e 100 (potenza calorifica nominale)
anche con apparecchio spento.
Premendo il tasto (+) la potenza aumenta ad intervalli di 5 (per
es. 35, 40, 45, ecc.)
Premendo il tasto (-) la potenza diminuisce ad intervalli di 5.
- Apparecchio: avvio
Tasto Display
I/O
IGNIT
START
HEAT
Descrizione
Premendo il tasto I/O l’apparecchio si avvia. Questo viene segnalato da “IGNITE” (accensione). Questa visualizzazione viene
dopo breve tempo sostituita da START. Una volta conclusa la
fase di avvio, sul display compare HEAT con indicazione.
Interruzione procedura di avvio: entro il primo minuto è possibile
interrompere la fase IGNIT tenendo premuto il tasto I/O finché
compare la visualizzazione IGNIT OFF. Dopo che il tasto è
stato rilasciato segue la visualizzazione HEAT OFF. Se la procedura di avvio viene interrotta dopo che è già trascorso un
minuto, il programma di avvio viene eseguito completamente
ma sul display viene però già visualizzato HEAT OFF. Vale per
tutte le modalità (HEAT, AUTO e ROOM).
- Apparecchio: acceso
Tasto Display
HEAT
40
+
HEAT
45
HEAT
40
Descrizione
Visualizzazione standard per un apparecchio acceso, in modalità “HEAT”.
Premendo il tasto (+) la potenza aumenta ad intervalli di 5.
Premendo il tasto (-) la potenza diminuisce ad intervalli di 5.
65
Modalità „ROOM“
- Apparecchio: spento
Tasto Display
ROOM
OFF
+
-
ROOM
25
ROOM
23
Descrizione
Visualizzazione standard per un apparecchio spento in modalità
“ROOM”. Qui è possibile regolare la temperatura ambiente in un
campo compreso tra 5-28DC anche con apparecchio spento.
Premendo il tasto (+) si aumenta la temperatura di 1°C.
Premendo il tasto (-) si diminuisce la temperatura di 1°C.
- Apparecchio: avvio
Tasto Display
I/O
IGNIT
START
ROOM
Descrizione
Premendo il tasto I/O si avvia l’apparecchio se non è ancora
stata raggiunta la temperatura ambiente desiderata.
Questo viene segnalato da “IGNITE” (accensione). Questa
visualizzazione viene dopo breve tempo sostituita da START.
Una volta conclusa la fase di avvio, sul display compare ROOM
con la temperatura ambiente desiderata.
- Apparecchio: acceso
Tasto Display
ROOM
23
+
ROOM
24
ROOM
22
Descrizione
Visualizzazione standard per un apparecchio acceso, in modalità “ROOM”.
Premendo il tasto (+) si aumenta la temperatura di 1°C.
Premendo il tasto (-) si diminuisce la temperatura di 1°C.
- Apparecchio: arresto automatico
Tasto Display
STOP
STANDBY
Descrizione
Quando viene raggiunta la temperatura ambiente desiderata
l’apparecchio si arresta automaticamente e si porta in posizione
STANDBY (modalità di pronto al funzionamento).
Non appena la temperatura ambiente scende al di sotto della
temperatura desiderata l’apparecchio si avvia di nuovo.
- Apparecchio: arresto tramite azionamento del tasto I/O
Tasto Display
I/O
STOP
ROOM
OFF
Descrizione
Premendo il tasto I/O compare per un breve tempo la visualizzazione STOP che cambia quindi in ROOM OFF. Per avviare
nuovamente è necessario premere il tasto I/O.
66
Modalità „AUTO“
- Apparecchio: spento
Impostazione della temperatura ambiente entro l’orario di azionamento.
Sfoglia
tasti
Modifica Display
tasto
AUTO
OFF
+
On – T
25
I/O
+
I/O
On – T
25
On – T
26
On – T
24
AUTO
OFF
Descrizione
Visualizzazione standard per un apparecchio spento in modalità “AUTO”. Qui è possibile impostare la
temperatura ambiente desiderata tra 10-28°C
anche con apparecchio spento.
Con il tasto Più (+) compare la visualizzazione per
accedere alla regolazione della temperatura ambiente.
Per poter impostare la temperatura ambiente desiderata occorre premere il tasto I/O.
Premendo il tasto (+) si aumenta la temperatura di
1°C.
Premendo il tasto (-) si diminuisce la temperatura
di 1°C.
Con questo si salva la temperatura ambiente selezionata.
Impostazione della temperatura minima tra gli orari di azionamento
Sfoglia
tasti
Modifica Display
tasto
AUTO
OFF
-
OFF – T
20
I/O
+
I/O
OFF – T
20
OFF – T
21
OFF – T
19
AUTO
OFF
Descrizione
Visualizzazione standard per un apparecchio spento in modalità “AUTO”. Qui è possibile regolare la
temperatura minima in un campo compreso tra 520 °C anche con apparecchio spento.
Con il tasto Meno (-) compare la visualizzazione
per accedere alla regolazione della temperatura
minima.
Per poter impostare la temperatura minima desiderata occorre premere il tasto I/O.
Premendo il tasto (+) si aumenta la temperatura di
1°C.
Premendo il tasto (-) si diminuisce la temperatura
di 1°C.
Con questo si salva la temperatura minima selezionata.
67
- Apparecchio: spento
Tasto Display
I/O
IGNIT
START
AUTO
Descrizione
Premendo il tasto I/O si avvia l’apparecchio se non è ancora
stata raggiunta la temperatura ambiente desiderata e
l’apparecchio si trova attualmente in un orario di azionamento.
Questo viene segnalato da “IGNITE” (accensione). Questa
visualizzazione viene dopo breve tempo sostituita da START.
Una volta conclusa la fase di avvio, sul display compare AUTO
con la temperatura ambiente desiderata.
- Apparecchio: acceso
L'impostazione della temperatura ambiente e della temperatura minima avviene come
descritto per apparecchio spento.
- Apparecchio: arresto automatico
Tasto Display
STOP
STANDBY
Descrizione
Quando viene raggiunta la temperatura ambiente desiderata o
la fine dell’orario di azionamento programmato, l’apparecchio si
arresta automaticamente e si porta in posizione STANDBY
(modalità di pronto al funzionamento). Non appena si scende
nuovamente al di sotto della temperatura desiderata o quando
inizia un nuovo orario di commutazione l'apparecchio si avvia di
nuovo.
- Apparecchio: arresto tramite azionamento del tasto I/O
Tasto Display
I/O
STOP
AUTO
OFF
Descrizione
Premendo il tasto I/O compare per un breve tempo la visualizzazione STOP che cambia quindi in AUTO OFF.
Attenzione:
ora l'apparecchio non riparte automaticamente ma deve essere
riavviato premendo il tasto I/O.
68
Oltre alla temperatura ambiente, il modo
comfort mette a disposizione anche la
possibilità di programmare vari orari di
funzionamento. È però necessario
entrare prima nel menu „Impostazioni“,
attivando gli orari di funzionamento
inserendo „ON“. Per la procedura di
programmazione
degli
orari
di
funzionamento
vi
preghiamo
di
consultare il manuale tecnico della
vostra
stuf
Stufa a pellet con display touch
Modo comfort
Il modo comfort può essere selezionato
(attivato) soltanto con un sensore
ambiente collegato.
Dopo aver collegato il sensore
ambiente alla stufa il modo comfort
viene evidenziato da un colore diverso
e sul lato destro del display si illumina il
termometro.
Premendo il tasto del modo comfort
si arriva alla schermata di scelta di
temperatura in C° al posto di quella
della potenza in percentuale.
69
70
71
Z33543 – 31.03.2014
RIKA Innovative Ofentechnik GmbH
A-4563 Micheldorf/Austria, Müllerviertel 20, Telefon: +43(0)7582/686-41,
Fax-DW: 43
72