1
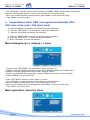
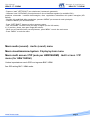
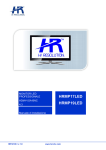
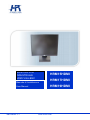
MONITOR LCD
INDUSTRIALE
HRM15HDMI
HDMI-VGA-BNC
HRM17HDMI
Manuale di Installazione
User Manual
HR1136/Ver.1.1
HRM19HDMI
www.hrcctv.com
Manuale di Installazione
User Manual
HRM15-17-19HDMI
NORME GENERALI DI SICUREZZA General safety recommendations
Sicurezza delle persone - Safety warnings
Leggere e seguire le istruzioni - Tutte le
istruzioni per la sicurezza e per l'operatività
devono essere lette e seguite prima che il
prodotto sia messo in funzione.
Precauzioni
particolari
Rispettare
tassativamente l'ordine delle istruzioni di
installazione e collegamento descritte nel
manuale. Verificare le indicazioni riportate sulla targa di
identificazione: esse devono corrispondere alla vostra rete
elettrica di alimentazione ed al consumo elettrico. Conservate le
istruzioni per una consulta futura.
Read and follow the instructions - Read the installation
instructions before connecting the system to its power source.
Follow these guidelines to ensure general safety.
In order to prevent injury, burns or electrical shock to yourself
and others, follow the connection instruction plan carefully.
Sicurezza del prodotto - Product Safety
Non posizionare in prossimità di liquidi oppure in un ambiente ad
umidità eccessiva.
Non lasciare penetrare del liquido o corpi estranei all'interno
dell'apparecchiatura.
Non ostruire le griglie di aerazione.
Non sottoporre all'esposizione dei raggi solari oppure in prossimità
di fonti di calore.
Do not use the product in a wet location.
Never push a foreign object through an opening inside the
product.
Slots and openings are provided for ventilation and should never
be covered.
Do not place under direct sunlight or heat sources.
INFORMAZIONI SULL’AMBIENTE ENVIRONMENT INFORMATION
Note per lo smaltimento del prodotto
valide per la Comunità Europea
Questo prodotto è stato progettato e
assemblato con materiali e componenti
di alta qualità che possono essere
riciclati e riutilizzati. Non smaltire il
prodotto come rifiuto solido urbano ma
smaltirlo negli appositi centri di
raccolta. E’ possibile smaltire il
prodotto direttamente dal distributore
dietro l’acquisto di uno nuovo,
equivalente a quello da smaltire. Abbandonando il prodotto
nell’ambiente si potrebbero creare gravi danni all’ambiente
stesso. Nel caso il prodotto contenga delle batterie è
necessario rimuoverle prima di procedere allo smaltimento.
Queste ultime debbono essere smaltite separatamente in
altri contenitori in quanto contenenti sostanze altamente
tossiche.
Il simbolo rappresentato in figura rappresenta il bidone dei
rifiuti urbani ed è tassativamente vietato riporre
l’apparecchio in questi contenitori.
L’immissione sul mercato dopo il 1° luglio 2006 di prodotti
non conformi al DLgs 151 del 25-07-05 (Direttiva RoHS
RAEE) è amministrativamente sanzionato.
pag.2
HRM15-17-19HDMI
Disposal of waste products for European Union
This products was designed to minimize their impact on the
environment by reducing or eliminating hazardous
materials and designing for recyclables.
This product should be handed over to a designated
collection point, e.g., on an authorized one -for-one basis
when you buy a new similar product or to an authorized
collection site for recycling waste electrical and electronic
equipment. Improper handling of this kind of waste could
have a possible negative impact on the environment and
human health due to potentially hazardous substances.
This symbol indicates that this product has not to be
disposed of with your household waste, according to the
WEEE Directive.
For more information about where you can drop off your
waste equipment for recycling, please contact your local
city waste authority, or your household waste disposal
service.
GARANZIA - Warranty
Questa garanzia ha validità di 2 anni a partire dalla data
di acquisto assicurata solo dietro presentazione della
fattura o scontrino rilasciati al cliente dal rivenditore.
L’assistenza gratuita non è prevista per i guasti causati da:
-Uso
improprio
del
prodotto,
immagazzinamento
inadeguato, cadute o urti, usura, sporcizia, acqua, sabbia,
manomissione da personale non autorizzato del prodotto
rispetto a quanto previsto nei manuali d’uso inclusi.
-Riparazioni, modifiche o pulizia effettuate da centri
assistenza non autorizzati da DEATRONIC.
-Danni o incidenti le cui cause non possono essere attribuite
alla DEATRONIC, comprendenti e non limitati a fulmini,
eventi naturali, alimentazione e ventilazione inadeguata.
This warranty is valid for 2 years from the date of
purchase obtained only against presentation of the
original invoice/ cash ticket issued to the customer by
the retailer.
Warranty repair service is excluded if damage or defects
have been caused by:
-Improper use, incorrect storage, dropping or shocks,
corrosion, dirt, water, handing or operation of the product
as referred to in the users’ manuals.
www.hrcctv.com
User Manual
Manuale di installazione
HRM15-17-19HDMI
HRM15-17-19HDMI
Indice - Index
1.
Introduzione - Introduction .....................................................................................4
1.1
Precauzioni d’uso - Important precautions ................................................ 4
1.2
Materiale a corredo - Package contents ..................................................... 4
1.3
Caratteristiche tecniche - Technical feature............................................... 5
1.4
Controllo - Control ........................................................................................ 6
1.5
Connessione - Connection .......................................................................... 7
1.6
Telecomando – Remote control .................................................................. 8
1.7
Collegamenti delle apparecchiature esterne –........................................... 8
External equipment connections ............................................................................ 8
2.
Nessuna sincronizzazione – No sync ..................................................................10
3.
Selezionare l’ingresso – Selecting input source.................................................10
4.
Selezionare la lingua – Selecting screen language ............................................11
5.
Impostazione menù OSD, con ingresso selezionato BNC/HDMI – OSD menu setup
under BNC/HDMI input mode ..........................................................................................11
6.
Impostazione menù OSD, con ingresso selezionato VGA – ..............................14
OSD menu setup under VGA input mode ......................................................................14
www.hrcctv.com
pag.3
Manuale di Installazione
HRM15-17-19HDMI
User Manual
HRM15-17-19HDMI
1. Introduzione - Introduction
1.1
Precauzioni d’uso - Important precautions
- Assicurarsi dell’integrità dell’apparecchio dopo averlo tolto dall’imballo.
- Prima di effettuare qualsiasi operazione di pulizia o di manutenzione scollegare la rete di alimentazione
elettrica. Non usare prodotti spray per la pulizia dell'apparecchio.
- Evitare di appoggiare su di esso oggetti contenenti liquidi; non esporre in alcun modo il prodotto ad acqua
e pioggia.
- Controllare che la temperatura d’esercizio sia nei limiti indicati e che l’ambiente non sia particolarmente
umido. Provvedere a un’idonea ventilazione.
- Si consiglia di scollegare il cavo di alimentazione qualora il monitor non dovesse essere utilizzato per
parecchio tempo.
- In caso di guasto e/o cattivo funzionamento togliere alimentazione tramite l'interruttore generale.
- Il dispositivo deve essere aperto soltanto da personale tecnico qualificato .
- Per le riparazioni rivolgersi solo ad un centro di assistenza tecnica autorizzato .
- L’inosservanza comporterà l’immediata decadenza della garanzia.
• Unpack the monitor carefully and check for any damage.
• Before carrying out any type of cleaning or maintenance, unplug the monitor from the mains supply.
Do not use spray products to clean the monitor.
• Do not rest objects containing liquids on the monitor.
• Check that operating temperature is in the range indicated and that the environment is not
particularly damp. Provide suitable ventilation and never install the appliance in niches with a volume
less than twice that of the appliance.
• It is good practice to unplug the power cord if the monitor is not to be used for long periods.
• In the case of faults or incorrect functioning, switch off the power supply using the main on/off
switch.
• The device must be opened only by a qualified technician.
• For repairs, contact only an authorized technical assistance center.
• Non observance will involve the immediate forfeiture of the guarantee.
1.2
Materiale a corredo - Package contents
L’imballo contiene - Package includes:
• Un monitor TFT LCD - TFT LCD monitor
• Un alimentatore - Power adapter
• Un cavo di alimentazione– Power cord.
• Un cavo VGA - VGA cable
• Un manuale d’istruzione - User manual
pag.4
www.hrcctv.com
User Manual
Manuale di installazione
HRM15-17-19HDMI
HRM15-17-19HDMI
Caratteristiche tecniche - Technical feature
HRM15HDMI - 15”LCD
1.3
Struttura - Structure
Area di visualizzazione – Display area
Misura Pixel (mm) - Pixel pitch
Luminosità - Brightness
Contrasto - Contrast
Tempo di risposta – Response time
Visualizzazione a colori – Display color
Risoluzione - Resolution
H-Posizione – H-Position
V-Posizione – V-Position
Case in metallo – Metal case
340mm x 273mm
0.294( H ) x 0.294( V )
450cd / m2
1000 : 1
8ms (typ)
16.7M
1280 x 1024
30-80KHz
Angolo di vista – View angle
Dimensioni (escluso base) - Size (excluding base)
Connettori - Connectors
170° / 160° (H/V)
328mm x 270mm x 58mm.
1xVGA In – 2xBNC In – 1xBNC out – 1xHDMI
In – 1x Audio In 3,5mm stereo
DC 12V 4A
Temperatura-Temperature: 0°C~ 40°C,
Umidità- Humidity: 20% ~ 80%
Temperatura-Temperature: -20°C~ 60°C,
Umidità- Humidity: 10% ~ 90%
4,6kg
Alimentazione - Power input
Condizioni di utilizzo - Operating condition
Condizioni di magazzino - Storage condition
Peso - Weight
60∼75Hz
HRM17HDMI - 17”LCD
Struttura - Structure
Area di visualizzazione – Display area
Misura Pixel (mm) - Pixel pitch
Luminosità - Brightness
Contrasto - Contrast
Tempo di risposta – Response time
Visualizzazione a colori – Display color
Risoluzione - Resolution
H-Posizione – H-Position
V-Posizione – V-Position
Case in metallo – Metal case
340mm x 273mm
0.294( H ) x 0.294( V )
450cd / m2
1000 : 1
8ms (typ)
16.7M
1280 x 1024
30-80KHz
Angolo di vista – View angle
Dimensioni (escluso base) - Size (excluding base)
Connettori - Connectors
170° / 160° (H/V)
362mm x 312mm x 68mm.
1xVGA In – 2xBNC In – 1xBNC out – 1xHDMI
In – 1x Audio In 3,5mm stereo
DC 12V 4A
Temperatura-Temperature: 0°C~ 40°C,
Umidità- Humidity: 20% ~ 80%
Temperatura-Temperature: -20°C~ 60°C,
Umidità- Humidity: 10% ~ 90%
6,00kg
Alimentazione - Power input
Condizioni di utilizzo - Operating condition
Condizioni di magazzino - Storage condition
Peso - Weight
www.hrcctv.com
60∼75Hz
pag.5
Manuale di Installazione
User Manual
HRM15-17-19HDMI
HRM15-17-19HDMI
HRM19HDMI - 19”LCD
Struttura - Structure
Area di visualizzazione – Display area
Misura Pixel (mm) - Pixel pitch
Luminosità - Brightness
Contrasto - Contrast
Tempo di risposta – Response time
Visualizzazione a colori – Display color
Risoluzione - Resolution
H-Posizione – H-Position
V-Posizione – V-Position
Case in metallo – Metal case
379mm x 304mm
0.294( H ) x 0.294( V )
450cd / m2
1000 : 1
8ms (typ)
16.7M
1280 x 1024
30-80KHz
Angolo di vista – View angle
Dimensioni (escluso base) - Size (excluding base)
Connettori - Connectors
170° / 160° (H/V)
396mm x 338mm x 68mm.
1xVGA In – 2xBNC In – 1xBNC out – 1xHDMI
In – 1x Audio In 3,5mm stereo
DC 12V 4A
Temperatura-Temperature: 0°C~ 40°C,
Umidità- Humidity: 20% ~ 80%
Temperatura-Temperature: -20°C~ 60°C,
Umidità- Humidity: 10% ~ 90%
6,5kg
Alimentazione - Power input
Condizioni di utilizzo - Operating condition
Condizioni di magazzino - Storage condition
Peso - Weight
60∼75Hz
1.4 Controllo - Control
-Pannello posteriore - Rear panel
N°
1
Nome
Funzione
POWER
2
3
MODE
MENU
Premere per accendere / spegnere il monitor – Press to turn on / off your
monitor
Premere per accedere al menù ingressi / Press to accesst frome main menu
Premere per aprire il menù principale– Press to bring up the main menu
pag.6
www.hrcctv.com
User Manual
Manuale di installazione
HRM15-17-19HDMI
4/5
6
7
1.5
HRM15-17-19HDMI
DOWN/UP In menù principale: premere per scorrere le voci relative a ogni icona / In the
main menu: press to scroll the entries for each icon
In menù ingressi: premere per selezionare la sorgente / In the input menu:
press to select the source
LEFT
Premere per regolare il suono (diminuire) /Premere per spostarsi tra le icone del
menù o per diminuire i valori - Press to decrease the sound level /Press to move
between the menu icons or to decease the values
RIGHT
Premere per regolare il suono (aumentare) /Premere per spostarsi tra le icone
del menù o per aumentare i valori - Press to increase the sound level / Press to
move between the menu icons or to increase the values
Connessione - Connection
N°
1
2
3
Nome
Funzione
POWER
HDMI
VGA INPUT
Presa di ingresso DC – DC input socket
Ingresso HDMI – HDMI input
Porta VGA – VGA port
4
AV1 INPUT
Porta di ingresso BNC1 – BNC1 input
5
AV2 INPUT
Porta di ingresso BNC2 – BNC2 input
6
7
AV OUT
AUDIO IN
Porta d’uscita BNC – BNC output
Porta ingresso audio jack 3,5mm stereo –
audio input
www.hrcctv.com
pag.7
Manuale di Installazione
User Manual
HRM15-17-19HDMI
HRM15-17-19HDMI
Telecomando – Remote control
Alimentazione - Power
1.6
Premere per accendere / spegnere il monitor
Press to turn on / off the monitor
Mute
Premere per disattivare l’audio. Premere nuovamente o premere” ,
e ” to unmute.
Press to mute the sound. Press again or press”
“per attivare l’audio
Tasti di direzione – Selection key
,
o per selezionare
Premere per aumentare / diminuire
Press to increase / decrease
,
or to select
, .
,
Menù
Premere per aprire il menù principale o uscire dal menù corrente
Press to bring up the main menu to the screen and exit the current menu.
Input
Premere per visualizzare l’elenco degli ingressi, scorrere ( , ) e selezionare ( ,
)
In alternativa è possibile premere direttamente i tasti “VGA”, “HDMI”, “AV” premuto una volta ( permette la
visione dell’ingresso BNC1), “AV” premuto 2 volte ( permette la visione dell’ingresso BNC2)
Press to cycle through the input source in following, scroll ( , ) and select ( ,
)
Alternatively it is possible to directly press the keys "VGA", "HDMI", "AV" key prossed 1 time (allows the
display input BNC1 ), "AV" key prossed 2 time (allows the display input BNC2).
1.7 Collegamenti delle apparecchiature esterne –
External equipment connections
Cavo di connessione – Power cord connection
Collegare il cavo di alimentazione come mostrato.
Premere l’interruttore di alimentazione del monitor per accendere il monitor. L’indicazione di accensione sul
LED del pannello frontale è verde.
Connect the power cord correctly as shown.
Press the power switch of your monitor to switch on the monitor. The power indication LED on the front
panel lights is green.
pag.8
www.hrcctv.com
User Manual
HRM15-17-19HDMI
Manuale di installazione
HRM15-17-19HDMI
Ingresso VGA, ingresso HDMI – VGA input, HDMI input
Questo monitor si adatta automaticamente alla risoluzione del segnale video presente su questi ingressi
(sino al massimo valore disponibile). Il monitor trasmette le informazioni di configurazione (EDID) alla
sorgente utilizzando l’associazione elettronica standard video (VESA).
This monitor adjust automatically to the resolution of the video signal present on the inputs (up the
maximum available). The monitor sends configuration information (EDID) to the p.c using the video
electronics standard association (VESA).
- Collegare l’ingresso VGA / HDMI del monitor all’uscita VGA / HDMI del p.c o di un DVR.
- Accendere il monitor.
- Selezionare l’ingresso VGA utilizzando i comandi input e menù sul frontale o tasti diretti sul telecomando.
•Connect the VGA / HDMI output of the p.c or DVR at monitor VGA / HDMI input.
•Turn on the monitor.
•Select the VGA input by using the commands and menus on the front or direct keys on the remote
control.
www.hrcctv.com
pag.9
Manuale di Installazione
User Manual
HRM15-17-19HDMI
HRM15-17-19HDMI
Ingressi BNC e uscita BNC – BNC inputs and BNC output
Ogni ingresso video composito (AV1 , AV2) è collegabile al segnale video proveniente da fonti quali
telecamere TVCC, DVR, etc. Il monitor è dotato di 2 ingressi BNC selezionabili. Sull’uscita BNC
compariranno le immagini dell’ultimo ingresso BNC selezionato, anche se sul monitor si è poi selezionato
una diversa sorgente ( HDMI, VGA,…).
- Collegare l’ingresso BNC del monitor.
Accendere il monitor
- Selezionare l’ingresso BNC utilizzando i comandi INPUT e UP /DOWN sul retro o i tasti
diretti sul telecomando (una pressione del tasto AV = BNC1, premere 2 volte per BNC2)
Each video input (AV1, AV2) is connected to the video signal from sources such as CCTV cameras, DVR,
etc The monitor is equipped with two BNC inputs selectable. In Output BNC, the last images selected
appear, even if the monitor is then selected a different source
(HDMI, VGA, ...)
- Connect the BNC input of the monitor
- Turn on the monitor
- Use INPUT and UP /DOWN button on the rear or the direct keys on the remote control (AV
pressing = BNC1, press 2 once for BNC2) to select the BNC input
2. Nessuna sincronizzazione – No sync
Quando non c’è un segnale d’ingresso, compare la scritta :
There is no sync menu on screen when there is no input signal :
NO SYNC
3. Selezionare l’ingresso – Selecting input source
BNC1
BNC2
HDMI
VGA
Sul retro del monitor è possibile selezionare l’ingresso premendo il tasto INPUT .
- Premere”MODE” e poi “UP/DOWN” per selezionare l’ingresso desiderato.
- Premere “LEFT/RIGHT” per confermare
Sul telecomando premere INPUT e selezionare l’ingresso utilizzando le frecce oppure premere
direttamente il tasto desiderato (una pressione del tasto AV = BNC1, premere 2 volte per BNC2).
You can select the input source by pressing input button on the remote control on front panel.
- Press the” MODE” and “UP/DOWN” button to select the source you want.
- Press “LEFT/RIGHT” button to confirm
On the remote control, press INPUT and select the input using the arrows or directly press the desired
key.
pag.10
www.hrcctv.com
User Manual
HRM15-17-19HDMI
Manuale di installazione
HRM15-17-19HDMI
4. Selezionare la lingua – Selecting screen language
Nota: La prima volta che si utilizza il monitor, selezionare la lingua desiderata per la visualizzazione dei
menù.
If you use your monitor for the first time, you should select the language which will be used for
displaying menus.
-
Premere”MENU” per accedere all’interfaccia del menù principale.
Premere “LEFT/RIGHT””per selezionare l’icona “system”.
Premere “UP/DOWN” per selezionare la lingua.
Premere”MENU” per uscire.
-
Press the ”MENU” button in to main menu
Press the “LEFT/RIGHT” button to select” system”.
Press the “UP/DOWN” button to select your language
Press ”MENU” to exit
5. Impostazione menù OSD, con ingresso selezionato BNC/HDMI –
OSD menu setup under BNC/HDMI input mode
a) Premere”MENÙ” per accedere all’interfaccia del menù principale
b) Premere “LEFT/RIGHT” o le frecce sul telecomando per selezionare il sottomenù desiderato.
c) Premere nuovamente MENU per entrare nel sottomenù.
a) Press the”MENU” button to access main menù setting interface.
b) Press the “LEFT / RIGHT” or arrows on the remote control to select the desired submenu.
c) Press MENU again to enter the submenu
Menù immagine (picture) – Picture menu
www.hrcctv.com
pag.11
Manuale di Installazione
HRM15-17-19HDMI
User Manual
HRM15-17-19HDMI
- Premere i tasti” LEFT / RIGHT ” o le frecce “SU / GIU”sul telecomando per selezionare il sotto menù
immagine (picture).
- Utilizzare i tasti “UP / DOWN” per selezionare ciò che si desidera regolare
(in modalita BNC1 / BNC2 / HDMI):
contrasto, luminosità, saturazione, definizione, temp, colore,primo piano ( scala) e modalità di visione.
- Quando si è soddisfatti della regolazione, premere “MENU” per tornare al menù principale.
- Premere MENU per uscire dal menù.
- Press “LEFT / RIGHT” or arrows “UP / DOWN” on the remote control to select picture menu
- Use “UP / DOWN” button to select what you want to adjust in the BNC1 / BNC2 / HDMI mode.
Contrast, brightness, saturation, sharpness, temperature, color, close-up (scale) and viewing mode.
- When you are satisfied with your adjustment, press “MENU” to return to main menu.
Press MENU to exit the menu
Menù audio (sound) – Audio menu
- Premere i tasti ” LEFT / RIGHT” per selezionare il sotto menù audio / sound
- Utilizzare i tasti “UP / DOWN” per selezionare ciò che si desidera regolare
(in modalita BNC1 / BNC2 / HDMI) : Bassi, bilanciamento, modalità.
- Quando si è soddisfatti della regolazione, premere “MENU” per uscire al menù principale.
- Premere “MENU” per uscire dal menù
- Press ” LEFT / RIGHT” button to select audio menù
- Use “UP / DOWN” to select what you want to adjust in the BNC1 / BNC2 / HDMI mode:
low, balanced, mode
- When you are satisfied with your adjustment, press “MENU” to return to main menu
Press “MENU” to exit the menu
Menù visualizzazione/system – Display/system menu
pag.12
www.hrcctv.com
User Manual
HRM15-17-19HDMI
Manuale di installazione
HRM15-17-19HDMI
- Premere i tasti ”LEFT / RIGHT” per selezionare il sotto menù visualizzazione/system
- Utilizzare i tasti “UP /DOWN” per selezionare ciò che si desidera regolare
(in modalita BNC1 / BNC2 / HDMI): Linguaggio, posizione menù, durata menù a schermo, trasparenza o
effettuare il reset di tutti parametri.
Nota: effettuando il reset, il linguaggio di default sarà inglese.
- Quando si è soddisfatti della regolazione, premere “MENU” per tornare al menù principale.
- Premere “MENU” per uscire dal menù
- Press ”LEFT / RIGHT” button to select display menu
- Use “UP /DOWN” to select what you want to adjust in the BNC1 / BNC2 / HDMI mode :
language, menu position, duration, or menu screen transparency, or reset all parameters.
Note: After reset, the default language will be English
- When you are satisfied with your adjustment, press “MENU” to return to main menu
- Press “MENU” to exit the menu
Menù advance (solo per HRM19HDMI) –
Advance menu (for HRM19HDMI)
- premere i tasti ”LEFT/RIGHT” per selezionare il sottomenù advance
- Utilizzare i tasti “UP/DOWN” e poi ”LEFT/RIGHT” per attivare lo spegnimento automatico temporizzato
(sleep timer)
- Al termine, premere “MENU” per tornare al menù principale, premere “MENU” per uscire dal menu.
- Press the "LEFT / RIGHT” to select the submenu advance
- Use "UP / DOWN" and then "LEFT / RIGHT" to turn off the automatic timer (sleep timer)
- When finished, press "MENU" to return to the main menu, press "MENU" to exit the menu
Menù multi screen / PIP (solo per HRM19HDMI) –
Multi screen/PIP menu (for HRM19HDMI)
- Premere i tasti ”LEFT/RIGHT” per selezionare il sotto menù funzione PIP (visione contemporanea di 2
canali)
- Utilizzare i tasti “UP/DOWN” per selezionare ciò che si desidera regolare
(in modalità BNC1 /BNC2 / HDMI) : scelta 2° canale, visualizzazione in finestra piccola o su metà schermo,
bordo, inversione tra i 2 canali (swap)
- Quando si è soddisfatti della regolazione, premere “MENU” per tornare al menù principale.
- Premere “MENU” per uscire dal menù
- Press ”LEFT/RIGHT” button to select submenu PIP ( contemporary vision of 2 channels)
www.hrcctv.com
pag.13
Manuale di Installazione
HRM15-17-19HDMI
User Manual
HRM15-17-19HDMI
- Use “UP/DOWN” to select what you want to adjust in theBNC1 /BNC2 / HDMI mode: 2nd channels
selection, viewing small window or mid-screen, between the 2 channels (swap)
- When you are satisfied with your adjustment, press "MENU" to return the main menu
- Press “MENU” to exit the menu
6. Impostazione menù OSD, con ingresso selezionato VGA –
OSD menu setup under VGA input mode
d) Premere”MENU” per accedere all’interfaccia del menù principale
e) Premere ”LEFT/RIGHT” per selezionare il sottomenù desiderato.
f) Premere “UP/DOWN” per entrare nel sottomenù.
d) Press the ”MENU” button to access main menù setting interface.
e) Press the ”LEFT/RIGHT” to select the desired submenu.
f) Press “UP/DOWN” to enter the submenu
Menù immagine (p.c.) – Image(p.c.) menu
- Premere i tasti ”LEFT/RIGHT” per selezionare il menù immagine / p.c
- Utilizzare i tasti “UP/DOWN” per selezionare ciò che si desidera regolare (in modalità VGA) :
contrasto, luminosità, temperatura colore, scala e qualià di visione
- Quando si è soddisfatti della regolazione, premere “MENU” per tornare al menù principale.
- Premere “MENU” per uscire dal menù
- Press “LEFT/RIGHT” button to select image /p.c menu
- Use “UP/DOWN” to select what you want to adjust( in the VGA mode) :
contrast, brightness, temperature color, scale and quality of vision
- When you are satisfied with your adjustment, press“MENU” to return to main menu.
- Press “MENU” to exit the menu
Menù geometria – Geometry menu
pag.14
www.hrcctv.com
User Manual
HRM15-17-19HDMI
Manuale di installazione
HRM15-17-19HDMI
- Premere i tasti ”LEFT/RIGHT” per selezionare il sottomenù geometria
- Utilizzare i tasti “UP/DOWN” per selezionare ciò che si desidera regolare (in modalità VGA) :
posizione orizzontale / verticale dell’immagine, fase, regolazione automatica del quadro immagine (HD
switch).
- Quando si è soddisfatti della regolazione, premere “MENU” per tornare al menù principale.
- Premere “MENU” per uscire dal menù
- Press ”LEFT/RIGHT” button to select geometry menu
- Use “UP/DOWN” to select what you want to adjust (in the VGA mode).
H / V position, phase, auto part image (HD switch).
- When you are satisfied with your adjustment, press”MENU” to exit the main menu
- Press “MENU” to exit the menu
Menù audio (sound) – Audio (sound) menu
Menù visualizzazione/system – Display/system menu
Menù multi screen / PIP (solo per HRM19HDMI) – Multi screen / PIP
menu (for HRM19HDMI)
Vedere impostazione menù OSD con ingresso BNC/ HDMI
See OSD setting BNC / HDMI mode.
www.hrcctv.com
pag.15
Manuale di Installazione
User Manual
HRM15-17-19HDMI
HRM15-17-19HDMI
Specifiche tecniche soggette a variazioni senza preavviso.
Technical specifications can be modified without any preliminary notice.
DEATRONIC s.r.l.
ROMA: sede legale e amministrativa; Via Giulianello, 1-7 – 00178 Roma, ITALIA – Tel +39 06 7612912 Fax +39 06 7612601
TORINO: sede operativa; Via G.B.Feroggio, 10 – 10151 Torino, ITALIA – Tel +39 011 453 53 23 Fax +39 011 453 70 49
web: www.deatronic.com – Codice Fiscale e Partita IVA 04913421006 – Iscrizione R.E.A. 817963
pag.16
www.hrcctv.com