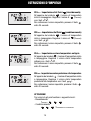
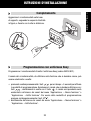
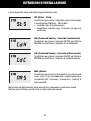
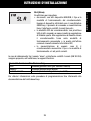
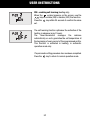
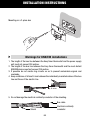
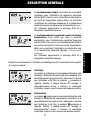
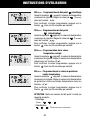
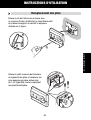
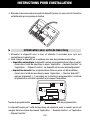
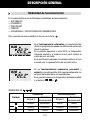
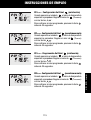
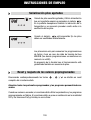
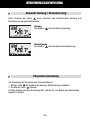
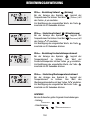
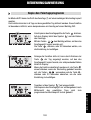
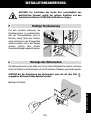
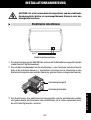
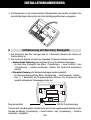
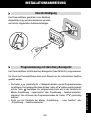
1
Cronotermostato Easy - da parete
Easy wall timer-thermostat
Chronothermostat Easy - mural
Cronotermostato Easy - de pared
Easy Thermostattimer für Wandmontage
GW 10 761 GW 14 761
INDICE
pag.
AVVERTENZE GENERALI
Contenuto della confezione ...............................................................................
4
DESCRIZIONE GENERALE
In breve ............................................................................................................
Posizione dei comandi.......................................................................................
Descrizione comandi.........................................................................................
Modalità di funzionamento ................................................................................
5
6
7
8
ISTRUZIONI D’IMPIEGO
Selezione riscaldamento/condizionamento ........................................................
Impostazione parametri.....................................................................................
Personalizzazione programma giornaliero .........................................................
Forzatura temporanea della temperatura...........................................................
Funzione Party ..................................................................................................
Funzione Holiday...............................................................................................
Copia del programma festivo.............................................................................
Segnalazione pile in esaurimento ......................................................................
Reset e ripristino dei valori preimpostati............................................................
Programmi preimpostati....................................................................................
Parametri preimpostati......................................................................................
Comportamento alla caduta e al ripristino dell’alimentazione bus......................
Sostituzione pile................................................................................................
Pulizia del cronotermostato ...............................................................................
10
10
19
20
21
22
23
24
24
25
26
26
27
28
ISTRUZIONI D’INSTALLAZIONE
Corretto posizionamento ...................................................................................
Montaggio della base di supporto......................................................................
Avvertenze per l’installazione KNX/EIB ..............................................................
Connessioni elettriche.......................................................................................
Inizializzazione con unità base Easy ..................................................................
Completamento ................................................................................................
Programmazione con unità base Easy ...............................................................
29
29
30
31
32
33
33
DATI TECNICI ........................................................................................................ 36
3
I
T
A
L
I
A
N
O
AVVERTENZE GENERALI
Attenzione! La sicurezza dell’apparecchio è garantita solo attendendosi alle istruzioni qui
riportate. Pertanto è necessario leggerle e conservarle. I prodotti Chorus devono essere
installati conformemente a quanto previsto dalla norma CEI 64-8 per gli apparecchi per
uso domestico e similare, in ambienti non polverosi e dove non sia necessaria una
protezione speciale contro la penetrazione di acqua.
L’organizzazione di vendita GEWISS è a disposizione per chiarimenti e informazioni
tecniche.
Gewiss SpA si riserva il diritto di apportare modifiche al prodotto descritto in questo
manuale in qualsiasi momento e senza alcun preavviso.
Contenuto della confezione
n. 1 Cronotermostato Easy da parete
n. 1 Base di supporto
n. 1 Morsetto bus
n. 1 Manuale di installazione e uso
4
DESCRIZIONE GENERALE
In breve
Il Cronotermostato Easy – da parete consente di gestire automaticamente, su base
settimanale, la temperatura dell’ambiente in cui è installato. La regolazione della temperatura
viene effettuata comandando, attraverso il bus KNX/EIB del sistema di Home Automation, gli
attuatori KNX/EIB che controllano l’impianto di riscaldamento o condizionamento.
In unione coi Termostati Easy – da parete (GW 10 763 - GW 14 763), di cui imposta via
bus il tipo e modalità di funzionamento, il cronotermostato consente di realizzare impianti
di termoregolazione multizona.
I profili di temperatura sono definiti su base settimanale. Per ogni giorno della settimana
è possibile programmare un profilo orario indipendente, con risoluzione di 15 minuti e
senza limite di variazioni giornaliere. Il cronotermostato prevede:
• 2 tipi di funzionamento: riscaldamento e condizionamento;
• 5 modalità di funzionamento: OFF, Economy, Precomfort, Comfort e Automatica;
• 4 temperature di regolazione per il riscaldamento (TECONOMY, TPRECOMFORT, TCOMFORT,
TANTIGELO);
• 4 temperature di regolazione per il condizionamento (TECONOMY, TPRECOMFORT, TCOMFORT,
TPROTEZIONE ALTE TEMPERATURE),
• 2 algoritmi di controllo, selezionabili localmente: a 2 punti (comando ON/OFF) e PI
(controllo di tipo PWM).
Il cronotermostato è alimentato dalla linea bus ed è dotato di display LCD con
retroilluminazione temporizzata,10 pulsanti di comando, un sensore integrato per la
rivelazione della temperatura ambientale (il cui valore viene inviato sul bus ogni 15 minuti),
pile alcaline (AAA) per il mantenimento di data e ora in caso di caduta della tensione bus.
I canali di uscita possono essere configurati per:
• inviare il comando ON/OFF agli attuatori KNX/EIB che controllano l’impianto di
termoregolazione (max 2 per riscaldamento/condizionamento);
• impostare il tipo (riscaldamento/condizionamento) e la modalità (OFF/Economy/
Precomfort/Comfort) di funzionamento dei termostati di zona;
• trasmettere le impostazioni (tipo e modalità e di funzionamento) e i dati correnti (temperatura
misurata) ad altri dispositivi, ad esempio il remotizzatore GSM Easy - GW 90 861.
I canali di ingresso possono essere configurati per:
• impostare da remoto, con altri dispositivi KNX/EIB (ad esempio col remotizzatore GSM
Easy - GW 90 861), tipo e modalità di funzionamento del cronotermostato;
• gestire scenari, associando a uno scenario una modalità e un tipo di funzionamento;
• gestire una segnalazione in ingresso, ad esempio un contatto di apertura finestra, per
spegnere temporaneamente il cronotermostato.
Il dispositivo viene installato a parete utilizzando la flangia in dotazione, che può essere
fissata a muro con dei tasselli o avvitata sopra una scatola da incasso a 3 moduli.
5
I
T
A
L
I
A
N
O
DESCRIZIONE GENERALE
Posizione dei comandi
Il cronotermostato è dotato di un display, di 3 pulsanti di comando sempre accessibili e
di 7 pulsanti di comando accessibili a sportello aperto.
21
22
23
24
25
26
27
28
18
7
17
20
16
15
14
8
19
13
9
1
2
3
4
5
6
12
6
11
10
DESCRIZIONE GENERALE
Descrizione comandi
PULSANTI DI COMANDO
1
2
3
4
5
6
7
8
9
10
11
12
13
14
15
16
17
18
19
20
21
22
23
24
25
26
27
28
Simbolo
Programmazione / impostazione
Regolazione tempo
Party
Holiday
Selezione riscaldamento / condizionamento
Copia
Regolazione temperatura (+) / Selezione parametri
Selezione modalità funzionamento / conferma
Regolazione temperatura (–) / Selezione parametri
SEGNALAZIONI A DISPLAY
Modalità di funzionamento
Unità di misura temperatura
Temperatura ambiente misurata
Profilo programma giornaliero
Attivazione condizionamento
Attivazione riscaldamento
Differenziale termico
Orologio
Giorno della settimana
Attivazione funzione autoapprendimento
Set-point temperatura - Modalità di funzionamento
Funzionamento in riscaldamento
Stato impostazione parametri
Funzionamento in condizionamento
Stato programmazione
Funzione holiday
Pile in esaurimento
Funzione copia programma festivo
Funzione party
7
Pag.
21
22
10
23
AUTO
°C / °F
SET
PROG
8
12
19
9
9
15
12
12
18
13
9
12
9
19
22
24
23
21
I
T
A
L
I
A
N
O
DESCRIZIONE GENERALE
Modalità di funzionamento
Il cronotermostato prevede 5 differenti modalità di funzionamento:
• AUTOMATICO
• ECONOMY
• PRECOMFORT
• COMFORT
• OFF-ANTIGELO / PROTEZIONE ALTE TEMPERATURE
Per commutare da una modalità a un'altra si utilizza il tasto
.
Nel funzionamento automatico il cronotermostato
utilizza un programma che può essere differenziato per
ogni giorno della settimana.
Sul display appaiono la scritta AUTO, la temperatura
ambiente misurata e il simbolo del set point relativo al
quarto d’ora corrente.
Nel profilo orario lampeggia la colonnina relativa all’ora
corrente con la rappresentazione del set point attivo.
Nei funzionamenti economy, precomfort e comfort il
cronotermostato utilizza permanentemente i set point di
temperatura corrispondenti.
Sul display appaiono la temperatura ambiente misurata e
il simbolo
,
o
.
SIGNIFICATO DI
Riscaldamento
Simbolo
Set point
Modalità
funzionamento
Condizionamento
Set point
Modalità
funzionamento
TECONOMY
Economy
TCOMFORT
Comfort
TPRECOMFORT
Precomfort
TPRECOMFORT
Precomfort
TCOMFORT
Comfort
TECONOMY
Economy
8
DESCRIZIONE GENERALE
Il funzionamento antigelo è attivo solo in riscaldamento,
a impianto di termoregolazione spento (OFF).
In questo caso il cronotermostato utilizza il set point
di temperatura antigelo impostato, riattivando l’impianto
di riscaldamento solo se la temperatura ambientale
scende sotto TANTIGELO .
Sul display appaiono la scritta OFF e la temperatura
ambiente misurata.
Il funzionamento protezione alte temperature è attivo
solo in condizionamento, a impianto di termoregolazione
spento (OFF).
In questo caso il cronotermostato utilizza il set point
di protezione alte temperature impostato, riattivando
l’impianto di condizionamento solo se la temperatura
ambientale supera TPROTEZIONE ALTE TEMPERATURE.
Sul display appaiono la scritta OFF e la temperatura
ambiente misurata.
Durante il funzionamento, l’attivazione del riscaldamento o del condizionamento sono
segnalate nel modo seguente:
Riscaldamento
Il simbolo indica che il comando di attivazione è stato
inviato all'attuatore di comando della caldaia.
Se il cronotermostato non riceve dall’attuatore il riscontro
dell’avvenuta attivazione, il simbolo inizia a lampeggiare.
Successivamente, ad ogni minuto dell’orologio, il
cronotermostato invia nuovamente il comando di attivazione
finché non riceve un riscontro positivo.
Condizionamento
Il simbolo
indica che il comando di attivazione è stato
inviato all'attuatore di comando del condizionatore. Se il
cronotermostato non riceve dall’attuatore il riscontro
dell’avvenuta attivazione, il simbolo
inizia a
lampeggiare. Successivamente, ad ogni minuto dell’orologio,
il cronotermostato invia nuovamente il comando di
attivazione finchè non riceve un riscontro positivo.
9
I
T
A
L
I
A
N
O
ISTRUZIONI D’IMPIEGO
Selezione riscaldamento/condizionamento
Premendo il tasto
è possibile commutare il tipo di funzionamento tra riscaldamento
e condizionamento e viceversa.
Riscaldamento
Il simbolo
identifica il riscaldamento.
Condizionamento
Il simbolo
identifica il condizionamento.
Impostazione parametri
Per impostare i parametri del cronotermostato:
1. selezionare con il tasto
il tipo di funzionamento (riscaldamento o condizionamento),
2. premere una volta il tasto
.
Sul display appaiono la scritta SET e l’orologio, mentre la barra del giorno della
settimana inizia a lampeggiare.
10
ISTRUZIONI D’IMPIEGO
A questo punto, secondo il tipo di funzionamento, è possibile modificare in sequenza:
Giorno della settimana
Ore
Minuti
Unità di misura della temperatura
Riscaldamento
Condizionamento
P02risc - Set Point
P02cond - Set Point
P04risc - Set Point TANTIGELO
P04cond - Set Point TPROTEZIONE ALTE TEMPERATURE
P05risc - Valore differenziale di regolazione P05cond - Valore differenziale di regolazione
ON/OFF riscaldamento
ON/OFF condizionamento
P06risc - Logica di controllo
P06cond - Logica di controllo
P07risc - Tempo di ciclo
P07cond - Tempo di ciclo
P08risc - Valore differenziale di regolazione
PWM
P08cond - Valore differenziale di regolazione
PWM
P09risc - Attivazione autoapprendimento
Per scorrere la sequenza, confermando il valore del parametro visualizzato, premere il
tasto
finché non appare il parametro che si desidera modificare.
L’uscita dalla procedura di impostazione dei parametri avviene premendo nuovamente il
tasto
oppure, automaticamente, dopo 30 secondi dall’ultima digitazione.
Per impostare i parametri di riscaldamento e condizionamento occorre eseguire entrambe
le sequenze (nella seconda sequenza si possono confermare i parametri uguali,
modificando solo quelli specifici).
11
I
T
A
L
I
A
N
O
ISTRUZIONI D’IMPIEGO
Impostazione del giorno della settimana
Quando la barra del giorno della settimana lampeggia,
selezionare il giorno corrente con i tasti
.
(lunedì=1, martedì=2 … domenica=7).
Per confermare il valore impostato, premere il tasto
entro 30 secondi.
Impostazione dell’ora
Quando le cifre dell’ora lampeggiano, impostare l’ora con
i tasti
.
Per confermare il valore impostato, premere il tasto
entro 30 secondi.
Impostazione dei minuti
Quando le cifre dei minuti lampeggiano, impostare i
minuti con i tasti
.
Per confermare il valore impostato, premere il tasto
entro 30 secondi.
Impostazione unità di misura temperatura
Quando il simbolo °C o °F della temperatura inizia a
lampeggiare, selezionare l’unità di misura della
temperatura con i tasti
.
Per confermare il valore impostato, premere il tasto
entro 30 secondi.
12
ISTRUZIONI D’IMPIEGO
P01risc - Impostazione Set Point
(riscaldamento)
All’apparire del simbolo , il valore di temperatura inizia
a lampeggiare. Regolare il valore di
(TECONOMY) con i
tasti
.
Per confermare il valore impostato, premere il tasto
entro 30 secondi.
(condizionamento)
P01cond - Impostazione Set Point
All’apparire del simbolo , il valore di temperatura inizia
a lampeggiare. Regolare il valore di
(TCOMFORT) con i
tasti
.
Per confermare il valore impostato, premere il tasto
entro 30 secondi.
P02risc - Impostazione Set Point
(riscaldamento)
All’apparire del simbolo , il valore di temperatura inizia
a lampeggiare. Regolare il valore di
(TPRECOMFORT) con
i tasti
.
Per confermare il valore impostato, premere il tasto
entro 30 secondi.
P02cond - Impostazione Set Point
(condizionamento)
All’apparire del simbolo
, il valore di temperatura
inizia a lampeggiare. Regolare il valore di
(TPRECOMFORT)
con i tasti
.
Per confermare il valore impostato, premere il tasto
entro 30 secondi.
13
I
T
A
L
I
A
N
O
ISTRUZIONI D’IMPIEGO
P03risc - Impostazione Set Point
(riscaldamento)
All’apparire del simbolo
, il valore di temperatura
inizia a lampeggiare. Regolare il valore di
(TCOMFORT)
con i tasti
.
Per confermare il valore impostato, premere il tasto
entro 30 secondi.
(condizionamento)
P03cond - Impostazione Set Point
All’apparire del simbolo
, il valore di temperatura
inizia a lampeggiare. Regolare il valore di
(TECONOMY)
con i tasti
.
Per confermare il valore impostato, premere il tasto
entro 30 secondi.
P04risc - Impostazione valore temperatura antigelo
All’apparire del simbolo
, il valore di temperatura inizia
a lampeggiare. Regolare il valore della temperatura
antigelo con i tasti
.
Per confermare il valore impostato, premere il tasto
entro 30 secondi.
P04cond - Impostazione valore protezione alte temperature
All’apparire del simbolo
, il valore di temperatura inizia
a lampeggiare. Regolare il valore della temperatura
protezione alte temperature con i tasti
.
Per confermare il valore impostato, premere il tasto
entro 30 secondi.
ATTENZIONE!
Tra i valori di set point esistono i seguenti vincoli:
- Riscaldamento
TANTIGELO
- Condizionamento
TPROTEZIONE ALTE TEMPERATURE
14
ISTRUZIONI D’IMPIEGO
P05 - Impostazione differenziale di regolazione ON/OFF
All’apparire del simbolo
, impostare il valore del
differenziale di regolazione con i tasti
.
Per confermare il valore impostato, premere il tasto
entro 30 secondi.
Il differenziale di regolazione è lo scostamento tra il set
point impostato e la temperatura effettiva di attivazione.
Si possono impostare differenziali di regolazione diversi
per riscaldamento e condizionamento.
Salvo situazioni particolari, si consiglia di mantenere i
valori preimpostati.
P06 - Logica di controllo
All’apparire della scritta P 06, impostare la logica di
controllo dell’impianto di termoregolazione con i tasti
.
(00 = controllo a 2 punti, 01 = controllo proporzionale
(PWM))
Per confermare il valore impostato, premere il tasto
entro 30 secondi.
Si possono impostare logiche di controllo diverse per
riscaldamento e condizionamento.
Se si è scelto il controllo a 2 punti saltare al punto P09,
per il controllo proporzionale andare al punto P07.
CONTROLLO A 2 PUNTI
L’impianto di termoregolazione viene disattivato quando la
temperatura ambientale è pari a set point e riattivato
quando:
- la temperatura è pari o inferiore a set point per il
riscaldamento;
- la temperatura è pari o superiore a set point +
per
il condizionamento.
I grafici che seguono mostrano i due tipi di funzionamento.
15
I
T
A
L
I
A
N
O
ISTRUZIONI D’IMPIEGO
RISCALDAMENTO
set point
T
CONDIZIONAMENTO
set point
T
CONTROLLO PROPORZIONALE (PWM)
La banda proporzionale (da set point a set point per il riscaldamento, da set point a set point +
per il
condizionamento) viene divisa in quattro zone uguali.
Il cronotermostato controlla, al termine di ogni tempo di
ciclo, la temperatura ambientale e, in base alla differenza
riscontrata, modula la proporzione dei comandi ON e OFF
trasmessi durante il tempo di ciclo.
I grafici che seguono mostrano il comportamento
del controllo proporzionale in riscaldamento e in
condizionamento.
RISCALDAMENTO
T
set point
set point -
20% 40% 60% 80%
tempo di ciclo
16
t
ISTRUZIONI D’IMPIEGO
CONDIZIONAMENTO
I
T
A
L
I
A
N
O
T
set point +
set point
20% 40% 60% 80%
tempo di ciclo
t
P07 - Impostazione tempo di ciclo
All’apparire della scritta P07, impostare la lunghezza del
tempo di ciclo con i tasti
.
I possibili valori sono: 5, 10, 20, 30, 40, 50, 60 minuti.
Si possono impostare tempi di ciclo diversi per
riscaldamento e condizionamento.
Per confermare il valore impostato, premere il tasto
entro 30 secondi.
P08 - Impostazione valore differenziale di regolazione
PWM
All’apparire della scritta P08, impostare il valore del
differenziale di regolazione PWM con i tasti
.
Si possono impostare valori differenziali di regolazione
PWM diversi per riscaldamento e condizionamento.
Per confermare il valore impostato, premere il tasto
entro 30 secondi.
La procedura di impostazione parametri è terminata.
Premere il tasto per tornare al funzionamento normale.
17
ISTRUZIONI D’IMPIEGO
P09 - Attivazione autoapprendimento (solo riscaldamento)
All’apparire del simbolo
, attivare (ON) o disattivare
(OFF) la funzione con i tasti
.
Per confermare il valore impostato, premere il tasto
entro 30 secondi.
L’autoapprendimento permette di ottimizzare l’anticipo
(max. 2 ore) sull’attivazione del riscaldamento.
Il cronotermostato gestisce automaticamente l’anticipo,
in modo da garantire la temperatura impostata all’inizio di
ogni periodo del profilo programmato.
Questa funzione si attiva solo in riscaldamento, nella
modalità di funzionamento automatico.
La procedura di impostazione parametri è terminata.
Premere il tasto
per tornare al funzionamento normale.
18
ISTRUZIONI D’IMPIEGO
Personalizzazione programma giornaliero
Per personalizzare il programma giornaliero preimpostato, o apportare delle modifiche,
premere due volte il tasto
.
Sul display appare la scritta PROG, mentre la barra del
primo giorno della settimana inizia a lampeggiare.
Selezionare il giorno desiderato con i tasti
.
Per confermare la selezione, premere il tasto
entro 30
secondi.
Dopo la conferma del giorno sul display viene visualizzato
il profilo corrente, relativo al giorno scelto.
L’orario inizia a lampeggiare.
I passi da eseguire per la personalizzazione sono:
1 - selezione dell’orario di inizio della variazione di
temperatura
2 - impostazione del nuovo set point di temperatura
3 - completamento della personalizzazione
1 - Selezione dell’orario di inizio della variazione di
temperatura
Con i tasti
modificare l’orario fino al momento in
cui si desidera variare il profilo proposto; durante
l’incremento sul profilo orario lampeggia la colonnina
relativa all’orario selezionato.
L’orario viene decrementato/incrementato con passi di 15
minuti a ogni pressione dei tasti
; è perciò possibile
avere fino a 4 periodi di programmazione per ogni ora.
19
I
T
A
L
I
A
N
O
ISTRUZIONI D’IMPIEGO
2 - Impostazione del nuovo set point di temperatura
Sul display il valore corrispondente al set point attualmente
impostato è indicato dal simbolo
,
o
.
Con i tasti
selezionare il nuovo set point, che sarà
applicato al profilo orario fino alla successiva variazione
presente nel programma.
3 - Completamento della personalizzazione
Dopo aver ripetuto i passi 1 e 2 fino ad aver ottenuto il
profilo orario di temperatura desiderato, si può:
- copiare il programma sul giorno successivo e
confermare la programmazione eseguita, premendo il
tasto
entro 30 secondi, oppure
- confermare la programmazione senza copiarla,
premendo il tasto
entro 30 secondi (si passa
automaticamente alla programmazione del giorno
successivo).
Al termine della programmazione settimanale premere il tasto
funzionamento normale.
per tornare al
Per attivare il programma selezionare la modalità di funzionamento AUTO premendo il
tasto
fino all’apparire sul display della scritta AUTO.
Forzatura temporanea della temperatura
Nelle modalità di funzionamento AUTO, Economy, Precomfort e Comfort è possibile
forzare temporaneamente il set point di temperatura attivo, utilizzando i tasti
per impostare il valore desiderato. Confermare il nuovo valore premendo il tasto
o attendere 5 secondi.
L’attivazione della forzatura viene segnalata sul display
dal lampeggio della scritta AUTO o, negli altri casi, dal
lampeggio di
,
o
. La forzatura nella modalità
di funzionamento AUTO rimane attiva fino alla successiva
variazione del profilo orario di temperatura.
20
ISTRUZIONI D’IMPIEGO
Funzione Party
In AUTO, Economy, Precomfort e Comfort la funzione Party permette di escludere
temporaneamente la modalità di funzionamento impostata e attivare la modalità comfort
con un set point regolabile, per un periodo di tempo compreso tra 1 e 23 ore.
Questa funzione può essere usata, ad esempio, per avere una temperatura più
comfortevole durante una cena, una festa, ecc.
Per attivare la funzione premere il tasto
.
Sul display appare il simbolo
, mentre lampeggia il
valore del set point
.
Con i tasti
impostare la temperatura desiderata.
Tramite i tasti
impostare poi il numero delle ore
di attivazione della funzione Party, che viene visualizzato
in alto a sinistra sul display.
Premere il tasto
, o attendere 5 secondi, per
confermare l’impostazione.
Quando la funzione è attiva, si possono modificare il valore del set point premendo i tasti
e quello del periodo di attivazione tramite i tasti
.
Durante il funzionamento il conteggio delle ore viene decrementato.
La funzione Party resta attiva fino allo scadere del periodo impostato.
Allo scadere del periodo impostato, la funzione Party si disattiva automaticamente e il
cronotermostato ritorna alla modalità di funzionamento di partenza.
Per disattivare anticipatamente la funzione Party premere il tasto
.
21
I
T
A
L
I
A
N
O
ISTRUZIONI D’IMPIEGO
Funzione Holiday
In AUTO, Economy, Precomfort e Comfort la funzione Holiday permette di escludere
temporaneamente la modalità di funzionamento impostata e attivare la modalità Economy
con un set point regolabile, per un periodo compreso tra 1 e 99 giorni.
Questa funzione può essere usata, ad esempio, per impostare un funzionamento
economico dell’impianto di termoregolazione durante una vacanza, o un lungo periodo
di assenza, e ritrovare la temperatura desiderata il giorno del rientro.
Per attivare la funzione premere il tasto
.
Sul display appare il simbolo
, mentre lampeggia il
valore del set point
.
Con i tasti
impostare la temperatura desiderata.
Tramite i tasti
impostare poi il numero dei giorni
di attivazione della funzione Holiday, che viene
visualizzato in alto a sinistra sul display.
Premere il tasto
, o attendere 5 secondi, per
confermare l’impostazione.
Quando la funzione è attiva, si possono modificare il valore del set point premendo i tasti
e quello del periodo di attivazione tramite i tasti
.
Durante il funzionamento il conteggio dei giorni viene decrementato.
La funzione Holiday resta attiva fino allo scadere del periodo impostato, che termina alle
ore 24. Nel calcolo dei giorni deve essere sempre incluso il giorno corrente.
Ad esempio, se il venerdì sera si vuole impostare la funzione Holiday in modo che termini
a mezzanotte di domenica occorre impostare 3 giorni (venerdì, sabato e domenica).
Allo scadere del periodo impostato, la funzione Holiday si disattiva automaticamente e il
cronotermostato ritorna alla modalità di funzionamento di partenza.
Per disattivare anticipatamente la funzione Holiday premere il tasto
.
22
ISTRUZIONI D’IMPIEGO
Copia del programma festivo
In modalità AUTO, è possibile copiare il profilo del giorno festivo (7) su un qualsiasi giorno
della settimana.
La funzione può essere attivata fino a 6 giorni prima del giorno scelto.
Questa funzione è particolarmente utile quando c’è, ad esempio, una festività
infrasettimanale.
Per copiare il profilo del giorno festivo premere il tasto
. Sul display lampeggiano il simbolo
e la barra del
giorno festivo.
Tramite i tasti
selezionare il giorno delle
settimana sul quale copiare il profilo del giorno festivo.
Premere il tasto
, o attendere 30 secondi, per
confermare l’impostazione.
Quando la funzione è attiva, premendo il tasto
si
visualizza il giorno sul quale è stato copiato il profilo del
giorno festivo; sul display la barra corrispondente
lampeggia.
Se si desidera disattivare la funzione, premere
nuovamente il tasto
; se si desidera modificare il
giorno della settimana, utilizzare i tasti
e premere
il tasto
, o attendere 30 secondi, per confermare la
nuova impostazione.
Durante il giorno il simbolo
è acceso fisso.
La validità della copia del giorno festivo è temporanea;
allo scadere della mezzanotte del giorno selezionato si
ritorna al profilo settimanale programmato.
23
I
T
A
L
I
A
N
O
ISTRUZIONI D’IMPIEGO
Segnalazione pile in esaurimento
Quando le pile sono in fase di esaurimento e manca
l’alimentazione bus sul display inizia a lampeggiare il
simbolo
. Sul display scompare anche l’indicazione
della temperatura ed è necessario procedere quanto
prima alla sostituzione delle pile.
Quando il simbolo
è acceso fisso le pile devono
essere assolutamente sostituite.
Le pile servono solo a conservare le impostazioni di data
e ora in caso di caduta di tensione del bus KNX/EIB (tutte
le altre impostazioni sono mantenute in memoria non
volatile).
In presenza della tensione bus il funzionamento è
comunque garantito anche in assenza di pile.
Reset e ripristino dei valori preimpostati
Premendo contemporaneamente i tasti
cronotermostato.
,
e
si effettua un reset completo del
Attenzione: tutti i parametri impostati e i programmi personalizzati vengono
cancellati.
Alla riaccensione, il cronotermostato utilizza i parametri e i programmi preimpostati in
fabbrica. Il cronotermostato si pone in riscaldamento, nella modalità OFF e le funzioni
Party e Holiday non sono attive.
24
ISTRUZIONI D’IMPIEGO
Programmi preimpostati
Il cronotermostato dispone di 2 programmi preimpostati, uno per il riscaldamento e uno
per il condizionamento.
PROGRAMMA RISCALDAMENTO
Lunedì - Venerdì
Sabato - Domenica
PROGRAMMA CONDIZIONAMENTO
Tutti i giorni della settimana
Questi programmi preimpostati possono essere modificati e personalizzati, secondo le
proprie esigenze. Per modificare i parametri preimpostati, seguire le indicazioni contenute
nel paragrafo “Personalizzazione programma giornaliero”.
25
I
T
A
L
I
A
N
O
ISTRUZIONI D’IMPIEGO
Parametri preimpostati
Giorno della settimana
1: lunedì
TANTIGELO
00:00
16 °C
18 °C
20 °C
5 °C
TPROTEZIONE ALTE TEMPERATURE
24 °C
26 °C
28 °C
35 °C
Ora
Set point temperatura di riscaldamento
Set point temperatura di condizionamento
Autoapprendimento
OFF
Riscaldamento
Condizionamento
Differenziale di regolazione
Unità di misura temperatura
0.2 °C
0.5 °C
°C
Comportamento alla caduta
e al ripristino dell’alimentazione bus
Alla caduta dell’alimentazione bus il dispositivo non compie nessuna azione.
Ora e data sono mantenute dall’alimentazione tampone (pile), mentre tutte le altre
impostazioni sono conservate in una memoria non volatile.
Il dispositivo è pienamente operativo entro massimo 5 secondi dal ripristino
dell’alimentazione bus.
In assenza dell’alimentazione tampone (pile), al ripristino dell'alimentazione bus il
cronotermostato si riattiva in modalità OFF.
26
ISTRUZIONI D’IMPIEGO
Sostituzione pile
Togliere la vite di fissaggio, che si trova sotto
il coperchietto frontale, e staccare
il cronotermostato dalla base di supporto,
seguendo la sequenza illustrata in figura.
UP
3
2
1
Togliere il coperchietto di chiusura
del vano pile e sostituire le pile
esauste con altre due da 1,5 V
(tipo AAA), rispettando le polarità indicate.
27
I
T
A
L
I
A
N
O
ISTRUZIONI D’IMPIEGO
1
Riagganciare il cronotermostato sulla base di supporto,
seguendo la sequenza illustrata in figura, e fissarlo
nuovamente con la vite frontale.
2
ATTENZIONE
- Se il cronotermostato non è stato alimentato dal bus durante la
sostituzione delle pile, riaggiornare data e ora.
- Sostituire tutte le pile contemporaneamente.
- Non utilizzare insieme pile vecchie e nuove.
- Utilizzare pile dello stesso tipo (non mischiare pile alcaline con pile allo
zinco carbone).
- Non gettare le pile nel fuoco.
- Le pile sono rifiuti speciali, il cui smaltimento è regolamentato da precise
predisposizione di legge, e devono essere conferite agli appositi centri di
raccolta.
Pulizia del cronotermostato
Per pulire il cronotermostato utilizzare un panno asciutto.
28
ISTRUZIONI D’INSTALLAZIONE
ATTENZIONE: l’installazione del dispositivo deve essere effettuata
esclusivamente da personale qualificato, seguendo la normativa
vigente e le linee guida per le installazioni KNX/EIB.
Corretto posizionamento
Per la corretta rilevazione della
temperatura dell’ambiente da controllare, il cronotermostato non deve
essere installato in nicchie, vicino a
porte o finestre, accanto a termosifoni
o condizionatori e non deve essere
colpito da correnti d’aria e dall’illuminazione solare diretta.
Montaggio della base di supporto
La base di supporto va posta ad una altezza da terra di 160 cm circa e può essere
fissata direttamente a parete, con dei tasselli, oppure sopra una scatola a 3 posti.
ATTENZIONE: Nel fissare la base di supporto rispettare il verso di montaggio indicato
dalla freccia
.
Montaggio con tasselli
UP
29
I
T
A
L
I
A
N
O
ISTRUZIONI D’INSTALLAZIONE
Montaggio su scatola a 3 posti
UP
Avvertenze per l’installazione KNX/EIB
1. La lunghezza della linea bus tra il cronotermostato Easy e l’alimentatore non deve
superare i 350 metri.
2. La lunghezza della linea bus tra il cronotermostato Easy e il più lontano dispositivo
KNX/EIB da comandare non deve superare i 700 metri.
3. Per evitare segnali e sovratensioni non voluti, non dar vita se possibile a circuiti ad
anello.
4. Mantenere una distanza di almeno 4 mm tra i cavi singolarmente isolati della linea bus
e quelli della linea elettrica .
230 V
Bus
≥ 4 mm
5. Non danneggiare il conduttore di continuità elettrica della schermatura.
Cavo bus
Conduttore di continuità
elettrica
Schermatura
30
ISTRUZIONI D’INSTALLAZIONE
ATTENZIONE: i cavi di segnale del bus non utilizzati e il conduttore di
continuità elettrica non devono mai toccare elementi sotto tensione o
il conduttore di terra.
Connessioni elettriche
+-
bus +-
Schema delle connessioni elettriche
1. Prima di procedere alla connessione al bus KNX/EIB, inserire le pile per la memoria
tampone (vedere paragrafo Sostituzione pile).
2. Connettere il filo rosso del cavo bus al morsetto rosso (+) del terminale e il filo nero
al morsetto nero (-). Al terminale bus si possono collegare fino a 4 linee bus (fili dello
stesso colore nello stesso morsetto).
Connessione dispositivo bus
Connessione cavo bus
3. Isolare lo schermo, il conduttore di continuità elettrica e i rimanenti fili bianco e giallo
del cavo bus (nel caso in cui si utilizzi un cavo bus a 4 conduttori), che non sono
necessari.
31
I
T
A
L
I
A
N
O
ISTRUZIONI D’INSTALLAZIONE
4. Inserire il morsetto bus negli appositi piedini del dispositivo. Il corretto senso di
inserzione è determinato dalle guide di fissaggio.
Inizializzazione con unità base Easy
1. Alimentare il dispositivo attraverso il bus e attendere 5 secondi affinché sia
completamente operativo.
2. Far acquisire il dispositivo dal sistema con una delle seguenti procedure:
• Acquisizione automatica (il dispositivo ha ancora le impostazioni di fabbrica):
- scegliere nell’unità base Easy il menu “Applicazione → Nuova funzione” o
“Applicazione → Edita funzione”: il dispositivo viene riconosciuto automaticamente.
• Acquisizione manuale (le impostazioni di fabbrica sono state modificate):
- scegliere nell’unità base Easy il menu “Applicazione → Cerca dispositivo”;
- premere brevemente (< 2 secondi) il tasto di programmazione. Il LED di
programmazione si illuminerà durante il processo di acquisizione.
Tasto di programmazione
LED di programmazione
Il dispositivo acquisito dall’unità base Easy viene elencato, con il numero assegnato, nei
canali dei menu “Applicazione → Nuova funzione” o “Applicazione → Edita funzione”.
32
ISTRUZIONI D’INSTALLAZIONE
Completamento
Agganciare il cronotermostato sulla base
di supporto, seguendo la sequenza illustrata
in figura, e fissarlo con la vite in dotazione.
UP
2
3
1
Programmazione con unità base Easy
Programmare il cronotermostato tramite l’unità base Easy (codice GW 90 831).
Il canale del cronotermostato, da utilizzare nella funzione che si desidera creare, può
essere selezionato a scelta:
• premendo contemporaneamente i tasti
per un tempo > 5 secondi per attivare
la modalità di programmazione. Selezionare il canale che si desidera utilizzare con i
tasti
, confermando la scelta con il tasto
: il canale corrispondente verrà
evidenziato nell’elenco dei canali del menu “Applicazione → Nuova funzione” o
“Applicazione → Edita funzione”. Per uscire dalla modalità di programmazione
premere contemporaneamente i tasti
;
• direttamente dall’elenco dei canali dei menu “Applicazione → Nuova funzione” o
“Applicazione → Edita funzione”.
33
I
T
A
L
I
A
N
O
ISTRUZIONI D’INSTALLAZIONE
I canali disponibili nella modalità di programmazione sono:
StS (Status - Stato)
Da utilizzare per inviare a dispositivi remoti (ad esempio
il remotizzatore GSM Easy - GW 90 861):
• modalità e tipo di funzionamento;
• temperatura misurata (ogni 15 minuti o ad ogni sua
variazione).
CdH (Command Heating - Comando riscaldamento)
Da utilizzare per inviare il comando ON/OFF agli attuatori
KNX/EIB che controllano l’impianto di riscaldamento.
CdC (Command Cooling - Comando raffrescamento)
Da utilizzare per inviare il comando ON/OFF agli attuatori
KNX/EIB che controllano l’impianto di condizionamento.
MAS (Master)
Da utilizzare per inviare ai termostati di zona funzionanti
come “slave” il tipo (riscaldamento / condizionamento) e
la modalità (OFF / Economy / Precomfort / Comfort) di
funzionamento.
Nella creazione delle funzioni sopra indicate non è necessario selezionare alcuna
funzione sull’unità base poichè il link è creato automaticamente.
34
ISTRUZIONI D’INSTALLAZIONE
SLA (Slave)
Da utilizzare per impostare:
• da remoto, con altri dispositivi KNX/EIB, il tipo e la
modalità di funzionamento del cronotermostato.
Esempi di dispositivi utilizzabili sono il remotizzatore
GSM Easy, il pannello di comando e visualizzazione
Easy, l’interfaccia contatti 4 canali Easy etc.;
• la modalità OFF del cronotermostato, con priorità su
tutti gli altri comandi, se viene ricevuta la segnalazione
di finestra aperta. Alla segnalazione di finestra chiusa
il cronotermostato torna nella modalità di
funzionamento precedente o in quella dell’ultimo
comando ricevuto durante la forzatura OFF;
• la memorizzazione di scenari, max 8: il
cronotermostato memorizza il tipo e la modalità di
funzionamento e il set point correnti.
In caso di abbinamento tra il canale “slave” e interfaccia contatti 4 canali (GW 90 834)
vengono proposte, sull'unità base, le seguenti funzioni.
Nomi delle funzioni sull’unità base Easy
fronti
comando gestione fronti (per contatto finestra)
scenario
comando gestione degli scenari
modalità climatiz.
comandi per la termoregolazione (modalità)
Per ulteriori informazioni sulle procedure di programmazione fare riferimento alla
documentazione dell’unità base Easy.
35
I
T
A
L
I
A
N
O
DATI TECNICI
Comunicazione
Alimentazione
Assorbimento corrente dal bus
Cavo bus
Elementi di comando
Elementi di visualizzazione
Bus KNX/EIB
Tramite bus KNX/EIB, 29 V dc SELV
+ 2 pile alcaline 1,5 V AAA per l’aggiornamento
data/ora in caso di assenza tensione bus
5 mA
KNX/EIB TP1
1 tasto di miniatura di programmazione
10 pulsanti di comando e configurazione
1 display LCD retroilluminato a LED
(temporizzato su intervento dell’utente)
1 LED rosso di programmazione
Intervallo di visualizzazione
temperatura
Elementi di misura
0 ÷ +45 °C
1 sensore NTC
risoluzione di misura: 0,1 °C
accuratezza di misura: ± 0,5 °C a 20 °C
intervallo tra misurazioni successive: 1 minuto
Intervalli di regolazione temperature TANTIGELO : +2 ÷ +7 °C
TPROTEZIONE ALTE TEMPERATURE : +30 ÷ +40 °C
Altri set point: +5 ÷ +40 °C
Ambiente di utilizzo
Interno, luoghi asciutti
Temperatura di funzionamento
-5 ÷ +45 °C
Temperatura di stoccaggio
-25 ÷ +70 °C
Umidità relativa
Max 93% (non condensante)
Connessione al bus
Morsetto ad innesto, 2 pin Ø 1 mm
Grado di protezione
IP20
Dimensione (B x H x P)
130 x 92 x 23 mm
Riferimenti normativi
Direttiva bassa tensione 2006/95/CE
Direttiva compatibilità elettromagnetica
89/336/CEE
EN50090-2-2, EN60730-1
Certificazioni
KNX/EIB
36
CONTENTS
page
GENERAL INFORMATION
Pack content .................................................................................................... 38
GENERAL DESCRIPTION
Summary..........................................................................................................
Position of controls ...........................................................................................
Control description ...........................................................................................
Operation mode ...............................................................................................
39
40
41
42
USER INSTRUCTIONS
Selecting heating/air conditioning .....................................................................
Setting parameters ...........................................................................................
Customising the daily programme.....................................................................
Temporary temperature override .......................................................................
Party Function ..................................................................................................
Holiday Function ...............................................................................................
Copying the holiday programme function ..........................................................
Low Battery indicator .......................................................................................
Reset and reinstatement of default settings ......................................................
Preset programs ...............................................................................................
Preset parameters ............................................................................................
Behaviour on the failure and reinstatement of the bus power supply .................
Replacing the batteries .....................................................................................
Cleaning the timer-thermostat ..........................................................................
44
44
53
54
55
56
57
58
58
59
60
60
61
62
INSTALLATION INSTRUCTIONS
Correct installation position...............................................................................
Assembly of the support base ...........................................................................
Warnings for KNX/EIB installations ....................................................................
Electrical connections .......................................................................................
Initialization with the Easy base unit..................................................................
Completing installation......................................................................................
Programming with the Easy base unit ...............................................................
63
63
64
65
66
67
67
TECHNICAL DATA ................................................................................................. 70
37
E
N
G
L
I
S
H
GENERAL INFORMATION
Warning! The safety of this appliance is only guaranteed if all the instructions given here
are followed scrupulously. These should be read thoroughly and kept in a safe place. The
Chorus products must be installed in compliance with the requisites of standard CEI 648 for devices for domestic use and similar, in non-dusty atmospheres and where special
protection against water penetration is not required.
The GEWISS sales organisation is at your disposal for clarifications and technical
information.
Gewiss SpA reserves the right to make changes to the product described in this manual
at any time and without giving any notice.
Pack content
n. 1 Easy wall timer-thermostat
n. 1 Support base
n. 1 Bus terminal
n. 1 Installation and user manual
38
GENERAL DESCRIPTION
Summary
Easy wall Timer-Thermostat allows you to automatically manage the temperature in the
area it is installed in on a weekly basis. The temperature is regulated by the KNX/EIB
actuators which are managed by the Home Automation KNX/EIB bus and control the
heating or air-conditioning systems. When combined with the Easy wall TimerThermostats (GW10 763 - GW14 763 ), from which it receives the function type and
mode via the bus, it is possible to create multi-zone thermal regulation systems.
The temperature profiles are defined on a weekly basis. It is possible to programme an
independent time profile for each day of the week, with a 15 minute resolution and without
limits to the daily variations. The timer-thermostat comprises:
• 2 function types: heating and air conditioning;
• 5 function modes: OFF, Economy, Precomfort, Comfort and Automatic;
• 4 temperature settings for the heating function (TECONOMY, TPRECOMFORT, TCOMFORT, TFROSTPROTECT);
• 4 temperature settings for the air conditioning function (TECONOMY, TPRECOMFORT, TCOMFORT,
THIGH TEMPERATURE PROTECTION),
• 2 control algorithm which can be set locally: with 2 points (ON/OFF command) and PI
(PWM type control).
The timer-thermostat is powered by the supplied bus line and is fitted with a timed backlit
LCD display, 10 control buttons, an integrated sensor to detect the ambient temperature (the
value of which is sent to the bus every 15 minutes), alkaline batteries (AAA) to maintain the
date and time on the display should the power be disconnected from the bus.
The output channels can be configured to:
• send the ON/OFF command to the KNX/EIB actuators that control the thermal regulation
system (max 2 for heating / air-conditioning);
• set the function type (heating/air-conditioning) and function mode (OFF/Economy/
Preconformt/Comfort)) for the zone thermostats;
• transmit the settings (function type and mode) and the current data (read temperature)
to other devices, for instance the EASY GSM repeater – GW 90 861.
The input channels can be configured to:
• remotely control the timer-thermostat function type and mode with other KNX/EIB
devices (for instance the Easy GSM remote control unit - GW 90 861);
• manage scenes, associating a function type or mode to a specific scene;
• manage an incoming signal, for instance a contact when a window is opened, to
temporarily switch off the timer-thermostat.
The device is installed on the wall using the supplied flange that can be fixed to the wall
using dowels or screwed onto a 3 module flush-mount box.
39
E
N
G
L
I
S
H
GENERAL DESCRIPTION
Position of the controls
The timer-thermostat is fitted with a display, 3 control buttons which are always
accessible and 7 control buttons which can be accessed when the cover is open.
21
22
23
24
25
26
27
28
18
7
17
20
16
15
14
8
19
13
9
1
2
3
4
5
6
12
40
11
10
GENERAL DESCRIPTION
Control description
CONTROL BUTTONS
1
2
3
4
5
6
7
8
9
10
11
12
13
14
15
16
17
18
19
20
21
22
23
24
25
26
27
28
Symbol
Programming / setting
Regulating the time
Party
Holiday
Selecting heating/air conditioning
Copy
Temperature regulation (+) / select parameters
Select function mode / confirmation
Temperature regulation (-) / select parameters
VDU SIGNALS
Function Mode
Temperature unit of measurement
Ambient temperature measured
Daily program profile
Activation of air-conditioning
Activation of heating
Thermal differential
Clock
Day of the week
Activation of self-learning function
Temperature set-point - function mode
Heating function
Parameter setting status
Air conditioning function
Programming status
Holiday Function
Low Batteries
Copy holiday programme function
Party Function
41
Page
55
56
44
57
AUTO
°C / °F
SET
PROG
42
46
53
43
43
49
46
46
52
47
43
46
43
53
56
58
57
55
E
N
G
L
I
S
H
GENERAL DESCRIPTION
Operation mode
The timer-thermostat provides 5 different operation modes:
• AUTOMATIC
• ECONOMY
• PRECOMFORT
• COMFORT
• OFF-FROSTPROTECT/HIGH TEMPERATURE PROTECTION
Use the
key to switch from one mode to another.
When in automatic mode the timer-thermostat uses a
programme that can be customised for each day of the
week.
The message “AUTO”, the measured ambient
temperature and the set point symbol relative to the
current quarter-hour are displayed on the screen.
The column relative to the current time with the
representation of the active set point blinks in the time
profile.
In the economy, precomfort and comfort function
modes the timer-thermostat permanently uses the
corresponding temperature set-points.
The current ambient temperature and the symbol
,
o
appear on the screen.
MEANINGS OF
Heating
Symbol
Set point
Air conditioning
Operating
mode
Set point
Operating
mode
TECONOMY
Economy
TCOMFORT
Comfort
TPRECOMFORT
Precomfort
TPRECOMFORT
Precomfort
TCOMFORT
Comfort
TECONOMY
Economy
42
GENERAL DESCRIPTION
The frostprotect function is only enabled in heating
function mode, when the thermal regulation system is OFF.
In this case the timer-thermostat uses the set
frostprotect temperature set-point, re-starting the
heating system only when the ambient temperature
decreases below TFROSTPROTECT.
The message ”OFF” and the measured ambient
temperature are displayed on the screen.
The high-temperature protection function is only
enabled in air-conditioning mode, when the thermal
regulation system is OFF.
In this case the timer-thermostat uses the set hightemperature set-point, re-starting the air-conditioning
system only when the ambient temperature exceeds the
THIGH TEMPERATURE PROTECTION.
The message ”OFF” and the measured ambient
temperature are displayed on the screen.
The activation of the heating or air-conditioning functions are indicated as followed:
Heating
The symbol indicates that the activation command has
been sent to the actuator which controls the boiler. If the
timer-thermostat does not receive confirmation from the
actuator that the same has been activated, the symbol
starts to flash. Subsequently, the timer-thermostat sends
the activation command again, at one minute intervals,
until it receives a positive response.
Air conditioning
The
symbol indicates that the activation command has
been sent to the actuator which controls the airconditioner. If the timer-thermostat does not receive
confirmation from the actuator that the same has been
activated, the symbol starts to flash. Subsequently, the
timer-thermostat sends the activation command again, at
one minute intervals, until it receives a positive response.
43
E
N
G
L
I
S
H
USER INSTRUCTIONS
Selecting heating/air conditioning
Press the
vice-versa.
key to switch the function modes from heating to air-conditioning and
Heating
The
symbol indicates the heating mode.
Air conditioning
The
symbol indicates the air-conditioning mode.
Setting parameters
To set the timer-thermostat parameters:
1. use the
to select the function type (heating/air conditioning);
2. press the
key once
The word SET and the clock appears on the screen, and the day of the week cursor starts
to flash.
44
USER INSTRUCTIONS
According to the function type, it is now possible to sequentially modify:
Day of the week
Hour
Minutes
Temperature unit of measurement
Heating
Air conditioning
P01heat - Set Point
P01cond - Set Point
P02heat - Set Point
P02cond - Set Point
P03heat - Set Point
P03cond - Set Point
P04heat - Set Point TFROSTPROTECT
P04cond - Set Point THIGH TEMPERATURE PROTECTION
P05heat - ON/OFF heating regulation
differential value
P05cond - ON/OFF air conditioning regulation
differential value
P06heat - Control logic
P06cond - Control logic
P07heat - Cycle time
P07cond - Cycle time
P08heat - PWM regulation differential value
P08cond - PWM regulation differential value
P09heat - Activation of self-learning function
To scroll the sequence, confirming the values displayed on the screen, press the
key
until you reach the parameter you want to change. Press the
key again to exit the
parameter setting procedure or it will exit automatically after a 30" time-out.
It is necessary to perform both sequences to set the heating and air-conditioning
parameters (in the second sequence it is possible to confirm the parameters which are
the same, and just change the specific ones).
45
E
N
G
L
I
S
H
USER INSTRUCTIONS
Setting the day of the week
When the day of week bar is blinking, select the current
day using the
keys.
(Monday=1, Tuesday=2, Sunday=7).
Press the
key within 30 seconds to confirm the value
set.
Setting the hour
When the hour figures blink, set the time using
the
keys.
Press the
key within 30 seconds to confirm the value
set.
Setting the minutes
When the minutes figures blink, set the minutes using
the
keys.
Press the
key within 30 seconds to confirm the value
set.
Setting the temperature unit of measurement
When the temperature symbols °C or °F starts to blink,
select the temperature unit of measurement using the
keys.
Press the
key within 30 seconds to confirm the value
set.
46
USER INSTRUCTIONS
P01heat - Set Point
setting (heating)
The temperature value starts to blink when the
symbol appears. Regulate the
value (TECONOMY) using
the
keys.
Press the
key within 30 seconds to confirm the value
set.
setting (air conditioning)
P01cond - Set Point
The temperature value starts to blink when the
symbol appears. Regulate the
value (TCOMFORT) using
the
keys.
Press the
key within 30 seconds to confirm the value
set.
P02risc - Set Point
setting (heating)
The temperature value starts to blink when the
symbol appears. Regulate the
value (TPRECOMFORT) using
the
keys.
Press the
key within 30 seconds to confirm the value
set.
P02cond - Set Point
setting (air conditioning)
The temperature value starts to blink when the
symbol appears. Regulate the
value (TPRECOMFORT)
using the
keys.
Press the
key within 30 seconds to confirm the value
set.
47
E
N
G
L
I
S
H
USER INSTRUCTIONS
P03heat - Set Point
setting (heating)
The temperature value starts to blink when the
symbol appears. Regulate the
value (TCOMFORT) using
the
keys.
Press the
key within 30 seconds to confirm the value
set.
setting (air conditioning)
P03cond - Set Point
The temperature value starts to blink when the
symbol appears. Regulate the
value (TECONOMY) using
the
keys.
Press the
key within 30 seconds to confirm the value
set.
P04heat - set frostprotect temperature value
The temperature value starts to blink when the
symbol appears. Regulate the temperature frostprotect
value using the
keys.
Press the
key within 30 seconds to confirm the value
set.
P04cond - Set high temperature protection value
The temperature value starts to blink when the
symbol appears. Regulate the high temperature
protection value using the
keys.
Press the
key within 30 seconds to confirm the value
set.
WARNING!
The set-point values have the following limits:
- Heating
TFROSTPROTECT
- Air conditioning
THIGH TEMPERATURES PROTECTION
48
USER INSTRUCTIONS
P05 - setting the ON/OFF regulation differential
When the
, symbol appears, set the differential
regulation value using the
keys.
Press the
key within 30 seconds to confirm the value
set.
The regulation differential is the deviance between the
set-point setting and the actual activation temperature.
It is possible to set different regulation differentials for the
heating and air-conditioning functions. It is recommended
to retain the preset values except in special situations.
P06 - Control logic
When the P06 code appears on the screen, set the
thermal regulation control logic using the
keys.
(00 = 2 point control, 01 = proportional control
(PWM))
Press the
key within 30 seconds to confirm the value
set.
It is possible to set different control logics for the heating
and air-conditioning functions.
If you select a 2 point control, move on to point P09, for
proportional control move on to point P07.
2 POINT CONTROL
The thermal regulation plant is disabled when:
the temperature is equal to the set point and reactivated
when:
- the temperature is equal to or lower than the set point
for heating;
- the temperature is equal to or higher than the set point
+
for air-conditioning;
The diagrams below show the two function types.
49
E
N
G
L
I
S
H
USER INSTRUCTIONS
HEATING
set point
T
AIR CONDITIONING
set point
T
PROPORTIONAL CONTROL (PWM)
The proportional channel (from set point to set point
for heating, from set point to set point +
for airconditioning) is divided into four equal zones.
At the end of each cycle time, the timer-thermostat controls
the ambient temperature and, according to the differences
recorded, it modulates the proportion of the ON and OFF
commands transmitted during the cycle time.
The diagrams below show the behaviour of the proportional
control in heating and air-conditioning functions.
HEATING
T
set point
set point -
20% 40% 60%
cycle time
50
80%
t
USER INSTRUCTIONS
AIR CONDITIONING
T
set point +
set point
20% 40% 60%
cycle time
80%
t
P07 - setting the cycle time
When the P07 code appears on the screen, set the cycle
time using the
keys.
The values available are as follows: 5, 10, 20, 30, 40, 50,
60 minutes.
It is possible to set different cycle times for the heating
and air-conditioning functions.
Press the
key within 30 seconds to confirm the value
set.
P08 - setting the PWM regulation differential value
When the P08 appears on the display, set the differential
PWM regulation value using the
keys.
It is possible to set different PWM values for the heating
and air-conditioning functions. Press the
key within
30 seconds to confirm the value set.
The parameter setting procedure has now been completed.
Press the
key to return to normal operating mode.
51
E
N
G
L
I
S
H
USER INSTRUCTIONS
P09 - enabling self-learning (heating only)
When the
symbol appears on the screen, use the
keys to enable (ON) or disable (OFF) the function.
Press the
key within 30 seconds to confirm the value
set.
The self-learning function optimises the activation of the
heating in advance (max 2 hours).
The timer-thermostat manages the advance
automatically, so as to guarantee the set temperature at
the beginning of every period of the programmed profile.
This function is activated in heating, in automatic
operation mode only.
The parameter setting procedure has now been completed.
Press the
key to return to normal operation mode.
52
USER INSTRUCTIONS
Customising the daily programme
To customise the preset daily programme, or modify the settings, press the
key twice.
The message “PROG” is displayed on the VDU, while the
bar of the first day of the week starts to blink.
Select the required day using the
keys.
Press the
key within 30 seconds to confirm the
selection.
After confirmation of the day, the current profile, relative
to the day selected, is displayed on the screen.
The time will start to blink.
Follow the steps below to customise the settings:
1 - select the starting time for the change in
temperature
2 - set the new temperature set point
3 - completing the customisation process
1 - Select the starting time for the change in
temperature
Use the
keys to change the time until you reach
the profile you wish to change; the selected time column
flashes as the hour profile increases. The time is
decremented/incremented in steps of 15 minutes each
time the
keys are pressed, so it is possible to
define up to 4 programming periods each hour.
53
E
N
G
L
I
S
H
USER INSTRUCTIONS
2 - Setting the new temperature set point
The current set point value is indicated on the display by the
symbol
,
or
.
The
keys are then used to select the new set point,
which will be applied to the time profile until the next
variation present in the program.
3 - Completing the customisation process
After repeating steps 1 and 2 to reach the desired
temperature hour profile, it is possible to:
- copy the programme to the next day and confirm the
performed programming phase by pressing the
key within 30 seconds, or
- confirm the performed programming without copying
it, by pressing the
key within 30 seconds (this
moves the programming on to the next day
automatically).
Press the
key on completion of weekly programming to return to normal operating.
To activate the program, select AUTO operating mode by pressing the
message “AUTO” is displayed on the screen.
key until the
Temporary temperature override
It is possible to temporarily the active temperature set point in AUTO, Economy,
Precomfort and Comfort operation modes by using the
keys to set the required
value. Confirm the new value by pressing the
key or waiting for 5 seconds.
The word AUTO will flash on the display to indicate
override is enabled or, in the other cases, when
,
or
flashes.
The override of the AUTO mode remains active until the
next variation in the temperature time profile.
54
USER INSTRUCTIONS
Party Function
When in AUTO, Economy, Precomfort and Comfort mode the Party function allows you
to temporarily exclude the set function mode and enable the comfort mode with an
adjustable set point, for a period of time of from 1 - 23 hours.
This function can be used, for instance, to set a more comfortable temperature during
a dinner or a party etc.
Press the key
twice to enable the function.
The
symbol appears on the screen, whilst the
set
point value flashes.
Use the
keys to set the desired temperature.
Press the
keys to set the number of hours for
which the Party function should be enabled, which is then
indicated in the top left hand corner of the screen.
Press the
key or wait 5 seconds to confirm the
setting made.
When the function is enabled, it is possible to change the set point value pressing the
keys and the activation period using the
keys.
The count of the hours is decremented during operation.
The party function remains active until the set period elapses.
When the set time expires, the Party function is automatically disabled and the timerthermostat returns to its regular function mode.
Press the key
to disable the Party function before the expiry time.
55
E
N
G
L
I
S
H
USER INSTRUCTIONS
Holiday Function
When in AUTO, Economy, Precomfort and Comfort mode the Holiday function allows you
to temporarily exclude the set function mode and enable the Economy mode with an
adjustable set point, for a period of time of from 1 - 99 days.
This function can be used, for instance, to set the thermal regulation system so it runs
economically during a holiday period, or during a prolonged period of absence, and
adjusts the settings the day you return.
Press the key
twice to enable the function.
The
, symbol appears on the screen, whilst the
set point value flashes.
Use the
keys to set the desired temperature.
Use the
keys to set the number of days for which
the Holiday function should be enabled, which is then
indicated in the top left hand corner of the screen.
Press the
key or wait 5 seconds to confirm the
setting made.
When the function is enabled, it is possible to change the set point value pressing the
keys and the activation period using the
keys.
The count of the days is decremented during operation.
The Holiday function remains on until the set expiry date, which ends at midnight.
When calculating the number of days, always include the current day.
For instance, if you want to set the Holiday function on Friday evening so that it ends on
Sunday at midnight, you should set 3 days (Friday, Saturday and Sunday).
When the set time expires, the Holiday function is automatically disabled and the timerthermostat returns to its regular function mode.
Press the key
to disable the Holiday function before the expiry time.
56
USER INSTRUCTIONS
Copying the holiday programme function
In AUTO mode it is possible to copy the holiday profile (7) to any other day of the week.
This function can be activated up to 6 days before the selected day.
This function is particularly useful when, for instance, there is a day’s holiday during
the week.
Press the
key to copy the holiday profile.
The
symbol and the holiday day cursor will flash on
the display.
Use the
keys to select the day of the week to
which the holiday profile should be copied.
Press the
key or wait 30 seconds to confirm the
setting made.
When the function is enabled, press the
key to view
the day to which the holiday profile was copied; the
corresponding cursor will flash on the display.
If you wish to disable the function, press the
again;
if you wish to change the day of the week, use
the
keys and press the
key, or wait 30
seconds, to confirm the new settings.
During the day the
symbol indicator light is
always ON.
The validity of the holiday copy function is temporary; at
midnight of the selected day the system returns to the
normal weekly profile programme.
57
E
N
G
L
I
S
H
USER INSTRUCTIONS
Low Battery indicator
When the batteries are low and there is not bus power
the
symbol will start to flash on the screen.
The temperature indications also disappear from the
screen and it is necessary to replace the batteries as soon
as possible.
When the
symbol is ON with a fixed light, it is
essential to replace them immediately.
The batteries are only used to preserve the time and date
settings when there is no bus KNX/EIB power (all the other
settings are stored in the non-volatile memory).
When the bus power is present it will always function
even without batteries.
Reset and reinstatement of default settings
Press the
,
and
keys all together to completely reset the timer-thermostat.
Caution: all the previously set parameters and customised programmes will be
cancelled.
When it is turned back on, the timer-thermostat will use the default factory settings.
The timer-thermostat will be set to heating, in OFF mode and the Party and Holiday
functions will not be enabled.
58
USER INSTRUCTIONS
Preset programs
The timer-thermostat has 2 preset programs, one for heating and one for air
conditioning.
HEATING PROGRAM
Monday - Friday
E
N
G
L
I
S
H
Saturday - Sunday
AIR CONDITIONING PROGRAM
Every day of the week
These preset programs can be modified and personalised according to one’s own
requirements. To change the preset parameters, follow the instructions provided in the
“Customising the daily programme” paragraph.
59
USER INSTRUCTIONS
Preset parameters
Day of the week
1:Monday
TFROSTPROTECT
00:00
16 °C
18 °C
20 °C
5 °C
THIGH TEMPERATURES PROTECTION
24 °C
26 °C
28 °C
35 °C
Hour
Heating temperature set-point
Air-conditioning temperature set-point
Self-learning
OFF
Heating
Air conditioning
Differential regulation
Temperature unit of measurement
0.2 °C
0.5 °C
°C
Behaviour on the failure and
reinstatement of the bus power supply
When the bus power supply fails, the device performs no actions. The time and date are
maintained by the buffer power system (batteries) whilst all the other settings are saved
to a non-volatile memory.
The device is in full operating mode within a maximum of 5 seconds from reinstatement
of the bus power supply
If the buffer power (battery) is absent, the timer-thermostat will restart in OFF mode when
the bus power is reinstated.
60
USER INSTRUCTIONS
Replacing the batteries
Remove the fastener screws which are under
the front cover, and remove the timer-thermostat
from the support base, as seen in the figure below.
UP
3
2
1
Remove the battery holder cover and
replace the dead batteries with another
two 1.5 V (AAA) batteries, paying attention
to the direction of the poles.
61
E
N
G
L
I
S
H
USER INSTRUCTIONS
1
Replace the timer-thermostat on the support base,
as seen in the figure below, and fix it in place using
the supplied screws.
2
WARNING:
- If the timer-thermostat was not powered by the bus whilst replacing the
battery, update the time and date.
- Replace all the batteries at the same time.
- Never use old and new batteries together.
- Always use the same type of batteries (do not mix alkaline and carbon
zinc batteries).
- Never throw the batteries into a fire.
- The batteries are a special waste product and therefore it must be
disposed of according to the laws in force and taken to a special collection
centre.
Cleaning the timer-thermostat
Use a dry cloth to clean the timer-thermostat.
62
INSTALLATION INSTRUCTIONS
WARNING: the installation of the device must be exclusively done by
qualified personnel, following the regulations in force and the
guidelines for KNX/EIB installations.
Correct installation position
In order for the timer-thermostat to
take correct readings of the ambient
temperature, it must not be installed in
an alcove, near a door or window, next
to radiators or air conditioner units and
must not be placed in direct sunlight
or in draughty areas.
E
N
G
L
I
S
H
Assembly of the support base
The support base should be positioned at 160 cm from the ground and can be mounted
on the wall, using dowels, or on top of a 3-place box.
WARNING: When mounting the support base, make sure you follow the directions
indicated by the arrow
.
Mounting with dowels
UP
63
INSTALLATION INSTRUCTIONS
Mounting on a 2-place box
UP
Warnings for KNX/EIB installations
1. The length of the bus line between the Easy timer-thermostat and the power supply
unit must not exceed 350 metres.
2. The length of the bus line between the Easy timer-thermostat and the most distant
KNX/EIB device must not exceed 700 metres.
3. If possible do not create ring circuits so as to prevent undesirable signals and
overloads.
4. Keep a distance of at least 4 mm between the individually insulated cables of the bus
line and those of the electric line.
230 V
Bus
≥ 4 mm
5. Do not damage the electrical continuity conductor of the shielding.
Bus cable
Electrical continuity
conductor
Shield
64
INSTALLATION INSTRUCTIONS
WARNING: the unused bus signal cables and the electrical continuity
conductor must never touch elements under power or the earth
conductor.
Electrical connections
+-
bus +Electrical connections diagram
1. Before connecting the KNX/EIB bus, insert the buffer memory batteries (see Replacing
the Batteries paragraph).
2. Connect the bus cable’s red wire to the terminal’s red connector (+) and the black wire
to the black connector (-). Up to 4 bus lines (wires of the same colour in the same
connector) can be connected to the bus terminal.
Bus device connection
Bus cable connection
3. Insulate the screen, the electrical continuity conductor and the remaining white and
yellow wires of the bus cable (should a bus cable with 4 conductors be used), which
are not needed.
65
E
N
G
L
I
S
H
INSTALLATION INSTRUCTIONS
4. Insert the bus connector into the special feet of the device. The fastener guides
determine the direction it should be inserted.
Initialization with the Easy base unit
1. Power up the device using the bus and wait for 5 seconds until it is in full operating
mode
2. Have the system acquire the device with one of the following procedures:
• Automatic acquisition (the device still has the factory settings):
- select the “Application → New function” or “Application → Edit function” menu in
the Easy base unit: the device will be recognized automatically.
• Manual acquisition (the factory settings have been modified):
- select the “Application → Search device” menu in the Easy base unit;
- briefly press (< 2 seconds) the programming key. The programming LED will light
up during the acquisition process.
Programming key
Programming LED
The device acquired by the Easy base unit will be listed, with the number assigned, in the
channels of the “Application → New function” or “Application → Edit function” menus.
66
INSTALLATION INSTRUCTIONS
Completing installation
Position the timer-thermostat on the support base,
as seen in the figure below, and fix it in place
using the supplied screws.
UP
2
3
1
Programming with the Easy base unit
Programming the timer-thermostat through the Easy base unit (code GW 90 831).
The timer-thermostat channel to be used in the function that is to be created can be
selected at choice:
• Press the
keys together for over >5 seconds to enable the programming mode.
Use the
keys to select the channel you wish to use, then press
to confirm:
The corresponding channel will be highlighted in the channel list in the "Application
→ New function" or "Application → Edit function" menu. Press the
keys
together to exit the programming mode.
• directly from the list of channels of the “Application → New function” or “Application
→ Edit function” menus.
67
E
N
G
L
I
S
H
INSTALLATION INSTRUCTIONS
The channels available in the programming mode are:
StS (Status)
Used to send to remote devices (for instance the Easy
GSM Remote Control Unit - GW 90 861):
• function type and mode:
• temperature reading (every 15 minutes or each time it
changes).
CdH (Heating command)
Used to send the ON/OFF command to the KNX/EIB
actuators that control the heating system.
CdC (Cooling command)
Used to send the ON/OFF command to the KNX/EIB
actuators that control the air conditioning system.
MAS (Master)
Used to send the zone thermostats enabled as “slaves”
the function type (heating/air-conditioning) and mode type
(OFF, Comfort, Precomfort, Economy).
When creating the above listed functions, it is not necessary to select a base unit function
as the link is created automatically.
68
INSTALLATION INSTRUCTIONS
SLA (Slave)
This is used to set:
• the timer-thermostat function type and mode with
other KNX/EIB devices from a remote position.
Examples of devices which can be used are the EASY
GSM Remote Control Unit, the EASY control panel and
display, the EASY 4-channel contact interface etc;
• the OFF mode on the timer-thermostat, with priority
over all the other commands, if an open window signal
is received. When the closed window signal is
received, the timer-thermostat returns to its previous
function mode or to the last mode it was in when it
received the forced OFF command;
• memorising the scenes, max 8: the timer-thermostat
memorises the current function type, mode and setpoint.
If the “slave” channel is combined with the 4-channel contact interface (GW 90 834) the
following functions are proposed on the base unit.
Names of the functions on the Easy base unit
edges
Edge management command (for window contacts)
scene
Scene management command
heating mode
Thermal regulation commands (mode)
Refer to the Easy base unit documentation for further information on the programming
procedures.
69
E
N
G
L
I
S
H
TECHNICAL DATA
Communication
Power Supply
Bus current consumption
Bus cable
Control elements
Display elements
Temperature
display range
Reading elements
Temperature regulation ranges
Ambit of use
Operating temperature
Storage temperature
Relative humidity
Bus connection
Protection rating
Size (L x H x W)
Reference standards
Certifications
KNX/EIB Bus
By KNX/EIB bus, 29 V dc SELV + 2 1.5 V AAA
alkaline batteries to update time/date when
there is no bus power
5mA
KNX/EIB TP1
1 mini programming key,
10 command and programming buttons
1 LED backlit LCD display
(timed to user intervention),
1 red programming LED
0 ÷ +45 °C
1 NTC
reading resolution: 0.1 °C
reading accuracy: ± 0.5 °C to 20 °C
intervals between the next readings: 1 minute
TFROSTPROTECT : +2 ÷ +7 °C
THIGH TEMPERATURE PROTECTION : +30 ÷ +40 °C
Other set points: +5 ÷ +40 °C
Indoors, dry places
-5 ÷ +45 °C
-25 ÷ +70 °C
Max 93% (no condensation)
Slot in terminal, 2 pin Ø 1 mm
IP20
130 x 92 x 23 mm
Low Voltage Standard 2006/95/CE
Electromagnetic Compatibility Standard
89/336/CEE EN50090-2-2, EN60730-1
KNX/EIB
70
SOMMAIRE
page
AVERTISSEMENTS GENERAUX
Contenu de la confection .................................................................................. 72
DESCRIPTION GENERALE
En bref .............................................................................................................
Position des commandes .................................................................................
Description des commandes ............................................................................
Modalités de fonctionnement ...........................................................................
73
74
75
76
INSTRUCTIONS D'UTILISATION
Sélection chauffage/climatisation......................................................................
Programmation paramètres ..............................................................................
Personnalisation du programme journalier .......................................................
Forçage temporaire de la température ..............................................................
Fonction Party .................................................................................................
Fonction Holiday ...............................................................................................
Copie du programme jours de fête ....................................................................
Signalisation piles en cours d’épuisement ........................................................
Reset et rétablissement des valeurs préréglées ................................................
Programmes prédéfinis ....................................................................................
Paramètres prédéfinis ......................................................................................
Comportement à la chute et au rétablissement de l’alimentation bus ...............
Remplacement des piles ...................................................................................
Nettoyage du chronothermostat .......................................................................
78
78
87
88
89
90
91
92
92
93
94
94
95
96
INSTRUCTIONS POUR L’INSTALLATION
Positionnement correct .....................................................................................
Montage de la base de support .........................................................................
Avertissements pour l’installation KNX/EIB ........................................................
Connexions électriques .....................................................................................
Initialisation avec unité de base Easy ...............................................................
Achèvement .....................................................................................................
Programmation avec unité de base Easy ..........................................................
97
97
98
99
100
101
101
DONNEES TECHNIQUES ....................................................................................... 104
71
F
R
A
N
Ç
A
I
S
AVERTISSEMENTS GENERAUX
Attention! La sécurité de l'appareil n'est garantie que si les instructions indiquées ici
sont respectées. Il est donc nécessaire de les lire et de bien les conserver. Les produits
de la gamme Chorus doivent être installés conformément aux dispositions de la norme
CEI 64-8 pour les appareils à usage ménager et similaires, dans des environnements
non poussiéreux et là où il n’est pas nécessaire de mettre en place une protection
spéciale contre la pénétration de l’eau. L’organisation de vente de la Société GEWISS est
à votre disposition pour tous éclaircissements et toutes informations techniques.
Gewiss SpA se réserve le droit de faire des modifications sur le produit décrit dans ce
manuel à n’importe quel moment et sans aucun préavis.
Contenu de la confection
n. 1 Chronothermostat Easy mural
n. 1 Base de support
n. 1 Borne bus
n. 1 Manuel d’installation et d’emploi
72
DESCRIPTION GENERALE
En bref
Le Chronothermostat Easy - mural permet de gérer automatiquement, sur base
hebdomadaire, la température de la pièce où il est installé. Le chronothermostat effectue le
réglage de la température en commandant, par le biais du bus KNX/EIB du système de Home
Automation, les actionneurs KNX/EIB qui contrôlent l’installation de chauffage ou de
climatisation. En union avec les Thermostats Easy - muraux (GW10 763 - GW14 763), dont,
via bus, il définit le type et la modalité de fonctionnement, le chronothermostat permet de
réaliser des installations de régulation thermique multizones.
Les profils de température sont définis sur une base hebdomadaire. Pour chaque jour de la
semaine il est possible de programmer un profil horaire indépendant, avec une résolution de
15 minutes, et sans limites de variations quotidiennes. Le chronothermostat prévoit:
• 2 types de fonctionnement: chauffage et climatisation;
• 5 modalités de fonctionnement: Arrêt, Economie, Preconfort, Confort et Automatique;
• 4 températures de réglage pour le chauffage (TÉCONOMIE, TPRECONFORT, TCONFORT, TANTIGEL);
• 4 températures de réglage pour la climatisation (TECONOMY, TPRECONFORT, TCONFORT, TPROTECTION
HAUTES TEMPÉRATURES),
• 2 algorithmes de contrôle, sélection locale : à 2 points (commande Marche/Arrêt), et
PI (contrôle du type PWM).
Le chronothermostat est alimenté par la ligne bus et est équipé d'afficheur LCD avec rétro
éclairage temporisé, 10 boutons de commande, un capteur intégré pour la détection de la
température ambiante (dont la valeur est envoyée sur le bus toutes les 15 minutes), piles
alcalines (AAA) pour le maintien de la date et de l'heure en cas de chute de la tension du bus.
Les canaux de sortie peuvent être configurés pour:
• envoyer la commande Marche/Arrêt aux actionneurs KNX/EIB qui contrôlent
l’installation de régulation thermique (max 2 pour chauffage / climatisation);
• définir le type (chauffage / climatisation) et la modalité (Arrêt/ Economie/ Preconfort/
Confort) de fonctionnement des thermostats de zone;
• transmettre les réglages (type et modalité de fonctionnement) et les données courantes
(température mesurée) à d’autres dispositifs, par exemple le système de contrôle à
distance GSM Easy - GW 90 861.
Les canaux d’entrée peuvent être configurés pour:
• programmer à distance, avec d’autres dispositifs KNX/EIB (par exemple avec le système
de contrôle à distance GSM Easy - GW 90 861), le type et la modalité de fonctionnement
du chronothermostat;
• gérer des scénarios, en associant à un scénario une modalité et un type de
fonctionnement;
• gérer une signalisation en entrée, par exemple un contact d’ouverture de fenêtre, pour
éteindre en même temps le chronothermostat.
On installe le dispositif au mur en utilisant la bride fournie, qui peut être fixée au mur avec
des chevilles ou bien vissée au-dessus d’une boîte encastrable à 3 modules.
73
F
R
A
N
Ç
A
I
S
DESCRIPTION GENERALE
Position des commandes
Le chronothermostat est muni d’un afficheur, de 3 boutons de commande toujours
accessibles, et de 7 boutons de commande accessibles quand le volet est ouvert.
21
22
23
24
25
26
27
28
18
7
17
20
16
15
14
8
19
13
9
1
2
3
4
5
6
12
74
11
10
DESCRIPTION GENERALE
Description des commandes
BOUTONS DE COMMANDE
1
2
3
4
5
6
7
8
9
10
11
12
13
14
15
16
17
18
19
20
21
22
23
24
25
26
27
28
Symbole
Programmation / réglage
Réglage du temps
Party
Holiday
Sélection chauffage / climatisation
Copier
Réglage de la température (+) / Sélection des paramètres
Sélection du mode de fonctionnement / confirmation
Réglage de la température (-) / Sélection des paramètres
SIGNALISATIONS SUR L’AFFICHEUR
Modalités de fonctionnement
Unité de mesure température
Température ambiante mesurée
Profil du programme journalier
Activation climatisation
Activation chauffage
Différentiel thermique
Horloge
Jour de la semaine
Activation fonction autoapprentissage
Set-point température – Modalité de fonctionnement
Fonctionnement en chauffage
Etat définition des paramètres
Fonctionnement en climatisation
Etat programmation
Fonction Holiday
Piles épuisées
Fonction copier programme jour de fête
Fonction Party
75
page
89
90
78
91
AUTO
°C / °F
SET
PROG
76
80
87
77
77
83
80
80
86
81
77
80
77
87
90
92
91
89
F
R
A
N
Ç
A
I
S
DESCRIPTION GENERALE
Modalités de fonctionnement
Le chronothermostat prévoit 5 modes de fonctionnement différents:
• AUTOMATIQUE
• ECONOMIE
• PRECONFORT
• CONFORT
• ARRET- ANTIGEL / PROTECTION HAUTES TEMPERATURES
Pour commuter d’un mode à un autre on utilise la touche
.
Dans
le
fonctionnement
automatique
le
chronothermostat utilise un programme qui peut être
différencié pour chaque jour de la semaine.
Sur l’afficheur apparaissent le message AUTO, la
température ambiante mesurée, et le symbole du Setpoint relatif au quart d’heure courant.
Dans le profil horaire, la petite colonne relative à l'heure
courante, avec la représentation du set point activé,
clignote.
Dans les fonctionnements economie, preconfort et
confort, le chronothermostat utilise de façon permanente
les set points de température correspondants.
Sur l’afficheur apparaissent la température ambiante
mesurée et le symbole
,
o
.
SIGNIFICATION DE
Chauffage
Symbole
Set-point
Climatisation
Modalité de
fonctionnement
Set-point
Modalité de
fonctionnement
TÉCONOMIE
Économie
TCONFORT
Confort
TPRECONFORT
Preconfort
TPRECONFORT
Preconfort
TCONFORT
Confort
TÉCONOMIE
Économie
76
DESCRIPTION GENERALE
Le fonctionnement antigel n’est activé qu’en modalité
chauffage, avec l’installation de régulation thermique
éteinte (Arrêt). Dans ce cas le chronothermostat utilise le
set point de température antigel défini, en réactivant
l’installation de chauffage uniquement si la température
ambiante descend au-dessous de la température TANTIGEL.
Sur l’afficheur apparaissent le message Arrêt et la
température ambiante mesurée.
Le fonctionnement de la protection contre les hautes
températures n'est activé que dans la modalité
climatisation, avec l'installation de régulation thermique
éteinte (Arrêt). Dans ce cas, le chronothermostat utilise le
set point de protection contre les hautes températures
défini, en ne réactivant l’installation de climatisation que
si la température ambiante dépasse TPROTECTION HAUTES
TEMPÉRATURES.
F
Sur l’afficheur apparaissent le message Arrêt et la R
température ambiante mesurée.
A
N
Pendant le fonctionnement, l’activation du chauffage ou de la climatisation est signalée Ç
de la façon suivante :
A
I
S
Chauffage
Le symbole indique que la commande d’activation a été
envoyée à l’actionneur de commande de la chaudière. Si le
chronothermostat ne reçoit pas de l’actionneur la réponse
que l’activation a été faite, le symbole
commence à
clignoter. Ensuite, à chaque minute de l’horloge, le
chronothermostat envoie à nouveau la commande
d’activation, jusqu’à ce qu’il reçoive une réponse positive.
Climatisation
Le symbole
indique que la commande d’activation a été
envoyée à l’actionneur de commande du climatiseur. Si le
chronothermostat ne reçoit pas de l’actionneur la réponse
que l’activation a été faite, le symbole
commence à
clignoter. Ensuite, à chaque minute de l’horloge, le
chronothermostat envoie à nouveau la commande
d’activation, jusqu’à ce qu’il reçoive une réponse positive.
77
INSTRUCTIONS D'UTILISATION
Sélection chauffage / climatisation
En appuyant sur la touche
on peut commuter le type de fonctionnement de
chauffage à climatisation, et vice-versa.
Chauffage
Le symbole
identifie le chauffage.
Climatisation
Le symbole
identifie la climatisation.
Programmation paramètres
Pour programmer les paramètres du chronothermostat:
1. sélectionner, avec la touche
, le type de fonctionnement (chauffage ou climatisation).
2. appuyer une fois sur la touche
Sur l’afficheur apparaissent le symbole SET et l’horloge, et la barre du jour de la semaine
commence à clignoter.
78
INSTRUCTIONS D'UTILISATION
On peut alors, suivant le type de fonctionnement, modifier en séquence:
Jour de la semaine
Heures
Minutes
Unité de mesure de la température
Chauffage
Climatisation
P02chauff - Set Point
P02climat - Set Point
P04chauff - Set Point TANTIGEL
P04climat - Set Point
TPROTECTION HAUTES TEMPERATURES
P05chauff - ON/OFF Valeur différent. de
P05climat - Valeur différent. de réglage
réglage Marche/Arrêt chauffage
Marche/Arrêt climatisation
P06chauff - Logique de contrôle
P06climat - Logique de contrôle
P07chauff - Temps de cycle
P07climat - Temps de cycle
P09chauff - Activation autoapprentissage
Pour faire défiler la séquence, en confirmant la valeur du paramètre affiché, appuyer sur
la touche
jusqu’à ce que le paramètre que l’on désire modifier apparaisse.
Pour sortir de la procédure de programmation des paramètres, appuyer à nouveau sur
la touche
, ou bien la sortie se fera automatiquement, 30 secondes après qu'on a
appuyé sur la dernière touche.
Pour programmer les paramètres de chauffage et de climatisation, il faut exécuter les
deux séquences (dans la deuxième séquence, on peut confirmer les paramètres qui sont
identiques, et ne modifier que ceux qui sont spécifiques).
79
F
R
A
N
Ç
A
I
S
INSTRUCTIONS D'UTILISATION
Programmation du jour de la semaine
Quand la barre du jour de la semaine clignote,
sélectionner le jour courant avec les touches
.
(lundi=1, mardi= 2, dimanche=7).
Pour confirmer la valeur programmée, appuyer sur la
touche
dans les 30 secondes qui suivent.
Programmation de l’heure
Quand les chiffres de l’heure clignotent, programmer
l’heure avec les touches
.
Pour confirmer la valeur programmée, appuyer sur la
touche
dans les 30 secondes qui suivent.
Programmation minutes
Quand les chiffres des minutes clignotent, programmer
les minutes avec les touches
.
Pour confirmer la valeur programmée, appuyer sur la
touche
dans les 30 secondes qui suivent.
Programmation de l’unité de mesure de la température
Lorsque le symbole °C ou °F de la température
commence à clignoter, il faut sélectionner l’unité de
mesure de la température avec les touches
.
Pour confirmer la valeur programmée, appuyer sur la
touche
dans les 30 secondes qui suivent.
80
INSTRUCTIONS D'UTILISATION
P01chauff - Programmation du Set-point (chauffage)
Quand le symbole
apparaît, la valeur de température
commence à clignoter. Régler la valeur de
(TÉCONOMIE)
avec les touches
.
Pour confirmer la valeur programmée, appuyer sur la
touche
dans les 30 secondes qui suivent.
P01climat - Programmation du Set-point
(climatisation)
Quand le symbole
apparaît, la valeur de température
commence à clignoter. Régler la valeur de
(TCONFORT)
avec les touches
.
Pour confirmer la valeur programmée, appuyer sur la
touche
dans les 30 secondes qui suivent.
P02chauff - Programmation du Set-point
(chauffage)
Quand le symbole
apparaît, la valeur de température
commence à clignoter. Régler la valeur de
.
(TPRECONFORT) avec les touches
Pour confirmer la valeur programmée, appuyer sur la
touche
dans les 30 secondes qui suivent.
P02climat - Programmation du Set-point
(climatisation)
Quand le symbole
apparaît, la valeur de température
commence à clignoter. Régler la valeur de
(TPRECONFORT)
avec les touches
.
Pour confirmer la valeur programmée, appuyer sur la
touche
dans les 30 secondes qui suivent.
81
F
R
A
N
Ç
A
I
S
INSTRUCTIONS D'UTILISATION
P03chauff - Programmation du Set-point
(chauffage)
Quand le symbole
apparaît, la valeur de température
commence à clignoter. Régler la valeur de
(TCONFORT)
avec les touches
.
Pour confirmer la valeur programmée, appuyer sur la
touche
dans les 30 secondes qui suivent.
P03climat - Programmation du Set-point
(climatisation)
Quand le symbole
apparaît, la valeur de température
commence à clignoter. Régler la valeur de
(TÉCONOMIE)
avec les touches
.
Pour confirmer la valeur programmée, appuyer sur la
touche
dans les 30 secondes qui suivent.
P04chauff - Programmation de la valeur
température antigel
Quand le symbole
apparaît, la valeur de température
commence à clignoter. Régler la valeur de la température
antigel avec les touches
.
Pour confirmer la valeur programmée, appuyer sur la
touche
dans les 30 secondes qui suivent.
P04climat - Programmation de la valeur de protection
hautes températures
Quand le symbole
apparaît, la valeur de température
commence à clignoter. Régler la valeur de la température
de protection contre les hautes températures avec les
touches
.
Pour confirmer la valeur programmée, appuyer sur la
touche
dans les 30 secondes qui suivent.
ATTENTION ! Entre les valeurs de Set-point il existe les
rapports suivants :
- Chauffage
TANTIGEL
- Climatisation
TPROTECTION HAUTES TEMPÉRATURES
82
INSTRUCTIONS D'UTILISATION
P05 - Programmation du différentiel de réglage
Marche/Arrêt
Quand le symbole
, apparaît, programmer la valeur
du différentiel de réglage, avec les touches
.
Pour confirmer la valeur programmée, appuyer sur la
touche
dans les 30 secondes qui suiventì.
Le différentiel de réglage est l’écart entre le Set-point
programmé et la température d’activation effective. Il est
possible de programmer divers différentiels de réglage
pour le chauffage et pour la climatisation. Sauf certaines
situations particulières, nous vous conseillons de
maintenir les valeurs préprogrammées.
P06 - Logique de contrôle
Quand le message P 06 apparaît, programmer la logique
de contrôle de l’installation de régulation thermique, avec
les touches
.
(00 = contrôle à 2 points,
01 = contrôle
proportionnel (PWM))
Pour confirmer la valeur programmée, appuyer sur la
touche
dans les 30 secondes qui suivent.
Il est possible de programmer diverses logiques de
contrôle pour le chauffage et pour la climatisation
Si l’on a choisi le contrôle à 2 points sauter au point P09,
pour le contrôle proportionnel aller au point P07.
CONTRÔLE A 2 POINTS
L’installation de régulation thermique est désactivée
quand la température ambiante est égale au set point, et
réactivée quand :
- la température est égale ou inférieure au set point
pour le chauffage;
- la température est égale ou supérieure au set point
+
pour la climatisation.
Les graphiques ci-après montrent les deux types de
fonctionnement.
83
F
R
A
N
Ç
A
I
S
INSTRUCTIONS D'UTILISATION
CHAUFFAGE
set point
T
CLIMATISATION
set point
T
PROPORTIONAL CONTROL (PWM)
CONTROLE PROPORTIONNEL (PWM)
La bande proportionnelle (du set point jusqu’au set point
pour le chauffage, du set point jusqu’au set point
+
pour la climatisation) est divisée en quatre zones
égales. A la fin de chaque temps de cycle, le
chronothermostat contrôle la température ambiante et,
en fonction de la différence constatée, il module la
proportion des commandes Marche et Arrêt transmises
pendant le temps du cycle. Les graphiques ci-après
montrent le comportement du contrôle proportionnel en
chauffage et en climatisation.
CHAUFFAGE
T
set point
set point -
20% 40% 60% 80%
temps de cycle
84
t
INSTRUCTIONS D'UTILISATION
CLIMATISATION
T
set point +
set point
20% 40% 60% 80%
temps de cycle
t
P07 - Programmation du temps de cycle
Lorsque le message P07 apparaît, il faut programmer la
longueur du temps de cycle avec les touches
.
Les valeurs possibles sont: 5, 10, 20, 30, 40, 50, 60
minutes.
Il est possible de programmer des temps de cycle
différents pour le chauffage et pour la climatisation.
Pour confirmer la valeur programmée, appuyer sur la
touche
dans les 30 secondes qui suivent.
P08 - Définition de la valeur du différentiel de réglage PWM
Quand le symbole P08 apparaît, programmer la valeur du
différentiel de réglage PWM, avec les touches
.
Il est possible de programmer des valeurs de différentiels
de réglage PWM différentes pour le chauffage et pour la
climatisation. Pour confirmer la valeur programmée,
appuyer sur la touche
dans les 30 secondes qui
suivent.
La procédure de programmation des paramètres est
terminée. Appuyer sur la touche
pour retourner au
fonctionnement normal.
85
F
R
A
N
Ç
A
I
S
INSTRUCTIONS D'UTILISATION
P09 - Activation autoapprentissage (seulement chauffage)
Quand le symbole
apparaît, activer (Marche) ou
désactiver (Arrêt) la fonction avec les touches
.
Pour confirmer la valeur programmée, appuyer sur la
touche
dans les 30 secondes qui suivent.
L’autoapprentissage permet d’optimiser l’avance (max. 2
heures) sur l'activation du chauffage.
Le chronothermostat gère automatiquement l'avance, de
façon à garantir la température programmée au début de
chaque période du profil programmé.
Cette fonction ne s’active qu’en chauffage, dans le mode
de fonctionnement automatique.
La procédure de programmation des paramètres est
pour retourner au
terminée. Appuyer sur la touche
fonctionnement normal.
86
INSTRUCTIONS D'UTILISATION
Personnalisation du programme journalier
Pour exécuter la personnalisation du programme journalier préprogrammé, ou pour
faire des modifications, appuyer deux fois sur la touche
.
Sur l’afficheur apparaît le symbole PROG, et la barre du
premier jour de la semaine commence à clignoter.
Sélectionner le jour désiré, avec les touches
.
Pour confirmer la sélection, appuyer sur la touche
dans les 30 secondes qui suivent.
Après la confirmation du jour, l’afficheur visualise le profil
courant relatif au jour choisi.
L’horaire commence à clignoter.
Les étapes à exécuter pour la personnalisation sont :
1 - sélection de l’heure du début de la variation de
température
2 - programmer la nouvelle valeur du Set-point de
température
3 - achèvement de la personnalisation
1 - Sélection de l’heure du début de la variation de
température
Avec les touches
, modifier l’heure jusqu’au
moment auquel on désire varier le profil proposé ;
pendant cette augmentation, sur le profil horaire la petite
colonne relative à l’heure sélectionnée clignote.
L’heure diminue/augmente avec des pas de 15 minutes à
chaque pression des touches
; il est donc
possible d’avoir jusqu’à 4 périodes de programmation
pour chaque heure.
87
F
R
A
N
Ç
A
I
S
INSTRUCTIONS D'UTILISATION
2 - Programmer la nouvelle valeur du Set-point de
température
Sur l’afficheur la valeur correspondant au set point
actuellement programmé est indiquée par le symbole
ou
ou
.
Avec les touches
sélectionner le nouveau Setpoint, qui sera appliqué jusqu’à la variation suivante
présente dans le programme.
3 - Achèvement de la personnalisation
Après avoir répété les pas 1 et 2 jusqu’à ce qu’on ait
obtenu le profil horaire de température désiré, on peut:
- copier le programme sur le jour suivant, confirmer la
programmation exécutée en appuyant sur la touche
avant 30 secondes, ou bien.
- confirmer la programmation sans la copier, appuyer
sur la touche
avant 30 secondes (on passe
automatiquement à la programmation du jour suivant).
Quand on a terminé la programmation de toute la semaine, appuyer sur la touche
pour revenir au fonctionnement normal.
Pour activer le programme, sélectionner le mode de fonctionnement AUTO en appuyant
sur la touche
jusqu’à ce que le symbole AUTO apparaisse sur l’afficheur.
Forçage temporaire de la température
Dans les modalités de fonctionnement AUTO, Economie, Preconfort et Confort, il est
possible de forcer temporairement le set point de température activé, en utilisant les
touches
pour programmer la valeur désirée. Pour confirmer la valeur, appuyer
sur la touche
ou attendre 5 secondes.
L’activation du forçage est signalé sur l’afficheur par le
clignotement du message AUTO, ou, dans les autres cas,
par le clignotement de
,
ou
flashes. Le
forçage dans la modalité de fonctionnement AUTO reste
activé jusqu’à la prochaine variation du profil horaire de
température.
88
INSTRUCTIONS D'UTILISATION
Fonction Party
En AUTO, Economie, Preconfort et Confort la fonction Party permet de débrancher
temporairement la modalité de fonctionnement programmée, et d’activer la modalité
Confort avec un set point réglable, pendant une période de temps comprise entre 1 et
23 heures. On peut utiliser cette fonction, par exemple, pour avoir une température plus
confortable pendant un dîner, une fête, etc.
Pour activer cette fonction appuyer sur la touche
.
Sur l’afficheur le symbole apparaît, et la valeur du Setpoint
clignote.
Avec les touches
régler la température désirée.
Avec les touches
, programmer ensuite le
nombre des heures d’activation de la fonction Party, qui
est affiché en haut à gauche sur l'afficheur. Appuyer sur
la touche
ou attendre 5 secondes, pour confirmer la F
R
programmation.
A
N
Ç
Quand la fonction est activée,on peut modifier la valeur du set point en appuyant sur les A
touches
et la valeur de la période d’activation en appuyant sur les touches
. I
Pendant le fonctionnement le comptage des heures diminue.
S
La fonction Party reste active jusqu’à ce que la période programmée termine.
Quand la période programmée expire, la fonction Party se désactive automatiquement et
le chronothermostat retourne en modalité de fonctionnement de départ.
Pour désactiver la fonction Party plus tôt que prévu, appuyer sur la touche
.
89
INSTRUCTIONS D'UTILISATION
Fonction Holiday
En AUTO, Economie, Preconfort et Confort, la fonction Holiday permet de débrancher
temporairement la modalité de fonctionnement programmée, et d’activer la modalité
Economie avec un set point réglable, pendant une période de temps comprise entre
1 et 99 jours.
On peut utiliser cette fonction, par exemple, pour programmer un fonctionnement
économique de l’installation de régulation thermique pendant des vacances, ou une
longue période d’absence, et ensuite retrouver la température désirée le jour du retour.
Pour activer cette fonction appuyer sur la touche
.
Sur l’afficheur le symbole
apparaît, et la valeur du
Set-point
clignote.
Avec les touches
régler la température désirée.
Avec les touches
programmer ensuite le nombre
des jours d’activation de la fonction Holiday, qui est
affiché en haut à gauche sur l'afficheur.
Appuyer sur la touche
ou attendre 5 secondes, pour
confirmer la programmation.
Quand la fonction est activée, on peut modifier la valeur du set point en appuyant sur les
touches
, et la valeur de la période d’activation en appuyant sur les touches
.
Pendant le fonctionnement le comptage des jours diminue.
La fonction Holiday reste active jusqu’à ce que la période programmée expire; cette
période termine à minuit.
Dans le calcul des jours, le jour courant doit toujours être inclus.
Par exemple, si le vendredi soir on veut programmer la fonction Holiday pour qu’elle
termine dimanche à minuit, il faut programmer 3 jours (vendredi, samedi et dimanche).
Quand la période programmée expire, la fonction Holiday se désactive automatiquement
et le chronothermostat retourne en modalité de fonctionnement de départ.
Pour désactiver la fonction Holiday plus tôt que prévu, appuyer sur la touche
.
90
INSTRUCTIONS D'UTILISATION
Copie du programme jours de fête
Dans le mode AUTO il est possible de copier le profil du jour de fête (7) sur n’importe quel
jour de la semaine.
Cette fonction peut être activée jusqu’à 6 jours avant le jour choisi.
Elle est particulièrement utile quand, par exemple, il y a un jour de fête au milieu de la
semaine.
Pour copier le profil du jour de fête, appuyer sur la touche
. Le symbole
et la barre du jour de fête clignotent
sur l’afficheur.
, sélectionner le jour de la
Avec les touches
semaine sur lequel on veut copier le profil du jour de fête.
Appuyer sur la touche
ou attendre 30 secondes, pour
confirmer la programmation.
Quand la fonction est activée, appuyer sur la touche
pour afficher le jour sur lequel on a copié le profil du jour
de fête ; sur l’afficheur la barre correspondante clignote.
Si l’on désire désactiver la fonction, appuyer à nouveau
sur la touche
; si l’on désire modifier le jour de la
semaine, utiliser les touches
et appuyer sur la
, ou bien attendre 30 secondes pour confirmer
touche
la nouvelle programmation.
Pendant la journée le symbole
est allumé fixe. La
validité de la copie du jour de fête est temporaire ; à
minuit du jour sélectionné on retourne au profil
hebdomadaire programmé.
91
F
R
A
N
Ç
A
I
S
INSTRUCTIONS D'UTILISATION
Signalisation piles en cours d’épuisement
Quand les piles sont en phase d’épuisement et que
l’alimentation manque au bus, sur l’afficheur le symbole
commence à clignoter. Sur l’afficheur l’indication de
la température disparaît elle aussi, et il faut procéder le
plus tôt possible au remplacement des piles.
Quand le symbole
est allumé d’une lumière fixe, il
faut absolument remplacer les piles.
Les piles ne servent qu’à conserver les programmations
de date et d’heure en cas de chute de tension du bus
KNX/EIB (toutes les autres programmations sont
maintenues dans une mémoire non volatile).
Quand le bus est alimenté, le fonctionnement est de toute
façon garanti, même en cas d’absence de piles.
Reset et rétablissement des valeurs préprogrammées
Si on appuie en même temps sur les touches
complet du chronothermostat.
,
et
on effectue le reset
Attention : tous les paramètres programmés et les programmes personnalisés
seront annulés.
Au rallumage, le chronothermostat utilise les paramètres et les programmes
préprogrammés en usine. Le chronothermostat se met en chauffage, dans la modalité
OFF, et les fonctions Party et Holiday ne sont pas activées.
92
INSTRUCTIONS D'UTILISATION
Programmes prédéfinis
Le chronothermostat dispose de 2 programmes prédéfinis, un pour le chauffage et un
pour la climatisation.
PROGRAMME CHAUFFAGE
Lundi - Vendredi
Samedi - Dimanche
F
R
A
N
Ç
A
I
S
PROGRAMME CLIMATISATION
Tous les jours de la semaine
Ces programmes prédéfinis peuvent être modifiés et personnalisés, suivant les exigences
propres. Pour modifier les paramètres prédéfinis, suivre les indications contenues dans
le paragraphe “Personnalisation du programme quotidien” .
93
INSTRUCTIONS D'UTILISATION
Paramètres prédéfinis
Jour de la semaine
1: Lundi
TANTIGEL
00:00
16 °C
18 °C
20 °C
5 °C
TPROTECTION HAUTES TEMPÉRATURES
24 °C
26 °C
28 °C
35 °C
Heure
Set-point de la température de chauffage
Set-point de la température de climatisation
Autoapprentissage
OFF
Chauffage
Climatisation
Différentiel de réglage
Unité de mesure température
0.2 °C
0.5 °C
°C
Comportement à la chute et
au rétablissement de l’alimentation bus
A la chute de l’alimentation du bus, le dispositif n’effectue aucune action. L’heure et la
date sont maintenues par l’alimentation de secours (piles), tandis que tous les autres
réglages sont conservés dans une mémoire non volatile. Le dispositif redevient
pleinement opérationnel environ 5 secondes au maximum après le rétablissement de
l’alimentation bus.
En absence de l’alimentation de secours (piles), au rétablissement de l’alimentation bus
le chronothermostat se réactive en modalité Arrêt.
94
INSTRUCTIONS D'UTILISATION
Remplacement des piles
Enlever la vis de fixation qui se trouve sous
le couvercle frontal, et détacher le chronothermostat
de la base de support, en suivant la séquence
illustrée sur la figure.
UP
3
2
1
F
R
A
N
Ç
A
I
S
Enlever le petit couvercle de fermeture
du logement des piles, et remplacer les
piles épuisées par deux autres piles
de 1,5 V (type AAA), tout en respectant
les polarités indiquées.
95
INSTRUCTIONS D'UTILISATION
1
Raccrocher le chronothermostat sur la base de support,
en suivant la séquence illustrée sur la figure, et le fixer à
nouveau avec la vis frontale.
2
ATTENTION:
- Si le chronothermostat n’a pas été alimenté par le bus pendant le
remplacement des piles, il faut remettre à jour la date et l’heure.
- Remplacer toutes les piles en même temps.
- Ne pas utiliser en même temps des piles vieilles et des piles neuves.
- Utiliser des piles du même type (ne pas mélanger des piles alcalines avec
des piles au zinc carbone).
- Ne pas jeter les piles au feu.
- Les piles sont des déchets spéciaux, dont l’élimination est réglementée
par des dispositions légales précises ; elles doivent être apportées dans
les centres de collecte prévus à cet effet.
Nettoyage du chronothermostat
Pour nettoyer le chronothermostat, n’utiliser qu’un chiffon sec.
96
INSTRUCTIONS POUR L’INSTALLATION
ATTENTION : l’installation du dispositif ne doit être effectuée que par du
personnel qualifié, conformément à la réglementation en vigueur et
aux lignes directrices pour les installations KNX/EIB.
Positionnement correct
Pour pouvoir relever correctement la
température de la pièce à contrôler, le
chronothermostat ne doit pas être
installé dans des niches, ni à côté des
portes ou fenêtres, ni à côté des
radiateurs ou des conditionneurs d’air,
et il ne doit pas être touché par les
courants d’air, ni par l’éclairage direct
du soleil.
F
R
A
N
Montage de la base de support
Ç
La base de support doit être placée à une hauteur de 160 cm environ du sol; elle peut A
I
être fixée directement au mur avec des chevilles, ou bien au-dessus d’une boîte à 3 S
places.
ATTENTION: En fixant la base de support, respecter le sens de montage qui est indiqué
par la flèche
.
Montage avec chevilles
UP
97
INSTRUCTIONS POUR L’INSTALLATION
Montage sur boîte à 3 postes
UP
Avertissements pour l’installation KNX/EIB
1. La longueur de la ligne bus entre le chronothermostat Easy et l’alimentateur ne doit
pas dépasser 350 mètres.
2. La longueur de la ligne bus entre le chronothermostat Easy et le dispositif KNX/EIB à
commander le plus éloigné ne doit pas dépasser 700 mètres.
3. Pour éviter tous signaux et surtensions non désirés, ne pas créer, si possible, de
circuits en boucle.
4. Maintenir une distance d’au moins 4 mm entre les câbles isolés un par un de la ligne
bus, et les câbles de la ligne électrique.
230 V
Bus
≥ 4 mm
5. Ne pas endommager le conducteur de continuité électrique du blindage.
Câble bus
Conducteur de continuité
électrique
Blindage
98
INSTRUCTIONS POUR L’INSTALLATION
ATTENTION : les câbles de signal du bus non utilisés et le conducteur
de continuité électrique ne doivent jamais toucher des éléments sous
tension ni le conducteur de terre.
Connexions électriques
+-
bus +Schéma des connexions électriques
F
R
A
1. Avant de procéder à la connexion au bus KNX/EIB, insérer les piles pour la mémoire N
Ç
de secours (voir le paragraphe Remplacement des piles).
2. Connecter le fil rouge du câble bus à la borne rouge (+) du terminal, et le fil noir à la A
I
borne noire (-). On peut relier au terminal bus jusqu’à 4 lignes bus (fils de la même S
couleur dans la même borne).
Connexion dispositif bus
Connexion câble bus
3. Isoler l’écran, le conducteur de continuité électrique et les fils restants blanc et jaune
du câble bus (au cas où l’on utilise un câble bus à 4 conducteurs), qui nesont pas
nécessaires.
99
INSTRUCTIONS POUR L’INSTALLATION
4. Brancher la borne bus dans les pieds du dispositif prévus. Le sens correct d’insertion
est déterminé par les guides de fixation.
Initialisation avec unité de base Easy
1. Alimenter le dispositif avec le bus, et attendre 5 secondes pour qu’il soit
complètement opérationnel.
2. Faire charger le dispositif par le système avec une des procédures suivantes:
• Acquisition automatique (le dispositif a encore les programmations faites en usine):
- choisir dans l’unité de base Easy le menu “Application → Nouvelle fonction” ou
“Application → Préparer fonction”. Le dispositif est reconnu automatiquement.
• Acquisition manuelle (les programmations faites en usine ont été modifiées):
- choisir dans l’unité de base Easy le menu “Application → Chercher dispositif”;
- appuyer brièvement (< 2 secondes) sur la touche de programmation. La LED de
programmation s’éclairera pendant le processus d’acquisition.
Touche de programmation
LED de programmation
Le dispositif acquis par l’unité de base Easy est répertorié, avec le numéro qui lui est
assigné, dans les canaux des menus “Application → Nouvelle fonction” ou “Application
→ Préparer fonction”.
100
INSTRUCTIONS POUR L’INSTALLATION
Achèvement
Accrocher le chronothermostat sur la base de support,
en suivant la séquence illustrée sur la figure, et le fixer
avec la vis fournie.
UP
2
3
1
Programmation avec unité de base Easy
Programmer le chronothermostat avec l’unité de base Easy (code GW 90 831).
Le canal du chronothermostat, à utiliser dans la fonction que l’on désire créer, peut être
sélectionné au choix:
• en appuyant en même temps sur les touches
pendant > 5 secondes pour
activer la modalité de programmation. Avec les touches
sélectionner le canal
qu’on veut utiliser, confirmer le choix avec la touche
: le canal correspondant
sera mis en évidence dans la liste des canaux du menu "Application → Nouvelle
fonction" ou "Application → Préparer fonction " . Pour sortir de la modalité de
programmation, appuyer en même temps sur les touches
;
• directement dans la liste des canaux du menu “Application → Nouvelle fonction” ou
“Application → Préparer fonction”.
101
F
R
A
N
Ç
A
I
S
INSTRUCTIONS POUR L’INSTALLATION
Les canaux disponibles dans la modalité de programmation sont:
StS (Status - Etat)
On utilise ce canal pour envoyer à des dispositifs déportés
(par exemple le système de contrôle à distance GSM Easy
- GW 90 861):
• modalité et type de fonctionnement;
• température mesurée (toutes les 15 minutes ou à
chaque variation).
CdH (Commande chauffage)
On utilise ce canal pour envoyer la commande
Marche/Arrêt aux actionneurs KNX/EIB qui contrôlent
l’installation de chauffage.
CdC (Commande rafraîchissement)
On utilise ce canal pour envoyer la commande
Marche/Arrêt aux actionneurs KNX/EIB qui contrôlent
l’installation de climatisation.
MAS (Master)
On utilise ce canal pour envoyer aux thermostats de zone
qui fonctionnent comme « slave » le type (chauffage
/climatisation) et la modalité (Arrêt / Economie /
Preconfort / Confort) de fonctionnement.
Pour créer les fonctions indiquées ci-dessus, il n’y a pas besoin de sélectionner de
fonction sur l’unité de base, car le link est créé automatiquement.
102
INSTRUCTIONS POUR L’INSTALLATION
SLA (Slave)
This is used to set:
On l’utilise pour programmer :
• à distance, avec d’autres dispositifs KNX/EIB, le type et
la modalité de fonctionnement du chronothermostat.
Exemples de dispositifs utilisables : le système de
contrôle à distance GSM Easy, le panneau de
commande et d’affichage Easy, l’interface contacts 4
canaux Easy, etc. ;
• la modalité Arrêt du chronothermostat, avec priorité
sur toutes les autres commandes, si la signalisation
de fenêtre ouverte est reçue. Dès que lui parvient la
signalisation de fenêtre fermée, le chronothermostat
retourne dans la modalité de fonctionnement
précédente, ou bien dans la modalité de la dernière
commande reçue durant le forçage Arrêt ;
• la mémorisation de scénarios, au max 8 : le F
chronothermostat mémorise le type et la modalité de R
A
fonctionnement et le set point courants.
N
Au cas où sont associés le canal « slave » et l’interface contacts à 4 canaux (GW 90 834), Ç
A
les fonctions suivantes seront proposées sur l’unité de base.
I
S
Noms des fonctions sur l’unité de base Easy
fronts
commande gestion des fronts (pour contact fenêtre)
scénario
commande de gestion des scénarios
fonction climat.
commandes pour régulation thermique (modalité).
Pour toutes informations supplémentaires sur les procédures de programmation, se
référer à la documentation de l’unité de base Easy.
103
DONNEES TECHNIQUES
Communication
Alimentation
Absorption du courant par le bus
Câble bus
Eléments de commande
Eléments d’affichage
Intervalle d’affichage
de température
Eléments de mesure
Intervalles de régulation
températures
Milieu d’utilisation
Température de fonctionnement
Température de stockage
Humidité relative
Connexion au bus
Degré de protection
Dimension (B x H x P)
Normes de référence
Certifications
Bus KNX/EIB
Par bus KNX/EIB, 29 V cc SELV + 2 piles alcalines
1,5 V AAA pour la mise à jour de la date et de
l’heure en cas d’absence de la tension au bus
5mA
KNX/EIB TP1
1 touche miniature de programmation
10 boutons de commande et de configuration
1 afficheur LCD rétro éclairé à LED
(temporisé sur intervention de l’utilisateur),
1 LED rouge de programmation
0 ÷ +45 °C
1 capteur NTC
résolution de mesure : 0,1 °C
précision de la mesure : ± 0,5 °C à 20 °C
intervalle entre les mesurages successifs : 1 minute
TANTIGEL : +2 ÷ +7 °C
TPROTECTION HAUTES TEMPERATURES : +30 ÷ +40 °C
Autres set points: +5 ÷ +40 °C
A l’intérieur, lieux secs
-5 ÷ +45 °C
-25 ÷ +70 °C
Max. 93% (sans condensation)
Borne à fiche, 2 pin Ø 1 mm
IP20
130 x 92 x 23 mm
Directive basse tension 2006/95/CE
Directive compatibilité électromagnétique
89/336/CEE EN50090-2-2, EN60730-1
KNX/EIB
104
ÍNDICE
pag.
ADVERTENCIAS GENERALES
Contenido del embalaje .................................................................................... 106
DESCRIPCIÓN GENERAL
En breve ...........................................................................................................
Posición de los mandos ....................................................................................
Descripción mandos ........................................................................................
Modalidad de funcionamiento ..........................................................................
107
108
109
110
INSTRUCCIONES DE EMPLEO
Selección calefacción/acondicionamiento .........................................................
Configuración parámetros ................................................................................
Personalización programa diario .......................................................................
Forzado temporal de la temperatura .................................................................
Función Party ...................................................................................................
Función Holiday ................................................................................................
Copia del programa festivo ...............................................................................
Señalización pilas agotadas .............................................................................
Réset y reajuste de los valores preprogramados ...............................................
Programas preprogramados .............................................................................
Parámetros preprogramados ............................................................................
Comportamiento a la caída y al reajuste de la alimentación bus .......................
Sustitución pilas ...............................................................................................
Limpieza del cronotermostato ..........................................................................
112
112
121
122
123
124
125
126
126
127
128
128
129
130
INSTRUCCIONES DE INSTALACIÓN
Correcto posicionamiento .................................................................................
Montaje de la base de soporte ..........................................................................
Advertencias para la instalación KNX/EIB ..........................................................
Conexiones eléctricas .......................................................................................
Inicialización con unidad base Easy ..................................................................
Finalización.......................................................................................................
Programación con unidad base Easy .................................................................
131
131
132
133
134
135
135
DATOS TÉCNICOS ................................................................................................ 138
105
E
S
P
A
Ñ
O
L
ADVERTENCIAS GENERALES
¡Atención! La seguridad del aparato está garantizada sólo si se respetan las instrucciones
aquí indicadas. Por lo tanto es necesario leerlas y conservarlas. Los productos Chorus
deben instalarse conforme a lo previsto por la norma CEI 64-8 para los aparatos para uso
doméstico y similar, en ambientes sin polvo y donde no sea necesaria una protección
especial contra la penetración de agua.
La organización de venta GEWISS se encuentra a disposición para informaciones
técnicas.
Gewiss SpA se reserva el derecho de aportar cambios al producto descrito en este
manual en cualquier momento y sin preaviso.
Contenido del embalaje
n. 1 Cronotermostato Easy de pared
n. 1 Base de soporte
n. 1 Borna bus
n. 1 Manual de instalación y uso
106
DESCRIPCIÓN GENERAL
En breve
El Cronotermostato Easy - de pared permite controlar automáticamente, en base
semanal, la temperatura del ambiente en la que se ha instalado. La regulación de la
temperatura se efectúa controlando, a través del bus KNX/EIB del sistema de Home
Automation, los actuadores KNX/EIB que controlan la instalación de calefacción o
acondicionamiento. En unión con los Termostatos Easy - de pared (GW10 763 - GW14
763), de la cual programa mediante bus el tipo y modalidad de funcionamiento, el
cronotermostato permite realizar instalaciones de termorregulación multizona.
Los perfiles de temperatura están definidos sobre la base semanal. Para cada día de la
semana es posible programar un perfil horario independiente, con resolución de 15 minutos
y sin límite de variaciones diarias. El cronotermostato prevé:
• 2 tipos de funcionamiento: calefacción y acondicionamiento;
• 5 modalidades de funcionamiento: OFF, Económico, Preconfort, Confort y Automática;
• 4 temperaturas de regulación para la calefacción (TECONÓMICO, TPRECONFORT, TCOMFORT, TANTIHIELO);
• 4 temperaturas de regulación para el acondicionamiento (TECONOMICO, TPRECONFORT, TCONFORT,
TPROTECCIÓN ALTAS TEMPERATURAS),
• 2 algoritmos de control, se pueden seleccionar localmente: de 2 puntos (mando
ON/OFF) y PI (control de tipo PWM).
El cronotermostato está alimentado desde la línea bus y está dotado de una pantalla LCD
con retroiluminación temporizada,10 pulsadores de mando, un sensor integrado para la
detección de la temperatura ambiental (cuyo valor se envía al bus cada 15 minutos), pilas
alcalinas (AAA) para el mantenimiento de fecha y hora en caso de caída de la tensión bus.
Los canales de salida pueden ser configurados para:
• enviar el mando ON/OFF a los actuadores KNX/EIB que controlan la instalación de
termorregulación (máx 2 para calefacción/acondicionamiento);
• configurar el tipo (calefacción/acondicionamiento) y la modalidad (OFF/Económico/
Preconfort/Confort) de funcionamiento de los termostatos de zona;
• transmitir las programaciones (tipo y modalidades de funcionamiento) y los datos
corrientes (temperatura medida) a otros dispositivos, por ejemplo el indicador remoto
GSM Easy - GW 90 861.
Los canales de entrada pueden ser configurados para:
• configurar desde control remoto, con otros dispositivos KNX/EIB (por ejemplo con el
indicador remoto GSM Easy - GW 90 861), tipo y modalidad de funcionamiento del
cronotermostato;
• controlar escenarios, asociando a un escenario una modalidad y un tipo de
funcionamiento;
• controlar una señalización en entrada, por ejemplo un contacto de apertura ventana,
para apagar temporalmente el cronotermostato.
El dispositivo se instala en la pared utilizando la brida suministrada, que puede fijarse al
muro con los tacos o atornillar encima de una caja de 3 módulos.
107
E
S
P
A
Ñ
O
L
DESCRIPCIÓN GENERAL
Posición de los mandos
El cronotermostato está dotado de una pantalla, de 3 pulsadores de mando siempre
accesibles y de 7 pulsadores de mando accesibles de ventanilla abierta.
21
22
23
24
25
26
27
28
18
7
17
20
16
15
14
8
19
13
9
1
2
3
4
5
6
12
108
11
10
DESCRIPCIÓN GENERAL
Descripción mandos
PULSADORES DE MANDO
1
2
3
4
5
6
7
8
9
10
11
12
13
14
15
16
17
18
19
20
21
22
23
24
25
26
27
28
Símbolo
Programación / configuración
Regulación tiempo
Party
Holiday
Selección calefacción/acondicionamiento
Copia
Regulación temperatura (+) / Selección parámetros
Selección modalidad funcionamiento / confirmación
Regulación temperatura (-) / Selección parámetros
SEÑALIZACIONES EN LA PANTALLA
Modalidad de funcionamiento
Unidad de medida temperatura
Temperatura ambiente medida
Perfil programa diario
Activación acondicionamiento
Activación calefacción
Diferencial térmico
Reloj
Día de la semana
Activación función autoaprendizaje
Set-point temperatura - Modalidad de funcionamiento
Funcionamiento en calefacción
Estado de programación parámetros
Funcionamiento en acondicionamento
Estado programación
Función holiday
Pilas agotadas
Función copia programa festivo
Función party
109
Pág.
123
124
112
125
AUTO
°C / °F
SET
PROG
110
114
121
111
111
117
114
114
120
115
111
114
111
121
124
126
125
123
E
S
P
A
Ñ
O
L
DESCRIPCIÓN GENERAL
Modalidad de funcionamiento
El cronotermostato prevé 5 diferentes modalidades de funcionamiento:
• AUTOMÁTICO
• ECONÓMICO
• PRECONFORT
• CONFORT
• OFF/ANTIHIELO / PROTECCIÓN ALTAS TEMPERATURAS
Para conmutar de una modalidad a otra se usa la tecla
.
En el funcionamiento automático el cronotermostato
utiliza un programa que puede ser diferenciado para cada
día de la semana.
En la pantalla aparecen la nota AUTO, la temperatura
ambiente medida y el símbolo de set point relativo al
cuarto de hora corriente.
En el perfil horario parpadea la columna relativa a la hora
corriente con la representación del set point activo.
En los funcionamientos económico, preconfort y
confort el cronotermostato utiliza permanentemente los
set point de temperatura correspondientes.
En la pantalla aparecen la temperatura ambiente medida
y el símbolo
,
o
.
SIGNIFICADO DE
Calefacción
Símbolo
Acondicionamiento
Set point
Modalidad
funcionamiento
Set point
Modalidad
funcionamiento
TECONÓMICO
Económico
TCONFORT
Confort
TPRECONFORT
Preconfort
TPRECONFORT
Preconfort
TCONFORT
Confort
TECONÓMICO
Económico
110
DESCRIPCIÓN GENERAL
El funcionamiento antihielo está activo solo en
calefacción, de instalación de termorregulación apagada
(OFF). En este caso el cronotermostato utiliza el set point
de temperatura antihielo programado, reactivando la
instalación de calefacción solo si la temperatura ambiental
desciende bajo TANTIHIELO.
En la pantalla aparecen la noto OFF y la temperatura
ambiente medida.
El funcionamiento protección altas temperaturas está
activo solo en acondicionamiento, de instalación de
termorregulación apagada (OFF).
En este caso el cronotermostato utiliza el set point de
protección altas temperaturas programado, reactivando
la instalación de calefacción solo si la temperatura
ambiental supera TPROTECCIÓN ALTAS TEMPERATURAS.
En la pantalla aparecen la nota OFF y la temperatura
ambiente medida.
Durante el funcionamiento, la activación del calefacción o del acondicionamiento están
señaladas de la manera siguiente:
Calefacción
El símbolo indica que el mando de activación se ha
enviado al actuador de mando de la caldera. Si el
cronotermostato no recibe del actuador el reconocimiento
de la activación efectuada, el símbolo empieza a
parpadear. Sucesivamente, a cada minuto del reloj, el
cronotermostato envía nuevamente el mando de
activación hasta que no recibe un reconocimiento positivo.
Acondicionamiento
El símbolo
indica que el mando de activación se ha
enviado al actuador de mando del acondicionador. Si el
cronotermostato no recibe del actuador el reconocimiento
de la activación efectuada, el símbolo
empieza a
parpadear. Sucesivamente, a cada minuto del reloj, el
cronotermostato envía nuevamente el mando de activación
hasta que no recibe un reconocimiento positivo.
111
E
S
P
A
Ñ
O
L
INSTRUCCIONES
Selección calefacción/acondicionamiento
Presionando la tecla
es posible conmutar el tipo de funcionamiento entre
calefacción y acondicionamiento y viceversa.
Calefacción
El símbolo
identifica la calefacción.
Acondicionamiento
El símbolo
identifica el acondicionamiento.
Configuración parámetros
Para configurar los parámetros del cronotermostato:
1. seleccionar con la tecla
el tipo de funcionamiento (calefacción o acondicionamiento);
2. presionar una vez la tecla
.
En la pantalla aparecen la nota SET y el reloj, mientras que en la barra del día de la
semana empieza a parpadear.
112
INSTRUCCIONES DE EMPLEO
En este momento, según el tipo de funcionamiento, es posible modificar en secuencia:
Día de la semana
Horas
Minutos
Unidad de medida temperatura
Calefacción
Acondicionamiento
P01calef - Set Point
P01acond - Set Point
P02calef - Set Point
P02acond - Set Point
P03calef - Set Point
P03acond - Set Point
P04calef - Set Point TANTICONGELANTE
P04acond - Set Point TPROTECCIÓN ALTAS TEMPERATURAS
P05calef - Valor diferencial de regulación
ON/OFF calefacción
P05acond - Valor diferencial de regulación
ON/OFF condicionamiento
P06calef - Lógica de control
P06acond - Lógica de control
P07calef - Tiempo de ciclo
P07acond - Tiempo de ciclo
P08calef - Valor diferencial de regulación
PWM
P08acond - Valor diferencial de regulación
PWM
P09calef - Activación autoaprendizaje
Para desplazar la secuencia, confirmando el valor del parámetro visualizado, presionar
la tecla
hasta que no aparezca el parámetro que se desea modificar.
La salida del procedimiento de programación de los parámetros se efectúa presionando
nuevamente la tecla
o, automáticamente, después de 30 segundos desde la última
vez que ha pulsado.
Para configurar los parámetros de calefacción y acondicionamiento es necesario efectuar
ambas secuencias (en la segunda secuencia se pueden confirmar los parámetros iguales,
modificando solo los específicos).
113
E
S
P
A
Ñ
O
L
INSTRUCCIONES DE EMPLEO
Configuración del día de la semana
Cuando la barra del día de la semana parpadea,
seleccionar el día corriente con las teclas
.
(lunes=1, martes=2, domingo=7).
Para confirmar el valor programado, presionar la tecla
antes de 30 segundos.
Configuración de la hora
Cuando las cifras de la hora parpadean, programar la hora
con las teclas
.
Para confirmar el valor programado, presionar la tecla
antes de 30 segundos.
Configuración de los minutos
Cuando las cifras de los minutos parpadean, programar
los minutos con las teclas
.
Para confirmar el valor programado, presionar la tecla
antes de 30 segundos.
Configuración unidad de medida temperatura
Cuando el símbolo °C o °F de la temperatura empieza a
parpadear, seleccionar la unidad de medida de la
temperatura con las teclas
.
Para confirmar el valor programado, presionar la tecla
antes de 30 segundos.
114
INSTRUCCIONES DE EMPLEO
P01calef. - Configuración Set Point
(calefacción)
Cuando aparezca el símbolo
el valor de temperatura
empezará a parpadear. Regular el valor de
(TECONÓMICO)
con las teclas
.
Para confirmar el valor programado, presionar la tecla
antes de 30 segundos.
P01acond - Configuración Set Point
(acondicionamiento)
Cuando aparezca el símbolo
el valor de temperatura
empezará a parpadear. Regular el valor de
(TCONFORT)
con las teclas
.
Para confirmar el valor programado, presionar la tecla
antes de 30 segundos.
P01calef. - Programación Set Point
(calefacción)
Cuando aparezca el símbolo
el valor de temperatura
empezará a parpadear. Regular el valor de
(TPRECONFORT)
con las teclas
.
Para confirmar el valor programado, presionar la tecla
antes de 30 segundos.
P02acond - Configuración Set Point
(acondicionamiento)
Cuando aparezca el símbolo
el valor de temperatura
empezará a parpadear. Regular el valor de
(TPRECONFORT)
con las teclas
.
Para confirmar el valor programado, presionar la tecla
antes de 30 segundos.
115
E
S
P
A
Ñ
O
L
INSTRUCCIONES DE EMPLEO
P03calef.- Configuración Set Point
(calefacción)
Cuando aparezca el símbolo
, el valor de temperatura
empezará a parpadear. Regular el valor de
(TCONFORT)
con las teclas
.
Para confirmar el valor programado, presionar la tecla
antes de 30 segundos.
P03acond - Configuración Set Point
(acondicionamiento)
Cuando aparezca el símbolo
, el valor de temperatura
empezará a parpadear. Regular el valor de
(TECONOMICO)
con las teclas
.
Para confirmar el valor programado, presionar la tecla
antes de 30 segundos.
P04calef. - Configuración valor temperatura antihielo
Cuando aparezca el símbolo
, el valor de temperatura
empezará a parpadear. Regular el valor de la temperatura
antihielo con las teclas
.
Para confirmar el valor programado, presionar la tecla
antes de 30 segundos.
P04acond - Configuración valor protección altas
temperaturas
Cuando aparezca el símbolo
, el valor de temperatura
empezará a parpadear. Regular el valor de la temperatura
protección altas temperaturas con las teclas
.
Para confirmar el valor programado, presionar la tecla
antes de 30 segundos.
¡ATENCIÓN!
Entre los valores de set point existen los siguientes vínculos:
- Calefacción
TANTIHIELO
- Acondicionamiento
TPROTECCIÓN ALTAS TEMPERATURAS
116
INSTRUCCIONES DE EMPLEO
P05 - Configuración diferencial de regulación ON/OFF
Cuando aparezca el símbolo
, programar el valor del
diferencial de regulación con las teclas
.
Para confirmar el valor programado, presionar la tecla
antes de 30 segundos.
El diferencial de regulación es la desviación entre el set
point programado y la temperatura efectiva de activación.
Se pueden programar diferenciales de regulación
diferentes para calefacción y acondicionamiento.
Salvo situaciones particulares, se aconseja mantener los
valores preprogramados.
P06 - Lógica de control
Cuando aparece la nota P 06, programar la lógica de
control de la instalación de termorregulación con las
teclas
.
(00 = control de 2 puntos, 01 = control proporcional (PWM))
Para confirmar el valor programado, presionar la tecla
antes de 30 segundos.
Se pueden programar lógicas de control diferentes para
calefacción y acondicionamiento.
Si se ha elegido el control de 2 puntos saltar al punto P09,
para el control proporcional ir al punto P07.
CONTROL DE 2 PUNTOS
La instalación de termorregulación se desactiva cuando
la temperatura ambiental es equivalente a set point y
reactivado cuando:
- la temperatura es equivalente o inferior a set point para la calefacción;
- la temperatura es equivalente o superior a set point
+
para el acondicionamiento.
Los gráficos que siguen muestran dos tipos de
funcionamiento.
117
E
S
P
A
Ñ
O
L
INSTRUCCIONES DE EMPLEO
CALEFACCIÓN
set point
T
ACONDICIONAMIENTO
set point
T
CONTROL PROPORCIONAL (PWM)
La banda proporcional (de set point a set point para
la calefacción, de set point a set point +
para el
acondicionamiento) se divide en cuatro zonas iguales.
El cronotermostato controla, al final de cada tiempo de
ciclo, la temperatura ambiente y, según la diferencia
detectada, modula la proporción de los mandos ON y OFF
transmitidos durante el tiempo de ciclo.
Los gráficos que siguen demuestran el comportamiento del
control proporcional en calefacción y en acondicionamiento.
CALEFACCIÓN
T
set point
set point -
20% 40% 60% 80%
tiempo de ciclo
118
t
INSTRUCCIONES DE EMPLEO
ACONDICIONAMIENTO
T
set point +
set point
20% 40% 60% 80%
tiempo de ciclo
t
P07 - Configuración tiempo de ciclo
Cuando aparece la nota P07, programar la longitud del
tiempo de ciclo con las teclas
.
Los posibles valores son: 5, 10, 20, 30, 40, 50, 60
minutos.
Se pueden programar tiempos de ciclo diferentes para
calefacción y acondicionamiento.
Para confirmar el valor programado, presionar la tecla
antes de 30 segundos.
P08 - Configuración valor diferencial de regulación PWM
Cuando aparezca el símbolo P08, programar el valor del
diferencial de regulación PWM con las teclas
.
Se pueden programar valores diferenciales de regulación
PWM diferentes para calefacción y acondicionamiento.
Para confirmar el valor programado, presionar la tecla
antes de 30 segundos..
El procedimiento de configuración parámetros está terminado.
Presionar la tecla
para volver al funcionamiento normal.
119
E
S
P
A
Ñ
O
L
INSTRUCCIONES DE EMPLEO
P09 - Activación autoaprendizaje (solo calefacción)
Cuando aparece el símbolo
, activar (ON) o desactivar
(OFF) la función con las teclas
.
Para confirmar el valor programado, presionar la tecla
antes de 30 segundos.
El autoaprendizaje permite optimizar el avance (máx. 2
horas) en la activación del calentamiento.
El cronotermostato efectúa automáticamente el avance,
de manera que se garantice la temperatura programada
al principio de cada periodo del perfil programado.
Esta función se activa solo en calefacción, en la
modalidad de funcionamiento automático.
El procedimiento de configuración parámetros está terminado.
Presionar la tecla
para volver al funcionamiento
normal.
120
INSTRUCCIONES DE EMPLEO
Personalización programa diario
Para personalizar el programa diario preprogramado, o aportar modificaciones,
presionar dos veces la tecla
.
En la pantalla aparece la nota PROG, mientras que la barra
del primer día de la semana empieza a parpadear.
Seleccionar el día deseado con las teclas
.
Para confirmar la selección, presionar la tecla
antes
de 30 segundos.
Después de la confirmación en la pantalla se visualiza el
perfil corriente, relativo al día elegido.
El horario empieza a parpadear.
Los pasos a seguir para la personalización son:
1 - selección del horario de inicio de la variación
de temperatura
2 - programación del nuevo set point de temperatura
3 - finalización de la personalización
1 - Selección del horario de inicio de la variación de
temperatura
Con las teclas
modificar el horario hasta el
momento en el que se desea cambiar el perfil propuesto;
durante el aumento en el perfil horario parpadea la
columna relativa al horario seleccionado.
El horario disminuye/aumenta a pasos de 15 minutos
cuando se presionan las teclas
, es por esto
posible definir hasta 4 periodos de programación cada
hora.
121
E
S
P
A
Ñ
O
L
INSTRUCCIONES DE EMPLEO
2 - Configuración del nuevo set point de temperatura
En la pantalla el valor correspondiente al set point
actualmente programado está indicado por el símbolo
,
o
.
Con las teclas
seleccionar el nuevo set point, que
se aplicará al perfil horario hasta la sucesiva variación
presente en el programa.
3 - Finalización de la personalización
Después de haber repetido los pasos 1 y 2 hasta haber
obtenido el perfil horario de temperatura deseado, se
puede:
- copiar el programa en el día sucesivo y confirmar la
programación efectuada, presionando la tecla
antes de 30 segundos, o
- confirmar la programación sin copiarla, presionando
la tecla
antes de 30 segundos (se pasa
automáticamente a la programación del día sucesivo).
Cuando termine la programación semanal presionar la tecla
funcionamiento normal.
para volver al
Para activar el programa seleccionar la modalidad de funcionamiento AUTO presionando
la tecla
hasta que aparezca en la pantalla el símbolo AUTO.
Forzado temporal de la temperatura
En modalidad de funcionamiento AUTO Económico, Preconfort y Confort es posible
forzar temporalmente el set point de temperatura activo, utilizando las teclas
para programar el valor deseado. Confirmar el nuevo valor presionando la tecla
o esperar 5 segundos.
La activación del forzado se señala en la pantalla por el
parpadeo de la nota AUTO o, en los demás casos, por el
parpadeo de
,
o
. El forzado en la modalidad
de funcionamiento AUTO permanece activo hasta la
sucesiva variación del perfil horario de temperatura.
122
INSTRUCCIONES DE EMPLEO
Función Party
En AUTO, Económico, Preconfort y Confort la función Party permite excluir temporalmente
la modalidad de funcionamiento programada y activar la modalidad confort con un set
point regulable, durante un período de tiempo comprendido entre 1 y 23 horas.
Esta función puede usarse, por ejemplo, para programar una temperatura más
confortable durante una cena, una fiesta, etc.
Para activar la función presionar la tecla
.
En la pantalla aparece el símbolo
, mientras parpadea
el valor del set point
.
Con las teclas
programar la temperatura deseada.
Con las teclas
programar el número de las horas
de activación de la función Party, que se visualiza arriba
a la izquierda en la pantalla.
Presionar la tecla
, o esperar 5 segundos, para
confirmar la programación.
Cuando la función está activa, se pueden modificar el valor del set point presionando las
teclas
y el del periodo de activación mediante las teclas
.
Durante el funcionamiento el recuento de las horas disminuye.
La función Party permanece activa hasta que pase el periodo programado.
Cuando pase el plazo del periodo programado, la función Party se desactiva
automáticamente y el cronotermostato vuelve a la modalidad de funcionamiento de
partida.
Para desactivar anticipadamente la función Party presionar la tecla
.
123
E
S
P
A
Ñ
O
L
INSTRUCCIONES DE EMPLEO
Función Holiday
En AUTO, Económico, Preconfort y Confort la función Holiday permite excluir
temporalmente la modalidad de funcionamiento programada y activar la modalidad
Económico con un set point regulable, durante un período de tiempo comprendido entre
1 y 99 días.
Esta función puede ser usada, por ejemplo, para programar un funcionamiento
económico de la instalación de termorregulación durante unas vacaciones, o un largo
periodo de ausencia, y volver a encontrar la temperatura deseada el día de vuelta.
Para activar la función presionar la tecla
.
En la pantalla aparece el símbolo
, mientras
parpadea el valor del set point
.
Con las teclas
programar la temperatura deseada.
Con las teclas
programar el número de los días
de activación de la función Holiday, que se visualiza arriba
a la izquierda en la pantalla.
Presionar la tecla
, o esperar 5 segundos, para
confirmar la programación.
Cuando la función es activa, se pueden modificar el valor del set point presionando las
teclas
y el del periodo de activación mediante las teclas
.
Durante el funcionamiento el recuento de los días disminuye.
La función Holiday permanece activa hasta que pase el periodo programado, que termina
a las 24 horas. Calculando los días debe incluirse siempre el día corriente.
Por ejemplo, si el viernes por la noche se quiere programar la función holiday de modo
que termine
a media noche del domingo es necesario programar 3 días (viernes, sábado y domingo).
Cuando pase el plazo del periodo programado, la función Holiday se desactiva
automáticamente y el cronotermostato vuelve a la modalidad de funcionamiento de
partida.
Para desactivar anticipadamente la función Holiday presionar la tecla
.
124
INSTRUCCIONES DE EMPLEO
Copia del programa festivo
En modalidad AUTO, es posible copiar el perfil del día festivo (7) en cualquier día de la
semana.
La función puede ser activada hasta 6 días antes del día elegido. Esta función es
especialmente útil cuando hay, por ejemplo, una festividad entre semana.
Para copiar el perfil del día festivo presionar la tecla
.
En la pantalla parpadean el símbolo
y la barra del día
festivo.
Mediante las teclas
seleccionar el día de la
semana en el cual copiar el perfil del día festivo. Presionar
la tecla
, o esperar 30 segundos, para confirmar la
programación.
Cuando la función es activa, presionando la tecla
se
visualiza el día en el cual se ha copiado el perfil del día
festivo; en la pantalla la barra correspondiente parpadea.
Si se desea desactivar la función, presionar
nuevamente la tecla
; si se desea modificar el día
de la semana, utilizar las teclas
y presionar la
tecla
, o esperar 30 segundos, para confirmar la
nueva programación.
Durante el día el símbolo
se enciende fijo.
La validez de la copia del día festivo es temporal; al
terminar el plazo de media noche del día seleccionado se
vuelve al perfil semanal programado.
125
E
S
P
A
Ñ
O
L
INSTRUCCIONES DE EMPLEO
Señalización pilas agotadas
Cuando las pilas se están agotando y falta la alimentación
bus en la pantalla empieza a parpadear el símbolo
.
En la pantalla desaparece también la indicación de la
temperatura y es necesario proceder cuanto antes a la
sustitución de las pilas.
Cuando el símbolo
está encendido fijo las pilas
deben ser sustituidas absolutamente.
Las pilas sirven solo para conservar las programaciones
de fecha y hora en caso de caída de tensión del bus
KNX/EIB (las demás programaciones se mantienen en
memoria no volátil).
En presencia de la tensión bus el funcionamiento está
garantizado también en ausencia de pilas.
Reset y reajuste de los valores preprogramados
Presionando contemporáneamente las teclas
completo del cronotermostato.
,
y
se efectúa un reset
Atención: todos los parámetros programados y los programas personalizados se
anulan.
Cuando se vuelven a encender, el cronotermostato utiliza los parámetros y los programas
preprogramados en fábrica. El cronotermostato se pone en calefacción en la modalidad
OFF y las funciones Party y Holiday no son activas.
126
INSTRUCCIONES DE EMPLEO
Programas preprogramados
El cronotermostato dispone de 2 programas preprogramados, uno para la calefacción
y uno para el acondicionamiento.
PROGRAMA CALEFACCIÓN
Lunes - Viernes
Sábado - Domingo
PROGRAMA ACONDICIONAMIENTO
E
S
P
A
Ñ
O
L
Todos los días de la semana
Estos programas preprogramados pueden modificarse y personalizarse según las propias
exigencias. Para modificar los parámetros preprogramados, efectuar las indicaciones
contenidas en el parágrafo “Personalización programa diario” .
127
INSTRUCCIONES DE EMPLEO
Parámetros preprogramados
Día de la semana
1: lunes
TANTIHIELO
00:00
16 °C
18 °C
20 °C
5 °C
TPROTECCIÓN ALTAS TEMPERATURAS
24 °C
26 °C
28 °C
35 °C
Hora
Set point temperatura de calefacción
Set point temperatura de acondicionamiento
Autoaprendizaje
OFF
Calefacción
Acondicionamiento
Diferencial de regulación
Unidad de medida temperatura
0.2 °C
0.5 °C
°C
Comportamiento a la caída y
al reajuste de la alimentación bus
Al caer la alimentación bus, el dispositivo no cumple ninguna acción.
Hora y fecha están mantenidas por la alimentación tampón (pilas), mientras que todas
las demás programaciones están conservadas en una memoria no volátil.
El dispositivo es completamente operativo dentro máximo 5 segundos desde el reajuste
de la alimentación bus.
En ausencia de la alimentación tampón (pilas), al reajuste de la alimentación bus el
cronotermostato se reactiva en modalidad OFF.
128
INSTRUCCIONES DE EMPLEO
Sustitución pilas
Quitar el tornillos de fijación, que se encuentra debajo de
la tapa frontal, y desenchufar el cronotermostato de la
base de soporte, siguiendo la secuencia ilustrada en la
figura.
UP
3
2
1
Quitar la tapa de cierre del compartimento
pilas y sustituir las pilas agotadas con
otras dos de 1,5 V (tipo AAA), respetando
las polarida des indicadas.
E
S
P
A
Ñ
O
L
129
INSTRUCCIONES DE EMPLEO
1
Volver a enganchar el cronotermostato en la base de
soporte, siguiendo la secuencia ilustrada en la figura
y fijarlo nuevamente con el tornillo frontal.
2
ATENCIÓN:
- Si el cronotermostato no ha sido alimentado del bus durante la sustitución
de las pilas, volver a actualizar fecha y hora.
- Sustituir todas las pilas contemporáneamente.
- No utilice pilas viejas y nuevas a la misma vez
- Utilizar pilas del mismo tipo (no mezcle pilas alcalinas con pilas de cinc
carbón).
- No tire las pilas al fuego.
- Las pilas son desechos especiales, cuya eliminación está reglamentada
por precisas disposiciones de ley, y deben ser conferidas a los centros
especiales de recogida.
Limpieza del cronotermostato
Para limpiar el cronotermostato utilizar un paño seco.
130
INSTRUCCIONES DE INSTALACIÓN
ATENCIÓN: La instalación del dispositivo debe efectuarse
exclusivamente por personal cualificado, siguiendo la normativa
vigente y las líneas guía para las instalaciones KNX/EIB.
Correcto posicionamiento
Para la correcta detección de la
temperatura del ambiente a controlar,
el cronotermostato no debe ser
instalado en recintos, cerca de
puertas o ventanas, al lado de
calefactores o acondicionadores y sin
soportar corrientes de aire ni
iluminación solar directa.
Montaje de la base de soporte
La base de soporte se coloca a una altura desde tierra de 160 cm aproximadamente y
puede fijarse directamente a la pared, con tacos o encima de una caja de 3 unidades.
ATENCIÓN: Al fijar la base de soporte respete la dirección del montaje indicado desde
la flecha
.
Montaje con tacos
UP
131
E
S
P
A
Ñ
O
L
INSTRUCCIONES DE INSTALACIÓN
Montaje en caja de 3 unidades
UP
Advertencias para la instalación KNX/EIB
1. La longitud de la línea bus entre el cronotermostato Easy y el alimentador no debe
superar los 350 metros.
2. La longitud de la línea bus entre el cronotermostato Easy y el más lejano dispositivo
KNX/EIB a dirigir no debe superar los 700 metros.
3. Para evitar señales y sobretensiones no deseadas, si es posible no de vida a circuitos
de anillo.
4. Mantener una distancia de al menos 4 mm entre los cables individualmente aislados
de la línea bus y los de la línea eléctrica.
230 V
Bus
≥ 4 mm
5. No dañe el conductor de continuidad eléctrica del blindaje.
Cable bus
Conductor de continuidad
eléctrica
Blindaje
132
INSTRUCCIONES DE INSTALACIÓN
ATENCIÓN: los cables de señal del bus no utilizados y el conductor de
continuidad eléctrica no deben nunca tocar elementos bajo tensión o
el conductor de tierra.
Conexiones eléctricas
+-
bus +-
Esquema de las conexiones eléctricas
1. Antes de proceder a la conexión al bus KNX/EIB, introducir las pilas para la memoria
tampón (ver parágrafo Sustitución pilas).
2. Conectar el cable rojo del cable bus a la borna roja (+) del terminal y el cable negro
a la borna negra (-). Al terminal bus se pueden conectar hasta 4 líneas bus (cables del
mismo color en la misma borna).
Conexión dispositivo bus
Conexión cable bus
3. Aislar la pantalla, el conductor de continuidad eléctrica y los cables blanco y amarillo
del cable bus (en el caso de que se utilice un cable bus de 4 conductores), que no son
necesarios.
133
E
S
P
A
Ñ
O
L
INSTRUCCIONES DE INSTALACIÓN
4. Introducir la borna bus en los pies específicos del dispositivo. El sentido correcto de
inserción está determinado por las guías de fijación.
Inicialización con unidad base Easy
1. Alimentar el dispositivo a través del bus y esperar 5 segundos hasta que sea
completamente operativo.
2. Conseguir el dispositivo del sistema con uno de los siguientes procedimientos:
• Adquisición automática (el dispositivo tiene aún las programaciones de fábrica):
- elegir en la unidad base Easy el menú “Aplicación → Nueva función” o “Aplicación
→ Edit function”: el dispositivo se reconoce automáticamente.
• Adquisición manual (las programaciones de fábrica se han modificado):
- elegir en la unidad base Easy el menú “Aplicación → Buscar dispositivo”;
- presionar brevemente (< 2 segundos) la tecla de programación. El LED de
programación se iluminará durante el proceso de adquisición.
Tecla de programación
LED de programación
El dispositivo adquirido desde la unidad base Easy se indica con el número asignado en
los canales de los menús “Aplicación → Nueva función” o “Aplicación → Editar función”.
134
INSTRUCCIONES DE INSTALACIÓN
Finalización
Volver a enganchar el cronotermostato en la base de soporte,
siguiendo la secuencia ilustrada en la figura y fijarlo
nuevamente con el tornillo suministrado.
UP
2
3
1
Programación con unidad base Easy
Programar el cronotermostaro mediante la unidad base Easy (código GW 90 831).
El canal del cronotermostato, a utilizar en la función que se desea crear, puede ser
seleccionado a elección:
• presionando contemporáneamente las teclas
durante un tiempo > 5 segundos
para activar la modalidad de programación. Seleccionar el canal que se desea utilizar
con las teclas
, confirmando la elección con la tecla
: el canal
correspondiente se resaltará en la lista de los canales del menú "Aplicación → Nueva
función" o "Aplicación → Editar función"; Para salir de la modalidad de programación
presionar contemporáneamente las teclas
.
• directamente de la lista de los canales de los menús “Aplicación → Nueva función”
o “Aplicación → Editar función.
135
E
S
P
A
Ñ
O
L
INSTRUCCIONES DE INSTALACIÓN
Los canales disponibles en la modalidad de programación son:
StS (Estado)
A utilizar para enviar a dispositivos remotos (por ejemplo
el indicador remoto GSM Easy - GW 90 861):
• modalidad y tipo de funcionamiento;
• temperatura medida (cada 15 minutos o en cada
variación).
CdH (Mando calefacción)
A utilizar para enviar el mando ON/OFF a los actuadores
KNX/EIB que controlan la instalación de calefacción.
CdC (Mando refrigeración)
A utilizar para enviar el mando ON/OFF a los actuadores
KNX/EIB que controlan la instalación de acondicionamiento.
MAS (Master)
A utilizar para enviar a los termostatos de zona que
funcionan como “slave” el tipo ( calefacción /
acondicionamiento) y la modalidad (OFF / Económico /
Preconfort / Confort) de funcionamiento.
En la creación de las funciones arriba indicadas no es necesario seleccionar ninguna
función en la unidad base pues el enlace está creado automáticamente.
136
INSTRUCCIONES DE INSTALACIÓN
SLA (Slave)
A utilizar para programar:
• desde control remoto, con otros dispositivos KNX/EIB,
el tipo y la modalidad de funcionamiento del
cronotermostato. Ejemplos de dispositivos utilizables
son el indicador remoto GSM Easy, el panel de mando
y visualización de mando y visualización Easy, la
interfaz contactos 4 canales Easy etc;
• la modalidad OFF del cronotermostato, con prioridad
en los demás mandos, si recibe la señalización de
ventana abierta. Con la señalización de ventana
cerrada el cronotermostato vuelve en la modalidad de
funcionamiento precedente o en la del último mando
recibido durante el forzado OFF;
• la memorización de escenarios, máx 8: El
cronotermostato memoriza el tipo y la modalidad de
funcionamiento y el set point corrientes.
En caso de combinación entre el canal "slave" e interfaz contactos 4 canales (GW 90 834)
se proponen, en la unidad base, las siguientes funciones.
Nombres de las funciones en la unidad base Easy
frentes
mando gestión frentes (por contacto ventana)
escenario
mando gestión de escenarios
modalidad climatización mando para termorregulación (modalidad)
Para ulteriores informaciones en los procedimientos de programación hágase referencia
a la documentación de la unidad base Easy.
137
E
S
P
A
Ñ
O
L
DATOS TÉCNICOS
Comunicación
Alimentación
Absorción corriente desde el bus
Cable bus
Elementos de mando
Elementos de visualización
Intervalo de
visualización temperatura
Elementos de medida
Intervalos de regulación
temperaturas
Ambiente de uso
Temperatura de funcionamiento
Temperatura de almacenaje
Humedad relativa
Conexión al bus
Grado de protección
Dimensión (B x H x P)
Referencias normativas
Certificaciones
Bus KNX/EIB
Mediante bus KNX/EIB, 29 V cc SELV +
2 pilas alcalinas 1,5 V AAA para la actualización
fecha/hora en caso de ausencia tensión bus
5mA
KNX/EIB TP1
1 tecla de miniatura de programación
10 pulsadores de mando y configuración
1 pantalla LCD retroiluminada de LED
(temporizada con la intervención del usuario),
1 LED rojo de programación
0 ÷ +45 °C
1 sensor NTC
resolución de medida: 0,1 °C
exactitud de medida: ± 0,5 °C de 20 °C
intervalo entre medidas sucesivas: 1 minuto
TANTIHIELO : +2 ÷ +7 °C
TTPROTECCIÓN ALTAS TEMPERATURAS : +30 ÷ +40 °C
Otros set point: +5 ÷ +40 °C
Interno, lugares secos
-5 ÷ +45 °C
-25 ÷ +70 °C
Máx 93% (no condensante)
Borne de conexión, 2 pin Ø 1 mm
IP20
130 x 92 x 23 mm
Directiva sobre baja tensión 2006/95/CE
Directiva sobre compatibilidad electromagnética
89/336/CEE
EN50090-22;EN60730-1
KNX/EIB
138
INHALTSVERZEICHNIS
Seite
ALLGEMEINE HINWEISE
Packungsinhalt ................................................................................................. 140
ALLGEMEINE BESCHREIBUNG
Kurzbeschreibung .............................................................................................
Position der Bedienelemente ............................................................................
Steuerungsbeschreibung ..................................................................................
Betriebsart .......................................................................................................
141
142
143
144
BEDIENUNGSANWEISUNG
Auswahl Heizung / Klimatisierung .....................................................................
Parametereinstellung ........................................................................................
Anpassung des Tagesprogramms ....................................................................
Kurzzeitiges Übersteuern der Temperatur..........................................................
Funktion Party ..................................................................................................
Funktion Holiday ...............................................................................................
Kopie des Feiertagsprogramms ........................................................................
Anzeige Batterie entladen .................................................................................
Rückstellung und Wiederherstellung der Werkseinstellung................................
Voreingestellte Programme ...............................................................................
Voreingestellte Parameter .................................................................................
Verhalten bei Ausfall und Wiederherstellung der Busversorgung........................
Batteriewechsel ................................................................................................
Reinigung des Thermostattimers ......................................................................
146
146
155
156
157
158
159
160
160
161
162
162
163
164
INSTALLATIONSANWEISUNG
Richtige Positionierung .....................................................................................
Montage des Bediensockels .............................................................................
Hinweise zur Installation KNX/EIB .....................................................................
Elektrische Anschlüsse ....................................................................................
Initialisierung mit dem Easy Basisgerät .............................................................
Vervollständigung .............................................................................................
Programmierung mit dem Easy Basisgerät .......................................................
165
165
166
167
168
169
169
TECHNISCHE DATEN ............................................................................................. 172
139
D
E
U
T
S
C
H
ALLGEMEINE HINWEISE
Achtung! Die Gerätesicherheit ist nur dann gegeben, wenn die nachfolgenden
Anweisungen eingehalten werden. Daher sind diese zu lesen, und aufzubewahren. Die
Produkte der Reihe Chorus müssen gemäß der Norm CEI 64-8 für Anwendung im
Wohnbereich oder ähnlich, in staubarmer Umgebung, wo kein besonderer Schutz gegen
Eindringen von Wasser erforderlich ist, installiert werden.
Die GEWISS Verkaufsabteilung steht für weitergehende Erläuterungen und technische
Informationen gerne zur Verfügung.
Gewiss S.p.A. behält sich das Recht vor, das in diesem Handbuch beschriebene Produkt
jederzeit und ohne Vorankündigung zu ändern.
Packungsinhalt
1 St. Easy Thermostattimer für Wandmontage
1 St. Haltesockel
1 St. Busklemme
1 St. Installations- und Bedienungshandbuch
140
ALLGEMEINE BESCHREIBUNG
Kurzbeschreibung
Der Easy Thermostattimer für Wandmontage ermöglicht mit Hilfe eines Wochenprogramms
die automatische Regelung der Temperatur in dem Raum, in dem er installiert ist. Die
Temperaturregelung erfolgt durch Ansteuerung der KNX/EIB-Antriebe der Heizungs- oder
Klimaanlage über den KNX/EIB-Bus des Home Automation Systems. Im Zusammenspiel mit
Easy Thermostaten zur Wandmontage (GW10 763 - GW14 763), bei denen über den Bus
die Betriebsart und -modus eingestellt wird, ermöglicht der Thermostattimer die Erstellung
von Temperaturegelanlagen mit mehreren Zonen.
Die Temperaturprofile werden auf Wochenbasis definiert.
Für jeden Wochentag kann ein individuelles Stundenprofil mit 15 Minuten Schritten und
beliebig vielen täglichen Änderungen erstellt werden.
Der Thermostattimer ermöglicht:
• 2 Funktionsarten: Heizung und Klimatisierung;
• 5 Betriebsarten: AUS, Absenkung, Prekomfort, Komfort und Automatik;
• 4 Solltemperaturen für die Heizung (TABSENKUNG, TPREKOMFORT, TKOMFORT, TFROSTSCHUTZ);
• 4 Solltemperaturen für die Klimatisierung (TABSENKUNG, TPREKOMFORT, TKOMFORT, TÜBERTEMPERATURSCHUTZ),
• 2 Kontrollalgorithmen, lokal wählbar: über 2 Punkt (Befehl AN/AUS) und PI (Kontrolle
Typ PWM).
Der Thermostattimer wird von der Buslinie versorgt und ist mit einem LCD-Display mit
zeitgesteuerter Hintergrundbeleuchtung ausgestattet, 10 Bedientasten, integriertem Sensor
für die Erfassung der Raumtemperatur (der Wert wird alle 15 Minuten an den Bus
übermittelt), Alkali-Batterien (AAA) für die Speicherung von Datum und Uhrzeit bei Ausfall
der Busspannung.
Die Ausgangskanäle können konfiguriert werden für:
• Übermittlung des Befehls AN/AUS an die KNX/EIB-Antriebe, die die Temperaturregelung
steuern (max. 2 je Heizung/Klimatisierung);
• Einstellen der Funktionsart (Heizung/Klimatisierung) und des Funktionsmodus
(AUS/Absenkung/Prekomfort/Komfort) der Zonenthermostate;
• Übertragen der Einstellungen (Funktionsart und-modus) und die aktuellen Daten
(gemessene Temperatur) an andere Geräte, z.B. der Easy GSM-Fernsteuerung - GW 90
861.
Die Eingangskanäle können konfiguriert werden für:
• Ferneinstellung der Betriebsart und –modus des Thermostattimers mit anderen
KNX/EIB-Geräten (z.B. mit der Easy GSM-Fernsteuerung – GW 90 861);
• Verwalten von Szenen, Zuordnen einer Funktionsart oder –modus an eine Szene;
• Verwalten einer Eingangsmeldung, beispielsweise eines Fensterkontakts, um
vorübergehend den Thermostattimer auszuschalten.
Das Gerät wird mit dem mitgelieferten Flansch an der Wand installiert, dieser kann direkt
mit Dübeln an die Wand oder auf ein UP-Gehäuse (3 Module) geschraubt werden.
141
D
E
U
T
S
C
H
ALLGEMEINE BESCHREIBUNG
Position der Bedienelemente
Der Thermostattimer ist mit einem Display, 3 immer zugänglichen Bedientasten und 7
bei offener Klappe zugänglichen Bedientasten ausgestattet.
21
22
23
24
25
26
27
28
18
7
17
20
16
15
14
8
19
13
9
1
2
3
4
5
6
12
142
11
10
ALLGEMEINE BESCHREIBUNG
Steuerungsbeschreibung
STEUERTASTEN
1
2
3
4
5
6
7
8
9
10
11
12
13
14
15
16
17
18
19
20
21
22
23
24
25
26
27
28
Symbol
Programmierung / Einstellung
Zeiteinstellung
Party
Holiday
Auswahl Heizung / Klimatisierung
Kopieren
Temperaturregelung (+) / Parameterauswahl
Auswahl Funktionsmodus / Bestätigung
Temperaturregelung (-) / Parameterauswahl
DISPLAYANZEIGEN
Betriebsart
Temperatureinheit
Gemessene Raumtemperatur
Profil des Tagesprogramms
Aktivierung Klimatisierung
Aktivierung Heizung
Temperaturdifferenz
Uhr
Wochentag
Aktivierung Selbstlernfunktion
Temperatursollwert - Betriebsart
Heizungsbetrieb
Status Parametereinstellung
Klimatisierungsbetrieb
Status Programmierung
Funktion Holiday
Batterien entladen
Funktion Kopie des Feiertagsprogramms
Funktion Party
143
Seite
157
158
146
159
AUTO
°C / °F
SET
PROG
144
148
155
145
145
151
148
148
154
149
145
148
145
155
158
160
159
157
D
E
U
T
S
C
H
ALLGEMEINE BESCHREIBUNG
Betriebsart
Der Thermostattimer sieht 5 verschiedene Betriebsarten vor:
• AUTOMATIK
• ABSENKUNG
• PREKOMFORT
• KOMFORT
• AUS - FROSTSCHUTZ / ÜBERTEMPERATURSCHUTZ
Zum Umschalten zwischen den Funktionsmodi wird die Taste
verwendet.
Beim Automatikbetrieb verwendet der Thermostattimer
ein Programm, das für jeden Wochentag unterschiedlich
sein kann.
Auf dem Display erscheint die Anzeige AUTO, die
gemessene Raumtemperatur, und das Symbol des
Sollwerts der aktuellen Viertelstunde.
Im Stundenprofil blinkt die Spalte der aktuellen Stunde
mit der Darstellung des aktiven Sollwerts.
Der Thermostattimer verwendet bei den Funktionsarten
Absenkung, Prekomfort und Komfort ständig die
entsprechenden Temperatursollwerte.
Auf dem Display erscheint die gemessene
Raumtemperatur und das Symbol
,
oder
.
BEDEUTUNG VON
Heizung
Klimatisierung
Symbol
Sollwert
Funktionsmodus
Sollwert
Funktionsmodus
TABSENKUNG
Absenkung
TKOMFORT
Komfort
TPREKOMFORT
Prekomfort
TPREKOMFORT
Prekomfort
TKOMFORT
Komfort
TABSENKUNG
Absenkung
144
ALLGEMEINE BESCHREIBUNG
Die Frostschutzfunktion ist nur in der Betriebsart Heizung
mit ausgeschalteter Temperaturregelung (AUS) aktiv.
In diesem Fall verwendet der Thermostattimer den
eingestellten Temperatursollwert für Frostschutz und
schaltet die Heizungsanlage nur ein, wenn die
Raumtemperatur unter TFROSTSCHUTZ absinkt.
Auf dem Display erscheint die Anzeige AUS und die
gemessene Raumtemperatur.
Die Übertemperaturschutzfunktion ist nur in der
Betriebsart Klimatisierung mit ausgeschalteter
Temperaturregelung (AUS) aktiv.
In diesem Fall verwendet der Thermostattimer den
eingestellten Temperatursollwert für Übertemperatur und
schaltet die Klimaanlage nur ein, wenn die
Raumtemperatur über TÜBERTEMPERATURSCHUTZ ansteigt.
Auf dem Display erscheint die Anzeige AUS und die
gemessene Raumtemperatur.
Während des Betriebs wird das Einschalten der Heizung oder der Klimatisierung auf die
folgende Weise angezeigt:
Heizung
Das Symbol zeigt an, dass der Einschaltbefehl vom
Antrieb der Heizkesselsteuerung erfasst wurde. Wenn
der Thermostattimer vom Antrieb nicht die Bestätigung
der erfolgten Einschaltung erhält, beginnt das
Symbol
zu blinken. Anschließend sendet der
Thermostattimer im Minutentakt den Einschaltbefehl,
bis er eine positive Antwort erhält.
Klimatisierung
Das Symbol
zeigt an, dass der Einschaltbefehl vom
Antrieb der Klimaanlagensteuerung erfasst wurde. Wenn
der Thermostattimer vom Antrieb nicht die Bestätigung
der erfolgten Einschaltung erhält, beginnt das Symbol
zu blinken. Anschließend sendet der Thermostattimer im
Minutentakt erneut den Einschaltbefehl, bis er eine
positive Antwort erhält.
145
D
E
U
T
S
C
H
BEDIENUNGSANWEISUNG
Auswahl Heizung / Klimatisierung
Durch Drücken der Taste
kann zwischen den Funktionsarten Heizung und
Klimatisierung umgeschaltet werden.
Heizung
Das Symbol
kennzeichnet die Heizung.
Klimatisierung
Das Symbol
kennzeichnet die Klimatisierung.
Parametereinstellung
Zur Einstellung der Parameter des Thermostattimers:
1. Mit der Taste
die Funktionsart (Heizung / Klimatisierung) auswählen,
2. Ein Mal die Taste
drücken.
Auf dem Display erscheint die Anzeige SET und die Uhr, der Balken des Wochentags
beginnt zu blinken.
146
BEDIENUNGSANWEISUNG
Nun können, je nach Funktionsart nacheinander folgende Punkte geändert werden:
Wochentag
Stunden
Minuten
Temperatureinheit
Heizung
Klimatisierung
P01Heiz - Sollwert
P01Klima - Sollwert
P02Heiz - Sollwert
P02Klima - Sollwert
P03Heiz - Sollwert
P03Klima - Sollwert
P04Heiz - Sollwert TFROSTSCHUTZ
P04Klima - Sollwert TÜBERTEMPERATURSCHUTZ
P05Heiz - Differenzwert der Regelung
AN/AUS Heizung
P05Klima - Differenzwert der Regelung
AN/AUS Klimatisierung
P06Heiz - Regellogik
P06Klima - Regellogik
P07Heiz - Taktzeit
P07Klima - Taktzeit
P08Heiz - Differenzwert der Regelung
PWM
P08Klima - Differenzwert der Regelung
PWM
P09Heiz - Aktivierung Selbstlernfunktion
Die Taste
zum Durchblättern der Sequenz und Bestätigung der angezeigten Werte
drücken, bis der Parameter angezeigt wird, der geändert werden soll. Das Verlassen der
Parametereinstellprozedur erfolgt durch erneutes Drücken der Taste
, oder
automatisch 30 Sekunden nach dem letzten Tastendruck.
Zum Einstellen der Heizungs-und Klimatisierungsparameter müssen beiden Sequenzen
ausgeführt werden (in der zweiten Sequenz können die gleichen Parameter bestätigt
und nur die spezifischen geändert werden).
147
D
E
U
T
S
C
H
BEDIENUNGSANWEISUNG
Einstellung des Wochentags
Wenn der Balken des Wochentags blinkt, den aktuellen
Tag mit den Tasten
wählen.
(Montag=1, Dienstag=2, Sonntag=7).
Zur Bestätigung des eingestellten Werts, die Taste
innerhalb von 30 Sekunden drücken.
Einstellung der Stunde
Wenn die Stundenziffern blinken, diese mit den Tasten
einstellen.
Zur Bestätigung des eingestellten Werts, die Taste
innerhalb von 30 Sekunden drücken.
Einstellung der Minuten
Wenn die Minutenziffern blinken, diese mit den Tasten
einstellen.
Zur Bestätigung des eingestellten Werts, die Taste
innerhalb von 30 Sekunden drücken.
Einstellung der Temperatureinheit
Wenn das Symbol °C oder °F der Temperatur anfängt zu
blinken, kann die Temperatureinheit mit den Tasten
gewählt werden.
Zur Bestätigung des eingestellten Werts, die Taste
innerhalb von 30 Sekunden drücken.
148
BEDIENUNGSANWEISUNG
P01Heiz - Einstellung Sollwert
(Heizung)
Bei der Anzeige des Symbols
, beginnt der
Temperaturwert zu blinken. Den Wert
(TABSENKUNG) mit
den Tasten
einstellen.
Zur Bestätigung des eingestellten Werts, die Taste
innerhalb von 30 Sekunden drücken.
(Klimatisierung)
P01Klima - Einstellung Sollwert
Bei der Anzeige des Symbols
, beginnt der
Temperaturwert zu blinken. Den Wert
(TKOMFORT) mit
den Tasten
einstellen.
Zur Bestätigung des eingestellten Werts, die Taste
innerhalb von 30 Sekunden drücken.
(Heizung)
P02Heiz - Einstellung Sollwert
Bei der Anzeige des Symbols
, beginnt der
Temperaturwert zu blinken. Den Wert
(TPREKOMFORT) mit
den Tasten
einstellen.
Zur Bestätigung des eingestellten Werts, die Taste
innerhalb von 30 Sekunden drücken.
P02Klima - Einstellung Sollwert
(Klimatisierung)
Bei der Anzeige des Symbols
, beginnt der
Temperaturwert zu blinken. Den Wert
(TPREKOMFORT) mit
den Tasten
einstellen.
Zur Bestätigung des eingestellten Werts, die Taste
innerhalb von 30 Sekunden drücken.
D
E
U
T
S
C
H
149
BEDIENUNGSANWEISUNG
P03Heiz - Einstellung Sollwert
(Heizung)
Bei der Anzeige des Symbols
, beginnt der
Temperaturwert zu blinken. Den Wert
(TKOMFORT) mit
den Tasten
einstellen.
Zur Bestätigung des eingestellten Werts, die Taste
innerhalb von 30 Sekunden drücken.
P03Klima - Einstellung Sollwert
(Klimatisierung)
Bei der Anzeige des Symbols
, beginnt der
Temperaturwert zu blinken. Den Wert
(TABSENKUNG) mit
den Tasten
einstellen.
Zur Bestätigung des eingestellten Werts, die Taste
innerhalb von 30 Sekunden drücken.
P04Heiz - Einstellung Frostschutztemperaturwert
Bei der Anzeige des Symbols
, beginnt der
Temperaturwert zu blinken. Den Wert der
Frostschutztemperatur mit den Tasten
einstellen.
Zur Bestätigung des eingestellten Werts, die Taste
innerhalb von 30 Sekunden drücken.
P04Klima - Einstellung Übertemperaturschutzwert
Bei der Anzeige des Symbols
, beginnt der
Temperaturwert zu blinken. Den Wert des
Übertemperaturschutzes mit den Tasten
einstellen.
Zur Bestätigung des eingestellten Werts die Taste
innerhalb von 30 Sekunden drücken.
ACHTUNG!
Bei den Sollwerten gelten folgende Einschränkungen:
- Heizung
TFROSTSCHUTZ
- Klimatisierung
TÜBERTEMPERATURSCHUTZ
150
BEDIENUNGSANWEISUNG
P05 - Differenzwerteinstellung der Regelung AN/AUS
Bei der Anzeige des Symbols
, den Differenzwert der
Regelung mit den Tasten
einstellen.
Zur Bestätigung des eingestellten Werts, die Taste
innerhalb von 30 Sekunden drücken.
Die Regeldifferenz ist die Abweichung zwischen dem
eingestellten Sollwert und der tatsächlichen
Einschalttemperatur. Für Heizung und Klimatisierung
können unterschiedliche Regeldifferenzen eingestellt
werden. Abgesehen von besonderen Situationen wird
empfohlen, die voreingestellten Werte beizubehalten.
P06 - Regellogik
Bei der Anzeige von P06 die Regellogik der
Temperaturregelung mit den Tasten
einstellen.
(00 = 2-Punkt Regelung 01 = Proportionalregelung
(PWM))
Zur Bestätigung des eingestellten Werts, die Taste
innerhalb von 30 Sekunden drücken.
Für Heizung und Klimatisierung können unterschiedliche
Regellogiken eingestellt werden.
Wenn die 2-Punkt Regelung gewählt wird, zum Punkt P09
springen, bei Proportionalregelung zum Punkt P07 gehen.
2-PUNKT REGELUNG
Die Temperaturregelung wird deaktiviert, wenn die
Raumtemperatur dem Sollwert entspricht und wird
wieder aktiviert wenn:
- die Temperatur für die Heizung gleich oder kleiner
dem Sollwert ist;
- die Temperatur für die Klimatisierung gleich oder
größer dem Sollwert +
ist;
Nachfolgende Grafiken zeigen die beiden Funktionsarten.
151
D
E
U
T
S
C
H
BEDIENUNGSANWEISUNG
HEIZUNG
Sollwert
T
KLIMATISIERUNG
Sollwert
T
PROPORTIONALREGELUNG (PWM)
Das Proportionalband (von Sollwert bis Sollwert für die Heizung, von Sollwert bis Sollwert +
für die
Klimatisierung) wird in vier gleiche Zonen eingeteilt.
Der Thermostattimer prüft am Ende jeder Taktzeit die
Raumtemperatur und moduliert je nach festgestellter
Abweichung das Verhältnis der während der Taktzeit
übermittelten AN und AUS Befehle. Nachfolgende
Grafiken zeigen das Verhalten der Proportionalregelung
beim Heizbetrieb und bei der Klimatisierung.
HEIZUNG
T
Sollwert
Sollwert -
20% 40% 60%
Taktzeit
152
80%
t
BEDIENUNGSANWEISUNG
KLIMATISIERUNG
T
Sollwert +
Sollwert
20% 40% 60%
Taktzeit
80%
t
P07 - Einstellung Taktzeit
Bei der Anzeige von P07 die Dauer der Taktzeit mit den
Tasten
einstellen.
Die möglichen Werte sind: 5, 10, 20, 30, 40, 50, 60
Minuten.
Für Heizung und Klimatisierung können unterschiedliche
Taktzeiten eingestellt werden.
Zur Bestätigung des eingestellten Werts, die Taste xxx
innerhalb von 30 Sekunden drücken.
P08 - Einstellung Differenzwert der Regelung PWM
Bei der Anzeige von P08 den Differenzwert der PWMRegelung mit den Tasten
einstellen.
Für Heizung und Klimatisierung können unterschiedliche
PWM Regeldifferenzen eingestellt werden. Zur
Bestätigung des eingestellten Werts, die Taste
innerhalb von 30 Sekunden drücken.
Die Prozedur zur Parametereinstellung ist hiermit beendet.
Die Taste
drücken, um zum normalen Betrieb zurück
zu kehren.
153
D
E
U
T
S
C
H
BEDIENUNGSANWEISUNG
P09 - Aktivierung Selbstlernfunktion (nur Heizung) Bei der
Anzeige des Symbols
, die Funktion mit den Tasten
aktivieren (AN) oder deaktivieren (AUS).
Zur Bestätigung des eingestellten Werts, die Taste
innerhalb von 30 Sekunden drücken.
Die Selbstlernfunktion ermöglicht die Optimierung der
vorzeitigen Einschaltung der Heizung (max. 2 Stunden).
Der Thermostattimer steuert die vorzeitige Einschaltung
automatisch, um die eingestellte Temperatur zu Beginn
jeder Periode des programmierten Zeitraums zu
garantieren.
Diese Funktion aktiviert sich ausschließlich in der
Betriebsart Automatik des Heizbetriebs.
Die Prozedur zur Parametereinstellung ist hiermit
beendet. Die Taste
drücken, um zum normalen
Betrieb zurück zu kehren.
154
BEDIENUNGSANWEISUNG
Anpassung des Tagesprogramms
Um die Anpassung des voreingestellten Tagesprogramms auszuführen, oder eine
Änderung auszuführen, muss die Taste
zwei Mal gedrückt werden.
Auf dem Display erscheint die Anzeige PROG, und der
Balken des ersten Wochentags beginnt zu blinken. Den
gewünschten Tag mit den Tasten
wählen. Zur
Bestätigung der Auswahl, die Taste
innerhalb von 30
Sekunden drücken.
Nach der Bestätigung des Tags wird auf dem Display das
aktuelle Profil des gewählten Tags angezeigt.
Die Stunde beginnt zu blinken.
Nachfolgend die Schritte, die für die Anpassung erforderlich
sind:
1 - Auswahl des zeitlichen Beginns der Temperaturänderung
2 - Einstellung des neuen Temperatursollwerts
3 - Abschluss der Anpassung
1 - Auswahl des zeitlichen Beginns der
Temperaturänderung
Mit den Tasten
die Uhrzeit bis zu dem Punkt
ändern, an dem das vorgeschlagene Profil geändert
werden soll; während der Zunahme blinkt im
Stundenprofil die Spalte der gewählten Stunde.
Bei jedem Drücken der Tasten
wird die Uhrzeit in
15 Minuten Schritten vor oder zurück bewegt; daher
können 4 Programmierperioden für jede Stunde definiert
werden.
155
D
E
U
T
S
C
H
BEDIENUNGSANWEISUNG
2 - Einstellung des neuen Temperatursollwerts
Auf dem Display wird der Wert entsprechend des aktuell
eingestellten Sollwerts durch das Symbol
,
oder
angezeigt. Mit den Tasten
den neuen
Sollwert auswählen, der innerhalb des Stundenprofils bis
zur nächsten Änderung innerhalb des Programms
angewendet wird.
3 - Abschluss der Anpassung
Nach der Wiederholung der Schritte 1 und 2 und dem
Einstellen des gewünschten Temperatur-Stundenprofils
kann:
- das Programm auf den nächsten Tag kopiert werden
und die ausgeführte Programmierung durch Drücken
der Taste
innerhalb von 30 Sekunden bestätigt
werden, oder
- die Programmierung ohne Kopieren bestätigt werden,
indem die Taste
innerhalb von 30 Sekunden
gedrückt wird (der Wechsel zur Programmierung des
nächsten Tages erfolgt automatisch).
Am Ende der Wochenprogrammierung die Taste
zurück zu kehren.
drücken, um zum normalen Betrieb
Zur Aktivierung des Programms die Betriebsart AUTO wählen, indem die Taste
gedrückt wird, bis auf dem Display die Anzeige AUTO angezeigt wird.
Kurzzeitiges Übersteuern der Temperatur
In den Betriebsarten AUTO, Absenkung, Prekomfort und Komfort kann der aktive
Temperatursollwert mit den Tasten
vorübergehend übersteuert werden, um
den gewünschten Wert einzustellen. Den neuen Wert mit der Taste
bestätigen
oder 5 Sekunden abwarten.
Die Aktivierung der Übersteuerung wird im Display durch
die blinkende Anzeige AUTO oder in anderen Fällen durch
das Blinken von
,
oder
angezeigt. Die
Übersteuerung in der Betriebsart AUTO bleibt bis zur
nächsten Änderung des Temperatur-Stundenprofils aktiv.
156
BEDIENUNGSANWEISUNG
Funktion Party
Die Funktion Party ermöglicht die vorübergehende Deaktivierung der eingestellten
Betriebsarten in den Modi AUTO, Absenkung, Prekomfort und Komfort und aktiviert für
einen Zeitraum zwischen 1 und 23 Stunden den Modus Komfort mit einem wählbaren
Sollwert. Diese Funktion kann beispielsweise verwendet werden, um während eines
Abendessens, eines Fests, usw. eine angenehmere Temperatur zu haben.
Zur Aktivierung der Funktion die Taste
drücken.
Auf dem Display erscheint das Symbol
, während der
Wert des Sollwerts
blinkt.
Mit den Tasten
die gewünschte Temperatur
einstellen. Mit den Tasten
dann die
Stundenanzahl der Aktivierung der Party-Funktion
einstellen, die oben links im Display angezeigt wird. Die
Taste
drücken, oder 5 Sekunden warten, um die
Einstellung zu bestätigen.
Solange die Funktion aktiv ist, kann der Temperatursollwert mit den Tasten
und
der Aktivierungszeitraum mit den Tasten
verändert werden.
Während des Betriebs läuft die eingestellte Zeit rückwärts.
Die Funktion Party bleibt bis zum Ablauf des eingestellten Zeitraums aktiv.
Nach Ablauf der eingestellten Zeit wird die Funktion Party automatisch deaktiviert und
der Thermostattimer kehrt in die ursprünglichen Betriebsart zurück.
Zur vorzeitigen Deaktivierung der Funktion Party die Taste
drücken.
D
E
U
T
S
C
H
157
BEDIENUNGSANWEISUNG
Funzione Holiday
Die Funktion Holiday ermöglicht die vorübergehende Deaktivierung der eingestellten
Betriebsart in den Modi AUTO, Absenkung, Prekomfort und Komfort und aktiviert für
einen Zeitraum zwischen 1 und 99 Tagen den Modus Absenkung mit einem wählbaren
Sollwert. Diese Funktion kann beispielsweise verwendet werden, um einen
Energiesparzeitraum der Heizung während eines Urlaubs oder einer längeren
Abwesenheit einzustellen, und die gewünschte Temperatur am Ankunftstag vorzufinden.
Zur Aktivierung der Funktion die Taste
drücken.
Auf dem Display erscheint das Symbol
, während der
Wert des Sollwerts
blinkt.
Mit den Tasten
die gewünschte Temperatur
einstellen.
Mit den Tasten
dann die Tagesanzahl der
Aktivierung der Holiday-Funktion einstellen, die oben links
im Display angezeigt wird.
Die Taste
drücken, oder 5 Sekunden warten, um die
Einstellung zu bestätigen.
Solange die Funktion aktiv ist, kann der Temperatursollwert mit den Tasten
und
der Aktivierungszeitraum mit den Tasten
verändert werden.
Während des Betriebs läuft die eingestellte Tagesanzahl rückwärts.
Die Funktion Holiday bleibt bis zum Ablauf des eingestellten Zeitraums aktiv, der um 24
Uhr endet. Bei der Berechnung der Tage muss immer der aktuelle Tag eingerechnet
werden.
Wenn beispielsweise Freitagabend die Funktion Holiday eingestellt werden soll, die
Sonntagabend um Mitternacht endet, müssen 3 Tage eingestellt werden (Freitag,
Samstag, Sonntag).
Nach Ablauf der eingestellten Zeit wird die Funktion Holiday automatisch deaktiviert und
der Thermostattimer kehrt in die ursprüngliche Betriebsart zurück.
Zur vorzeitigen Deaktivierung der Funktion Holiday die Taste
drücken.
158
BEDIENUNGSANWEISUNG
Kopie des Feiertagsprogramm
Im Modus AUTO kann das Profil des Feiertags (7) auf einen beliebigen Wochentag kopiert
werden.
Die Funktion kann bis zu 6 Tage vor dem gewählten Tag aktiviert werden. Diese Funktion
ist besonders nützlich, wenn beispielsweise ein Feiertag auf einen Werktag fällt.
Zum Kopieren des Feiertagsprofils die Taste
drücken.
Auf dem Display blinkt das Symbol
und der Balken
des Feiertags.
Mit den Tasten
den Werktag wählen, auf den das
Feiertagsprofil kopiert werden soll.
Die Taste
, drücken, oder 30 Sekunden warten, um
die Einstellung zu bestätigen.
Solange die Funktion aktiv ist, kann durch Drücken der
Taste
der Tag angezeigt werden, auf den das
Feiertagsprofil kopiert wurde; der entsprechende Balken
blinkt im Display.
Wenn die Funktion deaktiviert werden soll, die Taste
erneut drücken; wenn der Wochentag geändert werden
soll, die Tasten
verwenden und die Taste
,
drücken oder 30 Sekunden abwarten, um die neue
Einstellung zu bestätigen.
Tagsüber ist das Symbol
fest eingeschaltet.
Das Kopieren des Feiertags gilt nur vorübergehend; nach
Mitternacht des gewählten Tags wird zum
programmierten Wochenprofil zurück gekehrt.
D
E
U
T
S
C
H
159
BEDIENUNGSANWEISUNG
Anzeige Batterie entladen
Wenn die Batterien nahezu entladen sind, und die
Busversorgung fehlt, blinkt das Symbol
im Display.
Aus dem Display verschwindet auch die
Temperaturanzeige und die Batterien müssen so schnell
wie möglich ersetzt werden.
Wenn das Symbol
fest aufleuchtet, müssen die
Batterien unbedingt ersetzt werden.
Die Batterien dienen nur zum Speichern des Datums und
der Uhrzeit bei einem Spannungsausfall des KNX/EIBBusses (alle anderen Einstellungen werden in nicht
flüchtigen Speichern gesichert).
Bei anliegender Busspannung ist die Funktion auch bei
fehlenden Batterien gewährleistet.
Rückstellung und Wiederherstellung der Werkseinstellung
Für eine vollständige Rückstellung des Thermostattimers gleichzeitig die Tasten
und
drücken.
,
Achtung: Alle eingestellten Parameter und angepasste Programme werden
gelöscht.
Beim erneuten Einschalten verwendet der Thermostattimer die werksseitig eingestellten
Parameter und Programme. Der Thermostattimer schaltet in Heizbetrieb in den Modus
OFF ein und die Funktionen Party und Holiday sind deaktiviert.
160
BEDIENUNGSANWEISUNG
Voreingestellte Programme
Der Thermostattimer verfügt über zwei voreingestellte Programme, eines für die Heizung
und eines für die Klimatisierung.
HEIZUNGSPROGRAMM
Montag - Freitag
Samstag - Sonntag
KLIMATISIERUNGSPROGRAMM
Alle Wochentage
Diese voreingestellten Programme können entsprechend der persönlichen Anforderungen
geändert und angepasst werden. Für die Änderung der voreingestellten Programme wird
auf die Anweisungen des Abschnitts “Anpassung des Tagesprogramms” verwiesen.
161
D
E
U
T
S
C
H
BEDIENUNGSANWEISUNG
Voreingestellte Parameter
Wochentag
1 : Montag
TFROSTSCHUTZ
00:00
16 °C
18 °C
20 °C
5 °C
TÜBERTEMPERATURSCHUTZ
24 °C
26 °C
28 °C
35 °C
Uhrzeit
Sollwert Heizungstemperatur
Sollwert Klimatisierungstemperatur
Selbstlernen
OFF
Heizung
Klimatisierung
Differenzwert der Regelung
Temperatureinheit
0.2 °C
0.5 °C
°C
Verhalten bei Ausfall und
Wiederherstellung der Busversorgung
Bei Ausfall der Busversorgung führt das Gerät keinerlei Aktion aus. Datum und Uhrzeit
werden durch die Pufferbatterien gespeichert, alle anderen Einstellungen werden in
einem nicht flüchtigen Speicher gesichert. Das Geräte ist max. 5 Sekunden nach
Wiederherstellung der Busversorgung wieder voll funktionsfähig.
Ohne Pufferbatterien wird der Thermostattimer bei Wiederherstellung der Busspannung
im Modus AUS eingeschaltet.
162
BEDIENUNGSANWEISUNG
Batteriewechsel
Die Befestigungsschraube unter dem Frontdeckel entfernen
und den Thermostattimer gemäß folgender Abbildung vom
Haltesockel entfernen.
UP
3
2
1
Den Deckel des Batteriefachs entfernen
und die entladenen Batterien durch zwei
andere 1,5 V Batterien (Typ AAA) ersetzen,
dabei auf die Polung achten.
D
E
U
T
S
C
H
163
BEDIENUNGSANWEISUNG
1
Den Thermostattimer wieder gemäß der in der Abbildung
dargestellten Folge auf dem Haltesockel einrasten und
wieder mit der Frontschraube befestigen.
2
ACHTUNG
- Wenn die Busversorgung des Thermostattimers während des
Batteriewechsels unterbrochen wurde, müssen Datum und Uhrzeit wieder
eingestellt werden.
- Alle Batterien gleichzeitig austauschen.
- Alte und neue Batterien dürfen nicht zusammen verwendet werden.
- Nur gleichartige Batterien verwenden (keine Alkali-Batterien zusammen
mit Zink-Kohle Batterien verwenden).
- Keine Batterien ins Feuer werfen.
- Die Batterien sind Sondermüll, ihre Entsorgung wird durch besondere
gesetzliche Vorgaben geregelt, sie müssen besonderen
Entsorgungsstellen zugeführt werden.
Reinigung des Thermostattimers
Der Thermostattimer muss mit einem trockenen Tuch gereinigt werden.
164
INSTALLATIONSANWEISUNG
ACHTUNG: Die Installation des Geräts darf ausschließlich von
qualifiziertem Personal gemäß der gültigen Richtlinie und den
Installationsrichtlinien für KNX/EIB Installationen erfolgen.
Richtige Positionierung
Um eine korrekte Erfassung der
Raumtemperatur zu gewährleisten,
darf der Thermostattimer nicht in
Nischen, neben Türen oder Fenster,
neben Heizkörpern oder Klimageräten
montiert werden, und er darf keinem
direkten Luftzug oder direkter
Sonnenbestrahlung ausgesetzt werden.
Montage des Haltesockels
Der Haltesockel wird in einer Höhe von 160 cm über Fußbodenhöhe montiert, und kann
direkt mit Dübeln an die Wand oder auf ein UP-Gehäuse (3 Module) geschraubt werden.
ACHTUNG Bei der Befestigung des Haltesockels muss die mit dem Pfeil
angegebene Montagerichtung beachtet werden:
Montage mit Dübeln
UP
165
D
E
U
T
S
C
H
INSTALLATIONSANWEISUNG
Montage auf Gehäuse (3 Module)
UP
Hinweise zur Installation KNX/EIB
1. Die Länge der Busleitung zwischen dem Easy Thermostattimer und dem Netzgerät
darf 350 Meter nicht überschreiten.
2. Die Länge der Busleitung zwischen dem Easy Thermostattimer und dem am weitesten
entfernt liegenden, zu steuernden KNX/EIB-Gerät darf 700 Meter nicht überschreiten.
3. Um unerwünschte Signale und Überspannungen zu vermeiden, sind Ringkreise so
weit wie möglich zu vermeiden.
4. Es muss ein Mindestabstand von 4 mm zwischen den einzeln isolierten Kabeln der
Buslinie und den Kabeln der Stromleitung
eingehalten werden.
230 V
Bus
≥ 4 mm
5. Der elektrische Durchgangsleiter der Abschirmung darf nicht beschädigt werden.
Buskabel
Elektrischer
Durchgangsleiter
Abschirmung
166
INSTALLATIONSANWEISUNG
ACHTUNG: Die nicht verwendeten Bussignalkabel und der elektrische
Durchgangsleiter dürfen nie spannungsführende Elemente oder den
Erdungsleiter berühren.
Elektrische Anschlüsse
+-
bus +-
Elektroanschlussschema
1. Vor dem Anschluss an den KNX/EIB-Bus müssen die Pufferbatterien eingesetzt werden
(siehe Abschnitt Batteriewechsel).
2. Die rote Ader des Buskabels an die rote Klemme (+) des Terminals und die schwarze
Ader an die schwarze Klemme (-) anschließen. Es können bis zu 4 Buslinien an den
Busterminal angeschlossen werden (Adern der gleichen Farbe in die gleiche Klemme).
Verbindung Busgerät
Verbindung Buskabel
3. Die Abschirmung, den elektrische Durchgangsleiter und die verbleibenden weißen
und gelben Adern des Buskabels (falls ein Buskabel mit 4 Leitern verwendet wird),
die nicht benötigt werden, isolieren.
167
D
E
U
T
S
C
H
INSTALLATIONSANWEISUNG
4. Die Busklemme in die entsprechenden Steckkontakte des Gerätes einsetzen. Die
korrekte Montagerichtung wird durch die Befestigungsführungen vorgegeben.
Initialisierung mit dem Easy Basisgerät
1. Das Gerät über den Bus versorgen und ca. 5 Sekunden abwarten bis dieses voll
funktionsfähig ist.
2. Das Gerät vom System mit einer der folgenden Prozeduren erfassen lassen:
• Automatische Erfassung (das Gerät besitzt noch die Werkseinstellungen):
- An dem Easy Basisgerät das Menü „Projektierung → neue Funktion“ oder
„Projektierung → Funktion bearbeiten“ wählen: Das Gerät wird automatisch
erkannt.
• Manuelle Erfassung (die Werkseinstellungen wurden geändert):
- An dem Easy Basisgerät das Menü „Projektierung → Gerät erkennen“ wählen;
- kurz (< 2 Sekunden) die Programmiertaste drücken. Die Programmier-LED
leuchtet während der Erfassungsprozedur auf.
Programmiertaste
LED für Programmierung
Das von dem Easy Basisgerät erfasste Gerät wird mit der zugewiesenen Nummer in den
Kanälen der Menüs „Projektierung → neue Funktion“ oder „Projektierung → Funktion
bearbeiten“ aufgeführt.
168
INSTALLATIONSANWEISUNG
Vervollständigung
Den Thermostattimer gemäß der in der Abbildung
dargestellten Folge auf dem Haltesockel einrasten
und mit der mitgelieferten Schraube befestigen.
UP
2
3
1
Programmierung mit dem Easy Basisgerät
Den Thermostattimer mit Hilfe des Easy Basisgeräts (Code GW 90 831) programmieren.
Der Kanal des Thermostattimers kann nach Wunsch bei der erforderlichen Funktion
gewählt werden:
• Die Tasten
gleichzeitig für > 5 Sekunden drücken, um den Programmiermodus
zu aktivieren. Den gewünschten Kanal mit den Tasten
wählen und die Auswahl
mit der Taste
bestätigen: Der entsprechende Kanal wird in der Kanalliste der
Menüs „Projektierung → neue Funktion“ oder „Projektierung → Funktion bearbeiten“
angezeigt. Zum Verlassen des Programmiermodus die Tasten
gleichzeitig
drücken;
• Direkt aus der Kanalliste der Menüs „Projektierung → neue Funktion“ oder
„Projektierung → Funktion bearbeiten“.
169
D
E
U
T
S
C
H
INSTALLATIONSANWEISUNG
Im Programmiermodus stehen die folgenden Kanäle zur Verfügung:
StS (Status)
Zur Verwendung bei folgenden Übermittlungen an
entfernte Geräte (z.B. der Easy GSM-Fernsteuerung GW 90 861):
• Funktionsmodus und -art;
• gemessene Temperatur (alle 15 Minuten oder bei jeder
Veränderung).
CdH (Heizungsregelung)
Zur Verwendung beim Übermittlung des Befehls AN/AUS
an die KNX/EIB-Antriebe, die die Heizungsanlage regeln.
CdC (Kühlungsregelung)
Zur Verwendung beim Übermittlung des Befehls AN/AUS
an die KNX/EIB-Antriebe, die die Klimaanlage regeln.
MAS (Master)
Zur Verwendung beim Übermittlung des Typs (Heizung /
Klimatisierung) und des Funktionsmodus (AUS / Absenkung/
Prekomfort / Komfort) an die als „Slave“ konfigurierten
Zonenthermostate.
Bei der Erstellung der oben angegebenen Funktionen muss bei dem Basismodul keine
Funktion gewählt werden, da der Link automatisch erstellt wird.
170
INSTALLATIONSANWEISUNG
SLA (Slave)
Zur Verwendung für folgende Einstellungen:
• Ferneinstellung der Betriebsart und -modus des
Thermostattimers mit anderen KNX/EIB-Geräten.
Beispiele der verwendbaren Geräte sind die Easy GSMFernsteuerung, der Easy Bedien- und Anzeigepult, die
Easy 4-Kanal Kontaktschnittstelle, usw.;
• Der Modus AUS des Thermostattimers, mit Vorrang vor
allen anderen Befehlen, wenn das Signal „Fenster
offen“ empfangen wird. Bei der Meldung „Fenster
geschlossen“ kehrt der Thermostattimer in die
vorherige Betriebsart oder in die des letzten Befehls,
der während der Zwangssteuerung AUS empfangen
wurde, zurück;
• Die Speicherung von Szenen, max. 8: Der
Thermostattimer speichert die Betriebsart und -modus
und die aktuellen Sollwerte.
Bei Verknüpfung zwischen dem „Slave“ Kanal und der 4-Kanal Kontaktschnittstelle (GW
90 834) werden am Basismodul die folgenden Funktionen vorgeschlagen.
Namen der Funktionen am Easy Basisgerät
Flanken
Befehl Flankensteuerung (für Fensterkontakte)
Szene
Befehl Steuerung der Szenen
Betriebsart
Befehle für Temperaturregelung (Modus)
Für weitere Informationen zur Vorgehensweise bei der Programmierung lesen Sie bitte
in den Unterlagen des Easy Basisgeräts nach.
D
E
U
T
S
C
H
171
Stromaufnahme des Bus
Buskabel
Bedienelemente
Anzeigeelemente
Bereich der Temperaturanzeige
Messelemente
Temperaturregelbereich
Nutzungsumgebung
Betriebstemperatur
Lagertemperatur
Relative Luftfeuchtigkeit
Busanschluss
Schutzgrad
Abmessungen (B x H x T)
Normverweise
Zertifizierungen
Bus KNX/EIB
Über Bus KNX/EIB, 29 V dc SELV + 2 AlkaliBatterien 1,5 V AAA für die Aktualisierung von
Datum und Uhrzeit bei Ausfall der Busspannung
5 mA
KNX/EIB TP1
1 Miniatur-Programmiertaste
10 Bedien- und Konfigurationstasten
1 LCD-Display mit LED-Hintergrundbeleuchtung
(zeitgesteuert nach Eingriff des Anwenders)
1 rote Programmier-LED
0 ÷ +45 °C
1 NTC-Sensor
Auflösung: 0,1 °C
Messgenauigkeit: ± 0,5 °C bei 20 °C
Intervall zwischen zwei Messungen: 1 Minute
TFROSTSCHUTZ : +2 ÷ +7 °C
TÜBERTEMPERATURSCHUTZ : +30 ÷ +40 °C
Andere Sollwerte: +5 ÷ +40 °C
Innen, trockene Standorte
-5 ÷ +45 °C
-25 ÷ +70 °C
Max. 93% (nicht kondenswasserbildend)
Steckklemme 2 Pin Ø 1 mm
IP20
130 x 92 x 23 mm
Niederspannungsrichtlinie 2006/95/EG
EMV-Richtlinie 89/336/EWG 89/336/CEE
EN50090-2-2, EN60730-1
KNX/EIB
Ai sensi dell’articolo 9 comma 2 della Direttiva Europea 2004/108/CE si informa che responsabile dell’immissione del prodotto sul mercato Comunitario è:
According to article 9 paragraph 2 of the European Directive 2004/108/EC, the responsible for placing the apparatus on the Community market is:
GEWISS S.p.A Via A. Volta, 1 - 24069 Cenate Sotto (BG) Italy Tel: +39 035 946 111 Fax: +39 035 945 270 E-mail: [email protected]
+39 035 946 111
+39 035 946 260
8.30 - 12.30 / 14.00 - 18.00
lunedì ÷ venerdì - monday ÷ friday
24h
[email protected]
www.gewiss.com
ULTIMA REVISIONE 02/2011
Kommunikation
Stromversorgung
cod. 7.01.5.100.6
TECHNISCHE DATEN