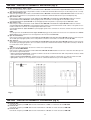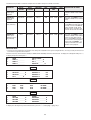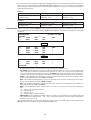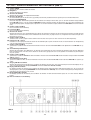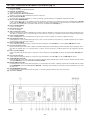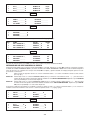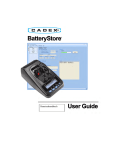
1
Sound Systems
RX 3000
MATRICE PROGRAMMABILE PER LA GESTIONE e IL CONTROLLO DEL SISTEMA
[pagina 2 - 62]
PROGRAMMABLE MATRIX FOR SYSTEM MANAGEMENT and CONTROL
[page 63 - 123]
MATRICE PROGRAMMABLE POUR LA GESTION et LE CONTRÔLE DES SYSTÈMES
[page 124 - 184]
PROGRAMMIERBARE MATRIX FÜR DIE STEUERUNG und ÜBERWACHUNG DER SYSTEME
[Seite 185 - 245]
MATRIX PROGRAMMABLE PARA LA GESTIÓN y EL CONTROL DE LOS SISTEMAS
[página 246 - 306]
MANUALE D’USO • OPERATION MANUAL
INSTRUCTIONS D’EMPLOI • BEDIENUNGSANLEITUNG • MANUAL DE USO
INDICE
AVVERTENZE PER LA SICUREZZA _______________________________________
PRECAUZIONI PER L’UTILIZZO __________________________________________
DESCRIZIONE __________________________________________________________
CP 3100 - UNITÀ DI CONTROLLO _______________________________________
MB 3200 - SUB-RACK _________________________________________________
IF 3260 - PANNELLO CONNESSIONI ____________________________________
IB 3210 / IB 3280 - SCHEDA AUDIO INPUT ______________________________
OB 3230 - SCHEDA AUDIO OUTPUT ____________________________________
IO 3250 - SCHEDA INPUT/OUTPUT DIGITALE ____________________________
BM 3616 - CONSOLLE MICROFONICA DIGITALE _________________________
BM 3604 - CONSOLLE MICROFONICA __________________________________
RB 3300 - SCHEDA RETROAMPLIFICATORE _____________________________
PS 3400 - ALIMENTATORE _____________________________________________
ES 3000 - SOFTWARE ESTESO _________________________________________
CP 3100 - DISPOSITIVI PANNELLO ANTERIORE ___________________________
CP 3100 - DISPOSITIVI PANNELLO POSTERIORE _________________________
MB 3200 - DISPOSITIVI PANNELLO ANTERIORE __________________________
MB 3200 - DISPOSITIVI PANNELLO POSTERIORE _________________________
DISPOSITIVI E FUNZIONI DEL SISTEMA __________________________________
MATRICI AUDIO _______________________________________________________
INGRESSI “GPI” _______________________________________________________
RELÉ PROGRAMMABILI _______________________________________________
UNITÀ A.C.U. _________________________________________________________
FUNZIONE “DAY/NIGHT” _______________________________________________
FUNZIONE “MONITOR” ________________________________________________
ALLARME “OVL” ______________________________________________________
FUNZIONE “FIRE-BREAK” ______________________________________________
FUNZIONE “LINE FAULT” _______________________________________________
FUNZIONE “PA FAULT” _________________________________________________
FUNZIONE “ALC” _____________________________________________________
EVENTI DEL SISTEMA _________________________________________________
EVENTI COMANDABILI DALLE CONSOLLE DIGITALE BM 3616 _________________
EVENTI COMANDABILI DALLE CONSOLLE BM 3604 _________________________
EVENTI COMANDABILI DAGLI INGRESSI “GPI” ______________________________
EVENTI TEMPORIZZATI ________________________________________________
EVENTI “VOX” ________________________________________________________
EVENTI “PLAYBACK” __________________________________________________
EVENTI “BACKGROUND MUSIC” _________________________________________
ORDINE DI PRIORITÀ __________________________________________________
FUNZIONE DI INTERDIZIONE DA PARTE DI UN EVENTO A PRIORITÀ ASSOLUTA __
DISPOSITIVO “VOX” ___________________________________________________
REGISTRAZIONE/RIPRODUZIONE DI SEGNALI AUDIO ____________________
CREAZIONE DI SUONI _________________________________________________
REGISTRAZIONE DI SEGNALI AUDIO _____________________________________
RIPRODUZIONE DI FILE AUDIO __________________________________________
ALLARMI DEL SISTEMA ________________________________________________
STAMPA DEGLI EVENTI DI ALLARME _____________________________________
DIFFUSIONE MUSICA DI SOTTOFONDO _________________________________
UTILIZZO DELL’UNITÀ DI CONTROLLO CP 3100 __________________________
UTILIZZO DEI MENU ___________________________________________________
PASSWORD DI ACCESSO AI MENU ______________________________________
USCITA DA UN MENU _________________________________________________
VISUALIZZAZIONE DEL LIVELLO AUDIO ___________________________________
FUNZIONAMENTO DEL SEGNALATORE ACUSTICO __________________________
FUNZIONAMENTO DELLA RETROILLUMINAZIONE ___________________________
2
4
4
5
5
6
6
6
6
6
6
7
7
8
8
8
10
11
11
13
13
13
13
13
15
15
16
16
16
16
16
16
16
16
17
17
17
17
17
17
18
19
19
19
19
19
20
20
20
20
20
21
21
22
22
22
ACCENSIONE DELL’APPARECCHIO _____________________________________
CONFIGURAZIONE DEL SISTEMA CORRETTA ______________________________
ERRORI NELLA CONFIGURAZIONE DEL SISTEMA ___________________________
SELEZIONE DELLA LINGUA _____________________________________________
MENU PRINCIPALE ___________________________________________________
CONFIGURAZIONE DEL SISTEMA (menu “CONFIGURATION”) _____________
PARAMETRI CARATTERISTICI ___________________________________________
UTILIZZO DEL MENU “PROCESSO INGRESSI AUDIO” ________________________
UTILIZZO DEL MENU “PROCESSO USCITE AUDIO” __________________________
UTILIZZO DEL MENU “GRUPPI DI ZONE” __________________________________
UTILIZZO DEL MENU “CONFIGURAZIONE RELAY” ___________________________
UTILIZZO DEL MENU “CONSOLES DIGITALI” _______________________________
UTILIZZO DEL MENU “ACU” ____________________________________________
UTILIZZO DEL MENU “EVENTI INGRESSI GPI” ______________________________
UTILIZZO DEL MENU “EVENTI TEMPORIZZATI” _____________________________
UTILIZZO DEL MENU “VOX” _____________________________________________
UTILIZZO DEL MENU “RECORDER” ______________________________________
UTILIZZO DEL MENU “SISTEMA” _________________________________________
UTILIZZO DEL MENU “COMPILA E SALVA” _________________________________
UTILIZZO DEL MENU “ESCI SENZA SALVARE” ______________________________
VISUALIZZAZIONE DELLO STATO ALLARMI (menu “ALLARMI”) ____________
VISUALIZZAZIONE DEGLI EVENTI DI ALLARME _____________________________
STAMPA DEGLI EVENTI DI ALLARME _____________________________________
DETTAGLIO ALLARMI SU SCHEDE AUDIO INPUT IB 3210 / IB 3280 _____________
DETTAGLIO ALLARMI SU SCHEDE AUDIO OUTPUT OB 3230 __________________
DETTAGLIO ALLARMI SU SCHEDE INPUT/OUTPUT DIGITALI IO 3250 ___________
DETTAGLIO ALLARMI SU CONSOLLE BM 3616 _____________________________
DETTAGLIO ALLARMI SU UNITÀ A.C.U. ___________________________________
DETTAGLIO ALLARMI “GPI” _____________________________________________
DETTAGLIO ALLARMI CONSOLLE BM 3616 ________________________________
DETTAGLIO ALLARMI FIREMAN _________________________________________
ALLARMI DEL SISTEMA ________________________________________________
ATTUAZIONE DI UNA CONFIGURAZIONE (menu “MEMOR. CONFIG.”) ______
PROGRAMMAZIONE DEI DISPOSITIVI TRAMITE MENU _______________________
PROGRAMMAZIONE DEI DISPOSITIVI TRAMITE RIAVVIO DEL SISTEMA __________
ERRORI DI COMPILAZIONE _____________________________________________
IMPOSTAZIONI AUDIO (menu “PROCESSO AUDIO”) ______________________
UTILIZZO DEL MENU “PROCESSO INP AUDIO” _____________________________
UTILIZZO DEL MENU “PROCESSO OUT AUDIO” ____________________________
UTILIZZO DEL MENU “INSER. RISERVA ACU” ______________________________
UTILIZZO DEL MENU “OPERAZIONI MONITOR” _____________________________
DATI TECNICI ___________________________________________________________
DATI TECNICI CP 3100 _________________________________________________
DATI TECNICI MB 3200 ________________________________________________
DATI TECNICI IF 3260 __________________________________________________
DATI TECNICI SCHEDE AUDIO INPUT IB 3210 / IB 3280 ___________________
DATI TECNICI SCHEDE AUDIO OUTPUT OB 3230 ________________________
DATI TECNICI SCHEDE INPUT/OUTPUT DIGITALI IO 3250 _________________
ESEMPIO DI COLLEGAMENTO ___________________________________________
3
22
22
22
23
23
23
25
25
26
27
28
29
33
34
37
39
40
43
45
45
46
47
48
48
49
50
51
51
52
53
54
54
55
55
55
55
56
56
57
57
60
61
61
61
61
62
62
62
307
IMPORTANTE
• Prima di utilizzare gli apparecchi del sistema leggete attentamente le istruzioni contenute in questo manuale, che vi consigliamo di
conservare per riferimenti futuri.
• Il presente manuale costituisce parte integrante del sistema, e deve accompagnare quest'ultimo anche nei passaggi di proprietà, per permettere al nuovo proprietario di conoscere le modalità d'utilizzo e le avvertenze per la sicurezza.
• L’utilizzo errato degli apparecchi del sistema esime la RCF da ogni responsabilità.
ATTENZIONE
• Per prevenire i rischi di fiamme o scosse elettriche, non esponete gli apparecchi del sistema alla pioggia o all'umidità.
AVVERTENZE PER LA SICUREZZA
1. Tutte le precauzioni accompagnate con il simbolo
devono essere lette con particolare attenzione, in quanto contengono importanti informazioni per la sicurezza.
2. Per evitare il rischio di incendi o scosse elettriche, accertatevi che il cavo di alimentazione dell’unità di controllo CP 3100 non possa venire calpestato o schiacciato da oggetti, al fine di salvaguardarne la perfetta integrità; evitate inoltre di piegare eccessivamente, tirare o
tagliare il cavo di alimentazione.
3. Per evitare il rischio di shock elettrici non aprite mai l’unità di controllo CP 3100: all'interno non vi sono parti che possono essere utilizzate dall'utente.
4. Impedite che oggetti o liquidi entrino all'interno degli apparecchi del sistema, in quanto potrebbero causare incendi o scosse elettriche.
5. Non tentate riparazioni non descritte in questo manuale; contattate CENTRI DI ASSISTENZA RCF quando:
a. un apparecchio non funziona (o funziona in modo anormale).
b. il cavo di alimentazione dell’unità di controllo CP 3100 ha subito gravi danni.
c. oggetti o liquidi sono entrati in un apparecchio.
d. un apparecchio ha subito forti urti.
6. Qualora il sistema non venga utilizzato per lunghi periodi, spegnetelo interrompendo l’alimentazione a tutti i relativi apparecchi.
7. Nel caso che da un apparecchio provengano odori anomali o fumo, spegnete immediatamente il sistema.
8. Per evitare il rischio di shock elettrici non connettete o disconnettete il cavo di alimentazione dell’unità di controllo CP 3100 con le
mani bagnate; afferrate sempre direttamente la spina, e non tirate mai il cavo.
9. Non dirigete il getto di spray sugli apparecchi del sistema (es. insetticidi, prodotti per la pulizia, ecc.): i gas utilizzati potrebbero incendiarsi
improvvisamente.
10. Gli apparecchi del sistema utilizzano circuiti digitali, e sebbene siano costruiti nel pieno rispetto delle normative vigenti in materia di emissione di radiodisturbi, in alcune circostanze potrebbero causare disturbi ed interferenze se posizionati molto vicino a radio, TV e apparecchi simili. Se si dovessero presentare dei problemi di questo tipo, cercate di spostare gli apparecchi disturbati lontano dagli apparecchi del sistema.
11. Utilizzate gli apparecchi del sistema solamente con gli eventuali accessori specificati dalla RCF o forniti assieme ai prodotti.
PRECAUZIONI PER L’UTILIZZO
• Non sforzate gli organi di comando (tasti, controlli, ecc.).
• Per la pulizia degli apparecchi evitate l'uso di diluenti, alcol, benzina, o altre sostanze volatili.
MARCHI E MARCHI REGISTRATI
• IBM® e VGA® sono marchi registrati della International Business Machines Inc.
• Microsoft® è un marchio registrato della Microsoft Corporation; Windows 95™ e Windows 98™ sono marchi della Microsoft Corporation.
• Sound Blaster è un marchio registrato della Creative Technology LTD.
• Eventuali altri nomi di prodotto menzionati in questo manuale sono di proprietà dei rispettivi produttori.
4
DESCRIZIONE
La matrice RX 3000 è stata progettata da RCF per rispondere ai requisiti dei moderni sistemi tecnologici per la gestione ed il controllo delle
moderne strutture commerciali, industriali, civili, come aeroporti, centri commerciali, hotel, centri direzionali, stazioni ferroviarie, ecc. Presenta le caratteristiche indicate di seguito.
• Fino a 64 ingressi audio di tipo modulare (8 schede AUDIO INPUT IB 3210 / IB 3280).
• Fino a 128 uscite audio di tipo modulare (16 schede AUDIO OUTPUT OB 3230).
• Possibilità di creare fino a 8 matrici audio, fra loro completamente indipendenti e ad accessibilità totale.
• Possibilità di creare matrici con capacità massima di 32 ingressi x 64 uscite (max 2 matrici 32 x 64).
• Fino a 256 ingressi optoisolati GPI (16 schede INPUT/OUTPUT digitali IO 3250), per il comando di eventi programmabili.
• Fino a 384 uscite a relè (16 schede INPUT/OUTPUT digitali IO 3250), utilizzabili per vari scopi.
• Fino a 16 consolle digitali BM 3616, per la diffusione di annunci microfonici ed il controllo di numerose funzioni del sistema.
• Fino a 24 consolle o gruppi di consolle BM 3604, per la diffusione di annunci microfonici ed il controllo di alcune funzioni del sistema.
• Fino a 120 schede retroamplificatore RB 3300 (unità A.C.U.), per il controllo diagnostico ed il monitoraggio degli amplificatori di potenza del
sistema e delle linee per diffusori.
• Struttura modulare per adattarsi ad eventuali future espansioni.
• Ingressi audio ad attivazione vocale (dispositivi VOX), per il collegamento di sorgenti sonore prive di organi di comando.
• Gestione di 8 sorgenti per musica di sottofondo, che viene automaticamente esclusa in caso di chiamate selettive nella zona sonorizzata.
• Monitoraggio completo dei segnali audio gestiti dal sistema (ingressi e uscite della matrice audio, uscite degli amplificatori di potenza).
• Diagnosi completa di amplificatori di potenza e linee per diffusori, con verifica delle dispersioni verso terra, impiegando gli stessi cavi di collegamento delle linee altoparlanti (con schede RB 3300 ed SB 3320).
• Controllo automatico del rapporto segnale/rumore negli ambienti sonorizzati, con sistemi di rilievo e regolazione digitali (con scheda LB
3340).
• Registratore digitale per la registrazione/riproduzione di messaggi o toni di avviso/allarme personalizzati (qualità CD).
• Toni di attenzione preregistrati.
• Possibilità di collegare una stampante, per registrare su carta la configurazione del sistema e gli eventi di allarme.
• Possibilità di diffondere i toni ed i messaggi registrati sul disco rigido dell’unità di controllo CP 3100 con le seguenti modalità:
– automaticamente ad un orario prestabilito.
– automaticamente con ripetizione entro un orario prestabilito.
– tramite comando dalle consolle microfoniche.
– tramite comando sugli ingressi delle schede INPUT/OUTPUT digitali IO 3250.
• Programmazione del sistema tramite diversi menu, che permettono di attribuire nomi o sigle ad ogni ingresso, uscita, consolle microfonica,
messaggio registrato, evento, ecc.
• Software standard incluso nel sistema che assolve alle seguenti funzioni:
– configurazione delle consolle digitali.
– configurazione degli ingressi audio.
– configurazione delle uscite audio
– configurazione dei gruppi di zone audio.
– configurazione dei relè.
– configurazione dei dispositivi VOX.
– configurazione degli eventi temporizzati.
– configurazione degli ingressi GPI.
– configurazione delle unità A.C.U. preposte al controllo degli amplificatori di potenza del sistema (primari, riserve).
– configurazione del monitoraggio audio.
– controllo degli eventi di allarme.
– registrazione/riproduzione di messaggi, annunci, toni di attenzione, segnali di allarme, ecc.
– configurazione di vari parametri di funzionamento del sistema (data, ora, modalità di stampa, password di configurazione, ecc.).
• Massima affidabilità del sistema grazie ad una minima interazione fra i singoli componenti hardware.
• Autodiagnostica di ogni malfunzionamento, con indicazione dettagliata della causa.
• Esclusivo sistema di comunicazione DCI (Data Communication Interface), che interfaccia ad alta velocità tutti i componenti del sistema.
• Software opzionale ES 3000, per la configurazione del sistema mediante un PC esterno.
Del sistema fanno parte gli apparecchi indicati di seguito.
CP 3100 – UNITÀ DI CONTROLLO
CP 3100 è l’unità di controllo che contiene il microprocessore in grado di gestire tutto il funzionamento del sistema. Presenta le caratteristiche indicate di seguito.
• Contenitore rack 19” da 3 unità.
• Microprocessore ad alta velocità.
• Programmabile sia tramite la tastiera ed il display presenti sul pannello frontale, sia tramite un PC esterno.
• 1 disco rigido per la memorizzazione del programma di gestione del sistema, dei file per la configurazione dei vari dispositivi (schede, consolle digitali, ecc.), dei file audio, ecc.
• 1 scheda audio digitale, per la registrazione/riproduzione di file audio.
• 1 connettore per monitor esterno.
• 1 connettore per tastiera esterna.
• 1 porta seriale RS 232, per la connessione di un PC di configurazione.
• 1 scheda interfaccia bus, per il collegamento dei sub-rack MB 3200.
• 2 porte seriali RS 485, per il collegamento delle consolle digitali BM 3616 e delle schede retroamplificatore RB 3300.
• 1 porta parallela, per il collegamento di una stampante.
• Alimentatore interno.
• Altoparlante per monitorare, selettivamente o in successione automatica, gli ingressi e le uscite della matrice audio, e le uscite degli amplificatori.
• Pannello anteriore con tastiera per configurazione e diagnostica.
• Display a cristalli liquidi retroilluminato 4x40 caratteri.
5
MB 3200 – SUB-RACK
L’ MB 3200 è il sub-rack che ospita i vari moduli del sistema. Nell’MB 3200 possono essere installate:
• 4 schede AUDIO INPUT IB 3210 / IB 3280 (per un totale di 32 ingressi audio).
• 8 schede AUDIO OUTPUT OB 3230 (per un totale di 64 uscite audio), oppure 8 schede INPUT/OUTPUT digitali IO 3250 (per un totale di
128 ingressi optoisolati e 192 uscite a relé), oppure 8 fra schede AUDIO OUTPUT OB 3230 e schede INPUT/OUTPUT digitali IO 3250.
Presenta le caratteristiche indicate di seguito.
• Contenitore rack 19” da 4 unità.
• Pannello anteriore con indicatori dello stato di funzionamento delle schede installate.
• Connettori e guide per schede elettroniche a standard DIN.
• Veloce installazione delle schede grazie a connessioni ad innesto rapido.
• Possibilità di connettere all’unità di controllo CP 3100 due o più MB 3200.
IF 3260 – PANNELLO CONNESSIONI
Il pannello consente l’installazione delle schede di connessione dei moduli presenti nel sub-rack MB 3200. Da collocare nella parte posteriore del contenitore rack, presenta le caratteristiche indicate di seguito.
• Pannello rack 19” da 6 unità, in lamiera verniciata.
• Possibilità di installare in alternativa: 15 schede di connessione a 12 morsetti, oppure 10 schede di connessione a 20 morsetti, oppure 5
schede di connessione a 32 morsetti.
IB 3210 / IB 3280 – SCHEDA AUDIO INPUT
L’ IB 3210 / IB 3280 è la scheda che permette l’ingresso dei segnali audio. Presenta le caratteristiche indicate di seguito.
• 8 ingressi bilanciati elettronicamente (IB 3210) o con trasformatore (IB 3280).
• Trimmer per la regolazione dei toni alti (±12 dB a 10 kHz) e dei toni bassi (±12 dB a 100 Hz) su ciascun ingresso.
• Possibilità di escludere i controlli di tono via software.
• 1 led di stato.
• Guadagno dei segnali in ingresso regolabile via software.
• Monitoraggio audio selezionabile via software su ciascuno degli 8 ingressi.
• Elevata affidabilità grazie all’hardware “watchdog”, che permette un immediato recupero delle normali condizioni di funzionamento in caso
di interferenze indotte.
• Autoconfigurazione delle schede installate.
• Configurazione di setup memorizzata sulla scheda, per un veloce avvio del sistema.
• 2 schede di connessione separate a 12 morsetti, da installare sul pannello IF 3260.
OB 3230 – SCHEDA AUDIO OUTPUT
L’ OB 3230 è la scheda che permette l’uscita dei segnali audio. Presenta le caratteristiche indicate di seguito.
• 8 uscite bilanciate a bassa impedenza.
• Matrice di scheda a 32 ingressi x 8 uscite.
• Livello d’uscita regolabile via software.
• 1 dispositivo VOX configurabile, per la connessione ad attivazione vocale di un ingresso con una o più uscite della scheda.
• Monitoraggio audio selezionabile via software su ciascuna delle 8 uscite.
• Autoconfigurazione delle schede installate.
• Elevata affidabilità grazie all’hardware “watchdog”, che permette un immediato recupero delle normali condizioni di funzionamento in caso
di interferenze indotte.
• Configurazione di setup memorizzata sulla scheda, per un veloce avvio del sistema.
• Scansione automatica dei canali di uscita per rilevamento clipping e canale difettoso.
• 6 led di stato.
• Scheda di connessione separata a 32 morsetti, da installare sul pannello IF 3260.
IO 3250 – SCHEDA INPUT/OUTPUT DIGITALE
L’ IO 3250 è una scheda provvista di ingressi optoisolati programmabili (ingressi GPI) e di relè di uscita, che consente di comandare diverse
tipologie di eventi. La scheda permette ad esempio l’utilizzo delle consolle microfoniche standard (es. BM 3604), per diffondere annunci microfonici o per comandare la riproduzione di messaggi preregistrati sull’unità di controllo. Indispensabile per interconnettere il sistema con dispositivi esterni, quali sistemi di illuminazione, centrali di allarme, o altri dispositivi comandabili tramite contatti. Presenta le caratteristiche indicate di seguito.
• 16 ingressi optoisolati.
• 24 relè di uscita.
• 6 led di stato.
• Possibilità di associare ad una combinazione dei contatti in ingresso una determinata configurazione d’uscita.
• Elevata affidabilità grazie all’hardware “watchdog”, che permette un immediato recupero delle normali condizioni di funzionamento in caso
di interferenze indotte.
• Configurazione di setup memorizzata sulla scheda, per un veloce avvio del sistema.
• 2 schede di connessione separate, una a 32 morsetti e l’altra a 20 morsetti, da installare sul pannello IF 3260.
BM 3616 – CONSOLLE MICROFONICA DIGITALE
La BM 3616 è una consolle microfonica da tavolo con braccio flessibile, che consente di diffondere un annuncio in 16 zone audio o gruppi di
zone audio, con la possibilità di attivare un segnale di preavviso annunci a 1, 2 o 3 toni (din-don). La consolle consente inoltre di diffondere
nelle zone selezionate dei segnali audio (messaggi o toni) registrati sull'unità di controllo CP 3100; assieme alla riproduzione può essere comandata anche la commutazione di relè delle schede INPUT/OUTPUT digitali IO 3250. Presenta le caratteristiche indicate di seguito.
6
•
•
•
•
•
•
•
•
•
•
•
•
•
•
•
•
•
Display a cristalli liquidi retroilluminato a 16 caratteri, per la visualizzazione di messaggi.
16 tasti programmabili per la selezione di zone e/o gruppi di zone.
Tasto per la selezione di tutte le zone associate alla consolle.
3 tasti funzione programmabili (F1, F2, F3), per il comando di relè o per la riproduzione remota di segnali audio (messaggi o toni).
Tasto di allarme per l’invio con priorità assoluta di messaggi.
Possibilità di registrare localmente un messaggio, che viene automaticamente diffuso nelle zone richieste quando le stesse vengono rese
disponibili dal sistema.
Microfono a condensatore su braccio flessibile, con indicatore luminoso ad anello.
Compressore per microfono provvisto di limitatore di livello.
Generatore di segnale di preavviso per annunci microfonici a 1, 2, 3 toni.
Uscita audio bilanciata con trasformatore, con livello regolabile.
Uscita audio per il preascolto tramite cuffia del messaggio registrato localmente.
Spie di segnalazione per zone e funzioni selezionate.
Segnalatore acustico interno (buzzer).
Password di attivazione consolle.
Connessione all’unità di controllo tramite linea seriale RS 485.
Elevata affidabilità grazie all’hardware “watchdog”, che permette un immediato recupero delle normali condizioni di funzionamento in caso
di interferenze indotte.
Configurazione di setup memorizzata all’interno della consolle, per un veloce avvio del sistema.
BM 3604 – CONSOLLE MICROFONICA
BM 3604 è una consolle microfonica da tavolo con braccio flessibile. Permette di diffondere un annuncio in 4 zone o gruppi di zone, che possono essere liberamente scelte/i tramite quattro tasti della consolle. Presenta le caratteristiche indicate di seguito.
• 4 tasti per la selezione di zone o gruppi di zone.
• Tasto per la selezione generale di tutte le zone o i gruppi di zone associate/i alla consolle.
• Tasto per diffondere l’annuncio microfonico nelle zone selezionate.
• Tasto per diffondere l’annuncio microfonico solamente in una zona locale.
• Tasto ausiliario per il comando di un evento del sistema RX 3000 (es. diffusione di un messaggio preregistrato memorizzato sull’unità di
controllo CP 3100, commutazione di un relè delle schede IO 3250, ecc.).
• Generatore di segnale di preavviso per annunci microfonici a 1, 2, 3 toni.
• Microfono a condensatore su braccio flessibile, con indicatore luminoso ad anello.
• Uscita audio bilanciata (livello “linea”).
• Uscita audio ausiliaria (livello “linea”), per pilotare un amplificatore dedicato alla sonorizzazione di una zona locale.
• Spie di segnalazione per zone e funzioni selezionate.
• Timer per la disattivazione automatica delle zone selezionate in mancanza di annuncio.
• Controllo automatico del guadagno, per una diffusione a volume costante.
• Possibilità di interconnettere più consolle BM 3604 in cascata sulla stessa linea.
RB 3300 – SCHEDA RETROAMPLIFICATORE
L’ RB 3300 è una scheda elettronica da accoppiare ad un amplificatore di potenza con uscite a tensione costante che permette di:
• inserire/disinserire l’amplificatore tramite l’unità di controllo CP 3100.
• controllare il funzionamento dell’amplificatore.
• inserire un amplificatore di riserva in caso di guasto dell’amplificatore controllato dalla scheda.
• monitorare l’uscita per diffusori dell’amplificatore, tramite l’apposito altoparlante dell’unità di controllo CP 3100.
L’amplificatore a cui la scheda viene accoppiata può essere quello primario, normalmente utilizzato per la sonorizzazione di una determinata
zona audio, oppure un amplificatore di riserva, da utilizzare al posto di un amplificatore primario in caso ad esempio di un guasto di quest’ultimo. Da installare a rack in corrispondenza del pannello posteriore dell’amplificatore da controllare, si collega all’unità di controllo CP 3100
tramite un bus digitale ed un bus audio di monitoraggio. La scheda presenta le caratteristiche indicate di seguito.
• Ingresso bilanciato per segnale di linea.
• Uscita bilanciata per pilotaggio amplificatore.
• Ingresso per segnalazione di allarme proveniente dall’amplificatore controllato (es. “overload”).
• Monitoraggio dell’uscita per diffusori dell’amplificatore, con possibilità di controllo di linee a 25 V, 50 V, 70 V, 100 V.
• Segnalazione all’unità di controllo CP 3100 dei seguenti allarmi:
- reset di scheda (“watchdog” reset).
- anomalie di alimentazione della scheda (12V e/o 24V).
- anomalie di funzionamento dell’amplificatore controllato, segnalate tramite contatto ausiliario di quest’ultimo (es. funzionamento in sovraccarico).
- allarmi trasmessi dalla scheda opzionale FAULT DETECTOR SB 3320.
- segnalazioni trasmesse dalla scheda opzionale DIGITAL ALC LB 3340.
• Inserimento di un amplificatore di riserva, al posto dell’amplificatore controllato dalla scheda, comandabile manualmente, o automaticamente in caso di:
- allarme trasmesso dall’amplificatore controllato (es. allarme “overload”).
- allarme trasmesso dalla scheda opzionale FAULT DETECTOR SB 3320.
• Elevata affidabilità grazie all’hardware “watchdog”, che permette un immediato recupero delle normali condizioni di funzionamento in caso
di interferenze indotte.
• Equipaggiabile con la scheda opzionale DIGITAL ALC LB 3340, che permette di utilizzare le funzioni ALC, per il controllo automatico del
rapporto segnale/rumore ambiente, e DAY/NIGHT, per l’abbassamento automatico del livello di diffusione durante le ore notturne.
• Equipaggiabile con la scheda opzionale FAULT DETECTOR SB 3320, che permette di utilizzare le funzioni LINE FAULT, per il controllo del
corretto funzionamento della linea per diffusori, PA FAULT, per il controllo del corretto funzionamento dell’amplificatore, e FIRE-BREAK,
per la diffusione con priorità assoluta di un segnale di allarme (es. messaggio allarme incendio), con esclusione del segnale proveniente dalla matrice audio del sistema.
7
PS 3400 – ALIMENTATORE
Il PS 3400 è un alimentatore multitensione stabilizzato in corrente continua, che permette di alimentare i seguenti apparecchi del sistema: consolle digitali BM 3616, consolle BM 3604, schede retroamplificatore RB 3300, schede INPUT/OUTPUT digitali IO 3250, schede AUDIO INPUT
IB 3210 / IB 3280, schede AUDIO OUTPUT OB 3230. Presenta le seguenti caratteristiche:
• uscita per tensione stabilizzata di 5 Vdc (3 A max).
• uscita per tensione stabilizzata di 12 Vdc (3 A max).
• uscita per tensione stabilizzata di 24 Vdc (2 A max).
• relè ausiliario comandato dalla protezione contro sovratemperature, con 1 contatto in scambio riportato su morsettiera.
• possibilità di collegare in parallelo più alimentatori.
• protezione contro cortocircuiti sulle uscite.
• indicatori luminosi per 5V DC, 12V DC, 24V DC, OVERHEATING, ON.
• telaio adatto al montaggio a rack (altezza 1 unità).
• doppia alimentazione in corrente alternata (115/230 Vac).
• morsettiera di collegamento estraibile.
ES 3000 – SOFTWARE ESTESO
ES 3000 è un software installabile su un personal computer esterno, IBM o compatibile, con sistema operativo Microsoft Windows 95 o Windows 98, che permette di migliorare la gestione del sistema RX 3000. In particolare esso consente di effettuare le seguenti operazioni:
• creazione di più configurazioni, memorizzate in cartelle di sistema sul PC di configurazione.
• invio di file “EXE” all’unità di controllo CP 3100, per aggiornamenti del software di sistema.
• invio di file di configurazione all’unità di controllo CP 3100, per definire una nuova configurazione del sistema.
• invio di file “WAV” all’unità di controllo CP 3100, per definire nuovi toni e/o messaggi (registrati ad esempio sul PC di configurazione mediante appositi programmi).
• prelievo dei file di configurazione dell’unità CP 3100 (ad esempio per diagnosi da parte di tecnici).
• prelievo di toni e/o messaggi registrati sull’unità CP 3100.
Il personal computer può disporre di una qualunque porta seriale RS232 standard (porta da COM1 a COM4 selezionabile mediante software
ES 3000).
Le operazioni di configurazione del sistema possono essere effettuate sul PC di configurazione, e successivamente possono essere trasmesse
mediante la linea seriale all’unità CP 3100.
Tutte le operazioni di configurazione del sistema vengono estremamente semplificate grazie alla grafica dell’ambiente Windows, ed all’utilizzo del mouse e della tastiera.
CP 3100 - DISPOSITIVI PANNELLO ANTERIORE (Fig. 1)
(1) Spia RECORD
Quando accesa segnala che è in corso la registrazione su file di un segnale audio, tramite la funzione RECORD del menu RECORDER
(vedi paragrafo REGISTRAZIONE/RIPRODUZIONE DI SEGNALI AUDIO).
(2) Tasti di direzione
I tasti ← , → , ↑ , ↓ permettono di spostare il punto di selezione nelle corrispondenti quattro direzioni; il tasto permette di spostare il punto di selezione nel primo campo del menu corrente.
(3) Tasti Pag ↑ / Pag ↓
Consentono di cambiare la pagina del menu correntemente visualizzato in giù (pag ↓ ) o in su (pag ↑ ).
(4) Display a cristalli liquidi
Display a cristalli liquidi retroilluminato per la visualizzazione dei vari menu dell’apparecchio (es. configurazione del sistema, allarmi,
ecc.).
(5) Tasto MEMORY
Permette di memorizzare la “password utente”, che consente di impedire l’accesso a determinati menu dell’unità di controllo da parte
di personale non autorizzato.
(6) Spia MEMORY
La spia si accende quando tramite il tasto MEMORY (5) viene correttamente memorizzata una nuova “password utente”.
(7) Tasti numerici
Consentono di inserire numeri, per programmare i campi dei vari menu dell’apparecchio.
(8) Tasto di regolazione contrasto
Premere il tasto per regolare il contrasto del display a cristalli liquidi tramite i tasti (24); l’impostazione viene salvata nella memoria dell’apparecchio.
(9) Spia MUTE
La spia si accende quando il volume dell’altoparlante monitor (10) viene azzerato tramite il tasto (23).
(10) Altoparlante monitor
Quando viene attivata la funzione “monitor” (monitoraggio audio), l’altoparlante permette di ascoltare i segnali audio trattati dal sistema
(segnali in ingresso, segnali in uscita, ecc.).
(11) Spia PLAY
Quando accesa segnala che è in corso la riproduzione di un segnale audio (file audio) registrato sul disco rigido dell’apparecchio (vedi
paragrafo REGISTRAZIONE/RIPRODUZIONE DI SEGNALI AUDIO).
(12) Spia POWER
La spia si illumina quando l’unità è accesa.
(13) Spia ALARM
La spia si accende quando viene attivato uno degli allarmi gestiti dal sistema (vedi paragrafo ALLARMI DEL SISTEMA).
(14) Tasto C ←
Cancella il carattere che precede il cursore di immissione caratteri, spostando quest’ultimo di una posizione verso sinistra.
(15) Tasto SPACE
Inserisce uno spazio in un campo (carattere “blank”), spostando il cursore di immissione caratteri di una posizione verso destra.
8
(16) Tasto C →
Cancella il carattere correntemente selezionato.
(17) Tasto CLEAR
Tasto per cancellare tutti i caratteri contenuti nel campo correntemente selezionato.
(18) Tasti F1 - F2 - F3 - F4
Tasti per accedere a sottomenu dell’apparecchio; la specifica funzione dei tasti è indicata di volta in volta nei vari menu.
(19) Tasto MENU
Tasto non utilizzabile nella presente versione dell’apparecchio.
(20) Tasto ENTER
Tasto per confermare il parametro impostato in un campo.
(21) Tasto ESC
Tasto per uscire da un menu/sottomenu e tornare al menu precedente. Qualora vengano modificati dei parametri, prima di procedere
verrà richiesto se salvare o meno i nuovi valori.
(22) Tasti +/Consentono sia di selezionare i vari parametri indicati nei campi a rotazione dei vari menu dell’unità di controllo, sia di selezionare caratteri alfanumerici per l’impostazione di nomi, numeri, sigle, ecc.
(23) Tasto MUTE
Il tasto consente di attivare/disattivare la funzione MUTE. Attivando la funzione MUTE il volume dell’altoparlante monitor viene azzerato e la spia (9) si accende; disattivando la funzione MUTE il volume dell’altoparlante monitor viene riportato al livello precedentemente
impostato, e la spia (9) si spegne.
(24) Tasti di regolazione
I due tasti svolgono una duplice funzione. Quando si accede al menu che permette di monitorare i segnali audio trattati dal sistema (vedi paragrafo UTILIZZO DEL MENU OPERAZIONI MONITOR), i due tasti permettono di regolare il volume dell’altoparlante monitor: premere il tasto
per diminuire il volume, premere il tasto
per aumentare il volume. In tutte le altre situazioni i due tasti consentono,
dopo avere premuto il tasto (8), di regolare il contrasto del display a cristalli liquidi.
NOTA
• Per ottenere la regolazione è necessario premere e rilasciare ciascuno dei tasti.
Fig. 1
9
CP 3100 - DISPOSITIVI PANNELLO POSTERIORE (Fig. 2)
(1) Interruttore POWER
Permette l'accensione e lo spegnimento dell’apparecchio.
(2) Ventola di raffreddamento
Permette il raffreddamento dell’apparecchio.
(3) Presa per cavo di alimentazione
Consente la connessione del cavo di alimentazione fornito in dotazione.
(4) Presa AC OUTLET
Il connettore è collegato in parallelo con la presa (3), e consente di alimentare con facilità l’eventuale monitor video.
(5) Morsettiere MONITOR BUS
Le due morsettiere a 3 poli permettono il collegamento delle linee “monitor bus” provenienti dalle schede retroamplificatore RB 3300 e
dai sub-rack MB 3200. Le due linee permettono di monitorare i segnali audio trattati dal sistema (segnali in ingresso, segnali in uscita,
segnali degli amplificatori controllati dalle schede retroamplificatore RB 3300, ecc.).
(6) Porta seriale N°2 (COM 2)
Connettore non utilizzabile.
(7) Porta per mouse PS2
Connettore non utilizzabile.
(8) Presa per tastiera
Consente la connessione di una tastiera standard per computer, da utilizzare in alternativa alla tastiera presente sul pannello anteriore
dell’apparecchio. La tastiera deve essere impiegata unitamente ad un monitor video da collegare alla presa (12), e permette di facilitare le operazioni di configurazione del sistema.
(9) Porta seriale N°1 (COM 1)
Porta seriale RS 232 su connettore SUB D maschio a 9 poli, per connettere il sistema con un PC di configurazione esterno.
(10) Porta parallela N°1 (LPT 1)
Porta parallela su connettore SUB D femmina a 25 poli, per collegare il sistema con una stampante, e permettere la stampa della configurazione del sistema e dei messaggi di allarme.
(11) Porta seriale N°4 (COM 4)
Porta seriale bilanciata RS 485, per la comunicazione fra l’unità di controllo CP 3100 e le consolle digitali BM 3616 del sistema.
(12) Connettore per monitor video
Consente la connessione di un monitor video, da utilizzare in alternativa al display a cristalli liquidi presente sul pannello anteriore dell’apparecchio. Il monitor deve essere impiegato unitamente ad una una tastiera esterna da collegare alla presa (8), e permette di facilitare le operazioni di configurazione del sistema.
(13) Porta seriale N°3 (COM 3)
Porta seriale bilanciata RS 485, per la comunicazione fra l’unità di controllo CP 3100 e le schede retroamplificatore RB 3300 del sistema.
(14) Connettore per sub-rack
Porta seriale sincrona DCI che consente la comunicazione fra l’unità di controllo CP 3100 ed i sub-rack MB 3200 del sistema.
(15) Uscita LINE OUT scheda audio
Permette l’uscita del segnale audio a livello “linea” della scheda audio dell’apparecchio, utilizzabile per pilotare uno degli ingressi audio
del sistema (ingresso PLAYBACK di una scheda AUDIO INPUT IB 3210 / IB 3280).
(16) Ingresso LINE IN scheda audio
L’ingresso permette di pilotare la scheda audio dell’apparecchio con il segnale audio a livello “linea” da registrare, proveniente da un’uscita audio del sistema (uscita RECORDER di una scheda AUDIO OUTPUT OB 3230), o da sorgenti audio esterne (es. lettori di cassette, sintonizzatori, lettori di CD audio, ecc.).
(17) Ingresso MICRO IN scheda audio
L’ingresso permette di pilotare la scheda audio dell’apparecchio con il segnale da registrare, proveniente da un microfono esterno.
(18) Connettore non utilizzabile
Fig. 2
10
MB 3200 - DISPOSITIVI PANNELLO ANTERIORE (Fig. 3)
(1) Spie di alimentazione 12 Vdc / 24 Vdc
Ciascuna spia è relativa ad una delle schede AUDIO OUTPUT OB 3230 o INPUT/OUTPUT digitali IO 3250 installate nel sub-rack, e
quando accesa segnala che la corrispondente scheda è correttamente alimentata dalla tensione per circuiti analogici (12 Vdc o 24 Vdc).
(2) Spie di alimentazione 5 Vdc
Ciascuna spia è relativa ad una delle schede AUDIO OUTPUT OB 3230 o INPUT/OUTPUT digitali IO 3250 installate nel sub-rack, e
quando accesa segnala che la corrispondente scheda è correttamente alimentata dalla tensione per circuiti digitali (5 Vdc).
(3) Spie monitor / GPI
Ciascuna spia è relativa ad una delle schede AUDIO OUTPUT OB 3230 o INPUT/OUTPUT digitali IO 3250 installate nel sub-rack.
Scheda AUDIO OUTPUT OB 3230: la spia lampeggia quando viene attivato il monitoraggio di un’uscita della scheda.
Scheda INPUT/OUTPUT digitale IO 3250: la spia lampeggia quando viene pilotato un qualunque ingresso GPI della scheda.
(4) Spie matrice / relè
Ciascuna spia è relativa ad una delle schede AUDIO OUTPUT OB 3230 o INPUT/OUTPUT digitali IO 3250 installate nel sub-rack.
Scheda AUDIO OUTPUT OB 3230: la spia lampeggia quando la matrice di commutazione della scheda è attiva, ossia quando un’uscita della scheda viene connessa con uno degli ingressi della matrice audio.
Scheda INPUT/OUTPUT digitale IO 3250: la spia lampeggia quando viene commutato in chiusura il contatto di uno dei relé di uscita
della scheda.
NOTA
• La spia (4) di una scheda INPUT/OUTPUT digitale IO 3250 lampeggia anche quando uno dei suoi relè viene impostato come normalmente chiuso, tramite l’apposito menu di configurazione dell’unità di controllo CP 3100.
(5) Spie di comunicazione
Ciascuna spia è relativa ad una delle schede AUDIO OUTPUT OB 3230 o INPUT/OUTPUT digitali IO 3250 installate nel sub-rack; quando una delle spie lampeggia significa che la corrispondente scheda sta comunicando con l’unità di controllo CP 3100.
(6) Spie di guasto
Ciascuna spia è relativa ad una delle schede AUDIO OUTPUT OB 3230 o INPUT/OUTPUT digitali IO 3250 installate nel sub-rack; quando una delle spie lampeggia significa che vi è un allarme causato da un malfunzionamento della corrispondente scheda (es. ritardo nella comunicazione, errore, guasto, ecc.).
NOTA
• Durante le fasi di configurazione del sistema è normale che la spia lampeggi.
(7) Spie per schede AUDIO INPUT
Ciascuna spia è relativa ad una delle schede AUDIO INPUT IB 3210 / IB 3280 installate nel sub-rack. In base allo stato della spia vengono fornite le seguenti indicazioni:
• spia accesa in modo permanente - Segnala una allarme causato da un malfunzionamento della corrispondente scheda (es. ritardo
nella comunicazione, errore, guasto, ecc.).
• spia accesa in modo intermittente - Segnala che la corrispondente scheda sta comunicando con l’unità di controllo CP 3100.
• spia spenta - Segnala che la corrispondente scheda non è alimentata dalla tensione per circuiti digitali (5 Vdc).
Fig. 3
MB 3200 - DISPOSITIVI PANNELLO POSTERIORE (Fig. 4)
(1) Ponticello JP6
Permette di collegare il polo GND della tensione di alimentazione a 5 Vdc con il telaio del sub-rack MB 3200.
(2) Ponticello JP7
Permette di collegare il polo GND della tensione di alimentazione a 12 Vdc con il telaio del sub-rack MB 3200.
(3) Ponticello JP8
Permette di collegare il polo GND della tensione di alimentazione a 24 Vdc con il telaio del sub-rack MB 3200.
11
(4) Morsettiere M1 e M2
Permettono di alimentare il sub-rack con le tensioni di alimentazione 5 Vdc, 12 Vdc, 24 Vdc. Sono presenti due morsettiere, collegate
fra loro in parallelo, per facilitare le connessioni quando nel sistema sono presenti più sub-rack MB 3200: una morsettiera può essere
utilizzata per l'ingresso delle tre alimentazioni, mentre la seconda morsettiera può essere utilizzata come uscita per alimentare il successivo sub-rack.
(5) Fusibile di protezione F2
Il fusibile, di tipo 2 A rapido, protegge i circuiti alimentati con la tensione di 12 Vdc.
(6) Fusibile di protezione F3
Il fusibile, di tipo 4 A rapido, protegge i circuiti alimentati con la tensione di 24 Vdc.
(7) Fusibile di protezione F1
Il fusibile, di tipo 2 A rapido, protegge i circuiti alimentati con la tensione di 5 Vdc.
(8) Dispositivi non utilizzabili
(9) Connettori IDC1 ÷ 8
I connettori permettono di collegare gli ingressi audio delle schede AUDIO INPUT IB 3210 / IB 3280 con le relative schede di connessione a 12 morsetti. Ciascuna scheda AUDIO INPUT si collega tramite due connettori (es. IDC1 e IDC2), ciascuno dei quali permette il
collegamento di 4 ingressi audio con una scheda di connessione a 12 morsetti. I connettori contrassegnati con i numeri dispari sono
relativi ai primi quattro ingressi delle schede AUDIO INPUT (es. ingressi da 1 a 4), mentre i connettori contrassegnati con i numeri pari
sono relativi ai restanti quattro ingressi (es. ingressi da 5 a 8).
(10) Ponticelli JP1 e JP2
I due ponticelli permettono di terminare la linea seriale RS 485, che interconnette i sub-rack MB 3200 con l’unità di controllo CP 3100.
(11) Connettore CN6
Consente il collegamento della linea seriale RS 485 proveniente dall’unità di controllo CP 3100, o dal sub-rack MB 3200 precedente.
(12) Connettore CN7
Consente il collegamento della linea seriale RS 485 diretta al sub-rack MB 3200 successivo (quando presente).
(13) Spia DL1
Quando accesa segnala che il sub-rack è alimentato con la tensione di 5 Vdc.
(14) Spia DL2
Quando accesa segnala che il sub-rack è alimentato con la tensione di 12 Vdc.
(15) Spia DL3
Quando accesa segnala che il sub-rack è alimentato con la tensione di 24 Vdc.
(16) Connettori J4A ÷ J4H
Ciascuno degli 8 connettori permette di collegare i 16 ingressi GPI di una scheda INPUT/OUTPUT digitale IO 3250 con la relativa scheda di connessione a 20 morsetti.
(17) Morsettiere M3 e M4
Permettono di trasmettere all’unità di controllo CP 3100 il segnale audio “monitor” proveniente dai vari sub-rack MB 3200, e relativo
agli ingressi delle schede AUDIO INPUT IB 3210 / IB 3280, o alle uscite delle schede AUDIO OUTPUT OB 3230. Il segnale “monitor”
potrà così essere ascoltato tramite l’altoparlante presente sul pannello frontale dell’unità di controllo. Sono presenti due morsettiere,
collegate fra loro in parallelo, per facilitare le connessioni quando nel sistema sono presenti più sub-rack MB 3200: una morsettiera può
essere utilizzata per l’uscita del segnale “monitor” diretto all’unità di controllo CP 3100, mentre la seconda morsettiera può essere utilizzata per l'ingresso del segnale “monitor” proveniente dall’eventuale sub-rack successivo.
(18) Connettori J3A ÷ J3H
Ciascuno degli 8 connettori permette di collegare le uscite audio di una scheda AUDIO OUTPUT OB 3230, oppure i relè di uscita di una
scheda INPUT/OUTPUT digitale IO 3250, con la relativa scheda di connessione a 32 morsetti. Quando in corrispondenza di un connettore viene installata una scheda AUDIO OUTPUT OB 3230, la relativa scheda con morsetti permette il collegamento di 8 uscite audio; quando in corrispondenza di un connettore viene installata una scheda INPUT/OUTPUT digitale IO 3250, la relativa scheda con
morsetti permette il collegamento dei contatti di 24 relè di uscita.
Fig. 4
12
DISPOSITIVI E FUNZIONI DEL SISTEMA
MATRICI AUDIO
Il sistema RX 3000 è in grado di gestire un massimo di 8 matrici audio, fra loro completamente indipendenti; la capacita massima di una matrice può arrivare a 32 ingressi e 64 uscite (max 2 matrici 32x64). Le matrici sono ad accessibilità totale, ossia in una determinata matrice audio ciascun ingresso può essere connesso con una qualunque delle uscite. Gli ingressi e le uscite delle matrici audio si ottengono con l’installazione delle schede AUDIO INPUT IB 3210 / IB 3280 ed AUDIO OUTPUT OB 3230; in base al numero di schede AUDIO INPUT IB 3210
/ IB 3280 ed AUDIO OUTPUT OB 3230 che vengono installate nei sub-rack MB 3200 è possibile creare di innumerevoli matrici audio (es. matrice con 8 ingressi e 16 uscite, matrice con 8 ingressi e 32 uscite, ecc.).
INGRESSI “GPI”
Gli ingressi GPI (General Purpose Input) sono dei particolari ingressi optoisolati, disponibili quando nei sub-rack MB 3200 del sistema vengono installate le schede INPUT/OUTPUT digitali IO 3250. Gli ingressi GPI permettono di comandare diverse tipologie di eventi, liberamente
programmabili dall’utente; l’elenco degli eventi comandabili è contenuto nel paragrafo EVENTI COMANDABILI DAGLI INGRESSI GPI. Per poter comandare un ingresso GPI è sufficiente connetterlo ad un normale contatto elettrico.
RELE’ PROGRAMMABILI
I relè programmabili sono disponibili quando nei sub-rack MB 3200 vengono installate le schede INPUT/OUTPUT digitali IO 3250. La programmazione dei relè avviene tramite l’unità di controllo CP 3100. Su ogni scheda INPUT/OUTPUT digitale IO 3250 sono presenti 24 relè, ciascuno dei quali è provvisto di un contatto; tramite un apposito menu di configurazione dell’unità di controllo CP 3100 è possibile impostare
lo stato “normalmente aperto” o “normalmente chiuso” del contatto, ossia lo stato che questo deve assumere una volta che il sistema è stato configurato (vedi paragrafo ATTUAZIONE DI UNA CONFIGURAZIONE). I contatti possono essere utilizzati con la massima libertà per vari
scopi. La commutazione dei contatti può essere comandata:
• tramite eventi del sistema (vedi paragrafo EVENTI COMANDABILI DAGLI INGRESSI GPI).
• tramite il tasto ALARM delle consolle digitali BM 3616 (vedi paragrafo EVENTI COMANDABILI DALLE CONSOLLE DIGITALI BM 3616).
• tramite i tasti F1, F2, F3 delle consolle digitali BM 3616 (vedi paragrafo EVENTI COMANDABILI DALLE CONSOLLE DIGITALI BM 3616).
• tramite le consolle BM 3604 (vedi paragrafo “EVENTI COMANDABILI DALLE CONSOLLE BM 3604”).
• tramite il dispositivo VOX presente sulle schede AUDIO OUTPUT OB 3230 (vedi paragrafo DISPOSITIVO VOX).
• tramite eventi temporizzati (vedi paragrafo EVENTI TEMPORIZZATI).
• tramite la matrice audio del sistema, quando una determinata uscita viene connessa con un ingresso, ad eccezione degli ingressi definiti di
tipo BGM (background music). Questa funzione viene definita con la programmazione delle uscite audio, come descritto nel paragrafo UTILIZZO DEL MENU PROCESSO USCITE AUDIO.
AVVERTENZA
• In alcuni casi i relè hanno un’assegnazione univoca, ossia possono essere comandati da un solo evento/dispositivo (es. relè di “feedback” di una console BM 3604).
• In base alla programmazione effettuata tramite il menu CONFIGURAZ. dell’unità di controllo CP 3100 (vedi paragrafo CONFIGURAZIONE
DEL SISTEMA), uno stesso relè può essere comandato contemporaneamente da più dispositivi; in questo caso la commutazione del
suo contatto avverrà con la modalità descritta di seguito.
a. Quando uno degli eventi/dispositivi appositamente programmati comanda il relè, il suo contatto commuta dalla posizione normale.
b. Se nel frattempo altri eventi/dispositivi comandano il relè, il suo contatto rimane commutato rispetto alla posizione normale.
c. Se viene a mancare il comando del relè da parte dell’evento/dispositivo che lo ha comandato per primo, il contatto rimane commutato.
d. Il relè ricommuta nella posizione normale solo quando non vi è più nessun dispositivo che lo comanda.
UNITA’ A.C.U.
Le schede retroamplificatore RB 3300 vengono identificate nei vari menu dell’unità di controllo CP 3100 con il nome di unità A.C.U. (Amplifier Control Unit). La funzione delle schede è indicata nel paragrafo DESCRIZIONE; tramite un apposito menu di configurazione dell’unità di
controllo è possibile configurare le schede, e programmarle con le modalità di funzionamento descritte nel presente paragrafo.
Ciascuna unità A.C.U. presente nel sistema viene contraddistinta nei vari menu dell’unità di controllo CP 3100 mediante un NUMERO DI IDENTIFICAZIONE, contenuto entro i valori da 1 a 120 (numero massimo di unità A.C.U. che il sistema è in grado di gestire), che dipende dall’indirizzo che le viene assegnato in fase di installazione.
In base alla funzione dell’amplificatore controllato dalla scheda retroamplificatore, le unità A.C.U. possono essere di due tipi:
• NORMAL – E’ un’unità A.C.U. che ha la funzione di controllare un amplificatore primario, normalmente dedicato alla sonorizzazione di una
determinata zona audio.
• RISERVA – E’ un’unità A.C.U. che ha la funzione di controllare un amplificatore di riserva, che viene normalmente utilizzato per sostituire
un amplificatore primario, ad esempio in caso di guasto di quest’ultimo. Quando un amplificatore primario viene sostituito, la
relativa zona audio viene sonorizzata tramite l’amplificatore di riserva. Qualora nel sistema vengano previsti due o più amplificatori di riserva per più amplificatori primari, la prima riserva ha la funzione di sostituire un qualunque amplificatore primario,
ad esempio in caso di guasto di quest’ultimo, la seconda riserva ha la funzione di sostituire unicamente la prima riserva,
qualora questa di guasti assieme all’amplificatore primario, e non potrà essere utilizzata per sostituire un secondo amplificatore primario guasto, la terza riserva ha la funzione di sostituire unicamente la seconda riserva, e così allo stesso modo
per tutti gli amplificatori di riserva presenti nel gruppo.
NOTE
• Qualora nell’impianto sia previsto un solo amplificatore di riserva per uno o più amplificatori primari, per ottenere la sua inserzione automatica in caso di guasto di un amplificatore primario non è indispensabile accoppiarlo con una scheda retroamplificatore RB 3300
(unità RISERVA).
• L’impiego di un’unità A.C.U. RISERVA è indispensabile quando l’amplificatore di riserva deve essere monitorato, o deve poter essere sostituito con un ulteriore amplificatore di riserva.
13
Le unità A.C.U. vengono suddivise in gruppi (max 64 gruppi comprensivi di unità NORMAL ed unità RISERVA). Di un gruppo può far parte
un qualsiasi numero di A.C.U. NORMAL o RISERVA, ma il numero totale di unità presenti nel sistema non deve comunque essere superiore
a 120. La sostituzione di un’unità NORMAL con un’unità RISERVA può avvenire solo se queste appartengono allo stesso gruppo.
Tramite un apposito menu dell’unità di controllo è possibile inserire o disinserire manualmente le unità A.C.U., per impiegare o meno l’amplificatore da esse controllato per sonorizzare una determinata zona (vedi paragrafo UTILIZZO DEL MENU INSER. RISERVA ACU). Con la disinserzione di un’unità A.C.U. l’amplificatore da essa controllato viene escluso dalla sonorizzazione di una determinata zona, ed al suo posto
può essere inserito l’eventuale amplificatore di riserva del gruppo, o l’eventuale unità A.C.U. RISERVA nel caso l’amplificatore di riserva
sia controllato tramite una scheda retroamplificatore RB 3300.
NOTA
• Le unità NORMAL sono normalmente INSERITE, mentre le unità RISERVA sono sempre normalmente DISINSERITE.
L’inserzione/disinserzione di un’unità A.C.U. (NORMAL o RISERVA), in caso di allarme provocato da un guasto o un malfunzionamento
di un amplificatore, può avvenire con la modalità MANUAL o AUTOM.. Di seguito è indicato il funzionamento delle unità NORMAL e RISERVA nelle due modalità.
• Modo MANUAL su unità NORMAL – La disinserzione dell’unità NORMAL, in caso di allarme dell’amplificatore da essa controllato, deve
essere comandata manualmente, tramite un apposito menu dell’unità di controllo CP 3100.
• Modo AUTOM. su unità NORMAL – La disinserzione dell’unità NORMAL, in caso di allarme dell’amplificatore da essa controllato, viene
comandata automaticamente dal sistema.
• Modo MANUAL su unità RISERVA – L’inserzione dell’unità RISERVA, in caso di allarme di un’unità NORMAL appartenente allo stesso
gruppo, deve essere comandata manualmente, tramite un apposito menu dell’unità di controllo CP
3100. La disinserzione dell’unità RISERVA, in caso di allarme dell’amplificatore da essa controllato,
deve essere comandata manualmente, tramite un apposito menu dell’unità di controllo CP 3100.
• Modo AUTOM. su unità RISERVA – L’inserzione dell’unità RISERVA, in caso di allarme di un’unità NORMAL appartenente allo stesso
gruppo, viene comandata automaticamente dal sistema se l’unità NORMAL che sostituisce è configurata con modo di inserzione/disinserzione AUTOM.; in caso contrario, se l’unità NORMAL che
sostituisce è configurata con modo di inserzione/disinserzione MANUAL, l’inserzione dell’unità RISERVA deve essere comandata manualmente.
La disinserzione dell’unità RISERVA, in caso di allarme dell’amplificatore da essa controllato, viene
comandata automaticamente dal sistema.
Quando in un gruppo di A.C.U. sono presenti più unità RISERVA configurate con modo di inserzione/disinserzione AUTOM., l’ordine di intervento di tali unità in caso di allarme di un’unità NORMAL dello stesso gruppo configurata con modo di inserzione/disinserzione AUTOM.,
dipende dal NUMERO DI IDENTIFICAZIONE ad esse associato: la prima unità RISERVA ad essere inserita sarà quella con il numero di identificazione più basso, la seconda unità RISERVA ad essere inserita sarà quella con il successivo numero di identificazione, e così allo stesso
modo per tutte le altre eventuali unità RISERVA.
NOTE
• L’inserzione di un’unità A.C.U. (NORMAL o RISERVA) che era stata automaticamente disinserita a causa di un allarme provocato da un guasto o un malfunzionamento dell’amplificatore da essa controllato, deve sempre essere effettuata manualmente, tramite l’apposito menu
dell’unità di controllo CP 3100.
• Quando viene disinserita un’unità NORMAL e nel gruppo di A.C.U. a cui appartiene è presente un amplificatore di riserva che non è controllato tramite una scheda retroamplificatore RB 3300 (nessuna unità “Riserva”), questo viene sempre automaticamente inserito al posto dell’amplificatore primario.
• Quando in un gruppo di A.C.U. sono presenti più unità RISERVA, in caso di allarme di un’unità NORMAL appartenente allo stesso gruppo
e configurata con modo di inserzione/disinserzione AUTOM., si inserisce per prima l’unità RISERVA che possiede il numero di identificazione più basso fra quelle configurate con modo di inserzione/disinserzione AUTOM.; le unità RISERVA con numero di identificazione più
basso in senso assoluto, ma che sono state configurate con modo di inserzione/disinserzione MANUAL, non interrompono quindi la sostituzione automatica di un’unità NORMAL.
Gli allarmi che determinano la disinserzione automatica di un’unità A.C.U., e l’eventuale inserzione automatica dell’unità di riserva (o dell’amplificatore di riserva se questo non è accoppiato con una scheda RB 3300) sono:
• Allarme PA FAULT. Questo allarme è attivabile se l’unità A.C.U. che controlla l’amplificatore è equipaggiata con la scheda opzionale FAULT
DETECTOR SB 3320. Indica un allarme causato da una qualsiasi rottura dell’amplificatore controllato, che determini una sensibile diminuzione della potenza trasmessa.
• Allarme OVL. Questo allarme è attivabile se l’amplificatore controllato dall’unità A.C.U. è provvisto di un contatto ausiliario di allarme, che
si chiude quando interviene una protezione, o quando l’apparecchio funziona in modo anormale (es. funzionamento in sovraccarico).
Al termine di un allarme su un’unità A.C.U., per ritornare allo stato iniziale di inserzione delle unità NORMAL e RISERVA (normalmente le unità
NORMAL sono inserite, mentre le unità RISERVA sono disinserite), occorre riportare manualmente le unità nella condizione originaria tramite un apposito menu dell’unità di controllo (vedi paragrafo UTILIZZO DEL MENU INSER. RISERVA ACU), o riconfigurare il sistema tramite una
delle procedere descritte nel paragrafo ATTUAZIONE DI UNA CONFIGURAZIONE.
Per la programmazione delle unità A.C.U. consultare il paragrafo UTILIZZO DEL MENU ACU; per l’inserzione/disinserzione manuale delle unità
A.C.U. consultare il paragrafo UTILIZZO DEL MENU INSER. RISERVA ACU. Gli esempi seguenti possono fornire ulteriori chiarimenti sul funzionamento delle unità A.C.U.
14
Esempio 1
UNITÀ A.C.U.
PRESENTI NEL
GRUPPO
TIPO
MODO
DI
FUNZION.
NORMAL
AUTOM.
RISERVA
AUTOM.
TIPO
MODO
DI
FUNZION.
NORMAL
AUTOM.
RISERVA
AUTOM.
TIPO
MODO
DI
FUNZION.
ACU 1
NORMAL
MANUAL
ACU 2
RISERVA
MANUAL
ACU 1
DESCRIZIONE FUNZIONAMENTO A.C.U.
a. Se si guasta l’amplificatore primario controllato dall’unità ACU
1, si inserisce automaticamente al suo posto l’amplificatore di
riserva, controllato dall’unità ACU 3.
b. Se successivamente si guasta l’amplificatore primario controllato dall’unità ACU 2, viene esclusivamente segnalato l’eventuale allarme relativo a tale unità.
c. Se in seguito si guasta anche l’amplificatore di riserva controllato dall’unità ACU 3, quest’ultima viene automaticamente disinserita; se è presente un secondo amplificatore di riserva
(non controllato da una scheda RB 3300), questo viene automaticamente utilizzato al posto del primo amplificatore di riserva.
ACU 2
ACU 3
Esempio 2
UNITÀ A.C.U.
PRESENTI NEL
GRUPPO
ACU 1
DESCRIZIONE FUNZIONAMENTO A.C.U.
a. Se si guasta l’amplificatore primario controllato dall’unità ACU
2, si inserisce automaticamente al suo posto l’amplificatore di
riserva, controllato dall’unità ACU 3.
b. Se successivamente si guasta l’amplificatore primario controllato dall’unità ACU 1, viene esclusivamente segnalato l’eventuale allarme relativo a tale unità.
c. Se in seguito si guasta anche l’amplificatore di riserva controllato dall’unità ACU 3, quest’ultima viene automaticamente disinserita; se è presente un secondo amplificatore di riserva
(non controllato da una scheda RB 3300), questo viene automaticamente utilizzato al posto del primo amplificatore di riserva.
ACU 2
ACU 3
Esempio 3
UNITÀ A.C.U.
PRESENTI NEL
GRUPPO
DESCRIZIONE FUNZIONAMENTO A.C.U.
a. Se si guasta l’amplificatore primario controllato dall’unità ACU
1, non avviene nessuna operazione ad eccezione dell’eventuale segnalazione di allarme relativa a tale unità; l’inserzione dell’amplificatore di riserva controllato dall’unità ACU 2 deve essere comandata manualmente, disinserendo l’unità ACU 1 in
allarme ed inserendo successivamente l’unità ACU 2.
b. Se in seguito si guasta anche l’amplificatore di riserva controllato dall’unità ACU 2, non avviene nessuna operazione ad eccezione dell’eventuale segnalazione di allarme relativa a tale
unità; l’inserzione dell’eventuale secondo amplificatore di riserva (non controllato da una scheda RB 3300) deve essere comandata manualmente, disinserendo l’unità ACU 2 in allarme.
FUNZIONE “DAY/NIGHT”
La funzione è utilizzabile quando la scheda retroamplificatore RB 3300 (unità A.C.U.) è equipaggiata con la scheda opzionale DIGITAL ALC
LB 3340, e permette di attenuare la sonorizzazione delle zone audio nelle ore notturne. Il livello di attenuazione può essere scelto in fase di
installazione della scheda LB 3340 fra 16 valori, e viene applicato a tutte le zone audio sonorizzate tramite la scheda RB 3300. Per attivare la
funzione DAY/NIGHT, e per definirne la fascia oraria di intervento, è necessario utilizzare gli appositi menu dell’unità di controllo CP 3100.
FUNZIONE “MONITOR” (MONITORAGGIO AUDIO)
La funzione consente di ascoltare, tramite l’altoparlante dell’unità di controllo CP 3100, il segnale “monitor” della scheda retroamplificatore
RB 3300 (unità A.C.U.), relativo all’uscita per diffusori dell’amplificatore da essa controllato. Per utilizzare la funzione “monitor” è necessario
accedere ad un apposito menu dell’unità di controllo CP 3100. Il comando per l’ascolto viene inoltrato tramite la linea seriale.
AVVERTENZE
• Quando un’unità A.C.U. viene disinserita, non è più possibile ascoltare il suo segnale “monitor”, questo per permettere l’ascolto dei segnali “monitor” delle altre unità A.C.U. anche nell’ipotesi in cui non fosse più possibile inserire nuovamente l’unità.
• E’ possibile monitorare una sola unità A.C.U. per volta.
15
ALLARME “OVL”
La scheda RB 3300 è provvista di un ingresso che permette di acquisire delle segnalazioni di allarme provenienti dall’amplificatore controllato. Il
tipo di allarme acquisito dipende quindi dallo specifico amplificatore utilizzato, e può essere ad esempio relativo all’intervento di una delle protezioni, o ad un funzionamento anormale dell’apparecchio (es. funzionamento in sovraccarico). La trasmissione dell’allarme avviene mediante la
chiusura di un contatto ausiliario dell’amplificatore: se il contatto rimane chiuso per almeno 10 secondi, la scheda RB 3300 attiva, tramite la linea seriale, la segnalazione di allarme sull’unità di controllo CP 3100; programmando opportunamente quest’ultima unità, quando l’amplificatore entra in allarme può essere automaticamente inserito al suo posto un amplificatore di riserva (vedi paragrafo UTILIZZO DEL MENU ACU).
FUNZIONE “FIRE-BREAK”
La funzione è utilizzabile quando la scheda retroamplificatore RB 3300 (unità A.C.U.) è equipaggiata con la scheda opzionale FAULT DETECTOR SB 3320, e permette di pilotare l’amplificatore controllato dalla scheda RB 3300 con un segnale di emergenza proveniente da una sorgente non connessa al sistema RX 3000, interrompendo la normale diffusione del segnale proveniente dalla matrice audio. In questo
modo, anche in caso di guasto ad un componente del sistema RX 3000 (es. scheda AUDIO OUTPUT OB 3230), si ha la certezza di poter
diffondere un messaggio con priorità assoluta (es. messaggio allarme incendio). Per ottenere la massima sicurezza di intervento, la funzione “fire-break” agisce esclusivamente a livello hardware.
FUNZIONE “LINE FAULT”
La funzione LINE FAULT è utilizzabile quando la scheda retroamplificatore RB 3300 (unità A.C.U.) è equipaggiata con la scheda opzionale
FAULT DETECTOR SB 3320, e permette il controllo dell’impedenza della linea per diffusori pilotata tramite la scheda RB 3300: qualsiasi guasto che determini una sensibile variazione dell’impedenza della linea, attiva il relativo allarme, che viene trasmesso all’unità di controllo CP
3100. I guasti rilevabili sono:
• cortocircuito fra i due conduttori della linea per diffusori.
• interruzione della linea per diffusori.
• cortocircuito fra la linea per diffusori ed il circuito di messa a terra.
AVVERTENZA
• Quando la scheda RB 3300 controlla un amplificatore di riserva, la funzione LINE FAULT è utilizzabile solamente per rilevare un cortocircuito fra la linea per diffusori ed il circuito di messa a terra; non possono essere invece rilevati il cortocircuito fra i due conduttori della linea per diffusori, e l’interruzione della linea per diffusori.
FUNZIONE “PA FAULT”
La funzione PA FAULT è utilizzabile quando la scheda retroamplificatore RB 3300 (unità A.C.U.) è equipaggiata con la scheda opzionale
FAULT DETECTOR SB 3320. Essa permette la verifica del corretto funzionamento dell’amplificatore controllato dalla scheda RB 3300, mediante la rilevazione del segnale sull’uscita per diffusori: qualsiasi malfunzionamento dell’amplificatore che determini una sensibile diminuzione della potenza trasmessa, attiva il relativo allarme, che viene trasmesso all’unità di controllo CP 3100; programmando opportunamente quest’ultima unità, quando l’amplificatore entra in allarme può essere automaticamente inserito al suo posto un amplificatore di riserva (vedi paragrafo UTILIZZO DEL MENU ACU).
FUNZIONE “ALC”
La funzione ALC (Automatic Level Control) è utilizzabile quando la scheda retroamplificatore RB 3300 (unità A.C.U.) è equipaggiata con la
scheda opzionale DIGITAL ALC LB 3340. Essa permette il controllo automatico del rapporto segnale/rumore nell’ambiente sonorizzato, ossia
consente di mantenere inalterato il margine di livello fra il segnale diffuso ed il rumore ambientale, in modo da assicurare una perfetta intelligibilità dei messaggi sonori. Tale caratteristica è particolarmente utile nei locali soggetti a notevoli variazioni del rumore. La funzione ALC si
basa sull’impiego di microfoni a condensatore (fino a 4 microfoni), o altoparlanti con trasformatore di linea in funzione di microfoni, che permettono di rilevare il livello del rumore presente nell’ambiente sonorizzato. Il segnale captato viene elaborato in modo digitale per controllare
un attenuatore elettronico, in modo da garantire una perfetta regolazione del segnale.
AVVERTENZA
• La funzione ALC non è utilizzabile quando la scheda RB 3300 controlla un amplificatore di riserva; un’unità A.C.U. RISERVA non può
quindi essere equipaggiata con la scheda opzionale DIGITAL ALC LB 3340.
EVENTI DEL SISTEMA
Il sistema è in grado di gestire le tipologie di eventi descritte nei paragrafi seguenti.
EVENTI COMANDABILI DALLE CONSOLLE DIGITALI BM 3616
Dalle consolle digitali BM 3616 è possibile comandare le seguenti operazioni:
• diffusione, in determinate zone e/o gruppi di zone audio, di un annuncio tramite il microfono della consolle.
• diffusione, in determinate zone e/o gruppi di zone, di un segnale audio (es. messaggio, tono di attenzione/allarme, ecc.) registrato sul disco
rigido dell’unità di controllo CP 3100 (file audio).
• diffusione, in determinate zone e/o gruppi di zone audio, di un messaggio registrato nella memoria della consolle.
• commutazione di contatti di determinati relè delle schede INPUT/OUTPUT digitali IO 3250.
• comando evento EMERGENZA, per la diffusione con priorità assoluta, in determinate zone e/o gruppi di zone audio, di un annuncio tramite il microfono della consolle, o di un segnale di allarme (messaggio o tono) registrato sul disco rigido dell'unità di controllo CP 3100. Con
l’attivazione dell’evento è inoltre possibile comandare la commutazione di relé delle schede INPUT/OUTPUT digitali IO 3250.
Per la programmazione degli eventi comandabili tramite le consolle digitali BM 3616 consultare il paragrafo UTILIZZO DEL MENU CONSOLES DIGITALI.
EVENTI COMANDABILI DALLE CONSOLLE BM 3604
Dalle consolle BM 3604 è possibile comandare le seguenti operazioni:
• diffusione, in determinate zone e/o gruppi di zone, di un annuncio tramite il microfono della consolle.
• commutazione di contatti di determinati relè delle schede INPUT/OUTPUT digitali IO 3250.
• diffusione, in determinate zone e/o gruppi di zone, di un segnale audio (es. messaggio, tono di attenzione/allarme, ecc.) registrato sul disco
rigido dell’unità di controllo CP 3100 (file audio).
• comando segnalazioni di avviso sull’unità di controllo CP 3100.
16
EVENTI COMANDABILI DAGLI INGRESSI “GPI”
Ciascuna scheda INPUT/OUTPUT digitale IO 3250 è provvista di 16 ingressi optoisolati che, opportunamente pilotati, permettono di comandare diversi eventi; tali ingressi vengono identificati nei vari menu dell’unità di controllo CP 3100 con il nome di ingressi GPI (vedi paragrafo
INGRESSI GPI). Gli eventi comandabili sono indicati di seguito (max 256 eventi).
• commutazione di uno o più relé delle schede INPUT/OUTPUT digitali IO 3250 (vedi paragrafo RELE’ PROGRAMMABILI), i cui contatti sono liberamente utilizzabili.
• diffusione, in determinate zone e/o gruppi di zone, di un segnale audio (es. messaggio, tono di attenzione/allarme, ecc.) memorizzato sul
disco rigido dell’unità di controllo CP 3100 (file audio), ed eventuale commutazione di uno o più relé delle schede INPUT/OUTPUT digitali
IO 3250.
• diffusione, in determinate zone e/o gruppi di zone, di un annuncio tramite il microfono della consolle BM 3604, ed eventuale commutazione di uno o più relé delle schede INPUT/OUTPUT digitali IO 3250.
• comando eventi di allarme FIREMAN 1 e/o FIREMAN 2, per la diffusione con priorità assoluta di segnali audio “fireman”, ed eventuale commutazione di uno o più relé delle schede INPUT/OUTPUT digitali IO 3250.
• comando segnalazioni di avviso sull’unità di controllo CP 3100.
Per pilotare gli ingressi della scheda è possibile utilizzare dei normali contatti elettrici (es. contatti di pulsanti). Per la programmazione degli
eventi comandabili tramite gli ingressi GPI consultare il paragrafo UTILIZZO DEL MENU EVENTI INGRESSI GPI.
EVENTI TEMPORIZZATI
Tramite un apposito menu dell’unità di controllo CP 3100 il sistema consente la programmazione di “eventi temporizzati”, ossia di eventi che
devono accadere ad un orario prefissato. Il sistema consente la programmazione di un massimo di 64 eventi temporizzati. Un evento temporizzato può comandare le seguenti azioni:
• commutazione di un relé con contatto normalmente aperto delle schede INPUT/OUTPUT digitali IO 3250.
• commutazione di un relé con contatto normalmente chiuso delle schede INPUT/OUTPUT digitali IO 3250.
• diffusione, in determinate zone e/o gruppi di zone, di un segnale audio (es. messaggio, tono di attenzione/allarme, ecc.) registrato sul disco
rigido dell’unità di controllo CP 3100 (file audio).
Per la programmazione degli eventi temporizzati consultare il paragrafo UTILIZZO DEL MENU EVENTI TEMPORIZZATI.
EVENTI “VOX”
Gli eventi VOX vengono comandati dai dispositivi VOX presenti sulle schede AUDIO OUTPUT OB 3230. Per la descrizione del funzionamento del dispositivo VOX consultare il paragrafo DISPOSITIVO VOX.
EVENTI “PLAYBACK”
Sono quegli eventi che prevedono l’impiego della scheda audio dell’unità di controllo CP 3100, per la riproduzione di segnali audio memorizzati sul disco rigido del CP 3100 (file audio). Maggiori informazioni riguardo la riproduzione dei file audio sono contenute nel paragrafo REGISTRAZIONE/RIPRODUZIONE DI SEGNALI AUDIO.
EVENTI “BACKGROUND MUSIC”
Sono gli eventi che permettono la diffusione della musica di sottofondo in determinate zone audio. Il sistema è in grado di gestire fino ad otto sorgenti per musica di sottofondo.
ORDINE DI PRIORITA’
Il funzionamento del sistema è basato sull’impiego di un ordine di priorità, in cui a ciascun evento del sistema è associato un livello di priorità. Il base al tipo di priorità posseduto dall’evento, questo viene eseguito con una diversa modalità, come descritto di seguito.
PRIORITÀ SCALARE
La priorità scalare permette a certi eventi di utilizzare determinati dispositivi del sistema prima degli eventi aventi un
livello di priorità più basso, ma senza la possibilità di interrompere gli eventi in corso, anche se di priorità inferiore; gli unici eventi che possono essere sempre interrotti sono gli eventi di tipo BACKGROUND MUSIC (diffusione di musica di sottofondo). Quando vi sono più eventi con diversa priorità in attesa di essere eseguiti a causa
di un dispositivo non disponibile, dapprima vengono evasi gli eventi aventi un livello di priorità più alto, ed a seguire quelli con priorità inferiore. La scala dei livelli di priorità è la seguente:
• Livelli 1 ÷ 8: livelli di priorità decrescenti da 1 (livello di priorità più alto) a 8 (livello di priorità più basso).
• Livello 9:
nessuna priorità.
PRIORITÀ ASSOLUTA La priorità assoluta è la massima priorità, e permette a certi eventi di utilizzare determinati dispositivi del sistema
prima degli eventi con priorità scalare, con la possibilità di interrompere gli eventi in corso (funzione “override”).
Un evento con priorità assoluta non ha la funzione di “override” su eventi di pari livello, ossia non può interrompere altri eventi con priorità assoluta in corso.
Quando vi sono più eventi aventi lo stesso livello di priorità che devono essere eseguiti (priorità assoluta o priorità scalare), l’ordine di esecuzione segue l’ordine di richiesta, ossia i primi eventi prenotati saranno i primi ad essere eseguiti.
I dispositivi del sistema che possono essere oggetto di priorità sono:
• uscite delle schede AUDIO OUTPUT OB 3230, che permettono di pilotare le unità di potenza dedicate alla sonorizzazione delle varie zone
audio del sistema.
• scheda audio presente all’interno dell’unità di controllo CP 3100, che permette la registrazione/riproduzione di file audio (messaggi, segnali
di attenzione/allarme, ecc.).
Nella tabella seguente, per ciascun evento del sistema è indicato il relativo livello di priorità e la descrizione di come tale priorità viene attuata.
17
EVENTO
Eventi di allarme EMERGENZA,
FIREMAN 1, FIREMAN 2.
LIVELLO DI
PRIORITÀ
DESCRIZIONE
ASSOLUTA
Sono eventi che possiedono la massima priorità. Gli eventi con
priorità più bassa, che utilizzano i dispositivi interessati dall’evento
con priorità assoluta, vengono interrotti (funzione “override”). Tutte
le uscite audio utilizzate dagli eventi interrotti, anche quelle non interessate dall’evento con priorità assoluta, vengono scollegate.
1
Sono gli eventi aventi il più alto livello di priorità dopo gli eventi
con priorità assoluta. Quando vi sono più eventi di diversa priorità
(eccetto eventi con priorità assoluta) in attesa di essere eseguiti,
l’evento temporizzato è il primo ad essere evaso. Gli eventi temporizzati non hanno la funzione “override”, ossia non possono interrompere gli eventi in corso aventi un livello di priorità più basso o
uguale.
Eventi comandabili dalle consolle
digitali BM 3616 (escluso evento
EMERGENZA).
2÷7
Gli eventi comandabili dalle consolle digitali BM 3616 possono
avere livelli di priorità variabili da 2 a 7, a seconda di quanto impostato tramite l’apposito menu di configurazione (menu CONSOLES DIGITALI); tali eventi non hanno la funzione “override”, ossia
non possono interrompere gli eventi in corso aventi un livello di
priorità più basso o uguale.
Eventi VOX.
Eventi comandabili dalle consolle
BM 3604.
Eventi PLAYBACK.
8
Tali eventi possiedono il livello di priorità più basso. Possono interrompere solo gli eventi BACKGROUND MUSIC, e non hanno la
funzione “override”, ossia non possono interrompere gli eventi in
corso aventi un livello di priorità più basso o uguale.
Eventi BACKGROUND MUSIC.
9
Questi eventi possono essere interrotti da qualunque altro evento.
Eventi temporizzati.
FUNZIONE DI INTERDIZIONE DA PARTE DI UN EVENTO A PRIORITA’ ASSOLUTA
Quando avviene un evento con priorità assoluta, gli altri eventi con priorità inferiore in esecuzione, che utilizzano i dispositivi interessati dall’evento prioritario, vengono interrotti e terminati (funzione “override”), e non vengono ripristinati al termine dell’evento prioritario (escluso evento BACKGROUND MUSIC). Nella tabella seguente sono indicate in particolare le azioni che interessano ciascun evento interdetto.
EVENTO INTERDETTO
AZIONI EFFETTUATE
Evento da consolle BM 3604
• Viene posto OFF il relé di “feedback” (FEED RELE’) della consolle, in modo da disabilitarla e scollegarla da tutte le zone e/o i gruppi zone audio del sistema (vedi paragrafo UTILIZZO DEL MENU EVENTI INGRESSI GPI).
• Tutte le selezioni effettuate sulla consolle vengono “azzerate”.
• Il microfono della base viene disabilitato.
Evento da consolle digitale BM 3616
(escluso evento EMERGENZA)
• Viene interrotta l’eventuale diffusione del segnale audio registrato sul disco rigido
dell’unità di controllo CP 3100 (file audio).
• Viene interrotta l’eventuale diffusione del messaggio locale registrato nella memoria
della consolle.
• Viene interrotta l’eventuale diffusione di un annuncio microfonico.
• La consolle viene disabilitata e scollegata da tutte le zone e/o i gruppi di zone audio
del sistema.
• Tutte le selezioni effettuate sulla consolle vengono “azzerate”.
Evento VOX
• Viene temporaneamente disattivata la funzione VOX.
• Vengono interrotte le connessioni fra l’ingresso INGR. VOX e le corrispondenti uscite che hanno la funzione VOX attivata (vedi paragrafo DISPOSITIVO VOX).
• Viene ricommutato nella posizione normale il RELE’ VOX (vedi paragrafo DISPOSITIVO VOX).
• A fine evento con priorità assoluta viene riabilitata la funzione VOX.
Eventi temporizzati
• Viene interrotta la riproduzione del segnale audio (messaggio o tono) associato.
Quando l’evento temporizzato prevede, oltre alla riproduzione di un segnale audio,
anche la commutazione di relé, questi ultimi vengono ricommutati nella posizione
normale.
Evento PLAYBACK comandato dagli
ingressi GPI
• Viene interrotta l’eventuale riproduzione del segnale audio (messaggio o tono) associato all’evento.
• Tutte le zone e/o i gruppi di zone audio associate all’evento vengono scollegate dall’ingresso di tipo PLAYBACK.
• Tutti gli eventuali relè associati all’evento vengono ricommutati nella posizione normale.
Evento BACKGROUND MUSIC
• Viene interrotta la diffusione della musica di sottofondo in tutte le zone e/o i gruppi
di zone audio utilizzate/i dall’evento con priorità assoluta. La diffusione della musica
riprende al termine dell’evento con priorità assoluta.
18
DISPOSITIVO “VOX”
Il dispositivo VOX (VOX detector) è presente sulle schede AUDIO OUTPUT OB 3230. La funzione del dispositivo è la seguente: quando il segnale audio (segnale VOX) che pilota un determinato ingresso delle schede AUDIO INPUT IB 3210 / IB 3280, chiamato INGR. VOX, supera
una determinata soglia, regolabile tramite un apposito trimmer della scheda OB 3230, il dispositivo VOX può comandare una delle seguenti
operazioni:
a) connettere l’ingresso INGR. VOX con determinate uscite delle schede AUDIO OUTPUT OB 3230 (uscite VOX), definibili tramite il menu di
configurazione PROCESSO USCITE AUDIO.
b) effettuare l’operazione descritta al punto (a), e commutare al contempo un determinato relè delle schede INPUT/OUTPUT digitali IO 3250,
chiamato RELE’ VOX.
Nella configurazione del sistema con 16 schede AUDIO OUTPUT OB 3230 installate, è possibile configurare 16 dispositivi VOX. La procedura di funzionamento del dispositivo VOX è la seguente.
a) Quando il dispositivo VOX di una scheda AUDIO OUTPUT OB 3230 rileva che il relativo segnale VOX supera la soglia impostata, invia
l’avviso di “vox attivo” all’unità di controllo CP 3100 se:
a1) la funzione VOX è stata attivata su almeno un’uscita della stessa scheda AUDIO OUTPUT (tramite il menu di configurazione delle uscite audio).
a2) le uscite utilizzate dal dispositivo VOX non sono impegnate, ossia non sono connesse con un ingresso audio, ad eccezione degli ingressi BGM (ingressi per musica di sottofondo).
a3) il segnale VOX viene effettivamente “sentito”.
b) Se viene generato l’avviso di “vox attivo”, la scheda AUDIO OUTPUT OB 3230 collega in modo autonomo l’ingresso INGR. VOX con le
relative uscite che hanno la funzione VOX attivata, mantenendole collegate per almeno 10 secondi.
c) L’unità di controllo CP 3100, non appena riceve l’avviso di “vox attivo”, comanda la commutazione del relé RELE’ VOX.
d) Il collegamento fra l’ingresso INGR. VOX e le relative uscite audio permane se:
d1) nessun evento con priorità assoluta richiede l’utilizzo delle zone audio impegnate dalla funzione VOX.
d2) il segnale VOX continua a pilotare l’ingresso INGR. VOX superando la soglia impostata.
e) Quando il segnale VOX diminuisce, ed il suo livello resta al di sotto della soglia impostata per un tempo di circa 10 secondi, la scheda
AUDIO OUTPUT OB 3230 ripristina gli eventuali collegamenti precedentemente interrotti fra gli ingressi audio definiti BGM e le uscite utilizzate dalla funzione VOX, ed invia l’avviso di “fine attività vox” all’unità di controllo CP 3100.
f) L’unità di controllo CP 3100, non appena riceve l’avviso di “fine attività vox”, ricommuta nella posizione normale il relé RELE’ VOX.
Le operazioni necessarie per utilizzare la funzione VOX sono le seguenti.
a) Tramite il menu di configurazione VOX (vedi relativo paragrafo), definire l’ingresso INGR. VOX che deve essere utilizzato per una determinata scheda AUDIO OUTPUT OB 3230; grazie a questa definizione, quando il segnale VOX supera la soglia impostata, le otto uscite audio della scheda prescelta hanno la possibilità di venire connesse con l’ingresso INGR. VOX selezionato.
b) Tramite il menu di configurazione PROCESSO USCITE AUDIO (vedi relativo paragrafo), attivare o meno la funzione VOX sulle uscite desiderate della scheda AUDIO OUTPUT OB 3230 prescelta; grazie a questa impostazione, quando il segnale VOX supera la soglia impostata, le uscite che hanno la funzione VOX attivata vengono connesse con l’ingresso INGR. VOX, definito con l’operazione descritta al
punto (a).
REGISTRAZIONE/RIPRODUZIONE DI SEGNALI AUDIO
Il sistema consente di creare e riprodurre dei file audio, in cui possono essere memorizzati dei segnali audio di vario tipo: messaggi, annunci,
toni di attenzione, toni di allarme, ecc.
CREAZIONE DI SUONI
Tramite la funzione GENERAZ. TONI del menu RECORDER (vedi paragrafo UTILIZZO DEL MENU RECORDER) è possibile creare dei suoni
composti da uno o più toni, che possono essere definiti a piacimento dall’utente. Il suono creato, di tipo digitale, viene memorizzato sotto forma di file sul disco rigido dell’unità di controllo, assieme agli altri file audio presenti nella libreria di segnali audio fornita in dotazione al sistema, o creati tramite le funzioni RECORD e ASSEMBLY dell’unità di controllo CP 3100 (vedi paragrafo UTILIZZO DEL MENU RECORDER). La
riproduzione dei suoni creati può avvenire con una delle modalità descritte nel paragrafo RIPRODUZIONE DI FILE AUDIO.
REGISTRAZIONE DI SEGNALI AUDIO
La scheda audio dell’unità di controllo CP 3100 consente di registrare dei segnali audio provenienti da:
a. un microfono connesso all’ingresso MICRO IN della scheda audio.
b. una delle sorgenti connesse agli ingressi del sistema (ingressi delle schede AUDIO INPUT IB 3210 / IB 3280). Quando viene attivata la
funzione di registrazione, la matrice audio del sistema provvede automaticamente a connettere l’ingresso selezionato con l’uscita definita di tipo RECORDER (vedi paragrafo UTILIZZO DEL MENU PROCESSO USCITE AUDIO).
Il segnale audio da registrare, di tipo analogico, viene digitalizzato tramite la scheda audio e memorizzato sotto forma di file sul disco rigido
dell’unità di controllo. La registrazione dei segnali audio si effettua tramite la funzione RECORD, del menu RECORDER (vedi paragrafo UTILIZZO DEL MENU RECORDER); la riproduzione dei segnali registrati può avvenire con una delle modalità descritte nel paragrafo RIPRODUZIONE DI FILE AUDIO.
RIPRODUZIONE DI FILE AUDIO
L’unità di controllo CP 3100 è provvista di una scheda audio che consente di riprodurre i segnali audio memorizzati come file sul suo disco
rigido (file audio), relativi a messaggi, annunci, toni di attenzione/allarme, ecc. I file audio disponibili sono quelli presenti nella libreria dei segnali audio fornita con il sistema, oppure quelli creati tramite le funzioni RECORD, ASSEMBLY e GENERAZ. TONI dell’unità di controllo CP
3100 (vedi paragrafo UTILIZZO DEL MENU RECORDER). La riproduzione di un file audio può essere comandata con una delle seguenti modalità:
a. tramite la funzione PLAY dell’unità di controllo CP 3100 (vedi paragrafo UTILIZZO DEL MENU RECORDER).
b. tramite il tasto F1 dell’unità di controllo CP 3100, durante l’utilizzo delle funzioni GENERAZ. TONI e ASSEMBLY.
c. tramite i tasti F1, F2, F3 delle consolle digitali BM 3616 (vedi paragrafo UTILIZZO DEL MENU CONSOLES DIGITALI).
d. tramite gli ingressi GPI delle schede INPUT/OUTPUT digitali IO 3250 (vedi paragrafo UTILIZZO DEL MENU EVENTI INGRESSI GPI).
e. tramite un evento temporizzato (vedi paragrafo UTILIZZO DEL MENU EVENTI TEMPORIZZATI).
19
Quando viene richiesta la riproduzione di un file audio, la matrice audio del sistema provvede automaticamente a connettere l’ingresso definito di tipo PLAYBACK (vedi paragrafo UTILIZZO DEL MENU PROCESSO INGRESSI AUDIO) con le uscite delle schede AUDIO OUTPUT OB
3230 previste dalle varie funzioni (zone audio).
ALLARMI DEL SISTEMA
Gli allarmi gestiti dal sistema sono di due tipi:
• ALLARMI DAI DISPOSITIVI DEL SISTEMA – Sono allarmi generati da guasti ai dispositivi del sistema (es. consolle BM 3616, unità A.C.U.,
schede IO 3250, schede IB 3210 / IB 3280, schede OB 3230, ecc.).
• COMANDI DI ALLARME/AVVISO – Sono allarmi o avvisi comandati dagli operatori alle consolle BM 3616 e/o BM 3604, o da dispositivi
esterni connessi agli ingressi GPI delle schede INPUT/OUTPUT digitali IO 3250 opportunamente configurati (vedi paragrafo UTILIZZO DEL
MENU EVENTI INGRESSI GPI).
Un qualunque evento di allarme determina l’attivazione del segnalatore acustico dell’unità di controllo, assieme all’accensione del led ALARM (rif.
13 – fig. 1, pag. 9). Per spegnere il segnalatore acustico ed il led ALARM occorre accedere al menu per la visualizzazione dello stato degli allarmi (vedi paragrafo VISUALIZZAZIONE DELLO STATO ALLARMI); questa operazione non disattiva l’allarme, ma solo la sua segnalazione.
Un allarme viene disattivato solo quando l’evento che lo ha determinato viene a mancare, ovvero quando si verifica una delle seguenti condizioni:
• viene eliminato il guasto al dispositivo del sistema.
• viene disattivato l’allarme tramite la consolle che l’ha comandato.
• non viene più pilotato l’ingresso GPI (schede INPUT/OUTPUT digitali IO 3250) che ha originato l’allarme/avviso (vedi paragrafo UTILIZZO
DEL MENU EVENTI INGRESSI GPI).
STAMPA DEGLI EVENTI DI ALLARME
La stampa degli eventi di allarme gestiti dal sistema può avvenire con due modalità.
a. Se nel sottomenu OPZIONI STAMPA, del menu di configurazione SISTEMA, viene selezionata l’opzione MODO STAMPA: AUTOMATICO, viene eseguita la stampa automatica di un messaggio di allarme nel momento stesso in cui l’evento di allarme si verifica.
b. Se nel sottomenu OPZIONI STAMPA, del menu di configurazione SISTEMA, viene selezionata l’opzione MODO STAMPA: SU RICHIESTA, la stampa degli eventi di allarme deve essere comandata manualmente. Gli allarmi che vengono stampati sono tutti quelli accaduti
da quando il sistema è stato acceso.
DIFFUSIONE MUSICA DI SOTTOFONDO
Il sistema permette di diffondere, in determinate zone audio, della musica di sottofondo. E’ possibile utilizzare fino ad 8 diverse sorgenti per
musica di sottofondo (es. sintonizzatore AM/FM, lettore di CD, lettore di cassette, ecc.), che andranno connesse agli ingressi delle schede AUDIO INPUT IB 3210 / IB 3280, definiti tramite il menu di configurazione PROCESSO INGRESSI AUDIO di tipo BGM (background music).
La modalità di diffusione della musica di sottofondo è descritta di seguito.
a. Normalmente la musica di sottofondo (evento “background music”) viene costantemente diffusa nelle zone audio definite di tipo BGM tramite il menu di configurazione PROCESSO USCITE AUDIO.
b. Quando nel sistema viene richiesta l’esecuzione di un evento avente maggiore priorità (vedi paragrafo ORDINE DI PRIORITA’), che prevede la diffusione di un segnale audio nelle zone di tipo BGM (es. annuncio da consolle digitali BM 3616, annuncio da consolle BM 3604,
ecc.), la diffusione della musica di sottofondo viene interrotta.
c. Al termine della diffusione del segnale audio a maggiore priorità viene ripristinata la diffusione della musica di sottofondo.
UTILIZZO DELL’UNITÀ DI CONTROLLO CP 3100
Tramite la tastiera ed il display a cristalli liquidi presenti sul pannello anteriore dell’unità di controllo CP 3100 è possibile controllare e configurare il sistema RX 3000; in alternativa è possibile utilizzare anche una tastiera ed un monitor video esterni (opzionali), da collegare agli appositi connettori dell’unità di controllo CP 3100. Nelle descrizioni del presente paragrafo è stato considerato l’utilizzo dei dispositivi dell’unità
di controllo.
UTILIZZO DEI MENU
L’utilizzo dell’unità di controllo è basato sull’impiego di numerosi menu, che vengono visualizzati sul display dell’apparecchio (o sul monitor
video opzionale). Nella figura seguente è rappresentata la struttura generale dei menu.
F1: CONFIGURAZIONE
!
F2: ALLARMI
!
F3: MEMORIZZA CONFIGURAZIONI
!
F4: PROCESSO AUDIO
AUDIO INPUT PROCESSORS
AUDIO OUTPUT PROCESSORS
GPI PROCESSORS
CONSOLLES DIG.
AMPLIFICATORI (ACU)
ALLARMI GPI
EMERGENZA
FIREMAN
ALLARMI SISTEMA
PROCESSO IN AUDIO
PROCESSO OUT AUDIO
INSER. RISERVA ACU
OPERAZIONI MONITOR
PROCESSI INGRESSI AUDIO
PROCESSI USCITE AUDIO
GRUPPI DI ZONA
CONFIGURAZIONE RELÈ
CONSOLES DIGITALI
ACU (AMPLIFICATORI)
EVENTI INGRESSI GPI
F1=DEF. RELÈ
EVENTI TEMPORIZZATI
VOX
RECORDER
SISTEMA
OPZIONI STAMPA
COMPILA & SALVA
STAMPA CONFIGURAZ.
ESCI SENZA SALVARE! DATA & ORA
GIORNO & NOTTE
PASSWORD
F1=CAMBIA ZONE
F1=DEF. TASTI
F2= DEF. EMERGENZA
F3=DEF. F1, F2, F3
OPZIONI
RECORD
PLAY
ASSEMBLY
GENERAZIONE TONI
CANCELLA MESSAGGI
Per utilizzare i vari menu è necessario agire sui tasti presenti sul pannello frontale dell’unità di controllo (o sulla tastiera esterna opzionale), la
cui funzione è indicata nella tabella seguente.
20
TASTO/I
ESC
Freccia a destra
Freccia a sinistra
Freccia in alto
Freccia in basso
Freccia obliqua
Pag ↑
Pag ↓
+, -
FUNZIONE
Permette di uscire da un menu/sottomenu.
Permette di spostare il punto di selezione a destra.
Permette di spostare il punto di selezione a sinistra.
Permette di spostare il punto di selezione in alto.
Permette di spostare il punto di selezione in basso.
Permette di spostare il punto di selezione nel primo campo del menu corrente.
Permette di spostare la visualizzazione della pagina del menu corrente in su.
Permette di spostare la visualizzazione della pagina del menu corrente in giù.
Permettono di impostare un parametro in un campo, selezionando a rotazione fra i
vari parametri disponibili; permettono inoltre di inserire un carattere alfanumerico,
selezionando a rotazione fra i vari caratteri disponibili.
Permettono di accedere a determinati sottomenu.
Permettono di inserire un carattere numerico.
Permette di confermare una selezione o un campo a rotazione.
Permette di memorizzare la “password utente”.
Permette di inserire uno spazio (blank) in un campo alfanumerico, spostando il
cursore di immissione caratteri di una posizione.
Permette di cancellare tutti i caratteri contenuti nel campo correntemente selezionato.
Permettono di cancellare il carattere alfanumerico successivo o precedente;
permettono inoltre spostamenti all’interno del campo corrente.
F1, F2, F3, F4
Tasti numerici 0 ÷ 9
ENTER
MEMORY
SPACE
CLEAR
C →, C ←
PASSWORD DI ACCESSO AI MENU
Tramite l’utilizzo di due password, determinati menu dell’unità di controllo CP 3100 possono essere resi accessibili solamente a determinati
operatori. Le due password dell’unità di controllo sono:
• PASSWORD UTENTE – E’ la password utilizzabile da tutti gli utenti abilitati alla configurazione del sistema. Può essere composta da un
massimo di 8 caratteri numerici. Per assegnare la password utente, operare come indicato nel paragrafo UTILIZZO DEL MENU SISTEMA.
• PASSWORD SUPERVISOR – E una password segreta utilizzabile solamente dal supervisore del sistema. Viene impostata dalla RCF, e può
sostituire la password utente qualora quest’ultima venga dimenticata.
NOTA
• La “password supervisor” viene impostata dalla RCF, e non può essere modificata.
I menu che possono essere protetti da password sono:
• menu CONFIGURAZ., per la configurazione del sistema (vedi paragrafo CONFIGURAZIONE DEL SISTEMA).
• menu MEMOR. CONFIG., per l’attuazione di una configurazione (vedi paragrafo ATTUAZIONE DI UNA CONFIGURAZIONE).
Quando l’unità di controllo richiede l’immissione della password, sul display dell’apparecchio viene visualizzata la schermata indicata di seguito.
INSERIRE PASSWORD PER ACCESSO CONFIGURAZ.
PASSWORD:
Per accedere al menu successivo digitare la “password utente” o la “password supervisor”, utilizzando il tastierino numerico dell’unità di controllo, e premere il tasto ENTER.
USCITA DA UN MENÙ
Per uscire da un menu/sottomenu dell’unità di controllo:
1) Premere il tasto ESC. Se sono state variate delle impostazioni o dei parametri, sul display appare il messaggio seguente, in cui viene richiesto se salvare o meno i nuovi valori.
ATTENZIONE PARAMETRI MODIFICATI !
SALVARE ?
NO
SI
2a) Tramite i tasti di direzione ↑ / ↓ spostare il punto di selezione sulla voce SI e premere il tasto ENTER per memorizzare temporaneamente i nuovi parametri.
2b) Tramite i tasti di direzione ↑ / ↓ spostare il punto di selezione sulla voce NO e premere il tasto ENTER per non salvare i nuovi parametri e mantenere quelli precedentemente memorizzati.
3) Se non sono state variate delle impostazioni o dei parametri viene direttamente visualizzata la schermata del menu precedente.
AVVERTENZA
• Quando viene configurato il sistema, per salvare permanentemente le impostazioni effettuate sul disco rigido dell’unità di controllo è indispensabile uscire dal menu principale di configurazione tramite il comando COMPILA E SALVA (vedi paragrafo UTILIZZO DEL MENU
COMPILA E SALVA).
21
VISUALIZZAZIONE DEL LIVELLO AUDIO
In un apposito menu viene visualizzata una barra VU, che indica il livello del segnale audio.
Tale indicazione permette di:
• controllare e regolare il livello dei segnali audio sugli ingressi delle schede AUDIO INPUT IB 3210 / IB 3280.
• controllare e regolare il livello dei segnali audio sulle uscite delle schede AUDIO OUTPUT OB 3230.
• controllare il livello dei segnali audio sulle uscite per diffusori delle unità di potenza controllate dalle unità A.C.U. (schede retroamplificatore RB 3300).
La barra VU è in grado di visualizzare segnali audio di livello compreso fra –12 dB e +6 dB.
FUNZIONAMENTO DEL SEGNALATORE ACUSTICO
L’apparecchio è provvisto di un segnalatore acustico (buzzer), che emette suono continuo nelle seguenti occasioni:
• durante la fase di autoconfigurazione del sistema.
• quando viene attivato un avviso/allarme (vedi paragrafo ALLARMI DEL SISTEMA). Per spegnere il segnalatore acustico in questa occasione occorre accedere al menu per la visualizzazione dello stato degli allarmi (vedi paragrafo VISUALIZZAZIONE DELLO STATO ALLARMI);
questa operazione non disattiva l’allarme, ma solo la sua segnalazione.
Il segnalatore acustico emette un singolo “beep” in tutte le occasioni dove è necessario dare un avviso.
FUNZIONAMENTO DELLA RETROILLUMINAZIONE
L’accensione della retroilluminazione del display a cristalli liquidi dell’apparecchio viene comandata nelle seguenti occasioni:
• ogni volta che viene premuto un tasto sul pannello anteriore dell’unità di controllo; un timer provvede a spegnere automaticamente la retroilluminazione del display dopo circa 2 minuti dall’ultima pressione di un tasto.
• all’avviamento del sistema; in questo caso la retroilluminazione rimane accesa fino al termine della fase di autoconfigurazione.
• utilizzando il menu per la configurazione del sistema (menu CONFIGURAZ.); in questo caso la retroilluminazione rimane accesa fino all’uscita dal menu di configurazione (timer escluso).
ACCENSIONE DELL’APPARECCHIO
Dopo aver acceso l’unità di controllo CP 3100, quest’ultima procede alle operazioni di caricamento del programma di gestione ed all’autoconfigurazione del sistema, che consiste nel rilevare tutti i dispositivi installati, e nel programmarli con le impostazioni contenute nei file di configurazione del sistema, memorizzati sul disco rigido dell’apparecchio. Sul display a cristalli liquidi viene visualizzata la seguente schermata:
RCF RX 3000 AUDIO SYSTEM
SISTEMA IN AUTOCONFIGURAZIONE
ATTENDERE PREGO ...
"##############
03 NOV 1999
15:29:52
CONFIGURAZIONE DEL SISTEMA CORRETTA
Al termine della procedura di autoconfigurazione del sistema, se il sistema è stato correttamente configurato sul display compare la schermata seguente, contenente il menu principale dell’unità.
RCF RX 3000 AUDIO SYSTEM
F1: CONFIGURAZ.
F2: ALLARMI
"##############
ITALIANO _ _ _ ▼
F3: MEMOR. CONFIG.
F4: PROCESSO AUDIO
03 NOV 1999
15:29:52
ERRORI NELLA CONFIGURAZIONE DEL SISTEMA
Al termine della procedura di autoconfigurazione del sistema, se il sistema non è stato correttamente configurato, ossia se il numero degli apparecchi che sono stati precedentemente configurati (tramite l’apposito menu dell’unità di controllo) non coincide con il numero degli
apparecchi effettivamente trovati e correttamente configurati, sul display compare la schermata seguente:
RCF RX 3000 AUDIO SYSTEM
CONFIGURAZIONE DI SISTEMA ERRATA!
F1: CONFIGURAZIONE
F2: CONTINUA->
ITALIANO _ _ _ ▼
Il questa condizione vengono visualizzate due possibilità di scelta, da selezionare premendo il tasto F1 o F2.
• F1: CONFIGURAZIONE Premendo il tasto F1 è possibile configurare in diverso modo il sistema, per eliminare gli errori di configurazione.
Per l’utilizzo delle varie funzioni dei sottomenu consultare il paragrafo CONFIGURAZIONE DEL SISTEMA.
• F2: CONTINUA->
Premendo il tasto F2 è possibile accedere al menu principale dell’unità, senza correggere gli errori di configurazione riscontrati.
AVVERTENZA
• Se non vengono corretti gli errori di configurazione riscontrati, alcune funzionalità del sistema saranno compromesse, in quanto taluni dispositivi verranno considerati “assenti”.
22
SELEZIONE DELLA LINGUA
I messaggi che appaiono sul display dell’unità di controllo CP 3100 possono essere visualizzati in diverse lingue. Dal menu principale, premere i tasti + e - per selezionare la lingua desiderata.
RCF RX 3000 AUDIO SYSTEM
F1 : CONFIGURAZ.
F2 : ALLARMI
"##############
ITALIANO _ _ _ ▼
F3: MEMOR. CONFIG.
F4: PROCESSO AUDIO
03 NOV 1999
15:29:52
MENU PRINCIPALE
Il menu principale contiene i quattro sottomenu indicati di seguito.
• F1: CONFIGURAZ.
Il sottomenu è accessibile premendo il tasto F1, e permette di configurare tutto il sistema (dispositivi, funzioni,
ecc.). Tramite questo sottomenu vengono creati dei file di configurazione, che consentono di programmare tutti
i dispositivi del sistema (vedi paragrafo ATTUAZIONE DI UNA CONFIGURAZIONE). Per l’utilizzo delle varie funzioni del sottomenu consultare il paragrafo CONFIGURAZIONE DEL SISTEMA.
• F2: ALLARMI
Il sottomenu è accessibile premendo il tasto F2, e permette di visualizzare lo stato degli allarmi gestiti dal sistema.
Per l’utilizzo delle varie funzioni del sottomenu consultare il paragrafo VISUALIZZAZIONE DELLO STATO ALLARMI.
• F3: MEMOR. CONFIG. Il sottomenu è accessibile premendo il tasto F3, e permette di programmare tutti i dispositivi del sistema con le
impostazioni contenute nei file di configurazione, creati tramite il sottomenu F1: CONFIGURAZ.. Per l’utilizzo della funzione consultare il paragrafo ATTUAZIONE DI UNA CONFIGURAZIONE”
• F4: PROCESSO AUDIO Il sottomenu è accessibile premendo il tasto F4, e permette di impostare o variare velocemente numerosi parametri audio; consente inoltre di monitorare i segnali audio trattati dal sistema (segnali in ingresso, segnali in uscita, ecc.). Per l’utilizzo delle varie funzioni del sottomenu consultare il paragrafo IMPOSTAZIONI AUDIO.
In basso a sinistra del menu principale è presente la BARRA ATTIVITA’, che con il suo “scorrimento” informa circa il corretto funzionamento
del sistema: la crescita della barra rappresenta la progressione del ciclo di controllo, che l’unità CP 3100 effettua periodicamente sui vari dispositivi del sistema.
In basso a destra del menu principale sono indicate la data e l’ora correnti, regolabili tramite un apposito menu.
CONFIGURAZIONE DEL SISTEMA (menu CONFIGURAZ.)
RCF RX 3000 AUDIO SYSTEM
F1 : CONFIGURAZ.
F2 : ALLARMI
"##############
ITALIANO _ _ _ ▼
F3: MEMOR. CONFIG.
F4: PROCESSO AUDIO
03 NOV 1999
15:29:52
Per accedere ai menu che consentono di configurare il sistema (dispositivi, funzioni, ecc.), dal menu principale premere il tasto F1: sul display
appare una pagina di menu contenente i campi indicati di seguito.
DISPOSITIVI Indica i vari dispositivi del sistema. Le diciture visualizzate sono:
• CONSOLES: indica le consolle digitali BM 3616.
• AUDIO INP PROC.: indica le schede AUDIO INPUT IB 3210 / IB 3280.
• AUDIO OUT PROC.: indica le schede AUDIO OUTPUT OB 3230.
• GPI PROCESS.: indica le schede INPUT/OUTPUT digitali IO 3250.
• ACU: indica le schede retroamplificatore RB 3300.
CONF.
Indica il numero degli apparecchi che sono stati configurati tramite il relativo menu dell’unità di controllo.
TROVATI
Indica il numero degli apparecchi rilevati e correttamente programmati dall’unità di controllo, tramite la procedura di autoconfigurazione del sistema.
Nella prima schermata vengono visualizzati solo i dati relativi ai primi 2 dispositivi del sistema; per visualizzare i successivi utilizzare i tasti ↑ /
↓ e/o pag ↑ / pag ↓.
ESC menu prec.
DISPOSITIVI
CONSOLES
AUDIO INP PROC.
ENTER per Config.
CONF
TROVATI
6
6
4
4
Pag ↓
ESC menu prec.
DISPOSITIVI
AUDIO OUT PROC.
GPI PROCESS.
ENTER per Config.
CONF
TROVATI
8
8
8
8
Pag ↓
ESC menu prec.
DISPOSITIVI
GPI PROCESS.
ACU
ENTER per Config.
CONF
TROVATI
8
8
10
10
Premere il tasto ESC per tornare al menu principale.
23
Premere il tasto ENTER per configurare i dispositivi il sistema: sul display appare un messaggio in cui si richiede di inserire l’eventuale password dell’unità di controllo (vedi paragrafo PASSWORD DI ACCESSO AI MENU); tramite il tastierino numerico inserire la password (quando
prevista) e premere ENTER: sul display dell’apparecchio vengono visualizzati i seguenti sottomenu:
• PROCESSO INGRESSI AUDIO Menu per programmare gli ingressi delle schede AUDIO INPUT IB 3210 / IB 3280.
• PROCESSO USCITE AUDIO
Menu per programmare le uscite delle schede AUDIO OUTPUT OB 3230.
• GRUPPI DI ZONE
Menu per programmare i gruppi di zone audio del sistema.
• CONFIGURAZIONE RELE’
Menu per programmare i relè delle schede INPUT/OUTPUT digitali IO 3250.
• CONSOLES DIGITALI
Menu per programmare le consolle digitali BM 3616.
• ACU
Menu per programmare le unità A.C.U. preposte al controllo degli amplificatori di potenza del sistema (vedi paragrafo UNITA’ A.C.U.).
• EVENTI INGRESSI GPI
Menu per programmare gli eventi comandabili tramite gli ingressi GPI delle schede INPUT/OUTPUT digitali IO 3250.
• EVENTI TEMPORIZZATI
Menu per programmare gli eventi temporizzati, ossia gli eventi che devono accadere ad un orario prefissato.
• VOX
Menu per programmare i dispositivi VOX delle schede AUDIO OUTPUT OB 3230.
• RECORDER
Menu per registrare e riprodurre dei file audio.
• SISTEMA
Menu per impostare vari parametri del sistema.
• COMPILA E SALVA
Comando per uscire dal menu di configurazione del sistema salvando le impostazioni effettuate.
• ESCI SENZA SALVARE!
Comando per uscire dal menu di configurazione del sistema senza salvare le impostazioni effettuate.
Nella prima schermata vengono visualizzate solo le prime 3 voci del menu di configurazione; per visualizzare le successive utilizzare i tasti ↑
/ ↓ e/o pag ↑ / pag ↓.
INSERIRE PASSWORD PER ACCESSO CONFIGURAZIONE
PASSWORD:
“numero password”
ENTER
- - - = = = MAIN MENU = = = - - ->PROCESSO INGRESSI AUDIO
->PROCESSO USCITE AUDIO
->GRUPPI DI ZONE
Pag ↓
- - - = = = MAIN MENU = = = - - ->CONFIGURAZIONE RELE’
->CONSOLES DIGITALI
->ACU (AMPLIFICATORI)
Pag ↓
- - - = = = MAIN MENU = = = - - ->EVENTI INGRESSI GPI
->EVENTI TEMPORIZZATI
->VOX
Pag ↓
- - - = = = MAIN MENU = = = - - ->RECORDER
->SISTEMA
->COMPILA E SALVA
Pag ↓
- - - = = = MAIN MENU = = = - - ->SISTEMA
->COMPILA E SALVA
->ESCI SENZA SALVARE!
24
AVVERTENZE
• Tutte le impostazioni effettuate tramite i vari menu di configurazione vengono temporaneamente memorizzate nella memoria RAM dell’unità
di controllo; per salvarle permanentemente sul disco rigido dell’unità di controllo sotto forma di file di configurazione è indispensabile uscire dal menu per la configurazione del sistema tramite il comando COMPILA E SALVA (vedi paragrafo UTILIZZO DEL MENU COMPILA E SALVA).
• Quando si utilizza il menu di configurazione dell’unità di controllo, non è possibile accedere al sistema tramite il PC di configurazione.
PARAMETRI CARATTERISTICI
Con l’installazione delle schede modulari del sistema RX 3000 (es. schede AUDIO INPUT IB 3210 / IB 3280, schede AUDIO OUTPUT OB
3230, ecc.) vengono definiti i parametri indicati di seguito, che vengono utilizzati nei vari menu di configurazione per identificare le schede ed
i relativi ingressi e/o uscite.
NUMERO SCHEDA
Ciascuna scheda di una determinata tipologia viene identificata mediante un numero progressivo, che dipende dallo slot e dal sub-rack in cui viene installata.
La numerazione progressiva delle schede AUDIO INPUT IB 3210 / IB 3280 e AUDIO OUTPUT OB 3230, dal
numero 1 al numero totale di schede di quel tipo presenti nel sistema, parte dalla scheda installata nello slot
numero 1 del primo sub-rack MB 3200, fino ad arrivare all’ultima scheda installata nello slot avente il numero più alto dell’ultimo sub-rack.
La numerazione progressiva delle schede INPUT/OUTPUT digitali IO 3250, dal numero 1 al numero totale di
schede di quel tipo presenti nel sistema, parte dalla scheda installata nello slot avente il numero più basso
del primo sub-rack MB 3200 (utilizzato per questo tipo di scheda), fino ad arrivare all’ultima scheda installata nello slot avente il numero più alto dell’ultimo sub-rack.
NUMERO INGRESSO AUDIO Gli 8 ingressi audio di ciascuna delle schede AUDIO INPUT IB 3210 / IB 3280 presenti nel sistema vengono
identificati mediante altrettanti numeri progressivi, che dipendono dal numero di identificazione della scheda
alla quale appartengono (parametro NUMERO SCHEDA). La numerazione progressiva degli ingressi, dal numero 1 al numero totale degli ingressi audio presenti nel sistema (max 64 ingressi audio), parte dalla scheda
AUDIO INPUT IB 3210 / IB 3280 numero 1: sulla scheda numero 1 sono presenti gli ingressi da 1 a 8, sulla
scheda numero 2 sono presenti gli ingressi da 9 a 16, e così via, fino ad arrivare ad esempio all’ultima scheda numero 4, dove sono presenti gli ingressi da 25 a 32.
NUMERO USCITA AUDIO
Le 8 uscite audio di ciascuna delle schede AUDIO OUTPUT OB 3230 presenti nel sistema vengono identificate mediante altrettanti numeri progressivi, che dipendono dal numero di identificazione della scheda alla
quale appartengono (parametro NUMERO SCHEDA). La numerazione progressiva delle uscite, dal numero
1 al numero totale delle uscite presenti nel sistema (max 128 uscite audio), parte dalla scheda AUDIO OUTPUT OB 3230 numero 1: sulla scheda numero 1 sono presenti le uscite da 1 a 8, sulla scheda numero 2 sono presenti le uscite da 9 a 16, e così via, fino ad arrivare ad esempio all’ultima scheda numero 8, dove sono presenti le uscite da 57 a 64.
NUMERO INGRESSO GPI
I 16 ingressi GPI di ciascuna delle schede INPUT/OUTPUT digitali IO 3250 presenti nel sistema vengono
identificati mediante altrettanti numeri progressivi, che dipendono dal numero di identificazione della scheda
alla quale appartengono (parametro NUMERO SCHEDA). La numerazione progressiva degli ingressi GPI, dal
numero 1 al numero totale degli ingressi presenti nel sistema (max 256 ingressi GPI), parte dalla scheda INPUT/OUTPUT digitale IO 3250 numero 1: sulla scheda numero 1 sono presenti gli ingressi da 1 a 16, sulla
scheda numero 2 sono presenti gli ingressi da 17 a 32, e così via, fino ad arrivare ad esempio all’ultima scheda numero 8, dove sono presenti gli ingressi da 113 a 128.
NUMERO RELE’
I 24 relè di ciascuna delle schede INPUT/OUTPUT digitali IO 3250 presenti nel sistema vengono identificati mediante altrettanti numeri progressivi, che dipendono dal numero di identificazione della scheda alla quale appartengono (parametro NUMERO SCHEDA). La numerazione progressiva dei relè, dal numero 1 al numero totale di relè presenti nel sistema (max 384 relè), parte dalla scheda INPUT/OUTPUT digitale IO 3250 numero 1:
sulla scheda numero 1 sono presenti i relè da 1 a 24, sulla scheda numero 2 sono presenti i relè da 25 a 48, e
così via, fino ad arrivare ad esempio all’ultima scheda numero 8, dove sono presenti i relè da 169 a 192.
AVVERTENZA
• La numerazione che identifica le schede AUDIO INPUT IB 3210 / IB 3280, le schede AUDIO OUTPUT OB 3230, e gli ingressi e le uscite audio delle suddette schede, è unica anche quando nel sistema sono presenti più matrici audio. Considerando ad esempio un sistema in
cui sono presenti due matrici audio indipendenti, con 32 ingressi (4 schede AUDIO INPUT) e 64 uscite (8 schede AUDIO OUTPUT) ciascuna, la scheda AUDIO INPUT IB 3210 / IB 3280 numero 5 corrisponderà alla prima scheda d’ingresso della seconda matrice, e la scheda
AUDIO OUTPUT OB 3230 numero 9 corrisponderà alla prima scheda d’uscita della seconda matrice, di conseguenza l’ingresso numero 33
corrisponderà al primo ingresso della seconda matrice, mentre l’uscita numero 65 corrisponderà alla prima uscita della seconda matrice.
UTILIZZO DEL MENU “PROCESSO INGRESSI AUDIO”
- - - = = = MAIN MENU = = = - - ->PROCESSO INGRESSI AUDIO
->PROCESSO USCITE AUDIO
->GRUPPI DI ZONE
Il menu consente la programmazione degli ingressi delle schede AUDIO INPUT IB 3210 / IB 3280. Dal menu principale di configurazione dell’apparecchio, tramite i tasti ↑ / ↓ e/o pag ↑ / pag ↓ spostare il punto di selezione sul sottomenu PROCESSO INGRESSI AUDIO e premere
il tasto ENTER; sul display dell’apparecchio vengono visualizzati i campi indicati di seguito.
N.
Indica il numero di identificazione dell’ingresso audio da programmare. L’indicazione è di tipo sequenziale: al numero 1 corrisponde
l’ingresso numero 1 della scheda AUDIO INPUT numero 1, al numero 9 corrisponde l’ingresso numero 1 della scheda AUDIO INPUT
numero 2, al numero 32 corrisponde l’ingresso numero 8 della scheda AUDIO INPUT numero 4, ecc.
NOME Consente di definire il nome di identificazione dell’ingresso, che può essere composto da un massimo di 16 caratteri alfanumerici.
Utilizzare i tasti + e - per selezionare a rotazione i caratteri alfanumerici; confermare ciascun carattere tramite il tasto ENTER. I caratteri numerici possono essere selezionati direttamente tramite il tastierino numerico.
25
TIPO
Consente di definire la tipologia l’ingresso. Utilizzare i tasti + e - per selezionare il tipo desiderato fra quelli indicati di seguito.
• AUDIO STD: indica un ingresso generico, utilizzabile per il collegamento di un’apparecchiatura audio che non presenta nessun
collegamento con il sistema RX 3000 ad eccezione della linea audio medesima. Un ingresso AUDIO STD non possiede nessuna
priorità, e non è soggetto a nessuna gestione particolare da parte del sistema.
• PLAYBACK: indica un ingresso dedicato alla connessione con l’uscita LINE OUT della scheda audio dell’unità di controllo, per la
riproduzione di segnali audio (file audio). E’ possibile definire un solo ingresso di questo tipo. Qualora la scheda audio non venga utilizzata per riprodurre segnali audio, non è necessario configurare un ingresso di questo tipo.
• FIREMAN 1: indica un ingresso dedicato alla connessione di una sorgente FIREMAN 1, avente la priorità assoluta (vedi paragrafo
EVENTI COMANDABILI DAGLI INGRESSI GPI). E’ possibile definire un solo ingresso di questo tipo.
• FIREMAN 2: indica un ingresso dedicato alla connessione di una sorgente FIREMAN 2, avente la priorità assoluta (vedi paragrafo
EVENTI COMANDABILI DAGLI INGRESSI GPI). E’ possibile definire un solo ingresso di questo tipo.
• CONSDIG n.: indica un ingresso dedicato alla connessione di una consolle digitale BM 3616. La dicitura n. rappresenta il numero di identificazione della consolle, compreso tra 1 e 16 (numero massimo di consolle digitali gestite); tale numero viene impostato localmente sulla consolle, tramite la procedura per l’assegnazione dell’indirizzo.
• CONSGPI n.: indica un ingresso dedicato alla connessione di una consolle BM 3604. La dicitura n. rappresenta il numero di identificazione della consolle, compreso tra 1 e 24 (numero massimo di consolle gestite).
• BGM n.: indica un ingresso dedicato alla connessione di una sorgente per musica di sottofondo (vedi paragrafo DIFFUSIONE MUSICA DI SOTTOFONDO). La dicitura n. rappresenta il numero di identificazione della sorgente, compreso tra 1 e 8 (numero massimo di sorgenti di sottofondo gestite).
Per visualizzare gli ingressi successivi o precedenti premere i tasti ↑ / ↓ e/o pag ↑ / pag ↓.
N.
1
2
3
NOME
SORGENTE 1
SORGENTE 2
SORGENTE 3
TIPO
PLAYBACK _ ▼
CONSGPI1_ ▼
CONSGPI2_ ▼
Pag ↓
N.
4
5
6
NOME
SORGENTE 4
SORGENTE 5
SORGENTE 6
TIPO
CONSDIG1_____ ▼
CONSDIG2_____ ▼
CONSDIG3____ ▼
Per uscire dal sottomenu premere il tasto ESC e procedere come indicato nel paragrafo USCITA DA UN MENU.
UTILIZZO DEL MENU “PROCESSO USCITE AUDIO”
- - - = = = MAIN MENU = = = - - ->PROCESSO INGRESSI AUDIO
->PROCESSO USCITE AUDIO
->GRUPPI DI ZONE
Il menu consente la programmazione delle uscite delle schede AUDIO OUTPUT OB 3230. Dal menu principale di configurazione dell’apparecchio, tramite i tasti ↑ / ↓ e/o pag ↑ / pag ↓ spostare il punto di selezione sul sottomenu PROCESSO USCITE AUDIO e premere il tasto
“ENTER”; sul display dell’apparecchio vengono visualizzati i campi indicati di seguito.
N.
Indica il numero di identificazione dell’uscita audio da programmare. L’indicazione è di tipo sequenziale: al numero 1 corrisponde l’uscita numero 1 della scheda AUDIO OUTPUT numero 1, al numero 9 corrisponde l’uscita numero 1 della scheda AUDIO OUTPUT
numero 2, al numero 64 corrisponde l’uscita numero 8 della scheda AUDIO OUTPUT numero 8, ecc.
NOME Consente di definire il nome dell’uscita, chiamato anche nome della zona audio, che può essere composto da un massimo di 16 caratteri alfanumerici. Utilizzare i tasti + e - per selezionare a rotazione i caratteri alfanumerici; confermare ciascun carattere tramite
il tasto ENTER. I caratteri numerici possono essere selezionati direttamente tramite il tastierino numerico.
VOX
Consente di attivare/disattivare la funzione VOX sull’uscita (vedi paragrafo DISPOSITIVO VOX). Utilizzare i tasti + e - per selezionare una delle seguenti opzioni:
• ON - Funzione VOX attivata sull’uscita.
• OFF - Funzione VOX disattivata sull’uscita.
TIPO
Consente di definire la tipologia dell’uscita. Utilizzare i tasti + e - per selezionare il tipo desiderato fra quelli indicati di seguito.
• GENERIC: indica un’uscita di tipo generico, che non è soggetta a nessuna gestione particolare da parte del sistema.
• RECORDER: indica un’uscita dedicata alla connessione con l’ingresso LINE IN della scheda audio dell’unità di controllo, per la
registrazione di segnali audio su file. E’ possibile definire una sola uscita di questo tipo. Qualora la scheda audio non venga
utilizzata per registrare segnali audio, non è necessario configurare un’uscita di questo tipo.
• BGM n.: indica un’uscita dedicata alla sonorizzazione di una zona audio in cui normalmente deve essere diffusa la musica di sottofondo (vedi paragrafo DIFFUSIONE MUSICA DI SOTTOFONDO). La dicitura n. rappresenta il numero della sorgente di sottofondo che deve essere diffusa nella zona (numero compreso tra 1 e 8); se ad esempio viene selezionata un’uscita di tipo BGM
1, nella relativa zona audio verrà normalmente diffusa la sorgente connessa all’ingresso di tipo BGM 1. E’ possibile assegnare la
stessa sorgente di musica di sottofondo a più uscite.
26
RELE’
Consente di scegliere un relè delle schede INPUT/OUTPUT digitali IO 3250 da commutare quando l’uscita viene connessa con un
ingresso audio, ad eccezione degli ingressi di tipo BGM (background music). Il relé può essere normalmente aperto o normalmente
chiuso, e ricommuta nella posizione normale, definita tramite il menu CONFIGURAZIONE RELE’, non appena l’uscita cessa di essere connessa. Utilizzare i tasti + e - per selezionare il nome del relé desiderato fra quelli definiti tramite il menu CONFIGURAZIONE RELE’ (campo NOME); scegliendo l’opzione NO RELE’ non viene selezionato nessun relé.
AVVERTENZA
• Il relè non viene mai commutato quando l’uscita viene connessa con un ingresso di tipo BGM (background music).
NOTA
• Le uscite delle schede AUDIO OUTPUT OB 3230 permettono di sonorizzare una determinata zona audio, di conseguenza il menu PROCESSO USCITE AUDIO consente indirettamente la definizione delle zone audio del sistema.
Nella prima schermata vengono visualizzati solo i primi 4 campi (N., NOME, VOX, TYPE) delle prime 3 uscite. Per visualizzare il campo successivo premere il tasto →; per visualizzare il campo precedente premere il tasto ←.
N.
1
2
3
NOME
ZONA 1
ZONA 2
ZONA 3
VOX
OFF▼
OFF▼
OFF▼
TIPO
GENERIC_ _ ▼
GENERIC_ _ ▼
GENERIC_ _ ▼
→
1
2
3
VOX
OFF▼
OFF▼
OFF▼
TIPO
GENERIC_ _ ▼
GENERIC_ _ ▼
GENERIC_ _ ▼
RELE’
NO RELE’ _ _ _ _ _ _ ▼
NO RELE’ _ _ _ _ _ _ ▼
NO RELE’ _ _ _ _ _ _ ▼
Per visualizzare le uscite successive o precedenti premere i tasti ↑ / ↓ e/o pag ↑ / pag ↓.
N.
1
2
3
NOME
ZONA 1
ZONA 2
ZONA 3
VOX
OFF▼
OFF▼
OFF▼
TIPO
GENERIC_ _ ▼
GENERIC_ _ ▼
GENERIC_ _ ▼
Pag ↓
N.
4
5
6
NOME
ZONA 4
ZONA 5
ZONA 6
VOX
OFF▼
OFF▼
OFF▼
TIPO
GENERIC_ _ ▼
GENERIC_ _ ▼
GENERIC_ _ ▼
Per uscire dal sottomenu premere il tasto ESC e procedere come indicato nel paragrafo USCITA DA UN MENU.
UTILIZZO DEL MENU “GRUPPI DI ZONE”
- - - = = = MAIN MENU = = = - - ->PROCESSO INGRESSI AUDIO
->PROCESSO USCITE AUDIO
->GRUPPI DI ZONE
Il menu consente di definire i gruppi di zone audio, ossia gli insiemi composti da più zone audio. I gruppi di zone permettono di semplificare
le operazioni di selezione delle zone in cui diffondere un determinato segnale audio, e possono ad esempio essere utilizzati dalle consolle BM
3604 e BM 3616 per selezionare con un unico tasto più zone audio. Ad un gruppo possono appartenere tutte le zone del sistema. Dal menu
principale di configurazione dell’apparecchio, tramite i tasti ↑ / ↓ e/o pag ↑ / pag ↓ spostare il punto di selezione sul sottomenu GRUPPI DI
ZONE e premere il tasto ENTER; sul display dell’apparecchio vengono visualizzati i campi indicati di seguito.
GRUPPO N. Indica in modo sequenziale il numero del gruppo di zone audio da programmare. Sono definibili un massimo di 24 gruppi di zone.
NOME
Consente di definire il nome di identificazione del gruppo di zone, che può essere composto da un massimo di 16 caratteri alfanumerici. Utilizzare i tasti + e - per selezionare a rotazione i caratteri alfanumerici; confermare ciascun carattere tramite il tasto ENTER. I caratteri numerici possono essere selezionati direttamente tramite il tastierino numerico.
A fianco del nome del gruppo di zone è indicato il numero di zone appartenenti a quel gruppo. Per definire le zone appartenenti a ciascun gruppo è necessario accedere ad un apposito sottomenu, premendo il tasto F1 (vedi paragrafo DEFINIZIONE DELLE ZONE DI CIASCUN GRUPPO).
27
Nella prima schermata vengono visualizzati solo i primi 3 gruppi di zone. Per visualizzare i gruppi di zone successivi o precedenti premere i
tasti ↑ / ↓ e/o pag ↑ / pag ↓.
GRUPPO N.
1
2
3
NOME
GRUPPO 1 _ _ _ _ _ _ _
GRUPPO 2 _ _ _ _ _ _ _
GRUPPO 3 _ _ _ _ _ _ _
(F1=CAMBIA)
4
12
2
Pag ↓
GRUPPO N.
4
5
6
NOME
NO ZONE _ _ _ _ _ _ _
NO ZONE _ _ _ _ _ _ _
NO ZONE _ _ _ _ _ _ _
(F1=CAMBIA)
0
0
0
Per uscire dal sottomenu premere il tasto ESC e procedere come indicato nel paragrafo USCITA DA UN MENU.
DEFINIZIONE DELLE ZONE DI CIASCUN GRUPPO
Per visualizzare il sottomenu che permette di definire le zone audio appartenenti a ciascun gruppo, dal menu GRUPPI DI ZONE spostare il punto di selezione sul nome del gruppo da configurare, e premere il tasto F1. Sul display dell’apparecchio appaiono i campi indicati di seguito.
AGG. ZONA Consente di scegliere le zone da inserire in ciascun gruppo. Utilizzare i tasti + e - per selezionare il nome della zona fra quelli precedentemente definiti tramite il menu PROCESSO USCITE AUDIO: sono disponibili per la selezione tutte le zone del sistema. Scegliendo l’opzione NO ZONE non viene selezionata nessuna zona.
AVVERTENZA
• Non è possibile inserire in un gruppo di zone un’uscita audio (zona) di tipo RECORDER: se ad esempio nel sistema sono presenti 64 uscite, ed un’uscita è configurata di tipo RECORDER, di un gruppo potranno far parte al massimo 63 zone (64-1).
Nella prima schermata vengono visualizzate solo le prime 3 zone del gruppo. Per visualizzare le zone successive o precedenti premere i tasti
↑ / ↓ e/o pag ↑ / pag ↓.
AGG. ZONA
1
2
3
ZONA 1 _ _ _ _ _ _ _ ▼
ZONA 2 _ _ _ _ _ _ _ ▼
ZONA 3 _ _ _ _ _ _ _ ▼
Pag ↓
AGG. ZONA
4
5
6
ZONA 4 _ _ _ _ _ _ _ ▼
NO ZONE _ _ _ _ _ _ ▼
NO ZONE _ _ _ _ _ _ ▼
Per uscire dal sottomenu premere il tasto ESC e procedere come indicato nel paragrafo USCITA DA UN MENU.
UTILIZZO DEL MENU “CONFIGURAZIONE RELE’”
- - - = = = MAIN MENU = = = - - ->PROCESSO USCITE AUDIO
->GRUPPI DI ZONE
->CONFIGURAZIONE RELE’
Il menu consente la programmazione dei relè delle schede INPUT/OUTPUT digitali IO 3250. Dal menu principale di configurazione dell’apparecchio, tramite i tasti ↑ / ↓ e/o pag ↑ / pag ↓ spostare il punto di selezione sul sottomenu CONFIGURAZIONE RELE’ e premere il tasto “ENTER”; sul display dell’apparecchio vengono visualizzati i campi indicati di seguito.
N.
Indica il numero di identificazione del relè da programmare. L’indicazione è di tipo sequenziale: al numero 1 corrisponde il relè numero 1 della scheda INPUT/OUTPUT digitale numero 1, al numero 25 corrisponde il relè numero 1 della scheda INPUT/OUTPUT
digitale numero 2, al numero 192 corrisponde il relè numero 24 della scheda INPUT/OUTPUT digitale numero 8, ecc.
NOME
Consente di definire il nome di identificazione del relè, che può essere composto da un massimo di 16 caratteri alfanumerici. Utilizzare i tasti + e - per selezionare a rotazione i caratteri alfanumerici; confermare ciascun carattere tramite il tasto ENTER. I caratteri numerici possono essere selezionati direttamente tramite il tastierino numerico.
STATUS Consente di definire lo stato normale del contatto del relè, ossia lo stato che il contatto deve assumere quando il relè non viene
comandato. Utilizzare i tasti + e - per selezionare una delle seguenti opzioni:
• N.A. - Contatto normalmente aperto.
• N.C. - Contatto normalmente chiuso.
28
Nella prima schermata vengono visualizzati solo i primi 3 relè. Per visualizzare i relè successivi o precedenti premere i tasti ↑ / ↓ e/o pag ↑ /
pag ↓.
N.
1
2
3
NOME
RELE’ 1 _ _ _ _ _ _ _
RELE’ 2 _ _ _ _ _ _ _
RELE’ 3 _ _ _ _ _ _ _
STATUS
N.A. _ _ _ _ ▼
N.A. _ _ _ _ ▼
N.C. _ _ ▼
Pag ↓
N.
4
5
6
NOME
RELE’ 4 _ _ _ _ _ _ _
RELE’ 5 _ _ _ _ _ _ _
RELE’ 6 _ _ _ _ _ _ _
STATUS
N.A. _ _ _ _ ▼
N.A. _ _ _ _ ▼
N.C. _ _ _ _ ▼
Per uscire dal sottomenu premere il tasto ESC e procedere come indicato nel paragrafo USCITA DA UN MENU.
UTILIZZO DEL MENU “CONSOLES DIGITALI”
- - - = = = MAIN MENU = = = - - ->GRUPPI DI ZONE
->CONFIGURAZIONE RELE’
->CONSOLES DIGITALI
Il menu consente la programmazione delle consolle digitali BM 3616. Dal menu principale di configurazione dell’apparecchio, tramite i tasti ↑
/ ↓ e/o pag ↑ / pag ↓ spostare il punto di selezione sul sottomenu CONSOLES DIGITALI e premere il tasto ENTER; sul display dell’apparecchio vengono visualizzati i campi indicati di seguito.
CONS.
Indica il numero di identificazione della consolle digitale BM 3616 da programmare; tale numero viene impostato localmente
sulla consolle, tramite la procedura per l’assegnazione dell’indirizzo (vedi manuale d’installazione e d’uso consolle BM 3616).
NOME
Consente di definire il nome di identificazione della consolle, che può essere composto da un massimo di 16 caratteri alfanumerici. Utilizzare i tasti + e - per selezionare a rotazione i caratteri alfanumerici; confermare ciascun carattere tramite il tasto ENTER. I caratteri numerici possono essere selezionati direttamente tramite il tastierino numerico.
PASSWORD Consente di definire la password per bloccare l’utilizzo della consolle. La password può contenere fino ad un massimo di 8
caratteri numerici; i caratteri numerici utilizzabili sono quelli selezionabili tramite i primi 8 tasti numerici della consolle, ossia:
1, 2, 3, 4, 5, 6, 7, 8. Utilizzare i tasti + e - per selezionare i caratteri numerici a rotazione; confermare ciascun carattere tramite il tasto ENTER. I caratteri possono essere selezionati direttamente tramite il tastierino numerico. Se nel campo non viene inserito nessun carattere, e vengono lasciati 8 spazi “vuoti” (caratteri “blank”), non viene definita nessuna password.
AVVERTENZE
• Per non definire nessuna password nel campo devono essere lasciati 8 spazi “vuoti”.
• Nell’assegnazione della password tenere presenti le seguenti limitazioni:
a. non è possibile inserire degli spazi (caratteri “blank”) fra due caratteri numerici della password.
b. non è possibile inserire degli spazi (caratteri “blank”) prima dei caratteri numerici della password.
Ulteriori chiarimenti sulla definizione della password sono forniti dagli esempi contenuti nella tabella seguente.
Esempio 1
Esempio 2
Esempio 3
Esempio 4
Esempio 5
1°
Caratt.
1
Blank
1
Blank
1
2°
Caratt.
2
Blank
2
1
Blank
3°
Caratt.
Blank
Blank
3
2
2
4°
Caratt.
Blank
Blank
4
3
3
PRIORITA’
PASSWORD
5°
6°
Caratt. Caratt.
Blank
Blank
Blank
Blank
5
6
Blank
Blank
Blank
Blank
7°
Caratt.
Blank
Blank
7
Blank
Blank
8°
Caratt.
Blank
Blank
8
Blank
Blank
Validità
Ammessa
Ammessa
Ammessa
Non ammessa
Non ammessa
Consente di definire il livello di priorità della consolle. Utilizzare i tasti + e - per impostare il livello di priorità entro i valori da
2 a 7; il livello 2 è il livello di priorità più alto che può essere associato alla consolle, mentre il livello 7 è il livello di priorità più
basso (vedi paragrafo ORDINE DI PRIORITA’).
GEN CALL
Consente di abilitare o disabilitare il tasto GENERAL CALL della consolle, che permette di selezionare tutte le zone e/o i gruppi di zone associate/i ai tasti numerici della consolle (tasti da 1 a 16). Utilizzare i tasti + e - per selezionare una delle seguenti opzioni:
• ATTIVO - Tasto GENERAL CALL abilitato.
• DISAB. - Tasto GENERAL CALL disabilitato.
EMERGENZA Consente di abilitare o disabilitare il tasto ALARM della consolle, che permette di comandare l’evento EMERGENZA (vedi paragrafo EVENTI COMANDABILI DALLE CONSOLLE DIGITALI BM 3616). Utilizzare i tasti + e - per selezionare una delle seguenti opzioni:
• ATTIVO - Tasto ALARM abilitato.
• DISAB. - Tasto ALARM disabilitato.
Se il tasto di allarme viene abilitato, per programmarlo è necessario accedere ad un apposito sottomenu, premendo il tasto
F2 (vedi paragrafo PROGRAMMAZIONE DEI TASTI ALARM).
29
TAS.F1
TAS.F2
TAS.F3
I 3 campi consentono di definire la funzione dei tasti F1, F2, F3 della consolle. Utilizzare i tasti + e - per selezionare in ciascun campo la funzione desiderata, fra quelle indicate di seguito.
• DISAB. - Tasto disabilitato; nessuna funzione associata (selezione predefinita).
• PLAY - Tasto configurato per comandare la riproduzione di un segnale audio memorizzato come file sul disco rigido dell’unità di controllo CP 3100 (vedi paragrafo REGISTRAZIONE / RIPRODUZIONE DI SEGNALI AUDIO).
• RELE’ - Tasto configurato per comandare la commutazione di uno o due relè delle schede INPUT/OUTPUT digitali IO 3250:
uno con contatto normalmente chiuso (N.C.) e/o uno con contatto normalmente aperto (N.A.).
AVVERTENZA
• Le funzioni PLAY e RELE’ sono fra loro esclusive, ossia non è possibile selezionare l’una se è stata selezionata l’altra.
Quando viene abilitato uno dei tasti F1, F2, F3 della consolle, per programmare la relativa funzione PLAY o RELE’ occorre accedere ad un apposito sottomenu, premendo il tasto F3 (vedi paragrafo PROGRAMMAZIONE DEI TASTI F1, F2, F3).
Nella prima schermata vengono visualizzati solo i primi 3 campi (CONS., NOME, PASSWORD) delle prime 3 consolle. Per visualizzare il campo successivo premere il tasto →; per visualizzare il campo precedente premere il tasto ←.
CONS.
1
2
3
NOME (F1=DEF.TAST)
CONSOLLE 1
CONSOLLE 2
CONSOLLE 3
PASSWORD
________
________
________
PRIO
→
→
→
→
1
2
3
PRIORITA’
4
6
2
GEN CALL
DISAB._ _ ▼
DISAB._ _ ▼
DISAB._ _ ▼
EMERGENZA (F2)
DISAB._ _ ▼
DISAB._ _ ▼
DISAB._ _ ▼
→
1
2
3
TAS.F1 (F3)
DISAB._ _ ▼
DISAB._ _ ▼
DISAB._ _ ▼
TAS.F2 (F3)
DISAB._ _ ▼
DISAB._ _ ▼
DISAB._ _ ▼
TAS.F3 (F3)
DISAB._ _ ▼
DISAB._ _ ▼
DISAB._ _ ▼
Per visualizzare le consolle successive o precedenti premere i tasti ↑ / ↓ e/o pag ↑ / pag ↓.
CONS.
1
2
3
NOME (F1=DEF.TAST)
CONSOLLE 1
CONSOLLE 2
CONSOLLE 3
PASSWORD
________
________
________
PRIO
→
→
→
Pag ↓
CONS.
4
5
6
NOME (F1=DEF.TAST)
CONSOLLE 4
CONSOLLE 5
___ _____
PASSWORD
________
________
________
PRIO
→
→
→
PROGRAMMAZIONE DEI TASTI ZONA/GRUPPO
Per visualizzare il sottomenu che permette di programmare i 16 tasti di selezione zona/gruppo di ciascuna consolle è necessario spostare il
punto di selezione su uno qualunque dei campi della consolle da configurare, e premere il tasto F1. Sul display dell’apparecchio appaiono i
campi indicati di seguito.
TASTI Indica il numero del tasto di selezione zona/gruppo da programmare.
ZONE Consente di scegliere la zona audio da associare al tasto di selezione zona/gruppo della consolle. Utilizzare i tasti + e - per selezionare il nome della zona fra quelli precedentemente definiti tramite il menu PROCESSO USCITE AUDIO. Scegliendo l’opzione NO
ZONE (selezione predefinita) non viene selezionata nessuna zona.
AVVERTENZA
• Per evitare errori durante la compilazione dei file di configurazione del sistema, è indispensabile selezionare soltanto una zona
audio nel campo ZONE, oppure un gruppo di zone nel campo GRUPPI, ma non entrambi; quando viene effettuata la selezione
di una zona, nel campo GRUPPI deve essere sempre selezionata l’opzione NO GRUPPI.
GRUPPI Consente di scegliere il gruppo di zone audio da associare al tasto di selezione zona/gruppo della consolle. Utilizzare i tasti + e per selezionare il nome del gruppo di zone fra quelli precedentemente definiti tramite il menu GRUPPI DI ZONE. Scegliendo l’opzione NO GRUPPI (selezione predefinita) non viene selezionato nessun gruppo.
AVVERTENZA
• Per evitare errori durante la compilazione dei file di configurazione del sistema, è indispensabile selezionare soltanto una zona
audio nel campo ZONE, oppure un gruppo di zone nel campo GRUPPI, ma non entrambi; quando viene effettuata la selezione
di un gruppo di zone, nel campo ZONE deve essere sempre selezionata l’opzione NO ZONE.
30
Nella prima schermata vengono visualizzati solo i primi 3 tasti di selezione zona/gruppo. Per visualizzare i tasti di selezione successivi o precedenti premere i tasti ↑ / ↓ e/o pag ↑ / pag ↓.
TASTI
1
2
3
ZONE
ZONA 1 _ _ _ _ _ _ _ _ ▼
ZONA 2 _ _ _ _ _ _ _ _ ▼
ZONA 3 _ _ _ _ _ _ _ _ ▼
GRUPPI
NO GRUPPI _ _ _ _ _ _ _ ▼
NO GRUPPI _ _ _ _ _ _ _ ▼
NO GRUPPI _ _ _ _ _ _ _ ▼
Pag ↓
TASTI
4
5
6
ZONE
ZONA 4 _ _ _ _ _ _ _ _ ▼
NO ZONE _ _ _ _ _ _ _ ▼
NO ZONE _ _ _ _ _ _ _ ▼
GRUPPI
NO GRUPPI _ _ _ _ _ _ _ ▼
GRUPPO 1_ _ _ _ _ _ _ _ ▼
GRUPPO 2_ _ _ _ _ _ _ _ ▼
Pag ↓
TASTI
7
8
9
ZONE
NO ZONE _ _ _ _ _ _ _ ▼
NO ZONE _ _ _ _ _ _ _ ▼
NO ZONE _ _ _ _ _ _ _ ▼
GRUPPI
GRUPPO 3_ _ _ _ _ _ _ _ ▼
NO GRUPPI _ _ _ _ _ _ _ ▼
NO GRUPPI _ _ _ _ _ _ _ ▼
PROGRAMMAZIONE DEI TASTI “ALARM”
AVVERTENZA
• Non è possibile programmare il tasto ALARM di una consolle se nel campo EMERGENZA del menu CONSOLES DIGITALI è selezionata
l’opzione DISAB..
Per visualizzare il sottomenu che permette di programmare il tasto ALARM di ciascuna consolle è necessario spostare il punto di selezione su
uno qualunque dei campi della consolle da configurare, e premere il tasto F2. Sul display dell’apparecchio appaiono i campi indicati di seguito.
SORGENTE
Consente di scegliere la sorgente del segnale di allarme da diffondere (vedi paragrafo EVENTI COMANDABILI DALLE CONSOLLE DIGITALI BM 3616). Utilizzare i tasti + e - per selezionare la sorgente fra:
• MICROFONO - La sorgente del segnale di allarme è il microfono della consolle.
• PLAYBACK - La sorgente del segnale di allarme è un segnale audio memorizzato sul disco rigido dell’unità di controllo (file audio).
AVVERTENZA
• Non è possibile utilizzare come segnale di allarme un messaggio registrato localmente sulla consolle.
MESSAGGIO
PLAY MESS.
Quando viene selezionata una sorgente di allarme PLAYBACK (campo SORGENTE), utilizzare questo campo per scegliere
il nome del file audio da riprodurre. Tramite i tasti + e - selezionare il nome del segnale audio desiderato, fra quelli presenti nella libreria dei segnali audio fornita con il sistema, oppure creati tramite le funzioni RECORD, ASSEMBLY e GENERAZ. TONI (vedi paragrafo UTILIZZO DEL MENU RECORDER).
Quando viene selezionata una sorgente di allarme PLAYBACK (campo SORGENTE), utilizzare questo campo per scegliere
se la riproduzione del segnale di allarme deve avvenire una sola volta o più volte. Utilizzare i tasti + e - per selezionare
una delle modalità indicate di seguito.
• PLAY SING.:
il segnale di allarme viene riprodotto una sola volta, anche se la funzione di allarme non viene disabilitata dopo la prima riproduzione del segnale.
• PLAY CONTINUO: il segnale di allarme viene riprodotto completamente almeno una volta, e continua ad essere riprodotto fino a che la funzione di allarme non viene disattivata.
AVVERTENZE
• Se la funzione di allarme viene disattivata mentre è in corso la riproduzione di un segnale di allarme registrato (playback),
quest’ultimo non viene immediatamente interrotto, ma continua ad essere riprodotto fino alla fine; nel caso del “playback
continuo”, l’interruzione fermerà quindi solo le successive riproduzioni.
DESTINAZIONE Consente di scegliere le zone o i gruppi di zone in cui diffondere il segnale di allarme (annuncio microfonico o segnale audio registrato). Utilizzare i tasti + e - per selezionare una delle opzioni indicate di seguito.
• TUTTE:
il segnale di allarme viene diffuso in tutte le zone audio del sistema.
• GENERAL:
il segnale di allarme viene diffuso in tutte le zone audio (e/o gruppi di zone) associate ai tasti numerici
della consolle (tasti da 1 a 16).
• ZONE/GRUPPI: il segnale di allarme viene diffuso in una specifica zona o gruppo di zone audio del sistema (non entrambi).
ZONE
Quando nel campo DESTINAZIONE viene selezionata l’opzione ZONE/GRUPPI, utilizzare questo campo per scegliere la
specifica zona audio in cui diffondere il segnale di allarme. Utilizzare i tasti + e - per selezionare il nome della zona fra
quelli precedentemente definiti tramite il menu PROCESSO USCITE AUDIO. Scegliendo l’opzione NO ZONE (selezione
predefinita) non viene selezionata nessuna zona.
AVVERTENZA
• Per evitare errori durante la compilazione dei file di configurazione del sistema, è indispensabile selezionare soltanto una
zona audio nel campo ZONE, oppure un gruppo di zone nel campo GRUPPI, ma non entrambi; quando viene effettuata la selezione di una zona, nel campo GRUPPI deve essere sempre selezionata l’opzione NO GRUPPI.
31
GRUPPI
Quando nel campo DESTINAZIONE viene selezionata l’opzione ZONE/GRUPPI, utilizzare questo campo per scegliere lo
specifico gruppo di zone audio in cui diffondere il segnale di allarme. Utilizzare i tasti + e - per selezionare il nome del
gruppo di zone fra quelli precedentemente definiti tramite il menu GRUPPI DI ZONE. Scegliendo l’opzione NO GRUPPI (selezione predefinita) non viene selezionato nessun gruppo.
AVVERTENZA
• Per evitare errori durante la compilazione dei file di configurazione del sistema, è indispensabile selezionare soltanto una
zona audio nel campo ZONE, oppure un gruppo di zone nel campo GRUPPI, ma non entrambi; quando viene effettuata la selezione di un gruppo di zone, nel campo ZONE deve essere sempre selezionata l’opzione NO ZONE.
RELE’ N.A.
RELE’ N.C.
Consente di scegliere un relè delle schede INPUT/OUTPUT digitali IO 3250 con contatto normalmente aperto (N.A.), da
commutare in chiusura con l’attivazione della funzione di allarme. Il relé ricommuta nella posizione normale, definita tramite il menu CONFIGURAZIONE RELE’, non appena la funzione di allarme viene disattivata. Utilizzare i tasti + e - per selezionare il nome del relé desiderato fra quelli definiti tramite il menu CONFIGURAZIONE RELE’ (campo NOME); scegliendo l’opzione NO RELE’ non viene selezionato nessun relé.
Consente di scegliere un relè delle schede INPUT/OUTPUT digitali IO 3250 con contatto normalmente chiuso (N.C.), da
commutare in apertura con l’attivazione della funzione di allarme. Il relé ricommuta nella posizione normale, definita tramite
il menu CONFIGURAZIONE RELE’, non appena la funzione di allarme viene disattivata. Utilizzare i tasti + e - per selezionare il nome del relé desiderato fra quelli definiti tramite il menu CONFIGURAZIONE RELE’ (campo NOME); scegliendo
l’opzione NO RELE’ non viene selezionato nessun relé.
Nella prima schermata vengono visualizzati solo i primi 3 campi del sottomenu. Per visualizzare i campi successivi o precedenti premere i tasti ↑ / ↓ e/o pag ↑ / pag ↓.
DEFINIZ.TASTO EMERGENZA
SORGENTE
MESSAGGIO
PLAY MESS.
PLAYBACK_ _ _ _ _ _ _ ▼
MSG 1_ _ _ _ _ _ _ _ _ _ ▼
PLAY CONTINUO _ _ _ ▼
Pag ↓
PLAY CONTINUO _ _ _ ▼
TUTTE_ _ _ _ _ _ _ ▼
NO ZONE _ _ _ _ _ _ _ _ ▼
NO GRUPPI _ _ _ _ _ _ _ ▼
PLAY MESS.
DESTINAZIONE
ZONE
GRUPPI
Pag ↓
ZONE
GRUPPI
RELE’ N.A.
RELE’ N.C.
NO ZONE_ _ _ _ _ _ _ _ ▼
NO GRUPPI_ _ _ _ _ _ _ ▼
NO RELE’ _ _ _ _ _ _ _ ▼
NO RELE’ _ _ _ _ _ _ _ ▼
Per uscire dal sottomenu premere il tasto ESC e procedere come indicato nel paragrafo USCITA DA UN MENU.
PROGRAMMAZIONE DEI TASTI F1, F2, F3
AVVERTENZA
• Non è possibile programmare i tasti F1, F2, F3 di una consolle se nei campi TAS.F1, TAS.F2, TAS.F3 del menu CONSOLES DIGITALI è selezionata l’opzione DISAB..
Per visualizzare il sottomenu che permette di programmare i tasti F1, F2, F3 di ciascuna consolle è necessario spostare il punto di selezione
nel campo del tasto da configurare (es. TAS.F1), e premere il tasto F3. Sul display dell’apparecchio appaiono i campi indicati di seguito.
DEFINIZ.TASTI SPECIALI
MESSAG.
RELE’ N.A.
RELE’ N.C.
NO MESS. _ _ ▼
NO RELE’_ _ _ _ _ _ _ ▼
NO RELE’_ _ _ _ _ _ _ ▼
MESSAG.
Il campo è accessibile solo se se nel campo TAS.F1 o TAS.F2 o TAS.F3 del menu CONSOLES DIGITALI è stata selezionata l’opzione PLAY, e consente di scegliere il nome del file audio da riprodurre. Tramite i tasti + e - selezionare il nome
del segnale audio desiderato, fra quelli presenti nella libreria dei segnali audio fornita con il sistema, oppure creati tramite
le funzioni RECORD, ASSEMBLY e GENERAZ. TONI (vedi paragrafo UTILIZZO DEL MENU RECORDER). Selezionando
l’opzione NO MESS. non viene impostato nessun segnale audio.
RELE’ N.A.
Il campo è accessibile solo se se nel campo TAS.F1 o TAS.F2 o TAS.F3 del menu CONSOLES DIGITALI è stata selezionata l’opzione RELE’, e consente di scegliere un relè con contatto normalmente aperto (N.A.) da commutare. Utilizzare i
tasti + e - per selezionare il nome del relé desiderato fra quelli definiti tramite il menu CONFIGURAZIONE RELE’ (campo NOME); scegliendo l’opzione NO RELE’ non viene selezionato nessun relé.
RELE’ N.C.
Il campo è accessibile solo se se nel campo TAS.F1 o TAS.F2 o TAS.F3 del menu CONSOLES DIGITALI è stata selezionata l’opzione RELE’, e consente di scegliere un relè con contatto normalmente chiuso (N.C.) da commutare. Utilizzare i
tasti + e - per selezionare il nome del relé desiderato fra quelli definiti tramite il menu CONFIGURAZIONE RELE’ (campo NOME); scegliendo l’opzione NO RELE’ non viene selezionato nessun relé.
Per uscire dal sottomenu premere il tasto ESC e procedere come indicato nel paragrafo USCITA DA UN MENU.
32
UTILIZZO DEL MENU “ACU”
- - - = = = MAIN MENU = = = - - ->CONFIGURAZIONE RELE’
->CONSOLES DIGITALI
->ACU (AMPLIFICATORI)
Il menu consente la programmazione delle unità A.C.U., ossia delle schede retroamplificatore RB 3300 che controllano gli amplificatori del sistema (vedi paragrafo UNITA’ A.C.U.). Dal menu principale di configurazione dell’apparecchio, tramite i tasti ↑ / ↓ e/o pag ↑ / pag ↓ spostare il punto di selezione sul sottomenu ACU e premere il tasto ENTER; sul display dell’apparecchio vengono visualizzati i campi indicati di seguito.
DEV
Indica il numero di identificazione dell’unità A.C.U. da programmare. L’indicazione, di tipo sequenziale, è legata all’indirizzo assegnato all’unità A.C.U. in fase di installazione: al numero 1 corrisponde l’unità A.C.U. con indirizzo 0, al numero 120 corrisponde
l’unità A.C.U. con indirizzo 119.
TIPO
Consente di definire il tipo di unità A.C.U. Utilizzare i tasti + e - per selezionare il tipo desiderato fra quelli indicati di seguito.
• NO:
Selezionare questa opzione quando è necessario rimuovere un’unità A.C.U. guasta, di tipo NORMAL o RISERVA,
per poterla riparare; in caso contrario l’unità A.C.U. guasta darebbe continuamente origine ad un allarme. Selezionando l’opzione NO l’unità A.C.U. non viene più controllata dall’unità CP 3100.
• NORMAL: E’ un’unità A.C.U. che ha la funzione di controllare un amplificatore primario, normalmente dedicato alla sonorizzazione di una determinata zona audio (selezione predefinita).
• RISER.: E’ un’unità A.C.U. che ha la funzione di controllare un amplificatore di riserva, che viene normalmente utilizzato per
sostituire un amplificatore primario, ad esempio in caso di guasto di quest’ultimo.
Maggiori informazioni riguardo la funzione dei tipi di A.C.U. sono contenute nel paragrafo UNITA’ A.C.U.
GRUP
Consente di definire il gruppo di appartenenza dell’unità A.C.U. Il sistema è in grado di gestire fino a 64 gruppi di A.C.U. L’assegnazione deve essere effettuata tenendo in considerazione le seguenti indicazioni:
a. Di un gruppo può far parte un qualsiasi numero di unità A.C.U. NORMAL o RISERVA, ma il numero totale di unità presenti nel
sistema non deve comunque essere superiore a 120.
b. La sostituzione di un’unità NORMAL con un’unità RISERVA può avvenire solo se queste appartengono allo stesso gruppo.
Maggiori informazioni riguardo la funzione dei gruppi di A.C.U. sono contenute nel paragrafo UNITA’ A.C.U. Utilizzare i tasti + e
- od il tastierino numerico per impostare il numero del gruppo entro i valori da 0 (selezione predefinita) a 64.
MODO
Consente di scegliere il metodo di inserzione/disinserzione dell’unità A.C.U. (NORMAL o RISERVA), in caso di allarme provocato da un guasto o un malfunzionamento di un amplificatore. Utilizzare i tasti + e - per selezionare la modalità desiderata
fra quelle indicate di seguito.
• MANUAL – L’inserzione/disinserzione dell’unità A.C.U. in caso di allarme deve essere comandata manualmente, tramite il sottomenu INSER. RISERVA ACU del menu principale PROCESSO AUDIO.
• AUTOM. - L’inserzione/disinserzione dell’unità A.C.U. in caso di allarme viene comandata automaticamente dal sistema.
Maggiori informazioni riguardo il funzionamento delle unità NORMAL e RISERVA in queste due modalità sono contenute nel paragrafo UNITA’ A.C.U.
NOTA
• Quando un’unità A.C.U. controlla l’ultimo amplificatore di riserva di un gruppo, si consiglia di impostare su questa unità la modalità MANUAL, per evitare che in caso di allarme PA FAULT o OVL causato dal relativo amplificatore, quest’ultimo venga escluso e la diffusione venga interrotta, in quanto ma non vi è nessun ulteriore amplificatore di riserva che lo possa sostituire.
PGM
Consente di attivare o disattivare la funzione DAY/NIGHT sulle unità A.C.U. provviste della scheda opzionale DIGITAL ALC LB
3340 (vedi paragrafo FUNZIONE DAY/NIGHT). Tramite i tasti + e - selezionare una delle seguenti opzioni:
• ON – Funzione DAY/NIGHT attivata (selezione predefinita).
• OFF – Funzione DAY/NIGHT disattivata.
Nella prima schermata vengono visualizzate solo le prime 3 unità A.C.U. Per visualizzare le unità successive o precedenti premere i tasti ↑ /
↓ e/o pag ↑ / pag ↓.
DEV
1
2
3
TIPO
NORMAL ▼
NORMAL ▼
NORMAL ▼
GRUP
01
01
01
MODO
MANUAL ▼
MANUAL ▼
MANUAL ▼
PGM
OFF ▼
OFF ▼
OFF ▼
MODO
MANUAL ▼
MANUAL ▼
MANUAL ▼
PGM
OFF▼
OFF▼
OFF▼
Pag ↓
DEV
4
5
6
TIPO
NORMAL ▼
NORMAL ▼
NORMAL ▼
GRUP
02
02
02
Per uscire dal sottomenu premere il tasto ESC e procedere come indicato nel paragrafo USCITA DA UN MENU.
33
UTILIZZO DEL MENU “EVENTI INGRESSI GPI”
- - - = = = MAIN MENU = = = - - ->CONSOLES DIGITALI
->ACU (AMPLIFICATORI)
->EVENTI INGRESSI GPI
Il menu consente la programmazione degli eventi comandabili tramite gli ingressi GPI delle schede INPUT/OUTPUT digitali IO 3250 (vedi paragrafo EVENTI COMANDABILI DAGLI INGRESSI GPI). Dal menu principale di configurazione dell’apparecchio, tramite i tasti ↑ / ↓ e/o pag ↑
/ pag ↓ spostare il punto di selezione sul sottomenu EVENTI INGRESSI GPI e premere il tasto ENTER; sul display dell’apparecchio vengono visualizzati i campi indicati di seguito.
GPI
Indica il numero di identificazione dell’ingresso GPI che comanda l’evento da programmare. L’indicazione è di tipo sequenziale: al
numero 1 corrisponde l’ingresso numero 1 della scheda I/O digitale numero 1, al numero 33 corrisponde l’ingresso numero 1 della scheda I/O digitale numero 3, al numero 128 corrisponde l’ingresso numero 16 della scheda I/O digitale numero 8, ecc.
NOME
Consente di definire il nome dell’evento comandabile tramite l’ingresso GPI; il nome può essere composto da un massimo di
16 caratteri alfanumerici. Utilizzare i tasti + e - per selezionare a rotazione i caratteri alfanumerici; confermare ciascun carattere tramite il tasto ENTER. I caratteri numerici possono essere selezionati direttamente tramite il tastierino numerico.
AZIONE
Consente di definire il tipo di azione (evento) comandabile pilotando l’ingresso GPI. Utilizzare i tasti + e - per selezionare il tipo desiderato fra quelli indicati di seguito.
• GENERICO: indica un’azione di tipo generico. Con un’assegnazione di questo tipo, quando l’ingresso GPI viene pilotato è
possibile comandare la commutazione di uno o più relé delle schede INPUT/OUTPUT digitali IO 3250 (programmazione del
campo RLY) e generare eventualmente un avviso (programmazione del campo ALL.).
• PLAYBACK: con un’assegnazione di questo tipo è possibile comandare la riproduzione, in determinate zone audio, di un segnale audio memorizzato sul disco rigido dell’unità di controllo CP 3100 (vedi paragrafo RIPRODUZIONE DI FILE AUDIO); in
particolare, quando l’ingresso GPI viene pilotato, l’ingresso audio definito PLAYBACK (campo TIPO del menu PROCESSO
INGRESSI AUDIO) viene connesso con le zone o i gruppi di zone audio definiti tramite il campo ZONE o GRUPPI del presente menu. L’assegnazione PLAYBACK consente inoltre di comandare la commutazione di uno o più relé delle schede INPUT/OUTPUT digitali IO 3250 (programmazione del campo RLY).
• FIREMAN 1: indica l’evento FIREMAN 1. Con un’assegnazione di questo tipo è possibile comandare la diffusione con priorità assoluta, in determinate zone o gruppi di zone audio, di un segnale audio “fireman”; in particolare, quando l’ingresso GPI
viene pilotato, l’ingresso audio definito FIREMAN 1 (campo TIPO del menu PROCESSO INGRESSI AUDIO) viene connesso
con le zone o i gruppi di zone audio definiti tramite il campo ZONE o GRUPPI del presente menu. Un evento FIREMAN 1 termina quando l’ingresso GPI che l’ha attivato cessa di essere pilotato. L’assegnazione FIREMAN 1 consente inoltre di comandare la commutazione di uno o più relé delle schede INPUT/OUTPUT digitali IO 3250 (programmazione del campo RLY).
• FIREMAN 2: indica l’evento FIREMAN 2. Con un’assegnazione di questo tipo è possibile comandare la diffusione con priorità assoluta, in determinate zone o gruppi di zone audio, di un segnale audio “fireman”; in particolare, quando l’ingresso GPI
viene pilotato, l’ingresso audio definito FIREMAN 2 (campo TIPO del menu PROCESSO INGRESSI AUDIO) viene connesso
con le zone o i gruppi di zone audio definiti tramite il campo ZONE o GRUPPI del presente menu. Un evento FIREMAN 2 termina quando l’ingresso GPI che l’ha attivato cessa di essere pilotato. L’assegnazione FIREMAN 2 consente inoltre di comandare la commutazione di uno o più relé delle schede INPUT/OUTPUT digitali IO 3250 (programmazione del campo RLY).
• CONSGPI n.: Con un’assegnazione di questo tipo è possibile diffondere, in determinate zone audio, un annuncio tramite il
microfono di una consolle BM 3604 (consolle GPI); in particolare, quando l’ingresso GPI viene pilotato tramite uno dei 4 tasti di selezione zone/gruppi della consolle, il corrispondente ingresso audio definito CONSGPI n. (campo TIPO del menu
PROCESSO INGRESSI AUDIO) viene connesso con le zone o i gruppi di zone audio definiti tramite il campo ZONE o GRUPPI del presente menu; la dicitura “n” rappresenta il numero di identificazione della consolle GPI (numero compreso fra 1 e 24).
L’assegnazione CONSGPI n. consente inoltre di comandare la commutazione di uno o più relé delle schede INPUT/OUTPUT
digitali IO 3250 (programmazione del campo RLY). Assegnando un evento CONSGPI sono da tenere presenti le seguenti indicazioni:
a. per ciascuna consolle BM 3604 può essere utilizzato un numero di ingressi GPI variabile da 1 a 4.
b. tutti gli ingressi GPI dedicati alla connessione di una determinata consolle BM 3604 devono obbligatoriamente essere
consecutivi (es. GPI1, GPI2, GPI3, GPI4), e devono appartenere alla stessa scheda INPUT/OUTPUT digitale IO 3250.
c. tutti gli ingressi GPI dedicati alla connessione di una determinata consolle BM 3604 (max 4) devono essere programmati
con lo stesso relé di “feedback” (vedi campo FEED RELE’).
Nella tabella seguente in base al tipo di azione selezionata sono indicati i campi programmabili
TIPO DI AZIONE
GENERICO
PLAYBACK
CONSGPI n
FIREMAN 1
FIREMAN 2
RLY
SI
SI
SI
SI
SI
PROGRAMMABILITA’ CAMPI
FEED RELE’
MESSAG.
No
No
No
SI
SI
No
No
No
No
No
ALL.
SI
SI
SI
SI
SI
ZONE/GRUPPI
No
SI
SI
SI
SI
AVVERTENZA
• Una programmazione errata dei campi indicati in tabella può originare malfunzionamenti, o errori durante la compilazione dei file di configurazione del sistema!
RLY (F1)
Nel campo vengono indicati due valori: il primo valore indica il numero di relè con contatto normalmente aperto che vengono
commutati quando l’ingresso GPI viene pilotato; il secondo valore indica il numero di relè con contatto normalmente chiuso
che vengono commutati quando l’ingresso GPI viene pilotato (es. 2/1 = 2 relé con contatto normalmente aperto e 1 relé con
contatto normalmente chiuso). La ricommutazione dei relè nella posizione normale avviene con le seguenti modalità:
34
a. se l’evento programmato è di tipo GENERICO (campo AZIONE, i relè ricommutano nella posizione normale, definita tramite
il menu CONFIGURAZIONE RELE’, non appena l’ingresso GPI cessa di essere pilotato.
b. se l’evento programmato è di tipo PLAYBACK (campo AZIONE), i relè ricommutano nella posizione normale, definita tramite il menu CONFIGURAZIONE RELE’, al termine della riproduzione.
c. se l’evento programmato è di tipo FIREMAN 1 o FIREMAN 2 (campo AZIONE), i relè ricommutano nella posizione normale,
definita tramite il menu CONFIGURAZIONE RELE’, quando l’ingresso GPI cessa di essere pilotato e l’evento “fireman” viene disattivato.
d. se l’evento programmato è di tipo CONSGPI (campo AZIONE), i relè ricommutano nella posizione normale, definita tramite il
menu CONFIGURAZIONE RELE’, al termine dell’annuncio (disattivazione microfono).
Per definire gli specifici relé da commutare occorre accedere ad un apposito sottomenu, premendo il tasto F1 (vedi paragrafo
DEFINIZIONE DEI RELE’ ASSOCIATI ALL’EVENTO).
FEED RELE’ Il campo è da utilizzare se nel campo TIPO del presente menu di configurazione è stata selezionata un’azione di tipo CONSGPI, e consente di definire il relé di “feedback” che, con la sua commutazione, abilita alla diffusione di un annuncio la consolle
BM 3604 indicata nel campo AZIONE. La commutazione del relé di “feedback” avviene quando tutte le zone (o i gruppi di zone) selezionate tramite la consolle sono disponibili. Utilizzare i tasti + e - per selezionare il nome del relè fra quelli precedentemente definiti tramite il menu CONFIGURAZIONE RELE’. Scegliendo l’opzione NO RELE’ (selezione predefinita) non viene
selezionato nessun relè.
AVVERTENZE
• Per evitare malfunzionamenti, o possibili errori di compilazione dei file di configurazione del sistema, tenere presenti le seguenti
indicazioni:
a. i relé delle schede INPUT/OUTPUT digitali IO 3250 utilizzati come relé di “feedback” non devono essere utilizzati per altre funzioni.
b. ogni relé di “feedback” deve essere configurato con contatto normalmente aperto (campo STATUS = N.A.).
c. tutti gli ingressi GPI dedicati alla connessione di una determinata consolle BM 3604 (max 4) devono essere programmati con
lo stesso relé di “feedback”.
d. non è possibile impostare un relé di “feedback” se l’ingresso GPI non è assegnato ad una consolle BM 3604.
MESSAG.
ALL.
Il campo è da utilizzare se nel campo TIPO del presente menu di configurazione è stata selezionata un’azione di tipo PLAYBACK, e consente di scegliere il nome del file audio da riprodurre. Tramite i tasti + e - selezionare il nome del segnale audio
desiderato, fra quelli presenti nella libreria dei segnali audio fornita con il sistema, oppure creati tramite le funzioni RECORD,
ASSEMBLY e GENERAZ. TONI (vedi paragrafo UTILIZZO DEL MENU RECORDER). Scegliendo l’opzione NO MESS. (selezione predefinita) non viene impostato nessun segnale audio.
Consente di attivare o disattivare la generazione di una segnalazione acustica di avviso (buzzer) quando l’ingresso GPI viene pilotato. Per visualizzare l’avviso è necessario accedere al menu allarmi dell’unità di controllo (vedi paragrafo VISUALIZZAZIONE
DELLO STATO ALLARMI). Utilizzare i tasti + e - per selezionare una delle seguenti opzioni.
• SI: pilotando l’ingresso GPI viene generato un avviso.
• NO: pilotando l’ingresso GPI non viene generato un avviso (selezione predefinita).
AVVERTENZE
• Per spegnere il segnalatore acustico una volta attivato l’avviso occorre accedere al menu per la visualizzazione dello stato degli allarmi (vedi paragrafo VISUALIZZAZIONE DELLO STATO ALLARMI).
ZONE
Consente di scegliere la zona in cui diffondere il segnale audio relativo all’evento selezionato tramite il campo AZIONE. Utilizzare i tasti + e - per selezionare il nome della zona fra quelli precedentemente definiti tramite il menu PROCESSO USCITE
AUDIO. Scegliendo l’opzione NO ZONE (selezione predefinita) non viene selezionata nessuna zona; scegliendo l’opzione TUTTE vengono selezionate tutte le zone.
AVVERTENZA
• Per evitare errori durante la compilazione dei file di configurazione del sistema, è indispensabile selezionare soltanto una
zona audio nel campo ZONE, oppure un gruppo di zone nel campo GRUPPI, ma non entrambi; quando viene effettuata la
selezione di una zona, nel campo GRUPPI deve essere sempre selezionata l’opzione NO GRUPPI.
GRUPPI
Consente di scegliere il gruppo di zone in cui diffondere il segnale audio relativo all’evento selezionato tramite il campo AZIONE. Utilizzare i tasti + e - per selezionare il nome del gruppo di zone fra quelli precedentemente definiti tramite il menu GRUPPI DI ZONE. Scegliendo l’opzione NO GRUPPI (selezione predefinita) non viene selezionato nessun gruppo.
AVVERTENZA
• Per evitare errori durante la compilazione dei file di configurazione del sistema, è indispensabile selezionare soltanto una
zona audio nel campo ZONE, oppure un gruppo di zone nel campo GRUPPI, ma non entrambi; quando viene effettuata la
selezione di un gruppo di zone, nel campo ZONE deve essere sempre selezionata l’opzione NO ZONE.
Nella prima schermata vengono visualizzati solo i primi 4 campi (GPI, NOME, AZIONE, RLY) dei primi 3 ingressi GPI. Per visualizzare il campo successivo premere il tasto →; per visualizzare il campo precedente premere il tasto ←.
GPI
1
2
3
NOME
TASTO 1 CONSOLLE 1 _
TASTO 2 CONSOLLE 1 _
TASTO 3 CONSOLLE 1 _
AZIONE
CONSGPI1 _ _▼
CONSGPI1 _ _▼
CONSGPI1 _ _▼
RLY(F1)
1/1
0/0
0/0
→
35
1
2
3
FEED RELE’
RELE’ 1_ _ _ _ _ _ _ _ _ ▼
RELE’ 1_ _ _ _ _ _ _ _ _ ▼
RELE’ 1_ _ _ _ _ _ _ _ _ ▼
MESSAG.
NO MESS. ▼
NO MESS. ▼
NO MESS. ▼
ALL.
NO_▼
NO_▼
NO_▼
→
1
2
3
ZONE
ZONA 1 _ _ _ _ _ _ _ _ ▼
ZONA 2 _ _ _ _ _ _ _ _ ▼
TUTTE _ _ __ _ _ _ _ _ ▼
GRUPPI
NO GRUPPI _ _ _ _ _ _ _
NO GRUPPI _ _ _ _ _ _ _
NO GRUPPI _ _ _ _ _ _ _
→
1
2
3
GRUPPI
NO GRUPPI_ _ _ _ _ _ _ _ ▼
NO GRUPPI_ _ _ _ _ _ _ _ ▼
NO GRUPPI_ _ _ _ _ _ _ _ ▼
Per visualizzare gli ingressi successivi o precedenti premere i tasti ↑ / ↓ e/o pag ↑ / pag ↓.
GPI
1
2
3
NOME
TASTO 1 CONSOLLE 1 _
TASTO 2 CONSOLLE 1 _
TASTO 3 CONSOLLE 1 _
AZIONE
CONSGPI1 _ _▼
CONSGPI1 _ _▼
CONSGPI1 _ _▼
RLY(F1)
1/1
0/0
0/0
Pag ↓
GPI
4
5
6
NOME
TASTO 4 CONSOLLE 1 _
MESSAGGIO 1_ _ _ _ _ _
MESSAGGIO 2_ _ _ _ _ _
AZIONE
CONSGPI1▼
PLAYBACK▼
PLAYBACK▼
RLY(F1)
0/0
0/0
0/0
Per uscire dal sottomenu premere il tasto ESC e procedere come indicato nel paragrafo USCITA DA UN MENU.
DEFINIZIONE DEI RELE’ ASSOCIATI ALL’EVENTO
Il sottomenu permette di definire i relé da commutare quando l’ingresso GPI viene pilotato, indicati nel campo RLY; possono essere commutati un massimo di 4 relè con contatto normalmente aperto ed un massimo di 4 relè con contatto normalmente chiuso. Per accedere al
sottomenu spostare il punto di selezione su uno qualunque dei campi dell’ingresso GPI da configurare, e premere il tasto F1; sul display dell’apparecchio appaiono i campi indicati di seguito.
N.
Indica il numero progressivo del relé con contatto normalmente aperto o con contatto normalmente chiuso associato all’evento (max 4 per tipo).
RELE’ N.A. Consente di scegliere un relè con contatto normalmente aperto (N.A.) da commutare in chiusura. Utilizzare i tasti + e - per
selezionare il nome del relè fra quelli precedentemente definiti tramite il menu CONFIGURAZIONE RELE’. Scegliendo l’opzione NO RELE’ (selezione predefinita) non viene selezionato nessun relè.
RELE’ N.C. Consente di scegliere un relè con contatto normalmente chiuso (N.C.) da commutare in apertura. Utilizzare i tasti + e - per
selezionare il nome del relè fra quelli precedentemente definiti tramite il menu CONFIGURAZIONE RELE’ . Scegliendo l’opzione NO RELE’ (selezione predefinita) non viene selezionato nessun relè.
Nella prima schermata vengono visualizzati solo i primi 6 relè: 3 con contatto normalmente aperto e 3 con contatto normalmente chiuso. Per
visualizzare i relè successivi o precedenti premere i tasti ↑ / ↓ e/o pag ↑ / pag ↓.
N.
1
2
3
RELE’ N.A.
RELE’ 1 _ _ _ _ _ _ _ ▼
RELE’ 3 _ _ _ _ _ _ _ ▼
NO RELE’ _ _ _ _ _ _ ▼
RELE’ N.C.
RELE’ 2 _ _ _ _ _ _ _ ▼
NO RELE’_ _ _ _ _ _ ▼
NO RELE’_ _ _ _ _ _ ▼
Pag ↓
N.
2
3
4
RELE’ N.A.
RELE’ 3 _ _ _ _ _ _ _ ▼
NO RELE’ _ _ _ _ _ _ ▼
NO RELE’ _ _ _ _ _ _ ▼
RELE’ N.C.
NO RELE’_ _ _ _ _ _ ▼
NO RELE’ _ _ _ _ _ _ ▼
NO RELE’ _ _ _ _ _ _ ▼
Per uscire dal sottomenu premere il tasto ESC e procedere come indicato nel paragrafo USCITA DA UN MENU.
36
UTILIZZO DEL MENU “EVENTI TEMPORIZZATI”
- - - = = = MAIN MENU = = = - - ->EVENTI INGRESSI GPI
->EVENTI TEMPORIZZATI
->VOX
Il menu consente la programmazione degli eventi temporizzati (vedi paragrafo EVENTI DEL SISTEMA). Dal menu principale di configurazione
dell’apparecchio, tramite i tasti ↑ / ↓ e/o pag ↑ / pag ↓ spostare il punto di selezione sul sottomenu EVENTI TEMPORIZZATI e premere il tasto ENTER; sul display dell’apparecchio vengono visualizzati i campi indicati di seguito.
N.
Indica il numero progressivo dell’evento temporizzato da programmare. Sono programmabili fino a 64 eventi.
NOME
Consente di definire il nome di identificazione dell’evento temporizzato, che può essere composto da un massimo di 16 caratteri alfanumerici. Utilizzare i tasti + e - per selezionare a rotazione i caratteri alfanumerici; confermare ciascun carattere tramite il tasto ENTER. I caratteri numerici possono essere selezionati direttamente tramite il tastierino numerico.
RELE’ N.A.
Consente di scegliere un relè con contatto normalmente aperto (N.A.) da commutare in chiusura quando viene attivato l’evento temporizzato. Il relé ricommuta nella posizione normale al termine del periodo definito tramite il campo DUR., o al termine della riproduzione del segnale audio, nel caso nel caso l’evento temporizzato preveda sia la riproduzione di un segnale
audio, sia la commutazione di relé. Utilizzare i tasti + e - per selezionare il nome del relè fra quelli precedentemente definiti tramite il menu CONFIGURAZIONE RELE’. Scegliendo l’opzione NO RELE’ (selezione predefinita) non viene selezionato nessun relè.
RELE’ N.C.
Consente di scegliere un relè con contatto normalmente chiuso (N.C.) da commutare in apertura quando viene attivato l’evento temporizzato. Il relé ricommuta nella posizione normale, al termine del periodo definito tramite il campo DUR., o al
termine della riproduzione del segnale audio, nel caso nel caso l’evento temporizzato preveda sia la riproduzione di un segnale audio, sia la commutazione di relé. Utilizzare i tasti + e - per selezionare il nome del relè fra quelli precedentemente definiti tramite il menu CONFIGURAZIONE RELE’. Scegliendo l’opzione NO RELE’ (selezione predefinita) non viene selezionato nessun relè.
MESSAG.
Consente di scegliere il file audio da riprodurre quando viene attivato l’evento temporizzato. Il segnale audio verrà diffuso
nelle zone o nei gruppi di zone audio definiti tramite il campo ZONE o GRUPPI del presente menu. Tramite i tasti + e selezionare il nome del segnale audio desiderato, fra quelli presenti nella libreria dei segnali audio fornita con il sistema, oppure creati tramite le funzioni RECORD, ASSEMBLY e GENERAZ. TONI (vedi paragrafo UTILIZZO DEL MENU RECORDER). Selezionando l’opzione NO MESS. (selezione predefinita) non viene impostato nessun segnale audio.
DUR.
Campo da utilizzare quando l’evento temporizzato prevede unicamente la commutazione di un relé con contatto normalmente aperto e/o con contatto normalmente chiuso. Consente di definire per quanto tempo i relé devono rimanere commutati. Utilizzare i tasti + e - od il tastierino numerico per impostare la durata entro i valori 0 secondi e 999 secondi.
AVVERTENZA
• L’impostazione del campo DUR. non ha effetto nel caso l’evento temporizzato preveda sia la riproduzione di un segnale
audio (assegnazione campo MESSAG.), sia la commutazione di relé (assegnazione campi RELE’ N.A. e/o RELE’ N.C.).
ORARIO ESEC. Consente di scegliere i due orari seguenti:
• orario di inizio evento, ossia l’orario in cui inizia ad essere eseguito l’evento temporizzato (riproduzione del segnale audio e/o commutazione del relé aperto e/o chiuso).
• orario di fine evento, ossia l’ultimo orario entro il quale l’evento temporizzato può essere eseguito.
Utilizzare il tastierino numerico per impostare i due orari espressi in ore e minuti.
RIP.
Consente di definire la ciclicità dell’evento temporizzato nell’intervallo di tempo definito tramite il campo ORARIO ESEC.,
ossia ogni quanto tempo il segnale audio deve essere riprodotto e/o il relé con contatto normalmente aperto e/o con contatto normalmente chiuso devono commutare. Utilizzare il tastierino numerico per impostare il tempo espresso in ore e minuti (es. 1:30 per impostare una ciclicità di 1 ora e 30 minuti).
ZONE
Consente di scegliere la zona audio in cui diffondere il segnale selezionato tramite il campo MESSAG.. Utilizzare i tasti +
e - per selezionare il nome della zona fra quelli precedentemente definiti tramite il menu PROCESSO USCITE AUDIO. Scegliendo l’opzione NO ZONE (selezione predefinita) non viene selezionata nessuna zona; scegliendo l’opzione TUTTE vengono selezionate tutte le zone.
AVVERTENZA
• Per evitare errori durante la compilazione dei file di configurazione del sistema, è indispensabile selezionare soltanto una
zona audio nel campo ZONE, oppure un gruppo di zone nel campo GRUPPI, ma non entrambi; quando viene effettuata la selezione di una zona, nel campo GRUPPI deve essere sempre selezionata l’opzione NO GRUPPI.
GRUPPI
Consente di scegliere il gruppo di zone audio in cui diffondere il segnale selezionato tramite il campo MESSAG.. Utilizzare
i tasti + e - per selezionare il nome del gruppo di zone fra quelli precedentemente definiti tramite il menu GRUPPI DI ZONE. Scegliendo l’opzione NO GRUPPI (selezione predefinita) non viene selezionato nessun gruppo.
AVVERTENZA
• Per evitare errori durante la compilazione dei file di configurazione del sistema, è indispensabile selezionare soltanto
una zona audio nel campo ZONE, oppure un gruppo di zone nel campo GRUPPI, ma non entrambi; quando viene effettuata la selezione di un gruppo di zone, nel campo ZONE deve essere sempre selezionata l’opzione NO ZONE.
37
Nella tabella seguente sono indicati alcuni esempi che possono meglio chiarire la funzionalità di un evento temporizzato.
RELE’
N.A.
NO RELE’
CAMPI DEL MENU “EVENTI TEMPORIZZATI”
RELE’
MESSAG.
DUR.
ORARIO
N.C.
ESEC.
NO RELE’
MSG 1
000
16:00 18:00
01:00
Il segnale audio MSG 1 viene
diffuso alle ore 16:00, 17:00,
18:00 (3 volte).
NO RELE’
NO RELE’
MSG 2
000
14:00 16:00
00:45
Il segnale audio MSG 2 viene
diffuso alle ore 14:00, 14:45,
15:30 (3 volte).
ESEMPIO 3:
commutazione
di relé
RLY 1
RLY 6
NO MESS.
060
16:00 16:30
00:10
Il relé con contatto normalmente
aperto RLY 1 ed il relé con contatto normalmente chiuso RLY 6
commutano alle ore 16:00,
16:10, 16:20, 16:30 (4 volte), rimanendo commutati per 60 secondi ogni volta.
ESEMPIO 4:
riproduzione di
un segnale audio
e commutazione
di relé
RLY 1
NO RELE’
MSG 1
060
16:00 18:00
01:00
Il segnale audio MSG 1 viene
diffuso alle ore 16:00, 17:00,
18:00 (3 volte); il relé con contatto normalmente aperto RLY 1
commuta nei medesimi orari in
cui avviene la riproduzione del
segnale audio MSG 1, rimanendo commutato per tutta la durata della riproduzione.
ESEMPI
ESEMPIO 1:
riproduzione di
un segnale audio
ESEMPIO 2:
riproduzione di
un segnale audio
RIP
DESCRIZIONE EVENTO
AVVERTENZA
• Per evitare malfunzionamenti, o possibili errori durante la compilazione dei file di configurazione del sistema, i relé utilizzati dall’evento temporizzato non devono essere assegnati ad altre funzioni.
Nella prima schermata vengono visualizzati solo i primi 3 campi (N., NOME, RELE’ N.A.) dei primi 3 eventi temporizzati. Per visualizzare il campo successivo premere il tasto →; per visualizzare il campo precedente premere il tasto ←.
N.
1
2
3
NOME
TIMER 1 _ _ _ _ _ _ _
TIMER 2 _ _ _ _ _ _ _
TIMER 3 _ _ _ _ _ _ _
RELE’ N.A.
RELE’ 1 _ _ _ _ _ _ _ ▼
RELE’ 2 _ _ _ _ _ _ _ ▼
NO RELE’ _ _ _ _ _ _ ▼
→
1
2
3
RELE’ N.C.
NO RELE’ _ _ _ _ _ _ ▼
NO RELE’ _ _ _ _ _ _ ▼
RELE’ 3 _ _ _ _ _ _ _ ▼
MESSAG.
NO MESS. ▼
NO MESS. ▼
NO MESS. ▼
DUR.
010
020
030
→
1
2
3
ORARIO ESEC.
08:00
20:00
04:00
05:00
14:00
15:00
RIP.
00:01
00:14
00:30
ZONE
NO ZONE _ _ _ _ _
NO ZONE _ _ _ _ _
NO ZONE _ _ _ _ _
→
1
2
3
ZONE
NO ZONE _ _ _ _ _ _ _ ▼
NO ZONE _ _ _ _ _ _ _ ▼
NO ZONE _ _ _ _ _ _ _ ▼
GRUPPI
NO GRUPPI _ _ _ _ _ _ _ ▼
NO GRUPPI _ _ _ _ _ _ _ ▼
NO GRUPPI _ _ _ _ _ _ _ ▼
Per visualizzare gli eventi temporizzati successivi o precedenti premere i tasti ↑ / ↓ e/o pag ↑ / pag ↓.
38
N.
1
2
3
NOME
TIMER 1 _ _ _ _ _ _ _
TIMER 2 _ _ _ _ _ _ _
TIMER 3 _ _ _ _ _ _ _
RELE’ N.A.
RELE’ 1 _ _ _ _ _ _ _ ▼
RELE’ 2 _ _ _ _ _ _ _ ▼
NO RELE’ _ _ _ _ _ _ ▼
Pag ↓
N.
3
4
5
NOME
TIMER 3 _ _ _ _ _ _ _
TIMER 4 _ _ _ _ _ _ _
____________
RELE’ N.A.
NO RELE’ _ _ _ _ _ _ ▼
NO RELE’ _ _ _ _ _ _ ▼
NO RELE’ _ _ _ _ _ _ ▼
Per uscire dal sottomenu premere il tasto ESC e procedere come indicato nel paragrafo USCITA DA UN MENU.
UTILIZZO DEL MENU “VOX”
- - - = = = MAIN MENU = = = - - ->EVENTI INGRESSI GPI
->EVENTI TEMPORIZZATI
->VOX
Il menu consente di configurare il dispositivo VOX (VOX detector) presente su ciascuna scheda AUDIO OUTPUT OB 3230. La funzione del dispositivo VOX è descritta nel paragrafo DISPOSITIVO VOX, a cui si rimanda per maggiori informazioni. Dal menu principale di configurazione dell’apparecchio, tramite i tasti ↑ / ↓ e/o pag ↑ / pag ↓ spostare il punto di selezione sul sottomenu VOX e premere il tasto ENTER; sul display dell’apparecchio vengono visualizzati i campi indicati di seguito.
AUDIO OUT
Indica la scheda AUDIO OUTPUT OB 3230 in cui configurare il dispositivo VOX. L’identificazione della scheda avviene tramite
il numero di uscite appartenenti ad essa (es. OUT 01:08 = scheda AUDIO OUTPUT con uscite da numero 1 a numero 8).
INGR. VOX
Consente di definire l’ingresso che deve essere utilizzato dal dispositivo VOX della scheda AUDIO OUTPUT. E’ possibile
specificare lo stesso ingresso INGR. VOX per più dispositivi VOX. Utilizzare i tasti + e - per selezionare il nome dell’ingresso fra i primi 8 ingressi del sistema, definiti tramite il menu PROCESSO INGRESSI AUDIO; scegliendo l’opzione NO
INGRESSI (selezione predefinita) non viene selezionato nessun ingresso.
AVVERTENZA
• L’ingresso INGR. VOX utilizzato da ciascun dispositivo VOX può essere scelto esclusivamente fra i primi 8 ingressi del
sistema (ingressi 1 ÷ 8 della scheda AUDIO INPUT numero 1).
RELE’ VOX
Consente di definire il relé da commutare quando, con l’attivazione della funzione VOX, l’ingresso INGR. VOX viene connesso con una delle uscite della scheda AUDIO OUTPUT OB 3230 indicata nel campo AUDIO OUT. Il relé deve essere lo
stesso per uno stesso ingresso INGR. VOX. Utilizzare i tasti + e - per selezionare il nome del relé fra quelli con contatto
normalmente aperto o normalmente chiuso precedentemente definiti tramite il menu CONFIGURAZIONE RELE’; scegliendo l’opzione NO RELE’ (selezione predefinita) non viene selezionato nessun relé.
AVVERTENZE
• Per evitare malfunzionamenti, o possibili errori durante la compilazione dei file di configurazione del sistema, è indispensabile che il relè indicato nel campo RELE’ VOX non venga utilizzato per altre funzioni (ad esempio non deve essere
utilizzato come relè di “feedback” per una consolle BM 3604).
AVVERTENZA
• Se vengono compilati i campi del menu VOX per una determinata scheda AUDIO OUTPUT OB 3230, senza attivare la funzione VOX su nessuna delle sue uscite (tramite il menu PROCESSO USCITE AUDIO), non viene generato nessun errore durante la compilazione dei file di configurazione.
AUDIO OUT
OUT 01:08
OUT 09:16
OUT 17:24
INGR. VOX
SORGENTE 1 _ _ _ _ _ ▼
SORGENTE 1 _ _ _ _ _ ▼
SORGENTE 2 _ _ _ _ _ ▼
RELE’ VOX
RELE’ 1 _ _ _ ▼
RELE’ 1 _ _ _ ▼
RELE’ 2 _ _ _ ▼
Pag ↓
AUDIO OUT
OUT 25:32
OUT 33:40
OUT 41:48
INGR. VOX
SORGENTE 2 _ _ _ _ _ ▼
NO INGRESSI _ _ _ _ _ ▼
NO INGRESSI _ _ _ _ _ ▼
RELE’ VOX
RELE’ 2 _ _ _ ▼
NO RELE’ _ _ ▼
NO RELE’ _ _ ▼
39
UTILIZZO DEL MENU “RECORDER”
- - - = = = MAIN MENU = = = - - ->EVENTI TEMPORIZZATI
->VOX
->RECORDER
Il menu consente la registrazione di segnali audio: messaggi, annunci, toni di attenzione, toni di allarme, ecc. (vedi paragrafo REGISTRAZIONE/RIPRODUZIONE DI SEGNALI AUDIO); tali segnali vengono memorizzati come file audio sul disco rigido dell’unità di controllo. Dal menu
principale di configurazione dell’apparecchio, tramite i tasti ↑ / ↓ e/o pag ↑ / pag ↓ spostare il punto di selezione sul sottomenu RECORDER
e premere il tasto ENTER; sul display dell’apparecchio vengono visualizzati i seguenti sottomenu:
SELEZIONA FUNZIONE
OPZIONI
RECORD
PLAY
Pag ↓
SELEZIONA FUNZIONE
ASSEMBLY
GENERAZ. TONI
CANCELLA MESS.
OPZIONI
Spostare il punto di selezione su questa voce di menu e premere il tasto ENTER per impostare i parametri di registrazione
indicati di seguito.
OPZIONI REGISTR.
QUALITA’ SONORA
DURATA MASSIMA (SEC)
: 44100 HZ ▼
:__
QUALITA’ SONORA: permette di definire la frequenza di campionamento della registrazione effettuabile tramite il sottomenu RECORD: maggiore è la frequenza selezionata e maggiore sarà la qualità della registrazione. Utilizzare i tasti
+ e - per selezionare la frequenza fra i valori 11025 Hz , 22050 Hz , 44100 Hz.
AVVERTENZA
• La frequenza selezionata nel campo QUALITA’ SONORA interviene unicamente sulla funzione RECORD.
DURATA MASSIMA (SEC): permette di definire la durata massima della registrazione. Utilizzare i tasti + e - od il tastierino numerico per impostare la durata tra i valori 1 secondo e 60 secondi.
AVVERTENZE
• Maggiori sono la frequenza di campionamento e la durata di una registrazione, e maggiore sarà la dimensione del relativo
file audio; una registrazione effettuata con una frequenza di campionamento di 44,1 kHz, ed avente una durata di 60 secondi, darà luogo ad un file di 2,6 Mb!
• Tutte le registrazioni vengono effettuate con una risoluzione di 16 bit.
Per uscire dal sottomenu premere il tasto ESC e procedere come indicato nel paragrafo USCITA DA UN MENU.
RECORD
Spostare il punto di selezione su questa voce di menu e premere il tasto ENTER per registrare un segnale audio (vedi paragrafo REGISTRAZIONE/RIPRODUZIONE DI SEGNALI AUDIO); sul display dell’apparecchio viene visualizzata la schermata seguente.
AVVIA REGISTRAZ.
SORGENTE REGISTR:
NOME MESSAGGIO:
DURATA:
(F1=PARTE – F2=STOP)
MICROFONO _ _ _ _ _ ▼
________
<FERMATO>
SORGENTE REGISTR: consente di scegliere la sorgente audio da utilizzare per la registrazione. Utilizzare i tasti + e
- per selezionare una delle seguenti opzioni:
• MICROFONO –
Consente di selezionare come sorgente per la registrazione il microfono connesso all’ingresso
MICRO IN della scheda audio dell’unità di controllo.
• “nome ingresso” – Consente di selezionare come sorgente per la registrazione uno degli ingressi delle schede AUDIO INPUT IB 3210 / IB 3280. Tramite i tasti + e - selezionare il nome dell’ingresso desiderato fra quelli definiti tramite il menu PROCESSO INGRESSI AUDIO (campo NOME).
NOME MESSAGGIO: consente di definire il nome del file in cui salvare il segnale audio da registrare, che può essere
composto da un massimo di 8 caratteri alfanumerici. Utilizzare i tasti + e - per selezionare a rotazione i caratteri alfanumerici; confermare ciascun carattere tramite il tasto ENTER . I caratteri numerici possono essere selezionati direttamente tramite il tastierino numerico.
DURATA: indicatore a barra che rappresenta il tempo trascorso dall’inizio della registrazione rispetto al tempo totale
a disposizione, che è rappresentato dall’intera lunghezza della barra; il tempo totale a disposizione è quello definito
tramite il sottomenu OPZIONI . Quando non è in corso la registrazione appare l’indicazione FERMATO.
40
Dopo aver definito la sorgente di registrazione ed il nome del file audio, premere il tasto F1 per iniziare la registrazione; premere il tasto F2 per terminare la registrazione. La registrazione termina automaticamente dopo 60 secondi. Completata la registrazione per uscire dal sottomenu premere il tasto ESC e procedere come indicato nel paragrafo USCITA DA UN MENU.
AVVERTENZA
• Si raccomanda di evitare di occupare completamente il disco rigido dell’unità di controllo con i file audio creati tramite la
funzione RECORD.
PLAY
La funzione consente di ascoltare localmente, tramite l’altoparlante monitor dell’unità di controllo, i segnali audio memorizzati come file sul disco rigido dell’unità di controllo CP 3100 (vedi paragrafo REGISTRAZIONE/RIPRODUZIONE DI SEGNALI AUDIO). La funzione è utile per effettuare un test di ascolto dei vari file audio (es. messaggi, annunci, toni di attenzione
allarme, ecc.). Per utilizzare la funzione spostare il punto di selezione su questa voce di menu e premere il tasto ENTER: sul
display dell’apparecchio viene visualizzata la schermata seguente.
PLAY MESSAGGIO
NOME MESSAGGIO:
DURATA:
(F1=PARTE – F2=STOP)
MUSICA 1▼
<FERMATO>
NOME MESSAGGIO: consente di scegliere il nome del file audio da riprodurre. Tramite i tasti + e - selezionare il
nome del segnale audio desiderato, fra quelli presenti nella libreria dei segnali audio fornita con il sistema, oppure
creati tramite le funzioni RECORD, ASSEMBLY e GENERAZ. TONI.
DURATA: indicatore a barra che rappresenta il tempo trascorso dall’inizio della riproduzione rispetto alla durata complessiva del segnale audio, che è rappresentata dall’intera lunghezza della barra. Quando non è in corso la riproduzione appare l’indicazione FERMATO.
Dopo aver scelto il nome del file audio, premere il tasto F1 per iniziare la riproduzione; la riproduzione termina automaticamente alla fine del segnale registrato. Premere il tasto F2 per interrompere anticipatamente la riproduzione. Per uscire dal
sottomenu premere il tasto ESC.
AVVERTENZA
• L’utilizzo della funzione PLAY non è possibile se è in corso il monitoraggio di una sorgente audio del sistema (vedi paragrafo UTILIZZO DEL MENU OPERAZIONI MONITOR); in questo caso infatti, alla pressione del tasto F1 (comando di inizio
riproduzione) viene emesso un segnale acustico di avvertimento. Per poter riprodurre il file audio è quindi necessario interrompere preventivamente l’eventuale monitoraggio audio in corso.
ASSEMBLY
Spostare il punto di selezione su questa voce di menu e premere il tasto ENTER per creare un file audio dall’unione di un
massimo di 6 singoli file audio, relativi a messaggi, annunci, toni di attenzione allarme, ecc. Il segnale audio complessivo
corrisponderà quindi alla successione dei singoli segnali audio. Sul display dell’apparecchio viene visualizzata la schermata seguente.
ASSEMBLA MESSAGGI
NOME FILE:
________
MSG. 1:
NO MESS. ▼
MSG. 2:
NO MESS. ▼
(F1=PARTE – F2=STOP)
Pag ↓
MSG. 3:
MSG. 4:
MSG. 5:
MSG. 6:
NO MESS. ▼
NO MESS. ▼
NO MESS. ▼
NO MESS. ▼
NOME FILE: consente di definire il nome del file audio da creare, che può essere composto da un massimo di 8 caratteri alfanumerici. Utilizzare i tasti + e - per selezionare a rotazione i caratteri alfanumerici; confermare ciascun carattere tramite il tasto ENTER. I caratteri numerici possono essere selezionati direttamente tramite il tastierino numerico. La definizione di questo campo è indispensabile per poter programmare i campi successivi.
MSG. 1: permette di scegliere il primo file audio da memorizzare nel file da creare. Utilizzare i tasti + e - per selezionare il nome del segnale audio desiderato, fra quelli memorizzati sul disco rigido dell’unità di controllo CP 3100. Selezionando l’opzione NO MESS. (selezione predefinita) non viene impostato nessun segnale audio.
MSG. 6: permette di scegliere il sesto e ultimo file audio da memorizzare nel file da creare. Utilizzare i tasti + e - per
selezionare il nome del segnale audio desiderato, fra quelli memorizzati sul disco rigido dell’unità di controllo CP 3100.
Selezionando l’opzione NO MESS. (selezione predefinita) non viene impostato nessun segnale audio.
Dopo aver compilato i campi del menu, premere il tasto F1 per ascoltare localmente il segnale audio creato tramite l’altoparlante monitor dell’unità di controllo CP 3100; premere il tasto F2 per interrompere anticipatamente la riproduzione.
Per uscire dal sottomenu premere il tasto ESC e procedere come indicato nel paragrafo USCITA DA UN MENU.
AVVERTENZE
• La sequenza con cui i vari segnali audio vengono memorizzati segue l’ordine numerico progressivo dei campi MSG: MSG.
1 sarà il primo segnale ad essere registrato, MSG. 6 sarà l’ultimo segnale ad essere registrato.
41
• Si raccomanda di evitare di occupare completamente il disco rigido dell’unità di controllo con i file audio creati tramite la
funzione ASSEMBLY.
• Quando due o più file audio vengono uniti, il file ottenuto avrà le caratteristiche di quello a qualità inferiore, come indicato
negli esempi delle tabelle seguenti.
• L’ascolto locale del segnale audio creato (tasto F1) non è possibile se è in corso il monitoraggio di una sorgente audio del
sistema (vedi paragrafo UTILIZZO DEL MENU OPERAZIONI MONITOR); in questo caso infatti, alla pressione del tasto F1
(comando di inizio riproduzione) viene emesso un segnale acustico di avvertimento. Per poter riprodurre il file audio è quindi
necessario interrompere preventivamente l’eventuale monitoraggio audio in corso.
Esempio 1
FILE N°1
Frequenza di camp. = 11 kHz
Risoluzione = 8 bit
FILE N°2
Frequenza di camp. = 22 kHz
Risoluzione = 8 bit
UNIONE FILE N°1 E N°2
Frequenza di camp. = 11 kHz
Risoluzione = 8 bit
FILE N°2
Frequenza di camp. = 22 kHz
Risoluzione = 16 bit
UNIONE FILE N°1 E N°2
Frequenza di camp. = 11 kHz
Risoluzione = 8 bit
Esempio 2
FILE N°1
Frequenza di camp. = 11 kHz
Risoluzione = 8 bit
GENERAZ. TONI
Selezionare questa voce di menu e premere il tasto ENTER per creare un suono composto da un massimo di 6 singoli
toni, che possono essere definiti a piacimento (vedi paragrafo REGISTRAZIONE/RIPRODUZIONE DI SEGNALI AUDIO);
sul display dell’apparecchio viene visualizzata la schermata seguente.
DEFINIZIONE TONO
NOME FILE:
N.
PARTE
1
00020
(F1=PARTE – F2=STOP)
________
FINE
DUR.
00020
0000
LIV.
1
Pag ↓
N.
2
3
4
PARTE
00020
00020
00020
FINE
00020
00020
00020
DUR.
0000
0000
0000
LIV.
1
1
1
Pag ↓
N.
PARTE
5
00020
6
00020
RIPETIZIONI:
FINE
00020
00020
1
DUR.
0000
0000
LIV.
1
1
N.: indica il numero progressivo del tono da inserire nel suono complessivo.
NOME FILE: consente di definire il nome del file audio in cui memorizzare la sequenza dei toni; il nome può essere
composto da un massimo di 8 caratteri alfanumerici. Utilizzare i tasti + e - per selezionare a rotazione i caratteri
alfanumerici; confermare ciascun carattere tramite il tasto ENTER. I caratteri numerici possono essere selezionati direttamente tramite il tastierino numerico. La definizione di questo campo è indispensabile per poter programmare i
campi successivi.
PARTE: permette di definire la frequenza iniziale del tono, espressa in hertz. Utilizzare il tastierino numerico per impostare la frequenza, scegliendola fra i valori 100 Hz e 4 kHz.
FINE: permette di definire la frequenza finale del tono, espressa in hertz. Utilizzare il tastierino numerico per impostare la frequenza, scegliendola fra i valori 100 Hz e 4 kHz.
DUR.: permette di definire la durata del tono in millisecondi. Utilizzare il tastierino numerico per impostare la durata,
scegliendola fra i valori 0 ms e 9999 ms.
LIV.: permette di definire il volume del tono. Utilizzare i tasti + e - per selezionare il volume fra i seguenti valori:
• “1” – Volume al 25 % (volume minimo)
• “2” – Volume al 50 %.
• “3” – Volume al 75 %.
• “4” – Volume al 100 % (volume massimo)
RIPETIZIONI: permette di definire quante volte la sequenza di toni definita deve essere ripetuta e salvata nel file audio da creare. Utilizzare i tasti + e - o il tastierino numerico per selezionare il numero di ripetizioni fra i valori 1 e 9.
Dopo aver compilato i campi del menu, premere il tasto F1 per ascoltare localmente il suono creato, tramite l’altoparlante monitor dell’unità di controllo CP 3100; premere il tasto F2 per interrompere anticipatamente la riproduzione.
42
AVVERTENZE
• Si raccomanda di evitare di occupare completamente il disco rigido dell’unità di controllo con i file audio creati tramite
la funzione GENERAZ. TONI.
• La sequenza con cui i vari toni del suono da creare vengono memorizzati segue l’ordine numerico progressivo del campo
N.: il tono N. 1 sarà il primo ad essere registrato, il tono N. 6 sarà l’ultimo ad essere registrato.
• La durata complessiva del suono creato, corrispondente alla somma delle durate dei singoli toni moltiplicata per il numero
di ripetizioni, non deve superare i 60 secondi.
• L’ascolto locale del suono creato creato (tasto F1) non è possibile se è in corso il monitoraggio di una sorgente audio del
sistema (vedi paragrafo UTILIZZO DEL MENU OPERAZIONI MONITOR); in questo caso infatti, alla pressione del tasto F1
(comando di inizio riproduzione) viene emesso un segnale acustico di avvertimento. Per poter riprodurre il suono creato è
quindi necessario interrompere preventivamente l’eventuale monitoraggio audio in corso.
Per uscire dal sottomenu premere il tasto ESC e procedere come indicato nel paragrafo USCITA DA UN MENU.
CANCELLA MESS. Spostare il punto di selezione su questa voce di menu e premere il tasto ENTER per accedere al menu che permette di
cancellare un file audio memorizzato sul disco rigido dell’unità di controllo; sul display dell’apparecchio viene visualizzata la schermata seguente.
CANCELLA MESSAGGI
SELEZ. FILE E PIGIARE F1
NOME FILE:
MUSICA 1 _ _ ▼
NOME FILE: consente di scegliere il nome del file corrispondente al segnale audio da cancellare. Utilizzare i tasti +
e - per selezionare il file desiderato, fra quelli memorizzati sul disco rigido dell’unità di controllo CP 3100.
Dopo aver selezionato il nome del file, premere il tasto F1 per eliminarlo. Per uscire dal sottomenu premere il tasto ESC
e procedere come indicato nel paragrafo USCITA DA UN MENU.
UTILIZZO DEL MENU “SISTEMA”
- - - = = = MAIN MENU = = = - - ->SISTEMA
->COMPILA E SALVA
->ESCI SENZA SALVARE!
Il menu consente di impostare vari parametri di funzionamento del sistema RX 3000. Dal menu principale di configurazione dell’apparecchio,
tramite i tasti ↑ / ↓ e/o pag ↑ / pag ↓ spostare il punto di selezione sul sottomenu SISTEMA e premere il tasto ENTER; sul display dell’apparecchio vengono visualizzati i seguenti sottomenu:
OPZIONI SISTEMA
OPZIONI STAMPA
STAMPA CONFIGURAZ.
DATA / ORA
Pag ↓
OPZIONI SISTEMA
DATA / ORA
GIORNO / NOTTE
PASSWORD
OPZIONI STAMPA Spostare il punto di selezione su questa voce di menu e premere il tasto ENTER per impostare le opzioni di stampa; sul
display dell’apparecchio viene visualizzata la schermata seguente.
OPZIONI STAMPA
MODO STAMPA:
NO _ _ _ _ _ _ _ _ ▼
MODO STAMPA: permette configurare la stampa degli eventi di allarme. Utilizzare i tasti + e - per selezionare una
delle seguenti opzioni:
• NO – Disabilita la stampa degli eventi di allarme. Selezionando questa opzione, tramite il menu ALLARMI è unicamente possibile visualizzare gli eventi di allarme accaduti da quando il sistema è stato acceso (vedi paragrafo
VISUALIZZAZIONE DEGLI EVENTI DI ALLARME).
• AUTOMATICO – Determina la stampa automatica di un messaggio di allarme nel momento stesso in cui l’evento
di allarme si verifica (vedi paragrafo STAMPA DEGLI EVENTI DI ALLARME).
• SU RICHIESTA – Consente di abilitare, nel menu ALLARMI, il comando per stampare manualmente gli eventi di
allarme accaduti da quando il sistema è stato acceso (vedi paragrafo STAMPA DEGLI EVENTI DI ALLARME).
43
STAMPA CONFIGURAZ. Spostare il punto di selezione su questa voce di menu e premere il tasto ENTER per comandare la stampa della
configurazione del sistema. Nella stampa vengono riportati, per i vari dispositivi del sistema, il numero degli apparecchi che sono stati configurati tramite il relativo menu dell’unità di controllo, ed il numero degli apparecchi che
sono stati rilevati e correttamente programmati dall’unità di controllo. Sul display dell’apparecchio viene visualizzata la schermata seguente.
RICHIESTA ATTIVA:
CONFIGURAZIONE IN STAMPA . . . .
DATA / ORA
Spostare il punto di selezione su questa voce di menu e premere il tasto ENTER per impostare la data e l’orario
correnti; sul display dell’apparecchio viene visualizzata la schermata seguente.
REGOLAZ. DATA/ORA
DATA:
12 / NOV ▼ / 1999
ORA:
15 : 49 : 50
DATA: permette di impostare il giorno, il mese e l’anno correnti. Utilizzare i tasti di direzione per spostare il punto
di selezione sul campo del giorno, del mese o dell’anno; impostare i valori desiderati utilizzando il tastierino numerico o i tasti + e - .
ORA: permette di impostare le ore, i minuti ed i secondi correnti. Utilizzare i tasti di direzione per spostare il punto
di selezione sul campo delle ore, dei minuti o dei secondi; impostare i valori desiderati utilizzando il tastierino numerico o i tasti + e - .
Per uscire dal sottomenu premere il tasto ESC e procedere come indicato nel paragrafo “USCITA DA UN MENU”.
GIORNO / NOTTE
Spostare il punto di selezione su questa voce di menu e premere il tasto ENTER per programmare la fascia oraria
di intervento della funzione DAY/NIGHT delle unità A.C.U. (vedi paragrafo FUNZIONE DAY/NIGHT). Sul display dell’apparecchio viene visualizzata la schermata seguente.
PROGRAMMA GIORNO/NOTTE
INIZIO ORE:
12 : 15
FINE ORE:
22 : 31
INIZIO ORE: permette di impostare l’ora di inizio dell’attenuazione notturna, espressa in ore e minuti. Utilizzare i tasti di direzione per spostare il punto di selezione sul campo delle ore o dei minuti; impostare i valori desiderati utilizzando il tastierino numerico o i tasti + e - .
FINE ORE: permette di impostare l’ora di termine dell’attenuazione notturna espressa in ore e minuti. Utilizzare i
tasti di direzione per spostare il punto di selezione sul campo delle ore o dei minuti; impostare i valori desiderati utilizzando il tastierino numerico o i tasti + e - .
AVVERTENZA
• La fascia oraria impostata viene utilizzata su tutte le unità A.C.U. che hanno la funzione DAY/NIGHT abilitata (vedi paragrafo UTILIZZO DEL MENU ACU).
PASSWORD
Consente di definire la “password utente”, che permette di impedire l’accesso a determinati menu dell’unità di controllo da parte di personale non autorizzato (vedi paragrafo PASSWORD DI ACCESSO AI MENU). Spostare il punto di selezione su questa voce di menu e premere il tasto ENTER per impostare la password; sul display dell’apparecchio viene visualizzata la schermata seguente.
INSERIMENTO PASSWORD
INSERIRE PASSWORD: ____________
RE-INSERIRE:
____________
INSERIRE PASSWORD: permette di impostare la password, che può essere composta da un massimo di 8 caratteri numerici. Utilizzare il tastierino numerico per impostare i vari numeri.
RE-INSERIRE: permette di inserire nuovamente la password, in modo da avere la sicurezza che la password precedentemente digitata nel campo INSERIRE PASSWORD sia corretta.
AVVERTENZA
• Nell’assegnazione della password tenere presenti le seguenti limitazioni:
a. non è possibile inserire degli spazi (caratteri “blank”) fra due caratteri numerici della password.
b. non è possibile inserire degli spazi (caratteri “blank”) prima dei caratteri numerici della password.
c. non è possibile inserire dei caratteri alfabetici.
Dopo aver compilato i due campi, premere il tasto MEMORY per salvare la password sul disco rigido dell’unità di
controllo. Se l’operazione va a buon fine, e la password impostata viene correttamente memorizzata, si accende la
spia MEMORY (rif. 6 - fig. 1, pag. 9). L’impostazione di una nuova password presenta un’operatività immediata, e
verrà richiesta al prossimo tentativo di accesso ad uno dei menu protetti.
Per uscire dal sottomenu premere il tasto ESC.
44
AVVERTENZE
• La password non può essere memorizzata se i caratteri inseriti nel campo INSERIRE PASSWORD non coincidono con
quelli inseriti nel campo RE-INSERIRE.
• Per salvare una nuova password non è necessario uscire del menu principale di configurazione tramite l’opzione COMPILA E SALVA.
• Per non impostare nessuna password lasciare vuoti i campi INSERIRE PASSWORD e RE-INSERIRE.
UTILIZZO DEL MENU “COMPILA E SALVA”
- - - = = = MAIN MENU = = = - - ->SISTEMA
->COMPILA E SALVA
->ESCI SENZA SALVARE!
Il comando COMPILA E SALVA permette di uscire dal menu principale di configurazione del sistema salvando permanentemente tutte le impostazioni effettuate in alcuni file di configurazione, che vengono memorizzati sul disco rigido dell’unità di controllo.
Per salvare i file di configurazione, tramite i tasti ↑ / ↓ e/o pag ↑ / pag ↓ spostare il punto di selezione sul sottomenu COMPILA E SALVA e
premere il tasto ENTER.
Se il salvataggio ha esito positivo il programma esce dal menu di configurazione e ritorna nel menu principale; per attuare le modifiche di configurazione effettuate, operare come indicato nel paragrafo ATTUAZIONE DI UNA CONFIGURAZIONE.
Se durante il salvataggio vengono riscontrati degli errori di configurazione, sul display vengono visualizzati i relativi messaggi, e non sarà possibile completare il salvataggio finchè non vengono rimosse tutte le cause d’errore riscontrate (vedi paragrafo ERRORI DI CONFIGURAZIONE); questo accorgimento evita di creare possibili situazioni di conflitto fra i vari dispositivi, che potrebbero determinare il blocco del sistema.
AVVERTENZA
• Se tramite i menu di configurazione il sistema viene configurato in modo scorretto, e durante l’utilizzo del comando COMPILA E SALVA vengono visualizzati dei messaggi di errore, è possibile uscire dal menu di configurazione senza correggere gli errori riscontrati solamente utilizzando il comando ESCI SENZA SALVARE!; in questo caso tutte le modifiche effettuate verranno perse.
ERRORI DI CONFIGURAZIONE
Se durante l’utilizzo del comando COMPILA E SALVA vengono riscontrati degli errori di configurazione, sul display dell’unità di controllo vengono visualizzati i relativi messaggi, che indicano in modo semplice e diretto la causa dell’errore, per potervi porre rimedio. Ad ogni errore riscontrato viene dedicata una diversa schermata, che contiene le indicazioni seguenti.
• Numero dell’errore, e numero degli errori totali.
• Indicazione del dispositivo o dell’evento a cui l’errore si riferisce.
• Indicazione della causa di errore.
Per visualizzare gli errori successivi o precedenti utilizzare i tasti pag ↑ (errore successivo) e pag ↓ (errore precedente). Nella schermata seguente è stato indicato un esempio di errore: tramite il menu CONSOLES DIGITALI è stata configurata una consolle digitale chiamata BM
3616 N.1 a cui non è stato associato nessun ingresso audio tramite il menu PROCESSO INGRESSI AUDIO; in questo caso per eliminare l’errore è necessario configurare un ingresso audio di tipo CONSDIG 1 (campo TIPO = CONSDIG 1).
ERRORI!
CONSOLLE “BM 3616 N.1” NON HA INGRESSO
AUDIO DEFINITO
1/1
UTILIZZO DEL MENU “ESCI SENZA SALVARE!”
- - - = = = MAIN MENU = = = - - ->SISTEMA
->COMPILA E SALVA
->ESCI SENZA SALVARE!
Permette di uscire dal menu principale di configurazione del sistema senza salvare le eventuali impostazioni effettuate. Tramite i tasti ↑ / ↓ e/o
pag ↑ / pag ↓ spostare il punto di selezione sul sottomenu ESCI SENZA SALVARE! e premere il tasto ENTER.
AVVERTENZA
• Se si esce dal menu di configurazione tramite l’opzione ESCI SENZA SALVARE! si avrà la perdita dei parametri modificati, e tutte le impostazioni effettuate non potranno essere attuate sui dispositivi del sistema.
45
VISUALIZZAZIONE DELLO STATO ALLARMI (menu “ALLARMI”)
RCF RX 3000 AUDIO SYSTEM
F1: CONFIGURAZ.
F2: ALLARMI
"##############
ITALIANO _ _ _ ▼
F3: MEMOR. CONFIG.
F4: PROCESSO AUDIO
03 NOV 1999
15:29:52
Per accedere ai menu che consentono di visualizzare lo stato corrente degli allarmi gestiti dal sistema (vedi paragrafo ALLARMI DEL SISTEMA), dal menu principale premere il tasto F2: sul display dell’apparecchio vengono visualizzati i sottomenu indicati di seguito.
• AUDIO INPUT PROCESSORS
Menu per visualizzare in dettaglio gli allarmi relativi al funzionamento delle schede AUDIO INPUT IB
3210 / IB 3280.
• AUDIO OUTPUT PROCESSORS Menu per visualizzare in dettaglio gli allarmi relativi al funzionamento delle schede AUDIO OUTPUT OB
3230.
• GPI PROCESSORS
Menu per visualizzare in dettaglio gli allarmi relativi al funzionamento delle schede INPUT/OUTPUT digitali IO 3250.
• CONSOLLES DIG.
Menu per visualizzare in dettaglio gli allarmi relativi al funzionamento delle consolle digitali BM 3616.
• (ACU) AMPLIFICATORI
Menu per visualizzare in dettaglio gli allarmi relativi al funzionamento delle unità A.C.U. (schede retroamplificatore RB 3300).
• ALLARMI GPI
Menu per visualizzare in dettaglio lo stato degli avvisi comandabili tramite gli ingressi delle schede INPUT/OUTPUT digitali IO 3250.
• EMERGENZA
Menu per visualizzare in dettaglio lo stato degli allarmi comandabili tramite il tasto ALARM delle consolle digitali BM 3616.
• FIREMAN
Menu per visualizzare in dettaglio lo stato degli allarmi comandabili tramite gli ingressi delle schede INPUT/OUTPUT digitali IO 3250 configurati FIREMAN.
• ALLARMI SISTEMA
Menu per visualizzare in dettaglio lo stato degli allarmi relativi al funzionamento dei componenti dell’unità di controllo CP 3100.
A fianco di ciascun sottomenu, nel campo ALLARMI, viene indicato lo stato dell’allarme del dispositivo/evento a cui il sottomenu si riferisce, che viene continuamente aggiornato; in particolare viene indicato:
• [ X ], quando uno o più allarmi sono attivati.
• [ ], quando non vi è nessun allarme attivato.
AVVERTENZA
• Nei sottomenu del menu ALLARMI vengono visualizzati anche “stati” o “dati” (es. campi REV, ALC) che non indicano una condizione di allarme.
Nella prima schermata vengono visualizzati solo i primi 2 sottomenu; per visualizzare i successivi utilizzare i tasti ↑ / ↓ e/o pag ↑ / pag ↓.
VISUALIZZAZIONE CAMPI ALLARME
AUDIO INPUT PROCESSORS
AUDIO OUTPUT PROCESSORS
PIGIARE F1 PER VEDERE ALLARMI
ALLARMI
[
]
[
]
Pag ↓
VISUALIZZAZIONE CAMPI ALLARME
GPI PROCESSORS
CONSOLLES DIG.
PIGIARE F1 PER VEDERE ALLARMI
ALLARMI
[
]
[
]
Pag ↓
VISUALIZZAZIONE CAMPI ALLARME
(ACU) AMPLIFICATORI
ALLARMI GPI
PIGIARE F1 PER VEDERE ALLARMI
ALLARMI
[
]
[
]
Pag ↓
VISUALIZZAZIONE CAMPI ALLARME
EMERGENZA
FIREMAN
PIGIARE F1 PER VEDERE ALLARMI
ALLARMI
[
]
[
]
Pag ↓
VISUALIZZAZIONE CAMPI ALLARME
FIREMAN
ALLARMI SISTEMA
PIGIARE F1 PER VEDERE ALLARMI
ALLARMI
[
]
[
]
46
VISUALIZZAZIONE DEGLI EVENTI DI ALLARME
Questa procedura permette di visualizzare gli eventi di allarme accaduti da quando il sistema è stato acceso, ed è utilizzabile quando nel sottomenu OPZIONI STAMPA, del menu di configurazione SISTEMA, è stata selezionata l’opzione MODO STAMPA: NO (vedi paragrafo UTILIZZO DEL MENU SISTEMA). Dopo aver visualizzato i sottomenu del menu ALLARMI, premere il tasto F1 per visualizzare gli eventi di allarme.
VISUALIZZAZIONE CAMPI ALLARME
AUDIO INPUT PROCESSORS
AUDIO OUTPUT PROCESSORS
PIGIARE F1 PER VEDERE ALLARMI
ALLARMI
[
]
[
]
!
F1
Sul display dell’apparecchio viene visualizzata una schermata per ciascun evento di allarme, che contiene le indicazioni seguenti.
• Numero dell’evento di allarme, e numero di allarmi totali.
• Data in cui è avvenuto l’evento di allarme.
• Ora in cui è avvenuto l’evento di allarme.
• Dispositivo che ha attivato l’allarme. Le diciture visualizzabili sono:
– INPUT PROC. – Indica una scheda AUDIO INPUT IB 3210 / IB 3280.
– OUTPUT PROC. - Indica una scheda AUDIO OUTPUT OB 3230.
– ALLARMI GPI Indica una scheda INPUT/OUTPUT digitale IO 3250.
– CONSOLE Indica una consolle digitale BM 3616.
– ACU Indica una scheda retroamplificatore RB 3300.
A fianco del nome del dispositivo è indicato il relativo numero di identificazione.
• Tipo di evento che ha causato l’allarme. I tipi visualizzabili dipendono dallo specifico dispositivo.
Nell’esempio seguente sono indicati 5 eventi di allarme; per visualizzare gli eventi successivi o precedenti utilizzare i tasti + (avanti) e - (indietro).
VISUALIZZAZIONE CAMPI ALLARME
AUDIO INPUT PROCESSORS
AUDIO OUTPUT PROCESSORS
PIGIARE F1 PER VEDERE ALLARMI
ALLARMI
[
]
[
]
F1
LISTA ALLARMI
03/11/1999
+ LOGGER
! INIZIO LOGGER !
001/005
15:34:44
+
+
LISTA ALLARMI
03/11/1999
15:34:44
* INPUT PROC.
NON COMUNICA! (KO)
002/005
01 *
+
LISTA ALLARMI
03/11/1999
15:34:44
* OUTPUT PROC.
NON COMUNICA! (KO)
003/005
01 *
+
LISTA ALLARMI
03/11/1999
15:34:44
* ALLARMI GPI
NON COMUNICA! (KO)
004/005
01 *
+
47
LISTA ALLARMI
03/11/1999
15:34:44
* ACU
NON COMUNICA! (KO)
005/005
01 *
STAMPA DEGLI EVENTI DI ALLARME
Questa procedura permette di stampare gli eventi di allarme accaduti da quando il sistema è stato acceso, ed è utilizzabile quando nel sottomenu OPZIONI STAMPA, del menu di configurazione SISTEMA, è stata selezionata l’opzione MODO STAMPA: SU RICHIESTA (vedi paragrafo UTILIZZO DEL MENU SISTEMA).
AVVERTENZA
• Se nel sottomenu OPZIONI STAMPA, del menu di configurazione SISTEMA, è stata selezionata l’opzione MODO STAMPA: AUTOMATICO, la stampa degli eventi di allarme avviene automaticamente momento in cui l’evento di allarme si verifica, e nel menu ALLARMI dell’unità di controllo viene indicato: STAMPA ALLARMI IN AUTOMATICO.
Dopo aver visualizzato i sottomenu del menu ALLARMI, premere il tasto F1 per avviare la stampa.
VISUALIZZAZIONE CAMPI ALLARME
AUDIO INPUT PROCESSORS
AUDIO OUTPUT PROCESSORS
PIGIARE F1 PER STAMPA ALLARMI ATTUALI
ALLARMI
[
]
[
]
!
F1
La stampa degli eventi di allarme contiene le indicazioni seguenti.
• Data in cui è avvenuto l’evento di allarme.
• Ora in cui è avvenuto l’evento di allarme.
• Dispositivo che ha attivato l’allarme. Le diciture visualizzabili sono:
– INPUT PROC. – Indica una scheda AUDIO INPUT IB 3210 / IB 3280.
– OUTPUT PROC. - Indica una scheda AUDIO OUTPUT OB 3230.
– ALLARMI GPI Indica una scheda INPUT/OUTPUT digitale IO 3250.
– CONSOLE Indica una consolle digitale BM 3616.
– ACU Indica una scheda retroamplificatore RB 3300.
A fianco del nome del dispositivo è indicato il relativo numero di identificazione.
• Tipo di evento che ha causato l’allarme. I tipi visualizzabili dipendono dallo specifico dispositivo.
DETTAGLIO ALLARMI SU SCHEDE AUDIO INPUT IB 3210 / IB 3280
VISUALIZZAZIONE CAMPI ALLARME
AUDIO INPUT PROCESSORS
AUDIO OUTPUT PROCESSORS
PIGIARE F1 PER STAMPA ALLARMI
ALLARMI
[
]
[
]
Per visualizzare in dettaglio lo stato corrente degli allarmi relativi alle schede AUDIO INPUT IB 3210 / IB 3280, dal menu ALLARMI dell’apparecchio, tramite i tasti ↑ / ↓ e/o pag ↑ / pag ↓ spostare il punto di selezione sul sottomenu AUDIO INPUT PROCESSORS e premere il tasto ENTER; sul display dell’apparecchio appaiono i campi indicati di seguito.
SCHEDA INPUT Indica il numero di identificazione della scheda AUDIO INPUT IB 3210 / IB 3280 (vedi paragrafo PARAMETRI CARATTERISTICI).
REV
Indica la versione del software della scheda AUDIO INPUT.
DCI
Indica un allarme causato da un problema di comunicazione fra la scheda e l’unità di controllo. Quando l’allarme è attivato
nel campo viene indicato il segno X.
EEP
Indica un allarme causato da un guasto o un funzionamento difettoso della memoria EEPROM della scheda. Quando l’allarme è attivato nel campo viene indicato il segno X.
RST
Indica un allarme causato da un “azzeramento” del microprocessore della scheda, per inizializzarne nuovamente il funzionamento (funzione “watchdog”). Quando l’allarme è attivato nel campo viene indicato il segno X.
CFG
Indica un allarme causato da una incompleta configurazione della scheda da parte dell’unità di controllo (es. estraendo la
scheda è stata interrotta la configurazione). Quando l’allarme è attivato nel campo viene indicato il segno X.
KO
Indica un allarme causato dalla rimozione della scheda (ad esempio per poterla riparare). In questa condizione la scheda
non comunica più con l’unità CP 3100, ed il controllo di tutte le altre cause di allarme viene sospeso. Per riutilizzare una
scheda precedentemente rimossa, occorre riconfigurare il sistema, operando come indicato nel paragrafo ATTUAZIONE DI
UNA CONFIGURAZIONE. Quando l’allarme è attivato nel campo viene indicato il segno X.
Per visualizzare le schede AUDIO INPUT IB 3210 / IB 3280 successive o precedenti premere i tasti ↑ / ↓ e/o pag ↑ / pag ↓.
48
SCHEDA INPUT
INP. PROC. 1
INP. PROC. 2
INP. PROC. 3
REV
1.0
1.0
1.0
DCI
EEP
RST
CFG
KO
RST
CFG
KO
Pag ↓
SCHEDA INPUT
INP. PROC. 4
INP. PROC. 5
INP. PROC. 6
REV
1.0
1.0
1.0
DCI
EEP
Per uscire dal sottomenu premere il tasto ESC.
DETTAGLIO ALLARMI SU SCHEDE AUDIO OUTPUT OB 3230
VISUALIZZAZIONE CAMPI ALLARME
AUDIO INPUT PROCESSORS
AUDIO OUTPUT PROCESSORS
PIGIARE F1 PER VEDERE ALLARMI
ALLARMI
[
]
[
]
Per visualizzare in dettaglio lo stato corrente degli allarmi relativi alle schede AUDIO OUTPUT OB 3230, dal menu ALLARMI dell’apparecchio,
tramite i tasti ↑ / ↓ e/o pag ↑ / pag ↓ spostare il punto di selezione sul sottomenu AUDIO OUTPUT PROCESSORS e premere il tasto ENTER; sul display dell’apparecchio appaiono i campi indicati di seguito.
SCHEDA OUT Indica il numero di identificazione della scheda AUDIO OUTPUT OB 3230 (vedi paragrafo PARAMETRI CARATTERISTICI).
REV
Indica la versione del software della scheda AUDIO OUTPUT.
DCI
Indica un allarme causato da un problema di comunicazione fra la scheda e l’unità di controllo. Quando l’allarme è attivato
nel campo viene indicato il segno X.
EEP
Indica un allarme causato da un guasto o un funzionamento difettoso della memoria EEPROM della scheda. Quando l’allarme è attivato nel campo viene indicato il segno X.
RST
Indica un allarme causato da un “azzeramento” del microprocessore della scheda, per inizializzarne nuovamente il funzionamento (funzione “watchdog”). Quando l’allarme è attivato nel campo viene indicato il segno X.
CFG
Indica un allarme causato da una incompleta configurazione della scheda da parte dell’unità di controllo (es. estraendo la
scheda è stata interrotta la configurazione). Quando l’allarme è attivato nel campo viene indicato il segno X.
POW
Indica un allarme causato da una tensione di alimentazione della scheda troppo bassa o assente. Quando l’allarme è attivato nel campo viene indicato il segno X.
AUD
Indica un allarme causato da un guasto ad una o più uscite audio della scheda. Quando l’allarme è attivato nel campo viene indicato il segno X.
KO
Indica un allarme causato dalla rimozione della scheda (ad esempio per poterla riparare). In questa condizione la scheda
non comunica più con l’unità CP 3100, ed il controllo di tutte le altre cause di allarme viene sospeso. Per riutilizzare una
scheda precedentemente rimossa, occorre riconfigurare il sistema, operando come indicato nel paragrafo ATTUAZIONE DI
UNA CONFIGURAZIONE. Quando l’allarme è attivato nel campo viene indicato il segno X.
Nella prima schermata vengono visualizzati solo i primi 7 campi (REV, DCI, EEP, RST, CFG, POW, AUD) delle prime 3 schede OB 3230. Per visualizzare il campo successivo premere il tasto →; per visualizzare il campo precedente premere il tasto ←.
SCHEDA OUT
OUT. PROC. 1
OUT. PROC. 2
OUT. PROC. 3
REV
1.0
1.0
1.0
DCI
EEP
RST
CFG
POW AUD
→
REV
1.0
1.0
1.0
DCI
EEP
RST
CFG
POW AUD
KO
Per visualizzare le schede AUDIO OUTPUT OB 3230 successive o precedenti premere i tasti ↑ / ↓ e/o pag ↑ / pag ↓.
49
SCHEDA OUT
OUT. PROC. 1
OUT. PROC. 2
OUT. PROC. 3
REV
1.0
1.0
1.0
DCI
EEP
RST
CFG
POW AUD
CFG
POW AUD
Pag ↓
SCHEDA OUT
OUT. PROC. 4
OUT. PROC. 5
OUT. PROC. 6
REV
1.0
1.0
1.0
DCI
EEP
RST
Per uscire dal sottomenu premere il tasto ESC.
DETTAGLIO ALLARMI SU SCHEDE INPUT/OUTPUT DIGITALI IO 3250
VISUALIZZAZIONE CAMPI ALLARME
GPI PROCESSORS
CONSOLLES DIG.
PIGIARE F1 PER VEDERE ALLARMI
ALLARMI
[
]
[
]
Per visualizzare in dettaglio lo stato corrente degli allarmi relativi alle schede INPUT/OUTPUT digitali IO 3250, dal menu ALLARMI dell’apparecchio, tramite i tasti ↑ / ↓ e/o pag ↑ / pag ↓ spostare il punto di selezione sul sottomenu GPI PROCESSORS e premere il tasto ENTER; sul
display dell’apparecchio appaiono i campi indicati di seguito.
SCHEDA GPI
Indica il numero di identificazione della scheda INPUT/OUTPUT digitale IO 3250 (vedi paragrafo PARAMETRI CARATTERISTICI).
REV
Indica la versione del software della scheda INPUT/OUTPUT digitale.
DCI
Indica un allarme causato da un problema di comunicazione fra la scheda e l’unità di controllo. Quando l’allarme è attivato
nel campo viene indicato il segno X.
EEP
Indica un allarme causato da un guasto o un funzionamento difettoso della memoria EEPROM della scheda. Quando l’allarme è attivato nel campo viene indicato il segno X.
RST
Indica un allarme causato da un “azzeramento” del microprocessore della scheda, per inizializzarne nuovamente il funzionamento (funzione “watchdog”). Quando l’allarme è attivato nel campo viene indicato il segno X.
CFG
Indica un allarme causato da una incompleta configurazione della scheda da parte dell’unità di controllo (es. estraendo la
scheda è stata interrotta la configurazione). Quando l’allarme è attivato nel campo viene indicato il segno X.
POW
Indica un allarme causato da una tensione di alimentazione della scheda troppo bassa o assente. Quando l’allarme è attivato nel campo viene indicato il segno X.
KO
Indica un allarme causato dalla rimozione della scheda (ad esempio per poterla riparare). In questa condizione la scheda
non comunica più con l’unità CP 3100, ed il controllo di tutte le altre cause di allarme viene sospeso. Per riutilizzare una
scheda precedentemente rimossa, occorre riconfigurare il sistema, operando come indicato nel paragrafo ATTUAZIONE DI
UNA CONFIGURAZIONE. Quando l’allarme è attivato nel campo viene indicato il segno X.
Per visualizzare le schede INPUT/OUTPUT digitali IO 3250 successive o precedenti premere i tasti ↑ / ↓ e/o pag ↑ / pag ↓.
SCHEDA GPI
GPI PROC. 1
GPI PROC. 2
GPI PROC. 3
REV
1.0
1.0
1.0
DCI
0
0
0
EEP
0
0
0
RST
0
0
0
CFG
0
0
0
POW
0
0
0
KO
0
0
0
CFG
0
0
0
POW
0
0
0
KO
0
0
0
Pag ↓
SCHEDA GPI
GPI PROC. 4
GPI PROC. 5
GPI PROC. 6
REV
1.0
1.0
1.0
DCI
0
0
0
EEP
0
0
0
RST
0
0
0
Per uscire dal sottomenu premere il tasto ESC.
50
DETTAGLIO ALLARMI SU CONSOLLE BM 3616
VISUALIZZAZIONE CAMPI ALLARME
GPI PROCESSORS
CONSOLLES DIG.
PIGIARE F1 PER VEDERE ALLARMI
ALLARMI
[
]
[
]
Per visualizzare in dettaglio lo stato corrente degli allarmi relativi alle consolle digitali BM 3616, dal menu ALLARMI dell’apparecchio, tramite
i tasti ↑ / ↓ e/o pag ↑ / pag ↓ spostare il punto di selezione sul sottomenu CONSOLLES DIG. e premere il tasto ENTER; sul display dell’apparecchio appaiono i campi indicati di seguito.
CONSOLLE
Indica il numero di identificazione della consolle digitale BM 3616; tale numero viene impostato localmente sulla consolle,
tramite la procedura per l’assegnazione dell’indirizzo (vedi manuale d’installazione e d’uso consolle BM 3616).
REV
Indica la versione del software della consolle.
COM
Indica un allarme causato da un problema di comunicazione fra la consolle e l’unità di controllo. Quando l’allarme è attivato nel campo viene indicato il segno X.
EEP
Indica un allarme causato da un guasto o un funzionamento difettoso della memoria EEPROM della consolle. Quando l’allarme è attivato nel campo viene indicato il segno X.
RST
Indica un allarme causato da un “azzeramento” del microprocessore della consolle, per inizializzarne nuovamente il funzionamento (funzione “watchdog”). Quando l’allarme è attivato nel campo viene indicato il segno X.
POW
Indica un allarme causato da una tensione di alimentazione della consolle troppo bassa o assente. Quando l’allarme è attivato nel campo viene indicato il segno X.
KO
Indica un allarme causato dalla rimozione della consolle (ad esempio per poterla riparare). In questa condizione la consolle
non comunica più con l’unità CP 3100, ed il controllo di tutte le altre cause di allarme viene sospeso. Per riutilizzare una
consolle precedentemente rimossa, occorre riconfigurare il sistema, operando come indicato nel paragrafo ATTUAZIONE DI
UNA CONFIGURAZIONE. Quando l’allarme è attivato nel campo viene indicato il segno X.
Per visualizzare le consolle digitali BM 3616 successive o precedenti premere i tasti ↑ / ↓ e/o pag ↑ / pag ↓.
CONSOLLE
1
2
3
REV
1.0
1.0
1.0
COM
EEP
RST
POW
KO
POW
KO
Pag ↓
CONSOLLE
4
5
6
REV
1.0
1.0
1.0
COM
EEP
RST
Per uscire dal sottomenu premere il tasto ESC.
DETTAGLIO ALLARMI SU UNITA’ A.C.U.
VISUALIZZAZIONE CAMPI ALLARME
(ACU) AMPLIFICATORI
ALLARMI GPI
PIGIARE F1 PER VEDERE ALLARMI
ALLARMI
[
]
[
]
Per visualizzare in dettaglio lo stato corrente degli allarmi relativi alle unità A.C.U. (vedi paragrafo UNITA’ A.C.U.), dal menu ALLARMI dell’apparecchio, tramite i tasti ↑ / ↓ e/o pag ↑ / pag ↓ spostare il punto di selezione sul sottomenu AMPLIFICATORI e premere il tasto ENTER;
sul display dell’apparecchio appaiono i campi indicati di seguito.
ACU N.
Indica il numero di identificazione dell’unità A.C.U. (scheda retroamplificatore RB 3300). L’indicazione, di tipo sequenziale,
è legata all’indirizzo assegnato all’unità A.C.U. in fase di installazione: al numero 1 corrisponde l’unità A.C.U. con indirizzo
“0”, al numero 120 corrisponde l’unità A.C.U. con indirizzo 119.
REV
Indica la versione del software dell’unità A.C.U.
COM
Indica un allarme causato da un problema di comunicazione fra l’unità A.C.U. e l’unità di controllo CP 3100. Quando l’allarme è attivato nel campo viene indicato il segno X.
LFT
L’allarme viene segnalato solo se l’unità A.C.U. è equipaggiata con la scheda opzionale FAULT DETECTOR SB 3320. Segnala uno o più dei seguenti guasti sulla linea audio per diffusori connessa all’uscita dell’amplificatore controllato dall’unità
A.C.U.: cortocircuito fra i due conduttori della linea, interruzione della linea, cortocircuito fra la linea ed il circuito di messa
a terra (vedi paragrafo FUNZIONE LINE FAULT). Quando l’allarme è attivato nel campo viene indicato il segno X.
PAF
L’allarme viene segnalato solo se l’unità A.C.U. è equipaggiata con la scheda opzionale FAULT DETECTOR SB 3320. Segnala un qualsiasi malfunzionamento dell’amplificatore controllato dall’unità A.C.U., che determini una sensibile diminuzione della potenza trasmessa (vedi paragrafo FUNZIONE PA FAULT). Se l’unità A.C.U. è stata configurata con l’opzione MODO=AUTOM., l’attivazione di questo allarme determina la disinserzione automatica dell’amplificatore controllato dall’unità,
e l’eventuale inserzione di un amplificatore di riserva, o di un’unità A.C.U. RISERVA nel caso l’amplificatore di riserva sia
anch’esso controllato da una scheda retroamplificatore RB 3300 (vedi paragrafo UTILIZZO DEL MENU ACU). Quando l’allarme è attivato nel campo viene indicato il segno X.
51
OVL
L’allarme viene segnalato se l’amplificatore controllato dall’unità A.C.U. è provvisto di un contatto ausiliario di allarme che,
commutando in chiusura quando interviene una protezione, o quando l’apparecchio funziona in modo anormale, pilota un
apposito ingresso dell’unità A.C.U. (vedi paragrafo FUNZIONE OVL). Se l’unità A.C.U. è stata configurata con l’opzione MODO=AUTOM., l’attivazione di questo allarme determina la disinserzione automatica dell’amplificatore controllato dall’unità,
e l’eventuale inserzione di un amplificatore di riserva, o di un’unità A.C.U. RISERVA nel caso l’amplificatore di riserva sia
anch’esso controllato da una scheda retroamplificatore RB 3300 (vedi paragrafo UTILIZZO DEL MENU ACU). Quando l’allarme è attivato nel campo viene indicato il segno X.
Indica un allarme causato da un “azzeramento” del microprocessore della scheda, per inizializzarne nuovamente il funzionamento (funzione “watchdog”). Quando l’allarme è attivato nel campo viene indicato il segno X.
L’allarme viene segnalato solo se l’unità A.C.U. è equipaggiata con la scheda opzionale FAULT DETECTOR SB 3320. Indica un allarme “fire-break”, che viene generato quando, tramite l’apertura di un contatto connesso alla scheda SB 3320 (es.
contatto di un pulsante), viene comandata l’interruzione della normale diffusione del segnale audio, per diffondere con priorità assoluta un segnale di emergenza proveniente da una sorgente non connessa alla matrice audio del sistema (vedi paragrafo FUNZIONE FIRE-BREAK).
Indica un allarme causato dalla mancanza della tensione di alimentazione a 24 V dell’unità A.C.U. Quando l’allarme è attivato nel campo viene indicato il segno X.
Indica un allarme causato dalla mancanza della tensione di alimentazione a 13,5 V dell’unità A.C.U. Quando l’allarme è attivato nel campo viene indicato il segno X.
Questa indicazione non rappresenta un allarme, e viene fornita solo se l’unità A.C.U. è equipaggiata con la scheda opzionale DIGITAL ALC LB 3340. Indica l’intervento del circuito per la correzione automatica del livello di diffusione, presente sulla scheda LB 3340. Quando avviene l’intervento, nel campo viene indicato il segno “X”; questa indicazione varia lentamente (circa 1 variazione al minuto).
Indica un allarme causato dalla rimozione dell’unità A.C.U. (ad esempio per poterla riparare). In questa condizione l’unità
A.C.U. non comunica più con l’unità CP 3100, ed il controllo di tutte le altre cause di allarme viene sospeso. Per riutilizzare un’unità precedentemente rimossa, occorre riconfigurare il sistema, operando come indicato nel paragrafo ATTUAZIONE
DI UNA CONFIGURAZIONE. Quando l’allarme è attivato nel campo viene indicato il segno X.
RST
FBK
24V
12V
ALC
KO
Nella prima schermata vengono visualizzati solo i primi 7 campi (REV, COM, LFT, PAF, OVL, RST, FBK) delle prime 3 unità A.C.U. Per visualizzare il campo successivo premere il tasto →; per visualizzare il campo precedente premere il tasto ←.
ACU N.
ACU 1
ACU 2
ACU 3
REV
1.0
1.0
1.0
COM LFT
PAF
OVL
RST
FBK
12V
ALC
KO
→
LFT
PAF
OVL
RST
FBK
24V
Per visualizzare le unità A.C.U. successive o precedenti premere i tasti ↑ / ↓ e/o pag ↑ / pag ↓.
ACU N.
ACU 1
ACU 2
ACU 3
REV
1.0
1.0
1.0
COM LFT
PAF
OVL
RST
FBK
OVL
RST
FBK
→
ACU N.
ACU 4
ACU 5
ACU 6
REV
1.0
1.0
1.0
COM LFT
PAF
Per uscire dal sottomenu premere il tasto ESC.
DETTAGLIO ALLARMI “GPI”
VISUALIZZAZIONE CAMPI ALLARME
(ACU) AMPLIFICATORI
ALLARMI GPI
PIGIARE F1 PER VEDERE ALLARMI
ALLARMI
[
]
[
]
Il sottomenu ALLARMI GPI consente di visualizzare lo stato degli avvisi comandabili tramite gli ingressi GPI che hanno la funzione di avviso
abilitata (campo ALL. = ON). Dal menu “ALLARMI” dell’apparecchio, tramite i tasti ↑ / ↓ e/o pag ↑ / pag ↓ spostare il punto di selezione sul
sottomenu ALLARMI GPI e premere il tasto ENTER; sul display dell’apparecchio vengono visualizzati i campi indicati di seguito.
52
EVENTO GPI
ALLARME
In questo campo vengono indicati i nomi degli eventi programmati tramite il menu EVENTI INGRESSI GPI (vedi paragrafo
UTILIZZO DEL MENU EVENTI INGRESSI GPI).
In questo campo viene indicato lo stato dell’avviso: quando l’avviso è attivato nel campo viene indicato il segno X.
Per visualizzare gli eventi GPI con avviso successivi o precedenti premere i tasti ↑ / ↓ e/o pag ↑ / pag ↓.
EVENTO GPI
TASTO 1 CONSOLLE 1
TASTO 2 CONSOLLE 1
TASTO 3 CONSOLLE 1
ALLARME
[
]
[
]
[
]
Pag ↓
EVENTO GPI
TASTO 4 CONSOLLE 1
TASTO 1 CONSOLLE 2
TASTO 2 CONSOLLE 2
ALLARME
[
]
[
]
[
]
Per uscire dal sottomenu premere il tasto “ESC”.
DETTAGLIO ALLARMI CONSOLLE BM 3616
VISUALIZZAZIONE CAMPI ALLARME
EMERGENZA
FIREMAN
PIGIARE F1 PER VEDERE ALLARMI
ALLARMI
[
]
[
]
Il sottomenu EMERGENZA consente di visualizzare lo stato degli allarmi comandabili tramite il tasto ALARM delle consolle digitali BM 3616
(vedi paragrafo UTILIZZO DEL MENU CONSOLES DIGITALI). Dal menu ALLARMI dell’apparecchio, tramite i tasti ↑ / ↓ e/o pag ↑ / pag ↓ spostare il punto di selezione sul sottomenu EMERGENZA e premere il tasto ENTER; sul display dell’apparecchio appaiono i campi indicati di
seguito.
CONSOLLE
In questo campo vengono indicati i nomi delle consolle digitali BM 3616, definiti tramite il menu CONSOLES DIGITALI.
EMERGENZA In questo campo viene indicato lo stato dell’allarme: quando l’allarme è attivato nel campo viene indicato il segno X.
AVVERTENZE
• Un allarme comandato da una consolle BM 3616 può essere interrotto solamente tramite la stessa consolle che l’ha attivato, o tramite lo spegnimento del sistema.
• Un allarme comandato da una consolle BM 3616 rimane attivato anche nel caso avvenga un’interruzione della comunicazione fra la consolle e l’unità di controllo.
Per visualizzare le consolle BM 3616 successive o precedenti premere i tasti ↑ / ↓ e/o pag ↑ / pag ↓.
CONSOLLE
CONSOLLE 1
CONSOLLE 2
CONSOLLE 3
EMERGENZA
[
]
[
]
[
]
Pag ↓
CONSOLLE
CONSOLLE 4
CONSOLLE 5
CONSOLLE 6
EMERGENZA
[
]
[
]
[
]
Per uscire dal sottomenu premere il tasto ESC.
53
DETTAGLIO ALLARMI FIREMAN
VISUALIZZAZIONE CAMPI ALLARME
EMERGENZA
FIREMAN
PIGIARE F1 PER VEDERE ALLARMI
ALLARMI
[
]
[
]
Il sottomenu FIREMAN consente di visualizzare lo stato degli allarmi comandabili tramite gli ingressi GPI configurati FIREMAN (vedi paragrafo
UTILIZZO DEL MENU EVENTI INGRESSI GPI). Dal menu ALLARMI dell’apparecchio, tramite i tasti ↑ / ↓ e/o pag ↑ / pag ↓ spostare il punto di
selezione sul sottomenu “FIREMAN” e premere il tasto ENTER; sul display dell’apparecchio vengono visualizzati i campi indicati di seguito.
EVENTO GPI
Indica lo specifico evento FIREMAN; il sistema gestisce 2 eventi di questo tipo.
ALLARME
In questo campo viene indicato lo stato dell’allarme: quando l’allarme FIREMAN è attivato nel campo viene indicato il segno X.
EVENTO GPI
FIREMAN1
FIREMAN2
ALLARME
[
]
[
]
Per uscire dal sottomenu premere il tasto ESC.
ALLARMI DI SISTEMA
VISUALIZZAZIONE CAMPI ALLARME
FIREMAN
ALLARMI SISTEMA
PIGIARE F1 PER VEDERE ALLARMI
ALLARMI
[
]
[
]
Il sottomenu ALLARMI SISTEMA consente di visualizzare in dettaglio lo stato corrente degli allarmi relativi a componenti dell’unità di controllo CP 3100. Dal menu ALLARMI dell’apparecchio, tramite i tasti ↑ / ↓ e/o pag ↑ / pag ↓ spostare il punto di selezione sul sottomenu ALLARMI SISTEMA e premere il tasto ENTER; sul display dell’apparecchio vengono visualizzati i campi indicati di seguito.
COMPONENTE Nel campo sono indicati i seguenti componenti dell’unità di controllo.
• SOUND BLASTER - Indica la scheda audio.
• COM1 PORT - Indica la porta seriale numero 1.
• COM2 PORT - Indica la porta seriale numero 2.
• COM3 PORT - Indica la porta seriale numero 3.
• COM4 PORT - Indica la porta seriale numero 4.
ALLARME
In questo campo viene indicato lo stato dell’allarme: quando l’allarme è attivato nel campo viene indicato il segno X.
Per visualizzare i componenti successivi o precedenti premere i tasti ↑ / ↓ e/o pag ↑ / pag ↓.
COMPONENTE
SOUND BLASTER
COM1 PORT
COM2 PORT
ALLARME
[
]
[
]
[
]
Pag ↓
COMPONENTE
COM2 PORT
COM3 PORT
COM4 PORT
ALLARME
[
]
[
]
[
]
Per uscire dal sottomenu premere il tasto ESC.
54
ATTUAZIONE DI UNA CONFIGURAZIONE (menu MEMOR. CONFIG.)
Con l’attuazione di una configurazione tutti i dispositivi del sistema vengono programmati con le impostazioni contenute nei file di configurazione, che possono essere generati tramite il comando COMPILA E SALVA del menu di configurazione dell’unità di controllo, oppure tramite
l’eventuale PC di configurazione. I dispositivi che vengono programmati sono:
• consolle digitali BM 3616.
• schede retroamplificatore RB 3300.
• schede INPUT/OUTPUT digitali IO 3250.
• schede AUDIO INPUT IB 3210 / IB 3280.
• schede AUDIO OUTPUT OB 3230.
Tale procedura si rende necessaria quando:
• viene aggiunto o eliminato un componente del sistema.
• viene cambiato l’indirizzo di un componente del sistema.
• vengono modificati i file di configurazione del sistema tramite l’unità di controllo CP 3100.
• viene reinserito un componente del sistema, precedentemente rimosso per poterlo riparare.
AVVERTENZA
• L’attuazione di una configurazione non è necessaria quando vengono variate delle impostazioni tramite il menu PROCESSO AUDIO (vedi
paragrafo IMPOSTAZIONI AUDIO).
Per programmare tutti i dispositivi del sistema è possibile operare in due modi diversi, descritti nei paragrafi seguenti.
PROGRAMMAZIONE DEI DISPOSITIVI TRAMITE MENU
1) Dal menu principale dell’unità di controllo premere il tasto F3 (MEMOR. CONFIG.): sul display appare un messaggio in cui si richiede di
inserire l’eventuale password dell’unità di controllo (vedi paragrafo PASSWORD DI ACCESSO AI MENU).
2) Tramite il tastierino numerico inserire la password dell’unità di controllo (quando prevista) e premere ENTER: tutti i dispositivi del sistema
verranno automaticamente programmati.
RCF RX 3000 AUDIO SYSTEM
F1: CONFIGURAZ.
F2: ALLARMI
"##############
ITALIANO _ _ _ ▼
F3: MEMOR. CONFIG.
F4: PROCESSO AUDIO
03 NOV 1999
15:29:52
F3
INSERIRE PASSWORD PER ACCESSO CONFIGURAZ
PASSWORD: “numero password”
ENTER
RCF RX 3000 AUDIO SYSTEM
F1: CONFIGURAZ.
F2: ALLARMI
"##############
ITALIANO _ _ _ ▼
F3: MEMOR. CONFIG.
F4: PROCESSO AUDIO
03 NOV 1999
15:29:52
AVVERTENZE
• L’attuazione di una nuova configurazione comporta il “reset” di tutti i dispositivi del sistema.
• L’attuazione di una nuova configurazione non può essere effettuata se è in corso un evento con priorità assoluta (es. evento EMERGENZA, FIREMAN 1, FIREMAN 2).
PROGRAMMAZIONE DEI DISPOSITIVI TRAMITE RIAVVIO DEL SISTEMA
1) Spegnere il sistema.
2) Riavviare il sistema, alimentando nuovamente tutti i dispositivi.
ERRORI DI COMPILAZIONE
Durante la programmazione dei dispositivi del sistema possono verificarsi degli errori, dovuti ad una compilazione scorretta dei campi dei menu per la configurazione del sistema (menu F1: CONFIGURAZ.). In questo caso sul display dell’unità di controllo viene visualizzato il messaggio ERRORI !, seguito dall’indicazione dell’errore avvenuto.
55
IMPOSTAZIONI AUDIO (menu PROCESSO AUDIO)
RCF RX 3000 AUDIO SYSTEM
F1: CONFIGURAZ.
F2: ALLARMI
"##############
ITALIANO _ _ _ ▼
F3: MEMOR. CONFIG.
F4: PROCESSO AUDIO
03 NOV 1999
15:29:52
Tramite il menu PROCESSO AUDIO è possibile impostare velocemente numerosi parametri audio, inserire e disinserire manualmente le unità
A.C.U., e monitorare i segnali audio trattati dal sistema. Per accedere al menu, dal menu principale dell’unità di controllo premere il tasto F4:
sul display dell’apparecchio vengono visualizzati i seguenti sottomenu:
• PROCESSO INP AUDIO
Menu per regolare il guadagno degli ingressi delle schede AUDIO INPUT IB 3210 / IB 3280; il menu consente
inoltre di attivare o disattivare i controlli di tono degli ingressi (alti/bassi).
• PROCESSO OUT AUDIO Menu per regolare il livello dei segnali audio sulle uscite delle schede AUDIO OUTPUT OB 3230.
• INSER. RISERVA ACU
Menu per inserire/disinserire manualmente le unità A.C.U. (vedi paragrafo UNITA’ A.C.U.), e per conoscere lo
stato operativo di tali unità.
• OPERAZIONI MONITOR Menu per ascoltare, tramite l’altoparlante monitor dell’unità di controllo, i segnali audio trattati dal sistema (es.
segnali in ingresso, segnali in uscita, segnali sulle uscite per diffusori degli amplificatori controllati dalle unità
A.C.U.). Il menu consente inoltre controllare i livelli dei segnali audio monitorati.
Le impostazioni effettuate tramite il menu PROCESSO AUDIO vengono applicate immediatamente, senza la necessità di utilizzare l’opzione
MEMOR. CONFIG. del menu principale (nessuna necessità di attuare la nuova configurazione). Nella prima schermata vengono visualizzati
solo i primi 3 sottomenu; per visualizzare i successivi utilizzare i tasti ↑ / ↓ e/o pag ↑ / pag ↓.
OPZIONI REGOLAZ. AUDIO
PROCESSO INP AUDIO
PROCESSO OUT AUDIO
INSER. RISERVA ACU
Pag ↓
OPZIONI REGOLAZ. AUDIO
PROCESSO OUT AUDIO
INSER. RISERVA ACU
OPERAZIONI MONITOR
UTILIZZO DEL MENU “PROCESSO INP AUDIO”
OPZIONI REGOLAZ. AUDIO
PROCESSO INP AUDIO
PROCESSO OUT AUDIO
INSER. RISERVA ACU
Dal menu PROCESSO AUDIO dell’apparecchio, tramite i tasti ↑ / ↓ e/o pag ↑ / pag ↓ spostare il punto di selezione sul sottomenu PROCESSO INP AUDIO e premere il tasto ENTER; sul display dell’apparecchio appaiono i campi indicati di seguito.
NOME INPUT Indica il nome dell’ingresso da regolare. I nomi visualizzati sono quelli associati ai vari ingressi tramite il menu di configurazione PROCESSO INGRESSI AUDIO.
GUAD. dB
Consente di regolare il guadagno dell’ingresso. Utilizzare i tasti + e - per impostare il guadagno entro i valori 0 e +20 dB.
La regolazione avviene a passi di 1 dB.
AVVERTENZE
• Valutare attentamente la regolazione del guadagno se effettuata contemporaneamente alla regolazione dei controlli di tono, per evitare problemi dovuti alla saturazione dell’ingresso.
BASSI/ALTI
Consente di attivare o disattivare i due controlli di tono dell’ingresso (trimmer), per la regolazione delle alte e basse frequenze. Utilizzare i tasti + e - per selezionare una delle seguenti opzioni:
• ON - Controlli di tono attivati.
• OFF - Controlli di tono disattivati.
Per visualizzare gli ingressi successivi o precedenti premere i tasti ↑ / ↓ e/o pag ↑ / pag ↓.
NOME INPUT
SORGENTE 1
SORGENTE 2
SORGENTE 3
GUAD. DB
00
00
00
BASSI/ALTI
OFF▼
OFF▼
OFF▼
Pag ↓
56
NOME INPUT
SORGENTE 4
SORGENTE 5
SORGENTE 6
GUAD. DB
00
00
00
BASSI/ALTI
OFF▼
OFF▼
OFF▼
Premere il tasto ESC per uscire dal sottomenu; le nuove impostazioni vengono automaticamente memorizzate.
UTILIZZO DEL MENU “PROCESSO OUT AUDIO”
OPZIONI REGOLAZ. AUDIO
PROCESSO INP AUDIO
PROCESSO OUT AUDIO
INSER. RISERVA ACU
Dal menu PROCESSO AUDIO dell’apparecchio, tramite i tasti ↑ / ↓ e/o pag ↑ / pag ↓ spostare il punto di selezione sul sottomenu PROCESSO OUT AUDIO e premere il tasto ENTER; sul display dell’apparecchio appaiono i campi indicati di seguito.
NOME OUTPUT Indica il nome dell’uscita da regolare. I nomi visualizzati sono quelli associati alle varie uscite tramite il menu di configurazione PROCESSO USCITE AUDIO.
ATTEN dB
Consente di attenuare il livello del segnale in uscita. Utilizzare i tasti + e - per impostare il livello di attenuazione entro i
valori 0 e -30dB. La regolazione avviene a passi di 1 dB ed è riferita ad un livello di uscita nominale con metodo sbilanciato di 0 dB.
AVVERTENZE
• I segnali bilanciati possiedono un livello di uscita di 6 dB superiore rispetto ai segnali sbilanciati: impostando ad esempio un’attenuazione di 0 dB, se l’uscita del segnale audio avviene con metodo sbilanciato il livello nominale del segna le sarà di
0 dB, mentre se l’uscita del segnale audio avviene con metodo bilanciato il livello nominale del segnale sarà di +6 dB.
• Si suggerisce di attenuare l’uscita di tipo RECORDER, dedicata a pilotare l’ingresso LINE IN della scheda audio, di -6 dB.
Per visualizzare le uscite successive o precedenti premere i tasti ↑ / ↓ e/o pag ↑ / pag ↓.
NOME OUTPUT
ZONA 1
ZONA 2
ZONA 3
ATTEN DB
04
02
00
Pag ↓
NOME OUTPUT
ZONA 4
ZONA 5
ZONA 6
ATTEN DB
00
00
00
Premere il tasto ESC per uscire dal sottomenu; le nuove impostazioni vengono automaticamente memorizzate.
UTILIZZO DEL MENU “INSER. RISERVA ACU”
OPZIONI REGOLAZ. AUDIO
PROCESSO INP AUDIO
PROCESSO OUT AUDIO
INSER. RISERVA ACU
Dal menu PROCESSO AUDIO dell’apparecchio, tramite i tasti ↑ / ↓ e/o pag ↑ / pag ↓ spostare il punto di selezione sul sottomenu INSER.
RISERVA ACU e premere il tasto ENTER; sul display dell’apparecchio appaiono i campi indicati di seguito.
ACU
Indica il numero di identificazione dell’unità A.C.U. L’indicazione, di tipo sequenziale, è legata all’indirizzo assegnato all’unità A.C.U. in fase di installazione: al numero 1 corrisponde l’unità A.C.U. con indirizzo 0, al numero 120 corrisponde l’unità
A.C.U. con indirizzo 119.
NOTA
• In questo campo compaiono solo i numeri di identificazione delle unità A.C.U. che sono state configurate tramite l’apposito menu.
TIPO
GRUP.
Indica il tipo di unità A.C.U., definito tramite il menu di configurazione ACU. Può essere visualizzato:
• NORMALE - E’ un’unità A.C.U. che ha la funzione di controllare un amplificatore primario, normalmente dedicato alla sonorizzazione di una determinata zona audio.
• RISERVA - E’ un’unità A.C.U. che ha la funzione di controllare un amplificatore di riserva, che viene normalmente utilizzato per sostituire un amplificatore primario, ad esempio in caso di guasto di quest’ultimo.
Indica il gruppo di appartenenza dell’unità A.C.U., definito tramite il menu di configurazione ACU. Il sistema è in grado di
gestire, nella configurazione massima, fino a 64 gruppi.
57
STATUS
INSERZ.
Indica lo stato operativo dell’unità A.C.U., che viene continuamente aggiornato in funzione dei vari eventi. Può essere visualizzato:
• N.C. Indica un problema di comunicazione fra l’unità di controllo CP 3100 e l’unità A.C.U. (vedi paragrafo DETTAGLIO ALLARMI SU UNITA’ A.C.U.). Questa segnalazione può avvenire in qualsiasi momento, e rappresenta uno stato di allarme.
• GUASTO - Indica l’attivazione di un allarme di tipo PA FAULT o OVL sull’unità A.C.U. (vedi paragrafo DETTAGLIO ALLARMI SU UNITA’ A.C.U.).
• NON INS. - Indica che l’unità A.C.U. è disinserita ma funziona correttamente e comunica regolarmente con l’unità di
controllo CP 3100.
• ATTIVA Indica che l’unità A.C.U. è inserita e funziona correttamente.
Consente di inserire o disinserire manualmente un’unità A.C.U. di tipo NORMAL o RISERVA, configurata con metodo di inserzione/disinserzione sia manuale che automatico (campo MODO del menu di configurazione ACU).
Un’unità NORMAL come un’unità RISERVA, può essere inserita o disinserita manualmente in qualunque momento, ad
esempio per effettuare un test per verificare l’inserzione automatica della relativa riserva.
Utilizzare i tasti + e - per selezionare una delle seguenti opzioni:
• ON – Unità A.C.U. inserita.
• OFF – Unità A.C.U. disinserita.
AVVERTENZE
• Quando non è possibile modificare il parametro del campo INSERZ., viene generato un segnale acustico (“beep”).
• Le unità NORMAL sono normalmente inserite (ON), mentre le unità RISERVA sono sempre normalmente disinserite
(OFF).
• Quando viene disinserita un’unità NORMAL e nel gruppo di A.C.U. a cui appartiene è presente un amplificatore di riserva
che non è controllato tramite una scheda retroamplificatore RB 3300, questo viene sempre automaticamente inserito al
posto dell’amplificatore primario.
Per visualizzare le unità A.C.U. successive o precedenti premere i tasti ↑ / ↓ e/o pag ↑ / pag ↓.
ACU
1
2
3
TIPO
NORMALE
RISERVA
RISERVA
GRUP.
01
01
01
STATUS
N.C.
N.C.
N.C.
INSERZ.
OFF▼
OFF▼
OFF▼
Pag ↓
ACU
4
5
6
TIPO
RISERVA
NORMALE
RISERVA
GRUP.
01
02
02
STATUS
N.C.
N.C.
N.C.
INSERZ.
OFF▼
OFF▼
OFF▼
Premere il tasto ESC per uscire dal sottomenu; le nuove impostazioni vengono automaticamente memorizzate.
Per chiarire il funzionamento delle unità A.C.U. con diverse configurazioni sono riportati i seguenti esempi.
Esempio 1: operazione di scambio manuale da un’unità NORMAL verso un’unità RISERVA
Configurazione unità A.C.U.:
a) Unità A.C.U. 1 di tipo NORMAL configurata MANUAL.
b) Unità A.C.U. 2 di tipo RISERVA configurata MANUAL.
Sul display dell’unità di controllo CP 3100 viene visualizzato:
ACU
1
2
TIPO
NORMALE
RISERVA
GRUP.
01
01
STATUS
ATTIVA
NON INS.
INSERZ.
ON▼
OFF▼
Operazioni da effettuare:
1) Nel campo INSERZ. della A.C.U. 1 selezionare l’opzione OFF; nel relativo campo STATUS compare di conseguenza la voce NON INS..
2) Per inserire la riserva occorre UN’OPERAZIONE MANUALE sulla A.C.U. 2: nel campo INSERZ. di quest’ultima unità selezionare l’opzione ON; nel relativo campo STATUS compare di conseguenza la voce ATTIVA.
Sul display dell’unità di controllo CP 3100 viene ora visualizzato:
ACU
1
2
TIPO
NORMALE
RISERVA
GRUP.
01
01
STATUS
NON INS.
ATTIVA
INSERZ.
OFF▼
ON▼
58
Esempio 2: operazione di scambio semiautomatico da un’unità NORMAL verso un’unità RISERVA
Configurazione unità A.C.U.:
a) Unità A.C.U. 1 di tipo NORMAL configurata AUTOM..
b) Unità A.C.U. 2 di tipo RISERVA configurata MANUAL.
Sul display dell’unità di controllo CP 3100 viene visualizzato:
ACU
1
2
TIPO
NORMALE
RISERVA
GRUP.
01
01
STATUS
ATTIVA
NON INS.
INSERZ.
ON▼
OFF▼
Operazioni da effettuare:
1) Provocare un allarme sulla A.C.U. 1 (es. allarme OVL); l’unità A.C.U. 1 viene automaticamente disinserita: nel relativo campo INSERZ.
compare OFF (unità automaticamente disinserita), mentre nel campo STATUS compare GUASTO.
2) Per inserire la riserva occorre UN’OPERAZIONE MANUALE sulla A.C.U. 2: nel campo INSERZ. di quest’ultima unità selezionare l’opzione ON; nel relativo campo STATUS compare di conseguenza la voce ATTIVA.
Sul display dell’unità di controllo CP 3100 viene ora visualizzato:
ACU
1
2
TIPO
NORMALE
RISERVA
GRUP.
01
01
STATUS
GUASTO
ATTIVA
INSERZ.
OFF▼
ON▼
NOTA
• Una volta che l’allarme sull’unità A.C.U. 1 è terminato, per inserire nuovamente tale unità occorre procedere manualmente tramite il comando INSERZ.; se l’unità A.C.U. 1 viene reinserita, ma permane il guasto o il malfunzionamento del relativo amplificatore, dopo alcuni secondi essa ritornerà in stato di GUASTO e inserzione OFF.
Esempio 3: operazione di scambio automatico da un’unità NORMAL verso un’unità RISERVA
Configurazione unità A.C.U.:
a) Unità A.C.U. 1 di tipo NORMAL configurata AUTOM..
b) Unità A.C.U. 2 di tipo RISERVA configurata AUTOM..
Sul display dell’unità di controllo CP 3100 viene visualizzato:
ACU
1
2
TIPO
NORMALE
RISERVA
GRUP.
01
01
STATUS
ATTIVA
NON INS.
INSERZ.
ON▼
OFF▼
Operazioni da effettuare:
1) Provocare un allarme sulla A.C.U. 1 (es. allarme OVL); l’unità A.C.U. 1 viene automaticamente disinserita: nel relativo campo INSERZ.
compare la voce OFF (unità automaticamente disinserita), mentre nel campo STATUS compare GUASTO.
2) L’unità A.C.U. 2 (riserva) viene automaticamente inserita al posto dell’unità A.C.U. 1: nel campo INSERZ. di quest’ultima unità compare
ON, mentre nel relativo campo STATUS compare ATTIVA.
Sul display dell’unità di controllo CP 3100 viene ora visualizzato:
ACU
1
2
TIPO
NORMALE
RISERVA
GRUP.
01
01
STATUS
GUASTO
ATTIVA
INSERZ.
OFF▼
ON▼
NOTE
• Se la causa dell’allarme viene meno, per ritornare alla situazione iniziale, con l’unità A.C.U. 1 inserita e l’unità A.C.U. 2 disinserita, occorre
riportare manualmente le unità nella condizione originaria tramite il comando INSERZ., o riconfigurare il sistema tramite una delle procedere descritte nel paragrafo ATTUAZIONE DI UNA CONFIGURAZIONE.
• L’operazione di inserimento manuale di un’unità A.C.U. risulta utile ad esempio quando più unità di riserva configurate in modo AUTOM.
vengono automaticamente commutate in stato di GUASTO, a causa ad esempio di un sovraccarico linea poi rimosso dall’utente.
59
UTILIZZO DEL MENU “OPERAZIONI MONITOR”
OPZIONI REGOLAZ. AUDIO
PROCESSO OUT AUDIO
INSER. RISERVA ACU
OPERAZIONI MONITOR
Il menu consente di utilizzare la funzione “monitor”, che permette di ascoltare i segnali audio dei seguenti dispositivi del sistema:
• ingressi delle schede AUDIO INPUT IB 3210 / IB 3280.
• uscite delle schede AUDIO OUTPUT OB 3230.
• uscite per diffusori degli amplificatori controllati dalle unità A.C.U. (schede retroamplificatore RB 3300).
L’ascolto avviene tramite l’altoparlante monitor dell’unità di controllo. Dal menu PROCESSO AUDIO dell’apparecchio, tramite i tasti ↑ / ↓ e/o
pag ↑ / pag ↓ spostare il punto di selezione sul sottomenu OPERAZIONI MONITOR e premere il tasto ENTER; sul display dell’apparecchio
vengono visualizzati i seguenti campi.
SORG.:
ATTIVA:
LIV. dB
F1 PARTE
SORG.
DURATA
ATTIVA
MODO
LIV. dB
NO _____
NO _____
<FERMATO>
F2 STOP
DURATA:
MODO:
000000
MANUAL
F3 CONFIG
Indica il tipo di sorgente selezionata per essere monitorata. Può essere visualizzato:
• NO Indica che non è selezionata nessuna sorgente.
• INPUT Indica il monitoraggio degli ingressi delle schede AUDIO INPUT IB 3210 / IB 3280.
• OUTPUT - Indica il monitoraggio delle uscite delle schede AUDIO OUTPUT OB 3230.
• ACU Indica il monitoraggio delle unità A.C.U. (schede retroamplificatore RB 3300).
Indica il tempo trascorso dall’inizio del monitoraggio della sorgente correntemente indicata nel campo ATTIVA.
Indica la specifica sorgente correntemente selezionata per essere monitorata. Quando si effettua il monitoraggio delle schede AUDIO INPUT IB 3210 / IB 3280 viene indicato il nome dell’ingresso correntemente monitorato; quando si effettua il monitoraggio delle schede AUDIO OUTPUT OB 3230 viene indicato il nome dell’uscita correntemente monitorata; quando si
effettua il monitoraggio delle unità A.C.U. viene indicato il numero di identificazione dell’unità A.C.U. correntemente monitorata.
Indica la modalità di funzionamento del monitoraggio. Può essere visualizzato:
• MANUAL - Indica che è stata selezionata la modalità manuale, che permette di monitorare una specifica sorgente.
• AUTOM. - Indica che è stata selezionata la modalità automatica, che permette di monitorare in sequenza per 10 secondi, tutte le sorgenti della tipologia indicata nel campo SORG..
Indica il livello in decibel del segnale monitorato. Quando la funzione “monitor” non è attivata nel campo viene indicato il
messaggio <FERMATO>.
Per attivare il monitoraggio premere il tasto F1; per interrompere il monitoraggio premere il tasto F2; per configurare la funzione “monitor” premere il tasto F3 (vedi paragrafo CONFIGURAZIONE DELLA FUNZIONE MONITOR).
CONFIGURAZIONE DELLA FUNZIONE “MONITOR”
Per visualizzare il sottomenu che permette di configurare la funzione “monitor”, dalla schermata iniziale del menu OPERAZIONI MONITOR
premere il tasto F1. Sul display dell’apparecchio viene visualizzata la schermata seguente.
MODO:
MANUAL ▼
AUDIO INPUT
:
AUDIO OUTPUT
:
ACU
:
MODO
SORG.: NO _ _ ▼
NO INGRESSI _ _ _ _ _ _ _ _ _ ▼
NO ZONE _ _ _ _ _ _ _ _ _ _ _▼
NO ACU _ _ _ _ _ _ _ _ _ _ _ _▼
Consente di selezionare la modalità di funzionamento del monitoraggio audio. Utilizzare i tasti + e - per selezionare una
delle seguenti modalità:
• MANUAL - Indica la modalità di monitoraggio manuale, che permette di selezionare manualmente l’ascolto di:
• un qualunque ingresso delle schede AUDIO INPUT IB 3210 / IB 3280.
• una qualunque uscita delle schede AUDIO OUTPUT OB 3230.
• una qualunque uscita per diffusori degli amplificatori controllati dalle unità A.C.U. (schede retroamplificatore RB 3300).
• AUTOM. - Indica la modalità di monitoraggio automatica, che permette di ascoltare in sequenza per 10 secondi:
• tutti gli ingressi delle schede AUDIO INPUT IB 3210 / IB 3280.
• tutte le uscite delle schede AUDIO OUTPUT OB 3230.
• tutte le uscite per diffusori degli amplificatori controllati dalle unità A.C.U. (schede retroamplificatore RB
3300).
La scansione delle varie sorgenti viene effettuata in modo completamente automatico.
AVVERTENZA
• Nella modalità AUTOM. non è possibile avere la scansione di più di un tipo di sorgenti per volta (es. INPUT e OUTPUT o
INPUT e A.C.U.).
• Nel sistema possono essere presenti fino a 120 untà A.C.U.: valutare attentamente l’impiego del monitoraggio automatico in questa condizione, in quanto richiederebbe un tempo di 20 minuti!
60
SORG.
Consente di selezionare il tipo di sorgente da monitorare. Utilizzare i tasti + e - per selezionare una delle seguenti opzioni:
• NO Indica nessuna sorgente monitorata.
• INPUT Indica gli ingressi delle schede AUDIO INPUT IB 3210 / IB 3280.
• OUTPUT - Indica le uscite delle schede AUDIO OUTPUT OB 3230.
• ACU Indica le unità A.C.U. (schede retroamplificatore RB 3300).
AUDIO INPUT Da utilizzare quando viene selezionata la modalità di monitoraggio MANUAL, consente di selezionare l’ingresso delle schede AUDIO INPUT IB 3210 / IB 3280 da ascoltare. Tramite i tasti + e - selezionare il nome dell’ingresso desiderato, fra
quelli definiti tramite il menu PROCESSO INGRESSI AUDIO (campo NOME). Selezionando l’opzione NO INGRESSI (selezione predefinita) non viene impostato nessun ingresso.
AUDIO OUTPUT Da utilizzare quando viene selezionata la modalità di monitoraggio MANUAL, consente di selezionare l’uscita delle schede
AUDIO OUTPUT OB 3230 da ascoltare. Tramite i tasti + e -selezionare il nome dell’uscita desiderato, fra quelli definiti tramite il menu PROCESSO USCITE AUDIO (campo NOME). Selezionando l’opzione NO ZONE (selezione predefinita) non
viene impostata nessuna uscita.
ACU
Da utilizzare quando viene selezionata la modalità di monitoraggio MANUAL, consente di selezionare l’unità A.C.U. da
ascoltare. Tramite i tasti + e - selezionare il numero di identificazione dell’unità A.C.U. desiderata. Selezionando l’opzione NO ACU (selezione predefinita) non viene impostata nessuna A.C.U.
NOTA
• Ogni volta che il sistema viene riconfigurato (vedi paragrafo ATTUAZIONE DI UNA CONFIGURAZIONE), la configurazione della funzione “monitor” viene persa, essendo la medesima solo a carattere temporaneo.
DATI TECNICI
DATI TECNICI CP 3100
Funzione
Unità di controllo
Microprocessore
Ad alta velocità
Scheda video
VGA
Scheda audio
16 bit
Porte seriali RS 232
2
Porte seriali RS 485
2
Porta seriale sincrona DCI
1
Porta parallela
1
Ventilazione
Forzata
Alimentazione / Assorbimento massimo
230 Vac ± 5% - 50 Hz (115 Vac - 60 Hz a richiesta) / 200 VA
Dimensioni (lxaxp)
483 x 132 x 368 mm
Peso
7,8 kg
DATI TECNICI MB 3200
Funzione
Sub-rack per schede elettroniche modulari
Standard slot per schede
DIN
Numero schede installabili
4 schede AUDIO INPUT IB 3210 / IB 3280
8 schede AUDIO OUTPUT OB 3230 o 8 schede INPUT/OUTPUT digitali IO 3250
Alimentazione
5 Vdc - 13,5 Vdc - 24 Vdc
Dimensioni (lxaxp)
483 x 176 x 304 mm
Peso
3,7 kg (senza schede)
DATI TECNICI IF 3260
Funzione
Pannello connessioni da rack
N° predisposizioni per schede con morsetti
5 predisposizioni
Schede di connessione installabili in
In alternativa: 3 schede di connessione a 12 morsetti, oppure 2 schede di connessione
ciascuna predisposizione
a 20 morsetti, oppure 1 scheda di connessione a 32 morsetti.
Altezza rack
6 unità
61
DATI TECNICI SCHEDE AUDIO INPUT IB 3210 / IB 3280
Funzione
Scheda ingressi audio
Numero ingressi
8 ingressi bilanciati
Tipo di bilanciamento
Elettronico - IB 3210
A trasformatore - IB 3280
Risposta in frequenza
10 ÷ 30.000 Hz (±3 dB)
Distorsione
≤ 0,1 % (30 Hz ÷ 15 kHz)
Rapporto segnale/rumore
≥ 85 dB
Sensibilità ingressi
775 mV nominale - 77,5 mV minimo
Impedenza ingressi
47 kΩ
Controlli di tono
Bassi: ± 12 dB - 100 Hz
Alti: ± 12 dB - 10 kHz
Alimentazione / Assorbimento
5 Vdc / 50 mA
13,5 Vdc / 140 mA
DATI TECNICI SCHEDE AUDIO OUTPUT OB 3230
Funzione
Scheda uscite audio
Numero uscite
8 uscite bilanciate/sbilanciate
Matrice di scheda
32 ingressi x 8 uscite
Risposta in frequenza
10 ÷ 30.000 Hz (±3 dB)
Distorsione
≤ 0,1 % (30 Hz ÷ 15 kHz)
Livello uscite
775 mV nominale sbil. - 1,55 V nominale bil. - >7,5 V massimo bil.
Impedenza uscite
< 600 Ω
Alimentazione / Assorbimento
5 Vdc / 70 mA
13,5 Vdc / 100 mA
DATI TECNICI SCHEDE INPUT/OUTPUT DIGITALI IO 3250
Funzione
Scheda con ingressi optoisolati programmabili ed uscite a relè
Numero ingressi
16 ingressi optoisolati
Numero uscite
24 uscite a relè
Tensione di comando ingressi optoisolati
15 ÷ 30 Vdc
Corrente nominale ingressi optoisolati
10 mA a 24 Vdc
Massima tensione commutabile dai relè d’uscita 50 Vdc
Massima corrente commutabile dai relè d’uscita
Alimentazione / Assorbimento
0,5 A (max 1 A per gruppo)
5 Vdc / 70 mA
24 Vdc / 0,5 mA (24 relè attivi)
62
CONTENTS
SAFETY PRECAUTIONS _________________________________________________
OPERATING PRECAUTIONS _____________________________________________
DESCRIPTION __________________________________________________________
CP 3100 CONTROL UNIT ______________________________________________
MB 3200 SUB-RACK __________________________________________________
IF 3260 CONNECTION PANEL __________________________________________
IB 3210 / IB 3280 AUDIO INPUT BOARDS ________________________________
OB 3230 AUDIO OUTPUT BOARD _______________________________________
IO 3250 DIGITAL INPUT/OUTPUT BOARD ________________________________
BM 3616 DIGITAL MICROPHONE CONSOLE _____________________________
BM 3604 MICROPHONE CONSOLE______________________________________
RB 3300 BACK-AMPLIFIER BOARD _____________________________________
PS 3400 POWER SUPPLIER ____________________________________________
ES 3000 EXTENDED SOFTWARE ________________________________________
CP 3100 – FRONT PANEL DEVICES _______________________________________
CP 3100 – REAR PANEL DEVICES ________________________________________
MB 3200 – FRONT PANEL DEVICES ______________________________________
MB 3200 – REAR PANEL DEVICES ________________________________________
SYSTEM DEVICES AND FUNCTIONS _____________________________________
AUDIO MATRIXES _____________________________________________________
“GPI” INPUTS _________________________________________________________
PROGRAMMABLE RELAYS _____________________________________________
AMPLIFIER CONTROL UNITS (A.C.U.s) __________________________________
“DAY/NIGHT” FUNCTION _______________________________________________
“MONITOR” FUNCTION (audio MONITORING) _______________________________
“OVL” ALARM ________________________________________________________
“FIRE-BREAK” FUNCTION ______________________________________________
“LINE FAULT” FUNCTION _______________________________________________
“PA FAULT” FUNCTION ________________________________________________
“ALC” FUNCTION _____________________________________________________
SYSTEM EVENTS _____________________________________________________
EVENTS CONTROLLED FROM THE BM 3616 DIGITAL CONSOLES _____________
EVENTS CONTROLLED FROM THE BM 3604 CONSOLE _____________________
EVENTS CONTROLLED BY “GPI” INPUTS __________________________________
TIMED EVENTS ______________________________________________________
“VOX” EVENTS _______________________________________________________
“PLAYBACK” EVENTS _________________________________________________
“BACKGROUND MUSIC” EVENTS ________________________________________
ORDER OF PRIORITY __________________________________________________
OVERRIDE FUNCTION BY AN EVENT WITH ABSOLUTE PRIORITY ______________
“VOX” DEVICE ________________________________________________________
AUDIO SIGNAL RECORDING/PLAYBACK ________________________________
CREATING THE SOUNDS ______________________________________________
AUDIO SIGNAL RECORDING ____________________________________________
AUDIO FILE PLAYBACK ________________________________________________
SYSTEM ALARMS _____________________________________________________
PRINTOUT OF ALARM EVENTS __________________________________________
BACKGROUND MUSIC TRANSMISSION _________________________________
USING THE CP 3100 CONTROL UNIT _____________________________________
USING THE MENUS ___________________________________________________
PASSWORD FOR MENU ACCESS ________________________________________
EXIT FROM MENUs ___________________________________________________
AUDIO LEVEL DISPLAY ________________________________________________
ACOUSTIC SIGNALLER OPERATION ______________________________________
DISPLAY BACK-LIGHTING ______________________________________________
63
65
65
66
66
67
67
67
67
67
67
68
68
69
69
69
71
72
72
74
74
74
74
74
76
76
77
77
77
77
77
77
77
77
78
78
78
78
78
78
79
80
80
80
80
80
81
81
81
81
81
82
82
83
83
83
EQUIPMENT SWITCH-ON ______________________________________________
CORRECT SYSTEM CONFIGURATION ____________________________________
ERRORS IN SYSTEM CONFIGURATION ___________________________________
LANGUAGE SELECTION _______________________________________________
MAIN MENU _________________________________________________________
SYSTEM CONFIGURATION (“CONFIGURATION” menu) ____________________
CHARACTERISTIC PARAMETERS ________________________________________
USING THE “INPUT PROCESSORS” MENU ________________________________
USING THE “OUTPUT PROCESSORS” MENU ______________________________
USING THE “GROUPS” MENU ___________________________________________
USING THE “RELAY CONFIGURATION” MENU ______________________________
USING THE “CONSOLES” MENU ________________________________________
USING THE “ACU” MENU ______________________________________________
USING THE “GPI EVENTS DEFINITION” MENU ______________________________
USING THE “TIMER EVENTS DEFINITION” MENU ____________________________
USING THE “VOX” MENU _______________________________________________
USING THE “RECORDER” MENU ________________________________________
USING THE “SYSTEM” MENU ___________________________________________
USING THE “COMPILE & SAVE” MENU ____________________________________
USING THE “EXIT WITHOUT SAVING” MENU _______________________________
ALARM STATUS DISPLAY (“ALARMS” menu) _____________________________
DISPLAY OF ALARM EVENTS ___________________________________________
PRINTOUT OF ALARM EVENTS __________________________________________
DETAIL OF ALARMS ON THE IB 3210 / IB 3280 AUDIO INPUT BOARDS __________
DETAIL OF ALARMS ON THE OB 3230 AUDIO OUTPUT BOARDS ______________
DETAIL OF ALARMS ON THE IO 3250 DIGITAL INPUT/OUTPUT BOARDS _________
DETAIL OF ALARMS ON THE BM 3616 CONSOLES __________________________
DETAIL OF ALARMS ON THE A.C.U.s _____________________________________
DETAIL OF “GPI” ALARMS ______________________________________________
DETAIL OF ALARMS ON BM 3616 CONSOLES _____________________________
DETAIL OF “FIREMAN” ALARMS _________________________________________
“SYSTEM ALARMS” ___________________________________________________
STORING A CONFIGURATION (“STORE CONFIG.” menu) __________________
PROGRAMMING DEVICES USING THE MENUs _____________________________
PROGRAMMING DEVICES BY MEANS OF SYSTEM RESTART _________________
COMPILATION ERRORS _______________________________________________
AUDIO SETTINGS (“AUDIO PROCESS” menu) ____________________________
USING THE “ADJUST AUDIO INPUT” MENU ________________________________
USING THE “ADJUST AUDIO OUTPUT” MENU ______________________________
USING THE “INSERT BACKUP ACU” MENU ________________________________
USING THE “MONITOR OPERATIONS” MENU ______________________________
SPECIFICATIONS _______________________________________________________
CP 3100 ______________________________________________________________
MB 3200 _____________________________________________________________
IF 3260 _______________________________________________________________
IB 3210 / IB 3280 AUDIO INPUT BOARDS ________________________________
OB 3230 AUDIO OUTPUT BOARD _______________________________________
IO 3250 DIGITAL INPUT/OUTPUT BOARDS _______________________________
GENERAL SYSTEM WIRING DIAGRAM ___________________________________
64
83
83
83
84
84
84
86
86
87
88
89
90
94
95
98
100
101
104
106
106
107
108
109
109
110
111
112
112
113
114
115
115
116
116
116
116
117
117
118
118
121
122
122
122
122
123
123
123
307
IMPORTANT NOTES
• Before using the system equipment, please read the instructions in this manual carefully and keep it for future reference.
• This manual is to be considered an integral part of the system, and must accompany it when it changes ownership as a reference for correct use and safety precautions.
• RCF will not assume any responsibility for incorrect installation of the system equipment.
CAUTION
• To prevent the risk of fire or electric shock, never expose the system equipment to rain or humidity.
SAFETY PREACAUTIONS
1. Please read the notes preceded by the symbol
with special attention, as they provide important safety information.
2. To prevent the risk of fire or electric shock, make sure that the power cable of the CP 3100 control unit cannot be stepped on or crushed
by objects. Do not bend, jerk or cut the cable.
3. To prevent the risk of electric shock, never open the CP 3100 control unit. There are no parts on the inside that the user needs to
access.
4. Make sure that no objects or liquids can get into the system equipment, as this could cause fires or electric shock.
5. Do not attempt to make any repairs not described in this manual. Contact the RCF Service Centre whenever:
a. a system component does not function (or functions abnormally).
b. the power cable of the CP 3100 control unit has been damaged.
c. objects or liquids have got into a system component.
d. a system component has been subject to heavy impact.
6. When the system is not to be used for long periods of time, switch it off and disconnect the power supply from all the related pieces of
equipment.
7. If any equipment begins to emit anomalous odours or smoke, switch the system off immediately.
8. To prevent the risk of electric shock, do not connect or disconnect the power cable of CP 3100 control unit with your hands wet;
always grasp the plug directly, and never pull on the cable.
9. Do not spray any product directly on the system equipment (e.g. insecticides, cleaning products, etc.), as the gasses used could ignite.
10. The system equipment makes use of digital circuits. Though all the equipment is constructed in full respect for the regulations in force
concerning radio-disturbance emission, in certain circumstances it could cause disturbance or interference if positioned very close to radios, TVs, or similar devices. Should any problems of this type occur, move the disturbed devices further away from the system equipment.
11. Use the system equipment only with accessories specified by RCF or supplied with the product.
OPERATING PRECAUTIONS
• Never force the control elements (keys, controls, etc.).
• For cleaning the equipment, do not use solvents, benzene, or other volatile substances.
TRADEMARKS AND REGISTERED TRADEMARKS
• IBM® and VGA® are registered trademarks of International Business Machines Inc.
• Microsoft® is a registered trademark of Microsoft Corporation; Windows 95™ and Windows 98™ are trademarks of Microsoft Corporation.
• Sound Blaster is a registered trademark of Creative Technology LTD.
• Any other product names mentioned in this manual are the property of the respective manufacturers.
65
DESCRIPTION
The RX 3000 matrix has been designed by RCF to respond to the requirements of modern technological systems for management and control in commercial, industrial, and civil structures such as airports, shopping centres, hotels, office complexes, railway stations, and so on. The
matrix has the following characteristics:
• Up to 64 modular audio inputs (8 IB 3210 / IB 3280 AUDIO INPUT boards).
• Up to 128 modular audio outputs (16 OB 3230 AUDIO OUTPUT boards).
• Possibility to create up to 8 audio matrixes, completely independent and with total accessibility.
• Possibility to create matrixes with maximum capacity of 32 inputs x 64 outputs (max. 2 matrixes 32 x 64).
• Up to 256 opto-insulated GPI inputs (16 IO 3250 digital INPUT/OUTPUT boards), for the control of programmable events.
• Up to 384 relay outputs (16 IO 3250 digital INPUT/OUTPUT boards) which can be used for various purposes.
• Up to 16 BM 3616 digital consoles, for microphone announcement transmission and control of numerous system functions.
• Up to 24 BM 3604 consoles or groups of consoles, for microphone announcement transmission and control of certain system functions.
• Up to 120 RB 3300 back-amplifier boards (A.C.U.s), for diagnostic control and monitoring of the power amplifiers and speaker lines of the
system.
• Modular structure for adapting to future system expansions.
• Voice-activated audio inputs (VOX devices), for the connection of sound sources without control elements.
• Management of 8 sources for background music, which is automatically excluded in the event of selective calls in a particular zone.
• Complete monitoring of the audio signals managed by the system (audio matrix inputs and outputs, outputs of the power amplifiers).
• Complete diagnosis of power amplifiers and speaker lines, with check on earth dispersion (with the RB 3300 and SB 3320 boards).
• Automatic control of the signal/noise ratio in the areas covered by the system, with digital detection and regulation systems (with the
LB 3340 board).
• Digital recorder for recording/playback of personalized messages or pre-announcement/alarm tones (CD quality).
• Pre-recorded pre-announcement/warning tones.
• Possibility to connect a printer for having a printed record of the system configuration and any alarm events.
• Possibility to transmit the tones and messages recorded on the hard disk of the CP 3100 control unit with one of the following methods:
– automatically at a preset time.
– automatically with repetition within a preset time period.
– by means of the microphone consoles.
– by means of the inputs of the IO 3250 digital INPUT/OUTPUT boards.
• System programming by means of various menus, used for assigning names or abbreviations to each input, output, microphone console,
recorded message, event, etc.
• Standard software included in the system, which carries out the following functions:
– configuration of the digital consoles.
– configuration of the audio inputs.
– configuration of the audio outputs.
– configuration of the groups of audio zones.
– configuration of the relays.
– configuration of the VOX devices.
– configuration of the timed events.
– configuration of the GPI inputs.
– configuration of the A.C.U.s used for controlling the power amplifiers of the system (primary, backup).
– configuration of the audio monitoring.
– alarm event control.
– recording/playback of messages, announcements, pre-announcement tones, alarm signals, etc.
– configuration of various system operating parameters (date, time, printing method, configuration password, etc.).
• Maximum reliability of the system thanks to the minimum interaction between the single hardware components.
• Self-diagnosis of any malfunction, with detailed indication of the cause.
• Exclusive DCI communication system (Data Communication Interface), which provides a high-speed interace between all the system components.
• Optional ES 3000 software for system configuration by means of an external PC.
The system includes the equipment described in the following sections.
CP 3100 CONTROL UNIT
The CP 3100 control unit contains the microprocessor that handles the entire operation of the system. The control unit has the following
characteristics:
• 19” rack mount in 3 units.
• High-speed microprocessor.
• Programmable by means of the keyboard and display on the front panel, or using an external PC.
• Hard disk for storing the system management programme, configuration files for the various devices (boards, digital consoles, etc.), audio
files, etc.
• Digital audio board for audio file recording/playback.
• Connector for external monitor.
• Connector for external keyboard.
• RS 232 serial port for connecting a configuration PC.
• Bus interface board for connecting the MB 3200 sub-racks.
• Two RS 485 serial ports for connecting the BM 3616 digital consoles and RB 3300 back-amplifier boards.
• Parallel port for connecting a printer.
• Built-in power supplier.
• Loudspeaker for monitoring the inputs and outputs of the audio matrix and the amplifier outputs, selectively or in automatic succession.
• Front panel with keyboard for configuration and diagnostics.
• Back-lit LCD display, 4x40.
66
MB 3200 SUB-RACK
The MB 3200 sub-rack houses the various modules of the system. The following boards can be installed in the MB 3200:
• Four IB 3210 / IB 3280 AUDIO INPUT boards (for a total of 32 audio inputs).
• Eight OB 3230 AUDIO OUTPUT boards (for a total 64 audio outputs), or eight IO 3250 digital INPUT/OUTPUT boards (for a total of 128 opto-insulated inputs and 192 relay outputs), or eight OB 3230 AUDIO OUTPUT boards and IO 3250 digital INPUT/OUTPUT boards in combination.
The MB 3200 has the following characteristics:
• 19” rack mount in 4 units.
• Front panel with indicators for the operating status of the boards installed.
• DIN standard connectors and guides for the electronic boards.
• Easy board installation thanks to quick connectors.
• Possibility to connect two or more MB 3200 sub-racks to the CP 3100 control unit.
IF 3260 CONNECTION PANEL
The IF 3260 panel enables the installation of the connection boards of the modules present in the MB 3200 sub-rack. It is situated on the back
of the rack enclosure, and has the following characteristics:
• 6-unit 19” rack panel in painted sheet metal.
• Possibility to install alternatively: 15 connection boards with 12 terminals each, 10 connection boards with 20 terminals each, or 5 connection boards with 32 terminals each.
IB 3210 / IB 3280 AUDIO INPUT BOARDS
The IB 3210 / IB 3280 boards enable the audio signal input. They have the following characteristics:
• 8 inputs that are balanced electronically (IB 3210) or with transformer (IB 3280).
• Trimmer for adjusting the treble tones (±12 dB at 10 kHz) and bass tones (±12 dB a 100 Hz) on each input.
• Possibility to exclude the tone controls via software.
• One status LED.
• Input signal gain adjustable via software.
• Audio monitoring that can be selected on each of the 8 inputs via software.
• High reliability thanks to the “watchdog” hardware which enables immediate recovery of normal operating conditions in the event of induced interference.
• Self-configuration of the boards installed.
• Setup configuration stored on the board for fast system startup.
• Two separate 12-terminal connection boards to be installed on the IF 3260 panel.
OB 3230 AUDIO OUTPUT BOARD
The OB 3230 board enables the audio signal output. It has the following characteristics:
• 8 balanced low impedance outputs.
• Board matrix with 32 inputs x 8 outputs.
• Output level adjustable via software.
• Configurable VOX device for connection and voice activation of one input with one or more outputs of the board.
• Audio monitoring that can be selected via software on each of the 8 outputs.
• Self-configuration of the boards installed.
• High reliability thanks to the “watchdog” hardware which enables immediate recovery of normal operating conditions in the event of induced interference.
• Setup configuration stored on the board for fast system startup.
• Automatic output channel scanning for detection of clipping and defective channels.
• 6 status LEDs.
• Separate 32-terminal connection board to be installed on the IF 3260 panel.
IO 3250 DIGITAL INPUT/OUTPUT BOARD
The IO 3250 board is equipped with programmable opto-insulated inputs (GPI inputs) and output relays, which makes it possible to control
various types of events. For example, the board makes it possible to use standard microphone consoles (e.g. BM 3604) for transmitting announcements or controlling the playback of messages pre-recorded on the control unit. This board is indispensable for connecting the system
with external devices such as lighting systems, alarm control units, or other devices controlled by contacts. It has the following characteristics:
• 16 opto-insulated inputs.
• 24 output relays.
• 6 status LEDs.
• Possibility to associate a certain output configuration with a combination of input contacts.
• High reliability thanks to the “watchdog” hardware which enables immediate recovery of normal operating conditions in the event of induced interference.
• Setup configuration stored on the board for fast system startup.
• Two separate connection boards, one with 32 terminals and one with 20 terminals, to be installed on the IF 3260 panel.
BM 3616 DIGITAL MICROPHONE CONSOLE
The BM 3616 is a table-top microphone console with gooseneck that can be used for making announcements in 16 audio zones or groups
of audio zones, with the possibility to activate a pre-announcement signal of 1, 2, or 3 tones (chime). The console can also be used for transmitting audio signals (messages or tones) recorded on the CP 3100 control unit to the selected zones; along with playback, relays of the
67
IO 3250 digital INPUT/OUTPUT boards can be switched. The BM 3616 console has the following characteristics:
• Back-lit liquid crystal display, 1x16, for message display.
• 16 programmable keys for the selection of zones and/or groups of zones.
• Key for selecting all the zones of the system.
• 3 programmable function keys (F1, F2, F3) for controlling relays or for remote playback of audio signals (messages or tones).
• Alarm key for sending messages with absolute priority.
• Possibility to record a message locally, which is automatically transmitted to the zones selected when the system makes them available.
• Condenser microphone on gooseneck with lighted indicator ring.
• Microphone compressor equipped with level limiter.
• Pre-announcement signal generator for 1, 2, or 3-tone signals.
• Balanced audio output with transformer, with adjustable level.
• Audio output for headphone monitoring of the locally recorded message.
• Indicator lights for the zones and functions selected.
• Incorporated acoustic signaller (buzzer).
• Password for console activation.
• Connection to the control unit via RS 485 serial line.
• High reliability thanks to the “watchdog” hardware, which enables immediate recovery of normal operating conditions in the event of induced interference.
• Setup configuration stored in the console for quick system startup.
BM 3604 MICROPHONE CONSOLE
The BM 3604 is a table-top microphone console with gooseneck. It can be used for making announcements in 4 zones or groups of zones,
which can be chosen as desired using four keys on the console. The BM 3604 has the following characteristics:
• 4 keys for selecting single zones or groups of zones.
• Key for general selection of all zones or groups of zones associated to the console.
• Key for transmitting a microphone announcement to the selected zones.
• Key for transmitting a microphone announcement only in a local zone.
• Auxiliary key for controlling an event of the RX 3000 system (e.g. transmission of a pre-recorded message stored on the CP 3100 control
unit, switching a relay of the IO 3250 boards, etc.).
• Pre-announcement signal generator with 1, 2, or 3 tones.
• Condenser microphone on gooseneck with lighted ring.
• Balanced audio output (line level).
• Auxiliary audio output (line level) for driving an amplifier dedicated to sound amplification in a local zone.
• Indicator lights for the zones and functions selected.
• Timer for automatic disactivation of the zones selected in the absence of an announcement.
• Automatic gain control for transmission at constant volume.
• Possibility to interconnect multiple BM 3604 consoles in cascade on the same line.
RB 3300 BACK-AMPLIFIER BOARD
The RB 3300 is an electronic board to be coupled with a power amplifier having constant voltage outputs, making it possible to:
• switch the amplifier on/off by means of the CP 3100 control unit.
• control amplifier operation.
• activate a backup amplifier in the event of a fault on the amplifier controlled by the board.
• monitor the amplifier speaker output by means of the dedicated loudspeaker on the CP 3100 control unit.
The amplifier to which the board is coupled can be the primary one normally used for sound diffusion in a certain audio zone, or a backup
amplifier to be used in place of the primary amplifier in the event of a breakdown. The board is installed on the rack in correspondence with
the rear panel of the amplifier to be controlled, and is connected to the CP 3100 control unit by means of a digital bus and an audio monitor
bus. The RB 3300 board has the following features and functions:
• Balanced input for line signal.
• Balanced output for driving the amplifier.
• Input for signalling an alarm coming from the amplifier being controlled (e.g. overload).
• Amplifier speaker output monitoring, with the possibility to control lines at 25 V, 50 V, 70 V, 100 V.
• Signalling the following types of alarms to the CP 3100 control unit:
- board reset (“watchdog” reset).
- power supply anomalies on the board (12V and/or 24V).
- operating anomalies on the amplifier being controlled, signalled by means of an auxiliary contact on the amplifier (e.g. operation in over
load).
- alarms transmitted by the optional SB 3320 FAULT DETECTOR board.
- indications from the optional LB 3340 DIGITAL ALC board.
• Manual or automatic activation of a backup amplifier in place of the amplifier being controlled in the event of:
- an alarm transmitted by the amplifier being controlled (e.g. overload alarm).
- an alarm transmitted by the optional SB 3320 FAULT DETECTOR board.
• High reliability thanks to the “watchdog” hardware, which permits immediate recovery of the normal operating conditions in the event of induced interference.
• Can be equipped with the optional LB 3340 DIGITAL ALC board, which makes it possible to use the ALC function for automatic control of
the ambient signal/noise ratio, and the DAY/NIGHT function for automatic lowering of the sound level during the night-time hours.
• Can be equipped with the optional SB 3320 FAULT DETECTOR board, which makes it possible to use the LINE FAULT function for checking
correct operation of the speaker line, the PA FAULT function for checking correct amplifier operation, and the FIRE-BREAK function for
transmitting an alarm signal with absolute priority (e.g. fire alarm), with exclusion of the signal coming from the audio matrix of the system.
68
PS 3400 POWER SUPPLIER
The PS 3400 is a stabilized multi-voltage direct current power supplier used for powering the following equipment of the system: BM 3616 digital consoles, BM 3604 consoles, RB 3300 back-amplifier boards, IO 3250 digital INPUT/OUTPUT boards, IB 3210 / IB 3280 AUDIO INPUT
boards, OB 3230 AUDIO OUTPUT boards. It has the following features:
• output for stabilized voltage of 5 Vdc (max. 3 A).
• output for stabilized voltage of 12 Vdc (max. 3 A).
• output for stabilized voltage of 24 Vdc (max. 2 A).
• auxiliary relay, with one switching contact on terminal strip, controlled by the overheat protection circuit.
• possibility to connect multiple power suppliers in parallel.
• protection against short circuits on the outputs.
• LED indicators for 5V DC, 12V DC, 24V DC, OVERHEATING, ON.
• frame suitable for rack mounting (1 unit height).
• dual power supply in alternating current (115/230 Vac).
• removable terminal strip for connections.
ES 3000 EXTENDED SOFTWARE
The ES 3000 software can be installed on an external personal computer, IBM or compatible, with Microsoft Windows 95 or Windows 98 operating system, which further facilitates management of the RX 3000 system. The software makes it possible to carry out the following operations:
• creation of multiple configurations, which are stored in system folders on the configuration PC.
• transmission of the “EXE” files to the CP 3100 control unit, for updates on the system software.
• transmission of the configuration files to the CP 3100 control unit, to define a new system configuration.
• transmission of the “WAV” files to the CP 3100 control unit, to define new tones and/or messages (recorded, for example, on the configuration PC by means of special programs).
• transfer of the configuration files of the CP 3100 control unit (for example, when technicians need to carry out a diagnosis).
transfer of tones and/or messages recorded on the CP 3100.
The personal computer can have any standard RS232 serial port (COM1 to COM4 port can be selected by means of the ES 3000 software).
The system configuration operations can be made on the configuration PC and subsequently transmitted to the CP 3100 control unit via
serial line.
All the system configuration operations are greatly simplified thanks to the graphics of Windows and the use of the mouse and keyboard.
CP 3100 – FRONT PANEL DEVICES (Fig. 1)
(1) RECORD indicator light
This LED lights up to indicate that an audio signal file is being recorded by means of the RECORD function of the RECORDER menu
(see the section AUDIO SIGNAL RECORDING/PLAYBACK).
(2) Direction keys
The keys ← , → , ↑ , ↓ are used for moving the selection point in the respective directions; the key is used for moving the selection point to the first field of the current menu.
(3) Pag ↑ / Pag ↓ keys
Used for changing the page of currently displayed menu down (pag ↓ ) or up (pag ↑ ).
(4) Liquid crystal display
Back-lit LCD for displaying the various menus of the unit (e.g. system configuration, alarms, etc.).
(5) MEMORY key
Used for storing the user password which prevents unauthorized persons from accessing certain menus of the control unit.
(6) MEMORY indicator light
This LED lights up when a new user password has been stored using the MEMORY key (5).
(7) Numerical keys
Used for entering numerical values to program the fields of the various menus.
(8) Contrast adjustment key
This key is pressed to adjust the contrast of the LCD by means of the adjustment keys (24); the setting is stored in the memory of the
control unit.
(9) MUTE indicator light
This LED lights up when the volume of the monitor loudspeaker (10) is muted by means of key (23).
(10) Monitor loudspeaker
When the audio monitor function is enabled, this speaker makes it possible to listen to the audio signals handled by the system (input
signals, output signals, etc.).
(11) PLAY indicator light
This LED lights up when the playback of an audio signal (audio file) recorded on the hard disk of the unit is in progress (see the section
AUDIO SIGNAL RECORDING/PLAYBACK).
(12) POWER indicator light
This LED lights up when the unit is switched on.
(13) ALARM indicator light
This LED lights up when one of the alarms handled by the system is activated (see the section SYSTEM ALARMS).
(14) C ← key
Deletes the character preceding the cursor, moving the cursor to the left by one position.
(15) SPACE key
Inserts a space in a field (blank character), moving the cursor to the right by one position.
(16) C → key
Deletes the currently selected character.
69
(17) CLEAR key
Used for clearing all the characters contained in the currently selected field.
(18) F1 - F2 - F3 - F4 keys
Keys for accessing the submenus of the unit; the specific function of each keys is indicated for each of the various menus.
(19) MENU key
Unusable in the present version of the equipment.
(20) ENTER key
Used for confirming the parameter set in a field.
(21) ESC key
Used for exiting from a menu/submenu and returning to the previous menu. Whenever parameters are modified, before proceeding you
are asked whether you want to save the new values or not.
(22) +/- keys
Used for selecting the various parameters indicated in the fields in rotation on the various menus of the control unit, and also for selecting alphanumerical characters to use for entering names, numbers, abbreviations, etc.
(23) MUTE key
Used for enabling/disabling the MUTE function. When the MUTE function is enabled, the volume of the monitor speaker is set at zero
and LED (9) comes on; when the MUTE function is disabled, the volume of the monitor speaker returns to the previously set level, and
LED (9) goes off.
(24) Adjustment keys
These two keys have a dual function. When you access the menu that makes it possible to monitor the audio signals handled by the
system (see the section USING THE “MONITOR OPERATIONS” MENU), these keys are used for adjusting the volume of the monitor
speaker; press
to decrease the volume; press
to increase the volume. In all other situations, these keys are used for adjusting the contrast of the LCD after key (8) has been pressed.
NOTE
• To carry out the adjustment, it is necessary to press and release each of the keys.
Fig. 1
70
CP 3100 - REAR PANEL DEVICES (Fig. 2)
(1) POWER switch
For switching the unit on and off.
(2) Fan
For cooling the unit.
(3) Power cable socket
Used for connecting the power cable supplied with the unit.
(4) AC OUTLET
Connected in parallel with socket (3), this connector provides a convenient power supply for a video monitor (where present).
(5) MONITOR BUS terminal strips
Two 3-pin terminal strips used for connecting the monitor bus lines leading from the RB 3300 back-amplifier boards and from the
MB 3200 sub-racks. The two lines make it possible to monitor the audio signals managed by the system (input/output signals, signals
of the amplifiers controlled by the RB 3300 back-amplifier boards, etc.).
(6) Serial port N°2 (COM 2)
Unusable
(7) PS2 mouse port
Unusable
(8) Socket for keyboard
Enables connection of a standard computer keyboard which can be used as an alternative to the keyboard on the front panel of the
unit. The keyboard must be used in conjunction with a monitor connected to socket (12), and facilitates the system configuration operations.
(9) Serial port N°1 (COM 1)
RS 232 serial port on 9-pin male SUB D connector, used for connecting the system with an external configuration PC.
(10) Parallel port N°1 (LPT 1)
Parallel port on 25-pin female SUB D connector, used for connecting the system to a printer in order to have a printout of the system
configuration and alarm messages.
(11) Serial port N°4 (COM 4)
Balanced RS 485 serial port for communication between the CP 3100 control unit and the BM 3616 digital consoles of the system.
(12) Connector for video monitor
Enables connection of a video monitor to be used in alternative to the LCD display on the front panel of the unit.
The monitor must be used in conjunction with an external keyboard to be connected to socket (8), and facilitates the system configuration operations.
(13) Serial port N°3 (COM 3)
Balanced RS 485 serial port for communication between the CP 3100 control unit and the RB 3300 back-amplifier boards of the
system.
(14) Connector for sub-rack
DCI synchronous serial port which enables communication between the CP 3100 control unit and the MB 3200 sub-racks of the system.
(15) Audio board LINE OUT output
Enables the output of the line level audio signal of the audio board of the control unit, and can be used for driving one of the audio inputs of the system (PLAYBACK input of an IB 3210 / IB 3280 AUDIO INPUT board).
(16) Audio board LINE OUT input
Makes it possible to drive the audio board of the unit with the line level audio signal to be recorded, coming from an audio output of the
system (RECORDER output of an OB 3230 AUDIO OUTPUT board), or from an external audio source (e.g. cassette player, tuner,
CD player, etc.).
(17) Audio board MICRO IN input
Makes it possible to drive the audio board of the unit with the signal to be recorded coming from an external microphone.
(18) Unusable connector
Fig. 2
71
MB 3200 – FRONT PANEL DEVICES (Fig. 3)
(1) Indicator light for 12 Vdc / 24 Vdc power supply
Each of these LEDs is related to one of the OB 3230 AUDIO OUTPUT boards or IO 3250 digital INPUT/OUTPUT boards installed in the subrack. The LED lights up to indicate that the corresponding board is correctly supplied by the voltage for analogue circuits (12 Vdc or 24 Vdc).
(2) Indicator light for 5 Vdc power supply
Each of these LEDs is related to one of the OB 3230 AUDIO OUTPUT boards or IO 3250 digital INPUT/OUTPUT boards installed in the
sub-rack. The LED lights up to indicate that the corresponding board is correctly supplied by the voltage for digital circuits (5 Vdc).
(3) Monitor / GPI indicator lights
Each of these LEDs is related to one of the OB 3230 AUDIO OUTPUT boards or IO 3250 digital INPUT/OUTPUT boards installed in the
sub-rack. OB 3230 AUDIO OUTPUT board: the LED flashes when the monitor function is activated on an output of the board. IO 3250
digital INPUT/OUTPUT board: the LED flashes when any GPI input of the board is being driven.
(4) Matrix / relay indicator lights
Each of these LEDs is related to one of the OB 3230 AUDIO OUTPUT boards or IO 3250 digital INPUT/OUTPUT boards installed in the
sub-rack.
OB 3230 AUDIO OUTPUT board: the LED flashes when the switching matrix of the board is active, or when an output of the board is
connected with one of the inputs of the audio matrix.
IO 3250 digital INPUT/OUTPUT board: the LED flashes when the contact of one of the output relays of the board is closed.
NOTE
• LED (4) of an IO 3250 digital INPUT/OUTPUT board also flashes when one of its relays is set as normally closed by means of the dedicated configuration menu on the CP 3100 control unit.
(5) Communication indicator lights
Each of these LEDs is related to one of the OB 3230 AUDIO OUTPUT boards or IO 3250 digital INPUT/OUTPUT boards installed in the
sub-rack. The LED lights up to indicate that the corresponding board is communicating with the CP 3100 control unit.
(6) Fault indicator lights
Each of these LEDs is related to one of the OB 3230 AUDIO OUTPUT boards or IO 3250 digital INPUT/OUTPUT boards installed in the
sub-rack. The LED lights up when there is an alarm caused by a malfunction of the corresponding board (e.g. delay in communication,
error, fault, etc.).
NOTE
• During the system configuration phases, it is normal for this LED to flash.
(7) Indicator lights for AUDIO INPUT boards
Each of these LEDs is related to one of the IB 3210 / IB 3280 AUDIO INPUT boards installed in the sub-rack. The status of the LED provides the following indications:
• LED on continuous mode - Indicates an alarm caused by a malfunction of the corresponding board (e.g. delay in communication,
error, failure, etc.).
• LED flashing - Indicates that the corresponding board is communicating with the CP 3100 control unit.
• LED off - Indicates that the corresponding board is not supplied by the voltage for digital circuits (5 Vdc).
Fig. 3
MB 3200 - REAR PANEL DEVICES (Fig. 4)
(1) JP6 jumper
Used for connecting the GND pole of the 5 Vdc power supply voltage with the frame of the MB 3200 sub-rack.
(2) JP7 jumper
Used for connecting the GND pole of the 12 Vdc power supply voltage with the frame of the MB 3200 sub-rack.
(3) JP8 jumper
Used for connecting the GND pole of the 24 Vdc power supply voltage with the frame of the MB 3200 sub-rack.
72
(4) M1 and M2 terminal strips
Used for supplying the sub-rack with the power supply voltages 5 Vdc, 12 Vdc, and 24 Vdc. The two terminal strips are connected to
each other in parallel in order to facilitate the connections when the system has more than one MB 3200 sub-rack: one terminal strip
can be used for the input of the three power supplies and the other can be used as an output for supplying the subsequent sub-rack.
(5) F2 protection fuse
This quick type 2 A fuse protects the circuits supplied at 12 Vdc.
(6) F3 protection fuse
This quick type 4 A fuse protects the circuits supplied at 24 Vdc.
(7) F1 protection fuse
This quick type 2 A fuse protects the circuits supplied at 5 Vdc.
(8) Unusable devices
(9) IDC1 ÷ 8 connectors
These connectors are used for connecting the audio inputs of the IB 3210 / IB 3280 AUDIO INPUT boards with the respective 12-terminal connection boards. Each AUDIO INPUT board is connected by means of two connectors (e.g. IDC1 and IDC2), each of which
enables the connection of 4 audio inputs with one 12-terminal connection board. The connectors marked with odd numbers are related to the four inputs of the AUDIO INPUT boards (e.g. inputs 1 to 4), and the connectors marked with even numbers are related to the
remaining four inputs (e.g. inputs 5 to 8).
(10) JP1 and JP2 jumpers
These two jumpers are used for terminating the RS 485 serial line that interconnects the MB 3200 sub-racks with the CP 3100 control unit.
(11) CN6 connector
Used for connecting the RS 485 serial line leading from the CP 3100 control unit or from the previous MB 3200 sub-rack.
(12) CN7 connector
Used for connecting the RS 485 serial line leading to the subsequent MB 3200 sub-rack (where present).
(13) DL1 indicator light
This LED lights up to indicate that the sub-rack is supplied at 5 Vdc.
(14) DL2 indicator light
This LED lights up to indicate that the sub-rack is supplied at 12 Vdc.
(15) DL3 indicator light
This LED lights up to indicate that the sub-rack is supplied at 24 Vdc.
(16) J4A ÷ J4H connectors
These 8 connectors are used for connecting the 16 GPI inputs of an IO 3250 digital INPUT /OUTPUT board with the corresponding 20terminal connection board.
(17) M3 and M4 terminal strips
Used for transmitting to the CP 3100 control unit the monitor audio signal coming from the various MB 3200 sub-racks, which is related to the inputs of IB 3210 / IB 3280 AUDIO INPUT boards or to the outputs of the OB 3230 AUDIO OUTPUT board. The monitor signal can then be listened to by means of the loudspeaker on the front panel of the control unit. The two terminal strips are connected
to each other in parallel in order to facilitate the connections when the system includes more than one MB 3200 sub-rack: one terminal strip can be used for the output of the monitor signal directed toward the CP 3100 control unit, and the other one can be used for
the input of the monitor signal coming from the subsequent sub-rack (where present).
(18) J3A ÷ J3H connectors
These 8 connectors are used for connecting the audio outputs of an OB 3230 AUDIO OUTPUT board, or the output relays of an IO 3250
digital INPUT/OUTPUT board, with the respective 32-terminal connection board. When an OB 3230 AUDIO OUTPUT board is installed
in correspondence with a connector, the related board with terminals enables the connection of 8 audio outputs; when an IO 3250 digital INPUT/OUTPUT board is installed in correspondence with a connector, the related board with terminals enables the connection of
the contacts of 24 output relays.
Fig. 4
73
SYSTEM DEVICES AND FUNCTIONS
AUDIO MATRIXES
The RX 3000 system can manage a maximum of 8 audio matrixes, which are completely independent of each other; the maximum capacity
of one matrix is 32 inputs and 64 outputs (max. 2 matrixes 32x64). The matrixes have total accessibility; i.e., in any one audio matrix, each
input can be connected with any of the outputs. The inputs and outputs of the audio matrixes are obtained with the installation of the
IB 3210 / IB 3280 AUDIO INPUT boards and OB 3230 AUDIO OUTPUT boards. Depending on the number of IB 3210 / IB 3280 AUDIO IN
and OB 3230 AUDIO OUTPUT boards installed in the MB 3200 sub-rack, it is possible to create innumerable audio matrixes (e.g. matrix with
8 inputs and 16 outputs, matrix with 8 inputs and 32 outputs, etc.).
“GPI” INPUTS
The GPI inputs (General Purpose Input) are special opto-insulated inputs that are available when the IO 3250 digital INPUT/OUTPUT boards
are installed in the MB 3200 sub-racks of the system. The GPI inputs can be used for controlling various types of events chosen as desired
by the user. The list of events that can be controlled is given in the section EVENTS CONTROLLED BY THE GPI INPUTS. To control a GPI input, it only needs to be connected to a normal electrical contact.
PROGRAMMBLE RELAYS
The programmable relays are available when the IO 3250 digital INPUT/OUTPUT boards are installed in the MB 3200 sub-racks. The relays
are programmed by means of the CP 3100 control unit. Each IO 3250 digital INPUT/OUTPUT board has 24 relays, each of which is equipped
with a contact. Using a dedicated menu on the CP 3100 control unit, you can set the status of the contact as “normally open” or “normally
closed”; i.e. the status that the contact must assume when the system has been configured (see the section STORING A CONFIGURATION).
The contacts can be used as desired for various purposes. The contact switching can be commanded in one of the following ways:
• by means of system events (see the section EVENTS CONTROLLED BY THE GPI INPUTS).
• using the ALARM key of the BM 3616 digital consoles (see the section EVENTS CONTROLLED FROM THE BM 3616 DIGITAL CONSOLES).
• using the F1, F2, F3 keys of the BM 3616 digital consoles (see the section EVENTS THAT CAN BE CONTROLLED FROM THE BM 3616 DIGITAL CONSOLES).
• by means of the BM 3604 consoles (see the section EVENTS CONTROLLED FROM THE BM 3604 DIGITAL CONSOLES).
• by means of the VOX device on the OB 3230 AUDIO OUTPUT boards (see the section VOX DEVICE).
• by means of timed events (see the section TIMED EVENTS).
by means of the audio matrix of the system, when a certain output is connected with an input, with the exception of the inputs defined as
BGM (background music).
This function is defined with the programming of the audio outputs as described in the section USING THE “OUTPUT PROCESSORS” MENU.
IMPORTANT NOTE
• In certain cases, the relays have a unitary assignment; that is, they can be controlled by only one event/device (e.g. feedback relay of a
BM 3604 console).
• According to the programming carried out using the CONFIGURATION menu of the CP 3100 control unit (see the section SYSTEM CONFIGURATION), the same relay can be controlled simultaneously by more than one device; in this case, the switching of its contact takes
place as follows.
a. When one of the specially programmed events/devices controls the relay, its contact switches from the normal position.
b. If, in the meantime, other events/devices control the relay, its contact remains switched with respect to the normal position.
c. If control of the relay by the first event/device that controlled it stops, the contact remains switched.
d. The relay is switched back to the normal position only when there is no device controlling it.
AMPLIFIER CONTROL UNITS (A.C.U.s)
The RB 3300 back-amplifier boards are identified in the various menus of the CP 3100 control unit with the abbreviation A.C.U. (Amplifier Control Unit). The function of the boards is indicated in the section DESCRIPTION.
A dedicated menu on the control unit is used for configuring the boards and programming them with the operating modes described in this
section.
Each A.C.U. in the system is identified in the various menus of the CP 3100 control unit by an IDENTIFICATION NUMBER in the range from
1 to 120 (the maximum number of A.C.U.s that the system can handle), which depends on the addresses assigned to the boards during the
installation phase.
Depending on the function of the amplifier controlled by the back-amplifier board, the A.C.U. can be one of two types:
• NORMAL – An A.C.U. whose function is to control a primary amplifier, normally dedicated to sound amplification in a certain audio zone.
• BACKUP – An A.C.U. whose function is to control a backup amplifier, which is normally used to substitute for a primary amplifier, for example, in the event of a failure. When a primary amplifier is substituted, the respective audio zone is covered by the backup amplifier. If the system includes two or more backup amplifiers for multiple primary amplifiers, the function of the first backup amplifier is to substitute any primary amplifier (e.g. in the event of a breakdown).
The function of the second backup amplifier is only to substitute for the first backup amplifier, if the first one fails in addition to the primary amplifier, and cannot be used to substitute for a second primary amplifier that has failed.
The third backup can only substitute for the second backup, and so on for all the backup amplifiers present in the group.
NOTES
• When there is only one backup amplifier in the system for one or more primary amplifiers, in order to have automatic activation of the
backup amplifier in the event of a breakdown on the primary amplifier, it is not indispensable for it to be coupled with an RB 3300
back-amplifier board (BACKUP A.C.U.).
• The use of a BACKUP A.C.U. is indispensable when the backup amplifier has to be monitored, or when it has to be substituted
with a further backup amplifier.
74
The A.C.U.s are divided into groups (max. 64 groups including NORMAL and BACKUP units). Any number of NORMAL or BACKUP A.C.U.s
can belong to a group, but the total number of units present in the system must not be more than 120. A NORMAL unit can be substituted
with a BACKUP unit only when these units belong to the same group. Using a special menu on the control unit, it is possible to activate
or disactivate the A.C.U.s manually, in order to use or not use the amplifier controlled by these units for sound amplification in a specific zone (see the section USING THE “INSERT BACKUP ACU” MENU). When an A.C.U. is disactivated, the amplifier being controlled by it is excluded from operating in a specific zone and a backup amplifier of the group can be inserted in its place, or a “BACKUP A.C.U. in the
event that the backup amplifier is controlled by an RB 3300 back-amplifier board.
NOTE
• The NORMAL units are normally ACTIVATED, while BACKUP units are always normally DISACTIVATED.
The activation/disactivation of an A.C.U. (NORMAL or BACKUP) in the event of an alarm caused by a breakdown or malfunction of an
amplifier, can be carried out in MANUAL or AUTO mode.
The operation of the NORMAL and BACKUP units in the two modes is described below.
• MANUAL mode on NORMAL unit – In the event of an alarm on the amplifier being controlled, the disactivation of the NORMAL unit
must be carried out manually using a dedicated menu on the CP 3100 control unit.
• AUTO mode on NORMAL unit –
In the event of an alarm on the amplifier being controlled, the disactivation of the NORMAL unit is
carried out by the system automatically.
• MANUAL mode on BACK UP unit – In the event of an alarm of the NORMAL unit belonging to the same group, the activation of the
BACKUP unit must be carried out manually using a dedicated menu on the CP 3100 control unit. In
the event of an alarm on the amplifier being controlled, the disactivation of the BACKUP unit must
be carried out manually by means of a dedicated menu on the CP 3100 control unit.
• AUTO mode on BACKUP unit –
In the event of an alarm of the NORMAL unit belonging to the same group, the activation of the
BACKUP unit is carried out by the system automatically if the NORMAL unit that substitutes it is
configured with the AUTO mode for activation/disactivation; otherwise, if the NORMAL unit that
substitutes it is configured with MANUAL activation/disactivation mode, the activation of the
BACKUP unit must be carried out manually.
In the event of an alarm on the amplifier being controlled, the disactivation of the BACKUP unit is
carried out by the system automatically.
When a group of A.C.U.s includes more than one BACKUP unit configured with the AUTO activation/disactivation mode, the order of intervention of these units in the event of an alarm on a NORMAL unit of the same group configured with the AUTO activation/disactivation mode, depends on the IDENTIFICATION NUMBER assigned to it: the first BACKUP unit to be activated is the one with the lowest identification
number; the second BACKUP unit to be activated is the one with the subsequent identification number; and so on for any other BACKUP
units.
NOTES
• The activation of an A.C.U. (NORMAL or BACKUP) that has been automatically disactivated due to an alarm caused by a fault or malfunction on the amplifier being controlled, must always be carried out manually using the dedicated menu on the CP 3100 control unit.
• When a NORMAL unit is disactivated and the group of A.C.U.s to which it belongs includes a backup amplifier that is not controlled by an
RB 3300 back-amplifier board (no Backup A.C.U.), the backup amplifier is always activated automatically in place of the primary
amplifier.
• When a group of A.C.U.s has more than one BACKUP unit, in the event of an alarm on the NORMAL unit belonging to the same group and
configured with the AUTO activation/disactivation mode, the BACKUP with the lowest identification number of those configured with the
AUTO activation/disactivation mode is activated first; the BACKUP units with the lowest identification number in the absolute sense, but
which have been configured with MANUAL activation/disactivation mode, therefore do not interrupt the automatic substitution of a
NORMAL unit.
The types of alarms that determine automatic disactivation of an A.C.U., and the eventual automatic activation of the backup unit (or of the
backup amplifier if it is not coupled with an RB 3300 board) are:
• PA FAULT. alarm: This alarm can be activated if the A.C.U. that controls the amplifier is equipped with the optional SB 3320 FAULT DETECTOR board. It indicates an alarm situation caused by any breakdown on the amplifier being controlled that causes a perceptible decrease in the power transmitted.
• OVL. alarm: This alarm can be activated if the A.C.U. is equipped with an auxiliary alarm contact, which closes when a protection device
intervenes or when the equipment is operating abnormally (e.g. operation in overload).
At the end of an alarm on the A.C.U., to return to the initial status of the NORMAL and BACKUP units (the NORMAL units are normally activated and the BACKUP units are normally disactivated), the units must be manually restored to the original condition by means of a dedicated menu on the control unit (see the section USING THE “INSERT BACKUP ACU” MENU), or the system must be reconfigured by means
of the procedures described in the section STORING A CONFIGURATION.
For A.C.U. programming, see the section USING THE “ACU” MENU; for manual activation/disactivation of the A.C.U.s, see the section USING
THE “INSERT BACKUP ACU” MENU. The following examples can provide further clarification on the operation of the A.C.U.s.
75
Example 1
A.C.U.s
PRESENT
IN THE GROUP
TYPE
OPER. MODE
NORMAL
AUTO
BACKUP
AUTO
TYPE
OPER. MODE
NORMAL
AUTO
BACKUP
AUTO
TYPE
OPER. MODE
ACU 1
NORMAL
MANUAL
ACU 2
BACKUP
MANUAL
ACU 1
DESCRIPTION OF A.C.U. OPERATION
a. If the primary amplifier controlled by ACU 1 breaks down, the
backup amplifier controlled by ACU 3 is automatically activated.
b. If, subsequently, the primary amplifier controlled by ACU 2
breaks down, only an eventual alarm related to that unit is signalled.
c. If, subsequently, also the backup amplifier controlled by
ACU 3 breaks down, this unit is automatically disactivated. If a
second backup amplifier is present, (not controlled by an RB
3300 board), it is automatically used in place of the first
backup amplifier.
ACU 2
ACU 3
Example 2
A.C.U.s
PRESENT
IN THE GROUP
ACU 1
DESCRIPTION OF A.C.U. OPERATION
a. If the primary amplifier controlled by ACU 2 breaks down, the
backup amplifier controlled by ACU 3 is automatically activated in its place.
b. If, subsequently, the primary amplifier controlled ACU 1 breaks
down, only the eventual alarm related to that unit is signalled.
c. If, subsequently, also the backup amplifier controlled by ACU
3 breaks down, the unit is automatically disactivated. If a second backup amplifier is present (not controlled by an RB
3300 board), it is automatically used in place of the first
backup amplifier.
ACU 2
ACU 3
Example 3
A.C.U.s
PRESENT
IN THE GROUP
DESCRIPTION OF A.C.U. OPERATION
a. If the primary amplifier controlled by ACU 1 breaks down, no
operation takes place except for an eventual alarm indication
related to that unit. Activation of the backup amplifier controlled by ACU 2 must be controlled manually by disactivating the
ACU 1 in alarm and then activating the ACU 2.
b. If, subsequently, also the backup amplifier controlled by ACU
2 breaks down, no operation takes place except for an eventual alarm indication related to that unit. Activation of the second backup amplifier (where present and not controlled by an
RB 3300 board) must be controlled manually by disactivating
the ACU 2 in alarm status.
“DAY/NIGHT” FUNCTION
This function can be used when the RB 3300 back-amplifier board (A.C.U.) is equipped with the optional LB 3340 DIGITAL ALC board, making
it possible to attenuate the sound level in the audio zones during the night-time hours. The level of attenuation can be chosen among 16 values during installation of the LB 3340 board, and is applied to all the audio zones controlled by the RB 3300 board. Special menus on the
CP 3100 control unit are used for activating the DAY/NIGHT function and defining the time band to be affected.
“MONITOR” FUNCTION (AUDIO MONITORING)
This function makes it possible to use the loudspeaker of the CP 3100 control unit to listen to the monitor signal of the RB 3300 back-amplifier board (A.C.U.) related to the speaker output of the amplifier under its control. A dedicated menu on the CP 3100 control unit is used for
setting the monitor function. The command for monitoring is transmitted via the serial line.
IMPORTANT NOTES
• When an A.C.U. is disactivated, it is no longer possible to listen to its monitor signal; this is to permit listening to the monitor signals of
the other A.C.U.s also in the event that it is no longer possible to activate that unit again.
• Only one A.C.U. can be monitored at a time.
76
“OVL” ALARM
The RB 3300 board is equipped with an input that can be connected to an auxiliary contact of the amplifier being controlled, which makes it possible to pick up alarm signals. The type of alarm picked up thus depends on the specific amplifier used, and can be, for example, related to the
intervention of one of the protection circuits, or to abnormal amplifier operation (e.g. operation in overload). The alarm is transmitted by means of
the closing of an auxiliary contact of the amplifier: if the alarm condition persists for at least 10 seconds, the RB 3300 activates the alarm indication on the CP 3100 control unit via the serial line. By programming the control unit in a certain way, when the amplifier goes into alarm status,
a backup amplifier will be automatically activated in its place (see the section USING THE “ACU" MENU).
“FIRE-BREAK” FUNCTION
This function can be used when the RB 3300 back-amplifier board (A.C.U.) is equipped with the optional SB 3320 FAULT DETECTOR board,
and makes it possible to drive the amplifier controlled by the RB 3300 board with an emergency signal coming from a source not connected
to the RX 3000 system, interrupting the normal transmission of the signal coming from the audio matrix. This guarantees, even in the
event of a fault on a component of the RX 3000 system (e.g. OB 3230 AUDIO OUTPUT board), that a message with absolute priority can be
transmitted (e.g. fire alarm). To ensure the maximum certainty of intervention, the "fire-break" function acts exclusively at the
hardware level.
“LINE FAULT” FUNCTION
The LINE FAULT function can be used when the RB 3300 back-amplifier board (A.C.U.) is equipped with the optional SB 3320 FAULT DETECTOR board, and makes it possible to control the impedance of the speaker line driven by means of the RB 3300 board. Any malfunction
that causes a significant variation in the line impedance activates the respective alarm, which is transmitted to the CP 3100 control unit. The
malfunctions that can be detected are:
• short circuit between the two conductors of the speaker line,
• interruption of the speaker line,
• short circuit between the speaker line and the earth circuit.
IMPORTANT NOTE
• When the RB 3300 board is controlling a backup amplifier, the LINE FAULT function can only be used to detect a short circuit between the
speaker line and the earth circuit; the function does not detect a short circuit between the two conductors of the speaker line or an
interruption of the speaker line.
“PA FAULT” FUNCTION
The PA FAULT function can be used when the RB 3300 back-amplifier board (A.C.U.) is equipped with the optional SB 3320 FAULT DETECTOR board. It enables a check for correct operation of the amplifier controlled by the RB 3300 board by picking up the signal on the speaker
output. Any amplifier malfunction that causes a significant decrease in the power transmitted activates the respective alarm, which is transmitted to the CP 3100 control unit. By programming the CP 3100 unit in a particular way, when the amplifier goes into alarm status, a backup
amplifier is automatically activated in its place (see the section USING THE "ACU" MENU).
“ALC” FUNCTION
The ALC function (Automatic Level Control) can be used when the RB 3300 back-amplifier board (A.C.U.) is equipped with the optional
LB 3340 DIGITAL ALC board. This function permits automatic control of the signal/noise ratio in the area covered by the sound system; that
is, it makes it possible to maintain a constant margin of level between the signal diffused and the ambient noise in order to ensure perfect clarity of the sound messages. This characteristic is particularly useful in premises that are subject to strong noise variations. The ALC function
is based on the use of condenser microphones (up to four), or loudspeakers with line transformer operating as microphones, used for detecting the ambient noise level. The signal picked up is processed digitally to control an electronic attenuator in order to guarantee perfect regulation of the signal.
IMPORTANT NOTE
• The ALC function cannot be used when the RB 3300 board is controlling a backup amplifier; therefore, a BACKUP A.C.U. cannot be
equipped with the LB 3340 DIGITAL ALC board.
SYSTEM EVENTS
The system is designed to handle the types of events described below.
EVENTS CONTROLLED FROM THE BM 3616 DIGITAL CONSOLES
The following operations can be controlled from the BM 3616 digital consoles:
• transmission of an announcement using the console microphone to specific zones and/or groups of zones.
• transmission of an audio signal (e.g. message, pre-announcement/alarm tone, etc.) recorded on the hard disk of the CP 3100 control unit
(audio files) to specific zones and/or groups of zones.
• transmission of a message recorded in the console memory to specific zones and/or groups of zones.
• switching of contacts of certain relays of the IO 3250 digital INPUT/OUTPUT boards.
• EMERGENCY event control, for the transmission of a microphone announcement from the console or an alarm signal (message or tone)
recorded on the hard disk of the CP 3100 control unit with absolute priority to specific zones and/or groups of zones. Together with the activation of the event, it is also possible to control the switching of relays of the IO 3250 digital INPUT/OUTPUT boards.
To program the events that can be controlled from the BM 3616 digital consoles, see the section USING THE “CONSOLES” MENU.
EVENTS CONTROLLED FROM THE BM 3604 CONSOLE
The following operations can be controlled from the BM 3604 consoles:
• transmission of an announcement using the console microphone to specific zones and/or groups of zones.
• switching of contacts of certain relays of the IO 3250 digital INPUT/OUTPUT boards.
• transmission of an audio signal (e.g. message, pre-announcement/alarm tone, etc.) recorded on the hard disk of the CP 3100 control unit
(audio files) to specific zones and/or groups of zones.
• control of warning signals on the CP 3100 control unit.
77
EVENTS CONTROLLED BY “GPI” INPUTS
Each IO 3250 digital INPUT/OUTPUT board is equipped with 16 opto-insulated inputs which can be specifically driven to control various
events. These inputs are identified in the various menus of the CP 3100 control unit with the name GPI inputs (see the section GPI INPUTS).
The following types of events can be controlled by the GPI inputs (max. 256 events).
• switching of one or more relays of the IO 3250 digital INPUT/OUTPUT boards (see the section PROGRAMMABLE RELAYS), the contacts
of which can be used as desired.
• transmission of an audio signal (e.g. message, pre-announcement/alarm tone, etc.) stored on the hard disk of the CP 3100 control unit (audio files) to specific zones and/or groups of zones, and eventual switching of one or more relays of the IO 3250 digital INPUT/OUTPUT
boards.
• transmission of an announcement using the microphone of the BM 3604 console to specific zones and/or groups of zones, and eventual
switching of one or more relays of the IO 3250 digital INPUT/OUTPUT boards.
• control of the FIREMAN 1 and/or FIREMAN 2 alarm events, for transmission of the “fireman” audio signal with absolute priority and eventual switching of one or more relays of the IO 3250 digital INPUT/OUTPUT boards.
• control of pre-announcement signals on the CP 3100 control unit.
To drive the inputs of the board, normal electrical contacts can be used (e.g. contacts of pushbuttons). To program the events controlled by
the GPI inputs, see the section USING THE “GPI EVENTS DEFINITION” MENU.
TIMED EVENTS
By means of a dedicated menu on the CP 3100 control unit, the system allows the programming of “timed events”; i.e. events that must take
place at a preset time. A maximum 64 timed events can be programmed in the system.
A timed event can control the following actions:
• switching of a relay with normally open contact of the IO 3250 digital INPUT/OUTPUT boards.
• switching of a relay with normally closed contact of the IO 3250 digital INPUT/OUTPUT boards.
• transmission of an audio signal (e.g. message, pre-announcement/alarm tone, etc.) recorded on the hard disk of the CP 3100 control unit
(audio files) to specific zones and/or groups of zones.
To program timed events, see the section USING THE “TIMER EVENTS DEFINITION” MENU.
“VOX” EVENTS
The VOX events are controlled by the VOX devices on the OB 3230 AUDIO OUTPUT boards. See the section VOX DEVICE for a complete description of the this device.
“PLAYBACK” EVENTS
These events make use of the audio board of the CP 3100 control unit for the playback of audio signals stored on the hard disk of the
CP 3100 (audio files).
Further information on audio file playback is provided in the section AUDIO SIGNAL RECORDING/PLAYBACK.
“BACKGROUND MUSIC” EVENTS
These events enable the transmission of background music in specific audio zones. The system can handle up to eight background music
sources.
ORDER OF PRIORITY
System operation is based on the use of an order of priority, in which each system event is assigned a priority level. Depending on the type
of priority of the event, it is carried out in a certain way, as described below.
GRADUATED PRIORITY Graduated priority makes it possible for certain events to use specific system devices before events having a lower
priority level, but without the possibility to interrupt the events in progress, even those with lower priority.
The only events that can always be interrupted are those of the BACKGROUND MUSIC type.
When there are several events with different priority levels waiting to be executed due to an unavailable device, the
events with the highest priority level are executed first, followed by those with lower priority.
The scale of priority is as follows:
• Levels 1 - 8:
Decreasing priority level starting from 1 (highest priority level) to 8 (lowest priority
level).
• Level 9:
no priority.
ABSOLUTE PRIORITY This is the maximum priority, permitting certain events to use system devices before events with graduated priority, with the possibility to interrupt events in progress (override function). An event with absolute priority does
not have the override function over events of the same level; that is, it cannot interrupt other events with absolute priority in progress.
Where there are events having the same priority level to be executed (absolute or graduated priority), the order of execution follows the order
of request; i.e. the first events booked are the first to be carried out.
The system devices that can be subject to priority are:
• outputs of the OB 3230 AUDIO OUTPUT boards, which can be used to drive the power amplifiers dedicated to the various audio zones of
the system.
• the audio board incorporated in the CP 3100 control unit, used for recording/playback of audio files (messages, pre-announcement/alarm
signals, etc.).
The table below indicates the respective priority level for each system event and a description of how this priority is implemented.
78
EVENT
EMERGENCY,
FIREMAN 1,
FIREMAN 2 alarm events
PRIORITY
LEVEL
DESCRIPTION
ABSOLUTE
These events have the maximum priority. Any events with a lower
priority that are using the devices needed for the absolute priority
event are interrupted (override function). All the audio outputs used
by the interrupted events are disconnected, even those not involved in the absolute priority event.
1
These events have the highest priority level after the absolute priority events. When there are several events with different priority levels (except for absolute priority events) waiting to be executed,
the timed event is the first to be carried out. The timed events do
not have the override function; i.e. they cannot interrupt events in
progress having the same or lower priority level.
Events controlled from the BM 3616
digital consoles
(excluding the EMERGENCY event)
2÷7
The events controlled from the BM 3616 digital consoles can have
variable priority levels from 2 to 7, depending on the settings made using the configuration menu (CONSOLES menu). These
events do not have the override function; i.e. they cannot interrupt
events in progress having the same or lower priority level.
VOX events
Events controlled from the BM 3604
consoles PLAYBACK events
8
BACKGROUND MUSIC events
9
Timed events
These events have the lowest priority level. They can only interrupt
BACKGROUND MUSIC events, and do not have the override
function; i.e. they cannot interrupt events in progress having the
same or lower priority level.
These events can be interrupted by any other event.
OVERRIDE FUNCTION BY AN EVENT WITH ABSOLUTE PRIORITY
When an event with absolute priority takes place, any other events in progress with lower priority which are using the devices needed for the
priority event are interrupted and terminated (override function), and are not restored on termination of the priority event (except for the
BACKGROUND MUSIC event). The table below describes the actions affecting each event overridden.
OVERRIDDEN EVENT
ACTIONS CARRIED OUT
Event from BM 3604 console
• The feedback relay (FEED RELAY) of the console is switched to OFF to disable it
and disconnect it from all the zones and/or groups of zones in the system (see the
section USING THE “GPI EVENTS DEFINITION” MENU).
• All the selections made on the console are reset.
• The console microphone is disabled.
Event from BM 3616 digital console
(excluding EMERGENCY)
• Transmission of any signal recorded on the hard disk of the CP 3100 control unit
(audio file) is interrupted.
• Transmission of any local message stored in the memory of the console is interrupted.
• Transmission of any microphone announcement is interrupted.
• The console is disabled and disconnected from all the zones and/or groups of zones in the system.
• All the selections made on the console are reset.
VOX event
• The VOX function is temporarily disactivated.
• The connections between the INPUT VOX input and the corresponding outputs
with the VOX function activated are interrupted (see the section VOX DEVICE).
• The RELAY VOX is switched back to the normal position (see the section VOX DEVICE).
• At the end of the event with absolute priority, the VOX function is re-enabled.
Timer events
• Playback of the associated audio signal (message or tone) is interrupted. When the
timed event also involves relay switching in addition to the audio signal playback,
the relays are switched back to the normal position.
PLAYBACK event controlled by the
GPI inputs
• Any playback of the associated audio signal (message or tone) is interrupted.
• All the audio zones and/or groups of zones associated to the event are disconnected from the PLAYBACK input.
• Any relays associated to the event are switched back to the normal position.
BACKGROUND MUSIC event
• The background music is interrupted in all the audio zones and/or groups of zones
used by the event with absolute priority. Transmission of the background music returns on termination of the absolute priority event.
79
“VOX” DEVICE
The VOX device (VOX detector) is located on the OB 3230 AUDIO OUTPUT boards. The function of the device is as follows: when the audio
signal (VOX signal) that drives a certain input of the IB 3210 / IB 3280 AUDIO INPUT boards, called INPUT VOX, exceeds a certain threshold,
which can be adjusted by means of a special trimmer on the OB 3230, the VOX device can control one of the following operations:
a) Connect the INPUT VOX input with certain outputs of the OB 3230 AUDIO OUTPUT boards (VOX outputs), which can be defined using
the OUTPUT PROCESSORS menu.
b) Carry out the operation described in point (a), and at the same time switch a certain relay of the IO 3250 digital INPUT/OUTPUT boards,
called RELAY VOX.
In the system configuration with sixteen OB 3230 AUDIO OUTPUT boards installed, it is possible to configure 16 VOX devices. The operating
procedure of the VOX device is as follows.
a) When the VOX device of an OB 3230 AUDIO OUTPUT board detects that the respective VOX signal has exceeded the threshold set, it
sends a “vox active” notification to the CP 3100 control unit when:
a1) the VOX function has been activated on at least one output of the same AUDIO OUTPUT board (by means of the audio outputs configuration menu).
a2) the outputs used by the VOX device are not engaged; i.e. they are not connected with an audio input, with the exception of the BGM
inputs (inputs for background music).
a3) the VOX signal is actually "heard".
b) If the “vox active” notification is generated, the OB 3230 AUDIO OUTPUT board autonomously connects the INPUT VOX inputs with the
respective outputs having VOX function activated, keeping them connected for at least 10 seconds.
c) The CP 3100 control unit, as soon as it receives the “vox active” notification, switches the RELAY VOX relays.
d) The connection between INPUT VOX input and the respective outputs remains as long as:
d1) no event with absolute priority requests use of the audio zones engaged by the VOX function.
d2) the VOX signal continues to drive the INPUT VOX input, exceeding the threshold set.
e) When the VOX signal diminishes, and its level remains below the established threshold for approximately 10 seconds, the OB 3230 AUDIO OUTPUT board restores any previously interrupted connections between the audio inputs defined BGM and the outputs used by the
VOX function, and sends the “end of vox activity” notification to the CP 3100 control unit.
f) As soon as the CP 3100 control unit receives the “end of vox activity” notification, the RELAY VOX relay switches back to the normal position.
The following operations are necessary for using the VOX function.
a) The VOX configuration menu (see the related section) must be used to define the INPUT VOX input to be used for a certain OB 3230 AUDIO OUTPUT board. With this definition, when the VOX signal exceeds the threshold set, the eight audio outputs of the selected board
can be connected with the selected INPUT VOX input.
b) The OUTPUT PROCESSORS configuration menu (see the related section) must be used to enable/disable the VOX function on the desired outputs of the selected OB 3230 AUDIO OUTPUT board. With this definition, when the VOX signal exceeds the threshold set, the outputs having the VOX function activated are connected with INPUT VOX input defined by means of the operation described in point (a).
AUDIO SIGNAL RECORDING/PLAYBACK
In the RX 3000 system, you can create and play back audio files for storing audio signals of various types: messages, announcements,
pre-announcement tones, alarm signals, etc..
CREATING THE SOUNDS
Using the TONE GENERATOR function of the RECORDER menu (see the section USING THE “RECORDER” MENU), you can create sounds
composed of one or more tones, which can be defined as desired.
The sound created is digital, and is stored as a file on the hard disk of the control unit along with the other audio files present in the library of
audio signals included with the system, or those created by means of the RECORD and ASSEMBLY functions of the CP 3100 control unit
(see the section USING THE “RECORDER” MENU).
Playback of the sounds created can take place in one of the ways described in the section AUDIO FILE PLAYBACK.
AUDIO SIGNAL RECORDING
The audio board of the CP 3100 control unit makes it possible to record audio signals coming from:
a. a. a microphone connected to the MICRO IN input of the audio board.
b. one of the sources connected to the system inputs (inputs of the IB 3210 / IB 3280 AUDIO INPUT boards). When the recording function
is enabled, the audio matrix of the system automatically connects the input selected with the RECORDER output defined (see the section USING THE “OUTPUT PROCESSORS” MENU).
The audio signal to be recorded, which is analogue, is digitalized by the audio board and stored as a file on the hard disk of the control unit.
Audio signal recording is made using the RECORD function of the RECORDER menu (see the section USING THE “RECORDER” MENU).
Playback of the recorded signals can take place in one of the ways described in the section AUDIO FILE PLAYBACK below.
AUDIO FILE PLAYBACK
The CP 3100 control unit is equipped with an audio board that makes it possible to play back audio signals stored as files on the hard disk
(audio files), which can be messages, announcements, pre-announcement/alarm signals, etc. The audio files available are those included in
the library of audio signals provided with the system, or those created using the RECORD, ASSEMBLY and TONE GENERATOR functions
of the CP 3100 control unit (see the section USING THE “RECORDER” MENU).
Playback of an audio file can be carried out in one of the following ways:
a. using the PLAY function of the CP 3100 control unit (see the section USING THE “RECORDER” MENU).
b. by means of the F1 key on the CP 3100 control unit during use of the TONE GENERATOR and ASSEMBLY functions.
c. by means of the F1, F2, F3 keys of the BM 3616 digital consoles (see the section USING THE “CONSOLES" MENU).
d. by means of the GPI inputs of the IO 3250 digital INPUT/OUTPUT boards (see the section USING THE “GPI EVENTS DEFINITION”
MENU).
e. by means of a timed event (see the section USING THE “TIMER EVENTS DEFINITION” MENU).
80
When playback of an audio file is requested, the audio matrix of the system automatically connects the PLAYBACK input defined (see the
section USING THE “INPUT PROCESSORS” MENU) with the outputs of the OB 3230 AUDIO OUTPUT boards used by the various functions
(audio zones).
SYSTEM ALARMS
The system handles two types of alarms:
• ALARMS FROM THE SYSTEM DEVICES – Alarms generated by system devices (e.g. BM 3616 consoles, A.C.U.s, IO 3250 boards, IB
3210 / IB 3280 boards, OB 3230 boards, etc.).
• ALARM/WARNING COMMANDS – Alarms or warnings controlled by the operator from the BM 3616 and/or BM 3604 consoles, or from
external devices connected to the GPI inputs of the IO 3250 digital INPUT/OUTPUT boards, configured for this purpose (see the section
USING THE “GPI EVENTS DEFINITION” MENU).
Any alarm event activates the acoustic signaller of the control unit, and the ALARM LEDs (ref. 13 – Fig. 1, page 70) light up. To switch off the signaller and the ALARM LEDs, you have to access the menu for alarm status display (see the section ALARM STATUS DISPLAY); this operation
does not disactivate the alarm but only its indication.
An alarm is disactivated only when the event that caused it is no longer present; that is, when one of the following conditions occurs:
• the fault on the system device has been eliminated.
• the alarm is disactivated from the console that generated it.
• the GPI input (IO 3250 digital INPUT/OUTPUT boards) that generated the alarm/warning is no longer driven (see the section USING THE
“GPI EVENTS DEFINITION” MENU).
PRINTOUT OF ALARM EVENTS
A record of the alarm events handled by the system can be printed out in one of the following two ways.
a. If the PRINT MODE: AUTO option of the PRINTER OPTIONS submenu of the SYSTEM configuration menu is selected, an alarm message is automatically printed out at the moment the alarm occurs.
b. If the PRINT MODE: REQUEST option of the PRINTER OPTIONS submenu of the SYSTEM configuration menu is selected, the alarm
event printout must be controlled manually. The messages printed out are related to all the alarms that have occurred since the system
was switched on.
BACKGROUND MUSIC TRANSMISSION
The system enables background music to be played in specific audio zones. Up to eight different sources can be used for the background
music (e.g. AM/FM tuner, CD player, cassette player, etc.), which are connected to the inputs of the IB 3210 / IB 3280 AUDIO INPUT boards
defined as BGM (background music) by means of the INPUT PROCESSORS configuration menu.
The background music is played as described below.
a. The background music (“background music” event) is normally played continuously in the audio zones defined as BGM by means of the
OUTPUT PROCESSORS configuration menu.
b. When the execution of an event with higher priority is requested (see the section ORDER OF PRIORITY), which involves transmission of
an audio signal in the zones defined as BGM (e.g. an announcement from a BM 3616 digital console or from a BM 3604 console, etc.),
the background music transmission is interrupted.
c. The background music is restored when transmission of the higher priority audio signal is completed.
USING THE CP 3100 CONTROL UNIT
The keyboard and liquid crystal display on the front panel of the CP 3100 control unit can be used to control and configure the RX 3000 system. Alternatively, an external keyboard and video monitor (optional) can be used, which are connected to the dedicated connectors of the
CP 3100 control unit. The descriptions in this section refer to use of the devices incorporated in the control unit.
USING THE MENUS
The control unit operations are based on the use of numerous menus which are shown on the incorporated display (or on the optional video
monitor). The figure below shows the general structure of the menus.
F1: CONFIGURATION
!
F2: ALARMS
!
F3: STORE CONFIG.
!
F4: AUDIO PROCESS
AUDIO INPUT PROCESSORS
AUDIO OUTPUT PROCESSORS
GPI PROCESSORS
DIG. CONSOLLES
ACU (AMPLIFIERS)
GPI ALARMS
EMERGENCY
FIREMAN
SYSTEM ALARMS
ADJUST AUDIO INPUT
ADJUST AUDIO OUTPUT
INSERT BACKUP ACU
MONITOR OPERATIONS
INPUT PROCESSORS
OUTPUT PROCESSORS
GROUPS
RELAY CONFIGURATION
CONSOLES
ACU (AMPLIFIERS)
GPI EVENTS DEFINITION
F1=DEF. RELAY
TIMER EVENTS DEFINITION
VOX
RECORDER
SYSTEM
PRINTER OPTIONS
COMPILE & SAVE
PRINT CONFIGURATION
EXIT WITHOUT SAVING! DATE & TIME
DAY & NIGHT
PASSWORD
F1=CHANGE ZONE
F1=DEF. KEY
F2= DEF. EMERGENCY
F3=DEF. F1, F2, F3
OPTIONS
RECORD
PLAY
ASSEMBLY
TONE GENERATOR
DELETE MESSAGES
To work in the various menus, use the keys on the front panel of the control unit (or on the optional external keyboard), the functions of which are given in the table below.
81
KEY/S
FUNCTION
ESC
Right arrow
Left arrow
Up arrow
Down arrow
Diagonal arrow
Pag ↑
Pag ↓
+, -
To exit from a menu/submenu.
To move the selection point to the right.
To move the selection point to the left.
To move the selection point up.
To move the selection point down.
To move the selection point to the first field of the current menu.
To move the current menu page up.
To move the current menu page down.
To set a parameter in a field, selecting in rotation among the various parameters available. These keys are also used for inserting an alphanumerical character, selecting in rotation among the various characters available.
To access certain submenus.
To enter an alphanumerical character.
To confirm a selection or a field in rotation.
To store the user password.
To insert a blank space in an alphanumerical field, moving the cursor by one position.
To cancel all the characters contained in the currently selected field.
To cancel the next or previous alphanumerical character, also enabling moves within
the current field.
F1, F2, F3, F4
Numerical keys 0 ÷ 9
ENTER
MEMORY
SPACE
CLEAR
C →, C ←
PASSWORD FOR MENU ACCESS
Using two passwords, certain menus on the CP 3100 control unit can be made accessible only to authorized operators. The two types of control unit passwords are:
• USER PASSWORD – The password that can be used by all operators authorized for system configuration. It can be composed of a maximum of 8 numerical characters. To assign the user password, proceed as described in the section USING THE “SYSTEM” MENU.
• SUPERVISOR PASSWORD – This is a secret password reserved to the system supervisor. It is set by RCF, and can substitute for the user
password when the latter has been forgot.
NOTE
• The “supervisor password” is set by RCF and cannot be modified.
The menus that can be protected by password are:
• CONFIGURATION menu, used for system configuration (see the section SYSTEM CONFIGURATION).
• STORE CONFIG. menu, used for implementing a configuration (see the section STORING A CONFIGURATION)
When the control unit asks you to enter the password, the following message appears on the control unit display.
INSERT PASSWORD TO ACCESS CONFIGURATION
PASSWORD:
To access the next menu, type in the “user password” or the “supervisor password ” using the numerical keypad of the control unit, and then
press ENTER.
EXIT FROM MENUS
To exit from a menu/submenu of the control unit:
1) Press ESC. If any settings or parameters have been modified, the following message appears on the control unit display, asking whether
you want to save the new values.
WARNING: PARAMETERS MODIFIED !
SAVE NEW PARAMETERS ?
NO
YES
2a) Using the direction keys ↑ / ↓ move the selection point to YES and press ENTER to store the new parameters temporarily.
2b) Using the direction keys ↑ / ↓ move the selection point to NO and press ENTER to not save the new parameters and maintain those previously stored.
3) If no settings or parameters have been modified, the screen of the previous menu is displayed.
IMPORTANT NOTE
• When the system is configured, to save the settings permanently on the hard disk of the control unit it is indispensable to exit from the
main configuration menu using the COMPILE & SAVE command (see the section USING THE “COMPILE & SAVE” MENU).
82
AUDIO LEVEL DISPLAY
A special menu displays a VU bar which indicates the level of the audio signal.
This indication makes it possible to:
• check and adjust the audio signal level on the inputs of the IB 3210 / IB 3280 AUDIO INPUT boards.
• check and adjust the audio signal level on the OB 3230 AUDIO OUTPUT boards.
• check the audio signal level on the speaker outputs of the power amplifiers controlled by the A.C.U.s (RB 3300 back-amplifier boards).
The VU bar can display audio signals at a level between -12 dB and +6 dB.
ACOUSTIC SIGNALLER OPERATION
The control unit is equipped with an acoustic signaller (buzzer), which emits a continuous sound in the following circumstances:
• during the system self-configuration phase.
• when a warning/alarm is activated (see the section SYSTEM ALARMS). To switch off the buzzer in these situations, you have to access the
menu for alarm status display (see the section ALARM STATUS DISPLAY).
This operation does not disactivate the alarm itself, but only the alarm indication.
The acoustic signaller emits a single “beep” in every situation where it is necessary to give a warning.
DISPLAY BACK-LIGHTING
The back-lighting of the LCD on the unit lights up in the following circumstances:
• whenever a key on the front panel of the control unit is pressed; a timer automatically switches off the display back-lighting after approximately 2 minutes from the last key pressing.
• when the system is switched on; in this case, the back-lighting stays on until the self-configuration phase is completed.
• when the system configuration menus are used (CONFIGURATION menu); in this case, the back-lighting stays on until you exit from the
configuration menu (timer excluded).
EQUIPMENT SWITCH-ON
After the CP 3100 control unit has been switched on, it loads the system management program and carries out the system self-configuration,
which consists of detecting all the devices installed and programming them with the settings contained in the system configuration files stored on the hard disk. The following message appears on the control unit display:
RCF RX 3000 AUDIO SYSTEM
SYSTEM CONFIGURATION STARED
PLEASE WAIT ...
"##############
03 NOV 1999
15:29:52
CORRECT SYSTEM CONFIGURATION
On termination of the system self-configuration procedure, if the system is correctly configured the following message appears on the control
unit display, which contains the main menu of the unit.
RCF RX 3000 AUDIO SYSTEM
F1: CONFIGURATION
F2: ALARMS
"##############
ENGLISH _ _ _ ▼
F3: STORE CONFIG.
F4: AUDIO PROCESS
03 NOV 1999
15:29:52
ERRORS IN SYSTEM CONFIGURATION
On termination of the system self-configuration procedure, if the system has not been correctly configured; i.e. if the number of system
components which have been previously configured (using the menu of the control unit) does not coincide with the number of system components actually found and correctly configured, the following message appears on the control unit display:
RCF RX 3000 AUDIO SYSTEM
WRONG SYSTEM CONFIGURATION
F1: CONFIGURATION
F2: RUN->
ENGLISH _ _ _ ▼
In this condition, two possible choices are displayed, to be selected using the F1 or F2 key.
• F1: CONFIGURATION
Press F1 to configure the system in a different way in order to eliminate the configuration errors. See the section
SYSTEM CONFIGURATION for the use of the various functions of the submenus.
• F2: RUN->
Press F2 to access the main menu of the unit, without correcting the configuration errors detected.
IMPORTANT NOTE
• If the configuration errors detected are not corrected, some of the system functions may be compromised, as
certain devices will be considered “absent”.
83
LANGUAGE SELECTION
The messages that appear on the display of the CP 3100 control unit can be shown in different languages. To select the desired language,
use the + and - keys.
RCF RX 3000 AUDIO SYSTEM
F1 : CONFIGURATION
F2 : ALARMS
"##############
ENGLISH _ _ _ ▼
F3: STORE CONFIG.
F4: AUDIO PROCESS
03 NOV 1999
15:29:52
MAIN MENU
The main menu contains the four submenus described below.
• F1: CONFIGURATION
This submenu is accessed by pressing the F1 key, and is used for configuring all the system (devices, functions,
etc.). By means of this submenu the configuration files are created, which make it possible to program all the system devices (see the section STORING A CONFIGURATION). For a description of how to use the various functions of the submenu, see the section SYSTEM CONFIGURATION.
• F2: ALARMS
This submenu is accessed by pressing the F2 key, and is used for displaying the status of the alarms managed by
the system. For a description of how to use the various functions of the submenu, see the section ALARM STATUS
DISPLAY.
• F3: STORE CONFIG.
This submenu is accessed by pressing the F3 key, and is used for programming all the system devices with the
settings contained in the configuration files created using the submenu F1: CONFIGURATION. For a description
of how to use the function, see the section STORING A CONFIGURATION
• F4: AUDIO PROCESS
This submenu is accessed by pressing the F4 key, and is used for setting or quick modification of numerous audio
parameters. It is also used for monitoring the audio signals handled by the system (input signals, output signals,
etc.). For a description of how to use the various functions of the submenu, see the section AUDIO SETTINGS.
At the bottom left of the main menu there is an ACTIVITY BAR, which "runs" to indicate whether the system is operating correctly. The filling
of the bar represents the progression of the control cycle which the CP 3100 unit carries out periodically on the system devices. At the bottom right of the main menu, the current date and time are indicated, which can be adjusted using a dedicated menu.
SYSTEM CONFIGURATION (“CONFIGURATION” menu)
RCF RX 3000 AUDIO SYSTEM
F1 : CONFIGURATION
F2 : ALARMS
"##############
ENGLISH _ _ _ ▼
F3: STORE CONFIG.
F4: AUDIO PROCESS
03 NOV 1999
15:29:52
To access the menus used for system configuration (devices, functions, etc.), from the main menu press F1. The display shows a menu page
containing the fields described below.
DEVICE
Indicates the various devices of the system. The texts displayed are:
• CONSOLES: indicates the BM 3616 digital consoles.
• AUDIO INP PROC.: indicates the IB 3210 / IB 3280 AUDIO INPUT boards.
• AUDIO OUT PROC.: indicates the OB 3230 AUDIO OUTPUT boards.
• GPI PROCESS.: indicates the IO 3250 digital INPUT/OUTPUT boards.
• ACU: indicates the RB 3300 back-amplifier boards.
USED
Indicates the number of system components that have been configured using the respective menu of the control unit.
FOUND
Indicates the number of system components found and correctly programmed by the control unit by means of the system selfconfiguration procedure.
The first screen only shows the data related to the first two devices of the system. To display the subsequent devices, use the ↑ / ↓ and/or
pag↑ / pag↓ keys.
ESC to go back
DEVICE
CONSOLES
AUDIO INP PROC.
ENTER to Configure
USED
FOUND
6
6
4
4
Pag ↓
ESC to go back
DEVICE
AUDIO OUT PROC.
GPI PROC.
ENTER per Config.
USED
FOUND
8
8
8
8
Pag ↓
ESC to go back
DEVICE
GPI PROCESS.
ACU
ENTER to Configure
USED
FOUND
8
8
10
10
Press ESC to return to the main menu.
84
Press ENTER to configure the system devices. A message appears on the control unit display requesting that you enter the password, where used (see the section PASSWORD FOR MENU ACCESS). Use the numerical keypad to enter the password (where used) and press
ENTER. The following submenus are shown on the display:
• INPUT PROCESSORS
Menu for programming the inputs of the IB 3210 / IB 3280 AUDIO INPUT boards.
• OUTPUT PROCESSORS
Menu for programming the outputs of the OB 3230 AUDIO OUTPUT boards.
• GROUPS
Menu for programming the groups of audio zones of the system.
• RELAY CONFIGURATION
Menu for programming the relays of the IO 3250 digital INPUT/OUTPUT boards.
• CONSOLES
Menu for programming the BM 3616 digital consoles.
• ACU (AMPLIFIERS)
Menu for programming the A.C.U.s dedicated to controlling the power amplifiers of the system (see the
section AMPLIFIER CONTROL UNITS).
• GPI EVENTS DEFINITION
Menu for programming the events controlled by the GPI inputs of the IO 3250 digital INPUT/OUTPUT
boards.
• TIMER EVENTS DEFINITION Menu for programming the timed events; i.e. the events that must take place at a pre-set time.
• VOX
Menu for programming the VOX devices of the OB 3230 AUDIO OUTPUT boards.
• RECORDER
Menu for recording and playing back audio files.
• SYSTEM
Menu for setting various parameters of the system.
• COMPILE & SAVE
Command for exiting from the system configuration menu and saving the settings made.
• EXIT WITHOUT SAVING
Command for exiting from the system configuration menu without saving the settings made.
The first screen only shows the first three items of the configuration menu. To display the subsequent items, use the ↑ / ↓ and/or pag ↑ / pag
↓ keys..
INSERT PASSWORD TO ACCESS CONFIGURATION
PASSWORD:
“nr password”
ENTER
- - - = = = MAIN MENU = = = - - ->INPUT PROCESSORS
->OUTPUT PROCESSORS
->GROUPS
Pag ↓
- - - = = = MAIN MENU = = = - - ->RELAY CONFIGURATION
->CONSOLES
->ACU (AMPLIFIERS)
Pag ↓
- - - = = = MAIN MENU = = = - - ->GPI EVENTS DEFINITION
->TIMER EVENTS DEFINITION
->VOX
Pag ↓
- - - = = = MAIN MENU = = = - - ->RECORDER
->SYSTEM
->COMPILE & SAVE
Pag ↓
- - - = = = MAIN MENU = = = - - ->SYSTEM
->COMPILE & SAVE
->EXIT WITHOUT SAVING
85
IMPORTANT NOTES
• All the settings made using the various configuration menus are temporarily stored in the RAM of the control unit; to save them permanently on the hard disk of the control unit as configuration files, it is indispensable to exit from the system configuration menu using the
command “COMPILE & SAVE” (see the section USING THE “COMPILE & SAVE” MENU).
• When the configuration menu of the control unit is being used, it is not possible to access the system via the configuration PC.
CHARACTERISTIC PARAMETERS
With the installation of the modular boards of the RX 3000 system (e.g. IB 3210 / IB 3280 AUDIO INPUT boards, OB 3230 AUDIO OUTPUT
boards, etc.), the parameters described below are defined, which are used in the various configuration menus to identify the boards and the
respective inputs and/or outputs.
BOARD NUMBER
Each board of a particular type is identified by a progressive number which depends on the slot and the subrack in which it is installed.
The progressive numbering of the IB 3210 / IB 3280 AUDIO INPUT boards and the OB 3230 AUDIO OUTPUT boards, from number 1 to the total number of boards of that type present in the system, starts from the
board installed in slot number 1 of the first MB 3200 sub-rack, up to the last board installed in the slot with
the highest number in the last sub-rack.
The progressive numbering of the IO 3250 digital INPUT/OUTPUT boards, from number 1 to the total number of boards of this type present in the system, starts from the board installed in the slot with the lowest
number of the first MB 3200 sub-rack used for this type of board, up to the last board installed in the slot
with the highest number in the last sub-rack.
AUDIO INPUT NUMBER
The 8 audio inputs of each IB 3210 / IB 3280 AUDIO INPUT board present in the system are identified by
progressive numbers that depend on the identification number of the board to which they belong (BOARD
NUMBER parameter). The progressive numbering of the inputs, from number 1 to the total number of audio
inputs present in the system (max. 64), starts from IB 3210 / IB 3280 AUDIO INPUT board number 1: board
number 1 has inputs 1 to 8; board number 2 has inputs 9 to 16, and so on up to the last board, for example
number 4, which has inputs 25 to 32.
AUDIO OUTPUT NUMBER
The 8 audio outputs of each OB 3230 AUDIO OUTPUT board present in the system are identified by progressive numbers that depend on the identification number of the board to which they belong (BOARD NUMBER parameter). The progressive numbering of the outputs, from number 1 to the total number of audio outputs present in the system (max. 128), starts from OB 3230 AUDIO OUTPUT board number 1: board number
1 has outputs 1 to 8; board number 2 has outputs 9 to 16, and so on up to the last board, for example number 8, which has outputs 57 to 64.
GPI INPUT NUMBER
The 16 GPI inputs of each IO 3250 digital INPUT/OUTPUT board present in the system are identified by progressive numbers that depend on the identification number of the board to which they belong (BOARD
NUMBER parameter). The progressive numbering of the GPI inputs, from number 1 to the total number of
GPI inputs present in the system (max. 256), starts from IO 3250 digital INPUT/OUTPUT board number 1:
board number 1 has inputs 1 to 16; board number 2 has inputs 17 to 32, and so on up to the last board, for
example number 8, which has inputs 113 to 128.
RELAY NUMBER
The 24 relays of each IO 3250 digital INPUT/OUTPUT board present in the system are identified by progressive numbers that depend on the identification number of the board to which they belong (BOARD NUMBER
parameter). The progressive numbering of the relays, from number 1 to the total number of relays present in the
system (max. 384), starts from IO 3250 digital INPUT/OUTPUT board number 1: board number 1 has relays 1
to 24; board number 2 has relays 25 to 48, and so on up to the last board, for example number 8, which has
relays 169 to 192.
IMPORTANT NOTE
• The numbering that identifies the IB 3210 / IB 3280 AUDIO INPUT boards, the OB 3230 AUDIO OUTPUT boards, and the audio inputs and
outputs of these boards, is only one, even when more than one audio matrix is present in the system.
Considering, for example, a system in which there are two independent audio matrixes, with 32 inputs (4 AUDIO INPUT boards) and 64 outputs (8 AUDIO OUTPUT boards) each, IB 3210 / IB 3280 AUDIO INPUT board number 5 corresponds to the first input board of the second
matrix, and OB 3230 AUDIO OUTPUT board number 9 corresponds to the first output board of the second matrix; consequently, input number 33 will correspond to the first input of the second matrix, and output number 65 will correspond to the first output of the second matrix.
USING THE “INPUT PROCESSORS” MENU
- - - = = = MAIN MENU = = = - - ->INPUT PROCESSORS
->OUTPUT PROCESSORS
->GROUPS
This menu is used for programming the inputs of the IB 3210 / IB 3280 AUDIO INPUT boards. From the main configuration menu of the control unit, use the ↑ / ↓ and/or pag↑ / pag↓ keys to move the selection point to the INPUT PROCESSORS submenu and press ENTER.
The fields described below appear on the control unit display.
N.
NAME
Indicates the identification number of the audio input to be programmed. The indication is sequential: the number 1 corresponds to
input number 1 of AUDIO INPUT board number 1; the number 9 corresponds to input number 1 of AUDIO INPUT board number 2;
the number 32 corresponds to input number 8 of AUDIO INPUT board number 4, and so on.
Used for defining the identification name of the input, which can be composed of a maximum of 16 alphanumerical characters.
Use the + and - keys to select the alphanumerical characters in rotation, and confirm each character with ENTER.
The numerical characters can be selected directly on the numerical keypad.
86
TYPE
Used for defining the type of input. Use the + and - keys to select the type desired from those described below.
• AUDIO STD: indicates a generic input that can be used for connecting audio equipment that has no connection with the RX 3000
system except for the audio line itself. An AUDIO STD input has no priority, and is not subject to any particular handling on the
part of the system.
• PLAYBACK: indicates an input dedicated to the connection with the LINE OUT output of the audio board of the control unit, for
the playback of audio signals (audio files). Only one input of this type can be defined. When the audio board is not used for
playing back audio signals, it is not necessary to configure an input of this type.
• FIREMAN 1: indicates an input dedicated to the connection of a FIREMAN 1 source, which has absolute priority (see the section
EVENTS CONTROLLED BY THE GPI INPUTS). Only one input of this type can be defined.
• FIREMAN 2: indicates an input dedicated to the connection of a FIREMAN 2 source, which has absolute priority (see the section
EVENTS CONTROLLED BY THE GPI INPUTS). Only one input of this type can be defined.
• CONSDIG n.: indicates an input dedicated to the connection of a BM 3616 digital console. The abbreviation n. represents the
identification number of the console, in the range between 1 and 16 (maximum number of digital consoles handled). This number
is set locally on the console by means of the address assignment procedure.
• CONSGPI n.: indicates an input dedicated to the connection of a BM 3604 console. The abbreviation n. represents the identification number of the console, in the range between 1 and 24 (maximum number of consoles handled).
• BGM n.: indicates an input dedicated to the connection of a background music source (see the section BACKGROUND MUSIC).
The abbreviation n. represents the identification number of the source, in the range between 1 and 8 (maximum number of sources handled).
To display the subsequent or previous inputs, press the ↑ / ↓ and/or pag↑ / pag ↓ keys.
N.
1
2
3
NAME
SOURCE 1
SOURCE 2
SOURCE 3
TYPE
PLAYBACK _ ▼
CONSGPI1_ ▼
CONSGPI2_ ▼
Pag ↓
N.
4
5
6
NAME
SOURCE 4
SOURCE 5
SOURCE 6
TYPE
CONSDIG1_____ ▼
CONSDIG2_____ ▼
CONSDIG3____ ▼
To exit from the submenu, press ESC and proceed as described in the section EXIT FROM A MENU.
USING THE “OUTPUT PROCESSORS” MENU
- - - = = = MAIN MENU = = = - - ->INPUT PROCESSORS
->OUTPUT PROCESSORS
->GROUPS
This menu is used for programming the outputs of the OB 3230 AUDIO OUTPUT boards. From the main configuration menu of the control
unit, use the ↑ / ↓ and/or pag↑ / pag↓ keys to move the selection point to the OUTPUT PROCESSORS submenu and press ENTER. The
fields described below appear on the control unit display.
N.
Indicates the identification number of the audio output to be programmed. The indication is sequential: the number 1 corresponds
to output number 1 of AUDIO OUTPUT board number 1; the number 9 corresponds to output number 1 of AUDIO OUTPUT board
number 2; the number 64 corresponds to output number 8 of AUDIO OUTPUT board number 8, and so on.
NAME Used for defining the identification name of the output, which can be composed of a maximum of 16 alphanumerical characters. Use
the + and - keys to select the alphanumerical characters in rotation, and confirm each character with ENTER. The numerical characters can be selected directly on the numerical keypad.
VOX
Used for enabling/disabling the VOX function on the output (see the section VOX DEVICE). Use the keys + and - to select one of the
following options:
• ON - VOX function activated on the output
• OFF - VOX function disactivated on the output
TYPE Used for defining the type of output. Use the keys + and - to select the desired type from those described below.
• GENERIC: indicates a generic output which is not subject to any particular handling on the part of the system.
• RECORDER: indicates an output dedicated to the connection with the LINE IN input of the audio board of the control unit, for recording audio signals on files. Only one output of this type can be defined. When the audio board is not used for recording audio signals, it is not necessary to configure an output of this type.
• BGM n.: indicates an output dedicated to sound coverage of an audio zone in which the background music is normally played
(see the section BACKGROUND MUSIC). The abbreviation n. represents the number of the background music source to be played
in the zone (number between 1 and 8). If, for example, a BGM 1 type output is selected, the source connected to the BGM 1 type input is normally played. The same background music source can be assigned to more than one output.
87
RELAY Used for choosing a relay of the IO 3250 digital INPUT/OUTPUT boards to be switched when the output is connected with an audio
input, except for the BGM type inputs (background music). The relay can be normally open or normally closed, and switches back
to the normal position, defined using the RELAY CONFIGURATION menu, as soon as the output is no longer connected. Use the +
and - keys to select the desired relay name from those defined using the RELAY CONFIGURATION menu (NAME field). If you choose the NO RELAY option, no relay is selected.
IMPORTANT NOTE
• The relay is never switched when the output is connected with a BGM type input (background music).
NOTE
• The outputs of the OB 3230 AUDIO OUTPUT boards enable sound coverage of a specific audio zone; consequently, the OUTPUT PROCESSORS menu indirectly enables the definition of the audio zones of the system.
The first screen only shows the first 4 fields (N., NAME, VOX, TYPE) of the first 3 outputs. To display the next field, press →; to display the
previous field, press ←.
N.
1
2
3
NAME
ZONE 1
ZONE 2
ZONE 3
VOX
OFF▼
OFF▼
OFF▼
TIPO
GENERIC_ _ ▼
GENERIC_ _ ▼
GENERIC_ _ ▼
→
1
2
3
VOX
OFF▼
OFF▼
OFF▼
TYPE
GENERIC_ _ ▼
GENERIC_ _ ▼
GENERIC_ _ ▼
RELAY
NO RELAY _ _ _ _ _ _ ▼
NO RELAY _ _ _ _ _ _ ▼
NO RELAY _ _ _ _ _ _ ▼
To display the subsequent or previous outputs, press the ↑ / ↓ and/or pag ↑ / pag ↓ keys.
N.
1
2
3
NAME
ZONE 1
ZONE 2
ZONE 3
VOX
OFF▼
OFF▼
OFF▼
TYPE
GENERIC_ _ ▼
GENERIC_ _ ▼
GENERIC_ _ ▼
Pag ↓
N.
4
5
6
NAME
ZONE 4
ZONE 5
ZONE 6
VOX
OFF▼
OFF▼
OFF▼
TYPE
GENERIC_ _ ▼
GENERIC_ _ ▼
GENERIC_ _ ▼
To exit from the submenu, press ESC and proceed as described in the section EXIT FROM A MENU.
USING THE “GROUPS” MENU
- - - = = = MAIN MENU = = = - - ->INPUT PROCESSORS
->OUTPUT PROCESSORS
->GROUPS
This menu is used for defining the groups of audio zones. Creating groups of zones makes it possible to simplify the operations involved in
selecting the zones to which a certain audio signal is to be transmitted. For example, the groups of zones can be used by the BM 3604 and
BM 3616 consoles for selecting multiple audio zones with a single key. One group can include all the zones of the system. From the main configuration menu of the control unit, use the ↑ / ↓ and/or pag↑ / pag↓ keys to move the selection point to the GROUPS submenu and press
ENTER. The fields described below appear on the control unit display.
N. GROUPS Indicates sequentially the number of the group of audio zones to be programmed. A maximum of 24 groups of zones can be
defined.
NAME
Used for defining the identification name of the group of zones, which can be composed of a maximum of 16 alphanumerical
characters. Use the + and - keys to select the alphanumerical characters in rotation, and confirm each character with ENTER.
The numerical characters can be selected directly on the numerical keypad.
The number of zones belonging to the group is indicated next to the name of the group. To define the zones belonging to each
group, you have to access a particular submenu by pressing F1 (see the section DEFINING THE ZONES OF EACH GROUP).
88
The first screen only shows the first 3 groups of zones. To display the subsequent or previous groups of zones, press the ↑ / ↓ and/or pag ↑
/ pag ↓ keys.
GROUP N.
1
2
3
NAME
GROUP 1 _ _ _ _ _ _ _
GROUP 2 _ _ _ _ _ _ _
GROUP 3 _ _ _ _ _ _ _
(F1=CHANGE)
4
12
2
Pag ↓
GROUP N.
4
5
6
NAME
NO ZONE _ _ _ _ _ _ _
NO ZONE _ _ _ _ _ _ _
NO ZONE _ _ _ _ _ _ _
(F1=CHANGE)
0
0
0
To exit from the submenu, press ESC and proceed as described in the section EXIT FROM A MENU.
DEFINING THE ZONES OF EACH GROUP
To display the submenu used for defining the audio zones belonging to each group, from the GROUPS menu move the selection point to the name of the group to be configured and press F1. The fields described below appear on the control unit display.
ADD. ZONE Used for selecting the zones to be included in each group. Use the + and - keys to select the name of the zone from those previously defined using the OUTPUT PROCESSORS menu; all the zones of the system are available for selection.
If you choose the NO ZONE option, no zone is selected.
IMPORTANT NOTE
• It is not possible to include an audio output (zone) of the RECORDER type in a group of zones. If, for example, the system has 64 outputs,
and one output is configured as RECORDER type, a maximum of 63 zones (64-1) can belong to a group.
The first screen only shows the first 3 zones of groups. To display the subsequent or previous zones, press the ↑ / ↓ and/or pag ↑ / pag ↓
keys.
ADD. ZONE
1
2
3
ZONE 1 _ _ _ _ _ _ _ ▼
ZONE 2 _ _ _ _ _ _ _ ▼
ZONE 3 _ _ _ _ _ _ _ ▼
Pag ↓
ADD. ZONE
4
5
6
ZONE 4 _ _ _ _ _ _ _ ▼
NO ZONE _ _ _ _ _ _ ▼
NO ZONE _ _ _ _ _ _ ▼
To exit from the submenu, press ESC and proceed as described in the section EXIT FROM A MENU.
USING THE “RELAY CONFIGURATION” MENU
- - - = = = MAIN MENU = = = - - ->OUTPUT PROCESSORS
->GROUPS
->RELAY CONFIGURATION
This menu is used for programming relays of the IO 3250 digital INPUT/OUTPUT boards. From the main configuration menu of the control
unit, use the ↑ / ↓ and/or pag↑ / pag↓ keys to move the selection point to the RELAY CONFIGURATION submenu and press ENTER. The
fields described below appear on the control unit display.
N.
Indicates the identification number of the relay to be programmed. The indication is sequential: the number 1 corresponds to relay number 1 of digital INPUT/OUTPUT board number 1; the number 25 corresponds to relay number 1 of digital INPUT/OUTPUT
board number 2; the number 192 corresponds to relay number 24 of digital INPUT/OUTPUT board number 8, and so on.
NAME
Used for defining the identification name of the relay, which can be composed of a maximum of 16 alphanumerical characters.
Use the + and - keys to select the alphanumerical characters in rotation, and confirm each character with ENTER. The numerical characters can be selected directly on the numerical keypad.
STATUS Used for defining the normal status of the relay contact; i.e. the status that the contact must assume when the relay is not being
controlled. Use the + and - keys to select one of the following options:
• OPEN - Contact normally open.
• CLOSED - Contact normally closed.
89
The first screen only shows the first 3 relays. To display the subsequent or previous relays, press the ↑ / ↓ and/or pag ↑ / pag ↓ keys.
N.
1
2
3
NAME
RLY 1 _ _ _ _ _ _ _
RLY 2 _ _ _ _ _ _ _
RLY 3 _ _ _ _ _ _ _
STATUS
OPEN _ _ _ _ ▼
OPEN_ _ _ _ ▼
CLOSED _ _ ▼
Pag ↓
N.
4
5
6
NAME
RLY 4 _ _ _ _ _ _ _
RLY 5 _ _ _ _ _ _ _
RLY 6 _ _ _ _ _ _ _
STATUS
OPEN_ _ _ _ ▼
OPEN _ _ _ _ ▼
CLOSED_ _ _ _ ▼
To exit from the submenu, press ESC and proceed as described in the section EXIT FROM A MENU.
USING THE “CONSOLES” MENU
- - - = = = MAIN MENU = = = - - ->GROUPS
->RELAY CONFIGURATION
->CONSOLES
This menu is used for programming the BM 3616 digital consoles. From the main configuration menu of the control unit, use the ↑ / ↓ and/or
pag↑ / pag↓ keys to move the selection point to the submenu CONSOLES and press ENTER. The fields described below appear on the control unit display.
CONS.
Indicates the identification number of the BM 3616 digital console to be programmed. This number is set locally on the console by means of the address assignment procedure (see the installation and operation manual for the BM 3616 console).
NAME
Used for defining the identification name of the console, which can be composed of a maximum of 16 alphanumerical characters. Use the + and - keys to select the alphanumerical characters in rotation, and confirm each character with ENTER.
The numerical characters can be selected directly on the numerical keypad.
PASSWORD Used for defining the password for blocking use of the console. The password can contain up to a maximum of 8 numerical
characters. The numerical characters available are those which can be selected among the first 8 numerical keys of the console; i.e. 1, 2, 3, 4, 5, 6, 7, 8.
Use the + and - keys to select the numerical characters in rotation, and confirm each character with ENTER. The characters
can be selected directly on the numerical keypad.
If no character is entered in the field, and 8 blank spaces are left, no password is defined.
IMPORTANT NOTES
• In order to not define any password, 8 blank spaces must be left.
• In assigning the password, keep the following limitations in mind:
a. It is not possible to insert blank spaces between two numerical characters of the password.
b. It is not possible to insert blank spaces before the numerical characters of the password.
The examples shown in the table below can provide further clarification on password definition.
Example 1
Example 2
Example 3
Example 4
Example 5
1st
Char.
1
Blank
1
Blank
1
2nd
Char.
2
Blank
2
1
Blank
3rd
Char.
Blank
Blank
3
2
2
4th
Char.
Blank
Blank
4
3
3
PRIORITY
PASSWORD
5th
Char.
Blank
Blank
5
Blank
Blank
6th
Char.
Blank
Blank
6
Blank
Blank
7th
Char.
Blank
Blank
7
Blank
Blank
8th
Char.
Blank
Blank
8
Blank
Blank
Validity
Allowed
Allowed
Allowed
Not allowed
Not allowed
Used for defining the priority level of the console. Use the + and - keys to set the priority in the range from 2 to 7.
Level 2 is the highest priority level that can be associated to the console; level 7 is the lowest priority level (see the section
ORDER OF PRIORITY).
GEN CALL
Used for enabling or disabling the GENERAL CALL key of the console, which is used for selecting all the zones and/or groups of zones associated with the numerical keys of the console (keys 1 to 16).
Use the + and - keys to select one of the following options:
• ENABLE - GENERAL CALL key enabled.
• DISABLED - GENERAL CALL disabled.
EMERGENCY Used for enabling or disabling the ALARM key of the console, which controls the EMERGENCY event (see the section EVENTS
CONTROLLED FROM THE BM 3616 DIGITAL CONSOLES). Use the + and - keys to select one of the following options:
• ENABLE - ALARM key enabled.
• DISABLED - ALARM key disabled.
If the alarm key is enabled, it must be programmed using the dedicated submenu, by pressing F2 (see the section ALARM
KEY PROGRAMMING).
90
KEY F1
KEY F2
KEY F3
These 3 fields are used for defining the function of the F1, F2, F3 keys of the console. Use the + and - keys to select the desired function in each field from those described below.
• DISABLED - Key disabled; no function associated (default selection).
• PLAY - Key configured for controlling the playback of an audio signal stored as a file on the hard disk of the CP 3100 control unit (see the section AUDIO SIGNAL RECORDING/PLAYBACK).
• RELAY - Key configured to control the switching of one or two relays of the IO 3250 digital INPUT/OUTPUT boards: one
with normally closed contact (CLOSED) and/or one with normally open contact (OPEN).
IMPORTANT NOTE
• The PLAY and RELAY functions are mutually exclusive; i.e. it is not possible to select one when the other has been selected.
When one of the F1, F2, F3 keys of the console has been enabled, to program the related PLAY or RELAY function you have
to access a dedicated submenu by pressing F3 (see the section PROGRAMMING THE F1, F2, F3 KEYS).
The first screen only shows the first 3 fields (CONS., NAME, PASSWORD) of the first 3 consoles. To display the next field, press →; to display
the previous field, press ←.
CONS.
1
2
3
NAME (F1=DEF. KEYS)
CONSOLLE 1
CONSOLLE 2
CONSOLLE 3
PASSWORD
________
________
________
PRYO
→
→
→
→
1
2
3
PRIORITY
4
6
2
GEN CALL
ENABLE_ _ ▼
DISABLE_ _ ▼
DISABLE_ _ ▼
EMERGENCE (F2)
ENABLE_ _ ▼
DISABLE_ _ ▼
DISABLE_ _ ▼
→
1
2
3
F1-KEY (F3)
PLAY_ _ ▼
DISAB._ _ ▼
DISAB._ _ ▼
F2-KEY (F3)
PLAY_ _ ▼
DISAB._ _ ▼
DISAB._ _ ▼
F3-KEY (F3)
PLAY_ _ ▼
DISAB._ _ ▼
DISAB._ _ ▼
To display the subsequent or previous consoles, press the ↑ / ↓ and/or pag↑ / pag↓ keys.
CONS.
1
2
3
NAME (F1=DEF. KEYS)
CONSOLLE 1
CONSOLLE 2
CONSOLLE 3
PASSWORD
________
________
________
PRIO
→
→
→
Pag ↓
CONS.
4
5
6
NAME (F1=DEF. KEYS)
CONSOLLE 4
CONSOLLE 5
___ _____
PASSWORD
________
________
________
PRIO
→
→
→
PROGRAMMING THE “ZONE/GROUP” KEYS
To access the submenu used for programming the 16 zone/group selection keys of each console, move the selection point to any of the fields
to be configured and press F1. The fields described below appear on the control unit display.
KEY
Indicates the number of the zone/group selection key to be programmed.
ZONE Used for selecting the audio zone to be associated to the zone/group selection key of the console. Use the keys + and - to select
the name of the zone from those previously defined using the OUTPUT PROCESSORS menu. If the NO ZONE option is chosen (default selection), no zone is selected.
IMPORTANT NOTE
• To prevent errors during the compilation of the system configuration files, it is indispensable to select only an audio zone in the
ZONE field, or a group of zones in the GROUP field, but not both. When the selection of a zone is carried out, the NO GROUP
option must always be selected in the GROUP field.
GROUP Used for selecting the group of audio zones to be associated to the zone/group selection key of the console. Use the + and - keys
to select the name of the group of zones from those previously defined using the GROUPS menu. If you choose the NO GROUP
option (default selection), no group is selected.
IMPORTANT NOTE
• To prevent errors during the compilation of the system configuration files, it is indispensable to select only an audio zone in the
ZONE field, or one group of zones in the GROUP field, but not both. When the selection of a group of zones is carried out, the
NO ZONE option must always be selected in the ZONE field.
91
The first screen only shows the first 3 zone/group selection keys. To display the subsequent or previous selection keys, press the keys ↑ / ↓
and/or pag ↑ / pag ↓.
KEY
1
2
3
ZONE
ZONE 1 _ _ _ _ _ _ _ _ ▼
ZONE 2 _ _ _ _ _ _ _ _ ▼
ZONE 3 _ _ _ _ _ _ _ _ ▼
GROUP
NO GROUP _ _ _ _ _ _ _ ▼
NO GROUP _ _ _ _ _ _ _ ▼
NO GROUP _ _ _ _ _ _ _ ▼
Pag ↓
KEY
4
5
6
ZONE
ZONE 4 _ _ _ _ _ _ _ _ ▼
NO ZONE _ _ _ _ _ _ _ ▼
NO ZONE _ _ _ _ _ _ _ ▼
GROUP
NO GROUP _ _ _ _ _ _ _ ▼
GROUP 1_ _ _ _ _ _ _ _ ▼
GROUP 2_ _ _ _ _ _ _ _ ▼
Pag ↓
KEYS
7
8
9
ZONE
NO ZONE _ _ _ _ _ _ _ ▼
NO ZONE _ _ _ _ _ _ _ ▼
NO ZONE _ _ _ _ _ _ _ ▼
GROUP
GROUP 3_ _ _ _ _ _ _ _ ▼
NO GROUP_ _ _ _ _ _ _ ▼
NO GROUP _ _ _ _ _ _ _ ▼
PROGRAMMING THE “ALARM” KEYS
IMPORTANT NOTE
• It is not possible to program the ALARM key of a console if the DISABLE option is selected in the EMERGENCY field of the CONSOLES
menu.
To access the submenu used for programming the ALARM key of each console, move the selection point of any field to be configured and press
F2. The fields described below appear on the control unit display.
SOURCE
Used for choosing the source of the alarm signal to be transmitted (see the section EVENTS CONTROLLED FROM THE
BM 3616 DIGITAL CONSOLES). Use the + and - keys to select the source between:
• MICROPHONE - The source of the alarm signal is the console microphone.
• PLAYBACK The source of the signal is an audio signal stored on the hard disk of the control unit (audio file).
IMPORTANT NOTE
• It is not possible to use a message recorded locally on the console as an alarm signal.
MESSAGE
PLAY MESS.
When a PLAYBACK alarm source is selected (SOURCE field), use this field to select the name of the audio file to be played.
Using the + and - keys, select the name of the desired audio signal from those present in the library of audio signals provided with the system, or those created by means of the RECORD, ASSEMBLY and TONE GENERATOR functions (see
the section USING THE “RECORDER” MENU).
When a PLAYBACK alarm source is selected (SOURCE field), use this field to choose whether the alarm signal playback is
to be made only once or continuously. Use the + and - keys to select one of the methods described below.
• PLAY ONCE:
the alarm signal is played only once, even if the alarm function is not disactivated after the first playback of the signal.
• CONTINUOUS:
the alarm signal is played completely at least once, and continues to be played until the alarm function is disactivated.
IMPORTANT NOTES
• If the alarm function is disactivated while a recorded alarm signal is being played, the playback is not immediately interrupted, but continues until the end. In the case of “continuous playback”, therefore, the interruption only stops the subsequent playbacks.
DESTINATION
ZONES
Used for selecting the zones or groups of zones in which the alarm signal is transmitted (microphone announcement or recorded audio signal). Use the + and - keys to select one of the options described below.
• ALL ZONES:
the alarm signal is transmitted to all the audio zones of the system.
• GENERAL:
the alarm signal is transmitted to all the audio zones (and/or groups of zones) associated with the console keys (keys 1 to 16).
• ZONE/GROUPS: the alarm signal is transmitted to a specific zone or group of zones of the system (not both).
When the ZONES/GROUPS option is selected in the DESTINATION field, use this field to select the specific audio zone in
which the alarm signal is to be transmitted.
Use the + and - keys to select the name of the zone from those previously defined using the OUTPUT PROCESSORS menu. If you choose the NO ZONE option (default selection), no zone is selected.
IMPORTANT NOTE
• To prevent errors during the compilation of the system configuration files, it is indispensable to select only an audio zone in the ZONE field, or a group of zones in the GROUP field, but not both.
When the selection of a zone is carried out, the NO GROUP option must always be selected in the GROUP field.
92
GROUPS
When the ZONES/GROUPS option is selected in the DESTINATION field, use this field to select the specific group of audio zones in which the alarm signal is to be transmitted. Use the + and - keys to select the name of the group of zones from
those previously defined using the GROUPS menu. If you choose the NO GROUP option (default selection), no group is selected.
IMPORTANT NOTE
• To prevent errors during the compilation of the system configuration files, it is indispensable to select only an audio zone in the ZONE field, or a group of zones in the GROUP field, but not both. When the selection of a group of zones is
carried out, the NO ZONE option must always be selected in the ZONE field.
RELAY OPEN
Used for choosing a relay of the IO 3250 digital INPUT/OUTPUT boards with normally open contact (OPEN), to be switched to closed with the activation of the alarm function. The relay is switched back to the normal position, defined using the
RELAY CONFIGURATION menu, as soon as the alarm function is disactivated. Use the + and - keys to select the name of
the desired relay from those defined using the RELAY CONFIGURATION menu (NAME field). If you choose the NO RELAY
option, no relay is selected.
RELAY CLOSED Used for choosing a relay of the IO 3250 digital INPUT/OUTPUT boards with normally closed contact (“CLOSED”), to be
switched to open with the activation of the alarm function. The relay is switched back to the normal position, defined using
the RELAY CONFIGURATION menu, as soon as the alarm function is disactivated. Use the + and - keys to select the name of the desired relay from those defined using the RELAY CONFIGURATION menu (NAME field). If you choose the NO
RELAY option, no relay is selected.
The first screen only shows the first 3 fields of the submenu. To display the subsequent or previous fields, press the “↑ / ↓“ and/or “pag↑ /
pag↓” keys.
EMERGENCY KEY DEFINITION
SOURCE
MESSAGE
PLAY MESS.
PLAYBACK_ _ _ _ _ _ _ ▼
MSG 1_ _ _ _ _ _ _ _ _ _ ▼
CONTINOUS _ _ _ ▼
Pag ↓
CONTINOUS _ _ _ ▼
ALL ZONES_ _ _ _ _ _ _ ▼
NO ZONE _ _ _ _ _ _ _ _ ▼
NO GROUP _ _ _ _ _ _ _ ▼
PLAY MESS.
DESTINATION
ZONE
GROUP
Pag ↓
NO ZONE_ _ _ _ _ _ _ _ ▼
NO GROUP_ _ _ _ _ _ _ ▼
NO RELAY _ _ _ _ _ _ _ ▼
NO RELAY _ _ _ _ _ _ _ ▼
ZONE
GROUP
RELAY OPEN
RELAY CLOSE
To exit from the submenu, press ESC and proceed as described in the section EXIT FROM A MENU.
PROGRAMMING THE F1, F2, F3 KEYS
IMPORTANT NOTE
• It is not possible to program the F1, F2, F3 keys of a console if the DISABLE option is selected in the KEY F1, KEY F2, KEY F3 fields of
the CONSOLES menu.
To display the submenu used for programming the F1, F2, F3 keys of each console, move the selection point to the field of the key to be configured (e.g. KEY F1), and press F3. The fields described below appear on the control unit display.
SPECIAL KEY DEFINITION
MESSAGE
RELAY N.O.
RELAY N.C.
NO MESS. _ _ ▼
NO RELAY_ _ _ _ _ _ _ ▼
NO RELAY_ _ _ _ _ _ _ ▼
MESSAGE
This field is accessible only if the PLAY option is selected in the KEY F1, KEY F2 or KEY F3 field of the CONSOLES menu. It is used for selecting the name of the audio file to be played. Use the + and - keys to select the name of the desired audio signal from those present in the library of audio signals provided with the system, or those created by means of
the RECORD, ASSEMBLY and TONE GENERATOR functions (see the section USING THE “RECORDER” MENU). If you
select the NO MESS. option, no audio signal is selected.
RELAY N.O.
This field is accessible only if the RELAY option is selected in the KEY F1, KEY F2 or KEY F3 field of the CONSOLES menu. It is used for selecting a relay with normally open contact (N.A.) to be switched. Use the + and - keys to select the name of the desired relay from those defined using the RELAY CONFIGURATION menu (NAME field). If you choose the NO
RELAY option, no relay is selected.
RELAY N.C.
This field is accessible only if the RELAY option is selected in the KEY F1, KEY F2 or KEY F3 field of the CONSOLES menu. It is used for selecting a relay with normally closed contact (N.C.) to be switched. Use the + and - keys to select the
name of the desired relay from those defined using the RELAY CONFIGURATION menu (NAME field). If you choose the NO
RELAY option, no relay is selected.
To exit from the submenu, press ESC and proceed as described in the section EXIT FROM A MENU.
93
USING THE “ACU” MENU
- - - = = = MAIN MENU = = = - - ->RELAY CONFIGURATION
->CONSOLES
->ACU (AMPLIFIERS)
This menu is used for programming the A.C.U.s; i.e. the RB 3300 back-amplifier boards that control the amplifiers of the system (see the section
AMPLIFIER CONTROL UNITS). From the main configuration menu of the control unit, use the ↑ / ↓ and/or pag ↑ / pag ↓ keys to move the selection point to the ACU submenu and press ENTER. The fields described below appear on the control unit display.
DEV
Indicates the identification number of the A.C.U. to be programmed. The indication is sequential, and is related to the address assigned to the A.C.U. in the installation phase: the number 1 corresponds to the A.C.U. with address 0; the number 120 corresponds to the A.C.U. with address 119.
TYPE
Used for defining the type of A.C.U.. Use the + and - keys to select the desired type from those indicated below.
• NONE:
Select this option when it is necessary to remove a failed A.C.U., either NORMAL or BACKUP type, for repairs;
otherwise, the failed A.C.U. would continue to generate an alarm. If you select the NO option, the A.C.U. is no longer controlled by the CP 3100 unit.
• NORMAL: An A.C.U. whose function is to control a primary amplifier normally dedicated to sound amplification in a certain audio zone (default selection).
• BACKUP: An A.C.U. whose function is to control a backup amplifier which is normally used to substitute a primary amplifier,
for example, in the event of a breakdown of the primary amplifier.
See the section AMPLIFIER CONTROL UNITS for further information on the functions of the types of A.C.U..
GROUP Used for defining the group to which the A.C.U. belongs. The system can handle up to 64 groups of A.C.U.s. Keep the following
indications in mind when making the group assignment:
a. A group can contain any number of NORMAL or BACKUP A.C.U.s, but the total number of units in the system must not be
greater than 120.
b. A NORMAL unit can only be substituted by a BACKUP unit when they belong to the same group.
See the section AMPLIFIER CONTROL UNITS for further information on the functions of the types of A.C.U.s. Use the + and keys or the numerical keypad to enter the group number within the range from 0 (default selection) to 64.
MODE
Used for choosing the method of activation/disactivation of the A.C.U. (NORMAL or BACKUP), in the event of an alarm caused
by a breakdown or malfunction of an amplifier. Use the + and - keys to select the desired method from those described below.
• MANUAL – In the event of an alarm, activation/disactivation of the A.C.U. must be carried out manually using the submenu “INSER. BACKUP ACU” of the main menu AUDIO PROCESS
• AUTO –
In the event of an alarm, activation/disactivation of is carried out automatically by the system.
See the section AMPLIFIER CONTROL UNITS for further information on the operation of the NORMAL and BACKUP units in these two modes.
NOTE
• When an A.C.U. controls the last backup amplifier of a group, we recommend that it be set in MANUAL mode, as in the event
of a PA FAULT or OVL alarm caused by the respective amplifier, this will prevent the amplifier from being excluded and sound
transmission interrupted because there is no further backup amplifier that can replace it.
PGM
Used for activating/disactivating the DAY/NIGHT function on the A.C.U.s equipped with the optional LB 3340 DIGITAL ALC board
(see the section DAY/NIGHT FUNCTION). Use the + and - keys to select one of the following options:
• ON – DAY/NIGHT function activated (default selection).
• OFF – DAY/NIGHT function disactivated.
The first screen only shows the first 3 A.C.U.s. To display the subsequent or previous units, press the ↑ / ↓ and/or pag ↑ / pag ↓ keys.
DEV
1
2
3
TYPE
NORMAL ▼
NORMAL ▼
NORMAL ▼
GROUP
01
01
01
MODE
MANUAL ▼
MANUAL ▼
MANUAL ▼
PGM
OFF ▼
OFF ▼
OFF ▼
MODE
MANUAL ▼
MANUAL ▼
MANUAL ▼
PGM
OFF▼
OFF▼
OFF▼
Pag ↓
DEV
4
5
6
TYPE
NORMAL ▼
NORMAL ▼
NORMAL ▼
GROUP
02
02
02
To exit from the submenu, press ESC and proceed as described in the section EXIT FROM A MENU.
94
USING THE “GPI EVENTS DEFINITION” MENU
- - - = = = MAIN MENU = = = - - ->CONSOLES
->ACU (AMPLIFIERS)
->GPI EVENTS DEFINITION
This menu is used for programming events to be controlled by the GPI inputs of the IO 3250 digital INPUT/OUTPUT boards (see the section
EVENTS CONTROLLED BY THE GPI INPUTS). From the main configuration menu of the control unit, use the ↑ / ↓ and/or pag ↑ / pag ↓ keys
to move the selection point to the GPI EVENTS DEFINITION submenu and press ENTER. The fields described below appear on the control
unit display.
GPI
Indicates the identification number of the GPI input that controls the event to be programmed. The indication is sequential: the
number 1 corresponds to input number 1 of digital I/O board number 1; the number 33 corresponds to input number 1 of digital
I/O board number 3; the number 128 corresponds to input number 16 of digital I/O board number 8, etc.
NAME
Used for defining the name of the event to be controlled by the GPI input. The name can be composed of a maximum of 16 alphanumerical characters. Use the + and - keys to select the alphanumerical characters in rotation, and confirm each character with
ENTER. The numerical characters can be selected directly on the numerical keypad.
ACTION
Used for defining the type of action (event) that can be controlled by driving the GPI input. Use the + and - keys to select the desired type from those indicated below.
• GENERIC: indicates a generic action. With this type of assignment, when the GPI input is driven it is possible to control the
switching of one or more relays of the IO 3250 digital INPUT/OUTPUT boards (field programming RLY) and where desired generate a warning signal (ALARM field programming).
• PLAYBACK: with this type of assignment, the GPI input controls the playback of an audio signal stored on the hard disk of
the CP 3100 control unit in certain audio zones (see the section AUDIO FILE PLAYBACK). In particular, when the GPI input is
driven, the audio input defined as PLAYBACK (TYPE field of the INPUT PROCESSORS menu) is connected with the audio
zone or group of zones defined in the field ZONE or GROUP of this present menu. The PLAYBACK assignment also makes
it possible to control the switching of one or more relays of the IO 3250 digital INPUT/OUTPUT boards (RLY field programming).
• FIREMAN 1: indicates the FIREMAN 1 event. With this type of assignment, a “fireman” audio signal can be transmitted with
absolute priority to certain audio zones or groups of zones. In particular, when the GPI input is driven, the audio input defined as FIREMAN 1 (TYPE field of the INPUT PROCESSORS menu) is connected with the zone or group of zones defined in
the ZONE or GROUP field of this present menu. A FIREMAN 1 event terminates when the GPI input that activated it is no
longer driven. The FIREMAN 1 assignment also makes it possible to control the switching of one or more relays of the IO
3250 digital INPUT/OUTPUT boards (RLY programming field).
• FIREMAN 2: indicates the FIREMAN 2 event. With this type of assignment, a “fireman” audio signal can be transmitted with
absolute priority to certain audio zones or groups of zones. In particular, when the GPI input is driven, the audio input defined as FIREMAN 2 (TYPE field of the INPUT PROCESSORS menu) is connected with the zones or groups of zones defined
in the field ZONE or GROUP of this present menu. A FIREMAN 2 event terminates when the GPI input that activated it is no
longer driven. The FIREMAN 2 assignment also makes it possible to control the switching of one or more relays of the IO
3250 digital INPUT/OUTPUT boards (RLY field programming).
• CONSGPI n.: with this type of assignment, it is possible to transmit an announcement using the microphone of a BM 3604
console (GPI console) to certain audio zones. In particular, when the GPI input is driven by one of the four zone/group selection keys of the console, the corresponding audio input defined as CONSGPI n. (TYPE field of the INPUT PROCESSORS
menu) is connected with the zones or groups of zones defined in the ZONE or GROUP field of this present menu. The abbreviation “n” represents the identification number of the GPI console (number between 1 and 24). The CONSGPI n. assignment also makes it possible to control the switching of one or more relays of the IO 3250 digital INPUT/OUTPUT boards (RLY
field programming). When assigning a CONSGPI event, keep the following indications in mind:
a. a variable number of GPI inputs from 1 to 4 can be used for each BM 3604 console.
b. all the GPI inputs dedicated to the connection of a certain BM 3604 console must be consecutive (e.g. GPI1, GPI2, GPI3,
GPI4), and must belong to the same IO 3250 digital INPUT/OUTPUT board.
c. all the GPI inputs dedicated to the connection of a certain BM 3604 console (max. 4) must be programmed with the same “feedback” relay (see the “FEED RELAY” field).
The table below shows the fields that can be programmed according to the type of action selected.
TYPE OF ACTION
GENERIC
PLAYBACK
CONSGPI n
FIREMAN 1
FIREMAN 2
RLY
YES
YES
YES
YES
YES
FIELDS THAT CAN BE PROGRAMMED
FEED RELAY
MESSAGE
ALARM
No
No
YES
No
YES
YES
YES
No
YES
No
No
YES
No
No
YES
ZONE/GROUP
No
YES
YES
YES
YES
IMPORTANT NOTE
• Incorrect programming of the fields indicated in the table can lead to malfunctions or errors during the compilation of the
system configuration files!
RLY (F1)
Two values are indicated in this field: the first indicates the number of relays with normally open contacts that are switched
when the GPI input is driven; the second value indicates the number of relays with normally closed contact that are switched
when the GPI input is driven (e.g. 2/1 = 2 relays with normally open contact and 1 relay with normally closed contact). The relays are switched back to the normal position in the following ways:
95
a. If the programmed event is GENERIC type (ACTION field), the relays switch back to the normal position, which is defined
using the RELAY CONFIGURATION menu, as soon as the GPI is no longer driven.
b. If the programmed event is PLAYBACK (ACTION field), the relays switch back to the normal position, which is defined using
the RELAY CONFIGURATION menu, at the end of the playback.
c. If the programmed event is FIREMAN 1 or FIREMAN 2 (ACTION field), the relays switch back to the normal position, which
is defined using the RELAY CONFIGURATION menu, when the input “GPI” is no longer driven and the “fireman” event is disactivated.
d. If the programmed event is CONSGPI (ACTION field), the relays switch back to the normal position, which is defined using
the RELAY CONFIGURATION menu, at the end of the announcement (microphone disactivation).
To define the specific relays to be switched, you have to access a dedicated submenu by pressing F1 (see the section DEFINING THE RELAYS ASSOCIATED TO THE EVENT).
FEED RELAY This field is to be used when a CONSGPI type action has been selected in the TYPE field of this present configuration menu.
It is used for defining the “feedback” relay which, when switched, enables the transmission of an announcement from the BM
3604 console indicated in the ACTION field. Feedback relay switching takes place when all the zones (or the groups of zones)
selected on the console are available. Use the + and - keys to select the name of the relay from those previously defined using
the RELAY CONFIGURATION menu. If you choose the NO RELAY option (default selection), no relay is selected.
IMPORTANT NOTES
• To prevent malfunctions, or possible errors in the compilation of the system configuration files, keep in mind the following indications:
a. The relays of the IO 3250 digital INPUT/OUTPUT boards used as feedback relays must not be used for other functions.
b. Each feedback relay must be configured with normally open contact (STATUS = OPEN field).
c. All the GPI inputs dedicated to the connection of a certain BM 3604 console (max. 4) must be programmed with the same
feedback relay.
d. It is not possible to set a feedback relay if the GPI input is not assigned to a BM 3604 console.
MESSAGE
ALARM
This field is to be used when a field PLAYBACK type action is selected in the TYPE field of this present menu, and is used for
choosing the name of the audio file to be played. Use the + and - keys to select the name of the audio signal desired from
those present in the library of audio signals provided with the system, or those created by means of the RECORD, ASSEMBLY
and TONE GENERATOR functions (see the section USING THE “RECORDER” MENU). If you choose the NO MESS. option (default selection), no audio signal is set.
Used for activating or disactivating the generation of an acoustic warning signal (buzzer) when the GPI input is driven. To display the warning signal, you have to access the alarms menu of the control unit (see the section ALARM STATUS DISPLAY).
Use the + and - keys to select one of the following options.
• YES: driving the GPI input generates a warning signal.
• NO: driving the GPI input does not generate a warning signal (default selection).
IMPORTANT NOTES
• To switch off the acoustic signaller once the warning signal has been activated, you have to access the menu for alarm status
display (see the section ALARM STATUS DISPLAY).
ZONE
Used for selecting the zone for transmission of the audio signal related to the event selected in the ACTION field. Use the + and
- keys to select the name of the zone from those previously defined by means of the OUTPUT PROCESSORS menu. If you
choose the NO ZONE option (default selection), no zone is selected; the ALL ZONES option selects all the zones.
IMPORTANT NOTES
• To prevent malfunctions, or possible errors in the compilation of the system configuration files, it is indispensable to select
only an audio zone in the ZONE field, or a group of zones in the GROUP field, but not both. When the selection of one zone is made, the option NO GROUPS must always be selected in the GROUP field.
GROUP
Used for selecting the group of zones for transmission of the audio signal related to the event selected in the ACTION field. Use
the + and - to keys select the name of the group of zones from those previously defined by means of the GROUPS menu. If
you choose the NO GROUP option (default selection), no group is selected.
IMPORTANT NOTE
• To prevent malfunctions, or possible errors in the compilation of the system configuration files, it is indispensable to select
only an audio zone in the ZONE field, or a group of zones in the GROUP field, but not both. When the selection of a group
of zones is made, the option NO ZONE must always be selected in the ZONE field.
The first screen only shows the first 4 fields (GPI, NAME, ACTION, RLY) of the first 3 GPI inputs. To display the next field, press →; to display
the previous field, press ←.
GPI
1
2
3
NAME
KEY 1 CONSOLLE 1 _
KEY 2 CONSOLLE 1 _
KEY 3 CONSOLLE 1 _
ACTION
CONSGPI1 _ _▼
CONSGPI1 _ _▼
CONSGPI1 _ _▼
RLY(F1)
1/1
0/0
0/0
→
1
2
3
FEED RELE’
RLY 1_ _ _ _ _ _ _ _ _ ▼
RLY 1_ _ _ _ _ _ _ _ _ ▼
RLY 1_ _ _ _ _ _ _ _ _ ▼
MESSAGE
NO MESS. ▼
NO MESS. ▼
NO MESS. ▼
ALARM
NO_▼
NO_▼
NO_▼
→
96
1
2
3
ZONE
ZONE 1 _ _ _ _ _ _ _ _ ▼
ZONE 2 _ _ _ _ _ _ _ _ ▼
ALL ZONES _ _ __ _ _ ▼
GROUP
NO GROUP _ _ _ _ _ _ _
NO GROUP _ _ _ _ _ _ _
NO GROUP _ _ _ _ _ _ _
→
1
2
3
GROUP
NO GROUP_ _ _ _ _ _ _ _ ▼
NO GROUP_ _ _ _ _ _ _ _ ▼
NO GROUP_ _ _ _ _ _ _ _ ▼
To display the subsequent or previous inputs, press the ↑ / ↓ and/or pag ↑ / pag ↓ keys.
GPI
1
2
3
NAME
KEY 1 CONSOLLE 1 _
KEY 2 CONSOLLE 1 _
KEY 3 CONSOLLE 1 _
ACTION
CONSGPI1 _ _▼
CONSGPI1 _ _▼
CONSGPI1 _ _▼
RLY(F1)
1/1
0/0
0/0
Pag ↓
GPI
4
5
6
NAME
KEY 4 CONSOLLE 1 _
MESSAGE 1_ _ _ _ _ _
MESSAGE 2_ _ _ _ _ _
ACTION
CONSGPI1▼
PLAYBACK▼
PLAYBACK▼
RLY(F1)
0/0
0/0
0/0
To exit from the submenu, press ESC and proceed as described in the section EXIT FROM A MENU.
DEFINING THE RELAYS ASSOCIATED TO THE EVENT
This submenu is used for defining the relays to be switched when the GPI input is driven, indicated in the field RLY.
A maximum of 4 relays with normally open contact and a maximum of 4 relays with normally closed contact can be switched. To access
the submenu, move the selection point to any of the fields of the GPI input to be configured, and press F1. The fields described below appear on the control unit display.
N.
Indicates the progressive number of the relay with normally open contact or with normally closed contact associated with the
event (max. 4 per type).
RELAY N.O. Used for selecting a relay with normally open contact (N.O.) to be switched to closed. Use the + and - keys to select the name of the relay from those previously defined using the RELAY CONFIGURATION menu. If you choose the NO RELAY option
(default selection), no relay is selected.
RELAY N.C. Used for selecting a relay with normally closed contact (N.C.) to be switched to open. Use the + and - keys to select the name of the relay from those previously defined using the RELAY CONFIGURATION menu. If you choose the NO RELAY option
(default selection), no relay is selected.
The first screen only shows the first 6 relays: 3 with normally open contact and 3 with normally closed contact. To display the subsequent or
previous relays, press the ↑ / ↓ and/or pag ↑ / pag ↓ keys.
N.
1
2
3
RELAY N.O.
RELAY 1 _ _ _ _ _ _ _ ▼
RELAY 3 _ _ _ _ _ _ _ ▼
NO RELE’ _ _ _ _ _ _ ▼
RELE’ N.C.
RLY 2 _ _ _ _ _ _ _ ▼
NO RELAY_ _ _ _ _ _ ▼
NO RELAY_ _ _ _ _ _ ▼
Pag ↓
N.
2
3
4
RELAY N.O.
RLY 3 _ _ _ _ _ _ _ ▼
NO RELAY _ _ _ _ _ _ ▼
NO RELAY _ _ _ _ _ _ ▼
RELAY N.C.
NO RELAY_ _ _ _ _ _ ▼
NO RELAY _ _ _ _ _ _ ▼
NO RELAY _ _ _ _ _ _ ▼
To exit from the submenu, press ESC and proceed as described in the section EXIT FROM A MENU.
97
USING THE “TIMER EVENTS DEFINITION” MENU
- - - = = = MAIN MENU = = = - - ->GPI EVENTS DEFINITION
->TIMER EVENTS DEFINITION
->VOX
This menu is used for programming timed events (see the section SYSTEM EVENTS). From the main configuration menu of the control unit,
use the ↑ / ↓ and/or pag ↑ / pag ↓ keys to move the selection point to the TIMER EVENTS DEFINITION submenu and press ENTER. The
fields described below appear on the control unit display.
N.
Indicates the progressive number of the timed event to be programmed. Up to 64 events can be programmed.
NAME
Used for defining the identification name of the timed event, which can be composed of a maximum of 16 alphanumerical
characters. Use the + and - keys to select the alphanumerical characters in rotation, and confirm each character with ENTER. The numerical characters can be selected directly on the numerical keypad.
RELAY N.OPEN Used for selecting a relay with normally open contact (“N.OPEN”) to be switched to closed when the timed event is activated. The relay switches back to the normal position at the end of the period defined in the DUR. field, or at the end of the
playback of the audio signal if the timed event includes both audio signal playback and relay switching. Use the + and keys to select the name of the relay from those previously defined using the RELAY CONFIGURATION menu. If you choose the NO RELAY option (default selection), no relay is selected.
RELAY N.CLOSE Used for choosing a relay with normally closed contact (“N.CLOSE”) to be switched to open when the timed event is activated. The relay switches back to the normal position at the end of the period defined in the DUR. field, or at the end of the
audio signal playback if the timed event includes both audio signal playback and relay switching. Use the + and - keys to
select the name of the relay from those previously defined using the RELAY CONFIGURATION menu. If you choose the NO
RELAY option (default selection), no relay is selected.
MESSAGE
Used for choosing the audio file to be played when the timed event is activated. The audio signal is transmitted to the zones or groups of zones defined in the ZONE or GROUP field of this present menu. Use the + and - keys to select the name of the audio signal desired among those in the library of audio signals provided with the system, or those created by
means of the RECORD, ASSEMBLY and TONE GENERATOR functions (see the section USING THE “RECORDER” MENU). If you select the NO MESS. option (default selection), no audio signal is set.
DUR.
Field to be used when the timed event only involves switching of a relay with normally open contact and/or normally closed
contact. Used for defining the length of time the relays must remained switched. Use the + and - keys or the numerical
keypad to set the duration in the range from 0 to 999 seconds.
IMPORTANT NOTE
• The setting of the DUR. field has no effect when the timed event involves both audio signal playback (“MESSAGE” field
assignment) and switching of relays (RELAY N.OPEN and/or RELAY N.CLOSE field assignment).
ALLOWED TIME Used for choosing the two following times:
• event start time; i.e. the time at which the timed event begins to be executed (audio signal playback and/or switching of
open and/or closed relay).
• event end time; i.e. the last time by which the timed event can be executed.
Use the numerical keypad to set the two times expressed in hours and minutes.
RATE
Used for defining the cycle of the timed event in the interval of time defined in the ALLOWED TIME field; i.e. how often the
audio signal must be played and/or the relay with normally open contact and/or normally closed contact must be switched.
Use the numerical keypad to set the time expressed in hours and minutes (e.g. 1:30 to set a rate of 1 hour and 30 minutes).
ZONE
Used for choosing the audio zone for transmitting the signal selected in the MESSAGE field. Use the + and - keys to select the name of the zone from those previously defined using the OUTPUT PROCESSORS menu. If you choose the NO
ZONE option (default selection), no zone is selected; selecting the ALL ZONES option, all the zones are selected.
IMPORTANT NOTE
• To prevent malfunctions, or possible errors in the compilation of the system configuration files, it is indispensable to select only an audio zone in the ZONE field, or a group of zones in the GROUP field, but not both. When the selection
of one zone is made, the option NO GROUPS must always be selected in the GROUP field.
GROUP
Used for choosing the group of audio zones for transmitting the signal selected in the MESSAGE field. Use the + and keys to select the name of the group of zones from those previously defined using the GROUPS menu. If you choose the
NO GROUP option (default selection), no group is selected.
IMPORTANT NOTE
• To prevent malfunctions, or possible errors in the compilation of the system configuration files, it is indispensable to select only an audio zone in the ZONE field, or a group of zones in the GROUP field, but not both. When the selection
of a group of zones is made, the option NO ZONE must always be selected in the ZONE field.
98
The table below provides a number of examples that can better clarify how a timed event works.
EXAMPLES
EXAMPLE 1:
audio signal
playback
RELAY
N.OPEN
NO RELAY
FIELDS OF THE “TIMER EVENTS DEFINITION” MENU
RELAY
MESSAGE
DUR.
ALLOWED
N.CLOSED
TIME
NO RELAY
MSG 1
000
16:00 18:00
RATE
DESCRIPTION OF EVENT
01:00
The audio signal MSG 1 is transmitted at 16:00, 17:00, 18:00 (3
times).
NO RELAY
NO RELAY
MSG 2
000
14:00 16:00
00:45
The audio signal MSG 2 is transmitted at 14:00, 14:45, 15:30 (3
times).
EXAMPLE 3:
relay switching
RLY 1
RLY 6
NO MESS.
060
16:00 16:30
00:10
The relay with normally open
contact RLY 1 and the relay with
normally closed contact RLY 6
switch at 16:00, 16:10, 16:20,
16:30 (4 times), remaining switched for 60 seconds each time.
EXAMPLE 4:
audio signal
playback and relay switching
RLY 1
NO RELAY
MSG 1
060
16:00 18:00
01:00
The audio signal MSG 1 is transmitted at 16:00, 17:00, 18:00 (3
times); the relay with normally
open contact RLY 1 switches at
the same times as the playback
of the audio signal MSG 1, remaining switched for the entire
duration of the playback.
EXAMPLE 2:
audio signal
playback
IMPORTANT NOTE
• To prevent system malfunctions or possible errors during the compilation of the system configuration files, the relays used by the timed event
must not be assigned to other functions.
The first screen only shows the first 3 fields (N., NAME, RELAY N.OPEN) of the first 3 timed events. To display the subsequent field, press →;
to display the previous field, press ←.
N.
1
2
3
NAME
TIMER 1 _ _ _ _ _ _ _
TIMER 2 _ _ _ _ _ _ _
TIMER 3 _ _ _ _ _ _ _
RELAY N.OPEN
RLY 1 _ _ _ _ _ _ _ ▼
RLY 2 _ _ _ _ _ _ _ ▼
NO RELAY _ _ _ _ _ _ ▼
→
1
2
3
RELAY N. CLOSE
NO RELAY _ _ _ _ _ _ ▼
NO RELAY _ _ _ _ _ _ ▼
RLY 3 _ _ _ _ _ _ _ ▼
MESSAGE
NO MESS. ▼
NO MESS. ▼
NO MESS. ▼
DUR.
010
020
030
→
1
2
3
ALLOWED TIME
08:00
20:00
04:00
05:00
14:00
15:00
RATE
00:01
00:14
00:30
ZONE
NO ZONE _ _ _ _ _
NO ZONE _ _ _ _ _
NO ZONE _ _ _ _ _
→
1
2
3
ZONE
NO ZONE _ _ _ _ _ _ _ ▼
NO ZONE _ _ _ _ _ _ _ ▼
NO ZONE _ _ _ _ _ _ _ ▼
GROUP
NO GROUP _ _ _ _ _ _ _ ▼
NO GROUP _ _ _ _ _ _ _ ▼
NO GROUP _ _ _ _ _ _ _ ▼
To display the subsequent or previous timed events, press the ↑ / ↓ and/or pag ↑ / pag ↓ keys.
99
N.
1
2
3
NAME
TIMER 1 _ _ _ _ _ _ _
TIMER 2 _ _ _ _ _ _ _
TIMER 3 _ _ _ _ _ _ _
RELAY N. OPEN
RLY 1 _ _ _ _ _ _ _ ▼
RLY 2 _ _ _ _ _ _ _ ▼
NO RELAY _ _ _ _ _ _ ▼
Pag ↓
N.
3
4
5
NAME
TIMER 3 _ _ _ _ _ _ _
TIMER 4 _ _ _ _ _ _ _
____________
RELAY N. OPEN
NO RELAY _ _ _ _ _ _ ▼
NO RELAY _ _ _ _ _ _ ▼
NO RELAY _ _ _ _ _ _ ▼
To exit from the submenu, press ESC and proceed as described in the section EXIT FROM A MENU.
USING THE “VOX” MENU
- - - = = = MAIN MENU = = = - - ->GPI EVENTS DEFINITION
->TIMER EVENTS DEFINITION
->VOX
This menu is used for configuring the VOX device (VOX detector) present on each OB 3230 AUDIO OUTPUT board. For further information
about the function of the VOX device, see the section “VOX” DEVICE. From the main configuration menu of the control unit, use the ↑ / ↓
and/or pag ↑ / pag ↓ keys to move the selection point to the VOX submenu and press ENTER. The fields described below appear on the
control unit display.
AUDIO OUT
Indicates the OB 3230 AUDIO OUTPUT board on which to configure the VOX device. The board is identified by means of the
number of outputs belonging to it (e.g. OUT 01:08 = AUDIO OUTPUT board with outputs from number 1 to number 8).
INPUT VOX
Used for defining the input to be used by the VOX device of the AUDIO OUTPUT board. The same INPUT VOX input can
be specified for multiple VOX devices. Use the + and - keys to select the name of the input among the first 8 inputs of the
system, defined by means of the INPUT PROCESSORS menu. If you select the NO INPUT option (default selection), no input is selected.
IMPORTANT NOTE
• The INPUT VOX input used by each VOX device can only be chosen from the first 8 inputs of the system (inputs 1- 8
of AUDIO INPUT board number 1).
RELAY VOX
Used for defining the relay to be switched when, with activation of the VOX function, the INPUT VOX input is connected
with one of the outputs of the OB 3230 AUDIO OUTPUT board indicated in the AUDIO OUT field. The relay must be the same for the same INPUT VOX input. Use the + and - keys to select the name of the relay from those with normally open
contact or normally closed contact previously defined by means of the RELAY CONFIGURATION menu. If you choose the
NO RELAY option (default selection), no relay is selected.
IMPORTANT NOTE
• To prevent malfunctions, or possible errors during the compilation of the system configuration files, it is indispensable
that the relay indicated in the RELAY VOX field not be used for other functions (for example, it must not be used as a
“feedback” relay for a BM 3604 console).
IMPORTANT NOTE
• If the fields of the VOX menu are filled in for a certain OB 3230 AUDIO OUTPUT board without activating the VOX function on any of its outputs (by means of the AUDIO OUTPUT PROCESSORS menu), no error is generated during the compilation of the configuration files.
AUDIO OUT
OUT 01:08
OUT 09:16
OUT 17:24
INPUT VOX
SOURCE 1 _ _ _ _ _ ▼
SOURCE 1 _ _ _ _ _ ▼
SOURCE 2 _ _ _ _ _ ▼
RELAY VOX
RLY 1 _ _ _ ▼
RLY 1 _ _ _ ▼
RLY 2 _ _ _ ▼
Pag ↓
AUDIO OUT
OUT 25:32
OUT 33:40
OUT 41:48
INPUT VOX
SOURCE 2 _ _ _ _ _ ▼
NO INPUT _ _ _ _ _ ▼
NO INPUT _ _ _ _ _ ▼
RELAY VOX
RLY 2 _ _ _ ▼
NO RELAY _ _ ▼
NO RELAY _ _ ▼
100
USING THE “RECORDER” MENU
- - - = = = MAIN MENU = = = - - ->TIMER EVENTS DEFINITION
->VOX
->RECORDER
This menu is used for recording audio signals: messages, announcements, pre-announcement tones, alarm tones, etc. (see the section AUDIO SIGNAL RECORDING/PLAYBACK). These signals are stored as audio files on the hard disk of the control unit. From the main configuration menu of the control unit, use the ↑ / ↓ and/or pag ↑ / pag ↓ keys to move the selection point to the RECORDER submenu and press
ENTER. The following submenus appear on the display:
SELECT A FUNCTION
OPTIONS
RECORD
PLAY
Pag ↓
SELECT A FUNCTION
ASSEMBLY
TONE GENERATOR
DELETE MESSAGES
OPTIONS
Move the selection point to this item and press ENTER to set the recording parameters described below.
RECORDER OPTION
SOUND QUALITY
MAX DURATION (SEC)
: 44100 HZ ▼
:__
SOUND QUALITY: used for defining the sampling frequency of the recording that can be made using the submenu
RECORD: the higher the frequency selected, the higher the quality of the recording. Use the + and - keys to select
the frequency from the values 11025 Hz, 22050 Hz, and 44100 Hz.
IMPORTANT NOTE
• The frequency selected in the SOUND QUALITY field only affects the RECORD function.
MAX DURATION (SEC): used for defining the maximum duration of the recording. Use the + and - keys or the numerical keypad to set the duration in the range from 1 second to 60 seconds.
IMPORTANT NOTES
• The higher the sampling frequency and duration of the recording, the larger the size of the respective audio file; e.g. a recording made with a sampling frequency of 44.1 kHz having a duration of 60 seconds will create a file of 2.6 Mb!
• All the recordings are executed with 16 bit resolution.
RECORD
To exit from the submenu, press ESC and proceed as described in the section EXIT FROM A MENU.
Move the selection point to this item of the menu and press ENTER to record an audio signal (see the section AUDIO SIGNAL RECORDING/PLAYBACK). The following screen appears on the control unit display.
RECORD A MESSAGE
RECORDER SOURCE:
MESSAGE NAME:
DURATION:
(F1=START – F2=STOP)
MICROPHONE _ _ _ _ _ ▼
________
<STOPPED>
RECORD A MESSAGE: used for choosing the audio source to be used for the recording. Use the + and - keys to
select one of the following options:
• MICROPHONE – selects the microphone connected to the MICRO IN input of the control unit audio board as the
recording source.
• “input name” –
selects one of the inputs of the IB 3210 / IB 3280 AUDIO INPUT boards as the recording source. Use the + and - keys to select the name of the input desired from those defined by means
of the INPUT PROCESSORS menu (NAME field).
MESSAGE NAME: used for defining the name of the file in which the audio signal to be recorded will be stored; the
name can be composed of a maximum of 8 alphanumerical characters. Use the + and - keys to select the alphanumerical characters in rotation, and confirm each character with ENTER. The numerical characters can be selected directly on the numerical keypad.
DURATION: bar indicator that represents the time elapsed from the beginning of the recording with respect to the total time available, which is represented by the entire length of the bar. The total time available is that defined by means
of the OPTIONS submenu. When the recording is not in progress, the message STOPPED is displayed.
101
After defining the source and the name of the audio file, press F1 to start the recording; press F2 to end the recording. The recording terminates automatically after 60 seconds. When the recording is completed, press ESC to exit from the submenu and
proceed as described in the section EXIT FROM A MENU.
IMPORTANT NOTE
• We recommend that you avoid completely occupying the hard disk of the control unit with audio files created using the
RECORD function.
PLAY
This function makes it possible to listen locally, by means of the monitor speaker on the control unit, to the audio signals
stored on the hard disk of the CP 3100 unit (see the section AUDIO SIGNAL RECORDING/PLAYBACK). This function is useful for carrying out a listening test on the various audio files (e.g. messages, announcements, pre-announcement or alarm
tones, etc.). To use this function, move the selection point to this item of the menu and press ENTER. The following screen
appears on the control unit display.
PLAY A MESSAGE
MESSAGE NAME:
DURATION:
ASSEMBLY
(F1=START – F2=STOP)
MUSIC 1▼
<STOPPED>
PLAY A MESSAGE: used for choosing the name of the audio file to be played. Use the + and - keys to select the
name of the audio signal desired from those present in the library of audio signals provided with the system, or those
created by means of the RECORD, ASSEMBLY and TONE GENERATOR functions.
DURATION: bar indicator that represents the time elapsed from the beginning of the playback with respect to the total duration of the audio signal, which is represented by the entire length of the bar. When playback is not in progress,
the message STOPPED is displayed.
After choosing the name of the audio file, press F1 to start the playback. Playback terminates automatically at the end of
the recorded signal. Press F2 to interrupt playback before the end. To exit from the submenu, press ESC.
IMPORTANT NOTE
• It is not possible to use the PLAY function when a system audio source monitor operation is in progress (see the section
USING THE “MONITOR OPERATIONS" MENU). In this case, in fact, if F1 is pressed (playback start command) an acoustic
warning signal is emitted. To play the audio files, it is therefore necessary to first interrupt any audio monitoring in progress.
Move the selection point to this menu item and press ENTER to create an audio file from the assembly of a maximum of 6
single audio files related to messages, announcements, pre-announcement or alarm tones, etc. The complete audio signal
will therefore correspond to the succession of the single audio signals. The following screen appears on the control unit display.
MESSAGE ASSEMBLY
FILE NAME:
________
MSG. 1:
NO MESS. ▼
MSG. 2:
NO MESS. ▼
(F1=START – F2=STOP)
Pag ↓
MSG. 3:
MSG. 4:
MSG. 5:
MSG. 6:
NO MESS. ▼
NO MESS. ▼
NO MESS. ▼
NO MESS. ▼
NAME FILE: used for defining the name of the audio file to be created, which can be composed of a maximum of 8
alphanumerical characters. Use the + and - keys to select the alphanumerical characters in rotation, and confirm each character with ENTER. The numerical characters can be selected directly on the numerical keypad. The definition
of this field is indispensable in order to program the subsequent fields.
MSG. 1: used for choosing the first audio file to be stored in the file being created. Use the + and - keys to select the
name of the audio signal desired from those stored on the hard disk of the CP 3100 control unit. If you select the NO
MESS. option (default selection), no audio signal is set.
MSG. 6: used for choosing the sixth and last audio file to be stored in the file being created. Use the + and - keys to
select the name of the audio signal desired from those stored on the hard disk of the CP 3100 control unit. If you select the NO MESS. option (default selection), no audio signal is set.
After completing the fields of the menu, press F1 to listen locally to the audio signal created by means of the monitor speaker
of the CP 3100 control unit; press F2 to interrupt playback before the end.
To exit from the submenu, press ESC and proceed as described in the section EXIT FROM A MENU.
IMPORTANT NOTES
• The sequence with which the various audio signals are stored follows the progressive numerical order of the “MSG” fields:
MSG. 1 is the first signal recorded, and MSG. 6 is the last signal recorded.
• We recommend that you avoid completely occupying the hard disk of the control unit with audio files created using the
ASSEMBLY function.
• When two or more audio files are joined, the file obtained will have the characteristics of one of lower quality, as indicated
in the examples given in the tables below.
102
• It is not possible to listen locally to the audio signal created (F1 key) when a system audio source monitor operation is in
progress (see the section USING THE "MONITOR OPERATIONS" MENU. In this case, in fact, if F1 is pressed (playback
start command) an acoustic warning signal is emitted. To play the audio files, it is therefore necessary to first interrupt any
audio monitoring in progress.
Example 1
FILE N°1
Sampling freq. = 11 kHz
Resolution = 8 bit
FILE N°2
Sampling freq. = 22 kHz
Resolution = 8 bit
ASSEMBLY OF FILE N°1 AND N°2
Sampling freq. = 11 kHz
Resolution = 8 bit
FILE N°2
Sampling freq. = 22 kHz
Resolution = 16 bit
ASSEMBLY OF FILE N°1 AND N°2
Sampling freq. = 11 kHz
Resolution = 8 bit
Example 2
FILE N°1
Sampling freq. = 11 kHz
Resolution = 8 bit
TONE GENERATOR Select this menu item and press ENTER to create a sound composed of a maximum of 6 single tones, which can be defined as desired (see the section AUDIO SIGNAL RECORDING/PLAYBACK). The following screen appears on the control
unit display.
TONE DEFINITION
FILE NAME:
N.
START
1
00020
(F1=START – F2=STOP)
________
END
DUR.
00020
0000
AMPL.
1
Pag ↓
N.
2
3
4
START
00020
00020
00020
END
00020
00020
00020
DUR.
0000
0000
0000
AMPL.
1
1
1
Pag ↓
N.
START
5
00020
6
00020
RIPETITIONS:
END
00020
00020
1
DUR.
0000
0000
AMPL.
1
1
N.: indicates the progressive number of the tone to be inserted in the complete sound.
FILE NAME: used for defining the name of the audio file in which the sequence of tones is to be stored; the name
can be composed of a maximum of 8 alphanumerical characters. Use the + and - keys to select the alphanumerical characters in rotation, and confirm each character with ENTER. The numerical characters can be selected directly on the numerical keypad. The definition of this field is indispensable in order to program the subsequent fields.
START: used for defining the initial frequency of the tone, expressed in hertz. Use the numerical keypad to set the
frequency, selecting between the values 100 Hz and 4 kHz.
END: used for defining the final frequency of the tone, expressed in hertz. Use the numerical keypad to set the frequency, selecting between the values 100 Hz and 4 kHz.
DUR.: used for defining the duration of the tone in milliseconds. Use the numerical keypad to set the duration, selecting between the values 0 ms and 9999 ms.
AMPL.: used for defining the volume of the tone. Use the + and - keys to select the volume from the following values::
• “1” – Volume at 25 % (minimum volume)
• “2” – Volume at 50 %.
• “3” – Volume at 75 %.
• “4” – Volume at 100 % (maximum volume)
REPETITIONS: used for defining the number of times the sequence of tones defined must be repeated and saved
in the audio file to be created. Use the + and - keys or the numerical keypad to select the number of repetitions in
the range of values from 1 to 9.
After completing the fields of the menu, press F1 to listen locally to the sound created using the monitor speaker of the
CP 3100 control unit; press F2 to interrupt the playback before the end.
103
IMPORTANT NOTES
• We recommend that you avoid completely occupying the hard disk of the control unit with audio files created using the
TONE GENERATOR function.
• The sequence with which the various tones of the sound are stored follows the progressive numerical order of the field
N.: tone N. 1 is the first to be recorded; tone N. 6 is the last to be recorded.
• The overall duration of the sound created, which corresponds to the sum of the duration times of the single tones multiplied by the number of repetitions, must not exceed 60 seconds.
• Local listening to the sound created (key F1) is not possible when a system audio source monitor operation is in progress (see the section USING THE "MONITOR OPERATIONS" MENU). In this case, in fact, if F1 is pressed (playback
start command) an acoustic warning signal is emitted. To play the sound created, it is therefore necessary to first interrupt any audio monitoring in progress.
To exit from the submenu, press ESC and proceed as described in the section EXIT FROM A MENU.
DELETE MESSAGES Move the selection point to this menu item and press ENTER to access the menu used for deleting an audio file stored on the hard disk of the control unit. The following screen appears on the control unit display.
DELETE MESSAGES
SELECT A FILE, THEN PRESS F1
FILE NAME:
MUSIC 1 _ _ ▼
FILE NAME: used for choosing the name of the file corresponding to the audio signal to be deleted. Use the + and
- keys to select the file desired from those stored on the hard disk of the CP 3100 control unit.
After selecting the name of the file, press F1 to delete it. To exit from the submenu, press ESC and proceed as described
in the section EXIT FROM A MENU.
USING THE “SYSTEM” MENU
- - - = = = MAIN MENU = = = - - ->SYSTEM
->COMPILE & SAVE
->EXIT WITHOUT SAVING
This menu is used for setting various operating parameters of the RX 3000 system. From the main configuration menu of the control unit, use
the ↑ / ↓ and/or pag ↑ / pag ↓ keys to move the selection point to the SYSTEM submenu and press ENTER. The following submenus appear on the control unit display:
SYSTEM OPTIONS
PRINTER OPTION
PRINT CONFIGURATION
DATE & TIME
Pag ↓
SYSTEM OPTIONS
DATE &TIME
DAY / NIGHT PROGRAM
PASSWORD
PRINTER OPTIONS Move the selection point to this menu item and press ENTER to set the printing options. The following screen appears
on the control unit display.
PRINTER OPTIONS
PRINT MODE:
NONE _ _ _ _ _ _ _ _ ▼
PRINT MODE: used for configuring the alarm events printout. Use the + and - keys to select one of the following
options:
• NONE – Disables the printout of alarm events. When this option is selected, on the ALARMS menu it is only possible to view the alarm events that have occurred since the system was switched on (see the section DISPLAY OF
ALARM EVENTS).
• AUTO – Generates an automatic printout of an alarm message at the moment in which the alarm event occurs (see
the section PRINTOUT OF ALARM EVENTS).
• REQUEST – Used for enabling the command on the ALARMS menu for manual printout of the alarm events that
have occurred since the system was switched on (see the section PRINTOUT OF ALARM EVENTS).
104
PRINT CONFIGURATION Move the selection point to this menu item and press ENTER to have a printout of the system configuration. The
printout indicates, for the various system devices, the number of system components that have been configured
by means of the related menu of the control unit, and the number of system components that have been detected
and correctly programmed by the control unit. The following screen appears on the control unit display.
INFORMATION:
PRINTING CONFIGURATION . . . .
DATE & TIME
Move the selection point to this menu item and press ENTER to set the current date and time. The following screen
appears on the control unit display.
DATE & TIME SETTING
DATE:
12 / NOV ▼ / 1999
TIME:
15 : 49 : 50
DATE: used for setting the current day, month, and year. Use the direction keys to move the selection point to the
field of the day, month, and year, and enter the desired values using the numerical keypad or the + and - keys.
TIME: used for setting the current hour, minutes, and seconds. Use the direction keys to move the selection point
to the field of the hours, minutes, and seconds, and enter the desired values using the numerical keypad or the +
and - keys.
To exit from the submenu, press ESC and proceed as described in the section “EXIT FROM A MENU”.
DAY/NIGHT PROGRAM Move the selection point to this menu item and press ENTER to program the time range for the DAY/NIGHT PROGRAM function of the A.C.U. (see the section DAY/NIGHT PROGRAM FUNCTION). The following screen appears
on the control unit display.
DAY / NIGHT PROGRAM SETTING
START TIME:
12 : 15
END TIME:
22 : 31
START TIME: used for setting the start time of the night-time attenuation, expressed in hours and minutes. Use the
direction keys to move the selection point to the field of the hours or minutes, and enter the desired values using
the numerical keypad or the + and - keys.
END TIME: used for setting the end time of the night-time attenuation, expressed in hours and minutes. Use the
direction keys to move the selection point to the field of the hours or minutes, and enter the desired values using
the numerical keypad or the + and - keys.
IMPORTANT NOTE
• The time range set is used by all the A.C.U.s having the DAY/NIGHT program function enabled (see the section
USING THE "ACU" MENU).
PASSWORD
Used for defining the “user password”, which makes it possible to prevent unauthorized personnel from accessing
certain menus of the control unit (see the section PASSWORD FOR MENU ACCESS). Move the selection point to
this menu item and press ENTER to set the password. The following screen appears on the control unit display.
PASSWORD SETTING
TYPE THE PASSWORD: ____________
RE-TYPE PASSWORD: ____________
TYPE THE PASSWORD: used for entering the password, which can be composed of a maximum of 8 numerical
characters. Use the numerical keypad to enter the various numbers.
RE-TYPE PASSWORD: used for entering the password again in order to be sure that the password previously typed in the TYPE THE PASSWORD field is correct.
IMPORTANT NOTE
• When assigning the password, keep in mind the following indications:
a. It is not possible to insert spaces (blank characters) between two numerical characters of the password.
b. It is not possible to insert spaces (blank characters) before the numerical characters of the password.
c. It is not possible to insert alphabetical characters.
After completing the two fields, press MEMORY to save the password on the hard disk of the control unit. If the
operation is successful and the password set is correctly stored, the MEMORY LED (ref. 6 - Fig. 1, page 70) lights
up. A new password set is immediately operational, and this password will be requested at the next attempt to access one of the protected menus.
To exit from the submenu, press ESC.
105
IMPORTANT NOTES
• The password cannot be stored if the characters entered in the TYPE THE PASSWORD field do not coincide with those entered in the RE-TYPE PASSWORD field.
• To save a new password it is not necessary to exit from the main configuration menu with the COMPILE & SAVE option.
• If you do not want to set any password, leave the TYPE THE PASSWORD and RE-TYPE PASSWORD fields empty.
USING THE “COMPILE & SAVE” MENU
- - - = = = MAIN MENU = = = - - ->SISTEM
->COMPILE & SAVE
->EXIT WITHOUT SAVING
The COMPILE & SAVE command is used when you want to exit from the main menu for system configuration and permanently save all the
settings made in a number of configuration files which are stored on the hard disk of the control unit.
To save the configuration files, use the ↑ / ↓ and/or pag ↑ / pag ↓ keys to move the selection point to the submenu COMPILE & SAVE and
press ENTER.
If the save is successful, the program exits from the configuration menu and returns to the main menu. To implement the configuration made,
proceed as described in the section STORING A CONFIGURATION.
If any configuration errors occur during the save operation, the related messages are shown on the display and it is not possible to complete
the save operation until all the causes of the errors have been removed (see the section CONFIGURATION ERRORS). This prevents the creation of possible conflicts between the various devices which could cause a blockage of the system.
IMPORTANT NOTE
• If the system is configured incorrectly on the configuration menus and error messages are displayed during the use of the COMPILE & SAVE command, you can only exit from the configuration menu without correcting the errors found using the EXIT WITHOUT SAVING command; in this case, all the modifications made are lost.
CONFIGURATION ERRORS
When configuration errors are found during the use of the COMPILE & SAVE command, the related error messages are shown on the control unit display. These messages indicate the cause of the error in a simple and direct way so that you can correct them. For each error found,
a different screen appears with the following indications.
• Error number and total number of errors.
• Indication of the device or event to which the error refers.
• Indication of the cause of the error.
To display the other error messages, use the pag ↑ key (subsequent error) and pag ↓ key (previous error). The screen below shows an example of an error. In this example, the CONSOLES menu was used to configure a digital console called BM 3616 N.1 to which no audio input
was assigned using the INPUT PROCESSORS menu. In this case, to eliminate the error you need to configure an audio input of the CONSDIG 1 type (TYPE = CONSDIG 1 field).
ERROR FOUND
CONSOLLE “BM 3616 N.1” UNDFINED
AUDIO INPUT
1/1
USING THE “EXIT WITHOUT SAVING” MENU
- - - = = = MAIN MENU = = = - - ->SISTEM
->COMPILE & SAVE
->EXIT WITHOUT SAVING
Used for exiting from the main menu for system configuration without saving any settings made. Use the ↑ / ↓ and/or pag ↑ / pag ↓ keys to
move the selection point to the submenu EXIT WITHOUT SAVING and press ENTER.
IMPORTANT NOTE
• If you exit from the configuration menu using the EXIT WITHOUT SAVING option, all parameters modified will be lost, and none of the
settings made can be implemented on the system devices
106
ALARM STATUS DISPLAY (“ALARMS” menu)
RCF RX 3000 AUDIO SYSTEM
F1 : CONFIGURATION
F2 : ALARMS
"##############
ENGLISH _ _ _ ▼
F3: STORE CONFIG.
F4: AUDIO PROCESS
03 NOV 1999
15:29:52
To access the menus used for displaying the current status of the alarms handled by the system (see the section SYSTEM ALARMS), from
the main menu press F2. The following submenus appear on the control unit display.
• AUDIO INPUT PROCESSORS
Gives a detailed indication of alarms related to the operation of the IB 3210 / IB 3280 AUDIO INPUT
boards.
• AUDIO OUTPUT PROCESSORS Gives a detailed indication of alarms related to the operation of the OB 3230 AUDIO OUTPUT boards.
• GPI PROCESSORS
Gives a detailed indication of alarms related to the operation of the IO 3250 digital INPUT/OUTPUT
boards.
• DIG.CONSOLLES
Gives a detailed indication of alarms related to the operation of the BM 3616 digital consoles.
• (ACU) AMPLIFIERS
Gives a detailed indication of alarms related to the operation of the A.C.U.s (RB 3300 back-amplifier
boards).
• GPI ALARMS
Gives a detailed indication of the status of warnings controlled by the inputs of the IO 3250 digital INPUT/OUTPUT boards.
• EMERGENCY
Gives a detailed indication of the status of alarms controlled by the ALARM key of the BM 3616 digital consoles.
• FIREMAN
Gives a detailed indication of the status of alarms controlled by the inputs of the IO 3250 digital INPUT/OUTPUT boards configured as FIREMAN.
• SYSTEM ALARMS
Gives a detailed indication of the status of alarms related to the operation of the components of the
CP 3100 control unit.
Next to each submenu, the ALARMS field indicates the status of the alarm of the device/event to which the submenu refers, which is continuously updated. Specifically, the indications are the following:
• [ X ], when one or more alarms are activated.
• [ ], when no alarm has been activated.
IMPORTANT NOTE
• The submenus of the ALARMS menu also show "status" or "data" (e.g. REV, ALC fields) which do not indicate an alarm condition.
The first screen only shows the first 2 submenus; to display the next submenus, use the ↑ / ↓ and/or pag ↑ / pag ↓ keys.
SYSTEM ALARMS OVERVIEW
AUDIO INPUT PROCESSORS
AUDIO OUTPUT PROCESSORS
PRESS F1 TO VIEW CURRENT ALARMS
ALARMS
[
]
[
]
Pag ↓
SYSTEM ALARMS OVERVIEW
GPI PROCESSORS
DIG. CONSOLLES
PRESS F1 TO VIEW CURRENT ALARMS
ALARMS
[
]
[
]
Pag ↓
SYSTEM ALARMS OVERVIEW
(ACU) AMPLIFIERS
GPI ALARMS
PRESS F1 TO VIEW CURRENT ALARMS
ALARMS
[
]
[
]
Pag ↓
SYSTEM ALARMS OVERVIEW
EMERGENCY
FIREMAN
PRESS F1 TO VIEW CURRENT ALARMS
ALARMS
[
]
[
]
Pag ↓
SYSTEM ALARMS OVERVIEW
FIREMAN
SYSTEM ALARMS
PRESS F1 TO VIEW CURRENT ALARMS
ALARMS
[
]
[
]
107
DISPLAY OF ALARM EVENTS
This procedure makes it possible to display the alarm events that have occurred since the system was switched on, and can be used when
the PRINT MODE: NO option has been selected in the PRINTER OPTIONS submenu of the SYSTEM configuration menu (see the section
USING THE "SYSTEM" MENU). After displaying the submenus of the ALARMS menu, press F1 to display the alarm events.
VISUALIZZAZIONE CAMPI ALLARME
AUDIO INPUT PROCESSORS
AUDIO OUTPUT PROCESSORS
PIGIARE F1 PER VEDERE ALLARMI
ALLARMI
[
]
[
]
!
F1
For each alarm event, a screen is shown on the control unit display containing the following information.
• Number of the alarm event and total number of alarms.
• Date on which the alarm event occurred.
• Time at which the alarm event occurred.
• Device that activated the alarm. The abbreviations that may appear are:
– INPUT PROC. – Indicates an IB 3210 / IB 3280 AUDIO INPUT board.
– OUTPUT PROC. - Indicates an OB 3230 AUDIO OUTPUT board.
– GPI ALARMS Indicates an IO 3250 digital INPUT/OUTPUT board.
– CONSOLE Indicates a BM 3616 digital console.
– ACU Indicates an RB 3300 back-amplifier board.
The related identification number is indicated next to the name of the device.
• Type of event that caused the alarm. The types that may be shown depend on the specific device.
The example below shows 5 alarm events. To view the subsequent or previous events, use the + (forward) and - (back) keys.
SYSTEM ALARMS OVERVIEW
AUDIO INPUT PROCESSORS
AUDIO OUTPUT PROCESSORS
PRESS F1 TO VIEW CURRENT ALARMS
ALARMS
[
]
[
]
F1
ALARMS LIST
03/11/1999
15:34:44
+ LOGGER
! LOGGER STARTED !
001/005
+
+
ALARMS LIST
03/11/1999
* INPUT PROC.
DCI FAULT KO
002/005
15:34:44
01 *
+
ALARMS LIST
03/11/1999
* OUTPUT PROC.
DCI FAULT KO
003/005
15:34:44
01 *
+
ALARMS LIST
03/11/1999
* GPI ALARMS
DCI FAULT KO
004/005
15:34:44
01 *
+
108
ALARMS LIST
03/11/1999
* ACU
DCI FAULT KO
005/005
15:34:44
01 *
PRINTOUT OF ALARM EVENTS
This procedure makes it possible to display the alarm events that have occurred since the system was switched on, and can be used when
the PRINT MODE: REQUEST option has been selected in the PRINTER OPTIONS submenu of the SYSTEM configuration menu (see the
section USING THE "SYSTEM" MENU).
IMPORTANT NOTE
• If the PRINTER MODE: AUTO option is selected in the PRINTER OPTIONS submenu of the SYSTEM configuration menu, the printout of
the alarm events takes place automatically at the moment in which the alarm occurs, and ALARMS menu of the control unit shows: PRINTER ALARMS AUTO.
After viewing the submenus of the ALARMS menu, press F1 to start the printout.
SYSTEM ALARMS OVERVIEW
AUDIO INPUT PROCESSORS
AUDIO OUTPUT PROCESSORS
PRESS F1 TO PRINT CURRENT ALARMS
ALARMS
[
]
[
]
!
F1
The printout of alarm events contains the following information.
• Date on which the alarm event occurred.
• Time at which the alarm event occurred.
• Device that activated the alarm. The abbreviations that may appear are:
– INPUT PROC. – Indicates an IB 3210 / IB 3280 AUDIO INPUT board.
– OUTPUT PROC. - Indicates an OB 3230 AUDIO OUTPUT board.
– GPI ALARMS Indicates an IO 3250 digital INPUT/OUTPUT board.
– CONSOLE Indicates a BM 3616 digital console.
– ACU Indicates an RB 3300 back-amplifier board.
The related identification number is indicated next to the name of the device.
• Type of event that caused the alarm. The types that may be shown depend on the specific device.
DETAIL OF ALARMS ON THE IB 3210 / IB 3280 AUDIO INPUT BOARDS
SYSTEM ALARMS OVERVIEW
AUDIO INPUT PROCESSORS
AUDIO OUTPUT PROCESSORS
PRESS F1 TO VIEW CURRENT ALARMS
ALARMS
[
]
[
]
For a detailed report on the current status of alarms related to the IB 3210 / IB 3280 AUDIO INPUT boards, from the ALARMS menu of the
control unit, use the ↑ / ↓ and/or pag ↑ / pag ↓ keys to move the selection point to the AUDIO INPUT PROCESSORS submenu and press
ENTER. The fields described below appear on the control unit display.
INPUT BOARD Indicates the identification number of the IB 3210 / IB 3280 AUDIO INPUT board (see the section CHARACTERISTIC PARAMETERS).
REV
Indicates the software version of the AUDIO INPUT board.
DCI
Indicates an alarm caused by a communication problem between the board and the control unit. When the alarm is active,
the symbol X is shown in the field.
EEP
Indicates an alarm caused by a failure or defective operation of the board's EEPROM memory. When the alarm is active, the
symbol X is shown in the field.
RST
Indicates an alarm caused by the reset of the board microprocessor for reinitializing its operation (“watchdog” function).
When the alarm is active, the symbol X is shown in the field.
CFG
Indicates an alarm caused by an incomplete configuration of the board on the part of the control unit (e.g. the configuration
was interrupted by board removal). When the alarm is active, the symbol X is shown in the field.
KO
Indicates an alarm caused by the removal of the board (e.g. to repair it). In this condition, the board no longer communicates with the CP 3100 control unit, and the control of all the other alarms causes is suspended. To use the previously removed board again, the system must be reconfigured as described in the section STORING A CONFIGURATION. When the
alarm is active, the symbol X is shown in the field.
To display the subsequent or previous IB 3210 / IB 3280 AUDIO INPUT boards, press the ↑ / ↓ and/or pag ↑ / pag ↓ keys.
109
INPUT BOARD
INP. PROC. 1
INP. PROC. 2
INP. PROC. 3
REV
1.0
1.0
1.0
DCI
EEP
RST
CFG
KO
RST
CFG
KO
Pag ↓
INPUT BOARD
INP. PROC. 4
INP. PROC. 5
INP. PROC. 6
REV
1.0
1.0
1.0
DCI
EEP
To exit from the submenu, press ESC.
DETAIL OF ALARMS ON THE OB 3230 AUDIO OUTPUT BOARDS
SYSTEMS ALARMS OVERVIEW
AUDIO INPUT PROCESSORS
AUDIO OUTPUT PROCESSORS
PRESS F1 TO VIEW CURRENT ALARMS
ALARMS
[
]
[
]
For a detailed report on the current status of alarms related to the OB 3230 AUDIO OUTPUT boards, from the ALARMS menu of the control
unit, use the ↑ / ↓ and/or pag ↑ / pag ↓ keys to move the selection point to the AUDIO OUTPUT PROCESSORS submenu and press ENTER. The fields described below appear on the control unit display.
OUTPUT BOARD Indicates the identification number of the OB 3230 AUDIO OUTPUT board (see the section CHARACTERISTIC PARAMETERS).
REV
Indicates the software version of the AUDIO OUTPUT board.
DCI
Indicates an alarm caused by a communication problem between the board and the control unit. When the alarm is active,
the symbol X is shown in the field.
EEP
Indicates an alarm caused by a failure or defective operation of the board's EEPROM memory. When the alarm is active, the
symbol X is shown in the field.
RST
Indicates an alarm caused by the reset of the board microprocessor for reinitializing its operation (“watchdog” function).
When the alarm is active, the symbol X is shown in the field.
CFG
Indicates an alarm caused by incomplete configuration of the board on the part of the control unit (e.g. the configuration
was interrupted by board removal). When the alarm is active, the symbol X is shown in the field.
POW
Indicates an alarm caused by a power supply voltage to the board that is too low or absent. When the alarm is active, the
symbol X is shown in the field.
AUD
Indicates an alarm caused by a failure on one or more audio outputs of the board. When the alarm is active, the symbol X
is shown in the field.
KO
Indicates an alarm caused by the removal of the board (e.g. to repair it). In this condition, the board no longer communicates with the CP 3100 control unit, and the control of all the other alarms causes is suspended. To use the previously removed board again, the system must be reconfigured as described in the section STORING A CONFIGURATION. When the
alarm is active, the symbol X is shown in the field.
The first screen only shows the first 7 fields (REV, DCI, EEP, RST, CFG, POW, AUD) of the first 3 OB 3230 boards. To display the next field,
press →; to display the previous field, press ←.
OUTPUT BOARD
OUT. PROC. 1
OUT. PROC. 2
OUT. PROC. 3
REV
1.0
1.0
1.0
DCI
EEP
RST
CFG
POW AUD
→
REV
1.0
1.0
1.0
DCI
EEP
RST
CFG
POW AUD
KO
To display the next or previous OB 3230 AUDIO OUTPUT boards, press the ↑ / ↓ and/or pag ↑ / pag ↓ keys.
110
OUTPUT BOARD
OUT. PROC. 1
OUT. PROC. 2
OUT. PROC. 3
REV
1.0
1.0
1.0
DCI
EEP
RST
CFG
POW AUD
CFG
POW AUD
Pag ↓
OUTPUT BOARD
OUT. PROC. 4
OUT. PROC. 5
OUT. PROC. 6
REV
1.0
1.0
1.0
DCI
EEP
RST
To exit from the submenu, press ESC.
DETAIL OF ALARMS ON THE IO 3250 DIGITAL INPUT/OUTPUT BOARDS
SYSTEM ALARMS OVERVIEW
GPI PROCESSORS
DIG. CONSOLLES
PRESS F1 TO VIEW CURRENT ALARMS
ALARMS
[
]
[
]
For a detailed report on the current status of alarms related to the IO 3250 digital INPUT/OUTPUT boards, from the ALARMS menu of the
control unit, use the ↑ / ↓ and/or pag ↑ / pag ↓ keys to move the selection point to the GPI PROCESSORS submenu and press ENTER. The
fields described below appear on the control unit display.
GPI BOARD
Indicates the identification number of the IO 3250 digital INPUT/OUTPUT board (see the section CHARACTERISTIC PARAMETERS).
REV
Indicates the software version of the digital INPUT/OUTPUT board.
DCI
Indicates an alarm caused by a communication problem between the board and the control unit. When the alarm is active,
the symbol X is shown in the field.
EEP
Indicates an alarm caused by a failure or defective operation of the board's EEPROM memory. When the alarm is active, the
symbol X is shown in the field.
RST
Indicates an alarm caused by the reset of the board microprocessor for reinitializing its operation (“watchdog” function).
When the alarm is active, the symbol X is shown in the field.
CFG
Indicates an alarm caused by incomplete configuration of the board on the part of the control unit (e.g. the configuration
was interrupted by board removal). When the alarm is active, the symbol X is shown in the field.
POW
Indicates an alarm caused by a power supply voltage to the board that is too low or absent. When the alarm is active, the
symbol X is shown in the field.
KO
Indicates an alarm caused by the removal of the board (e.g. to repair it). In this condition, the board no longer communicates with the CP 3100 control unit, and the control of all the other alarms causes is suspended. To use the previously removed board again, the system must be reconfigured as described in the section STORING A CONFIGURATION. When the
alarm is active, the symbol X is shown in the field.
To display the subsequent or previous IO 3250 digital INPUT/OUTPUT boards, press the ↑ / ↓ and/or pag ↑ / pag ↓ keys.
GPI BOARD
GPI PROC. 1
GPI PROC. 2
GPI PROC. 3
REV
1.0
1.0
1.0
DCI
0
0
0
EEP
0
0
0
RST
0
0
0
CFG
0
0
0
POW
0
0
0
KO
0
0
0
CFG
0
0
0
POW
0
0
0
KO
0
0
0
Pag ↓
GPI BOARD
GPI PROC. 4
GPI PROC. 5
GPI PROC. 6
REV
1.0
1.0
1.0
DCI
0
0
0
EEP
0
0
0
RST
0
0
0
To exit from the submenu, press ESC.
111
DETAIL OF ALARMS ON THE BM 3616 CONSOLES
SYSTEM ALARMS OVERVIEW
GPI PROCESSORS
DIG. CONSOLLES
PRESS F1 TO VIEW CURRENT ALARMS
ALARMS
[
]
[
]
For a detailed report on the current status of alarms related to the BM 3616 digital consoles, from the ALARMS menu of the control unit, use
the ↑ / ↓ and/or pag ↑ / pag ↓ keys to move the selection point to the DIG. CONSOLLES submenu and press ENTER. The fields described
below appear on the control unit display.
CONSOLLE
Indicates the identification number of the BM 3616 digital console; this number is set locally on the console by means of
the address assignment procedure (see the installation and operation manual for the BM 3616 console).
REV
Indicates the software version of the console.
COM
Indicates an alarm caused by a communication problem between the console and the control unit. When the alarm is active, the symbol X is shown in the field.
EEP
Indicates an alarm caused by a failure or defective operation of the console's EEPROM memory. When the alarm is active,
the symbol X is shown in the field.
RST
Indicates an alarm caused by the reset of the console microprocessor for reinitializing its operation (“watchdog” function).
When the alarm is active, the symbol X is shown in the field.
POW
Indicates an alarm caused by a power supply voltage to the console that is too low or absent. When the alarm is active, the
symbol X is shown in the field.
KO
Indicates an alarm caused by the removal of the console (e.g. for repairs). In this condition, the console no longer communicates with the CP 3100 control unit, and the control of all the other alarms causes is suspended. To use the previously removed console again, the system must be reconfigured as described in the section STORING A CONFIGURATION. When
the alarm is active, the symbol X is shown in the field.
To display the next or previous BM 3616 digital consoles, press the ↑ / ↓ and/or pag ↑ / pag ↓ keys.
CONSOLLE
1
2
3
REV
1.0
1.0
1.0
COM
EEP
RST
POW
KO
POW
KO
Pag ↓
CONSOLLE
4
5
6
REV
1.0
1.0
1.0
COM
EEP
RST
To exit from the submenu, press ESC.
DETAIL OF ALARMS ON THE A.C.U.s
SYSTEM ALARMS OVERVIEW
(ACU) AMPLIFIERS
GPI ALARMS
PRESS F1 TO VIEW CURRENT ALARMS
ALARMS
[
]
[
]
For a detailed report on the current status of alarms related to the A.C.U.s (see the section AMPLIFIER CONTROL UNITS), from the ALARMS
menu of the control unit, use the ↑ / ↓ and/or pag ↑ / pag ↓ keys to move the selection point to the AMPLIFIERS submenu and press ENTER. The fields described below appear on the control unit display.
ACU N.
Indicates the identification number of the A.C.U. (RB 3300 back-amplifier board). The indication is sequential and is related
to the address assigned to the A.C.U. in the installation phase: the number 1 corresponds to the A.C.U. with address “0”;
the number 120 corresponds to the A.C.U. with address 119.
REV
Indicates the software version of the A.C.U.
COM
Indicates an alarm caused by a communication problem between the A.C.U. and the CP 3100 control unit. When the alarm
is active, the symbol X is shown in the field.
LFT
This alarm is only signalled if the A.C.U. is equipped with the optional SB 3320 FAULT DETECTOR board. It indicates one
or more faulty signals on the audio line for speakers connected to the output of the amplifier controlled by the A.C.U.; e.g.
a short circuit between the two conductors of the line, an interruption of the line, a short circuit between the line and the
earth circuit (see the section LINE FAULT FUNCTION). When the alarm is active, the symbol X is shown in the field.
PAF
This alarm is only signalled if the A.C.U. is equipped with the optional SB 3320 FAULT DETECTOR board. It indicates any
malfunction of the amplifier controlled by the A.C.U. that causes a perceptible decrease in the power transmitted (see the
section PA FAULT FUNCTION). If the A.C.U. has been configured with the MODE=AUTO option, activation of this alarm
causes the automatic disactivation of the amplifier controlled by the unit and insertion of a backup amplifier, where present,
or a BACKUP A.C.U. if the backup amplifier is also controlled by a RB 3300 back-amplifier board (see the section USING
THE “ACU” MENU). When the alarm is active, the symbol X is shown in the field.
112
OVL
This alarm is only signalled if the amplifier controlled by the A.C.U. is equipped with an auxiliary alarm contact which is switched to closed when a protection device intervenes or when the equipment functions abnormally, and drives a dedicated
input of the A.C.U. (see the section OVL FUNCTION). If the A.C.U. has been configured with the MODE=AUTO option, activation of this alarm causes the automatic disactivation of the amplifier controlled by the unit and insertion of a backup amplifier, where present, or a BACKUP A.C.U. if the backup amplifier is also controlled by a RB 3300 back-amplifier board (see
the section USING THE "ACU" MENU). When the alarm is active, the symbol X is shown in the field.
Indicates an alarm caused by the reset of the board's microprocessor for reinitializing its operation (“watchdog” function).
When the alarm is active, the symbol X is shown in the field.
This alarm is only signalled if the A.C.U. is equipped with the optional SB 3320 FAULT DETECTOR board. It indicates a “fire-break” alarm, which is generated when, by means of the opening of a contact connected to the SB 3320 board (e.g. contact of a pushbutton), the normal transmission of the audio signal is interrupted in order to transmit an emergency signal
with absolute priority coming from a source not connected to the audio matrix of the system (see the section FIRE-BREAK
FUNCTION).
Indicates an alarm caused by the lack of 24 V power supply voltage to the A.C.U.. When the alarm is active, the symbol X
is shown in the field.
Indicates an alarm caused by the lack of 13.5 V power supply voltage to the A.C.U.. When the alarm is active, the symbol
X is shown in the field.
This indication does not represent an alarm but is provided only if the A.C.U. is equipped with the optional LB 3340 DIGITAL ALC board. It indicates the intervention of the circuit present on the LB 3340 used for automatic correction of the output level. When this intervention takes place, the symbol X is shown in the field; the indication varies slowly (approximately
1 variation per minute).
Indicates an alarm caused by the removal of the A.C.U. (e.g. for repairs). In this condition, the A.C.U. no longer communicates with the CP 3100 control unit, and control of all the other alarm causes is suspended. To use the previously removed
unit again, the system must be reconfigured as described in the section STORING A CONFIGURATION. When the alarm is
active, the symbol X is shown in the field.
RST
FBK
24V
12V
ALC
KO
The first screen only shows the first 7 fields (REV, COM, LFT, PAF, OVL, RST, FBK) of the first 3 A.C.U.s. To display the next field, press →; to
display the previous field, press ←.
ACU N.
ACU 1
ACU 2
ACU 3
REV
1.0
1.0
1.0
COM LFT
PAF
OVL
RST
FBK
12V
ALC
KO
→
LFT
PAF
OVL
RST
FBK
24V
To display the subsequent or previous A.C.U.s, press the ↑ / ↓ and/or pag ↑ / pag ↓ keys.
ACU N.
ACU 1
ACU 2
ACU 3
REV
1.0
1.0
1.0
COM LFT
PAF
OVL
RST
FBK
OVL
RST
FBK
→
ACU N.
ACU 4
ACU 5
ACU 6
REV
1.0
1.0
1.0
COM LFT
PAF
To exit from the submenu, press ESC.
DETAIL OF “GPI” ALARMS
SYSTEM ALARMS OVERVIEW
(ACU) AMPLIFIERS
GPI ALARMS
PRESS F1 TO VIEW CURRENT ALARMS
ALARMS
[
]
[
]
The GPI ALARMS submenu makes it possible to display the status of warnings controlled by the GPI inputs that have the warning function
enabled (ALL. = ON field). From the ALARMS menu of the control unit, use the ↑ / ↓ and/or pag ↑ / pag ↓ keys to move the selection point
to the GPI ALARMS submenu and press ENTER. The fields described below appear on the control unit display.
113
GPI EVENT
ALARM
This field indicates the names of the events programmed by means of the GPI EVENTS DEFINITION menu (see the section USING THE "GPI INPUT EVENTS DEFINITION" MENU).
This field indicates the status of the warning: when the warning is active, the symbol X is shown in the field.
To display the subsequent or previous GPI events with warning, press the ↑ / ↓ and/or pag ↑ / pag ↓ keys.
GPI EVENT
KEY 1 CONSOLLE 1
KEY 2 CONSOLLE 1
KEY 3 CONSOLLE 1
ALARMS
[
]
[
]
[
]
Pag ↓
GPI EVENT
KEY 4 CONSOLLE 1
KEY 1 CONSOLLE 2
KEY 2 CONSOLLE 2
ALARMS
[
]
[
]
[
]
To exit from the submenu, press “ESC”.
DETAIL OF ALARMS ON BM 3616 CONSOLES
SYSTEM ALARMS OVERVIEW
EMERGENCY
FIREMAN
PRESS F1 TO VIEW CURRENT ALARMS
ALARMS
[
]
[
]
The EMERGENCY submenu makes it possible to display the status of alarms controlled by means of the ALARM key of the BM 3616 digital
consoles (see the section USING THE "DIGITAL CONSOLES" MENU). From the ALARMS menu of the control unit, use the keys ↑ / ↓ and/or
pag ↑ / pag ↓ to move the selection point to the EMERGENCY submenu and press ENTER. The fields described below appear on the control unit display of the control unit.
CONSOLLE
This field indicates the names of the BM 3616 digital consoles defined by means of the CONSOLES menu.
EMERGENCY This field indicates the status of the alarm: when the alarm is active, the symbol X is shown in the field.
IMPORTANT NOTES
• An alarm controlled from a BM 3616 console can only be interrupted by the same console that activated it, or by switching off the
system.
• An alarm controlled from a BM 3616 console remains active even in the event of an interruption in the communication between the console and the control unit.
To display the subsequent or previous BM 3616 consoles, press the ↑ / ↓ and/or pag ↑ / pag ↓ keys.
CONSOLLE
CONSOLLE 1
CONSOLLE 2
CONSOLLE 3
EMERGENCY
[
]
[
]
[
]
Pag ↓
CONSOLLE
CONSOLLE 4
CONSOLLE 5
CONSOLLE 6
EMERGENCY
[
]
[
]
[
]
To exit from the submenu, press ESC.
114
DETAIL OF “FIREMAN” ALARMS
SYSTEM ALARMS OVERVIEW
EMERGENCY
FIREMAN
PRESS F1 TO VIEW CURRENT ALARMS
ALARMS
[
]
[
]
The FIREMAN submenu makes it possible to display the status of alarms controlled by means of the GPI inputs configured as FIREMAN (see
the section USING THE “GPI EVENTS DEFINITION” MENU). From the ALARMS menu of the control unit, use the ↑ / ↓ and/or pag ↑ / pag ↓
keys to move the selection point to the FIREMAN submenu and press ENTER. The fields described below appear on the control unit display.
GPI EVENT
Indicates the specific FIREMAN event; the system handles two events of this type.
ALARMS
This field indicates the status of the alarm: when the FIREMAN alarm is active, the symbol X is shown in the field.
GPI EVENT
FIREMAN1
FIREMAN2
ALARM
[
]
[
]
To exit from the submenu, press ESC.
“SYSTEM ALARMS”
SYSTEM ALARMS OVERVIEW
FIREMAN
SYSTEM ALARMS
PRESS F1 TO VIEW CURRENT ALARMS
ALARMS
[
]
[
]
The SYSTEM ALARMS submenu makes it possible to display in detail the current status of alarms related to components of the CP 3100
control unit. From the ALARMS menu of the control unit, use the ↑ / ↓ and/or pag ↑ / pag ↓ keys to move the selection point to the SYSTEM
ALARMS submenu and press ENTER. The fields described below appear on the control unit display.
COMPONENT
ALARM
This field indicates the following components of the control unit.
• SOUND BLASTER - Indicates the audio board.
• COM1 PORT - Indicates serial port number 1.
• COM2 PORT - Indicates serial port number 2.
• COM3 PORT - Indicates serial port number 3.
• COM4 PORT - Indicates serial port number 4.
This field indicates the status of the alarm: when the alarm is active, the symbol X is shown in the field.
To display the subsequent or previous components, press the ↑ / ↓ and/or pag ↑ / pag ↓ keys.
COMPONENT
SOUND BLASTER
COM1 PORT
COM2 PORT
ALARM
[
]
[
]
[
]
Pag ↓
COMPONENT
COM2 PORT
COM3 PORT
COM4 PORT
ALARM
[
]
[
]
[
]
To exit from the submenu, press ESC.
115
STORING A CONFIGURATION (“STORE CONFIG.” menu)
When a configuration is stored, all the devices of the system are programmed with the settings contained in the configuration files, which can
be generated by means of the COMPILE & SAVE command of the configuration menu of the control unit, or by means of a configuration PC
where present. The devices programmed are the following:
• BM 3616 digital consoles.
• RB 3300 back-amplifier boards.
• IO 3250 digital INPUT/OUTPUT boards.
• IB 3210 / IB 3280 AUDIO INPUT boards.
• OB 3230 AUDIO OUTPUT boards.
This procedure is necessary when:
• a system component is added or removed.
• the address of a system component is changed.
• the system configuration files are modified by means of the CP 3100 control unit.
• a system component previously removed for repairs is re-inserted.
IMPORTANT NOTE
• Configuration storing is not necessary when settings are changed using the AUDIO PROCESS menu (see the section AUDIO SETTINGS).
Two different methods can be used for programming the devices of the system, as described in the following sections.
PROGRAMMING DEVICES USING THE MENUS
1) From the main menu the control unit, press F3 (MEMOR. CONFIG.). A message appears on the display requesting that you enter the password of the control unit, where present (see the section PASSWORD FOR MENU ACCESS).
2) Using the numerical keypad, enter the password of the control unit (where required) and press ENTER: all the system devices will be automatically programmed.
RCF RX 3000 AUDIO SYSTEM
F1 : CONFIGURATION
F2 : ALARMS
"##############
ENGLISH _ _ _ ▼
F3: STORE CONFIG.
F4: AUDIO PROCESS
03 NOV 1999
15:29:52
F3
INSERT PASSWORD TO ACCESS CONFIGURATION
PASSWORD: “nr. password”
ENTER
RCF RX 3000 AUDIO SYSTEM
F1 : CONFIGURATION
F2 : ALARMS
"##############
ENGLISH _ _ _ ▼
F3: STORE CONFIG.
F4: AUDIO PROCESS
03 NOV 1999
15:29:52
IMPORTANT NOTES
• When a new configuration is stored, all the system devices are reset.
• Storing of a new configuration cannot be carried out when an absolute priority event is in progress (e.g. EMERGENCY, FIREMAN 1,
FIREMAN 2).
PROGRAMMING DEVICES BY MEANS OF SYSTEM RESTART
1) Switch off the system.
2) Restart the system, re-supplying power to all the devices.
COMPILATION ERRORS
During the programming of the system devices, errors may occur due to incorrect configuration of the fields of the system configuration menus (F1: CONFIGURATION menu). When errors occur, the message ERROR! appears on the control unit display, followed by an indication
of the type of error.
116
AUDIO SETTINGS (“AUDIO PROCESS” menu)
RCF RX 3000 AUDIO SYSTEM
F1 : CONFIGURATION
F2 : ALARMS
"##############
ENGLISH _ _ _ ▼
F3: STORE CONFIG.
F4: AUDIO PROCESS
03 NOV 1999
15:29:52
Using the AUDIO PROCESS menu, you can quickly set a number of audio parameters, manually activate and disactivate the A.C.U.s, and
monitor the audio signals handled by the system. To access this menu, from the main menu of the control unit, press F4. The following submenus appear on the control unit display:
• ADJUST AUDIO INPUT
Menu for adjusting the gain of the inputs of the IB 3210 / IB 3280 AUDIO INPUT boards. This menu also makes
it possible to activate or disactivate the tone controls of the inputs (treble/bass).
• ADJUST AUDIO OUTPUT Menu for adjusting the level of the audio signals on the outputs of the OB 3230 AUDIO OUTPUT boards.
• INSERT BACKUP ACU
Menu for manual activation/disactivation of the A.C.U.s (see the section AMPLIFIER CONTROL UNITS), and
for viewing the operating status of these units.
• MONITOR OPERATIONS Menu for listening through the monitor speaker of the control unit to the audio signals handled by the system
(e.g. input signals, output signals, signals on the speaker outputs of the amplifiers controlled by the A.C.U.s).
This menu can also be used for controlling the levels of the audio signals being monitored.
The settings made using the AUDIO PROCESS menu are applied immediately, without the need to use the STORE CONFIG. option of the
main menu (i.e. no need to store a new configuration). The first screen only shows the first 3 submenus; to display the subsequent submenus, use the ↑ / ↓ and/or pag ↑ / pag ↓ keys.
AUDIO ADJUST OPTIONS
ADJUST AUDIO INPUT
ADJUST AUDIO OUTPUT
INSERT BACKUP ACU
Pag ↓
AUDIO ADJUST OPTIONS
ADJUST AUDIO OUTPUT
INSERT BACKUP ACU
MONITOR OPERATIONS
USING THE “ADJUST AUDIO INPUT” MENU
AUDIO ADJUST OPTIONS
ADJUST AUDIO INPUT
ADJUST AUDIO OUTPUT
INSERT BACKUP ACU
From the menu AUDIO PROCESS of the control unit, use the keys ↑ / ↓ and/or pag ↑ / pag ↓ to move the selection point to the ADJUST
AUDIO INPUT submenu and press ENTER. The fields described below appear on the control unit display.
INPUT NAME
Indicates the name of the input to be adjusted. The names displayed are those associated to the various inputs by means
of the INPUT PROCESSORS configuration menu.
GAIN dB
Used for adjusting the gain of the input. Use the + and - keys to set the gain level between the values 0 dB and +20 dB.
The adjustment is made in 1 dB intervals.
IMPORTANT NOTES
• In order to avoid problems due to saturation of the input, evaluate the gain adjustment carefully if it is made at the same
time as the tone control adjustment.
BASS/TREBLE Used for activating or disactivating the two tone controls of the input (trimmers) for adjusting the high and low frequencies.
Use the + and - keys to select one of the following options:
• ON - Tone controls activated.
• OFF - Tone controls disactivated.
To display the subsequent or previous inputs, press the ↑ / ↓ and/or pag ↑ / pag ↓ keys.
INPUT NAME
SOURCE 1
SOURCE 2
SOURCE 3
GAIN DB
00
00
00
BASS/TREBLE
OFF▼
OFF▼
OFF▼
Pag ↓
117
INPUT NAME
SOURCE 4
SOURCE 5
SOURCE 6
GAIN DB
00
00
00
BASS/TREBLE
OFF▼
OFF▼
OFF▼
Press ESC to exit from the submenu; the new settings are stored automatically..
USING THE “ADJUST AUDIO OUTPUT” MENU
AUDIO ADJUST OPTIONS
ADJUST AUDIO INPUT
ADJUST AUDIO OUTPUT
INSERT BACKUP ACU
From the menu AUDIO PROCESS of the control unit, use the ↑ / ↓ and/or pag ↑ / pag ↓ keys to move the selection point to the ADJUST
AUDIO OUTPUT submenu and press ENTER. The fields described below appear on the control unit display.
OUTPUT NAME Indicates the name of the output to be adjusted. The names displayed are those associated to the various outputs by means
of the OUTPUT PROCESSORS configuration menu.
ATTEN dB
Used for attenuating the level of the signal in output. Use the + and - keys to set the level of attenuation between the values of 0 dB and -30 dB. The adjustment is made in 1 dB intervals and refers to a nominal output level of 0 dB with balanced method.
IMPORTANT NOTES
• The balanced signals have an output level 6 dB higher than the unbalanced signals: for example, if you set an attenuation of 0 dB, if the audio signal output takes place with the unbalanced method, the nominal level of the signal will be 0 dB; if the
audio signal output takes place with the balanced method, the nominal level of the signal will be +6 dB.
• We recommend that the RECORDER type output dedicated to driving the LINE IN input of the audio board be attenuated by
-6 dB.
To display the subsequent or previous outputs, press the ↑ / ↓ and/or pag ↑ / pag ↓ keys.
OUTPUT NAME
ZONE 1
ZONE 2
ZONE 3
ATTEN DB
04
02
00
Pag ↓
OUTPUT NAME
ZONE 4
ZONE 5
ZONE 6
ATTEN DB
00
00
00
Press ESC to exit from the submenu; the new settings are stored automatically.
USING THE “INSERT BACKUP ACU” MENU
AUDIO ADJUST OPTIONS
ADJUST AUDIO INPUT
ADJUST AUDIO OUTPUT
INSERT BACKUP ACU
From the menu AUDIO PROCESS of the control unit, use the ↑ / ↓ and/or pag ↑ / pag ↓ keys to move the selection point to the INSERT
BACKUP ACU submenu and press ENTER. The fields described below appear on the control unit display.
ACU
Indicates the identification number of the A.C.U. This indication is sequential, and is related to the address assigned to the
A.C.U. in the installation phase: the number 1 corresponds to the A.C.U. with address 0; the number 120 corresponds to
the A.C.U. with address 119.
NOTE
• This field only shows the identification numbers of the A.C.U.s that have been configured by means of the dedicated menu.
TYPE
GROUP
Indicates the type of A.C.U. defined by means of the ACU configuration menu. The following types may be displayed:
• NORMAL - An A.C.U. whose function is to control a primary amplifier which is normally dedicated to sound amplification in a certain audio zone.
• BACKUP - An A.C.U. whose function is to control a backup amplifier which is normally used to substitute for a primary
amplifier, for example in the event of a fault.
Indicates the group to which the A.C.U. belongs, defined by means of the ACU configuration menu. In the maximum configuration, the system can handle up to 64 groups.
118
STATUS
INSERT
Indicates the operating status of the A.C.U., which is continuously updated according to the various events that occur. The
following may be displayed:
• N.C. Indicates a communication problem between the CP 3100 control unit and the A.C.U. (see the section DETAIL OF ALARMS ON THE A.C.U.s). This indication can take place at any moment, and represents an alarm
status.
• FAULT Indicates the activation of an alarm of the PA FAULT or OVL type on the A.C.U. (see the section DETAIL OF
ALARMS ON THE A.C.U.).
• NOT INS. - Indicates that the A.C.U. is not inserted but is operating correctly and is in communication with the CP 3100
control unit.
• WORKING - Indicates that the A.C.U. is inserted and is operating correctly.
Used for activating or disactivating a NORMAL or BACKUP A.C.U. configured with either manual or automatic activation/disactivation mode (MODE field of the ACU configuration menu).
Either a NORMAL or a BACKUP unit can be activated or disactivated manually at any moment, for example, when you need
to carry out a test to check the automatic activation of the respective backup.
Use the + and - keys to select one of the following options:
• ON – A.C.U. activated..
• OFF – A.C.U. disactivated.
IMPORTANT NOTES
• When it is not possible to modify the parameter of the INSERT field, an acoustic warning signal is generated (“beep”).
• The NORMAL units are normally activated (ON); the BACKUP units are always normally disactivated (OFF).
• When a NORMAL unit is disactivated and the group of A.C.U.s to which it belongs includes a backup amplifier that is not
controlled by an RB 3300 back-amplifier board, this amplifier is always automatically activated in place of the primary
amplifier.
To display the subsequent or previous A.C.U.s, press the ↑ / ↓ and/or pag ↑ / pag ↓ keys.
ACU
1
2
3
TYPE
NORMAL
BACKUP
BACKUP
GROUP
01
01
01
STATUS
N.C.
N.C.
N.C.
INSERT
OFF▼
OFF▼
OFF▼
Pag ↓
ACU
4
5
6
TYPE
BACKUP
NORMAL
BACKUP
GROUP
01
02
02
STATUS
N.C.
N.C.
N.C.
INSERT
OFF▼
OFF▼
OFF▼
Press ESC to exit from the submenu; the new settings are stored automatically.
The following examples can help to clarify the operation of the A.C.U.s with different configurations
Example 1: manual exchange from a NORMAL unit to a BACKUP unit
A.C.U. configuration:
a) A.C.U. 1 of NORMAL type configured as MANUAL.
b) A.C.U. 2 of BACKUP type configured as MANUAL.
The following screen appears on the display of the CP 3100 control unit:
ACU
1
2
TYPE
NORMAL
BACKUP
GROUP
01
01
STATUS
WORKING
NOT INS.
INSERT
ON▼
OFF▼
Operations to be carried out:
1) In the INSERT field of A.C.U. 1, select the OFF option; the item NOT INS. consequently appears in the respective STATUS field.
2) To insert the backup, a MANUAL OPERATION must be carried out on A.C.U. 2: in the INSERT field of this unit, select the ON option; the
item WORKING appears in the related STATUS field.
The following screen then appears on the CP 3100 control unit display:
ACU
1
2
TYPE
NORMAL
BACKUP
GROUP
01
01
STATUS
NOT INS.
WORKING
INSERT
OFF▼
ON▼
119
Example 2: semi-automatic exchange from a NORMAL unit to a BACKUP unit
A.C.U. configuration:
a) A.C.U. 1 of NORMAL type configured as AUTO.
b) A.C.U. 2 of BACKUP type configured as MANUAL.
The following screen appears on the CP 3100 control unit display:
ACU
1
2
TYPE
NORMAL
BACKUP
GROUP
01
01
STATUS
WORKING
NOT INS.
INSERT
ON▼
OFF▼
Operations to be carried out:
1) Create an alarm on A.C.U. 1 (e.g. OVL alarm). A.C.U. 1 is automatically disactivated; OFF appears in the INSERT field (unit disactivated
automatically), while FAULT appears in the STATUS field.
2) To insert the backup, a MANUAL OPERATION must be carried out on A.C.U. 2: in the INSERT field of this unit, select the ON option; the
item WORKING appears in the related STATUS field.
The following screen then appears on the CP 3100 control unit display:
ACU
1
2
TYPE
NORMAL
BACKUP
GROUP
01
01
STATUS
FAULT
WORKING
INSERT
OFF▼
ON▼
NOTE
• Once the alarm on A.C.U. 1 has terminated, to re-activate this unit you must proceed manually using the INSERT command; if A.C.U. 1 is
re-activated but the fault or malfunction of the respective amplifier persists, after a few seconds the unit returns to FAULT status and activation OFF.
Example 3: automatic exchange from a NORMAL unit to a BACKUP unit
A.C.U. configuration:
a) A.C.U. 1 of NORMAL type configured as AUTO.
b) A.C.U. 2 of BACKUP type configured as AUTO.
The following screen appears on the display of the CP 3100 control unit:
ACU
1
2
TYPE
NORMAL
BACKUP
GROUP
01
01
STATUS
WORKING
NOT INS.
INSERT
ON▼
OFF▼
Operations to be carried out:
1) Create an alarm on A.C.U. 1 (e.g. OVL alarm); A.C.U. 1 is automatically disactivated, and OFF appears in the respective INSERT field (unit
automatically disactivated), while FAULT appears in the STATUS field.
2) A.C.U. 2 (backup) is automatically activated in place of A.C.U. 1: ON appears in the INSERT field and WORKING appears in the STATUS
field of the backup unit.
The following screen then appears on the CP 3100 control unit display:
ACU
1
2
TYPE
NORMAL
BACKUP
GROUP
01
01
STATUS
FAULT
WORKING
INSERT
OFF▼
ON▼
NOTES
• If the cause of the alarm diminishes, to return to the initial situation, with A.C.U. 1 activated and A.C.U. 2 disactivated, you have to put the
units back in the original condition manually using the INSERT command, or reconfigure the system using one of the methods described in
the section STORING A CONFIGURATION.
• Manual activation of an A.C.U. can be useful when, for example, several backup units configured in AUTO mode are automatically switched
to FAULT status due to a line overload, for example, which is then eliminated by the user.
120
USING THE “MONITOR OPERATIONS” MENU
AUDIO ADJUST OPTIONS
ADJUST AUDIO OUTPUT
INSERT BACKUP ACU
MONITOR OPERATIONS
This menu makes it possible to use the “monitor” function for listening to the audio signals of the following system devices:
• inputs of the IB 3210 / IB 3280 AUDIO INPUT boards.
• outputs of the OB 3230 AUDIO OUTPUT boards.
• speaker outputs of the amplifiers controlled by the A.C.U.s (RB 3300 back-amplifier boards).
The monitor speaker of the control unit is used for listening to the signals. From the AUDIO PROCESS menu of the control unit, use the ↑ /
↓ and/or pag ↑ / pag ↓ keys to move the selection point to the MONITOR OPERATIONS submenu and press ENTER. The fields described
below appear on the control unit display.
SOURCE:
ACTUAL:
LIV. dB
F1 START
SOURCE
DURATION
ACTUAL
MODE
LIV. dB
NONE _____
NONE _____
<STOPPED>
F2 STOP
DURATION:
MODE:
000000
MANUAL
F3 CONFIG.
Indicates the type of signal selected for monitoring. The following may appear:
• NO Indicates that no source is selected.
• INPUT Indicates monitoring of the inputs of the IB 3210 / IB 3280 AUDIO INPUT boards.
• OUTPUT - Indicates monitoring of the outputs of the OB 3230 AUDIO OUTPUT boards.
• ACU Indicates monitoring of the A.C.U.s (RB 3300 back-amplifier boards).
Indicates the time elapsed from the start of monitoring of the source currently indicated in the ACTUAL field.
Indicates the specific source currently selected for monitoring. When the IB 3210 / IB 3280 AUDIO INPUT boards are monitored, the name of the input currently being monitored is indicated; when the OB 3230 AUDIO OUTPUT boards are monitored, the name of the output currently being monitored is indicated; when the A.C.U. is monitored, the identification number of the A.C.U. currently being monitored is indicated.
Indicates the monitoring method. The following may appear:
• MANUAL - Indicates that the manual mode is selected, which makes it possible to monitor a specific source.
• AUTO Indicates that the automatic mode is selected, which makes it possible to monitor all the sources of the type indicated in the SOURCE field in sequence for 10 seconds.
Indicates the level of the signal being monitored in decibels. When the “monitor” function is not activated, the message
<STOPPED> appears in the field.
To activate the monitoring operation, press F1; to interrupt monitoring, press F2; to configure the “monitor” function, press
F3 (see the section CONFIGURING THE "MONITOR" FUNCTION below).
CONFIGURING THE “MONITOR” FUNCTION
To display the submenu used for configuring the “monitor” function, from the initial screen of the “MONITOR OPERATIONS” menu, press F1.
The following screen appears on the control unit display.
MODE:
MANUAL ▼
AUDIO INPUT
:
AUDIO OUTPUT
:
ACU
:
MODE
SOURCE:NONE _ _ ▼
NO INPUT
_________▼
NO ZONE _ _ _ _ _ _ _ _ _ _ _▼
NO ACU _ _ _ _ _ _ _ _ _ _ _ _▼
Used for selecting the operating mode of the audio monitoring. Use the + and - keys to select one of the following modes:
• MANUAL - Indicates the manual monitoring mode, where you can manually select to monitor:
• any input of the IB 3210 / IB 3280 AUDIO INPUT boards.
• any output of the OB 3230 AUDIO OUTPUT boards.
• any speaker output of the amplifiers controlled by the A.C.U.s (RB 3300 back-amplifier boards).
• AUTO Indicates the automatic monitoring mode, where you can listen in sequence for 10 seconds to:
• all the inputs of the IB 3210 / IB 3280 AUDIO INPUT boards.
• all the outputs of the OB 3230 AUDIO OUTPUT boards.
• all the speaker outputs of the amplifiers controlled by the A.C.U.s (RB 3300 back-amplifier boards).
The scanning of the various sources is completely automatic.
IMPORTANT NOTE
• In AUTO mode, it is not possible to have the scanning of more than one type of source at a time (e.g. INPUT and OUTPUT or INPUT and A.C.U.).
• Up to 120 A.C.U.s can be included in the system. Therefore, consider carefully the use of automatic monitoring in this
condition, as it would require a time of 20 minutes!
121
SOURCE
Used for selecting the type of source to be monitored. Use the + and - keys to select one of the following options:
• NO Indicates no source monitored.
• INPUT Indicates the inputs of the IB 3210 / IB 3280 AUDIO INPUT boards.
• OUTPUT - Indicates the outputs of the OB 3230 AUDIO OUTPUT boards.
• ACU Indicates the A.C.U.s (RB 3300 back-amplifier boards).
AUDIO INPUT Used when the MANUAL monitoring mode is selected, for choosing the input of the IB 3210 / IB 3280 AUDIO INPUT boards
to be monitored. Use the + and - keys to select the name of the input desired from those defined by means of the INPUT
PROCESSORS menu (NAME field). If you select the NO INPUT option (default selection), no input is selected.
AUDIO OUTPUT Used when the MANUAL monitoring mode is selected, for choosing the output of the OB 3230 AUDIO OUTPUT boards to
be monitored. Use the + and - keys to select the name of the output desired from those defined by means of the OUTPUT
PROCESSORS menu (NAME field). If you select the NO ZONE option (default selection), no output is selected.
ACU
Used when the MANUAL monitoring mode is selected, for choosing the A.C.U. to be monitored. Use the + and - keys to
select the identification number of the desired A.C.U.. If you select the NO ACU option (default selection), no A.C.U. is selected.
NOTE
• Each time the system is reconfigured (see the section STORING A CONFIGURATION), the configuration of the “monitor” function is lost, as
it is only temporary.
SPECIFICATIONS
CP 3100
Function
Control unit
Microprocessor
High-speed
Video board
VGA
Audio board
16 bit
RS 232 serial ports
2
RS 485 serial ports
2
DCI synchronous serial port
1
Parallel port
1
Ventilation
Forced
Power supply / Max. absorption
230 Vac ± 5% - 50 Hz (115 Vac - 60 Hz on request) / 200 VA
Dimensions (lxhxd)
483 x 132 x 368 mm
Weight
7.8 kg
MB 3200
Function
Sub-rack for modular electronic boards
Board slot standard
DIN
N° of boards that can be installed
Four IB 3210 / IB 3280 AUDIO INPUT boards
Eight OB 3230 AUDIO OUTPUT boards or eight IO 3250 digital INPUT/OUTPUT boards
Power supply
5 Vdc – 13.5 Vdc - 24 Vdc
Dimensions (lxhxd)
483 x 176 x 304 mm
Weight
3.7 kg (without boards)
IF 3260
Function
Rack connection panel
N° of fittings for boards with terminals
5 fittings
Connection boards that can be installed
Alternatively: 3 connection boards with 12 terminals, or 2 connection boards with
in each fitting
20 terminals, or 1 connection board with 32 terminals.
Rack height
6 units
122
IB 3210 / IB 3280 AUDIO INPUT BOARDS
Function
Audio input board
Number of inputs
8 balanced inputs
Type of balancing
Electronic - IB 3210
With transformer - IB 3280
Frequency response
10 – 30,000 Hz (±3 dB)
Distortion
≤ 0.1% (30 Hz - 15 kHz)
Signal/noise ratio
≥ 85 dB
Input sensitivity
775 mV nominal – 77.5 mV minimum
Input impedance
47 kΩ
Tone controls
Bass: ± 12 dB - 100 Hz
Treble: ± 12 dB - 10 kHz
Power supply / Absorption
5 Vdc / 50 mA
13.5 Vdc / 140 mA
OB 3230 AUDIO OUTPUT BOARD
Function
Audio output board
Number of outputs
8 balanced/unbalanced outputs
Board matrix
32 inputs x 8 outputs
Frequency response
10 – 30,000 Hz (±3 dB)
Distortion
≤ 0.1% (30 Hz - 15 kHz)
Output level
775 mV nominal unbal. – 1.55 V nominal bal. - >7.5 V maximum bal.
Output impedance
< 600 Ω
Power supply / Absorption
5 Vdc / 70 mA
13.5 Vdc / 100 mA
IO 3250 DIGITAL INPUT/OUTPUT BOARDS
Function
Board with programmable opto-insulated inputs and relay outputs
Number of inputs
16 opto-insulated inputs
Number of outputs
24 relay outputs
Control voltage of opto-insulated inputs
15 - 30 Vdc
Nominal current of opto-insulated inputs
10 mA at 24 Vdc
Maxi. voltage switchable by the output relays
50 Vdc
Maxi. current switchable by the output relays
0.5 A (max. 1 A per group)
Power supply / Absorption
5 Vdc / 70 mA
24 Vdc / 0.5 mA (24 active relays)
123
INDEX
CONSIGNES DE SECURITE_______________________________________________
PRECAUTIONS __________________________________________________________
DESCRIPTION ___________________________________________________________
CP 3100 – UNITE DE CONTROLE________________________________________
MB 3200 – SUB-RACK _________________________________________________
IF 3260 – PANNEAU DE CONNEXION ____________________________________
IB 3210 / IB 3280 – CARTE AUDIO INPUT ________________________________
OB 3230 – CARTE AUDIO OUTPUT ______________________________________
IO 3250 – CARTE INPUT/OUTPUT NUMERIQUE___________________________
BM 3616 – CONSOLE MICROPHONIQUE NUMERIQUE ____________________
BM 3604 – CONSOLE MICROPHONIQUE_________________________________
RB 3300 – CARTE RETRO-AMPLIFICATEUR ______________________________
PS 3400 – ALIMENTATEUR______________________________________________
ES 3000 – LOGICIEL DEVELOPPE _______________________________________
CP 3100 – DISPOSITIFS PANNEAU AVANT ________________________________
CP 3100 – DISPOSITIFS PANNEAU ARRIERE ______________________________
MB 3200 - DISPOSITIFS PANNEAU AVANT ________________________________
MB 3200 - DISPOSITIFS PANNEAU ARRIERE ______________________________
DISPOSITIFS ET FONCTIONS DU SYSTEME ______________________________
MATRICES AUDIO _____________________________________________________
ENTREES “GPI”________________________________________________________
RELAIS PROGRAMMABLES_____________________________________________
UNITES A.C.U _________________________________________________________
FONCTION “DAY/NIGHT”.____________________________________________________
FONCTION “MONITOR” (MONITORING AUDIO) _________________________________
ALARME “OVL” _____________________________________________________________
FONCTION “FIRE-BREAK” ___________________________________________________
FONCTION “LINE FAULT” ____________________________________________________
FONCTION “PA FAULT” ______________________________________________________
FONCTION “ALC” _____________________________________________________
OPERATIONS DU SYSTEME ____________________________________________
OPERATIONS COMMANDABLES A PARTIR DES CONSOLES NUMERIQUES BM 3616
OPERATIONS COMMANDABLES A PARTIR DES CONSOLES BM 3604 ____________
OPERATIONS COMMANDABLES A PARTIR DES ENTREES “GPI” _________________
OPERATIONS TEMPORISEES ________________________________________________
OPERATIONS “VOX” ________________________________________________________
OPERATIONS “PLAY BACK”__________________________________________________
OPERATIONS “BACKGROUND MUSIC” ___________________________________
ORDRE DE PRIORITE __________________________________________________
FONCTION D’INTERDICTION DE LA PART D’UNE OPERATION A PRIORITE ABSOLUE
DISPOSITIF “VOX” _____________________________________________________
ENREGISTREMENT/ REPRODUCTION DE SIGNAUX AUDIO _______________
CREATION DE SONS________________________________________________________
ENREGISTREMENT DE SIGNAUX AUDIO ______________________________________
REPRODUCTION DE FICHIERS AUDIO ____________________________________
ALARMES DU SYSTÈME _______________________________________________
IMPRESSION DES OPERATIONS D’ALARME ________________________________
DIFFUSION DE MUSIQUE DE FOND _____________________________________
UTILISATION DE L’UNITE DE CONTROLE CP 3100 _________________________
UTILISATION DES MENUS ______________________________________________
MOT DE PASSE (PASSWORD) POUR ACCEDER AUX MENUS ____________________
QUITTER UN MENU_________________________________________________________
AFFICHAGE DU NIVEAU AUDIO ______________________________________________
FONCTIONNEMENT DE L’AVERTISSEUR SONORE __________________________
124
126
126
127
127
128
128
128
128
128
128
129
129
130
130
130
132
133
133
135
135
135
135
135
137
137
138
138
138
138
138
138
138
138
139
139
139
139
139
139
140
141
141
141
141
141
142
142
142
142
142
143
143
144
144
MISE EN MARCHE DE L’APPAREIL ______________________________________ 144
CONFIGURATION CORRECTE DU SYSTÈME ___________________________________ 144
ERREURS DANS LA CONFIGURATION DU SYSTÈME ___________________________ 144
SELECTION DE LA LANGUE _________________________________________________ 145
MENU PRINCIPAL _____________________________________________________ 145
CONFIGURATION DU SYSTÈME (MENU “CONFIGURATION”) ______________ 145
PARAMETRES CARACTERISTIQUES __________________________________________ 147
UTILISATION DU MENU “INPUT PROCESSORS” ________________________________ 147
UTILISATION DU MENU “OUTPUT PROCESSORS” ______________________________ 148
UTILISATION DU MENU “GROUPS” ___________________________________________ 149
UTILISATION DU MENU “RELAY CONFIGURATION” _____________________________ 150
UTILISATION DU MENU “CONSOLES” _________________________________________ 151
UTILISATION DU MENU “ACU” _______________________________________________ 155
UTILISATION DU MENU “GPI EVENTS DEFINITION” _____________________________ 156
UTILISATION DU MENU “TIMER EVENTS DEFINITION” ___________________________ 159
UTILISATION DU MENU “VOX”________________________________________________ 161
UTILISATION DU MENU “RECORDER” _________________________________________ 162
UTILISATION DU MENU “SYSTEM”____________________________________________ 165
UTILISATION DU MENU “COMPILE & SAVE”____________________________________ 167
UTILISATION DU MENU “EXIT WITHOUT SAVING” ___________________________ 167
AFFICHAGE DE L’ETAT DES ALARMES (MENU “ALARMS”) _________________ 168
AFFICHAGE DES OPERATIONS D’ALARME ____________________________________ 169
IMPRESSION DES OPERATIONS D’ALARME ___________________________________ 170
DETAILS DES ALARMES SUR CARTES AUDIO INPUT IB 3210 / IB 3280 ___________ 170
DETAILS DES ALARMES SUR CARTES AUDIO OUTPUT OB 3230_________________ 171
DETAILS DES ALARMES SUR CARTES INPUT/OUTPUT NUMÉRIQUES IO 3250 ____ 172
DETAILS DES ALARMES SUR LES CONSOLES BM 3616 ________________________ 173
DETAIL DES ALARMES SUR LES UNITES A.C.U.________________________________ 173
DETAILS DES ALARMES “GPI” _______________________________________________ 174
DETAILS DES ALARMES SUR LES CONSOLES BM 3616 ________________________ 175
“SYSTEM ALARMS” ___________________________________________________ 176
REALISATION D’UNE CONFIGURATION (MENU “STORE CONFIG.) _________ 177
PROGRAMMATION DES DISPOSITIFS A PARTIR DU MENU ______________________ 177
PROGRAMMATION DES DISPOSITIFS PAR REDEMARRAGE DU SYSTÈME ________ 177
ERREURS DE COMPILATION ____________________________________________ 177
DEFINITIONS AUDIO (MENU “AUDIO PROCESS”) ________________________ 178
UTILISATION DU MENU “ADJUST AUDIO INPUT” _______________________________ 178
UTILISATION DU MENU “ADJUST AUDIO OUTPUT” _____________________________ 179
UTILISATION DU MENU “INSERT BACKUP ACU” _______________________________ 179
UTILISATION DU MENU “MONITOR OPERATIONS” ___________________________ 182
CARACTERISTIQUES TECHNIQUES ______________________________________ 183
CARACTERISTIQUES TECHNIQUES CP 3100 _____________________________ 183
CARACTERISTIQUES TECHNIQUES MB 3200 ____________________________ 183
CARACTERISTIQUES TECHNIQUES IF 3260 ______________________________ 183
CARACTERISTIQUES TECHNIQUES CARTES AUDIO INPUT IB 3210 / IB 3280_ 184
CARACTERISTIQUES TECHNIQUES CARTES AUDIO OUTPUT OB 3230 _____ 184
CARACTERISTIQUES TECHNIQUES CARTES INPUT/OUTPUT
NUMERIQUES IO 3250 _________________________________________________ 184
SCHÉMA GLOBAL D’INSTALLATION ______________________________________ 307
125
IMPORTANT
• Avant d'utiliser les appareils du système, lisez attentivement les instructions contenues dans ce manuel, que nous vous conseillons
de conserver pour le consulter plus tard.
• Ce manuel fait partie intégrante du produit et doit suivre celui-ci même dans les passages de propriété, pour permettre au nouveau propriétaire de connaître les modalités d’utilisation ainsi que les consignes de sécurité.
• Une mauvaise installation de l’appareil décharge RCF de toute responsabilité.
ATTENTION
• Pour prévenir les risques de flammes ou de décharges électriques, évitez d’exposer les appareils du système à la pluie et à l’humidité.
CONSIGNES DE SECURITE
1. Lisez très attentivement toutes les mises en garde accompagnées du symbole
car elles contiennent des renseignements importants pour votre sécurité et celle des autres.
2. Pour éviter les risques d’incendie ou de décharges électriques, veillez à ce que le câble d’alimentation de l’unité de contrôle CP 3100 ne
soit ni piétiné ni écrasé, et qu’il reste parfaitement indemne. Evitez également de trop le plier, de le tirer ou de le couper.
3. Pour éviter le risque de chocs électriques, n’ouvrez jamais l’unité de contrôle CP 3100. Ce que vous trouveriez à l’intérieur ne vous servirait à rien.
4. Evitez que tout objet ou liquide pénètre dans les appareils du système, ce qui risquerait de provoquer un incendie ou des décharges électriques.
5. N'essayez pas d'effectuer des réparations si elles ne sont pas décrites dans ce manuel. Adressez-vous aux CENTRES APRES-VENTE
RCF si :
a. l’appareil ne fonctionne pas (ou fonctionne mal).
b. le câble d’alimentation de l’unité de contrôle CP 3100 a subi des dégâts graves.
c. des objets ou des liquides ont pénétré dans un appareil.
d. un appareil a subi des chocs importants.
6. Si le système est inutilisé pendant de longues périodes, éteignez-le et coupez la tension d’alimentation sur tous les appareils.
7. S un appareil dégage des odeurs anormales ou s’il en sort de la fumée, éteignez immédiatement le système.
8. Pour éviter le risque de chocs électriques, évitez de connecter/ déconnecter le câble d’alimentation de l’unité de contrôle CP 3100
les mains mouillées. Saisissez toujours directement la fiche et ne tirez jamais sur le fil.
9. Ne dirigez pas de vaporisateur (insecticides, produits d’entretien, etc. ) sur les appareils du système car les gaz pourraient prendre feu à
l’improviste.
10. Les appareils du système utilisent des circuits numériques et ils sont construits conformément aux normes en vigueur en matière d’émission de radioperturbations. Cependant, dans certaines circonstances, placés tout près d’une radio, d’une TV ou autres appareils similaires, ils pourraient provoquer des perturbations et des interférences. Si ce problème se présente, essayez d’éloigner les appareils perturbés
de ceux du système.
11. Utilisez les appareils du système exclusivement avec les accessoires préconisés par RCF ou fournis avec les produits.
PRECAUTIONS
• Ne forcez pas les organes de commande (touches, contrôles, etc.).
• Pour le nettoyage des appareils, évitez les diluants, l’alcool, l’essence et autres substances volatiles.
MARQUES ET MARQUES DEPOSEES
• IBM® et VGA® sont des marques déposées de l’International Business Machines Inc.
• Microsoft® est une marque déposée de lMicrosoft Corporation; Windows 95™ et Windows 98™ sont des marques de Microsoft Corporation.
• Sound Blaster est une marque déposée de Creative Technology LTD.
• Les éventuels autres noms de produit mentionnés dans ce manuel appartiennent aux producteurs respectifs.
126
DESCRIPTION
RCF a conçu la matrice RX 3000 pour répondre aux exigences des systèmes technologiques modernes pour la gestion et le contrôle des
structures modernes commerciales, industrielles et civiles, comme les aéroports, les centres commerciaux, les hôtels, les centres directionnels, les gares ferroviaires, etc.. Elle présente les caractéristiques suivantes.
• Jusqu’à 64 entrées audio du type modulaire (8 cartes AUDIO INPUT IB 3210 / IB 3280).
• Jusqu’à 128 sorties audio du type modulaire (16 cartes AUDIO OUTPUT OB 3230).
• Possibilité de créer 8 matrices audio, entièrement indépendantes les unes des autres et parfaitement accessibles.
• Possibilité de créer des matrices d’une capacité maximale de 32 entrées x 64 sorties (max 2 matrices 32 x 64).
• Jusqu’à 256 entrées opto-isolées GPI (16 cartes INPUT/OUTPUT numériques IO 3250), pour commander les opérations programmables.
• Jusqu’à 384 sorties à relais (16 cartes INPUT/OUTPUT numériques IO 3250), utilisables pour plusieurs usages.
• Jusqu’à 16 consoles numériques BM 3616, pour diffuser des annonces microphoniques et contrôler de nombreuses fonctions du système.
• Jusqu’à 24 consoles ou groupes de consoles BM 3604, pour diffuser des annonces microphoniques et contrôler certaines fonctions du
système.
• Jusqu’à 120 cartes rétro-amplificateur RB 3300 (A.C.U.), pour le contrôle diagnostique et le monitoring des amplificateurs de puissance du
système et des lignes pour enceintes.
• Structure modulaire pour s’adapter à d’éventuelles futures expansions.
• Entrées audio à activation vocale (dispositifs VOX), pour la connexion de sources sonores privées d’organes de commande.
• Gestion de 8 sources pour musique de fond, qui se commute automatiquement en cas d’appels sélectifs dans la zone sonorisée.
• Monitoring complet des signaux audio gérés par le système (entrées et sorties de la matrice audio, sorties des amplificateurs de puissance).
• Diagnostic complet d’amplificateurs de puissance et lignes pour enceintes, avec vérification des dispersions vers la terre, avec les mêmes
câbles de connexion que les lignes haut-parleurs (avec cartes RB 3300 et SB 3320).
• Contrôle automatique du rapport signal/ bruit dans les espaces sonorisés, avec systèmes numériques de détection et de réglage (avec carte LB 3340).
• Enregistreur numérique pour enregistrer/ reproduire des messages ou des tonalités d’avis/ alarme personnalisés (qualité CD).
• Tonalités préenregistrées pour attirer l’attention.
• Possibilité de connecter une imprimante pour enregistrer sur papier la configuration du système et les opérations d’alarme.
• Possibilité de diffuser les tons et les messages enregistrés sur le disque dur de l’unité de contrôle CP 3100 selon les modes suivants :
– automatiquement à une heure préétablie.
– automatiquement avec répétition dans un horaire préétabli.
– par commande depuis les consoles microphoniques.
– par commande sur les entrées des cartes INPUT/OUTPUT numériques IO 3250.
• Programmation du système à travers plusieurs menus qui permettent d’attribuer des noms ou des sigles à chaque entrée, sortie, console
microphonique, message enregistré, opération, etc..
• Logiciel standard compris dans le système qui remplit les fonctions suivantes :
– configuration des consoles numériques.
– configuration des entrées audio.
– configuration des sorties audio.
– configuration des groupes de zones audio.
– configuration des relais.
– configuration des dispositifs VOX.
– configuration des opérations temporisées.
– configuration des entrées GPI.
– configuration des A.C.U. préposées au contrôle des amplificateurs de puissance du système (primaires, réserves).
– configuration du monitoring audio.
– contrôle des opérations d’alarme.
– enregistrement/ reproduction de messages, annonce, tonalités attirant l’attention, signaux d’alarme, etc.
– configuration de divers paramètres de fonctionnement du système (date, heure, mode d’imprimer, mot de passe de configuration, etc.).
• Fiabilité absolue du système grâce à une interaction minimale entre les composants du matériel.
• Auto-diagnostic de chaque panne, avec indication détaillée de la cause.
• Système exclusif de communication DCI (Data Communication Interface), qui interface à haute vitesse tous les composants du système.
• Logiciel optionnel ES 3000, pour la configuration du système au moyen d’un PC extérieur.
Les appareils suivants font partie du système.
CP 3100 – UNITE DE CONTROLE
CP 3100 est l’unité de contrôle qui contient le microprocesseur capable de gérer tout le fonctionnement du système. Elle présente les caractéristiques suivantes.
• Rack 19” de 3 unités.
• Microprocesseur haute vitesse.
• Programmable avec le clavier et l’écran situés sur le panneau de façade ou avec un PC externe.
• 1 disque dur pour mémoriser le programme de gestion du système, des fichiers pour la configuration des dispositifs (cartes, consoles numériques, etc.), des fichiers audio, etc..
• 1 carte audio numérique, pour enregistrer/ reproduire les fichiers audio.
• 1 connecteur pour écran extérieur.
• 1 connecteur pour clavier extérieur.
• 1 port série RS 232, pour connecter un PC de configuration.
• 1 carte interface bus, pour connecter les sub-racks MB 3200.
• 2 ports série RS 485, pour connecter les consoles numériques BM 3616 et les cartes rétro-amplificateur RB 3300.
• 1 port parallèle, pour connecter une imprimante.
• Alimentateur interne.
• Haut-parleur pour surveiller, en sélection ou en succession automatique, les entrées et les sorties de la matrice audio et les sorties des amplificateurs.
• Panneau avant avec clavier pour configuration et diagnostic.
• Afficheur à cristaux liquides rétro-éclairé 4 x 40 caractères.
127
MB 3200 SUB-RACK
Le MB 3200 est le sub-rack qui contient les différents modules du système. Dans le MB 3200, vous pouvez installer :
• 4 cartes AUDIO INPUT IB 3210 / IB 3280 (pour un total de 32 entrées audio).
• 8 cartes AUDIO OUTPUT OB 3230 (pour un total de 64 sorties audio), 8 cartes INPUT/OUTPUT numériques IO 3250 (pour un total de 128
entrées opto-isolées et 192 sorties à relais) ou 8 cartes parmi les AUDIO OUTPUT OB 3230 et les INPUT/OUTPUT numériques IO 3250.
Il présente les caractéristiques suivantes.
• Rack 19” de 4 unités.
• Panneau avant avec voyants indiquant l’état de fonctionnement des cartes installées.
• Connecteurs et guides pour cartes électroniques à standard DIN.
• Installation rapide des cartes grâce aux connexions rapides.
• Possibilité de connecter à l’unité de contrôle CP 3100 deux ou plusieurs MB 3200.
IF 3260 – PANNEAU DE CONNEXION
Le panneau permet d’installer les cartes de connexion des modules présents dans le sub-rack MB 3200. Il se place à l’arrière du rack et présente les caractéristiques suivantes.
• Panneau rack 19” de 6 unités, en tôle peinte.
• Possibilité d’installer 15 cartes de connexion à 12 bornes, 10 cartes de connexion à 20 bornes ou 5 cartes de connexion à 32 bornes.
IB 3210 / IB 3280 – CARTE AUDIO INPUT
L’IB 3210 / IB 3280 est la carte qui permet l’entrée des signaux audio. Elle présente les caractéristiques suivantes.
• 8 entrées symétriques réglées électroniquement (IB 3210) ou avec un transformateur (IB 3280).
• Trimmer pour le réglage des tons hauts (± 12 dB à 10 kHz) et des tons bas (± 12 dB à 100 Hz) sur chaque entrée.
• Possibilité de commuter les contrôles de ton via logiciel.
• 1 voyant.
• Gain des signaux en entrée réglable via logiciel.
• Monitoring audio sélectionnable via logiciel sur chacune des 8 entrées.
• Grande fiabilité grâce au matériel “chien de garde”, qui permet de récupérer immédiatement les conditions normales de fonctionnement en
cas d’interférences induites.
• Auto-configuration des cartes installées.
• Configuration de set up mémorisée sur la carte, pour un démarrage rapide du système.
• 2 cartes de connexion séparées à 12 bornes, à installer sur le panneau IF 3260.
OB 3230 – CARTE AUDIO OUTPUT
L’OB 3230 est la carte qui permet la sortie des signaux audio. Elle présente les caractéristiques suivantes.
• 8 sorties symétriques à basse impédance.
• Matrice de carte à 32 entrées x 8 sorties.
• Niveau de sortie réglable via logiciel.
• 1 dispositif VOX à configurer, pour la connexion à activation vocale d’une entrée avec une ou plusieurs sorties de la carte.
• Monitoring audio à sélectionner via logiciel sur chacune des 8 sorties.
• Auto-configuration des cartes installées.
• Grande fiabilité grâce au matériel “chien de garde”, qui permet de récupérer immédiatement les conditions normales de fonctionnement en
cas d’interférences induites.
• Configuration de set up mémorisée sur la carte, pour un démarrage rapide du système.
• Balayage automatique des canaux de sortie pour détection d’écrêtage et canal défectueux.
• 6 voyants d’état.
• Carte de connexion séparée à 32 bornes, à installer sur le panneau IF 3260.
IO 3250 – CARTE INPUT/OUTPUT NUMERIQUE
La IO 3250 est une carte dotée d’entrées opto-isolées programmables (entrées GPI) et de relais de sortie, qui permet de commander plusieurs types d’opérations. La carte permet, par exemple, d’utiliser les consoles microphoniques standard (BM 3604) pour diffuser des annonces microphoniques ou pour commander la reproduction de messages préenregistrés sur l’unité de contrôle. Indispensable pour interconnecter le système avec des dispositifs externes, comme les systèmes d’éclairage, les centrales d’alarme ou autres dispositifs se commandant par des contacts. Elle présente les caractéristiques suivantes.
• 16 entrées opto-isolées.
• 24 relais de sortie.
• 6 voyants.
• Possibilité d’associer une configuration définie de sortie à une combinaison des contacts d’entrée.
• Grande fiabilité grâce au matériel “chien de garde”, qui permet de récupérer immédiatement les conditions normales de fonctionnement en
cas d’interférences induites.
• Configuration de set up mémorisée sur la carte, pour un démarrage rapide du système.
• 2 cartes de connexion séparées, une à 32 bornes et l’autre à 20 bornes, à installer sur le panneau IF 32600.
BM 3616 – CONSOLE MICROPHONIQUE NUMERIQUE
La BM 3616 est une console microphonique de table à bras flexible, qui permet de diffuser une annonce dans 16 zones audio ou groupes de
zones audio, avec la possibilité d’activer un système de préavis d’annonces à 1, 2 ou 3 tons (ding dong). La console permet également de
diffuser, dans les zones signalées, des messages audio (messages ou tonalités) enregistrés sur l'unité de contrôle CP 3100 ; on peut, avec
la reproduction, commander également la commutation de relais des cartes INPUT/ OUTPUT numériques IO 3250. Elle présente les caractéristiques suivantes.
128
•
•
•
•
•
•
•
•
•
•
•
•
•
•
•
•
•
Ecran à cristaux liquides rétro-éclairé à 16 caractères, pour afficher les messages.
16 touches programmables pour sélectionner les zones et/ou les groupes de zones.
Touche pour sélectionner toutes les zones associées à la console.
3 touches de fonction programmables (F1, F2, F3) pour commander le relais ou pour reproduire à distance des signaux audio (messages
ou tons).
Touche d’alarme pour l’envoi de messages à priorité absolue.
Possibilité d’enregistrer un message localement et de diffuser automatiquement dans les zones demandées dès que par le système les rendra disponibles.
Microphone à condensateur sur bras flexible, avec anneau lumineux.
Compresseur pour microphone, équipé de limiteur de niveau.
Générateur de signal de préavis pour annonces microphoniques à 1, 2, 3 tons.
Sortie audio symétrique avec transformateur, à niveau réglable.
Sortie audio pour la pré-écoute dans le casque du message enregistré localement.
Voyants de signalisation pour zones et fonctions sélectionnées.
Avertisseur sonore intérieur (buzzer).
Mot de passe pour activer la console.
Connexion à l’unité de contrôle via ligne série RS 485.
Grande fiabilité, grâce au matériel ‘horloge de surveillance’ qui permet de rétablir immédiatement les conditions de fonctionnement en cas
d’interférences.
Configuration de RAZ mémorisée à l’intérieur de la console, pour un démarrage rapide su système.
BM 3604 – CONSOLE MICROPHONIQUE
BM 3604 est une console microphonique de table à bras flexible. Elle permet de diffuser une annonce dans 4 zones ou groupes de zones, à
sélectionner au moyen des quatre touches qu’elle présente. Ses caractéristiques sont les suivantes.
• 4 touches pour sélectionner les zones ou les groupes de zones.
• Touche pour la sélection générale de toutes les zones ou de tous les groupes de zones associés à la console.
• Touche pour diffuser l’annonce microphonique dans les zones sélectionnées.
• Touche pour diffuser l’annonce microphonique exclusivement dans une zone locale.
• Touche auxiliaire pour commander une opération du système RX 3000 (diffusion d’un message préenregistré mémorisé sur l’unité de contrôle CP 3100, commutation d’un relais des cartes IO 3250, etc.).
• Générateur de signal de préavis pour annonces microphoniques à 1, 2, 3 tons.
• Microphone à condensateur sur bras flexible, avec anneau lumineux.
• Sortie audio symétrique (niveau “ligne”).
• Sortie audio auxiliaire (niveau “ligne”) pour piloter un amplificateur dédié à la sonorisation d’une zone locale
• Voyants de signalisation zones et fonctions sélectionnées.
• Temporisateur pour désactiver automatiquement les zones sélectionnées, s’il n’y pas d’annonces.
• Contrôle automatique du gain, pour une diffusion à volume constant.
• Possibilité d’interconnecter plusieurs consoles BM 3604 en cascade sur la même ligne.
RB 3300 – CARTE RETRO-AMPLIFICATEUR
La RB 3300 est une carte électronique à associer avec un amplificateur de puissance ayant des sorties à tension constante et qui permet de:
• connecter/ déconnecter l’amplificateur via l’unité de contrôle CP 3100.
• contrôler le fonctionnement de l’amplificateur.
• insérer un amplificateur de secours en cas de panne de l’amplificateur contrôlé par la carte.
• surveiller la sortie enceintes de l’amplificateur, au moyen du haut-parleur approprié de l’unité de contrôle CP 3100.
L’amplificateur auquel est associée la carte peut être le primaire, normalement utilisé pour sonoriser une zone audio définie, ou un amplificateur de secours à utiliser à la place d’un primaire si celui-ci tombe en panne. Il s’installe dans un rack, à la hauteur du panneau arrière de l’amplificateur à contrôler, et se connecte à l’unité de contrôle CP 3100 par un bus numérique et un bus audio de monitoring. La carte présente
les caractéristiques suivantes.
• Entrée symétrique pour signal de ligne.
• Sortie symétrique pour piloter l’amplificateur.
• Entrée pour signalisation d’alarme provenant de l’amplificateur contrôlé (ex. “overload”).
• Monitoring de la sortie enceintes de l’amplificateur, avec possibilité de contrôler les lignes à 25 V, 50 V, 70 V, 100 V.
• Signalisation à l’unité de contrôle CP 3100 des alarmes suivantes :
– remise à zéro de la carte (RAZ chien de garde)
– anomalies d’alimentation des cartes (12 V et/ou 24 V).
– anomalies de fonctionnement de l’amplificateur contrôlé, signalées par le contact auxiliaire de celui-ci (ex. fonctionnement en surcharge).
– alarmes déclenchées par la carte optionnelle FAULT DETECTOR SB 3320.
– signalisations transmises par la carte optionnelle DIGITAL ALC LB 3340.
• Insertion d’un amplificateur de secours, à la place de l’amplificateur contrôlé par la carte, à commander manuellement ou automatiquement
en cas de :
– alarme déclenchée par l’amplificateur contrôlé (ex. alarme “overload”).
– alarme déclenchée par la carte optionnelle FAULT DETECTOR SB 3320.
• Grande fiabilité grâce au matériel “chien de garde”, qui permet de récupérer immédiatement les conditions normales de fonctionnement en
cas d’interférences induites.
• Possibilité de monter la carte optionnelle DIGITAL ALC LB 3340, qui permet d’utiliser les fonctions ALC, pour le contrôle automatique du
rapport signal/ bruit ambiant, et DAY/NIGHT, pour baisser automatiquement le volume de diffusion la nuit.
• Possibilité de monter la carte optionnelle FAULT DETECTOR SB 3320, qui permet d’utiliser les fonctions LINE FAULT, pour contrôler le bon
fonctionnement de la ligne pour enceintes, PA FAULT, pour contrôler le bon fonctionnement de l’amplificateur, et FIRE-BREAK, pour diffuser en priorité absolue un signal d’alarme (ex. message alarme incendie), avec exclusion du signal provenant de la matrice audio du système.
129
PS 3400 – ALIMENTATEUR
Le PS 3400 est un alimentateur multitension stabilisé en courant continu, qui permet d’alimenter les appareils du système suivants : consoles numériques BM 3616, consoles BM 3604, cartes rétro-amplificateur RB 3300, cartes INPUT/OUTPUT numériques IO 3250, cartes AUDIO
INPUT IB 3210 / IB 3280, cartes AUDIO OUTPUT OB 3230. Il présente les caractéristiques suivantes :
• sortie pour tension stabilisée de 5 V CC (3 A max).
• sortie pour tension stabilisée de 12 V CC (3 A max).
• sortie pour tension stabilisée de 24 V CC (2 A max).
• relais auxiliaire, commandé par la protection contre les surchauffes, avec 1 contact en échange reporté sur bornier.
• possibilité de relier en parallèle plusieurs alimentateurs.
• protection contre les courts-circuits sur les sorties.
• voyants pour 5 V CC, 12 V CC, 24 V CC, OVERHEATING, ON.
• châssis adapté au montage en baie (hauteur 1 unité).
• double d’alimentation en courant alternatif (115 / 230 V ca)
• bornier de connexion amovible.
ES 3000 – LOGICIEL DEVELOPPE
ES 3000 est un logiciel qui peut s’installer sur un PC externe, IBM ou compatible, avec un système Microsoft Windows 95 ou Windows 98, et qui
permet de mieux gérer le système RX 3000. Il permet, en particulier, d’effectuer les opérations suivantes :
• créer plusieurs configurations, mémorisées dans des répertoires de système sur le PC de configuration.
• envoyer des fichiers “EXE” à l’unité de contrôle CP 3100, pour l’aggiornamento du logiciel de système.
• envoyer des fichiers de configuration à l’unité de contrôle CP 3100, pour définir une nouvelle configuration du système.
• envoyer des fichiers “WAV” à l’unité de contrôle CP 3100, pour définir de nouveaux tons et/ou messages (enregistrés par exemple sur le PC
de configuration au moyen de programmes appropriés).
• prélever des fichiers de configuration de l’unité CP 3100 (par exemple pour un diagnostic de la part de techniciens).
• prélever des tons et/ou messages enregistrés sur l’unité CP 3100.
Le PC peut disposer d’un port série RS232 standard quelconque (port de COM1 à COM4 à sélectionner au moyen du logiciel ES 3000).
Les opérations de configuration du système peuvent s’effectuer sur le PC de configuration puis être transmises via la ligne série à l’unité CP 3100.
Toutes les opérations de configuration du système sont extrêmement simplifiées grâce au graphisme du milieu Windows et à l’utilisation de la
souris et du clavier.
CP 3100 – DISPOSITIFS PANNEAU AVANT (fig.1)
(1) Voyant RECORD
Allumé, il signale l’enregistrement en cours d’un signal audio sur fichier, au moyen de la fonction RECORD du menu RECORDER (voir
§ ENREGISTREMENT/ REPRODUCTION DE SIGNAUX AUDIO).
(2) Touches de direction
Les touches ← , → , ↑ , ↓ permettent de déplacer le point de sélection dans les quatre directions; la touche permet de déplacer le
point de sélection dans le premier champ du menu en cours.
(3) Touches Page ↑ / Page ↓
Elles permettent de changer la page du menu affiché vers le bas (page ↓ ) ou vers le haut (page ↑ ).
(4) Ecran à cristaux liquides
Ecran à cristaux liquides rétro-éclairé pour afficher les menus de l’appareil (p. e. configuration du système, alarmes, etc.).
(5) Touche MEMORY
Elle permet de mémoriser le ‘mot de passe utilisateur’ qui permet de bloquer l’accès de certains menus de l’unité de contrôle aux personnes non autorisées.
(6) Voyant MEMORY
Le voyant s’allume quand un nouveau ‘mot de passe utilisateur’ est correctement mémorisé au moyen de la touche MEMORY (5).
(7) Touches numériques
Elles permettent d’entrer des numéros pour programmer les champs des menus de l’appareil.
(8) Touche de réglage du contraste
Appuyez sur cette touche pour pouvoir régler le contraste de l’écran à cristaux liquides avec les touches (24) ; la définition est enregistrée dans la mémoire de l’appareil.
(9) Voyant MUTE
Le voyant s’allume quand le volume du haut-parleur monitor (10) est remis à zéro au moyen de la touche (23).
(10) Haut-parleur monitor
Quand la fonction “monitor” est activée (monitoring audio), le haut-parleur permet d’écouter les signaux audio traités par le système (signaux qui entrent, signaux qui sortent, etc.).
(11) Voyant PLAY
Allumé, il signale la reproduction en cours d’un signal audio (fichier audio) enregistré sur le disque dur de l’appareil (voir § ENREGISTREMENT/ REPRODUCTION DE SIGNAUX AUDIO).
(12) Voyant POWER
Il s’allume quand l’unité est allumée.
(13) Voyant ALARM
Il s’allume quand l’une des alarmes gérées par le système est activée (voir § ALARMES DU SYSTEME).
(14) Touche C ←
Elle efface le caractère qui précède le curseur d’insertion des caractères en le déplaçant d’un cran vers la gauche.
(15) Touche SPACE
Elle permet d’insérer un espace dans un champ (caractère “blank”) en déplaçant le curseur d’insertion des caractères d’un cran vers la
droite.
130
(16) Touche C →
Elle efface le caractère en cours sélectionné.
(17) Touche CLEAR
Elle sert à effacer tous les caractères contenus dans le champ en cours sélectionné.
(18) Touches F1 - F2 - F3 - F4
Touches pour accéder aux sous-menus de l’appareil ; la fonction spécifique des touches est chaque fois indiquée dans les différents
menus.
(19) Touche MENU
Touche inutilisable dans cette version de l ‘appareil.
(20) Touche ENTER
Touche pour confirmer le paramètre défini dans un champ.
(21) Touche ESC
Touche pour quitter le menu ou sous-menu et revenir au menu précédent. En cas de modification de paramètres, l’appareil demandera si vous voulez, avant de continuer, enregistrer ou non les nouvelles valeurs.
(22) Touches +/Elles permettent aussi bien de sélectionner les paramètres indiqués dans les champs à rotation des différents menus de l’unité de contrôle que de sélectionner des caractères alphanumériques pour définir des noms, des numéros, des sigles, etc.
(23) Touche MUTE
Cette touche permet d’activer/ désactiver la fonction MUTE. En activant la fonction MUTE, le volume du haut-parleur monitor est remis à zéro et le voyant (9) s’allume ; en désactivant la fonction MUTE, le volume du haut-parleur monitor revient au niveau précédemment établi et le voyant (9) s’éteint.
(24) Touches de réglage
Les deux touches ont une double fonction. Quand on accède au menu permettant le monitoring des signaux audio traités par le système (voir § UTILISATION DU MENU “MONITOR OPERATIONS”), les deux touches permettent de régler le volume du haut-parleur monito
appuyez sur la touche pour baisser le volume, et sur la touche
pour le relever. Dans toutes les autres situations, les deux
touches permettent, une fois que la touche (8) est pressée, de régler le contraste de l’écran à cristaux liquides.
REMARQUE
• Pour obtenir le réglage, appuyez et relâchez chaque touche.
Fig. 1
131
CP 3100 – DISPOSITIFS PANNEAU ARRIERE (Fig. 2)
(1) Interrupteur POWER
Il permet d’allumer et d’éteindre l’appareil.
(2) Ventilateur de refroidissement
Il permet de refroidir l’appareil.
(3) Prise pour câble d’alimentation
Elle permet de connecter le câble d’alimentation fourni avec l’appareil.
(4) Prise AC OUTLET
Le connecteur est relié en parallèle à la prise (3) et permet de facilement alimenter l’éventuel écran.
(5) Borniers MONITOR BUS
Les deux borniers à 3 pôles permettent de connecter les lignes “monitor bus” provenant des cartes rétro-amplificateur RB 3300 et des
sub-racks MB 3200. Les deux lignes permettent de surveiller les signaux audio traités par le système (signaux à l’entrée, signaux à la
sortie, signaux des amplificateurs contrôlés par les cartes rétro-amplificateur RB 3300, etc.).
(6) Port série n° 2 (COM 2)
Connecteur inutilisable.
(7) Port pour souris PS2
Connecteur inutilisable.
(8) Prise pour CLAVIER
Elle permet de connecter un clavier standard pour micro-ordinateur, à utiliser à la place du clavier qui se trouve sur le panneau avant
de l’appareil. Le clavier doit être utilisé avec un écran à brancher sur la prise (12) et permet de faciliter les opérations de configuration
du système.
(9) Port série N° 1 (COM 1)
Port série RS 232 sur connecteur SUB D mâle à 9 pôles, pour connecter le système à un PC de configuration externe.
(10) Port parallèle N° 1 (LPT 1)
Port parallèle sur connecteur SUB D femelle à 25 pôles, pour connecter le système à une imprimante et pouvoir imprimer la configuration du système et des messages d’alarme.
(11) Port série N° 4 (COM 4)
Port série symétrique RS 485, pour la communication entre l’unité de contrôle CP 3100 et les consoles numériques BM 3616 du système.
(12) Connecteur pour écran vidéo
Il permet de connecter un écran vidéo, à utiliser à la place de l’afficheur à cristaux liquides qui se trouve sur le panneau avant de l’appareil. Le monitor doit être utilisé avec un clavier externe à brancher sur la prise (8) et permet de faciliter les opérations de configuration du système.
(13) Port série N° 3 (COM 3)
Port série symétrique RS 485, pour la communication entre l’unité de contrôle CP 3100 et les cartes rétro-amplificateur RB 3300 du système.
(14) Connecteur pour sub-rack
Port série synchrone DCI permettant la communication entre l’unité de contrôle CP 3100 et les sub-racks MB 3200 du système.
(15) Sortie LINE OUT carte audio
Elle permet la sortie du signal audio au niveau “ligne” de la carte audio de l’appareil et s’utilise pour piloter l’une des entrées audio du
système (entrée PLAYBACK d’une carte AUDIO INPUT IB 3210 / IB 3280).
(16) Entrée LINE IN carte audio
Cette entrée permet de piloter la carte audio de l’appareil avec le signal audio au niveau “ligne” à enregistrer, provenant d’une sortie audio du système (sortie RECORDER d’une carte AUDIO OUTPUT OB 3230) ou de sources audio extérieures (lecteurs de cassettes, syntoniseurs, lecteurs de CD audio, etc.).
(17) Entrée MICRO IN carte audio
Cette entrée permet de piloter la carte audio de l’appareil avec le signal à enregistrer provenant d’un microphone extérieur.
(18) Connecteur inutilisable.
Fig. 2
132
MB 3200 - DISPOSITIFS PANNEAU AVANT (Fig. 3)
(1) Voyants d’alimentation 12 V CC / 24 V CC
Chaque voyant correspond à une des cartes AUDIO OUTPUT OB 3230 ou INPUT/ OUTPUT numériques IO 3250 installées dans le sub-rack;
allumé, il signale que la carte correspondante est correctement alimentée par la tension pour circuits analogiques (12 ou 24 V CC).
(2) Voyants d’alimentation 5 V CC
Chaque voyant correspond à une des cartes AUDIO OUTPUT OB 3230 ou INPUT/ OUTPUT numériques IO 3250 installées dans le sub-rack;
allumé, il signale que la carte correspondante est correctement alimentée par la tension pour circuits numériques (5 V CC).
(3) Voyants monitor / GPI
Chaque voyant correspond à une des cartes AUDIO OUTPUT OB 3230 ou INPUT/ OUTPUT numériques IO 3250 installées dans le sub-rack.
Carte AUDIO OUTPUT OB 3230 : le voyant clignote quand s’active le monitoring d’une sortie de la carte.
Carte INPUT/ OUTPUT numérique IO 3250 : le voyant clignote quand une quelconque entrée GPI de la carte est pilotée.
(4) Voyants matrice/ relais
Chaque voyant correspond à une des cartes AUDIO OUTPUT OB 3230 ou INPUT/ OUTPUT numériques IO 3250 installées dans le sub-rack.
Carte AUDIO OUTPUT OB 3230 : le voyant clignote quand la matrice de commutation de la carte est active, i. e. quand une sortie de la carte se connecte à l’une des entrées de la matrice audio.
Carte INPUT/ OUTPUT numérique IO 3250 : le voyant clignote quand le contact d’un des relais de sortie de la carte commute sur fermé.
REMARQUE
• Le voyant (4) d’une carte INPUT /OUTPUT numérique IO 3250 clignote également quand l’un de ses relais est défini comme normalement
fermé, avec le menu approprié de configuration de l’unité de contrôle CP 3100.
(5) Voyants de communication
Chaque voyant correspond à une des cartes AUDIO OUTPUT OB 3230 ou INPUT/ OUTPUT numériques IO 3250 installées dans le sub-rack;
quand l’un des voyants clignote, il indique que la carte correspondante communique avec l’unité de contrôle CP 3100.
(6) Voyants de panne
Chaque voyant correspond à une des cartes AUDIO OUTPUT OB 3230 ou INPUT/ OUTPUT numériques IO 3250 installées dans le sub-rack;
quand l’un des voyants clignote, il indique qu’une alarme s’est déclenchée à cause d’un mauvais fonctionnement de la carte correspondante
(retard dans la communication, erreur, panne, etc.).
REMARQUE
• Il est normal que le voyant clignote pendant les phases de configuration du système.
(7) Voyants pour cartes AUDIO INPUT
Chaque voyant correspond à une des cartes AUDIO INPUT IB 3210 / IB 3280 installées dans le sub-rack. Le voyant peut fournir les indications suivantes :
• Voyant allumé fixe – Il signale une alarme déclenchée par un mauvais fonctionnement de la carte correspondante (retard dans la communication, erreur, panne, etc.).
• Voyant allumé clignotant – Il signale que la carte correspondante est en train de communiquer avec l’unité de contrôle CP 3100.
• Voyant éteint – Il signale que la carte correspondante n’est pas alimentée par la tension pour circuits numériques (5 V CC).
Fig. 3
MB 3200 - DISPOSITIFS PANNEAU ARRIERE (Fig. 4)
(1) Pontet JP6
Il permet de relier le pôle GND de la tension d’alimentation à 5 V CC au cadre du sub-rack MB 3200.
(2) Pontet JP7
Il permet de relier le pôle GND de la tension d’alimentation à 12 V CC au cadre du sub-rack MB 3200.
(3) Pontet JP8
Il permet de relier le pôle GND de la tension d’alimentation à 24 V CC au cadre du sub-rack MB 3200.
133
(4) Borniers M1 et M2
Ils permettent d’alimenter le sub-rack avec les tensions d’alimentation 5 V CC, 12 V CC, 24 V CC. Deux borniers, reliés entre eux en
parallèle, facilitent les connexions quand le système présente plusieurs sub-racks MB 3200 : un bornier peut être utilisé comme entrée
des trois alimentations et l’autre comme sortie pour alimenter le sub-rack suivant.
(5) Fusible de protection F2
Ce fusible, 2 A rapide, protège les circuits alimentés avec une tension de 12 V CC.
(6) Fusible de protection F3
Ce fusible, 4 A rapide, protège les circuits alimentés avec une tension de 24 V CC.
(7) Fusible de protection F1
Ce fusible, 2 A rapide, protège les circuits alimentés avec une tension de 5 V CC.
(8) Dispositifs inutilisables
(9) Connecteurs IDC1 ÷ 8
Les connecteurs permettent de relier les entrées audio des cartes AUDIO INPUT IB 3210 / IB 3280 aux cartes de connexion correspondantes, à 12 bornes. Chaque carte AUDIO INPUT se relie au moyen de deux connecteurs (IDC1 et IDC2, par ex.), chacun permettant de connecter 4 entrées audio à une carte de connexion à 12 bornes. Les connecteurs portant des numéros impairs correspondent aux quatre premières entrées des cartes AUDIO INPUT (ex. entrées de 1 à 4) tandis que les connecteurs portant des numéros pairs correspondent aux quatre entrées restantes (ex. entrées de 5 à 8).
(10) Pontets JP1 et JP2
Les deux pontets permettent de terminer la ligne série RS 485, qui interconnecte les sub-racks MB 3200 à l’unité de contrôle CP 3100.
(11) Connecteur CN6
Il permet de connecter la ligne série RS 485 provenant de l’unité de contrôle CP 3100 ou du sub-rack MB 3200 précédent.
(12) Connecteur CN7
Il permet de connecter la ligne série RS 485 dirigée vers le sub-rack MB 3200 suivant (s’il existe).
(13) Voyant DL1
Allumé, il signale que le sub-rack est alimenté avec une tension de 5 V CC.
(14) Voyant DL2
Allumé, il signale que le sub-rack est alimenté avec une tension de 12 V CC.
(15) Voyant DL3
Allumé, il signale que le sub-rack est alimenté avec une tension de 24 V CC.
(16) Connecteurs J4A ÷ J4H
Chacun des 8 connecteurs permet de relier les 16 entrées GPI d’une carte INPUT/ OUTPUT numérique IO 3250 à la carte de connexion
correspondante, à 20 bornes.
(17) Borniers M3 et M4
Ils permettent de transmettre à l’unité de contrôle CP 3100 le signal audio “monitor” provenant des différents sub-racks MB 3200 et
correspondant aux entrées des cartes AUDIO INPUT IB 3210 / IB 3280 ou aux sorties des cartes AUDIO OUTPUT OB 3230. Le signal
“monitor” pourra ainsi être écouté dans le haut-parleur placé sur le panneau de façade de l’unité de contrôle. Deux borniers, reliés entre eux en parallèle, facilitent les connexions quand le système présente plusieurs sub-racks MB 3200 : un bornier peut être utilisé comme sortie du signal “monitor” dirigé vers l’unité de contrôle CP 3100 et l’autre comme entrée du signal “monitor” provenant de l’éventuel sub-rack suivant.
(18) Connecteurs J3A ÷ J3H
Chacun des 8 connecteurs permet de relier les sorties audio d’une carte AUDIO OUTPUT OB 3230 ou les relais de sortie d’une carte
INPUT/OUTPUT numérique IO 3250, à la carte de connexion correspondante, à 32 bornes. Quand on installe une carte AUDIO OUTPUT OB 3230 au niveau d’un connecteur, la carte à bornes correspondante permet de connecter 8 sorties audio ; quand on installe une
carte INPUT/OUTPUT numérique IO 3250 au niveau d’un connecteur, la carte à bornes correspondante permet de connecter les contacts de 24 relais de sortie.
Fig. 4
134
DISPOSITIFS ET FONCTIONS DU SYSTEME
MATRICES AUDIO
Le système RX 3000 peut gérer un maximum de 8 matrices audio, entièrement indépendantes les unes des autres ; la capacité maximale d’une matrice peut atteindre 32 entrées et 64 sorties (max. 2 matrices 32 x 64). Les matrices sont totalement accessibles : dans une matrice définie, chaque entrée peut se connecter à n’importe quelle sortie. les entrées et les sorties des matrices audio s’obtiennent en installant les cartes AUDIO INPUT IB 3210 / IB 3280 et AUDIO OUTPUT OB 3230 ; selon le nombre de cartes AUDIO INPUT IB 3210 / IB 3280 et AUDIO OUTPUT OB 3230 installées dans les sub-racks MB 3200, le système permet de créer un nombre considérable de matrices audio (p. e. matrice
à 8 entrées et 16 sorties, matrice à 8 entrées et 32 sorties, etc.).
ENTREES “GPI”
Les entrées GPI (General Purpose Input) sont des entrées opto-isolées, disponibles lorsque les cartes INPUT/OUTPUT numériques IO 3250
sont installées dans les sub-racks MB 3200 du système. Les entrées GPI permettent de commander diverses typologies d’opérations, que
l’utilisateur peut programmer librement ; le paragraphe OPERATIONS COMMANDABLES A PARTIR DES ENTREES GPI fournit la liste de ces
opérations. Pour pouvoir commander une entrée GPI il suffit de la connecter à un simple contact électrique.
RELAIS PROGRAMMABLES
Les relais programmables sont disponibles quand les cartes INPUT/ OUTPUT numériques IO 3250 sont installés dans les sub-racks MB 3200.
La programmation des relais s’effectue avec l’unité de contrôle CP 3100. Chaque carte INPUT/ OUTPUT numérique IO 3250 présente 24 relais, chacun d’eux étant doté d’un contact; un menu spécial de configuration de l’unité de contrôle CP 3100 permet de définir l’état “normalement ouvert” ou “normalement fermé” du contact, soit l’état dans lequel celui-ci doit être une fois que le système a été configuré (voir paragraphe REALISATION D’UNE CONFIGURATION). Les contacts peuvent s’utiliser le plus librement possible dans plusieurs buts. La commutation des contacts peut se commander :
• avec des opérations du système (voir paragraphe OPERATIONS COMMANDABLES A PARTIR DES ENTRÉES GPI).
• avec la touche ALARM des consoles numériques BM 3616 (voir paragraphe OPERATIONS COMMANDABLES A PARTIR DES CONSOLES
NUMERIQUES BM 3616).
• avec les touches F1, F2, F3 des consoles numériques BM 3616 (voir paragraphe OPERATIONS COMMANDABLES A PARTIR DES CONSOLES NUMERIQUES BM 3616).
• avec les consoles BM 3604 (voir paragraphe OPERATIONS COMMANDABLES A PARTIR DES CONSOLES BM 3604).
• avec le dispositif VOX qui se trouve sur les cartes AUDIO OUTPUT OB 3230 (voir paragraphe DISPOSITIF VOX).
• avec les opérations temporisées (voir paragraphe OPERATIONS TEMPORISEES).
• avec la matrice audio du système, quand une sortie définie se connecte sur une entrée, excepté les entrées définies BGM (background music). Cette fonction se définit avec la programmation des sorties audio, comme l’explique le paragraphe UTILISATION DU MENU “OUTPUT
PROCESSORS”.
MISE EN GARDE
• Dans certains cas, les relais ont une attribution unique, i. e. ils peuvent être commandés par une seule opération/ un seul dispositif (relais de “feedback” d’une console BM 3604).
• Selon la programmation effectuée avec le menu CONFIGURATION de l’unité de contrôle CP 3100 (voir paragraphe CONFIGURATION DU
SYSTÈME), un même relais peut être commandé simultanément par plusieurs dispositifs ; dans ce cas, son contact commutera de la
façon suivante
a. Quand un des dispositifs/ opérations spécialement programmés commande le relais, son contact commutera par rapport à la position
normale.
b. Si, entre temps, d’autres dispositifs/ opérations commandent le relais, son contact restera commuté par rapport à la position normale.
c. Si le dispositif/ l’opération qui l’a commandé le premier ne le commande plus, le contact restera commuté.
d. Le relais regagne sa position normale uniquement lorsqu’il n’y a plus aucun dispositif qui le commande.
UNITES A.C.U.
Les cartes rétro-amplificateur RB 3300 sont identifiées dans les différents menus de l’unité de contrôle CP 3100 comme A.C.U. (Amplifier
Control Unit). La fonction des cartes est indiquée au paragraphe DESCRIPTION. Un menu spécial de configuration de l’unité de contrôle permet de configurer les cartes et de les programmer selon les modes de fonctionnement décrits dans ce paragraphe.
Chaque A.C.U. présente dans le système se distingue, dans les menus de l’unité de contrôle CP 3100, par un NUMERO D’IDENTIFICATION
allant de 1 à 120 (nombre maximal d’A.C.U. que le système peut gérer) qui dépend de l’adresse qui lui est attribuée au moment de l’installation.
Il existe deux types d’A.C.U., suivant la fonction de l’amplificateur contrôlé par la carte rétro-amplificateur:
• NORMAL – L’A.C.U. doit contrôler un amplificateur primaire, normalement dédié à la sonorisation d’une zone audio définie.
• BACKUP – L’A.C.U. doit contrôler un amplificateur de réserve, normalement utilisé pour remplacer un amplificateur primaire, si celui-ci
tombe en panne, par exemple. Lorsqu’un amplificateur primaire est remplacé, c’est l’amplificateur de réserve (s’il existe) qui
sonorisera la zone audio correspondante. Dans un système qui prévoit deux amplificateurs de secours (ou plus), pour plusieurs
amplificateurs primaires, la première réserve a pour tâche de remplacer un amplificateur primaire quelconque, si celui-ci tombe en panne, par exemple; la deuxième réserve devra remplacer exclusivement la première réserve, si celle-ci tombe en
panne avec l’amplificateur primaire, et ne pourra pas être utilisée pour remplacer un second amplificateur primaire en
panne; la troisième réserve devra remplacer exclusivement la deuxième réserve ; il en va de même pour tous les amplificateurs de réserve présents dans le groupe.
REMARQUES
• Si le système prévoit un seul amplificateur de réserve pour un ou plusieurs amplificateurs primaires, pour pouvoir connecter automatiquement l’amplificateur de réserve en cas de panne d ‘un amplificateur primaire, il n’est pas indispensable de l’associer avec une carte rétro-amplificateur RB 3300 (unité de BACKUP).
• L’A.C.U. de BACKUP devient indispensable quand l’amplificateur de réserve doit être surveillé ou s’il doit pouvoir être remplacé par
un autre amplificateur de réserve.
135
Les A.C.U. se subdivisent en groupes (64 groupes au maximum, comprenant des unités NORMAL et des unités BACKUP). Un groupe peut
se composer d’un nombre quelconque d’A.C.U. NORMAL ou BACKUP mais le nombre total d’unités présentes dans le système ne doit jamais dépasser 120. Une unité BACKUP ne peut remplacer une unité NORMAL que si elles appartiennent toutes les deux au même
groupe. Un menu spécial de l’unité de contrôle permet de connecter/ déconnecter manuellement les A.C.U., pour utiliser ou non l’amplificateur qu’elles contrôlent pour sonoriser une zone définie (voir § UTILISATION DU MENU " INSERT BACKUP ACU’’). Si vous déconnectez une
A.C.U., l’amplificateur qu’elle contrôle sera exclu de la sonorisation d’une zone définie et pourra être remplacé par l’éventuel amplificateur
de réserve du groupe ou, si l’amplificateur de réserve est contrôlé au moyen d’une carte rétro-amplificateur RB 3300, par l’éventuelle A.C.U.
BACKUP.
REMARQUE
• Les unités NORMAL sont généralement CONNECTEES alors que les unités BACKUP sont toujours normalement DÉCONNECTÉES..
La connexion/ déconnexion d’une A.C.U. (NORMAL ou BACKUP), en cas d’alarme déclenchée par une panne ou un mauvais fonctionnement d’un amplificateur, peut advenir en MANUAL ou en AUTOM. Nous allons expliquer ces deux modes de fonctionner des unités
NORMAL et BACKUP.
• Mode MANUAL sur unité NORMAL La déconnexion de l’unité NORMAL, en cas d’alarme de l’amplificateur qu’elle contrôle, doit être
commandée manuellement, avec un menu spécial de l’unité de contrôle CP 3100.
• Mode AUTOM. sur unité NORMAL –
La déconnexion de l’unité NORMAL, en cas d’alarme de l’amplificateur qu’elle contrôle, est commandée automatiquement par le système.
• Mode MANUAL sur unité de BACKUP - La connexion de l’unité de BACKUP, en cas d’alarme d’une unité NORMAL appartenant au même groupe, doit être commandée manuellement, avec un menu spécial de l’unité de contrôle CP
3100. La déconnexion de l’unité de BACKUP, en cas d’alarme de l’amplificateur qu’elle contrôle, est commandée manuellement, avec un menu spécial de l’unité de contrôle CP 3100.
• Mode AUTOM sur unité de BACKUP - La connexion de l’unité de BACKUP, en cas d’alarme d’une unité NORMAL appartenant au même groupe, est commandée automatiquement par le système si l’unité NORMAL qu’elle remplace est configurée en mode connexion/ déconnexion AUTOM; si, au contraire, l’unité NORMAL qu’elle remplace est configurée en mode connexion/ déconnexion MANUAL, la connexion
de l’unité de BACKUP doit être commandée manuellement. La déconnexion de l’unité de
BACKUP, en cas d’alarme de l’amplificateur qu’elle contrôle, est commandée automatiquement
par le système.
Quand un groupe d’A.C.U. contient plusieurs unités BACKUP configurées en mode connexion/ déconnexion AUTO, l’ordre d’intervention de
ces unités - en cas d’alarme d’une unité NORMAL du même groupe configurée en mode connexion/ déconnexion AUTO - dépend du NUMERO D’IDENTIFICATION qui leur est associé ; la première unité BACKUP à être connectée sera celle ayant le plus petit numéro d’identification, la deuxième celle ayant le numéro d’identification suivant et ainsi de suite pour toutes les autres éventuelles unités BACKUP.
REMARQUES
• La connexion d’une A.C.U. (NORMAL ou BACKUP) qui avait été automatiquement déconnectée à cause d’une alarme déclenchée par une
panne ou un mauvais fonctionnement de l’amplificateur qu’elle contrôle, doit toujours s’effectuer manuellement, en utilisant le menu spécial de l’unité de contrôle CP 3100.
• Lorsqu’une unité NORMAL est déconnectée et que, dans le groupe d’A.C.U. auquel elle appartient, il y a un amplificateur de réserve qui
n’est pas contrôlé par une carte rétro-amplificateur RB 3300 (aucune unité BACKUP), celui-ci remplacera toujours automatiquement
l’amplificateur primaire.
• Lorsque dans un groupe d’A.C.U. il existe plusieurs unités de BACKUP, en cas d’alarme d’une unité NORMAL (appartenant au même groupe et configurée en mode connexion/ déconnexion AUTOM.) la première unité de BACKUP qui se connectera sera, de toutes les unités
configurées en mode connexion/ déconnexion AUTOM, celle qui aura le plus petit numéro d’identification; les unités de BACKUP ayant le
numéro d’identification le plus petit en absolu mais qui sont configurées en mode connexion/ déconnexion MANUAL, ne pourront pas interrompre le remplacement automatique d’une unité NORMAL.
Les alarmes qui provoquent la déconnexion automatique d’une A.C.U. et l’éventuelle connexion automatique de l’unité de réserve (ou de l’amplificateur de réserve si celui-ci n’est pas associé à une carte RB 3300) sont:
• l’alarme PA FAULT - Cette alarme s’active si l’A.C.U qui contrôle l’amplificateur est équipée de la carte optionnelle FAULT DETECTOR
SB 3320. Elle indique une alarme déclenchée par une rupture quelconque de l’amplificateur contrôlé qui provoque une diminution de la
puissance transmise.
• l’alarme OVL - Cette alarme s’active si l’amplificateur contrôlé par l’A.C.U. contient un contact auxiliaire d’alarme, qui se ferme quand une
protection se déclenche ou quand l’appareil ne fonctionne pas normalement (surcharge).
Pour revenir à l’état initial de connexion des unités NORMAL et BACKUP au terme d’une alarme sur une A.C.U. (normalement les unités NORMAL sont connectées tandis que celles de BACKUP sont déconnectées) vous devez ramener manuellement les unités dans leur condition
de départ : soit en utilisant un menu spécial de l’unité de contrôle (voir paragraphe UTILISATION DU MENU “INSER. BACKUP ACU”), soit en
recomposant le système au moyen d’une des procédures décrites au paragraphe REALISATION D’UNE CONFIGURATION.
Pour la programmation des unités A.C.U., consultez le paragraphe UTILISATION DU MENU “ACU” ; pour la connexion/ déconnexion manuelle
des unités A.C.U., consultez le paragraphe UTILISATION DU MENU INSER. BACKUP “ACU”. Les exemples suivants peuvent aider à mieux
comprendre le fonctionnement des A.C.U..
136
Exemple 1
A.C.U.
PRESENTES
DANS LE GROUPE
TYPE
MODE DE FONCT.
NORMAL
AUTOM.
BACKUP
AUTOM.
TYPE
MODE DE FONCT.
NORMAL
AUTOM.
BACKUP
AUTOM.
TYPE
MODE DE FONCT.
ACU 1
NORMAL
MANUAL
ACU 2
BACKUP
MANUAL
ACU 1
a. Si l’amplificateur primaire contrôlé par l’ACU 1 tombe en panne, l’amplificateur de réserve, contrôlé par l’ACU 3, prendra
automatiquement sa place.
b. Si, ensuite, l’amplificateur primaire contrôlé par l’ACU 2 tombe
en panne, seule l’éventuelle alarme relative à cette unité sera
signalée.
c. Si l’amplificateur de réserve contrôlé par l’ACU 3 tombe en
panne aussi, celle-ci sera automatiquement déconnectée; s’il
existe un second amplificateur de réserve, (non contrôlé par
une carte RB 3300), il prendra automatiquement la place du
premier amplificateur de réserve.
ACU 2
ACU 3
DESCRIPTION DU FONCTIONNEMENT DE L’A.C.U.
Exemple 2
A.C.U.
PRESENTES
DANS LE GROUPE
ACU 1
a. Si l’amplificateur primaire contrôlé par l’ACU 2 tombe en panne, l’amplificateur de réserve, contrôlé par l’ACU 3 prendra automatiquement sa place.
b. Si, ensuite, l’amplificateur primaire contrôlé par l’ACU 1 tombe
en panne, seule l’éventuelle alarme relative cette unité sera signalée.
c. Si l’amplificateur de réserve contrôlé par l’ACU 3 tombe en
panne aussi, celle-ci sera automatiquement déconnectée; s’il
existe un second amplificateur de réserve, (non contrôlé par
une carte RB 3300), il prendra automatiquement la place du
premier amplificateur de réserve.
ACU 2
ACU 3
DESCRIPTION DU FONCTIONNEMENT DE L’A.C.U.
Exemple 3
A.C.U.
PRESENTES
DANS LE GROUPE
DESCRIPTION DU FONCTIONNEMENT DE L’A.C.U.
a. Si l’amplificateur primaire contrôlé par l’ACU 1 tombe en panne, il ne se passera rien, sauf l’éventuel signal d’alarme relatif
à cette unité; la connexion de l’amplificateur de réserve contrôlé par l’ACU 2 doit être commandée manuellement en déconnectant l’ACU 1 en alarme et en connectant l’ACU 2.
b. Si, ensuite, l’amplificateur de réserve contrôlé par l’ACU 2
tombe en panne à son tour, il ne se passera rien, sauf l’éventuel signal d’alarme relatif à cette unité; la connexion de l’éventuel second amplificateur de réserve (non contrôlé par une
carte RB 3300) doit être commandée manuellement en déconnectant l’ACU 2 en alarme.
FONCTION “DAY/NIGHT”
La fonction est disponible quand la carte rétro-amplificateur RB 3300 (A.C.U.) est équipée de la carte optionnelle DIGITAL ALC LB 3340, et
permet d’atténuer la sonorisation des zones audio la nuit. Vous pouvez choisir le niveau d’atténuation, parmi 16 valeurs, au moment de monter la carte LB 3340, et l’appliquer à toutes les zones audio sonorisées au moyen de la carte RB 3300. Pour activer la fonction DAY/NIGHT,
et pour définir les heures d’intervention, vous devez utiliser les menus spéciaux de l’unité de contrôle CP 3100.
FONCTION “MONITOR” (monitoring audio)
Cette fonction permet d’écouter, dans le haut-parleur de l’unité de contrôle CP 3100, le signal “monitor” de la carte rétro-amplificateur RB
3300 (A.C.U.), relatif à la sortie enceintes de l’amplificateur qu’elle contrôle. Pour utiliser la fonction “monitor” vous devez accéder à un menu de l’unité de contrôle CP 3100. La commande pour l’écoute est transmise par la ligne série.
MISES EN GARDE
• Lorsqu’une A.C.U. est déconnectée, vous n’entendez plus son signal “monitor et ce, pour que vous puissiez écouter les signaux “monitor” des autres A.C.U., et au cas où vous ne pourriez plus reconnecter l’unité.
• On ne peut surveiller qu’une seule A.C.U. à la fois.
137
ALARME “OVL”
La carte RB 3300 est dotée d’une entrée qui permet d’obtenir les signaux d’alarme provenant de l’amplificateur contrôlé. Le type d’alarme obtenu dépend donc de l’amplificateur spécifique utilisé et peut, par exemple, correspondre au déclenchement d’une des protections ou à un fonctionnement anormal de l’appareil (surcharge). La transmission de l’alarme advient en fermant un contact auxiliaire de l’amplificateur: si le contact
reste fermé au moins 10 secondes, la carte RB 3300 activera, via la ligne série, le signal d’alarme sur l’unité de contrôle CP 3100; en programmant cette dernière unité comme il convient, vous pouvez, lorsque l’amplificateur va en alarme, le remplacer automatiquement par un amplificateur de réserve (voir § UTILISATION DU MENU “ACU”)
FONCTION “FIRE-BREAK”
La fonction est disponible quand la carte rétro-amplificateur RB 3300 (A.C.U.) est dotée de la carte optionnelle FAULT DETECTOR SB 3320
et permet de piloter l’amplificateur contrôlé par la carte RB 3300 avec un signal de secours provenant d’une source non connectée au système RX 3000, en interrompant la diffusion normale du signal qui provient de la matrice audio. De cette manière, même en cas de panne d’un composant du système RX 3000 (par exemple la carte AUDIO OUTPUT OB 3230), vous serez sûrs de pouvoir diffuser un message
en priorité absolue (par exemple le message alarme incendie). Pour une sécurité d’intervention parfaite, la fonction “fire-break” agit exclusivement au niveau du matériel.
FONCTION “LINE FAULT”
La fonction LINE FAULT est disponible quand la carte rétro-amplificateur RB 3300 (A.C.U.) est dotée de la carte optionnelle FAULT DETECTOR SB 3320 et permet de contrôler l’impédance de la ligne pour enceintes pilotée avec la carte RB 3300: toute panne provoquant une variation sensible de l’impédance de la ligne active l’alarme correspondante, qui est transmise à l’unité de contrôle CP 3100. Les pannes détectables sont :
• court-circuit entre les deux conducteurs de la ligne pour enceintes,
• interruption de la ligne pour enceintes,
• court-circuit entre la ligne pour enceintes et le circuit de mise à la terre.
MISE EN GARDE
• Quand la carte RB 3300 contrôle un amplificateur de réserve, la fonction LINE FAULT peut servir exclusivement à détecter un court-circuit
entre la ligne pour enceintes et le circuit de mise à la terre mais ni le court-circuit entre les deux conducteurs de la ligne pour enceintes ni l’interruption de la ligne pour enceintes ne peuvent être détectés.
FONCTION “PA FAULT”
La fonction PA FAULT est disponible quand la carte rétro-amplificateur RB 3300 (A.C.U.) est dotée de la carte optionnelle FAULT DETECTOR SB 3320. Elle permet de vérifier le bon fonctionnement de l’amplificateur contrôlé par la carte RB 3300, en détectant le signal sur la sortie enceintes: tout mauvais fonctionnement de l’amplificateur provoquant une diminution sensible de la puissance transmise active l’alarme
correspondante, qui est transmise à l’unité de contrôle CP 3100; en programmant cette dernière unité comme il convient, vous pouvez, lorsque l’amplificateur va en alarme, le remplacer automatiquement par un amplificateur de réserve (voir § UTILISATION DU MENU ACU).
FONCTION “ALC”
La fonction ALC (Automatic Level Control) est disponible quand la carte rétro-amplificateur RB 3300 (A.C.U.) est dotée de la carte optionnelle DIGITAL ALC LB 3340. Elle permet de contrôler automatiquement le rapport signal/ bruit dans la pièce sonorisée, c’est-à-dire de conserver toujours la même marge de niveau entre le signal diffusé et le bruit ambiant, de façon à assurer une parfaite intelligibilité des messages
sonores. Cette caractéristique est particulièrement utile dans les locaux où le niveau du bruit varie énormément. La fonction ALC se base sur
l’utilisation de microphones à condensateur (4 au maximum) ou haut-parleurs à transformateur de ligne fonctionnant comme microphones,
qui permettent de mesurer le niveau de bruit dans la pièce sonorisée. Le signal capté est élaboré de façon numérique pour contrôler un atténuateur électronique et assurer ainsi un réglage parfait du signal.
MISE EN GARDE
• La fonction ALC n’est pas disponible si la carte RB 3300 contrôle un amplificateur de réserve; une A.C.U. BACKUP ne peut donc pas
être équipée de carte optionnelle DIGITAL ALC LB 3340.
OPERATIONS DU SYSTEME
Le système peut gérer les typologies d’opérations décrites aux paragraphes suivants.
OPERATIONS COMMANDABLES A PARTIR DES CONSOLES NUMERIQUES BM 3616
Les opérations suivantes peuvent se commander à partir des consoles numériques BM 3616 :
• diffusion, dans des zones et/ ou groupes de zones audio définies, d’une annonce au microphone de la console.
• diffusion, dans des zones et/ ou groupes de zones définies, d’un signal audio (message, tonalité d’attention/ alarme, etc.) enregistré sur le
disque dur de l’unité de contrôle CP 3100 (fichier audio).
• diffusion, dans des zones et/ ou groupes de zones audio définies, d’un message enregistré dans la mémoire de la console.
• commutation de contacts de relais définis des cartes INPUT/OUTPUT numériques IO 3250.
• commande opération EMERGENCY, pour diffuser avec priorité absolue, dans des zones et/ ou groupes de zones audio définies, une annonce au microphone de la console ou un signal d’alarme (message ou tonalité) enregistré sur le disque dur de l'unité de contrôle CP 3100.
Activer l’opération permet également de commander la commutation de relais des cartes INPUT/OUTPUT numériques IO 3250.
Pour programmer des opérations commandables à partir des consoles numériques BM 3616, consultez le paragraphe UTILISATION DU MENU “CONSOLES”.
OPERATIONS COMMANDABLES A PARTIR DES CONSOLES BM 3604
Les opérations suivantes peuvent se commander à partir des consoles numériques BM 3604 :
• diffusion, dans des zones et/ ou groupes de zones définies, d’une annonce au microphone de la console.
• commutation de contacts de relais définis des cartes INPUT/OUTPUT numériques IO 3250.
• diffusion, dans des zones et/ ou groupes de zones définies, d’un signal audio (message, tonalité d’attention/ alarme, etc.) enregistré sur le
disque dur de l’unité de contrôle CP 3100 (fichier audio).
• commande de signalisations d’avis sur l’unité de contrôle CP 3100.
138
OPERATIONS COMMANDABLES A PARTIR DES ENTREES “GPI”
Chaque carte INPUT/OUTPUT numérique IO 3250 est dotée de 16 entrées opto-isolées qui, pilotées comme il convient, permettent de commander plusieurs types d’opérations ; dans les menus de l’unité de contrôle CP 3100, ces entrées sont identifiées sous le nom d’entrées GPI
(voir paragraphe ENTREES GPI). Les opérations commandables sont les suivantes (max. 256) :
• commutation d’un ou de plusieurs relais des cartes INPUT/OUTPUT numériques IO 3250 (voir paragraphe RELAIS PROGRAMMABLES,
dont les contacts sont librement utilisés.
• diffusion, dans des zones et/ ou groupes de zones définies, d’un signal audio (message, tonalité d’attention/ alarme, etc.) mémorisé sur le
disque dur de l’unité de contrôle CP 3100 (fichier audio), et éventuelle commutation d’un ou de plusieurs relais des cartes INPUT/OUTPUT
numériques IO 3250.
• diffusion, dans des zones et/ ou groupes de zones définies, d’une annonce au microphone de la console BM 3604, et éventuelle commutation d’un ou de plusieurs relais des cartes INPUT/OUTPUT numériques IO 3250.
• commande d’opérations d’alarme FIREMAN 1 et/ ou FIREMAN 2, pour la diffusion, en priorité absolue, de signaux audio “fireman”, et éventuelle commutation d’un ou de plusieurs relais des cartes INPUT/OUTPUT numériques IO 3250.
• commande de signalisations d’avis sur l’unité de contrôle CP 3100.
Pour piloter les entrées de la carte, vous pouvez utiliser de simples contacts électriques (contacts de bouton). Pour la programmation des
opérations commandables à partir des entrées GPI, consultez le paragraphe UTILISATION DU MENU “GPI EVENTS DEFINITION”.
OPERATIONS TEMPORISEES
Un menu spécial de l’unité de contrôle CP 3100 permet au système de programmer des “opérations temporisées”, soit des opérations qui
doivent avoir lieu à une heure préétablie. Le système permet de programmer un maximum de 64 opérations temporisées. Une opération temporisée peut commander les actions suivantes :
• commutation d’un relais à contact normalement ouvert des cartes INPUT/OUTPUT numériques IO 3250.
• commutation d’un relais à contact normalement fermé des cartes INPUT/OUTPUT numériques IO 3250.
• diffusion, dans des zones et/ ou groupes de zones définies, d’un signal audio (message, tonalité d’attention/ alarme, etc.) enregistré sur le
disque dur de l’unité de contrôle CP 3100 (fichier audio).
Pour la programmation des opérations temporisées, consultez le paragraphe UTILISATION DU MENU “TIMER EVENTS DEFINITION”.
OPERATIONS “VOX”
Les opérations VOX sont commandées par les dispositifs VOX présents sur les cartes AUDIO OUTPUT OB 3230. Pour la description du fonctionnement du dispositif VOX, consultez le paragraphe DISPOSITIF VOX..
OPERATIONS “PLAYBACK”
Ces opérations prévoient l’emploi de la carte audio de l’unité de contrôle CP 3100, pour la reproduction de signaux audio mémorisés sur le
disque dur du CP 3100 (fichier audio). Le paragraphe ENREGISTREMENT/ REPRODUCTION DE SIGNAUX AUDIO fournit de plus amples
informations sur la reproduction des fichiers audio.
OPERATIONS “BACKGROUND MUSIC”
Ces opérations permettent de diffuser de la musique de fond dans des zones audio définies. Le système peut gérer un maximum de huit sources sonores pour musique de fond.
ORDRE DE PRIORITE
Le fonctionnement du système se base sur l’emploi d’un ordre de priorité dans lequel chaque opération du système est associée à un niveau
de priorité. Selon le type de priorité de l’opération, celle-ci s’exécute d’une façon différente :
PRIORITE ECHELONNEE La priorité échelonnée permet à certaines opérations d’utiliser des dispositifs définis du système avant celles dont
le niveau de priorité est plus bas, mais sans pouvoir interrompre les opérations en cours, même si leur priorité est inférieure ; les seules opérations qui peuvent s’interrompre sont celles du type BACKGROUND MUSIC
(diffusion de musique de fond). Si plusieurs opérations, de priorités différentes, attendent qu’un dispositif se libère pour être exécutées, celles qui ont le niveau de priorité le plus haut seront exécutées les premières et les autres suivront dans l’ordre décroissant. L’échelle des niveaux de priorité est la suivante :
• Niveaux 1 - 8:
niveaux de priorité décroissants de 1 (le plus élevé) à 8 (le plus bas).
• Niveau 9:
aucune priorité.
PRIORITE ABSOLUE
La priorité absolue est la priorité maximale et permet à certaines opérations d’utiliser des dispositifs définis du
système avant les opérations à priorité échelonnée, avec la possibilité d’interrompre les opérations en cours
(fonction “override”). Une opération à priorité absolue n’a pas la fonction d’“override” sur des opérations de même niveau: elle ne peut pas interrompre d’autres opérations à priorité absolue en cours.
Si plusieurs opérations, ayant le même niveau de priorité, attendent d’être exécutées (priorité absolue ou priorité échelonnée), l’ordre de l’exécution suit celui de la demande : les premières opérations demandées seront les premières exécutées.
Les dispositifs du système susceptibles d’être objet de priorité sont :
• sorties des cartes AUDIO OUTPUT OB 3230, qui permettent de piloter les unités de puissance dédiées à la sonorisation des diverses zones audio du système.
• carte audio présente dans l’unité de contrôle CP 3100, qui permet d’enregistrer/ reproduire le fichier audio (messages, signaux d’attention/
alarme, etc.).
Le tableau suivant indique le niveau de priorité correspondant à chaque opération du système et explique comment cette priorité a lieu.
139
OPERATION
NIVEAU DE
PRIORITE
DESCRIPTION
Alarmes EMERGENCY,
FIREMAN 1,
FIREMAN 2.
ABSOLUE
Ces opérations ont la priorité maximale. Les opérations à priorité
inférieure qui doivent utiliser les dispositifs servant à l’opération à
priorité absolue sont interrompues (fonction “override”). Toutes les
sorties utilisées par les opérations interrompues, y compris celles
concernées par l’opération à priorité absolue ; sont déconnectées.
Opérations temporisées
1
Après les opérations à priorité absolue, celles-ci ont le plus haut
niveau de priorité. Si plusieurs opérations, de priorités différentes
(sauf celles à priorité absolue) attendent d’être exécutées, l’opération temporisée est la première effectuée. Les opérations temporisées n’ont pas la fonction d’“override” : elles ne peuvent pas interrompre les opérations en cours qui ont un niveau de priorité égal
ou inférieur.
Opérations commandables à partir
des consoles numériques BM 3616
(sauf opération EMERGENCY)
2÷7
Les opérations commandables à partir des consoles numériques
BM 3616 peuvent avoir des niveaux de priorité variant de 2 à 7,
selon ce qui a été défini avec le menu spécial de configuration
(menu CONSOLES); ces opérations n’ont pas la fonction “override”: elles ne peuvent pas interrompre les opérations en cours
ayant un niveau de priorité égal ou inférieur.
Opérations VOX
Opérations commandables à partir
des consoles BM 3604
Opérations PLAYBACK
8
Ces opérations ont le niveau de priorité le plus bas. Elles peuvent
interrompre exclusivement les opérations BACKGROUND MUSIC
et n’ont pas la fonction “override”: elles ne peuvent pas interrompre les opérations en cours ayant un niveau de priorité égal ou
inférieur.
Opérations BACKGROUND MUSIC
9
Ces opérations peuvent être interrompues par n’importe quelle autre opération.
FONCTION D’INTERDICTION DE LA PART D’UNE OPERATION A PRIORITE ABSOLUE
En cas d’opération à priorité absolue, les autres opérations en cours ayant une priorité inférieure et utilisant les dispositifs qui servent à l’opération prioritaire sont interrompues et terminées (fonction “override”), et elles ne sont pas rétablies au terme de l’opération prioritaire (sauf
celle de MUSIQUE DE FOND). Le tableau suivant Indique les actions concernant chaque opération interdite.
OPERATION INTERDITE
ACTIONS EFFECTUEES
Opération à partir de consoles BM 3604
• Le relais de “feedback” (FEED RELAY) de la console est mis sur OFF pour désactiver celle-ci et la déconnecter de toutes les zones et/ ou groupes de zones audio du
système (voir paragraphe UTILISATION DU MENU “ GPI EVENTS DEFINITION”).
• Toutes les sélections effectuées sur la console sont “remises à zéro”.
• Le microphone de la base est désactivé.
Opération à partir de consoles numérique
BM 3616 (sauf opération EMERGENCY)
• L’éventuelle diffusion du signal audio enregistré sur le disque dur de l’unité de contrôle CP 3100 (fichier audio) est interrompue.
• L’éventuelle diffusion du signal local enregistré dans la mémoire de la console est
interrompue.
• L’éventuelle diffusion d’une annonce microphonique est interrompue.
• La console est désactivée et déconnectée de toutes les zones et/ ou groupes de
zones audio du système.
• Toutes les sélections effectuées sur la console sont “remises à zéro”.
Opération VOX
• La fonction VOX est temporairement désactivée.
• Les connexions entre l’entrée INPUT VOX et les sorties correspondantes ayant la
fonction VOX activée sont interrompues (voir paragraphe DISPOSITIF VOX).
• Le RELAY VOX regagne sa position normale (voir paragraphe DISPOSITIF VOX).
• Au terme de l’opération à priorité absolue, la fonction VOX est réactivée.
Timer events definition
• La reproduction du signal audio (message ou tonalité) associé est interrompue. Lorsque, outre la reproduction d’un signal audio, l’opération temporisée prévoit la
commutation de relais, ceux-ci regagnent leur position normale.
PLAYBACK commandé à partir des
entrées GPI
• L’éventuelle reproduction du signal audio (message ou tonalité) associé à l’opération est interrompue.
• Toutes les zones et/ ou groupes de zones audio associées à l’opération sont déconnectées de l’entrée PLAYBACK.
• Tous les éventuels relais associés à l’opération regagnent leur position normale.
Opération BACKGROUND MUSIC
• La diffusion de la musique de fond dans toutes les zones et/ ou groupes de zones
audio utilisées par l’opération à priorité absolue est interrompue. La diffusion de la
musique reprend au terme de l’opération à priorité absolue.
140
DISPOSITIF “VOX”
Le dispositif VOX (VOX detector)” est présent sur les cartes AUDIO OUTPUT OB 3230. La fonction du dispositif est la suivante : quand le signal audio (signal VOX) qui pilote une entrée définie des cartes AUDIO INPUT IB 3210 / IB 3280, appelé INPUT VOX, dépasse un certain
seuil, réglable au moyen d’un trimmer approprié de la carte OB 3230, le dispositif VOX peut commander l’une des opérations suivantes :
a) connecter l’entrée INPUT VOX à des sorties définies des cartes AUDIO OUTPUT OB 3230 (sorties VOX), définissables avec le menu de
configuration OUTPUT PROCESSORS.
b) effectuer l’opération décrite au point (a) et commuter en même temps un relais défini des cartes INPUT/OUTPUT numériques IO 3250,
appelé RELAY VOX.
Le système ayant 16 cartes AUDIO OUTPUT OB 3230 installées permet de configurer 16 dispositifs VOX. La procédure de fonctionnement
du dispositif VOX est la suivante.
a) Quand le dispositif VOX d’une carte AUDIO OUTPUT OB 3230 détecte que le signal VOX correspondant dépasse le seuil établi, il envoie
l’avis de “vox actif” à l’unité de contrôle CP 3100 si:
a1) la fonction VOX a été activée sur au moins une sortie de la même carte AUDIO OUTPUT (au moyen du menu de configuration des
sorties audio).
a2) les sorties utilisées par le dispositif VOX ne sont pas prises (soit connectées à une entrée audio) sauf pour les BGM (entrées pour musique de fond).
a3) le signal VOX est effectivement “entendu”.
b) Si l’avis de “vox actif” est déclenché, la carte AUDIO OUTPUT OB 3230 relie en autonome l’entrée INPUT VOX aux sorties correspondantes ayant la fonction VOX activée, et les maintient connectées au moins 10 secondes.
c) Dès que l’unité de contrôle CP 3100 reçoit l’avis de “vox actif”, elle commande la commutation du relais RELAY VOX.
d) La connexion entre l’entrée INPUT VOX et les sorties audio correspondantes reste si:
d1) aucune opération à priorité absolue ne demande d’utiliser les zones audio prises par la fonction VOX.
d2) le signal VOX continue à piloter l’entrée INPUT VOX en franchissant le seuil établi.
e) Quand le signal VOX diminue et que son niveau reste environ 10 secondes au-dessous du seuil établi, la carte AUDIO OUTPUT OB 3230
rétablit les éventuelles connexions précédemment coupées entre les entrées audio définies BGM et les sorties utilisées par la fonction
VOX, et elle envoie l’avis de “fin activité vox” à l’unité de contrôle CP 3100.
f) Dès que l’unité de contrôle CP 3100 reçoit l’avis de “fin activité vox”, elle fait regagner au relais RELAY VOX sa position normale.
Les opérations nécessaires pour utiliser la fonction VOX sont les suivantes :
a) Définir, avec le menu de configuration VOX (voir paragraphe), l’entrée INPUT VOX qui doit être utilisée pour une carte AUDIO OUTPUT
OB 3230 définie ; grâce à cette définition, quand le signal VOX franchit le seuil établi, les huit sorties audio de la carte choisie peuvent se
connecter à l’entrée INPUT VOX sélectionnée.
b) Activer ou non, avec le menu de configuration OUTPUT PROCESSORS (voir paragraphe), la fonction VOX sur les sorties souhaitées de
la carte AUDIO OUTPUT OB 3230 choisie ; ainsi, quand le signal VOX franchit le seuil établi, le sorties qui ont la fonction VOX activée se
connectent à l’entrée INPUT VOX, définie avec l’opération décrite au point (a).
ENREGISTREMENT/ REPRODUCTION DE SIGNAUX AUDIO
Le système permet de créer et de reproduire des fichiers audio pouvant mémoriser des signaux audio de plusieurs types : messages, annonces, tonalités d’attention, d’alarme, etc.
CREATION DE SONS
La fonction TONE GENERATOR du menu RECORDER (voir paragraphe UTILISATION DU MENU “RECORDER”) permet de créer des sons
composés de un ou plusieurs tons, que l’utilisateur peut définir à son gré. Le son créé, numérique, est mémorisé sous la forme de fichier sur
le disque dur de l’unité de contrôle, avec les autres fichiers audio présents dans la bibliothèque de signaux audio fournie avec le système, ou
créés avec les fonctions RECORD et ASSEMBLY de l’unité de contrôle CP 3100 (voir paragraphe UTILISATION DU MENU “RECORDER”).
La reproduction des sons créés peut s’effectuer selon l’un des modes décrits au paragraphe REPRODUCTION DE FICHIERS AUDIO.
ENREGISTREMENT DE SIGNAUX AUDIO
La carte audio de l’unité de contrôle CP 3100 permet d’enregistrer des signaux audio provenant de ::
a. un microphone connecté à l’entrée MICRO IN de la carte audio.
b. une des sources connectées aux entrées du système (entrées des cartes AUDIO INPUT IB 3210 / IB 3280). Quand la fonction d’enregistrement est activée, la matrice audio du système connecte automatiquement l’entrée sélectionnée à la sortie définie du type RECORDER (voir paragraphe UTILISATION DU MENU “OUTPUT PROCESSORS”).
Le signal audio à enregistrer, analogique, devient numérique au moyen de la carte audio et mémorisé sous la forme de fichier sur le disque
dur de l’unité de contrôle. L’enregistrement des signaux audio s’effectue avec la fonction RECORD du menu RECORDER (voir paragraphe
UTILISATION DU MENU “RECORDER”) ; la reproduction des signaux enregistrés peut s’effectuer selon l’un des modes décrits au paragraphe
REPRODUCTION DE FICHIERS AUDIO.
REPRODUCTION DE FICHIERS AUDIO
L’unité de contrôle CP 3100 est dotée d’une carte audio qui permet de reproduire les signaux audio mémorisés comme fichiers sur son disque dur (fichiers audio), concernant des messages, annonces, tonalités d’attention/ alarme, etc.. Les fichiers audio disponibles sont ceux qui
sont présents dans la bibliothèque des signaux audio fournie avec le système ou ceux créés avec les fonctions RECORD, ASSEMBLY et TONE GENERATOR de l’unité de contrôle CP 3100 (voir paragraphe UTILISATION DU MENU “RECORDER”). La reproduction d’un fichier audio
peut se commander de plusieurs façons:
a. avec la fonction PLAY de l’unité de contrôle CP 3100 (voir paragraphe UTILISATION DU MENU “RECORDER”).
b. avec la touche F1 de l’unité de contrôle CP 3100, pendant l’utilisation des fonctions TONE GENERATOR et ASSEMBLY.
c. avec les touches F1, F2, F3 des consoles numériques BM 3616 (voir paragraphe UTILISATION DU MENU “CONSOLES”).
d. avec les entrées GPI des cartes INPUT/OUTPUT numériques IO 3250 (voir paragraphe UTILISATION DU MENU “ GPI EVENTS DEFINITION”).
e. avec une opération temporisée (voir paragraphe UTILISATION DU MENU “TIMER EVENTS DEFINITION”).
141
Quand la reproduction d’un fichier audio est demandée, la matrice audio du système connecte automatiquement l’entrée appelée PLAYBACK
(voir paragraphe UTILISATION DU MENU “INPUT PROCESSORS”) aux sorties des cartes AUDIO OUTPUT OB 3230 prévues par les différentes fonctions (zones audio).
ALARMES DU SYSTÈME
Il existe deux types d’alarmes gérées par le système:
• ALARMES PROVENANT DES DISPOSITIFS DU SYSTEME – Ces alarmes sont déclenchées par des pannes des dispositifs du système
(consoles BM 3616, unités A.C.U., cartes IO 3250, cartes IB 3210 / IB 3280, cartes OB 3230, etc.).
• COMMANDES D’ALARME/AVIS – Ce sont des alarmes ou des avis commandés par les opérateurs aux consoles BM 3616 et/ ou BM 3604,
ou par des dispositifs extérieurs connectés aux entrées GPI des cartes INPUT/OUTPUT numériques IO 3250 configurées comme il convient (voir paragraphe UTILISATION DU MENU “GPI EVENTS DEFINITION”)..
Une quelconque opération d’alarme fait s’activer l’avertisseur sonore de l’unité de contrôle et s’allumer le voyant ALARM (réf. 13 – fig. 1, page
131). Pour éteindre l’avertisseur sonore et le voyant ALARM, il faut accéder au menu pour afficher l’état des alarmes (voir paragraphe AFFICHAGE DE L’ETAT DES ALARMES) ; cette opération ne désactive pas l’alarme, mais sa signalisation seulement.
Une alarme se désactive uniquement quand l’opération qui l’a déclenchée manque, soit dans les conditions suivantes:
• la panne du dispositif du système est éliminée.
• l’alarme est désactivée à partir de la console qui l’a commandée.
• l’entrée GPI (cartes INPUT/OUTPUT numériques IO 3250) qui a déclenché l’alarme/ avis n’est plus pilotée (voir paragraphe UTILISATION
DU MENU “GPI EVENTS DEFINITION”).
IMPRESSION DES OPERATIONS D’ALARME
L’impression des opérations d’alarme gérées par le système peut s’effectuer de deux façons.
a. Si vous sélectionnez, dans le sous-menu PRINTER OPTIONS du menu de configuration SYSTEM, l’option PRINT MODE: AUTO, un message d’alarme sera automatiquement imprimé au moment même de l’alarme.
b. Si vous sélectionnez, dans le sous-menu PRINTER OPTIONS du menu de configuration SYSTEM, l’option PRINT MODE : REQUEST,
l’impression des opérations d’alarme doit être commandée manuellement. Les alarmes imprimées sont toutes celles qui se sont déclenchées depuis que le système a été mis en marche.
DIFFUSION DE MUSIQUE DE FOND
Le système permet de diffuser de la musique de fond dans des zones audio définies. Vous pouvez utiliser jusqu’à 8 sources différentes (syntoniseur AM/FM, lecteur de CD, lecteur de cassettes, etc.), qui se connecteront aux entrées des cartes AUDIO INPUT IB 3210 / IB 3280, définies avec le menu de configuration INPUT PROCESSORS du type BGM (background music).
La musique de fond peut se diffuser de la façon suivante.
a. Normalement, la musique de fond (opération “background music”) est constamment diffusée dans les zones audio définies du type BGM
avec le menu de configuration OUTPUT PROCESSORS.
b. Lorsque le système doit exécuter une opération à priorité supérieure (voir paragraphe ORDRE DE PRIORITE), prévoyant la diffusion d’un
signal audio dans les zones du type BGM (annonce à partir de consoles numériques BM 3616, de consoles BM 3604, etc.), la diffusion
de la musique de fond s’interrompt.
c. Une fois que le signal audio à priorité supérieure est diffusé, la diffusion de la musique de fond est rétablie.
UTILISATION DE L’UNITE DE CONTROLE CP 3100
Le clavier et l’écran à cristaux liquides sur le panneau avant de l’unité de contrôle CP 3100 permettent de contrôler et de configurer le système RX 3000; vous pouvez également utiliser un clavier et un monitor vidéo extérieurs (options), à relier aux connecteurs appropriés de l’unité
de contrôle CP 3100. Les explications de ce paragraphe contemplent l’utilisation des dispositifs de l’unité de contrôle..
UTILISATION DES MENUS
Le fonctionnement de l’unité de contrôle se base sur l’utilisation de nombreux menus, qui s’affichent à l’écran de l’appareil (ou sur le monitor
vidéo optionnel). La figure suivante représente la structure générale des menus.
F1: CONFIGURATION
!
F2: ALARMS
!
F3: STORE CONFIG.
!
F4: AUDIO PROCESS
AUDIO INPUT PROCESSORS
AUDIO OUTPUT PROCESSORS
GPI PROCESSORS
DIG. CONSOLLES
ACU (AMPLIFIERS)
GPI ALARMS
EMERGENCY
FIREMAN
SYSTEM ALARMS
ADJUST AUDIO INPUT
ADJUST AUDIO OUTPUT
INSERT BACKUP ACU
MONITOR OPERATIONS
INPUT PROCESSORS
OUTPUT PROCESSORS
GROUPS
RELAY CONFIGURATION
CONSOLES
ACU (AMPLIFIERS)
GPI EVENTS DEFINITION
F1=DEF. RELAY
TIMER EVENTS DEFINITION
VOX
RECORDER
SYSTEM
PRINTER OPTIONS
COMPILE & SAVE
PRINT CONFIGURATION
EXIT WITHOUT SAVING! DATE & TIME
DAY & NIGHT
PASSWORD
F1=CHANGE ZONE
F1=DEF. KEY
F2= DEF. EMERGENCY
F3=DEF. F1, F2, F3
OPTIONS
RECORD
PLAY
ASSEMBLY
TONE GENERATOR
DELETE MESSAGES
Pour utiliser les menus, agissez sur les touches présentes sur le panneau avant de l’unité de contrôle (ou sur le clavier extérieur optionnel),
dont la fonction est indiquée dans le tableau suivant.
142
TOUCHE /I
ESC
Flèche vers la droite
Flèche vers la gauche
Flèche vers le haut
Flèche vers le bas
Flèche oblique
Page ↑
Page ↓
+, -
FONCTION
Pour quitter un menu/ sous-menu.
Pour déplacer le point de sélection vers la droite.
Pour déplacer le point de sélection vers la gauche.
Pour déplacer le point de sélection vers le haut.
Pour déplacer le point de sélection vers le bas.
Pour déplacer le point de sélection dans le premier champ du menu en cours.
Pour déplacer vers le haut la page du menu en cours affichée.
Pour déplacer vers le bas la page du menu en cours affichée.
Pour établir un paramètre dans un champ, avec une sélection rotative des paramètres
disponibles et également pour insérer un caractère alphanumérique avec une sélection
rotative des caractères disponibles.
Pour accéder à des sous-menus définis.
Pour insérer un caractère numérique.
Pour confirmer une sélection ou un champ à rotation.
Pour mémoriser le mot de passe utilisateur.
Pour insérer une espace (blank) dans un champ alphanumérique, en déplaçant d’un
cran le curseur d’insertion des caractères.
Pour effacer tous les caractères contenus dans le champ sélectionné en cours.
Pour effacer le caractère alphanumérique suivant ou précédent et pour se déplacer à
l’intérieur du champ en cours.
F1, F2, F3, F4
Touches numériques 0 ÷ 9
ENTRE
MEMORY
SPACE
CLEAR
C →, C ←
MOT DE PASSE (PASSWORD) POUR ACCEDER AUX MENUS
Deux mots de passe permettent à certains opérateurs d’accéder à certains menus de l’unité de contrôle CP 3100. Les deux mots de passe
de l’unité de contrôle sont :
• MOT DE PASSE UTILISATEUR – C’est le mot de passe que tous les opérateurs habilités à la configuration du système peuvent utiliser. Il
peut se composer d’un maximum de 8 caractères numériques. Pour attribuer le mot de passe utilisateur, suivez les instructions fournies au
paragraphe UTILISATION DU MENU “SYSTEM”.
• MOT DE PASSE SUPERVISEUR – C’est un mot de passe secret que seul le superviseur du système peut utiliser. Il est établi par RCF et
peut remplacer le mot de passe utilisateur en cas d’oubli.
REMARQUE
• Le “password supervisor” est établi par RCF et ne peut pas se modifier.
Les menus pouvant être protégés par un mot de passe sont :
• menu CONFIGURATION, pour la configuration du système (voir paragraphe CONFIGURATION DU SYSTÈME).
• menu STORE CONFIG., pour réaliser une configuration (voir paragraphe REALISATION D’UNE CONFIGURATION).
Quand l’unité de contrôle demande le mot de passe, l’écran affiche la page suivante.
INSERT PASSWORD TO ACCESS CONFIGURATION
PASSWORD:
Pour accéder au menu suivant, tapez le ‘mot de passe utilisateur’ ou le ‘mot de passe superviseur’, au clavier numérique de l’unité de contrôle et appuyez sur la touche ENTER.
QUITTER UN MENU
Pour quitter un menu/ sous-menu de l’unité de contrôle :
1) Appuyez sur la touche ESC. Si des définitions ou des paramètres ont été modifiés, l’écran affiche le message suivant qui vous demande
si vous souhaitez enregistrer ou non les nouvelles valeurs.
WARNING: PARAMETERS MODIFIED !
SAVE NEW PARAMETERS ?
NO
YES
2a) Utilisez les touches ↑ / ↓ pour amener le point de sélection sur YES et appuyez sur ENTER pour mémoriser temporairement les nouveaux paramètres.
2b) Utilisez les touches ↑ / ↓ pour amener le point de sélection sur NO et appuyez sur ENTER pour ne pas enregistrer les nouveaux paramètres et conserver ceux précédemment mémorisés.
3) S’il n’y a eu aucune variation de définitions ni de paramètres, l’appareil affichera directement la page-écran du menu précédent.
MISE EN GARDE
• Lorsque le système se configure, il est indispensable, pour un enregistrement permanent des définitions effectuées sur le disque dur de
l’unité de contrôle, de sortir du menu principal de configuration avec la commande COMPILE & SAVE (voir paragraphe UTILISATION
DU MENU “COMPILE & SAVE”).
143
AFFICHAGE DU NIVEAU AUDIO
Un menu approprié affiche une barre VU qui indique le niveau du signal audio.
Cette indication permet de :
• contrôler et régler le niveau des signaux audio sur les entrées des cartes AUDIO INPUT IB 3210 / IB 3280.
• contrôler et régler le niveau des signaux audio sur les sorties des cartes AUDIO OUTPUT OB 3230.
• contrôler le niveau des signaux audio sur les sorties enceintes des unités de puissance contrôlées par les A.C.U. (cartes rétro-amplificateur
RB 3300).
La barre VU peut afficher des signaux audio compris entre –12 dB et + 6 dB.
FONCTIONNEMENT DE L’AVERTISSEUR SONORE
L’appareil est doté d’un avertisseur sonore (buzzer), qui émet un son continu dans les cas suivants :
• pendant la phase d’auto-configuration du système.
• lorsqu’on active un avis/ alarme (voir paragraphe ALARMES DU SYSTÈME). Dans ce cas, pour éteindre l’avertisseur sonore, vous devez
accéder au menu pour afficher l’état des alarmes (voir paragraphe AFFICHAGE DE L’ETAT DES ALARMES) ; cette opération ne désactive
pas l’alarme, mais sa signalisation seulement.
L’avertisseur sonore émet un bip chaque fois qu’un avis doit être donné.
FONCTIONNEMENT DU RETRO-ECLAIRAGE
Le rétro-éclairage de l’écran à cristaux liquides se commande dans les cas suivants :
• chaque fois qu’on appuie sur une touche sur le panneau avant de l’unité de contrôle : un temporisateur éteint automatiquement le rétroéclairage de l’écran au bout de 2 minutes environ après la dernière pression d’une touche.
• au démarrage du système : dans ce cas, le rétro-éclairage reste allumé jusqu’à la fin de la phase d’auto-configuration.
• en utilisant le menu pour la configuration du système (menu CONFIGURATION) : dans ce cas, le rétro-éclairage reste allumé tant que vous
ne quittez pas le menu de configuration (temporisateur exclu).
MISE EN MARCHE DE L’APPAREIL
Une fois que l’unité de contrôle CP 3100 est allumée, elle charge le programme de gestion et procède à l’auto-configuration du système, qui
consiste à détecter tous les dispositifs installés - et à les programmer tels qu’ils sont définis dans les fichiers de configuration du système mémorisés sur le disque dur de l’appareil. L’écran à cristaux liquides affiche la page suivante :
RCF RX 3000 AUDIO SYSTEM
SYSTEM CONFIGURATION STARED
PLEASE WAIT ...
"##############
03 NOV 1999
15:29:52
CONFIGURATION CORRECTE DU SYSTEME
La procédure d’auto-configuration du système étant terminée, si le système a été correctement configuré, l’écran affichera la page suivante,
contenant le menu principal de l’unité.
RCF RX 3000 AUDIO SYSTEM
F1: CONFIGURATION
F2: ALARMS
"##############
ENGLISH _ _ _ ▼
F3: STORE CONFIG.
F4: AUDIO PROCESS
03 NOV 1999
15:29:52
ERREURS DANS LA CONFIGURATION DU SYSTEME
La procédure d’auto-configuration du système étant terminée, si le système n’a pas été correctement configuré, soit si le nombre d’appareils précédemment configurés (avec le menu approprié de l’unité de contrôle) ne coïncide pas au nombre d’appareils effectivement trouvés
et correctement configurés, l’écran affichera la page suivante:
RCF RX 3000 AUDIO SYSTEM
WRONG SYSTEM CONFIGURATION
F1: CONFIGURATION
F2: RUN->
ENGLISH _ _ _ ▼
Dans ce cas, l’écran affiche deux possibilités, à sélectionner avec la touche F1 ou F2.
• F1: CONFIGURATION
Vous pouvez, en appuyant sur la touche F1, configurer le système différemment, pour éliminer les erreurs de configuration. Pour l’utilisation des fonctions des sous-menus, consultez le paragraphe CONFIGURATION DEL SYSTÈME.
• F2: RUN->
Vous pouvez, en appuyant sur la touche F2, accéder au menu principal de l’unité, sans corriger les erreurs de
configuration relevées.
MISE EN GARDE
• Si les erreurs de configuration relevées ne sont pas corrigées, certaines fonctions du système seront compromises, puisque certains dispositifs seront considérés comme “absents”.
144
SELECTION DE LA LANGUE
Les messages qui apparaissent à l’écran de l’unité de contrôle CP 3100 peuvent s’afficher en plusieurs langues. A partir du menu principal,
appuyez sur les touches + et - pour sélectionner la langue souhaitée.
RCF RX 3000 AUDIO SYSTEM
F1 : CONFIGURATION
F2 : ALARMS
"##############
ENGLISH _ _ _ ▼
F3: STORE CONFIG.
F4: AUDIO PROCESS
03 NOV 1999
15:29:52
MENU PRINCIPAL
Le menu principal contient les quatre sous-menus suivants.
• F1: CONFIGURATION
Appuyez sur la touche F1 pour accéder au sous-menu : Il permet de configurer tout le système (dispositifs, fonctions, etc.). Ce sous-menu permet de créer des fichiers de configuration pour programmer tous les dispositifs du
système (voir paragraphe REALISATION D’UNE CONFIGURATION). Pour l’utilisation des fonctions du sous-menu, consultez le paragraphe CONFIGURATION DU SYSTÈME.
• F2: ALARMS
Appuyez sur la touche F2 pour accéder au sous-menu : Il permet d’afficher l’état des alarmes gérées par le système. Pour l’utilisation des fonctions du sous-menu, consultez le paragraphe AFFICHAGE DE L’ETAT DES
ALARMES.
• F3: STORE CONFIG.
Appuyez sur la touche F3 pour accéder au sous-menu : Il permet de programmer tous les dispositifs du système tels qu’ils sont définis dans les fichiers de configuration créés avec le sous-menu F1: CONFIGURATION.
Pour l’utilisation des fonctions, consultez le paragraphe REALISATION D’UNE CONFIGURATION.
• F4: AUDIO PROCESS
Appuyez sur la touche F3 pour accéder au sous-menu : Il permet de définir et varier rapidement de nombreux
paramètres audio ; il permet également de surveiller les signaux audio traités par le système (signaux qui entrent,
qui sortent, etc.). Pour l’utilisation des fonctions du sous-menu, consultez le paragraphe DEFINITIONS AUDIO.
En bas à gauche du menu principal, la BARRE D’ACTIVITE indique, en “avançant” le bon fonctionnement du système : la croissance de la
barre représente la progression du cycle de contrôle que l’unité CP 3100 effectue périodiquement sur les dispositifs du système.
En bas à droite du menu principal sont indiquées la date et l’heure courantes, qui se règlent avec un menu approprié.
CONFIGURATION DU SYSTEME (menu “CONFIGURATION”)
RCF RX 3000 AUDIO SYSTEM
F1 : CONFIGURATION
F2 : ALARMS
"##############
ENGLISH _ _ _ ▼
F3: STORE CONFIG.
F4: AUDIO PROCESS
03 NOV 1999
15:29:52
Pour accéder aux menus permettant de configurer le système (dispositifs, fonctions, etc.), appuyez sur la touche F1 à partir du menu principal : l’écran affichera une page de menu contenant les champs suivants.
DEVICE
Il indique les dispositifs du système. Les inscriptions affichées sont:
• CONSOLES: indiquant les consoles numériques BM 3616.
• AUDIO INP PROC. indiquant les cartes AUDIO INPUT IB 3210 / IB 3280.
• AUDIO OUT PROC. indiquant les cartes AUDIO OUTPUT OB 3230.
• GPI PROCESS. indiquant les cartes INPUT/ OUTPUT numériques IO 3250.
• ACU indiquant les cartes rétro-amplificateur RB 3300.
USED
Il indique le nombre d’appareils qui ont été configurés avec le menu correspondant de l’unité de contrôle.
FOUND
Il indique le nombre d’appareils détectés et correctement programmés par l’unité de contrôle, selon la procédure d’auto-configuration du système.
La première page-écran n’affiche que les données concernant les 2 premiers dispositifs du système; pour afficher les suivants, utilisez les touches ↑ / ↓ et/ ou page ↑ / page ↓.
ESC to go back
DEVICE
CONSOLES
AUDIO INP PROC.
ENTER to Configure
USED
FOUND
6
6
4
4
Pag ↓
ESC to go back
DEVICE
AUDIO OUT PROC.
GPI PROC.
ENTER per Config.
USED
FOUND
8
8
8
8
Pag ↓
ESC to go back
DEVICE
GPI PROCESS.
ACU
ENTER to Configure
USED
FOUND
8
8
10
10
Appuyez sur la touche ESC (Echap) pour revenir au menu principal..
145
Appuyez sur la touche ENTER pour configurer les dispositifs du système : l’écran affichera un message demandant l’éventuel mot de passe
de l’unité de contrôle (voir paragraphe MOT DE PASSE POUR ACCEDER AUX MENUS) ; tapez le mot de passe (s’il est prévu) au clavier numérique et appuyez sur ENTER : l’écran de l’appareil affichera les sous-menus suivants:
• INPUT PROCESSORS
Menu pour programmer les entrées des cartes AUDIO INPUT IB 3210 / IB 3280.
• OUTPUT PROCESSORS
Menu pour programmer les sorties des cartes AUDIO OUTPUT OB 3230.
• GROUPS
Menu pour programmer les groupes de zones audio du système.
• RELAY CONFIGURATION
Menu pour programmer les relais des cartes INPUT/OUTPUT numériques IO 3250.
• CONSOLES
Menu pour programmer les consoles numériques BM 3616.
• ACU (AMPLIFIERS)
Menu pour programmer les unités A.C.U. préposées au contrôle des amplificateurs de puissance du système (voir paragraphe UNITES A.C.U.).
• GPI EVENTS DEFINITION
Menu pour programmer les opérations commandables à partir des entrées GPI des cartes INPUT/ OUTPUT numériques IO 3250.
• TIMER EVENTS DEFINITION Menu pour programmer les opérations temporisées, soit les opérations qui doivent avoir lieu à une heure
préétablie.
• VOX
Menu pour programmer les dispositifs VOX des cartes AUDIO OUTPUT OB 3230.
• RECORDER
Menu pour enregistrer et reproduire des fichiers audio.
• SYSTEM
Menu pour établir des paramètres du système.
• COMPILE & SAVE
Commande pour quitter le menu de configuration du système en enregistrant les définitions effectuées.
• EXIT WITHOUT SAVING
Commande pour quitter le menu de configuration du système sans enregistrer les définitions effectuées.
La première page-écran n’affiche que les 3 premières rubriques du menu de configuration; pour afficher les suivantes, utilisez les touches ↑ /
↓ et/ ou page ↑ / page ↓.
INSERT PASSWORD TO ACCESS CONFIGURATION
PASSWORD:
“nr password”
ENTER
- - - = = = MAIN MENU = = = - - ->INPUT PROCESSORS
->OUTPUT PROCESSORS
->GROUPS
Pag ↓
- - - = = = MAIN MENU = = = - - ->RELAY CONFIGURATION
->CONSOLES
->ACU (AMPLIFIERS)
Pag ↓
- - - = = = MAIN MENU = = = - - ->GPI EVENTS DEFINITION
->TIMER EVENTS DEFINITION
->VOX
Pag ↓
- - - = = = MAIN MENU = = = - - ->RECORDER
->SYSTEM
->COMPILE & SAVE
Pag ↓
- - - = = = MAIN MENU = = = - - ->SYSTEM
->COMPILE & SAVE
->EXIT WITHOUT SAVING
146
MISES EN GARDE
• Toutes les définitions effectuées avec les menus de configuration sont temporairement mémorisées dans la RAM de l’unité de contrôle ;
pour les enregistrer de façon permanente sur le disque dur de l’unité de contrôle sous la forme de fichiers de configuration, il est indispensable de quitter le menu pour la configuration du système en agissant sur la commande COMPILE & SAVE (voir paragraphe
UTILISATION DU MENU COMPILE & SAVE).
• Quand vous utilisez le menu de configuration de l’unité de contrôle, vous ne pouvez pas accéder au système au moyen du PC de configuration.
PARAMETRES CARACTERISTIQUES
L’installation des cartes modulaires du système RX 3000 (cartes AUDIO INPUT IB 3210 / IB 3280, cartes AUDIO OUTPUT OB 3230, etc.) définit les paramètres indiqués ci-après, qui permettent d’identifier les cartes et les entrées et/ou sorties correspondantes dans les menus de
configuration.
NUMERO CARTE
Chaque carte d’un type défini est identifiée par un numéro progressif, qui dépend de la fente et du sub-rack
où elle est installée.
La numérotation progressive des cartes AUDIO INPUT IB 3210 / IB 3280 et AUDIO OUTPUT OB 3230, du
premier au dernier numéro de cartes de ce type présentes dans le système, part de la carte installée dans la
fente numéro 1 du premier sub-rack MB 3200, et arrive à la dernière carte installée dans la fente ayant le
numéro le plus grand du dernier sub-rack.
La numérotation progressive des cartes INPUT/ OUTPUT numériques IO 3250, du premier au dernier numéro de cartes de ce type présentes dans le système, part de la carte installée dans la fente ayant le plus petit
numéro du premier sub-rack MB 3200 (utilisé pour ce type de carte) et arrive à la dernière carte installée dans
la fente ayant le numéro le plus grand du dernier sub-rack.
NUMERO ENTRÉE AUDIO
Les 8 entrées audio de chacune des cartes AUDIO INPUT IB 3210 / IB 3280 présentes dans le système s’identifient par autant de numéros progressifs qui dépendent du numéro d’identification de la carte à laquelle
ils appartiennent (paramètre NUMERO CARTE). La numérotation progressive des entrées, du premier au
dernier numéro des entrées audio présentes dans le système (max 64 entrées audio), part de la carte AUDIO
INPUT IB 3210 / IB 3280 numéro 1 : la carte numéro 1 présente les entrées de 1 à 8, la carte numéro 2 les
entrées de 9 à 16 et ainsi de suite jusqu’à, par exemple, la dernière carte numéro 4, qui présente les entrées
de 25 à 32.
NUMERO SORTIE AUDIO
Les 8 sorties audio de chacune des cartes AUDIO OUTPUT OB 3230 présentes dans le système s’identifient
par autant de numéros progressifs qui dépendent du numéro d’identification de la carte à laquelle ils appartiennent (paramètre NUMERO CARTE). La numérotation progressive des sorties, du premier au dernier
numéro des sorties présentes dans le système (max 128 sorties audio), part de la carte AUDIO OUTPUT OB
3230 numéro 1 : la carte numéro 1 présente les sorties de 1 à 8, la carte numéro 2 les sorties de 9 à 16 et
ainsi de suite jusqu’à, par exemple, la dernière carte numéro 8, qui présente les sorties de 57 à 64.
NUMERO ENTRÉE GPI
Les 16 entrées GPI de chacune des cartes INPUT/ OUTPUT numériques IO 3250 présentes dans le système s’identifient par autant de numéros progressifs qui dépendent du numéro d’identification de la carte à laquelle ils appartiennent (paramètre NUMERO CARTE). La numérotation progressive des entrées GPI, du premier au dernier numéro des entrées audio présentes dans le système (max 256 entrées GPI), part de la carte INPUT/ OUTPUT numérique IO 3250 numéro 1 : la carte numéro 1 présente les entrées de 1 à 16, la carte numéro 2 les entrées de 17 à 32 et ainsi de suite jusqu’à, par exemple, la dernière carte numéro 8, qui
présente les entrées de 113 à 128.
NUMERO RELAIS
Les 24 relais de chacune des cartes INPUT/ OUTPUT numériques IO 3250 présentes dans le système s’identifient par autant de numéros progressifs qui dépendent du numéro d’identification de la carte à laquelle
ils appartiennent (paramètre NUMERO CARTE). La numérotation progressive des relais, du premier au dernier numéro des relais présents dans le système (max 384 relais), part de la carte INPUT/ OUTPUT numérique IO 3250 numéro 1 : la carte numéro 1 présente les relais de 1 à 24, la carte numéro 2 les relais de 25 à
48 et ainsi de suite jusqu’à, par exemple, la dernière carte numéro 8, qui présente les relais de 169 à 192.
MISE EN GARDE
• La numérotation qui identifie les cartes AUDIO INPUT IB 3210 / IB 3280, les cartes AUDIO OUTPUT OB 3230 et les entrées et les sorties
audio de ces cartes, est unique même quand le système contient plusieurs matrices audio. Si nous considérons, par exemple, un système présentant deux matrices audio indépendantes, avec 32 entrées (4 cartes AUDIO INPUT) et 64 sorties (8 cartes AUDIO OUTPUT) chacune, la carte AUDIO INPUT IB 3210 / IB 3280 numéro 5 correspondra à la première carte d’entrée de la seconde matrice, et la carte AUDIO OUTPUT OB 3230 numéro 9 à la première carte de sortie de la seconde matrice ; par conséquent, l’entrée numéro 33 correspondra à
la première entrée de la seconde matrice, tandis que la sortie numéro 65 correspondra à la première sortie de la seconde matrice.
UTILISATION DU MENU “INPUT PROCESSORS”
- - - = = = MAIN MENU = = = - - ->INPUT PROCESSORS
->OUTPUT PROCESSORS
->GROUPS
Le menu permet de programmer les entrées des cartes AUDIO INPUT IB 3210 / IB 3280. A partir du menu principal de configuration de l’appareil, amenez, avec les touches ↑ / ↓ et/ ou page ↑ / page ↓ le point de sélection sur le sous-menu INPUT PROCESSORS et appuyez sur
la touche ENTER ; l’écran affichera les champs suivants .
N.
NAME
Il indique le numéro d’identification de l’entrée audio à programmer. L’indication est séquentielle : l’entrée numéro 1 de la carte AUDIO INPUT numéro 1 correspond au numéro 1, l’entrée numéro 1 de la carte AUDIO INPUT numéro 2 correspond au numéro 9, l’entrée numéro 8 de la carte AUDIO INPUT numéro 4 correspond au numéro 32, etc.
Il permet de définir le nom d’identification de l’entrée, qui peut se composer d’un maximum de 16 caractères alphanumériques. Utilisez les touches + et - pour sélectionner en rotation les caractères alphanumériques ; appuyez sur ENTER pour confirmer chaque
caractère. Les caractères numériques peuvent se sélectionner directement du clavier numérique.
147
TYPE
Il permet de définir la typologie de l’entrée. Utilisez les touches + et - pour sélectionner le type souhaité parmi les suivants.
• AUDIO STD: indique une entrée générique, servant à relier un appareil audio ne présentant aucune connexion avec le système
RX 3000 sauf la ligne audio. Une entrée AUDIO STD n’a aucune priorité et n’est sujette à aucune gestion particulière de la part
du système.
• PLAYBACK indique une entrée dédiée à la connexion avec la sortie LINE OUT de la carte audio de l’unité de contrôle, pour la
reproduction de signaux audio (fichier audio). On peut définir une seule entrée de ce type. Si la carte audio ne sert pas à reproduire des signaux audio, il n’est pas nécessaire de configurer une entrée de ce type.
• FIREMAN 1 indique une entrée dédiée à la connexion d’une source FIREMAN 1, ayant priorité absolue (voir paragraphe OPERATIONS COMMANDABLES A PARTIR DES ENTRÉES GPI). On peut définir une seule entrée de ce type.
• FIREMAN 2 indique une entrée dédiée à la connexion d’une source FIREMAN 2, ayant priorité absolue (voir paragraphe OPERATIONS COMMANDABLES A PARTIR DES ENTRÉES GPI). On peut définir une seule entrée de ce type.
• CONSDIG n. indique une entrée dédiée à la connexion d’une console numérique BM 3616. Le n. représente le numéro d’identification de la console, compris entre 1 et 16 (nombre maxi de consoles numériques gérées) ; ce numéro est établi localement sur
la console, en suivant la procédure pour l’attribution de l’adresse.
• CONSGPI n. indique une entrée dédiée à la connexion d’une console BM 3604. Le n. représente le numéro d’identification de la
console, compris entre 1 et 24 (nombre maxi de consoles gérées).
• BGM n. indique une entrée dédiée à la connexion d’une source pour musique de fond (voir paragraphe DIFFUSION DE MUSIQUE
DE FOND). Le n. représente le numéro d’identification de la source, compris entre 1 et 8 (nombre maxi de sources de fond gérées).
Pour afficher les entrées suivantes ou précédentes, appuyez sur les touches ↑ / ↓ et/ ou page ↑ / page ↓.
N.
1
2
3
NAME
SOURCE 1
SOURCE 2
SOURCE 3
TYPE
PLAYBACK _ ▼
CONSGPI1_ ▼
CONSGPI2_ ▼
Pag ↓
N.
4
5
6
NAME
SOURCE 4
SOURCE 5
SOURCE 6
TYPE
CONSDIG1_____ ▼
CONSDIG2_____ ▼
CONSDIG3____ ▼
Pour quitter le sous-menu, appuyez sur ESC et procédez comme l’indique le paragraphe QUITTER UN MENU.
UTILISATION DU MENU “OUTPUT PROCESSORS”
- - - = = = MAIN MENU = = = - - ->INPUT PROCESSORS
->OUTPUT PROCESSORS
->GROUPS
Le menu permet de programmer les entrées des cartes AUDIO OUTPUT OB 3230. A partir du menu principal de configuration de l’appareil,
amenez, avec les touches ↑ / ↓ et/ ou page ↑ / page ↓ le point de sélection sur le sous-menu OUTPUT PROCESSORS et appuyez sur la
touche ENTER ; l’écran affichera les champs suivants.
N.
Il indique le numéro d’identification de la sortie audio à programmer. L’indication est séquentielle : la sortie numéro 1 de la carte AUDIO INPUT numéro 1 correspond au numéro 1, la sortie numéro 1 de la carte AUDIO INPUT numéro 2 correspond au numéro 9, la
sortie numéro 8 de la carte AUDIO INPUT numéro 8 correspond au numéro 64, etc.
NAME Il permet de définir le nom de la sortie, appelé également nom de la zone audio, qui peut se composer d’un maximum de 16 caractères alphanumériques. Utilisez les touches + et - pour sélectionner en rotation les caractères alphanumériques ; appuyez sur
ENTER pour confirmer chaque caractère. Les caractères numériques peuvent se sélectionner directement au clavier numérique.
VOX
Il permet d’activer/ désactiver la fonction VOX sur la sortie (voir paragraphe DISPOSITIF VOX). Utilisez les touches + et - pour sélectionner une des options suivantes :
• ON - Fonction VOX activée sur la sortie.
• OFF - Fonction VOX désactivée sur la sortie.
TYPE Il permet de définir la typologie de l’entrée. Utilisez les touches + et - pour sélectionner le type souhaité parmi les suivants :
• GENERIC indique une sortie générique, qui n’est sujette à aucune gestion particulière de la part du système.
• RECORDER indique une sortie dédiée à la connexion avec l’entrée LINE IN de la carte audio de l’unité de contrôle, pour l’enregistrement de signaux audio sur fichier. On peut définir une seule sortie de ce type. Si la carte audio ne sert pas à enregistrer
des signaux audio, il n’est pas nécessaire de configurer une sortie de ce type.
• BGM n.” indique une sortie dédiée à la sonorisation d’une zone audio dans laquelle doit être normalement diffusée de la musique de fond (voir paragraphe DIFFUSION DE MUSIQUE DE FOND). Le n. représente le numéro de la source de fond qui doit être
diffusée dans la zone (numéro compris entre 1 et 8) ; si vous sélectionnez, par exemple, une sortie BGM 1, la zone audio correspondante recevra normalement la diffusion de la source connectée à l’entrée BGM 1. Vous pouvez attribuer la même source de
musique de fond à plusieurs sorties.
148
RELAY Il permet de choisir un relais des cartes INPUT/OUTPUT numériques IO 3250 à commuter quand la sortie se connecte à une entrée
audio, sauf les entrées BGM (background music). Le relais peut être normalement ouvert ou normalement fermé, et regagnera sa
position normale, définie avec le menu RELAY CONFIGURATION, dès que la sortie ne sera plus connectée. Utilisez les touches +
et - pour sélectionner le nom du relais souhaité parmi ceux qui ont été définis avec le menu RELAY CONFIGURATION (champ NAME) ; si vous choisissez NO RELAY, vous ne sélectionnerez aucun relais.
MISE EN GARDE
• Le relais ne commute jamais quand la sortie est connectée à une entrée BGM (background music).
REMARQUE
• Les sorties des cartes AUDIO OUTPUT OB 3230 permettent de sonoriser une zone audio définie ; par conséquent, le menu OUTPUT PROCESSORS permet indirectement de définir les zones audio du système.
La première page-écran n’affiche que les 4 premiers champs (N., NAME, VOX, TYPE) des 3 premières sorties. Pour afficher le champ suivant,
appuyez sur la touche →; pour afficher le champ précédent, appuyez sur la touche ←.
N.
1
2
3
NAME
ZONE 1
ZONE 2
ZONE 3
VOX
OFF▼
OFF▼
OFF▼
TIPO
GENERIC_ _ ▼
GENERIC_ _ ▼
GENERIC_ _ ▼
→
1
2
3
VOX
OFF▼
OFF▼
OFF▼
TYPE
GENERIC_ _ ▼
GENERIC_ _ ▼
GENERIC_ _ ▼
RELAY
NO RELAY _ _ _ _ _ _ ▼
NO RELAY _ _ _ _ _ _ ▼
NO RELAY _ _ _ _ _ _ ▼
Pour afficher les sorties suivantes ou précédentes, appuyez sur les touches ↑ / ↓ et/ou page ↑ / page ↓.
N.
1
2
3
NAME
ZONE 1
ZONE 2
ZONE 3
VOX
OFF▼
OFF▼
OFF▼
TYPE
GENERIC_ _ ▼
GENERIC_ _ ▼
GENERIC_ _ ▼
Pag ↓
N.
4
5
6
NAME
ZONE 4
ZONE 5
ZONE 6
VOX
OFF▼
OFF▼
OFF▼
TYPE
GENERIC_ _ ▼
GENERIC_ _ ▼
GENERIC_ _ ▼
Pour quitter le sous-menu, appuyez sur ESC et procédez comme l’indique le paragraphe QUITTER UN MENU.
UTILISATION DU MENU “GROUPS”
- - - = = = MAIN MENU = = = - - ->INPUT PROCESSORS
->OUTPUT PROCESSORS
->GROUPS
Le menu permet de définir les groupes de zones audio, i. e. les ensembles composés de plusieurs zones audio. Les groupes de zones permettent de simplifier les opérations de sélection des zones dans lesquelles diffuser un signal audio défini et peuvent être utilisés, par exemple, par les consoles BM 3604 et BM 3616 pour sélectionner plusieurs zones audio avec un seule touche. Toutes les zones du système peuvent appartenir à un groupe. Utilisez, à partir du menu principal de configuration de l’appareil, les touches ↑ / ↓ et/ou page ↑ / page ↓ pour
amener le point de sélection sur le sous-menu GROUPS et appuyez sur ENTER ; l’écran affichera les champs suivants.
N. GROUPS Il indique en séquence le numéro du groupe de zones audio à programmer. On peut définir un maximum de 24 groupes de zones.
NAME
Il permet de définir le nom d’identification du groupe de zones, qui peut se composer d’un maximum de 16 caractères alphanumériques. Utilisez les touches + et - pour sélectionner en rotation les caractères alphanumériques ; appuyez sur ENTER pour
confirmer chaque caractère. Les caractères numériques peuvent se sélectionner directement au clavier numérique.
A côté du nom du groupe de zones est indiqué le nombre de zones appartenant à ce groupe. Pour définir les zones appartenant à
chaque groupe, appuyez sur la touche F1 qui vous permettra d’accéder à un sous-menu spécial (voir paragraphe DEFINITION DES
ZONES DE CHAQUE GROUPE).
149
La première page-écran n’affiche que les 3 premiers groupes de zones. Pour afficher les groupes de zones suivants ou précédents, appuyez
sur les touches ↑ / ↓ et/ou page ↑ / page ↓ keys.
GROUP N.
1
2
3
NAME
GROUP 1 _ _ _ _ _ _ _
GROUP 2 _ _ _ _ _ _ _
GROUP 3 _ _ _ _ _ _ _
(F1=CHANGE)
4
12
2
Pag ↓
GROUP N.
4
5
6
NAME
NO ZONE _ _ _ _ _ _ _
NO ZONE _ _ _ _ _ _ _
NO ZONE _ _ _ _ _ _ _
(F1=CHANGE)
0
0
0
Pour quitter les sous-menu, appuyez sur ESC et procédez comme l’indique le paragraphe QUITTER UN MENU.
DEFINITION DES ZONES DE CHAQUE GROUPE
Pour afficher le sous-menu qui permet de définir les zones audio appartenant à chaque groupe, amenez le point de sélection, à partir du menu GROUPS, sur le nom du groupe à configurer et appuyez sur F1. L’écran affichera les champs suivants.
ADD. ZONE Il permet de choisir les zones à insérer dans chaque groupe. Utilisez les touches + et - pour sélectionner le nom de la zone
parmi ceux qui ont été précédemment définis avec le menu OUTPUT PROCESSORS : toutes les zones du système peuvent
être sélectionnées. Choisissez NO ZONE pour n’en sélectionner aucune.
MISE EN GARDE
• Vous ne pouvez pas, dans un groupe de zones, insérer une sortie audio (zone) RECORDER: si, par exemple, le système compte 64 sorties
dont une est configurée comme RECORDER, le groupe pourra se composer au maximum de 63 zones (64-1).
La première page-écran n’affiche que les 3 premières zones du groupe. Pour afficher les zones suivantes ou précédentes, appuyez sur les
touches ↑ / ↓ et/ou page ↑ / page ↓ keys.
ADD. ZONE
1
2
3
ZONE 1 _ _ _ _ _ _ _ ▼
ZONE 2 _ _ _ _ _ _ _ ▼
ZONE 3 _ _ _ _ _ _ _ ▼
Pag ↓
ADD. ZONE
4
5
6
ZONE 4 _ _ _ _ _ _ _ ▼
NO ZONE _ _ _ _ _ _ ▼
NO ZONE _ _ _ _ _ _ ▼
Pour quitter le sous-menu, appuyez sur ESC et procédez comme l’indique le paragraphe QUITTER UN MENU..
UTILISATION DU MENU “RELAY CONFIGURATION”
- - - = = = MAIN MENU = = = - - ->OUTPUT PROCESSORS
->GROUPS
->RELAY CONFIGURATION
Le menu permet de programmer les relais des cartes INPUT/OUTPUT numériques IO 3250. A partir du menu principal de configuration de
l’appareil, utilisez les touches ↑ / ↓ et/ou page ↑ / page ↓ pour amener le point de sélection sur le sous-menu RELAY CONFIGURATION et
appuyez sur la touche ENTER ; l’écran affichera les champs suivants.
N.
Il indique le numéro d’identification du relais à programmer. L’indication est séquentielle: le relais numéro 1 de la carte INPUT/OUTPUT numérique numéro 1 correspond au numéro 1, le relais numéro 1 de la carte INPUT/OUTPUT numérique numéro 2 correspond au numéro 25, le relais numéro 24 de la carte INPUT/OUTPUT numérique numéro 8 correspond au numéro 192, etc.
NAME
Il permet de définir le nom d’identification du relais, qui peut se composer d’un maximum de 16 caractères alphanumériques. Utilisez les touches + et - pour sélectionner en rotation les caractères alphanumériques; appuyez sur ENTER pour confirmer chaque caractère. Les caractères numériques peuvent se sélectionner directement du clavier numérique.
STATUS Il permet de définir l’état normal du contact du relais, soit l’état dans lequel le contact doit être quand le relais n’est pas commandé. Utilisez les touches + et - pour sélectionner une des options suivantes:
• OPEN - Contact normalement ouvert.
• CLOSED - Contact normalement fermé.
150
La première page-écran n’affiche que les 3 premiers relais. Pour afficher les relais suivants ou précédents, appuyez sur les touches ↑ / ↓ et/ou
page ↑ / page ↓.
N.
1
2
3
NAME
RLY 1 _ _ _ _ _ _ _
RLY 2 _ _ _ _ _ _ _
RLY 3 _ _ _ _ _ _ _
STATUS
OPEN _ _ _ _ ▼
OPEN_ _ _ _ ▼
CLOSED _ _ ▼
Pag ↓
N.
4
5
6
NAME
RLY 4 _ _ _ _ _ _ _
RLY 5 _ _ _ _ _ _ _
RLY 6 _ _ _ _ _ _ _
STATUS
OPEN_ _ _ _ ▼
OPEN _ _ _ _ ▼
CLOSED_ _ _ _ ▼
Pour quitter le sous-menu, appuyez sur ESC et procédez comme l’indique le paragraphe QUITTER UN MENU.
UTILISATION DU MENU “CONSOLES”
- - - = = = MAIN MENU = = = - - ->GROUPS
->RELAY CONFIGURATION
->CONSOLES
Le menu permet de programmer les consoles numériques BM 3616. A partir du menu principal de configuration de l’appareil, utilisez les touches ↑ / ↓ et/ou page ↑ / page ↓ pour amener le point de sélection sur le sous-menu CONSOLES et appuyez sur la touche ENTER ; l’écran
affichera les champs suivants.
CONS.
Il indique le numéro d’identification de la console numérique BM 3616 à programmer ;ce numéro est défini localement sur la
console, en suivant la procédure pour l’attribution de l’adresse (voir manuel d’installation et utilisation des consoles BM 3616).
NAME
Il permet de définir le nom d’identification de la console, qui peut se composer d’un maximum de 16 caractères alphanumériques. Utilisez les touches + et - pour sélectionner en rotation les caractères alphanumériques; appuyez sur ENTER pour
confirmer chaque caractère. Les caractères numériques peuvent se sélectionner directement au clavier numérique.
PASSWORD Il permet de définir le mot de passe pour bloquer la console. Le mot de passe peut contenir un maximum de 8 caractères
numériques, que vous pouvez sélectionner sur les 8 touches numériques de la console, à savoir : 1, 2, 3, 4, 5, 6, 7, 8. Utilisez
les touches + et - pour sélectionner les caractères numériques en rotation ; appuyez sur ENTER pour confirmer chaque caractère. Vous pouvez sélectionner les caractères directement au clavier numérique. Si vous n’insérez aucun caractère dans le
champ et que vous laissez 8 espaces vides (caractères “blank”), vous ne définirez aucun mot de passe.
MISES EN GARDE
• Pour ne définir aucun mot de passe, vous devez laisser 8 espaces vides dans le champ.
• Pour définir le mot de passe, respectez les limites suivantes :
a. vous ne pouvez pas insérer d’espaces (caractères “blank”) entre deux caractères numériques du mot de passe.
b. vous ne pouvez pas insérer d’espaces (caractères “blank”) avant les caractères numériques du mot de passe.
Les exemples du tableau suivant montrent comment définir le mot de passe.
Exemple 1
Exemple 2
Exemple 3
Exemple 4
Exemple 5
PRIORITY
GEN CALL
EMERGENCY
1er
Car.
1
Blank
1
Blank
1
2e
Car.
2
Blank
2
1
Blank
3e
Car.
Blank
Blank
3
2
2
MOT DE PASSE
4e
5e
6e
Car.
Car.
Car.
Blank
Blank
Blank
Blank
Blank
Blank
4
5
6
3
Blank
Blank
3
Blank
Blank
7e
Car.
Blank
Blank
7
Blank
Blank
8e
Car.
Blank
Blank
8
Blank
Blank
Validité
Oui
Oui
Oui
Non
Non
Il permet de définir le niveau de priorité de la console. Utilisez les touches + et - pour définir le niveau de priorité de 2 à
7 ; le niveau 2 est le niveau de priorité le plus élevé pouvant être associé à la console et le niveau 7 est le plus bas (voir paragraphe ORDRE DE PRIORITE).
Il permet d’activer et de désactiver la touche GENERAL CALL de la console qui permet de sélectionner toutes les zones
et/ ou groupes de zones associées aux touches numériques de la console (touches de 1 à 16). Utilisez les touches + et pour sélectionner une des options suivantes :
• ENABLE - Touche GENERAL CALL activée.
• DISABLED - Touche GENERAL CALL désactivée.
Il permet d’activer et de désactiver la touche ALARM de la console qui permet de commander l’opération EMERGENCY
(voir paragraphe OPERATIONS COMMANDABLES A PARTIR DES CONSOLES NUMÉRIQUES BM 3616). Utilisez les touches + et - pour sélectionner une des options suivantes :
• ENABLE - Touche ALARM activée.
• DISABLED - Touche ALARM désactivée.
Si la touche d’alarme est activée, appuyez sur la touche F2 pour accéder à un sous-menu spécial qui vous permettra de la
programmer (voir paragraphe PROGRAMMATION DES TOUCHES ALARM).
151
KEY F1
KEY F2
KEY F3
Les 3 champs permettent de définir la fonction des touches F1, F2, F3 de la console. Utilisez les touches + et - pour sélectionner, dans chaque champ, la fonction souhaitée parmi les suivantes.
• DISABLED - Touche désactivée ; aucune fonction associée (sélection prédéfinie).
• PLAY - Touche configurée pour commander la reproduction d’un signal audio mémorisé comme fichier sur le disque dur de
l’unité de contrôle CP 3100 (voir paragraphe ENREGISTREMENT/ REPRODUCTION DE SIGNAUX AUDIO).
• RELAY - Touche configurée pour commander la commutation d’un ou de deux relais des cartes INPUT/OUTPUT numériques IO 3250: une à contact normalement fermé (CLOSED) et/ ou une à contact normalement ouvert (OPEN).
MISE EN GARDE
• Les fonctions PLAY et RELAY s’excluent : vous ne pouvez pas sélectionner les deux à la foi.
Quand une des touches F1, F2, F3 de la console est activée, appuyez sur la touche F3 pour accéder à un sous-menu spécial
qui vous permettra de programmer la fonction PLAY ou RELAY correspondante (voir paragraphe PROGRAMMATION DES
TOUCHES F1, F2, F3).
La première page-écran n’affiche que les 3 premiers champs (CONS., NAME, PASSWORD) des 3 premières consoles. Pour afficher le champ
suivant, appuyez sur la touche → ; pour afficher le champ précédent, appuyez sur la touche ←.
CONS.
1
2
3
NAME (F1=DEF. KEYS)
CONSOLLE 1
CONSOLLE 2
CONSOLLE 3
PASSWORD
________
________
________
PRYO
→
→
→
→
1
2
3
PRIORITY
4
6
2
GEN CALL
ENABLE_ _ ▼
DISABLE_ _ ▼
DISABLE_ _ ▼
EMERGENCE (F2)
ENABLE_ _ ▼
DISABLE_ _ ▼
DISABLE_ _ ▼
→
1
2
3
F1-KEY (F3)
PLAY_ _ ▼
DISAB._ _ ▼
DISAB._ _ ▼
F2-KEY (F3)
PLAY_ _ ▼
DISAB._ _ ▼
DISAB._ _ ▼
F3-KEY (F3)
PLAY_ _ ▼
DISAB._ _ ▼
DISAB._ _ ▼
Pour afficher les consoles suivantes ou précédentes, appuyez sur les touches ↑ / ↓ et/ou page ↑ / page ↓.
CONS.
1
2
3
NAME (F1=DEF. KEYS)
CONSOLLE 1
CONSOLLE 2
CONSOLLE 3
PASSWORD
________
________
________
PRIO
→
→
→
Pag ↓
CONS.
4
5
6
NAME (F1=DEF. KEYS)
CONSOLLE 4
CONSOLLE 5
___ _____
PASSWORD
________
________
________
PRIO
→
→
→
PROGRAMMATION DES TOUCHES “ZONE/ GROUP”
Pour afficher le sous-menu qui permet de programmer les 16 touches de sélection zone/ groupe de chaque console, vous devez amener le
point de sélection sur un champ quelconque de la console à configurer et appuyer sur la touche F1. L’écran affichera les champs suivants.
KEY
Il indique le numéro de la touche de sélection zone/ groupe à programmer.
ZONE Il permet de choisir la zone audio à associer à la touche de sélection zone/ groupe de la console. Utilisez les touches + et - pour
sélectionner le nom de la zone parmi ceux qui ont été définis précédemment avec le menu OUTPUT PROCESSORS. Si vous choisissez NO ZONE (sélection prédéfinie) vous ne sélectionnerez aucune zone..
MISE EN GARDE
• Pour éviter les erreurs pendant la compilation des fichiers de configuration du système, il est indispensable que vous sélectionniez une seule zone audio dans le champ ZONE, ou un groupe de zones dans le champ GROUP, mais pas les deux; lorsque vous effectuez la sélection d’une zone, vous devez toujours sélectionner l’option NO GROUP dans le champ GROUP.
GROUP Il permet de choisir le groupe de zones audio à associer à la touche de sélection zone/ groupe de la console. Utilisez les touches +
et - pour sélectionner le nom du groupe de zones parmi ceux qui ont été précédemment définis avec le menu GROUPS. Si vous
choisissez NO GROUP (sélection prédéfinie) vous ne sélectionnerez aucun groupe.
MISE EN GARDE
• Pour éviter les erreurs pendant la compilation des fichiers de configuration du système, il est indispensable que vous sélectionniez une seule zone audio dans le champ ZONE, ou un groupe de zones dans le champ GROUP, mais pas les deux; lorsque
vous effectuez la sélection d’un groupe de zones, vous devez toujours sélectionner l’option NO ZONE dans le champ ZONE.
152
La première page-écran n’affiche que les 3 premières touches de sélection zone/ groupe. Pour afficher les touches de sélection suivantes ou
précédentes, appuyez sur les touches ↑ / ↓ et/ou page ↑ / page ↓.
KEY
1
2
3
ZONE
ZONE 1 _ _ _ _ _ _ _ _ ▼
ZONE 2 _ _ _ _ _ _ _ _ ▼
ZONE 3 _ _ _ _ _ _ _ _ ▼
GROUP
NO GROUP _ _ _ _ _ _ _ ▼
NO GROUP _ _ _ _ _ _ _ ▼
NO GROUP _ _ _ _ _ _ _ ▼
Pag ↓
KEY
4
5
6
ZONE
ZONE 4 _ _ _ _ _ _ _ _ ▼
NO ZONE _ _ _ _ _ _ _ ▼
NO ZONE _ _ _ _ _ _ _ ▼
GROUP
NO GROUP _ _ _ _ _ _ _ ▼
GROUP 1_ _ _ _ _ _ _ _ ▼
GROUP 2_ _ _ _ _ _ _ _ ▼
Pag ↓
KEYS
7
8
9
ZONE
NO ZONE _ _ _ _ _ _ _ ▼
NO ZONE _ _ _ _ _ _ _ ▼
NO ZONE _ _ _ _ _ _ _ ▼
GROUP
GROUP 3_ _ _ _ _ _ _ _ ▼
NO GROUP_ _ _ _ _ _ _ ▼
NO GROUP _ _ _ _ _ _ _ ▼
PROGRAMMATION DES TOUCHES “ALARM”
MISE EN GARDE
• Vous ne pouvez pas programmer la touche ALARM d’une console si, dans le champ EMERGENCY du menu CONSOLES, l’option DISABLE est sélectionnée.
Pour afficher le sous-menu qui permet de programmer la touche ALARM de chaque console, vous devez amener le point de sélection sur un
champ quelconque de la console à configurer et appuyer sur la touche F2. L’écran de l’appareil affichera les champs suivants.
SOURCE
Il permet de choisir la source du signal d’alarme à diffuser (voir paragraphe OPERATIONS COMMANDABLES A PARTIR DES
CONSOLES NUMÉRIQUES BM 3616). Utilisez les touches + et - pour sélectionner la source parmi:
• MICROPHONE - La source du signal d’alarme est le microphone de la console.
• PLAYBACK – La source du signal d’alarme est un signal audio mémorisé sur le disque dur de l’unité de contrôle (fichier
audio).
MISE EN GARDE
• Vous ne pouvez pas utiliser comme signal d’alarme un message enregistré localement sur la console.
MESSAGE
PLAY MESS.
Lorsque vous sélectionnez une source d’alarme PLAYBACK (champ SOURCE), utilisez ce champ pour choisir le nom du
fichier audio à reproduire. Utilisez les touches + et - pour sélectionner le nom du signal audio souhaité parmi ceux que présente la bibliothèque des signaux audio fournie avec le système ou ceux créés au moyen des fonctions RECORD, ASSEMBLY et TONE GENERATOR (voir paragraphe UTILISATION DU MENU “RECORDER”).
Lorsque vous sélectionnez une source d’alarme PLAYBACK (champ SOURCE), utilisez ce champ pour décider si la reproduction du signal d’alarme doit se faire en une seule fois ou en plusieurs fois. Utilisez les touches + et - pour sélectionner
un des modes suivants.
• PLAY ONCE:
le signal d’alarme est reproduit une seule fois, même si la fonction d’alarme n’est pas désactivée
après la première reproduction du signal.
• CONTINUOUS:
le signal d’alarme est entièrement reproduit au moins une fois et continue de l’être jusqu’à ce que la
fonction d’alarme soit désactivée.
MISES EN GARDE
• Si la fonction d’alarme est désactivée pendant la reproduction d’un signal d’alarme enregistré (play back), ce dernier sera
reproduit jusqu’au bout avant d’être interrompu ; s’il s’agit d’un “play back continu”, l’interruption ne concernera que les reproductions suivantes.
DESTINATION
ZONES
Il permet de choisir les zones ou les groupes de zones dans lesquelles diffuser le signal d’alarme (annonce microphonique
ou signal audio enregistré). Utilisez les touches + et - pour sélectionner une des options suivantes.
• ALL ZONES:
le signal d’alarme est diffusé dans toutes les zones audio du système.
• GENERAL :
le signal d’alarme est diffusé dans toutes les zones audio (et/ ou groupes de zones) associées aux touches numériques de la console (touches de 1 à 16).
• ZONES/GROUPS le signal d’alarme est diffusé dans une zone spécifique ou groupe de zones audio du système (mais
pas les deux).
Lorsque, dans le champ DESTINATION, vous sélectionnez l’option ZONES/GROUPS, utilisez ce champ pour choisir la zone audio spécifique dans laquelle diffuser le signal d’alarme. Utilisez les touches + et - pour sélectionner le nom de la zone parmi ceux qui ont été précédemment définis avec le menu OUTPUT PROCESSORS. Si vous choisissez NO ZONE (sélection prédéfinie) vous ne sélectionnerez aucune zone.
MISE EN GARDE
• Pour éviter les erreurs pendant la compilation des fichiers de configuration du système, il est indispensable que vous
sélectionniez une seule zone audio dans le champ ZONE, ou un groupe de zones dans le champ GROUP, mais pas
les deux; lorsque vous effectuez la sélection d’une zone, vous devez toujours sélectionner l’option NO GROUP dans le
champ GROUP.
153
GROUPS
Lorsque, dans le champ DESTINATION, vous sélectionnez l’option ZONES/GROUPS, utilisez ce champ pour choisir le
groupe de zones audio spécifique dans lequel diffuser le signal d’alarme. Utilisez les touches + et - pour sélectionner le
nom du groupe de zones parmi ceux précédemment définis avec le menu GROUPS. Si vous choisissez NO GROUP (sélection prédéfinie) vous ne sélectionnerez aucun groupe.
MISE EN GARDE
• Pour éviter les erreurs pendant la compilation des fichiers de configuration du système, il est indispensable que vous
sélectionniez une seule zone audio dans le champ ZONE, ou un groupe de zones dans le champ GROUP, mais pas
les deux; lorsque vous effectuez la sélection d’un groupe de zones, vous devez toujours sélectionner l’option NO ZONE
dans le champ ZONE.
RELAY OPEN
Il permet de choisir un relais des cartes INPUT/OUTPUT numériques IO 3250 à contact normalement ouvert (“OPEN”), à
commuter sur fermé quand la fonction d’alarme s’active. Le relais regagne sa position normale, définie avec le menu RELAY CONFIGURATION, dès que la fonction d’alarme se désactive. Utilisez les touches + et - pour sélectionner le nom du
relais souhaité, parmi ceux qui ont été définis avec le menu RELAY CONFIGURATION (champ NAME) ; si vous choisissez
NO RELAY vous ne sélectionnerez aucun relais.
RELAY CLOSED Il permet de choisir un relais des cartes INPUT/OUTPUT numériques IO 3250 à contact normalement fermé (“CLOSED”), à
commuter sur ouvert quand la fonction d’alarme s’active. Le relais regagne sa position normale, définie avec le menu RELAY CONFIGURATION, dès que la fonction d’alarme se désactive. Utilisez les touches + et - pour sélectionner le nom du
relais souhaité, parmi ceux qui ont été définis avec le menu RELAY CONFIGURATION (champ NAME) ; si vous choisissez
NO RELAY vous ne sélectionnerez aucun relais.
La première page-écran n’affiche que les 3 premiers champs du sous-menu. Pour afficher les champs suivants ou précédents, appuyez sur
les touches ↑ / ↓ et/ou page ↑ / page ↓.
EMERGENCY KEY DEFINITION
SOURCE
MESSAGE
PLAY MESS.
PLAYBACK_ _ _ _ _ _ _ ▼
MSG 1_ _ _ _ _ _ _ _ _ _ ▼
CONTINOUS _ _ _ ▼
Pag ↓
CONTINOUS _ _ _ ▼
ALL ZONES_ _ _ _ _ _ _ ▼
NO ZONE _ _ _ _ _ _ _ _ ▼
NO GROUP _ _ _ _ _ _ _ ▼
PLAY MESS.
DESTINATION
ZONE
GROUP
Pag ↓
ZONE
GROUP
RELAY OPEN
RELAY CLOSE
NO ZONE_ _ _ _ _ _ _ _ ▼
NO GROUP_ _ _ _ _ _ _ ▼
NO RELAY _ _ _ _ _ _ _ ▼
NO RELAY _ _ _ _ _ _ _ ▼
Pour quitter le sous-menu, appuyez sur ESC et procédez comme l’indique le paragraphe QUITTER UN MENU.
PROGRAMMATION DES TOUCHES F1, F2, F3
MISE EN GARDE
• Vous ne pouvez pas programmer les touches F1, F2, F3 d’une console si vous avez sélectionné l’option DISABLE dans les champs KEY
F1, KEY F2, KEY F3 du menu CONSOLES.
Pour afficher le sous-menu qui permet de programmer les touches F1, F2, F3 de chaque console, vous devez amener le point de sélection
dans le champ de la touche à configurer (p. e. KEY F1), et appuyer sur la touche F3. L’écran de l’appareil affichera les champs suivants.
SPECIAL KEY DEFINITION
MESSAGE
RELAY N.O.
RELAY N.C.
NO MESS. _ _ ▼
NO RELAY_ _ _ _ _ _ _ ▼
NO RELAY_ _ _ _ _ _ _ ▼
MESSAGE
Le champ est accessible uniquement si vous avez sélectionné l’option PLAY dans le champ KEY F1, KEY F2 ou KEY F3
du menu CONSOLES et il permet de choisir le nom du fichier audio à reproduire. Utilisez les touches + et - pour sélectionner le nom du signal audio souhaité parmi ceux qui se trouvent dans la bibliothèque de signaux audio fournie avec le
système, ou créés avec les fonctions RECORD, ASSEMBLY et TONE GENERATOR (voir paragraphe UTILISATION DU MENU “RECORDER”). Si vous choisissez NO MESS. vous ne définirez aucun signal audio.
RELAY N.O.
Le champ est accessible uniquement si, dans le champ KEY F1, KEY F2 ou KEY F3 du menu CONSOLES vous avez sélectionné l’option RELAY et il permet de choisir un relais à contact normalement ouvert (N.O.) à commuter. Utilisez les touches + et - pour sélectionner le nom du relais souhaité parmi ceux qui ont été définis avec le menu RELAY CONFIGURATION (champ NAME) ; si vous choisissez NO RELAY vous ne sélectionnerez aucun relais.
RELAY N. C.
Le champ est accessible uniquement si, dans le champ KEY F1, KEY F2 ou KEY F3 du menu CONSOLES vous avez sélectionné l’option RELAY et il permet de choisir un relais à contact normalement fermé (N. C.) à commuter. Utilisez les touches + et - pour sélectionner le nom du relais souhaité parmi ceux qui ont été définis avec le menu RELAY CONFIGURATION (champ NAME) ; si vous choisissez NO RELAY vous ne sélectionnerez aucun relais.
Pour quitter le sous-menu, appuyez sur ESC et procédez comme l’indique le paragraphe QUITTER UN MENU..
154
UTILISATION DU MENU “ACU”
- - - = = = MAIN MENU = = = - - ->RELAY CONFIGURATION
->CONSOLES
->ACU (AMPLIFIERS)
Le menu permet de programmer les unités A.C.U., i. e. les cartes rétro-amplificateur RB 3300 qui contrôlent les amplificateurs du système (voir
paragraphe UNITES A.C.U.). A partir du menu principal de configuration de l’appareil, utilisez les touches ↑ / ↓ et/ou page ↑ / page ↓ pour amener le point de sélection sur le sous-menu ACU et appuyez sur ENTER ; l’écran de l’appareil affichera les champs suivants.
DEV
Il indique le numéro d’identification de l’A.C.U. à programmer. L’indication, séquentielle, est liée à l’adresse associée à l’A.C.U.
en phase d’installation: au numéro 1 correspond l’A.C.U. ayant l’adresse 0, au numéro 120 correspond l’A.C.U. ayant l’adresse
119.
TYPE
Il permet de définir le type d’A.C.U. Utilisez les touches + et - pour sélectionner le type souhaité parmi les suivants.
• NONE:
Sélectionnez cette option quand vous devez enlever une A.C.U. en panne, NORMAL ou BACKUP, pour la réparer;
autrement, l’A.C.U. en panne déclencherait continuellement l’alarme. Si vous sélectionnez NO, l’A.C.U. ne sera plus
contrôlée par l’unité CP 3100.
• NORMAL : C’est une A.C.U. dont la fonction est de contrôler un amplificateur primaire, normalement dédié à la sonorisation
d’une zone audio définie (sélection prédéfinie).
• BACKUP: C’est une A.C.U. dont la fonction est de contrôler un amplificateur de réserve qui sert normalement à remplacer un
amplificateur primaire si celui-ci tombe en panne.
Le paragraphe UNITES A.C.U. fournit de plus amples informations sur la fonction des types d’A.C.U..
GROUP Il permet de définir le groupe auquel appartiennent les A.C.U. Le système peut gérer un maximum de 64 groupes d’A.C.U. L’attribution doit s’effectuer en tenant compte des indications suivantes:
a. Un groupe peut se composer d’un nombre quelconque d’A.C.U. NORMAL ou BACKUP, mais le nombre total d’unités dans
le système ne doit jamais dépasser 120.
b. Une unité de BACKUP ne peut remplacer une unité NORMAL que si elles appartiennent toutes les deux au même groupe.
Le paragraphe UNITES A.C.U. fournit de plus amples informations sur la fonction des groupes d’A.C.U.. Utilisez les touches + et
- ou le clavier numérique pour définir le numéro du groupe, de 0 (sélection prédéfinie) à 64.
MODE
Il permet de choisir la méthode de connexion/ déconnexion de l’A.C.U. (NORMAL ou BACKUP), en cas d’alarme déclenchée
par une panne ou un mauvais fonctionnement d’un amplificateur. Utilisez les touches + et - pour sélectionner l’un des modes suivants.
• MANUAL – En cas d’alarme, la connexion/ déconnexion de l’ A.C.U. doit être commandée manuellement, avec le sous-menu
INSER. BACKUP ACU du menu principal AUDIO PROCESS
• AUTO –
En cas d’alarme, la connexion/ déconnexion de l’ A.C.U. est commandée automatiquement par le système.
Le paragraphe UNITES A.C.U. fournit de plus amples informations sur ces deux modes de fonctionnement des unités NORMAL
et BACKUP.
REMARQUE
• Quand une A.C.U. contrôle le dernier amplificateur de réserve d’un groupe, il est conseillé de choisir sur cette unité le mode MANUAL, pour éviter qu’en cas d’alarme PA FAULT ou OVL déclenchée par l’amplificateur correspondant, celui-ci soit exclu et la diffusion coupée, puisqu’il n’y a aucun autre amplificateur de réserve qui puisse le remplacer.
PGM
Il permet d’activer et de désactiver la fonction DAY/NIGHT sur les A.C.U. dotées de la carte optionnelle DIGITAL ALC LB 3340
(voir paragraphe FONCTION DAY/NIGHT). Utilisez les touches + et - pour sélectionner une des options suivantes:
• ON – Fonction DAY/NIGHT activée (sélection prédéfinie).
• OFF – Fonction DAY/NIGHT désactivée.
La première page-écran n’affiche que les 3 premières A.C.U. Pour afficher les unités suivantes et précédentes, appuyez sur les touches ↑ /
↓ et/ou page ↑ / page ↓.
DEV
1
2
3
TYPE
NORMAL ▼
NORMAL ▼
NORMAL ▼
GROUP
01
01
01
MODE
MANUAL ▼
MANUAL ▼
MANUAL ▼
PGM
OFF ▼
OFF ▼
OFF ▼
MODE
MANUAL ▼
MANUAL ▼
MANUAL ▼
PGM
OFF▼
OFF▼
OFF▼
Pag ↓
DEV
4
5
6
TYPE
NORMAL ▼
NORMAL ▼
NORMAL ▼
GROUP
02
02
02
Pour quitter le sous-menu, appuyez sur ESC et procédez comme l’indique le paragraphe QUITTER UN MENU.
155
UTILISATION DU MENU “GPI EVENTS DEFINITION”
- - - = = = MAIN MENU = = = - - ->CONSOLES
->ACU (AMPLIFIERS)
->GPI EVENTS DEFINITION
Le menu permet de programmer les opérations commandables à partir des entrées GPI des cartes INPUT/OUTPUT numériques IO 3250 (voir
paragraphe OPÉRATIONS COMMANDABLES À PARTIR DES ENTRÉES GPI). A partir du menu principal de configuration de l’appareil, utilisez les touches ↑ / ↓ et/ou page ↑ / page ↓ pour amener le point de sélection sur le sous-menu GPI EVENTS DEFINITION et appuyez sur
ENTER; l’écran de l’appareil affichera les champs suivants.
GPI
Il indique le numéro d’identification de l’entrée GPI qui commande l’opération à programmer. L’indication est séquentielle : au
numéro 1 correspond l’entrée numéro 1 de la carte I/O numérique numéro 1, au numéro 33 correspond l’entrée numéro 1 de la
carte I/O numérique numéro 3, au numéro 128 correspond l’entrée numéro 16 de la carte I/O numérique numéro 8, etc..
NAME
Il permet de définir le nom de l’opération commandable à partir de l’entrée GPI; le nom peut se composer d’un maximum de 16
caractères alphanumériques. Utilisez les touches + et - pour sélectionner en rotation les caractères alphanumériques; appuyez
sur ENTER pour confirmer chaque caractère. Les caractères numériques peuvent se sélectionner directement sur le clavier numérique.
ACTION
Il permet de définir le type d’action (opération) commandable en pilotant l’entrée GPI. Utilisez les touches + et - pour sélectionner le type souhaité parmi les suivants.
• GENERIC: il indique une action générique. Quand l’entrée GPI est pilotée, vous pouvez commander la commutation d’un ou
de plusieurs relais des cartes INPUT/ OUTPUT numériques IO 3250 (programmation du champ RLY) et produire éventuellement un avis (programmation du champ ALARM).
• PLAYBACK : Vous pouvez commander la reproduction, dans des zones audio définies, d’un signal audio mémorisé sur le disque dur de l’unité de contrôle CP 3100 (voir paragraphe REPRODUCTION DE FICHIERS AUDIO) ; en particulier, quand l’entrée GPI est pilotée, l’entrée audio définie comme PLAYBACK (champ TYPE du menu INPUT PROCESSORS) se connecte
aux zones ou groupes de zones audio définies avec le champ ZONE ou GROUP de ce menu. L’attribution PLAYBACK permet également de commander la commutation d’un ou de plusieurs relais des cartes INPUT/ OUTPUT numériques IO 3250
(programmation du champ RLY).
• FIREMAN 1 : il indique l’opération FIREMAN 1. Vous pouvez commander la diffusion à priorité absolue, dans des zones ou
groupes de zones audio définies, d’un signal audio “fireman” ; en particulier, quand l’entrée GPI est pilotée, l’entrée audio définie comme FIREMAN 1 (champ TYPE du menu INPUT PROCESSORS) se connecte aux zones ou groupes de zones audio définies avec le champ ZONE ou GROUP de ce menu. Une opération FIREMAN 1 termine quand l’entrée GPI qui l’a activée cesse d’être pilotée. L’attribution FIREMAN 1 permet également de commander la commutation d’un ou de plusieurs
relais des cartes INPUT/ OUTPUT numériques IO 3250 (programmation du champ RLY).
• FIREMAN 2 : il indique l’opération FIREMAN 2. Vous pouvez commander la diffusion à priorité absolue, dans des zones ou
groupes de zones audio définies, d’un signal audio “fireman” ; en particulier, quand l’entrée GPI est pilotée, l’entrée audio définie comme FIREMAN 2 (champ TYPE du menu INPUT PROCESSORS) se connecte aux zones ou groupes de zones audio définies avec le champ ZONE ou GROUP de ce menu. Une opération FIREMAN 2 termine quand l’entrée GPI qui l’a activée cesse d’être pilotée. L’attribution FIREMAN 2 permet également de commander la commutation d’un ou de plusieurs
relais des cartes INPUT/OUTPUT numériques IO 3250 (programmation du champ RLY).
• CONSGPI n. : Vous pouvez, dans des zones audio définies, diffuser une annonce au microphone d’une console BM 3604
(console GPI) ; en particulier, quand l’entrée GPI est pilotée par l’une des 4 touches de sélection zones/ groupes de la console, l’entrée audio correspondante définie comme CONSGPI n. (champ TYPE du menu INPUT PROCESSORS) se connecte aux zones ou aux groupes de zones audio définies avec le champ ZONE ou GROUP de ce menu ; le n représente le
numéro d’identification de la console GPI (numéro compris entre 1 et 24). L’attribution CONSGPI n. permet également de
commander la commutation d’un ou de plusieurs relais des cartes INPUT/OUTPUT numériques IO 3250 (programmation du
champ RLY). Quand vous attribuez une opération CONSGPI, respectez les indications suivantes:
a. pour chaque console BM 3604 vous pouvez utiliser un numéro d’entrées GPI de 1 à 4.
b. toutes les entrées GPI dédiées à la connexion d’une console BM 3604 définie doivent être consécutives (GPI1, GPI2,
GPI3, GPI4), et appartenir à la même carte INPUT/OUTPUT numérique IO 3250.
c. toutes les entrées GPI dédiées à la connexion d’une console BM 3604 définie (max 4) doivent être programmées avec
le même relais de “feedback” (voir champ FEED RELAY).
Le tableau suivant indique les champs programmables selon le type d’action sélectionnée.
TYPE D’ACTION
GENERIC
PLAYBACK
CONSGPI n
FIREMAN 1
FIREMAN 2
RLY
YES
YES
YES
YES
YES
CHAMPS PROGRAMMABLES
FEED RELAY
MESSAGE
ALARM
No
No
YES
No
YES
YES
YES
No
YES
No
No
YES
No
No
YES
ZONE/GROUP
No
YES
YES
YES
YES
MISE EN GARDE
• Une programmation erronée des champs indiqués dans le tableau peut être à l’origine de mauvais fonctionnements ou
d’erreurs pendant la compilation des fichiers de configuration du système!
RLY (F1)
Ce champ indique deux valeurs : la première indique le nombre de relais à contact normalement ouvert qui commutent quand
l’entrée GPI est pilotée ; la seconde indique le nombre de relais à contact normalement fermé qui commutent quand l’entrée
GPI est pilotée (par exemple 2/1 = 2 relais à contact normalement ouvert et 1 relais à contact normalement fermé). Les relais
peuvent regagner leur position normale de plusieurs façons:
156
a. si l’opération programmée est GENERIC (champ ACTION) les relais regagnent leur position normale, définie avec le menu
RELAY CONFIGURATION, dès que l’entrée GPI cesse d’être pilotée.
b. si l’opération programmée est PLAY BACK (champ ACTION les relais regagnent leur position normale, définie avec le menu
RELAY CONFIGURATION, au terme de la reproduction.
c. si l’opération programmée est FIREMAN 1 ou FIREMAN 2 (champ ACTION), les relais regagnent leur position normale, définie avec le menu RELAY CONFIGURATION, quand l’entrée GPI cesse d’être pilotée et que l’opération “fireman” est désactivée.
d. si l’opération programmée est CONSGPI (champ ACTION), les relais regagnent leur position normale, définie avec le menu
RELAY CONFIGURATION, au terme de l’annonce (désactivation microphone).
Pour définir les relais spécifiques à commuter, appuyez sur la touche F1 pour accéder à un sous-menu spécifique (voir paragraphe DEFINITION DES RELAIS ASSOCIES A L’OPERATION).
FEED RELAY Ce champ est à utiliser si, dans le champ TYPE du menu de configuration présent vous avez sélectionné une action CONSGPI; il permet de définir le relais de “feedback” qui, en commutant, permet à la console BM 3604 indiquée dans le champ ACTION de diffuser une annonce. La commutation du relais de “feedback” advient quand toutes les zones (ou groupes de zones)
sélectionnées à la console sont disponibles. Utilisez les touches + et - pour sélectionner le nom du relais parmi ceux qui ont
été précédemment définis avec le menu RELAY CONFIGURATION. Si vous choisissez NO RELAY (sélection prédéfinie) vous
ne sélectionnerez aucun relais.
MISES EN GARDE
• Pour éviter les mauvais fonctionnements et les erreurs de compilation des fichiers de configuration du système, respectez les
indications suivantes :
a. les relais des cartes INPUT/ OUTPUT numériques IO 3250 utilisés comme relais de “feedback” ne doivent pas être utilisés
pour d’autres fonctions.
b. chaque relais de “feedback” doit être configuré comme contact normalement ouvert (champ STATUS = OPEN).
c. toutes les entrées GPI dédiées à la connexion d’une console BM 3604 définie (max 4) doivent être programmées avec le même relais de “feedback”.
d. vous ne pouvez pas définir un relais de “feedback” si l’entrée GPI n’est pas attribuée à une console BM 3604.
MESSAGE
ALARM
Ce champ est à utiliser si dans le champ TYPE du menu de configuration présent vous avez sélectionné une action PLAYBACK
et il permet de choisir le nom du fichier audio à reproduire. Utilisez les touches + et – pour sélectionner le nom du signal audio
souhaité, parmi ceux qui sont présents dans la bibliothèque de signaux audio fournie avec le système, ou créés avec les fonctions RECORD, ASSEMBLY et TONE GENERATOR (voir paragraphe UTILISATION DU MENU “RECORDER”). Si vous choisissez NO MESS. (sélection prédéfinie) vous ne définirez aucun signal audio.
Il permet d’activer et de désactiver la génération d’une signalisation sonore d’avis (buzzer) quand l’entrée GPI est pilotée. Pour
afficher l’avis, vous devez accéder au menu alarmes de l’unité de contrôle (voir paragraphe AFFICHAGE DE L’ETAT DES ALARMES). Utilisez les touches + et - pour sélectionner une des options suivantes.
• YES: en pilotant l’entrée GPI vous générez un avis.
• NO: en pilotant l’entrée GPI vous ne générez pas d’avis (sélection prédéfinie).
MISES EN GARDE
• Pour éteindre l’avertisseur sonore une fois que l’avis est activé, vous devez accéder au menu d’affichage de l’état des alarmes
(voir paragraphe AFFICHAGE DE L’ETAT DES ALARMES).
ZONE
Il permet de choisir la zone dans laquelle diffuser le signal audio relatif à l’opération sélectionnée avec le champ ACTION. Utilisez les touches + et - pour sélectionner le nom de la zone parmi ceux précédemment définis avec le menu OUTPUT PROCESSORS. Si vous choisissez NO ZONE (sélection prédéfinie) vous ne sélectionnerez aucune zone ; si vous choisissez ALL
ZONES vous sélectionnerez toutes les zones.
MISE EN GARDE
• Pour éviter les erreurs pendant la compilation des fichiers de configuration du système, il est indispensable que vous sélectionniez une seule zone audio dans le champ ZONE, ou un groupe de zones dans le champ GROUP, mais pas les
deux; lorsque vous effectuez la sélection d’une zone, vous devez toujours sélectionner l’option NO GROUP dans le champ
GROUP.
GROUP
Il permet de choisir le groupe de zones dans lesquelles diffuser le signal audio relatif à l’opération sélectionnée avec le champ
ACTION. Utilisez les touches + et - pour sélectionner le nom du groupe de zones parmi ceux précédemment définis avec le
menu GROUPS. Si vous choisissez NO GROUP (sélection prédéfinie) vous ne sélectionnerez aucun groupe.
MISE EN GARDE
• Pour éviter les erreurs pendant la compilation des fichiers de configuration du système, il est indispensable que vous sélectionniez une seule zone audio dans le champ ZONE, ou un groupe de zones dans le champ GROUP, mais pas les
deux ; lorsque vous effectuez la sélection d’un groupe de zones, vous devez toujours sélectionner l’option NO ZONE dans le
champ ZONE .
La première page-écran n’affiche que les 4 premiers champs (GPI, NAME, ACTION, RLY) des 3 premières entrées GPI. Pour afficher le champ
suivant, appuyez sur la touche →; pour afficher le champ précédent, appuyez sur la touche ←.
GPI
1
2
3
NAME
KEY 1 CONSOLLE 1 _
KEY 2 CONSOLLE 1 _
KEY 3 CONSOLLE 1 _
ACTION
CONSGPI1 _ _▼
CONSGPI1 _ _▼
CONSGPI1 _ _▼
RLY(F1)
1/1
0/0
0/0
→
157
1
2
3
FEED RELE’
RLY 1_ _ _ _ _ _ _ _ _ ▼
RLY 1_ _ _ _ _ _ _ _ _ ▼
RLY 1_ _ _ _ _ _ _ _ _ ▼
MESSAGE
NO MESS. ▼
NO MESS. ▼
NO MESS. ▼
ALARM
NO_▼
NO_▼
NO_▼
→
1
2
3
ZONE
ZONE 1 _ _ _ _ _ _ _ _ ▼
ZONE 2 _ _ _ _ _ _ _ _ ▼
ALL ZONES _ _ __ _ _ ▼
GROUP
NO GROUP _ _ _ _ _ _ _
NO GROUP _ _ _ _ _ _ _
NO GROUP _ _ _ _ _ _ _
→
1
2
3
GROUP
NO GROUP_ _ _ _ _ _ _ _ ▼
NO GROUP_ _ _ _ _ _ _ _ ▼
NO GROUP_ _ _ _ _ _ _ _ ▼
Pour afficher les entrées suivantes et précédentes, appuyez sur les touches ↑ / ↓ et/ou page ↑ / page ↓.
GPI
1
2
3
NAME
KEY 1 CONSOLLE 1 _
KEY 2 CONSOLLE 1 _
KEY 3 CONSOLLE 1 _
ACTION
CONSGPI1 _ _▼
CONSGPI1 _ _▼
CONSGPI1 _ _▼
RLY(F1)
1/1
0/0
0/0
Pag ↓
GPI
4
5
6
NAME
KEY 4 CONSOLLE 1 _
MESSAGE 1_ _ _ _ _ _
MESSAGE 2_ _ _ _ _ _
ACTION
CONSGPI1▼
PLAYBACK▼
PLAYBACK▼
RLY(F1)
0/0
0/0
0/0
Pour quitter le sous-menu, appuyez sur ESC et procédez comme l’indique le paragraphe QUITTER UN MENU.
DEFINITION DES RELAIS ASSOCIES A L’OPERATION
Ce sous-menu permet de définir les relais à commuter, indiqués dans le champ RLY, quand l’entrée GPI est pilotée ; vous pouvez commuter
un maximum de 4 relais à contact normalement ouvert et un maximum de 4 relais à contact normalement fermé. Pour accéder au sousmenu, amenez le point de sélection sur un quelconque des champs de l’entrée GPI à configurer et appuyez sur la touche F1; l’écran de l’appareil affichera les champs suivants.
N.
Il indique le numéro progressif du relais à contact normalement ouvert ou à contact normalement fermé associé à l’opération
(max 4 par type).
RELAY N.O. Il permet de choisir un relais à contact normalement ouvert (“N.O.”) à commuter sur fermé. Utilisez les touches + et - pour
sélectionner le nom du relais parmi ceux précédemment définis avec le menu RELAY CONFIGURATION. Si vous choisissez
NO RELAY (sélection prédéfinie) vous ne sélectionnerez aucun relais.
RELAY N. C. Il permet de choisir un relais à contact normalement fermé (“N. C.”) à commuter sur ouvert. Utilisez les touches + et - pour
sélectionner le nom du relais parmi ceux précédemment définis avec le menu RELAY CONFIGURATION. Si vous choisissez
NO RELAY (sélection prédéfinie) vous ne sélectionnerez aucun relais.
La première page-écran n’affiche que les 6 premiers relais : 3 à contact normalement ouvert et 3 à contact normalement fermé. Pour afficher
les relais suivants ou précédents, appuyez sur la touches ↑ / ↓ et/ou page ↑ / page ↓.
N.
1
2
3
RELAY N.O.
RELAY 1 _ _ _ _ _ _ _ ▼
RELAY 3 _ _ _ _ _ _ _ ▼
NO RELE’ _ _ _ _ _ _ ▼
RELE’ N.C.
RLY 2 _ _ _ _ _ _ _ ▼
NO RELAY_ _ _ _ _ _ ▼
NO RELAY_ _ _ _ _ _ ▼
Pag ↓
N.
2
3
4
RELAY N.O.
RLY 3 _ _ _ _ _ _ _ ▼
NO RELAY _ _ _ _ _ _ ▼
NO RELAY _ _ _ _ _ _ ▼
RELAY N.C.
NO RELAY_ _ _ _ _ _ ▼
NO RELAY _ _ _ _ _ _ ▼
NO RELAY _ _ _ _ _ _ ▼
Pour quitter le sous-menu, appuyez sur ESC et procédez comme l’indique le paragraphe QUITTER UN MENU.
158
UTILISATION DU MENU “TIMER EVENTS DEFINITION”
- - - = = = MAIN MENU = = = - - ->GPI EVENTS DEFINITION
->TIMER EVENTS DEFINITION
->VOX
Le menu permet de programmer les opérations temporisées (voir paragraphe OPERATIONS DU SYSTÈME). A partir du menu principal de configuration de l’appareil, utilisez les touches ↑ / ↓ et/ou page ↑ / page ↓ pour amener le point de sélection sur le sous-menu TIMER EVENTS
DEFINITION et appuyez sur ENTER; l’écran de l’appareil affichera les champs suivants.
N.
Il indique le numéro progressif de l’opération temporisée à programmer. Vous pouvez programmer 64 opérations au
maximum.
NAME
Il permet de définir le nom d’identification de l’opération temporisée et peut se composer de 16 caractères alphanumériques au maximum. Utilisez les touches + et - pour sélectionner en rotation les caractères alphanumériques ; appuyez sur
ENTER pour confirmer chaque caractère. Les caractères numériques peuvent se sélectionner directement au clavier numérique.
RELAY N. OPEN Il permet de choisir un relais à contact normalement ouvert (“N. OPEN”) à commuter sur fermé quand l’opération temporisée est activée. Le relais regagne sa position normale au bout de la période définie avec le champ DUR. ou à la fin de la
reproduction du signal audio, si l’opération temporisée prévoit la reproduction d’un signal audio et la commutation de relais. Utilisez les touches + et - pour sélectionner le nom du relais parmi ceux précédemment définis avec le menu RELAY
CONFIGURATION. Si vous choisissez NO RELAY (sélection prédéfinie) vous ne sélectionnerez aucun relais.
RELAY N.CLOSED Il permet de choisir un relais à contact normalement fermé (“N. CLOSED”) à commuter sur ouvert quand l’opération
temporisée est activée. Le relais regagne sa position normale, au bout de la période définie avec le champ DUR., ou à la
fin de la reproduction du signal audio, si l’opération temporisée prévoit la reproduction d’un signal audio et la commutation
de relais. Utilisez les touches + et - pour sélectionner le nom du relais parmi ceux précédemment définis avec le menu RELAY CONFIGURATION. Si vous choisissez NO RELAY (sélection prédéfinie) vous ne sélectionnerez aucun relais.
MESSAGE
Il permet de choisir le fichier audio à reproduire quand l’opération temporisée est activée. Le signal audio sera diffusé dans
les zones ou dans les groupes de zones audio définis avec le champ ZONE ou GROUP de ce menu. Utilisez les touches +
et - pour sélectionner le nom du signal audio souhaité, parmi ceux que présente la bibliothèque des signaux audio fournie
avec le système ou ceux créés au moyen des fonctions RECORD, ASSEMBLY et TONE GENERATOR (voir paragraphe
UTILISATION DU MENU “RECORDER”). Si vous choisissez NO MESS. (sélection prédéfinie) vous ne définirez aucun signal
audio.
DUR.
Champ à utiliser quand l’opération temporisée prévoit exclusivement la commutation d’un relais à contact normalement ouvert et/ ou à contact normalement fermé. Il permet de définir le temps que les relais devront rester commutés. Utilisez les
touches + et - ou le clavier numérique pour définir la durée, de 0 à 999 secondes.
MISE EN GARDE
• La définition du champ DUR. ne prend pas effet si l’opération temporisée prévoit la reproduction d’un signal audio (attribution champ MESSAGE), et la commutation de relais (attribution champs RELAY N. OPEN et/ ou RELAY N. CLOSED).
ALLOWED TIME Il permet de choisir les deux heures suivantes:
• heure de début d’opération; soit l’heure à laquelle commence l’exécution de l’opération temporisée (reproduction du signal audio et/ ou commutation du relais ouvert et/ ou fermé).
• heure de fin d’opération, soit la dernière heure avant laquelle l’opération temporisée peut s’exécuter.
Utilisez le clavier numérique pour définir les deux heures exprimées en heures et en minutes.
RATE
Il permet de définir le caractère cyclique de l’opération temporisée dans l’intervalle défini avec le champ ALLOWED TIME,
i. e. la fréquence à laquelle le signal audio doit être reproduit et/ ou le relais à contact normalement ouvert et/ ou à contact
normalement fermé doit commuter. Utilisez le clavier numérique pour définir le temps exprimé en heures et en minutes
(exemple : 1:30 pour définir une fréquence de 1 heure 30 minutes).
ZONE
Il permet de choisir la zone audio dans laquelle diffuser le signal sélectionné avec le champ MESSAGE. Utilisez les touches
+ et - pour sélectionner le nom de la zone parmi ceux précédemment définis avec le menu OUTPUT PROCESSORS. Si
vous choisissez l’option NO ZONE (sélection prédéfinie) vous ne sélectionnerez aucune zone ; si vous choisissez ALL ZONES vous sélectionnerez toutes les zones.
MISE EN GARDE
• Pour éviter les erreurs pendant la compilation des fichiers de configuration du système, il est indispensable que vous
sélectionniez une seule zone audio dans le champ ZONE, ou un groupe de zones dans le champ GROUP, mais pas
les deux ; lorsque vous effectuez la sélection d’une zone, vous devez toujours sélectionner l’option NO GROUP dans le
champ GROUP.
GROUP
Il permet de choisir le groupe de zones audio dans lesquelles diffuser le signal sélectionné avec le champ MESSAGE. Utilisez les touches + et - pour sélectionner le nom du groupe de zones parmi ceux précédemment définis avec le menu
GROUPS. Si vous choisissez l’option NO GROUP (sélection prédéfinie) vous ne sélectionnerez aucun groupe.
MISE EN GARDE
• Pour éviter les erreurs pendant la compilation des fichiers de configuration du système, il est indispensable que vous
sélectionniez une seule zone audio dans le champ ZONE, ou un groupe de zones dans le champ GROUP, mais pas
les deux; lorsque vous effectuez la sélection d’un groupe de zones, vous devez toujours sélectionner l’option NO ZONE
dans le champ ZONE
159
Le tableau suivant fournit quelques exemples pour éclaircir la fonction d’une opération temporisée..
EXEMPLES
EXEMPLE 1:
reproduction
d’un signal audio
RELAY
N.OPEN
NO RELAY
CHAMPS DU MENU “TIMER EVENTS DEFINITION”
RELAY
MESSAGE
DUR.
ALLOWED
N.CLOSED
TIME
NO RELAY
MSG 1
000
16:00 18:00
RATE
DESCRIPTION OPERATION
01:00
Le signal audio MSG 1 est diffusé à 16 h 17 h, 18 h (3 fois).
EXEMPLE 2:
reproduction
d’un signal audio
NO RELAY
NO RELAY
MSG 2
000
14:00 16:00
00:45
Le signal audio MSG 2 est diffusé à 14 h, 14 h 45, 15 h 30 (3
fois).
EXEMPLE 3:
commutation de
relais
RLY 1
RLY 6
NO MESS.
060
16:00 16:30
00:10
Le relais à contact normalement
ouvert RLY 1 et celui à contact
normalement fermé RLY 6 commutent à 16 h, 16 h 10, 16 h 20,
16 h 30 (4 fois) et restent commutés 60 secondes chaque fois.
EXEMPLE 4:
reproduction
d’un signal audio
et commutation
de relais
RLY 1
NO RELAY
MSG 1
060
16:00 18:00
01:00
Le signal audio MSG 1 est diffusé à 16 h, 17 h , 18 h (3 fois) ; le
relais à contact normalement
ouvert RLY 1 commute aux heures auxquelles advient la reproduction du signal audio MSG 1
et reste commuté tant que dure
la reproduction.
MISE EN GARDE
• Pour éviter les mauvais fonctionnements et les erreurs pendant la compilation des fichiers de configuration du système, les relais utilisés par
l’opération temporisée ne doivent pas être attribués à d’autres fonctions.
La première page-écran n’affiche que les 3 premiers champs (N., NAME, RELAY N.OPEN) des 3 premières opérations temporisées. Pour afficher le champ suivant, appuyez sur la touche →; pour afficher le champ précédent, appuyez sur la touche ←.
N.
1
2
3
NAME
TIMER 1 _ _ _ _ _ _ _
TIMER 2 _ _ _ _ _ _ _
TIMER 3 _ _ _ _ _ _ _
RELAY N.OPEN
RLY 1 _ _ _ _ _ _ _ ▼
RLY 2 _ _ _ _ _ _ _ ▼
NO RELAY _ _ _ _ _ _ ▼
→
1
2
3
RELAY N. CLOSE
NO RELAY _ _ _ _ _ _ ▼
NO RELAY _ _ _ _ _ _ ▼
RLY 3 _ _ _ _ _ _ _ ▼
MESSAGE
NO MESS. ▼
NO MESS. ▼
NO MESS. ▼
DUR.
010
020
030
→
1
2
3
ALLOWED TIME
08:00
20:00
04:00
05:00
14:00
15:00
RATE
00:01
00:14
00:30
ZONE
NO ZONE _ _ _ _ _
NO ZONE _ _ _ _ _
NO ZONE _ _ _ _ _
→
1
2
3
ZONE
NO ZONE _ _ _ _ _ _ _ ▼
NO ZONE _ _ _ _ _ _ _ ▼
NO ZONE _ _ _ _ _ _ _ ▼
GROUP
NO GROUP _ _ _ _ _ _ _ ▼
NO GROUP _ _ _ _ _ _ _ ▼
NO GROUP _ _ _ _ _ _ _ ▼
Pour afficher les opérations temporisées suivantes ou précédentes, appuyez sur les touches ↑ / ↓ et/ou page ↑ / page ↓.
160
N.
1
2
3
NAME
TIMER 1 _ _ _ _ _ _ _
TIMER 2 _ _ _ _ _ _ _
TIMER 3 _ _ _ _ _ _ _
RELAY N. OPEN
RLY 1 _ _ _ _ _ _ _ ▼
RLY 2 _ _ _ _ _ _ _ ▼
NO RELAY _ _ _ _ _ _ ▼
Pag ↓
N.
3
4
5
NAME
TIMER 3 _ _ _ _ _ _ _
TIMER 4 _ _ _ _ _ _ _
____________
RELAY N. OPEN
NO RELAY _ _ _ _ _ _ ▼
NO RELAY _ _ _ _ _ _ ▼
NO RELAY _ _ _ _ _ _ ▼
Pour quitter le sous-menu, appuyez sur ESC et procédez comme l’indique le paragraphe QUITTER UN MENU.
UTILISATION DU MENU “VOX”
- - - = = = MAIN MENU = = = - - ->GPI EVENTS DEFINITION
->TIMER EVENTS DEFINITION
->VOX
Le menu permet de configurer le dispositif VOX (VOX detector) présent sur chaque carte AUDIO OUTPUT OB 3230. La fonction du dispositif VOX est décrite au paragraphe DISPOSITIF VOX, que vous pouvez consulter pour de plus amples informations. A partir du menu principal de configuration de l’appareil, utilisez les touches ↑ / ↓ et/ou page ↑ / page ↓ pour amener le point de sélection sur le sous-menu VOX
et appuyez sur ENTER; l’écran de l’appareil affichera les champs suivants.
AUDIO OUT
Il indique la carte AUDIO OUTPUT OB 3230 dans laquelle configurer le dispositif VOX. L’identification de la carte se fait au
moyen du nombre de sorties qui lui appartiennent (exemple : OUT 01:08 = carte AUDIO OUTPUT avec sorties du numéro 1 au
numéro 8).
INPUT VOX
Il permet de définir l’entrée que doit utiliser le dispositif VOX de la carte AUDIO OUTPUT. Vous pouvez spécifier la même entrée INPUT VOX pour plusieurs dispositifs VOX. Utilisez les touches + et - pour sélectionner le nom de l’entrée parmi les 8
premières entrées du système, définies avec le menu INPUT PROCESSORS; si vous choisissez NO INPUT (sélection prédéfinie) vous ne sélectionnerez aucune entrée.
MISE EN GARDE
• L’entrée INPUT VOX utilisée par chaque dispositif VOX peut se choisir exclusivement parmi les 8 premières entrées
du système (entrées 1 ÷ 8 de la carte AUDIO INPUT numéro 1).
RELAY VOX
Il permet de définir le relais à commuter quand, en activant la fonction VOX, l’entrée INPUT VOX se connecte à l’une des
sorties de la carte AUDIO OUTPUT OB 3230 indiquée dans le champ AUDIO OUT. Le relais doit être le même pour une même entrée INPUT VOX. Utilisez les touches + et - pour sélectionner le nom du relais parmi ceux à contact normalement
ouvert ou normalement fermé précédemment définis avec le menu RELAY CONFIGURATION; si vous choisissez NO RELAY (sélection prédéfinie) vous ne sélectionnerez aucun relais.
MISES EN GARDE
• Pour éviter les mauvais fonctionnements et les erreurs pendant la compilation des fichiers de configuration du système, il
est indispensable que le relais indiqué dans le champ RELAY VOX ne soit pas utilisé pour d’autres fonctions (par
exemple, comme relais de “feedback” pour une console BM 3604).
MISE EN GARDE
• Si vous compilez les champs du menu VOX pour une carte AUDIO OUTPUT OB 3230 définie sans activer la fonction VOX sur aucune de
ses sorties (avec le menu PROCESSUS SORTIES AUDIO), il n’y aura aucune erreur pendant la compilation des fichiers de configuration.
AUDIO OUT
OUT 01:08
OUT 09:16
OUT 17:24
INPUT VOX
SOURCE 1 _ _ _ _ _ ▼
SOURCE 1 _ _ _ _ _ ▼
SOURCE 2 _ _ _ _ _ ▼
RELAY VOX
RLY 1 _ _ _ ▼
RLY 1 _ _ _ ▼
RLY 2 _ _ _ ▼
Pag ↓
AUDIO OUT
OUT 25:32
OUT 33:40
OUT 41:48
INPUT VOX
SOURCE 2 _ _ _ _ _ ▼
NO INPUT _ _ _ _ _ ▼
NO INPUT _ _ _ _ _ ▼
RELAY VOX
RLY 2 _ _ _ ▼
NO RELAY _ _ ▼
NO RELAY _ _ ▼
161
UTILISATION DU MENU “RECORDER”
- - - = = = MAIN MENU = = = - - ->TIMER EVENTS DEFINITION
->VOX
->RECORDER
Le menu permet d’enregistrer des signaux audio : messages, annonces, tonalités d’attention, d’alarme, etc. (voir paragraphe ENREGISTREMENT/ REPRODUCTION DE SIGNAUX AUDIO) ; ces signaux sont mémorisés comme fichiers audio sur le disque dur de l’unité de contrôle.
A partir du menu principal de configuration de l’appareil, utilisez les touches ↑ / ↓ et/ ou page ↑ / page ↓ pour amener le point de sélection
sur le sous-menu RECORDER et appuyez sur ENTER ; l’écran de l’appareil affichera les sous-menus suivants ::
SELECT A FUNCTION
OPTIONS
RECORD
PLAY
Pag ↓
SELECT A FUNCTION
ASSEMBLY
TONE GENERATOR
DELETE MESSAGES
OPTIONS
Amenez le point de sélection sur cette rubrique et appuyez sur ENTER pour définir les paramètres d’enregistrement indiqués ci-après.
RECORDER OPTION
SOUND QUALITY
MAX DURATION (SEC)
: 44100 HZ ▼
:__
SOUND QUALITY: permet de définir la fréquence d’échantillonnage de l’enregistrement pouvant s’effectuer avec le
sous-menu RECORD : la qualité de l’enregistrement augmente avec la fréquence sélectionnée. Utilisez les touches +
et - pour sélectionner la fréquence parmi 11025 Hz, 22050 Hz , 44100 Hz.
MISE EN GARDE
• La fréquence sélectionnée dans le champ SOUND QUALITY intervient exclusivement sur la fonction RECORD.
MAX DURATION (SEC): permet de définir la durée maximale de l’enregistrement. Utilisez les touches + et - ou le clavier numérique pour définir la durée, de 1 à 60 secondes.
MISES EN GARDE
• La dimension du fichier audio correspondant augmente avec la fréquence d’échantillonnage et la durée d’un enregistrement ; un enregistrement effectué avec une fréquence d’échantillonnage de 44,1 kHz et d’une durée de 60 secondes donnera lieu à un fichier de 2,6 Mb!
• Tous les enregistrements sont effectués avec une résolution de 16 bits.
RECORD
Pour quitter le sous-menu, appuyez sur ESC et procédez comme l’indique le paragraphe QUITTER UN MENU.
Amenez le point de sélection sur cette rubrique de menu et appuyez sur ENTER pour enregistrer un signal audio (voir paragraphe ENREGISTREMENT/ REPRODUCTION DE SIGNAUX AUDIO) ; l’écran de l’appareil affichera la page-écran suivante.
RECORD A MESSAGE
RECORDER SOURCE:
MESSAGE NAME:
DURATION:
(F1=START – F2=STOP)
MICROPHONE _ _ _ _ _ ▼
________
<STOPPED>
RECORD A MESSAGE: il permet de choisir la source audio à utiliser pour l’enregistrement. Utilisez les touches + et
- pour sélectionner une des options suivantes:
• MICROPHONE – elle permet de sélectionner comme source pour l’enregistrement le microphone connecté à
l’entrée MICRO IN de la carte audio de l’unité de contrôle.
• “nom entrée” –
elle permet sélectionner comme source pour l’enregistrement une des entrées des cartes AUDIO INPUT IB 3210 / IB 3280. Utilisez les touches + et - pour sélectionner le nom de l’entrée
souhaitée parmi celles définies avec le menu INPUT PROCESSORS (champ NAME).
MESSAGE NAME - elle permet de définir le nom du fichier dans lequel enregistrer le signal audio, qui peut se composer au maximum de 8 caractères alphanumériques. Utilisez les touches + et - pour sélectionner en rotation les caractères alphanumériques ; appuyez sur ENTER pour confirmer chaque caractère. Les caractères numériques peuvent se sélectionner directement au clavier numérique.
DURATION: indicateur à barre qui représente le temps écoulé depuis le début de l’enregistrement par rapport au temps total à disposition, qui est représenté par toute la longueur de la barre ; le temps total à disposition est celui défini
avec le sous-menu OPTIONS. Quand l’enregistrement n’est pas en cours, l’afficheur indique STOPPED.
162
Une fois que vous avez défini la source d’enregistrement et le nom du fichier audio, appuyez sur la touche F1 pour commencer l’enregistrement et sur la touche F2 pour le terminer. L’enregistrement finit automatiquement au bout de 60 secondes. L’enregistrement étant terminé, appuyez sur ESC pour quitter le sous-menu et procédez comme l’indique le paragraphe QUITTER
UN MENU.
MISE EN GARDE
• Il est recommandé de ne pas remplir tout le disque dur de l’unité de contrôle avec les fichiers audio créés avec la fonction
RECORD.
PLAY
Cette fonction permet d’écouter localement, dans le haut-parleur monitor de l’unité de contrôle, les signaux audio mémorisés comme fichiers sur le disque dur de l’unité de contrôle CP 3100 (voir paragraphe ENREGISTREMENT/ REPRODUCTION DE SIGNAUX AUDIO). La fonction est utile pour effectuer un test d’écoute des différents fichiers audio (messages, annonces, tonalités d’attention/ aLarme, etc.). Pour utiliser la fonction, amenez le point de sélection sur cette rubrique de menu et appuyez sur ENTER : l’écran de l’appareil affichera la page-écran suivante.
PLAY A MESSAGE
MESSAGE NAME:
DURATION:
ASSEMBLY
(F1=START – F2=STOP)
MUSIC 1▼
<STOPPED>
PLAY A MESSAGE: elle permet de choisir le nom du fichier audio à reproduire. Utilisez les touches + et - pour sélectionner le nom du signal audio souhaité parmi ceux que présente la bibliothèque des signaux audio fournie avec le
système ou ceux créés au moyen des fonctions RECORD, ASSEMBLY et TONE GENERATOR.
DURATION: indicateur à barre qui représente le temps écoulé depuis le début de l’enregistrement par rapport au temps total à disposition, qui est représenté par toute la longueur de la barre. Quand l’enregistrement n’est pas en cours,
l’afficheur indique STOPPED.
Après avoir choisi le nom du fichier audio, appuyez sur la touche F1 pour commencer la reproduction; la reproduction termine automatiquement à la fin du signal enregistré. Appuyez sur la touche F2 pour interrompre la reproduction à l’avance.
Pour quitter le sous-menu, appuyez sur ESC.
MISE EN GARDE
• Vous ne pouvez pas utiliser la fonction PLAY pendant le monitoring d’une source audio du système (voir paragraphe UTILISATION DU MENU OPERATIONS MONITOR) ; dans ce cas, si vous appuyez sur la touche F1 (commande de début de reproduction) vous entendrez un signal sonore d’avertissement. Pour reproduire le fichier audio, vous devez d’abord interrompre le monitoring audio en cours. .
Amenez le point de sélection sur cette rubrique de menu et appuyez sur ENTER pour créer un fichier audio réunissant un
maximum de 6 fichiers audio de messages, annonces, tonalités d’attention/ alarme, etc. Le signal audio global correspondra à la série de signaux audio. L’écran de l’appareil affichera la page-écran suivante.
MESSAGE ASSEMBLY
FILE NAME:
________
MSG. 1:
NO MESS. ▼
MSG. 2:
NO MESS. ▼
(F1=START – F2=STOP)
Pag ↓
MSG. 3:
MSG. 4:
MSG. 5:
MSG. 6:
NO MESS. ▼
NO MESS. ▼
NO MESS. ▼
NO MESS. ▼
NAME FILE : cette fonction permet de définir le nom du fichier audio à créer, qui peut se composer au maximum de
8 caractères alphanumériques. Utilisez les touches + et - pour sélectionner en rotation les caractères alphanumériques. Appuyez sur ENTER pour confirmer chaque caractère. Les caractères numériques peuvent se sélectionner directement au clavier numérique. La définition de ce champ est indispensable pour pouvoir programmer les champs
suivants.
MSG. 1 : cette fonction permet de choisir le premier fichier audio à mémoriser dans le fichier à créer. Utilisez les touches + et - pour sélectionner le nom du signal audio souhaité, parmi ceux mémorisés sur le disque dur de l’unité de
contrôle CP 3100. Si vous choisissez NO MESS. (sélection prédéfinie) vous ne définirez aucun signal audio
MSG. 6: cette fonction permet de choisir le dernier fichier audio à mémoriser dans le fichier à créer. Utilisez les touches + et - pour sélectionner le nom du signal audio souhaité, parmi ceux mémorisés sur le disque dur de l’unité de
contrôle CP 3100. Si vous choisissez NO MESS. (sélection prédéfinie) vous ne définirez aucun signal audio.
Après avoir compilé les champs du menu, appuyez sur la touche F1 pour écouter localement le signal audio créé dans le
haut-parleur monitor de l’unité de contrôle CP 3100 ; appuyez sur la touche F2 pour interrompre à l’avance la reproduction.
Pour quitter le sous-menu, appuyez sur ESC et procédez comme l’indique le paragraphe QUITTER UN MENU.
MISES EN GARDE
• La séquence dans laquelle les signaux audio sont mémorisés suit l’ordre numérique progressif des champs MSG: MSG.
1 sera le premier signal à être enregistré et MSG. 6 le dernier.
163
• Il est recommandé de ne pas remplir tout le disque dur de l’unité de contrôle avec les fichiers audio créés avec la fonction ASSEMBLY.
• Quand deux ou plusieurs fichiers audio s’unissent, le fichier qui en résulte présente les caractéristiques de celui de qualité inférieure, comme l’indiquent les exemples des tableaux suivants.
• L’écoute locale du signal audio créé (touche F1) n’est pas possible pendant le monitoring d’une source audio du système
(voir paragraphe UTILISATION DU MENU OPERATIONS MONITOR) ; dans ce cas, si vous appuyez sur la touche F1 (commande de début de reproduction) vous entendrez un signal sonore d’avertissement. Pour reproduire le fichier audio, vous
devez d’abord interrompre l’éventuel monitoring audio en cours.
Exemple 1
FICHIER n° 1
Fréquence d’échant. = 11 kHz
Résolution = 8 bits
FICHIER n° 2
Fréquence d’échant. = 22 kHz
Résolution = 8 bits
UNION FICHIERS n° 1 ET n° 2
Fréquence d’échant. = 11 kHz
Résolution = 8 bits
FICHIER n° 2
Fréquence d’échant. = 22 kHz
Résolution = 16 bits
UNION FICHIERS n° 1 ET n° 2
Fréquence d’échant. = 11 kHz
Résolution = 8 bits
Exemple 2
FICHIER n° 1
Fréquence d’échant. = 11 kHz
Résolution = 8 bits
TONE GENERATOR Sélectionnez cette rubrique de menu et appuyez sur ENTER pour créer un son composé d’un maximum de 6 tons, que
vous pouvez définir à votre gré (voir paragraphe ENREGISTREMENT/ REPRODUCTION DE SIGNAUX AUDIO) ; l’écran de
l’appareil affichera la page-écran suivante.
TONE DEFINITION
FILE NAME:
N.
START
1
00020
(F1=START – F2=STOP)
________
END
DUR.
00020
0000
AMPL.
1
Pag ↓
N.
2
3
4
START
00020
00020
00020
END
00020
00020
00020
DUR.
0000
0000
0000
AMPL.
1
1
1
Pag ↓
N.
START
5
00020
6
00020
RIPETITIONS:
END
00020
00020
1
DUR.
0000
0000
AMPL.
1
1
N.: Il indique le numéro progressif du ton à insérer dans le son global.
FILE NAME : Il permet de définir le nom du fichier audio dans lequel mémoriser la séquence de tons ; le nom peut
se composer d’un maximum de 8 caractères alphanumériques. Utilisez les touches + et - pour sélectionner en rotation les caractères alphanumériques ; appuyez sur ENTER pour confirmer chaque caractère. Les caractères numériques peuvent se sélectionner directement au clavier numérique. La définition de ce champ est indispensable pour
programmer les champs suivants.
START : Il permet de définir la fréquence initiale du ton, exprimée en hertz. Utilisez le clavier numérique pour définir
la fréquence, de 100 Hz à 4 kHz.
END : Il permet de définir la fréquence finale du ton, exprimée en hertz. Utilisez le clavier numérique pour définir la
fréquence, de 100 Hz à 4 kHz.
DUR. : Il permet de définir la durée du ton en millisecondes. Utilisez le clavier numérique pour définir la durée, de 0
ms à 9999 ms.
AMPL. : Il permet de définir le volume du ton. Utilisez les touches + et - pour sélectionner le volume parmi:
• “1” – Volume à 25 % (volume minimal)
• “2” – Volume à 50 %.
• “3” – Volume à 75 %.
• “4” – Volume à 100 % (volume maximal)
REPETITIONS : Il permet d’établir le nombre de fois que la séquence de tons définie doit se répéter et s’enregistrer
dans le fichier audio à créer. Utilisez les touches + et - ou le clavier numérique pour sélectionner le nombre de répétitions de 1 à 9.
Après avoir compilé les champs du menu, appuyez sur la touche F1 pour écouter localement le son créé dans le hautparleur monitor de l’unité de contrôle CP 3100 ; appuyez sur la touche F2 pour interrompre la reproduction à l’avance.
164
MISES EN GARDE
• Il est recommandé de ne pas remplir tout le disque dur de l’unité de contrôle avec les fichiers audio créés avec la fonction TONE GENERATOR
• La séquence dans laquelle les tons du son à créer sont mémorisés suit l’ordre numérique progressif du champ N. : le
ton N. 1 sera le premier à être enregistré et le ton N. 6 le dernier.
• La durée globale du son créé, correspondant à la somme des durées de chaque ton multipliée par le nombre de répétitions, ne doit pas dépasser 60 secondes.
• L’écoute locale du son créé (touche F1) n’est pas possible pendant le monitoring d’une source audio du système (voir
paragraphe UTILISATION DU MENU OPERATIONS MONITOR) ; dans ce cas, si vous appuyez sur la touche F1 (commande de début de reproduction) vous entendrez un signal sonore d’avertissement. Pour reproduire le son créé, vous
devez d’abord interrompre l’éventuel monitoring audio en cours.
Pour quitter le sous-menu, appuyez sur ESC et procédez comme l’indique le paragraphe QUITTER UN MENU.
DELETE MESSAGES Amenez le point de sélection sur cette rubrique de menu et appuyez sur ENTER pour accéder au menu qui permet de
supprimer un fichier audio mémorisé sur le disque dur de l’unité de contrôle ; l’écran de l’appareil affichera la page-écran
suivante.
DELETE MESSAGES
SELECT A FILE, THEN PRESS F1
FILE NAME:
MUSIC 1 _ _ ▼
FILE NAME: Cette fonction permet de choisir le nom du fichier correspondant au signal audio à supprimer. Utilisez
les touches + et - pour sélectionner le fichier souhaité, parmi ceux mémorisés sur le disque dur de l’unité de contrôle CP 3100.
Après avoir sélectionné le nom du fichier, appuyez sur la touche F1 pour l’éliminer. Pour quitter le sous-menu, appuyez
sur ESC et procédez comme l’indique le paragraphe QUITTER UN MENU.
UTILISATION DU MENU “SYSTEM”
- - - = = = MAIN MENU = = = - - ->SISTEM
->COMPILE & SAVE
->EXIT WITHOUT SAVING
Ce menu permet de définir plusieurs paramètres de fonctionnement du système RX 3000. A partir du menu principal de configuration de l’appareil, utilisez les touches ↑ / ↓ et/ou page ↑ / page ↓ pour amener le point de sélection sur le sous-menu SYSTEM et appuyez sur ENTER
; l’écran de l’appareil affichera les sous-menus suivants:
SYSTEM OPTIONS
PRINTER OPTION
PRINT CONFIGURATION
DATE & TIME
Pag ↓
SYSTEM OPTIONS
DATE &TIME
DAY / NIGHT PROGRAM
PASSWORD
PRINTER OPTIONS Amenez le point de sélection sur cette rubrique de menu et appuyez sur ENTER pour définir les options d’impression ;
l’écran de l’appareil affichera la page-écran suivante.
PRINTER OPTIONS
PRINT MODE:
NONE _ _ _ _ _ _ _ _ ▼
PRINT MODE: Elle permet de configurer l’impression des opérations d’alarme. Utilisez les touches + et - pour sélectionner une des options suivantes :
• NONE – Elle désactive l’impression des opérations d’alarme. Si vous choisissez cette option, le menu ALARMS
vous permettra uniquement d’afficher les opérations d’alarme qui ont eu lieu depuis que le système a été mis en
marche (voir paragraphe AFFICHAGE DES OPERATIONS D’ALARME).
• AUTO – Elle détermine l’impression automatique d’un message d’alarme au moment même où l’opération d’alarme a lieu (voir paragraphe IMPRESSION DES OPERATIONS D’ALARME).
• REQUEST – Elle permet d’activer, dans le menu ALARMS, la commande pour imprimer manuellement les opérations d’alarme qui ont eu lieu depuis que le système a été mis en marche (voir paragraphe IMPRESSION DES OPERATIONS D’ALARME).
165
PRINT CONFIGURATION Amenez le point de sélection sur cette rubrique de menu et appuyez sur ENTER pour commander l’impression de
la configuration du système. L’impression indiquera, pour les différents dispositifs du système, le nombre d'appareils configurés avec le menu correspondant de l’unité de contrôle et le nombre d'appareils détectés et correctement programmés par l’unité de contrôle. L’écran de l’appareil affichera la page-écran suivante.
INFORMATION:
PRINTING CONFIGURATION . . . .
DATE & TIME
Amenez le point de sélection sur cette rubrique de menu et appuyez sur ENTER pour définir la date et l’heure en
cours ; l’écran de l’appareil affichera la page-écran suivante.
DATE & TIME SETTING
DATE:
12 / NOV ▼ / 1999
TIME:
15 : 49 : 50
DATE: elle permet de définir le jour, le mois et l’année en cours. Utilisez les touches de direction pour amener le
point de sélection sur le champ du jour, du mois ou de l’année ; pour définir les valeurs souhaitées, utilisez le clavier numérique ou les touches + et -.
TIME: elle permet de définir les heures, les minutes et les secondes en cours. Utilisez les touches de direction pour
définir le point de sélection sur le champ des heures, des minutes et des secondes ; pour définir les valeurs
souhaitées, utilisez le clavier numérique ou les touches + et -.
Pour quitter le sous-menu, appuyez sur ESC et procédez comme l’indique le paragraphe “QUITTER UN MENU”.
DAY/NIGHT PROGRAM Amenez le point de sélection sur cette rubrique de menu et appuyez sur ENTER pour programmer l’horaire d’intervention de la fonction DAY/NIGHT PROGRAM des A.C.U. (voir paragraphe FONCTION DAY/NIGHT PROGRAM). L’écran de l’appareil affichera la page-écran suivante.
DAY / NIGHT PROGRAM SETTING
START TIME:
12 : 15
END TIME:
22 : 31
START TIME: elle permet de définir l’heure où commence l’atténuation de nuit, exprimée en heures et en minutes.
Utilisez les touches de direction pour amener le point de sélection sur le champ des heures ou des minutes ; pour
définir les valeurs souhaitées, utilisez le clavier numérique ou les touches + et -.
END TIME : elle permet de définir l’heure où termine l’atténuation de nuit, exprimée en heures et en minutes. Utilisez les touches de direction pour amener le point de sélection sur le champ des heures ou des minutes ; pour définir les valeurs souhaitées, utilisez le clavier numérique ou les touches + et -.
MISE EN GARDE
• L’horaire établi sera utilisé sur toutes les A.C.U. ayant la fonction DAY/NIGHT PROGRAM activée (voir paragraphe
UTILISATION DU MENU ACU).
PASSWORD
Il permet de définir le “mot de passe utilisateur”, qui permet de bloquer l’accès de certains menus de l’unité de contrôle aux personnes non autorisées (voir paragraphe MOT DE PASSE POUR ACCEDER AUX MENUS). Amenez le
point de sélection sur cette rubrique de menu et appuyez sur ENTER pour définir le mot de passe ; l’écran de l’appareil affichera la page-écran suivante.
PASSWORD SETTING
TYPE THE PASSWORD: ____________
RE-TYPE PASSWORD: ____________
TYPE THE PASSWORD: elle permet de définir le mot de passe, qui peut se composer d’un maximum de 8 caractères numériques. Utilisez le clavier numérique pour définir les numéros.
RE-TYPE PASSWORD : elle permet d’insérer de nouveau le mot de passe, pour assurer que le mot de passe tapé
avant dans le champ TYPE THE PASSWORD est correct.
MISE EN GARDE
• Pour attribuer le mot de passe, respectez les limites suivantes :
a. vous ne pouvez pas insérer d’espaces (caractères “blank”) entre deux caractères numériques du mot de passe.
b. vous ne pouvez pas insérer d’espaces (caractères “blank”) avant les caractères numériques du mot de passe
c. vous ne pouvez pas insérer de caractères alphabétiques.
Après avoir compilé les deux champs, appuyez sur la touche MEMORY pour enregistrer le mot de passe sur le disque dur de l’unité de contrôle. Si l’opération est menée à bien et que le mot de passe défini est correctement mémorisé, le voyant MEMORY s’allumera (réf. 6 - fig. 1, page 131). Un nouveau mot de passe défini opère instantanément et sera demandé dès la tentative suivante d’accéder à l’un des menus protégés.
Pour quitter le sous-menu, appuyez sur ESC.
166
MISES EN GARDE
• Le mot de passe ne peut pas se mémoriser si les caractères insérés dans le champ TYPE THE PASSWORD ne coïncident pas avec ceux insérés dans le champ RE-TYPE PASSWORD.
• Pour enregistrer un nouveau mot de passe, vous n’avez pas besoin de quitter le menu principal de configuration en sélectionnant COMPILE & SAVE.
• Pour ne définir aucun mot de passe, laissez en blanc les champs TYPE THE PASSWORD et RE- TYPE PASSWORD.
UTILISATION DU MENU “COMPILE & SAVE”
- - - = = = MAIN MENU = = = - - ->SISTEM
->COMPILE & SAVE
->EXIT WITHOUT SAVING
La commande COMPILE & SAVE permet de quitter le menu principal de configuration du système en enregistrant continuellement toutes les
définitions effectuées dans certains fichiers de configuration qui sont mémorisés sur le disque dur de l’unité de contrôle.
Pour enregistrer les fichiers de configuration, utilisez les touche ↑ / ↓ et/ou page ↑ / page ↓ pour amener le point de sélection sur le sousmenu COMPILE & SAVE et appuyez sur ENTER.
Si l’enregistrement réussit, le programme quitte le menu de configuration et revient au menu principal ; pour réaliser les modifications de configuration effectuées, opérez comme l’indique le paragraphe REALISATION D’UNE CONFIGURATION.
Si des erreurs de configuration sont détectées pendant l’enregistrement, l’écran affichera les messages correspondants et l’enregistrement
ne finira que quand toutes les causes d’erreur détectées auront été éliminées (voir paragraphe ERREURS DE CONFIGURATION) ; ce moyen
évite de créer des situations de conflit entre les différents dispositifs, qui risqueraient de bloquer le système.
MISE EN GARDE
• Si avec le menu de configuration le système n’est pas correctement configuré et si pendant l’utilisation de la commande COMPILE & SAVE l’écran affiche des messages d’erreur, vous pouvez quitter le menu de configuration sans corriger les erreurs détectées simplement en
utilisant la commande EXIT WITHOUT SAVING ; dans ce cas, toutes les modifications effectuées seront perdues
ERREURS DE CONFIGURATION
Si pendant l’utilisation de la commande COMPILE & SAVE des erreurs de configuration sont détectées, l’écran de l’unité de contrôle affichera
les messages correspondants indiquant simplement et directement la cause de l’erreur, pour pouvoir l’éliminer. A chaque erreur détectée correspond une page-écran qui indique.
• Numéro de l’erreur et nombre d’erreurs en tout.
• Le dispositif ou l’opération que l’erreur concerne.
• La cause de l’erreur.
Pour afficher les erreurs suivantes ou précédentes, utilisez les touches page ↑ (erreur suivante) et page ↓ (erreur précédente). La page-écran
suivante indique un exemple d’erreur: avec le menu CONSOLES, une console numérique appelée BM 3616 N.1 a été configurée mais aucune entrée audio ne lui a été associée avec le menu INPUT PROCESSORS; dans ce cas, pour éliminer l’erreur, vous devez configurer une entrée audio CONSDIG 1 (champ TYPE = CONSDIG 1).
ERROR FOUND
CONSOLLE “BM 3616 N.1” UNDFINED
AUDIO INPUT
1/1
UTILISATION DU MENU “EXIT WITHOUT SAVING”
- - - = = = MAIN MENU = = = - - ->SISTEM
->COMPILE & SAVE
->EXIT WITHOUT SAVING
Il permet de quitter le menu principal de configuration du système sans enregistrer les éventuelles définitions effectuées. Utilisez les touches
↑ / ↓ et/ou page ↑ / page ↓ pour amener le point de sélection sur le sous-menu EXIT WITHOUT SAVING et appuyez sur ENTER.
MISE EN GARDE
• Si vous quittez le menu de configuration avec l’option EXIT WITHOUT SAVING vous perdrez les paramètres modifiés et aucune des définitions effectuées ne pourra être réalisée sur les dispositifs du système.
167
AFFICHAGE DE L’ETAT DES ALARMES (menu “ALARMS”)
RCF RX 3000 AUDIO SYSTEM
F1 : CONFIGURATION
F2 : ALARMS
"##############
ENGLISH _ _ _ ▼
F3: STORE CONFIG.
F4: AUDIO PROCESS
03 NOV 1999
15:29:52
Pour accéder aux menus qui permettent d’afficher l’état en cours des alarmes gérées par le système (voir paragraphe ALARMES DU SYSTEME), appuyez sur F2 à partir du menu principal : l’écran de l’appareil affichera les sous-menus suivants.
• AUDIO INPUT PROCESSORS
Menu pour afficher dans les détails les alarmes relatives au fonctionnement des cartes AUDIO INPUT
IB 3210 / IB 3280.
• AUDIO OUTPUT PROCESSORS Menu pour afficher dans les détails les alarmes relatives au fonctionnement des cartes AUDIO OUTPUT OB 3230.
• GPI PROCESSORS
Menu pour afficher dans les détails les alarmes relatives au fonctionnement des cartes INPUT/ OUTPUT numériques IO 3250.
• DIG.CONSOLES
Menu pour afficher dans les détails les alarmes relatives au fonctionnement des consoles numériques
BM 3616.
• (ACU) AMPLIFIERS
Menu pour afficher dans les détails les alarmes relatives au fonctionnement des A.C.U. (cartes rétroamplificateur RB 3300).
• GPI ALARMS
Menu pour afficher dans les détails l’état des avis commandables à partir des entrées des cartes INPUT/ OUTPUT numériques IO 3250.
• EMERGENCY
Menu pour afficher dans les détails l’état des alarmes commandables avec la touche ALARM des consoles numériques BM 3616.
• FIREMAN
Menu pour afficher dans les détails l’état des alarmes commandables à partir des entrées des cartes
INPUT/OUTPUT numériques IO 3250 configurées FIREMAN.
• SYSTEM ALARMS
Menu pour afficher dans les détails l’état des alarmes relatives au fonctionnement des composants de
l’unité de contrôle CP 3100.
L’état de l’alarme du dispositif/ opération auquel le sous-menu se réfère est indiqué à côté de chaque sous-menu, dans le champ ALARMS;
il est continuellement mis à jour et indique, en particulier:
• [ X ], quand une ou plusieurs alarmes sont activées.
• [ ], quand il n’y a aucune alarme activée.
MISE EN GARDE
• Les sous-menus du menu ALARMS affichent également des “états ” ou des “données” (par exemple, champs REV, ALC) qui n’indiquent pas
d’alarme.
La première page-écran n’affiche que les 2 premiers sous-menu ; pour afficher les suivants, utilisez les touches ↑ / ↓ et/ou pag ↑ / pag ↓.
SYSTEM ALARMS OVERVIEW
AUDIO INPUT PROCESSORS
AUDIO OUTPUT PROCESSORS
PRESS F1 TO VIEW CURRENT ALARMS
ALARMS
[
]
[
]
Pag ↓
SYSTEM ALARMS OVERVIEW
GPI PROCESSORS
DIG. CONSOLLES
PRESS F1 TO VIEW CURRENT ALARMS
ALARMS
[
]
[
]
Pag ↓
SYSTEM ALARMS OVERVIEW
(ACU) AMPLIFIERS
GPI ALARMS
PRESS F1 TO VIEW CURRENT ALARMS
ALARMS
[
]
[
]
Pag ↓
SYSTEM ALARMS OVERVIEW
EMERGENCY
FIREMAN
PRESS F1 TO VIEW CURRENT ALARMS
ALARMS
[
]
[
]
Pag ↓
SYSTEM ALARMS OVERVIEW
FIREMAN
SYSTEM ALARMS
PRESS F1 TO VIEW CURRENT ALARMS
ALARMS
[
]
[
]
168
AFFICHAGE DES OPERATIONS D’ALARME
Cette procédure permet d’afficher les opérations d’alarme qui ont eu lieu depuis que le système a été mis en marche et peut s’utiliser lorsque
dans le sous-menu PRINTER OPTIONS du menu de configuration SYSTEM vous avez sélectionné PRINT MODE: NO (voir paragraphe UTILISATION DU MENU SYSTÈME). Après avoir affiché les sous-menus du menu ALARMS, appuyez sur la touche F1 pour afficher les opérations d’alarme.
SYSTEM ALARMS OVERVIEW
AUDIO INPUT PROCESSORS
AUDIO OUTPUT PROCESSORS
PRESS F1 TO VIEW CURRENT ALARMS
ALARMS
[
]
[
]
!
F1
L’écran de l’appareil affichera une page-écran pour chaque opération d’alarme, contenant les indications suivantes..
• Numéro de l’opération d’alarme et nombre d’alarmes en tout.
• Date à laquelle l’alarme a eu lieu.
• Heure à laquelle l’alarme a eu lieu.
• Dispositif qui a activé l’alarme. L’écran peut afficher les inscriptions suivantes:
– INPUT PROC. – Indique une carte AUDIO INPUT IB 3210 / IB 3280.
– OUTPUT PROC. - Indique une carte AUDIO OUTPUT OB 3230.
– GPI ALARMS Indique une carte INPUT/OUTPUT numérique IO 3250.
– CONSOLE Indique une console numérique BM 3616.
– ACU Indique une carte rétro-amplificateur RB 3300.
Le numéro d’identification correspondant est indiqué à côté du nom du dispositif.
• Type d’opération qui a déclenché l’alarme. Les types affichables dépendent du dispositif spécifique.
L’exemple suivant indique 5 opérations d’alarme ; pour afficher les opérations suivantes ou précédentes, utilisez les touches + (en avant) et
- (en arrière).
SYSTEM ALARMS OVERVIEW
AUDIO INPUT PROCESSORS
AUDIO OUTPUT PROCESSORS
PRESS F1 TO VIEW CURRENT ALARMS
ALARMS
[
]
[
]
F1
ALARMS LIST
03/11/1999
15:34:44
+ LOGGER
! LOGGER STARTED !
001/005
+
+
ALARMS LIST
03/11/1999
* INPUT PROC.
DCI FAULT KO
002/005
15:34:44
01 *
+
ALARMS LIST
03/11/1999
* OUTPUT PROC.
DCI FAULT KO
003/005
15:34:44
01 *
+
ALARMS LIST
03/11/1999
* GPI ALARMS
DCI FAULT KO
004/005
15:34:44
01 *
+
169
ALARMS LIST
03/11/1999
* ACU
DCI FAULT KO
005/005
15:34:44
01 *
IMPRESSION DES OPERATIONS D’ALARME
Cette procédure permet d’imprimer les opérations d’alarme qui ont eu lieu depuis que le système a été mis en marche et elle peut s’utiliser
si, dans le sous-menu PRINTER OPTION du menu de configuration SYSTEM, vous avez sélectionné PRINTER MODE: REQUEST (voir paragraphe UTILISATION DU MENU SYSTÈME).
MISE EN GARDE
• Si, dans le sous-menu PRINTER OPTION du menu de configuration SYSTEM, vous avez sélectionné PRINTER MODE: AUTO, l’impression des alarmes adviendra automatiquement au moment même de l’alarme et le menu ALARMS de l’unité de contrôle indiquera : PRINTER ALARMS AUTO.
Après avoir affiché les sous-menus du menu “ALARMS”, appuyez sur la touche F1 pour faire partir l’impression.
SYSTEM ALARMS OVERVIEW
AUDIO INPUT PROCESSORS
AUDIO OUTPUT PROCESSORS
PRESS F1 TO PRINT CURRENT ALARMS
ALARMS
[
]
[
]
!
F1
L’impression des alarmes contient les indications suivantes.
• Date à laquelle l’alarme a eu lieu.
• Heure à laquelle l’alarme a eu lieu.
• Dispositif qui a activé l’alarme. L’écran peut afficher les inscriptions suivantes:
– INPUT PROC. – Indique une carte AUDIO INPUT IB 3210 / IB 3280.
– OUTPUT PROC. - Indique une carte AUDIO OUTPUT OB 3230.
– GPI ALARMS Indique une carte INPUT/OUTPUT numérique IO 3250.
– CONSOLE Indique une console numérique BM 3616.
– ACU Indique une carte rétro-amplificateur RB 3300.
Le numéro d’identification correspondant est indiqué à côté du nom du dispositif.
• Type d’opération qui a déclenché l’alarme. Les types affichables dépendent du dispositif spécifique.
DETAILS DES ALARMES SUR CARTES AUDIO INPUT IB 3210 / IB 3280
SYSTEM ALARMS OVERVIEW
AUDIO INPUT PROCESSORS
AUDIO OUTPUT PROCESSORS
PRESS F1 TO VIEW CURRENT ALARMS
ALARMS
[
]
[
]
Pour afficher dans les détails l’état en cours des alarmes relatives aux cartes AUDIO INPUT IB 3210 / IB 3280, utilisez, à partir du menu
ALARMS, les touches ↑ / ↓ et/ou page ↑ / page ↓ pour amener le point de sélection sur le sous-menu AUDIO INPUT PROCESSORS et appuyez sur ENTER; l’écran affichera les champs suivants.
INPUT BOARD Il indique le numéro d’identification de la carte AUDIO INPUT IB 3210 / IB 3280 (voir paragraphe PARAMÈTRES CARACTERISTIQUES).
REV
Il indique la version du logiciel de la carte AUDIO INPUT.
DCI
Il indique une alarme déclenchée par un problème de communication entre la carte et l’unité de contrôle. Quand l’alarme
est activée, le signe X est indiqué dans le champ.
EEP
Il indique une alarme déclenchée par une panne ou un mauvais fonctionnement de la mémoire EEPROM de la carte. Quand
l’alarme est activée, le signe X est indiqué dans le champ.
RST
Il indique une alarme déclenchée par une “remise à zéro” du microprocesseur de la carte, pour en initialiser de nouveau le
fonctionnement (fonction “chien de garde ”). Quand l’alarme est activée, le signe X est indiqué dans le champ.
CFG
Il indique une alarme déclenchée par une configuration incomplète de la carte de la part de l’unité de contrôle (par exemple, en enlevant la carte la configuration a été interrompue). Quand l’alarme est activée, le signe X est indiqué dans le
champ.
KO
Il indique une alarme déclenchée parce qu’on a enlevé la carte (pour la réparer, par exemple). Dans cette condition, la carte ne communique plus avec l’unité CP 3100 et le contrôle de toutes les autres causes d’alarme est suspendu. Pour réutiliser une carte qui a été enlevée, vous devez reconfigurer le système, en opérant comme l’indique le paragraphe REALISATION D’UNE CONFIGURATION. Quand l’alarme est activée, le signe X est indiqué dans le champ.
Pour afficher les cartes AUDIO INPUT IB 3210 / IB 3280 suivantes et précédentes, appuyez sur les touches ↑ / ↓ et/ou page ↑ / page ↓.
170
INPUT BOARD
INP. PROC. 1
INP. PROC. 2
INP. PROC. 3
REV
1.0
1.0
1.0
DCI
EEP
RST
CFG
KO
RST
CFG
KO
Pag ↓
INPUT BOARD
INP. PROC. 4
INP. PROC. 5
INP. PROC. 6
REV
1.0
1.0
1.0
DCI
EEP
Pour quitter le sous-menu, appuyez sur ESC.
DETAILS DES ALARMES SUR CARTES AUDIO OUTPUT OB 3230
SYSTEMS ALARMS OVERVIEW
AUDIO INPUT PROCESSORS
AUDIO OUTPUT PROCESSORS
PRESS F1 TO VIEW CURRENT ALARMS
ALARMS
[
]
[
]
Pour afficher dans les détails l’état en cours des alarmes relatives aux cartes AUDIO OUTPUT OB 3230, utilisez, à partir du menu ALARMS,
les touches ↑ / ↓ et/ou page ↑ / page ↓ pour amener le point de sélection sur le sous-menu AUDIO OUTPUT PROCESSORS et appuyez sur
ENTER ; l’écran affichera les champs suivants.
OUTPUT BOARD Il indique le numéro d’identification de la carte AUDIO OUTPUT OB 3230 (voir paragraphe PARAMÈTRES CARACTERISTIQUES).
REV
Il indique la version du logiciel de la carte AUDIO OUTPUT.
DCI
Il indique une alarme déclenchée par un problème de communication entre la carte et l’unité de contrôle. Quand l’alarme
est activée, le signe X est indiqué dans le champ.
EEP
Il indique une alarme déclenchée par une panne ou un mauvais fonctionnement de la mémoire EEPROM de la carte. Quand
l’alarme est activée, le signe X est indiqué dans le champ.
RST
Il indique une alarme déclenchée par une “remise à zéro” du microprocesseur de la carte, pour en initialiser de nouveau le
fonctionnement (fonction “chien de garde ”). Quand l’alarme est activée, le signe X est indiqué dans le champ.
CFG
Il indique une alarme déclenchée par une configuration incomplète de la carte de la part de l’unité de contrôle (par exemple, en enlevant la carte la configuration a été interrompue). Quand l’alarme est activée, le signe X est indiqué dans le
champ.
POW
Il indique une alarme déclenchée par une tension d’alimentation de la carte trop basse ou absente. Quand l’alarme est activée, le signe X est indiqué dans le champ.
AUD
Il indique une alarme déclenchée par une panne à une ou plusieurs sorties audio de la carte. Quand l’alarme est activée, le
signe X est indiqué dans le champ.
KO
Il indique une alarme déclenchée parce qu’on a enlevé la carte (pour la réparer, par exemple). Dans cette condition, la carte ne communique plus avec l’unité CP 3100 et le contrôle de toutes les autres causes d’alarme est suspendu. Pour réutiliser une carte qui a été enlevée, vous devez reconfigurer le système, en opérant comme l’indique le paragraphe REALISATION D’UNE CONFIGURATION. Quand l’alarme est activée, le signe X est indiqué dans le champ.
La première page-écran n’affiche que les 7 premiers champs (REV, DCI, EEP, RST, CFG, POW, AUD) des 3 premières cartes OB 3230. Pour
afficher le champ suivant, appuyez sur la touche →; pour afficher le champ précédent, appuyez sur la touche ←.
OUTPUT BOARD
OUT. PROC. 1
OUT. PROC. 2
OUT. PROC. 3
REV
1.0
1.0
1.0
DCI
EEP
RST
CFG
POW AUD
→
REV
1.0
1.0
1.0
DCI
EEP
RST
CFG
POW AUD
KO
Pour afficher les cartes AUDIO OUTPUT OB 3230 suivantes et précédentes, appuyez sur les touches ↑ / ↓ et/ou page ↑ / page ↓.
171
OUTPUT BOARD
OUT. PROC. 1
OUT. PROC. 2
OUT. PROC. 3
REV
1.0
1.0
1.0
DCI
EEP
RST
CFG
POW AUD
CFG
POW AUD
Pag ↓
OUTPUT BOARD
OUT. PROC. 4
OUT. PROC. 5
OUT. PROC. 6
REV
1.0
1.0
1.0
DCI
EEP
RST
Pour quitter le sous-menu, appuyez sur ESC.
DETAILS DES ALARMES SUR CARTES INPUT/ OUTPUT NUMÉRIQUES IO 3250
SYSTEM ALARMS OVERVIEW
GPI PROCESSORS
DIG. CONSOLLES
PRESS F1 TO VIEW CURRENT ALARMS
ALARMS
[
]
[
]
Pour afficher dans les détails l’état en cours des alarmes relatives aux cartes INPUT/ OUTPUT numériques IO 3250, utilisez, à partir du menu ALARMS, les touches ↑ / ↓ et/ou page ↑ / page ↓ pour amener le point de sélection sur le sous-menu GPI PROCESSORS et appuyez
sur ENTER ; l’écran affichera les champs suivants.
GPI BOARD
Il indique le numéro d’identification de la carte INPUT/ OUTPUT numérique IO 3250 (voir paragraphe PARAMÈTRES CARACTERISTIQUES).
REV
Il indique la version du logiciel de la carte INPUT/ OUTPUT numérique.
DCI
Il indique une alarme déclenchée par un problème de communication entre la carte et l’unité de contrôle. Quand l’alarme
est activée, le signe X est indiqué dans le champ.
EEP
Il indique une alarme déclenchée par une panne ou un mauvais fonctionnement de la mémoire EEPROM de la carte. Quand
l’alarme est activée, le signe X est indiqué dans le champ.
RST
Il indique une alarme déclenchée par une “remise à zéro” du microprocesseur de la carte, pour en initialiser de nouveau le
fonctionnement (fonction “chien de garde ”). Quand l’alarme est activée, le signe X est indiqué dans le champ.
CFG
Il indique une alarme déclenchée par une configuration incomplète de la carte de la part de l’unité de contrôle (par exemple, en enlevant la carte la configuration a été interrompue). Quand l’alarme est activée, le signe X est indiqué dans le
champ.
POW
Il indique une alarme déclenchée par une tension d’alimentation de la carte trop basse ou absente. Quand l’alarme est activée, le signe X est indiqué dans le champ.
KO
Il indique une alarme déclenchée parce qu’on a enlevé la carte (pour la réparer, par exemple). Dans cette condition, la carte ne communique plus avec l’unité CP 3100 et le contrôle de toutes les autres causes d’alarme est suspendu. Pour réutiliser une carte qui a été enlevée, vous devez reconfigurer le système, en opérant comme l’indique le paragraphe REALISATION D’UNE CONFIGURATION. Quand l’alarme est activée, le signe X est indiqué dans le champ.
Pour afficher les cartes INPUT/ OUTPUT numériques IO 3250 suivantes et précédentes, appuyez sur les touches ↑ / ↓ et/ou page ↑ / page ↓.
GPI BOARD
GPI PROC. 1
GPI PROC. 2
GPI PROC. 3
REV
1.0
1.0
1.0
DCI
0
0
0
EEP
0
0
0
RST
0
0
0
CFG
0
0
0
POW
0
0
0
KO
0
0
0
CFG
0
0
0
POW
0
0
0
KO
0
0
0
Pag ↓
GPI BOARD
GPI PROC. 4
GPI PROC. 5
GPI PROC. 6
REV
1.0
1.0
1.0
DCI
0
0
0
EEP
0
0
0
RST
0
0
0
Pour quitter le sous-menu, appuyez sur ESC.
172
DETAILS DES ALARMES SUR LES CONSOLES BM 3616
SYSTEM ALARMS OVERVIEW
GPI PROCESSORS
DIG. CONSOLLES
PRESS F1 TO VIEW CURRENT ALARMS
ALARMS
[
]
[
]
Pour afficher dans les détails l’état en cours des alarmes relatives aux consoles numériques BM 3616, utilisez, à partir du menu ALARMS, les
touches ↑ / ↓ et/ou page ↑ / page ↓ pour amener le point de sélection sur le sous-menu DIG. CONSOLLES et appuyez sur ENTER ; l’écran
affichera les champs suivants.
CONSOLLE
Il indique le numéro d’identification de la console numérique BM 3616 ; ce numéro se définit localement à la console, selon la procédure de l’adressage (voir manuel d’installation et utilisation des consoles BM 3616).
REV
Il indique la version du logiciel de la console.
COM
Il indique une alarme déclenchée par un problème de communication entre la console et l’unité de contrôle. Quand l’alarme est activée, le signe X est indiqué dans le champ.
EEP
Il indique une alarme déclenchée par une panne ou un mauvais fonctionnement de la mémoire EEPROM de la console.
Quand l’alarme est activée, le signe X est indiqué dans le champ.
RST
Il indique une alarme déclenchée par une “remise à zéro” du microprocesseur de la console, pour en initialiser de nouveau
le fonctionnement (fonction “chien de garde ”). Quand l’alarme est activée, le signe X est indiqué dans le champ.
POW
Il indique une alarme déclenchée par une tension d’alimentation de la console trop basse ou absente. Quand l’alarme est
activée, le signe X est indiqué dans le champ.
KO
Il indique une alarme déclenchée parce qu’on a enlevé la console (pour la réparer, par exemple). Dans cette condition, la
console ne communique plus avec l’unité CP 3100 et le contrôle de toutes les autres causes d’alarme est suspendu. Pour
réutiliser une console qui a été enlevée, vous devez reconfigurer le système, en opérant comme l’indique le paragraphe
REALISATION D’UNE CONFIGURATION. Quand l’alarme est activée, le signe X est indiqué dans le champ.
Pour afficher les consoles numériques BM 3616 suivantes et précédentes, appuyez sur ↑ / ↓ et/ou page ↑ / page ↓.
CONSOLLE
1
2
3
REV
1.0
1.0
1.0
COM
EEP
RST
POW
KO
POW
KO
Pag ↓
CONSOLLE
4
5
6
REV
1.0
1.0
1.0
COM
EEP
RST
Pour quitter le sous-menu, appuyez sur ESC.
DETAIL DES ALARMES SUR LES UNITES A.C.U.
SYSTEM ALARMS OVERVIEW
(ACU) AMPLIFIERS
GPI ALARMS
PRESS F1 TO VIEW CURRENT ALARMS
ALARMS
[
]
[
]
Pour afficher dans les détails l’état en cours des alarmes relatives aux A.C.U. (voir paragraphe UNITES A.C.U.), utilisez, à partir du menu
ALARMS, les touches ↑ / ↓ et/ou page ↑ / page ↓ pour amener le point de sélection sur le sous-menu AMPLIFIERS et appuyez sur ENTER ; l’écran affichera les champs suivants.
ACU N.
Il indique le numéro d’identification de l’ A.C.U. (carte rétro-amplificateur RB 3300). L’indication, séquentielle, est liée à l’adresse attribuée à l’A.C.U. au moment de l’installation : au numéro 1 correspond l’A.C.U. ayant l’adresse “0”, au numéro
120 correspond l’A.C.U. ayant l’adresse 119.
REV
Il indique la version du logiciel de l’A.C.U.
COM
Il indique une alarme déclenchée par un problème de communication entre l’A.C.U. et l’unité de contrôle CP 3100. Quand
l’alarme est activée, le signe X est indiqué dans le champ.
LFT
L’alarme est signalée uniquement si l’A.C.U. est équipée de la carte optionnelle FAULT DETECTOR SB 3320. Elle signale
une ou plusieurs pannes sur la ligne audio pour enceintes connectée à la sortie de l’amplificateur contrôlé par l’A.C.U. :
court-circuit entre les deux conducteurs de la ligne, interruption de la ligne, court-circuit entre la ligne et le circuit de mise
à la terre (voir paragraphe FONCTION LINE FAULT). Quand l’alarme est activée, le signe X est indiqué dans le champ.
PAF
L’alarme est signalée uniquement si l’A.C.U. est équipée de la carte optionnelle FAULT DETECTOR SB 3320. Elle signale
tout mauvais fonctionnement de l’amplificateur contrôlé par l’A.C.U., qui déterminerait une sensible diminution de la puissance transmise (voir paragraphe FONCTION PA FAULT). Si l’A.C.U. a été configurée avec l’option MODE=AUTO, l’activation de cette alarme provoquera la déconnexion automatique de l’amplificateur contrôlé par l’unité et l’éventuelle connexion d’un amplificateur de réserve ou d’une A.C.U. BACKUP au cas où l’amplificateur de réserve serait lui aussi contrôlé
par une carte rétro-amplificateur RB 3300 (voir paragraphe UTILISATION DU MENU ACU). Quand l’alarme est activée, le signe X est indiqué dans le champ.
173
OVL
L’alarme est signalée si l’amplificateur contrôlé par l’A.C.U. est doté d’un contact auxiliaire d’alarme qui, en commutant sur
fermé quand une protection se déclenche ou quand l’appareil ne fonctionne pas normalement, pilote une entrée appropriée
de l’A.C.U. (voir paragraphe FONCTION OVL). Si l’A.C.U. a été configurée avec l’option MODE=AUTO, l’activation de cette alarme provoquera la déconnexion automatique de l’amplificateur contrôlé par l’unité et l’éventuelle connexion d’un amplificateur de réserve ou d’une A.C.U. BACKUP au cas où l’amplificateur de réserve serait lui aussi contrôlé par une carte
rétro-amplificateur RB 3300 (voir paragraphe UTILISATION DU MENU ACU). Quand l’alarme est activée, le signe X est indiqué dans le champ.
RST
Il indique une alarme déclenchée par une “remise à zéro” du microprocesseur de la carte, pour en initialiser de nouveau le
fonctionnement (fonction “chien de garde ”). Quand l’alarme est activée, le signe X est indiqué dans le champ.
FBK
L’alarme est signalée uniquement si l’A.C.U. est équipée de la carte optionnelle FAULT DETECTOR SB 3320. Elle indique
une alarme “fire-break” qui se déclenche lorsque l’ouverture d’un contact connecté à la carte SB 3320 ( contact d’un bouton) commande l’interruption de la diffusion normale du signal audio pour diffuser en priorité absolue un signal d’urgence
venant d’une source non connectée à la matrice audio du système (voir paragraphe FONCTION FIRE-BREAK).
24 V
Il indique une alarme déclenchée par le manque de tension d’alimentation 24 V de l’A.C.U. Quand l’alarme est activée, le
signe X est indiqué dans le champ.
12 V
Il indique une alarme déclenchée par le manque de tension d’alimentation 13,5 V de l’A.C.U. Quand l’alarme est activée, le
signe X est indiqué dans le champ.
ALC
Cette indication ne représente pas d’alarme et n’est fournie que si l’ A.C.U. est dotée de la carte optionnelle DIGITAL ALC
LB 3340. Elle indique l’intervention du circuit pour la correction automatique du niveau de diffusion, sur la carte LB 3340.
Quand il se déclenche, le signe X est indiqué dans le champ ; cette indication varie lentement (environ 1 variation par minute).
KO
Il indique une alarme déclenchée parce qu’on a enlevé l’A.C.U. (pour la réparer, par exemple). Dans cette condition l’A.C.U.
ne communique plus avec l’unité CP 3100 et le contrôle de toutes les autres causes d’alarme est suspendu. Pour réutiliser
une unité qui a été enlevée, vous devez reconfigurer le système, en opérant comme l’indique le paragraphe REALISATION
D’UNE CONFIGURATION. Quand l’alarme est activée, le signe X est indiqué dans le champ.
La première page-écran n’affiche que les 7 premiers champs (REV, COM, LFT, PAF, OVL, RST, FBK) des 3 premières A.C.U. Pour afficher le
champ suivant, appuyez sur la touche →; pour afficher le champ précédent, appuyez sur la touche ←.
ACU N.
ACU 1
ACU 2
ACU 3
REV
1.0
1.0
1.0
COM LFT
PAF
OVL
RST
FBK
12V
ALC
KO
→
LFT
PAF
OVL
RST
FBK
24V
Pour afficher les A.C.U. suivantes et précédentes, appuyez sur les touches ↑ / ↓ et/ou page ↑ / page ↓.
ACU N.
ACU 1
ACU 2
ACU 3
REV
1.0
1.0
1.0
COM LFT
PAF
OVL
RST
FBK
OVL
RST
FBK
→
ACU N.
ACU 4
ACU 5
ACU 6
REV
1.0
1.0
1.0
COM LFT
PAF
Pour quitter le sous-menu, appuyez sur ESC.
DETAILS DES ALARMES “GPI”
SYSTEM ALARMS OVERVIEW
(ACU) AMPLIFIERS
GPI ALARMS
PRESS F1 TO VIEW CURRENT ALARMS
ALARMS
[
]
[
]
Le sous-menu GPI ALARMS permet d’afficher l’état des avis commandables à partir des entrées GPI qui ont la fonction d’avis activée (champ
ALL. = ON). A partir du menu ALARMS, utilisez les touches ↑ / ↓ et/ou page ↑ / page ↓ pour amener le point de sélection sur le sous-menu
GPI ALARMS et appuyez sur ENTER ; l’écran de l’appareil affichera les champs suivants.
174
GPI EVENT
Ce champ indique les noms des opérations programmées avec le menu GPI EVENTS DEFINITION (voir paragraphe UTILISATION DU MENU OPERATIONS ENTREES GPI).
ALARM
Ce champ indique l’état de l’avis : Quand l’avis est activé, le signe X est indiqué dans le champ.
Pour afficher les opérations GPI avec avis suivantes et précédentes, appuyez sur les touches ↑ / ↓ et/ou page ↑ / page ↓.
GPI EVENT
KEY 1 CONSOLLE 1
KEY 2 CONSOLLE 1
KEY 3 CONSOLLE 1
ALARMS
[
]
[
]
[
]
Pag ↓
GPI EVENT
KEY 4 CONSOLLE 1
KEY 1 CONSOLLE 2
KEY 2 CONSOLLE 2
ALARMS
[
]
[
]
[
]
Pour quitter le sous-menu, appuyez sur ESC.
DETAILS DES ALARMES SUR LES CONSOLES BM 3616
SYSTEM ALARMS OVERVIEW
EMERGENCY
FIREMAN
PRESS F1 TO VIEW CURRENT ALARMS
ALARMS
[
]
[
]
Le sous-menu EMERGENCY permet d’afficher l’état des alarmes commandables à partir de la touche ALARM des consoles numériques BM
3616 (voir paragraphe UTILISATION DU MENU CONSOLES NUMÉRIQUES). A partir du menu ALARMS, utilisez les touches ↑ / ↓ et/ou page ↑ / page ↓ pour amener le point de sélection sur le sous-menu EMERGENCY et appuyez sur ENTER ; l’écran de l’appareil affichera les
champs suivants.
CONSOLLE
Ce champ indique les noms des consoles numériques BM 3616 définis avec le menu CONSOLES.
EMERGENCY Ce champ indique l’état de l’alarme : Quand l’alarme est activée, le signe X est indiqué dans le champ.
MISES EN GARDE
• Une alarme commandée à partir d’une console BM 3616 peut être coupée uniquement par la console qui l’a activée ou en éteignant
le système.
• Une alarme commandée à partir d’une console BM 3616 reste activée même en cas de coupure de la communication entre la console et
l’unité de contrôle.
Pour afficher les consoles BM 3616 suivantes ou précédentes, appuyez sur les touches ↑ / ↓ et/ou page ↑ / page ↓.
CONSOLLE
CONSOLLE 1
CONSOLLE 2
CONSOLLE 3
EMERGENCY
[
]
[
]
[
]
Pag ↓
CONSOLLE
CONSOLLE 4
CONSOLLE 5
CONSOLLE 6
EMERGENCY
[
]
[
]
[
]
Pour quitter le sous-menu, appuyez sur ESC.
175
DETAIL DES ALARMES “FIREMAN”
SYSTEM ALARMS OVERVIEW
EMERGENCY
FIREMAN
PRESS F1 TO VIEW CURRENT ALARMS
ALARMS
[
]
[
]
Le sous-menu FIREMAN permet d’afficher l’état des alarmes commandables à partir des entrées GPI configurés FIREMAN (voir paragraphe
UTILISATION DU MENU “GPI EVENTS DEFINITION”). A partir du menu ALARMS, utilisez les touches ↑ / ↓ et/ou page ↑ / page ↓ pour amener le point de sélection sur le sous-menu FIREMAN et appuyez sur ENTER ; l’écran de l’appareil affichera les champs suivants.
GPI EVENT
Il indique l’opération spécifique FIREMAN ; le système gère 2 opérations de ce type.
ALARMS
Ce champ indique l’état de l’alarme : Quand l’alarme FIREMAN est activée, le signe X est indiqué dans le champ.
GPI EVENT
FIREMAN1
FIREMAN2
ALARM
[
]
[
]
Pour quitter le sous-menu, appuyez sur ESC.
“SYSTEM ALARMS”
SYSTEM ALARMS OVERVIEW
FIREMAN
SYSTEM ALARMS
PRESS F1 TO VIEW CURRENT ALARMS
ALARMS
[
]
[
]
Le sous-menu SYSTEM ALARMS permet d’afficher dans les détails l’état en cours des alarmes concernant les composants de l’unité de contrôle CP 3100. A partir du menu ALARMS, utilisez les touches ↑ / ↓ et/ou page ↑ / page ↓ pour amener le point de sélection sur le sousmenu SYSTEM ALARMS et appuyez sur ENTER ; l’écran de l’appareil affichera les champs suivants.
COMPONENT
ALARM
Le champ indique les composants suivants de l’unité de contrôle..
• SOUND BLASTER - Indique la carte audio.
• COM1 PORT - Indique le port série numéro 1.
• COM2 PORT - Indique le port série numéro 2.
• COM3 PORT - Indique le port série numéro 3.
• COM4 PORT - Indique le port série numéro 4.
Ce champ indique l’état de l’alarme : Quand l’alarme est activée, le signe X est indiqué dans le champ.
Pour afficher les composants suivants ou précédents, appuyez sur les touches ↑ / ↓ et/ou page ↑ / page ↓.
COMPONENT
SOUND BLASTER
COM1 PORT
COM2 PORT
ALARM
[
]
[
]
[
]
Pag ↓
COMPONENT
COM2 PORT
COM3 PORT
COM4 PORT
ALARM
[
]
[
]
[
]
Pour quitter le sous-menu, appuyez sur ESC.
176
REALISATION D’UNE CONFIGURATION (menu “STORE CONFIG.)
La réalisation d’une configuration permet de programmer tous les dispositifs du système selon les définitions contenues dans les fichiers de
configuration, qui peuvent être créés avec la commande COMPILE & SAVE du menu de configuration de l’unité de contrôle ou avec l’éventuel PC de configuration. Les dispositifs programmés sont les suivants:
• les consoles numériques BM 3616.
• les cartes rétro-amplificateur RB 3300.
• les cartes INPUT/ OUTPUT numériques IO 3250.
• les cartes AUDIO INPUT IB 3210 / IB 3280.
• les cartes AUDIO OUTPUT OB 3230.
Cette procédure exige de :
• ajouter ou éliminer un composant du système.
• changer l’adresse d’un composant du système.
• modifier les fichiers de configuration du système au moyen de l’unité de contrôle CP 3100.
• réinsérer un composant du système qui avant été enlevé pour être réparé.
MISE EN GARDE
• La réalisation d’une configuration n’est pas nécessaire si vous modifiez des définitions en utilisant le menu AUDIO PROCESS (voir paragraphe DEFINITIONS AUDIO)..
Pour programmer tous les dispositifs du système, vous pouvez opérer de deux façons, que nous allons décrire..
PROGRAMMATION DES DISPOSITIFS A PARTIR DU MENU
1) A partir du menu principal de l’unité de contrôle, appuyez sur la touche F3 (MEMOR. CONFIG.) : l’écran affichera un message demandant
d’insérer l’éventuel mot de passe de l’unité de contrôle (voir paragraphe MOT DE PASSE POUR ACCEDER AUX MENUS).
2) Tapez au clavier numérique le mot de passe de l’unité de contrôle (s’il est prévu) et appuyez sur ENTER : tous les dispositifs du système
seront automatiquement programmés.
RCF RX 3000 AUDIO SYSTEM
F1 : CONFIGURATION
F2 : ALARMS
"##############
ENGLISH _ _ _ ▼
F3: STORE CONFIG.
F4: AUDIO PROCESS
03 NOV 1999
15:29:52
F3
INSERT PASSWORD TO ACCESS CONFIGURATION
PASSWORD: “nr. password”
ENTER
RCF RX 3000 AUDIO SYSTEM
F1 : CONFIGURATION
F2 : ALARMS
"##############
ENGLISH _ _ _ ▼
F3: STORE CONFIG.
F4: AUDIO PROCESS
03 NOV 1999
15:29:52
MISES EN GARDE
• La réalisation d’une nouvelle configuration comporte la RAZ de tous les dispositifs du système.
• La réalisation d’une nouvelle configuration n’est pas possible au cours d’une opération à priorité absolue (p. e. EMERGENCY, FIREMAN 1, FIREMAN 2).
PROGRAMMATION DES DISPOSITIFS PAR REDEMARRAGE DU SYSTEME
1) Eteignez le système.
2) Remettez le système en marche pour alimenter de nouveau tous les dispositifs.
ERREURS DE COMPILATION
Pendant la programmation des dispositifs du système vous pouvez trouver des erreurs dues à une mauvaise compilation des champs des
menus pour la configuration du système (menu F1 : CONFIGURATION). Dans ce cas, l’écran de l’unité de contrôle affichera le message ERROR ! et indiquera l’erreur en question.
177
DEFINITIONS AUDIO (menu “AUDIO PROCESS”)
RCF RX 3000 AUDIO SYSTEM
F1 : CONFIGURATION
F2 : ALARMS
"##############
ENGLISH _ _ _ ▼
F3: STORE CONFIG.
F4: AUDIO PROCESS
03 NOV 1999
15:29:52
Le menu AUDIO PROCESS permet de définir rapidement de nombreux paramètres audio, connecter et déconnecter manuellement les
A.C.U., et surveiller les signaux audio traités par le système. Pour y accéder, appuyez sur la touche F4 à partir du menu principal de l’unité
de contrôle : l’écran affichera les sous-menus suivants:
• ADJUST AUDIO INPUT
Menu pour régler le gain des entrées des cartes AUDIO INPUT IB 3210 / IB 3280 ; le menu permet également
d’activer et de désactiver les contrôles de ton des entrées (hauts/ bas).
• ADJUST AUDIO OUTPUT Menu pour régler le niveau des signaux audio sur les sorties des cartes AUDIO OUTPUT OB 3230.
• INSERT BACKUP ACU
Menu pour connecter/ déconnecter manuellement les A.C.U. (voir paragraphe UNITES A.C.U.), et pour connaître l’état de fonctionnement de ces unités.
• MONITOR OPERATIONS Menu pour écouter, dans le haut-parleur monitor de l’unité de contrôle, les signaux audio traités par le système (signaux entrée, signaux sortie, signaux sorties enceintes des amplificateurs contrôlés par les A.C.U.). Le
menu permet également de contrôler les niveaux des signaux audio surveillés.
Les définitions effectuées avec le menu AUDIO PROCESS sont appliquées immédiatement, sans nul besoin d’e recourir à l’option STORE
CONFIG. du menu principal (nul besoin de réaliser la nouvelle configuration). La première page-écran n’affiche que les 3 premiers sous-menus ; pour afficher les suivants, utilisez les touches ↑ / ↓ et/ou page ↑ / page ↓.
AUDIO ADJUST OPTIONS
ADJUST AUDIO INPUT
ADJUST AUDIO OUTPUT
INSERT BACKUP ACU
Pag ↓
AUDIO ADJUST OPTIONS
ADJUST AUDIO OUTPUT
INSERT BACKUP ACU
MONITOR OPERATIONS
UTILISATION DU MENU “ADJUST AUDIO INPUT”
AUDIO ADJUST OPTIONS
ADJUST AUDIO INPUT
ADJUST AUDIO OUTPUT
INSERT BACKUP ACU
A partir du menu AUDIO PROCESS, utilisez les touches ↑ / ↓ et/ou page ↑ / page ↓ pour amener le point de sélection sur le sous-menu
ADJUST AUDIO INPUT et appuyez sur ENTER ; l’écran de l’appareil affichera les champs suivants.
INPUT NAME
Il indique le nom de l’entrée à régler. Les noms affichés sont ceux associés aux entrées en utilisant le menu de configuration INPUT PROCESSORS.
GAIN dB
Il permet de régler le gain de l’entrée. Utilisez les touches + et - pour définir le gain de 0 à +20 dB. Le réglage advient par
pas de 1 dB.
MISES EN GARDE
• Evaluez attentivement le réglage du gain s’il est effectué en même temps que celui des contrôles de ton, pour éviter les
problèmes dus à la saturation de l’entrée.
BASS/TREBLE Il permet d’activer et de désactiver les deux contrôles de ton de l’entrée (trimmer), pour régler les basses et les hautes fréquences. Utilisez les touches + et - pour sélectionner une des options suivantes:
• ON - Contrôles de ton activés.
• OFF - Contrôles de ton désactivés.
Pour afficher les entrées suivantes ou précédentes, appuyez sur les touches ↑ / ↓ et/ou page ↑ / page ↓.
INPUT NAME
SOURCE 1
SOURCE 2
SOURCE 3
GAIN DB
00
00
00
BASS/TREBLE
OFF▼
OFF▼
OFF▼
Pag ↓
178
INPUT NAME
SOURCE 4
SOURCE 5
SOURCE 6
GAIN DB
00
00
00
BASS/TREBLE
OFF▼
OFF▼
OFF▼
Appuyez sur ESC pour quitter le sous-menu ; les nouvelles définitions seront automatiquement mémorisées.
UTILISATION DU MENU “ADJUST AUDIO OUTPUT”
AUDIO ADJUST OPTIONS
ADJUST AUDIO INPUT
ADJUST AUDIO OUTPUT
INSERT BACKUP ACU
A partir du menu AUDIO PROCESS, utilisez les touches ↑ / ↓ et/ou page ↑ / page ↓ pour amener le point de sélection sur le sous-menu
ADJUST AUDIO OUTPUT et appuyez sur ENTER ; l’écran de l’appareil affichera les champs suivants.
OUTPUT NAME Il indique le nom de la sortie à régler. Les noms affichés sont ceux associés aux sorties en utilisant le menu de configuration OUTPUT PROCESSORS.
ATTEN dB
Il permet d’atténuer le niveau du signal sur la sortie. Utilisez les touches + et - pour définir le niveau d’atténuation de 0 à
– 30 dB. Le réglage advient par pas de 1 dB et se réfère à un niveau de sortie nominal selon la méthode asymétrique de 0
dB.
MISES EN GARDE
• Les signaux symétriques possèdent un niveau de sortie supérieur de 6 dB aux signaux asymétriques: si vous définissez, par exemple, une atténuation de 0 dB, et si la sortie du signal audio advient selon la méthode asymétrique, le niveau nominal du signal sera de 0 dB, alors que si la sortie du signal audio advient selon la méthode symétrique, le niveau nominal du signal
sera de + 6 dB.
• Nous suggérons d’atténuer la sortie RECORDER, destinée à piloter l’entrée LINE IN de la carte audio, de -6 dB.
Pour afficher le sorties suivantes ou précédentes, appuyez sur les touches ↑ / ↓ et/ou page ↑ / page ↓.
OUTPUT NAME
ZONE 1
ZONE 2
ZONE 3
ATTEN DB
04
02
00
Pag ↓
OUTPUT NAME
ZONE 4
ZONE 5
ZONE 6
ATTEN DB
00
00
00
Appuyez sur ESC pour quitter le sous-menu; les nouvelles définitions seront automatiquement mémorisées.
UTILISATION DU MENU “INSERT BACKUP ACU”
AUDIO ADJUST OPTIONS
ADJUST AUDIO INPUT
ADJUST AUDIO OUTPUT
INSERT BACKUP ACU
A partir du menu AUDIO PROCESS, utilisez les touches ↑ / ↓ et/ou page ↑ / page ↓ pour amener le point de sélection sur le sous-menu
INSERT BACKUP ACU et appuyez sur ENTER ; l’écran de l’appareil affichera les champs suivants.
ACU
Il indique le numéro d’identification de l’A.C.U.. L’indication, séquentielle, est liée à l’adresse attribuée à l’A.C.U. en phase
d’installation : au numéro 1 correspond l’A.C.U. ayant l’adresse 0, au numéro 120 correspond l’A.C.U. ayant l’adresse 119.
REMARQUE
• Ce champ ne montre que les numéros d’identification des A.C.U. qui ont été configurées avec le menu approprié.
TYPE
GROUP
Il indique le type d’A.C.U. défini avec le menu de configuration ACU. L’écran peut afficher:
• NORMAL - La fonction de l’A.C.U. est de contrôler un amplificateur primaire, normalement dédié à la sonorisation d’une zone audio définie.
• BACKUP - La fonction de l’A.C.U. est de contrôler un amplificateur de réserve, normalement utilisé pour remplacer un
amplificateur primaire qui serait, par exemple, tombé en panne.
Il indique le groupe auquel appartient l’A.C.U., défini en utilisant le menu de configuration ACU. Le système peut, dans la
configuration maximale, gérer 64 groupes.
179
STATUS
Il indique l’état de fonctionnement de l’A.C.U., qui est continuellement mis à jour en fonction des événements. Il peut afficher:
• N.C. Il indique un problème de communication entre l’unité de contrôle CP 3100 et l’A.C.U. (voir paragraphe DETAILS DES ALARMES SUR LES A.C.U.). Cette signalisation peut advenir à tout moment et représente un
état d’alarme.
• FAULT Il indique l’activation d’une alarme PA FAULT ou OVL sur l’A.C.U. (voir paragraphe DETAILS DES ALARMES SUR LES A.C.U.).
• NOT INS. - Il indique que l’A.C.U. est déconnectée mais qu’elle fonctionne correctement et communique régulièrement
avec l’unité de contrôle CP 3100.
• WORKING - Il indique que l’A.C.U. est connectée et fonctionne correctement.
INSERT
Il permet de connecter/ déconnecter manuellement une A.C.U. du type NORMAL ou BACKUP, configurée selon la méthode de connexion/ déconnexion manuelle ou automatique (champ MODE du menu de configuration ACU).
Une unité NORMAL ou BACKUP peut se connecter/ déconnecter manuellement à tout moment, par exemple pour tester
la connexion automatique de sa réserve.
Utilisez les touches + et - pour sélectionner une des options suivantes:
• ON – A.C.U. connectée.
• OFF – A.C.U. déconnectée.
MISES EN GARDE
• Si le paramètre du champ INSERT ne peut pas se modifier, l’appareil émet un signal sonore (bip).
• Les unités NORMAL sont normalement connectées (ON) tandis que les unités BACKUP sont normalement toujours déconnectées (OFF).
• Lorsqu’une unité NORMAL est déconnectée et que, dans le groupe d’A.C.U. auquel elle appartient, il y a un amplificateur
de réserve qui n’est pas contrôlé par une carte rétro-amplificateur RB 3300, automatiquement celui-ci remplacera
toujours l’amplificateur primaire.
Pour afficher les A.C.U. suivantes ou précédentes, appuyez sur les touches ↑ / ↓ et/ou page ↑ / page ↓.
ACU
1
2
3
TYPE
NORMAL
BACKUP
BACKUP
GROUP
01
01
01
STATUS
N.C.
N.C.
N.C.
INSERT
OFF▼
OFF▼
OFF▼
Pag ↓
ACU
4
5
6
TYPE
BACKUP
NORMAL
BACKUP
GROUP
01
02
02
STATUS
N.C.
N.C.
N.C.
INSERT
OFF▼
OFF▼
OFF▼
Appuyez sur ESC pour quitter le sous-menu ; les nouvelles définitions seront automatiquement mémorisées.
Les exemples suivants peuvent aider à mieux comprendre le fonctionnement des A.C.U à plusieurs configurations
Exemple 1 : opération d’échange manuel d’une unité NORMAL contre une unité BACKUP
Configuration A.C.U.:
a) A.C.U. 1 NORMAL configurée MANUAL.
b) A.C.U. 2 BACKUP configurée MANUAL.
L’écran de l’unité de contrôle CP 3100 affiche:
ACU
1
2
TYPE
NORMAL
BACKUP
GROUP
01
01
STATUS
WORKING
NOT INS.
INSERT
ON▼
OFF▼
Opérations à effectuer :
1) Sélectionnez OFF dans le champ INSERT de l’A.C.U. 1 ; la rubrique NOT INS. apparaîtra dans le champ STATUS.
2) Pour connecter la réserve, vous devez effectuer une OPERATION MANUELLE sur l’A.C.U. 2 : sélectionnez ON dans le champ INSERT
de celle-ci ; la rubrique WORKING apparaîtra dans le champ STATUS.
L’écran de l’unité de contrôle CP 3100 affichera maintenant:
ACU
1
2
TYPE
NORMAL
BACKUP
GROUP
01
01
STATUS
NOT INS.
WORKING
INSERT
OFF▼
ON▼
180
Exemple 2 : opération d’échange semi-automatique d’une unité NORMAL contre une unité BACKUP
Configuration A.C.U. :
a) A.C.U. 1 NORMAL configurée AUTO.
b) A.C.U. 2 BACKUP configurée MANUAL
L’écran de l’unité de contrôle CP 3100 affiche:
ACU
1
2
TYPE
NORMAL
BACKUP
GROUP
01
01
STATUS
WORKING
NOT INS.
INSERT
ON▼
OFF▼
Opérations à effectuer :
1) Provoquez une alarme sur l’A.C.U. 1 (OVL, par ex.) ; l’A.C.U. 1 sera automatiquement déconnectée : OFF apparaîtra dans le champ INSERT (unité automatiquement déconnectée), tandis que le champ STATUS affichera FAULT.
2) Pour connecter la réserve, vous devez effectuer une OPERATION MANUELLE sur l’A.C.U. 2 : sélectionnez ON dans le champ INSERT
de celle-ci ; la rubrique WORKING apparaîtra dans le champ STATUS.
L’écran de l’unité de contrôle CP 3100 affichera maintenant:
ACU
1
2
TYPE
NORMAL
BACKUP
GROUP
01
01
STATUS
FAULT
WORKING
INSERT
OFF▼
ON▼
REMARQUE
• L’alarme sur l’A.C.U. 1 étant terminée, agissez sur la commande INSERT pour reconnecter cette unité ; si l’A.C.U. 1 est reconnectée mais
la panne ou le mauvais fonctionnement de l’amplificateur correspondant persiste, elle se remettra en FAULT au bout de quelques secondes et commutera sur OFF.
Exemple 3 : opération d’échange automatique d’une unité NORMAL contre une unité BACKUP
Configuration A.C.U.:
a) A.C.U. 1 NORMAL configurée AUTO
b) A.C.U. 2 BACKUP” configurée AUTO
L’écran de l’unité de contrôle CP 3100 affiche:
ACU
1
2
TYPE
NORMAL
BACKUP
GROUP
01
01
STATUS
WORKING
NOT INS.
INSERT
ON▼
OFF▼
Opérations à effectuer :
1) Provoquez une alarme sur l’A.C.U. 1 (OVL, par ex.) ; l’A.C.U. 1 sera automatiquement déconnectée : OFF apparaîtra dans le champ INSERT (unité automatiquement déconnectée), tandis que le champ STATUS affichera FAULT.
2) L’ A.C.U. 2 (réserve) est automatiquement connectée à la place de l’A.C.U. 1: ON apparaîtra dans le champ INSERT tandis que dans
le champ STATUS apparaîtra la rubrique WORKING.
L’écran de l’unité de contrôle CP 3100 affichera maintenant:
ACU
1
2
TYPE
NORMAL
BACKUP
GROUP
01
01
STATUS
FAULT
WORKING
INSERT
OFF▼
ON▼
REMARQUES
• Si la cause de l’alarme disparaît, vous devrez, pour revenir à la situation initiale (l’A.C.U. 1 connectée et l’A.C.U. 2 déconnectée) agir manuellement sur la commande INSERT pour ramener les unités dans leur état d’origine, ou reconfigurer le système en suivant une des procédures décrites au paragraphe REALISATION D’UNE CONFIGURATION.
• L’opération de connexion manuelle d’une A.C.U. se révèle utile lorsque plusieurs unités de réserve configurées en AUTO commutent automatiquement sur FAULT à cause, par exemple, d’une surcharge de ligne que l’utilisateur élimine.
181
UTILISATION DU MENU “MONITOR OPERATIONS”
AUDIO ADJUST OPTIONS
ADJUST AUDIO OUTPUT
INSERT BACKUP ACU
MONITOR OPERATIONS
Ce menu permet d’utiliser la fonction “monitor” pour écouter les signaux audio des dispositifs suivants:
• entrées des cartes AUDIO INPUT IB 3210 / IB 3280.
• sorties des cartes AUDIO OUTPUT OB 3230.
• sorties enceintes des amplificateurs contrôlés par les A.C.U. (cartes rétro-amplificateur RB 3300).
L’écoute s’effectue dans le haut-parleur monitor de l’unité de contrôle. A partir du menu AUDIO PROCESS, utilisez les touches ↑ / ↓ et/ou
page ↑ / page ↓ pour amener le point de sélection sur le sous-menu MONITOR OPERATIONS et appuyez sur ENTER ; l’écran de l’appareil
affichera les champs suivants.
SOURCE:
ACTUAL:
LIV. dB
F1 START
SOURCE
DURATION
ACTUAL
MODE
LIV. dB
NONE _____
NONE _____
<STOPPED>
F2 STOP
DURATION:
MODE:
000000
MANUAL
F3 CONFIG.
Il indique le type de source sélectionnée pour être surveillée. L’écran peut afficher:
• NO indiquant qu’aucune source est sélectionnée.
• INPUT indiquant le monitoring des entrées des cartes AUDIO INPUT IB 3210 / IB 3280.
• OUTPUT - indiquant le monitoring des sorties des cartes AUDIO OUTPUT OB 3230.
• ACU indiquant le monitoring des A.C.U. (cartes rétro-amplificateur RB 3300).
Il indique le temps qui s’est écoulé depuis le début du monitoring de la source en cours indiquée dans le champ ACTUAL.
Il indique la source spécifique en cours, sélectionnée pour le monitoring. Pendant le monitoring des cartes AUDIO INPUT
IB 3210 / IB 3280, l’appareil indique le nom de l’entrée en cours surveillée ; pendant le monitoring des cartes AUDIO OUTPUT OB 3230, l’appareil indique le nom de la sortie en cours surveillée ; pendant le monitoring des A.C.U., l’appareil indique le numéro d’identification de l’A.C.U. en cours surveillée.
Il indique le mode de fonctionnement du monitoring. L’écran peut afficher:
• MANUAL - Il indique que le mode sélectionné est le manuel, qui permet de surveiller une source spécifique.
• AUTO Il indique que le mode sélectionné est l’automatique, qui permet de surveiller en séquence pendant 10 secondes, toutes les sources du type indiqué dans le champ SOURCE.
Il indique le niveau en décibels du signal surveillé. Quand la fonction “monitor” n’est pas activée, le champ affiche le message <STOPPED>.
Pour activer le monitoring, appuyez sur la touche F1 ; pour le couper, appuyez sur la touche F2 ; pour configurer la fonction “monitor”, appuyez sur la touche F3 (voir paragraphe CONFIGURATION DE LA FONCTION MONITOR).
CONFIGURATION DE LA FONCTION “MONITOR”
Pour afficher le sous-menu qui permet de configurer la fonction “monitor”, appuyez sur la touche F1 à partir de la page-écran initiale du menu MONITOR OPERATIONS . L’écran affichera la page suivante.
MODE:
MANUAL ▼
AUDIO INPUT
:
AUDIO OUTPUT
:
ACU
:
MODE
SOURCE:NONE _ _ ▼
NO INPUT
_________▼
NO ZONE _ _ _ _ _ _ _ _ _ _ _▼
NO ACU _ _ _ _ _ _ _ _ _ _ _ _▼
Il permet de sélectionner le mode de fonctionnement du monitoring audio. Utilisez les touches + et - pour sélectionner un
des modes suivants:
• MANUAL - Il indique le monitoring en manuel, qui permet de sélectionner manuellement l’écoute de :
• une quelconque entrée des cartes AUDIO INPUT IB 3210 / IB 3280.
• une quelconque sortie des cartes AUDIO OUTPUT OB 3230.
• une quelconque sortie enceintes des amplificateurs contrôlés par les A.C.U. (cartes rétro-amplificateur RB
3300).
• AUTO Il indique le monitoring en automatique, qui permet d’écouter en séquence pendant 10 secondes :
• toutes les entrées des cartes AUDIO INPUT IB 3210 / IB 3280.
• toutes les sorties des cartes AUDIO OUTPUT OB 3230.
• toutes les sorties enceintes des amplificateurs contrôlés par les unités A.C.U. (cartes rétro-amplificateur
RB 3300).
L’exploration des sources s’effectue de façon entièrement automatique.
MISE EN GARDE
• Le mode AUTO ne permet pas d’explorer plus d’un type de sources à la fois (p. ex. INPUT et OUTPUT ou INPUT et
A.C.U.).
• Le système peut contenir 120 A.C.U. : évaluez attentivement l’utilisation du monitoring automatique dans cette condition car il demanderait 20 minutes !
182
SOURCE
Il permet de sélectionner le type de source à surveiller. Utilisez les touches + et - pour sélectionner une des options suivantes:
• NO Il indique qu’aucune source est surveillée.
• INPUT Il indique les entrées des cartes AUDIO INPUT IB 3210 / IB 3280.
• OUTPUT - Il indique les sorties des cartes AUDIO OUTPUT OB 3230.
• ACU Il indique les A.C.U. (cartes rétro-amplificateur RB 3300).
AUDIO INPUT A utiliser quand vous choisissez le monitoring MANUAL, il permet de sélectionner l’entrée des cartes AUDIO INPUT IB 3210
/ IB 3280 à écouter. Utilisez les touches + et - pour sélectionner le nom de l’entrée souhaitée parmi celles définies avec le
menu INPUT PROCESSORS (champ NAME). Si vous choisissez NO INPUT (sélection prédéfinie) vous ne définirez aucune entrée.
AUDIO OUTPUT A utiliser quand vous choisissez le monitoring MANUAL, il permet de sélectionner la sortie des cartes AUDIO OUTPUT OB
3230 à écouter. Utilisez les touches + et – pour sélectionner le nom de la sortie souhaitée parmi celles définies avec le menu OUTPUT PROCESSORS (champ NAME). Si vous choisissez NO ZONE (sélection prédéfinie) vous ne définirez aucune
sortie.
ACU
A utiliser quand vous choisissez le monitoring MANUAL, il permet de sélectionner l’A.C.U. à écouter. Utilisez les touches
+ et – pour sélectionner le numéro d’identification de l’A.C.U. souhaitée. Si vous choisissez NO ACU (sélection prédéfinie)
vous ne définirez aucune A.C.U.
REMARQUE
• Chaque fois que le système est reconfiguré (voir paragraphe REALISATION D’UNE CONFIGURATION), la configuration de la fonction “monitor” est perdue puisqu’elle est temporaire.
CARACTERISTIQUES TECHNIQUES
CARACTERISTIQUES TECHNIQUES CP 3100
Fonction
Unité de contrôle
Microprocesseur
à haute vitesse
Carte écran
VGA
Carte audio
16 bits
Ports série RS 232
2
Ports série RS 485
2
Port série synchrone DCI
1
Port parallèle
1
Ventilation
Forcée
Alimentation / consommation maximale
230 V CA ± 5% - 50 Hz (115 V CA - 60 Hz sur demande)/ 200 VA
Dimensions (l x h x p)
483 x 132 x 368 mm
Poids
7,8 kg
CARACTERISTIQUES TECHNIQUES MB 3200
Fonction
Sub-rack pour cartes électroniques modulaires
Standard fente pour cartes
DIN
Nombre de cartes pouvant s’installer
4 cartes AUDIO INPUT IB 3210 / IB 3280
8 cartes AUDIO OUTPUT OB 3230 ou 8 cartes INPUT/ OUTPUT numériques IO 3250
Alimentation
5 V CC - 13,5 V CC - 24 V CC
Dimensions (l x h x p)
483 x 176 x 304 mm
Poids
3,7 kg (sans cartes)
CARACTERISTIQUES TECHNIQUES IF 3260
Fonction
Panneau connexions de rack
N° prédispositions pour cartes à bornes
5 prédispositions
Cartes de connexion pouvant s’installer dans
Possibilités : 3 cartes de connexion à 12 bornes, 2 à 20 bornes ou 1 à 32 bornes.
chaque fente
Hauteur rack
6 unités
183
CARACTERISTIQUES TECHNIQUES CARTES AUDIO INPUT IB 3210 / IB 3280
Fonction
Carte entrées audio
Nombre d’entrées
8 entrées symétriques
Type de réglage
Electronique - IB 3210
A transformateur - IB 3280
Bande passante
10 ÷ 30.000 Hz (± 3 dB)
Distorsion
≤ 0,1 % (30 Hz ÷ 15 kHz)
Rapport signal/ bruit
≥ 85 dB
Sensibilité entrées
775 mV nominale - 77,5 mV minimale
Impédance entrées
47 kΩ
Contrôles de ton
Bas : ± 12 dB - 100 Hz
Hauts : ± 12 dB - 10 kHz
Alimentation / Consommation
5 V CC / 50 mA
13,5 V CC / 140 mA
CARACTERISTIQUES TECHNIQUES CARTES AUDIO OUTPUT OB 3230
Fonction
Carte sorties audio
Nombre de sorties
8 sorties symétriques/ asymétriques
Matrice de carte
32 entrées x 8 sorties
Bande passante
10 ÷ 30.000 Hz (± 3 dB)
Distorsion
≤ 0,1 % (30 Hz ÷ 15 kHz)
Niveau sorties
775 mV nominale asym. - 1,55 V nominale sym. - >7,5 V max sym.
Impédance sorties
< 600 Ω
Alimentation / Consommation
5 V CC / 70 mA
13,5 V CC / 100 mA
CARACTERISTIQUES TECHNIQUES CARTES INPUT/OUTPUT NUMERIQUES IO 3250
Fonction
Carte con entrées opto-isolées programmables et sorties à relais
Nombre d’entrées
16 entrées opto-isolées
Nombre de sorties
24 sorties à relais
Tension de commando entrées opto-isolées
15 ÷ 30 V CC
Courant nominal entrées opto-isolées
10 mA à 24 V CC
Tension max. commutable par les relais de sortie 50 V CC
Courant max. commutable par les relais de sortie 0,5 A (max 1 A par groupe)
Alimentation / Consommation
5 V CC / 70 mA
24 V CC / 0,5 mA (24 relais actifs)
184
INHALT
SICHERHEITSHINWEISE _________________________________________________
VORSICHTSMASSNAHMEN BEI DER BENUTZUNG ________________________
BESCHREIBUNG_________________________________________________________
CP 3100 – KONTROLLEINHEIT __________________________________________
MB 3200 – SUB-RACK _________________________________________________
IF 3260 – ANSCHLUSSPANEEL__________________________________________
IB 3210 / IB 3280 – KARTE AUDIO INPUT_________________________________
OB 3230 – KARTE AUDIO OUTPUT ______________________________________
IO 3250 – DIGITALE KARTE INPUT/OUTPUT ______________________________
BM 3616 – DIGITALE MIKROFONEINHEIT ________________________________
BM 3604 – MIKROFONEINHEIT__________________________________________
RB 3300 – DEM VERSTÄRKER NACHGESCHALTETE KARTE _______________
PS 3400 – NETZTEIL ___________________________________________________
ES 3000 – ERWEITERTE SOFTWARE_____________________________________
CP 3100 – VORRICHTUNGEN AUF DER VORDERSEITE ____________________
CP 3100 – VORRICHTUNGEN AUF DER RÜCKSEITE _______________________
MB 3200 – VORRICHTUNGEN AUF DER VORDERSEITE ____________________
MB 3200 - VORRICHTUNGEN AUF DER RÜCKSEITE ______________________
VORRICHTUNGEN UND FUNKTIONEN DES SYSTEMS _____________________
AUDIO-MATRIX ________________________________________________________
“GPI”-EINGÄNGE ______________________________________________________
PROGRAMMIERBARE RELAIS __________________________________________
A.C.U.-EINHEITEN _____________________________________________________
FUNKTION “DAY/NIGHT” ____________________________________________________
FUNKTION “MONITOR” (AUDIO-ÜBERWACHUNG) ______________________________
ALARM “OVL” ______________________________________________________________
FUNKTION “FIRE-BREAK” ___________________________________________________
FUNKTION “LINE FAULT” ____________________________________________________
FUNKTION “PA FAULT” ______________________________________________________
FUNKTION “ALC” _____________________________________________________
SYSTEMEREIGNISSE __________________________________________________
VON DEN DIGITALEN EINHEITEN BM 3616 STEUERBARE EREIGNISSE ___________
VON DEN EINHEITEN BM 3604 STEUERBARE EREIGNISSE______________________
VON DEN “GPI”-EINGÄNGEN STEUERBARE EINGÄNGE _________________________
ZEITGESTEUERTE EREIGNISSE ______________________________________________
EREIGNISSE “VOX” _________________________________________________________
EREIGNISSE “PLAYBACK” ___________________________________________________
EREIGNISSE “BACKGROUND MUSIC” ____________________________________
VORRANGORDNUNG __________________________________________________
FUNKTION SPERRUNG DURCH EIN EREIGNIS MIT ABSOLUTEM VORRANG ______
VORRICHTUNG “VOX” _________________________________________________
AUFZEICHNUNG/WIEDERGABE VON AUDIOSIGNALEN ___________________
ERZEUGUNG VON KLÄNGEN ________________________________________________
AUFZEICHNUNG VON AUDIOSIGNALEN_______________________________________
WIEDERGABE VON AUDIODATEIEN ______________________________________
SYSTEMALARME ______________________________________________________
AUSDRUCK DER ALARMEREIGNISSE _____________________________________
AUSSTRAHLUNG VON HINTERGRUNDMUSIK ___________________________
BENUTZUNG DER KONTROLLEINHEIT CP 3100 ___________________________
BENUTZUNG DER MENÜS _____________________________________________
PASSWORD FÜR DEN ZUGANG ZU DEN MENÜS_______________________________
VERLASSEN EINES MENÜS__________________________________________________
ANZEIGE DES AUDIO-PEGELS _______________________________________________
FUNKTIONSWEISE DER AKUSTISCHEN ANZEIGE ______________________________
FUNKTIONSWEISE DER RÜCKSEITIGEN BELEUCHTUNG _____________________
185
187
187
188
188
189
189
189
189
189
189
190
190
191
191
191
193
194
194
196
196
196
196
196
198
198
199
199
199
199
199
199
199
199
200
200
200
200
200
200
201
202
202
202
202
202
203
203
203
203
203
204
204
205
205
205
EINSCHALTEN DES GERÄTES __________________________________________ 205
KORREKTE KONFIGURIERUNG DES SYSTEMS ________________________________ 205
FEHLER IN DER KONFIGURIERUNG DES SYSTEMS ____________________________ 205
WAHL DER SPRACHE_______________________________________________________ 206
HAUPTMENÜ _________________________________________________________ 206
KONFIGURIERUNG DES SYSTEMS (MENÜ “CONFIGURATION”) ___________ 206
CHARAKTERISTISCHE PARAMETER __________________________________________ 208
BENUTZUNG DES MENÜS “INPUT PROCESSORS” _____________________________ 208
BENUTZUNG DES MENÜS “OUTPUT PROCESSORS” ___________________________ 209
BENUTZUNG DES MENÜS “GROUPS” ________________________________________ 210
BENUTZUNG DES MENÜS “RELAY CONFIGURATION” __________________________ 211
BENUTZUNG DES MENÜS “CONSOLES” ______________________________________ 212
BENUTZUNG DES MENÜS “ACU” ____________________________________________ 216
BENUTZUNG DES MENÜS “GPI EVENTS DEFINITION” __________________________ 217
BENUTZUNG DES MENÜS “TIMER EVENTS DEFINITION” ________________________ 220
BENUTZUNG DES MENÜS “VOX”_____________________________________________ 222
BENUTZUNG DES MENÜS “RECORDER” ______________________________________ 223
BENUTZUNG DES MENÜS “SYSTEM” _________________________________________ 226
BENUTZUNG DES MENÜS “COMPILE & SAVE” _________________________________ 228
BENUTZUNG DES MENÜS “EXIT WITHOUT SAVING” _________________________ 228
ANZEIGEN DES ALARMSTATUS (MENÜ “ALARMS”) _______________________ 229
ANZEIGEN DER ALARMEREIGNISSE __________________________________________ 230
AUSDRUCK DER ALARMEREIGNISSE _________________________________________ 231
DETAILLIERTE ANGABEN ZU DEN ALARMEN DER KARTEN AUDIO
INPUT IB 3210 / IB 3280_____________________________________________________
DETAILLIERTE ANGABEN ZU DEN ALARMEN DER KARTEN AUDIO OUTPUT OB 3230
DETAILLIERTE ANGABEN ZU DEN ALARMEN DER DIGITALEN KARTEN
INPUT/OUTPUT IO 3250 _____________________________________________________
DETAILLIERTE ANGABEN ZU DEN ALARMEN DER EINHEIT BM 3616 _____________
DETAILLIERTE ANGABEN ZU DEN ALARMEN DER A.C.U.-EINHEIT _______________
DETAILLIERTE ANGABEN ZU DEN ALARMEN “GPI” _____________________________
DETAILLIERTE ANGABEN ZU DEN ALARMEN EINHEIT BM 3616 __________________
DETAILLIERTE ANGABEN ZU DEN ALARMEN “FIREMAN” ________________________
SYSTEM ALARMS _____________________________________________________
UMSETZUNG EINER KONFIGURIERUNG (MENÜ “STORE CONFIG.) ________
PROGRAMMIERUNG DER VORRICHTUNGEN MIT DEM MENÜ ___________________
PROGRAMMIERUNG DER VORRICHTUNGEN DURCH NEUSTART DES SYSTEMS __
KOMPILIERUNGSFEHLER _______________________________________________
AUDIO-EINSTELLUNGEN (MENÜ “AUDIO PROCESS”) ____________________
BENUTZUNG
BENUTZUNG
BENUTZUNG
BENUTZUNG
DES
DES
DES
DES
MENÜS
MENÜS
MENÜS
MENÜS
“ADJUST AUDIO INPUT” ____________________________
“ADJUST AUDIO OUTPUT” __________________________
“INSERT BACKUP ACU”_____________________________
“MONITOR OPERATIONS” ________________________
TECHNISCHE DATEN ____________________________________________________
TECHNISCHE DATEN CP 3100 __________________________________________
TECHNISCHE DATEN MB 3200 __________________________________________
TECHNISCHE DATEN IF 3260 ___________________________________________
TECHNISCHE DATEN KARTEN AUDIO INPUT IB 3210 / IB 3280_____________
TECHNISCHE DATEN KARTEN AUDIO OUTPUT OB 3230 __________________
TECHNISCHE DATEN DIGITALE KARTEN INPUT/OUTPUT IO 3250 __________
ANSCHLUSSBEISPIELE __________________________________________________
186
231
232
233
234
234
235
236
237
237
238
238
238
238
239
239
240
240
243
244
244
244
244
245
245
245
307
WICHTIG
• Vor Benutzen der Geräte des Systems die im vorliegenden Handbuch enthaltenen Anweisungen aufmerksam lesen und dasselbe für Konsultationen in der Zukunft aufbewahren.
• Das vorliegende Handbuch stellt einen integralen Bestandteil des Systems dar und muss dasselbe auch bei einem Wechsel des Eigentümers begleiten, um es dem neuen Besitzer zu gestatten, sich über die Art und Weise der Installation sowie über die Sicherheitshinweise zu informieren.
• Die fehlerhafte Installation der Geräte des Systems entbindet RCF von jeglicher Haftung.
WICHTIG
• Zur Vermeidung der Gefahr von Flammen oder elektrischen Schlägen die Geräte des Systems nicht dem Regen oder der Feuchtigkeit aussetzen.
SICHERHEITSHINWEISE
1. Alle Hinweise, die mit dem Symbol
versehen sind, müssen besonders aufmerksam gelesen werden, da sie wichtige Informationen zur Sicherheit enthalten.
2. Zur Vermeidung der Gefahr von Bränden oder elektrischen Schlägen sicherstellen, dass das Netzkabel der Kontrolleinheit CP 3100 nicht zertreten oder von Gegenständen zerquetscht werden kann, um seine Unversehrtheit zu gewährleisten; außerdem vermeiden, das Netzkabel zu stark
zu biegen, zu ziehen oder einzuschneiden.
3. Zur Vermeidung der Gefahr von elektrischen Schlägen die Kontrolleinheit CP 3100 nie öffnen: Im Innern befinden sich keine Bauteile, die vom
Installationstechniker benutzt werden können.
4. Verhindern, das Gegenstände oder Flüssigkeiten ins Innere der Geräte des Systems eindringen, da dadurch Brände oder elektrische Schläge verursacht werden können.
5. Nie die Durchführung von Reparaturen versuchen, die im vorliegenden Handbuch nicht beschrieben werden. Wenden Sie sich an den RCF-KUNDENDIENST, wenn:
a. ein Gerät nicht (oder nicht normal) funktioniert.
b. das Netzkabel der Kontrolleinheit CP 3100 stark beschädigt worden ist.
c. Gegenstände oder Flüssigkeiten ins Innere eines Gerätes eingedrungen sind.
d. ein Gerät starke Stöße erfahren hat.
6. Schalten Sie das System aus und unterbrechen sie die Versorgung aller entsprechenden Geräte, falls das System für einen längeren Zeitraum nicht verwendet wird.
7. Schalten Sie das System sofort ab, falls anomale Gerüche oder Rauch aus einem Gerät kommen.
8. Zur Vermeidung von elektrischen Schlägen das Netzkabel der Kontrolleinheit CP 3100 nie mit nassen Händen anschließen oder abklemmen;
immer direkt am Stecker und nie am Kabel ziehen.
9. Die Geräte des Systems nie mit Sprays (zum Beispiel mit Insektiziden, Reinigungsmitteln usw.) einsprühen: Die verwendeten Gase könnten sich
plötzlich entzünden.
10. Die Geräte des Systems weisen digitale Schaltungen auf und auch wenn die geltenden Bestimmungen zur Funkentstörung befolgt worden sind,
so können in einigen Fällen Störungen und Interferenzen verursacht werden, falls sie in der Nähe von Radiogeräten, TV-Geräten usw. aufgestellt
werden. Falls Probleme dieser Art auftreten sollten, so sollte versucht werden, die gestörten Geräte in größerer Entfernung von den Geräten des
Systems aufzustellen.
11. Die Geräte des Systems ausschließlich mit den von RCF angegebenen oder zusammen mit den Produkten gelieferten Zubehörteilen einsetzen.
VORSICHTSMASSNAHMEN BEI DER BENUTZUNG
• Die Bedienungselemente (Taste, Regler usw.) nicht mit Gewalt bewegen.
• Bei der Reinigung der Geräte die Verwendung von Lösungsmitteln, Alkohol, Benzin oder sonstigen flüchtigen Substanzen vermeiden.
HANDELSMARKEN UND EINGETRAGENE WARENZEICHEN
• IBM® und VGA® sind eingetragene Warenzeichen der International Business Machines Inc.
• Microsoft® ist ein eingetragenes Warenzeichen der Microsoft Corporation; Windows 95™ und Windows 98™ sind Handelsmarken der Microsoft Corporation.
• Sound Blaster ist ein eingetragenes Warenzeichen der Creative Technology LTD.
• Eventuelle sonstige im vorliegenden Handbuch erwähnte Produktnamen sind Eigentum der jeweiligen Hersteller
187
BESCHREIBUNG
Die Matrix RX 3000 wurde von RCF entwickelt, um den Anforderungen der modernen technischen Systeme für die Steuerung und Überwachung der
modernen Einrichtungen in Geschäftszentren, Hotels, Verwaltungszentren, Bahnhöfen usw. zu genügen. Sie weist die folgenden Eigenschaften auf.
• Bis zu 64 modulare Audioeingänge (8 Karten AUDIO INPUT IB 3210 / IB 3280).
• Bis 128 modulare Audioausgänge (16 Karten AUDIO OUTPUT OB 3230).
• Möglichkeit der Erstellung von bis zu 8 Audio-Matrixen, voneinander vollkommen unabhängig und mit uneingeschränkter Zugänglichkeit.
• Möglichkeit der Erstellung von Matrixen mit bis zu max. 32 Eingängen x 64 Ausgängen (max. 2 Matrixen 32 x 64).
• Bis zu 256 optoisolierte Eingänge GPI (16 digitale Karten INPUT/OUTPUT IO 3250) zur Ansteuerung von programmierbaren Ereignissen.
• Bis zu 384 Relaisausgänge (16 digitale Karten INPUT/OUTPUT IO 3250), die für verschiedene Zwecke verwendet werden können.
• Bis zu 16 digitale Konsolen BM 3616 für die Ausstrahlung von Mikrofonansagen sowie die Überwachung zahlreicher Funktionen des Systems.
• Bis zu 24 Konsolen oder Gruppen von Konsolen BM 3604 für die Ausstrahlung von Mikrofonansagen sowie die Überwachung zahlreicher Funktionen des Systems.
• Bis zu 120 dem Verstärker nachgeschaltete Karten RB 3300 (A.C.U.-Einheit) zur Steuerung, Diagnose und Überwachung der Leistungsverstärker
des Systems sowie der Leitungen für die Lautsprecherboxen.
• Modularer Aufbau zur Anpassung an eventuelle Erweiterungen in der Zukunft.
• Audioeingänge zur Voice-Aktivierung (VOX-Geräte) für den Anschluss von Audioquellen ohne Bedienungselemente.
• Verwaltung von bis zu 8 Quellen für Hintergrundmusik, die bei selektiven Abrufen des Hörbereiches automatisch abgeschaltet wird.
• Vollständige Überwachung der vom System verwalteten Audiosignale (Eingänge und Ausgänge der Audio-Matrix, Ausgänge der Leistungsverstärker).
• Vollständige Diagnose der Leistungsverstärker sowie der Lautsprecherleitungen mit Kontrolle der Dispersion gegen Erde unter Verwendung der Verbindungskabel der Lautsprecherleitungen (und Karten RB 3300 und SB 3320).
• Automatische Kontrolle des Verhältnisses von Signal und Geräuschpegel in den beschallten Bereichen mit digitalen Systemen zur Feststellung und
Einstellung (mit Karte LB 3340).
• Digitales Aufzeichnungsgerät für die Aufzeichnung/Wiedergabe von Meldungen oder individuell abgestimmten Hinweis- oder Alarmsignalen (CD-Qualität).
• Voraufgezeichnete Warntöne.
• Möglichkeit des Anschlusses eines Druckers für den Ausdruck der Konfigurierung des Systems sowie der Alarmereignisse auf Papier.
• Möglichkeit der Ausstrahlung von auf der Festplatte der Kontrolleinheit CP 3100 aufgezeichneten Klängen und Meldungen auf die folgenden verschiedenen Weisen:
– Automatisch oder mit festgelegter Uhrzeit.
– Automatisch mit Wiederholung in einem festgelegten Zeitraum.
– Durch Befehl von den Mikrofonkonsolen.
– Durch Befehl an den Eingängen der digitalen Karten INPUT/OUTPUT IO 3250.
• Programmierung des Systems mit verschiedenen Menüs, die die Zuordnung von Namen oder Abkürzungen für alle Eingänge, Ausgänge, Mikrofonkonsolen, ausgezeichnete Meldungen, Ereignisse usw. gestatten.
• Im System enthaltene Standardsoftware, die die folgenden Funktionen ausführt:
– Konfigurierung der digitalen Konsolen.
– Konfigurierung der Audioeingänge.
– Konfigurierung der Audioausgänge.
– Konfigurierung der Gruppen von Hörbereichen.
– Konfigurierung der Relais.
– Konfigurierung der VOX-Geräte.
– Konfigurierung der zeitgesteuerten Ereignisse.
– Konfigurierung der Eingänge GPI.
– Konfigurierung der für die Überwachung der Leistungsverstärker des Systems vorbereiteten A.C.U.-Einheiten (primäre Einheit, Reserveeinheit).
– Konfigurierung der Audio-Überwachung.
– Kontrolle der Alarmereignisse.
– Aufzeichnung/Wiedergabe von Meldungen, Ansagen, Warntönen, Alarmsignalen usw.
– Konfigurierung der verschiedenen Betriebsparameter des Systems (Datum, Uhrzeit, Druckmodalität, Konfigurierungs-Password usw.).
• Größtmögliche Zuverlässigkeit des Systems dank einer minimalen Interaktion zwischen den einzelnen Hardware-Komponenten.
• Selbstdiagnose für sämtliche Funktionsstörungen, mit detaillierter Angabe der Ursache.
• Exklusives Kommunikationssystem DCI (Data Communication Interface), das die schnelle Kommunikation zwischen sämtlichen Komponenten des
Systems gewährleistet..
• Zusätzliche Software ES 3000 für die Konfigurierung des Systems über einen externen PC.
Zu dem System gehören die im Folgenden aufgeführten Geräte.
CP 3100 – KONTROLLEINHEIT
Die CP 3100 ist eine Kontrolleinheit, die einen Mikroprozessor enthält, der in der Lage ist, sämtliche Funktionen des Systems zu steuern. Sie weist die
folgenden Eigenschaften auf.
• 19”-Behälter mit 3 Einheiten.
• Hochgeschwindigkeitsmikroprozessor.
• Programmierbar sowohl über Tastatur und Display auf dem Frontpaneel, als auch über einen externen PC.
• 1 Festplatte zum Abspeichern des Programms zur Steuerung des Systems, der Dateien für die Konfigurierung der verschiedenen Geräte (Karten,
digitalen Konsolen usw.), der Audio-Dateien usw.
• 1 digitale Soundkarte für die Aufzeichnung/Wiedergabe der Audio-Dateien.
• 1 Steckverbindung für externen Bildschirm.
• 1 Steckverbindung für externe Tastatur.
• 1 serieller Port RS 232 für den Anschluss des PCs für die Konfigurierung.
• 1 Schnittstellenbuskarte für den Anschluss der Sub-Racks MB 3200.
• 2 serielle Ports RS 485 für den Anschluss der digitalen Konsolen BM 3616 sowie der dem Verstärker nachgeschalteten Karten RB 3300.
• 1 paralleler Port für den Anschluss eines Druckers.
• Internes Netzteil.
• Lautsprecher zum Abhören der Ein- und Ausgänge der Audio-Matrix sowie der Lautsprecherausgänge selektiv oder nacheinander.
• Frontpaneel mit Tastatur für Konfigurierung und Diagnose.
• LCD-Display mit 4x40 Zeichen.
188
MB 3200 SUB-RACK
Das MB 3200 ist ein Sub-Rack, das die verschiedenen Module des Systems aufnimmt. Im MB 3200 können installiert werden:
• 4 Karten AUDIO INPUT IB 3210 / IB 3280 (für insgesamt 32 Audio-Eingänge).
• 8 Karten AUDIO OUTPUT OB 3230 (für insgesamt 64 Audio-Ausgänge), 8 digitale Karten INPUT/OUTPUT IO 3250 (für insgesamt optoisolierte 128
Eingänge und 192 Relaisausgänge) oder 8 Karten AUDIO OUTPUT OB 3230 oder digitale Karten INPUT/OUTPUT IO 3250.
Es weist die folgenden Eigenschaften auf:
• 19”-Behälter mit 4 Einheiten.
• Frontpaneel mit Anzeige des Betriebsstatus der installierten Karten.
• Steckverbindungen und Führungen für Elektronikkarten nach DIN-Standard.
• Schnelle Installation der Karten dank Steckverbindungen mit Schnellkupplung.
• Möglichkeit des Anschlusses von zwei oder mehr MB 3200 an eine Kontrolleinheit.
IF 3260 – ANSCHLUSSPANEEL
Das Paneel gestattet die Installation der Karten für den Anschluss der im Sub-Rack MB 3200 vorhandenen Module. Wird auf der Rückseite des 19“Behälter untergebracht und weist die folgenden Eigenschaften auf:
• 19”-Behälter mit 6 Einheiten, aus lackiertem Blech.
• Möglichkeit der Installation von alternativ: 15 Anschlusskarten mit 12 Klemmen, 10 Anschlusskarten mit 20 Klemmen oder 5 Anschlusskarten mit
32 Klemmen.
IB 3210 / IB 3280 – KARTE AUDIO INPUT
Die IB 3210 / IB 3280 ist die Karte, die den Eingang der Audiosignale gestattet. Sie weist die folgenden Eigenschaften auf:
• 8 symmetrische Eingänge, elektronisch (IB 3210) oder mit Transformator (IB 3280).
• Trimmpotentiometer für die Einstellung der Höhen (±12 dB bis 10 kHz) und der Bässe (±12 dB bis 100 Hz) auf jedem Eingang.
• Möglichkeit der Ausschließung der Klangreglung per Software.
• 1 Status-Led.
• Verstärkung der eingehenden Signale einstellbar per Software.
• Audio-Überwachung, wählbar per Software für jeden der 8 Eingänge.
• Hohe Zuverlässigkeit dank der Verwendung von “Watchdog”-Hardware, die im Falle von Interferenzen ein sofortiges Wiederherstellen der normalen
Betriebsbedingungen gestattet.
• Selbstkonfigurierung der installierten Karten.
• Auf der Karte abgespeicherte Setup-Konfigurierung für einen schnellen Systemstart.
• 2 separate Anschlusskarten mit 12 Klemmen, zu installieren auf dem Paneel IF 3260.
OB 3230 – KARTE AUDIO OUTPUT
Die OB 3230 ist die Karte, die den Ausgang der Audiosignale gestattet. Sie weist die folgenden Eigenschaften auf.
• 8 symmetrische Ausgänge mit niedriger Impedanz.
• Matrix der Karte mit 32 Eingängen x 8 Ausgängen.
• Ausgangslautstärke per Software einstellbar.
• 1 konfigurierbares VOX-Gerät für den Anschluss und die Voice-Aktivierung eines Eingangs mit einem oder mehreren Ausgängen der Karte.
• Audio-Überwachung, wählbar per Software auf jedem der 8 Ausgänge.
• Selbstkonfigurierung der installierten Karten.
• Hohe Zuverlässigkeit dank der Verwendung von “Watchdog”-Hardware, die im Falle von Interferenzen ein sofortiges Wiederherstellen der normalen
Betriebsbedingungen gestattet.
• Auf der Karte abgespeicherte Setup-Konfigurierung für einen schnellen Systemstart.
• Automatische Abtastung der Ausgangskanäle zur Feststellung von Clipping und Kanal defekt.
• 6 Status-Leds.
• Separate Anschlusskarte mit 32 Klemmen, zu installieren auf dem Paneel IF 3260.
IO 3250 – DIGITALE KARTE INPUT/OUTPUT
Die IO 3250 ist eine Karte mit programmierbaren optoisolierten Eingängen (GPI-Eingänge) und Relaisausgängen, die die Ansteuerung von verschiedenen Ereignistypen gestattet. Die Karte gestattet zum Beispiel die Verwendung von Standard-Mikrofonkonsolen (zum Beispiel BM 3604) für das Ausstrahlen von Mikrofonansagen oder für die Steuerung der Wiedergabe von auf der Kontrolleinheit voraufgezeichneten Meldungen. Unverzichtbar für
den Anschluss des Systems an externe Geräte wie Beleuchtungssysteme, Alarmanlagen oder sonstige über Kontakte steuerbare Vorrichtungen. Sie
weist die folgenden Eigenschaften auf:
• 16 optoisolierte Eingänge.
• 24 Relaisausgänge.
• 6 Status-Leds.
• Möglichkeit der Zuordnung einer Kombination von Eingangskontakten zu einen bestimmten Ausgangskonfigurierung.
• Hohe Zuverlässigkeit dank der Verwendung von “Watchdog”-Hardware, die im Falle von Interferenzen ein sofortiges Wiederherstellen der normalen
Betriebsbedingungen gestattet.
• Auf der Karte abgespeicherte Setup-Konfigurierung für einen schnellen Systemstart.
• 2 separate Anschlusskarten, eine mit 32 Klemmen und die andere mit 20 Klemmen, zu installieren auf dem Paneel IF 3260.
BM 3616 – DIGITALE MIKROFONEINHEIT
Die BM 3616 ist eine Mikrofoneinheit mit Schwanenhals zur Aufstellung auf dem Tisch, die die Ausstrahlung einer Ansage in 16 Hörbereichen oder
Gruppen von Hörbereichen gestattet, mit der Möglichkeit, ein Vorankündigungssignal mit 1, 2 oder 3 Tönen (Ding-Dong) zu aktivieren. Die Einheit gestattet außerdem die Ausstrahlung von auf der Kontrolleinheit CP 3100 aufgezeichneten Audiosignalen (Meldungen oder Tönen) in den gewählten Hörbereichen; zusammen mit der Wiedergabe kann auch die Umschaltung der Relais der digitalen Karten INPUT/OUTPUT IO 3250 angesteuert werden.
189
Sie weist die folgenden Eigenschaften auf.
• Rückseitig beleuchtetes LCD-Display mit 16 Zeichen zum Anzeigen der Meldungen.
• 16 programmierbare Tasten für die Wahl von Hörbereichen und/oder Gruppen von Hörbereichen.
• Taste für die Wahl aller der Einheit zugeordneten Hörbereiche.
• 3 programmierbare Funktionstasten (F1, F2 und F3) für die Bedienung von Relais oder für die Wiedergabe von externen Audiosignalen (Meldungen
oder Töne).
• Alarmtaste für die Ausstrahlung von Meldungen mit absolutem Vorrang.
• Möglichkeit der lokalen Aufzeichnung einer Meldung, die automatisch in den gewählten Hörbereichen ausgestrahlt wird, wenn dieselben vom System freigegeben werden.
• Kondensatormikrofon auf Schwanenhals mit Leuchtring.
• Mikrofonkompressor mit Pegelbegrenzung.
• Signalgenerator zur Vorankündigung von Mikrofonansagen mit 1, 2 oder 3 Tönen.
• Symmetrischer Audioausgang mit Transformator, mit einstellbarem Pegel.
• Audioausgang zum Abhören der lokal aufgezeichneten Meldung über den Kopfhörer.
• Kontrollleuchten zum Anzeigen von Hörbereichen und Spezialfunktionen.
• Interner akustischer Signalgeber (Summer).
• Password für die Aktivierung der Einheit.
• Anschluss an die Kontrolleinheit über eine serielle Leitung RS 485.
• Hohe Zuverlässigkeit dank der Verwendung von “Watchdog”-Hardware, die eine sofortige Wiederherstellung der normalen Betriebsbedingungen bei
Interferenzen gestattet.
• In der Einheit abspeicherbare Setup-Konfigurierung für einen schnellen Systemstart.
BM 3604 – MIKROFONEINHEIT
Die BM 3604 ist eine Mikrofoneinheit mit Schwanenhals für die Aufstellung auf dem Tisch. Sie gestattet die Ausstrahlung einer Ansage in 4 Hörbereichen
oder Gruppen von Hörbereichen, die mit den 4 Tasten der Einheit nach Belieben gewählt werden können. Sie weist die folgenden Eigenschaften auf.
• 4 Tasten für die Wahl von Hörbereichen oder Gruppen von Hörbereichen.
• Taste für die allgemeine Wahl aller der Einheiten zugeordneten Hörbereiche oder Gruppen von Hörbereichen.
• Taste für die Ausstrahlung der Mikrofonansage in den gewählten Hörbereichen.
• Taste für die Ausstrahlung der Mikrofonansage nur im lokalen Hörbereich.
• Zusätzliche Taste für die Ansteuerung eines Ereignisses des Systems RX 3000 (zum Beispiel Ausstrahlung einer auf der Kontrolleinheit CP 3100 abgespeicherten Meldung, Umschaltung eines Relais der Karten IO 3250 usw.).
• Signalgenerator zur Vorankündigung von Mikrofonansagen mit 1, 2 oder 3 Tönen.
• Kondensatormikrofon auf Schwanenhals, mit Leuchtring.
• Symmetrischer Audioausgang (Pegel “line”).
• Zusätzlicher Audioausgang (Pegel “line”) zur Ansteuerung eines Verstärkers für die Beschallung des lokalen Hörbereiches.
• Kontrollleuchten für die Anzeige von Hörbereichen und Spezialfunktionen.
• Timer für die automatische Abschaltung der gewählten Hörbereiche, falls keine Meldung vorhanden ist.
• Automatische Verstärkungskontrolle für eine Ausstrahlung mit konstanter Lautstärke.
• Möglichkeit des Anschlusses mehrerer Einheiten BM 3604 in Reihe (Kaskadenschaltung) an die gleiche Leitung.
RB 3300 – DEM VERSTÄRKER NACHGESCHALTETE KARTE
Die RB 3300 ist eine Elektronikkarte, die mit einem Leistungsverstärker mit Ausgang mit konstanter Spannung angeschlossen wird und die gestattet:
• Einschaltung/Ausschaltung des Verstärkers über die Kontrolleinheit CP 3100.
• Überwachung des Betriebs des Verstärkers.
• Einschaltung eines Reserveverstärkers bei Störungen des von der Karte überwachten Verstärkers.
• Abhören des Lautsprecherausgangs des Verstärkers über den entsprechenden Lautsprecher der Kontrolleinheit CP 3100.
Die Karte kann mit dem primären Verstärker kombiniert werden, der normalerweise für die Beschallung eines bestimmten Hörbereiches verwendet
wird, oder mit einem Reserveverstärker, der zum Beispiel bei einer Störung des primären Verstärkers verwendet wird. Wird an der Rückseite des zu
überwachenden Verstärkers in einem 19”-Behälter installiert und über einen digitalen Bus sowie über einen Audio-Bus für das Abhören an die Kontrolleinheit CP 3100 angeschlossen. Die Karte weist die folgenden Eigenschaften auf.
• Symmetrischer Eingang für Leitungssignale.
• Symmetrischer Ausgang zur Ansteuerung des Verstärkers.
• Eingang für Alarmmeldungen vom überwachten Verstärker (zum Beispiel “Overload”).
• Abhören des Lautsprecherausgangs des Verstärkers mit Möglichkeit der Überwachung von Leitungen mit 25 V, 50 V, 70 V oder 100 V.
• Meldung der folgenden Alarme an die Kontrolleinheit CP 3100:
- Reset der Karte (“Watchdog”-Reset).
- Anomalien bei der Versorgung der Karte (12V und/oder 24V).
- Anomalien beim Betrieb des überwachten Verstärkers, gemeldet über den zusätzlichen Kontakt des letzteren (zum Beispiel Überlastbetrieb).
- Alarme von der Zusatzkarte FAULT DETECTOR SB 3320.
- Meldungen von der Zusatzkarte DIGITAL ALC LB 3340.
• Einschaltung eines Reserveverstärkers anstelle des von der Karte überwachten Verstärkers, mit manueller oder automatischer Umschaltung bei:
- Alarm vom überwachten Verstärker (zum Beispiel Alarm “Overload”).
- Alarm von der Zusatzkarte FAULT DETECTOR SB 3320.
• Hohe Zuverlässigkeit dank der Verwendung von “Watchdog”-Hardware, die im Falle von Interferenzen ein sofortiges Wiederherstellen der normalen
Betriebsbedingungen gestattet.
• Möglichkeit der Ausstattung mit der Zusatzkarte DIGITAL ALC LB 3340, die die Benutzung der Funktion ALC für die automatische Kontrolle des
Verhältnisses von Signal und Umgebungsgeräusch gestattet, sowie der Funktion DAY/NIGHT für die automatische Abschwächung der Ausstrahlungslautstärke während der Nachtstunden.
• Möglichkeit der Ausstrahlung mit der Zusatzkarte FAULT DETECTOR SB 3320, die die Benutzung der Funktion LINE FAULT für die Kontrolle des
korrekten Betriebs der Lautsprecherleitung gestattet, der Funktion PA FAULT für die korrekte Kontrolle des Verstärkers, sowie der Funktion FIREBREAK für die Ausstrahlung eines Alarmsignals (zum Beispiel Meldung Feueralarm) mit absolutem Vorrang sowie Abschaltung des Signals von der
Audiomatrix des Systems.
190
PS 3400 – NETZTEIL
Das PS 3400 ist ein stabilisiertes Mehrspannungs-Gleichstromnetzteil, das die Speisung der folgenden Geräte des Systems gestattet: digitale Mikrofoneinheit BM 3616, Mikrofoneinheit BM 3604, dem Verstärker nachgeschaltete Karte RB 3300, digitale Karten INPUT/OUTPUT IO 3250, Karten AUDIO INPUT IB 3210 / IB 3280, Karten AUDIO OUTPUT OB 3230. Es weist die folgenden Eigenschaften auf:
• Ausgang für stabilisierte Spannung von 5 Vdc (max. 3 A).
• Ausgang für stabilisierte Spannung von 12 Vdc (max. 3 A).
• Ausgang für stabilisierte Spannung von 24 Vdc (max. 2 A).
• Zusätzliches Relais, angesteuert vom Schutz gegen Überhitzung, mit 1 an eine Klemmleiste angeschlossenen Wechselkontakt.
• Möglichkeit der Parallelschaltung mehrerer Netzteile.
• Schutz gegen Kurzschluss der Ausgänge
• Leuchtanzeige für 5Vdc, 12Vdc, 24Vdc, OVERHEATING und ON.
• Für die Montage in 19”-Behältern geeigneter Rahmen (Höhe 1 Einheit).
• Doppelte Wechselstromversorgung (115/230 Vac).
• Abnehmbare Anschlussklemmleiste.
ES 3000 – ERWEITERTE SOFTWARE
ES 3000 ist eine Software, die auf einem externen Personal Computer mit Microsoft-Betriebssystem Windows 95 oder Windows 98 installiert werden kann
und eine bessere Verwaltung des Systems RX 3000 gestattet. Insbesondere gestattet sie die Durchführung der folgenden Operationen:
• Erstellung von Konfigurierungen, die in den Systemordnern des PCs für die Konfigurierung abgespeichert werden.
• Senden von EXE-Dateien an die Kontrolleinheit CP 3100 für die Aktualisierung der Software des Systems.
• Senden von Konfigurierungsdateien an die Kontrolleinheit CP 3100 für die Festlegung einer neuen Konfigurierung des Systems.
• Senden von WAV-Dateien an die Kontrolleinheit CP 3100 für die Festlegung von neuen Tönen und/oder Meldungen (die zum Beispiel auf dem PC für
die Konfigurierung mit entsprechenden Programmen aufgezeichnet werden).
• Entnahme der Konfigurierungsdateien von der Kontrolleinheit CP 3100 (zum Beispiel für die Diagnose durch Techniker).
• Entnahme von auf der Kontrolleinheit CP 3100 aufgezeichneten Tönen und/oder Meldungen.
Der Personal Computer muss einen seriellen Port RS232 Standard aufweisen (Port COM1 bis COM4, der mit der Software ES 3000 gewählt werden kann).
Die Konfigurierung des Systems kann auf dem PC für die Konfigurierung vorgenommen und anschließend über die serielle Leitung an die Kontrolleinheit
CP 3100 übertragen werden. Alle Arbeiten zur Konfigurierung des Systems werden durch die Grafik der Windows-Umgebung sowie durch die Benutzung
von Mouse und Tastatur extrem vereinfacht.
CP 3100 – VORRICHTUNGEN AUF DER VORDERSEITE (Abb. 1)
(1) Kontrollleuchte RECORD
Das Aufleuchten zeigt an, das die Aufzeichnung eines Audiosignals in einer Datei mit der Funktion RECORD des Menüs RECORDER stattfindet (siehe Abschnitt AUFZEICHNUNG/WIEDERGABE VON AUDIOSIGNALEN).
(2) Richtungstasten
Die Tasten ← , → , ↑ , ↓ das Verschieben des Wahlpunktes in die entsprechenden vier Richtungen; die Taste gestattet das Verschieben
des Wahlpunktes zum ersten Feld des ersten Menüs.
(3) Tasten Pag ↑ / Pag ↓
Gestatten das Ändern der aktuell angezeigten Seite des Menüs nach unten (Pag ↓ ) oder nach oben (Pag ↑).
(4) LCD- Display
Rückseitig beleuchtetes LCD-Display zum Anzeigen der verschiedenen Menüs des Gerätes (zum Beispiel Konfigurierung des Systems, Alarme
usw.).
(5) Taste MEMORY
Gestattet das Abspeichern des Benutzer-Passwords, das es gestattet, unbefugtem Personal den Zugang zu bestimmten Menüs der Kontrolleinheit zu verwehren.
(6) Kontrollleuchte MEMORY
Die Kontrollleuchte leuchtet auf, wenn mit der Taste MEMORY (5) ein neues Benutzer-Password korrekt abgespeichert wird.
(7) Zifferntasten
Gestatten die Eingabe von Ziffern für die Programmierung der Felder der verschiedenen Menüs des Gerätes.
(8) Taste Kontrasteinstellung
Diese Taste zum Einstellen des Kontrastes des LCD-Displays mit den Tasten (24) drücken; die Einstellung wird im Speicher des Gerätes abgespeichert.
(9) Kontrollleuchte MUTE
Die Kontrollleuchte leuchtet auf, wenn die Lautstärke des Monitorlautsprechers (10) mit der Taste (23) auf Null gestellt wird.
(10) Monitorlautsprecher
Wenn die Funktion “Monitor” (Audio-Überwachung) gewählt wird, so gestattet der Lautsprecher das Abhören der vom System verarbeiteten Audiosignale (Eingangssignale, Ausgangssignale usw.).
(11) Kontrollleuchte PLAY
Das Aufleuchten zeigt an, dass die Wiedergabe eines auf der Festplatte des Gerätes aufgezeichneten Audiosignals (Audiodatei) stattfindet (siehe
Abschnitt AUFZEICHNUNG/WIEDERGABE VON AUDIOSIGNALEN).
(12) Kontrollleuchte POWER
Die Kontrollleuchte leuchtet auf, wenn die Einheit eingeschaltet ist.
(13) Kontrollleuchte ALARM
Die Kontrollleuchte leuchtet auf, wenn einer der vom System verwalteten Alarme ausgelöst wird (siehe Abschnitt SYSTEMALARME).
(14) Taste C ←
Löscht das Zeichen, das dem Cursor für die Zeicheneingabe vorausgeht, und verschiebt diesen um eine Position nach links.
(15) Taste SPACE
Fügt einen Leerraum in ein Feld ein (Zeichen “Zeichenraum”) und verschiebt den Cursor für die Zeicheneingabe um eine Position nach rechts.
191
(16) Taste C →
Löscht das aktuell gewählte Zeichen.
(17) Taste CLEAR
Taste zum Löschen aller in dem aktuell gewählten Feld enthaltenen Zeichen.
(18) Tasten F1 - F2 - F3 - F4
Tasten für den Zugang zu den Untermenüs des Gerätes; die spezifische Funktion der Tasten wird von Mal zu Mal in den verschiedenen Menüs
angegeben.
(19) Taste MENU
Taste, die in der vorliegenden Version des Gerätes nicht benutzt werden kann.
(20) Taste ENTER
Taste für die Bestätigung der in ein Feld eingegebenen Parameter.
(21) Taste ESC
Taste zum Verlassen eines Menü/Untermenüs und für die Rückkehr zum vorausgehenden Menü. Falls Parameter geändert werden, so wird
vorher abgefragt, ob die neuen Werte gespeichert werden sollen oder nicht.
(22) Tasten +/Gestatten die sowohl Wahl der in den Feldern angezeigten Parameter mit Rotation der verschiedenen Menüs der Kontrolleinheit, als auch die
Wahl der alphanumerischen Zeichen für die Eingabe von Namen, Nummern, Abkürzungen usw.
(23) Taste MUTE
Die Taste gestattet die Aktivierung/Deaktivierung der Funktion MUTE. Beim Aktivieren der Funktion MUTE wird die Lautstärke des Monitorlautsprechers auf Null gestellt und die Kontrollleuchte (9) leuchtet auf; beim Deaktivieren der Funktion MUTE wird die Lautstärke des Monitorlautsprechers auf die zuvor eingestellte Lautstärke gestellt und die Kontrollleuchte (9) geht aus.
(24) Einstelltasten
Die Tasten haben eine doppelte Funktion. Beim Zugang zum Menü für das Abhören der vom System verarbeiteten Audiosignale (siehe Abschnitt BENUTZUNG DES MENÜS “MONITOR OPERATIONS”) gestatten die beiden Tasten die Einstellung der Lautstärke des Monitor Lautsprechers: Die Taste
drücken, um die Lautstärke zu verringern, die Taste
drücken, um die Lautstärke anzuheben. In allen Situationen gestatten die beiden Tasten nach dem Drücken der Taste (8) die Einstellung des Kontrastes des LCD-Displays.
ANMERKUNG
• Für die Einstellung muss jede der Tasten gedrückt und losgelassen werden.
Abb. 1
192
CP 3100 – VORRICHTUNGEN AUF DER RÜCKSEITE (Abb. 2 )
(1) Schalter POWER
Gestattet das Ein- und Ausschalten des Gerätes.
(2) Kühlgebläse
Gestattet die Kühlung des Gerätes.
(3) Anschluss für Netzkabel
Gestattet das Anschließen des mitgelieferten Netzkabels.
(4) Anschluss AC OUTLET
Die Steckverbindung ist mit dem Anschluss (3) parallel geschaltet und gestattet die einfache Speisung eines eventuellen Bildschirms.
(5) Klemmleisten MONITOR BUS
Die beiden dreipoligen Klemmleisten gestatten das Anschließen der Leitungen “Monitor Bus”, die von den dem Verstärker nachgeschalteten
Karten RB 3300 kommen, sowie der Sub-Racks MB 3200. Die beiden Leitungen gestatten das Überwachen der vom System verarbeiteten Audiosignale (Eingangssignale, Ausgangssignale, Signale der von den dem Verstärker nachgeschalteten Karten RB 3300 überwachten Verstärker
usw.).
(6) Serieller Port Nr. 2 (COM 2)
Nicht verwendbare Steckverbindung.
(7) Port für PS2-Maus
Nicht verwendbare Steckverbindung.
(8) Anschluss für Tastatur
Gestattet den Anschluss einer Standardtastatur für Computer, die alternativ zur Tastatur auf dem Frontpaneel des Gerätes verwendet wird. Die
Tastatur kann nur verwendet werden, wenn ein Bildschirm an den Anschluss (12) angeschlossen ist, und gestattet eine Vereinfachung der Konfigurierung des Systems.
(9) Serieller Port Nr. 1 (COM 1)
Serieller Port RS 232 an 9-poligem Stecker SUB D für den Anschluss des Systems an einen externen PC für die Konfigurierung.
(10) Paralleler Port Nr. 1 (LPT 1)
Paralleler Port auf 25-poliger Steckbuchse SUB D für die Verbindung des Systems mit einem Drucker, um das Ausdrucken der Konfigurierung
sowie der Alarmmeldungen zu ermöglichen.
(11) Serieller Port Nr. 4 (COM 4)
Symmetrischer serieller Port RS 485 für die Kommunikation zwischen der Kontrolleinheit CP 3100 und den digitalen Konsolen BM 3616 des Systems.
(12) Steckverbindung für Bildschirm
Gestattet das Anschließen eines Bildschirms, der alternativ zum LCD-Display auf dem Frontpaneel des Gerätes benutzt wird. Der Bildschirm
kann verwendet werden, wenn eine externe Tastatur an den Anschluss (8) angeschlossen ist, und gestattet eine Vereinfachung der Konfigurierung des Systems.
(13) Serieller Port Nr. 3 (COM 3)
Symmetrischer serieller Port RS 485 für die Kommunikation zwischen Kontrolleinheit CP 3100 und dem Verstärker nachgeschalteten Karten RB
3300 des Systems.
(14) Steckverbindung für Sub-Rack
Synchroner serieller Port DCI, der die Kommunikation zwischen der Kontrolleinheit CP 3100 und den Sub-Racks MB 3200 des Systems gestattet.
(15) Ausgang LINE OUT Soundkarte
Gestattet den Ausgang des Audiosignals der Soundkarte des Gerätes mit Pegel “line”, das zur Ansteuerung eines der Audioeingänge des Systems verwendet werden kann (Eingang PLAYBACK einer Karte AUDIO INPUT IB 3210 / IB 3280).
(16) Eingang LINE IN Soundkarte
Der Eingang gestattet das Ansteuern der Soundkarte des Gerätes mit dem aufzuzeichnenden Audiosignal mit Pegel “line”, das von einem Audioausgang des Systems (Ausgang RECORDER einer Karte AUDIO OUTPUT OB 3230) oder von externen Audioquellen (zum Beispiel Kassettenlaufwerk, Receiver, CD-Player usw.) kommt
(17) Eingang MICRO IN Soundkarte
Der Eingang gestattet die Ansteuerung der Soundkarte des Gerätes mit dem aufzuzeichnenden Signal, das von einem externen Mikrofon
kommt.
(18) Nicht verwendbare Steckverbindung.
Abb. 2
193
MB 3200 – VORRICHTUNGEN AUF DER VORDERSEITE (Abb. 3)
(1) Kontrollleuchten Versorgung 12 Vdc / 24 Vdc
Jede Kontrollleuchte bezieht sich auf eine der Karten AUDIO OUTPUT OB 3230 oder der digitalen Karten INPUT/OUTPUT IO 3250, die im Sub-Rack
installiert sind, und das Aufleuchten zeigt an, dass die entsprechende Karte korrekt mit der Spannung für analoge Schaltungen (12 Vdc oder 24 Vdc)
versorgt wird.
(2) Kontrollleuchten Versorgung 5 Vdc
Jede Kontrollleuchte bezieht sich auf eine der Karten AUDIO OUTPUT OB 3230 oder der digitalen Karten INPUT/OUTPUT IO 3250, die im Sub-Rack
installiert sind, und das Aufleuchten zeigt an, dass die entsprechende Karte korrekt mit der Spannung für digitale Schaltungen (5 Vdc) versorgt wird.
(3) Kontrollleuchten Monitor / GPI
Jede Kontrollleuchte bezieht sich auf eine der Karten AUDIO OUTPUT OB 3230 oder der digitalen Karten INPUT/OUTPUT IO 3250, die im Sub-Rack
installiert sind.
Karte AUDIO OUTPUT OB 3230: Die Kontrollleuchte blinkt, wenn die Überwachung des Ausgangs der Karte aktiviert wird.
Digitale Karte INPUT/OUTPUT IO 3250: Die Kontrollleuchte blinkt, wenn ein beliebiger GPI-Eingang der Karte angesteuert wird.
(4) Kontrollleuchten Matrix/Relais
Jede Kontrollleuchte bezieht sich auf eine der Karten AUDIO OUTPUT OB 3230 oder der digitalen Karten INPUT/OUTPUT IO 3250, die im Sub-Rack
installiert sind.
Karte AUDIO OUTPUT OB 3230: Die Kontrollleuchte blinkt, wenn die Kommutationsmatrix der Karte aktiv ist, das heißt wenn ein Ausgang der Karte mit einem der Eingänge der Audiomatrix verbunden wird.
Digitale Karte INPUT/OUTPUT IO 3250: Die Kontrollleuchte blinkt, wenn der Kontakt eines der Ausgangsrelais der Karte geschlossen wird.
ANMERKUNG
• Die Kontrollleuchte (4) einer digitalen Karte INPUT/OUTPUT IO 3250 blinkt auch, wenn eines ihrer Relais mit dem Menü für die Konfigurierung der
Kontrolleinheit CP 3100 als Ausschaltglied eingestellt wird.
(5) Kontrollleuchten Kommunikation
Jede Kontrollleuchte bezieht sich auf eine der Karten AUDIO OUTPUT OB 3230 oder der digitalen Karten INPUT/OUTPUT IO 3250, die im Sub-Rack
installiert sind; das Blinken einer der Kontrollleuchten bedeutet, dass die entsprechende Karte mit der Kontrolleinheit CP 3100 kommuniziert.
(6) Kontrollleuchten Funktionsstörung
Jede Kontrollleuchte bezieht sich auf eine der Karten AUDIO OUTPUT OB 3230 oder der digitalen Karten INPUT/OUTPUT IO 3250, die im Sub-Rack
installiert sind; das Blinken einer der Kontrollleuchten bedeutet, dass ein Alarm vorhanden ist, der durch eine Funktionsstörung der entsprechenden
Karte verursacht wird (zum Beispiel Verzögerung bei der Kommunikation, Fehler, Defekt usw.).
ANMERKUNG
• Während der Phasen der Konfigurierung des Systems ist es normal, dass die Kontrollleuchte blinkt.
(7) Kontrollleuchten für Karte “AUDIO INPUT”
Jede Kontrollleuchte bezieht sich auf eine der Karten AUDIO INPUT IB 3210 / IB 3280, die im Sub-Racks installiert sind. Auf Grundlage des Status
der Kontrollleuchte werden die folgenden Anzeigen geliefert:
• Kontrollleuchte permanent an – zeigt einen Alarm an, der durch die entsprechende Karte verursacht wird zum Beispiel Verzögerung bei der Kommunikation, Fehler, Defekt usw.).
• Kontrollleuchte intermittierend an – zeigt an, dass die entsprechende Karte mit der Kontrolleinheit CP 3100 kommuniziert.
• Kontrollleuchte aus – zeigt an, dass die entsprechende Karte nicht mit der Spannung der digitalen Schaltungen (5 Vdc) gespeist wird.
Abb. 3
MB 3200 - VORRICHTUNGEN AUF DER RÜCKSEITE (Abb. 4)
(1) Jumper JP6
Gestattet das Anschließen des Pols GND der Betriebsspannung von 5 Vdc an den Rahmen des Sub-Racks MB 3200.
2) Jumper JP7
Gestattet das Anschließen des Pols GND der Betriebsspannung von 12 Vdc an den Rahmen des Sub-Racks MB 3200.
3) Jumper JP8
Gestattet das Anschließen des Pols GND der Betriebsspannung von 24 Vdc an den Rahmen des Sub-Racks MB 3200.
4) Klemmleisten M1 und M2
Gestatten das Speisen des Sub-Racks mit den Betriebsspannungen 5 Vdc, 12 Vdc und 24 Vdc. Zur Vereinfachung der Anschlussarbeiten, wenn
194
5)
6)
7)
8)
9)
10)
11)
12)
13)
14)
15)
16)
17)
18)
im System mehrere Sub-Racks MB 3200 installiert sind, sind zwei Klemmleisten vorhanden, die miteinander parallel geschaltet sind: eine
Klemmleiste kann für den Eingang der drei Spannungen verwendet werden, während die zweite als Ausgang für die Speisung des folgenden
Sub-Racks verwendet werden kann.
Sicherung F2
Die Sicherung vom Typ 2 A flink schützt die mit der Spannung von 12 Vdc gespeisten Schaltungen.
Sicherung F3
Die Sicherung vom Typ 4 A flink schützt die mit der Spannung von 24 Vdc gespeisten Schaltungen.
Sicherung F1
Die Sicherung vom Typ 2 A flink schützt die mit der Spannung von 5 Vdc gespeisten Schaltungen.
Nicht verwendbare Vorrichtungen
Steckverbindungen IDC1 ÷ 8
Die Steckverbindungen gestatten das Anschließen der Audioeingänge der Karten AUDIO INPUT IB 3210 / IB 3280 an die entsprechenden Anschlusskarten mit 12 Klemmen. Jede Karte AUDIO INPUT wird mit zwei Steckverbindungen angeschlossen (zum Beispiel IDC1 und IDC2), wobei jede der beiden das Anschließen von 4 Audioeingängen an eine Anschlusskarte mit 12 Klemmen gestattet. Die mit ungeraden Ziffern
gekennzeichneten Steckverbindungen beziehen sich auf die ersten vier Eingänge der Karten AUDIO INPUT (zum Beispiel Eingänge von 1 bis
4), während die mit den geraden Ziffern gekennzeichneten Steckverbindungen sich auf die verbleibenden vier Eingänge beziehen (zum Beispiel
Eingänge von 5 bis 8).
Jumper JP1 und JP2
Die beiden Jumper gestatten das Abschließen der seriellen Leitung RS 485, die die Sub-Racks MB 3200 mit der Kontrolleinheit CP 3100 verbinden.
Steckverbindung CN6
Gestattet das Anschließen der seriellen Leitung RS 485, die von der Kontrolleinheit CP 3100 oder vom vorausgehenden Sub-Rack MB 3200
kommt.
Steckverbindung CN7
Gestattet das Anschließen der seriellen Leitung RS 485 zum nachfolgenden Sub-Rack MB 3200 (falls vorhanden).
Kontrollleuchte DL1
Das Aufleuchten zeigt an, dass der Sub-Rack mit einer Spannung von 5 Vdc gespeist wird.
Kontrollleuchte DL2
Das Aufleuchten zeigt an, dass der Sub-Rack mit einer Spannung von 12 Vdc gespeist wird.
Kontrollleuchte DL3
Das Aufleuchten zeigt an, dass der Sub-Rack mit einer Spannung von 24 Vdc gespeist wird.
Steckverbindungen J4A ÷ J4H
Jede der 8 Steckverbindungen gestattet es, die 16 GPI-Eingänge einer digitalen Karte INPUT/OUTPUT IO 3250 an die entsprechende Anschlusskarte mit 20 Klemmen anzuschließen.
Klemmleisten M3 und M4
Gestatten es, das Audiosignal “Monitor”, das von den verschiedenen Sub-Racks MB 3200 kommt und sich auf die Eingänge der Karten AUDIO
INPUT IB 3210 / IB 3280 oder auf die Ausgänge der AUDIO OUTPUT OB 3230 bezieht, an die Kontrolleinheit CP 3100 zu übertragen. Das Signal
“Monitor” kann so mit dem Lautsprecher auf dem Frontpaneel der Kontrolleinheit abgehört werden. Zur Vereinfachung der Anschlussarbeiten, wenn
im System mehrere Sub-Racks MB 3200 installiert sind, sind zwei Klemmleisten vorhanden, die miteinander parallel geschaltet sind: eine Klemmleiste kann als Ausgang für das Signal “Monitor” an die Kontrolleinheit CP 3100 verwendet werden, während die zweite Klemmleiste als Eingang
für das Signal “Monitor” vom eventuellen folgenden Sub-Rack verwendet werden kann.
Steckverbindung J3A ÷ J3H
Jede der 8 Steckverbindungen gestattet das Anschließen der Audioausgänge einer Karte AUDIO OUTPUT OB 3230 oder der Ausgangrelais einer digitalen Karte INPUT/OUTPUT IO 3250 an die entsprechende Anschlusskarte mit 32 Klemmen. Wenn an einer Steckverbindung eine Karte AUDIO OUTPUT OB 3230 installiert wird, so gestattet die entsprechende Karte mit Klemmen das Anschließen von 8 Audioausgänge; wenn
an einer Steckverbindung eine digitale Karte INPUT/OUTPUT IO 3250 installiert wird, so gestattet die entsprechende Karte mit Klemmen das
Anschließen der Kontakte der 24 Ausgangsrelais.
Abb. 4
195
VORRICHTUNGEN UND FUNKTIONEN DES SYSTEMS
AUDIO-MATRIX
Das System RX 3000 ist in der Lage, bis zu max. 8 Audio-Matrixen zu steuern, die voneinander vollkommen unabhängig sind; die max. Kapazität einer Matrix beträgt 32 Eingänge und 64 Ausgänge (max. 2 Matrixen 32x64). Die Matrixen sind uneingeschränkt konfigurierbar, das heißt in einer bestimmten Audio-Matrix kann jeder Eingang mit einem beliebigen Ausgang verbunden werden. Die Eingänge und die Ausgänge der Audio-Matrix werden durch die Installation der Karten AUDIO INPUT IB 3210 / IB 3280 und AUDIO OUTPUT OB 3230 hergestellt; auf Grundlage der Anzahl der Karten AUDIO INPUT IB 3210 / IB 3280 und AUDIO OUTPUT OB 3230, die in den Sub-Racks MB 3200 installiert werden, können unzählige Audio-Matrixen erstellt werden (zum Beispiel Matrix mit 8 Eingängen und 16 Ausgängen, Matrix mit 8 Eingängen und 32 Ausgängen usw.).
GPI-EINGÄNGE
Die GPI-Eingänge (General Purpose Input) sind spezielle optoisolierte Eingänge, die verfügbar sind, wenn in den Sub-Racks MB 3200 des Systems die
digitalen Karten INPUT/OUTPUT IO 3250 installiert werden. Die GPI-Eingänge gestatten die Ansteuerung von verschiedenen Ereignisarten, die vom Benutzer nach Belieben programmiert werden können; das Verzeichnis der ansteuerbaren Ereignisse ist im Abschnitt VON DEN GPI-EINGÄNGEN ANSTEUERBARE EREIGNISSE enthalten. Für die Ansteuerung eines GPI-Eingangs muss er an einen normalen elektrischen Kontakt angeschlossen werden.
PROGRAMMIERBARE RELAIS
Die programmierbaren Relais sind verfügbar, wenn in den Sub-Racks MB 3200 die digitalen Karten INPUT/OUTPUT IO 3250 installiert werden. Die
Programmierung der Relais erfolgt mit der Kontrolleinheit CP 3100. Auf jeder digitalen Karte INPUT/OUTPUT IO 3250 sind 24 Relais vorhanden, die
jeweils einen Kontakt aufweisen; mit dem entsprechenden Konfigurierungsmenü der Kontrolleinheit CP 3100 kann der Kontakt als “Einschaltglied”
oder als “Ausschaltglied” eingestellt werden, das heißt es ist möglich, den Status zu programmieren, den der Kontakt nach der Konfigurierung des System einnehmen sollen (siehe Abschnitt AUSFÜHRUNG EINER KONFIGURIERUNG). Die Kontakte können nach Belieben für verschiedene Zwecke
verwendet werden. Die Umschaltung der Kontakte kann angesteuert werden:
• durch Systemereignisse (siehe Abschnitt VON DEN GPI-EINGÄNGE ANSTEUERBARE EREIGNISSE).
• mit der Taste ALARM der digitalen Mikrofoneinheiten BM 3616 (siehe Abschnitt VON DEN DIGITALEN MIKROFONEINHEITEN BM 3616 ANSTEUERBARE EREIGNISSE).
• mit den Tasten F1, F2 und F3 der digitalen Mikrofoneinheiten BM 3616 (siehe Abschnitt VON DEN DIGITALEN MIKROFONEINHEITEN BM 3616 ANSTEUERBARE EREIGNISSE).
• mit den Mikrofoneinheiten BM 3604 (siehe Abschnitt VON DEN MIKROFONEINHEITEN BM 3604 ANSTEUERBARE EREIGNISSE).
• mit der Vorrichtung VOX der Karten AUDIO OUTPUT OB 3230 (siehe Abschnitt VORRICHTUNG VOX).
• durch zeitgesteuerte Ereignisse (siehe Abschnitt ZEITGESTEUERTE EREIGNISSE).
• durch die Audiomatrix des Systems, wenn ein bestimmter Ausgang mit einem Eingang verbunden wird, mit Ausnahme der Eingänge, die als Typ
BGM (Background Music) konfiguriert werden. Diese Funktion wird bei der Programmierung der Audioausgänge konfiguriert, wie im Abschnitt BENUTZUNG DES MENÜS “OUTPUT PROCESSORS” beschrieben wird.
HINWEIS
• In einige Fälle weisen die Relais eine eindeutige Zuordnung auf, das heißt sie können nur von einem Ereignis bzw. einem Gerät angesteuert werden (zum Beispiel “Feedback”-Relais einer Einheit BM 3604).
• Auf Grundlage der Konfigurierung, die mit dem Menü CONFIGURATION der Kontrolleinheit CP 3100 vorgenommen worden ist (siehe Abschnitt
KONFIGURIERUNG DES SYSTEMS), kann das gleiche Relais gleichzeitig von mehreren Vorrichtungen angesteuert werden; in diesem Fall
erfolgt die Umschaltung seines Kontakts auf folgende Weise.
a. Wenn eines der entsprechend programmierten Ereignisse/Vorrichtungen das Relais ansteuert, so wird sein Kontakt in die normale Stellung umgeschaltet.
b. Wenn in der Zwischenzeit andere Ereignisse/Vorrichtungen das Relais ansteuern, so bleibt sein Kontakt in die normale Position umgeschaltet.
c. Wenn die Ansteuerung des Relais durch das Ereignis/Vorrichtung, die es zuerst angesteuert hat, nicht mehr vorhanden ist, so bleibt der Kontakt
umgeschaltet.
d. Das Relais wird nur dann in die normale Position zurückgeschaltet, wenn es von keiner Vorrichtung angesteuert wird.
A.C.U.-EINHEITEN
Die dem Verstärker nachgeschalteten Karten RB 3300 werden in den verschiedenen Menüs der Kontrolleinheit CP 3100 mit dem Name A.C.U.-Einheit
(Amplifier Control Unit) bezeichnet. Die Funktion der Karten wird in dem Abschnitt BESCHREIBUNG angegeben; mit dem entsprechenden Konfigurierungsmenü der Kontrolleinheit können die Karten konfiguriert und für die im vorliegenden Abschnitt beschriebene Funktionsweise programmiert werden. Jede im System vorhandene A.C.U.-Einheit wird in den verschiedenen Menüs der Kontrolleinheit CP 3100 mit einer IDENTIFIZIERUNGSNUMMER gekennzeichnet, deren Wert zwischen 1 und 120 liegt (max. Anzahl der A.C.U.-Einheiten, die das System verwalten kann) und die von der Adresse abhängig ist, die in der Phase der Installation zugeordnet wird.
In Abhängigkeit von der Funktion des von der dem Verstärker nachgeschalteten Karte überwachten Verstärkers können die A.C.U.-Einheiten zwei Typen angehören:
• NORMAL – Dies ist eine A.C.U.-Einheit, die die Aufgabe hat, einen primären Verstärker zu überwachen, der normalerweise zur Beschallung eines
bestimmten Hörbereiches dient.
• BACKUP – Dies ist eine A.C.U.-Einheit, die die Aufgabe hat, einen Reserveverstärker zu überwachen, der normalerweise verwendet wird, um einen primären Verstärker zum Beispiel im Falle eines Defekts des letzteren zu ersetzen. Wenn ein primärer Verstärker ersetzt wird, so
wird der entsprechende Hörbereich mit dem Reserveverstärker beschallt. Falls im System zwei oder mehr Reserveverstärker für mehrere primäre Verstärker vorgesehen sind, so hat der erste Reserveverstärker die Aufgabe, einen beliebigen primären Verstärker zum
Beispiel bei einem Defekt des letzteren zu ersetzen, der zweite Reserveverstärker hat ausschließlich die Aufgabe, den ersten Reserveverstärker zu ersetzen, falls dieser zusammen mit dem primären Verstärker defekt ist, und er kann nicht zur Ersetzung eines
zweiten defekten primären Verstärkers verwendet werden, der dritte Reserveverstärker hat ausschließlich die Aufgabe, den zweiten Reserveverstärker zu ersetzen, und so weiter für alle in der Gruppe vorhandenen Reserveverstärker.
196
ANMERKUNGEN
• Falls in der Anlage nur ein Reserveverstärker für einen oder mehrere primäre Verstärker vorgesehen ist, so ist es für seine automatische Einschaltung
im Falle eines Defekts eines primären Verstärkers nicht erforderlich, das er mit einer dem Verstärker nachgeschalteten Karte RB 3300 (Einheit
BACKUP) kombiniert wird.
• Die Verwendung einer Einheit A.C.U. BACKUP ist unverzichtbar, wenn der Reserveverstärker überwacht oder durch einen weiteren Reserveverstärker ersetzt werden muss.
Die A.C.U.-Einheiten werden in Gruppen unterteilt (max. 64 Gruppen einschließlich der Einheiten NORMAL und der Einheiten BACKUP). Zu einer
Gruppe kann eine beliebige Anzahl von A.C.U.-Einheiten NORMAL oder BACKUP gehören, jedoch die Gesamtzahl der im System vorhandenen
Einheiten darf 120 nicht übersteigen. Die Ersetzung einer Einheit NORMAL durch eine Einheit BACKUP kann nur erfolgen, falls diese der gleichen Gruppe angehören. Mit dem entsprechenden Menü der Kontrolleinheit ist es möglich, die A.C.U.-Einheiten manuell ein- oder auszuschalten,
um den von ihnen überwachten Verstärker für die Beschallung eines bestimmten Hörbereiches zu verwenden (siehe Abschnitt BENUTZUNG DES
MENÜS “INSERT BACKUP ACU”). Durch die Abschaltung einer A.C.U.-Einheit wird der von ihr überwachte Verstärker aus der Beschallung eines bestimmten Hörbereiches ausgeschlossen und an seiner Stelle kann der eventuelle Reserveverstärker der Gruppe eingeschaltet werden, oder aber
die eventuelle A.C.U.-Einheit BACKUP, falls der Reserveverstärker von einer dem Verstärker nachgeschalteten Karte RB 3300 überwacht wird.
ANMERKUNG
• Die Einheiten NORMAL sind normalerweise EINGESCHALTET, während die Einheiten BACKUP normalerweise immer ABGESCHALTET sind.
Die Einschaltung/Abschaltung einer A.C.U.-Einheit (NORMAL oder BACKUP) kann bei einem Alarm durch einen Defekt oder eine Funktionsstörung eines Verstärkers mit der Betriebsweise MANUAL oder AUTO erfolgen. Im Folgenden wird die Funktionsweise der Einheiten NORMAL und
BACKUP in den beiden Betriebsweisen angegeben.
• Betriebsweise MANUAL auf Einheit NORMAL – Die Abschaltung der Einheit NORMAL bei einem Alarm des von ihr überwachten Verstärkers erfolgt
von Hand mit dem entsprechenden Menü der Kontrolleinheit CP 3100.
• Betriebsweise AUTO auf Einheit NORMAL –
Die Abschaltung der Einheit NORMAL bei einem Alarm des von ihr überwachten Verstärkers erfolgt
automatisch durch das System.
• Betriebsweise MANUAL auf Einheit BACKUP – Die Einschaltung der Einheit BACKUP muss im Falle eines Alarms der Einheit NORMAL, die der
gleichen Gruppe angehört, manuell mit dem entsprechenden Menü der Kontrolleinheit CP 3100
erfolgen. Die Abschaltung der Einheit BACKUP im Falle eines Alarms des von ihr überwachten Verstärkers muss manuell mit dem entsprechenden Menü der Kontrolleinheit CP 3100 erfolgen.
• Betriebsweise AUTO auf Einheit BACKUP –
Die Einschaltung der Einheit BACKUP erfolgt im Falle eines Alarms der Einheit NORMAL, die der
gleichen Einheit angehört, automatisch durch das System, falls die ersetzende Einheit NORMAL
für die Betriebsweise Einschaltung/Abschaltung AUTO konfiguriert worden ist; falls die ersetzenden Einheit NORMAL hingegen auf die Betriebsweise Einschaltung/Abschaltung MANUAL
konfiguriert worden ist, so muss die Einschaltung der Einheit BACKUP manuell erfolgen.
Die Abschaltung der Einheit BACKUP erfolgt im Falle eines Alarms des von ihr überwachten Verstärkers automatisch durch das System.
Wenn in einer A.C.U.-Gruppe mehrerer Einheiten BACKUP vorhanden sind, die auf die Betriebsweise Einschaltung/Abschaltung AUTO konfiguriert
worden sind, so hängt die Reihenfolge des Eingriffs dieser Einheiten im Falle eines Alarms der Einheit NORMAL der gleichen Gruppe, die auf die Betriebsweise Einschaltung/Abschaltung AUTO konfiguriert worden ist, von der ihr zugeordneten IDENTIFIZIERUNGSNUMMER ab: Die erste Einheit
BACKUP, die eingeschaltet wird, ist diejenige mit der niedrigsten Identifizierungsnummer, die zweite Einheit BACKUP, die eingeschaltet wird, ist diejenige mit der folgenden Identifizierungsnummer, und so weiter für alle eventuellen weiteren Einheiten BACKUP.
ANMERKUNGEN
• Die Einschaltung einer A.C.U.-Einheit (NORMAL oder BACKUP), die automatisch aufgrund eines Alarms wegen eines Defekts oder einer Funktionsstörung des von ihr überwachten Verstärkers abgeschaltet worden ist, muss immer manuell mit dem entsprechenden Menü der Kontrolleinheit
CP 3100 erfolgen.
• Wenn eine Einheit NORMAL abgeschaltet wird und in der A.C.U.-Gruppe, der sie angehört, ein Reserveverstärker vorhanden ist, der nicht von einer dem Verstärker nachgeschalteten Karte RB 3300 (keine Einheit Backup) überwacht wird, so wird dieser immer automatisch anstelle des
primären Verstärkers eingeschaltet.
• Wenn in einer A.C.U.-Gruppe mehrere Einheiten BACKUP vorhanden sind, so schaltet sich im Falle eines Alarms einer Einheit NORMAL der gleichen Gruppe, die auf die Betriebsweise Einschaltung/Abschaltung AUTO konfiguriert worden ist, zuerst die Einheit BACKUP ein, die unter denjenigen, die auf die Betriebsweise Einschaltung/Abschaltung AUTO konfiguriert worden sind, die niedrigste Identifizierungsnummer hat; die Einheiten
BACKUP mit der niedrigsten Identifizierungsnummer in absoluter Hinsicht, die jedoch auf die Betriebsweise Einschaltung/Abschaltung MANUAL
konfiguriert worden sind, unterbrechen also die automatische Ersetzung einer Einheit NORMAL nicht.
Die folgenden Alarme bewirken die automatische Abschaltung einer A.C.U.-Einheit und die eventuelle automatische Einschaltung der Reserveeinheit
(oder des Reserveverstärkers, falls diese nicht mit einer Karte RB 3300 kombiniert ist):
• Alarm PA FAULT. Dieser Alarm kann ausgelöst werden, falls die A.C.U.-Einheit, die den Verstärker überwacht, mit der Zusatzkarte FAULT DETECTOR SB 3320 ausgestattet ist. Er zeigt einen Alarm an, der durch einen beliebigen Defekt des überwachten Verstärkers ausgelöst wird, der eine
spürbare Verringerung der Leistungsabgabe bewirkt.
• Alarm OVL. Dieser Alarm kann ausgelöst werden, falls die A.C.U.-Einheit, die den Verstärker überwacht, mit einem zusätzlichen Alarmkontakt ausgestattet ist, der sich schließt, wenn eine Schutzvorrichtung eingreift oder wenn das Gerät nicht normal funktioniert (zum Beispiel Überlastbetrieb).
Am Ende eines Alarms auf einer A.C.U.-Einheit für die Rückkehr zum ursprünglichen Status der Einschaltung der Einheiten NORMAL und BACKUP
(normalerweise sind die Einheiten NORMAL eingeschaltet, während die Einheiten BACKUP abgeschaltet sind) die Einheiten manuell mit einem entsprechenden Menü der Kontrolleinheit in die Ausgangsbedingung zurückstellen (siehe Abschnitt BENUTZUNG DES MENÜS “INSERT BACKUP ACU”)
oder das System mit einer der im Abschnitt AUSFÜHRUNG EINER KONFIGURIERUNG beschriebenen Vorgehensweise neu konfigurieren.
Für die Programmierung der A.C.U.-Einheiten den Abschnitt BENUTZUNG DES MENÜS “ACU” konsultieren; für die manuelle Einschaltung/Abschaltung der A.C.U.-Einheiten den Abschnitt BENUTZUNG DES MENÜS “INSERT BACKUP ACU” konsultieren. Die folgenden Beispiele können weitere
Informationen zur Funktionsweise der A.C.U.-Einheiten liefern.
197
Beispiel 1
IN DER GRUPPE
VORHANDENE
A.C.U.
TYP
FUNKTIONS-WEISE
NORMAL
AUTO.
BACKUP
AUTO.
TYP
FUNKTIONS-WEISE
NORMAL
AUTO.
BACKUP
AUTO.
TYP
FUNKTIONS-WEISE
ACU 1
NORMAL
MANUALL
ACU 2
BACKUP
MANUALL
ACU 1
a. Bei einem Defekt des von der Einheit ACU 1 überwachten primären Verstärkers wird an seiner Stelle automatisch der Reserveverstärker eingeschaltet, der von der Einheit ACU 3 überwacht wird.
b. Bei einem anschließenden Defekt des von der Einheit ACU 2
überwachten primären Verstärkers wird der Alarm dieser Einheit
lediglich angezeigt.
c. Bei einem anschließenden Defekt des von der Einheit ACU 3
überwachten Reserveverstärkers wird dieser automatisch abgeschaltet; falls ein zweiter Reserveverstärker vorhanden ist( der nicht von einer Karte RB 3300 überwacht wird), so wird dieser automatisch anstelle des ersten Reserveverstärkers verwendet.
ACU 2
ACU 3
BESCHREIBUNG FUNKTIONSWEISE A.C.U.
Beispiel 2
IN DER GRUPPE
VORHANDENE
A.C.U.
ACU 1
a. Bei einem Defekt des von der Einheit ACU 2 überwachten primären Verstärkers wird an seiner Stelle automatisch der von der
Einheit ACU 3 überwachte Reserveverstärker eingeschaltet.
b. Bei einem anschließenden Defekt des von der Einheit ACU 1
überwachten primären Verstärkers wird der eventuelle Alarm dieser Einheit lediglich angezeigt.
c. Bei einem anschließenden Defekt des von der Einheit ACU 3
überwachten Reserveverstärkers wird dieser automatisch abgeschaltet; falls ein zweiter Reserveverstärker vorhanden ist (der nicht mit einer Karte RB 3300 ausgestattet ist), so wird dieser automatisch anstelle des ersten Reserveverstärkers verwendet.
ACU 2
ACU 3
BESCHREIBUNG FUNKTIONSWEISE A.C.U.
Beispiel 3
IN DER GRUPPE
VORHANDENE
A.C.U.
BESCHREIBUNG FUNKTIONSWEISE A.C.U.
a. Bei einem Defekt des von der Einheit ACU 1 überwachten primären
Verstärkers erfolgt keinerlei Operation, mit Ausnahme der eventuellen Anzeigung des Alarms dieser Einheit; die Einschaltung des von
der Einheit ACU 2 überwachten Reserveverstärkers muss manuell
erfolgen; dazu die Einheit ACU 1 in Alarm abschalten und anschließend die Einheit ACU 2 einschalten.
b. Bei einem anschließenden Defekt des von der Einheit ACU 2 überwachten Reserveverstärkers erfolgt keinerlei Operation, mit Ausnahme
der eventuellen Anzeigung des Alarms dieser Einheit; die Einschaltung des eventuellen zweiten Reserveverstärkers (der nicht mit einer
Karte RB 3300 ausgestattet ist) muss manuell vorgenommen werden,
wobei die Einheit ACU 2 in Alarm abgeschaltet werden muss.
FUNKTION “DAY/NIGHT”
Die Funktion kann verwendet werden, wenn die dem Verstärker nachgeschaltete Karte RB 3300 (A.C.U.-Einheit) mit der zusätzlichen Karte DIGITAL
ALC LB 3340 ausgestattet ist und sie gestattet die Abschwächung der Beschallung in den Nachtstunden. Das Ausmaß der Abschwächung kann in
der Phase der Installation der Karte LB 3340 auf 16 verschiedene Werte eingestellt werden und wird auf alle mit der Karte RB 3300 beschallten Hörbereiche angewendet. Zur Aktivierung der Funktion DAY/NIGHT sowie zur Festlegung der Eingriffszeiten muss das entsprechende Menü der Kontrolleinheit CP 3100 verwendet werden.
FUNKTION “MONITOR” (AUDIO-ÜBERWACHUNG)
Die Funktion gestattet das Abhören des Signals "MONITOR" der dem Verstärker nachgeschalteten Karte RB 3300 (A.C.U.-Einheit) des Lautsprecherausgangs des von ihr überwachten Verstärker über den Lautsprecher der Kontrolleinheit CP 3100. Zur Verwendung der Funktion “Monitor” das entsprechende Menü der Kontrolleinheit CP 3100 aufrufen Der Befehl für das Abhören wird über die serielle Leitung gesendet.
HINWEISE
• Wenn eine A.C.U.-Einheit abgeschaltet wird, so ist es nicht mehr möglich, ihr Signal "Monitor" abzuhören, dies gestattet das Abhören der Signale "Monitor" der übrigen A.C.U.-Einheiten, auch falls es nicht mehr möglich sein sollte, die Einheit erneut einzuschalten.
• Es kann jeweils nur eine A.C.U.-Einheit abgehört werden.
198
ALARM “OVL”
Die Karte RB 3300 weist einen Eingang auf, der die Aufnahme von Alarmmeldungen vom überwachten Verstärker gestattet. Die Art des aufgenommenen
Alarms ist von dem spezifischen verwendeten Verstärker abhängig und kann sich zum Beispiel auf den Eingriff einer Schutzvorrichtung oder auf eine Funktionsstörung des Gerätes beziehen (zum Beispiel Überlastbetrieb). Die Übertragung des Alarms erfolgt durch Schließung eines zusätzlichen Kontakts des
Verstärkers: Falls der Kontakt für zumindest 10 Sekunden geschlossen bleibt, so aktiviert die Karte RB 3300 über die serielle Leitung die Meldung des
Alarmes an die Kontrolleinheit CP 3100; wenn die Kontrolleinheit in entsprechender Weise programmiert wird, so kann beim Auftreten eines Alarms des
Verstärkers an seiner Stelle automatisch der Reserveverstärker eingeschaltet werden. (siehe Abschnitt BENUTZUNG DES MENÜS “ACU”).
FUNKTION “FIRE-BREAK”
Die Funktion kann benutzt werden, falls die dem Verstärker nachgeschaltete Karte RB 3300 (A.C.U.-Einheit) mit der Zusatzkarte FAULT DETECTOR
SB 3320 ausgestattet ist; sie gestattet die Ansteuerung des von der Karte RB 3300 überwachten Verstärkers mit einem Notfallsignal, das von einer an
das System RX 3000 angeschlossenen Quelle kommt, wobei die Ausstrahlung des von der Audiomatrix kommenden Signals unterbrochen wird.
Auf diese Weise besteht auch bei im Fall eines Defekts einer Komponente des Systems RX 3000 (zum Beispiel Karte AUDIO OUTPUT OB 3230) die
Gewissheit, eine Meldung mit absolutem Vorrang ausstrahlen zu können (zum Beispiel Meldung Feueralarm). Zur Erzielung der maximalen Sicherheit des Eingriffs ist die Funktion “Fire-Break” eine reine Hardware-Funktion.
FUNKTION “LINE FAULT”
Die Funktion LINE FAULT kann benutzt werden, wenn die dem Verstärker nachgeschaltete Karte RB 3300 (A.C.U.-Einheit) mit der Zusatzkarte FAULT
DETECTOR SB 3320 ausgestattet ist und sie gestattet die Kontrolle der Impedanz der von der Karte RB 3300 überwachten Lautsprecherleitung: Sämtliche Defekte, die zu einer spürbaren Änderung der Impedanz der Leitung führen, bewirken die Auslösung eines Alarms, der an die Kontrolleinheit CP
3100 gemeldet wird. Die folgenden Defekte können festgestellt werden:
• Kurzschluss zwischen zwei Leitern der Lautsprecherleitung;
• Unterbrechung der Lautsprecherleitung;
• Kurzschluss zwischen Lautsprecherleitung und Erdungsleitung.
HINWEIS
• Wenn die Karte RB 3300 einen Reserveverstärker überwacht, so kann die Funktion LINE FAULT lediglich zur Feststellung eines Kurzschlusses zwischen den Lautsprecherleitungen und der Erdungsschaltung verwendet werden; der Kurzschluss zwischen den beiden Leitern der Lautsprecherleitung und die Unterbrechung der Lautsprecherleitung kann hingegen nicht festgestellt werden.
FUNKTION “PA FAULT”
Die Funktion “PA FAULT” kann benutzt werden, wenn die dem Verstärker nachgeschaltete Karte RB 3300 (A.C.U.-Einheit) mit der Zusatzkarte FAULT
DETECTOR SB 3320 ausgestattet ist. Sie gestattet die Überprüfung des einwandfreien Betriebs des von der Karte RB 3300 überwachten Verstärkers
durch die Feststellung des Ausgangssignals für die Lautsprecher: Sämtlichen Funktionsstörungen des Verstärkers, die zu einer spürbaren Verringerung der abgegebenen Leistung führen, bewirken die Auslösung eines Alarms, der an die Kontrolleinheit CP 3100 gemeldet wird; wenn sie in entsprechender Weise programmiert wird, so kann im Falle des Auftretens eines Alarms des Verstärkers an seiner Stelle automatisch der Reserveverstärker eingeschaltet werden. (siehe Abschnitt BENUTZUNG DES MENÜS ACU).
FUNKTION “ALC”
Die Funktion ALC (Automatic Level Control) kann benutzt werden, wenn die dem Verstärker nachgeschaltete Karte RB 3300 (A.C.U.-Einheit) mit der zusätzlichen Karte DIGITAL ALC LB 3340 ausgestattet ist. Sie gestattet die automatische Kontrolle des Verhältnisses von Signal und Umgebungsgeräusch
im Hörbereich, das heißt sie ermöglicht es, die Lautstärke des Signals automatisch an Änderungen des Geräuschpegels des Hörbereiches anzupassen,
um eine perfekte Verstehbarkeit der ausgestrahlten Meldungen sicherzustellen. Diese Eigenschaft ist besonders nützlich in Hörbereichen, die starke
Schwankungen des Geräuschpegels aufweisen. Die Funktion ALC basiert auf der Verwendung von Kondensatormikrofone (bis zu 4 Mikrofone) oder Lautsprechern mit Leitungstransformatoren mit Mikrofonfunktion, die die Feststellung des Geräuschpegels im Beschallungsbereich gestatten. Das aufgenommene Signal wird digital verarbeitet und steuert eine elektronische Abschwächschaltung an, die eine perfekte Einstellung des Signals gestattet.
HINWEIS
• Die Funktion ALC kann nicht benutzt werden, wenn die Karte RB 3300 einen Reserveverstärker überwacht; eine Einheit A.C.U. BACKUP kann
deshalb nicht mit der zusätzlichen Karte DIGITAL ALC LB 3340 ausgestattet werden.
SYSTEMEREIGNISSE
Das System ist in der Lage, die in den folgenden Abschnitten beschrieben Typen von Ereignissen zu verwalten.
VON DEN DIGITALEN EINHEITEN BM 3616 STEUERBARE EREIGNISSE
Mit den digitalen Mikrofoneinheiten BM 3616 können die folgenden Operationen angesteuert werden:
• Ausstrahlung einer Ansage mit dem Mikrofon der Einheit in bestimmten Hörbereichen und/oder Gruppen von Hörbreichen.
• Ausstrahlung eines auf der Festplatte der Kontrolleinheit CP 3100 abgespeicherten Audiosignals (Audiodatei) (zum Beispiel Meldung, Warn- oder
Alarmton usw.) in bestimmten Hörbereichen und/oder Gruppen von Hörbreichen.
• Ausstrahlung einer im Speicher der Mikrofoneinheit abgespeicherten Meldung in bestimmten Hörbereichen und/oder Gruppen von Hörbreichen.
• Umschaltung der Kontakte bestimmter Relais der digitalen Karten INPUT/OUTPUT IO 3250.
• Ansteuerung des Ereignisses EMERGENCY für die Ausstrahlung einer Ansage über das Mikrofon der Einheit oder eines auf der Festplatte der Kontrolleinheit CP 3100 abgespeicherten Alarmsignals (Meldung oder Ton) mit absolutem Vorrang in bestimmten Hörbereichen und/oder Gruppen von
Hörbreichen. Durch die Aktivierung des Ereignisses kann außerdem die Umschaltung von Relais der digitalen Karten INPUT/OUTPUT IO 3250 angesteuert werden.
Für die Programmierung der mit der digitalen Mikrofoneinheit BM 3616 ansteuerbaren Ereignisse den Abschnitt BENUTZUNG DES MENÜS “CONSOLES” konsultieren.
VON DEN EINHEITEN BM 3604 STEUERBARE EREIGNISSE
Mit den Mikrofoneinheiten BM 3604 können die folgenden Operationen angesteuert werden:
• Ausstrahlung einer Ansage mit dem Mikrofon der Einheit in bestimmten Hörbereichen und/oder Gruppen von Hörbreichen.
• Umschaltung der Kontakte bestimmter Relais der digitalen Karten INPUT/OUTPUT IO 3250.
• Ausstrahlung eines auf der Festplatte der Kontrolleinheit CP 3100 abgespeicherten Audiosignals (Audiodatei) (zum Beispiel Meldung, Warn- oder
Alarmton usw.) in bestimmten Hörbereichen und/oder Gruppen von Hörbereichen.
• Ansteuerung Meldung an Kontrolleinheit CP 3100.
199
VON DEN “GPI”-EINGÄNGEN STEUERBARE EINGÄNGE
Jede digitale Karte INPUT/OUTPUT IO 3250 weist 16 optoisolierte Eingänge auf, die es bei entsprechender Ansteuerung gestatten, verschiedene Ereignisse anzusteuern; diese Eingänge werden in den verschiedenen Menüs der Kontrolleinheit CP 3100 mit dem Namen GPI-Eingänge bezeichnet (siehe
Abschnitt GPI-EINGÄNGE). Die ansteuerbaren Ereignisse (max. 256 Ereignisse) werden im Folgenden beschrieben.
• Umschaltung eines oder mehrerer Relais der digitalen Karten INPUT/OUTPUT IO 3250 (siehe Abschnitt siehe Abschnitt PROGRAMMIERBARE RELAIS), deren Kontakte nach Belieben verwendet werden können.
• Ausstrahlung eines auf der Festplatte der Kontrolleinheit CP 3100 abgespeicherten Audiosignals (Audiodatei) (zum Beispiel Meldung, Warn- oder
Alarmton usw.) in bestimmten Hörbereichen und/oder Gruppen von Hörbereichen und eventuelle Umschaltung eines oder mehrerer Relais der digitalen Karten INPUT/OUTPUT IO 3250.
• Ausstrahlung einer Ansage mit dem Mikrofon der Mikrofoneinheit BM 3604 in bestimmten Hörbereichen und/oder Gruppen von Hörbereichen und
eventuelle Umschaltung eines oder mehrerer Relais der digitalen Karten INPUT/OUTPUT IO 3250.
• Ansteuerung der Alarmereignisse FIREMAN 1 und/oder FIREMAN 2 für die Ausstrahlung von Audiosignalen “fireman” in bestimmten Hörbereichen
und/oder Gruppen von Hörbereichen mit absolutem Vorrang und eventuelle Umschaltung eines oder mehrerer Relais der digitalen Karten INPUT/OUTPUT IO 3250.
• Ansteuerung Meldung an Kontrolleinheit CP 3100.
Für die Ansteuerung der Eingänge der Karte können normale elektrische Kontakte verwendet werden (zum Beispiel Kontakte von Tastern). Für die Programmierung der mit den GPI-Eingängen ansteuerbaren Ereignisse den Abschnitt BENUTZUNG DES MENÜS “GPI EVENTS DEFINITION” konsultieren.
ZEITGESTEUERTE EREIGNISSE
Mit einem entsprechenden Menü der Kontrolleinheit CP 3100 gestattet das System die Programmierung von “zeitgesteuerten Ereignissen”, das heißt
von Ereignisse, die zu einer bestimmten Uhrzeit ausgeführt werden müssen. Das System gestattet die Programmierung von maximal 64 zeitgesteuerten Ereignissen. Ein zeitgesteuertes Ereignis kann die folgenden Aktionen ansteuern:
• Umschaltung eines Einschaltglieds der digitalen Karten INPUT/OUTPUT IO 3250.
• Umschaltung eines Ausschaltglieds der digitalen Karten INPUT/OUTPUT IO 3250.
• Ausstrahlung eines auf der Festplatte der Kontrolleinheit CP 3100 abgespeicherten Audiosignals (Audiodatei) (zum Beispiel Meldung, Warn- oder
Alarmton usw.) in bestimmten Hörbereichen und/oder Gruppen von Hörbereichen.
Für die Programmierung der zeitgesteuerten Ereignisse den Abschnitt BENUTZUNG DES MENÜS “TIMER EVENTS DEFINITION” konsultieren.
EREIGNISSE “VOX”
Die Ereignisse VOX werden von den Vorrichtungen VOX auf den Karten AUDIO OUTPUT OB 3230 angesteuert. Für die Beschreibung der Funktionsweise der Vorrichtung VOX den Abschnitt VORRICHTUNG VOX konsultieren.
EREIGNISSE “PLAYBACK”
Dabei handelt es sich um Ereignisse, die die Benutzung der Soundkarte der Kontrolleinheit CP 3100 für die Wiedergabe von auf der Festplatte der CP
3100 abgespeicherten Audiosignalen (Audiodateien) vorsehen. Weitere Informationen zur Wiedergabe der Audiodatei sind im Abschnitt AUFZEICHNUNG/WIEDERGABE VON AUDIOSIGNALEN enthalten.
EREIGNISSE “BACKGROUND MUSIC”
Dabei handelt es sich um Ereignisse, die die Ausstrahlung von Hintergrundmusik in bestimmten Hörbereichen gestatten. Das System ist in der Lage,
bis zu acht Quellen für Hintergrundmusik zu verwalten.
VORRANGORDNUNG
Die Funktionsweise des Systems beruht auf der Verwendung einer Vorrangordnung, in der jedem Systemereignis ein Vorrangniveau zugeordnet ist.
Auf Grundlage des Vorrangstyps wird das Ereignis auf verschiedene Weise ausgeführt, wie im Folgenden beschrieben.
ABGESTUFTER VORRANG Der abgestufte Vorrang gestattet es bestimmten Ereignissen, bestimmte Geräte des Systems vor Ereignissen mit niedrigerem Vorrangniveau zu benutzen, jedoch ohne Möglichkeit des Abbruches der laufenden Ereignisse, auch wenn
sie einen niedrigeres Vorrangniveau aufweisen; die einzigen Ereignisse, die immer unterbrochen werden können, sind
die Ereignisse des Typs BACKGROUND MUSIC (Ausstrahlung von Hintergrundmusik). Wenn mehrere Ereignisse mit unterschiedlichem Vorrangniveau auf die Ausführung auf einem nicht verfügbaren Gerät warten, so werden zuerst die Ereignisse mit einem höheren Vorrangniveau ausgeführt, und anschließend diejenigen mit niedrigerem Vorrangniveau. Die
Vorrangniveaus weisen die folgende Abstufung auf:
• Niveaus 1 ÷ 8: abnehmende Vorrangniveaus von 1 (höchstes Vorrangniveau) bis 8 (niedrigstes Vorrangniveau).
• Niveau 9: kein Vorrang.
ABSOLUTER VORRANG
Der absolute Vorrang ist der größtmögliche Vorrang und gestattet bestimmten Ereignissen die Verwendung bestimmter Geräte des Systems vor den Ereignissen mit abgestuftem Vorrang, mit der Möglichkeit, laufende Ereignisse zu unterbrechen (Funktion “Override”). Ein Ereignis mit absolutem Vorrang weist die Funktion “Override” für Ereignisse mit
gleichem Vorrangniveau nicht auf, das heißt es kann andere laufende Ereignisse mit absolutem Vorrang nicht unterbrechen.
Wenn mehrere Ereignisse mit dem gleichen Vorrangniveau vorhanden sind, die ausgeführt werden müssen (absoluter Vorrang oder abgestufter Vorrang), so folgt die Reihenfolge der Ausführung der Reihenfolge der Anforderung, das heißt die vorgemerkten Ereignisse werden zuerst ausgeführt.
Die folgenden Vorrichtungen des Systems können Gegenstand des Vorrangs sein:
• Ausgänge der Karten AUDIO OUTPUT OB 3230, die die Ansteuerung der Leistungseinheiten für die Beschallung der verschiedenen Hörbereiche
des Systems gestatten.
• Soundkarte im Innern der Kontrolleinheit CP 3100, die die Aufzeichnung/Wiedergabe der Audiodateien (Meldungen, Warn- oder Alarmtöne usw.) gestattet.
In der folgenden Tabelle werden für jedes Systemereignis das Vorrangniveau und die Beschreibung der Umsetzung dieses Vorrangniveau angegeben.
200
EREIGNIS
VORRANGNIVEAU
BESCHREIBUNG
ABSOLUT
Dies sind Ereignisse, die einen absoluten Vorrang aufweisen. Die Ereignisse mit niedrigerem Vorrangniveau, die die von dem Ereignis mit absolutem Vorrang betroffenen Vorrichtungen benutzen, werden unterbrochen (Funktion “Override”). Alle von den unterbrochenen Ereignissen
verwendeten Audioausgänge werden unterbrochen, auch diejenigen,
die von dem Ereignis mit absolutem Vorrang nicht betroffen sind.
1
Dies sind die Ereignisse mit dem höchstem Vorrangniveau nach den
Ereignissen mit absolutem Vorrang. Wenn Ereignisse mit verschiedenem Vorrangniveau (mit Ausnahme von Ereignissen mit absolutem Vorrang) auf die Ausführung warten, so werden die zeitgesteuerten Ereignisse zuerst ausgeführt. Die zeitgesteuerten Ereignisse weisen die
Funktion “Override” nicht auf, das heißt sie können laufende Ereignisse mit einem niedrigeren oder gleichen Vorrangniveau nicht unterbrechen
2÷7
Die mit den digitalen Mikrofoneinheiten BM 3616 ansteuerbaren Ereignisse können je nach Einstellung mit dem entsprechenden Konfigurierungsmenü (Menü CONSOLES) variable Vorrangniveaus von 2 bis 7
aufweisen; diese Ereignisse weisen die Funktion “Override” nicht auf,
das heißt sie können laufende Ereignisse mit einem niedrigeren oder
gleichen Vorrangniveau nicht unterbrechen.
Ereignisse VOX.
Ereignisse, die von den
Mikrofoneinheiten BM 3604
angesteuert werden können.
Ereignisse PLAYBACK
8
Diese Ereignisse weisen das niedrigste Vorrangniveau auf. Sie können
nur die Ereignisse BACKGROUND MUSIC unterbrechen und sie weisen die Funktion “Override” nicht auf, das heißt sie können laufende
Ereignisse mit einem niedrigeren oder gleichen Vorrangniveau nicht
unterbrechen
Ereignisse BACKGROUND MUSIC.
9
Diese Ereignisse können durch jedes beliebige andere Ereignis unterbrochen werden
ALARMEREIGNISSE
EMERGENCY,
FIREMAN 1,
FIREMAN 2.
Zeitgesteuerte Ereignisse.
Ereignisse, die von den digitalen
Mikrofoneinheiten BM 3616 angesteuert
werden können
(Ereignis EMERGENCY ausgeschlossen).
FUNKTION SPERRUNG DURCH EIN EREIGNIS MIT ABSOLUTEM VORRANG
Wenn ein Ereignis mit absolutem Vorrang ausgeführt wird, so werden die gerade ausgeführten Ereignisse mit niedrigerem Vorrangniveau, die die von
dem Ereignis mit Vorrang betroffenen Vorrichtungen benutzen, unterbrochen und beendet (Funktion “Override”) und sie werden nach Ende des Ereignisses mit Vorrang nicht wieder zurückgestellt (mit Ausnahme des Ereignisses BACKGROUND MUSIC). In der folgenden Tabelle werden die besonderen Aktionen angegeben, die sich auf die einzelnen unterbrochenen Ereignisse beziehen
UNTERBROCHENES EREIGNIS
AUSGEFÜHRTE AKTION
Ereignis von Mikrofoneinheit BM 3604
• Das Relais “Feedback” (FEED RELAIS) der Mikrofoneinheit wird auf OFF gestellt, so dass
sie deaktiviert und von allen Hörbereichen und/oder Gruppen von Hörbereichen des Audiosystems abgeklemmt wird (siehe Abschnitt BENUTZUNG DES MENÜS “GPI EVENTS
DEFINITION”).
• Alle mit der Mikrofoneinheit getroffenen Entscheidungen werden “nullgestellt”.
• Das Mikrofon der Einheit wird abgeschaltet.
Ereignis von digitaler Mikrofoneinheit BM 3616
(Ereignis EMERGENCY ausgeschlossen)
• Die eventuelle Ausstrahlung des auf der Festplatte der Kontrolleinheit CP 3100 aufgezeichneten Audiosignals (Audiosignal) wird unterbrochen.
• Die eventuelle Ausstrahlung der im Speicher der Mikrofoneinheit aufgezeichneten lokalen
Meldung wird unterbrochen.
• Die eventuelle Ausstrahlung der Mikrofonansage wird unterbrochen.
• Die Mikroneinheit wird deaktiviert und von allen Hörbereichen und/oder Gruppen von Hörbereichen des Audiosystems abgeklemmt.
• Alle mit der Mikrofoneinheit getroffenen Entscheidungen werden “nullgestellt”.
Ereignis VOX
• Die Funktion VOX wird vorübergehend deaktiviert.
• Die Verbindungen dem Eingang INPUT VOX und den entsprechenden Ausgängen mit der
aktivierter Funktion VOX werden unterbrochen (siehe Abschnitt VORRICHTUNG VOX).
• Das Relais RELAY VOX wird in die normale Position zurückgeschaltet (siehe Abschnitt
VORRICHTUNG VOX).
• Am Ende des Ereignisses mit absolutem Vorrang wird die Funktion VOX wieder aktiviert.
Timer events definition
• Die Wiedergabe des zugeordneten Audiosignals (Meldung oder Ton) wird unterbrochen.
Wenn das zeitgesteuerte Ereignis außer der Wiedergabe eines Audiosignals auch die Umschaltung von Relais vorsieht, so werden diese wieder in die normale Position zurückgeschaltet.
Ereignis PLAYBACK, angesteuert von den
GPI-Eingänge
• Die eventuelle Wiedergabe des dem Ereignis zugeordneten Audiosignals (Meldung oder
Ton) wird unterbrochen.
• Alle dem Ereignis zugeordneten Hörbereiche und/oder Gruppen von Hörbereichen werden
vom Eingang PLAYBACK abgeklemmt.
• Alle gegebenenfalls dem Ereignis zugeordneten Relais werden wieder in die normale Position zurückgeschaltet.
Ereignis BACKGROUND MUSIC
• Die Ausstrahlung der Hintergrundmusik wird in allen Hörbereichen und/oder Gruppen von
Hörbereichen unterbrochen, die von dem Ereignis mit absolutem Vorrang verwendet werden. Die Ausstrahlung der Musik wird nach Ende des Ereignisses mit Vorrang fortgesetzt.
201
VORRICHTUNG “VOX”
Die Vorrichtung VOX (VOX Detector) ist auf den Karten AUDIO OUTPUT OB 3230 vorhanden. Die Funktion der Vorrichtung ist die Folgende: Wenn das
Audiosignal (Signal VOX), das einen bestimmten Eingang der Karten AUDIO INPUT IB 3210 / IB 3280 ansteuert und INPUT VOX genannt wird, eine
bestimmte Schwelle übersteigt, die mit einem entsprechenden Trimmpotentiometer der Karte OB 3230 eingestellt werden kann, so kann die Vorrichtung VOX eine der folgenden Operationen ansteuern:
a) Verbindung des Eingangs INPUT VOX mit bestimmten Ausgängen der Karten AUDIO OUTPUT OB 3230 (Ausgänge VOX), die mit dem Konfigurierungsmenü OUTPUT PROCESSORS festgelegt werden können.
b) Durchführung der in Punkt a) beschriebenen Operation und gleichzeitige Umschaltung eines bestimmten Relais der digitalen Karten INPUT/OUTPUT IO 3250, das RELAY VOX genannt wird
Bei der Konfigurierung des Systems mit 16 installierten Karten AUDIO OUTPUT OB 3230 ist es möglich, 16 Vorrichtungen VOX zu konfigurieren. Die
Vorrichtung VOX weist die folgenden Funktionsweise auf.
a) Wenn die Vorrichtung VOX einer Karte AUDIO OUTPUT OB 3230 feststellt, dass das entsprechende Signal VOX die eingestellte Schwelle übersteigt, so sendet sie die Meldung “vox aktiv” an die Kontrolleinheit CP 3100, wenn:
a1) die Funktion VOX für zumindest einen Ausgang der gleichen Karte AUDIO OUTPUT aktiviert worden ist (mit dem Konfigurierungsmenü für die
Audioausgänge).
a2) die von der Vorrichtung VOX verwendeten Ausgänge nicht besetzt sind, das heißt wenn sie nicht mit einem Audioeingang verbunden sind,
mit Ausnahme der Eingänge BGM (Eingänge für Hintergrundmusik).
a3) das Signal VOX wirklich “gehört” wird.
b) Wenn eine Meldung “vox aktiv” erzeugt wird, so verbindet die Karte AUDIO OUTPUT OB 3230 automatisch den Eingang INPUT VOX mit den entsprechenden Ausgängen, deren Funktion VOX aktiviert ist, und hält sich für zumindest 10 Sekunden verbunden.
c) Die Kontrolleinheit CP 3100 steuert die Umschaltung des Relais RELAY VOX an, sobald die Meldung “vox aktiv” erhalten wird.
d) Die Verbindung zwischen dem Eingang INPUT VOX und den entsprechenden Ausgänge dauert an, wenn:
d1) kein Ereignis mit absolutem Vorrang die Benutzung der von der Funktion VOX besetzten Hörbereiche anfordert.
d2) das Signal VOX weiterhin den Eingang INPUT VOX ansteuert und dabei die Schwelle übersteigt.
e) Wenn das Signal VOX abnimmt und sein Pegel für eine Zeit von ca. 10 Sekunden unter die eingestellte Schwelle fällt, so stellt die Karte AUDIO
OUTPUT OB 3230 die gegebenenfalls zuvor unterbrochenen Verbindungen zwischen den als BGM definierten Audioeingängen und den von der
Funktion VOX verwendeten Eingängen wieder her und sendet die Meldung “Ende Aktivität vox” an die Kontrolleinheit CP 3100.
f) Die Kontrolleinheit CP 3100 schaltet das Relais RELAY VOX wieder in die normale Position zurück, sobald sie die Meldung “Ende Aktivität vox”
erhält.
Für die Benutzung der Funktion VOX sind die folgenden Operationen erforderlich.
a) Mit dem Konfigurierungsmenü VOX (siehe entsprechender Abschnitt) den Eingang INPUT VOX festlegen, der für eine bestimmte Karte AUDIO
OUTPUT OB 3230 verwendet werden soll; dank dieser Festlegung können die acht Audioausgänge der ausgewählten Karte mit dem ausgewählten Eingang INPUT VOX verbunden werden, wenn das Signal VOX die eingestellte Schwelle übersteigt.
b) Mit dem Konfigurierungsmenü OUTPUT PROCESSORS (siehe entsprechender Abschnitt) die Funktion VOX für die gewünschten Ausgänge der
ausgewählten Karte AUDIO OUTPUT OB 3230 aktivieren; dank dieser Festlegung können die Ausgänge mit aktivierter Funktion VOX mit dem mit
der in Punkt (a) beschriebenen Operation festgelegten Eingang INPUT VOX verbunden werden, wenn das Signal VOX die eingestellte Schwelle
übersteigt.
AUFZEICHNUNG/WIEDERGABE VON AUDIOSIGNALEN
Das System gestattet die Erstellung und die Wiedergabe von Audiodateien, in denen Audiosignale verschiedenen Typs abgespeichert werden können:
Meldungen, Ansagen, Warntöne, Alarmtöne usw.
ERZEUGUNG VON KLÄNGEN
Mit der Funktion TONE GENERATOR des Menüs RECORDER (siehe Abschnitt BENUTZUNG DES MENÜS “RECORDER”) ist es möglich, aus einem
oder mehreren Tönen zusammengesetzte Klänge zu erstellen, die vom Benutzer nach Belieben festgelegt werden können. Der erstellte digitale Klang
wird als Datei auf der Festplatte der Kontrolleinheit abgespeichert, zusammen mit den übrigen Audiodateien im Archiv der Audiosignale, das zusammen mit dem System geliefert wird, oder die mit den Funktionen RECORD und ASSEMBLY der Kontrolleinheit CP 3100 erstellt werden (siehe Abschnitt BENUTZUNG DES MENÜS “RECORDER”). Die Wiedergabe der erstellten Klänge kann auf die im Abschnitt WIEDERGABE VON AUDIODATEIEN beschriebenen Weise erfolgen.
AUFZEICHNUNG VON AUDIOSIGNALEN
Die Soundkarte der Kontrolleinheit CP 3100 gestattet die Aufzeichnung von Audiosignalen von:
a. einem Mikrofon, das an den Eingang MICRO IN der Soundkarte angeschlossen ist.
b. einer der an die Eingänge des Systems angeschlossenen Quellen (Eingänge der Karten AUDIO INPUT IB 3210 / IB 3280). Wenn die Aufzeichnungsfunktion aktiviert wird, so verbindet die Audiomatrix des Systems automatisch den ausgewählten Eingang mit dem Ausgang, der als Typ
RECORDER definiert worden ist (siehe Abschnitt BENUTZUNG DES MENÜS “OUTPUT PROCESSORS”).
Das aufzuzeichnende Audiosignal wird mit der Soundkarte digitalisiert und auf der Festplatte der Kontrolleinheit gespeichert. Die Aufzeichnung der Audiosignale erfolgt mit der Funktion RECORD des Menüs RECORDER (siehe Abschnitt BENUTZUNG DES MENÜS “RECORDER”); die Wiedergabe der
aufgezeichneten Signale kann auf eine der im Abschnitt WIEDERGABE VON AUDIODATEIEN beschriebenen Weisen erfolgen.
WIEDERGABE VON AUDIODATEIEN
Die Kontrolleinheit CP 3100 weist eine Soundkarte für die Wiedergabe von Audiosignalen auf, die als Dateien auf der Festplatte abgespeichert sind
(Audiodateien) und die sich auf Meldungen, Ansagen, Warn- und Alarmtöne usw. beziehen. Es stehen also die Audiodateien zur Verfügung, die sich in
dem zusammen mit dem System gelieferten Archiv der Audiosignale befinden, oder diejenigen, die mit den Funktionen RECORD, ASSEMBLY und
TONE GENERATOR der Kontrolleinheit CP 3100 erstellt worden sind. (siehe Abschnitt BENUTZUNG DES MENÜS “RECORDER”). Die Wiedergabe
einer Audiodatei kann auf eine der folgenden Weise angesteuert werden:
a. von der Funktion PLAY der Kontrolleinheit CP 3100 (siehe Abschnitt BENUTZUNG DES MENÜS “RECORDER”).
b. mit der Taste F1 der Kontrolleinheit CP 3100 während der Benutzung der Funktionen TONE GENERATOR und ASSEMBLY.
c. mit den Tasten F1, F2 und F3 der digitalen Mikrofoneinheiten BM 3616 (siehe Abschnitt BENUTZUNG DES MENÜS “CONSOLES).
d. von den GPI-Eingängen der digitalen Karten INPUT/OUTPUT IO 3250 (siehe Abschnitt BENUTZUNG DES MENÜS “ GPI EVENTS DEFINITION”).
e. von einem zeitgesteuerten Ereignis (siehe Abschnitt BENUTZUNG DES MENÜS “TIMER EVENTS DEFINITION”).
202
Wenn die Wiedergabe einer Audiodatei angefordert wird, so verbindet die Audiomatrix des Systems automatisch den als Typ PLAYBACK definierten
Eingang (siehe Abschnitt BENUTZUNG DES MENÜS “INPUT PROCESSORS”) mit den für die verschiedenen Funktionen (Hörbereiche) vorgesehenen
Ausgängen der Karten AUDIO OUTPUT OB 3230.
SYSTEMALARME
Vom System werden zwei Arten von Alarmen verwaltet:
• ALARME VON VORRICHTUNGEN DES SYSTEMS – Dabei handelt es sich um Alarme, die von Defekten an den Vorrichtungen des Systems ausgelöst werden (zum Beispiel Mikrofoneinheit BM 3616, A.C.U.-Einheit, Karten IO 3250, Karten IB 3210 / IB 3280, Karten OB 3230 usw.).
• ALARMBEFEHLE/MELDUNG –Dabei handelt es sich um Alarme oder Meldungen, die von den Bedienern der Mikrofoneinheit BM 3616 und/oder
BM 3604 oder von externen Vorrichtungen ausgelöst werden, die an die GPI-Eingänge der entsprechend konfigurierten digitalen Karten
INPUT/OUTPUT IO 3250 angeschlossen sind (siehe Abschnitt BENUTZUNG DES MENÜS “GPI EVENTS DEFINITION”).
Alle Alarmereignisse bewirken die Aktivierung eines akustischen Signalgebers der Kontrolleinheit sowie das Aufleuchten der Led ALARM (Pos. 13 –
Abb. 1, Seite 192). Zum Abschalten des Signalgebers und der Led ALARM das Menü für die Anzeige des Alarmstatus aufrufen (siehe Abschnitt ANZEIGE DES ALARMSTATUS); dadurch wird der Alarm nicht deaktiviert, sondern lediglich seine Anzeige.
Ein Alarm wird nur deaktiviert, wenn das Ereignis, das ihn ausgelöst hat, nicht mehr vorhanden ist, das heißt wenn eine der folgenden Bedingungen
auftritt:
• Der Defekt der Vorrichtung des Systems wird behoben.
• Der Alarm wird mit der Mikrofoneinheit deaktiviert, die ihn ausgelöst hat.
• Der GPI-Eingang, der den Alarm / die Meldung ausgelöst hat, wird nicht mehr angesteuert (digitale Karten INPUT/OUTPUT IO 3250) (siehe Abschnitt BENUTZUNG DES MENÜS “GPI EVENTS DEFINITION”).
AUSDRUCK DER ALARMEREIGNISSE
Der Ausdruck der vom System verwalteten Ereignisse kann auf zwei Weisen erfolgen.
a. Falls im Untermenü PRINTER OPTIONS des Konfigurierungsmenüs SYSTEM die Option PRINT MODE: AUTO gewählt wird, so wird die Alarmmeldung automatisch ausgedruckt, wenn das Alarmereignis auftritt.
b. Falls im Untermenü PRINTER OPTIONS des Konfigurierungsmenüs SYSTEM die Option PRINT MODE: REQUEST gewählt wird, so muss der
Ausdruck der Alarmereignisse manuell vorgenommen werden. Es werden die Alarme ausgedruckt, die seit dem Einschalten des Systems aufgetreten sind.
AUSSTRAHLUNG VON HINTERGRUNDMUSIK
Das System gestattet es, in bestimmten Hörbereichen Hintergrundmusik auszustrahlen. Dazu können bis zu 8 verschiedene Quellen für Hintergrundmusik verwendet werden (zum Beispiel AM/FM-Empfangsgerät, CD-Player, Kassettenlaufwerk usw.), die an die Eingänge der Karten AUDIO INPUT IB
3210 / IB 3280 angeschlossen werden, die mit dem Konfigurierungsmenü INPUT PROCESSORS als Typ BGM (Background Music) konfiguriert werden.
Im Folgenden wird die Art und Weise der Ausstrahlung der Hintergrundmusik beschrieben.
a. Normalerweise wird die Hintergrundmusik (Ereignis “Background Music”) in den mit dem Konfigurierungsmenü OUTPUT PROCESSORS als Typ
BGM definierten Hörbereichen ununterbrochen ausgestrahlt.
b. Wenn im System die Ausführung eines Ereignisses mit einem höheren Vorrangniveau angefordert wird (siehe Abschnitt VORRANGORDNUNG),
das die Ausstrahlung eines Audiosignals in den Hörbereichen vom Typ BGM vorsieht (zum Beispiel Ansage von der digitalen Mikrofoneinheit BM
3616, Ansage von der Mikrofoneinheit BM 3604 usw.), so wird die Ausstrahlung der Hintergrundmusik unterbrochen.
c. Am Ende der Ausstrahlung des Audiosignals mit dem höheren Vorrangniveau wird die Ausstrahlung der Hintergrundmusik fortgesetzt.
BENUTZUNG DER KONTROLLEINHEIT CP 3100
Mit der Tastatur und dem LCD-Display auf der Vorderseite der Kontrolleinheit CP 3100 kann das System RX 3000 überwacht und konfiguriert werden;
alternativ dazu können auch eine externe Tastatur und ein externer Bildschirm verwendet werden (Sonderzubehör), die an die entsprechenden Steckverbindungen der Kontrolleinheit CP 3100 angeschlossen werden. In den Beschreibungen im vorliegenden Abschnitt wird die Verwendung der Vorrichtungen der Kontrolleinheit berücksichtigt.
BENUTZUNG DER MENÜS
Die Benutzung der Kontrolleinheit basiert auf der Verwendung zahlreicher Menüs, die auf dem Display des Gerätes (oder auf einem zusätzlichen externen Bildschirm) angezeigt werden. In der folgenden Abbildung wird der allgemeine Aufbau der Menüs wiedergegeben.
F1: CONFIGURATION
!
F2: ALARMS
!
F3: STORE CONFIG.
!
F4: AUDIO PROCESS
AUDIO INPUT PROCESSORS
AUDIO OUTPUT PROCESSORS
GPI PROCESSORS
DIG. CONSOLLES
ACU (AMPLIFIERS)
GPI ALARMS
EMERGENCY
FIREMAN
SYSTEM ALARMS
ADJUST AUDIO INPUT
ADJUST AUDIO OUTPUT
INSERT BACKUP ACU
MONITOR OPERATIONS
INPUT PROCESSORS
OUTPUT PROCESSORS
GROUPS
RELAY CONFIGURATION
CONSOLES
ACU (AMPLIFIERS)
GPI EVENTS DEFINITION
F1=DEF. RELAY
TIMER EVENTS DEFINITION
VOX
RECORDER
SYSTEM
PRINTER OPTIONS
COMPILE & SAVE
PRINT CONFIGURATION
EXIT WITHOUT SAVING!
DATE & TIME
DAY & NIGHT
PASSWORD
F1=CHANGE ZONE
F1=DEF. KEY
F2= DEF. EMERGENCY
F3=DEF. F1, F2, F3
OPTIONS
RECORD
PLAY
ASSEMBLY
TONE GENERATOR
DELETE MESSAGES
Bei der Benutzung der verschiedenen Menüs werden die Tasten auf der Vorderseite der Kontrolleinheit (oder der zusätzlichen externen Tastatur)
verwendet, deren Funktionen in der folgenden Tabelle wiedergegeben wird.
203
TASTE/N
ESC
Pfeil nach rechts
Pfeil nach links
Pfeil nach oben
Pfeil nach unten
Schräger Pfeil
Pag ↑
Pag ↓
+, -
FUNKTION
Gestattet das Verlassen eines Menüs/Untermenüs.
Gestattet das Verschieben des Wahlpunkts nach rechts.
Gestattet das Verschieben des Wahlpunkts nach links.
Gestattet das Verschieben des Wahlpunkts nach oben.
Gestattet das Verschieben des Wahlpunkts nach unten.
Gestattet das Verschieben des Wahlpunkts zum ersten Feld des aktuellen Menüs.
Gestattet das Verschieben der Darstellung der aktuellen Seite des Menüs nach oben.
Gestattet das Verschieben der Darstellung der aktuellen Seite des Menüs nach unten.
Gestatten die Eingabe eines Parameters in ein Feld durch Rotationswahl zwischen den verschiedenen verfügbaren Parametern; gestatten außerdem die Eingabe eines alphanumerischen Zeichens durch Rotationswahl zwischen den verschiedenen verfügbaren Zeichen.
Gestatten den Zugang zu bestimmten Untermenüs.
Gestatten die Eingabe eines numerischen Zeichens.
Gestattet das Bestätigen einer Wahl oder eines Rotationsfelds.
Gestattet das Abspeichern des “Benutzerpasswords”.
Gestattet das Eingeben eines Zwischenraums in ein alphanumerisches Feld durch
Verschieben des Cursors für die Zeicheneingabe um eine Position.
Gestattet das Löschen aller im aktuell gewählten Feld enthaltenen Zeichen.
Gestatten das Löschen des folgenden oder des vorausgehenden alphanumerischen
Zeichens; gestatten außerdem Bewegungen innerhalb des aktuellen Felds.
F1, F2, F3, F4
Zifferntasten 0 ÷ 9
ENTER
MEMORY
SPACE
CLEAR
C →, C ←
PASSWORD FÜR DEN ZUGANG ZU DEN MENÜS
Mit den beiden Passwörtern können bestimmte Menüs der Kontrolleinheit CP 3100 ausschließlich für bestimmte Benutzer zugänglich gemacht werden. Die beiden Passwörter der Kontrolleinheit sind:
• BENUTZERPASSWORD – Dies ist das Password, das von allen zur Konfigurierung des Systems befugten Benutzern verwendet werden kann. Es
kann aus bis zu maximal 8 Ziffern bestehen. Für die Zuordnung die Benutzerpasswords wie im Abschnitt BENUTZUNG DES MENÜS “SYSTEM”
angegeben vorgehen.
• SUPERVISORPASSWORD – Dies ist ein geheimes Password ausschließlich für den Systemsupervisor. Es wird von RCF eingegeben und kann das
Benutzerpassword ersetzen, falls es vergessen worden ist.
ANMERKUNG
• Das “Supervisorpassword” wird von RCF eingegeben und kann nicht geändert werden.
Die folgenden Menüs können durch ein Password geschützt werden:
• Menü CONFIGURATION für die Konfigurierung des Systems (siehe Abschnitt KONFIGURIERUNGS DES SYSTEMS).
• Menü STORE CONFIG. Für das Ausführen einer Konfigurierung (siehe Abschnitt AUSFÜHRUNG EINER KONFIGURIERUNG).
Wenn die Kontrolleinheit zur Eingabe des Passwords auffordert, so erscheint auf dem Display des Gerätes die im Folgenden wiedergegebene Anzeige.
INSERT PASSWORD TO ACCESS CONFIGURATION
PASSWORD:
Für den Zugang zum nächsten Menü das “Benutzerpassword” auf dem Ziffertastfeld der Kontrolleinheit eingeben und die Taste ENTER drücken.
VERLASSEN EINES MENÜS
Zum Verlassen eines Menüs/Untermenüs der Kontrolleinheit:
1) Die Taste ESC drücken. Falls Einstellung oder Parameter geändert worden sind, so erscheint auf dem Display die folgende Meldung, in der abgefragt wird, ob die neuen Werte gespeichert werden sollen oder nicht.
WARNING: PARAMETERS MODIFIED !
SAVE NEW PARAMETERS ?
NO
YES
2a) Mit den Richtungstasten ↑ / ↓ den Wahlpunkt auf die Position YES setzen und die ENTER zum vorübergehenden Abspeichern der neuen Werte drücken.
2b) Mit den Richtungstasten ↑ / ↓ den Wahlpunkt auf die Position NO setzen und die Taste ENTER drücken, um die neuen Werte nicht zu speichern
und die zuvor abgespeicherten beizubehalten.
3) Falls keine Änderungen von Einstellungen oder Parametern vorgenommen worden sind, so wird direkt das vorausgehende Menü angezeigt.
HINWEIS
• Bei der Konfigurierung des Systems ist es zum dauerhaften Abspeicherung der Einstellungen auf der Festplatte der Kontrolleinheit unbedingt erforderlich, dass Konfigurierungshauptmenü mit dem Befehl COMPILE & SAVE zu verlassen (siehe Abschnitt BENUTZUNG DES MENÜS “COMPILE & SAVE”).
204
ANZEIGE DES AUDIO-PEGELS
In einem entsprechenden Menü wird ein VU-Balken angezeigt, der den Pegel des Audiosignals anzeigt. Diese Anzeige gestattet:
• das Überwachen und Einstellen des Pegels der Audiosignale an den Eingängen der digitalen Karten AUDIO INPUT IB 3210 / IB 3280.
• das Überwachen und Einstellen des Pegels der Audiosignale an den Ausgängen der Karten AUDIO OUTPUT OB 3230.
• Das Überwachen des Pegels der Audiosignale an den Lautsprecherausgängen der von den A.C.U.-Einheiten (dem Verstärker nachgeschalteten Karten RB 3300) überwachten Leistungseinheiten.
Der VU-Balken kann Audiosignale mit einem Pegel zwischen –12 dB und +6 dB anzeigen.
FUNKTIONSWEISE DER AKUSTISCHEN ANZEIGE
Das Gerät ist mit einem akustischen Signalgeber (Summer) ausgestattet, der in den folgenden Fällen einen ununterbrochen Ton abgibt:
• während der Phase der Selbstkonfigurierung des Systems.
• Wenn eine Meldung/ein Alarm aktiviert wird (siehe Abschnitt SYSTEMALARME). Zum Abschalten des akustischen Signalgebers in diesem Fall das
Menü für die Anzeige des Alarmstatus aufrufen (siehe Abschnitt ANZEIGE DES ALARMSTATUS); dadurch wird nur die Anzeige abgeschaltet, nicht
der Alarm.
Der akustische Signalgeber gibt in allen Situationen einen einzelnen “Beepton” ab, in denen ein Hinweis erforderlich ist.
FUNKTIONSWEISE DER RÜCKSEITIGEN BELEUCHTUNG
Die Einschaltung der rückseitigen Beleuchtung des LCD-Display des Gerätes erfolgt in den folgenden Fällen:
• jedesmal, wenn eine Taste auf der Vorderseite der Kontrolleinheit gedrückt wird; ein Timer sorgt für die automatische Abschaltung der rückseitigen
Beleuchtung des Displays ca. 2 Minuten nach dem letzten Drücken einer Taste.
• beim Einschalten des Systems; in diesem Fall bleibt die rückseitige Beleuchtung bis zum Abschluss der Phase der Selbstkonfigurierung eingeschaltet.
• bei der Benuzung des Menüs für die Konfigurierung des Systems (Menü CONFIGURATION); in diesem Fall bleibt die rückseitige Beleuchtung bis
zum verlassen des Konfigurierungsmenüs (Timer ausgeschlossen) eingeschaltet.
EINSCHALTEN DES GERÄTES
Nach dem Einschalten der Kontrolleinheit CP 3100 nimmt diese die Operationen für das Laden des Steuerungsprogramms und die Selbstkonfigurierung des Systems vor, die in der Feststellung aller installierten Geräte, ihrer Programmierung mit den in den auf der Festplatte des Gerätes abgespeicherten Konfigurierungsdateien des Systems enthaltenen Einstellungen besteht. Auf dem LCD-Display wird die folgende Anzeige angezeigt:
RCF RX 3000 AUDIO SYSTEM
SYSTEM CONFIGURATION STARED
PLEASE WAIT ...
"##############
03 NOV 1999
15:29:52
KORREKTE KONFIGURIERUNG DES SYSTEMS
Am Ende des Vorgangs der Selbstkonfigurierung des Systems erscheint auf dem Display die folgende Anzeige, die das Hauptmenü der Einheit
enthält, falls das System korrekt konfiguriert worden ist.
RCF RX 3000 AUDIO SYSTEM
F1: CONFIGURATION
F2: ALARMS
"##############
ENGLISH _ _ _ ▼
F3: STORE CONFIG.
F4: AUDIO PROCESS
03 NOV 1999
15:29:52
FEHLER IN DER KONFIGURIERUNG DES SYSTEMS
Am Ende des Vorgangs der Selbstkonfigurierung des Systems erscheint auf dem Display die folgende Anzeige, falls das System nicht korrekt konfiguriert worden ist, das heißt wenn die Anzahl der Geräte, die zuvor konfiguriert (mit dem entsprechenden Menü der Kontrolleinheit) worden ist, nicht mit der Anzahl der tatsächlich gefundenen und korrekt konfigurierten Geräte übereinstimmt:
RCF RX 3000 AUDIO SYSTEM
WRONG SYSTEM CONFIGURATION
F1: CONFIGURATION
F2: RUN->
ENGLISH _ _ _ ▼
Dabei werden zwei Wahlmöglichkeiten angezeigt; für die Wahl die Taste F1 oder F2 drücken.
• F1: CONFIGURATION
Durch Drücken der Taste F1 ist es möglich, das System auf andere Weise zu konfigurieren, um die Konfigurierungsfehler zu beheben. Für die Benutzung der verschiedenen Funktionen des Untermenüs den Abschnitt KONFIGURIERUNG
DES SYSTEMS konsultieren.
• F2: RUN->
Durch Drücken der Taste F2 ist es möglich, zum Hauptmenü der Einheit zu gelangen, ohne die festgestellten Konfigurierungsfehler zu korrigieren.
HINWEIS
• Falls die festgestellten Konfigurierungsfehler nicht korrigiert werden, so werden einige Funktionen des Systems beeinträchtigt, da diese Vorrichtungen als „abwesend“ behandelt werden.
205
WAHL DER SPRACHE
Die Meldungen, die auf dem Display der Kontrolleinheit CP 3100 erscheinen, können in verschiedenen Sprachen angezeigt werden; für die Wahl der
gewünschten Sprache die Tasten + und - drücken.
RCF RX 3000 AUDIO SYSTEM
F1 : CONFIGURATION
F2 : ALARMS
"##############
ENGLISH _ _ _ ▼
F3: STORE CONFIG.
F4: AUDIO PROCESS
03 NOV 1999
15:29:52
HAUPTMENÜ
Das Hauptmenü enthält die vier im Folgenden wiedergegebenen Untermenüs.
• F1: CONFIGURATION
Das Untermenüs wird durch Drücken der Taste F1 aufgerufen und gestattet die Konfigurierung des gesamten Systems
(Vorrichtungen, Funktionen usw.). Mit diesem Untermenü werden Konfigurierungsdateien erstellt, die die Programmierung
aller Vorrichtungen des Systems gestattet (siehe Abschnitt AUSFÜHRUNG EINER KONFIGURIERUNG). Für die Benutzung der verschiedenen Funktionen des Untermenüs den Abschnitt KONFIGURIERUNG DES SYSTEMS konsultieren.
• F2: ALARMS
Das Untermenüs wird durch Drücken der Taste F2 aufgerufen und gestattet das Anzeigen des Status der vom System
verwalteten Alarme. Für die Benutzung der verschiedenen Funktionen des Untermenüs den Abschnitt ANZEIGE DES
ALARMSTATUS konsultieren.
• F3: STORE CONFIG.
Das Untermenüs wird durch Drücken der Taste F3 aufgerufen und gestattet die Programmierung aller Vorrichtungen des Systems mit den in den Konfigurierungsdateien enthaltenen Einstellungen, die mit dem Untermenü F1: CONFIGURATION erstellt worden sind. Für die Benutzung der Funktion den Abschnitt AUSFÜHRUNG EINER KONFIGURIERUNG konsultieren.
• F4: AUDIO PROCESS
Das Untermenüs wird durch Drücken der Taste F4 aufgerufen und gestattet die die schnelle Eingabe oder Änderung
zahlreicher Audioparameter; es gestattet außerdem die Überwachung der vom System verarbeiteten Audiosignale (Eingangssignale, Ausgangssignale usw.). Für die Benutzung der verschiedenen Funktionen des Untermenüs den Abschnitt AUDIOEINSTELLUNGEN konsultieren.
Unten links im Hauptmenü ist der BALKEN AKTIVITÄT vorhanden, der mit seiner Bewegung den korrekten Betrieb des Systems anzeigt: Das Wachsen des Balkens zeigt den Fortgang des Kontrollzyklusses an, den die Einheit CP 3100 in regelmäßigen Abständen bei den verschiedenen Vorrichtungen des Systems durchführt. Unten rechts im Hauptmenü werden das aktuelle Datum sowie die aktuelle Uhrzeit angezeigt, die mit dem entsprechenden Menü eingestellt werden können.
KONFIGURIERUNG DES SYSTEMS (Menü CONFIGURATION)
RCF RX 3000 AUDIO SYSTEM
F1 : CONFIGURATION
F2 : ALARMS
"##############
ENGLISH _ _ _ ▼
F3: STORE CONFIG.
F4: AUDIO PROCESS
03 NOV 1999
15:29:52
Für den Zugang zu den Menüs, die die Konfigurierung des Systems (Vorrichtungen, Funktionen usw.) gestatten, im Hauptmenü die Taste F1 drücken:
Auf dem Display erscheint eine Menüseite, die die im Folgenden wiedergegebenen Felder aufweist.
DEVICE
zeigt die verschiedenen Vorrichtungen des Systems an. Die Anzeigen sind:
• CONSOLES: Zeigt die digitalen Mikrofoneinheiten BM 3616 an.
• AUDIO INP PROC.: Zeigt die Karten AUDIO INPUT IB 3210 / IB 3280 an.
• AUDIO OUT PROC.: Zeigt die Karten AUDIO OUTPUT OB 3230 an.
• GPI PROCESS.: Zeigt die digitalen Karten INPUT/OUTPUT IO 3250 an.
• ACU: Zeigt die dem Verstärker nachgeschalteten Karten RB 3300 an.
USED
zeigt die Anzahl der Geräte an, die mit dem entsprechenden Menü der Kontrolleinheit konfiguriert worden sind.
FOUND
Zeigt die Anzahl der gefundenen und von der Kontrolleinheit mit dem Vorgang der Selbstkonfigurierung des Systems korrekt konfigurierten Geräte an.
In der ersten Anzeige werden nur die Daten der ersten beiden Vorrichtungen des Systems angezeigt; für die Anzeige der folgenden die Tasten ↑ / ↓
und/oder pag ↑ / pag ↓ benutzen.
ESC to go back
DEVICE
CONSOLES
AUDIO INP PROC.
ENTER to Configure
USED
FOUND
6
6
4
4
Pag ↓
ESC to go back
DEVICE
AUDIO OUT PROC.
GPI PROC.
ENTER per Config.
USED
FOUND
8
8
8
8
Pag ↓
ESC to go back
DEVICE
GPI PROCESS.
ACU
ENTER to Configure
USED
FOUND
8
8
10
10
206
Für die Rückkehr zum Hauptmenü die Taste ESC drücken. Für die Konfigurierung des Systems die Taste ENTER drücken: Auf dem Display erscheint
eine Meldung, in der zur Eingabe des eventuellen Passwords der Kontrolleinheit aufgefordert wird (siehe Abschnitt PASSWORD FÜR DEN ZUGANG
ZU DEN MENÜS); mit dem Ziffernfeld das Password (falls vorgesehen) eingeben und ENTER drücken: Auf dem Display des Gerätes erscheint die Anzeige der folgenden Untermenüs:
• INPUT PROCESSORS
Menü für die Programmierung der Eingänge der Karten AUDIO INPUT IB 3210 / IB 3280.
• OUTPUT PROCESSORS
Menü für die Programmierung der Ausgänge der Karten AUDIO OUTPUT OB 3230.
• GROUPS
Menü für die Programmierung der Gruppen von Hörbereichen des Systems.
• RELAY CONFIGURATION
Menü für die Programmierung der Relais der Karten INPUT/OUTPUT IO 3250.
• CONSOLES
Menü für die Programmierung der digitalen Mikrofoneinheiten BM 3616.
• ACU (AMPLIFIERS)
Menü für die Programmierung der A.C.U.-Einheiten für die Überwachung der Leistungseinheiten des Systems
(siehe Abschnitt A.C.U.-EINHEIT).
• GPI EVENTS DEFINITION
Menü für die Programmierung der von den GPI-Eingängen der Karten INPUT/OUTPUT IO 3250 ansteuerbaren
Ereignisse.
• TIMER EVENTS DEFINITION
Menü für die Programmierung der zeitgesteuerten Ereignisse, das heißt der Ereignisse, die zu einem bestimmten Zeitpunkt ausgeführt werden müssen.
• VOX
Menü für die Programmierung der Vorrichtungen VOX der Karten AUDIO OUTPUT OB 3230.
• RECORDER
Menü für die Aufzeichnung und Wiedergabe der Audiodateien.
• SYSTEM
Menü für die Eingabe der Systemparameter.
• COMPILE & SAVE
Befehl zum Verlassen des Konfigurierungsmenüs des Systems mit Speichern der vorgenommenen Änderungen.
• EXIT WITHOUT SAVING
Befehl zum Verlassen des Konfigurierungsmenüs des Systems ohne Speichern der vorgenommenen Änderungen
Auf der ersten Anzeige werden nur die ersten drei Positionen des Konfigurierungsmenüs angezeigt; zum Anzeigen der folgenden die Tasten ↑ / ↓
und/oder pag ↑ / pag ↓ benutzen.
INSERT PASSWORD TO ACCESS CONFIGURATION
PASSWORD:
“nr password”
ENTER
- - - = = = MAIN MENU = = = - - ->INPUT PROCESSORS
->OUTPUT PROCESSORS
->GROUPS
Pag ↓
- - - = = = MAIN MENU = = = - - ->RELAY CONFIGURATION
->CONSOLES
->ACU (AMPLIFIERS)
Pag ↓
- - - = = = MAIN MENU = = = - - ->GPI EVENTS DEFINITION
->TIMER EVENTS DEFINITION
->VOX
Pag ↓
- - - = = = MAIN MENU = = = - - ->RECORDER
->SYSTEM
->COMPILE & SAVE
Pag ↓
- - - = = = MAIN MENU = = = - - ->SYSTEM
->COMPILE & SAVE
->EXIT WITHOUT SAVING
207
HINWEISE
• Alle mit den verschiedenen Konfigurierungsmenüs vorgenommenen Einstellungen werden vorübergehend im RAM-Speicher der Kontrolleinheit zwischengespeichert; zum dauerhaften Abspeichern auf der Festplatte der Kontrolleinheit in Form einer Konfigurierungsdatei muss das Menü für die Konfigurierung des Systems mit dem Befehl COMPILE & SAVE verlassen werden (siehe Abschnitt BENUTZUNG DES MENÜS COMPILE & SAVE).
• Bei der Benutzung des Konfigurierungsmenüs der Kontrolleinheit ist das System vom PC für die Konfigurierung aus nicht zugänglich.
CHARAKTERISTISCHE PARAMETER
Mit den im System RX 3000 installierten modularen Karten (zum Beispiel Karten AUDIO INPUT IB 3210 / IB 3280, Karten AUDIO OUTPUT OB 3230
usw.) werden die im Folgenden wiedergegebenen Parameter festgelegt, die in den verschiedenen Konfigurierungsmenüs zur Identifizierung der Karten sowie der entsprechenden Eingänge und/oder Ausgänge verwendet werden.
NUMMER KARTE
Jede Karte eines bestimmten Typs wird durch eine fortlaufende Nummer identifiziert, die von dem Slot und dem
Sub-Rack abhängig ist, in dem sie installiert wird.
Die fortlaufende Nummerierung der Karten AUDIO INPUT IB 3210 / IB 3280 und AUDIO OUTPUT OB 3230 von
Nummer 1 bis zur Gesamtzahl der im System vorhandenen Karten dieses Typs beginnt mit der Karte, die in Slot 1
des ersten Sub-Racks MB 3200 installiert ist, bis zur letzten Karte, die im Slot mit der höchsten Nummer des letzten Sub-Racks installiert ist.
Die fortlaufende Nummerierung der digitalen Karten INPUT/OUTPUT IO 3250 von Nummer 1 bis zur Gesamtzahl
der im System vorhandenen Karten dieses Typs beginnt mit der Karte, die im Slot mit der niedrigsten Nummer des
ersten Sub-Racks MB 3200 installiert ist (der für diesen Kartentyp verwendet wird), bis zur letzten Karte, die im Slot
mit der höchsten Nummer im letzten Sub-Rack installiert ist.
NUMMER AUDIOEINGANG
Die 8 Audioeingänge einer jeden im System vorhandenen Karte AUDIO INPUT IB 3210 / IB 3280 werden ebenfalls durch fortlaufende Nummern identifiziert, die von der Identifizierungsnummer der Karte abhängig sind, der sie angehören (Parameter NUMMER KARTE). Die fortlaufende Nummerierung der Eingänge von Nummer 1 bis zur Gesamtzahl der im System vorhandenen Audioeingänge (max. 64 Audioeingänge) beginnt mit der Karte AUDIO INPUT
IB 3210 / IB 3280 Nummer 1: Auf der Karte Nummer 1 sind die Eingänge von 1 bis 8 vorhanden, auf der Karte Nummer 2 sind die Eingänge von 9 bis 16 vorhanden, und so weiter, zum Beispiel bis zur letzten Karte mit der Nummer
4, auf der die Eingänge von 25 bis 32 vorhanden sind.
NUMMER AUDIOAUSGANG
die 8 Audioausgänge einer jeden im System vorhandenen Karte AUDIO OUTPUT OB 3230 werden ebenfalls durch
fortlaufende Nummern identifiziert, die von der Identifizierungsnummer der Karte abhängig sind, der sie angehören
(Parameter NUMMER KARTE). Die fortlaufende Nummerierung der Ausgänge von Nummer 1 bis zur Gesamtzahl
der im System vorhandenen Audioausgänge (max. 128 Audioausgänge) beginnt mit der Karte AUDIO OUTPUT OB
3230 Nummer 1: Auf der Karte Nummer 1 sind die Ausgänge von 1 bis 8 vorhanden, auf der Karte Nummer 2 sind
die Ausgänge von 9 bis 16 vorhanden, und so weiter, zum Beispiel bis zur letzten Karte mit der Nummer 8, auf der
die Ausgänge von 57 bis 64 vorhanden sind.
NUMMER GPI-EINGANG
Die 16 GPI-Eingänge einer jeden im System vorhandenen digitalen Karte INPUT/OUTPUT IO 3250 werden ebenfalls durch fortlaufende Nummern identifiziert, die von der Identifizierungsnummer der Karte abhängig sind, der sie
angehören (Parameter NUMMER KARTE). Die fortlaufende Nummerierung der GPI-Eingänge von Nummer 1 bis
zur Gesamtzahl der im System vorhandenen Eingänge (max. 256 GPI-Eingänge) beginnt mit der digitalen Karte INPUT/OUTPUT IO 3250 Nummer 1: Auf der Karte Nummer 1 sind die Eingänge von 1 bis 16 vorhanden, auf der Karte Nummer 2 sind die Eingänge von 17 bis 32 vorhanden, und so weiter, zum Beispiel bis zur letzten Karte mit der
Nummer 8, auf der die Eingänge von 113 bis 128 vorhanden sind.
NUMMER RELAIS
Die 24 Relais einer jeden im System vorhandenen Karte INPUT/OUTPUT IO 3250 werden ebenfalls durch fortlaufende Nummern identifiziert, die von der Identifizierungsnummer der Karte abhängig sind, der sie angehören (Parameter NUMMER KARTE). Die fortlaufende Nummerierung der Relais von Nummer 1 bis zur Gesamtzahl der im
System vorhandenen Relais (max. 384 Relais) beginnt mit der digitalen Karte INPUT/OUTPUT IO 3250 Nummer 1:
Auf der Karte Nummer 1 sind die Relais von 1 bis 24 vorhanden, auf der Karte Nummer 2 sind die Relais von 25
bis 48 vorhanden, und so weiter, zum Beispiel bis zur letzten Karte Nummer 8, auf der die Relais von 169 bis 192
vorhanden sind.
HINWEIS
• Die Nummerierung, die die Karten AUDIO INPUT IB 3210 / IB 3280, die Karten AUDIO OUTPUT OB 3230 sowie die Eingänge und Ausgänge der
vorgenannten Karten identifiziert, ist eindeutig, wenn im System mehre Audiomatrixen vorhanden sind. Wenn in einem System zum Beispiel
zwei unabhängige Audiomatrixen mit jeweils 32 Eingängen (4 Karten AUDIO INPUT) und 64 Ausgängen (8 Karten AUDIO OUTPUT) vorhanden sind,
so entspricht die Karte AUDIO INPUT IB 3210 / IB 3280 Nummer 5 der ersten Eingangskarte der zweiten Matrix und die Karte AUDIO OUTPUT OB
3230 Nummer 9 entspricht der ersten Ausgangskarte der zweiten Matrix; folglich entspricht der Eingang Nummer 33 dem ersten Eingang der zweiten Matrix, während der Ausgang Nummer 65 dem ersten Ausgang der zweiten Matrix entspricht.
BENUTZUNG DES MENÜS “INPUT PROCESSORS”
- - - = = = MAIN MENU = = = - - ->INPUT PROCESSORS
->OUTPUT PROCESSORS
->GROUPS
Das Menü gestattet die Programmierung der Eingänge der Karten AUDIO INPUT IB 3210 / IB 3280. Vom Hauptmenü für die Konfigurierung des Gerätes mit den Tasten ↑ / ↓ und/oder pag ↑ / pag ↓ den Wahlpunkt auf das Untermenü INPUT PROCESSORS setzen und die Taste ENTER drücken;
auf dem Display des Gerätes erscheinen die folgenden Anzeigen .
N.
NAME
Zeigt die Identifizierungsnummer des zu programmierenden Audioeingangs an. Die Anzeige ist sequentiell: Nummer 1 entspricht der Eingang Nummer 1 der Karte AUDIO INPUT Nummer 1, Nummer 9 entspricht der Eingang Nummer 1 der Karte AUDIO INPUT Nummer 2, Nummer 32 entspricht der Eingang Nummer 8 der Karte AUDIO INPUT Nummer 4 usw.
Gestattet die Festlegung des Namens zur Identifizierung des Eingangs, der aus max. 16 alphanumerischen Zeichen bestehen kann. Die Tasten + und – für die Rotationswahl der alphanumerischen Zeichen benutzen; jedes Zeichen mit der Taste ENTER bestätigen. Die Ziffern können direkt mit dem Ziffernfeld eingegeben werden.
208
TYPE
Gestattet die Festlegung des Typs des Eingangs. Die Tasten + und – für die Wahl des gewünschten Typs benutzen; die verfügbaren Typen
werden im Folgenden aufgeführt.
• AUDIO STD: zeigt einen allgemeinen Eingang an, der für den Anschluss eines Audiogerätes verwendet werden kann, das außer der Audioleitung selbst keine Verbindung mit dem System RX 3000 aufweist. Ein Eingang AUDIO STD besitzt kein Vorrangniveau und unterliegt
keiner besonderen Steuerung durch das System.
• PLAYBACK: Zeigt einen Eingang an, der für den Anschluss des Ausgangs LINE OUT der Soundkarte der Kontrolleinheit für die Wiedergabe von Audiosignalen (Audiodateien) verwendet wird. Es kann nur ein Eingang auf diesen Typ festgelegt werden. Falls die Soundkarte nicht für die Wiedergabe von Audiosignalen verwendet wird, so muss kein Eingang auf diesen Typ programmiert werden.
• FIREMAN 1: Zeigt einen Eingang an, der für den Anschluss einer Quelle “FIREMAN 1” mit absolutem Vorrang verwendet wird (siehe Abschnitt VON DEN GPI-EINGÄNGEN ANSTEUERBARE EREIGNISSE). Es kann nur ein Eingang auf diesen Typ festgelegt werden.
• FIREMAN 2: Zeigt einen Eingang an, der für den Anschluss einer Quelle “FIREMAN 2” mit absolutem Vorrang verwendet wird (siehe Abschnitt VON DEN GPI-EINGÄNGEN ANSTEUERBARE EREIGNISSE). Es kann nur ein Eingang auf diesen Typ festgelegt werden.
• CONSDIG n.: Zeigt einen Eingang an, der für den Anschluss einer digitalen Mikrofoneinheit BM 3616 verwendet wird. n. gibt die Identifizierungsnummer der Mikrofoneinheit an und liegt zwischen 1 und 16 (max. Anzahl der verwalteten digitalen Mikrofoneinheiten); diese
Nummer wird mit dem Verfahren für die Zuordnung der Adresse lokal auf der Mikrofoneinheit eingegeben.
• CONSGPI n.: Zeigt einen Eingang an, der für den Anschluss einer Mikrofoneinheit BM 3604 verwendet wird. n. gibt die Identifizierungsnummer der Mikrofoneinheit an und liegt zwischen 1 und 24 (max. Anzahl der verwalteten Mikrofoneinheiten).
• BGM n.: Zeigt einen Eingang an, der für den Anschluss einer Quelle für Hintergrundmusik dient (siehe Abschnitt AUSSTRAHLUNG VON
HINTERGRUNDMUSIK). n. gibt die Identifizierungsnummer der Quelle an und liegt zwischen 1 und 8 (max. Anzahl der verwalteten Quellen für Hintergrundmusik).
Zum Anzeigen der nachfolgenden oder der vorausgehenden Eingänge die Tasten ↑ / ↓ und/oder pag ↑ / pag ↓ benutzen.
N.
1
2
3
NAME
SOURCE 1
SOURCE 2
SOURCE 3
TYPE
PLAYBACK _ ▼
CONSGPI1_ ▼
CONSGPI2_ ▼
Pag ↓
N.
4
5
6
NAME
SOURCE 4
SOURCE 5
SOURCE 6
TYPE
CONSDIG1_____ ▼
CONSDIG2_____ ▼
CONSDIG3____ ▼
Zum Verlassen des Untermenüs die Taste ESC drücken und wie im Abschnitt VERLASSEN EINES MENÜS angegeben vorgehen.
BENUTZUNG DES MENÜS “OUTPUT PROCESSORS”
- - - = = = MAIN MENU = = = - - ->INPUT PROCESSORS
->OUTPUT PROCESSORS
->GROUPS
Dieses Menü gestattet die Programmierung der Ausgänge der Karten AUDIO OUTPUT OB 3230. Vom Hauptmenü für die Konfigurierung des Systems
aus mit den Tasten ↑ / ↓ und/oder pag ↑ / pag ↓ den Wahlpunkt auf das Untermenü OUTPUT PROCESSORS setzen und die Taste ENTER drücken;
auf dem Display des Gerätes werden die folgenden Felder angezeigt.
N.
Gibt die Identifizierungsnummer des zu programmierenden Audioausgangs an. Die Anzeige ist sequentiell: Nummer 1 entspricht der Ausgang Nummer 1 der Karte AUDIO OUTPUT Nummer 1, Nummer 9 entspricht der Ausgang Nummer 1 der Karte AUDIO OUTPUT Nummer
2, Nummer 64 entspricht der Ausgang Nummer 8 der Karte AUDIO OUTPUT Nummer 8 usw.
NAME Gestattet die Festlegung des Namens der Ausgangs, der auch Name des Hörbereiches genannt wird und der aus max. 16 alphanumerischen Zeichen zusammengesetzt sein kann. Die Tasten + und – für die Rotationswahl der alphanumerischen Zeichen benutzen; jedes Zeichen mit der Taste ENTER bestätigen. Die Ziffern können direkt mit dem Ziffernfeld eingegeben werden.
VOX
Gestattet das Aktivieren/Deaktivieren der Funktion VOX des Ausgangs (siehe Abschnitt VORRICHTUNG VOX). Die Tasten + und – für die
Wahl der folgenden Optionen benutzen:
• ON - Funktion VOX für den Ausgang aktiviert.
• OFF - Funktion VOX für den Ausgang deaktiviert.
TYPE
Gestattet die Festlegung des Typs des Ausgangs. Die Tasten + und - für die Wahl des gewünschten Typs benutzen; die verfügbaren Typen
werden im Folgenden aufgeführt:
• GENERIC Zeigt einen allgemeinen Ausgang an, der keinen besonderen Steuerung durch das System unterlieget.
• RECORDER: Zeigt einen Ausgang an, der für den Anschluss des Eingangs LINE IN der Soundkarte der Kontrolleinheit für die Aufzeichnung von Audiosignalen in Dateien verwendet wird. Es kann nur ein Eingang auf diesen Typ festgelegt werden. Falls die Soundkarte
nicht für die Aufzeichnung von Audiosignalen verwendet wird, so muss kein Eingang auf diesen Typ programmiert werden
• BGM n.: Zeigt einen Ausgang an, der für die Beschallung eines Hörbereiches verwendet wird, in der normalerweise Hintergrundmusik
ausgestrahlt werden muss (siehe Abschnitt AUSSTRAHLUNG VON HINTERGRUNDMUSIK). n. gibt die Nummer der Quelle für die Hintergrundmusik an, die in dem Hörbereich ausgestrahlt werden muss (Nummer zwischen 1 und 8); falls zum Beispiel ein Ausgang vom Typ
BGM 1 gewählt wird, o wird in dem Hörbereich normalerweise die Quelle ausgestrahlt, die an den Eingang vom Typ BGM 1 angeschlossen ist. Es ist möglich, die gleiche Quelle für Hintergrundmusik mehreren Ausgängen zuzuordnen.
209
RELAY
Gestattet die Wahl eines Relais der digitalen Karten INPUT/OUTPUT IO 3250, das umgeschaltet werden soll, wenn der Ausgang an einen
Audioeingang angeschlossen wird, mit Ausnahme der Eingänge vom Typ BGM (Background Music). Das Relais kann ein Einschaltglied oder
ein Ausschaltglied sein; dies wird mit dem Menü RELAY CONFIGURATION festgelegt, sobald der Ausgang nicht mehr verbunden ist. Die
Tasten + und – für die Wahl des Namens des gewünschten Relais aus dem Menü RELAY CONFIGURATION (Feld NAME) auszuwählen;
wenn die Option NO RELAY gewählt wird, so wird kein Relais gewählt.
HINWEIS
• Das Relais wird nie angesteuert, wenn der Ausgang an einen Eingang vom Typ BGM (Background Music) angeschlossen wird.
ANMERKUNG
• Die Ausgänge der Karten AUDIO OUTPUT OB 3230 gestatten die Beschallung eines bestimmten Hörbereiches und folglich gestattet das Menü
OUTPUT PROCESSORS indirekt die Festlegung der Hörbereiche des Systems.
In der ersten Anzeige werden nur die ersten vier Felder (N., NAME, VOX, TYPE) der ersten drei Ausgänge angezeigt. Für die Anzeige des folgenden
Felds die Taste → drücken; für die Anzeige des vorausgehenden Felds die Taste ← drücken.
N.
1
2
3
NAME
ZONE 1
ZONE 2
ZONE 3
VOX
OFF▼
OFF▼
OFF▼
TIPO
GENERIC_ _ ▼
GENERIC_ _ ▼
GENERIC_ _ ▼
→
1
2
3
VOX
OFF▼
OFF▼
OFF▼
TYPE
GENERIC_ _ ▼
GENERIC_ _ ▼
GENERIC_ _ ▼
RELAY
NO RELAY _ _ _ _ _ _ ▼
NO RELAY _ _ _ _ _ _ ▼
NO RELAY _ _ _ _ _ _ ▼
Zum Anzeigen der folgenden oder vorausgehenden die Tasten ↑ / ↓ und/oder pag ↑ / pag ↓ benutzen.
N.
1
2
3
NAME
ZONE 1
ZONE 2
ZONE 3
VOX
OFF▼
OFF▼
OFF▼
TYPE
GENERIC_ _ ▼
GENERIC_ _ ▼
GENERIC_ _ ▼
Pag ↓
N.
4
5
6
NAME
ZONE 4
ZONE 5
ZONE 6
VOX
OFF▼
OFF▼
OFF▼
TYPE
GENERIC_ _ ▼
GENERIC_ _ ▼
GENERIC_ _ ▼
Zum Verlassen des Untermenüs die Taste ESC drücken und wie im Abschnitt VERLASSEN EINES MENÜS angegeben vorgehen.
BENUTZUNG DES MENÜS “GROUPS”
- - - = = = MAIN MENU = = = - - ->INPUT PROCESSORS
->OUTPUT PROCESSORS
->GROUPS
Das Menü gestattet die Festlegung der Gruppen von Hörbereichen, das heißt der Gruppen, die sich aus mehr als einem Hörbereich zusammensetzen.
Die Gruppen von Hörbereichen gestatten die Vereinfachung der Operationen für die Wahl der Hörbereiche, in denen ein bestimmtes Audiosignal ausgestrahlt werden soll, und können zum Beispiel mit den Mikrofoneinheiten BM 3604 und BM 3616 für die Wahl mehrerer Hörbereiche mit einer einzigen Taste verwendet werden. Einer Gruppe können alle Hörbereiche des Systems angehören. Im Hauptmenü für die Konfigurierung des Gerätes mit
den Tasten ↑ / ↓ und/oder pag ↑ / pag ↓ den Wahlpunkt auf das Untermenü GROUPS setzen und die Taste ENTER drücken; auf dem Display des
Gerätes erscheinen die folgenden Felder.
N. GROUPS Gibt die sequentielle Nummer der zu programmierenden Gruppe von Hörbereichen an. Es können bis zu max. 24 Gruppen von Hörbereichen festgelegt werden.
NAME
Gestattet die Festlegung des Namens für die Identifizierung der Gruppe von Hörbereichen, der sich aus bis zu max. 16 alphanumerischen
Zeichen zusammensetzen kann. Die Tasten + und – für die Rotationswahl der alphanumerischen Zeichen verwenden; jedes Zeichen mit
der Taste ENTER bestätigen. Die Ziffern können direkt mit dem Ziffernfeld eingegeben werden.
Neben dem Namen der Gruppe von Hörbereichen wird die Anzahl der Hörbereiche angegeben, die der Gruppe angehören. Für die Festlegung der Hörbereiche, die einer Gruppe angehören, das entsprechende Untermenü durch Drücken der Taste F1 aufrufen (siehe Abschnitt
FESTLEGUNG DER HÖRBEREICHE FÜR DIE EINZELNEN GRUPPEN)..
210
In der ersten Anzeige werden nur die ersten drei Gruppen von Hörbereichen angezeigt. Für die Anzeige der folgenden oder vorausgehenden die Tasten ↑ / ↓ und/oder pag ↑ / pag ↓ benutzen.
GROUP N.
1
2
3
NAME
GROUP 1 _ _ _ _ _ _ _
GROUP 2 _ _ _ _ _ _ _
GROUP 3 _ _ _ _ _ _ _
(F1=CHANGE)
4
12
2
Pag ↓
GROUP N.
4
5
6
NAME
NO ZONE _ _ _ _ _ _ _
NO ZONE _ _ _ _ _ _ _
NO ZONE _ _ _ _ _ _ _
(F1=CHANGE)
0
0
0
Zum Verlassen des Untermenüs die Taste ESC drücken und wie im Abschnitt VERLASSEN EINES MENÜS angegeben vorgehen.
DEFESTLEGUNG DER HÖRBEREICHE EINER JEDEN GRUPPE
Zum Anzeige des Untermenüs, das die Festlegung der Hörbereiche gestattet, die einer jeden Gruppe angehören, im Menü GROUPS den Wahlpunkt
auf den Namen der zu konfigurierenden Gruppe setzen und die Taste F1. Auf dem Display des Gerätes erscheinen die folgenden Felder.
ADD. ZONE Gestattet die Wahl der Hörbereiche, die in eine jede Gruppe aufgenommen werden sollen. Die Tasten + und – benutzen, um den Namen des Hörbereiches aus den zuvor mit dem Menü OUTPUT PROCESSORS festgelegten auszuwählen: Für die Auswahl stehen alle
Hörbereiche des Systems zur Verfügung. Wenn die Option NO ZONE gewählt wird, so wird kein Hörbereich gewählt.
HINWEIS
• Es ist nicht möglich, in einer Gruppe von Hörbereichen einen Audioausgang (Hörbereich) vom Typ RECORDER aufzunehmen: Wenn im System zum
Beispiel 64 Ausgänge vorhanden sind und ein Ausgang als Typ RECORDER konfiguriert worden ist, so können zu einer Gruppe maximal 63 (64-1)
Hörbereiche gehören.
In der ersten Anzeige werden nur die ersten drei Hörbereiche der Gruppe angezeigt. Für die Anzeige der folgenden oder vorausgehenden die Tasten
↑ / ↓ und/oder pag ↑ / pag ↓ benutzen.
ADD. ZONE
1
2
3
ZONE 1 _ _ _ _ _ _ _ ▼
ZONE 2 _ _ _ _ _ _ _ ▼
ZONE 3 _ _ _ _ _ _ _ ▼
Pag ↓
ADD. ZONE
4
5
6
ZONE 4 _ _ _ _ _ _ _ ▼
NO ZONE _ _ _ _ _ _ ▼
NO ZONE _ _ _ _ _ _ ▼
Zum Verlassen des Untermenüs die Taste ESC drücken und wie im Abschnitt VERLASSEN EINES MENÜS angegeben vorgehen.
BENUTZUNG DES MENÜS “RELAY CONFIGURATION”
- - - = = = MAIN MENU = = = - - ->OUTPUT PROCESSORS
->GROUPS
->RELAY CONFIGURATION
Das Menü gestattet die Programmierung der digitalen Karten INPUT/OUTPUT IO 3250. Im Hauptmenü für die Konfigurierung des Gerätes mit den Tasten ↑ / ↓ und/oder pag ↑ / pag ↓ den Wahlpunkt auf das Untermenü RELAY CONFIGURATION setzen und die Taste ENTER drücken; auf dem Display des Gerätes erscheinen die folgenden Felder.
N.
Gibt die Identifizierungsnummer des zu programmierenden Relais an. Die Anzeige ist sequentiell: Nummer 1 entspricht dem Relais Nummer 1 der digitalen Karte INPUT/OUTPUT Nummer 1, Nummer 25 entspricht dem Relais Nummer 1 der digitalen Karte INPUT/OUTPUT
Nummer 2, Nummer 192 entspricht dem Relais Nummer 24 der digitalen Karte INPUT/OUTPUT Nummer 8 usw.
NAME
Gestattet die Festlegung des Namens für die Identifizierung des Relais, der sich aus bis zu max. 16 alphanumerischen Zeichen zusammensetzen kann. Die Tasten + und – für die Rotationswahl der alphanumerischen Zeichen verwenden; jedes Zeichen mit der Taste ENTER bestätigen. Die Ziffern können direkt mit dem Ziffernfeld eingegeben werden.
STATUS Gestattet die Festlegung des normalen Status des Relais, das heißt die Definition des Relais als Einschaltglied oder Ausschaltglied. Die
Tasten + und – für die Wahl der folgenden Optionen benutzen:
• OPEN - Einschaltglied
• CLOSED - Ausschaltglied.
211
In der ersten Anzeige werden nur die ersten drei Relais angezeigt. Für die Anzeige der folgenden oder der vorausgehenden die Tasten ↑ / ↓ und/oder
pag ↑ / pag ↓ benutzen.
N.
1
2
3
NAME
RLY 1 _ _ _ _ _ _ _
RLY 2 _ _ _ _ _ _ _
RLY 3 _ _ _ _ _ _ _
STATUS
OPEN _ _ _ _ ▼
OPEN_ _ _ _ ▼
CLOSED _ _ ▼
Pag ↓
N.
4
5
6
NAME
RLY 4 _ _ _ _ _ _ _
RLY 5 _ _ _ _ _ _ _
RLY 6 _ _ _ _ _ _ _
STATUS
OPEN_ _ _ _ ▼
OPEN _ _ _ _ ▼
CLOSED_ _ _ _ ▼
Zum Verlassen des Untermenüs die Taste ESC drücken und wie im Abschnitt VERLASSEN EINES MENÜS angegeben vorgehen.
BENUTZUNG DES MENÜS “CONSOLES”
- - - = = = MAIN MENU = = = - - ->GROUPS
->RELAY CONFIGURATION
->CONSOLES
Das Menü gestattet die Programmierung der digitalen Mikrofoneinheiten BM 3616. Im Hauptmenü für die Konfigurierung des Gerätes mit den Tasten
↑ / ↓ und/oder pag ↑ / pag ↓ den Wahlpunkt auf das Untermenü CONSOLES setzen und die Taste ENTER drücken; auf dem Display des Gerätes erscheinen die folgenden Felder.
CONS.
Gibt die Identifizierungsnummer der zu programmierenden digitalen Mikrofoneinheit BM 3616 an; diese Nummer wird mit dem Verfahren für die Zuordnung der Adresse lokal auf der Mikrofoneinheit eingegeben (siehe Installation- und Bedienungshandbuch Mikrofoneinheit BM 3616).
NAME
gestattet die Festlegung des Namens für die Identifizierung der Einheit, der aus bis zu max. 16 alphanumerischen Zeichen bestehen
kann. Die Tasten + und – für die Rotationswahl der alphanumerischen Zeichen verwenden; jedes Zeichen mit der Taste ENTER bestätigen. Die Ziffern können direkt mit dem Ziffernfeld eingegeben werden.
PASSWORD Gestattet die Festlegung des Passwords für das Sperren der Benutzung der Mikrofoneinheit. Das Password kann aus bis zu max. 8
Ziffern bestehen; es können die Ziffern der ersten 8 Zifferntasten der Mikrofoneinheit benutzt werden, das heißt die: 1, 2, 3, 4, 5, 6,
7, 8. Die Tasten + und – für die Rotationswal der Ziffern benutzen; jedes Zeichen mit der Taste ENTER bestätigen. Die Ziffern können
direkt mit dem Zifferntastfeld eingegeben werden. Falls kein Zeichen in das Feld eingegeben wird und die 8 Positionen freigelassen
werden (Leertasten), so wird kein Password festgelegt.
HINWEISE
• Um kein Password festzulegen, müssen 8 Leertasten eingegeben werden.
• Bei der Zuordnung des Passwords die folgenden Einschränkungen berücksichtigen:
a. Es ist nicht möglich, Leertasten zwischen zwei Ziffern des Passwords einzugeben.
b. Es ist nicht möglich, Leertasten vor den Ziffern des Passwords einzugeben.
Weitere Hinweise zur Festlegung des Passwords gehen aus den in der folgenden Tabelle enthaltenen Beispielen hervor.
Beispiel 1
Beispiel 2
Beispiel 3
Beispiel 4
Beispiel 5
PRIORITY
GEN CALL
EMERGENCY
1°
Zeichen
1
Leer
1
Leer
1
2°
Zeichen
2
Leer
2
1
Leer
3°
Zeichen
Leer
Leer
3
2
2
4°
Zeichen
Leer
Leer
4
3
3
PASSWORD
5°
6°
Zeichen Zeichen
Leer
Leer
Leer
Leer
5
6
Leer
Leer
Leer
Leer
7°
Zeichen
Leer
Leer
7
Leer
Leer
8°
Zeichen
Leer
Leer
8
Leer
Leer
Wert
zulässig
zulässig
zulässig
unzulässig
unzulässig
Gestattet die Festlegung des Vorrangniveaus der Mikrofoneinheit. Die Tasten + und – für die Festlegung des Vorrangniveaus zwischen den Werten 2 und 7 vorzunehmen; das Niveau 2 ist das höchste Niveau, dass der Mikrofoneinheit zugeordnet werden kann,
während das Niveau 7 das niedrigste Vorrangniveau ist (siehe Abschnitt VORRANGORDNUNG).
Gestattet das Aktivierung oder Deaktivieren der Taste GENERAL CALL der Mikrofoneinheit, die das Wählen der Hörbereichen
und/oder der Gruppen von Hörbereichen gestattet, die der Mikrofoneinheit zugeordnet sind (Tasten von 1 bis 16). Die Tasten + und
– für die Wahl der folgenden Optionen benutzen:
• ENABLE - Taste GENERAL CALL befähigt.
• DISABLED - Taste GENERAL CALL nicht befähigt.
Gestattet das Aktivierung oder Deaktivieren der Taste ALARM der Mikrofoneinheit für die Ansteuerung des Ereignisses EMERGENCY (siehe Abschnitt VON DEN DIGITALEN MIKROFONEINHEITEN BM 3616 ANSTEUERBARE EREIGNISSE). Die Tasten + und
– für die Wahl der folgenden Optionen benutzen:
• ENABLE - Taste ALARM befähigt.
• DISABLED - Taste ALARM nicht befähigt.
Falls die Alarmtaste befähigt wird, so ist für die Programmierung das Aufrufen des entsprechenden Untermenüs durch Drücken der
Taste F2 erforderlich (siehe Abschnitt PROGRAMMIERUNG DER TASTEN ALARM).
212
KEY F1
KEY F2
KEY F3
Die 3 Felder gestatten die Festlegung der Funktion der Tasten F1, F2 und F3 der Mikrofoneinheit. Die Tasten + und – benutzen, um
für ein jedes Feld die gewünschte Funktionen zu wählen.
• DISABLED - Taste deaktiviert; keine Funktion zugeordnet (Default).
• PLAY - Taste konfiguriert für die Ansteuerung der Wiedergabe eines Audiosignals, das als Datei auf der Festplatte der Kontrolleinheit CP 3100 abgespeichert ist (siehe Abschnitt AUFZEICHNUNG / WIEDERGABE VON AUDIOSIGNALEN).
• RELAY - Taste konfiguriert für die Umschaltung eines oder zwei Relais der digitalen Karten INPUT/OUTPUT IO 3250: ein Ausschaltglied (CLOSED) und/oder ein Einschaltglied (OPEN).
HINWEIS
• Die Funktionen PLAY und RELAY schließen sich gegenseitig aus, das heißt es ist nicht möglich, die eine zu wählen, falls die andere
gewählt worden ist.
Wenn eine der Tasten F1, F2 oder F3 der Mikrofoneinheit befähigt wird, so muss für die Programmierung der entsprechenden Funktion PLAY oder RELAY ein entsprechendes Untermenü aufgerufen werden, indem die Taste F3 gedrückt wird (siehe Abschnitt PROGRAMMIERUNG DER TASTEN F1, F2, F3).
In der ersten Anzeige werden nur die ersten drei Felder (CONS., NAME, PASSWORD) der ersten drei Mikrofoneinheiten angezeigt. Für die Anzeige des
folgenden Felds die Taste → drücken; für die Anzeige des vorausgehenden Felds die Taste ← drücken.
CONS.
1
2
3
NAME (F1=DEF. KEYS)
CONSOLLE 1
CONSOLLE 2
CONSOLLE 3
PASSWORD
________
________
________
PRYO
→
→
→
→
1
2
3
PRIORITY
4
6
2
GEN CALL
ENABLE_ _ ▼
DISABLE_ _ ▼
DISABLE_ _ ▼
EMERGENCE (F2)
ENABLE_ _ ▼
DISABLE_ _ ▼
DISABLE_ _ ▼
→
1
2
3
F1-KEY (F3)
PLAY_ _ ▼
DISAB._ _ ▼
DISAB._ _ ▼
F2-KEY (F3)
PLAY_ _ ▼
DISAB._ _ ▼
DISAB._ _ ▼
F3-KEY (F3)
PLAY_ _ ▼
DISAB._ _ ▼
DISAB._ _ ▼
Für die Anzeige der folgenden oder vorausgehenden Mikrofoneinheiten die Tasten ↑ / ↓ und/oder pag ↑ / pag ↓
CONS.
1
2
3
NAME (F1=DEF. KEYS)
CONSOLLE 1
CONSOLLE 2
CONSOLLE 3
PASSWORD
________
________
________
PRIO
→
→
→
Pag ↓
CONS.
4
5
6
NAME (F1=DEF. KEYS)
CONSOLLE 4
CONSOLLE 5
___ _____
PASSWORD
________
________
________
PRIO
→
→
→
PROGRAMMIERUNG DER TASTEN “ZONE/GROUP”
Für die Anzeige des Untermenüs, das die Programmierung der 16 Tasten für die Wahl der Hörbereiche/Gruppen einer jeden Mikrofoneinheit gestattet,
den Wahlpunkt auf eines der Felder der zu konfigurierenden Mikrofoneinheit setzen und die Taste F1 drücken. Auf dem Display des Gerätes erscheinen die folgenden Felder.
KEY
Gibt die Nummer der Taste für die Wahl den zu programmierenden Hörbereich bzw. die zu programmierende Gruppe von Hörbereichen an.
ZONE Gestattet die Wahl des Hörbereiches, der der Wahltaste Hörbereich/Gruppe von Hörbereichen der Mikrofoneinheit zugeordnet wird. Die Tasten + und – für die Wahl des Namens des Hörbereiches aus den mit dem Menü OUTPUT PROCESSORS zuvor festgelegten auszuwählen.
Bei der Wahl der Option NO ZONE (Default) wird kein Hörbereich zugeordnet.
HINWEIS
• Zur Vermeidung von Fehlern beim Kompilieren der Konfigurierungsdateien des Systems darf im Feld ZONE nur ein Hörbereich gewählt
werden, oder aber eine Gruppe im Feld GROUP, jedoch nicht beide; wenn die Wahl eines Hörbereiches vorgenommen wird, so muss im
Feld GROUP immer die Option NO GROUP gewählt werden.
GROUP gestattet die Wahl der Gruppe von Hörbereichen, die der Taste für die Wahl Hörbereich/Gruppe von Hörbereichen der Mikrofoneinheit zugeordnet wird. Die Tasten + und – benutzen, um den Namen der Gruppe von Hörbereichen aus den zuvor mit dem Menü GROUPS festgelegten auszuwählen. Beim Wählen der Option NO GROUP (Default) wird keine Gruppe gewählt.
HINWEIS
• Zur Vermeidung von Fehlern beim Kompilieren der Konfigurierungsdateien des Systems, darf im Feld ZONE nur ein Hörbereich gewählt
werden, oder aber eine Gruppe im Feld GROUP, jedoch nicht beide; wenn eine Wahl einer Gruppe von Hörbereichen vorgenommen wird,
so muss im Feld ZONE immer die Option NO ZONE gewählt werden.
213
In der ersten Anzeige werden nur die ersten drei Tasten für die Wahl von Hörbereichen/Gruppen von Hörbereichen angezeigt. Für die Anzeige der folgenden oder vorausgehenden die Tasten ↑ / ↓ und/oder pag ↑ / pag ↓ benutzen.
KEY
1
2
3
ZONE
ZONE 1 _ _ _ _ _ _ _ _ ▼
ZONE 2 _ _ _ _ _ _ _ _ ▼
ZONE 3 _ _ _ _ _ _ _ _ ▼
GROUP
NO GROUP _ _ _ _ _ _ _ ▼
NO GROUP _ _ _ _ _ _ _ ▼
NO GROUP _ _ _ _ _ _ _ ▼
Pag ↓
KEY
4
5
6
ZONE
ZONE 4 _ _ _ _ _ _ _ _ ▼
NO ZONE _ _ _ _ _ _ _ ▼
NO ZONE _ _ _ _ _ _ _ ▼
GROUP
NO GROUP _ _ _ _ _ _ _ ▼
GROUP 1_ _ _ _ _ _ _ _ ▼
GROUP 2_ _ _ _ _ _ _ _ ▼
Pag ↓
KEYS
7
8
9
ZONE
NO ZONE _ _ _ _ _ _ _ ▼
NO ZONE _ _ _ _ _ _ _ ▼
NO ZONE _ _ _ _ _ _ _ ▼
GROUP
GROUP 3_ _ _ _ _ _ _ _ ▼
NO GROUP_ _ _ _ _ _ _ ▼
NO GROUP _ _ _ _ _ _ _ ▼
PROGRAMMIERUNG DER TASTEN “ALARM”
HINWEIS
• Es ist nicht möglich, die Taste ALARM einer Mikrofoneinheit zu programmieren, wenn im Feld EMERGENCE des Menüs CONSOLES die Option
DISABLE gewählt worden ist.
Zum Anzeigen des Untermenüs, das die Programmierung der Taste ALARM einer jeden Mikrofoneinheit gestattet, den Wahlpunkt auf eines der Felder der
zu konfigurierenden Mikrofoneinheit setzen und die Taste F2 drücken. Auf dem Display des Gerätes erscheinen die folgenden Felder.
SOURCE
Gestattet die Wahl der Quelle für das auszustrahlende Alarmsignal (siehe Abschnitt VON DER DIGITALEN MIKROFONEINHEIT ANSTEUERBARE EREIGNISSE). Für die Wahl die Tasten + und – benutzen; zur Auswahl stehen:
• MICROPHONE - Die Quelle des Alarmsignals ist das Mikrofon der Mikrofoneinheit.
• PLAYBACK – Die Quelle des Alarmsignals ist ein auf der Festplatte der Kontrolleinheit abgespeichertes Audiosignal (Audiodatei).
HINWEIS
• Es ist nicht möglich, als Alarmsignal eine lokal auf der Mikrofoneinheit abgespeicherte Meldung zu benutzen.
MESSAGE
PLAY MESS.
Wenn eine Alarmquelle PLAYBACK (Feld SOURCE) gewählt wird, so wird dieses Feld für die Wahl des Namens der wiederzugebenden Audiodatei benutzt. Mit den Tasten + und - den Namen des gewünschten Audiosignals aus dem Archiv der zusammen
mit dem System gelieferten oder mit den Funktionen RECORD, ASSEMBLY und TONE GENERATOR erstellten Audiodateien auswählen (siehe Abschnitt BENUTZUNG DES MENÜS “RECORDER”).
Wenn eine Alarmquelle PLAYBACK (Feld SOURCE) gewählt wird, so wird dieses Feld für die Wahl verwendet, ob die Wiedergabe
des Alarmsignals einmal oder mehrmals erfolgen soll. Die Tasten + und – für die Wahl einer der im folgenden angegebenen Modalitäten benutzen.
• PLAY ONCE:
Das Alarmsignal wird nur einmal wiedergegeben, auch wenn die Alarmfunktion nach der ersten Wiedergabe des Signals nicht deaktiviert wird.
• CONTINUOUS:
Das Alarmsignal wird zumindest einmal vollständig wiedergegeben und wiederholt, bis die Alarmfunktion
deaktiviert wird.
HINWEIS
• Wenn die Alarmfunktion deaktiviert wird, während die Wiedergabe eines aufgezeichneten Alarmsignals stattfindet (Playback), so
wird dieses nicht sofort unterbrochen, sondern bis zu Ende wiedergegeben; im Falle von “wiederholtem Playback” stoppt die Unterbrechung also nur die folgenden Wiederholungen.
DESTINATION
ZONES
Gestattet die Wahl des Hörbereiches oder der Gruppe von Hörbereichen, in denen das Alarmsignal (Mikrofonansage oder aufgezeichnetes Audiosignal) ausgestrahlt wird. Die Tasten + und – für die Wahl einer der im folgenden wiedergegebenen Optionen benutzen.
• ALL ZONES:
Das Alarmsignal wird in allen Hörbereichen des Systems ausgestrahlt.
• GENERAL:
Das Alarmsignal wird in allen Hörbereichen (und/oder Gruppen von Hörbereichen) ausgestrahlt, die den Zifferntasten der Mikrofoneinheit zugeordnet sind (Tasten von 1 bis 16).
• ZONES/GROUPS: Das Alarmsignal wird in einem bestimmten Hörbereich oder einer bestimmten Gruppe von Hörbereichen des
Systems (nicht beiden) ausgestrahlt.
Wenn im Feld DESTINATION Die Option ZONES/GROUPS gewählt wird, so wird dieses Feld für die Wahl eines bestimmten Hörbereiches benutzt, in dem das Alarmsignal ausgestrahlt wird. Die Tasten + und – benutzen, um den Namen des Hörbereiches aus
den zuvor mit dem Menü OUTPUT PROCESSORS festgelegten auszuwählen. Bei der Wahl der Option NO ZONE (Default) wird
kein Hörbereich ausgewählt.
HINWEIS
• Zur Vermeidung von Fehlern beim Kompilieren der Konfigurierungsdateien des Systems darf im Feld ZONE nur ein Hörbereich
gewählt werden, oder aber eine Gruppe im Feld GROUP, jedoch nicht beide; wenn die Wahl eines Hörbereiches vorgenommen
wird, so muss im Feld GROUP immer die Option NO GROUP gewählt werden.
214
GROUPS
Wenn im Feld DESTINATION die Option ZONES/GROUPS gewählt wird, so wird dieses Feld für die Wahl einer bestimmten Gruppe von Hörbereichen benutzt, in der das Alarmsignal ausgestrahlt wird. Die Tasten + und – benutzen, um den Namen der Gruppe
von Hörbereichen aus den zuvor mit dem Menü GROUPS festgelegten auszuwählen. Bei der Wahl der Option NO GROUP (Default) wird kein Hörbereich ausgewählt.
HINWEIS
• Zur Vermeidung von Fehlern beim Kompilieren der Konfigurierungsdateien des Systems, darf im Feld ZONE nur ein Hörbereich gewählt werden, oder aber eine Gruppe im Feld GROUP, jedoch nicht beide; wenn eine Wahl einer Gruppe von Hörbereichen vorgenommen wird, so muss im Feld ZONE immer die Option NO ZONE gewählt werden.
RELAY OPEN
Gestattet die Wahl eines Relais der Karten INPUT/OUTPUT IO 3250 mit Einschaltglied (“OPEN”), das bei der Aktivierung der
Alarmfunktion geschlossen wird. Das Relais wird wieder in die normale Position zurückgeschaltet, die mit dem Menü RELAY CONFIGURATION festgelegt wird, sobald die Alarmfunktion deaktiviert wird. Die Tasten + und – benutzen, um den Namen des gewünschten Relais aus den zuvor mit dem Menü RELAY CONFIGURATION (Feld NAME) festgelegten auszuwählen; bei der Wahl der
Option NO RELAY wird kein Relais gewählt.
RELAY CLOSED Gestattet die Wahl eines Relais der Karten INPUT/OUTPUT IO 3250 mit Ausschaltglied (“CLOSED”), das bei der Aktivierung der
Alarmfunktion geöffnet wird. Das Relais wird wieder in die normale Position zurückgeschaltet, die mit dem Menü RELAY CONFIGURATION festgelegt wird, sobald die Alarmfunktion deaktiviert wird. Die Tasten + und – benutzen, um den Namen des gewünschten Relais aus den zuvor mit dem Menü RELAY CONFIGURATION (Feld NAME) festgelegten auszuwählen; bei der Wahl der
Option NO RELAY wird kein Relais gewählt.
In der ersten Anzeige werden nur die ersten drei Felder des Untermenüs angezeigt. Für die Anzeige der folgenden oder vorausgehenden die Tasten ↑
/ ↓ und/oder pag ↑ / pag ↓ benutzen.
EMERGENCY KEY DEFINITION
SOURCE
MESSAGE
PLAY MESS.
PLAYBACK_ _ _ _ _ _ _ ▼
MSG 1_ _ _ _ _ _ _ _ _ _ ▼
CONTINOUS _ _ _ ▼
Pag ↓
CONTINOUS _ _ _ ▼
ALL ZONES_ _ _ _ _ _ _ ▼
NO ZONE _ _ _ _ _ _ _ _ ▼
NO GROUP _ _ _ _ _ _ _ ▼
PLAY MESS.
DESTINATION
ZONE
GROUP
Pag ↓
ZONE
GROUP
RELAY OPEN
RELAY CLOSE
NO ZONE_ _ _ _ _ _ _ _ ▼
NO GROUP_ _ _ _ _ _ _ ▼
NO RELAY _ _ _ _ _ _ _ ▼
NO RELAY _ _ _ _ _ _ _ ▼
Zum Verlassen des Untermenüs die Taste ESC drücken und wie im Abschnitt VERLASSEN EINES MENÜS angegeben vorgehen.
PROGRAMMIERUNG DER TASTEN F1, F2, F3
HINWEIS
• Es ist nicht möglich, die Tasten F1, F2 und F3 einer Mikrofoneinheit zu programmieren, wenn in den Feldern KEY F1, KEY F2 und KEY F3 des Menüs
CONSOLES die Option DISABLE gewählt worden ist.
Zum Anzeigen des Untermenüs, das das Programmieren der Tasten F1, F2, F3 einer jeden Mikrofoneinheit gestattet, den Wahlpunkt auf das Feld der
zu konfigurierenden Taste setzen (zum Beispiel KEY F1) und die Taste F3 drücken. Auf dem Display des Gerätes erscheinen die folgenden Felder.
SPECIAL KEY DEFINITION
MESSAGE
RELAY N.O.
RELAY N.C.
NO MESS. _ _ ▼
NO RELAY_ _ _ _ _ _ _ ▼
NO RELAY_ _ _ _ _ _ _ ▼
MESSAGE
Das Feld ist nur zugänglich, wenn im Feld KEY F1, KEY F2 oder KEY F3 des Menüs CONSOLES die Option PLAY gewählt worden ist und es gestattet die Wahl des Namens der wiederzugebenden Audiodatei. Mit den Tasten + und – den Namen der gewünschten Audiodatei aus dem Archiv der zusammen mit dem System gelieferten oder mit den Funktionen RECORD, ASSEMBLY und
TONE GENERATOR erstellten Audiosignalen auswählen (siehe Abschnitt BENUTZUNG DES MENÜS “RECORDER”). Bei der Wahl
der Option NO MESS. Wird kein Audiosignal eingegeben.
RELAY N.O.
Das Feld ist nur zugänglich, wenn im Feld KEY F1, KEY F2 oder KEY F3 des Menüs CONSOLES die Option RELAY gewählt worden ist und es gestattet die Wahl des umzuschaltenden Relais mit Einschaltglied. Mit den Tasten + und – den Namen des gewünschten Relais aus den zuvor mit dem Menü RELAY CONFIGURATION (Feld NAME) festgelegten auszuwählen; bei der Wahl der
Option NO RELAY wird kein Relais ausgewählt.
RELAY N. C.
Das Feld ist nur zugänglich, wenn im Feld KEY F1, KEY F2 oder KEY F3 des Menüs CONSOLES die Option RELAY gewählt worden ist und es gestattet die Wahl des umzuschaltenden Relais mit Ausschaltglied. Mit den Tasten + und – den Namen des gewünschten Relais aus den zuvor mit dem Menü RELAY CONFIGURATION (Feld NAME) festgelegten auszuwählen; bei der Wahl der
Option NO RELAY wird kein Relais ausgewählt.
Zum Verlassen des Untermenüs die Taste ESC drücken und wie im Abschnitt VERLASSEN EINES MENÜS angegeben vorgehen.
215
BENUTZUNG DES MENÜS “ACU”
- - - = = = MAIN MENU = = = - - ->RELAY CONFIGURATION
->CONSOLES
->ACU (AMPLIFIERS)
Das Menü gestattet die Programmierung der A.C.U.-Einheiten, das heißt der dem Verstärker nachgeschalteten Karten RB 3300, die die Verstärker des
Systems überwachen (siehe Abschnitt A.C.U.-EINHEIT). Im Hauptmenü für die Konfigurierung des Gerätes mit den Tasten ↑ / ↓ und/oder pag↑ / pag↓
den Wahlpunkt auf das Untermenü ACU setzen und die Taste ENTER drücken; auf dem Display des Gerätes werden die folgenden Felder angezeigt.
DEV
Gibt die Identifizierungsnummer der zu programmierenden A.C.U.-Einheit an. Die Anzeige ist sequentiell und an die Adresse gebunden,
die der A.C.U.-Einheit in der Phase der Installation zugeordnet wird: Nummer 1 entspricht die A.C.U.-Einheit mit Adresse 0, Nummer 120
entspricht die A.C.U. -Einheit mit Adresse 119.
TYPE
Gestattet die Festlegung des Typs der A.C.U.-Einheit. Die Tasten + und – für die Auswahl eines der folgenden Typen benutzen.
• NONE:
Diese Option wählen, wenn eine defekte A.C.U.-Einheit vom Typ NORMAL oder BACKUP für die Reparatur entfernt werden muss; anderenfalls würde die defekte A.C.U.-Einheit ständig einen Alarm auslösen. Bei der Wahl der Option NO wird
die A.C.U.-Einheit nicht mehr von der Kontrolleinheit CP 3100 überwacht.
• NORMAL : Diese ist eine A.C.U.-Einheit, die die Funktion hat, einen primären Verstärker zu überwachen, der normalerweise für die Beschallung eines bestimmten Hörbereiches dient (Default).
• BACKUP: Diese ist eine A.C.U.-Einheit, die die Funktion hat, einen Reserveverstärker zu überwachen, der normalerweise für die Ersetzung eines primären Verstärkers dient, zum Beispiel bei einem Defekt des letzteren.
Weitere Informationen zur Funktion der A.C.U.-Typen sind im Abschnitt A.C.U.-EINHEIT enthalten.
GROUP
Gestattet die Festlegung der Zugehörigkeit einer A.C.U.-Einheit zu einer Gruppe. Das System ist in der Lage, bis zu 64 Gruppen von
A.C.U.-Einheiten zu verwalten. Bei der Zuordnung müssen die folgenden Angaben berücksichtigt werden:
a. Einer Gruppe kann eine beliebige Anzahl von A.C.U.-Einheiten NORMAL oder BACKUP, jedoch die Gesamtzahl der im System
vorhandenen Einheiten darf 120 nicht übersteigen.
b. Die Ersetzung einer Einheit NORMAL durch eine Einheit BACKUP ist nur möglich, wenn sie der gleichen Gruppe angehören.
Weitere Informationen zur Funktion der A.C.U.-Einheiten sind im Abschnitt A.C.U.-EINHEIT enthalten. Die Tasten + und – oder das Ziffernfeld für die Eingabe der Nummer zwischen den Werten 0 (Default) und 64 benutzen.
MODE
Gestattet die Wahl der Betriebsweise Einschaltung/Abschaltung der A.C.U.-Einheit (NORMAL oder BACKUP), bei einem Alarm, der durch einen Defekt oder eine Funktionsstörung eines Verstärkers verursacht wird. Die Tasten + und – benutzen, um eine der folgenden
Betriebsweisen auszuwählen.
• MANUAL – Die Einschaltung/Ausschaltung der A.C.U.-Einheit muss im Falle eines Alarms manuell mit dem Untermenü INSER.
BACKUP ACU des Hauptmenüs AUDIO PROCESS erfolgen.
• AUTO –
Die Einschaltung/Ausschaltung der A.C.U.-Einheit erfolgt automatisch durch das System
Weitere Informationen zur Funktionsweise der Einheiten NORMAL und BACKUP in diesen beiden Betriebsweisen sind im Abschnitt
A.C.U.-EINHEIT enthalten.
ANMERKUNG
• Wenn eine A.C.U.-Einheit den letzten Reserveverstärker einer Gruppe überwacht, so wird empfohlen, diese Einheit auf die Betriebsweise MANUAL einzustellen, um zu vermeiden, dass der Verstärker im Falle eines durch den entsprechenden Verstärker verursachten Alarms
PA FAULT oder OVL abgeschaltet und die Ausstrahlung unterbrochen wird, da kein weiterer Reserveverstärker vorhanden ist, der ihn
ersetzen könnte.
PGM
Gestattet das Aktivieren oder Deaktivieren der Funktion DAY/NIGHT der A.C.U.-Einheiten, die mit der Zusatzkarte DIGITAL ALC LB 3340
ausgestattet sind (siehe Abschnitt FUNKTION DAY/NIGHT). Mit den Tasten + und – eine der folgenden Optionen wählen:
• ON – Funktion DAY/NIGHT aktiviert (Default).
• OFF – Funktion DAY/NIGHT deaktiviert.
In der ersten Anzeige werden nur die ersten drei A.C.U.-Einheiten angezeigt. Für die Anzeige der folgenden oder vorausgehenden die Tasten ↑ / ↓
und/oder page ↑ / page ↓ benutzen.
DEV
1
2
3
TYPE
NORMAL ▼
NORMAL ▼
NORMAL ▼
GROUP
01
01
01
MODE
MANUAL ▼
MANUAL ▼
MANUAL ▼
PGM
OFF ▼
OFF ▼
OFF ▼
MODE
MANUAL ▼
MANUAL ▼
MANUAL ▼
PGM
OFF▼
OFF▼
OFF▼
Pag ↓
DEV
4
5
6
TYPE
NORMAL ▼
NORMAL ▼
NORMAL ▼
GROUP
02
02
02
Zum Verlassen des Untermenüs die Taste ESC drücken und wie im Abschnitt VERLASSEN EINES MENÜS angegeben vorgehen.
216
BENUTZUNG DES MENÜS “GPI EVENTS DEFINITION”
- - - = = = MAIN MENU = = = - - ->CONSOLES
->ACU (AMPLIFIERS)
->GPI EVENTS DEFINITION
Das Menü gestattet das Programmieren der mit den GPI-Eingängen der digitalen Karten INPUT/OUTPUT IO 3250 ansteuerbaren Ereignisse (siehe Abschnitt VON DEN GPI-EINGÄNGEN ANSTEUERBARE EREIGNISSE). Im Hauptmenü für die Programmierung des Gerätes mit den Tasten ↑ / ↓
und/oder pag↑ / pag↓ den Wahlpunkt auf das Untermenü GPI EVENTS DEFINITION setzen und die Taste ENTER drücken; auf dem Display des
Gerätes erscheinen die folgenden Felder.
GPI
Gibt die Identifizierungsnummer des GPI-Eingangs an, der das zu programmierende Ereignis ansteuert. Die Anzeige ist sequentiell: Nummer 1 entspricht der Eingang Nummer 1 der digitalen Karte I/O Nummer 1, Nummer 33 entspricht der Eingang Nummer 1 der digitalen
Karte I/O Nummer 3, Nummer 128 entspricht der Eingang Nummer 16 der digitalen Karte I/O Nummer 8 usw.
NAME
Gestattet die Festlegung des mit dem GPI-Eingang ansteuerbaren Ereignisses; der Name kann sich aus bis zu max. 16 alphanumerischen
Zeichen zusammensetzen. Die Tasten + und – für die Rotationswahl der alphanumerischen Zeichen benutzen; jedes Zeichen mit der Taste ENTER bestätigen. Die Ziffern können direkt mit dem Ziffernfeld eingegeben werden.
ACTION
Gestattet die Festlegung des Typs der mit den GPI-Eingängen ansteuerbaren Aktion (Ereignisses). Die Tasten + und – für die Auswahl eines der folgenden Typen benutzen.
• GENERIC: Gibt einen allgemeinen Typ von Aktion an. Bei der Zuordnung dieses Typs ist die Ansteuerung der Umschaltung eines
oder mehrerer Relais der digitalen Karten INPUT/OUTPUT IO 3250 (Programmierung des Felds RLY) und gegebenenfalls die Erzeugung eines Hinweises (Programmierung des Felds ALARM) möglich, wenn der GPI-Eingang angesteuert wird.
• PLAYBACK: Bei der Zuordnung dieses Typs ist es möglich, die Wiedergabe eines auf der Festplatte der Kontrolleinheit CP 3100 abgespeicherten Audiosignals in bestimmten Hörbereichen anzusteuern CP 3100 (siehe Abschnitt WIEDERGABE VON AUDIODATEIEN); wenn der GPI-Eingang angesteuert wird, so wird insbesondere der als PLAYBACK (Feld TYPE des Menüs INPUT PROCESSORS) definierte Audioeingang mit den Hörbereichen oder den Gruppen von Hörbereichen verbunden, die mit dem Feld ZONE
oder GROUP des vorliegenden Menüs definiert werden. Die Zuordnung PLAYBACK gestattet außerdem die Ansteuerung der Umschaltung eines oder mehrerer Relais der digitalen Karten INPUT/OUTPUT IO 3250 (Programmierung des Felds RLY).
• FIREMAN 1: Gibt das Ereignis FIREMAN 1 an. Bei der Zuordnung dieses Typs ist es möglich, die Ausstrahlung eines Audiosignals
“fireman” mit absolutem Vorrang in bestimmten Hörbereichen oder Gruppen von Hörbereichen anzusteuern; wenn der GPI-Eingang
angesteuert wird, so wird insbesondere der als FIREMAN 1 (Feld TYPE des Menüs INPUT PROCESSORS) definierte Audioeingang
mit den Hörbereichen oder Gruppen von Hörbereichen verbunden, die mit dem Feld ZONE oder GROUP des vorliegenden Menüs
definiert werden. Ein Ereignis FIREMAN 1 endet, wenn der GPI-Eingang, der es aktiviert hat, nicht mehr angesteuert wird. Die Zuordnung FIREMAN 1 gestattet außerdem die Ansteuerung eines oder mehrerer Relais der digitalen Karten INPUT/OUTPUT IO 3250 (Programmierung des Felds RLY).
• FIREMAN 2 : Gibt das Ereignis FIREMAN 2 an. Bei der Zuordnung dieses Typs ist es möglich, die Ausstrahlung eines Audiosignals
“fireman” mit absolutem Vorrang in bestimmten Hörbereichen oder Gruppen von Hörbereichen anzusteuern; wenn der GPI-Eingang
angesteuert wird, so wird insbesondere der als FIREMAN 2 (Feld TYPE des Menüs INPUT PROCESSORS) definierte Audioeingang
mit den Hörbereichen oder Gruppen von Hörbereichen verbunden, die mit dem Feld ZONE oder GROUP des vorliegenden Menüs
definiert werden. Ein Ereignis FIREMAN 2 endet, wenn der GPI-Eingang, der es aktiviert hat, nicht mehr angesteuert wird. Die Zuordnung FIREMAN 2 gestattet außerdem die Ansteuerung eines oder mehrerer Relais der digitalen Karten INPUT/OUTPUT IO 3250 (Programmierung des Felds RLY).
• CONSGPI n. : Bei der Zuordnung dieses Typs ist es möglich, in bestimmten Hörbereichen eine Ansage mit der Mikrofoneinheit BM
3604 (GPI-Konsole) auszustrahlen; wenn der GPI-Eingang mit einer der 4 Tasten für die Wahl der Hörbereiche/Gruppen von Hörbereichen der Mikrofoneinheit angesteuert wird, so wird der entsprechende als CONSGPI n. (Feld TYPE des Menüs INPUT PROCESSORS) definierte Audioeingang mit den Hörbereichen oder Gruppen von Hörbereichen verbunden, die mit dem Feld ZONE oder
GROUP des vorliegenden Menüs definiert werden; n gibt die Identifizierungsnummer der GPI-Konsole an (Nummer zwischen 1 und
24). Die Zuordnung CONSGPI n. gestattet außerdem das Ansteuern der Umschaltung eines oder mehrerer Relais der digitalen Karten INPUT/OUTPUT IO 3250 (Programmierung des Felds RLY). Bei der Zuordnung eines Ereignisses CONSGPI sind die folgenden
Angaben zu berücksichtigen:
a. für jede Mikrofoneinheit BM 3604 kann eine variable Anzahl von GPI-Eingängen von 1 bis 4 verwendet werden.
b. alle GPI-Eingänge, die an eine bestimmte Mikrofoneinheit BM 3604 angeschlossen werden sollen, müssen eine fortlaufende
Nummerierung aufweisen (zum Beispiel GPI1, GPI2, GPI3, GPI4) und sie müssen der gleichen digitalen INPUT/OUTPUT IO
3250 angehören.
c. alle GPI-Eingänge, die an eine bestimmte Mikrofoneinheit BM 3604 angeschlossen werden sollen (max. 4) müssen mit dem gleichen “Feedback”-Relais programmiert sein (siehe Feld FEED RELAY).
In der folgenden Tabelle werden die programmierbaren Felder auf Grundlage des gewählten Aktionstyps angegeben
AKTIONSTYP
GENERIC
PLAYBACK
CONSGPI n
FIREMAN 1
FIREMAN 2
RLY
YES
YES
YES
YES
YES
PROGRAMMERIBARKEIT DER FELDER
FEED RELAY
MESSAGE
ALARM
No
No
YES
No
YES
YES
YES
No
YES
No
No
YES
No
No
YES
ZONE/GROUP
No
YES
YES
YES
YES
HINWEIS
• Eine falsche Programmierung der in der Tabelle angegebenen Felder kann zu Funktionsstörungen oder Fehlern beim Kompilieren
der Fonfigurierungsdateien des Systems führen!
RLY (F1)
Im Feld werden zwei Werte angezeigt: Der erste Wert gibt die Anzahl der Relais mit Einschaltglied an, die bei der Ansteuerung des
GPI-Eingangs angesteuert werden; der zweite Wert gibt die Anzahl der Relais mit Ausschaltglied an, die bei der Ansteuerung des GPIEingangs angesteuert werden (zum Beispiel 2/1 = 2 Relais mit Einschaltglied und 1 Relais mit Ausschaltglied). Die Rückschaltung der
217
Relais in die Normalstellung erfolgt auf verschiedene Weise:
a. Falls das programmierte Ereignis dem Typ GENERIC (Feld ACTION) angehört, so werden die Relais in die Normalstellung zurückgeschaltet, die mit dem Menü RELAY CONFIGURATION definiert worden ist, sobald der GPI-Eingang nicht mehr angesteuert wird.
b. Falls das programmierte Ereignis dem Typ PLAYBACK (Feld ACTION) angehört, so werden die Relais am Ende der Wiedergabe in
die Normalstellung zurückgeschaltet, die mit dem Menü RELAY CONFIGURATION, definiert worden ist.
c. Falls das programmierte Ereignis dem Typ FIREMAN 1 oder FIREMAN 2 (Feld ACTION) angehört, so werden die Relais in die Normalposition zurückgeschaltet, die mit dem Menü RELAY CONFIGURATION definiert worden ist, wenn der GPI-Eingang nicht mehr
angesteuert und das Ereignis “fireman” deaktiviert wird.
d. Falls das programmierte Ereignis dem Typ CONSGPI (Feld ACTION) angehört, so werden die Relais am Ende der Ansage (Mikrofon
deaktiviert) in die Normalposition zurückgeschaltet, die mit dem Menü RELAY CONFIGURATION definiert worden ist.
Für die Festlegung der spezifischen umzuschaltenden Relais ist der Zugang zu einem entsprechenden Untermenü durch Drücken der
Taste F1 erforderlich (siehe Abschnitt FESTLEGUNG DER DEM EREIGNIS ZUGEORDNETEN RELAIS).
FEED RELAY Das Feld wird verwendet, falls im Feld TYPE des vorliegenden Konfigurierungsmenüs eine Aktion vom Typ CONSGPI gewählt worden
ist, und es gestattet die Festlegung des “Feedback”-Relais. Das mit seiner Umschaltung die Ausstrahlung einer Ansage mit der im Feld
ACTION angegebenen Mikrofoneinheit BM 3604 befähigt. Die Umschaltung des “Feedback”-Relais erfolgt, wenn alle mit der Mikrofoneinheit gewählten Hörbereiche (oder Gruppen von Hörbereichen verfügbar sind. Die Tasten + und – zum Auswählen des Namens aus
den zuvor mit dem Menü RELAY CONFIGURATION festgelegten benutzen. Bei der Wahl der Option NO RELAY (Default) wird kein Relais gewählt.
HINWEIS
• Zur Vermeidung von Funktionsstörungen oder möglichen Fehlern beim Kompilieren der Konfigurierungsdateien des Systems die folgenden Angaben berücksichtigen:
a. Die Relais der digitalen Karten INPUT/OUTPUT IO 3250, die als “Feedback”-Relais verwendet werden, dürfen nicht für andere Funktionen verwendet werden.
b. Alle “Feedback”-Relais müssen als Einschaltglieder konfiguriert werden (Feld STATUS = OPEN).
c. Alle GPI-Eingänge für die Umschaltung einer bestimmten Mikrofoneinheit BM 3604 (max. 4) müssen mit dem gleichen “Feedback”Relais programmiert sein.
d. Es ist nicht möglich, ein “Feedback”-Relais einzurichten, falls der GPI-Eingang nicht der Mikrofoneinheit BM 3604 zugeordnet worden ist.
MESSAGE
ALARM
Das Feld wird verwendet, falls im Feld TYPE des vorliegenden Konfigurierungsmenüs eine Aktion vom Typ PLAYBACK gewählt worden ist und es gestattet die Wahl des Namens der wiederzugebenden Audiodatei. Mit den Tasten + und – den Namen des gewünschten Audiosignals aus denjenigen auswählen, die im Archiv der zusammen mit dem System gelieferten oder mit den Funktionen RECORD, ASSEMBLY und TONE GENERATOR erstellten Audiosignale enthalten sind (siehe Abschnitt BENUTZUNG DES MENÜS “RECORDER”). Bei der Wahl der Option NO MESS. (Default) wird kein Audiosignal gewählt.
Gestattet das Aktivieren oder Deaktivieren der Erzeugung eines akustischen Signals (Summton), wenn der GPI-Eingang angesteuert
wird. Für die Anzeige des Hinweises ist der Zugang zum Alarmmenü der Kontrolleinheit erforderlich (siehe Abschnitt ANZEIGE DES
ALARMSTATUS). Die Tasten + und – für die Wahl einer der folgenden Optionen benutzen.
• YES: bei Ansteuerung des GPI-Eingangs wird ein Hinweis erzeugt.
• NO: bei Ansteuerung des GPI-Eingangs wird kein Hinweis erzeugt (Default).
HINWEIS
• Das Abschalten des akustischen Signalgebers nach der Aktivierung des Hinweises erfolgt im Menü für die Anzeige des Alarmstatus
(siehe Abschnitt ANZEIGE DES ALARMSTATUS).
ZONE
Gestattet die Wahl des Hörbereiches, in dem das Audiosignal ausgestrahlt wird, das mit dem Feld ACTION gewählten Ereignis verbunden ist. Mit den Tasten + und – den Namen des Hörbereiches aus den zuvor mit dem Menü OUTPUT PROCESSORS festgelegten
auswählen. Bei der Wahl der Option NO ZONE (Default) wird kein Hörbereich ausgewählt; bei der Wahl der Option ALL ZONES werden alle Hörbereiche gewählt.
HINWEIS
• Zur Vermeidung von Fehlern während des Kompilierens der Konfigurierungsdateien des Systems darf nur ein Hörbereich im Feld
ZONE oder eine Gruppe von Hörbereichen im Feld GROUP gewählt werden, nie beide; wenn ein Hörbereich gewählt wird, so muss
im Feld GROUP immer die Option NO GROUP gewählt werden.
GROUP
Gestattet die Wahl der Gruppe von Hörbereichen, in der das Audiosignal ausgestrahlt wird, das mit dem Feld ACTION gewählten Ereignis verbunden ist. Mit den Tasten + und – den Namen der Gruppe von Hörbereichen aus den zuvor mit dem Menü GROUPS festgelegten auswählen. Bei der Wahl der Option NO GROUP (Default) wird keine Gruppe ausgewählt.
HINWEIS
• Zur Vermeidung von Fehlern während des Kompilierens der Konfigurierungsdateien des Systems darf nur ein Hörbereich im Feld
“ZONE” oder eine Gruppe von Hörbereichen im Feld GROUP gewählt werden, nie beide; wenn eine Gruppe von Hörbereichen
gewählt wird, so muss im Feld ZONE immer die Option NO ZONE gewählt werden.
In der ersten Anzeige werden nur die ersten 4 Felder (GPI, NAME, ACTION, RLY) der ersten drei GPI-Eingänge angezeigt. Für die Anzeige des folgenden Felds die Taste → drücken; für die Anzeige des vorausgehenden Felds die Taste ← drücken.
GPI
1
2
3
NAME
KEY 1 CONSOLLE 1 _
KEY 2 CONSOLLE 1 _
KEY 3 CONSOLLE 1 _
ACTION
CONSGPI1 _ _▼
CONSGPI1 _ _▼
CONSGPI1 _ _▼
RLY(F1)
1/1
0/0
0/0
→
218
1
2
3
FEED RELE’
RLY 1_ _ _ _ _ _ _ _ _ ▼
RLY 1_ _ _ _ _ _ _ _ _ ▼
RLY 1_ _ _ _ _ _ _ _ _ ▼
MESSAGE
NO MESS. ▼
NO MESS. ▼
NO MESS. ▼
ALARM
NO_▼
NO_▼
NO_▼
→
1
2
3
ZONE
ZONE 1 _ _ _ _ _ _ _ _ ▼
ZONE 2 _ _ _ _ _ _ _ _ ▼
ALL ZONES _ _ __ _ _ ▼
GROUP
NO GROUP _ _ _ _ _ _ _
NO GROUP _ _ _ _ _ _ _
NO GROUP _ _ _ _ _ _ _
→
1
2
3
GROUP
NO GROUP_ _ _ _ _ _ _ _ ▼
NO GROUP_ _ _ _ _ _ _ _ ▼
NO GROUP_ _ _ _ _ _ _ _ ▼
Für die Anzeige der folgenden oder vorausgehenden Eingänge die Tasten ↑ / ↓ und/oder pag↑ / pag↓ drücken.
GPI
1
2
3
NAME
KEY 1 CONSOLLE 1 _
KEY 2 CONSOLLE 1 _
KEY 3 CONSOLLE 1 _
ACTION
CONSGPI1 _ _▼
CONSGPI1 _ _▼
CONSGPI1 _ _▼
RLY(F1)
1/1
0/0
0/0
Pag ↓
GPI
4
5
6
NAME
KEY 4 CONSOLLE 1 _
MESSAGE 1_ _ _ _ _ _
MESSAGE 2_ _ _ _ _ _
ACTION
CONSGPI1▼
PLAYBACK▼
PLAYBACK▼
RLY(F1)
0/0
0/0
0/0
Zum Verlassen des Untermenüs die Taste ESC drücken und wie im Abschnitt VERLASSEN EINES MENÜS beschrieben vorgehen.
FESTLEGUNG DER DEM EREIGNIS ZUGEORDNETEN RELAIS
Das Untermenü gestattet die Festlegung der Relais, die umgeschaltet werden sollen, wenn der GPI-Eingang angesteuert wird und sie werden im Feld
RLY angezeigt; es können bis zu max. 4 Relais mit Einschaltglied und max. 4 Relais mit Ausschaltglied umgeschaltet werden. Für den Zugang zum
Untermenü den Wahlpunkt auf eines der Felder des zu konfigurierenden GPI-Eingangs setzen und die Taste F1 drücken; auf dem Display des Gerätes erscheinen die folgenden Felder.
N.
Gibt die fortlaufende Nummer des dem Ereignis zugeordneten Relais (max. 4 je Typ) mit Einschaltglied oder Ausschaltglied an.
RELAY N.O. Gestattet die Wahl eines zu schließenden Relais mit Einschaltglied (“N.O.”). Mit den Tasten + und - den Namen des Relais aus den
zuvor mit dem Menü RELAY CONFIGURATION festgelegten auswählen. Bei der Wahl der Option NO RELAY (Default) wird kein Relais
gewählt.
RELAY N. C. Gestattet die Wahl eines zu öffnenden Relais mit Ausschaltglied (“N.C.”). Mit den Tasten + und - den Namen des Relais aus den zuvor mit dem Menü RELAY CONFIGURATION festgelegten auswählen. Bei der Wahl der Option NO RELAY (Default) wird kein Relais
gewählt.
In der ersten Anzeige werden nur die ersten 6 Relais angezeigt: 3 mit Einschaltglied und 3 mit Ausschaltglied. Für die Anzeige der folgenden oder vorausgehenden Relais die Tasten ↑ / ↓ und/oder pag↑ / pag↓ benutzen.
N.
1
2
3
RELAY N.O.
RELE’ 1 _ _ _ _ _ _ _ ▼
RELE’ 3 _ _ _ _ _ _ _ ▼
NO RELE’ _ _ _ _ _ _ ▼
RELE’ N.C.
RLY 2 _ _ _ _ _ _ _ ▼
NO RELAY_ _ _ _ _ _ ▼
NO RELAY_ _ _ _ _ _ ▼
Pag ↓
N.
2
3
4
RELAY N.O.
RLY 3 _ _ _ _ _ _ _ ▼
NO RELAY _ _ _ _ _ _ ▼
NO RELAY _ _ _ _ _ _ ▼
RELAY N.C.
NO RELAY_ _ _ _ _ _ ▼
NO RELAY _ _ _ _ _ _ ▼
NO RELAY _ _ _ _ _ _ ▼
Zum Verlassen des Untermenüs die Taste ESC drücken und wie im Abschnitt VERLASSEN EINES MENÜS beschrieben vorgehen.
219
BENUTZUNG DES MENÜS “TIMER EVENTS DEFINITION”
- - - = = = MAIN MENU = = = - - ->GPI EVENTS DEFINITION
->TIMER EVENTS DEFINITION
->VOX
Das Menü gestattet das Programmieren der zeitgesteuerten Ereignisse (siehe Abschnitt SYSTEMEREIGNISSE). Im Hauptmenü für die Konfigurierung
des Systems mit den Tasten ↑ / ↓ und/oder pag↑ / pag↓ den Wahlpunkt auf das Untermenü TIMER EVENTS DEFINITION und die Taste ENTER; auf
dem Display des Gerätes werden die folgenden Felder angezeigt.
N.
Gibt die fortlaufende Nummer des zu programmierenden zeitgesteuerten Ereignisses an. Es können bis zu 64 Ereignisse programmiert werden.
NAME
gestattet das Festlegen des Namens des zeitgesteuerten Ereignisses, der aus bis zu max. 16 alphanumerischen Zeichen bestehen
kann. Die Tasten + und – für die Rotationswahl der alphanumerischen Zeichen verwenden; jedes Zeichen mit der Taste ENTER bestätigen. Die Ziffern können direkt mit dem Ziffernfeld eingegeben werden.
RELAY N. OPEN Gestattet die Wahl eines Relais mit Einschaltglied (“N.OPEN”), das geschlossen wird, wenn das zeitgesteuerte Ereignis aktiviert
wird. Das Relais wird nach Ablauf der im Feld DUR. festgelegten Zeit oder – falls das zeitgesteuerte Ereignis sowohl die Wiedergabe eines Audiosignals, als auch die Umschaltung eines Relais vorsieht - nach Ende der Wiedergabe des Audiosignals in die normale Position zurückgeschaltet. Die Tasten + und – benutzen, um den Namen des Relais aus den zuvor mit dem Menü RELAY
CONFIGURATION festgelegten auszuwählen. Bei der Wahl der Option NO RELAY (Default) wird kein Relais gewählt.
RELAY N.CLOSED Gestattet die Wahl eines Relais mit Ausschaltglied (“N.OPEN”), das geöffnet wird, wenn das zeitgesteuerte Ereignis aktiviert wird.
Das Relais wird nach Ablauf der im Feld DUR. festgelegten Zeit oder – falls das zeitgesteuerte Ereignis sowohl die Wiedergabe eines Audiosignals, als auch die Umschaltung eines Relais vorsieht - nach Ende der Wiedergabe des Audiosignals in die normale
Position zurückgeschaltet. Die Tasten + und – benutzen, um den Namen des Relais aus den zuvor mit dem Menü RELAY CONFIGURATION festgelegten auszuwählen. Bei der Wahl der Option NO RELAY (Default) wird kein Relais gewählt.
MESSAGE
Gestattet die Wahl der Audiodatei, die wiedergegeben wird, wenn das zeitgesteuerte Ereignis aktiviert wird. Das Audiosignal wird
in den Hörbereichen oder den Gruppen von Hörbereichen ausgestrahlt, die mit dem Feld ZONE oder GROUP des vorliegenden
Menüs festgelegt werden. Mit den Tasten + und – den Namen des gewünschten Audiosignals aus dem Archiv der zusammen mit
dem System gelieferten oder den mit den Funktionen RECORD, ASSEMBLY und TONE GENERATOR erstellten Audiosignalen
auswählen (siehe Abschnitt BENUTZUNG DES MENÜS “RECORDER”). Bei der Wahl der Option NO MESS. (Default) wird kein Audiosignal eingegeben.
DUR.
Dieses Feld wird verwendet, wenn das zeitgesteuerte Ereignis nur die Umschaltung eines Relais mit Einschaltglied und/oder mit
Ausschaltglied vorsieht. Mit diesem Feld kann festgelegt werden, wann die Relais umgeschaltet werden müssen. Mit den Tasten +
und – oder dem Ziffernfeld die Dauer zwischen Werten von 0 Sekunden und 999 Sekunden eingeben.
HINWEIS
• Die Einstellung des Felds DUR. hat keine Auswirkung, falls das zeitgesteuerte Ereignis sowohl die Wiedergabe eines Audiosignals
(Zuordnung Feld MESSAGE), als auch die Umschaltung von Relais (Zuordnung Felder RELAY N.OPEN und/oder RELAY N.CLOSED) vorsieht.
ALLOWED TIME Gestattet die Wahl der folgenden beiden Zeitpunkte:
• Zeitpunkt Beginn Ereignis, das heißt den Zeitpunkt, an dem die Ausführung des zeitgesteuerten Ereignisses (Wiedergabe des
Audiosignals und/oder Umschaltung des Relais mit Einschaltglied und/oder Ausschaltglied) beginnt.
• Zeitpunkt Ende Ereignis, das heißt den Zeitpunkt, bis zu dem das zeitgesteuerte Ereignis abgeschlossen werden muss.
Das Ziffernfeld für die Eingabe der beiden Zeitpunkte in Stunden und Minuten einzugeben.
RATE
Gestattet die Eingabe der zyklischen Wiederholung des zeitgesteuerten Ereignisses in dem mit Feld ALLOWED TIME festgelegten
Zeitraum, das heißt die Anzahl der Wiederholungen der Wiedergabe des Audiosignals und/oder der Umschaltungen des Relais mit
Einschaltglied und/oder mit Ausschaltglied. Mit dem Ziffernfeld den Zeitraum für die zyklische Wiederholung eingeben, ausgedrückt
in Stunden und Minuten (zum Beispiel 1:30 für die Eingabe einer zyklischen Wiederholung von 12 Stunden und 30 Minuten).
ZONE
Gestattet die Wahl des Hörbereiches, in dem das mit dem Feld MESSAGE gewählte Signal ausgestrahlt wird. Mit den Tasten + und
– den Namen des Hörbereiches aus den zuvor mit dem Menü OUTPUT PROCESSORS festgelegten auswählen. Bei der Wahl der
Option NO ZONE (Default) wird kein Hörbereich ausgewählt; bei der Wahl der Option ALL ZONES werden alle Hörbereiche ausgewählt.
HINWEIS
• Zur Vermeidung von Fehlern beim Kompilieren der Konfigurierungsdateien des Systems, darf nur ein Hörbereich im Feld ZONE oder eine Gruppe von Hörbereichen im GROUP gewählt werden, nie beide; bei der Wahl eines Hörbereiches muss im Feld
GROUP immer die Option NO GROUP gewählt werden.
GROUP
Gestattet die Wahl der Gruppe von Hörbereichen, in der das mit dem Feld MESSAGE gewählte Signal ausgestrahlt wird. Mit den
Tasten + und – den Namen der Gruppe von Hörbereichen aus den zuvor mit dem Menü GROUPS festgelegten auswählen. Bei der
Wahl der Option NO GROUP (Default) wird keine Gruppe ausgewählt.
HINWEIS
• Zur Vermeidung von Fehlern beim Kompilieren der Konfigurierungsdateien des Systems, darf nur ein Hörbereich im Feld ZONE oder eine Gruppe von Hörbereichen im GROUP gewählt werden, nie beide; bei der Wahl einer Gruppe von Hörbereichen
muss im Feld ZONE immer die Option NO ZONE gewählt werden.
220
In der folgenden Tabelle werden einige Beispiele wiedergegeben, die für ein besseres Verständnis der Funktionsweise der zeitgesteuerten Ereignisse
dienlich sein können.
BEISPIELE
BEISPIEL 1:
Wiedergabe eines
Audiosignals
RELAY
N.OPEN
NO RELAY
FELDER DES MENÜS “TIMER EVENTS DEFINITION”
RELAY
MESSAGE
DUR.
ALLOWED
N.CLOSED
TIME
NO RELAY
MSG 1
000
16:00 18:00
RATE
BESCHREIBUNG EREIGNIS
01:00
Das Audiosignal MSG 1 wird um
16:00 Uhr, 17:00 Uhr und 18:00
Uhr (3 Mal) ausgestrahlt.
NO RELAY
NO RELAY
MSG 2
000
14:00 16:00
00:45
Das Audiosignal MSG 2 wird um
14:00 Uhr, 14:45 Uhr und 15:30
Uhr (3 Mal) ausgestrahlt.
BEISPIEL 3:
Umschaltung
eines Relais
RLY 1
RLY 6
NO MESS.
060
16:00 16:30
00:10
Das Relais mit Einschaltglied RLY
1 und das Relais mit Ausschaltglied RLY 6 werden um 16:00 Uhr,
16:10 Uhr, 16:20 Uhr und 16:30
Uhr (4 Mal) umgeschaltet, und
bleiben jeweils für 60 Sekunden
umgeschaltet.
BEISPIEL 4:
Wiedergabe eines
Audiosignals und
Umschaltung eines Relais
RLY 1
NO RELAY
MSG 1
060
16:00 18:00
01:00
Das Audiosignal MSG 1 wird um
16:00 Uhr, 17:00 Uhr und 18:00
Uhr (3 Mal) ausgestrahlt; das Relais mit Einschaltglied RLY 1 wird
umgeschaltet, wenn die Wiedergabe des Audiosignals MSG 1
erfolgt und bleibt für die gesamte
Dauer der Ausstrahlung umgeschaltet.
BEISPIEL 2:
Wiedergabe eines
Audiosignals
HINWEIS
• Zur Vermeidung von Funktionsstörungen oder möglichen Fehlern während der Kompilierung der Zur Konfigurierungsdateien des Systems dürfen die
für zeitgesteuerte Ereignisse verwendeten Relais nicht anderen Funktionen zugeordnet werden
In der ersten Anzeige werden nur die ersten drei Felder (N., NAME, RELAY N.OPEN) der ersten drei zeitgesteuerten Ereignisse angezeigt. Für die Anzeige des folgenden Felds die Taste → drücken; für die Anzeige des vorausgehenden Felds die Taste ← drücken.
N.
1
2
3
NAME
TIMER 1 _ _ _ _ _ _ _
TIMER 2 _ _ _ _ _ _ _
TIMER 3 _ _ _ _ _ _ _
RELAY N.OPEN
RLY 1 _ _ _ _ _ _ _ ▼
RLY 2 _ _ _ _ _ _ _ ▼
NO RELAY _ _ _ _ _ _ ▼
→
1
2
3
RELAY N. CLOSE
NO RELAY _ _ _ _ _ _ ▼
NO RELAY _ _ _ _ _ _ ▼
RLY 3 _ _ _ _ _ _ _ ▼
MESSAGE
NO MESS. ▼
NO MESS. ▼
NO MESS. ▼
DUR.
010
020
030
→
1
2
3
ALLOWED TIME
08:00
20:00
04:00
05:00
14:00
15:00
RATE
00:01
00:14
00:30
ZONE
NO ZONE _ _ _ _ _
NO ZONE _ _ _ _ _
NO ZONE _ _ _ _ _
→
1
2
3
ZONE
NO ZONE _ _ _ _ _ _ _ ▼
NO ZONE _ _ _ _ _ _ _ ▼
NO ZONE _ _ _ _ _ _ _ ▼
GROUP
NO GROUP _ _ _ _ _ _ _ ▼
NO GROUP _ _ _ _ _ _ _ ▼
NO GROUP _ _ _ _ _ _ _ ▼
für die Anzeige der folgenden oder vorausgehenden zeitgesteuerten Ereignisses die Tasten ↑ / ↓ und/oder pag↑ / pag↓.
221
N.
1
2
3
NAME
TIMER 1 _ _ _ _ _ _ _
TIMER 2 _ _ _ _ _ _ _
TIMER 3 _ _ _ _ _ _ _
RELAY N. OPEN
RLY 1 _ _ _ _ _ _ _ ▼
RLY 2 _ _ _ _ _ _ _ ▼
NO RELAY _ _ _ _ _ _ ▼
Pag ↓
N.
3
4
5
NAME
TIMER 3 _ _ _ _ _ _ _
TIMER 4 _ _ _ _ _ _ _
____________
RELAY N. OPEN
NO RELAY _ _ _ _ _ _ ▼
NO RELAY _ _ _ _ _ _ ▼
NO RELAY _ _ _ _ _ _ ▼
Zum Verlassen des Untermenüs die Taste ESC drücken; die neuen Einstellungen werden automatisch abgespeichert.
BENUTZUNG DES MENÜS “VOX”
- - - = = = MAIN MENU = = = - - ->GPI EVENTS DEFINITION
->TIMER EVENTS DEFINITION
->VOX
Das Menü gestattet die Konfigurierung der Vorrichtung VOX (VOX Detector) auf einer jeden Karte AUDIO OUTPUT OB 3230. Die Funktion der Vorrichtung VOX wird im Abschnitt VORRICHTUNG VOX beschrieben, auf den an dieser Stelle für weitere Informationen verwiesen wird. Im Hauptmenü
für die Konfigurierung des Gerätes mit den Tasten ↑ / ↓ und/oder pag↑ / pag↓ den Wahlpunkt auf das Untermenü VOX setzen und die Taste ENTER;
auf dem Display des Gerätes werden die folgenden Felder angezeigt.
AUDIO OUT
Gibt die Karte AUDIO OUTPUT OB 3230, deren Vorrichtung VOX konfiguriert wird. Die Identifizierung der Karte erfolgt über die Nummer ihrer Ausgänge (zum Beispiel OUT 01:08 = Karte AUDIO OUTPUT mit Ausgängen von Nummer 1 bis Nummer 8).
INPUT VOX
Gestattet das Festlegen des Eingangs der für die Vorrichtung VOX der Karte AUDIO OUTPUT verwendet werden soll. Es ist möglich,
den gleichen Eingang INPUT VOX für mehrere Vorrichtungen VOX abzugeben. Die Tasten + und - zum Auswählen des Namens des
Eingangs aus den ersten 8 Eingängen des Systems benutzen, die mit dem Menü INPUT PROCESSORS festgelegt worden sind. Bei
der Wahl der Option NO INPUT (Default) wird kein Eingang gewählt.
HINWEIS
• Der Eingang INPUT VOX, der von einer jeden Vorrichtung VOX verwendet wird, kann ausschließlich unter den ersten 8 Eingängen des Systems gewählt werden (Eingänge 1 ÷ 8 der Karte AUDIO INPUT Nummer 1).
RELAY VOX
Gestattet das Festlegen des Relais, das umgeschaltet werden soll, wenn der Eingang INPUT VOX bei der Aktivierung der Funktion
VOX mit einem der Ausgänge der Karte AUDIO OUTPUT OB 3230 verbunden wird, die im Feld AUDIO OUT angegeben werden.
Das Relais muss für einen gleichen Eingang das gleiche sein. Die Tasten + und – zum Auswählen des Relais aus den Relais mit Einschaltglied oder mit Ausschaltglied verwenden, die zuvor mit dem Menü RELAY CONFIGURATION festgelegt worden sind. Bei der
Wahl der Option NO RELAY (Default) wird kein Relais gewählt.
HINWEIS
• Zur Vermeidung von Funktionsstörungen oder möglichen Fehlern beim Kompilieren der Konfigurierungsdateien des Systems darf
das im Feld RELAY VOX angegebene Relais nicht für andere Funktionen verwendet werden (zum Beispiel darf es nicht als
“Feedback”-Relais für eine Mikrofoneinheit BM 3604) verwendet werden.
HINWEIS
• Wenn die Felder des Menüs VOX für eine bestimmte Karte AUDIO OUTPUT OB 3230 kompiliert werden, ohne dass die Funktion VOX (mit dem
Menü PROZESS AUDIOAUSGÄNGE) für einen ihrer Ausgänge aktiviert worden ist, so wird beim Kompilieren der Konfigurierungsdateien kein Fehler erzeugt.
AUDIO OUT
OUT 01:08
OUT 09:16
OUT 17:24
INPUT VOX
SOURCE 1 _ _ _ _ _ ▼
SOURCE 1 _ _ _ _ _ ▼
SOURCE 2 _ _ _ _ _ ▼
RELAY VOX
RLY 1 _ _ _ ▼
RLY 1 _ _ _ ▼
RLY 2 _ _ _ ▼
Pag ↓
AUDIO OUT
OUT 25:32
OUT 33:40
OUT 41:48
INPUT VOX
SOURCE 2 _ _ _ _ _ ▼
NO INPUT _ _ _ _ _ ▼
NO INPUT _ _ _ _ _ ▼
RELAY VOX
RLY 2 _ _ _ ▼
NO RELAY _ _ ▼
NO RELAY _ _ ▼
222
BENUTZUNG DES MENÜS “RECORDER”
- - - = = = MAIN MENU = = = - - ->TIMER EVENTS DEFINITION
->VOX
->RECORDER
Das Menü gestattet das Aufzeichnen von Audiosignalen: Meldungen, Ansagen, Warntönen, Alarmtönen usw. (siehe Abschnitt AUFZEICHNUNG/WIEDERGABE VON AUDIOSIGNALEN); diese Signale werden als Audiodateien auf der Festplatte der Kontrolleinheit abgespeichert. Im Hauptmenü für die
Konfigurierung des Gerätes mit den Tasten ↑ / ↓ und/oder page ↑ / page ↓ den Wahlpunkt auf das Untermenü RECORDER setzen und die Taste ENTER; auf dem Display des Gerätes werden die folgenden Untermenüs angezeigt:
SELECT A FUNCTION
OPTIONS
RECORD
PLAY
Pag ↓
SELECT A FUNCTION
ASSEMBLY
TONE GENERATOR
DELETE MESSAGES
OPTIONS
Den Wahlpunkt auf diese Menüposition setzen und die Taste ENTER drücken, um die im folgenden wiedergegebenen Aufzeichnungsparameter einzugeben.
RECORDER OPTION
SOUND QUALITY
MAX DURATION (SEC)
: 44100 HZ ▼
:__
SOUND QUALITY: Gestattet die Festlegung der Samplingfrequenz der Aufzeichnung mit dem Untermenü RECORD: Je
größer die gewählte Frequenz, desto besser ist die Aufzeichnungsqualität. Die Tasten + und – für die Wahl des Frequenzwerts
11.025 Hz, 22.050 Hz oder 44.100 Hz benutzen.
HINWEIS
• Die im Feld SOUND QUALITY gewählte Frequenz hat ausschließlich auf die Funktion RECORD Auswirkung.
MAX DURATION (SEC): Gestattet die Festlegung der max. Dauer der Aufzeichnung. Die Tasten + und - oder das Ziffernfeld
für die Eingabe der Dauer auf Werte zwischen 1 Sekunde und 60 Sekunden benutzen.
HINWEIS
• Je größer die Samplingfrequenz und die Aufzeichnungsdauer, desto größer ist die entsprechende Audiodatei; eine Aufzeichnung
mit einer Samplingfrequenz von 44,1 kHz und einer Dauer von 60 Sekunden ergibt eine Dateigröße von 2,6 Mb!
• Alle Aufzeichnungen werden mit einer Auflösung von 16 Bit vorgenommen.
RECORD
Zum Verlassen des Untermenüs die Taste ESC drücken und wie im Abschnitt VERLASSEN EINES MENÜS angegeben vorgehen.
Den Wahlpunkt auf diese Menüposition setzen und die Taste ENTER drücken, um ein Audiosignal aufzuzeichnen (siehe Abschnitt
AUFZEICHNUNG/WIEDERGABE VON AUDIOSIGNALEN); auf dem Display des Gerätes erscheint die folgende Anzeige.
RECORD A MESSAGE
RECORDER SOURCE:
MESSAGE NAME:
DURATION:
(F1=START – F2=STOP)
MICROPHONE _ _ _ _ _ ▼
________
<STOPPED>
RECORD A MESSAGE: Gestattet die Wahl der für die Aufzeichnung zu verwendenden Audioquelle. Die Tasten + und – für
die Wahl einer der folgenden Optionen benutzen:
• MICROPHONE –
Gestattet die Wahl des an den Eingang MICRO IN der Soundkarte der Kontrolleingang angeschlossenen Mikrofons als Quelle für die Aufzeichnung.
• Name Eingang –
Gestattet die Wahl eines der Eingänge der Karten AUDIO INPUT IB 3210 / IB 3280 als Quelle für die
Aufzeichnung. Mit den Tasten + und – den Namen des gewünschten Eingangs aus den zuvor mit dem
Menü INPUT PROCESSORS (Feld NAME) festgelegten auswählen.
MESSAGE NAME - Gestattet das festlegen des Namens der Datei, in der das aufzuzeichnende Audiosignal abgespeichert
wird; der Name kann aus bis zu max. 8 alphanumerischen Zeichen bestehen. Mit Tasten + und – für die Rotationswahl der
alphanumerischen Zeichen verwenden; jedes Zeichen mit der Taste ENTER bestätigen. Die Ziffern können direkt mit dem Ziffernfeld eingegeben werden.
DURATION: Balkenanzeige, die die Zeit anzeigt, die seit Beginn der Aufzeichnung vergangen ist, mit Bezug auf die zur Verfügung stehende Gesamtzeit, die durch die volle Länge des Balkens dargestellt wird; die zur Verfügung stehende Gesamtzeit
wird mit dem Untermenü OPTIONS festgelegt. Wenn keine Aufzeichnung stattfindet, erscheint die Anzeige STOPPED.
223
Nach dem Festlegen der Quelle für die Aufzeichnung und dem Namen der Audiodatei die Taste F1 für den beginn der Aufzeichnung
drücken; die Taste F2 zum Beenden der Aufzeichnung drücken. Die Aufzeichnung endet automatisch nach 60 Sekunden. Nach dem
Abschließen der Aufzeichnung zum Verlassen des Untermenüs die Taste ESC drücken und wie im Abschnitt VERLASSEN EINES
MENÜS angegeben vorgehen.
HINWEIS
• Es wird empfohlen, die Festplatte der Kontrolleinheit nicht vollständig mit Audiodateien vollzuschreiben, die mit der Funktion
RECORD erstellt worden sind.
PLAY
Die Funktion gestattet das lokale Abhören der als Audiodatei auf der Festplatte der Kontrolleinheit CP 3100 abgespeicherten Audiosignale über den Monitorlautsprecher der Kontrolleinheit (siehe Abschnitt AUFZEICHNUNG/WIEDERGABE VON AUDIODATEIEN). Die Funktion ist nützlich für die Durchführung zum Abhören der verschiedenen Audiodateien (zum Beispiel Meldungen, Ansagen, Warn- und Alarmtöne usw.). Zur Verwendung der Funktion den Wahlpunkt auf diese Menüposition setzen und die Taste
ENTER drücken: auf dem Display des Gerätes erscheint die folgende Anzeige.
PLAY A MESSAGE
MESSAGE NAME:
DURATION:
ASSEMBLY
(F1=START – F2=STOP)
MUSIC 1▼
<STOPPED>
PLAY A MESSAGE: Gestattet die Wahl des Namens der wiederzugebenden Audiodatei. Mit den Tasten + und – den Namen
der gewünschten Audiodatei aus dem Archiv der zusammen mit dem System gelieferten oder mit den Funktionen RECORD,
ASSEMBLY und TONE GENERATOR erstellten Audiosignalen auswählen.
DURATION: Dies ist die Balkenanzeige, die die Zeit angibt, die seit Beginn der Wiedergabe vergangen ist, mit Bezug auf die
Gesamtdauer des Audiosignals, die durch die volle Länge des Balkens dargestellt wird. Wenn keine Wiedergabe stattfindet,
erscheint die Anzeige STOPPED.
Nach der Wahl des Namens der Audiodatei die Taste F1 drücken, um die Wiedergabe zu beginnen; die Wiedergabe endet automatisch am Ende des aufgezeichneten Signals. Die Taste F2 drücken, um die Wiedergabe vorzeitig abzubrechen. Zum Verlassen
des Untermenüs die Taste ESC drücken.
HINWEIS
• Die Benutzung der Funktion PLAY ist nicht möglich, während die Überwachung einer Audioquelle des Systems stattfindet (siehe
Abschnitt BENUTZUNG DES MENÜS MONITOROPERATIONEN); in diesem Fall wird beim Drücken der Taste F1 (Befehl Beginn
Wiedergabe) ein akustischer Warnton erzeugt. Für die Wiedergabe der Audiodatei muss zuvor die laufende Audioüberwachung unterbrochen werden
Den Wahlpunkt auf diese Menüposition setzen und die Taste ENTER drücken, um eine Audiodatei zu erstellen, die sich aus bis zu
max. 6 einzelnen Audiodateien zusammensetzt, bezogen auf Meldungen, Ansagen, Alarme usw. Das Gesamtaudiosignale entspricht der Abfolge der einzelnen Audiosignale. Auf dem Display des Gerätes wird die folgende Anzeige angezeigt.
MESSAGE ASSEMBLY
FILE NAME:
________
MSG. 1:
NO MESS. ▼
MSG. 2:
NO MESS. ▼
(F1=START – F2=STOP)
Pag ↓
MSG. 3:
MSG. 4:
MSG. 5:
MSG. 6:
NO MESS. ▼
NO MESS. ▼
NO MESS. ▼
NO MESS. ▼
NAME FILE: Gestattet die Festlegung des Namens der zu erstellenden Audiodatei, der aus bis zu max. 8 alphanumerischen
Zeichen bestehen kann. Die Tasten + und - für die Rotationswahl der alphanumerischen Zeichen benutzen; jedes Zeichen
mit der Taste ENTER. Die Ziffern können direkt mit dem Ziffernfeld eingegeben werden. Die Definition dieses Felds ist für die
Programmierung der folgenden Felder unbedingt erforderlich.
MSG. 1: Gestattet die Wahl der ersten Audiodatei, die in der zu erstellenden Datei zu speichern ist. Mit den Tasten + und –
die Namen des gewünschten Audiosignals aus den auf der Festplatte der Kontrolleinheit CP 3100 abgespeicherten auswählen. Bei der Wahl der Option NO MESS. (Default) wird kein Audiosignal eingegeben.
MSG. 6: Gestattet die Wahl der sechsten und letzten Audiodatei, die in der zu erstellenden Datei zu speichern ist. Mit den Tasten + und – die Namen des gewünschten Audiosignals aus den auf der Festplatte der Kontrolleinheit CP 3100 abgespeicherten auswählen. Bei der Wahl der Option NO MESS. (Default) wird kein Audiosignal eingegeben.
Nach dem Ausfüllen der Menüfelder die Taste F1 drücken, um das erstellte Audiosignal lokal über den Monitorlautsprecher der Kontrolleinheit CP 3100 abzuhören; die Taste F2 drücken, um die Wiedergabe vorzeitig abzubrechen.
Zum Verlassen des Untermenüs die Taste ESC drücken und wie im Abschnitt VERLASSEN EINES MENÜS angegeben vorgehen.
HINWEISE
• Die Reihenfolge, in der die verschiedenen Audiosignale abgespeichert werden, folgt der fortlaufenden numerischen Ordnung der
Felder MSG: MSG. 1 ist das erste Signal, das aufgezeichnet wird, MSG. 6 ist das letzte Signal, das aufgezeichnet wird.
224
• Es wird empfohlen, die Festplatte der Kontrolleinheit nicht ganz mit mit der Funktion ASSEMBLY erstellten Audiodateien vollzuschreiben.
• Wenn zwei oder mehr Audiodateien verbunden werden, so hat die erstellte Datei die Eigenschaften derjenigen mit der geringsten
Qualität, wie in den Beispielen der folgenden Tabelle angegeben.
• Das lokale Abhören des erstellten Audiosignals (Taste F1) ist nicht möglich, wenn gerade eine Audioquelle des Systems abgehört
wird (siehe Abschnitt BENUTZUNG DES MENÜS MONITOROPERATIONEN); in diesem Fall wird beim Drücken der Taste F1 (Befehl Beginn Wiedergabe) ein akustischer Warnton erzeugt. Zum Wiedergeben der Audiodatei muss zuvor die laufende Audioüberwachung abgebrochen werden.
Beispiel 1
DATEI n° 1
Samplingfrequenz= 11 kHz
Auflösung= 8 bits
DATEI n° 2
Samplingfrequenz= 22 kHz
Auflösung= 8 bits
VERBINDUNG DATEI Nr. 1 und Nr. 2
Samplingfrequenz= 11 kHz
Auflösung= 8 bits
DATEI n° 2
Samplingfrequenz= 22 kHz
Auflösung= 16 bits
VERBINDUNG DATEI Nr. 1 und Nr. 2
Samplingfrequenz= 11 kHz
Auflösung= 8 bits
Beispiel 2
DATEI n° 1
Samplingfrequenz= 11 kHz
Auflösung= 8 bits
TONE GENERATOR Diese Menüposition wählen und die Taste ENTER drücken, um einen Ton zu erzeugen, der aus bis zu max. 6 einzelnen Tönen
bestehen kann, die nach Belieben festgelegt werden können (siehe Abschnitt AUFZEICHNUNG/WIEDERGABE VON AUDIOSIGNALEN); auf dem Display des Gerätes erscheint die folgende Anzeige.
TONE DEFINITION
FILE NAME:
N.
START
1
00020
(F1=START – F2=STOP)
________
END
DUR.
00020
0000
AMPL.
1
Pag ↓
N.
2
3
4
START
00020
00020
00020
END
00020
00020
00020
DUR.
0000
0000
0000
AMPL.
1
1
1
Pag ↓
N.
START
5
00020
6
00020
RIPETITIONS: 1
END
00020
00020
DUR.
0000
0000
AMPL.
1
1
N.: Gibt die fortlaufende Nummer des Tons an, der in das Gesamtsignal einzufügen ist.
FILE NAME: Gestattet die Festlegung des Namens der Audiodatei, in der die Tonsequenz abgespeichert wird; der Name
kann aus bis zu max. 8 alphanumerischen Zeichen bestehen. Die Tasten + und – für die Rotationswahl der alphanumerischen Zeichen verwenden; jedes Zeichen mit der Taste ENTER bestätigen. Die Ziffern können direkt mit dem Ziffernfeld eingegeben werden. Die Definition dieses Felds ist für die Programmierung der folgenden Felder unbedingt erforderlich.
START: Gestattet die Festlegung der Startfrequenz des Tons, ausgedrückt in Hertz. Das Ziffernfeld verwenden, um die Frequenz auf Werte zwischen 100 Hz und 4 kHz einzustellen.
END: Gestattet die Festlegung der Endfrequenz des Tons, ausgedrückt in Hertz. Das Ziffernfeld verwenden, um die Frequenz auf Werte zwischen 100 Hz und 4 kHz einzustellen.
DUR.: Gestattet die Festlegung der Dauer des Tons in Millisekunden. Das Ziffernfeld verwenden, um die Dauer auf Werte
zwischen 0 ms und 9999 ms einzustellen.
AMPL.: Gestattet das Festlegen der Lautstärke des Tons. Mit den Tasten + und – die Lautstärke auf einen der folgenden
Werte einstellen:
• Lautstärke auf 25 % (min. Lautstärke)
• Lautstärke auf 50 %.
• Lautstärke auf 75 %.
• Lautstärke auf 100 % (max. Lautstärke)
REPETITIONS: Gestattet die Festlegung der Anzahl der Wiederholungen der in der zu erstellenden Audiodatei gespeicherten Tonsequenz. Mit den Tasten + und – der dem Ziffernfeld die Anzahl der Wiederholungen zwischen den Werten 1 und 9
eingeben.
Nach dem Ausfüllen der Menüfelder die Taste F1 drücken, um den erzeugten Ton lokal über den Monitorlautsprecher der Kontrolleinheit CP 3100 abzuhören; die Taste F2 drücken, um die Wiedergabe vorzeitig abzubrechen.
225
HINWEIS
• Es wird empfohlen, die Festplatte der Kontrolleinheit nicht ganz mit mit der Funktion TONE GENERATOR erstellten Audiodateien vollzuschreiben.
• Die Reihenfolge, mit der die verschiedenen Töne des zu stellenden Klangs abgespeichert werden, folgt der fortlaufenden numerischen Ordnung des Feld N.: Der Ton N. 1 wird als erster aufgezeichnet, der Ton N. 6 wird als letzter aufgezeichnet.
• Die Gesamtdauer des erstellten Klangs entspricht der Summe der Dauer der einzelnen Töne, multipliziert mit der Anzahl der
Wiederholungen und darf 60 Sekunden nicht übersteigen.
• Das lokale Abhören des erstellten Tons (Taste F1) ist nicht möglich, wenn gerade eine Audioquelle des Systems abgehört wird
(siehe Abschnitt BENUTZUNG DES MENÜS MONITOROPERATIONEN); in diesem Fall wird beim Drücken der Taste F1 (Befehl Beginn Wiedergabe) ein akustischer Warnton erzeugt. Zum Wiedergeben der Audiodatei muss zuvor die laufende Audioüberwachung abgebrochen werden.
Zum Verlassen des Untermenüs die Taste ESC drücken und wie im Abschnitt VERLASSEN EINES MENÜS angegeben vorgehen.
DELETE MESSAGES Den Wahlpunkt auf diese Menüposition setzen und die Taste ENTER drücken, um zu dem Menü zu gelangen, das das Löschen
einer auf der Festplatte der Kontrolleinheit abgespeicherten Audiodatei gestattet; auf dem Display des Gerätes erscheint die folgende Anzeige.
DELETE MESSAGES
SELECT A FILE, THEN PRESS F1
FILE NAME:
MUSIC 1 _ _ ▼
FILE NAME: Gestattet die Wahl des Namens der Datei, die das zu löschende Audiosignal enthält. Mit den Tasten + und –
die gewünschte Datei aus den auf der Festplatte der Kontrolleinheit CP 3100 abgespeicherten auswählen.
Nach dem Auswählen des Dateinamens die Taste F1 drücken, um die Datei zu löschen. Zum Verlassen des Untermenüs die Taste ESC drücken und wie im Abschnitt VERLASSEN EINES MENÜS beschrieben vorgehen.
UTILISATION DU MENU “SYSTEM”
- - - = = = MAIN MENU = = = - - ->SISTEM
->COMPILE & SAVE
->EXIT WITHOUT SAVING
Das Menü gestattet die Eingabe der verschiedenen Betriebsparameter des Systems RX 3000. Im Hauptmenü für die Konfigurierung des Gerätes mit
den Tasten ↑ / ↓ und/oder page ↑ / page ↓ den Wahlpunkt auf das Untermenü SYSTEM und die Taste ENTER drücken; auf dem Display des Gerätes werden die folgenden Untermenüs angezeigt:
SYSTEM OPTIONS
PRINTER OPTION
PRINT CONFIGURATION
DATE & TIME
Pag ↓
SYSTEM OPTIONS
DATE &TIME
DAY / NIGHT PROGRAM
PASSWORD
PRINTER OPTIONS Den Wahlpunkt auf diese Menüposition setzen und die Taste ENTER drücken, um die Optionen des Ausdrucks einzugeben; auf
dem Display des Gerätes erscheint die folgende Anzeige.
PRINTER OPTIONS
PRINT MODE:
NONE _ _ _ _ _ _ _ _ ▼
PRINT MODE: Gestattet die Konfigurierung des Ausdruck der Alarmereignisse. Die Tasten + und – für die Wahl einer der
folgenden Optionen benutzen:
• NONE – Deaktiviert den Ausdruck der Alarmereignisse. Bei der Wahl dieser Option mit dem Menü ALARMS ist es nur
möglich, die Alarmereignisse anzuzeigen, die seit dem Einschalten des Systems aufgetreten sind (siehe Abschnitt ANZEIGE DER ALARMEREIGNISSE).
• AUTO – Bewirkt den automatischen Ausdruck einer Alarmmeldung zum Zeitpunkt, an den das Alarmereignis auftritt
(siehe Abschnitt AUSDRUCK DER ALARMEREIGNISSE).
• REQUEST – Gestattet die Befähigung des Befehls für den manuellen Ausdruck der seit dem Einschalten des Systems
vorgefallenen Alarmereignisse im Menü ALARMS (siehe Abschnitt AUSDRUCK DER ALARMEREIGNISSE).
226
PRINT CONFIGURATION Den Wahlpunkt auf diese Menüposition setzen und die Taste ENTER setzen, um den Ausdruck der Konfigurierung des Systems anzusteuern. Auf dem Ausdruck werden für die verschiedenen Vorrichtungen des Systems die Anzahl der Geräte,
die mit dem entsprechenden Menü der Kontrolleinheit konfiguriert worden sind, sowie die Anzahl der von der Kontrolleinheit festgestellten und korrekt programmierten Vorrichtungen angezeigt. Auf dem Display des Gerätes erscheint die folgende Anzeige.
INFORMATION:
PRINTING CONFIGURATION . . . .
DATE & TIME
Den Wahlpunkt aus diese Menüposition setzen und die Taste ENTER drücken, um das aktuelle Datum und die aktuelle
Uhrzeit einzugeben; auf dem Display des Gerätes erscheint die folgende Anzeige.
DATE & TIME SETTING
DATE:
12 / NOV ▼ / 1999
TIME:
15 : 49 : 50
DATE: Gestattet die Eingabe des aktuellen Tages, Monats und Jahres. Die Richtungstasten benutzen, um den Wahlpunkt
auf das Feld des Tages, des Monats oder des Jahres zu setzen; die gewünschten Werte mit dem Ziffernfeld oder mit den
Tasten + und – eingeben.
TIME: Gestattet die Eingabe der aktuellen Zeit in Stunden, Minuten und Sekunden. Die Richtungstasten verwenden, um
den Wahlpunkt auf das Feld der Stunden, Minuten oder Sekunden zu setzen; die gewünschten Werte mit dem Ziffernfeld
oder mit den Tasten + und – eingeben.
Zum Verlassen des Untermenüs die Taste ESC drücken und wie im Abschnitt VERLASSEN EINES MENÜS angegeben vorgehen.
DAY/NIGHT PROGRAM
Den Wahlpunkt auf diese Menüposition setzen und die Taste ENTER drücken, um den Zeitraum für den Eingriff der Funktion DAY/NIGHT PROGRAM der A.C.U.-Einheiten einzugeben (siehe Abschnitt FUNKTION DAY/NIGHT PROGRAM). Auf
dem Display des Gerätes wird die folgende Anzeige angezeigt.
DAY / NIGHT PROGRAM SETTING
START TIME:
12 : 15
END TIME:
22 : 31
START TIME: Gestattet die Eingabe der Uhrzeit für den Beginn der Abschwächung für die Nacht, ausgedrückt in Stunden und Minuten. Die Richtungstasten benutzen, um den Wahlpunkt auf das Feld der Stunden oder der Minuten zu setzen; die gewünschten Werte mit dem Ziffernfeld oder mit den Tasten + und – eingeben.
END TIME: Gestattet die Eingabe der Uhrzeit für das Ende der Abschwächung für die Nacht, ausgedrückt in Stunden und
Minuten. Die Richtungstasten benutzen, um den Wahlpunkt auf das Feld der Stunden oder der Minuten zu setzen; die
gewünschten Werte mit dem Ziffernfeld oder mit den Tasten + und – eingeben.
HINWEIS
• Der eingegebene Zeitraum wird für alle A.C.U.-Einheiten verwendet, die eine befähigte Funktion DAY/NIGHT PROGRAM
aufweisen (siehe Abschnitt BENUTZUNG DES MENÜS ACU).
PASSWORD
Gestattet die Festlegung des “Benutzerpasswords”, das gewährleistet, dass der Zugang zu bestimmten Menüs der Kontrolleinheit nur für dazu befugte Personen möglich ist (siehe Abschnitt PASSWORD FÜR DEN ZUGANG ZU DEN MENÜS).
Den Wahlpunkt auf diese Menüposition setzen und die Taste ENTER setzen, um das Password einzugeben; auf dem Display des Gerätes erscheint die folgende Anzeige.
PASSWORD SETTING
TYPE THE PASSWORD:
RE-TYPE PASSWORD:
____________
____________
TYPE THE PASSWORD: Gestattet das Eingeben des Passwords, das aus bis zu max. 8 Ziffern bestehen kann. Für die
Eingabe der verschiedenen Ziffern das Ziffernfeld benutzen.
RE-TYPE PASSWORD: Gestattet das erneute Eingeben des Passwords, so dass die Gewissheit besteht, dass das in das
Feld TYPE THE PASSWORD eingegebene Password korrekt ist.
HINWEIS
• Bei der Zuordnung des Passwords müssen die folgenden Einschränkungen berücksichtigt werden:
a. Es ist nicht möglich, Zwischenräume (Leertasten) zwischen zwei Ziffern des Passwords zu setzen.
b. Es ist nicht möglich, Zwischenräume (Leertasten) vor die Ziffern des Passwords zu setzen.
c. Es ist nicht möglich, Buchstaben einzugeben.
Nach dem Ausfüllen der beiden Felder die Taste MEMORY zum Abspeichern des Passwords auf der Festplatte der Kontrolleinheit drücken. Falls dieser Vorgang erfolgreich abgeschlossen und das Password korrekt abgespeichert wird, so leuchte die Kontrollleuchte MEMORY (Pos. 6 - Abb. 1, Seite 192) auf. Das neu eingegebene Password ist sofort operativ und
es wird beim nächsten Aufrufen eines Menüs abgefragt.
Zum Verlassen des Untermenüs die Taste ESC drücken.
227
HINWEIS
• Das Password kann nicht abgespeichert werden, falls die in das Feld TYPE THE PASSWORD eingegebenen Zeichen nicht mit
den in das Feld RE-TYPE PASSWORD eingegebenen übereinstimmen.
• Zum Abspeichern eines neuen Passwords ist es nicht erforderlich, das Hauptmenü für die Konfigurierung mit der Option COMPILE & SAVE zu verlassen
• Um kein Password einzugeben die Felder TYPE THE PASSWORD und RE- TYPE PASSWORD leer lassen.
BENUTZUNG DES MENÜS “COMPILE & SAVE”
- - - = = = MAIN MENU = = = - - ->SISTEM
->COMPILE & SAVE
->EXIT WITHOUT SAVING
Der Befehl COMPILE & SAVE gestattet das Verlassen des Hauptmenüs für die Konfigurierung des Systems mit dauerhafter Abspeicherung aller Einstellungen, die in einigen Konfigurierungsdateien vorgenommen worden sind, auf der Festplatte der Kontrolleinheit.
Zum Abspeichern der Konfigurierungsdateien mit den Tasten ↑ / ↓ und/oder pag ↑ / pag ↓ den Wahlpunkt auf das Untermenü COMPILE & SAVE setzen und die Taste ENTER.
Falls das abspeichern positiv verläuft, so verlässt das Programm das Konfigurierungsmenü und kehrt zum Hauptmenü zurück; zum Ausführen der vorgenommenen Änderungen an den Konfigurierungen wie im Abschnitt AUSFÜHRUNG EINER KONFIGURIERUNG beschrieben vorgehen. Falls während des Abspeicherns Konfigurierungsfehler festgestellt werden, so werden auf dem Display die entsprechenden Meldungen angezeigt und es ist nicht möglich, die Abspeicherung durchzuführen, bis alle festgestellten Fehlerursachen beseitigt worden sind (siehe Abschnitt KONFIGURIERUNGSFEHLER); dadurch werden mögliche Konfliktsituationen zwischen den verschiedenen Vorrichtungen vermieden, das System blockieren könnten.
HINWEIS
• Wenn das Menü für die Konfigurierung des Systems falsch konfiguriert wird, so werden während der Benutzung des Befehls COMPILE & SAVE Fehlermeldungen angezeigt; in diesem Fall ist es nur möglich, das Konfigurierungsmenü ohne Korrektur der festgestellten Fehler zu verlassen, indem
der Befehl EXIT WITHOUT SAVING verwendet wird; in diesem Fall gehen alle vorgenommenen Änderungen verloren.
KONFIGURIERUNGSFEHLER
Falls während der Benutzung des Befehls COMPILE & SAVE Konfigurierungsfehler festgestellt werden, so werden auf dem Display der Kontrolleinheit
die entsprechenden Meldungen angezeigt, die die Ursache des Fehlers auf einfache und direkte Weise angeben, damit er behoben werden kann. Für
jeden festgestellten Fehler erscheint eine eigene Anzeige, die die folgenden Angaben enthält.
• Fehlernummer und Gesamtanzahl der Fehler.
• Angabe der Vorrichtung oder des Ereignisses, auf die/das der Fehler sich bezieht.
• Angabe der Fehlerursache.
Für die Anzeige der folgenden oder vorausgehenden Fehler die Tasten pag ↑ (folgender Fehler) und pag ↓ ((vorausgehender Fehler) benutzen. In der
folgenden Anzeige wird ein Beispiel für einen Fehler wiedergegeben: Mit dem Menü CONSOLES wurde eine digitale Mikrofoneinheit BM 3616 konfiguriert, die die Bezeichnung Nr. 1 trägt und der mit dem Menü INPUT PROCESSORS kein Audioeingang zugeordnet worden ist; in diesem Fall muss
zur Behebung des Fehlers ein Audioeingang vom Typ CONSDIG 1 konfiguriert werden (Feld TYPE = CONSDIG 1).
ERROR FOUND
CONSOLLE “BM 3616 N.1” UNDFINED
AUDIO INPUT
1/1
UTILISATION DU MENU “EXIT WITHOUT SAVING”
- - - = = = MAIN MENU = = = - - ->SISTEM
->COMPILE & SAVE
->EXIT WITHOUT SAVING
Gestattet das Verlassen des Hauptmenüs für die Konfigurierung des Systems ohne Speichern der gegebenenfalls vorgenommenen Änderungen. Mit
den Tasten ↑ / ↓ und/oder pag ↑ / pag ↓ den Wahlpunkt auf das Untermenü EXIT WITHOUT SAVING setzen und die Taste ENTER drücken.
HINWEIS
• Beim Verlassen des Konfigurierungsmenüs mit der Option EXIT WITHOUT SAVING gehen die geänderten Parameter verloren und alle vorgenommenen Einstellungen werden auf den Vorrichtungen des Systems nicht ausgeführt.
228
ANZEIGEN DES ALARMSTATUS (Menü “ALARMS”)
RCF RX 3000 AUDIO SYSTEM
F1 : CONFIGURATION
F2 : ALARMS
"##############
ENGLISH _ _ _ ▼
F3: STORE CONFIG.
F4: AUDIO PROCESS
03 NOV 1999
15:29:52
Für den Zugang zu dem Menü, das das Anzeigen des aktuellen Status der vom System verwalteten Alarme gestattet (siehe Abschnitt SYSTEMALARME) im Hauptmenü die Taste F2 drücken: Auf dem Display des Gerätes werden die folgenden Untermenüs angezeigt..
• AUDIO INPUT PROCESSORS
Menü für die detaillierte Anzeige der Alarme zur Funktionsweise der Karten AUDIO INPUT IB 3210 / IB 3280.
• AUDIO OUTPUT PROCESSORS
Menü für die detaillierte Anzeige der Alarme zur Funktionsweise der Karten AUDIO OUTPUT OB 3230.
• GPI PROCESSORS
Menü für die detaillierte Anzeige der Alarme zur Funktionsweise der digitalen Karten INPUT/OUTPUT IO
3250.
• DIG.CONSOLES
Menü für die detaillierte Anzeige der Alarme zur Funktionsweise der digitalen Mikrofoneinheiten BM 3616.
• (ACU) AMPLIFIERS
Menü für die detaillierte Anzeige der Alarme zur Funktionsweise der A.C.U.-Einheiten (dem Verstärker nachgeschaltete Karten RB 3300).
• GPI ALARMS
Menü für die detaillierte Anzeige des Status der mit den Eingängen der digitalen Karten INPUT/OUTPUT IO
3250 ansteuerbaren Meldungen.
• EMERGENCY
Menü für die detaillierte Anzeige des Status der mit der Taste ALARM der digitalen Mikrofoneinheit BM 3616
ansteuerbaren Meldungen.
• FIREMAN
Menü für die detaillierte Anzeige des Status der mit den Eingängen der als FIREMAN konfigurierten digitalen Karten INPUT/OUTPUT IO 3250 ansteuerbaren Alarme.
• SYSTEM ALARMS
Menü für die detaillierte Anzeige des Status der Alarme zur Funktionsweise der Komponenten der Kontrolleinheit CP 3100.
Neben jedem Untermenü wird im Feld ALARMS der ständig aktualisierte Status des Alarms der Vorrichtung bzw. des Ereignisses angezeigt, auf
den/das das Untermenü sich bezieht; insbesondere werden angezeigt:
• [ X ], wenn einer oder mehrere Alarme aktiv sind.
• [ ], wenn kein Alarm aktiv ist.
HINWEIS
• In den Untermenüs des Menüs ALARMS werden auch der “Status” bzw. die “Daten” angezeigt (zum Beispiel die REV, ALC), die keine Alarmbedingungen angeben..
In der ersten Anzeige werden nur die ersten beiden Untermenüs angezeigt; für die Anzeige der folgenden die Tasten ↑ / ↓ und/oder pag ↑ / pag ↓ benutzen.
SYSTEM ALARMS OVERVIEW
AUDIO INPUT PROCESSORS
AUDIO OUTPUT PROCESSORS
PRESS F1 TO VIEW CURRENT ALARMS
ALARMS
[
]
[
]
Pag ↓
SYSTEM ALARMS OVERVIEW
GPI PROCESSORS
DIG. CONSOLLES
PRESS F1 TO VIEW CURRENT ALARMS
ALARMS
[
]
[
]
Pag ↓
SYSTEM ALARMS OVERVIEW
(ACU) AMPLIFIERS
GPI ALARMS
PRESS F1 TO VIEW CURRENT ALARMS
ALARMS
[
]
[
]
Pag ↓
SYSTEM ALARMS OVERVIEW
EMERGENCY
FIREMAN
PRESS F1 TO VIEW CURRENT ALARMS
ALARMS
[
]
[
]
Pag ↓
SYSTEM ALARMS OVERVIEW
FIREMAN
SYSTEM ALARMS
PRESS F1 TO VIEW CURRENT ALARMS
ALARMS
[
]
[
]
229
ANZEIGEN DER ALARMEREIGNISSE
Dieses Verfahren gestattet das Anzeigen der Alarmereignisse, die seit dem Einschalten des System aufgetreten sind, und es kann benutzt werden,
wenn im Untermenü PRINTER OPTIONS des Konfigurierungsmenüs SYSTEM die Option PRINT MODE: NO gewählt worden ist (siehe Abschnitt BENUTZUNG DES MENÜS SYSTEM). Nach dem Anzeigen des Untermenüs des Menüs ALARMS die Taste F1 drücken, um die Alarmereignisse anzuzeigen.
SYSTEM ALARMS OVERVIEW
AUDIO INPUT PROCESSORS
AUDIO OUTPUT PROCESSORS
PRESS F1 TO VIEW CURRENT ALARMS
ALARMS
[
]
[
]
!
F1
Auf dem Display des Gerätes erscheint eine Anzeige, die für jedes Alarmereignis die folgenden Angaben enthält.
• Nummer des Alarmereignisses und die Gesamtanzahl der Alarme.
• Datum des Auftretens des Alarmereignisses.
• Uhrzeit des Auftretens des Alarmereignisses.
• Vorrichtung, die den Alarm verursacht hat. Es können die folgenden Anzeigen erscheinen:
– INPUT PROC. –
Gibt eine Karte AUDIO INPUT IB 3210 / IB 3280 an.
– OUTPUT PROC. - Gibt eine Karte AUDIO OUTPUT OB 3230 an.
– GPI ALARMS Gibt eine digitale Karte INPUT/OUTPUT IO 3250 an.
– CONSOLE Gibt eine digitale Mikrofoneinheit BM 3616 an.
– ACU Gibt eine dem Verstärker nachgeschaltete Karte RB 3300 an.
Neben dem Namen Vorrichtung wird die entsprechende Identifizierungsnummer angezeigt.
• Typ des Ereignisses, das den Alarm verursacht hat. Die Typen, die angezeigt werden können, sind von der spezifischen Vorrichtung abhängig.
Im folgenden Beispiel werden 5 Alarmereignisse wiedergegeben; zum Anzeigen der folgenden oder der vorausgehenden Ereignisse die Tasten + (vor)
und - (zurück) benutzen.
SYSTEM ALARMS OVERVIEW
AUDIO INPUT PROCESSORS
AUDIO OUTPUT PROCESSORS
PRESS F1 TO VIEW CURRENT ALARMS
ALARMS
[
]
[
]
F1
ALARMS LIST
03/11/1999
15:34:44
+ LOGGER
! LOGGER STARTED !
001/005
+
+
ALARMS LIST
03/11/1999
* INPUT PROC.
DCI FAULT KO
002/005
15:34:44
01 *
+
ALARMS LIST
03/11/1999
* OUTPUT PROC.
DCI FAULT KO
003/005
15:34:44
01 *
+
ALARMS LIST
03/11/1999
* GPI ALARMS
DCI FAULT KO
004/005
15:34:44
01 *
+
230
ALARMS LIST
03/11/1999
* ACU
DCI FAULT KO
005/005
15:34:44
01 *
AUSDRUCK DER ALARMEREIGNISSE
Dieses Verfahren gestattet das Ausdrucken der Alarmereignisse, die seit dem Einschalten des System vorgefallen sind, und es kann benutzt werden,
wenn im Untermenü PRINTER OPTION des Konfigurierungsmenüs SYSTEM die Option PRINTER MODE: REQUEST gewählt worden ist (siehe Abschnitt BENUTZUNG DES MENÜS SYSTEM)..
HINWEIS
• Falls im Untermenü PRINTER OPTION des Konfigurierungsmenüs SYSTEM die Option PRINTER MODE: AUTO gewählt worden ist, so erfolgt der
Ausdruck der Alarmereignisse automatisch zu dem Zeitpunkt, an dem das Alarmereignis sich ereignet, und im Menü ALARMS der Kontrolleinheit
wird angezeigt: PRINTER ALARMS AUTO.
Nach dem Anzeigen des Untermenüs des Menü ALARMS die Taste F1 zum Starten des Ausdrucks drücken.
SYSTEM ALARMS OVERVIEW
AUDIO INPUT PROCESSORS
AUDIO OUTPUT PROCESSORS
PRESS F1 TO PRINT CURRENT ALARMS
ALARMS
[
]
[
]
!
F1
Der Ausdruck der Alarmereignisse enthält die folgenden Angaben.
• Datum, zu dem das Alarmereignis sich ereignet hat.
• Uhrzeit, zu der das Alarmereignis sich ereignet hat.
• Vorrichtung, die den Alarm verursacht hat. Es können angezeigt werden:
– INPUT PROC. –
Gibt eine Karte AUDIO INPUT IB 3210 / IB 3280 an.
– OUTPUT PROC. - Gibt eine Karte AUDIO OUTPUT OB 3230 an.
– GPI ALARMS Gibt eine digitale Karte INPUT/OUTPUT IO 3250 an.
– CONSOLE Gibt eine digitale Mikrofoneinheit BM 3616 an.
– ACU Gibt eine dem Verstärker nachgeschaltete Karte RB 3300 an.
Neben dem Namen Vorrichtung wird die entsprechende Identifizierungsnummer angezeigt.
• Typ des Ereignisse, das den Alarm verursacht hat. Die Typen, die angezeigt werden können, sind von der spezifischen Vorrichtung abhängig.
DETAILLIERTE ANGABEN ZU DEN ALARMEN DER KARTEN AUDIO INPUT IB 3210 / IB 3280
SYSTEM ALARMS OVERVIEW
AUDIO INPUT PROCESSORS
AUDIO OUTPUT PROCESSORS
PRESS F1 TO VIEW CURRENT ALARMS
ALARMS
[
]
[
]
Für die detaillierte Darstellung des aktuellen Status der Alarmereignisse der Karten AUDIO INPUT IB 3210 / IB 3280 im Menü ALARMS des Gerätes
mit den Tasten ↑ / ↓ und/oder pag ↑ / pag ↓ den Wahlpunkt auf das Untermenü AUDIO INPUT PROCESSORS setzen und die Taste ENTER drücken;
auf dem Display des Gerätes erscheinen die folgenden Felder.
INPUT BOARD Gibt die Identifizierungsnummer der Karte AUDIO INPUT IB 3210 / IB 3280 an (siehe Abschnitt CHARAKTERISTISCHE PARAMETER).
REV
Gibt die Softwareversion der Karte AUDIO INPUT an.
DCI
Zeigt einen Alarm an, der durch ein Problem bei der Kommunikation zwischen der Karte und der Kontrolleinheit verursacht wird.
Wenn der Alarm aktiv ist, so wird im Feld das Zeichen X angezeigt.
EEP
Zeigt einen Alarm an, der durch einen Defekt oder eine Funktionsstörung des EEPROM-Speichers der Karte verursacht wird. Wenn
der Alarm aktiv ist, so wird im Feld das Zeichen X angezeigt.
RST
Zeigt einen Alarm an, der durch eine “Nullstellung” des Mikroprozessors der Karte für die neue Initialisierung des Betriebs (Funktion “Watchdog”). Wenn der Alarm aktiv ist, so wird im Feld das Zeichen X angezeigt.
CFG
Zeigt einen Alarm an, der durch eine unvollständige Konfigurierung der Karte durch die Kontrolleinheit verursacht wird (zum Beispiel wurde die Konfigurierung durch Herausziehen der Karte unterbrochen). Wenn der Alarm aktiv ist, so wird im Feld das Zeichen
X angezeigt.
KO
Zeigt einen Alarm an, der durch die Entfernung der Karte (zum Beispiel für ihre Reparatur) verursacht wird. In diesem Fall kommuniziert die Karte nicht mit der Kontrolleinheit CP 3100 und die Überwachung aller anderen Ursachen wird unterbrochen. Für die Wiederverwendung einer zuvor entfernten Karte muss das System neu konfiguriert werden, indem wie im Abschnitt AUSFÜHREN EINER KONFIGURIERUNG vorgegangen wird. Wenn der Alarm aktiv ist, so wird im Feld das Zeichen X angezeigt.
Für die Anzeige der folgenden oder der vorausgehenden Karten AUDIO INPUT IB 3210 / IB 3280 die Tasten ↑ / ↓ und/oder pag ↑ / pag ↓ benutzen.
231
INPUT BOARD
INP. PROC. 1
INP. PROC. 2
INP. PROC. 3
REV
1.0
1.0
1.0
DCI
EEP
RST
CFG
KO
RST
CFG
KO
Pag ↓
INPUT BOARD
INP. PROC. 4
INP. PROC. 5
INP. PROC. 6
REV
1.0
1.0
1.0
DCI
EEP
Zum Verlassen des Untermenüs die Taste ESC drücken.
DETAILLIERTE ANGABEN ZU DEN ALARMEN DER KARTEN AUDIO OUTPUT OB 3230
SYSTEMS ALARMS OVERVIEW
AUDIO INPUT PROCESSORS
AUDIO OUTPUT PROCESSORS
PRESS F1 TO VIEW CURRENT ALARMS
ALARMS
[
]
[
]
Für die detaillierte Darstellung des aktuellen Status der Alarme der Karten AUDIO OUTPUT OB 3230 im Menü ALARMS des Gerätes mit den Tasten
↑ / ↓ und/oder pag ↑ / pag ↓ den Wahlpunkt auf das Untermenü AUDIO OUTPUT PROCESSORS setzen und die Taste ENTER drücken; auf dem Display des Gerätes erscheinen die folgenden Felder.
OUTPUT BOARD Gibt die Identifizierungsnummer der Karte AUDIO OUTPUT OB 3230 an (siehe Abschnitt CHARAKTERISTISCHE PARAMETER).
REV
Gibt die Softwareversion der Karte AUDIO OUTPUT an.
DCI
Zeigt einen Alarm an, der durch Probleme bei der Kommunikation zwischen der Karte und der Kontrolleinheit verursacht wird. Wenn
der Alarm aktiv ist, so wird im Feld das Zeichen X angezeigt.
EEP
Zeigt einen Alarm an, der durch einen Defekt oder eine Funktionsstörung des EEPROM-Speichers der Karte verursacht wird. Wenn
der Alarm aktiv ist, so wird im Feld das Zeichen X angezeigt.
RST
Zeigt einen Alarm an, der durch eine “Nullstellung” des Mikroprozessors der Karte für die neue Initialisierung des Betriebs (Funktion “Watchdog”). Wenn der Alarm aktiv ist, so wird im Feld das Zeichen X angezeigt.
CFG
Zeigt einen Alarm an, der durch eine unvollständige Konfigurierung der Karte durch die Kontrolleinheit verursacht wird (zum Beispiel wurde die Konfigurierung durch Herausziehen der Karte unterbrochen). Wenn der Alarm aktiv ist, so wird im Feld das Zeichen
X angezeigt.
POW
Zeigt einen Alarm an, der durch eine zu niedrige oder nicht vorhandens Spannung der Karte verursacht wird. Wenn der Alarm aktiv ist, so wird im Feld das Zeichen X angezeigt.
AUD
Zeigt einen Alarm an, der durch einen Defekt eines oder mehrerer Audioausgänge der Karte verursacht wird. Wenn der Alarm aktiv
ist, so wird im Feld das Zeichen X angezeigt.
KO
Zeigt einen Alarm an, der durch die Entfernung der Karte (zum Beispiel für ihre Reparatur) verursacht wird. In diesem Fall kommuniziert die Karte nicht mit der Kontrolleinheit CP 3100 und die Überwachung aller anderen Ursachen wird unterbrochen. Für die Wiederverwendung einer zuvor entfernten Karte muss das System neu konfiguriert werden, indem wie im Abschnitt AUSFÜHREN EINER KONFIGURIERUNG vorgegangen wird. Wenn der Alarm aktiv ist, so wird im Feld das Zeichen X angezeigt.
In der ersten Anzeige werden die ersten 7 Felder (REV, DCI, EEP, RST, CFG, POW, AUD) der ersten drei Karten OB 3230 angezeigt. Für die Anzeige
des folgenden Felds die Taste → drücken; für die Anzeige des vorausgehenden Felds die Taste ← drücken.
OUTPUT BOARD
OUT. PROC. 1
OUT. PROC. 2
OUT. PROC. 3
REV
1.0
1.0
1.0
DCI
EEP
RST
CFG
POW
AUD
→
REV
1.0
1.0
1.0
DCI
EEP
RST
CFG
POW
AUD
KO
Für das Anzeigen der folgenden oder der vorausgehenden Karten AUDIO OUTPUT OB 3230 die Tasten ↑ / ↓ und/oder pag ↑ / pag ↓ benutzen.
232
OUTPUT BOARD
OUT. PROC. 1
OUT. PROC. 2
OUT. PROC. 3
REV
1.0
1.0
1.0
DCI
EEP
RST
CFG
POW
AUD
CFG
POW
AUD
Pag ↓
OUTPUT BOARD
OUT. PROC. 4
OUT. PROC. 5
OUT. PROC. 6
REV
1.0
1.0
1.0
DCI
EEP
RST
Zum Verlassen des Untermenüs die Taste ESC drücken.
DETAILLIERTE ANGABEN ZU DEN ALARMEN DER DIGITALEN KARTEN INPUT/OUTPUT IO 3250
SYSTEM ALARMS OVERVIEW
GPI PROCESSORS
DIG. CONSOLLES
PRESS F1 TO VIEW CURRENT ALARMS
ALARMS
[
]
[
]
Für die detaillierte Darstellung des aktuellen Status der Alarme der digitalen Karten INPUT/OUTPUT IO 3250 im Menü ALARMS des Gerätes mit den
Tasten ↑ / ↓ und/oder pag ↑ / pag ↓ den Wahlpunkt auf das Untermenü GPI PROCESSORS setzen und die Taste ENTER drücken; auf dem Display
des Gerätes erscheinen die folgenden Felder.
GPI BOARD
Gibt die Identifizierungsnummer der digitalen Karte INPUT/OUTPUT IO 3250 an (siehe Abschnitt CHARAKTERISTISCHE PARAMETER).
REV
Gibt die Softwareversion der Karte INPUT/OUTPUT an.
DCI
Zeigt einen Alarm an, der durch Probleme bei der Kommunikation zwischen der Karte und der Kontrolleinheit verursacht wird. Wenn
der Alarm aktiv ist, so wird im Feld das Zeichen X angezeigt.
EEP
Zeigt einen Alarm an, der durch einen Defekt oder eine Funktionsstörung des EEPROM-Speichers der Karte verursacht wird. Wenn
der Alarm aktiv ist, so wird im Feld das Zeichen X angezeigt.
RST
Zeigt einen Alarm an, der durch eine “Nullstellung” des Mikroprozessors der Karte für die neue Initialisierung des Betriebs (Funktion “Watchdog”). Wenn der Alarm aktiv ist, so wird im Feld das Zeichen X angezeigt.
CFG
Zeigt einen Alarm an, der durch eine unvollständige Konfigurierung der Karte durch die Kontrolleinheit verursacht wird (zum Beispiel wurde die Konfigurierung durch Herausziehen der Karte unterbrochen). Wenn der Alarm aktiv ist, so wird im Feld das Zeichen
X angezeigt.
POW
Zeigt einen Alarm an, der durch eine zu niedrige oder nicht vorhandens Spannung der Karte verursacht wird. Wenn der Alarm aktiv ist, so wird im Feld das Zeichen X angezeigt.
KO
Zeigt einen Alarm an, der durch die Entfernung der Karte (zum Beispiel für ihre Reparatur) verursacht wird. In diesem Fall kommuniziert die Karte nicht mit der Kontrolleinheit CP 3100 und die Überwachung aller anderen Ursachen wird unterbrochen. Für die Wiederverwendung einer zuvor entfernten Karte muss das System neu konfiguriert werden, indem wie im Abschnitt AUSFÜHREN EINER KONFIGURIERUNG vorgegangen wird. Wenn der Alarm aktiv ist, so wird im Feld das Zeichen X angezeigt.
Für die Anzeige der folgenden oder der vorausgehenden digitalen Karten INPUT/OUTPUT IO 3250 die Tasten ↑ / ↓ und/oder pag ↑ / pag ↓ benutzen.
GPI BOARD
GPI PROC. 1
GPI PROC. 2
GPI PROC. 3
REV
1.0
1.0
1.0
DCI
0
0
0
EEP
0
0
0
RST
0
0
0
CFG
0
0
0
POW
0
0
0
KO
0
0
0
CFG
0
0
0
POW
0
0
0
KO
0
0
0
Pag ↓
GPI BOARD
GPI PROC. 4
GPI PROC. 5
GPI PROC. 6
REV
1.0
1.0
1.0
DCI
0
0
0
EEP
0
0
0
RST
0
0
0
Zum Verlassen des Untermenüs die Taste ESC drücken.
233
DETAILLIERTE ANGABEN ZU DEN ALARMEN DER EINHEIT BM 3616
SYSTEM ALARMS OVERVIEW
GPI PROCESSORS
DIG. CONSOLLES
PRESS F1 TO VIEW CURRENT ALARMS
ALARMS
[
]
[
]
Für die detaillierte Darstellung des aktuellen Status der Alarme der digitalen Mikrofoneinheit BM 3616 im Menü ALARMS des Gerätes mit den Tasten
↑ / ↓ und/oder pag ↑ / pag ↓ den Wahlpunkt auf das Untermenü DIG. CONSOLES setzen und die Taste ENTER drücken; auf dem Display des Gerätes erscheinen die folgenden Felder.
CONSOLLE
Gibt die Identifizierungsnummer der digitalen Mikrofoneinheit BM 3616 an; die Nummer wird lokal mit dem Verfahren für die Zuordnung der Adresse auf der Mikrofoneinheit eingegeben (siehe Installations- und Bedienungshandbuch der Mikrofoneinheit BM 3616).
REV
Gibt die Softwareversion der Mikrofoneinheit an.
COM
Zeigt einen Alarm an, der durch Probleme bei der Kommunikation zwischen der Mikrofoneinheit und der Kontrolleinheit verursacht
wird. Wenn der Alarm aktiv ist, so wird im Feld das Zeichen X angezeigt.
EEP
Zeigt einen Alarm an, der durch einen Defekt oder eine Funktionsstörung des EEPROM-Speichers der Mikrofoneinheit verursacht
wird. Wenn der Alarm aktiv ist, so wird im Feld das Zeichen X angezeigt.
RST
Zeigt einen Alarm an, der durch eine “Nullstellung” des Mikroprozessors der Mikrofoneinheit für die neue Initialisierung des Betriebs
(Funktion “Watchdog”). Wenn der Alarm aktiv ist, so wird im Feld das Zeichen X angezeigt.
POW
Zeigt einen Alarm an, der durch eine zu niedrige oder nicht vorhandene Spannung der Mikrofoneinheit verursacht wird. Wenn der
Alarm aktiv ist, so wird im Feld das Zeichen X angezeigt.
KO
Zeigt einen Alarm an, der durch die Entfernung der Mikrofoneinheit (zum Beispiel für ihre Reparatur) verursacht wird. In diesem Fall kommuniziert die Mikrofoneinheit nicht mit der Kontrolleinheit CP 3100 und die Überwachung aller anderen Ursachen wird unterbrochen.
Für die Wiederverwendung einer zuvor entfernten Mikrofoneinheit muss das System neu konfiguriert werden, indem wie im Abschnitt
AUSFÜHREN EINER KONFIGURIERUNG vorgegangen wird. Wenn der Alarm aktiv ist, so wird im Feld das Zeichen X angezeigt.
Für die Anzeige der folgenden oder der vorausgehenden digitalen Mikrofoneinheiten BM 3616 die Tasten ↑ / ↓ und/oder pag ↑ / pag ↓ benutzen.
CONSOLLE
1
2
3
REV
1.0
1.0
1.0
COM
EEP
RST
POW
KO
POW
KO
Pag ↓
CONSOLLE
4
5
6
REV
1.0
1.0
1.0
COM
EEP
RST
Zum Verlassen des Untermenüs die Taste ESC drücken.
DETAILLIERTE ANGABEN ZU DEN ALARMEN DER A.C.U.-EINHEIT
SYSTEM ALARMS OVERVIEW
(ACU) AMPLIFIERS
GPI ALARMS
PRESS F1 TO VIEW CURRENT ALARMS
ALARMS
[
]
[
]
Für die detaillierte Darstellung des aktuellen Status der Alarme der A.C.U.-Einheiten (siehe Abschnitt A.C.U.-EINHEITEN) im Menü ALARMS des Gerätes mit den Tasten ↑ / ↓ und/oder pag ↑ / pag ↓ den Wahlpunkt auf das Untermenü AMPLIFIERS setzen und die Taste ENTER drücken; auf dem Display des Gerätes erscheinen die folgenden Felder.
ACU N.
Gibt die Identifizierungsnummer der A.C.U.-Einheit an (dem Verstärker nachgeschaltete Karte RB 3300). Die Anzeige ist sequentiell und an die Adresse gebunden, die der A.C.U.-Einheit in der Phase der Installation zugeordnet worden ist: Nummer 1 entspricht der A.C.U.-Einheit mit der Adresse “0”, Nummer 120 entspricht der A.C.U.-Einheit mit der Adresse 119.
REV
Gibt die Softwareversion der A.C.U.-Einheit an.
COM
Zeigt einen Alarm an, der durch ein Problem bei der Kommunikation zwischen der A.C.U.-Einheit und der Kontrolleinheit CP 3100
verursacht wird. Wenn der Alarm aktiv ist, so wird im Feld das Zeichen X angezeigt.
LFT
Der Alarm wird nur angezeigt, falls die A.C.U.-Einheit mit der Zusatzkarte FAULT DETECTOR SB 3320 ausgestattet ist. Zeigt einen
oder mehrere folgenden Defekte auf der Audioleitung für die an den von der A.C.U.-Einheit überwachten Verstärker angeschlossenen Lautsprecher an: Kurzschluss zwischen zwei Leitern der Leitung, Unterbrechung der Leitung, Kurzschluss zwischen der Leitung und der Erdung (siehe Abschnitt FUNKTION LINE FAULT). Wenn der Alarm aktiv ist, so wird im Feld das Zeichen X angezeigt.
PAF
Der Alarm wird nur angezeigt, falls die A.C.U.-Einheit mit der Zusatzkarte FAULT DETECTOR SB 3320 ausgestattet ist. Zeigt alle
Funktionsstörungen des von der A.C.U.-Einheit überwachten Verstärkers an, die eine spürbare Verringerung der Leistungsabgabe
bewirken (siehe Abschnitt FUNKTION PA FAULT). Falls die A.C.U.-Einheit mit der Option MODE=AUTO konfiguriert worden ist, so
bewirkt die Aktivierung dieses Alarms die automatische Abschaltung des von der Einheit überwachten Verstärkers sowie gegebenenfalls die Einschaltung des Reserveverstärkers oder einer Einheit A.C.U. BACKUP, falls auch der Reserveverstärker von einer
dem Verstärker nachgeschaltete Karte RB 3300 überwacht wird (siehe Abschnitt BENUTZUNG DES MENÜS ACU). Wenn der Alarm
aktiv ist, so wird im Feld das Zeichen X angezeigt.
234
OVL
Der Alarm wird nur angezeigt, falls der von der A.C.U.-Einheit überwachte Verstärker mit einem zusätzlichen Alarmkontakt ausgestattet ist, der einen entsprechenden Eingang der A.C.U.-Einheit ansteuert, indem er sich schließt, wenn die Schutzvorrichtung eingreift oder wenn das Gerät auf anomale Weise funktioniert (siehe Abschnitt FUNKTION OVL). Falls die A.C.U.-Einheit mit der Option MODE=AUTO konfiguriert worden ist, so bewirkt die Aktivierung dieses Alarms die automatische Abschaltung des von der
Einheit überwachten Verstärkers sowie gegebenenfalls die Einschaltung des Reserveverstärkers oder einer Einheit A.C.U.
BACKUP, falls auch der Reserveverstärker von einer dem Verstärker nachgeschaltete Karte RB 3300 überwacht wird (siehe Abschnitt BENUTZUNG DES MENÜS ACU). Wenn der Alarm aktiv ist, so wird im Feld das Zeichen X angezeigt.
RST
Zeigt einen Alarm an, der durch eine “Nullstellung” des Mikroprozessors der Karte für die neue Initialisierung des Betriebs (Funktion “Watchdog”). Wenn der Alarm aktiv ist, so wird im Feld das Zeichen X angezeigt.
FBK
Der Alarm wird nur angezeigt, falls die A.C.U.-Einheit mit der Zusatzkarte FAULT DETECTOR SB 3320 ausgestattet ist. Zeigt einen
Alarm “fire-break” an, der ausgelöst wird, wenn durch Öffnung des an die Karte SB 3320 angeschlossenen Kontakts (zum Beispiel
Kontakt einer Taste) die Unterbrechung der normalen Ausstrahlung des Audiosignals angesteuert wird, um mit absolutem Vorrang
ein Notfallsignal ausstrahlen zu können, das von einer nicht an die Audiomatrix des Systems angeschlossenen Quelle kommt (siehe
Abschnitt FUNKTION FIRE-BREAK).
24V
Zeigt einen Alarm an, der durch das Fehlen der Spannung 24 V der A.C.U.-Einheit verursacht wird. Wenn der Alarm aktiv ist, so
wird im Feld das Zeichen X angezeigt.
12V
Zeigt einen Alarm an, der durch das Fehlen der Spannung 13,5 V der A.C.U.-Einheit verursacht wird. Wenn der Alarm aktiv ist, so
wird im Feld das Zeichen X angezeigt.
ALC
Diese Anzeige stellt keinen Alarm da und sie wird nur angezeigt, falls die A.C.U.-Einheit mit der Zusatzkarte DIGITAL ALC LB 3340 ausgestattet ist. Zeigt den Eingriff der Schaltung für die automatische Korrektur des Ausstrahlungspegels auf der Karte LB 3340 an, Wenn
der Eingriff erfolgt, so wird im Feld das Zeichen “X” angezeigt; diese Anzeige ändert sich langsam (ca. 1 Änderung/Minute).
KO
Zeigt einen Alarm an, der durch die Entfernung der A.C.U.-Einheit (zum Beispiel für ihre Reparatur) verursacht wird. In diesem Fall kommuniziert die A.C.U.-Einheit nicht mit der Kontrolleinheit CP 3100 und die Überwachung aller anderen Ursachen wird unterbrochen.
Für die Wiederverwendung einer zuvor entfernten Einheit muss das System neu konfiguriert werden, indem wie im Abschnitt AUSFÜHREN EINER KONFIGURIERUNG vorgegangen wird. Wenn der Alarm aktiv ist, so wird im Feld das Zeichen X angezeigt.
In der ersten Anzeige werden nur die ersten 7 Felder (REV, COM, LFT, PAF, OVL, RST, FBK) der ersten drei A.C.U.-Einheiten angezeigt. Für die Anzeige des folgenden Felds die Taste → drücken; für die Anzeige des vorausgehenden Felds die Taste ← drücken.
ACU N.
ACU 1
ACU 2
ACU 3
REV
1.0
1.0
1.0
COM
LFT
PAF
OVL
RST
FBK
12V
ALC
KO
→
LFT
PAF
OVL
RST
FBK
24V
Für die Anzeige der folgenden oder der vorausgehenden A.C.U.-Einheit die Tasten ↑ / ↓ und/oder pag ↑ / pag ↓ benutzen.
ACU N.
ACU 1
ACU 2
ACU 3
REV
1.0
1.0
1.0
COM
LFT
PAF
OVL
RST
FBK
OVL
RST
FBK
→
ACU N.
ACU 4
ACU 5
ACU 6
REV
1.0
1.0
1.0
COM
LFT
PAF
Zum Verlassen des Untermenüs die Taste ESC drücken.
DETAILLIERTE ANGABEN ZU DEN ALARMEN “GPI”
SYSTEM ALARMS OVERVIEW
(ACU) AMPLIFIERS
GPI ALARMS
PRESS F1 TO VIEW CURRENT ALARMS
ALARMS
[
]
[
]
Das Untermenü GPI ALARMS das Anzeigen des Status der Meldungen, die mit den GPI-Eingängen angesteuert werden können, deren Meldungsfunktion aktiviert ist (Feld ALL. = ON). Im Menü ALARMS des Gerätes mit den Tasten ↑ / ↓ und/oder pag ↑ / pag ↓ den Wahlpunkt auf das Untermenü GPI ALARMS setzen und die Taste ENTER drücken; auf dem Display des Gerätes werden die folgenden Felder angezeigt.
235
GPI EVENT
In diesem Feld werden die Namen der Ereignisse angezeigt, die mit dem Menü GPI EVENTS DEFINITION programmiert worden
sind (siehe Abschnitt BENUTZUNG DES MENÜS EREIGNISSE GPI-EINGÄNGE).
ALARM
In diesem Feld wird der Status der Meldung angezeigt; wenn die Meldung aktiv ist, so wird im Feld das Zeichen X angezeigt.
Für die Anzeige der folgenden oder der vorausgehenden GPI-Ereignisse mit Meldungen die Tasten ↑ / ↓ und/oder pag ↑ / pag ↓ benutzen.
GPI EVENT
KEY 1 CONSOLLE 1
KEY 2 CONSOLLE 1
KEY 3 CONSOLLE 1
ALARMS
[
]
[
]
[
]
Pag ↓
GPI EVENT
KEY 4 CONSOLLE 1
KEY 1 CONSOLLE 2
KEY 2 CONSOLLE 2
ALARMS
[
]
[
]
[
]
Zum Verlassen des Untermenüs die Taste “ESC” drücken.
DETAILLIERTE ANGABEN ZU DEN ALARMEN EINHEIT BM 3616
SYSTEM ALARMS OVERVIEW
EMERGENCY
FIREMAN
PRESS F1 TO VIEW CURRENT ALARMS
ALARMS
[
]
[
]
Das Untermenü EMERGENCY gestattet die Anzeige des Status der Alarme, die mit der Taste ALARM der digitalen Mikrofoneinheiten BM 3616 angesteuert werden können (siehe Abschnitt BENUTZUNG DES MENÜS DIGITALE MIKROFONEINHEITEN). Im Menü ALARMS des Gerätes mit den Tasten ↑ / ↓ und/oder pag ↑ / pag ↓ den Wahlpunkt auf das Untermenü EMERGENCY setzen und die Taste ENTER drücken; auf dem Display des Gerätes erscheinen die folgenden Felder.
CONSOLLE
In diesem Feld werden die Namen der digitalen Mikrofoneinheiten BM 3616 angezeigt, die mit dem Menü CONSOLES festgelegt
worden sind.
EMERGENCY
In diesem Feld wird der Status des Alarms angezeigt; wenn der Alarm aktiv ist, so wird im Feld das Zeichen X angezeigt.
HINWEISE
• Ein von einer Mikrofoneinheit BM 3616 angesteuerter Alarm kann nur von der Mikrofoneinheit abgeschaltet werden, die ihn ausgelöst hat, oder
aber durch Abschaltung des Systems.
• Ein von einer Mikrofoneinheit BM 3616 angesteuerter Alarm bleibt auch im Falle einer Unterbrechung der Kommunikation zwischen Mikrofoneinheit
und Kontrolleinheit aktiv.
Für die Anzeige der folgenden oder der vorausgehenden Mikrofoneinheiten BM 3616 die Tasten ↑ / ↓ und/oder pag ↑ / pag ↓ benutzen.
CONSOLLE
CONSOLLE 1
CONSOLLE 2
CONSOLLE 3
EMERGENCY
[
]
[
]
[
]
Pag ↓
CONSOLLE
CONSOLLE 4
CONSOLLE 5
CONSOLLE 6
EMERGENCY
[
]
[
]
[
]
Zum Verlassen des Untermenüs die Taste ESC drücken.
236
DETAILLIERTE ANGABEN ZU DEN ALARMEN “FIREMAN”
SYSTEM ALARMS OVERVIEW
EMERGENCY
FIREMAN
PRESS F1 TO VIEW CURRENT ALARMS
ALARMS
[
]
[
]
Das Untermenü FIREMAN gestattet das Anzeige des Status der Alarme, die mit den GPI-Eingängen angesteuert werden können, die als FIREMAN konfiguriert worden sind (siehe Abschnitt BENUTZUNG DES MENÜS “GPI EVENTS DEFINITION”). Im Menü ALARMS des Gerätes mit den Tasten ↑ / ↓
und/oder pag ↑ / pag ↓ den Wahlpunkt auf das Untermenü FIREMAN setzen und die Taste ENTER; auf dem Display des Gerätes werden die folgenden
Felder angezeigt.
GPI EVENT
Gibt das spezifische Ereignis FIREMAN; das System verwaltet zwei Ereignisse dieses Typs.
ALARMS
In diesem Feld wird der Alarmstatus angezeigt: Wenn der Alarm FIREMAN aktiv ist, wird im Feld das Zeichen X angezeigt.
GPI EVENT
FIREMAN1
FIREMAN2
ALARM
[
]
[
]
Zum Verlassen des Menüs die Taste ESC drücken.
“SYSTEM ALARMS”
SYSTEM ALARMS OVERVIEW
FIREMAN
SYSTEM ALARMS
PRESS F1 TO VIEW CURRENT ALARMS
ALARMS
[
]
[
]
Das Untermenü SYSTEM ALARMS gestattet die detaillierte Darstellung des aktuellen Status der Alarme, die sich auf Komponenten der Kontrolleinheit
CP 3100 beziehen. Im Menü ALARMS des Gerätes mit den Tasten ↑ / ↓ und/oder pag ↑ / pag ↓ den Wahlpunkt auf das Untermenü SYSTEM ALARMS
setzen und die Taste ENTER drücken; auf dem Display des Gerätes werden die folgenden Felder angezeigt.
COMPONENT
Im Feld werden die folgenden Komponenten der Kontrolleinheit angezeigt.
• SOUND BLASTER - Gibt die Soundkarte an.
• COM1 PORT - Gibt den seriellen Port Nummer 1 an.
• COM2 PORT - Gibt den seriellen Port Nummer 2 an.
• COM3 PORT - Gibt den seriellen Port Nummer 3 an.
• COM4 PORT - Gibt den seriellen Port Nummer 4 an.
ALARM
In diesem Feld wird der Alarmstatus angezeigt: Wenn der Alarm aktiv ist, so wird im Feld das Zeichen X angezeigt.
Für die Anzeige der folgenden oder vorausgehenden Komponenten die Tasten ↑ / ↓ und/oder pag ↑ / pag ↓ drücken.
COMPONENT
SOUND BLASTER
COM1 PORT
COM2 PORT
ALARM
[
]
[
]
[
]
Pag ↓
COMPONENT
COM2 PORT
COM3 PORT
COM4 PORT
ALARM
[
]
[
]
[
]
Zum Verlassen des Menüs die Taste ESC drücken.
237
AUSFÜHREN EINER KONFIGURIERUNG (Menü STORE CONFIG.)
Bei der Ausführung einer Konfigurierung werden alle Komponenten des Systems mit den Einstellungen programmiert, die in den Konfigurierungsdateien enthalten sind, die mit dem Befehl COMPILE & SAVE des Konfigurierungsmenüs der Kontrolleinheit oder mit dem eventuellen PC für die Konfigurierung erstellt werden können. Die folgenden Vorrichtungen können programmiert werden:
• digitale Mikronfoneinheiten BM 3616.
• dem Verstärker nachgeschaltete Karten RB 3300.
• Karten INPUT/OUTPUT IO 3250.
• Karten AUDIO INPUT IB 3210 / IB 3280.
• Karten AUDIO OUTPUT OB 3230.
Dieses Verfahren ist erforderlich:
• wenn die Adresse einer Komponente des Systems geändert wird.
• wenn die Konfigurierungsdateien des Systems mit der Kontrolleinheit CP 3100 geändert werden.
• wenn eine Komponente des Systems wieder eingesetzt wird, die zuvor für die Reparatur entfernt worden ist.
HINWEIS
• Das Ausführen einer Konfigurierung ist nicht erforderlich, wenn Einstellungen mit dem Menü AUDIO PROCESS geändert werden (siehe Abschnitt
AUDIOEINSTELLUNGEN).
Bei der Programmierung aller Vorrichtungen des Systems kann auf zwei verschiedene Weisen vorgegangen werden, die in den folgenden Abschnitten
beschrieben werden.
PROGRAMMIERUNG DER VORRICHTUNGEN MIT DEM MENÜ
1) Im Hauptmenü der Kontrolleinheit die Taste F3 (MEMOR. CONFIG.) drücken: Auf dem Display erscheint eine Meldung, in der zur Eingabe des
eventuellen Passwords der Kontrolleinheit aufgefordert wird (siehe Abschnitt PASSWORD FÜR DEN ZUGANG ZU DEN MENÜS).
2) Mit dem Ziffernfeld das Password der Kontrolleinheit (falls vorgesehen) eingeben und ENTER drücken: Alle Vorrichtzungen des Systems werden
automatisch programmiert.
RCF RX 3000 AUDIO SYSTEM
F1 : CONFIGURATION
F2 : ALARMS
"##############
ENGLISH _ _ _ ▼
F3: STORE CONFIG.
F4: AUDIO PROCESS
03 NOV 1999
15:29:52
F3
INSERT PASSWORD TO ACCESS CONFIGURATION
PASSWORD:
“nr. password”
ENTER
RCF RX 3000 AUDIO SYSTEM
F1 : CONFIGURATION
F2 : ALARMS
"##############
ENGLISH _ _ _ ▼
F3: STORE CONFIG.
F4: AUDIO PROCESS
03 NOV 1999
15:29:52
HINWEISE
• Das Ausführen einer neuen Konfigurierung bewirkt einen „Reset“ alle Vorrichtungen des Systems.
• Das Ausführen der neuen Konfigurierung kann nicht vorgenommen werden, wenn gerade ein Ereignis mit absolutem Vorrang ausgeführt wird
(zum Beispiel EMERGENCY, FIREMAN 1, FIREMAN 2).
PROGRAMMIERUNG DER VORRICHTUNGEN DURCH NEUSTART DES SYSTEMS
1) Das System abschalten.
2) Das System neu starten und alle Vorrichtungen erneut speisen.
KOMPILIERUNGSFEHLER
Während der Programmierung der Vorrichtungen des Systems können Fehler auftreten, die auf einer falschen Kompilierung der Felder des Menüs für
die Konfigurierung des Systems beruhen (Menü F1: CONFIGURATION). In diesem Fall wird auf dem Display der Kontrolleinheit die Meldung ERROR
! angezeigt, gefolgt von der Angabe des aufgetretenen Fehlers.
238
AUDIO-EINSTELLUNGEN (Menü “AUDIO PROCESS”)
RCF RX 3000 AUDIO SYSTEM
F1 : CONFIGURATION
F2 : ALARMS
"##############
ENGLISH _ _ _ ▼
F3: STORE CONFIG.
F4: AUDIO PROCESS
03 NOV 1999
15:29:52
In dem Menü AUDIO PROCESS können zahlreiche Audioparameter auf schnelle Weise eingegeben werden; außerdem ist es möglich, die A.C.U.Einheiten ein- und auszuschalten und die vom System verarbeiteten Audiosignale zu überwachen. Für den Zugang zum Menü im Hauptmenü der Kontrolleinheit die Taste F4 drücken: Auf dem Display des Gerätes werden die folgenden Untermenüs angezeigt:
• ADJUST AUDIO INPUT
Menü für die Einstellung der Verstärkung der Eingänge der Karten AUDIO INPUT IB 3210 / IB 3280; das Menü gestattet außerdem das Ein- und Ausschalten der Klangregler der Eingänge (Höhen/Bässe).
• ADJUST AUDIO OUTPUT Menü für die Einstellung des Pegels der Audiosignale der Ausgänge der Karten AUDIO OUTPUT OB 3230.
• INSERT BACKUP ACU
Menü zum manuellen Ein- und Ausschalten der A.C.U.-Einheiten (siehe Abschnitt A.C.U.-EINHEITEN) sowie das Anzeigen des Betriebsstatus dieser Einheiten.
• MONITOR OPERATIONS
Menü zum Abhören der vom System verarbeiteten Audiosignale (zum Beispiel Eingangssignale, Ausgangssignale, Signale der Lautsprecherausgänge der von A.C.U.-Einheiten überwachten Verstärker) mit dem Monitorlautsprecher der
Kontrolleinheit. Das Menü gestattet außerdem das Einstellen der Lautstärke der abgehörten Signale.
Die Einstellungen mit dem Menü AUDIO PROCESS werden sofort angewendet, ohne dass die Option STORE CONFIG. des Hauptmenüs benutzt
werden muss (die neue Konfigurierung muss nicht ausgeführt werden). In der ersten Anzeige werden die ersten drei Untermenüs angezeigt; für die Anzeige der folgenden die Tasten ↑ / ↓ und/oder pag ↑ / pag ↓ benutzen.
AUDIO ADJUST OPTIONS
ADJUST AUDIO INPUT
ADJUST AUDIO OUTPUT
INSERT BACKUP ACU
Pag ↓
AUDIO ADJUST OPTIONS
ADJUST AUDIO OUTPUT
INSERT BACKUP ACU
MONITOR OPERATIONS
BENUTZUNG DES MENÜS “ADJUST AUDIO INPUT”
AUDIO ADJUST OPTIONS
ADJUST AUDIO INPUT
ADJUST AUDIO OUTPUT
INSERT BACKUP ACU
Im Menü AUDIO PROCESS des Gerätes mit den Tasten ↑ / ↓ und/oder pag ↑ / pag ↓ den Wahlpunkt auf das Untermenü ADJUST AUDIO INPUT
setzen und die Taste ENTER drücken; auf dem Display des Gerätes erscheinen die folgenden Felder
INPUT NAME
Gibt den Namen des einzustellenden Eingangs an. Die angezeigten Namen sind diejenigen, die den verschiedenen Eingängen mit
dem Konfigurierungsmenüs INPUT PROCESSORS zugeordnet worden sind.
GAIN dB
Gestattet die Einstellung der Verstärkung des Eingang. Mit den Tasten + und – die Verstärkung auf Werte zwischen 0 und +20 dB
einstellen. Die Einstellung erfolgt in Schritten von 1 dB.
HINWEISE
• Die Einstellung der Verstärkung sorgfältig abwägen, wenn gleichzeitig die Einstellung der Klangregler vorgenommen wird, um auf
der Sättigung des Eingangs beruhende Probleme zu vermeiden.
BASS/TREBLE
Gestattet das Aktivieren oder Deaktivieren der beiden Klangregler des Eingangs (Trimmpotentiometer) für die Einstellung der hohen
sowie der tiefen Frequenzen. Mit den Tasten + und – eine der beiden Optionen wählen:
• ON - Klangregler aktiviert.
• OFF - Klangregler deaktiviert.
Für die Anzeige der folgenden oder der vorausgehenden Eingänge die Tasten ↑ / ↓ und/oder pag ↑ / pag ↓ drücken.
INPUT NAME
SOURCE 1
SOURCE 2
SOURCE 3
GAIN DB
00
00
00
BASS/TREBLE
OFF▼
OFF▼
OFF▼
Pag ↓
239
INPUT NAME
SOURCE 4
SOURCE 5
SOURCE 6
GAIN DB
00
00
00
BASS/TREBLE
OFF▼
OFF▼
OFF▼
Zum Verlassen des Untermenüs die Taste ESC drücken; die neuen Einstellungen werden automatisch abgespeichert.
BENUTZUNG DES MENÜS “ADJUST AUDIO OUTPUT”
AUDIO ADJUST OPTIONS
ADJUST AUDIO INPUT
ADJUST AUDIO OUTPUT
INSERT BACKUP ACU
Im Menü AUDIO PROCESS des Gerätes mit den Tasten ↑ / ↓ und/oder pag ↑ / pag ↓ den Wahlpunkt auf das Untermenü ADJUST AUDIO OUTPUT
setzen und die Taste ENTER drücken; auf dem Display des Gerätes erscheinen die folgenden Felder.
OUTPUT NAME Gibt den Namen des einzustellenden Ausgangs an. Die angezeigten Namen sind diejenigen, die den verschiedenen Ausgängen mit
dem Konfigurierungsmenüs OUTPUT PROCESSORS zugeordnet worden sind.
ATTEN dB
Gestattet die Abschwächung des Pegels des ausgehenden Signals. Mit den Tasten + und – den Abschwächungspegel auf Werte
zwischen 0 und -30 dB einstellen. Die Einstellung erfolgt in Schritten von 1 dB und ist auf einen nominalen Ausgangspegel mit dem
unsymmetrischen Verfahren 0 dB bezogen.
HINWEISE
• Die symmetrischen Signale besitzen einen Ausgangspegel, der um 6 dB über dem der unsymmetrischen Signale liegt: Zum
Beispiel bei einer Abschwächung von 0 dB ergibt sich ein nominaler Pegel des Signals von 0 dB, falls der Ausgang des Audiosignals mit
dem unsymmetrischen Verfahren erfolgt, während der nominale Pegel des Signal +6 dB beträgt, falls der Ausgang des Signals mit dem
symmetrischen Verfahren erfolgt.
• Empfohlen wird eine Abschwächung des Ausgangs vom Typ RECORDER für die Ansteuerung des Eingangs LINE IN der Soundkarte von -6 dB.
Für die Anzeige der folgenden oder der vorausgehenden Ausgänge die Tasten ↑ / ↓ und/oder pag ↑ / pag ↓ drücken.
OUTPUT NAME
ZONE 1
ZONE 2
ZONE 3
ATTEN DB
04
02
00
Pag ↓
OUTPUT NAME
ZONE 4
ZONE 5
ZONE 6
ATTEN DB
00
00
00
Zum Verlassen des Untermenüs die Taste ESC drücken; die neuen Einstellungen werden automatisch abgespeichert.
BENUTZUNG DES MENÜS “INSERT BACKUP ACU”
AUDIO ADJUST OPTIONS
ADJUST AUDIO INPUT
ADJUST AUDIO OUTPUT
INSERT BACKUP ACU
Im Menü AUDIO PROCESS des Gerätes mit den Tasten ↑ / ↓ und/oder pag ↑ / pag ↓ den Wahlpunkt auf das Untermenü INSERT BACKUP ACU
setzen und die Taste ENTER drücken; auf dem Display des Gerätes erscheinen die folgenden Felder.
ACU
Gibt die Identifizierungsnummer der A.C.U.-Einheit an. Die Angabe ist sequentiell und an die Adresse gebunden, die der A.C.U.Einheit in der Phase der Installation zugeordnet worden ist: Nummer 1 entspricht die A.C.U.-Einheit mit der Adresse 0, Nummer
120 entspricht die A.C.U.-Einheit mit der Adresse 119.
ANMERKUNG
• In diesem Feld erscheinen nur die Identifizierungsnummern der A.C.U.-Einheiten, die mit dem entsprechenden Menü konfiguriert
worden sind.
TYPE
GROUP
Gibt den Typ der A.C.U.-Einheit an, der mit dem Konfigurierungsmenü ACU festgelegt worden ist. Es können angezeigt werden:
• NORMAL Dies ist eine A.C.U.-Einheit, die die Funktion hat, einen primären Verstärker zu überwachen, der normalerweise
für die Beschallung eines bestimmten Hörbereiches dient.
• BACKUP Dies ist eine A.C.U.-Einheit, die die Funktion hat, einen Reserveverstärker zu überwachen, der normalerweise
verwendet wird, um einen primären Verstärker zu ersetzen, zum Beispiel bei einem Defekt des letzteren.
Gibt die Gruppe an, der die A.C.U.-Einheit angehört und die mit dem Konfigurierungsmenü ACU festgelegt worden ist. Das System
ist in der maximalen Konfigurierung in der Lage, bis zu 64 Gruppen zu verwalten.
240
STATUS
INSERT
Gibt den Betriebsstatus der A.C.U.-Einheit an, der in Abhängigkeit von den verschiedenen Ereignisse ständig aktualisiert wird. Es
können angezeigt werden:
• N.C. Zeigt ein Problem bei der Kommunikation zwischen der Kontrolleinheit CP 3100 und der A.C.U.-Einheit an (siehe
Abschnitt DETAIL ALARM AUF A.C.U.-EINHEIT). Diese Anzeige kann jederzeit erscheinen und stellt einen Alarmstatus dar.
• FAULT Zeigt die Aktivierung eines Alarms vom Typ PA FAULT oder OVL auf der A.C.U.-Einheit an (siehe Abschnitt DETAIL ALARM AUF A.C.U.-EINHEIT).
• NOT INS. Zeigt an, dass die A.C.U.-Einheit abgeschaltet ist, jedoch korrekt funktioniert und ordnungsgemäß mit der Kontrolleinheit CP 3100 kommuniziert.
• WORKING - Zeigt an, dass die A.C.U.-Einheit einschaltet ist und korrekt funktioniert.
Gestattet das manuelle Einschalten oder Abschalten einer A.C.U.-Einheit vom Typ NORMAL oder BACKUP, die auf die Betriebsweise Einschaltung/Abschaltung sowohl manuell, als auch automatisch konfiguriert worden ist (Feld MODE des Konfigurierungsmenüs ACU). Eine Einheit NORMAL kann wie eine Einheit BACKUP zu jedem Zeitpunkt von Hand ein- oder ausgeschaltet
werden, zum Beispiel für die Durchführung eines Tests der automatischen Einschaltung der entsprechenden Reserveeinheit.
Die Tasten + und – für die Wahl einer der folgenden Optionen benutzen:
• ON – A.C.U. Einheit eingeschaltet.
• OFF – A.C.U. Einheit abgeschaltet.
HINWEISE
• Wenn es nicht möglich ist, den Parameter des Felds INSERT zu ändern, so wird ein akustisches Signal (“Beepton”) erzeugt.
• Die Einheiten NORMAL sind normalerweise eingeschaltet (ON), während die Einheiten BACKUP normalerweise immer abgeschaltet sind (OFF).
• Wenn eine Einheit NORMAL abgeschaltet wird und in der A.C.U.-Gruppe, der sie angehört, ein weiterer Reserveverstärker vorhanden ist, der nicht durch eine dem Verstärker nachgeschaltete Karte RB 3300 überwacht wird, so wird dieser immer automatisch
anstelle des primären Verstärkers eingeschaltet.
Für die Anzeige der folgenden oder vorausgehenden A.C.U.-Einheiten die Tasten ↑ / ↓ und/oder pag ↑ / pag ↓ benutzen.
ACU
1
2
3
TYPE
NORMAL
BACKUP
BACKUP
GROUP
01
01
01
STATUS
N.C.
N.C.
N.C.
INSERT
OFF▼
OFF▼
OFF▼
Pag ↓
ACU
4
5
6
TYPE
BACKUP
NORMAL
BACKUP
GROUP
01
02
02
STATUS
N.C.
N.C.
N.C.
INSERT
OFF▼
OFF▼
OFF▼
Zum Verlassen des Untermenüs die Taste ESC drücken; die neuen Einstellungen werden automatisch abgespeichert.
Zur Erklärung der Funktionsweise der A.C.U.-Einheiten mit den verschiedenen Konfigurierungen werden die folgenden Beispiele wiedergegeben.
Beispiel 1: Manuelle Austauschung einer Einheit “NORMAL” durch eine Einheit “BACKUP”
Konfigurierung A.C.U.-Einheit:
a) Einheit A.C.U. 1 vom Typ NORMAL als MANUAL konfiguriert.
b) Einheit A.C.U. 2 vom Typ BACKUP als MANUAL konfiguriert.
Auf dem Display der Kontrolleinheit CP 3100 wird angezeigt:
ACU
1
2
TYPE
NORMAL
BACKUP
GROUP
01
01
STATUS
WORKING
NOT INS.
INSERT
ON▼
OFF▼
Auszuführende Operationen:
1) Im Feld INSERT der A.C.U. 1 die Option OFF wählen; im entsprechenden Feld STATUS erscheint folglich die Position NOT INS..
2) Zum Einschalten der Reserve muss EINE MANUELLE OPERATION auf A.C.U. 2 eingegeben werden: Im Feld INSERT derselben die Option ON
wählen; im entsprechenden Feld STATUS erscheint folglich die Position WORKING.
Auf dem Display der Kontrolleinheit CP 3100 wird angezeigt:
ACU
1
2
TYPE
NORMAL
BACKUP
GROUP
01
01
STATUS
NOT INS.
WORKING
INSERT
OFF▼
ON▼
241
Beispiel 2: Halbautomatischer Austausch einer Einheit “NORMAL” durch eine Einheit “BACKUP”
Konfigurierung A.C.U.-Einheit:
a) Einheit A.C.U. 1 vom Typ NORMAL als AUTO konfiguriert.
b) Einheit A.C.U. 2 vom Typ BACKUP als MANUAL konfiguriert.
Auf dem Display der Kontrolleinheit CP 3100 wird angezeigt:
ACU
1
2
TYPE
NORMAL
BACKUP
GROUP
01
01
STATUS
WORKING
NOT INS.
INSERT
ON▼
OFF▼
Auszuführende Operationen:
1) Auf A.C.U. 1 einen Alarm auslösen (zum Beispiel Alarm OVL); die Einheit A.C.U. 1 wird automatisch abgeschaltet: Im entsprechenden Feld INSERT erscheint OFF (Einheit automatisch abgeschaltet), während im Feld STATUS FAULT erscheint.
2) Zum Einschalten der Reserve muss EINE MANUELLE OPERATION auf A.C.U. 2 gewählt werden: Im Feld INSERT derselben die Option ON wählen: im entsprechenden Feld STATUS erscheint folglich die Position WORKING.
Auf dem Display der Kontrolleinheit CP 3100 wird jetzt angezeigt:
ACU
1
2
TYPE
NORMAL
BACKUP
GROUP
01
01
STATUS
FAULT
WORKING
INSERT
OFF▼
ON▼
ANMERKUNG
• Nach Ende des Alarms auf der Einheit A.C.U. 1 erfolgt das Wiedereinschalten dieser Einheit manuell mit dem Befehl INSERT; falls die Einheit A.C.U.
1 wieder eingebaut wird, der Defekt oder die Funktionsstörung des entsprechenden Verstärkers jedoch fortbesteht, so kehrt sie nach einigen Sekunden erneut zu Status FAULT und Einschaltung OFF zurück.
Beispiel 3: Automatischer Austausch einer Einheit “NORMAL” durch eine Einheit “BACKUP”
Konfigurierung A.C.U.-Einheit:
a) Einheit A.C.U. 1 vom Typ NORMAL als AUTO konfiguriert.
b) Einheit A.C.U. 2 vom Typ BACKUP als AUTO konfiguriert
Auf dem Display der Kontrolleinheit CP 3100 wird angezeigt:
ACU
1
2
TYPE
NORMAL
BACKUP
GROUP
01
01
STATUS
WORKING
NOT INS.
INSERT
ON▼
OFF▼
Auszuführende Operationen:
1) Auf A.C.U. 1 einen Alarm auslösen (zum Beispiel Alarm OVL); die Einheit A.C.U. 1 wird automatisch abgeschaltet: Im entsprechenden Feld INSERT erscheint OFF (Einheit automatisch abgeschaltet), während im Feld STATUS FAULT erscheint.
2) Die Einheit A.C.U. 2 (Reserve) wird automatisch anstelle der Einheit A.C.U. 1 eingeschaltet: Im Feld INSERT derselben erscheint ON, während im
entsprechenden Feld STATUS WORKING erscheint.
Auf dem Display der Kontrolleinheit CP 3100 wird angezeigt:
ACU
1
2
TYPE
NORMAL
BACKUP
GROUP
01
01
STATUS
FAULT
WORKING
INSERT
OFF▼
ON▼
HINWEISE
• Falls die Ursache des Alarms wegfällt, für die Rückkehr zur Ausgangssituation mit eingeschalteter Einheit A.C.U. 1 und abgeschalteter Einheit A.C.U.
2 die Einheiten manuell mit dem Befehl INSERT in die Ausgangssituation zurückbringen oder das System neu konfigurieren, wie im Abschnitt AUSFÜHRUNG EINER KONFIGURIERUNG beschrieben.
• Die manuelle Einschaltung einer A.C.U.-Einheit ist zum Beispiel nützlich, wenn mehrere Reserveeinheiten, die auf die Betriebsweise AUTO konfiguriert worden sind, automatisch auf den Status FAULT umgeschaltet werden, zum Beispiel aufgrund einer Überlastung der Leitung, die dann vom Benutzer behoben worden ist.
242
BENUTZUNG DES MENÜS “MONITOR OPERATIONS”
AUDIO ADJUST OPTIONS
ADJUST AUDIO OUTPUT
INSERT BACKUP ACU
MONITOR OPERATIONS
Das Menü gestattet die Benutzung der Funktion “Monitor”, die das Abhören der Audiosignale der folgenden Vorrichtungen des Systems gestattet:
• Eingänge der Karten AUDIO INPUT IB 3210 / IB 3280.
• Ausgänge der Karten AUDIO OUTPUT OB 3230.
• Lautsprecherausgänge der Verstärker, die von den A.C.U.-Einheiten (dem Verstärker nachgeschalteten Karten RB 3300) überwacht werden.
Das Abhören erfolgt über den Monitorlautsprecher der Kontrolleinheit. Im Menü AUDIO PROCESS des Gerätes mit den Tasten ↑ / ↓ und/oder pag ↑
/ pag ↓ den Wahlpunkt auf das Untermenü MONITOR OPERATIONS setzen und die Taste ENTER drücken; auf dem Display des Gerätes werden die
folgenden Felder angezeigt.
SOURCE:
ACTUAL:
LIV. dB
F1 START
SOURCE
DURATION
ACTUAL
MODE
NONE _____
NONE _____
<STOPPED>
F2 STOP
DURATION:
MODE:
000000
MANUAL
F3 CONFIG.
Gibt die für die Überwachung gewählte Quelle an. Es kann angezeigt werden:
• NO Gibt an, dass keine Quelle gewählt worden ist.
• INPUT Gibt die Überwachung der Eingänge der Karten AUDIO INPUT IB 3210 / IB 3280 an.
• OUTPUT - Gibt die Überwachung der Ausgänge der Karten AUDIO OUTPUT OB 3230 an.
• ACU Gibt die Überwachung der A.C.U.-Einheiten (den Verstärker nachgeschalteten Karten RB 3300) an.
Gibt die Zeit an, die seit Beginn der Überwachung der im Feld ACTUAL angezeigten Quelle vergangen ist.
Gibt die zur Zeit für die Überwachung gewählte spezifische Quelle an. Bei der Überwachung der Karten AUDIO INPUT IB 3210 /
IB 3280 wird der Name der des zur Zeit überwachten Eingangs angezeigt; bei der Überwachung der Karten AUDIO OUTPUT OB
3230 wird der Name des zur Zeit überwachten Ausgangs angezeigt; bei der Überwachung der A.C.U.-Einheiten wird die Identifizierungsnummer der zur Zeit überwachten A.C.U.-Einheit angezeigt.
Gibt die Betriebsweise der Überwachung an. Es kann angezeigt werden:
• MANUAL • AUTO -
LIV. dB
Gibt an, dass die manuelle Betriebsweise gewählt worden ist, die das Abhören einer bestimmten Quelle gestattet.
Gibt an, dass die automatische Betriebsweise gewählt worden ist, die nacheinander das Abhören aller Quellen von
dem im Feld SOURCE angegebenen Quelle für 10 Sekunden gestattet.
Gibt den Pegel des überwachten Signals in Dezibel an. Wenn die Funktion “Monitor” nicht aktiv ist, so wird im Feld die Meldung
<STOPPED> angezeigt.
Zur Aktivierung der Überwachung die Taste F1 drücken; zum Unterbrechen der Überwachung die Taste F2 drücken; zum Konfigurieren der Funktion “Monitor” die Taste F3 drücken (siehe Abschnitt KONFIGURIERUNG DER FUNKTION MONITOR).
KONFIGURIERUNG DER FUNKTION “MONITOR”
Zum Anzeigen des Untermenüs, das das Konfigurieren der Funktion “Monitor” gestattet, in der Startanzeige des Menüs MONITOR OPERATIONS die
Taste F1 drücken. Auf dem Display des Gerätes wird die folgende Anzeige angezeigt.
MODE:
MANUAL ▼
AUDIO INPUT
:
AUDIO OUTPUT
:
ACU
:
MODE
SOURCE: NONE _ _ ▼
NO INPUT
_________▼
NO ZONE _ _ _ _ _ _ _ _ _ _ _▼
NO ACU _ _ _ _ _ _ _ _ _ _ _ _▼
Gestattet die Wahl der Betriebsweise der Audioüberwachung. Mit den Tasten + und – für die Wahl der folgenden Betriebsweise
verwenden:
• MANUAL - Gibt die Betriebsweise der manuellen Überwachung an, die die die manuelle des Abhörens gestattet; es können
abgehört werden:
• ein beliebiger Eingang der Karten AUDIO INPUT IB 3210 / IB 3280.
• ein beliebiger Ausgang der Karten AUDIO OUTPUT OB 3230.
• Ein beliebiger Lautsprecherausgang der Verstärker, die von den A.C.U.-Einheiten (dem Verstärker nachgeschaltete Karten RB 3300) überwacht werden.
• AUTO Gibt die Betriebsweise der automatischen Überwachung an, die nacheinander das Abhören für 10 Sekunden gestattet; es können abgehört werden:
• alle Eingänge der Karten AUDIO INPUT IB 3210 / IB 3280.
• alle Ausgänge der Karten AUDIO OUTPUT OB 3230.
• alle Lautsprecherausgänge der Verstärker, die von den A.C.U.-Einheiten (dem Verstärker nachgeschaltete Karten
RB 3300) überwacht werden.
Die Abtastung der verschiedenen Quellen erfolgt vollkommen automatisch.
HINWEISE
• In der Betriebsweise AUTO ist die gleichzeitige Abtastung mehr als eines Typs von Quellen (zum Beispiel INPUT und OUTPUT
oder INPUT und A.C.U.) nicht möglich.
• Im System können bis zu 120 A.C.U.-Einheiten enthalten sein: In diesem Fall die Verwendung der automatischen Überwachung
sorgfältig abwägen, da eine Zeit von 20 Minuten dazu erforderlich sein könnte!
243
SOURCE
Gestattet die Wahl des Typs der zu überwachenden Quelle. Die Tasten + und – für die Wahl einer der folgenden Optionen benutzen:
• NO Gibt an, dass keine Quelle überwacht wird.
• INPUT Gibt die Eingänge der Karten AUDIO INPUT IB 3210 / IB 3280 an
• OUTPUT - Gibt die Ausgänge der Karten AUDIO OUTPUT OB 3230 an.
• ACU Gibt die A.C.U.-Einheiten (dem Verstärker nachgeschaltete Karten RB 3300) an.
AUDIO INPUT
Wird verwendet, wenn die Modalität der Überwachung MANUAL gewählt wird und gestattet die Wahl des abzuhörenden Eingangs
der Karten AUDIO INPUT IB 3210 / IB 3280. Mit den Tasten + und – den Namen des gewünschten Eingangs aus den zuvor mit
dem Menü INPUT PROCESSORS (Feld NAME) festgelegten auswählen. Bei der Wahl der Option NO INPUT (Default) wird kein
Eingang eingegeben.
AUDIO OUTPUT Wird verwendet, wenn die Modalität der Überwachung MANUAL gewählt wird und gestattet die Wahl des abzuhörenden Ausgangs
der Karten AUDIO OUTPUT OB 3230. Mit den Tasten + und – den Namen des gewünschten Ausgangs aus den zuvor mit dem Menü
OUTPUT PROCESSORS (Feld NAME) festgelegten auswählen. Bei der Wahl der Option NO ZONE (Default) wird keine Ausgang
eingegeben.
ACU
Wird verwendet, wenn die Modalität der Überwachung MANUAL gewählt wird und gestattet die Wahl der abzuhörenden A.C.U.Einheit. Mit den Tasten + und – die Identifizierungsnummer der gewünschten A.C.U.-Einheiten eingeben. Bei der Wahl der Option
NO ACU (Default) wird keine A.C.U.-Einheit eingegeben.
ANMERKUNG
• Jedes Mal, wenn das System neu konfiguriert wird (siehe Abschnitt AUSFÜHRUNG EINER KONFIGURIERUNG) geht die Konfigurierung der Funktion “Monitor” verloren, da sie nur temporär ist.
TECHNISCHE DATEN
TECHNISCHE DATEN CP 3100
Funktion
Kontrolleinheit
Mikroprozessor
Hochgeschwindigkeitsprozessor
Videokarte
VGA
Soundkarte
16 Bit
Serielle Ports RS 232
2
Serielle Ports RS 485
2
Synchroner serieller Port DCI
1
Paralleler Port
1
Lüftung
erzwungen
Speisung / max. Leistungsaufnahme
230 Vac ± 5% - 50 Hz (115 Vac - 60 Hz auf Anfrage) / 200 VA
Abmessungen (LxHxT)
483 x 132 x 368 mm
Gewicht
7,8 kg
TECHNISCHE DATEN MB 3200
Funktion
Sub-Rack für modulare Elektronikkarten
Standardslot für Karten
DIN
Anzahl der installierbaren Karten
4 Karten AUDIO INPUT IB 3210 / IB 3280
8 Karten AUDIO OUTPUT OB 3230 oder 8 Karten INPUT/OUTPUT IO 3250
Speisung
5 Vdc - 13,5 Vdc - 24 Vdc
Abmessungen (LxHxT)
483 x 176 x 304 mm
Gewicht
3,7 kg (ohne Karten)
TECHNISCHE DATEN IF 3260
Funktion
Rack-Anschlusspaneel
Anzahl Vorbereitungen für Karten mit Klemmen
5 Vorbereitungen
In jeder Vorbereitung installierbare Anschlusskarten Alternativ: 3 Anschlusskarten mit 12 Klemmen, 2 Anschlusskarten mit 20 Klemmen oder
1 Anschlusskarte mit 32 Klemmen.
Höhe 19”-Behälter
6 Einheiten
244
TECHNISCHE DATEN KARTEN AUDIO INPUT IB 3210 / IB 3280
Funktion
Karte Audioeingänge
Anzahl Eingänge
8 symmetrische Eingänge
Symmetrie
Elektronisch - IB 3210
mit Transformator - IB 3280
Frequenzgang
10 ÷ 30.000 Hz (±3 dB)
Verzerrung
≤ 0,1 % (30 Hz ÷ 15 kHz)
Fremdspannungsabstand
≥ 85 dB
Empfindlichkeit Eingänge
775 mV nom. - 77,5 mV min.
Impedanz Eingänge
47 kΩ
Klangregler
Bässe: ± 12 dB - 100 Hz
Höhen: ± 12 dB - 10 kHz
Speisung / Leistungsaufnahme
5 Vdc / 50 mA
13,5 Vdc / 140 mA
TECHNISCHE DATEN KARTEN AUDIO OUTPUT OB 3230
Funktion
Karte Audioausgänge
Anzahl Ausgänge
8 Ausgänge symmetrisch/unsymmetrisch
Matrix der Karte
32 Eingänge x 8 Ausgänge
Frequenzgang
10 ÷ 30.000 Hz (±3 dB)
Verzerrung
≤ 0,1 % (30 Hz ÷ 15 kHz)
Ausgangspegel
775 mV nom. unsymm. - 1,55 V nom. symm. - >7,5 V max. symm.
Ausgangsimpedanz
< 600 Ω
Speisung / Leistungsaufnahme
5 Vdc / 70 mA
13,5 Vdc / 100 mA
TECHNISCHE DATEN DIGITALE KARTEN INPUT/OUTPUT IO 3250
Funktion
Karte mit programmierbaren optoisolierten Eingängen und Relaisausgängen
Anzahl Eingänge
16 optoisolierte Eingänge
Anzahl Ausgänge
24 Relaisausgänge
Steuerspannung optoisolierte Eingänge
15 ÷ 30 Vdc
Nominalspannung optoisolierte Eingänge
10 mA a 24 Vdc
Max. Schaltspannung der Ausgangsrelais
50 Vdc
Max. Schaltstrom der Ausgangsrelais
0,5 A (max. 1 A je Gruppe)
Speisung / Leistungsaufnahme
5 Vdc / 70 mA
24 Vdc / 0,5 mA (24 aktive Relais)
245
INDICE
ADVERTENCIAS PARA LA SEGURIDAD ___________________________________
PRECAUCIONES PARA LA UTILIZACIÓN __________________________________
DESCRIPCIÓN___________________________________________________________
CP 3100 – UNIDAD DE CONTROL _______________________________________
MB 3200 – SUB-RACK _________________________________________________
IF 3260 – PANEL CONEXIONES _________________________________________
IB 3210 / IB 3280 – FICHA AUDIO INPUT _________________________________
OB 3230 – FICHA AUDIO OUTPUT_______________________________________
IO 3250 – FICHA INPUT/OUTPUT DIGITAL ________________________________
BM 3616 – CONSOLA MICROFÓNICA DIGITAL____________________________
BM 3604 – CONSOLA MICROFÓNICA____________________________________
RB 3300 – FICHA RETROAMPLIFICADORA _______________________________
PS 3400 – ALIMENTADOR ______________________________________________
ES 3000 – SOFTWARE EXTENDIDO ______________________________________
CP 3100 – DISPOSITIVOS PANEL ANTERIOR ______________________________
CP 3100 - DISPOSITIVOS PANEL POSTERIOR _____________________________
MB 3200 - DISPOSITIVOS PANEL ANTERIOR ______________________________
MB 3200 - DISPOSITIVOS PANEL POSTERIOR ____________________________
DISPOSITIVOS Y FUNCIONES DEL SISTEMA ______________________________
MATRICES AUDIO _____________________________________________________
ENTRADAS “GPI” ______________________________________________________
RELÉ PROGRAMABLES ________________________________________________
UNIDADES A.C.U. _____________________________________________________
FUNCIÓN “DAY/NIGHT” _____________________________________________________
FUNCIÓN “MONITOR” _______________________________________________________
ALARMA “OVL”_____________________________________________________________
FUNCIÓN “FIRE-BREAK” ____________________________________________________
FUNCIÓN “LINE FAULT” _____________________________________________________
FUNCIÓN “PA FAULT” _______________________________________________________
FUNCIÓN “ALC” ______________________________________________________
EVENTOS DEL SISTEMA _______________________________________________
EVENTOS QUE PUEDEN SER COMANDADAS DESDE LAS CONSOLASS DIGITALES BM 3616
EVENTOS QUE PUEDEN SER COMANDADAS DESDE LAS CONSOLASS BM 3604 _
EVENTOS QUE PUEDEN SER COMANDADAS DESDE LAS ENTRADAS “GPI” ______
EVENTOS TEMPORIZADOS __________________________________________________
EVENTOS “VOX”____________________________________________________________
EVENTOS “PLAYBACK” _____________________________________________________
EVENTOS “BACKGROUND MUSIC” _______________________________________
ORDEN DE PRIORIDAD_________________________________________________
FUNCIÓN DE INTERDICCIÓN POR PARTE DE UN EVENTO CON PRIORIDAD ABSOLUTA
DISPOSITIVO “VOX”____________________________________________________
GRABACIÓN/REPRODUCCIÓN DE SEÑALES AUDIO ______________________
CREACIÓN DE SONIDOS ____________________________________________________
GRABACIÓN DE SEÑALES AUDIO ____________________________________________
REPRODUCCIÓN DE FILE AUDIO _________________________________________
ALARMAS DEL SISTEMA _______________________________________________
IMPRESIÓN DE LOS EVENTOS DE ALARMA ________________________________
DIFUSIÓN MÚSICA DE FONDO _________________________________________
UTILIZACIÓN DE LA UNIDAD DE CONTROL CP 3100 ______________________
UTILIZACIÓN DE LOS MENU____________________________________________
PASSWORD DE ACCESO A LOS MENÚ _______________________________________
SALIDA DE UN MENÚ _______________________________________________________
VISUALIZACIÓN DEL NIVEL AUDIO ___________________________________________
FUNCIONAMIENTO DEL SEÑALADOR ACÚSTICA_______________________________
FUNCIONAMIENTO DE LA ILUMINACIÓN POSTERIOR ________________________
246
248
248
249
249
250
250
250
250
250
250
251
251
252
252
252
254
255
255
257
257
257
257
257
259
259
260
260
260
260
260
260
260
260
261
261
261
261
261
261
262
263
263
263
263
263
264
264
264
264
264
265
265
266
266
266
ENCENDIDO DEL APARATO ____________________________________________ 266
CONFIGURACIÓN DEL SISTEMA CORREGIDA _________________________________ 266
ERRORES EN LA CONFIGURACIÓN DEL SISTEMA _____________________________ 266
SELECCIÓN DEL IDIOMA ____________________________________________________ 267
MENU PRINCIPAL _____________________________________________________ 267
CONFIGURACIÓN DEL SISTEMA (MENU “CONFIGURATION”) ______________ 267
PARÁMETROS CARACTERÍSTICOS ___________________________________________ 269
UTILIZACIÓN DEL MENU “INPUT PROCESSORS” _______________________________ 269
UTILIZACIÓN DEL MENU “OUTPUT PROCESSORS”_____________________________ 270
UTILIZACIÓN DEL MENU “GROUPS” __________________________________________ 271
UTILIZACIÓN DEL MENU “RELAY CONFIGURATION” ____________________________ 272
UTILIZACIÓN DEL MENU “CONSOLES”________________________________________ 273
UTILIZACIÓN DEL MENU “ACU” ______________________________________________ 277
UTILIZACIÓN DEL MENU “GPI EVENTS DEFINITION” ____________________________ 278
UTILIZACIÓN DEL MENU “TIMER EVENTS DEFINITION”__________________________ 281
UTILIZACIÓN DEL MENU “VOX” ______________________________________________ 283
UTILIZACIÓN DEL MENU “RECORDER”________________________________________ 284
UTILIZACIÓN DEL MENU “SYSTEM” __________________________________________ 287
UTILIZACIÓN DEL MENU “COMPILE & SAVE” __________________________________ 289
UTILIZACIÓN DEL MENU “EXIT WITHOUT SAVING” ___________________________ 289
VISUALIZACIÓN DEL ESTADO ALARMAS (MENU “ALARMS”)_______________ 290
VISUALIZACIÓN DE LOS EVENTOS DE ALARMA _______________________________ 291
IMPRESIÓN DE LOS EVENTOS DE ALARMA ___________________________________ 292
DETALLE ALARMAS EN FICHAS AUDIO INPUT IB 3210 / IB 3280 _________________ 292
DETALLE ALARMAS EN FICHAS AUDIO OUTPUT OB 3230 ______________________ 293
DETALLE ALARMAS EN FICHAS INPUT/OUTPUT DIGITALES IO 3250______________ 294
DETALLE ALARMAS EN CONSOLA BM 3616___________________________________ 295
DETALLE ALARMAS EN UNIDADES A.C.U._____________________________________ 295
DETALLE ALARMAS “GPI” ___________________________________________________ 296
DETALLE ALARMAS CONSOLA BM 3616 ______________________________________ 297
DETALLE ALARMAS FIREMAN________________________________________________ 298
SYSTEM ALARMS _____________________________________________________ 298
ACTUACIÓN DE UNA CONFIGURACIÓN (MENU “STORE CONFIG.”) ________ 299
PROGRAMACIÓN DE LOS DISPOSITIVOS MEDIANTE MENU _____________________ 299
PROGRAMACIÓN DE LOS DISPOSITIVOS MEDIANTE NUEVO ENCENDIDO DEL SISTEMA __ 299
ERRORES DE COMPLETAMIENTO INFORMACIÓN ___________________________ 299
DETERMINACIÓN AUDIO (MENU “AUDIO PROCESS”) ____________________ 300
UTILIZACIÓN DEL MENU “ADJUST AUDIO INPUT” ______________________________ 300
UTILIZACIÓN DEL MENU “ADJUST AUDIO OUPUT” _____________________________ 301
UTILIZACIÓN DEL MENU “INSERT BACKUP ACU” ______________________________ 301
UTILIZACIÓN DEL MENU “MONITOR OPERATIONS” __________________________ 304
DATOS TÉCNICOS _______________________________________________________ 305
DATOS TÉCNICOS CP 3100 ____________________________________________ 305
DATOS TÉCNICOS MB 3200____________________________________________ 305
DATOS TÉCNICOS IF 3260 _____________________________________________ 305
DATOS TÉCNICOS FICHAS AUDIO INPUT IB 3210 / IB 3280 ______________ 306
DATOS TÉCNICOS FICHAS AUDIO OUTPUT OB 3230 ____________________ 306
DATOS TÉCNICOS FICHAS INPUT/OUTPUT DIGITALES IO 3250 __________ 306
EJEMPLO DE CONEXION ________________________________________________ 307
247
IMPORTANTE
• Antes de utilizar los aparatos del sistema leer atentamente las instrucciones contenidas en este manual, que aconsejamos conservar para referencias futuras.
• El presente manual constituye parte integrante del sistema, y debe acompañarlo también en los pasajes de propriedad, para permitir al nuevo propietario conocer las modalidades de utilización y las advertencias para la seguridad.
• La utilización equivocada de los aparatos del sistema exime a RCF de cualquier responsabilidad.
ATENCION
• Para prevenir los riesgos de llamas o sacudidas eléctricas, no exponer los aparatos del sistema a la lluvia o a la humedad.
ADVERTENCIAS PARA LA SEGURIDAD
1. Todas le precauciones acompañadas con el símbolo
deben ser leidas con particular atención, ya que contienen importantes informaciones para la seguridad.
2. Para evitar el riesgo de incendios o sacudidas eléctricas, verificar que el cable de alimentación de la unidad de control CP 3100 no pueda ser pisado o aplastado por objetos, con la finalidad de salvaguardar la perfecta integridad; evitar además doblar excesivamente, tirar o cortar el cable
de alimentación.
3. Para evitar el riesgo de shock eléctrico no abrir jamás la unidad de control CP 3100: en su parte interna no hay partes que puedan ser utilizadas por el usuario.
4. Impedir que objetos o líquidos entren en la parte interna de los aparatos del sistema, ya que podrían causar incendios o sacudidas eléctricas.
5. No tratar de llevar a cabo reparaciones no descriptas en este manual; ponerse en contacto con CENTROS DE ASISTENCIA RCF cuando:
a. un aparato no funciona (o funciona en forma anormal).
b. el cable de alimentación de la unidad de control CP 3100 ha sufrido graves daños.
c. objetos o líquidos han entrado en el aparato.
d. un aparato ha sufrido fuertes golpes.
6. Cuando el sistema no sea utilizado por largos periodos de tiempo, apagarlo interrumpiendo la alimentación de todos aparatos.
7. En el caso en que de un aparato provengan olores anomales o humo, apagar inmediatamente el sistema.
8. Para evitar el riesgo de shock eléctrico no conectar o desconectar el cable de alimentación de la unidad de control CP 3100 con las manos mojadas; tomar siempre directamente la clavija, y no tirar jamás del cable.
9. No dirigir chorros de spray hacia los aparatos del sistema (ej. insecticidas, productos para la limpieza, etc.): los gases utilizados podrían incendiarse en forma imprevista.
10. Los aparatos del sistema utilizan circuitos digitales, y si bien están construidos en pleno respeto de las normativas vigentes en materia de emisión de radiodisturbios, en algunas circunstancias podrían causar disturbios e interferencias se ubicados muy cerca de radio, TV y aparatos similares. Si se presentaran problemas de este tipo, tratar de desplazar los aparatos disturbados lo más lejos posible de los aparatos del sistema.
11. Utilizar los aparatos del sistema solamente con los eventuales accesorios especificados por RCF o provistos junto con los productos.
PRECAUCIONES PARA LA UTILIZACIÓN
• No esforzar los elementos de comando (teclas, controles, etc.).
• Para la limpieza de los aparatos evitar el uso de diluyentes, alcohol, bencina, u otras sustancias volátiles.
MARCAS Y MARCAS GRABADAS
•
•
•
•
IBM® y VGA® son marcas grabadas de la International Business Machines Inc.
Microsoft® es una marca grabada de la Microsoft Corphoration; Windows 95™ y Windows 98™ son marcas de la Microsoft Corphoration.
Sound Blaster es una marca grabada de la Creadosve Technology LTD.
Eventuales otros nombres de productos mencionados en este manual son de propriedad de los respectivos productores.
248
DESCRIPCIÓN
La matriz RX 3000 ha sido proyectada por RCF para responder a los requisitos de los modernos sistemas tecnológicos para la gestión y el control
de las modernas estructuras comerciales, industriales, civiles, como aeropuertos, centros comerciales, hoteles, centros direccionales, estaciones ferroviarias, etc. Presenta las características indicadas a continuación.
• Hasta 64 entradas audio de tipo modular (8 fichas AUDIO INPUT IB 3210 / IB 3280).
• Hasta 128 salidas audio de tipo modular (16 fichas AUDIO OUTPUT OB 3230).
• Posibilidad de crear hasta 8 matrices audio, entre sí completamente independientes y de accesibilidad total.
• Posibilidad de crear matrices con capacidad máxima de 32 entradas x 64 salidas (max 2 matrices 32 x 64).
• Hasta 256 entradas optoaisladas GPI (16 fichas INPUT/OUTPUT digitales IO 3250), para el comando de eventos programables.
• Hasta 384 salidas de relé (16 fichas INPUT/OUTPUT digitales IO 3250), que pueden ser utilizadas para varios objetivos.
• Hasta 16 consolas digitales BM 3616, para la difusión de anuncios microfónicos y el control de númerosas funciones del sistema.
• Hasta 24 consolas o grupos de consolas BM 3604, para la difusión de anuncios microfónicos y el control de algunas funciones del sistema.
• Hasta 120 fichas retroamplificadoras RB 3300 (unidades A.C.U.), para el control diagnóstico y el monitoreo de los amplificadores de potencia del
sistema y de las líneas para difusores.
• Estructura modular para adaptarse a eventuales futuras expansiones.
• Entradas audio de activación vocal (dispositivos VOX), para la conexión de fuentes sonoras sin elementos de comando.
• Gestión de 8 fuentes para música de fondo, que es automáticamente excluida en caso de llamadas selectivas en la zona sonorizada.
• Monitoreo completo de las señales audio controladas por el sistema (entradas y salidas de la matriz audio, salidas de los amplificadores de potencia).
• Diagnóstico completo de amplificadores de potencia y líneas para difusores, con verificación de las dispersiones hacia tierra, empleando los mismos cables de conexión de las líneas altavoz (con fichas RB 3300 y SB 3320).
• Control automático de la relación señal/ruido en los ambientes sonorizados, con sistemas de relévación y regulación digitales (con ficha LB 3340).
• Grabador digital para la grabación/reproducción de mensajes o tonos de aviso/alarma personalizados (calidad CD).
• Tonos de atención pregrabados.
• Posibilidad de conectar una impresora, para grabar en papel la configuración del sistema y los eventos de alarma.
• Posibilidad de difundir los tonos y los mensajes grabados en el disco rigido de la unidad de control CP 3100 con las siguientes modalidades:
– automáticamente a un horario preestablecido.
– automáticamente con repetición dentro de un horario preestablecido.
– mediante comando desde las consolas microfónicas.
– mediante comando en las entradas de las fichas INPUT/OUTPUT digitales IO 3250.
• Programación del sistema mediante diversos menús, que permiten atribuir nombres o siglas a cada entrada, salida, consola microfónica, mensajes grabado, evento, etc.
• Software estándard incluido en el sistema que cumple con las siguientes funciones:
– configuración de las consolas digitales.
– configuración de las entradas audio.
– configuración de las salidas audio
– configuración de los grupos de zonas audio.
– configuración de los relé.
– configuración de los dispositivos VOX.
– configuración de los eventos temporizados.
– configuración de las entradas GPI.
– configuración de las unidades A.C.U. predispuestas para el control de los amplificadores de potencia del sistema (primarios, reservas).
– configuración del monitoreo audio.
– control de los eventos de alarma.
– grabación/reproducción de mensajes, anuncios, tonos de atención, señales de alarma, etc.
– configuración de varios parámetros de funcionamiento del sistema (fecha, hora, modalidades de impresión, password de configuración, etc.).
• Máxima confiabilidad del sistema gracias a una mínima interacción entre los componentes individuales hardware.
• Autodiagnóstico de cada malfuncionamiento, con indicación detallada de la causa.
• Exclusivo sistema de comunicación DCI (Data Communication Interface), que efectua la interfaz a alta velocidad de todos los componentes del sistema.
• Software opcional ES 3000, para la configuración del sistema mediante un PC externo.
Del sistema forman parte los aparatos indicados a continuación.
CP 3100 – UNIDAD DE CONTROL
CP 3100 es la unidad de control que contiene el microprocesador capaz de controlar todo el funcionamiento del sistema. Presenta las características
indicadas a continuación.
• Contenedor rack 19” de 3 unidades.
• Microprocesador de alta velocidad.
• Programable mediante el teclado y el display presentes en el panel frontal, o bien mediante un PC externo.
• 1 disco rigido para la memorización del programa de gestión del sistema, de los file para la configuración de los varios dispositivos (fichas, consolas digitales, etc.), de los file audio, etc.
• 1 ficha audio digital, para la grabación/reproducción de file audio.
• 1 conector para monitor externo.
• 1 conector para teclado externo.
• 1 puerta serial RS 232, para la conexión de un PC de configuración.
• 1 ficha interfaz bus, para la conexión de los sub-rack MB 3200.
• 2 puertas seriales RS 485, para la conexión de las consolas digitales BM 3616 y de las fichas retroamplificadoras RB 3300.
• 1 puerta paralela, para la conexión de una impresora.
• Alimentador interno.
• Altavoz para monitorear, en forma selectiva o en sucesión automática, las entradas y las salidas de la matriz audio, y las salidas de los amplificadores.
• Panel anterior con teclado para configuración y diagnóstico.
• Display de cristales líquidos iluminado desde la parte posterior 4x40 carácteres.
249
MB 3200 SUB-RACK
MB 3200 es el sub-rack que alberga los diferentes módulos del sistema. En el MB 3200 pueden ser instaladas:
• 4 fichas AUDIO INPUT IB 3210 / IB 3280 (para un total de 32 entradas audio).
• 8 fichas AUDIO OUTPUT OB 3230 (para un total de 64 salidas audio), o bien 8 fichas INPUT/OUTPUT digitales IO 3250 (para un total de 128 entradas optoaisladas y 192 salidas a relé), o bien 8 entre fichas AUDIO OUTPUT OB 3230 y fichas INPUT/OUTPUT digitales IO 3250.
Presenta las características indicadas a continuación.
• Contenedor rack 19” de 4 unidades.
• Panel anterior con indicadores del estado de funcionamiento de las fichas instaladas.
• Conectores y guías para fichas electrónicas a estándard DIN.
• Veloz instalación de las fichas gracias a conexiones de encastre rápido.
• Posibilidad de conectar a la unidad de control CP 3100 dos o más MB 3200.
IF 3260 – PANEL CONEXIONES
El panel permite la instalación de las fichas de conexión de los módulos presentes en el sub-rack MB 3200. A colocar en la parte posterior del contenedor rack, presenta las características indicadas a continuación.
• Panel rack 19” de 6 unidades, de chapa pintada.
• Posibilidad de instalar en alternativa: 15 fichas de conexión de 12 bornes, o bien 10 fichas de conexión de 20 bornes, o bien 5 fichas de conexión
de 32 bornes
IB 3210 / IB 3280 – FICHA AUDIO INPUT
IB 3210 / IB 3280 es la ficha que permite la entrada de las señales audio. Presenta las características indicadas a continuación.
• 8 entradas balanceadas electrónicamente (IB 3210) o con transformador (IB 3280).
• Trimmer para la regulación de los tonos altos (±12 dB a 10 kHz) y de los tonos bajos (±12 dB a 100 Hz) en cada entrada.
• Posibilidad de excluir los controles de tono via software.
• 1 led de estado.
• Ganancia de las señales en entrada regulable via software.
• Monitoreo audio que puede ser seleccionado via software en cada una de las 8 entradas.
• Elevada confiabilidad gracias al hardware “watchdog”, que permite una inmediata recuperación de las normales condiciones de funcionamiento en
caso de interferencias inducidas.
• Autoconfiguración de las fichas instaladas.
• Configuración de setup memorizado en la ficha, para un veloz encendido del sistema.
• 2 fichas de conexión separadas de 12 bornes, a instalar en el panel IF 3260.
OB 3230 – FICHA AUDIO OUTPUT
OB 3230 es la ficha que permite la salida de las señales audio. Presenta las características indicadas a continuación.
• 8 salidas balanceadas de baja impedancia.
• Matriz de ficha de 32 entradas x 8 salidas.
• Nivel de salida regulable via software.
• 1 dispositivo “VOX” configurable, para la conexión y la activación vocal de una entrada con una o más salidas de la ficha.
• Monitoreo audio que puede ser seleccionado via software en cada una de las 8 salidas.
• Autoconfiguración de las fichas instaladas.
• Elevada confiabilidad gracias al hardware “watchdog”, que permite una inmediata recuperación de las normales condiciones de funcionamiento en
caso de interferencias inducidas.
• Configuración de setup memorizada en la ficha, para un veloz encendido del sistema.
• Análisis automática de los canales de salida para relévación clipping y canal defectuoso.
• 6 led de estado.
• Ficha de conexión separada de 32 bornes, a instalar en el panel IF 3260.
IO 3250 – FICHA INPUT/OUTPUT DIGITAL
IO 3250 es una ficha provista de entradas optoaisladas programables (entradas GPI) y de relés de salida, que permite comandar diferentes tipologías
de eventos. La ficha permite por ejemplo la utilización de las consolas microfónicas estándard (ej. BM 3604), para difundir anuncios microfónicos o
para comandar la reproducción de mensajes pregrabados en la unidad de control. Indispensable para interconectar el sistema con dispositivos externos, como sistemas de iluminación, centrales de alarma, u otros dispositivos que pueden ser comandadas mediante contactos. Presenta las características indicadas a continuación.
• 16 entradas optoaisladas.
• 24 relé de salida.
• 6 led de estado.
• Posibilidad de asociar a una combinación de los contactos en entrada una determinada configuración de salida.
• Elevada confiabilidad gracias al hardware “watchdog”, que permite una inmediata recuperación de las normales condiciones de funcionamiento en
caso de interferencias inducidas.
• Configuración de setup memorizada en la ficha, para un veloz encendido del sistema.
• 2 fichas de conexión separadas, una de 32 bornes y la otra de 20 bornes, a instalar en el panel IF 3260.
BM 3616 – CONSOLA MICROFÓNICA DIGITAL
La BM 3616 es una consola microfónica de mesa con brazo flexible, que permite difundir un anuncio en 16 zonas audio o grupos de zonas audio, con
la posibilidad de activar una señal de preaviso de anuncios de 1, 2 o 3 tonos (din-don). La consola permite además difundir en las zonas seleccionadas señales audio (mensajes o tonos) grabados en la unidad de control CP 3100; junto a la reproducción puede ser comandada también la conmutación de relés de las fichas INPUT/OUTPUT digitales IO 3250. Presenta las características indicadas a continuación.
250
•
•
•
•
•
•
•
•
•
•
•
•
•
•
•
•
•
Display de cristales líquidos iluminado desde la parte posterior de 16 carácteres, para la visualización de mensajes.
16 teclas programables para la selección de zonas y/o grupos de zonas.
Tecla para la selección de todas las zonas asociadas a la consola.
3 teclas función programables (F1, F2, F3), para el comando de relés o para la reproducción remota de señales audio (mensajes o tonos).
Tecla de alarma para el envio con prioridad absoluta de mensajes.
Posibilidad de grabar localmente un mensaje, que es automáticamente difundido en las zonas requeridas cuando las mismas son puestas a disposición por el sistema.
Micrófono de condensador en brazo flexible, con indicador luminoso de anillo.
Compresor para micrófono provisto de limitador de nivel.
Generador de señal de preaviso para anuncios microfónicos de 1, 2, 3 tonos.
Salida audio balanceada con transformador, con nivel regulable.
Salida audio para escuchar antes de la transmisión mediante auriculares el mensaje grabado localmente.
Luces indicadoras de señalación para zonas y funciones seleccionadas.
Señalador acústico interno (buzzer).
Password de activación consola.
Conexión a la unidad de control mediante linea serial RS 485.
Elevada confiabilidad gracias al hardware “watchdog”, que permite una inmediata recuperación de las normales condiciones de funcionamiento en
caso de interferencias inducidas.
Configuración de setup memorizado en la parte interna de la consola, para un veloz encendido del sistema.
BM 3604 – CONSOLA MICROFÓNICA
BM 3604 es una consola microfónica de mesa con brazo flexible. Permite difundir un anuncio en 4 zonas o grupos de zonas, que pueden ser libremente elegidas/os mediante cuatro teclas de la consola. Presenta las características indicadas a continuación.
• 4 teclas para la selección de zonas o grupos de zonas.
• Tecla para la selección general de todas las zonas o los grupos de zonas asociadas/os a la consola.
• Tecla para difundir el anuncio microfónico en las zonas seleccionadas.
• Tecla para difundir el anuncio microfónico solamente en una zona local.
• Tecla auxiliar para el comando de un evento del sistema RX 3000 (ej. difusión de un mensaje pregrabado memorizado en la unidad de control CP
3100, conmutación de los relé de las fichas IO 3250, etc.).
• Generador de señal de preaviso para anuncios microfónicos de 1, 2, 3 tonos.
• Micrófono de condensador en brazo flexible, con indicador luminoso de anillo.
• Salida audio balanceada (nivel “linea”).
• Salida audio auxiliar (nivel “linea”), para controlar un amplificador dedicado a la sonorización de una zona local.
• Luces indicadoras de señalación para zonas y funciones seleccionadas.
• Timer para la desactivación automática de las zonas seleccionadas en ausencia de anuncio.
• Control automático de la ganancia, para una difusión a volumen constante.
• Posibilidad de interconectar varias consolas BM 3604 en cascada en la misma linea.
RB 3300 – FICHA RETROAMPLIFICADORA
RB 3300 es una ficha electrónica a acoplar a un amplificador de potencia con salidas a tensión constante que permite:
• activar/desactivar el amplificador mediante la unidad de control CP 3100.
• controlar el funcionamiento del amplificador.
• activar un amplificador de reserva en caso de desperfecto del amplificador controlado por la ficha.
• monitorear la salida para difusores del amplificador, mediante el correspondiente altavoz de la unidad de control CP 3100.
El amplificador al cual es acoplada la ficha puede ser el primario, normalmente utilizado para la sonorización de una determinada zona audio, o bien
un amplificador de reserva, a utilizar en lugar de un amplificador primario en caso, por ejemplo, de un desperfecto de este último. A instalar en rack
en correspondencia con el panel posterior del amplificador a controlar, se conecta a la unidad de control CP 3100 mediante un bus digital y un bus
audio de monitoreo. La ficha presenta las características indicadas a continuación.
• Entrada balanceada para señal de línea.
• Salida balanceada para control amplificador.
• Entrada para señalación de alarma proveniente del amplificador controlado (ej. “overload”).
• Monitoreo de la salida para difusores del amplificador, con posibilidad de control de líneas de 25 V, 50 V, 70 V, 100 V.
• Señalación a la unidad de control CP 3100 de las siguientes alarmas:
– reset de ficha (“watchdog” reset).
– anomalías de alimentación de la ficha (12V y/o 24V).
– anomalías de funcionamiento del amplificador controlado, señaladas mediante contacto auxiliar de este último (ej. funcionamiento en sobrecarga).
– alarmas transmitidas por la ficha opcional FAULT DETECTOR SB 3320.
– señalaciones transmitidas por la ficha opcional DIGITAL ALC LB 3340.
• Incorporación de un amplificador de reserva, en lugar del amplificador controlado por la ficha, comandable manualmente, o automáticamente en
caso de:
– alarma transmitida por el amplificador controlado (ej. alarma “overload”).
– alarma transmitida por la ficha opcional FAULT DETECTOR SB 3320.
• Elevada confiabilidad gracias al hardware “watchdog”, que permite una inmediata recuperación de las normales condiciones de funcionamiento en
caso de interferencias inducidas.
• Puede estar equipado con la ficha opcional DIGITAL ALC LB 3340, que permite utilizar las funciones ALC, para el control automático de la relación señal/ruido ambiente, y DAY/NIGHT, para bajar en modo automático el nivel de difusión durante las horas nocturnas.
• Puede estar equipado con la ficha opcional FAULT DETECTOR SB 3320, que permite utilizar las funciones LINE FAULT, para el control del correcto
funcionamiento de la linea para difusores, PA FAULT, para el control del correcto funcionamiento del amplificador, y FIRE-BREAK, para la difusión
con prioridad absoluta de una señal de alarma (ej. mensaje alarma incendio), con exclusión de la señal proveniente de la matriz audio del sistema.
251
PS 3400 – ALIMENTADOR
PS 3400 es un alimentador multitensión estabilizado en corriente continua, que permite alimentar los siguientes aparatos del sistema: consola digital
BM 3616, consola BM 3604, ficha retroamplificadora RB 3300, fichas INPUT/OUTPUT digitales IO 3250, fichas AUDIO INPUT IB 3210 / IB 3280,
fichas AUDIO OUTPUT OB 3230. Presenta las siguientes características:
• salida para tensión estabilizada de 5 Vdc (3 A max).
• salida para tensión estabilizada de 12 Vdc (3 A max).
• salida para tensión estabilizada de 24 Vdc (2 A max).
• relé auxiliar comandado por la protección contra temperaturas muy elevadas, con 1 contacto de intercambio indicado en caja de bornes
• posibilidad de conectar en paralelo varios alimentadores.
• protección contra corto circuitos en las salidas.
• indicadores luminosos para 5V DC, 12V DC, 24V DC, OVERHEATING, ON.
• bastidor apto para el montaje en rack (altura 1 unidad).
• doble alimentación en corriente alterna (115/230 Vac).
• caja de bornes de conexión extraible.
ES 3000 – SOFTWARE EXTENDIDO
ES 3000 es un software que puede ser instalado en una computadora personal externa, IBM o compatible, con sistema operativo Microsoft Windows 95
o Windows 98, que permite mejorar la gestión del sistema RX 3000. Esto permite en especial efectuar las siguientes operaciones:
• creación de varias configuraciones, memorizadas en carpetas de sistema en la PC de configuración.
• envio de file “EXE” a la unidad de control CP 3100, para actualizaciones del software de sistema.
• envio de file de configuración a la unidad de control CP 3100, para definir una nueva configuración del sistema.
• envio de file “WAV” a la unidad de control CP 3100, para definir nuevos tonos y/o mensajes (grabados por ejemplo en la PC de configuración mediante
programas especiales).
• retiro de los file de configuración de la unidad CP 3100 (por ejemplo para diagnóstico por parte de técnicos).
• retiro de tonos y/o mensajes grabados en la unidad CP 3100.
Una computadora personal puede disponer de una puerta serial cualquiera RS232 estándard (puerta de COM1 a COM4 que puede ser seleccionada mediante software ES 3000). Las operaciones de configuración del sistema pueden ser efectuadas en la PC de configuración, y sucesivamente pueden ser
transmitidas mediante la linea serial a la unidad CP 3100.
Todas las operaciones de configuración del sistema son extremadamente simples gracias a la gráfica del ambiente Windows, y a la utilización del mouse y del teclado.
CP 3100 – DISPOSITIVOS PANEL ANTERIOR (fig. 1)
(1) Luz indicadora RECORD
Cuando encendida señala que está en curso la grabación en file de una señal audio, mediante la función RECORD del menu RECORDER (ver
párrafo GRABACIÓN/REPRODUCCIÓN DE SEÑALES AUDIO).
(2) Teclas di dirección
Las teclas ← , → , ↑ , ↓ permiten desplazar el punto de selección en las correspondiente cuatro direcciones; la tecla permite desplazar el
punto de selección en el primer campo del menu corriente.
(3) Teclas Pag ↑ / Pag ↓
Permiten cambiar la pagina del menu corrientemente visualizado hacia abajo (pag ↓ ) o hacia arriba (pag ↑).
(4) Display de cristales líquidos
Display de cristales líquidos iluminado desde la parte posterior para la visualización de los varios menu del aparato (ej. configuración del sistema, alarmas, etc.).
(5) Tecla MEMORY
Permite memorizar la “password usuario”, que permite impedir el acceso a determinados menu de la unidad de control por parte de personal
no autorizado.
(6) Luz indicadora MEMORY
La luz indicadora se enciende cuando mediante la tecla MEMORY (5) es correctamente memorizada una nueva “password usuario”.
(7) Teclas numéricas
Permiten activar números, para programar los campos de los varios menú del aparato.
(8) Tecla de regulación contraste
Apretar la tecla para regular il contraste del display de cristales líquidos mediante las teclas (24); la determinación de datos es salvada en la
memoria del aparato.
(9) Luz indicadora MUTE
La luz indicadora se enciende cuando el volumen del altavoz monitor (10) es puesto en cero mediante la tecla (23).
(10) Altavoz monitor
Cuando es activada la función “monitor” (monitoreo audio), el altavoz permite escuchar las señales audio tratadas por el sistema (señales en
entrada, señales en salida, etc.).
(11) Luz indicadora PLAY
Cuando encendida señala que está en curso la reproducción de una señal audio (file audio) grabada en el disco rigido del aparato (ver párrafo
GRABACIÓN/REPRODUCCIÓN DE SEÑALES AUDIO).
(12) Luz indicadora POWER
La luz indicadora se ilumina cuando la unidad está encendida.
(13) Luz indicadora ALARM
La luz indicadora se enciende cuando se activa una de las alarmas controladas por el sistema (ver párrafo ALARMAS DEL SISTEMA).
(14) Tecla C ←
Borra el carácter que precede el cursor de inmisión carácteres, desplazando este último una posición hacia la izquierda.
(15) Tecla SPACE
Incorpora un espacio en un campo (carácter “blank”), desplazando el cursor de inmisión carácteres una posición hacia la derecha.
252
(16) Tecla C →
Borra el carácter corrientemente seleccionado.
(17) Tecla CLEAR
Tecla para borrar todos los carácteres contenidos en el campo corrientemente seleccionado.
(18) Teclas F1 - F2 - F3 - F4
Teclas para acceder a submenu del aparato; la especifica función de las teclas está indicada cada vez en los varios menú.
(19) Tecla MENU
Tecla no utilizable en la presente versión del aparato.
(20) Tecla ENTER
Tecla para confirmar el parametro determinado en un campo.
(21) Tecla ESC
Tecla para salir de un menú/submenú y volver al menu anterior. Cuando sean modificados los parámetros, antes de proceder será requerido
si salvar o no los nuevos valores.
(22) Teclas +/Permiten seleccionar los varios parámetros indicados en los campos a rotación de los varios menu de la unidad de control, y seleccionar carácteres alfanúméricos para la determinación de nombres, números, siglas, etc.
(23) Tecla MUTE
La tecla permite activar/desactivar la función MUTE. Activando la función MUTE el volumen del altavoz monitor es puesto en cero y la luz indicadora (9) se enciende; desactivando la función MUTE el volumen del altavoz monitor es indicado en el nivel anteriormente determinado, y
la luz indicadora (9) se apaga.
(24) Teclas de regulación
Las dos teclas desarrollan una doble función. Cuando se enciende el menu que permite monitorear las señales audio tratadas por el sistema
(ver párrafo UTILIZACIÓN DEL MENU MONITOR OPERATIONS), las dos teclas permiten regular el volumen del altavoz monitor: apretar la
tecla
para disminuir el volumen, apretar la tecla
para aumentar el volumen. En todas las demás situaciones las dos teclas permiten,
después de haber apretado la tecla (8), regular el contraste del display de cristales líquidos.
NOTA
• Para obtener la regulación es necesario apretar y soltar cada una de las teclas.
Fig. 1
253
CP 3100 - DISPOSITIVOS PANEL POSTERIOR (fig. 2)
(1) Interruptor POWER
Permite el encendido y el apagado del aparato.
(2) Ventilador de enfriamiento
Permite el enfriamiento del aparato.
(3) Toma corriente para cable de alimentación
Permite la conexión del cable de alimentación provisto en dotación.
(4) Toma corriente AC OUTLET
El conector está conectado en paralelo con el toma corriente (3), y permite alimentar con facilidad el eventual monitor video.
(5) Cajas de bornes MONITOR BUS
Las dos cajas de bornes de 3 polos permiten la conexión de las líneas “monitor bus” provenientes de las fichas retroamplificadoras RB 3300
y de los sub-rack MB 3200. Las dos líneas permiten monitorear las señales audio tratadas por el sistema (señales en entrada, señales en salida, señales de los amplificadores controlados desde las fichas retroamplificadoras RB 3300, etc.).
(6) Puerta serial N°2 (COM 2)
Conector no utilizable.
(7) Puerta para mouse PS2
Conector no utilizable.
(8) Toma corriente para teclado
Permite la conexión de un teclado estándard para computer, a utilizar en alternativa al teclado presente en el panel anterior del aparato. El teclado debe ser empleado junto con un monitor video a conectar al toma corriente (12), y facilita las operaciones de configuración del sistema.
(9) Puerta serial N°1 (COM 1)
Puerta serial RS 232 en conector SUB D macho de 9 polos, para conectar el sistema con un PC de configuración externo.
(10) Puerta paralela N°1 (LPT 1)
Puerta paralela en conector SUB D hembra de 25 polos, para conectar el sistema con una impresora, y permitir la impresión de la configuración del sistema y de los mensajes de alarma.
(11) Puerta serial N°4 (COM 4)
Puerta serial balanceada RS 485, para la comunicación entre la unidad de control CP 3100 y las consolas digitales BM 3616 del sistema.
(12) Conector para monitor video
Permite la conexión de un monitor video, a utilizar en alternativa al display de cristales líquidos presente en el panel anterior del aparato. El monitor debe ser empleado junto con un teclado externo a conectar al toma corriente (8), y facilita las operaciones de configuración del sistema.
(13) Puerta serial N°3 (COM 3)
Puerta serial balanceada RS 485, para la comunicación entre la unidad de control CP 3100 y las fichas retroamplificadoras RB 3300 del sistema.
(14) Conector para sub-rack
Puerta serial sincrona DCI que permite la comunicación entre la unidad de control CP 3100 y los sub-rack MB 3200 del sistema.
(15) Salida LINE OUT ficha audio
Permite la salida de la señal audio a nivel “linea” de la ficha audio del aparato, utilizable para controlar una de las entradas audio del sistema
(entrada PLAYBACK de una ficha AUDIO INPUT IB 3210 / IB 3280).
(16) Entrada LINE IN ficha audio
La entrada permite controlar la ficha audio del aparato con la señal audio a nivel “linea” a grabar, proveniente de una salida audio del sistema
(salida RECORDER de una ficha AUDIO OUTPUT OB 3230), o de fuentes audio externas (ej. lectores de cassette, sintonizadores, lectores de
CD audio, etc.).
(17) Entrada MICRO IN ficha audio
La entrada permite controlar la ficha audio del aparato con la señal a grabar, proveniente de un micrófono externo.
(18) Conector no utilizable
Fig. 2
254
MB 3200 - DISPOSITIVOS PANEL ANTERIOR (fig. 3)
(1) Luces indicadoras de alimentación 12 Vdc / 24 Vdc
Cada luz indicadora corresponde a una de las fichas AUDIO OUTPUT OB 3230 o INPUT/OUTPUT digitales IO 3250 instaladas en el sub-rack,
y cuando está encendida señala que la correspondiente ficha está correctamente alimentada por la tensión para circuitos analógicos (12 Vdc
o 24 Vdc).
(2) Luces indicadoras de alimentación 5 Vdc
Cada luz indicadora corresponde a una de las fichas AUDIO OUTPUT OB 3230 o INPUT/OUTPUT digitales IO 3250 instaladas en el sub-rack,
y cuando está encendida señala que la correspondiente ficha está correctamente alimentada por la tensión para circuitos digitales (5 Vdc).
(3) Luces indicadoras monitor / GPI
Cada luz indicadora corresponde a una de las fichas AUDIO OUTPUT OB 3230 o INPUT/OUTPUT digitales IO 3250 instaladas en el sub-rack.
Ficha AUDIO OUTPUT OB 3230: la luz indicadora se enciende y se apaga cuando es activado el monitoreo de una salida de la ficha.
Ficha INPUT/OUTPUT digital IO 3250: la luz indicadora se enciende y se apaga cuando se controla una entrada cualquiera GPI de la ficha.
(4) Luces indicadoras matriz / relé
Cada luz indicadora corresponde a una de las fichas AUDIO OUTPUT OB 3230 o INPUT/OUTPUT digitales IO 3250 instaladas en el sub-rack.
Ficha AUDIO OUTPUT OB 3230: la luz indicadora se enciende y se apaga cuando la matriz de conmutación de la ficha está activada, es decir
cuando una salida de la ficha está conectada con una de las entradas de la matriz audio.
Ficha INPUT/OUTPUT digital IO 3250: la luz indicadora se enciende y se apaga cuando es conmutatdo en cierre el contacto de uno de los relé
de salida de la ficha.
NOTA
• La luz indicadora (4) de una ficha INPUT/OUTPUT digital IO 3250 se enciende y se apaga también cuando uno de sus relé está determinado
como normalmente cerrado, mediante el correspondiente menu de configuración de la unidad de control CP 3100.
(5) Luces indicadoras de comunicación
Cada luz indicadora corresponde a una de las fichas AUDIO OUTPUT OB 3230 o INPUT/OUTPUT digitales IO 3250 instaladas en el sub-rack;
cuando una de las luces indicadoras se enciende y se apaga significa que la correspondiente ficha está comunicando con la unidad de control CP 3100.
(6) Luces indicadoras de desperfecto
Cada luz indicadora corresponde a una de las fichas AUDIO OUTPUT OB 3230 o INPUT/OUTPUT digitales IO 3250 instaladas en el sub-rack;
cuando una de las luces indicadoras se enciende y se apaga significa que hay una alarma causada por un malfuncionamiento de la correspondiente ficha (ej. retraso en la comunicación, error, desperfecto, etc.).
NOTA
• Durante las fases de configuración del sistema es normal que la luz indicadora se encienda y se apague.
(7) Luces indicadoras para fichas AUDIO INPUT
Cada luz indicadora corresponde a una de las fichas AUDIO INPUT IB 3210 / IB 3280 instaladas en el sub-rack. En base al estado de la luz
indicadora se proveen las siguientes indicaciones:
• luz indicadora encendida en forma permanente - Señala una alarma causada por un malfuncionamiento de la correspondiente ficha (ej.
retraso en la comunicación, error, desperfecto, etc.).
• luz indicadora encendida en forma intermitente - Señala que la correspondiente ficha está comunicando con la unidad de control CP 3100.
• Luz indicadora apagada - Señala que la correspondiente ficha no está alimentada por la tensión para circuitos digitales (5 Vdc).
Fig. 3
MB 3200 - DISPOSITIVOS PANEL POSTERIOR (fig. 4 )
(1) Puentecito JP6
Permite conectar el polo GND de la tensión de alimentación de 5 Vdc con el bastidor del sub-rack MB 3200.
(2) Puentecito JP7
Permite conectar el polo GND de la tensión de alimentación de 12 Vdc con el bastidor del sub-rack MB 3200.
(3) Puentecito JP8
Permite conectar el polo GND de la tensión de alimentación de 24 Vdc con el bastidor del sub-rack MB 3200.
255
(4) Cajas de bornes M1 y M2
Permiten alimentar el sub-rack con las tensiones de alimentación 5 Vdc, 12 Vdc, 24 Vdc. Hay presentes dos cajas de bornes, conectadas entre sí en paralelo, para facilitar las conexiones cuando en el sistema hay presentes varios sub-rack MB 3200 una caja de bornes puede ser utilizada para la entrada de las tres alimentaciones, mientras que la segunda caja de bornes puede ser utilizada como salida para alimentar el
sub-rack sucesivo.
(5) Fusible de protección F2
El fusible, de tipo 2 A rapido, protege los circuitos alimentados con la tensión de 12 Vdc.
(6) Fusible de protección F3
El fusible, de tipo 4 A rapido, protege los circuitos alimentados con la tensión de 24 Vdc.
(7) Fusible di protección F1
El fusible, de tipo 2 A rapido, protege los circuitos alimentados con la tensión de 5 Vdc.
(8) Dispositivos que no pueden ser utilizados
(9) Conectores IDC1 ÷ 8
Los conectores permiten conectar las entradas audio de las fichas AUDIO INPUT IB 3210 / IB 3280 con las correspondientes fichas de conexión de 12 bornes. Cada ficha AUDIO INPUT se conecta mediante dos conectores (ej. IDC1 y IDC2), cada uno de los cuales permite la conexión de 4 entradas audio con una ficha de conexión de 12 bornes. Los conectores marcados con los números impares corresponden a las
primeras cuatro entradas de las fichas AUDIO INPUT (ej. entradas de 1 a 4), mientras que los conectores marcados con los números pares
corresponden a las restantes cuatro entradas (ej. entradas de 5 a 8).
(10) Puentecitos JP1 y JP2
Los dos puentecitos permiten terminar la linea serial RS 485, que interconecta los sub-rack MB 3200 con la unidad de control CP 3100.
(11) Conector CN6
Permite la conexión de la linea serial RS 485 proveniente de unidad de control CP 3100, o del sub-rack MB 3200 anterior.
(12) Conector CN7
Permite la conexión de la linea serial RS 485 directa al sub-rack MB 3200 sucesivo (cuando presente).
(13) Luz indicadora DL1
Cuando encendida señala que el sub-rack es alimentado con la tensión de 5 Vdc.
(14) Luz indicadora DL2
Cuando encendida señala que el sub-rack es alimentado con la tensión de 12 Vdc.
(15) Luz indicadora DL3
Cuando encendida señala que el sub-rack es alimentado con la tensión de 24 Vdc.
(16) Conectores J4A ÷ J4H
Cada uno de los 8 conectores permite conectar las 16 entradas GPI de una ficha INPUT/OUTPUT digital IO 3250 con la correspondiente ficha
de conexión de 20 bornes
(17) Cajas de bornes M3 y M4
Permiten transmitir a la unidad de control CP 3100 la señal audio “monitor” proveniente de los varios sub-rack MB 3200, y correspondiente a
las entradas de las fichas AUDIO INPUT IB 3210 / IB 3280, o a las salidas de las fichas AUDIO OUTPUT OB 3230. La señal “monitor” podrá
así ser escuchada mediante el altavoz presente en el panel frontal de la unidad de control. Hay presentes dos cajas de bornes, conectadas entre sí en paralelo, para facilitar las conexiones cuando en el sistema hay presentes más sub-rack MB 3200: una caja de bornes puede ser utilizada para la salida de la señal “monitor” dirigida a la unidad de control CP 3100, mientras que la segunda caja de bornes puede ser utilizada
para la entrada de la señal “monitor” proveniente del eventual sub-rack sucesivo.
(18) Conectores J3A ÷ J3H
Cada uno de los 8 conectores permite conectar las salidas audio de una ficha AUDIO OUTPUT OB 3230, o bien los relé de salida de una ficha
INPUT/OUTPUT digital IO 3250, con la correspondiente ficha de conexión de 32 bornes. Cuando en correspondencia de un conector es insta
lada una ficha AUDIO OUTPUT OB 3230, la correspondiente ficha con bornes permite la conexión de 8 salidas audio; cuando en correspondencia de un conector es insta lada una ficha INPUT/OUTPUT digital IO 3250, la correspondiente ficha con bornes permite la conexión de los
contactos de 24 relé de salida.
Fig. 4
256
DISPOSITIVOS Y FUNCIONES DEL SISTEMA
MATRICES AUDIO
El sistema RX 3000 puede controlar un máximo de 8 matrices audio, entre sí completamente independientes; la capacidad máxima de una matriz
puede llegar a 32 entradas y 64 salidas (max 2 matrices 32x64). Las matrices son de accesibilidad total, es decir en una determinada matriz audio cada entrada puede ser conectada con cualquiera de las salidas. Las entradas y las salidas de las matrices audio se obtienen con la instalación de las
fichas AUDIO INPUT IB 3210 / IB 3280 y AUDIO OUTPUT OB 3230; en base al número de fichas AUDIO INPUT IB 3210 / IB 3280 y AUDIO OUTPUT OB 3230 que son instaladas en los sub-rack MB 3200 es posible crear innumerables matrices audio (ej. matriz con 8 entradas y 16 salidas, matriz con 8 entradas y 32 salidas, etc.).
ENTRADAS “GPI”
Las entradas GPI (General Purpose Input) son entradas particulares optoaisladas, disponibles cuando en los sub-rack MB 3200 del sistema son instaladas las fichas INPUT/OUTPUT digitales IO 3250. Las entradas GPI permiten comandar diferentes tipologías de eventos, libremente programables por el usuario; el elenco de los eventos que pueden ser comandadas está contenido en el párrafo EVENTOS QUE PUEDEN SER COMANDADAS
POR LAS ENTRADAS GPI. Para poder comandar una entrada GPI es suficiente conectarla a un normal contacto eléctrico.
RELÉ PROGRAMABLES
Los relé programables están disponibles cuando en los sub-rack MB 3200 son instaladas las fichas INPUT/OUTPUT digitales IO 3250. La programación de los relé tiene lugar mediante la unidad de control CP 3100. En cada ficha INPUT/OUTPUT digital IO 3250 hay presentes 24 relé, cada uno
de los cuales está provisto de un contacto; mediante un menu especial de configuración de la unidad de control CP 3100 es posible determinar el
estado “normalmente abierto” o “normalmente cerrado” del contacto, es decir el estado que este debe asumir una vez que el sistema ha sido configurado (ver párrafo ACTUACIÓN DE UNA CONFIGURACIÓN). Los contactos pueden ser utilizados con la máxima libertad para varios objetivos. La
conmutación de los contactos puede ser comandada:
• mediante eventos del sistema (ver párrafo EVENTOS QUE PUEDEN SER COMANDADAS POR LAS ENTRADAS GPI).
• mediante la tecla ALARM de las consolas digitales BM 3616 (ver párrafo EVENTOS QUE PUEDEN SER COMANDADAS DESDE LAS CONSOLAS
DIGITALES BM 3616).
• mediante las teclas F1, F2, F3 de las consolas digitales BM 3616 (ver párrafo EVENTOS QUE PUEDEN SER COMANDADAS DESDE LAS CONSOLAS DIGITALES BM 3616).
• mediante la consola BM 3604 (ver párrafo EVENTOS QUE PUEDEN SER COMANDADAS DESDE LAS CONSOLAS BM 3604).
• mediante el dispositivo VOX presente en la fichas AUDIO OUTPUT OB 3230 (ver párrafo DISPOSITIVO VOX).
• mediante eventos temporizados (ver párrafo EVENTOS TEMPORIZADOS).
• mediante la matriz audio del sistema, cuando una determinada salida está conectada con una entrada, a excepción de las entradas definidas de
tipo BGM (background music). Esta función es definida con la programación de las salidas audio, como descripto en el párrafo UTILIZACIÓN DEL
MENU “OUTPUT PROCESSORS”.
ADVERTENCIA
• En algunos casos los relé tienen una asignación univoca, es decir pueden ser comandados por un solo evento/dispositivo (ej. relé de “feedback” de una consola BM 3604).
• En base a la programación efectuada mediante el menu CONFIGURATION de la unidad de control CP 3100 (ver párrafo CONFIGURACIÓN DEL
SISTEMA), un mismo relé puede ser comandado al mismo tiempo por varios dispositivos; en este caso la conmutación de su contacto tendrá
lugar con la modalidad descripta a continuación.
a. Cuando uno de los eventos/dispositivos especialmente programados comanda el relé, su contacto commuta a la posición normal.
b. Si en el intervalo otros eventos/dispositivos comandan el relé, su contacto queda conmutado respecto a la posición normal.
c. Si faltara el comando del relé por parte del evento/dispositivo que lo ha comandado en primer lugar, el contacto queda conmutado.
d. El relé conmuta nuevamente a la posición normal solamente cuando no hay ningún dispositivo que lo comanda.
UNIDADES A.C.U.
Las fichas retroamplificadoras RB 3300 están identificadas en los varios menú de la unidad de control CP 3100 con el nombre de unidades A.C.U.
(Amplifier Control Unit). La función de las fichas está indicada en el párrafo DESCRIPCIÓN; mediante un menu especial de configuración de la unidad de control es posible configurar las fichas, y programarlas con las modalidades de funcionamiento descriptas en el presente párrafo.
Cada unidad A.C.U. presente en el sistema se distingue en los varios menú de la unidad de control CP 3100 mediante un NÚMERO DE IDENTIFICACION, contenido dentro de los valores de 1 a 120 (número máximo de unidades A.C.U. que el sistema es capaz de controlar), que depende de la
dirección que se le asigna en fase de instalación.
En base a la función del amplificador controlado por la ficha retroamplificadora, las unidades A.C.U. pueden ser de dos tipos:
• NORMAL – Es una unidad A.C.U. que tiene la función de controlar un amplificador primario, normalmente dedicado a la sonorización de una determinada zona audio.
• BACKUP – Es una unidad A.C.U. que tiene la función de controlar un amplificador de reserva, que es normalmente utilizado para sustituir un amplificador primario, por ejemplo en caso de desperfecto de este último. Cuando un amplificador primario es sustituido, la correspondiente zona audio es sonorizada mediante el amplificador de reserva. Cuando en el sistema hay previstos dos o más amplificadores
de reserva para más amplificadores primarios, la primera reserva tiene la función de sustituir un amplificador primario cualquiera, por
ejemplo en caso de desperfecto de este último, la segunda reserva tiene la función de sustituir unicamente la primera reserva,
cuando tiene desperfectos junto al amplificador primario, y no podrá ser utilizada para sustituir un segundo amplificador primario con desperfecto, la tercera reserva tiene la función de sustituir unicamente la segunda reserva, y así del mismo modo para todos
los amplificadores de reserva presentes en el grupo.
NOTA
• Cuando en la instalación está previsto solamente un amplificador de reserva para uno o más amplificadores primarios, para obtener su incorporación automática en caso de desperfecto de un amplificador primario no es indispensable acoplarlo con una ficha retroamplificadora RB 3300
(unidad BACKUP).
• El empleo de una unidad A.C.U. BACKUP es indispensable cuando el amplificador de reserva debe ser monitoreado, o debe poder ser sustituido con un ulterior amplificador de reserva.
257
Las unidades A.C.U. están subdivididas en grupos (max 64 grupos que comprenden unidad NORMAL y unidad BACKUP). De un grupo puede formar parte un número cualquiera de A.C.U. NORMAL o BACKUP, pero el número total de unidades presentes en el sistema no debe ser superior a
120. La sustitución de una unidad NORMAL con una unidad BACKUP puede tener lugar solamente si éstas pertenecen al mismo grupo.
Mediante un menu especial de la unidad de control es posible activar o desactivar manualmente las unidades A.C.U., para emplear o no el amplificador controlado por las mismas para sonorizar una determinada zona (ver párrafo UTILIZACIÓN DEL MENU “INSERT BACKUP ACU”). Con la desactivación de una unidad A.C.U. el amplificador controlado por ella es excluido de la sonorización de una determinada zona, y en su lugar puede
ser incorporado el eventual amplificador de reserva del grupo, o las eventuales unidades A.C.U. BACKUP en el caso en que el amplificador de
reserva esté controlado mediante una ficha retroamplificadora RB 3300.
NOTA
• Las unidades NORMAL están normalmente ACTIVADAS, mientras que las unidades BACKUP están siempre normalmente DESACTIVADAS
La activación/desactivación de una unidad A.C.U. (NORMAL o BACKUP), en caso de alarma provocada por un desperfecto o un malfuncionamiento de un amplificador, puede tener lugar con las modalidades MANUAL o AUTO. A continuación se indica el funcionamiento de las unidades
NORMAL y BACKUP en las dos modalidades.
• Modo MANUAL en unidad NORMAL –
La desactivación de la unidad NORMAL, en caso de alarma del amplificador por ella controlado, debe ser comandada manualmente, mediante un menu especial de la unidad de control CP 3100.
• Modo AUTO en unidad NORMAL –
La desactivación de la unidad NORMAL, en caso de alarma del amplificador por ella controlado, es
comandada automáticamente por el sistema.
• Modo MANUAL en unidad BACKUP –
La activación de la unidad BACKUP, en caso de alarma de una unidad NORMAL perteneciente al mismo grupo, debe ser comandada manualmente, mediante un menu especial de la unidad de control
CP 3100. La desactivación de la unidad BACKUP, en caso de alarma del amplificador por ella controlado, debe ser comandada manualmente, mediante un menu especial de la unidad de control CP
3100.
• Modo AUTO en unidad BACKUP –
La activación de la unidad BACKUP, en caso de alarma de una unidad NORMAL perteneciente al mismo grupo, es comandada automáticamente por el sistema si la unidad NORMAL que sustituye está
configurada con modo de activación/desactivación AUTO; en caso contrario, si la unidad NORMAL que sustituye está configurada con modo de activación/desactivación MANUAL, la activación de
la unidad BACKUP debe ser comandada manualmente.
La desactivación de la unidad BACKUP, en caso de alarma del amplificador por ella controlado, es
comandada automáticamente por el sistema.
Cuando en un grupo de A.C.U. hay presentes varias unidades BACKUP configuradas con modo de activación/desactivación AUTO, el orden de intervención de tales unidades en caso de alarma de una unidad NORMAL del mismo grupo configurada con modo de activación/desactivación AUTO, depende del NÚMERO DE IDENTIFICACIÓN a ellas asociado: la primera unidad BACKUP a ser activada será aquella con el número de identificación más bajo, la segunda unidad BACKUP a ser activada será aquella con el sucesivo número de identificación, y así del mismo modo para todas las demás eventuales unidades BACKUP.
NOTA
• La activación de una unidad A.C.U. (NORMAL o BACKUP) que había sido automáticamente desactivada a causa de una alarma provocada por un
desperfecto o un malfuncionamiento del amplificador por ella controlado, debe siempre ser efectuada manualmente, mediante el correspondiente menu de la unidad de control CP 3100.
• Cuando es desactivada una unidad NORMAL y en el grupo de A.C.U. al que pertenece hay presente un amplificador de reserva que no está controlado mediante una ficha retroamplificadora RB 3300 (ninguna unidad Backup), este es siempre automáticamente activado en lugar del amplificador primario.
• Cuando en un grupo de A.C.U. hay presentes varias unidades BACKUP, en caso de alarma de una unidad NORMAL perteneciente al mismo grupo y configurada con modo de activación/desactivación AUTO, se incorpora en primer lugar la unidad BACKUP que posee el número de identificación más bajo entre aquellas configuradas con modo de activación/desactivación AUTO; las unidades BACKUP con número de identificación
más bajo en sentido absoluto, pero que han sido configuradas con modo de activación/desactivación MANUAL, no interrumpen entonces la sustitución automática de una unidad NORMAL.
Las alarmas que determinan la desactivación automática de una unidad A.C.U., y la eventual activación automática de la unidad de reserva (o del amplificador de reserva si este no está acoplado con una ficha RB 3300) son:
• Alarma PA FAULT. Esta alarma puede ser activada si la unidad A.C.U. que controla el amplificador está equipada con la ficha opcional FAULT DETECTOR SB 3320. Indica una alarma causada por una rotura cualquiera del amplificador controlado, que determina una sensible disminución de
la potencia transmitida.
• Alarma OVL. Esta alarma puede ser activada si el amplificador controlado por la unidad A.C.U. está provisto de un contacto auxiliar de alarma,
que se cierra cuando interviene una protección, o cuando el aparato funciona en forma anormal (ej. funcionamiento en sobrecarga).
Al final de una alarma en una unidad A.C.U., para volver al estado inicial de activación de las unidades NORMAL y BACKUP (normalmente las unidades NORMAL están activadas, mientras que las unidades BACKUP están desactivadas ), es necesario llevar manualmente las unidades a la condición original mediante un menu especial de la unidad de control (ver párrafo UTILIZACIÓN DEL MENU “INSERT BACKUP ACU”), o configurar nuevamente el sistema mediante uno de los procedimientos descriptos en el párrafo ACTUACIÓN DE UNA CONFIGURACIÓN.
Para la programación de las unidades A.C.U. consultar el párrafo UTILIZACIÓN DEL MENU “ACU”; para la activación/desactivación manual de las
unidades A.C.U. consultar el párrafo UTILIZACIÓN DEL MENU “INSERT BACKUP ACU”. Los ejemplos siguientes pueden suministrar ulteriores aclaraciones sobre el funcionamiento de las unidades A.C.U.
258
Ejemplo 1
UNIDADES A.C.U.
PRESENTES EN
EL GRUPO
TIPO
MODO DE FUNCION.
NORMAL
AUTO.
BACKUP
AUTO.
TIPO
MODO DE FUNCION.
NORMAL
AUTO.
BACKUP
AUTO.
TIPO
MODO DE FUNCION.
ACU 1
NORMAL
MANUAL
ACU 2
BACKUP
MANUAL
ACU 1
a. Si se descompone el amplificador primario controlado por la unidad
ACU 1, se incorpora automáticamente en su lugar el amplificador
de reserva, controlado por la unidad ACU 3.
b. Si sucesivamente se descompone el amplificador primario controlado por la unidad ACU 2, es exclusivamente señalada la eventual
alarma correspondiente a tales unidades.
c. Si luego se descompone también el amplificador de reserva controlado por la unidad ACU 3, esta ultima es automáticamente desactivada; si hay presente un segundo amplificador de reserva (no
controlado por una ficha RB 3300), este es automáticamente utilizado en lugar del primer amplificador de reserva.
ACU 2
ACU 3
DESCRIPCIÓN FUNCIONAMIENTO A.C.U.
Ejemplo 2
UNIDADES A.C.U.
PRESENTES EN
EL GRUPO
ACU 1
a. a. Si se descompone el amplificador primario controlado por la unidad ACU 2, se incorpora automáticamente en su lugar el amplificador de reserva, controlado por la unidad ACU 3.
b. Si sucesivamente se descompone el amplificador primario controlado por la unidad ACU 1, es exclusivamente señalada la eventual
alarma correspondiente a tales unidades.
c. Si luego se descompone también el amplificador de reserva controlado por la unidad ACU 3, esta ultima es automáticamente desactivada; si presente un segundo amplificador de reserva (no controlado da una ficha RB 3300), este es automáticamente utilizado
en lugar del primo amplificador de reserva.
ACU 2
ACU 3
DESCRIPCIÓN FUNCIONAMIENTO A.C.U.
Ejemplo 3
UNIDADES A.C.U.
PRESENTES EN
EL GRUPO
DESCRIPCIÓN FUNCIONAMIENTO A.C.U.
a. Si se descompone el amplificador primario controlado por la unidad
ACU 1, no tiene lugar ninguna operación a excepción de la eventual señalación de alarma correspondiente a tales unidades; la activación del amplificador de reserva controlado por la unidad ACU
2 debe ser comandada manualmente, desactivando la unidad ACU
1 en alarma y activando sucesivamente la unidad ACU 2.
b. Si luego se descompone también el amplificador de reserva controlado por la unidad ACU 2, no tiene lugar ninguna operación a excepción de la eventual señalación de alarma correspondiente a esa
unidad; la activación del eventual segundo amplificador de reserva
(no controlado por una ficha RB 3300) debe ser comandada manualmente, desactivando la unidad ACU 2 en alarma.
FUNCIÓN “DAY/NIGHT”
La función es utilizable cuando la ficha retroamplificadora RB 3300 (unidad A.C.U.) está equipada con la ficha opcional DIGITAL ALC LB 3340, y permite atenuar la sonorización de las zonas audio en las horas nocturnas. El nivel de atenuación puede ser elegido en fase de instalación de la ficha
LB 3340 entre 16 valores, y es aplicado en todas las zonas audio sonorizadas mediante la ficha RB 3300. Para activar la función DAY/NIGHT, y para definir el horario de intervención, es necesario utilizar los menú especiales de la unidad de control CP 3100.
FUNCIÓN “MONITOR” (MONITOREO AUDIO)
La función permite escuchar, mediante el altavoz de la unidad de control CP 3100, la señal “monitor” de la ficha retroamplificadora RB 3300 (unidad
A.C.U.), correspondiente a la salida para difusores del amplificador por ella controlado. Para utilizar la función “monitor” es necesario acceder a un
menu especial de la unidad de control CP 3100. El comando para la audición es activado mediante la linea serial.
ADVERTENCIAS
• Cuando la unidad A.C.U. es desactivada, ya no es posible escuchar su señal “monitor”, esto para permitir la audición de las señales “monitor”
de las demás unidades A.C.U. también en la hipótesis en que ya no fuera posible activar nuevamente la unidad.
• Es posible monitorear una sola unidad A.C.U. a la vez.
259
ALARMA “OVL”
La ficha RB 3300 está provista de una entrada que permite adquirir las señalaciones de alarma provenientes del amplificador controlado. El tipo de alarma adquirido depende entonces del especifico amplificador utilizado, y puede por ejemplo corresponder a la intervención de una de las protecciones, o
a un funcionamiento anormal del aparato (ej. funcionamiento en sobrecarga). La transmisión de la alarma tiene lugar mediante el cierre de un contacto
auxiliar del amplificador: si el contacto queda cerrado por lo menos por 10 segundos, la ficha RB 3300 activa, mediante la linea serial, la señalación de
alarma en la unidad de control CP 3100; programando oportunamente esta última unidad, cuando el amplificador entra en alarma puede ser automáticamente activado en su lugar un amplificador de reserva (ver párrafo UTILIZACIÓN DEL MENU “ACU”).
FUNCIÓN “FIRE-BREAK”
La función es utilizable cuando la ficha retroamplificadora RB 3300 (unidades A.C.U.) está equipada con la ficha opcional FAULT DETECTOR SB 3320,
y permite controlar el amplificador controlado por la ficha RB 3300 con una señal de emergencia proveniente de una fuente no conectada al sistema
RX 3000, interrumpiendo la normal difusión de la señal proveniente de la matriz audio. De esta forma, también en caso de desperfecto de un
componente del sistema RX 3000 (ej. ficha AUDIO OUTPUT OB 3230), se tiene la certeza de poder difundir un mensaje con prioridad absoluta (ej.
mensaje alarma incendio). Para obtener la máxima seguridad de intervención, la función “fire-break” actua exclusivamente a nivel hardware.
FUNCIÓN “LINE FAULT”
La función LINE FAULT puede ser utilizada cuando la ficha retroamplificadora RB 3300 (unidades A.C.U.) está equipada con la ficha opcional FAULT
DETECTOR SB 3320, y permite el control de la impedancia de la linea para difusores controlada mediante la ficha RB 3300: cualquier desperfecto
que defina una sensible variación de la impedancia de la linea, activa la correspondiente alarma, que es transmitida a la unidad de control CP 3100.
Los desperfectos que se verifican son:
• Corto circuito entre los dos conductores de la linea para difusores.
• interrupción de la linea para difusores.
• Corto circuito entre la linea para difusores y el circuito de puesta a tierra.
ADVERTENCIA
• Cuando la ficha RB 3300 controla un amplificador de reserva, la función LINE FAULT es utilizable solamente para verificar un corto circuito entre la
linea para difusores y el circuito de puesta a tierra; no pueden ser en cambio verificados el corto circuito entre los dos conductores de la linea para difusores, y la interrupción de la linea para difusores.
FUNCIÓN “PA FAULT”
La función PA FAULT es utilizable cuando la ficha retroamplificadora RB 3300 (unidad A.C.U.) está equipada con la ficha opcional FAULT DETECTOR SB 3320. Esta permite la verificación del correcto funcionamiento del amplificador controlado por la ficha RB 3300, mediante la verificación de
la señal en la salida para difusores: cualquier malfuncionamiento del amplificador que defina una sensible disminución de la potencia transmitida, activa la correspondiente alarma, que es transmitida a la unidad de control CP 3100; programando oportunamente esta ultima unidad, cuando el amplificador entra en alarma puede ser automáticamente activado en su lugar un amplificador de reserva (ver párrafo UTILIZACIÓN DEL MENU ACU).
FUNCIÓN “ALC”
La función ALC (Automatic Level Control) es utilizable cuando la ficha retroamplificadora RB 3300 (unidad A.C.U.) está equipada con la ficha opcional DIGITAL ALC LB 3340. Esta permite el control automático de la relación señal/ruido en el ambiente sonorizado, es decir permite mantener inalterado el margen de nivel entre la señal difundida y el ruido ambiental, en forma de asegurar una perfecta inteligibilidad de los mensajes sonoros. Esta
característica es particularmente útil en los locales sujetos a notables variaciones del ruido. La función ALC se basa en el empleo de micrófonos de
condensador (hasta 4 micrófonos), o altavoz con transformador de línea en función de micrófonos, que permiten verificar el nivel del ruido presente
en el ambiente sonorizado. La señal captada es elaborada en forma digital para controlar un atenuador electrónico, en forma que garantice una perfecta regulación de la señal.
ADVERTENCIA
• La función ALC no es utilizable cuando la ficha RB 3300 controla un amplificador de reserva; una unidad A.C.U. BACKUP no puede entonces estar equipada con la ficha opcional DIGITAL ALC LB 3340
EVENTOS DEL SISTEMA
El sistema puede controlar las tipologías de eventos descriptas en los párrafos siguientes.
EVENTOS QUE PUEDEN SER COMANDADAS DESDE LAS CONSOLAS DIGITALES BM 3616
Desde las consolas digitales BM 3616 es posible comandar las siguientes operaciones:
• difusión, en determinadas zonas y/o grupos de zonas audio, de un anuncio mediante el micrófono de la consola.
• difusión, en determinadas zonas y/o grupos de zonas, de una señal audio (ej. mensaje, tono de atención/alarma, etc.) grabado en el disco rigido
de la unidad de control CP 3100 (file audio).
• difusión, en determinadas zonas y/o grupos de zonas audio, de un mensaje grabado en la memoria de la consola.
• conmutación de contactos de determinados relé de las fichas INPUT/OUTPUT digitales IO 3250.
• comando evento EMERGENCY, para la difusión con prioridad absoluta, en determinadas zonas y/o grupos de zonas audio, de un anuncio mediante el micrófono de la consola, o de una señal de alarma (mensaje o tono) grabado en el disco rigido de la unidad de control CP 3100. Con la
activación del evento es además posible comandar la conmutación de relé de las fichas INPUT/OUTPUT digitales IO 3250.
Para la programación de los eventos que pueden ser comandadas mediante las consolas digitales BM 3616 consultar el párrafo UTILIZACIÓN DEL
MENU “CONSOLES”.
EVENTOS QUE PUEDEN SER COMANDADAS DESDE LAS CONSOLAS BM 3604
Desde las consolas BM 3604 es posible comandar las siguientes operaciones:
• difusión, en determinadas zonas y/o grupos de zonas, de un anuncio mediante el micrófono de la consola.
• conmutación de contactos de determinados relé de las fichas INPUT/OUTPUT digitales IO 3250.
• difusión, en determinadas zonas y/o grupos de zonas, de una señal audio (ej. mensaje, tono de atención/alarma, etc.) grabado en el disco rigido
de la unidad de control CP 3100 (file audio).
• comando señalaciones de aviso en la unidad de control CP 3100.
260
EVENTOS QUE PUEDEN SER COMANDADAS DESDE LAS ENTRADAS “GPI”
Cada ficha INPUT/OUTPUT digital IO 3250 está provista de 16 entradas optoaisladas que, oportunamente controladas, permiten comandar diversos
eventos; estas entradas están identificadas en los diferentes menú de la unidad de control CP 3100 con el nombre de entradas GPI (ver párrafo ENTRADAS GPI). Los eventos que pueden ser comandadas son los indicados a continuación (max 256 eventos).
• conmutación de uno o más relé de las fichas INPUT/OUTPUT digitales IO 3250 (ver párrafo RELÉ PROGRAMABLES), cuyos contactos pueden ser
utilizados libremente.
• difusión, en determinadas zonas y/o grupos de zonas, de una señal audio (ej. mensaje, tono de atención/alarma, etc.) memorizado en el disco rigido de la unidad de control CP 3100 (file audio), y eventual conmutación de uno o más relé de las fichas INPUT/OUTPUT digitales IO 3250.
• difusión, en determinadas zonas y/o grupos de zonas, de un anuncio mediante el micrófono de la consola BM 3604, y eventual conmutación de
uno o más relé de las fichas INPUT/OUTPUT digitales IO 3250.
• comando eventos de alarma FIREMAN 1 y/o FIREMAN 2, para la difusión con prioridad absoluta de señales audio “fireman”, y eventual conmutación de uno o más relé de las fichas INPUT/OUTPUT digitales IO 3250.
• comando señalaciones de aviso en la unidad de control CP 3100.
Para controlar las entradas de la ficha es posible utilizar normales contactos eléctricos (ej. contactos de teclas). Para la programación de los eventos
que pueden ser comandadas mediante las entradas GPI consultar el párrafo UTILIZACIÓN DEL MENU “GPI EVENTS DEFINITION”.
EVENTOS TEMPORIZADOS
Mediante un menu especial de la unidad de control CP 3100 el sistema permite la programación de “eventos temporizados”, es decir de eventos que
deben tener lugar en un horario prefijado. El sistema permite la programación de un máximo de 64 eventos temporizados. Un evento temporizado
puede comandar las siguientes acciones:
• conmutación de un relé con contacto normalmente abierto de las fichas INPUT/OUTPUT digitales IO 3250.
• conmutación de un relé con contacto normalmente cerrado de las fichas INPUT/OUTPUT digitales IO 3250.
• difusión, en determinadas zonas y/o grupos de zonas, de una señal audio (ej. mensaje, tono de atención/alarma, etc.) grabado en el disco rigido
de la unidad de control CP 3100 (file audio).
Para la programación de los eventos temporizados consultar el párrafo UTILIZACIÓN DEL MENU “TIMER EVENTS DEFINITION”.
EVENTOS “VOX”
Los eventos VOX son comandados por los dispositivos VOX presentes en las fichas AUDIO OUTPUT OB 3230. Para la descripción del funcionamiento del dispositivo VOX consultar el párrafo DISPOSITIVO VOX.
EVENTOS “PLAYBACK”
Son aquellos eventos que prevén el empleo de la ficha audio de la unidad de control CP 3100, para la reproducción de señales audio memorizadas
en el disco rigido del CP 3100 (file audio). Mayores informaciones respecto a la reproducción de los file audio están contenidas en el párrafo GRABACIÓN/REPRODUCCIÓN DE SEÑALES AUDIO.
EVENTOS “BACKGROUND MUSIC”
Son los eventos que permiten la difusión de la música de fondo en determinadas zonas audio. El sistema puede controlar hasta ocho fuentes para
música de fondo.
ORDEN DE PRIORIDAD
El funcionamiento del sistema está basado en el empleo de un orden de prioridad, en el cual a cada evento del sistema está asociado un nivel de
prioridad. En base al tipo de prioridad que posee el evento, este es ejecutado con una diferente modalidad, como descripto a continuación:
PRIORIDAD ESCALAR
La prioridad escalar permite a ciertos eventos utilizar determinados dispositivos del sistema antes de los eventos que
poseen un nivel de prioridad más bajo, pero sin la posibilidad de interrumpir los eventos en curso, aún si tiene prioridad inferior; los únicos eventos que pueden ser siempre interrumpidos son los eventos de tipo BACKGROUND MUSIC (difusión de música de fondo). Cuando hay varios eventos con diversa prioridad en espera de ser ejecutados a causa de un dispositivo no disponible, en primer lugar son enviados al aire los eventos con un nivel de prioridad más alto,
y luego aquellos con prioridad inferior. La escala de los niveles de prioridad es la siguiente:
• Niveles 1 ÷ 8: niveles de prioridad decrescientes de 1 (nivel de prioridad más alto) a 8 (nivel de prioridad más bajo).
• Nivel 9:
ninguna prioridad.
PRIORIDAD ABSOLUTA La prioridad absoluta es la máxima prioridad, y permite a ciertos eventos utilizar determinados dispositivos del sistema antes de los eventos con prioridad escalar, con la posibilidad de interrumpir los eventos en curso (función “override”). Un evento con prioridad absoluta no tiene la función de “override” sobre eventos de nivel igual, es decir no puede interrumpir otros eventos con prioridad absoluta en curso.
Cuando hay varios eventos con el mismo nivel de prioridad que deben ser ejecutados (prioridad absoluta o prioridad escalar), el orden de ejecución
sigue el orden de requerimiento, es decir los primeros eventos reservados serán los primeros a ser ejecutados.
Los dispositivos del sistema que pueden ser objeto de prioridad son:
• salidas de las fichas AUDIO OUTPUT OB 3230, que permiten controlar las unidades de potencia dedicadas a la sonorización de las varias zonas
audio del sistema.
• ficha audio presente en la parte interna de la unidad de control CP 3100, que permite la grabación/reproducción de file audio (mensajes, señales
de atención/alarma, etc.).
En el cuadro siguiente, para cada evento del sistema se indica el correspondiente nivel de prioridad y la descripción de cómo tal prioridad es actuada.
261
EVENTO
NIVEL DE
PRIORIDAD
DESCRIPCIÓN
ABSOLUTA
Son eventos que poseen la máxima prioridad. Los eventos con prioridad
más baja, que utilizan los dispositivos interesados por el evento con prioridad absoluta, son interrumpidos (función “override”). Todas las salidas audio utilizadas por los eventos interrumpidos, también aquellas no interesadas por el evento con prioridad absoluta, son desconectadas.
1
Son los eventos que poseen el más alto nivel de prioridad después de
los eventos con prioridad absoluta. Cuando hay varios eventos de diferente prioridad (excepto eventos con prioridad absoluta) en espera de
ser ejecutados, el evento temporizado es el primero a ser enviado al aire. Los eventos temporizados no tienen la función “override”, es decir
no pueden interrumpir los eventos en curso con un nivel de prioridad
más bajo o igual.
Eventos que pueden ser comandadas
desde las consolas digitales
BM 3616 (excluido evento
EMERGENCY)
2÷7
Los eventos que pueden ser comandadas desde las consolas digitales
BM 3616 pueden tener niveles de prioridad variables de 2 a 7, de acuerdo a cuanto determinado con el correspondiente menu de configuración (menu CONSOLES); tales eventos no tienen la función “override”,
es decir no pueden interrumpir los eventos en curso con un nivel de
prioridad más bajo o igual.
Eventos VOX
Eventos que pueden ser comandadas
desde las consolas BM 3604
Eventos PLAYBACK
8
Eventos BACKGROUND MUSIC
9
Eventos de alarma
EMERGENCY,
FIREMAN 1,
FIREMAN 2.
Eventos temporizados
Tales eventos poseen el nivel de prioridad más bajo. Pueden interrumpir solamente los eventos BACKGROUND MUSIC, y no tienen la función “override”, es decir no pueden interrumpir los eventos en curso
con un nivel de prioridad más bajo o igual.
Estos eventos pueden ser interrumpidos por cualquier otro evento.
FUNCIÓN DE INTERDICCIÓN POR PARTE DE UN EVENTO DE PRIORIDAD ABSOLUTA
Cuando tiene lugar un evento con prioridad absoluta, los demás eventos con prioridad inferior en ejecución, que utilizan los dispositivos interesados por
el evento prioritario, son interrumpidos y terminados (función “override”), y no son puestos nuevamente al aire una vez finalizado el evento prioritario (excluido evento BACKGROUND MUSIC). En el cuadro siguiente se indican especialmente las acciones que interesan cada evento interrumpido.
EVENTO INTERRUMPIDO
ACCIONES EFECTUADAS
Evento de consola BM 3604
• Se coloca en OFF el relé de “feedback” (FEED RELÉ) de la consola, en forma que se la deshabilita y desconecta de todas las zonas y/o los grupos zonas audio del sistema (ver párrafo UTILIZACIÓN DEL MENU “ GPI EVENTS DEFINITION”).
• Todas las selecciones efectuadas en la consola son “puestas en cero”.
• El micrófono de la base es deshabilitado.
Evento de consola digital BM 3616
(excluido evento EMERGENCY)
• Es interrumpida la eventual difusión de la señal audio grabada en el disco rigido de la unidad
de control CP 3100 (file audio).
• Es interrumpida la eventual difusión del mensaje local grabado en la memoria de la consola.
• Es interrumpida la eventual difusión de un anuncio microfónico.
• La consola es dehabilitada y desconectada de todas las zonas y/o los grupos de zonas audio del sistema.
• Todas las selecciones efectuadas en la consola son “puestas en cero”.
Evento VOX
• Es desactivada momentaneamente la función VOX.
• Son interrumpidas las conexiones entre la entrada INPUT VOX y las correspondientes salidas que tienen la función VOX activada (ver párrafo DISPOSITIVO VOX).
• Es conmutado nuevamente en la posición normal el RELAY VOX (ver párrafo DISPOSITIVO
VOX).
• Al final del evento con prioridad absoluta se rehabilita la función VOX.
Timer events definition
• Es interrumpida la reproducción de la señal audio (mensaje o tono) asociado. Cuando el evento temporizado prevé, además de la reproducción de una señal audio, también la conmutación de relé, este último es conmutado nuevamente a la posición normal.
Evento PLAYBACK comandato da las
entradas GPI
• Es interrumpida la eventual reproducción de la señal audio (mensaje o tono) asociada al evento.
• Todas las zonas y/o los grupos de zonas audio asociadas al evento son desconectadas por
la entrada de tipo PLAYBACK.
• Todos los eventuales relé asociados al evento son conmutados nuevamente a la posición normal.
Evento BACKGROUND MUSIC
• Es interrumpida la difusión de la música de fondo en todas las zonas y/o los grupos de zonas audio utilizadas/dos por el evento con prioridad absoluta. La difusión de la música retoma al final del evento con prioridad absoluta.
262
DISPOSITIVO “VOX”
El dispositivo VOX (VOX detector) está presente en las fichas AUDIO OUTPUT OB 3230. La función del dispositivo es la siguiente: cuando la señal
audio (señal VOX) que controla una determinada entrada de las fichas AUDIO INPUT IB 3210 / IB 3280, llamado INPUT VOX, supera un determinado nivel, regulable mediante un trimmer de la ficha OB 3230, el dispositivo VOX puede comandar una de las siguientes operaciones:
a) conectar la entrada INPUT VOX con determinadas salidas de las fichas AUDIO OUTPUT OB 3230 (salidas VOX), que pueden ser definidas mediante el menú de configuración OUTPUT PROCESSORS.
b) efectuar la operación descripta en el punto (a), y conmutar al mismo tiempo un determinado relé de las fichas INPUT/OUTPUT digitales IO 3250,
llamado RELAY VOX.
En la configuración del sistema con 16 fichas AUDIO OUTPUT OB 3230 instaladas, es posible configurar 16 dispositivos VOX. El procedimiento de
funcionamiento del dispositivo VOX es el siguiente.
a) a) Cuando el dispositivo VOX de una ficha AUDIO OUTPUT OB 3230 verifica que la correspondiente señal VOX supera el nivel determinado, envia el aviso de “vox activo” a la unidad de control CP 3100 si:
a1) la función VOX ha sido activada en por lo menos una salida de la misma ficha AUDIO OUTPUT (mediante el menú de configuración de las
salidas audio).
a2) las salidas utilizadas por el dispositivo VOX no están ocupadas, es decir no están conectadas con una entrada audio, a excepción de las entradas BGM (entradas para música de fondo).
a3) la señal VOX es efectivamente “sentida”.
b) Si es generado el aviso de “vox activo”, la ficha AUDIO OUTPUT OB 3230 conecta en forma autónoma la entrada INPUT VOX con las correspondientes salidas que tienen la función VOX activada, manteniéndolas conectadas por lo menos por 10 segundos.
c) La unidad de control CP 3100, apenas recibe el aviso de “vox activo”, comanda la conmutación del relé RELAY VOX.
d) La conexión entre la entrada INPUT VOX y las correspondientes salidas audio permanece si:
d1) ningún evento con prioridad absoluta requiere la utilización de las zonas audio comprometidas por la función VOX.
d2) la señal VOX continua controlando la entrada INPUT VOX superando el nivel determinado.
e) Cuando la señal VOX disminuye, y su nivel queda por debajo del nivel determinado por un tiempo de aprox. 10 segundos, la ficha AUDIO OUTPUT OB 3230 activa nuevamente las eventuales conexiones anteriormente interrumpidas entre las entradas audio definidas BGM y las salidas
utilizadas por la función VOX, y envia el aviso de “final actividad vox” a la unidad de control CP 3100.
f) La unidad de control CP 3100, apenas recibe el aviso de “final actividad vox”, conmuta nuevamente a la posición normal el relé RELAY VOX.
Las operaciones necesarias para utilizar la función VOX son las siguientes.
a) Mediante el menú de configuración VOX (ver correspondiente párrafo), definir la entrada INPUT VOX que debe ser utilizada para una determinada ficha AUDIO OUTPUT OB 3230; gracias a esta definición, cuando la señal VOX supera el nivel determinado, las ocho salidas audio de la ficha
preseleccionada tienen la posibilidad de ser conectadas con la entrada INPUT VOX seleccionada.
b) Mediante el menú de configuración OUTPUT PROCESSORS (ver correspondiente párrafo), activar o no la función VOX en las salidas deseadas
de la ficha AUDIO OUTPUT OB 3230 preseleccionada; gracias a esta determinación, cuando la señal VOX supera el nivel determinado, las salidas que tienen la función VOX activada son conectadas con la entrada INPUT VOX, definida con la operación descripta en el punto (a).
GRABACIÓN/REPRODUCCIÓN DE SEÑALES AUDIO
El sistema permite crear y reproducir de los file audio, en los cuales pueden ser memorizadas señales audio de varios tipos: mensajes, anuncios, tonos de atención, tonos de alarma, etc.
CREACIÓN DE SONIDOS
Mediante la función TONE GENERATOR del menu RECORDER (ver párrafo UTILIZACIÓN DEL MENU “RECORDER”) es posible crear sonidos compuestos por uno o más tonos, que pueden ser definidos a gusto por el usuario. El sonido creado, de tipo digital, es memorizado bajo forma de file en
el disco rigido de la unidad de control, junto a los demás fil