Download 2 6 5 3 4 > nl 9 : gebrauchsanweisung brugsanvisning
Transcript
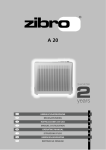
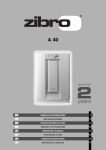
A 20
2
GEBRAUCHSANWEISUNG
2
6
BRUGSANVISNING
10
5
INSTRUCCIONES DE USO
18
3
MANUEL D'UTILISATION
26
4
OPERATING MANUAL
34
>
ISTRUZIONI D’USO
42
1
GEBRUIKSAANWIJZING
50
9
MANUAL DE INSTRUÇÕES
58
:
INSTRUKCJA OBSŁUGI
66
Sehr geehrte Dame, sehr geehrter Herr!
Herzlichen Glückwunsch zum Kauf Ihres Luftreinigers! Sie haben ein hochwertiges Produkt
erworben, das Ihnen jahrelang Freude machen wird, vorausgesetzt, Sie benutzen das Gerät
vorschriftsmäßig. Lesen Sie daher zunächst diese Gebrauchsanweisung, damit Sie danach
Ihren Luftreiniger optimal nutzen können.
Wir gewähren stellvertretend für den Hersteller zwei Jahre Garantie auf eventuell
auftretende Material- und Produktionsfehler.
Wir wünschen Ihnen viel Freude mit Ihrem Luftreiniger.
Mit freundlichen Grüßen
PVG International B.V.
1 LESEN SIE ZUNÄCHST DIE GEBRAUCHSANWEISUNG.
2 WENDEN SIE SICH IM ZWEIFELSFALL AN IHREN FACHHÄNDLER.
2
2
HAUPTBAUTEILE
2
4
3
1
5
A
Front
B
Bedienfeld
C
Lufteinlass
4
Luftaustritt
E
Verschluss
F
HEPA-Filter (High
Efficiency Particulate
Airfilter)
G
Stecker und Kabel
6
G
2
3
A. WAS SIE VORHER WISSEN MÜSSEN
ALLGEMEINES
Damit Sie ein optimales Ergebnis erzielen, gehen Sie folgendermaßen vor.
•
Wenn der Luftreiniger insbesondere kleine Staubteilchen filtern soll, wie z.B. Rauch,
dann stellen Sie ihn an einem hohen Standort auf (z.B. auf einem Tisch oder einem
Schrank). Zum Filtern großer Staubteilchen, wie Pollen, müssen Sie den Luftreiniger
an einem niedrigen Standort (auf dem Boden) aufstellen.
•
Sorten Sie dafür, dass rings um das Gerät immer 30 cm frei bleiben.
•
Lesen Sie diese Bedienungsanleitung bitte sorgfältig durch und befolgen Sie die
Anweisungen.
SICHERHEITSVORSCHRIFTEN
•
Dieses Gerät muss gemäß den örtlich geltenden Vorschriften, Richtlinien und Normen
installiert werden.
•
Das Gerät eignet sich ausschließlich zum Betrieb im Innenbereich, in trockenen
Räumen.
•
Kontrollieren Sie die Netzspannung.
•
Das Gerät eignet sich ausschließlich für den Anschluss an Steckdosen mit
Schutzkontakt mit einer Anschlussspannung von 220 bis 240 Volt / 50 Herz.
•
Das Gerät muss immer über eine Steckdose mit Schutzkontakt angeschlossen werden.
Sie sollten das Gerät auf keinen Fall anschließen, wenn der Stromanschluss nicht
geerdet ist.
•
Der Stecker sollte immer leicht zugänglich sein, wenn das Gerät angeschlossen ist.
•
Schließen Sie das Gerät nicht über ein Verlängerungskabel an.
•
Benutzen Sie das Gerät nie mit einem beschädigten Kabel oder Stecker.
•
Der Anschluss des Geräts an das Elektrizitätsnetz muss über einen geerdeten Anschluss
erfolgen. Achten Sie darauf, dass das Kabel frei liegt, d.h. nicht aufgerollt ist.
•
Schalten Sie immer erst das Gerät aus, bevor Sie den Stecker aus der Steckdose ziehen.
•
Verhindern Sie bitte, dass Kinder mit dem Gerät spielen. Das Gerät darf ausschließlich
Ziehen Sie zum Herausziehen des Steckers nicht am Kabel, sondern am Stecker.
von Erwachsenen benutzt werden.
•
Es ist gefährlich und unzulässig, Änderungen am Gerät anzubringen.
•
Es ist unzulässig, das Gerät abzudecken oder Fremdkörper hineinzustecken. Dies kann
zur Überhitzung führen. Feuergefahr!
•
Das Gerät darf nicht nass gemacht werden.
•
Vermeiden Sie die Benutzung von Sprühdosen (Insektenspray, Haarspray usw.) in der
Nähe des Luftreinigers. Hierdurch könnte das Gerät beschädigt werden bzw. es
könnte Brand entstehen.
•
Das Gerät darf nicht in feuchter Umgebung wie zum Beispiel einem Badezimmer
benutzt werden.
•
Lassen Sie ein beschädigtes Stromkabel ausschließlich vom Lieferanten oder von einer
befugten Person / Kundendienststelle ersetzen.
TIPPS ZUR SICHEREN BENUTZUNG
•
2
4
Bitte halten Sie Plastik und andere Verpackungsmaterialen außerhalb der Reichweite
von kleinen Kindern.
•
Das Gerät wurde zum Reinigen der Luft entwickelt, nicht für andere Zwecke.
•
Wenden Sie sich wegen Reparatur- oder Wartungsarbeiten immer an Ihren
Fachhändler.
•
Installieren Sie das Gerät nicht in der Nähe von Wärmequellen, brandgefährlichen
Anlagen bzw. brandgefährlichem Material (wie zum Beispiel Gardinen) oder
explosionsgefährdeten Umgebungen.
•
Schalten Sie immer erst das Gerät aus und ziehen Sie den Stecker aus der Steckdose,
•
Der Untergrund muss stabil und waagerecht sein.
bevor Sie das Gerät reinigen.
B. INSTALLATION
1
Entfernen Sie die Front 1, indem Sie den Verschluss 5 an beiden Seiten des Geräts
öffnen.
2
Nehmen Sie den Filter 6 aus dem Gerät und entfernen Sie die Verpackung.
3
Setzen Sie den Filter wieder in das Gerät und achten Sie darauf, dass die weiße Seite
nach oben zeigt.
4
Befestigen Sie die Front wieder, indem Sie die drei Haken in die Aussparungen oben
am Gerät stecken. Lassen Sie dann die Front links und rechts unten einrasten.
5
Das Gerät ist jetzt betriebsbereit.
ACHTUNG
Damit die einwandfreie Funktion gewährleistet ist, muss der HEPA-Filter richtig
eingesetzt werden.
C. LUFTFILTER
Nach dem Öffnen behält der HEPA-Filter etwa 1 Jahr lang seine Wirkungskraft. Wie oft ein Filter
ausgewechselt werden muss, hängt von der Häufigkeit der Benutzung und der Umgebung ab.
Um festzustellen, ob der Filter ausgewechselt werden muss, gehen Sie folgendermaßen vor:
1
Entfernen Sie die Front 1, indem Sie den Verschluss 5 an beiden Seiten des Geräts
öffnen.
2
Neben dem Filter sehen Sie einen Aufkleber, auf dem ein graues und ein braunes
Quadrat stehen. Wenn der Filter eine dieser Farben hat, müssen Sie ihn entsprechend
der Beschreibung in Abschnitt B auswechseln.
3
Den verschmutzten HEPA-Filter können Sie unbedenklich im Hausmüll entsorgen
(kein biologisch abbaubarer Abfall).
4
Neue Filter sind bei Ihrem Händler erhältlich.
2
5
ACHTUNG
- Wenn der Filter ausgewechselt werden muss, müssen Sie immer einen neuen
Filter benutzen. Verwenden Sie nie erneut einen verschmutzten Filter, auch
nicht, wenn Sie ihn zuvor gereinigt haben.
- Es empfiehlt sich, unabhängig von der Benutzung, den Filter mindestens 1
Mal pro Saison gegen einen neuen HEPA-Filter auszuwechseln.
D. BEDIENUNG
1
Stecken Sie den Stecker in die Steckdose.
2
Zum Einschalten des Geräts müssen Sie den ON-/OFF-Schalter auf ON stellen. Die
Lampe des Gebläses LO oder HI leuchtet nun auf. Es werden negative Ionen erzeugt
und die Luftreinigung beginnt.
3
Über die Gebläse-Taste stellen Sie die gewünschte Geschwindigkeit ein. Sie können
zwischen dem
(niedrig) und dem
(hoch) wählen. Die entsprechende Lampe LO
(niedrig) oder HI (hoch) leuchtet nun auf.
4
Zum Ausschalten des Geräts stellen Sie den ON-/OFF-Schalter auf OFF.
E. REINIGUNG
Bevor Sie mit der Reinigung beginnen, schalten Sie bitte den Entfeuchter aus. Ziehen Sie
anschließend den Stecker aus der Steckdose.
GEHÄUSE
Reinigen Sie das Gehäuse des Geräts mit einem trockenen weichen Lappen. Wenn das
Gerät stark verschmutzt ist, können Sie ein mildes Reinigungsmittel benutzen. Wischen Sie
dann mit einem feuchten Lappen nach. Spritzen Sie das Gerät niemals nass ab.
DER HEPA-FILTER
Reinigen Sie den Grill der Front mit einem Staubsauger. Den HEPA-Filter können Sie nicht
reinigen. Wenn er verschmutzt ist, muss er ausgewechselt werden (siehe Abschnitt B).
Benutzen Sie das Gerät niemals ohne Luftfilter.
2
6
F.
LAGERUNG
Wenn Sie das Gerät lange Zeit nicht benutzen, tun Sie am besten Folgendes:
1
Ziehen Sie den Stecker aus der Steckdose.
2
Reinigen Sie den Luftfilter.
3
Entfernen Sie den HEPA-Filter (siehe Kapitel C).
4
Wahren Sie das Gerät in einem staubfreien Raum auf. Decken Sie es vorzugsweise mit
einem Plastikbeutel ab.
G. STÖRUNGSTABELLE
Bevor Sie den technischen Kundendienst zu Hilfe rufen, müssen Sie zunächst Folgendes
kontrollieren.
Problem
Das Gerät funktioniert
nicht.
Ursache
Abhilfe
Der Stecker steckt nicht in der
Steckdose.
Stecken Sie den Stecker in die
Steckdose.
Der Stecker steckt nicht richtig in Stecken Sie den Stecker richtig in
der Steckdose.
die Steckdose.
Eine Sicherung ist defekt.
Wechseln Sie die Sicherung aus.
Der HEPA-Filter ist verschmutzt.
Wechseln Sie den Filter aus.
Das Gerät entfernt keine
Es ist kein HEPA-Filter
Gerüche bzw. keinen
eingesetzt.
Staub.
Der HEPA-Filter wurde nicht
richtig eingesetzt.
Setzen Sie einen Filter in das
Gerät ein.
Setzen Sie den Filter richtig ein.
Das Gerät macht ein
knackendes Geräusch.
Dieses Geräusch entsteht, wenn
Wenn dieses Geräusch ständig zu
kleine Staubteilchen in das Gerät
hören ist, wenden Sie sich bitte
gelangen; dies weist nicht auf
an Ihren Fachhändler.
einen Defekt hin.
Keine oder
unzureichende
Luftumwälzung.
Der Luftdurchfluss wird
blockiert.
Entfernen Sie das Hindernis.
Wechseln Sie den HEPA-Filter
aus.
2
7
H. GARANTIEBESTIMMUNGEN
Sie erhalten zwei Jahre ab dem Kaufdatum Garantie auf Ihren Luftreiniger. Innerhalb
dieses Zeitraums werden alle Material- und Herstellungsfehler kostenlos behoben.
Dabei gelten folgende Bedingungen:
•
Jeglichen weiteren Ansprüchen auf Schadenersatz, einschließlich Folgeschäden wird
•
Reparaturen oder Ersatz von Teilen innerhalb der Garantiefrist führt nicht zu einer
nicht stattgegeben.
Verlängerung der Garantie.
•
Der Anspruch auf Garantie erlischt, wenn Änderungen am Luftreiniger vorgenommen, andere als Originalteile eingebaut oder Reparaturen am Luftreiniger von
Dritten durchgeführt wurden.
•
Teile, die dem normalen Verschleiß unterliegen fallen nicht unter die Garantie.
•
Voraussetzung für die Inanspruchnahme von Garantieleistungen ist die Vorlage der
mit dem Datum versehenen, unveränderten Originalrechnung.
•
Die Garantie gilt nicht für Schäden, der durch von den in der Bedienungsanleitung
abweichenden Handlungen oder durch Nachlässigkeit entstanden sind.
•
Die Versandkosten und das Risiko des Einschickens des Luftreinigers oder dessen
Teilen gehen grundsätzlich zu Lasten des Käufers.
Zur Vorbeugung von unnötigen Kosten empfehlen wir Ihnen, zunächst immer erst genau
in der Bedienungsanleitung nachzulesen. Wenn Sie dort keine Lösung finden, können Sie
den Luftreiniger bei Ihrem Händler zur Reparatur bringen.
2
8
I.
TECHNISCHE DATEN
Typ
Netzspannung
A 20
V / Hz / F
220-240 / 50 / 1
Stromaufnahme (Min./ Max.)
W
18 / 30
Stromstärke (Max.)
A
0,15
dB
24 – 38
m3/Stunde
60 / 120
kg
4
mm
430 x 366 x 131
m3
40
Anzahl/cc
30.000 - 50.000
Schallpegel (Min./ Max.)
Luftdurchflussmenge (Min./ Max.)
Nettogewicht
Abmessungen (B x H x T)
Geeignet für Räume von bis zu
Erzeugte negative Ionen
Elektroartikel gehören nicht in den Hausmüll. Bitte entsorgen Sie sie den örtlichen
Vorschriften gemäß. Erkundigen Sie sich eventuell bei der Behörde oder bei Ihrem Händler.
2
9
Kære.
Hjertelig til lykke med din luftrenser. Du har købt et kvalitetsprodukt, som du vil have
glæde af i mange år, hvis du bruger apparatet korrekt. Læs derfor først denne
brugervejledning, så din luftrenser får en optimal levetid. På vegne af fabrikanten giver vi
dig to års garanti på mulige materiale- eller fabrikationsfejl.
Vi ønsker dig god fornøjelse med din luftrenser.
Med venlig hilsen
PVG International B.V.
1 LÆS BRUGERVEJLEDNINGEN FØRST.
2 KONTAKT DIN FORHANDLER I TVIVLSTILFÆLDE.
6
10
VIGTIGE DELE
2
4
3
1
5
A
Forpanel
B
Betjeningspanel
C
Luftindtagning
4
Luftudstødning
E
Lukning
F
HEPA-filter (High
Efficiency Particulate
Airfilter)
G
Stik og ledning
6
G
6
11
HVAD DU SKAL VIDE PÅ FORHÅND
GENERELT
Gå til værks som følger for at få et optimalt resultat.
•
Sæt luftrenseren et højt sted (f.eks. på et bord eller et skab) for især at kunne filtrere
små støvpartikler såsom røg. For at filtrere store støvpartikler såsom pollen skal du
sætte luftrenseren et lavt sted (på gulvet).
•
Du må ikke anbringe apparatet tættere end 30 cm på andre ting i lokalet.
•
Læs denne brugervejledning grundigt igennem og følg anvisningerne heri.
SIKKERHEDSFORSKRIFTER
•
Installationen skal være udført helt i overensstemmelse med lokalt gældende
forskrifter, bestemmelser og standarder.
•
Apparatet er kun beregnet til indendørs brug på tørre steder.
•
Kontroller netspændingen.
•
Dette apparat er kun egnet til en effektivt jordet stikkontakt, tilslutningsspænding
220-240 V/ 50 Hz.
•
Apparatet SKAL altid være tilsluttet til en effektivt jordet stikkontakt. Hvis
strømforsyningen ikke er effektivt jordet, må De under ingen omstændigheder
tilslutte apparatet.
•
Stikket skal altid være lettilgængeligt, når apparatet er tilsluttet.
•
Tilslut ikke apparatet med en forlængerledning.
•
Brug aldrig apparatet med en beskadiget ledning eller et beskadiget stik.
•
Tilslutningen af apparatet til det elektriske system skal finde sted ved hjælp af en
jordtilslutning. Sørg for, at ledningen ligger frit (ikke rullet sammen).
•
Sluk altid først apparatet, før du tager stikket ud af stikkontakten. Træk i den
forbindelse ikke i ledningen men i stikket.
•
Børn må ikke lege med apparatet. Apparatet må kun bruges af voksne.
•
Det er farligt at indføre ændringer på apparatet.
•
Undgå at dække apparatet til og stikke fremmede genstande ind i det, da det kan
være farligt.
•
Undgå at apparatet bliver vådt.
•
Undgå brug af spraydåser (insektspray, hårlak osv.) i nærheden af luftrenseren. Det
•
Apparatet må ikke bruges i fugtige rum, såsom badeværelser.
•
En beskadiget netledning må kun udskiftes af leverandøren eller en autoriseret
kan beskadige apparatet og/eller forårsage brand.
person hhv. kundeservice.
TIPS TIL SIKKER BRUG
•
Sørg for at plasticposer og øvrigt emballage er udenfor børns rækkevidde.
•
Apparatet er konstrueret til at rense luften og ikke til andre formål.
•
Kontakt altid din leverandør i tilfælde af reparation/vedligeholdelse.
•
Installer ikke apparatet i nærheden af varmekilder, brandfarlige installationer/
materialer (f.eks. gardiner) og eksplosive omgivelser.
6
12
•
Sluk altid apparatet og tag stikket ud, inden du begynder at gøre det rent.
•
Overfladen, som apparatet står på, skal være solid og plan.
B. INSTALLATION
1
Løsn forpanelet 1 ved hjælp af lukningen 5 på begge sider af apparatet.
2
Tag filteret 6 ud af apparatet og fjern emballagen.
3
Sæt filteret tilbage i apparatet med den hvide side opad.
4
Sæt forpanelet fast igen ved at stikke de tre små kroge på oversiden ind i apparatets
åbninger. Klik efterfølgende forpanelet fast til venstre og højre på undersiden.
5
Apparatet er nu klar til brug.
NB!
HEPA-filteret skal anbringes korrekt for at sikre, at det virker, som det skal.
C. LUFTFILTER
Efter åbning bibeholder HEPA-filteret sin virkning i ca. et år. Brugshyppigheden og
omgivelserne er afgørende for, hvor ofte et filter skal skiftes ud. For at finde ud af, om
filteret skal skiftes ud, skal du gøre som følger:
1
Løsn forpanelet 1 ved hjælp af lukningen 5 på begge sider af apparatet.
2
Ved siden af filteret er der et klistermærke med en grå og brun firkant. Hvis filteret
har en af disse farver, skal det skiftes ud, som beskrevet i kapitel B.
3
Det beskidte HEPA-filter kan sagtens deponeres som husholdningsaffald (ikke
biologisk nedbrydeligt affald).
4
Du kan få nye filtre hos din forhandler.
NB!
- Hvis filteret skal skiftes ud, skal du altid bruge et nyt filter. Brug aldrig et
beskidt filter igen, selv om det er blevet gjort rent.
- Det anbefales at skifte filteret ud med et nyt HEPA-filter mindst én gang pr.
sæson, uanset brug.
6
13
D. BETJENING
1
Stik stikket i stikkontakten.
2
For at tænde apparatet skal du sætte ON- / OFF-kontakten på ON. Lampen på
ventilatoren LO eller HI begynder at lyse. Negative ioner bliver genereret, og
luftrensningen begynder.
3
Ved hjælp af ventilatorknappen kan du indstille den ønskede hastighed. Du kan
vælge mellem
(lav) eller
(høj). Den tilhørende lampe LO (lav) eller HI (høj)
begynder at lyse.
4
Du slukker apparatet ved at sætte ON- / OFF-kontakten på OFF.
E. RENGØRING
Før du påbegynder rengøringen, Skal du slukke affugteren. Tag herefter stikket ud af
stikkontakten.
YDERSIDEN
Rengør ydersiden med en blød, tør klud. Hvis apparatet er meget beskidt, kan du bruge et
mildt rengøringsmiddel. Tør efterfølgende efter med en lidt fugtig klud.
Apparatet må aldrig sprøjtes vådt.
HEPA-FILTERET
Rengør risten på forpanelet med en støvsuger. HEPA-filteret kan ikke gøres rent. Hvis det
er beskidt, skal det skiftes ud (se kapitel B).
Brug aldrig apparatet uden luftfilter.
6
14
F.
OPBEVARING
Før du beder om teknisk hjælp, kan du selv kontrollere følgende:
1
Tag stikket ud af stikkontakten.
2
Rengør luftfilteret.
3
Fjern HEPA-filtret (se kapitel C).
4
Opbevar apparatet i støvfrie omgivelser, helst dækket til med en plastikpose.
G. FEJLMELDINGSTABEL
Før du beder om teknisk støtte, skal du kontrollere følgende.
Problem
Årsag
Løsning
Stikket sidder ikke i
stikkontakten.
Stik stikket i stikkontakten.
Apparatet fungerer ikke Stikket sidder ikke godt i
stikkontakten.
Stik stikket i stikkontakten
korrekt.
Der er sprunget en sikring.
Skift sikringen ud.
HEPA-filteret er beskidt.
Skift filteret ud.
Apparatet fjerner ingen HEPA-filteret mangler.
lugte og/eller støv.
HEPA-filteret er ikke anbragt
korrekt.
Apparatet laver en
skraldende lyd.
Denne lyd opstår, hvis der er
kommet små støvpartikler ind i
apparatet. Det tyder ikke på en
defekt.
Ingen/utilstrækkelig
luftcirkulation.
Luftgennemstrømningen er
blokeret.
Anbring filteret i apparatet igen.
Anbring filteret korrekt.
Hvis du hele tiden kan høre
denne lyd, skal du kontakte din
forhandler.
Fjern blokaden.
Skift HEPA-filteret ud.
6
15
H. GARANTIBETINGELSER
Du får to års garanti på din luftrenser fra købsdatoen. Inden for denne periode bliver alle
materiale- og fabrikationsfejl afhjulpet gratis.
I den forbindelse gælder følgende regler:
•
Alle yderligere krav på erstatning, inklusive følgeskade, betales ikke.
•
Vi afviser udtrykkeligt alle andre krav om skadeserstatning, inkl. følgeskader.
•
Reparation eller udskiftning af reservedele inden for garantifristen bevirker ikke at
•
Garantien gælder ikke, hvis der er foretaget ændringer, monteret ikke originale
garantien forlænges.
reservedele, eller hvis udenforstående har udført reparationer på luftrenseren.
•
Reservedele der er udsat for normal slitage er ikke omfattet af garantien.
•
Garantien gælder udelukkende mod fremlæggelse af den originale, daterede
købsbon og hvis der ingen ændringer er foretaget på den.
•
Garantien gælder ikke for skader, der er opstået som følge af handlinger, der afviger
fra brugsanvisningen, eller som skyldes forsømmelse.
•
Forsendelsesomkostningerne og risikoen for at sende luftrenseren eller dele heraf er
altid for købers regning.
For at forhindre unødige udgifter, råder vi dig til altid først omhyggeligt at læse
brugsanvisningen. Hvis det ikke giver resultat, skal du tage luftrenseren hen til din
forhandler, så den kan blive repareret.
6
16
I.
TEKNISKE SPECIFIKATIONER
Type
Netspænding
A 20
V / Hz / F
220-240 / 50 / 1
Optaget kapacitet (min./maks.)
W
18 / 30
Strømstyrke (maks.)
A
0,15
dB
24 - 38
m3/time
60 / 120
Nettovægt
kg
4
Mål (bxhxd)
mm
430 x 366 x 131
m3
40
n/cc
30.000 - 50.000
Støjniveau (min./maks.)
Luftgennemstrømning (min./maks.)
Egnet til lokaler op til
Genererede negative ioner
Elektrisk affald bør ikke smides ud sammen med husholdningsaffaldet. Indlever det
venligst til et genbrugsanlæg. Spørg de lokale myndigheder eller forhandleren til råds
angående genbrug.
6
17
Estimada/-o cliente:
Le felicitamos por la compra de su purificador de aire. Usted acaba de adquirir un producto
de absoluta calidad , que le satisfará durante muchos años, a condición de que lo utilice
debidamente. Por lo tanto, lea primero este manual de instrucciones para prolongar la vida
útil de su purificador de aire.
En nombre del fabricante le ofrecemos una garantía de dos años para toda clase de
defectos de fabricación y de material.
Le deseamos un gran confort con su purificador de aire.
Un saludo cordial,
PVG International B.V.
1 LEA PRIMERO EL MANUAL DE USUARIO.
2 EN CASO DE DUDA, CONSULTE A SU DISTRIBUIDOR.
5
18
2
4
3
1
5
COMPONENTES
PRINCIPALES
A
Panel delantero
B
Panel de control
C
Entrada de aire
4
Salida de aire
E
Cierre
F
Filtro HEPA
(filtro de alto
rendimiento para
partículas en
suspensión)
G
Enchufe y cable
6
G
5
19
LO QUE DEBE SABER DE ANTEMANO
GENERALIDADES
Para obtener un óptimo resultado, proceda como sigue:
•
Coloque el purificador de aire en un sitio alto (por ej. encima de una mesa o armario)
para filtrar partículas pequeñas, como el humo. Para filtrar partículas de mayor
tamaño, tales como polen, sitúa el purificador en un sitio bajo (en el suelo).
•
Procure que el aparato tenga a su alrededor un espacio libre de 30 cm.
•
Lea estas instrucciones de uso detenidamente y siga las indicaciones.
INSTRUCCIONES DE SEGURIDAD
•
La instalación deberá responder por completo a las disposiciones, reglamentos y
normas locales en vigor.
•
El aparato está indicado para utilizarlo exclusivamente en el hogar.
•
Compruebe si la tensión de red es la correcta. El aparato se debe utilizar
•
El aparato debe estar conectado siempre con una toma a tierra. En caso de que la
exclusivamente en un enchufe con toma de tierra, voltaje 220-240 Volt/ 50 Hz.
corriente eléctrica no esté provista de una toma a tierra, está absolutamente
prohibido conectar el mismo.
•
Cuando el aparato esté conectado, el acceso a la clavija tendrá que poder hacerse sin
•
No use un cable prolongador para conectar el aparato.
•
Nunca use el aparato en caso de que el cable o el enchufe esté dañado.
•
El aparato debe conectarse a la red eléctrica con un enchufe con toma de tierra.
que haya obstáculos por medio.
Asegúrese de que el cable no esté enrollado.
•
Apague el aparato siempre antes de desenchufarlo. Desenchufe el aparato tirando del
enchufe, nunca del cable.
•
No permita a los niños jugar con el aparato. El aparato debe usarse únicamente por
•
Está prohibido, siendo además peligroso, manipular o realizar alteraciones en el
adultos.
aparato.
•
Está prohibido cubrir el aparato o introducir objetos extraños en el mismo. Podría
causar una descarga eléctrica o un incendio.
•
No moje el aparato.
•
Evite el uso de aerosoles (insecticidas, laca, etc.) en el entorno del purificador de aire.
Los aerosoles pueden dañar el aparato y/o causar un incendio.
•
No utilice el aparato en un ambiente húmedo, como por ejemplo en un cuarto de
baño.
•
En caso de que el cable eléctrico esté dañado, éste deberá ser cambiado por un
técnico de servicio cualificado o su distribuidor.
CONSEJOS PARA UN USO SEGURO
•
Mantenga las bolsas de plástico y otros envoltorios fuera del alcance de los niños.
•
El aparato ha sido creado únicamente para la purificación de estancias. Por
consiguiente, no puede ser usado para otros fines.
•
En caso de precisar mantenimiento/reparación, póngase en contacto con su
distribuidor.
•
No coloque el aparato cerca de fuentes caloríficas, materiales, instalaciones o cortinas,
con peligro de incendio, o en sitios donde pueda producirse alguna explosión.
5
20
•
Antes de limpiar el aparato, apáguelo y desenchúfelo.
•
El suelo debe ser sólido y nivelado.
B. INSTALACIÓN
1
Separe el panel delantero 1 mediante el cierre 5 situado en los dos laterales del
aparato.
2
Saque el filtro F del aparato y retire el embalaje.
3
Coloque el filtro de nuevo en el aparato, el lado blanco orientado hacia arriba.
4
Fije el panel delantero insertando los tres ganchos de la parte superior en las huecos
del aparato. A continuación, sujete el panel delantero por la izquierda y derecha a la
parte inferior hasta que oiga un clic.
5
El aparato está listo para su uso.
¡ATENCIÓN!
El filtro HEPA debe estar colocado de la forma correcta, a fin de garantizar el
funcionamiento correcto del purificador.
C. FILTRO DE AIRE
El filtro HEPA debe cambiarse aproximadamente al cumplirse un año de colocado. La
frecuencia de uso y el entorno determinan la frecuencia con que se debe cambiar un filtro.
Para determinar si se debe cambiar el filtro, proceda como sigue:
1
Separe el panel delantero 1 mediante el cierre 5 de los dos laterales del aparato.
2
Al lado del filtro está adherida una etiqueta con una casilla gris y marrón. Si el filtro
tiene uno de estos colores, sustituya el filtro del forma descrita en el capítulo B.
3
El filtro HEPA sucio puede desecharse sin problemas con los residuos domésticos
(residuos no biodegradables) .
4
Su distribuidor vende filtros nuevos.
¡ATENCIÓN!
- Si el filtro está sucio, cambiarlo siempre por uno nuevo. No reutilizar nunca un
filtro sucio, tampoco si lo ha limpiado.
- Es recomendable cambiar el filtro HEPA mínimo una vez por año por un filtro
nuevo, cualquiera que sea su intensidad de uso.
5
21
D. MANEJO
1
Enchufe el aparato.
2
Para encender el aparato, sitúe el interruptor ON / OFF en posición ON. El testigo del
ventilador LO o HI se encenderá. Se generan iones negativos y el aparato comienza a
purificar el aire.
3
El botón le permite controlar la velocidad del ventilador. Puede elegir entre
o
4
(bajo)
(alto). Se encenderá el testigo correspondiente LO (bajo) o HI (alto).
Para apagar el aparato, sitúe el interruptor ON / OFF en posición OFF.
E. LIMPIEZA
Apague el purificador de aire antes de limpiarlo. A continuación desenchufe el aparato.
PARTE EXTERIOR
Limpie la parte exterior con un paño suave y seco. Si está muy sucio, puede usar un
producto de limpieza suave. A continuación, pasar un paño húmedo.
Nunca pulverice agua sobre el aparato.
EL FILTRO HEPA
Limpie la rejilla del panel delantero con un aspirador. El HEPA no se puede limpiar. Cuando
está sucio, debe cambiarse por uno nuevo (ver capítulo B).
Nunca use el aparato sin el filtro colocado.
5
22
F.
ALMACENAMIENTO
Cuando el aparato no se use durante un largo período de tiempo, proceda como sigue:
1
Desenchufe el aparato.
2
Limpie el filtro de aire.
3
Quita el filtro HEPA (ve capitulo C).
4
Guarde el aparato y protéjalo contra el polvo, preferentemente metido en una funda
de plástico.
G. CUADRO DE FALLOS
Antes de solicitar asistencia técnica, verifique los siguientes puntos:
Problema
El aparato no funciona.
Causa
Solución
El enchufe no está introducido
Enchufe el aparato.
El aparato no está
correctamente enchufado.
Enchufe correctamente el
aparato.
Se ha fundido un fusible.
Cambie el fusible.
El filtro HEPA está sucio.
Cambie el filtro HEPA.
El aparato no elimina los El filtro HEPA no está colocado.
malos olores y/o polvo.
Coloque el filtro en el aparato.
El filtro HEPA no está colocado
correctamente.
Coloque el filtro correctamente
en el aparato.
El aparato produce un
chirrido.
Este ruido se produce cuando
Cuando oye este ruido
partículas pequeñas entran en el continuamente, póngase en
aparato, no es un defecto.
contacto con su distribuidor.
No / insuficiente
circulación de aire.
El paso del aire está bloqueado.
Retire el obstáculo.
Cambie el filtro HEPA.
5
23
H. CONDICIONES DE GARANTÍA
El aparato tiene una garantía de dos años a partir de la fecha de adquisición. Durante este
período todos los defectos de material y de fabricación serán subsanados gratuitamente.
A estos efectos, rigen las siguientes condiciones:
•
Se excluye toda reclamación de indemnización, incluso por daños indirectos.
•
La reparación o el reemplazo de componentes no supone una ampliación del período
de garantía.
•
La garantía no será válida cuando se hayan realizado modificaciones, se hayan usado
componentes no originales o terceros hayan efectuado reparaciones en el purificador
de aire.
•
Componentes sujetos a desgaste normal quedan excluidos de la garantía.
•
La garantía se aplica únicamente si se presenta la factura de compra, fechada y sin
modificación alguna.
•
La garantía no cubre los daños causados por una utilización contraria a la descrita en
este manual de instrucciones o por un uso negligente.
•
Los gastos de envío y el riesgo que conlleva el envío del purificador de aire o partes del
mismo, correrán siempre por cuenta del comprador.
A fin de evitar costes innecesarios, le recomendamos que lea con atención las instrucciones
de uso. Si no ofrecen ninguna solución, lleve el purificador de aire al distribuidor para su
reparación.
5
24
I.
ESPECIFICACIONES TÉCNICAS
Tipo
Tensión de red
A 20
V / Hz / F
220-240 / 50 / 1
Potencia consumida (mín./máx.)
W
18 / 30
Amperaje (máx.)
A
0,15
Nivel de ruido (mín./máx.)
dB
24 - 38
Caudal de aire (mín./máx.)
m3/hora
60 / 120
kg
4
mm
430 x 366 x 131
m3
40
número/cc
30.000 - 50.000
Peso neto
Dimensiones (anxalxp)
Apto para habitaciones de hasta
Iones negativos generados
No deseche aparatos eléctricos junto con la basura doméstica, sino elimínelos a través de
un Punto Limpio si existe. Consulte a las autoridades locales o a su distribuidor acerca del
reciclado adecuado.
5
25
Madame, Monsieur,
Nous vous félicitons pour l’achat de votre purificateur d’air. Vous venez d’acquérir un
produit d’excellente qualité qui vous donnera satisfaction pendant des années si vous
l’utilisez correctement. Lisez attentivement ces instructions d’utilisation, vous optimiserez la
durée de vie de votre purificateur d’air.
Au nom du fabricant, nous vous offrons 2 ans de garantie sur les vices de matériel ou de
fabrication.
Nous vous souhaitons beaucoup de confort avec votre purificateur d’air.
Sincères salutations,
PVG International B.V.
1 LISEZ D’ABORD CES INSTRUCTIONS D’UTILISATION.
2 EN CAS DE DOUTE, CONSULTEZ VOTRE REVENDEUR.
3
26
2
4
PIÈCES
PRINCIPALES
A
Façade
B
Tableau de
commande
3
1
5
C
Entrée d’air
4
Sortie d’air
E
Fermeture
F
Filtre HEPA (High
Efficiency Particulate
Airfilter)
G
Cordon et fiche
électrique
6
G
3
27
A. À SAVOIR AVANT LA PREMIÈRE UTILISATION
GÉNÉRALITÉS
Pour obtenir un résultat optimal de votre appareil, procédez comme suit:
•
Installez le purificateur d’air en hauteur (sur une table ou un placard par exemple)
afin de filtrer entre autres les petites particules telles que la fumée. Pour filtrer les
grosses particules, comme le pollen, installez le purificateur de préférence par-terre.
•
Gardez toujours un espace libre de 30 cm autour de l’appareil.
•
Lisez soigneusement ce manuel et suivez les instructions.
CONSIGNES DE SÉCURITÉ
•
L’installation doit répondre entièrement aux réglementations, ordonnances et
normes en vigueur localement.
•
L’appareil est conçu exclusivement pour une utilisation dans un lieu sec, à l’intérieur
de la maison.
•
Vérifiez la tension du réseau. Cet appareil est conçu uniquement pour une prise de
•
L’appareil DOIT toujours être branché sur une prise de terre. Si l’alimentation
courant avec mise à la terre avec une tension de raccordement de 220-240 V. / 50 Hz
électrique n’est pas connectée à la terre, l’appareil ne doit absolument pas être
branché.
•
La fiche électrique doit toujours être facilement accessible lorsque l’appareil est
branché.
•
N’utilisez pas de rallonge électrique pour brancher l’appareil.
•
N’utilisez jamais l’appareil si son cordon ou sa fiche électrique sont détériorés.
•
L’appareil doit être branché sur une prise reliée à la terre. Veillez à ce que le fil soit
bien déroulé.
•
Éteignez toujours l’appareil en premier avant de le débrancher. Pour débrancher
l’appareil, tirez sur la fiche et non pas sur le cordon électrique.
•
Ne laissez pas les enfants jouer avec l’appareil. Le déshumidificateur doit être
exclusivement utilisé par des adultes.
•
Il est dangereux et interdit d’apporter toute modification à l’appareil.
•
Il est interdit de couvrir l’appareil et d’y insérer des objets (risque de surchauffe et
d’incendie).
•
L’appareil ne doit jamais être mouillé.
•
Évitez d’utiliser des aérosols aux alentours de l’appareil (insecticide, bombe de laque
etc.). Ceci pourrait endommager le purificateur d’air et/ou provoquer un incendie.
•
N’utilisez pas l’appareil dans une pièce humide telle qu’une salle de bain.
•
Si le cordon électrique de l’appareil est endommagé, faites-le toujours changer par
votre distributeur, le service après-vente ou un technicien agréé.
CONSEILS POUR UNE UTILISATION SANS RISQUES
•
Veillez à ce que le matériel de l’emballage et le plastique sont tenus hors de portée
des enfants.
•
L’appareil a été conçu pour purifier l’air ambiant et pour aucune autre fonction.
•
Pour toute réparation ou activité d’entretien, contactez toujours votre fournisseur.
•
Ne placez pas l’appareil à proximité de sources de chaleur, ni près d‘installations/
matériels sensibles au feu (rideaux par exemple) ni dans un environnement explosif.
3
28
•
Éteignez et débranchez toujours l’appareil avant de le nettoyer.
•
Placez l’appareil à au moins 20 cm du mur.
•
La surface où l’appareil est installé doit être stable et plane.
B. INSTALLATION
1
Détachez la façade de l’appareil 1 à l’aide des fermetures 5 placées des deux côtés
de l’appareil.
2
Retirez le filtre 6 de l’appareil et sortez-le de son emballage.
3
Replacez le filtre dans l’appareil, le côté blanc tourné vers le haut.
4
Remettez en place la façade de l’appareil en enfilant les trois crochets dans les fentes.
Puis cliquez la façade à gauche, à droite et en bas du purificateur.
5
L’appareil peut maintenant être utilisé.
ATTENTION!
Le filtre HEPA doit être placé correctement pour garantir un bon
fonctionnement de l’appareil.
C. FILTRE À AIR
Après ouverture, le filtre HEPA peut être utilisé avec efficacité pendant environ 1 an. La
durée d’utilisation du filtre est déterminée par la fréquence d’utilisation et par les
conditions d’environnement. Pour savoir si le filtre doit être remplacé, procédez comme
suit:
1
Détachez la façade de l’appareil 1 à l’aide des fermetures 5 placées des deux côtés
de l’appareil.
2
À côté du filtre, vous pouvez voir un autocollant sur lequel figure un carré gris et
marron. Si le filtre est de l’une de ces deux couleurs, changez-le en suivant les
instructions du chapitre B.
3
Le filtre HEPA sale peut être jeté sans problème avec vos ordures ménagères (aucun
composant bio-dégradable).
4
De nouveaux filtres sont disponibles chez votre distributeur.
ATTENTION!
- Si un filtre est devenu sale et qu’il doit être changé, utilisez alors un filtre
neuf. N’utilisez jamais un filtre sale plusieurs fois, même après l’avoir nettoyé.
- En règle générale, nous vous recommandons de remplacer le filtre HEPA au
moins 1x par saison.
3
29
D. COMMANDE
1
Branchez l’appareil.
2
Pour le mettre en route, mettez le bouton ON- / OFF sur la position ON. Le témoin
lumineux du ventilateur LO ou HI s’allume. Des ions négatifs sont alors générés et la
purification de l’air commence.
3
Pour régler la vitesse de ventilation, utilisez le bouton du ventilateur. Vous pouvez
choisir entre
(vitesse réduite) ou
(grande vitesse). Le témoin lumineux
correspondant s’allumera LO (vitesse réduite) ou HI (grande vitesse).
4
Pour éteindre l’appareil, mettez le bouton ON- / OFF sur la position OFF.
E. LE NETTOYAGE
Avant de nettoyer le purificateur d’air, éteignez-le puis débranchez-le.
L’EXTÉRIEUR
Nettoyez l’extérieur de l’appareil avec un chiffon doux et sec. Si l’appareil est vraiment
sale, vous pouvez utiliser un produit nettoyant doux. Passer ensuite un chiffon légèrement
humide. Ne jamais verser d‘eau sur l’appareil.
LE FILTRE HEPA
Nettoyez la grille de la façade avec un aspirateur. Le filtre HEPA ne doit pas être nettoyé. Si
le filtre est sale il doit être changé (voir chapitre B).
N’utilisez jamais l’appareil sans filtre à air.
3
30
F.
LE STOCKAGE
Si vous n’utilisez plus l’appareil pendant une longue période, appliquez les consignes
suivantes:
1
Débranchez l’appareil.
2
Nettoyez le filtre à air.
3
Enlevez le filtre HEPA (chapitre C).
4
Rangez l’appareil dans un endroit à l’abri de la poussière, de préférence recouvert
d’une housse.
G. TABLEAU DES PANNES
Avant de demander une assistance technique, contrôlez d’abord les points suivants:
Problème
Origines
Solutions
L’appareil n’est pas branché.
Branchez l’appareil.
L’appareil ne fonctionne La fiche n’est pas correctement
pas.
enfilée dans la prise de contact.
Branchez l’appareil
correctement.
Un fusible est endommagé.
Remplacez le fusible.
Le filtre HEPA est sale.
Remplacez le filtre.
Le filtre HEPA n’est pas installé
dans l’appareil.
Placez le filtre dans l’appareil.
Le filtre HEPA n’est pas installé
correctement dans l’appareil.
Placez le filtre correctement
dans l’appareil.
L’appareil émet des
craquements.
Ce bruit est émis lorsque de
petites particules entrent dans
l’appareil. Ce bruit n’est pas
anormal sauf s’il est continu.
Si ces craquements sont
continuels, consultez votre
distributeur.
Pas ou trop peu de
circulation d’air.
Le flux d’air est bloqué.
L’appareil n’élimine
aucune odeur et/ou
particule.
Remédiez au blocage.
Remplacez le filtre HEPA.
3
31
H. LES CONDITIONS DE GARANTIE
Votre purificateur d’air est garanti 2 ans à partir de sa date d’achat. Durant cette période,
toutes les réparations nécessaires dues à des défauts de fabrication et de matériels sont
effectuées gratuitement.
Dans ce cadre, les règles suivantes s’appliquent:
•
Toutes les autres demandes de dommages et intérêts, y compris pour dommages
•
La réparation ou le changement d’une pièce durant la période de garantie ne
indirects ne seront pas honorées.
provoque pas un prolongement de cette même garantie.
•
La garantie n’est pas valable en cas de modification de l’appareil, de montage de
pièces qui ne sont pas d’origine, ou de réparation du purificateur d’air effectuée par
des tierces personnes.
•
Les pièces subissant une usure normale ne sont pas garanties (à préciser).
•
La garantie n’est valable que sur présentation de la preuve d’achat originale et datée
sur laquelle aucune modification n’a été apportée.
•
La garantie ne couvre pas les dégâts causés par une utilisation ne respectant pas le
mode d’emploi, ou suite à des négligences.
•
L’acheteur est responsable des frais d’envoi et des risques inhérents à l’expédition de
l’appareil ou de ses pièces détachées.
Pour éviter des dépenses inutiles, nous vous conseillons de toujours consulter en premier
lieu mode d’emploi. Si malgré cela, vous ne parvenez pas à remédier à la panne, rapportez
le purificateur d’air chez votre distributeur pour réparation.
3
32
I.
SPÉCIFICATION TECHNIQUES
Typ
A 20
V / Hz / F
220-240 / 50 / 1
Puissance absorbée (min./max.)
W
18 / 30
Intensité du courant (max.)
A
0,15
dB
24 - 38
m3/heure
60 / 120
kg
4
mm
430 x 366 x 131
m3
40
nombre/cc
30.000 - 50.000
Tension électrique d’alimentation
Niveau sonore(min./max.)
Débit d’air (min./max.)
Poids net
Dimensions (lxhxp)
S’utilise dans des pièces jusqu’à
Ions négatifs générés
Ne pas jeter vos appareils électriques avec vos ordures ménagères. Prière de les déposer
dans les lieux de dépôt prévus à cet effet. Pour tout information concernant le recyclage,
merci de vous informer auprès de votre distributeur ou des autorités locales.
3
33
Dear Sir/Madam,
Congratulations on the purchase of your air purifier. You have acquired a high quality
product that will give you years of pleasure if you use it sensibly. Read this manual first in
order to optimise the life span of your air purifier.
On behalf of the manufacturer, we provide a two-year guarantee on possible material or
manufacturing defects.
Enjoy your air purifier.
Yours sincerely,
PVG International B.V.
1 FIRST READ THE MANUAL.
2 IF IN DOUBT, CONSULT YOUR DEALER.
4
34
2
4
3
1
IMPORTANT
COMPONENTS
A
Front panel
B
Control panel
C
Air inlet
4
Air outlet
E
Fastening
mechanism
5
F
HEPA filter
(High Efficiency
Particulate Air filter)
G
Plug and cord
6
G
4
35
A. WHAT YOU MUST KNOW IN ADVANCE
GENERAL
Take the following actions to obtain an optimum result.
•
Place the air purifier in an elevated location (e.g. on a table or cupboard) in order to
allow it to filter small particles such as smoke. Place the air purifier near or on the
ground to enable it to filter large dust particles such as pollen.
•
Always maintain a free space of 30 cm around the device.
•
Read these instructions carefully and follow the directions.
SAFETY REGULATIONS
•
The installation must be completely in accordance with local regulations, ordinances
and standards.
•
The device is suitable exclusively for use in dry places, indoors.
•
Check the mains voltage. This device is suitable exclusively for earthed sockets –
connection voltage 220-240 Volt/ 50 Hz.
•
The device MUST always have an earthed connection. You may absolutely not
connect the device if the power supply is not earthed.
•
The plug must always be easily accessible when the device is connected.
•
Do not connect the device with an extension cord.
•
Never use the device with a damaged cord or plug.
•
The device must be connected to the power supply with an earthed plug. Ensure that
the power cord is not entangled or rolled up.
•
Always switch the device off before pulling the plug out from the wall outlet. When
you pull out the plug from the socket, grip the plug to avoid damaging the cord.
•
It is forbidden for children to play with the device. The device may only be used by
adults.
•
It is dangerous and forbidden to modify the device.
•
It is forbidden to cover the device or to insert foreign objects into the device as a fire
•
Do not make the device wet.
•
Avoid using spray cans (insect spray, hairspray, etc.) in the vicinity of the air purifier.
or electric shock could occur.
This may damage the device and/or cause fires.
•
The device may not be used in humid rooms such as bathrooms.
•
A damaged electricity cable may only be replaced by the supplier or n authorised
person/service point.
TIPS FOR SAFE USAGE
•
Keep plastic bags and other packaging materials out of reach of children.
•
The device was developed to purify air and not for any other application.
•
Always contact your supplier if repair or maintenance is required.
•
Do not place the device in the vicinity of heat sources, materials, installations, or near
curtains, that may cause a fire hazard or in environments where explosions may occur.
4
36
•
Always switch the device off and remove the plug from the socket before cleaning it.
•
The floor must be stable and level.
B. INSTALLATION
1
Remove the front panel 1 with the aid of the fastening mechanism 5 on both sides
of the device.
2
Take the filter 6 out of the device and remove the packaging.
3
Put the filter back into the device, with the white side facing up.
4
Attach the front panel by pushing the three hooks on the top into the recesses in the
device. Now click the bottom left and right of the front panel into position.
5
The device is now ready for use.
ATTENTION!
The HEPA filter must be inserted correctly in order to guarantee that it will
function correctly.
C. AIR FILTER
The A20 air purifier is equipped with a 3 layer filter package to clean the circulated room air.
HEPA (High Efficiency Particulate Airfilter) filter captures allergens like bacteria, dust
-
and pollen.
-
Active carbon filter removes unpleasant odours from the air.
-
Screen filter captures large dust particles.
The HEPA filter and activated carbon filter continue to work for a long period of time after
opening. Both must be replaced approximately 1 - 2 x per year. The frequency of use and
operating conditions determine how often a filter must be replaced.
1
Switch the device off and remove the plug from the socket.
2
Remove the front panel 1 with the aid of the fastening mechanism E on both sides
of the device.
3
Next to the filter you will see a sticker printed with a small grey and brown square. If
the filter is one of these colours, replace it in the matter described in chapter B.
4
Install the new HEPA / active carbon filter (see chapter B) and close the front panel.
5
The dirty filter can be disposed with the household waste (not biologically
degradable waste) without any problem.
6
New filters can be purchased from your dealer.
4
37
ATTENTION!
- Always use a new filter when the filter must be replaced. Never re-use a dirty
filter, even after cleaning.
- Regardless of the frequency of use, we recommend replacing the HEPA filter
with a new filter at least once per season.
D. OPERATION
1
Push the plug into the socket.
2
Move the ON/OFF switch to the ON setting to activate the device. The ventilator LO or
HI light will switch on.
Negative ions are generated and air purification commences.
3
Use the ventilator button to set the desired speed. You can select the
(low) or the
(high). The appropriate light – LO (low) or HI (high) – will then switch on.
4
Switch the device off by moving the ON/OFF switch to the OFF position.
E. CLEANING
Switch the air purifier off and remove the plug from the socket before cleaning.
THE EXTERIOR
Clean the exterior with a soft, dry cloth. If the device is extremely dirty, use a mild cleaning
agent. Wipe the device with a slightly damp cloth. Never spray the device with water.
THE HEPA FILTER
Clean the grill of the front panel with a vacuum cleaner. It is not possible to clean the HEPA
filter. It must be replaced when it becomes dirty (see section B).
Never use the device without the air filter.
4
38
F.
STORAGE
If the machine will not be used for a long period of time, take the following steps:
1
Remove the plug from the socket.
2
Clean the air filter.
3
Remove the HEPA filter (see chapter C).
4
Store the device in a dust-free location, preferably covered with a sheet of plastic.
G. TROUBLE SHOOTING
Check the following before contacting technical support:
Problem
Cause
Solution
The plug is not in the socket.
Push the plug into the socket.
The plug has been inserted into
the socket incorrectly.
Push the plug into the socket
correctly
A fuse has blown.
Replace the fuse.
The HEPA filter is dirty.
Replace the filter
The HEPA filter is missing.
Insert the filter.
The HEPA filter is not placed
correctly.
Place the filter in the correct
manner.
The device makes a
creaking sound.
This noise is caused by small
particles of dust entering the
device and is normal.
Contact your dealer if this noise is
constant.
No / insufficient air
circulation.
The air flow is blocked.
The device does not work
The device does not
remove odours and/or
dust.
Remove the blockage.
Replace the HEPA filter.
4
39
H. GUARANTEE CONDITIONS
We provide a two-year guarantee on your air purifier from the date of purchase. All
material or manufacturing defects will be repaired free of charge.
The following applies:
•
All claims for compensation, including consequential damage, will not be
•
Any repairs or replacement of components during the warranty period will not result
entertained.
in an extension of the warranty period.
•
The warranty will expire if any alterations have been made, not genuine components
have been fitted or if the air purifier has been repaired by a third party.
•
Components subject to normal wear and tear, such as the air filter, are not covered by
the warranty.
•
The warranty is only valid on presentation of the original, unaltered, and datestamped purchase receipt.
•
The warranty does not cover damage caused by actions that deviate from those as
described in the user’s manual or by neglect.
•
Shipment costs and the risks associated with the shipment of the air purifier or parts
of the air purifier are always borne by the purchaser.
To prevent unnecessary expenses, we recommend that you always carefully read the user’s
manual first. If this does not provide a solution, take the air purifier to your dealer for
repair.
4
40
I.
TECHNICAL SPECIFICATIONS
A 20
Type
Mains power
V / Hz / F
220-240 / 50 / 1
Power consumption (min./max.)
W
18 / 30
Amperage (max.)
A
0.15
Noise level (min./max.)
dB
24 - 38
m3/hour
60 / 120
kg
4
Dimensions (wxhxd)
mm
430 x 366 x 131
Suitable for rooms to
m3
40
number/cc
30,000 - 50,000
Air debit (min./max.)
Net weight
Generated negative ions
Waste electrical products should not be disposed with household waste. Please recycle
where facilities exist. Check with your local authority or retailer for recycling advice.
4
41
Gentile signora, egregio signore,
Congratulazioni per aver acquistato un depuratore d'aria di nostra fornitura. Siete infatti in
possesso di un prodotto di qualità il cui uso in piena soddisfazione e al massimo del comfort
potrà durare per molti anni a condizione che sappiate usarlo con la dovuta oculatezza. Vi
preghiamo pertanto di leggere innanzitutto le istruzioni d'uso per essere in grado di gestire
correttamente il vostro depuratore d'aria e di assicurarne un funzionamento ottimale nel
tempo.
Il costruttore dell'apparecchio concede una garanzia di due anni a copertura di difetti di
fabbricazione e vizi del materiale.
Ci auguriamo che ricaverete il maggior comfort possibile dal vostro depuratore d'aria.
Con i migliori saluti,
PVG International B.V.
1 LEGGERE INNANZITUTTO LE ISTRUZIONI PER L'USO.
2 RIVOLGERSI AL PROPRIO PUNTO DI VENDITA IN CASO DI DUBBI.
>
42
2
4
3
1
COMPONENTI
PRINCIPALI
A
Pannello anteriore
B
Quadro di controllo
C
Presa di ingresso
dell'aria
5
4
Uscita dell'aria
E
Chiusura
F
Filtro HEPA
(acronimo di: High
Efficiency Particulate
Airfilter)
G
Cordone elettrico
con spina
6
G
>
43
A. INFORMAZIONI PRELIMINARI IMPORTANTI
GENERALITÀ
Per ottenere un rendimento ottimale procedere nel modo seguente:
•
Collocare il depuratore d'aria più in alto possibile (per esempio su un tavolo o
armadio) per agevolare soprattutto l'aspirazione delle particelle più sottili di aria,
come ad esempio quelle in cui è presente il fumo o gas. Per poter filtrare particelle
d'aria più voluminose, ad esempio quelle contenenti polline, è invece indispensabile
posizionare il depuratore in basso (sul pavimento).
•
Intorno all'apparecchio, e fra lo stesso ed altri oggetti o pareti, occorre osservare in
tutti i casi una distanza minima di 30 cm.
•
Si consiglia di leggere accuratamente le presenti istruzioni e di attenersi alle
indicazioni fornite.
NORME DI SICUREZZA
•
L’impianto deve essere completamente rispondente alle prescrizioni, disposizioni e
•
L’apparecchio è indicato solo per l’utilizzo negli interni ed in luoghi non umidi.
•
Verificare la rispondenza della tensione di alimentazione.
•
L’apparecchio deve essere collegato solo ad una presa di corrente equipaggiata con
norme localmente vigenti.
messa a terra ed erogante una tensione di allacciamento pari a 220-240 V / 50 Hz.
•
L’apparecchio DEVE essere collegato ad un impianto elettrico dotato di messa a terra.
Se tale tipo di collegamento non è disponibile, è vietato collegare l‘apparecchio alla
rete di alimentazione.
•
E’ inoltre opportuno assicurare che l’accesso alla spina elettrica non sia ostacolato in
nessun modo.
•
Non utilizzare mai l'apparecchio se la spina o il cavo mostrano danneggiamenti.
•
Collegare l'apparecchio all'impianto elettrico dell'abitazione che sia dotato di messa a
terra. Assicurarsi che il cavo elettrico non sia attorcigliato o piegato.
•
Spegnere l'apparecchio prima di disinserire la spina dalla presa. Per togliere la spina
dalla presa estrarre la spina senza tirare il cavo.
•
Proibire ai bambini di giocare con l'apparecchio. L'apparecchio deve essere usato solo
dagli adulti.
•
E' sconsigliato, nonché pericoloso, apportare modifiche all'apparecchio.
•
Per evitare il rischio di surriscaldamento e di incendio, non coprire l'apparecchio né
introdurre oggetti nelle sue aperture.
•
L'apparecchio non deve essere bagnato.
•
E' preferibile non usare bombolette spray (insetticidi, lacche per capelli, ecc.) in
prossimità del depuratore d'aria. Si evita così di incorrere nel rischio di incendio o di
danneggiamento dell'apparecchio.
•
L'apparecchio non va utilizzato in ambienti domestici ad elevato tenore di umidità
(stanza da bagno, ecc.).
•
La sostituzione di un cordone elettrico danneggiato è un intervento riservato a
persone qualificate o al centro di assistenza.
SUGGERIMENTI PER UN UTILIZZO IMPRONTATO ALLA SICUREZZA
•
>
44
Tenere fuori dalla portata dei bambini i materiali di imballaggio che proteggevano
l’apparecchio.
•
L'apparecchio è stato progettato per la depurazione dell'aria e non è idoneo per
nessun altro scopo.
•
Per eventuali necessità di manutenzione e per interventi di riparazione rivolgersi
sempre al proprio fornitore.
•
Non posizionare l'apparecchio in prossimità di fonti di calore, apparecchi o materiale
infiammabile (per esempio le tende) e in ambienti a rischio di esplosione.
•
Pulire l'apparecchio solo dopo aver spento il deumidificatore e staccato la spina di
alimentazione dalla presa.
•
Il piano di sostegno/pavimento deve essere robusto e perfettamente orizzontale.
B. INSTALLAZIONE
1
Sganciare il pannello anteriore 1 agendo sulle chiusure 5 poste sui due lati
dell'apparecchio.
2
Togliere il filtro 6 dall'apparecchio e mettere via l'imballo.
3
Rimontare il filtro nell'apparecchio, tenendo presente che il lato bianco deve essere
rivolto verso l'alto.
4
Richiudere il pannello anteriore, inserendo nelle apposite rientranze dell'apparecchio
i tre ganci siti in alto Agganciare successivamente il pannello anteriore con uno
scatto delle chiusure in basso a sinistra e a destra.
5
A questo punto l'apparecchio è pronto per entrare in servizio.
ATTENZIONE!
Il filtro HEPA deve essere posizionato in modo corretto, per garantirne
l'efficiente del funzionamento.
C. FILTRO ARIA
Dopo l'apertura della confezione il filtro HEPA rimane attivo per circa 1 anno. Ovviamente
i ritmi di uso e le condizioni ambientali influiscono sulla frequenza di sostituzione del
filtro. Per verificare se è necessario sostituire il filtro procedere nel modo seguente:
1
Aprire il pannello anteriore 1 agendo sulle chiusure 5 site su entrambi i lati
dell'apparecchio.
2
Accanto al filtro individuare la targhetta adesiva con i due riferimenti cromatici:
campi grigio e marrone. Quando il filtro ha assunto lo stesso colore di uno dei due
riferimenti è giunto il momento di procedere alla sua sostituzione, in osservanza alle
istruzioni fornite nel capitolo B.
>
45
3
Un filtro HEPA esausto può essere smaltito senza problemi con i rifiuti domestici (ma
non con i rifiuti organici biodegradabili o riciclabili).
4
I filtri di ricambio sono comunemente disponibili in commercio.
ATTENZIONE!
- Se occorre sostituire il filtro, adottate solo filtri nuovi, cioè assolutamente
vergini. E' tassativamente interdetto il riutilizzo di filtri usati, anche dopo la
loro pulitura o il ricondizionamento.
- Indipendentemente dall'uso è consigliabile sostituire il filtro al meno 1 volta a
stagione, con un nuovo filtro HEPA.
D. USO
1
Inserire la spina dell'apparecchio nella presa della rete di alimentazione.
2
Per mettere in funzione l'apparecchio occorre posizionare l'interruttore ON /OFF
(accensione/spegnimento) su ON. Uno degli indicatori luminosi del ventilatore, LO
oppure HI, si accende. Ha quindi inizio la produzione di ioni negativi ed ha luogo la
depurazione dell'aria.
3
Utilizzando il tasto di regolazione del ventilatore potrete impostare la velocità
desiderata. E' possibile scegliere fra
(bassa velocità) o l
(alta velocità). Il relativo
indicatore luminoso LO (bassa velocità) o HI (alta velocità ) si accende.
4
Per spegnere l'apparecchio basta posizionare l'interruttore ON- / OFF nella posizione
di disattivazione OFF.
>
46
E. PULIZIA
Pulire il depuratore d'aria solo dopo averlo spento ed averlo staccato dalla presa della
corrente.
L'ESTERNO
Il depuratore d'aria può essere pulito esternamente con un panno morbido ed asciutto. Se
l'apparecchio è molto sporco si può utilizzare un detergente neutro da togliersi con un
panno leggermente umido. Non pulire mai l'apparecchio con getti d'acqua.
IL FILTRO HEPA
Pulire la griglia del pannello anteriore con un aspiratore. Il filtro HEPA non può essere
pulito né rigenerato. Se il filtro ha raggiunto il massimo della contaminazione deve essere
sostituito (fare riferimento al capitolo B).
Non utilizzare l'apparecchio senza il filtro.
F.
COME RIPORRE L'APPARECCHIO
Se l'apparecchio deve rimanere inutilizzato per un lungo periodo di tempo, seguire i
seguenti accorgimenti:
1
Togliere la spina dalla presa.
2
Pulire il filtro dell'aria.
3
Togliere il filtro HEPA (rif. capitolo C).
4
Riporre l'apparecchio in un locale protetto dalla polvere; preferibilmente coprire
l'apparecchio con un telo di plastica.
>
47
G. INDIVIDUAZIONE DEI GUASTI
Prima di richiedere assistenza tecnica, si consiglia di verificare i punti di seguito elencati :
Problema
L'apparecchio non
funziona
Causa probabile
Rimedio
La spina non è stata inserita
nella presa.
Inserire la spina nella presa.
La spina non è stata inserita
correttamente nella presa.
Inserire la spina correttamente
nella presa.
Un fusibile è bruciato.
Sostituire il fusibile.
Il filtro HEPA è sporco.
Sostituire il filtro.
Il filtro HEPA non è stato
L'apparecchio non aspira montato.
l'aria e/o la polvere.
Il filtro HEPA non è stato
sistemato correttamente
nell'apparecchio.
Si tratta di un rumore che si
verifica allorché minuscole
L'apparecchio produce
particelle di aria penetrano
uno crepitio ben udibile.
nell'apparecchio ed è indice di
un difetto .
Circolazione di aria
assente o insufficiente.
Il flusso di aria è ostacolato.
Inserire il filtro nell'apparecchio.
Sistemare il filtro correttamente
nell'apparecchio.
Se il rumore è percepito in
continuazione rivolgersi al punto
di vendita dell'apparecchio.
Eliminare
l'ostacolo/l'intasamento.
Sostituire il filtro HEPA.
H. CONDIZIONI DI GARANZIA
Al depuratore di aria si applica una garanzia di due anni a decorrere dalla data di acquisto.
Entro tale termine saranno effettuati gratuitamente tutti gli interventi di riparazione in
conseguenza di difetti di fabbricazione o vizi del materiale.
Nella fattispecie si applicano le seguenti disposizioni:
•
Saranno respinti tutti gli altri reclami o richieste di risarcimento, compresi quelli per
danni derivanti.
•
La riparazione o la sostituzione di componenti, entro il periodo di garanzia, non
comporta un prolungamento della garanzia.
•
La garanzia è nulla nel caso in cui siano state apportate modifiche al depuratore
d'aria, siano state montate componenti non originali, o l’apparecchio sia stato
riparato da terzi.
•
Le componenti soggette a normale usura, non sono comprese nella garanzia.
•
Per esigere l’applicazione della garanzia si dovrà presentare lo scontrino d’acquisto
originale, datato, e non dovranno esser state apportate modifiche d’alcun tipo
all’apparecchio.
>
48
•
La garanzia è nulla in caso di danni sorti in seguito ad azioni che differiscono da
quanto indicato nelle istruzioni o in seguito a negligenza.
•
Le spese di spedizione ed i rischi connessi al trasporto del depuratore d'aria o all'invio
di parti di ricambio sono sempre a carico dell'acquirente.
Per prevenire costi inutili, si consiglia di leggere sempre attentamente le istruzioni prima
dell’uso. Se ciò nonostante non riuscite a risolvere il problema vi consigliamo di rivolgervi
al vostro punto di vendita, per far effettuare le riparazioni del caso.
I.
SPECIFICHE TECNICHE
Tipo
Alimentazione elettrica
A 20
V / Hz / F
220-240 / 50 / 1
Potenza assorbita (min./max.)
W
18 / 30
Corrente (max.)
A
0,15
dB
24 - 38
m3/uur
60 / 120
kg
4
Dimensioni (larghxalt.xprof)
mm
430 x 366 x 131
Idoneo per ambienti fino a
m3
40
numero/cc
30.000 - 50.000
Rumorosità: livello di potenza sonora
(min./max.)
Portata di aria (min./max.)
Peso netto
Ioni negativi generati
Gli elettrodomestici e gli apparecchi elettrici fuori uso non devono essere smaltiti come
rifiuti domestici. Utilizzare gli appositi centri di consegna e riciclaggio, se disponibili.
Rivolgersi alle autorità locali o ai punti di vendita per le informazioni del caso.
>
49
Geachte mevrouw, mijnheer,
Van harte gefeliciteerd met de aankoop van uw luchtreiniger. U heeft een
kwaliteitsproduct aangeschaft waar u nog vele jaren plezier van zult hebben, mits u het
apparaat verantwoord gebruikt. Lees daarom eerst deze gebruiksaanwijzing voor een
optimale levensduur van uw luchtreiniger.
Wij geven u namens de fabrikant twee jaar garantie op mogelijke materiaal- of
fabricagefouten.
Wij wensen u veel comfort met uw luchtreiniger.
Met vriendelijke groet,
PVG International B.V.
1 LEES EERST DE GEBRUIKSAANWIJZING.
2 RAADPLEEG BIJ TWIJFEL UW DEALER.
1
50
2
4
3
1
5
BELANGRIJKE
ONDERDELEN
A
Voorpaneel
B
Bedieningspaneel
C
Inlaat van lucht
4
Uitlaat van lucht
E
Sluiting
F
HEPA filter (High
Efficiency Particulate
Airfilter)
G
Stekker en snoer
6
G
1
51
A. WAT U VOORAF DIENT TE WETEN
ALGEMEEN
Ga als volgt te werk om een optimaal resultaat te verkrijgen.
•
Zet de luchtreiniger op een hoge plaats (bijv. tafel of kast) om met name kleine
stofdeeltjes te filteren, zoals rook. Om grotee stofdeeltjes te filteren, zoals pollen,
dient u de luchtreiniger laag (op de grond) te zetten.
•
Houd altijd 30 cm vrije ruimte rondom het apparaat.
•
Lees deze gebruiksinstructie zorgvuldig en volg de aanwijzingen.
VEILIGHEIDSVOORSCHRIFTEN
•
De installatie moet volledig in overeenstemming zijn met de ter plaatse geldende
voorschriften, bepalingen en normen.
•
Het apparaat is uitsluitend geschikt voor gebruik op droge plaatsen, binnenshuis.
•
Controleer de netspanning.
•
Dit apparaat is uitsluitend geschikt voor een geaard stopcontact, aansluitspanning
•
Het apparaat MOET altijd geaard worden aangesloten. Als de stroomvoorziening
220-240 Volt/ 50 Hz.
niet geaard is, mag u het apparaat absoluut niet aansluiten.
•
De stekker moet altijd makkelijk toegankelijk zijn als het apparaat is aangesloten.
•
Sluit het apparaat niet aan met behulp van een verlengsnoer.
•
Gebruik het apparaat nooit met een beschadigd(e) snoer of stekker.
•
Het aansluiten van het apparaat op het elektrische systeem moet gebeuren door
middel van een geaarde aansluiting. Zorg ervoor dat het snoer vrij ligt (niet
opgerold).
•
Schakel altijd eerst het apparaat uit alvorens de stekker uit het stopcontact te halen.
Trek hierbij niet aan het snoer maar aan de stekker.
•
Het is verboden voor kinderen om met het apparaat te spelen. Het apparaat mag
•
Het is gevaarlijk en verboden veranderingen aan het apparaat aan te brengen.
•
Het is verboden het apparaat af te dekken en vreemde voorwerpen erin te stoppen,
•
Het apparaat mag niet nat gemaakt worden.
•
Vermijd het gebruik van spuitbussen (insectenspray, haarlak, enz.) in de buurt van de
•
Het apparaat mag niet gebruikt worden in vochtige ruimtes zoals een badkamer.
•
Een beschadigd elektriciteitssnoer alleen laten vervangen door de leverancier of een
alleen door volwassenen gebruikt worden.
dit in verband met de kans op oververhitting en brandgevaar.
luchtreiniger. Dit kan het apparaat beschadigen en/of brand veroorzaken.
bevoegd persoon/servicepunt.
TIPS VOOR EEN VEILIG GEBRUIK
•
Houd plastic en overig verpakkingsmateriaal van het apparaat buiten het bereik van
kinderen.
•
Het apparaat is ontwikkeld om de lucht te zuiveren en niet voor enige andere
toepassing.
•
Neem in geval van reparatie of onderhoud altijd contact op met uw leverancier.
•
Plaats het apparaat niet in de buurt van warmtebronnen, brandgevaarlijke
installaties of materialen (bijvoorbeeld gordijnen) en explosieve omgevingen.
•
1
52
Schakel het apparaat altijd uit en haal de stekker uit het stopcontact alvorens het te
reinigen.
•
Zet het apparaat op een stevige ondergrond die waterpas is.
B. INSTALLATIE
1
Maak het voorpaneel 1 los met behulp van de sluiting 5 aan de beide zijkanten van
het apparaat.
2
Haal het filter 6 uit het apparaat en verwijder de verpakking.
3
Plaats het filter terug in het apparaat, met de witte zijde naar boven.
4
Maak het voorpaneel weer vast door de drie haakjes aan de bovenzijde in de
uitsparingen van het apparaat te steken. Klik vervolgens het voorpaneel links en
rechts aan de onderzijde vast.
5
Het apparaat is nu gebruiksklaar.
LET OP!
Het HEPA filter dient op de juiste wijze geplaatst te worden, om een goede
werking te waarborgen.
C. LUCHTFILTER
Na opening behoudt het HEPA filter ca. 1 jaar haar werking. De gebruiksfrequentie en
omgeving bepalen hoe vaak een filter vervangen moet worden. Om te bepalen of het
filter vervangen moet worden gaat u als volgt te werk:
1
Maak het voorpaneel 1 los met behulp van de sluiting 5 aan de beide zijkanten van
het apparaat.
2
Naast het filter ziet u een sticker waarop een grijs en bruin vierkantje staan. Als de
filter een van deze kleuren heeft, vervang dan het filter zoals beschreven in
hoofdstuk B.
3
Het verontreinigde HEPA filter kan zonder problemen afgevoerd worden met het
huisvuil (geen biologisch afbreekbaar afval).
4
Nieuwe filters zijn verkrijgbaar bij uw dealer.
LET OP!
- Indien het filter vervangen moet worden altijd een nieuw filter gebruiken.
Nooit een verontreinigd filter hergebruiken, ook niet na schoonmaak.
- Aan te raden is ongeacht het gebruik, het filter minimaal 1 x per seizoen te
vervangen door een nieuwe HEPA filter.
1
53
D. BEDIENING
1
Steek de stekker in het stopcontact.
2
Om het apparaat aan te zetten dient u de ON- / OFF schakelaar op ON te zetten. Het
lampje van de ventilator LO of HI gaat dan branden. Negatieve ionen worden
gegenereerd en de luchtzuivering gaat van start.
3
Met behulp van de ventilator knop stelt u de gewenste snelheid in. U heeft de keuze
uit
(laag) of
(hoog). Het bijbehorende lampje LO (laag) of HI (hoog)zal gaan
branden.
4
U schakelt het apparaat uit door de ON- / OFF schakelaar op OFF te zetten.
E. REINIGING
Voordat u begint met reinigen dient u het apparaat uit te schakelen. Trek daarna de
stekker uit het stopcontact.
DE BUITENKANT
Reinig de buitenkant met een zachte, droge doek.
Indien het apparaat erg vuil is kunt u een mild schoonmaakmiddel gebruiken. Vervolgens
afvegen met een licht vochtige doek.
Het apparaat nooit nat spuiten.
HET HEPA FILTER
Reinig de grille van het voorpaneel met een stofzuiger. Het HEPA filter kunt u niet
reinigen. Wanneer deze verontreinigd is moet het vervangen worden (zie hoofdstuk B).
LET OP!
Gebruik het apparaat nooit zonder luchtfilter.
1
54
F.
OPSLAG
Wanneer u het apparaat lange tijd niet gebruikt, kunt u het beste als volgt te werk te
gaan:
1
Haal de stekker uit het stopcontact.
2
Reinig het apparaat.
3
Verwijder het HEPA-filter (zie hoofdstuk C).
4
Berg het apparaat op in een stofvrije ruimte, bij voorkeur afgedekt met plastic.
G. STORINGSTABEL
Voordat u om technische ondersteuning vraagt, dient u de volgende zaken te controleren:
Probleem
Oorzaak
Oplossing
De stekker zit niet in het
stopcontact.
Steek de stekker in het
stopcontact.
Het apparaat werkt niet De stekker zit niet goed in het
stopcontact.
Er is een zekering stuk.
Vervang de zekering.
Het HEPA filter is vies.
Vervang het filter.
Het apparaat verwijdert Het HEPA filter ontbreekt.
geen luchtjes en/of stof.
Het HEPA filter is niet juist
geplaatst.
Dit geluid ontstaat wanneer
Het apparaat maakt een kleine stofdeeltjes het apparaat
krakend geluid.
binnen komen, dit duidt niet op
een defect.
Geen / onvoldoende
luchtcirculatie.
Steek de stekker op de juiste
wijze in het stopcontact.
De luchtdoorstroming is
geblokkeerd.
Plaats alsnog het filter in het
apparaat.
Plaats het filter op de juiste
wijze in het apparaat.
Wanneer dit geluid continu
hoorbaar is, neem dan contact
op met uw dealer.
Verwijder de blokkade.
Vervang HEPA filter.
1
55
H. GARANTIEVOORWAARDEN
U krijgt op uw luchtreiniger twee jaar garantie vanaf de aankoopdatum. Binnen deze
periode worden materiaal- en fabricagefouten kosteloos verholpen. Hierbij gelden de
volgende regels:
•
Alle verdere aanspraken op schadevergoeding, inclusief gevolgschade, worden niet
gehonoreerd.
•
Reparatie of vervanging van onderdelen binnen de garantietermijn leidt niet tot
•
De garantie geldt niet wanneer veranderingen zijn aangebracht, niet-originele
verlenging van de garantie.
onderdelen zijn gemonteerd of reparaties zijn verricht door derden.
•
Onderdelen die aan normale slijtage onderhevig zijn vallen buiten de garantie.
•
De garantie geldt uitsluitend als u de originele, gedateerde aankoopbon overlegt en
als daarop geen veranderingen zijn aangebracht.
•
De garantie geldt niet bij schade ontstaan door handelingen die afwijken van die in
de gebruiksaanwijzing zijn vermeld of door verwaarlozing.
•
De verzendkosten en het risico van het opsturen van de luchtreiniger of onderdelen
daarvan, komen altijd voor rekening van de koper.
Om onnodige kosten te voorkomen, raden wij u aan eerst altijd zorgvuldig de
gebruiksaanwijzing te raadplegen. Wanneer deze geen uitkomst biedt, breng de
luchtreiniger dan ter reparatie naar uw dealer.
1
56
I.
TECHNISCHE SPECIFICATIES
Type
Netspanning
A 20
V / Hz / F
220-240 / 50 / 1
Opgenomen vermogen (min./max.)
W
18 / 30
Stroomsterkte (max.)
A
0,15
dB
24 - 38
m3/uur
60 / 120
kg
4
mm
430 x 366 x 131
m3
40
aantal/cc
30.000 - 50.000
Geluidsniveau (min./max.)
Luchtdebiet (min./max.)
Netto gewicht
Afmetingen (bxhxd)
Geschikt voor ruimtes tot
Gegenereerde negatieve ionen
Defecte elektrische apparaten horen niet bij het huisafval. Zorg voor een goede recycling
waar mogelijk. Vraag eventueel uw gemeente of uw lokale handelaar voor een deskundig
recycling advies.
1
57
Prezada Senhora/Prezado Senhor,
Parabéns pela compra do seu purificador de ar. O produto que adquiriu é de alta qualidade
e terá com este muitos anos de prazer, desde que utilize o aparelho de forma responsável.
Por isso, leia primeiro estas instruções de utilização, para uma vida útil mais prolongada do
seu purificador de ar.
Este produto está garantido pelo fabricante durante dois anos para possíveis defeitos de
material e fabrico.
Desejamo-lhe muito conforto com o seu purificador.
Com os melhores cumprimentos,
PVG International B.V.
1 LEIA PRIMEIRAMENTE AS INSTRUÇÕES DE UTILIZAÇÃO.
2 EM CASO DE DÚVIDA, CONSULTE O SEU DISTRIBUIDOR.
9
58
2
4
3
1
5
COMPONENTES
IMPORTANTES
A
Painel frontal
B
Painel de operação
C
Admissão de ar
4
Saída de ar
E
Fecho
F
Filtro HEPA (Filtro de
Ar para Partículas de
Alta Eficácia)
G
Fio eléctrico e ficha
6
G
9
59
A. O QUE DEVE SABER ANTES
ASPECTOS GERAIS
Para obter o melhor resultado, proceda da seguinte maneira:
•
Coloque o purificador de ar num lugar alto (por exemplo sobre uma mesa ou
armário) para filtrar especialmente partículas pequenas, como fumo. Para filtrar
partículas grandes, como pólen, deve colocar o purificador de ar num lugar baixo (no
chão).
•
Mantenha sempre um espaço livre de 30 cm ao redor do aparelho.
•
Leia estas instruções de utilização com atenção e siga as instruções.
INSTRUÇÕES DE SEGURANÇA
•
A instalação deve ser inteiramente de acordo com as instruções, disposições e normas
locais em vigor.
•
O aparelho serve exclusivamente para utilização em lugares secos, dentro de casa.
•
Verifique a tensão de rede.
•
Este aparelho somente é apropriado para uma tomada com ligação à terra, tensão de
alimentação de 220-240 V / 50 Hz.
•
O aparelho deve SEMPRE ter ligação à terra. Quando a alimentação eléctrica não
tiver ligação à terra, o aparelho não deve ser conectado.
•
A ficha deve sempre estar facilmente acessível quando o aparelho estiver ligado.
•
Não conecte jamais o aparelho com a ajuda de um cabo de prolongamento.
•
Jamais utilize o aparelho com um fio ou uma ficha com defeito.
•
A ligação do aparelho ao sistema eléctrico deve ser efectuada por meio de uma
conexão com ligação de terra. Assegure-se de o um fio esteja livre (não enrolado).
•
Antes de retirar a ficha da tomada, desligue sempre o aparelho.
Não retire a ficha da tomada puxando pelo fio.
•
É proibido para crianças brincar com o aparelho. O aparelho somente deve ser
utilizado por adultos.
•
É proibido e perigoso introduzir modificações no aparelho.
•
É proibido cobrir o aparelho e introduzir objectos estranhos neste, para se evitar o
perigo de sobreaquecimento e incêndio.
•
O aparelho não deve ser molhado.
•
Evite o uso de aerossóis (pulverização de insecticidas, laca para cabelo, etc.) nas
proximidades do purificador de ar. Estes produtos podem danificar o aparelho e/ou
provocar incêndio.
•
O aparelho não deve ser utilizado em recintos húmidos como a casa de banho.
•
Um fio eléctrico danificado deve ser substituído sempre pelo fornecedor ou por uma
pessoa ou serviço técnico competente.
RECOMENDAÇÕES PARA UMA UTILIZAÇÃO SEGURA
•
Mantenha plástico e outros materiais de embalagem do aparelho fora do alcance de
crianças.
•
•
O aparelho foi desenvolvido para purificar o ar e não para outras aplicações.
Em caso de reparação ou manutenção, ponha-se sempre em contacto com o seu
fornecedor.
•
Não coloque o aparelho nas proximidades de fontes de calor, instalações ou materiais
inflamáveis (por exemplo cortinas) e ambientes explosivos.
9
60
•
Antes de limpar o aparelho, desligue sempre este e retire a ficha da tomada.
•
Coloque o aparelho sobre uma base estável e horizontal.
B. INSTALAÇÃO
1
Solte o painel frontal 1 com a ajuda do fecho 5 em ambos os lados do aparelho.
2
Retire o filtro 6 do aparelho e remova a embalagem.
3
Recoloque o filtro no aparelho, com o lado branco para cima.
4
Fixe novamente o painel frontal, introduzindo os três ganchos no lado superior nos
entalhes do aparelho. Em seguida encaixe o painel frontal à esquerda e à direita no
lado inferior.
5
O aparelho estará então pronto para ser utilizado.
ATENÇÃO!
O filtro HEPA deve ser colocado de forma correcta, para garantir um bom
funcionamento do aparelho.
C. FILTRO DE AR
Após a abertura, o filtro HEPA mantém a sua eficácia durante aprox. 1 ano. A frequência
de utilização e o ambiente determinam a frequência de substituição do filtro. Para
determinar se o filtro deve ser substituído, proceda da seguinte maneira:
1
Solte o painel frontal 1 com a ajuda do fecho 5 em ambos os lados do aparelho.
2
Ao lado do filtro encontra-se uma etiqueta com um quadrado cinzento e castanho.
Quando o filtro estiver com uma destas cores, substitua-o segundo a descrição no
capítulo B.
3
O filtro HEPA contaminado pode ser deitado fora com o lixo doméstico sem nenhum
inconveniente (resíduo não biodegradável).
4
Os filtros novos podem ser adquiridos do seu distribuidor.
ATENÇÃO!
• Ao substituir o filtro, utilize sempre um filtro novo. Jamais torne a utilizar um
filtro contaminado, mesmo que este tenha sido limpo.
• Recomenda-se, independentemente da utilização, substituir o filtro pelo
menos uma vez por estação por um filtro HEPA novo.
9
61
D. OPERAÇÃO
1
Introduza a ficha na tomada.
2
Para ligar o aparelho, coloque o interruptor ON/OFF em ON. A lâmpada do ventilador
LO ou HI se acenderá. São gerados iões negativos e é iniciada a purificação do ar.
3
Para regular a velocidade desejada do ventilador, use o botão correspondente. Pode
optar entre (baixa) ou (alta). Se acenderá então a lâmpada correspondente LO
(baixa) ou HI
4
(alta).
Para desligar o aparelho, posicione o interruptor ON/OFF em OFF.
E. LIMPEZA
Antes de começar a limpeza, deve desligar do aparelho Em seguida retire a ficha da
tomada.
A PARTE EXTERIOR
Limpe a parte exterior com um pano suave e seco.
Caso o aparelho esteja muito sujo, pode utilizar um produto de limpeza suave. Em seguida
limpe com um pano húmido.
Não lance jorro de água contra o aparelho.
O FILTRO HEPA
Limpe a grelha do painel frontal com um aspirador de pó. O filtro HEPA não pode ser
limpo. Ao estar contaminado, o filtro deve ser substituído (veja o capítulo B).
ATENÇÃO!
Jamais utilize o aparelho sem filtro de ar.
9
62
F.
ARMAZENAGEM
Ao deixar de utilizar o aparelho durante muito tempo, proceda da seguinte maneira:
1
Retire a ficha da tomada.
2
Limpe o aparelho.
3
Remova o filtro HEPA (veja o capítulo C).
4
Guarde o aparelho num lugar livre de poeira, de preferência coberto com plástico.
G. QUADRO DE AVARIAS
Antes de recorrer a assistência técnica, verifique os seguintes aspectos:
Problema
Causa
Solução
A ficha não está na tomada
eléctrica
Introduza a ficha na tomada
O aparelho não funciona A ficha não está bem colocada
na tomada eléctrica
Introduza a ficha correctamente
na tomada
O fusível está queimado
Substitua o fusível
O filtro HEPA está sujo
Substitua o filtro
Falta o filtro HEPA
Instale o filtro HEPA no aparelho
O filtro HEPA não está
correctamente instalado
Instale o filtro correctamente no
aparelho
O aparelho emite um
ruído de clique
Pode haver este ruído quando
entram pequenas partículas no
aparelho. Isso não significa que
haja qualquer defeito.
Quando se escuta este ruído
continuamente, ponha-se em
contacto com o seu distribuidor
Não há circulação de ar
ou a circulação é
insuficiente
A corrente de ar está bloqueada
O aparelho não elimina
odores e/ou poeira
Remova o bloqueio
Substitua o filtro HEPA
9
63
H. CONDIÇÕES DE GARANTIA
O seu purificador de ar está coberto por uma garantia de dois anos a partir da data da
compra. Dentro deste prazo, os defeitos de material e fabrico podem ser solucionados sem
custos. A essa garantia são aplicáveis as seguintes regras:
•
Nenhum dos outros direitos a indemnização, inclusive perdas indirectas, são
ressarcidos.
•
A reparação ou substituição de peças dentro do prazo de garantia não implica no
prolongamento da garantia.
•
A garantia já não será aplicável quando o aparelho tenha sido modificado, tenham
sido montadas peças não originais, ou quando tenham sido efectuadas reparações
por terceiros.
•
As peças que estão sujeitas a desgaste normal, não estão cobertas pela garantia.
•
A garantia somente é válida contra a apresentação de comprovante de compra
original e datado e sob a condição de que este comprovante não tenha sido alterado.
•
A garantia não é aplicável a danos originados por acções que divirjam das indicadas
nas instruções de utilização ou por negligência.
•
As despesas de transporte e os riscos de transporte do purificador de ar ou de
componentes deste, correrão sempre por conta do comprador.
Para evitar despesas desnecessárias, recomendamos que primeiramente leia com atenção
as instruções de utilização. Quando estas instruções não ofereçam soluções, leve o
purificador de ar para o seu distribuidor para ser reparado.
9
64
I.
ESPECIFICAÇÕES TÉCNICAS
Tipo
Tensão de rede
A 20
V / Hz / F
220-240 / 50 / 1
Potência de entrada (min./max.)
W
18 / 30
Intensidade de corrente (max.)
A
0,15
Nível sonoro (min./max.)
dB
24 - 38
Débito de ar (min./max.)
m3/hora
60 / 120
Peso líquido
kg
4
Dimensões (bxhxd)
mm
430 x 366 x 131
Apropriado para recintos até
m3
40
número/cc
30.000 - 50.000
Geração de iões negativos
Os aparelhos eléctricos defeituosos não devem ser deitados fora como lixo doméstico.
Assegure-se de que haja reciclagem sempre que possível. Peça eventualmente ao seu
município ou ao distribuidor local orientação correcta sobre reciclagem.
9
65
Szanowni Państwo,
Serdecznie gratulujemy Państwu zakupu naszego oczyszczacza powietrza. Nabyli Państwo
urządzenie najwyższej jakości, i mamy nadzieję, że będą Państwo zadowoleni z wielu korzyści,
jakie oczyszczacz ten zapewnia oraz że będzie on Państwu służyć przez wiele lat. Tak będzie,
oczywiście, o ile będą Państwo używać go we właściwy sposób. Dlatego prosimy o
poświęcenie czasu na przeczytanie niniejszej instrukcji obsługi, gdyż pomoże to Państwu
zapewnić optymalną trwałość urządzenia.
My natomiast w imieniu producenta dajemy Państwu dwuletnią gwarancję na wszelkie usterki
materiałowe i fabryczne.
Życzymy Państwu dużo wygody z nowym oczyszczaczem powietrza.
Z poważaniem,
PVG International B.V.
1 Przed pierwszym użyciem przeczytać instrukcję obsługi.
2 W razie wątpliwości skontaktować się z dealerem.
:
66
2
4
3
1
Identyfikacja
części
A
Panel przedni
B
Panel kontrolny
C
Otwór wlotowy
powietrza
4
Otwór wylotowy
powietrza
5
E
Zamknięcie
F
Filtr HEPA
(High Efficiency
Particulate Airfilter)
G
Przewód zasilający
z wtyczką
6
G
:
67
A. JAK UŻYWAĆ OCZYSZCZACZA
WSKAZÓWKI OGÓLNE
Aby uzyskać optymalny rezultat, stosuj się do następujących wskazówek:
•
Umieść oczyszczacz powietrza na odpowiedniej wysokości (np. na stole lub szafie) po to,
aby urządzenie mogło przy pomocy filtra zatrzymywać nawet najdrobniejsze
zanieczyszczenia, jak np. dym papierosowy. W celu usuwania większych cząstek kurzu,
jak np. pyłków kwiatowych, należy urządzenie umieścić niżej (np. na podłodze).
•
Wolna przestrzeń wokół urządzenia musi wynosić co najmniej 30 cm.
•
Przed przystąpieniem do instalacji klimatyzatora zapoznaj się najpierw z instrukcją
obsługi i postępuj zgodnie z podanymi w niej zaleceniami.
Przepisy bezpieczeństwa
•
Instalacja urządzenia musi odbyć się w całkowitej zgodzie z obowiązującymi na miejscu
przepisami, ustaleniami i normami.
•
Klimatyzator nadaje się do użytku jedynie w suchych pomieszczeniach zamkniętych
wewnątrz budynku.
•
Przed zainstalowaniem go sprawdzić należy napięcie sieci zasilającej. Klimatyzator przystosowany jest do przyłączenia do sieci wyłącznie za pośrednictwem uziemiającego
gniazdka sieciowego o napięciu sieci zasilającej 220-240 Volt / 50 Hz.
•
Klimatyzator MUSI być przyłączony do sieci zasilającej przewodem uziemiającym. Jeżeli
przyłączenie do sieci nie jest uziemiające, urządzenia nie wolno w żadnym wypadku do
niej przyłączać.
•
Gdy klimatyzator jest przyłączony do sieci, wtyczka przewodu zasilającego musi być
zawsze łatwo dostępna.
•
Nie należy podłączać odwilżacza do sieci zasilającej przy pomocy przedłużacza.
•
Nie wolno w żadnym wypadku korzystać z urządzenia, jeśli wtyczka sieciowa lub
przewód są uszkodzone.
•
Przy podłączeniu odwilżacza do sieci zasilającej należy pamiętać o tym, że przewód oraz
gniazdko zasilania muszą być uziemiające. Przewód powinien spoczywać swobodnie (w
żadnym wypadku zwinięty).
•
Nie wolno wyłączać urządzenia za pomocą wtyczki sieciowej. Zawsze należy najpierw
wyłączyć odwilżacz za pomocą włącznika, a dopiero potem wyciągnąć wtyczkę z
kontaktu. W żadnym wypadku nie pociągać za przewód sieciowy.
•
Nie dopuszczać do urządzenia dzieci. Urządzenie powinno być obsługiwane wyłącznie
przez osoby dorosłe.
•
Ze względu na bezpieczeństwo zabrania się dokonywania samodzielnie jakichkolwiek
prób naprawy lub zmian w urządzeniu.
•
Nie wolno pod żadnym pozorem przykrywać odwilżacza ani też wkładać do niego
żadnych ciał obcych (z uwagi na niebezpieczeństwo przegrzania i pożaru).
•
Nie wolno dopuścić do zamoczenia urządzenia.
•
W pobliżu oczyszczacza nie wolno korzystać z żadnych urządzeń rozpylających (jak np.
rozpylacz środków owadobójczych czy lakieru do włosów itp.), gdyż może to
spowodować uszkodzenie urządzenia oraz/ lub niebezpieczeństwo pożaru.
•
Nie wolno korzystać z urządzenia w pomieszczeniach o dużej wilgotności powietrza, jak
np. w łazience.
•
:
68
Jeśli zaistnieje potrzeba wymiany przewodu zasilającego na nowy, należy zlecić to
fachowcowi z autoryzowanego serwisu naprawczego lub serwisu firmy dostawczej.
Wskazówki dotyczące bezpiecznego użytkowania
•
Trzymaj plastikowe torby i nne materiały opakowaniowe z dala od zasięgu dzieci.
•
Niniejsze urządzenie zostało zaprojektowane w celu usuwaniu zanieczyszczeń z
powietrza, dlatego nie wolno używać go w żadnym innym celu.
•
W razie konieczności naprawy bądź konserwacji zawsze skontaktować się z dealerem.
•
Nie wolno instalować urządzenia w pobliżu grzejników lub innego sprzętu
wytwarzającego ciepło, ani też w sąsiedztwie urządzeń bądź materiałów łatwopalnych
(jak na przykład firanki) ani wybuchowych.
•
Przed przystąpieniem do czyszczenia odwilżacza zawsze należy najpierw wyłączyć
urządzenie korzystając z wyłącznika, a dopiero potem wyjąć wtyczkę sieciową z kontaktu.
•
Podłoga pod urządzeniem powinna być twarda i równa, gdyż zapobiega to m.in.
B. INSTALACJA
1
Zluzuj panel przedni 1 posługując się zamknięciem 5 znajdującym się na obu
krawędziach urządzenia.
2
Wyjmij filtr 6 z urządzenia, a następnie usuń opakowanie.
3
Umieść filtr z powrotem w oczyszczaczu, białą stroną do góry.
4
Umocuj ponownie panel przedni, wkładając trzy haczyki znajdujące się na górnej
krawędzi w odpowiednie otwory w obudowie urządzenia, a następnie wciśnij panel
przedni w obudowę, naciskając na dolną jego krawędź z prawej i lewej strony.
5
Urządzenie jest gotowe do użytku.
UWAGA!
Aby zapewnić właściwe działanie oczyszczacza, filtr HEPA należy umieścić w
urządzeniu w sposób opisany w instrukcji.
C. FILTR
Filtr HEPA po wyjęciu z opakowania zachowuje swą skuteczność działania przez okres ok. 1
roku. Częstotliwość użycia oczyszczacza jak też stopień zanieczyszczenia powietrza decydują
o tym, w jakich odstępach czasu filtr należy wymieniać. Aby ustalić, czy filtr nadaje się już do
wymiany, należy:
1
Zluzować panel przedni 1 posługując się zamknięciem 5 znajdującym się na obu
krawędziach urządzenia.
2
Obok filtra umieszczona jest nalepka, na której widoczny jest czworokąt w kolorach
szarym i brązowym. Jeśli kolor filtra upodabnia się do któregoś z tych dwóch kolorów,
oznacza to, że filtr nadaje się do wymiany, przy czym należy postępować zgodnie ze
wskazówkami podanymi w rozdziale B.
:
69
3
Zanieczyszczony filtr HEPA można wyrzucić wraz z normalnymi odpadami komunalnymi
(jednak nie z odpadami ekologicznymi, ponieważ nie ulega on biologicznemu rozkładowi).
4
Filtry na wymianę dostępne są u Twojego dealera.
UWAGA!
- Jeżeli filtr nadaje się do wymiany, należy zastąpić go całkiem nowym filtrem. W
żadnym wypadku nie wolno ponownie używać zużytego już filtra, nawet po jego
dokładnym oczyszczeniu.
- Zaleca się wymianę filtra HEPA przynajmniej raz w sezonie, nie zależnie od częstotliwości korzystania z urządzenia.
D. OBSŁUGA
1
Włożyć wtyczkę do gniazdka sieciowego.
2
W celu włączenia urządzenia posłużyć się przyciskiem ON- / OFF, ustawiając go w pozycji
ON . Dioda kontrolna wentylatora LO lub HI zapala się.
Urządzenie generuje dużą ilość jonów ujemnych, co oznacza, że oczyszczanie powietrza
rozpoczęło się.
3
Za pomocą przycisku można regulować prędkość wentylatora, przy czym do wyboru są
dwie możliwości
(niska prędkość) lub
(wysoka prędkość). Odpowiednia dioda
kontrolna LO (dla niskiej) lub HI (dla wysokiej) zapala się.
4
W celu wyłączenia urządzenia posłużyć się przyciskiem ON- / OFF, ustawiając go w
pozycji OFF.
:
70
E. CZYSZCZENIE
Przed przystąpieniem do czyszczenia należy najpierw wyłączyć odwilżacz, a następnie
odłączyć go od sieci zasilającej.
Czyszczenie obudowy
Zewnętrzny korpus urządzenia należy wycierać miękką, suchą szmatką. Jeśli urządzenie jest
bardzo zabrudzone, można użyć delikatnego środka czyszczącego, a następnie wytrzeć lekko
wilgotną ściereczką. W żadnym wypadku nie wolno spłukiwać urządzenia wodą.
Filtr HEPA
Kratkę na panelu przednim oczyścić za pomocą odkurzacza. Filtr HEPA nie nadaje się do
czyszczenia. Jeżeli filtr jest zanieczyszczony, należy wymienić go na nowy (patrz rozdział B).
W żadnym wypadku nie wolno używać urządzenia bez filtra.
F.
MAGAZYNOWANIE
Jeśli urządzenie nie będzie używane przez dłuższy okres czasu, należy:
1
Wyłączyć odwilżacz, odłączyć go od sieci zasilającej oraz całkowicie opróżnić i wytrzeć
zbiornik wody. Zarówno zbiornik jak i samo urządzenie muszą być całkowicie suche;
2
Oczyścić filtr powietrza;
3
Wyjmij filtr HEPA (patrz rozdział C).
4
Umieścić urządzenie w miejscu wolnym od kurzu.
:
71
G. WYKRYWANIE I USUWANIE USTEREK
Przed skontaktowaniem się z serwisem należy sprawdzić następujące możliwe przyczyny
usterek:
Urządzenie nie działa.
Wtyczka nie tkwi w gniazdku
sieciowym.
Włóż wtyczkę do gniazdka
sieciowego.
Wtyczka nie jest właściwie
podłączona do gniazdka.
Włóż wtyczkę we właściwy
sposób do gniazdka sieciowego.
Zepsuł się bezpiecznik.
Wymień bezpiecznik.
Filtr HEPA jest zanieczyszczony.
Wymień filtr na nowy.
Urządzenie nie usuwa
W urządzeniu brak jest filtra
zapachów ani cząsteczek HEPA.
kurzu.
Filtr HEPA nie jest umieszczony
we właściwy sposób.
Urządzenie wydaje
skrzypiący dźwięk.
Umieść filtr w urządzeniu.
Umieść filtr we właściwy sposób.
Tego rodzaju dźwięk powstaje,
Jeżeli dźwięk ten słyszalny jest
gdy cząsteczki kurzu przedostają
nieprzerwanie, skontaktuj się z
się do urządzenia, nie wskazuje to
serwisem dealera.
na żadną awarię.
Całkowity brak lub/
Przepływ powietrza został
niedostateczny przepływ
zablokowany.
powietrza.
Usuń ewentualną przyczynę
zablokowania.
Wymień filtr HEPA na nowy.
H. WARUNKI GWARANCJI
Producent udziela na ten oczyszczacz powietrza dwuletniej gwarancji, licząc od daty zakupu.
W okresie tym wszelkie usterki materiałowe i fabryczne podlegają bezpłatnej naprawie.
Obowiązują przy tym następujące warunki:
•
Wszelkie dodatkowe roszczenia, w tym roszczenia odszkodowań z racji ewentualnie
poniesionych strat, nie będą honorowane.
•
Naprawy i wymiany części w okresie gwarancji nie przedłużają okresu gwarancji.
•
Gwarancja traci ważność jeżeli dokonano przeróbek, zastosowano nieoryginalne części
lub urządzenie było naprawiane przez osoby trzecie.
•
Części podlegające naturalnemu zużyciu nie podlegają gwarancji.
•
Gwarancja jest ważna po przedstawieniu oryginalnej, prawidłowo wypełnionej karty
gwarancyjnej i dowodu zakupu.
•
Gwarancja nie obejmuje uszkodzeń spowodowanych nieprawidłową eksploatacją lub
niedostosowaniem się do zaleceń instrukcji obsługi.
•
:
72
Koszty i ryzyko związane z przesyłką oczyszczacza lub części zamiennych ponosi klient.
W celu uniknięcia niepotrzebnych kosztów zawsze początkowo proponujemy korzystanie z
instrukcji obsługi. Jeżeli podane w niej wskazówki nie dadzą zadowalającego rezultatu,
oczyszczacz należy oddać do naprawy w serwisie dealerskim.
I.
DANE TECHNICZNE
Napięcie sieci zasilającej
V / Hz / F
220-240 / 50 / 1
Pobór mocy (min./max)
W
18 / 30
Zużycie energii (max)
A
0,15
dB
24 - 38
m3/godz.
60 / 120
Poziom głośności (min./max)
Wydajność (min./max)
Ciężar netto
Wymiary (szerokość x wysokość x głębokość)
Max powierzchnia pomieszczenia
Ilość generowanych jonów negatywnych
kg
4
mm
430 x 366 x 131
m3
40
n/cc
30.000-50.000
Zużytych artykułów elektrycznych nie wolno usuwać wraz z normalnymi odpadami
komunalnymi, lecz jeśli jest to możliwe poddać je utylizacji. W razie wątpliwości co do
pozbywania się tych odpadów należy skontaktować się władzami lokalnymi lub z dealerem.
:
73
DISTRIBUTED IN EUROPE BY PVG INTERNATIONAL B.V.
i ÖSTERREICH
PVG Austria VertriebsgmbH
Salaberg 49
3350 HAAG
tel:
+43 7434 44867
+43 7434 44868
fax:
email:
[email protected]
4 UNITED KINGDOM
Scott Brothers Ltd.
The Old Barn, Holly House Estate
Cranage, Middlewich, CW10 9LT UK
tel.:
+44 1606 837787
+44 1606 837757
fax:
email: [email protected]
e BELGIË
PVG Belgium NV/SA
Industrielaan 55
2900 SCHOTEN
+32 3 326 39 39
tel:
fax:
+32 3 326 26 39
email: [email protected]
> ITALIA
PVG Italy SRL
Via Niccolò Copernico 5
50051 CASTELFIORENTINO (FI)
tel:
+39 571 628 500
fax:
+39 571 628 504
email: [email protected]
q SCHWEIZ
PVG Schweiz AG
Salinenstrasse 63
4133 PRATTELN
tel:
+41 61 337 26 51
fax:
+41 61 337 26 78
email: [email protected]
u NORGE
Appliance Norge AS
Vogellunden 31
1394 NESBRU
tel:
+47 667 76 200
fax:
+47 667 76 201
email: [email protected]
2 DEUTSCHLAND
PVG Deutschland GmbH
Siemensstrasse 31
47533 KLEVE
tel:
0800 - 9427646
fax:
+31 (0)412 648 385
email: [email protected]
1 NEDERLAND
PVG International B.V.
P.O. Box 96
5340 AB OSS
tel:
+31 412 694 694
fax:
+31 412 622 893
email: [email protected]
6 DANMARK
Appliance A/S
Gefionsvej 7
DK-3400 HILLERØD
tel:
+45 70 205 701
fax:
+45 70 208 701
email: [email protected]
9 PORTUGAL
Gardena, Lda
Recta da Granja do Marquês
ALGUEIRÃO
2725-596 MEM MARTINS
tel:
+ 35 21 92 28 530
fax:
+ 35 21 92 28 536
email: [email protected]
5 ESPAÑA
PVG España S.A.
Pol. Ind. San José de Valderas II
Comunidad ”La Alameda”
C/ Aurora Boreal, 19
28918 LEGANÉS (Madrid)
tel:
+34 91 611 31 13
+34 91 612 73 04
fax:
email: [email protected]
: POLSKA
PVG Polska Sp. z. o. o.
ul. Kościelna 110
26-800 Białobrzegi
+48 48 613 00 70
tel:
fax:
+48 48 613 00 70
email: [email protected]
Rev. 8/08
TR TURKEY
PVG Is›tma Klima So¤utma Ltd.fiti.
Tepekule is merkezi
Anadolu Cad. No: 40 K:3 D:306
35010 BAYRAKLI/IZMIR
tel:
+ 90 232 461 51 01
fax:
+ 90 232 461 51 85
email: [email protected]
man_A20
y SLOVENIJA
Monteko d.o.o.
Neubergerjeva 4
1000 Ljubljana
tel:
+386 (0)1 437 1273
fax:
+386 (0)1 437 1273
email: [email protected]
avg©080827
F I N SUOMI
Appliance Finland Oy
Piispantilankuja 6C
02240 ESPOO
tel:
+358 9 4390 030
+358 9 4390 0320
fax:
email: [email protected]
= SVERIGE
Appliance A/S
Gefionsvej 7
DK-3400 HILLERØD
+45 70 205 701
tel:
fax:
+45 70 208 701
email: [email protected]
PVG Traffic
3 FRANCE
PVG France SARL
4, Rue Jean Sibélius
B.P. 185
76410 SOTTEVILLE SOUS LE VAL
tel:
+33 2 32 96 07 47
fax:
+33 0 820 34 64 84
email: [email protected]


