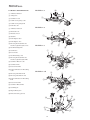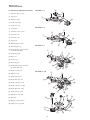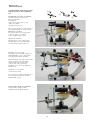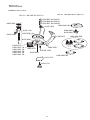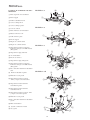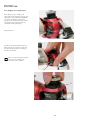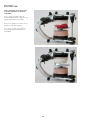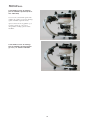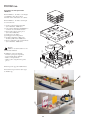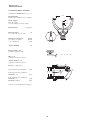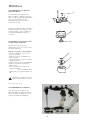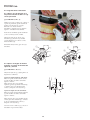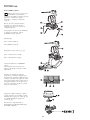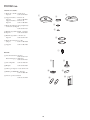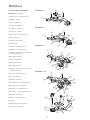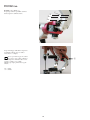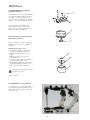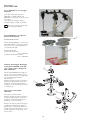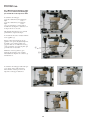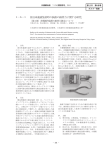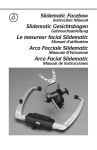
1
Documents PROTAR® evo. Always on the safe side. KaVo Dental GmbH Bismarckring 39 D-88400 Biberach Tel.: 0 73 51 / 56-0 • Fax: 0 73 51 / 56 -14 88 Hersteller/manufacturer: Kaltenbach & Voigt GmbH Bismarckring 39 D-88400 Biberach Gebrauchsanweisung PROTAR® evo. Immer auf der sicheren Seite. KaVo Dental GmbH. D-88400 Biberach/Riss Vertrieb/distribution: KaVo Dental GmbH Bismarckring 39 • D-88400 Biberach Tel.: 0 73 51 / 56-0 • Fax: 0 73 51 / 1488 Hersteller/manufacturer: Kaltenbach & Voigt GmbH Bismarckring 39 D-88400 Biberach PROTAR®evo. A 1 Benutzerhinweise ..................................................................................................................................................................2 A 1.1 Bedeutung der Piktogramme ......................................................................................................................................2 A 1.2 Wichtige Hinweise ......................................................................................................................................................2 A 1.3 Sicherheitsmaßnahmen ..............................................................................................................................................2 A 1.4 Verwendungszweck und Einsatzmöglichkeit ..............................................................................................................3 A 1.5 Betrachtung der Bewegungs-möglichkeiten des Unterkiefers in der Horizontalebene ..............................................4 A 1.6 Systemphilosophie ......................................................................................................................................................5 A 2 Lieferumfang-Zubehör ..........................................................................................................................................................6 A 2.1 Lieferumfang ..............................................................................................................................................................6 A 2.2 Zubehör ......................................................................................................................................................................8 A 3 Bedien- und Funktionsteile ................................................................................................................................................11 A 4 Vorbereitung zur Inbetriebnahme ......................................................................................................................................13 A 4.1 Stützstift ....................................................................................................................................................................13 A 4.2 Zentrikverriegelung ..................................................................................................................................................13 A 4.3 PROTAR®evo mit Splitcast (Werksjustierung) ........................................................................................................15 A 4.4 Arbeiten mit dem Eingipsset Mat.-Nr. 0.622.1121 ....................................................................................................15 A 4.5.1 PROTAR®evo mit Magnetbefestigung ..................................................................................................................16 A 4.6 PROTAR®evo mit Splitcast (Laborjustierung) ..........................................................................................................16 Montageanleitung: Umbau von PROTAR Artikulatoren ohne Split Cast auf Magnetbefestigung Mat.-Nr. 1.002.4686 ..................................16 Gleichschaltung 3PS Mat.-Nr. 1.002.2095 ........................................................................................................................16 A 4.6.1 Justierung 1.002.2080 ..........................................................................................................................................17 A 4.6.2 Messung ................................................................................................................................................................17 A 5 Einstellmöglichkeiten der PROTAR®evo Artikulatoren ....................................................................................................18 A 6 Einartikulieren der Zahnmodelle ........................................................................................................................................19 A 6.1 Einartikulieren des Oberkiefermodelles mit dem KaVo Gesichtsbogen ARCUS ......................................................19 A 6.2 Einartikulieren des Oberkiefermodelles mit Hilfe des Transferstandes ....................................................................20 A 6.4 Einartikulieren des Oberkiefermodelles mit Gesichtsbogen anderer Hersteller ......................................................21 A 6.5 Einstellwerte bei Verwendung von Fremdbögen im PROTARevo Artikulator ..........................................................22 A 6.6 Mittelwertige Methode mit dem KaVo Oberkiefermodellpositionierer Mat.-Nr. 0.622.1781 APFnt Methode ............23 A 6.7 Mittelwertige Methode mit der KaVo Montage- und Aufstellhilfe für den Oberkiefer ..............................................24 A 6.8 Mittelwertige Methode mit der KAVo Eingipslehre Mat.- Nr. 0.622.1171 für das Unterkiefermodell ........................25 A 6.8.1 Montage eines unbezahnten Unterkiefermodelles ................................................................................................25 A 6.9 Einartikulieren des Unterkiefermodelles ..................................................................................................................27 A 7 Programmieren des Artikulators ........................................................................................................................................28 A 7.1 Justieren der Gelenkbahnneigung mittels Protrusionsregistrat ................................................................................28 A 7.2 Justieren des Bennettwinkels mittels linkem und rechtem Laterotrusionsregistrat ..................................................28 A 7.3 Einstellung der Seitenbeweglichkeit ........................................................................................................................29 A 7.4 Justieren des Shift- Winkels ....................................................................................................................................30 A 7.5 Einstellen einer Protrusionsposition / Distraktionsposition ......................................................................................31 A 7.6 Einstellen der Retrusion / Protrusion ........................................................................................................................32 A 7.7 Erstellung eines individuellen Inzisalführungstellers ............................................................................................33 A 7.8 Programmieren des einstellbaren Inzisaltisches ......................................................................................................34 A 7.8.1 Über Situationsmodell ............................................................................................................................................34 A 7.8.2 Über Einstellwerte des ARCUSdigma ..................................................................................................................34 A 8 Einbau des Shift- Winkel- Einsatzes am PROTAR®evo 7 ..............................................................................................35 A 9 Programmierung des Artikulators mit Messdaten des ARCUSdigma ........................................................................36 A 10 Aufstellhilfen für Totalprothesen ......................................................................................................................................37 A 10.1 Aufstellhilfen für Unterkiefermodell nach der APFnt- Methode (Mat.- Nr. 0.622.2071) ..........................................37 A 10.2 3D Aufstellhilfe für Unterkiefermodell nach APF Methode ......................................................................................38 A 10.3 3D Aufstellkalotte für Oberkiefermodell (Mat.- Nr. 1.002.4919) ..............................................................................40 A 10.4 2D Aufstellhilfe für den Oberkiefer (Mat.- Nr. 1.001.9452) ....................................................................................41 A 10.5 2D Aufstellhilfe für den Oberkiefer für Schraubmontage (Mat.- Nr. 1.001.9451) ..................................................41 A 11 Modelltisch mit Split-Cast ................................................................................................................................................42 A 12 Transportbox KaVo LOGICase ........................................................................................................................................44 A 13 Technische Daten ..............................................................................................................................................................45 A 14 Pflege und Justierung ......................................................................................................................................................46 Garantiebedingungen ........................................................................................................................................................47 PROTAR®evo 3 ..................................................................................................................................................................48 Ersatzteile PROTAR®evo 2 ................................................................................................................................................48 PROTAR®evo 5B ..............................................................................................................................................................49 PROTAR®evo 5 ................................................................................................................................................................49 PROTAR®evo 9 ..................................................................................................................................................................50 PROTAR®evo 7 ..................................................................................................................................................................50 PROTAR®evo Unterteil ......................................................................................................................................................51 1 PROTAR®evo. A 1 Benutzerhinweise A 1.2 Wichtige Hinweise A 1.3 Sicherheitsmaßnahmen A 1.1 Bedeutung der Piktogramme Die Gebrauchsanweisung ist vor der ersten Inbetriebnahme durch den Benutzer/Anwender zu lesen, um Fehlbedienung und sonstige Schädigungen zu vermeiden. Sofern weitere Sprachausführungen erforderlich sind, bitten wir Sie diese bei Ihrer zuständigen KaVo-Niederlassung anzufordern. Vervielfältigung und Weitergabe der Gebrauchsanweisung (GA) bedürfen der vorherigen Zustimmung der Fa. KaVo. Ein sicherer Betrieb und Schutz des Produktes ist nur bei bestimmungsgemäßem Gebrauch, gemäß der Gebrauchsanweisung, mit den dafür zugelassenen Werkzeugen gegeben. Ausserdem sind zu beachten: Situation, die bei Mißachtung des Hinweises zu einer Gefährdung, Beschädigung von Material oder zu Betriebsstörungen führen kann. Wichtige Informationen für Bediener und Techniker. Automatikbetrieb Automatischer Ablauf Schließen, einschrauben, befestigen, usw. Öffnen, lösen, lockern + ∞ mehr, höher weniger, niedriger Dauerbetrieb Uhrzeit, zeitlicher Ablauf Netzstecker ziehen Alle technischen Daten, Informationen sowie Eigenschaften des in dieser GAAnweisung beschriebenen Gerätes entsprechen dem Stand bei Drucklegung. Änderungen und Verbesserungen des Produktes aufgrund technischer Neuentwicklungen sind möglich. Ein Anspruch auf Nachrüstung bereits bestehender Geräte entsteht daraus nicht. KaVo übernimmt keine Verantwortung für Schäden, entstanden durch: • äußere Einwirkungen (schlechte Qualität der Medien oder mangelhafte Installation) • Anwendung falscher Information, • nicht bestimmungsgemäßem Gebrauch • unsachgemäß ausgeführte Reparaturen. Reparatur und Wartungsarbeiten - außer den in dieser Gebrauchsanweisung beschriebenen Tätigkeiten - dürfen nur von qualifizierten Fachkräften ausgeführt werden. Bei Änderungen durch Dritte erlöschen die Zulassungen. Zum Betrieb bzw. zur Reparatur empfiehlt KaVo nur OriginalErsatzteile zu verwenden. 2 • die Arbeitsschutzvorschriften, • die Unfallverhütungsvorschriften. Nach diesen Bestimmungen ist es die Pflicht des Anwenders: • nur fehlerfreie Arbeitsmittel zu benutzen • auf den richtigen Verwendungszweck zu achten • sich, den Patienten und Dritte vor Gefahren zu schützen • eine Kontamination durch das Produkt zu vermeiden • nicht mit beschädigten Funktionsteilen weiterarbeiten. PROTAR®evo. A 1.4 Verwendungszweck und Einsatzmöglichkeit Das Kauorgan ist aufgrund seiner dreidimensionalen räumlichen Bewegungen das komplizierteste Bewegungssystem des menschlichen Körpers. Bei größeren Defekten in diesem System ist eine funktionell orientierte Therapie unabdingbar. Da derartige Therapieschritte überwiegend nicht in der Mundhöhle durchgeführt werden können, besteht die Notwendigkeit der Simulation von Unterkieferbewegungen nicht nur in der zahnärztlichen Praxis, sondern auch im zahntechnischen Labor. Artikulatoren und geeignete Meßsysteme sind unentbehrliche Hilfsmittel um anatomische Verhältnisse und Stellgrößen zu erfassen und übertragen zu können. Sie sind Grundlage für eine funktionsorientierte Therapie. Das störungsfreie morphologische Zusammenspiel zwischen Kiefergelenk und Zahnreihen ist die Grundlage eines funktionierenden Kauorgans. 1 FH 7 6 2 3 4 5 Um Kieferbewegungen reproduzieren zu können, müssen am Patienten Referenzpunkte und Referenzlinien im Sinne eines Koordinaten-Systems festgelegt werden. Die Verbindung zwischen Subnasalpunkt und Tragus Medialis 5 bildet die Campersche Ebene 2 (CE). Die Verbindung von Porion 6 und InfraOrbitalpunkt 1 (IOP) ergibt die Frankfurter Horizontale (FH). Die Neigung der Kondylenbahnen gegen diese Referenzebenen ergibt den Kondylenbahn-Neigungswinkel “HCN “. Betrachtung der Bewegungsmöglichkeiten des Unterkiefers in der Horizontalebene. 3 Subnasal Punkt 4 Okklusions-Ebene 7 Scharnierachse 3 PROTAR®evo. A 1.5 Betrachtung der Bewegungsmöglichkeiten des Unterkiefers in der Horizontalebene Die Protrusion Bei der Protrusion bewegt sich der Unterkiefer nach vorne. Die beiden Kondylen bewegen sich nach ventral und caudal. Es werden auf den Zähnen die Bewegungsspuren des Oberkieferzahns im Unterkieferzahn dargestellt. Die Mediotrusion und die Laterotrusion Bei der “Seitbissbewegung“ wird zwischen Laterotrusionauf der Arbeitsseite und Mediotrusion auf der Leerlaufseite unterschieden. Die Verbindung von Anfangs- und Endpunkt des nach innen bewegten Kondylus auf der mediotrusiven Bahn bildet mit der Protrusionsspur auf der Leerlaufseite den Bennettwinkel 1. tt nne Be 1 Auf der Arbeitsseite beschreibt der Kondylus eine Laterotrusion. Abweichungen von der Laterotrusionsbewegung, werden als Shift-Winkel 2 definiert. t Shif 2 t net B en 4 PROTAR®evo. A 1.6 Systemphilosophie 1 Das Artikulator- und Gesichtsbogensystem von KaVo, ist so aufgebaut, daß wahlweise mit der Frankfurter Horizontale (FH) wie auch mit der Camperschen Ebene (CE) gearbeitet werden kann. 2 3 Die Nasenstütze 1 richtet den Gesichtsbogen mittelwertig nach beiden Ebenen aus. Mit Hilfe des Referenzzeigers 3 kann der Gesichtsbogen auch individuell nach der gewünschten Referenzebene ausgerichtet werden. 4 2 Infra-Orbital Punkt 4 Subnasal Punkt 6 Im Artikulator wird der Gesichtsbogen immer in der gleichen Lage eingesetzt, auf den seitlichen Referenzstiften 5 und auf dem Inzisalstift (auf Null stellen) abgelegt. 5 Entsprechend der Anatomie des Patienten hat die Bissgabel jedoch unterschiedliche Lagen. 6 Auflage des Gesichtsbogens 7 Inzisalstift 7 Im Protar Artikulator liegen die Modelle nahezu immer parallel (Abweichungen ±10) zur Camperschen Ebene 9. Vorteil für die Zahntechnik: Die einartikulierten Modelle stehen mit ihrer Okklusionsebene q nahezu parallel zur Camperschen Ebene 9 und somit auch zur Arbeitsfläche. Die Gipsexpansion ist gleichmäßig. 8 r e 9 0 w q 8 Infra-Orbital Punkt 0 Subnasal Punkt w Tragus medialis e Porion r Scharnierachse 5 PROTAR®evo. A 2 Lieferumfang-Zubehör A 2.1 Lieferumfang Artikulator PROTAR®evo 2 bestehend aus: Artikulator-Oberteil Mat.-Nr. 1.002.3303 Artikulator-Unterteil Mat.-Nr. 1.002.3265 oder PROTAR evo 2 Artikulator PROTAR®evo 3 mit SplitCast bestehend aus: Artikulator-Oberteil Mat.-Nr. 1.002.3307 Artikulator-Unterteil Mat.-Nr. 1.002.3266 oder Artikulator PROTAR®evo 3 ohne SplitCast bestehend aus: Artikulator-Oberteil Mat.-Nr. 1.002.3306 Artikulator-Unterteil Mat.-Nr. 1.002.3265 PROTAR evo 3 oder CE 70 55 0 6 45 0 5 35 0 4 25 30 15 Artikulator PROTAR®evo 5 mit SplitCast bestehend aus: Artikulator-Oberteil Mat.-Nr. 1.002.3311 Artikulator-Unterteil Mat.-Nr. 1.002.3266 oder 05 -5 20 1 15 0 0 25 0 10 35 20 Artikulator PROTAR®evo 5 ohne SplitCast bestehend aus: Artikulator-Oberteil Mat.-Nr. 1.002.3310 Artikulator-Unterteil Mat.-Nr. 1.002.3265 PROTAR evo 5 oder CE0 7 55 0 6 45 0 5 35 0 4 25 30 15 Artikulator PROTAR 5B mit SplitCast bestehend aus: Artikulator-Oberteil Mat.-Nr. 1.002.3315 Artikulator-Unterteil Mat.-Nr. 1.002.3266 oder 05 -5 20 1 15 0 0 25 0 10 35 20 1 0 Artikulator PROTAR®evo 5B ohne Split-Cast bestehend aus: Artikulator-Oberteil Mat.-Nr. 1.002.3314 Artikulator-Unterteil Mat.-Nr. 1.002.3265 oder PROTAR evo 5B 6 PROTAR®evo. 50 3 5 40 25 30 15 Artikulator PROTAR®evo 7 mit SplitCast bestehend aus: Artikulator-Oberteit Mat.-Nr. 1.002.3319 Artikulator-Unterteil Mat.-Nr. 1.002.3266 oder 0 05 -5 20 1 15 0 0 25 0 10 35 20 1,5 1, 0 0,5 10 20 30 Artikulator PROTAR®evo 7 ohne SplitCast bestehend aus: Artikulator-Oberteil Mat.-Nr. 1.002.3318 Artikulator-Unterteil Mat.-Nr. 1.002.3265 PROTAR evo 7 40 0 0,5 1, 25 30 05 20 05 10 15 0 25 10 0 15 6 0 7 55 6 0 45 50 35 Artikulator PROTAR®evo 9 mit SplitCast bestehend aus: Artikulator-Oberteil Mat.-Nr. 1.002.3323 Artikulator-Unterteil Mat.-Nr. 1.002.3266 oder 10 20 1,5 oder 30 Artikulator PROTAR®evo 9 ohne SplitCast bestehend aus: Artikulator-Oberteil Mat.-Nr. 1.002.3322 Artikulator-Unterteil Mat.-Nr. 1.002.3265 Gebrauchsanweisung PROTAR®evo Mat.-Nr. 1.002.5701 PROTAR evo 9 7 PROTAR®evo. A 2.2 Zubehör 1 3 2 Zubehör auf Wunsch lieferbar: 7 6 5 @ Inzisalzeiger Mat.-Nr. 0.622.1021 4 3 2 ” Inzisalteller 10 ° Mat.-Nr. 0.622.1922 Inzisalteller 20 ° Mat.-Nr. 0.622.1932 Inzisalteller 30 ° Mat.-Nr. 0.622.1942 Inzisalteller 40 ° Mat.-Nr. 0.622.1952 Inzisalteller 50 ° Mat.-Nr. 0.622.1962 Split-Cast Einbausatz Mat.-Nr. 0.622.1031 (ohne Abbildung) # Transferstand 1 0 622 1141 4b 4 4c 5 Mat.-Nr. 0.622 1141 £ Fremdbogenreferenz Mat.-Nr. 0.622 1151 £b Gesichtsbogenhalter £c Adapter Referenzstift 6 7 5 Mittelwertige Eingipslehre UK Mat.-Nr. 0.622.1171 Ì Aufstellkalotte Mat.-Nr. 0.622.1161 \ Kalotte kurz Mat.-Nr. 0.622.1201 | Kalotte lang Mat.-Nr. 0.622.1211 8 20 9 Montage/Aufstellhilfe OK Totalprothetik Mat.-Nr.1.001.9451 für PROTARevo mit Schraube 9 0 Klemme für Fremdartikulatoren Mat.-Nr.1.001.9471 0 Montage/Aufstellhilfe OK Totalprothese Mat.-Nr.1.001.9452 für PROTARevo mit Kontrollsockel q q Oberkiefer-Modellpositionierer Mat.-Nr. 0.622.1781 w w Okklusionsneigungs-Anzeiger Mat.-Nr. 0.622.2071 e Eingips-Manschetten Mat.-Nr.0.622.2212 44,0 mm Mat.-Nr.0.622.2222 22,0 mm Mat.-Nr.0.622.2232 14,6 mm r Modelltisch mit Split-Cast Mat.-Nr. 0.625.0770 t Eingips-Set t r e Mat.-Nr. 0.622.1121 z Eingipsscheibe (20)Mat.-Nr. 1.001.0888 u u Video ARCUS /PROTAR Mat.-Nr. 0.622.3202 i Denar Adapter Mat.-Nr. 0.622.1351 i KaVo A rik t la u tro-un d G eic s hstb go e -n S ytse m o o Panadent Zeiger Mat.-Nr. 0.622.1371 p Bißgabelträger Mat.-Nr. 0.622.0901 8 z PROTAR®evo. Zubehör auf Wunsch lieferbar: p Stützstift “E “ Stützstift “P “ Stützstift “T “ p Mat.-Nr.0.622.1181 Mat.-Nr.0.622.1791 Mat.-Nr.0.622.1891 s a “E“ 0 10 20 30 40 50 60 a Einstellbarer Inzisaltisch Mat.-Nr.0.622.1701 5 d 0 0 5 Mat.-Nr.0.622.1161 5 s Halter f 0 5 0 d Bißgabelträger “T“ Mat.-Nr.0.622.0901 “P“ L f PDR-Einsatz (Paar)Mat.-Nr.0.622.1001 4 5 2 3 6R 0 1 h g Shift-Winkel-Einsatz (Paar) Mat.-Nr. 0.622.1111 j g h Transportkoffer Mat.-Nr. 1.000.3682 j Befestigungsschrauben für Montageplatten (2 Stück) Mat.-Nr. 1.000.3733 ö nur für PROTARevo k Mess- Justierlehre Mat.-Nr. 1.002.2080 l MagnetbefestigungMat.-Nr. 1.002.4686 l k ö Montageplatten für 3 PS (10 Stk.) Mat.-Nr. 1.002.2096 y y Gleichschaltung 3PS Mat.-Nr. 1.002.2095 Transportbox / Arbeitschalen x LOCIcase (10 Stk.) Mat.-Nr.1.001.1511 LOCIcase (50 Stk.) Mat.-Nr.1.000.9355 x c c Dose für Registrate Mat.-Nr. 1.000.9354 v Runddose für Kleinteile Mat.-Nr. 1.000.9353 b b Schaumstoff zur Modellfixierung Mat.-Nr. 1.000.9351 9 v PROTAR®evo. Verbrauchsmaterial: 1 Kontrollplatten Packung mit 10 Stück Mat.-Nr.0.622.0791 3 1 2 2 Retentionsadapter Packung mit Mat.-Nr.1.001.0887 10 Stück Retentionsadapter Packung mit 50 Stück Mat.-Nr.1.001.0953 4 3 Montageplatten (nicht für Split-Cast) Packung mit 10 Stück Mat.-Nr.0.622.1871 5 4 Gewindeeinsätze Packung mit 20 Stück Mat.-Nr.0.622.0781 5 Eingipsscheiben Packung mit 20 Stück Mat.-Nr.0.622.1481 6 6 Montageplatten für 3 PS (10 Stk.) Mat.-Nr. 1.002.2096 7 Retentionsadapter 3PS Mat.-Nr. 1.003.2868 7 Ersatzteile: 8 Oberteil-Stützstift Mat.-Nr.0.622.1872 Split-Cast Einbausatz Mat.-Nr.0.622.1031 9 Abdrückschraube Mat.-Nr.0.220.1741 0 Magnet Mat.-Nr.0.622.2682 q Magnetschlüssel Mat.-Nr.0.411.1212 8 w Elastische Zugbänder für PROTAR 2 10 Stück Mat.-Nr.1.000.3101 0 9 q e Kleber für Neujustierung Mat.-Nr.0.359.2014 e w Härter Harz 10 PROTAR®evo. A 3 Bedien- und Funktionsteile PROTARevo 2 ö 2 2 @ Artikulator-Oberteil 2 Auflagefüße 1 3 Gelenkbox rechts p 4 Zentrik-Verriegelung rechts 3 5 Zentrik-Verriegelung links 6 Kontrollsockel PROTARevo 3 7 Artikulator-Unterteil 2 8 Inzisalteller 20 ° 2 9 Inzisaltisch eben h 1 0 Stützstift p q Kontrollplatte unten w Kontrollplatte oben e Fixierung Bennettwinkel und Seitenbeweglichkeit (ISS) rechts a 3 w 4 PROTARevo 5 5 r ISS -Einstellung links t Gelenkachse 1 2 2 z Referenzstift 3 u ISS -Einstellung rechts j i Fixierung Bennettwinkel und Seitenbeweglichkeit (ISS) links h CE FH 0 7 55 -5 45 35 60 25 50 4 15 0 30 053 o Gelenkbox-Einsatz rechts w 4 p Gelenkbox links p a Federelement links s Retrusion/Protrusion- Einstellung rechts f d o 5 PROTARevo 5B a 2 d Fixierung Gelenkbox links 2 3 f Fixierung Gelenkbox lrechts g Retrusion/Protrusion- Einstellung links 1 45 35 60 25 50 4 15 0 30 053 j h FH CE 5 70 5 -5 h Federelement links w j Gelenkbox-Einsatz links 4 p k Gelenkkugeln o 5 l Magnet-Haftsystem f d a ö Knebelschraube (optional) k 0 t q z 9 7 8 6 PROTAR 11 l 2 PROTAR®evo. @ Artikulator-Oberteil PROTARevo 7 2 Auflagefüße 2 1 3 Gelenkbox rechts e r 3 j 2 4 Zentrik-Verriegelung rechts 5 Zentrik-Verriegelung links g 1,0 0 0,5 h 6 Kontrollsockel 65 55 8 0 7 45 0 8 Inzisalteller 20 ° D FH CE 90 75 w 7 Artikulator-Unterteil i 4 u p 9 Inzisaltisch eben f d o 0 Stützstift 5 a s q Kontrollplatte unten w Kontrollplatte oben e Fixierung Bennettwinkel und Seitenbeweglichkeit (ISS) rechts PROTARevo 9 2 1 r ISS -Einstellung rechts e 2 r 3 j t Gelenkachse 1,0 z Referenzstift g 0 0,5 h 65 55 80 7 45 0 u ISS -Einstellung links D FH CE 5 90 7 w i Fixierung Bennettwinkel und Seitenbeweglichkeit (ISS) links i 4 u p o Gelenkbox-Einsatz links f d o p Gelenkbox links 5 a Federelement links a s s Retrusion/Protrusion- Einstellung links d Fixierung Gelenkbox links f Fixierung Gelenkbox rechts g Retrusion/Protrusion- Einstellung rechts 0 k h Federelement rechts j Gelenkbox-Einsatz rechts t k Gelenkkugeln z q l Magnet-Haftsystem ö Knebelschraube (optional) 9 7 8 6 12 l 2 PROTAR®evo. A 4 Vorbereitung zur Inbetriebnahme A 4.1 Stützstift 3 1 -5 CE 70 55 0 6 45 0 5 35 0 4 25 30 15 Stützstift 6 wahlweise in ArtikulatorOber-bzw. Unterteil einsetzen und festschrauben. 2 05 20 10 15 0 25 0 10 35 20 4 Inzisaltisch eben 1 mit Inzisal-Teller 2 20° je nach Arbeitsweise in Ober - bzw. Unterteil einsetzen. Anstelle des 20 ° Tellers können auch Teller mit 10 -50 ° eingesetzt werden. 6 5 A 4.2 Zentrikverriegelung öffnen Position “0“ 7 In Position 0 ist das Zentrikschloß 4 geschlossen. Das Artikulatoroberteil kann nur auf “zu“ rotiert werden. 7 “0“ 8 Position “1“ 9 Sind die Zentrikschlösser 4 in der mittleren Position “1“, ist der Artikulator frei beweglich und kann so die gewünschten Artikulationsbewegungen durchführen. Mit Hilfe der Federelemente 8 werden die Gelenkkugeln 5 an die Gelenkflächen 0 der Gelenkboxen 3 gedrückt, so daß keine unerwünschten Abhebungen möglich sind. 1 2 Der Artikulator ist in seiner Position “1“ wie ein Non-Arcon Artikulator zu handhaben. Ein Auseinanderfallen des Artikulatoroberteils vom Artikulatorunterteil wird so verhindert. “1“ “0“ 9 0 13 PROTAR®evo. Position “2“ = geöffnet 1 In dieser Position kann das Oberteil abgenommen werden. 1 “2“ “1“ “0“ Nach dem Aufsetzen des Artikulatoroberteils und schließen der beiden Zentrikschlösser ist der Artikulator komplett. 2 Die Zentrikschlösser 2 können nur dann geschlossen werden, wenn das Artikulatoroberteil bis auf Anschlag mit den Kondylenkugeln gebracht wird. Immer erst das linke Zentrikschloss 2 schließen 3. 3 “R“ “R“ = rechts “L“ = links “L“ 14 PROTAR®evo. A 4.3 PROTAR®evo mit Splitcast (Werksjustierung) @ Ist der Artikulator werkseitig mit KaVoSplitcast ausgerüstet, so dient die magnetisch gehaltene Kontrollplatte 2 zur Modellaufnahme. Der Retensionsadapter 1 dient als Gipsretension. 2 Nach Beendigung der Arbeit wird das Modell mit Hilfe der Sterngriff-Schraube 4 von der Kontrollplatte 3 abgedrückt. Kontrollplatten 3 anschließend säubern. 3 A 4.4 Arbeiten mit dem Eingipsset Mat.-Nr. 0.622.1121 4 Das Eingipsset dient zum Herstellen von passgenauen Gipsplatten für KaVo SplitCast. Praktische Hinweise Funktion • Eingipsscheibe 5 auf das Eingipsset 6 aufschnappen. • Eingips-Set muss in der Regel nicht isolieren werden. • Gipsplatten spätestens nach 6 Stunden entnehmen. • Eingips-Set nach jeder Anwendung sofort unter fließendem Wasser gründlich reinigen. • gegebenenfalls KaVo Trennmittel (Mat.Nr. 0.622.4442 verwenden. Überschüssiges Trennmittel abblasen. 5 6 7 Eingips-Set auf keinen Fall mit Gipslöser reinigen. Mat.- Nr. siehe A 2.2 8 9 A 4.5 PROTAR®evo ohne Splitcast Ist der Artikulator werksseitig ohne Splitcast ausgerüstet, so werden die Montageplatten 9 (0.622.1871) mit Hilfe einer Knebelschraube 8 fixiert. 9 8 15 PROTAR®evo. A 4.5.1 PROTAR®evo mit Magnetbefestigung Mit Hilfe der Magnetbefestigung 1.002.4686 kann an Stelle der Knebelschraube ein Magnet 3 in den PROTAR®evo eingesetzt werden. Zusammen mit den 3PS Montageplatten 4 ist ein schneller Modellwechsel möglich. 3 Diese Art der Modellbefestigung ist keine Gleichschaltung. 4 A 4.6 PROTAR®evo mit Splitcast (Laborjustierung) (Justierung im Labor) PROTAR®evo Artikulatoren, die nicht werksseitig mit einem Split Cast ausgerüstet sind, können mit dem 3PS Split im Labor selbst gleichgeschaltet werden. 5 Benötigtes Zubehör: 4 Gleichschaltung 3PS Mat.-Nr. 1.002.2095 5 Mess- und Justierlehre Mat.-Nr. 1.002.2080 Montageanleitung: Umbau von PROTAR Artikulatoren ohne Split Cast auf Magnetbefestigung Mat.-Nr. 1.002.4686 PROTAR Artikulatoren ohne Split Cast können auf Magnetbefestigung umgerüstet werden. Hier am Beispiel Artikulatorunterteil sind die Arbeitsschritte dargestellt: Modellmontageplatte(7) entfernen. Fixierstifte für Modellmontageplatte und Knebelschraube (8) aus Artikulator herausdrehen. Magnet (6)einsetzen. 2 1 Gleichschaltung 3PS Mat.-Nr. 1.002.2095 6 Artikulator Oberteil Modellmontageplatte (1) entfernen. Fixierstifte für Modellmontageplatte und Knebelschraube (2)aus Artikulator herausdrehen. 7 Artikulator Unterteil Modellmontageplatte (7) entfernen. Fixierstifte für Modellmontageplatte und Knebelschraube (8)aus Artikulator herausdrehen. Magnet (6)mit Schraubensatz befestigen. 8 16 PROTAR®evo. A 4.6.1 Justierung 1.002.2080 Dichtringe 1 aus Schaumstoff (1.003.3998) von Träger abnehmen und auf Justierplatte 2 zentrisch aufkleben. 1 2 Mess-und Justierlehre 6 in das Artikulatorunterteil 5 einsetzen. Der Magnet fixiert die Mess- und Justierlehre. Justierplatte 2 auf die Justierlehre 6 auflegen. 3 4 Artikulatorstützsift 7 auf Null einstellen (oder mit Rastsift “nullen“). 7 Magnet 4 entfernen, wenn dieser im Artikulatoroberteil 3 montiert ist. Beigelegten Kleber auf der Justierplatte 2 ausserhalb des Dichtrings auftragen und Artikulator vorsichtig schließen. (Kleber reicht für ca. 3 Justierungen) 2 5 6 Gummiring 1 über Artikulatorober- und unterteil spannen und Kleber über 12 Stunden aushärten lassen. 1 A 4.6.2 Messung 1 Die Mess- und Justierlehre 2 ist geeignet, die Gleichschaltung jederzeit im Labor zu überprüfen. Hierzu wird die Mess- und Justierlehre mit Hilfe der beiden Zentrierschrauben 1 in zwei Teile separiert. 2 3 Mit Okklusionspapier 3 die Gleichschaltung überprüfen. 17 18 Protrusion Retrusion Distraktion Horizontale Gelenkbahn Shift Winkel Horizontale Gelenkbahn (Iss) 1 Fix Horizontale Gelenkbahn (Bennet) Sagittale Gelenkbahn 0° 0 mm Fix Fix 30° zur CE 45° zur FH PROTAR 2 0° 0 mm Fix 15° Fix 30° zur CE 45° zur FH PROTAR 3 0° 0 mm Fix 15° Einstellbar -10° bis 90° (FH) -25° bis 75° (CE) PROTAR 5 0° 0 mm Einstellbar 0 - 30° Einstellbar -10° bis 90° (FH) -25° bis 75° (CE) PROTAR 5B Einstellbar 0 - 1,5 mm 0 - 1 mm 0 - 1,5 mm Optional - 20° bis +20° mit 0.622.1111 0 - 1,5 mm Einstellbar 0 - 30° Einstellbar -10° bis 90° (FH) -25° bis 75° (CE) PROTAR 7 Einstellbar 0 - 6 mm 0 - 1 mm 0 - 6 mm 0° 0 - 1,5 mm Einstellbar 0 - 30° Einstellbar -10° bis 90° (FH) -25° bis 75° (CE) PROTAR 9 PROTAR®evo. A 5 Einstellmöglichkeiten der PROTAR®evo Artikulatoren PROTAR®evo. A 6 Einartikulieren der Zahnmodelle A 6.1 Einartikulieren des Oberkiefermodelles mit dem KaVo Gesichtsbogen ARCUS Klemmhebel 4 öffnen und Gesichtsbogen 3 auseinanderziehen. @ 4 Der Stützstift 2 muß zuvor in das Artikulatorunterteil eingesetzt und auf Null gestellt werden. (Inzisaltisch 6 entfernen und die ZentrikVerriegelungen zuerst links und anschließend rechts des Oberteils verriegeln.) 3 2 Bohrungen der Ohroliven des Gesichtsbogens, auf die Referenzstifte 1 im Artikulatorunterteil aufschieben,Gesichtsbogen zusammenschieben und Klemmhebel 4 verriegeln. @ Der Gesichtsbogen 3 wird auf den Stützstift 2 aufgelegt. Oberkiefer 5 in die Impressionen 7 der Bissgabel positionieren. Sahnigen Gips anrühren und auf das Oberkiefermodell auflegen (Öffnung in der Kontrollplatte mit dem Retentionsadapter Mat.-Nr. 1.001.0887 verschließen); Gips auf die Kontrollplatte im Oberteil auftragen. Artikulatoroberteil druckfrei schließen. 2 7 5 6 Nach Aushärten des Gipses Gesichtsbogen mit Bissgabel aus dem Artikulator entfernen. Klemmhebel 4 öffnen und Gesichtsbogen 3 aus dem Artikulator entfernen. 4 3 19 PROTAR®evo. A 6.2 Einartikulieren des Oberkiefermodelles mit Hilfe des Transferstandes Soll im Dentalabor einartikuliert werden, so genügt es, nur den Bissgabelträger mit Bissgabel zu versenden. Stützstift und Inzisalteller aus dem Artikulator entfernen. 1 Transferstand 1 in das Unterteil des Artikulators einsetzen. Bissgabel 3 mit Bissgabelträger 2 in den Transferstand 1 einsetzen. 2 3 20 6 5 4 3 2 1 0 PROTAR evo. ® 622 1141 A 6.4 Einartikulieren des Oberkiefermodelles mit Gesichtsbogen anderer Hersteller 4b 4 1 4 3c 5 2 Folgendes Zubehör wird benötigt: Fremdbogenreferenz Mat.-Nr. 0.622.1151 bestehend aus: 1 Referenzebene (Hülse + Schraube) 2 Gesichtsbogenhalter 3 Adapter Referenzstift 6 47 Mit diesem Hilfsmittel besteht die Möglichkeit andere Gesichtsbogen-Systeme in den PROTAR®evo Artikulator einsetzen zu können. 8 Für Systeme mit einem frei beweglichen Zeiger wird am Artikulator-Oberteil eine Referenzebene 1 benötigt. 20 (Abbildung Dentatus) Der Dentatusbogen wird mit seinem Infraorbitalzeiger 4 bis zum Kontakt mit der Referenzebene 1 geschwenkt. 9 Einsetzen von Gesichtsbögen mit schwenkbarem Zeiger bzw.Glabellastütze (z. B. SAM, Whip Mix) Inzisaltisch und Stützstift aus dem Artikulator entfernen. 0 q w Die Rändelschraube des Transferbestandes nahezu ganz herausdrehen und den Transferstand in seiner zweiten möglichen Lage in das Artikulatorunterteil bis zum Anschlag einschieben und mit der Rändelschraube fixieren. Den Gesichtsbogenhalter an den Transferbestand montieren. t r e Den Gesichtsbogenhalter mit Hilfe der Skalierung ausrichten und mit der Rändelschraube fixieren. u i KaVo Denar Adapter Mat.- Nr. 0.622.1351 Mit Hilfe des Denar Adapters kann mit der Denar Bissgabel einartikuliert werden. A rik t la u tro-un d G eic s hstb go e -n S ytse m o P R OAT R 21 z PROTAR®evo. 0 622 1141 1 2 3 4 5 Folgendes Zubehör wird benötigt: 1 Transferstand Mat.-Nr. 0.622.1141 6 7 A 6.5 Einstellwerte bei Verwendung von Fremdbögen im PROTARevo Artikulator 2 Fremdbogenreferenz Mat.-Nr. 0.622.1151 bestehend aus: Referenzebene (Hülse + Schraube) Gesichtsbogenhalter Adapter Referenzstift Fabrikat Einsatzmöglichkeit mit Nasenstütze Skalenwert Referenzzeiger auf Infraorbitalpunkt Skalenwert 66 Benötigtes Zubehör Girrbach Rotofix ja 39 Girbach Referenz ja 51 Dentatus ja - - 2 Referenzebene Hanau 153 Earpiece Facebow ja - - kein Zubehör notwendig (vordere Querstange 70 mm über Tischfläche SAM ja 58 - 1 Transferstand 2 Gesichtsbogenhalter Panadent ja nicht möglich 51 1 Transferstand 2 Referenzebene und Gesichtsbogenhalter und Zusatzzeiger (0.622.1371) Hanau 164-2 Twirl-Bow ja - 59 1 Transferstand 2 Referenzebene + Gesichtsbogenhalter Gerber bedingt - - kein Zubehör notwendig Denar ja - - Adapter Mat.-Nr.0.622.1351 Whip-Mix ja 56 - 1 Transferstand 2 Referenzebene + Gesichtsbogenhalter Adapter Referenzstift Quick ja 56 oben 49 mitte 44 unten - 1 Transferstand 2 Referenzebene + Gesichtsbogenhalter Springbow Hanau ja auf Referenzebene ausrichten mit Bißgabelunterstützung 0.622.1391 Hager und Werken ja Ivoclar ja 1 Transferstand , 2 Referenzebene + Gesichtsbogenhalter 1 Transferstand 2 Referenzebene + Gesichtsbogenhalter 46 1 Transferstand 2 Referenzebene + Gesichtsbogenhalter 59 weitere Fabrikate auf Anfrage 22 1 Transferstand 2 Referenzebene + Gesichtsbogenhalter PROTAR®evo. A 6.6 Mittelwertige Methode mit dem KaVo Oberkiefermodellpositionierer Mat.-Nr. 0.622.1781 APFnt Methode Der mittelwertige Modellpositionierer für das zahnlose Oberkiefermodell erlaubt das Einartikulieren, wenn kein Gesichtsbogen zur Verfügung steht. Als Referenzpunkte dienen die Umschlagfalten und die tiefste Erscheinung hinter den beiden Tubern. 1 Fixierschraube 2 Einstellmarkierung wenn kein KaVo Split- Cast montiert. 3 Einstellmarkierung wenn KaVo SplitCast montiert. 3 2 1 Referenzpunkte 23 PROTAR®evo. A 6.7 Mittelwertige Methode mit der KaVo Montage- und Aufstellhilfe für den Oberkiefer Die Montage-Aufstellhilfe 2 Mat.-Nr. 1.001.9451 (ohne Split- CastMontage) 5 Mat.-Nr. 1.001.9452 (mit Split- CastMontage) dient zum mittelwertigen Einartikulieren von zahnlosen Oberkiefermodellen, wenn kein Gesichtsbogen zur Verfügung steht. 3 1 2 Die Aufstellhilfen sind parallel zur Camperschen Ebene ausgerichtet. Die mesiale Ausrichtung erfolgt mit der Papillenschraube 3. Entsprechend der Aufstellmethode wird die Papillenschraube auf richtige Länge herausgedreht, das Modell mit seiner Papille auf der Schraube aufgelegt und der Querschlitten 1 solange verschoben, bis dieser an der tiefsten Stelle hinter den beiden Tubern zum liegen kommt. Mit Hilfe der Einstellschrauben 4 wird die Montage und Aufstellhilfe einmalig auf die Okklusionsebene 6 des jeweiligen Artikulators ausgerichtet. 6 5 4 Die Montage- und Aufstellhilfe 1.001.5451 kann mit Hilfe der Klemme 1.001.9471 auch im Denar, Hanau und Stratos fixiert werden. 24 PROTAR®evo. A 6.8 Mittelwertige Methode mit der KAVo Eingipslehre Mat.- Nr. 0.622.1171 für das Unterkiefermodell (APF Methode) Mit der Eingipslehre können un- / teilbezahnte Unterkiefermodelle mittelwertig in den PROTAR Artikulator einartikuliert werden. Ist der KaVo Artikulator mit einem SplitCast ausgerüstet, muß die Eingipslehre in Position 1 fixiert werden (Schraube 3 lösen) 2 Ist kein Split- Cast montiert muß in Position 2 fixiert werden. 3 1 A 6.8.1 Montage eines unbezahnten Unterkiefermodelles Auf dem UK- Modell wird das retromolare Polster umrundet. Eine Mittellinie 2 eingezeichnet und gedrittelt. Die Okklussionsebene 1 verläuft zum oberen Teilstrich. 1 2 25 PROTAR®evo. Die Symphysengabel 9 auf Höhe des unteren Wachswall 8 einstellen. 5 4 3 3 oberer Wachswall q 5 Mittelwertige Eingipslehre 6 Retromolares Polster 0 7 Verschiebefuß auf retromolaren Polster 20-22 18-20 4 Feststellschraube 8 unterer Wachswall 9 9 Symphysengabel 8 0 Kauebene 6 7 q Campersche Ebene Nach dem lösen der Feststellschraube w, daß Verschiebeteil an die gewünschte Stelle am retromolaren Polster ansetzen und Feststellschraube schließen. Mit einem Gummiband e das Modell an der Eingipslehre fixieren. w e 9 Anschließend das Unterkiefermodell in den Artikulator einartikulieren. PROTAR 26 PROTAR®evo. A 6.9 Einartikulieren des Unterkiefermodelles Artikulator auf den Kopf stellen (ZentrikVerriegelungen 2 bleiben geschlossen). 1 2 Artikulator aufklappen. 3 Das Unterkiefermodell wird schaukelfrei auf das Oberkiefermodell gelegt. Der Stützstift 1 wird, wenn ohne Zentrikregistrat gearbeitet wird, auf Null eingestellt. Öffnung in der Kontrollplatte 3 mit Retentionsadapter 4 Mat.-Nr. 1.001.0887 verschließen. Danach sahnigen Gips auf Unterkiefer-Modell und auf Kontrollplatte des Artikulator- Unterteils 3 auftragen. 4 Artikulator druckfrei schließen. Nach dem Aushärten des Gipses Zentrikregistrat entfernen und Stützstift 1 wieder auf Null stellen. Ober- und Unterkiefer sind nun lagerichtig einartikuliert. 1 27 PROTAR®evo. A 7 Programmieren des Artikulators A 7.1 Justieren der Gelenkbahnneigung mittels Protrusionsregistrat 1 (für PROTAR 5, 5B, 7, 9) Die beiden Zentrik-Verriegelungen 3 öffnen und das Protrusionsregistrat 5 zwischen die Zahnreihen der Gipsmodelle legen. Hierbei wird das Artikulatorunterteil gegenüber dem Artikulatoroberteil nach vorne verschoben. 5 2 2 Die Gelenkkugeln 6 des Artikulators berühren die Kondylenbahn nun nicht mehr. Fixierungen 2 der Gelenkboxen 4 lösen und jeweilige Gelenkbox 4 auf Kontakt mit den Gelenkkugeln 6 bringen. 4 3 3 Fixierungen 2 der Gelenkboxen feststellen. 1 1 4 4 7 7 6 6 A 7.2 Justieren des Bennettwinkels mittels linkem und rechtem Laterotrusionsregistrat (für PROTARevo 5B, 7, 9) Fixierungen 1 lösen; zunächst max. Bennettwinkel einstellen. 6 Linken Bennettwinkel einstellen Rechtes Laterotrusionsregistrat 5 zwischen die Zahnreihen von Ober-und Unterkiefer legen. Linken Gelenkboxeinsatz 7 drehen bis sich Gelenkkugel 6 und Gelenkboxeinsatz 7 berühren und mit Fixierung 1 feststellen. Rechten Bennettwinkel einstellen Linkes Laterotrusionsregistrat 5 zwischen die Zahnreihen von Ober-und Unterkiefer legen. Rechten Gelenkboxeinsatz 7 drehen bis sich Gelenkkugel 6 und Gelenkboxeinsatz 7 berühren und mit Fixierung 1 feststellen. 8 Zentrik-Verriegelungen 3 schließen und Artikulator in Arbeitslage stellen. 28 PROTAR®evo. A 7.3 Einstellung der Seitenbeweglichkeit (für PROTAR 5B, 7, 9) Immediate Side Shift (ISS) Die unmittelbare Seitenbeweglichkeit (ISS) des Mediotrusionskondylus kann von “0 “bis “1,5 mm“ (in 0,5 mm Schritten) vorgewählt werden. 1 Die Fixierungsschraube 1 der Bennettwinkelführungen muß zur Einstellung etwa 1/4 Drehung gelöst werden. Die Einstellung auf den erforderlichen Wert an der Einstellmarke 2 der Seitenbeweglichkeit (ISS) einstellen. Die Fixierungsschraube wieder schließen. Die Einstellwerte des Bennett-Winkels bleiben erhalten. 2 29 PROTAR®evo. A 7.4 Justieren des Shift- Winkels Sind im PROTAR 7 die Shift- Winkeleinsätze (0.622.1111) eingesetzt, so können Bewegungen auf der Arbeitsseite (Laterotrusionsseite) exakt eingestellt werden. @ 2 3 Rändelschraube 3 lösen, damit der ShiftWinkeleinsatz 2 durch drehen am Stift 1 eingestellt werden kann. Mit dem linkslateralen Registrat kann der rechte Bennettwinkel und gleichzeitig der linke Shift- Winkel eingestellt werden. Mit dem rechtslateralen Registrat der linke Bennettwinkel und gleichzeitig der rechte Shift- Winkel. @ 3 Zur Einstellung wird der Shift- Winkeleinsatz 2 so lange gedreht, bis dieser Kontakt mit den Gelenkkugeln 4 hat. 2 4 30 PROTAR®evo. A 7.5 Einstellen einer Protrusionsposition / Distraktionsposition PROTARevo 9 Der PROTARevo 9 ist baugleich mit dem PROTARevo 7. Zusätzlich hat der "9er" einen P/D/REinsatz. Mat.-Nr. 0.622.1001 rechts / links Definierte Einstellung der Protrusion. Definierte Einstellung der Distraktion. Definierte Einstellung der Retrusion. Der PROTARevo 7 ist nachrüstbar mit P/D/R-Einsatz. Einstellung einer geführten Protrusion von 0 – 2 mm in 0,25 mm Schritten von 2 - 6 mm in 0,5 mm Schritten. Diese Einstellungen sind definiert geführt und reproduzierbar. In jeder Protrusionstellung bleibt das Oberteil stehen. Verwendung z.B.: Protrusionsschienen Einschleifen der totalprothese Einstellung einer geführten Distraktion von 0 – 2 mm in 0,25 mm Schritten von 2 - 6 mm in 0,5 mm Schritten, aus der zentrischen Position. Diese Einstellungen sind definiert geführt und reproduzierbar. In jeder Distraktionstellung bleibt das Oberteil stehen. Der Stützstift kann entsprechend nachgeführt werden. Verwendung z.B.: Aufbißschienen 31 PROTAR®evo. A 7.6 Einstellen der Retrusion / Protrusion Zum Erzeugen von retrusiven Freiräumen beim Aufwachsen, ist beim PROTAR 7/9 eine retrusive Bewegung möglich. Dadurch werden Einschleifarbeiten beim Zahnarzt reduziert. Retrusive Freiräume werden bereits in der Modellation berücksichtigt. Nullstellung der Retrusion @ Wird die Seitenbeweglichkeit 3 (ISS) auf 1,5 mm eingestellt, so läßt sich eine retrusive Bewegung von 1 mm durchführen (in Schritten von 0,25 mm). In diesem Fall ist keine exakte zentrische Position bei geschlossenen Zentrikverriegelungen möglich! 1 3 32 PROTAR®evo. A 7.7 Erstellung eines individuellen Inzisalführungstellers Aus dem flachen Inzisaltisch des Protars kann der Anwender einen individuellen Inzisalführungsteller gestalten. Die Zentrikschlösser des Artikulators auf die Stellung “1“ setzen und den Artikulator nach hinten aufklappen. Den Inzisaltisch und die Spitze des Stützstiftes mit einem Trennmittel (Vaseline) einstreichen. Der Inzisaltisch wird mit einem teigig angerührten Autopolymerisat bis zum Rand bündig aufgefüllt. Mit Hilfe von Modellen vor der Präparation, können die Front / Eckzahnführungen durch Bewegungen im Artikulator mit dem Stützstift in das noch plastische Autopolymerisat übertragen werden. Durch das Aushebeln mit einem Instrument in dem Einschnitt des Inzisaltellers wird der individuelle Inzisalführungsteller von dem Inzisaltisch gelöst. Der individuelle Inzisalteller kann wieder zurückgesetzt werden da durch die Nut exakt wieder die richtige Position gefunden werden kann. 33 PROTAR®evo. A 7.8 Programmieren des einstellbaren Inzisaltisches A 7.8.1 Über Situationsmodell Vor dem Beschleifen der Zähne wird vom Patienten ein Situationsmodell erstellt. Mit diesem Situationsmodell wird dann der einstellbare Inzisaltisch programmiert. 1 Zur korrekten Montage des Inzisaltisches wird die mittlere Führung auf einen Wert von ca. 70° 2 eingestellt. R Der Inzisaltisch wird dann bis auf Kontakt mit der Kugel 1 des Inzisalstiftes eingeschoben und mit der Befestigungsschraube 3 fixiert. 2 3 L M Den Unterkiefer im Artikulator nach links bewegen und damit die linke Führung einstellen. Dann den Unterkiefer nach rechts bewegen und die rechte Führung einstellen. Wird das Modell an den Frontzähnen entlang bewegt, so kann die mittlere Führung eingestellt werden. Somit übernimmt der einstellbare Inzisaltisch die Zahnführung . A 7.8.2 Über Einstellwerte des ARCUSdigma Das ARCUSdigma gibt direkt die Einstellwerte für diesen Inzisaltisch an. (R) (M) (L) Werte wie beschrieben einstellen 34 60,0 63,6 57,0 PROTAR®evo. A 8 Einbau des Shift- WinkelEinsatzes am PROTAR®evo 7 2 Zunächst muss der bestehende / Pro/Retrusionszylinder 1 entfernt werden. Hierzu wird mit Hilfe des beigelegten Inbusschlüssels 2 der Sperrstift 5 mit etwas Druck aus dem Antriebsrad 3 herausgedrückt. 3 4 1 5 1. Pro/Retrusionszylinder 1 entfernen. 2. Antriebsrad 3 entfernen 3. Schwarze Kunststoffraste 4 entfernen 1 3 4 5 Einbau des Shift Winkel Einsatzes 6. 6 Der Shift- Winkel- Einsatz wir folgendermaßen eingebaut: - Schraube 7 in Schlitz einschieben. - Shift- Winkel- Einsatz 8 von Aussen in die Artikulatorbox einschieben. - Schraube 7 festziehen. 8 7 35 PROTAR®evo. A 9 Programmierung des Artikulators mit Messdaten des ARCUSdigma (Mat. Nr. 1.000.8232) Der PROTARevo 7 mit dem ShiftWinkeleinsatz ( Mat.- Nr. 0.622.1111) und dem einstellbaren Inzisaltisch (Mat.- Nr. 0.622.1701) kann alle berechneten Einstellwerte exakt reproduzieren. 36 PROTAR®evo. A 10 Aufstellhilfen für Totalprothesen A 10.1 Aufstellhilfen für Unterkiefermodell nach der APFnt- Methode (Mat.- Nr. 0.622.2071) Okklusionsneigungsanzeiger 1 auf die Achzentrierung des Artikulators fixieren. 1 Schraube 4 festziehen. Artikulator auf den Kopf stellen. Kalotte 3 auf das Zahnmodell legen. 5 6 Im messalen Bereich des Frontinsert 2 auf die beiden 1er Frontzähne auflegen. 2 Im dorsalen Bereich, die hintere Querleiste 6 hinter den beiden Tubern plazieren. 3 Schraube 5 festziehen, dann Schraube 7 festziehen. Wenn nötig Schraube 5 nochmal nachjustieren. 4 7 3 37 DE PROTAR®evo. GEBRAUCHSANWEISUNG A 10.2 3D Aufstellhilfe für Unterkiefermodell nach APF Methode 1 Aufnahme 2 Kalotteträger 3 Kalotte lang 4 Kalotte kurz 5 Stellschraube 5 1 4 Mat.- Nr. 0.622.1211 Mat.- Nr. 0.622.1201 3 Dieses Kalottensystem kann generell eingesetzt werden, egal nach welchen Gesichtspunkten das Modell in den Artikulator einartikuliert wurde (Gesichtsbogen bzw. mittelwertige Eingipslehre). In diesem Kalottensystem steht dem Benutzer eine plane Fläche zu Verfügung, die den Bezug zur Okklusionsebene vermittelt und eine konvexe Fläche, die die Kompensationskurven in sagittaler wie tranversaler Richtung zu statischen Aufstellung des Unterkiefers berücksichtigt. Mit Hilfe des Kalottenträger und der Aufnahme kann die Kalotte universell eingerichtet werden. Ob mit Gesichtsbogen, Eingipslehre oder Gummiband einartikuliert wurde, die Kalotte läßt sich auf jeden Fall ausrichten. Durch Zusammendrücken der Aufnahme wird die gesamte Einheit zwischen den Gelenkkugeln des Artikulators fixiert. PROT 38 2 PROTAR®evo. Die Kalotte 1 wird zur Ausrichtung auf den Wachswall 2 aufgelegt. Der Wachswall muß hierzu okklusal so modifiziert werden, daß die Kalotte im Bereich der Inzisiven und im Bereich der unteren Molaren ausgerichtet wird. Die plane Fläche der Kalotte kann z.B. für die Gerber Methode angewendet werden. 1 2 Mit der Stellschraube 3, die durch die Kalotte 1 auf das Modell eingeschraubt wird, wird die Lage der Kalotte fixiert. Der Wachswall kann nun zum Aufstellen etwas zurück genommen werden. Ein Tropfen Klebewachs fixiert die Stellschraube. Der Unterkiefer kann nun gegen die Kalotte aufgestellt werden. Nach Entfernen des Kalottenhalters wird der Artikulator wieder komplettiert. 3 39 PROTAR®evo. A 10.3 3D Aufstellkalotte für Oberkiefermodell (Mat.- Nr. 1.002.4919) Diese plane Aufstellhilfe für das zahnlose Oberkiefermodell wird durch den oberen Wachswall ausgerichtet. Hierzu wird die Aufstellhilfe über ein Gummiband gegen den oberen Wachswall gedrückt. Mit etwas Gips wird die Aufstellhilfe dann ins Artikulator- Unterteil individuell fixiert. 40 PROTAR®evo. A 10.4 2D Aufstellhilfe für den Oberkiefer (Mat.- Nr. 1.001.9452) Dieses Zubehör ist sowohl Eingips- wie auch Aufstellhilfe für den zahnlosen Oberkiefer. Nach dem zurückdrehen der Papillenschraube 1 und dem zurückschieben des Auflageschiebers 2, kann mit dem Aufstellen des Oberkiefermodelles begonnen werden. 1 2 A 10.5 2D Aufstellhilfe für den Oberkiefer für Schraubmontage (Mat.- Nr. 1.001.9451) 41 PROTAR®evo. A 11 Modelltisch mit Split-Cast Für zahntechnische Arbeiten, die Arbeitschritte auf dem Fräsgerät erfordern, besteht oft die Notwendigkeit, das Modell zwischen Artikulator und Fräsgerät im Wechsel zu übertragen. 1 2 1 Magnet 2 Kontrollsockel 3 Hebel 3 Durch die Magnetkraft ist ein sicherer Halt der Arbeit auch bei Fräsarbeiten gewährleistet. Das flankenzentrierte Split-Cast-System auf der Basis der Artikulator-Kontrollplatten garantiert einen präzisen Sitz der Arbeit. Das Modell wird nur einmal für die jeweilige Arbeit zum Fräsen eingestellt und kann danach beliebig oft, ohne weiteren Einstellaufwand, umgesetzt werden. 42 PROTAR®evo. Okklusare Strukturen können im Artikulator erstellt werden. Die notwendigen Fräßarbeiten können zu jedem Zeitpunkt durchgeführt werden. Alle Arbeitschritte können durch paßgenaues Umsetzen zwischen Artikulator und Fräßgerät immer wieder kontrolliert werden. 43 GA PROTAR evo -A11 KaVo LOGIcase PROTAR®evo. A 12 Transportbox KaVo LOGICase KaVo LOGICase die wirtschaftliche stabelbare Transportbox zwischen Praxis und Labor. KaVo LOGICase ist Transportbox und Arbeitsschale in einem. r m bo ter La us M 1 Schaumstoff zur Modellfixierung (50 Stk. 1.000.9351) 2 Beim ersten Einsatz am ERGOspace werden die seitlichen Aussparungen geöffnet. 3 Runddose für Kleinteile (50 Stk. 1.000.9353) 4 Feld für Barcode 5 Feld für Patientenname 6 10 Boxen (20 Halbschalen 1.001.1511) 50 Boxen (100 Halbschalen 1.000.9355) 7 Rechteckdose für Registrate (50 Stk. 1.000.9354) n an 1 Hygiene: LOGIcase ist mit üblichem Mittel desinfizierbar. 2 3 7 1 Folgende Bestückung ist möglich: - 4 Modelle - oder 4 Abdrucklöffel - KaVo ARCUS Bißgabelträger - 2 Boxen für Registrate - 2 Dosen für Kleinteile 4 Spezielle Halterung 8 für KaVo Labormöbelprogramm. 6 5 Universeller Einsatz für alle weiteren Möbelprogramme 8. 8 8 44 PROTAR®evo. A 13 Technische Daten Artikulatoren PROTARevo 2, 3, 5, 5B, 6, 7 und 9 110 Unterteil Interkondylar-Abstand = fix 110 mm +10 0 - 10 Stützstift Verstellbereich von + 10 bis - 10 mm mit Arretierung Inzisaltisch eben (plan) Inzisalteller (Zubehör 10°, 30°, 40°, 50°) 20° Bauhöhe mit Kontrollplatte + mit Split-Cast 120 mm 108 mm 97 mm Balkwill-Winkel 20° Campersche Ebene (CE) parallel zur Tischebene HCN gekrümmt (nach 5mm Exkursion) Bennettwinkel gekrümmt (nach 5 mm Exkursion) 20∞ Gewicht (mit Split-Cast) Artikulator-Unterteil Artikulator-Oberteile PROTARevo 2/3 Artikulator- Oberteile PROTARevo 5 PROTARevo 5B/7/9 ( 10∞ , 30∞ , 40∞ , 50∞ ) 450 g 235 g 420g 450 g 120 108 97 CE Technische Änderungen vorbehalten. 45 20∞ PROTAR®evo. A 14 Pflege und Justierung Vor Inbetriebnahme Artikulator mit handelsüblichen ArtikulatorTrennmitteln (Silikonsprays) einsprühen, nicht fetten. Keine Oxydations-Löser oder Gips-Löser verwenden. Gelenkkugeln 8, Magnet-Haftsystem 9 bzw. Kontrollplatten-Gewinde bei Bedarf leicht einölen. Sollten die Spannhebel für die HCN nicht mehr richtig spannen, besteht die Möglichkeit der Nachjustierung. Werkzeug: Inbus-Schlüssel 1,5 mm 6 Schraubendreher 4,5 mm 3 Zentrik-Verriegelungen 1 und 2 nachjustieren. Inbus-Schlüssel außen 3 mm 4 Inbus-Schlüssel innen 2 mm 5 Split-Cast Kontrolle im PROTAR 3/5/7/9. (Empfehlen halbjährlich mit Meß- und Justierlehre 0.622.1221) Magnet-Haftsystem 9 mit Magnetschlüssel q herausschrauben. Der Split-Cast ist aus Genauigkeitsgründen flankenzentriert. Die Kontrollplatte muß auf den Flanken e plan aufliegen. Der Luftspalt w zwischen Kontrollsockel r und Kontrollplatte muß parallel sein. Nach Beendigung der Arbeit wird das Modell mit Hilfe der Sterngriff-Schraube u von der Kontrollplatte t - z abgedrückt. Kontrollplatten t - z anschließend säubern. Für besseres Gleitverhalten Gelenkkugelfläche i mit Articulator Lubricating Paste REF. 1.001.7613 einfetten. 46 PROTAR®evo. Garantiebedingungen KaVo übernimmt dem Endkunden gegenüber für das im Übergabeprotokoll genannte Produkt die Garantieleistung für einwandfreie Funktion, Fehlerfreiheit im Material oder der Verarbeitung auf die Dauer von 12 Monaten ab dem Kaufdatum zu folgenden Bedingungen: Bei begründeten Beanstandungen wegen Mängeln oder Minderlieferung leistet KaVo Garantie nach ihrer Wahl durch kostenlose Ersatzlieferung oder Instandsetzung. Andere Ansprüche, gleich welcher Art, insbesondere auf Schadenersatz sind ausgeschlossen. Im Falle des Verzuges und des groben Verschuldens oder Vorsatzes gilt dies nur, soweit nicht zwingende gesetzliche Vorschriften entgegenstehen. KaVo haftet nicht für Defekte und deren Folgen, die entstanden sind durch natürliche Abnutzung, unsachgemäße Reinigung oder Wartung, Nichtbeachtung der Bedienungs-, Wartungs- oder Anschlussvorschriften, Verkalkung oder Korrosion, Verunreinigung in der Luft- und Wasserversorgung oder chemische oder elektrische Einflüsse, die ungewöhnlich oder nach den Werksvorschriften nicht zulässig sind. Die Garantieleistung erstreckt sich generell nicht auf Lampen, Glasware, Gummiteile und auf die Farbbeständigkeit von Kunststoffen. Eine Haftung ist ausgeschlossen, wenn Defekte oder ihre Folgen darauf beruhen können, dass der Kunde oder Dritte Eingriffe oder Veränderungen am Produkt vornehmen. Ansprüche aus dieser Garantieleistung können nur geltend gemacht werden, wenn das zu dem Produkt gehörende Übergabeprotokoll (Durchschlag) an KaVo eingesandt wurde und das Original durch den Betreiber/Anwender vorgelegt werden kann. 47 Verk.-Nr. PROTARevo 2 Mat.-Nr. 1.002.3306 06/02003 09.21 PROTAR®evo. Ersatzteile PROTAR®evo 2 Mat.-Nr. 1.002.3305 ohne Split-Cast 0.622.0981 1.002.4686 3PS 1.002.2074 0.200.6034 0.200.6093 0.622.1363 0.622.1373 1.001.0889 0.200.6301 Verk.-Nr. (10x) PROTARevo 3 1.002.2096 10x Mat.-Nr. 1.002.3307 mit Split-Cast Mat.-Nr. 1.002.3306 ohne Split-Cast 06/2003 09.22 PROTAR®evo 3 Mat.-Nr. 1.002.3307 mit Split-Cast Mat.-Nr. 1.002.3306 ohne Splitcast 0.622.0981 0.200.6034 3x 0.201.1459 1.002.2074 1.001.0889 10x 0.622.2702 0.622.2652 0.622.0791(10x) 0.622.2682 0.411.1212 0.622.2692 0.622.1822 0.622.1812 1.002.4686 3PS 0.622.2712 0.220.1309 0.253.6045 2x 0.249.4168 1.002.2096 10x 1/1 48 Verk.-Nr. PROTARevo 5 Mat.-Nr. 1.002.3311 mit Split-Cast Mat.-Nr. 1.002.3310 ohne Split-Cast 06/2003 09.23 PROTAR®evo. PROTAR®evo 5 Mat.-Nr. 1.002.3311 mit Splitcast Mat.-Nr. 1.002.3310 ohne Splitcast 0.622.0981 0.200.6034 3x 0.201.1459 1.002.2074 1.001.0889 10x 45 35 60 25 50 4 15 0 3 050 3 0.622.2652 0.622.0791(10x) FH CE 5 70 5 -5 1.002.4686 3PS 0.622.2682 0.622.2702 0.411.1212 0.622.1822 0.622.2692 0.622.1812 0.249.4168 Verk.-Nr. PROTARevo 5B Mat.-Nr. 1.002.3315 0.253.6045 2x mit Split-Cast Mat.-Nr. 1.002.3314 ohne Split-Cast 0.220.1309 0.622.2712 1.002.2096 10x 06/2003 09.23 PROTAR®evo 5B Mat.-Nr. 1.002.3315 mit Splitcast Mat.-Nr. 1.002.3314 ohne Splitcast 3x 0.201.1459 1.002.2074 1.001.0889 FH C E 5 70 5 -5 45 6 35 0 25 50 4 15 0 30 053 0.622.2652 0.622.0791(10x) 0.622.0981 0.200.6034 1.002.4686 0.622.2682 0.622.2702 0.411.1212 0.622.1822 0.622.2692 0.622.1812 0.249.4168 0.253.6045 2x 0.220.1309 0.622.2712 1.002.2096 10x 1/1 49 Verk.-Nr. PROTARevo 7 Mat.-Nr. 1.002.3319 mit Split-Cast Mat.-Nr. 1.002.3318 ohne Split-Cast 09/2004 09.24 PROTAR®evo. PROTAR®evo 7 Mat.-Nr. 1.002.3319 mit Splitcast Mat.-Nr. 1.002.3318 ohne Splitcast 0.250.0031 1.002.0508 0.222.4043 0.622.2032 (L) 0.622.2042 (R) 0.622.2542 0.622.2532 0.622.2502 3x 0.201.1459 0.622.2082 (R) 0.622.2092 (L) 1.002.2074 0.622.0981 0.200.6034 1,0 0 0,5 65 55 8 0 7 45 0 0.622.2652 0.622.0791(10x) D FH CE 5 90 7 1.001.0889 10x 0.622.2702 0.622.2682 1.002.2085 0.411.1212 1.002.4686 3PS 0.622.1822 0.622.2692 0.622.1812 0.249.4168 0.253.6045 2x 0.220.1309 0.622.2712 1.002.2096 10x 06/2003 Verk.-Nr. PROTARevo 9 0.240.2240 Mat.-Nr. 1.002.3323 mit Split-Cast Mat.-Nr. 1.002.3322 ohne Split-Cast 09.25 5 2 3 6R 0 1 1.002.2085 PROTAR®evo 9 Mat.-Nr. 1.002.3323 mit Splitcast Mat.-Nr. 1.002.3322 ohne Splitcast 0.250.0031 1.002.0508 0.222.4043 0.622.2032 (L) 0.622.2042 (R) 0.622.2542 0.622.0981 0.622.2532 0.200.6034 0.622.2502 3x 0.201.1459 0.622.2082 (R) 0.622.2092 (L) 1.001.0889 1.002.2074 1.002.4686 0.622.2652 0.622.0791(10x) 0.622.2682 0.411.1212 1/1 0.622.2702 0.622.1822 0.622.2692 0.622.1812 1.002.2096 10x 0.249.4168 0.253.6045 2x 0.220.1309 0.622.2712 50 Verk.-Nr. PROTARevo Unterteil Mat.-Nr. 1.002.3265 ohne Splitcast ® PROTAR Mat.-Nr.evo. 1.002.3266 mit Splitcast 06/2003 09.26 PROTAR®evo Unterteil Mat.-Nr. 1.002.3265 ohne Splitcast Mat.-Nr. 1.002.3266 mit Splitcast 0.222.5045 (8x12x0,15) 0.222.5046 (8x12x0,18) 0.222.5047 (8x12x0,20) 1.001.0889 10x 0.622.1852 0.622.2022 0.200.6034 0.622.0981 0.622.1181 0.622.0791 10x 0.622.3142 1.002.2075 1.002.4686 3PS 0.622.2682 0.622.1912 0.622.1922 0.622.1932 0.622.1942 0.622.1952 0.622.1962 10° 20° 30° 40° 50° 1.002.2074 1.002.2079 3x 0.201.1459 0.622.2652 1.002.2096 10x 0.411.1212 0.220.1741 1/1 51 1.002.5701 Fk 7/07 de 09.20 KaVo Dental GmbH. D-88400 Biberach/Riss Telefon +49 7351 56-0 Fax +49 7351 56-1488 Internet: www.kavo.com Operating Instructions PROTAR® evo. Always on the safe side. KaVo Dental GmbH. D-88400 Biberach/Riss Vertrieb/distribution: KaVo Dental GmbH Bismarckring 39 • D-88400 Biberach Tel.: 0 73 51 / 56-1600 • Fax: 0 73 51 / 1488 Hersteller/manufacturer: Kaltenbach & Voigt GmbH Bismarckring 39 D-88400 Biberach PROTAR®evo. A 1 User notes ..............................................................................................................................................................................2 A 1.1 Meaning of the pictograms ..........................................................................................................................................2 A 1.2 Important information ..................................................................................................................................................2 A 1.3 Safety measures ..........................................................................................................................................................2 A 1.4 Purpose and applications ............................................................................................................................................3 A 1.5 Observation of the movements of the mandible in the horizontal plane ....................................................................4 A 1.6 System philosophy ......................................................................................................................................................5 A 2 Scope of delivery – Accessories ..........................................................................................................................................6 A 2.1 Scope of delivery ........................................................................................................................................................6 A 3 Controls and functional elements ......................................................................................................................................11 A 4 Preparations for start-up operation ....................................................................................................................................13 A 4.1Support pin ................................................................................................................................................................13 A 4.2 Centric locks ..............................................................................................................................................................13 A 4.3 PROTARevo with Splitcast (Factory adjustment) ......................................................................................................15 A 4.4 Working with the Mounting Set Mat. No. 0.622.1121 ................................................................................................15 A 4.5 PROTARevo without Split-cast ..................................................................................................................................15 A 4.5.1 PROTARevo with magnetic fixing ..........................................................................................................................16 A 4.6 PROTARevo with Splitcast ........................................................................................................................................16 Assembly Instructions: Fitting magnetic fastenings to PROTAR articulators without split cast. Material number 1.002.4686 ............................16 3PS commonality material no. 1.002.2095 ......................................................................................................................16 A 4.6.1 Calibration 1.002.2080 ............................................................................................................................................17 A 4.6.2 Measuring ..............................................................................................................................................................17 A 5 Programming possibilities for KaVo PROTARevo articulators ........................................................................................18 A 6 Articulation of the model ....................................................................................................................................................19 A 6.1 Articulation of the upper model with the KaVo Face bow ARCUS ............................................................................19 A 6.2 Articulation of the upper model with the help of the Transfer Stand ........................................................................20 A 6.3 Articulation of the upper model with KaVo Facebow ARCUS light ............................................................................20 A 6.4 Articulation of the upper model with face bows of other manufacturers ..................................................................21 A 6.5 Programme data when using non –KaVo face bows in the PROTAR Articulator ....................................................22 A 6.6 Average value method using the KaVo upper jaw model positioner Mat. No. 0.622.1781 APFnt Method ..............23 A 6.7 Average value method using the KaVo Mounting and Setup Aid for the upper jaw ................................................24 A 6.8 Average value method for the lower jaw model using the KaVo Plastering Gauge Mat. No. 0.622.1171 ..............25 A 6.8.1 Mounting of an edentulous lower jaw model ..........................................................................................................25 A 6.9 Articulation of the lower jaw model ............................................................................................................................27 A 7 Programming the articulator ..............................................................................................................................................28 A 7.1 Adjusting the condylar path inclination with protrusion recording block ....................................................................28 A 7.2 Adjusting the Bennett angle with the left and right laterotrusion recording block ......................................................28 A 7.3 Setting the immediate Side Shift (ISS) ......................................................................................................................29 A 7.4 Adjusting the Shift-angle ............................................................................................................................................30 A 7.5 Setting of a protrusion / distraction position ..............................................................................................................31 A 7.6 Setting the retrusion ..................................................................................................................................................32 A 7.7 Producing an individual incisal guidance ..................................................................................................................33 A 7.8 Programming the adjustable incisal plate ..................................................................................................................34 A 7.8.1 By use of a situation model ....................................................................................................................................34 A 7.8.2 By use of programme data from ARCUSdigma ....................................................................................................34 A 8 Installation of the shift angle insert in PROTARevo 7 ......................................................................................................35 A 9 Programming the articulator with data from ARCUSdigma ............................................................................................36 A 10 Setup aid for full dentures ................................................................................................................................................37 A 10.1 Setup aid for lower jaw models according to the APFnt method (Mat. No. 0.622.2071) ........................................37 A 10.2 3D Setup aid for lower jaw models according to the APF method ..........................................................................38 A 10.3 3D Setup template for upper jaw model (Mat. No. 1.002.4919) ..............................................................................40 A 10.4 2D Setup aid for the upper jaw (Mat. No. 1.001.9452) ..........................................................................................41 A 10.5 2D Setup aid for the upper model for screw mounting (Mat. No. 1.001.9451) ......................................................41 A 11 Milling table with transfer plate Split system ..................................................................................................................42 A 12 Transport Box KaVo LOGICase ........................................................................................................................................44 A 13 Technical data ....................................................................................................................................................................45 A 13 Maintenance and adjustment ............................................................................................................................................46 Guarantee conditions ..........................................................................................................................................................47 PROTARevo 3......................................................................................................................................................................48 Spare parts PROTARevo 2 ..................................................................................................................................................48 PROTARevo 5B ..................................................................................................................................................................49 PROTARevo 5......................................................................................................................................................................49 PROTARevo 9......................................................................................................................................................................50 PROTARevo 7......................................................................................................................................................................50 PROTARevo lower section ..................................................................................................................................................51 1 PROTAR®evo. A 1 User notes A 1.2 Important information A 1.3 Safety measures A 1.1 Meaning of the pictograms The operating instructions should be read by the user before putting the unit into operation for the first time, in order to avoid incorrect operation and damage. If further language versions are required, please request these from your responsible KaVo agent. Duplication and distribution of the Operating Instructions (OI) require prior consent from KaVo. Safe operation and protection of the unit are ensured only through proper use in accordance with the Operating Instructions, using the tools approved for this purpose. The following should also be followed: Situation which can lead to danger, damage to materials or operating faults if the information is ignored. Important information for operators and technicians. Automatic mode Automatic sequence All technical data, information and properties of the unit described in these OI instructions correspond to the situation on going to press. Close, screw in, fasten, etc. Open, release, loosen + ∞ more, higher Modifications and improvements to the product on the basis of technical innovations are possible. This does not imply any right to upgrading of existing units. less, lower KaVo assumes no responsibility for damage arising through: Continuous operation external influences (poor quality of the media or poor installation) use of incorrect information improper use improperly performed repairs. Time, time sequence Disconnect mains plug The following are authorized to repair and service KaVo products: the engineers of the KaVo agents throughout the world the engineers of the KaVo dealers who have been specially trained by KaVo independent engineers specially trained by KaVo. In the event of modifications by third parties, the approvals become null and void. KaVo recommends using only original spare parts for operation and for repairs. 2 • the work safety regulations • the accident prevention regulations. In accordance with these requirements, it is the duty of the user • to use only flawless materials • to observe the correct applications • to protect the patient, and others, from exposure to injury • to avoid contamination by the product. • not to work not with damaged functional parts. PROTAR®evo. A 1.4 Purpose and applications The Gnathostomatic System is one of the most complex locomotor organs in the human body, largely due to its three dimensional spatial movements. In the event where a therapeutic, prosthetic or orthognathic treatment is required, a function-oriented therapy is essential. Segments of this kind of therapy, by necessity, have to be performed extraorally, i.e. functional diagnosis, treatment planning, surgical, therapeutic or prosthodontic appliances. A simulation device which can mimic the mandibular movements and can accept the parameters of the patient’s condylar and anterior guidance accurately, in addition, will retain the program of the dynamics of the mandible and the condyles, is not only necessary in the dental practice, but also in the dental laboratory. 1 FH 7 6 2 3 4 5 An articulator and associated measuring devices are indispensable tools for recording and transferring existing anatomical conditions or manipulable variables, they form the basis for functionoriented therapy. A defect-free morphological condition between the temporomandibular joint, the neuromuscular system and the dentition, forms the basis for a healthy and well functioning gnathostomatic system. In order to faithfully reproduce the movements of the mandible on an articulator, anatomical reference points and reference lines have to be identified on the patient, with regard to a system of coordinates. The visual connection between the subnasal point and the Tragus Medialis 5 for instance, forms Camper’s Plane of Occlusion 2 (CP). On the other hand, the visual connection between the Porion 6 and the InfraOrbital Point 1 (IOP) forms the Frankfurt Horizontal Plane (FHP). The co-ordinates of these reference points and planes result in the Horizontal Condylar Inclination (HCI) . Other terms in use: Protrusive Path - Mid-Sagittal Horizontal Inclination - Condylar Path Angle. 3 Subnasal point 4 Okklusions plane 7 Hinge axis 3 PROTAR®evo. A 1.5 Observation of the movements of the mandible in the horizontal plane Protrusion With protrusion, the mandible moves forward. There is ventral and caudal movement of the two condyles. The movement tracks of the maxillary tooth are shown on the mandibular tooth. Mediotrusion and laterotrusion In lateral occlusion, a differentiation is made between laterotrusion on the working side and mediotrusion on the non-working side. The connection between the beginning and end point of the condyle moved inwards on the mediotrusive path forms the Bennett angle 1 with the protrusion trace on the non-working side. tt nne Be 1 The condyle describes a laterotrusion on the working side. Deviations from the . laterotrusion are defined as shift angle 2. t Shif 2 t net B en 4 PROTAR®evo. A 1.6 System philosophy 1 2 The articulator and face bow system from KaVo is designed so that work can be carried out using either the Frankfurt horizontal plane (FH) or Camper’s plane (CP). 3 The nasal support 1 provides an average alignment of the face bow with respect to the two planes. The face bow can also be individually aligned to the required reference plane 3 by using the reference pointer. 4 2 Infra-orbital point 4 Subnasal point 6 In the articulator, the face bow is always inserted in the same position on the lateral reference pins 5 and on the incisal pin (set to zero). The bite fork will, however, vary in its position depending on the patient’s anatomy. 5 6 Support of the face bow 7 Incisal pin 7 In the PROTAR articulator, the models are almost parallel (deviations ± 10º) with the Camper’s plane 9. 8 r Advantage for dental technology: the models mounted in an articulator have their occlusion plane q almost parallel to the Camper’s plane 9 and thus also to the work surface. The plaster expansion is uniform. e 9 0 w q 8 Infra-orbital point 0 Subnasal point w Tragus medialis e Porion r Hinge axis 5 PROTAR®evo. A 2 Scope of delivery – Accessories A 2.1 Scope of delivery Articulator PROTAR®evo 2 Cast consisting of: Articulator upper section Mat. No. 1.002.3305 Articulator lower section Mat. No. 1.002.3265 or PROTAR evo 2 Articulator PROTAR®evo 3 with-SplitCast consisting of: Articulator-upper section Mat. No. 1.002.3307 Articulator-lower section Mat. No. 1.002.3266 or Artikulator PROTAR®evo 3 with-out Split-Cast consisting of: Articulator-upper section Mat. No. 1.002.3308 Articulator-lower section Mat. No. 1.002.3265 or PROTAR evo 3 CE 70 55 0 6 45 0 5 35 0 4 25 30 15 Articulator PROTAR®evo 5 with-SplitCast consisting of: Articulator-upper section Mat. No. 1.002.3313 Articulator-lower section Mat. No. 1.002.3266 or 05 -5 20 1 15 0 0 25 0 10 35 20 Articulator PROTAR®evo 5 with-out Split-Cast consisting of: Articulator-upper section Mat. No. 1.002.3310 Articulator-lower section Mat. No. 1.002.3265 or PROTAR evo 5 CE0 7 55 0 6 45 0 5 35 0 4 25 30 15 Articulator PROTAR®evo 5B with-SplitCast consisting of: Articulator-upper section Mat. No. 1.002.3314 Articulator-lower section Mat. No. 1.002.3266 05 -5 20 1 15 0 0 25 0 10 35 20 or 1 0 Articulator PROTAR®evo 5B with-out Split-Cast consisting of: Articulator-upper section Mat. No. 1.002.3315 Articulator-lower section Mat. No. 1.002.3265 PROTAR evo 5B 6 PROTAR®evo. 50 3 5 40 25 30 15 Articulator PROTAR®evo 7 with-SplitCast consisting of: Articulator-upper section Mat. No. 1.002.3319 Articulator-lower section Mat. No. 1.002.3266 0 05 -5 20 1 15 0 0 25 0 10 35 20 1,5 1, 0 0,5 10 20 30 or Articulator PROTAR®evo 7 with-out Split-Cast consisting of: Articulator-upper section Mat. No. 1.002.3318 Articulator-lower section Mat. No. 1.002.3265 PROTAR evo 7 or 40 1, 0 0,5 10 20 1,5 25 30 05 20 05 10 15 0 25 10 0 15 6 0 7 55 6 0 45 50 35 Articulator PROTAR®evo 9 with-SplitCast consisting of: Articulator-upper section Mat. No. 1.002.3323 Articulator-lower section Mat. No. 1.002.3266 30 or Articulator PROTAR®evo 9 with-out Split-Cast consisting of: Articulator-upper section Mat.-No. 1.002.3322 Articulator-lower section Mat. No. 1.002.3265 PROTAR evo 9 Operating Instructions PROTAR®evo Mat. No. 1.002.5701 7 PROTAR®evo. A 2.2 Optional accessories Available on request: @ Incisal pointer Mat. No. 0.622.1021 ” Incisal guidance 10°Mat. No. 0.622.1922 Incisal guidance 20°Mat. No. 0.622.1932 Incisal guidance 30°Mat. No. 0.622.1942 Incisal guidance 40°Mat. No. 0.622.1952 Incisal guidance 50°Mat. No. 0.622.1962 Split-cast-built-in set Mat.-No. 0.622.1031 (without drawing) # Transfer stand Mat. No. 0.622 1141 £ Orbital plane guide for non-KaVo face bows Mat.-No. 0.622 1151 £b face bow holder £c Adapter referenz pin 5 Jigs for average value articulator mounting Mat. No. 0.622.1171 Ì Template holder Mat. No. 0.622.1161 \ Short template Mat. No. 0.622.1201 | Long template Mat. No. 0.622.1211 9 Mounting/Setting-up aid Upper complete prosthesis Mat. No. 1.001.9451 for PROTARevo with screw Clamp for non-KaVo articulator Mat. No. 1.001.9471 0 Mounting/Setting-up aid Upper complete prosthesis Mat. No. 1.001.9452 for PROTARevo with control base q Upper-model positioner Mat. No. 0.622.1781 w Occlusion angle indicator Mat. No. 0.622.2071 e Plaster mounting sleeve Mat. No.0.622.2212 44,0 mm Mat. No.0.622.2222 22,0 mm Mat. No.0.622.2232 14,6 mm r Milling table with transfer plate Split system Mat. No. 0.625.0770 t Mounting Set Mat. No. 0.622.1121 z Plaster mounting disc Mat. No. 1.001.0888 u Video ARCUS /PROTAR Mat. No. 0.622.3202 i Denar adapter Mat. No. 0.622.1351 o Panadent indicator Mat. No. 0.622.1371 p Bitefork holder Mat. No. 0.622.0901 8 PROTAR®evo. Available on request: p Support pin “E “ Mat.-Nr.0.622.1181 Support pin “P “ Mat.-Nr.0.622.1791 Support pin “T “ Mat.-Nr.0.622.1891 p s a “E“ a Adjustable incisal plate Mat. No. 0.622.1701 0 10 20 30 40 50 60 d 5 5 Mat. No. 0.622.0901 0 d Bitefork holder 0 Mat. No. 0.622.1161 5 s Holder 5 0 f “T“ 0 f PDR-Insert (pair) Mat. No. 0.622.1001 L “P“ 4 5 2 3 6R 0 1 g Shift angle inserts (pair) Mat. No. 0.622.1111 h Carrying case Mat. No. 1.000.3682 h j g j Fixing screws for mounting plates (2 pieces) Mat. No. 1.000.3733 only for PROTARevo k Calibration gauge Mat. No. 1.002.2080 ö l Magnetic fixture Mat. No. 1.002.4686 ö Mounting plates for 3 PS (pack of 10) Mat. No. 1.002.2096 l k y Synchronization 3PS Mat. No. 1.002.2095 Transport box / Work trays x LOCIcase (pack of 10.) Mat. No. 1.001.1511 LOCIcase (pack of 50.) Mat. No. 1.000.9355 y x c c Box for registrations Mat. No. 1.000.9354 v Round canister for small parts Mat. No. 1.000.9353 b b Foam sponge for securing of models Mat. No. 1.000.9351 9 v PROTAR®evo. Consumable materials 1 Mounting plates pack of 10 Mat. No. 0.622.0791 3 1 2 2 Retention adapters pack of 10. Mat. No. 1001.0887 Retention adapters pack of 50. Mat. No. 1.001.0953 Retention adapters pack of 50. Mat. No. 1.001.0953 4 3 Mounting plates (not for Split-cast) pack of 10 Mat. No. 0.622.1871 5 4 Inserts for mounting plate pack of 20. Mat. No. 0.622.0781 6 5 Plaster mounting disc pack of 20. Mat. No. 0.622.1481 6 Mounting plates for 3 PS (pack of 10 ) Mat. No. 1.002.2096 7 Closure caps Mat. No. 1.003.2868 7 Spare parts: 8 Upper section support pin Mat. No. 0.622.1872 Shift angle inserts Mat. No. 0.622.1031 8 9 Mould release screw Mat. No. 0.220.1741 0 Magnet Mat. No. 0.622.2682 q Magnet wrench Mat. No. 0.411.1212 0 w Elastic bands forPROTAR 2 pack of 10 Mat. No. 1.000.3101 e Adhesive for adjustments Mat. No. 0.359.2014 9 q e w Härter Harz 10 PROTAR®evo. A 3 Controls and functional elements PROTARevo 2 ö 2 2 1 Articulator upper section 2 Support feet 1 p 3 Hinge box, right 4 Centric lock, right 3 5 Centric lock, left PROTARevo 3 6 Control base 2 7 Articulator lower section 2 8 Incisal tray, 20° h 1 9 Incisal disc, flat p 0 Support pin 4 PROTARevo 5 w Mounting plate, top a 3 w q Mounting plate, bottom 5 e Fixing Bennett angle and lateral movement (ISS), right 1 2 2 3 r ISS setting, right j t Hinge axis h CE FH 0 7 55 -5 45 35 60 25 50 4 15 0 30 053 z Reference pin w u ISS setting, left 4 p i Fixing Bennett angle and lateral movement (ISS), left f d o 5 o Hinge box insert, left PROTARevo 5B a 2 p Hinge box, left 2 3 a Spring element, left s Fixing shift angle, left 1 45 35 60 25 50 4 15 0 30 053 j h FH CE 5 70 5 -5 d Fixing of hinge box, left w 4 f Fixing of hinge box, right p g Fixing shift angle, right o 5 h Spring element, right f d a j Hinge box insert, right k k Ball joints 0 t q z l Magnet retention system ö Tommy screw (optional) 9 7 8 6 PROTAR 11 l 2 PROTAR®evo. 1 Articulator upper section PROTARevo 7 2 Support feet 2 1 e r 3 j 2 3 Hinge box, right 4 Centric lock, right g 1,0 0 0,5 5 Centric lock, left h 65 55 8 0 7 45 0 w 7 Articulator lower section D FH CE 90 75 6 Control base i 4 u p 8 Incisal tray, 20° f d o 9 Incisal disc, flat 5 a s 0 Support pin q Mounting plate, bottom PROTARevo 9 w Mounting plate, top 2 1 e 2 e Fixing Bennett angle and lateral movement (ISS), right r 3 j 1,0 g 0,5 0 r ISS setting, right h 65 55 80 7 45 0 t Hinge axis D FH CE 5 90 7 w i 4 z Reference pin u p f d u ISS setting, left o i Fixing Bennett angle and lateral movement (ISS), left 5 a s o Hinge box insert, left p Hinge box, left a Spring element, left s Fixing shift angle, left 0 k d Fixing of hinge box, left f Fixing of hinge box, right t g Fixing shift angle, right z q h Spring element, right j Hinge box insert, right k Ball joints 9 l Magnet retention system 7 8 ö Tommy screw (optional) 6 12 l 2 PROTAR®evo. A 4 Preparations for start-up operation A 4.1Support pin 3 1 -5 CE 70 55 0 6 45 0 5 35 0 4 25 30 15 Insert support pin 6 into top or bottom part of articulator and screw in firmly. 2 05 20 10 15 0 25 0 10 35 20 4 Fit flat incisal plate 1 with 20° incisal tray 2 in the top or lower section. 10° - 50° trays can also be used instead of the 20° tray. 6 5 A 4.2 Centric locks open Position “0“ 7 In position “0“ the centric lock 4 is closed. The articulator upper section can only be rotated in the “closed“ position 7 “0“ 8 Position “1“ 9 When the centric locks 4 are in the middle Position “1“, the articulator is freely movable so that the desired articulator movements can be carried out. The spring elements 8 press the condyles 5 against the joint surfaces 0 of the hinge boxes 3 to prevent them from lifting off. 1 2 In its Position “1“, the articulator can be handled like a non-Arcon articulator. This will prevent the upper and lower sections of the articulator from coming apart. “1“ “0“ 9 0 13 PROTAR®evo. Position “2“ = open 1 In this position, the upper section can be removed. 1 “2“ “1“ “0“ After positioning the articulator upper sections and closing the two centric locks, the articulator is now complete. 2 The centric locks 2 can only be closed when the articulator upper section is firmly located into the condylarball. The left centric lock 2 must always be closed first 3. 3 “R“ “L“ “R“ = right “L“ = left 14 PROTAR®evo. A 4.3 PROTARevo with Splitcast (Factory adjustment) @ If the articulator is factory-equipped with the KaVo Splitcast, the magnetically-held control plate 2 serves to accept the model. The retention adapter 1 is used for retention of plaster. 2 After completing the work, the model is pressed out of the control plate 3 by use of the star-grip screw 4. Finally, clean the control plate 3. 3 A 4.4 Working with the Mounting Set Mat. No. 0.622.1121 4 The mounting set enables the production of accurately fitting plaster plates for the KaVo Split- Cast. Practical hints – function • Snap the mounting disc 5 into the mounting set 6. • As a rule, the mounting set does not have to be insulated. • Remove the plaster plate after 6 hours, at the latest. • After each use, immediately clean the mounting set thoroughly under running water. • If necessary, use KaVo Separating Material (Order No. 0.622.4442). Blow off superfluous separating material. 5 6 7 Never use plaster solvents to clean the mounting set. Mat.- No. see A 2.2 8 9 A 4.5 PROTARevo without Split-cast If the Artikulator is factory-installed equipped without Split-cast, then the mounting plates 9 (0.622.1871) are fixed with the help of a tommy screw 8. 9 8 15 PROTAR®evo. A 4.5.1 PROTARevo with magnetic fixing By use of the magnetic fixing 1.002.4686, a magnet 3 can be located in the PROTARevo in place of the capstan-head screw.Together with the 3PS mounting plates 4 a fast change of model is possible. 3 This method of fixing the model does not allow synchronization. A 4.6 PROTARevo with Splitcast 4 (Adjustment in the laboratory) PROTARevo articulators, which are not factory-equipped with a Split Cast , can be synchronized with the 3PS mounting plates in the laboratory. 5 Required accessories: 4 Mounting plate 3PS Mat. No. 1.002.2095 5 Calibration gauge Mat. No. 1.002.2080 Assembly Instructions: Fitting magnetic fastenings to PROTAR articulators without split cast. Material number 1.002.4686 It is possible to fit magnetic fastenings to PROTAR articulators without split cast. The diagram shows the individual steps to be performed on the articulator base: Remove the model mounting plate 7. Unscrew and remove the model mounting plate positionig pins and tommy screw 8 from the articulator. Insert magnet 6. 2 1 3PS commonality material no. 1.002.2095 Upper part of articulator Remove the model mounting plate 1. Unscrew and remove the model mounting plate positionig pins and tommy screw 2 from the articulator. 6 7 Articulator base Remove the model mounting plate 7. Unscrew and remove the model mounting plate positionig pins and tommy screw 8 from the articulator. Fasten the magnet 6 securely using the screws. 8 16 PROTAR®evo. A 4.6.1 Calibration 1.002.2080 Remove foam washer 1 (1.003.3998) from holder and glue centrally on calibration plate 2. 1 2 Insert measuring and calibration gauge 6 in the articulator lower part 5. The magnet holds the gauge. Place calibration plate 2 on the gauge 6. 3 4 Adjust articulator support pin 7 to 0 (or “zero“ with ratchet pin). 7 Remove magnet 4, if this is mounted in articulator upper part 3. Spread the provided adhesive over calibration plate 2 outside the washer and carefully close the articulator. (Adhesive is sufficient for approx. 3 calibrations) 2 5 6 1 A 4.6.2 Measuring 1 The measuring/calibration gauge 2 is designed to check the calibration at any time in the laboratory. To this end, the gauge is separated into two parts with the help of the two centre screws 1. 2 Now the calibration can be checked by using occlusal paper 3. 3 17 18 Protrusion Retrusion Distraktion Horizontal condylar path - Shift angle Horizontal condylar path (ISS) 0 - 30° Fix Horizontal condylar path - (Bennet) Saggittal condylar path 0° 0 mm Fixed Fixed 30° zur CE 45° zur FH PROTAR 2 0° 0 mm Fixed 15° Fixed 30° zur CE 45° zur FH PROTAR 3 0° 0 mm Fixed 15° Adjustable -10° bis 90° (FH) -25° bis 75° (CE) PROTAR 5 0° 0 mm Adjustable 15° Adjustable -10° bis 90° (FH) -25° bis 75° (CE) PROTAR 5B Adjustable 0 - 1,5 mm 0 - 1 mm 0 - 1,5 mm Optional - 20° bis +20° with 0.622.1111 0 - 1,5 mm Adjustable 0 - 30° Adjustable -10° bis 90° (FH) -25° bis 75° (CE) PROTAR 7 Adjustable 0 - 6 mm 0 - 1 mm 0 - 6 mm 0° 0 - 1,5 mm Adjustable 0 - 30° Adjustable -10° bis 90° (FH) -25° bis 75° (CE) PROTAR 9 PROTAR®evo. A 5 Programming possibilities for KaVo PROTARevo articulators PROTAR®evo. A 6 Articulation of the model A 6.1 Articulation of the upper model with the KaVo Face bow ARCUS Release clamping lever 4 and pull face bow 3 apart. @ 4 The support pin 2 must already be located in the articulator lower section and set to the zero position. (Remove the incisal plate 6 and close the centric locks, at first the left, finally the right of the upper section). 3 2 Affix the ear-pieces of the face bow to the orientation pins 1 on the articulator lower section, slide the face bow together again then lock the clamping lever 4. @ The face bow 3 is placed on the support pin 2. Position the upper dentition 5 in the impressions 7 on the bite fork. Mix the plaster to a creamy consistency, and place on the model of the upper jaw (Close the opening in the control plate with the retention adapter Mat. No. 1.001.0887) Spread the plaster over the control plate in the upper section. Close the upper section, using no pressure. 2 7 5 6 After the plaster has hardened, remove the face bow together with the bite fork from the articulator. Release clamping lever 4, and take the facebow 3 out of the articulator. 4 3 19 PROTAR®evo. A 6.2 Articulation of the upper model with the help of the Transfer Stand If articulation is to be carried out in the dental laboratory, it is only necessary to send the bitefork with holder. Remove the support pin and incisal plate from the articulator. Locate Transfer Stand 1 in the lower section of the articulator. 1 Insert bite fork 3 with bitefork holder 2 into the transfer stand 1. 2 3 5 A 6.3 Articulation of the upper model with KaVo Facebow ARCUS light Attach face bow ARCUS light with its earpieces 4 to the orientation pins on PROTARevo. 4 The provided support 8 is screwed into the lower end of the rod 7, for the bitefork holder 6. 6 Place facebow ARCUS light with its support 8 on the worktop. Place the articulator upper section 5 on the facebow. 7 8 20 PROTAR®evo. A 6.4 Articulation of the upper model with face bows of other manufacturers 1 2 The following accessories are required: Non-KaVo face bow reference kit Mat. No. 0.622.1151 Consisting of: 1 Reference plane (collar + screw) 2 Face bow holder 3 Adapter reference pin 3 3 This accessory enables face bow systems of other manufacturers to be mounted in the PROTARevo Articulator. For systems with a free-moving pointer, a reference plane 1 is required for the articulator upper section. (Illustration - Dentatus) The Dentatus face bow, with its infraorbital indicator 3, is swivelled until it contacts with the reference plane 1. Mounting of face bows with Swivelling pointer or glabella support (eg. SAM, Whip Mix) - remove incisal plate and support pin from the articulator. Turn the knurled screw of the transfer stand almost completely out, and push the transfer stand in its second possible position as far as the stop into the articulator lower section, then tighten the knurled screw. Mount the face bow holder onto the transfer stand. Locate the face bow holder with the help of the scale division and fix into position with the knurled screw. Denar Adapter Order No. 0.622.1351 Using the Denar Adapter enables articulation with the Denar Bitefork. 21 PROTAR®evo. 0 622 1141 1 2 3 4 5 7 The following accessories are required: 1 Transfer stand Mat. No. 0.622.1141 6 A 6.5 Programme data when using non –KaVo face bows in the PROTAR Articulator 2 Non-KaVo reference kit Mat. No. 0.622.1151 consisting of: Reference plane (collar + screw) Face bow holder Adapter reference pin Manufacturer mounting possibility Girrbach Rotofix yes with nasal support reference pointer scale value for infra-orbital point scale value 39 66 accessory required Girbach Referenz yes 51 Dentatus yes - - 2 Reference plane Hanau 153 Earpiece Face bow yes - - No accessories required front cross rod 70 mm over worktop SAM yes 58 - 1 Transfer stand 2 Face bow holder Panadent yes not possible 51 1 Transfer stand 2 Reference plane and face bow holder and extra pointer (0.622.1371) Hanau 164-2 Twirl-Bow yes - 59 1 Transfer stand 2 Reference plane + face bow holder Gerber conditional - - No accessories required Denar yes - - Adapter Mat. No. 0.622.1351 Whip-Mix yes 56 - 1 Transfer stand 2 Reference plane + face bow holder Adapter reference pin Quick yes 56 top 49 middle 44 bottom - 1 Transfer stand 2 Reference plane + face bow holder Springbow Hanau yes orientate on reference plane with bitefork support 0.622.1391 Hager und Werken yes Ivoclar yes 1 Transfer stand , 2 Reference plane + face bow holder 1 Transfer stand 2 Reference plane + face bow holder 46 1 Transfer stand 2 Reference plane + face bow holder 59 further manufacturers – on request 22 1 Transfer stand 2 Reference plane + face bow holder PROTAR®evo. A 6.6 Average value method using the KaVo upper jaw model positioner Mat. No. 0.622.1781 APFnt Method The medium-value model positioner for an edentulous upper jaw model makes articulation possible, if no face bow is available. The edentulous flaps and the lowest points behind the two tubercles serve as reference points. 1 Fixiing screw 2 Adjustment mark if KaVo Split- Cast is not installed. 3 Adjustment mark when KaVo SplitCast is installed. 3 2 1 Reference points 23 PROTAR®evo. A 6.7 Average value method using the KaVo Mounting and Setup Aid for the upper jaw The Mounting-Setup aid 2 Mat. No. 1.001.9451 (without SplitCast- mounting) 5 Mat. No. 1.001.9452 (with Split- Castmounting) enables medium-value articulation of an edentulous upper jaw model, if no face bow is available. 3 1 2 The setup aids are aligned parallel to Camper’s Plane. The mesial alignment is achieved by use of the papilla screw 3. According to the setup method, the papilla screw is withdrawn to the appropriate length, the model with its papilla placed on the screw, and the cradle 1 pushed in so far until this comes to rest at the lowest point behihd the two tubercles. 6 By use of the adjustment screw 4, the mounting and setup aid is uniquely aligned to the occlusal plane 6 of the respective articulator. 5 4 By using the clamp 1.001.9471, the mounting and setup aid 1.001.5451 can also be fixed in the Denar, Hanau and Stratos articulators. 24 PROTAR®evo. A 6.8 Average value method for the lower jaw model using the KaVo Plastering Gauge Mat. No. 0.622.1171 (APF Method) The plastering gauge makes it possible for partial or fully edentulous lower jaw models to be articulated in the PROTAR articulator. If the KaVo articulator is equipped with the Split-Cast, the plastering gauge must be fixed in Position 1 (loosen screw 3) If no Split-Cast is mounted, the gauge must be fixed in Position 2. 2 3 1 A 6.8.1 Mounting of an edentulous lower jaw model Draw a circle around the retro-molar protuberance of the lower jaw model. Mark a centre line 2 and divide into three parts. The occlusal plane 1 runs to the upper marking. 1 2 25 PROTAR®evo. Adjust the symphysis fork 9 to the height of the lower wax rim 8. 5 4 3 3 Upper wax rim q 5 Average value plastering gauge 6 Retro-molar protuberance 0 7 Sliding foot to retro-molar protuberance 20-22 18-20 4 Locking screw 8 Lower wax rim 9 9 Symphysis fork 8 0 Occlusal plane 6 7 q Camper’s plane After releasing the locking screw w, move the sliding part to the desired position and tighten the locking screw. Fix the plastering gauge to the model by using a rubber band e. w e 9 Finally, articulate the lower jaw model in the articulator. PROTAR 26 PROTAR®evo. A 6.9 Articulation of the lower jaw model Turn the articulator upside down. (centric locks 2 remain closed). 1 2 Fold out the articulator. 3 Set the lower jaw model on the upper jaw model, with no rocking movement. When working without centric registration, the support pin 1 is set at zero. Close the opening in the control plate 3 with a retention adapter 4 Mat. No. 1.001.0887. Then apply plaster of a creamy consistency to the lower jaw model, and to the control plate of the articulator lower section 3. 4 Using no pressure, now close the articulator. After the plaster has hardened, remove the centric registration and return support pin 1 to the zero position. The upper and lower jaws are now articulated in the correct relationship. 1 27 PROTAR®evo. A 7 Programming the articulator A 7.1 Adjusting the condylar path inclination with protrusion recording block 1 (for PROTAR 5, 5B, 7, 9) Open the two centric locks 3 and place the protrusion recording block 5 between the dentition of the plaster models. This pushes the lower part of the articulator forwards in relation to the top part. 5 2 2 The ball joints 6 of the articulator now no longer touch the condyle path. Release the clamps 2 of the hinge boxes 4 and bring the respective hinge boxes 4 into contact with the ball joints 6. 4 3 Apply clamps 2 of the hinge boxes. 3 1 1 4 4 7 7 6 A 7.2 Adjusting the Bennett angle with the left and right laterotrusion recording block 6 (for PROTARevo 5B, 7, 9) Release clamps 1 and set the max. Bennett angle. Setting the left Bennett angle Place the right laterotrusion recording block 5 between the dentition of teeth of the upper and lower jaws. 6 Turn the left hinge box insert 7 until the ball joint 6 and insert 7 touch and then secure with clamp 1. Setting the right Bennett angle Place the left laterotrusion recording block 5 between the dentition of teeth of the upper and lower jaws. Turn the right hinge box insert 8 until the ball joint 6 and insert 7 touch and then secure with clamp 1. 8 Close the centric locks 3 and place the articulator in its working position. 28 PROTAR®evo. A 7.3 Setting the immediate Side Shift (ISS) (für PROTAR 5B, 7, 9) The immediate side shift (ISS) of the mediotrusion condyle can be preselected from “0“ to “1.5 mm“ (in 0.5 mm steps). 1 The fixing screw 1 of the Bennett angle guides must be slackened by about 1/4 of a turn to make the adjustment. Set the adjustment to the value required on the adjustment mark 2 of the immediate side shift (ISS). Retighten the fixing screw. The Bennett angle selected is retained. 2 29 PROTAR®evo. A 7.4 Adjusting the Shift-angle If PROTAR 7 is equipped with the shift angle inserts (0.622.1111), movements on the working side (Laterotrusion side) can be exactly adjusted. @ 2 Slacken knurled screw 3 so that the shiftangle insert 2 can be adjusted by turning the pin 1. 3 With the left lateral registration, the right Bennet angle and the left shift angle can be adjusted simultaneously. With the right lateral registration, the left Bennet angle and the right shift angle can be adjusted simultaneously. @ 3 To adjust, turn the shift angle insert 2 so far until it makes contact with the joint ball 4. 2 4 30 PROTAR®evo. A 7.5 Setting of a protrusion / distraction position PROTARevo 9 The PROTARevo 9 is constructed in the same way as the PROTARevo 7. Supplementary the PROTARevo 9 has a P/D/R-insert. Mat. No. 0.622.1001 right / left Defined Protrusion setting Defined Distraction setting Defined Retrusion setting The PROTARevo 7 can be retrofitted with P/D/R-insert. Setting a guided protrusion from 0 to 2 mm in 0,25 mm steps from 2 to 6 mm in 0,5 mm steps These settings are specifically guided and reproducible. The upper section stops in each protrusion setting. Examples of uses: Protrusion guides Grinding in the occlusion Setting a guided distraction from 0 to 2 mm in 0,25 mm steps from 2 to 6 mm in 0,5 mm steps from the centric position These settings are specifically guided and reproducible. The upper section stops in each distraction setting. The support pin can be readjusted accordingly. Example of use: Bite plate guides. 31 PROTAR®evo. A 7.6 Setting the retrusion To produce retrusive free spaces when waxing, a retrusive movement is possible in PROTARevo 7/9. This reduces grinding-in work on the part of the dentist. Retrusive free spaces have already been provided in the modelling. Zero position of the Retrusion @ When the lateral movement 3 (ISS) is set to 1.5 mm, the retrusive movement can be increased to 1.0 mm (in step of 0,25 mm). In this case, no exactly centric position is possible with centric locks closed! 1 3 32 PROTAR®evo. A 7.7 Producing an individual incisal guidance The user can shape an individual incisal guidance from the flat PROTAR incisal plate. Set the articulator centric lock to position “1“ and fold open the articulator towards the rear. Apply a release agent (petroleum jelly) to the incisal plate and the tip of the support pin. Fill the incisal plate with a doughy, stirred autopolymer so that it comes flush with the edge. By using models before the preparation, the front incisal guidance can be transferred to the still doughy autopolymer by movements in the articulator with the support pin. Release the individual tray from the incisal plate by levering it out with a suitable instrument in the opening in the incisal plate. The individual incisal guidance can be reinserted, since the retention slot allows the correct position to be found accurately. 33 PROTAR®evo. A 7.8 Programming the adjustable incisal plate A 7.8.1 By use of a situation model Before cutting the teeth, a situation model from the patient is produced. The adjustable incisal plate is then programmed with this situation model. 1 R For correct installation of the incisal plate, the middle guidance is set to a value of approx. 70° 2. 2 The incisal plate is then moved until contact with the ball 1 of the incisal plate is reached, and then is fixed with the locking screw 3. M L Move the lower jaw in the articulator to the left and set the left guidance,. Then move the lower jaw to the right and set the right guidance. The middle guidance can be set by moving the model along the anterior teeth. Thus, the adjustable incisal plate records the tooth guidance. 3 A 7.8.2 By use of programme data from ARCUSdigma The ARCUSdigma directly provides the programme data for the incisal plate. Set the values as described. (R) (M) (L) 34 60,0 63,6 57,0 PROTAR®evo. A 8 Installation of the shift angle insert in PROTARevo 7 2 First the existing protrusion/retrusion cylinder 1 has to be removed. This is achieved with the help of the provided hexagonal-slot wrench 2 by using some some pressure to push out the locking pin 5 from the drive wheel 3. 3 4 1 5 1. Remove protrusion/retrusion cylinder 1 2. Remove drive wheel 3 3. Remove black plastic stopping device 4 1 3 4 5 Installing the shift angle insert 6. 6 The shift angle insert is installed as follows: - Push screw 7 in the slot. - Push the shift angle insert 8 from outside into the articulator box. - Tighten screw 7. 8 7 35 PROTAR®evo. A 9 Programming the articulator with data from ARCUSdigma (Mat. No. 1.000.8232) PROTAR 7 together with shift angle insert (Order No. 0.622.1111) and the adjustable incisal plate (Order No. 0.622.1701) can exactly reproduce all calculated settings. 36 PROTAR®evo. A 10 Setup aid for full dentures A 10.1 Setup aid for lower jaw models according to the APFnt method (Mat. No. 0.622.2071) Attach the occlusion inclination indicator 1 to the centering axis of the articulator. 1 Tighten screw 4. Turn the articulator upside down. Lay template 3 on the model. 5 6 In the mesial area, place the front insert 2 on the two first anterior teeth. 2 In the dorsal area, position the rear crossrod 6 behind the two tubercles. 3 Tighten screw 5, then tighten screw 7. If necessary, re-adjust screw 5 again. 4 7 3 37 DE PROTAR®evo. GEBRAUCHSANWEISUNG A 10.2 3D Setup aid for lower jaw models according to the APF method 5 1 1 Receptacle 2 Template holder 3 Long template Mat. No. 0.622.1211 4 Short template Mat. No. 0.622.1201 5 Positioning screw 4 3 This template system can be applied generally no matter which aspects have governed mounting of the model in the articulator (face bow or jig for averagevalue articulator). With this template system, the user is provided with a flat surface providing the reference to the occlusal plane, and a convex surface, which takes into account the compensation curves in both the saggittal and transversal directions with respect to the static position of the mandible. The template can be universally adjusted with the aid of the template holder and the receptacle. The template can be aligned in every case whether with face bow, articulator jig or rubber band. By pressing the receptacle together, the complete unit is fixed between the balljoints of the articulator. PROT 38 2 PROTAR®evo. For alignment, the template 1 is placed on the wax rim 2. To achieve this, the wax rim must be occlusally modified so that the template is aligned in the areas of the incisors and the lower molars. The flat surface of the template can be used, for example, for the Gerber method. 1 2 The position of the template 1 is determined by the positioning screw 3, which is fixed to the model through the template. The wax rim can now be somewhat retracted for setting up. A small drop of sticky wax will hold the positioning screw. 3 The lower jaw can now be set up against the template. After removing the template holder, the articulator is once again complete. 39 PROTAR®evo. A 10.3 3D Setup template for upper jaw model (Mat. No. 1.002.4919) This flat setup aid for the edentulous upper jaw model is aligned by the upper wax rim. To achieve this, the setup aid is held against the upper wax rim by a rubber band. The setup aid is then individually fixed in the lower section of the articulator by a small amount of plaster. 40 PROTAR®evo. A 10.4 2D Setup aid for the upper jaw (Mat. No. 1.001.9452) This accessory is both a plastering and a setup aid for the edentulous upper jaw. After retracting the papilla screw 1 and pushing back the setdown slider 2, settting up of the upper jaw model can now begin. 1 2 A 10.5 2D Setup aid for the upper model for screw mounting (Mat. No. 1.001.9451) 41 PROTAR®evo. A 11 Milling table with transfer plate Split system For dental laboratory work required milling operations, it is often necessary to transfer the model alternately between articulator and milling machine. 1 2 1 Magnet 2 control bases 3 lever 3 The magnetic force provides secure holding of the work also during milling operations. The edge-to-edge fit of the split cast system based on the articulator mounting plates guarantees precise holding of the work. The model is set just once for the milling work and can then be rotated as often as required without the need for further adjustment. 42 PROTAR®evo. Occlusal features can be constructed in the articulator. The necessary milling work can be carried out at any time. By accurate fit of the transfer between articulator and milling machine, all work stages can be continuously controlled. 43 GA PROTAR evo -A11 KaVo LOGIcase PROTAR®evo. A 12 Transport Box KaVo LOGICase KaVo LOGICase the economic stackable transport box between the dental practice and laboratory. KaVo LOGICase is a transport box and work tray in one unit. r m bo ter La us M 1 Foam sponge for holding the models (50 pieces. 1.000.9351) 2 For the first application at ERGOspace the side latches are opened. 3 Round canister for small parts (50 pieces. 1.000.9353) 4 Field for barcode 5 Field for patient’s name 6 10 boxes (20 half-trays 1.001.1511) 50 boxes (100 half-trays 1.000.9355) 7 Square container for registrations (50 pieces. 1.000.9354) n an 1 2 Hygiene: LOGIcase can be disinfected with conventional materials. 3 7 1 Following contents are possible: - 4 models - or 4 impression trays - KaVo ARCUS bite fork holder - 2 containers for registrations - 2 canisters for small parts 4 Special holder 8 for KaVo laboratory furniture programme. 6 5 Universal insert for all further furniture programmes 8. 8 8 44 PROTAR®evo. A 13 Technical data PROTAR®evo 3, 5, 7 and 9 Lower section Intercondylar distance articulators 110 = fixed 110 mm Support pin Adjustment range from + 10 mm to - 10 mm with locking facility Incisal table flat Incisal tray (Accessories 10°, 30°, 40°,50°) 20° Height with mounting plate + with split cast Balkwill angle +10 0 - 10 120 mm 108 mm 97 mm 20° Camper’s plane (CE) parallel to the table plane Bennett angle, curved (after 5 mm excursion) 20∞ Weight (with Split-Cast) Articulator lower section Articulator upper section PROTAR 3 Articulator upper section PROTAR 5/7/9 ( 10∞ , 30∞ , 40∞ , 50∞ ) 490 g 360 g 520 g 120 108 97 CE Technical modifications reserved 45 20∞ PROTAR®evo. A 13 Maintenance and adjustment Before starting up operation, spray the articulator with commercially available release agents (silicone sprays) do not apply grease. Apply a light film of oil to ball joints 8, magnet retention system 9 or mounting plate thread as required. If the clamping levers for the HCI no longer clamp properly, they can be readjusted. Tool: Hexagon-slot wrench 1.5 mm 6 Screwdriver 4.5 mm 3 For re-adjusting the centric locks 1 and 2. Hexagon-slot wrench outer 3 mm 4 Hexagon-slot wrench inner 2 mm 5 Split-cast mounting in PROTARevo 3/5/7/9. (It is advisable to check every six months with measuring and adjusting gauge 0.622.1221.) Unscrew magnet retention system 9 with magnet key q. For reasons of accuracy, the split-cast is aligned onto flanks e. The mounting plate must come flush with the flanks e. The gap w between the split cast r and the mounting plate must be parallel. On completion of the work, press off the model using the star grip screw u of the mounting plate t - z. Then clean mounting plates t - z. For better lubrication grease the Hinge i with Articulator Lubricating Paste REF. 1.001.7613 46 PROTAR®evo. Guarantee conditions For the product cited in the transfer protocol, KaVo warrantees the end customer that the product will function properly, have no material or manufacturing flaws for 12 months from the date of purchase under the following conditions: In the case of valid complaints due to defects or a short delivery, KaVo will make good its warranty by replacing the product free of cost or repairing it according to your wishes. All other claims of any kind are excluded, especially claims for damages. In case of delayed performance, gross negligence or criminal intent, this shall apply only if there are no compelling legal regulations to the contrary. KaVo is not liable for defects and their consequences that arise from natural wear, improper cleaning or servicing, the non-observance of instructions for use, servicing or connection, scale formation or corrosion, impurities in the air and water supply, or chemical or electrical influences that are unusual or impermissible according to the manufacturer's specifications. The warranty does not generally extend to lamps, glassware, rubber parts and the colour fastness of plastic parts. No liability is assumed when defects or their consequences can arise from manipulations or changes to the product by the customer or a third party. Claims from this warranty can only be asserted when the transfer protocol (copy) belonging to the product has been sent to KaVo, and the original can be presented by the operator or user. 47 Verk.-Nr. PROTARevo 2 Mat.-Nr. 1.002.3306 06/02003 09.21 PROTAR®evo. Spare parts PROTARevo 2 without Mat. No. 1.002.3905 Mat.-Nr. 1.002.3305 ohneSplit-Cast Split-Cast 0.622.0981 1.002.4686 3PS 1.002.2074 0.200.6034 0.200.6093 0.622.1363 0.622.1373 1.001.0889 (10x) 0.200.6301 1.002.2096 10x Verk.-Nr. PROTARevo 3 Mat.-Nr. 1.002.3307 mit Split-Cast Mat.-Nr. 1.002.3306 ohne Split-Cast 06/2003 09.22 PROTARevo 3 Mat. No. 1.002.3306 without Split-Cast Mat. No. 1.002.3307 with Split-Cast Mat.-Nr. 1.002.3307 mit Split-Cast Mat.-Nr. 1.002.3306 ohne Splitcast 0.622.0981 0.200.6034 3x 0.201.1459 1.002.2074 1.001.0889 10x 0.622.2702 0.622.2652 0.622.0791(10x) 0.622.2682 0.411.1212 0.622.2692 0.622.1822 0.622.1812 1.002.4686 3PS 0.622.2712 0.220.1309 0.253.6045 2x 0.249.4168 1.002.2096 10x 1/1 48 Verk.-Nr. PROTARevo 5 Mat.-Nr. 1.002.3311 mit Split-Cast Mat.-Nr. 1.002.3310 ohne Split-Cast 06/2003 09.23 PROTAR®evo. PROTARevo 5 Mat. No. 1.002.3310 without Split-Cast No. 1.002.3311 withmit Split-Cast Mat. Mat.-Nr. 1.002.3311 Splitcast Mat.-Nr. 1.002.3310 ohne Splitcast 0.622.0981 0.200.6034 3x 0.201.1459 1.002.2074 1.001.0889 10x 4 5 35 60 25 50 4 15 0 3 050 3 0.622.2652 0.622.0791(10x) FH CE 5 70 5 -5 1.002.4686 3PS 0.622.2682 0.622.2702 0.411.1212 0.622.1822 0.622.2692 0.622.1812 0.249.4168 1.002.2096 10x Verk.-Nr. PROTARevo 5B 0.253.6045 2x 0.220.1309mit Split-Cast Mat.-Nr. 1.002.3315 0.622.2712 Mat.-Nr. 1.002.3314 ohne Split-Cast 06/200 09.2 PROTARevo 5B Mat. No. 1.002.3314 without Mat.-Nr. 1.002.3314 ohneSplit-Cast Splitcast Mat. No. 1.002.3315 withmit Split-Cast Splitcast Mat.-Nr. 1.002.3315 3x 0.201.1459 1.002.2074 1.001.0889 FH C E 5 70 5 -5 45 6 35 0 25 50 4 15 0 30 053 0.622.2652 0.622.0791(10x) 0.622.0981 0.200.6034 1.002.4686 0.622.2682 0.622.2702 0.411.1212 0.622.1822 0.622.2692 0.622.1812 0.249.4168 0.253.6045 2x 0.220.1309 0.622.2712 1.002.2096 10x 1/1 49 Verk.-Nr. PROTARevo 7 Mat.-Nr. 1.002.3319 mit Split-Cast Mat.-Nr. 1.002.3318 ohne Split-Cast 09/2004 09.24 PROTAR®evo. PROTARevo 7 1.002.3319 mit Splitcast Mat. No.Mat.-Nr. 1.002.3319 with Split-Cast Mat. No. 1.002.3318 Split-Cast Mat.-Nr. 1.002.3318 ohnewithout Splitcast 0.250.0031 1.002.0508 0.222.4043 0.622.2032 (L) 0.622.2042 (R) 0.622.2542 0.622.2532 0.622.2502 3x 0.201.1459 0.622.2082 (R) 0.622.2092 (L) 1.002.2074 0.622.0981 0.200.6034 1,0 0 0,5 65 55 8 0 7 45 0 0.622.2652 0.622.0791(10x) D FH CE 5 90 7 1.001.0889 10x 0.622.2702 0.622.2682 1.002.2085 0.411.1212 1.002.4686 3PS 0.622.1822 0.622.2692 0.622.1812 0.249.4168 0.253.6045 2x 0.220.1309 Verk.-Nr. PROTARevo 9 0.622.2712 Mat.-Nr. 1.002.3323 mit Split-Cast 0.240.2240 Mat.-Nr. 1.002.3322 ohne Split-Cast 1.002.2096 10x 06/2003 09.25 5 2 3 6R 0 1 1.002.2085 PROTARevo 9 1.002.3323 mitSplit-Cast Splitcast Mat.-Nr. Mat. No. 1.002.3323 with 1.002.3322 ohne Split-Cast Splitcast Mat.-Nr. Mat. No. 1.002.3322 without 0.250.0031 1.002.0508 0.222.4043 0.622.2032 (L) 0.622.2042 (R) 0.622.2542 0.622.0981 0.622.2532 0.200.6034 0.622.2502 3x 0.201.1459 0.622.2082 (R) 0.622.2092 (L) 1.001.0889 1.002.2074 1.002.4686 0.622.2652 0.622.0791(10x) 0.622.2682 0.411.1212 1/1 0.622.2702 0.622.1822 0.622.2692 0.622.1812 0.249.4168 0.253.6045 2x 0.220.1309 0.622.2712 50 1.002.2096 10x Verk.-Nr. PROTARevo Unterteil Mat.-Nr. ® 1.002.3265 ohne Splitcast PROTAR Mat.-Nr.evo. 1.002.3266 mit Splitcast 06/2003 09.26 PROTARevo lower section Mat. No. 1.002.3265 without Mat.-Nr. 1.002.3265 ohneSplit-Cast Splitcast Mat. No. 1.002.3266 with Split-Cast Mat.-Nr. 1.002.3266 mit Splitcast 0.222.5045 (8x12x0,15) 0.222.5046 (8x12x0,18) 0.222.5047 (8x12x0,20) 0.622.2022 1.001.0889 10x 0.622.1852 0.200.6034 0.622.0981 0.622.1181 0.622.0791 10x 0.622.3142 1.002.2075 1.002.4686 3PS 0.622.2682 0.622.1912 0.622.1922 0.622.1932 0.622.1942 0.622.1952 0.622.1962 10° 20° 30° 40° 50° 1.002.2074 1.002.2079 3x 0.201.1459 0.622.2652 1.002.2096 10x 0.411.1212 0.220.1741 1/1 51 1.002.5701 Fk 7/07 en 09.20 KaVo Dental GmbH. D-88400 Biberach/Riss Telefon +49 7351 56-0 Fax +49 7351 56-1488 Internet: www.kavo.com Instructions d’utilisation PROTAR® evo. Toujours à votre écoute. Vertrieb/distribution: KaVo Dental GmbH Bismarckring 39 • D-88400 Biberach Tel.: 0 73 51 / 56-1600 • Fax: 0 73 51 / 1488 Hersteller/manufacturer: Kaltenbach & Voigt GmbH Bismarckring 39 D-88400 Biberach PROTAR®evo. A 1 Instructions d’utilisation ......................................................................................................................................................2 A 1.1 Légende des pictogrammes ......................................................................................................................................2 A 1.2 Indications importantes ..............................................................................................................................................2 A 1.3 Mesures de sécurité ..................................................................................................................................................2 A 1.4 But d’utilisation ............................................................................................................................................................3 A 1.5 Les mouvements mandibulaires dans le plan horizontal ............................................................................................4 A 1.6 La philosophie du système ........................................................................................................................................5 A 2 Programme de livraison -Accessoires ................................................................................................................................6 A 2.1 Programme de livraison - ..........................................................................................................................................6 A 2.2 Accessoires ................................................................................................................................................................8 A 3 Pièces de commande et de fonctionnement ....................................................................................................................11 A 4 Préparatifs pour la mise en service ..................................................................................................................................13 A 4.1 Broche support ........................................................................................................................................................13 A 4.2 Verrou de centrée ....................................................................................................................................................13 A 4.3 PROTAR®evo avec Splitcast (réglage usine) ..........................................................................................................15 A 4.4 Utilisation du kit de mise en plâtre (N° d’article 0.622.1121) ....................................................................................15 A 4.5 PROTAR®evo sans Splitcast ..................................................................................................................................15 A 4.5.1 PROTAR®evo avec système de fixation magnétique ..........................................................................................16 A 4.6 PROTAR®evo avec Splitcast (réglage au laboratoire) ............................................................................................16 Notice de montage : Montage d’articulateurs sans Split Cast par fixation magnétique N° de matériel 1.002.4686 ..........................................16 Synchronisation 3PS N° de matériel 1.002.2095 ............................................................................................................16 A 4.6.1 Procédure de réglage 1.002.2080 ........................................................................................................................17 A 4.6.2 Mesurage ..............................................................................................................................................................17 A 5 Possibilités de programmation pour des articulators de KaVo PROTARevo ................................................................18 A 6 Mise en articulateur des modèles ......................................................................................................................................19 A 6.1 Mise en articulateur du modèle maxillaire avec l’arc facial KaVo ARCUS ..............................................................19 A 6.2 Mise en articulateur du modèle maxillaire à l’aide du système de transfert ............................................................20 A 6.3 Mise en articulateur du modèle maxillaire avec l’arc facial KaVo ARCUS light ......................................................20 A 6.4 Mise en articulateur du modèle maxillaire avec des arcs faciaux d’autres marques ..............................................21 A 6.5 Paramètres de réglage dans le cas où l’articulateur PROTARevo est utilisé avec un arc facial d’une autre marque 22 A 6.6 Manière de procéder avec le positionneur (selon valeurs moyennes) de modèle maxillaire KaVo N° d’article 0.622.1781 (méthode APFnt) ............................................................................................................................................23 A 6.7 Méthode de montage (selon les valeurs moyennes) avec l’accessoire de montage pour le maxillaire supérieur 24 A 6.8 Technique d’utilisation (selon les valeurs moyennes) du gabarit de mise en plâtre du maxillaire inférieur KaVo (N° d’article 0.622.1171) ..........................................................................................................................................................25 A 6.8.1 Montage d’un modèle mandibulaire édenté total ..................................................................................................25 A 6.9 Mise en articulateur du modèle mandibulaire ..........................................................................................................27 A 7 Programmation de l’articulateur ........................................................................................................................................28 A 7.1 Réglage de la pente condylienne avec l’enregistrement de la propulsion ..............................................................28 A 7.2 Réglage de l’angle de Bennett à l’aide des enregistrements des mouvements de latéralité ................................28 A 7.3 Réglage du déport latéral immédiat (Immediate Side Shift (ISS) ............................................................................29 A 7.4 Réglage de l’angle de Shift ......................................................................................................................................30 A 7.5 Réglage de la propulsion/de l’écartement ................................................................................................................31 A 7.6 Réglage de la rétroposition ......................................................................................................................................32 A 7.7 Réalisation d’un guide incisif individuel ................................................................................................................33 A 7.8 Programmation du plateau incisif réglable ..............................................................................................................34 A 7.8.1 Le modèle d’étude ................................................................................................................................................34 A 7.8.2 Valeurs de réglage fournies par l’ARCUSdigma ....................................................................................................34 A 8 Mise en place de l’insert d’angle de shift sur le PROTAR®evo 7 ..................................................................................35 A 9 Programmation de l’articulateur à partir des valeurs fournies par l’ARCUSdigma ..................................................36 A 10 Accessoires de montage (prothèse complète) ..............................................................................................................37 A 10.1 Accessoires de montage pour modèle mandibulaire selon méthode “APFnt”(N° d’article 0.622.2071) ................37 A 10.2 3D Accessoire de montage pour modèle maxillaire (selon méthode APF) ............................................................38 A 10.3 3D Calotte de montage pour le modèle maxillaire (N° d’article 1.002.4919) ........................................................40 A 10.4 2D Accessoire de montage pour le maxillaire supérieur (N° d’article 1.001.9452) ................................................41 A 10.5 2D Accessoire de montage pour le maxillaire supérieur (montage vissé) - N° d’article 1.001.9451 ....................41 A 11 Table de montage avec Split-Cast ....................................................................................................................................42 A 12 Boîtes de transport KaVo LOGICase ..............................................................................................................................44 A 13 Caractéristiques techniques ............................................................................................................................................45 A 14 Cuidados y ajuste ..............................................................................................................................................................46 Conditions de garantie ......................................................................................................................................................47 PROTAR®evo 3 ..................................................................................................................................................................48 Pièces de rechange PROTAR®evo 2 ................................................................................................................................48 PROTAR®evo 5B ..............................................................................................................................................................49 PROTAR®evo 5 ................................................................................................................................................................49 PROTAR®evo 9 ..................................................................................................................................................................50 PROTAR®evo 7 ..................................................................................................................................................................50 PROTAR®evo la partie inférieure ......................................................................................................................................51 1 elektr. Spannung geprüfte Sicherheit PROTAR®evo. A 1 Instructions d’utilisation A 1.2 Indications importantes A 1.3 Mesures de sécurité L’utilisateur est invité à lire les présentes Un fonctionnement et une protection sûrs instructions d’utilisation avant la première de l’équipement sont seulement possibles si mise en service, afin d’éviter toute manipul’emploi est effectué conformément aux Attention ! lation erronée et autres détériorations. Dans instructions d’utilisation, avec les outils Situations pouvant entraîner un le cas où ce texte serait exigé dans d’autres homologués. danger, un endommagement du matériel ou VDE langues, vous voudrez bien en faire la De plus, vous devez respecter : des dysfonctionnements en cas de nonPRODUCT demande auprès de votre distributeur PRODUCT KaVo observation des instructions geprüfte SERVICE SERVICE Sicherheit compétent. Toute reproduction et distribu• la réglementation en vigueur sur la sécurité tion de ces instructions d’utilisation (IU) sur le lieu de travail, Information ! exigent l’autorisation préalable de la société • les mesures de prévention des accidents Informations et indications 1008 KaVo. en vigueur. importantes pour l’opérateur et le Achtung, technicien Allgemeine Gefahrenstelle Toutes les caractéristiques techniques, Conformément à ces dispositions, l’utilisainformations et autres caractéristiques du teur a l’obligation: produit décrit dans les présentes instrucFonctionnement automatique tions d’utilisation correspondent à l’état de • deISO n’utiliser Séquence automatique DIN 9001 que des produits irréprochables, la technique au moment de la rédaction. • de respecter les modalités d’application Le produit est susceptible d’être modifié conformes, Fermer, visser, fixer, etc. par suite de nouveaux développements. • de protéger patients, tiers et lui-même de tout danger, Toutefois, il n’en résulte aucun droit à la • d’éviter toute contamination par le biais Ouvrir, détacher, desserrer mise en conformité d’unités déjà existantes. du produit. i A 1.1 Légende des pictogrammes - Zeichen VDE i + Augmentation, plus haut ! - Diminution, plus bas Fonctionnement permanent KaVo n’est pas responsable des dommages provoqués par : • une influence extérieure (mauvaise qualité des fluides ou installation incorrecte), • l’application d’informations erronées, • une utilisation du produit non conforme aux prescriptions, • des réparations exécutées de façon mal appropriée. Montre, écoulement du temps Débrancher Les réparations et les travaux d’entretien – à l’exception des activités décrites dans ces instructions d’utilisation – ne doivent être effectués que par des professionnels qualifiés. Toute modification d’unité effectuée par des tiers entraîne l’expiration des autorisations. Nous recommandons de n’utiliser que des pièces de rechange d’origine pour le fonctionnement ou la réparation de l’unité. ARCUSdigma est • exclusivement réservé aux traitements relevant de la médecine, tout usage étranger au domaine étant interdit et pouvant représenter un danger, • un produit médical conforme aux dispositions légales en vigueur sur le territoire. 2 PROTAR®evo. A 1.4 But d’utilisation Du fait de ses mouvements dans les trois dimensions, l’appareil manducateur est le plus compliqué des systèmes moteur du corps humain. En cas de dysfonctionnement de cet appareil, une thérapie fonctionnelle est indispensable. La majeure partie des étapes de ce genre de thérapie ne pouvant se faire en bouche, il est indispensable de pouvoir simuler – pas seulement au cabinet dentaire mais aussi au laboratoire de prothèse – les mouvements de la mandibule. Les articulateurs et appareils de mesure sont à cet égard des outils absolument nécessaires pour la saisie et la transmission des paramètres anatomiques du patient. Ces outils sont le point de départ de toute thérapie fonctionnelle. Le bon fonctionnement de l’appareil manducateur présuppose des rapports interactifs morphologiquement corrects entre les articulations temporomandibulaires et les arcades dentaires. 1 FH 7 6 2 3 4 5 Pour pouvoir reproduire les mouvements mandibulaires, on a besoin de points et de plans de référence sur le patient, c’est à dire d’un système de coordonnées. Le plan de Camper (CE ) 2 est le plan de référence qui passe par le point sous-nasal et les tragus. Et le plan de Francfort (FH) le plan de référence qui passe par les porions 6 et les points sous-orbitaires (IOP) 1. On appelle “pente condylienne“ l’inclinaison de la trajectoire condylienne par rapport au plan de référence. 3 point sous-nasal 4 plan d’occlusion 7 axe charnière 3 PROTAR®evo. A 1.5 Les mouvements mandibulaires dans le plan horizontal La propulsion C’est le mouvement de la mandibule vers l’avant. Lors de ce mouvement, les deux condyles se déplacent vers l’avant et vers le bas. Au niveau des arcades dentaires, on retrouve sur les dents mandibulaires les trajectoires des mouvements effectués par les dents maxillaires. Les mouvements de latéralité de la mandibule Ces mouvements de latéralité sont le mouvement ectal (mouvement centrifuge effectué par l’hémi-mandibule du côté travaillant) et le mouvement ental (mouvement centripète effectué par l’hémimandibule du côté non travaillant). On appelle angle de Bennett 1 l’angle formé par la trajectoire du condyle effectuant un mouvement de propulsion centripète et par le plan médian. tt nne Be 1 Le condyle du côté travaillant effectue un mouvement de latéralité. On appelle angle de “shift“ 2 la déviation par rapport à ce mouvement. t Shif 2 t net B en 4 PROTAR®evo. A 1.6 La philosophie du système 1 Le système KaVo “articulateur + arc facial“ a été conçu pour pouvoir être utilisé aussi bien par rapport au plan de Francfort (FH) qu’au plan de Camper (CE). 2 3 L’appui nasal 1 permet de positionner selon les valeurs moyennes l’arc facial par rapport à ces deux plans. Et le pointeau 3 de le positionner, par rapport au plan de référence choisi, selon les données individuelles. 4 2 point infraorbitaire 4 point sous-nasal 6 L’arc facial est toujours positionné de la même façon dans l’articulateur (il repose sur les tiges latérales 5 et sur la tige d’appui 7 – réglage sur la valeur “0“). La position de la fourchette occlusale étant fonction des données anatomiques du patient, elle n’est jamais la même. 5 6 positionnement de l’arc facial 7 tige d’appui 7 Dans l’articulateur Protar les modèles sont pratiquement parallèles (à +/- 10 près) au plan de Camper 9. 8 r L’avantage pour le prothésiste : Le plan d’occlusion q des modèles dans l’articulateur étant pratiquement parallèle au plan de Camper 9, il l’est également par rapport au plan de travail. Ce qui se traduit par une expansion (plâtre) uniforme. e 9 0 w q 8 point infraorbitaire 0 point sous-nasal w tragus e porion r axe charnière 5 PROTAR®evo. A 2 Programme de livraison Accessoires A 2.1 Programme de livraison L’articulateur PROTAR®evo 2 avec “Split-Cast“ comprend: la partie supérieure de l’articulateur N° de article 1.002.3306 la partie inférieure de l’articulateur N° de article 1.002.3265 e L’articulateur PROTAR®evo 3 sans “SplitCast“ comprend: la partie supérieure de l’articulateur N° de article 1.002.3307 la partie inférieure de l’articulateur N° de article 1.002.3266 PROTAR evo 2 e L’articulateur PROTAR®evo 3 avec “Split-Cast“ comprend: la partie supérieure de l’articulateur la partie supérieure de l’articulateur N° de article 1.002.3308 la partie inférieure de l’articulateur N° de article 1.002.3265 e PROTAR evo 3 L’articulateur PROTAR evo 5 sans “Split-Cast“ comprend: la partie supérieure de l’articulateur la partie supérieure de l’articulateur N° de article 1.002.3313 la partie inférieure de l’articulateur N° de article 1.002.3266 ® CE 70 55 0 6 45 0 5 35 0 4 25 30 15 05 -5 20 1 15 0 0 25 0 10 35 20 e L’articulateur PROTAR®evo 5 avec “Split-Cast“ comprend: la partie supérieure de l’articulateur la partie supérieure de l’articulateur N° de article 1.002.3310 la partie inférieure de l’articulateur N° de article 1.002.3265 e PROTAR evo 5 CE0 7 55 0 6 45 0 5 35 0 4 2 5 30 15 L’articulateur PROTAR®evo 5B sans “Split-Cast“ comprend: la partie supérieure de l’articulateur la partie supérieure de l’articulateur N° de article 1.002.3314 la partie inférieure de l’articulateur N° de article 1.002.3266 05 -5 20 1 15 0 0 25 0 10 35 20 1 0 e L’articulateur PROTAR®evo 5B avec “Split-Cast“ comprend: la partie supérieure de l’articulateur la partie supérieure de l’articulateur N° de article 1.002.3315 la partie inférieure de l’articulateur N° de article 1.002.3265 PROTAR evo 5B 6 PROTAR®evo. 50 3 5 40 25 30 15 L’articulateur PROTAR®evo 7 sans “Split-Cast“ comprend: la partie supérieure de l’articulateur N° de article 1.002.3319 la partie inférieure de l’articulateur N° de article 1.002.3266 0 05 -5 20 1 15 0 0 25 0 10 35 20 1,5 1, 0 0,5 10 20 30 e L’articulateur PROTAR®evo 7 avec “Split-Cast“ comprend: la partie supérieure de l’articulateur N° de article 1.002.3318 la partie inférieure de l’articulateur N° de article 1.002.3265 PROTAR evo 7 e 40 1, 0 0,5 10 20 1,5 25 30 05 20 05 10 15 0 25 10 0 15 6 0 7 55 6 0 45 50 35 L’articulateur PROTAR®evo 9 sans “Split-Cast“ comprend: la partie supérieure de l’articulateur la partie supérieure de l’articulateur N° de article 1.002.3323 la partie inférieure de l’articulateur N° de article 1.002.3266 30 e L’articulateur PROTAR®evo 9 avec “Split-Cast“ comprend: la partie supérieure de l’articulateur N° de article 1.002.3322 la partie inférieure de l’articulateur N° de article 1.002.3265 PROTAR evo 9 Mode d’emploi du PROTAR®evo N° d’article 1.002.5701 7 PROTAR®evo. A 2.2 Accessoires Les accessoires disponibles sur simple demande : @ Jauge incisale Mat.-Nr. 0.622.1021 ” Plateau incisal 10 ° N° d’article 0.622.1922 Plateau incisal 20 °N° d’article 0.622.1932 Plateau incisal 30 °N° d’article 0.622.1942 Plateau incisal 40 °N° d’article 0.622.1952 Plateau incisal 50 °N° d’article 0.622.1962 Kit de montage Split-Cast N° d’article 0.622.1031 (pas d‘ illustration) # Module de transfert N° d’article 0.622 1141 £ Indicateur pour arcs faciaux autres que KaVo N° d’article 0.622 1151 £b Support pour arc facial £c Adaptateur reference goupille 5 Table montage selon valeur moyenne N° d’article 0.622.1171 Ì Support de calottes de montage N° d’article 0.622.1161 \ Calotte longue N° d’article 0.622.1201 | Calotte longue N° d’article 0.622.1211 9 Accessoire pour le montage OK Totalprothetik Mat.-Nr.1.001.9451 für PROTARevo mit Schraube Pince pour autres articulateurs N° d’article 1.001.9471 0 Accessoire pour le montage prothèse totale haut N° d’arcle 1.001.9452 pour PROTARevo avec socle de contrôle q Positionneur pour modèle maxillaire N° d’article 0.622.1781 w Indicateur de pente d’occlusion N° d’article 0.622.2071 e Manchon pour mise en plâtre N° d’article 0.622.2212 44,0 mm N° d’article 0.622.2222 22,0 mm N° d’article 0.622.2232 14,6 mm r Porte modèle pour fraiseuse avec Split-Cast N° d’article 0.625.0770 t Kit de mise en plâtre N° d’article 0.622.1121 z Disque pour la mise en plâtre N° d’article 1.001.0888 u Video ARCUS /PROTAR N° d’article 0.622.3202 i adaptateur Denar N° d’article 0.622.1351 o Pointeau Panadent N° d’article 0.622.1371 p Porte-fourchette N° d’article 0.622.0901 8 PROTAR®evo. Les accessoires disponibles sur simple demande : p p Tige d’appui “E “ N° d’article 0.622.1181 Tige d’appui “P “ N° d’article 0.622.1791 Tige d’appui “T “ N° d’article 0.622.1891 s a “E“ 0 10 20 30 40 50 60 a Plateau incisif (réglable) N° d’article 0.622.1701 0 0 5 d 5 5 f 0 “T“ “P“ L d Porte-fourchette N° d’article 0.622.0901 5 N° d’article 0.622.1161 0 s Fixation 4 5 2 3 6R 0 f Insert PDR (x2) N° d’article 0.622.1001 1 g Insert d’angle de shift (x2) N° d’article 0.622.1111 h h Mallette pour le transport N° d’article 1.000.3682 j g j Vis de fixation pour les plaques de montage (2x) N° d’article 1.000.3733 pour PROTARevo uniquement k Gabarit N° d’article 1.002.2080 l Fixation par aimant N° d’article 1.002.4686 ö l k ö Plaques de montage pour 3 PS (lot de 10) N° d’article 1.002.2096 y y Synchroniseur 3PS N° d’article 1.002.2095 Containers pour le transport/ boîtes x LOCIcase (lot de 10) N° d’article1.001.1511 LOGIcase (lot de 50) N° d’article1.000.9355 x c c Boîte pour les enregistrements N° d’article1.000.9354 v Boite ronde pour les petites pièces N° d’article 1.000.9353 b b Mousse pour le calage des modèles N° d’article 1.000.9351 9 v PROTAR®evo. Verbrauchsmaterial: 1 Plaques de contrôle, lot de 10 N° d’article 0.622.0791 3 1 2 2 Adaptateur rétentif (lot de 10) N° d’article 1.001.0887 Adaptateur rétentif (lot de 50) N° d’article 1.001.0953 4 3 Plaques de montage (pas pour Split-Cast) (lot de 10 plaques) N° d’article 0.622.1871 5 4 Inserts magnétiques paquet de 20 N° d’article 0.622.0781 5 Disques de mise en plâtre (lot de 20) N° d’article 0.622.1481 6 6 Plaques de montage pour 3 PS (lot de 10) N° d’article 1.002.2096 7 Bouchons N° d’article. 1.003.2868 Pièces de rechange 7 8 Pointe d´appui de la partie supérieure N° d’article 0.622.1872 Kit de montage “Split-Cast“ N° d’article 0.622.1031 9 Vis à chasser N° d’article 0.220.1741 0 Aimant N° d’article 0.622.2682 q Clé aimant N° d’article 0.411.1212 8 w Elastiques pour PROTAR 2 (lot de 10) N° d’article 1.000.3101 0 9 q e Colle pour le réajustage N° d’article 0.359.2014 e w Härter Harz 10 PROTAR®evo. A 3 Pièces de commande et de fonctionnement PROTARevo 2 ö 2 2 1 Partie supérieure de l’articulateur 1 2 Pieds d’appui p 3 Boîtier d’articulation droit 4 Verrou centrique droit 3 5 Verrou centrique gauche PROTARevo 3 6 Socle de contrôle 2 7 Partie inférieure de l’articulateur 2 8 Plateau d’incisive à 10° h 1 9 Table d’incisive plate p 0 Broche support q Plaques de contrôle du bas a 3 w w Plaques de contrôle du haut 4 PROTARevo 5 e Dispositif de fixation de l’angle de Bennett et du degré de mobilité latérale (ISS) gauche 5 1 2 2 r Dispositif de réglage ISS droit 3 t Axe d'articulation j z Broche de référence h FH 0 7 55 -5 CE 45 35 60 25 50 4 15 0 30 053 u Dispositif de réglage ISS gauche w i Dispositif de fixation de l’angle de Bennett et du degré de mobilité latérale (ISS) gauche 4 p f d o 5 o Pièce d’insertion du boîtier d’articulation droit PROTARevo 5B a 2 p Boîtier d’articulation gauche 2 a Élément à ressort gauche 3 s Dispositif de fixation de l’angle “shift“ (= angle de déviation) droit 1 FH CE 5 70 5 -5 45 35 60 25 50 4 15 0 30 053 j h w d Dispositif de fixation du boîtier d’articulation gauche 4 p f Dispositif de fixation du boîtier d’articulation droit o 5 g Dispositif de fixation de l’angle “shift“ (= angle de déviation) gauche f d a k h Élément à ressort gauche 0 j Pièce d’insertion du boîtier d’articulation gauche t q z k Billes d’articulation l Système à aimant de fixation ö Vis à garrot 9 7 8 6 PROTAR 11 l 2 PROTAR®evo. 1 Partie supérieure de l’articulateur PROTARevo 7 2 Pieds d’appui 2 1 3 Boîtier d’articulation droit e r 3 j 2 4 Verrou centrique droit 1,0 g 0,5 0 5 Verrou centrique gauche h 65 55 8 0 7 45 0 6 Socle de contrôle D FH CE 90 75 w 7 Partie inférieure de l’articulateur i 4 u p 8 Plateau d’incisive à 10° f d o 9 Table d’incisive plate 5 0 Broche support a s q Plaques de contrôle du bas w Plaques de contrôle du haut PROTARevo 9 e Dispositif de fixation de l’angle de Bennett et du degré de mobilité latérale (ISS) gauche 2 1 e 2 r 3 j r Dispositif de réglage ISS droit g 1,0 0 0,5 t Axe d'articulation h 65 55 80 7 45 0 z Broche de référence D FH CE 5 90 7 w u Dispositif de réglage ISS gauche i 4 u p i Dispositif de fixation de l’angle de Bennett et du degré de mobilité latérale (ISS) gauche f d o 5 o Pièce d’insertion du boîtier d’articulation droit a s p Boîtier d’articulation gauche a Élément à ressort gauche s Dispositif de fixation de l’angle “shift“ (= angle de déviation) droit 0 k d Dispositif de fixation du boîtier d’articulation gauche t f Dispositif de fixation du boîtier d’articulation droit z q g Dispositif de fixation de l’angle “shift“ (= angle de déviation) gauche h Élément à ressort gauche j Pièce d’insertion du boîtier d’articulation gauche k Billes d’articulation 9 7 8 6 l Système à aimant de fixation ö Vis à garrot 12 l 2 PROTAR®evo. A 4 Préparatifs pour la mise en service A 4.1 Broche support 2 3 -5 CE 70 55 0 6 45 0 5 35 0 4 25 30 15 1 05 20 10 15 0 25 0 10 35 20 Insérer la broche support 6 dans la partie supérieure ou inférieure de l’articulateur et visser à bloc. 4 Insérer la table d’incisive plate 1 et le plateau d’incisive 2 à 20° suivant le mode de travail dans la partie supérieure ou inférieure. A la place du plateau à 20°, on peut aussi insérer des plateaux de 10 à 50°. 6 5 A 4.2 Verrou de centrée L’ouvrir. Position “0“ 7 En position “0“ le verrou 4 est “mis“. Dans cette position la partie supérieure de l’articulateur peut uniquement être amenée, par rotation, en position “fermée“. . 7 “0“ 8 Position “1“ 9 Lorsque les verrous de centrée 4 sont à la position médiane “1“, l’articulateur peut être manœuvré librement , ce qui permet d’effectuer les mouvements souhaités. Les éléments élastiques 8 plaquent les boules condyliennes 5 contre la paroi 0 des boîtiers condyliens 3, excluant ainsi les risques de soulèvements indésirables. 1 2 En position “1“ l’articulateur se manipule comme un articulateur “Non-Arcon“, empêchant ainsi toute désolidarisation de la partie supérieure de celle inférieure. “1“ “0“ 9 0 13 PROTAR®evo. Position “2“ = ouvert 1 Dans cette position vous pouvez retirer la partie supérieure de l’articulateur. 1 “2“ “1“ “0“ Une fois que l’on a monté sa partie supérieure et fermé les deux verrous de centrée, l’articulateur est considéré comme “entier“. 2 Pour pouvoir fermer les verrous de centrée 2, la partie supérieure de l’articulateur doit bien être plaquée contre les boules condyliennes. Toujours commencer par fermer 3 le verrou de gauche. 3 “R“ “L“ “R“ = côté droit “L“ = côté gauche 14 PROTAR®evo. A 4.3 PROTAR®evo avec Splitcast (réglage usine) @ Concernant les articulateurs PROTAR®evo équipés (en usine) d’un Splitcast KaVo : la plaque de contrôle aimantée 2 sert de réceptacle au modèle. L’adaptateur rétentif 1 sert, lui, à la rétention du plâtre. 2 Une fois le travail terminé, on expulse le modèle de la plaque de contrôle 3 à l’aide de la vis crantée 4. Ensuite on nettoie la plaque de contrôle 3. 3 A 4.4 Utilisation du kit de mise en plâtre (N° d’article 0.622.1121) 4 Ce kit sert à fabriquer des plaques (plâtre) de haute précision pour le Split-Cast KaVo. Indications concernant l’utilisation : • Monter le disque 5 sur le kit 6. • Normalement, pas besoin d’isoler le kit. • Sortir les plaques au bout de 6 heures au plus tard. • Bien nettoyer le kit à l’eau courante dès que l’on a fini de s’en servir. • Si nécessaire, utiliser du séparateur KaVo (N° d’article 0.622.4442 ). En éliminer les excès en les soufflant.. 5 6 7 Ne pas nettoyer le kit avec du dissolvant ! N° d’article : voir A 2.2 A 4.5 PROTAR®evo sans Splitcast 8 9 Pour les PROTAR evo sans Splitcast, les plaques de montage 9 (0.622.1871) se fixent à l’aide de la vis à garrot 8. ® 9 8 15 PROTAR®evo. A 4.5.1 PROTAR®evo avec système de fixation magnétique La fixation magnétique 1.002.4686 permet de remplacer la vis à garrot du PROTAR®evo par un aimant 3. Ce qui, avec les plaques de montage 3PS 4 permet de changer le modèle plus rapidement. 3 Ce mode de fixation n’est pas synchrone. A 4.6 PROTAR®evo avec Splitcast (réglage au laboratoire) 4 (réglage au laboratoire) Le “Split 3PS“ permet de synchroniser au laboratoire les articulateurs PROTAR®evo non équipés d’un Split Cast. 5 Accessoires requis : 4 Synchroniseur 3PS N° d’article 1.002.2095 5 Gabarit N° d’article 1.002.2080 Notice de montage : Montage d’articulateurs sans Split Cast par fixation magnétique N° de matériel 1.002.4686 Les articulateurs sans Split Cast PROTAR peuvent être réadaptés par fixation magnétique. Dans l’exemple ci-contre de la partie inférieure de l’articulateur sont présentées les étapes de montage : Ecarter la plaque de montage 7 . Dévisser les pivots de fixation de la plaque de montage ainsi que la vis de bascule 8 de l’articulateur Placer l’aimant 6 2 1 Synchronisation 3PS N° de matériel 1.002.2095 6 Partie supérieure de l’articulateur Ecarter la plaque de montage 1 Dévisser les pivots de fixation de la plaque de montage ainsi que la vis de bascule 2 de l’articulateur 7 Partie inférieure de l’articulateur Ecarter la plaque de montage 7 Dévisser les pivots de fixation de la plaque de montage ainsi que la vis de bascule 8 de l’articulateur Fixer l’aimant 6 à l’aide de l’écrou. 8 16 PROTAR®evo. A 4.6.1 Procédure de réglage 1.002.2080 1 Sortir les joints d'étanchéité en mousse 1 (réf.1.003.3998) du support puis les coller, de façon centrée, sur la plaque de réglage 2. 2 Introduire ensuite le gabarit de mesure et de réglage 6 dans la branche inférieure de l'articulateur 5. Ce gabarit est maintenu par l'aimant. 3 Poser à présent la plaque de réglage 2 sur le gabarit 6. 4 7 Régler sur "zéro" la tige d'appui 7 de l'articulateur (ou la remettre à zéro avec la broche de blocage). Retirer, s'il s'y trouve, l'aimant 4 de la branche supérieure de l'articulateur 3. 2 5 6 Appliquer la colle (fournie) sur la plaque de réglage 2 et ce, à l'extérieur du joint d'étanchéité, puis refermer l'articulateur délicatement. (La colle permet 3 réglages environ). Passer l'élastique 1 autour des branches supérieure et inférieure de l'articulateur puis laisser durcir la colle pendant 12 heures. 1 A 4.6.2 Mesurage 1 Le gabarit 2 permet au laboratoire de pouvoir contrôler à tout moment la synchronisation en procédant comme suit : séparer en deux parties le gabarit à l’aide des deux vis de centrage 1. 2 Contrôler à présent, avec du papier à articuler 3, la synchronisation. 3 17 18 0 mm Fixe Fixe 30° par CE 45° par FH Propulsion Rétrusion Eloignement 0° Pente condylienne horizontale (angle de “shift“) Pente condylienne horizontale (ISS) Pente condylienne horizontale (Bennett) Pente condylienne sagittale PROTAR 2 0° 0 mm Fixe 15° Fixe 30° par CE 45° par FH PROTAR 3 0° 0 mm Fixe 15° Réglable -10° par 90° (FH) -25° par 75° (CE) PROTAR 5 0° 0 mm Réglable 0 - 30° Réglable -10° par 90° (FH) -25° par 75° (CE) PROTAR 5B Réglable 0 - 1,5 mm 0 - 1 mm 0 - 1,5 mm En option - 20° à +20° con 0.622.1111 0 - 1,5 mm Réglable 0 - 30° Réglable -10° par 90° (FH) -25° par 75° (CE) PROTAR 7 Réglable 0 - 6 mm 0 - 1 mm 0 - 6 mm 0° 0 - 1,5 mm Réglable 0 - 30° Réglable -10° par 90° (FH) -25° par 75° (CE) PROTAR 9 PROTAR®evo. A 5 Possibilités de programmation pour des articulators de KaVo PROTARevo PROTAR®evo. A 6 Mise en articulateur des modèles A 6.1 Mise en articulateur du modèle maxillaire avec l’arc facial KaVo ARCUS @ 4 Mettre en position “ouvert“ le levier de blocage 4 puis dégager l’arc facial 3. 3 Mais avant, installer la tige d’appui 2 dans la partie inférieure de l’articulateur puis la régler sur “0“ (retirer le plateau incisif 6 puis fermer les deux verrous de la partie supérieure en commençant par celui de gauche). 2 Positionner les orifices des olives auriculaires de l’arc facial sur les tiges de référence 1 de la partie supérieure de l’articulateur, mettre en place l’arc facial puis verrouiller avec le levier de blocage 4. @ Positionner ensuite l’arc facial 3 sur la tige d’appui 2. Positionner le modèle maxillaire 5 sur les indentations 7 de la fourchette occlusale. Préparer du plâtre crémeux et le déposer sur le modèle maxillaire (obturer l’orifice de la plaque de contrôle avec l’adaptateur rétentif 1.001.0887). Ensuite, enduire de plâtre la plaque de contrôle puis rabattre la partie supérieure de l’articulateur sans forcer. 2 7 5 6 Après durcissement du plâtre, sortir l’arc facial et la fourchette de l’articulateur. Pour ce faire, mettre le levier de blocage 4 en position “ouvert“ puis sortir l’arc facial 3 de l’articulateur. 4 3 19 PROTAR®evo. A 6.2 Mise en articulateur du modèle maxillaire à l’aide du système de transfert Si la mise en articulateur doit être effectuée au laboratoire, il suffira d’envoyer la fourchette (avec le portefourchette). Sortir la tige d’appui et le plateau incisif de l’articulateur. 1 Installer le système de transfert 1 dans la partie inférieure de l’articulateur. Monter le porte-fourchette 2, muni de la fourchette 3, sur le système de transfert 1. 2 3 5 A 6.3 Mise en articulateur du modèle maxillaire avec l’arc facial KaVo ARCUS light 4 Positionner les olives 4 de l’arc facial ARCUS light sur les tiges de référence du PROTAR®evo. 6 Visser, pour soutenir le porte-fourchette 6, le pied d’appui fourni 8 sur la tige 7. Poser l’arc facial ARCUS light, muni de son pied d’appui 8, sur la table puis faire reposer la partie supérieure de l’articulateur 5 sur l’arc. 7 8 20 PROTAR®evo. A 6.4 Mise en articulateur du modèle maxillaire avec des arcs faciaux d’autres marques 1 3 2 Les accessoires requis sont les suivants : Référence arc facial N° d’article 0.622.1151 comprenant : 1 plan de référence (douille + vis) 2 support pour arc facial 3 adaptateur reference goupille 4 Ces accessoires permettent de monter des arcs faciaux d’autres types dans le PROTAR®evo. Pour les arcs faciaux présentant un pointeau mobile, un plan de référence 1 doit être monté sur la partie supérieure de l’articulateur. (Illustration de l’arc facial Dentatus) L’arc facial Dentatus : on fait pivoter son pointeau infraorbitaire 4 jusqu’à ce qu’il soit en contact avec le plan de référence 1. Montage d’arcs faciaux à pointeau/appui glabelle (par exemple : SAM, Whip Mix) : sortir de l’articulateur le plateau incisif et la tige d’appui Dévisser presque complètement la vis moletée du système de transfert puis faire glisser ce dernier dans la partie inférieure de l’articulateur jusqu’au point de butée (= 2ème position possible du système de transfert) puis le bloquer dans cette position avec la vis moletée. Fixer le support d’arc facial sur le système de transfert. A l’aide de la graduation, positionner correctement le support d’arc facial puis le bloquer avec la vis moletée. Adaptateur Denar N° d’article 0.622.1351 Cet adaptateur permet la mise en articulateur avec la fourchette occlusale Denar. 21 PROTAR®evo. 0 622 1141 1 2 3 4 5 6 Les accessoires requis sont les suivants : 1 Système de transfert N° d’article 0.622.1141 7 A 6.5 Paramètres de réglage dans le cas où l’articulateur PROTARevo est utilisé avec un arc facial d’une autre marque 2 Référence pour arc facial d’autre marque N° d’article 0.622.1151 comprenant: plan de référence (manchon + vis) Support d’arc facial Adaptateur reference goupille Marque Inserts Avec appui nasal valeur Pointeau de référence sur point infraorbitaire Accessoires requis Girrbach Rotofix oui 39 66 1 Système de transfert 2 Plan de référence + Support d’arc facial Girbach Referenz oui 51 Dentatus oui - - 2 Plan de référence Hanau 153 Earpiece Facebow oui - - pas besoin d’accessoires (Traverse avant: 70 mm dessus table9 SAM oui 58 - 1 Système de transfert 2 Gesichtsbogenhalter Panadent oui pas possible 51 1 Système de transfert 2 Plan de référence + Support d’arc facial plémentaire (0.622.1371) Hanau 164-2 Twirl-Bow oui - 59 1 Système de transfert 2 Plan de référence + Support d’arc facial Gerber sous certaines - - pas besoin d’accessoires conditions. Denar oui - - Adaptateur N° d’article 0.622.1351 Whip-Mix oui 56 - Quick oui 56 en haut 49 au milieu 44 en bas - 1 Système de transfert 2 Plan de référence + Support d’arc facial Adaptateur reference goupille 1 Système de transfert 2 Plan de référence + Support d’arc facial Springbow Hanau oui Hager und Werken oui Ivoclar oui 1 Système de transfert 2 Plan de référence + Support d’arc facial L‘aligner par rapport au plan de référence 46 avec support de fourchette occlusale 0.622.1391 1 Système de transfert 2 Plan de référence + Support d’arc facial 59 Autres marques : nous consulter. 22 1 Système de transfert 2 Plan de référence + Support d’arc facial PROTAR®evo. A 6.6 Manière de procéder avec le positionneur (selon valeurs moyennes) de modèle maxillaire KaVo N° d’article 0.622.1781 (méthode APFnt) Ce positionneur pour modèle maxillaire édenté permet la mise en articulateur quand on n’a pas d’arc facial. Les points de référence sont les culs-de-sac gingivolabiaux et la zone la plus profonde derrière les deux tubérosités. 1 vis de fixation 2 repère de réglage servant lorsqu’il n’y a pas de SplitCast KaVo de monté. 3 repère de réglage servant lorsqu’ il y a un SplitCast KaVo de monté. . 3 2 1 Points de référence 23 PROTAR®evo. A 6.7 Méthode de montage (selon les valeurs moyennes) avec l’accessoire de montage pour le maxillaire supérieur Les accessoires de montage 2 N° d’article 1.001.9451 (montage sans Split-Cast) 5 N° d’article 1.001.9452 (montage avec Split- Cast) servent pour la mise en articulateur (selon les valeurs moyennes) des modèles maxillaires édentés quand on n’a pas d’arc facial. 3 1 2 Ces accessoires se positionnent parallèlement au plan de Camper. Le réglage mésial s’effectue avec la vis papillaire 3. Conformément à la méthode de montage : dévisser cette vis 3 de la longueur qu’il faut, puis poser le modèle (sa papille) dessus et déplacer le chariot 1 jusqu’à ce que celui-ci se trouve dans la zone la plus profonde située derrière les deux tubérosités. 6 5 4 Avec les vis de réglage 4, régler une fois pour toutes le montage et l’accessoire de montage sur le plan d’occlusion 6 de l’articulateur. Le montage et l’accessoire de montage 1.001.5451 peuvent, en utilisant pour cela la pince 1.001.9471, également être fixés dans un Denar, un Hanau ou un Stratos. 24 PROTAR®evo. A 6.8 Technique d’utilisation (selon les valeurs moyennes) du gabarit de mise en plâtre du maxillaire inférieur KaVo (N° d’article 0.622.1171) (Méthode “APF“) Le gabarit de mise en plâtre permet de mettre dans l’articulateur Protar, selon les valeurs moyennes, des modèles mandibulaires partiellement ou totalement édentés. Si l’articulateur KaVo est équipé d’un Split-Cast , fixer le gabarit de mise en plâtre à la position 1 (desserrer la vis 3). S’il n’y a pas de Split-Cast de monté, fixer le gabarit à la position 2. 2 3 1 A 6.8.1 Montage d’un modèle mandibulaire édenté total Entourer, sur le modèle mandibulaire, le bourrelet rétromolaire, tracer la médiane 2 puis la diviser en trois parties. Le plan d’occlusion 1 correspond au trait supérieur. 1 2 25 PROTAR®evo. Régler la fourchette symphysale 9de façon à ce qu’elle soit à hauteur du bourrelet de cire inférieur 8. 5 4 3 4 vis de serrage q 5 gabarit de mise en plâtre (selon valeurs moyennes) 0 6 bourrelet rétromolaire 20-22 18-20 3 bourrelet de cire supérieur 7 pied (mobile) sur bourrelet rétromolaire 9 8 bourrelet de cire inférieur 8 9 fourchette symphysale 6 7 0 plan d’occlusion q plan de Camper Après avoir dévissé la vis de serrage w, amener l’élément coulissant à l’endroit du bourrelet rétromolaire souhaité puis bloquer avec la vis de serrage. Ensuite, avec un élastique e, solidariser le modèle avec le gabarit. w e 9 PROTAR Ensuite, mettre dans l’articulateur le modèle mandibulaire. 26 PROTAR®evo. A 6.9 Mise en articulateur du modèle mandibulaire Retourner l’articulateur (laisser les verrous de centrée AL et AM fermés.). 1 2 Ouvrir l’articulateur. 3 Positionner de façon stable le modèle mandibulaire sur l’enregistrement du modèle maxillaire (ou sur l’enregistrement de centrée). Si vous n’utilisez pas d’enregistrement de centrée, réglez la tige d’appui 1 sur “0“. 4 Obturer avec l’adaptateur rétentif 4 (N° d’article 1.001.0887) l’orifice de la plaque de contrôle 3. Etaler ensuite le plâtre (crémeux) sur le modèle mandibulaire et sur la plaque de contrôle de la partie inférieure de l’articulateur 3. Fermer l’articulateur sans forcer. Après durcissement du plâtre, retirer l’enregistrement de centrée puis régler de nouveau la tige d’appui 1sur “0“. Les deux modèles sont à présent en place dans l’articulateur. 1 27 PROTAR®evo. A 7 Programmation de l’articulateur A 7.1 Réglage de la pente condylienne avec l’enregistrement de la propulsion 1 (pour modèles PROTAR 5, 5B, 7, 9) Ouvrir les deux verrous de centrée 3 puis insérer l’enregistrement de propulsion 5entre les deux modèles. Lors de cette étape, la partie inférieure de l’articulateur est déplacée vers l’avant . 5 2 2 Les boules condyliennes 6 de l’articulateur ne touchent plus la voie condylienne. Débloquer 2 les boîtiers condyliens 4 puis les mettre en contact avec les boules condyliennes 6. 4 3 3 Ensuite, bloquer 2 les boîtiers condyliens. 1 1 4 4 7 7 6 6 A 7.2 Réglage de l’angle de Bennett à l’aide des enregistrements des mouvements de latéralité (pour modèles PROTARevo 5B, 7, 9) Desserrer 1 puis régler dans un premier l’angle de Bennett sur la valeur maximale. 6 Réglage de l’angle de Bennett côté gauche Insérer l’enregistrement de latéralité droite 5 entre les deux modèles puis tourner l’insert 7 du boîtier condylien de gauche jusqu’à ce que la boule condylienne 6 et l’insert 7 se touchent puis bloquer avec 1 Réglage de l’angle de Bennett côté droit Insérer l’enregistrement de latéralité gauche 5 entre les deux modèles puis tourner l’insert 7 du boîtier condylien de droite jusqu’à ce que la boule condylienne 6 et l’insert 7 se touchent puis bloquer avec 1. 8 Fermer les verrous de centrée 3 puis placer l’articulateur en position de travail. 28 PROTAR®evo. A 7.3 Réglage du déport latéral immédiat (Immediate Side Shift (ISS) (pour les modèles PROTAR 5B, 7, 9) Immediate Side Shift (ISS) Le déport latéral immédiat (ISS) du condyle côté non travaillant est réglable de 0 à 1,5 mm par tranches de 0,5 mm. 1 Pour procéder à son réglage , commencer tout d’abord par desserrer d’environ de tour la vis de blocage 1 des guides de l’angle de Bennett. Régler ensuite sur la valeur requise au niveau du repère 2 de déport latéral (ISS). Resserrer ensuite la vis de blocage 1. Conservation des valeurs réglées pour l’angle de Bennett. 2 29 PROTAR®evo. A 7.4 Réglage de l’angle de Shift Une fois que les inserts d’angle de Shift (0.622.1111) sont en place dans le PROTAR 7, vous pouvez procéder au réglage précis des mouvements côté travaillant. @ 2 3 Desserrer la vis moletée 3 afin de pouvoir ensuite régler l’insert d’angle de shift 2 à l’aide du levier 1. Vous pouvez avec l’enregistrement de latéralité gauche régler en même temps l’angle de Bennett côté droit et l’angle de shift côté gauche. Et avec l’enregistrement de latéralité droite régler en même temps l’angle de Bennett côté gauche et l’angle de shift côté droit. @ 3 Pour régler : tourner l’insert d’angle de shift 2 jusqu’à ce que celui soit en contact avec les boules condyliennes 4. 2 4 30 PROTAR®evo. A 7.5 Réglage de la propulsion/de l’écartement PROTARevo 9 Le PROTARevo 9 est de même conception que le PROTARevo 7, sauf qu’il possède en plus un insert “P/D/R“. N° d’article 0.622.1001 côté droit/côté gauche Réglage (défini) de la propulsion (P). Réglage (défini) de l’écartement (D) Réglage (défini) de la rétrusion/rétroposition (R). Le PROTARevo 7 peut être équipé d’un insert “P/D/R“ . Réglage d’une propulsion guidée (sur une plage de 0 à 2 mm et de 2 à 6 mm (par tranches de 0,5 mm)). Ces réglages sont guidés de façon définie et reproductible. Quelque soit la positon de propulsion, la partie supérieure ne bouge pas. Exemples d’applications : Gouttières de propulsion Equilibration occlusale en prothèse complète Réglage d’un écartement (guidé), à partir de la position centrée, sur une plage de 0 à 2 mm et de 2 à 6 mm (par tranches de 0,5 mm). Ces réglages sont guidés de façon définie et reproductible. Quelque soit la position d’écartement, la partie supérieure ne bouge pas. La tige d’appui peut être guidée en conséquence. Exemples d’application: gouttières occlusales 31 PROTAR®evo. A 7.6 Réglage de la rétroposition Pour obtenir des espaces libres pour rétropositions lors du moulage à la cire, la rétroposition est possible sur le PROTAR® 7/9. Ainsi, on réduit les opérations de fraisage chez le dentiste. Les espaces libres pour rétropositions ont déjà été pris en considération lors du modelage. @ Rétroposition “0“ Si la liberté des mouvements latéraux 3 (ISS) est réglée sur 1,5 mm, on peut alors effectuer une rétroposition de 1 mm (par tranches de 0,25 mm). Dans ce cas, une position de centrage exacte n’est pas possible si les verrous de centrée sont verrouillés. 1 3 32 PROTAR®evo. A 7.7 Réalisation d’un guide incisif individuel L’utilisateur a la possibilité de réaliser un guide individuel sur le plateau incisif (plat) du Protar en procédant comme indiqué ciaprès : Régler sur “1“ les verrous de centrée de l’articulateur puis ouvrir l’articulateur. Enduire ensuite d’isolant (vaseline) le plateau incisif et le bout de la tige incisive puis garnir, jusqu’au bord, le plateau incisif de résine autopolymérisante. A l’aide des modèles d’avant la préparation, vous pouvez alors transférer sur l’articulateur les guidages antérieurs en effectuant des mouvements dans l’articulateur avec la tige incisive introduite dans la résine qui a encore une consistance plastique. Pour dégager le guide incisif individuel du plateau incisif : le soulever avec un instrument adéquat introduit dans l’encoche du plateau incisif. Le guide incisif individuel pourra être remis en place de façon précise grâce à la rainure. 33 PROTAR®evo. A 7.8 Programmation du plateau incisif réglable A 7.8.1 Le modèle d’étude Avant la taille des dents on réalise un modèle d’étude (situation clinique). Avec ce modèle on programme ensuite le plateau incisif (réglable). 1 Afin de garantir un montage correct du plateau incisif : régler le guide médian sur 70° environ 2. R Pousser ensuite le plateau incisif jusqu’à ce qu’il y ait contact avec la boule 1 de la tige incisive puis serrer la vis de fixation 3. 2 3 L M Régler ensuite le guidage de gauche en déplaçant le modèle mandibulaire vers la gauche dans l’articulateur. Le déplacer ensuite vers la droite pour régler le guidage de droite. Pour régler le guidage médian : déplacer le modèle le long des antérieures. Le guidage antérieur est à présent assuré par le plateau incisif réglable. A 7.8.2 Valeurs de réglage fournies par l’ARCUSdigma L’ARCUSdigma vous donne directement les valeurs de réglage pour ce plateau incisif. (R) (M) (L) Appliquer les valeurs de réglage indiquées. Anterior guidance: guide antérieur Right: côté droit Middle: centre Left : côté gauche 34 60,0 63,6 57,0 PROTAR®evo. A 8 Mise en place de l’insert d’angle de shift sur le PROTAR®evo 7 2 Commencer par retirer le cylindre de propulsion/rétrusion 1. Pour ce faire, chasser l’axe de blocage 5 hors du pignon 3 à l’aide de la clé Allen 2 en exerçant une légère pression. 3 4 1 5 1) Enlever le cylindre de propulsion/rétrusion 1. 2) Retirer le pignon 3 3) Retirer le logement 4 1 3 4 5 Mettre en place l’insert d’angle de shift 6 en procédant comme suit : 6 - introduire la vis 7 dans l’interstice - insérer l’angle de shift 8 dans le boîtier - serrer la vis 7 8 7 35 PROTAR®evo. A 9 Programmation de l’articulateur à partir des valeurs fournies par l’ARCUSdigma (N° d’article : 1.000.8232) Toutes les valeurs de réglage calculées peuvent être reportées de façon exacte sur le PROTARevo 7 à l’aide de l’insert d’angle de shift (N° d’article 0.622.1111) et du plateau incisif réglable (N° d’article 0.622.1701). 36 PROTAR®evo. A 10 Accessoires de montage (prothèse complète) A 10.1 Accessoires de montage pour modèle mandibulaire selon méthode “APFnt”(N° d’article 0.622.2071) Monter l’indicateur de pente d’occlusion 1 sur le centreur d’axe de l’articulateur. 1 Serrer la vis 4. Retourner l’articulateur. Poser la calotte 3 sur le modèle. 5 6 Positionner l’insert frontal 2 sur les deux incisives centrales. 2 Et, au niveau postérieur, placer la traverse 6 derrière les deux tubérosités. 3 Serrer la vis 5 puis la vis 7. Si nécessaire, réajuster la vis 5. 4 7 3 37 DE PROTAR®evo. GEBRAUCHSANWEISUNG A 10.2 3D Accessoire de montage pour modèle maxillaire (selon méthode APF) 5 1 1 support 2 porte-calotte 3 calotte petit format N° d’article 0.622.1211 4 calotte grand format N° d’article 0.622.1201 5 vis de réglage 4 3 Ces calottes peuvent être utilisés dans tous les cas, quels que soient les conditions de montage du modèle dans l’articulateur (arc facial/gabarit de mise en plâtre selon valeurs moyennes). Avec ce type de calotte l’utilisateur dispose d’une surface plane basée sur le plan d’occlusion et d’une surface convexe qui, pour le montage statique du modèle mandibulaire, prend en compte les courbes de compensation sagittale et transversale. Avec leurs porte-calotte et support, ces calottes sont d’un usage universel : que l’on utilise un arc facial, un gabarit de mise en plâtre ou un élastique, dans tous les cas de figure elles s’installent sans problème. Exercer une pression sur le support pour fixer l’ensemble entre les boules condyliennes de l’articulateur. PROT 38 2 PROTAR®evo. Positionner la calotte 1 sur le bourrelet de cire 2. Retoucher le bourrelet en occlusal de façon à ce que la calotte soit placée correctement au niveau des incisives ainsi qu’au niveau des molaires mandibulaires. La surface plane de la calotte sert , entre autres, pour la méthode Gerber. 1 2 Fixer la calotte 1 avec la vis de réglage 3 qui se visse sur le modèle via la calotte. Afin de permettre le montage, vous pouvez à présent un peu reculer le bourrelet. Bloquer la vis de réglage avec une goutte de cire collante. Vous pouvez à présent monter les dents mandibulaires par rapport à la calotte. Après avoir retiré le porte-calotte, remettre l’articulateur comme avant. 3 39 PROTAR®evo. A 10.3 3D Calotte de montage pour le modèle maxillaire (N° d’article 1.002.4919) Cet accessoire de montage plat pour modèle maxillaire édenté se positionne par rapport au bourrelet de cire du haut. Pour ce faire, plaquer l’accessoire contre ce bourrelet à l’aide d’un élastique. Avec un peu de plâtre, fixer ensuite cet accessoire dans la partie inférieure de l’articulateur. 40 PROTAR®evo. A 10.4 2D Accessoire de montage pour le maxillaire supérieur (N° d’article 1.001.9452) Cet accessoire sert aussi bien pour la mise en plâtre que comme accessoire de montage (pour le maxillaire supérieur édenté). Après avoir desserré la vis papillaire 1 et reculé le poussoir 2, vous pouvez entreprendre le montage pour le modèle maxillaire. 1 2 A 10.5 2D Accessoire de montage pour le maxillaire supérieur (montage vissé) - N° d’article 1.001.9451 41 PROTAR®evo. A 11 Table de montage avec SplitCast Pour les étapes de laboratoire nécessitant le recours à la fraiseuse, on est souvent amené à transférer le modèle de l’articulateur à la fraiseuse et vice-versa. 1 2 1 aimant 2 socle de contrôle 3 levier 3 La force de l’aimant garantit un maintien efficace de la pièce prothétique pendant le fraisage. Le système “Split-Cast“ centré au niveau de ses flancs et reposant sur la plaque de contrôle de l’articulateur garantit un positionnement précis de la pièce prothétique. Après avoir réglé une fois pour toutes le modèle pour l’ouvrage à fraiser, on peut ensuite le transférer autant de fois que l’on veut (entre l’articulateur et la fraiseuse) sans avoir à régler de nouveau. 42 PROTAR®evo. Le relief occlusal peut être réalisé dans l’articulateur. Et les travaux de fraisage être effectués à n’importe quel moment. Toutes les étapes sont, du fait de la précision du transfert entre l’articulateur et la fraiseuse, faciles à contrôler. 43 GA PROTAR evo -A11 KaVo LOGIcase PROTAR®evo. A 12 Boîtes de transport KaVo LOGICase KaVo LOGICase : des boîtes économiques (et empilables entre elles) pour les transferts entre le laboratoire et le cabinet. KaVo LOGICase : des boîtes de transport et de travail en un. r m bo ter La us M 1 mousse pour la fixation du modèle (lot de 50 unités. 1.000.9351) 2 à la première utilisation sur ERGOspace ouverture des évidements latéraux. 3 boîte ronde pour les petites pièces (lot de 50 ; 1.000.9353) 4 champ pour code barres 5 champ pour le nom du patient 6 10 boîtes (20 moitiés 1.001.1511) 50 boîtes (100 moitiés 1.000.9355) 7 boite rectangulaire pour enregistrements (lot de 50 unités. 1.000.9354) n an 1 Hygiène: LOGIcase est désinfectable avec les désinfectants habituels. 2 3 1 7 Possibilité de ranger à l’intérieur : - 4 modèles (ou 4 porte-empreintes) - porte-fourchette KaVo ARCUS - 2 boîtes à enregistrements - 2 boîtes pour le rangement des petites pièces. 4 6 Fixation spéciale 8 pour mobilier KaVo. 5 Insert universel pour tous les autres types de mobilier 8. 8 8 44 PROTAR®evo. A 13 Caractéristiques techniques Articulateurs PROTHÉ PLUS 3, 5, 7 et 9 110 Partie inférieure Distance intercondylienne fixe = 110 mm Broche support Plage de réglage de + 10 à -10 mm avec butée d’arrêt Table d’incisive +10 0 - 10 plate (plane) Plateau d’incisive (accessoires 10°, 30°, 40°, 50°) Hauteur de construction avec plaque de contrôle + avec “Split-Cast« Angle de Balkwill 20° 120 mm 108 mm 97 mm 20° Plan de Camper (CE) parallèle au plan de la table 20∞ ( 10∞ , 30∞ , 40∞ , 50∞ ) HCN coudé (au bout de 5 mm d’excursion) Angle de Bennett coudé (au bout de 5 mm d’excursion) Poids (avec “Split-Cast“) CE 420 g 120 108 97 Partie inférieure de l’articulateur Partie supérieure de l’articulateur PROTARevo 2/3 235 g Partie supérieure de l’articulateur PROTARevo 5 PROTARevo 5B/7/9 420g 450 g Sous réserve de modifications techniques. 45 20∞ PROTAR®evo. A 14 Cuidados y ajuste Antes de la puesta en servicio del articulador, rociarlo con un agente aislante corriente para articuladores (spray a base de silicona); no engrasarlo. Si se hace necesario, se aceitará ligeramente las esferas de articulation 8, el sistema magnético de retención 9 o bien la rosca de placa de control. Si las palancas tensoras HCN ya no tensasen más correctamente, existe la posibilidad de reajustarlas. Herramienta: Llave de macho hexagonal 1,5 mm 6 Destornillador 4,5 mm 3 Reajustar los enclavamientos céntricos 1 y 2. Llave de macho hexagonal fuera 3 mm 4 Llave de macho hexagonal dentro 2 mm 5 Control del Split-Cast en el PROTARevo 3/5/7/9. (Il est recommandé de vérifier semestriellement avec le calibre d'ajustage de mesure et 0.622.1221.). Desenroscar el sistema de retención magnético 9 con la ayuda de la llave magnética q. Por razones de precisión, el split-cast se encuentra centrado por los flancos. La placa de control tiene que estar apoyada planamente en los flancos e. El intersticio w entre el zócalo de control r y la placa de control tiene que ser paralelo. Después de concluido el trabajo, el modelo es separado de las placas de control t - z con la ayuda del tornillo con mando estrellado u. Seguidamente limpiar las placas de control t - z. Pour que le mouvement de l’articulation i de l’articulateur glisse mieux. Veuillez graisser celui-ci à l’aide de la graisse Réf 1001.7613 46 PROTAR®evo. Conditions de garantie KaVo prend en charge les prestations de garantie vis-à-vis du client final pour le produit cité dans le protocole de remise en ce qui concerne le bon fonctionnement, un matériel sans défaut ou la transformation pour une durée de 12 mois à partir de la date d'achat sous les conditions suivantes : En cas de réclamation fondée en raison de défauts ou d'insuffisances à la livraison, KaVo se porte garant en effectuant gratuitement, au choix, la fourniture des pièces de rechange ou la réparation. Toutes autres revendications, de quelque nature qu'elles soient, en particulier visant des dommages et intérêts, sont exclues. Dans le cas d'un retard ou d'une faute lourde ou d'intention, la garantie n'est valable que si aucun règlement législatif impératif ne s'y oppose. KaVo n'endosse pas la responsabilité pour les défauts et leurs conséquences entraînés à la suite d'une usure naturelle ou d'un nettoyage ou maintenance nonconforme, du non-respect des prescriptions de manipulation, d'entretien et de raccordement, d'un entartrage ou d'une corrosion, de la présence d'impuretés dans l'alimentation en air ou en eau ou des influences chimiques ou électriques qui seraient inhabituelles ou ne seraient pas permises d'après les spécifications du constructeur. La prestation de garantie ne s'étend pas, en règle générale, aux lampes, verrerie, pièces en caoutchouc et à la résistance des couleurs des matières plastiques. La garantie est exclue lorsque les défauts ou leurs conséquences reposent sur le fait que le client ou une tierce personne a effectué des interventions ou des modifications sur le produit. Les revendications concernant cette prestation de garantie ne peuvent être exercées que si le protocole de remise faisant partie du produit (copie) est envoyé à KaVo et que l'original du document peut être présenté par l'opérateur/utilisateur. 47 Verk.-Nr. PROTARevo 2 Mat.-Nr. 1.002.3306 06/02003 09.21 PROTAR®evo. Pièces de rechange PROTAR®evo 2 N° d’article1.002.3305 1.002.3305 sans “Split-Cast“ Mat.-Nr. ohne Split-Cast 0.622.0981 1.002.4686 3PS 1.002.2074 0.200.6034 0.200.6093 0.622.1363 0.622.1373 1.001.0889 Verk.-Nr. PROTARevo 3 (10x) Mat.-Nr. 1.002.3307 mit Split-Cast Mat.-Nr. 1.002.3306 ohne Split-Cast 0.200.6301 1.002.2096 10x 06/2003 09.22 PROTAR®evo 3 N° d’article 1.002.3307 sans “Split-Cast“ N° d’article 1.002.3308 acec “Split-Cast“ Mat.-Nr. 1.002.3307 mit Split-Cast Mat.-Nr. 1.002.3306 ohne Splitcast 0.622.0981 0.200.6034 3x 0.201.1459 1.002.2074 1.001.0889 10x 0.622.2702 0.622.2652 0.622.0791(10x) 0.622.2682 0.411.1212 0.622.2692 0.622.1822 0.622.1812 1.002.4686 3PS 0.622.2712 0.220.1309 0.253.6045 2x 0.249.4168 1.002.2096 10x 1/1 48 Verk.-Nr. PROTARevo 5 Mat.-Nr. 1.002.3311 mit Split-Cast Mat.-Nr. 1.002.3310 ohne Split-Cast 06/2003 09.23 PROTAR®evo. PROTAR®evo 5 N° d’article1.002.3311 1.002.3313 sans Mat.-Nr. mit“Split-Cast“ Splitcast N° d’article 1.002.3310 acec “Split-Cast“ Mat.-Nr. 1.002.3310 ohne Splitcast 0.622.0981 0.200.6034 3x 0.201.1459 1.002.2074 1.001.0889 10x 45 35 60 25 50 4 15 0 3 050 3 0.622.2652 0.622.0791(10x) FH CE 5 70 5 -5 1.002.4686 3PS 0.622.2682 0.622.2702 0.411.1212 0.622.1822 0.622.2692 0.622.1812 0.249.4168 Verk.-Nr. PROTARevo 5B 0.253.6045 2x Mat.-Nr. 1.002.3315 mit Split-Cast 0.220.1309 Mat.-Nr. 1.002.3314 0.622.2712ohne Split-Cast 1.002.2096 10x 06/20 09. PROTAR®evo 5B N° d’article 1.002.3314 acec “Split-Cast“ N° d’article 1.002.3315 sans “Split-Cast“ Mat.-Nr. 1.002.3315 mit Splitcast Mat.-Nr. 1.002.3314 ohne Splitcast 3x 0.201.1459 1.002.2074 1.001.0889 FH C E 5 70 5 -5 45 35 60 25 50 4 15 0 3 050 3 0.622.2652 0.622.0791(10x) 0.622.0981 0.200.6034 1.002.4686 0.622.2682 0.622.2702 0.411.1212 0.622.1822 0.622.2692 0.622.1812 0.249.4168 0.253.6045 2x 0.220.1309 0.622.2712 1.002.2096 10x 1/1 49 Verk.-Nr. PROTARevo 7 Mat.-Nr. 1.002.3319 mit Split-Cast Mat.-Nr. 1.002.3318 ohne Split-Cast 09/2004 09.24 PROTAR®evo. PROTAR®evo 7 N° d’article Mat.-Nr.1.002.3318 1.002.3318acec ohne“Split-Cast“ Splitcast N° d’article 1.002.3319 sans “Split-Cast“ Mat.-Nr. 1.002.3319 mit Splitcast 0.250.0031 1.002.0508 0.222.4043 0.622.2032 (L) 0.622.2042 (R) 0.622.2542 0.622.2532 0.622.2502 3x 0.201.1459 0.622.2082 (R) 0.622.2092 (L) 1.002.2074 0.622.0981 0.200.6034 1,0 0 0,5 65 55 8 0 7 45 0 0.622.2652 0.622.0791(10x) D FH CE 5 90 7 1.001.0889 10x 0.622.2702 0.622.2682 1.002.2085 0.411.1212 1.002.4686 3PS 0.622.1822 0.622.2692 0.622.1812 0.249.4168 0.253.6045 2x 0.220.1309 0.622.27129 Verk.-Nr. PROTARevo 1.002.2096 10x Mat.-Nr. 1.002.3323 mit Split-Cast 0.240.2240 Mat.-Nr. 1.002.3322 ohne Split-Cast 06/2003 09.25 5 2 3 6R 0 1 1.002.2085 PROTAR®evo 9 N° d’article 1.002.3323mit sans “Split-Cast“ Mat.-Nr. 1.002.3323 Splitcast N° d’article1.002.3322 1.002.3322 acec ohne“Split-Cast“ Splitcast Mat.-Nr. 0.250.0031 1.002.0508 0.222.4043 0.622.2032 (L) 0.622.2042 (R) 0.622.2542 0.622.0981 0.622.2532 0.200.6034 0.622.2502 3x 0.201.1459 0.622.2082 (R) 0.622.2092 (L) 1.001.0889 1.002.2074 1.002.4686 0.622.2652 0.622.0791(10x) 0.622.2682 0.411.1212 1/1 0.622.2702 0.622.1822 0.622.2692 0.622.1812 1.002.2096 10x 0.249.4168 0.253.6045 2x 0.220.1309 0.622.2712 50 Verk.-Nr. PROTARevo Unterteil Mat.-Nr. 1.002.3265 ohne Splitcast ® PROTAR Mat.-Nr.evo. 1.002.3266 mit Splitcast 06/2003 09.26 PROTAR®evo la partie inférieure N°Mat.-Nr. d’article 1.002.3265 1.002.3265 acec “Split-Cast“ ohne Splitcast N° d’article 1.002.3266 1.002.3266 avec Mat.-Nr. mit“Split-Cast“ Splitcast 0.222.5045 (8x12x0,15) 0.222.5046 (8x12x0,18) 0.222.5047 (8x12x0,20) 1.001.0889 10x 0.622.1852 0.622.2022 0.200.6034 0.622.0981 0.622.1181 0.622.0791 10x 0.622.3142 1.002.2075 1.002.4686 3PS 0.622.2682 0.622.1912 0.622.1922 0.622.1932 0.622.1942 0.622.1952 0.622.1962 10° 20° 30° 40° 50° 1.002.2074 1.002.2079 3x 0.201.1459 0.622.2652 1.002.2096 10x 0.411.1212 0.220.1741 1/1 51 fr 09.20 1.002.5701 Fk 7/07 KaVo Dental GmbH. D-88400 Biberach/Riss Telefon +49 7351 56-0 Fax +49 7351 56-1488 Internet: www.kavo.com Instrucciones de uso PROTAR® evo. Siempre en el lado correcto. KaVo Dental GmbH. D-88400 Biberach/Riss Vertrieb/distribution: KaVo Dental GmbH Bismarckring 39 • D-88400 Biberach Tel.: 0 73 51 / 56-1600 • Fax: 0 73 51 / 1488 Hersteller/manufacturer: Kaltenbach & Voigt GmbH Bismarckring 39 D-88400 Biberach PROTAR®evo. A1 Indicaciones para el usuario ............................................................................................................................................2 A 1.1 Significado de los pictogramas ..................................................................................................................................2 A 1.2 Indicaciones importantes ............................................................................................................................................2 A 1.3 Medidas de seguridad ................................................................................................................................................2 A 1.4 Uso previsto y posibilidad de aplicación ....................................................................................................................3 A 1.5 Observación de las posibilidades de movimiento del maxilar inferior en el plano horizontal ....................................4 A 1.6 Filosofía del sistema ..................................................................................................................................................5 A 2 Volumen de suministro – Accesorios ..................................................................................................................................6 A 2.1 Volumen de suministro ..............................................................................................................................................6 A 2.2 Accesorios ................................................................................................................................................................8 A 3 Componentes de servicio y piezas funcionales ..............................................................................................................11 A 4 Preparación para servicio ..................................................................................................................................................13 A 4.1 Espiga de apoyo ......................................................................................................................................................13 A 4.2 Enclavamientos céntricos ........................................................................................................................................13 A 4.3 PROTAR®evo con Splitcast (ajuste de fábrica) ......................................................................................................15 A 4.4 Trabajar con el juego de enyesar No. de mat. 0.622.1121 ......................................................................................15 A 4.5 PROTAR®evo sin Splitcast ......................................................................................................................................15 A 4.6 PROTAR®evo con Splitcast (ajuste de laboratorio) ................................................................................................16 Instrucciones de montaje: Reforma de articuladores PROTAR sin Split Cast a fijación magnética N.º de material 1.002.4686 ..............................16 Alineación 3PS n.º de material 1.002.2095 ......................................................................................................................16 A 4.6.1 Ajuste 1.002.2080 ..................................................................................................................................................17 A 4.6.2 Medición ................................................................................................................................................................17 A 6 Articulación de los modelos de diente ..............................................................................................................................19 A 6.1 Articulación del modelo de maxilar superior con el arco facial ARCUS de KaVo ....................................................19 A 6.3 Articulación del modelo de maxilar superior con KaVo ............................................................................................20 A 6.4 Articulación del modelo de maxilar superior con arco facial de otros fabricantes ..................................................21 A 6.5 Valores de ajuste al utilizar arcos ajenos en el articulador PROTARevo ................................................................22 A 6.6 Método valor promedio con el posicionador de modelo de maxilar superior de KaVo No. de mat. 0.622.1781 método APFnt ............................................................................................................................................................................23 A 6.7 Método valor promedio con la ayuda de montaje / colocación de KaVo para el maxilar superior ..........................24 A 6.8 Método valor promedio con el KAVo calibre de enyesar No. de mat. 0.622.1171 para el modelo de maxilar inferior 25 A 6.8.1 Montaje de un modelo de maxilar inferior sin dientes ..........................................................................................25 A 6.9 Articulación del modelo de maxilar inferior ..............................................................................................................27 A 7 Programación del articulador ............................................................................................................................................28 A 7.1 Ajuste de la inclinación de la trayectoria articular mediante el registro de protrusión ............................................28 A 7.2 Ajuste del ángulo de Bennett mediante el registro de laterotrusión izquierdo y derecho ........................................28 A 7.3 Ajuste de la movilidad lateral ....................................................................................................................................29 A 7.4 Ajustar el ángulo – Shift ............................................................................................................................................30 A 7.5 Ajuste de una posición de protrusión / distracción ..................................................................................................31 A 7.6 Ajuste de la retrusión / protrusión ............................................................................................................................32 A 7.7 Elaboración de una mesilla-guía incisal individual ................................................................................................33 A 7.8 Programación de la mesilla incisal ajustable ............................................................................................................34 A 7.8.1 A través de modelo de situación ............................................................................................................................34 A 7.8.2 A través de los valores de ajuste del ARCUSdigma ..............................................................................................34 A 8 Montaje del inserto de ángulo-Shift en el PROTAR®evo 7 ............................................................................................35 A 9 Programación del articulador con datos de medición del ARCUSdigma ..................................................................36 A 10 Ayudas de colocación para prótesis totales ..................................................................................................................37 A 10.1 Ayudas de colocación para el modelo de maxilar inferior según el método – APFnt- Methode (No. de mat. 0.622.2071) ........................................................................................................................................................................37 A 10.2 Ayuda de colocación 3D para el modelo de maxilar inferior según el método – APFnt ......................................38 A 10.3 Calota de colocación – 3D para el modelo de maxilar superior (No. de mat. 1.002.4919) ..................................40 A 10.4 Ayuda de colocación – 2D para el maxilar superior (No. de mat. 1.001.9452) ......................................................41 A 10.5 Ayuda de colocación – 2D para el maxilar superior para el montaje atornillado (No. de mat. 1.001.9451) ..........41 A 11 Mesilla de modelo con Split-Cast ..............................................................................................................................42 A 12 Caja de transporte KaVo LOGICase ................................................................................................................................44 A 13 Datos técnicos ..................................................................................................................................................................45 A 14 Cuidado y ajuste ................................................................................................................................................................46 Condiciones de garantía ....................................................................................................................................................47 PROTAR®evo 3 ..................................................................................................................................................................48 Piezas de recambio PROTAR®evo 2 ................................................................................................................................48 PROTAR®evo 5B ..............................................................................................................................................................49 PROTAR®evo 5 ................................................................................................................................................................49 PROTAR®evo 9 ..................................................................................................................................................................50 PROTAR®evo 7 ..................................................................................................................................................................50 PROTAR®evo Brazo inferior ..............................................................................................................................................51 1 PROTAR®evo. A 1 Indicaciones para el usuario A 1.2 Indicaciones importantes A 1.3 Medidas de seguridad A 1.1 Significado de los pictogramas Antes de la primera puesta en marcha, el usuario / operador debe leer las instrucciones de uso, para evitar un manejo incorrecto y otros deterioros. Si fuera necesaria la traducción a otros idiomas, rogamos la soliciten a su sucursal correspondiente de KaVo. Un servicio seguro y la protección del aparato sólo están garantizados con el uso adecuado según las instrucciones de uso y con las herramientas autorizadas. Situación que puede conducir a peligro, daño de materiales o fallos de funcionamiento en caso de que no se tenga en cuenta la indicación. Informaciones importantes para los usuarios y técnicos Servicio automático Desarrollo automático Cerrar, enroscar, fijar, etc. La reproducción y distribución de las instrucciones de uso (IU) requieren el previo consentimiento de la empresa KaVo. Todos los datos técnicos, informaciones, así como propiedades del equipo descrito en estas instrucciones de uso corresponden al estado en el momento de la impresión. Abrir, soltar, aflojar + ∞ -¨ Es posible que se realicen cambios y mejoras del producto debido a nuevos desarrollos técnicos. más, más alto menos, más bajo Servicio continuo Esto no da derecho a una ampliación posterior de los equipos ya existentes. La empresa KaVo no responde de daños provocados por Hora, desarrollo temporal ‡ Sacar enchufe de la red • influencias externas (mala calidad de los medios o instalación defectuosa), • aplicación de información incorrecta, • uso de la unidad no conforme a lo prescrito, • reparaciones realizadas de forma inadecuada. Reparaciones y trabajos de mantenimiento • salvo labores descritas en estas instrucciones de uso • están permitidos exclusivamente a personal calificado. En caso de realizarse modificaciones por terceros, las autorizaciones dejarán de ser válidas. Para el servicio o la reparación del aparato KaVo recomienda que se utilicen piezas de recambio originales. 2 Además hay que tener en cuenta: • Las prescripciones de protección laboral • Las prescripciones de prevención de accidentes • usar exclusivamente medios de trabajo sin defectos • prestar atención al fin de uso correcto • a sí mismo, pacientes y terceros contra peligros • evitar una contaminación por medio del producto • no seguir trabajando con piezas funcionales dañadas PROTAR®evo. A 1.4 Uso previsto y posibilidad de aplicación A causa de sus movimientos tridimensionales el órgano masticatorio es el sistema de movimiento más complicado del cuerpo humano. En caso de defectos de mayor alcance en este sistema es imprescindible una terapia orientada funcionalmente. Ya que la mayoría de semejantes medidas de terapia no se pueden realizar en la cavidad bucal, existe la necesidad de la simulación de movimientos del maxilar inferior no sólo en la consulta odontológica, sino también en el laboratorio técnicodental. Articuladores y sistemas de medición adecuados son medios auxiliares imprescindibles para poder registrar y transferir condiciones anatómicas y magnitudes de ajuste. Ellos forman la base para una terapia orientada funcionalmente. La interacción morfológica sin estorbos entre la articulación mandibular y las filas de dientes es la base de un órgano masticatorio funcionando correctamente. 1 FH 7 6 2 3 4 5 Para poder reproducir movimientos mandibulares se tienen que determinar puntos de referencia en el paciente en el sentido de un sistema de coordinadas. La conexión entre el punto subnasal y el tragus medialis 5 forma el plano de Camper 2 (CE). La conexión de porion 6 y punto infraorbital 1 (IOP) da por resultado la horizontal de Francfort (FH). La inclinación de las trayectorias condilares respecto a estos planos de referencia da por resultado el ángulo de inclinación – trayectoria condilar “HCN “. Observación de las posibilidades de movimiento del maxilar inferior en el plano horizontal. 3 Punto subnasal 4 Plano - oclusión 7 Eje de bisagra 3 PROTAR®evo. A 1.5 Observación de las posibilidades de movimiento del maxilar inferior en el plano horizontal La protrusión Durante la protrusión el maxilar inferior se mueve hacia delante. Los dos cóndilos se mueven hacia ventral y caudal. Sobre los dientes se reproducen las huellas de movimiento del diente de maxilar superior en el diente de maxilar inferior. La mediotrusión y la laterotrusión En caso del “movimiento de mordida lateral se distingue entre laterotrusión en el lado de trabajo y la mediotrusión en el lado sin trabajo. La conexión del punto de partida y punto final del cóndulo movido hacia dentro sobre la trayectoria mediotrusiva forma con la pista de protrusión en el lado sin trabajo el ángulo de Bennet 1. tt nne Be 1 En el lado de trabajo el cóndulo describe una laterotrusión. Desviaciones del movimiento de laterotrusión se definen como ángulo-Shift 2. t Shif 2 t net B en 4 PROTAR®evo. A 1.6 Filosofía del sistema 1 El sistema de articulador y arco facial de KaVo están construidos de tal forma que se puede trabajar tanto con la horizontal de Francfort (FH) como también con el plano de Camper (CE). 2 3 El soporte nasal 1 alinea el arco facial con un valor medio según los dos planos. Con la ayuda del indicador de referencia 3 se puede alinear el arco facial también de forma individual según el plano de referencia deseado. 4 2 Punto infra-orbital 4 Punto subnasal 6 El arco facial se inserta en el articulador siempre en la misma posición, sobre las espigas de referencia laterales 5 y puesta sobre la espiga incisal (poner a cero). 5 Pero la horquilla de mordida tiene diferentes posiciones según la anatomía del paciente. 6 Apoyo de arco facial 7 Espiga incisal 7 En el articulador Protar los modelos se encuentran casi siempre en paralelo (desviaciones ±10) respecto al plano de Camper 9. Ventaja para la prótesis dental: Los modelos articulados se encuentran con su plano de oclusión q casi en paralelo respecto al plano de Camper 9 y con ello también respecto a la superficie de trabajo. La expansión de la escayola es uniforme. 8 r e 9 0 w q 8 Punto infra-orbital 0 Punto subnasal w Tragus medialis e Porion r Eje de bisagra 5 PROTAR®evo. A 2 Volumen de suministro – Accesorios A 2.1 Volumen de suministro Articulador PROTARevo 2 compuesto de: Brazo superior del articulador No. de mat. 1.002.3303 Brazo inferior del articulador No. de mat. 1.002.3265 o PROTAR evo 2 Articulador PROTARevo 3 con split-cast compuesto de: Brazo superior del articulador No. de mat. 1.002.3307 Brazo inferior del articulador No. de mat. 1.002.3266 o Articulador PROTARevo 3 sin split-cast compuesto de: Brazo superior del articulador No. de mat. 1.002.3306 Brazo inferior del articulador No. de mat. 1.002.3265 o PROTAR evo 3 CE 70 55 0 6 45 0 5 35 0 4 25 30 15 Articulador PROTARevo 5 con split-cast compuesto de: Brazo superior del articulador N° de mat. 1.002.3311 Brazo inferior del articulador N° de mat. 1.002.3266 o 05 -5 20 1 15 0 0 25 0 10 35 20 Articulador PROTARevo 5 sin split-cast compuesto de: Brazo superior del articulador No. de mat. 1.002.3310 Brazo inferior del articulador No. de mat. 1.002.3265 o PROTAR evo 5 CE0 7 55 0 6 45 0 5 35 0 4 25 30 15 Articulador PROTARevo 5B con split-cast compuesto de: Brazo superior del articulador No. de mat. 1.002.3315 Brazo inferior del articulador No. de mat. 1.002.3266 o 05 -5 20 1 15 0 0 25 0 10 35 20 1 0 Articulador PROTARevo 5B sin split-cast compuesto de: Brazo superior del articulador No. de mat. 1.002.3314 Brazo inferior del articulador No. de mat. 1.002.3265 Articulador PROTARevo 7 con splitcast compuesto por: PROTAR evo 5B 6 PROTAR®evo. 50 3 5 40 25 30 15 Articulador PROTARevo 7 con split-cast compuesto de: Brazo superior del articulador No. de mat. 1.002.3319 Brazo inferior del articulador No. de mat. 1.002.3266 0 05 -5 20 1 15 0 0 25 0 10 35 20 1,5 1, 0 0,5 10 20 30 o Articulador PROTARevo 7 sin split-cast compuesto de: Brazo superior del articulador No. de mat. 1.002.3318 Brazo inferior del articulador No. de mat. 1.002.3265 PROTAR evo 7 o 40 1, 0 0,5 10 20 1,5 25 30 05 20 05 10 15 0 25 10 0 15 6 0 7 55 6 0 45 50 35 Articulador PROTARevo 9 con split-cast compuesto de: Brazo superior del articulador No. de mat. 1.002.3323 Brazo inferior del articulador No. de mat. 1.002.3266 o 30 Articulador PROTARevo 9 sin split-cast compuesto de: Brazo superior del articulador No. de mat. 1.002.3322 Brazo inferior del articulador No. de mat. 1.002.3265 PROTAR evo 9 Instrucciones de uso PROTARevo No. de mat. 1.002.5701 7 PROTAR®evo. A 2.2 Accesorios suministrables a petición: @ Indicador incisalN° de mat. 0.622.1021 ” Platillo incisivo de 10° N° de mat. 0.622.1922 Platillo incisivo de 20° N° de mat. 0.622.1932 Platillo incisivo de 30° N° de mat. 0.622.1942 Platillo incisivo de 40° N° de mat. 0.622.1952 Platillo incisivo de 50° N° de mat. 0.622.1962 Juego de montaje split-cast N° de ref. 0.622.1031 (sín ilustración) # Soporte de transfer N° de mat. 0.622 1141 £ Referencia otros arcos N° de mat. 0.622 1151 £b Soporte de arco facial £c Adaptador referencia pin 5 Guía de enyesado de valor promedio N° de mat. 0.622.1171 Ì Soporte de calota N° de mat. 0.622.1161 \ Calota corta N° de mat. 0.622.1201 | Calota larga N° de mat. 0.622.1211 9 Ayuda de montaje / colocación OK prótesis total No. de mat.1.001.9451 para PROTARevo con tornillo Pinza para articuladores ajenos N° de mat. 1.001.9471 0 Ayuda de montaje / colocación OK prótesis total No. de mat.1.001.9452 para PROTARevo con zócalo de control q Posicionador de modelo – maxilar superior N° de mat. 0.622.1781 w Indicador – inclinación de oclusión N° de mat. 0.622.2071 e Recipiente de enyesado N° de mat.0.622.2212 44,0 mm N° de mat.0.622.2222 22,0 mm N° de mat.0.622.2232 14,6 mm r Mesa modelado. Split cast N° de mat. 0.625.0770 t Juego de enyesar N° de mat. 0.622.1121 z Platillo de enyesar N° de mat. 1.001.0888 u Vídeo ARCUS /PROTAR N° de mat. 0.622.3202 i Adaptador Denar N° de mat. 0.622.1351 o Indicador Panadent N° de mat. 0.622.1371 p Soporte de horquilla de mordida N° de mat. 0.622.0901 8 PROTAR®evo. suministrables a petición: p Espiga de apoyo“E “ N° de mat. 0.622.1181 Espiga de apoyo“P “ N° de mat. 0.622.1791 Espiga de apoyo “T “ N° de mat. 0.622.1891 p s a “E“ 0 10 20 30 40 50 60 a Plato incisal ajustable N° de mat. 0.622.1701 0 0 5 d 5 5 f 0 “T“ “P“ L d Soporte de horquilla de mordida N° de mat. 0.622.0901 5 N° de mat. 0.622.1161 0 s Soporte 4 5 2 3 6R 0 f Inserto - PDR (por pareja) N° de mat.0.622.1001 1 h g Inserto – ángulo Shift (por pareja) N° de mat. 0.622.1111 j g h Maletín de transporte N° de mat. 1.000.3682 j Tornillo de fijación para placas de montaje (2 unidades) N° de mat. 1.000.3733 sólo para PROTARevo k Calibre de ajuste y medición N° de mat. 1.002.2080 ö l k l Fijación magnética N° de mat. 1.002.4686 y ö Placas de montaje para 3 PS (10 unidades) N° de mat. 1.002.2096 y Sincrinización 3 PS N° de mat. 1.002.2095 x c Caja de transporte / bandeja de trabajo x LOCIcase (10 unidades) N° de mat. 1.001.1511 LOCIcase (50 unidades) N° de mat. 1.000.9355 b c Caja para registros N° de mat. 1.000.9354 v Bote redondo para piezas N° de mat. 1.000.9353 b Goma-espuma para la fijación del N° de mat. 1.000.9351 modelo 9 v PROTAR®evo. Material consumible: 1 Placas de control Pq. con 10 unidades N° de mat. 0.622.0791 3 1 2 2 Adaptador de retención paquete con Mat.-Nr. 1.001.0887 10 unidades Adaptador de retención paquete con 50 unidades N° de mat. 1.001.0953 4 3 Placas de montaje (no para Split-Cast) Paquete con 10 unidades N° de mat. 0.622.1871 5 4 Insertos roscados paquete con 20 unidades N° de mat. 0.622.0781 5 Platillos de enyesado paquete con 20 unidades N° de mat. 0.622.1481 6 6 Placas de montaje para 3 PS (10 unidades) N° de mat. 1.002.2096 7 Retentionsadapter 3PS Mat.-Nr. 1.003.2868 7 Piezas de recambio: 8 Espiga de apoyo – brazo superior No. de mat. 0.622.1872 Juego de montaje Split-Cast No. de mat. 0.622.1031 8 9 Tornillo de desmontaje No. de mat. 0.220.1741 0 Imán 9 No. de mat. 0.622.2682 q Llave magnética No. de mat. 0.411.1212 w Tirantes elásticos para PROTAR 2 10 unidades No. de mat. 1.000.3101 e Pegamento para ajuste nuevo No. de mat. 0.359.2014 0 q e w Härter Harz 10 PROTAR®evo. A 3 Componentes de servicio y piezas funcionales PROTARevo 2 ö 2 2 @ Brazo superior del articulador 1 2 Patas de apoyo p 3 Caja de articulación derecha 3 4 Enclavamiento céntrico derecha 5 Enclavamiento céntrico izquierda PROTARevo 3 6 Zócalo de control 2 7 Brazo inferior del articulador 8 Platillo incisivo 20° 2 h 1 9 Mesa incisiva plana p 0 Espiga de apoyo 4 PROTARevo 5 w Placa de control arriba a 3 w q Placa de control abajo 5 e Fijación ángulo de Bennet y movilidad lateral (ISS) derecha 1 2 2 r Ajuste ISS derecha 3 j t Eje de referencia h z Espiga de referencia CE FH 0 7 55 -5 45 35 60 25 50 4 15 0 30 053 u Ajuste ISS izquierda w i Fijación ángulo de Bennett y movilidad lateral (ISS) izquierda 4 p f d o 5 o Suplemento de caja de articulación izquierda PROTARevo 5B a 2 p Caja de articulación izquierda 2 3 a Elemento elástico izquierda 1 -5 45 35 60 25 50 4 15 0 30 053 d Fijación caja de articulación izquierda j h FH CE 5 70 5 s Retrusion/Protrusion- ajuste izquierda w f Fijación caja de articulación derecha 4 p g Retrusion/Protrusion- ajuste derecha o 5 h Elemento elástico derecha f d a j Fijación ángulo shift derecha k k Esferas de articulación 0 l Sistema de retención magnético t q z ö Tornillo de muletilla (optionale) 9 7 8 6 PROTAR 11 l 2 PROTAR®evo. @ Brazo superior del articulador PROTARevo 7 2 Patas de apoyo 2 1 3 Caja de articulación derecha e r 3 j 2 4 Enclavamiento céntrico derecha g 1,0 0 0,5 5 Enclavamiento céntrico izquierda h 65 55 8 0 7 45 0 D FH CE 90 75 6 Zócalo de control w i 4 7 Brazo inferior del articulador u p 8 Platillo incisivo 20° f d o 9 Mesa incisiva plana 5 a s 0 Espiga de apoyo q Placa de control abajo PROTARevo 9 w Placa de control arriba 2 1 e Fijación ángulo de Bennet y movilidad lateral (ISS) derecha e 2 r 3 j r Ajuste ISS derecha g 1,0 0 0,5 t Eje de referencia h 65 55 80 7 45 0 w u Ajuste ISS izquierda D FH CE 5 90 7 z Espiga de referencia i 4 u p i Fijación ángulo de Bennett y movilidad lateral (ISS) izquierda f d o 5 o Suplemento de caja de articulación izquierda a s p Caja de articulación izquierda a Elemento elástico izquierda s Retrusion/Protrusion- ajuste izquierda d Fijación caja de articulación izquierda 0 k f Fijación caja de articulación derecha t g Retrusion/Protrusion- ajuste derecha z q h Elemento elástico derecha j Fijación ángulo shift derecha k Esferas de articulación l Sistema de retención magnético ö Tornillo de muletilla (optionale) 9 7 8 6 12 l 2 PROTAR®evo. A 4 Preparación para servicio A 4.1 Espiga de apoyo 3 1 -5 CE 70 55 0 6 45 0 5 35 0 4 25 30 15 Colocar la espiga de apoyo 6 en el brazo superior o inferior del articulador y atornillarla firmemente. 2 05 20 10 15 0 25 0 10 35 20 4 Colocar la mesa incisiva plana 1 con el platillo incisivo 2 de 20°, de acuerdo con la modalidad de trabajo, en el brazo superior o inferior. En lugar del platillo con 20° se podrán emplear también platillos con 10 - 50°. 6 5 A 4.2 Enclavamientos céntricos Abrir Posición “0“ 7 En la posición 0 el cierre céntrico 4 está cerrado. El brazo superior del articulador sólo se puede girar a “cerrado“. 7 “0“ 8 Posición “1“ 9 Si los cierres céntricos 4 están en la posición “1“, el articulador se puede mover libremente y puede realizar así los movimientos de articulador deseados. Con la ayuda de los elementos de resorte 8 se aprietan las bolas articuladas 5 contra las superficies de articulación 0 de las cajas de articulación 3, lo que imposibilita alzas no deseadas. 1 2 “1“ “0“ 9 El articulador se tiene que manejar en su posición “1“ como un articulador NonArcon. De tal forma se impide una dislocación del brazo superior del articulador del brazo inferior del articulador. 0 13 PROTAR®evo. Posición “2“ = abierto 1 En esta posición se puede quitar el brazo superior. 1 “2“ “1“ “0“ Después de poner el brazo superior del articulador y cerrar los dos cierres céntricos el articulador está completo. 2 Los cierres céntricos 2 sólo se pueden cerrar, cuando el brazo superior del articulador se lleva hasta el tope con las bolas condilares. Siempre cerrar primero el cierre céntrico izquierdo 2 y 3. 3 “R“ “R“ = derecha “L“ = izquierda “L“ 14 PROTAR®evo. A 4.3 PROTAR®evo con Splitcast (ajuste de fábrica) @ Si el articulador está equipado por la fábrica con KaVo – Splitcast, entonces la placa de control 2 sujetada magnéticamente sirve de alojamiento de modelo. El adaptador de retención 1 sirve de retención de escayola. 2 Después de finalizar el trabajo el modelo se desmonta de la placa de control 3 con la ayuda del tornillo – agarre estrellado 4. A continuación limpiar las placas de control 3. 3 4 A 4.4 Trabajar con el juego de enyesar No. de mat. 0.622.1121 El juego de enyesar sirve para la elaboración de placas de escayola exactas para KaVo Split- Cast. Indicaciones prácticas - funcionamiento • Enclavar el platillo de enyesar 5 en el juego de enyesar 6. • El juego de enyesar normalmente no se tiene que aislar. • Sacar las placas de escayola lo más tarde después de 6 horas. • Limpiar el juego de enyesar inmediatamente después de cada empleo a fondo bajo agua corriente. • En caso necesario usar un agente de separación de KaVo (No. de mat. 0.622.4442). Quitar agente de separación sobrante con aire. 5 6 7 ! En ningún caso limpiar el juego de enyesar con disolvente de escayola. No. de mat. véase A 2.2 8 A 4.5 PROTAR®evo sin Splitcast 9 Si el articulador está equipado por la fábrica sin Splitcast, entonces se fijan las placas de montaje 9 (0.622.1871) con la ayuda de un tornillo de muletilla 8. 9 8 15 PROTAR®evo. A 4.5.1 PROTAR®evo con fijación magnética Con la ayuda de la fijación magnética 1.002.4686 se puede insertar en lugar del tornillo de muletilla un imán 3 en el PROTAR®evo. Junto con las placas de montaje 3 PS 4 se puede cambiar el modelo rápidamente. 3 Este tipo de fijación de modelo no es ninguna sincronización. A 4.6 PROTAR®evo con Splitcast (ajuste de laboratorio) 4 (ajuste en el laboratorio) Los articuladores PROTAR®evo, que no están equipados por la fábrica con un Split Cast, se pueden sincronizar con el 3PS Split en el laboratorio. Accesorios necesarios: 4 Sincronización 3PS No. de mat. 1.002.2095 5 Calibre de medición y ajuste No. de mat. 1.002.2080 5 Instrucciones de montaje: Reforma de articuladores PROTAR sin Split Cast a fijación magnética N.º de material 1.002.4686 Los articuladores PROTAR sin Split Cast pueden reformarse a fijación magnética. En el presente ejemplo de parte inferior del articulador se presentan los pasos de trabajo: Retirar la placa de montaje del modelo 7. Desatornillar del articulador las puntas de fijación de la placa de montaje del modelo y el tornillo de muletilla 8. Colocar el imán 6. 2 1 Alineación 3PS n.º de material 1.002.2095 Parte superior del articulador Retirar la placa de montaje del modelo 1. Desatornillar del articulador las puntas de fijación de la placa de montaje del modelo y el tornillo de muletilla 2 6 7 Parte inferior del articulador Retirar la placa de montaje del modelo 7. Desatornillar del articulador las puntas de fijación de la placa de montaje del modelo y el tornillo de muletilla 8. Fijar el imán 6 con el juego de tornillo. 8 16 PROTAR®evo. A 4.6.1 Ajuste 1.002.2080 Quitar los anillos de junta 1 de goma espuma (1.003.3998) del soporte y pegar sobre el platillo de ajuste 2 de forma céntrica. 1 2 Insertar el calibre de medición y ajuste 6 en la parte inferior del articulador 5. El imán fija el calibre de medición y ajuste. 3 Poner el platillo de ajuste 2 sobre el calibre de ajuste 6. 4 Ajustar el puntero de apoyo del articulador 7 a cero (o “poner a cero“ con el perno de retención). Quitar el imán 4, si este está montado en la parte superior del articulador 3. 7 2 Aplicar el pegamento adjunto sobre el platillo de ajuste 2 fuera del anillo de goma y cerrar el articulador con cuidado. (El pegamento es suficiente para aprox. 3 ajustes) 5 6 Tensar el anillo de goma 1 sobre la parte superior e inferior del articulador y dejar endurecer el pegamento durante 12 horas. 1 A 4.6.2 Medición 1 El calibre de medición y ajuste 2 es apto para comprobar la sincronización en cualquier momento en el laboratorio. Para ello se separa el calibre de medición y ajuste con la ayuda de los dos tornillos de centraje 1 en dos partes. 2 3 Ahora se puede comprobar la sincronización con papel de oclusión 3. 17 18 Protrusion Retrusion Distracción Trayectoria articular horizontal ángulo Shift Trayectoria articular horizontal (Iss) 1 Fix Trayectoria articular (Bennet) Trayectoria articular sagital 0° 0 mm Fija Fija 30° zur CE 45° zur FH PROTAR 2 0° 0 mm Fija 15° Fija 30° zur CE 45° zur FH PROTAR 3 0° 0 mm Ajustable 15° Ajustable -10° bis 90° (FH) -25° bis 75° (CE) PROTAR 5 0° 0 mm Ajustable 0 - 30° Ajustable -10° bis 90° (FH) -25° bis 75° (CE) PROTAR 5B Ajustable 0 - 1,5 mm 0 - 1 mm 0 - 1,5 mm Optional - 20° bis +20° mit 0.622.1111 0 - 1,5 mm Ajustable 0 - 30° Ajustable -10° bis 90° (FH) -25° bis 75° (CE) PROTAR 7 Ajustable 0 - 6 mm 0 - 1 mm 0 - 6 mm 0° 0 - 1,5 mm Ajustable 0 - 30° Ajustable -10° bis 90° (FH) -25° bis 75° (CE) PROTAR 9 PROTAR®evo. A 5 Posibilidades de ajuste de los articuladores PROTAR®evo PROTAR®evo. A 6 Articulación de los modelos de diente A 6.1 Articulación del modelo de maxilar superior con el arco facial ARCUS de KaVo @ 4 Abrir la palanca de apriete 4 y separar el arco facial 3. 3 Antes la espiga de apoyo 2 se tiene que insertar en el brazo inferior del articulador y poner a cero. (Quitar el platillo incisal 6 y bloquear los cierres primero a la izquierda y a continuación a la derecha del brazo superior.) 2 Empujar los taladros de los apoyos de oído del arco facial sobre las espigas de referencia 1 en el brazo inferior del articulador, Juntar el arco facial y bloquear con la palanca de apriete 4. @ El arco facial 3 pone sobre la espiga de apoyo 2. Posicionar el maxilar superior 5 en las impresione 7 de la horquilla de mordida. Amasar una escayola cremosa y meter sobre el modelo de maxilar superior (Cerrar el orificio en la placa de control con el adaptador de retención No. de mat.1.001.0887); recargar la escayola sobre la placa de control en el brazo superior. Cerrar el brazo superior del articulador sin presión. 2 7 5 6 Después del endurecimiento de la escayola quitar el arco facial con la horquilla de mordida del articulador Abrir la palanca de apriete 4 y quitar el arco facial 3 del articulador. 4 3 19 PROTAR®evo. A 6.2 Articulación del modelo de maxilar superior con la ayuda del soporte de transfer Si se quiere articular en el laboratorio dental, es suficiente que se envíe sólo el soporte de la horquilla de mordida y la horquilla de mordida. Quitar la espiga de apoyo y platillo incisal del articulador. 1 Insertar el soporte de transfer 1 en el brazo inferior del articulador. Insertar la horquilla de mordida 3 con el soporte de la horquilla de mordida 2 en el soporte de transfer 1. 2 3 5 A 6.3 Articulación del modelo de maxilar superior con KaVo arco facial light Poner el ARCUS light con sus apoyos de oído 4 sobre las espigas de referencia del PROTAR®evo. 4 Enroscar el apoyo 8 adjunto en el extremo inferior de la barra 7 para el soporte de horquilla de mordida 6. 6 Depositar el arco facial ARCUS light con su apoyo 8 en la mesa. Poner el brazo superior de articulador 5 sobre el arco facial. 7 8 20 PROTAR®evo. A 6.4 Articulación del modelo de maxilar superior con arco facial de otros fabricantes 1 3 2 Se requieren los accesorios siguientes: Referencia de arco ajeno No. de mat. 0.622.1151 compuesto de: 1 Plano de referencia (casquillo + tornillo) 2 Soporte de arco facial 3 Adaptador referencia pin 4 Con estos medios auxiliares existe la posibilidad de poder insertar otros sistemas – arco facial en el articulador PROTAR®evo. Para sistemas con un indicador libremente movible se requiere en el brazo superior del articulador un plano de referencia 1. (Imagen Dentatus) El arco Dentatus se gira con su indicador infraorbital 3 hasta el contacto con el plano de referencia 1. Insertar arcos faciales con indicador giratorio o soporte nasal (p. ej. SAM, Whip Mix) quitar el platillo incisal y la espiga de apoyo del articulador. Destornillar el moleteado del soporte de transfer casi por completo y meter el soporte de transfer en su segunda posición posible hasta el tope en el brazo inferior del articulador. Montar el soporte de la horquilla de mordida en el soporte de transfer. Alinear el soporte de la horquilla de mordida con la ayuda de la escala y fijar con el tornillo moleteado. Adaptardor Denar No. de mat. 0.622.1351 Con la ayuda del adaptador Denar se puede articular una horquilla de mordida Denar. 21 PROTAR®evo. 0 622 1141 1 2 3 4 5 6 Se requieren los accesorios siguientes: 1 Soporte de transfer No. de mat. 0.622.1141 7 A 6.5 Valores de ajuste al utilizar arcos ajenos en el articulador PROTARevo 2 Referencia a arco ajeno No. de mat. 0.622.1151 compuesto de: Plano de referencia (casquillo + tornillo) Soporte de arco facial Adaptador referencia pin Marca Posibilidad de empleo con soporte nasal Valor de escala Indicador de referencia sobre punto infraorbital Valor de escala 66 Accesorios necesarios Girrbach Rotofix sí 39 Girbach sí 51 Dentatus sí - - 2 Plano de referencia Hanau 153 Earpiece Facebow sí - - No se requieren accesorios Barra transversal 70 mm encima de superficie de mesa SAM sí 58 - Panadent sí no posible 51 1 Soporte de transfer 2 Soporte de arco facial 1 Soporte de transfer 2 Plano de referencia y soporte de arco facial y indicador adicional (0.622.1371) Hanau 164-2 Twirl-Bow sí - 59 1 Soporte de transfer 2 Plano de referencia y soporte de arco facial Gerber restringido - - No se requieren accesorios Denar sí - - Adaptador No. de mat. 0.622.1351 Whip-Mix sí 56 - 1 Soporte de transfer 2 Plano de referencia y soporte de arco facial Adaptador referencia pin Quick sí 56 arriba 49 medio 44 abajo - 1 Soporte de transfer 2 Plano de referencia y soporte de arco facial Springbow Hanau sí Alinear sobre plano de referencia Con soporte de horquilla de mordida 0.622.1391 Hager und Werken sí Ivoclar sí 1 Soporte de transfer, 2 Plano de referencia + soporte de arco facial 1 Soporte de transfer 2 Plano de referencia + soporte de arco facial 46 1 Soporte de transfer 0.622.1141 2 Plano de referencia y soporte de arco facial 59 1 Soporte de transfer 0.622.1141 2 Plano de referencia y soporte de arco facial Más marcas a petición 22 PROTAR®evo. A 6.6 Método valor promedio con el posicionador de modelo de maxilar superior de KaVo No. de mat. 0.622.1781 método APFnt El posicionador de modelo de valor promedio para modelo de maxilar superior sin dientes permite la articulación, si no se dispone de un arco facial. Como puntos de referencia sirven los pliegues mucolabiales y el punto más profundo detrás de las dos tuberosidades maxilares. 1 Tornillo de fijación 2 Marca de ajuste, si no está montado un KaVo Split- Cast. 3 Marca de ajuste, si está montado un KaVo Split- Cast. 3 2 1 Puntos de referencia 23 PROTAR®evo. A 6.7 Método valor promedio con la ayuda de montaje / colocación de KaVo para el maxilar superior La ayuda de montaje / colocación 2 No. de mat. 1.001.9451 (sin montaje – Split-Cast) 5 No. de mat. 1.001.9452 (con montaje – Split- Cast) sirve para la articulación de valor promedio de modelos de maxilar superior sin dientes, cuando no se dispone de un arco facial. 3 1 2 Las ayudas de colocación están alineadas en paralelo respecto al plano de Camper. La alineación mesial se realiza con el tornillo de papila 3. Según el método de colocación se desenrosca el tornillo de botón hasta alcanzar la longitud correcta, el modelo se coloca con su papila incisiva sobre el tornillo y el trineo transversal 1 se desplaza tanto tiempo que llegue a parar en el punto más profundo detrás de las dos tuberosidades maxilares. Con la ayuda de los tornillos de ajuste 4 se alinea la ayuda de montaje / colocación una vez respecto al plano de oclusión 6 del articulador correspondiente. 6 5 4 Con la ayuda de la pinza 1.001.9471 se puede fijar la ayuda de montaje / colocación 1.001.5451 también en el Denar, Hanau y Stratos. 24 PROTAR®evo. A 6.8 Método valor promedio con el KAVo calibre de enyesar No. de mat. 0.622.1171 para el modelo de maxilar inferior (Método APF) Con el calibre de enyesar se pueden articular modelos de maxilar inferior sin dientes o parcialmente dentados con valor promedio en el articulador PROTAR. Si el KaVo articulador está equipado con un Split- Cast, se tiene que fijar el calibre de enyesar en la posición 1 (aflojar el tornillo 3). 2 Si no está montado ningún Split- Cast, se tiene que fijar en la posición 2. 3 1 A 6.8.1 Montaje de un modelo de maxilar inferior sin dientes 1 Sobre el modelo – UK se marca el cojín retromolar con un círculo. Se dibuja una mediana 2 que se divide en tres partes. El plano oclusal 1 transcurre al trazado de división superior. 2 25 PROTAR®evo. Colocar la horquilla de sínfisis 9 a la altura del dique de cera inferior 8. 5 4 3 3 Dique de cera superior q 5 Calibre de enyesar de valor promedio 6 Cojín retromolar 0 7 Base corredera sobre cojín retromolar 20-22 18-20 4 Tornillo de fijación 8 Dique de cera superior 9 9 Horquilla de sínfisis 8 0 Plano oclusal 6 7 q Plano de Camper Después de aflojar el tornillo de fijación w colocar la base corredera sobre el punto deseado en el cojín retromolar y cerrar el tornillo de fijación. Fijar el modelo con una cinta de goma e en el calibre de enyesar. w e 9 A continuación articular el modelo de maxilar inferior en el articulador. PROTAR 26 PROTAR®evo. A 6.9 Articulación del modelo de maxilar inferior Poner el articulador sobre la cabeza (cierres céntricos 2 quedan cerrados). 1 2 Abrir el articulador. 3 El modelo de maxilar inferior se pone sobre el modelo de maxilar superior sin balanceo. La espiga de apoyo 1 se ajusta a cero, si se trabaja sin registro céntrico. Cerrar el orificio en la placa de control 3 con el adaptador de retención 4 No. de mat. 1.001.0887. Después recargar la escayola cremosa sobre el modelo de maxilar inferior y la placa de control del brazo inferior del articulador 3. 4 Cerrar el articulador sin presión. Después del endurecimiento de la escayola quitar el registro céntrico y poner la espiga de apoyo 1 de nuevo a cero. Maxilar superior e inferior están articulados ahora en la posición correcta. 1 27 PROTAR®evo. A 7 Programación del articulador A 7.1 Ajuste de la inclinación de la trayectoria articular mediante el registro de protrusión 1 (para PROTAR 5, 5B, 7, 9) Abrir los dos cierres céntricos 3 y meter el registro de protrusión 5 entre las filas de dientes de los modelos de escayola. Haciendo esto el brazo inferior – articulador se desplaza respecto al brazo superior – articulador hacia adelante. 5 2 2 Las bolas de articuladas 6 del articulador ya no tocan la trayectoria condilar. Aflojar las fijaciones 2 de las cajas articulares 4 y llevar la caja articular correspondiente 4 en contacto con las bolas articulares 6. 4 3 3 Inmovilizar las fijaciones 2 de las cajas articulares. 1 1 4 4 7 7 6 6 A 7.2 Ajuste del ángulo de Bennett mediante el registro de laterotrusión izquierdo y derecho (para PROTARevo 5B, 7, 9) Aflojar las fijaciones 1; ajustar primero el ángulo máx. de Bennett. Ajustar el ángulo izquierdo de Bennett. Meter el registro de laterotrusión derecho 5 entre las filas de dientes de maxilar superior e inferior. Girar el inserto de la caja articular izquierdo 7 hasta que la bola articular 6 y el inserto de la caja articular tengan contacto y bloquear con la fijación 1. 6 Ajustar el ángulo derecho de Bennett. Meter el registro de laterotrusión izquierdo 5 entre las filas de dientes de maxilar superior e inferior. 8 Girar el inserto de la caja articular derecho 7 hasta que la bola articular 6 y el inserto de la caja articular tengan contacto y bloquear con la fijación 1. Cerrar los cierres céntricos 3 y colocar el articulador en posición de trabajo. 28 PROTAR®evo. A 7.3 Ajuste de la movilidad lateral (para PROTAR 5B, 7, 9) Immediate Side Shift (ISS) La movilidad lateral inmediata (ISS) del cóndilo de mediotrusión se puede pre-seleccionar desde “0“ hasta “1,5 mm“ (en pasos de 0,5 mm). 1 La rueda de fijación 1 de las guías del ángulo de Bennett se tiene que aflojar para el ajuste aprox. 1/4 vuelta. Poner el ajuste al valor necesario en la marca de ajuste 2 de la movilidad lateral inmediata (ISS). Cerrar la rueda de fijación de nuevo. Los valores de ajuste del ángulo de Bennett se conservan. 2 29 PROTAR®evo. A 7.4 Ajustar el ángulo – Shift Si los insertos de ángulo – Shift (0.622.1111) están insertados en el PROTAR 7, entonces se pueden ajustar movimientos en el lado de trabajo (lado de laterotrusión) exactamente. @ 2 3 Aflojar el tornillo moleteado 3 para poder ajustar el inserto de ángulo – Shift 2 mediante giro en la espiga 1. Con el registro latero-izquierdo se puede ajustar el ángulo de Bennett derecho y a la vez el ángulo – Shift izquierdo. Con el registro latero- derecho se puede ajustar el ángulo de Bennett izquierdo y a la vez el ángulo – Shift derecho. @ 3 Para el ajuste se gira el inserto de ángulo – Shift 2 tanto tiempo hasta que éste tenga contacto con las bolas articulares 4. 2 4 30 PROTAR®evo. A 7.5 Ajuste de una posición de protrusión / distracción PROTARevo 9 El PROTARevo 9 tiene la misma forma constructiva que el PROTARevo 7. El “9” dispone adicionalmente de un inserto – P/D/R. No. de mat. 0.622.1001 derecha / izquierda Ajuste definido de la Protrusión. Ajuste definido de la Distracción. Ajuste definido de la Retrusión. El PROTARevo 7 se puede equipar posteriormente con un inserto – P/D/R. Ajuste de una protrusión guiada de 0 – 2 mm en pasos de 0,25 mm de 2 - 6 mm en pasos de 0,5 mm. Estos ajustes están guiados de forma definida y son reproducibles. En cada posición de protrusión el brazo superior queda inamovible. Empleo p. ej.: Férula de protrusión Afilado de la prótesis total Ajuste de una distracción guiada de 0 – 2 mm en pasos de 0,25 mm de 2 - 6 mm en pasos de 0,5 mm, desde la posición céntrica Estos ajustes están guiados de forma definida y reproducibles. En cada posición de distracción el brazo superior queda inamovible. La espiga de apoyo se puede reajustar correspondientemente. Empleo p. ej: Férulas de mordida 31 PROTAR®evo. A 7.6 Ajuste de la retrusión / protrusión Para generar espacios libres retrusivos durante la recarga de cera, en el PROTAR 7/9 es posible un movimiento retrusivo. Con ello se reducen los trabajos de esmerilado en la consulta del odontólogo. Espacios libres retrusivos ya se tienen en cuenta durante el modelado. Posición cero de la retrusión @ Si la movilidad lateral 3 (ISS) se ajusta a 1,5 mm, entonces se puede realizar un movimiento retrusivo de 1 mm (en pasos de 0,25 mm). ¡En este caso una posición exactamente céntrica con los cierres céntricos cerrados no es posible! 1 3 32 PROTAR®evo. A 7.7 Elaboración de una mesillaguía incisal individual Partiendo de la mesilla incisal plana del Protar el usuario puede configurar un platillo-guía incisal individual. Poner los cierres céntricos del articulador a la posición “1“ y abrir el articulador hacia atrás. Cubrir la mesilla incisal y la punta de la espiga de apoyo con un agente de separación (vaselina). La mesilla incisal se rellena con un autopolimerizado pastoso hasta el borde. Con la ayuda de modelos antes de la preparación se pueden transferir las guías anteriores / caninas por medio de movimientos en el articulador con la espiga de apoyo al autopolimerizado todavía plástico. El platillo-guía incisal individual se separa del platillo incisal aparcándolo con un instrumento en la hendidura. El platillo-guía incisal individual se reponer de nuevo, ya que mediante la ranura se puede reencontrar exactamente la posición correcta 33 PROTAR®evo. A 7.8 Programación de la mesilla incisal ajustable A 7.8.1 A través de modelo de situación Antes del afilado de los dientes se elabora un modelo de situación del paciente. Con este modelo de situación se puede programar a continuación la mesilla incisal programable. 1 Para el montaje correcto de la mesilla incisal se ajusta la guía central a un valor de aprox. 70° 2. R La mesilla incisal se introduce hasta que tenga contacto con la bola 1 de la espiga incisal y se fija con el tornillo de fijación 3. 2 3 L M Mover el maxilar inferior en el articulador hacia la izquierda y ajustar con ello la guía izquierda. A continuación mover el maxilar inferior en el articulador hacia la derecha y ajustar la guía derecha. Si el modelo se mueve a lo largo de los dientes frontales, entonces se puede ajustar la guía central. De tal forma la mesilla incisal ajustable se encarga de la guía de diente. A 7.8.2 A través de los valores de ajuste del ARCUSdigma El ARCUSdigma indica directamente los valores de ajuste para esta mesilla incisal. (R) (M) (L) Ajustar los valores como descrito 34 60,0 63,6 57,0 PROTAR®evo. A 8 Montaje del inserto de ánguloShift en el PROTAR®evo 7 2 Primero se tiene que quitar el Pro/cilindro de retrusión 1 existente. Para ello se saca la espiga de bloqueo 5 con la ayuda de la llave Allen adjunta 2 con un poco de presión de la rueda de presión 3. 3 4 1 5 1. Quitar el Pro/cilindro de retrusión 1. 2. Quitar la rueda de propulsión 3. 3. Quitar la muesca de plástico negra 4. 1 3 4 5 Montaje del inserto de ángulo-Shift 6. 6 El inserto de ángulo-Shift se monta de la siguiente manera: - Introducir el tornillo 7 en la muesca. - Introducir el inserto de ángulo-Shift 8 desde fuera en la caja de articulador. - Apretar el tornillo 7. 8 7 35 PROTAR®evo. A 9 Programación del articulador con datos de medición del ARCUSdigma (No. de mat. 1.000.8232) El PROTARevo 7 con el inserto de ánguloShift (No. de mat. 0.622.1111) y la mesilla incisal ajustable (No. de mat. 0.622.1701) puede reproducir exactamente todos los valores de ajuste calculados. 36 PROTAR®evo. A 10 Ayudas de colocación para prótesis totales A 10.1 Ayudas de colocación para el modelo de maxilar inferior según el método – APFnt- Methode (No. de mat. 0.622.2071) Fijar el indicador – inclinación de oclusión 1 sobre el centraje de eje del articulador. 1 Apretar el tornillo 4. Invertir el articulador. Poner la calota 3 sobre el modelo de diente. 5 6 2 En la zona mesial del inserto frontal 2 poner sobre los dos dientes frontales de 1. En la zona dorsal posicionar el listón transversal trasero 6 detrás de las dos tuberosidades. 3 Apretar el tornillo 5, después apretar el tornillo 7. Si es necesario, reajustar el tornillo 5 otra vez. 4 7 3 37 DE PROTAR®evo. GEBRAUCHSANWEISUNG A 10.2 Ayuda de colocación 3D para el modelo de maxilar inferior según el método – APFnt 5 1 4 1 Alojamiento 2 Soporte de calota 3 Calota larga No. de mat. 0.622.1211 4 Calota corta No. de mat. 0.622.1201 5 Tornillo de ajuste 3 Este sistema de calota se puede emplear de forma universal, no importa según qué aspecto se articuló el modelo en el articulador (arco facial o calibre de enyesado respectivamente). En este sistema de calota el usuario dispone de una superficie plana que transmite la relación respecto al plano de oclusión y una superficie convexa que tiene en cuenta las curvas de compensación en dirección sagital como transversal respecto a la colocación del maxilar inferior. Con la ayuda del soporte de calota y el alojamiento la calota se puede ajustar de forma universal. Si se articuló o con arco facial, calibre de enyesado o cinta de goma, la calota se puede alinear en cualquier cado. Comprimiendo el alojamiento se fija toda la unidad entre las bolas articulares del articulador. PROT 38 2 PROTAR®evo. Para la alineación la calota 1 se pone sobre el dique de cera 2. Para ello el dique de cera se tiene que modificar oclusal de tal forma que la calota se alinea en la zona de los incisivos y en la zona de los molares inferiores. La superficie de la calota se puede emplear p. ej. para el método Gerber. 1 2 Con el tornillo de ajuste 3, que se enrosca a través de la calota 1 sobre el modelo, se fija la posición de la calota. Para la colocación el dique de cera se puede retirar ahora un poco. Una gota de cera adhesiva fija el tornillo de ajuste. 3 El maxilar inferior se puede colocar ahora contra la calota. Después de quitar el soporte de calota el articulador se completa de nuevo. 39 PROTAR®evo. A 10.3 Calota de colocación – 3D para el modelo de maxilar superior (No. de mat. 1.002.4919) Esta ayuda de colocación plana para el modelo de maxilar superior sin dientes se alinea mediante el dique de cera superior. Para ello se aprieta la ayuda de colocación por medio de una cinta de goma contra el dique de cera superior. A continuación se fija la ayuda de colocación individualmente con un poco de escayola en el brazo inferior del articulador. 40 PROTAR®evo. A 10.4 Ayuda de colocación – 2D para el maxilar superior (No. de mat. 1.001.9452) Este accesorio es tanto ayuda de enyesado como también de colocación para maxilar superior sin dientes. Después de girar el tornillo de papila 1 y descorrer la corredera de apoyo 2 se puede empezar con la colocación del modelo de maxilar superior. 1 2 A 10.5 Ayuda de colocación – 2D para el maxilar superior para el montaje atornillado (No. de mat. 1.001.9451) 41 PROTAR®evo. A 11 Mesilla de modelo con SplitCast Para trabajos protésicos que requieren pasos de trabajo sobre el aparato de fresar, a menudo existe la necesidad de alternar el modelo entre el articulador y el aparato de fresar. 1 2 1 Imán 2 Zócalo de control 3 Palanca 3 Por medio de la fuerza magnética se garantiza una sujeción segura del trabajo también durante trabajos de fresar. El sistema – Split-Cast sobre la base de las placas de control – articulador garantiza una fijación precisa del trabajo. El modelo se fija sólo una vez para el trabajo correspondiente para el fresado y después se puede cambiar tantas veces que sean necesarias sin más ajustes. 42 PROTAR®evo. Estructuras oclusales se pueden establecer en el articulador. Los trabajos de fresado necesarios se pueden realizar en cualquier momento. Todos los pasos de trabajo se pueden controlar reiteradamente a causa del cambio preciso entre el articulador y el aparato de fresar. 43 GA PROTAR evo -A11 KaVo LOGIcase PROTAR®evo. A 12 Caja de transporte KaVo LOGICase KaVo LOGICase la caja de transporte económica y apilable entre consulta y laboratorio. KaVo LOGICase es caja de transporte y bandeja de trabajo en uno. r m bo ter La us M 1 Gomaespuma para la fijación de modelo (50 unidades. 1.000.9351) 2 Para el primer empleo en el ERGOspace se abren las escotaduras laterales. 3 Bote redondo para piezas sueltas (50 unidades 1.000.9353) 4 Sitio para código de barras 5 Sitio para nombre del paciente 6 10 Cajas (20 semi-bandejas 1.001.1511) 50 Cajas (100 semi-bandejas 1.000.9355) 7 Caja rectangular para registros (50 unidades 1.000.9354) n an 1 Higiene: LOGIcase se puede desinfectar con agente habitual. 2 3 7 1 El equipamiento siguiente es posible: - 4 Modelos - o 4 cubetas - KaVo ARCUS soporte de horquilla de mordida - 2 Cajas para registros - 2 Botes redondo para piezas sueltas 4 6 Soporte especial 8 para KaVo programa de mobiliario de laboratorio. 5 Empleo universal para todos los demás programas de mobiliario 8. 8 8 44 PROTAR®evo. A 13 Datos técnicos Articuladores PROTARevo‚ 2, 3, 5, 5B, 6, 7y9 110 Brazo inferior Distancia - intercondilar = fija 110 mm +10 0 - 10 Espiga de apoyo Campo de ajuste de + 10 hasta - 10 mm con bloqueo Mesilla incisal plana (plan) Platillo incisal (Accesorios 10°, 30°, 40°, 50°) Altura constructiva con placa de control + con Split-Cast Ángulo – Balkwilll 20° 120 mm 108 mm 97 mm 20° Plano de Camper (CE) paralelo respecto al plano de mesa HCN curvado (después 5mm de excursión) Ángulo – Bennett curvado (después 5mm de excursión) 20∞ Peso (con Split-Cast) Articulador – brazo inferior Articulador – brazos superiores PROTARevo 2/3 Articulador – brazos superiores PROTARevo 5 PROTARevo 5B/7/9 ( 10∞ , 30∞ , 40∞ , 50∞ ) 450 gr. 235 gr. 420 gr. 450 gr. 120 108 97 CE Reservado el derecho a cambios técnicos. 45 20∞ PROTAR®evo. A 14 Cuidado y ajuste Antes de la puesta en servicio rociar el articulador con un agente de separación - articulador corriente (espray de silicona, no engrasar. No emplear disolventes – oxidación o disolvente escayola. En caso necesario engrasar las bolas articulares 8, sistema de adhesión magnético 9 o las roscas – placas de control ligeramente. Si las palancas de sujeción para la HCN ya no sujetan correctamente, existe la posibilidad un ajuste posterior Herramientas: Llave - Allen 1,5 mm 6 Destornillador 4,5 mm 3 Reajustar los cierres cétricos 1 y 2. Llave - Allen exterior 3 mm 4 Llave - Allen interior 2 mm 5 Control de Split-Cast en el PROTAR 3/5/7/9. (Recomendado cada seis meses con calibre de medición y ajuste No. de mat. 0.622.1221) Desenroscar el sistema de adhesión magnético 9 con la llave magnética q. Por motivos de exactitud el Split-Cast está centrado en los flancos. La placa de control tiene que descansar sobre los flancos e de forma plana. El hueco de aire w entre el zócalo de control r y la placa de control tiene que estar paralelo. Después de terminar el trabajo se quita a presión el modelo con el tornillo – mando estrellado u de la placa de control t - z. A continuación limpiar las placas de control t - z. Para un mejor comportamiento de deslizamiento i Articulator Lubricating Paste REF. 1.001.7613 46 PROTAR®evo. Condiciones de garantía KaVo asume ante el cliente final la prestación de garantía para el correcto funcionamiento y la ausencia de defectos en el material o en el procesamiento del producto mencionado en el justificante de entrega durante un período de 12 meses a partir de la fecha de compra según las siguientes condiciones: En reclamaciones justificadas por defectos o envíos incompletos,KaVo prestará garantía según su elección mediante suministro de repuesto o reparación sin coste. Quedan excluidas otras reclamaciones, independientemente del tipo que sean, especialmente las relativas a indemnización por daños y perjuicios. En caso de retraso o de culpa grave o dolo, sólo se aplicará si las prescripciones legales obligatorias no establezcan lo contrario. KaVo no se hace responsable de los defectos y sus consecuencias derivados del desgaste natural, de una limpieza o un mantenimiento inadecuados, del incumplimiento de las instrucciones de funcionamiento, mantenimiento o conexión, de calcificación o corrosión, de suciedad en la alimentación de aire y agua o de influencias químicas o eléctricas no habituales o no permitidas según las normas de la fábrica. La prestación de garantía normalmente no incluye bombillas, material de cristal, piezas de goma y a la permanencia de los colores de los materiales sintéticos. Queda excluida la responsabilidad si los defectos o sus consecuencias pudieran deberse a que el cliente o terceras personas intervengan o modifiquen el producto. Las reclamaciones de esta garantía sólo serán válidas si el justificante de entrega (copia) del producto fue enviado a KaVo y el usuario/explotador puede presentar el original. 47 Verk.-Nr. PROTARevo 2 Mat.-Nr. 1.002.3306 06/02003 09.21 PROTAR®evo. Piezas de recambio PROTAR®evo 2 N° de mat.1.002.3305 1.002.3303 sin Split-Cast Mat.-Nr. ohne Split-Cast 0.622.0981 1.002.4686 3PS 1.002.2074 0.200.6034 0.200.6093 0.622.1363 0.622.1373 1.001.0889 0.200.6301 Verk.-Nr. (10x) PROTARevo 3 1.002.2096 10x Mat.-Nr. 1.002.3307 mit Split-Cast Mat.-Nr. 1.002.3306 ohne Split-Cast 06/2003 09.22 PROTAR®evo 3 N° de mat. 1.002.3307 con mit Split-Cast Mat.-Nr. 1.002.3307 Split-Cast N° de mat. 1.002.3306 sin Split-Cast Mat.-Nr. 1.002.3306 ohne Splitcast 0.622.0981 0.200.6034 3x 0.201.1459 1.002.2074 1.001.0889 10x 0.622.2702 0.622.2652 0.622.0791(10x) 0.622.2682 0.411.1212 0.622.2692 0.622.1822 0.622.1812 1.002.4686 3PS 0.622.2712 0.220.1309 0.253.6045 2x 0.249.4168 1.002.2096 10x 1/1 48 Verk.-Nr. PROTARevo 5 Mat.-Nr. 1.002.3311 mit Split-Cast Mat.-Nr. 1.002.3310 ohne Split-Cast 06/2003 09.23 PROTAR®evo. PROTAR®evo 5 N° de mat.1.002.3311 1.002.3311 con Mat.-Nr. mitSplit-Cast Splitcast N° deMat.-Nr. mat. 1.002.3310 sin Split-Cast 1.002.3310 ohne Splitcast 0.622.0981 0.200.6034 3x 0.201.1459 1.002.2074 1.001.0889 10x 45 35 60 25 50 4 15 0 3 050 3 0.622.2652 0.622.0791(10x) FH CE 5 70 5 -5 1.002.4686 3PS 0.622.2682 0.622.2702 0.411.1212 0.622.1822 0.622.2692 0.622.1812 0.249.4168 Verk.-Nr. PROTARevo 5B Mat.-Nr. 1.002.3315 0.253.6045 2x mit Split-Cast Mat.-Nr. 1.002.3314 ohne Split-Cast 0.220.1309 0.622.2712 1.002.2096 10x 06/2003 09.23 PROTAR®evo 5B N° de mat.1.002.3315 1.002.3315 con Splitcast Mat.-Nr. mit Split-Cast N° de mat. 1.002.3314 sin Split-Cast Mat.-Nr. 1.002.3314 ohne Splitcast 3x 0.201.1459 1.002.2074 1.001.0889 FH C E 5 70 5 -5 45 6 35 0 25 50 4 15 0 30 053 0.622.2652 0.622.0791(10x) 0.622.0981 0.200.6034 1.002.4686 0.622.2682 0.622.2702 0.411.1212 0.622.1822 0.622.2692 0.622.1812 0.249.4168 0.253.6045 2x 0.220.1309 0.622.2712 1.002.2096 10x 1/1 49 Verk.-Nr. PROTARevo 7 Mat.-Nr. 1.002.3319 mit Split-Cast Mat.-Nr. 1.002.3318 ohne Split-Cast 09/2004 09.24 PROTAR®evo. PROTAR®evo 7 N° de mat. 1.002.3318 sinSplitcast Split-Cast Mat.-Nr. 1.002.3318 ohne Mat.-Nr. 1.002.3319 Splitcast 1.002.3319 con mit Split-Cast N° de mat. 0.250.0031 1.002.0508 0.222.4043 0.622.2032 (L) 0.622.2042 (R) 0.622.2542 0.622.2532 0.622.2502 3x 0.201.1459 0.622.2082 (R) 0.622.2092 (L) 1.002.2074 0.622.0981 0.200.6034 1,0 0 0,5 65 55 8 0 7 45 0 0.622.2652 0.622.0791(10x) D FH CE 5 90 7 1.001.0889 10x 0.622.2702 0.622.2682 1.002.2085 0.411.1212 0.622.1822 1.002.4686 3PS 0.622.2692 0.622.1812 0.249.4168 0.253.6045 2x 0.220.1309 0.622.2712 Verk.-Nr. PROTARevo 9 0.240.2240 Mat.-Nr. 1.002.3323 mit Split-Cast Mat.-Nr. 1.002.3322 ohne Split-Cast 1.002.2096 10x 06/2003 09.25 5 2 3 6R 0 1 1.002.2085 PROTAR®evo 9 N° de mat. 1.002.3323 con Split-Cast Mat.-Nr. 1.002.3323 mit Splitcast N° de mat. 1.002.3322 sin Split-Cast Mat.-Nr. 1.002.3322 ohne Splitcast 0.250.0031 1.002.0508 0.222.4043 0.622.2032 (L) 0.622.2042 (R) 0.622.2542 0.622.0981 0.622.2532 0.200.6034 0.622.2502 3x 0.201.1459 0.622.2082 (R) 0.622.2092 (L) 1.001.0889 1.002.2074 1.002.4686 1/1 0.622.2652 0.622.0791(10x) 0.622.2682 0.411.1212 0.622.2702 0.622.1822 0.622.2692 0.622.1812 0.249.4168 0.253.6045 2x 0.220.1309 0.622.2712 50 1.002.2096 10x Verk.-Nr. PROTARevo Unterteil Mat.-Nr. 1.002.3265 ohne Splitcast ® PROTAR Mat.-Nr.evo. 1.002.3266 mit Splitcast 06/2003 09.26 PROTAR®evo Brazo inferior N°Mat.-Nr. de mat. 1.002.3265 Split-Cast 1.002.3265sin ohne Splitcast N° de mat.1.002.3266 1.002.3266 con Mat.-Nr. mit Split-Cast Splitcast 0.222.5045 (8x12x0,15) 0.222.5046 (8x12x0,18) 0.222.5047 (8x12x0,20) 1.001.0889 10x 0.622.1852 0.622.2022 0.200.6034 0.622.0981 0.622.1181 0.622.0791 10x 0.622.3142 1.002.2075 1.002.4686 3PS 0.622.2682 0.622.1912 0.622.1922 0.622.1932 0.622.1942 0.622.1952 0.622.1962 10° 20° 30° 40° 50° 1.002.2074 1.002.2079 3x 0.201.1459 0.622.2652 1.002.2096 10x 0.411.1212 0.220.1741 1/1 51 1.002.5701 Fk 7/07 es 09.20 KaVo Dental GmbH. D-88400 Biberach/Riss Telefon +49 7351 56-0 Fax +49 7351 56-1488 Internet: www.kavo.com Istruzioni per l´uso PROTAR® evo. Sempre dalla giusta parte. KaVo Dental GmbH. D-88400 Biberach/Riss Telefon +49 7351 56-0 Fax +49 7351 56-1488 Vertrieb/distribution: KaVo Dental GmbH Bismarckring 39 • D-88400 Biberach Tel.: 0 73 51 / 56-0 • Fax: 0 73 51 / 1488 Hersteller/manufacturer: Kaltenbach & Voigt GmbH Bismarckring 39 D-88400 Biberach PROTAR®evo. A 1 Informazioni per l’utente ......................................................................................................................................................2 A 1.1 Significato dei pittogrammi ..........................................................................................................................................2 A 1.2 Avvisi importanti ..........................................................................................................................................................2 A 1.3 Misure di sicurezza ....................................................................................................................................................2 A 1.4 Ambito di utilizzo ........................................................................................................................................................3 A 1.5 Osservazione dei possibili movimenti della mandibola sul piano orizzontale ............................................................4 A 1.6 Filosofia del sistema ..................................................................................................................................................5 A 2 Fornitura - Accessori ............................................................................................................................................................6 A 2.1 Fornitura ......................................................................................................................................................................6 A 2.2 Accessori ....................................................................................................................................................................8 A 3 Comandi e parti funzionali ..................................................................................................................................................11 A 4 Preparazione alla messa in funzione ................................................................................................................................13 A 4.1 Asta incisale ..............................................................................................................................................................13 A 4.2 Chiusura in centrica ..................................................................................................................................................13 A 4.3 PROTAR®evo con Splitcast (taratura in fabbrica) ..................................................................................................15 A 4.4 Lavorazione con il kit di gessatura Codice 0.622.1121 ............................................................................................15 A 4.5 PROTAR®evo senza Splitcast ................................................................................................................................15 A 4.5.1 PROTAR®evo con fissaggio magnetico ................................................................................................................16 A 4.6 PROTAR®evo con Splitcast (taratura in laboratorio) ..............................................................................................16 Istruzioni di montaggio: Montaggio di articolatori PROTAR senza split-cast con bloccaggio a magnete N. Matr. 1.002.4686 ........................................................................................................................................................................16 Messa in fase 3PS N. Matr. 1.002.2095 ..........................................................................................................................16 A 4.6.1 Taratura 1.002.2080 ..............................................................................................................................................17 A 4.6.2 Misurazione ............................................................................................................................................................17 A 5 Possibili regolazioni degli articolatori PROTAR®evo ......................................................................................................18 A 6 Montaggio in articolatore dei modelli ................................................................................................................................19 A 6.1 Montaggio in articolatore del modello superiore con l’arco facciale ARCUS KaVo ..................................................19 A 6.2 Montaggio del modello superiore in articolatore mediante il supporto di trasferimento ..........................................20 A 6.4 Montaggio del modello superiore in articolatore con arco facciale non KaVo ..........................................................21 A 6.5 Regolazioni per l’uso di archi non KaVo con l’articolatore PROTARevo ..................................................................22 A 6.6 Metodica di montaggio a valori medi con la croce di fissaggio per modelli di arcata superiore KaVo, Codice 0.622.1781, sistema APFnt ................................................................................................................................................23 A 6.7 Metodica di montaggio a valori medi con lo strumento di montaggio per modelli di arcata superiore KaVo ..........24 A 6.8 Metodica di montaggio a valori medi con la croce di fissaggio modelli dell’arcata inferiore KaVo, Codice 0.622.1171 ..........................................................................................................................................................................25 A 6.8.1 Montaggio di un modello dell’arcata inferiore edentulo ........................................................................................25 A 6.9 Montaggio in articolatore del modello dell’arcata inferiore ......................................................................................27 A 7 Programmazione dell’articolatore ......................................................................................................................................28 A 7.1 Regolazione dell’angolo di eminenza mediante la registrazione di protrusione ......................................................28 A 7.2 Regolazione dell’angolo di Bennett mediante la registrazione di laterotrusione sinistra e destra ..........................28 A 7.3 Regolazione dell’escursione in lateralità ..................................................................................................................29 A 7.4 Regolazione dell’angolo di Shift ..............................................................................................................................30 A 7.5 Regolazione di una posizione di protrusione/posizione di distrazione ....................................................................31 A 7.6 Regolazione della retrusione/protrusione ................................................................................................................32 A 7.7 Costruzione di un piatto incisale individuale ............................................................................................................33 A 7.8 Programmazione del tavolato incisale regolabile ....................................................................................................34 A 7.8.1 Mediante il modello di studio ................................................................................................................................34 A 7.8.2 Mediante i valori dell’ARCUSdigma ......................................................................................................................34 A 8 Inserimento dell’inserto dell’angolo di Shift sul PROTAR®evo 7 ..................................................................................35 A 9 Programmazione dell’articolatore con i dati di misurazione dell’ARCUSdigma ..........................................................36 A 10 Strumenti di montaggio per la protesi totale ..................................................................................................................37 A 10.1 Strumenti di montaggio per il modello dell’arcata inferiore secondo il sistema APFnt ..........................................37 A 10.2 Strumento di montaggio 3D per modello dell’arcata inferiore secondo il sistema APF ........................................38 A 10.3 Calotta di montaggio 3D per il modello dell’arcata superiore (Codice 1.002.4919) ..............................................40 A 10.4 Strumento di montaggio 2D per l’arcata superiore (Codice 1.001.9452) ..............................................................41 A 10.5 Strumento di montaggio 2D per l’arcata superiore per il montaggio a vite (Codice 1.001.9451) ..........................41 A 11 Base per modello con Split-Cast ....................................................................................................................................42 A 12 Contenitore per il trasporto KaVo LOGICase ................................................................................................................44 A 13 Dati tecnici ..........................................................................................................................................................................45 A 14 Manutenzione e regolazione ............................................................................................................................................46 Condizioni di garanzia ........................................................................................................................................................47 PROTAR®evo 3 ..................................................................................................................................................................48 Parti di ricambio PROTAR®evo 2 ......................................................................................................................................48 PROTAR®evo 5B ..............................................................................................................................................................49 PROTAR®evo 5 ................................................................................................................................................................49 PROTAR®evo 9 ..................................................................................................................................................................50 PROTAR®evo 7 ..................................................................................................................................................................50 PROTAR®evo branca inferiore ..........................................................................................................................................51 1 Gefährliche elektr. Spannung PROTAR®evo. A 1 Informazioni per l’utente geprüfte Sicherheit A 1.2 Avvisi importanti A 1.3 Misure di sicurezza Consigliamo agli utenti di leggere Il funzionamento sicuro e la protezione del attentamente le istruzioni per il prodotto sono garantiti soltanto da un uso montaggio, l’uso e la manutenzione prima corretto dell’apparecchio, in conformità le Attenzione! VDE - Zeichen di mettere in esercizio l’apparecchio, al fine istruzioni d’uso e con i rispettivi accessori Situazioni che, se vengono ignorate di evitare problemi nel funzionamento o omologati. le istruzioni, possono portare a pericolo, danni di qualsiasi genere. Presso le filiali deterioramento del materiale o ad anomalie KaVo sono disponibili, a richiesta, le Inoltre occorre rispettare le seguenti norme di funzionamento. VDE istruzioni d’uso nella lingua desiderata. La vigenti: PRODUCT PRODUCT riproduzione e la diffusione delle istruzioni Nota! geprüfte SERVICE E Sicherheit deve essere autorizzata a priori dalla SERVIC KaVo. • norme sulla sicurezza del lavoro Informazioni e suggerimenti impor• norme antinfortunistiche. tanti per l'utilizzatore e per il personale I dati tecnici, le informazioni e le tecnica. del'assistenza 1008 caratteristiche dei prodotti descritti nelle In base a dette norme l’utente ha l’obbligo Achtung, istruzioni d’uso corrispondono alle di: Allgemeine Gefahrenstelle specifiche esistenti all’atto della pubblicazione. Modo automatico Sono possibili modifiche e migliorie del Funzionamento automatico prodotto sulla base di innovazioni tecniche. • accertarsi ISO 9001 del corretto funzionamento DIN della macchina e del perfetto stato di tutti chiudere, avvitare, serrare ecc. Ciò non comporta il diritto dell’utente a i componenti prima di utilizzare modificare di conseguenza gli apparecchi l’apparecchio già installati. • rispettare la corretta destinazione d’uso aprire, svitare, allentare dell’apparecchio KaVo non è responsabile dei danni • proteggere se stesso, il paziente e terzi da i dipendenti da: eventuali pericoli • evitare una contaminazione causata dal + più, aumentare • cause esterne (qualità scadente prodotto degli strumenti o installazione imperfetta) • non proseguire nella lavorazione se sono • applicazione di informazioni errate danneggiati alcune parti funzionali. -! meno, ridurre • uso improprio non conforme alle norme • riparazioni non idonee. A 1.1 Significato dei pittogrammi i funzionamento continuo orologio, temporizzatore scollegare la spina dalla presa de corrente Lavori di riparazione e manutenzione – al di fuori di quelli riportati nelle presenti istruzioni d’uso – devono essere effettuati esclusivamente da tecnici autorizzati. Il mancato rispetto di questa clausola rende inoperante ogni garanzia. Modifiche effettuati da terzi annullano la validità delle omologazioni. Per il funzionamento o le riparazioni devono essere utilizzati esclusivamente pezzi di ricambio originali KaVo. 2 PROTAR®evo. A 1.4 Ambito di utilizzo Per i suoi movimenti spaziali tridimensionali l’organo masticatorio è il sistema motorio più complesso del corpo umano. Se sussistono gravi anomalie del sistema è indispensabile intervenire con una terapia funzionale. Poiché tali misure terapeutiche vanno eseguite prevalentemente al di fuori del cavo orale, risulta necessario simulare i movimenti mandibolari non solo nello studio dentistico, ma anche nel laboratorio odontotecnico. 1 FH 7 Articolatori e sistemi di misurazione adeguati rappresentano strumenti indispensabili per la rilevazione e il trasferimento delle relazioni anatomiche e dei parametri funzionali. Il rapporto morfologico privo d’interferenze tra articolazione temporo-mandibolare (ATM) e arcate dentarie è alla base del corretto funzionamento dell’organo masticatorio. 6 2 3 4 5 Per riprodurre i movimenti dei mascellari occorre stabilire sul paziente punti e linee di riferimento sotto forma di sistema di coordinate. Il collegamento tra punto sottonasale e trago mediale 5 forma il piano di Camper 2 (PC). Il collegamento tra porion 6 e punto infraorbitale 1 (PIO) dà l’orizzontale di Francoforte (OF). L’inclinazione dei tragitti condiloidei rispetto a questi piani di riferimento dà l’angolo di inclinazione del tragitto condiloideo “HCN“. Osservazione dei possibili movimenti della mandibola sul piano orizzontale. 3 punto sottonasale 4 piano di occlusione 7 asse cerniera 3 PROTAR®evo. A 1.5 Osservazione dei possibili movimenti della mandibola sul piano orizzontale Protrusione In protrusione la mandibola si sposta in avanti. I due condili si muovono in direzione ventrale e caudale. Sui denti i tracciati di movimento del dente superiore vengono rappresentati sul dente inferiore. Mediotrusione e laterotrusione Durante la “escursione in lateralità“ si distingue tra laterotrusione sul lato lavorante e mediotrusione sul lato bilanciante. Il collegamento del punto iniziale con il punto finale del condilo che si muove verso l’interno sul tragitto di mediotrusione forma l’angolo di Bennett 1 con la protrusione sul lato bilanciante. tt nne Be 1 Sul lato lavorante il condilo descrive una laterotrusione. Eventuali deviazioni dal movimento di laterotrusione vengono definite come angolo di Shift 2. t Shif 2 t net B en 4 PROTAR®evo. A 1.6 Filosofia del sistema 1 Il sistema di articolatori e archi facciali KaVo è costruito in modo che l’utente possa optare indifferentemente per il riferimento all’orizzontale di Francoforte (OF) o al piano di Camper (PC). 2 3 Il supporto nasale 1 orienta l’arco facciale a valori medi in base ai due piani. Con l’aiuto dell’indicatore di riferimento 3 l’arco facciale può essere anche orientato a valori individuali in base al piano di riferimento desiderato. 4 2 punto infra-orbitale 4 punto sottonasale 6 In articolatore l’arco facciale viene inserito sempre nella stessa posizione, poggiante sui perni di riferimento laterali 5 e sull’asta incisale (mettere a zero). 5 In conformità all’anatomia del paziente la forchetta assume però posizioni diverse. 6 appoggio dell’arco facciale 7 asta incisale 7 Nell’articolatore Protar i modelli sono quasi sempre paralleli (scarto ± 10) al piano di Camper 9. Vantaggio per l’odontotecnico: I modelli montati in articolatore, con il loro piano di occlusione q, sono quasi paralleli al piano di Camper 9 e dunque anche alla superficie di lavoro. L’espansione del gesso risulta omogenea. 8 0 w e r 8 r e 9 0 w q punto infra-orbitale punto sottonasale trago mediale porion asse cerniera 5 PROTAR®evo. A 2 Fornitura - Accessori A 2.1 Fornitura Articolatore PROTAR®evo 2 composto da: branca superiore Codice 1.002.3303 branca inferiore Codice 1.002.3265 oppure PROTAR evo 2 Articolatore PROTAR®evo 2 con Split-Cast composto da: branca superiore Codice 1.002.3307 branca inferiore Codice 1.002.3266 oppure Articolatore PROTAR®evo 3 senza Split-Cast composto da: branca superiore Codice 1.002.3306 branca inferiore Codice 1.002.3265 PROTAR evo 3 oppure CE 70 55 0 6 45 0 5 35 0 4 25 30 15 Articolatore PROTAR®evo 5 con Split-Cast composto da: branca superiore Codice 1.002.3311 branca inferiore Codice 1.002.3266 oppure 05 -5 20 1 15 0 0 25 0 10 35 20 Articolatore PROTAR®evo 5 senza Split-Cast composto da: branca superiore Codice 1.002.3310 branca inferiore Codice 1.002.3265 PROTAR evo 5 oppure CE0 7 55 0 6 45 0 5 35 0 4 2 5 30 15 Articolatore PROTAR®evo 5B con Split-Cast composto da: branca superiore Codice 1.002.3315 branca inferiore Codice 1.002.3266 05 -5 20 1 15 0 0 25 0 10 35 20 1 0 oppure Articolatore PROTAR®evo 5B senza Split-Cast composto da: branca superiore Codice 1.002.3314 branca inferiore Codice 1.002.3265 oppure PROTAR evo 5B 6 PROTAR®evo. 50 3 5 40 25 30 15 Articolatore PROTAR®evo 7 con Split-Cast composto da: branca superiore Codice 1.002.3319 branca inferiore Codice 1.002.3266 oppure 0 05 -5 20 1 15 0 0 25 0 10 35 20 1,5 1, 0 0,5 10 20 30 Articolatore PROTAR®evo 7 senza Split-Cast composto da: branca superiore Codice 1.002.3318 branca inferiore Codice 1.002.3265 PROTAR evo 7 40 0 0,5 1, 25 30 05 20 05 10 15 0 25 10 0 15 6 0 7 55 6 0 45 50 35 Articolatore PROTAR®evo 9 con Split-Cast composto da: branca superiore Codice 1.002.3323 branca inferiore Codice 1.002.3266 oppure 10 20 1,5 oppure 30 Articolatore PROTAR®evo 9 senza Split-Cast composto da: branca superiore Codice 1.002.3322 branca inferiore Codice 1.002.3265 Istruzioni d’uso PROTAR®evo Codice 1.002.5701 PROTAR evo 9 7 PROTAR®evo. A 2.2 Accessori Accessori disponibili su richiesta: 1 Indicatore incisale Codice 0.622.1021 2 Piatto incisale 10 ° Codice 0.622.1922 Piatto incisale 20 ° Codice 0.622.1932 Piatto incisale 30 ° Codice 0.622.1942 Piatto incisale 40 ° Codice 0.622.1952 Piatto incisale 50 ° Codice 0.622.1962 Kit di montaggio per Split-Cast Codice 0.622.1031 (senza illustrazione) 3 Supporto di trasferimento Codice 0.622 1141 4 Adattatore per archi facciali non KaVo, Codice 0.622 1151 4b Sostegno per arco facciale 4c adattatore riferimento perno 5 Croce di fissaggio modelli a valori medi dell’arcata inferiore, Codice 0.622.1171 6 Calotta di montaggio Codice 0.622.1161 7 Calotta corta Codice 0.622.1201 8 Calotta lunga Codice 0.622.1211 9 Strumento di montaggio Protesi totale superiore Codice 1.001.9451 per PROTARevo con vite Dispositivo di fissaggio per articolatori non KaVo, Codice 1.001.9471 0 Strumento di montaggio Protesi totale superiore Codice 1.001.9452 per PROTARevo con zoccolo di controllo q Croce di fissaggio per modelli di arcata superiore, Codice 0.622.1781 w Strumento di montaggio per piano protesico, Codice 0.622.2071 e Preformati per gessatura Codice 0.622.2212 44,0 mm Codice 0.622.2222 22,0 mm Codice 0.622.2232 14,6 mm r Base per modello con Split-Cast, Codice 0.625.0770 t Kit di gessatura, Codice 0.622.1121 z Piattino di gessatura, Codice 1.001.0888 u Video ARCUS /PROTAR, Codice 0.622.3202 i Adattatore Denar, Codice 0.622.1351 o Adattatore con indicatore incisale Panadent Codice 0.622.1371 p Supporto forchetta Codice 0.622.0901 8 PROTAR®evo. Accessori disponibili su richiesta: pAsta incisale “E “ Asta incisale “P “ Asta incisale “T “ Codice 0.622.1181 Codice 0.622.1791 Codice 0.622.1891 p s a a Tavolato incisale regolabile, Codice 0.622.1701 “E“ 0 10 20 30 40 50 60 s Supporto per calotta Codice 0.622.1161 Codice 0.622.0901 d 0 5 5 0 5 d Supporto forchetta f 0 5 f Inserti PDR (coppia) “T“ 0 Codice 0.622.1001 L “P“ 4 5 2 3 6R 0 1 g Inserti per angolo di Shift (coppia), Codice 0.622.1111 h h Valigetta j Codice 1.000.3682 g j Viti di fissaggio per modelli in gesso (2 pezzi) Codice 1.000.3733 solo per PROTARevo k Calibro di misurazione/taratura Codice 1.002.2080 ö l Fissaggio magnetico Codice 1.002.4686 ö Piastre di montaggio per 3 PS (10 pz.), Codice 1.002.2096 l k y Chiave di taratura 3PS, Codice 1.002.2095 Box trasporto / Contenitori x LOCIcase (10 pz.) Codice 1.001.1511 LOCIcase (50 pz.) Codice 1.000.9355 y x c c Contenitore per registrazioni occlusali Codice 1.000.9354 v Scatolina rotonda per piccoli pezzi, Codice 1.000.9353 b b Gommapiuma per fissaggio modelli, Codice 1.000.9351 9 v PROTAR®evo. Materiale di consumo: 1 Piastre di controllo, confezione da Codice 0.622.0791 10 pezzi 3 1 2 2 Cappette ritentive, confezione da Codice 1.001.0887 10 pezzi Cappette ritentive, confezione da 50 pezzi Codice 1.001.0953 4 3 Piastre di montaggio (non per Split-Cast) Confezione da 10 pezzi Codice 0.622.1871 5 4 Piattini di gessatura filettati, confezione Codice 0.622.0781 da 20 pezzi 5 Piattini di gessatura, confezione da 20 pezzi Codice 0.622.1481 6 6 Piastre di montaggio per 3 PS (10 pz.) Codice 1.002.2096 7 Cappucci Codice 1.003.2868 7 Ricambi: 8 Asta incisale branca superiore Codice 0.622.1872 Kit di montaggio per Split-Cast Codice 0.622.1031 9 Vite d’impronta Codice 0.220.1741 0 Magnete Codice 0.622.2682 8 9 q Chiave per magnete Codice 0.411.1212 0 w Elastici per PROTAR 2, 10 pezzi Codice 1.000.3101 e Adesivo per nuova taratura Codice 0.359.2014 q e w Härter Harz 10 PROTAR®evo. A 3 Comandi e parti funzionali PROTARevo 2 ö 2 2 PROTARevo 2, 3, 5, 5B 1 Branca superiore dell’articolatore 1 p 2 Piedini d’appoggio 3 Cesta condiloidea ds. 3 4 Chiusura in centrica ds. PROTARevo 3 5 Chiusura in centrica sin. 2 6 Zoccolo di controllo 2 7 Branca inferiore dell’articolatore h 1 8 Piatto incisale 20 ° p 9 Tavolato incisale piano q Piastra di controllo inferiore a 3 w 0 Asta incisale 4 PROTARevo 5 5 w Piastra di controllo superiore 1 2 2 e Fissaggio angolo di Bennett e Bennett immediato (ISS) sin. 3 j r Regolazione ISS sin. h CE FH 0 7 55 -5 45 35 60 25 50 4 15 0 30 053 t Angolo dell’eminenza w z Perno di riferimento 4 p u Regolazione ISS ds. f d o 5 i Fissaggio angolo di Bennett e Bennett immediato (ISS) ds. PROTARevo 5B a 2 o Inserto cesta condiloidea ds. 2 3 p Cesta condiloidea ds. a Elemento a molla ds. 1 45 35 60 25 50 4 15 0 30 053 j h FH CE 5 70 5 -5 s Regolazione retrusione/protrusione ds. w 4 d Fissaggio cesta condiloidea ds. p f Fissaggio cesta condiloidea sin. o 5 g Regolazione retrusione/protrusione sin. f d a h Elemento a molla sin. k j Inserto cesta condiloidea ds. 0 t q z k Condili l Sistema di adesione magnetico ö Vite ad alette (optional) 9 7 8 6 PROTAR 11 l 2 PROTAR®evo. PROTARevo 7, 9 PROTARevo 7 1 Branca superiore dell’articolatore 2 1 e r 3 j 2 2 Piedini d’appoggio 3 Cesta condiloidea ds. g 1,0 0 0,5 4 Chiusura in centrica ds. h 65 55 8 0 7 45 0 w 6 Zoccolo di controllo D FH CE 90 75 5 Chiusura in centrica sin. i 4 u p 7 Branca inferiore dell’articolatore f d o 8 Piatto incisale 20 ° 5 a s 9 Tavolato incisale piano 0 Asta incisale PROTARevo 9 q Piastra di controllo inferiore 2 1 e 2 w Piastra di controllo superiore e Fissaggio angolo di Bennett e Bennett immediato (ISS) sin. r 3 j g 1,0 0 0,5 h 65 55 80 7 45 0 r Regolazione ISS sin. D FH CE 5 90 7 w i 4 t Angolo dell’eminenza u p f d z Perno di riferimento o u Regolazione ISS ds. 5 a s i Fissaggio angolo di Bennett e Bennett immediato (ISS) ds. o Inserto cesta condiloidea ds. p Cesta condiloidea ds. a Elemento a molla ds. 0 k s Regolazione retrusione/protrusione ds. d Fissaggio cesta condiloidea ds. t f Fissaggio cesta condiloidea sin. z q g Regolazione retrusione/protrusione sin. h Elemento a molla sin. j Inserto cesta condiloidea ds. 9 k Condili 7 8 l Sistema di adesione magnetico 6 ö Vite ad alette (optional) 12 l 2 PROTAR®evo. A 4 Preparazione alla messa in funzione A 4.1 Asta incisale 2 3 -5 CE 70 55 0 6 45 0 5 35 0 4 25 30 15 1 05 20 10 15 0 25 0 10 35 20 Inserire l’asta incisale 6 a scelta nella branca superiore o inferiore dell’articolatore e serrarla in posizione. 4 Inserire il tavolato incisale piano 1 con piatto incisale 2 di 20°, a seconda del lavoro, nella branca superiore o inferiore dell’articolatore. Invece del piatto a 20° si possono utilizzare anche piatti con inclinazione a 10 - 50°. 6 5 A 4.2 Chiusura in centrica aprire Posizione “0“ 7 Nella posizione 0 la chiusura in centrica 4 è bloccata. La branca superiore dell’articolatore può essere ruotata solo su “chiuso“. 7 “0“ 8 Posizione “1“ 9 Se le chiusure di centrica 4 sono nella posizione intermedia “1“, l’articolatore è liberamente mobile e può dunque eseguire i movimenti di escursione desiderati. Con l’aiuto degli elementi a molla 8 i condili 5 vengono spinti sull’eminenza 0 delle ceste condiloidee 3, per cui non sono possibili rialzi indesiderati. 1 2 Nella posizione “1“ l’articolatore va trattato come un articolatore Non-Arcon: si evita così il distacco della branca superiore dalla branca inferiore dell’articolatore. “1“ “0“ 9 0 13 PROTAR®evo. Posizione “2“ = aperto 1 In questa posizione è possibile estrarre la branca superiore dell’articolatore. 1 “2“ “1“ “0“ Dopo il montaggio della branca superiore e la chiusura delle due leve di centrica l’articolatore è completo. 2 Le leve per il bloccaggio in centrica 2 possono essere chiuse soltanto se la branca superiore dell’articolatore viene portata a contatto con i condili. Chiudere 3 sempre prima la leva 2 di sinistra. 3 “R“ “L“ “D“ = destra “S“ = sinistra 14 PROTAR®evo. A 4.3 PROTAR®evo con Splitcast (taratura in fabbrica) @ Se l’articolatore viene fornito dalla fabbrica con dotazione di KaVo Splitcast, la piastra di controllo con fissaggio magnetico 2 serve come base per il modello. La cappetta ritentiva 1 serve da ritenzione per il gesso. 2 Al termine del lavoro il modello viene staccato dalla piastra di controllo 3 per mezzo della vite con manopola a crociera. Pulire poi le piastre di controllo 3. 3 A 4.4 Lavorazione con il kit di gessatura Codice 0.622.1121 4 Il kit di gessatura serve per la realizzazione di basi in gesso di precisione per KaVo Split-Cast. Indicazioni pratiche per l’uso: • Far scattare in posizione il piattino di gessatura 5 sul kit di gessatura 6. • Il kit di gessatura, di norma, non va isolato. • Estrarre le basi in gesso dopo un massimo di 6 ore. • Dopo l’uso, pulire subito a fondo il kit di gessaggio sotto l’acqua corrente. • Eventualmente utilizzare l’isolante KaVo (Codice 0.622.4442) ed eliminare con l’aria eventuali residui di materiale. 5 6 7 Non pulire mai il kit di gessatura con un solvente per gesso. Codice vedi A 2.2 A 4.5 PROTAR®evo senza Splitcast 8 Se l’articolatore viene fornito dalla fabbrica senza Splitcast, le piastre di montaggio 9 (0.622.1871) vengono fissate mediante una vite ad alette 8. 9 9 8 15 PROTAR®evo. A 4.5.1 PROTAR®evo con fissaggio magnetico Con l’aiuto del fissaggio magnetico 1.002.4686 è possibile utilizzare sul PROTAR®evo un magnete 3 al posto della vite ad alette. Con le piastre di montaggio 3PS 4 è possibile un rapido scambio dei modelli. 3 Questo tipo di fissaggio dei modelli non è una taratura identica. A 4.6 PROTAR®evo con Splitcast (taratura in laboratorio) 4 (taratura in laboratorio) Gli articolatori PROTAR®evo che non sono forniti dalla fabbrica con dotazione di Split Cast, possono essere tarati in laboratorio con il sistema 3PS Split. 5 Accessori necessari: 4 Chiave di taratura 3PS Codice 1.002.2095 5 Calibro di misurazione-taratura Codice 1.002.2080 Istruzioni di montaggio: Montaggio di articolatori PROTAR senza splitcast con bloccaggio a magnete N. Matr. 1.002.4686 Gli atricolatori PROTAR senza split-cast possono essere usati con un bloccaggio a magnete. Qui ad esempio sono rappresentate le fasi di montaggio della base dell’articolatore: Estrarre il modello di piastra di montaggio 7. Estrarre dall’articolatore i perni di riferimento del modello della piastra di montaggio e la vite ad aletta 8. Posizionare il magnete 6. 2 1 Messa in fase 3PS N. Matr. 1.002.2095 6 Parte superiore dell’articolatore Estrarre il modello di piastra di montaggio 1. Estrarre dall’articolatore i perni di riferimento del modello della piastra di montaggio e la vite ad aletta 2. 7 Estrarre il modello di piastra di montaggio 7 dalla base dell’articolatore. Estrarre dall’articolatore i perni di riferimento del modello della piastra di montaggio e la vite ad aletta 8. Fissare il magnete 6 con la vite meccanica. 8 16 PROTAR®evo. A 4.6.1 Taratura 1.002.2080 Togliere l’anello di tenuta 1 dal supporto in schiumato (1.003.3998) ed incollarlo sulla piastra di regolazione 2. 1 2 Introdurre il calibro di misurazione-taratura 6 nella branca inferiore dell’articolatore 5. Il magnete blocca il calibro di regolazione. 3 Applicare la piastra 2 sul calibro misurazione-taratura 6. 4 Regolare l’asta dell’articolatore 7 sullo zero, (oppure “annullare“ sulla scala graduata) Togliere il magnete 4 quando questi è montato nella branca superiore 3 dell’articolatore. 7 2 5 6 Applicare il collante in dotazione sulla piastra di regolazione 2, comunque al di fuori dell’anello di tenuta e chiudere con delicatezza l’articolatore (la colla è sufficiente per tre misurazioni). Con l’elastico 1 bloccare la branca superiore e inferiore e lasciar indurire il collante per 12 ore. 1 A 4.6.2 Misurazione 1 Il calibro di misurazione-taratura 2 adatto al controllo della taratura conforme in laboratorio in ogni momento. A tale scopo il calibro di misurazionetaratura viene separato in due parti mediante le due viti di centraggio 1. 2 3 E’ ora possibile controllare l’identicità della taratura con la cartina di occlusione 3. 17 18 Protrusione Retrusione Distrazione Eminenza orizz (ang. Shift) Eminenza orizz. (ISS) 1 Fix Eminenza orizz. (Bennett) Eminenza sagittale 0° 0 mm Fisso Fisso 30° zur CE 45° zur FH PROTAR 2 0° 0 mm Fisso 15° Fisso 30° zur CE 45° zur FH PROTAR 3 0° 0 mm Fisso 15° Regolabile -10° bis 90° (FH) -25° bis 75° (CE) PROTAR 5 0° 0 mm Regolabile 0 - 30° Regolabile -10° bis 90° (FH) -25° bis 75° (CE) PROTAR 5B Regolabile 0 - 1,5 mm 0 - 1 mm 0 - 1,5 mm Optionale - 20° bis +20° con 0.622.1111 0 - 1,5 mm Regolabile 0 - 30° Regolabile -10° bis 90° (FH) -25° bis 75° (CE) PROTAR 7 Regolabile 0 - 6 mm 0 - 1 mm 0 - 6 mm 0° 0 - 1,5 mm Regolabile 0 - 30° Regolabile -10° bis 90° (FH) -25° bis 75° (CE) PROTAR 9 PROTAR®evo. A 5 Possibili regolazioni degli articolatori PROTAR®evo PROTAR®evo. A 6 Montaggio in articolatore dei modelli A 6.1 Montaggio in articolatore del modello superiore con l’arco facciale ARCUS KaVo @ 4 Aprire la leva di bloccaggio 4 e separare l’arco facciale 3. 3 Inserire prima l’asta incisale 2 nella branca inferiore dell’articolatore e metterla a zero. (togliere il tavolato incisale 6 e bloccare le chiusure in centrica prima a sinistra e poi a destra della branca superiore). 2 Spingere i fori delle olive dell’arco facciale sui perni di riferimento 1 nella branca inferiore dell’articolatore, assemblare l’arco facciale e chiudere la leva di bloccaggio 4. @ L’arco facciale 3 viene poggiato sull’asta incisale 2. Posizionare l’arcata superiore 5 nelle impronte dei denti 7 della forchetta. Miscelare il gesso con consistenza cremosa e applicarlo sul modello superiore (chiudere l’apertura nella piastra di controllo con la cappetta di ritenzione Codice 1.001.0887); applicare il gesso anche sulla piastra di controllo nella branca superiore. Chiudere senza pressione la branca superiore dell’articolatore. 2 7 5 6 Dopo che il gesso è indurito estrarre l’arco facciale con la forchetta dall’articolatore. Aprire la leva di bloccaggio 4 ed estrarre l’arco facciale 3 dall’articolatore. 4 3 19 PROTAR®evo. A 6.2 Montaggio del modello superiore in articolatore mediante il supporto di trasferimento Se il montaggio dei modelli viene effettuato in laboratorio, è sufficiente inviare solo il sostegno con la relativa forchetta. Estrarre l’asta e il piatto incisale dall’articolatore. 1 Inserire il supporto di trasferimento 1 nella branca inferiore dell’articolatore. Inserire la forchetta 3 con il relativo sostegno 2 nel supporto di trasferimento 1. 2 3 20 PROTAR®evo. A 6.4 Montaggio del modello superiore in articolatore con arco facciale non KaVo 1 3 2 Sono necessari i seguenti accessori: Adattatore per archi facciali non KaVo, Codice 0.622.1151, composto da: 1 piano di riferimento (guaina + vite) 2 sostegno per arco facciale 3 adattatore riferimento perno 4 Con questo strumento è possibile inserire archi facciali di altre case produttrici nell’articolatore PROTAR®evo. Per sistemi con indicatore mobile è necessario avere un piano di riferimento 1 fissato alla branca superiore dell’articolatore. (Immagine Dentatus) L’arco Dentatus viene inclinato fino a portare l’indicatore infraorbitale 4 a contatto con il piano di riferimento 1. Inserimento di archi facciali con indicatore orientabile e supporto della glabella (es. SAM, Whip Mix): Rimuovere il tavolato incisale e l’asta incisale dall’articolatore. Aprire quasi completamente la vite a testa zigrinata del supporto di trasferimento e inserire il supporto di trasferimento nella posizione 2 nella branca inferiore dell’articolatore, fino all’arresto; fissare poi con la vite zigrinata. Montare il sostegno per arco facciale sul supporto di trasferimento. Orientare il sostegno per arco facciale mediante l’apposita scala e fissarlo con la vite zigrinata. Adattatore Denar Codice 0.622.1351 L’adattatore Denar permette il montaggio dei modelli in articolatore con la forchetta Denar. 21 PROTAR®evo. 0 622 1141 1 2 3 4 5 7 Sono necessari i seguenti accessori: 1 supporto di trasferimento Codice 0.622.1141 6 A 6.5 Regolazioni per l’uso di archi non KaVo con l’articolatore PROTARevo 2 adattatore per archi facciali non KaVo Codice 0.622.1151, composto da: piano di riferimento (guaina + vite) sostegno per arco facciale adattatore riferimento perno Articolo Possibilità di utilizzo Girrbach Rotofix sì con supporto nasale, valore della scala 39 indicatore di riferimento Accessori sul punto infraorbitale, necessari valore della scala 66 1 supporto di trasferimento 2 piano rif. + sostegno arco Girbach Referenz sì 51 Dentatus sì - - 2 piano rif. Hanau 153 Earpiece Facebow sì - - nessun accessorio necessario (asta trasversale anteriore 70 mm superficie del tavolo) SAM sì 58 - 1 supporto di trasferimento 2 piano rif. Panadent sì nessun 51 1 supporto di trasferimento 2 piano rif. + sostegno arco indicatore supplementare (0.622.1371) Hanau 164-2 Twirl-Bow sì - 59 1 supporto di trasferimento 2 piano rif. + sostegno arco Gerber imitato - - nessun accessorio necessario Denar sì - - adattatore codice 0.622.1351 Whip-Mix sì 56 - 1 supporto di trasferimento 2 piano rif. + sostegno arco Quick sì 56 sopra 49 centro 44 sotto - 1 supporto di trasferimento 2 piano rif. + sostegno arco adattatore riferimento perno Springbow Hanau sì orientare sul con supporto forchetta 0.622.1391 Hager und Werken sì Ivoclar sì 1 supporto di trasferimento 2 piano rif. + sostegno arco 46 1 supporto di trasferimento 2 piano rif. + sostegno arco 59 Altri articoli disponibili su richiesta 22 1 supporto di trasferimento 2 piano rif. + sostegno arco PROTAR®evo. A 6.6 Metodica di montaggio a valori medi con la croce di fissaggio per modelli di arcata superiore KaVo, Codice 0.622.1781, sistema APFnt La croce di fissaggio per modelli di arcata superiore edentuli consente il montaggio a valori medi in articolatore se non si dispone di arco facciale. Come punti di repere si fa riferimento ai fornici e alla parte più profonda dietro ai due tuberi. 1 vite di fissaggio 2 tacca di regolazione se non è montato lo Split-Cast KaVo 3 tacca di regolazione se è montato lo SplitCast KaVo 3 2 1 Punti di repere 23 PROTAR®evo. A 6.7 Metodica di montaggio a valori medi con lo strumento di montaggio per modelli di arcata superiore KaVo Lo strumento di montaggio 2 Codice 1.001.9451 (senza montaggio Cast) Split5 Codice 1.001.9452 (con montaggio SplitCast) serve per il montaggio a valori medi di modelli di arcata superiore edentuli se non si dispone di un arco facciale. 3 1 2 Gli strumenti di montaggio sono orientati parallelamente al piano di Camper. L’orientamento mesiale si effettua mediante la vite papillare 3. In base al metodo di montaggio la vite papillare viene aperta alla giusta lunghezza, il modello con la relativa papilla viene poggiato sulla vite e la slitta trasversale 1 viene spostata fino a trovarsi nel punto più profondo dietro ai due tuberi. Mediante le viti di regolazione 4 lo strumento di montaggio viene orientato individualmente sul piano di occlusione 6 dell’articolatore. 6 5 4 Lo strumento di montaggio 1.001.5451 può essere fissato anche sugli articolatori Denar, Hanau e Stratos per mezzo del dispositivo di fissaggio 1.001.9471. 24 PROTAR®evo. A 6.8 Metodica di montaggio a valori medi con la croce di fissaggio modelli dell’arcata inferiore KaVo, Codice 0.622.1171 (sistema APF) La croce di fissaggio per modelli dell’arcata inferiore consente il montaggio a valori medi di modelli dell’arcata inferiore parzialmente e totalmente edentuli nell’articolatore PROTAR. Se l’articolatore KaVo è dotato di SplitCast, la croce di fissaggio modelli dell’arcata inferiore deve essere fissata nella posizione 1 (allentare la vite 3). 2 3 Senza montaggio dello Split-Cast la croce di fissaggio deve essere fissata nella posizione 2. 1 A 6.8.1 Montaggio di un modello dell’arcata inferiore edentulo 1 Sul modello inferiore viene arrotondato il cuscinetto retromolare. Si traccia una linea mediana 2 e la si divide in tre parti. Il piano occlusale 1 decorre fino alla linea di divisione superiore. 2 25 PROTAR®evo. Regolare la forchetta della sinfisi 9 all’altezza del vallo in cera inferiore 8. 5 4 3 3 vallo in cera superiore q 5 croce di fissaggio a valori medi per modelli dell’arcata inferiore 0 6 cuscinetto retromolare 7 elemento scorrevole sul cuscinetto retromolare 20-22 18-20 4 vite di arresto 9 8 vallo in cera inferiore 8 6 7 9 forchetta della sinfisi 0 piano di occlusione q piano di Camper Dopo avere allentato la vite di arresto w applicare l’elemento scorrevole nel punto desiderato del cuscinetto retromolare e serrare la vite di arresto. Fissare il modello alla croce di fissaggio con un elastico e. w e 9 Procedere poi al montaggio del modello inferiore in articolatore. PROTAR 26 PROTAR®evo. A 6.9 Montaggio in articolatore del modello dell’arcata inferiore Capovolgere l’articolatore (le leve di bloccaggio in centrica 2 rimangono chiuse). 1 2 3 Aprire l’articolatore. Il modello inferiore viene poggiato sul modello superiore in posizione stabile. L’asta incisale 1 viene messa a zero se si lavora senza registrazione di centrica. 4 Chiudere l’apertura nella piastra di controllo 3 con la cappetta di ritenzione 4, Codice 1.001.0887. Miscelare poi il gesso con consistenza cremosa e applicarlo sul modello inferiore e sulla piastra di controllo 3 della branca inferiore dell’articolatore. Chiudere senza pressione l’articolatore. Dopo che il gesso è indurito estrarre la registrazione di centrica e riposizionare l’asta incisale 1 a zero. Ora il modello superiore e inferiore sono montati nella corretta relazione in articolatore. 1 27 PROTAR®evo. A 7 Programmazione dell’articolatore A 7.1 Regolazione dell’angolo di eminenza mediante la registrazione di protrusione 1 (per PROTAR 5, 5B, 7, 9) Aprire le due leve di bloccaggio in centrica 3 e porre la registrazione di protrusione 5 tra le arcate dei modelli in gesso: in questa fase la branca inferiore dell’articolatore viene dislocata in avanti rispetto alla branca superiore. 5 2 2 I condili 6 dell’articolatore non hanno più contatto con il tragitto condiloideo. Aprire le leve di fissaggio 2 delle ceste condiloidee 4 e portare la rispettiva cesta condiloidea 4 a contatto con il condilo 6. 4 3 3 Fissare le leve 2 delle ceste condiloidee. 1 1 4 4 7 7 6 6 A 7.2 Regolazione dell’angolo di Bennett mediante la registrazione di laterotrusione sinistra e destra (per PROTARevo 5B, 7, 9) Aprire i dispositivi di fissaggio 1; regolare inizialmente l’angolo di Bennett max. 6 Regolare l’angolo di Bennett di sinistra Porre la registrazione di laterotrusione destra 5 tra le arcate superiore e inferiore. Ruotare l’inserto della cesta condiloidea di sinistra 7 finché il condilo 6 e l’inserto della cesta condiloidea 7 non si trovino a contatto e fissare con l’apposita rondella 1. Regolare l’angolo di Bennett di destra Porre la registrazione di laterotrusione sinistra 5 tra le arcate superiore e inferiore. Ruotare l’inserto della cesta condiloidea di destra 7 finché il condilo 6 e l’inserto della cesta condiloidea 7 non si trovino a contatto e fissare con l’apposita rondella 1. 8 Chiudere le leve di bloccaggio in centrica 3 e porre l’articolatore in posizione di lavoro. 28 PROTAR®evo. A 7.3 Regolazione dell’escursione in lateralità (per PROTAR 5B, 7, 9) Immediate Side Shift (ISS) o Bennett immediato Lo spostamento laterale immediato (ISS) del condilo di mediotrusione può essere definito da “0“ a “1,5 mm“ (con incrementi di 0,5 mm). 1 La vite di fissaggio 1 delle guide dell’angolo di Bennett deve essere allentata di ca. ? di giro per la regolazione. Impostare il parametro desiderato con la tacca di regolazione 2 del Bennett immediato (ISS). Chiudere nuovamente la vite di fissaggio. Le impostazioni dell’angolo di Bennett rimangono invariate. 2 29 PROTAR®evo. A 7.4 Regolazione dell’angolo di Shift Se nel PROTAR 7 sono inseriti gli inserti dell’angolo di Shift (0.622.1111), è possibile regolare con esattezza i movimenti sul lato lavorante (lato di laterotrusione). @ 2 3 Allentare la vite a testa zigrinata 3, per poter regolare l’inserto dell’angolo di Shift 2 ruotando il perno 1. Con la registrazione di lateralità sinistra si possono regolare l’angolo di Bennett di destra e contemporaneamente l’angolo di Shift di sinistra. Con la registrazione di lateralità destra si possono regolare l’angolo di Bennett di sinistra e contemporaneamente l’angolo di Shift di destra. @ 3 Per la regolazione ruotare l’inserto dell’angolo di Shift 2 fino a portarlo in contatto con i condili 4. 2 4 30 PROTAR®evo. A 7.5 Regolazione di una posizione di protrusione/posizione di distrazione PROTARevo 9 Il PROTARevo 9 ha la stessa costruzione del PROTARevo 7. Inoltre il “9“ ha un inserto P/D/R. Codice 0.622.1001 destra/sinistra Regolazione definita della Protrusione Regolazione definita della Distrazione Regolazione definita della Retrusione Nel PROTARevo 7 è possibile aggiungere in seguito l’inserto P/D/R. Regolazione di una protrusione guidata di 0 – 2 mm con incrementi di 0,25 mm di 2 – 6 mm con incrementi di 0,5 mm Queste regolazioni sono guidate in modo definito e riproducibili. In ogni posizione di protrusione la branca superiore rimane ferma. Utilizzo per es. placche di protrusione molaggio della protesi totale Regolazione di una distrazione guidata di 0 – 2 mm con incrementi di 0,25 mm di 2 – 6 mm con incrementi di 0,5 mm dalla posizione di centrica Queste regolazioni sono guidate in modo definito e riproducibili. In ogni posizione di distrazione la branca superiore rimane ferma. L’asta incisale può essere guidata in conformità. Utilizzo, per es.: bite occlusali 31 PROTAR®evo. A 7.6 Regolazione della retrusione/protrusione Per creare svincoli in retrusione durante la ceratura, il PROTAR 7/9 consente un movimento retrusivo. Ciò permette di ridurre il molaggio finale da parte del clinico, in quanto gli svincoli in retrusione vengono considerati già in fase di modellazione. Posizione zero della retrusione @ Impostando il Bennett immediato 3 (ISS) a 1,5 mm è possibile eseguire un movimento di retrusione di 1 mm (con incrementi di 0,25 mm). In questo caso non è possibile una posizione centrica esatta con le leve di bloccaggio in centrica chiuse! 1 3 32 PROTAR®evo. A 7.7 Costruzione di un piatto incisale individuale Dal tavolato incisale piatto del Protar l’odontotecnico può modellare una guida incisale individuale. Porre le leve di chiusura in centrica dell’articolatore in posizione “1“ e aprire l’articolatore all’indietro. Spalmare di isolante (vaselina) il tavolato incisale e la punta dell’asta incisale. Il tavolato incisale viene poi riempito fino all’orlo con una resina autoindurente di consistenza pastosa. Con l’aiuto di modelli non preparati è possibile trasferire le guide incisive/canine, mediante movimenti in articolatore, nella resina autoindurente ancora plastica. Facendo leva con uno strumento nella fessura del piatto incisale si può staccare il piatto incisale individuale dal tavolato incisale. Il piatto incisale individuale può essere riposizionato in quanto la scanalatura permette di ritrovare esattamente la giusta posizione. 33 PROTAR®evo. A 7.8 Programmazione del tavolato incisale regolabile A 7.8.1 Mediante il modello di studio Prima del molaggio dei denti si esegue un modello di studio del paziente. Mediante tale modello di studio si procede alla programmazione del tavolato incisale regolabile. 1 Per il corretto montaggio del tavolato incisale la guida intermedia viene regolata su un valore di ca. 70° 2. R Il tavolato incisale viene quindi inserito fino al contatto con la sfera 1 dell’asta incisale e fissato con l’apposita vite 3. 2 3 L M Muovere la mandibola a sinistra in articolatore per regolare la guida di sinistra. Muovere poi la mandibola verso destra e regolare la guida di destra. Spostando il modello lungo gli incisivi è possibile regolare la guida intermedia. In questo modo il tavolato incisale regolabile assume la funzione di guida. A 7.8.2 Mediante i valori dell’ARCUSdigma (R) (M) (L) L’ARCUSdigma indica direttamente i parametri Anterior Guidance per la regolazione di questo tavolato incisale. 34 60,0 63,6 57,0 PROTAR®evo. A 8 Inserimento dell’inserto dell’angolo di Shift sul PROTAR®evo 7 2 Rimuovere innanzi tutto il cilindro di pro/retrusione 1 dall’articolatore. A tale scopo, con l’aiuto della chiave per viti ad esagono cavo 2 in dotazione, spingere fuori con una leggera pressione il perno di bloccaggio 5 dalla ruota motrice 3. 3 4 1 5 1. Rimuovere il cilindro 1 di PRO/retrusione 2. Rimuovere la ruota motrice 3 3. Estrarre il dispositivo di arresto di plastica nero 4. 1 3 4 5 Inserimento dell’inserto dell’angolo di Shift 6. 6 L’inserto dell’angolo di Shift viene inserito nella maniera seguente: - Inserire la vite 7 nella fessura. - Infilare l’inserto dell’angolo di Shift 8 dall’esterno nella cesta dell’articolatore. - Serrare la vite 7 8 7 35 PROTAR®evo. A 9 Programmazione dell’articolatore con i dati di misurazione dell’ARCUSdigma (Codice 1.000.8232) Il PROTARevo 7 con l’inserto dell’angolo di Shift (Codice 0.622.1111) e il tavolato incisale regolabile (Codice 0.622.1701) è in grado di riprodurre esattamente tutti i valori calcolati con ARCUSdigma (vedi figura: valori di regolazione del PROTAR 7) 36 PROTAR®evo. A 10 Strumenti di montaggio per la protesi totale A 10.1 Strumenti di montaggio per il modello dell’arcata inferiore secondo il sistema APFnt (Codice 0.622.2071) Fissare lo strumento di montaggio per piano protesico 1 sulla centratura dell’asse dell’articolatore. 1 Serrare la vite 4. Capovolgere l’articolatore. Porre la calotta 3 sul modello. 5 6 Nella zona mesiale porre l’inserto frontale 2 sui due incisivi centrali. 2 Nella zona dorsale posizionare la lista trasversale posteriore 6 dietro i due tuberi. 3 Serrare la vite 5, poi la vite 7. Se necessario stringere nuovamente la vite 5. 4 7 3 37 DE PROTAR®evo. GEBRAUCHSANWEISUNG A 10.2 Strumento di montaggio 3D per modello dell’arcata inferiore secondo il sistema APF 5 1 1 Alloggiamento 2 Supporto calotta 3 Calotta lunga Codice 0.622.1211 4 Calotta corta Codice 0.622.1201 5 Vite di regolazione 4 3 Questo sistema di calotte può essere utilizzato in generale, indipendentemente dai criteri di montaggio del modello in articolatore (arco facciale o croce di fissaggio modelli a valori medi). In questo sistema di calotte l’odontotecnico ha a disposizione una superficie piana che consente il riferimento al piano di occlusione e una superficie convessa, che considera le curve di compensazione in direzione sagittale e trasversale per il montaggio statico della mandibola. Mediante il supporto della calotta e l’alloggiamento è possibile l’orientamento universale della calotta: indipendentemente dal montaggio in articolatore con arco facciale, croce di fissaggio modelli a valori medi o elastico, la calotta si può orientare in ogni caso. Esercitando una pressione sull’alloggiamento, lo strumento di montaggio 3 D viene stretto e fissato tra i condili dell’articolatore. PROT 38 2 PROTAR®evo. La calotta 1 viene posta sul vallo in cera 2 per essere orientata. A tale scopo il vallo in cera deve essere modificato nella parte occlusale in modo da orientare la calotta nella regione degli incisivi e nella regione dei molari inferiori. La superficie piana della calotta può essere utilizzata, per es., per la metodica di Gerber. 1 2 Con la vite di regolazione 3, che viene avvitata attraverso la calotta 1 sul modello, viene fissata la posizione della calotta. Il vallo in cera può essere ora retratto leggermente per il montaggio. Una goccia di cera collante serve a fissare la vite di regolazione. 3 La mandibola può ora essere montata a contatto con la calotta. Dopo avere rimosso il supporto della calotta l’articolatore viene nuovamente assemblato. 39 PROTAR®evo. A 10.3 Calotta di montaggio 3D per il modello dell’arcata superiore (Codice 1.002.4919) Questo strumento di montaggio piano per il modello superiore edentulo viene orientato mediante il vallo in cera superiore. A tale scopo lo strumento di montaggio viene spinto a contatto con il vallo in cera superiore per mezzo di un elastico. Con un po’ di gesso lo strumento di montaggio viene poi fissato a valori individuali alla branca inferiore dell’articolatore. 40 PROTAR®evo. A 10.4 Strumento di montaggio 2D per l’arcata superiore (Codice 1.001.9452) Questo accessorio è sia uno strumento di gessatura che di montaggio per l’arcata superiore edentula. Dopo avere aperto la vite papillare 1 e spinto indietro il piano scorrevole 2, si può procedere al montaggio del modello superiore. 1 2 A 10.5 Strumento di montaggio 2D per l’arcata superiore per il montaggio a vite (Codice 1.001.9451) 41 PROTAR®evo. A 11 Base per modello con SplitCast Per le fasi protesiche che prevedono il lavoro con il fresatore è spesso necessario trasferire il modello dall’articolatore al fresatore e viceversa. 1 2 1 magnete 2 zoccolo di controllo 3 leva 3 Grazie alla forza magnetica è garantita una tenuta sicura della protesi anche durante le operazioni di fresaggio. Il sistema Split-Cast centrato sui fianchi sulla base delle piastre di controllo dell’articolatore garantire un preciso alloggiamento della protesi. Il modello viene regolato solo una volta per il fresaggio del manufatto e può poi essere trasferito tutte le volte che si vuole senza dover ripetere la regolazione. 42 PROTAR®evo. Le strutture occlusali possono essere realizzate in articolatore. Le necessarie operazioni di fresaggio possono essere eseguite in ogni momento. Tutte le fasi di lavoro possono essere ripetutamente controllate grazie al preciso trasferimento dall’articolatore al fresatore e viceversa. 43 GA PROTAR evo -A11 KaVo LOGIcase PROTAR®evo. A 12 Contenitore per il trasporto KaVo LOGICase KaVo LOGICase: il contenitore economico e sovrapponibile per il trasporto dallo studio al laboratorio e viceversa. KaVo LOGICase è contenitore per il trasporto e scatola portalavoro in uno. r m bo ter La us M 1 gommapiuma per il fissaggio dei modelli (50 pezzi 1.000.9351) 2 al momento del primo utilizzo con ERGOspace si aprono le aperture laterali 3 scatola rotonda per piccoli pezzi (50 pezzi 1.000.9353) 4 spazio per codice a barre 5 spazio per il nome del paziente 6 10 contenitori (20 metà, 1.001.1511) 50 contenitori (100 metà, 1.000.9355) 7 Scatola rettangolare per registrazioni (50 pezzi 1.000.9354) n an 1 2 Igiene: LOGICase può essere disinfettato con i normali detergenti. 3 7 1 E’ possibile sistemare nella scatola quanto segue: - 4 modelli - o 4 cucchiai da impronta - porta forchetta KaVo ARCUS - 2 scatole per registrazioni - 2 contenitori per piccoli pezzi 4 6 Speciale supporto 8 per mobili da laboratorio KaVo 5 Attacco universale per tutti gli altri mobili 8. 8 8 44 PROTAR®evo. A 13 Dati tecnici Articolatori PROTARevo 2, 3, 5, 5B, 6, 7 e9 110 Branca inferiore distanza intercondilare = fissa 110 mm +10 0 - 10 Asta incisale range di regolazione da + 10 a – 10 con arresto Tavolato incisale piano Piatto incisale (accessori 10°, 30°, 40°, 50°) Altezza d’ingombro con piastra di controllo + con Split-Cast 20° 120 mm 108 mm 97 mm Angolo di Balkwill 20° Piano di Camper (PC) parallelo al piano del tavolo HCN curvo (dopo 5 mm di escursione) Angolo di Bennett curvo (dopo 5 mm di escursione) Peso (con Split-Cast) Branca inferiore dell’articolatore Branche superiori degli articolatori PROTARevo 2/3 Branche superiori degli articolatori PROTARevo 5 PROTARevo 5B/7/9 20∞ ( 10∞ , 30∞ , 40∞ , 50∞ ) 450 g 235 g 420 g 450 g Con riserva di modifiche tecniche 120 108 97 CE 45 20∞ PROTAR®evo. A 14 Manutenzione e regolazione Prima di utilizzare l’articolatore per la prima volta spruzzarlo con un apposito isolante (spray al silicone) in commercio, non ingrassare. Non utilizzare antiossidanti o solventi per gesso. Se necessario lubrificare leggermente i condili 8, il sistema di fissaggio magnetico 9 e la filettatura delle piastre di controllo. Se le leve di bloccaggio per l’HCN non tenessero più a sufficienza, è possibile regolarle di nuovo. Strumenti: Chiave per viti ad esagono cavo 1,5 mm 6 Cacciavite 4,5 mm 3 Regolare di nuovo le leve di bloccaggio in centrica 1 e 2. Chiave per viti ad esagono cavo esterna 3 mm 4 Chiave per viti ad esagono cavo interna 2 mm 5 Controllo Split-Cast nel PROTAR 3/5/7/9. (si consiglia di tarare ogni sei mesi con il calibro di misurazione e taratura 0.622.1221) Svitare il sistema di fissaggio magnetico 9 con la chiave per magnete q. Lo SplitCast, per motivi di precisione, è centrato sui fianchi. La piastra di controllo deve poggiare piana sui fianchi e. La fessura w tra zoccolo di controllo r e piastra di controllo deve essere parallela. Al termine del lavoro il modello viene staccato dalla piastra di controllo t - z per mezzo della vite con manopola a crociera u. Pulire poi le piastre di controllo t - z. Per un miglior scorrimento lubrificare la superficie degli snodi con Articulator Lubricating Paste codice 1.001.7613 46 PROTAR®evo. Condizioni di garanzia KaVo garantisce al cliente finale prestazioni in garanzia per il prodotto menzionato nel documento di consegna in relazione a funzionamento ineccepibile, assenza di difetti di materiale o lavorazione, per una durata di 12 mesi dalla data di acquisto, alle seguenti condizioni: Nel caso di reclami legittimi dovuti a difetti o consegne incomplete,KaVo garantisce a propria discrezione la prestazione della garanzia, con la consegna gratuita delle parti in sostituzione o riparazione gratuita. E' escluso dalla garanzia qualsiasi altro tipo di richiesta, in particolare richieste di risarcimento danni. In caso di ritardo, grave negligenza o dolo, questa condizione è valida solo se non vengono violate specifiche norme di legge vigenti. KaVo non risponde per difetti e relative conseguenze derivanti dall'usura naturale, da pulizia o manutenzione impropria, dall'inosservanza delle istruzioni per l'uso, per la manutenzione o il collegamento, da depositi calcarei o corrosione, da contaminazione dell'aria o dell'acqua erogata o da influenze chimiche o elettriche, di carattere eccezionale o non consentiti dalle prescrizioni d'uso. La prestazione in garanzia non comprende generalmente lampade, parti in vetro o in gomma o la solidità dei colori delle materie plastiche. La responsabilità viene esclusa se i difetti o le relative conseguenze sono dovuti a interventi o modifiche al prodotto apportati dal cliente o da terzi. Le richieste di prestazione in garanzia sono considerate valide solo in seguito all'invio del documento di consegna (in copia) del prodotto a KaVo. Il documento originale deve essere messo a disposizione e presentato dal gestore/utente. 47 Verk.-Nr. PROTARevo 2 Mat.-Nr. 1.002.3306 06/02003 09.21 PROTAR®evo. Parti di ricambio PROTAR®evo 2 Codice 1.002.3305 senza Split-Cast Mat.-Nr. 1.002.3305 ohne Split-Cast 0.622.0981 1.002.4686 3PS 1.002.2074 0.200.6034 0.200.6093 0.622.1363 0.622.1373 1.001.0889 0.200.6301 Verk.-Nr. (10x) PROTARevo 3 1.002.2096 10x Mat.-Nr. 1.002.3307 mit Split-Cast Mat.-Nr. 1.002.3306 ohne Split-Cast 06/2003 09.22 PROTAR®evo 3 Codice 1.002.3307 con Split-Cast Codice 1.002.3306 senza Split-Cast Mat.-Nr. 1.002.3307 mit Split-Cast Mat.-Nr. 1.002.3306 ohne Splitcast 0.622.0981 0.200.6034 3x 0.201.1459 1.002.2074 1.001.0889 10x 0.622.2702 0.622.2652 0.622.0791(10x) 0.622.2682 0.411.1212 0.622.2692 0.622.1822 0.622.1812 1.002.4686 3PS 0.622.2712 0.220.1309 0.253.6045 2x 0.249.4168 1.002.2096 10x 1/1 48 Verk.-Nr. PROTARevo 5 Mat.-Nr. 1.002.3311 mit Split-Cast Mat.-Nr. 1.002.3310 ohne Split-Cast 06/2003 09.23 PROTAR®evo. PROTAR®evo 5 Codice 1.002.3311 con Split-Cast Codice 1.002.3310 senza Split-Cast Mat.-Nr. 1.002.3311 mit Splitcast Mat.-Nr. 1.002.3310 ohne Splitcast 0.622.0981 0.200.6034 3x 0.201.1459 1.002.2074 1.001.0889 10x 45 35 60 25 50 4 15 0 3 050 3 0.622.2652 0.622.0791(10x) FH CE 5 70 5 -5 1.002.4686 3PS 0.622.2682 0.622.2702 0.411.1212 0.622.1822 0.622.2692 0.622.1812 0.249.4168 Verk.-Nr. PROTARevo 5B Mat.-Nr. 1.002.3315 0.253.6045 2x mit Split-Cast Mat.-Nr. 1.002.3314 ohne Split-Cast 0.220.1309 0.622.2712 1.002.2096 10x 06/2003 09.23 PROTAR®evo 5B Codice 1.002.3315 con Split-Cast Mat.-Nr. 1.002.3315 mit Splitcast Codice 1.002.3314 senza Split-Cast Mat.-Nr. 1.002.3314 ohne Splitcast 3x 0.201.1459 1.002.2074 1.001.0889 FH C E 5 70 5 -5 45 6 35 0 25 50 4 15 0 30 053 0.622.2652 0.622.0791(10x) 0.622.0981 0.200.6034 1.002.4686 0.622.2682 0.622.2702 0.411.1212 0.622.1822 0.622.2692 0.622.1812 0.249.4168 0.253.6045 2x 0.220.1309 0.622.2712 1.002.2096 10x 1/1 49 Verk.-Nr. PROTARevo 7 Mat.-Nr. 1.002.3319 mit Split-Cast Mat.-Nr. 1.002.3318 ohne Split-Cast 09/2004 09.24 PROTAR®evo. PROTAR®evo 7 Codice 1.002.3319 senza Split-Cast Mat.-Nr. 1.002.3319 mit Splitcast Codice 1.002.3318 senza Split-Cast Mat.-Nr. 1.002.3318 ohne Splitcast 0.250.0031 1.002.0508 0.222.4043 0.622.2032 (L) 0.622.2042 (R) 0.622.2542 0.622.2532 0.622.2502 3x 0.201.1459 0.622.2082 (R) 0.622.2092 (L) 1.002.2074 0.622.0981 0.200.6034 1,0 0 0,5 65 55 80 7 45 0 0.622.2652 0.622.0791(10x) D FH C E 5 90 7 1.001.0889 10x 0.622.2702 0.622.2682 1.002.2085 0.411.1212 1.002.4686 3PS 0.622.1822 0.622.2692 0.622.1812 0.249.4168 Verk.-Nr. PROTARevo 9 0.253.6045 2x Mat.-Nr. 1.002.3323 0.220.1309mit Split-Cast Mat.-Nr. 1.002.3322 ohne Split-Cast 0.622.2712 06/2003 09.25 1.002.2096 10x 0.240.2240 5 2 3 6R 0 1 PROTAR evo 9 ® Codice 1.002.3323 senza Split-Cast Codice 1.002.3322 senza Split-Cast 1.002.2085 Mat.-Nr. 1.002.3323 mit Splitcast Mat.-Nr. 1.002.3322 ohne Splitcast 0.250.0031 1.002.0508 0.222.4043 0.622.2032 (L) 0.622.2042 (R) 0.622.2542 0.622.0981 0.622.2532 0.200.6034 0.622.2502 3x 0.201.1459 0.622.2082 (R) 0.622.2092 (L) 1.001.0889 1.002.2074 1.002.4686 0.622.2652 0.622.0791(10x) 0.622.2682 0.411.1212 0.622.2702 0.622.1822 1/1 0.622.2692 0.622.1812 1.002.2096 10x 0.249.4168 0.253.6045 2x 0.220.1309 0.622.2712 50 Verk.-Nr. PROTARevo Unterteil Mat.-Nr. 1.002.3265 ohne Splitcast ® PROTAR Mat.-Nr.evo. 1.002.3266 mit Splitcast 06/2003 09.26 PROTAR®evo branca inferiore Codice 1.002.3266 senza Split-Cast Codice 1.002.3265 senza Split-Cast Mat.-Nr. 1.002.3265 ohne Splitcast Mat.-Nr. 1.002.3266 mit Splitcast 0.222.5045 (8x12x0,15) 0.222.5046 (8x12x0,18) 0.222.5047 (8x12x0,20) 1.001.0889 10x 0.622.1852 0.622.2022 0.200.6034 0.622.0981 0.622.1181 0.622.0791 10x 0.622.3142 1.002.2075 1.002.4686 3PS 0.622.2682 0.622.1912 0.622.1922 0.622.1932 0.622.1942 0.622.1952 0.622.1962 10° 20° 30° 40° 50° 1.002.2074 1.002.2079 3x 0.201.1459 0.622.2652 1.002.2096 10x 0.411.1212 0.220.1741 1/1 51 1.002.5701 Fk7/07 it 09.20 KaVo Dental GmbH. D-88400 Biberach/Riss Telefon +49 7351 56-0 Fax +49 7351 56-1488 Internet: www.kavo.com 1.002.5701 ● Fk ● 7/07● ● 09.20 K12 4940 52