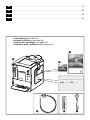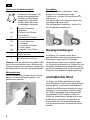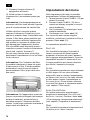
1
TE 503.. siemens-home.com/welcome deGebrauchsanleitung en Instruction manual fr Mode d’emploi it Istruzioni per l’uso Register your product online de ���������������������������������������������������������������������������������������������������������������������������������2 en �������������������������������������������������������������������������������������������������������������������������������22 fr �������������������������������������������������������������������������������������������������������������������������������42 it �������������������������������������������������������������������������������������������������������������������������������63 Lieferumfang (siehe Seite 2) Included in delivery (see page 22) Contenu de l’emballage (voir page 42) Contenuto della confezione (ved. pagina 63) c a b E-Nr. ……… FD… … d e f A 4 1 2 3 17 16 15 14 13 5 12 11 6 10 9 8 7 B 18 20 19 C D 8b 8a 6a 6b 8e 6d 6e 8c 6c 8d E 5c 2. 5f 5a 5b 5d 1. 5e 1. 2. de Inhalt Lieferumfang����������������������������������������������2 Sicherheitshinweise������������������������������������3 Auf einen Blick��������������������������������������������5 Bedienelemente�����������������������������������������5 Displaymeldungen��������������������������������������6 aromaDouble Shot�������������������������������������6 Vor dem ersten Gebrauch��������������������������7 Wasserfilter�������������������������������������������������8 Menüeinstellungen�������������������������������������9 Mahlgrad einstellen����������������������������������10 Zubereitung mit Kaffeebohnen�����������������10 Zubereitung mit gemahlenem Kaffee ������ 11 Heißwasser beziehen������������������������������� 11 Milchschaum oder warme Milch zubereiten��������������������������� 11 Pflege und tägliche Reinigung������������������12 Tipps zum Energiesparen�������������������������15 Service-Programme���������������������������������15 Frostschutz ����������������������������������������������18 Zubehör����������������������������������������������������19 Entsorgung ����������������������������������������������19 Garantiebedingungen�������������������������������19 Technische Daten�������������������������������������19 Einfache Probleme selbst beheben����������20 2 Sehr geehrte Kaffeeliebhaberin, sehr geehrter Kaffeeliebhaber. Herzlichen Glückwunsch zum Kauf dieses Kaffeevollautomaten aus dem Hause Siemens. Bitte auch die beiliegende Kurzanleitung beachten. Sie kann in einem speziellen Aufbewahrungsfach (5c) bis zum nächsten Gebrauch verstaut werden. Lieferumfang (siehe Übersichtsbild am Anfang der Anleitung) a Kaffeevollautomat TE503 b Kurzanleitung c Gebrauchsanleitung d Milchschlauch/Drehwähler e Wasserhärtestreifen f Pulverlöffel de Sicherheitshinweise Die Gebrauchsanleitung bitte sorgfältig durchlesen, danach handeln und aufbewahren! Bei Weitergabe des Geräts diese Anleitung beilegen. Dieses Gerät ist für die Verarbeitung haushaltsüblicher Mengen im Haushalt oder in haushaltsähnlichen, nicht-gewerblichen Anwendungen bestimmt. Haushaltsähnliche Anwendungen umfassen z. B. die Verwendung in Mitarbeiterküchen von Läden, Büros, landwirtschaftlichen und anderen gewerblichen Betrieben, sowie die Nutzung durch Gäste von Pensionen, kleinen Hotels und ähnlichen Wohneinrichtungen. A Stromschlaggefahr! Gerät nur gemäß Angaben auf dem Typenschild anschließen und betreiben. Reparaturen am Gerät, wie z. B. eine beschädigte Netzanschlussleitung auswechseln, dürfen nur durch unseren Kundendienst ausgeführt werden, um Gefährdungen zu vermeiden. Dieses Gerät kann von Kindern ab 8 Jahren und darüber und von Personen mit reduzierten physischen, sensorischen oder mentalen Fähigkeiten oder Mangel an Erfahrung und/oder Wissen benutzt werden, wenn sie beaufsichtigt oder bezüglich des sicheren Gebrauchs des Gerätes unterwiesen wurden und die daraus resultierenden Gefahren verstanden haben. Kinder unter 8 Jahren sind vom Gerät und der Anschlussleitung fernzuhalten und dürfen das Gerät nicht bedienen. Kinder dürfen nicht mit dem Gerät spielen. Reinigung und BenutzerWartung dürfen nicht durch Kinder vorgenommen werden, es sei denn, sie sind 8 Jahre oder älter und werden beaufsichtigt� 3 de Gerät oder Netzkabel niemals in Wasser tauchen. Nur benutzen, wenn Zuleitung und Gerät keine Beschädigungen aufweisen. Im Fehlerfall sofort den Netzstecker ziehen oder die Netzspannung ausschalten� A Erstickungsgefahr! Kinder nicht mit Verpackungsmaterial spielen lassen� ¡¡ Verbrühungsgefahr! Der Auslauf (6c) des Milchschäumers wird sehr heiß. Milchschaum oder warme Milch tritt mit hohem Druck aus dem Milchschäumer (6) aus. Milchspritzer können zu Verbrühungen führen. Auslauf (6c) nicht berühren oder auf Personen richten. Nach Benutzung zuerst abkühlen lassen und erst dann berühren. Gerät nur benutzen, wenn der Milchschäumer (6) komplett zusammengebaut und montiert ist. ¡¡ Verletzungsgefahr! Nicht in das Mahlwerk greifen. 4 de Auf einen Blick Bedienelemente (siehe Übersichtsbilder A, B, C, D und E am Anfang der Anleitung) Netzschalter O / I Mit dem Netzschalter O / I (9) wird das Gerät eingeschaltet oder vollständig ausgeschaltet (Stromzufuhr wird unterbrochen). 1 2 3 4 Bohnenbehälter Aromadeckel Drehwähler für Mahlgradeinstellung Pulverschublade (Kaffeepulver / Reinigungstablette) 5 Brüheinheit (Bild E) a)Brüheinheit b)Tür c)Aufbewahrungsfach Kurzanleitung d)Auswurfhebel für Brüheinheit e)Verriegelung f) Abdeckung 6 Milchschäumer (Bild C) abnehmbar a)Dampfventil b)Luftdüse c)Auslauf d)Drehwähler warme Milch / Milchschaum e)Milchschlauch 7 Kaffeeauslauf höhenverstellbar 8 Tropfschale (Bild D) a)Blende b)Kaffeesatzbehälter c)Tropfschale Kaffeeauslauf d)Tropfblech Kaffeeauslauf e)Schwimmer 9 Netzschalter O / I 10 Taste start 11 Taste h 12 Taste off / j 13 Drehknopf „Kaffeestärke“ 14 Drehknopf „Getränkeauswahl“ 15 Display 16 Abnehmbarer Wassertank 17 Wassertankdeckel 18 Pulverlöffel (Einsetzhilfe für Wasserfilter) 19 Aufbewahrungsfach für Pulverlöffel 20 Stromanschlusskabel mit Staufach Wichtig: Vor dem Ausschalten das Spülprogramm ausführen oder zum Ausschalten die Taste off / j (12) benutzen. e e Taste off / j Durch kurzes Drücken der Taste off / j (12) spült das Gerät und schaltet aus. Durch langes Drücken der Taste off / j (12) werden die Benutzerein stellungen aufgerufen oder die Entkalkungsund Reinigungsfunktion gestartet. e e Taste h Durch Drücken der Taste h (11) wird Dampf erzeugt, der zur Zubereitung von Milchschaum oder warmer Milch dient. Taste start Durch Drücken der Taste start (10) wird die Getränkezubereitung oder ein Serviceprogramm gestartet. Durch erneutes Drücken während der Getränkezubereitung kann der Bezug vorzeitig gestoppt werden. Drehknopf „Kaffeestärke“ Mit diesem Drehknopf (13) wird die Kaffeestärke eingestellt. e h bis g Sehr mild Mild Normal Stark DoubleShot stark + DoubleShot stark ++ Bei diesen Kaffeestärken wird der Kaffee in 2 Stufen gebrüht (siehe Kapitel „aromaDouble Shot“). 5 de Drehknopf „Getränkeauswahl“ Mit diesem Drehknopf (14) werden das gewünschte Getränk und die Menge ausgewählt. Außerdem werden damit Benutzer einstellungen verändert. a bis c b bis d e f Kleiner Espresso Espresso Kleiner Café Crème Café Crème Grosser Café Crème 2 kleine Espressi 2 Espressi 2 kleine Café Crème 2 Café Crème 2 grosse Café Crème Gerät spülen Milchsystem spülen Hinweis: Wird ein Getränk ausgewählt, das nicht zubereitet werden kann, erscheint im Display Kombination ungültig. Ändern Sie die Kaffeestärke oder die Getränkeauswahl. Milchschäumer Der Milchschäumer (6) kann durch Heraus ziehen und Hineindrücken geöffnet und geschlossen werden. 6 Drehwähler Um Milchschaum zu beziehen – zum Beispiel für Latte Macchiato oder Cappuccino – drehen Sie das Symbol nach vorne. Um warme Milch zu beziehen, drehen Sie das Symbol nach vorne. Um Heißwasser zu beziehen, stellen Sie den Drehwähler waagerecht. j i Displaymeldungen Im Display (15) werden außer dem aktuellen Betriebszustand verschiedene Meldungen angezeigt, die Zustands informationen geben oder mitteilen, wenn Ihr Eingreifen erforderlich ist. Sobald Sie die erforderliche Maßnahme ausgeführt haben, erlischt die Meldung und es wird wieder das Menü für die Getränkeauswahl angezeigt. aromaDouble Shot Je länger der Kaffee gebrüht wird, desto mehr Bitterstoffe und unerwünschte Aromen werden gelöst. Geschmack und Bekömmlichkeit des Kaffees werden dadurch beeinträchtigt. Für extra starken Kaffee verfügt die TE503 deswegen über eine spezielle aromaDouble Shot-Funktion. Nach der Hälfte der zubereiteten Menge wird erneut Kaffeepulver gemahlen und gebrüht, so dass jeweils nur die wohlschmeckenden und gut bekömmlichen Aromastoffe gelöst werden. de Die aromaDouble Shot-Funktion ist aktiv bei den folgenden Einstellungen: Vor dem ersten Gebrauch Allgemeines Nur reines, kaltes Wasser ohne Kohlensäure und ausschließlich geröstete Bohnen (vorzugsweise Espresso- oder VollautomatenBohnenmischungen) in die entsprechenden Behälter füllen. Keine glasierten, karamelli sierten oder mit sonstigen zuckerhaltigen Zusätzen behandelte Kaffeebohnen verwenden, sie verstopfen die Brüheinheit. Bei diesem Gerät ist die Wasserhärte einstellbar. Ab Werk ist die Wasserhärte 4 eingestellt. Die Wasserhärte des verwendeten Wassers mit beiliegendem Prüfstreifen feststellen. Ergibt die Prüfung einen anderen Wert als 4, das Gerät nach Inbetriebnahme entsprechend programmieren (siehe Wasserhärte im Kapitel „Menüeinstellungen“). Gerät in Betrieb nehmen 1. Vorhandene Schutzfolien entfernen. 2. Den Kaffeevollautomat auf eine ebene und für das Gewicht ausreichende wasserfeste Fläche stellen. Die Lüftungsschlitze des Gerätes müssen frei bleiben. Wichtig: Das Gerät nur in frostfreien Räumen verwenden. Wurde das Gerät bei Temperaturen unter 0° C transportiert oder gelagert, mindestens 3 Stunden warten, bevor das Gerät in Betrieb genommen wird. 3. Netzstecker aus dem Kabelfach (20) ziehen und anschließen. Die Länge kann durch Zurückschieben und Herausziehen passend eingestellt werden. Das Gerät dazu mit der Rückseite z. B. an die Tischkante stellen und das Kabel entweder nach unten ziehen, oder nach oben schieben. 4. Milchschäumer montieren. Gerät nur benutzen, wenn der Milchschäumer (6) komplett zusammengebaut und montiert ist. 5. Wassertankdeckel (17) hochklappen. 6. Wassertank (16) abnehmen, ausspülen und mit frischem, kaltem Wasser füllen. Die Markierung max beachten. 7. Den Wassertank (16) gerade aufsetzen und ganz nach unten drücken. 8. Den Wassertankdeckel (17) wieder schließen. 9. Bohnenbehälter (1) mit Kaffeebohnen füllen (für Zubereitung mit Kaffeepulver siehe Kapitel „Zubereitung mit gemahlenem Kaffee“). 10.Gerät am Netzschalter O / I (9) einschalten. Im Display (15) erscheint das Menü zum Einstellen der Displaysprache. 11.Mit dem oberen Drehknopf (14) die gewünschte Displaysprache auswählen. Folgende Sprachen stehen zur Auswahl: Deutsch English Français Italiano 12.Taste start (10) drücken. Die ausgewählte Sprache ist gespeichert. Im Display erscheint Schäumer ziehen. 7 de 13.Gefäß unter den Auslauf (6c) stellen. 14.Milchschäumer (6) vorsichtig heraus ziehen, um ihn zu öffnen. Das Gerät durchspült den Milchschäumer (6) mit Wasser. Im Display erscheint S chäumer drücken. 15.Milchschäumer (6) hineindrücken, um ihn zu schließen. Das Gerät heizt auf und spült. Etwas Wasser läuft aus dem Kaffeeauslauf. Wenn im Display die Getränkeauswahl erscheint, ist das Gerät betriebsbereit. Wasserfilter Ein Wasserfilter kann Kalkablagerungen vermindern. Bevor ein neuer Wasserfilter verwendet werden kann, muss dieser gespült werden. Dazu gehen Sie folgendermaßen vor: 1. Wasserfilter mit Hilfe des Pulverlöffels (18) in den Wassertank fest eindrücken. Gerät ausschalten Der Kaffeevollautomat ist ab Werk mit den Standardeinstellungen für optimalen Betrieb programmiert. Das Gerät schaltet nach einer ausgewählten Zeit automatisch ab und spült (Dauer einstellbar, siehe Auto Off im Kapitel „Menüeinstellungen“). Ausnahme: Wenn nur Heißwasser oder Dampf bezogen wurde, schaltet das Gerät aus, ohne zu spülen. Um das Gerät vorher manuell auszuschalten, drücken Sie die Taste off / j (12). Das Gerät spült und schaltet aus. e Hinweis: Bei der ersten Benutzung, nach der Durchführung eines Service-Programms oder wenn das Gerät längere Zeit nicht in Betrieb war, hat das erste Getränk noch nicht das volle Aroma und sollte nicht getrunken werden. Nach Inbetriebnahme des Kaffeevollautomaten wird eine feinporige und standfeste „Crema“ erst nach dem Bezug einiger Tassen dauerhaft erreicht. Bei längerem Gebrauch ist es normal, dass sich an den Lüftungsschlitzen Wassertropfen bilden. 8 2. Wassertank (16) bis zur Markierung max mit Wasser füllen. 3. Taste off / j (12) mindestens 3 Sekunden gedrückt halten. Die Menüeinstellung öffnet sich. 4. Taste off / j (12) so oft drücken, bis Filter Nein / Alt im Display erscheint. 5. Mit dem oberen Drehknopf (14) Filter a ktivieren wählen. 6. Taste start (10) drücken. 7. Einen Behälter mit 0,5 Liter Fassungs vermögen unter den Auslauf (6c) stellen. 8. Taste start (10) drücken. 9. Milchschäumer (6) durch Herausziehen öffnen. 10.Wasser fließt durch den Filter und spült ihn. 11.Milchschäumer (6) durch Hineindrücken schließen. 12.Den Behälter entleeren. Das Gerät ist wieder betriebsbereit. e e Info: Durch das Spülen des Filters ist gleichzeitig die Einstellung für die Anzeige Filter wechseln! aktiviert worden. de Nach Anzeige Filter wechseln! oder spätestens nach zwei Monaten ist die Wirkung des Filters erschöpft. Er ist aus hygienischen Gründen und damit das Gerät nicht verkalkt (Gerät kann Schaden nehmen), auszutauschen. Ersatzfilter sind über den Handel oder den Kundendienst erhältlich (siehe Kapitel „Zubehör“). Wird kein neuer Filter eingesetzt, die Einstellung Filter auf Nein / Alt drehen. Info: Mit dem Filter-Indikator können Sie den Monat markieren, in dem Sie den Filter eingesetzt haben. Sie können auch den Monat markieren, in dem Sie den Filter das nächste mal wechseln müssen (spätestens nach zwei Monaten). Folgendes können Sie einstellen: Auto Off Hier kann die Zeitspanne eingestellt werden, nach der das Gerät nach der letzten Getränkezubereitung automatisch ausschaltet. Die Einstellung ist von 15 Minuten bis 4 Stunden möglich. Die voreingestellte Zeit kann zum Energiesparen verkürzt werden. Filter Hier kann eingestellt werden, ob ein Wasserfilter verwendet wird. Wird kein Wasserfilter verwendet, die Einstellung auf Nein / Alt drehen. Wird ein Wasserfilter verwendet, die Einstellung auf Filter a ktivieren drehen. Bevor ein neuer Wasserfilter verwendet werden kann, muss dieser gespült werden (siehe Kapitel „Wasserfilter“). Start Calc‘n‘Clean Info: Wurde das Gerät längere Zeit nicht benutzt (z. B. im Urlaub), sollte der eingesetzte Filter vor dem Gebrauch durchgespült werden. Dazu eine Tasse Heißwasser beziehen und wegschütten. Menüeinstellungen In den Menüeinstellungen können Sie das Gerät individuell anpassen. 1. Taste off / j (12) mindestens 3 Sekunden gedrückt halten. 2. Taste off / j (12) so oft drücken, bis der gewünschte Menüpunkt im Display erscheint. 3. Mit dem oberen Drehknopf (14) die gewünschte Einstellung wählen. 4. Mit Taste start (10) bestätigen. Um das Menü ohne Änderungen zu verlassen, den Drehwähler auf Zurück stellen und Taste start (10) drücken. e e Hier können die Service-Programme einigen) (Calc‘n‘Clean / Entkalken / R manuell ausgewählt werden. Die Taste start (10) drücken und das ausgewählte Programm durchführen (siehe Kapitel „Service-Programme“). Temp. Hier kann die Brühtemperatur (hoch / mittel / niedrig) eingestellt werden. Sprache Hier kann die Displaysprache eingestellt werden. Wasserhärte Bei diesem Gerät ist die Wasserhärte einstellbar. Die richtige Einstellung der Wasserhärte ist wichtig, damit das Gerät rechtzeitig anzeigt, wenn es entkalkt werden muss. Ab Werk ist die Wasserhärte 4 voreingestellt. Die Wasserhärte kann mit dem beiliegenden Teststreifen festgestellt oder bei der örtlichen Wasserversorgung erfragt werden. 9 de Den Teststreifen kurz in Wasser tauchen, leicht abschütteln und nach einer Minute das Ergebnis ablesen. Zubereitung mit Kaffeebohnen Stufe Dieser Kaffeevollautomat mahlt für jeden Brühvorgang frischen Kaffee. 1 2 3 4 Wasserhärtegrad Deutsch (°dH) Französisch (°fH) 1-7 1-13 8-14 14-25 15-21 26-38 22-30 39-54 Mahlgrad einstellen Mit dem Drehwähler (3) für Mahlgradein stellung kann die gewünschte Feinheit des Kaffeepulvers eingestellt werden. AAAchtung! Den Mahlgrad nur bei laufendem Mahlwerk verstellen! Das Gerät kann sonst beschädigt werden. Nicht in das Mahlwerk greifen. ●● Bei laufendem Mahlwerk den Drehwähler (3) zwischen feinem Kaffeepulver (a: Drehen gegen den Uhrzeigersinn) und gröberem Kaffeepulver (b: Drehen im Uhrzeigersinn) einstellen. a b Info: Die neue Einstellung macht sich erst ab der zweiten Tasse Kaffee bemerkbar. Tipp: Bei dunkel gerösteten Bohnen einen feineren, bei helleren Bohnen einen gröberen Mahlgrad einstellen. Tipp: Vorzugsweise Espresso- oder Vollautomaten-Bohnenmischungen verwenden. Für eine optimale Qualität die Bohnen kühl und verschlossen aufbewahren oder tiefgefrieren. Die Kaffeebohnen können auch tiefgefroren gemahlen werden. Wichtig: Täglich frisches Wasser in den Wassertank (16) füllen. Es sollte immer ausreichend Wasser für den Betrieb des Gerätes im Wassertank (16) sein. Es können verschiedene Kaffeegetränke ganz einfach durch Knopfdruck zubereitet werden. Zubereitung Das Gerät muss betriebsbereit sein. 1. Vorgewärmte Tasse(n) unter den Kaffee auslauf (7) stellen. Tipp: Bei kleinem Espresso immer die Tasse vorwärmen, z. B. mit Heißwasser. 2. Den gewünschten Kaffee und die gewünschte Menge durch Drehen des oberen Drehknopfs (14) auswählen. Der gewählte Kaffee und die Menge werden im Display angezeigt. 3. Die gewünschte Stärke des Kaffees durch Drehen des unteren Drehknopfs (13) auswählen. Die gewählte Stärke wird im Display angezeigt. 4. Taste start (10) drücken. Der Kaffee wird gebrüht und läuft anschließend in die Tasse(n). Hinweis: Bei einigen Einstellungen wird der Kaffee in zwei Schritten zubereitet (siehe Kapitel „aromaDouble Shot“). Warten Sie, bis der Vorgang komplett abgeschlossen ist. 10 de Durch erneutes Drücken der Taste start (10) kann der Brühvorgang vorzeitig beendet werden. Zubereitung mit gemahlenem Kaffee Dieser Kaffeevollautomat kann auch mit gemahlenem Kaffee (kein löslicher Kaffee) betrieben werden. Hinweis: Bei der Zubereitung mit gemahlenem Kaffee ist die aromaDouble ShotFunktion nicht verfügbar. Heißwasser beziehen AAVerbrennungsgefahr! Der Milchschäumer (6) wird sehr heiß. Milchschäumer (6) nur am Kunststoffteil anfassen. Vor dem Bezug von Heißwasser muss der Milchschäumer gereinigt sein. Das Gerät muss betriebsbereit sein. 1. Vorgewärmte Tasse oder Glas unter den Auslauf des Milchschäumers (6) stellen. 2. Drehwähler (6d) waagerecht stellen. Wichtig: Täglich frisches Wasser in den Wassertank (16) füllen. Es sollte immer ausreichend Wasser für den Betrieb des Gerätes im Wassertank (16) sein. Zubereitung 1. Pulverschublade (4) öffnen. 2. Maximal 2 gestrichene Pulverlöffel Kaffee in die Pulverschublade einfüllen. Achtung: Keine ganzen Bohnen oder löslichen Kaffee einfüllen. 3. Pulverschublade (4) schließen. 4. Gewünschtes Getränk durch Drehen des oberen Drehknopfs (14) auswählen (nur eine Tasse möglich). 5. Taste start (10) drücken. Der Kaffee wird gebrüht und läuft anschließend in die Tasse. Hinweis: Für eine weitere Tasse Kaffee den Vorgang wiederholen. Wird innerhalb von 90 Sekunden kein Kaffee bezogen, entleert sich die Brühkammer automatisch, um eine Überfüllung zu vermeiden. Das Gerät spült. 3. Milchschäumer (6) durch Herausziehen öffnen. Das Gerät heizt auf. Heißes Wasser läuft für ca. 40 Sekunden aus dem Auslauf des Milchschäumers (6). 4. Durch Hineindrücken des Milch schäumers (6) den Vorgang stoppen. Milchschaum oder warme Milch zubereiten AAVerbrennungsgefahr! Der Milchschäumer (6) wird sehr heiß. Milchschäumer (6) nur am Kunststoffteil anfassen. Tipp: Erst die Milch aufschäumen und dann Kaffee beziehen oder die Milch separat aufschäumen und auf den Kaffee geben. Das Gerät muss betriebsbereit sein. 1. Vorgewärmte Tasse unter den Auslauf (6c) stellen. 2. Den Milchschlauch (6e) in einen Milch behälter einführen. 11 de 3. Den Drehwähler (6d) auf „warme Milch“ oder „Milchschaum“ stellen. i j Pflege und tägliche Reinigung AAStromschlaggefahr! Vor der Reinigung den Netzstecker ziehen. Das Gerät niemals in Wasser tauchen. Keinen Dampfreiniger benutzen. 4. Taste h (11) drücken. Die Taste h (11) blinkt, das Gerät heizt nun ca. 20 Sekunden lang auf. Danach erscheint Schäumer ziehen im Display. 5. Milchschäumer (6) durch Herausziehen öffnen. AAVerbrennungsgefahr! Milchschaum oder warme Milch tritt mit hohem Druck aus dem Milchschäumer (6) aus. Milchspritzer können zu Verbrühungen führen. Milchschäumer (6) vorsichtig öffnen. Auslauf (6c) nicht berühren oder auf Personen richten. 6. Milchschäumer (6) durch Hineindrücken schließen. Tipp: Für einen optimalen Milchschaum bevorzugt kalte Milch mit einem Fettgehalt von mindestens 1,5 % verwenden. Wichtig: Getrocknete Milchreste sind schwer zu entfernen, deshalb unbedingt nach jeder Benutzung den Milchschäumer (6) mit lauwarmem Wasser reinigen und mit Hilfe des Programms Milchsystem spülen durchspülen. 12 ●● Das Gehäuse mit einem weichen, feuchten Tuch abwischen. ●● Keine scheuernden Tücher oder Reinigungsmittel verwenden. ●● Rückstände von Kalk, Kaffee, Milch und Entkalkungslösung immer sofort entfernen. Unter solchen Rückständen kann sich Korrosion bilden. ●● Neue Schwammputztücher können mit Salzen behaftet sein. Salze können Flugrost am Edelstahl verursachen, deshalb vor Benutzung unbedingt gründlich auswaschen. ●● Tropfschale (8c) mit Kaffeesatzbehälter (8b) nach vorne herausziehen. Blende (8a) und Tropfblech (8d) abnehmen. Tropfschale und Kaffeesatzbehälter entleeren und reinigen. ●● Pulverschublade (4) entnehmen und reinigen. de ●● Schwimmer (8e) ausbauen und mit einem feuchten Tuch reinigen. OO Die folgenden Bauteile nicht in den Geschirrspüler geben: Blende (8a), Schwimmer (8e), Pulverschublade (4), Brüheinheit (5a). Die folgenden Bauteile sind geeignet für den Geschirrspüler: Tropfschale (8c), Kaffeesatzbehälter (8b), Tropf blech (8d), Aromadeckel (2) und Pulverlöffel (18). ●● Innenraum des Gerätes (Aufnahme Schalen und Pulverschublade) auswischen. NN Wichtig: Tropfschale (8c) und Kaffeesatz behälter (8b) sollten täglich geleert und gereinigt werden, um Schimmelbildung zu vermeiden. Hinweis: Wenn das Gerät in kaltem Zustand mit dem Netzschalter O / I (9) eingeschaltet wird oder nach Bezug von Kaffee automatisch ausschaltet, spült das Gerät automatisch. Das System reinigt sich somit selbst. Wichtig: Sollte das Gerät längere Zeit (z. B. Urlaub) nicht benutzt werden, das komplette Gerät einschließlich Milchsystem und Brüheinheit gründlich reinigen. Milchsystem reinigen Wenn nach einem Milchbezug das Milch system nicht gereinigt wurde, erscheint nach einer gewissen Zeit im Display die Meldung Milchsystem reinigen! Milchsystem nach jeder Benutzung reinigen! Den Drehwähler (6d) zum Reinigen in der Position der letzten Benutzung lassen. Milchsystem automatisch vorreinigen: 1. Mit dem Drehknopf (14) auswählen. 2. Ein leeres, möglichst hohes Gefäß unter den Auslauf (6c) stellen. 3. Den Kaffeeauslauf möglichst nah an das Gefäß schieben. 4. Das Ende des Milchschlauchs (6e) in das Gefäß geben. 5. Taste start (10) drücken. 6. Milchschäumer (6) durch Herausziehen öffnen. Das Gerät füllt nun automatisch Wasser in das Gefäß und saugt es zum Spülen über den Milchschlauch (6e) wieder an. Nach ca. einer Minute stoppt der Spülvorgang automatisch. 7. Milchschäumer (6) durch Hineindrücken schließen. 8. Gefäß entleeren und den Milchschlauch (6e) reinigen. f Zusätzlich das Milchsystem regelmäßig gründlich reinigen (Geschirrspüler oder per Hand). Milchsystem zum Reinigen zerlegen: 1. Auslauf (6c) vom Dampfventil (6a) abziehen (Bild C am Anfang der Anleitung). 13 de 2. Die Einzelteile mit Spüllauge und einer weichen Bürste reinigen, bei Bedarf in warmer Spüllauge einlegen. 3. Alle Teile mit klarem Wasser spülen und abtrocknen. 4. Alle Teile wieder zusammenstecken und bis zum Anschlag einsetzen. 3. Die rote Verriegelung (5e) an der Brüheinheit (5a) ganz nach links schieben. 4. Den Auswurfhebel (5c) ganz nach unten drücken. Die Brüheinheit wird gelöst. 5. Die Brüheinheit (5a) an den Griffmulden fassen und vorsichtig herausnehmen. 6. Die Abdeckung (5f) der Brüheinheit abnehmen und die Brüheinheit (5a) unter fließendem Wasser gründlich reinigen. 7. Das Sieb der Brüheinheit unter dem Wasserstrahl gründlich reinigen. AAVerbrühungsgefahr! Gerät nur benutzen, wenn der Milch schäumer (6) komplett zusammengebaut und montiert ist. Brüheinheit reinigen Brüheinheit regelmäßig reinigen! Brüheinheit automatisch vorreinigen: 1. Mit dem Drehknopf (14) auswählen. 2. Ein leeres Glas unter den Auslauf (7) stellen. 3. Taste start (10) drücken. Das Gerät spült. e Zusätzlich zum automatischen Reinigungs programm sollte die Brüheinheit (5a) regelmäßig zum Reinigen entnommen werden (Bild E am Anfang der Anleitung). 1. Mit dem Netzschalter O / I (9) das Gerät ausschalten. Keine Taste leuchtet. 2. Die Tür (5b) zur Brüheinheit öffnen. 14 Wichtig: Ohne Spül- und sonstige Reinigungsmittel reinigen und nicht in den Geschirrspüler geben. 8. Den Geräte-Innenraum mit einem feuchten Tuch gründlich reinigen, eventuell vorhandene Kaffeereste entfernen. 9. Brüheinheit (5a) und Geräte-Innenraum trocknen lassen. de 10.Die Abdeckung (5f) wieder auf die Brüheinheit setzen und die Brüheinheit (5a) bis zum Anschlag in das Gerät schieben. 11.Den Auswurfhebel (5c) ganz nach oben drücken. 12.Die rote Verriegelung (5e) ganz nach rechts schieben und die Tür (5b) schließen. Tipps zum Energiesparen ●● Wird der Kaffeevollautomat nicht benutzt, das Gerät ausschalten. Dazu die Taste off / j (12) drücken. Das Gerät spült und schaltet aus. ●● Kaffee- oder Milchschaumbezug nach Möglichkeit nicht unterbrechen. Vorzeitiger Abbruch führt zu erhöhtem Energieverbrauch und zu einer schnelleren Füllung der Tropfschale. ●● Das Gerät regelmäßig entkalken, um Kalkablagerungen zu vermeiden. Kalk rückstände führen zu einem höheren Energieverbrauch. e Service-Programme Tipp: Siehe auch Kurzanleitung im Aufbewahrungsfach (5c). Je nach Benutzung erscheinen in gewissen Zeitabständen die folgenden Meldungen im Display: Entkalken notwendig! oder Reinigen notwendig! oder Calc‘n‘Clean notwendig! Das Gerät sollte unverzüglich mit dem entsprechenden Programm gereinigt oder entkalkt werden. Wahlweise können beide Vorgänge durch die Funktion Calc‘n‘Clean zusammengefasst werden (siehe Kapitel „Calc‘n‘Clean“). Erfolgt das Service-Programm nicht nach Anweisung, kann das Gerät beschädigt werden. AAAchtung! Bei jedem Service-Programm Entkalkungsund Reinigungsmittel nach Anleitung benutzen. Sicherheitshinweise auf der Verpackung der Reinigungsmittel beachten. Das Service-Programm keinesfalls unterbrechen! Flüssigkeiten nicht trinken! Niemals Essig, Mittel auf Essigbasis, Zitronensäure oder Mittel auf Zitronen säurebasis verwenden! Keinesfalls Entkalkungstabletten oder andere Entkalkungsmittel in die Pulver schublade (4) einfüllen! Speziell entwickelte und geeignete Entkalkungs- und Reinigungstabletten sind über den Handel sowie den Kundendienst erhältlich (siehe Kapitel „Zubehör“). 15 de Entkalken Dauer: ca. 25 Minuten Wichtig: Ist ein Wasserfilter in den Wasser tank (16) eingesetzt, diesen unbedingt vor dem Start des Entkalkungsvorgangs entfernen. Behälter platzieren Schäumer ziehen ●● Einen Behälter mit mindestens 0,5 Liter Fassungsvermögen unter den Auslauf (6c) stellen. ●● Milchschäumer (6) durch Herausziehen öffnen. Wenn im Display die Meldung Entkalken notwendig! erscheint, drücken Sie die Taste off / j (12) für 3 Sekunden und drücken Sie anschließend die Taste start (10). Der Entkalkungsvorgang startet. Um das Gerät zwischendurch zu entkalken, drücken Sie die Taste off / j (12) für mindestens 3 Sekunden. Drücken Sie dann zweimal kurz die Taste off / j (12). Drehen Sie den oberen Drehknopf (14) so lange, bis im Display Start Entkalken erscheint. Um den Entkalkungsvorgang zu starten, drücken Sie die Taste start (10). Das Display führt durch das Programm. Entkalkung läuft Schale leeren Schale einsetzen Schäumer drücken e e e ●● Tropfschale (8) leeren und wieder einsetzen. Hinweis: Ist der Wasserfilter aktiviert, erscheint die entsprechende Aufforderung, den Filter zu entfernen und erneut die Taste start (10) zu drücken. Falls noch nicht geschehen, Filter jetzt entfernen. Taste start (10) drücken. Entkalker einfüllen start drücken ●● Lauwarmes Wasser in den leeren Wassertank (16) bis zur Markierung 0,5l einfüllen und eine Siemens Entkalkungstablette TZ80002 darin auflösen. Bei Verwendung von TZ60002 unbedingt zwei Tabletten auflösen. ●● Taste start (10) drücken. Entkalkung läuft Das Entkalkungsprogramm läuft jetzt ca. 10 Minuten. 16 Das Entkalkungsprogramm läuft jetzt ca. 12 Minuten. Tank reinigen/füllen start drücken ●● Den Wassertank (16) spülen und frisches Wasser bis zur Markierung max einfüllen. ●● Taste start (10) drücken. Entkalkung läuft Das Entkalkungsprogramm läuft jetzt ca. 30 Sekunden und spült das Gerät. ●● Milchschäumer (6) durch Hineindrücken schließen. Entkalkung läuft Das Entkalkungsprogramm läuft jetzt ca. 1 Minute. Schale leeren Schale einsetzen ●● Tropfschale (8) leeren und wieder einsetzen. Wenn ein Filter verwendet wird, diesen jetzt wieder einsetzen. Das Gerät ist fertig entkalkt und wieder betriebsbereit. Wichtig: Das Gerät mit einem weichen, feuchten Tuch abwischen um Rückstände der Entkalkungslösung sofort zu entfernen. Unter solchen Rückständen kann sich Korrosion bilden. Neue Schwammputz tücher können mit Salzen behaftet sein. Salze können Flugrost am Edelstahl verursachen, deshalb vor Benutzung unbedingt gründlich auswaschen. de Reinigen Dauer: ca. 10 Minuten Calc‘n‘Clean Dauer: ca. 35 Minuten Wichtig: Die Brüheinheit vor dem Start des Service-Programms reinigen, siehe Kapitel „Brüheinheit reinigen“. Calc‘n‘Clean kombiniert die Einzelfunk tionen Entkalken und Reinigen. Liegt die Fälligkeit der beiden Programme nah beieinander, schlägt der Kaffeevollautomat automatisch dieses Serviceprogramm vor. Wenn im Display die Meldung Reinigen notwendig! erscheint, drücken Sie die Taste off / j (12) für 3 Sekunden und drücken Sie anschließend die Taste start (10). Der Reinigungsvorgang startet. Um das Gerät zwischendurch zu reinigen, drücken Sie die Taste off / j (12) für mindestens 3 Sekunden. Drücken Sie dann zweimal kurz die Taste off / j (12). Drehen Sie den oberen Drehknopf (14) so lange, bis im Display Start Reinigen erscheint. Um den Reinigungsvorgang zu starten, drücken Sie die Taste start (10). Das Display führt durch das Programm. e e e Wichtig: Ist ein Wasserfilter in den Wasser tank (16) eingesetzt, diesen unbedingt vor dem Start des Service-Programms entfernen. Die Brüheinheit vor dem Start des Service-Programms reinigen, siehe Kapitel „Brüheinheit reinigen“. Schublade öffnen Wenn im Display die Meldung Calc‘n‘Clean notwendig! erscheint, drücken Sie die Taste off / j (12) für 3 Sekunden und drücken Sie anschließend die Taste start (10). Das Service-Programm startet. Um Calc‘n‘Clean zwischendurch durchzuführen, drücken Sie die Taste off / j (12) für mindestens 3 Sekunden. Drücken Sie dann zweimal kurz die Taste off / j (12). Drehen Sie den oberen Drehknopf (14) so lange, bis im Display Start Calc‘n‘Clean erscheint. Um Calc‘n‘Clean zu starten, drücken Sie die Taste start (10). Das Display führt durch das Programm. Reiniger einfüllen Schale leeren Schale einsetzen Schale leeren Schale einsetzen ●● Tropfschale (8) leeren und wieder einsetzen. Reinigung läuft Das Gerät spült zweimal. ●● Die Pulverschublade (4) öffnen. ●● Eine Siemens Reinigungstablette einwerfen und die Pulverschublade (4) schließen. Reinigung läuft Das Reinigungsprogramm läuft jetzt ca. 8 Minuten. Schale leeren Schale einsetzen ●● Tropfschale (8) leeren und wieder einsetzen. Das Gerät ist fertig gereinigt und wieder betriebsbereit. e e e ●● Tropfschale (8) leeren und wieder einsetzen. Calc‘n‘Clean läuft Das Gerät spült zweimal. Schublade öffnen ●● Die Pulverschublade (4) öffnen. Reiniger einfüllen ●● Eine Siemens Reinigungstablette einwerfen und die Pulverschublade (4) schließen. 17 de Hinweis: Ist der Wasserfilter aktiviert, erscheint die entsprechende Aufforderung, den Filter zu entfernen und erneut die Taste start (10) zu drücken. Falls noch nicht geschehen, Filter jetzt entfernen. Taste start (10) drücken. Entkalker einfüllen start drücken ●● Lauwarmes Wasser in den leeren Wassertank (16) bis zur Markierung 0,5l einfüllen und eine Siemens Entkalkungstablette TZ80002 darin auflösen. Bei Verwendung von TZ60002 unbedingt zwei Tabletten auflösen. ●● Taste start (10) drücken. Calc‘n‘Clean läuft Das Entkalkungsprogramm läuft jetzt ca. 10 Minuten. Behälter platzieren Schäumer ziehen ●● Einen Behälter mit mindestens 1 Liter Fassungsvermögen unter den Auslauf (6c) stellen. ●● Milchschäumer (6) durch Herausziehen öffnen. Calc‘n‘Clean läuft Das Entkalkungsprogramm läuft jetzt ca. 12 Minuten. Tank reinigen/füllen start drücken ●● Den Wassertank (16) spülen und frisches Wasser bis zur Markierung max einfüllen. ●● Taste start (10) drücken. Calc‘n‘Clean läuft Das Entkalkungsprogramm läuft jetzt ca. 30 Sekunden und spült das Gerät. Schäumer drücken ●● Milchschäumer (6) durch Hineindrücken schließen. 18 Calc‘n‘Clean läuft Das Reinigungsprogramm läuft jetzt ca. 8 Minuten. Schale leeren Schale einsetzen ●● Tropfschale (8) leeren und wieder einsetzen. Wenn ein Filter verwendet wird, diesen jetzt wieder einsetzen. Das Gerät ist fertig gereinigt und wieder betriebsbereit. Wichtig: Das Gerät mit einem weichen, feuchten Tuch abwischen um Rückstände der Entkalkungslösung sofort zu entfernen. Unter solchen Rückständen kann sich Korrosion bilden. Neue Schwammputz tücher können mit Salzen behaftet sein. Salze können Flugrost am Edelstahl verursachen, deshalb vor Benutzung unbedingt gründlich auswaschen. Frostschutz AAUm Schäden durch Frosteinwirkung bei Transport und Lagerung zu vermeiden, muss das Gerät vorher vollständig entleert werden. Info: Das Gerät muss betriebsbereit und der Wassertank (16) gefüllt sein. 1. Ein großes Gefäß unter den Auslauf (6c) stellen. 2. Taste h (11) drücken. Die Taste h (11) blinkt, das Gerät heizt nun ca. 20 Sekunden lang auf. Danach erscheint Schäumer ziehen im Display. 3. Milchschäumer (6) durch Herausziehen öffnen und ca. 15 Sekunden dampfen lassen. 4. Mit dem Netzschalter O / I (9) das Gerät ausschalten. 5. Den Wassertank (16) und die Tropf schale (8) entleeren. de Zubehör Garantiebedingungen Folgendes Zubehör ist über den Handel und Kundendienst erhältlich. Zubehör Bestellnummer Handel / Kundendienst Reinigungstabletten TZ60001 00310575 Entkalkungstabletten TZ80002 00576693 Wasserfilter TZ70003 00575491 Pflegeset TZ80004 00576330 Milchbehälter mit TZ80009N „Fresh Lock“ Deckel 00576166 Für dieses Gerät gelten die von unserer jeweils zuständigen Landesvertretung herausgegebenen Garantiebedingungen des Landes, in dem das Gerät gekauft wurde. Sie können die Garantiebedingungen jederzeit über Ihren Fachhändler, bei dem Sie das Gerät gekauft haben oder direkt bei unserer Landesvertretung anfordern. Die Garantiebedingungen für Deutschland und die Adressen finden Sie auf den letzten vier Seiten dieses Heftes. Darüber hinaus sind die Garantiebe dingungen auch im Internet unter der benannten Webadresse hinterlegt. Für die Inanspruchnahme von Garantieleistungen ist in jedem Fall die Vorlage des Kauf beleges erforderlich. Entsorgung A Änderungen vorbehalten. Entsorgen Sie die Verpackung umwelt gerecht. Dieses Gerät ist entsprechend der europäischen Richtlinie 2012 / 19 / EG über Elektro- und Elektronikaltgeräte (waste electrical and electronic equipment – WEEE) gekennzeichnet. Die Richtlinie gibt den Rahmen für eine EU-weit gültige Rücknahme und Verwertung der Altgeräte vor. Über aktuelle Entsorgungswege bitte beim Fachhändler informieren. Technische Daten Elektrischer Anschluss (Spannung – Frequenz) Leistung der Heizung Maximaler Pumpendruck, statisch Maximales Fassungsvermögen Wassertank (ohne Filter) Maximales Fassungsvermögen Bohnenbehälter Länge der Zuleitung Abmessungen (H x B x T) Gewicht, ungefüllt Art des Mahlwerks 220-240 V – 50/60 Hz 1600 W 15 bar 1,7 l 300 g 100 cm 385 x 280 x 479 mm 9,3 kg Keramik 19 de Einfache Probleme selbst beheben Problem Displayanzeige Ursache Bohnen fallen nicht Bohnen nachfüllen! trotz ins Mahlwerk (zu ölige gefülltem Bohnenbehälter Bohnen). (1) oder Mahlwerk mahlt keine Kaffeebohnen. Kein Heißwasserbezug möglich. Der Milchschäumer (6) ist verschmutzt. Zu wenig oder kein Milchschaum oder der Milchschäumer (6) saugt keine Milch an. Der Milchschäumer (6) ist verschmutzt. Ungeeignete Milch. Der Milchschäumer (6) ist nicht richtig zusammengesetzt. Das Gerät ist verkalkt. Kaffee läuft nur tropfen weise oder es fließt kein Kaffee mehr. Kaffee hat keine „Crema“. Der Kaffee ist zu „sauer“. Der Kaffee ist zu „bitter“. Displayanzeige Störung Hotline Abhilfe Leicht an den Bohnenbehälter (1) klopfen. Eventuell Kaffeesorte wechseln. Bei geleertem Bohnenbehälter (1) diesen mit einem trockenen Tuch auswischen. Milchschäumer (6) reinigen, siehe Kapitel „Pflege und tägliche Reinigung“. Milchschäumer (6) reinigen, siehe Kapitel „Pflege und tägliche Reinigung“. Milch mit mindestens 1,5 % Fettgehalt verwenden. Milchschäumerteile befeuchten und fest zusammenpressen. Das Gerät nach Anleitung entkalken. Der Mahlgrad ist zu fein Mahlgrad gröber stellen eingestellt oder das Kaffee- oder gröberes Kaffeepulver pulver ist zu fein. verwenden. Das Gerät ist stark verkalkt. Das Gerät nach Anleitung entkalken. Ungeeignete Kaffeesorte. Kaffeesorte mit höherem Anteil an Robusta-Bohnen verwenden. Die Bohnen sind nicht mehr Frische Bohnen verwenden. röstfrisch. Der Mahlgrad ist nicht Mahlgrad auf fein einstellen. auf die Kaffeebohnen abgestimmt. Der Mahlgrad ist zu grob Mahlgrad feiner stellen eingestellt oder das Kaffee- oder feineres Kaffeepulver pulver ist zu grob. verwenden. Ungeeignete Kaffeesorte. Dunklere Röstung verwenden. Der Mahlgrad ist zu fein Mahlgrad gröber stellen eingestellt oder das Kaffee- oder gröberes Kaffeepulver verwenden. pulver ist zu fein. Ungeeignete Kaffeesorte. Kaffeesorte wechseln. Im Gerät ist ein Fehler. Bitte die Hotline anrufen. Können Probleme nicht behoben werden, unbedingt die Hotline anrufen! Die Telefonnummern befinden sich auf den letzten Seiten der Anleitung. 20 de Problem Der Wasserfilter hält nicht im Wassertank (16). Displayanzeige Wassertank prüfen Der Kaffeesatz ist nicht kompakt und zu nass. Displayanzeige Brüheinheit reinigen Ursache Der Wasserfilter ist nicht richtig befestigt. Wassertank falsch eingesetzt oder neuer Wasserfilter nicht nach Anleitung gespült. Kohlensäurehaltiges Wasser im Wassertank. Der Mahlgrad ist zu fein oder zu grob eingestellt oder es wird zu wenig Kaffeepulver verwendet. Verschmutzte Brüheinheit (5). Zuviel Pulverkaffee in der Brüheinheit (5). Abhilfe Wasserfilter gerade und fest in den Tankanschluss drücken. Wassertank richtig einsetzen oder Wasserfilter nach Anleitung spülen und in Betrieb nehmen. Wassertank mit frischem Leitungswasser füllen. Mahlgrad gröber oder feiner stellen oder 2 gestrichene Messlöffel Kaffeepulver verwenden. Brüheinheit (5) reinigen. Brüheinheit (5) reinigen. Maximal 2 gestrichene Pulverlöffel mit Kaffeepulver einfüllen. Der Mechanismus Brüheinheit entnehmen und der Brüheinheit ist reinigen, siehe Kapitel „Pflege schwergängig. und tägliche Reinigung“. Stark schwankende Kaffee- Das Gerät ist verkalkt. Das Gerät nach Anleitung bzw. Milchschaumqualität. entkalken. Tropfwasser auf innerem Tropfschale (8) zu früh Tropfschale (8) erst einige Geräteboden bei entnom- entnommen. Sekunden nach dem letzten mener Tropfschale (8). Getränkebezug entnehmen. Brüheinheit (5) fehlt oder Gerät bei eingesetzter Brüh Displayanzeige Brüheinheit einsetzen wurde nicht erkannt. einheit (5) ausschalten, drei Sekunden warten und wieder einschalten. Die Werkseinstellungen Gerät mit dem Netzschalter Eigene, nicht mehr wurden verändert und gewünschte Einstellungen O / I (9) ausschalten. Taste off / j (12) und Taste h sollen wieder aktiviert wurden vorgenommen. (11) gedrückt halten und werden („Reset“). Gerät mit Netzschalter O / I (9) einschalten. Anschließend mit Taste start (10) bestätigen. Die Werkseinstellungen sind aktiviert. Können Probleme nicht behoben werden, unbedingt die Hotline anrufen! Die Telefonnummern befinden sich auf den letzten Seiten der Anleitung. e 21 en Table of Contents Included in delivery�����������������������������������22 Safety instructions������������������������������������23 Overview��������������������������������������������������25 Controls����������������������������������������������������25 Display messages������������������������������������26 aromaDouble Shot�����������������������������������26 Before using for the first time�������������������27 Water filter������������������������������������������������28 Menu settings�������������������������������������������29 Adjusting the grinding unit������������������������30 Preparation using coffee beans����������������30 Preparation using ground coffee �������������31 Dispensing hot water��������������������������������31 Preparing milk froth and warm milk����������31 Maintenance and daily cleaning���������������32 Tips on energy saving������������������������������35 Service Programmes��������������������������������35 Frost protection����������������������������������������38 Accessories����������������������������������������������38 Disposal ���������������������������������������������������39 Guarantee������������������������������������������������39 Technical data������������������������������������������39 Simple troubleshooting�����������������������������40 22 Dear Coffee Connoisseur, Congratulations on purchasing this fully automatic espresso machine from Siemens. Please also note the enclosed quick reference guide. It can be kept in the special storage compartment (5c) until it is needed. Included in delivery (see overview image at the start of the instructions) a Fully automatic espresso machine TE503 b Quick reference guide c Instruction manual d Milk frother/Rotary selector e Water hardness testing strip f Measuring spoon en Safety instructions Please read and follow the operating instructions carefully and keep them for later reference. Enclose these instructions when you give this appliance to someone else. This appliance is designed for the preparation of normal household quantities in the home, or in household-like, non-commercial environments. Household-like environments include staff kitchens in shops, offices, agricultural and other small businesses or for use by guests at bed-and-breakfast establishments, small hotels and similar residential facilities. ¡ Danger of electric shock! Connect and operate the appliance only according to the type plate specifications. To avoid potential hazards, repairs such as replacing a damaged cable must only be carried out by our customer service personnel� This appliance may be used by children aged 8 years and older and by persons with reduced physical, sensory or mental capabilities or who lack experience and/or knowledge if they are supervised or have been given instruction in the safe use of the appliance and have understood the dangers involved� Keep children under 8 years of age away from the appliance and connecting cable and do not allow them to use the appliance� Children shall not play with the appliance� Cleaning and user maintenance shall not be made by children unless they are older than 8 years and supervised� Never immerse the appliance or mains cable in water� Use only if power cord and appliance show no signs of damage� Should a fault occur, pull the plug or disconnect from the mains immediately� 23 en ¡ Risk of suffocation! Do not allow children to play with packaging material� ¡¡ Risk of scalding! The milk frother outlet (6c) gets very hot. Milk froth or warm milk comes out of the milk frother (6) at high pressure. Splashes of milk can scald. Do not touch the outlet (6c) or aim it at anyone. After use, allow to cool down first before touching. Use this appliance only after the milk frother (6) has been fully assembled and installed. ¡¡ Risk of injury! Do not reach into the grinding unit. 24 en Overview Controls (see overview images A, B, C, D and E at the beginning of this instruction manual) Power on/off switch O / I The power switch O / I (9) is used to switch the appliance on or to switch it off fully (power supply off). 1 2 3 4 Bean container Aroma cover Selector for grind setting Drawer (ground coffee / cleaning tablet) 5 Brewing unit (Fig. E) a)Brewing unit b)Door c)Storage compartment for quick reference guide d)Eject lever for brewing unit e)Lock f) Cover 6 Milk frother (Fig. C) removable a)Steam valve b)Air nozzle c)Outlet d)Rotary selector for warm milk / milk froth e)Milk tube 7 Coffee outlet, height-adjustable 8 Drip tray (Fig. D) a)Drip tray panel b)Coffee grounds container c)Drip tray for coffee outlet d)Grate for coffee outlet e)Float 9 Power on/off switch O / I 10 start button 11 h button 12 off / j button 13 “Coffee strength” rotary knob 14 “Drink selection” rotary knob 15 Display 16 Removable water tank 17 Lid for water tank 18 Measuring spoon (insertion aid for water filter) 19 Storage compartment for measuring spoon 20 Power cable with storage compartment e Important: Before switching off, run the cleaning programme or use the off / j button (12) to switch off. e e off / j button When the off / j button (12) is pressed briefly, the appliance rinses and switches off. Pressing and holding down the off / j button (12) displays the user settings or starts the descaling and cleaning function. e e h button Press the h button (11) to generate steam for preparing milk froth or warm milk. start button Press the start button (10) to begin drink preparation or to start a service programme. Press the start button (10) again during drink preparation to cut the dispensing process short. “Coffee strength” rotary knob This rotary knob (13) is used to set the coffee strength. h to g Very mild Mild Normal Strong DoubleShot strong+ DoubleShot strong++ With these coffee strengths the coffee is brewed in 2 stages. See “aromaDouble Shot”. 25 en “Drink selection” rotary knob This rotary knob (14) is used to select the required drink and the per-cup quantity. It is also used to change user settings. a to c b to d e f Small Espresso Espresso Small Café Crème Café Crème Large Café Crème 2 small Espresso 2 Espresso 2 small Café Crème 2 Café Crème 2 large Café Crème Rinse machine Rinse milk system N.B.: If a drink is selected that cannot be prepared, Invalid combination appears in the display. Change the coffee strength or the selected drink. Milk frother Pull the milk frother (6) out to open it and push it back in to close it. 26 Rotary selector To dispense milk froth – for example for a latte macchiato or cappuccino – turn the symbol to the front. To dispense warm milk, turn the symbol to the front. To dispense hot water, set the rotary selector to the horizontal position. j i Display messages The display (15) shows not only the current operating status, but also various messages that give you status information or let you know when you need to take action. As soon as you have taken the necessary action, the message disappears and the menu for drink selection is displayed again. aromaDouble Shot The longer the coffee is brewed, the more bitter substances and undesired aromas are released. This has a negative effect on the taste and makes the coffee less easily digestible. So for extra strong coffee the TE503 has a special aromaDouble Shot function. When half the quantity has been prepared, coffee is ground and brewed again so that only the pleasant, aromatic scents are released. en The aromaDouble Shot function is activated with the following settings: Before using for the first time General Fill the appropriate container using only pure, cold, uncarbonated water and only roasted beans (preferably espresso or coffee bean blends for fully automatic coffee machines). Do not use coffee beans that have been glazed, caramelised or treated with other additives containing sugar, since they will block the brewing unit. The water hardness setting can be adjusted on this appliance. The factory default setting for the water hardness is 4. Check the water hardness with the enclosed test strip. If the check reveals a value other than 4, change the setting on the appliance accordingly after switching on (see “Menu settings” Water hardness). Switching on the appliance 1. Remove the protective film. 2. Place the fully automatic espresso machine on a flat, water-resistant surface that can take its weight. Make sure that the machine’s ventilation slots remain unobstructured. Important: Only use the appliance in frost-free rooms. If the appliance has been transported or stored at temperatures below 0 °C, wait at least 3 hours before operation. 3. Pull the power cord out of the storage compartment (20) and plug in. Adjust the length of the cable by pushing it back in or pulling it out. The easiest way to do this is to place the appliance so that its back is flush with the edge of the counter and either pull the cable downward or push it upward. 4. Install the milk frother. Operate the machine only after the milk frother (6) has been fully assembled and installed. 5. Lift the lid of the water tank (17). 6. Remove and rinse the water tank (16) and fill it with fresh cold water. Do not fill above the max mark. 7. Replace the water tank (16) and push it firmly downward into place. 8. Close the lid of the water tank (17) again. 9. Fill the bean container (1) with coffee beans (for preparation using ground coffee, see “Preparation using ground coffee”). 10.Press the power switch O / I (9). The display (15) shows the menu for setting the display language. 11.Select the required display language with the upper rotary knob (14). The following languages are available: Deutsch English Français Italiano 12.Press the start button (10). The language you selected is saved. The display shows Pull milk frother. 13.Place a receptacle under outlet (6c). 27 en 14.Carefully pull out the milk frother (6) to open it. The appliance rinses out the milk frother (6) with water. The display shows Push milk frother. 15.Push the milk frother (6) in to close it. The appliance heats up and rinses. Some water will run out of the coffee outlet. When the drink selection menu is shown in the display, the appliance is ready for use. Water filter A water filter can prevent scale buildup. Before a new water filter is used, it must be rinsed. To do this, proceed as follows: 1. Press the water filter firmly into the water tank with the aid of the measuring spoon (18). Switching off the appliance The factory settings of the fully automatic espresso machine are programmed for optimal performance. The appliance switches off automatically after a specific time (time span can be programmed, see “Menu settings” Shut off). Exception: The appliance switches off without rinsing if only hot water or steam were dispensed. To switch the appliance off manually before this, press the off / j button (12). The appliance rinses and switches off. e N.B.: If the appliance is being used for the first time, a service program has been run, or the appliance has not been operated for a long period, the first beverage will not have the full aroma and should not be consumed. When using the espresso machine for the first time, you will achieve a suitably thick and stable “crema” only after the first few cups have been dispensed. After extended use, water droplets may form on the ventilation slots. This is normal. 2. Fill the water tank (16) with water up to the max mark. 3. Press and hold the off / j button (12) for at least three seconds. The menu opens. 4. Press the off / j button (12) repeatedly until the display shows No / Old filter. 5. Select Activate filter with the upper rotary knob (14). 6. Press the start button (10). 7. Place a receptacle with a capacity of 0.5 litres under the outlet (6c). 8. Press the start button (10). 9. Pull the milk frother (6) to open it. 10.Water will now flow through the filter to rinse it. 11.Push the milk frother (6) in to close it. 12.Empty the container. The appliance is ready to use once more. e e Note: Rinsing the filter simultaneously activates the setting for the Change filter! display. 28 en The filter is no longer effective when the Change filter! display appears, or at the latest after 2 months. It needs to be replaced for reasons of hygiene and so that there is no build-up of limescale (this could damage the appliance). Replacement filters can be obtained from retailers or from customer service (see “Accessories”). If no new filter is used, turn the filter setting to No / Old. You can set the following: Note: You can use the filter indicator to mark the month in which you inserted the filter. You can also mark the month in which you will need to replace the filter next (at the latest after two months). Here you can set whether a water filter is being used. If a water filter is not being used, turn the setting to No / Old. If a water filter is being used, turn the setting to Activate filter. New water filters have to be rinsed before use (see “Water filter”). Shut off Here you can set the time span after which the appliance automatically switches off following the last drink preparation. A time between 15 minutes and 4 hours can be set. To save power you can specify a shorter period. Filter Start Calc‘n‘Clean The service programmes (Calc‘n‘Clean / descaling / cleaning) can be selected manually here. Press the start button (10) and run the selected programme (see “Service Programmes”). Note: If the appliance has not been used for a prolonged period (e.g. vacation) the filter should be rinsed before the appliance is used again. To do so, dispense a cup of hot water and pour it away. Menu settings You can adapt the appliance to your individual needs in the menu settings. 1. Hold the off / j button (12) down for at least 3 seconds. 2. Press the off / j button (12) repeatedly until the required menu item appears in the display. 3. Select the required setting with the upper rotary knob (14). 4. Confirm by pressing the start button (10). To leave the menu without making any changes, turn the rotary selector to Exit and press the start button (10). e e Temp. The brewing temperature (high / middle / low) can be set here. Language The display language can be set here. Water hardness The water hardness setting can be adjusted on this appliance. It is important to set the water hardness correctly, so that the appliance indicates accurately when the descaling programme should be run. The factory setting for the water hardness is 4. You can check the water hardness using the enclosed test strip or by asking your local water supplier. 29 en Dip the test strip briefly in water, gently shake off any drips, and check the result after one minute. Level Water hardness German (°dH) French (°fH) 1 1-7 1-13 2 8-14 14-25 3 15-21 26-38 4 22-30 39-54 Adjusting the grinding unit The rotary selector (3) adjusts the grind settings from coarse to fine. AAWarning! Adjust the grinding unit only while it is r unning! Otherwise the appliance may be damaged. Do not reach into the grinding unit. ●● While the grinding unit is running, adjust the rotary selector (3) from fine (a: Turn anticlockwise) to coarse (b: Turn clockwise) as required. a b Note: The new setting will not become apparent until after the second cup of coffee. Tip: For dark roast coffee beans, choose a finer grind, for lighter beans a coarser grind. Preparation using coffee beans This fully automatic espresso machine grinds beans freshly for each brew. Tip: If possible, use only beans for fully automatic coffee and espresso machines. For optimal quality, deep-freeze the beans or store in a cool place in sealed containers. Coffee beans can be ground while frozen. Important: Fill the water tank (16) with fresh water every day. The tank (16) should always contain sufficient water for operating the appliance. Different coffee drinks can be prepared quite simply at the press of a button. Preparation The appliance must be ready for use. 1. Place the pre-warmed cup(s) under the coffee outlet (7). Tip: For a small espresso, always preheat the cup, e.g. using hot water. 2. Select the required coffee and the required per-cup quantity by turning the upper rotary knob (14). The selected coffee and the per-cup quantity are shown in the display. 3. Select the required coffee strength by turning the lower rotary knob (13). The selected coffee strength is shown in the display. 4. Press the start button (10). Coffee is brewed and then poured into the cup(s). N.B.: With some settings the coffee is prepared in two stages (see “aromaDouble Shot”). Wait until the procedure is fully completed. Press the start button (10) again to cut the brewing process short. 30 en Preparation using ground coffee This fully automatic espresso machine can also be operated with ground coffee (not instant coffee powder). N.B.: The aromaDouble Shot function cannot be used when coffee is prepared using ground coffee. Important: Fill the water tank (16) with fresh water every day. The tank (16) should always contain sufficient water for operating the appliance. Preparation 1. Open the drawer (4). 2. Pour in no more than 2 level measuring spoons of ground coffee. Warning: Do not use whole beans or instant coffee. 3. Close the drawer (4). 4. Select the required drink by turning the upper rotary knob (14) (only one cup possible). 5. Press the start button (10). Coffee is brewed and then poured into the cup. N.B.: Repeat the procedure for another cup of coffee. If no coffee is taken within 90 seconds, the brewing chamber empties automatically to avoid overfilling. The appliance rinses. Dispensing hot water AARisk of burns! The milk frother (6) gets very hot. Hold the milk frother (6) by the plastic part only. The milk frother must be cleaned before drawing hot water. The appliance must be ready for use. 1. Place the pre-warmed cup or glass under the outlet of the milk frother (6). 2. Set the rotary selector (6d) to the horizontal position. 3. Pull the milk frother (6) to open it. The appliance heats up. Hot water runs out of the milk frother outlet (6) for about 40 seconds. 4. Stop the process by pushing in the milk frother (6). Preparing milk froth and warm milk AARisk of burns! The milk frother (6) gets very hot. Hold the milk frother (6) by the plastic part only. Tip: You can foam the milk first and then dispense coffee, or foam the milk separately and pour it onto the coffee. The appliance must be ready for use. 1. Place a pre-warmed cup under outlet (6c). 2. Insert the milk tube (6e) into a milk container. 31 en 3. Turn the rotary selector (6d) to “Warm milk” or “Milk froth” . i j Maintenance and daily cleaning AARisk of electric shock! Unplug the appliance before cleaning it. Never immerse the appliance in water. Do not use a steam cleaner. 4. Press the h button (11). The h button (11) flashes and the appliance now heats up for approx. 20 seconds. The display then shows Pull milk frother. 5. Pull the milk frother (6) to open it. AARisk of burns! Milk froth or warm milk comes out of the milk frother (6) at high pressure. Splashes of milk can scald. Do not touch the outlet (6a) or aim it at anyone. 6. Close milk frother (6) by pushing it in. Tip: For optimal milk froth quality, use cold milk with a fat content of at least 1.5 % if possible. Important: Dried milk residue is difficult to remove, so the milk frother (6) must be cleaned with lukewarm water immediately after use and rinse using the Rinse milk system programme. 32 ●● Wipe the outside of the appliance with a soft, damp cloth. ●● Do not use abrasive cloths or cleaning agents. ●● Always remove any limescale, coffee, milk or descaling fluid residue immediately. Such residue can cause corrosion. ●● New sponge cloths may contain salts. Salts can cause rust film on stainless steel and must therefore be washed out thoroughly before use. ●● Pull the drip tray (8c) with the coffee grounds container (8b) forward and out. Remove the panel (8a) and the grate (8d). Empty and clean the drip tray and coffee grounds container. ●● Remove drawer (4) and clean. en ●● Remove the float (8e) and clean with a damp cloth. OO Do not put the following items in the dishwasher: drip tray panel (8a), float (8e), drawer (4), brewing unit (5a). The following items are dishwashersafe: drip tray for coffee outlet (8c), coffee grounds container (8b), grate for coffee outlet (8d), aroma cover (2) and measuring spoon (18). ●● Wipe out the inside of the appliance (tray holders and drawer). NN Important: Drip tray for coffee outlet (8c) and coffee grounds container (8b) should be emptied and cleaned daily to prevent mould from developing. N.B.: If the appliance is cold when switched on with the power switch O / I (9) or if it switches off automatically after coffee has been dispensed, it rinses automatically. In other words the system cleans itself. Important: If the appliance has not been used for a prolonged period of time (e.g. after a vacation), clean the entire appliance thoroughly, including the milk system and brewing unit. Cleaning the milk system If the milk system was not cleaned after milk has been dispensed, after a certain amount of time the message Clean milk system! will appear on the display. Clean the milk system immediately after use! To clean, leave the rotary selector (6d) in the same position it was in when last used. To pre-clean the milk system automatically: 1. Select by turning the rotary knob (14). 2. Place a tall, empty container under the outlet (6c). 3. Push the outlet as close as possible to the container. 4. Place the end of the milk tube (6e) into the container. 5. Press the start button (10). 6. Pull the milk frother (6) to open it. The machine automatically releases water into the container and vacuums it up again via the milk tube (6e) to rinse the milk system. The rinse procedure stops automatically after about 1 minute. 7. Push the milk frother (6) in to close it. 8. Empty the container and clean the milk tube (6e). In addition to this, clean the milk system thoroughly at regular intervals (by hand or in the dishwasher). f Dismantling the milk system for cleaning: 1. Detach outlet (6c) from steam valve (6a) (Fig. C). 33 en 2. Clean the individual parts with a detergent solution and a soft brush. If necessary, soak in a warm detergent solution. 4. Press the eject lever (5c) down fully. The brewing unit is released. 5. Grasp the brewing unit (5a) by the recessed grips and remove carefully. 6. Remove the cover (5f) of the brewing unit and rinse the brewing unit (5a) thoroughly under running water. 3. Rinse all parts with clear water and dry them. 4. Reassemble all the parts and replace fully in the appliance. 7. Thoroughly clean the brewing unit sieve under the running water. AARisk of scalding! Use this appliance only after the milk frother (6) has been fully assembled and installed. Cleaning the brewing unit Clean the brewing unit regularly. To pre-clean the brewing unit automatically: 1. Select by turning the rotary knob (14). 2. Place an empty glass under outlet (7). 3. Press the start button (10). The appliance rinses. e In addition to the automatic cleaning programme, the brewing unit (5a) should be removed regularly for cleaning. (See figure E at the start of the operating instructions.) 1. Switch the appliance off at the power on/off switch O / I (9). No buttons are lit. 2. Open the door (5b) to the brewing unit. 3. Slide the red lock (5e) on the brewing unit (5a) completely to the left. 34 Important: Do not clean with detergent or other cleaning agents and do not put it in the dishwasher. 8. Wipe out the inside of the appliance thoroughly with a damp cloth and remove any coffee residues. 9. Allow the brewing unit (5a) and the inside of the appliance to dry. 10.Replace the cover (5f) on the brewing unit and reinsert the brewing unit (5a) fully into the appliance. 11.Press the eject lever (5c) up fully. 12.Slide the red lock (5e) fully to the right and close the door (5b). en Tips on energy saving ●● Switch off the fully automatic espresso machine when not in use. To do this, press the off / j (12) button. The appliance rinses and switches off. ●● If possible, do not interrupt coffee or milk froth dispensing. Cutting the coffee or milk froth dispensing process short results in higher energy consumption and in more residual water collecting in the drip tray. ●● Descale the appliance regularly to avoid a build-up of limescale. Limescale residue results in higher energy consumption. e Service Programmes Tip: Refer also to the quick reference guide in the storage compartment (5c). Depending on usage, the following messages will appear on the display at certain intervals: Descale required! or Clean required! or Calc‘n‘Clean required! The appliance should be cleaned or descaled immediately using the corresponding programme. You also have the option of combining both processes with the Calc‘n‘Clean function (see “Calc‘n‘Clean“). If the service programme is not run as instructed, the appliance may be damaged. AAWarning! Each time you run the service programme, you should follow the instructions for using the descaling and cleaning agents. Please observe the safety instructions on the packaging of the cleaning agent. Never interrupt the service programme! Do not drink the liquids! Never use vinegar, vinegar-based products, citric acid or citric acid-based products! Never put descaling tablets or other descaling agents in the ground coffee drawer or the drawer for cleaning tablets (4)! Specially developed descaling and cleaning tablets are available from retailers or customer service (see “Accessories”). Descaling Duration: approx. 25 minutes Important: If there is a filter in the water tank (16), it needs to be removed before the descaling programme is run. If the message Descale required! appears on the display, press the off / j button (12) for 3 seconds and then press the start button (10). The descaling programme will start. To descale the appliance before being prompted, press the off / j button (12) for at least 3 seconds. Then press the off / j button (12) briefly twice. Turn the upper rotary knob (14) until Start descaling appears in the display. To start the descaling procedure, press the start button (10). The display will guide you through the programme. e e e 35 en Empty drip tray Insert drip tray ●● Empty drip tray (8) and replace them. N.B.: If the water filter is activated, the display will prompt you to remove the filter and then press the start button (10) again. Remove the filter now if you have not already done so. Press the start button (10). Fill descaler Press start ●● Pour lukewarm water into the empty water tank (16) up to the 0.5 l mark and then dissolve 1 Siemens descaling tablet TZ80002 in it. When using TZ60002, 2 tablets must be dissolved. ●● Press the start button (10). Descale in progress The descaling programme will now run for about 10 minutes. Place container Pull milk frother ●● Place a receptacle with a capacity of at least 0.5 litres under the outlet (6c). ●● Pull the milk frother (6) to open it. Descale in progress The descaling programme will now run for about 12 minutes. Clean / Fill water tank Press start ●● Rinse the water tank (16) and refill it with fresh water up to the max mark. ●● Press the start button (10). Descale in progress The descaling programme now runs for about 30 seconds and rinses the appliance. Push milk frother ●● Push the milk frother (6) in to close it. 36 Descale in progress The descaling programme now runs for about 1 minute. Empty drip tray Insert drip tray ●● Empty drip tray (8) and replace them. Replace the filter if one is being used. The appliance has completed descaling and is ready for use again. Important: Wipe down the appliance using a soft, damp cloth to immediately remove any descaler residue. Such residue can cause corrosion. New sponge cloths may contain salts. Salts can cause rust film on stainless steel and must therefore be washed out thoroughly before use. Cleaning Duration: approx. 10 minutes Important: Clean the brewing unit before starting the service programme, see chapter “Cleaning the brewing unit”. If the message Clean required! appears on the display, press the off / j button (12) for 3 seconds and then press the start button (10). The cleaning programme will start. To clean the appliance before being prompted, press the off / j button (12) for at least 3 seconds. Then press the off / j button (12) briefly twice. Turn the upper rotary knob (14) until Start cleaning appears in the display. To start the cleaning procedure, press the start button (10). The display will guide you through the programme. e e Empty drip tray Insert drip tray e ●● Empty drip tray (8) and replace them. en e Then press the off / j button (12) briefly twice. Turn the upper rotary knob (14) until Start Calc‘n‘Clean appears in the display. To start Calc‘n‘Clean, press the start button (10). The display will guide you through the programme. Cleaning in progress The appliance rinses twice. Open drawer ●● Open the drawer (4). Fill cleaner ●● Drop a Siemens cleaning tablet in the drawer (4) and close. Cleaning in progress Empty drip tray Insert drip tray ●● Empty drip tray (8) and replace them. The cleaning programme will now run for about 8 minutes. Calc‘n‘Clean in progress Empty drip tray Insert drip tray Open drawer ●● Empty drip tray (8) and replace them. The appliance has finished cleaning is ready for use again. Calc‘n‘Clean Duration: approx. 35 minutes Calc‘n‘Clean combines the separate functions of descaling and cleaning. If both programmes are due to be run soon, the espresso machine automatically suggests this service programme. Important: If there is a filter in the water tank (16), it needs to be removed before the service programme is run. Clean the brewing unit before starting the service programme, see chapter “Cleaning the brewing unit”. If the message Calc‘n‘Clean required! appears on the display, press the off / j button (12) for 3 seconds and then press the start button (10). The service programme will start. To run Calc‘n‘Clean before being prompted, press the off / j button (12) for at least 3 seconds. e e The appliance rinses twice. ●● Open the drawer (4). Fill cleaner ●● Drop a Siemens cleaning tablet in the drawer (4) and close. N.B.: If the water filter is activated, the display will prompt you to remove the filter and then press the start button (10) again. Remove the filter now if you have not already done so. Press the start button (10). Fill descaler Press start ●● Pour lukewarm water into the empty water tank (16) up to the 0.5 l mark and then dissolve 1 Siemens descaling tablet TZ80002 in it. When using TZ60002, 2 tablets must be dissolved. ●● Press the start button (10). Calc‘n‘Clean in progress The descaling programme will now run for about 10 minutes. Place container Pull milk frother ●● Place a receptacle with a capacity of at least 1 litre under the outlet (6c). ●● Pull the milk frother (6) to open it. 37 en Calc‘n‘Clean in progress The descaling programme will now run for about 12 minutes. Clean / Fill water tank Press start ●● Rinse the water tank (16) and refill it with fresh water up to the max mark. ●● Press the start button (10). Calc‘n‘Clean in progress The descaling programme now runs for about 30 seconds and rinses the appliance. Push milk frother ●● Push the milk frother (6) in to close it. Calc‘n‘Clean in progress The cleaning programme will now run for about 8 minutes. Empty drip tray Insert drip tray ●● Empty drip tray (8) and replace them. Replace the filter if one is being used. The appliance has finished cleaning is ready for use again. Important: Wipe down the appliance using a soft, damp cloth to immediately remove any descaler residue. Such residue can cause corrosion. New sponge cloths may contain salts. Salts can cause rust film on stainless steel and must therefore be washed out thoroughly before use. Frost protection AATo avoid damage from low temperatures during transport and storage, the appliance must be completely emptied first. Note: The appliance must be ready for use and the water tank (16) filled. 1. Place a large receptacle under outlet (6c). 2. Press the h button (11). The h button (11) flashes and the appliance now heats up for approx. 20 seconds. The display then shows Pull milk frother. 3. Open the milk frother (6) by pulling it out and release steam for about 15 seconds. 4. Switch the appliance off at the power on/off switch O / I (9). 5. Empty the water tank (16) and the drip tray (8). Accessories The following accessories can be obtained from retailers and customer service. Accessories Cleaning tablets Descaling tablets Water filter Care set Milk container with “Fresh Lock” lid 38 Ordering number Retail / Customer service TZ60001 00310575 TZ80002 00576693 TZ70003 00575491 TZ80004 00576330 TZ80009N 00576166 en Disposal A Dispose of packaging in an environmentally-friendly manner. This appliance is labelled in accordance with European Directive 2012/19/EG concerning used electrical and electronic appliances (waste electrical and electronic equipment – WEEE). The guideline determines the framework for the return and recycling of used appliances as applicable throughout the EU. Please ask your specialist retailer about current disposal facilities. Guarantee The guarantee conditions for this appliance are as defined by our representative in the country in which it is sold. Details regarding these conditions can be obtained from the dealer from whom the appliance was purchased. The bill of sale or receipt must be produced when making any claim under the terms of this guarantee. Right of modification reserved. Technical data Power connection (voltage – frequency) 220-240 V – 50/60 Hz Heater wattage 1600 W Maximum static pump pressure 15 bar Maximum water tank capacity (without filter) 1.7 l Maximum capacity of the coffee bean container 300 g Length of power cable 100 cm Dimensions (H x W x D) 385 x 280 x 479 mm Weight, empty 9.3 kg Type of grinding unit Ceramic 39 en Simple troubleshooting Problem Display shows Refill beans! Cause Beans are not falling into the grinding unit (beans too oily). Solution Gently tap the bean container (1). Change the type of coffee if necessary. When the bean container (1) is empty, wipe it with a dry cloth. although the bean container (1) is full, or the grinding unit does not grind the beans. No hot water dispensed. The milk frother (6) is soiled. Clean the milk frother (6), see “Maintenance and daily cleaning”. Too little or no milk froth The milk frother (6) is soiled. Clean the milk frother (6), or see “Maintenance and the milk frother (6) does daily cleaning”. not draw the milk in. Milk unsuitable for frothing. Use low-fat milk (1.5 % fat). The milk frother (6) is not Wet the milk frother parts and correctly assembled. press together firmly. Build-up of limescale in the Descale the appliance as appliance. described in the instructions. Coffee dispensing slows Coffee is ground too finely. Adjust the grinding unit to a to a trickle or stops Pre-ground coffee is too coarser setting. Use coarser prefine. completely. ground coffee. Build-up of limescale in the Descale the appliance as appliance. described in the instructions. Coffee has no “crema”. Unsuitable type of coffee. Use a type of coffee with a higher proportion of robusta beans. The beans are no longer Use fresh beans. fresh. The grinding setting is not Adjust grinding setting to fine. suitable for the beans. Coffee is too “acidic”. The grinding setting is too Adjust the grinding unit to a finer coarse or the pre-ground setting or use finer pre-ground coffee is too coarse. coffee. Unsuitable type of coffee Use a darker roast. Coffee is too “bitter”. The grinding setting is Adjust the grinding unit to a too fine or the pre-ground coarser setting or use coarser coffee is too fine. pre-ground coffee. Unsuitable type of coffee. Change type of coffee used. The appliance has a fault. Please call the hotline. Display shows Error Call hotline If you are unable to solve the problem, always call the hotline! You will find the telephone numbers at the back of these instructions. 40 en Problem The water filter does not stay in position in the water tank (16). Display shows Check water tank Cause The water filter is not mounted correctly. Water tank has been incorrectly inserted or the new water filter has not been rinsed according to instructions. Carbonated water in the water tank. The grinding setting is too fine or too coarse, or not enough ground coffee has been used. Brewing unit (5) is soiled. Too much pre-ground coffee in the brewing unit (5). The brewing unit’s mechanism is stiff. Solution Firmly press the water filter straight down into the tank connection. Insert the water tank correctly or rinse the water filter according to instructions and then switch on. Fill the water tank with fresh tap water. The coffee grounds are Adjust the grinding unit to a coarser or finer setting, or use not compact and are too 2 level measuring spoons of wet. ground coffee. Clean brewing unit (5). Display shows Clean brewing unit Clean brewing unit (5). Pour in no more than 2 level measuring spoons of ground coffee. Remove and clean the brewing unit, see “Maintenance and daily cleaning”. Coffee or milk froth quality Build-up of limescale in the Descale the appliance as described in the instructions. varies considerably. appliance. Water dripped onto the Drip tray (8) removed too Wait a few seconds after the inner floor of the appliance early. last drink was dispensed before when the drip tray (8) was removing the drip tray (8). removed. Brewing unit (5) is missing Switch off the appliance with the Display shows Insert brewing unit or was not recognised. brewing unit (5) in place, wait three seconds and switch on the appliance. Restore the unit to its You changed some settings Turn off the unit with the power original factory settings and want to discard them. on/off switch O / I (9). Press and (“Reset”). hold the off / j (12) and the h (11) button and turn the appliance on with the power on/off switch O / I (9). Confirm by pressing the start button start (10). The factory settings are now activated. If you are unable to solve the problem, always call the hotline! You will find the telephone numbers at the back of these instructions. e 41 fr Sommaire Contenu de l’emballage����������������������������� 42 Consignes de sécurité������������������������������� 43 Présentation����������������������������������������������� 45 Eléments de commande���������������������������� 45 Messages à l’écran������������������������������������ 46 aromaDouble Shot������������������������������������� 46 Avant la première utilisation����������������������� 47 Filtre eau���������������������������������������������������� 48 Réglages menu������������������������������������������ 49 Régler la finesse de la mouture����������������� 50 Préparation avec du café en grains����������� 51 Préparation à partir de café moulu ����������� 51 Préparer de l’eau chaude�������������������������� 52 Préparer de la mousse de lait et du lait chaud������������������������������������������� 52 Entretien et nettoyage quotidien���������������� 53 Conseils pour économiser l’énergie���������� 55 Programmes de maintenance������������������� 56 Protection contre le gel������������������������������ 59 Accessoires������������������������������������������������ 59 Mise au rebut��������������������������������������������� 60 Garantie����������������������������������������������������� 60 Caractéristiques techniques���������������������� 60 Eliminer soi-même les problèmes simples61 42 Chère amatrice de café, cher amateur de café. Félicitation pour avoir choisi la cafetière Siemens. Veuillez également tenir compte du Mémento fourni. Un logement (5c) a été prévu pour le conserver à portée de main dans la machine. Contenu de l’emballage (voir l’illustration figurant au début du présent Mode d’emploi) a Machine à café TE503 b Mémento c Mode d’emploi d Mousseur lait/Sélecteur rotatif e Bandelette pour déterminer la dureté de l’eau f Cuillère-dose fr Consignes de sécurité Lire attentivement ce mode d’emploi, s’y conformer lors de l’utilisation et le conserver ! Veuillez joindre ce mode d’emploi si vous passez l’appareil à quelqu’un d’autre. Cet appareil est conçu pour la préparation de quantités usuelles, dans le cadre d’un foyer ou d’un usage non commercial de type domestique. Citons p. ex. les cuisines du personnel dans les commerces, bureaux, exploitations agricoles et établissements artisanaux ainsi que les clients de pensions, petits hôtels et toute autre résidence de type similaire. ¡ Risque de chocs électriques ! Ne brancher et n’utiliser l’appareil que conformément aux données indiquées sur la plaque signalétique� Les réparations sur l’appareil telles que le remplacement d’un cordon endommagé ne doivent être effectuées que par notre SAV afin d’éliminer tout danger. Cet appareil peut être utilisé par des enfants à partir de 8 ans et par des personnes ayant des facultés physiques, sensorielles ou mentales réduites ou manquant d’expérience et/ou de connaissances à condition d’être surveillés ou d’avoir été informés quant à la bonne utilisation de l’appareil et d’avoir compris les dangers qui en découlent� Les enfants de moins de 8 ans doivent être tenus éloignés de l’appareil et du cordon d’alimentation et ne doivent pas utiliser l’appareil� Ne pas laisser les enfants jouer avec l’appareil� Le nettoyage et l’entretien incombant à l’utilisateur ne doivent pas être effectués par des enfants sauf s’ils ont 8 ans ou plus et sont surveillés� 43 fr Ne jamais plonger l’appareil ou le cordon électrique dans l’eau� N’utiliser la machine que lorsque le cordon électrique et l’appareil ne présentent aucun dommage� En cas de défaut, débrancher immédiatement la fiche secteur ou couper la tension du réseau. ¡ Risque d’étouffement ! Ne pas laisser les enfants jouer avec les emballages� ¡¡ Risque de brûlure ! L’embout (6c) du mousseur de lait devient brûlant. De la mousse de lait ou du lait chaud s’écoule à haute pression du mousseur de lait (6). Les éclaboussures de lait peuvent provoquer des brûlures. Ne pas toucher l’embout (6c) et ne pas le diriger vers une personne. Après utilisation, bien laisser refroidir la buse avant de la saisir. N’utilisez la machine que lorsque le mousseur de lait (6) est entièrement monté et installé. ¡¡ Risque de blessure! Ne pas glisser les doigts à l’intérieur du broyeur. 44 fr Présentation Eléments de commande (voir les illustrations de vue d’ensemble A, B, C, D et E au début de la notice) 1 Bac à café 2 Couvercle préservateur d’arôme 3 Sélecteur de réglage de finesse de mouture 4 Tiroir à café (café en poudre/pastille de nettoyage) 5 Unité de percolation (figure E) a)Unité de percolation b)Volet c)Logement du Mémento d)Levier d’éjection pour l’unité de percolation e)Verrouillage f) Couvercle de protection 6 Mousseur de lait amovible (figure C) a)Buse vapeur b)Buse à air c)Embout d)Sélecteur rotatif Lait chaud/Mousse de lait e)Flexible Lait 7 Bec verseur du café, réglable en hauteur 8 Bac collecteur (figure D) a)Support des bacs collecteurs b)Récipient pour marc de café c)Bac collecteur du bec verseur du café d)Grille bec verseur du café e)Flotteur 9 Interrupteur électrique O / I 10 Touche start 11 Touche h 12 Touche off / j 13 Sélecteur rotatif « Arôme du café » 14 Sélecteur rotatif « Sélection de la boisson » 15 Ecran 16 Réservoir d’eau amovible 17 Couvercle du réservoir d’eau 18 Cuillère-dose (sert de poignée pour placer le filtre d’eau) 19 Logement de la cuillère-dose 20 Cordon électrique et logement Interrupteur électrique O / I L’interrupteur réseau O / I (9) permet de mettre en marche et d’arrêter entièrement la machine (alimentation électrique coupée). e Important : Avant d’arrêter la machine, lancer un programme de rinçage ou bien utiliser la touche off / j (12). e e Touche off / j Appuyer brièvement sur la touche off / j (12) pour effectuer un rinçage et arrêter la machine. Appuyer de manière prolongée sur la touche off / j (12) pour afficher les réglages utilisateur ou pour lancer un cycle de détartrage et de nettoyage. e e Touche h Appuyer sur la touche h (11) pour produire de la vapeur, nécessaire pour la production de mousse de lait ou de lait chaud. Touche start Appuyer sur la touche start (10) pour lancer la préparation d’une boisson ou pour effectuer un programme de Service. Pour réduire la quantité de boisson appuyer de nouveau sur la touche start (10) en cours de préparation. Sélecteur rotatif « Arôme du café » Le sélecteur rotatif (13) sert à régler l’arôme du café. h à g Très doux Doux Normal Fort DoubleShot fort + DoubleShot fort ++ Avec ces réglages de l’arôme, le café est préparé en 2 étapes. Voir point « aromaDouble Shot ». 45 fr Sélecteur rotatif « Sélection de la boisson » Le sélecteur (14) permet de sélectionner la boisson et la quantité. Il permet aussi de modifier les réglages de l’utilisateur. a à c b à d e f Petit espresso Espresso Petit café crème Café crème Grand café crème 2 petits espressos 2 espressos 2 petits cafés crème 2 cafés crème 2 grands cafés crème Rinçage machine Rincer syst.de lait Remarque : Lorsqu’il est sélectionné une boisson impossible à préparer, l’écran affiche Combinaison non valide. Modifier l’arôme du café ou la sélection de la boisson. Mousseur lait Tirer le mousseur lait (6) pour ouvrir, le repousser pour fermer. 46 Sélecteur rotatif Pour prélever de la mousse de lait – par exemple pour préparer du Latte Macchiato ou un Cappuccino – tourner le symbole vers l’avant. Pour prélever du lait chaud, tourner le symbole vers l’avant. Pour prélever de l’eau chaude, placer le sélecteur horizontalement. j i Messages à l’écran En plus de l’état de fonctionnement actuel, l’écran (15) affiche également différents messages qui correspondent à des informations d’état ou qui vous demandent d’intervenir. Dès que vous avez effectué l’opération nécessaire, le message disparaît et le menu de sélection des boissons s’affiche de nouveau. aromaDouble Shot Plus la percolation du café dure longtemps, plus les substances amères et les arômes indésirables sont prononcés. Cela a un effet négatif sur le goût et rend le café moins digeste. La TE503 dispose donc d’une fonction spéciale, aromaDouble Shot pour préparer un café très fort. Une fois que la moitié de la quantité a été préparée, la machine moud de nouveau du café et effectue une percolation. Cela permet de ne développer que les arômes parfumés et très digestes du café. fr Pour activer la fonction aromaDouble Shot, procéder comme indiqué ci-après : Avant la première utilisation Généralités Utiliser exclusivement de l’eau pure, froide, sans gaz carbonique et exclusivement du café en grains torréfié (de préférence pour expresso ou percolateur) et remplir les conteneurs correspondants. Ne pas employer des grains de café avec glaçage, des grains caramélisés ou enrobés d’une substance sucrée quelconque ; ils encrassent et obturent l’unité de percolation. Sur cette machine, il existe un réglage de la dureté de l’eau. En usine, la machine est réglée sur la dureté 4. Se servir de la bandelette fournie pour déterminer la dureté de l’eau. Si le contrôle donne une valeur différente de 4, il faut programmer la machine en conséquence après la mise en service (voir Eau Dureté point « Réglages menu »). Mise en service de la machine 1. Retirer le film de protection existant. 2. Placer la machine à café sur un plan horizontal, suffisamment solide pour supporter son poids et résistant à l’eau. Assurez-vous que la fente de ventilation de la machine n’est pas obstruée. Important : Utiliser l’appareil uniquement dans des locaux hors gel. Dans le cas où l’appareil a été transporté ou entreposé à des températures en dessous de 0° C, attendre au moins 3 heures avant la mise en service de l’appareil. 3. Extraire du logement (20) la longueur de cordon électrique nécessaire et brancher dans une prise. Pour ajuster la longueur du cordon, il suffit de le tirer ou de le repousser à l’intérieur. Pour cela, placer la machine sur un bord de table, par ex., et tirer le câble vers le bas ou le pousser vers le haut. 4. Installez le mousseur de lait. N’utilisez la machine que lorsque le mousseur de lait (6) est entièrement monté et installé. 5. Rabattre vers le haut le couvercle du réservoir d’eau (17). 6. Retirer le réservoir d’eau (16), le rincer et le remplir d’eau froide. Ne pas dépasser le repère max. 7. Placer le réservoir d’eau (16) bien vertical et appuyer pour le faire descendre. 8. Refermer le couvercle du réservoir d’eau (17). 9. Remplir de café en grains le bac à café (1) (pour la préparation à partir de café moulu, voir point « Préparation à partir de café moulu »). 10.Appuyer sur l’interrupteur électrique O / I (9). L’écran (15) affiche le menu de réglage de la langue d’affichage. 11.A l’aide du sélecteur (14), choisir la langue d’affichage souhaitée. Les langues suivantes sont disponibles : Deutsch English Français Italiano 47 fr 12.Appuyer sur la touche start (10). La langue sélectionnée est enregistrée. L’écran affiche Retirer mousseur. 13.Placer un récipient sous l’embout (6c). 14.Tirer avec précaution le mousseur lait (6) pour l’ouvrir. La machine rince le mousseur de lait (6) à l’eau. L’écran affiche Insérer mousseur. 15.Pousser le mousseur lait (6) pour le refermer. Filtre eau L’utilisation d’un filtre à eau peut diminuer la formation de dépôts calcaires. Avant d’utiliser un nouveau filtre à eau il faut tout d’abord effectuer un rinçage. Pour cela, procéder comme indiqué ci-après. 1. En s’aidant de la cuillère dose (18), bien insérer le filtre à eau dans le réservoir d’eau. La machine chauffe et effectue un rinçage. Un peu d’eau s’écoule à partir du bec verseur du café. Lorsque la sélection de boisson apparaît à l’écran, la machine est prête à fonctionner. Arrêter la machine La machine à expresso automatique est programmée en usine de façon à fonctionner de manière optimale. La machine s’arrête automatiquement après une durée définie (durée réglable, voir Arrêt point « Réglages menu »). Exception : Lorsque vous avez prélevé de l’eau chaude ou de la vapeur, la machine s’arrête sans effectuer de nettoyage. Pour arrêter la machine manuellement, appuyer sur la touche off / j (12). La machine effectue un rinçage et s’arrête. e Remarque : Lors de la première utilisation de la machine ou après un programme de service ou encore après une longue période d’inutilisation, la première tasse préparée n’a pas encore son plein arôme. Il ne faut donc pas la boire. Une fois effectuée la mise en service de la machine, la présence d’une mousse dense et fine sur le café n’est obtenue qu’après avoir préparé plusieurs tasses. Après une utilisation extensive, il peut se former des gouttelettes d’eau sur les fentes de ventilation. C’est un phénomène normal. 48 2. Remplir d’eau le réservoir (16) jusqu’au repère max. 3. Maintenez appuyé le bouton off / j (12) durant au moins trois secondes. Le menu s’ouvre. 4. Appuyez plusieurs fois sur le bouton off / j (12) jusqu’à ce que l’écran affiche Sans/ancien filtre. 5. A l’aide du sélecteur du haut (14), choisir Activer filtre. 6. Appuyer sur la touche start (10). 7. Placer un récipient d’une contenance de 0,5 litre sous l’embout (6c). 8. Appuyer sur la touche start (10). 9. Tirer le mousseur lait (6) pour l’ouvrir. 10.L’eau traverse le filtre pour le rincer. 11.Pousser le mousseur lait (6) pour le refermer. 12.Ensuite, vider le récipient. La machine est de nouveau prête à fonctionner. e e Info : Le rinçage du filtre a activé le réglage pour l’affichage du changement de filtre. fr Au moment où s’affiche Remplacer filtre! ou bien au bout de 2 mois, au plus tard, le filtre n’est plus efficace. Pour des raisons d’hygiène et pour éviter l’entartrage de la machine (ce qui provoque des dommages), il faut remplacer le filtre. Les filtres de rechange sont disponibles dans le commerce ou peuvent être commandés auprès du Service Clientèle (voir point « Accessoires »). Si l’on n’utilise pas un nouveau filtre, il faut régler filtre sur Sans/ancien. Info : L’indicateur de filtre vous permet d’indiquer le mois où vous avez placé le filtre. Vous pouvez aussi préciser le mois où vous devrez le remplacer (au plus tard au bout de deux mois). Réglages menu Vous pouvez adapter votre machine de manière individuelle à l’aide des réglages menu. 1. Maintenir appuyée la touche off / j (12) au moins 3 secondes. 2. Appuyer plusieurs fois sur la touche off / j (12) jusqu’à ce que l’option de menu souhaitée s’affiche à l’écran. 3. A l’aide du sélecteur du haut (14), choisir le réglage souhaité. 4. Confirmer avec la touche start (10). Pour quitter le menu sans enregistrer les modifications, placer le sélecteur sur Quitter et appuyer sur la touche start (10). e e Vous pouvez effectuer les réglages suivants : Arrêt Info : Si la machine n’est pas utilisée durant une période prolongée (par ex. congés), il faut que le filtre utilisé soit rincé avant utilisation. Pour cela, prélever une tasse d’eau chaude et en jeter le contenu. Vous pouvez régler ici l’intervalle de temps à l’issue duquel la machine s’arrête automatiquement après la préparation de la dernière boisson. La plage de réglage est de 15 minutes à 4 heures. La durée programmée peut être raccourcie pour économiser l‘énergie. Filtre Vous pouvez indiquer ici si vous utilisez ou non un filtre à eau avec la machine. Si vous n’utilisez pas de filtre, sélectionnez le réglage Sans/ancien. Si vous utilisez un filtre, sélectionnez le réglage Activer filtre. Avant de placer un nouveau filtre à eau, rincez celui-ci (voir point « Filtre eau »). Démarrer Calc‘n‘Clean Vous pouvez ici sélectionner manuellement les programmes de service (Calc‘n‘Clean / d ettoyage). Appuyer sur la étartrage / n touche start (10) et effectuer le programme sélectionné (voir point « Programmes de maintenance »). 49 fr Temp. Régler la finesse de la mouture Langue Le sélecteur (3) de réglage de la mouture du café permet de régler la finesse de mouture souhaitée du café. Vous pouvez régler ici la température de percolation (élevée / moyenne / basse). Vous pouvez régler ici la langue d’affichage. Eau Dureté Il est possible, sur cette machine, de régler la dureté de l’eau. Le réglage correct de la dureté de l’eau est important car il permet à la machine d’indiquer le moment où un détartrage est nécessaire. En usine, la dureté de l’eau est réglée sur 4. La dureté de l’eau peut être déterminée à l’aide de la bandelette fournie ou être demandée au Service des Eaux local. Plonger brièvement la bandelette dans l’eau, la secouer légèrement et attendre une minute pour lire le résultat. Niveau Dureté de l’eau Allemagne (°dH) 1 1-7 2 8-14 3 15-21 4 22-30 AAAttention ! Modifier le réglage de la mouture uniquement lorsque le broyeur fonctionne. Sinon la machine peut être endommagée. Ne pas glisser les doigts à l’intérieur du moulin. ●● Lorsque le broyeur fonctionne, régler le sélecteur (3) entre une mouture fine (a : tourner dans le sens opposé aux aiguilles d’une montre) et une mouture plus grossière (b : tourner dans le sens des aiguilles d’une montre). a b France (°fH) 1-13 14-25 26-38 39-54 Info : Le nouveau réglage n’est perceptible qu’à la seconde ou la troisième tasse. Conseil pratique : Régler une mouture plus fine pour les grains torréfiés foncés et une mouture plus grossière pour les grains torréfiés clairs. 50 fr Préparation avec du café en grains Cette machine Espresso tout automatique moud du café frais lors de chaque préparation. Conseil pratique : Utiliser de préférence du café pour espresso / pour percolateur. Conserver le café au froid dans un récipient hermétiquement fermé ou le congeler. Il est possible de broyer les grains de café congelés. Important : Mettre tous les jours de l’eau fraîche dans le réservoir d’eau (16). Celui-ci doit toujours contenir suffisamment d’eau pour assurer le fonctionnement de la machine. Il est possible de préparer différents cafés très simplement, en appuyant sur un bouton. Préparation La machine doit être prête à fonctionner. 1. Placer la(les) tasse(s) sous le bec verseur du café (7). Conseil pratique : Pour préparer un espresso, toujours préchauffer la tasse, par ex. à l’eau bouillante. 2. Sélectionner le café et la quantité à l’aide du sélecteur rotatif (14). Le café et la quantité sélectionnés s’affichent à l’écran. 3. Sélectionner l’arôme du café en tournant le sélecteur inférieur (13). L’arôme sélectionné est affiché à l’écran. 4. Appuyer sur la touche start (10). Le café se fait et s’écoule ensuite dans la/ les tasse(s). Remarque : Avec certains réglages, le café est préparé en deux étapes (voir point « aromaDouble Shot »). Attendre que l’opération soit entièrement terminée. Appuyer de nouveau sur la touche start (10) pour interrompre avant terme la percolation. Préparation à partir de café moulu La machine peut aussi préparer un café à partir de café moulu (pas du café soluble). Remarque : Lorsque l’on utilise du café moulu pour la préparation du café, la fonction aromaDouble Shot n’est pas disponible. Important : Mettre tous les jours de l’eau fraîche dans le réservoir d’eau (16). Celui-ci doit toujours contenir suffisamment d’eau pour assurer le fonctionnement de la machine. Préparation 1. Ouvrir le tiroir à café (4). 2. Verser au maximum 2 cuillères-dose rases de café moulu. Attention : Ne pas verser de café en grains ou de café soluble. 3. Fermer le tiroir à café (4). 4. Sélectionner la boisson souhaitée à l’aide du sélecteur du haut (14) (une seule tasse possible). 5. Appuyer sur la touche start (10). Le café se fait et s’écoule ensuite dans la tasse. Remarque : Pour préparer une autre tasse de café moulu, répéter l’opération. Si vous ne versez pas de café dans un délai de 90s, la chambre de percolation se vide automatiquement afin d’empêcher un débordement. La machine effectue un rinçage. 51 fr Préparer de l’eau chaude AARisque de brûlure ! 3. Régler le sélecteur (6d) sur « Lait chaud » ou « Mousse de lait » . i j Le mousseur de lait (6) devient brûlant. Ne saisir le mousseur de lait (6) que par la partie plastique. Avant de préparer de l’eau chaude, le mousseur de lait doit être nettoyé. La machine doit être prête à fonctionner. 1. Placer la tasse préchauffée ou le verre sous le bec du mousseur de lait (6). 2. Placer le sélecteur (6d) en position horizontale. 4. Appuyer sur la touche h (11). La touche h (11) clignote, la machine chauffe durant 20 s environ. Ensuite, Retirer mousseur s’affiche à l’écran. 5. Tirer le mousseur lait (6) pour l’ouvrir. AARisque de brûlure ! De la mousse de lait ou du lait chaud s’écoule à haute pression du mousseur de lait (6). Les éclaboussures de lait peuvent provoquer des brûlures. Ouvrir avec précaution le mousseur lait (6). Ne pas toucher l’embout (6c) et ne pas le diriger vers une personne. 3. Tirer le mousseur lait (6) pour l’ouvrir. La machine se met à chauffer. De l’eau chaude s’écoule durant 40 s environ de l’embout du mousseur de lait (6). 4. Pousser le mousseur lait (6) pour arrêter l’opération. 6. Pousser le mousseur lait (6) pour le refermer. Préparer de la mousse de lait et du lait chaud Conseil : Pour réaliser une mousse de lait optimale, employer de préférence du lait froid avec une teneur en matières grasses d’au moins 1,5 %. AARisque de brûlure ! Le mousseur de lait (6) devient brûlant. Ne saisir le mousseur de lait (6) que par la partie plastique. Conseil pratique : Faire mousser tout d’abord le lait puis préparer le café ; ou bien faire mousser séparément le lait et verser la mousse sur le café. La machine doit être prête à fonctionner. 1. Placer une tasse préchauffée sous l’embout (6c). 2. Placer le flexible lait (6e) dans un récipient de lait. 52 Important : Les restes de lait séchés sont difficiles à retirer. Après chaque utilisation du mousseur lait (6), il est impératif d’effectuer un nettoyage à l’eau tiède à l’aide du programme Rinser syst.de lait. fr Entretien et nettoyage quotidien ●● Démonter le flotteur (8e) et le nettoyer avec un chiffon humide. AARisque de choc électrique ! Avant tout nettoyage, débrancher le cordon électrique. Ne jamais plonger la machine dans l’eau. Ne pas utiliser de nettoyeur à vapeur. ●● Nettoyer le boîtier de la machine à l’aide d’un chiffon doux humide. ●● Ne pas utiliser de tissus ou de produits nettoyants abrasifs. OO Ne pas passer en lave-vaisselle les éléments suivants : panneau des bacs collecteurs (8a), flotteur (8e), tiroir à café (4), unité de percolation (5a). Les éléments suivants peuvent passer en lave-vaisselle : bac collecteur du bec verseur du café (8c), récipient pour marc de café (8b), grille bec verseur du café (8d), couvercle préservateur d’arôme (2) et cuillère-dose (18). ●● Essuyer l’intérieur de la machine (bacs collecteurs et tiroir à café). NN ●● Toujours nettoyer immédiatement les résidus de calcaire, de café, de lait ou de solution détartrante. En effet, de la corrosion peut se former sous ces résidus. ●● Les chiffons éponges neufs peuvent contenir des sels. Les sels peuvent être responsables de rouille superficielle sur l’acier spécial ; un rinçage soigneux est par conséquent indispensable avant l’emploi. ●● Extraire le bac collecteur (8c) et le récipient pour marc de café (8b). Retirer le support (8a) et la grille (8d). Vider et nettoyer le bac collecteur et le récipient pour marc de café. ●● Retirer le tiroir à café (4) et le nettoyer. Important : Vider et nettoyer tous les jours le bac collecteur du bec verseur du café (8c) et le récipient pour marc de café (8b) afin d’éviter le développement de moisissures. Remarque : Lorsque la machine est mise en marche à froid à l’aide de l’interrupteur O / I (9) ou lorsqu’elle s’arrête automatiquement après la préparation d’un café, elle effectue automatiquement un rinçage. Elle se nettoie donc de manière autonome. Important : Si la machine est restée inutilisée durant une période prolongée (congés, p. ex.), nettoyer soigneusement l’ensemble de la machine, y compris le mousseur lait et l’unité de percolation. 53 fr Nettoyage du mousseur de lait Si après avoir prélevé du lait vous ne nettoyez pas le système de lait, le message Nettoyer syst. lait ! s’affiche à l’écran au bout d’un certain temps. Nettoyer le mousseur de lait après chaque utilisation. Pour nettoyer le sélecteur (6d), le laisser dans la position de la dernière utilisation. Pour effectuer un nettoyage prélable automatique du système lait : 1. A l’aide du sélecteur (14), choisir . 2. Placez un récipient haut et vide sous l’embout (6c). 3. Poussez l’embout pour le rapprocher autant que possible du récipient. 4. Placez l’extrémité du flexible Lait (6e) à l’intérieur du récipient. 5. Appuyer sur la touche start (10). 6. Tirer le mousseur lait (6) pour l’ouvrir. La machine verse automatiquement de l’eau dans le récipient et l’aspire à l’aide du flexible (6e) pour effectuer le rinçage. Au bout de 1 min environ, l’opération de nettoyage s’arrête automatiquement. 7. Pousser le mousseur lait (6) pour le refermer. 8. Videz le récipient et nettoyez le flexible (6e). 2. Nettoyer les différentes pièces avec une solution de produit détergent et une brosse douce. Si nécessaire, laisser tremper dans une solution détergente chaude. f De plus, nettoyer régulièrement et très soigneusement le mousseur de lait (en lave-vaisselle ou à la main). Démonter le mousseur lait pour le nettoyer : 1. Retirer l’embout (6c) de la soupape vapeur (6a) (figure C). 3. Bien rincer tous les éléments à l’eau courante et les sécher. 4. Remonter tous les éléments et les remplacer jusqu’en butée. AARisque de brûlure ! N’utilisez la machine que lorsque le mousseur de lait (6) est entièrement monté et installé. Nettoyer l’unité de percolation Nettoyer régulièrement l’unité de percolation ! Pour effectuer un nettoyage prélable automatique de l’unité de percolation : 1. A l’aide du sélecteur (14), choisir . 2. Disposer un verre vide sous l’embout (7). 3. Appuyer sur la touche start (10). La machine effectue un rinçage. e 54 fr En plus du programme de nettoyage automatique, il convient de retirer régulièrement l’unité de percolation (5a) afin de la nettoyer (voir la figure E au début du mode d’emploi). 1. Arrêter la machine à l’aide de l’interrupteur électrique O / I (9). Aucune touche n’est allumée. 2. Ouvrir le volet (5b) de l’unité de percolation. 3. Faire glisser le verrouillage rouge (5e) de l’unité de percolation (5a) vers la gauche. 4. Pousser le levier d’éjection (5d) totalement vers le bas. L’unité de percolation se débloque. 5. Saisir l’unité de percolation (5a) par les évidements et la retirer avec précaution. 6. Retirer le couvercle de protection (5f) de l’unité de percolation et nettoyer soigneusement l’unité de percolation (5a) sous l’eau courante. Important : Effectuer le nettoyage sans produit vaisselle ou autre produit nettoyant et ne pas placer en lave-vaisselle. 8. Essuyer l’intérieur de la machine avec un chiffon humide et retirer tous les résidus de café. 9. Laisser sécher l’unité de percolation (5a) et l’intérieur de la machine. 10.Remettre le couvercle de protection (5f) de nouveau en place sur l’unité de percolation (5a) et la pousser jusqu’en butée dans l’appareil. 11.Pousser le levier d’éjection (5d) totalement vers le haut. 12.Faire glisser vers la droite le verrouillage rouge (5e) et fermer le volet (5b). Conseils pour économiser l’énergie ●● Lorsque vous n’utilisez pas la machine à café, vous devez l’arrêter. Pour cela, appuyer sur la touche off / j (12). La machine effectue un rinçage et s’arrête. ●● Autant que possible ne jamais interrompre la production de café ou de mousse de lait. Une interruption provoque en effet une consommation d’énergie supérieure ainsi que le remplissage plus rapide des bacs collecteurs. ●● Détartrer régulièrement la machine afin d’éviter les dépôts de calcaire. Les dépôts de calcaire provoquent en effet une consommation électrique plus élevée. e 7. Nettoyer soigneusement le tamis de l’unité de percolation sous le jet d’eau. 55 fr Programmes de maintenance Conseil : Voir aussi le Mémento placé dans son logement (5c). En fonction de l’utilisation, les messages suivant apparaissent à l’écran à certains intervalles. Détartrage nécessaire ! ou Nettoyage nécessaire ! ou Calc‘n‘Clean nécessaire ! La machine doit alors être nettoyée ou détartrée sans délai avec le programme correspondant. Il est également possible d’effectuer les deux opérations simultanément avec la fonction Calc‘n‘Clean (voir point « Calc‘n‘Clean »). Si le programme de maintenance n’est pas réalisé conformément aux indications, cela peut détériorer la machine. AAAttention ! Lors de chaque programme de maintenance, utiliser le produit détartrant et le produit nettoyant conformément aux indications. Respecter les consignes de sécurité figurant sur l’emballage du produit nettoyant. Ne jamais interrompre le programme de maintenance ! Ne jamais boire les liquides ! Ne jamais utiliser de vinaigre, de produits à base de vinaigre, d’acide citrique ou de produits à base d’acide citrique ! Ne jamais déposer de pastilles de détartrage ou autres produits de détartrage dans le tiroir du café moulu (4) ! Des pastilles de détartrage et de nettoyage spécialement développées sont disponibles dans le commerce et auprès du Service Clientèle (voir point « Accessoires »). 56 Détartrage Durée : env. 25 minutes. Important : Lorsqu’un filtre à eau est présent dans le réservoir d’eau (16), le retirer impérativement avant de lancer un détartrage. Lorsque le message Détartrage nécessaire ! apparaît à l’écran, appuyer e sur la touche off / j (12) durant 3 secondes et appuyer ensuite sur la touche start (10). Le détartrage commence. Pour détartrer entre-temps la machine, appuyer sur la touche off / j (12) durant au moins 3 secondes. Appuyer brièvement à deux reprises sur la touche off / j (12). Tourner le sélecteur du haut (14) jusqu’à ce que Démarrer détartrage s’affiche à l’écran. Pour lancer le détartrage, appuyer sur la touche start (10). Le programme défile à l’écran. e e Vider bac Placer bac ●● Vider le bac collecteur (8) et le replacer. Remarque : Si le filtre à eau est activé, le message correspondant s’affiche, demandant de retirer le filtre et d’appuyer de nouveau sur la touche start (10). Si cela n’a pas déjà été fait, retirer le filtre maintenant. Appuyer sur la touche start (10). Remplir détartrant Appuyer sur start ●● Verser de l’eau tiède dans le réservoir d’eau (16) jusqu’au repère « 0,5 l » et y dissoudre 1 pastille de détartrage Siemens TZ80002. En cas d’utilisation de TZ60002, dissoudre impérativement 2 pastilles. ●● Appuyer sur la touche start (10). Détartrage en cours Le programme de détartrage se déroule maintenant durant 10 minutes environ. fr Placer réservoir Retirer mousseur Nettoyage Durée : env. 10 minutes. Détartrage en cours Important : Avant le lancement du programme de Service, nettoyer l’unité de percolation, voir chapitre « Nettoyage de l’unité de percolation ». ●● Placer un récipient d’une contenance d’au moins 0,5 litre sous l’embout (6c). ●● Tirer le mousseur lait (6) pour l’ouvrir. Le programme de détartrage se déroule maintenant durant 12 minutes environ. Nett./Remp. réserv. eau Appuyer sur start ●● Rincer le réservoir d’eau (16) et le remplir d’eau fraîche jusqu’au repère max. ●● Appuyer sur la touche start (10). Détartrage en cours Le programme de détartrage se déroule durant env. 30 secondes et effectue un rinçage de la machine. Insérer mousseur ●● Pousser le mousseur lait (6) pour le refermer. Détartrage en cours Le programme de détartrage se déroule durant env. 1 minute. Vider bac Placer bac ●● Vider le bac collecteur (8) et le replacer. Si un filtre est utilisé, le replacer maintenant. La machine est maintenant détartrée et de nouveau prête à fonctionner. Important : Essuyer l’appareil avec un torchon doux et humide pour éliminer immédiatement les résidus du détartrant. En effet, de la corrosion peut se former sous ces résidus. Les chiffons éponges neufs peuvent contenir des sels. Les sels peuvent être responsables de rouille superficielle sur l’acier spécial ; un lavage soigneux est par conséquent indispensable avant l’emploi. Lorsque le message Nettoyage nécessaire ! apparaît à l’écran, appuyer e sur la touche off / j (12) durant 3 secondes et appuyer ensuite sur la touche start (10). Le nettoyage commence. Pour nettoyer entre-temps la machine, appuyer sur la touche off / j (12) durant au moins 3 secondes. Appuyer brièvement à deux reprises sur la touche off / j (12). Tourner le sélecteur du haut (14) jusqu’à ce que Démarrer nettoyage s’affiche à l’écran. Pour lancer le nettoyage, appuyer sur la touche start (10). Le programme défile à l’écran. e e Vider bac Placer bac ●● Vider le bac collecteur (8) et le replacer. Nettoyage en cours La machine effectue deux rinçages. Ouvrir tiroir ●● Ouvrir le tiroir à café (4). Remplir nettoyant ●● Placer une pastille de nettoyage Siemens dans le tiroir (4) et refermer. Nettoyage en cours Le nettoyage est activé pour une durée de 8 minutes env. Vider bac Placer bac ●● Vider le bac collecteur (8) et le replacer. La machine est maintenant nettoyée et de nouveau prête à fonctionner. 57 fr Calc‘n‘Clean Durée : env. 35 minutes. Calc‘n‘Clean combine les fonctions Détartrage et Nettoyage. Si le moment de réaliser chacun des deux programmes est proche, la machine propose automatiquement ce programme. Avant le lancement du programme de Service, nettoyer l’unité de percolation, voir chapitre « Nettoyage de l’unité de percolation ». Important : Si un filtre d’eau est placé dans le réservoir d’eau (16) le retirer impérativement avant de lancer le programme de maintenance. Lorsque le message Calc‘n‘Clean nécessaire ! apparaît à l’écran, appuyer e sur la touche off / j (12) durant 3 secondes et appuyer ensuite sur la touche start (10). Le programme de service démarre. Pour effectuer entre-temps l’opération Calc‘n‘Clean, appuyer sur la touche off / j (12) durant au moins 3 secondes. Appuyer brièvement à deux reprises sur la touche off / j (12). Tourner le sélecteur du haut (14) jusqu’à ce que Démarrer Calc‘n‘Clean s’affiche à l’écran. Pour lancer Calc‘n‘Clean, appuyer sur la touche start (10). Le programme défile à l’écran. e e Remarque : Si le filtre à eau est activé, le message correspondant s’affiche, demandant de retirer le filtre et d’appuyer de nouveau sur la touche start (10). Si cela n’a pas déjà été fait, retirer le filtre maintenant. Appuyer sur la touche start (10). Remplir détartrant Appuyer sur start ●● Verser de l’eau tiède dans le réservoir d’eau (16) jusqu’au repère « 0,5 l » et y dissoudre 1 pastille de détartrage Siemens TZ80002. En cas d’utilisation de TZ60002, dissoudre impérativement 2 pastilles. ●● Appuyer sur la touche start (10). Calc‘n‘Clean en cours Le programme de détartrage se déroule maintenant durant 10 minutes environ. Placer réservoir Retirer mousseur ●● Placer un récipient d’une contenance d’au moins 1 litre sous l’embout (6c). ●● Tirer le mousseur lait (6) pour l’ouvrir. Calc‘n‘Clean en cours Le programme de détartrage se déroule maintenant durant 12 minutes environ. Nett./Remp. réserv. eau Appuyer sur start Vider bac Placer bac ●● Vider le bac collecteur (8) et le replacer. ●● Rincer le réservoir d’eau (16) et le remplir d’eau fraîche jusqu’au repère max. ●● Appuyer sur la touche start (10). Calc‘n‘Clean en cours Calc‘n‘Clean en cours La machine effectue deux rinçages. Ouvrir tiroir Le programme de détartrage se déroule durant env. 30 secondes et effectue un rinçage de la machine. Remplir nettoyant ●● Pousser le mousseur lait (6) pour le refermer. ●● Ouvrir le tiroir à café (4). ●● Placer une pastille de nettoyage Siemens dans le tiroir (4) et refermer. 58 Insérer mousseur fr Calc‘n‘Clean en cours Le nettoyage est activé pour une durée de 8 minutes env. Vider bac Placer bac ●● Vider le bac collecteur (8) et le replacer. Si un filtre est utilisé, le replacer maintenant. La machine est maintenant nettoyée et de nouveau prête à fonctionner. Important : Essuyer l’appareil avec un torchon doux et humide pour éliminer immédiatement les résidus du détartrant. En effet, de la corrosion peut se former sous ces résidus. Les chiffons éponges neufs peuvent contenir des sels. Les sels peuvent être responsables de rouille superficielle sur l’acier spécial ; un lavage soigneux est par conséquent indispensable avant l’emploi. Accessoires Les accessoires suivants sont disponibles dans le commerce ou auprès du service Clientèle Accessoires N° commande Commerce / Service Clientèle Pastilles de nettoyage TZ60001 00310575 Pastilles de détartrage TZ80002 00576693 Filtre eau TZ70003 00575491 Kit d’entretien TZ80004 00576330 Réservoir de lait avec TZ80009N couvercle « Fresh Lock » 00576166 Protection contre le gel AAAfin d’éviter les dommages provoqués par le gel lors du transport et du stockage, il faut préalablement vider entièrement la machine. Info : La machine doit être prête à fonctionner et le réservoir d’eau (16) doit être rempli. 1. Placer un grand récipient sous l’embout (6c). 2. Appuyer sur la touche h (11). La touche h (11) clignote, la machine chauffe durant 20 s environ. Ensuite, Retirer mousseur s’affiche à l’écran. 3. Ouvrir le mousseur lait (6) en tirant et laisser la vapeur s’échapper durant env. 15 secondes. 4. Arrêter la machine à l’aide de l’interrupteur électrique O / I (9). 5. Vider le réservoir d’eau (16) et le bac collecteur (8). 59 fr Mise au rebut A Garantie Eliminez l’emballage en respectant l’environnement. Cet appareil est marqué selon la directive européenne 2012/19/CE relative aux appareils électriques et électroniques usagés (waste electrical and electronic equipment – WEEE). La directive définit le cadre pour une reprise et une récupération des appareils usagés applicables dans les pays de la CE. S’informer auprès du revendeur sur la procédure actuelle de recyclage. Les conditions de garantie applicables sont celles publiées par notre distributeur dans le pays où a été effectué l’achat. Le revendeur chez qui vous vous êtes procuré l’appareil fournira les modalités de garantie sur simple demande de votre part. En cas de recours en garantie, veuillez toujours vous munir de la preuve d’achat. Sous réserve de modifications. Caractéristiques techniques Raccordement électrique (tension – fréquence) 220-240 V – 50/60 Hz Puissance de chauffage 1600 W Pression statique maximale de la pompe 15 bars Contenance maximale du réservoir d’eau (sans filtre) 1,7 l Contenance du bac à café 300 g Longueur du cordon d’alimentation 100 cm Dimensions (Ht x Lg x Prof) 385 x 280 x 479 mm Poids, à vide 9,3 kg Type de meule céramique 60 fr Eliminer soi-même les problèmes simples Problème Affichage à l’écran Remplir grains ! Cause Les grains ne tombent pas dans le broyeur (grains trop gras). bien que le bac à café (1) soit rempli, ou bien le moulin ne parvient pas à moudre. Impossible de produire de Le mousseur lait (6) est l’eau chaude. obturé. Trop peu de mousse ou pas de mousse ou le mousseur de lait (6) n’aspire pas le lait. Le mousseur lait (6) est obturé. Lait non adapté. Le mousseur de lait (6) n’est pas correctement monté. La machine est entartrée. Remède Frapper légèrement le bac à café (1). Changer éventuellement de café. Une fois que le bac à café (1) est vide, l’essuyer avec un chiffon sec. Nettoyer le mousseur lait (6), voir chapitre « Entretien et nettoyage quotidien ». Nettoyer le mousseur lait (6), voir chapitre « Entretien et nettoyage quotidien ». Utiliser du lait à une teneur de 1,5 % de matières grasses. Humidifier les éléments du mousseur lait et serrer vigoureusement. Détartrer la machine suivant la notice. Le café s’écoule goutte à Mouture trop fine, Régler une mouture moins fine. goutte ou ne s’écoule plus. café moulu trop fin. Utiliser du café moulu moins fin. La machine est fortement Détartrer la machine suivant la entartrée. notice. Le café ne présente pas Qualité du café ne convient Utiliser un café avec une proporde « crème ». pas. tion plus importante de Robusta. Les grains ne sont pas Utiliser des grains fraîchement fraîchement torréfiés. torréfiés. La mouture n’est pas Optimiser la finesse de la adaptée aux grains de mouture. café. Le café est trop « acide ». La mouture n’est pas Régler une mouture plus fine ou assez fine ou bien le café acheter du café moulu plus fin. moulu n’est pas assez fin. Utiliser un café torréfié plus foncé. Qualité de café non adaptée. Le café est trop « amer ». La mouture est trop fine ou Régler une mouture moins fine ou le café moulu est trop fin. acheter du café moulu moins fin. Qualité du café ne convient Changer de qualité de café. pas. Une défaillance s’est Appeler le Service Clientèle. Affichage à l’écran Défaillance Hotline produite dans la machine. Appeler impérativement la hotline si les problèmes ne peuvent pas être résolus ! Les numéros de téléphone se trouvent aux dernières pages de la notice. 61 fr Problème Le filtre à eau ne tient pas dans le réservoir d’eau (16). Cause Le filtre d’eau n’est pas correctement fixé. Remède Placer le filtre d’eau bien droit et appuyer fortement pour l’enfoncer dans le réservoir. Le réservoir d’eau n‘est Insérer le réservoir d’eau correcAffichage à l’écran pas inséré correctement tement ou rincer le filtre à eau Contrôler réserv. eau ou le filtre à eau n‘est pas d’après la notice et remettre en rincé d’après la notice. service. Le réservoir d'eau contient Remplir le réservoir d'eau avec de de l'eau gazeuse. l'eau fraîche du robinet. Le marc de café n’est La mouture est trop fine Régler la mouture plus grossière pas compact et il est trop ou trop grossière ou bien ou plus fine ou bien utiliser humide. la quantité de café moulu 2 cuillères-doses de café moulu utilisée est trop faible. bien rases. Unité de percolation (5) Nettoyer l’unité de percolation (5). Affichage à l’écran Nettoyer unité perc. encrassée. Trop de café moulu dans Nettoyer l’unité de percolation (5). l’unité de percolation (5). Remplir au maximum 2 cuillèresdoses de café moulu bien rases. Le mécanisme de l’unité Retirer et nettoyer l’unité de de percolation ne foncpercolation (voir chapitre « Entretionne pas aisément. tien et nettoyage quotidien »). Qualité de la mousse de La machine est entartrée. Détartrer la machine suivant la café ou de lait variable. notice. Présence d’eau sur le fond Bac collecteur (8) retiré Retirer le bac collecteur (8) en interne de la machine une trop tôt. attendant quelques secondes fois que l’on a retiré le bac après la dernière boisson collecteur (8). préparée. Unité de percolation Une fois l’unité de percolation Affichage à l’écran Placer unité perco. (5) non placée ou non (5) placée, arrêter la machine, reconnue. attendre trois secondes, puis la remettre en marche. Les réglages usine ont été Des réglages individuels Arrêter la machine à l’aide de modifiés et doivent être ont été antérieurement l’interrupteur électrique O / I (9). rétablis (« Reset »). définis ; ils ne sont plus Maintenir appuyées les touches off / j (12) et h (11) et remettre souhaités. en marche la machine à l’aide de l’interrupteur électrique O / I (9). Ensuite, confirmer avec la touche start (10). Les réglages usine sont rétablis. Appeler impérativement la hotline si les problèmes ne peuvent pas être résolus ! Les numéros de téléphone se trouvent aux dernières pages de la notice. e 62 it Sommario Contenuto della confezione����������������������63 Avvertenze di sicurezza����������������������������65 Panoramica����������������������������������������������66 Elementi di comando��������������������������������66 Messaggi sul display��������������������������������67 aromaDouble Shot�����������������������������������67 Al primo impiego���������������������������������������68 Filtro acqua�����������������������������������������������69 Impostazioni del menu�����������������������������70 Regolare il grado di macinatura���������������71 Preparazione con chicchi di caffè�������������72 Preparazione con caffè macinato�������������72 Prelievo di acqua calda����������������������������73 Preparazione di schiuma di latte e di latte caldo���������������������������������������������73 Cura e pulizia quotidiana��������������������������74 Consigli per risparmiare energia��������������76 Programmi di assistenza��������������������������77 Protezione dal gelo�����������������������������������80 Accessori��������������������������������������������������80 Smaltimento���������������������������������������������81 Garanzia���������������������������������������������������81 Dati tecnici������������������������������������������������81 Soluzione di piccoli guasti������������������������82 Gentili amanti del caffè. Congratulazioni per aver acquistato questa macchina automatica per espresso della società Siemens. Si prega di osservare anche le istruzioni brevi. Queste si possono inserire in un apposito scomparto (5c), che consente di tenerle sempre a portata di mano per la consultazione durante l’uso. Contenuto della confezione (vedere la panoramica all’inizio delle istruzioni per l’uso) a Macchina automatica per espresso TE503 b Istruzioni brevi c Istruzioni per l’uso d Inserto schiuma/Selettore e Striscia per la misurazione della durezza dell’acqua f Dosatore del caffè macinato 63 it Avvertenze di sicurezza Leggere, osservare e conservare le istruzioni con cura! Se l’apparecchio viene ceduto, allegare anche le presenti istruzioni. Questo apparecchio e destinato alla lavorazione di quantità adeguate all’utilizzo domestico, e in generale per usi domestici e non professionali. Gli utilizzi simili a quelli domestici comprendono, ad es. l’uso nelle cucine del personale di negozi, uffici, aziende agricole o artigianali, nonché l’utilizzo da parte di ospiti in pensioni, piccoli alberghi e simili realtà residenziali. ¡ Rischio di scossa elettrica! Collegare e far funzionare l’apparecchio solo conformemente alle indicazioni fornite sulla targhetta. Al fine di evitare rischi, le riparazioni sull’apparecchio, come ad es� la sostituzione di un cavo danneggiato, sono consentite solo al nostro servizio clienti� Questo apparecchio può essere usato da bambini di almeno 8 anni di età e da persone con ridotte facoltà psichiche, sensoriali o mentali o con conoscenze e/o esperienza insufficienti, purché siano sotto il controllo di persone adulte o siano stati istruiti sull’uso sicuro dell’apparecchio e abbiano compreso i pericoli connessi all’uso dello stesso. I bambini di età inferiore agli 8 anni devono essere tenuti lontani dall’apparecchio e dal cavo di collegamento e non devono utilizzare l’apparecchio� Tenere l’apparecchio lontano dalla portata dei bambini. I lavori di pulizia o manutenzione non devono essere eseguiti da parte di bambini che non abbiano compiuto almeno 8 anni di età e solo sotto la sorveglianza di una persona adulta� 64 it Non immergere mai l’apparecchio o il cavo di alimentazione in acqua� Utilizzare solo se il cavo e l’apparecchio non presentano danni� In caso di errore, estrarre immediatamente la spina dalla presa di corrente o disinserire la tensione di rete� ¡ Pericolo di soffocamento! Non lasciare che i bambini giochino con il materiale di imballaggio� ¡¡ Pericolo di scottature! L’uscita (6c) dell’inserto schiuma diventa molto caldo. Dall’inserto schiuma (6) fuoriesce schiuma di latte oppure latte caldo ad alta pressione. Gli spruzzi di latte possono provocare ustioni. Non toccare l’uscita (6c), né orientarla verso le persone. Prima di toccarlo, dopo l’uso, è necessario lasciarlo raffreddare. Utilizzare l’apparecchio solo se l’inserto schiuma (6) è completamente assemblato e montato. ¡¡ Pericolo di lesioni! Non inserire le dita nel macinacaffè! 65 it Panoramica Elementi di comando (vedere le immagini esplicative A, B, C, D ed E all’inizio delle istruzioni) Interruttore di rete O / I L’apparecchio si accende o si spegne completamente con l’interruttore di rete O / I (9) (interruzione dell’alimentazione elettrica). Importante: Prima dell’accensione, avviare il programma di pulizia e per spegnere utilizzare il tasto off / j (12). 1 Serbatoio chicchi 2 Coperchio salva-aroma 3 Selettore della regolazione del grado di macinatura 4 Cassetto per caffè macinato/ pastiglie di pulizia 5 Unità di infusione (figura E) a)Unità di infusione b)Sportello c)Scomparto per riporre le istruzioni brevi d)Leva di sgancio per bollitore e)Dispositivo di blocco f) Coperchio 6 Inserto schiuma (figura C) removibile a)Valvola vapore b)Ugello aria c)Uscita d)Selettore per latte caldo/schiuma e)Tubetto latte 7 Uscita caffè regolabile in altezza 8 Raccogligocce (figura D) a)Pannello raccogligocce b)Contenitore per fondi di caffè c)Raccogligocce uscita caffè d)Griglia di sgocciolamento uscita caffè e)Galleggiante 9 Interruttore di rete O / I 10 Tasto start 11 Tasto h 12 Tasto off / j 13 Pulsante “Intensità caffè” 14 Pulsante “Selezione bevanda” 15 Display 16 Serbatoio acqua rimovibile 17 Coperchio del serbatoio per l’acqua 18 Dosatore del caffè macinato (guida di inserimento per il filtro dell’acqua) 19 Scomparto per il dosatore del caffè 20 Cavo di corrente con cassetto e e Tasto off / j Premendo brevemente il tasto off / j (12) l’apparecchio esegue un lavaggio e si spegne. Premendo a lungo il tasto off / j (12) si richiamano le impostazioni utente o si avvia la funzione di decalcificazione e di pulizia. e Tasto h Azionando il tasto h (11) si produce il vapore che serve per la preparazione della schiuma del latte o del latte caldo. Tasto start Premendo il tasto start (10) si avvia la preparazione della bevanda e un programma di assistenza. Premendo nuovamente il tasto start (10) durante la preparazione della bevanda è possibile interrompere anticipatamente il prelievo. Pulsante “Intensità caffè” e 66 e Con il pulsante (13) si imposta l’intensità del caffè. h a g Molto delicato Delicato Normale Forte DoubleShot forte + DoubleShot forte ++ Con queste intensità, il caffè viene preparato con 2 livelli di infusione. Ved. capitolo “aromaDouble Shot”. it Pulsante “Selezione bevanda” Con il pulsante (14) si seleziona la bevanda e la quantità. Inoltre permette di modificare le impostazioni per l’utente. a a c b a d Espresso ristretto Espresso Café Crème ristretto Café Crème Café Crème lungo 2 ristretti espressi 2 espressi 2 ristretti Café Crème 2 Café Crème 2 lunghi Café Crème e Risciacquare apparecchio f Risciacquare sist.latte Nota: Se viene selezionata una bevanda, che non può essere preparata, nel display compare Comb.non valida. Modificare l’intensità del caffè oppure la bevanda scelta. Inserto schiuma Per aprire l’inserto schiuma (6), è sufficiente estrarlo o reinserirlo. Selettore Per prelevare la schiuma del latte, ad esempio per il Latte Macchiato o il Cappuccino, ruotare finché il simbolo è rivolto in avanti. Per prelevare latte caldo, ruotare finché il simbolo è rivolto in avanti. Per prelevare acqua calda, posizionare il selettore in posizione orizzontale. j i Messaggi sul display Sul display (15), oltre all’attuale stato operativo, vengono visualizzati altri messaggi, che forniscono informazioni sugli altri stati oppure comunicano quando è necessario l’intervento dell’utente. Non appena l’intervento è stato eseguito, il messaggio scompare e viene nuovamente visualizzato il menu per la selezione delle bevande. aromaDouble Shot Una cottura prolungata del caffè provoca un gusto più amaro e la formazione di aromi indesiderati, che ne compromettono il sapore e la digeribilità. Per un caffè extra-forte la TE503 dispone di un’apposita funzione speciale aromaDouble Shot. A metà della quantità di preparazione il caffè viene macinato nuovamente e infuso in modo da attivare solo gli aromi più profumati e pregiati. 67 it La funzione aromaDouble Shot è attiva nelle seguenti impostazioni: 3. Estrarre il cavo dal vano portacavo (20) e inserire la spina. Per regolare la lunghezza, estrarre il cavo spostandolo verso il basso oppure reinserirlo spostandolo verso l’alto. Per eseguire questa operazione, posizionare l’apparecchio ad esempio al bordo del tavolo. 4. Montare l’inserto schiuma. Utilizzare l’apparecchio solo se l’inserto schiuma (6) è completamente assemblato e montato. Al primo impiego Informazioni generali Riempire i corrispondenti contenitori solo con acqua pulita, fredda, non addizionata con anidride carbonica e utilizzare esclusivamente chicchi tostati (preferibilmente miscele per macchine automatiche da caffè o macchine per caffè espresso). Non usare chicchi di caffè glassati, caramellati o trattati con altri additivi contenenti zucchero, in quanto otturano l’unità di infusione. In questo apparecchio è possibile regolare la durezza dell’acqua. Il valore preimpostato è 4. Determinare la durezza dell’acqua con le apposite strisce fornite in dotazione. Se dal controllo risulta un valore diverso da 4, dopo la messa in funzione programma di conseguenza l’apparecchio (vedere capitolo “Impostazioni del menu” Durezza acqua). Mettere l’apparecchio in funzione 1. Rimuovere la pellicola protettiva. 2. Posizionare la macchina automatica per espresso su una superficie piana e sufficiente resistente all’acqua in funzione del peso dell’apparecchio stesso. La fessura di ventilazione dell’apparecchio deve restare libera. Importante: Usare l’apparecchio solo in ambienti privi di gelo. Qualora l’apparecchio venga trasportato o stoccato a temperature inferiori a 0 °C, attendere almeno 3 ore prima di metterlo in funzione. 68 5. Sollevare il coperchio del serbatoio per l’acqua (17). 6. Estrarre il serbatoio per l’acqua (16), sciacquarlo e riempirlo con acqua pulita fredda. Non superare il livello indicato come max. 7. Posizionare il serbatoio dell’acqua (16) diritto e spingerlo completamente verso il basso. 8. Richiudere il coperchio del serbatoio per l’acqua (17). 9. Riempire l’apposito serbatoio (1) con i chicchi di caffè. (Per la preparazione del caffè macinato, vedere il capitolo “Preparazione con caffè macinato”.) 10.Premere l’interruttore di rete O / I (9). Sul display (15) compare il menu per l’impostazione della lingua del display. 11.Con il pulsante (14) selezionare la lingua desiderata. Sono disponibili le seguenti lingue: Deutsch English Français Italiano it 12.Premere il tasto start (10). La lingua selezionata viene memorizzata. Sul display compare il messaggio Tirare ins.schiuma. 13.Posizionare il recipiente sotto l’uscita (6c). 14.Estrarre delicatamente l’inserto schiuma (6) per aprirlo. L’apparecchio esegue un lavaggio con acqua dell’inserto schiuma (6). Sul display compare il messaggio Premere ins.schiuma. 15.Spingere l’inserto schiuma (6) per chiuderlo. L’apparecchio inizia il riscaldamento e il lavaggio. Dall’uscita caffè fuoriesce un po’ di acqua. Quando il display visualizza la selezione delle bevande, l’apparecchio è pronto per l’uso. Spegnere l’apparecchio La macchina automatica per espresso è programmata già in fabbrica con dei valori standard che garantiscono un funzionamento ottimale. L’apparecchio si spegne automaticamente dopo un tempo preimpostato (la durata è liberamente impostabile, ved. capitolo “Impostazioni del menu” Shut off). Eccezione: Se è stata prelevata solo acqua calda oppure vapore, l’apparecchio si spegne senza eseguire il lavaggio. Per spegnere prima l’apparecchio manualmente, premere il tasto off / j (12). L’apparecchio esegue il lavaggio e si spegne. e Nota: Al primo utilizzo dopo l’esecuzione di un programma di servizio, oppure se l’apparecchio non è stato utilizzato per lungo tempo, la prima bevanda non ha ancora il suo pieno aroma e non dovrebbe essere consumata. Dopo la prima messa in funzione della macchina automatica per espresso, si otterrà una crema consistente e densa solo dopo aver prodotto alcune tazze. Dopo un utilizzo prolungato è normale che sulle fessure di ventilazione si formino delle gocce d’acqua. Filtro acqua Un filtro acqua consente di ridurre la presenza di depositi di calcare. Ogni volta che si inserisce un nuovo filtro acqua nel serbatoio acqua, è necessario eseguire un risciacquo del nuovo filtro. Procedere come descritto qui di seguito: 1. Spingere fino in fondo al serbatoio acqua il filtro acqua aiutandosi con il dosatore (18). 2. Riempiere poi il serbatoio (16) con acqua fino al contrassegno max. 3. Tenere premuto il tasto off / j (12) per almeno 3 secondi. Si apre l’impostazione del menu. 4. Premere il tasto off / j (12) fino a quando sul display compare Ness. filtro vecchio. 5. Con il pulsante superiore (14) selezionare Attivare filtro. 6. Premere il tasto start (10). 7. Posizionare sotto l’uscita (6c) un recipiente da 0,5 litri. 8. Premere il tasto start (10). 9. Aprire l’inserto schiuma (6) tirandolo delicatamente. 10.Ora l’acqua scorre attraverso il filtro per sciacquarlo. e e 69 it 11.Chiudere l’inserto schiuma (6) spingendolo all’interno. 12.Quindi vuotare il recipiente. L’apparecchio è nuovamente pronto per l’uso. Informazione: Contemporaneamente al risciacquo del filtro viene attivata l’impostazione di visualizzazione del cambio filtro. L’effetto del filtro è esaurito quando compare l’indicazione Cambiare filtro! oppure al massimo dopo 2 mesi dalla sostituzione. Il filtro deve essere sostituito per ragioni igieniche e affinché l’apparecchio non presenti un eccesso di calcare (che può danneggiare l’apparecchio stesso). Filtri di ricambio sono disponibili presso i rivenditori o presso il servizio di assistenza clienti (ved. capitolo “Accessori”). Se non viene inserito alcun nuovo filtro, posizionare l’impostazione filtro su Ness. filtro vecchio. Informazione: Con l’indicatore del filtro è possibile evidenziare il mese nel quale è stato inserito il filtro. È anche possibile evidenziare il mese futuro nel quale si dovrà cambiare il filtro (al più tardi entro due mesi). Impostazioni del menu Nelle impostazioni del menu è possibile personalizzare l’utilizzo dell’apparecchio. 1. Tenere premuto il tasto off / j (12) per almeno 3 secondi. 2. Premere il tasto off / j (12) fino a quando sul display compare la voce di menu desiderata. 3. Con il pulsante (14) selezionare l’impostazione desiderata. 4. Confermare con il tasto start (10). Per uscire dal menu senza eseguire modifiche, posizionare il selettore su Esci e premere il tasto start (10). e e Le impostazioni possibili sono: Shut off Qui è possibile impostare l’intervallo di tempo, successivo all’ultima bevanda preparata, al termine del quale l’apparecchio si spegne automaticamente. Il periodo impostabile varia dai 15 minuti alle 4 ore. Il tempo predefinito può essere diminuito per ridurre il consumo di energia. Filtro Qui è possibile impostare se viene utilizzato un filtro acqua. Se non viene utilizzato nessun filtro acqua, ruotare l’impostazione su Ness.filtro vecchio. Se viene utilizzato un filtro acqua, ruotare l’impostazione su Attivare filtro. Prima di poter utilizzare un nuovo filtro acqua, è necessario lavarlo (ved. capitolo “Filtro acqua”). Avvio Calc‘n‘Clean Informazione: Se l’apparecchio resta inattivo per un periodo prolungato (ad esempio durante le vacanze), prima dell’uso si dovrebbe eseguire il risciacquo del filtro inserito. A tale scopo prelevare una tazza di acqua calda e buttarla via. 70 Qui potete selezionare manualmente i programmi di assistenza (Calc‘n‘Clean / decalcif. / pulizia). Premere il tasto start (10) ed eseguire il programma selezionato (ved. capitolo “Programmi di assistenza”). Temp. Qui è possibile impostare la temperatura di infusione (alta / media / bassa). it Lingua Regolare il grado di macinatura Durezza acqua Con il selettore (3) è possibile regolare il grado di macinatura desiderato per il caffè. Qui è possibile impostare la lingua del display. Questo apparecchio consente di impostare la durezza dell’acqua. L’impostazione corretta della durezza dell’acqua è importante affinché l’apparecchio possa indicare per tempo quando è necessario eseguire la decalcificazione. Il valore predefinito per la durezza dell’acqua è 4. La durezza dell’acqua si può testare mediante l’apposita striscia di test fornita in dotazione, oppure è possibile richiedere questa informazione all’azienda locale fornitrice. Immergere per breve tempo la striscia di test in acqua, scuotere leggermente e dopo un minuto leggere il risultato. Livello 1 2 3 4 Grado di durezza dell’acqua Tedesco (°dH) Francese (°fH) 1-7 1-13 8-14 14-25 15-21 26-38 22-30 39-54 AAAttenzione! Regolare il grado di macinatura solo con il macinacaffè in funzione! In caso contrario l’apparecchio potrebbe subire danni. Non toccare i dispositivi di macinazione. ●● Con il macinacaffè in funzione, posizionare il selettore (3) su un valore compreso tra caffè macinato fine (a: Ruotare in senso antiorario) è caffè macinato grosso (b: Ruotare in senso orario). a b Informazione: La nuova regolazione risulta effettiva solo a partire dalla seconda tazza. Consiglio: Per chicchi più tostati scegliere un grado di macinatura più fine, per chicchi meno tostati scegliere un grado di macinatura più grosso. 71 it Preparazione con chicchi di caffè Questa macchina automatica per espresso macina automaticamente i chicchi freschi prima di ogni preparazione. Consiglio: Usare preferibilmente miscele di caffè o espresso appositamente preparate per l’uso con macchine da caffè. Per garantire una qualità ottimale, conservare i chicchi di caffè in luogo fresco e chiuso oppure congelarli. È possibile macinare anche chicchi congelati. Importante: L’acqua del serbatoio dell’acqua (16) deve essere sempre fresca. Il serbatoio (16) dovrebbe contenere sempre una quantità di acqua sufficiente per garantire il funzionamento dell’apparecchio. È possibile preparare diverse bevande a base di caffè in modo molto semplice agendo sui tasti. Preparazione L’apparecchio deve essere pronto per l’uso. 1. Posizionare la o le tazze preriscaldate sotto l’uscita caffè (7). Consiglio: Per un espresso ristretto, riscaldare sempre prima la tazza, ad esempio con acqua calda. 2. Selezionare il caffè desiderato e la quantità richiesta ruotando il pulsante superiore (14). Il caffè e la quantità richiesti vengono visualizzati sul display. 3. Selezionare l’intensità desiderata del caffè ruotando il pulsante (13). L’intensità desiderata viene visualizzata sul display. 4. Premere il tasto start (10). Il caffè viene preparato e scende nella/e tazza/e. 72 Nota: In alcune impostazioni il caffè viene preparato in due fasi (ved. capitolo “aromaDouble Shot”). Attendere fino a quando la procedura è completamente conclusa. Premendo nuovamente il tasto start (10), è possibile concludere anticipatamente il processo di infusione. Preparazione con caffè macinato Questa macchina automatica per caffè espresso può funzionare anche con caffè macinato (non con caffè solubile). Nota: La funzione aromaDouble Shot non è disponibile per la preparazione con caffè macinato. Importante: L’acqua del serbatoio dell’acqua (16) deve essere sempre fresca. Il serbatoio (16) dovrebbe contenere sempre una quantità di acqua sufficiente per garantire il funzionamento dell’apparecchio. Preparazione 1. Aprire il cassetto del caffè macinato (4). 2. Versare 2 dosatori di caffè pieni. Attenzione: Non versare nel cassetto chicchi interi o caffè solubile. 3. Chiudere il cassetto del caffè macinato (4). 4. Selezionare la bevanda desiderata ruotando il pulsante superiore (14) (è possibile solo una tazza). 5. Premere il tasto start (10). Il caffè viene preparato e scende nella tazza. Nota: Per preparare un’altra tazza con caffè, ripetere l’operazione. Se entro 90 secondi non viene prelevato caffè, l’unità di infusione si vuota automaticamente per prevenire che l’acqua trabordi. L’apparecchio esegue un risciacquo. it Prelievo di acqua calda AAPericolo di ustioni! L’inserto schiuma (6) diventa molto caldo. Toccare l’inserto schiuma (6) solo afferrando l’impugnatura in plastica. Prima di prelevare acqua calda, è necessario pulire lo schiumeggiatore. L’apparecchio deve essere pronto per l’uso. 1. Posizionare la tazza o il bicchiere sotto l’uscita dell’inserto schiuma (6). 2. Portare il selettore (6d) in posizione orizzontale. 3. Aprire l’inserto schiuma (6) tirandolo delicatamente. L’apparecchio si riscalda. Per circa 40 secondi fuoriesce acqua calda dall’uscita dell’inserto schiuma (6). 4. Chiudere l’inserto schiuma (6) spingendolo all’interno. Preparazione di schiuma di latte e di latte caldo AAPericolo di ustioni! L’inserto schiuma (6) diventa molto caldo. Toccare l’inserto schiuma (6) solo afferrando l’impugnatura in plastica. Consiglio: Eseguire prima la schiumatura del latte e poi prelevare il caffè oppure schiumare il latte separatamente e aggiungerlo al caffè. L’apparecchio deve essere pronto per l’uso. 1. Posizionare la tazza preriscaldata sotto l’uscita (6c). 2. Introdurre il tubetto del latte (6e) in un apposito recipiente. 3. Posizionare il selettore (6d) su “Latte caldo” o “Schiuma latte” . i j 4. Premere il tasto h (11). Il tasto h (11) lampeggia e l’apparecchio si riscalda per circa 20 secondi. Quindi sul display compare il testo Tirare ins.schiuma. 5. Aprire l’inserto schiuma (6) tirandolo delicatamente. AAPericolo di ustioni! Dall’inserto schiuma (6) fuoriesce schiuma di latte oppure latte caldo ad alta pressione. Gli spruzzi di latte possono provocare ustioni. Aprire con cautela l’inserto schiuma (6). Non toccare l’uscita (6c), né orientarla verso le persone. 6. Chiudere l’inserto schiuma (6) spingendolo all’interno. Consiglio: Per ottenere una schiuma di latte di ottima qualità, utilizzare preferibilmente latte freddo con una percentuale minima di grasso dello 1,5 %. Importante: I resti secchi di latte sono difficili da rimuovere, per questa ragione si deve assolutamente sempre pulire l’inserto schiuma (6) con acqua tiepida dopo ogni uso e avviare il programma Risciacquare sist.latte. 73 it Cura e pulizia quotidiana AAPericolo di scarica elettrica! Prima della pulizia, staccare la spina di rete. Non immergere mai l’apparecchio in acqua. Non usare dispositivi di pulizia a vapore. ●● Smontare il galleggiante (8e) e pulirlo con un panno umido. ●● Pulire l’esterno con un panno morbido e umido. ●● Non usare panni o detergenti abrasivi. OO ●● Rimuovere sempre subito eventuali resti di calcare, caffè, latte e decalcificante. Sotto questi resti possono formarsi punti di corrosione. ●● I panni in spugna nuovi possono contenere sali. I sali possono causare ruggine sull’acciaio inossidabile, pertanto lavare i panni in spugna accuratamente prima dell’uso. ●● Estrarre in avanti il pannello raccogligocce (8c) con il contenitore per fondi di caffè (8b). Estrarre il pannello (8a) e la griglia (8d). Svuotare la pannello e il contenitore per fondi di caffè. ●● Togliere il cassetto per caffè macinato (4) e pulirlo. Non lavare in lavastoviglie i seguenti componenti: Pannello raccogligocce (8a), galleggiante (8e), cassetto per caffè macinato (4), unità di infusione (5a). I seguenti componenti possono essere lavati in lavastoviglie: raccogligocce uscita caffè (8c), contenitore per fondi di caffè (8b), griglia di sgocciolamento uscita caffè (8d), coperchio salva-aroma (2) e dosatore del caffè macinato (18). ●● Pulire con un panno l’interno dell’apparecchio (supporto vaschette e cassetto del caffè macinato). NN Importante: Il raccogligocce uscita caffè (8c) e il contenitore per fondi di caffè (8b) si dovrebbero vuotare e pulire ogni giorno, per evitare la formazione di muffe. Nota: Se l’apparecchio è freddo quando viene acceso con l’interruttore di rete O / I (9) o se si spegne automaticamente dopo il prelievo del caffè, esso si lava automaticamente. Il sistema è quindi autopulente. Importante: Se l’apparecchio non è stato utilizzato per lungo tempo (ad esempio dopo una vacanza), è necessario eseguire una pulizia a fondo dello stesso, comprendendo anche il sistema del latte e l’unità di infusione. 74 it Pulire il sistema del latte Se dopo un prelievo di latte il sistema latte non è stato pulito, dopo un certo periodo di tempo sul display compare il messaggio Pulire sist. latte!. Pulire il sistema del latte dopo ogni utilizzo! Per il risciacquo lasciare il selettore (6d) nella posizione dell’ultimo utilizzo. Pre-risciacquo automatico del sistema del latte: 1. Con il pulsante selezionare (14). 2. Posizionare un recipienti vuoto, possibilmente alto, sotto l’uscita (6c). 3. Spostare l’uscita del caffè il più vicino possibile al recipiente. 4. Inserire l’estremità del tubetto latte (6e) nel recipiente. 5. Premere il tasto start (10). 6. Aprire l’inserto schiuma (6) tirandolo delicatamente. L’apparecchio ora riempie automaticamente il recipiente con acqua e quindi la riaspira attraverso il tubetto latte (6e) per pulirlo. La procedura di risciacquo si conclude automaticamente dopo circa 1 minuto. 7. Chiudere l’inserto schiuma (6) spingendolo all’interno. 8. Svuotare il recipiente e pulire il tubetto latte (6e). 2. Pulire le singole parti con una miscela di acqua e detersivo e una spazzola morbida. Se necessario immergere nella miscela di acqua e detersivo calda. f Inoltre pulire a fondo regolarmente anche il sistema del latte (in lavastoviglie oppure a mano). Smontare il sistema del latte per sciacquarlo: 1. Staccare l’uscita (6c) dalla valvola (6a) (figura C). 3. Sciacquare ed asciugare tutte le parti. 4. Rimontare tutti i pezzi, inserendoli fino in fondo nelle loro posizioni. AAPericolo di scottature! Utilizzare l’apparecchio solo se l’inserto schiuma (6) è completamente assemblato e montato. Pulire l’unità di infusione Pulire regolarmente l’unità di infusione! Per eseguire la pulizia preventiva automatica dell’unità di infusione: 1. Con il pulsante (14) selezionare . 2. Posizionare un bicchiere vuoto sotto l’uscita (7). 3. Premere il tasto start (10). L’apparecchio esegue un risciacquo. e 75 it Oltre al programma di pulizia automatica, l’unità di infusione (5a) dovrebbe venir tolta regolarmente per poterla pulire (ved. figura E all’inizio delle istruzioni). 1. Spegnere l’apparecchio con l’interruttore di rete O / I (9). Non è illuminato nessun tasto. 2. Aprire lo sportello (5b) dell’unità di infusione. 3. Spingere completamente a sinistra il blocco rosso (5e) sull’unità infusione (5a). 4. Premere completamente verso il basso la leva di sgancio (5d). Il bollitore viene sbloccato. 5. Afferrare il bollitore (5a) per le apposite maniglie sagomate ed estrarlo con cautela. 6. Rimuovere il coperchio (5f) dell’unità infusione e pulire bene l’unità infusione stessa (5a) sotto l’acqua corrente. Importante: Eseguire il lavaggio senza utilizzare detergenti o altri prodotti per la pulizia e non lavare in lavastoviglie. 8. Pulire bene l’interno dell’apparecchio con un panno umido e togliere le eventuali tracce di caffè. 9. Lasciar asciugare l’unità di infusione (5a) e l’interno dell’apparecchio. 10.Riposizionare il coperchio (5f) sull’unità infusione e fare scorrere l’unità infusione (5a) fino al suo incastro. 11.Premere completamente verso l’alto la leva di sgancio (5d). 12.Spingere completamente verso destra il blocco rosso (5e) e chiudere lo sportello (5b). Consigli per risparmiare energia ●● Se la macchina per espresso non viene utilizzata, spegnere l’apparecchio. A tale scopo premere il tasto off / j (12). L’apparecchio esegue il lavaggio e si spegne. ●● Se possibile non interrompere mai il prelievo di caffè o di latte. L’arresto anticipato del prelievo di latte o di caffè provoca un consumo maggiorato di energia e un eccessivo livello di acqua residua nel raccogligocce. ●● Decalcificare regolarmente l’apparecchio, per evitare eccessivi depositi di calcare. La presenza di residui di calcare provoca un maggior consumo di energia. e 7. Pulire a fondo il filtro dell’unità infusione tenendolo sotto il getto dell’acqua. 76 it Programmi di assistenza Consiglio: Vedere anche Istruzioni brevi nello scomparto per la conservazione (5c). A seconda della frequenza di utilizzo, a determinati intervalli di tempo, il display visualizza i seguenti messaggi: Decalcif. necessaria! oppure Pulizia necessaria! oppure Calc‘n‘Clean necessario! In questo caso l’apparecchio deve essere immediatamente pulito o decalcificato utilizzando il corrispondente programma. A scelta le due procedure si possono riunire nella funzione Calc‘n‘Clean (ved. capitolo “Calc‘n‘Clean”). Se il programma di assistenza non viene utilizzato correttamente secondo le istruzioni, esiste il rischio di provocare dei danni all’apparecchio. AAAttenzione! Per ogni programma di assistenza, utilizzare i decalcificanti e i detergenti seguendo le istruzioni. Osservare le istruzioni di sicurezza sulla confezione del detergente. Non interrompere mai il programma di assistenza. Non ingerire i liquidi utilizzati! Non utilizzare mai aceto, sostanze a base di aceto, acido citrico o sostanze a base di acido citrico! Non mettere mai le pastiglie di decalcificante o altri decalcificanti nel cassetto del caffè macinato (4)! Presso i rivenditori autorizzati e il servizio clienti sono disponibili specifiche pastiglie decalcificanti e detergenti (ved. capitolo “Accessori”). Decalcificare Durata: circa 25 minuti. Importante: Se nel serbatoio acqua (16) è inserito un filtro, è obbligatorio toglierlo prima di iniziare la decalcificazione. Se sul display compare il messaggio Decalcif. necessaria!, premere il tasto off / j (12) per 3 secondi e successivamente premere il tasto start (10). La decalcificazione si avvia. Per decalcificare ogni tanto l’apparecchio, premere il tasto off / j (12) per almeno 3 secondi. Quindi premere per due volte rapidamente il tasto off / j (12). Ruotare il pulsante superiore (14) fino a quando sul display compare Avvio decalcif. Per avviare la decalcificazione, premete il tasto start (10). e e e Il display guida nelle fasi del programma. Vuotare vaschetta Inserire vaschetta ●● Svuotare il raccogligocce (8) e reinserirlo. Nota: Se il filtro acqua è attivo, compare il corrispondente invito, togliere il filtro e premere nuovamente il tasto start (10). Togliere ora il filtro, se non è già stato fatto. Premere il tasto start (10). Aggiungere Decalcif. Premere start ●● Versare 0,5 L di acqua tiepida nel recipiente vuoto del serbatoio (16) fino al contrassegno “0,5 l” e sciogliervi 1 pastiglia per la decalcificazione Siemens TZ80002. Se si utilizzano le TZ60002 devono essere sciolte 2 pastiglie. ●● Premere il tasto start (10). Decalcif. in corso Il programma di decalcificazione dura circa 10 minuti. 77 it Inserire recipiente Tirare ins.schiuma ●● Posizionare un recipiente da almeno 0,5 litri sotto l’uscita (6c). ●● Aprire l’inserto schiuma (6) tirandolo delicatamente. Decalcif. in corso Il programma di decalcificazione dura circa 12 minuti. Pulire/riemp.serb. Premere start ●● Sciacquare il serbatoio dell’acqua (16) e riempirlo con acqua pulita fino al contrassegno max. ●● Premere il tasto start (10). Decalcif. in corso Il programma di decalcificazione dura circa 30 secondi e poi esegue il risciacquo. Pulire Durata: circa 10 minuti. Importante: Pulire l’unità di infusione prima di avviare il programma di servizio, vedi capitolo “Pulire l’unità di infusione”. Se sul display compare il messaggio ulizia necessaria!, premere il tasto P off / j (12) per 3 secondi e successi vamente premere il tasto start (10). Il processo di pulizia si avvia. Per pulire ogni tanto l’apparecchio, premere il tasto off / j (12) per almeno 3 secondi. Quindi premere per due volte rapidamente il tasto off / j (12). Ruotare il pulsante superiore (14) fino a quando sul display compare Avvio pulizia. Per avviare il processo di pulizia, premete il tasto start (10). Il display guida nelle fasi del programma. e e e Premere ins.schiuma Vuotare vaschetta Inserire vaschetta Decalcif. in corso Pulizia in corso ●● Chiudere l’inserto schiuma (6) spingendolo all’interno. Il programma di decalcificazione dura circa 1 minuto. Vuotare vaschetta Inserire vaschetta ●● Svuotare il raccogligocce (8) e reinserirlo. Se viene utilizzato un filtro, è il momento di reinserirlo. L’apparecchio è decalcificato e nuovamente pronto per l’uso. Importante: Pulire l’apparecchio con un panno umido e morbido per eliminare subito i residui di soluzione decalcificante. Sotto questi resti possono formarsi punti di corrosione. rosione. I panni in spugna nuovi possono contenere sali. I sali possono causare ruggine sull’acciaio inossidabile, pertanto lavare i panni in spugna accuratamente prima dell’uso. 78 ●● Svuotare il raccogligocce (8) e reinserirlo. L’apparecchio esegue un doppio ciclo di lavaggio. Aprire cassetto ●● Aprire il cassetto del caffè macinato (4). Aggiungere detergente ●● Inserire una pastiglia di pulizia Siemens e chiudere il cassetto (4). Pulizia in corso Il programma di pulizia dura circa 8 minuti. Vuotare vaschetta Inserire vaschetta ●● Svuotare il raccogligocce (8) e reinserirlo. L’apparecchio è pulito e nuovamente pronto per l’uso. it Calc‘n‘Clean Durata: circa 35 minuti. La funzione Calc‘n‘Clean combina le due operazioni di decalcificazione e di pulizia. Se la scadenza delle due procedure è ravvicinata, la macchina automatica per caffè espresso propone questo programma di servizio. Importante: Se nel serbatoio per l’acqua (16) è inserito un filtro acqua, è assolutamente necessario toglierlo prima di iniziare il programma di assistenza. Pulire l’unità di infusione prima di avviare il programma di servizio, vedi capitolo “Pulire l’unità di infusione”. Se sul display compare il messaggio Calc‘n‘Clean necessario!, premere il tasto off / j (12) per 3 secondi e successivamente premere il tasto start (10). Il programma di servizio si avvia. Per eseguire ogni tanto il Calc‘n‘Clean, premere il tasto off / j (12) per almeno 3 secondi. Quindi premere per due volte rapidamente il tasto off / j (12). Ruotare il pulsante superiore (14) fino a quando sul display compare Avvio Calc‘n‘Clean. Per avviare il Calc‘n‘Clean di pulizia, premete il tasto start (10). Il display guida nelle fasi del programma. e e e Vuotare vaschetta Inserire vaschetta ●● Svuotare il raccogligocce (8) e reinserirlo. Calc‘n‘Clean in corso L’apparecchio esegue un doppio ciclo di lavaggio. Aprire cassetto ●● Aprire il cassetto del caffè macinato (4). Aggiungere detergente ●● Inserire una pastiglia di pulizia Siemens e chiudere il cassetto (4). Nota: Se il filtro acqua è attivo, compare il corrispondente invito, togliere il filtro e premere nuovamente il tasto start (10). Togliere ora il filtro, se non è già stato fatto. Premere il tasto start (10). Aggiungere Decalcif. Premere start ●● Versare 0,5 L di acqua tiepida nel recipiente vuoto del serbatoio (16) fino al contrassegno “0,5 l” e sciogliervi 1 pastiglia per la decalcificazione Siemens TZ80002. Se si utilizzano le TZ60002 devono essere sciolte 2 pastiglie. ●● Premere il tasto start (10). Calc‘n‘Clean in corso Il programma di decalcificazione dura circa 10 minuti. Inserire recipiente Tirare ins.schiuma ●● Posizionare un recipiente da almeno 1 litro sotto l’uscita (6c). ●● Aprire l’inserto schiuma (6) tirandolo delicatamente. Calc‘n‘Clean in corso Il programma di decalcificazione dura circa 12 minuti. Pulire/riemp.serb. Premere start ●● Sciacquare il serbatoio dell’acqua (16) e riempirlo con acqua pulita fino al contrassegno max. ●● Premere il tasto start (10). Calc‘n‘Clean in corso Il programma di decalcificazione dura circa 30 secondi e poi esegue il risciacquo. Premere ins.schiuma ●● Chiudere l’inserto schiuma (6) spingendolo all’interno. 79 it Calc‘n‘Clean in corso Il programma di pulizia dura circa 8 minuti. Vuotare vaschetta Inserire vaschetta ●● Svuotare il raccogligocce (8) e reinserirlo. Se viene utilizzato un filtro, è il momento di reinserirlo. L’apparecchio è pulito e nuovamente pronto per l’uso. Importante: Pulire l’apparecchio con un panno umido e morbido per eliminare subito i residui di soluzione decalcificante. Sotto questi resti possono formarsi punti di corrosione. I panni in spugna nuovi possono contenere sali. I sali possono causare ruggine sull’acciaio inossidabile, pertanto lavare i panni in spugna accuratamente prima dell’uso. Protezione dal gelo AAPer evitare danni provocati dall’azione del gelo durante il trasporto o il deposito, è necessario svuotare completamente l’apparecchio. Informazione: L’apparecchio deve essere pronto per l’uso e il serbatoio dell’acqua (16) deve essere pieno. 1. Posizionare un grande recipiente sotto l’uscita (6c). 2. Premere il tasto h (11). Il tasto h (11) lampeggia e l’apparecchio si riscalda per circa 20 secondi. Quindi sul display compare il testo Tirare ins.schiuma. 3. Aprire l’inserto schiuma (6) tirandolo e lasciare evaporare per circa 15 secondi. 4. Spegnere l’apparecchio con l’interruttore di rete O / I (9). 5. Svuotare il serbatoio dell’acqua (16) ed il raccogligocce (8). Accessori I seguenti accessori generalmente sono disponibile presso i rivenditore e presso il servizio clienti. Accessori Pastiglie di pulizia Compresse decalcificanti Filtro acqua Kit di pulizia Recipiente per il latte con coperchio “Fresh Lock” 80 Codice ordinazione Rivenditori / Servizio clienti TZ60001 / 00310575 TZ80002 / 00576693 TZ70003 / 00575491 TZ80004 / 00576330 TZ80009N / 00576166 it Smaltimento A Garanzia Si prega di smaltire le confezioni nel rispetto dell’ambiente. Questo apparecchio dispone di contrassegno ai sensi della direttiva europea 2012/19/CE in materia di apparecchi elettrici ed elettronici (waste electrical and electronic equipment – WEEE). Questa direttiva definisce le norme per la raccolta e il riciclaggio degli apparecchi dismessi valide su tutto il territorio dell’Unione Europea. Informarsi presso il rivenditore specializzato sulle attuali disposizioni per la rottamazione. Per questo apparecchio sono valide le condizioni di garanzia pubblicate dal nostro rappresentante nel paese di vendita. Il rivenditore, presso il quale è stato acquistato l’apparecchio, è sempre ben disposto a fornire a richiesta informazioni a proposito. Per l’esercizio del diritto di garanzia è comunque necessario presentare il documento di acquisto. Con riserva di modifica. Dati tecnici Collegamento elettrico (tensione – frequenza) 220-240 V – 50/60 Hz Potenza del riscaldamento 1600 W Pressione massima pompa, statica 15 bar Capacità massima del serbatoio acqua (senza filtro) 1,7 l Capacità massima del contenitore chicchi 300 g Lunghezza del cavo 100 cm Dimensioni (A x L x P) 385 x 280 x 479 mm Peso, a vuoto 9,3 kg Tipo di meccanismo di macinatura Ceramica 81 it Soluzione di piccoli guasti Guasto Messaggio sul display Aggiungere chicchi! anche se il serbatoio chicchi (1) è pieno o se il macinacaffè non macina chicchi. Prelievo acqua calda impossibile. Troppo poco o troppa schiuma oppure L’inserto schiuma (6) non aspira il latte. Causa I chicchi non ricadono nel macinacaffè (chicchi troppo oleosi). L’inserto schiuma (6) o l’alloggiamento dell’inserto schiuma è otturato. L’inserto schiuma (6) o l’alloggiamento dell’inserto schiuma è sporco. Latte non adatto. Rimedio Battere leggermente il serbatoio chicchi (1). Eventualmente cambiare il tipo di caffè. Quando il serbatoio chicchi (1) è vuoto, pulirlo con un panno asciutto. Pulire l’inserto schiuma (6) o il suo alloggiamento, cfr. Cap. “Cura e pulizia quotidiana”. Pulire l’inserto schiuma (6) o il suo alloggiamento, cfr. Cap. “Cura e pulizia quotidiana”. Usare latte con una percentuale di grasso del 1,5%. Inumidire le parti dell’inserto schiuma e rimontarle. Decalcificare l‘apparecchio secondo le istruzioni. Aumentare il grado di macinatura. Usare caffè macinato più grosso. L’inserto schiuma (6) non è montato correttamente. L’apparecchio presenta incrostazioni di calcare. Il caffè scende solo a Grado di macinatura gocce oppure non è possi- troppo fine. Caffè macinato bile più alcun prelievo di troppo fine. caffè. Decalcificare l‘apparecchio L’apparecchio ha troppi secondo le istruzioni. depositi di calcare. Il caffè non ha nessuna Tipo di caffè non adatto. Utilizzare una qualità di caffè che crema. contenga una percentuale elevata di chicchi robusta. I chicchi non sono freschi Utilizzare chicchi freschi. di tostatura. Il grado di macinatura non Impostare il grado di macinatura è adeguato ai chicchi di fine. caffè. Il caffè è troppo “acido”. Il grado di macinatura è Impostare il grado di macinatura troppo grosso oppure il su un valore più fine oppure utilizcaffè è macinato troppo zare un caffè macinato più fine. grosso. Utilizzare un caffè più tostato. Tipo di caffè non adatto. Il caffè è troppo “amaro”. Il grado di macinatura è Impostare il grado di macinatura troppo fine oppure il caffè è su un valore più grosso oppure macinato troppo fine. utilizzare un caffè macinato più grosso. Tipo di caffè non adatto. Cambiare il tipo di caffè. Se non è possibile risolvere un problema, chiamare l’assistenza! I numeri di telefono si trovano sull’ultima pagina del manuale. 82 it Guasto Messaggio sul display Causa Si è verificato un errore nell’apparecchio. Guasto Assistenza Il filtro dell’acqua non resta Il filtro dell’acqua non è incastrato nel serbatoio fissato correttamente. dell’acqua (16). Serbatoio dell’acqua non Messaggio sul display Controllo serb. inserito correttamente o acqua nuovo filtro dell’acqua non sciacquato come descritto. Acqua gassata nel serbatoio dell'acqua. I fondi di caffè non sono Il grado di macinatura compatti e sono troppo impostato è troppo fine o bagnati. troppo grosso oppure è stato utilizzato troppo poco caffè macinato. Unità di infusione (5) Messaggio sul display sporca. Pulire un. infusione Troppo caffè macinato nell’unità di infusione (5). Il meccanismo dell’unità di infusione si muove con fatica. L’apparecchio presenta incrostazioni di calcare. Forti differenze nella qualità del caffè o della schiuma del latte. Presenza di gocce d’acqua Il raccogligocce (8) è stato sul fondo interno dell’ap- estratto troppo presto. parecchio dopo aver tolto il raccogligocce (8). Manca l’unità di infusione Messaggio sul display (5) oppure non è stata Inserire un. infusione riconosciuta. Rimedio Chiamare l’assistenza. Tenere diritto il filtro dell’acqua e spingerlo saldamente nel collegamento del serbatoio. Inserire il serbatoio dell’acqua correttamente oppure sciacquare il filtro dell’acqua come descritto e mettere in funzione. Riempire il serbatoio dell’acqua con acqua fresca del rubinetto. Impostare un grado di macinatura più grosso o più fine oppure utilizzare 2 dosatori rasi di caffè macinato. Pulire l’unità di infusione (5). Pulire l’unità di infusione (5). Usare al massimo 2 dosatori rasi di caffè macinato. Rimuovere e pulire l’unità di infusione (vedere capitolo “Cura e pulizia quotidiana”). Decalcificare l‘apparecchio secondo le istruzioni Estrarre il raccogligocce (8) solo alcuni secondi dopo l’ultimo prelievo. Spegnere l’apparecchio con l’unità di infusione (5) inserita, attendere per tre secondi e riaccendere. Le impostazioni predefinite Sono state eseguite Spegnere l’apparecchio con l’insono state modificate e impostazioni personali, non terruttore di rete O / I (9). Tenere ora è necessario ripristirichieste. premuto il tasto off / j (12) e il narle (“reset”). tasto h (11) e accendere l’apparecchio con l’interruttore di rete O / I (9). Quindi confermare con il tasto start (10). Le impostazioni predefinite sono attive. Se non è possibile risolvere un problema, chiamare l’assistenza! I numeri di telefono si trovano sull’ultima pagina del manuale. e 83 Kundendienst-Zentren Central-Service-Depots Service Après-Vente Servizio Assistenza Centrale Servicestation Asistencia técnica Servicevaerkter Apparatservice Huolto DE Deutschland, Germany BSH Hausgeräte Service GmbH Zentralwerkstatt für kleine Hausgeräte Trautskirchener Strasse 6-8 90431 Nürnberg Online Auftragsstatus, Pickup Service für Kaffeevollautomaten und viele weitere Infos unter: www.siemens-home.de Reparaturservice, Ersatzteile & Zubehör, Produkt-Informationen: Tel.: 0911 70 440 044 mailto:cp-servicecenter@ bshg.com BA Bosnia-Herzegovina, Bosna i Hercegovina "HIGH" d.o.o. Gradačačka 29b 71000 Sarajevo Info-Line: 061 10 09 05 Fax: 033 21 35 13 mailto:[email protected] AE United Arab Emirates, BG Bulgaria BSH Domakinski Uredi Bulgaria EOOD 115К Tsarigradsko Chausse Blvd. European Trade Center Building, 5th floor 1784 Sofia Tеl.: 02 892 90 47 Fax: 02 878 79 72 mailto:informacia.servis-bg@ bshg.com www.siemens-home.bg Wir sind an 365 Tagen rund um die Uhr erreichbar. اﻹﻣﺎرات اﻟﻌﺮﺑﻴّﺔ اﻟﻤﺘّﺤﺪة BSH Home Appliances FZE Round About 13, Plot Nr MO-0532A Jebel Ali Free Zone - Dubai Tel.: 04 881 4401 mailto:[email protected] www.siemens-home.com/ae AL Republika e Shqiperise, Albania AERTECH SH.P.K. Rruga Qemal Stafa Pallati i ri perball Prokuroris se Pergjithshme Hyrja C Kati 10 Tirana Tel.: 066 206 47 94 mailto:[email protected] AT Österreich, Austria BSH Hausgeräte Gesellschaft mbH Werkskundendienst für Hausgeräte Quellenstrasse 2 1100 Wien Tel.: 0810 550 522* Fax: 01 605 75 51 212 mailto:vie-stoerungsannahme@ bshg.com Hotline für Espresso-Geräte: Tel.: 0810 700 400* www.siemens-home.at *innerhalb Österreichs zum Regionaltarif AU Australia BSH Home Appliances Pty. Ltd. 7-9 Arco Lane HEATHERTON, Victoria 3202 Tel.: 1300 368 339 mailto:[email protected] www.siemens-home.com.au 02/14 BE Belgique, België, Belgium BSH Home Appliances S.A. Avenue du Laerbeek 74 Laarbeeklaan 74 1090 Bruxelles – Brussel Tel.: 070 222 142 Fax: 024 757 292 mailto:[email protected] www.siemens-home.be BH Bahrain, ﻣﻤﻠﻜﺔ اﻟﺒﺤﺮﻳﻦ Khalaifat Company Manama Tel.: 01 7400 553 mailto:[email protected] CH Schweiz, Suisse, Svizzera, Switzerland BSH Hausgeräte AG Werkskundendienst für Hausgeräte Fahrweidstrasse 80 8954 Geroldswil mailto:ch-info.hausgeraete@ bshg.com Service Tel.: 0848 840 040 Service Fax: 0848 840 041 mailto:[email protected] Ersatzteile Tel.: 0848 880 080 Ersatzteile Fax: 0848 880 081 mailto:[email protected] www.siemens-home.com CY Cyprus, Κύπρος BSH Ikiakes Syskeves-Service 39, Arh. Makaariou III Str. 2407 Egomi/Nikosia (Lefkosia) Tel.: 7777 8007 Fax: 022 65 81 28 mailto:bsh.service.cyprus@ cytanet.com.cy CZ Česká Republika, Czech Republic BSH domácí spotřebiče s.r.o. Firemní servis domácích spotřebičů Pekařská 10b 155 00 Praha 5 Tel.: 0251 095 546 Fax: 0251 095 549 www.siemens-home.com/cz DK Danmark, Denmark BSH Hvidevarer A/S Telegrafvej 4 2750 Ballerup Tel.: 44 89 89 85 Fax: 44 89 89 86 mailto:BSH-Service.dk@ BSHG.com www.siemens-home.dk EE Eesti, Estonia SIMSON OÜ Raua 55 10152 Tallinn Tel.: 0627 8730 Fax: 0627 8733 mailto:[email protected] ES España, Spain En caso de avería puede ponerse en contacto con nosotros, su aparato será trasladado a nuestro taller especializado de cafeteras. Tel.: 902 28 88 38 BSH Electrodomésticos España S. A. Servicio Oficial del Fabricante Parque Empresarial PLAZA, C/ Manfredonia, 6 50197 Zaragoza Tel.: 902 11 88 21 mailto:[email protected] www.siemens-home.es FI Suomi, Finland BSH Kodinkoneet Oy Itälahdenkatu 18 A PL 123 00201 Helsinki Tel.: 0207 510 700 Fax: 0207 510 780 mailto:Siemens-Service-FI@ bshg.com www.siemens-home.fi Lankapuhelimesta 8,28 snt/puhelu + 7 snt/min (alv 23%) Matkapuhelimesta 8,28 snt/puhelu + 17 snt/min (alv 23%) FR France BSH Electroménager S.A.S. 50 rue Ardoin – BP 47 93401 Saint-Ouen cedex Service interventions à domicile: 01 40 10 12 00 Service Consommateurs: 0 892 698 110 (0,34 € TTC/mn) mailto:soa-siemens-conso@ bshg.com Service Pièces Détachées et Accessoires: 0 892 698 009 (0,34 € TTC/mn) www.siemens-home.fr GB Great Britain BSH Home Appliances Ltd. Grand Union House Old Wolverton Road Wolverton Milton Keynes MK12 5PT To arrange an engineer visit, to order spare parts or accessories or for product advice please visit www.siemens-home.co.uk or call Tel.: 0844 892 8999* *Calls from a BT landline will be charged at up to 3 pence per minute. A call set-up fee of up to 6 pence may apply. GR Greece, Ελλάς BSH Ikiakes Siskeves A.B.E. Central Branch Service 17 km E.O. Athinon-Lamias & Potamou 20 14564 Kifisia Πανελλήνιο τηλέφωνο: 181 82 (αστική χρέωση) www.siemens-home.gr HK Hong Kong, 香港 BSH Home Appliances Limited Unit 1 & 2, 3rd Floor North Block, Skyway House 3 Sham Mong Road Tai Kok Tsui, Kowloon Hong Kong Tel.: 2565 6151 Fax: 2565 6681 mailto:siemens.hk.service@ bshg.com www.siemens-home.com.hk HR Hrvatska, Croatia BSH kućni uređaji d.o.o. Kneza Branimira 22 10000 Zagreb Tel:. 01 640 36 09 Fax: 01 640 36 03 mailto:informacije.servis-hr@ bshg.com www.siemens-home.com/hr 02/14 HU Magyarország, Hungary BSH Háztartási Készülék Kereskedelmi Kft. Háztartási gépek márkaszervize Királyhágó tér 8-9. 1126 Budapest Hibabejelentés Tel.: 01 489 5461 Fax: 01 201 8786 mailto:[email protected] Alkatrészrendelés Tel.: 01 489 5463 Fax: 01 201 8786 mailto:[email protected] www.siemens-home.com/hu IE Republic of Ireland BSH Home Appliances Ltd. Unit F4, Ballymount Drive Ballymount Industrial Estate Walkinstown Dublin 12 Service Requests, Spares and Accessories Tel.: 01450 2655 Fax: 01450 2520 www.siemens-home.com/ie IL Israel, ישראל C/S/B Home Appliance Ltd. Uliel Building 2, Hamelacha St. Industrial Park North 71293 Lod Tel.: 08 9777 222 Fax: 08 9777 245 mailto:[email protected] www.siemens-home.co.il IN India, Bhārat, भारत BSH Customer Service Front Office Shop No.4, Everest Grande, Opp. Shanti Nagar Bus Stop, Mahakali Caves Road, Andheri East Mumbai 400 093 IS Iceland Smith & Norland hf. Noatuni 4 105 Reykjavik Tel.: 0520 3000 Fax: 0520 3011 www.sminor.is IT Italia, Italy BSH Elettrodomestici S.p.A. Via. M. Nizzoli 1 20147 Milano (MI) Numero verde 800 018346 mailto:info@ siemens-elettrodomestici.it www.siemens-home.com/it KZ Kazakhstan, Қазақстан IP Turebekov Yerzhan Nurmanovich Jangeldina str. 15 Shimkent 160018 Tel.: 0252 31 00 06 mailto:[email protected] LB Lebanon, ﻟﺒﻨﺎن Tehaco s.a.r.l Boulevard Dora 4043 Beyrouth P.O. Box 90449 Jdeideh 1202 2040 Tel.: 01 255 211 mailto:[email protected] LT Lietuva, Lithuania Baltic Continent Ltd. Lukšio g. 23 09132 Vilnius Tel.: 05 274 1788 Fax: 05 274 1765 mailto:[email protected] www.balticcontinent.lt LU Luxembourg BSH électroménagers S.A. 13-15, ZI Breedeweues 1259 Senningerberg Tel.: 26349 300 Fax: 26349 315 mailto:lux-service.electromenager@ bshg.com www.siemens-home.com/lu LV Latvija, Latvia General Serviss Limited Bullu street 70c 1067 Riga Tel.: 07 42 41 37 mailto:[email protected] MD Moldova S.R.L. "Rialto-Studio" ул. Щусева 98 2012 Кишинев тел./факс: 022 23 81 80 MK Macedonia, Македонија GORENEC Jane Sandanski 69 lok. 3 1000 Skopje Tel.: 02 2454 600 Mobil: 070 697 463 mailto:[email protected] MT Malta Aplan Limited The Atrium Mriehel by Pass BKR3000 Birkirkara Tel.: 025 495 122 Fax: 021 480 598 mailto:[email protected] NL Nederlande, Netherlands BSH Huishoudapparaten B.V. Taurusavenue 36 2132 LS Hoofddorp Storingsmelding: Tel.: 088 424 4020 Fax: 088 424 4845 mailto:siemens-contactcenter@ bshg.com Onderdelenverkoop: Tel.: 088 424 4020 Fax: 088 424 4801 mailto:siemens-onderdelen@ bshg.com www.siemens-home.nl NO Norge, Norway BSH Husholdningsapparater A/S Grensesvingen 9 0661 Oslo Tel.: 22 66 06 46 Fax: 22 66 05 55 mailto:Siemens-Service-NO@ bshg.com www.siemens-home.no NZ New Zealand BSH Home Appliances Ltd. Unit F 2, 4 Orbit Drive Mairangi Bay Auckland 0632 Tel.: 09 477 0492 Fax: 09 477 2647 mailto:[email protected] PL Polska, Poland BSH Sprzęt Gospodarstwa Domowego Sp. z o.o. Al. Jerozolimskie 183 02-222 Warszawa Tel.: 801 191 534 Fax: 022 572 7709 mailto:Serwis.Fabryczny@ bshg.com www.siemens-home.pl PT Portugal BSHP Electrodomésticos, Lda. Rua Alto do Montijo, nº 15 2790-012 Carnaxide Tel.: 707 500 545* Fax: 214 250 701 mailto: siemens.electrodomesticos.pt@ bshg.com www.siemens-home.com/pt *(PT 0,10 €/min., Mobile 0,25 €/min) 02/14 RO România, Romania BSH Electrocasnice srl. Sos. Bucuresti-Ploiesti, nr. 19-21, sect.1 13682 Bucuresti Tel.: 021 203 9748 Fax: 021 203 9733 mailto:service.romania@ bshg.com www.siemens-home.com/ro RU Russia, Россия OOO "БСХ Бытовая техника" Сервис от производителя Малая Калужская 19/1 119071 Москва тел.: 495 737 2962 mailto:[email protected] www.siemens-home.com SE Sverige, Sweden BSH Home Appliances AB Landsvägen 32 169 29 Solna Tel.: 0771 11 22 77 local rate mailto:Siemens-Service-SE@ bshg.com www.siemens-home.se TR Türkiye, Turkey BSH Ev Aletleri Sanayi ve Ticaret A.S. Fatih Sultan Mehmet Mahallesi Balkan Caddesi No: 51 34771 Ümraniye, Istanbul Tel.: 0 216 444 6688* Fax: 0 216 528 9188 mailto:[email protected] www.siemens-home.com/tr *Çağrı merkezini sabit hatlardan aramanın bedeli şehir içi ücretlendirme, Cep telefonlarından ise kullanılan tarifeye gore değişkenlik göstermektedir UA Ukraine, Україна ТОВ "БСХ Побутова Техніка" тел.: 044 490 2095 mailto:[email protected] www.siemens-home.com.ua XK Kosovo NTP GAMA Rruga Mag Prishtine-Ferizaj 70000 Ferizaj Tel.: 0290 321 434 mailto:a_service@ gama-electronics.com SG Singapore, 新加坡 BSH Home Appliances Pte. Ltd. TECHPLACE I and Mo Kio Avenue 10 Block 4012 #01-01 569628 Singapore Tel.: 6751 5000 Fax: 6751 5005 mailto:[email protected] XS Srbija, Serbia BSH Kućni aparati d.o.o. Milutina Milankovića 11ª 11070 Novi Beograd Tel.: 011 205 23 97 Fax: 011 205 23 89 mailto:informacije.servis-sr@ bshg.com www.siemens-home.rs SI Slovenija, Slovenia BSH Hišni aparati d.o.o. Litostrojska 48 1000 Ljubljana Tel.: 01 583 07 00 Fax: 01 583 08 89 mailto:informacije.servis@ bshg.com www.siemens-home.si ZA South Africa BSH Home Appliances (Pty) Ltd. 15th Road Randjespark Private Bag X36, Randjespark 1685 Midrand – Johannesburg Tel.: 086 002 6724 Fax: 086 617 1780 mailto:applianceserviceza@ bshg.com www.siemens-home.com SK Slovensko, Slovakia BSH domáci spotřebiče s.r.o. Organizačná zložka Bratislava Galvaniho 17/C 821 04 Bratislava Tel.: 02 44 45 20 41 mailto:[email protected] www.siemens-home.com/sk Garantiebedingungen DEUTSCHLAND (DE) Die nachstehenden Bedingungen, die Voraussetzungen und Umfang unserer Garantieleistung beschreiben, lassen die Gewährleistungsverpflichtungen des Verkäufers aus dem Kaufvertrag mit dem Endabnehmer unberührt. Für dieses Gerät leisten wir Garantie gemäß nachstehenden Bedingungen: Siemens Info Line (Mo-Fr: 8.00-18.00 Uhr erreichbar) Für Produktinformationen sowie Anwendungs- und Bedienungsfragen zu kleinen Hausgeräten: Tel.: 0911 70 440 044 oder unter [email protected] Nur für Deutschland gültig! 1. Wir beheben unentgeltlich nach Maßgabe der folgenden Bedingungen (Nr. 2 – 6) Mängel am Gerät, die nachweislich auf einem Material- und / oder Herstellungsfehler beruhen, wenn sie uns unverzüglich nach Feststellung und innerhalb von 24 Monaten nach Lieferung an den Erstendabnehmer gemeldet werden. Zeigt sich der Mangel innerhalb von 6 Monaten ab Lieferung, wird vermutet, dass es sich um einen Material- oder Herstellungsfehler handelt. 2. Die Garantie erstreckt sich nicht auf leicht zerbrechliche Teile wie z. B. Glas oder Kunststoff bzw. Glühlampen. E ine Garantiepflicht wird nicht ausgelöst durch geringfügige Abweichungen von der Soll-Beschaffenheit, die für Wert und Gebrauchstauglichkeit des Gerätes unerheblich sind, oder durch Schäden aus chemischen und elektrochemischen Einwirkungen von Wasser, sowie allgemein aus anomalen Umweltbedingungen oder sachfremden Betriebsbedingungen oder wenn das Gerät sonst mit ungeeigneten Stoffen in Berührung gekommen ist. Ebenso kann keine Garantie übernommen werden, wenn die Mängel am Gerät auf Transportschäden, die nicht von uns zu vertreten sind, nicht fachgerechte Installation und Montage, Fehlgebrauch, eine nicht haushaltsübliche Nutzung, mangelnde Pflege oder Nichtbeachtung von Bedienungs- oder Montagehinweisen zurückzuführen sind. Der Garantieanspruch erlischt, wenn Reparaturen oder Eingriffe von Personen vorgenommen werden, die hierzu von uns nicht ermächtigt sind, oder wenn unsere Geräte mit Ersatzteilen, Ergänzungs- oder Zubehörteilen versehen werden, die keine Originalteile sind und dadurch ein Defekt verursacht wird. 3. Die Garantieleistung erfolgt in der Weise, dass mangelhafte Teile nach unserer Wahl unentgeltlich instandgesetzt oder durch einwandfreie Teile ersetzt werden. G eräte, die zumutbar (z. B. im PKW) transportiert werden können, und für die unter Bezugnahme auf diese Garantie eine Garantieleistung beansprucht wird, sind unserer nächstgelegenen Kundendienststelle oder unserem Vertragskundendienst zu übergeben oder zuzusenden. Instandsetzungen am Aufstellungsort können nur für stationär betriebene (feststehende) Geräte verlangt werden. E s ist jeweils der Kaufbeleg mit Kauf- und/oder Lieferdatum vorzulegen. Ersetzte Teile gehen in unser Eigentum über. 4. Sofern die Nachbesserung von uns abgelehnt wird oder fehlschlägt, wird innerhalb der oben genannten Garantiezeit auf Wunsch des Endabnehmers kostenfrei gleichwertiger Ersatz geliefert. 5. Garantieleistungen bewirken weder eine Verlängerung der Garantiefrist, noch setzen sie eine neue Garantiefrist in Lauf. Die Garantiefrist für eingebaute Ersatzteile endet mit der Garantiefrist für das ganze Gerät. 6. Weitergehende oder andere Ansprüche, insbesondere solche auf Ersatz außerhalb des Gerätes ent standener Schäden sind – soweit eine Haftung nicht zwingend gesetzlich angeordnet ist – ausgeschlossen. Diese Garantiebedingungen gelten für in Deutschland gekaufte Geräte. Werden Geräte ins Ausland verbracht, die die technischen Voraussetzungen (z. B. Spannung, Frequenz, Gasarten, etc.) für das entsprechende Land aufweisen und die für die jeweiligen Klima- und Umweltbedingungen geeignet sind, gelten diese Garantiebedingungen auch, soweit wir in dem entsprechenden Land ein Kundendienstnetz haben. Für im Ausland gekaufte Geräte gelten die von unserer jeweils zuständigen Landesvertretung herausgegebenen Garantiebedingungen. Diese können Sie über Ihren Fachhändler, bei dem Sie das Gerät gekauft haben, oder direkt bei unserer Landesvertretung anfordern. Beachten Sie unser weiteres Kundendienst-Angebot: Auch nach Ablauf der Garantie stehen Ihnen unser Werkskundendienst und unsere Servicepartner zur Verfügung. Siemens-Electrogeräte GmbH Carl-Wery-Str. 34 / 81739 München // Germany 05/13 Beratung bei Störungen • Advice on troubleshooting • Conseils sur les problèmes • Consejos sobre problemas de • Consulenza su problemi Service-Hotlines www.siemens-home.com AT 0810 700 400 BE 070 222 142 CH 043 455 4095 DE 0911 70 440 044 DK 44 89 89 85 ES 902 11 88 21 FI 020 7510700 Lankapuhelimesta 8,28 snt/puhelu + 7 snt/min (alv 23%) Matkapuhelimesta 8,28 snt/puhelu + 17 snt/min (alv 23%) fi NL 088 424 4020 NO 22 66 06 00 PT 21 4250 720 SE 0771 - 11 22 77 AE 04 8030501 TR 444 66 88 BA 061 100 905 BG 879 256 630 CZ 0251 095 578 EE 0627 8730 GB 0844 892 8999 HR 01 64 03 609 HU 014 895 461 IE 01450 2655 IS 0520 3000 LT 052 74 17 88 LU 26 349 300 UK Calls provided by a UK BT Landline will be charged at up to 3 pence per minute. A Call Set-Up Fee of up to 6 pence per call applies to calls from residential lines. Mobile and other providers’ costs may vary. See www.bt.com/pricing for details. LV 067 42 52 32 ME 020 662 444 MK 02 2454 600 PL 801 191 534 RO 021 203 97 48 RU 495 737 2962 SI 041 991 100 SK 02 44 452 041 XS 011 6147 110 AU 1300 368 339 02/14 Siemens-Electrogeräte GmbH Carl-Wery-Str. 34 81739 München www.siemens-home.com © 2014 by Siemens-Electrogeräte GmbH, München 9000 943 337 – 02/14