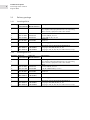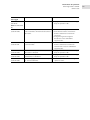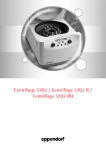
1
Register your instrument! www.eppendorf.com/myeppendorf Centrifuge 5418 / 5418 R Operating Manual Istruzioni per l'uso Copyright© 2013 Eppendorf AG, Hamburg. No part of this publication may be reproduced without the prior permission of the copyright owner. Trademarks Eppendorf® and the Eppendorf logo are registered trademarks of Eppendorf AG. Microtainer® is a registered trademark of Becton Dickinson, Franklin Lakes, NJ, USA. Trademarks are not marked in all cases with ™ or ® in this manual. Operating manual. . . . . . . . . . . . . . . . . . . . . . . . . . . . . . . . . . . . . . . . . . . . . . . . . . . . . . . . . . . . . . . . . . . . . . 3 Istruzioni per l'uso . . . . . . . . . . . . . . . . . . . . . . . . . . . . . . . . . . . . . . . . . . . . . . . . . . . . . . . . . . . . . . . . . . . . 43 5401 900.022-07/102013 Table of contents Centrifuge 5418 / 5418 R English (EN) Table of contents p. Tab. Operating Centrifuge on see Fig. p. manual 5418 / 5418 R English Operating (EN) manual 1 Operating instructions . . . . . . . . . . . . . . . . . . . . . . . . . . . . . . . . . . . . . . . . . . . . . . . . . . . . . . . . . . . . . . 5 1.1 Using this manual . . . . . . . . . . . . . . . . . . . . . . . . . . . . . . . . . . . . . . . . . . . . . . . . . . . . . . . . . . . . . 5 1.2 Danger symbols and danger levels . . . . . . . . . . . . . . . . . . . . . . . . . . . . . . . . . . . . . . . . . . . . . . . . 5 1.2.1 Danger symbols. . . . . . . . . . . . . . . . . . . . . . . . . . . . . . . . . . . . . . . . . . . . . . . . . . . . . . . . 5 1.2.2 Danger levels. . . . . . . . . . . . . . . . . . . . . . . . . . . . . . . . . . . . . . . . . . . . . . . . . . . . . . . . . . 5 1.3 Symbols used . . . . . . . . . . . . . . . . . . . . . . . . . . . . . . . . . . . . . . . . . . . . . . . . . . . . . . . . . . . . . . . . 5 1.4 Abbreviations used . . . . . . . . . . . . . . . . . . . . . . . . . . . . . . . . . . . . . . . . . . . . . . . . . . . . . . . . . . . . 6 2 Product description . . . . . . . . . . . . . . . . . . . . . . . . . . . . . . . . . . . . . . . . . . . . . . . . . . . . . . . . . . . . . . . . 7 2.1 Main illustration . . . . . . . . . . . . . . . . . . . . . . . . . . . . . . . . . . . . . . . . . . . . . . . . . . . . . . . . . . . . . . 7 2.2 Delivery package . . . . . . . . . . . . . . . . . . . . . . . . . . . . . . . . . . . . . . . . . . . . . . . . . . . . . . . . . . . . . . 8 2.2.1 Centrifuge 5418. . . . . . . . . . . . . . . . . . . . . . . . . . . . . . . . . . . . . . . . . . . . . . . . . . . . . . . . 8 2.2.2 Centrifuge 5418 R . . . . . . . . . . . . . . . . . . . . . . . . . . . . . . . . . . . . . . . . . . . . . . . . . . . . . . 8 2.3 Features. . . . . . . . . . . . . . . . . . . . . . . . . . . . . . . . . . . . . . . . . . . . . . . . . . . . . . . . . . . . . . . . . . . . . 9 2.4 Rotor FA-45-18-11. . . . . . . . . . . . . . . . . . . . . . . . . . . . . . . . . . . . . . . . . . . . . . . . . . . . . . . . . . . . . 9 2.4.1 rcf display and calculation . . . . . . . . . . . . . . . . . . . . . . . . . . . . . . . . . . . . . . . . . . . . . . 10 3 Safety. . . . . . . . . . . . . . . . . . . . . . . . . . . . . . . . . . . . . . . . . . . . . . . . . . . . . . . . . . . . . . . . . . . . . . . . . . . 11 3.1 Intended use . . . . . . . . . . . . . . . . . . . . . . . . . . . . . . . . . . . . . . . . . . . . . . . . . . . . . . . . . . . . . . . . 11 3.2 User profile . . . . . . . . . . . . . . . . . . . . . . . . . . . . . . . . . . . . . . . . . . . . . . . . . . . . . . . . . . . . . . . . . 11 3.3 Application limits . . . . . . . . . . . . . . . . . . . . . . . . . . . . . . . . . . . . . . . . . . . . . . . . . . . . . . . . . . . . 11 3.3.1 Declaration concerning the ATEX directive (94/9/EC) . . . . . . . . . . . . . . . . . . . . . . . . . 11 3.3.2 Maximum service life for accessories . . . . . . . . . . . . . . . . . . . . . . . . . . . . . . . . . . . . . . 11 3.4 Information on product liability . . . . . . . . . . . . . . . . . . . . . . . . . . . . . . . . . . . . . . . . . . . . . . . . . 12 3.5 Warnings for intended use . . . . . . . . . . . . . . . . . . . . . . . . . . . . . . . . . . . . . . . . . . . . . . . . . . . . . 12 3.5.1 Personal injury or damage to the equipment . . . . . . . . . . . . . . . . . . . . . . . . . . . . . . . . 12 3.5.2 Incorrect handling of the centrifuge . . . . . . . . . . . . . . . . . . . . . . . . . . . . . . . . . . . . . . . 14 3.5.3 Incorrect handling of the rotors . . . . . . . . . . . . . . . . . . . . . . . . . . . . . . . . . . . . . . . . . . 14 3.5.4 Extreme strain on the centrifuging tubes . . . . . . . . . . . . . . . . . . . . . . . . . . . . . . . . . . . 15 3.5.5 Aerosol-tight centrifugation . . . . . . . . . . . . . . . . . . . . . . . . . . . . . . . . . . . . . . . . . . . . . 16 3.6 Safety instructions located on the device . . . . . . . . . . . . . . . . . . . . . . . . . . . . . . . . . . . . . . . . . . 16 4 Installation . . . . . . . . . . . . . . . . . . . . . . . . . . . . . . . . . . . . . . . . . . . . . . . . . . . . . . . . . . . . . . . . . . . . . . 17 4.1 Selecting the location . . . . . . . . . . . . . . . . . . . . . . . . . . . . . . . . . . . . . . . . . . . . . . . . . . . . . . . . . 17 4.2 Preparing installation . . . . . . . . . . . . . . . . . . . . . . . . . . . . . . . . . . . . . . . . . . . . . . . . . . . . . . . . . 17 4.3 Installing the instrument . . . . . . . . . . . . . . . . . . . . . . . . . . . . . . . . . . . . . . . . . . . . . . . . . . . . . . . 18 5 Operation. . . . . . . . . . . . . . . . . . . . . . . . . . . . . . . . . . . . . . . . . . . . . . . . . . . . . . . . . . . . . . . . . . . . . . . . 19 5.1 Overview of operating controls . . . . . . . . . . . . . . . . . . . . . . . . . . . . . . . . . . . . . . . . . . . . . . . . . . 19 5.2 Preparing for centrifugation . . . . . . . . . . . . . . . . . . . . . . . . . . . . . . . . . . . . . . . . . . . . . . . . . . . . 20 5.2.1 Switching on the centrifuge . . . . . . . . . . . . . . . . . . . . . . . . . . . . . . . . . . . . . . . . . . . . . 20 5.2.2 Inserting the rotor . . . . . . . . . . . . . . . . . . . . . . . . . . . . . . . . . . . . . . . . . . . . . . . . . . . . . 20 5.2.3 Loading the rotor . . . . . . . . . . . . . . . . . . . . . . . . . . . . . . . . . . . . . . . . . . . . . . . . . . . . . 21 5.2.4 Closing the rotor lid . . . . . . . . . . . . . . . . . . . . . . . . . . . . . . . . . . . . . . . . . . . . . . . . . . . 21 5.2.5 Closing the centrifuge lid . . . . . . . . . . . . . . . . . . . . . . . . . . . . . . . . . . . . . . . . . . . . . . . 22 3 4 Table of contents Centrifuge 5418 / 5418 R English (EN) 5.3 5.4 5.5 5.6 Cooling (only 5418 R) . . . . . . . . . . . . . . . . . . . . . . . . . . . . . . . . . . . . . . . . . . . . . . . . . . . . . . . . . 22 5.3.1 Temperature adjustment . . . . . . . . . . . . . . . . . . . . . . . . . . . . . . . . . . . . . . . . . . . . . . . . 22 5.3.2 Temperature display . . . . . . . . . . . . . . . . . . . . . . . . . . . . . . . . . . . . . . . . . . . . . . . . . . . 22 5.3.3 Temperature monitoring . . . . . . . . . . . . . . . . . . . . . . . . . . . . . . . . . . . . . . . . . . . . . . . . 22 5.3.4 FastTemp . . . . . . . . . . . . . . . . . . . . . . . . . . . . . . . . . . . . . . . . . . . . . . . . . . . . . . . . . . . . 23 5.3.5 Continuous cooling . . . . . . . . . . . . . . . . . . . . . . . . . . . . . . . . . . . . . . . . . . . . . . . . . . . . 23 Centrifuging . . . . . . . . . . . . . . . . . . . . . . . . . . . . . . . . . . . . . . . . . . . . . . . . . . . . . . . . . . . . . . . . 24 5.4.1 Centrifugation with time setting . . . . . . . . . . . . . . . . . . . . . . . . . . . . . . . . . . . . . . . . . . 24 5.4.2 Centrifuging in continuous operation . . . . . . . . . . . . . . . . . . . . . . . . . . . . . . . . . . . . . . 25 5.4.3 Short-spin centrifugation . . . . . . . . . . . . . . . . . . . . . . . . . . . . . . . . . . . . . . . . . . . . . . . 25 5.4.4 Removing the rotor . . . . . . . . . . . . . . . . . . . . . . . . . . . . . . . . . . . . . . . . . . . . . . . . . . . . 26 Standby mode (only 5418) . . . . . . . . . . . . . . . . . . . . . . . . . . . . . . . . . . . . . . . . . . . . . . . . . . . . . 26 Special functions (only 5418 R) . . . . . . . . . . . . . . . . . . . . . . . . . . . . . . . . . . . . . . . . . . . . . . . . . 26 6 Maintenance . . . . . . . . . . . . . . . . . . . . . . . . . . . . . . . . . . . . . . . . . . . . . . . . . . . . . . . . . . . . . . . . . . . . . 27 6.1 Prepare cleaning/disinfection . . . . . . . . . . . . . . . . . . . . . . . . . . . . . . . . . . . . . . . . . . . . . . . . . . . 27 6.2 Cleaning/disinfection . . . . . . . . . . . . . . . . . . . . . . . . . . . . . . . . . . . . . . . . . . . . . . . . . . . . . . . . . 27 6.2.1 Cleaning and disinfecting the device . . . . . . . . . . . . . . . . . . . . . . . . . . . . . . . . . . . . . . 28 6.2.2 Cleaning and disinfecting the rotor. . . . . . . . . . . . . . . . . . . . . . . . . . . . . . . . . . . . . . . . 28 6.3 Additional service instructions for Centrifuge 5418 R . . . . . . . . . . . . . . . . . . . . . . . . . . . . . . . . 29 6.4 Glass breakage . . . . . . . . . . . . . . . . . . . . . . . . . . . . . . . . . . . . . . . . . . . . . . . . . . . . . . . . . . . . . . 29 6.5 Fuses . . . . . . . . . . . . . . . . . . . . . . . . . . . . . . . . . . . . . . . . . . . . . . . . . . . . . . . . . . . . . . . . . . . . . . 30 6.6 Decontamination before shipment . . . . . . . . . . . . . . . . . . . . . . . . . . . . . . . . . . . . . . . . . . . . . . . 30 7 Troubleshooting . . . . . . . . . . . . . . . . . . . . . . . . . . . . . . . . . . . . . . . . . . . . . . . . . . . . . . . . . . . . . . . . . . 31 7.1 General errors . . . . . . . . . . . . . . . . . . . . . . . . . . . . . . . . . . . . . . . . . . . . . . . . . . . . . . . . . . . . . . . 31 7.2 Error messages . . . . . . . . . . . . . . . . . . . . . . . . . . . . . . . . . . . . . . . . . . . . . . . . . . . . . . . . . . . . . . 32 7.3 Emergency lid release . . . . . . . . . . . . . . . . . . . . . . . . . . . . . . . . . . . . . . . . . . . . . . . . . . . . . . . . . 33 7.3.1 Centrifuge 5418. . . . . . . . . . . . . . . . . . . . . . . . . . . . . . . . . . . . . . . . . . . . . . . . . . . . . . . 33 7.3.2 Centrifuge 5418 R . . . . . . . . . . . . . . . . . . . . . . . . . . . . . . . . . . . . . . . . . . . . . . . . . . . . . 33 8 Transport, storage and disposal . . . . . . . . . . . . . . . . . . . . . . . . . . . . . . . . . . . . . . . . . . . . . . . . . . . . . 35 8.1 Transport . . . . . . . . . . . . . . . . . . . . . . . . . . . . . . . . . . . . . . . . . . . . . . . . . . . . . . . . . . . . . . . . . . . 35 8.2 Storage . . . . . . . . . . . . . . . . . . . . . . . . . . . . . . . . . . . . . . . . . . . . . . . . . . . . . . . . . . . . . . . . . . . . 35 8.3 Disposal. . . . . . . . . . . . . . . . . . . . . . . . . . . . . . . . . . . . . . . . . . . . . . . . . . . . . . . . . . . . . . . . . . . . 35 9 Technical data . . . . . . . . . . . . . . . . . . . . . . . . . . . . . . . . . . . . . . . . . . . . . . . . . . . . . . . . . . . . . . . . . . . . 37 9.1 Power supply. . . . . . . . . . . . . . . . . . . . . . . . . . . . . . . . . . . . . . . . . . . . . . . . . . . . . . . . . . . . . . . . 37 9.2 Ambient conditions . . . . . . . . . . . . . . . . . . . . . . . . . . . . . . . . . . . . . . . . . . . . . . . . . . . . . . . . . . . 38 9.3 Weight/dimensions . . . . . . . . . . . . . . . . . . . . . . . . . . . . . . . . . . . . . . . . . . . . . . . . . . . . . . . . . . . 38 9.4 Application parameters . . . . . . . . . . . . . . . . . . . . . . . . . . . . . . . . . . . . . . . . . . . . . . . . . . . . . . . . 39 10 Ordering information . . . . . . . . . . . . . . . . . . . . . . . . . . . . . . . . . . . . . . . . . . . . . . . . . . . . . . . . . . . . . . 41 10.1 Centrifuge 5418. . . . . . . . . . . . . . . . . . . . . . . . . . . . . . . . . . . . . . . . . . . . . . . . . . . . . . . . . . . . . . 41 10.2 Centrifuge 5418 R . . . . . . . . . . . . . . . . . . . . . . . . . . . . . . . . . . . . . . . . . . . . . . . . . . . . . . . . . . . . 41 10.3 Accessories . . . . . . . . . . . . . . . . . . . . . . . . . . . . . . . . . . . . . . . . . . . . . . . . . . . . . . . . . . . . . . . . . 41 10.4 Fuses . . . . . . . . . . . . . . . . . . . . . . . . . . . . . . . . . . . . . . . . . . . . . . . . . . . . . . . . . . . . . . . . . . . . . . 42 10.4.1 Fuses for Centrifuge 5418. . . . . . . . . . . . . . . . . . . . . . . . . . . . . . . . . . . . . . . . . . . . . . . 42 10.4.2 Fuses for Centrifuge 5418 R . . . . . . . . . . . . . . . . . . . . . . . . . . . . . . . . . . . . . . . . . . . . . 42 Operating instructions Centrifuge 5418 / 5418 R English (EN) 1 Operating instructions 1.1 Using this manual Read this operating manual completely before using the device for the first time. Please also note the operating instructions for the accessories, if applicable. This operating manual is part of the product. Thus, it must always be easily accessible. Enclose this operating manual when transferring the device to third parties. If this manual is lost, please request another one. You will find the current version on our webpage www.eppendorf.com/worldwide. 1.2 Danger symbols and danger levels The safety instructions in this manual appear with the following danger symbols and danger levels: 1.2.1 Danger symbols 1.2.2 Biohazard Explosion Electric shock Crushing Hazard point Material damage Danger levels DANGER Will lead to severe injuries or death. WARNING May lead to severe injuries or death. CAUTION May lead to light to moderate injuries. NOTICE May lead to material damage. 1.3 Symbols used Symbol Meaning Handling 1. 2. Actions in the specified order • Text List Name of fields in the software Useful information 5 6 Operating instructions Centrifuge 5418 / 5418 R English (EN) 1.4 Abbreviations used PCR Polymerase chain reaction RZB/rcf Relative centrifugal force – g-force in m/s2 rpm Revolutions per minute – in rpm UV Ultraviolet radiation Product description Centrifuge 5418 / 5418 R English (EN) 2 Product description 2.1 Main illustration Abb. 2-1: Front and rear view of the Centrifuge 5418 1 2 1 2 3 4 6 7 8 9 5 Fig. 2-1: Front and rear view of the Centrifuge 5418 Abb. 2-2: Front and rear view of the Centrifuge 5418 R 1 2 1 2 5 3 4 6 9 10 10 7 8 Fig. 2-2: Front and rear view of the Centrifuge 5418 R 1 Centrifuge lid 6 Name plate 2 Monitoring glass Visual control for rotor stop or speed control option using stroboscope 7 Mains/power switch Switch for switching the device on and off. Switch position 0: The device is switched off. Switch position I: The device is switched on. 3 Display Depiction of the current centrifuging parameters 8 Mains connection and device settings. Connection socket for the mains cable supplied. 4 Control panel For operating the centrifuge. 5 Emergency lid release 9 Fuse holder 10 Condensation water tray (only Centrifuge 5418 R) 7 8 Product description Centrifuge 5418 / 5418 R English (EN) 2.2 Delivery package 2.2.1 Centrifuge 5418 Quantity Order no. Order no. (International) (North America) 1 - - 1 or 5425 351.003 5425 353.006 022668188 022668226 1 5416 301.001 022634305 1 - - 1 1 5401 900.022 5401 900.030 5401900022 5401900030 2.2.2 Description Centrifuge 5418 See chapter Ordering Information for corresponding device version, equipment and order number Fuse 2.5 A T (230 V), set of 2 5 A T (120 V), UL, set of 2 Rotor key Standard Power supply device Operating manual Centrifuge 5418/5418 R Languages: EN, DE, FR, ES, IT, PT Languages: DA, FI, EL, NL, SV (230 V devices only) Centrifuge 5418 R Quantity Order no. Order no. (International) (North America) 1 - - 1 or 5425 351.003 5426 355.100 022668188 022668200 1 5416 301.001 022634305 1 5401 850.076 5401850076 1 - - 1 1 5401 900.022 5401 900.030 5401900022 5401900030 Description Centrifuge 5418 R See chapter Ordering Information for corresponding device version, equipment and order number Fuse 2.5 A T (230 V), set of 2 6.25 AT (100 V/120 V), set of 2 Rotor key Standard Tray for condensation water Power supply device Operating manual Centrifuge 5418/5418 R Languages: EN, DE, FR, ES, IT, PT Languages: DA, FI, EL, NL, SV (230 V devices only) Product description Centrifuge 5418 / 5418 R English (EN) 2.3 Features The compact and easy-to-use Centrifuge 5418 / 5418 R has a capacity of 18 x 2 ml and reaches a maximum of 16,873 x g / 14,000 rpm. The microcentrifuge is equipped with an aerosol-tight standard rotor for centrifugation of the following tubes: • Micro test tubes (0.2 to 2.0 ml) • Microtainers (0.6 ml) • Spin columns (1.5/2.0 ml) The Centrifuge 5418 R has an additional temperature control function for centrifugation between 0°C and +40°C. The fast temp function can be used to start a temperature control run without samples to adjust the rotor chamber incl. rotor and adapters quickly to the set target temperature. 2.4 Rotor FA-45-18-11 Before using tubes, observe the manufacturer's recommended specifications on resistance to centrifugation (max. g-force). Max. capacity Max. g-force (rcf) or speed (rpm) without adapter Notes Max. load per rotor bore(1) Acceleration/deceleration time (2) Rotor FA-45-18-11 18 micro test tubes of 1.5/ 2.0 ml each or spin columns. With adapters: • 0.2 mL PCR tubes • 0.4 ml/0.5 ml micro test tubes • 0.6 mL Microtainers 16,873 x g / 14,000 rpm 3.75 g • Aerosol-tight(3) rotor lid (aluminum). 5418: 16 s / 18 s 5418 R: 13 s / 13 s (1) Maximum load per rotor bore for adapter + tube + contents. (2) According to DIN 58 970 (device version: 230 V, 50 to 60 Hz). (3) Aerosol tightness tested and certified by the Centre of Emergency Preparedness and Response, Health Protection Agency, Porton Down (UK) (see certificates at the end of this operating manual). Rotor code: All Eppendorf® rotors are identified using a simple, alphanumeric format that represents the technical specifications in a uniform series of letters and numbers. Fixed-angle rotor F A Aerosol-tight version Angle of bores 45 30 Number of bores Ø of bores (mm) Swing-bucket rotor 11 A Ø of buckets (mm) 4 Number of buckets 81 9 10 Product description Centrifuge 5418 / 5418 R English (EN) 2.4.1 rcf display and calculation Use the rpm/rcf key to switch the display of centrifugation speed between rcf and rpm. Only 5418 R: For speeds ≤ 800 rpm only the lowest adjustable g-force (100 x g) is displayed upon switching. The exact g-force (rcf) can be determined using the formula given below. Ensure that the g-force (rcf) displayed upon switching is standardized to suit the rotor without an adapter. You can achieve the following maximum g-forces (rcf) at maximum speed (rpm) when adapters are used: Adapter Max. centrifugation radius rmax [cm] Max. g-force (rcf) Without adapter 7.7 16,873 for 0.2 mL PCR tubes 5.6 12,271 for 0.4 mL micro test tubes 7.7 16,873 for 0.5 mL micro test tubes 6.6 14,462 for 0.6 mL Microtainers 7.7 16,873 To determine the g-force (rcf) for a special adapter, you can perform a calculation according to DIN 58 970 with the following formula: rcf = 1.118 · 10-5 · n2 · rmax n: Revolutions per minute (rpm) rmax: Max. centrifugation radius in cm Example: The 0.2 ml adapter has a maximum radius of 5.6 cm. At 5,000 rpm a maximum g-force of 1,565 x g is reached. Safety Centrifuge 5418 / 5418 R English (EN) 3 Safety 3.1 Intended use The Centrifuge 5418 / 5418 R is intended exclusively for indoor use and for separating aqueous solutions and suspensions of various densities in approved test tubes. 3.2 User profile This device may only be operated by trained specialist staff. They must have carefully read the operating manual and be familiar with the function of the device. 3.3 Application limits 3.3.1 Declaration concerning the ATEX directive (94/9/EC) DANGER! Risk of explosion. Do not operate the device in areas where work is completed with explosive substances. Do not use this device to process any explosive or highly reactive substances. Do not use this device for processing any substances which could generate an explosive atmosphere. Due to its design and the environmental conditions inside the device, the Centrifuge 5418 / 5418 R is not suitable for use in a potentially explosive atmosphere. The device only must be used in a safe environment, such as the open environment of a ventilated laboratory or fume hood. The use of substances which could create a potentially explosive atmosphere is not permitted. The final decision on the risks associated with the use of these types of substances is the responsibility of the user. 3.3.2 Maximum service life for accessories WARNING! Risk of injury from chemically or mechanically damaged accessories. Even minor scratches and cracks can lead to serious internal material amage. Protect all accessory parts from mechanical damage. Inspect the accessories for damage before each use. Replace any damaged accessories. Do not use rotors or rotor lids with signs of corrosion or mechanical damage (e.g. deformations). Do not use any accessories which are past their use-by date. 11 12 Safety Centrifuge 5418 / 5418 R English (EN) Accessories Maximum service from the first commissioning onward Rotor lid 3 years Requirement: The "click" is still audible when tightening the rotor lid screw. Plastic adapters 1 year For the rotor described there is no limit on the service life as long as the following prerequisites are met: • Proper use, • Recommended maintenance • Undamaged condition The date of manufacture is stamped on the rotors in the format 03/10 (= March 2010). This is for information only and does not have any reference to the service life. To ensure aerosol tightness, the following applies: • Replace aerosol-tight rotor lids and caps after 50 autoclaving cycles. • Replace the seal of QuickLock rotor lids after 50 autoclaving cycles. 3.4 Information on product liability In the following cases, the designated protection of the device may be compromised. Liability for any resulting property damage or personal injury is then transferred to the operator: • • • • • The device is not used in accordance with the operating manual. The device is used outside of its intended use. The device is used with accessories or consumables which are not recommended by Eppendorf. The device is maintained or repaired by people not authorized by Eppendorf. The user makes unauthorized changes to the device. 3.5 Warnings for intended use Read the operating manual and observe the following general safety instructions before using the Centrifuge 5418 / 5418 R. 3.5.1 Personal injury or damage to the equipment WARNING! Electric shock due to damage to device or mains cable. Only switch on the device if the device and mains cable are undamaged. Only use devices that have been properly installed or repaired. In case of danger, disconnect the device from the mains supply by pulling the power plug from the device or the mains socket or, by using the isolating device intended for this purpose (e.g., emergency stop switch in the laboratory). Safety Centrifuge 5418 / 5418 R English (EN) WARNING! Lethal voltages inside the device. Ensure that the housing is always closed and undamaged so that no parts inside the device can be contacted by accident. Do not remove the housing of the device. Do not allow any liquids to penetrate the inside of the housing. Do not allow the device to be opened by anyone except service personnel who have been specifically authorized by Eppendorf. WARNING! Risk from incorrect supply voltage Only connect the device to voltage sources that match the electrical requirements listed on the name plate. Only use sockets with a protective earth (PE) conductor and suitable power cable. WARNING! Damages to health due to infectious liquids and pathogenic germs. When handling infectious liquids and pathogenic germs, observe the national regulations, the biological security level of your laboratory, the material safety data sheets, and the manufacturer's application notes. Use aerosol tight sealing systems for the centrifugation of these substances. When working with pathogenic germs belonging to a higher risk group, more than one aerosol-tight bioseal must be used. Wear personal protective equipment. Consult the "Laboratory Biosafety Manual" (Source: World Health Organization, Laboratory Biosafety Manual, as amended) for comprehensive regulations on the handling of risk group II germs or biological materials). WARNING! Crushing of the fingers with the centrifuge lid. When opening or closing the device lid, do not reach between the lid and device or into the latching mechanism of the lid. Always open the centrifuge lid completely to prevent it from falling. CAUTION! Poor safety due to incorrect accessories and spare parts. The use of accessories and spare parts other than those recommended by Eppendorf may impair the safety, functioning and precision of the device. Eppendorf cannot be held liable or accept any liability for damage resulting from the use of incorrect or non-recommended accessories and spare parts, or from the improper use of such equipment. Only use accessories and original spare parts recommended by Eppendorf. 13 14 Safety Centrifuge 5418 / 5418 R English (EN) NOTICE! Damage to device due to spilled liquids. 1. Switch the device off. 2. Disconnect the device from the power supply. 3. Carefully clean the device and the accessories in accordance with the cleaning and disinfection instructions in the operating manual. 4. If a different cleaning and disinfecting method is to be used, contact Eppendorf AG to ensure that the intended method will not damage the device. NOTICE! Damage to electronic components due to condensation. Condensation can form inside the device after the device has been moved from a cool to a warmer environment. 5418: Wait for at least 3 hours before connecting the device to the power supply. Only 5418: Alternative: Let the device heat up for 30 minutes right before a brief transport. 5418 R: Wait for at least 4 hours before connecting the device to the power supply. 3.5.2 Incorrect handling of the centrifuge NOTICE! Damage from knocking against or moving the device during operation. If the rotor bangs against the rotor chamber wall, it will cause considerable damage to the device and rotor. Do not move or knock against the device during operation. 3.5.3 Incorrect handling of the rotors WARNING! Risk of injury from improperly attached rotors and rotor lids. Only centrifuge with rotor and rotor lid firmly tightened. If unusual noises occur when the centrifuge starts, the rotor or the rotor lid may not be properly secured. Immediately press the start/stop key to stop centrifuging. CAUTION! Risk of injury due to asymmetric loading of a rotor. Load rotors symmetrically with identical tubes. Only load adapters with suitable tubes. Always use the same type of tubes (weight, material/density and volume). Check symmetric loading by balancing the adapters and tubes used with scales. CAUTION! Risk of injury from overloaded rotor. The Centrifuge 5418 / 5418 R is designed for the centrifugation of centrifugation material with a max. density of 1.2 g/mL at maximum speed and volume. Please note the information on each rotor on the maximum load (adapter, tube and contents) per rotor bore and do not exceed it. Safety Centrifuge 5418 / 5418 R English (EN) NOTICE! Damage to rotors from aggressive chemicals. Rotors are high-quality components which withstand extreme stresses. This stability can be impaired by aggressive chemicals. Avoid the use of aggressive chemicals, including strong and weak alkali, strong acids, solutions with mercury, copper and other heavy metal ions, halogenated hydrocarbons, concentrated saline solutions and phenol. Due to the manufacturing process, color variations may occur on rotors marked "coated". These color variations do not effect service life or resistance to chemicals. 3.5.4 Extreme strain on the centrifuging tubes CAUTION! Risk of injury from overloaded tubes. Note the loading limits specified by the tube manufacturer. Only use tubes which are approved by the manufacturer for the required rcf. NOTICE! Risk from damaged tubes. Damaged tubes must not be used, as this could cause further damage to the device and the accessories and loss of the samples. Before use, visually check all of the tubes for damage. NOTICE! Risk from open tube lids. Open tube lids can break off during centrifugation and damage both the rotor and the centrifuge. Carefully seal all tube lids before centrifuging. NOTICE! Hazard to plastic tubes from organic solvents. The density of plastic tubes is reduced when organic solvents (e.g., phenol, chloroform) are used, i.e. the tubes could become damaged. Note the manufacturer’s information on the chemical resistance of the tubes. NOTICE! Sample tubes heat up. In uncooled centrifuges, the temperature in the rotor chamber, rotor and sample can increase to above 40 °C, based on the run time, g-force (rcf)/speed and ambient temperature. Note that this can reduce the centrifugation resistance of the sample tubes. Please note the temperature resistance of the samples. 15 16 Safety Centrifuge 5418 / 5418 R English (EN) 3.5.5 Aerosol-tight centrifugation WARNING! Risk to health due to limited aerosol tightness with incorrect rotor/rotor lid combination. Aerosol-tight centrifugation is guaranteed only if the rotors and rotor lids intended for this purpose are used. For fixed-angle rotors the labeling always begins with FA, swing-bucket rotors are labeled with AT (aerosol tight). The aerosol-tight rotors and rotor lids of this centrifuge are additionally marked with a red ring on the rotor and a red rotor lid screw. For aerosol-tight centrifugation, always simultaneously use rotors and rotor lids which are marked as aerosol-tight in the centrifuge intended for the corresponding purpose. The details specifying in which centrifuge you may use the aerosol-tight rotors and rotor lids can be found on the rotor and, beginning from production date of October 2003, on the upper side of the rotor lid. Only use aerosol-tight rotor lids in combination with rotors which are marked on the rotor lid. WARNING! Health hazard from limited aerosol-tightness due to incorrect use. Autoclaving, mechanical stresses and contamination by chemicals or other aggressive solvents can impair the aerosol-tightness of the rotors and rotor lid. Check the integrity of the seals of the aerosol-tight rotor lids or caps before each use. Only use aerosol-tight rotor lids or caps if the seals are undamaged and clean. Thinly brush the threads of the rotor lid screw with pivot grease (order no. Int. 5810 350.050, North America 022634330). Do not apply the pivot grease to the seals. Replace aerosol-tight rotor lids and caps after 50autoclaving cycles. For QuickLock rotor lids, the seal must be replaced after 50 autoclaving cycles. Never store aerosol-tight rotors or buckets closed. 3.6 Safety instructions located on the device Display Meaning Location Follow the instructions in the operating manual. 5418: Rear of the device 5418 R: Right side of the device CAUTION Top of device, below the Always tighten the rotor using the supplied rotor centrifuge lid key. CAUTION Close all tubes and use a rotor lid. Top of device, below the centrifuge lid Installation Centrifuge 5418 / 5418 R English (EN) 4 Installation 4.1 Selecting the location NOTICE! If an error occurs, the objects in the immediate proximity of the device will be damaged. In accordance with recommendations in EN 61010-2-020, leave a safety clearance of 30 cm around the device during operation. Please remove all materials and objects from this area. NOTICE! Damage from overheating. Do not install the device near to any heat sources (e.g., heating, drying cabinet). Do not expose the device to direct sunlight. Ensure unobstructed air circulation. Keep free a clearance of at least 33 cm around all ventilation grilles. Select the location for the device according to the following criteria: • Suitable power connection as per the name plate (230 V/120 V/100 V). • Stable, horizontal and resonance-free lab bench. Weight of the device: 7.7 kg (5418) or 22 kg (5418 R). • A well ventilated environment which is protected from direct sunlight to prevent the device from heating up more. 4.2 Preparing installation Prerequisites The weight of the Centrifuge 5418 is 7.7 kg or the Centrifuge 5418 R 22 kg. For unpacking and installing the Centrifuge 5418 R, you require the assistance of another person. Perform the following steps in the sequence described. 1. Open the packaging board. 2. Remove the accessories. 3. Lift the Centrifuge 5418 / 5418 R out of the carton. Lift the Centrifuge 5418 R out of the carton with the help of another person. 4. Remove the front and back transport protection pads. 5. Place the device on a suitable lab bench. 6. Remove the plastic sleeve. 17 18 Installation Centrifuge 5418 / 5418 R English (EN) 4.3 Installing the instrument NOTICE! Damage to electronic components due to condensation. Condensation can form inside the device after the device has been moved from a cool to a warmer environment. 5418: Wait for at least 3 hours before connecting the device to the power supply. Only 5418: Alternative: Let the device heat up for 30 minutes right before a brief transport. 5418 R: Wait for at least 4 hours before connecting the device to the power supply. NOTICE! Centrifuge 5418 R: compressor damage after improper transport. Only switch on the centrifuge 4 hours after installation. Perform the following steps in the sequence described. 1. Let the device warm up to ambient temperature. 2. Check that the mains voltage and frequency match the requirements on the device type plate. 3. Connect the centrifuge to the mains and switch it on using the mains/power switch. • Display is active. • Lid opens automatically 4. Loosen and remove the rotor using the supplied rotor key. 5. Remove the transport protection pad from the motor shaft. 6. Use the details included in the scope of delivery to check that the delivery is complete. 7. Check all parts for any transport damage. Contact your dealer if any damage is found. 8. Only 5418 R: Insert the condensation water tray at the side of the device into the holder provided. Retain the packaging material and the transport protection device for subsequent transport or storage. See also the instructions relating to transport. Operation Centrifuge 5418 / 5418 R English (EN) 5 Operation 5.1 Overview of operating controls Familiarize yourself with the operating controls and the display before using the Centrifuge 5418 / 5418 R for the first time. Abb. 5-1: Control panel of Centrifuge 5418 and Centrifuge 5418 R. 1 3 2 5418 5 (1) 5418 R 4 Fig. 5-1: 2 4 (9) 5 9 8 8 6 7 6 3 Control panel of Centrifuge 5418 and Centrifuge 5418 R. 1 Switch the displayed speed of centrifugation (rpm/rcf) 6 Adjust temperature (only 5418 R) 2 Display 7 Start the temperature control run fast temp (only 5418 R) 3 Release lid 8 Short-spin centrifugation 4 Set centrifugation time 9 Start and stop centrifugation Only 5418 R: Press the time dial to start and stop centrifugation. 5 Set speed of centrifugation Only 5418 R: Press the speed dial to switch the displayed centrifugation speed (rpm/rcf). 19 20 Operation Centrifuge 5418 / 5418 R English (EN) Abb. 5-2: Display of Centrifuge 5418 and Centrifuge 5418 R. 1 2 5418 Fig. 5-2: 3 7 1 4 6 5 5418 R 2 8 3 7 Display of Centrifuge 5418 and Centrifuge 5418 R. 1 Centrifugation time 5 Temperature (only 5418 R) 2 g-force (rcf) / speed (rpm) 5418 R: Set value x 1000 6 Status of the key lock (only 5418 R) : Centrifuging parameters cannot be modified unintentionally. : No key lock. 3 Status of centrifuge : Centrifuge lid unlocked. : Centrifuge lid locked. (Flashing): Centrifuging in progress. 7 Status of centrifugation speed display rcf: g-force (relative centrifugal force, RCF) rpm: speed (revolutions per minute) 4 At set rpm (only 5418 R) : Start of run time when reaching 95% of the 8 Status of the loudspeaker (only 5418 R) preset g-force (rcf) / speed (rpm). : Switched on. : Immediate start of run time. No symbol: Switched off. 5.2 Preparing for centrifugation 5.2.1 Switching on the centrifuge 1. Switch on the centrifuge using the mains switch. The centrifuge lid opens automatically after switching on using the mains switch. 2. Open the closed centrifuge lid by pressing the open key. The parameter settings of the last run are displayed. 5.2.2 Inserting the rotor NOTICE! If handled incorrectly, the rotor can fall over. The rotor lid screw may become loose if it is used to retain the rotor. Always grasp the rotor with both hands for holding or transport. 1. Place the rotor on the motor shaft. 2. Insert the delivered rotor key in the rotor nut. 3. Turn rotor key clockwise until the rotor nut is firmly tightened. Operation Centrifuge 5418 / 5418 R English (EN) 5.2.3 Loading the rotor CAUTION! Risk of injury due to asymmetric loading of a rotor. Load rotors symmetrically with identical tubes. Only load adapters with suitable tubes. Always use the same type of tubes (weight, material/density and volume). Check symmetric loading by balancing the adapters and tubes used with scales. CAUTION! Risk from damaged or overloaded tubes. When loading the rotor, observe the safety precautions on dangers as a result of overloaded or damaged tubes (see Warnings for intended use on p. 12). To load the rotor, proceed as follows: 1. Check the maximum load (adapter, tube and contents) per rotor bore. The maximum load is 3.75 g per rotor bore. This information can also be found on the rotor. 2. Load rotors and adapters only with the tubes intended for them. 3. Insert tubes opposite each other in pairs into the rotor bores. For symmetric loading, tubes that face each other must be the same type and have the same filling quantity. To keep the weight differences between the filled tubes low, we recommend taring with a balance. This is gentle on the drive and reduces the operating noises. 5.2.4 Closing the rotor lid With the rotor FA-45-18-11 centrifugation is also possible without a rotor lid. Please also note: • The tube lids must be closed securely. • Without the rotor lid, the rotor is not aerosol-tight. • The centrifugation is slightly louder. • Spin columns must always be centrifuged with a rotor lid. 21 22 Operation Centrifuge 5418 / 5418 R English (EN) 1. Check to see if the outer sealing ring is correctly positioned in the groove. 2. Fit the rotor lid vertically onto the rotor. 3. Lock the rotor by turning the red rotor lid screw clockwise beyond an audible click until it can be turned no further. The rotor is correctly locked after the audible "click" is heard! 5.2.5 Closing the centrifuge lid WARNING! Crushing of the fingers with the centrifuge lid. When opening or closing the device lid, do not reach between the lid and device or into the latching mechanism of the lid. Always open the centrifuge lid completely to prevent it from falling. 1. Check correct attachment of rotor and rotor lid. 2. Push down the centrifuge lid until the lid latch engages and the lid is automatically closed. The centrifuge will close automatically. The display shows the symbol. Only 5418: The open key lights blue. 5.3 Cooling (only 5418 R) 5.3.1 Temperature adjustment Set the temperature using the temp arrow keys from 0°C to +40°C. 5.3.2 Temperature display If the rotor is stopped: During centrifugation: 5.3.3 Set temperature Actual temperature Temperature monitoring After the set temperature has been reached the centrifuge responds as follows to temperature fluctuations during centrifugation: Deviation from the target value Action ΔT > 3°C Temperature display flashes. ΔT > 5°C Periodic warning tone and display Error 18. Centrifugation is stopped automatically. Operation Centrifuge 5418 / 5418 R English (EN) 5.3.4 FastTemp This function can be used to start a temperature control run directly without samples with a rotor and temperature-specific speed in order to quickly adjust the rotor chamber, incl. rotor and adapters, up to the set target temperature. Prerequisites • • • • The centrifuge is switched on. Rotor and rotor lid are correctly mounted. The centrifuge lid is closed. The temperature and g-force (rcf) or speed (rpm) are set for the subsequent centrifugation (see Centrifuging on p. 24). 1. Press the fast temp key. The display shows FT as well as the current temperature and g-force (rcf) or speed (rpm). The cooling time from room temperature (≈23 °C) to 4 °C takes Approx. 16 min. The temperature control cycle ends automatically when the target temperature has been reached. A periodic signal tone sounds. 2. Press the start/stop key to end the temperature control run early. After the set temperature has been reached and the temperature control run is complete, the centrifuge keeps the rotor chamber, with the centrifuge lid closed, at the set temperature, if the temperature is below the ambient temperature. Irrespective of the target temperature, however, this continuous cooling does not go below 4°C to prevent the rotor chamber from freezing. The centrifuge stops the run automatically when the rotor has reached the set temperature. Therefore, there may be a delay between the display of the achieved set temperature and the automatic end of the temperature control run. 5.3.5 Continuous cooling When the rotor is stopped the rotor chamber is kept at the target temperature when the following prerequisites are met: • The centrifuge is switched on. • The centrifuge lid is closed. • The target temperature is below the ambient temperature. During continuous cooling the following applies: • The target temperature is displayed. • Irrespective of the target temperature, continuous cooling does not go below 4°C to prevent the rotor chamber and the samples from freezing and increased condensation in the device. • The temperature adjustment takes longer because the rotor is not rotating. Open the centrifuge lid to end continuous cooling. If the centrifuge is not used for more than 8 hours, the continuous cooling is switched off automatically. This protects against ice formation in the rotor chamber and the tubes, and against increased condensation in the device. The display shows the actual temperature of the rotor chamber. With fast temp you can quickly reach the desired temperature again (see p. 23). 23 24 Operation Centrifuge 5418 / 5418 R English (EN) 5.4 Centrifuging CAUTION! Risk from incorrectly-loaded rotors and damaged/overloaded tubes! Before commencing centrifugation, follow the safety instructions relating to risks from asymmetrically loaded and/or overloaded rotors and from overloaded, damaged and/or open tubes (see Warnings for intended use on p. 12). WARNING! Risk of injury from improperly attached rotors and rotor lids. Only centrifuge with rotor and rotor lid firmly tightened. If unusual noises occur when the centrifuge starts, the rotor or the rotor lid may not be properly secured. Immediately press the start/stop key to stop centrifuging. Before using the Centrifuge 5418 / 5418 R for the first time, familiarize yourself with the operating controls and the display (see Overview of operating controls on p. 19). Each of the centrifuging variants described here must be preceded by the preparation described above (see Preparing for centrifugation on p. 20). Only 5418 R: Please also note the instructions on cooling (see p. 22). 5.4.1 Centrifugation with time setting Perform the following steps in the sequence described. 1. Use time to set the run time. 2. Only 5418 R: Use temp to set the temperature. 3. Use speed to set the g-force (rcf) or speed (rpm). 4. Press start/stop to start centrifuging. During centrifugation: • In the display flashes while the rotor is running. • Only 5418 R: The current temperature will be displayed. • The fast temp (only 5418 R), open and short keys are blocked during centrifugation. • During the run you can modify the total run time, the temperature (only 5418 R), the speed and the rpm/rcf display. Only 5418 R: To change the centrifugation parameters, press the short key first. The values flash in the display during the change. The new parameters are adopted immediately. When the time is changed during a run, the time which has already elapsed is taken into account. Please note that the shortest new total run time that can be set is the elapsed time plus 2 minutes. • You can also terminate the centrifugation before the set run time has elapsed by pressing the start/ stop key. Operation Centrifuge 5418 / 5418 R English (EN) End of centrifugation • The centrifuge automatically stops after the set time has elapsed. The elapsed centrifugation will be shown in a blinking display during the braking process. A signal tone sounds when the rotor is at a standstill. • Only 5418: The centrifuge lid opens automatically. The display shows the symbol . • Only 5418 R: The centrifuge lid remains closed to maintain the sample temperature. You can open it by pressing the open key. 5. Remove the material for centrifuging. 5.4.2 Centrifuging in continuous operation Perform the following steps in the sequence described. 1. Use time to set the continuous run. The continuous run function can be set above 9:59 h or under 30 s (5418) or above 99 min or under 0.5 min (5418 R). The timer shows oo to indicate continuous operation. 2. Only 5418 R: Use the temp arrow keys to adjust the temperature. 3. Use speed to set the g-force (rcf) or speed (rpm). 4. Press start/stop to start centrifuging. In the display flashes while the rotor is running. Time is counted upwards, first in 30-second increments and then in minute increments from ten minutes. 5. Press start/stop to end centrifuging after the desired time period. • The centrifugation time will be shown in a blinking display during the braking process. • A signal tone sounds when the rotor is at a standstill. • Only 5418: The centrifuge lid opens automatically. The display shows the symbol . • Only 5418 R: The centrifuge lid remains closed to maintain the sample temperature. You can open it by pressing the open key. 6. Remove the material for centrifuging. 5.4.3 Short-spin centrifugation 5418: You can carry out a short run with the maximum g-force (rcf) / speed (rpm). 5418 R: You can carry out a short run with the currently set or with the maximum g-force (rcf) / speed (rpm). Set this short spin mode as described in the following section. 5.4.3.1 Selecting short spin mode (only 5418 R) 1. Press the short key while the centrifuge lid is open. The current mode is displayed: • Display 1 – 14 t (run at preselected speed) • Display 14 t (run at maximum speed of 14.000 rpm) 2. When the centrifuge lid is open, press the short key for longer than 2 s to switch between these modes. 25 26 Operation Centrifuge 5418 / 5418 R English (EN) 5.4.3.2 Performing short spin centrifugation 1. Only 5418 R: A short run at preselected g-force (rcf) or speed (rpm) can be set directly using the speed dial. 2. Only 5418 R: Use the temp arrow keys to adjust the temperature. 3. Start short run: Hold down the short key. • In the display flashes while the rotor is running. • The time is counted upwards in seconds. • During short run centrifuging all other keys are blocked. 4. End short run: Release the short key. • The centrifugation time will be shown in a blinking display during the braking process. • Only 5418: The centrifuge lid opens automatically. The display shows the symbol . • Only 5418 R: The centrifuge lid remains closed to maintain the sample temperature. You can open it by pressing the open key. 5. Remove the material for centrifuging. During the braking process, you can restart the centrifugation up to two times by pressing the short key again. 5.4.4 Removing the rotor 1. Turn the rotor nut counterclockwise using the supplied rotor key. 2. Remove the rotor vertically in an upward motion. 3. Only 5418 R: Switch off the centrifuge after use and empty the condensation water tray (pull out from the left or right side of the device). Leave the centrifuge lid fully open and secure it against closing. 5.5 Standby mode (only 5418) If the centrifuge has not been used for 15 min, it switches to standby mode. The EP logo then appears in the display. When a button or knob is used or the centrifuge lid is closed, the centrifuge is reactivated and ready for operation. 5.6 Special functions (only 5418 R) Function Status of centrifuge lid Press > 2 s key Display Flashes 5 s Modify parameter during the cycle. closed short key Enable/disable signal tone. open open Enable/disable key lock. open short + open At set rpm open time / / Maintenance Centrifuge 5418 / 5418 R English (EN) 6 Maintenance 6.1 Prepare cleaning/disinfection The procedure described in the following chapter applies to the cleaning as well as to the disinfection or decontamination. The table below describes the steps required on top of this: Cleaning Disinfecting/decontamination 1. Use a mild cleaning fluid to clean the accessible 1. Choose the disinfection method which surfaces of the device and the accessories. corresponds to the legal regulations and 2. Carry out the cleaning as described in the guidelines in place for your range of application. following chapter. For example, use alcohol (ethanol, isopropanol) or alcohol-based disinfectants. 2. Carry out the disinfection or decontamination as described in the following chapter. 3. Then clean the device and the accessories. If you have any further questions regarding the cleaning and disinfection or decontamination or regarding the cleaning fluid to be used, contact the Eppendorf AG Application Support. The contact details are provided on the back of this manual. 6.2 Cleaning/disinfection DANGER! Electric shock as a result of penetration of liquid. Switch off the device and disconnect the power plug before starting cleaning or disinfection work. Do not allow any liquids to penetrate the inside of the housing. Do not spray clean/spray disinfect the housing. Only plug the device back in if it is completely dry, both inside and outside. NOTICE! Damage from the use of aggressive chemicals. Do not use any aggressive chemicals on the device or its accessories, such as strong and weak bases, strong acids, acetone, formaldehyde, halogenated hydrocarbons or phenol. If the device has been contaminated by aggressive chemicals, immediately clean it by means of a mild cleaning agent. NOTICE! Corrosion from aggressive cleaning agents and disinfectants. Do not use corrosive cleaning agents, aggressive solvents or abrasive polishes. Do not incubate the accessories in aggressive cleaning agents or disinfectants for a longer period of time. 27 28 Maintenance Centrifuge 5418 / 5418 R English (EN) NOTICE! Damage from UV and other high-energy radiation. Do not use UV, beta, gamma, or any other high-energy radiation for disinfecting. Avoid storage in areas with strong UV radiation Autoclaving Rotors, rotor lids and adapters can be autoclaved (121 °C, 20 min). Replace the sealing ring in the lid groove of the aerosol-tight rotor lid after a maximum of 50 autoclaving cycles. Aerosol tightness Check that the seals are intact before use. Only QuickLock rotor lid: Replace the sealing ring in the lid groove when it becomes worn. The sealing rings require regular care to protect the rotors. Aerosol-tight rotors should never be stored with lids screwed on! In order to prevent damage, lightly lubricate the lid thread of the aerosol-tight rotors with pivot grease (order no. Int.: 5810 350.050/North America: 022634330). 6.2.1 Cleaning and disinfecting the device 1. Open the lid. Switch off the device with the mains/power switch. Disconnect the power plug from the power supply. 2. Loosen the rotor nut by turning the rotor key counterclockwise. 3. Remove the rotor. 4. Clean and disinfect all accessible surfaces of the device, including the power cable, using a damp cloth and the recommended cleaning agents. 5. Thoroughly clean the rubber seals of the rotor chamber with water. 6. Rub the dry rubber seals with glycerine or talcum powder to prevent them from becoming brittle. Other components of the device, such as the lid latch, motor shaft and rotor cone, must not be lubricated. 7. Clean the motor shaft with a soft, dry and lint-free cloth. Do not lubricate the motor shaft. 8. Check the motor shaft for damage. 9. Inspect the device for corrosion and damage. 10. Leave the centrifuge lid open when the device is not being used. 11. Only connect the device to the power supply if it is fully dry inside and out. 6.2.2 Cleaning and disinfecting the rotor 1. Inspect the rotor and accessories for damage and corrosion. Do not use any damaged rotors or accessories. 2. Clean and disinfect the rotors and accessories with the recommended cleaning agents. 3. Use a bottle brush to clean and disinfect the rotor bores. 4. Remove the sealing ring to clean and disinfect the rotor lid. Clean the groove below it and the sealing ring. Maintenance Centrifuge 5418 / 5418 R English (EN) 5. Rinse the rotors and accessories thoroughly with distilled water. Rinse the rotor bores of fixed-angle rotors particularly thoroughly. Do not immerse the rotor in liquid as liquid can get trapped inside the cavities. 6. Place rotors and accessories on a cloth to dry. Place fixed-angle rotors with the rotor bores facing downwards to allow the bores to also dry. 7. Correctly reinsert the rotor lid sealing ring in the clean and dry groove. 8. Clean the rotor cone with a soft, dry and lint-free cloth. Do not lubricate the rotor cone. 9. Inspect the rotor cone for damage. 10. Place the dry rotor onto the motor shaft. 11. Tighten the rotor nut firmly by turning it clockwise with the rotor key. 12. Leave the rotor lid open when the rotor is not being used. 6.3 Additional service instructions for Centrifuge 5418 R Empty and clean the condensation water tray regularly and especially after liquid spillage in the rotor chamber. Pull out the condensation water tray from the left or right side of the centrifuge. Regularly free the rotor chamber ice formations via thawing, by leaving the centrifuge lid open or carrying out a short temperature control run at approx. 30 °C. Leave the centrifuge lid open when not in use for a long period. Wipe up condensate in the rotor chamber using a soft, absorbent cloth. Remove dust deposits from the ventilation slits of the centrifuge using a brush or swab at the latest every six months. First switch off the device and remove the power plug. 6.4 Glass breakage When using glass tubes there is a risk of glass breakage in the rotor chamber. The resulting glass splinters are swirled around in the rotor chamber during centrifugation and have a sandblasting effect on the rotor and accessories. The smallest glass particles become lodged in the rubber parts (e.g., the motor guide, the rotor chamber gasket, and the rubber mats of adapters). 29 30 Maintenance Centrifuge 5418 / 5418 R English (EN) NOTICE! Glass breakage in the rotor chamber Glass tubes in the rotor chamber may break if the g-force is too high. Broken glass can damage the rotor, accessories and samples. Please note the manufacturer's information on the recommended centrifugation parameters (load and speed). Effects of glass breakage in the rotor chamber: • Fine black metal abrasion in the rotor chamber (in metal rotor chambers) • The surfaces of the rotor chamber and accessories are scratched. • The chemical resistance of the rotor chamber is reduced. • Contamination of samples • Wear on rubber parts How to proceed in case of glass breakage 1. Remove all splinters and glass powder from the rotor chamber and accessories. 2. Thoroughly clean the rotor and rotor chamber. Thoroughly clean the bores of the fixed-angle rotors, in particular. 3. If required, replace the adapters to prevent any further damage. 4. Regularly check the rotor bores for deposits and damage. 6.5 Fuses The fuse holder is located under the mains power socket (5418) or on the left next to the mains switch (5418 R). 1. Disconnect the mains plug. 2. Remove the fuse holder. Both fuses are now accessible and can be replaced. 6.6 Decontamination before shipment If you are shipping the device to the authorized Technical Service for repairs or to your authorized dealer for disposal please note the following: WARNING! Risk to health from contaminated device 1. Observe the notes on the decontamination certificate. You find it as a PDF file on our website (www.eppendorf.com/decontamination). 2. Decontaminate all the parts you would like to dispatch. 3. Include the fully completed decontamination certificate in the package. Troubleshooting Centrifuge 5418 / 5418 R English (EN) 7 Troubleshooting If you cannot remedy an error with the recommended measures, please contact your local Eppendorf partner. The contact address can be found online at: www.eppendorf.com/worldwide. 7.1 General errors Symptom/message Cause Remedy No display. No power connection. Check mains/power connection. No display. Power failure. Check the mains fuse of the device (see Fuses on p. 30). Check the mains fuse of the laboratory. Lid of the device cannot be opened. Rotor is still running. Wait for rotor to stop. Lid of the device cannot be opened. Power failure. 1. Check the mains fuse of the device (see Fuses on p. 30). 2. Check the mains fuse of the laboratory. 3. Activate the emergency lid release (see p. 33). Device cannot be started. Lid of the device is not closed. Close device lid. Device shakes when it starts up. Rotor loaded unsymmetrically. 1. Stop the device and load symmetrically. 2. Restart device. Centrifuge brakes during a short run centrifugation, although the short key is pressed. The short key was released briefly more than twice (protective function for the drive). Press the short key continuously Temperature display flashes. (only for 5418 R) Temperature deviation from the set value: ±3 °C. Check the settings. Wait until the set temperature has during a short run centrifugation. been reached. Check unhindered air circulation through the air slots. Thaw ice or switch off device and allow it to cool down. 31 32 Troubleshooting Centrifuge 5418 / 5418 R English (EN) 7.2 Error messages If one of the following error messages appears, proceed as follows: 1. Remove fault (see Remedies). 2. If necessary, repeat centrifugation. Symptom/message Cause Remedy LID ERROR (5418)/ Centrifuge lid cannot be locked. LID (5418 R) Try again to close centrifuge lid. LID ERROR (5418)/ Centrifuge lid cannot be released. LID (5418 R) 1. Switch the centrifuge off and back on. 2. Press the open key. If the error occurs again: 1. Switch off centrifuge. 2. Activate the emergency lid release (see Emergency lid release on p. 33). LID ERROR (5418)/ Centrifuge lid must not be released LID (5418 R) during a run. Wait for rotor to stop. INT Mains/power failure during a run. Check the mains connection. NO RPM (5418)/ Error 3 (5418 R) Error in the speed measuring system or drive overheated. Leave the device switched on until the Error 5 (only for 5418 R) Prohibited opening of lid or lid switch is defective during a run. 1. Wait for rotor to stop. 2. Open and close again the lid of the device. 3. Repeat the run. Err 6 (5418)/ Error 6 (5418 R) Drive fault. Repeat the run. If this error message appears again, error message disappears (10 s or 6 min). switch centrifuge off and back on again after > 20 s. Allow the drive to cool down for at Error 6 (only for 5418 R) Drive overheated. Err 7 (5418)/ Error 7 (5418 R) Major deviation in the speed control. 1. Wait for rotor to stop. 2. Tighten rotor. Err 8 (5418)/ Error 8 (5418 R) Drive fault. 1. Wait for rotor to stop. 2. Repeat the run. least 15 min. Err 9 to 17 (5418)/ Electronics error. Error 9 to 17 (5418 R) Switch centrifuge off and back on Error 18 (only for 5418 R) Check the settings. Check unhindered air circulation Too high temperature deviation from set value in the rotor chamber. again after > 20 s. through the air slots. Thaw ice or switch off device and allow it to cool down. Troubleshooting Centrifuge 5418 / 5418 R English (EN) Symptom/message Cause Remedy Error 19 (only for 5418 R Cooling circuit is overheated. Check unhindered air circulation Error 20 (only for 5418 R) Temperature sensor in rotor chamber is faulty. Switch centrifuge off and back on Error 21 (only for 5418 R) Temperature sensor on condenser is faulty. Switch centrifuge off and back on Error 24 (only for 5418 R) Cooling unit fault, e.g. overheated. Allow the centrifuge to cool down and 7.3 through the air slots and allow device to cool down. again after > 20 s. again after > 20 s. repeat the run. Emergency lid release If the centrifuge lid cannot be opened, the emergency lid release can be operated manually. WARNING! Risk of injury from rotating rotor. Wait until the rotor has come to a standstill before you operate the emergency release. To check, look through the inspection glass in the centrifuge lid. 7.3.1 Centrifuge 5418 1. Disconnect the mains plug. 2. Open the plastic cover of the emergency lid release. This is located behind the front left device foot in the base plate (Fig. 2-1 on p. 7). 3. Pull the cord vertically downwards. The centrifuge lid is unlocked. 4. Before closing the centrifuge lid again: push the cord completely into the housing and insert the plastic cover in the base plate. 7.3.2 Centrifuge 5418 R 1. Disconnect the mains plug. 2. Turn the plastic cover of the emergency lid release anti-clockwise by 90° with a suitable tool (e.g. screwdriver), and remove it. The plastic cover is located on the right side of the device (Fig. 2-2 on p. 7). 3. Insert the centrifuge rotor key into the hexagonal opening at rear until some resistance can be felt. 4. Press the rotor key slightly down, and turn it clockwise. This will release the centrifuge lid. 5. Open the centrifuge lid. 6. Remove the rotor key and put the plastic cover back on rotating it 90° clockwise. 33 34 Troubleshooting Centrifuge 5418 / 5418 R English (EN) Transport, storage and disposal Centrifuge 5418 / 5418 R English (EN) 8 Transport, storage and disposal 8.1 Transport CAUTION! Bodily injury due to lifting and carrying heavy loads The device is heavy. Lifting and carrying the device can lead to back injuries. The device must be transported by least two people. Use a transport aid (e.g., dolly) to transport the device longer distances. Remove the rotor from the centrifuge before transport. Use the original packaging for transport. Air temperature Relative humidity Atmospheric pressure General transport -25 °C – 60 °C 10 % – 75 % 30 kPa – 106 kPa Air freight -20 °C – 55 °C 10 % – 75 % 30 kPa – 106 kPa Air temperature Relative humidity Atmospheric pressure In transport packaging -25 °C – 55 °C 10 % – 75 % 70 kPa – 106 kPa Without transport packaging -5 °C – 45 °C 10 % – 75 % 70 kPa – 106 kPa 8.2 8.3 Storage Disposal In case the product is to be disposed of, the relevant legal regulations are to be observed. Information on the disposal of electrical and electronic devices in the European Community: Within the European Community, the disposal of electrical devices is regulated by national regulations based on EU Directive 2002/96/EC pertaining to waste electrical and electronic equipment (WEEE). According to these regulations, any devices supplied after August 13, 2005, in the business-to-business sphere, to which this product is assigned, may no longer be disposed of in municipal or domestic waste. To document this, they have been marked with the following identification: Because disposal regulations may differ from one country to another within the EU, please contact your supplier if necessary. 35 36 Transport, storage and disposal Centrifuge 5418 / 5418 R English (EN) Technical data Centrifuge 5418 / 5418 R English (EN) 9 Technical data 9.1 Power supply Centrifuge 5418 Mains connection 230 V, 50 Hz – 60 Hz 120 V, 50 Hz – 60 Hz 100 V, 50 Hz – 60 Hz Current consumption 1.4 A (230 V ) 2.8 A (120 V ) 3.4 A (100 V ) Power consumption Maximum 170 W EMC: Interference emission. (radio interference) EN 61326 – Class B (230 V) FCC15 - Class A (120 V/100 V) EMC: Noise immunity EN 61326 Overvoltage category II Fuses 2.5 AT (230 V) 5.0 AT (120 V / 100 V) Degree of pollution 2 Centrifuge 5418 R Mains connection 230 V, 50 Hz – 60 Hz 120 V, 50 Hz – 60 Hz 100 V, 50 Hz – 60 Hz Current consumption 1.4 A (230 V) 2.8 A (120 V) 3.0 A (100 V) Power consumption Maximum 320 W EMC: Interference emission. (radio interference) EN 61326 – Class B (230 V) FCC15 - Class A (120 V/100 V) EMC: Noise immunity EN 61326 Overvoltage category II Fuses 2.5 AT (230 V) 6.25 AT (120 V / 100 V) Degree of pollution 2 37 38 Technical data Centrifuge 5418 / 5418 R English (EN) 9.2 Ambient conditions Environment: Only for use indoors. Ambient temperature: Centrifuge 5418: 2 °C to 40 °C Centrifuge 5418 R: 15 °C to 35 °C Max. relative humidity: 75 %, non-condensing humidity. Atmospheric pressure: Use up to an altitude of 2 000 m above MSL. Degree of pollution: 2 9.3 Weight/dimensions Tab. 9-1: Centrifuge 5418 Dimensions: Width: 208 cm (8.19 in) Depth: 300 cm (11.8 in) Height: 210 cm (8.27 in) Weight without rotor: 7.7 kg Noise level: < 51 dB (A) * Tab. 9-2: Centrifuge 5418 R Dimensions: Width: 298 cm (11.73 in) Depth: 463 cm (18.23 in) Height: 463 cm (18.23 in) Weight without rotor: 22 kg Noise level: < 57 dB (A) * *) The noise level was measured according to DIN EN ISO 3745 frontally in a sound measuring room with accuracy class 1 at a distance of 1 m from the device and at lab bench height. Technical data Centrifuge 5418 / 5418 R English (EN) 9.4 Application parameters Start and stop times according to DIN 58 970 Rotor FA-45-18-11 5418 5418 R Voltage Acceleration times Deceleration times Voltage Acceleration times Deceleration times 230 V 120 V 100 V 16 s 16 s 18 s 18 s 18 s 18 s 230 V 120 V 100 V 13 s 13 s 13 s 13 s 13 s 13 s These values were calculated at 23°C. run time (5418) 30 s to 9:59 h, as well as infinity (oo), Adjustable to 10 min in 30 s increments, then increments of 1 min run time (5418 R) 0.5 min to 99 min, as well as infinity (oo), Adjustable to 10 min in 0.5 min increments, then increments of 1 min Temperature (only 5418 R) 0°C to 40°C Relative centrifugal force (RCF) 1 to 16,873 x g adjustable to 5000 × g in 100 x g increments, then increments of 200 × g. RPM 100 to 14,000 rpm adjustable in 100 rpm increments Maximum load 18 micro test tubes of 2.0 mL each. Max. kinetic energy 2,600 Nm Test log mandatory: No Allowable density of the centrifuge material (at maximum g-force (rcf)/speed (rpm) and maximum load) 1.2 g/mL 39 40 Technical data Centrifuge 5418 / 5418 R English (EN) Ordering information Centrifuge 5418 / 5418 R English (EN) 10 Ordering information 10.1 Centrifuge 5418 Order no. (International) 5418 000.017 - 10.2 022620321 022620304 Description Centrifuge 5418 with rotor FA-45-18-11 incl. rotor lid 230 V / 50 – 60 Hz 120 V / 50 – 60 Hz, with US-plug Centrifuge 5418 R Order no. (International) 5401 000.013 - 10.3 Order no. (North America) Order no. (North America) 5401000013 5401000137 Description Centrifuge 5418 R with rotor FA-45-18-11 incl. rotor lid 230 V / 50 Hz 120 V / 50 – 60 Hz, with US-plug Accessories Order no. (International) Order no. (North America) 5418 707.005 022652061 5418 708.001 022652087 5418 709.008 022652109 5425 715.005 5425 717.008 5425 716.001 022636260 022636243 022636227 5416 301.001 022634305 5401 850.076 5401850076 Description Rotor FA-45-18-11 aerosol-tight, angle 45°, 18 places, max. tube diameter 11 mm, incl. rotor lid (aluminum) Rotor lid for FA-45-18-11 aerosol-tight, aluminum Seal for rotor lid FA-45-18-11 and FA-45-6-30 5 pieces Adapter used in FA-45-18-11 for 1 PCR tube (0.2 mL, max. Ø 6 mm), set of 6 for 1 sample tube (0.4 mL, max. Ø 6 mm), set of 6 for 1 sample tube (0.5 mL, max. Ø 6 mm) or 1 Microtainer (0.6 mL, max. Ø 8 mm), set of 6 Rotor key Standard Tray for condensation water *) Aerosol impermeability tested and certified by the Centre of Emergency Preparedness and Response, Health Protection Agency, Porton Down (UK). 41 42 Ordering information Centrifuge 5418 / 5418 R English (EN) 10.4 Fuses 10.4.1 Fuses for Centrifuge 5418 Order no. (International) Order no. (North America) 5425 351.003 5425 353.006 022668188 022668226 10.4.2 Description Fuse 2.5 A T (230 V), set of 2 5 A T (120 V), UL, set of 2 Fuses for Centrifuge 5418 R Order no. (International) Order no. (North America) 5425 351.003 5426 355.100 022668188 022668200 Description Fuse 2.5 A T (230 V), set of 2 6.25 AT (100 V/120 V), set of 2 Indice Centrifuge 5418 / 5418 R Italiano (IT) Indice Tab. Istruzioni Centrifuge vedi Fig. a pag. per 5418 l'uso / 5418 R Italiano Istruzioni (IT) per l'uso 1 Descrizione del prodotto . . . . . . . . . . . . . . . . . . . . . . . . . . . . . . . . . . . . . . . . . . . . . . . . . . . . . . . . . . . 45 1.1 Illustrazione generale . . . . . . . . . . . . . . . . . . . . . . . . . . . . . . . . . . . . . . . . . . . . . . . . . . . . . . . . . 45 1.2 Rotore FA-45-18-11. . . . . . . . . . . . . . . . . . . . . . . . . . . . . . . . . . . . . . . . . . . . . . . . . . . . . . . . . . . 46 2 Avvertenze di sicurezza generali . . . . . . . . . . . . . . . . . . . . . . . . . . . . . . . . . . . . . . . . . . . . . . . . . . . . 47 2.1 Impiego delle presenti istruzioni . . . . . . . . . . . . . . . . . . . . . . . . . . . . . . . . . . . . . . . . . . . . . . . . 47 2.2 Uso conforme . . . . . . . . . . . . . . . . . . . . . . . . . . . . . . . . . . . . . . . . . . . . . . . . . . . . . . . . . . . . . . . 47 2.3 Richiesta all'utente . . . . . . . . . . . . . . . . . . . . . . . . . . . . . . . . . . . . . . . . . . . . . . . . . . . . . . . . . . . 47 2.4 Limiti di applicazione . . . . . . . . . . . . . . . . . . . . . . . . . . . . . . . . . . . . . . . . . . . . . . . . . . . . . . . . . 47 2.4.1 Nota sulla direttiva ATEX (94/9/CE) . . . . . . . . . . . . . . . . . . . . . . . . . . . . . . . . . . . . . . . 47 2.4.2 Durata massima d'impiego degli accessori. . . . . . . . . . . . . . . . . . . . . . . . . . . . . . . . . . 48 2.5 Note sulla responsabilità da prodotto . . . . . . . . . . . . . . . . . . . . . . . . . . . . . . . . . . . . . . . . . . . . . 48 2.6 Pericoli in caso di uso conforme . . . . . . . . . . . . . . . . . . . . . . . . . . . . . . . . . . . . . . . . . . . . . . . . . 49 2.6.1 Danni alle persone o all'apparecchio . . . . . . . . . . . . . . . . . . . . . . . . . . . . . . . . . . . . . . 49 2.6.2 Uso errato della centrifuga . . . . . . . . . . . . . . . . . . . . . . . . . . . . . . . . . . . . . . . . . . . . . . 50 2.6.3 Uso errato dei rotori . . . . . . . . . . . . . . . . . . . . . . . . . . . . . . . . . . . . . . . . . . . . . . . . . . . 50 2.6.4 Sollecitazione eccessiva delle provette durante la centrifugazione . . . . . . . . . . . . . . . 51 2.6.5 Centrifugazione a tenuta di aerosol . . . . . . . . . . . . . . . . . . . . . . . . . . . . . . . . . . . . . . . 52 2.7 Avvertenze di sicurezza sull'apparecchio . . . . . . . . . . . . . . . . . . . . . . . . . . . . . . . . . . . . . . . . . . 53 3 Installazione . . . . . . . . . . . . . . . . . . . . . . . . . . . . . . . . . . . . . . . . . . . . . . . . . . . . . . . . . . . . . . . . . . . . . 55 3.1 Scelta dell'ubicazione . . . . . . . . . . . . . . . . . . . . . . . . . . . . . . . . . . . . . . . . . . . . . . . . . . . . . . . . . 55 3.2 Installazione dell'apparecchio. . . . . . . . . . . . . . . . . . . . . . . . . . . . . . . . . . . . . . . . . . . . . . . . . . . 55 4 Uso. . . . . . . . . . . . . . . . . . . . . . . . . . . . . . . . . . . . . . . . . . . . . . . . . . . . . . . . . . . . . . . . . . . . . . . . . . . . . 57 4.1 Panoramica elementi di comando. . . . . . . . . . . . . . . . . . . . . . . . . . . . . . . . . . . . . . . . . . . . . . . . 57 4.2 Preparazione della centrifugazione. . . . . . . . . . . . . . . . . . . . . . . . . . . . . . . . . . . . . . . . . . . . . . . 58 4.2.1 Accensione della centrifuga . . . . . . . . . . . . . . . . . . . . . . . . . . . . . . . . . . . . . . . . . . . . . 58 4.2.2 Inserimento del rotore. . . . . . . . . . . . . . . . . . . . . . . . . . . . . . . . . . . . . . . . . . . . . . . . . . 58 4.2.3 Caricamento del rotore . . . . . . . . . . . . . . . . . . . . . . . . . . . . . . . . . . . . . . . . . . . . . . . . . 59 4.2.4 Chiusura del coperchio del rotore. . . . . . . . . . . . . . . . . . . . . . . . . . . . . . . . . . . . . . . . . 59 4.2.5 Chiusura del coperchio della centrifuga . . . . . . . . . . . . . . . . . . . . . . . . . . . . . . . . . . . . 59 4.3 Raffreddamento (solo 5418 R) . . . . . . . . . . . . . . . . . . . . . . . . . . . . . . . . . . . . . . . . . . . . . . . . . . 59 4.3.1 Impostazione della temperatura . . . . . . . . . . . . . . . . . . . . . . . . . . . . . . . . . . . . . . . . . . 59 4.3.2 Indicazione della temperatura. . . . . . . . . . . . . . . . . . . . . . . . . . . . . . . . . . . . . . . . . . . . 60 4.3.3 Monitoraggio della temperatura . . . . . . . . . . . . . . . . . . . . . . . . . . . . . . . . . . . . . . . . . . 60 4.3.4 FastTemp . . . . . . . . . . . . . . . . . . . . . . . . . . . . . . . . . . . . . . . . . . . . . . . . . . . . . . . . . . . . 60 4.3.5 Raffreddamento permanente . . . . . . . . . . . . . . . . . . . . . . . . . . . . . . . . . . . . . . . . . . . . 61 4.4 Centrifugazione . . . . . . . . . . . . . . . . . . . . . . . . . . . . . . . . . . . . . . . . . . . . . . . . . . . . . . . . . . . . . . 61 4.4.1 Centrifugazione e impostazione del tempo. . . . . . . . . . . . . . . . . . . . . . . . . . . . . . . . . . 62 4.4.2 Altre possibilità di centrifugazione . . . . . . . . . . . . . . . . . . . . . . . . . . . . . . . . . . . . . . . . 62 4.4.3 Rimozione del rotore . . . . . . . . . . . . . . . . . . . . . . . . . . . . . . . . . . . . . . . . . . . . . . . . . . . 63 4.5 Modalità Standby (solo 5418) . . . . . . . . . . . . . . . . . . . . . . . . . . . . . . . . . . . . . . . . . . . . . . . . . . . 63 4.6 Funzioni speciali (solo 5418 R) . . . . . . . . . . . . . . . . . . . . . . . . . . . . . . . . . . . . . . . . . . . . . . . . . . 63 43 44 Indice Centrifuge 5418 / 5418 R Italiano (IT) 5 Manutenzione . . . . . . . . . . . . . . . . . . . . . . . . . . . . . . . . . . . . . . . . . . . . . . . . . . . . . . . . . . . . . . . . . . . . 65 5.1 Preparazione per la pulizia/disinfezione . . . . . . . . . . . . . . . . . . . . . . . . . . . . . . . . . . . . . . . . . . . 65 5.2 Esecuzione della pulizia/disinfezione . . . . . . . . . . . . . . . . . . . . . . . . . . . . . . . . . . . . . . . . . . . . . 65 5.2.1 Pulizia e disinfezione dell'apparecchio . . . . . . . . . . . . . . . . . . . . . . . . . . . . . . . . . . . . . 66 5.2.2 Pulizia e disinfezione del rotore . . . . . . . . . . . . . . . . . . . . . . . . . . . . . . . . . . . . . . . . . . 66 5.3 Ulteriori indicazioni sulla cura dell'apparecchio per Centrifuga 5418 R . . . . . . . . . . . . . . . . . . 67 5.4 Rottura di parti in vetro. . . . . . . . . . . . . . . . . . . . . . . . . . . . . . . . . . . . . . . . . . . . . . . . . . . . . . . . 67 5.5 Fusibili. . . . . . . . . . . . . . . . . . . . . . . . . . . . . . . . . . . . . . . . . . . . . . . . . . . . . . . . . . . . . . . . . . . . . 68 5.6 Decontaminazione prima della spedizione . . . . . . . . . . . . . . . . . . . . . . . . . . . . . . . . . . . . . . . . . 68 6 Risoluzione dei problemi . . . . . . . . . . . . . . . . . . . . . . . . . . . . . . . . . . . . . . . . . . . . . . . . . . . . . . . . . . . 69 6.1 Anomalie generiche . . . . . . . . . . . . . . . . . . . . . . . . . . . . . . . . . . . . . . . . . . . . . . . . . . . . . . . . . . 69 6.2 Messaggi di anomalia . . . . . . . . . . . . . . . . . . . . . . . . . . . . . . . . . . . . . . . . . . . . . . . . . . . . . . . . . 70 6.3 Sblocco di emergenza del coperchio . . . . . . . . . . . . . . . . . . . . . . . . . . . . . . . . . . . . . . . . . . . . . 72 6.3.1 Centrifuga 5418. . . . . . . . . . . . . . . . . . . . . . . . . . . . . . . . . . . . . . . . . . . . . . . . . . . . . . . 72 6.3.2 Centrifuga 5418 R . . . . . . . . . . . . . . . . . . . . . . . . . . . . . . . . . . . . . . . . . . . . . . . . . . . . . 72 7 Trasporto, immagazzinamento e smaltimento . . . . . . . . . . . . . . . . . . . . . . . . . . . . . . . . . . . . . . . . . . 73 7.1 Trasporto . . . . . . . . . . . . . . . . . . . . . . . . . . . . . . . . . . . . . . . . . . . . . . . . . . . . . . . . . . . . . . . . . . . 73 7.2 Immagazzinamento . . . . . . . . . . . . . . . . . . . . . . . . . . . . . . . . . . . . . . . . . . . . . . . . . . . . . . . . . . . 73 7.3 Smaltimento . . . . . . . . . . . . . . . . . . . . . . . . . . . . . . . . . . . . . . . . . . . . . . . . . . . . . . . . . . . . . . . . 73 Descrizione del prodotto Centrifuge 5418 / 5418 R Italiano (IT) 1 1.1 Descrizione del prodotto Illustrazione generale Abb. 1-1: Vista anteriore e posteriore della Centrifuga 5418 1 2 1 2 3 4 6 7 8 9 5 Fig. 1-1: Vista anteriore e posteriore della Centrifuga 5418 Abb. 1-2: Vista anteriore e posteriore della Centrifuga 5418 R 1 2 1 2 5 3 4 6 9 10 10 7 8 Fig. 1-2: Vista anteriore e posteriore della Centrifuga 5418 R 1 Coperchio della centrifuga 6 Targhetta 2 Vetro di ispezione 7 Interruttore di rete Ispezione visiva dell'arresto del rotore oppure Interruttore per l'accensione e lo spegnimento possibilità di controllare la velocità mediante uno dell'apparecchio. stroboscopio. Posizione 0: l'apparecchio è spento. Posizione I: l'apparecchio è acceso. 3 Display Rappresentazione dei parametri di 8 Alimentazione elettrica centrifugazione in uso e delle impostazioni Spina per il cavo di rete incluso. dell'apparecchio . 9 Portafusibili 4 Pannello di controllo 10 Vaschetta raccoglicondensa (solo Centrifuga Per l'azionamento della centrifuga . 5418 R) 5 Sblocco di emergenza del coperchio 45 46 Descrizione del prodotto Centrifuge 5418 / 5418 R Italiano (IT) 1.2 Rotore FA-45-18-11 Prima dell'utilizzo di provette di reazione, prestare attenzione alle specifiche raccomandate dai produttori per la resistenza alla centrifugazione (valore g max.). Capacità max. Valore g (rcf) / numero di giri (rpm) senza adattatore Note Carico max. per alesaggio rotore(1) Tempo di avvio / arresto (2) Rotore FA-45-18-11 18 provette di reazione da 1,5/ 2,0 ml o Spin column. Con adattatore: • Provette PCR 0,2 ml • Provette di reazione da 0,4 ml/0,5 ml • Microtainer 0,6 ml 16.873 x g / 3,75 g 14.000 giri/ min • Guarnizione a tenuta di aerosol (3) coperchio del rotore (alluminio). 5418: 16 s / 18 s 5418 R: 13 s / 13 s (1) Carico massimo per alesaggio rotore per adattatore + recipiente + contenuto. (2) Secondo DIN 58 970 (versione dell'apparecchio: 230 V, da 50 a 60 Hz). (3) Tenuta anti-aerosol controllata e certificata da Centre of Emergency Preparedness and Response, Health Protection Agency, Porton Down (UK) (vedi certificati alla fine delle presenti istruzioni per l'uso). Rotor code: All Eppendorf® rotors are identified using a simple, alphanumeric format that represents the technical specifications in a uniform series of letters and numbers. Fixed-angle rotor F A Aerosol-tight version Angle of bores 45 30 Number of bores Ø of bores (mm) Swing-bucket rotor 11 A Ø of buckets (mm) 4 Number of buckets 81 Avvertenze di sicurezza generali Centrifuge 5418 / 5418 R Italiano (IT) 2 2.1 Avvertenze di sicurezza generali Impiego delle presenti istruzioni Prima di mettere in funzione l'apparecchio per la prima volta, leggere le presenti istruzioni per l'uso. Se necessario, attenersi alle istruzioni per l'uso degli accessori. Inoltre, nella versione inglese e tedesca delle presenti istruzioni d'uso è contenuta una descrizione dettagliata dell'apparecchio. Sempre nella versione inglese e tedesca sono riportati i dati tecnici e le informazioni per l'ordine. Le presenti istruzioni per l'uso fanno parte del prodotto e vanno conservate in un punto facilmente raggiungibile. Accludere sempre il manuale di istruzioni in caso di trasferimento dell'apparecchio a terzi. In caso di smarrimento delle istruzioni per l'uso, richiederne una copia sostitutiva. La versione attuale si può consultare sulla pagina web www.eppendorf.com/worldwide. 2.2 Uso conforme La Centrifuga 5418 / 5418 R è concepita esclusivamente per l'uso in luoghi chiusi e serve a separare le soluzioni acquose e le sospensioni di diversa densità nelle apposite provette. 2.3 Richiesta all'utente L'apparecchio può essere utilizzato esclusivamente da personale specializzato, appositamente formato. È necessario aver letto accuratamente le istruzioni per l'uso e conoscere bene il funzionamento dell'apparecchio. 2.4 Limiti di applicazione 2.4.1 Nota sulla direttiva ATEX (94/9/CE) PERICOLO! Pericolo di esplosione. Non mettere in funzione il dispositivo in ambienti in cui si lavora con sostanze a rischio di esplosione. Con questo dispositivo, non trattare sostanze esplosive o che possano reagire violentemente. Con questo dispositivo, non trattare alcuna sostanza che possa generare un'atmosfera esplosiva. Per motivi strutturali e a causa delle condizioni ambientali, la Centrifuga 5418 / 5418 R non è adatta a essere utilizzata in un'atmosfera potenzialmente esplosiva. Gli apparecchi devono essere pertanto utilizzati esclusivamente in un ambiente sicuro, quale ad esempio l'ambiente aperto di un laboratorio adeguatamente areato o di una cappa aspirante. Non è consentito l'uso di sostanze che possono contribuire a creare un'atmosfera potenzialmente esplosiva. La valutazione finale dei rischi connessi all'impiego di tali sostanze rientra nell'ambito delle responsabilità dell'utilizzatore degli apparecchi. 47 48 Avvertenze di sicurezza generali Centrifuge 5418 / 5418 R Italiano (IT) 2.4.2 Durata massima d'impiego degli accessori AVVERTENZA! Pericolo di lesioni causate da accessori danneggiati chimicamente o meccanicamente. Già dei graffi o delle crepe di lieve entità possono comportare dei gravi danneggiamenti interni del materiale. Fare in modo di proteggere tutti i pezzi degli accessori da eventuali danneggiamenti di tipo meccanico. Controllare che gli accessori non presentino danneggiamenti prima di ogni utilizzo. Sostituire gli accessori danneggiati. Non utilizzare rotori o coperchi di rotori che presentano segni di corrosione o danneggiamenti di tipo meccanico (ad es. piegature). Non utilizzare accessori la cui durata di utilizzo massima è stata superata. Accessori Durata massima d'impiego a partire dalla prima messa in funzione Coperchio del rotore 3 anni Requisito: il "clic" durante il serraggio della vite del coperchio del rotore non viene percepito. Adattatori di plastica 1 anno Non vi è alcuna limitazione della durata di impiego per il rotore descritto a condizione che vengano soddisfatte le seguenti premesse: • uso corretto • cura consigliata • stato privo di danni. La data di produzione è incisa sui rotori nel seguente formato 03/10 (= marzo 2010). Questa indicazione ha un valore puramente informativo e non costituisce alcun riferimento per la determinazione della durata d'impiego effettiva. Per garantire la tenuta anti-aerosol vale quanto indicato di seguito. • Sostituire i coperchi rotore e i coperchi a tenuta di aerosol dopo 50 cicli di autoclave. • Sostituire la guarnizione dei coperchi rotore QuickLock dopo 50 cicli di autoclave. 2.5 Note sulla responsabilità da prodotto Nei seguenti casi la responsabilità da prodotto prevista per l'apparecchio può decadere. La responsabilità per eventuali danni personali e materiali derivanti passa al gestore se: • l'apparecchio non viene utilizzato conformemente alle istruzioni per l'uso; • l'apparecchio viene utilizzato per un uso non conforme all'impiego previsto; • l'apparecchio viene utilizzato con accessori o materiali di consumo diversi da quelli raccomandati da Eppendorf; • la manutenzione o la riparazione dell'apparecchio viene eseguita da persone non autorizzate da Eppendorf; • l'utente effettua modifiche non autorizzate dell'apparecchio. Avvertenze di sicurezza generali Centrifuge 5418 / 5418 R Italiano (IT) 2.6 Pericoli in caso di uso conforme Prima di utilizzare la Centrifuga 5418 / 5418 R, leggere le istruzioni per l'uso e osservare le seguenti avvertenze di sicurezza generali. 2.6.1 Danni alle persone o all'apparecchio AVVERTENZA! Folgorazione dovuta a danni all'apparecchio o al cavo di rete. Accendere l'apparecchio solo se questo e il cavo di rete non sono danneggiati. Mettere in funzione solo apparecchi che siano stati installati o riparati in modo appropriato. In caso di pericolo, isolare l'apparecchio dalla tensione di rete rimuovendo il connettore dall'apparecchio o dalla presa oppure utilizzando l'apposito dispositivo di esclusione della rete elettrica (ad es. il pulsante di emergenza in laboratorio). AVVERTENZA! Tensioni pericolose all'interno dell'apparecchio. Assicurarsi che il corpo dell'apparecchio sia sempre chiuso e integro, in modo che non sia possibile toccare inavvertitamente alcun componente all'interno dell'apparecchio. Non rimuovere il rivestimento dell'apparecchio. Impedire ai liquidi di penetrare all'interno dell'alloggiamento. Far aprire il dispositivo esclusivamente dal personale del servizio di assistenza autorizzato da Eppendorf. AVVERTENZA! Pericolo a causa dell'alimentazione di tensione errata. Collegare il dispositivo soltanto a fonti di alimentazione di tensione che soddisfano i criteri elettrici della targhetta identificativa. Utilizzare esclusivamente le prese dotate di messa a terra e un cavo di rete adeguato. AVVERTENZA! Danni alla salute dovuti a liquidi infettivi e germi patogeni. Per il contatto con liquidi infettivi e germi patogeni, attenersi alle disposizioni nazionali, al livello di sicurezza biologica del vostro laboratorio e alle schede di sicurezza e alle istruzioni per l'uso dei produttori. Per la centrifugazione di tali sostanze utilizzare sistemi di chiusura a tenuta di aerosol. Lavorando con germi patogeni di una categoria di rischio superiore, prevedere più di una chiusura a tenuta di aerosol. Indossare i propri dispositivi di protezione individuale. Consultare le disposizioni complete sul contatto con germi o materiale biologico della categoria di rischio II o superiore del "Laboratory Biosafety Manual" (fonte: World Health Organisation, Laboratory Biosafety Manual, nella versione valida aggiornata). AVVERTENZA! Schiacciamento delle dita a causa del coperchio della centrifuga. Durante l'apertura e la chiusura del coperchio dell'apparecchio, non afferrare la parte tra il coperchio e l'apparecchio, né il meccanismo di bloccaggio del coperchio. Aprire sempre completamente il coperchio della centrifuga, per evitare che si possa richiudere. 49 50 Avvertenze di sicurezza generali Centrifuge 5418 / 5418 R Italiano (IT) ATTENZIONE! Rischi per la sicurezza dovuti ad accessori e pezzi di ricambio errati. Gli accessori e i pezzi di ricambio non raccomandati da Eppendorf pregiudicano la sicurezza, il funzionamento e la precisione del dispositivo. Per i danni causati da accessori o pezzi di ricambio che non siano quelli raccomandati da Eppendorf o dovuti ad un utilizzo improprio, si esclude ogni garanzia e responsabilità da parte di Eppendorf. Usare esclusivamente accessori raccomandati da Eppendorf e pezzi di ricambio originali. AVVISO! Danni al dispositivo dovuti a liquidi versati. 1. Spegnere l'apparecchio. 2. Scollegare l'apparecchio dall'alimentazione elettrica. 3. Effettuare una pulizia accurata dell'apparecchio e degli accessori attenendosi alle indicazioni sulla pulizia e sulla disinfezione, riportate nelle istruzioni per l'uso. 4. Se si intende utilizzare un altro metodo di pulizia e disinfezione, contattare la società Eppendorf AG per accertarsi che il metodo previsto non danneggi l'apparecchio. AVVISO! Danni ai componenti elettronici dovuti a formazione di condensa. In seguito al trasporto dell'apparecchio da un ambiente freddo a un ambiente più caldo si può formare della condensa all'interno dell'apparecchio stesso. 5418: aspettare almeno tre ore prima di collegare l'apparecchio all'alimentazione di tensione. Solo 5418: in alternativa: immediatamente prima di un breve trasporto, mettere in funzione il dispositivo per mezz'ora. 5418 R: aspettare almeno quattro ore prima di collegare l'apparecchio all'alimentazione di tensione. 2.6.2 Uso errato della centrifuga AVVISO! Danni a causa di urti o spostamenti dell'apparecchio in funzione. Se il rotore urta contro la parete della camera rotore possono verificarsi danni considerevoli all'apparecchio e al rotore. Quando l'apparecchio è in funzione, evitare di muoverlo o urtarlo. 2.6.3 Uso errato dei rotori AVVERTENZA! Pericolo di lesioni dovute a un fissaggio non corretto dei rotori e dei rispettivi coperchi. Procedere con la centrifugazione solo se il rotore e il rispettivo coperchio sono fissati stretti. Se all'avvio della centrifuga si percepiscono rumori insoliti, significa eventualmente che il rotore o il rispettivo coperchio non è fissato correttamente. Terminare immediatamente la centrifugazione premendo il tasto start/stop. Avvertenze di sicurezza generali Centrifuge 5418 / 5418 R Italiano (IT) ATTENZIONE! Pericolo di lesioni dovute al carico asimmetrico di un rotore. Caricare i rotori in modo simmetrico con provette identiche. Caricare gli adattatori solo con le provette idonee. Utilizzare sempre provette dello stesso tipo (peso, materiale/densità e capacità). Controllare che il carico sia simmetrico tarando con una bilancia gli adattatori e le provette utilizzati. ATTENZIONE! Pericolo di lesioni dovute al sovraccarico del rotore. La Centrifuga 5418 / 5418 R è predisposta per la centrifugazione di materiale con una densità massima di 1,2 g/ml, a velocità e con capacità di riempimento o carico massima. Osservare i valori indicati su ogni rotore per il carico massimo (adattatore, recipiente e contenuto) per foro rotore e non superarli. AVVISO! Rotori danneggiati a causa di sostanze chimiche aggressive. I rotori sono componenti di elevato valore, che devono sopportare sollecitazioni estreme. La stabilità dei rotori può essere compromessa dall'impiego di sostanze chimiche aggressive. Evitare di utilizzare sostanze chimiche aggressive, tra le quali alcali forti e deboli, acidi forti, soluzioni con ioni di mercurio, rame e altri metalli pesanti, idrocarburi alogenati, soluzioni saline concentrate e fenolo. I rotori classificati come "coated" possono subire alterazioni del colore dovute al processo di fabbricazione. Tali alterazioni non ne influenzano la robustezza e la resistenza alle sostanze chimiche. 2.6.4 Sollecitazione eccessiva delle provette durante la centrifugazione ATTENZIONE! Pericolo di lesioni dovute a provette sottoposte a sollecitazioni eccessive. Fare attenzione ai valori limite specificati dal produttore delle provette riguardo alla loro resistenza. Utilizzare solo provette, che sono state approvate dal produttore con i valori g (rcf) desiderati. AVVISO! Pericolo a causa di provette danneggiate. Non utilizzare delle provette danneggiate. In caso contrario, si potrebbero danneggiare l'apparecchio e gli accessori e si rischierebbe di perdere i campioni. Ispezionare a vista tutte le provette prima di procedere all'utilizzo per verificare che non vi siano parti danneggiate. AVVISO! Pericolo a causa della presenza di provette con tappi aperti. Durante la centrifugazione, eventuali tappi aperti potrebbero staccarsi e danneggiare sia il rotore che la centrifuga. Prima di centrifugare, chiudere accuratamente tutti i tappi delle provette. 51 52 Avvertenze di sicurezza generali Centrifuge 5418 / 5418 R Italiano (IT) AVVISO! Danni alle provette in plastica a causa di solventi organici. In caso di utilizzo di solventi organici (ad es. fenolo, cloroformio), la resistenza dei tubi in plastica, viene ridotta pertanto i recipienti possono essere danneggiati. Fare attenzione alle indicazioni del produttore riguardo alla resistenza chimica delle provette. AVVISO! Le provette si riscaldano. Nelle centrifughe non raffreddate, a seconda del tempo di ciclo, del valore g (rcf) / della velocità e della temperatura ambiente, la temperatura nella camera rotore, nel rotore e nel campione può superare i 40 °C. Tenere presente che la resistenza delle provette alla centrifugazione si riduce. Controllare la resistenza termica dei campioni utilizzati. 2.6.5 Centrifugazione a tenuta di aerosol AVVERTENZA! Danni alla salute dovuti a una limitata tenuta agli aerosol in caso di combinazione di rotore/coperchio rotore errata. Si ha la garanzia di una buona tenuta agli aerosol durante la centrifugazione solo nel caso in cui si utilizzino i rotori e i coperchi appositamente previsti. La denominazione dei rotori ad angolo fisso inizia sempre con FA mentre i rotori basculanti sono contrassegnati da AT (aerosol tight). I rotori e i coperchi a tenuta di aerosol di questa centrifuga sono contrassegnati da un anello rosso sul rotore e da una vite rossa del coperchio del rotore. Per la centrifugazione a tenuta di aerosol utilizzare sempre contemporaneamente rotori e coperchi rotore contrassegnati come articoli a tenuta di aerosol nella centrifuga prevista. Le centrifughe nelle quali è possibile utilizzare rotori e coperchi rotore a tenuta di aerosol sono indicate sul rotore e, a partire dalla data di produzione ottobre 2003, sul lato superiore del coperchio del rotore. Utilizzare i coperchi a tenuta di aerosol solo assieme ai rotori che sono indicati su tali coperchi. Avvertenze di sicurezza generali Centrifuge 5418 / 5418 R Italiano (IT) AVVERTENZA! Danni alla salute dovuti a tenuta agli aerosol limitata nel caso di una applicazione sbagliata. La sterilizzazione in autoclave, le sollecitazioni meccaniche e le contaminazioni provocate dalle sostanze chimiche o altre soluzioni aggressive possono compromettere la tenuta agli aerosol dei rotori e dei rispettivi coperchi. Prima di ogni utilizzo controllare che le guarnizioni dei coperchi rotore o dei coperchi a tenuta di aerosol siano intatte. Utilizzare i coperchi rotore o coperchi a tenuta di aerosol solo se le guarnizioni sono pulite e non danneggiate. Dopo ogni sterilizzazione in autoclave (121 °C, 20 min.) eseguita appropriatamente, stendere sulla filettatura della vite del coperchio del rotore uno strato sottile di grasso per perni (cod. ord. Int. 5810 350.050, Nord America 022634330). Si raccomanda di non passare il grasso per perni sulle guarnizioni. Sostituire i coperchi rotore e i coperchi a tenuta di aerosol dopo 50 cicli di autoclave. La guarnizione dei coperchi rotore QuickLock deve essere sostituita dopo 50 cicli di autoclave. Non conservare mai chiusi i cestelli o i rotori a tenuta di aerosol. 2.7 Avvertenze di sicurezza sull'apparecchio Illustrazione Significato Ubicazione Attenersi a quanto indicato nelle istruzioni per l'uso. 5418: Parte posteriore dell'apparecchio 5418 R: Lato destro dell'apparecchio ATTENZIONE Fissare sempre il rotore utilizzando la chiave fornita. Parte superiore dell'apparecchio, sotto il coperchio della centrifuga. ATTENZIONE Chiudere tutte le provette e utilizzare il coperchio del rotore. Parte superiore dell'apparecchio, sotto il coperchio della centrifuga. 53 54 Avvertenze di sicurezza generali Centrifuge 5418 / 5418 R Italiano (IT) Installazione Centrifuge 5418 / 5418 R Italiano (IT) 3 3.1 Installazione Scelta dell'ubicazione AVVISO! In caso di anomalia, possibile danneggiamento di oggetti nelle immediate vicinanze dell'apparecchio. Secondo le raccomandazioni riportate nella norma EN 61010-2-020, durante il funzionamento occorre mantenere libera un'area di sicurezza di 30 cm intorno all'apparecchio. Rimuovere tutti i materiali e gli oggetti che si trovano in quest'area. AVVISO! Danni dovuti a surriscaldamento. Non installare l'apparecchio in prossimità di fonti di calore (ad es. dispositivi di riscaldamento, camere d'essiccazione). Non esporre l'apparecchio alla luce solare diretta. Assicurarsi che l'aria possa circolare liberamente. Mantenere una distanza di almeno 30 cm da ogni foro di aerazione. Scegliere l'ubicazione dell'apparecchio in base ai criteri indicati di seguito. • Allacciamento alla rete adatto, conforme a quanto indicato sulla targhetta (230 V/120 V/100 V). • Tavolo da laboratorio stabile, orizzontale, con proprietà antirisonanti. Peso dell'apparecchio: 7,7 kg (5418) o 22 kg (5418 R). • Ambiente ben areato e protetto dai raggi solari diretti in modo da evitare che l'apparecchio possa riscaldarsi ulteriormente. 3.2 Installazione dell'apparecchio AVVISO! Danni ai componenti elettronici dovuti a formazione di condensa. In seguito al trasporto dell'apparecchio da un ambiente freddo a un ambiente più caldo si può formare della condensa all'interno dell'apparecchio stesso. 5418: aspettare almeno tre ore prima di collegare l'apparecchio all'alimentazione di tensione. Solo 5418: in alternativa: immediatamente prima di un breve trasporto, mettere in funzione il dispositivo per mezz'ora. 5418 R: aspettare almeno quattro ore prima di collegare l'apparecchio all'alimentazione di tensione. AVVISO! Centrifuga 5418 R: danni al compressore dovuti ad un trasporto non eseguito a regola d'arte. Accendere la centrifuga solo 4 ore dopo il montaggio. 55 56 Installazione Centrifuge 5418 / 5418 R Italiano (IT) Eseguire i seguenti passaggi nella sequenza indicata. 1. Fare riscaldare l'apparecchio finché non raggiunge la temperatura ambiente. 2. Verificare che la tensione e la frequenza di rete siano conformi ai requisiti riportati sulla targhetta dell'apparecchio. 3. Collegare la centrifuga alla rete e accenderla tramite l'interruttore di rete. • Il display è attivo. • Il coperchio si apre automaticamente. 4. Rimuovere il rotore allentandolo con l'apposita chiave fornita in dotazione. 5. Rimuovere il dispositivo di sicurezza per il trasporto dell'albero motore. 6. Verificare che le parti non siano state danneggiate durante il trasporto. Rivolgersi al proprio rivenditore in caso di danni. 7. Solo 5418 R: Spingere la vaschetta raccogli condensa su un lato dell'apparecchio nell'apposito supporto. Conservare l'imballaggio e i dispositivi di sicurezza per il trasporto per futuri spostamenti o per riporre l'apparecchio. A tal riguardo, attenersi anche alle indicazioni relative al trasporto. Uso Centrifuge 5418 / 5418 R Italiano (IT) 4 4.1 Uso Panoramica elementi di comando Prima di utilizzare per la prima volta la Centrifuga 5418 / 5418 R, acquisire dimestichezza con gli elementi di comando e il display. Abb. 4-1: Pannello di controllo della Centrifuga 5418 e della Centrifuga 5418 R. 1 3 2 5418 5 (1) 5418 R 4 Fig. 4-1: 2 4 (9) 5 9 8 8 6 7 6 3 Pannello di controllo della Centrifuga 5418 e della Centrifuga 5418 R. 1 Commutazione della velocità di centrifugazione visualizzata (rpm/rcf) 6 Impostazione della temperatura (solo 5418 R) 2 Display 7 Avvio del controllo della temperatura fast temp (solo 5418 R) 3 Sbloccaggio del coperchio 8 Centrifugazione short spin 4 Impostazione della durata di centrifugazione Solo 5418 R: Premere la manopola time per avviare e arrestare la centrifugazione. 9 Avvio e arresto della centrifugazione 5 Impostazione della velocità di centrifugazione Solo 5418 R: Premere la manopola speed per commutare la velocità di centrifugazione visualizzata (rpm/rcf). 57 58 Uso Centrifuge 5418 / 5418 R Italiano (IT) Abb. 4-2: Display della Centrifuga 5418 e della Centrifuga 5418 R. 1 2 5418 Fig. 4-2: 3 1 7 4 6 5 5418 R 2 8 3 7 Display della Centrifuga 5418 e della Centrifuga 5418 R. 1 Durata della centrifugazione 5 Temperatura (solo 5418 R) 2 Valore g (rcf)/numero di giri (rpm) 5418 R: valore impostato x 1000 6 Stato del blocco tasti (solo 5418 R) : i parametri di centrifugazione non possono essere modificati inavvertitamente. : nessun blocco dei tasti 3 Stato della centrifuga : coperchio della centrifuga sbloccato : coperchio della centrifuga bloccato (lampeggiante): centrifugazione in corso 4 At set rpm (solo 5418 R) : avvio del tempo di ciclo a partire dal raggiungimento del 95 % del valore g (rcf)/ numero di giri (rpm). : avvio immediato del tempo di ciclo 7 Stato della visualizzazione della velocità di centrifugazione rcf: valore g (accelerazione centrifugazione relativa, RZB) rpm: numero di giri (giri al minuto) 8 Stato des altoparlante (solo 5418 R) : acceso Nessun simbolo: disattivato. 4.2 Preparazione della centrifugazione 4.2.1 Accensione della centrifuga 1. Accendere la centrifuga azionando l'interruttore di rete. Dopo l'accensione mediante interruttore di rete, il coperchio della centrifuga si apre automaticamente. 2. Aprire il coperchio chiuso della centrifuga premendo il tasto open. Vengono visualizzati i parametri impostati per l'ultimo ciclo di funzionamento. 4.2.2 Inserimento del rotore AVVISO! In caso di manipolazione errata, il rotore può cadere. La vite del coperchio rotore può allentarsi se la si utilizza per sostenere il rotore. Sostenere o trasportare il rotore afferrandolo sempre con entrambe le mani. 1. Posizionare il rotore perpendicolarmente all'albero motore. 2. Inserire la chiave fornita nel dado del rotore. 3. Ruotare la chiave del rotore in senso orario e stringere il dado del rotore. Uso Centrifuge 5418 / 5418 R Italiano (IT) 4.2.3 Caricamento del rotore Per caricare il rotore, procedere nel modo indicato di seguito. 1. Verificare il carico massimo (adattatore, provetta a contenuto) per ciascun foro del rotore. Il carico massimo è di 3,75 g per alesaggio del rotore. Questi dati sono indicati anche sul rotore. 2. Caricare il rotore e l'adattatore solo con provette adeguate. 3. Inserire le provette a coppie, l'una di fronte all'altra, all'interno dei fori del rotore. Per un caricamento simmetrico, le provette collocate l'una di fronte all'altra devono essere dello stesso tipo e avere lo stesso livello di riempimento. Per ridurre le differenze di peso tra le provette riempite, si raccomanda di effettuare una taratura utilizzando una bilancia. In questo modo si evita di compromettere ulteriormente il sistema di azionamento e si riducono i rumori di funzionamento. 4.2.4 Chiusura del coperchio del rotore Con il rotore FA-45-18-11 è possibile anche centrifugare senza il coperchio del rotore. In questo caso tenere presente quanto segue: • I tappi delle provette devono essere serrati a fondo. • Il rotore senza coperchio non è a tenuta di aerosol. • La centrifugazione è leggermente più rumorosa. • Le colonnette di centrifugazione devono essere sempre centrifugate con il coperchio del rotore. 1. Verificare che l'anello di tenuta esterno sia in sede nella scanalatura. 2. Inserire il coperchio del rotore in verticale sul rotore. 3. Chiudere il rotore serrando a fondo la vite rossa del coperchio in senso orario fino a percepire un clic e fino all'arresto. Solo dopo aver percepito il clic il rotore risulta chiuso correttamente! 4.2.5 Chiusura del coperchio della centrifuga 1. Verificare che il rotore e il coperchio del rotore siano stati fissati correttamente. 2. Premere verso il basso il coperchio della centrifuga finché il dispositivo di bloccaggio del coperchio fa presa e il coperchio viene automaticamente chiuso. La centrifuga si chiude automaticamente. Sul display viene visualizzato il simbolo . Solo 5418: Il tasto open si illumina di blu. 4.3 Raffreddamento (solo 5418 R) 4.3.1 Impostazione della temperatura Impostare la temperatura selezionando con i tasti freccia temp un valore compreso tra 0 °C e +40 °C. 59 60 Uso Centrifuge 5418 / 5418 R Italiano (IT) 4.3.2 Indicazione della temperatura Con il rotore fermo: Durante la centrifugazione: 4.3.3 temperatura nominale temperatura effettiva Monitoraggio della temperatura Una volta raggiunta la temperatura nominale, durante la centrifugazione la centrifuga reagisce alle variazioni della temperatura nei modi seguenti: Scostamento dal valore nominale Azione ΔT > 3 °C L'indicazione della temperatura lampeggia. ΔT > 5 °C Segnale acustico di avvertimento intermittente e indicazione Error 18. La centrifugazione viene automaticamente terminata. 4.3.4 FastTemp Questa funzione consente di avviare direttamente il ciclo di controllo della temperatura senza i campioni con il numero di giri specifico del rotore e della temperatura, per portare rapidamente la camera del rotore con il rotore stesso e gli adattatori alla temperatura nominale impostata. Premessa • • • • La centrifuga è accesa. Il rotore e il rispettivo coperchio sono fissati correttamente. Il coperchio della centrifuga è chiuso. La temperatura e il valore g (rcf)/numero di giri (rpm) per la centrifugazione successiva sono impostati (vedi Centrifugazione a pag. 61). 1. Premere il tasto fast temp. Sul display appaiono l'indicazione FT, la temperatura attuale e il valore g (rcf)/numero di giri (rpm). Il tempo necessario per portare la temperatura ambiente (≈23 °C) a 4 °C è di circa 16 min. Il ciclo di controllo della temperatura termina automaticamente al raggiungimento della temperatura nominale. Viene attivato un segnale acustico periodico. 2. Per terminare prima il ciclo di controllo della temperatura, premere il tasto start/stop. Una volta raggiunta la temperatura nominale e concluso il ciclo di controllo della temperatura, la centrifuga mantiene la camera del rotore con il coperchio chiuso alla temperatura nominale, se questa è al di sotto della temperatura ambiente. Indipendentemente dalla temperatura nominale, tuttavia, durante questo raffreddamento continuo la temperatura non scende al di sotto di 4 °C, per impedire il congelamento della camera rotore. La centrifuga termina automaticamente il ciclo se la temperatura del rotore è stata regolata completamente. Pertanto tra l'indicazione della temperatura nominale raggiunta e la fine automatica del ciclo di controllo della temperatura può esserci un ritardo. Uso Centrifuge 5418 / 5418 R Italiano (IT) 4.3.5 Raffreddamento permanente Con il rotore fermo, la camera rotore viene mantenuta alla temperatura nominale finché sono soddisfatti i seguenti presupposti: • La centrifuga è accesa. • Il coperchio della centrifuga è chiuso. • La temperatura nominale è inferiore alla temperatura ambiente. Durante questo raffreddamento permanente vale quanto segue: • Viene visualizzata la temperatura nominale. • Indipendentemente dalla temperatura nominale, la temperatura non scende al di sotto di 4 °C per impedire il congelamento della camera del rotore e dei campioni e un aumento della formazione di condensa all'interno dell'apparecchio. • Poiché il rotore non gira, la regolazione della temperatura è più lenta. Per terminare il raffreddamento continuo, aprire il coperchio della centrifuga. Se la centrifuga non viene utilizzata per più di 8 ore, il raffreddamento permanente viene automaticamente disattivato Ciò protegge il dispositivo dalla formazione di ghiaccio nella camera del rotore e nelle provette nonché da una maggiore formazione di condensa nell'apparecchio. Sul display appare la temperatura effettiva della camera del rotore Con il tasto fast temp è possibile raggiungere di nuovo rapidamente la temperatura desiderata(vedi a pag. 60). 4.4 Centrifugazione Prima di utilizzare per la prima volta la Centrifuga 5418 / 5418 R, acquisire dimestichezza con gli elementi di comando e il display.(vedi Panoramica elementi di comando a pag. 57) Per ogni tipo di centrifugazione qui descritta è richiesta la fase di preparazione descritta in precedenza (vedi Preparazione della centrifugazione a pag. 58). Solo 5418 R: Osservare anche le avvertenze relative al raffreddamento(vedi a pag. 59) 61 62 Uso Centrifuge 5418 / 5418 R Italiano (IT) 4.4.1 Centrifugazione e impostazione del tempo Eseguire i seguenti passaggi nella sequenza indicata. 1. Con time impostare la durata del ciclo. 2. Solo 5418 R: Con temp regolare la temperatura. 3. Impostare il valore g (rcf)/numero di giri con il tasto a freccia speed. 4. Premere start/stop per avviare la centrifugazione. Durante la centrifugazione • Durante il funzionamento del rotore lampeggia l'indicazione . • Solo 5418 R: la temperatura attuale viene visualizzata. • Durante la centrifugazione, i tasti fast temp (nur 5418 R), open e short sono bloccati. • Durante il ciclo è possibile modificare il tempo totale di ciclo, la temperatura (solo 5418 R), il numero di giri e i valori rpm/rcf. Solo 5418 R: ZPer modificare i parametri della centrifugazione, premere prima il tasto short. Durante la modifica lampeggiano i valori sul display. I nuovi parametri vengono immediatamente acquisiti. Quando si modifica il tempo durante il ciclo, viene tenuto conto del tempo già trascorso. Verificare che la nuova durata totale del ciclo più breve sia almeno pari al tempo già trascorso più 2 minuti. • È possibile terminare la centrifugazione anche prima che sia trascorso il tempo impostato per il ciclo premendo il tasto start/stop. Fine della centrifugazione • Una volta trascorso il tempo impostato, la centrifuga si ferma automaticamente. Durante il processo di frenata, il tempo di centrifugazione trascorso lampeggia. Quando il rotore si arresta viene attivato un segnale acustico. • Solo 5418: Il coperchio della centrifuga si apre automaticamente. Sul display viene visualizzato il simbolo . • Solo 5418 R: Il coperchio della centrifuga resta chiuso per mantenere la temperatura dei campioni. È possibile aprirlo premendo il tasto open. 5. Prelievo del centrifugato. 4.4.2 Altre possibilità di centrifugazione 4.4.2.1 Funzionamento continuo Con il tasto time impostare il ciclo lungo. Nella visualizzazione del tempo appare oo. Uso Centrifuge 5418 / 5418 R Italiano (IT) 4.4.2.2 Short spin 5418: è possibile eseguire un ciclo corto con il valore g(rcf)/numero di giri massimo. 5418 R: è possibile eseguire un ciclo corto con i valori attualmente impostati o con il valore g(rcf)/numero di giri massimo. Selezione della modalità short spin (solo 5418 R) Con il coperchio della centrifuga aperto, premere il tasto short. Appare poi la modalità attualmente attivata: • l'indicazione 1 – 14 t (ciclo con numero di giri preselezionato) • l'indicazione 14 t (ciclo con un numero di giri massimo pari a 14.000 rpm) Con il coperchio della centrifuga aperto, tenere premuto il tasto short per più di 2 secondi per passare da una di queste due modalità all'altra e viceversa. Esecuzione della centrifugazione short spin Per avviare un ciclo breve con il coperchio della centrifuga chiuso, premere il tasto short e tenerlo premuto. Per fermare l'apparecchio, rilasciare il tasto. 4.4.3 Rimozione del rotore 1. Ruotare in senso antiorario il dado del rotore con l'apposita chiave in dotazione. 2. Rimuovere il rotore dall'alto inclinandolo verticalmente. 3. Solo 5418 R: Dopo l'uso spegnere la centrifuga e svuotare la vaschetta raccoglicondensa (estraendola dal lato sinistro o destro dell'apparecchio). Lasciare completamente aperto il coperchio della centrifuga e assicurarsi che questo non possa cadere. 4.5 Modalità Standby (solo 5418) Se la centrifuga non viene utilizzata per 15 minuti, questa commuta sulla modalità Standby. Sul display viene visualizzata l'indicazione EP. Premendo un tasto o una manopola oppure chiudendo il coperchio della centrifuga, la centrifuga viene riattivata e diventa operativa. 4.6 Funzioni speciali (solo 5418 R) Funzione Stato del coperchio della centrifuga Pressione del tasto > 2 s Display Modificare i parametri durante il ciclo. chiuso short Attivare o disattivare il segnale acustico. aperto open Attivare o disattivare il blocco tasti. aperto short + open At set rpm aperto time lampeggia per 5 secondi / / 63 64 Uso Centrifuge 5418 / 5418 R Italiano (IT) Manutenzione Centrifuge 5418 / 5418 R Italiano (IT) 5 5.1 Manutenzione Preparazione per la pulizia/disinfezione La procedura descritta nel capito successivo è valida sia per la pulizia che per la disinfezione o la decontaminazione. Nella seguente tabella sono descritti gli ulteriori passaggi necessari: Pulizia Disinfezione/Decontaminazione 1. Per la pulizia delle superfici accessibili dell'apparecchio e degli accessori utilizzare un detergente neutro. 2. Effettuare la pulizia nel modo indicato nel capitolo successivo. 1. Scegliere metodi di disinfezione che siano conformi alle disposizioni e alle direttive di legge vigenti per il proprio campo d'applicazione. Utilizzare ad esempio alcol (etanolo, isopropanolo) o disinfettanti contenenti alcol. 2. Effettuare la disinfezione o la decontaminazione nel modo descritto nel capitolo successivo. 3. Pulire successivamente l'apparecchio e gli accessori. In caso di ulteriori domande sulla pulizia e sulla disinfezione o decontaminazione, nonché sui prodotti di pulizia da utilizzare, rivolgersi al servizio Application Support della società Eppendorf AG. I dati di contatto sono riportati sul retro delle presenti istruzioni. 5.2 Esecuzione della pulizia/disinfezione PERICOLO! Scosse elettriche dovute all'infiltrazione di liquidi. Prima di procedere con la manutenzione o la pulizia, spegnere l'apparecchio e staccarlo dalla rete elettrica. Impedire ai liquidi di penetrare all'interno dell'alloggiamento. Non effettuare alcuna pulizia o disinfezione a spruzzo sul corpo dell'apparecchio. Collegare di nuovo l'apparecchio all'alimentazione elettrica solo dopo averne completamente asciugato l'interno e l'esterno. AVVISO! Danni dovuti a sostanze chimiche aggressive. Non utilizzare sull'apparecchio e sugli accessori prodotti chimici aggressivi quali, ad esempio, basi forti e deboli, acidi forti, acetone, formaldeide, idrocarburi alogenati o fenoli. In caso di contaminazione con sostanze chimiche aggressive, pulire immediatamente l'apparecchio con un detergente neutro. AVVISO! Corrosione dovuta a detergenti e disinfettanti aggressivi. Non utilizzare detergenti corrosivi né solventi aggressivi o lucidi abrasivi. Non incubare per lungo tempo gli accessori in disinfettanti o detergenti aggressivi. 65 66 Manutenzione Centrifuge 5418 / 5418 R Italiano (IT) AVVISO! Danni dovuti a raggi UV e ad altri raggi ricchi di energia. Non eseguire la disinfezione tramite raggi UV, beta o gamma o altri raggi ricchi di energia. Evitare di conservare il dispositivo in locali con forti emissioni di raggi UV. Sterilizzazione in autoclave I rotori, i coperchi e gli adattatori possono essere autoclavati (121 °C, 20 min). Dopo massimo 50 cicli di sterilizzazione in autoclave è necessario sostituire l'anello di tenuta nella scanalatura del coperchio rotore a tenuta di aerosol. Tenuta di aerosol Prima dell'uso, assicurarsi che le guarnizioni siano intatte. Solo coperchio rotore QuickLock: in caso di usura, sostituire l'anello di tenuta nella scanalatura del coperchio. Al fine di proteggere i rotori, è necessaria una manutenzione regolare degli anelli di tenuta. Non immagazzinare mai i rotori a tenuta di aerosol con il coperchio serrato! Per evitare danni, ingrassare leggermente le filettature dei coperchi dei rotori a tenuta di aerosol, utilizzando del grasso per perni (cod. ord. Int.: 5810 350.050/Nord America: 022634330). 5.2.1 Pulizia e disinfezione dell'apparecchio 1. Aprire il coperchio. Spegnere l'apparecchio con l'interruttore principale. Staccare la spina dall'alimentazione di corrente. 2. Allentare il dado del rotore con l'apposita chiave, girandolo in senso antiorario. 3. Rimuovere il rotore. 4. Pulire tutte le superfici accessibili dell'apparecchio incluso il cavo di rete, pulendole e disinfettandole con un panno umido e il detergente raccomandato. 5. Sciacquare con abbondante acqua le guarnizioni in gomma della camera rotore. 6. Strofinare glicerina o talco sulle guarnizioni in gomma secche per evitare che si formino delle screpolature. Ulteriori componenti dell'apparecchio, come ad esempio il bloccaggio del coperchio, l'albero motore e il cono del rotore, non devono essere ingrassati. 7. Pulire l'albero motore con un panno morbido, asciutto e privo di pelucchi. Non ingrassare l'albero motore. 8. Verificare l'eventuale presenza di danni all'albero motore. 9. Verificare che l'apparecchio non presenti segni di corrosione o parti danneggiate. 10. Lasciare aperto il coperchio della centrifuga, quando l'apparecchio non viene utilizzato. 11. Collegare di nuovo l'apparecchio all'alimentazione elettrica solo dopo averne completamente asciugato l'interno e l'esterno. 5.2.2 Pulizia e disinfezione del rotore 1. Verificare che il rotore e gli accessori non presentino segni di corrosione o parti danneggiate. Non utilizzare rotori o accessori danneggiati. 2. Pulire e disinfettare i rotori e gli accessori con i detergenti raccomandati. 3. Pulire e disinfettare i fori del rotore con uno scovolo. 4. Per la pulizia e la disinfezione del coperchio del rotore, rimuovere l'anello di tenuta. Pulire anche la scanalatura sottostante e l'anello di tenuta. Manutenzione Centrifuge 5418 / 5418 R Italiano (IT) 5. Sciacquare accuratamente i rotori e gli accessori con acqua distillata. Sciacquare con particolare cura i fori dei rotori ad angolo fisso. Non immergere il rotore, poiché in questo modo potrebbe penetrare del liquido nelle cavità. 6. Mettere ad asciugare i rotori e gli accessori su un panno. Riporre i rotori ad angolo fisso con i fori rivolti verso il basso, per consentire anche ai fori di asciugarsi. 7. Reinserire correttamente l'anello di tenuta del coperchio rotore nella scanalatura pulita e asciutta. 8. Pulire il cono del rotore con un panno morbido, asciutto e privo di pelucchi. Non ingrassare il cono del rotore. 9. Verificare l'eventuale presenza di danni al cono del rotore. 10. Montare il rotore asciutto sull'albero motore. 11. Serrare il dado del rotore con l'apposita chiave, girandolo in senso orario. 12. Lasciare aperto il coperchio del rotore, quando l'apparecchio non viene utilizzato. 5.3 Ulteriori indicazioni sulla cura dell'apparecchio per Centrifuga 5418 R Svuotare e pulire regolarmente la vaschetta raccoglicondensa, specialmente dopo il versamento di liquidi nella camera rotore. Estrarre la vaschetta raccoglicondensa dal lato sinistro o destro della centrifuga. Liberare regolarmente la camera rotore dai depositi di ghiaccio facendolo sciogliere, lasciando aperto il coperchio della centrifuga oppure eseguendo un breve ciclo di controllo della temperatura a circa 30 °C. Lasciare aperto il coperchio della centrifuga se non la si utilizza per un periodo di tempo prolungato. Rimuovere la condensa dalla camera del rotore. A tale scopo utilizzare un panno morbido e assorbente. Rimuovere al più tardi ogni mezz'ora la polvere che ha aderito alle feritoie di ventilazione della centrifuga con un pennello o uno scopino. Spegnere prima la centrifuga e staccare la spina. 5.4 Rottura di parti in vetro In caso di utilizzo di provette in vetro, può capitare che nella camera del rotore il vetro si rompa. Le schegge di vetro derivanti, vorticando nella camera del rotore durante la centrifugazione, svolgerebbero un'azione di sabbiatura sul rotore e sugli accessori. Minuscole particelle di vetro si accumulano nei componenti in gomma (ad es. nell'anello di tenuta del motore, nella guarnizione della camera rotore e nei rivestimenti in gomma degli adattatori). 67 68 Manutenzione Centrifuge 5418 / 5418 R Italiano (IT) AVVISO! Rottura di provette in vetro nella camera del rotore Nella camera del rotore, in caso di valore g troppo elevato, le provette in vetro possono rompersi. La rottura delle provette in vetro causa danni al rotore, agli accessori e ai campioni. Attenersi alle indicazioni del produttore delle provette riguardo ai parametri di centrifugazione raccomandati (carico e velocità). Conseguenze della rottura delle provette in vetro nella camera del rotore: • leggera abrasione sul metallo nero della camera del rotore (in caso di camera del rotore in metallo); • le superfici della camera del rotore e degli accessori vengono graffiate; • la resistenza agli agenti chimici della camera del rotore diminuisce; • i campioni risultano contaminati; • abrasione sulle parti in gomma. Comportamento in caso di rottura delle provette in vetro 1. Rimuovere le schegge e la polvere di vetro dalla camera del rotore e dagli accessori. 2. Pulire accuratamente il rotore e la camera del rotore. Pulire con particolare cura gli alesaggi dei rotori ad angolo fisso. 3. Eventualmente, per evitare ulteriori danni, sostituire gli adattatori. 4. Controllare regolarmente che nelle cavità del rotore non vi siano residui di nessun tipo o parti danneggiate. 5.5 Fusibili Il portafusibile si trova sotto la presa di allacciamento alla rete (5418) o a sinistra dell'interruttore di rete (5418 R). 1. Staccare la spina. 2. Estrarre il portafusibili. I due fusibili sono ora raggiungibili e possono essere sostituiti. 5.6 Decontaminazione prima della spedizione Se l'apparecchio viene spedito al servizio di assistenza tecnica autorizzato per la riparazione o al concessionario per lo smaltimento, fare attenzione a quanto segue. AVVERTENZA! Pericolo per la salute dovuto a contaminazione dell'apparecchio. 1. Osservare le avvertenze del certificato di decontaminazione. Sono consultabili in formato PDF sul nostro sito Internet (www.eppendorf.com/decontamination). 2. Decontaminare tutti i componenti che si desidera spedire. 3. Allegare alla spedizione la certificazione di decontaminazione compilata in tutte le sue parti. Risoluzione dei problemi Centrifuge 5418 / 5418 R Italiano (IT) 6 Risoluzione dei problemi Se con le misure proposte non è possibile eliminare l'errore, rivolgersi al proprio partner Eppendorf locale. L'indirizzo di contatto è reperibile in Internet al sito www.eppendorf.com/worldwide. 6.1 Anomalie generiche Sintomo/ messaggio Causa Rimedio Nessuna indicazione Nessun collegamento alla rete. Controllare l'allacciamento alla rete. Nessuna indicazione Caduta di corrente Verificare il fusibile di rete Il coperchio dell'apparecchio non si apre. Il rotore gira ancora. Il coperchio dell'apparecchio non si apre. Interruzione dell'alimentazione. 1. Verificare il fusibile di rete dell'apparecchio (vedi Fusibili a pag. 68). 2. Verificare il fusibile di rete del laboratorio. 3. Premere il dispositivo di sbloccaggio d'emergenza del coperchio (vedi a pag. 72). L'apparecchio non si avvia. Il coperchio dell'apparecchio non è chiuso. Chiudere il coperchio dell'apparecchio (vedi Fusibili a pag. 68). Verificare il fusibile di rete del laboratorio. Attendere che il rotore si sia fermato del tutto. All'avvio, Caricare il rotore in modo asimmetrico. l'apparecchio vibra. dell'apparecchio. 1. Fermare l'apparecchio e caricarlo in modo simmetrico. 2. Riavviare l'apparecchio. Tenere premuto il tasto short durante La centrifuga si ferma durante una breve centrifugazione nonostante venga premuto il tasto short. Il tasto short è stato rilasciato brevemente per più di due volte (funzione di protezione del sistema di azionamento). L'indicazione della temperatura lampeggia. (solo 5418 R) Scostamento della temperatura dal valore Controllare le impostazioni. Attendere il raggiungimento della nominale: ±3 °C. temperatura nominale. Controllare la libera circolazione dell'aria attraverso le fessure di aerazione. Sciogliere il ghiaccio oppure disattivare e fare raffreddare l'apparecchio. una breve centrifugazione. 69 70 Risoluzione dei problemi Centrifuge 5418 / 5418 R Italiano (IT) 6.2 Messaggi di anomalia Se vengono visualizzati i messaggi di anomalia indicati di seguito, procedere nel modo seguente. 1. Eliminare l'anomalia (v. rimedio). 2. Se necessario, ripetere la centrifugazione. Sintomo/ messaggio Causa Rimedio LID ERROR (5418)/ Non è possibile bloccare il coperchio LID (5418 R) della centrifuga. Richiudere il coperchio della LID ERROR (5418)/ Non è possibile sbloccare il coperchio LID (5418 R) della centrifuga. 1. Spegnere e riaccendere la centrifuga. 2. Premere il tasto open. centrifuga. Nel caso in cui si verifichi ancora l'anomalia: 1. spegnere la centrifuga; 2. Premere il dispositivo di sbloccaggio d'emergenza del coperchio (vedi Sblocco di emergenza del coperchio a pag. 72). LID ERROR (5418)/ Non è possibile sbloccare il coperchio LID (5418 R) della centrifuga durante il ciclo di funzionamento. Attendere che il rotore si sia fermato INT Interruzione di rete durante il ciclo di funzionamento Controllare l'allacciamento alla rete. NO RPM (5418)/ Error 3 (5418 R) Guasto nel sistema di misurazione del numero di giri o motore surriscaldato. Lasciare accesa la centrifuga finché Error 5 (solo 5418 R) Apertura del coperchio non consentita o interruttore del coperchio difettoso durante un ciclo di funzionamento 1. Attendere che il rotore si sia fermato del tutto. 2. Aprire il coperchio della centrifuga e richiuderlo. 3. Ripetere il ciclo di funzionamento. Err 6 (5418)/ Error 6 (5418 R) Anomalia al sistema di funzionamento Ripetere il ciclo di funzionamento. In caso di nuovo messaggio, del tutto. l'anomalia non scompare (10 s o 6 min). disattivare la centrifuga e riattivarla dopo almeno 20 secondi. Lasciar raffreddare il motore per Error 6 (solo 5418 R) Sistema di azionamento surriscaldato Err 7 (5418)/ Error 7 (5418 R) Differenza maggiore nel controllo della velocità 1. Attendere che il rotore si sia fermato del tutto. 2. Avvitare il rotore fissandolo bene. Err 8 (5418)/ Error 8 (5418 R) Anomalia al sistema di funzionamento 1. Attendere che il rotore si sia fermato del tutto. 2. Ripetere il ciclo di funzionamento. almeno 15 min. Risoluzione dei problemi Centrifuge 5418 / 5418 R Italiano (IT) Sintomo/ messaggio Causa Rimedio Da Err 9 a 17 (5418)/da Error 9 a 17 (5418 R) Anomalia elettronica Spegnere e riaccendere la centrifuga Error 18 (solo 5418 R) Differenza di temperatura eccessiva dal valore nominale all'interno della camera del rotore. dopo un periodo > 20 s. Controllare le impostazioni. Controllare la libera circolazione dell'aria attraverso le fessure di aerazione. Sciogliere il ghiaccio oppure disattivare e fare raffreddare l'apparecchio. Error 19 (solo 5418 R Il circuito del liquido di raffreddamento si Verificare la libera circolazione dell'aria attraverso le feritoie di è surriscaldato. ventilazione e lasciare raffreddare l'apparecchio. Error 20 (solo 5418 R) Il sensore di temperatura nella camera del rotore è difettoso. Spegnere e riaccendere la centrifuga Error 21 (solo 5418 R) Il sensore di temperatura sul condensatore è difettoso. Spegnere e riaccendere la centrifuga Error 24 (solo 5418 R) Errore nel gruppo di raffreddamento, ad es. surriscaldamento. Lasciare raffreddare la centrifuga e dopo un periodo > 20 s. dopo un periodo > 20 s. ripetere il ciclo. 71 72 Risoluzione dei problemi Centrifuge 5418 / 5418 R Italiano (IT) 6.3 Sblocco di emergenza del coperchio Se il coperchio della centrifuga non si apre, è possibile azionare manualmente lo sblocco di emergenza del coperchio. AVVERTENZA! Pericolo di lesioni dovute alla rotazione del rotore. Attendere che il rotore si sia fermato del tutto prima di azionare lo sblocco di emergenza. Dare un'occhiata attraverso il vetro di controllo del coperchio della centrifuga. 6.3.1 Centrifuga 5418 1. Rimuovere la spina. 2. Togliere la copertura in plastica dallo sblocco di emergenza del coperchio. Questa si trova dietro il piede anteriore sinistro dell'apparecchio nella piastra di fondo (Fig. 1-1 a pag. 45). 3. Tirare verso il basso la corda in verticale. Il coperchio della centrifuga è sbloccato. 4. Prima di richiudere il coperchio della centrifuga: spingere completamente la corda nella scatola e inserire la copertura in plastica nella piastra di fondo. 6.3.2 Centrifuga 5418 R 1. Rimuovere la spina. 2. Con un utensile adeguato (ad es. un cacciavite), girare di 90° in senso antiorario la copertura in plastica dello sblocco di emergenza del coperchio ed estrarla. La copertura in plastica si trova sul lato destro dell'apparecchio (Fig. 1-2 a pag. 45). 3. Inserire la chiave del rotore nella centrifuga utilizzando l'apertura esagonale posta sul retro, fino a incontrare resistenza. 4. Girare la chiave del rotore in senso orario esercitando una leggera pressione. In questo modo è possibile sbloccare il coperchio della centrifuga. 5. Aprire il coperchio della centrifuga. 6. Rimuovere la chiave del rotore e girare nuovamente la copertura in plastica di 90° in senso orario. Trasporto, immagazzinamento e smaltimento Centrifuge 5418 / 5418 R Italiano (IT) 7 7.1 Trasporto, immagazzinamento e smaltimento Trasporto ATTENZIONE! Danni alle persone dovuti al sollevamento e al trasporto di carichi pesanti L'apparecchio è pesante. Il sollevamento e il trasporto dell'apparecchio può causare danni alla spina dorsale. È necessario trasportare l'apparecchio con l'aiuto di una seconda persona. Per il trasporto su percorsi più lunghi, utilizzare un ausilio per il trasporto (ad es. un carrello). Quando si trasporta la centrifuga, rimuovere prima il rotore. Utilizzare l'imballaggio originale per il trasporto. Temperatura dell'aria Umidità relativa Pressione atmosferica Trasporto generale -25° C – 60 °C 10 % – 75 % 30 kPa – 106 kPa Trasporto aereo -20° C – 55 °C 10 % – 75 % 30 kPa – 106 kPa Temperatura dell'aria Umidità relativa Pressione dell'aria Nell'imballaggio per il trasporto -25° C – 55 °C 10 % – 75 % 70 kPa – 106 kPa Senza imballaggio per il trasporto -5° C – 45 °C 10 % – 75 % 70 kPa – 106 kPa 7.2 7.3 Immagazzinamento Smaltimento In caso di smaltimento del prodotto rispettare le relative disposizioni di legge applicabili. Nota sullo smaltimento degli apparecchi elettrici ed elettronici nella Comunità Europea Nell'ambito della Comunità Europea lo smaltimento degli apparecchi elettrici viene definito dalle normative nazionali che si basano sulla Direttiva UE 2002/96/CE sui Rifiuti di Apparati Elettrici ed Elettronici (RAEE). In base a questa direttiva, tutti i dispositivi immessi sul mercato dopo il 13.08.2005 in ambito business-to-business (nel quale questo prodotto rientra) non devono essere smaltiti assieme ai rifiuti comunali o domestici. Per documentare tutto ciò i prodotti riportano la seguente indicazione: Poiché le normative in materia di smaltimento all'interno della UE possono divergere di paese in paese, Vi preghiamo di metterVi in contatto con il Vostro fornitore in caso di necessità. 73 74 Trasporto, immagazzinamento e smaltimento Centrifuge 5418 / 5418 R Italiano (IT) Evaluate your manual Give us your feedback. www.eppendorf.com/manualfeedback Your local distributor: www.eppendorf.com/contact Eppendorf AG · 22331 Hamburg · Germany [email protected] · www.eppendorf.com