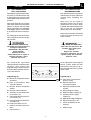
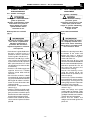
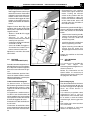
1
FS30 elite
FS35 elite
FS41 elite
I
GB
COMBINATA PIALLA FILO-SPESSORE
COMBINED SURFACING-THICKNESSING PLANER
USO E MANUTENZIONE
OPERATION AND MAINTENANCE
QUESTO LIBRETTO È DA CONSERVARE PER FUTURI
RIFERIMENTI E DOVRÀ SEMPRE SEGUIRE LA MACCHINA
THIS MANUAL MUST BE KEPT FOR FUTURE REFERENCE
AND MUST ALWAYS ACCOMPANY THE MACHINE
code n° 0000570674A
Ed. 09/06
ITALIANO
Nel presente manuale, alcune informazioni ed illustrazioni, possono differire dalla macchina in vostro possesso in
quanto sono descritte ed illustrate tutte le configurazioni inerenti alla macchina completa di tutti gli OPTIONAL;
pertanto fare riferimento solo alle informazioni strettamente legate alla configurazione della macchina da voi
acquistata.
Con questo libretto desideriamo fornirvi le informazioni necessarie alla manutenzione e all'uso corretto della macchina.
La rete di distribuzione è da questo momento al vostro servizio per qualunque problema di assistenza tecnica, parti di
ricambio e per qualunque nuova esigenza che possa far sviluppare la vostra attività.
Ogni vostra osservazione sul presente libretto è un contributo importante per il miglioramento dei servizi che
l'azienda può offrire ai propri clienti.
La macchina è stata esaminata dall'organismo notificato CERMET per la certificazione CE, in rispetto della
Direttiva Macchine 98/37/CE
ENGLISH
Some information and illustrations in this manual may differ from the machine in your possession, since all the
configurations inherent in the machine complete with all the OPTIONALS are described and illustrated. Therefore,
refer only to that information strictly connected with the machine configuration you have purchased.
With this manual we would like to provide the necessary information for maintenance and proper use of the machine.
The distribution network is at your service for any technical problem, spare parts or any new requirement you may have for
the development of your activity.
Any observations you might wish to make on this handbook will be an important contribution to improve
the services the company offers its customers.
The machine has been examined by the notified body, CERMET, for CE certification in accordance
with Machine Directive 98/37/CE.
Per qualsiasi problema o informazione siamo a vostra completa disposizione:
Please do not hesitate to contact us for any help or information:
SCM INDUSTRIA
TECNOMAX
47892 Gualdicciolo - Rep.San Marino
e-mail: [email protected]
dall'Italia:
from Italy:
Tel.0549 / 876910 - Telefax 0549 / 999604
dall'estero:
from abroad:
Tel.00378 / 0549 876912 - Telefax 00378 / 0549 999604
elite
LIBRETTO USO E MANUTENZIONE FS30-35-41elite
elite(CE)
Emissione S.M.C
Italiano - Inglese
Data modifica
Prima edizione
N°bolla modifica
/
Indice modifica
00
01/09/06
1500
01
Data modifica
N°bolla modifica
–2–
Indice modifica
Data emissione
Codice
01/09/06
0000570674A
Data modifica
N°bolla modifica
Indice modifica
INDICE
1.
INFORMAZIONI GENERALI
1.1.
1.2.
1.3.
SCOPODELMANUALE ............................................................. 5
IDENTIFICAZIONECOSTRUTTOREEMACCHINA ....................... 6
RACCOMANDAZIONIPERL’ASSISTENZA .................................. 7
2.
SPECIFICHE TECNICHE
2.1.
2.2.
2.3.
2.4.
2.5.
2.6.
2.7.
DESCRIZIONE DELLAMACCHINA ............................................. 8
CONDIZIONIPREVISTED’UTILIZZOECONTROINDICAZIONI ..... 9
CARATTERISTICHETECNICHE .................................................. 11
POSTAZIONI DI LAVORO ......................................................... 11
LIVELLO DI RUMOROSITÀ ........................................................ 13
POLVERIEMESSE ................................................................... 13
DISPOSITIVI DI SICUREZZA ..................................................... 14
3.
3.1.
3.2
3.3
4.
4.1.
4.2.
4.3.
4.3.1
4.3.2
4.3.3
4.3.4
4.4.
4.5.
PRECAUZIONI PER LA SICUREZZA
(PRATICHE DI LAVORO SICURO)
NORMEDISICUREZZA ............................................................. 15
RISCHI RESIDUI ....................................................................... 18
SEGNALI DI SICUREZZA E DI INFORMAZIONE .......................... 19
5.
NORME DI MESSA A PUNTO
5.1.
5.1.1
5.1.2
5.2.
5.3.
5.4.
UTENSILI - MONTAGGIO E REGISTRAZIONE ............................ 27
Coltelli - montaggio ................................................................... 27
Punte per mandrino - montaggio ................................................ 29
PIALLA A SPESSORE - REGOLAZIONI ...................................... 30
PIANI A FILO - REGISTRAZIONE .............................................. 31
GUIDA FILO - REGOLAZIONE ................................................... 31
6.
NORME DI FUNZIONAMENTO
6.1.
6.1.1
6.1.2
6.1.3
6.1.4
6.2.
6.2.1
6.2.2
6.3.
6.4.
QUADROCOMANDI .................................................................. 32
Funzioni di comando ................................................................. 32
Avviamento macchina ............................................................... 33
Arresto macchina ...................................................................... 33
Arresto di emergenza ................................................................ 33
PIALLATURA A FILO ................................................................. 33
Protezione pialla ....................................................................... 35
Guida aggiunta ribaltabile .......................................................... 37
PIALLATURA A SPESSORE ..................................................... 37
LAVORAZIONI CON LA CAVATRICE .......................................... 39
7. ESIGENZE DI MANUTENZIONE
INSTALLAZIONE
SOLLEVAMENTOESCARICO ................................................... 20
ZONA DI INSTALLAZIONE - CARATTERISTICHE ......................... 21
INSTALLAZIONE PARTI SMONTATE - PREMESSA ...................... 22
Cavatrice - Installazione ............................................................ 22
Guida filo - Installazione ............................................................ 22
Protezione pialla - Installazione ................................................. 23
Ruote di spostamento - Montaggio ............................................. 23
COLLEGAMENTO ELETTRICO .................................................. 24
ASPIRAZIONE DEI TRUCIOLI .................................................... 26
ITALIANO
7.1.
7.2.
7.3.
7.4.
7.5.
7.6.
CINGHIETRAPEZOIDALI-SOSTITUZIONEETENSIONAMENTO .. 41
MOTOREAUTOFRENANTE ........................................................ 42
VERIFICA DISPOSITIVI DI SICUREZZA ...................................... 43
PULIZIAGENERALE ................................................................. 44
LUBRIFICAZIONE GENERALE .................................................. 44
SOSTITUZIONEESMALTIMENTO .............................................. 44
8. GUIDA ALLA RICERCA DEI GUASTI
8.1.
-3-
EVENTUALI INCONVENIENTI, CAUSE, RIMEDI .......................... 45
ENGLISH
INDEX
1. GENERAL INFORMATION
5.
SET - UP PROCEDURES
1.1.
1.2.
1.3.
5.1.
5.1.1
5.1.2
5.2.
5.3.
5.4.
TOOL - ASSEMBLY AND ADJUSTMENT .....................................27
Cutters - assembly ....................................................................27
Spindle bits - assembly .............................................................29
THICKNESSING TABLES - ADJUSTING ......................................30
SURFACING TABLES - ADJUSTING ...........................................31
BUZZ PLANER - ADJUSTING .....................................................31
PURPOSE OF THIS MANUAL ..................................................... 5
MANUFACTURERANDMACHINEIDENTIFICATION ..................... 6
CUSTOMERSERVICERECOMMENDATIONS .............................. 7
SPECIFICATIONS
2.
2.1. DESCRIPTIONOFTHEMACHINE ..............................................
2.2.
2.3.
2.4.
2.5.
2.6.
2.7.
8
OPERATINGCONDITIONSAND
CONTRARYDIRECTIONS .......................................................... 9
SPECIFICATIONS ..................................................................... 11
WORKINGPLACES ................................................................... 11
NOISE LEVEL ........................................................................... 13
DUSTEMISSION ...................................................................... 13
SAFETYDEVICES .................................................................... 14
PRECAUTIONS
3. SAFETY
(SAFE WORKING PRACTICES)
3.1.
3.2
3.3
SAFETYREGULATIONS ............................................................ 15
RESIDUALRISKS ..................................................................... 18
SAFETYANDINFORMATIONSIGNALS ...................................... 19
6. OPERATING PROCEDURES
6.1.
6.1.1
6.1.2
6.1.3
6.1.4
6.2.
6.2.1
6.2.2
6.3.
6.4.
CONTROLBOARD ....................................................................32
Control functions ......................................................................32
Starting the machine .................................................................33
Stopping the machine ...............................................................33
Emergency stop .......................................................................33
SURFACINGTABLES ................................................................33
Planer protection ......................................................................35
Retiltable added guide ...............................................................37
THICKNESSING ........................................................................37
WORKINGWITHSLOTTER ........................................................39
4. INSTALLATION
7. MAINTENANCE REQUIREMENTS
4.1.
4.2.
4.3.
4.3.1
4.3.2
4.3.3
4.3.4
4.4.
4.5.
7.1.
7.2.
7.3.
7.4.
7.5.
7.6.
V-BELTREPLACEMENTANDTIGHTENING ................................41
SELF-BRAKINGMOTOR ............................................................42
CHECKINGTHESAFETYDEVICES ............................................43
OVERALLCLEANING ................................................................44
GENERALLUBRICATION ..........................................................44
REPLACEMENTANDDISPOSAL ................................................44
8.
TROUBLE - SHOOTING GUIDE
8.1.
TROUBLES-CAUSES-WHATTODO ............................................45
LIFTINGANDUNLOADING ........................................................ 20
INSTALLATIONAREA-CHARACTERISTICS ............................... 21
INSTALLATIONOFDISASSEMBLEDPARTS-INTRODUCTION .... 22
Slotter - Installation .................................................................. 22
Planing fence - Installation ........................................................ 22
Planer protection - Installation ................................................... 23
Displacing wheels - Assembly .................................................... 23
ELECTRICALCONNECTION ...................................................... 24
CHIPSUCTION ......................................................................... 26
-4-
1.
INFORMAZIONI GENERALI • GENERAL INFORMATION
ITALIANO
ENGLISH
Consultare attentamente questo
manuale prima di procedere a
qualsiasi intervento sulla
macchina.
1.1.
Carefully consult this manual
before doing any adjustment or
maintenance services.
1.1.
SCOPO DEL MANUALE
Questo manuale è stato redatto
dal Costruttore e costituisce parte
integrante del corredo della macchina(1).
Le informazioni contenute sono dirette a personale qualificato(2).
PURPOSE OF THIS
MANUAL
This manual has been drawn up
by the manufacturer and is enclosed with the machine(1).
The information contained is intended for skilled operators(2).
This manual defines the purpose
for which the machine has been
manufactured and contains all the
necessary information for safe,
correct use.
Il manuale definisce lo scopo per
cui la macchina è stata costruita e
contiene tutte le informazioni necessarie per garantirne un uso sicuro e corretto.
Constant observance of the
instructions contained in this
manual increases the level of
safety of the operator and the
machine, guaranteeing a longer
operating life.
La costante osservanza delle indicazioni in esso contenute aumenta il livello di sicurezza
dell’uomo e della macchina, garantendo una più lunga durata di
funzionamento della macchina
stessa.
To facilitate its reading, it has been
divided into sections pointing out
the most important operations. For
a quick research of the topics, it is
recommended to consult the index.
Per facilitarne la consultazione,
esso è stato suddiviso in sezioni
che ne identificano i concetti principali; per una ricerca rapida degli
argomenti consultare l'indice descrittivo.
To better stress the importance of
some basic passages, they have
been written in heavy type and
marked by some preceding
symbols:
I testi da non trascurare, sono stati evidenziati in grassetto e preceduti da simboli quì di seguito
illustrati e definiti.
Indica pe-
Indicates
ricoli imminenti che potrebbero
provocare gravi lesioni all'operatore o ad altre persone; è necessario prestare attenzione e seguire
scrupolosamente le indicazioni.
imminent risks which may cause
serious injury to the operator or
other persons. Be careful and
scrupulously
follow
the
instructions.
Indica che è
A statement
nesessario prestare attenzione al
fine di non incorrere in serie conseguenze che potrebbero portare
al danneggiamento di beni materiali, quali le risorse o il prodotto.
advising of the need to take care
lest serious consequences result
in harm to material items such as
the asset or the product.
(1)
La definizione macchina, sostituisce la denominazione commerciale a cui fa riferimento il
manuale in oggetto (vedi copertina).
(1)
The word “machine” replaces the commercial
denomination which this manual refers to (see
the cover).
(2)
Sono le persone in possesso di esperienza,
preparazione tecnica, conoscenza normativa e
legislativa, in grado di svolgere le attività necessarie ed in grado di riconoscere ed evitare possibili pericoli nell'eseguire la movimentazione,
l'installazione, l'uso e la manutenzione della macchina.
(2)
Only experienced people having the proper
technical ability and knowledge of the regulations
and laws will be able to carry out the necessary
operations and to identify and avoid possible
damages during handling, installation, operation
and maintenance of the machine.
-5-
INFORMAZIONI GENERALI • GENERAL INFORMATION
ITALIANO
ENGLISH
Indicazio-
1.
Important
ni di particolare importanza.
information.
A
B
D
C
E
G
M
H
N
I
F
L
Q
O
P
1
027_069_0.tif
1.2.
IDENTIFICAZIONE
COSTRUTTORE E
MACCHINA
1.2.
MANUFACTURER AND
MACHINE
IDENTIFICATION
La targa di identificazione (fig.1) è
fissata sul basamento della macchina e riporta i seguenti dati:
The identification plate (Fig. 1) is
fixed to the base of the machine and
carries the following data:
A
B
C
D
E
F
G
H
A
B
C
D
E
F
G
H
I
L
M
N
O
P
Q
- Identificazione del costruttore
- Marchio commerciale
- Tipo macchina
- Anno di produzione
- Numero di serie
- Peso in kilogrammi
- Tensione nominale in volt
- Numero fasi (corrente alternata)
- Corrente nominale in ampere
- Frequenza elettrica in hertz
- Potere di interruzione di corto
circuito del dispositivo di protezione in kiloampere
- Numero schema elettrico
- Modello macchina
- Composizione macchina
- Riferimento interno
I
L
M
N
O
P
Q
Questi dati devono essere sempre
precisati al costruttore per
informazioni, richieste ricambi,
ecc.
- Manufacturer
- Merchandise mark
- Machine type
- Production year
- Serial number
- Weight (kg)
- Rated voltage (volt)
- Phases number (alternate
current)
- Rated current (ampere)
- Frequency (hertz)
- Short circuit breaking capacity
of the protective device (kA)
- Wiring diagram number
- Machine model
- Machine version
- Internal references
Always specify this data to the
manufacturer for any information,
request of spare parts, etc.
-6-
INFORMAZIONI GENERALI • GENERAL INFORMATION
ITALIANO
1.3.
ENGLISH
RACCOMANDAZIONI
PER L’ASSISTENZA
1.3.
Nel redigere questo libretto abbiamo preso in considerazione tutte
le operazioni che rientrano nella
consuetudine della normale manutenzione.
1.
CUSTOMER SERVICE
RECOMMENDATIONS
Any operation concerning routine
maintenance has been taken into
account while compiling this
manual.
Never carry out any repair or
operations which have not been
mentioned in this manual. Apply
to skilled and authorized technical
staff to carry out any operation
dealing with parts disassembly.
Raccomandiamo di non eseguire
alcuna riparazione o intervento non
indicati in questo manuale.Tutte
quelle operazioni che richiedono
smontaggio di parti, vanno affidate al personale tecnico autorizzato.
Keep to the instructions contained
in this manual for the correct use
of the machine.
Per l’impiego corretto della macchina seguire le istruzioni di questo manuale.
Solo personale addestrato ed
autorizzato può usare la macchina
ed eseguire operazioni di
manutenzione, dopo aver letto
questo manuale.
Osservare le norme
antinfortunistiche, le regole di
sicurezza generale e della
medicina del lavoro.
Only skilled and authorized
staff shall use and service the
machine after reading this
manual.
Respect the accidentprevention regulations and the
general safety and industrial
medicine rules.
Per informazioni riguardanti
specificatamente l’impianto elettrico fornire i dati riportati sulla
targhetta di fig. 2 situata nella parte interna dello sportello di accesso al vano elettrico.
As for information concerning the
electric system, detail the data
indicated on the plate of fig. 2,
located inside the electric system
access door.
B
A
D
C
E
H
G
I
Legenda (fig. 2)
A - Ditta che ha eseguito l’impianto elettrico.
B - Data di costruzione della
centralina elettrica.
C - Numero distinta componenti
elettrici.
D - Numero schema elettrico.
E - Tensione di rete alimentazione macchina (V).
F - Tensione di alimentazione circuiti ausiliari (V).
G - Tensione di alimentazione freno motore (V).
H - Frequenza elettrica in Hz.
I - Potenza assorbita dalla macchina.
L - Tipo macchina.
F
L
Legend (fig. 2)
2
009_064_0.tif
A - Firm which carried out the
electric system
B - Electric control unit
manufacturing date.
C - Electrical components bill
number.
D - Wiring diagram number.
E - Machine supply voltage (V).
F - Auxiliary circuits supply
voltage (V).
G - Motor brake supply voltage (V).
H - Electric frequency in Hz.
I - Power absorbed from the
machine.
L - Machine type.
-7-
SPECIFICHE TECNICHE • SPECIFICATIONS
ITALIANO
ENGLISH
R
N
2.
A
D
P
M
I
Q
F
I
C
B
G
L
E
M
H
51.001.0.tif
2.1.
2.1.
DESCRIZIONE DELLA
MACCHINA (fig. 1)
La macchina è una pialla a filospessore completa di una guida
filo inclinabile da 90° a 45°.
The machine is a surfacingthicknessing planer equipped with
a tiltable surface fence which
ranges from 90° to 45°.
Può essere dotata di cavatrice con
mandrino autocentrante o fisso, e
doppia velocita' di trascinamento
rulli spessore.
The machine may be equipped
with a fixed or self centring slotter
and two-speed thicknessing feed
rollers
Organi principali:
A
B
C
D
E
-
F GH I
L
M
N
P
Q
R
S
-
1
DESCRIPTION OF THE
MACHINE (fig. 1)
Pialla a filo
Pialla a spessore
Cavatrice
Guida filo
Leva azionamento rulli di
trascinamento
Bloccaggio sollevamento
spessore
Sollevamento piano spessore
Visualizzatore sollevamento
piano spessore
Bloccaggio piani a filo
Pressore
Quadro comandi
Spingilegno
Guida aggiunta ribaltabile
Protezione pialla a ponte
Protezione pialla
Indicatore numerico sollevamento piano spessore (OPT)
Main components:
A
B
C
D
E
F
G
H
- Surfacing tables
- Thicknessing tables
- Slotter
- Buzz planer
- Feed roller drive lever
- Shim lifting lock
- Shim lifting
- Thicknessing table lifting
display
I - Surfacing table locking
L - Presser
M - Control board
N - Wood thrust
P - Tiltable added guide
Q - Bridge planing safety
R - Planing safety
S - Thicknessing table lifting
numeric indicator (OPT)
-8-
SPECIFICHE TECNICHE • SPECIFICATIONS
ITALIANO
2.2.
ENGLISH
2.2.
CONDIZIONI PREVISTE
D’UTILIZZO E
CONTROINDICAZIONI
2.
OPERATING
CONDITIONS AND
CONTRARY DIRECTIONS
Questa macchina é stata progettata per forare e piallare il legno
massello, i pannelli di fibra, i
truciolari, i compensati e paniforte
rivestiti e non.
This machine has been designed
to drill and to plane heartwood,
fiberboard, chipboard panels,
plywood and lamin board both
coated and not coated.
I materiali diversi da quelli citati
qui sopra non essendo assimilati
al legno sono di conseguenza vietati; i danni provocati da una loro
lavorazione vedrebbero come unico responsabile l’utilizzatore.
Materials different from those quoted
above, since dissimilar to wood, are
thus prohibited: the user is solely
responsible for any damage caused
by machining such materials.
La macchina è stata progettata per
impiegare esclusivamente utensili conformi alla norma EN 847-1,
adatti per il tipo di materiale usato.
The machine has been designed
to be used exclusively with EN
8471 compliant tools, suitable for
the type of material used.
Always connect the machine to a
sufficiently dimensioned suction
system (see Chapter 4).
Collegare sempre la macchina all’impianto di aspirazione che deve
essere
sufficientemente
dimensionato (vedi cap.4).
E' vietato l'utilizzo della macchina
senza aver installato correttamente le protezioni.
Seguire scrupolosamente le precauzioni per la sicurezza indicate
nel capitolo 3.
It is prohibited to use the machine
without having properly installed
the protections.
Legenda • Legend
1 FS 30 elite
2 FS 35 elite
3 FS 41 elite
1 1460
E' vietato eseguire modifiche alla
macchina; l'esecuzione di modifiche, fa decadere la Dichiarazione
di Conformità della macchina.
2 1505
Scrupulously
follow
the
precautions for safety indicated in
Chapter 3.
3 1630
It is prohibited to make any
modifications to the machine. If
modifications are made, the
Declaration of Conformity is
forfeited.
1 1100 2 1150 3 1210
1 540
2 590
3 650
Per i danni che ne derivano da
un’uso improprio l’unico
responsabile è l’utilizzatore.
945
For damages deriving from
improper use the user is solely
responsible.
CARATTERISTICHE
TECNICHE
(OPT) = Dispositivo a richiesta
2.3.
2000
2.3.
(OPT) = Optional device
Over-all dimensions
945
Dimensioni d'ingombro
SPECIFICATIONS
Dimensioni ......................... fig.2
Dimension .......................... fig.2
Altezza piano
di lavoro ........................ 900 mm
Work-table height ......... 900 mm
1 425
2 475
3 535
560
2
51.002.0.tif
-9-
SPECIFICHE TECNICHE • SPECIFICATIONS
ITALIANO
ENGLISH
2.
Pialla a spessore
Thicknessing tables
Rullo trascinamento in
entrata a denti elicoidali .. 34 mm
Helical teeth
inlet driving roller ............. 34 mm
Dimensione piano spessore
(FS 30 elite) .......... 775x313 mm
Thicknessing table
dimensions
(FS 30 elite) .......... 775x313 mm
(FS 35 elite) .......... 775x363 mm
(FS 35 elite) .......... 775x363 mm
(FS 41 elite) .......... 775x423 mm
Driving speed (double)
(FS 41 elite) .......... 775x423 mm
Velocità di
trascinamento (doppia)
..................................... 6 m/min
..................................... 6 m/min
................................... 12 m/min
................................... 12 m/min
Maximum removal ............ 5 mm
Asportazione massima ..... 5 mm
Work height:
minimum ........................... 3 mm
maximum ...................... 230 mm
Altezza utile di lavoro:
minima .............................. 3 mm
massima ....................... 230 mm
Minimum working
length ............................ 160 mm
Lunghezza minima
di lavoro ........................ 160 mm
Suction system
coupling .................. Ø 120 mm
Attacco aspirazione ... ø 120 mm
Pialla a filo
Surfacing tables
Albero pialla
(con 3 coltelli) .............. ø 87 mm
Dimensione coltelli pialla
(FS 30 elite) ................ 300x30x3
Cutterblock
(with 3 blades) ............. ø 87 mm
(FS 35 elite) ................ 350x30x3
(FS 30 elite) ................ 300x30x3
(FS 41 elite) ................ 410x30x3
(FS 35 elite) ................ 350x30x3
Altezza minima coltelli .... 18 mm
(FS 41 elite) ................ 410x30x3
Albero pialla tipo TERSA
(con 4 coltelli) (OPT). ... ø 87 mm
Minimum blade height ..... 18 mm
Velocità di rotazione
albero ...................... ~5200 g/min
(with 4 knives) (OPT) .... ø 87mm
Planer blade size
Cutterblock TERSA-type
Cutterblock rotation
speed.....................~5200r.p.m.
Tempo di arresto
albero ...................... max 10 sec.
Shaft stop time ...... max 10 sec.
Asportazione massima ..... 5 mm
Maximum removal ............ 5 mm
Inclinazione guida ........ 90°÷ 45°
Fence tilting ................. 90°÷ 45°
Attacco aspirazione ... ø 120 mm
Suction system
Protezione a ponte
coupling .................... Ø 120 mm
Bridge-type protection
- 10 -
SPECIFICHE TECNICHE • SPECIFICATIONS
ENGLISH
ITALIANO
2.
Cavatrice (OPT)
Slotter (OPT)
Dimensione piano
di lavoro ................ 470x230 mm
Working table
size ...................... 470x230 mm
Work table travel:
- x ................................. 160 mm
- y ................................. 105 mm
- z ................................. 120 mm
Corsa piano di lavoro:
- x ................................. 160 mm
- y ................................. 105 mm
- z ................................. 120 mm
Fixed spindle .............. ø 16 mm
Self-centering
spindle (OPT). ....... ø 0÷16 mm
Mandrino fisso ............. ø 16 mm
Collet spindle (OPT). .................
ø 16 mm / ø 10 mm / ø 5 mm
Suction hose connection ............
............................... ø 120 mm
Mandrino autocentrante (OPT)
. ............................... ø 0÷16 mm
Mandrino portapinza (OPT) ........
... ø 16 mm / ø 10 mm / ø 5 mm
Attacco tubo
di aspirazione ..............ø120 mm
3
050_052_0.tif
Ruote di trasferimento (OPT)
Displacing wheels (OPT)
Potenza motore (50 Hz)
Motor power (50 Hz)
trifase ..... 3 KW - 4 KW - 5,5 KW
monofase ....................... 1,8 KW
three-phase3KW - 4 KW - 5,5 KW
Single-phase .................. 1,8 KW
Pesi
Weights
FS 30 elite
Con cavatrice .................. 407 kg
Senza cavatrice ............... 365 kg
FS 35 elite
Con cavatrice .................. 417 kg
Senza cavatrice ............... 375 kg
FS 41 elite
Con cavatrice .................. 452 kg
Senza cavatrice ............... 410 kg
FS 30 elite
With slotter ...................... 407 kg
Without slotter ................. 365 kg
FS 35 elite
With slotter ...................... 417 kg
Without slotter ................. 375 kg
FS 41 elite
With slotter ...................... 452 kg
Without slotter ................. 410 kg
2.4.
2.4.
POSTAZIONI
DI LAVORO (fig. 4)
WORKING PLACES
(fig. 4)
B
The machine has been
designed to be used by a
single user.
La macchina è stata concepita
per essere utilizzata da un solo
operatore.
A - Piallatura filo
B - Piallatura spessore
C - Foratura
A - Surfacing planer
B - Thicknessing planer
C - Drilling
C
A
4
51.003.0.tif
- 11 -
2.
SPECIFICHE TECNICHE • SPECIFICATIONS
ITALIANO
ENGLISH
PIALLA A FILO
SURFACING PLANER
Misura dell'emissione sonora emessa
secondo le norme .......... ISO 3746/1979
Lavorazione ................. Piallatura a filo
Condizioni di funzionamento
secondo le norme ............ ISO/DIS 7960
........................................... Allegato B
Measure of the noise level according to
standards ....................... ISO 3746/1979
Machining ................... Surface planing
Operating condition according to
standards .......................... ISO/DIS 7960
........................................ Enclosure B
Posto
operatore
Livello
Livello max
equivalente
LpeaK dB
LAeq dB (A)
Alimentazione
pezzo
91,0 dB (A)
Workstation
Workpiece
feed
< 130
Potenza acustica 98,1 (6,46) dB (A)
(mW)
solamente se LAeq > 85 dB (A)
Equivalent
Peak value
noise level
Lpeak dB
Laeq dB (A)
91,0 dB (A)
< 130
Acoustic power 98,1 (6,46) dB (A)
(mW) Only if LAeq > 85 dB (A)
PIALLA A SPESSORE
THICKNESSING PLANER
Misura dell'emissione sonora emessa
secondo le norme .......... ISO 3746/1979
Lavorazione ...... Piallatura a spessore
Condizioni di funzionamento
secondo le norme ............ ISO/DIS 7960
........................................... Allegato C
Measure of the noise level according to
standards ....................... ISO 3746/1979
Machining ........ Thicknessing planing
Operating condition according to
standards .......................... ISO/DIS 7960
........................................ Enclosure C
Posto
operatore
Livello
Livello max
equivalente LpeaK dB
LAeq dB (A)
Workstation
Equivalent
Peak value
noise level
Lpeak dB
Laeq dB (A)
Alimentazione
pezzo
85,2 dB (A)
< 130
Workpiece
feed
Uscita pezzo
(eventuale) 85,5 dB (A)
< 130
Workpiece
outlet (if fitted)85,5 dB (A)
85,2 dB (A)
< 130
< 130
Potenza acustica 97,4 (5,50) dB (A)
(mW)
solamente se LAeq > 85 dB (A)
Acoustic power 97,4 (5,50) dB (A) (mW)
Only if LAeq > 85 dB (A)
CAVATRICE
SLOTTER
Misura dell'emissione sonora emessa
secondo le norme .......... ISO 3746/1979
Lavorazione ............................ Foratura
Condizioni di funzionamento
secondo le norme ............ ISO/DIS 7960
Measure of the noise level according to
standards ....................... ISO 3746/1979
Machining .................................. Boring
Operating condition according to
standards .......................... ISO/DIS 7960
Posto
operatore
Livello
Livello max
equivalente LpeaK dB
LAeq dB (A)
Alimentazione
pezzo
89,8 dB (A)
Workstation
Workpiece
feed
< 130
Equivalent
Peak value
noise level
Lpeak dB
Laeq dB (A)
89,8 dB (A)
< 130
Acoustic power
101,4 (12,4) dB (A) (mW)
Only if LAeq > 85 dB (A)
Potenza acustica
101,4 (12,4) dB (A) (mW)
solamente se LAeq > 85 dB (A)
- 12 -
SPECIFICHE TECNICHE • SPECIFICATIONS
ITALIANO
2.5.
ENGLISH
LIVELLO DI
RUMOROSITÀ
2.5.
NOISE LEVEL
The noise levels measured are
emission levels and not necessarily the safe working level. Although
there is a correlation between the
emission levels and the exposure
levels, this cannot be used reliably to determine whether or not
further precautions are required.
The factors which affect the actual level of operator exposure include the duration of exposure, the
ambient characteristics and other
sources of emission, for example,
the number of machines and other
adjacent machining. The permitted exposure values may also vary
from country to country. Nevertheless, this information allows the
user of the machine to better
evaluate the dangers and risks.
Other factors which reduce
exposure to noise are:
- correct tool choice
- tool and machine maintenance
- use of hearing protection
systems (e.g. headsets,
earplugs,...)
I valori misurati per il rumore sono
livelli di emissione e non necessariamente livello di lavoro sicuro.
Mentre vi è una correlazione tra
livelli di emissione e livelli di esposizione, questa non può essere
usata affidabilmente per determinare se siano richieste o no ulteriori precauzioni. I fattori che
influenzano il reale livello di esposizione del lavoratore includono la
durata dell'esposizione, le caratteristiche dell'ambiente, altre sorgenti
di emissione, per es. il numero delle macchine e altre lavorazioni
adiacenti. Anche i livelli di esposizione permessi possono variare da
paese a paese. Queste informazioni comunque mettono in grado
l'utilizzatore della macchina di fare
una migliore valutazione dei pericoli e dei rischi.
Altri fattori che riducono l'esposizione del rumore sono:
- corretta scelta dell'utensile
- manutenzione degli utensili e della macchina
- utilizzo di sistemi di protezione
dell'udito (es. cuffie, tappi,...)
2.6.
2.
POLVERI EMESSE
2.6.
DUST EMISSION
Valore medio delle polveri emesse con pezzo in alimentazione:
Piallatura a filo ........ 0,73 mg/m3
Average dust emission value with
fed piece:
Surfacing ............... 0,73 mg/m3
Piallatura a spessore 0,27 mg/m3
Thicknessing ......... 0,27 mg/m3
Foratura ................. 0,39 mg/m3
Drilling .................... 0,39 mg/m3
Valore medio delle polveri emesse con pezzo in uscita:
Piallatura a filo ........ 0,32 mg/m3
Average dust emission value with
outgoing workpiece:
Surfacing ............... 0,32 mg/m3
Piallatura a spessore 0,14 mg/m3
Thicknessing ......... 0,14 mg/m3
Foratura ................. 0,38 mg/m3
Drilling ................... 0,38 mg/m3
- 13 -
SPECIFICHE TECNICHE • SPECIFICATIONS
ITALIANO
2.7.
ENGLISH
DISPOSITIVI DI
SICUREZZA (fig. 5)
2.7.
La macchina è dotata dei seguenti
dispositivi di sicurezza (è assolutamente vietato modificarli o
disattivarli):
A - Microinterruttore pialla.
Arresta la macchina al ribaltamento delle piane a filo.
Abilita il motore per lavorazioni allo spessore qualora venga ribaltata la cuffia D dalla
posizione 1 alla 2.
B - Protezioni per lavorazioni
alla pialla.
C - Pulsante di emergenza
A - Plane microswitch.
Stops machine when planing
tables tip.
Enables the motor for
thicknessing operations if the
hood D is turned over from
position 1 to 2.
B - Guard for planer operations
C - Emergency button
2
1
B
C
B
5
51.004.0.tif
- 14 -
SAFETY DEVICES
(fig. 5)
The machine is equipped with the
following safety devices (it is strictly
prohibited to modify them or
deactivate them):
A
D
2.
PRECAUZIONI PER LA SICUREZZA (PRATICHE DI LAVORO SICURO)
SAFETY PRECAUTIONS (SAFE WORKING PRACTICES)
ENGLISH
ITALIANO
3.1.
3.1.
NORME DI SICUREZZA
3.
SAFETY REGULATIONS
Leggere attentamente il Manuale
delle istruzioni per l'uso e la
manutenzione prima di procedere
alle operazioni di avviamento,
impiego, manutenzione, o
qualsiasi altro intervento sulla
macchina.
Il Costruttore declina ogni
responsabilità per danni a
persone o cose, conseguenti
l’inosservanza delle norme di
sicurezza.
Read carefully the operation and
maintenance manual before
starting, using, servicing and
carrying out any other operation
on the machine.
The manufacturer disclaims all
responsibilities for damages to
persons or things, which might
be caused by any failure to
comply with the above
mentioned safety regulations.
Esaminare attentamente le targhette di sicurezza applicate sulla
macchina e rispettarne le indicazioni in esse contenute.
Read carefully the safety plates
located on the machine and follow
all the instructions.
The machine operator shall have
all necessary prerequisites in oder
to operate a complex machiery.
L'operatore deve possedere tutti i
requisiti prescritti per l’utilizzo di una
macchina complessa.
It is prohibited to use the machine
when under the influence of alcohol, drugs or medication.
E' vietato utilizzare la macchina
sotto l'influenza di alcool, droghe,
o medicine.
All the operators must be suitably
trained for use, adjustment and
operation of the machine.
E' obbligatorio che tutti gli operatori siano adeguatamente formati
per l'utilizzazione, la regolazione
ed il funzionamento della macchina.
The operators must carefully read
the manual paying particular attention to the warning and safety
notes. Furthermore, they must be
informed on the dangers associated with use of the machine and
the precautions to be taken, and
must be instructed to periodically
inspect the guards and safety devices.
Gli operatori devono leggere attentamente il manuale prestando
particolare attenzione alle note e
avvertenze di sicurezza; devono
inoltre essere informati sui pericoli
associati con l'uso della macchina
e le precauzioni che devono essere osservate, e devono essere
istruiti ad effettuare esami periodici sui ripari e dispositivi di sicurezza.
A suitable padlock must be procured to lock the main power
switch. The qualified and authorised operator is responsible for
safekeeping of the key.
E' indispensabile procurarsi un lucchetto idoneo al bloccaggio dell'interruttore
generale
di
alimentazione elettrica. L'operatore qualificato e autorizzato è responsabile e custode della chiave.
Before carrying out adjustment,
repair or cleaning work, disconnect the machine from the electric
power by setting the main switch
to 0, and lock it with the padlock.
Prima di effettuare interventi di
regolazione, riparazione o pulizia,
togliere tensione alla macchina
mettendo l'interruttore generale
sullo O e chiuderlo con l'aiuto di
un lucchetto.
- 15 -
PRECAUZIONI PER LA SICUREZZA (PRATICHE DI LAVORO SICURO)
SAFETY PRECAUTIONS (SAFE WORKING PRACTICES)
ENGLISH
ITALIANO
3.
In the version with self-braking
motor, periodically carry out the
maintenance and cleaning
operations and check the motor
stopping time as described in Chap.
7.
Eseguire periodicamente le operazione di manutenzione, pulizia e
controllo tempo arresto motori
come indicato nel cap.7.
La zona di lavoro attorno alla macchina deve sempre essere mantenuta pulita e sgombra per l’immediato e facile accesso ai
comandi del quadro elettrico.
The working area around the machine must be kept always clean
and clear, in order to have an immediate and easy access to the
switchboard.
Non introdurre nella macchina materiale diverso da quello previsto
per il suo utilizzo.
Never insert materials which are
different from those which are prescribed for the machine utilization.
Il materiale da lavorare non deve
contenere parti metalliche.
The material to be machined must
not contain any metal parts.
Non lavorare mai pezzi troppo piccoli o troppo grossi per la capacità
della macchina.
Never machine pieces which may
be too small or too wide ithrespect
to the machine capacity.
Non lavorare legni che presentano difetti molto evidenti (spaccature, nodi, parti metalliche, etc.....)
Do not work wood which has evident defects (cracks, knots, metal
parts, etc.)
Utilizzare rulliere o tavoli di estensione quando si lavorano pezzi di
dimensioni elevate.
Use rollers or extension tables
when machining very large pieces.
Non mettere le mani tra le parti e/
o materiali in movimento.
Never place hands among the
moving parts and/or materials.
Non mettere le mani in prossimità
dell'utensile; eseguire l'avanzamento del pezzo con l'aiuto di uno
spintore.
Keep hands clear from the tool;
feed the piece with the aid of a
pusher.
Keep the tools tidy and far away
from those not authorized persons.
Custodire gli utensili in maniera
ordinata e lontano da persone non
addette.
Never employ cracked nor uckled,
neither not correctlyreground tools.
Non impiegare mai utensili incrinati, deformati o non correttamente riaffilati.
Only use tools in conformity with
EN 847-1 standard.
Usare esclusivamente utensili conformi alla norma EN 847-1.
Never use the tools beyond the
speed limit recommended bythe
producers.
Non usare gli utensili oltre il limite
di velocità indicato dai costruttori.
Carefully clean the rest surfaces of
tools and make surethat they find
perfectly horizontally positioned, and
withno dents at all.
Pulire accuratamente le superfici
di appoggio degli utensili ed assicurarsi che siano perfettamente
piane e prive di ammaccature.
Always wear gauntlets when handling the tools.
Maneggiare gli utensili utilizzando
i guanti di protezione.
- 16 -
PRECAUZIONI PER LA SICUREZZA (PRATICHE DI LAVORO SICURO)
SAFETY PRECAUTIONS (SAFE WORKING PRACTICES)
ENGLISH
ITALIANO
3.
Montare gli utensili nel giusto verso di lavorazione
Mount the tools in the right machining direction.
Non avviare la macchina senza
aver correttamente installato tutte
le protezioni.
Never start the machine before
having correctly installed all the
protections.
Iniziare la lavorazione solo quando gli utensili hanno raggiunto la
velocita' di regime.
Start machining only when the
tools have reached their operating
speed.
Collegare le cappe di evacuazione
polveri ad un adeguato impianto di
aspirazione attenendosi alle indicazioni del cap.4.; l'aspirazione
deve essere sempre avviata all'accensione della macchina.
Connect the dust suction hoods to
an adequate suction system, following the instructions in Chap. 4;
suction must always be activated
when the machine is switched on.
Never open doors or protections
when the machine or the system
is operating.
Non aprire, in nessun caso, portelli
o protezioni con la macchina o l’impianto in movimento.
Many unpleasant experiences have
shown that anybody may wear objects which could cause serious
accidents.
Therefore, before starting working,
take any bracelet, watch or ring off.
Spiacevoli e numerose esperienze hanno evidenziato che sulla
persona vi possono essere svariati oggetti in grado di provocare
gravi infortuni: prima di iniziare a
lavorare, togliersi monili, orologi o
altro.
Button the working garment sleeve
well around the wrists.
Serrare bene attorno ai polsi, le
maniche dell’indumento da lavoro, abbottonandole in modo sicuro.
Take any garment off which, by
hanging out, may get tangled in
the MOVING UNITS.
Togliersi gli indumenti che penzolando, potrebbero impigliarsi nei
GRUPPI IN MOVIMENTO.
Always wear strong working footwear, as prescribed by the accident-prevention regulations of all
countries.
Utilizzare sempre le robuste calzature da lavoro, previste dalle norme
antinfortunistiche di tutte le nazioni.
Use protection glasses.
Use appropriate hearing protection systems (headsets, earplugs,
etc.) and dust protection masks.
Adottare gli occhiali di protezione.
Usare appropriati sistemi di protezione per l'udito (cuffie, tappi, etc.)
e per la polvere (mascherine).
Never let unauthorized people repair, service or operate the machine.
Non permettere alle persone non
autorizzate di riparare od eseguire la manutenzione o di effettuare
qualsiasi genere di intervento sulla
macchina.
The manufacturer is not responsible for any damage deriving from
arbitrary modifications made to the
machine.
Any transport, assembly and dismantling is to be made only by
trained staff, who shall have specific skill for the specified operation.
Modifiche arbitrarie sulla macchina, escludono ogni responsabilita'
del costruttore, per i danni che ne
possono derivare.
Effettuare le operazioni di trasporto, installazione e montaggio, solo
da addetti in possesso delle indispensabili competenze tecniche
ed esperienza in ciascuno dei settori previsti.
- 17 -
PRECAUZIONI PER LA SICUREZZA (PRATICHE DI LAVORO SICURO)
SAFETY PRECAUTIONS (SAFE WORKING PRACTICES)
ENGLISH
ITALIANO
3.
Fissare sempre la macchina al
pavimento (vedi cap.4).
Always fix the machine to the floor
(see Chapter 4).
L'operatore non deve mai lasciare
la macchina incostudita durante il
funzionamento.
The operator must never leave the
machine unattended during operation.
Durante la sosta in un ciclo operativo spegnere la macchina.
During any working cycle break,
switch the machine off.
In caso di soste protratte, scollegare l'alimentazione elettrica generale.
In case of long working cycle
breaks, disconnect the general
power supply.
3.2
3.2
RISCHI RESIDUI
RESIDUAL RISKS
Nonostante l'osservanza di tutte
le norme di sicurezza, e l'impiego
secondo le regole descritte nel presente manuale, si possono avere
ancora dei rischi residui fra i quali
i piu' ricorrenti sono:
Despite observance of all the
safety regulations, and use according to the rules described in this
manual, residual risks may still be
present, among which the most
recurring are:
- contatto con l'utensile
- contatto con le parti in movimento (cinghie, pulegge, etc..)
- rinculo del pezzo o parti di esso
- infortuni dovuti a schegge o frammenti di legno
- Eiezione di inserti di utensile
- Folgorazione dovuta al contatto
con parti in tensione
- Pericolo dovuto al montaggio
sbagliato dell'utensile
- Rotazione inversa degli utensili
dovuta all'errato collegamento
elettrico
- pericolo dovuto all'inalazione di
polveri nel caso di lavoro senza
aspiratore.
Tenete presente che l'uso di qualsiasi macchina utensile implica dei
rischi.
Affrontare ogni tipo di lavorazione
(anche la piu' semplice) con la giusta attenzione e concentrazione.
La maggiore sicurezza e' nelle
vostre mani.
- contact with tool
- contact with moving parts (belts,
pulleys, etc..)
- recoil of the piece or part of it
- accidents due to wood splinters
or fragments
- tool insert ejection
- electrocution from contact with
live parts
- danger due to incorrect tool installation
- inverse tool rotation due to incorrect electrical connection
- danger due to dust inhalation in
case of working without vacuum
cleaner.
Bear in mind that the use of any
machine tool carries risks.
Use the appropriate care and concentration for any type of machining (also the most simple).
The highest safety is in your
hands.
- 18 -
PRECAUZIONI PER LA SICUREZZA (PRATICHE DI LAVORO SICURO)
SAFETY PRECAUTIONS (SAFE WORKING PRACTICES)
ENGLISH
ITALIANO
3.3.
SEGNALI DI SICUREZZA
E DI INFORMAZIONE
3.3.
Questi segnali sono applicati sulla
macchina; in alcuni casi indicano
possibili situazioni di pericolo, in
altri servono come indicazione.
Prestare sempre la massima attenzione; a fianco di ognuno di essi
è specificato il loro significato.
SAFETY AND
INFORMATION SIGNALS
This signals are applied on the
machine; in some cases they indicate possible danger conditions,
in others they serve as indication.
Always take the utmost care; the
meaning of each one of them is
specified next to it
A
SEGNALI DI SICUREZZA (FIG.1)
3.
SAFETY SIGNALS (FIG.1)
B
A - Danger of cutting the upper
limbs (moving tools): do not
insert the hands in the cutting
area.
A - Pericolo di taglio arti superiori (utensili in movimento):
non introdurre le mani nella
zona di taglio.
B - Pericolo di shock elettrico:
non accedere alla zona con
macchina in tensione.
B - Danger of electric shock: do
not access the area when the
machine is powered.
C
C - Warning plate: carefully read
the warnings on it.
C - Targa di avvertenze: leggere
attentamente le avvertenze riportate.
1
028_074_0.tif
INFORMATION SIGNALS (FIG.2)
SEGNALI DI INFORMAZIONE
(FIG.2)
D - Indica il punto dove inserire i
ganci per il sollevamento della
macchina.
D - Indicates the point where to insert the hooks for lifting the
machine.
D
E- Indica il senso di rotazione
dell'utensile.
E - Indicates the tool rotation direction.
F - Simbolo di bloccaggio.
F - Locking symbol.
E
F
2
028_073_0.tif
- 19 -
INSTALLAZIONE • INSTALLATION
ITALIANO
4.1.
ENGLISH
SOLLEVAMENTO E
SCARICO
4.1.
Le operazioni di sollevamento e
movimentazione devono essere
eseguite dal personale
specializzato ed addestrato a
questo tipo di manovre.
Durante la fase di carico e scarico
occorre evitare urti al fine di
evitare danni alla macchina e alle
persone. Nessuna persona dovrà
trovarsi in prossimità del carico
sospeso e/o comunque nel raggio
d’azione del carro ponte durante la
fase di sollevamento e
movimentazione della macchina.
– Predisporre un carrello elevatore A di portata adeguata;
– inserire le forche B come da
figura(tenendole accostate ai due
piedi E) e verificare che queste
fuoriescano di almeno 15 cm dalla parte posteriore del
basamento.
Lifting may be carried out by
bridge crane or self-propelled lift
truck. Before starting the
manoeuvres, free the machine of
all the parts used for transport or
packaging that have remained on
the machine.
Check that the capacity of the
hoisting means is greater than the
gross weight of the machine
indicated in fig. 1.
D
C
C
– Provide a fork lift truck A having
suitable carrying capacity;
– Insert the forks B as per the figure (keeping them alongside the
two feet E) and check that these
protrude at least 15 cm from the
rear part of the base.
E
B
E
A
If lifting with a hook, open the
holes already prepared and
indicated by the plate as shown
in the figure.
In caso di sollevamento con
gancio è necessario aprire le
forature già predisposte e
segnalate dall'apposita targhetta,
come indicato in figura.
Qualora si disponga di carro ponte o gru procedere come segue:
– predisporre di due cinghie C di
ugual lunghezza (circa 2000 mm)
aventi portata adeguata;
– agganciare le cinghie al carro
ponte D di portata adeguata;
– sollevare le cinghie e posizionarle come rappresentato in figura 1;
LIFTING AND
UNLOADING
Lifting and handling should only
be carried out by skilled
personnel specially trained to
execute this kind of operations.
During loading and unloading,
avoid knocks to prevent
damages to persons or things.
Make sure no one is standing
under the overhung load and/or
within the bridge crane working
range during machine lifting and
handling.
Kg.600
Il sollevamento si puo' effettuare
tramite carro ponte o carrello
elevatore semovente.Prima di cominciare le manovre,liberare la
macchina di tutte le parti che,per
esigenze di trasporto o imballaggio risultino appoggiate su di essa.
Controllare che la portata del mezzo di sollevamento sia adeguata
al peso lordo della macchina indicato in fig.1.
4.
1
037.005.1.tif
- 20 -
If a bridge crane or a crane is
available, proceed as follows:
– arrange the two belts C of equal
length (about 2000 mm) with
adequate capacity;
– fasten the slings to the bridge
crane D having adequate lifting
power;
– lift the slings and position them
as is shown in the figure1;
INSTALLAZIONE • INSTALLATION
ITALIANO
ENGLISH
4.
– procedere all’assestamento delle cinghie C, muovendo il carro
ponte con brevi spostamenti fino
al raggiungimento della condizione di stabilità ottimale;
– sollevare lentamente e movimentare con la massima cautela evitando le oscillazioni anche
minime e posizionare la macchina nella zona di lavoro
prestabilita;
– rimuovere dai piani e da tutte le
superfici non verniciate, lo strato
di cera protettiva, utilizzando solamente kerosene o derivati.
Non utilizzare solventi, benzina
o gasolio, che possono intaccare la vernice opacizzandola o
produrre ossidazione nelle diverse parti.
– move the bridge crane by small
steps to allow the slings C to
settle, until optimum stability
conditions are reached;
– lift carefully and slowly, without
causing the load to swing, and
place the machine in the selected
setting;
– remove the protective wax coat
from all tables and unpainted
surfaces, using kerosene or its
derivative products.
Do not use any solvent, petrol or
gas oil, which might dull the paint
or oxidate machine parts.
4.2.
4.2.
800
ZONA DI INSTALLAZIONE - CARATTERISTICHE
(fig. 2)
INSTALLATION AREA CHARACTERISTICS
(fig. 2)
A
E' vietato installare la macchina in
ambienti esplosivi.
La zona di installazione deve essere scelta valutando lo spazio di
lavoro in funzione delle dimensioni dei pezzi da lavorare e tenendo
presente che attorno alla macchina deve rimanere uno spazio di
almeno 800 mm
It is prohibited to install the
machine in explosive
environments.
800
A
800
Verificare inoltre la portata del solaio e la superficie del pavimento,
affinché il basamento possa appoggiare uniformemente in piano
sui quattro punti.
La zona prestabilita dovrà disporre di una presa di distribuzione
dell’energia elettrica, di un raccordo dell’impianto di aspirazione dei
trucioli e dovrà essere adeguatamente illuminata (intensità luminosa: 500 LUX).
Bloccaggio a terra.
La macchina deve essere obbligatoriamente fissata a terra.
Fissare ai piedi A (fig. 2) della macchina gli angolari B in dotazione e
bloccare a terra con viti a espansione C (non in dotazione).
The installation zone must be selected evaluating the work space
required depending on the dimension of the pieces to be machined,
and taking into account that a free
space of at least 800 mm must be
left around the machine.
800
It is also necessary to check the
floor capacity and its surface, so
that the machine base is evenly
resting on its four supports.
A power outlet and a chip-suction
system connection shall be close
to the selected machine setting
and it must be conveniently lighted
(luminous intensity: 500 LUX).
C
A
B
2
037.006.0.tif
- 21 -
Fixing to the floor.
The machine must be fixed to the
floor.
Fix the supplied angles B to
machine feet A (fig. 2) and fix on
ground by means of expansion
bolts C (not supplied).
INSTALLAZIONE • INSTALLATION
ITALIANO
4.3.
ENGLISH
4.3.
INSTALLAZIONE PARTI
SMONTATE PREMESSA
Togliere le staffe C (fig. 3) che
bloccano i piani a filo per le
operazioni di trasporto.
C
A few machine elements will be
disassembled from the machine
main structure due to packaging
and shipping requirements. These
loose parts should be installed as
follows.
3
044_005.0.tif
Peso dell'elemento: ~ 40 kg
Predisporre le viti A e relative rondelle sul basamento della macchina.
Sollevare la cavatrice B mediante
adeguate cinghie di sollevamento
come indicato in figura.
inserire la slitta C a coda di rondine sulla testa delle viti A.
Avvitare le viti A fino ad unire la
cavatrice al basamento e registrare il parallelismo del piano rispetto
la punta E agendo sulle viti D e sui
quattro grani F.
Assicurarsi che il piano di lavoro
sia ad una distanza di 11mm dal
centro della punta
Verificare la corretta registrazione
spostando il piano trasversalmente e serrare le viti A.
Assicurarsi che i quattro grani F
siano in appoggio sul basamento.
INSTALLATION OF
DISASSEMBLED PARTS
- INTRODUCTION
Remove the bracket C (fig. 3)
fastening the surface tables
during transport operations.
Alcuni elementi risulteranno smontati dalla struttura principale della
macchina, per esigenze di imballaggio e trasporto.
Procedere alla loro installazione
come descritto di seguito.
4.3.1 Cavatrice - Installazione
(fig. 4)
4.
4.3.1 Slotter - Installation
(fig. 4)
Weight of the element: ~ 40 kg
E
B
A
D
C
F
4
50_015_0.tif
A
4.3.2 Guida filo Installazione (fig. 5)
Prepare the screws A and the relative grommets on the base of
the machine.
Lift mortising machine B using
sufficiently strong lifting belts as
indicated in the figure.
Insert dovetail slide C into head of
screws A.
Screw down the screws A until
joining the mortising machine to
the base and adjust the parallelism
of the table with respect to the bit
E acting on the screws D and on
the four grub screws F.
Ensure that the work table is a
distance of 11mm from the point
centre
Check proper adjustment by moving
the working table transversally,
and tighten the screws A.
Ensure that the four grub screws
F rest on the base.
4.3.2 Planing fence Installation (fig. 5)
– Posizionare il gruppo guida filo
perpendicolare all'albero pialla e
serrare le due viti A.
– Position the planing fence unit
perpendicular to the planer and
tighten the two screws A.
Per motivi di sicurezza è vietato
l'uso della macchina senza la
guida filo montata.
For safety reasons the machine
must not be used if the wire
guide is not mounted.
5
044.007.0.tif
- 22 -
INSTALLAZIONE • INSTALLATION
ITALIANO
ENGLISH
4.3.3 Protezione pialla Installazione (fig. 6)
4.
4.3.3 Planer protection Installation (fig. 6)
A
Le protezioni devono sempre essere montate,e devono essere
posizionate in modo da coprire
al massimo gli utensili.
The protections must always
be mounted and be positioned
in such as way as to
completely cover the tools.
B
B
– Posizionare la protezione A
come da figura.
– Avvitare le 2 viti di fissaggio attraverso i fori B.
– Fit the protection A into place as
shown in the picture.
6
50_017 .0.tif
– Screw the 2 retaining screws
through the holes B.
4.3.4 Displacing wheels Assembly
4.3.4. Ruote di spostamento Montaggio
Il gruppo ruote è composto da :
– 2 ruote fisse (A)
– 1 leva di spostamento(B).
– percuotere i lamierini fino ad
aprire le forature già predisposte per i supporti C e per le ruote fisse A.
C
The unit is composed by:
– 2 fixed wheels (A)
– 1 movement lever (B).
B
– strike the sheet-metal to open
the holes provided for supports
C and fixed wheels A.
– Disassemble
the
door
corresponding to position 3 and
insert wheels in the relative feet.
– smontare lo sportello in corrispondenza della posizione 3 e
inserire le ruote negli appositi
piedi.
3
– montare le ruote fisse A.
Per l’utilizzo delle ruote procedere
in questo modo:
To use the wheels, proceed as
follows:
– Open surfacer tables
1
2
– aprire i piani a filo
– mount the fixed wheels A.
A
– inserire la leva B nel supporto
C dal lato 1 e utilizzarla come
leva per il sollevamento della
macchina;
– insert lever B into support C from
side 1 and use it as a lever to
raise the machine;
– move the fixed wheels A into
the slot next to E; if necessary
move by inserting a hexagonal
wrench into screw D.
A
– spostare le ruote fisse A nell’asola a fianco E; se necessita eseguire lo spostamento
inserendo
una
chiave
esagonale nella vite D.
– move lever B to the opposite
side of the machine (side 2),
insert it into mount C and
proceed with moving the
machine.
E
– spostare la leva B dalla parte
opposta della macchina (lato 2),
inserirlo nell’attacco C e procedere alla movimentazione della macchina.
A
D
7
037.008.0.tif
- 23 -
INSTALLAZIONE • INSTALLATION
Il collegamento elettrico e le
verifiche di seguito elencate
devono essere sempre eseguite
da un elettricista specializzato.
Lo schema elettrico della macchina e il catalogo delle parti di ricambio sono situati nel pacco
accessori ed è parte integrante del
presente manuale.
Accertarsi con l’idonea strumentazione, della perfetta efficienza
dell’impianto di messa a terra dello stabilimento e del tronco di linea
a cui si dovrà collegare la macchina.
<10
10 ÷ 14
14 ÷ 18
18 ÷ 22
22 ÷ 28
28 ÷ 36
4.4.
Fusibili ritardati
Fuse
COLLEGAMENTO
ELETTRICO
Sezione cavi
Cable section
4.4.
ENGLISH
Ampere assorbiti
Absorbed Amperes
ITALIANO
2.5 mm
4.0 mm
6.0 mm
6.0 mm
10.0 mm
10.0 mm
ELECTRICAL
CONNECTION
12 The electrical connection and the
checkings hereafter indicated are
always to be carried out by an
electrician.
12A AM
16A AM
20A AM
25A AM
32A AM
40A AM
8
The machine electric diagram and
spare parts catalogue are in the
accessory pack and form an integral
part of this manual.
Using suitable instruments, check
the earth connection, the earth
electrodes installed in the factory
and the electrical wiring the machine will be connected to for efficiency.
Make sure a differential thermal
circuit breaker has been fitted
upstream from the mains
section connecting the machine
(SAFETY SWITCH).
Verificare che il tronco di linea a
cui si dovrà collegare la macchina, sia protetto a monte da un
interruttore
differenziale
magnetotermico (SALVAVITA).
Check that the mains voltage (V)
and frequency (Hz) are as those
indicated.
Verificare che la tensione di linea
(V) e frequenza (Hz) corrispondano a quella cui è stata predisposta
la macchina.
The machine works under ideal
conditions when the supplied line
voltage is the same voltage specified in the machine data plate; however, higher or lower working
voltage values are also acceptable
within a tolerance range of +/- 5% .
If this tolerance range is exceeded,
input voltage must be corrected.
La condizione di lavoro ottimale
per la macchina é quella di fornire
l'esatta tensione riportata sulla
targhetta di identificazione tuttavia può adeguarsi a tensioni di lavoro superiori o inferiori in un
campo di tolleranza di +/- 5%.
Al di fuori di questo campo provvedere alla regolazione della tensione di alimentazione.
Check total absorbed power (Amp)
in the machine data plate (B fig.9).
Leggere sulla targhetta di identificazione macchina (B fig.9), il valore della corrente totale assorbita
(Amp.)
Consultare la tabella di fig. 8 per
usare la giusta sezione di cavi, e
per installare a monte della macchina fusibili del tipo "AD INTERVENTO RITARDATO".
4.
Check table (fig.8) to choose cables having an appropriate cross
section and to install “DELAYED
OPERATION” fuses upstream
from the machine.
B
A
9
037_012_1.TIF
- 24 -
INSTALLAZIONE • INSTALLATION
ITALIANO
ENGLISH
4.
Accertarsi che il cavo di
collegamento non sia alimentato
elettricamente.
Ensure that the connection
cable is not electrically powered.
Predisporre il cavo di alimentazione in prossimità della morsettiera
A (fig. 10).
Prearrange the feeding cable near
the terminal board A (fig. 10).
Introdurre il cavo all’interno della
morsettiera e collegare le fasi ai
morsetti R-S-T, il neutro (versione
monofase) al morsetto N e il cavo
di messa a terra al morsetto contrassegnato con il simbolo
(fig.10).
Drive the cable inside the terminal
board and connect the phases to
the terminals R-S-T, the neutral
wire to the terminal N (single-fase
version) and the earthing cable to
the terminal marked by the symbol
(fig. 10).
•
•
•
•
•
T
R
S
N
10
63_064_0.tif
CAREFUL WITH THE
ELECTRICAL CONNECTION
ATTENZIONE AL
COLLEGAMENTO ELETTRICO
L'errata rotazione dell'utensile
causa pericolo all'operatore e
danni al prodotto.
Avviare per una frazione di
secondo il gruppo pialla e
verificare che l'albero B (fig.11)
ruoti in senso orario; nel caso la
rotazione non sia corretta,
togliere immediatamente
tensione ed invertire due delle
tre fasi sui morsetti (R-S-T).
B
11
037_013_0.tif
- 25 -
Incorrect rotation of the tool
causes danger to the operator
and damage to the product.
Start the planer unit for a fraction
of a second and check that the
spindle B (Fig. 11) turns
clockwise.
If rotation is incorrect,
immediately cut the power and
invert two of the three phases
on the terminals
(R-S-T).
INSTALLAZIONE • INSTALLATION
ITALIANO
4.5.
ENGLISH
4.5.
ASPIRAZIONE DEI
TRUCIOLI
B
Lavorare sempre con
l'aspirazione attivata.
L’impianto d’aspirazione deve
sempre essere avviato
contemporaneamente al motore
del gruppo operatore in
funzione.
CHIP SUCTION
Always work with the suction
system on.
Always start the suction system
and the operator assembly
motor at the same time.
A
Proper suction eliminates the risks
of dust inhalation and aids better
functioning of the machine.
Una corretta aspirazione elimina i
rischi di inalazione polveri e favorisce un migliore funzionamento della macchina.
The tables list the minimum air flow
and speed values referenced to
each single suction operation.
Nelle tabelle sono riportati i valori
minimi di portata e velocita' dell'aria riferiti ad ogni singola aspirazione.
Ensure that the suction system
guarantees these values at the
hood-mouth connection point.
Assicurarsi che l’impianto d’aspirazione garantisca questi valori nel
punto di collegamento con le bocche delle cuffie.
Pialla
Pialla
filo
spessore
Portata
750 m3/h
750 m3/h
Velocita' minima dell'aria 20 m/s
4.
C
12
006_016_0.tif
Surfacing Thicknessing
planer
planer
Air flow
750 m3/h 750 m3/h
Minimum air speed 20 m/s
Mortising machine
Air flow
750 m3/h
Minimum air speed 20 m/s
Cavatrice
Portata
750 m3/h
Velocita' minima dell'aria 20 m/s
Diametro bocche d'aspirazione
(fig.12):
Suction mouth diameter (fig.12):
A - Thicknessing planer
hood ..................... ø 120 mm
B - Mortising machine
suction ................. ø 120 mm
C - tenoning shaper
hood ..................... ø 120 mm
A - cuffia pialla filo .... ø 120 mm
B - cuffia spessore .... ø 120 mm
C - aspirazione
cavatrice .............. ø 120 mm
Collegare le bocche all'impianto di
aspirazione con tubi flessibili di diametro adeguato.Serrare con
fascette.
Connect the mouths to the suction
system with flexible tubes of
adequate diameter. Tighten with
clamps.
Il tubo deve essere posizionato in
maniera tale da non ostacolare
l'operatore durante la lavorazione.
Si consiglia un'aspirazione a soffitto.
The tube must be positioned in
such a way so as not to obstruct
the operator during machining.
- 26 -
NORME DI MESSA A PUNTO • SET-UP PROCEDURES
ITALIANO
ENGLISH
5.
5.1. UTENSILI - MONTAGGIO
E REGISTRAZIONE
5.1. TOOL - ASSEMBLY AND
ADJUSTMENT
5.1.1 Coltelli - montaggio
5.1.1 Cutters - assembly
Maneggiare i coltelli utilizzando i
guanti di protezione.
Montare esclusivamente coltelli
della stessa serie (aventi la
stessa altezza) per evitare
squilibri.Altezza minima
consentita 18 mm.
Handle the knives wearing
protective gloves.
Exclusively mount knives of the
same series (with the same
height) to prevent unbalancing.
Minimum permitted
height: 18 mm
Albero pialla con 3 coltelli
(fig. 1)
Three-cutters cutterblock
(fig. 1)
Per motivi di sicurezza i coltelli
sono inseriti completamente
nell'albero pialla;prima di
procedere alla lavorazione
registrarli seguendo le istruzioni
sottoriportate.
– Posizionare la guida filo B a fondo corsa e serrare la leva L. Il
pomello C blocca automaticamente la guida a fondo corsa;
– Allentare le leve A (fig.1) e sollevare la piana filo uscita N e poi
la piana filo entrata O ( l'apertura
della piana N aziona un micro
che impedisce l'avviamento della macchina);
– Svitare le viti di bloccaggio con
apposita chiave C; il coltello
fuoriesce spinto dalle molle di
contrasto.
– Se necessita sostituire i coltelli
inserendoli nell' apposita sede D
(fig.1) rispettando l'orientamento
dell'angolo di affilatura relativamente al senso di rotazione dell'albero pialla E.
– Posizionare il registracoltelli F
come in fig.1;
– Verificare l’efficienza delle molle
di contrasto esercitando una leggera pressione sui coltelli: questi
devono rientrare nelle sedi per poi
tornare nella posizione iniziale.
– Verificare che i coltelli ed i lardoni
siano centrati rispetto all’albero
pialla E.
For safety reasons the blades
are completely inserted in the
cutter block; before machining
adjust them in accordance with
the instructions below.
D
E
N
B
F
L
O
C
A
A
1
037_015_1.tif
- 27 -
– Position the planing fence B at
the bottom of the stroke and
tighten the lever L. Knob C
automatically blocks the guides
at the end of the run;
– Loosen the lever A (fig.1) and
raise the wire outfeed table N and
then the wire infeed table O (when
table N is opened this sets off
the micro that prevents the
machine from starting).
– Loosen the blocking screws
using the specific key C; the
blade comes out pushed by the
contrast springs.
– If necessary, replace the blades
by inserting them in their specific
slot D (fig.1) ensuring that the
cutting edge meets the direction
of rotation of the planer E.
– Position the cutter adjuster F as
shown in fig. 1.
– Make sure springs are in good
working order by exerting a light
pressure on cutters: these should
go deeper into their seats and then
go back to their initial position.
– Check that the blades and
wedges are centered against the
planer E.
NORME DI MESSA A PUNTO • SET-UP PROCEDURES
ITALIANO
ENGLISH
Per una buona registrazione
occorre che i quattro punti di
appoggio del registracoltelli
aderiscano in maniera uniforme
all’albero pialla (fig.1).
In questo modo viene garantita
la giusta sporgenza del coltello
dall'albero pialla
(massimo 1 mm).
5.
For a correct adjustment, check
that the four supports of the
cutter adjuster evenly stick to
the cutterblock (fig. 1).
In this way proper projection of
the knife from the planer spindle
is guaranteed (maximum 1 mm).
2
042_068_0.tif
– Serrare le viti di bloccaggio con
apposita chiave C esercitando
una certa pressione sul
registracoltelli.
F
– Tighten the locking screws using the special wrench C and exerting pressure on the cutter
adjuster.
A
Montare allo stesso modo tutti i
coltelli.
In the same way mount all the
knives.
A operazione ultimata predisporre
la macchina per la piallatura a filo
o spessore seguendo le indicazioni riportate nel cap. 5 e 6.
When the operation has been
completed, set up the machine for
buzz planing or thicknessing
following the instructions in
Chapters 5 and 6.
E
3
044_013_0.tif
Albero pialla tipo TERSA con 4
coltelli (fig. 2 - 3)
TERSA-type 4-cutters cutterblock (fig. 2 - 3)
– Inserire i coltelli E nell'albero F
attraverso il foro A.
– Verificare che i coltelli siano centrati rispetto all’albero pialla F.
– predisporre la macchina per la
piallatura a filo o spessore seguendo le indicazioni riportate
nel cap. 5 e 6.
– Avviare il gruppo operatore pialla per bloccare i coltelli.
– Piallare per qualche minuto un
pezzo di legno duro su tutta la
lunghezza dell'albero per ottenere un miglior bloccaggio del
gruppo lardone-coltello.
– Per lo smontaggio percuotere il
lardone e sfilare il coltello.
– Insert the knives E in the spindle
F through the hole A.
– Check if the knives are centered
with reference to the cutterblock F .
– set up the machine for planing
or thicknessing in accordance
with the indications in sections 5
and 6.
– Start the planer working unit to
lock the cutters.
– Take a piece of hard wood and
plane it on its whole length for a
few minutes, in order to get a
better locking of the cutter-gib
unit.
– To remove the cutters, strike the
gib and pull out the cutter.
- 28 -
NORME DI MESSA A PUNTO • SET-UP PROCEDURES
ITALIANO
ENGLISH
5.1.2 Spindle bits - assembly
(fig. 4)
5.1.2 Punte per mandrino montaggio (fig. 4)
E' proibito l'uso di mole abrasive.
Fra due utilizzi della cavatrice
smontare la punta, poichè la sua
rotazione è comune all’albero di
piallatura a filo e la punta non
può essere protetta.
Le punte devono essere
bloccate per tutta la lunghezza
utile del mandrino.
La macchina puo' essere dotata di
mandrino fisso, mandrino
autocentrante
o mandrino
portapinza.
5.
It is prohibited to use abrasive
grinding wheels.
When the slotter is not in use, it
is necessary to disassemble the
bit, as it rotates jointly with the
surfacing table shaft and it
cannot be protected.
The bits must be locked over the
entire useful length of the
spindle.
A
D
C
The machine can be equipped with
a fixed chuck, self-centring chuck
or a gripper carrier chuck.
B
1) Mandrino fisso
1) Fixed spindle
Monta punte sinistre da 16 mm le
quali vengono serrate tramite due
viti.
Mounts 16 mm left bits which are
locked by two screws.
1
2) Self-centering spindle
2) Mandrino autocentrante
D
Monta punte sinistre da 3 a 16 mm
le quali vengono serrate tramite
una vite.
Mounts from 3 to 16 mm left bits
which are locked by a screw.
2
3) Collet spindle
Fit bits with shanks of Ø 5mm, Ø
10mm, Ø 16mm
3) Mandrino portapinza
Monta punte con codolo da Ø
5mm, Ø 10mm, Ø 16mm
Fitting the tool (fixed and selfcentring spindle)
Montaggio utensile (mandrino fisso e autocentrante)
- Release the lever B and lift the
guard C;
- Sbloccare la leva B e sollevare
la protezione C;
- Tighten the tool D though the
holes A in the spindle cover;
- Serrare l'utensile D attraverso i
fori A del coprimandrino;
Fitting the tool (collet spindle)
F
Montaggio utensile (mandrino
portapinza)
- Lock tool D using accessory
pin F and special key G as
indicated in figure.
G
- Serrare l'utensile D tramite perno accessorio F e chiave speciale G come indicato in figura.
Prima di cominciare la
lavorazione posizionare la
protezione C in appoggio sul
piano in modo da coprire
totalmente l'albero pialla
D
Before you start machining, rest
the guard C on the table so that
the cutter block is completely
covered
3
4
042.034/072.0.tif
- 29 -
NORME DI MESSA A PUNTO • SET-UP PROCEDURES
ITALIANO
ENGLISH
5.2. PIALLA A SPESSORE REGOLAZIONI
L
5.2. THICKNESSING TABLES
- ADJUSTING
C
Predisporre la macchina per lavorazioni allo spessore seguendo le
istruzioni indicate di seguito:
– Posizionare la guida filo B a fondo corsa e serrare la leva L. Il
pomello C blocca automaticamente la guida a fondo corsa;
– Allentare le leve A (fig.4) e sollevare la piana filo uscita N e poi
la piana filo entrata O ( l'apertura
della piana N aziona un micro
che impedisce l'avviamento della macchina);
– Ribaltare la cuffia convogliatruccioli E assicurandola tramite la molla F nella protezione
G (la rotazione della cuffia agisce nuovamente sul micro
riattivando la macchina).
5.
Set up the machine for
thicknessing following the
instructions and then:
N
B
O
L
A
A
5
037_018_1.tif
Registrare il piano spessore in funzione dell’asportazione desiderata, operando in questo modo:
Adjust the thicknessing tables to
obtain the required stock removal.
Proceed as follows:
E
Q
– allentare il bloccaggio H;
– ruotare il volantino, facendo riferimento all’indice I o all'indicatore numerico S (OPT);
– serrare il bloccaggio H.
– Position the planing fence B at
the bottom of the stroke and
tighten the lever L. Knob C
automatically blocks the guides
at the end of the run;
– Loosen the lever A (fig.4) and
raise the wire outfeed table N and
then the wire infeed table O (when
table N is opened this sets off
the micro that prevents the
machine from starting).
– Turn over the shaving conveyor
hood E securing it with the spring
F in the protection G (the hood
rotation again actuates the micro
re-activating the machine).
– loosen the knob H;
– Rotate handwheel referring to
index I or numeric indicator S
(OPT);
– tighten the knob H.
F
G
Per azionare i rulli di trascinamento,
agire sulla leva L.
To activate the feeding rollers,
react on the lever L.
Pos. 6 - Attivazione rullo di
trascinamento con velocità
di 6m/min.
Pos. 0 - Disattivazione rullo di
trascinamento.
Pos. 12 - Attivazione rullo di
trascinamento con velocità
di 12m/min.
Per regolare la pressione dei rulli
di traino, agire sui grani Q (i grani
sono da entrambi le parti).
Pos. 6 – Activation of the feeding
rollers with a speed of 6 metres/
min.
Pos. 0 – Deactivation of the
feeding rollers.
Pos. 12 - Activation of the feeding
rollers with a speed of 12 metres/
min.
To adjust the driving roller pressure,
turn dowels Q (on both sides).
Si consiglia di aumentare la pressione per legni duri e/o di grosse
dimensioni.
Prima di abbassare i piani a filo,
ricordarsi di rimettere la cuffia E
nella posizione iniziale, di
abbassare il piano spessore in
modo da non danneggiare alcun
elemento e di riportare la leva L
in posizione di riposo per non
rovinare la frizione.
Pressure should be increased to
machine hard wood and/or large
sized workpieces.
I
L
H
Before lowering the
thicknessing tables, remember
to return the protection E to its
original position, to lower the
thicknessing table in such a way
as to avoid damaging any part
and to return lever L to rest
position so as not to damage the
clutch.
S
6
51.006.0.tif
- 30 -
NORME DI MESSA A PUNTO • SET-UP PROCEDURES
ITALIANO
5.3. PIANI A FILO REGISTRAZIONE (fig. 7)
ENGLISH
E
5.3. SURFACING TABLES ADJUSTING (fig. 7)
C
H G
5.
Piano d’entrata
Inlet table
Allentare la leva A.
Loosen the lever A.
Agire sulla maopola B per posizionare il piano D in funzione dell’asportazione desiderata: leggere
lo spostamento sulla targhetta C.
Operate on the handle B in order
to place the table D depending on
the chosen removal: read the traverse on the data plate C.
D
A regolazione eseguita serrare la
leva A.
B
When the adjustment is over,
tighten the lever A.
F
Piano d’uscita
Outlet table
Il piano a filo in uscita E deve essere perfettamente a filo con i coltelli montati.
The outlet surface table E must
be perfectly aligned with the
mounted knives.
Per verificare il corretto allineamento, posizionare un quadrotto
ben piallato fra piano e albero pialla; ruotare manualmente l’albero
pialla e verificare che i coltelli sfiorino il quadrotto.
A
7
037.020.1.tif
To make sure it is correct, place a
well planed workpiece between the
surface and the cutterblock;
manually turn the cutterblock and
make sure the cutters skim the
workpiece.
Se si rende necessario un eventuale allineamento, allentare la leva
F e la vite H. Allineare il piano E
agendo sulla manopola G.
If it is necessary to carry out a
new alignment, loosen the lever F
and the screw H. Get the table E
aligned by operating the handle G.
Serrare la vite H e la leva F a
regolazione ultimata.
Tighten the screw H and the lever
F when the adjustment is over.
5.4. GUIDA FILO REGOLAZIONE (fig.8)
Allentare la leva D e posizionare
la guida.
C
H
5.4. BUZZ PLANER ADJUSTING (fig.8)
E
Loosen the lever D and position
the guide.
Sollevare la leva E e regolare l'inclinazione della guida da 90° a 45°
facendo riferimento all'indice H.
Serrare la leva D e E.
Raise lever E and adjust the
inclination of the guide from 90° to
45° referring to index H.
Tighten the levers D and E.
D
Il pomello C blocca automaticamente la guida a fondo corsa.
Le protezioni F e L devono
essere sempre posizionate
sull’albero pialla durante la
lavorazione.
Knob C automatically blocks the
guides at the end of the run.
F
During the machining, the
protections F and L must
always be positioned on the
cutterblock.
L
8
037.021.0.tif
- 31 -
NORME DI FUNZIONAMENTO • OPERATING PROCEDURES
ITALIANO
6.1.
ENGLISH
QUADRO COMANDI
6.1.
6.
CONTROL PANEL
6.1.1 Funzioni di comando
6.1.1 Control functions
A - Pulsante di emergenza
Disinserisce immediatamente
la tensione di alimentazione in
situazioni di emergenza.
Il pulsante è a ritenuta meccanica. Per il ripristino ruotare il
pulsante in senso orario.
A - Emergency pushbutton
It immediately disconnects
input power in case of
emergency.
It is a mechanically-operated
push-button. Reset this button
by turning it clockwise.
B - Magnetotermico
Inserisce e disinserisce la tensione di alimentazione al gruppo operatore.
O- la macchina non è alimentata;
I - la macchina è alimentata.
B - Thermal switch
It connects and disconnects
the power supply of the
operating unit.
O- the machine is not powe
supplied;
I - the machine is power
supplied.
C - Pulsante di avvio pialla
Avvia il motore pialla.
Premere per avviare.
D - Spia presenza tensione
Si accende ruotando il
sezionatore B in posizione I e
segnala la presenza di tensione nel circuito elettrico della
macchina.
E - Selettore sbloccaggio freno
motore.
Ruotare il selettore a destra
per sbloccare il motore.
Ruotando il selettore in questa
posizione con motore acceso,
esso si arresta. L'effettivo
sbloccaggio del freno motore
avviene dopo 20 secondi
dall'azionamento del selettore
stesso.
C
A
C - Planer starting button
This button switches on the
planer motor.
Press to start.
B
D - Power on warning lamp
Lights up when you turn switch
B to position I and indicates
the presence of power in the
machine electrical circuit.
D
E
1
51_007_1.tif
Fusibili
Sono posizionati all'interno del quadro elettrico e proteggono il circuito ausiliario di comando dai
sovraccarichi
termici
e
l'avvolgimento primario del trasformatore.
E - Motor brake release selector
Turn the selector switch to the
right to unlock the motor.
Turning the selector switch to
this position with the motor
switched on stops the motor.
The effective unlocking of the
motor brake occurs 20 seconds
after the activation of the
selector switch.
Fuses
They are fitted inside the cubicle
and they protect the auxiliary
control circuit from thermal
overloads and the transformer
primary winding.
- 32 -
NORME DI FUNZIONAMENTO • OPERATING PROCEDURES
ITALIANO
ENGLISH
6.
6.1.2 Avviamento
macchina
6.1.2 Starting the
machine
– Ruotare il selettore del magnetotermico B in posizione I .
– Premere il pulsante C per avviare.
– Portarsi nella relativa postazione di lavoro.
– Turn the selector switch B to
position I .
– Press pushbutton C to start.
– Go to the right working place.
6.1.3 Arresto macchina
6.1.3 Stopping the machine
– Premere il pulsante A
– Ruotare il selettore del magnetotermico B in posizione O.
– Press pushbutton A
– Turn the main selector switch B
to position 0.
6.1.4 Arresto di
emergenza
C
Premendo il pulsante di emergenza A si disattivano tutti i circuiti
elettrici della macchina. Per il ripristino ruotare il pulsante in senso orario.
A
6.1.4 Emergency stop
All the electric circuits are
disconnected by pushing the
emergency button A. IReset this
button by turning it clockwise.
B
D
E
1
51_007_1.tif
6.2.
6.2.
PIALLATURA A FILO
Serve per raddrizzare, con una o
più passate, legno massiccio e fare
il refilo sul lato lungo di un pannello.
Queste operazioni consentono un
primo piano di riferimento per tutte
le successive fasi di lavorazione
(fig. 2).
Dopo aver raddrizzato un lato del
listello 1 piallare a filo il lato continuo 2, a 90°, per eseguire le successive piallature a spessore e
ricavare un quadrotto finito su tutte e quattro le faccie.
Prima di procedere alla lavorazione leggere attentamente nei paragrafi che seguono,i consigli di
sicurezza e le regolazioni della protezione pialla.
1
2
295.040.064 Ec.0
- 33 -
1
2
SURFACING TABLES
This operation is carried out for
straightening a wood piece and for
trimming the long side of a panel.
In this way you get a reference
plan for the next working steps (fig.
2).
After straightening a ledge side 1
surface side 2 at 90° in order to
carry out the thicknessing: in this
way it is possible to obtain a
finished piece planned on all 4
sides.
Before proceeding with machining,
carefully read the advice on safety
and planer-protection adjustment
in the following paragraphs.
NORME DI FUNZIONAMENTO • OPERATING PROCEDURES
ITALIANO
ENGLISH
6.
Consigli di sicurezza
Safety recommandations
Lavorare sempre con la protezione albero pialla montata.
Conservare i bordi della macchina puliti e sgombri. Adottare una
posizione stabile durante tutto il
lavoro.
ll pressaggio del legno si effettua
sui piani a filo e mai in corrispondenza dell'albero pialla.
Nell'ultimo tratto la mano deve
essere sempre posizionata dopo
l'albero pialla,sul piano di uscita.
Presentare la parte concava del
pezzo di legno verso i piani ed
evitare di lavorare legni che abbiano archi ed altri difetti troppo
evidenti (fessure, spaccature
ecc).
In particolare fare attenzione ai
nodi che potrebbero fuoriuscire
dalla propria sede costituendo un
pericolo.
Realizzare ed utilizzare degli
spintori di fine passaggio in particolare modo per i piccoli pezzi
di piccola sezione.
La velocita' di avanzamento del
legno deve essere sempre proporzionata allo spessore da
asportare.
Assicurarsi della perfetta stabilità dei pezzi ed utilizzare un supporto posizionato dietro il piano
di uscita per reggere i pezzi lunghi.
Durante la lavorazione di pezzi di
grande altezza (pannelli) contro
la guida , bloccare il ponte di protezione il più vicino possibile al
pannello.
Pulire i trucioli rimasti sui piani
con un pezzo di legno piuttosto
che con le mani. Mettere il ponte di protezione a contatto con i
piani.
In caso di intasamento dei trucioli all’interno della macchina
o della bocca, intervenire solo
con la macchina ferma ed interruttore generale lucchettato.
Paraffinare i piani o utilizzare
qualsiasi altro prodotto simile
per migliorare lo scorrimento
dei pezzi.
Always work with the plane
arbor guard fitted.
Keep the edges of the machine
clean and clear. Keep a steady
position while working.
The wood piece should always
be pressed on the thicknessing
tables and never near the plane
arbor.
When working the last part, the
hand should always be
positioned after the plane arbor,
on the exit table.
Rest the wood piece with its
hollow side towards the tables;
avoid the working of wood
blocks with bendings and other
very evident flaws (cracks,
splits, etc.).
In particular, be careful of knots
which could jump out and
represent a hazard.
Do get and use some pushing
devices, in order to safely
machine small workpieces with
small sections.
The feed speed of the wood
must always be proportionate
to the thickness to be removed.
Always check that the pieces
are steady and use a support,
to be positioned behind the
outlet table, to hold long
workpieces.
While machining very high
pieces (panels) against the
fence, lock the protection
bridge as near as possible to
the panel.
Clear the chips left on the tables
using a wood piece, not with
your hands. Rest the protection
bridge against the tables.
In case the chips have blocked
the inside of the machine or the
inlet area, do clear them only
after stopping the machine and
locking the main switch.
In order to have a better gliding
of the pieces to be machined,
apply some paraffin onto the
tables, or use a similar product.
- 34 -
NORME DI FUNZIONAMENTO • OPERATING PROCEDURES
ITALIANO
ENGLISH
6.2.1 Planer protection
6.2.1 Protezione pialla
La macchina è dotata di due protezioni alla pialla:
6.
E
D
A
C
The machine is equipped with two
protections on the planer:
A - protezione dietro la guida pialla
B - protezione a ponte
A - protection behind the planer guide
B - bridge-type protection
Protezione dietro la guida pialla
E' una protezione snodata che copre sempre l'albero pialla in entrambe le posizioni della guida
rispettivamente a 90° e 45°.
Protection behind the planer
guide
This is an articulated protection
which always covers the planer
shaft in both the guide positions,
90º and 45º respectively.
B
F
Protezione a ponte
3
037_023_0.TIF
Bridge-type protection
Regolare la protezione in modo da
coprire al massimo l'albero pialla.
Adjust the guard so that it covers
the planer spindle completely.
Descrizione
B - Protezione a ponte
C - Pomello di bloccaggio del ponte
D - Braccio
E - Pomello di regolazione altezza
F - Leva bloccaggio protezione
Description
B - Protection bridge
C - Bridge locking knob
D - Arm
E - Height adjustment knob
F - Protection locking lever
Per regolarla in altezza agire sul
pomello E (fig. 3); la posizione desiderata viene mantenuta dall’ammortizzatore.
To adjust the height, operate the
knob E (fig. 3); the right position
is maintained by the shock
absorber.
Use
This protection is easily adjustable
on the whole length of the
cutterblock.
The bridge is lifted parallel to the
table, until a maximum height of
75 mm.
Utilizzazione
Questa protezione si adatta facilmente su tutta la lunghezza dell'albero pialla.
Il ponte si solleva parallelamente
al piano fino ad un’altezza max 75
mm.
- 35 -
NORME DI FUNZIONAMENTO • OPERATING PROCEDURES
ITALIANO
Piallatura in piano (fig. 4)
Appoggiare il ponte contro la guida, sollevarlo per mezzo del pomello E ad un’altezza leggermente
superiore al pezzo da lavorare.
Fare passare il legno sotto il ponte
spingendolo con una mano ed
esercitando una pressione con l’altra.
Riportare il pezzo indietro facendolo passare sopra il ponte, che si
abbasserà e ritornerà automaticamente nella posizione registrata in
precedenza pronto per una nuova
passata.
ENGLISH
Surface planing (fig. 4)
Rest the bridge against the fence
and lift it, by operating the knob E,
until it is a little higher than the
piece to be machined.
Let the workpiece slide under the
bridge pushing it with one hand
and pressing it steadily with the
other hand.
Move back the piece letting it slide
over the bridge, which will come
down and will automatically come
back to the preset position, ready
for another sliding of the
workpiece.
To obtain a good finish of table
thickness the surface planing must
be perfectly flat.
B
E
Per ottenere una buona finitura
della tavola allo spessore la
piallatura a filo deve essere perfettamente piana.
4
51_008_0.tif
Piallatura di pezzi di piccole dimensioni (fig.5)
Usare la manopola B.
La manopola B può essere applicata a spintori di diverse dimensioni avvitandola con le viti in
dotazione.
Piallatura dei lati (fig. 5)
Appoggiare il ponte sulla piana per
mezzo del pomello E e scoprire l’albero quanto basta per fare passare
il pezzo da lavorare sfilando il ponte, dopo aver sbloccato il pomello
C (ribloccare poi il ponte).
Le mani non devono mai essere
in corrispondenza dell'albero
pialla.
Non dimenticare mai di rimettere
in posizione la protezione per
coprire totalmente l'albero
portautensile fra due fasi di
lavoro.
6.
Planing small pieces (Fig.5)
B
E
Use the knob B.
The knob B may be applied to
pushers of different size, screwing it on with the screws provided.
Planing of the edges (fig. 5)
Rest the bridge onto the table by
means of the knob E and expose
the shaft as it is enough to let the
piece to be machined pass by
pulling the bridge away, after
releasing the knob C (lock the
bridge again, then).
C
Never put your hands near the
cutterblock.
Never forget to move the
protection to its right position,
to protect the tool-holder shaft
between two working phases.
5
051_009_0.tif
- 36 -
NORME DI FUNZIONAMENTO • OPERATING PROCEDURES
ITALIANO
ENGLISH
6.2.2 Guida aggiunta ribaltabile (OPT)(fig.6)
La guida aggiunta ribaltabile B
deve essere utilizzata per la lavorazione dei pezzi bassi.
- Agire sulla leva A per posizionare la guida nella posizione desiderata.
6.
6.2.2 Retiltable added guide
(OPT) (fig.6)
The retiltable added guide B must
be used for machining low pieces.
- Use lever A to position the guide
in desired position.
A
B
6
51_011_0.tif
6.3.
PIALLATURA A
SPESSORE
6.3.
Serve per portare allo spessore desiderato dei listelli, dopo la piallatura
a filo.
Per ottenere una buona finitura
della piallatura a spessore, è necessario che la piallatura effettuato precedentemente sul filo sia
perfettamente piana.
Controllare con un calibro la misura del quadrotto da piallare .
L’asportazione massima per ogni
passata è di 5 mm.
THICKNESSING
This operation is carried out for
obtaining the required thickness of
a given workpiece after surfacing.
To obtain a good finish of thickness
planing, the surface planing
previously carried out must be
perfectly flat.
Measure the workpiece thickness
by means of a gauge.
Max. stock removal after each
stroke: 5 mm.
D
To execute thicknessing set up the
machine (fig. 7) following the
instructions in Chap. 5.
Per eseguire la piallatura a spessore predisporre la macchina (fig.7)
seguendo le istruzioni del cap. 5.
Use supports for longer
workpieces.
Activate the feeder by selecting
the desired speed using lever H.
Utilizzare dei supporti per pezzi
lunghi.
Attivare il trascinatore selezionando la velocità desiderata tramite la
leva H.
Start the machine and proceed with
machining, carefully following the
instructions in the paragraph
below.
Avviare la macchina e procedere
alla lavorazione seguendo attentamente le indicazioni del paragrafo che segue.
H
Before lowering the surface
planer tables, remember to put
the hood D (fig. 7) into start
position, to lower thicknessing
table so that no elements are
damaged and to bring lever H to
0 position.
Prima di abbassare i piani a
filo, ricordarsi di rimettere la
cuffia D (fig. 7) nella posizione
iniziale, di abbassare il piano
spessore in modo da non
danneggiare alcun elemento e
di riportare la leva H in
posizione 0.
7
051.010.0.tif
- 37 -
NORME DI FUNZIONAMENTO • OPERATING PROCEDURES
ITALIANO
ENGLISH
6.
Consigli di sicurezza
Safety recommandations
Dei martelletti di ritenuta a
funzionamento automatico
adeguabili a qualsiasi spessore
di legno, evitano che il pezzo in
lavorazione possa essere
proiettato contro l’operatore,
garantendo quindi una
protezione attiva efficace.
Prima di qualsiasi lavorazione,
controllare che tutti i martelletti
di ritenuta possano muoversi
con flessibilità intorno al proprio
albero di supporto e che
ricadano correttamente in
posizione bassa.
Per evitare l’eventuale
indurimento o bloccaggio dei
martelletti di ritenuta, è
necessario mantenerli
costantemente puliti, togliendo
trucioli o pezzetti di legno con un
getto energico di aria
compressa.
Togliere i residui di resina,
lavando tutto il gruppo con un
pennello e acqua ragia,
asciugando successivamente
con aria compressa.
Qualora il pezzo da lavorare si
bloccasse, arrestare
completamente l'albero pialla,
abbassare il piano spessore ed
estrarre il pezzo.
Evitare di trovarsi con l'albero
pialla in movimento, col viso di
fronte al piano dove potrebbero
fuoriuscire dei residui di legno.
Evitare di lavorare legno con
difetti troppo rilevanti (fessure,
nodi......).
Lavorare un solo pezzo per
volta.
Verificare periodicamente che i
rulli di trascinamento abbiano
sempre una corretta
sospensione (oscillazione verso
l’alto). Pulire regolarmente
l’albero portautensili e i rulli di
trascinamento legno (con aria
compressa-petrolio).
Effettuare la pulizia della
macchina facendo uso di
un'aspiratore; usare l'aria
compressa solo quando è
strettamente necessario,
facendo uso di occhiali di
protezione e mascherina.
Some automatically working
pawls, which fit to wood pieces
of whichever thickness, avoid
that the piece being machined
may be thrown against the user,
assuring in this way an active
and effective kind of protection.
Before whichever kind of
machining, check the correct
and easy movement of the pawls
around its own support shaft,
and that they correctly fall down
to their low position.
To avoid any hardening or
blocking of the pawls, it is
necessary to keep them
constantly clean, clearing away
chips and wood splinters by
means of a powerful jet of
compressed air.
Remove any resine spot cleaning
the whole unit with some
turpentine (to be applied with a
brush) and drying then it up with
some compressed air.
In case of jamming of the
workpiece, completely stop the
cutterblock, lower the
thicknessing table and pull out
the workpiece.
Never remain with your face in
front of the table when the plane
arbor is operating. Danger of
wood shavings flying out.
Do not machine wood pieces
with too evident flaws (cracks,
knots...).
Machine one piece at a time.
Periodically check that the
driving rollers are correctly
suspended, i.e. that they oscillate
in the right way. Regularly clean
the shaft and the wood driving
rollers (using compressed air or
some oil).
Clean the machine using a
vacuum cleaner. Use
compressed air only when
strictly necessary, using
protective glasses and a mask.
- 38 -
NORME DI FUNZIONAMENTO • OPERATING PROCEDURES
ITALIANO
6.4.
ENGLISH
LAVORAZIONI CON LA
CAVATRICE
6.4.
L
I
E
6.
WORKING WITH
SLOTTER
ATTENZIONE AL
COLLEGAMENTO ELETTRICO
CAREFUL WITH THE
ELECTRICAL CONNECTION
L'utensile deve
obbligatoriamente ruotare nel
senso indicato dalla freccia di
fig.8.
The tool must turn in the
direction indicated by the arrow
as shown in Fig. 8.
Switch on the machine for a
fraction of a second and check
the direction of rotation. Should
rotation be incorrect, follow the
instructions listed in Chap. 4
“Electrical connection”.
Mount the tool following the
instructions and warnings listed
in Chap. 5.
Check that the tool is well
tightened.
Completely lower the guard E to
rest against the surfacing table
(Fig. 8).
When the slotter is not in use, it is
necessary to disassemble the bit,
as it rotates jointly with the
surfacing table shaft and it
cannot be protected.
Always check that the piece is
well locked to the table
For long workpieces, use a
support that can be adjusted as
for its height and apply, if
necessary, a clamp to the table.
H
Accendere la macchina per una
frazione di secondo verificando
il senso di rotazione; nel caso la
rotazione non sia corretta,
seguire le indicazioni riportate
nel cap.4 "Collegamento
elettrico".
Montare l'utensile seguendo le
istruzioni e attenzioni riportate
nel cap.5.
8
051_012_1.tif
Verificare che l'utensile sia ben
serrato.
Sollevare la leva H e ribaltare la
protezione I di 180°; traslare la
guida filo L a fine corsa in modo
da coprire totalmente l'albero
pialla tramite la protezione E
(fig.8).
Fra due utilizzi della cavatrice
smontare la punta, poiché la
sua rotazione è comune
all’albero di piallatura a filo e la
punta non può essere protetta.
Verificare sempre che il pezzo
sia ben serrato sul piano
Per i pezzi lunghi, utilizzare un
supporto regolabile in altezza e
aggiungere, all’occorrenza, un
morsetto sul piano.
- 39 -
NORME DI FUNZIONAMENTO • OPERATING PROCEDURES
ITALIANO
ENGLISH
With the use of slotter it is possible
to carry out holes and slots both
dead or through.
Con la cavatrice, o mortasa, si possono eseguire fori e asole
(bedanature) cieche o passanti.
– posizionare il pezzo sul piano
mandandolo in battuta e fissarlo
tramite pressore B;
D
– place the workpiece on the table,
stopping it and securing it by
means of the presser B;
Per fori non passanti occorre registrare la corsa del pianetto A
in profondità (asse Z):
– provare la corsa in avanti tramite la leva F e bloccare la battuta
di profondità serrando la leva H.
– posizionare il piano in altezza
tramite volantino accessorio C ;
bloccare la posizione serrando il
pomello G;
Per bedanature non passanti occorre registrare la corsa in profondità, come già visto, e la corsa
trasversale del pianetto (asse X):
In the case of dead holes you have
to adjust the stroke of additional
table A (axis Z):
G
B
– Try the forward stroke using lever
F and lock the depth stop by
tightening lever H.
H
– position the table at the correct
height using the accessory
handwheel C; lock it in position
by tightening the knob G;
E
A
F
C
9
006.038.0.tif
For mortising which does not go
through the workpiece, adjust the
depth of the stroke, as already
indicated, and the transversal
stroke of the table (X-axis):
– using a pencil, mark the position
of the mortise to be cut on the
workpiece (fig. 10);
– test the transversal stroke using
lever D according to the mortise
to be cut and adjust the side
stops to suit, by tightening the
knobs E.
– segnare a matita sul pezzo la
zona della cava da eseguire
(fig. 10);
– provare la corsa trasversale tramite leva D in funzione della cava
da eseguire e registrare di conseguenza le battute laterali serrando i pomelli E.
Per le bedanature
occorre eseguire una serie di fori
vicini, poi facendo traslare il
piano tramite la leva (D), si
pulisce completamente
l’interno della cava.
6.
10
295.040.077 Eps
- 40 -
To carry out slots, it is necessary
to drill a row of holes, then,
moving the table by means of
the lever (D), the inside of the
slot is thoroughly cleaned.
ESIGENZE DI MANUTENZIONE • MAINTENANCE REQUIREMENTS
ITALIANO
ENGLISH
Prima di eseguire le operazioni
di pulizia, manutenzione,
regolazioni e/o sostituzioni di
qualunque organo, è
obbligatorio mettere
l'interruttore generale sullo 0
(zero) e chiuderlo con l'aiuto di
un lucchetto.
7.
Before carrying out any
cleaning, maintenance,
adjustment and/or replacement
operations of any part, the main
switch must be set to 0 (zero)
and locked with a padlock.
7.1. CINGHIE TRAPEZOIDALI SOSTITUZIONE E
TENSIONAMENTO
7.1.
Verificare il grado di tensionamento
dopo le prime 10 ore di funzionamento della macchina.
Dei controlli periodici dovranno essere effettuati sulla cinghia almeno ogni 6 mesi.
Non eccedere nel tensionamento
delle cinghie per non sovraccaricare i cuscinetti.
L’eccessivo tensionamento, provoca lo stiramento delle cinghie,
surriscaldamento e la rapida distruzione delle stesse.
Le cinghie devono essere sostituite in coppia e devono essere della stessa marca e lunghezza.
Verificare almeno una volta al mese
il tempo di arresto della pialla; se il
tempo di arresto supera i 10 secondi intervenire tensionando o sostituendo le cinghie (nel caso siano
rovinate) come indicato nei paragrafi che seguono.
Nel caso in cui la macchina sia
dotata di motore autofrenante e il
tempo di arresto supera i 10 secondi intervenire sul gruppo di
frenatura come indicato nei paragrafi che seguono.
A regolazione eseguita verificare
nuovamente il tempo di arresto.
Check the belt tension after the
first 10 hours of machine operation.
At least every 6 months,it is
necessary to perform a periodical
check on the belt.
Do not overstretch the belts not to
overload the bearings.
Overstretching may overheat and
destroy the belts.
Substitute the belts in pairs and
always use the same brand and
length.
Check planer stopping time at least
once a month; If the stopping time
exceeds 10 seconds, intervene by
tensioning or replacing the belts
(should they be worn) as indicated
in the following paragraphs.
If the machine is fitted with a selfbraking motor and the stopping
time exceeds 10 seconds adjust
brake unit as indicated in the
paragraphs below.
V-BELT REPLACEMENT
AND TIGHTENING
After the adjustments have been
made, again check the stopping
time.
- 41 -
ESIGENZE DI MANUTENZIONE • MAINTENANCE REQUIREMENTS
ITALIANO
ENGLISH
– (Se presente)Ruotare il selettore
sbloccaggio motore a destra per
sbloccare il motore. Ruotando il
selettore in questa posizione con
motore acceso, esso si arresta.
L'effettivo sbloccaggio del freno
motore avviene dopo 20 secondi dall'azionamento del selettore
stesso.
F
D
Togliere il carter A e F (fig.1) per
accedere alle cinghie di comando
albero pialla e procedere come di
seguito indicato:
- allentare i dadi B di fissaggio
del motore;
- allentare la vite D di
tensionamento attraverso il foro
sotto il piano spessore;
- sostituire le cinghie e tensionarle
avvitando la vite D;
- serrare le viti B di fissaggio assicurandosi che il motore sia in
battuta contro la lamiera H.
A
D
Remove the guards A and F (Fig.1)
to access the planer spindle driving
belts and proceed as described
below:
- Loosen motor fastening nuts B;
- Loosen the tensioning screw D
through the hole under the
thicknessing table;
- tighten fastening screws B and
ensure that the motor has
stopped against the sheet-metal
H.
B
H
Return the machine to the initial
conditions.
7.2.
MOTORE
AUTOFRENANTE (OPT)
Periodici controlli ed opportune regolazioni dovranno essere effettuati sul dispositivo elettromagnetico
di frenatura come illustrato in figura 5.
– (If present)Turn the selector
switch to the right to unlock the
motor. Turning the selector
switch to this position with the
motor switched on stops the
motor. The effective unblocking
of the motor brake occurs 20
seconds after the activation of
the selector switch.
- substitute the belts and tension
them by tightening screw D;
Riportare la macchina alle condizioni iniziali.
7.2.
7.
1
037_029_0.TIF
SELF-BRAKING
MOTOR
It is necessary to periodically
check
and
adjust
the
electromagnetic braking device, as
shown in picture 4.
Before any intervention on the
electric motor, it is necessary to
disconnect the power supply; pull
the plug from the socket.
Prima di effettuare qualsiasi intervento sul motore elettrico, occorre
indispensabilmente interrompere
l’alimentazione elettrica.
Traferro dell’elettromagnete
Electromagnet gap
La distanza A fra la carcassa
dell’elettromagnete B ed il nucleo
C é denominata ‘traferro” e viene
regolata in sede di costruzione del
dispositivo.
La regolazione si rende necessaria solo in caso di sostituzione del
nucleo mobile C che reca incollato
alla superficie l’anello di materiale
di attrito F soggetto ad usura.
Il limite di usura dell’anello di attrito é di 3 mm.
L’intervento di sostituzione deve
essere eseguito solo da personale
tecnico del vostro Concessionario.
The distance A between the frame
of the electromagnet B and the
core C is said ‘gap’ and is adjusted
when the whole device is
assembled.
It is necessary to perform some
adjustments only in case of
replacement of the movable core
C, on which is stuck the friction
material ring F, that may get worn
out.
The friction ring is worn out when
it is 3 mm thick.
Only an engineer at your local
dealer’s can replace the ring.
2
295.045.057 Ez.0
- 42 -
ESIGENZE DI MANUTENZIONE • MAINTENANCE REQUIREMENTS
ITALIANO
ENGLISH
7.
Regolazione del gruppo frenatura
Braking unit adjustment
La riduzione dell’efficacia del freno é rilevabile dall’aumento del
tempo occorrente all’albero per arrestarsi completamente con utensile di massime dimensioni ed alla
massima velocità ammessa (tempo massimo di arresto 10 secondi) .
A reduction in braking efficiency
is noticeable by the longer time
required for the spindle to stop
completely with a tool of maximum
dimension and at the maximum
permitted speed (maximum
stopping time: 10 seconds).
Il ripristino della coppia di frenatura
a livello ottimale si ottiene agendo
nel modo seguente:
– avvitare progressivamente la vite
D (fig.3) sino al compattamento
degli elementi mobili ed all’annullamento della distanza A (fig.2)
(traferro);
– svitare la vite D di circa 1/4 di
giro;
– avviare e spegnere il motore alcune volte per verificare il corretto funzionamento (verificare
che il tempo di arresto del motore sia al massimo di 10 secondi).
D
3
21_052_0.cgm
The brake is released by
moving back the screw (D)
more than 1 mm.
Arretrando la vite (D)
di oltre 1 mm si ottiene lo
sblocco del freno.
7.3.
The braking torque is correctly
reset to a good level of efficiency
by operating as follows:
– gradually tighten the screw D
(fig. 3) until the movable pieces
are close together and the
distance A (fig. 2) is no longer
existent (gap);
– unscrew the screw D by about
¼ turn.
– start and stop the motor some
times to check that it works in
the right way (check that the
motor stopping time is maximum
10 seconds).
VERIFICA DISPOSITIVI
DI SICUREZZA
7.3. CHECKING THE SAFETY
DEVICES
La sicurezza della macchina è conseguenza diretta dello stato di efficienza dei dispositivi di sicurezza
utilizzati.
Controllare ogni 2 settimane i
dispositivi seguenti :
- verificare che il micro di sicurezza descritto nel cap. 2 funzioni
correttamente.
- verificare che premendo il pulsante di emergenza (vedi cap.2)
il motore si arresta.
- accertarsi del buono stato delle
protezioni pialla (vedi cap.6) verificando che funzionino correttamente e che assicurino una
protezione efficace.
The safety of the machine is a
direct consequence of the state of
efficiency of the safety devices
used.
Every 2 weeks check the following
devices:
- Check that the safety
microswitch described in
Chapter 2 functions properly.
- Check that the motor stops when
the emergency button is pressed
(see Chap. 2)
- Ensure the good state of the
planer guards (see Chap. 6)
checking that they function
properly and that they assure
efficient protection.
- 43 -
ESIGENZE DI MANUTENZIONE • MAINTENANCE REQUIREMENTS
ITALIANO
7.4.
ENGLISH
PULIZIA GENERALE
7.4.
7.
OVERALL CLEANING
Dopo ogni ciclo di lavoro, pulire
accuratamente la macchina e tutti
i suoi organi, aspirando trucioli e
polvere, e rimuovere ogni residuo
mediante un getto di aria compressa.
Usare l'aria compressa solo quando è strettamente necesario, facendo uso di occhiali di protezione
e mascherina.
Almeno una volta ogni 6 mesi oppure ogni 500 ore, togliere i carter
laterali per completare la totale pulizia della macchina e di tutti i suoi
organi.
After every work cycle, carefully
clean the machine and all its parts;
vacuum chips and dust, and
remove any other residue using
compressed air.
Use compressed air only when
strictly necessary, using protective
glasses and a mask.
At least once every 6 months or
every 500 hours, remove side
guards to complete overall cleaning
of the machine and of its parts.
7.5.
7.5. GENERAL LUBRICATION
LUBRIFICAZIONE
GENERALE
Weekly clean and lubricate all the
mobile couplings of the machine
with a thin film of oil and grease.
Protect all belts and pulleys to
avoid contamination with oil.
Pulire settimanalmente e lubrificare con un leggero velo di olio e
grasso tutti gli accoppiamenti mobili della macchina.
Proteggere tutte le cinghie e le pulegge per evitarne la possibile contaminazione con il lubrificante.
7.6.
SOSTITUZIONE E
SMALTIMENTO
7.6.
REPLACEMENT AND
DISPOSAL
Qualora fosse necessario, le parti
della macchina devono essere sostituite con componenti originali di
fabbricazione al fine di garantire la
loro efficacia.
Should replacement become
necessary, the machine parts must
be replaced with original
components in order to guarantee
their efficiency.
Lo smaltimento delle parti sostituite dovrà essere effettuato nel rispetto delle leggi in materia vigenti
nel paese di utilizzo.
The replaced parts must be
disposed of in compliance with the
laws in force in the country of use.
Component replacement requires
specific training and technical
skills; for this reason, the above
interventions must be carried out
by qualified personnel to prevent
damage to the machine and risks
to the safety of persons.
La sostituzione di componenti richiede una specifica preparazione e competenza tecnica; per tale
motivo, suddetti interventi vanno
eseguiti da personale qualificato
al fine di evitare danni alla macchina e rischi all' incolumità delle persone.
- 44 -
GUIDA ALLA RICERCA DEI GUASTI • TROUBLE - SHOOTING GUIDE
ITALIANO
8.1.
ENGLISH
EVENTUALI INCONVENIENTI, CAUSE, RIMEDI
8.1.
8.
TROUBLES - CAUSES WHAT TO DO
Per qualsiasi informazione o problema contattare il concessionario di zona o il nostro centro
assistenza (vedi recapito telefonico pag.3).
For any information or problem
contact your area dealer or our
technical service centre (see
telephone number on Page 3).
Gli interventi da eseguire devono
essere effettuati da personale
tecnico specializzato.
Prima di accedere all'interno del
quadro elettrico, mettere a zero O
l'interruttore generale posto a
monte della macchina, e chiuderlo
con l'aiuto di un lucchetto.
The necessary interventions must
be carried out by specialised
technical personnel.
Before accessing the electric
panel, set the main switch at the
top of the machine to O and lock it
with a padlock.
Inconveniente
Trouble
ALL'ACCENSIONE LA
MACCHINA NON PARTE
THE MACHINE DOES
NOT START
Causa
Cause
1 - Mancanza di tensione d'alimentazione.
2 - Emergenza inserita.
3 - Micro di sicurezza inserito.
4 - Fusibili interrotti.
1 - Lack of line voltage.
2 - Emergency on.
3 - Safety microswitch on.
4 - Fuses blown
L1
What to do
Rimedi
1 - Verificare con un tester che ci
sia tensione sulle tre fasi L
(fig. 1).
2 - Disinserire il pulsante d'emergenza ruotandolo in senso orario.
3 - Verificare
il
corretto
posizionamento delle piane filo
e cuffia lanciatruccioli come indicato nel cap.2.
4 - Controllare l'integrità dei fusibili ed eventualmente sostituirli
(i fusibili sono posizionati all'interno dell'apparecchiatura elettrica).
1- Check that the 3 phases L are
under voltage (fig. 1).
L2
L3
2 - Disconnect the emergency
button, by turning it clockwise.
1
63_064_1.tif
3 -Check the proper position of the
surfacing tables, shaving
conveyor hood as described in
Chap. 2.
4 - Check that the fuses are undamaged and, if necessary,
replace them (the fuses are
positioned inside the electrical
equipment).
- 45 -
GUIDA ALLA RICERCA DEI GUASTI • TROUBLE - SHOOTING GUIDE
ITALIANO
ENGLISH
8.
Inconveniente
Trouble
LA MACCHINA SI FERMA
DURANTE LA LAVORAZIONE
THE MACHINE STOPS
DURING THE WORKING
Causa
Cause
1 - Mancanza di energia elettrica
su una o più fasi.
2 - Termico di protezione A (fig. 2)
inserito a causa di un eccessivo
assorbimento di corrente dovuto
ad un uso improprio della macchina (lavoro troppo pesante in rapporto alla potenza del motore).
1 - No electrical energy on one or
more phases.
2 - Overload cutout A (fig. 2) on
due to a strong electrical input
(wrong use of the machine, too
heavy work in relation to the
motor power)
Rimedi
What to do
A
1 - Verificare con un tester che ci
sia tensione sulle tre fasi L
(fig. 1).
2 - Attendere che la termica si raffreddi e avviare la macchina.
2
51_014_0.tif
- 46 -
1 - With a tester check that there
is power on the three phases L
(Fig. 1)
2 - Wait for the thermal cutout to cool
down and start the machine.