1
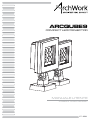
ARCQUBE9
COMPACT LED PROJECTOR
MANUALE UTENTE
USER MANUAL
IT - EN
Music & Lights S.r.l. si riserva ogni diritto di elaborazione in qualsiasi forma delle presenti istruzioni per l’uso.
La riproduzione - anche parziale - per propri scopi commerciali è vietata.
Al fine di migliorare la qualità dei prodotti, la Music&Lights S.r.l. si riserva la facoltà di modificare, in
qualunque momento e senza preavviso, le specifiche menzionate nel presente manuale di istruzioni.
Tutte le revisioni e gli aggiornamenti sono disponibili nella sezione 'Manuali' sul sito www.musiclights.it
REV.001-12/13
ARCQUBE9
INDICE
Sicurezza
Avvertenze generali
Attenzioni e precauzioni per l’installazione
Informazioni generali
4
4
5
1 Introduzione
1. 1 Descrizione
1. 2 Specifiche tecniche
6
6
2 Installazione
2. 1 Montaggio
8
3 Collegamenti
3. 1 Diagramma di connessione
3. 2 Connessioni
10
11
4 Manutenzione
4. 1 Manutenzione e pulizia del sistema ottico
12
Certificato di garanzia
Contenuto dell'imballo:
3
•
•
•
•
ARCQUBE9
Staffa di montaggio
Pressacavi
Manuale utente
ARCQUBE9
4
ATTENZIONE! Prima di effettuare qualsiasi operazione con l’unità, leggere con attenzione
questo manuale e conservarlo accuratamente per riferimenti futuri. Contiene informazioni
importanti riguardo l’installazione, l’uso e la manutenzione dell’unità.
SICUREZZA
Avvertenze generali
• I prodotti a cui questo manuale si riferisce sono conformi alle Direttive della Comunità Europea e pertanto recano la sigla .
• Il dispositivo funziona con pericolosa tensione di rete 230V~. Non intervenire mai al suo interno al di
fuori delle operazioni descritte nel presente manuale; esiste il pericolo di una scarica elettrica.
• È obbligatorio effettuare il collegamento ad un impianto di alimentazione dotato di un’efficiente messa
a terra (apparecchio di Classe I secondo norma EN 60598-1). Si raccomanda, inoltre, di proteggere le
linee di alimentazione delle unità dai contatti indiretti e/o cortocircuiti verso massa tramite l’uso di
interruttori differenziali opportunamente dimensionati.
• Le operazioni di collegamento alla rete di distribuzione dell’energia elettrica devono essere effettuate
da un installatore elettrico qualificato. Verificare che frequenza e tensione della rete corrispondono alla
frequenza ed alla tensione per cui l’unità è predisposta, indicate sulla targhetta dei dati elettrici.
• L’unità non per uso domestico, solo per uso professionale.
• Evitare di utilizzare l’unità:
- in luoghi soggetti a vibrazioni, o a possibili urti;
- in luoghi a temperatura superiore ai 45°C.
• Evitare che nell’unità penetrino liquidi infiammabili, acqua o oggetti metallici.
• Non smontare e non apportare modifiche all’unità.
• Tutti gli interventi devono essere sempre e solo effettuati da personale tecnico qualificato. Rivolgersi al
più vicino centro di assistenza tecnica autorizzato.
• Se si desidera eliminare il dispositivo definitivamente, consegnarlo
per lo smaltimento ad un’istituzione locale per il riciclaggio.
Attenzioni e precauzioni per l’installazione
• Se il dispositivo dovesse trovarsi ad operare in condizioni differenti da quelle descritte nel presente
manuale, potrebbero verificarsi dei danni; in tal caso la garanzia verrebbe a decadere. Inoltre, ogni altra
operazione potrebbe provocare cortocircuiti, incendi, scosse elettriche, rotture etc.
• Ogni persona coinvolta con l’installazione e la manutenzione di questo prodotto deve essere qualificata e seguire le istruzioni di questo manuale.
• Prima di iniziare qualsiasi operazione di manutenzione o pulizia sull’unità togliere la tensione dalla rete
di alimentazione.
• Installare l’unità in un luogo ben ventilato.
• Mantenere i materiali infiammabili ad una distanza di sicurezza dall’unità.
• I filtri, le lenti o gli schermi ultravioletti se danneggiati possono limitare la loro efficienza.
• I LED devono essere sostituiti se danneggiati o termicamente deformati.
• Non guardare direttamente il fascio luminoso. Tenete presente che i veloci cambi di luce possono provocare attacchi d’epilessia presso persone fotosensibili o epilettiche.
• Nell’eseguire qualsiasi intervento attenersi scrupolosamente a tutte le normative (in materia di sicurezza) vigenti nel paese di utilizzo.
• Assicurarsi sempre che la struttura portante sia solida e capace di sostenere il peso del prodotto.
• Non toccare i cavi di alimentazione con le mani bagnate.
ARCQUBE9
5
INFORMAZIONI GENERALI
Spedizioni e reclami
Le merci sono vendute “franco nostra sede” e viaggiano sempre a rischio e pericolo del distributore/cliente. Eventuali avarie e danni dovranno essere contestati al vettore. Ogni reclamo per imballi manomessi
dovrà essere inoltrato entro 8 giorni dal ricevimento della merce.
Garanzie e resi
Il prodotto è coperto da garanzia in base alle vigenti normative. Sul sito www.musiclights.it è possibile
consultare il testo integrale delle “Condizioni Generali di Garanzia”. Si prega, dopo l’acquisto, di procedere
alla registrazione del prodotto sul sito www.musiclights.it. In alternativa il prodotto può essere registrato
compilando e inviando il modulo riportato alla fine del manuale. A tutti gli effetti la validità della garanzia
è avallata unicamente dalla presentazione del certificato di garanzia. Music & Lights constata tramite verifica sui resi la difettosità dichiarata, correlata all’appropriato utilizzo, e l’effettiva validità della garanzia;
provvede quindi alla riparazione dei prodotti, declinando tuttavia ogni obbligo di risarcimento per danni
diretti o indiretti eventualmente derivanti dalla difettosità.
ARCQUBE9
6
- 1 - INTRODUZIONE
1.1 DESCRIZIONE
ArcQUBE9 è un proiettore LED di nuova generazione concepito con un corpo super-slim e dal design
elegante. Utilizzato in combinazione con gli alimentatori della serie arcDRIVE, arcQUBE è ingegnerizzato
per essere una soluzione versatile ed economicamente vantaggiosa per molti concept di progetti illuminotecnici.
ArcQUBE9 si integra perfettamente sia con architetture moderne che tradizionali, grazie al design di forma
cubica che lo rende un proiettore unico nel suo genere.
1.2 SPECIFICHE TECNICHE
arcQUBE9RGB
arcQUBE9CW
arcQUBE9WW
arcQUBE9A
LED Source
9x2W (3R,3G,3B)
9x2W Cool white
9x2W Warm white
9x2W Hiflux amber
Lumen
629lm
1241lm
884lm
750lm
Peak Intensity
1875cd (30°)
3740cd (30°)
2635cd (30°)
2312cd (30°)
Input voltage
DC 12V (600mA)
DC 12V (600mA)
DC 12V (600mA)
DC 12V (600mA)
Max Power
16,5W
18,5W
18,5W
12,5W
Optics
30° (12°,55°)
30° (12°,55°)
30° (12°,55°)
30° (12°,55°)
DMX control channels
RGB, dimmer (0-100%)
Dimmer (0-100%)
Dimmer (0-100%)
Dimmer (0-100%)
Interface
DMX
DMX
DMX
DMX
Controllable sections
1
1
1
1
Mains connection
arcDrive436
arcDrive436
arcDrive436
arcDrive436
Data connection
arcDrive436
arcDrive436
arcDrive436
arcDrive436
Protection
IP66
IP66
IP66
IP66
Operating temperature
-40°C/+45°C
-40°C/+45°C
-40°C/+45°C
-40°C/+45°C
Housing material
Die-cast aluminium
Die-cast aluminium
Die-cast aluminium
Die-cast aluminium
Housing color
Off-White
Off-White
Off-White
Off-White
Dimensions (WxHxD)
137x214x53 (mm)
137x214x53 (mm)
137x214x53 (mm)
137x214x53 (mm)
Weight
1,5kg
1,5kg
1,5kg
1,5kg
ARCQUBE9
53
214
137
7
Disegno
90
510
1020
-60
60
1530
2040
-30
2550
0
Average Beam Angle ( 50% ) : 32.8°
30
Illuminance at a Distance
30°
Light Intensity Distribution (30°)
-90
2.0m
4.0m
6.0m
8.0m
10.0m
— Vert. Intensity (cd)
— Hori. Intensity (cd)
323/469lx
1.18m
82/117lx
2.35m
36/53lx
3.53m
12/17lx
4.71m
14/19lx
Eavg/Emax
5.89m
Beam Angle:32.8°
Beam Width
Diagramma di luminosità
Fig.1
8
ARCQUBE9
- 2 - INSTALLAZIONE
2.1 MONTAGGIO
L’ ARCQUBE9 può essere collocata su un piano solido. Inoltre, grazie alle possibilità di fissaggio sulla staffa,
l’unità può essere montata anche a testa in giù, su una traversa. Per il fissaggio occorrono dei supporti
robusti per il montaggio. L’area di collocazione deve avere una stabilità sufficiente e supportare almeno
10 volte il peso dell’unità.
Inoltre assicurarsi di rispettare tutte le avvertenze in materia di sicurezza.
• Fissare la staffa di montaggio alla superficie di montaggio con 4 viti M4 (fig.2).
• Per regolare la direzione del fascio luminoso utilizzare una chiave esagonale per allentare il bullone
M8 esagonale, regolare la direzione del dispositivo, quindi serrare mediante la chiave esagonale (fig.3).
Fig.2
ARCQUBE9
9
Fig.3
ARCQUBE9
10
- 3 - COLLEGAMENTI
Il proiettore a LED può essere collegato al controller dedicato ARCDRIVE436.
Fare riferimento al manuale di questa unità per tutti i dettagli relativi ai requisiti di alimentazione, programmi preimpostati e operazioni DMX.
• Collegare l’estremità del cavo con terminale RJ45 direttamente all’unità di controllo oppure ad opportune unità di giunzione se il cavo deve essere esteso.
3.1 DIAGRAMMA DI CONNESSIONE
Il numero di proiettori a LED che possono essere collegati insieme è definito dal valore della potenza di
uscita dell’unità di controllo.
Esempio di connessione
Nella tabella riportata di seguito è indicato il numero massimo di moduli LED che possono essere collegati
all’ARCDRIVE436.
Total LEDs
Max. number of connected modules
3
12
6
6
9
4
12
3
18
2
36
1
11
ARCQUBE9
3.2 CONNESSIONI
Il terminale RJ45 del cavo di rete, ha il seguente cablaggio:
PIN Color (wire)
Function
1
WHITE/ORANGE
Red LED+
2
ORANGE
Green LED+
3
WHITE/GREEN
Blue LED+
4
BLUE
Not used
5
WHITE/BLUE
Red LED-
6
GREEN
Green LED-
7
WHITE/BROWN
Blue LED-
8
BROWN
Not used
Fig.4
12
ARCQUBE9
- 4 - MANUTENZIONE
4.1 MANUTENZIONE E PULIZIA DEL SISTEMA OTTICO
• Durante gli interventi, assicurarsi che l’area sotto il luogo di installazione sia libera da personale non
qualificato.
• Prima di iniziare qualsiasi operazione di manutenzione o pulizia disconnettere l’unità dalla rete di alimentazione.
• Tutte le viti utilizzate per l’installazione dell’unità e le sue parti devono essere assicurate saldamente e
non devono essere corrose.
• Alloggiamenti, elementi di fissaggio e di installazione (soffitto, truss, sospensioni) devono essere totalmente esenti da qualsiasi deformazione.
• I cavi di alimentazione devono essere in condizione impeccabile e devono essere sostituiti immediatamente nel momento in cui anche un piccolo problema viene rilevato.
• Si dovrebbe procedere, ad intervalli regolari, alla pulizia della parte frontale per asportare polvere,
fumo e altre particelle. Solo così, la luce può essere irradiata con la luminosità massima. Per la pulizia
usare un panno morbido, pulito e un detergente per vetri come si trovano in commercio. Quindi asciugare le parti delicatamente.
All rights reserved by Music & Lights S.r.l. No part of this instruction manual may be
reproduced in any form or by any means for any commercial use.
In order to improve the quality of products, Music&Lights S.r.l. reserves the right to modify the
characteristics stated in this instruction manual at any time and without prior notice.
All revisions and updates are available in the ‘manuals’ section on site www.musiclights.it
ARCQUBE9
TABLE OF CONTENTS
Safety
General instructions
Warnings and installation precautions
General information
2
2
3
1 Introduction
1. 1 Description
1. 2 Technical specifications
4
4
2 Installation
2. 1 Mounting
6
3 Linking
3. 1 Wiring diagram
3. 2 Connections
8
9
4 Maintenance
4. 1 Maintenance and cleaning the unit
10
Warranty
Packing content
1
•
•
•
•
ARCQUBE9
Mount bracket
Junctions
User manual
ARCQUBE9
2
WARNING! Before carrying out any operations with the unit, carefully read this instruction
manual and keep it with cure for future reference. It contains important information about
the installation, usage and maintenance of the unit.
SAFETY
General instruction
• The products referred to in this manual conform to the European Community Directives and are therefore marked with .
• The unit is supplied with hazardous network voltage (230V~). Leave servicing to skilled personnel only.
Never make any modifications on the unit not described in this instruction manual, otherwise you will
risk an electric shock.
• Connection must be made to a power supply system fitted with efficient earthing (Class I appliance according to standard EN 60598-1). It is, moreover, recommended to protect the supply lines of the units
from indirect contact and/or shorting to earth by using appropriately sized residual current devices.
• The connection to the main network of electric distribution must be carried out by a qualified electrical
installer. Check that the main frequency and voltage correspond to those for which the unit is designed
as given on the electrical data label.
• This unit is not for home use, only professional applications.
• Never use the fixture under the following conditions:
- in places subject to vibrations or bumps;
- in places with a temperature of over 45 °C.
• Make certain that no inflammable liquids, water or metal objects enter the fixture.
• Do not dismantle or modify the fixture.
• All work must always be carried out by qualified technical personnel. Contact the nearest sales point for
an inspection or contact the manufacturer directly.
• If the unit is to be put out of operation definitively, take it to a local recycling
plant for a disposal which is not harmful to the environment.
Warnings and installation precautions
• If this device will be operated in any way different to the one described in this manual, it may suffer
damage and the guarantee becomes void. Furthermore, any other operation may lead to dangers like
short circuit, burns, electric shock, etc.
• Every person involved with installation and maintenance of this device have to be qualified and follow
the instructions of this manual.
• Before starting any maintenance work or cleaning the projector, cut off power from the main supply.
• Install the fixture in a well ventilated place.
• Keep any inflammable material at a safe distance from the fixture.
• Shields, lenses or ultraviolet screens shall be changed if they have become damaged to such an extent
that their effectiveness is impaired.
• The lamp (LED) shall be changed if it has become damaged or thermally deformed.
• Never look directly at the light beam. Please note that fast changes in lighting, e. g. flashing light, may
trigger epileptic seizures in photosensitive persons or persons with epilepsy.
• When carrying out any work, always comply scrupulously with all the regulations (particularly regarding safety) currently in force in the country in which the fixture’s being used.
• Always make sure that the supporting structure is solid and can support the combined weight of the
products.
• Do not touch the power cables if your hands are wet.
ARCQUBE9
3
GENERAL INFORMATION
Shipments and claims
The goods are sold “ex works” and always travel at the risk and danger of the distributor. Eventual damage will have to be claimed to the freight forwarder. Any claim for broken packs will have to be forwarded
within 8 days from the reception of the goods.
Warranty and returns
The guarantee covers the fixture in compliance with existing regulations. You can find the full version of
the “General Guarantee Conditions” on our web site www.musiclights.it. Please remember to register the
piece of equipment soon after you purchase it, logging on www.musiclights.it. The product can be also
registered filling in and sending the form available on your guarantee certificate. For all purposes, the validity of the guarantee is endorsed solely on presentation of the guarantee certificate. Music & Lights will
verify the validity of the claim through examination of the defect in relation to proper use and the actual
validity of the guarantee. Music & Lights will eventually provide replacement or repair of the products declining, however, any obligation of compensation for direct or indirect damage resulting from faultiness.
ARCQUBE9
4
- 1 - INTRODUCTION
1.1 DESCRIPTION
ArcQUBE9 is engineered as a compact and sleek lighting fixture suitable for building facades and monuments. Used in conjunction with arcDRIVE power supplies, the arcQUBE9 is developed as a cost-effective
and efficient solution for many kinds of lighting application. With a modern cubic design, arcQUBE9 is
ideal for both modern and more traditional architectures.
1.2 TECHNICAL SPECIFICATIONS
arcQUBE9RGB
arcQUBE9CW
arcQUBE9WW
arcQUBE9A
LED Source
9x2W (3R,3G,3B)
9x2W Cool white
9x2W Warm white
9x2W Hiflux amber
Lumen
629lm
1241lm
884lm
750lm
Peak Intensity
1875cd (30°)
3740cd (30°)
2635cd (30°)
2312cd (30°)
Input voltage
DC 12V (600mA)
DC 12V (600mA)
DC 12V (600mA)
DC 12V (600mA)
Max Power
16,5W
18,5W
18,5W
12,5W
Optics
30° (12°,55°)
30° (12°,55°)
30° (12°,55°)
30° (12°,55°)
DMX control channels
RGB, dimmer (0-100%)
Dimmer (0-100%)
Dimmer (0-100%)
Dimmer (0-100%)
Interface
DMX
DMX
DMX
DMX
Controllable sections
1
1
1
1
Mains connection
arcDrive436
arcDrive436
arcDrive436
arcDrive436
Data connection
arcDrive436
arcDrive436
arcDrive436
arcDrive436
Protection
IP66
IP66
IP66
IP66
Operating temperature
-40°C/+45°C
-40°C/+45°C
-40°C/+45°C
-40°C/+45°C
Housing material
Die-cast aluminium
Die-cast aluminium
Die-cast aluminium
Die-cast aluminium
Housing color
Off-White
Off-White
Off-White
Off-White
Dimensions (WxHxD)
137x214x53 (mm)
137x214x53 (mm)
137x214x53 (mm)
137x214x53 (mm)
Weight
1,5kg
1,5kg
1,5kg
1,5kg
ARCQUBE9
53
214
137
5
Drawing
90
510
1020
-60
60
1530
2040
-30
2550
0
Average Beam Angle ( 50% ) : 32.8°
30
Illuminance at a Distance
30°
Light Intensity Distribution (30°)
-90
2.0m
4.0m
6.0m
8.0m
10.0m
— Vert. Intensity (cd)
— Hori. Intensity (cd)
323/469lx
1.18m
82/117lx
2.35m
36/53lx
3.53m
12/17lx
4.71m
14/19lx
Eavg/Emax
5.89m
Beam Angle:32.8°
Beam Width
Photometric data
Fig.1
6
ARCQUBE9
- 2 - INSTALLATION
2.1 MOUNTING
ARCQUBE9 may be set up on a solid and even surface. The unit can also be mounted upside down to a
cross arm. For fixing, stable mounting clips are required. The mounting place must be of sufficient stability
and be able to support a weight of 10 times of the unit’s weight.
When carrying out any installation, always comply scrupulously with all the regulations (particularly regarding safety) currently in force in the country in which the fixture’s being used.
• Install the projector at a suitable location by means of the mounting bracket using 4xM4 screws (fig.2).
• To adjust the direction of the fixture use a #6 hex key to loosen the hex bolt, adjust the direction of the
fixture, and then tighten the hex key (fig.3).
Fig.2
ARCQUBE9
7
Fig.3
ARCQUBE9
8
- 3 - LINKING
The units should be installed with ARCDRIVE436 controller. See ARCDRIVE436 user manual for full details
of mains power requirement, built-in programs and DMX operation.
• Connect the end of the LED unit cable directly to the driver or use suitable junction box if the cable has
to be extended.
3.1 WIRING DIAGRAM
For the number of LED projectors that can be linked together, please follow the maximum power output
limit of each zone of the unit controller.
Example
The table below shows the maximum number of LED modules that can be connected to ARCDRIVE436.
Total LEDs
Max. number of connected modules
3
12
6
6
9
4
12
3
18
2
36
1
ARCQUBE9
9
3.2 CONNECTIONS
The RJ45 plug has the following wiring:
PIN Color (wire)
Function
1
WHITE/ORANGE
Red LED+
2
ORANGE
Green LED+
3
WHITE/GREEN
Blue LED+
4
BLUE
Not used
5
WHITE/BLUE
Red LED-
6
GREEN
Green LED-
7
WHITE/BROWN
Blue LED-
8
BROWN
Not used
Fig.4
10
ARCQUBE9
- 4 - MAINTENANCE
4.1 MAINTENANCE AND CLEANING THE UNIT
• Make sure the area below the installation place is free from unwanted persons during setup.
• Before starting any maintenance work or cleaning the projector, cut off power from the main supply.
• All screws used for installing the device and any of its parts should be tightly fastened and should not
be corroded.
• Housings, fixations and installation spots (ceiling, trusses, suspensions) should be totally free from any
deformation.
• The main cables must be in impeccable condition and should be replaced immediately even when a
small problem is detected.
• It is recommended to clean the front at regular intervals, from impurities caused by dust, smoke, or
other particles to ensure that the light is radiated at maximum brightness. For cleaning, disconnect the
main plug from the socket. Use a soft, clean cloth moistened with a mild detergent. Then carefully wipe
the part dry. For cleaning other housing parts use only a soft, clean cloth. Never use a liquid, it might
penetrate the unit and cause damage to it.
"
• Si prega, dopo l’acquisto, di
procedere alla registrazione del
prodotto sul sito www.musiclights.it.
In alternativa il prodotto può essere
registrato compilando e inviando il
modulo riportato sul retro.
• Sono esclusi i guasti causati da
imperizia e da uso non appropriato
dell’apparecchio.
• La garanzia non ha più alcun effetto
qualora l’apparecchio sia stato
manomesso.
• La garanzia non prevede la
sostituzione dell’apparecchio.
• Sono escluse dalla garanzia le parti
esterne, le lampade, le manopole, gli
interruttori e le parti asportabili.
• Le spese di trasporto e i rischi
conseguenti sono a carico del
possessore dell’apparecchio.
• A tutti gli effetti la validità della
garanzia è avallata unicamente
dalla presentazione del certificato di
garanzia.
Estratto dalle
Condizioni Generali di Garanzia
Il prodotto è coperto da garanzia
in base alle vigenti normative.
Sul sito www.musiclights.it è
possibile consultare il testo
integrale delle “Condizioni
Generali di Garanzia”.
• Please remember to register the
piece of equipment soon after you
purchase it, logging on
www.musiclights.it. The product
can be also registered filling in and
sending the form available on your
guarantee certificate.
• Defects caused by inexperience
and incorrect handling of the
equipment are excluded.
• The guarantee will no longer be
effective if the equipment has
been tampered.
• The guarantee makes no provision
for the replacement of the
equipment.
• External parts, lamps, handles,
switches and removable parts are
not included in the guarantee.
• Transport costs and subsequent
risks are responsibility of the
owner of the equipment.
• For all purposes, the validity of
the guarantee is endorsed solely
on presentation of the guarantee
certificate.
Abstract
General Guarantee Conditions
The guarantee covers the unit
in compliance with existing
regulations. You can find the
full version of the “General
Guarantee Conditions” on our
web site www.musiclights.it.
CERTIFICATO DI GARANZIA
GUARANTEE CERTIFICATE
"
Place Stamp Here
Affrancare
Spett.le
Music&Lights S.r.l.
Via Appia Km 136.200
04020 Itri (LT) Italy
"
Purchased by / Acquistato da
SERIAL N° / SERIE N°
MODEL / MODELLO
SURNAME / COGNOME
Purchased by / Acquistato da
SERIAL N° / SERIE N°
MODEL / MODELLO
Dealer’s stamp
and signature
N.
PROV.
"
"
SURNAME / COGNOME
CITY / CITTà
ADDRESS / VIA
NAME / NOME
N.
NAME / NOME
ADDRESS / VIA
CITY / CITTA’
Dealer’s stamp
and signature
Timbro e firma
del Rivenditore
ZIP CODE / C.A.P.
Timbro e firma
del Rivenditore
Purchasing date
Data acquisto
PROV.
Purchasing date
Data acquisto
FORM TO BE FILLED IN AND KEPT / CEDOLA DA COMPILARE E CONSERVARE
ZIP CODE / C.A.P.
FORM TO BE FILLED IN AND MAILED / CEDOLA DA COMPILARE E SPEDIRE
ARCHWORK is a brand of Music & Lights S.r.l .company. ©2013 Music & Lights S.r.l.
Via Appia, km 136,200 - 04020 Itri (LT) - ITALY
Phone +39 0771 72190 - Fax +39 0771 721955
www.musiclights.it - email: [email protected]
ISO 9001:2008 Certified Company
ARCHWORK è un brand di proprietà della Music & Lights S.r.l.
MUSIC & LIGHTS S.r.l.