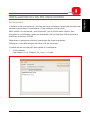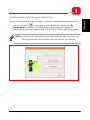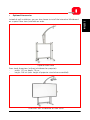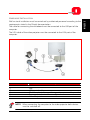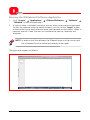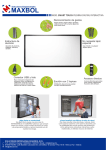
1
PUBBLICAZIONE EMESSA DA:
Olivetti S.p.A.
Gruppo Telecom Italia
Via Jervis, 77 - 10015 Ivrea (ITALY)
www.olivetti.com
Copyright © 2010, Olivetti
Tutti i diritti riservati
I requisiti qualitativi di questo prodotto sono attestati
dall’apposizione della marcatura sul prodotto.
Il produttore si riserva il diritto di apportare modifiche al prodotto descritto in questo manuale in qualsiasi momento e
senza alcun preavviso.
Si richiama l’attenzione sulle seguenti azioni che possono compromettere la conformità sopra attestata,
oltre, naturalmente, le caratteristiche del prodotto:
• errata alimentazione elettrica;
• errata installazione o uso errato o improprio o comunque difforme dalle avvertenze riportate sul manuale
d’uso fornito col prodotto;
• sostituzione di componenti o accessori originali con altri di tipo non approvato dal costruttore, o effettuata da
personale non autorizzato.
Tutti i diritti riservati. Nessuna parte di questo documento può essere riprodotto o trasmesso in qualsiasi
forma o strumento, elettronico o meccanico, compresa la fotocopiatura, registrazione o altri, senza la
preventiva autorizzazione scritta dell'editore.
ISTRUZIONE: fornisce un'istruzione aggiuntiva relativa al software.
NOTA: descrive eventuali problemi che possono insorgere durante l'uso della
lavagna e i rimedi per risolverli e prevenirli.
ATTENZIONE: richiama l'attenzione sul pericolo di subire lesioni
fisiche o di arrecare danni al prodotto in caso di uso
improprio.
Avvertenza
• Per evitare scosse elettriche, non installare la lavagna interattiva in ambienti
umidi o fumosi.
• Dopo aver installato la lavagna interattiva, evitare di toccare il cavo di
alimentazione e il cavo di trasmissione dati.
• Tenere la lavagna interattiva lontano da fiamme libere, contatti elettrici e luce
solare diretta.
• Dopo l'installazione assicurarsi che la lavagna interattiva sia ben fissata.
• Evitare di guardare direttamente il fascio di luce emesso dal proiettore sulla
lavagna.
OLIBOARD - Lavagne interattive
III
Note importanti
• La lavagna interattiva deve essere utilizzata esclusivamente con le apposite
penne elettroniche. Non usare evidenziatori, matite o altri tipi di penne. Se
necessario, pulire la lavagna con alcool.
• Assicurarsi che la lavagna sia correttamente collegata al computer e alla rete
elettrica. E’ preferibile optare per la posa nascosta dei cavi di collegamento e
di alimentazione, per evitare che essi possano essere tirati e scollegati.
• Non graffiare la superficie o la cornice della lavagna con oggetti duri o
appuntiti. Nell'ambiente circostante non devono essere presenti forti campi
magnetici. In presenza di una parete in metallo o altro materiale magnetico,
fra tale parete e la lavagna deve essere lasciata una distanza di 10 metri.
• Per scrivere con la penna elettronica, tenere quest'ultima perpendicolare alla
lavagna senza calcare.
• In caso di installazione a parete, la lavagna deve essere parallela alla
superficie della parete.
Questo manuale riguarda esclusivamente la lavagna Oliboard e il software in
dotazione. Pur essendoci riferimenti al computer (notebook, PC, etc.) collegato
alla lavagna e al video-proiettore, per questi altri dispositivi occorre fare
riferimento alla documentazione originale dei rispettivi produttori.
IV
OLIBOARD - Lavagne interattive
INTRODUZIONE ..............................................................................................1
Premessa............................................................................................................... 1
Requisiti di sistema ................................................................................................ 2
Disimballaggio della lavagna interattiva ................................................................. 3
CARATTERISTICHE PRINCIPALI............................................................................... 6
Aspetto esteriore.............................................................................................. 6
Tasti funzione presenti sulla lavagna ...................................................................... 7
Dati tecnici ....................................................................................................... 8
Installazione fisica ................................................................................................. 9
Installazione della batteria della penna elettronica ............................................... 10
INSTALLAZIONE DEL SOFTWARE PER WINDOWS ..........................................11
Installazione rapida ............................................................................................. 11
Installazione passo-passo..................................................................................... 12
Installazione driver software Oliboard ............................................................. 12
Installazione del software Oliboard ................................................................. 13
Installazione del driver software del cavo USB ................................................. 13
Disinstallazione del software Oliboard ................................................................. 14
Esecuzione del software ...................................................................................... 14
Avvio del driver della lavagna interattiva ......................................................... 14
Orientamento della lavagna interattiva ........................................................... 15
Avvio del software applicativo della lavagna.................................................... 17
Creazione di un account e di una password personali ..................................... 18
Impostazione delle funzioni Oliboard .............................................................. 20
INSTALLAZIONE DEL SW PER LINUX-UBUNTU ...............................................21
Installazione ........................................................................................................ 21
Disinstallazione del software................................................................................ 23
Esecuzione del software ...................................................................................... 24
Avvio del Oliboard Driver................................................................................ 24
Orientamento della lavagna interattiva ........................................................... 25
Avvio del software applicativo della lavagna.................................................... 27
INSTALLAZIONE DEL SOFTWARE PER MAC ...................................................28
Installazione ........................................................................................................ 28
Disinstallazione del software................................................................................ 32
Esecuzione del software ...................................................................................... 32
Avvio del Oliboard Driver................................................................................ 32
Orientamento della lavagna interattiva ........................................................... 34
Avvio del software applicativo della lavagna.................................................... 36
RICERCA GUASTI..........................................................................................38
OLIBOARD - Lavagne interattive
V
ITALIANO
INDICE
Pagina lasciata intenzionalmente bianca
VI
OLIBOARD - Lavagne interattive
PREMESSA
La lavagna interattiva è un’apparecchiatura periferica di input che, grazie
all'applicazione di tecnologie avanzate e affidabili, come l'induzione elettromagnetica
e la localizzazione digitale, permette di creare, in collegamento ad un PC e ad un
video-proiettore, un ambiente interattivo ad uso didattico o dimostrativo.
Caratteristiche
•
La lavagna Oliboard è caratterizzata da una superficie dura, per assicurare
resistenza all’usura e buona protezione da atti vandalici, e da un’elevata
precisione di tracciatura, rapidità di risposta e sensibilità operativa per consentire
un uso naturale anche ai meno esperti.
•
Il software in dotazione offre funzioni evolute, quali ingrandimento parziale,
modifica parziale, riflettore, riproduzione, effetto calligrafia, fotocamera, schermo
e modello personalizzato.
•
La penna elettronica permette di scrivere, prendere appunti, cancellare, tracciare
figure geometriche, copiare, riprodurre e salvare i file.
•
La penna elettronica può inoltre essere utilizzata come un mouse per impartire
comandi al PC.
OLIBOARD - Lavagne interattive
1
ITALIANO
INTRODUZIONE
REQUISITI DI SISTEMA
La lavagna deve essere collegata a un computer che visualizzi immagini sulla lavagna
per mezzo di un video-proiettore.
Configurazione
hardware
Configurazione
software
Configurazione minima
CPU: 1GHz
Configurazione consigliata
CPU: 1.7 GHz o superiore
RAM: 256 MB
RAM: 512 MB o superiore
Porta USB (per il collegamento
della lavagna)
Porta VGA (tipo SUB-D15
femmina) per il collegamento
del video-proiettore).
NOTA: alcuni computer (es.
MAC) sono sprovvisti di questa
porta; in tal caso occorrerà
usare un adattatore (non in
dotazione alla lavagna e al
proiettore).
Windows 2000, XP, Vista, 7
Linux Ubuntu7.0/8.0
(I386/AMD64);
Mac OS X V10.4 e successive
Porta USB (per il collegamento
della lavagna)
Porta VGA (tipo SUB-D15
femmina) per il collegamento del
video-proiettore).
NOTA: alcuni computer (es.
MAC) sono sprovvisti di questa
porta; in tal caso occorrerà usare
un adattatore (non in dotazione
alla lavagna e al proiettore).
Windows 2000, XP, Vista, 7
Linux Ubuntu7.0/8.0
(I386/AMD64);
Mac OS X V10.4 e successive
Impostazioni suggerite per il computer:
1)
Per una visione ottimale sulla lavagna, il formato dell’uscita video del computer (la
risoluzione) e del proiettore devono essere nel medesimo formato della lavagna.
Quindi per lavagne in formato 4/3 (Oliboard 78S e Oliboard 78D) si suggerisce di
utilizzare una risoluzione di uscita corrispondente al formato 4/3 (es. 1024x768, o
800x600).
Per una lavagna in formato 16:9 (Oliboard 95D) si suggerisce di usare una
risoluzione di uscita corrispondente al formato 16:9 (ad es. 1280x800).
2)
Durante l’uso della lavagna, il computer collegato potrebbe entrare in modalità
“stand-by”. Per evitarlo si suggerisce di disabilitare le funzioni di screen-saver e di
risparmio energetico.
2
OLIBOARD - Lavagne interattive
La dotazione della lavagna interattiva comprende normalmente i seguenti componenti:
•
Lavagna interattiva
(Il colore del prodotto può variare)
•
Accessori
OLIBOARD - Lavagne interattive
3
ITALIANO
DISIMBALLAGGIO DELLA LAVAGNA INTERATTIVA
Il corredo normale di accessori comprende:
Descrizione
Quantità
Funzione
Figura
2
Penna speciale
per lavagna
interattiva, con
una batteria AAA
(mini Stilo) da 1,5
V per ogni
penna.
I colori possono variare
Cavo speciale da
10 metri
1
Cavo per la
connessione tra
computer e
lavagna
interattiva
Disco di
installazione
Oliboard
Fino a 3
dischi
Driver e software
applicativo per
Windows, Linux,
Mac
Manuale utente
1
Guida per
l'utente
Staffe di
installazione e
accessori per il
fissaggio a parete
1
Kit di fissaggio a
Varie parti meccaniche
parete
Penna elettronica
4
OLIBOARD - Lavagne interattive
Accessori opzionali
In alternativa all'installazione a parete è possibile installare la lavagna interattiva su uno
speciale piedistallo ordinabile a richiesta.
Piedistallo opzionale
Dimensioni piedistallo (senza lavagna e proiettore):
larghezza: 127 cm; prof. 75 cm;
altezza: 246 cm (max altezza del supporto proiettore montato).
Lavagna OLIBOARD 95D su piedistallo
OLIBOARD - Lavagne interattive
5
ITALIANO
•
CARATTERISTICHE PRINCIPALI
Aspetto esteriore
(Il colore può variare in funzione del modello)
Rif.
1
Descrizione
Area di scrittura
2
Tasti funzione
3
Portapenne
4
Scheda interfaccia
5
Interfaccia per il cavo speciale da collegare alla porta USB del
computer (la lavagna è di norma alimentata attraverso lo stesso
cavo)
6
Connettore di alimentazione (di norma non usato)
6
OLIBOARD - Lavagne interattive
Tasti
funzione
Definizione
Orientamento
(taratura)
Modalità
comando
Orientamento
Modalità
finestra
Orientam.
Orientam.
Modalità comando
Nessun effetto
(simile mouse)
Passa alla
modalità
comando
Modalità
annotazione
Nessun
effetto
Modalità finestra
Passa alla
modalità
comando
Passa alla
Passa alla modalità
modalità
annotazione
annotazione
Modalità
annotazione
Nessun effetto
Frontespizio Frontespizio
Crea pagina vuota Crea pagina vuota
Crea pagina Crea pagina
vuota
vuota
Pg Su
Nessun effetto
Pg Su
Pg Su
Pg Giù
Nessun effetto
Pg Giù
Pg Giù
Penna normale
Passa a modalità
Penna
annotazione e usa
normale
penna norm.
Penna
normale
Penna trasparente
Passa a modalità
Penna
annotazione e usa
trasparente
penna trasp.
Penna
trasparente
Gomma
Gomma
Gomma
Gomma
Riproduci
Riproduci pagine
Riproduci
pagine
Riproduci
pagine
Stampa
Stampa
Stampa
Stampa
OLIBOARD - Lavagne interattive
7
ITALIANO
TASTI FUNZIONE PRESENTI SULLA LAVAGNA
Dati tecnici
Piattaforma hardware
Dispositivo periferico per PC, notebook, ecc.
Risoluzione
100 linee/mm (254 linee/pollice)
Precisione
+/- 1 mm
Principio di funzionamento
Induzione elettromagnetica
Modalità operative
Modalità
Modalità
Modalità
Modalità
Alimentazione USB
DC 5V 100mA
comando
finestra
annotazione
schermo intero
La durata delle batterie varia a seconda del tipo;
Durata della batteria della penna
le comuni batterie alcaline possono arrivare a una
elettronica
durata di tre mesi circa.
Temperatura di esercizio
20℃ ~ +55℃
Umidità di esercizio
RH:30% ~ 80%
Potenza
< 2W
Modelli
OLIBOARD 78S
OLIBOARD 78D
Area esterna
- diagonale
- dimensioni
Area attiva
- larghezza
- altezza
OLIBOARD 95D
85"
174 x 127 cm
101"
223 x 127 cm
78"
160 x 119 cm
95"
210 x 118 cm
Rapporto d’aspetto
4,3
16:9
Peso netto (+/- 1 kg)
17 Kg
25,5 Kg
Imballo
- dimensioni
- peso lordo (+/- 2 Kg)
1860 x 1400 x 120 cm
29 Kg
2350 x 1400 x 120 cm
32 Kg
8
OLIBOARD - Lavagne interattive
ITALIANO
INSTALLAZIONE FISICA
L'installazione a parete o su piedistallo deve essere eseguita da personale autorizzato
nel rispetto di quanto prescritto dalla documentazione Olivetti.
Il cavo di collegamento della lavagna deve essere connesso alla porta USB del
computer.
Il cavo VGA del video-proiettore deve essere connesso alla porta VGA del computer.
Rif.
1
2
3
4
5
6
Descrizione
VGA
USB
Cavo speciale USB
Porta interfaccia lavagna per cavo speciale in dotazione
Connettore di alimentazione (di norma non usato)
Video-Proiettore
NOTA: il collegamento fra computer e video-proiettore deve essere effettuato
con i due dispositivi spenti.
OLIBOARD - Lavagne interattive
9
INSTALLAZIONE DELLA BATTERIA DELLA PENNA ELETTRONICA
Aprire il cappuccio posteriore della penna elettronica ruotandolo in senso antiorario,
inserire una batteria AAA (mini Stilo) da 1,5 V come illustrato in figura e avvitare di
nuovo il cappuccio posteriore agendo in senso orario.
I colori della penna possono variare.
10
OLIBOARD - Lavagne interattive
ITALIANO
INSTALLAZIONE DEL SOFTWARE PER WINDOWS
Il software Oliboard prevede due tipi di installazione: "installazione rapida" e
"installazione passo-passo".
L'installazione rapida comprende le seguenti fasi eseguite automaticamente in
sequenza:
-
Installazione del driver software Oliboard.
-
Installazione del software applicativo Oliboard.
-
Installazione del driver software per il cavo USB.
L’installazione passo-passo permette di installare il software un passo alla volta.
INSTALLAZIONE RAPIDA
Non collegare il cavo della lavagna al computer (qualora il cavo USB sia già
stato collegato al computer, scollegarlo); durante la procedura di installazione
apparirà un messaggio a video quando occorrerà collegare il cavo.
(Se si avvia la procedura di installazione con il cavo già collegato, sarà poi necessario
installare il driver software per il cavo USB).
1.
Inserire il disco Oliboard Software.
2.
Fare clic sul logo del programma (equivale a lanciare il programma di “autorun”).
3.
Apparirà la finestra della guida all'installazione.
4.
Fare clic su “Install All“ per eseguire l’installazione rapida.
5.
Selezionare la lingua che si desidera installare e confermare con “AVANTI”.
6.
Selezionare il percorso di installazione e confermare con “AVANTI”.
L'installazione del software avrà inizio; al termine verrà eseguita l'installazione del
driver per il cavo USB.
7.
Quando il sistema chiede se si desidera installare il driver FTDI USB, fare clic
sull'opzione “SI” per eseguire l'installazione. Al termine (dopo un'attesa di alcuni
secondi) verrà visualizzato un messaggio che richiederà di effettuare la
connessione del cavo USB al computer.
Collegare il cavo a una porta USB del computer (l'altro capo del cavo deve essere
collegato alla lavagna interattiva).
Dopo aver collegato il cavo, fare clic su “OK”.
OLIBOARD - Lavagne interattive
11
8.
Alla visualizzazione del messaggio di installazione completata, fare clic su “FINE”
e, al ritorno alla maschera principale, fare clic su “Esci”.
9.
Seguire le istruzioni riportate al paragrafo “Esecuzione del software”.
INSTALLAZIONE PASSO-PASSO
Questo tipo di installazione è consigliato soltanto per aggiornare il software in
dotazione alla lavagna.
1.
Inserire il disco Oliboard Software.
2.
Fare clic sul logo del programma.
3.
Apparirà la finestra della guida all'installazione.
4.
Fare clic su “Install Step By Step” per installare il driver e il software Oliboard e il
driver del cavo USB seguendo la modalità passo-passo.
Installazione driver software Oliboard
1.
Fare clic su
2.
Selezionare la lingua che si desidera installare e confermare con “AVANTI”.
3.
Selezionare il percorso di installazione e confermare con “AVANTI”.
4.
Terminare l'installazione premendo il pulsante “Fine”. Collegare il cavo a una
porta USB del computer (l'altro capo del cavo deve essere collegato alla lavagna
interattiva).
Dopo aver collegato il cavo, fare clic su “OK”.
12
per installare il driver della lavagna interattiva.
OLIBOARD - Lavagne interattive
ITALIANO
Installazione del software Oliboard
1.
Fare clic su
.
2.
Selezionare la lingua che si desidera installare.
3.
Selezionare il percorso di installazione. L'installazione del software avrà inizio.
4.
Alla visualizzazione del messaggio di completamento dell’installazione, fare click
su “Fine”.
Installazione del driver software del cavo USB
Normalmente non è necessario eseguire questa procedura se si è già eseguita
l’installazione rapida.
1.
Fare clic su
cavo USB.
“Install USB Driver” per installare il driver per il
2.
Fare clic su “Install FTDI Driver” per installare il driver.
Dopo aver collegato il cavo, fare clic su “SI”.
Se l’installazione è stata eseguita correttamente, un messaggio di installazione
eseguita viene visualizzato.
Si può verificare l’avvenuta installazione del cavo USB, facendo click con il tasto destro
del mouse in “Risorse del computer“, e quindi, con tasto sinistro del mouse, in
“Proprietà“ → “Hardware“ → “Gestione periferiche“ → “Porte (Com e LPT)“
apparirà la periferica “Porta seriale USB“. Verificare che la porta COM assegnata sia
minore di 10 (es. COM 5) e che la velocità di trasmissione sia 57600.
OLIBOARD - Lavagne interattive
13
DISINSTALLAZIONE DEL SOFTWARE OLIBOARD
Fare clic su “Start” → “Pannello di controllo” → “Installazione applicazioni”,
selezionare “Oliboard” e successivamente fare clic su “Rimuovi programmi”.
Quindi selezionare l’opzione per rimuovere tutte le caratteristiche installate ed eseguire
le istruzioni a video.
In alternativa, inserire il disco del software, fare clic sul logo del programma Oliboard e
avviare la guida alla disinstallazione del software seguendo le istruzioni a video.
Al termine della disinstallazione si consiglia di riavviare il computer.
ESECUZIONE DEL SOFTWARE
Il cavo della lavagna deve essere collegato alla porta USB del computer.
Per l’esecuzione del software, si deve innanzitutto avviare il driver software della
lavagna, eseguire,se necessario, la funzione di orientamento e quindi avviare il
software della lavagna.
Avvio del driver della lavagna interattiva
Fare clic su “Start“ → “Tutti i programmi“ → “Olivetti“ → “Oliboard“ e avviare
Oliboard Driver. Nell'angolo inferiore destro della barra di stato del desktop comparirà
l'icona del modulo di comunicazione
.
NOTA: se compare il messaggio “Comunicazione con la lavagna fallita”,
verificare che il cavo della lavagna sia collegato correttamente al
computer e alla lavagna. Fare quindi clic sull'icona dell'Oliboard Driver
e selezionare “Riconnetti” nel menu a comparsa. Se la segnalazione
persiste, verificare che il driver del cavo USB sia installato
correttamente (vedere nota su verifica installazione del cavo USB a
pag. 13).
14
OLIBOARD - Lavagne interattive
Orientamento della lavagna interattiva
Questa funzione serve a tarare la lavagna rispetto all’immagine proiettata su di essa.
1.
dell’Oliboard Driver nella
Fare clic con il pulsante sinistro del mouse sull'icona
barra dei comandi in basso; selezionare “Orientamento” nel menu a comparsa e
quindi selezionare la modalità di orientamento desiderata (vedere nota
ISTRUZIONE in fondo a questo paragrafo).
NOTA: la funzione di orientamento può anche essere attivata con l’apposito
pulsante posto alla sommità della barra dei pulsanti sulla lavagna.
OLIBOARD - Lavagne interattive
15
ITALIANO
NOTA: dopo aver avviato l’esecuzione del driver, cliccare sull’icona di Oliboard
driver per attivare o disattivare il parametro di “autostart” in funzione
che si voglia o meno lanciare in automatico l’esecuzione di Oliboard
driver alla successiva riaccensione del computer. Se il computer è
sempre connesso alla lavagna è preferibile attivare “autostart”.
Se invece il computer può essere scollegato alla lavagna si suggerisce
di disattivare “autostart” per evitare una segnalazione di errore per
lavagna non collegata alla successiva riaccensione del computer.
2.
Facendo clic con il pulsante sinistro del mouse su “Ri-orientamento” si aprirà la
finestra a comparsa Orientamento. Fare clic con la penna elettronica al centro
della croce lampeggiante “+” sulla lavagna. Successivamente ripetere l’operazione
per gli altri punti di orientamento (in totale sono sei), avendo cura di centrare
bene con la penna elettronica il centro della croce lampeggiante.
ISTRUZIONE: selezionare “Ri-orientamento” in occasione della prima
installazione dell'Oliboard Driver, o se è cambiata la posizione
del proiettore o della lavagna interattiva, o se è cambiata la
modalità di visualizzazione (es. dimensione dell’immagine o
risoluzione).
Per eseguire rapidamente un orientamento, è possibile
selezionare “Ri-orientamento precedente”, a condizione che
non siano state apportate modifiche dopo l'ultimo utilizzo.
Se non è necessario un orientamento preciso, selezionare
“Orientamento predefinito”.
16
OLIBOARD - Lavagne interattive
1.
Fare clic su “Start” → “Tutti i programmi” → “Olivetti” → “Oliboard
Software” e avviare il programma applicativo. Si aprirà una finestra di accesso
nella quale potranno essere digitati il nome utente e la password.
2.
Per avviare il software utilizzando l’account predefinito, basta fare clic sul
pulsante di login “Accedi” senza inserire alcun dato, oppure si può inserire il
proprio account personale. Quando utilizza un account personale, l’utente ha la
possibilità di personalizzare la barra degli strumenti, le risorse e i modelli.
NOTA: prima di avviare il programma applicativo, assicurarsi che la lavagna
interattiva sia correttamente collegata al PC e che il driver della
lavagna interattiva sia in esecuzione.
NOTA: per le modalità di funzionamento del software fare riferimento alle
istruzioni dell’HELP ON LINE.
OLIBOARD - Lavagne interattive
17
ITALIANO
Avvio del software applicativo della lavagna
Creazione di un account e di una password personali
1.
Fare clic su “Start” → ”Tutti i programmi” → ”Olivetti” → “Oliboard” →
“User Manager” apparirà la finestra seguente:
Digitare i dati dell’account amministratore per accedere al software. L’account
amministratore predefinito è: Administrator, Password: oliboard.
2.
18
Apparirà la finestra User Manager.
OLIBOARD - Lavagne interattive
Selezionare “Modifica” → ”Nuovo utente” per creare un account personale.
4.
Digitare il nome utente e la password e selezionare “Crea”.
5.
Al termine del processo, nella finestra comparirà il nuovo utente:
ITALIANO
3.
OLIBOARD - Lavagne interattive
19
Impostazione delle funzioni Oliboard
Fare clic su “Opzioni”
per aprire la finestra sotto raffigurata.
Per i modelli di lavagna Oliboard 78D e Oliboard 95D, impostare la funzione “penna
doppia” come sotto indicato.
20
OLIBOARD - Lavagne interattive
INSTALLAZIONE
Si evidenzia che sono necessari i privilegi da amministratore e l'eventuale password per
portare a compimento l'installazione, sia del software che dei driver.
Nella cartella di installazione, sono disponibili, per la distribuzione Ubuntu, due
procedure di installazione: quella per processori Intel (architettura i386 e derivate) e
quella per processori AMD64.
Selezionare la procedura relativa al processore del proprio computer.
Collegare il cavo della lavagna alla porta USB del computer.
A questo punto sono possibili due metodi di installazione:
1.
Primo metodo:
Fare doppio clic su Oliboard_for_Linux_V1.0.deb
OLIBOARD - Lavagne interattive
21
ITALIANO
INSTALLAZIONE DEL SW PER LINUX-UBUNTU
La procedura di installazione prevede i passi seguenti (eseguire le istruzioni a video):
•
Selezionare “Installa pacchetto”.
•
Digitare la password (in funzione dei diritti dell’account utente nel sistema
operativo).
•
Esecuzione della procedura di installazione; al suo completamento viene
visualizzato un apposito messaggio.
2.
Secondo metodo:
•
Aprire una finestra di terminale.
•
Digitare i comandi necessari per accedere alla cartella dove risiede
Oliboard_for_Linux_V1.0.deb.
•
Digitare il comando seguente:
sudo dpkg -i Oliboard_for_Linux_V1.0.deb.
e inserire la password di root.
•
In caso di problemi, digitare il comando in questa altra sequenza:
su –
password di root.
Digitare i comandi necessari per accedere alla cartella dove risiede
Oliboard_for_Linux_V1.0.deb.
dpkg –i Oliboard_for_Linux_V1.0.deb.
22
OLIBOARD - Lavagne interattive
Prima di disinstallare il sw occorre disattivare il driver sw (tramite il comando “exit”
attivabile cliccando sull’icona del driver nella barra di comando) e uscire
dall’applicazione se è ancora in corso di esecuzione.
Oliboard per Linux può essere rimosso dal computer in due modi. Uno consiste nel
seguire le istruzioni visualizzate sullo schermo, l’altro nell’utilizzare la riga di comando.
1.
Primo metodo:
•
Aprire Synaptic Package Manager.
•
Digitare la parola seguente nella barra di ricerca: Oliboard.
•
Selezionare la voce Oliboard per rimuovere Oliboard per Linux dal computer.
Oliboard per Linux verrà quindi rimosso dal computer.
2.
Secondo metodo:
•
Aprire una finestra di terminale.
•
Digitare il comando seguente:
sudo dpkg -P Oliboard.
Oliboard per Linux verrà quindi rimosso dal computer.
OLIBOARD - Lavagne interattive
23
ITALIANO
DISINSTALLAZIONE DEL SOFTWARE
ESECUZIONE DEL SOFTWARE
Il cavo della lavagna deve essere collegato alla porta USB del computer.
Per l’esecuzione del software, si deve innanzitutto avviare il driver software della
lavagna, eseguire, se necessario, la funzione di orientamento e quindi avviare il
software della lavagna.
Avvio del Oliboard Driver
1.
Fare clic su “Applicazioni“ → “Oliboard“ → “Oliboard Driver“ per eseguire il
Oliboard Driver.
2.
Una volta eseguito il Oliboard Driver, apparirà un’icona di modulo di
sul pannello nell’angolo superiore destro del desktop:
comunicazione
3.
Al momento dell’esecuzione del driver la lavagna eseguirà un test di connessione.
In caso di errore, controllare che il cavo della lavagna sia correttamente collegato
al computer e alla lavagna; quindi fare clic sull'icona
“Riconnetti” dal menu a comparsa.
e selezionare l'opzione
NOTA: dopo aver avviato l’esecuzione del driver, cliccare sull’icona di Oliboard
Driver per attivare o disattivare il parametro di “autostart” in funzione
che si voglia o meno lanciare in automatico l’esecuzione di Oliboard
Driver alla successiva riaccensione del computer. Se il computer è
sempre connesso alla lavagna è preferibile attivare “autostart”. Se
invece il computer può essere scollegato alla lavagna si suggerisce di
disattivare “autostart” per evitare una segnalazione di errore per
lavagna non collegata alla successiva riaccensione del computer.
24
OLIBOARD - Lavagne interattive
Questa funzione serve a tarare la lavagna rispetto all’immagine proiettata su di essa.
1.
sul pannello in alto del desktop, selezionare “RiFare clic sull'icona
orientamento” nel menu a comparsa e quindi selezionare la modalità di
orientamento desiderata (vedere nota ISTRUZIONE in fondo a questo paragrafo).
NOTA: la funzione di orientamento può anche essere attivata con l’apposito
pulsante posto alla sommità della barra dei pulsanti sulla lavagna.
OLIBOARD - Lavagne interattive
25
ITALIANO
Orientamento della lavagna interattiva
2.
Facendo clic con il pulsante sinistro del mouse su “Ri-orientamento” si aprirà la
finestra a comparsa Orientamento. Fare clic con la penna elettronica al centro
della croce lampeggiante “+” sulla lavagna. Successivamente ripetere l’operazione
per gli altri punti di orientamento (in totale sono sei), avendo cura di centrare
bene con la penna elettronica il centro della croce lampeggiante.
ISTRUZIONE: selezionare “Ri-orientamento” in occasione della prima
installazione dell'Oliboard Driver, o se è cambiata la posizione
del proiettore o della lavagna interattiva, o se è cambiata la
modalità di visualizzazione (es. dimensione dell’immagine o
risoluzione).
Per eseguire rapidamente un orientamento, è possibile
selezionare “Ri-orientamento precedente”, a condizione che
non siano state apportate modifiche dopo l'ultimo utilizzo.
Se non è necessario un orientamento preciso, selezionare
“Orientamento predefinito”.
26
OLIBOARD - Lavagne interattive
1.
Fare clic su “Applicazioni“ → “Oliboard“ → “Oliboard“ per avviare
l’applicazione.
2.
Si aprirà una finestra di accesso nella quale potranno essere digitati il nome utente
e la password. Per avviare il software utilizzando l’account predefinito, basta fare
clic sul pulsante di login “Accedi” senza inserire alcun dato, oppure si può inserire
il proprio account personale. Quando utilizza un account personale, l’utente ha la
possibilità di personalizzare la barra degli strumenti, le risorse e i modelli.
NOTA: per poter avviare il software è necessario che il driver Oliboard sia in
esecuzione e che la lavagna sia collegata correttamente al cavo.
NOTA: per le modalità di funzionamento del software fare riferimento alle
istruzioni dell’HELP ON LINE.
OLIBOARD - Lavagne interattive
27
ITALIANO
Avvio del software applicativo della lavagna
INSTALLAZIONE DEL SOFTWARE PER MAC
Si evidenzia che sono necessari i privilegi da amministratore e l'eventuale password per
portare a compimento l'installazione sia del software che dei driver.
INSTALLAZIONE
1.
Fare clic su Oliboard For Mac per avviare l'installazione.
2.
Fare clic su “Continua” per proseguire, quindi attenersi alle istruzioni visualizzate
fino al completamento dell'installazione.
28
OLIBOARD - Lavagne interattive
ITALIANO
Una volta terminata l'installazione del software, la cartella contenente l'applicativo
Oliboard comparirà nella cartella APPLICAZIONI.
A questo punto bisogna installare il driver software del cavo USB.
Per compiere questa operazione occorre scegliere quale file installare in base al
processore del computer Macintosh che si possiede, PowerPC oppure Intel.
NOTA: fare click sul logo di Apple e poi su “informazioni su questo MAC”
per ottenere l’informazione sul tipo di processore installato nel
computer.
A tale proposito si consideri anche, come indicazione generale, che:
-
tutti i Mac successivi all'anno 2006 sono costruiti con microprocessori Intel,
mentre quelli precedenti sono con microprocessori IBM e Motorola detti PowerPC
(G3, G4, G5);
-
dato che il passaggio da un tipo di architettura ad un altro è durata circa un anno
si può anche consultare il sito ufficiale Apple www.apple.com/it per capire a quale
categoria appartiene il modello di Mac posseduto;
-
se nel nome del computer è presente come sigla del processore G3, G4, G5,
questo appartiene alla categoria PowerPC.
OLIBOARD - Lavagne interattive
29
Di seguito i due tipi di file (con la sigla PPC si intende PowerPC):
In base al tipo di processore fare Click due volte sul file:
-
Intel_FTDIUSBSerialDriver_v2_2_7.dmg nel caso di processore Intel.
oppure:
-
PPC_FTDIUSBSerialDriver_v2_1_7.dmg, nel caso di processore PowerPC.
A questo punto viene visualizzata sul desktop un'immagine disco (l'estensione del file
.dmg vuole dire appunto diskimage) che mostra al suo interno un installer su cui
bisogna fare Click due volte per far partire l'installazione.
30
OLIBOARD - Lavagne interattive
ITALIANO
NOTA: al termine dell'installazione, il driver il sistema si riavvierà
automaticamente.
OLIBOARD - Lavagne interattive
31
DISINSTALLAZIONE DEL SOFTWARE
1.
Selezionare il software Oliboard in “Applicazioni”, quindi fare clic su
“Disinstalla” per avviare la procedura di disinstallazione del software, come
illustrato di seguito:
2.
Fare clic su “SI“ per avviare la disinstallazione del software.
ESECUZIONE DEL SOFTWARE
Per l’esecuzione del software, si deve innanzitutto avviare il driver software della
lavagna, eseguire,se necessario, la funzione di orientamento e quindi avviare il
software della lavagna.
Avvio del Oliboard Driver
1.
Fare clic su “Sistema“ → “Applicazioni“ → “Oliboard Software“ → “Driver“
→ “V2.0“ → “Oliboard Driver“ per eseguire il Oliboard Driver.
2.
Dopo aver avviato il Oliboard Driver, nell'angolo superiore destro del desktop
apparirà l'icona del modulo di comunicazione
32
, come illustrato di seguito:
OLIBOARD - Lavagne interattive
Quando è in esecuzione, il Oliboard Driver verifica automaticamente la lavagna (se
appare un messaggio di errore, verificare l'alimentazione della lavagna e la
connessione tra la lavagna e il computer. Fare clic sull'icona
l'opzione “Riconnetti“ dal menu a comparsa).
, per selezionare
NOTA: dopo aver avviato l’esecuzione del driver, cliccare sull’icona di Oliboard
Driver per attivare o disattivare il parametro di “autostart” in funzione
che si voglia o meno lanciare in automatico l’esecuzione di Oliboard
Driver alla successiva riaccensione del computer. Se il computer è
sempre connesso alla lavagna è preferibile attivare “autostart”.
Se invece il computer può essere scollegato alla lavagna si suggerisce
di disattivare “autostart” per evitare una segnalazione di errore per
lavagna non collegata alla successiva riaccensione del computer.
OLIBOARD - Lavagne interattive
33
ITALIANO
3.
Orientamento della lavagna interattiva
Questa funzione serve a tarare la lavagna rispetto all’immagine proiettata su di essa.
1.
, selezionare “Orientamento” dal menu a comparsa e
Fare clic sull’icona
quindi selezionare la modalità di orientamento desiderata (vedere nota
ISTRUZIONE in fondo a questo paragrafo).
NOTA: la funzione di orientamento può anche essere attivata con l’apposito
pulsante posto alla sommità della barra dei pulsanti sulla lavagna.
34
OLIBOARD - Lavagne interattive
Facendo clic con il pulsante sinistro del mouse su “Ri-orientamento” si aprirà la
finestra a comparsa di Orientamento seguente. Fare clic con la penna elettronica
al centro della croce lampeggiante “+” sulla lavagna. Successivamente ripetere
l’operazione per gli altri punti di orientamento (in totale sono sei), avendo cura di
centrare bene con la penna elettronica il centro della croce lampeggiante.
ISTRUZIONE: selezionare “Ri-orientamento” in occasione della prima
installazione dell'Oliboard Driver, o se è cambiata la posizione
del proiettore o della lavagna interattiva, o se è cambiata la
modalità di visualizzazione (es. dimensione dell’immagine o
risoluzione).
Per eseguire rapidamente un orientamento, è possibile
selezionare “Ri-orientamento precedente”, a condizione che
non siano state apportate modifiche dopo l'ultimo utilizzo.
Se non è necessario un orientamento preciso, selezionare
“Orientamento predefinito”.
OLIBOARD - Lavagne interattive
35
ITALIANO
2.
Avvio del software applicativo della lavagna
1.
2.
Fare clic su “Sistema“ → “Applicazioni“ → “Oliboard Software“ →
“Software“ → “Oliboard“ per avviare l'applicazione.
Si aprirà una finestra di accesso nella quale potranno essere digitati il nome utente
e la password. Per avviare il software utilizzando l’account predefinito, basta fare
clic sul pulsante di login “Accedi” senza inserire alcun dato, oppure si può inserire
il proprio account personale. Quando utilizza un account personale, l’utente ha la
possibilità di personalizzare la barra degli strumenti, le risorse e i modelli.
NOTA: per poter avviare il software è necessario che il driver Oliboard sia in
esecuzione e che la lavagna sia collegata correttamente al cavo.
Successivamente l’applicazione avrà questo aspetto:
36
OLIBOARD - Lavagne interattive
ITALIANO
Quando si clicca sull'icona del mouse in alto a destra, si passa alla modalità
“comando” nella quale compare una barra degli strumenti e un pulsante sul lato
opposto per spostare la barra dal lato destro a quello sinistro.
NOTA: per le modalità di funzionamento del software fare riferimento alle
istruzioni dell’HELP ON LINE.
OLIBOARD - Lavagne interattive
37
RICERCA GUASTI
1.
Se viene visualizzato il messaggio “Verifica lavagna fallita, il programma
non può proseguire!”, controllare la connessione tra la lavagna e il
computer.
•
•
•
•
•
Verificare che sia stato utilizzato il cavo speciale di collegamento della
lavagna e che tale cavo sia stato collegato correttamente.
Controllare che la lavagna sia accesa (la spia rossa sul retro, parte destra,
deve essere illuminata).
Controllare che il driver software della lavagna sia stato attivato.
Controllare che il driver sw del cavo USB sia correttamente installato
(vedere nota nel paragrafo relativo alla sua installazione).
Se il computer non deve essere collegato alla lavagna e compare il
messaggio, verificare che sia stato disattivato il parametro di “autostart” di
Oliboard Driver (cliccare sull’icona e disattivare il parametro).
2.
All'avvio del software appare il messaggio “Errore durante il caricamento
del file XML“.
Controllare la versione di Internet Explorer. Aggiornare IE alla versione 6.0, se la
versione in uso è la 5.0 o una versione precedente.
3.
È possibile scrivere solo su alcune parti della lavagna.
Eseguire la procedura di Ri-Orientamento della lavagna.
4.
Durante l'orientamento della lavagna risulta impossibile trovare alcuni
punti di orientamento.
Controllare che la deviazione laterale e l'offset verticale del proiettore siano
corretti. Assicurarsi che tutti i contenuti visualizzati sul video del compute possano
essere proiettati nella loro integrità sulla lavagna.
5.
La penna elettronica non scrive correttamente.
•
Verificare la modalità operativa corrente del software. La funzione di scrittura
è attiva soltanto in modalità disegno o in modalità annotazione, mentre non
è attiva in modalità comando.
•
Non premere il pulsante della penna elettronica durante la scrittura.
•
Tenere la punta della penna elettronica in posizione verticale rispetto al
pannello della lavagna.
•
Evitare di calcare con la penna elettronica.
•
Controllare che la batteria sia carica. In caso contrario sostituirla con una
batteria nuova.
38
OLIBOARD - Lavagne interattive
7.
Come uscire dal software Oliboard?
•
Fare clic sulla Tavolozza operativa in “Modalità comando“
quindi clic su “Esci“ nel menu a comparsa.
•
In alternativa, fare clic su “File“ (nel menu principale) “Esci“, ppure fare clic
sull'icona Oliboard nella "Barra strumenti principale" e al prompt fare clic su
“Esci“.
, e fare
Perché l'immagine proiettata ha forma trapezoidale? Perché è necessario
correggerla e come si fa?
•
È possibile che il proiettore non sia in piano (ad esempio perché la parte
anteriore è più alta di quella posteriore o viceversa) e che di conseguenza
l'immagine proiettata assuma una forma trapezoidale.
•
Un'immagine trapezoidale è un'immagine distorta e deve essere regolata
fino ad ottenere le normali condizioni di proiezione.
•
Generalmente è possibile regolare l'immagine utilizzando un manipolatore
remoto o correggendo l'altezza del proiettore. Per informazioni dettagliate
fare riferimento al Manuale Utente in dotazione al proiettore.
Trapezio
8.
ITALIANO
6.
Rettangolo
Che tipo di proiettore deve essere utilizzato con la lavagna interattiva?
Il proiettore deve soddisfare i tre seguenti requisiti:
•
deve essere un proiettore frontale;
•
deve supportare la risoluzione del computer;
•
la potenza luminosa minima deve essere superiore a 500 Lumen. Per il
requisito specifico fare riferimento alle dimensioni della sala.
9.
Cosa fare se si è utilizzato un pennarello colorato non cancellabile per
scrivere sulla lavagna?
Non usare mai pennarelli colorati per scrivere sulla lavagna! Qualora accadesse,
pulire delicatamente la lavagna con cotone assorbente inumidito con alcol.
OLIBOARD - Lavagne interattive
39
10. Come si pulisce il pannello della lavagna?
Pulire il pannello strofinandolo delicatamente con uno straccio inumidito.
ATTENZIONE:
dopo averlo bagnato, strizzare lo straccio per
rimuovere l’acqua in eccesso. In tal modo si eviteranno
infiltrazioni d’acqua all’interno della lavagna.
11. Perché non è possibile utilizzare la funzionalità di rete?
40
•
Se nella configurazione si è selezionata la funzione “Doppia Penna”, la
funzionalità di rete non è operativa.
•
Fare clic su “Tavolozza operativa“ → “Opzione“ per modificare
l’impostazione della funzione DualPen se si desidera attivare la funzionalità di
rete.
OLIBOARD - Lavagne interattive
OLIBOARD
INTERACTIVE WHITEBOARDS
PUBLICATION ISSUED BY:
Olivetti S.p.A.
Gruppo Telecom Italia
Via Jervis, 77 - 10015 Ivrea (ITALY)
www.olivetti.com
Copyright © 2010, Olivetti
All rights reserved
The label applied to the product certifies that the product
satisfies the basic quality requirements.
The manufacturer reserves the right to carry out modifications to the product described in this manual at any time
and without any notice.
Your attention is drawn to the following actions which could compromise the conformance guaranteed
above, as well as the technical features of the product:
• incorrect electrical power supply;
• incorrect installation, incorrect or improper use or use not in compliance with the warnings provided in the
User’s Manual supplied with the product;
• replacement of original components or accessories with others of a type not approved by the manufacturer, or
performed by unauthorised personnel.
All rights reserved. No part of this material may be reproduced or transmitted in any form or by any
means, electronic or mechanical, including photocopying, recording or similar, without prior permission in
writing from the Publisher.
INSTRUCTION: provides additional software instructions.
NOTE: describes problems that could occur when using the whiteboard
and how to avoid and resolve them.
WARNING:
draws attention to the danger of personal injury or
product damage if improperly used.
Caution Warning
• In order to avoid electric shocks, do not install the interactive whiteboard in
damp or smoky environments.
• After the interactive whiteboard is installed, avoid touching its power and
data cables.
• Keep the interactive whiteboard away from open flames, electrical contacts
and direct sunlight.
• After the interactive whiteboard is installed, make sure that it is fixed securely.
• Avoid looking directly at the beam of light emitted by the projector onto the
whiteboard.
OLIBOARD – Interactive Whiteboard
III
Important notes
• The interactive whiteboard must be used only with the special electronic
pens. Do not use marker pens, pencils or other types of pen. If necessary,
clean the whiteboard using alcohol.
• Make sure that the whiteboard is connected correctly to the computer and
to the power supply. It is best if the connection and power cables be placed
out of the way to avoid them being pulled or disconnected.
• Do not scratch the surface or the frame of the whiteboard with sharp or
hard objects. Environmental conditions: no strong magnetic fields must be
present. If there is a wall made of metal or other magnetic materials, a
distance of 10 meters must be maintained between the whiteboard and the
wall.
• When writing on the whiteboard with the electronic pen, keep the pen
vertical to the board and do not press.
• When fixed onto a wall, the whiteboard must be vertical to the wall surface.
This manual relates exclusively to the Oliboard whiteboard and the software
provided with it. Although references are made to the computer connected to the
whiteboard (notebook, PC and so on) and to the video-projector, for these
devices you should refer to the original documentation provided by their
manufacturers.
IV
OLIBOARD – Interactive Whiteboard
INTRODUCTION ..............................................................................................1
Overview............................................................................................................... 1
System Requirements ............................................................................................ 2
Unpacking the Interactive Whiteboard................................................................... 3
Main Features ....................................................................................................... 6
External View ................................................................................................... 6
Whiteboard Function Keys..................................................................................... 7
Technical Specifications .................................................................................... 8
Hardware Installation ............................................................................................ 9
Installing the Battery of the Electronic Pen ........................................................... 10
WINDOWS SOFTWARE INSTALLATION .........................................................11
Express Installation .............................................................................................. 11
Step-by-step Installation ...................................................................................... 12
Installing the Oliboard Software Driver............................................................ 12
Installing the Oliboard Software...................................................................... 13
Installing the Software Driver for the USB Cable.............................................. 13
Removing the Oliboard Software......................................................................... 14
Running the Software ......................................................................................... 14
Starting the Driver of the Interactive Whiteboard ............................................ 14
Orienting the Interactive Whiteboard.............................................................. 15
Starting the Whiteboard Application Software ................................................ 17
Creating a Personal Account and Password .................................................... 18
Setting Up the Oliboard Functions .................................................................. 20
LINUX-UBUNTU SOFTWARE INSTALLATION ..................................................21
Installation .......................................................................................................... 21
Removing the Software ....................................................................................... 23
Running the Software ......................................................................................... 24
Starting the Oliboard Driver ............................................................................ 24
Orienting the Interactive Whiteboard.............................................................. 25
Running the Whiteboard Software Application ............................................... 27
MAC SOFTWARE INSTALLATION ..................................................................28
Installation .......................................................................................................... 28
Removing the Software ....................................................................................... 32
Running the Software ......................................................................................... 32
Starting the Oliboard Driver ............................................................................ 32
Orienting the Interactive Whiteboard.............................................................. 34
Running the Whiteboard Software Application ............................................... 36
TROUBLESHOOTING .....................................................................................38
OLIBOARD - Interactive Whiteboards
V
INGLESE
TABLE OF CONTENTS
Page left intentionally blank
VI
OLIBOARD - Interactive Whiteboards
OVERVIEW
The Interactive Whiteboard is an input peripheral device that, thanks to the application
of stable, advanced technologies such as electromagnetic induction and digital
localisation, allows an interactive environment to be created that, by connecting a
computer and a video-projector, can be used for teaching and demos.
Features
•
The Oliboard whiteboard is furnished with a hard surface to ensure resilience to
wear and a sound protection against acts of vandalism; featuring high tracing
precision, rapid response and operational sensitivity it allows intuitive use by even
less expert users.
•
The software provided offers sophisticated functions such as partial magnification,
partial editing, searchlight, replay, calligraphic effects, camera, screen and
customised template.
•
With the electronic pen, you can write, take notes, erase, trace geometrical
figures, copy, run and save files.
•
The electronic pen can also be used as a mouse to send commands to the
computer.
OLIBOARD - Interactive Whiteboards
1
INGLESE
INTRODUCTION
SYSTEM REQUIREMENTS
The whiteboard must be connected to a computer that displays images on the
whiteboard by means of a video-projector.
Hardware
Configuration
Software
Configuration
Minimum Configuration
CPU: 1GHz
Recommended Configuration
CPU: 1.7 GHz or higher
RAM: 256 MB
RAM: 512 MB or higher
USB port (for connecting
whiteboard)
VGA port (female, type SUBD15) for connecting the videoprojector.
NOTE: some computers (e.g.
MAC) are not equipped with
this type of port. In this case
you must use an adapter (not
supplied with the whiteboard
and projector).
Windows 2000, XP, Vista, 7
Linux Ubuntu7.0/8.0
(I386/AMD64)
Mac OS X V10.4 and later
USB port (for connecting
whiteboard)
VGA port (female, type SUB-D15)
for connecting the videoprojector.
NOTE: some computers (e.g.
MAC) are not equipped with this
type of port. In this case you must
use an adapter (not supplied with
the whiteboard and projector).
Windows 2000, XP, Vista, 7
Linux Ubuntu7.0/8.0
(I386/AMD64);
Mac OS X V10.4 and later
Recommended Computer Setup:
1)
2)
2
To obtain the best picture on the whiteboard, the format of the computer video
output (its resolution) and of the projector must be the same as that of the
whiteboard.
Therefore, for whiteboards in format 4/3 (Oliboard 78S and Oliboard 78D), it is
recommended to use an output resolution corresponding to the 4/3 format (e.g.
1024x768 or 800x600).
For a whiteboard in format 16:9 (Oliboard 95D), it is recommended to use an
output resolution corresponding to the 16:9 format (e.g. 1280x800).
While using the whiteboard, the computer connected could enter “stand-by”
mode. To avoid this, it is advisable to disactivate the screen-saver and energysaving functions.
OLIBOARD - Interactive Whiteboards
UNPACKING THE INTERACTIVE WHITEBOARD
•
INGLESE
The standard Interactive Whiteboard kit contains the following components:
Interactive Whiteboard
(the colour of the product could vary)
•
Accessories
OLIBOARD - Interactive Whiteboards
3
The standard accessories provided include:
Description
Electronic pen
Quantity
2
Purpose
Image
Special pen for
Interactive
Whiteboard.
Each pen has one
1.5V AAA battery
(mini-Style).
Colours can vary
1
Cable for
connecting the
computer to the
Interactive
Whiteboard
Oliboard
Installation Disk
Up to 3
disks
Drivers and
application
software for
Windows, Linux
and Mac
User Manual
1
User Guide
Special 10-meter
cable
Installation brackets
and accessories for 1
wall fixing
4
Wall fixing kit
Various mechanical parts
OLIBOARD - Interactive Whiteboards
•
Optional Accessories
INGLESE
Instead of wall installation, you can also choose to install the Interactive Whiteboard
on a special floor stand, available on order.
Optional floor stand
Floor stand dimensions (without whiteboard or projector):
width: 127 cm; depth: 75 cm;
height: 246 cm (max. height of projector stand when assembled).
OLIBOARD 95D whiteboard on floor stand
OLIBOARD - Interactive Whiteboards
5
MAIN FEATURES
External View
(The colour varies according to the model).
Ref.
Description
1
Writing Area
2
Function Keys
3
Pen Holder
4
Interface Board
5
Interface for the special cable to connect to the USB port of the
computer (the whiteboard is normally powered via this same
cable).
6
Power Socket (normally not used).
6
OLIBOARD - Interactive Whiteboards
Function
keys
Definition
Control Mode
Orientation
(tuning)
Orientation
Control Mode
(mouse-like)
No effect
Annotation Mode
Switch to
Annotation Mode
Window Mode
Window
Mode
Annotation Mode
Orientation
Orientation
Switch to
Control
Mode
Switch to
Annotation
Mode
Switch to
Control
Mode
No effect
Front Page
Front Page
Creates a blank
page
Create a blank
page
Create a
blank page
Create a
blank page
Page Up
No effect
Page Up
Page Up
Page Down
No effect
Page Down
Page Down
Normal Pen
Transparent Pen
No effect
Switch to
Annotation Mode, Normal Pen Normal Pen
using Normal Pen
Switch to
Annotation Mode, Transparent Transparent
using Transparent Pen
Pen
Pen
Eraser
Eraser
Eraser
Replay
Replay pages
Replay pages Replay pages
Print
Print
Print
OLIBOARD - Interactive Whiteboards
Eraser
Print
7
INGLESE
WHITEBOARD FUNCTION KEYS
Technical Specifications
Hardware Platform
Peripheral device for computer, notebook etc.
Resolution
100 lines/mm (254 lines/inch)
Precision
+/- 1 mm
Operating Principle
Electromagnetic induction
Operation Modes
Control Mode
Window Mode
Annotation Mode
Full-screen Mode
USB Power Supply
100mA 5V DC
The service life of the batteries varies according to
Electronic pen battery service life their type; common alkaline batteries can last for
up to approximately three months.
Operating Temperature
+20 °C, +55 °F
Operating Humidity
RH 30% to ~ 80%
Power capability
< 2W
Models
OLIBOARD 78S
OLIBOARD 78D
External area
- diagonal
- dimensions
Active area
- width
- height
OLIBOARD 95D
85"
174 x 127 cm
101"
223 x 127 cm
78"
160 x 119 cm
95"
210 x 118 cm
Aspect ratio
4:3
16:9
Net weight (+/- 1 kg)
17 Kg
25.5 Kg
Packaging
- dimensions
- gross weight (+/- 2 Kg)
1860 x 1400 x 120 cm
29 Kg
2350 x 1400 x 120 cm
32 Kg
8
OLIBOARD - Interactive Whiteboards
Wall or stand installation must be carried out by authorised personnel according to the
requirements stated in the Olivetti documentation.
The cable for connecting the whiteboard must be connected to the USB port of the
computer.
The VGA cable of the video-projector must be connected to the VGA port of the
computer.
Ref.
1
2
3
4
5
6
Description
VGA
USB
USB special cable
Whiteboard interface port for special-purpose cable provided
Power socket (not used normally)
Video-Projector
NOTE: When connecting the computer to the video-projector both devices
must be switched off.
OLIBOARD - Interactive Whiteboards
9
INGLESE
HARDWARE INSTALLATION
INSTALLING THE BATTERY OF THE ELECTRONIC PEN
Unscrew the rear cap of the electronic pen, turning it in an anti-clockwise direction.
Insert one 1.5V AAA (mini Style) battery as shown in the figure below, then tighten
the rear cap again, turning in a clockwise direction.
Pen colours can vary.
10
OLIBOARD - Interactive Whiteboards
The Oliboard software provides two types of installation: “Express installation” and
“Step-by-step installation”.
Express installation includes the following phases that are carried out automatically in
sequence:
-
Installation of Oliboard software driver.
-
Installation of Oliboard application software.
-
Installation of software driver for USB cable.
Step-by-step installation allows the software to be installed one step at a time.
EXPRESS INSTALLATION
Do not connect the cable of the whiteboard to the computer (if the USB cable
is already connected to the computer, disconnect it). During the installation
procedure, a message is displayed on the screen indicating when you should
connect the cable.
(If installation is started with the cable already connected, afterwards you will have to
install the software driver for the USB cable).
1.
Insert the Oliboard Software disk.
2.
Click on the program logo (this is equivalent to running the “autorun” program).
3.
The Installation Guide window opens.
4.
Click “Install All“ to perform the express installation.
5.
Choose the language you want to install and confirm with “Next“.
6.
Select the installation path and confirm with “Next“. Software installation starts;
at the end, the driver for the USB cable is installed.
7.
When the system asks if you want to install the FTDI USB driver, click on “YES“ to
perform the installation. At the end (after a few seconds), a message is displayed
asking you to connect the USB cable to the computer.
Connect the cable to a USB port on the computer (the other end of the cable
must be connected to the Interactive Whiteboard).
After connecting the cable, click “OK“.
OLIBOARD - Interactive Whiteboards
11
INGLESE
WINDOWS SOFTWARE INSTALLATION
8.
When the installation completed message is displayed, click on “Finish” then, on
returning to the main screen, click “Exit”.
9.
Follow the instructions in the paragraph “Running the Software”.
STEP-BY-STEP INSTALLATION
This type of installation is recommended only when upgrading the software provided
with the whiteboard.
1.
Insert the Oliboard Software disk.
2.
Click the program logo.
3.
The Installation Guide window opens.
4.
Click “Install Step By Step” to install the Oliboard driver and software, and the
driver for the USB cable following the step-by-step procedure.
Installing the Oliboard Software Driver
1.
Click
2.
Choose the language you want to install and confirm with “Next”.
3.
Select the installation path and confirm with “Next”.
4.
End the installation by clicking the “Finish” button. Connect the cable to a USB
port on the computer (the other end of the cable must be connected to the
Interactive Whiteboard). After connecting the cable, click on “OK”.
12
to install the driver for the Interactive Whiteboard.
OLIBOARD - Interactive Whiteboards
INGLESE
Installing the Oliboard Software
1.
Click
.
2.
Choose the language you want to install.
3.
Select the installation path. The software installation starts.
4.
When installation completes a message appears; click on “Finish”.
Installing the Software Driver for the USB Cable
Normally it is not necessary to execute this procedure if the “Express installation” has
already been performed.
1.
Click
cable.
2.
Click “Install FTDI Driver” to install the driver.
After connecting the cable, click “OK”. If the installation completes correctly, a
message to this effect is displayed.
“Install USB Driver” to install the driver for the USB
You can check if the USB cable driver has been installed by clicking with the mouse
right button on “Computer Resources”, then with the mouse left button on
“Properties“ → “Hardware“ → “Device Manager“ → “Port“ (COM and LPT)”.
The device “USB Serial Port“ is shown. Make sure that the COM port assigned is less
than 10 (e.g. COM 5) and that the transmission speed is 57600.
OLIBOARD - Interactive Whiteboards
13
REMOVING THE OLIBOARD SOFTWARE
Click on “Start” → “Control Panel” → “Add or Remove Programs”, select
“Oliboard” then click on “Add/Remove”.
Select the option for removing all the features installed and follow the instructions
shown on the screen.
Alternatively, insert the software disk, click on the Oliboard program logo and run the
software removal guide following the instructions on the screen.
At the end of removal, it is recommended that you restart the computer.
RUNNING THE SOFTWARE
The whiteboard cable must be connected to the USB port of the computer.
To run the software, first of all the software driver of the whiteboard must be started,
the orientation operation performed if necessary, after which the whiteboard software
can be started.
Starting the Driver of the Interactive Whiteboard
Click “Start“ → “All programs“ → “Olivetti“ → “Oliboard“ and start the Oliboard
Driver. The Communications module icon
Status bar on the desktop.
appears in the lower right corner of the
NOTE: If the message “Communication with whiteboard failed“, first make
sure that the cable of the whiteboard is connected correctly between
the computer and the whiteboard. Click on the Oliboard Driver icon
and select “Reconnect“ in the popup menu. If this warning persists,
make sure that the driver of the USB cable is installed correctly (see
the note on how to check installation of the USB cable on page 13).
14
OLIBOARD - Interactive Whiteboards
Orienting the Interactive Whiteboard
This function serves to tune the whiteboard for the image to be projected onto it.
1.
Using the mouse left button, click on the Oliboard Driver ico
in the control
bar at the bottom. Select “Orientation“ in the popup menu, then select the type
of orientation required (see the INSTRUCTION note at the end of this paragraph).
NOTE: The orientation operation can also be activated by means of the special
key at the top of the Function Key panel on the whiteboard.
OLIBOARD - Interactive Whiteboards
15
INGLESE
NOTE: After having started the driver, click on the icon of the Oliboard driver
to activate or disactivate the “autostart” parameter, depending on
whether or not you want the Oliboard driver to be run automatically
the next time the computer is powered on. If the computer is
permanently connected to the whiteboard, it is advisable to activate
“autostart”. On the other hand, if the computer could be
disconnected from the whiteboard, it is advisable to disactivate
“autostart” to avoid an error message appearing the next time the
computer is powered on which indicates that no whiteboard is
connected.
2.
Wth the mouse left button click on “Re-orientation“ to open the popup
window for Orientation. With the electronic pen, click on the mid-point of the
flashing cross “+“ on the whiteboard. Repeat this same operation for all the other
orientation points (there are six in all), being careful to center well the mid-point
of the flashing cross with the electronic pen.
INSTRUCTION: Select “Re-orientation” the first time you install the
Oliboard Driver or if the position of the projector or the
Interactive Whiteboard changes, or if the display mode
changes (e.g. the image size or resolution).
To perform a rapid re-orientation, you can select “Previous
re-orientation record” as long as no changes have been
made since it was last used. If an accurate orientation is not
required, you can select “Default orientation”.
16
OLIBOARD - Interactive Whiteboards
1.
Click “Start” → “All programs” → “Olivetti” → “Oliboard Software” and
start the application program. A Logon window opens in which you can enter the
user name and the password.
2.
To start the software using the default account, click simply on the “Login”
button without entering any data, otherwise you can enter your own personal
account. When a personal account is used, the user can customise the tool bar,
resources and templates.
NOTE: Before starting the application software, make sure that the Interactive
Whiteboard is connected correctly to the computer and that the
Interactive Whiteboard driver is running.
NOTE: For how to operate the software, refer to the instructions in the
ONLINE HELP.
OLIBOARD - Interactive Whiteboards
17
INGLESE
Starting the Whiteboard Application Software
Creating a Personal Account and Password
1.
Click “Start” → ”All Programs” → ”Olivetti” → ”Oliboard” → “User
Manager” to display the following window:
Key-in the administrator account data to access the software. The default
administrator account is Administrator and the Password is oliboard.
2.
18
The User Manager window is displayed.
OLIBOARD - Interactive Whiteboards
Select “Edit” → ”New User” to create a personal account.
4.
Key-in the user name and password and select “Create”.
5.
When the process completes, the new user appears in the window:
INGLESE
3.
OLIBOARD - Interactive Whiteboards
19
Setting Up the Oliboard Functions
Click “Options”
to open the window shown below.
For the Oliboard 78D and Oliboard 95D models of whiteboard, set the “Double Pen”
function as shown below.
20
OLIBOARD - Interactive Whiteboards
INGLESE
LINUX-UBUNTU SOFTWARE INSTALLATION
INSTALLATION
Note that you must have Administrator access and its related password, if set, to be
able to install the software and drivers.
In the installation folder, two installation procedures are present for the Ubuntu
software distribution: one for Intel processors (i386 architecture and derivations) and
the other for AMD64 processors.
Select the procedure for the processor installed on your computer.
Connect the whiteboard cable to the USB port of the computer.
At this point, two installation methods are possible:
1.
First method:
Double-click on Oliboard_for_Linux_V1.0.deb
OLIBOARD - Interactive Whiteboards
21
The installation procedure consists of the following steps (follow the instructions on
the screen):
•
Click “Install Package”.
•
Enter the password (depends on the permissions the user account has on the
operating system).
•
The installation procedure is performed. At the end, a message is displayed to
the effect that installation has completed.
2.
Second method:
•
Open a terminal window.
•
Enter the commands necessary for accessing the directory where
Oliboard_for_Linux_V1.0.deb resides.
•
Type the following command:
sudo dpkg -i Oliboard_for_Linux_V1.0.deb.
and enter the password for root.
•
If a problem occurs, enter the command using this other sequence:
su –
root password.
Enter the commands necessary for accessing the folder where
Oliboard_for_Linux_V1.0.deb resides.
dpkg –i Oliboard_for_Linux_V1.0.deb.
22
OLIBOARD - Interactive Whiteboards
Before removing the software, disactivate the software driver (via the “exit”
command that can be activated by clicking on the driver icon in the control bar) and
exit from the application if it is still running.
The Oliboard for Linux software can be removed from your computer in one of two
ways. The first way is to follow the on-screen instructions, the second way is to use the
command line.
1.
First method:
•
Launch the Synaptic Package Manager.
•
Type the following word in the search bar: Oliboard.
•
Select the Oliboard item to remove.
Oliboard for Linux from your computer.
2.
Second method:
•
Open a terminal window.
•
Type the following command:
sudo dpkg -P Oliboard.
Oliboard for Linux is removed from your computer.
OLIBOARD - Interactive Whiteboards
23
INGLESE
REMOVING THE SOFTWARE
RUNNING THE SOFTWARE
The whiteboard cable must be connected to the USB port of the computer.
To run the software, you must first of all run the whiteboard software driver, then
perform the orientation operation if necessary before finally starting the whiteboard
software.
Starting the Oliboard Driver
1.
Click “Applications” → “Oliboard” → “Oliboard Driver” to run the Oliboard
Driver.
2.
When the Oliboard Driver starts, a Communications module icon
on the panel in the top right corner of the desktop:
3.
When the driver starts, the whiteboard runs a connection check. If an error is
encountered, make sure that the whiteboard cable is connected correctly
between the computer and the whiteboard. Click on the
“Reconnect” option from the popup menu.
appears
icon and select the
NOTE: After having started the driver, click on the icon of the Oliboard driver
to activate or to disactivate the “autostart” parameter, depending on
whether or not you want the Oliboard driver to be run automatically
the next time the computer is powered on. If the computer is
permanently connected to the whiteboard, it is advisable to activate
“autostart”. If, on the other hand, the computer could be
disconnected from the whiteboard, it is advisable to disactivate
“autostart” to avoid an error message appearing the next time the
computer is powered on indicating that no whiteboard is connected.
24
OLIBOARD - Interactive Whiteboards
This function is used to tune the whiteboard for the image projected on it.
1.
icon in the panel at the top of the desktop and select “ReClick on the
orientation” in the popup menu, then select the orientation mode required (see
the INSTRUCTION note at the end of this paragraph).
NOTE: The orientation operation can also be activated using the related key at
the top of the Function Key panel on the whiteboard.
OLIBOARD - Interactive Whiteboards
25
INGLESE
Orienting the Interactive Whiteboard
2.
Clicking with the mouse left button on “Re-orientation”, a popup window
appears. With the electronic pen, click at the mid-point of the flashing cross “+”
on the whiteboard. Repeat this same operation for all the other orientation points
(there are six in all), being careful to center precisely the mid-point of the flashing
cross with the electronic pen.
INSTRUCTION: Select “Re-orientation” the first time the Oliboard Driver is
installed or if the position of the projector or of the Interactive
Whiteboard changes, or if the display mode changes (e.g. image
size or resolution).
To perform a rapid orientation, you can select “Previous reorientation record” as long as no changes have been made
since it was last used. If an accurate orientation is not required,
select “Default Orientation”.
26
OLIBOARD - Interactive Whiteboards
1.
Click “Applications” → ”Oliboard” → ”Oliboard” to start the application.
2.
A login window is displayed into which you can enter a user name and password.
To start the software using the default account, just click on the “Login” button
without entering any data, otherwise enter your personal account details. When a
personal account is used, the user can customise the tool bar, resources and
templates.
NOTE: In order to start the software, the Oliboard driver must be running and
the whiteboard connected to the cable in the correct manner.
NOTE: For how to operate the software, refer to the instructions in the
ONLINE HELP.
OLIBOARD - Interactive Whiteboards
27
INGLESE
Running the Whiteboard Software Application
MAC SOFTWARE INSTALLATION
Note that Administrator access rights and its related password, if any, are necessary for
installing both the software and the drivers.
INSTALLATION
1.
Click Oliboard For Mac to start the installation.
2.
Click on “Continue” to proceed and follow the instructions displayed until
installation completes.
28
OLIBOARD - Interactive Whiteboards
INGLESE
When software installation is terminated, the folder containing the Oliboard
application appears in the APPLICATIONS folder.
At this point, you must install the software driver for the USB cable.
To perform this operation, you must choose which file to install depending on the type
of processor installed on your Macintosh computer, whether PowerPC or Intel.
NOTE: Click on the Apple logo and then on “About this MAC” to obtain
information on the type of processor installed on your computer.
In this regard, take also as a general guideline that:
-
All Macs after the year 2006 were built with Intel microprocessors, whilst earlier
ones have IBM and Motorola microprocessors, known as PowerPC (G3, G4, G5);
-
given that the passage from one type of architecture to another took
approximately a year, you can also consult the official Apple site
www.apple.com/it to determine in which category your Mac model belongs;
-
if one of the processor acronyms G3, G4 or G5 appears in the name of your
computer, it means that it belongs to the PowerPC category.
OLIBOARD - Interactive Whiteboards
29
The two types of file are shown below (the acronym “PPC” stands for PowerPC):
Depending on your processor type, double-click on the file:
-
Intel_FTDIUSBSerialDriver_v2_2_7.dmg in the case of an Intel processor.
or:
-
PPC_FTDIUSBSerialDriver_v2_1_7.dmg, in the case of a PowerPC processor.
At this point a disk image is displayed on the desktop (the file suffix .dmg means
exactly that, “diskimage”) with an installer inside which you must double-click to start
the installation.
30
OLIBOARD - Interactive Whiteboards
INGLESE
NOTE: At the end of installation, the system is restarted automatically.
OLIBOARD - Interactive Whiteboards
31
REMOVING THE SOFTWARE
1.
Select the Oliboard software in “Applications” then click “Uninstall” to start
the software removal procedure as shown below:
2.
Click “YES” to start the software removal.
RUNNING THE SOFTWARE
To run the software, you must first of all start the software driver of the whiteboard,
then if necessary perform the orientation operation before starting the whiteboard
software.
Starting the Oliboard Driver
1.
Click “System“ → “Applications“ →“Oliboard Software“ →
“Driver“→“V2.0“ → “Oliboard Driver“ to run the Oliboard driver.
2.
After starting the Oliboard Driver, a Communications module icon
at the top right corner of the desktop, as shown below:
32
appears
OLIBOARD - Interactive Whiteboards
When the Oliboard driver is run, it automatically checks the whiteboard (if an
error message appears, check the power supply to the whiteboard and the
connection between the whiteboard and the computer. Click the
select the “Reconnect“ option from the popup menu).
icon and
NOTE: After having started the driver, click on the Oliboard driver icon to
activate or to disactivate the “autostart” parameter, depending on
whether or not you want the Oliboard driver to be run automatically
the next time the computer is powered on. If the computer is
permanently connected to the whiteboard, it is advisable to activate
“autostart”. On the other hand, if the computer could be
disconnected from the whiteboard, it is advisable to disactivate
“autostart” to avoid an error message appearing the next time the
computer is powered on indicating that no whiteboard is connected.
OLIBOARD - Interactive Whiteboards
33
INGLESE
3.
Orienting the Interactive Whiteboard
This function calibrates the whiteboard for the image projected onto it.
1.
, select “Orientation“ from the popup menu then select the
Click the icon
orientation mode you require (see the INSTRUCTION note at the end of this
paragraph).
NOTE: The orientation operation can also be activated using the related key at
the top of the Function Key panel on the whiteboard.
34
OLIBOARD - Interactive Whiteboards
Wth the mouse left button click on “Re-orientation“ to open the popup
window for Orientation shown below. With the electronic pen, click at the midpoint of the flashing cross “+“ on the whiteboard. Repeat the same operation for
all the other orientation points (there are six in all), being careful to center
precisely the mid-point of the flashing cross with the electronic pen.
INSTRUCTION: Select “Re-orientation” the first time you install the Oliboard
Driver, when the position of the projector or the Interactive
Whiteboard changes or when the display mode changes (e.g.
the image size or resolution).
To perform a rapid re-orientation, you can select “Previous reorientation record” as long as no changes have been made
since it was last used. If an accurate orientation is not required,
select “Default orientation”.
OLIBOARD - Interactive Whiteboards
35
INGLESE
2.
Running the Whiteboard Software Application
1.
Click “System“ → “Applications“ → “Oliboard Software“ → “Software“ →
“Oliboard“ to start the application.
2.
A login window is displayed into which you can enter a user name and password.
To start the software using the default account, just click on the “Login” button
without entering any data, otherwise enter your personal account details. When a
personal account is used, the user can customise the tool bar, resources and
templates.
NOTE: In order to start the software, the Oliboard driver must be running and
the whiteboard must be connected correctly to the cable.
The application appears as follows:
36
OLIBOARD - Interactive Whiteboards
NOTE: For how to operate the software, refer to the instructions in the
ONLINE HELP.
OLIBOARD - Interactive Whiteboards
37
INGLESE
By clicking on the mouse icon at top right you enter “Control” mode. A tool bar
appears with a button on the opposite side which can be used to move the bar from
the right to the left side.
TROUBLESHOOTING
1.
If a message is displayed: “Failed to verify the whiteboard, the program
can't run further!“, check whether there is a good connection between
whiteboard and the computer.
•
•
•
•
•
Make sure that the special-purpose connection cable of the whiteboard
has been used, and that the cable has been connected correctly.
Check that the whiteboard is powered-on (the red indicator lamp on the
rear, right side, must be lit).
Check that the software driver of the whiteboard is running.
Check that the software driver of the USB cable has been correctly installed
(see the note in the paragraph related to its installation).
If this message appears when the computer should not be connected to
the whiteboard, make sure that the “autostart” parameter of the Oliboard
driver has been disactivated (click on the icon to disactivate the parameter).
2.
When the software starts, a message appears: “Error while loading the
XML File“.
Check the version of Internet Explorer. Update to Internet Explorer version 6.0 if
the version in use is 5.0 or earlier.
3.
Only certain parts of whiteboard can be written on.
Carry out the procedure for orienting the whiteboard.
4.
Some orientation points cannot be found when orienting
the whiteboard.
Make sure that the lateral deviation and the vertical offset of the projector are
correct. Ensure that all contents of the computer screen can be entirely projected
onto the whiteboard.
5.
Electronic pen does not write normally.
•
Check the current working mode of the software. The writing functionality is
only effective in Draw Mode or Annotation Mode, not in Control Mode.
•
Do not press the electronic pen button while writing.
•
Keep the nib of the electronic pen vertical to the whiteboard panel.
•
Avoid pressing the electronic pen.
•
Check that the battery is charged, if not replace it with a new one.
38
OLIBOARD - Interactive Whiteboards
7.
w to exit from the Oliboard software?
•
Click on the Operation Round Plate in ”Control Mode”
”Exit” in the popup menu.
•
Click ”File” (in the main menu), then ”Exit”, or Click the Oliboard icon in
the “Main Tool Bar”, then click ”Exit” in reply to the prompt.
Why is the image projected in the shape of a trapezium? Why must it be
adjusted, and how to do so?
•
It sometimes happens that the projector is not level (for example, because
the front is higher than the back, or vice-versa) and consequently the
image projected is trapezoidal in shape.
•
A trapezoidal image is a distorted image and it must be adjusted until a
normal projection is achieved.
•
Generally speaking, the image can be adjusted by using a remote control
device or by correcting the height of the projector. For detailed
information, refer to the User Manual provided with the projector.
Trapezium
8.
, then on
INGLESE
6.
Rectangle
What type of projector must be used with the Interactive Whiteboard?
The projector must satisfy the three following requisites. It must:
•
be a front projector;
•
support the computer resolution;
•
have a minimum luminous flux exceeding 500 Lumens. For the precise
amount, the room size must be taken into account.
9.
What to do when an unerasable colour pen has been used to write on the
whiteboard?
Never use colour pens to write on the Oliboard! Should this happen, clean the
whiteboard lightly using cotton-wool dampened with alcohol.
OLIBOARD - Interactive Whiteboards
39
10. How to clean the panel of the whiteboard?
Clean the panel passing over it lightly with a damp cloth.
CAUTION:
After wetting the cloth, you must wring it out to remove
any excess water. This is to avoid water penetrating
inside the whiteboard.
11. Why is it not possible to use network functions?
40
•
If the Double Pen function is chosen for the configuration, the network
functionality is not available.
•
Click ”Operation Round Plate” → ”Option” to change the configuration
of the Double Pen function if you want to use network functionality.
OLIBOARD - Interactive Whiteboards
DIRETTIVA 2002/96/CE SUL TRATTAMENTO, RACCOLTA, RICICLAGGIO E
SMALTIMENTO DI APPARECCHIATURE ELETTRICHE ED ELETTRONICHE
E LORO COMPONENTI
1. PER I PAESI DELL’UNIONE EUROPEA (UE)
È vietato smaltire qualsiasi apparecchiatura elettrica ed elettronica come rifiuto solido urbano: è obbligatorio
effettuare una sua raccolta separata. L’abbandono di tali apparecchiature in luoghi non specificatamente
predisposti
ed
autorizzati,
può
avere
effetti
pericolosi
sull’ambiente
e
sulla
salute.
I trasgressori sono soggetti alle sanzioni ed ai provvedimenti a norma di Legge.
PER SMALTIRE CORRETTAMENTE LE NOSTRE APPARECCHIATURE POTETE:
a)
b)
Rivolgervi alle Autorità Locali che vi forniranno indicazioni e informazioni pratiche sulla corretta gestione
dei rifiuti, ad esempio: luogo e orario delle stazioni di conferimento, ecc.
All’acquisto di una nostra nuova apparecchiatura, riconsegnare al nostro Rivenditore un’apparecchiatura
usata, analoga a quella acquistata.
l simbolo del contenitore barrato, riportato sull’apparecchiatura, significa che:
- L’apparecchiatura, quando sarà giunta a fine vita, deve essere portata in centri di raccolta
attrezzati e deve essere trattata separatamente dai rifiuti urbani;
- Olivetti garantisce l’attivazione delle procedure in materia di trattamento, raccolta, riciclaggio e
smaltimento della apparecchiatura in conformità alla Direttiva 2002/96/CE (e succ.mod.).
2. PER GLI ALTRI PAESI (NON UE)
Il trattamento, la raccolta, il riciclaggio e lo smaltimento di apparecchiature elettriche ed elettroniche dovrà essere
effettuato in conformità alle Leggi in vigore in ciascun Paese.
DIRECTIVE 2002/96/CE ON THE TREATMENT, COLLECTION, RECYCLING
AND DISPOSAL OF ELECTRIC AND ELECTRONIC DEVICES
AND THEIR COMPONENTS
1. FOR COUNTRIES IN THE EUROPEAN UNION (EU)
The disposal of electric and electronic devices as solid urban waste is strictly prohibited: it must be collected
separately. The dumping of these devices at unequipped and unauthorized places may have hazardous effects
on health and the environment.
Offenders will be subjected to the penalties and measures laid down by the law.
TO DISPOSE OF OUR DEVICES CORRECTLY:
a)
b)
Contact the Local Authorities, who will give you the practical information you need and the instructions for
handling the waste correctly, for example: location and times of the waste collection centres, etc.
When you purchase a new device of ours, give a used device similar to the one purchased to our dealer
for disposal.
The crossed dustbin symbol on the device means that:
- When it to be disposed of, the device is to be taken to the equipped waste collection centres
and is to be handled separately from urban waste;
- Olivetti guarantees the activation of the treatment, collection, recycling and disposal procedures
in accordance with Directive 2002/96/CE (and subsequent amendments).
2. FOR OTHER COUNTRIES (NOT IN THE EU)
The treatment, collection, recycling and disposal of electric and electronic devices will be carried out in accordance with
the laws in force in the country in question.
DIRECTIVE 2002/96/CE SUR LE TRAITEMENT, LA COLLECTE, LE RECYCLAGE
ET LA MISE AU REBUT DES EQUIPEMENTS ELECTRIQUES
ET ELECTRONIQUES ET DE LEURS COMPOSANTS
1. POUR LES PAYS DE L'UNION EUROPEENNE (UE)
Il est interdit de mettre au rebut tout équipement électrique ou électronique avec les déchets municipaux non
triés : leur collecte séparée doit être effectuée. L'abandon de ces équipements dans des aires non appropriées
et non autorisées peut nuire gravement à l'environnement et à la santé. Les transgresseurs s'exposent aux
sanctions et aux dispositions prévues par la loi.
POUR METTRE CORRECTEMENT NOS EQUIPEMENTS AU REBUT, VOUS POUVEZ EFFECTUER L'UNE DES OPERATIONS
SUIVANTES :
a)
Adressez-vous aux autorités locales, qui vous fourniront des indications et des informations pratiques sur
la gestion correcte des déchets (emplacement et horaire des déchetteries, etc.).
A l'achat d'un de nos équipements, remettez à notre revendeur un équipement usagé, analogue à celui
acheté.
b)
Le symbole du conteneur barré, indiqué sur l'équipement, a la signification suivante :
- Au terme de sa durée de vie, l'équipement doit être remis à un centre de collecte approprié, et
doit être traité séparément des déchets municipaux non triés ;
- Olivetti garantit l'activation des procédures de traitement, de collecte, de recyclage et de mise
au rebut de l'équipement, conformément à la Directive 2002/96/CE (et modifications
successives).
2. POUR LES AUTRES PAYS (NON UE)
Le traitement, la collecte, le recyclage et la mise au rebut des équipements électriques et électroniques doivent être
effectués conformément à la loi en vigueur dans chaque pays.
RICHTLINIE 2002/96/CE FÜR DIE BEHANDLUNG, SAMMLUNG, WIEDERVERWERTUNG
UND ENTSORGUNG VON ELEKTRO- UND ELEKTRONIK ALTGERÄTEN
UND DEREN BESTANDTEILE
1. FÜR DIE LÄNDER DER EUROPÄISCHEN UNION (EG)
Es ist verboten, jede Art von Elektro- und Elektronik-Altgeräten als unsortierten Siedlungsabfall zu entsorgen: es
ist Pflicht, diese separat zu sammeln.
Das Abladen dieser Geräte an Orten, die nicht speziell dafür vorgesehen und autorisiert sind, kann gefährliche
Auswirkungen für Umwelt und Gesundheit haben.
Widerrechtliche Vorgehensweisen unterliegen den Sanktionen und Maßnahmen laut Gesetz.
UM UNSERE GERÄTE ORDNUNGSGEMÄß ZU ENTSORGEN, KÖNNEN SIE:
a)
b)
Sich an die örtliche Behörde wenden, die Ihnen praktische Auskünfte und Informationen für die
ordnungsgemäße Verwaltung der Abfälle liefert, beispielsweise: Ort und Zeit der Sammelstation etc.
Beim Neukauf eines unserer Geräte ein benutztes Gerät, das dem neu gekauften entspricht, an unseren
Wiederverkäufer zurückgeben.
Das durchkreuzte Symbol auf dem Gerät bedeutet, dass:
- Nach Ableben des Gerätes, dieses in ausgerüstete Sammelzentren gebracht werden und
separat von Siedlungsabfällen behandelt werden muss;
- Olivetti die Aktivierung der Behandlungs-, Sammel-, Wiederverwertungs- und
Entsorgungsprozedur der Geräte in Konformität mit der Richtlinie 2002/96/CE (u. folg.mod.)
garantiert.
2. FÜR DIE ANDEREN LÄNDER (NICHT-EG-STAATEN)
Das Behandeln, Sammeln, Wiederverwerten und Entsorgen von Elektro- und Elektronik-Altgeräten muss nach
den geltenden Vorschriften des jeweiligen Landes erfolgen.
DIRECTIVA 2002/96/CE SOBRE EL TRATAMIENTO, LA RECOGIDA, EL RECICLAJE
Y LA ELIMINACIÓN DE APARATOS ELÉCTRICOS Y ELECTRÓNICOS
Y DE SUS COMPONENTES
1. PARA LOS PAÍSES DE LA UNIÓN EUROPEA (UE)
Está prohibido eliminar cualquier tipo de aparato eléctrico y electrónico como residuo urbano no seleccionado:
en el caso de estos equipos es obligatorio realizar su recogida selectiva.
La eliminación de estos aparatos en lugares que no estén específicamente preparados y autorizados puede
tener efectos peligrosos para el medio ambiente y la salud.
Los transgresores están sujetos a las sanciones y a las medidas que establece la Ley.
PARA ELIMINAR CORRECTAMENTE NUESTROS APARATOS EL USUARIO PUEDE:
a)
b)
Dirigirse a las Autoridades Locales, que le brindarán las indicaciones y las informaciones prácticas
necesarias para el correcto manejo de los desechos, por ejemplo: lugar y horario de las instalaciones de
tratamiento, etc.
En el momento de comprar uno de nuestros equipos nuevos, puede entregar a nuestro Revendedor un
aparato usado, similar al que ha adquirido.
El símbolo del contenedor con la cruz, que se encuentra en el aparato, significa que:
- Cuando el equipo haya llegado al final de su vida útil, deberá ser llevado a los centros
de recogida previstos, y que su tratamiento debe estar separado del de los residuos urbanos;
- Olivetti garantiza la activación de los procedimientos en materia de tratamiento, recogida,
reciclaje y eliminación de los equipos, de conformidad con la Directiva 2002/96/CE
(y suces. mod.).
2. PARA LOS OTROS PAÍSES (FUERA DE LA UE)
El tratamiento, la recogida, el reciclaje y la eliminación de equipos eléctricos y electrónicos se deberán llevar a
cabo de conformidad con las Leyes vigentes en cada País.
DIRECTIVA 2002/96/CE RELATIVA AO TRATAMENTO, RECOLHA, RECICLAGEM
E ELIMINAÇÃO DE RESÍDUOS DE EQUIPAMENTOS ELÉCTRICOS E
ELECTRÓNICOS E DE SEUS COMPONENTES
1. PARA OS PAÍSES DA UNIÃO EUROPEIA (UE)
É proibido eliminar qualquer resíduo de equipamentos eléctricos ou electrónicos como lixo sólido urbano: é
obrigatório efectuar uma recolha separada. O abandono de tais equipamentos em locais não especificamente
preparados e autorizados, pode ter efeitos perigosos sobre o ambiente e a saúde. Os transgressores estão
sujeitos às sanções e às disposições legais.
PARA ELIMINAR CORRECTAMENTE OS NOSSOS EQUIPAMENTOS, É POSSÍVEL:
a)
b)
Dirigir-se às Autoridades Locais que fornecerão indicações e informações práticas sobre a gestão
correcta dos resíduos, por exemplo: local e horário dos centros de entrega, etc.
Na compra de um nosso novo equipamento, devolver ao nosso Revendedor um equipamento usado,
semelhante ao comprado.
O símbolo do contentor riscado, indicado sobre o equipamento, significa que:
- O equipamento, quando chegar ao fim de sua vida útil, deve ser levado para centros de
recolha aparelhados e deve ser tratado separadamente dos resíduos urbanos;
- A Olivetti garante a activação dos procedimentos no tocante ao tratamento, recolha,
reciclagem e eliminação do equipamento em conformidade com a Directiva 2002/96/CE (e
mod. post.).
2. PARA OS OUTROS PAÍSES (FORA DA UE)
O tratamento, a recolha, a reciclagem e a eliminação de equipamentos eléctricos e electrónicos terão de ser
realizados em conformidade com as Leis em vigor em cada país.
EU-DIREKTIV 2002/96/EF (WEEE) OM OPSAMLING, GENBRUG OG
BORTSKAFFELSE AF ELEKTRISK OG ELEKTRONISK UDSTYR
1. GÆLDENDE FOR EU-LANDE
Det er forbudt at bortskaffe elektrisk eller elektronisk udstyr som almindeligt husholdningsaffald: Det skal
opsamles separat.
Hvis ikke elektrisk og elektronisk affald afleveres på særligt indrettede opsamlingssteder, kan det få alvorlige
konsekvenser for miljø og helbred.
Overtrædere kan straffes og retforfølges i henhold til gældende lovgivning.
FOR KORREKT BORTSKAFFELSE AF VORES UDSTYR KAN DU:
a)
b)
Henvende dig til de lokale myndigheder, som vil kunne give dig anvisninger og praktiske oplysninger om
en korrekt bortskaffelse af affaldet, f.eks.: Genbrugsstationers adresser og åbningstider osv.
Aflevere brugt udstyr ved køb af tilsvarende nyt udstyr hos vores Forhandler.
Det viste symbol, som findes på udstyret, betyder:
- At, brugt udstyr skal afleveres på særlige opsamlingssteder og bortskaffes separat;
- at, Olivetti garanterer at procedurerne for behandling, opsamling, genbrug og bortskaffelse af
udstyret i henhold til EU-direktiv 2002/96/EF (og efterfølgende tilføjelser) efterleves.
2. GÆLDENDE FOR IKKE EU-LANDE
Behandling, opsamling, genanvendelse og bortskaffelse af elektrisk og elektronisk udstyr skal ske i henhold til
landets gældende lovgivning.
DIREKTIV 2002/96/CE OM BEHANDLING, OPPSAMLING, GJENVINNING OG
ELIMINERING AV ELEKTRISKE OG ELEKTRONISKE APPARATER
OG DERES KOMPONENTER
1. FOR LAND I EUROPAUNIONEN (EU)
Det er forbudt å eliminere et hvert elektrisk og elektronisk apparat som vanlig avfall: det er obligatorisk å legge
dem i separat oppsamling.
Kasting av disse apparatene på steder som ikke er spesielt forutsett eller autoriserte, kan være farlig for helse
og miljø.
Overtrederne kan underkastes sanksjoner etter loven.
FOR Å ELIMINERE VÅRE APPARATER KORREKT KAN DERE:
a)
b)
Henvende dere til den lokale myndigheten som gir dere praktiske anvisninger og opplysninger om korrekt
behandling av avfallet, for eksempel: sted og tid for oppsamling, osv.
Ved kjøp av et av våre apparater, kan dere levere det brukte apparatet, analogisk med det som er kjøpt,
til vår forhandler.
Symbolet med krysset beholder, som står på apparatet betyr at:
- Når apparatet ikke fungerer mer, skal det bringes til oppsamlingssenter som er utrustet for
dette og må behandles separat fra vanlig avfall;
- Olivetti garanterer aktivering av prosedyrene i materien for behandling, oppsamling,
gjenvinning og eliminering av apparatet i konformitet med direktiv 2002/96/CE (og senere
modif.).
2. FOR ANDRE LAND (IKKE EU)
Behandling, oppsamling, gjenvinning og eliminering av elektriske og elektroniske apparater må utføres i
konformitet med de lovene som gjelder i hvert land.
DIRETTIVA 2006/66/CE RELATIVA A PILE E ACCUMULATORI
E AI RIFIUTI DI PILE E ACCUMULATORI
INFORMAZIONI
Applicabili nei paesi dell’Unione Europea e in altri paesi con sistemi di raccolta
differenziata
Il simbolo riportato sulle batterie, o sulla confezione, o sulla documentazione,
significa che le batterie in dotazione al prodotto non devono essere smaltite
come rifiuto solido urbano, ma è obbligatorio effettuare una raccolta separata.
Portare la batteria esausta nei centri di raccolta autorizzati per il riciclo.
Lo smaltimento non corretto può avere effetti pericolosi sull’ambiente e sulla
salute.
Quando presenti, i simboli chimici Hg (mercurio), Cd (cadmio), PB (piombo) indicano che la
batteria contiene la sostanza in quantità superiori a quanto definito nella direttiva.
DIRECTIVE 2006/66/CE ON BATTERIES AND ACCUMULATORS
AND ON WASTE BATTERIES AND ACCUMULATORS
INFORMATION
Applicable in European Union countries and in other countries with recycling collection
systems
The symbol shown on batteries, on their packaging or on their documentation
means that the batteries supplied with the product must not be disposed of as
solid urban waste but must be collected separately. Take used batteries to the
authorised recycling centres.
Improper disposal could have dangerous effects on the environment and on
health.
When any of the chemical symbols Hg (mercury), Cd (cadmium) or Pb (lead) are present, they
indicate that the battery contains a higher quantity of the related substance than stipulated in
the directive.
DIRECTIVE 2006/66/CE RELATIVE AUX PILES ET ACCUMULATEURS
AINSI QU’AUX DECHETS DE PILES ET D’ACCUMULATEURS
INFORMATIONS
Applicables dans les pays de l’Union européenne et dans les pays qui utilisent des
systèmes de tri sélectif
Le symbole reporté sur les batteries, sur l’emballage ou sur la documentation
signifie que les batteries fournies avec le produit ne doivent pas être mises au
rebut avec les déchets municipaux non triés mais que leur collecte séparée
doit être effectuée. Il faut déposer la batterie usagée dans les points de
collecte agréés.
La mise au rebut incorrecte peut avoir des effets dangereux sur
l’environnement et sur la santé.
La présence des symboles chimiques Hg (mercure), Cd (cadmium) et Pb (plomb) indique que
la batterie contient la substance mentionnée dans des quantités supérieures aux prescriptions
de la directive.
RICHTLINIE 2006/66/CE FÜR ALTBATTERIEN
UND AKKUS
INFORMATIONEN
Für alle Länder der Europäischen Union sowie die Länder, in denen die getrennte
Hausmüllsammlung erfolgt
Dieses Symbol, das auf den Batterien bzw. Akkus, auf deren Verpackung
oder in deren Unterlagen erscheint, bedeutet, dass die mitgelieferten
Batterien oder Akkus nicht gemeinsam mit den Siedlungsabfällen entsorgt
werden dürfen sondern getrennt gesammelt, d.h. zu einem der
Sammelzentren gebracht werden müssen, die für die Wiederverwertung
ausgerüstet sind. Eine nicht fachgerechte Entsorgung kann gefährliche
Auswirkungen auf die Umwelt und die allgemeine Gesundheit haben.
Erscheinen die chemischen Symbole Hg (Quecksilber), Cd (Kadmium), Pb (Blei) heißt das,
dass die Batterie bzw. das Akku diese Substanz in höherem Maße enthält als von der
Richtlinie bestimmt wurde.
DIRECTIVA 2006/66/CE RELATIVA A LAS BATERÍAS Y LOS
ACUMULADORES Y A LOS RESIDUOS DE PILAS Y ACUMULADORES
INFORMACIÓN
Aplicable en los países de la Unión Europea y en otros países con sistemas de
recogida y reciclado
La presencia de este símbolo en las pilas, su embalaje o su documentación
significa que las pilas suministradas con el producto no deben ser eliminadas
como parte de los residuos sólidos urbanos y que deben recogerse de forma
separada. Lleve las pilas usadas a los centros de reciclado autorizados.
Una eliminación incorrecta puede tener efectos peligrosos para el medio
ambiente y la salud.
La presencia de cualquiera de los símbolos químicos Hg (mercurio), Cd (cadmio) o Pb
(plomo) indica que la pila contiene una cantidad superior de la sustancia indicada que la
estipulada en la Directiva.
DIRECTIVA 2006/66/CE RELATIVA A PILHAS E ACUMULADORES
E RESPECTIVOS RESÍDUOS
INFORMAÇÃO
Aplicável nos países da União Europeia e noutros países que possuam sistemas de
recolha para reciclagem
O símbolo apresentado nas pilhas, sua embalagem ou respectiva
documentação, significa que as pilhas fornecidas com o produto não devem
ser eliminadas junto com lixo sólido doméstico, devendo antes ser recolhidas
separadamente. As pilhas usadas devem ser colocadas em contentores
adequados para reciclagem de pilhas (Pilhão).
A eliminação inadequada das pilhas, pode resultar em efeitos perigosos para
o ambiente e para a saúde.
Quando as pilhas apresentarem qualquer um dos símbolos químicos Hg (mercúrio),
Cd (cádmio) ou Pb (chumbo), significa que a pilha contém uma quantidade dessa substância
mais elevada do que o estipulado na directiva.
EU-DIREKTIV 2006/66/CE OM BATTERIER OG AKKUMULATORER
OG BRUGTE BATTERIER OG AKKUMULATORER
INFORMATIONER
Gældende for lande i EU og lande med affaldssortering
Symbolet ’ingen skraldespand’ på batterier, produktemballage eller vejledning
og betyder, at batterierne der leveres med produktet efter endt levetid skal
holdes adskilt fra andet husholdningsaffald, og efterfølgende bringes til en
genbrugsstation.
En ulovlig bortsmidning af produktet kan have skadelige virkninger på miljø og
personers helbred.
De kemiske symboler Hg (kviksølv), Cd (cadmium), Pb (bly) angiver at batteriet indeholder det
pågældende stof i en større mængde end angivet i direktivet.
DIREKTIV 2006/66/EF OM BATTERIER OG AKKUMULATORER OG
ELIMINERING AV BATTERIER OG AKKUMULATORER
INFORMASJONER
Gjelder i Europaunionen og andre land med sorteringsanlegg
Symbolet som står på batteriene eller emballasjen eller i dokumentasjonen
betyr at batterienes som er levert sammen med produktet ikke får kastes i
avfallen som solid byavfall, uten det er obligatorisk å utføre en separat sorte
ring. Innlever batterier som er utladed til et autorisert sorteringsanlegg for
gjenvinning.
En gal avfallshåndtering kan lede till farlige effekter på miljøen og helsen.
Hvis de kjemiske symbolene Hg (kvikksølv), Cd (kadmium), Pb (bly) er tilstede, betyr dette at
batteriet innholder substansen i mengder som overskrider grenseverdiene som er angitt i
direktivet.
Modulo gestione Serbatoio di GPL
MGSG
GUIDA RAPIDA
Prima installazione
Codice: 538914R