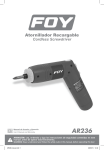
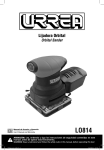
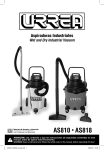
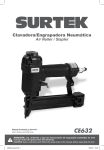
1
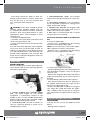
Atornillador para Tablaroca
Drywall Screwdriver
Manual de Usuario y Garantía.
User’s Manual and Warranty.
AT714
ATENCIÓN: Lea, entienda y siga las instrucciones de seguridad contenidas en este
manual, antes de operar esta herramienta.
WARNING: Read, understand and follow the safety rules in this manual, before operating this tool.
AT714 manual.indd 1
28/05/15 15:37
E S P A Ñ O L
E N G L I S H
CONTENIDO
CONTENT
Normas generales de seguridad
3
General safety rules
9
Seguridad eléctrica
3
Electric safety
9
Seguridad personal
3
Personal safety
9
Utilización y cuidados de las
herramientas eléctricas
4
Tool use and care
10
Advertencias de seguridad para
atornilladores para tablaroca
5
Specific safety rules for
drywall screwdrivers
10
Características
5
Features
11
Instrucciones de operación
6
Operation instructions
11
Mantenimiento
7
Maintenance
13
Especificaciones técnicas
8
Technical data
13
Notas
14
Notes
14
Garantía
16
Warranty policy
16
SIMBOLOS
S YM BOLS
PELIGRO, ADVERTENCIA, PRECAUCIÓN:
Indica un riesgo personal o la posibilidad
de un daño.
DANGER, CAUTION, WARNING: Indicates risk of
personal injury and/or the possibility of damage.
Herramientas tipo II: Doble aislamiento,
protege las herramientas eléctricas.
Type II power tools: Indicates double insulation.
2
AT714 manual.indd 2
28/05/15 15:37
E S P A Ñ O L •
NORMAS GENERALES DE SEGURIDAD
Este ATORNILLADOR PARA TABLAROCA tiene
características que harán su trabajo más rápido
y fácil. Seguridad, comodidad y confiabilidad
fueron previstos como prioridad para el diseño
del mismo, haciendo más fácil su operación.
ADVERTENCIA: Lea todas las advertencias
de seguridad y todas las instrucciones. La omisión de alguna de las advertencias e instrucciones que se enlistan a continuación puede dar
como resultado un choque eléctrico, fuego y/o
un serio daño.
CONSERVE TODAS LAS ADVERTENCIAS Y
TODAS LAS INSTRUCCIONES.
SEGURIDAD EN EL ÁREA DE TRABAJO
Mantenga el área de trabajo limpia y bien iluminada. Las áreas desordenadas y oscuras provocan accidentes.
No maneje herramientas eléctricas en atmósferas explosivas, tales como en presencia de
líquidos inflamables, gases o polvo. Las herramientas eléctricas crean chispas que pueden
encender el polvo o los humos.
Mantenga alejados a los niños y curiosos
mientras maneja una herramienta eléctrica.
Las distracciones pueden causarle la pérdida
del control.
SEGURIDAD ELÉCTRICA
La clavija de la herramienta eléctrica debe
coincidir con receptáculo. No modificar nunca
la clavija de ninguna manera. No usar ningún
adaptador de clavijas con herramientas eléctricas puestas a tierra. Clavijas no modificadas y
bases coincidentes reducirán el riesgo de choque eléctrico.
Evite el contacto del cuerpo con superficies
puestas a tierra como tuberías, radiadores, cocinas eléctricas y refrigeradores. Hay un riesgo
aumentado de choque eléctrico si su cuerpo
está puesto a tierra.
No exponga las herramientas eléctricas a la lluvia o a condiciones de humedad. El agua que
entre en la herramienta aumentará el riesgo
de choque eléctrico.
No abuse del cable. No usar nunca el cable para
llevar, levantar o desenchufar la herramienta
Manual de U suario
eléctrica. Mantenga el cable lejos del calor,
aceite, cantos vivos o piezas en movimiento.
Los cables dañados o enredados aumentan el
riesgo de choque eléctrico.
Cuando maneje una herramienta eléctrica en
el exterior, use una prolongación de cable adecuada para uso en el exterior. El uso de una
prolongación de cable adecuada para uso en el
exterior reduce el riesgo de choque eléctrico.
“ESTA HERRAMIENTA CUENTA CON UN
SUJETACABLE TIPO “Y“, EN CASO DE DAÑARSE EL CORDÓN DE ALIMENTACIÓN, ÉSTE DEBERÁ SER REEMPLAZADO POR EL FABRICANTE,
SUS CENTROS DE SERVICIO AUTORIZADOS, O
PERSONAL CALIFICADO A FIN DE EVITAR RIESGOS.”
EXTENSIONES DE CABLE
NOTA: El uso de cables dañados incrementa el
riesgo de descargas eléctricas o quemaduras.
Si es necesario un cable de extensión, debe ser
usado un cable con el tamaño adecuado de los
conductores. La tabla de la siguiente página,
muestra el tamaño correcto para usar dependiendo en la longitud del cable y el rango de
amperaje especificado en la etiqueta de valores nominales del producto. Si está en duda,
use el rango próximo más grande.
Siempre use cables de extensión listados en UL,
CSA ó NOM.
TAMAÑOS RECOMENDADOS DE EXTENSIONES
DE CABLE:
Cuando esté usando el producto afuera, use
una extensión para exteriores marcadas con lo
siguiente: “WA” o “W”. Estas extensiones están
pensadas para trabajar en exteriores y reducen
el riesgo de descarga eléctrica.
SEGURIDAD PERSONAL
Esté alerta, vigile lo que está haciendo y use el
sentido común cuando maneje una herramienta eléctrica. No use una herramienta eléctrica
cuando esté cansado o bajo la influencia de
3
AT714 manual.indd 3
28/05/15 15:37
drogas, alcohol o medicamentos. Un momento
de distracción mientras maneja herramientas
eléctricas puede causar un daño personal serio.
Use equipo de seguridad. Lleve siempre protección para los ojos. La utilización para las
condiciones apropiadas de un equipo de seguridad tal como mascarilla antipolvo, zapatos no
resbaladizos, gorro duro, o protección para los
oídos reducirá los daños personales.
Evite un arranque accidental. Asegúrese de
que el interruptor está en posición apagado
antes de conectar a la red y/o a la batería, coger o transportar la herramienta. Transportar
herramientas eléctricas con el dedo sobre el
interruptor o enchufar herramientas eléctricas
que tienen en interruptor en posición encendido invita a accidentes.
Retire llaves o herramienta antes de arrancar
la herramienta eléctrica. Una llave o herramienta dejada unida a una pieza rotativa de
una herramienta eléctrica puede causar un
daño personal.
No se sobrepase. Mantenga los pies bien asentados sobre el suelo y conserve el equilibrio en
todo momento. Esto permite un mejor control
de la herramienta eléctrica en situaciones inesperadas.
Vista adecuadamente. No vista ropa suelta o
joyas. Mantenga su pelo, su ropa y guantes
alejados de las piezas en movimiento. La ropa
suelta, las joyas o el pelo largo pueden ser cogidos en las piezas en movimiento.
Si hay dispositivos para la conexión de medios
de extracción y recolección de polvo, asegúrese de que éstos estén conectados y se usen correctamente. El uso de estos dispositivos puede
reducir los peligros relacionados con el polvo.
IMPORTANTE: Este aparato no se destina
para utilizarse por personas (incluyendo niños)
cuyas capacidades físicas, sensoriales o mentales sean diferentes o estén reducidas, o carezcan de experiencia o conocimiento, a menos
que dichas personas reciban una supervisión o
capacitación para el funcionamiento del aparato por una persona responsable de su seguridad. Los niños deben supervisarse para asegurar que ellos no empleen los aparatos como
juguete.
UTILIZACIÓN Y CUIDADOS DE LAS
HERRAMIENTAS ELÉCTRICAS
No fuerce la herramienta eléctrica. Use la herramienta eléctrica correcta para su aplicación.
La herramienta eléctrica correcta hará el trabajo mejor y más seguro al ritmo para la que
fue concebida.
No use la herramienta eléctrica si el interruptor no gira “encendido” y “apagado”. Cualquier herramienta eléctrica que no pueda controlarse con el interruptor es peligrosa y debe
repararse.
Desenchufe la clavija de la fuente de alimentación y/o de la batería antes de efectuar
cualquier ajuste, cambio de accesorios, o de
almacenar las herramientas eléctricas. Tales
medidas preventivas de seguridad reducen el
riesgo de arrancar la herramienta accidentalmente.
Almacene las herramientas eléctricas inactivas
fuera del alcance de los niños y no permita el
manejo de la herramienta eléctrica a personas
no familiarizadas con las herramientas o con
estas instrucciones. Las herramientas eléctricas
son peligrosas en manos de usuarios no entrenados.
Mantenga las herramientas eléctricas. Compruebe que las partes móviles no estén desalineadas o trabadas, que no haya piezas rotas u otras condiciones que puedan afectar la
operación de las herramientas eléctricas. Las
herramientas eléctricas se reparan antes de su
uso, cuando están dañadas. Muchos accidentes son causados por herramientas eléctricas
pobremente mantenidas.
Mantenga las herramientas de corte afiladas y
limpias. Las herramientas de corte mantenidas
correctamente con los bordes de corte afilados
son menos probables de trabarse y más fáciles
de controlar.
Use la herramienta eléctrica, accesorios y puntas de herramienta, etc. de acuerdo con estas
instrucciones y de la manera prevista para el
tipo particular de herramienta eléctrica, teniendo en cuenta las condiciones de trabajo
y el trabajo a desarrollar. El uso de la herramienta eléctrica para aplicaciones diferentes
de las previstas podría causar una situación de
peligro.
4
AT714 manual.indd 4
28/05/15 15:37
E S P A Ñ O L •
SERVICIO
Haga revisar su herramienta eléctrica por un
servicio de reparación calificado usando solamente piezas de reemplazo idénticas. Esto garantizará que la seguridad de la herramienta
eléctrica se mantiene.
ADVERTENCIAS DE SEGURIDAD PARA
ATORNILLADORES DE TABLAROCA
Sostenga la herramienta por las superficies aisladas cuando realice una operación donde la
herramienta de perforación pueda entrar en
contacto con cables ocultos o con su propio
cable. El contacto con un cable “vivo” hará que
las partes metálicas expuestas de la herramienta de perforación carguen eléctricamente y se
descargue hacia el operador.
· Conozca su herramienta eléctrica. Lea el manual del operador cuidadosamente. Aprenda
sus usos y limitaciones, así como los posibles
peligros específicos de esta herramienta.
Siguiendo esta regla, reducirá el riesgo de descarga eléctrica, incendio o lesiones graves.
· Siempre use lentes de seguridad. Los lentes de
uso diario sólo serán resistentes al impacto; NO
son lentes de seguridad.
· Proteja sus pulmones. Use una careta o mascarilla contra el polvo si la operación va a ser
polvorienta.
· Proteja su audición. Use protección auditiva
durante periodos prolongados de operación.
· Inspeccione periódicamente los cables de la
herramienta, si está dañado, llévelo a su centro
de servicio autorizado más cercano. Observe
constantemente la ubicación del cordón mientras trabaja.
· Inspeccione que no haya piezas dañadas.
Antes de seguir usando la herramienta, cualquier protección u otra pieza que esté dañada
debe ser cuidadosamente evaluados para determinar si funcionará correctamente y realizará la función prevista. Verifique la alineación
de las piezas móviles, la unión de las piezas móviles, ruptura de piezas, el montaje y cualquier
otra condición que pueda afectar su funcionamiento. Toda protección o pieza que esté dañada debe ser reparada correctamente o reemplazada en un centro de servicio autorizado. El
seguir esta regla, reducirá el riesgo de descargas eléctricas, incendios o lesiones graves.
Manual de U suario
· Inspeccione y saque todos los clavos de la madera antes de utilizar esta herramienta. El seguir esta regla reduce el riesgo de lesiones personales graves.
· Guarde estas instrucciones. Consúltelas con
frecuencia y úselas para ayudar a otros vayan
a usar esta herramienta. Si le presta a alguien
esta herramienta, facilítele también estas instrucciones.
ADVERTENCIA: Polvo creado por el lijado,
serrado, rebajado, taladrado y otras actividades de construcción contienen productos químicos que pueden producir cáncer, defectos de
nacimiento u otros daños reproductivos. Algunos ejemplos de estos productos químicos son:
• Plomo de las pinturas a base de plomo,
• Sílice cristalina de ladrillos y cemento y otros
productos de mampostería, y
• Arsénico y cromo de madera tratada químicamente.
El riesgo derivado a estas exposiciones varía,
dependiendo de con cuánta frecuencia realice
este tipo de trabajo. Para reducir su exposición
a estos agentes químicos: trabaje en un área
bien ventilada y trabaje con equipos de seguridad aprobados, tales como máscaras contra el
polvo especialmente diseñadas para filtrar las
partículas microscópicas.
CARACTERÍSTICAS
CONOZCA SU HERRAMIENTA
Antes de intentar usar este producto, familiarícese con todas sus características de operación
y requerimientos de seguridad.
4
6
2
5
3
1
5
AT714 manual.indd 5
28/05/15 15:37
1. INTERRUPTOR CON VELOCIDAD VARIABLE.
El interruptor para el atornillador de tablaroca
está convenientemente ubicado en el mango
de la herramienta. El interruptor de velocidad
variable produce mayor al girar el dial de velocidad encontrado en el gatillo.
2. BOTÓN DE TRABA. La función de bloqueo
permite la operación continua y atornillado de
tornillos por períodos prolongados de tiempo.
3. PALANCA DE AVANCE / REVERSA. La palanca
de avance y reversa cambia la dirección de rotación de la broca.
4. PORTA PUNTAS AJUSTABLE. Su destornillador tiene un porta puntas ajustable con la cual
podrá variar la profundidad del tornillo y cambiar rápidamente las puntas.
5. ADAPTADOR MAGNÉTICO. El imán mantiene sujeta la punta de atornillar y los tornillos
hasta que esté listo para atornillarlos en un
muro.
6. CLIP DE CORREA. Un clip para cinturón se encuentra en la parte superior de la carcasa del
motor.
INSTALANDO Y CAMBIANDO EL SOPORTE DE
LA PUNTA Y LAS PUNTAS
Para instalar o cambiar las puntas:
· Instale puntas de destornillador de 1/4 pulgada insertándolas en el soporte magnético.
NOTA: No es necesario retirar el soporte ajustable para instalar o retirar puntas.
· Reemplace puntas de destornillador de 1/4
pulgada tirando de ellos fuera del soporte
magnético.
Soporte.
Soporte magnético.
Collarín de ajuste.
Para quitar el soporte/adaptador magnético:
· Tire del collarín de ajuste. El collarín de ajuste
y la pieza de la punta ajustable salen de la caja
de engranajes como un conjunto.
· Retire el soporte magnético. Tire del soporte
de puntas con pinzas si no se puede quitarla
con la mano.
Para volver a montar el soporte de puntas y boquilla:
· Empuje el portabrocas en la abertura hexagonal del husillo hasta que el bloqueo de balín
encaje en la ranura del vástago porta puntas.
· Coloque la boquilla ajustable a la caja de engranes. Alinee la lengüeta levantada en el interior del soporte ajustable con la ranura de la
caja de engranajes y empuje la boquilla hasta
que encaje en su lugar.
INSTRUCCIONES DE OPERACIÓN
APLICACIONES
Usted puede utilizar esta herramienta para los
fines siguientes:
· Atornillado de tornillos en tablaroca
ENCENDIENDO Y DETENIENDO EL ATORNILLADOR: Para encender el atornillador , presione
el gatillo. Suelte el gatillo para apagar el destornillador.
INTERRUPTOR DE VELOCIDAD VARIABLE
Ese atornillador tiene
un regulador de velocidad (envía alta velocidad y torque incrementando la presión
en el gatillo). La velocidad es regulada por
la presión aplicada al
gatillo.
La cualidad de velocidad variable es particularmente util cuando se comienza el atornillado.
También le permite seleccionar la mejor velocidad para distintos tipos de trabajo.
Para limitar la velocidad máxima de la herramienta, rote la perilla que se encuentra en el
gatillo y seleccione la velocidad deseada.
BOTÓN DE TRABA
El atornillador está equipado con una función
de traba, el cual es conveniente para la operación continua y atornillado de tornillos por períodos prolongados de tiempo. Para bloquear
en funcionamiento, presione el gatillo y oprima el botón de traba situado en el costado del
mango, en seguida suelte el gatillo. Soltando
el botón traba y el interruptor de encendido lo
dejará operando continuamente.
Para liberar la traba, presione el gatillo y suéltelo. Si usted tiene la traba de operación con-
6
AT714 manual.indd 6
28/05/15 15:37
E S P A Ñ O L •
tinua activada durante el uso y el atornillador
se desconecta de la fuente de alimentación,
desactive la función de traba inmediatamente.
PALANCA DE AVANCE / REVERSA
La dirección de rotación de la broca es controlada por una palanca situada arriba del gatillo.
Cuando el atornillador se mantiene en posición
de funcionamiento normal, la palanca de dirección de rotación debería estar a la izquierda
del interruptor para la operación de operación
hacia adelante. El sentido de giro cambiará a
dirección inversa cuando la palanca se encuentra a la derecha del interruptor.
NOTA: El atornillador no encenderá a menos
que la palanca de avance / retroceso esté ubicada totalmente hacia la izquierda o la derecha.
El diseño del interruptor no permitirá cambiar
la dirección de rotación, mientras que el atornillador esté funcionando. Suelte el gatillo y
deje que el destornillador se detenga antes de
cambiar la dirección.
AJUSTANDO LA PROFUNDIDAD
El porta puntas ajustable de la herramienta llevará automáticamente los tornillos a una profundidad preestablecida. Podría ser útil antes
de comenzar un nuevo trabajo, hacer varias
pruebas de atornillado en material de desecho
para comprobar y ajustar la configuración de
profundidad.
Para realizar ajustes de profundidad predeterminados:
· Gire el collarín de ajuste hasta obtener la profundidad deseada para el soporte de puntas o
punta de atornillar.
· Pruebe introducir un tornillo en material de
desecho para determinar si es correcto.
· Ajuste si es necesario para aumentar o disminuir a la profundidad deseada.
ATORNILLANDO
Hay dos opciones para sostener el mango del
destornillador esto será determinado por la comodidad del operador y el ángulo de trabajo.
El atornillador tiene un interruptor de velocidad variable para un buen manejo del operador y así pueda controlar la velocidad y torque.
· Asegúrese de que el atornillador esté apagado antes de conectarlo a la fuente de alimentación.
Manual de U suario
· Compruebe que el sentido de giro de la palanca sea el correcto (adelante o atrás).
· Asegure la pieza de trabajo. Use abrazaderas
si es necesario.
· Enchufe el atornillador a la fuente de alimentación.
· Oprima el gatillo para encender el atornillador. No trabe el interruptor de encendido en
trabajos donde pueda necesitar que el atornillador se detenga de repente.
· Sostenga el atornillador con firmeza y coloque la broca y el tornillo en el punto donde ser
introducido.
NOTA: El portapuntas está magnetizado y sostendrá la mayoría de tornillos para tablaroca
comerciales.
· Aplique una presión rápida y de golpe para
introducir la broca. La presión aplicada activará
el embrague y apretará el tornillo.
MANTENIMIENTO
ADVERTENCIA: Cuando repare la herramienta use solamente repuestos idénticos Surtek. El uso de cualquier otro repuesto puede
crear un riesgo o dañar el producto .
ADVERTENCIA: Siempre use lentes de seguridad o lentes protectores con protección lateral al usar herramientas eléctricas o al soplar
el polvo. Si la operación genera mucho polvo,
también utilice una mascarilla contra polvo.
MANTENIMIENTO GENERAL
Evite el empleo de solventes al limpiar las piezas de plástico. La mayoría de los plásticos son
susceptibles a daños causados por diferentes
tipos de solventes comerciales y pueden dañarse con el uso. Use paños limpios para eliminar
la suciedad, polvo, aceite, grasa, etc.
ADVERTENCIA: No permita que en ningún
momento, fluidos para frenos, gasolina, productos a base de petróleo, aceites penetrantes, etc., entren en contacto con las piezas de
plástico. Las sustancias químicas pueden dañar,
debilitar o destruir el plástico, lo cual puede resultar en lesiones personales graves.
Las herramientas eléctricas que se utilizan en
materiales de fibra de vidrio, madera laminada y yeso están sujetas a desgaste acelerado y
posible fallo prematuro porque las partículas
7
AT714 manual.indd 7
28/05/15 15:37
de fibra de vidrio y de desbaste son altamente
abrasivas para los baleros, carbones, conmutadores, etc. Nosotros no recomendamos el uso
de esta herramienta para trabajos extendidos
en estos tipos de materiales. Sin embargo, si
usted trabaja con cualquiera de estos materiales, es sumamente importante limpiar la herramienta usando aire comprimido.
ESPECIFICACIONES TÉCNICAS
VOLTAJE-FRECUENCIA
120 V ~ 60 Hz
VELOCIDAD
(0 - 4 000) r/min
CAPACIDAD DE PORTAPUNTAS
1/4" (6,3 mm)
POTENCIA
710 W
CONSUMO ENERGÉTICO
0,3 kWh
PESO
1,3 kg (2,8 lb)
LUBRICACIÓN
Todos los baleros de esta la herramienta están
lubricados con suficiente cantidad de lubricante de alta calidad para la vida de la unidad en
condiciones normales de funcionamiento. Por
lo tanto, no se requerirá lubricación adicional.
8
AT714 manual.indd 8
28/05/15 15:37
E N G L I S H •
GENERAL SAFETY RULES
Your DRYWALL SCREWDRIVER has many features that will make your job faster and easier.
Safety, performance and reliability have been
given top priority in the design of this tool,
qualities to make easy to maintain and to operate.
WARNING: Read and understand all instructions. Failure to follow all indications listed below, may result in electric shock, fire and/
or serious personal injury.
SAVE THESE INSTRUCTIONS.
SAFETY IN WORKING AREA
Keep your work area clean and well lit. Cluttered benches and dark areas may cause accidents.
Do not operate power tools in explosive atmospheres, such as in the presence of flammable
liquids, gases or dust. Some power tools create
sparks which may provoke fire.
Keep away observers, children and visitors
while operating a power tool. Distractions can
cause you to lose control.
ELECTRIC SAFETY
Double insulation eliminates the need for the
three wire grounded power cord and grounded power supply system.
Avoid the body contact with grounded surfaces such as pipes, radiators and refrigerators.
There is an increased risk of electric shock if
your body is grounded.
Don’t expose power tools to rain or wet conditions. The precense of water into power tools
will increase the risk of electric shock.
Do not abuse of the power cord. Never use the
power cord to carry the tool and do not pull
the plug off the outlet. Keep the cable away of
heat, oil, sharp edges or moving parts. Replace
damaged cords immediately. Damaged cords
increase the risk of electric shock.
When operating a power tool outside, use an
outdoor extension cord marked “W-A” or “W”.
These cords are rated for outdoor use and reduce the risk of electric shock.
EXTENSION CORDS
Replace damaged cords immediately. The use
of damaged cords can shock, burn or electric
U ser's manual
shock. If an extension cord is necessary, a cord
with adequate size conductors should be used
to prevent excessive voltage drop, loss of power or overheating. The table below shows the
correct size to use, depending on cord length
and nameplate amperage rating of tools. In
case of doubt use the next heavier gauge. Always use UL listed extension cords.
SIZE RECOMMEND EXTENSION CABLES
PERSONAL SAFETY
Stay alert, watch what you are doing and use
common sense when operating a power tool.
Don’t use the tool if you are tired or under the
influence of drugs, alcohol or medication. A
moment of unattention while operating power tools may cause a serious personal injury.
Dress properly. Do not wear loose clothing or
jewellery. Contain long hair. Keep your hair,
clothing and gloves away of moving parts.
Loose clothes, jewellery or long hair can be
caught in moving parts.
Avoid an accidental starting. Be sure that the
switch is OFF before plugging in. Carrying
tools with the finger on the switch or plug in
the tool switch in ON may cause accidents.
Remove the adjusting keys or wrenches before turning the tool on. A wrench or a key
that is left close to a rotating part of the tool
may provoke a personal injury.
Do not overreach. Keep proper footing and
balance at all times. Proper footing and balance enables better control of the tools on unexpected situations.
Use safety equipment. Always wear eye protection. Dust mask, nonskid safety shoes, hard
hat, or hearing protection must be used for appropriate conditions.
Before connecting the tool to a power source
(receptacle, outlet, etc.) be sure that the voltage supplied is the same as that one specified
on the nameplate of the tool. To use a not
specified voltage may cause a serious injury to
the user as well as damage the tool.
9
AT714 manual.indd 9
28/05/15 15:37
IMPORTANT: This appliance is not intended
for use by persons (including children) with reduced physical, sensory or mental capabilities
may be different or reduced, or lack of experience or knowledge, unless such persons are supervised or trained to operate the product by
a person responsible for their safety. Children
should be supervised to ensure they do not use
the devices as toys.
TOOL USE AND CARE
Do not force the power tool. Use the correct
tool for the application. The correct tool will
do the job better and more safely at the rate
that it was designed to work at.
Do not use tools if switch does not turn it on or
off. Any tool that cannot be controlled whith
the switch is dangerous and must be repaired.
Disconnect the plug from the power source
before making any adjustments, changing accessories or storing the tool. This preventive
safety measures reduce the risk of accidental
starting of the tool.
When the power tool is not in use, store it out
of the reach of children, and do not allow individuals who are not familiar with the power
tool or these instructions to operate it. Power
tools are dangerous in the hands on untrained
users.
Maintain the power tool. Check for misalignment or binding of moving parts, broken parts,
and any other condition that may affect the
operation of the power tool. If it is damaged,
have it repaired before using. Many accidents
are caused by poorly maintained power tools.
Check for misalignment or bonding of moving
parts, breakage parts, and any other condition
that may affect the tools operation. If you find
a damaged tool, take it to service before use it.
Use only accessories that are recommended by
the manufacturer of your model. Suitable accessories for one tool, may become hazardous
when are used on another tool.
Keep cutting tools, sharpened and clean. Cutting tools in good condition with sharpened
edges, are less likely to stuck in workpieces or
easier to control.
Is recommendable to use a safety device suitable, such a thermal and diferential switch
when you are using an electric equipment.
SERVICE
Tool service must be perfomed only by qualified repair personnel. Service or maintenance
performed by unqualified personnel could result in a risk of injury.
SPECIFIC SAFETY RULES FOR
DRYWALL SCREWDRIVERS
Hold tool by insulated gripping surfaces when
performing an operation where the drilling
tool may contact hidden wiring or its own
cord. Contact with a“live” wire will make exposed metal parts of the drilling tool become
electric and shock the operator.
·Know your power tool. Read operator’s manual carefully. Learn its applications and limitations, as well as the specific potential hazards
related to this tool.
Following this rule will reduce the risk of electric shock, fire, or serious injury.
· Always wear safety glasses. Everyday eyeglasses have only impact-resistant lenses; they
are NOT safety glasses. Following this rule will
reduce the risk of serious personal injury.
· Protect your lungs. Wear a face or dust mask
if the operation is dusty. Following this rule
will reduce the risk of serious personal injury.
· Protect your hearing. Wear hearing protection during extended periods of operation.
Following this rule will reduce the risk of serious personal injury.
· Inspect tool cords periodically and, if damaged, have repaired at your nearest authorized
service center. Constantly stay aware of cord
location. Following this rule will reduce the risk
of electric shock or fire.
· Check damaged parts. Before further use of
the tool, a guard or other part that is damaged
should be carefully checked to determine that
it will opérate properly and perform its intended function. Check for alignment of moving
parts, binding of moving parts, breakage of
parts, mounting, and any other conditions that
may affect its operation. A guard or other part
that is damaged should be properly repaired or
replaced by an authorized service center. Following this rule will reduce the risk of shock,
fire, or serious injury.
· Inspect for and remove all nails from lumber
before using this tool. Following this rule will
reduce the risk of serious personal injury.
10
AT714 manual.indd 10
28/05/15 15:37
E N G L I S H •
· Save these instructions. Refer to them frequently and use them to instruct others who
may use this tool. If you loan someone this
tool, loan them these instructions
also.
WARNING: Some dust created by power
sanding, sawing, grinding, drilling, and other construction activities contains chemicals
known to cause cancer, birth defects or other
reproductive harm. Some examples of these
chemicals are:
• lead from lead-based paints,
• crystalline silica from bricks and cement and
other masonry products, and
• arsenic and chromium from chemically-treated lumber.
Your risk from these exposures varies, depending on how often you do this type of work. To
reduce your exposure to these chemicals: work
in a well ventilated area, and work with approved safety equipment, such as those dust
masks that are specially designed to filter out
microscopic particles.
U ser's manual
3. FORWARD/REVERSE LEVER. The forward/
reverse lever changes the direction of bit rotation.
4. ADJUSTABLE NOSEPIECE. Your screwdriver
has an adjustable nosepiece for varying screw
depth and easy bit changes.
5. MAGNETIC BIT HOLDER. The magnet holds
the screwdriver bit and screws until you are
ready to drive them into drywall.
6. BELT CLIP. A convenient belt clip is located
on top of the motor housing.
INSTALLING AND REPLACING BIT HOLDER AND
BITS
To install or replace bits:
· Install 1/4 in. screwdriver bits by inserting
them into the magnetic bit holder.
NOTE: It is not necessary to remove the adjustable nosepiece to install or remove bits.
· Replace 1/4 in. screwdriver bits by pulling
them out of the magnetic bit holder.
Tool
support.
Magnetic support.
FEATURES
KNOW YOUR TOOL
Before attempting to use this hammer drill, become familiar with all of its operating features
and safety requirements.
4
6
2
5
3
1
1. SWITCH TRIGGER WITH VARIABLE SPEED
DIAL. The switch trigger for your drywall
screwdriver is conveniently located on the
handle of the tool. The variable speed switch
delivers higher speed with increased trigger
pressure and selecting with the dial.
2. LOCK-ON BUTTON. The lock-on feature allows for continuous driving of screws for extended periods of time.
Adjustment sleeve.
To remove the magnetic bit holder:
· Pull the adjusting sleeve. The adjusting sleeve
and adjustable nosepiece come off the gear
casing as a set.
· Remove the magnetic bit holder. Pull the bit
holder out with pliers if you cannot remove it
by hand.
To reassemble the bit holder and nosepiece:
· Push the bit holder into the hex opening of
the spindle until the ball lock snaps into the
groove in the bit holder shank.
· Attach the adjustable nosepiece to the gear
case. Align the raised tab inside the adjustable nosepiece with the groove on the gear
case and push the nosepiece until it snaps into
place.
OPERATION INSTRUCTIONS
APPLICATIONS
You may use this tool for the purposes listed
below:
· Driving screws in drywall.
11
AT714 manual.indd 11
28/05/15 15:37
STARTING/STOPPING THE SCREWDRIVER
To turn the screwdriver ON, depress the switch
trigger. Release the switch trigger to turn the
screwdriver OFF.
VARIABLE SPEED
SWITCH
Your hammer drill has
a variable speed dial
on switch. The speed
is regulated by the
pressure applied to
the switch.
Variable speed is particularly useful when
starting the hammer drill. Also allows you to
set an optimal speed for any kind of job.
LOCK-ON BUTTON
The screwdriver is equipped with a lock-on
feature which is convenient for continuous
driving of screws for extended periods of time.
To lock-on, depress the switch trigger, push in
and hold the lock-on button located on the
side of the handle, then release switch trigger.
Release the lock-on button and the screwdriver
will continue running.
To release the lock, depress the switch trigger
and release.
If you have the lock-on feature engaged during use and the screwdriver becomes disconnected from the power supply, disengage the
lock-on feature immediately.
FORWARD/REVERSE LEVER
The direction of rotation of the bit is controlled
by a lever located above the switch trigger.
With the screwdriver held in normal operating position, the direction of rotation lever
should be positioned to the left of the switch
for forward driving operation. The direction of
rotation is in reverse when the lever is to the
right of the switch.
NOTE: The screwdriver will not run unless forward/reverse lever is pushed fully to the left or
right. The design of the switch will not permit
changing the direction of rotation while the
screwdriver is running. Release the switch trigger and allow the screwdriver to stop before
changing its direction.
SETTING DEPTH
The adjustable nosepiece of your tool will
automatically drive screws to preset depths.
It may be helpful to begin each new job by
driving several test screws in scrap material to
check and adjust the depth setting.
To make preset depth adjustments:
· Rotate the adjusting sleeve until you obtain
the desired depth for the bit holder or screwdriver bit.
· Test drive a screw in scrap material to determine if it is correct.
· Adjust as necessary to increase or decrease
the desired depth.
DRIVING SCREWS
There are two two options for gripping the
handle of the screwdriver, determined by operator comfort and working angle.
The screwdriver has a variable speed switch for
operator control of speed and torque limits.
· Be sure the screwdriver is in the OFF position
before connecting it to the power supply.
· Check the direction of rotation lever for correct setting (forward or reverse).
· Secure the workpiece. Use clamps if necessary.
· Plug the screwdriver into power supply
source.
· Depress the switch trigger to start the screwdriver. Do not lock the switch ON for jobs
where the screwdriver may need to be stopped
suddenly.
· Hold the screwdriver firmly and place the bit
and screw at the point to be driven.
NOTE: The bit holder is magnetized and will
hold most commercial drywall screws.
· Apply quick, snap action type pressure to the
bit. The pressure applied will engage the clutch
and drive the screw.
MAINTENANCE
WARNING: When servicing use only identical SURTEK replacement parts. Use of any
other parts may create a hazard or cause product damage.
WARNING: Always wear safety goggles or
safety glasses with side shields during power
tool operation or when blowing dust. If operation is dusty, also wear a dust mask.
12
AT714 manual.indd 12
28/05/15 15:37
E N G L I S H •
GENERAL MAINTENANCE
Avoid using solvents when cleaning plastic
parts. Most plastics are susceptible to damage
from various types of commercial solvents and
may be damaged by their use. Use clean cloths
to remove dirt, dust, oil, grease, etc.
WARNING: Do not at any time let brake fluids,
gasoline, petroleum-based products, penetrating oils, etc., come in contact with plastic parts.
Chemicals can damage, weaken or destroy
plastic which may result in serious personal
injury.
Electric tools used on fiberglass material,
wallboard, spackling compounds, or plaster
are subject to accelerated wear and possible
premature failure because the fiberglass chips
and grindings are highly abrasive to bearings,
brushes, commutators, etc. Consequently,
we do not recommended using this tool for
extended work on these types of materials.
However, if you do work with any of these materials, it is extremely important to clean the
tool using compressed air.
U ser's manual
TECHNICAL DATA
VOLTAGE-FREQUENCY
120 V ~ 60 Hz
SPEED
(0 - 4 000) r/min
BIT HOLDER CAPACITY
1/4” (6,3 mm)
POWER
710 W
POWER CONSUMPTION
0,3 kWh
WEIGHT
1,3 kg (2,8 lb)
LUBRICATION
All of the bearings in this tool are lubricated
with a sufficient amount of high grade lubricant for the life of the unit under normal
operating conditions. Therefore, no further
lubrication is required.
13
AT714 manual.indd 13
28/05/15 15:37
Notas / Notes
14
AT714 manual.indd 14
28/05/15 15:37
M a n u a l d e u s u a r i o / U s e r ’s m a n u a l
Notas / Notes
15
AT714 manual.indd 15
28/05/15 15:37
E S P A Ñ O L
E N G L I S H
POLIZA DE GARANTÍA
WARRANT POLICY
Urrea Herramientas Profesionales S.A. de C.V.
garantiza este producto por el termino de 2 años
en sus piezas, componentes y mano de obra contra cualquier defecto de fabricación a partir de la
fecha de entrega.
Urrea Herramientas Profesionales S.A. de C.V.
Warranties this product for a period of 2 years in
its parts, components and manual labour against
any manufacture defect from the purchasing date.
Fecha de venta: ____/____/____
Producto: ___________________
Marca: ______________________
Modelo: ____________________
Purchase date: ____/____/____
Product:____________________
Brand:______________________
Model:______________________
______________________________
Sello y firma de distribuidor
______________________________
Distributor seal and signature
Comercializado e Importado por:
Urrea Herramientas Profesionales S.A. de C.V.
km 11,5 Carretera A El Castillo, El Salto, Jalisco, México. C. P. 45680, Tel. (33) 3208 7900,
RFC UHP900402Q29
Sold and Imported by:
Urrea Herramientas Profesionales S.A. de C.V.
km 11,5 Carretera A El Castillo, El Salto, Jalisco, México. C. P. 45680, Tel. (33) 3208 7900,
RFC UHP900402Q29
Condiciones:
Para hacer efectiva la garantía deberá presentar
el producto junto con la poliza de garantia debidamente firmada y sellada por el establecimiento
donde la adquirio, en cualquiera de los centros de
servicio autorizados.
Los gastos de transportación que se deriven del
cumplimiento de la garantía seran cubiertos por:
Urrea Herramientas Profesionales S.A. de C.V.
Terms:
In order to make warranty effective you must present the product along with the warranty properly
fillled and signed to an authorized distributor or
service center.
Esta garantía no será valida en los siguientes
casos:
· Cuando el producto haya sido utilizado en condiciones distintas a las normales o al desgaste natural de sus partes.
· Cuando el producto no haya sido operado de
acuerdo al instructivo de uso que lo acompaña.
· Cuando el producto haya sido alterado o reparado por personas no autorizadas.
This warranty is not applicable in the following cases:
· When the product has not been used according
to normal conditions or natural wear of its parts.
· When the product has not been used according
with this user’s manual instructions.
· When the product has been fixed or modified by
unauthorized or unqualified person.
AT714
Urrea Herramientas Profesionales S.A. de C.V.
will cover the transportation cost related to the
warranty.
16
AT714 manual.indd 16
28/05/15 15:37