1
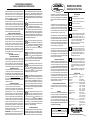
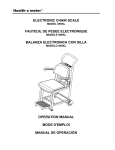
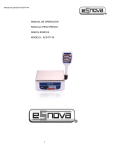
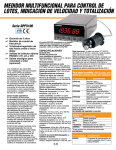
INSTRUCCIONES DE OPERACIÓN
PARA EL MEDIDOR ELECTRÓNICO E500R
PARA PESAR CON EL E500R
Presione el botón ON/OFF y espere dos segundos para que el
E500R se encienda y vuelva a cero. Al encenderse, el medidor
muestra “SC1”, “SC2” o “dir” y “Lbs” o “Kilo”, dependiendo de
la última báscula usada. La báscula programada de fábrica
para usar con Básculas Accu-Arm es “SC1”. Para cambiar la
báscula, vea CAMBIANDO LA BÁSCULA.
Si el E500R no vuelve a cero, presione el botón ZERO por dos
segundos. Después que el medidor ha vuelto a cero, ponga
el animal en la báscula. El medidor se congelará en el peso
correcto. Si es necesario, presione READ para repesar el animal
después que la lectura inicial se congela. El medidor volverá
a cero automáticamente antes de pesar al próximo animal.
Presione el botón ON/OFF para apagar el medidor.
USANDO LA FUNCIÓN TOTALIZADORA
La función totalizadora suma el peso de cada animal a un total.
Para usar TOTALIZE, se debe borrar el último total almacenado
en la memoria antes de comenzar a pesar a los animales.
Presione y mantenga presionado el botón DISPLAY TOTAL
hasta que aparezcan cuatro ceros (aproximadamente ocho
segundos). Al pesar a cada animal, y antes de sacarlo de la
báscula, presione el botón TOTALIZE hasta que muestre el
total de animales pesados (aproximadamente un segundo).
Esta acción suma el peso de los animales y los cuenta.
Momentáneamente verá el peso total de los animales. Saque el
animal e ingrese el próximo en la báscula. Repita este proceso
hasta completar el pesaje.
MOSTRANDO EL PESO TOTAL Y
LA CANTIDAD DE ANIMALES
Presione por un momento el botón DISPLAY TOTAL. El E500R
muestra la cantidad total por tres segundos y luego muestra
el peso total. Estos totales quedan en la memoria cuando el
medidor es apagado. Borre el total presionando DISPLAY
TOTAL hasta que aparezcan cuatro ceros (aproximadamente
ocho segundos). Para apagar el medidor, presione ON/OFF.
CAMBIANDO LA BÁSCULA
Con el medidor apagado, presione el botón SCALE 1, SCALE
2 o DIRECT, para cambiar la báscula. Mantenga el botón
presionado mientras presiona el botón ON/OFF. Sólo se puede
acceder a básculas que han sido habilitadas. Para habilitar
una báscula, vea Programando el E500R: Enab. El medidor
ahora se encenderá con la báscula seleccionada. El E500R
está ahora listo para pesar de acuerdo a la programación de
la báscula seleccionada.
CALIBRANDO EL MEDIDOR
1. Apague el medidor. 2. Si va a calibrar el medidor para “Scale
1” o “Scale 2”, enganche el medidor en la báscula.
3. Presiones los botones DISPLAY TOTAL, ZERO y ON-OFF
al mismo tiempo y luego suéltelos. 4. El medidor mostrará la
programación actual: “SC_1”, “SC_2” o “DIR”. Seleccione una
programación diferente, si lo desea, presionando los botones
SCALE 1, SCALE 2 o DIRECT. 5. El medidor mostrará “0000”
ó “000.0”. Si va a calibrar para las programaciones SCALE 1
o SCALE 2, asegúrese de que el medidor está correctamente
conectado al gancho y la plataforma. Presiones READ para
continuar. 6. El medidor mostrará ahora el valor del peso de
calibración. Usando los botones de flechas, ingrese el peso de
las pesas que usará en la calibración. 7. Coloque las pesas en
la plataforma de la báscula y cierre las puertas. 8. Presione
READ para completar la calibración. 9. Al finalizar, el medidor
mostrará “DONE” y luego se apagará.
OBSERVACIÓN: El peso de calibración debe ser de por lo
menos 23 kg para SCALE 1 o SCALE 2, o más de 3 kg para
DIRECTO. De otra forma la calibración será rechazada.
PROGRAMANDO EL E500R
Con el medidor apagado, presione al mismo tiempo los botones
DISPLAY TOTAL y UNIT CONVERT. Mientras mantiene
presionados estos dos botones, presione el botón ON/OFF. Se
mostrará la báscula actualmente en uso. Se puede seleccionar
una báscula diferente usando los botones SCALE 1, SCALE
2 o DIRECT.
Presione el botón READ para comenzar a programar la báscula. Si selecciona SCALE 2, la pantalla
mostrará "Enab". Usando los botones
o , habilite o deshabilite esta báscula desplegando "ON" u
"OFF". La programación de defecto de SC2 es "Enab-OFF".
En cualquier momento durante el proceso de programación,
puede salir sin cambiar el valor actual presionando ZERO.
Presionando READ reiteradamente puede saltarse los parámetros hasta que aparezca "DONE". Luego el medidor se
apaga, manteniendo la programación.
EnAb
Para continuar cambiando los valores de parámetros, presione READ para la próxima opción.
Aparecerá "Unit", permitiendo cambiar la unidad
de medida para la báscula. Usando los botones o , cambie
el peso a "Kilo" o "Lb". Por defecto es "Lb". Presione ZERO
para salir sin hacer cambios.
Unit
Presione READ para la próxima opción. Aparecerá "Pd", para la opción apagado. Usando los
botones o , cambie la opción de apagado a "ON"
u "OFF". "ON" significa que el medidor se apagará después
de 15 minutos sin uso. Por defecto es "ON". Presione ZERO
para salir de este parámetro sin cambiar los valores.
Pd
Presione READ para la próxima opción. Aparecerá "Spd", permitiendo seleccionar la velocidad
de respuesta del medidor a cambios de peso.
Usando los botones o , cambie la opción a "Slo" o "Fst".
Por defecto es "Slo" para SCALE 1 y 2, y "Fst" para DIRECT.
Presione ZERO para salir sin hacer cambios.
SPd
Presione READ para la opción siguiente. Aparecerá "Int", permitiendo cambiar el intervalo entre
las mediciones de peso y el congelamiento de
la pantalla. Usando los botones o , cambie el tiempo en
segundos. "0" significa que el medidor no se congela. Otras
opciones van de 5 a 30 segundos. Intervalos más largos mejoran la precisión del peso desplegado, pero alargan el tiempo
total de pesaje. Por defecto es 15 segundos. Presione ZERO
para salir sin hacer cambios.
Int
E500R DIGITAL METER
OPERATING INSTRUCTIONS
The E500R is a microprocessor based digital meter that is
designed for use with all Osborne Accu-Arm® 500 scales
and is directly interchangeable with the 500 Mechanical
Dial, the E500 Electronic Meter and, the E500M Electronic
Meter.
ON/OFF
READ
The E500R can read, display and totalize weights in pounds
or kilograms. It has two programmable scale ratios, Scale
1, and Scale 2. Scale 1 is factory programmed to work with
the Osborne Accu-Arm® scale. Scale 2 is user programmable. The E500R also features a Direct Scale capable of
measuring direct weights to 50 pounds, (22.7 kg).
ZERO
TOTALIZE
The E500R "Freezes" on the correct weight after an adjustable "sampling" interval for each animal. The E500R provides a totalize function which adds each animal's weight to
a summary total of all animals weighed. The E500R features
an auto-zeroing function that automatically recalibrates the
scale to zero as the tare weight changes as the result of
debris accumulating on the scale platform.
The E500R has a water and dust resistant case that provides reliable service in harsh environments. An RS232
port is available for connection to auxiliary devices like the
Osborne ID Logger or a PC for automatic weight acquisition. Contact Osborne Customer Service at 800-255-0316
about instructions for the RS232 port.
INSTALLING THE BATTERIES
The E500R is powered by two D-Cell alkaline batteries, (not
included). To install new batteries, loosen the six screws
in the back of the E500R case. Carefully open the back
cover. Caution: A ribbon cable connects the front of
the case to the rear. Open the case only enough to install
the batteries. Use only fresh, alkaline batteries. Place batteries according to the diagram on the back of the circuit
board. Carefully close the back cover and tighten the six
screws. During operation, a flashing colon (:) will appear
in the display window to indicate low battery power. Very
low battery power will be indicated by "batt". Replace the
batteries immediately for continuous service. Replacing
the batteries will not clear the memory.
INSTALLING THE METER ON THE SCALE
To install the E500R on an Accu-Arm® Scale, simply attach the E500R between the upper and lower dial hanger
hooks.
Presione READ para la próxima opción. Aparecerá "Zero", permitiendo cambiar el valor
máximo que la tara puede variar y aún volver
a cero. Usando los botones o , cambie el peso de 3 a 30
para SCALE 1 y 2, o 0.3 a 2.9 para DIRECT. Use y para
mover los dígitos a la derecha o izquierda. Por defecto es 5
lb. para SCALE 1 y 2, y 0,5 lb. para DIRECT. Presione READ
para grabar los cambios y ZERO para salir. En este momento,
aparece "Done" y el medidor se apaga.
WARRANTY
Osborne Industries Inc. warrants the E500R Digital Meter to be
free from defects in material and workmanship under normal use
for a period of ONE YEAR from date of purchase. Alleged defective products shall be returned to Osborne Industries, Electronics
Bldg., 120 N. Industrial Avenue, Osborne, KS 67473, freight
prepaid, with owner identification. This warranty is limited
to repair or replacement of the product and excludes all
consequential or special damages.
VALORES POR DEFECTO
Con el medidor apagado, seleccione los valores por defecto
presionando al mismo tiempo los botones DISPLAY TOTAL,
READ, ZERO y UNIT CONVERT, mientras presiona ON/OFF.
Cuando los cambios han terminado, el medidor se apagará.
CAUTION
Do not exert more than 50 pounds, (22.7 kg), of direct
force on the meter. Weight or force in excess of 50
pounds may damage the meter permanently.
ZEro
KEY FUNCTIONS
SCALE 1
DISPLAY
TOTAL
SCALE 2
UNIT
CONVERT
DIRECT
Turns the scale on and off.
Used during programming to increment display.
Restarts display of weight measurements after the display has "frozen" on a weight.
Zeros out the scale. This button must be held for one second before zeroing occurs, (to prevent accidental zeroing).
Adds the current reading to the total and increments the total count. The total count will be displayed for two seconds and then the total weight will be displayed for two seconds. This button must be held down for one second before the totalizing process begins, (to prevent accidental totalizing).
Used during programming to decrement display.
SCALE 1: Used to select Scale 1.
Displays the current total count and total weight when pressed. This button will not add to the total
weight, only display the count and weight. If this
button is still pressed when displaying is complete,
the total count and weight will be cleared to zero.
Used in programming to move digit space to left.
SCALE 2: Used to select Scale 2.
Pressing this button will convert the weight to the al-
ternate standard of that chosen during user setup. If pounds were chosen, "Kilo" will display as the alter-
nate and will be displayed for one second before the alternate weight is displayed. If you continue to press the button, the converted weight will continue to be displayed.
Used in programming to move digit space to right.
DIRECT: Used to select the Direct Weight Scale.
SPECIFICATIONS
Maximum weight, indirect on scale......
direct on meter.......
Measuring error...................................
Power supply.......................................
Battery life...........................................
500 lbs, (227 kg.)
50 lbs. (22.7 kg.)
< 1.0%
2 D-Cell Alkaline
Slow Update: 388 Hrs.
(Note: life depends upon use and battery quality) Fast Update: 692 Hrs.
Meter housing..................................... Water/ shock resistant
Weight................................................. 2.1 lbs. (w/o batteries)
Dimensions......................................... Height 13.0 inches
Width
3.58 inches
Depth
3.15 inches
Overweight protection........................ Positive and Negative
Interfacing compatibility...................... Five pin type DIN
Resolution.......................................... Scale 1: 1 lb or 0.45 kg
Scale 2: 1 lb or 0.45 kg
Direct: .05 lb or .02 kg
Totalizing Capacity............................. Scale 1 or 2: 9999 lbs
(Note: Display rolls over after 9999)
Direct: 999.9 lbs
Scale.................................................. Scale 1: 16.67 to 1
Scale 2: User Program
Total count and weight....................... 9999 Lb or Kg, 99 Item
Lower port.......................................... RS232
800-255-0316
www.osbornelivestockequipment.com
RLX-0819_I
E500R Digital Meter Operating Instructions
WEIGHING WITH THE E500R
Push the ON/OFF button and allow the E500R two seconds
to come on and to zero. As the meter comes on, it displays
"SC1", "SC2" or "dir" and "Lbs" or "Kilo", depending upon the
last Scale used. The factory programmed scale for use with
Accu-Arm® Scales is "SC1". To change the scale, see Changing the Scale.
If the E500R does not zero, press the ZERO button for
two seconds. After the meter has zeroed, place the animal
on the scale. The meter will freeze on the correct weight.
If necessary, push READ to reweigh an animal after the
initial display reading freezes. The meter will automatically rezero before the next animal is weighed. Push the
ON/OFF button to turn the meter off.
USING THE TOTALIZING FUNCTION
The totalizing function adds the weight of each animal to a
total. To use TOTALIZE, the last total must first be cleared
from memory before starting to weigh animals. Press and
hold the DISPLAY TOTAL button until four zeros appear
(approx. eight sec.). As each animal is weighed, and
before removing the animal, press the TOTALIZE button
until the total number of animals weighed is displayed (approx. one sec.). This action adds the animal's weight and
count into the total weight and count. The totalized weight
is displayed momentarily. Remove the animal and place the
next animal on the scale. Repeat this process until weighing
is complete.
DISPLAYING THE TOTAL WEIGHT AND COUNT
Press the DISPLAY TOTAL button momentarily. The E500R
displays the total count for three seconds and then displays
the total weight. These totals remain in memory when the
meter is turned off. Clear the total by pressing DISPLAY
TOTAL until four zeros appear, (appx. eight sec.). To turn
the meter off, press ON/OFF.
CHANGING THE SCALE
With the Meter turned OFF, press the button labeled
SCALE 1, SCALE 2, or DIRECT to choose a scale. Keep
the button pressed while pressing the ON/OFF button.
Only Scales that have been enabled can be accessed. To
enable a Scale, see Programming the E500R: Enab. The
Meter now comes on with the newly selected scale. The
E500R is now ready to weigh according to the programming of the scale chosen.
CALIBRATING THE METER
1. Turn meter off. 2. If calibrating the meter’s Scale 1 or
Scale 2 settings, hook the meter onto the scale. 3. Press
the DISPLAY TOTAL, ZERO, and ON/OFF buttons all at
the same time and release. 4. The meter will show the
current scale setting, SC_1, SC_2, or DIR. Choose a
different scale setting, if desired, by pressing SCALE 1,
SCALE 2, or DIRECT button. Press the READ button to
continue. 5. “0000” or “000.0” is displayed. If calibrating
to SCALE 1 or SCALE 2 make sure the meter is properly
connected to the scale hanger and platform. Press READ
to continue. 6. The value of the calibration weight is now
shown. Use the arrow keys to enter the known weight of
the calibration weight you will be using. 7. Place the weight
on the scale platform and close the gates on the platform.
8. Press READ to complete the calibration. 9. When it is
finished, the display will flash “done” and then turn off.
NOTE: The calibration weight must be at least 50 lbs for
SCALE 1 or SCALE 2, or more than 5 lbs for DIRECT, or
the calibration will be rejected.
INSTRUCCIONES DE OPERACIÓN
PARA EL MEDIDOR
ELECTRÓNICO E500R
PROGRAMMING THE E500R
With the Meter turned OFF, press the DISPLAY TOTAL
and UNIT CONVERT buttons at the same time. While
holding down these two buttons, press the ON/OFF button. The scale currently in use is displayed. A different
scale is chosen by using the buttons SCALE 1, SCALE
2, or DIRECT.
Push the READ button to begin setting up the
scale. If SCALE 2 is selected, the display
will read "Enab". Using the or buttons,
enable or disable this scale by displaying "ON" or "OFF".
The default setting for SC2 is "Enab-OFF". At any time in
the programming process, pressing ZERO permits exiting without changing the current value. Pressing READ
repeatedly skips through the parameters until "DONE" is
displayed. The Meter then turns itself off, retaining the
programming.
EnAb
To continue changing the parameter values,
press READ for the next option. "Unit" is
displayed, allowing the unit of measure for
the scale to be changed. Using the or buttons, change
the weight to "Kilo" or "Lb". Default is "Lb". Press ZERO
to exit without changing.
Unit
Press READ for the next option. "Pd" is displayed, for the power-down option. Using the
or buttons, change the power-down option
to "ON" or "OFF". "ON" means the meter will power-down
after 15 minutes of non-use. Default is "ON". Press ZERO
to exit this parameter without changing the values.
Pd
Press READ for the next option. "Spd" is displayed, allowing the speed of meter response
to changes in weight to be chosen. Using the
or buttons, change the option to "Slo" or "FSt". Default is "Slo" for Scales 1 and 2, and "FSt" for the Direct
Scale. Press ZERO to exit without changing.
SPd
Press READ for the next option. "Int" is
displayed, allowing changes to the interval
during which weights are measured before
the display freezes. Using the or buttons, change the
time in seconds. "0" means the meter does not freeze.
Other choices range from 5 to 30 seconds. Longer interval
values improve the precision of the displayed weight, but
lengthen the total weighing time. Default is 15 sec. Press
ZERO to exit without changing.
Int
Press READ for the next option. "Zero" is
displayed, allowing changes to the maximum
value that the tare weight can drift and still
zero. Using the or buttons, change the weight from 3
to 30 for Scales1 and 2, or 0.3 to 2.9 for the Direct Scale.
Use the and to move the digits to the right and left.
Default is 5 Lb for Scales 1 and 2 and 0.5 Lb for the Direct
Scale. Press READ to save changes and ZERO to exit.
At this point, "Done" is displayed and the meter shuts
itself off.
ZEro
DEFAULT SETTINGS
With the Meter turned OFF, default settings are chosen
by pressing the DISPLAY TOTAL, READ, ZERO, and UNIT
CONVERT buttons together while pressing ON/OFF. When
the changes are completed, the Meter shuts off.
El E500R es un medidor digital en base a un microprocesador
diseñado para el uso con todas las básculas Accu-Arm® de
Osborne de 500 libras, y es perfectamente intercambiable
con el Medidor Mecánico de 500 libras, el Medidor Electrónico
E500 y el Medidor Electrónico E500M.
El E500R puede leer, desplegar y totalizar los pesos en libras
o kilogramos. Tiene dos programas de pesaje, Scale 1 y Scale
2. Scale 1 está programado de fábrica para funcionar con las
básculas Accu-Arm de Osborne. Scale 2 es programable.
El E500R también posee un Direct Scale, capaz de medir
pesos directos de hasta 50 libras (22,7 Kg).
El E500R se “congela” en el peso correcto después de un
intervalo de muestreo ajustable para cada animal. Posee una
función totalizadora que suma el peso de cada animal al total
de todos los animales pesados. El E500R tiene una función
de “auto-cero”, que recalibra automáticamente la báscula en
cero cuando cambia la tara producto de elementos que se
acumulan en la plataforma de la báscula.
El E500R tiene una caja resistente al agua y el polvo,
entregando servicio confiable en entornos adversos. Dispone
de un puerto RS232 para conectar equipos adicionales
como el ID Logger de Osborne o un PC para la transferencia
automática de los datos de peso. Comuníquese con Servicio
a Clientes de Osborne al 1-785-346-2192 para solicitar las
instrucciones del puerto RS232.
INSTALACIÓN DE LAS BATERÍAS
El E500R opera con dos baterías alcalinas D (no incluidas).
Para instalar las baterías nuevas, suelte los cinco tornillos en la
parte posterior de la caja del E500R. Abra cuidadosamente la
cubierta posterior. Precaución: una cinta de cables conecta
la parte delantera de la caja con la parte posterior. Abra la
caja sólo lo suficiente para instalar las baterías. Use sólo pilas
alcalinas nuevas. Coloque las baterías de acuerdo al diagrama
detrás de la placa de circuitos. Cierre cuidadosamente la tapa
posterior y apriete los tornillos. Durante el uso, dos puntos
intermitentes (:) en la pantalla indicarán cuando la batería
está baja. Con batería muy baja indicará “batt”. Reemplace
las baterías inmediatamente para un servicio continuo. El
reemplazo de las baterías no borrará la memoria.
INSTALACIÓN DEL MEDIDOR EN LA BÁSCULA
Para instalar el E500R en una báscula Accu-Arm, simplemente
fíjelo entre los ganchos superior e inferior.
GARANTÍA
Osborne Industries, Inc. garantiza que el Medidor Digital
E500R está libre de defectos en materiales y mano de obra
bajo el uso normal durante UN AÑO desde la fecha de
compra. Los productos defectuosos deben ser retornados
a Osborne Industries, Electronics Bldg., 120 N. Industrial
Avenue, Osborne, KS 67473, USA, flete prepagado, con
la identificación del propietario. Esta garantía se limita a
la reparación o reemplazo del producto y excluye todo
daño consecuencial o especial.
PRECAUCIÓN
No exceda las 50 libras (22,7 Kg) de peso directo en
el medidor. El peso o fuerza en exceso de 50 libras
puede dañar el medidor en forma permanente.
800-255-0316
www.osbornelivestockequipment.com
FUNCIONES DE BOTONES
ON/OFF
READ
ZERO
TOTALIZE
SCALE 1
DISPLAY
TOTAL
SCALE 2
UNIT
CONVERT
DIRECT
Enciende y apaga la báscula.
Se usa durante la programación para subir.
Reinicia el despliegue de medidas de peso después que la pantalla se ha “congelado” en un peso.
Vuelve a cero. Se debe apretar por un segundo
para que vuelva a cero (para prevenir el borrado accidental).
Suma la lectura actual al total e incrementa el contador.
El contador se mostrará por dos segundos y luego se
muestra el peso total por dos segundos. Este botón se debe presionar por un segundo para que empiece el proceso de totalización (para prevenir la totalización accidental).
Se usa durante la programación para bajar.
SCALE 1: Se usa para seleccionar Scale 1.
Muestra el conteo y el peso total actual cuando se
presiona. Este botón no suma al peso total, sólo
muestra el conteo y el peso. Si se mantiene presionado después de mostrar los números, el conteo total y el peso volverán a cero.
Se usa durante la programación para mover un
dígito a la izquierda.
SCALE 2: Se usa para seleccionar Scale 2.
Presione este botón para convertir el peso a la opción
alternativa a la programada. Si escogió libras, mostrará "kilo" como la alternativa y se mostrará por un segundo antes de mostrar el peso alternativo. Si sigue presionando el botón, el peso convertido se seguirá mostrando.
Se usa durante la programación para mover un
dígito a la derecha.
DIRECT: Se usa para seleccionar el Pesaje Directo.
ESPECIFICACIONES
Peso máximo, indirecto en la báscula....500 lbs, (227 kg.)
directo en el medidor....... 50 lbs. (22,7 kg.)
Error de medición............................... < 1,0%
Suministro de energía........................ 2 baterías alcalinas D
Duración de baterías.......................... Actualización lenta: 388 Hrs.
(Nota: depende del uso y de la calidad de las baterías)
Actualización rápida: 692 hrs.
Caja del medidor................................ Resistente al agua y
choques eléctricos
Peso................................................... 2,1 lb (950 gr)
Dimensiones...................................... Alto 13-in (33 cm)
Ancho 3,58-in (9,1 cm)
Largo 3,15-in (8 cm)
Protección de sobrecarga.................
Positiva y negativa
Compatibilidad de interfase..............
Tipo DIN de 5 agujas
Resolución......................................... Scale 1: 1 lb (0,45 kg)
Scale 2: 1 lb (0,45 kg)
Directa: 0,05 lb (0,02 kg)
Capacidad de totalización.................
Scale 1 ó 2: 9999 lb. o kg
(Nota: la pantalla vuelve a cero después de 9999)
Directa: 999,9 lb o kg
Escala................................................. Scale 1: 16,67 a 1
Scale 2: programable
Conteo y peso total............................ 9999 lb o kg, 99 ítem
Puerto inferior..................................... RS232
INSTRUCCIONES DE OPERACIÓN
PARA EL MEDIDOR ELECTRÓNICO E500R
PARA PESAR CON EL E500R
Presione el botón ON/OFF y espere dos segundos para que el
E500R se encienda y vuelva a cero. Al encenderse, el medidor
muestra “SC1”, “SC2” o “dir” y “Lbs” o “Kilo”, dependiendo de
la última báscula usada. La báscula programada de fábrica
para usar con Básculas Accu-Arm es “SC1”. Para cambiar la
báscula, vea CAMBIANDO LA BÁSCULA.
Si el E500R no vuelve a cero, presione el botón ZERO por dos
segundos. Después que el medidor ha vuelto a cero, ponga
el animal en la báscula. El medidor se congelará en el peso
correcto. Si es necesario, presione READ para repesar el animal
después que la lectura inicial se congela. El medidor volverá
a cero automáticamente antes de pesar al próximo animal.
Presione el botón ON/OFF para apagar el medidor.
USANDO LA FUNCIÓN TOTALIZADORA
La función totalizadora suma el peso de cada animal a un total.
Para usar TOTALIZE, se debe borrar el último total almacenado
en la memoria antes de comenzar a pesar a los animales.
Presione y mantenga presionado el botón DISPLAY TOTAL
hasta que aparezcan cuatro ceros (aproximadamente ocho
segundos). Al pesar a cada animal, y antes de sacarlo de la
báscula, presione el botón TOTALIZE hasta que muestre el
total de animales pesados (aproximadamente un segundo).
Esta acción suma el peso de los animales y los cuenta.
Momentáneamente verá el peso total de los animales. Saque el
animal e ingrese el próximo en la báscula. Repita este proceso
hasta completar el pesaje.
MOSTRANDO EL PESO TOTAL Y
LA CANTIDAD DE ANIMALES
Presione por un momento el botón DISPLAY TOTAL. El E500R
muestra la cantidad total por tres segundos y luego muestra
el peso total. Estos totales quedan en la memoria cuando el
medidor es apagado. Borre el total presionando DISPLAY
TOTAL hasta que aparezcan cuatro ceros (aproximadamente
ocho segundos). Para apagar el medidor, presione ON/OFF.
CAMBIANDO LA BÁSCULA
Con el medidor apagado, presione el botón SCALE 1, SCALE
2 o DIRECT, para cambiar la báscula. Mantenga el botón
presionado mientras presiona el botón ON/OFF. Sólo se puede
acceder a básculas que han sido habilitadas. Para habilitar
una báscula, vea Programando el E500R: Enab. El medidor
ahora se encenderá con la báscula seleccionada. El E500R
está ahora listo para pesar de acuerdo a la programación de
la báscula seleccionada.
CALIBRANDO EL MEDIDOR
1. Apague el medidor. 2. Si va a calibrar el medidor para “Scale
1” o “Scale 2”, enganche el medidor en la báscula.
3. Presiones los botones DISPLAY TOTAL, ZERO y ON-OFF
al mismo tiempo y luego suéltelos. 4. El medidor mostrará la
programación actual: “SC_1”, “SC_2” o “DIR”. Seleccione una
programación diferente, si lo desea, presionando los botones
SCALE 1, SCALE 2 o DIRECT. 5. El medidor mostrará “0000”
ó “000.0”. Si va a calibrar para las programaciones SCALE 1
o SCALE 2, asegúrese de que el medidor está correctamente
conectado al gancho y la plataforma. Presiones READ para
continuar. 6. El medidor mostrará ahora el valor del peso de
calibración. Usando los botones de flechas, ingrese el peso de
las pesas que usará en la calibración. 7. Coloque las pesas en
la plataforma de la báscula y cierre las puertas. 8. Presione
READ para completar la calibración. 9. Al finalizar, el medidor
mostrará “DONE” y luego se apagará.
OBSERVACIÓN: El peso de calibración debe ser de por lo
menos 23 kg para SCALE 1 o SCALE 2, o más de 3 kg para
DIRECTO. De otra forma la calibración será rechazada.
PROGRAMANDO EL E500R
Con el medidor apagado, presione al mismo tiempo los botones
DISPLAY TOTAL y UNIT CONVERT. Mientras mantiene
presionados estos dos botones, presione el botón ON/OFF. Se
mostrará la báscula actualmente en uso. Se puede seleccionar
una báscula diferente usando los botones SCALE 1, SCALE
2 o DIRECT.
Presione el botón READ para comenzar a programar la báscula. Si selecciona SCALE 2, la pantalla
mostrará "Enab". Usando los botones
o , habilite o deshabilite esta báscula desplegando "ON" u
"OFF". La programación de defecto de SC2 es "Enab-OFF".
En cualquier momento durante el proceso de programación,
puede salir sin cambiar el valor actual presionando ZERO.
Presionando READ reiteradamente puede saltarse los parámetros hasta que aparezca "DONE". Luego el medidor se
apaga, manteniendo la programación.
EnAb
Para continuar cambiando los valores de parámetros, presione READ para la próxima opción.
Aparecerá "Unit", permitiendo cambiar la unidad
de medida para la báscula. Usando los botones o , cambie
el peso a "Kilo" o "Lb". Por defecto es "Lb". Presione ZERO
para salir sin hacer cambios.
Unit
Presione READ para la próxima opción. Aparecerá "Pd", para la opción apagado. Usando los
botones o , cambie la opción de apagado a "ON"
u "OFF". "ON" significa que el medidor se apagará después
de 15 minutos sin uso. Por defecto es "ON". Presione ZERO
para salir de este parámetro sin cambiar los valores.
Pd
Presione READ para la próxima opción. Aparecerá "Spd", permitiendo seleccionar la velocidad
de respuesta del medidor a cambios de peso.
Usando los botones o , cambie la opción a "Slo" o "Fst".
Por defecto es "Slo" para SCALE 1 y 2, y "Fst" para DIRECT.
Presione ZERO para salir sin hacer cambios.
SPd
Presione READ para la opción siguiente. Aparecerá "Int", permitiendo cambiar el intervalo entre
las mediciones de peso y el congelamiento de
la pantalla. Usando los botones o , cambie el tiempo en
segundos. "0" significa que el medidor no se congela. Otras
opciones van de 5 a 30 segundos. Intervalos más largos mejoran la precisión del peso desplegado, pero alargan el tiempo
total de pesaje. Por defecto es 15 segundos. Presione ZERO
para salir sin hacer cambios.
Int
E500R DIGITAL METER
OPERATING INSTRUCTIONS
The E500R is a microprocessor based digital meter that is
designed for use with all Osborne Accu-Arm® 500 scales
and is directly interchangeable with the 500 Mechanical
Dial, the E500 Electronic Meter and, the E500M Electronic
Meter.
ON/OFF
READ
The E500R can read, display and totalize weights in pounds
or kilograms. It has two programmable scale ratios, Scale
1, and Scale 2. Scale 1 is factory programmed to work with
the Osborne Accu-Arm® scale. Scale 2 is user programmable. The E500R also features a Direct Scale capable of
measuring direct weights to 50 pounds, (22.7 kg).
ZERO
TOTALIZE
The E500R "Freezes" on the correct weight after an adjustable "sampling" interval for each animal. The E500R provides a totalize function which adds each animal's weight to
a summary total of all animals weighed. The E500R features
an auto-zeroing function that automatically recalibrates the
scale to zero as the tare weight changes as the result of
debris accumulating on the scale platform.
The E500R has a water and dust resistant case that provides reliable service in harsh environments. An RS232
port is available for connection to auxiliary devices like the
Osborne ID Logger or a PC for automatic weight acquisition. Contact Osborne Customer Service at 800-255-0316
about instructions for the RS232 port.
INSTALLING THE BATTERIES
The E500R is powered by two D-Cell alkaline batteries, (not
included). To install new batteries, loosen the six screws
in the back of the E500R case. Carefully open the back
cover. Caution: A ribbon cable connects the front of
the case to the rear. Open the case only enough to install
the batteries. Use only fresh, alkaline batteries. Place batteries according to the diagram on the back of the circuit
board. Carefully close the back cover and tighten the six
screws. During operation, a flashing colon (:) will appear
in the display window to indicate low battery power. Very
low battery power will be indicated by "batt". Replace the
batteries immediately for continuous service. Replacing
the batteries will not clear the memory.
INSTALLING THE METER ON THE SCALE
To install the E500R on an Accu-Arm® Scale, simply attach the E500R between the upper and lower dial hanger
hooks.
Presione READ para la próxima opción. Aparecerá "Zero", permitiendo cambiar el valor
máximo que la tara puede variar y aún volver
a cero. Usando los botones o , cambie el peso de 3 a 30
para SCALE 1 y 2, o 0.3 a 2.9 para DIRECT. Use y para
mover los dígitos a la derecha o izquierda. Por defecto es 5
lb. para SCALE 1 y 2, y 0,5 lb. para DIRECT. Presione READ
para grabar los cambios y ZERO para salir. En este momento,
aparece "Done" y el medidor se apaga.
WARRANTY
Osborne Industries Inc. warrants the E500R Digital Meter to be
free from defects in material and workmanship under normal use
for a period of ONE YEAR from date of purchase. Alleged defective products shall be returned to Osborne Industries, Electronics
Bldg., 120 N. Industrial Avenue, Osborne, KS 67473, freight
prepaid, with owner identification. This warranty is limited
to repair or replacement of the product and excludes all
consequential or special damages.
VALORES POR DEFECTO
Con el medidor apagado, seleccione los valores por defecto
presionando al mismo tiempo los botones DISPLAY TOTAL,
READ, ZERO y UNIT CONVERT, mientras presiona ON/OFF.
Cuando los cambios han terminado, el medidor se apagará.
CAUTION
Do not exert more than 50 pounds, (22.7 kg), of direct
force on the meter. Weight or force in excess of 50
pounds may damage the meter permanently.
ZEro
KEY FUNCTIONS
SCALE 1
DISPLAY
TOTAL
SCALE 2
UNIT
CONVERT
DIRECT
Turns the scale on and off.
Used during programming to increment display.
Restarts display of weight measurements after the display has "frozen" on a weight.
Zeros out the scale. This button must be held for one second before zeroing occurs, (to prevent accidental zeroing).
Adds the current reading to the total and increments the total count. The total count will be displayed for two seconds and then the total weight will be displayed for two seconds. This button must be held down for one second before the totalizing process begins, (to prevent accidental totalizing).
Used during programming to decrement display.
SCALE 1: Used to select Scale 1.
Displays the current total count and total weight when pressed. This button will not add to the total
weight, only display the count and weight. If this
button is still pressed when displaying is complete,
the total count and weight will be cleared to zero.
Used in programming to move digit space to left.
SCALE 2: Used to select Scale 2.
Pressing this button will convert the weight to the al-
ternate standard of that chosen during user setup. If pounds were chosen, "Kilo" will display as the alter-
nate and will be displayed for one second before the alternate weight is displayed. If you continue to press the button, the converted weight will continue to be displayed.
Used in programming to move digit space to right.
DIRECT: Used to select the Direct Weight Scale.
SPECIFICATIONS
Maximum weight, indirect on scale......
direct on meter.......
Measuring error...................................
Power supply.......................................
Battery life...........................................
500 lbs, (227 kg.)
50 lbs. (22.7 kg.)
< 1.0%
2 D-Cell Alkaline
Slow Update: 388 Hrs.
(Note: life depends upon use and battery quality) Fast Update: 692 Hrs.
Meter housing..................................... Water/ shock resistant
Weight................................................. 2.1 lbs. (w/o batteries)
Dimensions......................................... Height 13.0 inches
Width
3.58 inches
Depth
3.15 inches
Overweight protection........................ Positive and Negative
Interfacing compatibility...................... Five pin type DIN
Resolution.......................................... Scale 1: 1 lb or 0.45 kg
Scale 2: 1 lb or 0.45 kg
Direct: .05 lb or .02 kg
Totalizing Capacity............................. Scale 1 or 2: 9999 lbs
(Note: Display rolls over after 9999)
Direct: 999.9 lbs
Scale.................................................. Scale 1: 16.67 to 1
Scale 2: User Program
Total count and weight....................... 9999 Lb or Kg, 99 Item
Lower port.......................................... RS232
800-255-0316
www.osbornelivestockequipment.com
RLX-0819_I
E500R Digital Meter Operating Instructions
WEIGHING WITH THE E500R
Push the ON/OFF button and allow the E500R two seconds
to come on and to zero. As the meter comes on, it displays
"SC1", "SC2" or "dir" and "Lbs" or "Kilo", depending upon the
last Scale used. The factory programmed scale for use with
Accu-Arm® Scales is "SC1". To change the scale, see Changing the Scale.
If the E500R does not zero, press the ZERO button for
two seconds. After the meter has zeroed, place the animal
on the scale. The meter will freeze on the correct weight.
If necessary, push READ to reweigh an animal after the
initial display reading freezes. The meter will automatically rezero before the next animal is weighed. Push the
ON/OFF button to turn the meter off.
USING THE TOTALIZING FUNCTION
The totalizing function adds the weight of each animal to a
total. To use TOTALIZE, the last total must first be cleared
from memory before starting to weigh animals. Press and
hold the DISPLAY TOTAL button until four zeros appear
(approx. eight sec.). As each animal is weighed, and
before removing the animal, press the TOTALIZE button
until the total number of animals weighed is displayed (approx. one sec.). This action adds the animal's weight and
count into the total weight and count. The totalized weight
is displayed momentarily. Remove the animal and place the
next animal on the scale. Repeat this process until weighing
is complete.
DISPLAYING THE TOTAL WEIGHT AND COUNT
Press the DISPLAY TOTAL button momentarily. The E500R
displays the total count for three seconds and then displays
the total weight. These totals remain in memory when the
meter is turned off. Clear the total by pressing DISPLAY
TOTAL until four zeros appear, (appx. eight sec.). To turn
the meter off, press ON/OFF.
CHANGING THE SCALE
With the Meter turned OFF, press the button labeled
SCALE 1, SCALE 2, or DIRECT to choose a scale. Keep
the button pressed while pressing the ON/OFF button.
Only Scales that have been enabled can be accessed. To
enable a Scale, see Programming the E500R: Enab. The
Meter now comes on with the newly selected scale. The
E500R is now ready to weigh according to the programming of the scale chosen.
CALIBRATING THE METER
1. Turn meter off. 2. If calibrating the meter’s Scale 1 or
Scale 2 settings, hook the meter onto the scale. 3. Press
the DISPLAY TOTAL, ZERO, and ON/OFF buttons all at
the same time and release. 4. The meter will show the
current scale setting, SC_1, SC_2, or DIR. Choose a
different scale setting, if desired, by pressing SCALE 1,
SCALE 2, or DIRECT button. Press the READ button to
continue. 5. “0000” or “000.0” is displayed. If calibrating
to SCALE 1 or SCALE 2 make sure the meter is properly
connected to the scale hanger and platform. Press READ
to continue. 6. The value of the calibration weight is now
shown. Use the arrow keys to enter the known weight of
the calibration weight you will be using. 7. Place the weight
on the scale platform and close the gates on the platform.
8. Press READ to complete the calibration. 9. When it is
finished, the display will flash “done” and then turn off.
NOTE: The calibration weight must be at least 50 lbs for
SCALE 1 or SCALE 2, or more than 5 lbs for DIRECT, or
the calibration will be rejected.
INSTRUCCIONES DE OPERACIÓN
PARA EL MEDIDOR
ELECTRÓNICO E500R
PROGRAMMING THE E500R
With the Meter turned OFF, press the DISPLAY TOTAL
and UNIT CONVERT buttons at the same time. While
holding down these two buttons, press the ON/OFF button. The scale currently in use is displayed. A different
scale is chosen by using the buttons SCALE 1, SCALE
2, or DIRECT.
Push the READ button to begin setting up the
scale. If SCALE 2 is selected, the display
will read "Enab". Using the or buttons,
enable or disable this scale by displaying "ON" or "OFF".
The default setting for SC2 is "Enab-OFF". At any time in
the programming process, pressing ZERO permits exiting without changing the current value. Pressing READ
repeatedly skips through the parameters until "DONE" is
displayed. The Meter then turns itself off, retaining the
programming.
EnAb
To continue changing the parameter values,
press READ for the next option. "Unit" is
displayed, allowing the unit of measure for
the scale to be changed. Using the or buttons, change
the weight to "Kilo" or "Lb". Default is "Lb". Press ZERO
to exit without changing.
Unit
Press READ for the next option. "Pd" is displayed, for the power-down option. Using the
or buttons, change the power-down option
to "ON" or "OFF". "ON" means the meter will power-down
after 15 minutes of non-use. Default is "ON". Press ZERO
to exit this parameter without changing the values.
Pd
Press READ for the next option. "Spd" is displayed, allowing the speed of meter response
to changes in weight to be chosen. Using the
or buttons, change the option to "Slo" or "FSt". Default is "Slo" for Scales 1 and 2, and "FSt" for the Direct
Scale. Press ZERO to exit without changing.
SPd
Press READ for the next option. "Int" is
displayed, allowing changes to the interval
during which weights are measured before
the display freezes. Using the or buttons, change the
time in seconds. "0" means the meter does not freeze.
Other choices range from 5 to 30 seconds. Longer interval
values improve the precision of the displayed weight, but
lengthen the total weighing time. Default is 15 sec. Press
ZERO to exit without changing.
Int
Press READ for the next option. "Zero" is
displayed, allowing changes to the maximum
value that the tare weight can drift and still
zero. Using the or buttons, change the weight from 3
to 30 for Scales1 and 2, or 0.3 to 2.9 for the Direct Scale.
Use the and to move the digits to the right and left.
Default is 5 Lb for Scales 1 and 2 and 0.5 Lb for the Direct
Scale. Press READ to save changes and ZERO to exit.
At this point, "Done" is displayed and the meter shuts
itself off.
ZEro
DEFAULT SETTINGS
With the Meter turned OFF, default settings are chosen
by pressing the DISPLAY TOTAL, READ, ZERO, and UNIT
CONVERT buttons together while pressing ON/OFF. When
the changes are completed, the Meter shuts off.
El E500R es un medidor digital en base a un microprocesador
diseñado para el uso con todas las básculas Accu-Arm® de
Osborne de 500 libras, y es perfectamente intercambiable
con el Medidor Mecánico de 500 libras, el Medidor Electrónico
E500 y el Medidor Electrónico E500M.
El E500R puede leer, desplegar y totalizar los pesos en libras
o kilogramos. Tiene dos programas de pesaje, Scale 1 y Scale
2. Scale 1 está programado de fábrica para funcionar con las
básculas Accu-Arm de Osborne. Scale 2 es programable.
El E500R también posee un Direct Scale, capaz de medir
pesos directos de hasta 50 libras (22,7 Kg).
El E500R se “congela” en el peso correcto después de un
intervalo de muestreo ajustable para cada animal. Posee una
función totalizadora que suma el peso de cada animal al total
de todos los animales pesados. El E500R tiene una función
de “auto-cero”, que recalibra automáticamente la báscula en
cero cuando cambia la tara producto de elementos que se
acumulan en la plataforma de la báscula.
El E500R tiene una caja resistente al agua y el polvo,
entregando servicio confiable en entornos adversos. Dispone
de un puerto RS232 para conectar equipos adicionales
como el ID Logger de Osborne o un PC para la transferencia
automática de los datos de peso. Comuníquese con Servicio
a Clientes de Osborne al 1-785-346-2192 para solicitar las
instrucciones del puerto RS232.
INSTALACIÓN DE LAS BATERÍAS
El E500R opera con dos baterías alcalinas D (no incluidas).
Para instalar las baterías nuevas, suelte los cinco tornillos en la
parte posterior de la caja del E500R. Abra cuidadosamente la
cubierta posterior. Precaución: una cinta de cables conecta
la parte delantera de la caja con la parte posterior. Abra la
caja sólo lo suficiente para instalar las baterías. Use sólo pilas
alcalinas nuevas. Coloque las baterías de acuerdo al diagrama
detrás de la placa de circuitos. Cierre cuidadosamente la tapa
posterior y apriete los tornillos. Durante el uso, dos puntos
intermitentes (:) en la pantalla indicarán cuando la batería
está baja. Con batería muy baja indicará “batt”. Reemplace
las baterías inmediatamente para un servicio continuo. El
reemplazo de las baterías no borrará la memoria.
INSTALACIÓN DEL MEDIDOR EN LA BÁSCULA
Para instalar el E500R en una báscula Accu-Arm, simplemente
fíjelo entre los ganchos superior e inferior.
GARANTÍA
Osborne Industries, Inc. garantiza que el Medidor Digital
E500R está libre de defectos en materiales y mano de obra
bajo el uso normal durante UN AÑO desde la fecha de
compra. Los productos defectuosos deben ser retornados
a Osborne Industries, Electronics Bldg., 120 N. Industrial
Avenue, Osborne, KS 67473, USA, flete prepagado, con
la identificación del propietario. Esta garantía se limita a
la reparación o reemplazo del producto y excluye todo
daño consecuencial o especial.
PRECAUCIÓN
No exceda las 50 libras (22,7 Kg) de peso directo en
el medidor. El peso o fuerza en exceso de 50 libras
puede dañar el medidor en forma permanente.
800-255-0316
www.osbornelivestockequipment.com
FUNCIONES DE BOTONES
ON/OFF
READ
ZERO
TOTALIZE
SCALE 1
DISPLAY
TOTAL
SCALE 2
UNIT
CONVERT
DIRECT
Enciende y apaga la báscula.
Se usa durante la programación para subir.
Reinicia el despliegue de medidas de peso después que la pantalla se ha “congelado” en un peso.
Vuelve a cero. Se debe apretar por un segundo
para que vuelva a cero (para prevenir el borrado accidental).
Suma la lectura actual al total e incrementa el contador.
El contador se mostrará por dos segundos y luego se
muestra el peso total por dos segundos. Este botón se debe presionar por un segundo para que empiece el proceso de totalización (para prevenir la totalización accidental).
Se usa durante la programación para bajar.
SCALE 1: Se usa para seleccionar Scale 1.
Muestra el conteo y el peso total actual cuando se
presiona. Este botón no suma al peso total, sólo
muestra el conteo y el peso. Si se mantiene presionado después de mostrar los números, el conteo total y el peso volverán a cero.
Se usa durante la programación para mover un
dígito a la izquierda.
SCALE 2: Se usa para seleccionar Scale 2.
Presione este botón para convertir el peso a la opción
alternativa a la programada. Si escogió libras, mostrará "kilo" como la alternativa y se mostrará por un segundo antes de mostrar el peso alternativo. Si sigue presionando el botón, el peso convertido se seguirá mostrando.
Se usa durante la programación para mover un
dígito a la derecha.
DIRECT: Se usa para seleccionar el Pesaje Directo.
ESPECIFICACIONES
Peso máximo, indirecto en la báscula....500 lbs, (227 kg.)
directo en el medidor....... 50 lbs. (22,7 kg.)
Error de medición............................... < 1,0%
Suministro de energía........................ 2 baterías alcalinas D
Duración de baterías.......................... Actualización lenta: 388 Hrs.
(Nota: depende del uso y de la calidad de las baterías)
Actualización rápida: 692 hrs.
Caja del medidor................................ Resistente al agua y
choques eléctricos
Peso................................................... 2,1 lb (950 gr)
Dimensiones...................................... Alto 13-in (33 cm)
Ancho 3,58-in (9,1 cm)
Largo 3,15-in (8 cm)
Protección de sobrecarga.................
Positiva y negativa
Compatibilidad de interfase..............
Tipo DIN de 5 agujas
Resolución......................................... Scale 1: 1 lb (0,45 kg)
Scale 2: 1 lb (0,45 kg)
Directa: 0,05 lb (0,02 kg)
Capacidad de totalización.................
Scale 1 ó 2: 9999 lb. o kg
(Nota: la pantalla vuelve a cero después de 9999)
Directa: 999,9 lb o kg
Escala................................................. Scale 1: 16,67 a 1
Scale 2: programable
Conteo y peso total............................ 9999 lb o kg, 99 ítem
Puerto inferior..................................... RS232