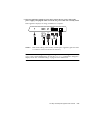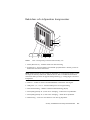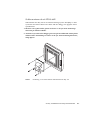
1
Sun Ray™ 150 Enterprise Appliance User’s Guide Guide de l’utilisateur Benutzerhandbuch Manuale dell’utente Guía del usuario Användarhandbok Sun Microsystems, Inc. 901 San Antonio Road Palo Alto, CA 94303 U.S.A. 650-960-1300 Part No. 806-5238-10 June 2000, Revision A Send comments about this document to: [email protected] Copyright 2000 Sun Microsystems, Inc., 901 San Antonio Road • Palo Alto, CA 94303-4900 USA. All rights reserved. This product or document is protected by copyright and distributed under licenses restricting its use, copying, distribution, and decompilation. No part of this product or document may be reproduced in any form by any means without prior written authorization of Sun and its licensors, if any. Third-party software, including font technology, is copyrighted and licensed from Sun suppliers. Parts of the product may be derived from Berkeley BSD systems, licensed from the University of California. UNIX is a registered trademark in the U.S. and other countries, exclusively licensed through X/Open Company, Ltd. For Netscape Communicator™, the following notice applies: Copyright 1995 Netscape Communications Corporation. All rights reserved. Sun, Sun Microsystems, the Sun logo, AnswerBook2, docs.sun.com, Solaris, and Sun Ray are trademarks, registered trademarks, or service marks of Sun Microsystems, Inc. in the U.S. and other countries. All SPARC trademarks are used under license and are trademarks or registered trademarks of SPARC International, Inc. in the U.S. and other countries. Products bearing SPARC trademarks are based upon an architecture developed by Sun Microsystems, Inc. The OPEN LOOK and Sun™ Graphical User Interface was developed by Sun Microsystems, Inc. for its users and licensees. Sun acknowledges the pioneering efforts of Xerox in researching and developing the concept of visual or graphical user interfaces for the computer industry. Sun holds a non-exclusive license from Xerox to the Xerox Graphical User Interface, which license also covers Sun’s licensees who implement OPEN LOOK GUIs and otherwise comply with Sun’s written license agreements. As an Energy Star Partner, Sun Microsystems, Inc. has determined that this product meets the Energy Star guidelines for energy efficiency. RESTRICTED RIGHTS: Use, duplication, or disclosure by the U.S. Government is subject to restrictions of FAR 52.227-14(g)(2)(6/87) and FAR 52.227-19(6/87), or DFAR 252.227-7015(b)(6/95) and DFAR 227.7202-3(a). DOCUMENTATION IS PROVIDED “AS IS” AND ALL EXPRESS OR IMPLIED CONDITIONS, REPRESENTATIONS AND WARRANTIES, INCLUDING ANY IMPLIED WARRANTY OF MERCHANTABILITY, FITNESS FOR A PARTICULAR PURPOSE OR NONINFRINGEMENT, ARE DISCLAIMED, EXCEPT TO THE EXTENT THAT SUCH DISCLAIMERS ARE HELD TO BE LEGALLY INVALID. Please Recycle Contents Safety and Compliance Statements v Sun Ray 150 Enterprise Appliance User’s Guide en-1 Guide de l'utilisateur du Sun Ray 150 Enterprise Appliance Sun Ray 150 Enterprise-Gerät – Benutzerhandbuch fr-1 de-1 Guida dell'utente di Sun Ray 150 Enterprise Appliance it-1 Guía del usuario de Sun Ray 150 Enterprise Appliance es-1 Sun Ray 150 Nätterminal för företag Användarhandbok sv-1 Sun Ray 150 Enterprise Appliance ja-1 Sun Ray 150 Enterprise Appliance ko-1 Sun Ray 150 zh-1 Sun Ray 150 zh_TW-1 Contents iii iv Sun Ray 150 Enterprise Appliance User’s Guide • June 2000 Safety Agency Compliance Statements Read this section before beginning any procedure. The following text provides safety precautions to follow when installing a Sun Microsystems product. Placement of a Sun Product Caution – Do not block or cover the openings of your Sun product. Never place a Sun product near a radiator or heat register. Failure to follow these guidelines can cause overheating and affect the reliability of your Sun product. Safety Precautions For your protection, observe the following safety precautions when setting up your equipment: ■ ■ ■ Follow all cautions and instructions marked on the equipment. Ensure that the voltage and frequency of your power source match the voltage and frequency inscribed on the equipment’s electrical rating label. Never push objects of any kind through openings in the equipment. Dangerous voltages may be present. Conductive foreign objects could produce a short circuit that could cause fire, electric shock, or damage to your equipment. Symbols The following symbols may appear in this book: Caution – There is risk of personal injury and equipment damage. Follow the instructions. Caution – Hazardous voltages are present. To reduce the risk of electric shock and danger to personal health, follow the instructions. Modifications to Equipment Do not make mechanical or electrical modifications to the equipment. Sun Microsystems is not responsible for regulatory compliance of a modified Sun product. Caution – Do not operate Sun products without the top cover in place. Failure to take this precaution may result in personal injury and system damage. Caution – The workplace-dependent noise level defined in DIN 45 635 Part 1000 must be 70Db(A) or less. SELV Compliance Safety status of I/O connections comply to SELV requirements. Power Cord Connection Caution – Sun products are designed to work with single-phase power systems having a grounded neutral conductor. To reduce the risk of electric shock, do not plug Sun products into any other type of power system. Contact your facilities manager or a qualified electrician if you are not sure what type of power is supplied to your building. Caution – Not all power cords have the same current ratings. Household extension cords do not have overload protection and are not meant for use with computer systems. Do not use household extension cords with your Sun product. Caution – Your Sun product is shipped with a grounding type (three-wire) power cord. To reduce the risk of electric shock, always plug the cord into a grounded power outlet. v Déclarations de conformité de l'agence de sécurité Lisez attentivement la section suivante avant d’entamer une procédure quelconque. Le texte suivant énumère toutes les précautions de sécurité à observer lors de l’installation d'un produit Sun Microsystems. responsabilité quant à la non-conformité éventuelle d'un produit Sun modifié. Attention : ne travaillez jamais avec un produit Sun sans en avoir réinstallé le couvercle. Tout manquement à cette mesure de sécurité risque d’endommager votre système et de provoquer des blessures physiques personnelles. Mesures de sécurité Pour votre protection, observez les mesures de sécurité suivantes lors de la mise en marche de l’équipement : ■ ■ ■ Observez tous les avertissements et consignes indiqués sur l’équipement. Assurez-vous que la tension et la fréquence de votre source d'alimentation électrique correspondent à la tension et à la fréquence indiquées sur l'étiquette de tension électrique nominale du matériel. N'insérez en aucun cas un objet quelconque dans les orifices d'aération de l'équipement. Des tensions potentiellement dangereuses peuvent être présentes dans l’équipement. Tout objet étranger conducteur risque de produire un court-circuit présentant un risque d’incendie ou de décharge électrique, ou susceptible d’endommager le matériel. Lieu d’installation d'un produit Sun Attention : évitez de bloquer et de couvrir les orifices d'aération de votre produit Sun. Ne placez jamais un produit Sun à proximité d’un radiateur ou d'une source de chaleur. Tout manquement à ces consignes peut entraîner une surchauffe de votre produit Sun, qui risque de nuire à sa fiabilité. Attention : le niveau de bruit électronique inhérent au lieu de travail, tel qu’il est défini par la norme DIN 45 635, section 1000, doit être inférieur ou égal à 70 Db (A). Symboles Les symboles suivants peuvent figurent dans cet ouvrage : Attention : vous risquez d’endommager le matériel ou de vous blesser. Observez les consignes données. Attention : des tensions dangereuses sont présentes dans l’équipement. Pour réduire le risque de décharge électrique et de danger physique personnel, observez les consignes données. Modifications de l’équipement N’apportez aucune modification mécanique ou électrique à l’équipement. Sun Microsystems décline toute vi Conformité aux normes SELV Le niveau de sécurité des connexions E/S est conforme aux normes SELV. Raccordement à la source d’alimentation électrique Attention : les produits Sun sont conçus pour être exploités avec des systèmes d’alimentation électrique monophasés avec prise de terre. Pour réduire les risques de décharge électrique, ne branchez jamais les produits Sun sur une source d’alimentation d'un autre type. Contactez le gérant de votre immeuble ou un électricien certifié si vous avez le moindre doute quant au type d’alimentation électrique fourni dans votre immeuble. Attention : tous les cordons d’alimentation n’ont pas la même intensité nominale. Les cordons d’alimentation d’usage domestique ne sont pas protégés contre les surtensions et ne sont pas conçus pour être utilisés avec des ordinateurs. N'utilisez jamais de cordon d’alimentation d’usage domestique avec votre produit Sun. Attention : votre produit Sun est livré avec un cordon d’alimentation avec raccord à la terre (à trois broches). Pour réduire le risque de décharge électrique, branchez toujours ce cordon sur une source d'alimentation électrique avec prise de terre. Vorschriften der Sicherheitsbehörde Lesen Sie diesen Abschnitt sorgfältig, bevor Sie eine Installation vornehmen. Der folgende Text beschreibt die bei der Installation von Sun Microsystems-Geräten zu befolgenden Sicherheitsmaßnahmen. Sicherheitsmaßnahmen Zu Ihrem eigenen Schutz sollten Sie die folgenden Sicherheitsmaßnahmen bei der Installation des Geräts befolgen: ■ ■ ■ Befolgen Sie alle Anweisungen und Warnhinweise, die auf den Geräten aufgedruckt sind. Beachten Sie die Geräteaufschrift, um sicherzustellen, daß Netzspannung und -frequenz mit der Gerätespannung und -frequenz übereinstimmen. Führen Sie niemals Gegenstände durch die Geräteöffnungen. Es können elektrische Spannungsfelder vorhanden sein. Leitende Fremdgegenstände können zu Kurzschlüssen führen, die elektrische Schläge oder Feuer verursachen oder Ihr Gerät beschädigen. Symbole Die folgenden Symbole werden in diesem Handbuch verwendet: Warnhinweis – Es besteht die Gefahr der Verletzung und der Beschädigung des Geräts. Befolgen Sie die Anweisungen. Warnhinweis – Elektrisches Spannungsfeld vorhanden. Befolgen Sie bitte die Anweisungen, um elektrische Schläge und Verletzungen zu vermeiden. Modifikationen des Geräts Nehmen Sie keine mechanischen oder elektrischen Gerätemodifikationen vor. Sun Microsystems ist für die Einhaltung der Sicherheitsvorschriften von modifizierten Sun-Geräten nicht haftbar. vii Netzanschlußkabel Warnhinweis – Sun-Geräte dürfen nicht ohne Abdeckung in Gebrauch genommen werden. Die Nichtbeachtung dieses Warnhinweises kann Verletzungen oder Systembeschädigungen zur Folge haben. Aufstellen eines Sun-Geräts Warnhinweis – Blockieren oder decken Sie nie die Öffnungen des Sun-Geräts ab. Stellen Sie das Gerät nie in der Nähe eines Heizkörpers oder einer anderen Wärmequelle auf. Bei Nichtbeachtung dieser Empfehlungen kann das Gerät überhitzen und die Funktionstüchtigkeit beeinträchtigt werden. Warnhinweis – Der Geräuschpegel, definiert nach DIN 45 635 Part 1000, darf am Arbeitsplatz nicht 70Db(A) überschreiten. SELV-Richtlinien Der Sicherheitsstatus aller Ein- und Ausgänge entspricht den SELV-Richtlinien. viii Warnhinweis – Sun-Geräte benötigen ein einphasiges Stromversorgungssystem mit eingebautem Erdleiter. Schließen Sie SunGeräte nie an ein anderes Stromversorgungssystem an, um elektrische Schläge zu vermeiden. Falls Sie die Spezifikationen der Gebäudestromversorgung nicht kennen, sollten Sie den Gebäudeverwalter oder einen qualifizierten Elektriker konsultieren. Warnhinweis – Nicht alle Netzanschlußkabel besitzen die gleiche Spannungsleistung. Normale Verlängerungskabel besitzen keinen Überstromschutz und sind nicht für Computersysteme geeignet. Verwenden Sie keine Haushaltverlängerungskabel für SunGeräte. Warnhinweis – Ihr Sun-Gerät wurde mit einem geerdeten (dreiadrigen) Netzanschlußkabel geliefert. Stecken Sie dieses Kabel immer nur in eine geerdete Netzsteckdose, um Kurzschlüsse zu vermeiden. Dichiarazioni di conformità con l'ente sulla sicurezza Leggere questa sezione prima di iniziare qualsiasi procedura. Quanto segue, fornisce delle precauzioni di sicurezza da seguire quando si installa un prodotto di Sun Microsystem. Precauzioni di sicurezza Per protezione personale, seguire le seguenti precauzioni di sicurezza nell'installazione delle varie apparecchiature: ■ ■ ■ Seguire tutte le avvertenze e precauzioni indicate sull'apparecchio. Accertarsi che il voltaggio e la frequenza di rete corrispondano al voltaggio e alla frequenza di rete indicata sull'etichetta presente sull'apparecchio. Non inserire mai alcun oggetto di alcun tipo nelle aperture dell'apparecchio. Potrebbero essere presenti delle tensioni elettriche pericolose. Oggetti conduttori possono produrre un corto circuito in grado di causare un incendio, una scossa elettrica o danni all'apparecchiatura. Attenzione – Non utilizzare i prodotti Sun senza il coperchio superiore montato. La mancata osservanza di questa precauzione può risultare in danni alla persona e al sistema. Collocazione di un prodotto Sun Attenzione – Non bloccare o coprire le aperture di un prodotto Sun. Non collocare mai un prodotto Sun vicino ad un radiatore o fonte di calore. La mancata osservanza di queste indicazioni può causare surriscaldamento e influenzare l'affidabilità del prodotto Sun. Attenzione – Il livello di rumore del posto di lavoro, definito in DIN 45 635 Parte 1000 deve essere 70Db(A) o minore. Conformità SELV Simboli I simboli seguenti possono apparire in questa pubblicazione: Lo stato della sicurezza dei collegamenti I/O è conforme alle disposizioni SELV. Attenzione – Rischio di ferite e danni all'attrezzatura. Seguire le istruzioni. Attenzione – Sono presenti tensioni pericolose. Per ridurre il rischio di scossa elettrica e di pericolo per la propria salute, seguire le istruzioni. Modifiche all'attrezzatura Non apportare alcuna modifica meccanica o elettrica all'attrezzatura. Sun Microsystems non è responsabile per la conformità ai regolamenti in vigore per un prodotto Sun che sia stato modificato. ix Collegamento del cavo di alimentazione Attenzione – I prodotti Sun sono progettati per il funzionamento con impianti elettrici monofase- forniti di connettore neutro a terra. Per ridurre il rischio di scossa elettrica, non collegare i prodotti Sun ad alcun altro tipo di impianto elettrico. Se non si è certi del tipo di elettricità presente nel proprio edificio, contattare il manager del sito o un elettricista qualificato. Attenzione – Non tutti i cavi di alimentazione sono in grado di sopportare la stessa potenza elettrica. Le prolunghe per uso domestico non includono alcuna protezione da sovraccarico e non sono adatte per essere utilizzate con i computer. Non utilizzare prolunghe per uso domestico con i prodotti Sun. Declaraciones de cumplimiento con normas de seguridad Antes de empezar ningún procedimiento, lea esta sección. El texto siguiente explica las medidas de seguridad que deben respetarse al instalar un producto Sun Microsystems. Medidas de precaución Para su propia seguridad, al instalar y configurar el equipo adopte las siguientes medidas de precaución: ■ ■ ■ Attenzione – I prodotti Sun includono un cavo di alimentazione a tre conduttori, con spina di terra. Per ridurre il rischio di scossa elettrica, inserire sempre il cavo in una presa che sia provvista di terminale collegato a terra. Respete todas las medidas de precaución e instrucciones señaladas en el equipo. Asegúrese de que el voltaje y la frecuencia de la fuente de alimentación coinciden con el voltaje y la frecuencia indicada en la etiqueta de clasificación eléctrica del equipo. No introduzca objetos de ningún tipo a través de las aberturas del equipo. El voltaje en el interior puede resultar peligroso. Los objetos extraños conductores podrían producir un cortocircuito y provocar fuego, un shock eléctrico o daños en el equipo. Símbolos En este libro pueden aparecer los símbolos siguientes: Precaución: Existe riesgo de provocar lesiones personales y daños en el equipo. Siga las instrucciones. Precaución: Voltaje peligroso. Para reducir el riesgo de shock eléctrico y de lesiones, siga las instrucciones. x Modificaciones en el equipo No realice modificaciones mecánicas ni eléctricas en el equipo. Sun Microsystems no se hará responsable del cumplimiento de la normativa si el producto Sun ha sido modificado. Precaución: No mantenga funcionando ningún producto Sun sin que éste tenga colocada la cubierta. De lo contrario, pueden producirse lesiones personales o daños en el sistema. Ubicación adecuada de un producto Sun Precaución: No obstruya ni cubra las aberturas del producto Sun. No coloque nunca el producto Sun junto a una fuente de calor, como un radiador. El incumplimiento de estas medidas puede provocar el recalentamiento del equipo Sun y afectar a la confiabilidad del mismo. Precaución: Según se estipula en DIN 45 635 Parte 1000, el nivel de ruido que afecte al lugar de trabajo debe ser de 70 Db(A) como máximo. Conexión del cable de alimentación Precaución: Los productos Sun han sido diseñados para funcionar con sistemas de alimentación monofásicos que dispongan de un conector neutral de conexión a tierra. Para reducir el riesgo de shock eléctrico, no enchufe ningún producto Sun en ningún otro tipo de sistema de alimentación. Si no está seguro del tipo de alimentación del que dispone su edificio, póngase en contacto con el director de las instalaciones o con un electricista calificado. Precaución: No todos los cables de alimentación tienen la misma clasificación en cuanto a corriente eléctrica. Los cables de prolongación caseros no ofrecen protección contra sobrecargas ni están ideados para ser utilizados con computadoras. No utilice cables de prolongación caseros con el producto Sun. Precaución: El producto Sun va provisto de un cable de alimentación de tres hilos con conexión a tierra. Para reducir el riesgo de shock eléctrico, enchufe siempre el cable a una toma de corriente con conexión a tierra. Cumplimiento con normas SELV El estado de seguridad de conexiones de E/S cumplen los requisitos de las normas SELV. xi Säkerhetsuttalanden avseende standardiseringskommission Läs detta avsnitt innan du påbörjar procedur. Följande text består av säkerhetsvarningar som du ska iaktta vid installation av en produkt från Sun Microsystems. Säkerhetsvarningar För din egen säkerhet bör du iaktta följande säkerhetsvarningar när du installerar utrustningen: ■ ■ ■ Följ alla varningar och anvisningar som finns på utrustningen. Försäkra dig om att strömkällans spänning och frekvens motsvarar den spänning och frekvens som finns stämplade på utrustningens elmärkningsetikett. Tryck aldrig in ett objekt av något slag genom utrustningens öppningar. Det kan finnas farliga spänningar. Konduktiva främmande objekt kan orsaka kortslutning, vilket i sin tur kan förorsaka brand, elektrisk stöt eller skada i utrustningen. Symboler Följande symboler kan återfinnas i den här boken: Varning – Det finns risk för person- och utrustningsskada. Följ anvisningarna. Varning – Det finns farliga spänningar här. Minska risken för elektrisk stöt och fara för din personliga hälsa genom att följa anvisningarna. Modifikationer i utrustningen Gör inga mekaniska eller elektriska modifikationer i utrustningen. Sun Microsystems är inte ansvarigt för en modifierad Sun-produkt som eventuellt inte uppfyller kraven. Varning – Använd inte Suns produkter utan att höljet finns på plats. Om du inte vidtar denna försiktighetsåtgärd kan det resultera i personlig och/eller systemskada. xii Placering av en Sun-produkt Varning – Du ska inte blockera eller täcka över Sun-produktens öppningar. Placera aldrig en Sun-produkt nära element eller värmealstrande apparat. Om du inte följer dessa riktlinjer kan det orsaka överhettning vilket kan påverka Sun-produktens tillförlitlighet. Varning – Arbetsplatsberoende brusnivå enligt vad som definieras i DIN 45 635 Part 1000 måste vara 70Db(A) eller mindre. SELV-standard I/O-anslutningarnas säkerhetsstatus följer SELV-kraven. Sladdanslutning Varning – Sun-produkter är utformade så att de fungerar med enkelfasiga strömsystem som har en jordad neutral ledare. Du kan minska risken för elektrisk stöt genom att inte koppla in Sun-produkter i någon annan typ av strömsystem. Kontakta anläggningschefen eller kvalificerad elektriker om du inte är säker på vilken typ av ström som används där du arbetar. Varning – Alla sladdar har inte samma strömmärkningar. Förlängningssladdar avsedda för hushåll har inget överströmsskydd och är inte avsedda för användning med datorsystem. Använd därför inte förlängningssladdar avsedda för hushåll tillsammans med Sun-produkten. Varning – Sun-produkten levereras med en sladd av jordningstyp (tre trådar). Du kan minska risken för elektrisk stöt genom att alltid använda sladden i en jordad kontakt. xiii xiv xv xvi Declaration of Conformity Compliance ID: Model 104 Product Name: Sun Ray 150 This product has been tested and complies with the following rules and requirements. EMC USA—FCC Class B This device complies with Part 15 of the FCC Rules. Operation is subject to the following two conditions: 1. This device may not cause harmful interference. 2. This device must accept any interference received, including interference that may cause undesired operation. European Union—EC This equipment complies with the following requirements of the EMC Directive 89/336/EEC: EN55022/CISPR22 (1985) Class B EN61000-3-2/IEC1000-3-2 (1994) Pass EN61000-3-3/IEC1000-3-3 (1995) Pass EN55024/CISPR24 (1997) Pass Safety This equipment complies with the following requirements of the Low Voltage Directive 73/23/EEC: EC Type Examination Certificates: EN60950/IEC950 (1993) EN60950 w/Worldwide Deviations Supplementary Information This product was tested and complies with all the requirements for the CE Mark (when connected to a Sun workstation or server). /S/ Dennis P. Symanski Manager, Product Compliance /S/ DATE John Shades Quality Assurance Manager Sun Microsystems, Inc. 901 San Antonio Road, M/S UMPK15-102 Palo Alto, CA 94303, USA Sun Microsystems Scotland, Limited Springfield, Linlithgow West Lothian, EH49 7LR Scotland, United Kingdom Tel: 650-786-3255 Fax: 650-786-3723 Tel: 0506-670000 Fax: 0506 760011 DATE xvii Regulatory Compliance Statements Your Sun product is marked to indicate its compliance class: • • • • Federal Communications Commission (FCC) — USA Industry Canada Equipment Standard for Digital Equipment (ICES-003) - Canada Voluntary Control Council for Interference (VCCI) — Japan Bureau of Standards Metrology and Inspection (BSMI) — Taiwan Please read the appropriate section that corresponds to the marking on your Sun product before attempting to install the product. FCC Class B Notice This device complies with FCC CFR Title 47 Part 2 and Part 15, Subpart B, Class B of the FCC Rules. Operation is subject to the following two conditions: 1. This device may not cause harmful interference. 2. This device must accept any interference received, including interference that may cause undesired operation. Note: This equipment has been tested and found to comply with the limits for a Class B digital device, pursuant to Part 15 of the FCC Rules. These limits are designed to provide reasonable protection against harmful interference in a residential installation. This equipment generates, uses and can radiate radio frequency energy and, if not installed and used in accordance with the instructions, may cause harmful interference to radio communications. However, there is no guarantee that interference will not occur in a particular installation. If this equipment does cause harmful interference to radio or television reception, which can be determined by turning the equipment off and on, the user is encouraged to try to correct the interference by one or more of the following measures: • • • • Reorient or relocate the receiving antenna. Increase the separation between the equipment and receiver. Connect the equipment into an outlet on a circuit different from that to which the receiver is connected. Consult the dealer or an experienced radio/television technician for help. Shielded Cables: Connections between the workstation and peripherals must be made using shielded cables in order to maintain compliance with FCC radio frequency emission limits. Networking connections can be made using unshielded twisted pair (UTP) cables. Modifications: Any modifications made to this device that are not approved by Sun Microsystems, Inc. may void the authority granted to the user by the FCC to operate this equipment. ICES-003 Class B Notice - Avis NMB-003, Classe B This Class B digital apparatus complies with Canadian ICES-003. Cet appareil numérique de la classe B est conforme à la norme NMB-003 du Canada. xviii BSMI Class B Notice This device complies with Taiwanese BSMI Class B specifications. Under BSMI rules, no special conditions apply to the operation of a Class B device. xix xx Sun Ray 150 Enterprise Appliance User’s Guide This guide provides the following information to help you get started with your new Sun Ray 150 enterprise appliance. ■ ■ ■ ■ ■ ■ “Overview and Setup” on page en-1 “Troubleshooting” on page en-8 “Adjusting the Session or Display” on page en-12 “Display Mode” on page en-14 “Maintaining the Appliance” on page en-14 “Specifications” on page en-15 Overview and Setup Package Contents Please make sure the following items are included in the packing carton. If any items are missing, contact your dealer. ■ ■ ■ ■ ■ Sun Ray 150 enterprise appliance Power supply with attached DC power cord Ethernet cable This manual Optional accessory kit, including: ■ ■ ■ ■ AC power cable Keyboard and palm rest Mouse Mousepad en-1 ■ ■ Keyboard/mouse operation guide Ergonomics guide Front Panel Components m ic ro sy s te m s 1 2 3 4 FIGURE 1 Front and Side Panels of the Sun Ray 150 Enterprise Appliance 1. Power LED—Illuminates when the appliance is powered on. 2. Smart card LED—Illuminates when a smart card is inserted. 3. Smart card reader—Accepts a valid smart card. 4. Brightness controls—Adjust screen brightness up or down. en-2 Sun Ray 150 Enterprise Appliance User’s Guide • June 2000 Back and Side Panel Components 6 7 8 9 1 FIGURE 2 2 3 4 5 Back and Side Panels of the Sun Ray 150 Enterprise Appliance 1. Power (DC power in)—Connect the power cord to this receptacle. 2. Projector port—You can connect an external projection display device to this port for conferences or demos. Note – The projector port is not for attaching an additional monitor to create a “dual head” Sun Ray appliance. If a standard CRT monitor is attached to this port, the CRT screen image may be corrupted due to incompatible display modes. 3. Video in—Input for a device that provides a composite video signal. 4. USB ports 1, 2, 3, and 4—Standard USB ports for peripherals. 5. Network connector—100BASE-T Ethernet cable receptacle (RJ-45). 6. Stereo audio signal line-in 1/8 inch (3.5 mm) stereo mini-plug—Input from an audio input device. 7. Stereo audio signal line-out 1/8 inch (3.5 mm) stereo mini-plug—Output to an audio device. 8. Headphone output—Designed to work with low impedance stereo headphones. Sun Ray 150 Enterprise Appliance User’s Guide en-3 9. Microphone input—Adjust microphone volume through software (see page en-12). This appliance also offers you the opportunity to attach a Kensington-type security device on the panel cabinet. The Kensington slot is located on the back (vertical) surface of the LCD below the DC-in connector. Kensington lock not included. Refer to your locking device documentation for installation instructions. Setting Up the Appliance After carefully removing the Sun Ray 150 enterprise appliance from its packing carton, set it up using the following procedure. Note – Your appliance operates by communicating over the network with a server on which the Sun Ray administration software has been installed. If the appliance does not operate correctly after the following procedure, check with your system administrator to make sure the Sun Ray enterprise server has been set up. To Set Up the Appliance 1. Place the appliance face down on a cushion, being careful not to harm the screen, so that you can access the cable connectors along the bottom of the rear recess. 2. Connect the DC power cord to the power port on the back of the appliance. 3. Connect the keyboard and mouse to any of the USB ports. 4. Connect the Ethernet cable to the Ethernet port. en-4 Sun Ray 150 Enterprise Appliance User’s Guide • June 2000 5. Place the appliance upright on your desk, connect the AC power cable to the power supply, and plug the other end of the AC power cable into a nearby outlet. If the appliance displays an image, installation is complete. FIGURE 3 Back Panel Cabling of the Sun Ray 150 Enterprise Appliance (optional cables at connectors 2 and 3 are shown for reference) Note – If the screen image is too large, causing some icons to disappear from view, you or your system administrator can use the utxconfig command to change the display mode. See “Troubleshooting” on page en-8 for instructions. Sun Ray 150 Enterprise Appliance User’s Guide en-5 To Insert a Smart Card ● Insert the smart card with the square circuit facing the back of the appliance and oriented toward the card slot. m FIGURE 4 en-6 ic ro sy s te m s Inserting a Smart Card in the Sun Ray 150 Enterprise Appliance Sun Ray 150 Enterprise Appliance User’s Guide • June 2000 To Mount a VESA Stand The Sun Ray 150 enterprise appliance has a VESA mounting system. This system enables you to attach the appliance to any stand or extension that meets VESA specifications. 1. Detach the old stand by unscrewing the four VESA mount screws on the back of the appliance. 2. Attach the new stand or extension by placing its VESA plate in the appliance’s back recess and screwing in the four VESA mount screws, as shown in the figure. FIGURE 5 Attaching a VESA Stand to the Sun Ray 150 Enterprise Appliance Sun Ray 150 Enterprise Appliance User’s Guide en-7 Troubleshooting Before calling for service, check the information in this section to see if you can solve the problem yourself. If you do need assistance, please contact Sun technical support. TABLE 1 en-8 Troubleshooting Tips Problem Solution There is no picture. • Check to see that the appliance is plugged in. • The appliance may be in PowerSaver mode. Move the mouse to activate the display. The picture is too large for the screen, causing some icons to disappear from view. The Sun Ray 150 appliance supports only 1024x768@60Hz screen resolution. If the image sent by the Sun Ray enterprise server is of a higher resolution, it will create a “panning” effect on the appliance. If this effect is not desirable for your desktop, there are two ways to change the resolution: • Open a terminal window and type the following command: /opt/SUNWut/lib/utxconfig -r 1024x768 If you type this command with your smart card inserted in the appliance, the new display setting will be associated with the smart card and will follow your smart card to any other appliance attached to the Sun Ray enterprise server. If you type this command without your smart card inserted, the new display setting will be associated with the appliance and will remain in effect until you or another user types the utxconfig command to change it. • Ask your system administrator to change the display mode for all appliances using the utxconfig command, which is fully described in the Sun Ray system administration documentation. The image is too light or too dark. Adjust the Brightness setting (see page en-13). There is no response from the keyboard or mouse. • Disconnect the keyboard or mouse, wait 15 seconds, then reconnect. • Disconnect the power cord, wait 15 seconds, then reconnect. Sun Ray 150 Enterprise Appliance User’s Guide • June 2000 TABLE 1 Troubleshooting Tips (Continued) Problem Solution The power indicator is yellow for more than 3 seconds. A hardware fault has occurred. Contact your system administrator for a replacement unit. See “LED Indicators” on page en-11 for more information. The power indicator is blinking green. The unit is inoperable. Contact your system administrator to correct the problem. See “LED Indicators” on page en-11 for more information. You cannot adjust the appliance with the buttons on the front panel. Please contact Sun technical support. Status Icons The icons below indicate the boot status of the appliance. Icon What it means Action to take The unit is starting up. Wait. If the unit does not start within a short time, contact your system administrator. The server is currently downloading to the unit ‘s PROM. Wait. The unit will restart when downloading is complete. A unit failure has occurred. The unit tried to download from the server to the PROM, but failed. Contact your system administrator. Sun Ray 150 Enterprise Appliance User’s Guide en-9 Icon en-10 What it means Action to take The unit does not detect an Ethernet signal. The unit’s Ethernet address is displayed. Check that the Ethernet cable is correctly plugged into the back of the unit and into the correct network outlet. If the problem persists, contact your system administrator. The unit cannot communicate with the server software. Contact your system administrator. The sound has been muted. Press the Mute key again or use the Settings screen (page en-12) to unmute the sound. The volume has been changed. Press either of the volume keys or use the Settings screen (page en-12) to adjust the volume. The unit’s Ethernet address is displayed when the three audio volume control keys are pressed simultaneously or the Ethernet cable is initially plugged in. The address disappears after 15 seconds. Sun Ray 150 Enterprise Appliance User’s Guide • June 2000 Icon What it means Action to take Prompt for smart card insertion. Insert smart card. Unit cannot read smart card. Insert smart card properly. Clean contacts on smart card and reinsert. Contact your system administrator. You are denied access. Contact your system administrator. LED Indicators The Sun Ray 150 enterprise appliance has two LED indicators (Power/Fault and Smart Card), whose states are shown in the table below. LED State What it means Power/Fault Off The unit is not plugged in. Yellow The LED briefly lights for 2-3 seconds at power on while the unit checks the hardware. If this LED stays on, or lights at any other time, a hardware fault has occurred. Contact your system administrator for a replacement unit. Green The unit is powered on and the hardware is functioning normally. Blinking The unit is inoperable. Contact your system administrator to correct the problem. Off No smart card is inserted. On The smart card has been inserted correctly. Blinking It is safe to enter your secure PIN now (secure smart card installations only). Smart Card Sun Ray 150 Enterprise Appliance User’s Guide en-11 PowerSaver The Sun Ray 150 enterprise appliance has a built-in power management system called PowerSaver. This system saves energy by switching the appliance into a lowpower mode when it has not been used for a certain amount of time. The table below shows the characteristics of normal and PowerSaver modes. To return the appliance to normal mode, move the mouse or press a key on the keyboard. TABLE 2 Power States of the Sun Ray 150 Enterprise Appliance State Display Power Indicator Approximate Power Consumption Normal operation Active Green 30W PowerSaver Blanked Green 15W Adjusting the Session or Display The Sun Ray 150 enterprise appliance has two sets of controls that enable you to adjust the features on your desktop: ■ ■ The Settings screen enables you to adjust features of the Sun Ray session. The Brightness buttons enable you to adjust the brightness of the display. Adjusting Session Attributes The Sun Ray Settings screen enables you to control the following features of your Sun Ray session: ■ ■ ■ ■ en-12 Audio input and output Mouse speed Display resolution and frequency Video input Sun Ray 150 Enterprise Appliance User’s Guide • June 2000 Note – The recommended method to change Display settings on the Sun Ray 150 enterprise appliance is through the utxconfig command, as described in “Troubleshooting” on page en-8. FIGURE 6 Sun Ray 150 Enterprise Appliance Settings Screen To Use the Settings Screen 1. Open the Settings screen using one of the following methods: ■ Press Shift+Props on the keyboard. ■ Open a terminal window and type: % /opt/SUNWut/bin/utsettings The Settings screen appears after a few seconds. 2. Select the category, then the setting you want. Contact your system administrator if you have questions. Adjusting Screen Brightness The Brightness buttons on the right panel of the Sun Ray 150 enterprise appliance enable you to adjust the brightness of your display. Sun Ray 150 Enterprise Appliance User’s Guide en-13 To Adjust Brightness ● Use the Brightness buttons to adjust screen brightness up or down. Display Mode The Sun Ray 150 enterprise appliance displays images at 1024x768 at 60Hz resolution. If a different display mode is used by the Sun Ray enterprise server, a panning effect may result. See “Troubleshooting” on page en-8 if this effect is not desirable for your particular desktop. Maintaining the Appliance Caution – To avoid risk of electric shock, do not disassemble the cabinet. The unit is designed not to be user-serviceable. User maintenance is restricted to cleaning as explained below. To Clean the Appliance 1. Unplug the appliance from the power outlet before cleaning. 2. To clean your display screen, lightly dampen a soft, clean cloth with water or mild detergent. If possible, use a special screen cleaning tissue or solution suitable for the antistatic coating. 3. To clean the cabinet, use a cloth lightly dampened with a mild detergent. Caution – Never use flammable cleaning material to clean your Sun Ray 150 enterprise appliance or any other electrical apparatus. en-14 Sun Ray 150 Enterprise Appliance User’s Guide • June 2000 Specifications The table below lists the specifications for the Sun Ray 150 enterprise appliance. TABLE 3 Specifications item Description Display 38.1 cm (15.0") AM-TFT-LCD flat panel, 1024x768 resolution, 0.31mm full pixel pitch Weight • Display Head—4.0 kg maximum (8.8lb) • Stand—0.5 kg maximum (1.1lb) • Total—4.5 kg maximum (9.9lb) (All measurements approximate.) Power adapter ~100-240V, 47-63Hz, 0.5A Power consumption 45W AC maximum in use, 15W AC maximum in PowerSaver mode VESA mount Meets FPMPMI standard, 100mm spacing Environmental considerations Operating environment • Temperature—0C to 40C (32F to 104F) • Humidity—5% to 93%RH • Altitude—0m to 3.2km (0ft to 10,500ft) Storage environment • Temperature—-20C to 60C (-4F to 140F) • Humidity—5% to 93%RH • Altitude—0m to 12.5km (0ft to 41,000ft) Acoustic noise 3.0B Declared Sound Power per ISO 9296-1988 Sun Ray 150 Enterprise Appliance User’s Guide en-15 en-16 Sun Ray 150 Enterprise Appliance User’s Guide • June 2000 Guide de l'utilisateur du Sun Ray 150 Enterprise Appliance Ce guide propose les informations suivantes, qui vous aideront à utiliser au mieux votre nouveau Sun Ray 150 Enterprise Appliance. ■ ■ ■ ■ ■ ■ « Présentation et installation » à la page fr-1 « Dépannage » à la page fr-8 « Réglage de la session ou de l'affichage » à la page fr-12 « Mode d'affichage » à la page fr-14 « Maintenance du système » à la page fr-15 « Spécifications » à la page fr-16 Présentation et installation Contenu du carton Assurez-vous que le carton d'emballage contient les éléments suivants. Si tel n'est pas le cas, adressez-vous à votre revendeur. ■ ■ ■ ■ ■ Sun Ray 150 Enterprise Appliance Bloc d'alimentation avec cordon d'alimentation secteur Câble Ethernet Le présent manuel Kit d'accessoires facultatif, incluant : ■ ■ ■ ■ Câble d'alimentation CA Un clavier et un repose-paume Une souris Un tapis de souris fr-1 ■ ■ Un guide d'utilisation du clavier/de la souris Un guide sur l’ergonomie Composants du panneau avant m ic ro sy s te m s 1 2 3 4 FIGURE 1 Panneaux avant et arrière du Sun Ray 150 Enterprise Appliance 1. Voyant d'alimentation : s'allume lorsque le système est mis sous tension. 2. Voyant de carte à mémoire : s'allume lorsqu'une carte à mémoire est insérée. 3. Lecteur de carte à mémoire : accepte toute carte à mémoire valide. 4. Contrôles de luminosité : permettent de régler la luminosité de l'écran. fr-2 Guide de l’utilisateur du Sun Ray 150 Enterprise Appliance • Juin 2000 Composants des panneaux arrière et latéraux 6 7 8 9 1 FIGURE 2 2 3 4 5 Panneaux avant et latéraux du système Sun Ray 150 Enterprise Appliance 1. Alimentation (entrée de l'alimentation secteur) : connectez le cordon d'alimentation à cette prise. 2. Port projecteur : vous pouvez connecter un appareil de projection externe à ce port pour les conférences ou les démos. Remarque: Ce port ne permet pas de relier un moniteur supplémentaire de façon à créer un système Sun Ray à « double écran ». Si vous reliez un moniteur à écran cathodique standard à ce port, l'incompatibilité des modes d'affichage risque d'altérer la qualité de l'image. 3. Entrée vidéo : entrée pour un périphérique générant un signal vidéo composite. 4. Ports USB 1, 2, 3 et 4 : ports USB standard pour des périphériques. 5. Connecteur réseau : prise pour un câble Ethernet 100BASE-T (RJ-45). 6. Mini-prise stéréo 1/8 pouce (3,5 mm) pour l'entrée des signaux audio stéréo : entrée depuis un périphérique d'entrée audio. Guide de l'utilisateur du Sun Ray 150 Enterprise Appliance fr-3 7. Mini-prise stéréo 1/8 pouce (3,5 mm) pour la sortie des signaux audio stéréo : sortie vers un périphérique audio. 8. Sortie écouteur : destinée à un écouteur stéréo à basse impédance. 9. Entrée microphone : permet de régler le volume du microphone par le biais du logiciel. (voir page fr-13). Ce système vous permet également de fixer un dispositif de sécurité de type Kensington sur l'armoire du panneau. Le connecteur Kensington se trouve sur la surface arrière (verticale) de l'affichage à cristaux liquides au-dessous du connecteur d'entrée de l'alimentation secteur. Le dispositif de verrouillage Kensington n'est pas inclus. Reportez-vous à la documentation de votre dispositif de verrouillage pour plus de détails sur les instructions d'installation. Configuration du système Déballez avec précautions le Sun Ray 150 Enterprise Appliance, puis installez-le en procédant comme suit. Remarque: Votre système communique via le réseau avec un serveur sur lequel le logiciel d'administration Sun Ray est installé. Si le système ne fonctionne pas correctement à l'issue de la procédure suivante, assurez-vous auprès de votre administrateur système que le serveur d'entreprise Sun Ray est configuré comme il convient. Pour installer le système 1. Placez le système face vers le bas sur un coussin, en veillant à ne pas abîmer l'écran, de sorte que vous puissiez accéder aux connecteurs placés au bas du renfoncement arrière. 2. Connectez le cordon d'alimentation secteur au port d'alimentation à l'arrière du système. 3. Connectez le clavier et la souris à l'un des ports USB. 4. Connectez le câble Ethernet au port Ethernet. fr-4 Guide de l’utilisateur du Sun Ray 150 Enterprise Appliance • Juin 2000 5. Placez le système verticalement sur votre bureau, connectez le cordon d'alimentation CA au bloc d'alimentation et branchez l'autre extrémité de ce cordon à une prise murale proche. Si le système affiche une image, l'installation est terminée. FIGURE 3 Câblage au panneau arrière du système Sun Ray 150 Enterprise Appliance (les câbles optionnels pour les connecteurs 2 et 3 sont représentés à titre de référence) Remarque: Si l'image affichée à l'écran est trop volumineuse et que certaines icônes disparaissent de l'affichage, l'administrateur système ou vous-même pouvez utiliser la commande utxconfig pour modifier le mode d'affichage. Reportez-vous à « Dépannage » à la page fr-8 pour plus d'informations. Guide de l'utilisateur du Sun Ray 150 Enterprise Appliance fr-5 Pour insérer une carte à mémoire ● Insérez la carte à mémoire : introduisez la carte dans son emplacement en orientant le circuit carré vers l'arrière du système. m FIGURE 4 fr-6 ic ro sy s te m s Insertion d'une carte à mémoire dans le système Sun Ray 150 Enterprise Appliance Guide de l’utilisateur du Sun Ray 150 Enterprise Appliance • Juin 2000 Pour monter un support VESA Le système Sun Ray 150 Enterprise Appliance est doté d'un dispositif de montage VESA. Ce dispositif vous permet de fixer le système à tout support ou extension respectant les spécifications VESA. 1. Pour détacher l'ancien support, desserrez les quatre vis de montage VESA à l'arrière du système. 2. Pour fixer le nouveau support ou la nouvelle extension, placez sa plaque VESA sur le renfoncement arrière du système et serrez les quatre vis de montage VESA, comme indiqué sur la figure. FIGURE 5 Fixation d'un support VESA au système Sun Ray 150 Enterprise Appliance Guide de l'utilisateur du Sun Ray 150 Enterprise Appliance fr-7 Dépannage Avant d'appeler le service technique, consultez les informations de cette section afin de voir si vous pouvez résoudre le problème par vous-même. Si vous avez malgré tout besoin d'aide, veuillez vous adresser à l'assistance technique Sun. TABLE 1 fr-8 Conseils de dépannage Problème Solution Il n'y a pas d'image. • Assurez-vous que le système est bien branché. • Le système est peut-être en mode PowerSaver. Déplacez la souris pour activer l'affichage. L'image est trop grande pour l'écran, si bien que certaines icônes disparaissent de l'affichage. Le système Sun Ray 150 gère uniquement une résolution de 1024 x 768 (60 Hz). Si l'image envoyée par le serveur d'entreprise Sun Ray possède une résolution élevée, elle crée un effet de « panoramique » sur le système. Si cet effet est indésirable sur votre bureau, vous disposez de deux méthodes pour modifier la résolution : • Ouvrez une fenêtre de terminal et entrez la commande suivante : /opt/SUNWut/lib/utxconfig -r 1024x768 Si la carte à mémoire est insérée dans l'appareil lorsque vous entrez cette commande, le nouveau paramètre de l'affichage est associé à cette carte et il applique ses instructions à tout autre système relié au serveur d'entreprise Sun Ray. Si la carte à mémoire n'est pas insérée dans l'appareil lorsque vous entrez cette commande, le nouveau paramètre de l'affichage est associé au système et il s'applique tant que vous-même ou un autre utilisateur n'entrez pas la commande utxconfig pour le modifier. • Demandez à l'administrateur système d'utiliser la commande utxconfig, qui fait l'objet d'une description complète dans la documentation de l'administration système Sun Ray, pour modifier le mode d'affichage. L'image est trop claire ou trop foncée. Ajustez la luminosité au moyen du paramètre approprié (voir page fr-14). Le clavier ou la souris ne répond pas. • Déconnectez le clavier ou la souris, puis attendez 15 secondes avant de reconnecter. • Déconnectez le câble d'alimentation, puis attendez 15 secondes avant de reconnecter. Guide de l’utilisateur du Sun Ray 150 Enterprise Appliance • Juin 2000 TABLE 1 Conseils de dépannage (Suite) Problème Solution Le voyant d'alimentation reste jaune fixe pendant plus de 3 secondes. Une panne matérielle s'est produite. Demandez à l'administrateur système de vous fournir une nouvelle unité. Voir « Voyants » à la page fr-11 pour de plus amples informations. Le voyant d'alimentation est vert clignotant. L'unité ne peut pas fonctionner. Adressez-vous à votre administrateur système pour corriger le problème. Voir « Voyants » à la page fr-11 pour de plus amples informations. Vous ne pouvez pas régler le système en utilisant les boutons du panneau avant. Adressez-vous à l'assistance technique Sun. Icônes d'état Les icônes ci-dessous indiquent l'état d'amorçage du système. Icône Explication Solution L'unité démarre. Attendez. Si l'unité ne démarre pas dans un bref délai, contactez l'administrateur système. Le serveur est en train de télécharger des informations dans la mémoire morte programmable (PROM) de l’unité. Attendez. L'unité redémarrera à la fin du téléchargement. L'unité est défaillante. L'unité a essayé d'effectuer un téléchargement du serveur vers la mémoire morte programmable (PROM), mais sans succès. Contactez l’administrateur système. Guide de l'utilisateur du Sun Ray 150 Enterprise Appliance fr-9 Icône fr-10 Explication Solution L’unité ne détecte aucun signal Ethernet. L’adresse Ethernet de l'unité est affichée. Vérifiez que le câble Ethernet est correctement branché à l’arrière de l’unité et dans la prise réseau appropriée. Si le problème persiste, contactez l’administrateur système. L’unité ne peut pas communiquer avec le logiciel du serveur. Contactez l’administrateur système. Le son a été coupé. Appuyez de nouveau sur la touche Mute ou utilisez l'écran de configuration (page fr-13) pour activer le son. Le volume a été changé. Appuyez sur les touches de volume ou utilisez l'écran de configuration (page fr-13) pour régler le volume. L'adresse Ethernet de l'unité apparaît lorsque les trois touches du contrôle de volume audio sont enfoncées simultanément ou lors du branchement initial du câble Ethernet. L'adresse disparaît après 15 secondes. Guide de l’utilisateur du Sun Ray 150 Enterprise Appliance • Juin 2000 Icône Explication Solution Invite d'insertion de la carte à mémoire. Insérez la carte à mémoire. L'unité ne peut pas lire la carte à mémoire. Insérez la carte à mémoire correctement. Nettoyez les contacts de la carte à mémoire et insérez-la à nouveau. Contactez l’administrateur système. L’accès vous est refusé. Contactez l’administrateur système. Voyants Le système Sun Ray 150 Enterprise Appliance possède deux voyants (Alimentation /Panne et Carte à mémoire), dont les états sont indiqués dans le tableau ci-dessous. Voyant État Explication Alimentation/ Panne Hors tension L’unité est actuellement débranchée. Jaune La DEL s’allume brièvement pendant 2 à 3 secondes lors de la mise sous tension pendant que l’unité vérifie le matériel. Si cette DEL reste allumée ou s’allume à tout autre moment, une panne matérielle s’est produite. Demandez à l'administrateur système de vous fournir une nouvelle unité. Vert L’unité est sous tension et le matériel fonctionne correctement. Clignotant L'unité ne peut pas fonctionner. Adressez-vous à votre administrateur système pour corriger le problème. Guide de l'utilisateur du Sun Ray 150 Enterprise Appliance fr-11 Voyant État Explication Carte à mémoire Hors tension Pas de carte à mémoire insérée. Sous tension La carte à mémoire a été insérée correctement. Clignotant Vous pouvez maintenant entrer votre numéro d’identification personnel (PIN) sécurisé (installation sécurisée de la carte à mémoire uniquement). PowerSaver Le système Sun Ray 150 Enterprise Appliance est doté du dispositif PowerSaver intégré de gestion de l'alimentation. Ce dispositif permet de réduire la consommation d'énergie en passant le système en mode de veille lorsqu'il est inactif depuis un temps donné. Le tableau ci-dessous indique les caractéristiques des modes d'alimentation normale et PowerSaver. Pour revenir en mode normal, déplacez la souris ou appuyez sur une touche quelconque du clavier. TABLE 2 États de l'alimentation du système Sun Ray 150 Enterprise Appliance État Affichage Voyant d'alimentation Consommation approximative Mode normal Actif Vert 30 W PowerSaver Vide Vert 15 W Réglage de la session ou de l'affichage Le système Sun Ray 150 Enterprise Appliance propose deux groupes de contrôles écran, qui vous permettent d'ajuster les réglages sur votre bureau : ■ ■ fr-12 L'écran de configuration vous permet d'ajuster les réglages de la session Sun Ray. Les boutons de la partie Brightness vous permettent de régler la luminosité de l'affichage. Guide de l’utilisateur du Sun Ray 150 Enterprise Appliance • Juin 2000 Réglage des attributs de session L'écran de configuration Sun Ray vous permet de contrôler les fonctions suivantes de votre session Sun Ray : ■ ■ ■ ■ Entrée et sortie audio Vitesse de la souris Fréquence et résolution d'affichage Entrée vidéo Remarque: Pour modifier le réglage de l'affichage sur le système Sun Ray 150 Enterprise Appliance, il est recommandé d'employer la commande utxconfig, comme décrit dans la section « Dépannage » à la page fr-8. FIGURE 6 Écran de configuration du système Sun Ray 150 Enterprise Appliance Pour utiliser l'écran de configuration 1. Ouvrez l'écran de configuration en appliquant l'une des méthodes suivantes : ■ Appuyez sur Maj+Props à partir du clavier. ■ Ouvrez une fenêtre de terminal et entrez : % /opt/SUNWut/bin/utsettings L'écran de configuration apparaît au bout de quelques secondes. Guide de l'utilisateur du Sun Ray 150 Enterprise Appliance fr-13 2. Sélectionnez la catégorie voulue, puis le paramètre approprié. Contactez l'administrateur système si vous avez des questions. Réglage de la luminosité de l'écran Les boutons qui se trouvent sur le panneau droit du système Sun Ray 150 Enterprise Appliance vous permettent de régler la luminosité de l'affichage. Pour régler la luminosité ● Utilisez les boutons prévus à cet effet pour régler la luminosité. Mode d'affichage Le système Sun Ray 150 Enterprise Appliance affiche les images à une résolution de 1024 x 768 (60 Hz). Si le serveur d'entreprise Sun Ray utilise un autre mode d'affichage, vous risquez de constater un effet de panoramique. Reportez-vous à la section « Dépannage » à la page fr-8 si cet effet est indésirable pour votre bureau. fr-14 Guide de l’utilisateur du Sun Ray 150 Enterprise Appliance • Juin 2000 Maintenance du système Attention: Pour écarter tout risque de décharge électrique, ne démontez jamais l'armoire. L'utilisateur ne doit jamais assurer le service de l'unité. La maintenance utilisateur est limitée au nettoyage de l'unité, comme expliqué ci-dessous. Pour nettoyer le système 1. Débranchez le système de la prise murale avant de passer au nettoyage. 2. Pour nettoyer l'écran, humidifiez légèrement un chiffon doux et propre avec de l'eau ou un détergent non abrasif. Si possible, utilisez un chiffon de nettoyage spécial ou une solution appropriée au revêtement antistatique. 3. Pour nettoyer l'armoire, utilisez un chiffon légèrement imbibé d'un détergent non abrasif. Attention: N'utilisez jamais un produit de nettoyage inflammable pour nettoyer le système Sun Ray 150 Enterprise Appliance ou tout autre appareil électrique. Guide de l'utilisateur du Sun Ray 150 Enterprise Appliance fr-15 Spécifications Le tableau ci-dessous répertorie les spécifications du système Sun Ray 150 Enterprise Appliance. TABLE 3 fr-16 Spécifications Composant Description Affichage Écran à cristaux liquides plat AM-TFT de 38,1 cm (15 pouces), résolution de 1024 x 768, pas de pixel de 0,31 mm Poids • Tête d'affichage : 4,0 kg maximum (8,8 livres) • Support : 0,5 kg maximum (1,1 livres) • Total : 4,5 kg maximum (9,9 livres) (Les mesures sont toutes approximatives.) Adaptateur d'alimentation ~100-240 V, 47-63 Hz, 0,5 A Consommation 45 W CA maximum pendant l'utilisation, 15 W CA maximum en mode PowerSaver Montage VESA Respecte la norme FPMPMI, avec espacement de 100 mm Considérations relatives à l'environnement Environnement de fonctionnement • Température : 0˚C à 40˚C (32˚F à 104˚F) • Humidité : 5% à 93% RH • Altitude : 0 m à 3,2 km Environnement de stockage • Température : -20˚C à 60˚C (-4˚F à 140˚F) • Humidité : 5% à 93% RH • Altitude : 0 m à 12,5 km Bruit de fond Puissance sonore déclarée de 3 B selon ISO 9296-1988. Guide de l’utilisateur du Sun Ray 150 Enterprise Appliance • Juin 2000 Sun Ray 150 Enterprise-Gerät – Benutzerhandbuch Dieses Handbuch enthält die folgenden Informationen zur Inbetriebnahme des Sun Ray 150 Enterprise-Geräts. ■ ■ ■ ■ ■ ■ "Übersicht und Installation" auf Seite de-1 "Fehlerbehebung" auf Seite de-8 "Ändern der Sitzung oder der Anzeige" auf Seite de-12 "Anzeigemodus" auf Seite de-14 "Wartung des Geräts" auf Seite de-14 "Spezifikationen" auf Seite de-15 Übersicht und Installation Paketinhalt Überprüfen Sie bitte, ob die folgenden Gegenstände in der Verpackung enthalten sind. Sollte etwas fehlen, setzen Sie sich bitte mit Ihrem Händler in Verbindung. ■ ■ ■ ■ ■ Sun Ray 150 Enterprise-Gerät Netzgerät mit Gleichstromkabel Ethernet-Kabel Dieses Handbuch Optionales Zubehör-Kit mit den folgenden Bestandteilen: ■ ■ ■ ■ Wechselstromkabel Tastatur und Handflächenablage Maus Mauspad de-1 ■ ■ Tastatur/Maus-Betriebsanleitungen Ergonomik-Anleitungen Komponenten der Frontabdeckung m ic ro sy s te m s 1 2 3 4 ABBILDUNG 1 Frontabdeckung und Seiten des Sun Ray 150 Enterprise-Geräts 1. Strom-LED – Leuchtet, wenn das Gerät eingeschaltet ist. 2. Smart Card-LED – Leuchtet, wenn eine Smart Card eingelegt wurde. 3. Smart Card-Leser – Nimmt eine gültige Smart Card an. 4. Helligkeitssteuerungen – Zum Einstellen der Helligkeit. de-2 Sun Ray 150 Enterprise-Gerät – Benutzerhandbuch • Juni 2000 Komponenten auf der Rückseite und an den Seiten 6 7 8 9 1 ABBILDUNG 2 2 3 4 5 Rückseite und Seiten des Sun Ray 150 Enterprise-Geräts 1. Strom (Gleichstromeingang) – Schließen Sie an diesem Anschluß das Netzkabel an. 2. Projektoranschluß – An diesen Anschluß kann ein externer Projektor für Konferenzen und Demos angeschlossen werden. Hinweis – Dieser Anschluß ist nicht zum Anschließen eines zweiten Monitors vorgesehen, und es kann kein Sun Ray-Doppelmonitorgerät erstellt werden. Wenn an diesen Anschluß ein Standard-CRT-Monitor angeschlossen wird, treten aufgrund von inkompatiblen Anzeigemodi möglicherweise Bildschirmstörungen auf. 3. Videoeingang – Eingang für ein Gerät, das ein FBAS-Signal ausgibt. 4. USB-Anschlüsse 1, 2, 3 und 4 – Standard-USB-Anschlüsse für Peripheriegeräte. 5. Netwerkanschluß – 100BASE-T Ethernet-Kabelanschluß (RJ-45). 6. Audio-Stereosignal-Eingang 3,5 mm Stereo-Ministecker – Eingang von einem Audiogerät. Sun Ray 150 Enterprise-Gerät – Benutzerhandbuch de-3 7. Audio-Stereosignal-Ausgang 3,5 mm Stereo-Ministecker – Ausgang zu einem Audiogerät. 8. Kopfhörerausgang – Zum Anschließen von niederohmigen Stereo-Kopfhörern. 9. Mikrophoneingang – Die Mikrophonlautstärke wird über die Software eingestellt. (siehe page de-12). An dieses Gerät kann außerdem eine Kensington-Sperrvorrichtung angeschlossen werden. Der Kensington-Anschluß befindet sich auf der hinteren (vertikalen) Fläche der LCD-Anzeige unter dem Gleichstrom-Anschluß. Eine Kensington-Sperrvorrichtung ist nicht im Lieferumfang enthalten. Installationsanleitungen erhalten Sie in der Dokumentation der Sperrvorrichtung. Aufstellen des Geräts Nehmen Sie das Sun Ray 150 Enterprise-Gerät vorsichtig aus der Verpackung heraus, und stellen Sie es gemäß den folgenden Anleitungen auf. Hinweis – Das Gerät kommuniziert über das Netzwerk mit einem Server, auf dem die Sun Ray-Administrationssoftware installiert wurde. Wenn das Gerät nach dem folgenden Vorgang nicht ordnungsgemäß funktioniert, vergewissern Sie sich bei Ihrem Systemverwalter, daß der Sun Ray Enterprise-Server eingerichtet wurde. So stellen Sie das Gerät auf 1. Legen Sie die Vorderseite des Geräts vorsichtig auf ein Kissen – passen Sie auf, daß der Bildschirm dabei nicht beschädigt wird, – um Zugang zu den Kabelanschlüssen auf der Rückseite zu erhalten. 2. Schließen Sie das Gleichstromnetzkabel an dem dafür vorhergesehenen Anschluß auf der Rückseite des Geräts an. 3. Schließen Sie die Tastatur und die Maus an einem der USB-Anschlüsse an. 4. Schließen Sie das Ethernet-Kabel an dem Ethernet-Anschluß an. de-4 Sun Ray 150 Enterprise-Gerät – Benutzerhandbuch • Juni 2000 5. Stellen Sie das Gerät senkrecht auf Ihre Arbeitsfläche, stecken Sie das eine Ende des Wechselstromkabels in das Netzgerät und das andere Ende in eine Steckdose in der Nähe ein. Wenn auf dem Bildschirm des Geräts ein Bild angezeigt wird, ist die Installation abgeschlossen. Kabelanschlüsse auf der Rückseite des Sun Ray 150 Enterprise-Geräts (die optionalen Kabel in den Anschlüssen 2 und 3 sind zur Referenz abgebildet) ABBILDUNG 3 Hinweis – Wenn das Monitorbild zu groß ist, wodurch einige Symbole nicht sichtbar sind, können Sie oder Ihr Systemverwalter mit dem Befehl utxconfig den Anzeigemodus ändern. Anleitungen finden Sie unter "Fehlerbehebung" auf Seite de-8. Sun Ray 150 Enterprise-Gerät – Benutzerhandbuch de-5 So legen Sie eine Smart Card ein ● Legen Sie die Smart Card, die rechteckige Platine zur Rückseite des Geräts zeigend und in Richtung Karteneinschub ausgerichtet, ein. m ABBILDUNG 4 de-6 ic ro sy s te m s Einlegen einer Smart Card in das Sun Ray 150 Enterprise-Gerät Sun Ray 150 Enterprise-Gerät – Benutzerhandbuch • Juni 2000 So befestigen Sie einen VESA-Fuß Das Sun Ray 150 Enterprise-Gerät besitzt ein VESA-Montagesystem. Mit diesem System können Sie das Gerät an einem Fuß oder Arm befestigen, der den VESASpezifikationen entspricht. 1. Nehmen Sie den alten Fuß ab, indem Sie die vier VESA-Schrauben auf der Rückseite des Geräts lösen. 2. Befestigen Sie den neuen Fuß oder Arm, indem Sie in die Vertiefung auf der Rückseite des Geräts die entsprechende VESA-Platte einsetzen und die vier VESA-Schrauben, wie in der Abbildung gezeigt, festschrauben. ABBILDUNG 5 Anbringen eines VESA-Fußes am Sun Ray 150 Enterprise-Gerät Sun Ray 150 Enterprise-Gerät – Benutzerhandbuch de-7 Fehlerbehebung Bevor Sie den Kundendienst anrufen, lesen Sie die in diesem Abschnitt enthaltenen Informationen, um zu prüfen, ob Sie das Problem selbst beheben können. Wenn Sie Hilfe benötigen, setzen Sie sich bitte mit dem technischen Kundendienst von Sun in Verbindung. TABELLE 1 de-8 Tips zur Fehlerbehebung Problem Lösung Es wird kein Monitorbild angezeigt. • Überprüfen Sie, ob das Gerät an den Strom angeschlossen ist. • Das Gerät befindet sich möglicherweise im PowerSaver-Modus. Bewegen Sie die Maus, um den Bildschirm zu aktivieren. Das Bild ist für den Bildschirm zu groß, wodurch einige Symbole nicht sichtbar sind. Das Sun Ray 150-Gerät unterstützt nur eine Bildschirmauflösung von 1024 x 768 bei 60 Hz. Wenn das vom Sun Ray Enterprise-Server gesendete Bild eine höhere Auflösung hat, entsteht auf dem Monitor ein "Schwenkeffekt". Wenn Sie diesen Effekt auf Ihrem Desktop vermeiden möchten, können Sie die Auflösung auf zwei Arten ändern: • Öffnen Sie ein Terminal-Fenster, und geben Sie den folgenden Befehl ein: /opt/SUNWut/lib/utxconfig -r 1024x768 Wenn Sie diesen Befehl mit eingelegter Smart Card eingeben, wird die neue Bildschirmeinstellung mit der Smart Card gespeichert und auf alle mit dem Sun Ray Enterprise-Server verbundenen Geräte angewandt, in die die Smart Card eingelegt wird. Wenn Sie diesen Befehl eingeben, ohne daß die Smart Card eingelegt ist, wird die neue Bildschirmeinstellung mit dem Gerät gespeichert und bleibt so lange wirksam, bis ein anderer Benutzer den Befehl utxconfig eingibt, um die Einstellung zu ändern. • Bitten Sie Ihren Systemverwalter, mit dem Befehl utxconfig, der in der Dokumentation zur Sun Ray-Systemverwaltung beschrieben ist, den Anzeigemodus für alle Geräte zu ändern. Das Monitorbild ist zu hell oder zu dunkel. Ändern Sie die Helligkeitseinstellung (siehe Seite de-14). Die Tastatur oder die Maus reagiert nicht. • Trennen Sie die Tastatur oder die Maus vom Anschluß, warten Sie 15 Sekunden, und stellen Sie die Verbindung wieder her. • Stecken Sie das Netzkabel aus, warten Sie 15 Sekunden, und schließen Sie es wieder an. Sun Ray 150 Enterprise-Gerät – Benutzerhandbuch • Juni 2000 TABELLE 1 Tips zur Fehlerbehebung (Fortsetzung) Problem Lösung Die Strom-LEDLeuchte leuchtet länger als 3 Sekunden gelb. Es ist ein Hardware-Fehler aufgetreten. Setzen Sie sich mit Ihrem Systemverwalter in Verbindung, damit das Gerät ausgetauscht wird. Weitere Informationen erhalten Sie unter "LED-Leuchten" auf Seite de-11. Die Strom-LEDLeuchte blinkt grün. Das Gerät ist nicht betriebsbereit Wenden Sie sich zur Fehlerbehebung an Ihren Systemverwalter. Weitere Informationen erhalten Sie unter "LED-Leuchten" auf Seite de-11. Das Gerät kann nicht mit den Tasten auf der Frontabdeckung eingestellt werden. Wenden Sie sich bitte an den technischen Kundendienst von Sun. Statussymbole Die Symbole unten weisen auf den Boot-Status des Geräts hin. Symbol Bedeutung Auszuführende Handlung Inbetriebnahme des Geräts. Bitte warten. Wenn sich das Gerät nicht innerhalb von kurzer Zeit einschaltet, setzen Sie sich mit Ihrem Systemverwalter in Verbindung. Der Server nimmt ein Download in den PROM des Geräts vor. Bitte warten. Das Gerät wird neu gestartet, sobald das Downloading abgeschlossen ist. Es ist ein Gerätefehler aufgetreten. Der Versuch des Geräts, vom Server in den PROM downzuloaden, schlug fehl. Setzen Sie sich mit Ihrem Systemverwalter in Verbindung. Sun Ray 150 Enterprise-Gerät – Benutzerhandbuch de-9 Symbol de-10 Bedeutung Auszuführende Handlung Das Gerät kann kein Ethernet-Signal erkennen. Die Ethernet-Adresse des Geräts wird angezeigt. Überprüfen Sie, ob das Ethernet-Kabel ordnungsgemäß an der Rückseite des Geräts und im richtigen Netzanschluß eingesteckt ist. Wenn das Problem weiterhin besteht, wenden Sie sich an Ihren Systemverwalter. Das Gerät kann nicht mit der Serversoftware kommunizieren. Setzen Sie sich mit Ihrem Systemverwalter in Verbindung. Der Ton ist abgeschaltet. Drücken Sie erneut die Taste "Mute", oder verwenden Sie das Fenster "Einstellungen" (page de-12), um den Ton erneut einzuschalten. Die Lautstärke wurde verändert. Verstellen Sie die Lautstärke durch Drücken einer der Lautstärketasten oder über das Fenster "Einstellungen" (page de-12). Die Ethernet-Adresse des Geräts wird angezeigt, wenn die drei Lautstärketasten gleichzeitig gedrückt werden oder das Ethernet-Kabel zu Beginn eingesteckt wurde. Die Adresse wird nach 15 Sekunden ausgeblendet. Sun Ray 150 Enterprise-Gerät – Benutzerhandbuch • Juni 2000 Symbol Bedeutung Auszuführende Handlung Aufforderung zum Einlegen der Smart Card. Legen Sie die Smart Card ein. Das Gerät kann die Smart Card nicht lesen. Legen Sie die Smart Card richtig ein. Reinigen Sie die Kontakte auf der Smart Card, und legen Sie die Karte erneut ein. Setzen Sie sich mit Ihrem Systemverwalter in Verbindung. Der Zugriff wurde verwehrt. Setzen Sie sich mit Ihrem Systemverwalter in Verbindung. LED-Leuchten Das Sun Ray 150 Enterprise-Gerät hat zwei LED-Leuchten (Strom/Fehler und Smart Card), deren Statusmodi in der folgenden Tabelle angezeigt werden. LED Status Bedeutung Strom/Fehler Aus Das Gerät ist nicht eingesteckt. Gelb Die LED-Leuchte leuchtet nach dem Einschalten 2 bis 3 Sekunden auf, während das Gerät die Hardware prüft. Wenn die LED-Leuchte weiter oder zu einem anderen Zeitpunkt aufleuchtet, ist ein Hardware-Fehler aufgetreten. Setzen Sie sich mit Ihrem Systemverwalter in Verbindung, damit das Gerät ausgetauscht wird. Grün Das Gerät ist in Betrieb, und die Hardware funktioniert normal. Blinkend Das Gerät ist nicht betriebsbereit Wenden Sie sich zur Fehlerbehebung an Ihren Systemverwalter. Sun Ray 150 Enterprise-Gerät – Benutzerhandbuch de-11 LED Status Bedeutung Smart Card Aus Es wurde keine Smart Card eingelegt. Ein Die Smart Card wurde ordnungsgemäß eingelegt. Blinkend Sie können jetzt Ihren geschützten PIN-Code eingeben (nur bei geschützten Smart Card-Installationen). PowerSaver Das Sun Ray 150 Enterprise-Gerät verfügt über ein integriertes Stromverwaltungssystem, genannt PowerSaver. Dieses System versetzt das Gerät in den Stromsparmodus, wenn es seit einem bestimmten Zeitraum nicht mehr verwendet wurde. In der Tabelle unten sind die Merkmale des normalen und des PowerSaverBetriebszustands aufgezeigt. Bewegen Sie die Maus, oder drücken Sie eine Taste auf der Tastatur, um das Gerät in den normalen Modus zurückzusetzen. TABELLE 2 Betriebszustände des Sun Ray 150 Enterprise-Geräts Status Monitor Strom-LED-Leuchte Ungefährer Stromverbrauch Normaler Betrieb Aktiv Grün 30 W PowerSaver Leerer Bildschirm Grün 15 W Ändern der Sitzung oder der Anzeige Das Sun Ray 150 Enterprise-Gerät besitzt zwei Gruppen von Steuerungen, mit denen Sie die Funktionen auf Ihrem Desktop einstellen können: ■ ■ Im Fenster "Einstellungen" können Sie Funktionen der Sun Ray-Sitzung ändern. Mit der Taste "Brightness" können Sie die Helligkeit des Bildschirms einstellen. Ändern der Sitzungsmerkmale Im Sun Ray-Fenster "Einstellungen" können Sie die folgenden Funktionen der Sun Ray-Sitzung steuern: ■ de-12 Audioeingang und -ausgang Sun Ray 150 Enterprise-Gerät – Benutzerhandbuch • Juni 2000 ■ ■ ■ Mausgeschwindigkeit Bildschirmauflösung und -frequenz Videoeingang Hinweis – Die bevorzugte Methode zum Ändern der Bildschirmeinstellungen des Sun Ray 150 Enterprise-Geräts ist die Verwendung des Befehls utxconfig (siehe "Fehlerbehebung" auf Seite de-8). ABBILDUNG 6 Sun Ray 150 Enterprise-Gerät – Fenster "Einstellungen" So verwenden Sie das Fenster "Einstellungen" 1. Öffnen Sie das Fenster "Einstellungen" mit einer der folgenden Methoden: ■ Drücken Sie auf der Tastatur die Tasten "Shift+Props". ■ Öffnen Sie ein Terminal-Fenster, und geben Sie folgendes ein: % /opt/SUNWut/bin/utsettings Nach wenigen Sekunden wird das Fenster "Einstellungen" eingeblendet. 2. Wählen Sie die Kategorie und anschließend die gewünschte Einstellung aus. Wenn Sie Fragen haben, setzen Sie sich mit Ihrem Systemverwalter in Verbindung. Sun Ray 150 Enterprise-Gerät – Benutzerhandbuch de-13 Ändern der Bildschirmhelligkeit Mit den Tasten zur Einstellung der Helligkeit ("Brightness") auf der rechten Seite des Sun Ray 150 Enterprise-Geräts können Sie die Helligkeit des Bildschirms einstellen. So ändern Sie die Helligkeit ● Verändern Sie mit den Helligkeitstasten die Bildschirmhelligkeit. Anzeigemodus Das Sun Ray 150 Enterprise-Gerät zeigt Bilder mit einer Auflösung von 1024 x 768 bei 60 Hz an. Wenn der Sun Ray Enterprise-Server einen anderen Anzeigemodus verwendet, kann ein Schwenkeffekt entstehen. Wenn dieser Effekt für Ihren speziellen Desktop nicht wünschenswert ist, lesen Sie nach unter "Fehlerbehebung" auf Seite de-8. Wartung des Geräts Warnhinweis – Um die Gefahr von elektrischen Schlägen zu reduzieren, darf das Gehäuse nicht auseinandergenommen werden. Für das Gerät ist keine Wartung durch den Benutzer vorgesehen. Eine Wartung durch den Benutzer beschränkt sich auf die Reinigung, wie weiter unten beschrieben. So reinigen Sie das Gerät 1. Ziehen Sie vor dem Reinigen das Gerätenetzkabel aus der Steckdose. 2. Befeuchten Sie zum Reinigen des Bildschirms ein weiches sauberes Tuch mit Wasser oder mit einem milden Reinigungsmittel. Verwenden Sie idealerweise ein spezielles Tuch und eine spezielle Lösung, die für die antistatische Beschichtung geeignet sind. 3. Reinigen Sie das Gehäuse mit einem Tuch, das Sie mit einem milden Reinigungsmittel befeuchten. de-14 Sun Ray 150 Enterprise-Gerät – Benutzerhandbuch • Juni 2000 Warnhinweis – Verwenden Sie zum Reinigen des Sun Ray 150 Enterprise-Geräts oder eines anderen Elektrogeräts kein entzündbares Reinigungsmaterial. Spezifikationen In der Tabelle unten sind die Spezifikationen des Sun Ray 150 Enterprise-Geräts aufgelistet. TABELLE 3 Spezifikationen Element Beschreibung Monitor 38,1 cm (15,0 Zoll) AM-TFT-LCD-Flachbildschirm, 1024 x 768 Auflösung, 0,31 mm volle Pixeldichte Gewicht • Monitor – maximal 4,0 kg • Fuß – maximal 0,5 kg • Gesamt – maximal 4,5 kg (Alle Meßwerte sind ungefähre Angaben.) Stromadapter ~100-240 V, 47-63 Hz, 0,5 A Stromverbrauch 45 W Wechselstrom bei Normalbetrieb, 15 W Wechselstrom im PowerSaver-Modus VESA-Fuß Entspricht dem FPMPMI-Standard, 100 mm Abstand Äußere Bedingungen Betriebsumgebung • Temperatur – 0 C bis 40 C • Feuchtigkeit – 5% bis 93% Relative L. • Höhe – 0 m bis 3,2 km Lagerbedingungen • Temperatur – -20 C bis 60 C • Feuchtigkeit – 5% bis 93% Relative L. • Höhe – 0 m bis 12,5 km Akustische Geräusche 3,0 dB deklarierte Schallleistung gemäß ISO 9296-1988 Sun Ray 150 Enterprise-Gerät – Benutzerhandbuch de-15 de-16 Sun Ray 150 Enterprise-Gerät – Benutzerhandbuch • Juni 2000 Guida dell'utente di Sun Ray 150 Enterprise Appliance Questa guida fornisce le seguenti informazioni, come supporto ai nuovi utenti di Sun Ray 150 Enterprise Appliance. ■ ■ ■ ■ ■ ■ “Informazioni generali e installazione” a pagina it-1 “Soluzione dei problemi” a pagina it-8 “Regolazione della sessione o della visualizzazione” a pagina it-12 “Modalità di visualizzazione” a pagina it-14 “Manutenzione dell'apparecchio” a pagina it-15 “Specifiche” a pagina it-16 Informazioni generali e installazione Contenuto dell'imballaggio Assicurarsi che i seguenti componenti siano inclusi nell'imballaggio. Nel caso che alcuni componenti non siano presenti, contattare il rivenditore. ■ ■ ■ ■ ■ Sun Ray 150 Enterprise Appliance Alimentatore con cavo di alimentazione CC collegato. Cavo ethernet Il presente manuale Componenti accessori opzionali, inclusi: ■ ■ ■ ■ Cavo per CA Tastiera e supporto per la mano Mouse Tappetino per mouse it-1 ■ ■ La guida operativa della tastiera/mouse Guida all'ergonomia Componenti del Pannello di controllo m ic ro sy s te m s 1 2 3 4 FIGURA 1 Pannelli frontale e laterali del Sun Ray 150 Enterprise Appliance 1. LED di accensione — si illumina quando l'apparecchio viene acceso. 2. LED smart card — si illumina quando viene inserita una smart card. 3. Lettore smart card — accetta smart card valide. 4. Controlli di luminosità — regolano la luminosità dello schermo. it-2 Guida dell’utente di Sun Ray 150 Enterprise Appliance • Giugno 2000 Componenti dei pannelli posteriore e laterali 6 7 8 9 1 FIGURA 2 2 3 4 5 Pannelli posteriore e laterali del Sun Ray 150 Enterprise Appliance 1. Alimentazione (ingresso alimentazione in CC) — connettere il cavo di alimentazione a questa presa. 2. Porta per proiettore — è possibile connettere un proiettore esterno a questa porta, utile per conferenze e dimostrazioni. Nota – Notare che questa porta non è adatta per il collegamento di uno schermo aggiuntivo per creare un Sun Ray a “due schermi”. Se si collega uno schermo tradizionale a questa porta, l'immagine potrebbe essere incorretta a causa delle modalità di visualizzazione incompatibili. 3. Video in — ingresso per dispositivi che forniscono un segnale video composito. 4. Porte USB 1, 2, 3 e 4 — porte USB standard per la connessione di periferiche. 5. Connettore per la rete — connettore per cavo 100BASE-T Ethernet (RJ-45). 6. Presa jack da 3,5 mm d'ingresso line-in — ingresso per la connessione di un dispositivo audio. Guida dell'utente di Sun Ray 150 Enterprise Appliance it-3 7. Presa jack da 3,5 mm line-out stereo — uscita linea per la connessione di un dispositivo audio. 8. Uscita Headphone — progettata per cuffie stereo a bassa impedenza. 9. Ingresso Microphone — è possibile regolare il volume del microfono per mezzo del software.(vedi page it-13). Questo apparecchio offre la possibilità di collegare un dispositivo di sicurezza di tipo Kensington sul pannello del cabinet. Lo slot Kensington si trova nella parte verticale posteriore dell’LCD, al di sotto del connettore per l'alimentazione CC. Il dispositivo di sicurezza Kensington non è incluso. Per istruzioni riguardo l'installazione, riferirsi alla documentazione del dispositivo di sicurezza. Montaggio e installazione dell'apparecchio Dopo aver rimosso con la dovuta cura il Sun Ray 100 Enterprise Appliance, installarlo utilizzando le procedure riportate di seguito. Nota – Questo apparecchio funziona comunicando sulla rete con un server sul quale sia stato installato il software di amministrazione Sun Ray. Se l'apparecchio non dovesse funzionare correttamente una volta eseguite le procedure seguenti, rivolgersi all'amministratore di sistema per assicurarsi che un server Sun Ray risulti installato. Per installare l'apparecchio 1. Porre l'apparecchio con lo schermo verso il basso su un cuscino, facendo attenzione a non danneggiarlo, in modo da accedere ai connettori per i cavi nella parte inferiore sul retro dell'apparecchio. 2. Connettere il cavo di alimentazione alla presa situata nel pannello posteriore dell'apparecchiatura. 3. Connettere la tastiera e il mouse ad una delle porte USB. 4. Connettere il cavo ethernet alla porta ethernet. it-4 Guida dell’utente di Sun Ray 150 Enterprise Appliance • Giugno 2000 5. Porre l'apparecchio di nuovo in posizione normale, connettere il cavo di alimentazione CA all'alimentatore e inserire l'altro capo del cavo CA in una presa di corrente elettrica. Se l'apparecchiatura visualizza una immagine, l'installazione è completa. FIGURA 3 Cavi del pannello posteriore del Sun Ray 150 Enterprise Appliance (i cavi opzionali sui connettori 2 e 3 vengono mostrati per riferimento). Nota – Se l'immagine sullo schermo risultasse troppo grande causando la mancata visualizzazione di alcune icone sullo schermo, l'utente o l'amministratore di sistema possono utilizzare il comando utxconfig per modificare la modalità di visualizzazione. Vedi “Soluzione dei problemi” a pagina it-8 per ulteriori istruzioni. Guida dell'utente di Sun Ray 150 Enterprise Appliance it-5 Per inserire una smart card ● Inserire la smart card con il circuito di forma quadrata rivolto verso il retro dell'apparecchio e orientato verso la fessura di inserzione. m FIGURA 4 it-6 ic ro sy s te m s Inserzione della smart card nel Sun Ray 150 Enterprise Appliance Guida dell’utente di Sun Ray 150 Enterprise Appliance • Giugno 2000 Montaggio di un supporto VESA Il Sun Ray 150 Enterprise Appliance comprende un sistema di supporto VESA. Tale sistema consente di montare l'apparecchio su qualsiasi supporto che rispetti le specifiche VESA. 1. Distaccare il vecchio supporto svitando le quattro viti VESA sul retro dell'apparecchio. 2. Montare il nuovo supporto o estensione inserendo la placca VESA nell'apposito recesso sul retro dell'apparecchio, reinserendo le quattro viti VESA, come mostrato in figura. FIGURA 5 Montaggio di un supporto VESA sul Sun Ray 150 Enterprise Appliance Guida dell'utente di Sun Ray 150 Enterprise Appliance it-7 Soluzione dei problemi Prima di chiamare il servizio di assistenza, controllare le informazioni contenute in questa sezione, per vedere se il problema è di facile soluzione. In caso contrario, contattare il supporto tecnico di Sun. TABELLA 1 it-8 Suggerimenti per la soluzione dei problemi Problema Soluzione Nessuna immagine. • Controllare che l'apparecchiatura sia connessa alla rete elettrica. • L'apparecchio potrebbe trovarsi nella modalità di risparmio dell'energia. Spostare il mouse per attivare lo schermo. L'immagine risulta più grande dello schermo, causando la mancata visualizzazione di alcune icone. Il Sun Ray 150 supporta soltanto una risoluzione pari a 1024 x 768@60 Hz. Se l'immagine inviata dal server Sun Ray Enterprise ha una risoluzione più alta, ciò creerà un effetto “panoramico” sullo schermo dell'apparecchiatura. Se si desidera evitare tale effetto, esistono due modi per cambiare la risoluzione: • Aprire una finestra di terminale e digitare il seguente comando: /opt/SUNWut/lib/utxconfig -r 1024x768 Se si digita questo comando con la smart card inserita nell'apparecchio, le nuove impostazioni verranno associate alla smart card e seguiranno la smart card stessa in qualsiasi altra apparecchiatura connessa ad un server Sun Ray Enterprise. Se si digita questo comando quando la smart card non è inserita, le nuove impostazioni verranno associate con l'apparecchio e rimarranno valide finché un altro utente non digita il comando utxconfig per modificarle. • Richiedere all'amministratore di sistema di modificare la modalità di visualizzazione per tutti gli apparecchi utilizzando il comando utxconfig, descritto in modo completo nella documentazione per l'amministrazione del sistema Sun Ray. L'immagine è troppo chiara o troppo scura. Regolare le impostazioni della luminosità (vedi pagina it-14). Nessuna risposta dalla tastiera o dal mouse. • Disconnettere la tastiera o il mouse, attendere 15 secondi e quindi riconnettere. • Disconnettere il cavo di alimentazione, attendere 15 secondi e riconnettere. Guida dell’utente di Sun Ray 150 Enterprise Appliance • Giugno 2000 TABELLA 1 Suggerimenti per la soluzione dei problemi (Continua) Problema Soluzione La luce spia di accensione è di colore giallo per più di tre secondi. Si è verificato un malfunzionamento dell'hardware. Rivolgersi all'amministratore di sistema per la sostituzione dell'unità difettosa. Per ulteriori informazioni, vedi “Indicatori LED” a pagina it-11. La luce spia di accensione è di colore verde lampeggiante. L'unità non è operativa. Per risolvere il problema, contattare l'amministratore di sistema. Per ulteriori informazioni, vedi “Indicatori LED” a pagina it-11. Non è possibile regolare l'apparecchio con i pulsanti posti sul pannello frontale. Contattare il supporto tecnico di Sun. Icone di stato Le icone qui sotto indicano lo stato di avviamento dell'apparecchio. Icona Significato Azione L'unità si sta avviando. Attendere. Se l'unità non si avvia in breve tempo, contattare l'amministratore di sistema. Il server sta scaricando la PROM dell'unità. Attendere. L'unità verrà riavviata una volta completato lo scaricamento. Si è verificato un malfunzionamento dell'unità. L'unità ha tentato di scaricare dati dal server alla PROM, ma l'operazione non è riuscita. Contattare l'amministratore di sistema. Guida dell'utente di Sun Ray 150 Enterprise Appliance it-9 Icona it-10 Significato Azione L'unità non rileva il segnale ethernet. Viene visualizzato l'indirizzo ethernet dell'unità. Controllare che il cavo ethernet nella parte posteriore dell'unità sia inserito nel modo corretto e che sia stato collegato al giusto connettore. Se il problema persiste, contattare l'amministratore di sistema. L'unità non è in grado di comunicare con il software del server. Contattare l'amministratore di sistema. L'audio è stato disattivato. Per riattivare l'audio, premere di nuovo il tasto Mute o utilizzare la schermata Impostazioni (page it-13). Il volume è stato modificato. Per regolare il volume, premere uno dei tasti di regolazione del volume, o utilizzare la schermata Impostazioni (page it-13). L'indirizzo ethernet dell'unità viene visualizzato quando si premono simultaneamente i tre tasti per la regolazione del volume o al momento dell'inserzione iniziale del cavo ethernet. L'indirizzo sparisce dopo 15 secondi. Guida dell’utente di Sun Ray 150 Enterprise Appliance • Giugno 2000 Icona Significato Azione Richiesta di inserzione della smart card. Inserire la smart card. L'unità non è in grado di leggere la smart card. Inserire la smart card correttamente. Pulire i contatti della smart card e reinserirla. Contattare l'amministratore di sistema. Accesso negato. Contattare l'amministratore di sistema. Indicatori LED Sun Ray 150 comprende due indicatori LED (Alimentazione/Errore e smart card): gli stati possibili di tali indicatori sono mostrati nella tabella riportata di seguito. LED Stato Significato Power/Fault Spento L'unità non è collegata alla rete elettrica. Giallo Il LED si accende brevemente per 2-3 secondi all'accensione mentre l'unità controlla lo stato dell'hardware. Se tale LED rimane acceso, o si accende in qualsiasi altro momento, si è verificato un malfunzionamento hardware. Rivolgersi all'amministratore di sistema per la sostituzione dell'unità difettosa. Verde L'unità è accesa e l'hardware funziona normalmente. Lampeggiante L'unità non è operativa. Per risolvere il problema, contattare l'amministratore di sistema. Guida dell'utente di Sun Ray 150 Enterprise Appliance it-11 LED Stato Significato Smart card Spento Nessuna smart card inserita. Acceso La smart card è stata inserita correttamente. Lampeggiante È possibile a questo punto immettere il PIN di sicurezza (solo per smart card protette). PowerSaver Il Sun Ray 150 Enterprise Appliance include un sistema per la gestione dell'alimentazione chiamato PowerSaver. Tale sistema risparmia energia ponendo l'apparecchio in modalità a basso consumo quando non viene utilizzato per un certo tempo. La tabella qui sotto mostra le caratteristiche delle modalità normale e PowerSaver. Per riportare l'apparecchio in modalità normale, spostare il mouse o premere un tasto sulla tastiera. TABELLA 2 Modalità di consumo di Sun Ray 150 Enterprise Appliance Stato Schermo Spia di accensione Consumo approssimato Operatività normale Attivo Verde 30W PowerSaver Nessuna immagine Verde 15W Regolazione della sessione o della visualizzazione Sun Ray 150 comprende due tipi di controllo che consentono di regolare le caratteristiche del desktop: ■ ■ it-12 La schermata Impostazioni consente di regolare le caratteristiche della sessione di Sun Ray. Il pulsante Brightness consente di regolare la luminosità dello schermo. Guida dell’utente di Sun Ray 150 Enterprise Appliance • Giugno 2000 Regolazione degli attributi della sessione La schermata Impostazioni sul Sun Ray consente di controllare le seguenti caratteristiche della sessione di Sun Ray: ■ ■ ■ ■ Ingresso e uscita audio Velocità del mouse Risoluzione e frequenza dello schermo Ingresso video Nota – Il metodo consigliato per la modifica delle impostazioni di visualizzazione di Sun Ray 150 Enterprise Appliance è quello di usare il comando utxconfig come descritto in “Soluzione dei problemi” a pagina it-8. FIGURA 6 Schermata Impostazioni di Sun Ray 150 Utilizzazione dello schermata Impostazioni 1. Aprire la schermata Impostazioni utilizzando uno dei metodi seguenti: ■ Premere Shift+Props sulla tastiera. ■ Aprire una finestra di terminale e digitare: % /opt/SUNWut/bin/utsettings Dopo alcuni secondi appare la schermata Impostazioni. Guida dell'utente di Sun Ray 150 Enterprise Appliance it-13 2. Selezionare la categoria, quindi l'impostazione desiderata. Contattare l'amministratore di sistema in caso si desideri avere chiarimenti. Regolazione della luminosità dello schermo I pulsanti Brightness situati nel pannello di destra del Sun Ray 150 consentono di regolare la luminosità dello schermo. Per regolare la luminosità ● Utilizzare i pulsanti Brightness per aumentare o diminuire la luminosità dello schermo. Modalità di visualizzazione Il Sun Ray 150 Enterprise Appliance visualizza le immagini con una risoluzione pari a 1024 x 768 a 60 Hz. Se il server utilizza una modalità di visualizzazione differente, si può avere un effetto "panorama" sull'immagine. Se non si desidera avere questo effetto, vedere “Soluzione dei problemi” a pagina it-8. it-14 Guida dell’utente di Sun Ray 150 Enterprise Appliance • Giugno 2000 Manutenzione dell'apparecchio Attenzione – Per ridurre il pericolo di scossa elettrica, non aprire il cabinet. Questa unità non è stata progettata per essere riparata dall'utente. La manutenzione effettuata dall'utente è limitata alla pulizia dell'apparecchio, come spiegato qui sotto. Pulizia dell'apparecchio 1. Prima di effettuare al pulizia, disconnettere l'apparecchio dalla rete elettrica. 2. Per pulire lo schermo, inumidire un panno soffice e pulito con dell'acqua o alcune gocce di detergente delicato. Se possibile, utilizzare un panno specificamente progettato per la pulizia dello schermo o una soluzione adatta a superfici antistatiche. 3. Per pulire il cabinet, utilizzare un panno inumidito con del detergente delicato. Attenzione – Non utilizzare mai materiali infiammabili per pulire il Sun Ray 150 Enterprise Appliance, come per qualunque altro apparecchio elettrico. Guida dell'utente di Sun Ray 150 Enterprise Appliance it-15 Specifiche La tabella qui sotto elenca le specifiche tecniche del Sun Ray 150. TABELLA 3 it-16 Specifiche Parte Descrizione Schermo Pannello piatto AM-TFT-LCD 38.1 cm (15 pollici), con risoluzione 1024 x 768 e pixel pitch pari a 0,31mm Peso • Schermo — 4,0 kg massimo (8,8 libbre) • Supporto — 0,5 kg massimo (1,1 libbre) • Totale — 4,5 kg massimo (9,9 libbre) (Tutte le misure sono approssimate.) Alimentatore ~100-240V, 47-63Hz, 0,5 A Consumi 45 W AC massimo durante l'uso, 15W AC massimo in modalità di risparmio di energia Supporto di tipo VESA Rispetta gli standard FPMPMI, spaziatura 100 mm Caratteristiche ambientali considerazioni Ambiente operativo • Temperatura — 0C a 40C (32F a 104F) • Umidità — dal 5% al 93% RH • Altitudine — da 0 m a 3,2 km (da 0 a 103.500 piedi) Ambiente di stoccaggio • Temperatura — da -20C a 60C (da -4F a 140F) • Umidità — dal 5% al 93% RH • Altitudine — da 0 m a 12,5 km (da 0 a 41.000 piedi) Rumore 3,0 B potenza audio dichiarate secondo ISO 9296-1988 Guida dell’utente di Sun Ray 150 Enterprise Appliance • Giugno 2000 Guía del usuario de Sun Ray 150 Enterprise Appliance Para ayudarle a familiarizarse con la nueva unidad Sun Ray 150 Enterprise Appliance, en esta guía se ofrece la siguiente información: ■ ■ ■ ■ ■ ■ “Descripción general e instalación” en la página es-1 “Resolución de problemas” en la página es-8 “Ajuste de la sesión o pantalla” en la página es-12 “Modalidad de visualización” en la página es-14 “Mantenimiento de la unidad” en la página es-14 “Especificaciones” en la página es-16 Descripción general e instalación Contenido del paquete Compruebe que la caja de embalaje contenga los siguientes elementos. Si falta alguno, póngase en contacto con el distribuidor. ■ ■ ■ ■ ■ La unidad Sun Ray 150 Enterprise Appliance Fuente de alimentación con cable de CA conectado Cable para Ethernet Este manual Kit opcional de accesorios, que incluye: ■ ■ ■ ■ Cable de alimentación Teclado y reposamanos Ratón Alfombrilla es-1 ■ ■ Guía de funcionamiento del teclado y del ratón Guía sobre ergonomía Componentes del panel frontal m ic ro sy s te m s 1 2 3 4 FIGURA 1 Paneles frontal y lateral de la unidad Sun Ray 150 Enterprise Appliance 1. Indicador LED de encendido: Se ilumina cuando la unidad está encendida. 2. Indicador LED de tarjeta inteligente: Se ilumina al insertar una tarjeta inteligente. 3. Lector de tarjeta inteligente: Acepta una tarjeta inteligente que sea válida. 4. Controles de brillo: Aumentan o reducen el brillo de la pantalla. es-2 Guía del usuario de Sun Ray 150 Enterprise Appliance • Junio de 2000 Componentes del panel posterior y lateral 6 7 8 9 1 FIGURA 2 2 3 4 5 Paneles posterior y lateral de la unidad Sun Ray 150 Enterprise Appliance 1. Alimentación (entrada de CC): Aquí va conectado el cable de alimentación. 2. Puerto del proyector: Aquí puede conectarse un dispositivo de pantalla externo para conferencias y presentaciones. Nota: El puerto del proyector no está preparado para conectar un monitor adicional y crear una unidad Sun Ray “de dos pantallas”. Si a este puerto se conecta un monitor CRT estándar, es posible que la imagen de éste presente anomalías, debido a una incompatibilidad de las modalidades de visualización. 3. Entrada de vídeo: Entrada para un dispositivo que proporcione señal de vídeo compuesto. 4. Puertos USB 1, 2, 3 y 4: Puertos USB estándar para periféricos. 5. Conector de red: Para conectar el cable Ethernet 100BASE-T (RJ-45). 6. Mini-conector estéreo de 3,5 mm para la entrada de la señal de audio estéreo: Entrada para un dispositivo de entrada de audio. Guía del usuario de Sun Ray 150 Enterprise Appliance es-3 7. Mini-conector estéreo de 3,5mm para la salida de la señal de audio estéreo: Salida para un dispositivo de audio. 8. Salida de auriculares: Ideada para trabajar con auriculares estéreo de baja impedancia. 9. Salida de micrófono: Para ajustar el volumen del micrófono mediante el software (consulte la página es-12). Esta unidad también ofrece la posibilidad de colocar un dispositivo de seguridad de tipo Kensington. La ranura Kensington está situada en la superficie posterior (vertical) de la pantalla LCD, debajo del conector de entrada de corriente continua. El dispositivo Kensington no viene incluido. Para conocer las instrucciones de instalación, consulte la documentación que acompañe al dispositivo de bloqueo que usted tenga. Instalación de la unidad Extraiga con cuidado de la caja la unidad Sun Ray 150; acto seguido, siga el procedimiento que se indica a continuación para instalarla. Nota: La unidad se comunica a través de la red con un servidor que debe tener instalado el software de administración Sun Ray. Si la unidad no funciona correctamente una vez concluido el siguiente procedimiento, solicite al administrador del sistema que compruebe que el servidor de empresa Sun Ray esté bien configurado. Para instalar la unidad 1. Coloque la unidad cara abajo sobre un cojín, con cuidado para no dañar la pantalla; así podrá acceder cómodamente a los conectores para cables situados en la parte inferior del hueco de la parte trasera. 2. Conecte el cable de alimentación de CC al puerto de alimentación situado en la parte posterior de la unidad. 3. Conecte el teclado y el ratón a cualquiera de los puertos USB. 4. Conecte el cable Ethernet al puerto Ethernet. es-4 Guía del usuario de Sun Ray 150 Enterprise Appliance • Junio de 2000 5. Coloque la unidad boca arriba sobre el escritorio, conecte el cable de alimentación de CA a la fuente de alimentación y enchufe el otro extremo del cable de alimentación de CA a una toma de corriente. Si en la unidad aparece alguna imagen, quiere decir que la instalación ha finalizado. FIGURA 3 Cableado del panel posterior de la unidad Sun Ray 150 Enterprise Appliance (los cables opcionales de los conectores 2 y 3 se muestran a modo de referencia) Nota: Si la imagen es demasiado grande y algunos iconos aparecen ocultos, puede solicitar ayuda al administrador del sistema o tratar de arreglar el problema usted mismo con el comando utxconfig para cambiar la modalidad de visualización. Consulte “Resolución de problemas” en la página es-8 para obtener instrucciones. Guía del usuario de Sun Ray 150 Enterprise Appliance es-5 Para insertar una tarjeta inteligente ● Inserte la tarjeta inteligente con el circuito cuadrado mirando hacia la parte posterior de la unidad y orientado hacia la ranura. m FIGURA 4 es-6 ic ro sy s te m s Inserción de la tarjeta inteligente en la unidad Sun Ray 150 Enterprise Appliance Guía del usuario de Sun Ray 150 Enterprise Appliance • Junio de 2000 Para montar una base de soporte VESA La unidad Sun Ray 150 Enterprise Appliance dispone de un sistema de montaje VESA. Dicho sistema permite conectar la unidad a cualquier base o extensión de soporte que cumpla las especificaciones VESA. 1. Separe la base de soporte antigua; para ello, desenrosque los cuatro tornillos VESA de la parte posterior de la unidad. 2. Acople la nueva base o extensión de soporte; para ello, coloque la placa VESA en la parte posterior de la unidad y enrosque los cuatro tornillos de montaje VESA, tal y como se muestra en la figura. FIGURA 5 Acoplamiento de una base de soporte VESA a la unidad Sun Ray 150 Enterprise Appliance Guía del usuario de Sun Ray 150 Enterprise Appliance es-7 Resolución de problemas Antes de solicitar servicio técnico, lea la información de esta sección para ver si usted mismo puede resolver el problema fácilmente. Si precisa de ayuda, póngase en contacto con el servicio técnico de Sun. TABLA 1 es-8 Consejos para la resolución de problemas Problema Solución No aparece la imagen. • Compruebe que la unidad esté enchufada. • La unidad puede estar en modalidad de ahorro de alimentación (PowerSaver). Mueva el ratón para activar la pantalla. La imagen es demasiado grande para la pantalla, por lo que algunos iconos permanecen ocultos. La unidad Sun Ray 150 sólo admite una resolución de 1024x768, a 60Hz. Si la imagen enviada por el servidor de empresa Sun Ray tiene una resolución superior, en la unidad esto producirá un efecto “panorámico”. Si este efecto constituye un problema, hay dos maneras de cambiar la resolución: • Abra una ventana del terminal y escriba el comando: /opt/SUNWut/lib/utxconfig -r 1024x768 Si este comando se escribe mientras se encuentra insertada una tarjeta inteligente en la unidad, la nueva configuración de visualización se asociará a la tarjeta inteligente, y esa misma tarjeta conservará la nueva configuración al utilizarse en cualquier otra unidad que esté conectada al servidor de empresa Sun Ray. Si al escribir el comando no hay insertada ninguna tarjeta inteligente, la nueva configuración de visualización se asociará a la unidad, y permanecerá vigente hasta que vuelva a escribirse el comando utxconfig para cambiarla. • Para cambiar la modalidad de visualización de todas las unidades, solicite al administrador del sistema que utilice el comando utxconfig, tal y como se explica detalladamente en la documentación dirigida al administrador del sistema de Sun Ray. La imagen es demasiado clara o demasiado oscura. Ajuste el control del brillo (consulte la página es-14). No se obtiene respuesta del teclado o del ratón. • Desconecte el teclado o el ratón, espere 15 segundos y vuelva a conectarlos. • Desconecte el cable de alimentación, espere 15 segundos y vuelva a conectarlo. Guía del usuario de Sun Ray 150 Enterprise Appliance • Junio de 2000 TABLA 1 Consejos para la resolución de problemas (Continúa) Problema Solución El indicador de encendido aparece amarillo durante más de 3 segundos. Se ha producido un error del hardware. Solicite al administrador del sistema que sustituya la unidad. Consulte “Indicadores LED” en la página es-11 para obtener más información. El indicador de encendido parpadea en verde. La unidad no funciona. Solicite al administrador del sistema que corrija el problema. Consulte “Indicadores LED” en la página es-11 para obtener más información. La unidad no puede ajustarse con los botones del panel frontal. Póngase en contacto con el servicio técnico de Sun. Iconos de estado El estado de la unidad se indica por medio de los siguientes iconos. Icono Qué significa Acción a emprender La unidad se está iniciando. Espere. Si la unidad no se inicia en unos segundos, póngase en contacto con el administrador del sistema. En estos momentos, el servidor está transfiriendo datos a la memoria PROM de la unidad. Espere. La unidad se reiniciará cuando la transferencia haya concluido. Se ha producido un error en la unidad al tratar de transferir datos del servidor a la memoria PROM. Póngase en contacto con el administrador del sistema. Guía del usuario de Sun Ray 150 Enterprise Appliance es-9 Icono es-10 Qué significa Acción a emprender La unidad no detecta ninguna señal Ethernet. Aparece indicada la señal Ethernet de la unidad. Compruebe que el cable para Ethernet esté correctamente enchufado a la parte posterior de la unidad y a una toma de corriente adecuada. Si aun así el problema persiste, póngase en contacto con el administrador del sistema. La unidad no consigue comunicarse con el software del servidor. Póngase en contacto con el administrador del sistema. Se ha silenciado el sonido. Pulse de nuevo la tecla de silenciar o bien active el sonido en la pantalla Configuración (página es-12). Se ha modificado el volumen. Pulse las teclas de volumen o bien ajuste el volumen en la pantalla Configuración (página es-12). La dirección Ethernet de la unidad se muestra al pulsar simultáneamente las tres teclas de control del volumen de audio o cuando se enchufa por primera vez el cable para Ethernet. Transcurridos 15 segundos, la dirección desaparece. Guía del usuario de Sun Ray 150 Enterprise Appliance • Junio de 2000 Icono Qué significa Acción a emprender La unidad solicita que se inserte una tarjeta inteligente. Inserte una tarjeta inteligente. La unidad no puede leer la tarjeta inteligente. Inserte la tarjeta inteligente correctamente. Limpie el contacto de la tarjeta y vuelva a insertarla. Póngase en contacto con el administrador del sistema. Se le ha denegado el acceso. Póngase en contacto con el administrador del sistema. Indicadores LED La unidad Sun Ray 150 Enterprise Appliance dispone de dos indicadores LED (Encendido/Fallo y Tarjeta inteligente), que presentan los siguientes estados: LED Estado Qué significa Encendido/Fallo Desactivado La unidad no está enchufada. Amarillo Al encender la unidad, el indicador luminoso se enciende brevemente, durante 2 ó 3 segundos, mientras ésta efectúa una comprobación del hardware. Si el indicador permanece encendido, o si se enciende en cualquier otro momento, significa que se ha producido un error del hardware. Solicite al administrador del sistema que sustituya la unidad. Verde La unidad está encendida y el hardware funciona con toda normalidad. Intermitente La unidad no funciona. Solicite al administrador del sistema que corrija el problema. Guía del usuario de Sun Ray 150 Enterprise Appliance es-11 LED Estado Qué significa Tarjeta inteligente Desactivada No hay ninguna tarjeta inteligente insertada. Activada La tarjeta inteligente está insertada correctamente. Intermitente Ahora puede introducir su NIP (número de identificación personal) sin correr riesgo (sólo en instalaciones seguras de tarjeta inteligente). PowerSaver La unidad Sun Ray 150 Enterprise Appliance incorpora un sistema para ahorrar energía denominado PowerSaver. Cuando la unidad no se utiliza durante un determinado intervalo de tiempo, este sistema transfiere la unidad a la modalidad de bajo consumo. La tabla siguiente muestra las características de las modalidades Normal y PowerSaver. Para volver a la modalidad normal, basta con mover el ratón o pulsar cualquier tecla. TABLA 2 Estados del consumo de la unidad Sun Ray 150 Enterprise Appliance Estado Pantalla Indicador de energía Consumo aproximado Funcionamiento normal Activa Verde 30W PowerSaver En blanco Verde 15W Ajuste de la sesión o pantalla La unidad Sun Ray 150 Enterprise Appliance dispone de dos grupos de controles en pantalla que permiten ajustar las funciones del escritorio: ■ ■ La pantalla Configuración sirve para ajustar las funciones de la sesión Sun Ray. Los botones de Brightness sirven para ajustar el brillo de la pantalla. Ajuste de los atributos de la sesión La pantalla Configuración de la unidad Sun Ray controla las siguientes funciones de la sesión Sun Ray: ■ es-12 Entrada y salida de audio Guía del usuario de Sun Ray 150 Enterprise Appliance • Junio de 2000 ■ ■ ■ Velocidad del ratón Resolución y frecuencia de la pantalla Entrada de vídeo Nota: El método recomendado para cambiar la configuración de visualización en la unidad Sun Ray 150 Enterprise Appliance es mediante el comando utxconfig, tal y como se describe en “Resolución de problemas” en la página es-8. FIGURA 6 Pantalla de configuración de la unidad Sun Ray 150 Enterprise Appliance Para usar la pantalla Configuración 1. Abra la pantalla Configuración y emplee uno de los métodos siguientes: ■ Pulse las teclas Mayús+Props. ■ Abra una ventana del terminal y escriba: % /opt/SUNWut/bin/utsettings La pantalla Configuración aparecerá en breves segundos. 2. Seleccione la categoría y luego la configuración que desee. Si le surge alguna duda, póngase en contacto con el administrador del sistema. Guía del usuario de Sun Ray 150 Enterprise Appliance es-13 Ajuste del brillo de la pantalla Los botones de Brightness, situados en el panel derecho de la unidad Sun Ray 150 Enterprise Appliance, permiten ajustar el brillo de la pantalla. Para ajustar el brillo ● Los botones de Brightness sirven para aumentar o reducir el brillo en pantalla. Modalidad de visualización La unidad Sun Ray 150 Enterprise Appliance emite imágenes con una resolución de 1024x768, a 60Hz. Si el servidor de empresa Sun Ray emplea otra modalidad de pantalla, puede producirse un efecto panorámico. Si este efecto constituye un problema para usted, consulte “Resolución de problemas” en la página es-8. Mantenimiento de la unidad Precaución: Para eliminar el riesgo de descarga eléctrica, no desmonte la unidad. No está diseñada para que el propio usuario pueda repararla. El único mantenimiento que puede realizar el usuario es la limpieza, tal y como se explica a continuación. es-14 Guía del usuario de Sun Ray 150 Enterprise Appliance • Junio de 2000 Para limpiar la unidad 1. Antes que nada, desenchufe la unidad de la toma de corriente. 2. Para limpiar la pantalla, pase un paño limpio y suave, levemente humedecido en agua o en un detergente no abrasivo. Si es posible, emplee un pañuelo de papel especial para limpieza de pantallas o algún otro elemento adecuado para la capa antiestática. 3. Para limpiar la carcasa, pase un paño levemente humedecido con detergente no abrasivo. Precaución: No utilice nunca material inflamable para limpiar la unidad Sun Ray 150 ni ningún aparato eléctrico. Guía del usuario de Sun Ray 150 Enterprise Appliance es-15 Especificaciones En la tabla siguiente se indican las especificaciones de la unidad Sun Ray 150 Enterprise Appliance. TABLA 3 es-16 Especificaciones Elemento Descripción Pantalla Pantalla plana AM-TFT-LCD de 15 pulgadas (38,1cm), resolución de 1024x768, barrido completo de píxeles de 0,31mm Peso • Monitor: 4,0kg, como máximo • Base de soporte: 0,5kg, como máximo • Total: 4,5kg, como máximo (Todas las medidas son aproximadas.) Adaptador de corriente ~100-240V, 47-63Hz, 0,5A Consumo eléctrico 45W como máximo de CA en funcionamiento, y 15W como máximo de CA en modalidad PowerSaver Montaje VESA Cumple el estándar FPMPMI, con espaciado de 100mm Consideraciones ambientales Entorno para el funcionamiento • Temperatura — Entre 0º C y 40º C • Humedad relativa — Del 5% al 93% • Altitud — Entre 0m y 3,2km Entorno para el almacenamiento • Temperatura — Entre -20º C y 60º C • Humedad relativa — Del 5% al 93% • Altitud — Entre 0m y 12,5km Emisiones acústicas 3,0B de potencia declarada de sonido para cumplir ISO 9296-1988 Guía del usuario de Sun Ray 150 Enterprise Appliance • Junio de 2000 Sun Ray 150 Nätterminal för företag Användarhandbok Denna handbok tillhandahåller följande information som hjälper dig att komma igång med din nya nätterminal Sun Ray 150. ■ ■ ■ ■ ■ ■ "Översikt och installation" på sidan sv-1 "Felsökning" på sidan sv-8 "Justera session eller visning" på sidan sv-12 "Visningsläge" på sidan sv-14 "Underhålla nätterminalen" på sidan sv-14 "Specifikationer" på sidan sv-15 Översikt och installation Paketets innehåll Försäkra dig om att följande artiklar finns med i transportkartongen. Om det saknas en eller flera artiklar ska du kontakta återförsäljaren. ■ ■ ■ ■ ■ Sun Ray 150 Nätterminal för företag Strömförsörjning med ansluten sladd Ethernet-kabel Denna handbok Tillbehörspaket som tillval som inkluderar: ■ ■ ■ ■ Elsladd Tangentbord och stöd Mus Musdyna sv-1 ■ ■ Bruksanvisning för tangentbord/mus Ergonomihandbok Framsidans komponenter m ic ro sy s te m s 1 2 3 4 FIGUR 1 Fram- och baksidan på nätterminalen Sun Ray 150 1. Strömlysdiod – tänds när terminalen får ström. 2. Smartkortlysdiod – tänds när det finns ett smartkort. 3. Smartkortläsare – accepterar ett giltigt smartkort. 4. Ljusstyrkans kontroller – justerar skärmens ljusstyrka upp eller ner. sv-2 Sun Ray 150 Nätterminal för företag Användarhandbok • Juni 2000 Baksidans och sidpanelens komponenter 6 7 8 9 1 FIGUR 2 2 3 4 5 Bak- och sidpaneler på nätterminalen Sun Ray 150 1. Ström (likström in) – sladden ansluts till detta honuttag. 2. Projektorport – du kan ansluta en fristående projektorenhet i den här porten för konferenser eller demonstrationer. Anm. Projektorporten är inte avsedd för anslutning av en ytterligare monitor i syfte att skapa en Sun Ray-enhet med "dubbelt huvud". Om en standard-CRT-monitor ansluts till denna port kan det uppstå skärmproblem p g a visningslägen som inte är kompatibla. 3. Video in – indata för enhet som tillhandahåller sammansatt videosignal. 4. USB-portar 1, 2, 3 och 4 – standard USB-portar för kringutrustning. 5. Nätverksanslutning – 100Base-T Ethernet-kabelhonuttag (RJ-45). 6. Stereoljudsignal linje in 3,5 mm stereo miniplug – indata från en ljudinenhet. 7. Stereoljudsignal linje ut 3,5 mm stereo miniplug – utdata till en ljudenhet. 8. Hörlursuttag – avsett för stereohörlurar som har låg impedans. Sun Ray 150 Nätterminal för företag Användarhandbok sv-3 9. Mikrofoninenhet – justera mikrofonvolymen genom programvaran (se sida sv-12). Denna nätterminal ger dig dessutom möjlighet att ansluta en säkerhetsenhet av typ Kensington i panelskåpet. Kensington-platsen finns på den flytande kristallskärmens bakre (vertikala) yta under likström-in-kontakten. Kensington-lås medföljer ej. Installationsanvisningar för låsningsenheten finns i motsvarande dokumentation. Installera nätterminalen Efter det att du försiktigt tagit ut nätterminalen Sun Ray 150 ur transportkartongen installerar du den genom att använda följande procedur. Anm. Nätterminalen fungerar genom att kommunicera över nätverket med en server som Sun Rays administrationsprogramvara har installerats på. Om nätterminalen inte fungerar på rätt sätt efter följande procedur ska du tala med systemadministratören för att försäkra dig om att Sun Rays företagsserver har installerats. Installera nätterminalen 1. Placera nätterminalen med framsidan nedåt på en kudde – var försiktig så att du inte skadar skärmen – så att du kan komma åt kabelkontakterna längs nederkanten på den bakre försänkningen. 2. Anslut sladden till strömporten på nätterminalens baksida. 3. Anslut tangentbordet och musen till USB-portarna. 4. Anslut Ethernet-kabeln till Ethernet-porten. sv-4 Sun Ray 150 Nätterminal för företag Användarhandbok • Juni 2000 5. Placera nätterminalen med rätt sida upp på skrivbordet, anslut sladden till strömförsörjningen och anslut den andra änden av sladden till en närliggande kontakt. Om nätterminalen visar en bild är installationen klar. FIGUR 3 Bakpanelskablaget för nätterminalen Sun Ray 150 (tillvalskablarna på kontakt 2 och 3 visas som referens) Anm. Om skärmbilden är alltför stor, vilket orsakar att du inte kan se en del av ikonerna, kan du eller systemadministratören använda kommandot utxconfig till att ändra visningsläget. Se "Felsökning" på sidan sv-8 för anvisningar. Sun Ray 150 Nätterminal för företag Användarhandbok sv-5 Så här sätter du i ett smartkort ● Sätt i smartkortet med den fyrkantiga kretsen mot enhetens baksida och riktad mot kortplatsen. m FIGUR 4 sv-6 ic ro sy s te m s Isättning av ett smartkort i nätterminalen Sun Ray 150 Sun Ray 150 Nätterminal för företag Användarhandbok • Juni 2000 Så här monterar du ett VESA-ställ Nätterminalen Sun Ray 150 har ett VESA-monteringssystem. Med hjälp av detta system kan du ansluta enheten till valfritt ställ eller tillägg som uppfyller VESAspecifikationer. 1. Montera av det gamla stället genom att skruva av de fyra VESA-monteringsskruvarna på enhetens baksida. 2. Anslut det nya stället eller tillägget genom att placera tillhörande VESA-platta i enhetens bakre försänkning och skruva in de fyra VESA-monteringsskruvarna, enligt figuren. FIGUR 5 Anslutning av ett VESA-ställ till nätterminalen Sun Ray 150 Sun Ray 150 Nätterminal för företag Användarhandbok sv-7 Felsökning Innan du kontaktar service ska du läsa igenom den information som finns i detta avsnitt för att se om du själv kan lösa problemet. Om du behöver hjälp kontaktar du Suns tekniska support. TABELL 1 sv-8 Felsökningstips Problem Lösning Det finns ingen bild. • Försäkra dig om att nätterminalen är inkopplad. • Nätterminalen kan vara i energibesparingsläge. Flytta musen om du vill aktivera skärmen. Bilden är alltför stor för skärmen vilket innebär att du inte kan se en del av ikonerna. Nätterminalen Sun Ray 150 kan bara användas med skärmupplösningen 1024 x 768 med 60 Hz. Om bilden som skickades av Sun Rays företagsserver har en högre upplösning kommer det att skapa en panoreringseffekt på nätterminalen. Om du inte vill ha denna effekt för ditt skrivbord finns det två sätt att ändra upplösningen: • Öppna ett terminalfönster och skriv följande kommando: /opt/SUNWut/lib/utxconfig -r 1024x768 Om du skriver detta kommando när smartkortet är isatt i nätterminalen associeras den nya visningsinställningen med smartkortet och kommer att följa ditt smartkort till alla andra enheter som är anslutna till Sun Ray-företagsservern. Om du skriver detta kommando när smartkortet inte är isatt associeras den nya visningsinställningen med nätterminalen och kommer att gälla tills du eller någon annan användare skriver kommandot utxconfig för att ändra det. • Be systemadministratören att ändra visningsläget för alla nätterminaler genom att använda kommandot utxconfig som beskrivs i sin helhet i dokumentationen för Sun Rays systemadministration. Bilden är antingen alltför ljus eller alltför mörk. Justera ljusstyrkans inställning (se sida sv-13). Inget svar från tangentbord eller mus. • Koppla bort tangentbordet eller musen, vänta 15 sekunder och återanslut dem sedan. • Ta ut sladden, vänta 15 sekunder, återanslut den sedan. Sun Ray 150 Nätterminal för företag Användarhandbok • Juni 2000 TABELL 1 Felsökningstips (forts.) Problem Lösning Strömindikatorn är gul i längre än tre sekunder. Ett maskinvarufel har uppstått. Kontakta systemadministratören för en reservenhet. Se "Lysdiodindikatorer" på sidan sv-11 för mer information. Strömindikatorn har ett blinkande grönt ljus. Det går inte att använda enheten. Kontakta systemadministratören. Se "Lysdiodindikatorer" på sidan sv-11 för mer information. Du kan inte justera nätterminalen genom att använda knapparna på framsidan. Kontakta Suns tekniska support. Statusikoner Ikonerna nedan indikerar nätterminalens kallstartstatus. Ikon Innebörd Åtgärd att vidta Enheten startar. Vänta. Om enheten inte startar inom en kort tidsperiod ska du kontakta systemadministratören. Servern laddar för närvarande ner till enhetens PROM. Vänta. Enheten kommer att startas om när nedladdningen är klar. Ett enhetsfel har uppstått. Enheten försökte ladda ner från server till PROM, men misslyckades. Kontakta systemadministratören. Sun Ray 150 Nätterminal för företag Användarhandbok sv-9 Ikon sv-10 Innebörd Åtgärd att vidta Enheten kan inte identifiera någon Ethernet-signal. Enhetens Ethernetadress visas. Kontrollera att Ethernet-kabeln är korrekt isatt i enhetens baksida och i rätt nätverksuttag. Kontakta systemadministratören om problemet består. Enheten kan inte kommunicera med serverns programvara. Kontakta systemadministratören. Du kan inte höra något ljud från enheten. Tryck på Tyst-tangenten igen eller använd menyn Inställningar (sida sv12) när du vill ha tillbaka ljudet. Volymen har ändrats. Tryck antingen på volymknapparna eller använd menyn Inställningar (sida sv-12) till att justera volymen. Enhetens Ethernet-adress visas när de tre knapparna för ljudvolymskontroll trycks ner samtidigt eller när Ethernetkabeln tillkopplas för första gången. Adressen försvinner efter 15 sekunder. Sun Ray 150 Nätterminal för företag Användarhandbok • Juni 2000 Ikon Innebörd Åtgärd att vidta Fråga efter smartkortisättning. Sätt i smartkortet. Enheten kan inte läsa smartkortet. Sätt i smartkortet på rätt sätt. Rengör kontakterna på smartkortet och sätt i det igen. Kontakta systemadministratören. Du förnekas åtkomst. Kontakta systemadministratören. Lysdiodindikatorer Nätterminalen Sun Ray 150 har två lysdiodindikatorer (Ström/fel och Smartkort), vars lägen visas i tabellen nedan. Lysdiod Läge Innebörd Ström/fel Av Enheten är inte inkopplad. Gul När strömmen tillkopplas är lysdioden tänd i mellan två och tre sekunder medan enheten kontrollerar maskinvaran. Om lysdioden förblir aktiv, eller tänds vid något annat tillfälle, har det uppstått ett maskinvarufel. Kontakta systemadministratören för en reservenhet. Grön Enheten har ström och maskinvaran fungerar normalt. Blinkar Det går inte att använda enheten. Kontakta systemadministratören. Av Inget smartkort är isatt. På Smartkortet har satts i på rätt sätt. Blinkar Det är nu säkert att skriva in ditt hemliga lösenord (PIN) (gäller endast säkra smartkortinstallationer). Smartkort Sun Ray 150 Nätterminal för företag Användarhandbok sv-11 PowerSaver Nätterminalen Sun Ray 150 har ett inbyggt energihanteringssystem som kallas PowerSaver. Detta system sparar energi genom att försätta enheten i ett lågströmsläge när det inte har använts under en viss tid. Tabellen nedan visar egenskaperna för normalt och PowerSaver-läge. När du vill ha tillbaka enheten i normalt läge flyttar du musen eller trycker på en tangent på tangentbordet. TABELL 2 Strömlägen för nätterminalen Sun Ray 150 Läge Skärm Strömindikator Ungefärlig energiförbrukning Normal drift Aktiv Grön 30 w PowerSaver Besparing Grön 15 w Justera session eller visning Nätterminalen Sun Ray 150 har två kontrolluppsättningar med vars hjälp du kan justera skrivbordets funktioner: ■ ■ Du kan justera Sun Ray-sessionens funktioner på menyn Inställningar. Med knapparna för ljusstyrka kan du justera skärmens ljusstyrka. Justera sessionsattribut Med menyn Inställningar för Sun Ray kan du styra följande egenskaper för Sun Raysessionen: ■ ■ ■ ■ sv-12 Ljud: indata och utdata Mushastighet Skärmens upplösning och frekvens Videoindata Sun Ray 150 Nätterminal för företag Användarhandbok • Juni 2000 Anm. Den rekommenderade metoden att ändra visningsinställningar på nätterminalen Sun Ray 150 är med hjälp av kommandot utxconfig som beskrivs i "Felsökning" på sidan sv-8. FIGUR 6 Menyn Inställningar för Sun Ray 150 Använda menyn Inställningar 1. Öppna menyn Inställningar genom att använda en av följande metoder: ■ Tryck på Skift+Egenskaper på tangentbordet. ■ Öppna ett terminalfönster och skriv: % /opt/SUNWut/bin/utsettings Menyn Inställningar visas efter ett par sekunder. 2. Välj kategori och sedan den inställning du vill ha. Kontakta systemadministratören om du har frågor. Justera skärmens ljusstyrka Med hjälp av knapparna för ljusstyrka som finns på den högra sidan på nätterminalen Sun Ray 150 kan du justera bildskärmens ljusstyrka. Sun Ray 150 Nätterminal för företag Användarhandbok sv-13 Så här justeras ljusstyrkan ● Använd ljusstyrkeknappen till att justera skärmens ljusstyrka upp eller ner. Visningsläge Nätterminalen Sun Ray 150 visar bilder med 1024 x 768 upplösning med 60 Hz. Om ett annat visningsläge används av Sun Rays företagsserver kan resultatet bli en panoreringseffekt. Se "Felsökning" på sidan sv-8 om denna effekt inte är önskvärd för ditt speciella skrivbord. Underhålla nätterminalen Varning – Undvik risken för elektrisk stöt genom att inte nedmontera skåpet. Enheten är utformad så att användaren inte kan utföra service på den. Användarunderhåll är begränsat till rengöring enligt vad som förklaras nedan. Rengöra nätterminalen 1. Innan du rengör nätterminalen ska du ta ut sladden ur kontakten. 2. Rengör bildskärmen genom att använda en mjuk och ren duk som fuktats med vatten eller milt rengöringsmedel. Om det är möjligt ska du använda en speciell skärmrengöringsduk eller -lösning som är avsedd för antistatbeläggning. 3. Rengör skåpet genom att använda en duk som fuktats med ett milt rengöringsmedel. Varning – Använd aldrig antändligt rengöringsmaterial när du rengör nätterminalen Sun Ray 150 eller någon annan elektrisk apparat. sv-14 Sun Ray 150 Nätterminal för företag Användarhandbok • Juni 2000 Specifikationer Tabellen nedan visar specifikationerna för nätterminalen Sun Ray 150. TABELL 3 Specifikationer artikel Beskrivning Skärm 38,1 cm (15 tum) AM-TFT-LCD flat panel, 1024 x 768 upplösning, 0,31 mm full bildpunktsbredd Vikt • Skärmhuvud 4,0 kg maximalt • Ställ 0,5 kg maximalt • Totalt 4,5 kg maximalt (Alla mått är ungefärliga.) Strömadapter ~100-240V, 47-63 Hz, 0,5A Energiförbrukning 45 w växelström maximalt under användning, 15 w växelström maximalt i PowerSaver-läge VESA-montering Uppfyller standarden FPMPMI, 100 mm avstånd Miljöhänsynstaganden Arbetsmiljö • Temperatur – 0C till 40C • Fuktighet – 5 % till 93 % RH • Höjd – 0 m till 3,2 km Förvaringsmiljö • Temperatur – -20C to 60C (-4F to 140F) • Fuktighet – 5 % till 93 % RH • Höjd – 0 m till 12,5 km Akustik 3,0B deklarerad ljudstyrka per ISO 9296-1988 Sun Ray 150 Nätterminal för företag Användarhandbok sv-15 sv-16 Sun Ray 150 Nätterminal för företag Användarhandbok • Juni 2000 Copyright 2000 Sun Microsystems, Inc., 901 San Antonio Road • Palo Alto, CA 94303-4900 USA. Tous droits réservés. Ce produit ou document est protégé par un copyright et distribué avec des licences qui en restreignent l’utilisation, la copie, la distribution, et la décompilation. Aucune partie de ce produit ou document ne peut être reproduite sous aucune forme, par quelque moyen que ce soit, sans l’autorisation préalable et écrite de Sun et de ses bailleurs de licence, s’il y en a. Le logiciel détenu par des tiers, et qui comprend la technologie relative aux polices de caractères, est protégé par un copyright et licencié par des fournisseurs de Sun. Des parties de ce produit pourront être dérivées des systèmes Berkeley BSD licenciés par l’Université de Californie. UNIX est une marque déposée aux Etats-Unis et dans d’autres pays et licenciée exclusivement par X/Open Company, Ltd. La notice suivante est applicable à Netscape Communicator™ Copyright 1995 Netscape Communications Corporation. Tous droits réservés. Sun, Sun Microsystems, the Sun logo, AnswerBook2, docs.sun.com, Solaris, et Sun Ray sont des marques de fabrique ou des marques déposées, ou marques de service, de Sun Microsystems, Inc. aux Etats-Unis et dans d’autres pays. Toutes les marques SPARC sont utilisées sous licence et sont des marques de fabrique ou des marques déposées de SPARC International, Inc. aux Etats-Unis et dans d’autres pays. Les produits portant les marques SPARC sont basés sur une architecture développée par Sun Microsystems, Inc. L’interface d’utilisation graphique OPEN LOOK et Sun™ a été développée par Sun Microsystems, Inc. pour ses utilisateurs et licenciés. Sun reconnaît les efforts de pionniers de Xerox pour la recherche et le développement du concept des interfaces d’utilisation visuelle ou graphique pour l’industrie de l’informatique. Sun détient une licence non exclusive de Xerox sur l’interface d’utilisation graphique Xerox, cette licence couvrant également les licenciés de Sun qui mettent en place l’interface d’utilisation graphique OPEN LOOK et qui en outre se conforment aux licences écrites de Sun. Partenaire d'Energy Star®, Sun Microsystems, Inc. a déterminé que ce produit respecte les critères d'Energy Star® en matière de gestion d'énergie. CETTE PUBLICATION EST FOURNIE "EN L’ETAT" ET AUCUNE GARANTIE, EXPRESSE OU IMPLICITE, N’EST ACCORDEE, Y COMPRIS DES GARANTIES CONCERNANT LA VALEUR MARCHANDE, L’APTITUDE DE LA PUBLICATION A REPONDRE A UNE UTILISATION PARTICULIERE, OU LE FAIT QU’ELLE NE SOIT PAS CONTREFAISANTE DE PRODUIT DE TIERS. CE DENI DE GARANTIE NE S’APPLIQUERAIT PAS, DANS LA MESURE OU IL SERAIT TENU JURIDIQUEMENT NUL ET NON AVENU. Veullez recycler Copyright 2000 Sun Microsystems, Inc., 901 San Antonio Road • Palo Alto, CA 94303-4900 USA. Alle Rechte vorbehalten. Dieses Produkt oder Dokument unterliegt dem Urheberschutz und wird mit einer Lizenz verteilt, die das Verwenden, Kopieren, Verteilen und Dekompilieren des Produkts oder Dokuments einschränkt. Das Reproduzieren von Teilen dieses Produkts oder Dokuments, in welcher Form oder mit welchen Mitteln auch immer, ist ohne vorherige schriftliche Genehmigung von Sun und seinen Lizenzinhabern, falls vorhanden, verboten. Dritthersteller-Software, einschließlich Schrifttechnologie, unterliegt dem Urheberschutz und ist von Sun-Lieferanten lizenziert. Teile des Produkts können von Berkeley BSD-Systemen abgeleitet worden sein und wurden von der University of California lizenziert. UNIX ist ein eingetragenes Warenzeichen in den USA und in anderen Ländern und exklusiv lizenziert durch X/Open Company, Ltd. Für Netscape Communicator™ kommt der folgende Hinweis zur Anwendung: Copyright 1995 Netscape Communications Corporation. Alle Rechte vorbehalten. Sun, Sun Microsystems, das Sun-Logo, AnswerBook2, docs.sun.com, Solaris und Sun Ray sind Warenzeichen, eingetragene Warenzeichen oder Dienstleistungsmarken von Sun Microsystems, Inc. in den USA und in anderen Ländern. Alle SPARC-Warenzeichen werden unter Lizenz benutzt und sind Warenzeichen oder eingetragene Warenzeichen von SPARC International, Inc. in den USA und in anderen Ländern. Produkte, die SPARC-Warenzeichen enthalten, basieren auf einer von Sun Microsystems, Inc. entwickelten Architektur. Die graphische Benutzeroberfläche von OPEN LOOK und Sun™ wurde von Sun Microsystems, Inc. für seine Benutzer und Lizenzinhaber entwickelt. Sun anerkennt die Pionierleistung von Xerox in der Forschung und Entwicklung des Konzepts von visuellen oder graphischen Benutzeroberflächen für die Computerindustrie. Sun besitzt für die graphische Xerox-Benutzeroberfläche eine nicht-exklusive Lizenz von Xerox. Diese Lizenz bezieht sich auch auf die Lizenzinhaber von Sun, die OPEN LOOK GUIs implementieren und sich mit den schriftlichen Lizenzvereinbarungen von Sun einverstanden erklären. Als ein Energy Star-Partner hat Sun Microsystems, Inc. festgelegt, daß dieses Produkt den Energy Star -Richtlinien für den energetischen Wirkungsgrad entspricht. DIE DOKUMENTATION WIRD SO BEREITGESTELLT, “WIE SIE VORLIEGT”, UND SUN ZEICHNET SICH VON JEGLICHEN AUSDRÜCKLICHEN ODER STILLSCHWEIGENDEN BEDINGUNGEN, ERKLÄRUNGEN UND GARANTIEN, EINSCHLIESSLICH KONKLUDENTER GEWÄHRLEISTUNGEN DER HANDELSÜBLICHKEIT, EIGNUNG FÜR EINEN BESTIMMTEN ZWECK ODER NICHTVERLETZUNG DER RECHTE DRITTER, FREI, AUSSER BIS ZUM DEM UMFANG, IN DEM SOLCHE VERZICHTERKLÄRUNGEN FÜR RECHTLICH UNGÜLTIG ERACHTET WERDEN. Recyclefähig Copyright 2000 Sun Microsystems, Inc., 901 San Antonio Road • Palo Alto, CA 94303-4900 USA. Tutti i diritti riservati. Questo prodotto o documento è protetto da copyright ed è distribuito sotto contratto che ne limita l'uso, la copia, la distribuzione e la decompilazione. Nessuna parte di questo prodotto o documento può essere riprodotto in alcuna forma o alcun mezzo senza precedente autorizzazione scritta da parte di Sun o di eventuali suoi licenziatari. Il software di parti terze, incluse le tecnologie dei caratteri tipografici, è protetto da copyright ed è concesso in licenza dai fornitori di Sun. Parti del prodotto potrebbero derivare da sistemi Berkeley BSD, sotto licenza della University of California. UNIX è un marchio registrato negli USA e in altri paesi, concesso in licenza esclusiva tramite X/Open Company, Ltd. Per Netscape Communicator™, è valida la nota seguente: Copyright 1995 Netscape Communications Corporation. Tutti i diritti riservati. Sun, Sun Microsystems, il logo di Sun, AnswerBook2, docs.sun.com, Solaris, e Sun Ray sono marchi, marchi registrati o di servizio di Sun Microsystems, Inc. negli USA e in altri paesi. Tutti i marchi SPARC sono utilizzati sotto contratto e sono marchi o marchi registrati di SPARC International, Inc. negli USA e in altri paesi. I prodotti con il marchio SPARC sono basati su architettura sviluppata da Sun Microsystems, Inc. OPEN LOOK e Sun™ Graphical User Interface sono stati sviluppati da Sun Microsystems, Inc. per i propri utenti e licenziatari. Sun riconosce il lavoro pionieristico svolto da Xerox nella ricerca e nello sviluppo del concetto di interfaccia grafica a vantaggio del settore industriale dei computer. Sun possiede un contratto di concessione in licenza non esclusiva da Xerox per la Xerox Graphical User Interface, contratto di licenza che copre i licenziatari di Sun che implementino OPEN LOOK GUI e che risultino in conformità con gli accordi di licenza scritti di Sun. Nella sua posizione di partner di Energy Star, Sun Microsystems, Inc. ha determinato che questo prodotto rispetta le indicazioni stabilite da Energy Star riguardo il risparmio energetico. LA DOCUMENTAZIONE VIENE FORNITA “COSI' COM'È” E NON VIENE ASSUNTA ALCUNA RESPONSABILITÀ PER CONDIZIONI ESPRESSE O IMPLICITE, RAPPRESENTAZINI E GARANZIE, INCLUSE LE GARANZIE IMPLICITE DI COMMERCIABILITÀ, DI IDONEITÀ AD UN FINE SPECIFICO O DI NON VIOLAZIONE DI DIRITTI ALTRUI, ESCLUSO IL CASO IN CUI CIÒ RISULTI ESSERE LEGALMENTE NON VALIDO. Riciclabile Copyright 2000 Sun Microsystems, Inc., 901 San Antonio Road • Palo Alto, CA 94303-4900 USA. Reservados todos los derechos. Este producto o documento está protegido por leyes de copyright y se distribuye bajo licencias que restringen su uso, copia, distribución y descompilación. Prohibida su reproducción total o parcial en cualquier formato o por cualquier medio, sin previo consentimiento por escrito de Sun y de sus otorgantes de licencias, si procede. El software de terceros, incluida la tecnología fuente, está sujeto a derechos de copyright y a licencias de los proveedores de Sun. Algunos componentes de este producto pueden derivarse de sistemas BSD de Berkeley, con licencias de la Universidad de California. UNIX es una marca comercial registrada en EE.UU. y en otros países, exclusivamente otorgada bajo licencia a través de X/Open Company, Ltd. Para Netscape Communicator™ se aplica el siguiente aviso: Copyright 1995 Netscape Communications Corporation. Reservados todos los derechos. Sun, Sun Microsystems, el logotipo de Sun, AnswerBook2, docs.sun.com, Solaris y Sun Ray son marcas comerciales, marcas registradas o marcas de servicios de Sun Microsystems, Inc. tanto en EE.UU. como en otros países. Todas las marcas comerciales SPARC se utilizan bajo licencia y corresponden a marcas comerciales o a marcas registradas de SPARC International, Inc. tanto en EE.UU. como en otros países. Los productos que presentan marcas comerciales SPARC se basan en una arquitectura desarrollada por Sun Microsystems, Inc. La interfaz OPEN LOOK y la Sun™ Graphical User Interface han sido desarrolladas por Sun Microsystems, Inc. para sus usuarios y poseedores de licencias. Sun reconoce el esfuerzo pionero de Xerox en la investigación y desarrollo del concepto de interfaces gráficas de usuario o visuales para la industria informática. Sun posee una licencia no exclusiva de Xerox para la Xerox Graphical User Interface; dicha licencia también cubre a aquellos poseedores de licencias de Sun que implementen las interfaces gráficas de usuario OPEN LOOK y que cumplan de otro modo contratos escritos de licencias con Sun. Como asociado de Energy Star, Sun Microsystems, Inc. ha determinado que este producto cumple las directrices de Energy Star en materia de eficacia energética. ESTA DOCUMENTACIÓN SE FACILITA EN EL ESTADO EN QUE SE ENCUENTRA, SIN CONDICIONES, REPRESENTACIONES NI GARANTÍAS DE NINGUNA CLASE, NI EXPLÍCITAS NI IMPLÍCITAS, RENUNCIANDO EXPRESAMENTE A CUALQUIER GARANTÍA IMPLÍCITA DE COMERCIALIZACIÓN O IDONEIDAD PARA UN PROPÓSITO DETERMINADO, SALVO EN LA MEDIDA EN QUE TAL RENUNCIA CONTRAVENGA LAS LEGISLACIONES LOCALES. Por favor, recicle. Copyright 2000 Sun Microsystems, Inc., 901 San Antonio Road • Palo Alto, CA 94303-4900 USA. Med ensamrätt. Denna produkt eller detta dokument skyddas av upphovsrättslag och distribueras under licenser som begränsar deras användning, kopiering, distribution och dekompilering. Ingen del av denna produkt eller detta dokument får reproduceras i någon form på något sätt utan tidigare skriftligt tillstånd från Sun och dess eventuella licensgivare. Tredjepartsprogram, inklusive teckensnittsteknologi, är under upphovsrätt och licensieras från Suns leverantörer. Delar av produkten kommer från Berkeley BSD Systems och licensieras från University of California. UNIX är ett registrerat varumärke i USA och andra länder och licensieras exklusivt genom X/Open Company, Ltd. För Netscape Communicator™ gäller följande: Copyright 1995 Netscape Communications Corporation. Med ensamrätt. Sun, Sun Microsystems, logotypen för Sun, AnswerBook2, docs.sun.com, Solaris och Sun Ray är varumärken, registrerade varumärken eller servicemärken som tillhör Sun Microsystems, Inc. i USA och andra länder. Alla SPARC-varumärken används under licens och är varumärken eller registrerade varumärken som tillhör SPARC International, Inc. i USA och andra länder. Produkter med SPARC-varumärken är baserade på en arkitektur som utvecklats av Sun Microsystems, Inc. OPEN LOOK och Sun™ Graphical User Interface har utvecklats av Sun Microsystems, Inc. för dess användare och licenstagare. Sun inser hur mycket Xerox har bidragit till forskningen i och utvecklingen av koncept med visuella eller grafiska användargränssnitt för datorbranschen. Sun har en icke-exklusiv licens från Xerox för Xerox Graphical User Interface och den licensen omfattar även Suns licenstagare som implementerar OPEN LOOK:s grafiska användargränssnitt och i övrigt följer Suns skrivna licensavtal. Som Energy Star“ Partner har Sun Microsystems, Inc. fastställt att denna produkt uppfyller Energy Star“ riktlinjer avseende energiförbrukning. DOKUMENTATIONEN TILLHANDAHÅLLES "I BEFINTLIGT SKICK" OCH ALLA UTTRYCKLIGA ELLER UNDERFÖRSTÅDDA VILLKOR, REPRESENTATIONER OCH GARANTIER, INKLUSIVE ALLA UNDERFÖRSTÅDDA GARANTIER AVSEENDE SÄLJBARHET, PASSNING FÖR ETT VISST ÄNDAMÅL ELLER ICKE-ÖVERTRÄDELSE, FRÅNSÄGES, FÖRUTOM I DEN UTSTRÄCKNING SOM SÅDANA FRISKRIVNINGSKLAUSULER ANSES VARA JURIDISKT OGILTIGA. För återanvä