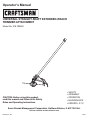
1
Operator’s Manual
®
UNIVERSAL STRAIGHT-SHAFT EXTENDED-REACH
TRIMMER ATTACHMENT
Model No. 316.792640
CAUTION: Before using this product,
read this manual and follow all its Safety
Rules and Operating Instructions.
• SAFETY
• ASSEMBLY
• OPERATION
• MAINTENANCE
• ESPAÑOL, P. 13
Sears Brands Management Corporation, Hoffman Estates, IL 60179 U.S.A.
Visit our website: www.craftsman.com
769-09334 / 00
09/13
TABLE OF CONTENTS
Safety . . . . . . . . . . . . . . . . . . . . . . . . . . . . . . . . . . . . . . . . . . . . . . .2
Warranty . . . . . . . . . . . . . . . . . . . . . . . . . . . . . . . . . . . . . . . . . . . . .5
Know Your Unit . . . . . . . . . . . . . . . . . . . . . . . . . . . . . . . . . . . . . . . .6
Specifications . . . . . . . . . . . . . . . . . . . . . . . . . . . . . . . . . . . . . . . . .6
Assembly . . . . . . . . . . . . . . . . . . . . . . . . . . . . . . . . . . . . . . . . . . . . .7
Operation . . . . . . . . . . . . . . . . . . . . . . . . . . . . . . . . . . . . . . . . . . . . .9
Maintenance . . . . . . . . . . . . . . . . . . . . . . . . . . . . . . . . . . . . . . . . .10
Cleaning and Storage . . . . . . . . . . . . . . . . . . . . . . . . . . . . . . . . . .11
Troubleshooting . . . . . . . . . . . . . . . . . . . . . . . . . . . . . . . . . . . . . . .12
All information, illustrations and specifications in this manual are based
on the latest product information available at the time of printing. We
reserve the right to make changes at any time without notice.
© Sears Brands, LLC
SAFETY
Read the operator’s manual and follow all warnings and safety
instructions. Failure to do so can result in serious injury to the
operator and/or bystanders.
The purpose of safety symbols is to attract your attention to
possible dangers. The safety symbols, and their explanations,
deserve your careful attention and understanding. The safety
warnings do not by themselves eliminate any danger. The
instructions or warnings they give are not substitutes for proper
accident prevention measures.
SYMBOL
MEANING
DANGER: Signals an EXTREME hazard.
Failure to obey a safety DANGER signal WILL result in
serious injury or death to yourself or to others.
WARNING: Signals a SERIOUS hazard.
Failure to obey a safety WARNING signal CAN result in
serious injury to yourself or to others.
CAUTION: Signals a MODERATE hazard.
Failure to obey a safety CAUTION signal MAY result in
property damage or injury to yourself or to others.
NOTE: Advises you of information or instructions vital to the
operation or maintenance of the equipment.
2
• IMPORTANT SAFETY INSTRUCTIONS •
READ ALL INSTRUCTIONS BEFORE OPERATING
SAFETY WARNINGS FOR ELECTRIC UNITS
WARNING: To reduce the risk of electrical shock, use
When using the unit, all safety
WARNING:
rules must be followed. Please read these instructions
only extension cords approved for outdoor use, such as an
extension cord of cord type SW-A, SOW-A, STW-A, STOWA, SJW-A, SJOW-A, SJTW-W or SJTOW-A. Extension
cords are available from your local retailer. Use only roundjacketed extension cords approved for outdoor use.
before operating the unit in order to ensure the safety of
the operator and any bystanders. Please keep these
instructions for later use.
•
•
•
•
•
•
•
•
•
•
Carefully read and understand the operator's manual of the unit
that powers this attachment.
Read the instructions carefully. Be familiar with the controls and
proper use of the unit.
Do not operate this unit when tired, ill or under the influence of
alcohol, drugs or medication.
Children must not operate the unit. Teens must be accompanied
and guided by an adult.
All guards and safety attachments must be installed properly
before operating the unit.
Inspect the unit before use. Replace damaged parts. Check for
fuel leaks. Make sure all fasteners are in place and secure.
Replace parts that are cracked, chipped, or damaged in any
way. Do not operate the unit with loose or damaged parts.
Carefully inspect the area before starting the unit. Remove all
debris and hard or sharp objects such as glass, wire, etc.
Only use the trimming line described in the Specifications section
of this manual. Never use metal-reinforced line, wire, chain or
rope. These can break off and become dangerous projectiles.
Be aware of the risk of injury to the head, hands and feet.
Clear the area of children, bystanders and pets; keep them
outside a 50-foot (15 m) radius, at a minimum. Even then, they are
still at risk from thrown objects. Encourage bystanders to wear
eye protection. If you are approached, stop the unit immediately.
•
•
•
•
•
•
•
CORD SETS: Make sure your cord set is in good condition.
When using a cord set, be sure to use a cord that is heavy
enough to carry the current that your unit will draw. An
undersized cord set will cause a drop in line voltage resulting in
loss of power and overheating. See the operator’s manual for
the unit that will power this attachment for the recommended
cord size.
Inspect all extension cords and the unit power connection
periodically. Look closely for deterioration, cuts or cracks in the
insulation. Also inspect the connections for damage. Replace
the cords if any defects or damage appear.
Prevent disconnection of the power head from the extension
cord during operation by using a plug-receptacle retaining strap,
connector, or by making a knot (Fig. A).
Avoid dangerous environments. Never operate your unit in damp
or wet conditions. Moisture is a shock hazard.
Do not use the unit in the rain. Do not use in or around water.
Do not handle the plug or unit with wet hands or standing on
any wet surfaces.
Do not leave the unit plugged in when not in use, changing
attachments or while being serviced.
Extension Cord
Unit Power Cord
SAFETY WARNINGS FOR GAS UNITS
WARNING:
Gasoline is highly flammable and
its vapors can explode if ignited. Take the following
precautions:
Fig. A
•
•
•
•
•
•
Store fuel only in containers specifically designed and approved
for the storage of such materials.
Always stop the engine and allow it to cool before filling the
tank. Never remove the fuel tank cap or add fuel when the
engine is hot. Always loosen the fuel tank cap slowly to relieve
any pressure in the tank before fueling.
Always mix and add fuel in a clean, well-ventilated outdoor area
where there are no sparks or flames. DO NOT smoke.
Never operate the unit without the fuel cap securely in place.
Avoid creating a source of ignition for spilled fuel. Wipe up any
spilled fuel from the unit immediately, before starting the unit.
Move the unit at least 30 ft. (9.1 m) from the fueling source and
site before starting the engine. DO NOT smoke.
Never start or run the unit inside a closed room or building.
Breathing exhaust fumes can kill. Operate this unit only in a wellventilated outdoor area.
WHILE OPERATING
•
•
•
•
•
3
Wear safety glasses or goggles that meet current ANSI / ISEA
Z87.1 standards and are marked as such. Wear ear/hearing
protection when operating this unit. Wear a face or dust mask if
the operation is dusty.
Wear heavy long pants, boots, gloves and a long sleeve shirt. Do
not wear loose clothing, jewelry, short pants, sandals or go
barefoot. Secure hair above shoulder level.
The cutting head shield must always be in place while operating
the unit. Do not operate the unit without both trimming lines
extended and the proper line installed. Do not extend the
trimming line beyond the length of the shield.
Adjust the handle to provide the best grip, if applicable.
Make sure the attachment is not in contact with anything before
starting the unit.
•
•
•
•
•
•
•
•
•
•
•
•
Use the unit only in daylight or good artificial light.
Use the right tool. Only use this tool for its intended purpose.
Always hold the unit with both hands when operating. Keep a
firm grip on both handles or grips.
Do not overreach. Always keep proper footing and balance. Take
extra care when working on stairs, steep slopes or inclines. To
avoid serious injury, do not operate the unit while on a ladder or
a roof.
Keep hands, face, and feet away from all moving parts. Do not
touch or try to stop moving parts.
Do not operate the unit faster than the speed needed to do the job.
Do not run the unit at high speed when not in use.
Do not force the unit. It will do a better, safer job when used at
the intended rate.
Always stop the unit when operation is delayed or when walking
from one location to another.
If you strike or become entangled with a foreign object, stop the
unit immediately and check for damage. Do not operate before
repairing damage. Do not operate the unit with loose or
damaged parts.
Use only original equipment manufacturer (OEM) replacement
parts and accessories for this unit. Use of any other parts or
accessories could lead to serious injury to the user, or damage
to the unit, and void the warranty.
Keep the unit clean. Carefully remove vegetation and other
debris that could block moving parts.
If the unit starts to vibrate abnormally, stop the unit immediately.
Inspect the unit for the cause of the vibration. Vibration is
generally an indicator of trouble.
OTHER SAFETY WARNINGS
•
•
•
•
•
•
•
•
•
Maintain the unit with care.
All service, other than the maintenance procedures described in
this manual, should be performed by a qualified service dealer.
Never remove, modify or make inoperative any safety device
furnished with the unit.
Before inspecting, maintaining, cleaning, storing, transporting or
replacing any parts on the unit:
1. Stop the unit.
2. Make sure all moving parts have stopped.
3. Allow the unit to cool.
4. For gas-powered units, disconnect the spark plug wire. For
electric-powered units, disconnect the unit from the power
source.
Secure the unit while transporting.
Never store the unit with fuel in the tank, inside a building where
fumes may reach an open flame (pilot lights, etc.) or sparks
(switches, electrical motors, etc.).
Store the unit in a dry place, secured or at a height to prevent
unauthorized use or damage. Keep the unit out of the reach of
children.
Never douse or squirt the unit with water or any other liquid.
Keep handles dry, clean and free from debris. Clean the unit
after each use. Refer to Cleaning and Storage. Do not use
solvents or strong detergents.
Keep these instructions. Refer to them often and use them to
instruct other users. If you loan this unit to others, also loan
them these instructions.
SAVE THESE INSTRUCTIONS
4
• SAFETY & INTERNATIONAL SYMBOLS •
This operator's manual describes safety and international symbols and pictographs that may appear on this product. Read the operator's
manual for complete safety, assembly, operating and maintenance and repair information.
SYMBOL
MEANING
SYMBOL
MEANING
• THROWN OBJECTS AND ROTATING CUTTER CAN
CAUSE SEVERE INJURY
• SAFETY ALERT SYMBOL
Indicates danger, warning or caution. May be used in
conjunction with other symbols or pictographs.
Small objects can be
WARNING:
propelled at high speed, causing injury. Keep away
• READ OPERATOR'S MANUAL
from the rotating rotor.
WARNING: Read the operator’s
manual(s) and follow all warnings and safety
• KEEP BYSTANDERS AWAY
Keep all bystanders,
WARNING:
especially children and pets, at least 50 feet (15 m)
instructions. Failure to do so can result in serious
injury to the operator and/or bystanders.
from the operating area.
• WEAR EYE AND HEARING PROTECTION
WARNING:
Thrown objects and loud
noise can cause severe eye injury and hearing loss.
• SHARP BLADE
Sharp blade on trimmer
WARNING:
attachment shield. To prevent serious injury, do not
Wear eye protection meeting current ANSI / ISEA
Z87.1 standards and ear protection when operating
this unit. Use a full face shield when needed.
touch the line cutting blade.
WARRANTY
CRAFTSMAN TWO YEAR FULL WARRANTY
FOR TWO YEARS from the date of purchase, this product is warranted against any defects in material or workmanship. A defective product
will be replaced free of charge.
For warranty coverage details to obtain free replacement, visit the web page: www.craftsman.com/warranty
This warranty does not cover the cutting line, which is an expendable part that can wear out from normal use within the warranty period.
This warranty is void if this product is ever used while providing commercial services or if rented to another person.
This warranty gives you specific legal rights, and you may also have other rights which vary from state to state.
Sears Brands Management Corporation, Hoffman Estates, IL 60179
5
KNOW YOUR UNIT
APPLICATIONS
As a trimmer:
• Cutting grass and light weeds.
• Edging
• Decorative trimming around trees, fences, etc.
Hanger Cap
ASSEMBLY TOOLS REQUIRED:
•
#2 Phillips screwdriver
Shaft Housing
Cutting Head Shield
Cutting Head
Line Cutting Blade
SPECIFICATIONS*
Approximate Unit Weight (attachment only) . . . . . . . . . . . . . . . . . . . . . . . . . . . . . . . . . . . . . . . . . . . . . . . . . . . . . . . . . . 3.5 - 4.5 lbs. (1.6 - 2.0 kg)
Trimmer Mechanism . . . . . . . . . . . . . . . . . . . . . . . . . . . . . . . . . . . . . . . . . . . . . . . . . . . . . . . . . . . . . . . . . . . . . . . . . . . . . . . . . . . . . . . Bump Head
Trimming Line Diameter . . . . . . . . . . . . . . . . . . . . . . . . . . . . . . . . . . . . . . . . . . . . . . . . . . . . . . . . . . . . . . . . . . . . . . . . . . . 0.095 inches (2.41 mm)
Cutting Path Diameter . . . . . . . . . . . . . . . . . . . . . . . . . . . . . . . . . . . . . . . . . . . . . . . . . . . . . . . . . . . . . . . . . . . . . . . . . . . . . . . . . . 17 in. (43.18 cm)
* All specifications are based on the latest product information available at the time of printing. We reserve the right to make changes at any
time without notice.
6
ASSEMBLY
INSTALLING THE CUTTING HEAD SHIELD
Screws (2)
WARNING: To prevent serious personal injury, never
operate the unit without the cutting head shield in place.
Cutting Head Shield
Mount Bracket
1. Place the cutting head shield onto the mount bracket. Align the
holes in the cutting head shield with the holes in the mount
bracket. (Fig. 1)
2. Screw the 2 screws through the mount bracket and into the
cutting head shield until finger tight.
3. Using a #2 Phillips screwdriver, tighten the screws until the
cutting head shield is firmly in place. Tighten the screws equally.
The gap between the mount bracket and the cutting head shield
should be the same on each side.
Fig. 1
7
WARNING: Before using any attachment, read and
understand the manual that came with the attachment.
Follow all safety information contained within.
WARNING: To avoid serious personal injury and
damage to the unit, shut the unit off before removing or
installing an attachment.
Coupler
OPERATING THE COUPLER
Attachment
Fig. 2
The coupler enables the use of various optional attachments.
Installing the Attachment
1. Remove the hanger cap from the attachment. Keep the hanger
cap for use when storing the attachment. If present, remove the
gray spacer from the coupler.
2. Set the unit on a flat, level surface.
3. Turn the knob counterclockwise to loosen the coupler (Fig. 3).
4. Align the release button with the guide recess (Fig. 4).
5. Push the attachment straight into the coupler until the release
button snaps firmly into the primary hole (Fig. 4).
6. Turn the knob clockwise to tighten the coupler (Fig. 3).
NOTE: Do not tighten the nut (Fig. 4).
Tighten
Loosen
Knob
CAUTION: Before operating the unit, make sure the
Fig. 3
release button is fully snapped into the primary hole and
the knob is securely tightened.
CAUTION: The release button should be snapped into
the primary hole only. Using the wrong hole could lead to
personal injury or damage to the unit.
Primary Hole
Release Button
Removing the Attachment
1.
2.
3.
4.
Set the unit on a flat, level surface.
Turn the knob counterclockwise to loosen the coupler (Fig. 3).
Press and hold the release button (Fig. 4).
Pull the attachment straight out of the coupler (Fig. 2).
Guide Recess
Nut
Fig. 4
8
OPERATION
HOLDING THE UNIT
WARNING: Always wear eye, hearing, hand, foot and
body protection to reduce the risk of injury when operating
this unit.
•
•
•
•
•
•
Stand in the operating position (Fig. 5). Stand up straight. Do not
bend over.
Keep feet apart and firmly planted.
Hold the shaft grip with the right hand. Keep the right arm
slightly bent.
Hold the handle with the left hand. Keep the left arm straight.
Hold the unit at waist level.
Position the cutting head a few inches above the ground.
Fig. 5
ADJUSTING THE TRIMMING LINE LENGTH
This unit is equipped with a Bump Head. Trimming line can be
released from the cutting head without stopping the engine.
To release more line, lightly tap the bump knob on the ground (Fig. 6)
while operating the unit at high speed. For best results, tap the bump
knob on bare ground or hard soil. Attempting to release line in tall
grass may stall the engine.
NOTE: Do not rest the cutting head on the ground while the unit is
running.
Each time the bump knob is tapped, about 1.5 inches (38 mm) of
trimming line is released.
NOTE: Always keep the trimming line fully extended. Line release
becomes more difficult when the cutting line gets shorter.
A blade in the cutting head shield will cut the line to the proper
length if any excess line is released.
Bump Knob
Fig. 6
CAUTION: Do not remove or alter the line cutting blade
assembly. Excessive line length will make the unit
overheat. This may lead to serious personal injury or
damage to the unit.
TIPS FOR BEST RESULTS
•
To direct clippings away from the operator, tilt the cutting head
slightly down to the right; cut from left to right whenever possible.
• Do not trim wet grass or weeds.
NOTE: Some line breakage will occur from:
• Entanglement with foreign matter
• Normal line fatigue
• Attempting to cut thick vegetation
• Forcing the line into objects such as walls or fence posts
DECORATIVE TRIMMING
When trimming around trees, posts, fences, etc., rotate the whole
unit so that the cutting head is at a 30° angle to the ground (Fig. 7).
Fig. 7
9
MAINTENANCE
Bump Knob
WARNING: To prevent serious injury, never perform
maintenance or repairs while the unit is running. Always
allow the unit to cool before servicing or repairing the unit.
For gas-powered units, disconnect the spark plug wire to
prevent the unit from starting accidentally. For electricpowered units, disconnect the unit from the power source
to prevent the unit from starting accidentally.
Entry Eyelet
Exit Eyelet
Trimming
Line
Arrows
REPLACING THE TRIMMING LINE
Fig. 8
Only use the trimming line described in the Specifications section.
Other types of trimming line may cause the unit to overheat or fail.
WARNING: Never use metal-reinforced line, wire, chain or
rope. These can break off and become dangerous projectiles.
NOTE: Always use the correct line length when installing trimming
line. The line may not release properly if the line is too long.
NOTE: The outer spool will remain attached to the unit.
Installing New Trimming Line
1. If necessary, remove any old trimming line and/or obstructions
from the cutting head. Refer to Removing Old Trimming Line and
Obstructions.
2. Cut one 20 foot (6 m) length of new trimming line.
3. Turn the bump knob clockwise to align the arrows (Fig. 8).
4. Insert the new trimming line into the entry eyelet (Fig. 8). Push
the line through the cutting head until a few inches protrude from
the exit eyelet. Pull the line until the ends are of equal length.
5. Turn the bump knob clockwise to wind the line until about 5 inches
(12.7 cm) protrude from each side of the cutting head (Fig. 9). DO
NOT push the bump knob down while winding the line.
Fig. 9
Spool Cover
Removing Old Trimming Line and Obstructions
Tab
Inner Reel
If necessary, remove any old trimming line and/or obstructions from
the cutting head.
1. Firmly press in the tabs on the cutting head (Fig. 10).
2. Remove the spool cover (Fig. 10).
3. Remove any old trimming line and/or obstructions.
4. Use a clean cloth to clean the inner reel, outer spool and spool
cover (Fig. 10).
5. Align the tabs on the spool cover with the holes on the outer
spool (Fig. 10). Push the spool cover onto the outer spool until
the tabs securely snap into the holes.
Hole
Outer Spool
Fig. 10
10
CLEANING AND STORAGE
STORAGE
CLEANING
•
WARNING: To avoid serious personal injury, always stop
the unit and allow it to cool before cleaning or maintaining
the unit.
•
•
WARNING: Do not use strong detergents. Household
cleaners that contain aromatic oils such as pine and lemon,
and solvents such as kerosene, can damage plastic.
•
•
•
•
Use a small brush or clean, dry cloth to clean the outside of the unit.
11
Never store a fueled unit where fumes may reach an open flame
or spark.
Allow the unit to cool.
Thoroughly clean the unit and inspect it for any loose or
damaged parts. Replace damaged parts and tighten loose
screws, nuts or bolts.
Lock up the unit to prevent unauthorized use or damage.
Store the unit indoors, in a dry, well-ventilated area.
Store the unit out of the reach of children.
To suspend the attachment from a hook, install the hanger cap
onto the attachment. Make sure the release button is securely
locked into one of the holes on the hanger cap.
TROUBLESHOOTING
PROBLEM
SOLUTION
THE CUTTING HEAD WILL NOT ADVANCE LINE
The cutting head is bound with grass
Stop the unit and clean the cutting head
The cutting head is out of line
Refill the cutting head with new line
The inner reel is bound up
Rewind the line
The cutting head is dirty
Clean the inner reel and outer spool
The line is welded
Open the cutting head and remove the welded section
The line is twisted
Rewind the line
Not enough line is extended
Stop the unit, push the bump knob and pull the line until 4 inches
(102 mm) is outside of the cutting head
THE CUTTING LINE ADVANCES UNCONTROLLABLY
There is oil, cleaner or lubricant in the cutting head
Clean and thoroughly dry the cutting head
NEED MORE HELP?
You’ll find the answer and more on managemylife.com – for free!
n
n
n
n
Find this and all your other product manuals online.
Get answers from our team of home experts.
Get a personalized maintenance plan for your home.
Find information and tools to help with home projects.
brought to you by Sears
12
Manual del Operador
®
ACCESORIO DE RECORTE DE GRAN ALCANCE
CON EJE RECTO UNIVERSAL
Modelo No. 316.792640
PRECAUCIÓN: Antes de utilizar, este
producto lea este manual y siga todas
las reglas de seguridad e instrucciones
de operación.
• SEGURIDAD
• ENSAMBLAJE
• OPERACIÓN
• MANTENIMIENTO
Sears Brands Management Corporation, Hoffman Estates, IL 60179 U.S.A.
Visite nuestro sitio web: www.craftsman.com
769-09334 / 00
09/13
TABLA DE CONTENIDO
Seguridad . . . . . . . . . . . . . . . . . . . . . . . . . . . . . . . . . . . . . . . . . . .14
Garantía . . . . . . . . . . . . . . . . . . . . . . . . . . . . . . . . . . . . . . . . . . . . .17
Conozca su unidad . . . . . . . . . . . . . . . . . . . . . . . . . . . . . . . . . . . .18
Especificaciones . . . . . . . . . . . . . . . . . . . . . . . . . . . . . . . . . . . . . .18
Montaje . . . . . . . . . . . . . . . . . . . . . . . . . . . . . . . . . . . . . . . . . . . . .19
Funcionamiento . . . . . . . . . . . . . . . . . . . . . . . . . . . . . . . . . . . . . . .21
Mantenimiento . . . . . . . . . . . . . . . . . . . . . . . . . . . . . . . . . . . . . . . .22
Limpieza y almacenamiento . . . . . . . . . . . . . . . . . . . . . . . . . . . . .23
Solución de Problemas . . . . . . . . . . . . . . . . . . . . . . . . . . . . . . . . .23
Toda la información, las ilustraciones y especificaciones que contiene
este manual se basan en la información más reciente del producto,
existente en el momento de la impresión. Nos reservamos el derecho
de hacer cambios en cualquier momento, sin previo aviso.
© Sears Brands, LLC
SEGURIDAD
Lea el manual del operador y siga todas las advertencias e
instrucciones de seguridad. No hacerlo puede ocasionar
lesiones graves al operador y/o a las personas presentes.
El propósito de los símbolos de seguridad es llamar la atención
sobre posibles peligros. Los símbolos de seguridad y sus
explicaciones merecen toda su atención y comprensión. Las
advertencias de seguridad no eliminan de por sí ningún peligro.
Las instrucciones o advertencias que dan no sustituyen las
medidas adecuadas de prevención de accidentes.
SÍMBOLO
SIGNIFICADO
PELIGRO: Indica un peligro EXTREMO.
El no obedecer una señal de seguridad de PELIGRO
TRAERÁ COMO CONSECUENCIA que usted u otras
personas puedan sufrir lesiones graves o la muerte.
Indica un peligro
ADVERTENCIA:
GRAVE.
El no obedecer una señal de ADVERTENCIA de seguridad
PUEDE conducir a que usted u otras personas sufran
graves lesiones.
PRECAUCIÓN:
Indica un peligro
MODERADO.
El no obedecer una señal de PRECAUCIÓN de seguridad
PUEDE conducir a daños a la propiedad o a que usted u
otras personas se lesionen.
NOTA: Indica información o instrucciones de vital importancia para
la operación o el mantenimiento del equipo.
14
• INSTRUCCIONES DE SEGURIDAD IMPORTANTES •
•
LEA TODAS LAS INSTRUCCIONES ANTES DE OPERAR
LA UNIDAD
ADVERTENCIA:
Al usar la unidad
deben seguirse todas las normas de seguridad. Lea estas
•
instrucciones antes de operar la unidad a fin de garantizar
la seguridad del operador y de cualquier otra persona
presente. Guarde estas instrucciones para poder usarlas
más adelante.
•
•
•
•
•
•
•
•
•
•
Lea cuidadosamente y entienda el manual del operador de la
unidad que impulsa a este acople.
Lea detenidamente las instrucciones. Familiarícese con los
controles y el uso adecuado de la unidad.
No opere esta unidad si está cansado, enfermo o bajo los
efectos del alcohol, drogas o medicamentos.
Los niños no deben operar la unidad. Los adolescentes deben
estar acompañados y supervisados por un adulto.
Todos los accesorios de protección y seguridad deben estar
instalados adecuadamente antes de comenzar a operar la unidad.
Inspeccione la unidad antes de utilizarla. Reemplace las piezas
dañadas. Verifique que no haya fugas de combustible. Asegúrese
de que todos los sujetadores estén en su sitio y asegurados.
Cambie las piezas rajadas, melladas o dañadas de cualquier
forma. No opere la unidad si hay piezas flojas o dañadas.
Inspeccione cuidadosamente el área antes de encender la
unidad. Elimine todos los escombros y los objetos duros o
filosos tales como cristales, alambres, etc.
Use únicamente el hilo de recorte que se describe en la sección
Especificaciones de este manual. Nunca use un hilo, un cable,
una cadena o una cuerda de metal reforzados. Podrían
separarse y convertirse en proyectiles peligrosos.
Tenga en cuenta el riesgo de lesiones a la cabeza, las manos y
los pies.
Aleje a los niños, personas presentes y animales domésticos del
área; manténgalos fuera de un radio de 50 pies (15 m) como
mínimo. Aún así es posible que se arriesguen a ser golpeados por
los objetos lanzados. Sugiera a los presentes usar protección para
los ojos. Si alguien se le acerca, pare la unidad inmediatamente.
ADVERTENCIAS DE SEGURIDAD PARA LAS UNIDADES
ELÉCTRICAS
ADVERTENCIA: Para reducir el riesgo de descarga
eléctrica, use sólo cables de extensión aprobados para uso
en exteriores, como un cable de extensión con cable tipo
SW-A, SOW-A, STW-A, STOW-A, SJW-A, SJOW-A, SJTWW o SJTOW-A. Puede adquirir cables de extensión en su
distribuidor local. Use sólo cables de extensión de camisa
cilíndrica aprobados para su uso al exterior.
•
•
•
•
•
•
ADVERTENCIAS DE SEGURIDAD PARA UNIDADES DE
GASOLINA
•
La gasolina es
ADVERTENCIA:
sumamente inflamable y, de prenderse, sus vapores pueden
hacer explosión. Tome las siguientes precauciones:
•
•
•
•
Evite el peligro de incendio debido a combustible derramado.
Limpie de inmediato todo combustible derramado de la unidad
antes de encenderla. Antes de arrancar el motor, aleje la unidad
a una distancia de 30 pies (9.1 m) como mínimo del lugar de
abasto de combustible. NO fume.
No arranque ni use nunca la unidad dentro de una habitación o
edificio cerrados. Inhalar los gases de escape puede ser fatal.
Opere esta unidad solamente en un área exterior bien ventilada.
JUEGOS DE CABLES: Verifique que su juego de cable esté en
buenas condiciones. Cuando use un juego de cables, verifique
que el cable que usa es lo suficientemente grueso para conducir
la corriente que consumirá la unidad. Un juego de cables de
menor calibre puede causar una caída de voltaje en la línea y
ocasionar la pérdida de energía y recalentamiento. Vea el
manual del operador de la unidad que le dará electricidad a este
accesorio para saber la medida recomendada para el cable.
Inspeccione todos los cables de extensión y la conexión
eléctrica de la unidad con frecuencia. Observe en detalle si
existe deterioro, cortes o grietas en el aislamiento. Inspeccione
también si existen daños en las conexiones. Cambie los cables
si encuentra algún defecto o daño.
Evite que el cabezal motorizado se desconecte del cable de
extensión durante la operación usando una correa de sujeción en
el receptáculo o enchufe, un conector, o hágale un nudo (Fig. A).
Evite los ambientes peligrosos. No opere nunca su unidad en
ambientes húmedos ni mojados. La humedad representa un
peligro de descarga eléctrica.
No use la unidad bajo la lluvia. No la use dentro del agua ni
alrededor de ella.
No toque el enchufe ni la unidad con las manos mojadas ni
parado sobre superficies mojadas.
Do not leave the unNo deje la unidad enchufada cuando no se
utilice, esté cambiando los accesorios o mientras se le está
dando mantenimiento.
Cable de extensión
Almacene el combustible solo en los recipientes diseñados y
aprobados específicamente para estos materiales.
Pare siempre el motor y deje que se enfríe antes de llenar el
tanque. Nunca quite la tapa del tanque de combustible ni eche
combustible cuando el motor esté caliente. Antes de llenar el
tanque, siempre afloje la tapa lentamente para disipar la presión
del mismo.
Mezcle o eche siempre el combustible en un área exterior bien
ventilada y limpia, donde no haya chispas ni llamas. NO fume.
No opere nunca la unidad si la tapa del combustible no está
bien asegurada en su lugar.
Cable de alimentación de la unidad
Fig. A
15
AL OPERAR LA UNIDAD
OTRAS ADVERTENCIAS DE SEGURIDAD
•
•
•
•
•
•
•
•
•
•
•
•
•
•
•
•
•
•
•
Use gafas o lentes de seguridad que cumplan con las normas
actuales ANSI / ISEA Z87.1 y estén marcados como tales. Use
siempre protección para los oídos al operar esta unidad. Si la
operación levanta polvo, lleve puesta una máscara facial o
contra el polvo.
Use pantalones largos y gruesos, botas, guantes y camisa de
mangas largas. No use ropa holgada, alhajas, pantalones
cortos, sandalias ni ande descalzo. Asegure su cabello por
encima del nivel de los hombros.
El protector del cabezal de corte siempre debe estar colocado
mientras se opera la unidad. No utilice la unidad si no están
extendidos ambos hilos de recorte y si no está instalado el hilo
adecuado. No extienda el hilo de recorte más allá de la longitud
del protector.
Ajuste la manija para que brinde el mejor agarre, si corresponde.
Antes de arrancar la unidad, asegúrese de que la cuchilla no
haga contacto con ningún objeto.
Use la unidad únicamente a la luz del día o con buena luz artificial.
Use la herramienta correcta. Use esta herramienta solamente
con el propósito previsto.
Sostenga siempre la unidad con ambas manos al operarla.
Agarre firmemente ambos mangos o empuñaduras.
No intente alcanzar demasiado lejos. Mantenga siempre una
posición y equilibrio adecuados. Tenga cuidado al trabajar sobre
escalinatas, cuestas empinadas o pendientes. Para evitar
lesiones graves, no haga funcionar la unidad desde una escalera
de mano o un techo.
Mantenga las manos, la cara y los pies lejos de todas las partes
móviles. No toque o trate de detener las piezas móviles.
No opere la unidad a una velocidad mayor a la necesaria para la
tarea. No haga funcionar la unidad a alta velocidad cuando no
está en uso.
No fuerce el equipo. El mismo trabajará mejor y con mayor
seguridad si lo utiliza a la velocidad para la que ha sido diseñado.
Pare siempre la unidad cuando posponga el trabajo o mientras
camine entre diferentes zonas de corte.
Si golpea o se enreda con un objeto extraño, pare de inmediato
la unidad y verifique si hay algún daño. No ponga a funcionar el
equipo sin reparar el daño. No opere la unidad si hay piezas
flojas o dañadas.
Use únicamente para esta unidad las piezas de repuesto y
accesorios del fabricante original. El uso de cualquier pieza o
accesorio no autorizado podría causar lesiones graves al
usuario o daños a la unidad y anular la garantía.
Mantenga limpia la unidad. Quite con cuidado cualquier resto de
vegetación u otros residuos que puedan bloquear las piezas
móviles.
Si la unidad comienza a vibrar anormalmente, deténgala de
inmediato. Inspeccione la unidad para encontrar la causa de la
vibración. Generalmente, la vibración es un indicador de problemas.
•
•
•
•
•
•
•
El mantenimiento de la unidad debe ser minucioso.
Todos los servicios, que no sean los procedimientos de
mantenimiento descritos en este manual, deberán realizarse por
un centro de servicio autorizado.
Nunca extraiga, modifique o deje inoperativo ningún dispositivo
de seguridad que venga con la unidad.
Antes de inspeccionar, limpiar, guardar o transportar la unidad, o
de hacer tareas de reparación o mantenimiento o reemplazar
alguna de sus piezas:
1. Detenga la unidad.
2. Asegúrese de que se hayan detenido todas las piezas móviles.
3. Deje que la unidad se enfríe.
4. Para las unidades que funcionan con gasolina, desconecte el
cable de la bujía. Para las unidades que funcionan con
electricidad, desconecte la unidad de la alimentación eléctrica.
Sujete la unidad durante el transporte.
Nunca almacene la unidad con combustible en el depósito, en el
interior de una construcción donde las emanaciones puedan
alcanzar una llama abierta (luces piloto, etc.) o chispas
(interruptores, motores eléctricos, etc.).
Almacene la unidad en un lugar seco, asegurada o a una altura
que evite que se la use sin autorización o se la dañe. Mantenga
la unidad lejos del alcance de los niños.
Nunca rocíe ni arroje chorros de agua ni de ningún otro líquido a
la unidad. Mantenga las manijas secas, limpias y sin residuos.
Limpie la unidad luego de cada uso. Consulte Limpieza y
almacenamiento. No utilice solventes o detergentes fuertes.
Guarde estas instrucciones. Consúltelas con frecuencia y úselas
para capacitar a otros usuarios. Si le presta esta unidad a otras
personas, también debe prestarles estas instrucciones.
GUARDE ESTAS
INSTRUCCIONES
16
• SÍMBOLOS INTERNACIONALES Y DE SEGURIDAD •
Este manual del operador describe símbolos y pictografías internacionales y de seguridad que posiblemente aparezcan en este producto.
Lea el manual del operador para informarse bien sobre la seguridad, ensamblaje, operación, mantenimiento y reparación.
SÍMBOLO
SIGNIFICADO
SÍMBOLO
• SÍMBOLO DE ALERTA DE SEGURIDAD
SIGNIFICADO
• LOS OBJETOS QUE SON ARROJADOS POR EL
AIRE Y EL CORTADOR GIRATORIO PUEDEN
PROVOCAR LESIONES GRAVES
Indica peligro, advertencia o precaución. Puede
utilizarse junto a otros símbolos o pictografías.
Los objetos
ADVERTENCIA:
pequeños pueden ser lanzados a gran velocidad y
• LEA EL MANUAL DEL OPERADOR
ADVERTENCIA:
ocasionar lesiones. Manténgase alejado del rotor
giratorio.
Lea el o los
manuales del operador y siga todas las advertencias e
instrucciones de seguridad. No hacerlo puede
ocasionar lesiones graves al operador y/o a las
personas presentes.
• MANTENGA ALEJADOS A LOS PRESENTES
Mantenga a
ADVERTENCIA:
todos los presentes, especialmente a los niños y
• USE PROTECCIÓN PARA LOS OJOS Y OÍDOS
animales domésticos, a una distancia de al menos 50
pies (15 m).
Los objetos
ADVERTENCIA:
lanzados y el ruido fuerte pueden ocasionar lesiones
• CUCHILLA AFILADA
graves a los ojos y pérdida de la audición. Al operar esta
unidad, use protección para los ojos que cumpla con la
normas ANSI / ISEA Z87.1 y protección para los oídos.
De ser necesario, use un protector facial completo.
ADVERTENCIA:
Hay una cuchilla
afilada en el protector del accesorio de recorte. A fin
de evitar lesiones graves, no toque la cuchilla de corte
del hilo.
GARANTÍA
GARANTÍA TOTAL POR DOS AÑOS CRAFTSMAN
Este producto se garantiza POR DOS AÑOS a partir de la fecha de compra, contra cualquier defecto de materiales o mano de obra. Un
producto defectuoso será sustituido sin cargo alguno.
Para ver detalles sobre la cobertura de la garantía para obtener reemplazo gratuito, visite el sitio Web: www.craftsman.com/warranty
Esta garantía no cubre la línea de corte, que es una pieza consumible que se desgasta debido al uso normal dentro del período de garantía.
Esta garantía se anula si el producto en algún momento se utiliza para prestar servicios comerciales o se alquila a otra persona.
Esta garantía le confiere a usted derechos legales específicos y usted puede tener, además, otros derechos que difieren de un estado a otro.
Sears Brands Management Corporation, Hoffman Estates, IL 60179
17
CONOZCA SU UNIDAD
USOS
Como recortadora:
• Corta hierbas y malezas ligeras.
• Bordeado
• Recorte decorativo alrededor de árboles, vallas, etc.
Tapa de
suspensión
HERRAMIENTAS DE ENSAMBLADO
REQUERIDAS:
•
Destornillador Phillips n.° 2
Cuerpo del eje
Protector del cabezal de corte
Cabezal de corte
Cuchilla de corte de hilo
ESPECIFICACIONES*
Peso aproximado de la unidad (sólo el accesorio) . . . . . . . . . . . . . . . . . . . . . . . . . . . . . . . . . . . . . . . . . . . . . . . . . . . 3.5 - 4.5 libras (1.6 - 2.0 kg)
Mecanismo de corte . . . . . . . . . . . . . . . . . . . . . . . . . . . . . . . . . . . . . . . . . . . . . . . . . . . . . . . . . . . . . . . . . . . . . . . . . . . . . . . . . . . . . . . Bump Head
Diámetro de la línea de corte . . . . . . . . . . . . . . . . . . . . . . . . . . . . . . . . . . . . . . . . . . . . . . . . . . . . . . . . . . . . . . . . . . . . . 0.095 pulgadas (2.41 mm)
Diámetro de la senda de corte . . . . . . . . . . . . . . . . . . . . . . . . . . . . . . . . . . . . . . . . . . . . . . . . . . . . . . . . . . . . . . . . . . . . . . 17 pulgadas (43.18 cm)
* Todas las especificaciones se basan en la información del producto más reciente disponible en el momento de la impresión. Nos reservamos
el derecho de hacer cambios en cualquier momento, sin previo aviso.
18
ENSAMBLAJE
INSTALACIÓN DEL PROTECTOR DEL CABEZAL
DE CORTE
Tornillos (2)
ADVERTENCIA: A fin de evitar que se produzcan
lesiones personales graves, no opere nunca la unidad sin
el protector del cabezal de corte en su lugar.
Protector del
cabezal de corte
Soporte de
montaje
1. Ubique el protector del cabezal de corte sobre el soporte de
montaje. Se deben alinear los orificios del protector del cabezal
de corte con los orificios del soporte de montaje. (Fig. 1)
2. Enrosque los 2 tornillos a través del soporte de montaje y dentro
del protector del cabezal de corte hasta que queden ajustados
manualmente.
3. Con un destornillador Phillips n.° 2, ajuste los tornillos hasta que
el protector del cabezal de corte quede firmemente en su lugar.
Apriete los tornillos de manera uniforme. Las separación que
hay entre el soporte de montaje y el protector del cabezal de
corte debe ser la misma a ambos lados.
Fig. 1
19
ADVERTENCIA: Antes de utilizar algún accesorio, lea y
comprenda el manual adjunto. Siga todas las instrucciones
de seguridad que contengan.
ADVERTENCIA: Para evitar lesiones personales graves
y daños a la unidad, apague la unidad antes de quitar o
instalar cualquier accesorio.
Acoplador
Accesorio
CÓMO OPERAR EL ACOPLADOR
Fig. 2
El acoplador permite usar accesorios opcionales.
Instalación del accesorio
1. Quite la tapa de suspensión del accesorio. Guarde la tapa de
suspensión para utilizarla al almacenar el accesorio. De estar
presente, extraiga el espaciador gris del acoplador.
2. Coloque la unidad en una superficie plana y nivelada.
3. Gire la perilla en el sentido contrario a las agujas del reloj para
aflojar el acoplador (Fig. 3).
4. Alinee el botón de liberación con el embutimiento de la guía (Fig. 4).
5. Presione el accesorio directamente dentro del acoplador hasta
que el botón de liberación encaje a presión firmemente del
orificio principal (Fig. 4).
6. Gire la perilla en el sentido de las agujas del reloj para apretar el
acoplador (Fig. 3).
NOTA: No ajuste demasiado la tuerca (Fig. 4).
Apriete
Afloje
Perilla
Fig. 3
PRECAUCIÓN: Antes de operar esta unidad,
cerciórese de que el botón de desconexión esté
completamente encajado en el agujero principal y de que
la perilla esté firmemente apretada.
Orificio principal
Botón de desconexión
PRECAUCIÓN: El botón de desconexión debe estar
encajado solamente en el orificio principal. Usar un orificio
incorrecto podría ocasionar lesiones personales o daños a
la unidad.
Cómo quitar el accesorio
Agujero guía
1. Coloque la unidad en una superficie plana y nivelada.
2. Gire la perilla en el sentido contrario a las agujas del reloj para
aflojar el acoplador (Fig. 3).
3. Oprima y mantenga apretado el botón de liberación (Fig. 4).
4. Tire del accesorio directamente hacia fuera del acoplador (Fig. 2).
Tuerca
Fig. 4
20
OPERACIÓN
SUJETAR LA UNIDAD
ADVERTENCIA: Utilice siempre protección ocular,
auditiva, de manos, pies y corporal para reducir el riesgo
de sufrir lesiones durante la operación de esta unidad.
•
•
•
•
•
•
Párese en la posición de arranque (Fig. 5). Párese derecho. No
se incline sobre el aparato.
Mantenga los pies alejados y apoyados firmemente sobre el suelo.
Sujete la empuñadura del eje con la mano derecha. Mantenga el
brazo derecho ligeramente doblado.
Sostenga la manija con la mano izquierda. Mantenga el brazo
izquierdo bien derecho.
Mantenga la unidad al nivel de la cintura.
Coloque el cabezal de corte a algunas pulgadas del suelo.
Fig. 5
AJUSTE DE LA LONGITUD DEL HILO DE RECORTE
Esta unidad cuenta con un cabezal de impacto. Se puede soltar el
hilo de recorte del cabezal de corte sin parar el motor.
Para soltar más hilo, golpee suavemente la perilla de impacto
contra el suelo (Fig. 6) mientras utiliza la unidad a alta velocidad.
Para obtener los mejores resultados, golpee la perilla de impacto
contra suelo descubierto o duro. Si se intenta soltar hilo en un lugar
donde el césped está alto, se puede parar el motor.
NOTA: No apoye el cabezal de corte en el suelo mientras la unidad
está en marcha.
Cada vez que se golpea la perilla de impacto, se suelta
aproximadamente 1.5 pulgada (38 mm) de hilo de recorte.
NOTA: Siempre debe mantener el hilo de recorte completamente
extendido.
Resulta más difícil soltar hilo cuando se acorta el hilo de corte. La
cuchilla del protector del cabezal de corte corta el hilo a la longitud
correcta si se suelta hilo excesivamente.
Perilla de impacto
Fig. 6
PRECAUCIÓN: No extraiga ni modifique el conjunto de
la cuchilla de corte del hilo. Si la longitud del hilo es
excesiva, se sobrecalentará la unidad. Esto puede provocar
lesiones personales graves o daños a la unidad.
RECOMENDACIONES PARA MEJORES RESULTADOS
•
Para alejar los recortes del operador, incline levemente el
cabezal de corte hacia abajo a la derecha, corte de izquierda a
derecha siempre que sea posible.
• No recorte césped o malezas que estén húmedos.
NOTA: El hilo puede romperse:
• Si se enreda con objetos extraños
• Por la fatiga normal del hilo
• Si se intenta cortar plantas gruesas
• Si se empuja el hilo contra objetos como paredes o cercas
RECORTE DECORATIVO
Cuando recorte alrededor de árboles, postes, vallas, etc., rote toda
la unidad de manera que el cabezal de corte quede en un ángulo de
30° en relación con el suelo (Fig. 7).
Fig. 7
21
MANTENIMIENTO
Perilla de impacto
ADVERTENCIA: Para evitar lesiones graves, no haga
Ojal de entrada
nunca ningún mantenimiento ni reparación con la unidad
funcionando. Siempre deje que la unidad se enfríe antes
de darle mantenimiento o repararla. Para las unidades que
funcionan con gasolina, desconecte el cable de la bujía
para prevenir que la unidad se encienda por accidente.
Para las unidades que funcionan con electricidad,
desconecte la unidad de la alimentación eléctrica para
prevenir que la unidad se encienda por accidente.
Ojal de salida
Hilo de
recorte
Flechas
Fig. 8
REEMPLAZO DEL HILO DE RECORTE
Use únicamente el hilo de recorte que se describe en la sección
Especificaciones. Otros tipos de hilo de recorte pueden causar el
recalentamiento o la falla de la unidad.
ADVERTENCIA: Nunca use un hilo, un cable, una
cadena o una cuerda de metal reforzados. Podrían
separarse y convertirse en proyectiles peligrosos.
NOTA: Utilice siempre la longitud de hilo correcta al instalar el hilo
de recorte. Es posible que el hilo no se suelte adecuadamente si
está demasiado largo.
NOTA: La bobina exterior permanecerá conectada a la unidad.
Instalación del hilo de recorte nuevo
Fig. 9
1. Si es necesario, extraiga el hilo de recorte viejo y/o las
obstrucciones del cabezal de corte. Consulte Extracción de hilo
de recorte viejo y/u obstrucciones.
2. Corte una longitud de 20 pies (6 m) de hilo de recorte nuevo.
3. Gire la perilla de impacto en el sentido de las agujas del reloj
para alinear las flechas (Fig. 8).
4. Inserte el nuevo hilo de recorte en el ojal de entrada (Fig. 8).
Oprima el hilo a través del cabezal de corte hasta que
sobresalgan unas pulgadas por el ojal de salida. Tire del hilo
hasta que los extremos tengan la misma longitud.
5. Gire la perilla de impacto en el sentido de las agujas del reloj para
enrollar el hilo hasta que sobresalgan aproximadamente 5
pulgadas (12.7 cm) por cada lado del cabezal de corte (Fig. 9).
NO oprima la perilla de impacto mientras se enrolla el hilo.
Cubierta de
la bobina
Lengüeta
Carrete
interior
Orificio
Bobina
exterior
Extracción de hilo de recorte viejo y obstrucciones
Fig. 10
Si es necesario, extraiga el hilo de recorte viejo y/o las
obstrucciones del cabezal de corte.
1. Oprima firmemente las lengüetas del cabezal de corte (Fig. 10).
2. Retire la cubierta de la bobina (Fig. 10).
3. Extraiga el hilo de recorte viejo y/o las obstrucciones.
4. Utilice una tela limpia para limpiar el carrete interior, la bobina
exterior y la cubierta de la bobina (Fig. 10).
5. Se deben alinear las lengüetas de la cubierta de la bobina con
los orificios de la bobina exterior (Fig. 10). Oprima la cubierta de
la bobina sobre la bobina exterior hasta que las lengüetas entren
a presión firmemente en los orificios.
22
LIMPIEZA Y ALMACENAMIENTO
LIMPIEZA
ALMACENAMIENTO
•
ADVERTENCIA: Para evitar lesiones personales graves,
apague siempre la unidad y deje que se enfríe antes de
limpiarla o darle mantenimiento.
•
•
ADVERTENCIA: No utilice detergentes fuertes. Los
limpiadores caseros que contienen aceites esenciales, por
ejemplo, de pino y limón, y los solventes como el
queroseno, pueden dañar el plástico.
•
•
Use un cepillo pequeño o un paño limpio y seco para limpiar la
unidad por fuera.
•
•
No guarde nunca la unidad con combustible en el tanque en un
lugar en el que los gases puedan ponerse en contacto con una
llama expuesta o chispas.
Deje que la unidad se enfríe.
Limpie bien la unidad y compruebe que no haya piezas sueltas
o dañadas. Reemplace las piezas dañadas y ajuste los tornillos,
tuercas o pernos sueltos.
Guarde la unidad bajo llave para evitar su uso no autorizado o daño.
Almacene la unidad en un espacio cerrado, en un lugar seco y
bien ventilado.
Guarde la unidad fuera del alcance de los niños.
Para suspender el accesorio de un gancho, instale la tapa de
suspensión sobre el accesorio. Asegúrese de que el botón de
liberación esté firmemente trabado dentro de uno de los orificios
de la tapa de suspensión.
LOCALIZACIÓN Y SOLUCIÓN DE PROBLEMAS
PROBLEMA
SOLUCIÓN
EL CABEZAL DE CORTE NO AVANZA LA LÍNEA
El cabezal de corte está atascado de hierba
Pare la unidad y limpie el cabezal de corte
El cabezal de corte no tiene línea
Rellénelo con línea nueva
El carrete interior está trabado
Rebobine la línea
El cabezal de corte está sucio
Limpie el carrete interior y la bobina exterior
La línea está soldada
Abra el cabezal de corte y quite la sección soldada
La línea está torcida
Rebobine la línea
No hay suficiente línea extendida
Detenga la unidad, empuje la perilla percusiva y hale la línea hasta
que 4 pulgadas (102 mm) estén fuera del cabezar de corte
LA LINEA DE CORTE AVANZA SIN CONTROL
Hay aceite, limpiador o lubricante en el cabezal de corte
Limpie y seque bien el cabezal de corte
¿NECESITA MÁS AYUDA?
Encontrará la respuesta y más información en managemylife.com – ¡gratis!
n
n
n
n
Busque en Internet éste y todos los demás manuales de sus productos.
Pregúntele a nuestro equipo de expertos del hogar.
Reciba un plan de mantenimiento personalizado para su hogar.
Busque información y herramientas que lo ayuden en sus proyectos del hogar.
ofrecido por Sears
23
®