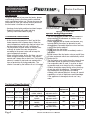
1
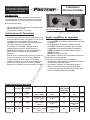
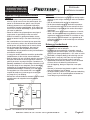
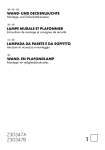
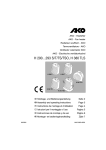
User’s Manual and
Operating Instructions
by
F
BC
Electric Fan Heater
Table of Contents
hte
dd
oc
um
en
t-
all
rig
hts
res
erv
ed
Model #’s: PT-02-230, PT-033-230,
PT-033-230, PT-05-400, PT-09-400
co
py
rig
Do not operate this heater until you have read, and
thoroughly understand these safety and operating
English ................................................................. 2-3 instructions. Failure to comply with the precautions and
Spanish................................................................. 4-5 instructions provided with this heater can result in death,
serious bodily injury, property loss or damage from the
French ................................................................. 6-7 hazards of fire, explosion, burns, or electric shock. Only
Dutch .................................................................. 8-9 persons who can read and understand these instructions
Exploded View and Parts List............................ 10-11 should use or service this heater. Not for recreational
vehicle use.
CONSUMER: Retain this manual for future reference.
821000175-11
NEVER LEAVE HEATER
UNATTENDED WHILE BURNING, OR WHILE CONNECTED
TO A POWER SOURCE.
BC
Electric Fan Heater
Introduction
by
F
To get the most out of your new fan heater, please
read through these instructions and the attached
safety regulations before use. Please also save the
instructions in case you need to remind yourself of
the fan heater’s functions at a later date.
Function Selector with
three power settings
ed
- Housing of steel plate and heat-resistant lacquer
- Supplied complete with cable and plug
Thermostat Dial
Figure 1. Fan Heater Dials
(9w may not include cable or plug).
res
erv
Special Safety Regulations
- The fan heater is not suitable for use outdoors in
Thermostat Instructions
- At first turn the thermostat to “Max” and let the
hts
-
rig
-
dd
oc
um
en
t-
all
heater operate with full power input. When the
room temperature reaches the required value, turn
the thermostat to the left until it switches off.
- The thermostat will then switch on and off automatically to control the room temperature
according to the preset value and to keep the
room temperature constant.
- When using the heater for the first time, you may
notice a slight emission of smoke. This is quite
normal and it stops after a short time. The heating
element is made of steel and was coated with a
layer of protective oil during production. The
smoke is caused by the leftover oil as it is heated.
damp weather, in bathrooms or in other wet or
damp environments.
Please note that the fan heater can become very
hot and should, therefore, be placed at a safe
distance from flammable objects such as furniture,
curtains and similar objects.
Do not cover the fan heater.
Do not place the fan heater immediately under a
wall outlet.
Do not connect the fan heater using an on/off timer
or other equipment which can automatically switch
the device on.
The fan heater must not be placed in rooms where
flammable liquids or gases are used or stored.
If an extension cable is used, it must be as short
as possible and must always be fully extended.
Children should be supervised to ensure that they
do not play with the appliance. The appliance in
not intended for use by persons (including
children) with reduced physical, sensory or mental
capabilities, or lack of experience and knowledge.
If the appliance is damaged, do not use it any
more.
-
Technical Specifications
Temp
2,000
4 (OFF, 650W,
1300W, 2000W)
continuously
adjustable 0-85°C
PT-033-230 230V~50Hz
3,300
4 (OFF, 30W, 1650W,
3300W)
PT-05-400
400V~50Hz
5,000
400V~50Hz
9,000
PT-09-400
rig
230V~50Hz
Dims
Weight
10A
197x210x303
mm
4.2 kg
continuously
adjustable 0-40°C
16A
250x250x390
mm
5.6 kg
4 (OFF, FAN, 2500W,
5000W)
continuously
adjustable 0-40°C
10A
250x250x390
mm
6.6 kg
4 (OFF, FAN, 4500W,
9000W)
continuously
adjustable 0-40°C
16A
350x440x480
11.8 kg
mm
hte
Settings
PT-02-230
Voltage / Hz Power
Rating
co
py
Model
Fuse
requirement
Specifications subject to change without notice
Page 2
EN
Electric Fan Heater User’s Manual
NEVER LEAVE HEATER
UNATTENDED WHILE BURNING, OR WHILE CONNECTED
TO A POWER SOURCE.
Special Safety Regulations (cont.)
BC
Electric Fan Heater
Operation
- Do not place the appliance on moving vehicles or
-
-
ed
Cleaning and Maintenance
rig
-
-
res
erv
-
-
firm surface and at a safe distance from wet
environments and flammable objects.
Connect the fan heater to the electrical power.
Set the thermostat dial to the maximum
temperature.
The fan heater will switch on when the function
selector dial is set to one of the three power
settings.
Once the room reaches the desired temperature,
turn the thermostat dial back until heating element
turns off. The fan will still continue to run. The
thermostat is now set at your desired temperature,
and the heater will continue to maintain a constant
temperature.
hts
-
ventilation, do not position it near a wall or corner.
It is recommended that a separate circuit serving
only this appliance be provided. Keep the power
cable far enough from the hot air outlet.
If the supply cable is damaged, it must be replaced
by the manufacturer or service agent or a similarly
qualified person in order to avoid a hazard.
You must not connect other appliances to the
same electrical outlet as the fan heater.
Do not dispose of electrical appliances as unsorted
municipal waste; use separate collection facilities.
Contact your local government for information
regarding the collection systems available. If
electrical appliances are disposed of in landfills or
dumps, hazardous substances can leak into the
groundwater and get into the food chain, damaging
your health and well-being. When replacing old
appliances with new ones, the retailer is legally
obligated to take back your old appliance for
disposals free of charge.
If the fan heater is to be permanently installed, the
following instructions must be observed (see figure
2).
by
F
- Position the fan heater so that it stands upright on a
somewhere it may easily tip over.
- Use the appliance in places with good air
the outlet and let it cool down.
- The enclosure is easy to get dirty. Wipe it often
all
with a soft sponge. For very dirty parts, wipe with a
sponge dipped in < 50°C water and mild detergent,
then dry the heater enclosure with a clean cloth.
Be careful not to let the water enter the inside of
the appliance
- In order to protect the enclosure, don’t splash
water onto the heater, and never use a solvent like
gasoline, isoamyl acetate, toluene, etc. to clean
the heater.
- Clean the coupler, dry and pack it in a plastic bag.
- When you store the heater, let it cool down first
and, keep it dry. Then cover it with a plastic bag,
put it in the packing box and store it in a dry,
ventilated place.
co
py
rig
hte
dd
oc
um
en
t-
-
- Before cleaning the appliance, disconnect it from
Figure 2. Installing your Heater
Electric Fan Heater User’s Manual
EN
Page 3
Calentadores
Eléctricos Portátiles
BC
NUNCA DEJE DESATENDIDO EL CALENTADOR MIENTRAS ESTÉ ENCENDIDO O
MIENTRAS ESTÉ CONECTADO A UNA
FUENTE DE ALIMENTACIÓN.
Introducción
by
F
Para obtener los mejores resultados, antes de utilizar el
calefactor de aire, lea las instrucciones y las normas de
seguridad adjuntas. Por favor guarde las instrucciones
para referencias futuras.
- Caja de placa de acero con esmalte resistente al calor
- Adjunto con cable y enchufe
ed
Selector de función con tres
posiciones de potencia
(9w no incluye el cable o el enchufe).
Figure 1. Indicadores del calefactor de aire
Reglas específicas de seguridad
- Encienda el termostato a la máxima temperatura y deje
- El calefactor no es apropiado para su uso externo en
rig
hts
-
climas húmedos, en lavabos o en otras zonas húmedas
o mojadas.
Por favor tenga en cuenta que el calefactor puede
calentarse a temperaturas elevadas, por lo que debe
ser colocado a una distancia prudencial alejado de
objetos inflamables tales como muebles, cortinas y
objetos similares. .
No cubra el calefactor de aire.
No coloque el calefactor de aire directamente bajo una
toma de corrientes de pared.
No conecte el calefactor de aire utilizando un
temporizador u otros dispositivos que puedan causar la
activación automática del aparato.
No coloque el calefactor en habitaciones donde se
utilicen o almacenen gases o líquidos inflamables.
Si utiliza una regleta de extensión utilice una de corto
alcance y colóquela totalmente extendida.
-
dd
oc
um
en
t-
all
-
que el calefactor funcione a esta potencia. Una vez que
la temperatura de la habitación llegue al valor
apropiado, gire el termostato hacia la izquierda hasta
que llegue a la posición de apagado.
El termostato se encenderá y apagará de forma
automática para controlar la temperatura de la
habitación de acuerdo con el valor preestablecido y
para mantener la temperatura de la habitación
constante.
Cuando utilice el calefactor por primera vez notará una
leve emisión de humo. Esto es normal y dejará de
suceder después de unos instantes. El elemento
calefactor es de acero y cuenta con una capa de protección de aceite de fábrica. El humo es causado
debido a los remanentes de aceite mientras se calienta.
res
erv
Instrucciones del Termostato
-
Indicador del termostato
-
Especificaciones técnicas
Voltaje / Clasificación
frecuencia de potencia
hte
Modelo
Velocidades
Temperatura
Requiere
Dimensiones Peso
como mínimo
un fusible
2,000
4 (APAGADO, 650W, ajuste continuado
1300W, 2000W)
0-85°C
10A
197x210x303 4.2 kg
mm
PT-033-230 230V~50Hz
3,300
4 (APAGADO, 30W,
1650W, 3300W)
ajuste continuado
0-40°C
16A
250x250x390 5.6 kg
mm
PT-05-400 400V~50Hz
5,000
4 (APAGADO, VENTIajuste continuado
LADOR, 2500W,
0-40°C
5000W)
10A
250x250x390 6.6 kg
mm
PT-09-400 400V~50Hz
9,000
4 (APAGADO,
ajuste continuado
VENTILADOR, 4500W,
0-40°C
9000W)
16A
350x440x480
mm
co
py
rig
PT-02-230 230V~50Hz
Página 4
SP
Manual del Propietario del Calentadores Eléctricos Portátiles
11.8
kg
Calentadores
Eléctricos Portátiles
Uso
-
-
by
F
ed
Antes de limpiar el dispositivo, desconéctelo de la toma
de electricidad y espere a que se enfríe.
La carcasa se ensucia fácilmente. Límpiela con
frecuencia utilizando una esponja suave. Limpie las
partes sucias con una esponja tras haber sido
sumergida en agua a < 50º y detergente suave; luego
seque la carcasa del calefactor con un paño limpio.
Evite que entre agua en el interior del aparato.
Para proteger la carcasa, no salpique agua en el
calefactor y no utilice nunca disolventes como gasolina,
acetato de isoamilo, tuoleno, etc., para limpiar el
calefactor.
Limpie, seque y guarde el conector en una bolsa
plástica.
Cuando guarde el calefactor, siempre deje que se
enfríe antes de hacerlo y manténgalo seco. Cúbralo con
una bolsa plástica, colóquelo en la caja de empaque y
guárdelo en un área ventilada y seca.
-
Techo
Min.
0.5 m
Pared
Min.
15 cm
co
py
Pared
rig
hte
Min.
0.5 m
dd
oc
um
en
t-
all
-
Limpieza y mantenimiento
rig
-
evitar que jueguen con el dispositivo. El aparato no fue
creado para ser utilizado por personas (incluidos niños)
con capacidades físicas, sensoriales o mentales
reducidas, o con falta de experiencia y conocimientos.
Si el dispositivo resulta dañado, deje de utilizarlo de
forma permanente.
No coloque el dispositivo en vehículos móviles o en
lugares de donde se pueda caer fácilmente.
Utilice el aparato en zonas con buena ventilación, no lo
coloque en esquinas o cerca de paredes.
Se recomienda utilizar un circuito exclusivo para el
dispositivo. Mantenga el cable de electricidad a una distancia prudencial de la salida de aire caliente.
Si el cable de electricidad resulta dañado, para evitar
peligros, este deberá ser reemplazado por el fabricante
o el agente de servicios o por personal igualmente
cualificado.
No utilice la misma toma de corriente que utiliza el
calefactor para conectar otros dispositivos.
No tire el dispositivo en un bote de basura con ruedas.
No arroje aparatos eléctricos a la basura de residuos
generales. Utilice otros contenedores de recogida. Para
mayor información acerca de los diferentes métodos de
recolección, póngase en contacto con las autoridades
locales. Si se arroja aparatos eléctricos en basureros o
vertederos, puede que se filtren una fuga de líquidos
dañinos agua y entren en la cadena alimenticia
dañando así su salud y bienestar. Al reemplazar
aparatos eléctricos antiguos por nuevos, el minorista
está obligado por ley a recoger y desechar su aparato
antiguo de forma gratuita.
Si el calefactor de aire va a estar instalado de forma
permanente, preste atención a las siguientes
instrucciones:
res
erv
- Los niños deben estar bajo supervisión adulta para
Coloque el radiador de manera que permanezca de
manera vertical sobre una superficie firme y a una distancia segura de ambientes húmedos y objetos
inflamables.
Conecte el radiador a la toma de corriente.
Ponga el dial del termostato en la temperatura máxima.
El radiador se encenderá cuando el dial de selección
de función se ponga en una de las tres modalidades de
encendido.
Una vez que la habitación alcance la temperatura
deseada, gire el dial del termostato en sentido inverso
hasta que el elemento calentador se apague. El ventidalor permanecerá encendido todavía. El termostato
está ahora programado en la temperatura deseada y el
radiador continuará manteniendo una temperatura constante.
hts
Reglas específicas de seguridad
(cont.)
BC
NUNCA DEJE DESATENDIDO EL CALENTADOR MIENTRAS ESTÉ ENCENDIDO O
MIENTRAS ESTÉ CONECTADO A UNA
FUENTE DE ALIMENTACIÓN.
Min.
1.8 m
Suelo
Figure 2. Instalar su calentadora
Manual del Propietario del Calentadores Eléctricos Portátiles
SP
Página 5
NE JAMAIS LAISSER UN RADIATEUR SANS SURVEILLANCE
LORSQU'IL FONCTIONNE OU
LORSQU'IL EST BRANCHÉ À UNE
SOURCE D'ALIMENTATION.
BC
Radiateurs
électriques portables
by
F
MODE D’EMPLOI
INTRODUCTION
Pour profiter totalement des performances de votre
appareil, lisez attentivement ce mode d’emploi et les
consignes de sécurité avant utilisation.
Conservez ce mode d’emploi à proximité de l’appareil.
ed
Sélecteur de fonction avec 3
unités de paramétrage
Thermostat réglable
Figure 1. Cadran du Generateur electrique
res
erv
- Coque en acier avec peinture résistant à la chaleur
- Fourni complet avec câble et prise
REGLES SPECIALES DE SECURITE
(9w peut pas le câble ou la fiche).
INSTRUCTIONS THERMOSTAT
- Le générateur n’est pas adapté pour un usage extérieur
rig
-
dd
oc
um
en
t-
all
-
laissez le générateur fonctionner à toute puissance.
Quand la température de la pièce est bonne, tournez le
thermostat sur off.
Ensuite le thermostat se mettra automatiquement en
arrêt ou en marche automatique pour que la
température de la pièce reste toujours constance. Quand vous utilisez le générateur pour la première fois,
il est possible qu’une légère fumée se dégage. C’est
tout à fait normal, cela s’arrête très rapidement.
L’élément de chauffe est fait d’acier et a été enduit
d’une couche d’huile de protection. La fumée est
provoquée par l’huile.
hts
- Premièrement, tournez le thermostat jusqu’à “Max” et
par temps humide, dans les salles de bains ou autres
environnements humides.
Veuillez noter que le générateur peut devenir très chaud
et devrait donc être place à distance de sécurité des
objets inflammables tels que les meubles, rideaux,
Ne pas couvrir le générateur.
Ne pas placer le générateur directement à une prise
murale.
Ne pas relier le générateur à l’aide d’un minuteur ou de
toute autre équipement pouvant enclencher le dispositif
automatiquement.
Le générateur ne peut pas être place dans une pièce
contenant des liquides inflammables ou gaz.
Si vous utilisez une rallonge, c’est mieux d’utiliser une
rallonge la plus courte possible.
-
SPECIFICATIONS TECHNIQUES
Voltage /
fréquence
Paramétrages
Température
2,000
4 (arrêt, 650W,
1300W, 2000W)
Ajustable en
continu de 0-85°C
10A
197x210x303
4.2 kg
mm
PT-033-230 230V~50Hz
3,300
4 (arrêt, 30W,
1650W, 3300W)
Ajustable en
continu de 0-40°C
16A
250x250x390
5.6 kg
mm
PT-05-400 400V~50Hz
5,000
ventilateur, 2500W,
Ajustable en
continu de 0-40°C
10A
250x250x390
6.6 kg
mm
Ajustable en
continu de 0-40°C
16A
350x440x480
11.8 kg
mm
co
py
rig
PT-02-230 230V~50Hz
Puissance
calorifique
hte
Modelo
PT-09-400 400V~50Hz
Page 6
FR
4 (arrêt,
5000W)
9,000
4 (arrêt,
ventilateur, 4500W,
9000W)
Exige au
moins un
fusible
Manuel du propriétaire pour radiateurs électriques portables
Dim.
Poids
NE JAMAIS LAISSER UN RADIATEUR SANS SURVEILLANCE
LORSQU'IL FONCTIONNE OU
LORSQU'IL EST BRANCHÉ À UNE
SOURCE D'ALIMENTATION.
REGLES SPECIALES DE SECURITE
(cont.)
UTILISATION
- Positionnez le radiateur soufflant de façon à ce qu’il
-
-
by
F
ed
NETTOYAGE ET ENTRETIEN
- Avant de nettoyer l’appareil, déconnectez le et laissez le
refroidir.
- Si la grille devient sale, vous pouvez la frotter avec une
éponge douce. Pour les parties très sales, utilisez un
chiffon avec une éponge plongée dans de l’eau
inférieure à 50°C et un détergent doux. Ensuite essuyez
le tout au chiffon.
Faîtes attention à ne pas faire entrer de l’eau dans
l’appareil.
Ne pas éclabousser de l’eau sur le générateur ;
N’utilisez pas de dissolvant tels que l’essence, acétate
isoamylique, toluène, pour nettoyer le générateur, afin
de protéger la grille.
Nettoyez le coupleur, séchez le et mettez le dans un
sachet en plastique.
Quand vous rangez le générateur, laissez le d’abord
refroidir. Ensuite recouvrez le d’un sac plastique et
mettez le dans une emballage adapté.
Stockez le dans un endroit sec et aéré.
all
-
-
hts
-
-
rig
-
L’appareil n’est également pas prévu pour des
personnes présentant des facultés physiques,
sensorielles ou mentales réduites. Si l’appareil est
endommagé, ne l’utilisez plus.
Ne pas placer l’appareil sur des véhicules automobiles
ou endroits inclinés.
Utilisez l’appareil dans des endroits toujours bien
ventilés ; ne pas le placer près d’un mur ou dans un
coin.
Il est recommandé de se servir d’un circuit séparé
Gardez le cordon d’alimentation à distance de la bouche
d’air chaud.
Vous ne devez pas connecter d’autres appareils sur le
même secteur que le générateur.
Ne pas jeter l’appareil dans une poubelle, mais déposez
le dans un parc à conteneur adapté permettant le
recyclage.
Si le générateur doit être installé de manière permanente, veuillez suivre les instructions d’utilisation suivante :
repose sur une surface plane et ferme, à distance des
environnements humides et des objets inflammables. Connectez le générateur.
Branchez le radiateur soufflant à la prise électrique.
Réglez la molette du thermostat sur la température
maximale.
Le radiateur soufflant s’allumera lorsque la molette de
sélection des fonctions sera réglée sur l’une des trois
puissances disponibles.
Une fois que la pièce chauffée atteint la température
souhaitée, redescendez la molette pour arrêter le
chauffage. La soufflerie continuera à fonctionner. Le
thermostat est maintenant réglé à la température
souhaitée, et le chauffage maintiendra une température
constante.
res
erv
- Gardez toujours les enfants à l’écart de l’appareil.
-
BC
Radiateurs
électriques portables
Mur
dd
oc
um
en
Min.
0,5 m
t-
Plafond
Mur
Min.
0,5 m
Min.
1,8 m
-
Min.
15 cm
-
hte
Plancher
-
co
py
rig
Figure 2. Installer votre appareil de chauffage
Manuel du propriétaire pour radiateurs électriques portables
FR
Page 7
VERLAAT NOOIT VERWARMER
ONBEHEERD TERWIJL VERBRANDEN OF TERWIJL AAN
EEN MACHTBRON AANSLOOT.
BC
Elektrische
ventilatorverwarmer
HANDLEIDING
by
F
Introductie
Gelieve onderstaande instructies en veiligheidsvoorschriften door te nemen vooraleer u het toestel in
gebruik neemt dit om het beste naar boven te halen uit uw
nieuwe warmeluchtblazer. Alsook bewaar de instructies
voor het geval je later één van de functies vergeten bent.
ed
Functie selector met drie vermogens instellingen
Thermostaat kiezer
res
erv
Figure 1. Warmeluchtblazer aanduidingen
- Stalen behuizing en warmtebestendige lak
- Geleverd met een snoer en stekker
Speciale veiligheidsvoorschriften
(9W mogen niet zijn voorzien van kabel of de stekker).
- De warmeluchtblazer is niet geschikt voor gebruik in
THERMOSTAAT INSTRUCTIES
- Zet de thermostaat eerst op “Max” en laat het toestel
hts
-
rig
dd
oc
um
en
t-
-
-
all
-
draaien op een volledig invoer vermogen. Wanneer de
kamertemperatuur de gewenste waarde bereikt heeft,
draai je de thermostaat naar links tot hij uitschakelt.
De thermostaat zal dan automatisch aan- en
uitschakelen om de ingestelde gewenste temperatuur te
behouden, hierdoor zal de temperatuur constant blijven
.
Wanneer u het toestel voor het eerst gebruikt, is het
mogelijk dat u een kleine emissie van rook gewaar
wordt. Dit is heel gebruikelijk en zal dan ook stoppen na
enkele seconden. Het verwarmingsonderdeel is
gemaakt van staal en was tijdens de productie bedekt
met een beschermingslaag van olie, de resterende olie
veroorzaakt de geringe emissie van rook.
vochtige weersomstandigheden, in badkamers of in
andere natte of vochtige ruimtes.
Merk op dat de warmeluchtblazer behoorlijk warm kan
worden en moet hierdoor op een veilige afstand van
brandbare objecten geplaatst worden zoals
meubels,gordijnen en gelijkaardige voorwerpen.
Bedekt het toestel niet.
Plaats het toestel niet onder een stopcontact.
Connecteer het toestel niet met een aan/uit
tijdschakelaar of andere apparatuur die automatisch het
toestel kan starten.
De warmeluchtblazer mag niet geplaatst worden in
ruimtes die vlambare producten en gas bevatten
Als een verlengingskabel gebruikt wordt, dan moet die
zo kort mogelijk en altijd volledig uitgestrekt zijn.
-
Technische specificaties
Voltage /
hertzgolf
Vermogen
hte
Model
Instellingen
Temperatuur
De geringste
zekering
vereiste
Afmetingen Gewicht
2,000W
4 (uitschakelen, 650W,
1300W, 2000W)
steeds aanpasbaar 0-85°C
10A
197x210x303
mm
4.2 kg
PT-033-230 230V~50Hz
3,300W
4 (uitschakelen, 30W,
1650W, 3300W)
steeds aanpasbaar 0-40°C
16A
250x250x390
mm
5.6 kg
PT-05-400 400V~50Hz
5,000W
4 (uitschakelen,
ventilator, 2500W,
5000W)
steeds aanpasbaar 0-40°C
10A
250x250x390
mm
6.6 kg
PT-09-400 400V~50Hz
9,000W
4 (uitschakelen,
ventilator, 4500W,
9000W)
steeds aanpasbaar 0-40°C
16A
350x440x480
11.8 kg
mm
co
py
rig
PT-02-230 230V~50Hz
Pagina 8
NL
Elektrische ventilator de van verwarmer van het gebruikerhandboek
VERLAAT NOOIT VERWARMER
ONBEHEERD TERWIJL VERBRANDEN OF TERWIJL AAN
EEN MACHTBRON AANSLOOT.
Speciale veiligheidsvoorschriften
(voort.)
Gebruik
- Plaats de ventilatorkachel rechtop op een stevige onder-
-
-
Plafond
by
F
res
erv
- Voor u het toestel kuist, ontkoppel het van het
stopcontact en laat het afkoelen.
- De behuizing kan gemakkelijk vuil worden, veeg dit
vaak af moet een zachte spons. Voor heel vuile delen,
veeg met een spons gedompeld in < 50° water en zacht
wasmiddel, vervolgens droog je de behuizing met een
droge doek. Let op de je het water niet laat insijpelen.
Spat geen water op het toestel, gebruik nooit een
oplosmiddel zoals benzine, tolueen, enz om de toestel
te kuisen, dit om de behuizing te beschermen.
Kuis de koppeling, droog en verpak het in een plastiekzak.
Wanneer je het toestel weg plaatst na gebruik, laat het
dan eerst afkoelen, hou het droog.
Vervolgens bedek je deze met een plastieken bedekking
(hoes), steek het in de verpakkingdoos en bewaar het
in een droge en geventilleerde plaats
Min.
0.5 m
Muur
-
Min.
15 cm
co
py
Muur
rig
hte
Min.
0.5 m
dd
oc
um
en
t-
-
Kuisen en onderhoud
hts
-
-
rig
-
-
all
-
zeker te zijn dat men niet met het toestel speelt. Het
toestel is niet bestemd voor gebruik voor (inclusief
kinderen) personen met verminderde lichamelijke,
zintuiglijke of mentale mogelijkheden, of bij gebrek van
kennis. Als het toestel beschadigd is, gelieve deze dan
niet meer te gebruiken.
Plaats het toestel niet op beweegbare voertuigen of
ergens waar ze gemakkelijk kunnen om vallen.
Gebruik het toestel in goed geventileerde ruimtes,
plaats het toestel niet bij in een hoek of dicht bij de
muur.
Het is aanbevolen om het toestel op een apart elektrisch circuit aan te sluiten, hou de elektrische kabel
steeds op een veilige afstand van de warmte uitlaat
Als de stroomkabel beschadigd is, dan moet het
vervangen worden door de producent of onderhoudspersoon of een persoon met de juist kwalificaties
om brand te vermijden.
Je mag geen andere toestellen aansluiten op dezelfde
hoofdcontacten als die van het warmeluchttoestel.
Gooi het toestel niet een vuilnisbak voorzien van wielen.
Recycleer het toestel en niet als algemeen materiaal,
gebruik de correct recyclage richtlijnen. Contacteer uw
plaatselijk stadsbestuur voor de nodige informatie. Als je
het toestel dumpt in een stortplaats, kan de brandbare
vloeistoffen in het grondwater terecht komen en uw
gezondheid beschadigen .Wanneer je uw oud toestel
vervangt door een nieuw toestel dan is uw verdeler
verplicht de oude terug in ontvangst te nemen voor
recyclage dit vrij van betaling.
Wanneer de warmeluchtblazer constant in gebruik wordt
gesteld moeten de volgende instructies worden
nageleefd:
grond en op een veilige afstand van vocht en brandbare
objecten.
Sluit de ventilatorkachel aan op het stopcontact.
Zet de thermostaatknop op de maximale temperatuur.
De ventilatorkachel begint te werken wanneer de functiekeuzeknop is ingesteld op één van de drie energieinstellingen.
Zodra in de kamer de gewenste temperatuur is bereikt,
draait u de thermostaatknop terug totdat het verwarmingselement wordt uitgeschakeld. De ventilator zal nog
blijven draaien. De thermostaat is nu ingesteld op de
gewenste temperatuur en de kachel blijft een constante
warmte uitstralen.
ed
- Kinderen moeten in de gaten worden gehouden om
-
BC
Elektrische
ventilatorverwarmer
Min.
1.8 m
Vloer
Figure 2. Het installeren van uw verwarmer
Elektrische ventilator de van verwarmer van het gebruikerhandboek
NL
Pagina 9
BC
1 2 3
11
17
18
15 16
8
9
ed
12 13 14
5 6
7
dd
oc
um
en
t-
all
rig
hts
res
erv
10
by
F
4
23
20
21
22
co
py
rig
hte
19
Page 10
EN SP FR NL
res
erv
ed
BC
by
F
PT-05-400
82-015-0440
82-025-0115
82-025-0122
82-025-0130
82-001-0260
82-005-0205
82-008-0105
82-022-0405
82-025-0105
82-001-0622
82-004-0205
82-004-0215
82-013-0305
82-001-0545
82-013-0415
82-012-0210
82-017-0105
82-022-0205
82-016-0105
82-016-0255
82-001-0115
82-001-0505
82-008-0105
hts
rig
PT-033-230
82-015-0440
82-025-0115
82-025-0122
82-025-0130
82-001-0260
82-005-0155
82-008-0205
82-022-0355
82-025-0105
82-001-0612
82-004-0105
82-004-0215
82-013-0210
82-001-0545
82-013-0415
82-012-0105
82-017-0105
82-022-0155
82-016-0105
82-016-0255
82-001-0115
82-001-0505
82-008-0105
PT-09-400
82-015-0445
82-025-0115
82-025-0122
82-025-0130
82-001-0265
82-005-0255
82-008-0405
82-022-0455
82-025-0105
82-001-0632
82-004-0205
82-004-0215
82-013-0405
82-001-0555
82-013-0425
82-012-0305
82-017-0105
82-022-0255
82-016-0205
82-016-0255
82-001-0117
82-001-0515
82-008-0105
rig
hte
dd
oc
um
en
t-
all
PT-02-230
82-015-0440
82-025-0115
82-025-0122
82-025-0130
82-001-0260
82-005-0105
82-008-0305
82-022-0305
82-025-0105
82-001-0602
82-004-0105
82-004-0215
82-013-0105
82-001-0545
82-013-0415
82-012-0105
82-017-0105
82-022-0105
82-016-0105
82-016-0255
82-001-0115
82-001-0505
82-008-0105
co
py
#
1
2
3
4
5
6
7
8
9
10
11
12
13
14
15
16
17
18
19
20
21
22
23
EN SP FR NL
Page 11
t-
dd
oc
um
en
hte
rig
co
py
all
hts
rig
res
erv
ed
BC
by
F