1
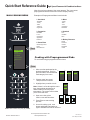
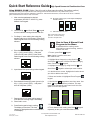
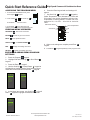
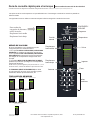
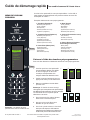
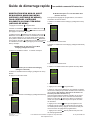
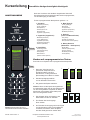
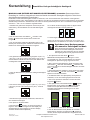
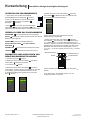
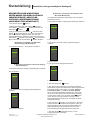
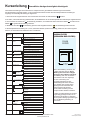
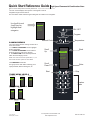
Quick Start Reference Guide Refer to Product Safety Manual for Safety Statements. High Speed Commercial Combination Oven Complete Owner’s Manual available online The oven screen displays menu options. The keypad is used to navigate through onscreen menus. The icons below will be used throughout this guide to indicate menu navigation. Use Scroll Up and Scroll Down to highlight food categories 1 Sandwich 2 Meat 3 Vegetarian 4 Seafood 5 Pasta-Pizza 6 Bake-Dess 7 8 9 0 ON / OFF Program Temperature Manual Cook COOKING MENUS Your ovens ships with the cooking screens set to three menu levels. 1. The MENU CATEGORIES screen highlights product categories. 2. The FOOD CATEGORIES screen features products within the main menu category. 3. The MENU ITEM screen features products within the food category screen. Scroll Up NOTE: The oven can be set to operate with 1, 2, or 3 menu levels see user options for more details. The ITEM MENU breaks the item group menu down further allowing you to input quantities, different food types, etc. Food Category Sandwich 1 Sandwich 2 Meat 3 Vegetarian 4 Seafood 5 Pasta-Pizza 6 Bake-Dess 7 8 9 0 1 Breakfast 2 Poultry 3 Meat 4 Seafood 5 Vegetarian 6 7 8 9 0 TWO MENU LEVELS Food Category Scroll Down Stop Menu Item Sandwich Breakfast 1 Biscuit E.B.C. 2 B. fast Croissant 3 Croissant Sand 4 English Muff san 5 Biscuit S.E.C. 6 7 8 9 0 .’-# 1 2 abc 3 4 ghi 5 jkl mno 7 8 wxyz pqrs Menu Item tuv def 6 9 Number Pads 0 Sandwich Breakfast Sandwich 1 Biscuit E.B.C. 2 B. fast Croissant 3 Croissant Sand 4 English Muff san 5 Biscuit S.E.C. 6 7 8 9 0 1 Breakfast 2 Poultry 3 Meat 4 Seafood 5 Vegetarian 6 7 8 9 0 Enter Start THREE MENU LEVELS Menu Categories Back 1 Sandwich 2 Meat 3 Vegetarian 4 Seafood 5 Pasta-Pizza 6 Bake-Dess 7 8 9 0 &/ ONE MENU LEVEL Menu Item Sandwich Breakfast 1 Biscuit E.B.C. 2 B. fast Croissant 3 Croissant Sand 4 English Muff san 5 Biscuit S.E.C. 6 7 8 9 0 2011 ACP, Inc. Cedar Rapids, IA 52404 For full product documentation visit: www.acpsolutions.com Part No. 20041101 Quick Start Reference Guide High Speed Commercial Combination Oven After the oven has preheated, the menu appears. The oven comes preprogrammed with several menu items to simplify cooking. MAIN COOKING MENU Examples of Preprogrammed Menu Items Include: 1. Sandwich 2. Meat 3. Vegetarian 4. Seafood - Poultry - Beef - Pork -Appetizers -Breakfast - Breakfast - Poultry - Meat - Seafood -Vegetarian -Fish -Shellfish -Misc -Breakfast -Lunch -Vegetables -Appetizers -Potatoes 6. Bakery-Desserts -Bread -Desserts -Snacks -Breakfast -Sweet 5. Pasta-Pizza Back 1 Sandwich 2 Meat 3 Vegetarian 4 Seafood 5 Pasta-Pizza 6 Bake-Dess 7 8 9 0 -Small/Large Pizza -Pasta -Miscellaneous Cooking with Preprogrammed Pads To cook food using preprogrammed menu items Enter 1. After oven has preheated to the 1 desired temperature. Scroll or press number to choose desired food category from menu. .’-# 1 2 abc 3 4 ghi 5 jkl 6 mno 7 8 wxyz pqrs tuv def 9 0 &/ Note: Menu Items may vary by model. Part No. 20041101 Rev. 0 2. Choose menu item group and press Enter to select. 2 1 Sandwich 2 Meat 3 Vegetarian 4 Seafood 5 Pasta-Pizza 6 Bake-Dess 7 8 9 0 Sandwich 1 Breakfast 2 Poultry 3 Meat 4 Seafood 5 Vegetarian 6 7 8 9 0 3 Sandwich Breakfast 1 Biscuit E.B.C. 2 B. fast Croissant 3 Croissant Sand 4 English Muff san 5 Biscuit S.E.C. 6 7 8 9 0 3. Highlight item you wish to cook. Note: If there is a line through the menu item, then preheat temperature is different than menu item preset temperature. The control will not allow you to select that item. 1 Sandwich 2 Meat 3 Vegetarian 4 Seafood 5 Pasta-Pizza 6 Bake-Dess 7 8 9 0 4. Open oven door, place food in oven and close door. 5. Press Enter to start cooking process. 6. At end of cooking cycle, oven beeps and displays animation at right to indicate food can be removed. For full product documentation visit: www.acpsolutions.com 2011 ACP, Inc. Cedar Rapids, IA 52404 Quick Start Reference Guide High Speed Commercial Combination Oven Using MANUAL COOK (Option 4 has to be set to allow manual cooking. See options section) Use Manual cooking when a specific time and cooking power levels are desired. It’s very useful when you are experimenting with new food items. Maximum cook time is 100 minutes. Microwave, Fan and IR can be set in 11 different power levels between 0-100% at 10% increments. 1. After oven has preheated to desired temperature (200-520°F / 95-270°C), press Manual Cook keypad. 10. At end of cooking cycle, oven beeps and displays animation below: 2. Use Scroll Up and Scroll Down keypad to move between cooking elements and time 11. Remove food from oven. 3. For Stage 1, enter cooking time using the number pads (up to 100 minutes). Press Scroll Down keypad to move to the following cooking element. 4. Enter desired microwave power (press 0 (for 0%), 1 (10%), press 5 (50%)… and press 1 twice for full power (100%). Press Scroll Down keypad to move to the following cooking element Note: To interrupt cooking cycle, open door. To resume cooking, close door and press start. How to Save A Manual Cook Program to the Menu If satisfied with the cooking results achieved from manual cooking, save the manual cook item: 1. To save, press Enter keypad. Note: Option 5 must be set to save after manual cook. 2. Highlight Menu Category by using Scroll Up or keypad or create new Menu Category Scroll Down name. Press Enter keypad. 3. Highlight food category by using Scroll Up 5. Input desired fan speed using number keypad. Scroll Down and keypad to select open menu location. 4. In the Menu Item screen, highlight the location where you wish to add the new name. 5. When new location is highlighted Press Program keypad. KEYPAD 6. Enter desired Infrared (IR) power (press 0 (for 0%), 1 (10%), press 5 (50%)… and press 1 twice for full power (100%). keypads to enter item name. Use 6. Use Number keypad to delete any mistakes. This step Back needs to be repeated for each menu level. See user option 2 for text case options. Breakfast 7. Repeat steps 2-6 for each cooking stage, if more than one cooking stage is necessary. 8. Place food in oven. 9. Press Start keypad to begin cooking. The display counts down. The food category is displayed and the word Manual is in the display. 2011 ACP, Inc. Cedar Rapids, IA 52404 1 Biscuit E.B.C. 2 B. fast Croissant 3 Croissant Sand 4 English Muff san 5 Biscuit S.E.C. 6 7 8 9 0 7. Press Enter Sandwich Breakfast Sandwich Breakfast Bagel & Cheese 1 Biscuit E.B.C. 2 B. fast Croissant 3 Croissant Sand 4 English Muff san 5 Biscuit S.E.C. 6 Bagel & Cheese 7 8 9 0 keypad when finished. keypad 8. To exit Manual Cook mode, press Back repeatedly to take you to the Main Menu screen. For full product documentation visit: www.acpsolutions.com Part No. 20041101 Quick Start Reference Guide ACCESSING THE PROGRAM MENU 1. To access the PROGRAM mode, press the Program keypad. with Scroll Up 2. Then select Edit Scroll Down or from the screen. then select the food 3. Press Enter category, food item to be programed using the PROGRAM MENU OVERVIEW PROGRAM 7. Use Scroll Up or Scroll Down keypad to Select Temperature, Time, Microwave %, Fan% and IR% setting. Use number keypads to enter the time, temperature or cooking powers. For MW, Fan or IR, press 0 for 0%, 1 for 10%..... 9 for 90% or 1 twice for 100%. Microwave Power Cook Time Oven Temperature IR Fan To save or go to next screen Go to previous screen SCROLL UP EDIT 6. Press the Enter keypad and cook settings will appear. Add a new menu item ENTER BACK High Speed Commercial Combination Oven or SCROLL DOWN 8. When cook settings are complete press Enter keypad. Change an existing menu item DELETE Delete an existing menu item 9. Press Back keypad repeatedly to exit program mode. EDITING OR ADDING MENU PROGRAM SETTINGS 1. Press the Program keypad. 2. Highlight Edit with Scroll Up keypad. 3. Press the Enter or Scroll Down keypad 4. Use the Scroll Up or Scroll Down keypad to highlight Menu Category and/or Food Category where menu item to edit is saved. Press Enter keypad. Sandwich 1 Sandwich 2 Meat 3 Vegetarian 4 Seafood 5 Pasta-Pizza 6 Bake-Dess 7 8 9 0 1 Breakfast 2 Poultry 3 Meat 4 Seafood 5 Vegetarian 6 7 8 9 0 5. At the Menu item screen, use Scroll Up or Scroll Down keypad to highlight the desired item to edit. Sandwich Breakfast 1 Biscuit E.B.C. 2 B. fast Croissant 3 Croissant Sand 4 English Muff san 5 Biscuit S.E.C. 6 7 8 9 0 Part No. 20041101 Rev. 0 For full product documentation visit: www.acpsolutions.com 2011 ACP, Inc. Cedar Rapids, IA 52404 Quick Start Reference Guide EDITING OR ADDING NEW NAMES FOR MENU CATEGORY OR FOOD CATEGORY OR MENU ITEM 1. Press the Program keypad. with Scroll Up 2. Highlight Edit keypad. keypad and press Enter III. Editing / Adding Name in Menu Item In order to add program settings, you must name your item first. A. Highlight desired Menu Category or Scroll Down or Scroll Down keypad to 3. Using the Scroll Up highlight location where new category or item will be placed. (In order to navigate to the following screen, Scroll Up keypad to highlight desired menu and and Scroll Down keypad). For example: press Enter High Speed Commercial Combination Oven 1 Sandwich 2 Meat 3 Vegetarian 4 Seafood 5 Pasta-Pizza 6 Bake-Dess 7 8 9 0 I. Editing Name in Menu Category Screen A. Highlight Item B. go to Step 4 B. Press Enter C. Highlight desired Food Category 1 Sandwich 2 Meat 3 Vegetarian 4 Seafood 5 Pasta-Pizza 6 Bake-Dess 7 8 9 0 II. Editing Name in Food Category A. Highlight desired Menu Category B. Press Enter 1 Sandwich 2 Meat 3 Vegetarian 4 Seafood 5 Pasta-Pizza 6 Bake-Dess 7 8 9 0 C. Highlight desired Food Category Sandwich 1 Breakfast 2 Poultry 3 Meat 4 Seafood 5 Vegetarian 6 7 8 9 0 D. Press Enter E. Highlight desired Menu Item Sandwich Breakfast 1 Biscuit E.B.C. 2 B. fast Croissant 3 Croissant Sand 4 English Muff san 5 Biscuit S.E.C. 6 7 8 9 0 F. Go to Step 4 4. Press the Program keypad. Sandwich 1 Breakfast 2 Poultry 3 Meat 4 Seafood 5 Vegetarian 6 7 8 9 0 D. Go to Step 4 2011 ACP, Inc. Cedar Rapids, IA 52404 For full product documentation visit: www.acpsolutions.com Part No. 20041101 Quick Start Reference Guide High Speed Commercial Combination Oven There are several options you can change to customize the operation of the oven for your business. The table below shows these options; the factory setting is shown in bold type. 1. Oven must be off. To turn oven off, press ON/OFF keypad. 2. Press and hold “2” keypad until option screen appears. 3. Choose option by pressing Enter desired option. keypad then use Scroll Up keypad to save and press Stop / Reset 4. Press Start and Scroll Down keypad to select option to highlight to exit options mode. 5. Option 6, if “Password Needed” is highlighted press Program keypad to view or edit password. Options# Setting Name Options 01 Digit Entry Single digit entry 02 Text Case Double digit entry Lower case CLEAN FILTERS Mixed 03 Menu Setting CLEAN FILTER Caps 01=10 Items 02 =100 Items 03 = 360 items 04 (Manual) Cook 05 (Manual) Save 06 Program Password 07 Door Reset 08 Keyboard Activation Manual cooking allowed Manual cooking not allowed Save after manual cook Do not save after manual cook Password needed Changes to programs allowed Opening door resets timer Opening door pauses cook cycle Off 30 Seconds 60 Seconds When this message displays, clean the air filter thoroughly. Cleaning the air filter will not shut off the message. The message will automatically stop displaying after 24 hours. 120 Seconds 09 Keybeep On Off 10 Keybeep Volume Low Medium High 11 End Of Cycle Beep Three beeps once Three beeps repeating Continuous until door is opened 12 Preheat Warning 13 Temperature Scale Warn if oven not at temp Off Temperatures are displayed in °F for 60Hz models Temperatures are displayed in °C for 50Hz models 14 Clean Filter Reminder Air Filters On Sides Off Depending on microwave use and environmental conditions, the filter may need to be cleaned more or less frequently. Once the frequency is determined, set the option for the appropriate time frame. Air filter and vents must be cleaned regularly to prevent overheating of the oven. Refer to Owner’s Manual for complete cleaning instructions. Displays every 7 days Displays every 30 days Displays every 90 days 15 (Microwave) Only Allow microwave only mode No microwave only mode 16 Auto Off Disable 2 Hours 4 Hours 8 Hours 17 Data Transfer Begin Transfer: Card to Oven Begin Transfer: Oven to Card Part No. 20041101 Rev. 0 For full product documentation visit: www.acpsolutions.com 2011 ACP, Inc. Cedar Rapids, IA 52404 Guía de consulta rápida para el arranque Horno combinado comercial de alta velocidad Consulte las Normas de Seguridad en el Manual de Seguridad del Producto. El Manual del Propietario completo está disponible en línea Las opciones de los menús aparecen en la pantalla del horno. Para navegar a través de los menús en pantalla se utiliza el teclado. Los siguientes iconos se utilizan en este manual para indicar la navegación a través de los menús. Para resaltar las categorías de alimentos, utilice las teclas Desplazarse hacia arriba Desplazarse hacia abajo 1 Sandwich 2 Meat 3 Vegetarian 4 Seafood 5 Pasta-Pizza 6 Bake-Dess 7 8 9 0 MENÚS DE COCCIÓN El horno se despacha con la pantalla de cocción configurada para tres niveles de menús. 1. En la pantalla MENU CATEGORIES (CATEGORÍAS DE MENÚS) se resaltan las categorías de productos. 2. En la pantalla FOOD CATEGORIES (CATEGORÍAS DE ALIMENTOS) se presentan los tipos de productos que integran la correspondiente categoría del menú principal. 3. La pantalla MENU ITEM (ELEMENTOS DE MENÚ) presenta los productos que integran la correspondiente categoría de alimentos. ENCENDER / APAGAR Programar Cocción manual Temperatura Desplazarse hacia arriba Volver 1 Sandwich 2 Meat 3 Vegetarian 4 Seafood 5 Pasta-Pizza 6 Bake-Dess 7 8 9 0 Desplazarse hacia abajo Ingresar NOTA: El horno puede configurarse para que funcione con 1, 2 ó 3 niveles de menús; consulte más detalles en Opciones del usuario. El ITEM MENU (MENÚ DE ELEMENTOS) se divide en más elementos de menú que le permiten ingresar cantidades, distintos tipos de alimentos, etc. TRES NIVELES DE MENÚS Categorías de menús Categorías de alimentos Sandwich 1 Sandwich 2 Meat 3 Vegetarian 4 Seafood 5 Pasta-Pizza 6 Bake-Dess 7 8 9 0 1 Breakfast 2 Poultry 3 Meat 4 Seafood 5 Vegetarian 6 7 8 9 0 Elementos de menú Sandwich Breakfast 1 Biscuit E.B.C. 2 B. fast Croissant 3 Croissant Sand 4 English Muff san 5 Biscuit S.E.C. 6 7 8 9 0 Parar Arrancar .’-# 1 2 abc 3 4 ghi 5 jkl mno 7 8 wxyz pqrs DOS NIVELES DE MENÚS Categorías de alimentos tuv def 6 9 Teclas numéricas 0 &/ Elementos de menú Sandwich Breakfast Sandwich 1 Biscuit E.B.C. 2 B. fast Croissant 3 Croissant Sand 4 English Muff san 5 Biscuit S.E.C. 6 7 8 9 0 1 Breakfast 2 Poultry 3 Meat 4 Seafood 5 Vegetarian 6 7 8 9 0 UN NIVEL DE MENÚ Elementos de menú Sandwich Breakfast 1 Biscuit E.B.C. 2 B. fast Croissant 3 Croissant Sand 4 English Muff san 5 Biscuit S.E.C. 6 7 8 9 0 © 2011 ACP, Inc. Cedar Rapids, IA 52404 Para obtener la documentación completa del producto, visite: www.acpsolutions.com N.º de pieza 20041101 Guía de consulta rápida para el arranque Horno combinado comercial de alta velocidad Una vez precalentado el horno, aparece el menú. El horno de alta velocidad AXP viene preprogramado con varios elementos de menú que simplifican la cocina. MENÚS DE COCCIÓN PRINCIPAL Por ejemplo, algunos elementos de menú preprogramados son: 1. Sandwich (Sándwich) 2. Meat (Carnes rojas) 3. Vegetarian (Platos vegetarianos) 4. Seafood (Mariscos) - Breakfast (Desayuno) - Poultry (Aves) - Meat (Carnes rojas) - Seafood (Mariscos) - Vegetarian (Platos vegetarianos) - Breakfast (Desayuno) - Lunch (Almuerzo) - Vegetables (Vegetales) - Appetizers (Entremeses) - Potatoes (Papas) Volver 1 Sandwich 2 Meat 3 Vegetarian 4 Seafood 5 Pasta-Pizza 6 Bake-Dess 7 8 9 0 5. Pasta-Pizza (Pasta y pizza) - Small/Large Pizza (Pizza grande o pequeña) - Pasta (Pasta) - Miscellaneous (Varios) - Poultry (Aves) - Beef (Carne de res) - Pork (Carne de cerdo) - Appetizers (Entremeses) - Breakfast (Desayuno) - Fish (Pescado) - Shellfish (Mariscos) - Misc (Varios) 6. Bakery-Desserts (Panes y postres) - Bread (Pan) - Desserts (Postres) - Snacks (Meriendas) - Breakfast (Desayuno) - Sweet (Dulces) Cocinar mediante teclas preprogramadas Para cocinar alimentos mediante elementos de menú preprogramados Ingresar 1. Una vez que el horno haya alcanzado 1 la temperatura de precalentamiento deseada, desplácese por la pantalla u oprima un número para elegir la categoría de alimentos que le interese. 1 .’-# 2 abc 3 2. Elija el grupo de elementos de menú y oprima la tecla Ingresar para seleccionar. 6 3. Resalte el elemento que desea cocinar. def 4 ghi 5 jkl mno 7 8 wxyz pqrs tuv 1 Sandwich 2 Meat 3 Vegetarian 4 Seafood 5 Pasta-Pizza 6 Bake-Dess 7 8 9 0 Nota: Si el elemento de menú está atravesado por una línea, significa que la temperatura de precalentamiento es distinta a la configurada para el elemento de menú originalmente. El control no le permitirá seleccionar dicho elemento. 9 0 2 Sandwich 1 Breakfast 2 Poultry 3 Meat 4 Seafood 5 Vegetarian 6 7 8 9 0 3 Sandwich Breakfast 1 Biscuit E.B.C. 2 B. fast Croissant 3 Croissant Sand 4 English Muff san 5 Biscuit S.E.C. 6 7 8 9 0 1 Sandwich 2 Meat 3 Vegetarian 4 Seafood 5 Pasta-Pizza 6 Bake-Dess 7 8 9 0 4. Abra la puerta del horno, introduzca los alimentos y cierre la puerta. &/ 5. Oprima la tecla Ingresar para iniciar el proceso de cocción. Nota: Los elementos de menú pueden variar según el modelo. N.º de pieza 20041101 Rev. 0 6. Al terminar el ciclo de cocción, el horno emite un pitido y en la pantalla aparece esta animación para indicar que la comida se puede remover. Para obtener la documentación completa del producto, visite: www.acpsolutions.com © 2011 ACP, Inc. Cedar Rapids, IA 52404 Guía de consulta rápida para el arranque Horno combinado comercial de alta velocidad Utilización de COCCIÓN MANUAL (la Opción 4 debe configurarse para permitir la cocción manual. Consulte la sección de Opciones.) Cuando desee configurar tiempos de cocción y niveles de potencia específicos, utilice la función de cocción manual. Es de gran utilidad cuando se experimenta con nuevos alimentos. El período máximo de cocción es 100 minutos. El microondas, el ventilador y el elemento radiante (infrarrojo, IR) pueden configurarse a 11 niveles diferentes de potencia entre 0 y 100%, en incrementos de 10%. 1. Una vez que el horno haya alcanzado la temperatura de precalentamiento deseada (95 a 270 °C / 200 a 520 °F), oprima la tecla Cocción manual. 2. Para pasar de un elemento y tiempo de cocción a otro, utilice las teclas Desplazarse hacia arriba y Desplazarse hacia abajo. 3. Para la primera etapa, ingrese el tiempo de cocción con las teclas numéricas (hasta 100 minutos). Oprima la tecla Desplazarse hacia abajo para pasar al siguiente elemento de cocción. 10. Al terminar el ciclo de cocción, el horno emite un pitido y la pantalla muestra esta animación: 11. Remueva los alimentos del horno. Nota: Para interrumpir el ciclo de cocción, abra la puerta. Para reanudar la cocción, cierre la puerta y oprima la tecla Arrancar. Cómo guardar un programa de cocción manual en el menú Si le complacen los resultados alcanzados con la cocción manual, puede guardar el elemento de cocción manual. 4. Ingrese la potencia de microondas deseada. Oprima la tecla 0 [para el 0%], 1 [para el 10%], 5 [para el 50%], y oprima la tecla 1 dos veces para potencia máxima (100%). Oprima la tecla Desplazarse hacia abajo para pasar al siguiente elemento de cocción. 5. Ingrese la velocidad de ventilador deseada con las teclas numéricas. 1. Oprima la tecla Ingresar para guardarlo. Nota: Debe configurar la opción 5 para guardar después de la cocción manual. 2. Para resaltar Menu Category (Categoría de menú), utilice las teclas Desplazarse hacia arriba y Desplazarse hacia abajo, o cree un nuevo nombre de categoría de menú. Oprima la tecla Ingresar. 3. Para resaltar Food Category (Categoría de alimentos), utilice las teclas Desplazarse hacia arriba y Desplazarse hacia abajo y seleccione la ubicación de menú abierta. 4. En la pantalla Menu Item (Elementos de menú), resalte la ubicación en la que desea agregar el nuevo nombre. 5. Cuando la nueva ubicación esté resaltada, oprima la tecla Programar. KEYPAD 6. Ingrese la potencia del elemento radiante (infrarrojo, IR) deseada. Oprima la tecla 0 [para el 0%], 1 [para el 10%], 5 [para el 50%], y oprima la tecla 1 dos veces para potencia máxima (100%). 6. Oprima las teclas numéricas para ingresar el nombre del elemento. Oprima la tecla Volver para eliminar errores. Es necesario repetir este paso para cada nivel de menú. Consulte la opción 2 para seleccionar tamaños de texto. Breakfast 7. Si es necesaria más de una etapa de cocción, repita los pasos 2 a 6 para cada una. 8. Introduzca el alimento en el horno. 9. Oprima la tecla Arrancar para iniciar la cocción. Se inicia la cuenta regresiva en pantalla. Food Category (Categoría de alimentos) y la palabra Manual aparecen en pantalla. © 2011 ACP, Inc. Cedar Rapids, IA 52404 1 Biscuit E.B.C. 2 B. fast Croissant 3 Croissant Sand 4 English Muff san 5 Biscuit S.E.C. 6 7 8 9 0 7. Oprima la tecla Sandwich Breakfast Bagel & Cheese Sandwich Breakfast 1 Biscuit E.B.C. 2 B. fast Croissant 3 Croissant Sand 4 English Muff san 5 Biscuit S.E.C. 6 Bagel & Cheese 7 8 9 0 Ingresar al terminar. 8. Para salir del modo de cocción manual y regresar a la pantalla del menú principal, oprima la tecla Volver repetidamente. Para obtener la documentación completa del producto, visite: www.acpsolutions.com N.º de pieza 20041101 Guía de consulta rápida para el arranque ACCESO AL MENÚ DE PROGRAMACIÓN 1. Para obtener acceso al modo de programación, oprima la tecla Programar. 2. A continuación, seleccione Modificar y Desplazarse hacia arriba o Desplazarse hacia abajo en la pantalla. 3. Oprima la tecla Ingresar y luego seleccione la categoría de alimentos y el alimento que desea programar con las teclas Desplazarse hacia arriba o Desplazarse hacia abajo. DESCRIPCIÓN GENERAL DEL MENÚ DE PROGRAMACIÓN PROGRAMAR se usa para agregar un nuevo elemento de menú INGRESAR se usa para guardar o pasar a la siguiente pantalla VOLVER se usa para volver a la pantalla anterior DESPLAZARSE HACIA ARRIBA o HACIA ABAJO DESPLAZARSE MODIFICAR se usa para modificar un elemento de menú ELIMINAR se usa para eliminar un elemento de menú PARA MODIFICAR O AGREGAR CONFIGURACIONES DE PROGRAMAS DE MENÚS 1. Oprima la tecla 5. En la pantalla Menu Item (Elementos de menú), utilice las teclas Desplazarse hacia arriba o Desplazarse hacia abajo para resaltar el elemento que desea modificar. Sandwich Breakfast 1 Biscuit E.B.C. 2 B. fast Croissant 3 Croissant Sand 4 English Muff san 5 Biscuit S.E.C. 6 7 8 9 0 6. Oprima la tecla Ingresar para ver la configuración de cocción en pantalla. 7. Para seleccionar la temperatura, hora, porcentajes de microondas, ventilador y elemento radiante (infrarrojo, IR), utilice las teclas Desplazarse hacia arriba y Desplazarse hacia abajo. Oprima las teclas numéricas para ingresar el tiempo, temperatura o potencias de cocción. Para el microondas, ventilador o elemento radiante (infrarrojo, IR), oprima el 0 (para el 0%), 1 (para el 10%), 9 (para el 90%), o el 1 dos veces (para el 100%). Potencia de Temperatura microondas del horno Elemento radiante Tiempo de cocción (infrarrojo, IR) Ventilador Programar. 2. Resalte Modificar con las teclas Desplazarse hacia arriba o Desplazarse hacia abajo. 3. Oprima la tecla Horno combinado comercial de alta velocidad Ingresar. 4. Para resaltar la categoría de menú o de alimentos en la cual se ha guardado el elemento de menú que desea modificar, utilice las teclas Desplazarse hacia arriba o Desplazarse hacia abajo. Oprima la tecla Ingresar. 8. Cuando haya terminado de hacer los ajustes de cocción, oprima la tecla Ingresar. 9. Oprima la tecla Volver repetidamente para salir del modo de programación. Sandwich 1 Sandwich 2 Meat 3 Vegetarian 4 Seafood 5 Pasta-Pizza 6 Bake-Dess 7 8 9 0 1 Breakfast 2 Poultry 3 Meat 4 Seafood 5 Vegetarian 6 7 8 9 0 N.º de pieza 20041101 Rev. 0 Para obtener la documentación completa del producto, visite: www.acpsolutions.com © 2011 ACP, Inc. Cedar Rapids, IA 52404 Guía de consulta rápida para el arranque CÓMO MODIFICAR O AÑADIR NUEVOS NOMBRES PARA MENU CATEGORY (CATEGORÍA DE MENÚ), FOOD CATEGORY (CATEGORÍA DE ALIMENTOS) O MENU ITEM (ELEMENTOS DE MENÚ) 1. Oprima la tecla Programar. 2. Resalte Modificar con las teclas Desplazarse hacia arriba o Desplazarse hacia abajo, y oprima la tecla Ingresar. 3. Para resaltar la ubicación de la nueva categoría o elemento, utilice las teclas Desplazarse hacia arriba o Desplazarse hacia abajo. (Para navegar a la siguiente pantalla, utilice las teclas Desplazarse hacia arriba o Desplazarse hacia abajo para resaltar el menú deseado, y oprima Ingresar.) Por ejemplo: I. M odificación del nombre en la pantalla Menu Category (Categoría de menú) A. Resalte el elemento B. Vaya al paso 4 A. Resalte Menu Category (Categoría de menú) deseada 1 Sandwich 2 Meat 3 Vegetarian 4 Seafood 5 Pasta-Pizza 6 Bake-Dess 7 8 9 0 © 2011 ACP, Inc. Cedar Rapids, IA 52404 1 Sandwich 2 Meat 3 Vegetarian 4 Seafood 5 Pasta-Pizza 6 Bake-Dess 7 8 9 0 B. Oprima la tecla Ingresar C. Resalte Food Category (Categoría de alimentos) deseada Sandwich E. Resalte Menu Item (Elemento de menú) deseado Sandwich Breakfast F. Vaya al paso 4 4. Oprima la tecla C. Resalte Food Category (Categoría de alimentos) deseada D. Vaya al paso 4 A. Resalte Menu Category (Categoría de menú) deseada 1 Biscuit E.B.C. 2 B. fast Croissant 3 Croissant Sand 4 English Muff san 5 Biscuit S.E.C. 6 7 8 9 0 B. Oprima la tecla Ingresar Sandwich Para añadir ajustes de programación, primero debe dar nombre al elemento. D. Oprima la tecla Ingresar II. M odificación del nombre en la pantalla Food Category (Categoría de alimentos) 1 Breakfast 2 Poultry 3 Meat 4 Seafood 5 Vegetarian 6 7 8 9 0 III. M odificación o adición del nombre en la pantalla Menu Item (Elementos de menú) 1 Breakfast 2 Poultry 3 Meat 4 Seafood 5 Vegetarian 6 7 8 9 0 1 Sandwich 2 Meat 3 Vegetarian 4 Seafood 5 Pasta-Pizza 6 Bake-Dess 7 8 9 0 Horno combinado comercial de alta velocidad Programar. 5. Ingrese el nombre de la categoría o del elemento con las teclas numéricas para escribir letras, números y símbolos. [Por ejemplo: Oprima tres veces la tecla “2” para ingresar la letra “c”] Una vez que aparezca en pantalla la letra indicada, espere a que el cursor pase al siguiente espacio. Si es necesario hacer alguna corrección, oprima la tecla Volver para borrar los caracteres uno por uno. Vea la opción 2 para seleccionar tamaños de texto. 6. Oprima la tecla Ingresar para guardar el nombre y pasar a la siguiente pantalla. Si va a añadir o modificar Menu Item (Elementos de menú) (la última pantalla), al oprimir la tecla Ingresar pasará a la pantalla de configuración de programas. 7. Oprima la tecla de programación. Volver repetidamente para salir del modo Para obtener la documentación completa del producto, visite: www.acpsolutions.com N.º de pieza 20041101 Guía de consulta rápida para el arranque Horno combinado comercial de alta velocidad Son varias las opciones que puede modificar para ajustar el funcionamiento del horno a su negocio. Dichas opciones se muestran en el siguiente cuadro; el ajuste de fábrica aparece en negritas. 1. El horno deber estar apagado. Para apagar el horno, oprima la tecla ENCENDER / APAGAR. 2. Mantenga oprimida la tecla “2” hasta que aparezca la pantalla de opciones. 3. Para resaltar y elegir la opción deseada, oprima la tecla Desplazarse hacia abajo. 4. Oprima la tecla Arrancar para guardar y Ingresar y luego las teclas Desplazarse hacia arriba o Parar / Restablecer para salir del modo de opciones. 5. Si la Opción 6, “Password Needed” (Contraseña necesaria) está resaltada, oprima la tecla Programar para ver o cambiar la contraseña. Opciones N.º Nombre del ajuste Opciones 01 Entrada de dígitos Entrada de un dígito 02 Tamaño del texto Entrada de dos dígitos CLEAN FILTER (LIMPIAR FILTRO) Mayúsculas CLEAN FILTERS Minúsculas Combinadas 03 Ajustes de menús 1 nivel, 10 elementos 2 niveles, 100 elementos 3 niveles, 360 elementos 04 Cocción manual 05 Guardar programa 06 Bloqueo de programas 07 Abrir la puerta 08 Ventana del teclado Se permite la cocción manual No se permite la cocción manual de cocción manual No guardar tras la cocción manual Contraseña necesaria Se permite la modificación de programas Al abrir la puerta se pone en cero el temporizador Al abrir la puerta se interrumpe temporalmente Desactivado Air Filters On Sides 30 segundos 60 segundos 120 segundos 09 Pitido de las teclas Activado Desactivado 10 Volumen del pitido Bajo Intermedio Alto 11 Pitido de fin de ciclo Tres pitidos una sola vez Tres pitidos varias veces Continuo hasta que se abre la puerta 12 13 Advertencias sobre precalentamiento Escala de temperatura Advertir si el horno no tiene la temperatura adecuada Desactivado Las temperaturas se muestran en °F para los modelos de 60Hz Las temperaturas se muestran en °C para los modelos de 50Hz 14 Clean Filter (Limpiar filtro) Desactivado Aparece cada 7 días Aparece cada 30 días Aparece cada 90 días 15 16 Modo de sólo microondas Apagado automático Se recomienda limpiar el filtro de aire a fondo cada vez que aparezca este mensaje. Limpiar el filtro de aire no hará desaparecer el mensaje. El mensaje dejará de mostrarse automáticamente al cabo de 24 horas. Dependiendo del uso que se le dé al microondas y de las condiciones externas, puede ser necesario limpiar el filtro con mayor o menor frecuencia. Una vez determinada la frecuencia, configure la opción en el intervalo de tiempo correspondiente. El filtro de aire y los ventiladores deben limpiarse con regularidad para evitar que el horno se sobrecaliente. Consulte el Manual de Propietario para obtener instrucciones completas de limpieza. Se permite la modalidad “Sólo microondas” No se permite la modalidad “Sólo microondas” Desactivar 2 horas 4 horas 8 horas 17 Transferencia de datos N.º de pieza 20041101 Rev. 0 Iniciar transferencia: De la tarjeta al horno Iniciar transferencia: Del horno a la tarjeta Para obtener la documentación completa del producto, visite: www.acpsolutions.com © 2011 ACP, Inc. Cedar Rapids, IA 52404 Guide de démarrage rapide Four combiné commercial à haute vitesse Consulter le Manuel sur la sécurité des produits pour les énoncés de sécurité. L’intégralité du manuel du propriétaire est disponible en ligne. L’écran du four affiche les options de menu. Les touches du clavier sont utilisées pour naviguer dans les menus à l’écran. Les icônes ci-après sont utilisées dans ce guide pour indiquer la navigation dans les menus. Utiliser la touche Défilement vers le haut ou la touche Défilement vers le bas pour mettre en surbrillance les catégories d’aliments 1 Sandwich 2 Meat 3 Vegetarian 4 Seafood 5 Pasta-Pizza 6 Bake-Dess 7 8 9 0 MENUS DE CUISSON Lorsque nous expédions les fours, les écrans concernant la cuisson sont réglés selon trois niveaux de menu. 1. L’écran MENU CATEGORIES (CATÉGORIES DE MENUS) présente les catégories de produits. 2. L’écran FOOD CATEGORIES (CATÉGORIES D’ALIMENTS) indique les produits inclus dans l’écran Menu Category principal (Catégorie de menu) principal. 3. L’écran MENU ITEM (ARTICLES DE MENU) indique les produits inclus dans l’écran Food Category (Catégorie d’aliments). REMARQUE : Le four peut être réglé pour fonctionner selon 1, 2 ou 3 niveaux de menu. Se reporter aux options de l’utilisateur pour obtenir de plus amples informations. Le ITEM MENU (MENU D’ARTICLES) décompose le groupe d’articles de menu pour permettre d’entrer des quantités, différents types d’aliments, etc. TROIS NIVEAUX DE MENU Catégories de menus Catégorie d’aliments Articles de menu Sandwich 1 Sandwich 2 Meat 3 Vegetarian 4 Seafood 5 Pasta-Pizza 6 Bake-Dess 7 8 9 0 1 Breakfast 2 Poultry 3 Meat 4 Seafood 5 Vegetarian 6 7 8 9 0 Sandwich Breakfast 1 Biscuit E.B.C. 2 B. fast Croissant 3 Croissant Sand 4 English Muff san 5 Biscuit S.E.C. 6 7 8 9 0 MARCHE/ ARRÊT Programmation Cuisson manuelle Température Défilement vers le haut Défilement vers le bas Entrer Arrêter Démarrer .’-# 1 2 abc 3 4 ghi 5 jkl mno 7 8 wxyz pqrs DEUX NIVEAUX DE MENU Catégorie d’aliments Retour 1 Sandwich 2 Meat 3 Vegetarian 4 Seafood 5 Pasta-Pizza 6 Bake-Dess 7 8 9 0 tuv def 6 9 Touches numériques 0 &/ Articles de menu Sandwich Breakfast Sandwich 1 Biscuit E.B.C. 2 B. fast Croissant 3 Croissant Sand 4 English Muff san 5 Biscuit S.E.C. 6 7 8 9 0 1 Breakfast 2 Poultry 3 Meat 4 Seafood 5 Vegetarian 6 7 8 9 0 UN NIVEAU DE MENU Articles de menu Sandwich Breakfast 1 Biscuit E.B.C. 2 B. fast Croissant 3 Croissant Sand 4 English Muff san 5 Biscuit S.E.C. 6 7 8 9 0 2011 ACP, Inc. Cedar Rapids, IA 52404 Pour obtenir la documentation complète sur le produit visiter : www.acpsolutions.com N° de pièce 20041101 Guide de démarrage rapide Four combiné commercial à haute vitesse Une fois le four préchauffé, le menu principal s’affiche. Le four AXP à haute vitesse est préprogrammé avec plusieurs articles de menu afin de simplifier la cuisson. MENU DE CUISSON PRINCIPAL Exemples d’éléments de menu préprogrammés : 1. Sandwich (Sandwich) 2. Meat (Viande) 3. Vegetarian (Plats Végétarien) 4. Seafood (Produits de la mer) - Breakfast (Petit déjeuner) - Poultry (Volaille) - Meat (Viande) - Seafood (Produits de la mer) - Végétarian (Végétarien) - Breakfast (Petit déjeuner) - Lunch (Déjeuner) - Vegetables (Légumes) - Appetizers (Hors-d’œuvre) - Potatoes (Pommes de terre) 5. Pasta-Pizza (Pâtes/pizza) Retour 1 Sandwich 2 Meat 3 Vegetarian 4 Seafood 5 Pasta-Pizza 6 Bake-Dess 7 8 9 0 - Small/Large Pizza (Petite/grande Pizza) - Pasta (Pâtes) - Miscellaneous (Divers) - Poultry (Volaille) - Beef (Bœuf) - Pork (Porc) - Appetizers (Hors-d’œuvre) - Breakfast (Petit déjeuner) - Fish (Poisson) - Shellfish (Crustacés) - Miscellaneous (Divers) 6. Bakery-Desserts (Produits de boulangerie/desserts) - Bread (Pains) - Desserts (Desserts) - Snacks (En-cas) - Breakfast (Petit déjeuner) - Sweet (Entremêts sucrés) Cuisson à l’aide des touches préprogrammées Pour cuire des aliments en utilisant des articles de menu préprogrammées Entrer 1. Une fois que le four a été préchauffé à la température désirée, faire défiler le menu ou appuyer sur la touche numérique correspondante à la catégorie d’aliments désirée du menu. 1 .’-# 2 abc 3 2. Choisir le groupe d’articles du menu et appuyer sur Entrer pour le sélectionner. 6 3. Mettre en surbrillance l’article désiré qu’il faut cuire. def 4 ghi 5 jkl mno 7 8 wxyz pqrs tuv 1 1 Sandwich 2 Meat 3 Vegetarian 4 Seafood 5 Pasta-Pizza 6 Bake-Dess 7 8 9 0 Remarque : Si l’article du menu est rayé, cela signifie que la température de préchauffage est différente de la température du menu préréglée. La commande du four ne permet pas de sélectionner cet article. 9 0 2 Sandwich 1 Breakfast 2 Poultry 3 Meat 4 Seafood 5 Vegetarian 6 7 8 9 0 3 Sandwich Breakfast 1 Biscuit E.B.C. 2 B. fast Croissant 3 Croissant Sand 4 English Muff san 5 Biscuit S.E.C. 6 7 8 9 0 1 Sandwich 2 Meat 3 Vegetarian 4 Seafood 5 Pasta-Pizza 6 Bake-Dess 7 8 9 0 4. Ouvrir la porte du four, placer l’aliment dans le four et refermer la porte. &/ 5. Appuyer sur la touche Entrer pour démarrer le cycle de cuisson. Remarque : Les articles de menu peuvent varier selon le modèle du four. N° de pièce 20041101 Rev. 0 6. À la fin du cycle de cuisson, le four émet des bips et la séquence d’animations indiquée à droite s’affiche pour indiquer que les aliments peuvent être retirés du four. Pour obtenir la documentation complète sur le produit visiter : www.acpsolutions.com 2011 ACP, Inc. Cedar Rapids, IA 52404 Guide de démarrage rapide Four combiné commercial à haute vitesse Utilisation du mode CUISSON MANUELLE (L’option 4 doit être configurée pour permettre une cuisson manuelle. Se reporter à la section sur les options). Utiliser le mode Cuisson manuelle lorsqu’un temps et des niveaux de puissance de cuisson spécifiques sont désirés. Cette option est très pratique lors d’essais de cuisson avec de nouveaux aliments. Le temps de cuisson maximal est de 100 minutes. Les fonctions micro-ondes, ventilateur et IR peuvent être réglées selon 11 niveaux de puissance différents de 0 à 100 % par progression de 10 %. 1. Une fois que le four est préchauffé à la température désirée (95-270 °C / 200-520 °F), appuyer sur la touche Cuisson manuelle. 2. Utiliser la touche Défilement vers le haut ou la touche Défilement vers le bas pour naviguer entre les divers éléments de configuration de la cuisson. 3. Pour l’étape 1, entrer le temps de cuisson en utilisant les touches numériques (jusqu’à 100 minutes). Appuyer sur la touche Défilement vers le bas pour passer à l’élément suivant de configuration de la cuisson. 10. À la fin du cycle de cuisson, le four émet des bips et la séquence d’animations ci-après s’affiche : 11. Retirer les aliments du four. Remarque : Pour interrompre le cycle de cuisson, ouvrir la porte. Pour poursuivre la cuisson, fermer la porte et appuyer sur la touche Démarrer. Enregistrement d’une programmation de Cuisson manuelle dans le menu Si les résultats en matière de cuisson sont satisfaisants, enregistrer la programmation de la cuisson manuelle de l’article. 4. Entrer le niveau de puissance micro-ondes désiré (appuyer sur 0 (pour 0 %), 1 (10 %), appuyer sur 5 (50 %)… et appuyer sur la touche 1 deux fois pour obtenir la puissance maximale (100 %). Appuyer sur la touche Défilement vers le bas pour sélectionner l’élément suivant de configuration de la cuisson. 5. Entrer la vitesse de ventilateur désirée en utilisant les touches numériques. 1. Pour enregistrer, appuyer sur la touche Entrer. Remarque : L’option 5 doit être configurée pour enregistrer une cuisson manuelle. 2. Mettre en surbrillance Menu Category (Catégorie de menu) en utilisant la touche Défilement vers le haut ou la touche Défilement vers le bas ou créer un nouveau nom de Menu Category (Catégorie de menu). Appuyer sur la touche Entrer. 3. Mettre en surbrillance Food Category (Catégorie d’aliments) en utilisant la touche Défilement vers le haut ou la touche Défilement vers le bas pour sélectionner l’endroit du menu ouvert. 4. Dans l’écran Item Menu (Articles de menu) mettre en surbrillance l’endroit désiré pour y ajouter un nouveau nom. 5. Lorsque le nouvel endroit est mis en surbrillance, appuyer sur la touche Programmation. KEYPAD 6. Entrer le niveau de puissance micro-ondes désiré (appuyer sur 0 pour 0 %), 1 (10 %), appuyer sur 5 (50 %)… et appuyer sur 1 deux fois pour obtenir la puissance maximale (100 %). 6. Utiliser les touches numériques pour entrer un nom d’article. Utiliser la touche Retour pour effacer toute erreur. Cette étape doit être effectuée pour chaque niveau de menu. Voir l’option d’utilisateur 2 pour des options de saisie de caractères. Breakfast 7. Répéter les étapes 2 à 6 pour chaque étape de la cuisson, si plusieurs étapes sont nécessaires. 8. Placer les aliments dans le four. 9. Appuyer sur la touche Démarrer pour démarrer la cuisson. Le compte à rebours s’affiche. Food category (Catégorie d’aliments) s’affiche ainsi que Manual (cuisson manuelle). 2011 ACP, Inc. Cedar Rapids, IA 52404 1 Biscuit E.B.C. 2 B. fast Croissant 3 Croissant Sand 4 English Muff san 5 Biscuit S.E.C. 6 7 8 9 0 Sandwich Breakfast Sandwich Breakfast Bagel & Cheese 7. Appuyer sur la touche 1 Biscuit E.B.C. 2 B. fast Croissant 3 Croissant Sand 4 English Muff san 5 Biscuit S.E.C. 6 Bagel & Cheese 7 8 9 0 Entrer pour finir. 8. Pour sortir du mode Cuisson manuelle, appuyer plusieurs fois sur la touche Retour pour revenir à l’écran du menu principal. Pour obtenir la documentation complète sur le produit visiter : www.acpsolutions.com N° de pièce 20041101 Guide de démarrage rapide ACCÈS AU MENU PROGRAMMATION 1. Pour accéder au mode PROGRAMMATION appuyer sur la touche Programmation. 2. Puis sélectionner Modifier en utilisant la touche Défilement vers le haut ou la touche Défilement vers le bas sur l’écran. 3. Appuyer sur la touche Entrer puis sélectionner la catégorie d’aliments et l’aliment à programmer en utilisant la touche Défilement vers le haut ou sur la touche Défilement vers le bas. APERÇU DU PROGRAMME MENU PROGRAMMATION – Permet d’ajouter un nouvel élément de menu ENTRER – Permet d’enregistrer ou de passer à l’écran suivant RETOUR – Permet de revenir à l’écran précédent DÉFILEMENT VERS LE HAUT ou VERS LE BAS DÉFILEMENT MODIFIER – Permet de modifier un article de menu existant SUPPRIMER – Permet de supprimer un article de menu existant Four combiné commercial à haute vitesse 5. Dans l’écran Articles de menu, sélectionner la touche Défilement vers le haut ou la touche Défilement vers le bas pour mettre en surbrillance l’article qui doit être modifié. Sandwich Breakfast 1 Biscuit E.B.C. 2 B. fast Croissant 3 Croissant Sand 4 English Muff san 5 Biscuit S.E.C. 6 7 8 9 0 6. Appuyer sur la touche Entrer pour afficher les réglages de cuisson. 7. Utiliser la touche Défilement vers le haut ou la touche Défilement vers le bas pour sélectionner le réglage de la température, du temps de cuisson, de micro-ondes (%), du ventilateur (%) et IR (%). Utiliser les touches numériques pour entrer le temps de cuisson, la température et les niveaux de puissance de cuisson. Pour Micro-ondes, ventilateur ou IR appuyer sur 0 pour 0 %, 1 pour 10 %, 9 pour 90 % ou 1 deux fois pour 100 %. Puissance micro-ondes Temps de cuisson MODIFICATION OU AJOUT DE RÉGLAGES DE PROGRAMMATION DE MENU 1. Appuyer sur la touche Température du four IR Ventilateur PROGRAMMATION. 2. Mettre en surbrillance Modifier en utilisant la touche Défilement vers le haut ou la touche Défilement vers le bas. 3. Appuyer sur la touche Entrer. 4. Utiliser la touche Défilement vers le haut ou la touche Défilement vers le bas pour mettre en surbrillance la catégorie de menu et/ou la catégorie d’aliment dans laquelle l’article de menu qui est modifié doit être enregistré. Appuyer sur la touche Entrer. 8. Lorsque tous les réglages de cuisson ont été effectués appuyer sur la touche Entrer. 9. Appuyer sur la touche du mode programmation. Retour plusieurs fois pour sortir Sandwich 1 Sandwich 2 Meat 3 Vegetarian 4 Seafood 5 Pasta-Pizza 6 Bake-Dess 7 8 9 0 N° de pièce 20041101 Rev. 0 1 Breakfast 2 Poultry 3 Meat 4 Seafood 5 Vegetarian 6 7 8 9 0 Pour obtenir la documentation complète sur le produit visiter : www.acpsolutions.com 2011 ACP, Inc. Cedar Rapids, IA 52404 Guide de démarrage rapide MODIFICATION D’UN NOM OU AJOUT DE NOUVEAUX NOMS DANS MENU CATEGORY (CATÉGORIE DE MENUS), FOOD CATEGORY (CATÉGORIE D’ALIMENTS) OU DANS ITEM MENU (ARTICLES DE MENU) 1. Appuyer sur la touche 3. Utiliser la touche Défilement vers le haut ou la touche Défilement vers le bas pour mettre en surbrillance l’endroit où une nouvelle catégorie ou un nouvel article doit être placé(e). (Pour passer à l’écran suivant, utiliser la touche Défilement vers le haut ou la touche Défilement vers le bas pour mettre en surbrillance le menu désiré, puis appuyer sur la touche Entrer). Exemple : I. M odification du nom dans l’écran Menu Category (Catégorie de menu) A. Mettre en surbrillance l’article B. Passer à l’étape 4 1 Sandwich 2 Meat 3 Vegetarian 4 Seafood 5 Pasta-Pizza 6 Bake-Dess 7 8 9 0 A. Mettre en surbrillance Menu Category (Catégorie de menu) désirée B. Appuyer sur la touche Entrer 1 Sandwich 2 Meat 3 Vegetarian 4 Seafood 5 Pasta-Pizza 6 Bake-Dess 7 8 9 0 D. Passer à l’étape 4 2011 ACP, Inc. Cedar Rapids, IA 52404 A. Mettre en surbrillance Menu Category (Catégorie de menu) désirée 1 Sandwich 2 Meat 3 Vegetarian 4 Seafood 5 Pasta-Pizza 6 Bake-Dess 7 8 9 0 B. Appuyer sur la touche Entrer C. Mettre en surbrillance Food Category (Catégorie d’aliments) désirée Sandwich 1 Breakfast 2 Poultry 3 Meat 4 Seafood 5 Vegetarian 6 7 8 9 0 E. Mettre en surbrillance Menu Item (Article de menu) désiré Sandwich Breakfast 1 Biscuit E.B.C. 2 B. fast Croissant 3 Croissant Sand 4 English Muff san 5 Biscuit S.E.C. 6 7 8 9 0 F. Passer à l’étape 4 4. Appuyer sur la touche C. Mettre en surbrillance Food Category (Catégorie d’aliments) désirée Sandwich Pour ajouter des réglages de programmation, il est d’abord nécessaire de nommer l’article. D. Appuyer sur la touche Entrer II. M odification du nom dans Food Category (Catégorie d’aliments) 1 Breakfast 2 Poultry 3 Meat 4 Seafood 5 Vegetarian 6 7 8 9 0 III. M odification/ajout d’un nom dans Menu Item (Articles de menu) Programmation. 2. Mettre en surbrillance Modifier en utilisant la touche Défilement vers le haut ou la touche Défilement vers le bas, puis appuyer sur la touche Entrer. Four combiné commercial à haute vitesse Programmation. 5. Entrer un nom pour la catégorie ou pour l’article en utilisant les touches numériques pour saisir des lettres, des numéros et des symboles. [Par exemple : Appuyer sur la touche « 2 » trois fois pour entrer la lettre « c »] Une fois la lettre pertinente affichée, attendre que le curseur passe à l’espace suivant. Si une correction est nécessaire, appuyer sur la touche retour pour effacer un caractère à la fois. Voir l’option d’utilisateur 2 pour les options de saisie de caractères. 6. Appuyer sur la touche Entrer pour enregistrer le nom et passer à l’écran suivant. Si un article de menu est ajouté ou modifié (dernier écran), appuyer sur la touche Entrer pour revenir à l’écran de réglage de la programmation. 7. Appuyer sur la touche du mode programmation. Pour obtenir la documentation complète sur le produit visiter : www.acpsolutions.com Retour plusieurs fois pour sortir N° de pièce 20041101 Guide de démarrage rapide Four combiné commercial à haute vitesse Il est possible de modifier plusieurs options pour personnaliser le fonctionnement du four en fonction des besoins de l’utilisateur. Le tableau ci-dessous illustre ces options ; les réglages d’usine sont en caractères gras. 1. Le four doit être à l’arrêt. Pour arrêter le four, appuyer sur la touche MARCHE/ARRÊT. 2. Appuyer sur la touche « 2 » et la maintenir appuyée jusqu’à ce que l’écran option s’affiche. 3. Choisir l’option en appuyant sur la touche Entrer, puis utiliser la touche Défilement vers le bas pour sélectionner l’option désirée. 4. Appuyer sur la touche options. Défilement vers le haut ou la touche Démarrer pour enregistrer et appuyer sur la touche Arrêter/Réinitialiser pour sortir du mode 5. Option 6, si le message « Password Needed » (mot de passe requis) est en surbrillance, appuyer sur la touche Programmation pour afficher ou modifier le mot de passe. N° d’option Nom du réglage Options 01 Entrée de chiffre Entrée à un chiffre 02 Type de caractères Entrée à deux chiffres CLEAN FILTER (NETTOYER FILTRE) Majuscules CLEAN FILTERS Minuscules Combinaison de majuscules et de minuscules 03 Réglage de menu 1 niveau, 10 articles 2 niveaux, 100 articles 3 niveaux, 360 articles 04 Cuisson manuelle 05 programme manuel Cuisson manuelle autorisée Cuisson manuelle non autorisée Enregistrer après une cuisson manuelle Ne pas enregistrer après une cuisson manuelle 06 Verrouillage du programme Mot de passe nécessaire Modifications des programmes autorisées 07 Porte ouverte L’ouverture de la porte réinitialise le minuteur L’ouverture de la porte interrompt le cycle de cuisson 08 Fenêtre du clavier Air Filters On Sides Désactivée 30 secondes 60 secondes 120 secondes 09 Bip de touche Activé Désactivé 10 Volume de bip de touche Faible Moyen Fort 11 Fin du cycle de cuisson Trois bips une seule fois Trois bips qui se répètent Bip continu jusqu’à ce que la porte soit ouverte 12 Avertissement de préchauffage 13 Échelle de température Avertit si le four n’est pas à la température Désactivé Les températures sont affichées en °F sur les modèles 60 Hz Les températures sont affichées en °C sur les 14 Nettoyer les filtres Désactivé S’affiche tous les 7 jours S’affiche tous les 30 jours Lorsque ce message s’afficher, nettoyer soigneusement les filtres à air. Le nettoyage des filtres à air ne fera pas disparaître le message. Le message disparaît automatiquement après 24 heures. La fréquence de nettoyage des filtres dépend de l’utilisation du four à micro-ondes et des conditions environnementales. Lorsque la fréquence est déterminée, régler l’option pour la durée correspondante. Les filtres à air et les évents doivent être nettoyés régulièrement pour éviter la surchauffe du four. Consulter le manuel du propriétaire pour obtenir des instructions complètes sur le nettoyage. S’affiche tous les 90 jours 15 Mode micro-ondes Autoriser le mode Micro-ondes seulement Pas de mode Micro-ondes seulement 16 Arrêt automatique Désactivé 2 heures 4 heures 8 heures 17 Transfert de données N° de pièce 20041101 Rev. 0 Commencer le transfert : Carte vers four Commencer le transfert : Four vers carte Pour obtenir la documentation complète sur le produit visiter : www.acpsolutions.com 2011 ACP, Inc. Cedar Rapids, IA 52404 Kurzanleitung Gewerbliches Hochgeschwindigkeits-Kombigerät Sicherheitshinweise dem Handbuch zur Produktsicherheit entnehmen. Die komplette Bedienungsanleitung ist online verfügbar. Auf dem Bildschirm des Geräts werden Menüoptionen angezeigt. Die Navigation durch die Bildschirmmenüs erfolgt über das Tastenfeld. Die nachfolgenden Symbole werden in diesem Handbuch zur Erläuterung der Menünavigation verwendet. Mit den Tasten Nach oben blättern und Nach unten blättern die Speisenkategorien markieren 1 Sandwich 2 Meat 3 Vegetarian 4 Seafood 5 Pasta-Pizza 6 Bake-Dess 7 8 9 0 EIN/AUS Programm Betrieb mit manueller Zeiteingabe Temperatur KOCHMENÜS Ab Werk verfügen die Koch-Bildschirme des Geräts über drei Menüebenen. 1. Auf dem Bildschirm MENU CATEGORIES (MENÜKATEGORIEN) werden Produktkategorien angezeigt. 2. Auf dem Bildschirm FOOD CATEGORIES (SPEISENKATEGORIEN) werden Produkte in der Hauptmenü-Kategorie angezeigt. 3. Auf dem Bildschirm MENU ITEM (MENÜPUNKT) werden Produkte im Speisenkategorie-Bildschirm angezeigt. HINWEIS: Das Gerät kann so eingestellt werden, dass es mit 1, 2 oder 3 Menüebenen arbeitet. Weitere Einzelheiten hierzu sind in den Benutzerspezifischen Einstellungen zu finden. In ITEM MENU (SPEISENMENÜ) wird das Speisegruppenmenü weiter differenziert, damit Mengen, verschiedene Speisearten usw. eingegeben werden können. DREI MENÜEBENEN Menükategorien Speisenkategorien Sandwich 1 Sandwich 2 Meat 3 Vegetarian 4 Seafood 5 Pasta-Pizza 6 Bake-Dess 7 8 9 0 1 Breakfast 2 Poultry 3 Meat 4 Seafood 5 Vegetarian 6 7 8 9 0 Nach oben blättern Nach unten blättern Enter Stopp Start Menüpunkt Sandwich Breakfast 1 Biscuit E.B.C. 2 B. fast Croissant 3 Croissant Sand 4 English Muff san 5 Biscuit S.E.C. 6 7 8 9 0 .’-# 1 2 abc 3 4 ghi 5 jkl mno 7 8 wxyz pqrs tuv def 6 Zifferntasten 9 0 &/ ZWEI MENÜEBENEN Speisenkategorien Zurück 1 Sandwich 2 Meat 3 Vegetarian 4 Seafood 5 Pasta-Pizza 6 Bake-Dess 7 8 9 0 Menüpunkt Sandwich Breakfast Sandwich 1 Biscuit E.B.C. 2 B. fast Croissant 3 Croissant Sand 4 English Muff san 5 Biscuit S.E.C. 6 7 8 9 0 1 Breakfast 2 Poultry 3 Meat 4 Seafood 5 Vegetarian 6 7 8 9 0 EINE MENÜEBENE Menüpunkt Sandwich Breakfast 1 Biscuit E.B.C. 2 B. fast Croissant 3 Croissant Sand 4 English Muff san 5 Biscuit S.E.C. 6 7 8 9 0 2011 ACP, Inc. Cedar Rapids, IA 52404 Komplette Produktdokumentation unter: www.acpsolutions.com Teile-Nr. 20041101 Kurzanleitung Gewerbliches Hochgeschwindigkeits-Kombigerät Nach dem Vorheizen wird das Menü eingeblendet. Beim AXP Schnellgargerät sind einige Menüpunkte bereits vorprogrammiert, um den Garvorgang zu erleichtern. HAUPTKOCHMENÜ Zu den vorprogrammierten Menüpunkten gehören u. a.: 1. Sandwich 2. Meat (Fleisch) 3. Vegetarian (Vegetarisch) 4. Seafood (Fisch und Meeresfrüchte) - Breakfast (Frühstück) - Poultry (Geflügel) - Meat (Fleisch) - Seafood (Fisch und Meeresfrüchte) - Vegetarian (Vegetarisch) - Breakfast (Frühstück) - Lunch (Mittagessen) - Vegetables (Gemüse) - Appetizers (Vorspeisen) - Potatoes (Kartoffeln) Zurück 1 Sandwich 2 Meat 3 Vegetarian 4 Seafood 5 Pasta-Pizza 6 Bake-Dess 7 8 9 0 5. Pasta/Pizza - Small/Large Pizza (Kleine/große Pizza) - Pasta (Pasta) - Miscellaneous (Diverse andere Speisen) .’-# 2 abc - Bread (Brot) - Desserts (Nachspeisen) - Snacks (Snacks) - Breakfast (Frühstück) - Sweet (Süßes) Enter 3 2. Die Menüpunktgruppe wählen und zur Auswahl Enter drücken. 6 3. Die gewünschte Speise markieren. def ghi 5 jkl mno 7 8 wxyz tuv 6. Bakery-Desserts (Backwaren – Nachspeisen) Zum Kochen von Speisen über vorprogrammierte Menüpunkte 4 pqrs - Fish (Fisch) - Shellfish (Krustentiere) - Misc (Diverse andere Speisen) Kochen mit vorprogrammierten Tasten 1. Nach dem Vorheizen auf die gewünschte Temperatur durch die Zahlen blättern oder eine Zahl drücken, um die gewünschte Speisenkategorie im Menü zu wählen. 1 - Poultry (Geflügel) - Beef (Rind) - Pork (Schwein) - Appetizers (Vorspeisen) - Breakfast (Frühstück) 9 0 &/ 1 1 Sandwich 2 Meat 3 Vegetarian 4 Seafood 5 Pasta-Pizza 6 Bake-Dess 7 8 9 0 Hinweis: Wenn ein Menüpunkt durchgestrichen ist, bedeutet das, dass sich die Vorheiztemperatur von der voreingestellten Temperatur für diesen Menüpunkt unterscheidet. Dieser Menüpunkt kann nicht ausgewählt werden. 2 Sandwich 1 Breakfast 2 Poultry 3 Meat 4 Seafood 5 Vegetarian 6 7 8 9 0 3 Sandwich Breakfast 1 Biscuit E.B.C. 2 B. fast Croissant 3 Croissant Sand 4 English Muff san 5 Biscuit S.E.C. 6 7 8 9 0 1 Sandwich 2 Meat 3 Vegetarian 4 Seafood 5 Pasta-Pizza 6 Bake-Dess 7 8 9 0 4. Die Gerätetür öffnen, die Speise in das Gerät stellen und die Tür schließen. 5. Zum Starten des Kochvorgangs Enter drücken. Hinweis: Menüpunkte können je nach Modell unterschiedlich ausfallen. Teile-Nr. 20041101 Rev. 0 6. Am Ende des Kochvorgangs ertönt ein Signal und die Animation rechts wird eingeblendet, um darauf hinzuweisen, dass die Speise aus dem Gerät genommen werden kann. Komplette Produktdokumentation unter: www.acpsolutions.com 2011 ACP, Inc. Cedar Rapids, IA 52404 Kurzanleitung Gewerbliches Hochgeschwindigkeits-Kombigerät MANUAL COOK (BETRIEB MIT MANUELLER ZEITEINGABE) verwenden (Benutzerspezifische Einstellung Nr. 4 muss so eingestellt sein, dass der Betrieb mit manueller Zeiteingabe möglich ist. Siehe hierzu Abschnitt Benutzerspezifische Einstellungen). Der Betrieb mit manueller Zeiteingabe ist dann zu verwenden, wenn eine bestimmte Zeit und bestimmte Leistungsstufen eingegeben werden sollen. Dieser Modus ist sehr hilfreich, wenn Sie mit verschiedenen Speisen experimentieren. Die maximale Garzeit beträgt 100 Minuten. Die Mikrowelle, der Lüfter und der IR (Heizstrahler) können auf 11 verschiedene Leistungsstufen zwischen 0 – 100 % in 10 %-Schritten eingestellt werden. 1. Nachdem die gewünschte Temperatur erreicht ist (95-270° C/200-520°F), die Taste Betrieb mit manueller Zeiteingabe drücken. 2. Mit den Tasten Nach oben blättern und Nach unten blättern zwischen den Garelementen und der Zeit navigieren. 3. Für die erste Stufe mithilfe der Zifferntasten (bis zu 100 Minuten) die Garzeit eingeben. Mithilfe der Taste Nach unten blättern zum nachfolgenden Garelement navigieren. 10. Am Ende des Kochvorgangs ertönt ein Signal und die nachfolgende Animation wird eingeblendet: 11. Das Kochgut aus dem Gerät nehmen. Hinweis: Um den Kochvorgang zu unterbrechen, die Tür öffnen. Zum Wiederaufnehmen des Betriebs die Tür schließen und START drücken. Speichern eines Kochprogramms mit manueller Zeiteingabe im Menü Wenn Sie mit dem Kochergebnis, das durch den Betrieb mit manueller Zeiteingabe erzielt wurde, zufrieden sind, kann die Speise, die mit manueller Zeiteingabe gekocht wurde, gespeichert werden. 4. Die gewünschte Mikrowellenleistung eingeben. 0 (für 0 %), 1 (für 10 %), 5 (für 50 %) und für volle Leistung (100 %) die „1“ zweimal drücken. Mithilfe der Taste Nach unten blättern zum nachfolgenden Garelement navigieren. 1. Zum Speichern die Taste Enter drücken. Hinweis: Benutzerspezifische Einstellung Nr. 5 muss so eingestellt sein, dass nach dem Betrieb mit manueller Zeiteingabe ein Speichervorgang vorgenommen wird. 2. Menu Category (Menükategorie) mithilfe der Tasten Nach oder Nach unten blättern markieren oder oben blättern einen neuen Namen für die Menükategorie erstellen. Die Taste Enter drücken. 5. Über die Zifferntasten die gewünschte Lüftergeschwindigkeit eingeben. 3. Die Speisenkategorie markieren. Hierzu mithilfe der Tasten und Nach unten blättern den freien Nach oben blättern Speicherort im Menü auswählen. 4. Im Bildschirm Menu Item (Menüpunkt) den Speicherort auswählen, wo der neue Name gespeichert werden soll. 5. Den neuen Speicherort markieren und dann die Taste drücken. Programm KEYPAD 6. Die Infrarot-Leistung (IR) eingeben. 0 (für 0 %), 1 (für 10 %), 5 (für 50 %) und für volle Leistung (100 %) die „1“ zweimal drücken. eingeben. 6. Den Speisenamen über die Zifferntasten Etwaige Fehler mit der Taste Zurück löschen. Dieser Schritt muss für jede Menüebene wiederholt werden. Siehe Benutzerspezifische Einstellung Nr. 2 zur Großund Kleinschreibung. Breakfast 7. Schritte 2-6 für jede Garstufe wiederholen, falls mehr als eine Garstufe notwendig ist. 8. Die Speise in das Gerät stellen. 9. Die Taste Start drücken, um den Kochvorgang zu beginnen. Der Countdown beginnt auf dem Display. Die Speisenkategorie wird angezeigt und auf dem Display erscheint das Wort Manual (Manuell). 2011 ACP, Inc. Cedar Rapids, IA 52404 1 Biscuit E.B.C. 2 B. fast Croissant 3 Croissant Sand 4 English Muff san 5 Biscuit S.E.C. 6 7 8 9 0 Sandwich Breakfast Sandwich Breakfast Bagel & Cheese 7. Anschließend die Taste Enter 1 Biscuit E.B.C. 2 B. fast Croissant 3 Croissant Sand 4 English Muff san 5 Biscuit S.E.C. 6 Bagel & Cheese 7 8 9 0 drücken. 8. Um den Modus Manual Cook (Betrieb mit manueller Zeiteingabe) zu beenden, die Taste Zurück wiederholt drücken, bis der Hauptmenü-Bildschirm eingeblendet wird. Komplette Produktdokumentation unter: www.acpsolutions.com Teile-Nr. 20041101 Kurzanleitung Gewerbliches Hochgeschwindigkeits-Kombigerät AUFRUFEN DES PROGRAMMMENÜS 1. Zum Aufrufen des des Modus PROGRAM (PROGRAMM) die Taste Programm drücken. 2. Dann auf dem Bildschirm über die Tasten Nach oben blättern oder Nach unten blättern Bearbeiten auswählen. 3. Enter drücken und dann über die Tasten Nach oben blättern oder Nach unten blättern die zu programmierende Speisenkategorie und Speise auswählen. ÜBERBLICK ÜBER DAS PROGRAMMMENÜ PROGRAMM Ein neuer Menüpunkt wird hinzugefügt ENTER Einstellungen werden gespeichert oder der nächste Bildschirm wird aufgerufen ZURÜCK Zurück zum vorherigen Bildschirm NACH OBEN BLÄTTERN BLÄTTERN BEARBEITEN LÖSCHEN oder NACH UNTEN Einen bestehenden Menüpunkt ändern Einen bestehenden Menüpunkt löschen BEARBEITEN ODER HINZUFÜGEN VON MENÜPROGRAMMEINSTELLUNGEN 1. Die Taste Programm Sandwich Breakfast 1 Biscuit E.B.C. 2 B. fast Croissant 3 Croissant Sand 4 English Muff san 5 Biscuit S.E.C. 6 7 8 9 0 6. Nach dem Drücken der Taste Enter werden die Gareinstellungen eingeblendet. 7. Mithilfe der Tasten Nach oben blättern oder Nach unten blättern die Temperatur, Zeit, Mikrowellenleistung in %, Lüfterleistung in % und die Heizstrahlerleistung in % auswählen. Die Zeit, Temperatur und Garleistung werden über die Zifferntasten eingegeben. Zur Eingabe der Leistung der Mikrowelle, des Lüfters oder des Heizstrahlers „0“ für 0 %, „1“ für 10 %, „9“ für 90 % drücken. Für 100 % die „1“ zweimal drücken. Mikrowellenleistung Garzeit drücken. 2. Mithilfe der Tasten Nach oben blättern unten blättern Bearbeiten markieren. 3. Die Taste Enter 5. Mithilfe der Tasten Nach oben blättern oder Nach unten blättern im Bildschirm Menu Item (Menüpunkt) die zu bearbeitende Speise markieren. Gerätetemperatur IR (Heizstrahler) Lüfter oder Nach drücken. 4. Mithilfe der Tasten Nach oben blättern oder Nach unten blättern Menu Category (Menükategorie) und/oder Food Category (Speisenkategorie) markieren, wo der zu bearbeitende Menüpunkt gespeichert ist. Die Taste Enter drücken. 8. Nach Einstellen der Gareinstellungen die Taste Enter drücken. 9. Die Taste Zurück wiederholt drücken, um den Programmiermodus zu beenden. Sandwich 1 Sandwich 2 Meat 3 Vegetarian 4 Seafood 5 Pasta-Pizza 6 Bake-Dess 7 8 9 0 Teile-Nr. 20041101 Rev. 0 1 Breakfast 2 Poultry 3 Meat 4 Seafood 5 Vegetarian 6 7 8 9 0 Komplette Produktdokumentation unter: www.acpsolutions.com 2011 ACP, Inc. Cedar Rapids, IA 52404 Kurzanleitung Gewerbliches Hochgeschwindigkeits-Kombigerät BEARBEITEN ODER HINZUFÜGEN NEUER NAMEN FÜR MENU CATEGORY (MENÜKATEGORIE) ODER FOOD CATEGORY (SPEISENKATEGORIE) ODER MENU ITEM (MENÜPUNKT) 1. Die Taste Programm drücken. 2. Mithilfe der Tasten Nach oben blättern oder Nach unten blättern Bearbeiten markieren und dann die Taste Enter drücken. 3. Mit den Tasten Nach oben blättern oder Nach unten blättern die Stelle markieren, an der die neue Kategorie bzw. die neue Speise abgelegt werden soll. (Um zum folgenden Bildschirm zu gelangen, mithilfe der Tasten Nach oben blättern und Nach unten blättern das gewünschte Menü markieren und die Taste Enter drücken). Beispiel: I. B earbeiten eines Namens im Bildschirm Menu Category (Menükategorie) A. Die Speise markieren B. Mit Schritt 4 fortfahren A. Die gewünschte Menu Category (Menükategorie) markieren 1 Sandwich 2 Meat 3 Vegetarian 4 Seafood 5 Pasta-Pizza 6 Bake-Dess 7 8 9 0 1 Sandwich 2 Meat 3 Vegetarian 4 Seafood 5 Pasta-Pizza 6 Bake-Dess 7 8 9 0 B. Enter drücken C. Die gewünschte Food Category (Speisenkategorie) markieren Sandwich E. Den gewünschten Menüpunkt markieren Sandwich Breakfast F. Mit Schritt 4 fortfahren 4. Die Taste Programm C. Die gewünschte Food Category (Speisenkategorie) markieren D. Mit Schritt 4 fortfahren A. Die gewünschte Menu Category (Menükategorie) markieren 1 Biscuit E.B.C. 2 B. fast Croissant 3 Croissant Sand 4 English Muff san 5 Biscuit S.E.C. 6 7 8 9 0 B. Enter drücken Sandwich Um Programmeinstellungen hinzuzufügen, muss die Speise erst benannt werden. D. Enter drücken II. B earbeiten eines Namens unter Food Category (Speisenkategorie) 1 Breakfast 2 Poultry 3 Meat 4 Seafood 5 Vegetarian 6 7 8 9 0 III. B earbeiten / Hinzufügen eines Namens unter Menu Item (Menüpunkt) 1 Breakfast 2 Poultry 3 Meat 4 Seafood 5 Vegetarian 6 7 8 9 0 1 Sandwich 2 Meat 3 Vegetarian 4 Seafood 5 Pasta-Pizza 6 Bake-Dess 7 8 9 0 drücken. 5. Den Namen der Kategorie bzw. der Speise mithilfe der Tastenfelder eingeben und dabei die den Tasten zugeordneten Buchstaben, Zahlen und Symbole verwenden. [Beispiel: Für den Buchstaben „c“ Taste „2“ dreimal drücken] Wenn der korrekte Buchstabe angezeigt wird, warten, bis der Cursor an die nächste Stelle rückt. Falls eine Korrektur vorgenommen werden muss, die Taste Zurück drücken, um ein Zeichen nach dem anderen zu löschen. Siehe Benutzerspezifische Einstellung Nr. 2 bezüglich der Großund Kleinschreibung. 6. Die Taste Enter drücken, um den Namen zu speichern. Danach wird der nächste Bildschirm aufgerufen. Wenn ein Menu Item (Menüpunkt) hinzugefügt oder bearbeitet wird (letzter Bildschirm), wird nach dem Drücken der Taste Enter der Bildschirm Programmeinstellung aufgerufen. 7. Die Taste Zurück wiederholt drücken, um den Programmiermodus zu beenden. 2011 ACP, Inc. Cedar Rapids, IA 52404 Komplette Produktdokumentation unter: www.acpsolutions.com Teile-Nr. 20041101 Kurzanleitung Gewerbliches Hochgeschwindigkeits-Kombigerät Verschiedene Einstellungen des Geräts können entsprechend den geschäftlichen Anforderungen Ihres Betriebs benutzerspezifisch angepasst werden. In der nachstehenden Tabelle werden diese benutzerspezifischen Einstellungen angezeigt. Die werkseitige Einstellung ist fettgedruckt. 1. Das Gerät muss ausgeschaltet sein. Zum Ausschalten des Geräts die Taste EIN/AUS drücken. 2. Die Taste „2“ drei Sekunden lang gedrückt halten, bis der Bildschirm mit den benutzerspezifischen Einstellungen eingeblendet wird. 3. Durch Drücken der Taste Enter die Einstellung auswählen, und mithilfe der Tasten Nach oben blättern blättern die gewünschte Einstellung markieren. 4. Mithilfe der Taste Start die Einstellung speichern. Mit Stopp/Zurücksetzen und Nach unten den Einstellungsmodus beenden. 5. Benutzerspezifische Einstellung Nr. 6, wenn „Password Needed” (Passwort notwendig) markiert ist, die Taste Programm drücken, um das Passwort einzublenden oder zu bearbeiten. Benutzer Einstellungsname spezifische Einstellungen – Nr. 01 Zifferneingabe 02 Groß- bzw. Kleinschreibung des Textes Benutzerspezifische Einstellungen Eingabe einer einstelligen Zahl Eingabe einer zweistelligen Zahl Großbuchstaben Kleinbuchstaben Gemischt 03 Menüeinstellung CLEAN FILTER (REINIGEN DER FILTER) CLEAN FILTERS 1 Ebene, 10 Speisen 2 Ebenen, 100 Speisen 3 Ebenen, 360 Speisen 04 Betrieb mit manueller Zeiteingabe Betrieb mit manueller Zeiteingabe erlaubt 05 Manuelles Speichern von Programmen Nach Betrieb mit manueller Zeiteingabe speichern 06 Programmsperre 07 Tür offen Betrieb mit manueller Zeiteingabe nicht erlaubt Nach Betrieb mit manueller Zeiteingabe nicht speichern Passwort benötigt Änderungen am Programm erlaubt Durch das Öffnen der Tür wird der Zeitschalter zurückgesetzt Durch das Öffnen der Tür wird der Garvorgang unterbrochen 08 Tastenfeld-Fenster Aus Air Filters On Sides 30 Sekunden 60 Sekunden Wenn diese Meldung erscheint, den Luftfilter gründlich reinigen. Diese Meldung wird auch nach erfolgter Reinigung des Luftfilters angezeigt. Die Meldung wird nach 24 Stunden automatisch nicht mehr angezeigt. 120 Sekunden 09 10 Signalton der Tasten Signaltonlautstärke Ein Aus Niedrig Mittel Hoch 11 Ton am Zyklusende Einmal 3 Töne 3 Töne wiederholend Dauerton bis zum Öffnen der Tür 12 Temperaturwarnton 13 Temperaturskala Warnung, wenn Temperatur nicht erreicht Aus Bei 60 Hz Modellen werden Temperaturen in °F angezeigt Bei 50 Hz Modellen werden Temperaturen in °C angezeigt 14 Filter reinigen Aus Anzeige alle 7 Tage Anzeige alle 30 Tage Anzeige alle 90 Tage 15 16 Modus Nur Mikrowelle Automatische Abschaltung Modus Nur Mikrowelle erlauben Je nach Verwendung und Umgebungsbedingungen des Mikrowellengeräts muss der Filter ggf. häufiger oder weniger häufig gereinigt werden. Nachdem das Reinigungsintervall bestimmt wurde, diese Einstellung auf den entsprechenden Zeitraum einstellen. Luftfilter und Abzugsöffnungen müssen regelmäßig gereinigt werden, um ein Überhitzen des Geräts zu verhindern. Die kompletten Reinigungsanweisungen sind der Bedienungsanleitung zu entnehmen. Keinen Modus Nur Mikrowelle Deaktivieren 2 Stunden 4 Stunden 8 Stunden 17 Datentransfer Transfer beginnen: Von Karte an Gerät Transfer beginnen: Von Gerät an Karte Teile-Nr. 20041101 Rev. 0 Komplette Produktdokumentation unter: www.acpsolutions.com 2011 ACP, Inc. Cedar Rapids, IA 52404