1
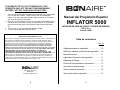
PARA OPERAR EL BLOQUE DE ALIMENTACIÓN DE 12 V:
ESTE SOLO FUNCIONA CON LA BATERÍA RECARGABLE
DE LA UNIDAD, NO CON LA BATERÍA DE SU VEHÍCULO.
1. Gire el interruptor principal de energía ubicado en la parte posterior de la
empuñadura de la unidad, hasta la posición “Power On” (encendido).
Ahora la energía está siendo suministrada por la batería recargable. Las
luces indicadoras verdes y amarillas ubicadas en la parte superior de la
unidad le indicarán el nivel de energía de la batería.
2. Enchufe el accesorio de 12 V en el tomacorriente de 12 V ubicado al
costado de la unidad, el más cercano al compartimiento del fusible de 15
A. Encontrará una tapa circular protectora de caucho encajada en el
tomacorriente para protegerlo del polvo, etc.
3. Encienda el accesorio de 12 V y hágalo funcionar normalmente.
4. Apague el interruptor (“Power Off”) cuando termine de usar la unidad.
OWNERS MANUAL
Manual del Propietario
INFLATOR 5000
CORDLESS AIR INFLATOR & 12 VOLT POWER PACK
INFLADOR DE AIRE SIN CABLE Y FUENTE DE ENERGIA
DE 12 V cc
PÓLIZA DE GARANTÍA LIMITADA DE UN AÑO
Cada uno de nuestros productos ha sido cuidadosamente inspeccionado y probado antes de
salir de la fábrica. Le garantizamos que va a estar libre de defectos en su mano de obra y
materiales durante un período de UN AÑO, contado a partir de la fecha de compra original. En
el caso en que surja algún problema durante este período de un año, póngase en contacto por
favor con nuestro Centro de Servicio al Cliente, llamando al 1-800-874-5771(Válido para
llamadas gratis en los E.U.A.) de lunes a viernes de 8:00 a.m. a 5:00 p.m. (Horario estándar de
las montañas). Esta garantía no es aplicable en los siguientes casos: en casos en los que
se haya hecho o intentado hacer una reparación por partes ajenas; en caso en que sea
necesaria una reparación por causa del uso y desgaste normales de la unidad; si el
producto hubiera sido objeto de abuso uso indebido, o sujeto a un mantenimiento
inadecuado; que se hubiera hecho algún tipo de modificación en el producto. EN NINGÚN
CASO BON-AIRE INDUSTRIES, INC. SERÁ RESPONSABLE DE ALGÚN TIPO DE DAÑO,
SEA INDIRECTO, INCIDENTAL O CONSECUENCIAL, PRODUCIDOS POR CAUSA DE LA
VENTA O EL USO DE ESTE PRODUCTO. ESTA EXENCIÓN DE RESPONSABILIDAD ES
APLICABLE DURANTE Y DESPUÉS DEL PERÍODO DE VALIDEZ DE ESTA GARANTÍA.
Esta garantía le otorga derechos legales específicos; es posible que a usted le asistan otros
derechos legales de acuerdo con las leyes de cada estado de los Estados Unidos. Algunos
estados no permiten limitaciones en el tiempo de duración de una garantía implícita ni la
exclusión o limitación de daños fortuitos o consecuentes, por lo que las limitaciones o
exclusiones mencionadas en esta garantía pueden no ser aplicables en su caso. Esta garantía
en México es reemplazada por la del importador.
873 E. Citation Court
Boise, Idaho 83716 E.U.A.
1-800-874-5771(Válido para llamadas gratis en los E.U.A.)
www.bon-aireindustries.com
16
PART/PARTE #: i5000
This Manual contains information regarding the safety and operation of
this product. Before you use, read and understand all instructions,
cautions, and warnings. Failure to do so can result in serious injury or
property damage.
Este manual contiene información relacionada con la seguridad y el
funcionamiento de este producto. Antes de usarlo, lea y comprenda
todas las instrucciones, precauciones y advertencias. La falta en el
cumplimiento de las mismas puede generar severas lesiones
personales o daños a la propiedad. MANUAL EN ESPAÑOL Pág. 9
Table of Contents
Page No.
General Safety Rules............................................ 2
Safety Symbols, Words and Labels ...................... 2
Specifications ....................................................... 3
Important Safety Information ................................ 3
Parts Diagram....................................................... 4
Important Operating Points................................... 5
About Battery/Charging ........................................ 5
Operating Instructions........................................... 7
Warranty Information ............................................ 8
PARA OPERAR EL INFLADOR DE AIRE SIN CABLE CON
UN CORDÓN DE ENERGÍA DE 12 V ENCHUFADO
DIRECTAMENTE EN EL TOMACORRIENTE DE 12 V DEL
VEHÍCULO/RECEPTÁCULO DEL ENCENDEDOR: esto
puede hacerse cuando la batería recargable de su inflador
esté baja o totalmente descargada y usted no tenga tiempo
para recargar el inflador antes de usarlo:
1.
2.
3.
INTENDED USE
This product is intended for consumer use only.
GENERAL SAFETY RULES
4.
WARNING
Read and understand all instructions. Failure to follow instructions can result in
electric shock, fire and/or serious personal injury. SAVE THESE INSTRUCTIONS
FOR FUTURE REFERENCE.
SAFETY SYMBOLS, WORDS AND LABELS
The safety instructions provided in this manual are not intended to cover all possible
conditions that may occur during product operation. Always use common sense and
pay attention to all WARNING and CAUTION statements in this manual.
WARNING
WARNING indicates a potentially hazardous
situation. Failure to avoid may result in serious
injury or death.
CAUTION
CAUTION indicates a potentially hazardous
situation. Failure to avoid may result in minor
personal injury.
2
5.
Para operar el inflador, remueva la manguera de aire que se encuentra enrollada
en la parte inferior del inflador (vea debajo del inflador). Esta manguera de aire
tiene una longitud de 61 cm.
En el extremo de la manguera de aire hay una válvula metálica de conexión
rápida. Simplemente apoye la válvula sobre el manguito del artículo que usted
desea inflar (la aguja de inflado de una pelota, la válvula de la bicicleta, etc.).
Trábela en su sitio empujando la palanca pequeña de la válvula hacia abajo.
Tome el cable de energía de 3,6 m que viene con el equipo y conecte el
enchufe haciendo coincidir los dos agujeros con las dos patas ubicadas en la
parte posterior de la empuñadura, debajo del enchufe circular ca. Ahora enchufe
el otro extremo (con el adaptador para el receptáculo del encendedor de
cigarrillos) en el receptáculo del encendedor de cigarrillos del vehículo. Gire el
interruptor principal de energía, que está ubicado en la parte posterior, en el
medio de la empuñadura de la unidad, hasta la posición “Power On”. (Vea la
sección 3 en la página 3).
PROGRAME LA PRESIÓN DESEADA GIRANDO EL DIAL DEL MANÓMETRO,
CON LA LÍNEA INDICADORA APUNTANDO HACIA LA PRESIÓN DESEADA
EN LA ESCALA DEL PANEL DEL MANÓMETRO. POR FAVOR ASEGÚRESE
DE PROGRAMAR LA PRESIÓN HASTA LA CUAL USTED DESEA INFLAR.
Para poner en funcionamiento el inflador, presione el interruptor “On/Off”
(Encedido/Apagado) (ubicado en la parte de arriba de la unidad justo por debajo
de las luces indicadoras verde y amarilla) hacia atrás hasta la posición “On by
Car Battery” ( funcionado con la batería del vehículo) Ahora el inflador
comenzará a funcionar directamente con la energía suministrada desde el
receptáculo del encendedor de cigarrillos de su vehículo, evitando usar la batería
recargable del inflador.
BOQUILLAS ADAPTADORAS: Su inflador trae 3 boquillas
para inflar, las cuales están ubicadas en el compartimiento
cercano a la empuñadura. En el mismo compartimiento
encontrará un fusible de repuesto de 15 A.
15
4.
5.
6.
La batería nunca debe estar totalmente descargada. Se recomienda cargarla
cuando todavía haya algo de carga disponible en las baterías. Esto evitará que
se acorte la vida de las baterías o que se dañe el bloque de alimentación del
inflador.
Después de que el inflador haya sido usado y la batería esté casi totalmente
descargada usted deberá recargarla en forma inmediata. Esto le asegurará una
vida larga de la batería y en condiciones óptimas.
Si se lo recarga correctamente, el inflador puede recargarse aproximadamente
500 veces durante toda su vida útil.
SPECIFICATIONS
THIS INFLATOR OPERATES ONLY ON 12 VOLT DC OR THE INTERNAL
BATTERY. DO NOT ATTEMPT TO OPERATE THIS INFLATOR WITH ANY OTHER
SOURCE OR VOLTAGE. DO NOT REWIRE OR RECONFIGURE INFLATOR FROM
ITS ORIGINAL DESIGN OR PERSONAL INJURY OR BODILY HARM MAY OCCUR
12 Volt DC Lead Acid
Batteries
Battery/Rechargeable
120 Volt AC Current/12 Volt DC
Power Requirement
INSTRUCCIONES DE OPERACIÓN
PRECAUCIÓN: NUNCA INFLE EN EXCESO UN ARTÍCULO INFLABLE
Note: This unit is equipped with fuse protection. If at some point your
Inflator fails to operate, check the fuse in the end of the 12 volt plug. To replace
the fuse, simply unscrew the 12 Volt power plug tip, install new fuse and
reassemble power plug tip. Use only an AGC - 15 amp replacement fuse.
PARA PONER EN FUNCIONAMIENTO EL INFLADOR DE
AIRE SIN CABLE SIN USAR EL CORDÓN DE ENERGIA:
1.
2.
3.
4.
5.
Para operar el inflador, remueva la manguera de aire que se encuentra enrollada
en la cara inferior (base) del inflador. Esta manguera de aire tiene una longitud
de 61 cm.
En el extremo de la manguera de aire hay una válvula metálica de conexión
rápida. Simplemente apoye la válvula sobre el manguito del artículo que usted
desea inflar (la aguja de inflado de una pelota, la válvula de la bicicleta, etc.).
Trábela en su sitio empujando la palanca pequeña de la válvula hacia abajo.
Encienda el inflador. Gire el interruptor principal de energía ubicado en la parte
posterior, en el medio de la empuñadura de la unidad, hasta la posición “Power
On”. Esto encenderá la batería de la unidad de manera que ahora tendrá
energía. Si la batería está totalmente cargada, se encenderá la luz verde
ubicada en la parte superior del inflador, indicando que la batería está lista para
usarse con toda su potencia. Una luz amarilla (ubicada a la derecha de la luz
verde) se iluminará si la batería está baja o no completamente cargada.
Programe la presión deseada girando el dial del manómetro con la línea
indicadora apuntando hacia la presión deseada en la escala del panel del
manómetro. Por favor asegúrese de programar la presión hasta la cual usted
desea inflar. (Consulte el manual del propietario del artículo inflable).
Para poner en funcionamiento el inflador, deslice el interruptor “On/Off”
(Encedido/Apagado) (ubicado en la parte superior de la unidad, justo en el medio
de las luces indicadoras verde y amarilla) hacia delante hasta la posición “On By
Built-In Battery” (funcionado con la batería interna del inflador). Ahora el inflador
comenzará a funcionar permitiéndole inflar el artículo deseado hasta la presión
correcta. Por favor revise el manómetro para corroborar la lectura correcta de
presión en PSI.
14
IMPORTANT SAFETY INFORMATION
WARNING
1.
2.
3.
4.
5.
6.
7.
8.
9.
10.
11.
12.
13.
14.
15.
16.
Only use the provided charging cords/power cords when operating/charging.
Avoid charging the battery in ambient temperature below 5°C (40°F) or above
40°C (05° F).
Do not operate while charging.
Corded Operation: Use 12 Volt DC only. Make sure that your vehicle
cigarette lighter is free of any ash residue or debris. A dirty cigarette lighter
can cause the Inflator and power cord to overheat. Overheating can cause
damage to your Inflator/vehicle and could cause bodily harm or injury.
Disconnect power when not in use.
The Inflator is designed to inflate car tires, bike tires, ATV tires, sports equipment, air
mattresses, beach toys and other inflatables. Do not uses for any purpose other than
inflating, or personal injury can occur.
When operating your Inflator do not run more than 10 minutes continuous use. Allow
Inflator to cool down 10 minutes before re-using.
After using inflator, turn off power.
The Inflator is not a toy. Keep away from children at all times.
Do not carry Inflator by the air hose or power cord, damage may occur.
Do not leave Inflator unattended while in operation.
Do not over-inflate your item. Follow manufacture’s instructions for item being inflated.
Keep Inflator away from flammable areas/liquids at all times.
Do not operate Inflator in wet or damp areas.
Operate Inflator only with the accessories that are included.
Recharge Inflator every 2-3 months even if it has not been used. This will keep
the internal battery at optimum operating level.
3
PARTS DIAGRAM DESCRIPTION
5 PUNTOS IMPORTANTES DEL FUNCIONAMIENTO
•
•
•
•
•
•
Este inflador está diseñado para inflar llantas de autos y bicicletas, equipos
deportivos, colchones de aire, juguetes para la playa y otros artículos.
El inflador está diseñado para poner en funcionamiento accesorios de 12 V
cc, alimentándolos con la batería recargable de 12 V cc que viene incorporada. Estos accesorios, tales como los teléfonos celulares, organizadores
personales computarizados, computadoras portátiles, etc., pueden enchufarse directamente en el toma de 12 V cc ubicado en la cara lateral del inflador.
Nota: Esta unidad puede ponerse verticalmente o con la base en el piso.
Cuando cargue su inflador con la corriente de 120 V ca del tomacorriente de
su casa, debe usar el adaptador para recarga ca. El cordón de energía/carga
para 12 V y la clavija adaptadora para 12 V cc deben usarse cuando cargue
su inflador usando el tomacorriente de 12 V del vehículo ( el receptáculo
para el encendedor de cigarrillos). Es posible que su inflador no esté
totalmente cargado en el momento en que lo adquiere. El tiempo necesario
de carga es de aproximadamente 11 horas a 12 horas.
En la parte de atrás de la empuñadura hay una luz LED indicadora de carga.
Este se iluminará mientras el inflador está cargando. Esta luz permanecerá
encendida todo el tiempo que el inflador está enchufado y cargándose
Si usted desea, puede usar su inflador alimentándolo directamente con el
energía del tomacorriente de 12 V del vehículo (el receptáculo para el
encendedor de cigarrillos) utilizando el cable de energía con la clavija de 12
V en el extremo. Cuando lo opere de esta manera, la corriente proveniente
del receptáculo para el encendedor de cigarrillos evitará que use la energía
de la batería del inflador de 12 V, y por lo tanto el inflador funcionará
directamente con la energía del vehículo.
ACERCA DE LA BATERÍA / CARGA
4
La batería interna de su inflador puede recargarse con 120 V de corriente ca o con
12 V de corriente cc. Recárguela únicamente usando los cables de recarga que
vienen con el equipo. No utilice ningún otro tipo de artefacto para recargar.
1. Para cargar con 12 V /120 V ca: la toma de entrada de recarga para la clavija
de 12 V cc /120 V ca que se utiliza para recargar la batería de su unidad, se
encuentra en la parte de atrás de la empuñadura de la unidad, directamente por
encima de las dos patas y por debajo de la luz LED indicadora de carga.
Enchufe un extremo del cordón de recarga de 120 V ca en la toma de entrada
para recarga y el otro extremo en el tomacorriente común de 120 V de su hogar.
2. Para cargar con 12 V cc: Conecte la clavija adaptadora para carga de 12 V cc
al cordón de energía/carga de 12 V. Conecte un extremo del cordón de energía
en la toma de entrada de recarga para la clavija de 12 V y el otro extremo en el
receptáculo para el encendedor de cigarrillos de su vehículo. La luz LED verde
indicadora de carga se iluminará indicando que la carga está en proceso. Nota:
el tiempo de carga a 120 V ca es de aproximadamente 11 horas a 13 horas,
cuando la batería está casi agotada. El tiempo de carga a 12 V cc es de
aproximadamente 3 horas a 5 horas, cuando la batería está casi agotada.
3. No abra la batería interna del inflador. La batería ha sido diseñada para
permanecer en el interior de inflador en forma permanente
13
DESCRIPCIÓN DEL DIAGRAMA DE PARTES
IMPORTANT OPERATING POINTS
•
•
•
•
•
•
Your Inflator is designed to inflate car tires, bike tires, sports equipment, air
mattresses, beach toys and other inflatable items.
The Inflator is also designed to run 12 Volt accessories off the 12 Volt
Rechargeable Battery that is built into the Inflator. These accessories, such
as cell phones, PDA’s, laptop computers, etc., can plug directly into the12 V
outlet located on the side of the Inflator.
Note: This power unit is intended to be correctly orientated in a vertical
or floor mount position.
The AC Charging Adaptor is to be used when charging your Inflator off 120
Volt AC household current. The 12 Volt DC Power/Charging Cord and 12 Volt
DC Charging Adaptor Plug is to be used when charging your Inflator using
your 12 Volt vehicle power outlet (cigarette lighter). Your Inflator may not be
fully charged at time of purchase. Charging time is 11 to 12 hours.
An LED charging light is located on the back side of the handle. This will
illuminate when the Inflator is charging. This light will stay on as long as the
Inflator is plugged in and charging.
If you desire, you can run your Inflator directly off your vehicle’s 12 V power
outlet (cigarette lighter) using the provided power cord with the 12 Volt plug-in
on the end of the cord. When operating in this fashion the current from your
12 Volt vehicle cigarette lighter bypasses the Inflator’s 12 Volt battery, and
therefore, runs directly off the vehicle’s power.
ABOUT THE BATTERY/CHARGING
Your Inflator’s internal battery is re-charged via 120 Volt AC or 12 Volt DC current.
Re-charge using only the provided charging cords. Do not use any other charging
apparatus.
1.
2.
3.
12
For 12 Volt/120 Volt AC charging: The 12 Volt/120 Volt AC Plug-in Charging
Port to recharge your unit’s battery is located on the backside of the unit’s handle
directly above the two prongs and below the LED charging light. Plug one end of
the 120 Volt AC Charging Cord into the Plug-in Charging Port and plug the other
end into your normal 120 Volt AC household outlet.
For 12 Volt DC Charging, connect the 12 Volt Charging Adaptor Plug to the 12
Volt DC Power/Charging Cord. Connect one end of the Charging Cord into the
Plug-in Charging Port and the other end into your 12 Volt vehicle cigarette lighter
plug. The green LED light will shine to signify charging is in progress. Note: 120
Volt AC Charging time is approximately 11 to 13 hours when the battery is almost
exhausted. 12 Volt DC Charging time is approximately 3 to 5 hours when the
battery is almost exhausted.
Do not open the battery inside the Inflator. The battery is designed to
permanently remain inside the Inflator.
5
4.
5.
6.
The battery should never be totally discharged. It is recommended that charging
should occur when there is still some current available in the batteries. This will
prevent any “short” use or damage to the Inflator battery pack.
After the Inflator has been used and the battery is almost totally discharged, it
should immediately be recharged. This will insure that the battery maintains a
long and proper life.
If charged correctly the Inflator can be charged approximately 500 times
throughout its existence.
OPERATING INSTRUCTIONS
CAUTION: DO NOT OVER-INFLATE YOUR INFLATABLE ITEM
ESPECIFICACIONES
ESTE INFLADOR FUNCIONA SOLO CON 12 V cc O CON LA BATERÍA
INTERNA. NO INTENTE PONER EN FUNCIONAMIENTO ESTE INFLADOR CON
NINGÚN OTRA FUENTE DE ALIMENTACIÓN O VOLTAJE. NO REHAGA EL
CABLEADO NI VUELVA A CONFIGURAR EL INFLADOR DE MANERA
DIFERENTE A SU DISEÑO ORIGINAL; PODRÍA SUFRIR LESIONES
PERSONALES O DAÑOS CORPORALES
Batería recargable ácida de plomo de
Baterías
12 V cc
Tensión de 120 V ca/12 V cc
Requerimiento energético
Nota: Esta unidad está equipada con un fusible de protección. Si en
algún punto se produce una falla en el funcionamiento de su inflador, revise el
fusible que se encuentra en el extremo de la clavija de 12 V. Para reemplazar el
fusible, simplemente desenrosque la punta de la clavija de 12 V, coloque el
fusible nuevo y vuelva a ensamblar la punta. Use sólo un fusible de repuesto
AGC – de 15 A.
IMPORTANTE INFORMACIÓN DE SEGURIDAD
ADVERTENCIA
TO OPERATE THE CORDLESS AIR INFLATOR WITHOUT
POWER CORD:
1.
1.
2.
2.
3.
4.
5.
To operate the Inflator, remove the air hose that is coiled up on the underneath
side (bottom) of the Inflator. The air hose is 24” in length.
A metal “quick connect” valve is located on the end of the air hose. Simply put
the valve on the stem, etc., of the item you wish to inflate (sports needle, bicycle
tire valve, etc.). Lock into place by pushing the small arm on the valve down.
Turn the Inflator on. The main power switch located on the back-side in the
middle of the handle to the “Power On” position. This turns the battery on so the
unit has power. A green light located on top of the Inflator will illuminate if the
battery is fully charged/ready for full power use. A yellow light (to the right of the
green light) will illuminate if the battery is low and not fully charged.
Preset the desired pressure by turning the gauge dial with the indicator line
pointing to the desired pounds of pressure on the scale panel of the gauge.
Please make sure you have dialed in the desired amount of pressure you wish to
inflate to. (Refer to your inflatable item’s owners manual.)
To turn on the Inflator on, slide the power “On/Off” switch (located on the top of
the unit just below the green and yellow indicator lights) forward to the “On By
Built-In Battery” position. The Inflator should now be operating allowing you to
inflate your desired item to the correct PSI level. Please check the gauge for the
correct read-out on PSI.
6
3.
4.
5.
6.
7.
8.
9.
10.
11.
12.
13.
14.
15.
16.
Sólo utilice los cables de energía/carga que se le proveen cuando ponga a
fucionar/cargar la unidad.
Evite cargar la batería en una ambiente a temperaturas por debajo de los 5° C o por
encima de los 40° C.
No ponga la unidad a funcionar mientras la está cargando.
Funcionamiento con cable: use solo 12 V cc. Asegúrese de que el
receptáculo del encendedor de cigarrillos de su vehículo esté libre de restos
de cenizas o residuos. Un el receptáculo del encendedor de cigarrillos sucio
hará que el inflador y el cable de energía se sobrecalienten. El
sobrecalentamiento puede dañar el inflador o el vehículo y puede causarle
daños o lesiones corporales.
Desconecte la energía cuando no use la unidad.
Este inflador está diseñado para inflar llantas de autos, bicicletas, vehículos todo terreno,
equipos deportivos, colchones de aire, juguetes para la playa y otros artículos. No lo
utilice para otro fin que no sea el de inflar, ya que podría provocarle lesiones corporales.
No haga funcionar el inflador durante más de 10 minutos en forma continua. Espere que
se enfríe durante 10 minutos antes de volverlo a usar.
Apague el inflador después de usarlo.
Este inflador no es un juguete. Manténgalo siempre fuera del alcance de los niños.
No carge el inflador de la manguera de aire ni por el cable, ya que podría dañarse.
No deje el inflador en funcionamiento sin supervisión.
Nunca infle un artículo en exceso. Siga las instrucciones del fabricante del mismo.
Mantenga siempre el inflador alejado de áreas en las que haya materiales inflamables.
No haga funcionar el inflador en áreas húmedas o mojadas.
Solo haga funcionar el inflador con los accesorios que vienen incluidos.
Recargue el inflador cada 2-3 meses aún cuando no lo haya usado. Esto mantendrá
la batería interna en un nivel operativo óptimo.
11
APLICACIONES
Este producto ha sido diseñado para uso exclusivo de los consumidores.
REGLAS GENERALES DE SEGURIDAD
TO OPERATE THE CORDLESS AIR INFLATOR WITH 12
VOLT POWER CORD PLUGGING DIRECTLY INTO THE
VEHICLE’S 12 VOLT POWER OUTLET/CIGARETTE
LIGHTER: This can be used if your Inflator’s rechargeable
battery is low or drained of power and you do not have time
to re-charge the Inflator before using:
1.
2.
ADVERTENCIA
Lea y comprenda todas las instrucciones. La falta de seguimiento de las
instrucciones puede generar descargas eléctricas, incendios y/o severas lesiones
personales. GUARDE ESTAS INSTRUCCIONES PARA CONSULTAS FUTURAS.
3.
4.
SÍMBOLOS, PALABRAS Y ETIQUETAS DE SEGURIDAD
Las instrucciones de seguridad que se proporcionan en este manual no intentan
cubrir todas las situaciones que pueden surgir durante la operación del producto. Use
siempre el sentido común y preste atención a todas las ADVERTENCIAS y
PRECAUCIONES que aparecen en este manual.
ADVERTENCIA
PRECAUCIÓN
ADVERTENCIA indica una situación potencialmente
peligrosa. La falta de atención a la misma puede tener como
resultado lesiones personales graves o la muerte.
PRECAUCIÓN indica una situación potencialmente peligrosa.
La falta de atención a la misma puede tener como resultado
lesiones personales leves.
10
5.
To operate the Inflator, remove the air hose that is coiled up on the bottom of the
Inflator (see underneath the inflator). The air hose is 24” in length.
A metal “quick connect” valve is located on the end of the air hose. Simply put
the valve on the stem, etc., of the item you wish to inflate (sports needle, bicycle
tire valve, etc.). Lock into place by pushing the small arm on the valve down.
Take the provided 12’ power cord and plug the “plug-in” with the two holes onto
the two prongs located on the back of the handle below the round AC plug in.
Now plug the other end (the cigarette lighter adaptor plug in) into your vehicle’s
cigarette lighter. Turn the main power switch located on the back-side in the
middle of the handle to the “Power On” position. (See section 3 at the bottom of
page 3)
PRESET THE DESIRED PRESSURE BY TURNING THE GAUGE DIAL WITH
THE INDICATOR LINE POINTING TO THE DESIRED POUNDS OF
PRESSURE ON THE SCALE PANEL OF THE GAUGE. PLEASE MAKE SURE
YOU HAVE “DIALED IN: THE DESIRED AMOUNT OF PRESSURE YOU WISH
TO INFLATE TO.”
To turn the Inflator on push the power “On/Off” switch (located on the top of the
unit just below the green and yellow indicator lights) backward to the “On by Car
Battery” position. The Inflator will now be operating directly off your Vehicle
cigarette lighter, “bypassing” your Inflator’s rechargeable battery.
ADAPTOR NOZZLES: Your Inflator has 3 inflation
nozzles which are located in the compartment by the
handle. An extra 15-amp fuse is also provided in the
same compartment.
7
TO OPERATE THE 12.0 VOLT POWER PACK: THIS
OPERATES ONLY OFF THE UNIT’S RECHARGEABLE
BATTERY, NOT OFF YOUR VEHICLE’S BATTERY.
1.
2.
3.
4.
Turn the main power switch located on the back-side of the unit’s handle
to the “Power On” position. Power is now on via the rechargeable
battery. The green and yellow indicator lights on the top of unit will tell
you the level of power in the battery.
Plug your 12 Volt accessory into the 12 Volt power outlet located on the
side of the unit nearest the 15 amp fuse compartment. A round rubber
dust cover locks into place over the power outlet to protect from dust,
etc.
Turn on your 12 Volt accessory and operate normally.
Turn the main power switch off when done.
Manual del Propietario Español
INFLATOR 5000
INFLADOR DE AIRE SIN CABLE Y FUENTE DE ENERGIA
DE 12 V cc
Parte #: i5000
LIMITED ONE YEAR WARRANTY POLICY
Every product is thoroughly inspected and tested before leaving the factory. It is warranted to be
free of defects from workmanship and materials for the period of ONE YEAR from date of
original purchase. Should any trouble develop during this one year period, please contact our
Customer Service Center at 1-800-874-5771 between 800 a.m. and 5:00 p.m. Mountain
Standard Time, Monday through Friday. This warranty does not apply to the following:
Where repairs have been made or attempted by others; where repairs are required
because of normal wear and tear; if the product has been abused, misused, or improperly
maintained; any alterations have been made to the product. IN NO EVENT SHALL BONAIRE INDUSTRIES, INC. BE LIABLE FOR ANY INDIRECT, INCIDENTAL OR
CONSEQUENTIAL DAMAGES FROM THE SALE OR USE OF THE PRODUCT. THIS
DISCLAIMER APPLIES BOTH DURING AND AFTER THE TERM OF THIS WARRANTY. This
warranty gives you specific legal rights, and you may also have other rights which vary from
state to state in the United States. Some states do not allow the exclusion or limitation of
incidental of consequential damages, and/or some states do not allow limitation on how long an
implied warranty lasts, so the above limitation may not apply to you.
Tabla de contenidos
Pág. No.
Reglas generales de seguridad.......................... 10
Símbolos, palabras y etiquetas de seguridad..... 10
Especificaciones ................................................ 11
Importante información de seguridad................. 11
Diagrama de Partes ........................................... 12
Puntos de funcionamiento importantes .............. 13
Acerca de la batería/carga ................................. 13
873 E. Citation Court
Boise, Idaho 83716 USA
800-874-5771
www.bon-aireindustries.com
8
Instrucciones de operación ................................ 14
Información sobre la garantía............................. 16
9