1
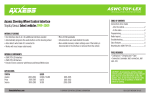
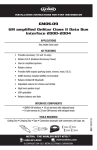
INSTALLATION INSTRUCTIONS FOR PART GMOS-10
GMOS-10
Cadillac Amplified OnStar Interface
2003-2006
REV. 2/17/2014 INSTGMOS-10
APPLICATIONS
(Note: This interface will also work in vehicles listed below that are not equipped with Onstar.)
CadillaC
CTS
2003-2006
SRX
2004-2006
(SRX with RPO codes U2R U2S)
KIT FEATURES
• Providesaccessory(12volt10amp)
• RetainsR.A.P.(retainedaccessorypower)
• Usedinamplifiedsystems
• Retainschimes
• ProvidesNAVoutputs(parkingbrake,reverse,mute,V.S.S.)
• RetainsOnStar/OEBluetooth
• AdjustablevolumeforchimesandOnStar
• Highlevelspeakerinput
• USBupdatable
• Retainsbalanceandfade
METRA. The World’s best kits.™ 1-800-221-0932
INTERFACE COMPONENTS
GMOS-10interface•16-pinharnesswithstripped
leads•14-pinharnessto16and20-pinharness
withstrippedleads
TOOLS REQUIRED
•Cuttingtool•Crimpingtool•Tape•Connectors
(example:butt-connectors,bellcaps,etc.)
CAUTION: Metra recommends disconnecting the
negative battery terminal before beginning any
installation. All accessories, switches, and especially
air bag indicator lights must be plugged in before
reconnecting the battery or cycling the ignition.
NOTE: Refer to the instructions included with the
aftermarket radio.
metraonline.com
© COPYRIGHT 2004-2013 METRA ELECTRONICS CORPORATION
GMOS-10
Connections to be made
From the 16-pin harness:
• ConnecttheRedwirestotheignitionwireoftheaftermarketradio.
• ConnecttheOrange/Whitewireisnotusedinthisapplication.
• ConnecttheWhitewiretotheleftfrontpositivespeakeroutputofthe
aftermarketradio.
• ConnecttheWhite/Blackwiretotheleftfrontnegativespeakeroutputofthe
aftermarketradio.
• ConnecttheGraywiretotherightfrontpositivespeakeroutputofthe
aftermarketradio.
• ConnecttheGray/Blackwiretotherightfrontnegativespeakeroutputofthe
aftermarketradio.
• ConnecttheGreenwiretotheradio’sleftrearpositivespeakeroutput.
• ConnecttheGreen/Blackwiretotheradio’sleftrearnegativespeakeroutput.
• ConnectthePurplewiretotheradio’srightrearpositivespeakeroutput.
• ConnectthePurple/Blackwiretotheradio’srightrear
negativespeakeroutput.
• ConnecttheBlue/Whitewiretotheradio’sampturnonwire.
• ConnecttheBrownwiretothemutewireoftheaftermarketradio.Ifthe
aftermarketradiodoesnothaveaMutewire,tapeuptheBrownwire.
• Connectthelight Greenwiretotheparkingbrakewireoftheaftermarket
navigationradio.
• ConnecttheBlue/PinkwiretotheVSSorspeedsensewireoftheaftermarket
navigationradio.
• ConnecttheGreen/Purplewiretothereversewireoftheaftermarket
navigationradio.
• Plugthe16-pinharnessintotheGMOS-10.
From the 20-pin GM harness:
• ConnecttheYellowwiretotheradio’s12voltbatteryormemorywire.
• ConnecttheBlackwiretotheradio’sgroundwire.
• Plugthe14-pinharnessintotheGMOS-10
TheBlack/YellowwireisfortheOnStarvolumeadjustment.Thiswillbediscussed
intheOnStarLevelAdjustmentsectionofthisinstruction.
Installing the GMOS-10
• Withallconnectionscompletedtotheaftermarketradio,plugthe16and20-pin
GMharnessesintothevehicleswiringharnesses.
• Reconnectthenegativebatteryterminal.
• Cyclethekey,byturningtheignitiononfor30seconds.Thenoffandonagain
totesttheradio.
2
GMOS-10
Testing the GMOS-10
1) Turntheignitiononifnotalready,andthenturntheradioontoverifythatthe
radioworks.Checkbalanceandfadercontrolsforproperoperation.
3) Withasmallscrewdriveradjustthepotentiometerclockwisetoraisetheaudio
levelandcounterclockwisetolowertheaudiolevel.
2) PushtheOnstarbutton(ifequipped)toverifyOnstarisworking.Theradio
willshutofformute,dependingiftheBrownwireonthe16-pinharnessis
connected,andOnstarwillbeheardthroughthefrontspeakers.TurnoffOnstar
andtheradiowillturnbackon.
4) Onceatdesiredlevelyouraudioadjustmentiscomplete.
OnStar level adjustment
ToadjusttheOnStarvolumelevelfindtheBlack/Yellowwireonthe16-pin
harness.
Chime Volume adjustment
Please refer to your owner’s manual to adjust the chime level.
PushtheblueOnStarbutton,whilethevoiceisspeakingtaptheBlack/Yellowwire
toground.
audio level adjustment
Thereare4volumesettingsforOnStar;oncethe4thsettingisreachedandthe
Black/Yellowwireistappedtogrounditwillautomaticallygobacktothefirst
volumesetting.
(Potentiometer located on 16-pin side of
the interface)
OncethevolumeissetitwillstayatthatvolumeuntiltheBlack/Yellowwireis
tappedtogroundagain.Thiscanbesetduringinstallationandthenleftalone.
1) Startyourvehicleandturnonthe
radiohavingaudioplaying.
Ifuseradjustmentisdesired,thecustomermayalsotapvolumeupordownonthe
steeringwheel(ifequipped)toadjusttheOnStarlevel.
2) Turnyouraftermarketradio’svolume
up¾oftheway.
Potentiometer
3
INSTALLATION INSTRUCTIONS FOR PART GMOS-10
iMPORTaNT WaRNiNG
REV. 2/17/2014 INSTGMOS-10
Thisproductincludesinstructionsforinstallationwhichmustbecarefullyfollowed.The
instructionsarewordedinsuchamannertoassumethattheinstalleriscapableof
completingthesetypeofelectronicinstallations.Ifyouareunclearastowhatyouare
instructedtodoorbelievethatyoudonotunderstandtheinstructionssoastoproperly
andsafelycompletetheinstallationyou should consult a technician who does have this
knowledge and understanding.
Failure to follow these instructions carefully and to install the interface as described
could cause harm to the vehicle or to safety systems on the vehicle. interference
with certain safety systems could cause harm to persons as well. if you have any
questions in this regard please call the Help line or Metra at 1-800-221-0932 for
assistance.
KNOWLEDGE IS POWER
Enhance your installation and fabrication skills by
enrolling in the most recognized and respected
mobile electronics school in our industry.
Log onto www.installerinstitute.com or call
800-354-6782 for more information and take steps
toward a better tomorrow.
Metra recommends MECP
certified technicians
METRA. The World’s best kits.™
1-800-221-0932
metraonline.com
© COPYRIGHT 2004-2013 METRA ELECTRONICS CORPORATION
INSTRUCCIONES DE INSTALACIÓN PARA LA PIEZA GMOS-10
GMOS-10
Interfase OnStar amplificada para Cadillac
2003-2006
APPLICATIOnS
(Nota: Esta interfase también funcionará en los vehículos enumerados a
continuación que no están equipados con OnStar)
REV. 2/17/2014 INSTGMOS-10
CadillaC
CTS
2003-2006
SRX
2004-2006
(SRX con RPO códigos U2R U2S)
CARACTERÍSTICAS DEL KIT
• Proporcionaaccesorio(12voltios10amperes)
• RetieneR.A.P.(corrientedeaccesorioretenida)
• Seusaensistemasamplificados
• Retienelostonos
• ProporcionasalidasdeNAV(frenodemano,reversa,silencio,V.S.S.)
• RetieneOnStar/Bluetoothdefabricanteoriginal
• VolumenajustableparatonosyOnStar
• Entradadebocinadealtonivel
• ActualizablemedianteUSB
• Retieneelbalanceylaintensidad
METRA. The World’s best kits.™ 1-800-221-0932
COmPOnEnTES DE LA InTERfASE
InterfaseGMOS-10•Arnésde16pinscon
conectorespelados•Arnésde16y20pinscon
conectorespelados
HERRAmIEnTAS REquERIDAS
•Cortador•Pelacables•Cinta
•Conectores(ejemplo:conectoresatope,tapas
tipocampana,etc.)
PRECAUCIÓN: Metra recomienda desconectar el terminal
negativo de la batería antes de comenzar cualquier
instalación. Todos los accesorios, interruptores y,
especialmente, las luces indicadoras de airbag deben
estar enchufados antes de volver a conectar la batería o
comenzar el ciclo de ignición.
NOTA: Remítase a las instrucciones incluidas con el
radio de postventa.
metraonline.com
© COPYRIGHT 2004-2013 METRA ELECTRONICS CORPORATION
GMOS-10
Conexiones que se deben hacer
From the 16-pin harness:
• Conecteloscablesrojosconelcabledeignicióndelradiodemercado
secundario.
• Elcableanaranjado/blanconoseutilizaenestaaplicación.
• Conecteelcableblancoalasalidapositivadelabocinafrontalizquierdadel
radiodemercadosecundario.
• Conecteelcableblanco/negroconlasalidanegativadelabocinafrontal
izquierdadelradiodemercadosecundario.
• Conecteelcablegrisconlasalidapositivadelabocinafrontalderechadel
radiodemercadosecundario.
• Conecteelcablegris/negroconlasalidanegativadelabocinafrontalderecha
delradiodemercadosecundario.
• Conecteelcableverdeconlasalidapositivadelabocinaizquierdade atrásdelradio.
• Conecteelcableverde/negroconlasalidanegativadelabocinaizquierdade
atrásdelradio.
• Conecteelcablepúrpuraconlasalidapositivadelabocinaderechadeatrás
delradio.
• Conecteelcablepúrpura/negroconlasalidanegativadelabocinaderechade
atrásdelradio.
• Conecteelcableazul/blancoconelcabledeencendidodelamplificador.
• Conecteelcablemarrónalcabledesilenciodelradiodemercadosecundario.
Sielradiodemercadosecundarionotieneuncabledesilencio,encinteel
cablemarrón.
• Conecteelcable verde claroconelcabledelfrenodemanodelradiode
navegacióndemercadosecundario.
• Conecteelcableazul/rosaconelcableVSSodedeteccióndevelocidaddel
radiodenavegacióndemercadosecundario.
• Conecteelcableverde/púrpuraalcabledereversadelradioconnavegación
demercadosecundario.
• Conecteelarnésde16pinsenelGMOS-10.
desde el arnés GM de 20 pins:
• Conecteelcableamarilloalabateríade12voltiosoelcabledememoria
delradio.
• Conecteelcablenegroconelcabledepuestaatierradelradio.
• Conecteelarnésde14pinsenelGMOS-10.
Elcablenegro/amarilloesparaelajustedevolumendeOnStar.Estoseexplicará
enlasecciónAjustedelniveldeOnStardeesteinstructivo.
Instalación del GMOS-10
• Cuandoterminetodaslasconexionesenelradiodemercadosecundario,
conectelosarnesesde16y20pinsenlosarnesesdecablesdelvehículo.
• Reconectelaterminalnegativadelabatería.
• Ciclelallave,encendiendolaignicióndurante30segundos.Despuésapaguey
enciendadenuevoparaprobarelradio.
2
GMOS-10
Prueba del GMOS-10
1) Prendalaigniciónsinolohahecho,ydespuésprendaelradioparaprobarsi
funciona.Revisequefuncionenbienloscontrolesdebalanceeintensidad.
3) Conunpequeñodestornillador,ajusteelpotenciómetrohacialaderechapara
aumentarelniveldeaudioyhacialaizquierdaparadisminuirelniveldeaudio.
2) PresioneelbotóndeOnStar(silotiene)paraverificarqueOnStaresté
funcionando.Elradioseapagaráosepondráensilencio,dependiendodesiel
cablemarróndelarnésde16pinsestáconectado,yseescucharáOnStarpor
lasbocinasfrontales.ApagueOnStaryelradiosevolveráaprender.
4) Unavezquehayallegadoalniveldeseado,suajustedeaudioestácompleto.
ajuste del nivel de OnStar
ParaajustarelniveldelvolumendeOnstar,busqueelcable negro/amarilloenel
arnésde16pins.
ajuste del volumen de los tonos
Consulte el manual del propietario para ajustar el nivel de los tonos.
PresioneelbotónazuldeOnStarymientraslavozestéhablando,toqueelcable
negro/amarilloatierra.
ajuste del nivel de audio
HaycuatroajustesdevolumenparaOnStar;unavezquehayallegadoalcuarto
ajusteyqueelcablenegro/amarilloestéconectadoatierra,automáticamente
volveráalprimerniveldevolumen.
(El potenciómetro está localizado en el
lado de 16 pins de la interfase)
Unavezconfiguradoelvolumen,permaneceráaesenivelhastaqueelcable
amarillo/negrovuelvaatocarseatierra.Estopuedeajustarsedurantela
instalaciónyluegonovolveracambiarse.
1) Arranquesuvehículoyenciendael
radiomientrasreproduceaudio.
Sisedeseaqueelusuariopuedahacerajustes,elclientetambiénpuedepulsarel
botónquesubeobajaelvolumendesdeelvolante(siestáequipado)paraajustarel
niveldeOnStar.
2) Aumenteelvolumendelradiode
mercadosecundariohastallegara¾
delmáximonivel.
Potentiometer
3
INSTRUCCIONES DE INSTALACIÓN PARA LA PIEZA GMOS-10
adVERTENCia iMPORTaNTE
REV. 2/17/2014 INSTGMOS-10
Esteproductoincluyeinstruccionesdeinstalaciónquedebenseguirsecuidadosamente.
Dichasinstruccionesestánredactadasdandoporsupuestoqueelinstaladorescapazde
completarestostiposdeinstalacioneselectrónicas.Sitienedudasrespectodeloquese
leindicaquehagaocreequenocomprendelasinstruccionescomoparacompletarla
instalaciónenformaadecuadaysegura,debeconsultarauntécnicoqueefectivamente
tengaestosconocimientosycomprensión.
Si no sigue estas instrucciones con cuidado y no instala la interfaz como se
describe, podría provocar daños en el vehículo o en los sistemas de seguridad del
vehículo. la interferencia con determinados sistemas de seguridad también podría
provocar daños a las personas. Si tiene alguna pregunta al respecto, llame a la línea
de ayuda o a metra, al 1-800-221-0932 para obtener asistencia.
EL CONOCIMIENTO ES PODER
KMejoresushabilidadesdeinstalaciónyfabricación
NOWLEDGE IS POWER
Enhance your installation and fabrication skills by
enrolling
in the most recognized and respected
inscribiéndoseenlaescueladedispositivoselectrónicos
mobile
electronics school in our industry.
móvilesmásreconocidayrespetadadenuestra
Log onto www.installerinstitute.com or call
industria.Regístreseenwww.installerinstitute.como
800-354-6782 for more information and take steps
toward
a better tomorrow.
llameal800-354-6782paraobtenermásinformacióny
avancehaciaunfuturomejor.
Metra recomienda técnicos con
certificación del Programa de
Certificación en Electrónica Móvil
(Mobile Electronics Certification
Program, MECP).
METRA. The World’s best kits.™
1-800-221-0932
metraonline.com
© COPYRIGHT 2004-2013 METRA ELECTRONICS CORPORATION