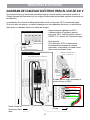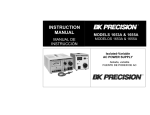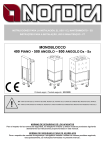
1
MANUAL DEL PROPIETARIO
Modelos de 110 V / 230 V
PARTE # 303556.14 REV. C (8/14)
MANUAL DEL PROPIETARIO PARA AquaTerra
Sistemas de 115 V / 230 V
Registro del propietario
Cómo localizar el número de serie del spa:
La etiqueta del número de serie del spa se encuentra en la cubierta de la caja de control en el
interior del compartimiento del equipo. El panel de acceso del compartimiento del equipo está
debajo del panel de control superior de los cuatro botones del spa. Necesitará el modelo de spa y
el número de serie para registrar correctamente el spa y activar la garantía Escriba la información
del spa en el espacio proporcionado.
FECHA DE COMPRA:
COMPRADO A:
MODELO DE SPA:
NÚMERO DE SERIE:
Lea el "Manual del propietario" atentamente, ya que está diseñado para proporcionarle la
información que necesita para garantizar el uso seguro del spa.
IMPORTANTE: Watkins Manufacturing Corporation se reserva el derecho a cambiar las
especificaciones y/o el diseño sin notificarlo y sin ninguna obligación.
ESPECIFICACIONES DEL SPA
Modelo
Colocación
del spa
Milano II
Transport™ II
Toscano II
Verona
Benicia
7 personas
5 personas
3 personas
7 personas
4 personas
Longitud Ancho
6'8½"
6'3"
6'
6'9"
5'8"
6'8½"
6'3"
6'
6'9"
5'
Altura
Peso seco
Especificaciones
eléctricas 60 Hz
34"
34"
31"
34"
32"
476 LBS.
424 LBS.
378 LBS.
440 LBS.
288 LBS.
230 V, 26 A,
110/230 V,11 (19)/26 A
110/230 V,11 (19)/26 A
110/230 V,11 (19)/26 A
110/230 V,11 (19)/26 A
PRECAUCIÓN
NO UTILICE EL SPA ANTES DE LEER ESTE MANUAL
No leer este manual y no seguir las instrucciones puede hacer que el funcionamiento sea poco
seguro y causar daños permanentes al spa portátil.
La mayoría de las ciudades, condados, estados y países requieren permisos para la construcción
externa y circuitos eléctricos. Además, algunas comunidades han adoptado normas que requieren
barreras residenciales, tales como vallas y / o puertas de cierre automático en la propiedad para
evitar el acceso sin vigilancia de los niños a una piscina o spa. Asegúrese de consultar a sus
agencias locales con respecto a los requerimientos específicos.
Si necesita información adicional y/o asistencia, comuníquese con el Servicio al Cliente al
001 855 671 3997 o a [email protected].
Gracias por elegir un spa AquaTerra. Visite nuestro sitio Web en www.AquaTerraspas.com.
ÍNDICE DE CONTENIDO
TÍTULO
PÁGINA
INFORMACIÓN SOBRE LA SEGURIDAD
INSTRUCCIONES IMPORTANTES SOBRE SEGURIDAD .....................................................................................................1
INSTRUCCIONES IMPORTANTES DEL SPA ...........................................................................................................................4
INSTALACIÓN
DÓNDE COLOCAR EL SPA ........................................................................................................................................................5
COLOCAR EL SPA .......................................................................................................................................................................6
ACCESO AL EQUIPO
ACCESO AL EQUIPO PANEL .....................................................................................................................................................7
REQUISITOS ELÉCTRICOS
REQUISITOS ELÉCTRICOS .......................................................................................................................................................8
SISTEMA DE CONFIGURACIÓN ...............................................................................................................................................9
DIAGRAMA DE CABLEADO ELÉCTRICO PARA EL USO DE 230 V ...................................................................................10
OPERACIÓN DEL PANEL DE CONTROL
REGULACIÓN DE LA TEMPERATURA (80 °F-104 °F) ..........................................................................................................11
FUNCIONAMIENTO DE LOS SURTIDORES ..........................................................................................................................11
LUZ LED MULTICOLOR ............................................................................................................................................................11
MODO DE FUNCIONAMIENTO ...............................................................................................................................................11
CICLOS PREESTABLECIDOS DE FILTRADO .......................................................................................................................12
PROTECCIÓN CONTRA EL CONGELAMIENTO ...................................................................................................................12
MENSAJE LC DE DIAGNÓSTICO ............................................................................................................................................13
FUNCIONAMIENTO DE LOS COMPONENTES
FUNCIONAMIENTO DE LOS COMPONENTES DEL SPA.....................................................................................................14
INSTRUCCIONES DE LLENADO Y PUESTA EN MARCHA
CÓMO LLENAR CON AGUA EL SPA .......................................................................................................................................15
CÓMO SUMINISTRAR ENERGÍA ............................................................................................................................................15
CÓMO AGREGAR LOS PRODUCTOS QUÍMICOS DE INICIO
GUÍA SOBRE PRODUCTOS QUÍMICOS DEL AGUA ............................................................................................................16
MANTENIMIENTO DEL SPA
MANTENIMIENTO DEL CARTUCHO DEL FILTRO ................................................................................................................17
CUIDADO DE LA SUPERFICIE ................................................................................................................................................18
CUIDADO DE LA CUBIERTA ....................................................................................................................................................18
CUIDADO DEL GABINETE .......................................................................................................................................................18
REEMPLAZO DE LA LUZ LED DEL SPA .................................................................................................................................18
VACIADO O ACONDICIONAMIENTO PARA EL INVIERNO
VACIADO DEL SPA ....................................................................................................................................................................19
ACONDICIONAR EL SPA PARA EL INVIERNO ......................................................................................................................19
PROCEDIMIENTOS DE SOLUCIÓN DE PROBLEMAS
NO FUNCIONAN LOS COMPONENTES ................................................................................................................................20
LA BOMBA NO FUNCIONA, PERO LA LUZ SÍ ........................................................................................................................20
MAL FUNCIONAMIENTO DE LOS SURTIDORES .................................................................................................................20
EL AGUA ESTÁ DEMASIADO CALIENTE ...............................................................................................................................20
PIEZAS DE RECAMBIO
PIEZAS DE RECAMBIO DEL SPA.............................................................................................................................................21
INFORMACIÓN SOBRE LA SEGURIDAD
INSTRUCCIONES IMPORTANTES SOBRE SEGURIDAD
LEA Y SIGA TODAS LAS INSTRUCCIONES
EVITE CUALQUIER TIPO DE RIESGO PARA LOS NIÑOS
PELIGRO:
• RIESGO DE QUE LOS NIÑOS SE AHOGUEN. Extreme las precauciones para evitar el acceso no
autorizado de los niños. Para evitar accidentes, asegúrese de que los niños no puedan utilizar el
spa a menos que estén bajo total vigilancia.
ADVERTENCIA:
• Para reducir el riesgo de lesiones personales, no permita que los niños utilicen el spa a menos que
estén bajo total vigilancia.
• Para reducir el riesgo de lesiones, se recomienda disminuir la temperatura del agua para los niños
pequeños. Los niños son particularmente sensibles al agua caliente.
QUÉ SE DEBE HACER:
• Para mayor seguridad, asegúrese siempre de bloquearlos cierres a prueba de niños después
de utilizar el spa. Todos los spas están equipados con una cubierta de cierre que cumple con la
normativa para cubiertas de seguridad ASTM F1346-91.
• Toque el agua con la mano para asegurarse de que esté a una temperatura adecuada antes de
permitir que los niños entren en el spa. Los niños son particularmente sensibles al agua caliente.
• Recuerde a los niños que las superficies mojadas son muy resbaladizas. Asegúrese de que tengan
cuidado al entrar y al salir del spa.
QUÉ NO HACER:
• No permita que los niños se suban a la cubierta del spa.
• No deje que los niños tengan acceso al spa sin vigilancia alguna.
CÓMO EVITAR EL RIESGO DE ELECTROCUCIÓN
Riesgo de electrocución
• Conecte solo a una fuente de electricidad con toma a tierra.
• No entierre el cable de suministro eléctrico. Un cable de suministro eléctrico enterrado puede
provocar la muerte o graves daños personales debido a una electrocución, en el caso de que no se
utilice un cable especial o se excave inadecuadamente.
• Se incluye una terminal de tierra (conector de cable de presión) en la caja de control que se
encuentra dentro de la unidad para que se pueda conectar a un conductor de enlace de cobre
sólido, mínimo del nº 10 AWG entre ese punto y cualquier otro equipo de metal, así como una
tubería de agua de metal, cajas de metal para equipo eléctrico y un conducto que deberá colocarse
a una distancia de cinco pies (1,5 m) o menos de la unidad, según sea necesario para cumplir las
normas de la localidad.
ADVERTENCIA:
• Para disminuir el riesgo de descarga eléctrica, sustituya cualquier cable dañado inmediatamente. No
hacerlo podría causar la muerte o graves daños personales debido a una electrocución.
• El spa de 11 voltios cuenta con un interruptor de circuito de fallo a tierra para proteger al usuario y
al equipo. Para garantizar el funcionamiento apropiado de este importante dispositivo de seguridad,
realice una prueba de acuerdo con las siguientes instrucciones según la configuración eléctrica.
1
INFORMACIÓN SOBRE LA SEGURIDAD
110 VOLTIOS, MODELOS CONECTADOS POR CABLE:
• El GFCI se ubica en el extremo del cable de la corriente. Antes de usar, y con la unidad en funcionamiento, pulse el botón PRUEBA (TEST) de cada disyuntor. La unidad debe dejar de funcionar y el
indicador de encendido GFCI se apagará. Espere 30 segundos y luego reinicie el GFCI pulsando el
botón REINICIAR (RESET). El indicador de encendido GFCI se encenderá para restablecer la energía
al spa. Si el interruptor no funciona de esta manera, puede haber un problema eléctrico y la posibilidad
de una descarga eléctrica. Desconecte la corriente hasta que el problema se haya solucionado.
NOTA: esto reiniciará el ciclo de filtrado.
230 VOLTIOS, MODELOS CONVERTIDOS:
• Se proporciona una terminal a tierra en la caja de control. A fin de reducir el riesgo de una descarga
eléctrica, conecte esta terminal a la terminal a tierra del suministro de electricidad o al subpanel con
un cable continuo verde de cobre con aislamiento. La medida del cable debe ser equivalente a los
conductores de circuito que alimenten al equipo. Además, se proporciona una terminal de unión (conector
de cable de presión) en el exterior de la caja de control para unirse con los puntos de tierra locales. A fin
de reducir el riesgo de una descarga eléctrica, este conector debe unirse con un cable de cobre sólido
nº 8 AWG (8,4 mm²) a cualquier escalera de metal, tubería de agua u otro metal que se encuentre dentro
de una distancia de 5 pies (1,5 metros) del spa con el fin de cumplir los requisitos locales. Los medios de
desconexión deben quedar accesibles, pero deben instalarse por lo menos a 5 pies (1,5 m) del spa.
• El spa necesita un disyuntor de capacidad adecuada para abrir todos los conductores de suministro
sin conexión a tierra.
• El spa cuenta con un interruptor de circuito de fallo a tierra en un subpanel eléctrico. Antes de usar el
spa cada vez, y con la unidad en funcionamiento, pulse el botón PRUEBA (TEST) en el disyuntor. El
interruptor debe volver a la posición "Desconexión" ("Trip"). Espere 30 segundos y vuelva a ajustar el
interruptor GFCI. Para ello, apáguelo y enciéndalo completamente. El interruptor debe quedar en la
posición de encendido. Si el interruptor no funciona de la manera explicada quiere decir que hay un
fallo eléctrico y que existe la posibilidad de que se produzca una descarga eléctrica. Desconecte la
corriente y no la vuelva a conectar hasta que se identifique y corrija la anomalía.
IMPORTANTE: si no espera 30 segundos antes de reiniciar el GFCI, el indicador de encendido del
spa (en el panel de control) parpadeará. Si esto sucede, repita la comprobación del GFCI.
PELIGRO: RIESGO DE DESCARGA ELÉCTRICA
• Instale el spa a un mínimo de 5 pies (1,5 m) de distancia de cualquier superficie metálica. El spa
puede instalarse dentro de una distancia de 5 pies (1,5 m) de una superficie metálica si esta se
encuentra permanentemente conectada a un conductor de cobre sólido nº 10 AWG, conectado
a un conector de toma a tierra en la caja de terminales que se proporciona para dicho fin, de
conformidad con el Código Nacional de Electricidad ANSI/NMFPA70-1993.
• No deje ningún aparato eléctrico, como luces, teléfonos, radios o televisores a 5 pies (1,5 m) o
menos del spa. No mantener la distancia de seguridad podría causar la muerte o graves daños
personales, debido a una electrocución, en el caso de que el aparato eléctrico caiga dentro del spa.
• Instale el spa de forma que el desagüe esté alejado de cualquier compartimiento o componente eléctrico.
QUÉ HACER:
• Asegúrese de que su spa esté conectado a la red eléctrica correctamente. Contrate los servicios de
un electricista autorizado.
• Contrate los servicios de un electricista autorizado. Desconecte el spa antes de vaciarlo o de
reparar cualquier componente eléctrico.
• Compruebe que el/los GFCI funcione(n) antes de cada uso.
2
INFORMACIÓN SOBRE LA SEGURIDAD
QUÉ SE DEBE EVITAR:
• No utilice el spa sin la puerta del compartimiento del equipo.
• No coloque los aparatos eléctricos a 5 pies (1,5 m) del spa.
• No utilice una extensión para conectar el spa a la fuente de corriente. La extensión podría no estar
conectada a tierra debidamente, lo que representaría un peligro de descarga eléctrica. Un cable
alargador podría provocar una caída del voltaje, causando un posible sobrecalentamiento de la
bomba de surtidores y daños en el motor.
• No intente abrir la caja de control eléctrica. En su interior no hay componentes reparables.
RIESGOS A EVITAR
PELIGRO: RIESGO DE LESIÓN
• NO se siente en el área del compartimiento del filtro. Sentarse en esta área puede causar:
a) Merma de función de la bomba de succión/vacío
b) Daño en los componentes
• Ambos podrían causar lesiones al cuerpo. En caso de que se produjeran daños en los componentes
de dicha área, reemplácelos de inmediato!
Para reducir el riesgo de daños físicos, NO retire el vertedero flotante, la canastilla ni el filtro situados en el compartimiento del filtro mientras el spa esté en funcionamiento.
• Los accesorios de succión del spa están diseñados para ajustarse al caudal de agua específico
creado por la bomba. Nunca reemplace los accesorios de succión con accesorios que tengan una
capacidad menor de velocidad de flujo de la marcada en el accesorio de succión original.
• Existe el riesgo de resbalar y caer. Recuerde que las superficies mojadas son resbaladizas. Tenga
cuidado al entrar y salir del spa.
• Nunca haga funcionar el spa si faltan o están rotos los accesorios de succión.
• El spa no debe ser utilizado por personas con enfermedades contagiosas.
• Mantenga las prendas de vestir sueltas y los artículos de joyería colgantes alejados de los
surtidores rotatorios o de cualquier otro componente móvil.
Aumento de los efectos secundarios de las medicinas
• La ingestión de drogas, alcohol o medicación antes o durante la utilización del spa puede llevar a la
inconsciencia, con la posibilidad de ahogamiento.
• Aquellas personas que tomen medicamentos deben consultar con un médico antes de utilizar cualquier
spa; algunos medicamentos pueden provocar somnolencia al usuario, mientras que otros pueden
afectar el ritmo cardíaco, la presión y la circulación sanguínea.
• Aquellas personas que toman medicamentos que puedan producir somnolencia, como los
tranquilizantes, antihistamínicos o anticoagulantes, no deben utilizar el spa.
Estados de salud que pueden verse afectados por el uso del spa
• Las mujeres embarazadas deben consultar a un médico antes de utilizar el spa.
• Aquellas personas que sufran de obesidad o que tengan un historial médico de enfermedades
coronarias, presión sanguínea alta o baja, problemas del sistema circulatorio o diabetes, deben
consultar a un médico antes de utilizar el spa.
Agua sucia
• Mantenga el agua limpia y desinfectada con los productos químicos adecuados. Los niveles
recomendables para su spa son:
cloro liberado disponible(FAC): 3,0-5,0 ppm
Alcalinidad total:
80 - 120 ppm
pH del agua:
7,2 - 7,8
Dureza del agua:
100- 250 ppm
IMPORTANTE: Encienda la bomba de surtidores durante un mínimo de diez minutos después de
AÑADIR cualquier producto químico al agua del spa en el interior de compartimiento del filtro.
• Limpie el cartucho de filtrado mensualmente para eliminar la suciedad y la acumulación de
3
INFORMACIÓN SOBRE LA SEGURIDAD
minerales que pueden afectar el rendimiento de los surtidores de hidromasaje, limitar el caudal, o
desconectar el termostato de límite máximo, lo que apagará el spa.
CÓMO EVITAR EL RIESGO DE HIPERTERMIA
La inmersión prolongada en agua caliente podría producir HIPERTERMIA, que es un trastorno peligroso
que se da cuando la temperatura interna del cuerpo alcanza un nivel por encima de lo normal (98,6 °F, 37
ºC). Los síntomas de la hipertermia incluyen la falta de conciencia del peligro inminente, incapacidad de
percibir el calor, incapacidad de reconocer la necesidad de salir del spa, incapacidad física para salir del
spa, daños fetales en mujeres embarazadas y pérdida del conocimiento que podría llevar al ahogamiento.
ADVERTENCIA:
El consumo de alcohol, drogas o medicamentos puede aumentar en gran medida el riesgo de
hipertermia mortal en bañeras de hidromasaje y spas.
CÓMO REDUCIR EL RIEGO DE LESIONES PERSONALES:
• El agua del spa nunca debe superar los 104 °F (40 °C). La temperatura del agua entre 100 °F (38 °C) y 104
°F (40 °C) se considera segura para un adulto sano. Se recomiendan temperaturas más bajas para un uso
prolongado (más de 10 minutos) y para los niños pequeños. El uso prolongado puede provocar hipertermia.
• Las mujeres embarazadas, o que sospechen que pueden estarlo, deben limitar la temperatura del
agua del spa a 100 °F (38 °C). No hacerlo podría suponer daños graves permanentes para el bebé.
• No utilice el spa inmediatamente después de realizar ejercicio extenuante.
PARA EVITAR EL RIESGO DE QUEMADURAS EN LA PIEL:
• Para reducir el riesgo de lesiones, antes de entrar al spa, el usuario debe medir la temperatura del
agua con un termómetro que funcione con precisión.
• Toque el agua antes de entrar en el spa para asegurarse que esté agradable.
SEÑAL DE SEGURIDAD
LETRERO DE SEGURIDAD dentro del paquete del propietario. El letrero se requiere como condición para
el Listado de productos y debe instalarse permanentemente en un lugar visible a los usuarios del spa.
INSTRUCCIONES IMPORTANTES DEL SPA
El siguiente apartado contiene información importante sobre el spa; insistimos en la importancia
de que la lea y la ponga en práctica.
QUÉ HACER:
• Use y cierre (bloquee) la cubierta de vinilo cuando no utilice el spa, tanto si está vacío, como si está lleno.
• Siga las recomendaciones de cuidado y mantenimiento del spa que se ofrecen en este manual.
• Utilice solamente accesorios autorizados y productos químicos y de limpieza recomendados para su spa.
QUÉ SE DEBE EVITAR:
• Dejar el spa expuesto a la luz solar sin agua en su interior o sin la cubierta vinílica colocada. La
exposición directa a la luz del sol puede provocar daños en los materiales del casco.
• No ruede ni deslice el spa sobre los costados. Esto dañaría el revestimiento exterior.
• Elevar o arrastrar la cubierta tirando de las correas de cierre de la cubierta. Siempre eleve o arrastre
la cubierta utilizando sus tiradores.
• No intente abrir la caja de control eléctrica. En su interior no hay componentes reparables. Si
el propietario abre la caja de control, la garantía queda anulada. Si detecta algún problema de
operación, siga detenidamente los pasos descritos en la sección Solución de problemas. Si no es
capaz de resolver el problema, consulte a su distribuidor autorizado. Muchos problemas pueden ser
fácilmente diagnosticados mediante una llamada al técnico de servicio autorizado.
4
INSTALACIÓN
DÓNDE COLOCAR EL SPA
Tenga en cuenta estas cosas al determinar dónde colocar su spa.
LA SEGURIDAD ES PRIMORDIAL:
Asegúrese de que el spa está situado de modo tal que el acceso al compartimiento del equipo
y a los paneles laterales no se bloquee. Asegúrese de que la instalación cumpla con todas las
normas y requisitos de seguridad local y de la ciudad.
USO PREVISTO DEL SPA:
Determinar cómo planea utilizar el spa le ayudará a decidir dónde debe colocarlo. Por ejemplo, ¿lo
utilizará más con fines recreativos o terapéuticos? Si el spa es principalmente para disfrute familiar, deje espacio suficiente a su alrededor para actividades y muebles de jardín. Si lo va a usar
más para relajación y terapia, es probable que quiera crear cierta privacidad alrededor del spa.
PRIVACIDAD:
Piense en su entorno durante las cuatro estaciones del año para determinar las mejores opciones
de privacidad. Tenga en cuenta a sus vecinos cuando planiique la ubicación de su spa.
VISTAS:
Piense en la dirección en la que mirará al sentarse en su spa. ¿Hay algún paisaje especial que
le resulta agradable? Tal vez haya una zona que tenga una suave brisa durante el día o una
hermosa puesta de sol a la tarde.
MEDIO AMBIENTE:
Si usted vive en un clima con nieve en el invierno y veranos calurosos, es conveniente contar
con un lugar para cambiarse de ropa o una entrada a la casa cerca del spa. Un clima más cálido
puede requerir sombra para protegerse del sol. Considere colocar árboles, arbustos, una cubierta
de patio o tal vez un cenador para proporcionar lo que necesita. Las instalaciones interiores
requieren una ventilación adecuada. Cuando el spa está en uso, se produce una cantidad
considerable de humedad. Esta humedad puede dañar las paredes y el cielorraso con el tiempo.
Existe una pintura especial para resistir los daños causados por la humedad. Recuerde que los
spas requieren periódicamente de desagüe, por lo tanto, planifique el entorno en consecuencia.
MANTENER LIMPIO:
Evite ingresar al spa con los pies sucios o con césped utilizando senderos y áreas de acceso de
cemento. Compruebe la ubicación de los derrames de alcantarillas, árboles y arbustos.
ACCESO AL SERVICIO:
Muchas personas optan por instalar azulejos o madera a medida alrededor del spa. Si instala
el spa con un borde decorativo a medida, recuerde que debe permitir el acceso al spa para su
reparación. Si necesita servicio técnico, es posible que el técnico deba quitar el panel de la puerta
del spa, o acceder a este desde abajo. Siempre es mejor diseñar instalaciones especiales para
que el spa se pueda mover o levantar del suelo.
UNA BUENA BASE:
Su nuevo spa necesita una buena base sólida. El área donde se asiente el spa debe ser capaz
de soportar el spa, el agua y los que lo utilizan. Si la base no es adecuada, se puede mover o
asentar después de que el spa esté colocado causando presión en el casco o componentes.
NOTA: no se recomienda colocar cuñas en el spa ya que podrían deformar la cabina, anulando
de esta manera la garantía.
5
INSTALACIÓN
TENGA EN CUENTA:
Los daños causados por el apoyo inadecuado o incorrecto de la base no están cubiertos por la
garantía. Es responsabilidad exclusiva del propietario del spa proporcionarle una base adecuada.
Asegúrese de que la base donde se coloca el spa drene el agua del spa. El drenaje adecuado
mantendrá a los componentes aislados de la lluvia y el tiempo húmedo.
Siempre se debe tener en cuenta el peso del spa al instalarlo. Si lo va a instalar sobre una plataforma de madera elevada u otra estructura, es aconsejable consultar a un ingeniero o contratista
para garantizar que la estructura puede soportar el peso.
SE RECOMIENDA ENFÁTICAMENTE QUE UN CONTRATISTA CALIFICADO Y HABILITADO
PREPARE LAS BASES DE SU SPA.
Se recomienda una plataforma de concreto de un mínimo de cuatro pulgadas de espesor para su
spa. Las varillas y mallas de refuerzo de la plataforma deben conectarse a un cable de unión.
INSTALACIÓN EN INTERIORES:
Asegúrese de cumplir con los siguientes requisitos especiales si desea instalar el spa en el interior
de su hogar. El agua se acumulará alrededor del spa, por lo que el piso debe ser de un material
que ofrezca un buen agarre aunque esté mojado. NOTA: El desagüe del balde de hielo en el spa
Monterey está diseñado para desagotar en la parte inferior exterior del spa. Por lo tanto, el agua
acumulada en la parte trasera del spa probablemente sea agua que drena del balde de hielo, y no
una fuga del spa. Es esencial un desagüe adecuado para evitar la acumulación de agua alrededor
del spa. Si construye una habitación nueva para el spa, es recomendable que coloque un desagüe
en el suelo. El nivel de humedad aumentará con la instalación del spa. El agua podría filtrarse en la
madera y provocar su putrefacción, la presencia de moho y otros problemas. Compruebe los efectos
que causa la humedad del aire sobre la madera, el papel, etc., en la habitación. Para minimizar estos
efectos, la mejor solución es disponer de la máxima ventilación en la zona donde se instale el spa.
Un arquitecto puede ayudar a determinar si es necesaria una ventilación suplementaria.
CÓMO COLOCAR EL SPA
VERIFIQUE LAS DIMENSIONES DEL SPA:
Compare las dimensiones de spa con el ancho de portones, veredas y puertas a lo largo del
recorrido que haría para llevar el spa en su patio. Es probable que necesite quitar alguna puerta
o parte de una cerca con el fin de movilizar la bañera sin obstáculos hasta el lugar de instalación.
Además, tenga en cuenta que si usted está utilizando un equipo especial para colocar el spa en
un área, será necesario incluir esas medidas y pesos.
CÓMO PLANIFICAR LA VÍA DE ENTREGA:
Verifique el ancho de portones, puertas y veredas para asegurarse de que el spa pase sin
obstrucciones. Es posible que tenga que quitar un portón o una parte de una cerca para permitir
el espacio suficiente. Si la vía de entrega requiere un giro de 90 grados, compruebe las medidas
en el lugar de giro para garantizar que el spa quepa. Compruebe que no sobresalgan los
medidores de gas, medidores de agua, A/C, etc., en su casa que causarán obstrucciones a lo
largo de la vía de entrega hacia su patio. Tenga en cuenta los aleros del techo, las ramas que
cuelgan o las canaletas, que podrían ser un obstáculo para la distancia en la parte superior.
CIRCUNSTANCIAS ESPECIALES:
El uso de una grúa para la entrega y la instalación es principalmente para evitar que el spa, su
propiedad o el personal de entrega sufran lesiones o daños. Nuestro Servicio al Cliente puede
ayudarle con los arreglos. El uso de grúas no se considera "entrega normal”.
6
ACCESO AL EQUIPO
PANEL DE ACCESO AL EQUIPO
Panel de control superior
Listón
Listón
Puerta del Panel de
Acceso al Equipo
Tornillo
Manguera de Desagüe
Hueco para Electricidad
Para acceder al compartimiento del equipo(si su spa tiene listones verticales):
• Retire 1 listón vertical y 3 tornillos a cada lado de la puerta del panel de acceso al equipo.
• Retire los 6 tornillos de la puerta del panel de acceso al equipo y luego retire la puerta.
• Retire los tornillos de la puerta ABS negra (si el spa tiene listones verticales) para acceder al
compartimiento del equipo.
Eléctrico
Acceso
Puerta ABS
negra
Grifo de la
manguera
Compartimiento del
equipo
7
REQUISITOS ELÉCTRICOS
REQUISITOS ELÉCTRICOS
¡NO ENCIENDA EL SPA SIN ANTES HABERLO LLENADO DE AGUA!
PELIGRO: RIESGO DE DESCARGA ELÉCTRICA
Las instalaciones que no cumplan con los siguientes procedimientos y requisitos pueden
exponer a los usuarios a una descarga eléctrica. Las instalaciones que no cumplan con los
procedimientos y requisitos no estarán cubiertas por la garantía.
Si se instala en los Estados Unidos, el cableado eléctrico de este spa debe cumplir con los requisitos del
Código Eléctrico Nacional (NEC) y los códigos estatales y locales aplicables. El circuito eléctrico debe ser
instalado por un electricista y estar aprobado por la autoridad de inspección eléctrica de construcción local.
1. Las instalaciones a menos de 5 pies de las superficies metálicas deben conectar a tierra las superficies
metálicas de la bañera. Utilice un cable de cobre sólido nº 8 AWG y conéctelo a la terminal de puesta a
tierra en la caja de control, ubicada en el compartimiento del equipo.
2. Únicamente un electricista autorizado puede instalar la conexión eléctrica del spa.
3. La instalación de la fuente de alimentación debe incluir un interruptor adecuado de circuito de fallo a
tierra (GFCI) tal como lo requiere el Artículo 680-42 del NEC. El interruptor debe ser propio y no debe
compartirse con otros aparatos eléctricos. Debe estar etiquetado y tener fácil acceso para los usuarios.
4. La corriente eléctrica para el spa debe incluir un interruptor adecuado o disyuntor para abrir todos los
conductores de corriente eléctrica sin conexión a tierra a fin de cumplir con la Sección 422-20 del Código
Nacional de Electricidad, ANSI / NFPA 70. El medio de desconexión debe ser de fácil acceso para los
ocupantes del spa, pero estar instalado por lo menos a 5 pies del agua del spa.
5. La red eléctrica de 230 V debe tener un cableado directo en la caja de control. NO USE cables
alargadores o de enchufes de ningún tipo. También se recomienda el uso de una caja de corte de
energía cerca de la bañera. Esta caja proporciona un método rápido y conveniente para apagar la
bañera en situaciones de emergencia y de mantenimiento.
6. Las líneas de suministro eléctrico deben ser de tamaño adecuado según el NEC. Se debe proporcionar
una línea a tierra que sea tan grande como la mayor corriente que transporte el conductor, pero no inferior a 8 AWG. Use únicamente cableado de cobre.
7. Abra la cubierta frontal de la caja de control y siga las instrucciones y el diagrama de circuito impreso en
la parte trasera.
8. Todos los modelos con alimentación 110 V deben
utilizar el cable de 15 pies provisto para el GFCI y
enchufarlo directamente a un tomacorriente de pared
exclusivo con conexión a tierra.
9. PRECAUCIÓN, SPAS ALIMENTADOS CON 230 V: Estos
spas deben tener un cableado directo únicamente a
la caja de servicio eléctrico de su casa. No use un
cable alargador ni ningún otro cable de alimentación
desconectable. ¡El uso de un cable alargador o
cualquier otro cable de alimentación desconectable es
sumamente peligroso y anulará todas las garantías!
• El tamaño del cable debe ser apropiado según el NEC
El acceso al equipo está debajo
y/o los códigos locales.
• El tamaño del cable se determina por la longitud del trayecto desde del panel de control superior.
la caja del interruptor al spa y la máxima generación de corriente.
• Se recomienda utilizar cables con núcleo de cobre THHN.
• Los cableados deben ser de cobre para garantizar las conexiones adecuadas. No utilice cables de aluminio.
8
REQUISITOS ELÉCTRICOS
CÓMO CONFIGURAR EL SISTEMA
SELECCIONE EL SUMINISTRO DE VOLTAJE PARA EL SPA
Su spa está diseñado para funcionar a un circuito de 110 V 15 amp; 110 V 30 amp, o 230 V 40 amp.
• Cuando el spa está configurado para 110 V 15 amp, el calentador proporciona aproximadamente 1000
vatios de calor solo cuando la bomba está funcionando en velocidad BAJA y el termostato indica que se
requiere calor (NOTA: el calentador no funciona cuando la bomba está en alta velocidad).
• Cuando el spa está conectado a 110 voltios 30 amperios, el calentador proporcionará aproximadamente
1000 vatios de calor cuando la bomba está funcionando en BAJA o ALTA velocidad y el termostato indica
que se requiere calor.
• Cuando el spa está conectado a 230 voltios, el calentador proporcionará aproximadamente 4000 vatios
de calor cuando la bomba está funcionando en BAJA o ALTA velocidad y el termostato indica que se
requiere calor.
Todas las conexiones eléctricas deben realizarse de acuerdo con la información de cableado que figura en la
tapa de la caja del control eléctrico.
INSTALACIÓN DE 110 VOLTIOS (CONECTADA AL CABLE)
Los spas vienen con un cable de alimentación para el GFCI instalado de fábrica y debe enchufarse en una
conexión a tierra en un receptáculo de 115 voltios, 15 amperios. Ningún otro aparato eléctrico o dispositivo
se puede utilizar en este circuito
IMPORTANTE: Bajo NINGUNA circunstancia use un cable alargador. El uso de un cable alargador reducirá seriamente el rendimiento del equipo y puede crear un peligro eléctrico.
110 VOLTIOS 30 A O 230 VOLTIOS 40 A (CONEXIÓN PERMANENTEMENTE AL CAMPO DE CONVERSIÓN)
• Una configuración de 110 voltios 30 amperios necesita runa caja de subpanel GFCI de 30 amperios
GFCI (no incluida).
• Una configuración de 230 voltios, 40 amperios necesitará una caja de subpanel GFCI de 40 amperios
(no incluida)
Cualquiera de este tipo de instalación debe realizarla un electricista titulado.
Caja de control de campo de conversión 110 V 30 A
Caja de control de campo de conversión 110/230 V
Rojo
Blanco
Negro
Verde
Subpanel
Para la conversión, quite el cable del bloque de
terminales y reemplácelo por cables blancos,
negros y verdes de 10# y conéctelos al subpanel
GFCi de 30 A.
Subpanel
Blanco
Negro
Verde
Para la conversión, cambie el puente de 230 V
pasándolo de P14 a P20 (véase más abajo). Para la
conversión, quite el cable del bloque de terminales y
reemplácelo por cables blancos, negros y verdes de 8#
y conéctelos al subpanel GFCi de 40 A.
IMPORTANTE: una vez conectado el spa a un campo de conversión de 110 V 30 A o 230 V 40, necesitará el
programa, de configuración. Pulse y mantenga los botones JETS durante 30 segundos para acceder a los
ajustes de nivel bajo (LL) en el panel de control. Utilice los botones +/- para cambiar el ajuste del nivel ajustado de
fábrica LL1 (sin calor concurrente ni bomba de alta velocidad) a la configuración LL2 (calor concurrente y bomba
de lata velocidad). Pulse el botón LIGHT durante 25 segundos para guardar el nuevo programa configurado.
9
REQUISITOS ELÉCTRICOS
DIAGRAMA DE CABLEADO ELÉCTRICO PARA EL USO DE 230 V
Se recomienda que un electricista autorizado haga la conexión eléctrica del spa de acuerdo al
Código Nacional de Electricidad y/o los códigos locales sobre electricidad vigentes al momento de
la instalación.
La instalación de la fuente de alimentación debe incluir un disyuntor GFCI nominal adecuado.
El circuito debe ser propio y no debe compartirse con otros aparatos eléctricos. La red eléctrica
debe tener un cableado directo a la fuente de energía.
Instrucciones de cableado de 230 V:
4 cables/mínimo 40 amperios para el
interruptor GFCI, cable de cobre mínimo n°
8 AWG 75 °C (menos de 100 pies de largo)
Carcasa de la caja de disyuntores
Nota especial:
Si el interruptor GFCI se desconecta
inmediatamente después de intentar
encenderlo, compruebe si el cable neutro
blanco está conectado al spa.
ROJO (CALIENTE)
NEGRO (CALIENTE)
VERDE
BLANCO
Botón de visualización de
G.F.C.I. (Casilla D)
G.F.C.I. Caja de disyuntores
Vista frontal de G.F.C.I. (Casilla D)
ROJO
(CALIENTE)
NEGRO
(CALIENTE)
VERDE (TIERRA)
BLANCO
CARGA
(ROJO)
El cable blanco neutro conectado al
neutro del spa va AQUÍ.
Rojo
Blanco
Negro
VERDE (TIERRA)
BLANCO
ROJO (CALIENTE)
CARGA
(NEGRO)
NEGRO (CALIENTE)
NEGRO (CALIENTE)
ROJO (CALIENTE)
BLANCO (NEUTRO)
VERDE (TIERRA)
BLANCO
Desde la caja de
disyuntores de la
casa
Verde
Al spa.
10
OPERACIÓN DEL PANEL DE CONTROL
MARCHA INICIAL - una vez que el spa se conecta por primera vez, el sistema de control
comienza el modo inicio a los dos minutos. La pantalla mostrará códigos diferentes. Una vez que
el modo Inicio se ha completado, verá en la pantalla la temperatura actual, el spa empezará a
calentar y mantener la temperatura del
Luces indicadoras
agua e iniciará el ciclo del primer filtrado.
El spa está diseñado para calentar el
agua automáticamente a la temperatura
establecida de fábrica de 100 °F a
menos que usted establezca una
temperatura diferente. Si se desconecta
el spa del suministro eléctrico,
cuando se vuelva a conectar, volverá
Luces Surtidores
Temp. Temp.
automáticamente a la última temperatura
Más
Menos
establecida antes de la desconexión.
REGULACIÓN DE LA TEMPERATURA (80°F-104°F/26°C-40°C)
La temperatura puede funcionar únicamente entre 80 °F - 104 °F / 26 °C - 40 °C. La última
temperatura medida se mostrará constantemente en el LCD.
Pulse los botones de más or menos para ver la temperatura ajustada y el indicador . Cada vez
que vuelva a pulsar alguno de los dos botones, la temperatura ajustada aumentará o disminuirá
dependiendo de qué botón pulse. Pasados cuatro segundos, el LCD mostrará automáticamente
la temperatura actual del spa.
El indicador “calentar”
se iluminará cuando el calentador esté activado. Si parpadea, indicará
que necesita más calor y que el calentador no está activado. El indicador se para en cuanto se
alcanza la temperatura ajustada y la velocidad baja de la bomba del surtidor se apaga pasados
30 segundos (si no está en el ciclo de filtrado).
FUNCIONAMIENTO DE LOS SURTIDORES
Pulse firmemente el botón Jets una vez para activar la baja velocidad de la bomba y una vez más
para la velocidad alta. Pulse firmemente el botón Jets nuevamente para apagar la bomba. Si deja
la bomba funcionando a baja o alta velocidad, se detendrá automáticamente después de 1 hora.
La luz del indicador "Jets" al lado del botón comenzará a parpadear cuando la bomba del surtidor
esté a baja y alta velocidad.
LUZ LED MULTICOLOR
Pulse el botón Light una vez para volver a iluminarlo. El indicador luminoso al lado de los botones
estará encendido mientras la luz lo esté. Pulse el botón nuevamente para apagar la luz. La luz se
apagará cada vez rápidamente y aparecerá un nuevo modo de luz. La secuencia es la siguiente:
blanco, rueda de color total lenta, rueda de colores ámbar azul, rojo, verde, púrpura azul/verde;
rueda de color rojo/verde y rueda de color rápido total. Volverá a mostrarse el último modo de
color utilizado si la luz se ha desconectado durante más de dos segundos.
NOTA: si la deja encendida, la luz se apagará automáticamente después de cuatro horas de
funcionamiento.
CICLOS DE FILTRADO
Hay dos ciclos de filtrado: el primero (F1) se inicia tras la conexión y el segundo (F2) 12 horas
después. La duración por defecto del primer ciclo es de una hora y de 30 minutos para el
segundo. Los ciclos de filtrado solo funcionan a baja velocidad. El indicador “filtro”
se iluminará
cuando el ciclo de filtrado esté activado. Puede modificarse la duración de cada ciclo de filtrado.
11
OPERACIÓN DEL PANEL DE CONTROL
AJUSTAR LOS CICLOS PREESTABLECIDOS DE FILTRADO
Puede programar la duración del filtrado entre 0 y 6 horas incrementándolo 30 minutos (media
hora) en ambos ciclos de filtrado. Para programar los tiempos del ciclo:
1. Pulse y mantenga el botón Light durante 5 segundos hasta que se muestre F1.
2. Pulse el botón más o menos para ajustar el tiempo del ciclo para F1.
3. Pulse el botón Light para guardar el ciclo F1 y pasar al ciclo F2.
4. Pulse el botón más o menos para ajustar el tiempo del ciclo para F2.
5. Espere 15 segundos para que el temporizador de salida finalice y almacene el ajuste.
IMPORTANTE: para restablecer el primer ciclo de filtrado a tiempo de inicio, omita el paso 5 y
siga pulsando el botón Light hasta que se muestre la temperatura actual. Si baja la potencia del
spa, también se restablecerá el tiempo de inicio del primer filtrado.
SUSPENSIÓN DEL CICLO DE FILTRADO: el ciclo de filtrado se suspenderá cada vez
que una bomba de surtidor o una luz se active manualmente durante dicho tiempo de filtrado. La
suspensión finalizará 10 minutos después de finalizar el manejo manual.
MODOS DE FUNCIONAMIENTO
El modo estándar es el modo de funcionamiento predefinido por defecto de fábrica. Para
poder poner a funcionar el programa del spa en modo económico, debe introducir el modo de
programación que implementa el cambio.
MODO ESTÁNDAR: está programado para mantener la temperatura deseada
MODO ECONÓMICO: el spa se calentará normalmente durante el ciclo de filtrado y fuera de
él, el punto de ajuste de temperatura bajará a 20°F. Para entrar en la pantalla de programación y
cambiar entre el modo estándar y el económico, deberá realizar lo siguiente:
1. Pulse y mantenga el botón Light durante 5 segundos
2. Pulse el botón Light varias veces hasta que se muestre EP 0 o EP 1.
3. Utilice el botón más or menos para seleccionar el modo estándar o económico.
EP 0 = modo estándar y EP 1 = modo económico.
4. Espere 15 segundos para que el temporizador de salida finalice y almacene el ajuste.
MODO OFF: este modo le permite parar todas las funciones del spa durante 30 minutos si
necesita realizar un mantenimiento rápido del spa. Para poner el spa en MODO OFF, pulse y
mantenga el botón Jets durante 5 segundos. La pantalla alternará entre OFF y temperatura del
agua cuando esté en MODO OFF. Para parar el MODO OFF antes de completar el ciclo de 30
minutos, solo necesita pulsar brevemente el botón Jet.
AJUSTE FAHRENHEIT/CELSIUS
Para cambiar la visualización de la temperatura a grados Fahrenheit o Celsius, pulse y mantenga
el botón Light durante 5 segundos hasta que se muestre F1. Pulse el botón Light varias veces
hasta que vea F o C . Pulse el botón más o menos para cambiar. Espere 15 segundos para
que el temporizador de salida finalice y almacene el ajuste.
MODO INTELIGENTE INVIERNO
El modo invernal inteligente se utiliza para evitar que el agua se congele en las tuberías del spa.
En cuanto exista el riesgo de que esto suceda, se activa la protección La protección invernal
inteligente (SWM) solo se desconectará pasadas 24 horas sin riesgo de congelación. Durante
estas 24 horas, el indicador del modo invernal inteligente permanecerá encendido, y parpadeará
cuando la purga esté activa.
12
OPERACIÓN DEL PANEL DE CONTROL
MENSAJE DIAGNÓSTICO EN LCD
Mensaje Significado
Ningún mensaje en la pantalla.
Se ha cortado la conexión eléctrica
del spa.
HL
El sistema ha desconectado el calentador porque este ya alcanzado los
122°F (50°C). ¡No entre en el agua!
AOH
PRR
SC
La temperatura dentro del
compartimiento del equipo es
demasiado alta 194º F (90°C), lo que
ocasiona que la temperatura interna
del sistema de control aumente por
encima de los límites normales.
Se ha detectado un problema con la
prueba de temperatura.
La temperatura del agua del spa ha
alcanzado los 108°F (42°C). ¡No entre en el agua!
Acción requerida
El panel de control se desactivará hasta que
vuelva la energía. Los ajustes del spa se
mantendrán hasta que vuelva a encenderse.
NO ENTRE EN EL AGUA. Quite la cubierta
del spa para que el agua se enfríe y luego
desconecte la corriente y vuelva a conectarla
para restablecer el sistema.
Si el spa no se reajusta, cierre la alimentación
eléctrica del spa y llame al Servicio al Cliente.
Abra el compartimiento del equipo y espere a
que se solucione el fallo.
Llame a su vendedor o proveedor de servicios.
Quite la cubierta del spa para que el agua pueda bajar de temperatura. Llame a su vendedor o proveedor de servicios.
UPL
El sistema no cuenta con un software Llame a su vendedor o proveedor de servicios.
de configuración de bajo nivel.
FLO
El sistema de control no detecta flujo
de agua cuando se espera que se
produzca uno.
Asegúrese de que la bomba de surtidor está
funcionando y que el agua fluye; compruebe y
limpie los filtros y que el spa tenga el nivel de
agua apropiado. Si el problema persiste, llame
a su vendedor o proveedor de servicios.
¡Advertencia! ¡Peligro de descarga eléctrica! No hay componentes que el usuario
pueda reparar.
No intente reparar la caja de control. Comuníquese con el Servicio al Cliente para recibir
asistencia. Siga todas las instrucciones del Manual del propietario para la conexión de
alimentación. La instalación la debe realizar un electricista autorizado y todas las conexiones a
tierra deben estar correctamente instaladas.
¡ADVERTENCIA! NO ENTRE AL SPA SI EL AGUA ESTÁ DEMEDIADO CALIENTE
El agua está demasiado caliente. La protección contra el sobrecalentamiento del calentador
está desactivada. La temperatura del agua del spa supera los límites aceptables. Cuando la
temperatura real del agua es de aproximadamente 2 ºF (1 ºC) por encima de la temperatura
establecida, la bomba de los surtidores dejará de funcionar para reducir la calefacción (fricción).
Si la temperatura del agua del spa sigue aumentando y sube por encima de 108 ºF (42 ºC), el spa
entrará en un estado de sobrecalentamiento "SC".
13
FUNCIONAMIENTO DE LOS COMPONENTES
FUNCIONAMIENTO DE LOS COMPONENTES DEL SPA
VÁLVULA DE CONTROL DE AIRE
La válvula de control de aire sirve para regular la cantidad de aire mezclado con el agua
cuando los surtidores están funcionando. Gire las válvulas de control del aire en una dirección
y aumentará la acción del surtidor. Gire el control del aire en la dirección opuesta para apagar
el aire y permitir que los surtidores trabajen sólo con agua. Apague los controles de aire cuando
el spa no está en uso; esto evitará que el aire frío entre al spa y mantendrá los costos de
calefacción al mínimo. El surtidor de ozono siempre producirá burbujas de aire cuando la bomba
esté encendida.
VÁLVULA DESVIADORA (CUANDO ESTÁ EQUIPADA)
La válvula de desvío del spa le permite dirigir el caudal del agua desde la bomba a una de las
combinaciones de surtidores. La función de la válvula desviadora se puede aprender mejor con
la experimentación. Gire completamente la válvula a un lado para ver dónde están los surtidores
y luego gírela hacia el otro totalmente para ver qué surtidores está afectados. (Para obtener la
presión de surtidor que más le agrade, puede ajustar la válvula de desvío a cualquier posición
entre sus dos extremos).
IMPORTANTE: su spa no está diseñado para proporcionar una potencia total a todos los
surtidores cuando las válvulas de desvío están en posición "media". No obstante, con la válvula
de desvío en dicha posición, puede aumentar la potencia de los surtidores seleccionados
mediante la rotación de los surtidores de hidroterapia y cerrando los que no se estén utilizando.
SURTIDORES DE HIDROTERAPIA
Los surtidores de hidroterapia están empotrados en la pared del spa. Rote los frontales medios
del surtidor para conectar o desconectar los surtidores. Encender o apagar un surtidor hará que
aumenten o disminuyan los efectos de los surtidores que no están cerrados.
GENERADOR DE OZONO (OPCIONAL EN TOSCANO)
El sistema de ozono de alto rendimiento mejora la calidad del agua cuando se utiliza como
complemento del programa habitual de mantenimiento del propietario del spa. Contrariamente a
algunas informaciones que circulan en el sector respecto de los sistemas de ozono, el ozono NO
PUEDE utilizarse como el único desinfectante, aclarador del agua, inhibidor de espuma ni agente
quelante de minerales. Debe utilizarse un segundo desinfectante para mantener un nivel de 3.0
- 5.0 ppm de cloro liberado disponible (FAC). Watkins Manufacturing Corporation recomienda
que se siga un programa de mantenimiento químico basado en los estándares reconocidos y
documentados de la industria, aunque también se utilice un sistema de purificación de ozono para
asegurar la desinfección del agua y una purificación de alta calidad.
CASCADA
El spa tiene una válvula de control para regular el caudal de la cascada que varía desde cero
caudal a caudal constante. Esta válvula se ubica al lado de la cascada. Nota: La válvula de
control de aire y la válvula de caudal de la cascada pueden tener el mismo aspecto y funcionar
del mismo modo; sin embargo, son componentes distintos.
14
INSTRUCCIONES DE LLENADO Y PUESTA EN MARCHA
Se deben seguir los siguientes procedimientos en el encendido inicial y cada vez que el spa se
vacíe para el mantenimiento de rutina.
CÓMO LLENAR CON AGUA EL SPA
1. Retire todos los desechos de su spa.
2. Asegúrese de abrir todos los surtidores para permitir que escape todo el aire posible de las
tuberías durante el proceso de llenado.
3. Introduzca una manguera de jardín
dentro del compartimiento del filtro
para llenar el spa.
NOTA: No use agua caliente ni blanda.
4. En tanto el nivel de agua aumenta,
verifique que no haya pérdidas
en el compartimiento del equipo.
Puede ser necesario ajustar las
uniones y/o los accesorios que
pueden haberse aflojado durante
el transporte. No hay necesidad de
llamar al Servicio al Cliente, esto
es muy fácil de hacer. Si necesita
asistencia, comuníquese con
un representante de Servicio al
Cliente llamando al (888) 961-7727,
extensión 8440
UNIONES
5. En circunstancias normales, mantenga el nivel de agua entre la parte superior del spa y la parte
superior del anillo gris del filtro o justo por encima de los surtidores más altos (el que sea mayor).
No mantener suficiente agua en el spa puede provocar daños en el sistema e invalidar su garantía.
Si el filtro del spa está aspirando aire, esto hace que la bomba cavite, ¡debe agregar agua!
6. Verifique la instalación del filtro y asegúrese de que el filtro no esté flojo.
CÓMO SUMINISTRAR ENERGÍA
1. Active el suministro eléctrico del spa desde el panel principal de la casa y en el subpanel.
2. Pulse el botón Jets en el panel de control superior para activar el spa. Gire todas las válvulas
de control de aire en sentido antihorario y observe el aumento de la acción de los surtidores
(aire mezclado con agua).
3. Mientras la bomba está funcionando, verifique nuevamente si hay fugas de agua en el grifo de
drenaje, uniones o accesorios en el compartimiento del equipo (se pueden haber producido
fugas durante el transporte). Si el agua se fuga por una de estas áreas, no hay necesidad
de llamar al servicio técnico. Simplemente ajuste el conector. Si necesita asistencia,
comuníquese con un representante de Servicio al Cliente llamando al (888) 961-7727,
extensión 8440
4. Después de verificar si existen fugas en el spa, es momento de ajustar las configuraciones del
spa. Pulse el botón más o menos en el panel de control superior hasta que la pantalla indique
que se estableció la temperatura deseada.
15
CÓMO AGREGAR LOS PRODUCTOS QUÍMICOS DE INICIO
GUÍA SOBRE PRODUCTOS QUÍMICOS DEL AGUA
Las siguientes instrucciones paso a paso son una guía recomendada para equilibrar la química del agua.
Si tiene dudas sobre algún paso del procedimiento, comuníquese con un empleado del Servicio al Cliente
al 001 855 671 3997 o por correo electrónico a [email protected].
En un primer lugar, se aconseja identificar los minerales (por ej., hierro) que están presentes en la fuente
de agua local. Esto le hará comprender mejor cómo tratar el agua. Siga los cuatro pasos siguientes y
asegúrese de lograr los niveles adecuados en cada área antes de pasar al próximo paso.
PASO 1: ESTABLEZCA EL NIVEL DE PH ADECUADO:
El rango recomendado de pH del agua del spa está entre 7.2 y 7.8. Si la lectura es demasiado alta,
baje el pH usando un reductor de pH (bisulfato sódico). Si necesita aumentar el nivel de pH, utilice
un incrementador de pH (hidrocarbonato sódico). Los productos para aumentar o reducir el pH deben
agregarse de a una cucharadita a la vez, esperar media hora entre las aplicaciones y volver a medir.
PASO 2: DETERMINAR LA ALCALINIDAD TOTAL:
El rango ideal es entre 80-120 partes por millón (PPM). Si la alcalinidad total es demasiado alta, debe
reducirla usando un reductor de alcalinidad (bisulfato sódico). Si la alcalinidad total es demasiado
baja, debe aumentarla usando un incrementador de alcalinidad (bisulfato sódico o hidrocarbonato
sódico). Estos productos deben agregarse en pequeñas cantidades: una cucharadita por vez. Luego
de agregar una cucharadita, espere media hora antes de volver a medir. Una vez que establezca el
rango seguro de alcalinidad total, siga con el siguiente paso.
PASO 3: DETERMINAR LA DUREZA DEL AGUA:
Es importante que la lectura del calcio esté entre 100-250 PPM. Si fuera necesario ajustar la lectura,
debe corregirse ahora. Si el agua es demasiado blanda (una lectura baja), se debe agregar dureza
al gua para aumentar la lectura de PPM. Si el agua es demasiado dura (una lectura alta), puede ser
corregida por medio de: (A) una mezcla de agua dura y blanda añadida para alcanzar una lectura en el
rango seguro, o (B) el agregado de control de manchas y óxido. Si la dureza del agua es un problema
de la fuente de agua local (ya sea, demasiado dura o demasiado blanda) es esencial contar con un kit
de prueba, que determina la dureza del agua.
PASO 4: DESINFECCIÓN
Luego de completar los pasos 1-3, se debe desinfectar el spa utilizando cloro (dicloro sódico).
Agregar 2 cucharaditas de cloro, aumentar en tanto sea necesario a fin de alcanzar el nivel de 3-5
ppm. Controle y mantenga este nivel semanalmente, y antes y después de utilizar el spa. NOTA
IMPORTANTE: Se recomienda el uso de dicloro sódico granulado para desinfectar el agua del spa.
Nunca use tabletas de tricloro sódico, ni siquiera con un suministrador flotante. Al igual que con
otros productos químicos, el desinfectante debe colocarse en el spa con los surtidores encendidos
durante un mínimo de 15 minutos.
CHOQUE SEMANAL:
Usar un choque de potasio monopersulfato (MPS), diseminar aproximadamente 2 oz. sobre el agua,
mientras que los surtidores están funcionando. El tratamiento de choque se logra agregando el MPS
al agua turbulenta. Deje la cubierta tapada y ponga los surtidores al máximo durante 10 minutos.
Luego cierre los surtidores y vuelva a colocar la cubierta a la posición cerrada para mantener el calor.
Luego vuelva a colocar la cubierta a la posición cerrada para mantener el calor.
16
MANTENIMIENTO DEL SPA
MANTENIMIENTO DEL CARTUCHO DEL FILTRO
El cartucho del filtro se debe limpiar cada dos semanas para eliminar los objetos y partículas que
se han acumulado en los pliegues del filtro. Use la presión del agua doméstica y una manguera
de jardín con una boquilla a presión para empujar el agua desde el interior al exterior de los
pliegues, y forzar la salida de todas las partículas atrapadas. NOTA: ¡Nunca haga funcionar el spa
sin el cartucho del filtro! Esto invalidará la garantía.
NOTA: Los cartuchos de los filtros deben reemplazarse entre cada seis a ocho meses, o antes,
de ser necesario. Los filtros sucios pueden hacer que la bomba del spa se queme e invalide la
garantía.
INSTRUCCIONES PARA RETIRAR Y LIMPIAR EL CARTUCHO DEL FILTRO
El spa tiene un tornillo en el cartucho del filtro que se puede quitar fácilmente.
• Desconecte la alimentación eléctrica del spa (apagando el disyuntor del subpanel).
• Empuje ligeramente hacia abajo y gire el contador de la canastilla del filtro en sentido horario
para desbloquearlo, luego tire de la canastilla y del vertedero.
• Desenrosque el contador del cartucho del filtro y retírelo del spa (da varios giros).
• Enjuague el cartucho con una manguera de jardín. Gire y separe los pliegues del filtro
mientras los rocía con agua para eliminar toda la suciedad y los residuos posibles. Permita
que el filtro se seque y busque depósitos de calcio (oxidación) o una película de aceite. Si tal
es el caso, tendrá que limpiar el cartucho a fondo con una solución "limpiadora de filtros" para
descomponer y eliminar los depósitos y aceites no deseados. (Para una mayor duración del
filtro, debe remojarlo regularmente).
¡PRECAUCIÓN! Siempre use protección para los ojos cuando utilice productos químicos o
agua a alta presión. Lea las instrucciones de los productos de limpieza y siga las instrucciones
pertinentes de precaución y seguridad que aparecen en la etiqueta.
¡PRECAUCIÓN! Nunca frote el cartucho de filtro con un cepillo, ya que hará que el filtro se
desgaste y se rompa. Nunca deje que la bomba del spa funcione sin un cartucho de filtro en el
compartimiento del vertedero. ¡Hacer funcionar la bomba del spa sin un cartucho de filtro permite
que los residuos entren en las tuberías del spa y se anule la garantía!
• Reemplace el cartucho del filtro, luego vuelva a colocar la canastilla y el vertedero (inserte y
gire en el sentido horario hasta la posición de bloqueo). ¡NO AJUSTE DEMASIADO!
• Vuelva a encender el spa.
17
MANTENIMIENTO DEL SPA
CUIDADO DE LA SUPERFICIE
No utilice solventes ni limpiadores abrasivos para limpiar el spa. Por lo general, un detergente
suave y agua resuelven los temas de limpieza.
CUIDADO DE LA CUBIERTA
Mantenga la cubierta limpia en todo momento. Use un limpiador para cubiertas o agua tibia y
jabón suave para limpiar la superficie. No use productos en base a siliconas ya que secarán
y eventualmente producirán grietas en el vinilo. NOTA: No se pare sobre la cubierta en ningún
momento. Quite la cubierta cuando agregue productos químicos al spa. Esto prolongará la vida
de la cubierta. Los gases de los productos químicos quedarán atrapados debajo de la cubierta
si no se los elimina. Estos gases pueden erosionar el revestimiento protector de los interiores de
espuma. Esto no está cubierto por la garantía.
CUIDADO DE LA CABINA
Se necesita poco mantenimiento para que la cabina del spa luzca bien.
La cabina del spa se debe limpiar en tanto sea necesario para eliminar la suciedad y los residuos.
• NO debe usar productos químicos abrasivos o fuertes en la cabina del spa.
• NO debe usar solventes ni productos que contengan solventes aromáticos en la cabina del spa.
• La mejor elección para limpiar la cabina del spa es agua jabonosa caliente.
REEMPLAZO DEL LED DEL SPA
•
•
•
•
Desconecte la alimentación eléctrica del spa.
Retire la puerta de acceso del compartimiento del equipo.
Localice la parte posterior de la luz del spa.
Para quitar el tablero LED, gire el contador de la caja externa en sentido horario ¼ de giro, tire
y retire el tablero LED del enchufe.
• Reemplace invirtiendo los pasos anteriores.
18
VACIADO O ACONDICIONAMIENTO PARA EL INVIERNO
Se necesita renovar el agua cada tres a seis meses, dependiendo del estado del agua.
PRECAUCIÓN: LEA ESTO ANTES DE VACIAR EL SPA
• Para evitar que los componentes del spa se dañen, DESCONECTE EL CABLE GFCI O
APAGUE EL DISYUNTOR DEL SUBPANEL antes del vaciar el spa. No vuelva a encender
el spa hasta haberlo llenado de agua.
• Existen ciertas precauciones que debe tener en cuenta cuando vacíe su spa. Si está extremadamente
frío y el spa está en el exterior, es posible que las tuberías o el equipo estén congelados.
• No deje el casco del spa (superficie interior) expuesto a la luz solar directa.
VACIADO DEL SPA
• Si lo vacía por primera vez. Tire algunas pulgadas del grifo de la manguera desde el spa (que
se encuentra en el hueco debajo del spa, justo a la derecha y por debajo de la puerta de
entrada al equipo)
• Desenrosque y quite el tapón de drenaje.
• Conecte el grifo de la manguera a una manguera de jardín y directo
a un área de desagüe adecuada, manteniendo la manguera por
debajo de la línea del agua.
• Después de haber vaciado el spa, limpie el casco y el cartucho del
filtro. Consulte la sección "Mantenimiento del spa".
• Luego de la limpieza, retire la manguera de jardín, vuelva a colocar
el tapón de drenaje y empuje el grifo de la manguera de vuelta al hueco.
• Siga las "Instrucciones de llenado y puesta en marcha" en la página 15.
ACONDICIONE SU SPA PARA EL INVIERNO
Si planea guardar el spa en el invierno, también debe utilizar una aspiradora para líquidos para
limpiar las tuberías y asegurarse de que estén sin agua. El agua que quede en las tuberías se
puede congelar y dañar las tuberías y surtidores.
1. Es necesario retirar toda el agua del interior de las tuberías.
2. Retire el vertedero flotante, la canastilla y el cartucho del filtro. Limpie el cartucho del filtro y
guárdelo en un lugar seco. Fije la manguera de aspiración al lateral de aspiración del equipo
de aspiración y seque completamente el compartimiento del filtro.
3. Usando el equipo de aspiración, elimine el agua comenzando con los surtidores de la parte
superior y acabando con los de la parte inferior del spa. NOTA: Al extraer el agua de las
aberturas de los surtidores, puede que advierta la succión proveniente de otro surtidor. Con la
ayuda de una segunda persona, proceda a bloquear cualquier succión del resto de los surtidores
mediante un paño. Esto ayudará a extraer el agua que haya quedado dentro de la línea principal.
4. Seque cuidadosamente el casco del spa con una toalla limpia.
5. Con un embudo, vierta propilenglicolanticongelante en los accesorios de succión del filtro y en las
salidas de los surtidores. PRECAUCIÓN: Use únicamente propilenglicol como anticongelante.
El propilenglicol no es tóxico. NUNCA use anticongelante para automóviles, ya que es tóxico.
6. Retire el tapón de desagüe de la bomba situado en el frente de las cajas de la bomba. Permita un
desagüe completo. Coloque el tapón de desagüe en una bolsa de plástico que se pueda cerrar y
guárdelo cerca de la bomba. Vuelva a colocar los tapones de desagüe antes de encender el spa.
7. Destornille la bomba de succión y descarga y las uniones del calentador para permitir que el
agua se desagote. Deje las uniones flojas. NOTA: Ajuste las uniones antes de llenar el spa.
8. Vuelva a colocar la puerta del compartimiento del equipo y asegúrela con tornillos.
Nota: El daño provocado por el acondicionamiento inapropiado para el invierno no estará
cubierto por la garantía. Puede comunicarse con el Servicio al Cliente para obtener información
sobre el acondicionamiento adecuado para el invierno.
19
PROCEDIMIENTOS DE SOLUCIÓN DE PROBLEMAS
En el caso de que el spa no esté funcionando como debería, primero revise todas las
instrucciones de instalación y funcionamiento en este manual y compruebe el mensaje en
la pantalla del panel. Si aún no considera que esté funcionando correctamente, siga las
instrucciones para solucionar problemas.
¡PRECAUCIÓN! ¡ADVERTENCIA! ¡PELIGRO DE DESCARGA ELÉCTRICA! No hay
componentes que el usuario pueda reparar.
No intente reparar la caja de control. Comuníquese con Servicio al Cliente para recibir asistencia.
Siga todas las instrucciones del Manual del propietario para la conexión de alimentación.
NO FUNCIONAN LOS COMPONENTES
Verifique los siguientes puntos:
1. ¿El spa recibe alimentación eléctrica?
2. ¿El disyuntor doméstico está desconectado?
3. ¿El subpanel (230 V) o el cable GFCI (115 V) están conectados?
4. Si las posibilidades 1, 2 o 3 son afirmativas, comuníquese con el Servicio al Cliente para
recibir asistencia.
LA BOMBA NO FUNCIONA, PERO LA LUZ SÍ
Pulse el botón Jets:
La bomba funciona, pero los surtidores no reciben caudal de agua. Es posible que la bomba no
se haya puesto a punto en la forma debida. Esto puede suceder cuando el spa se ha vaciado y
vuelto a llenar. Pulse el botón Jets varias veces, nunca deje el motor encendido durante más de
5-10 segundos por vez sin que salga agua de los surtidores.
MAL FUNCIONAMIENTO DE LOS SURTIDORES
1. Pulse el botón Jets para asegurarse de que la bomba está encendida.
2. Gire todas las válvulas de control de aire en sentido antihorario y observe el aumento de la
acción de los surtidores.
3. Asegúrese de que el nivel del agua está a medio camino entre la parte superior del spa y la
parte superior del anillo del filtro gris.
4. Verifique que el filtro no esté sucio. Límpielo, de ser necesario.
5. Asegúrese de que todos los surtidores estén en la posición abierta (girar en sentido contrario a
las agujas del reloj).
EL AGUA ESTÁ DEMASIADO CALIENTE
1. Verifique la temperatura deseada en el control superior.
2. Verifique el Mensaje diagnóstico (en la sección Funcionamiento del panel de control).
SC- Sobrecalentamiento (el spa se desactiva) NO ENTRE EN EL AGUA DEL SPA
Si el spa se ha sobrecalentado, debe retirar la cubierta para facilitar la pérdida de calor. El sistema
de control del spa se reajusta por sí mismo cuando la temperatura se reduce por debajo de 104 ºF
o 40 ºC. Cuando el spa alcanza una temperatura inferior a la del reajuste, puede pulsar cualquier
botón del control superior para reajustar el sistema de control. Si el spa no se reajusta, cierre la
alimentación eléctrica del spa y llame al Servicio al Cliente al (888) 961-7727, extensión 8440.
En condiciones climáticas extremas y/o prolongadas, es posible que la temperatura ambiente supere
los 106 °F/41 °C, que afecta la temperatura del agua del spa y hace que se sobrecaliente. Estas
condiciones pueden hacer que los sensores del spa produzcan el mensaje SC y eviten el uso del spa
20
PROCEDIMIENTOS DE SOLUCIÓN DE PROBLEMAS
durante estas condiciones. Debe considerar la ubicación del spa para reducir la temperatura exterior
alrededor del mismo. Por ejemplo, es posible que necesite evitar la luz solar directa en las superficies
del spa. Independientemente de esto, no entre al spa si la temperatura supera los 104 °F.
Si luego de realizar los pasos anteriores, el problema sigue sin resolverse, comuníquese con el
Servicio al Cliente al (888) 961-7727, extensión 8440.
PIEZAS DE RECAMBIO
PARTES DE REEMPLAZO DEL SPA
NÚMERO DE PARTE
DESCRIPCIÓN
303279
FILTRO DEL SPA – 50 pies cuadrados Filtro
303530
EQUIPO
1431701-01
BOMBA DE 1,5hp (115 V, 2SPD)
1431601-04
BOMBA DE 3 CV (230 V, 2 SPD Milano II)
303535
PANEL DE CONTROL DE 4 BOTONES
303540
PLANTILLA DEL PANEL DE CONTROL SUPERIOR
303298
VERTEDERO REDONDO DEL FILTRO
303299
CANASTILLA DEL VERTEDERO DEL FILTRO
303445
SURTIDOR VORTEX
303443
SURTIDOR DE 7 PUERTOS
303307
LUZ LED MULTICOLOR
77190
JUEGO DE OZONO PARA Toscano II
(INCLUYE TODOS LOS MATERIALES)
303574
OZONADOR
303205
TAPA DE FILTRO (LG. 11 ¼", Transport II,
Toscano II)
21
REPLACEMENT PARTS
REPLACEMENT SPA PARTS
FILTER LID (LG. 11 ¼", Transport II, Toscano II)
303205
OZONATOR
303574
OZONE KIT FOR Toscano II
(INCLUDES ALL MATERIALS)
77190
LED MULTI-COLOR LIGHT
303307
7-PORT JET
303443
VORTEX JET
303445
FILTER BASKET SKIMMER
303299
ROUND FILTER WEIR
303298
TOPSIDE CONTROL PANEL OVERLAY
303540
4 BUTTON CONTROL PANEL
303535
3.0 Hp PUMP (230V, 2SPD Milano II)
1431601-04
1.5 Hp PUMP (110V, 2SPD)
1431701-01
EQUIPMENT PACK
303530
SPA FILTER – 50sq. ft. Filter
303279
DESCRIPTION
PART NUMBER
21
TROUBLESHOOTING PROCEDURES
In the event the spa is not working the way it should, please first review all the installation and
operating instructions in this manual and check the message on the panel display. If you are still
not satisfied it is working properly, please follow the appropriate troubleshooting instructions.
CAUTION! WARNING! SHOCK HAZARD! No User Serviceable Parts.
Do not attempt service of the control box. Contact Customer Service for assistance. Follow all
owner's manual power connection instructions.
NO COMPONENT OPERATION
Check the following:
1. Is there power to the spa?
2. Is the household circuit breaker tripped?
3. Is the subpanel (230V) or cord GFCI (110V) tripped?
4. If 1, 2 or 3 are yes contact Customer Service for assistance.
PUMP DOES NOT OPERATE, BUT THE LIGHT DOES
Press the Jets button:
The pump operates but no water flows to jets. Pump may not be properly primed. This can happen
after the spa is drained and refilled. Press the Jets button several times, never leaving the motor
on for more than 5-10 seconds at-a-time with no water coming of of jets.
POOR JET ACTION
1.
2.
3.
4.
5.
Press the Jets button to make certain the pump is on.
Rotate all the air control valves counterclockwise and observe the increased jet action.
Make sure the water level is half way between top of spa and top of the gray filter ring.
Check for dirty filter. Clean, if necessary.
Make sure all jets are in the open position (turn counterclockwise).
WATER IS TOO HOT
1. Check desired temperature on topside control.
2. Check for a Diagnostic Message (in Control Panel Operation section).
OH - Overheat (spa is deactivated) DO NOT ENTER THE WATER.
If the spa has overheated you should remove the cover to promote heat reduction. The spa control
system should reset itself when the water temperature reduces below 104ºF or 40ºC. When the
spa falls below the reset temperature you can push any button on the topside control to reset the
control system. If the spa will not reset, then shut off power to the spa and call Customer Service
at (888) 961-7727 Ext. 8440.
Under extreme and/or prolonged weather conditions it is possible for the ambient temperature to
exceed 106F/41C; effecting the water temperature of the spa and causing it to overheat. These
conditions could cause the spa sensors to produce an OH message and prevent the usage of
your spa during these conditions. The location of your spa should be reconsidered to reduce the
outside temperature around the spa. For example, you may need to prevent direct sunlight on any
surface of your spa. Regardless, do not enter your spa if the temperature is above 104°F.
Should checking the above steps fail to correct the problem, please contact Customer Service at
(888) 961-7727 Ext. 8440.
20
DRAINING OR WINTERIZING
Every three to six months, depending upon the water condition, you need to renew your water.
CAUTION: READ THIS BEFORE DRAINING YOUR SPA
• To prevent damage to the spa’s components, UNPLUG GFCI CORD OR TURN OFF
SUBPANEL BREAKER BEFORE DRAINING. Do not power back up until your spa has
been refilled with water.
• There are certain precautions to keep in mind when draining your spa. If it is extremely cold,
and the spa is outdoors, freezing could occur in the plumbing or the equipment.
• Do not leave the spa's shell (inside surface) exposed to direct sunlight.
DRAINING YOUR SPA
• If draining for the first time. Pull the hose bib out a few inches from the spa (located in the
recess under the spa, just right and below the equipment access door)
• Unscrew and remove the drain cap.
• Attach hose bib to a garden hose and direct to an appropriate
draining area, keeping the hose below the water line.
• After your spa is empty, clean the shell and filter cartridge. See
“Spa Maintenance” section.
• After cleaning, remove garden hose, replace drain cap and
push the hose bib back into the recess.
• Follow the “Fill up and Start-up Instructions” on page 15.
WINTERIZING YOUR SPA
If you plan to store your spa for the winter, you must also use a wet-vac to clean out the water
lines to ensure they are free of any water. Water left in the lines might freeze and damage the
lines and jets.
1. It will be necessary to remove all water from the interior plumbing.
2. Remove the floating weir, basket, and filter cartridge. Clean the filter cartridge and store in a
dry place. Attach the vacuum hose to the vacuum side of the shop vac and thoroughly dry the
filter compartment.
3. Using the shop vac, remove the water starting with the jets at the top and moving to the ones
at the bottom of the spa. NOTE: When removing the water from jet openings, you may notice
suction coming from another jet. With the help of a second person, block off any suction from
the other jet using a large rag or cloth. This will help pull out the water that is trapped deep
inside the main line.
4. Thoroughly dry the spa shell with a clean towel.
5. Using a funnel, pour Propylene glycol anti-freeze into the filter suction fittings and jet outlets.
CAUTION: Use only Propylene glycol as your anti-freeze. This is non-toxic. NEVER use
automobile anti-freeze since it is toxic.
6. Remove the pump drain plug located on the front of the pump housings. Allow all water to
drain out. Place the drain plug in a reclosable plastic storage bag and store near the pump.
Replace the drain plugs on start-up.
7. Unscrew the suction/discharge pump and heater unions and allow the water to drain. Leave
union loose. NOTE: Tighten unions before filling spa.
8. Replace the equipment compartment door and secure with screws.
Note: Damage caused by improper winterizing will not be covered under warranty. You may want
to contact Customer Service for proper winterizing.
19
SPA MAINTENANCE
SURFACE CARE
Do not use solvents or abrasive cleaners to clean the spa. Typically, a mild detergent and water
will resolve cleaning issues.
COVER CARE
Please keep your cover free from dirt at all times. Use a cover cleaner or a warm mild soapy
water to clean the surface. Do not use any silicone-based products, as it will dry and may
eventually crack the vinyl. NOTE: Do not stand on the cover at any time. Remove the cover when
adding chemicals to your spa. This will extend the life of your cover. The gasses from burned off
chemicals will be trapped under the cover, if not removed. These gasses may erode the protective
lining of the foam inserts. This will not be covered under warranty.
CABINET CARE
Little maintenance is required to keep your spa cabinet looking good.
Spa cabinet product should be cleaned as needed to remove dirt and debris.
• NO abrasive or harsh chemicals should be used on the spa's cabinet.
• NO solvents or cleaners containing aromatic solvents should be used on the spas cabinet.
• Hot soapy water is the best choice for cleaning the spa's cabinet.
SPA LED REPLACEMENT
• Turn OFF the power to the spa.
• Remove the equipment compartment access door.
• Locate the rear of the spa light.
• To remove the LED board, turn outside housing counter clockwise ¼ turn, and pull out and
remove LED board from socket.
• Replace by reversing the above steps.
18
SPA MAINTENANCE
FILTER CARTRIDGE MAINTENANCE
Every two weeks, the filter cartridge should be cleaned to remove the objects and particles that
have lodged in the cartridge pleats. Using household water pressure and a garden hose with a
pressurized nozzle, push water from inside to outside of the pleats, forcing all the trapped particles
out. NOTE: Never run your spa without a filter cartridge!!! This will invalidate your warranty.
NOTE: Filter cartridges should be replaced every six to eight months or earlier when needed.
Dirty filters can cause your spa pump to burn out and will invalidate your warranty.
FILTER CARTRIDGE REMOVAL AND CLEANING INSTRUCTIONS
Spa uses a screw in filter cartridge that is easily removed.
• Turn off the power to the spa, (by turning OFF the subpanel breaker).
• Push down slightly and turn filter basket counter clockwise to unlock, then pull the basket and
weir out.
• Unscrew the filter cartridge counter clockwise and bring it out of the spa (requires many turns).
• Rinse cartridge using a garden hose. Rotate and separate filter pleats while spraying water to
remove all dirt and debris possible. Let filter dry and look for calcium deposits (scaling) or an oil
film. If you find these, you will need to deep clean your filter cartridge with a “spa filter cleaner”
solution to break down and remove unwanted deposits and oils. (For longer filter life you
should soak filter in solution regularly.)
CAUTION! Always use proper eye protection when using chemicals, or high-pressure water.
Read instructions on cleaning products and follow applicable safety and warning instructions listed
on label.
CAUTION! Never scrub the filter cartridge with a brush, as this will cause the filter to wear out and
come apart. Never let the spa pump run without a filter cartridge in the skimmer compartment.
Running the spa without a filter cartridge may permit debris to enter the spa plumbing and void the
warranty!
• Replace filter cartridge, then reinstall basket and weir, (insert and rotate clockwise to lock into
position). DO NOT OVERTIGHTEN!
• Turn spa’s power back on.
17
ADDING START-UP CHEMICALS
WATER CHEMISTRY GUIDELINES
The following step-by-step instructions are a recommended guideline for balancing water chemistry. If
unsure about any step in the process, please contact a Customer Care Associate at (888) 961-7727 Ext.
8440 or by email at [email protected].
Initially, it is advisable to identify what minerals (e.g. iron) are present in the local source water. This will
provide a better understanding of how to treat the water. Please follow the four steps below and be sure to
achieve the correct levels in each area before moving onto the next step.
STEP #1: ESTABLISH PROPER PH LEVEL:
The recommended range for pH is between 7.2 and 7.8. If the reading is too high, lower the pH by
using a pH Down/Decreaser (sodium bisulfate). If the pH level needs to be increased, do so with a pH
Up/Increaser (sodium hydrogen carbonate). Any pH Up or Down should be added one teaspoon at a
time, waiting one-half hour between application and re-measuring.
STEP #2: MEASURE TOTAL ALKALINITY:
The ideal range is between 80-120 parts per million (PPM). If the total alkalinity is too high, it should
be reduced by using an Alkalinity Down/Decreaser (sodium bisulfate). If the total alkalinity is too low,
it can be increased by adding an Alkalinity UP/Increaser (sodium bicarbonate or sodium hydrogen
carbonate). These products should be added in small amounts – a teaspoon at a time. After adding
one teaspoon, wait one half hour before re-measuring. Once the safe range of total alkalinity is
established, proceed to the next step.
STEP #3: DETERMINE CALCIUM HARDNESS:
It is important to bring the calcium reading to between 100-250 PPM. If the reading requires adjustment,
it should now be corrected. If the water is too soft (a low reading) calcium hardness should be added to
the water to increase the PPM reading. If the water is too hard (a high reading), it can be corrected by
either: (A) a mixture of hard and soft water added to attain a reading in the safe range, or (B) addition of
stain and scale control. If calcium hardness is a problem with the local source water (either too hard or
too soft) a test kit, which measures calcium hardness, is essential.
STEP #4: SANITIZING:
After steps 1-3 are complete, the spa must be sanitized using Chlorine (sodium dichlor). Add 2
teaspoons of Chlorine, and increase as necessary to reach a level of 3-5 ppm. Check and maintain
this level weekly, and before and after using the spa. IMPORTANT NOTE: A granulated sodium dichlor
is highly recommended for sanitizing spa water. Never use a sodium trichlor or bromine tablet in
any form even with a floater. As with any other chemicals, the sanitizer should be introduced to the
spa with the jets running for 15 minutes.
WEEKLY SHOCK:
Using a potassium monopersulfate (MPS) shock, add approximately 2 oz. spreading it over the water
while the jets are running. Shocking is achieved by adding the MPS to turbulent water. Leave the cover
up and jets on high for 10 minutes. Then shut jets off and return the cover to the closed position to
maintain heat. Then return the cover to the closed position to maintain heat.
16
FILL UP AND START-UP INSTRUCTIONS
The following procedures should be followed on initial startup and whenever the spa is drained for
routine maintenance.
FILLING THE SPA WITH WATER
1. Clear all the debris from your spa.
2. Be sure to open all jets to allow as much air as possible to escape from the plumbing during
the filling process.
3. Insert a garden hose into filter compartment to fill your spa.
NOTE: Do not use hot or softened
water.
4. As the water level rises, check
inside the equipment compartment
for water leaks. It may be
necessary to tighten unions and/
or fittings that may have loosened
during delivery. There is no need
to call for service; this can easily
be done. If assistance is required,
contact a Customer Service
representative at (888) 961-7727
Ext. 8440
5. Under normal circumstances keep
UNIONS
the water level half way between
the top of the spa and the top of the gray filter ring or just above the highest jets (whichever is
higher).
Failure to keep enough water in your spa may result in damage to your system and invalidate
your warranty. If your spa filter is sucking in air causing the pump to cavitate, you need to add
water!
6. Check the filter installation and make sure the filter is not loose.
APPLYING POWER
1. Turn power to spa "ON" from the main panel at the house and the subpanel.
2. Press the Jets button on the topside control panel to activate the spa. Rotate all the air control
valves counterclockwise and observe the increased jet action (air mixed with water).
3. While the pump is running check again for water leaks at the drain spigot, unions, or fittings in
the equipment compartment (leaks may have occurred during transit). If water is leaking from
one of these areas, there is no need to call for service. Simply tighten the fitting. If assistance
is required, call a Customer Service representative at (888) 961-7727 Ext. 8440.
4. After checking your spa for leaks it is now time to adjust your spa settings. Press the Plus or
Minus button on your topside control panel until the display indicates your desired temperature
is set.
15
COMPONENT OPERATION
SPA COMPONENT OPERATION
AIR CONTROL VALVE
The air control valve serves to regulate the amount of air mixed with the water when the jets are
operational. Turn the air control valves in one direction to increased jet action. Rotating the air
control in the opposite direction to turn air off and allow the jets to work with water only. Turn the
air controls off when the spa is not in use, this will prevent cold air from entering the spa and will
keep heating cost to a minimum. The ozone jet, will always produce air bubbles when pump is on.
DIVERTER VALVE (WHEN EQUIPPED)
The diverter valve on your spa allows you to direct the flow of water to one of the jet flow
combinations. The function of the diverter valve can best be learned by experimentation. Turn
the large valve completely to one side to see which jets are on, then turn completely to the other
to see which jets are affected. (You can adjust the diverter value to any position between the two
possible extremes to achieve the jet pressure that feels best to you).
IMPORTANT: Your spa is not designed to provide full power to all jets when the diverter valves
are in the “mid” position. However with the diverter valve in this position, you may increase the
power to selected jets by rotating the faces of the hydrotherapy jets to close the ones that are not
in use.
HYDROTHERAPY JETS
The hydrotherapy jets are recessed in the wall of the spa. Rotate the medium jet faces to turn
the jets on or off. Turning a jet on or off will increase or decrease the effects of any jets not in the
closed position.
OZONE GENERATOR (OPTIONAL ON TOSCANO II)
The ozone system enhances the quality of the spa water when used to supplement the spa
owner’s regular water maintenance program. Contrary to some information circulated throughout
the pool and spa industry regarding ozone systems, ozone CAN'T be used as a single-source
sanitizer, water clarifier, anti-foamer, and mineral chelating agent. A secondary source sanitizer
must be used to maintain 3.0 -5.0 ppm of Free Available Chlorine (FAC). Watkins Manufacturing
Corporation recommends that a chemical maintenance program based on recognized and
documented industry standards still be followed when using an ozone purification system to
assure water sanitation and the highest quality purified water.
WATERFALL
Your spa has a control valve to operate the amount of flow through the waterfall from no flow to
a steady stream. This valve is located next to the waterfall. Note: The air control valve and the
waterfall flow valve may look and function exactly the same and may operate in the same way,
however; they will be separate components.
14
CONTROL PANEL OPERATION
DIAGNOSTIC LCD MESSAGE
Message Meaning
No message on display.
Power has been cut off to the spa.
HL
AOH
PRR
OH
The system has shut the heater
off because the temperature at the
heater has reached 122°F (50°C).
Do not enter the water!
Temperature inside the equipment
compartment is too high 194F
(90°C), causing the internal
temperature in the control system to
increase above normal limits.
A problem is detected with the
temperature probe.
The water temperature in the spa
has reached 108°F (42°C). Do not
enter the water!
Action Required
The control panel will be disabled until power
returns. Spa settings will be preserved until
next power up.
DO NOT ENTER THE WATER. Remove the
spa cover and allow the water to cool down,
then shut power off and power your spa up
again to reset the system.
If spa does not reset, shut off the power to the
spa and call Customer Service.
Open equipment compartment and wait until
error clears.
Call your dealer or service supplier.
Remove the spa cover and allow the water to
cool down to a lower temperature. Call your
dealer or service supplier if problem persists.
Make sure that the jet pump is running and
water is flowing; check and clean filters; make
sure water valves are open; make sure spa
has a proper water level. If problem persists,
call your dealer or service supplier.
No water flow is detected by the
control system but flow is expected.
FLO
Call your dealer or service supplier.
No low level configuration software
has been installed into the system.
UPL
Warning! Shock Hazard! No User Serviceable Parts.
Do not attempt service of the control box. Contact Customer Service for assistance. Follow
all owner manual power connection instructions. Installation must be performed by a licensed
electrician and all grounding connections must be properly installed.
WARNING! DO NOT ENTER SPA IF WATER IS TOO HOT
Water is too hot. Overheat protection heater is deactivated. Spa water temperature is above
acceptable limits. When the actual water temperature is approximately 2º F (1º C) above the
set temperature, the jet pump will stop operating to reduce (frictional) heating. If the spa water
temperature continues to rise and gets above 108º F (42ºC), the spa will go into an “OH” overheat
condition.
13
CONTROL PANEL OPERATION
ADJUSTING PRESET FILTER CYCLES
Filter duration is programmable between 0 and 6 hours in 30 minute increments (0.5 hours) for
both filter cycles. To program the cycle times:
1.
2.
3.
4.
5.
Press and hold Light button for 5 seconds until F1 is displayed.
Press the Plus or Minus button to adjust the cycle time for F1.
Press the Light button to store the F1 cycle and move to the F2 cycle.
Press the Plus or Minus button to adjust the cycle time for F2.
Wait 15 seconds to allow the exit timer to expire and store the setting.
IMPORTANT: To reset the first filter cycle start time, skip step 5 and continue pressing the Light
button until the actual temperature is displayed. Powering down of the spa will also reset the first
filter start time.
FILTER CYCLE SUSPENSION: The filter cycle will be suspended every time a jet pump or
light is activated manually during the filter cycle time. The suspension will end 10 minutes after the
completion of the manual use.
OPERATIONAL MODES
The Standard Mode is the default operational mode preset from the factory. In order to program the
spa to operate in the Economy mode you must enter the programming mode to make the change.
STANDARD MODE: Is programmed to maintain the desired temperature.
ECONOMY MODE: The spa will heat normally during the filter cycle; outside of the filter
cycle, the set point will be lowered by 20°F. To enter the programming screen and toggle between
Standard and Economy Mode the following is required:
1. Press and hold the Light button for 5 seconds
2. Press the Light button several times until EP 0 or EP 1 is displayed.
3. Use the Plus or Minus button to choose between Standard and Economy Mode.
EP 0 = Standard Mode and EP 1 = Economy Mode.
4. Wait 15 seconds to allow the exit timer to expire and store the setting.
OFF MODE: This mode allows you to stop all spa functions for 30 minutes to perform quick
spa maintenance. To place the spa in OFF MODE, press and hold the Jets button for 5 seconds.
The display will toggle between OFF and water temperature when in the OFF MODE. To stop the
OFF MODE before the 30 minute cycle time is complete, simply tap (short press) the Jet button.
FAHRENHEIT/CELSIUS SETTING
To Change water temperature display to either Fahrenheit or Celsius, press and hold Light
button for 5 seconds until F1... is displayed. Press the Light button several times until F or C
is displayed. Press the Plus or Minus button to change. Wait 15 seconds to allow the exit timer to
expire and store the setting.
SMART WINTER MODE
The Smart Winter Mode is used to prevent water from freezing in the plumbing of the spa. As soon
as there is a risk of freezing, this protection kicks in. The SWM protection will turn back off only
after 24 hours without a risk of freezing. During this 24 hour period, the Smart Winter Mode icon
remains on; the icon blinks when the purge is active.
12
CONTROL PANEL OPERATION
INITIAL START-UP - When the spa is first powered up the control system begins a 2 minute
Startup Mode. Different codes will display on the screen. Once Startup Mode completes, the
actual temperature is displayed on
the screen, and the spa will then
Indicator Lights
begin to heat and maintain the
water temperature and the first filter
cycle will start. Your spa has been
designed so that it will automatically
heat the water to the factory set
temperature of 100°F unless you set
the spa to a different temperature. If
Jets Light
Temp Temp
power is disconnected from the spa,
Plus
Minus
it will automatically revert back to the
last saved set temperature when power is reapplied.
TEMPERATURE ADJUSTMENT (80°F-104°F/26°C-40°C)
The temperature can only function between 80°F - 104°F / 26°C - 40°C. The last measured
temperature will constantly display on LCD.
Press the Plus or Minus buttons to display the set temperature and indicator . Each time either
button is pressed again, the set temperature will increase or decrease depending on which button
is pressed. After five seconds, the LCD will automatically display the current spa temperature.
lights up when the heater is on. It flashes when there is a request for
The “heater” indicator
more heat, but the heater is not on. Once set temperature is reached the indicator shuts off and
the low speed of the jet pump turns off after 30 seconds (if not in filter cycle).
JETS OPERATION
Firmly press the Jets button once to activate the low speed of the pump and again for the high
speed. Firmly press the Jets button again to turn off the pump. If left running the low or high speed
pump will automatically turn off after 1 hour. The "Jets" indicator light next to the button will blink
when jet pump is on low speed and is solid on high speed.
MULTI COLOR LED LIGHT
Press the Light button once to turn on the light, the light indicator next to the button is lit when
the light is on. Press the button again to turn the light off. Every time the light is quickly turned off
and on a new light mode will appear. The sequence is as follows: White, Slow Full color wheel,
Amber, Blue, Red, Green, Purple, Blue/Green color wheel, Red/Green color wheel and Fast Full
color wheel. The last light mode used will come back on when the light is turned off for more than
2 seconds.
NOTE: If left on, the light will automatically turn off after 4 hours of operation.
FILTER CYCLES
There are two filter cycles: the first cycle (F1) starts right after power up and the second cycle (F2)
will start 12 hours later. The default duration for the first filter cycle is 1 hour, and 30 minutes for
the second cycle. Filter cycles only run at low speed. The “Filter” indicator
lights up when a
filter cycle is on. The duration of each filter cycle can be modified.
11
ELECTRICAL REQUIREMENTS
ELECTRICAL WIRING DIAGRAM FOR 230V USE
It is recommended that a licensed electrician install the power to your spa in accordance with the
National Electric Code and/or any local electrical codes in effect at the time of installation.
Power supply installation must include a properly rated GFCI circuit breaker. The circuit must be
dedicated and should not be shared with any other appliances. The power supply must be hard
wired into the power pack.
230V Wiring Instructions:
4 wires/Minimum 40 amp GFCI
Breaker #8 AWG 75°C Copper Wire
Minimum (less than 100’ length)
Special Note:
If the GFCI breaker trips immediately
after attempting to turn on, please
check the White Neutral Wire that is
connected to the spa.
White Neutral Wire that is connected
to Spa Neutral goes HERE.
Red
White
Black
Green
From the House
Breaker Box
To the Spa
10
ELECTRICAL REQUIREMENTS
CONFIGURING SYSTEM
SELECTING THE SUPPLY VOLTAGE FOR YOUR SPA
Your spa is designed to operate at either 110V 15 amp; 110V 30 amp, or 230V 40 amp circuit.
• When the spa is setup for 110V 15 amp, the heater will provide approximately 1000 watts of
heat only when the pump is operating in LOW speed and the thermostat is calling for heat
(NOTE: The heater does not operate when the pump is on high speed).
• When the spa is connected to 110V 30 amp, the heater will provide approximately 1000 watts of
heat when the pump is operating in LOW or HIGH speed and the thermostat is calling for heat.
• When the spa is connected to 230 volts, the heater will provide approximately 4000 watts of
heat when the pump is operating in LOW or HIGH speed and the thermostat is calling for heat.
All electrical connections must be made in accordance with the wiring information contained on
the electrical control box cover and the National Electrical Code.
110 VOLT INSTALLATION (CORD CONNECTED)
Spas come with a factory-installed power supply GFCI cord and are to be plugged into a grounded
type 110 volt, 15 ampere receptacle. No other electrical appliance or fixture can be used on this circuit.
IMPORTANT: Under NO circumstances should an extension cord be used. Use of an extension
cord will seriously degrade the performance of the equipment and can create an electrical hazard.
110 VOLT 30A OR 230 VOLT 40A (PERMANENTLY CONNECTED FIELD CONVERSION)
• A 110 volt, 30 ampere configuration requires a 30 ampere GFCI Subpanel box (not included).
• A 230 volt, 40 ampere configuration requires a 40 ampere GFCI Subpanel (not included)
Either one of these installation requires a licensed electrician.
Field Converted 110V 30A Control Box
Field Converted 110/230V Control Box
Subpanel
Red
White
Black
Green
SubPanel
White
Black
Green
To Convert, remove the cord from the
terminal block and replace with White,
Black and Green #10 wires and connect
to 30A GFCI Subpanel.
To Convert, move 230V jumper from P14 to
P20 (see above). Remove the cord from the
terminal block and replace with Red, White,
Black and Green #8 wires and connect to
40A Subpanel.
IMPORTANT: After powering up the spa on 110V 30A or 230V 40A field conversions, a program
configuration is required. Press and Hold JETS button for 30 seconds to access the Low Level
(LL) settings on the control panel. Use the +/- button to change the setting from LL1 Factory
Default (non concurrent heat and high speed) to LL2 (concurrent Heater and High Speed pump)
configuration. Press the LIGHT button within 25 seconds to save the new program setting.
9
ELECTRICAL REQUIREMENTS
ELECTRICAL REQUIREMENT
DO NOT POWER THE SPA WITHOUT FIRST FILLING WITH WATER!
DANGER – RISK OF ELECTRIC SHOCK
Installations that do not conform to the following procedures and requirements may expose
users to electric shock. Non-conforming installations will not be covered under warranty.
If installed in the United States, the electrical wiring of this spa must meet the requirements of the
National Electric Code (NEC) and any applicable state or local codes. The electrical circuit must be
installed by an electrical contractor and approved by a local building electrical inspection authority.
1.
2.
3.
4.
5.
6.
7.
8.
9.
Installations within 5 feet of any metal surfaces must ground the metal surfaces to the hot tub.
Use an 8 AWG solid copper wire and attach it to the grounding lug on the control box, located
in the equipment compartment.
Only a licensed electrician may install power to the spa.
Power supply installation must include a suitably rated ground fault circuit interrupter (GFCI)
as required by NEC Article 680-42. The circuit breaker must be dedicated and should not be
shared with any other appliances. It must be labeled and easily accessible to users.
The electrical supply for the spa must include a suitable rated switch or circuit breaker to open
all ungrounded supply conductors to comply with Section 422-20 of the National Electric Code,
ANSI/NFPA 70. The disconnecting means must be readily accessible to the spa’s occupant but
installed at least 5 feet from the spa water.
230V Power supply lines must be hard wired into the control box. DO NOT use extension or
plug-type cords of any kind. The use of a shut-off box near the hot tub is also recommended.
This box provides a quick and convenient method to shut off power to the hot tub for
emergencies and maintenance.
Supply lines must be properly sized as per the NEC. A ground line must be provided that is
as large as the largest current carrying conductor, but no less than 8 AWG. Use copper wiring
only.
Please open the front cover of the control box, and follow the instructions and wiring diagram
printed on the backside.
All 110 V powered models must use the
provided 15 foot GFCI cord and be plugged
directly into a dedicated grounded wall outlet.
CAUTION, 230V POWERED SPAS – These
spas must be hard wired to your household
electrical service box only. Do not use an
extension cord or any other disconnect-able
power cord. The use of an extension cord
or a disconnect-able power cord is highly
dangerous and will void all warranties!
• Wire size must be appropriate per NEC and/or
local codes.
• Wire size is determined by length of run from
Equipment access is below
breaker box to spa and maximum current draw.
the topside control panel.
• THHN copper core wire is recommended.
• All wiring must be copper to ensure adequate connections. Do not use aluminum wire.
8
EQUIPMENT ACCESS
EQUIPMENT ACCESS PANEL
Topside Control Panel
Slat
Slat
Screw
Equipment Access Panel Door
Drain Hose
Electrical Recess
To access the equipment compartment (if your spa has vertical slats):
• Remove 1 vertical slat and 3 screws on each side of Equipment Access Panel Door.
• Remove 6 screws from Equipment Access Panel Door then remove door.
• Remove screws from black ABS Door to access Equipment Compartment.
Electrical
Access
Black ABS Door
Hose
Bib
Equipment Compartment
7
INSTALLATION
BE AWARE:
Damage caused by inadequate or improper foundation support is not covered by the spa warranty.
It is the sole responsibility of the spa owner to provide a proper foundation for the spa.
Make sure the foundation where the spa is placed drains water away from the spa. Proper
drainage will keep components dry from rain and wet weather.
Your spa weight must always be considered when installing your spa. If you are installing it on an
elevated wood deck or other structure, it is advisable to consult a structural engineer or contractor
to ensure the structure will support the weight.
IT IS STRONGLY RECOMMENDED THAT A QUALIFIED, LICENSED CONTRACTOR
PREPARE THE FOUNDATION FOR YOUR SPA.
A reinforced concrete pad at least four inches thick is recommended for your spa. The reinforcing
rod or mesh in the pad should be attached to a bond wire.
INDOOR INSTALLATION:
Be aware of some special requirements if you place your spa indoors. Water will accumulate
around the spa, so flooring materials must provide a good grip when wet. NOTE: The Ice Bucket
drain on the Monterey spa is designed to drain at the bottom exterior of the spa. Therefore, any
water accumulated at the backside of the spa is probably water draining from the Ice Bucket, and
not a spa leak. Proper drainage is essential to prevent a build-up of water around the spa. When
building a new room for the spa, it is recommended that a floor drain be installed. The humidity
will naturally increase with the spa installed. Water may get into woodwork and produce dryrot,
mildew, or other problems. Check for airborne moisture’s effects on exposed wood, paper, etc. in
the room. To minimize these effects, it is best to provide plenty of ventilation to the spa area. An
architect can help to determine if more ventilation must be installed.
PLACING THE SPA
CHECK THE DIMENSIONS OF YOUR SPA:
Compare the spa dimensions to the width of gates, sidewalks, and doorways along the delivery
route used to bring the spa into your yard. It may be necessary for you to remove a gate or
partially remove a fence in order to provide an unobstructed passageway to the installation
location. Also, keep in mind—if you are using special equipment to place your spa into an area it
will be necessary to include those measurements and weights.
PLANNING A DELIVERY ROUTE:
Check the width of gates, doors and sidewalks to make sure your spa will pass through
unobstructed. You may have to remove a gate or part of a fence to allow for adequate width
clearance. If the delivery route will require a 90-degree turn, check the measurements at the turn
to ensure the spa will fit. Check for protruding gas meters, water meters, A/C units, etc., on your
home which will cause obstructions along the delivery path to your yard. Check for low roof eaves,
over hanging branches or rain gutters that could be an obstruction to overhead clearances.
SPECIAL CIRCUMSTANCES:
The use of a crane for delivery and installation is primarily to avoid injury to your spa, your
property or to delivery personnel. Our Customer Service may be able to assist you with the
arrangements. Cranes are not considered “normal delivery”.
6
INSTALLATION
PLANNING A LOCATION FOR YOUR SPA
Consider these things when determining where to place your spa.
SAFETY FIRST:
Make sure your spa is positioned so access to the equipment compartment and side panels
will not be blocked. Be certain your installation will meet all city and local safety codes and
requirements.
PLANNED USE OF SPA:
How you intend to use your spa will help you determine where you should position the spa. For
example, will you use it more for recreational or therapeutic purposes? If your spa is mainly for
family recreation, leave plenty of room around it for activity and lawn furniture. If you will use it
more for relaxation and therapy, you’ll probably want to create privacy around the spa.
PRIVACY:
Think of your surroundings during all seasons to determine your best privacy options. Consider
the view of your neighbors when you plan the location of your spa.
VIEWS:
Think about the direction you will be facing when sitting in your spa. Do you have a special
landscape you will find enjoyable? Perhaps there is an area that has a soothing breeze during the
day or a lovely sunset in the evening.
ENVIRONMENT:
If you live in a climate with a snowy winter and hot summer, a place to change clothes or a house
entry near the spa is convenient. A warmer climate may require shade from the hot sun. Consider
placement of trees, shrubs, patio cover or perhaps a gazebo structure to provide what you will
need. Indoor installations require adequate ventilation. When the spa is in use, considerable
amounts of moisture are produced. This moisture can damage walls and ceiling surfaces over
time. Special paint is available to resist moisture damage. Remember that spas periodically
require drainage, so plan your environment accordingly.
KEEP CLEAN:
Prevent dirt and foliage from being tracked into your spa by utilizing concrete for paths and access
areas. Check the location of spill paths from gutters, trees, and shrubs.
SERVICE ACCESS:
Many people choose to install tile or custom wood around their spas. If you are installing your tub
with custom decorative trimming, remember to allow for access to it for service. Should you need
service, a technician may need to remove the tub’s door panel, or access it from beneath. It is
always best to design special installations so the spa can still be moved, or lifted from the ground.
A GOOD FOUNDATION:
Your new spa needs a good solid foundation. The area your spa sits on must be able to support
the spa, the water in it and those who use it. If the foundation is inadequate, it may shift or settle
after the spa is in place, causing stress to the shell or components. NOTE: Do Not shim your spa
in any manner, as this could cause the cabinet to warp, thereby voiding the warranty.
5
SAFETY INFORMATION
AVOIDING THE RISK OF HYPERTHERMIA
Prolonged immersion in hot water can result in HYPERTHERMIA, a dangerous condition which
occurs when the internal temperature of the body reaches a level above normal (98.6°F, 37ºC).
The symptoms of hyperthermia include unawareness of impending hazard, failure to perceive
heat, failure to recognize the need to exit the spa, physical inability to exit the spa, fetal damage in
pregnant women, and unconsciousness resulting in a danger of drowning.
WARNING:
The use of alcohol, drugs, or medication can greatly increase the risk of fatal hyperthermia in hot
tubs and spas.
TO REDUCE THE RISK OF INJURY:
• The water in the spa should never exceed 104°F (40°C). Water temperatures between 100°F
(38°C) and 104°F (40°C) are considered safe for a healthy adult. Lower water temperatures are
recommended for extended use (exceeding 10 minutes) and for young children. Extended use can
cause hyperthermia.
• Pregnant or possibly pregnant women should limit spa water temperatures to 100°F (38°C). Failure
to do so may result in permanent injury to your baby.
• Do not use spa immediately following strenuous exercise.
AVOIDING THE RISK OF SKIN BURNS:
• To reduce the risk of injury, before entering a spa the user should measure the water temperature
with an accurate thermometer.
• Test the water with your hand before entering the spa to be sure it’s comfortable.
SAFETY SIGN
A SAFETY SIGN in the owner’s package. The sign, which is required as a condition of Product
Listing, should be permanently installed where it is visible to the users of the spa.
IMPORTANT SPA INSTRUCTIONS
The following contains important spa information, and we strongly encourage you to read and
apply them.
DO:
• Use and lock the vinyl cover when the spa is not in use, whether it is empty or full.
• Follow the Spa Care and Maintenance recommendations stated in this manual.
• Use only approved accessories and recommended spa chemicals and cleaners.
DON’T:
• Leave the spa exposed to the sun without water or the vinyl cover in place. Exposure to direct
sunlight can cause solar distress of the shell material.
• Roll or slide the spa on its side. This will damage the siding.
• Lift or drag the cover by using the cover lock straps; always lift or carry the cover by using the handles.
• Attempt to open the electrical control box. There are no user serviceable parts inside. Opening of the
control box by the spa owner will void the warranty. If you have an operational problem, carefully go
through the steps outlined in the Troubleshooting section. If you are not able to resolve the problem,
contact your authorized dealer. Many problems can easily be diagnosed over the telephone by an
Authorized Service Technician.
4
SAFETY INFORMATION
DON’T:
• Use the spa with the equipment compartment door removed.
• Place electrical appliances within 5 feet (1.5m) of the spa.
• Use an extension cord to connect the spa to its power source. The cord may not be properly
grounded and the connection is a shock hazard. An extension cord may cause a voltage drop, which
will cause overheating of the jet pump motor and motor damage.
• Attempt to open the electrical control box. There are no user serviceable parts inside.
RISKS TO AVOID
DANGER: RISK OF INJURY
• DO NOT sit in the filter compartment area. Sitting in this area can cause:
a) Restriction of Filter Pump suction/vacuum
b) Damage to components
• Both can result in bodily harm. Should damage occur to components in this area, replace
immediately!
To reduce the risk of injury to persons, DO NOT remove floating weir, basket, and filter located in
the filter compartment while the spa is running.
• The suction fittings in the spa are sized to match the specific water flow created by the pump. Never
replace a suction fitting with one rated less than the flow rate marked on the original suction fitting.
• There is a danger of slipping and falling. Remember that wet surfaces can be very slippery. Take
care when entering or exiting the spa.
• Never operate spa if the suction fittings are broken or missing.
• People with infectious diseases should not use the spa.
• Keep any loose articles of clothing or hanging jewelry away from rotating jets or other moving
components.
Increased side effects of medication
• The use of drugs, alcohol or medication before or during spa use may lead to unconsciousness with
the possibility of drowning.
• Persons using medications should consult a physician before using a spa; some medication may cause
a user to become drowsy, while other medication may affect heart rate, blood pressure, and circulation.
• Persons taking medications which induce drowsiness, such as tranquilizers, antihistamines or
anticoagulants should not use the spa.
Health problems affected by spa use
• Pregnant women should consult a physician before using spa.
• Persons suffering from obesity or with a medical history of heart disease, low or high blood pressure,
circulatory system problems, or diabetes should consult a physician before using spa.
Unclean water
• Keep the water clean and sanitized with correct chemical care. The recommended levels for your
spa are: Free Available Chlorine (FAC):
3.0-5.0 ppm Total Alkalinity:
80 - 120 ppm
Water pH:
7.2 - 7.8
Calcium Hardness: 100- 250 ppm
IMPORTANT: Turn jet pump on for at least ten minutes after adding ANY spa water chemicals into the filter compartment.
• Clean the filter cartridge monthly to remove debris and mineral buildup which may affect the
performance of the hydromassage jets, limit the flow, or trip the high-limit thermostat which will turn
off the entire spa.
3
SAFETY INFORMATION
110 VOLT, CORD-CONNECTED MODELS:
• The GFCI is located at the end of the power cord. Before each use, with the unit operating,
push the TEST button. The unit should stop operating and the GFCI power indicator will
go out. Wait 30 seconds and then reset the GFCI by pushing the RESET button. The GFCI
power indicator will turn on, restoring power to the spa. If the interrupter does not perform in
this manner, there may be an electrical malfunction and with it, the possibility of an electric
shock. Disconnect the power until the problem has been corrected.
NOTE: This will reset the filter cycle.
230 VOLT, CONVERTED MODELS:
• A ground terminal is provided on the control box. To reduce the risk of electric shock, connect this
terminal to the grounding terminal of your electrical service or subpanel with a continuous green,
insulated copper wire. The wire must be equivalent in size to the circuit conductors supplying the
equipment. In addition, a bonding terminal (pressure wire connector) is provided on the outside of
the control box for bonding to local ground points. To reduce the risk of electric shock, this connector
should be bonded with a No. 8 AWG (8.4 mm²) solid copper wire to any metal ladders, water pipes,
or other metal within 5 feet (1.5 m) of the spa to comply with local requirements. The means of
disconnection must be readily accessible, but must be installed at least 5 feet (1.5 m) from the spa.
• Your spa requires a suitably rated circuit breaker to open all ungrounded supply conductors.
• Your spa must have a ground fault circuit interrupter in an electrical subpanel. Before each use of
the spa and with the unit operating, push the TEST button on the breaker. The switch should click
over to the “Trip” position. Wait 30 seconds and reset the GFCI breaker by switching it completely
off and then completely on. The switch should then stay on. If the interrupter does not perform in
this manner, it is an indication of an electrical malfunction and the possibility of an electric shock.
Disconnect the power until the fault has been identified and corrected.
IMPORTANT: Failure to wait 30 seconds before resetting the GFCI may cause the spa’s Power
Indicator (on the control panel) to blink. If this occurs, repeat the GFCI test procedure.
DANGER: RISK OF ELECTRICAL SHOCK
• Install spa at least 5 feet (1.5 m) from all metal surfaces. A spa may be installed within 5 feet of
a metal surface if each metal surface is permanently connected by a minimum No. 10 AWG solid
copper conductor attached to the wire ground connector on the terminal box that is provided for this
purpose if in accordance with National Electrical Code ANSI/NMFPA70-1993.
• Do not permit any electrical appliances, such as a light, telephone, radio, or television within 5 feet
(1.5 m) of a spa. Failure to maintain a safe distance may result in death or serious personal injury
due to electrocution if the appliance should fall into the spa.
• Install your spa in such a way that drainage is away from the electrical compartment and from all
electrical components.
DO:
• Be sure your spa is connected to the power supply correctly - use a licensed electrical contractor.
• Disconnect the spa from the power supply before draining the spa or servicing the electrical
components.
• Test the Ground Fault Circuit Interrupter(s) before each use.
2
SAFETY INFORMATION
IMPORTANT SAFETY INSTRUCTIONS
READ AND FOLLOW ALL INSTRUCTIONS
AVOIDING THE RISK TO CHILDREN
DANGER:
• RISK OF CHILD DROWNING. Extreme caution must be exercised to prevent unauthorized access
by children. To avoid accidents, ensure that children cannot use a spa unless they are supervised at
all times.
WARNING:
• To reduce the risk of injury, do not permit children to use this product unless they are closely
supervised at all times.
• To reduce the risk of injury, lower water temperatures are recommended for young children. Children
are especially sensitive to hot water.
DO:
• Make sure you always lock the child resistant locks after using the spa for your children’s safety.
Every spa is equipped with a locking cover that meets the ASTM F1346-91 Standard for Safety
Covers.
• Test the water temperature with your hand before allowing your child to enter the spa to be sure that
it’s comfortable. Children are especially sensitive to hot water.
• Remind children that wet surfaces can be very slippery. Make sure that the children are careful when
entering or exiting the spa.
DON’T:
• Allow children to climb onto the spa cover.
• Allow children to have unsupervised access to the spa.
AVOIDING THE RISK OF ELECTROCUTION
Risk of Electrocution
• Connect only to a grounded source.
• Do not bury the power cord. A buried power cord may result in death or serious personal injury due
to electrocution if direct burial-type cable is not used, or if improper digging occurs.
• A ground terminal (pressure wire connector) is provided on the control box inside the unit to permit
connection of a minimum No. 10 AWG solid copper bonding conductor between this point and any
metal equipment, metal water pipe, metal enclosures of electrical equipment, or conduit within five
feet (1.5 m) of the unit as needed to comply with local requirements.
WARNING:
• To reduce the risk of electrical shock, replace a damaged cord immediately. Failure to do so may
result in death or serious personal injury due to electrocution.
• Your 110 volt spa is provided with a Ground Fault Circuit Interrupter for user and equipment
protection. To ensure proper operation of this important safety device, test according to the following
instructions per electrical configuration.
1
TABLE OF CONTENTS
TITLEPAGE
SAFETY INFORMATION
IMPORTANT SAFETY INSTRUCTIONS.....................................................................................................................................1
IMPORTANT SPA INSTRUCTIONS.............................................................................................................................................4
INSTALLATION
PLANNING A LOCATION FOR YOUR SPA................................................................................................................................5
PLACING THE SPA.......................................................................................................................................................................6
EQUIPMENT ACCESS
EQUIPMENT ACCESS PANEL....................................................................................................................................................7
ELECTRICAL REQUIREMENTS
ELECTRICAL REQUIREMENT....................................................................................................................................................8
CONFIGURING SYSTEM ............................................................................................................................................................9
ELECTRICAL WIRING DIAGRAM FOR 230V USE.................................................................................................................10
CONTROL PANEL OPERATION
TEMPERATURE ADJUSTMENT (80°F-104°F)........................................................................................................................11
JETS OPERATION......................................................................................................................................................................11
MULTI COLOR LED LIGHT........................................................................................................................................................11
OPERATIONAL MODE ..............................................................................................................................................................11
PRESET FILTER CYCLES ........................................................................................................................................................12
FREEZE PROTECTION ............................................................................................................................................................12
DIAGNOSTIC LCD MESSAGE.................................................................................................................................................13
COMPONENT OPERATION
SPA COMPONENT OPERATION..............................................................................................................................................14
FILL UP AND START-UP INSTRUCTIONS
FILLING THE SPA WITH WATER..............................................................................................................................................15
APPLYING POWER....................................................................................................................................................................15
ADDING START-UP CHEMICALS
WATER CHEMISTRY GUIDELINES..........................................................................................................................................16
SPA MAINTENANCE
FILTER CARTRIDGE MAINTENANCE.....................................................................................................................................17
SURFACE CARE.........................................................................................................................................................................18
COVER CARE.............................................................................................................................................................................18
CABINET CARE ..........................................................................................................................................................................18
SPA LED REPLACEMENT.........................................................................................................................................................18
DRAINING OR WINTERIZING
DRAINING YOUR SPA ...............................................................................................................................................................19
WINTERIZING YOUR SPA.........................................................................................................................................................19
TROUBLESHOOTING PROCEDURES
NO COMPONENT OPERATION................................................................................................................................................20
PUMP DOES NOT OPERATE, BUT THE LIGHT DOES.........................................................................................................20
POOR JET ACTION....................................................................................................................................................................20
WATER IS TOO HOT...................................................................................................................................................................20
REPLACEMENT PARTS
REPLACEMENT SPA PARTS....................................................................................................................................................21
AquaTerra OWNER'S MANUAL
110V / 230V Systems
Owner's Record
Locating the Spa Serial Number:
The spa serial number label is located on control box cover inside the equipment compartment.
Equipment compartment access panel is below the spas 4-button topside control panel. You will
need the spa model and serial number to properly register your spa and activate coverage. Write
your spa information in the space provided.
DATE PURCHASED:
PURCHASED FROM:
SPA MODEL:
SERIAL NUMBER:
Please read this “Owner’s Manual” carefully, as it is designed to provide you with the information
you will need to ensure the safe, secure use of your spa.
IMPORTANT: Watkins Manufacturing Corporation reserves the right to change specifications
and/or design without notification and without any obligation.
SPA SPECIFICATIONS
Model
Milano II
Transport™ II
Toscano II
Verona
Benicia
Spa Seating Length
7 person
5 person
3 person
7 person
4 person
6'8½"
6'3"
6'
6'9"
5'8"
Width
6'8½"
6'3"
6'
6'9"
5'
Height
34"
34"
31"
34"
32"
Dry Weight
476 LBS.
424 LBS.
378 LBS.
440 LBS.
288 LBS.
Electrical Specs 60Hz
230V, 26A
110/230V,11 (19)/26A
110/230V,11 (19)/26A
110/230V,11 (19)/26A
110/230V,11 (19)/26A
CAUTION
DO NOT OPERATE SPA BEFORE READING THIS MANUAL
Failure to read this manual and follow its instructions may result in unsafe operation and or
permanent damage to your portable spa.
Most cities, counties, states, and countries require permits for exterior construction and electrical
circuits. In addition, some communities have codes requiring residential barriers such as fencing
and/or self-closing gates on the property to prevent unsupervised access to a pool or spa by
children. Be sure to check with your local agencies for specific requirements.
If you need additional information and/or assistance, please contact Customer Service
at 888-961-7727 Ext. 8440 or at [email protected].
Thank you for choosing an AquaTerra Spa. Visit our web site at www.AquaTerraspas.com.
OWNER’S MANUAL
110V / 230V 60Hz Models
PART # 303556.14 REV. C (8/14)