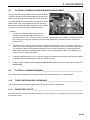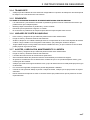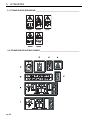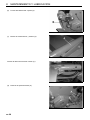
1
24036G-ES (rev.4) ® Safety, Operation & Maintenance Manual Manual de seguridad, funcionamiento y mantenimiento Ransomes Hydraulic TG3400 & TG4650 Series: UC Hydraulic 3400 with 6 knife fixed head Magna 250 cutting unit Product codes: LHAC201 Serie: UC Hydraulic 3400 con unidad de corte Magna 250 con cabezal fijo de 6 cuchillas Código de producto: LHAC201 Series: UD Hydraulic 3400 with 8 knife floating head Sport 200 cutting unit Product codes: LHAC202 Serie: UD Hydraulic 3400 con unidad de corte Sport 200 con cabezal flotante de 8 cuchillas Código de producto: LHAC202 Series: UA Hydraulic 4650 with 6 knife fixed head Magna 250 cutting unit Product codes: LHAB201 Serie: UA Hydraulic 4650 con unidad de corte Magna 250 con cabezal fijo de 6 cuchillas Código de producto: LHAB201 Series: UB Hydraulic 4650 with 8 knife floating head Sport 200 cutting unit Product codes: LHAB202 Serie: UB Hydraulic 4650 con unidad de corte Sport 200 con cabezal flotante de 8 cuchillas Código de producto: LHAB202 WARNING WARNING: If incorrectly used this machine can cause severe injury. Those who use and maintain this machine should be trained in its proper use, warned of its dangers and should read the entire manual before attempting to set up, operate, adjust or service the machine. ADVERTENCIA ADVERTENCIA: Si se usa de forma incorrecta esta máquina puede causar graves lesiones. Cualquier persona que use y mantenga esta máquina deberá estar entrenado en su uso correcto, instruido sobre sus peligros y deberá leer el manual completamente antes de tratar de instalar, operar, ajustar o revisar la máquina. GB ES United Kingdom Spain RJL 100 April 2010 Ransomes Jacobsen Limited reserves the right to make design changes without obligation to make these changes on units previously sold and the information contained in this manual is subject to change without notice. Ransomes Jacobsen Limited se reserva el derecho a realizar cambios de diseño sin obligación de realizar dichos cambios en unidades previamente vendidas y la información incluida en este manual puede cambiar sin aviso previo. © 2010, Ransomes Jacobsen Limited. All Rights Reserved / Todos los derechos reservados 1 SECTION 2.1 2.2 2.3 2.3.1 2.3.2 2.4 2.5 SAFETY & OPERATORS MANUAL CONTENTS PAGE SECTION PAGE IMPORTANT ........................................................................ 4 PRODUCT IDENTIFICATION ............................................. 4 GUIDELINES FOR THE DISPOSAL OF SCRAP PRODUCTS ........................................................... 5 DURING SERVICE LIFE ..................................................... 5 END OF SERVICE LIFE ...................................................... 5 PARTS MANUAL ................................................................. 6 SALES & SERVICE ............................................................. 7 3.1 3.1.1 3.1.2 3.1.3 3.1.4 3.1.5 3.1.6 3.1.7 OPERATING SAFETY ......................................................... 8 OPERATING INSTRUCTIONS ............................................ 8 SAFETY SIGNS ................................................................... 8 DRIVING THE MACHINE .................................................... 8 TRANSPORTING ................................................................ 8 SLOPES .............................................................................. 9 BLOCKED CUTTING UNITS ............................................... 9 ADJUSTMENTS, LUBRICATION, MAINTENANCE & CLEANING ........................................................................ 9 4.1 4.2 4.3 4.4 4.5 4.7 4.8 4.9 DIMENSIONS & WEIGHTS ................................................. 11 MACHINE SPECIFICATION ................................................ 12 HYDRAULIC SPECIFICATION ........................................... 12 CUTTING UNIT SPECIFICATION ....................................... 13 RECOMMENDED LUBRICANTS ........................................ 13 CUTTING PERFORMANCE (AREA) ................................... 13 CUTTING PERFORMANCE (FREQUENCY) ...................... 13 CERTIFICATES OF CONFORMITY .................................... 14 5.1 5.2 SAFETY DECALS ............................................................... 18 INSTRUCTION DECALS ..................................................... 18 6.1 6.2 6.3 6.4 SAFETY HOOK LEVERS .................................................... 20 PARKING BRAKE ............................................................... 21 CONTROL LEVERS ............................................................. 21 WEIGHT TRANSFER VALVE .............................................. 21 7.1 7.2 7.3 7.4 DAILY INSPECTION ........................................................... 22 OPERATING PROCEDURE ................................................ 23 ATTACHING THE MACHINE TO THE TRACTOR. ............. 24 OPERATION OF THE MACHINE......................................... 26 8.1 8.2 8.3 MAINTENANCE & LUBRICATION CHART ......................... 28 LUBRICATION...................................................................... 30 MAINTENANCE.................................................................... 33 9.1 9.2 9.3 9.4 9.5 9.6 9.7 9.8 9.9 9.10 9.11 9.12 CYLINDER DRIVE CUT-OUTS ............................................ 35 UNIT DRIVE DISENGAGEMENT......................................... 35 LIFT ARM POSITION VALVE............................................... 36 OPERATING ADJUSTMENT ............................................... 36 BRAKES (AUTO REVERS TYPE)........................................ 37 HEIGHT OF CUT.................................................................. 38 SPORT 200 FLOATING HEAD FRONT ROLL SETTING .... 38 CUTTING CYLINDER TO BOTTOM BLADE ADJUSTMENT...................................................................... 39 CUTTING CYLINDER BEARINGS ....................................... 39 FRONT & REAR ROLL BEARINGS ..................................... 39 GRASS DEFLECTOR .......................................................... 39 BACKLAPPING .................................................................... 40 10 10.1 10.2 10.3 10.4 10.5 10.6 10.7 10.8 10.9 QUALITY OF CUT TROUBLESHOOTING .......................... 42 WASHBOARDING ............................................................... 42 MARCELLING 4 ................................................................... 43 STEP CUTTING .................................................................. 44 SCALPING ........................................................................... 45 STRAGGLERS .................................................................... 46 STREAKS ............................................................................. 47 WINDROWING .................................................................... 48 RIFLING OR TRAMLINING ................................................. 49 MISMATCHED CUTTING UNITS ........................................ 49 11 GUARANTEE ....................................................................... 50 GB-3 2 2.1 INTRODUCTION IMPORTANT _________________________________________________________ The Ransomes Hydraulic TG3400 & TG4650 are tractor towed reel mowers. Using hydraulic systems for cutting unit drive. IMPORTANT: This is a precision machine and the service obtained from it depends on the way it is operated and maintained. This SAFETY AND OPERATORS MANUAL should be regarded as part of the machine. Suppliers of both new and second-hand machines are advised to retain documentary evidence that this manual was provided with the machine. This machine is designed solely for use as a grass cutting machine operating within the parameters listed in the specification pages. Use in any other way is considered as contrary to the intended use. Compliance with and strict adherence to the conditions of operation, service and repair as specified by the manufacturer, also constitute essential elements of the intended use. Before attempting to operate this machine, ALL operators MUST read through this manual and make themselves thoroughly conversant with Safety Instructions, controls, lubrication and maintenance. Accident prevention regulations, all other generally recognized regulations on safety and occupational medicine, and all road traffic regulations shall be observed at all times. Any arbitrary modifications carried out on this machine may relieve the manufacturer of liability for any resulting damage or injury. It is important that during the life of the machine wearing and replaceable parts are disposed of in an environmentally responsible way using the resources available in the country where it is used. There are guidelines in this manual for the eventual decommissioning of the mower once it has no further use. Use only Ransomes Jacobsen Genuine spare parts to ensure the control of EC compliance 2006/42/EC These are the Original instructions verified by Ransomes Jacobsen Limited 2.2 PRODUCT IDENTIFICATION ___________________________________________ A B C D E F G H J Maximum front axle load in Kg (for machines being driven on the highway) Gross weight (mass) in Kg Maximum rear axle load in Kg (for machines being driven on the highway) Power in Kw Date code Machine type (Designation) Product code Product name Serial number SERIAL PLATE LOCATION The serial plate is located on the Main Frame . en-4 West Road Ransomes Europark Ipswich IP3 9TT England A B Kg Kg F H C Kg D E Kw G J 2 INTRODUCTION 2.3 GUIDELINES FOR THE DISPOSAL OF SCRAP PRODUCTS ________________ 2.3.1 DURING SERVICE LIFE Used oil, oil filters and engine coolant are hazardous materials and should be handled in a safe and environmentally responsible way. In the event of a fluid leak, contain the spill to prevent it entering the ground or drainage system. Local legislation will dictate how such spills are to treated. Following the maintenance procedures laid out in this manual will ensure that the impact the machine has on the local environment is controlled. When it has been identified that a turf care product has no further functional value and requires disposal, the following actions should be taken. 2.3.2 END OF SERVICE LIFE These guidelines should be used in conjunction with applicable Health, Safety and Environmental legislation and use of approved local facilities for waste disposal and recycling. • • • • • • • • Position the machine in a suitable location for any necessary lifting equipment to be used. Use appropriate tools and Personal Protective Equipment (PPE) and take guidance from the technical manuals applicable to the machine. Remove and store appropriately: 1. Batteries 2. Fuel residue 3. Engine coolant 4. Oils Disassemble the structure of the machine referring to the technical manuals where appropriate. Special attention should be made for dealing with ‘stored energy’ within pressurised elements of the machine or tensioned springs. Any items that still have a useful service life as second hand components or can be re-serviced should be separated and returned to the relevant centre. Other worn out items should be separated into material groups for recycling and disposal consistent with available facilities. More common separation types are as follows: • Steel • Non ferrous metals • Aluminium • Brass • Copper •Plastics •Identifiable • Recyclable • Non recyclable • Not identified • Rubber • Electrical & Electronic Components Items that cannot be separated economically into different material groups should be added to the ‘General waste’ area. Do not incinerate waste. Finally update machinery records to indicate that the machine has been taken out of service and scrapped. Provide this serial number to Ransomes Jacobsen Warranty department to close off relevant records. en-5 2 INTRODUCTION 2.4 PARTS MANUAL ___________________________________________________ As part of the ISO14001 principles and in the era of free electronic media, Ransomes Jacobsen Limited no longer sends a paper parts manual with every product. If you wish to refer to a parts list for this mower you have four options from which to choose: Website – www.ransomesjacobsen.com then use the “GENUINE PARTS” tab then the “online parts look-up” tab. This will give you live access to Parts drawings and lists to aid the identification of spare parts. Website – www.ransomesjacobsen.com then use the “CUSTOMER CARE” tab followed by the “manuals” tab this will give you access to a printable version of the parts manual. It can be saved to your computer drive for reference on the screen or to print all or part of the book as required. Alternatively by completing the form included in the technical manual pack supplied with the machine, we can send you either: • A CD containing an electronic copy of the Parts Book. • A paper copy of the parts manual. en-6 2 INTRODUCTION 2.5 SALES & SERVICE ____________________________________________________ A network of authorised Sales and Service dealers has been established and these details are available from your supplier. When service attention, or spares, are required for the machine, within or after the guarantee period your supplier or any authorised dealer should be contacted. Always quote the registered number of the machine. If any damage is apparent when delivery is made, report the details at once to the supplier of the machine. It is recommended that the machine number is recorded. The machine serial number is located on the registration plate. MACHINE NUMBER:- ___________________________ en-7 3 3.1 SAFETY INSTRUCTIONS OPERATING SAFETY________________________________________________ This safety symbol indicates important safety messages in this manual. When you see this symbol, be alert to the possibility of injury, carefully read the message that follows, and inform other operators. 3.1.1 OPERATING INSTRUCTIONS • • • Ensure that the instructions in this book are read and fully understood. No person should be allowed to operate this machine unless they are fully acquainted with all the controls and the safety procedures. Never allow children or people unfamiliar with these instructions to use this machine. Local regulations may restrict the age of the operator. 3.1.2 SAFETY SIGNS • It is essential all safety labels are kept legible, if they are missing or illegible they must be replaced. If any part of the machine is replaced and it originally carried a safety label, a new label must be affixed to the replacement part. New safety labels are obtainable from Ransomes Jacobsen dealers. 3.1.3 DRIVING THE MACHINE • • • • • • • • • • Before moving the machine, check to ensure that all parts are in good working order, paying particular attention to the security of cutting blades. Mow only in daylight or good artificial light Stop the blades rotating before crossing surfaces other than grass. Remember that some people are deaf or blind and that children and animals can be unpredictable. Remove or avoid obstructions in the area to be cut, thus reducing the possibility of injury to yourself and/or bystanders. Keep in mind that the operator or user is responsible for accidents or hazards occurring to other people or their property. When the machine is to be parked, stored or left unattended, lower the cutting units. While mowing, always use Personal Protective Equipment (PPE), Such As Safety Glasses, Leather Work Shoes Or Boots, A Hard Hat, Leather Work Gloves And Ear Protection Should Be Used Subject To A Local Risk Assessment Completed By the Owner/User When Operating the Mowing Machine to Help Prevent Injury After striking a foreign object Inspect the lawnmower for damage and make repairs before restarting and operating the equipment. If the machine starts to vibrate abnormally, check immediately. 3.1.4 TRANSPORTING • en-8 Ensure that the cutting units are securely fastened in the transport position. Do not transport with cutting mechanism rotating. 3 SAFETY INSTRUCTIONS 3.1.5 SLOPES TAKE EXTRA CARE WHEN WORKING ON SLOPES • Local undulations and sinkage will change the general slope. Avoid ground conditions which can cause the machine to slide. • Keep machine speeds low on slopes and during tight turns. • Remember there is no such thing as a “safe” slope. • Travel on grass slopes requires particular care. 3.1.6 BLOCKED CUTTING UNITS • • • • Stop the engine and make sure all moving parts are stationary. Apply brakes and disengage all drives. Release blockages with care. Keep all parts of the body away from the cutting edge. Beware of energy in the drive which can cause rotation when the blockage is released. Keep other people away from the cutting units as rotation of one can cause the others to rotate. 3.1.7 ADJUSTMENTS, LUBRICATION, MAINTENANCE & CLEANING • • • • • • • • • Stop the engine and make sure all moving parts are stationary. Apply brakes and disengage all drives. Read all the appropriate servicing instructions. Use only the replacement parts supplied by the original manufacturer. When adjusting the cutter blades take care not to get hands and feet trapped when rotating blades. Make sure that other people are not touching any cutting unit, as rotation of one blade can cause the others to rotate. Replace worn or damaged parts for safety. When working underneath lifted parts or machines, make sure adequate support Is provided. Do not dismantle the machine without releasing or restraining forces which can cause parts to move suddenly. DANGER: Indicates an imminently hazardous situation which, if not avoided, WILL result in death or serious injury. WARNING: Indicates a potentially hazardous situation which, if not avoided, COULD result in death or serious injury. en-9 3 SAFETY INSTRUCTIONS CAUTION: Indicates a potentially hazardous situation which, if not avoided, MAY result in minor or moderate injury and property damage. It may also be used to alert against unsafe practices. CAUTION Personal Protective Equipment (PPE), Such As Safety Glasses, Leather Work Shoes Or Boots, A Hard Hat, Leather Work Gloves And Ear Protection Should Be Used Subject To A Local Risk Assessment Completed By the Owner/ User When Operating the Mowing Machine to Help Prevent Injury. Training in All Manual Operations Should Be Given By A Qualified Person Prior To Using The Machine For The First Time. WARNING Ear Protection Should Be Worn When Operating Machines With Operator Ear Noise Levels Above 85dB(A)Leq. WARNING To Prevent Serious Injury From Hot, High Pressure Oil, Never Use Your Hands To Check For Oil Leaks, Use Paper Or Cardboard. Hydraulic Fluid Escaping Under Pressure Can Have Sufficient Force To Penetrate Skin. If Fluid Is Injected Into The Skin It Must Be Surgically Removed Within A Few Hours By A Doctor Familiar With This Form Of Injury Or Gangrene May Result. en-10 4 SPECIFICATION 4.1 DIMENSIONS & WEIGHTS ______________________________________________ Hydraulic TG3400 A Width of Cut: 342 cm B Overall Width Cutting: 360 cm C Overall Width Transport (minimum): 217 cm D Overall Height Transport. 150 cm E Overall Length 337 cm F Weight of Rear Frame, Hydraulic Tank Full 895 kg G Weight of one 4 Knife Cutting Unit (Fixed) 80 kg H Weight of one 6 Knife Cutting Unit (Fixed) 85 kg J Weight of one Vertiicut Cutting Unit ?? kg Hydraulic TG4650 A Width of Cut: 469 cm B Overall Width Cutting: 486 cm C Overall Width Transport (minimum): 228 cm D Overall Height Transport. 150 cm E Overall Length 337 cm F Weight of Rear Frame, Hydraulic Tank Full 1110 kg G Weight of one 4 Knife Cutting Unit (Fixed) 80 kg H Weight of one 6 Knife Cutting Unit (Fixed) 85 kg J Weight of one Vertiicut Cutting Unit ?? kg TYRE PRESSURE Product Cutting (maximum 30kph) (18.6mph) Transport (maximum 90kph) (55mph) Tyre Size Tyre Type Tyre Pressure Tyre Pressure TG3400 275/65-R16 Michelin XP27™ 1.1 bar (16psi) 2.2 bar (31psi) TG4650 275/65-R16 Michelin XP27™ 1.5 bar (22psi) 2.2 bar (31psi) en-11 4 SPECIFICATION 4.2 MACHINE SPECIFICATION ______________________________________________ Frame construction:Heavy duty fabricated steel Axle: RHS axle beam with trailing arm independent suspension. Brakes: 250mm (9.84in.) dia. x 40mm (1.57in.) wide overrun drum brakes with "auto-reverse" mechanism and handbrake. Drawbar: Heigh adjustable square section steel tube with interchangeable towing eyes to suit tractor pick-up hitch, swinging drawbar, Drawbar provided with drop-down jack and jockey wheel. Lights: Rear tail/stop lights, direction indicators, rear and side reflectors, side marker lights. Hydraulic system:Two twin gear pumps mounted on "speed-up" splitter gearbox driven by universal drive shaft from tractor PTO. Hydraulic filtration 25 micron absolute with indicator. Diagnostic test ports on each pump outlet. Three mechanically operated motor drive valves on TG4650 and two on the TG3400, simultaneously operated for forward, neutral and reverse rotation of the cutting unit drivemotors, in three seperate circuits on TG4650 and two on the TG3400 to give 69bar (1000psi) for each cutting cylinder. Mechanically operated diverter valves for each cutting unit disengage drive when lifting. Diverter valves re-engage drive by pilot flow activated by push switch at handlevers. Three spool lift valve provides lift for the three centre cutting units and individual lift for left and right pairs of wing cutting units on the TG4650, or lift for the three centre cutting units and individual lift for left and right wing units on the TG3400. All cutting units have variable weight transfer by adjustable valve. Controls: Four handlever controls mounted in vehicle. Push/pull cables operate hydraulic control valves on machine. Single push button to re-engage reel drive when the cutting units are lowered. Single control lever for forward/neutral/reverse reel drive. Three control levers for lift/lower of centre five and two wing cutting units on TG4650, or centre three and two wing units on TG3400. Electrics: 12 Volt Towing Vehicle: 45kw minimum 4.3 HYDRAULIC SPECIFICATION Description Liters / Minute. Relief Valve Pressure Units 1, 2 & 3 27.54 207bar Units 4, 5, 6 & 7 27.54 138bar 8.1 172 bar Cutting Litf Circuit en-12 4 SPECIFICATION 4.4 CUTTING UNIT SPECIFICATION ______________________________________________ Magna Sportcutter 762mm 762mm Number of Knives 6 8 Number of Blades N/A N/A Reel Diameter (New) 254mm 197mm Minimum Reel Diameter (Before Replacement) 235mm 178mm Construction Reel Length Fixed Head Height of Cut (Standard Blade) 12.7mm - 89mm Floating Head Height of Cut (Standard Blade) 12.7mm - 35.7mm Floating Head Height of Cut (Thin Blade) 9mm - 32mm Rear Roll 60mm Diameter Adjustable screw system on rear roll Height of Cut Adjustment Transmission Adjustable screw system on front & rear roll By hydraulic motor through gear & pinion to reel. Maximum Reel Speed at Maximum PTO Speed 1240rpm NOTE These cutting units are designed to cut grass of maximum height 100mm down to the available height of cut range. 4.5 RECOMMENDED LUBRICANTS __________________________________________ Hydraulic Oil: ISO VG 46. Gearbox Pump drive: Cutting unit: Grease: 80W-90 Shell Gadus S2 V220 Lithium Based General Purpose Grease. 4.7 CUTTING PERFORMANCE (AREA) _______________________________________ TG3400 3.6 hectares / hour at 12 km TG4650 5 hectares / hour at 12 km 10% allowance is included for normal overlaps and turning at the end of each cut. 4.8 CUTTING PERFORMANCE (FREQUENCY) _________________________________ 6-blade Fixed Head: 8-blade Floating Head: 24 cuts/m at 12 km/h 32 cuts/m at 12 km/h en-13 4 SPECIFICATION 4.9 CERTIFICATES OF CONFORMITY ________________________________________ DECLARATION OF CONFORMITY ƒ ȾȿɄɅȺɊȺɐɂə ɁȺ ɋɔɈɌȼȿɌɋɌȼɂȿ ƒ PROHLÁŠENÍ O SHODċ ƒ OVERENSSTEMMELSESERKLÆRING ƒ CONFORMITEITSVERKLARING ƒ VASTAVUSDEKLARATSIOON ƒ VAATIMUSTENMUKAISUUSVAKUUTUS ƒ DECLARATION DE CONFORMITE ƒ KONFORMITÄTSERKLÄRUNG ƒ ǻǾȁȍȈǾ ȈȊȂȂȅȇĭȍȈǾȈ ƒ MEGFELELėSÉGI NYILATKOZAT ƒ DICHIARAZIONE DI CONFORMITÀ ƒ ATBILSTƮBAS DEKLARƖCIJA ƒ ATITIKTIES DEKLARACIJA ƒ DIKJARAZZJONI TAL-KONFORMITÀ ƒ DEKLARACJA ZGODNOĝCI ƒ DECLARAÇÃO DE CONFORMIDADE ƒ DECLARAğIE DE CONFORMITATE ƒ VYHLÁSENIE O ZHODE ƒ IZJAVA O SKLADNOSTI ƒ DECLARACIÓN DE CONFORMIDAD ƒ DEKLARATION OM ÖVERENSSTÄMMELSE ƒ SAMRÆMISYFIRLÝSING ƒ KONFORMITETSERKLÆRING Business name and full address of the manufacturer ƒ Ɍɴɪɝɨɜɫɤɨ ɢɦɟ ɢ ɩɴɥɟɧ ɚɞɪɟɫ ɧɚ ɩɪɨɢɡɜɨɞɢɬɟɥɹ ƒ Obchodní jméno a plná adresa výrobce ƒ Producentens firmanavn og fulde adresse ƒ Bedrijfsnaam en volledig adres van de fabrikant ƒ Tootja ärinimi ja täielik aadress ƒ Valmistajan toiminimi ja täydellinen osoite ƒ Nom commercial et adresse complète du fabricant ƒ Firmenname und vollständige Adresse des Herstellers ƒ ǼʌȦȞȣȝȓĮ țĮȚ IJĮȤȣįȡȠȝȚțȒ įȚİȪșȣȞıȘ țĮIJĮıțİȣĮıIJȒ ƒ A gyártó üzleti neve és teljes címe ƒ Ragione sociale e indirizzo completo del fabbricante ƒ UzƼƝmuma nosaukums un pilna ražotƗja adrese ƒ Verslo pavadinimas ir pilnas gamintojo adresas ƒ Isem kummerƛjali u indirizz sƫiƫ tal-fabbrikant ƒ Nazwa firmy i pełny adres producenta ƒ Nome da empresa e endereço completo do fabricante ƒ Denumirea comercială úi adresa completă a producătorului ƒ Obchodný názov a úplná adresa výrobcu ƒ Naziv podjetja in polni naslov proizvajalca ƒ Nombre de la empresa y dirección completa del fabricante ƒ Tillverkarens företagsnamn och kompletta adress ƒ Fyrirtækisheiti og fullt heimilisfang framleiðanda ƒ Firmanavn og full adresse for produsenten Ransomes Jacobsen Limited West Road, Ransomes Europark, Ipswich, England, IP3 9TT Product Code ƒ Ʉɨɞ ɧɚ ɩɪɨɞɭɤɬɚ ƒ Kód výrobku ƒ Produktkode ƒ Productcode ƒ Toote kood ƒ Tuotekoodi ƒ Code produit ƒ Produktcode ƒ ȀȦįȚțȩȢ ʌȡȠȧȩȞIJȠȢ ƒ Termékkód ƒ Codice prodotto ƒ Produkta kods ƒ Produkto kodas ƒ Kodiƛi tal-Prodott ƒ Kod produktu ƒ Código do Produto ƒ Cod produs ƒ Kód výrobku ƒ Oznaka proizvoda ƒ Código de producto ƒ Produktkod ƒ Vörunúmer ƒ Produktkode LHAC201 LHAC202 LHAB201 LHAB202 Machine Name ƒ ɇɚɢɦɟɧɨɜɚɧɢɟ ɧɚ ɦɚɲɢɧɚɬɚ ƒ Název stroje ƒ Maskinnavn ƒ Machinenaam ƒ Masina nimi ƒ Laitteen nimi ƒ Nom de la machine ƒ Maschinenbezeichnung ƒ ȅȞȠȝĮıȓĮ ȝȘȤĮȞȒȝĮIJȠȢ ƒ Gépnév ƒ Denominazione della macchina ƒ IekƗrtas nosaukums ƒ Mašinos pavadinimas ƒ Isem tal-Magna ƒ Nazwa urządzenia ƒ Nome da Máquina ƒ Numele echipamentului ƒ Názov stroja ƒ Naziv stroja ƒ Nombre de la máquina ƒ Maskinens namn ƒ Heiti tækis ƒ Maskinnavn Designation ƒ ɉɪɟɞɧɚɡɧɚɱɟɧɢɟ ƒ Oznaþení ƒ Betegnelse ƒ Benaming ƒ Nimetus ƒ Tyyppimerkintä ƒ Pažymơjimas ƒ Bezeichnung ƒ ȋĮȡĮțIJȘȡȚıȝȩȢ ƒ Megnevezés ƒ Funzione ƒ ApzƯmƝjums ƒ Lithuanian ƒ Denominazzjoni ƒ Oznaczenie ƒ Designação ƒ SpecificaĠie ƒ Oznaþenie ƒ Namen stroja ƒ Descripción ƒ Beteckning ƒ Merking ƒ Konstruksjon Serial Number ƒ ɋɟɪɢɟɧ ɧɨɦɟɪ ƒ Sériové þíslo ƒ Serienummer ƒ Serienummer ƒ Seerianumber ƒ Valmistusnumero ƒ Numéro de série ƒ Seriennummer ƒ ȈİȚȡȚĮțȩȢ ĮȡȚșȝȩȢ ƒ Sorozatszám ƒ Numero di serie ƒ SƝrijas numurs ƒ Serijos numeris ƒ Numru Serjali ƒ Numer seryjny ƒ Número de Série ƒ Număr de serie ƒ Sériové þíslo ƒ Serijska številka ƒ Número de serie ƒ Serienummer ƒ Raðnúmer ƒ Serienummer Ransomes Hydraulic TG3400 Ransomes Hydraulic TG4650 Towed Reel Mower UA000301 - UA999999 UB000301 - UB999999 UC000301 - UC999999 UD000301 - UD999999 Engine ƒ Ⱦɜɢɝɚɬɟɥ ƒ Motor ƒ Motor ƒ Motor ƒ Mootor ƒ Moottori ƒ Moteur ƒ Motor ƒ ȂȘȤĮȞȒ ƒ Modulnév ƒ Motore ƒ DzinƝjs ƒ Variklis ƒ Saƫƫa Netta Installata ƒ Silnik ƒ Motor ƒ Motor ƒ Motor ƒ Motor ƒ Motor ƒ Motor ƒ Vél ƒ Motor Not Applicable Net Installed Power ƒ ɇɟɬɧɚ ɢɧɫɬɚɥɢɪɚɧɚ ɦɨɳɧɨɫɬ ƒ ýistý instalovaný výkon ƒ Installeret nettoeffekt ƒ Netto geïnstalleerd vermogen ƒ Installeeritud netovõimsus ƒ Asennettu nettoteho ƒ Puissance nominale nette ƒ Installierte Nettoleistung ƒ ȀĮșĮȡȒ İȖțĮIJİıIJȘȝȑȞȘ ȚıȤȪȢ ƒ Nettó beépített teljesítmény ƒ Potenza netta installata ƒ ParedzƝtƗ tƯkla jauda ƒ Grynoji galia ƒ Wisa’ tal-Qtugƫ ƒ Moc zainstalowana netto ƒ Potência instalada ƒ Puterea instalată netă ƒ ýistý inštalovaný výkon ƒ Neto vgrajena moþ ƒ Potencia instalada neta ƒ Nettoeffekt ƒ Nettóafl vélar ƒ Netto installert kraft Not Applicable Cutting Width ƒ ɒɢɪɨɱɢɧɚ ɧɚ ɪɹɡɚɧɟ ƒ ŠíĜka Ĝezu ƒ Skærebredde ƒ Maaibreedte ƒ Lõikelaius ƒ Leikkuuleveys ƒ Largeur de coupe ƒ Schnittbreite ƒ ȂȒțȠȢ ȝȚıȚȞȑȗĮȢ ƒ Vágási szélesség ƒ Larghezza di taglio ƒ Griešanas platums ƒ Pjovimo plotis ƒ Tikkonforma mad-Direttivi ƒ SzerokoĞü ciĊcia ƒ Largura de Corte ƒ LăĠimea de tăiere ƒ Šírka záberu ƒ Širina reza ƒ Anchura de corte ƒ Klippbredd ƒ Skurðbreidd ƒ Klippebredde 340 cm 465cm Conforms to Directives ƒ ȼ ɫɴɨɬɜɟɬɫɬɜɢɟ ɫ ɞɢɪɟɤɬɢɜɢɬɟ ƒ SplĖuje podmínky smČrnic ƒ Er i overensstemmelse med direktiver ƒ Voldoet aan de richtlijnen ƒ Vastab direktiividele ƒ Direktiivien mukainen ƒ Conforme aux directives ƒ Entspricht Richtlinien ƒ ǹțȠȜȠȣșȒıIJİ ʌȚıIJȐ IJȚȢ ȅįȘȖȓİȢ ƒ Megfelel az irányelveknek ƒ Conforme alle Direttive ƒ Atbilst direktƯvƗm ƒ Atitinka direktyvǐ reikalavimus ƒ Valutazzjoni tal-Konformità ƒ Dyrektywy związane ƒ Cumpre as Directivas ƒ Respectă Directivele ƒ Je v súlade so smernicami ƒ Skladnost z direktivami ƒ Cumple con las Directivas ƒ Uppfyller direktiv ƒ Samræmist tilskipunum ƒ I samsvar med direktiv 2006/42/EC 2004/108/EC Conformity Assessment ƒ Ɉɰɟɧɤɚ ɡɚ ɫɴɨɬɜɟɬɫɬɜɢɟ ƒ Hodnocení plnČní podmínek ƒ Overensstemmelsesvurdering ƒ Conformiteitsbeoordeling ƒ Vastavushindamine ƒ Vaatimustenmukaisuuden arviointi ƒ Evaluation de conformité ƒ Konformitätsbeurteilung ƒ ǻȚĮʌȓıIJȦıȘ ȈȣȝȝȩȡijȦıȘȢ ƒ MegfelelĘség-értékelés ƒ Valutazione della conformità ƒ AtbilstƯbas novƝrtƝjums ƒ Atitikties Ƴvertinimas ƒ Livell tal-Qawwa tal-ƪoss Imkejjel ƒ Ocena zgodnoĞci ƒ Avaliação de Conformidade ƒ Evaluarea conformităĠii ƒ Vyhodnotenie zhodnosti ƒ Ocena skladnosti ƒ Evaluación de conformidad ƒ Bedömning av överensstämmelse ƒ Samræmismat ƒ Konformitetsvurdering Not Applicable Measured Sound Power Level ƒ ɂɡɦɟɪɟɧɨ ɧɢɜɨ ɧɚ ɡɜɭɤɨɜɚ ɦɨɳɧɨɫɬ ƒ NamČĜený akustický výkon ƒ Målte lydstyrkeniveau ƒ Gemeten geluidsniveau ƒ Mõõdetud helivõimsuse tase ƒ Mitattu äänitehotaso ƒ Niveau de puissance sonore mesuré ƒ Gemessener Schalldruckpegel ƒ ȈIJĮșȝȚıȝȑȞȠ İʌȓʌİįȠ ȘȤȘIJȚțȒȢ ȚıȤȪȠȢ ƒ Mért hangteljesítményszint ƒ Livello di potenza sonora misurato ƒ IzmƝrƯtais skaƼas jaudas lƯmenis ƒ Išmatuotas garso stiprumo lygis ƒ Livell tal-Qawwa tal-ƪoss Iggarantit ƒ Moc akustyczna mierzona ƒ Nível sonoro medido ƒ Nivelul măsurat al puterii acustice ƒ Nameraná hladina akustického výkonu ƒ Izmerjena raven zvoþne moþi ƒ Nivel de potencia sonora medido ƒ Uppmätt ljudeffektsnivå ƒ Mælt hljóðaflsstig ƒ Målt lydeffektnivå Not Applicable Guaranteed Sound Power Level ƒ Ƚɚɪɚɧɬɢɪɚɧɨ ɧɢɜɨ ɧɚ ɡɜɭɤɨɜɚ ɦɨɳɧɨɫɬ ƒ Garantovaný akustický výkon ƒ Garanteret lydstyrkeniveau ƒ Gegarandeerd geluidsniveau ƒ Garanteeritud helivõimsuse tase ƒ Taattu äänitehotaso ƒ Niveau de puissance sonore garanti ƒ Garantierter Schalldruckpegel ƒ ǼȖȖȣȘȝȑȞȠ İʌȓʌİįȠ ȘȤȘIJȚțȒȢ ȚıȤȪȠȢ ƒ Szavatolt hangteljesítményszint ƒ Livello di potenza sonora garantito ƒ GarantƝtais skaƼas jaudas lƯmenis ƒ Garantuotas garso stiprumo lygis ƒ Livell tal-Qawwa tal-ƪoss Iggarantit ƒ Moc akustyczna gwarantowana ƒ Nível sonoro farantido ƒ Nivelul garantat al puterii acustice ƒ Garantovaná hladina akustického výkonu ƒ Zajamþena raven zvoþne moþi ƒ Nivel de potencia sonora garantizado ƒ Garanterad ljudeffektsnivå ƒ Hljóðaflsstig sem ábyrgð er tekin á ƒ Garanter lydeffektnivå Not Applicable Conformity Assessment Procedure (Noise) ƒ Ɉɰɟɧɤɚ ɡɚ ɫɴɨɬɜɟɬɫɬɜɢɟ ɧɚ ɩɪɨɰɟɞɭɪɚɬɚ (ɒɭɦ) ƒ Postup hodnocení plnČní podmínek (hluk) ƒ Procedure for overensstemmelsesvurdering (Støj) ƒ Procedure van de conformiteitsbeoordeling (geluid) ƒ Vastavushindamismenetlus (müra) ƒ Vaatimustenmukaisuuden arviointimenettely (Melu) ƒ Procédure d’évaluation de conformité (bruit) ƒ Konformitätsbeurteilungsverfahren (Geräusch) ƒ ǻȚĮįȚțĮıȓĮ ǹȟȚȠȜȩȖȘıȘȢ ȈȣȝȝȩȡijȦıȘȢ (ĬȩȡȣȕȠȢ) ƒ MegfelelĘség-értékelési eljárás (Zaj) ƒ Procedura di valutazione della conformità (rumore) ƒ AtbilstƯbas novƝrtƝjuma procednjra (troksnis) ƒ Atitikties Ƴvertinimo procednjra (garsas) ƒ Proƛedura tal-Valutazzjoni tal-Konformità (ƪoss) ƒ Procedura oceny zgodnoĞci (poziom hałasu) ƒ Processo de avaliação de conformidade (nível sonoro) Procedura de evaluare a conformităĠii (zgomot) ƒ Postup vyhodnocovania zhodnosti (hluk) ƒ Postopek za ugotavljanje skladnosti (hrup) ƒ Procedimiento de evaluación de conformidad (ruido) ƒ Procedur för bedömning av överensstämmelse (buller) ƒ Samræmismatsaðferð (hávaði) ƒ Prosedyre for konformitetsvurdering (støy) Not Applicable UK Notified Body for 2000/14/EC ƒ ɇɨɬɢɮɢɰɢɪɚɧ ɨɪɝɚɧ ɜ Ɉɛɟɞɢɧɟɧɨɬɨ ɤɪɚɥɫɬɜɨ ɡɚ 2000/14/ȿɈ ƒ ÚĜad certifikovaný podle smČrnice þ. 2000/14/EC ƒ Det britiske bemyndigede organ for 2001/14/EF ƒ Engels adviesorgaan voor 2000/14/EG ƒ Ühendkuningriigi teavitatud asutus direktiivi 2000/14/EÜ mõistes ƒ Direktiivin 2000/14/EY mukainen ilmoitettu tarkastuslaitos Isossa-Britanniassa ƒ Organisme notifié concernant la directive 2000/14/CE ƒ Britische benannte Stelle für 2000/14/EG ƒ ȀȠȚȞȠʌȠȚȘȝȑȞȠȢ ȅȡȖĮȞȚıȝȩȢ ǾȞȦȝȑȞȠȣ ǺĮıȚȜİȓȠȣ ȖȚĮ 2000/14/ǼȀ ƒ 2000/14/EK – egyesült királyságbeli bejelentett szervezet ƒ Organismo Notificato in GB per 2000/14/CE ƒ 2000/14/EK AK reƧistrƝtƗ organizƗcija ƒ JK notifikuotosios Ƴstaigos 2000/14/EC ƒ Korp Notifikat tar-Renju Unit gƫal 2000/14/KE ƒ Dopuszczona jednostka badawcza w Wielkiej Brytanii wg 2000/14/WE ƒ Entidade notificada no Reino Unido para 2000/14/CE ƒ Organism notificat în Marea Britanie pentru 2000/14/CE ƒ Notifikovaný orgán Spojeného kráĐovstva pre smernicu 2000/14/ES ƒ Britanski priglašeni organ za 2000/14/ES ƒ Cuerpo notificado en el Reino Unido para 2000/14/CE ƒ Anmält organ för 2000/14/EG i Storbritannien ƒ Tilkynntur aðili í Bretlandi fyrir 2000/14/EC ƒ Britisk teknisk for 2000/14/EF en-14 Number: 1088 Sound Research Laboratories Limited Holbrook House, Little Waldingfield Sudbury, Suffolk CO10 0TH 4 SPECIFICATION Operator Ear Noise Level ƒ Ɉɩɟɪɚɬɨɪ ɧɚ ɧɢɜɨɬɨ ɧɚ ɞɨɥɨɜɢɦ ɨɬ ɭɯɨɬɨ ɲɭɦ ƒ Hladina hluku v oblasti uší operátora ƒ Støjniveau i førers ørehøjde ƒ Geluidsniveau oor bestuurder ƒ Müratase operaatori kõrvas ƒ Melutaso käyttäjän korvan kohdalla ƒ Niveau de bruit à hauteur des oreilles de l’opérateur ƒ Schallpegel am Bedienerohr ƒ ǼʌȓʌİįȠ șȠȡȪȕȠȣ ıİ ȜİȚIJȠȣȡȖȓĮ ƒ A kezelĘ fülénél mért zajszint ƒ Livello di potenza sonora all’orecchio dell’operatore ƒ TrokšƼa lƯmenis pie operatora auss ƒ Dirbanþiojo su mašina patiriamo triukšmo lygis ƒ Livell tal-ƪoss fil-Widna tal-Operatur ƒ Dopuszczalny poziom hałasu dla operatora ƒ Nível sonoro nos ouvidos do operador ƒ Nivelul zgomotului la urechea operatorului ƒ Hladina hluku pôsobiaca na sluch operátora ƒ Raven hrupa pri ušesu upravljavca ƒ Nivel sonoro en el oído del operador ƒ Ljudnivå vid förarens öra ƒ Hávaðastig fyrir stjórnanda ƒ Støynivå ved operatørens øre Harmonised standards used ƒ ɂɡɩɨɥɡɜɚɧɢ ɯɚɪɦɨɧɢɡɢɪɚɧɢ ɫɬɚɧɞɚɪɬɢ ƒ Použité harmonizované normy ƒ Brugte harmoniserede standarder ƒ Gebruikte geharmoniseerde standaards ƒ Kasutatud ühtlustatud standardid ƒ Käytetyt yhdenmukaistetut standardit ƒ Normes harmonisées utilisées ƒ Angewandte harmonisierte Normen ƒ ǼȞĮȡȝȠȞȚıȝȑȞĮ ʌȡȩIJȣʌĮ ʌȠȣ ȤȡȘıȚȝȠʌȠȚȒșȘțĮȞ ƒ Harmonizált szabványok ƒ Standard armonizzati applicati ƒ Izmantotie saskaƼotie standarti ƒ Panaudoti suderinti standartai ƒ Standards armonizzati uĪati ƒ Normy spójne powiązane ƒ Normas harmonizadas usadas ƒ Standardele armonizate utilizate ƒ Použité harmonizované normy ƒ Uporabljeni usklajeni standardi ƒ Estándares armonizados utilizados ƒ Harmoniserade standarder som används Not Applicable BS EN 1032:2003+A1:2008 BS EN ISO 20643:2008 BS EN ISO 5349-1:2001 BS EN ISO 5349-2:2002 BS EN ISO 14982:1998 BS EN ISO 12100-1:2003+A1:2009 BS EN ISO 61310-1:2008 Parts 1 to 3 BS EN 836-1997 Technical standards and specifications used ƒ ɂɡɩɨɥɡɜɚɧɢ ɬɟɯɧɢɱɟɫɤɢ ɫɬɚɧɞɚɪɬɢ ɢ ɫɩɟɰɢɮɢɤɚɰɢɢ ƒ Použité technické normy a specifikace ƒ Brugte tekniske standarder og specifikationer ƒ Gebruikte technische standaards en specificaties ƒ Kasutatud tehnilised standardid ja spetsifikatsioonid ƒ Käytetyt tekniset standardit ja eritelmät ƒ Spécifications et normes techniques utilisées ƒ Angewandte technische Normen und Spezifikationen ƒ ȉİȤȞȚțȐ ʌȡȩIJȣʌĮ țĮȚ ʌȡȠįȚĮȖȡĮijȑȢ ʌȠȣ ȤȡȘıȚȝȠʌȠȚȒșȘțĮȞ ƒ MĦszaki szabványok és specifikációk ƒ Standard tecnici e specifiche applicati ƒ Izmantotie tehniskie standarti un specifikƗcijas ƒ Panaudoti techniniai standartai ir techninơ informacija ƒ Standards u speƛifikazzjonijiet tekniƛi uĪati ƒ Normy i specyfikacje techniczne powiązane ƒ Normas técnicas e especificações usadas ƒ Standardele tehnice úi specificaĠiile utilizate ƒ Použité technické normy a špecifikácie ƒ Uporabljeni tehniþni standardi in specifikacije ƒ Estándares y especificaciones técnicas utilizadas ƒ Tekniska standarder och specifikationer som används ƒ Samræmdir staðlar sem notaðir eru ƒ Benyttede harmoniserte standarder Not Applicable The place and date of the declaration ƒ Ɇɹɫɬɨ ɢ ɞɚɬɚ ɧɚ ɞɟɤɥɚɪɚɰɢɹɬɚ ƒ Místo a datum prohlášení ƒ Sted og dato for erklæringen ƒ Plaats en datum van de verklaring ƒ Deklaratsiooni väljastamise koht ja kuupäev ƒ Vakuutuksen paikka ja päivämäärä ƒ Lieu et date de la déclaration ƒ Ort und Datum der Erklärung ƒ ȉȩʌȠȢ țĮȚ ȘȝİȡȠȝȘȞȓĮ įȒȜȦıȘȢ ƒ A nyilatkozat kelte (hely és idĘ) ƒ Luogo e data della dichiarazione ƒ DeklarƗcijas vieta un datums ƒ Deklaracijos vieta ir data ƒ Il-post u d-data tad-dikjarazzjoni ƒ Miejsce i data wystawienia deklaracji ƒ Local e data da declaração ƒ Locul úi data declaraĠiei ƒ Miesto a dátum vyhlásenia ƒ Kraj in datum izjave ƒ Lugar y fecha de la declaración ƒ Plats och datum för deklarationen ƒ Tæknistaðlar og tæknilýsingar sem notaðar eru ƒ Benyttede tekniske standarder og spesifikasjoner ƒ Staður og dagsetning yfirlýsingar ƒ Sted og dato for erklæringen Ransomes Jacobsen Limited West Road, Ransomes Europark, Ipswich, England, IP3 9TT 4th January 2010 Signature of the person empowered to draw up the declaration on behalf of the manufacturer, holds the technical documentation and is authorised to compile the technical file, and who is established in the Community. ɉɨɞɩɢɫ ɧɚ ɱɨɜɟɤɚ, ɭɩɴɥɧɨɦɨɳɟɧ ɞɚ ɫɴɫɬɚɜɢ ɞɟɤɥɚɪɚɰɢɹɬɚ ɨɬ ɢɦɟɬɨ ɧɚ ɩɪɨɢɡɜɨɞɢɬɟɥɹ, ɤɨɣɬɨ ɩɨɞɞɴɪɠɚɳ ɬɟɯɧɢɱɟɫɤɚɬɚ ɞɨɤɭɦɟɧɬɚɰɢɹ ɢ ɟ ɨɬɨɪɢɡɢɪɚɧ ɞɚ ɢɡɝɨɬɜɢ ɬɟɯɧɢɱɟɫɤɢɹ ɮɚɣɥ ɢ ɟ ɪɟɝɢɫɬɪɢɪɚɧ ɜ ɨɛɳɧɨɫɬɬɚ. Podpis osoby oprávnČné sestavit prohlášení jménem výrobce, držet technickou dokumentaci a osoby oprávnČné sestavit technické soubory a založené v rámci Evropského spoleþenství. Underskrift af personen, der har fuldmagt til at udarbejde erklæringen på vegne af producenten, der er indehaver af dokumentationen og er bemyndiget til at udarbejde den tekniske journal, og som er baseret i nærområdet. Handtekening van de persoon die bevoegd is de verklaring namens de fabrikant te tekenen, de technische documentatie bewaart en bevoegd is om het technische bestand samen te stellen, en die is gevestigd in het Woongebied. Ühenduse registrisse kantud isiku allkiri, kes on volitatud tootja nimel deklaratsiooni koostama, kes omab tehnilist dokumentatsiooni ja kellel on õigus koostada tehniline toimik. Sen henkilön allekirjoitus, jolla on valmistajan valtuutus vakuutuksen laadintaan, jolla on hallussaan tekniset asiakirjat, joka on valtuutettu laatimaan tekniset asiakirjat ja joka on sijoittautunut yhteisöön. Signature de la personne habilitée à rédiger la déclaration au nom du fabricant, à détenir la documentation technique, à compiler les fichiers techniques et qui est implantée dans la Communauté. Unterschrift der Person, die berechtigt ist, die Erklärung im Namen des Herstellers abzugeben, die die technischen Unterlagen aufbewahrt und berechtigt ist, die technischen Unterlagen zusammenzustellen, und die in der Gemeinschaft niedergelassen ist. ȊʌȠȖȡĮijȒ ĮIJȩȝȠȣ İȟȠȣıȚȠįȠIJȘȝȑȞȠȣ ȖȚĮ IJȘȞ ıȪȞIJĮȟȘ IJȘȢ įȒȜȦıȘȢ İț ȝȑȡȠȣȢ IJȠȣ țĮIJĮıțİȣĮıIJȒ, Ƞ ȠʌȠȓȠȢ țĮIJȑȤİȚ IJȘȞ IJİȤȞȚțȒ ȑțșİıȘ țĮȚ ȑȤİȚ IJȘȞ İȟȠȣıȚȠįȩIJȘıȘ ȞĮ IJĮȟȚȞȠȝȒıİȚ IJȠȞ IJİȤȞȚțȩ ijȐțİȜȠ țĮȚ Ƞ ȠʌȠȓȠȢ İȓȞĮȚ įȚȠȡȚıȝȑȞȠȢ ıIJȘȞ ȀȠȚȞȩIJȘIJĮ. A gyártó nevében meghatalmazott személy, akinek jogában áll módosítania a nyilatkozatot, a mĦszaki dokumentációt Ęrzi, engedéllyel rendelkezik a mĦszaki fájl összeállításához, és aki a közösségben letelepedett személy. Firma della persona autorizzata a redigere la dichiarazione a nome del fabbricante, in possesso Della documentazione tecnica ed autorizzata a costituire il fascicolo tecnico, che deve essere stabilita nella Comunità. TƗs personas paraksts, kura ir pilnvarota deklarƗcijas sastƗdƯšanai ražotƗja vƗrdƗ, kurai ir tehniskƗ dokumentƗcija, kura ir pilnvarota sagatavot tehnisko reƧistru un kura ir apstiprinƗta KopienƗ. Asmuo, kuris yra gana žinomas, kuriam gamintojas suteikơ Ƴgaliojimus sudaryti šią deklaraciją, ir kuris ją pasirašơ, turi visą techninĊ informaciją ir yra Ƴgaliotas sudaryti techninơs informacijos dokumentą. Il-firma tal-persuna awtorizzata li tfassal id-dikjarazzjoni f’isem il-fabbrikant, gƫandha d-dokumentazzjoni teknika u hija awtorizzata li tikkompila l-fajl tekniku u li hija stabbilita fil-Komunità. Podpis osoby upowaĪnionej do sporządzenia deklaracji w imieniu producenta, przechowującej dokumentacjĊ techniczną, upowaĪnioną do stworzenia dokumentacji technicznej oraz wyznaczonej ds. wspólnotowych. Assinatura da pessoa com poderes para emitir a declaração em nome do fabricante, que possui a documentação técnica, que está autorizada a compilar o processo técnico e que está estabelecida na Comunidade. Semnătura persoanei împuternicite să elaboreze declaraĠia în numele producătorului, care deĠine documentaĠia tehnică, este autorizată să compileze dosarul tehnic úi este stabilită în Comunitate. Podpis osoby poverenej vystavením vyhlásenia v mene výrobcu, ktorá má technickú dokumentáciu a je oprávnená spracovaĢ technické podklady a ktorá je umiestnená v Spoloþenstve. Podpis osebe, pooblašþene za izdelavo izjave v imenu proizvajalca, ki ima tehniþno dokumentacijo in lahko sestavlja spis tehniþne dokumentacije, ter ima sedež v Skupnosti. Firma de la persona responsable de la declaración en nombre del fabricante, que posee la documentación técnica y está autorizada para recopilar el archivo técnico y que está establecido en la Comunidad. Undertecknas av den som bemyndigad att upprätta deklarationen å tillverkarens vägnar, innehar den tekniska dokumentationen och är bemyndigad att sammanställa den tekniska informationen och som är etablerad i gemenskapen. Undirskrift aðilans sem hefur umboð til að gera yfirlýsinguna fyrir hönd framleiðandans, hefur undir höndum tæknigögnin og hefur leyfi til að taka saman tækniskýrsluna, og er viðurkenndur innan evrópska efnahagssvæðisins. Signaturen til personen som har fullmakt til å utferdige erklæringen på vegne av produsenten, er i besittelse av den tekniske dokumentasjonen, har autorisasjon til å utarbeide den tekniske filen og som har tilhold i EU. Tim Lansdell Technical Director 4th January 2010 Ransomes Jacobsen Limited West Road, Ransomes Europark, Ipswich, England, IP3 9TT Certificate Number ƒ ɇɨɦɟɪ ɧɚ ɫɟɪɬɢɮɢɤɚɬ ƒ ýíslo osvČdþení ƒ Certifikatnummer ƒ Certificaatnummer ƒ Sertifikaadi number ƒ Hyväksyntänumero ƒ Numéro de certificat ƒ Bescheinigungsnummer ƒ ǹȡȚșȝȩȢ ȆȚıIJȠʌȠȚȘIJȚțȠȪ ƒ Hitelesítési szám ƒ Numero del certificato ƒ SertifikƗta numurs ƒ Sertifikato numeris ƒ Numru taƛ-ƚertifikat ƒ Numer certyfikatu ƒ Número do Certificado ƒ Număr certificat ƒ ýíslo osvedþenia ƒ Številka certifikata ƒ Número de certificado ƒ Certifikatsnummer ƒ Númer skírteinis ƒ Sertifikatnummer 4126504 (Rev.2) en-15 4 SPECIFICATION DECLARATION OF INCORPORATION ƒ ȾȿɄɅȺɊȺɐɂə ɁȺ ɈȻȿȾɂɇȿɇɂȿ ƒ PROHLÁŠENÍ O ZALOŽENÍ SPOLEýNOSTI ƒ INKORPORERINGSERKLÆRING ƒ INCORPORATIEVERKLARING ƒ KINNITUS ÜHENDAMISE KOHTA ƒ ASENNUSTODISTUS ƒ DECLARATION D’INCORPORATION ƒ EINBAUBESCHEINIGUNG ƒ ǻǾȁȍȈǾ ȂǾ ȈȊȂȂȅȇĭȍȈǾȈ ƒ BEÉPÍTÉSI NYILATKOZAT ƒ DICHIARAZIONE DI INCORPORAZIONE ƒ NOFORMƜŠANAS DEKLARƖCIJA ƒ PRIJUNGIMO DEKLARACIJA ƒ DIKJARAZZJONI TA’ INKORPORAZZJONI ƒ DEKLARACJA ZGODNOĝCI DLA PODZESPOŁU ƒ DECLARAÇÃO DE INCORPORAÇÃO ƒ DECLARAğIE DE ÎNCORPORARE ƒ VYHLÁSENIE O ZABUDOVANÍ SÚýASTI ƒ IZJAVA ZA VGRADNJO ƒ DECLARACIÓN DE INCORPORACIÓN ƒ INBYGGNADSDEKLARATION ƒ YFIRLÝSING UM ÍSETNINGU ƒ PRODUSENTENS ERKLÆRING Business name and full address of the manufacturer ƒ Ɍɴɪɝɨɜɫɤɨ ɢɦɟ ɢ ɩɴɥɟɧ ɚɞɪɟɫ ɧɚ ɩɪɨɢɡɜɨɞɢɬɟɥɹ ƒ Obchodní jméno a plná adresa výrobce ƒ Producentens firmanavn og fulde adresse ƒ Bedrijfsnaam en volledig adres van de fabrikant ƒ Tootja ärinimi ja täielik aadress ƒ Valmistajan toiminimi ja täydellinen osoite ƒ Nom commercial et adresse complète du fabricant ƒ Firmenname und vollständige Adresse des Herstellers ƒ ǼʌȦȞȣȝȓĮ țĮȚ IJĮȤȣįȡȠȝȚțȒ įȚİȪșȣȞıȘ țĮIJĮıțİȣĮıIJȒ ƒ A gyártó üzleti neve és teljes címe ƒ Ragione sociale e indirizzo completo del fabbricante ƒ UzƼƝmuma nosaukums un pilna ražotƗja adrese ƒ Verslo pavadinimas ir pilnas gamintojo adresas ƒ Isem kummerƛjali u indirizz sƫiƫ tal-fabbrikant ƒ Nazwa firmy i pełny adres producenta ƒ Nome da empresa e endereço completo do fabricante ƒ Denumirea comercială úi adresa completă a producătorului ƒ Obchodný názov a úplná adresa výrobcu ƒ Naziv podjetja in polni naslov proizvajalca ƒ Nombre de la empresa y dirección completa del fabricante ƒ Tillverkarens företagsnamn och kompletta adress ƒ Fyrirtækisheiti og fullt heimilisfang framleiðanda. ƒ Firmanavn og full adresse for produsenten. Ransomes Jacobsen Limited West Road, Ransomes Europark, Ipswich, England, IP3 9TT Description and identification of the partly completed machinery. ƒ Ɉɩɢɫɚɧɢɟ ɢ ɢɞɟɧɬɢɮɢɤɚɰɢɹ ɧɚ ɱɚɫɬɢɱɧɨ ɡɚɜɴɪɲɟɧɢɬɟ ɦɚɲɢɧɢ. ƒ Popis a identifikace þásteþnČ dokonþeného strojního zaĜízení. ƒ Beskrivelse og identifikation af den delvist fremstillede maskine. ƒ Beschrijving en identificatie van de gedeeltelijk voltooide machinerie. ƒ Osaliselt komplekteeritud masina kirjeldus ja määratlus. ƒ Osittain kootun laitteiston kuvaus ja määrittely. ƒ Description et identification de la quasi-machine. ƒ Bezeichnung und Identifizierung der teilgefertigten Vorrichtung ƒ ȆİȡȚȖȡĮijȒ țĮȚ ʌȡȠıįȚȠȡȚıȝȩȢ ȘȝȚIJİȜȠȪȢ ȝȘȤĮȞȒȝĮIJȠȢ. ƒ A részlegesen megépített gép leírása és meghatározása. ƒ Descrizione e identificazione della quasi-macchina ƒ DaƺƝji pabeigtas iekƗrtas apraksts un identifikƗcija. ƒ Dalinai užbaigtos Ƴrangos aprašymas ir identifikacija. ƒ Deskrizzjoni u identifikazzjoni tal-makkinarju li jkun lest parzjalment. ƒ Opis i oznaczenie czĊĞciowo ukoĔczonego urządzenia ƒ Descrição e identificação do equipamento parcial ƒ Descrierea úi identificarea echipamentului finalizat parĠial ƒ Opis a identifikácia podzostavy strojného zariadenia ƒ Opis in identifikacija delno dokonþanega stroja. ƒ Descripción e identificación de la maquinaria parcialmente completada ƒ Beskrivning och identifiering av maskindelarna ƒ Fyrirtækisheiti og fullt heimilisfang framleiðanda ƒ Lýsing og auðkenni hálfsamsetta vélbúnaðarins ƒ Erklæring og identifikasjon for det delvis ferdigstilte maskineriet Description Magna 250 6 Knife Fixed Head - Right Hand Drive Product Code LMAB592 Serial Number XQ200301 - XQ299999 LMAB591 XP300301 - XP399999 Magna 250 6 Knife Fixed Head - Left Hand Drive LMAB352 UV200301 - UV299999 Sport 200 8 Knife Floating Head - Left Hand Drive LMAB353 UW300301 - UW399999 Sport 200 8 Knife Floating Head - Right Hand Drive We undertake to transmit, in response to a reasoned request by the national authorities, relevant information on the partly completed machinery. This shall be by hardcopy and shall be without prejudice to the intellectual property rights of the manufacturer of the partly completed machinery. ɇɢɟ ɨɛɟɳɚɜɚɦɟ ɞɚ ɩɪɟɞɚɞɟɦ, ɩɪɟɞɚɞɟɦ ɜ ɨɬɝɨɜɨɪ ɧɚ ɨɫɧɨɜɚɬɟɥɧɨ ɢɫɤɚɧɟ ɨɬ ɧɚɰɢɨɧɚɥɧɢɬɟ ɨɪɝɚɧɢ ɨɪɝɚɧɢ, ɫɴɨɬɜɟɬɧɚ ɢɧɮɨɪɦɚɰɢɹ ɡɚ ɱɚɫɬɢɱɧɨ ɡɚɜɴɪɲɟɧɢɬɟ ɦɚɲɢɧɢ. ɦɚɲɢɧɢ Ɍɨɜɚ ɳɟ ɫɟ ɨɫɴɳɟɫɬɜɢ ɱɪɟɡ ɞɨɤɭɦɟɧɬ ɢ ɧɹɦɚ ɞɚ ɛɴɞɟ ɜ ɧɚɪɭɲɟɧɢɟ ɧɚ ɩɪɚɜɚɬɚ ɡɚ ɢɧɬɟɥɟɤɬɭɚɥɧɚ ɫɨɛɫɬɜɟɧɨɫɬ ɧɚ ɩɪɨɢɡɜɨɞɢɬɟɥɹ ɧɚ ɱɚɫɬɢɱɧɨ ɡɚɜɴɪɲɟɧɢɬɟ ɦɚɲɢɧɢ. Zavazujeme se na základČ zdĤvodnČné žádosti ze strany národních úĜadĤ poskytnout pĜíslušné informace o þásteþnČ dokonþeném strojním zaĜízení. Informace budou pĜedány v tištČné podobČ a nepoškodí práva k duševnímu vlastnictví výrobce týkající se þásteþnČ dokonþeného strojního zaĜízení. Som svar på en begrundet anmodning fra de nationale myndigheder forpligter vi os til at videregive oplysninger om den delvist fremstillede maskine. Dette bliver gjort i papirudgave og med forbehold for de immaterielle rettigheder, som indehaves af producenten af den delvist fremstillede maskine. We zijn van plan, in reactie op een redelijk verzoek van de nationale autoriteiten, relevante informatie over de gedeeltelijk voltooide machinerie te verzenden. Dit wordt gedaan in de vorm van fysieke kopieën en deze kopieën zullen onder alle voorbehoud behoren tot de intellectuele eigendomsrechten van de fabrikant van de gedeeltelijk voltooide machinerie. Me kohustume riigisiseste asutuste põhjendatud nõudmisel edastama asjakohast teavet osaliselt komplekteeritud masina kohta. Andmed edastatakse paberkandjal ning sellega ei tohi piirata osaliselt komplekteeritud masina tootja õigusi intellektuaalsele omandile. Sitoudumme toimittamaan osittain koottua laitteistoa koskevat olennaiset tiedot vastineena kansallisten viranomaisten perusteltuun pyyntöön. Tiedot toimitetaan paperitulosteena. Ne eivät rajoita valmistajan osittain koottua laitteistoa koskevia immateriaalioikeuksia. Nous nous engageons à fournir, en réponse à une demande rationnelle des autorités nationales, toute information appropriée concernant la quasi-machine. Ceci se fera par copie papier et sans préjuger des droits de propriété intellectuelle du fabricant de la quasi-machine. Wir verpflichten uns, auf eine begründete Aufforderung durch die nationalen Behörden hin, relevante Informationen über die teilgefertigte Maschine zu übersenden. Diese werden als Ausdruck übersandt und dürfen sich nicht nachteilig auf die Rechte am geistigen Eigentum des Herstellers der teilgefertigten Maschine auswirken. ǹȞĮȜĮȝȕȐȞȠȣȝİ ȞĮ ȝİIJĮȕȚȕȐıȠȣȝİ, ʌȡȠȢ ĮʌȐȞIJȘıȘ İȪȜȠȖȘȢ ĮȓIJȘıȘȢ IJȦȞ İșȞȚțȫȞ ĮȡȤȫȞ, IJȚȢ ıȤİIJȚțȑȢ ʌȜȘȡȠijȠȡȓİȢ ȩıȠȞ ĮijȠȡȐ IJȠ ȘȝȚIJİȜȑȢ ȝȘȤȐȞȘȝĮ. ǹȣIJȩ șĮ ʌȡȑʌİȚ ȞĮ ȖȓȞİȚ ȖȡĮʌIJȫȢ țĮȚ įȓȤȦȢ ȞĮ șȓȖİȚ IJĮ ʌȞİȣȝĮIJȚțȐ įȚțĮȚȫȝĮIJĮ IJȠȣ țĮIJĮıțİȣĮıIJȒ IJȠȣ ȘȝȚIJİȜȠȪȢ ȝȘȤĮȞȒȝĮIJȠȢ. Vállaljuk, hogy átadjuk – a nemzeti hatóságok megalapozott kérésére válaszul – a részlegesen megépített gépre vonatkozó információkat. Az információkat nyomtatott példányban adjuk át. A nyomtatott példány átadása a részlegesen megépített gép gyártójának szellemi tulajdonjogaira tett kötelezettség nélkül történik. Ci impegniamo a trasmettere, in risposta ad una richiesta adeguatamente motivata delle autorità nazionali, informazioni pertinenti sulla quasi-macchina. L’impegno sarà redatto in forma cartacea e lascerà impregiudicati i diritti di proprietà intellettuale del fabbricante della quasi-macchina. Atsaucoties uz pamatotu valsts iestƗžu pieprasƯjumu, mƝs apƼemamies nodot saistƯto informƗciju par daƺƝji pabeigtu iekƗrtu. TƗ bnjs cietƗ kopija un neradƯs kaitƝjumus daƺƝji pabeigtƗs iekƗrtas ražotƗja intelektuƗlƗ Ưpašuma tiesƯbƗm. Atsakydami Ƴ nacionaliniǐ valdžios organǐ užklausą, pateikiame informaciją apie dalinai užbaigtus mechanizmus. Šis dokumentas yra atspausdintas elektroninio originalo variantas ir be jokio išankstinio nusistatymo neturi tikslo pažeisti dalinai užbaigto mechanizmo gamintojo intelektualinơs nuosavybơs teisiǐ. Aƫna nwiegƫdu li nippreĪentaw, meta mitlubin mill-awtoritajiet nazzjonali, l-informazzjoni relevanti dwar il-makkinarju li jkun lest parzjalment. Din l-informazzjoni gƫandha tkun f’forma stampata u mingƫajr preƥudizzju gƫad-drittijiet tal-proprjetà intelletwali tal-fabbrikant tal-makkinarju li jkun lest parzjalment. Na uzasadnioną proĞbĊ instytucji paĔstwowych zobowiązujemy siĊ do przekazania wszelkich informacji na temat czĊĞciowo ukoĔczonego urządzenia. BĊdą one przekazane na piĞmie. Strona przekazująca w/wym. dokumentacjĊ nie bĊdzie roĞciła sobie Īadnych praw do własnoĞci intelektualnej producenta czĊĞciowo ukoĔczonego urządzenia. Na sequência de pedido razoável por parte das autoridades nacionais, comprometemo-nos a transmitir informações importantes sobre o equipamento parcial. Tal será feito por meio de hardcopy e sem prejuízo para os direitos de propriedade intelectual do fabricante do equipamento parcial. Ne angajăm să transmitem, ca răspuns la o solicitare motivată a autorităĠilor naĠionale, informaĠii relevante privind echipamentul finalizat parĠial. Aceasta se va efectua în format hârtie úi fără a aduce atingere drepturilor de proprietate intelectuală ale producătorului echipamentului finalizat parĠial. Zaväzujeme sa, že na základe odôvodnenej požiadavky národných orgánov predložíme dôležité informácie o podzostave strojného zariadenia. Musí to byĢ v tlaþenej forme a bez ujmy na právach duševného vlastníctva výrobcu podzostavy strojného zariadenia. Zavezujemo se, da bomo na utemeljeno zahtevo nacionalnih organov predložili zadevne informacije o delno dokonþanem stroju. Informacije bodo v tiskani obliki in ne bodo posegale v pravice intelektualne lastnine proizvajalca delno dokonþanega stroja. Nos comprometemos a transmitir, en respuesta a una petición razonada por parte de las autoridades nacionales, información relevante sobre la maquinaria parcialmente completada. Ésta será transmitida en copia impresa y no afectará a los derechos de propiedad intelectual del fabricante de la maquinaria parcialmente completada. Vi åtar oss att vidarebefordra relevant information om maskindelarna vid en motiverad förfrågan från nationella myndigheter. Informationen ska erhållas i form av papperskopior och ska vara utan men för maskindelstillverkarens immateriella rättigheter. Berist okkur rökstudd beiðni frá landsyfirvöldum um að senda mikilvægar upplýsingar um hálfsamsetta vélbúnaðinn, munum við verða við slíkri beiðni. Beiðnin skal vera í prentriti og gilda með fyrirvara um hugverkarétt framleiðanda hálfsamsetta vélbúnaðarins. Vi vil, på anmodning fra nasjonale myndigheter, formidle all relevant informasjon om det delvis ferdigstilte maskineriet. Informasjonen vil bli formidlet i papirutgave og skal være uten prejudise for åndsrettighetene til produsenten av det delvis ferdigstilte maskineriet. en-16 4 SPECIFICATION Partly completed machinery must not be put into service until the final machinery into which it is to be incorporated has been declared in conformity with the provisions of Directive 2006/42/EC. ɑɚɫɬɢɱɧɨ ɡɚɜɴɪɲɟɧɢɬɟ ɦɚɲɢɧɢ ɧɟ ɬɪɹɛɜɚ ɞɚ ɛɴɞɚɬ ɩɭɫɤɚɧɚ ɜ ɭɩɨɬɪɟɛɚ, ɞɨɤɚɬɨ ɤɪɚɣɧɢɬɟ ɦɚɲɢɧɢ, ɜ ɤɨɢɬɨ ɫɚ ɜɝɪɚɞɟɧɢ, ɧɟ ɫɚ ɩɪɢɜɟɞɟɧɢ ɜ ɫɴɨɬɜɟɬɫɬɜɢɟ ɫ ɩɨɫɬɚɧɨɜɥɟɧɢɹɬɚ ɧɚ ɞɢɪɟɤɬɢɜɚ 2006/42/EɈ. ýásteþnČ dokonþené zaĜízení nesmí být uvedeno do provozu, dokud koneþné zaĜízení, do kterého bylo uvedené zaĜízení namontováno, neodpovídá ustanovením SmČrnice þ. 2006/42/EC. Delvist fremstillede maskiner må ikke indsættes i driften, før den endelige maskine, som den skal inkorporeres i, er blevet erklæret I overensstemmelse med bestemmelserne i Direktiv 2006/42/EF. Gedeeltelijk voltooide machinerie mag niet in dienst worden genomen, totdat er voor de definitieve machinerie, waarvan gedeeltelijk voltooide machinerie onderdeel uitmaakt, een conformiteitsverklaring is ontvangen onder de voorwaarden van Richtlijn 2006/42/EG. Osaliselt komplekteeritud masinat ei tohi kasutusele võtta enne, kui lõplikult komplekteeritud masin, millega see ühendatakse, on tunnistatud direktiivi 2006/42/EÜ sätetele vastavaks. Osittain koottua laitteistoa ei saa ottaa käyttöön, ennen kuin lopullinen laitteisto, johon se asennetaan, on vakuutettu direktiivin 2006/42/EY säännösten mukaiseksi. La quasi-machine ne doit pas être mise en service avant que la machine finale dans laquelle elle doit être incorporée n’ait été déclarée conforme aux dispositions de la directive 2006/42/CE Die teilgefertigte Vorrichtung darf erst in Betrieb genommen werden, wenn die Konformität der Maschine, in die sie eingebaut wird, entsprechend den Bestimmungen der Richtlinie 2006/42/EG erklärt worden ist. ĬĮ ʌȡȑʌİȚ ȞĮ İțIJİȜİıIJİȓ ıȑȡȕȚȢ ıIJȠ ȘȝȚIJİȜȑȢ ȝȘȤȐȞȘȝĮ ȝȑȤȡȚ IJȠ IJİȜȚțȩ ȝȘȤȐȞȘȝĮ ıIJȠ ȠʌȠȓȠ șĮ İȞıȦȝĮIJȦșİȓ ȞĮ ȑȤİȚ IJȘ įȒȜȦıȘ ıȣȝȝȩȡijȦıȘȢ, ıȪȝijȦȞĮ ȝİ IJȚȢ įȚĮIJȐȟİȚȢ IJȘȢ ȅįȘȖȓĮȢ 2006/42/ǼȀ. A részlegesen megépített gépet tilos üzembe helyezni mindaddig, amíg a 2006/42/EK irányelv rendelkezéseivel összhangban a részlegesen megépített gépet be nem építik a végleges változatba, és errĘl nem nyilatkoznak. La quasi-macchina non deve essere messa in servizio finché la macchina finale in cui deve essere incorporata non è stata dichiarata conforme, nel caso, alle disposizioni della Direttiva 2006/42/CE. DaƺƝji pabeigtu iekƗrtu nedrƯkst nodot ekspluatƗcijƗ, lƯdz galƯgƗ iekƗrta, kurƗ tƗ ir jƗiebnjvƝ, ir deklarƝta atbilstoši direktƯvas Nr. 2006/42/EK noteikumiem. These accessories have been designed to be fitted to the Ransomes Hydraulic TG3400 & TG4650 LHAC201, LHAC202, LHAB201, LHAB202. Dalinai užbaigto mechanizmo negalima paleisti kol kiti mechanizmai, kurie dar bus prijungti, nebus patvirtinti kaip atitinkantys 2006/42/EC Direktyvos reikalavimus. Il-makkinarju li jkun parzjalment lest ma gƫandux jibda jitƫaddem sakemm il-makkinarju finali li fih ikun se jiƥi inkorporat ikun ƥie ddikjarat konformi mad-dispoĪizzjonijiet tad-Direttiva 2006/42/KE. Urządzenia czĊĞciowo ukoĔczonego nie wolno uĪytkowaü aĪ do orzeczenia zgodnoĞci urządzenia w postaci kompletnej z wymaganiami dyrektywy 2006/42/WE. O equipamento parcial não poderá entrar em funcionamento antes do mecanismo final no qual vai ser incorporado ser declarado como estando em conformidade com as condições da Directiva 2006/42/CE. Echipamentul finalizat parĠial nu trebuie pus în funcĠiune până ce echipamentul final în care va fi încorporat nu este declarat ca fiind conform cu prevederile Directivei 2006/42/CE. Podzostava strojného zariadenia nesmie byĢ uvedená do prevádzky, pokiaĐ finálne strojné zariadenie, ktorého sa stane súþasĢou, nebude vyhlásené ako zhodné s ustanoveniami smernice 2006/42/ES. Delno dokonþanega stroja ni dovoljeno dati v obratovanje, dokler se dokonþani stroj, v katerega se vgradi delno dokonþani stroj, ne potrdi kot skladen z doloþbami Direktive 2006/42/ES. La maquinaria parcialmente completada no debe ponerse en servicio hasta que la maquinaria final a la que debe incorporarse cumpla con las provisiones de la Directiva 2006/42/CE. Maskindelarna får ej tas i bruk förrän maskinen som delen tillhör har deklarerats som överensstämmande med föreskrifterna I direktivet 2006/42/EG. Hálfsamsettan vélbúnað má ekki taka í notkun fyrr en vottað hefur verið að endanlegi vélbúnaðurinn sem setja á hann í samræmist ákvæðum tilskipunar 2006/42/EC. Delvis ferdigstilt maskineri skal ikke tas i bruk før det endelige maskineriet som dette skal integreres i, er erklært å være i overensstemmelse med bestemmelsene i direktiv 2006/42/EF. The place and date of the declaration ƒ Ɇɹɫɬɨ ɢ ɞɚɬɚ ɧɚ ɞɟɤɥɚɪɚɰɢɹɬɚ ƒ Místo a datum prohlášení ƒ Sted og dato for erklæringen ƒ Plaats en datum van de verklaring ƒ Deklaratsiooni väljastamise koht ja kuupäev ƒ Vakuutuksen paikka ja päivämäärä ƒ Lieu et date de la déclaration ƒ Ort und Datum der Erklärung ƒ ȉȩʌȠȢ țĮȚ ȘȝİȡȠȝȘȞȓĮ įȒȜȦıȘȢ ƒ A nyilatkozat kelte (hely és idĘ) ƒ Luogo e data della dichiarazione ƒ DeklarƗcijas vieta un datums ƒ Deklaracijos vieta ir data ƒ Il-post u d-data tad-dikjarazzjoni ƒ Miejsce i data wydania deklaracji ƒ Local e data da declaração ƒ Locul úi data declaraĠiei ƒ Miesto a dátum vyhlásenia ƒ Slovenian ƒ Lugar y fecha de la declaración ƒ Plats och datum för deklarationen ƒ Staður og dagsetning yfirlýsingar ƒ Sted og dato for erklæringen Ransomes Jacobsen Limited West Road, Ransomes Europark, Ipswich, England, IP3 9TT 4th January 2010 Signature off the up the holds Si t th person empowered d to t draw d th declaration d l ti on behalf b h lf off the th manufacturer, f t h ld the th technical t h i l documentation d t ti and d is i authorised th i d to compile the technical file, and who is established in the Community. ɉɨɞɩɢɫ ɧɚ ɱɨɜɟɤɚ, ɭɩɴɥɧɨɦɨɳɟɧ ɞɚ ɫɴɫɬɚɜɢ ɞɟɤɥɚɪɚɰɢɹɬɚ ɨɬ ɢɦɟɬɨ ɧɚ ɩɪɨɢɡɜɨɞɢɬɟɥɹ, ɤɨɣɬɨ ɩɨɞɞɴɪɠɚɳ ɬɟɯɧɢɱɟɫɤɚɬɚ ɞɨɤɭɦɟɧɬɚɰɢɹ ɢ ɟ ɨɬɨɪɢɡɢɪɚɧ ɞɚ ɢɡɝɨɬɜɢ ɬɟɯɧɢɱɟɫɤɢɹ ɮɚɣɥ ɢ ɟ ɪɟɝɢɫɬɪɢɪɚɧ ɜ ɨɛɳɧɨɫɬɬɚ. Podpis osoby oprávnČné sestavit prohlášení jménem výrobce, držet technickou dokumentaci a osoby oprávnČné sestavit technické soubory a založené v rámci Evropského spoleþenství. Underskrift af personen, der har fuldmagt til at udarbejde erklæringen på vegne af producenten, der er indehaver af dokumentationen og er bemyndiget til at udarbejde den tekniske journal, og som er baseret på stedet. Handtekening van de persoon die bevoegd is de verklaring namens de fabrikant te tekenen, de technische documentatie bewaart en bevoegd is om het technische bestand samen te stellen, en die is gevestigd in het Woongebied. Ühenduse registrisse kantud isiku allkiri, kes on volitatud tootja nimel deklaratsiooni koostama, kes omab tehnilist dokumentatsiooni ja kellel on õigus koostada tehniline toimik. Sen henkilön allekirjoitus, jolla on valmistajan valtuutus vakuutuksen laadintaan, jolla on hallussaan tekniset asiakirjat, joka on valtuutettu laatimaan tekniset asiakirjat ja joka on sijoittautunut yhteisöön. Signature de la personne habilitée à rédiger la déclaration au nom du fabricant, à détenir la documentation technique, à compiler les fichiers techniques et qui est implantée dans la Communauté. Unterschrift der Person, die berechtigt ist, die Erklärung im Namen des Herstellers abzugeben, die die technischen Unterlagen aufbewahrt und berechtigt ist, die technischen Unterlagen zusammenzustellen, und die in der Gemeinschaft niedergelassen ist. ȊʌȠȖȡĮijȒ ĮIJȩȝȠȣ İȟȠȣıȚȠįȠIJȘȝȑȞȠȣ ȖȚĮ IJȘȞ ıȪȞIJĮȟȘ IJȘȢ įȒȜȦıȘȢ İț ȝȑȡȠȣȢ IJȠȣ țĮIJĮıțİȣĮıIJȒ, Ƞ ȠʌȠȓȠȢ țĮIJȑȤİȚ IJȘȞ IJİȤȞȚțȒ ȑțșİıȘ țĮȚ ȑȤİȚ IJȘȞ İȟȠȣıȚȠįȩIJȘıȘ ȞĮ IJĮȟȚȞȠȝȒıİȚ IJȠȞ IJİȤȞȚțȩ ijȐțİȜȠ țĮȚ Ƞ ȠʌȠȓȠȢ İȓȞĮȚ įȚȠȡȚıȝȑȞȠȢ ıIJȘȞ ȀȠȚȞȩIJȘIJĮ. A gyártó nevében meghatalmazott személy, akinek jogában áll módosítania a nyilatkozatot, a mĦszaki dokumentációt Ęrzi, engedéllyel rendelkezik a mĦszaki fájl összeállításához és a közösségben letelepedett személy. Firma della persona autorizzata a redigere la dichiarazione a nome del fabbricante, in possesso della documentazione tecnica ed autorizzata a costituire il fascicolo tecnico, che deve essere stabilita nella Comunità. TƗs personas paraksts, kura ir pilnvarota deklarƗcijas sastƗdƯšanai ražotƗja vƗrdƗ, kurai ir tehniskƗ dokumentƗcija, kura ir pilnvarota sagatavot tehnisko reƧistru un kura ir apstiprinƗta KopienƗ. Tim Lansdell Technical Director 4th January 2010 Ransomes Jacobsen Limited West Road, Ransomes Europark, Ipswich, England, IP3 9TT Asmuo, kuris yra gana žinomas, kuriam gamintojas suteikơ Ƴgaliojimus sudaryti šią deklaraciją, ir kuris ją pasirašơ, turi visą techninĊ informaciją ir yra Ƴgaliotas sudaryti techninơs informacijos dokumentą. Il-firma tal-persuna awtorizzata li tfassal id-dikjarazzjoni f’isem il-fabbrikant, gƫandha d-dokumentazzjoni teknika u hija awtorizzata li tikkompila l-fajl tekniku u li hija stabbilita fil-Komunità. Podpis osoby upowaĪnionej do sporządzenia deklaracji w imieniu producenta, przechowującej dokumentacjĊ techniczną, upowaĪnioną do stworzenia dokumentacji technicznej oraz wyznaczonej ds. wspólnotowych. Assinatura da pessoa com poderes para emitir a declaração em nome do fabricante, que possui a documentação técnica, que está autorizada a compilar o processo técnico e que está estabelecida na Comunidade. Semnătura persoanei împuternicite să elaboreze declaraĠia în numele producătorului, care deĠine documentaĠia tehnică, este autorizată să compileze dosarul tehnic úi este stabilită în Comunitate. Podpis osoby poverenej vystavením vyhlásenia v mene výrobcu, ktorá má technickú dokumentáciu a je oprávnená spracovaĢ technické podklady a ktorá je umiestnená v Spoloþenstve. Podpis osebe, pooblašþene za izdelavo izjave v imenu proizvajalca, ki ima tehniþno dokumentacijo in lahko sestavlja spis tehniþne dokumentacije, ter ima sedež v Skupnosti. Firma de la persona responsable de la declaración en nombre del fabricante, que posee la documentación técnica y está autorizada para recopilar el archivo técnico y que está establecido en la Comunidad. Undertecknas av någon som bemyndigad att upprätta deklarationen å tillverkarens vägnar, innehar den tekniska dokumentationen och är bemyndigad att sammanställa den tekniska informationen och som är etablerad i gemenskapen. Undirskrift aðilans sem hefur umboð til að gera yfirlýsinguna fyrir hönd framleiðandans, hefur undir höndum tæknigögnin og hefur leyfi til að taka saman tækniskýrsluna, og er viðurkenndur innan evrópska efnahagssvæðisins. Signaturen til personen som har fullmakt til å utferdige erklæringen på vegne av produsenten, er i besittelse av den tekniske dokumentasjonen, har autorisasjon til å utarbeide den tekniske filen og som har tilhold i EU. Certificate Number ƒ ɇɨɦɟɪ ɧɚ ɫɟɪɬɢɮɢɤɚɬ ƒ ýíslo osvČdþení ƒ Certifikatnummer ƒ Certificaatnummer ƒ Sertifikaadi number ƒ Hyväksyntänumero ƒ Numéro de certificat ƒ Bescheinigungsnummer ƒ ǹȡȚșȝȩȢ ȆȚıIJȠʌȠȚȘIJȚțȠȪ ƒ Hitelesítési szám ƒ Numero del certificato ƒ SertifikƗta numurs ƒ Sertifikato numeris ƒ Numru taƛ-ƚertifikat ƒ Numer certyfikatu ƒ Número do Certificado ƒ Număr certificat ƒ ýíslo osvedþenia ƒ Številka certifikata ƒ Número de certificado ƒ Certifikatsnummer ƒ Númer skírteinis ƒ Sertifikatnummer Ransomes 3400-UD-4650-UC-Incorp-r2 en-17 5 DECALS 5.1 SAFETY DECALS _____________________________________________________ 5.2 INSTRUCTION DECALS _______________________________________________ en-18 5 DECALS Safety Decals A903491 Read Operator's Manual. A903489 Keep a Safe Distance from the Machine. A911411 Caution. Power Take Off. (PTO) Keep Clear While Running. A903494 Caution Rotating Blades. A903493 Avoid Fluid Escaping Under Pressure. Consult Technical Manual for Service Procedures. Instruction Decals A. Jacking Point B. Lifting Point C. Hydraulic Oil Fill D. Weight Transfer E. Cutting Unit Lift Controls/Cutting Circuit Rotation Control& Real Engage TG4650 F. Cutting Unit Lift Controls/Cutting Circuit Rotation Control& Real Engage TG3400 G. Tyre Pressure H. Cutting Unit Engage en-19 6 CONTROLS 6.1 SAFETY HOOK LEVERS __________________________________________ All safety hooks should be in place when the machine is being transported along the highway with the units in the raised position. The hooks can be found on the main framework and hold the unit lifting arms in place. WARNING Before releasing safety hook levers it is important that all cutting units are fully raised. 1.Park the machine on level ground. 2.With the engine running at operating speed and the PTO engaged raise the cutting units to their maximum position by operating lift levers whilst seated in the driving position. 3.Disengage drives, stop the engine and make sure all moving parts are stationary. Apply brakes and remove the starter key. 4.Safety hook levers can now be released. 6.2 PARKING BRAKE ________________________________________________ A parking brake is fitted to the drawbar of the machine and should be applied when the machine is being unhitched from the towing vehicle. Ensure that the handbrake lever is in the fully down (off) position when in work. en-20 6 CONTROLS 6.3 CONTROL LEVERS ______________________________________________ CUTTING CYLINDER ROTATION This lever (A) has three positions, in its centre, neutral position the cutting cylinders will not rotate. By moving the lever towards the operator the cutting cylinders will rotate forward for cutting. By moving the lever away from the operator the cutting cylinders will rotate in reverse for clearing and backlapping. NOTE: When cutting units are lowered to the ground they will not rotate untill the mow switch on the left hand side of the control assembly has been operated. CUTTING UNIT LIFT Three levers control the cutting unit lift. The centre lever (B) controls cutting units 1, 2 & 3 on the TG4650, cutting unit 1, 2, 3 on the TG3400. The right hand lever C controls cutting unit 4 & 6 on the TG4650, cutting unit 4 on the TG3400. Tthe left hand lever D controls cutting unit 5 & 7 on the TG4650, cutting unit 5 on the TG3400. Each lever has three positions: 1. 2. 3. Away from the operator for lowering the cutting units to the ground and "float" position. Towards the operator to raise the cutting units. Central position is neutral. WARNING WARNING: The control levers must only be operated while mounted in the cab of the towing vehicle with the operator on the seat . MOW SWITCH This switch (E) starts the cutting cylinders rotating once the cutting units have been lowered to the ground. 6.4 WEIGHT TRANSFER VALVE _______________________________________ The weight transfer valve (A) is situated behind the front bulkhead under the top cover, above the gearbox. Screw the control knob in to reduce the weight on the cutting units. Adjustment should be made with the cutting units lowered and the PTO at operating speed (without the drive engaged). NEVER COMPLETELY CLOSE THE VALVE. WARNING Care should be taken when adjusting the weight transfer valve as the cutting unit arms may raise if the setting is excessive en-21 7 OPERATION 7.1 DAILY INSPECTION __________________________________________________ CAUTION The Daily Inspection Should Be Performed Only When The Tractors Engine Is Off And All Fluids Are Cold. Lower Implements To The Ground, Engage Tractors Parking Brake, Stop Engine And Remove Ignition Key. 1. Perform a visual inspection of the entire unit, look for signs of wear, loose hardware and missing or damaged components. Check for oil leaks to ensure connections are tight and hoses and tubes are in good condition. 2. All fluids must be at the full mark when cold. 3. Make sure all cutting units are adjusted to the same height of cut. en-22 7 OPERATION 7.2 OPERATING PROCEDURE _____________________________________________ CAUTION To Help Prevent Injury, Always Wear Safety Glasses, Leather Work Shoes Or Boots, A Hard Hat And Ear Protection. 1. Do not operate with loose, damaged or missing components. Whenever possible mow when grass is dry 2. First mow in a test area to become thoroughly familiar with the operation of the controls. 3. Study the area to determine the best and safest operating procedure. Consider the height of the grass, type of terrain, and condition of the surface. Each condition will require certain adjustments or precautions. 4. Never direct discharge of material toward bystanders, nor allow anyone near the machine while in operation. The owner/operator is responsible for injuries inflicted to bystanders and/or damage to their property. 5. Use discretion when mowing near gravel areas (roadway, parking areas, cart paths, etc.). Stones discharged from the implement may cause serious injuries to bystanders and/or damage the equipment. CAUTION Remove All Debris From The Site Before Mowing. Enter A New Area Cautiously Always Operate At Speeds That Allow You To Have Complete Control Of The Mower. 6. Disengage the cutter motors and raise the implements when crossing paths or roads. Look out for traffic. 7. Stop and inspect the equipment for damage immediately after striking an obstruction or if the machine begins to vibrate abnormally. Have the equipment repaired before resuming operation. CAUTION Before You Clean, Adjust, Or Repair This Equipment, Always Disengage All Drives, Lower Implements To The Ground, Engage Tractor Parking Brake, Stop Engine And Remove Key From Ignition Switch To Prevent Injuries. 10. Do not operate with loose, damaged or missing components. en-23 7 OPERATION 7.3 ATTACHING THE MACHINE TO THE TRACTOR ___________________________ 1. Before attachment can be made to the tractor it is essential that the following items are available: (a) Swinging drawbar or Pick-up hitch on tractor. (c) 7 pin socket for lighting cable. (d) The tractor drawbar must have at least 60mm (2 3/8in) vertical clearance within the jaw to allow freedom of movement at the pivot when travelling over uneven ground. The hitch eye should not be restricted by the addition of collars to reduce the clearance in the jaw. 2. Ensure that the telescopic P.T.O. drive shaft has been cut to the correct length required for the power unit. (a) The length can be measured by hitching the eye of the drawbar of the machine to the jaw of the hitch on the power unit and measuring the drive shaft in the shortest possible position. (b) Instructions for cutting the drive shaft are supplied with the shaft. 3. Assemble drive shaft to power unit using the quick release pins and couple up safety chain securely. NOTE: These safety chains prevent the outer guards from revolving and must be connected. 4. (a) After ensuring that drawbar eye is secure to the hitch on the power unit, wind jockey wheel handle to raise the wheel into its highest position. NOTE: The jockey wheel handle should be turned fully upwards until the shaft becomes tight. (b) (c) The clamp on the side of the shaft can be released to raise the wheel and shaft. Re-clamp the bracket securely. 5. (a) (b) Attach power cable to towing vehicle and connect up to battery. Red cable (A) with fuse attached should be connected to the positive (+) terminal. The black cable (B) should be connected to the negative (-) terminal. NOTE: This applies to towing vehicles with negative earth (ground). 6. Plug in the light and power cables. The power cable (small black) (A) is fitted with a black plug and the lighting cable (black) (B) is fitted with a seven pin black plug. en-24 7 OPERATION 7. The lighting cable is precoiled and when not plugged into the power unit should be clipped into its “parking” position on the main frame (A) on the LH side. 8. Release parking brake (A) on side of drawbar and attach safety ring and cable (B) to a convenient point on the towing vehicle. NOTE: The safety cable should be fitted loosely to allow for turning. 9. Fit operator control levers into cab of power unit. en-25 7 OPERATION 7.4 OPERATION OF THE MACHINE ________________________________________ Always refer to the tractor manufactures Operators Manual, in conjuction with the mower's Safety & Operators manual, before operating this machine. MOWING: 1. Check that all drives, switches and gears are in neutral and that the park brake is applied. 2. Check that the safety catches have been released. 3. Start the engine. 4. Lower the cutting units to the ground. 5. Select the 540 RPM PTO Speed and engage the PTO drive. Increase PTO speed to 540 RPM. (Maximum PTO Speed). 6. Engage the cutting cylinder drive 7. Select the appropriate gear to give a forward speed between 5 - 12 KPH depending on conditions. 8. Depress the mow switch to start the cutting cylinders rotating. 9. Begin Driving Forward. IMPORTANT NOTE: When cutting the PTO speed should always be set to 540 RPM. This will ensure efficient operation, fuel economy, minimum cylinder and bottom blade wear and the cleanest cut in difficult conditions. If the engine starts to labour, the forward speed of the machine should be reduced by changing down a gear. STOPPING: 1. Take the tractor out of gear and apply the park brake. 2. Lift all the cutting units to the raised position. 3. Decrease the PTO speed. Stop the cutting cylinder drive by moving the cutter control switch to the centre position. (Neutral). Stop the PTO. 6. Switch off the engine. en-26 7 OPERATION en-27 8 MAINTENANCE & LUBRICATION 8.1 MAINTENANCE & LUBRICATION CHART _________________________________ MAINTENANCE AND LUBRICATION CHART Interval Item Section First 50 hours Change P.T.O. gearbox Oil Daily 10 hours Check Hydraulic Fluid Level. Clean Machine. Weekly Every 50 hours Check for Loose Components. Check for Hydraulic Leaks. Check P.T.O. Gearbox Oil Lubricate all Cutting Unit Grease Fittings. Lubricate P.T.O. Lubricate Control Valve Linkage. Every 400 hours Lubricate the Direct Drive Cutting Unit Motor Shaft End of season Every 1000 hours Change Hydraulic Oil & Filter. Change P.T.O. gearbox Oil Lubricate all Grease fittings weekly A = Divertor Acctuator Rods, B =Cutting Unit Pivot, C = Cutting Unit Bearing Housing, (see diagram) FLUID REQUIREMENTS en-28 Quantity Type A Hydraulic Oil (with filter) 150 litres ISO VG 46 B P.T.O. Gearbox 0.85 litres Shell Spirax G90 C General Lubrication - Lithium Based General Purpose Grease similar to Shell Darina R2 D Power Take Off Shaft - Rocol GP1 Grease E Cutting Unit Motor Shaft - Shell S7222 grease (MBE3927) 8 MAINTENANCE & LUBRICATION SAFETY, OPERATORS & MAINTENANCE MANUAL en-29 8 MAINTENANCE & LUBRICATION 8.2 LUBRICATION________________________________________________________ Before using the machine for the first time: (a) Lubricate all points (Refer to “weekly” lubrication). (b) Check that the pump gearbox has been filled with oil. The correct amount is when the oil is level with the upper mark on dipstick (B). see End of Season. (c) Check that the hydraulic tank has been filled with Shell Tellus 46 up to the correct level. (Halfway up the sight glass (A). IMPORTANT: DO NOT run the machine if the level of oil is below the bottom of the sight glass. Daily (every 10 working hours) Check level of hydraulic oil Weekly (every 50 working hours) Hydraulic Oil Filter Check tell-tale indicator A for the return filter to determine condition. If the indicator on the filter head is showing red at the normal operating temperature the filter should be changed. Refer to instructions for changing filter. The indicator can be seen from the rear of the machine. NOTE: The pump must be running at operating speed when checking the filter gauge. Weekly (every 50 working hours) 1. (a) Lubricate the following using Shell Darina R2 grease; of equivalent: Cutting unit rolls (2 lubricators) (A). Rotate the roll continuously during lubrication. NOTE: Lubricate more often in dry and dusty conditions. en-30 8 MAINTENANCE & LUBRICATION (b) Bearing housing pivots (A). (c) Outer lift arms pivots (A). Inner lift arms pivots (A) (d) Height adjustment threads (A). en-31 8 MAINTENANCE & LUBRICATION (e) Drawbar (A). 2. Lubricate with Rocol GP.1 grease: (a) (b) P.T.O. shaft bearings (A) P.T.O. shaft sliding portion. 3. Lubricate the following with Rocol anti-sieze: (a) Cutting cylinder adjusting screws (A) Lubrication of Direct Drive Hydraulic Motor (Every 400 hours) Lower all cutting units onto level ground. Before leaving the driving position, stop the engine and make sure all moving parts are stationary. Apply brakes and disengage all drives. remove the starter key. The direct drive hydraulic motor can be removed from the cutting unit by removing the two screws and washers holding the motor to the bearing housing. Carefully withdraw the motor from the bearing housing, it is important not to contaminate the motor shaft or internal splines of the cutting cylinder. If for any reason they are contaminated, they should be cleaned by degreasing. Liberally lubricate the motor and cylinder splines with Shell S7222 grease (Textron Part no. MBE3927) before reassembling. en-32 8 MAINTENANCE & LUBRICATION 8.3 MAINTENANCE _______________________________________________________ DAILY (every 10 working hours) Tyre Pressures: The tyre pressures should be checked and maintained as per the tyre pressure chart in the Specification section. Wheel Removal If it is necessary to remove a wheel the following instructions should be worked to: (a) Slightly release the wheel nuts while the wheel is on the ground. (b) Jack up side of the machine, using a suitable point under the chassis. (c) Remove wheel nuts and take off wheel. (d) After replacing wheel, secure with wheel nuts to a torque of 115Nm (85lb/f). IMPORTANT NOTE: USE EXTREME CARE when jacking up the machine. en-33 8 MAINTENANCE & LUBRICATION HYDRAULIC SYSTEM PRESSURE GAUGE TEST PORTS If any problems are experienced with the hydraulic system service ports are provided to enable pressures to be checked. TEST PORTS: NOTE: A applies to TG4650 only. A. Cutting unit 6 & 7 drive pressure: 138 bar (2000psi) B. Cutting cylinder lift pressure: 170 bar (2500 psi) C. Cutting unit 1, 2 & 3 drive pressure: 207 bar (3000psi) D. Cutting unit 4 & 5 drive pressure: 138 bar (2000psi) NOTE: Any servicing of the hydraulic system must be carried out by trained service personnel. en-34 9 ADJUSTMENTS 9.1 CYLINDER DRIVE CUT-OUTS__________________________________________ DIVERTOR VALVE OPERATING MECHANISM (Fig.20) The clearance between the divertor valve spool A and the actuating rod B should be 1mm (0.04in) C when the lift arm is in the raised position with the spool pushed fully in (detented position). To adjust (Fig 21): a. Release the clevis nut A. b. Rotate the actuating rod B to obtain the correct clearance. c. Tighten locknut A. 9.2 UNIT DRIVE DISENGAGEMENT (FIG.23) _________________________________ The divertor valves operated by each lift arm should automatically disengage the cutting unit drive when the bottom blade of the cutting unit is no more than 400mm (15.75in) above level ground. To adjust: a. Release the cam locking screw A. b. Rotate the cam B to obtain the correct setting. c. Tighten the locking screw A. en-35 9 ADJUSTMENTS 9.3 LIFT ARM POSITION VALVE (UNITS 6 & 7) TG4650 ONLY _________________ The additional divertor valves operated by lift arms 6 & 7 allow weight transfer pressure to act on the annulus end of the lift ram without acting on the piston end when the cutting unit is in the lowered position. There should be no clearance between the roller and the cam with the lift arm in the lower position (without compressing the divertor spool). To adjust: a. Slacken the two divertor valve mounting bolts A. b. Slide the divertor valve B to obtain the correct setting. c. Tighten the mounting bolts. 9.4 OPERATING ADJUSTMENT __________________________________________ The divertor spool should be compressed by 2mm (0.078in) when the bottom blade of the cutting unit is raised 400mm (15.75in) above level ground. To adjust: a. Release the cam locking screw A. b. Rotate the cam B to obtain the correct setting. c. Tighten the locking screw A. en-36 9 ADJUSTMENTS 9.5 1. (a) (b) (c) BRAKES (AUTO-REVERSE TYPE) _____________________________________ The brakes on each wheel should be adjusted in turn as follows: Always rotate wheel in forwards direction at all times during adjustment. Using the adjusting nut (A) on the inside of the brake plate turn until the brake shoes lock onto the drum. Back off slightly until no resistance is felt during rotation of wheel. Further adjustment can be made at the equaliser (A). Ensure that all locknuts(B) are secure after adjustments have been made. en-37 9 ADJUSTMENTS 9.6 HEIGHT OF CUT____________________________________________________ The height of cut can be set between: 13mm (1/2in) and 51mm (2in) on the Magna 250 fixed head. 13mm (1/2in) and 101mm (4in) on the Sport 200 fixed head. 13mm (1/2in) and 35mm (1 3/8in) on the Sport 200 floating head standard blade. 7mm (9/32in) and 30mm (1 3/16in) on the Sport 200 floating head thin blade. to adjust: 1. Turn the adjuster handwheel or nut (A) situated on handwheel clockwise (+) to increase the height of cut, or anticlockwise (-) to decrease the height of cut. 2. Ensure that an equal amount of adjustment is made to both adjusters on all the cutting units. To assist in obtaining equal adjustment height of cut indicators (B) are provided at each end of the roll assembly. NOTE: The numbers 1 to 9 are only for reference from one side of the roll to the other and bear no relation to the height of cut other than each graduation gives approximately 6.25mm (1/4in) height of cut movement for fixed head units and 3.75mm (5/32in) for floating head units. These indicators are set at the factory and when the pointer is set the same at each end of the roll the roll will be parallel with the bottom blade. If due to any reason the roll and bottom blade are not parallel with each other the roll can be set parallel with the bottom blade by rotating one of the handwheels and then one indicator adjusted by slackening the small clamping screw in the centre of the indicator plate and positioning the indicator relative to the pointer at the opposite end of the roll assembly. 3. No other adjustments are necessary. 4. THIS IS A SELF LOCKING MECHANISM THERE BEING NO NECESSITY TO UNLOCK OR LOCK THE MECHANISM. SPORT 200 FIXED HEAD ADDITIONAL ADJUSTMENT 1. Accommodation for extra high height of cut adjustment is built into the cutting unit centre pivot. 2. By repositioning the rear centre pivot bolt height of cut up to 101mm (4in) can be achieved. 9.7 SPORT 200 FLOATING HEAD FRONT ROLL SETTING ____________________ 1. The right hand end of the front roll is fixed. To set the roll parallel to the bottom blade rotation of an eccentric clamping nut on the left hand front roll bearing housing is necessary. 2. Slacken left hand roll bearing housing clamping bolts. 3. Rotate the eccentric nut to give the desired parallelism of the roll to the bottom blade. 4. While still holding the eccentric nut from rotating tighten the the roll bearing housing clamping bolts. en-38 9 ADJUSTMENTS 9.8 CUTTING CYLINDER TO BOTTOM BLADE ADJUSTMENT __________________ To check that the cutting cylinder is set to the bottom blade correctly, hold a piece of thin paper between the edge of the blade and the spiral cutters and turn the cylinder manually. The paper should be cut cleanly along the total length of the bottom blade, if not, some adjustment may be necessary, BUT DO NOT OVERTIGHTEN. Alternatively if the cylinder is worn it may require back lapping before adjusting. To adjust: 1. To adjust the cylinder to the bottom blade turn alternately left and right hand handwheels (C) clockwise to put on cut. A ‘notching’ effect will be felt as the handwheel is rotated in a clockwise direction this ‘notching’ is moving the cylinder in increments of approximately 0.035mm (0.0014in) towards the bottom blade. 2. The correct ‘on cut’ must be achieved with the adjustment mechanism ‘slack’ (i.e. between ‘notches’). A requirement of the hand adjustment is that the cylinder must always be moved towards the bottom blade (i.e. clockwise rotation of handwheels) to attain the correct cutting relationship of cylinder and bottom blade. NEVER PLACE CYLINDER HARD ‘ON CUT’, and by anticlockwise rotation of handwheel try to attain the correct cutting relationship. 3 If cylinder is placed too hard ‘on cut’ it must be adjusted to clear the bottom blade by anticlockwise rotation of handwheel then re-adjusted back down to the bottom blade. 4. THIS IS A SELF LOCKING MECHANISM THERE BEING NO NECESSITY TO UNLOCK OR LOCK THE MECHANISM. 9.9 CUTTING CYLINDER BEARINGS _______________________________________ The cutting cylinder bearings are self adjusting taper roller bearings and require no adjustements. 9.10 FRONT AND REAR ROLL BEARINGS ___________________________________ The roll bearings are self adjusting taper roller bearings and require no adjustement 9.11 GRASS DEFLECTOR_________________________________________________ The grass deflector can be positioned by hand as it is ‘friction clamped’ by nuts (tightening the nuts will increase the clamping effect). en-39 9 ADJUSTMENTS 9.12 BACKLAPPING ____________________________________________________ Routine cylinder backlapping is part of a general maintenance plan for cylinder mowers. NOTE:Even when the engine is OFF, rotating one cylinder may cause the others to rotate. Use the following procedure with the engine off and the cylinders disengaged. 1. Wash the cylinders and bottom blades. 2. Slightly back off the cylinder to bottom blade adjustment. 3. Apply lapping compound to the cylinders BEFORE starting the engine and engaging the cylinders. NOTE:DO NOT apply lapping compound to cylinders UNLESS the engine is off and the cylinders disengaged. DO NOT apply lapping compound to rotating cylinders. 4. Lower the cutting units so they are firmly on the ground, apply the parking brake, place the cylinder control switch (A) in the backlap position. With the operator in the operating position, start the engine. DO NOT run the engine in an enclosed area. 5. Run the engine at idle speed. Start the PTO. Engage the reel drive (B) from the operators position on the machine. The engine revs may need to be increased to allow the units to engage but then should be returned to idle to limit cylinder speed. 6. Backlap reels for several minutes, periodically disengage cylinder drive, shut off engine and check the blade condition. Add additional backlapping compound and adjust cylinder to bottom blade clearance. Return to the operating position and continue backlapping until all blades are uniformly sharp. 7. Disengage cylinder drive, shut off engine and thoroughly wash all backlapping compound from cylinders and bottom blades. Apply a thin coating of oil to all sharpened surfaces. 8. For a finer cut, file across the front face of the bottom blade to remove any burrs from the sharp edge. 9. Adjust the cylinder to bottom blade (see cutting unit manual). en-40 9 ADJUSTMENTS en-41 10 QUALITY OF CUT 10 QUALITY OF CUT TROUBLESHOOTING_________________________________ 10It is recommended that a “test cut” be performed to evaluate the mower’s performance before beginning repairs. An area should be available where “test cuts” can be made. This area should provide known and consistent turf conditions to allow accurate evaluation of the mower’s performance. Another “test cut” should be performed after the completion of the repairs and/or adjustments to verify the mower’s performance. 2. Reel Bearing Condition and Pre-Load (End Play) Adjustment. 3. Reel and Bedknife Sharpness. 4. Bedknife Alignment to Reel. 5. Reel-to-Bedknife Contact. 6. Height-of-Cut (HOC). 7. Roller and Roller Bearing Condition. Before performing a “test cut” to diagnose cut appearance and mower performance, the following items should be verified to ensure an accurate “test cut.” 1. Mowing (Ground) Speed. 10.1 WASHBOARDING __________________________________________________ Washboarding is a cyclical pattern of varying cutting heights, resulting in a wave-like cut appearance. In most cases, the wave tip-to-tip distance is approximately 6—8 in. (15—20 cm). Colour variation (light-to-dark) may also be noticed. This condition is usually caused by a rocking motion in the cutting unit(s). This condition is found mostly on mowers with multiple (suspended) cutting units, but other causes can produce the same result. Washboarding may also be caused by variations in the turf. TN0159 NOTE: Arrow indicates direction of travel. Probable Cause Remedy Mowing (ground) speed is too fast. Reduce mowing (ground) speed. Grass build-up on roller. Clean the roller and use scrapers or brushes. Roller is out of round. Replace roller. Mowing in the same direction. Change mowing direction regularly. Use of a groomer on cleanup pass. Groomers should be used only in a straight line. en-42 10 QUALITY OF CUT 10.2 MARCELLING______________________________________________________ Marcelling, like washboarding, is a cyclical pattern of varying cutting heights, resulting in a wave-like cut appearance. In most cases, the wave tip-to-tip distance is 2 in. (5 cm) or less. TN0220 NOTE: Arrow indicates direction of travel. Probable Cause Remedy Mowing (ground) speed is too fast. Reduce mowing (ground) speed. HOC (height-of-cut) setting is too low for turf conditions. Check/adjust HOC to turf conditions. Cutting reel diameter is worn. Check cutting reel diameter and replace if worn. en-43 10 QUALITY OF CUT 10.3 STEP CUTTING _____________________________________________________ Step cutting occurs when grass is cut taller on one side of a reel than the other or one cutting unit to another. This is usually caused by mechanical wear or an incorrect roller or HOC (height-of-cut) adjustment. TN0221 NOTE: Arrow indicates direction of travel. Probable Cause Remedy HOC (height-of-cut) settings are different from one side of a reel to the other or from one cutting unit to another. Check HOC adjustment of cutting units. Worn front roller bearings. Check/replace front roller bearings. Reel-to-bedknife contact is different from one side of the cutting unit to the other or from one cutting unit to another. Check reel-to-bedknife contact. Cutting reel movement is restricted. Check/remove cutting reel movement obstruction. Variations in turf density. Change mowing direction. Machine weight distribution is uneven. Check/adjust tire inflation pressure. en-44 10 QUALITY OF CUT 10.4 SCALPING ________________________________________________________ Scalping is a condition in which areas of grass are cut noticeably shorter than the surrounding areas, resulting in a light green or even brown patch. This is usually caused by an excessively low height-of-cut (HOC) setting and/or uneven turf. TN0222 NOTE: Arrow indicates direction of travel. Probable Cause Remedy HOC (height-of-cut) settings are lower than normal. Check/adjust the HOC settings. Improper reel-to-bedknife adjustment. Adjust reel-to-bedknife setting for desired HOC. Turf too uneven for the mower to follow. Change mowing direction. Cutting too much grass at one time. Mow more often. Mowing (ground) speed is too fast. Reduce mowing (ground) speed. en-45 10 QUALITY OF CUT 10.5 STRAGGLERS ______________________________________________________ Stragglers are scattered blades of uncut or poorly cut grass. TN0223 NOTE: Arrow indicates direction of travel. Probable Cause Remedy Bedknife improperly adjusted. Adjust reel-to-bedknife setting. Dull reel or bedknife cutting edges. Sharpen or replace reel blade and bedknife as necessary. Mowing (ground) speed is too fast. Reduce mowing (ground) speed. Grass is too tall. Mow more often. Mowing in the same direction. Change mowing direction regularly. Nicks in reel or bedknife. Grind, sharpen or replace reel blades and bedknife as necessary. en-46 10 QUALITY OF CUT 10.6 STREAKS _________________________________________________________ A streak is a line of uncut grass. This is usually caused by a nicked or bent bedknife. TN0224 NOTE: Arrow indicates direction of travel. Probable Cause Remedy Damaged bedknife. Replace bedknife. Damaged or unevenly worn reel. Inspect reel. Replace as needed. Loose or missing bedknife fasteners. Check bedknife screws. Tighten loose screws; replace missing screws. Turning too aggressively. Cutting units don’t overlap around turns or on side hills. Turn less aggressively to allow cutting units to overlap. Change mowing direction or pattern on side hills. Tire mats down grass before it is cut. Check/adjust tire inflation pressure. Wet grass is matted down before it is cut. Mow when grass is dry. en-47 10 QUALITY OF CUT 10.7 WINDROWING ______________________________________________________ Windrowing is the deposit of clippings concentrated at one end of cutting unit(s) or between two cutting units, forming a line in the direction of travel. TN0225 NOTE: Arrow indicates direction of travel. Probable Cause Remedy Grass is too tall. Mow more often. Mowing while grass is wet. Mow when grass is dry. Grass built up on roller(s). Clean roller(s) and scraper(s). Grass collecting on bedknife. Adjust reel-to-bedknife setting. en-48 10 QUALITY OF CUT 10.8 RIFLING OR TRAMLINING ___________________________________________ Rifling or tramlining is a pattern of varying cutting heights, resulting in a wave-like cut appearance, usually due to heavy contact points across a reel and/or bedknife. NOTE: Arrow indicates direction of travel. Probable Cause Remedy Reel and/or bedknife unevenly worn. Inspect bedknife and reel. Sharpen or replace reel and bedknife as necessary. Missing, loose, or over torqued bedknife screws. Install, replace or tighten bedknife screws to proper torque setting. Mowing (ground) speed is too fast. Reduce mowing (ground) speed. 10.9 MISMATCHED CUTTING UNITS _______________________________________ Mismatched cutting units is a pattern of varying cutting heights, resulting in a stepped cut appearance, usually due to mismatched HOC (height-of-cut) adjustment from one cutting unit to another. NOTE: Arrow indicates direction of travel. Probable Cause Remedy HOC inconsistent from one cutting unit to another. Check/adjust HOC on cutting units. Difference in mower ride height side to side. Check/adjust tire inflation pressure. en-49 11 GUARANTEE 11.1 GUARANTEE _________________________________________________________ GUARANTEE We GUARANTEE that should any defect in workmanship or material occur in the goods within TWO YEARS or two thousand hours (on models equipped with hour meters), or whichever occurs first. Exception to this warranty will be Aeration products, which are covered for a period of TWO-YEARS or five hundred hours (on models equipped with hour meters) or whichever occurs first. We will repair, or at our option, replace the defective part without making any charge for labour or for materials, provided that the claim under this guarantee is made through an authorised dealer and that the defective part shall, if we so request, be returned to us or to the dealer. This guarantee is in addition to, and does not exclude, any condition or warranty implied by law, except that we accept no liability in respect of used/second-hand goods, or in respect of defects which in our opinion are in any way or to any extent attributable to misuse, lack of reasonable care or ordinary wear and tear, or to the fitting of spares, replacements, or extra components which are not supplied or approved by us for the purpose. The use of non-recommended oil or lubricant nullifies the guarantee. Damage through transport or normal wear does not come under the guarantee. The warranty is extended to the original purchaser only and is not transferable to subsequent owners. The warranty period begins on the date the product is delivered to the end user (customer), unless otherwise agreed with the manufacturer. At the end of the first year the owner must have the product serviced by an authorised dealer to be eligible for the second year of warranty coverage. en-50 1 ÍNDICE SECCIÓN 2 2.1 2.2 2.3 2.3.1 2.3.2 2.4 2.5 3 3.1 3.1.1 3.1.2 3.1.3 3.1.4 3.1.5 3.1.6 3.1.7 4 4.1 4.2 4.3 4.4 PÁGINA INTRODUCCIÓN IMPORTANTE ............................................................. 2 IDENTIFICACIÓN DEL PRODUCTO .......................... 2 PAUTAS PARA LA ELIMINACIÓN DE PRODUCTOS DE DESECHO .............................. 3 DURANTE LA VIDA ÚTIL ........................................... 3 DESPUÉS DE LA VIDA ÚTIL ..................................... 3 MANUAL DE REPUESTOS ........................................ 4 VENTAS & SERVICIO ................................................ 5 8 8.1 INSTRUCCIONES DE SEGURIDAD SEGURIDAD DE FUNCIONAMIENTO ....................... 6 INSTRUCCIONES DE FUNCIONAMIENTO ............... 6 SEŃALES DE SEGURIDAD ....................................... 6 CONDUCCIÓN DE LA MÁQUINA .............................. 6 TRANSPORTE ............................................................ 7 PENDIENTES ............................................................. 7 UNIDADES DE CORTE BLOQUEADAS .................... 7 AJUSTES, LUBRICACIÓN, MANTENIMIENTO Y LIMPIEZA ................................................................ 7 9.3 4.5 4.6 4.7 4.8 ESPECIFICACIONES DIMENSIONES Y PESOS .......................................... 9 ESPECIFICACIÓN DE LA MÁQUINA ....................... 10 ESPECIFICACIÓN HIDRÁULICA ............................. 10 ESPECIFICACIONES DE LA UNIDAD DE CORTE................................................................. 11 LUBRICANTES RECOMENDADOS ......................... 11 RENDIMIENTO DE CORTE (ÁREA) ........................ 11 RENDIMIENTO DE CORTE (FRECUENCIA) ........... 11 CERTIFICADOS DE CONFORMIDAD ..................... 12 5 5.1 5.2 ETIQUETAS ETIQUETAS DE SEGURIDAD ................................. 16 ETIQUETAS DE INSTRUCCIONES ......................... 16 6 6.1 6.2 6.3 6.4 CONTROLES PALANCAS DE ENGANCHE DE SEGURIDAD ....... 18 FRENO DE ESTACIONAMIENTO ............................ 18 PALANCAS DE CONTROL ...................................... 19 VÁLVULA DE TRANSFERENCIA DE PESO ............ 19 7 7.1 7.2 7.3 OPERACIÓN INSPECCIÓN DIARIA ............................................... 20 PROCEDIMIENTO DE OPERACIÓN ....................... 21 ACOPLAMIENTO DE LA MÁQUINA AL TRACTOR ........................................................... 22 FUNCIONAMIENTO DE LA MÁQUINA .................... 24 7.4 SECCIÓN 8.2 8.3 9 9.1 9.2 9.4 9.5 9.6 9.7 9.8 9.9 9.10 9.11 9.12 10 10.1 PÁGINA MANTENIMIENTO Y LUBRICACIÓN CUADRO DE MANTENIMIENTO Y LUBRICACIÓN .......................................................... 26 LUBRICACIÓN .......................................................... 27 MANTENIMIENTO .................................................... 30 AJUSTES CORTE DE TRANSMISIÓN DEL CILINDRO ........... 33 DESACTIVACIÓN DE LA TRANSMISIÓN DE LA UNIDAD (FIG.23) ................................................. 33 VÁLVULA DE POSICIÓN DEL BRAZO DE SUBIDA (UNIDADES 6 & 7) SÓLO TG4650 ........................... 34 AJUSTE DE FUNCIONAMIENTO............................. 34 FRENOS (AUTOMÁTICOS TRASEROS) ................. 35 ALTURA DE CORTE ................................................ 36 AJUSTE DEL RODILLO DELANTERO CON CABEZAL FLOTANTE SPORT 200 .......................... 36 AJUSTE DEL CILINDRO DE CORTE A LA CUCHILLA INFERIOR .............................................. 37 COJINETES DEL CILINDRO DE CORTE ................ 37 COJINETES DE LOS RODILLOS DELANTERO Y TRASERO ............................................................. 37 DEFLECRTOR DE HIERBA ..................................... 37 ESMERILADO .......................................................... 38 10.2 10.3 10.4 10.5 10.6 10.7 10.8 10.9 10.10 CALIDAD DE CORTE SOLUCIÓN DE PROBLEMAS PARA LA CALIDAD DEL CORTE ............................................. 40 SUPERFICIE ONDULADA ........................................ 40 ONDULAMIENTOS EN LÍNEAS SUCESIVAS ......... 41 CORTE ESCALADO ................................................. 42 PELADO .................................................................... 43 PENACHOS .............................................................. 44 VETAS ...................................................................... 45 FORMACIÓN DE HILERAS ...................................... 46 ESTRIADO O FORMACIÓN DE REGUEROS ......... 47 UNIDADES DE CORTE DESIGUALES .................... 47 11 11.1 GARANTÍA GARANTÍA ................................................................ 48 es-1 2 2.1 INTRODUCCIÓN IMPORTANTE ________________________________________________________ Los Ransomes Hydraulic TG3400 & TG4650 son cortacéspedes de molinetes montados en tractor. Utiliza sistemas hidráulicos para la transmisión de la unidad de corte. IMPORTANTE: Es una máquina de precisión, y el funcionamiento que se obtiene depende de la forma en que se utiliza y se realiza el mantenimiento. Este MANUAL DE SEGURIDAD, FUNCIONAMIENTO Y MANTENIMIENTO debe considerarse parte de la máquina. Se recomienda a los proveedores de máquinas nuevas y de segunda mano que guarden prueba documental de que este manual se ha suministrado con la máquina. Esta máquina está diseñada únicamente como máquina de corte de césped dentro de los parámetros citados en la sección Especificaciones. Si se utiliza de otra forma, se considerará contraria a su uso previsto. El cumplimiento de las condiciones de funcionamiento, servicio y reparación especificadas por el fabricante también constituye un elemento esencial de su uso previsto. Antes de utilizar esta máquina, TODOS los operarios DEBEN leer este manual en su totalidad y familiarizarse completamente con las Instrucciones de seguridad, los controles, la lubricación y el mantenimiento. En todo momento se debe cumplir el reglamento de prevención de accidentes y toda la normativa reconocida a nivel general sobre seguridad y medicina ocupacional, así como toda la normativa de tráfico en carretera. Todas las modificaciones arbitrarias que se realicen en esta máquina pueden eximir al fabricante de su responsabilidad por los daños o lesiones resultantes. Es importante que durante la vida de la máquina se desechen las piezas desgastadas y cambiables de un modo respetuoso con el medioambiente utilizando los recursos disponibles en el país donde se utilice. Existen pautas en este manual para el desmontaje eventual del cortacésped cuando ya no tenga utilidad. Utilice piezas de repuesto originales de Ransomes Jacobsen para garantizar el cumplimiento con las normas de la Unión Europea. 2006/42/CE Estas son las traducciones de las instrucciones originales verificadas por ACMTRAD SL. 2.2 IDENTIFICACIÓN DEL PRODUCTO _____________________________________ A B C D E F G H J Carga máxima en el eje delantero en kg (para máquinas conducidas en vías rápidas) Peso bruto en kg Carga máxima en el eje trasero en kg (para máquinas conducidas en vías rápidas) Potencia en kW Código de fecha Tipo de máquina (designación) Código de producto Nombre de producto Número de serie UBICACIÓN DE LA PLACA DE DATOS La placa de datos está situada en el chasis principal. es-2 West Road Ransomes Europark Ipswich IP3 9TT England A B Kg Kg F H C Kg D E Kw G J 2 INTRODUCCIÓN 2.3 PAUTAS PARA LA ELIMINACIÓN DE PRODUCTOS DE DESECHO __________ 2.3.1 DURANTE LA VIDA ÚTIL El aceite, filtros de aceite y refrigerante del motor usados son materiales peligrosos y deben manejarse de modo seguro y respetuoso con el medio ambiente. Si se produce una fuga de líquido conténgala lo más posible para impedir que penetre en el suelo o en un desagüe. La legislación local le dictará cómo tratar ese tipo de fugas. Seguir los procedimientos mostrados en este manual garantizará que el impacto que esta máquina tenga en el medio ambiente local esté controlado. Cuando un producto de cuidado del césped no tenga más valor funcional y haya que eliminarlo, se deben realizar las acciones siguientes. 2.3.2 DESPUÉS DE LA VIDA ÚTIL Estas medidas deben realizarse en conjunción con la legislación vigente de salud, seguridad y medio ambiente y utilizando las instalaciones autorizadas locales de eliminación y reciclaje de desechos. • • • • • • • • Ponga la máquina en un lugar adecuado donde se pueda utilizar el equipo de elevación necesario. Utilice las herramientas adecuadas y el Equipo de Protección Personal y cumpla las instrucciones de los manuales técnicos correspondientes del cortacésped. Extraiga y almacene adecuadamente lo siguiente: 1. Baterías 2. Residuos de combustible 3. Refrigerante del motor 4. Aceites Desmonte la estructura de la máquina, remitiéndose a los manuales técnicos cuando sea necesario. Debe prestar una atención especial cuando manipule la ‘energía almacenada’ en el interior de los elementos presurizados de la máquina o los muelles tensados. Todos los componentes que tengan una vida de servicio útil y se puedan utilizar como componentes de segunda mano o se puedan reparar deben apartarse y enviarse al centro correspondiente. Otros componentes desgastados deben agruparse en grupos de material para su reciclado y eliminación, en conformidad con las instalaciones disponibles. Los grupos de separación más comunes son los siguientes: • Acero • Metales no ferrosos • Aluminio • Latón • Cobre • Plásticos • Identificados • Reciclables • No reciclables • No identificados • Goma • Componentes eléctricos y electrónicos Los componentes que no se pueden separar en diferentes grupos de material deben llevarse al área de ‘Residuos generales’. No prenda fuego a los desechos. Por último, se debe actualizar la documentación de la máquina para reflejar que la máquina está fuera de servicio y se ha desguazado. Proporcione este número de serie al departamento de garantías de Ransomes Jacobsen para cerrar los registros pertinentes. es-3 2 INTRODUCCIÓN 2.4 MANUAL DE REPUESTOS ___________________________________________ Como parte de los principios de la ISO14001, y en la era de los medios electrónicos libres, Ransomes Jacobsen Limited ya no manda un manual de piezas de papel con cada producto. Si desea consultar una lista de piezas para este cortacésped, tiene cuatro opciones entre las que elegir: Vaya al sitio web www.ransomesjacobsen.com, a continuación use la pestaña “PARTES ORIGINALES” y luego la pestaña “Búsqueda de piezas online”. Esto le facilitará un acceso directo a dibujos y listas de piezas para ayudar a identificar piezas de repuesto. Vaya al sitio Web www.ransomesjacobsen.com, a continuación use la pestaña “ATENCIÓN AL CLIENTE” seguida de la pestaña “manuales” y esto le facilitará acceso a un versión imprimible del manual de piezas. Puede guardarlo en su ordenador para consultarlo en la pantalla o puede imprimir todo o sólo parte del libro, según necesite. Alternativamente, al completar el formulario incluido en el manual técnico con la máquina, también le podemos mandar: • Un CD que contiene una copia electrónica del libro de piezas. • Una copia en papel del manual de piezas. es-4 2 INTRODUCCIÓN 2.5 VENTAS & SERVICIO___________________________________________________ Se ha establecido una red de representantes oficiales de venta y servicio, cuyos detalles pueden obtenerse de su suministrador. Deberá ponerse en contacto con su suministrador o con cualesquiera representantes oficiales cuando se precise efectuar un servicio a la máquina o se requieran piezas de repuesto, ya sea dentro del plazo de la garantía o tras su finalización. Debe citar siempre el número de registro de la máquina. Si en el momento de la entrega se observa algún daño, deberá informar inmediatamente del mismo al suministrador de la máquina. Se recomienda anotar el número de la máquina. El número de serie de la máquina está situado en la placa de registro. NÚMERO DE MÁQUINA:_________________________ es-5 3 3.1 INSTRUCCIONES DE SEGURIDAD SEGURIDAD DE FUNCIONAMIENTO ___________________________________ Este símbolo de seguridad indica mensajes importantes sobre seguridad de este manual. Cuando vea este símbolo, esté alerta de posibles accidentes, lea atentamente el mensaje que viene junto a él e informe a los otros operarios. 3.1.1 INSTRUCCIONES DE FUNCIONAMIENTO • • • Asegúrese de que se leen y entienden en su totalidad las instrucciones de este manual. No permita que ninguna persona opere esta máquina, a no ser que esté totalmente familiarizada con la totalidad de los procedimientos de control y seguridad. Nunca permita que niños o personas no familiarizadas con estas instrucciones utilicen esta máquina. Los reglamentos locales pueden restringir la edad del operario. 3.1.2 SEŃALES DE SEGURIDAD • Es esencial que todas las etiquetas de seguridad se mantengan legibles; si se deterioran o quedan ilegibles deberán reemplazarse. Cuando se cambie cualquier pieza de la máquina que originalmente cuente con una etiqueta de seguridad, otra etiqueta nueva se deberá fijar en la pieza de recambio. Las etiquetas nuevas de seguridad pueden obtenerse de los representante oficiales de Ransomes Jacobsen. 3.1.3 CONDUCCIÓN DE LA MÁQUINA • • • • • • • • • • es-6 Antes de utilizar la máquina asegúrese de que todos los componentes se encuentran en buen estado, especialmente la seguridad de las cuchillas de corte. Corte césped únicamente de día o con buena luz artificial. Detenga la rotación de las cuchillas cuando atraviese superficies que no sean césped. Tenga en cuenta la existencia de personas sordas y ciegas, así como la impredictibilidad de los niños y de los animales. Quite o evite obstáculos en el área a cortar, reduciendo de esa manera la posibilidad de lesionar a algún peatón o a usted mismo. Recuerde que el operario o usuario es responsable de accidentes o riesgos que ocurran a otra gente o a su propiedad. Cuando la máquina se tenga que aparcar, guardar o dejar sola, baje las unidades de corte. Deben utilizarse equipos de protección de personal (PPE) como gafas protectoras, zapatos o botas de trabajo de cuero, casco, guantes de trabajo de cuero y protectores de oídos después de que el propietario/ usuario realice una evaluación local de riesgos al utilizar la máquina de corte de césped para evitar lesiones. Después de dar contra un cuerpo extraño inspeccione el cortacésped para determinar si ha sufrido daño y repárelo antes de volver a encenderlo y utilizarlo. Si la máquina comenzara a vibrar anormalmente, contrólela inmediatamente. 3 INSTRUCCIONES DE SEGURIDAD 3.1.4 TRANSPORTE • Verifique que las unidades de corte estén bien aseguradas en la posición de transporte. Nunca transporte la máquina con el mecanismo de corte rotando. 3.1.5 PENDIENTES A LA HORA DE OPERAR EN PENDIENTES SE DEBERÁ PRESTAR UNA ATENCIÓN ESPECIAL • Las ondulaciones y hundimientos cambiarán la pendiente general. Evite las condiciones de terreno que puedan hacer que la máquina patine. • Mantenga bajas velocidades en pendientes y curvas cerradas. • Recuerde que las pendientes “seguras” no existen. • El movimiento en pendientes de césped requiere atención especial para evitar vuelcos. 3.1.6 UNIDADES DE CORTE BLOQUEADAS • • • • Pare el motor y asegúrese de que todas las piezas móviles estén estacionarias. Ponga los frenos y desactive todas las transmisiones. Suelte los bloqueos con cuidado. Mantenga todos los componentes de la carrocería alejados de la arista cortante. Tenga cuidado con la energía de la transmisión, que puede girar al soltar el bloqueo. Tenga cuidado de que no haya nadie cerca de las unidades de corte, ya que la rotación de una de ellas puede propiciar el giro de las otras. 3.1.7 AJUSTES, LUBRICACIÓN, MANTENIMIENTO Y LIMPIEZA • • • • • • • • • Pare el motor y asegúrese de que todas las piezas móviles estén estacionarias. Ponga los frenos y desactive todas las transmisiones. Lea todas las instrucciones de mantenimiento pertinentes. Sólo se deberán utilizar las piezas de recambio suministradas por el fabricante original. Al ajustar las cuchillas de corte se deberá tener cuidado de que no se queden atrapados manos y pies cuando giren las cuchillas. Verifique que nadie toca ninguna unidad de corte, ya que la rotación de una cuchilla puede propiciar el giro de las demás. Por motivos de seguridad, reemplace las piezas desgastadas o dañadas. Cuando se esté operando debajo de piezas o máquinas izadas, verifique que se proporciona un soporte adecuado. Nunca desmonte la máquina sin soltar o contener fuerzas que puedan hacer que las piezas se muevan repentinamente. es-7 3 INSTRUCCIONES DE SEGURIDAD PELIGRO: Indica una situación de inminente peligro que, de no ser evitada, PROVOCARÁ la muerte o graves lesiones. ADVERTENCIA: Indica una situación potencialmente peligrosa que, de no ser evitada, PUEDE PROVOCAR la muerte o graves lesiones. PRECAUCIÓN: Indica una situación potencialmente peligrosa que, de no ser evitada, PODRÍA PROVOCAR lesiones moderadas o dańos materiales menores. También puede utilizarse para advertir contra las prácticas laborales peligrosas. PRECAUCIÓN Deben utilizarse equipos de protección de personal (PPE) como gafas protectoras, zapatos o botas de trabajo de cuero, casco, guantes de trabajo de cuero y protectores de oídos después de que el propietario/usuario realice una evaluación local de riesgos al utilizar la máquina de corte de césped para evitar lesiones. Antes de utilizar la máquina por primera vez una persona cualificada debe mostrar todas las operaciones manuales. ADVERTENCIA Cuando al manejar máquinas los niveles de ruido en los oídos del operario sean superiores a 85 dB(A)Leq. (nivel de ruido continuo equivalente ) deberá llevarse protección para los oídos. ADVERTENCIA Para evitar heridas graves producidas por el aceite caliente a alta presión, no utilice nunca las manos al comprobar fugas de aceite, utilice papel o cartón. El líquido hidráulico que escapa bajo presión puede tener suficiente fuerza para penetrar en la piel. Si se inyecta líquido en la piel se deberá quitar quirúrgicamente al cabo de unas pocas horas con un doctor que esté familiarizado con este tipo de heridas o se puede formar gangrena es-8 4 ESPECIFICACIONES 4.1 DIMENSIONES Y PESOS _______________________________________________ Hydraulic TG3400 A Anchura de corte 342 cm B Anchura global de corte 360 cm C Anchura total de transporte (mínimo) 217 cm D Altura total de transporte 150 cm E Longitud total 337 cm F Peso del bastidor trasero con depósito de combustible lleno 895 kg G Peso de una unidad de corte con 4 cuchillas (fijas) 80 kg H Peso de una unidad de corte con 6 cuchillas (fijas) 85 kg J Peso de una unidad de corte Verticut ?? kg Hydraulic TG4650 A Anchura de corte: 469 cm B Anchura global de corte: 486 cm C Anchura total de transporte (mínimo): 228 cm D Altura total de transporte 150 cm E Longitud total 337 cm F Peso del bastidor trasero con depósito de combustible lleno 1.110 kg G Peso de una unidad de corte con 4 cuchillas (fijas) 80 kg H Peso de una unidad de corte con 6 cuchillas (fijas) 85 kg J Peso de una unidad de corte Verticut ?? kg PRESIÓN DE NEUMÁTICO Producto Tamaño de neumático Tipo de neumático Corte (máximo 30 km/h) Transporte (máximo 90 km/h) Presión de neumático Presión de neumático TG3400 275/65-R16 Michelin XP27™ 1,1 bar (16 psi) 2,2 bar (31 psi) TG4650 275/65-R16 Michelin XP27™ 1,5 bar (22 psi) 2,2 bar (31 psi) es-9 4 ESPECIFICACIONES 4.2 ESPECIFICACIÓN DE LA MÁQUINA ______________________________________ Construcción del bastidor: Acero fresado sólido. Eje: Vigueta de eje RHS con brazo posterior y suspensión independiente. Frenos: Frenos de tambor de inercia de 250 mm x 40 mm de diámetros con mecanismo de marcha atrás automático y freno de mano. Receptor: Receptor oscilante de tubo de acero de sección cuadrada ajustable en altura con anillos de remolque intercambiables para adaptarse al enganche de recogida del tractor, receptor disponible con enganche desplegable e impulsor. Luces: Luces traseras/de parada, indicadores de dirección, reflectores trasero y lateral, intermitentes. Sistema hidráulico: Controles: Dos bombas de engranajes gemelos montadas en caja de engranajes divisora operada por eje de transmisión universal desde el PTO del tractor. Filtración hidráulica de 25 micrones con indicador. Puertos de prueba de diagnosis en todas las salidas de bomba. Tres válvulas operadas por motor mecánicamente en TG4650 y dos en TG3400, operadas simultáneamente para rotación hacia delante, punto muerto y marcha atrás de los motores de transmisión de la unidad de corte en tres circuitos distintos en TG4650 y dos en TG3400 para ofrecer 69 Bar (1000 psi) en cada cilindro de corte. Válvulas de descarga operadas mecánicamente para cada transmisión de desactivación de la unidad de corte al levantar. Transmisión de activación de válvulas de descarga por flujo piloto activada con interruptor pulsador y palancas de mano. Válvula de subida de tres bobinas que permite subir las tres unidades de corte centrales y subir los pares izquierdo y derecho de las unidades de corte laterales en TG4650, o subir las tres unidades de corte centrales y subir indivualmente las unidades de corte laterales en TG3400. Todas las unidades de corte tienen transferencia de peso variable con válvula ajustable. Cuatro controles de palanca de mano montados en el vehículo. Las válvulas de control hidráulico de la máquina son operadas por cables “push/pull”. Botón pulsador simple para volver a activar la transmisión del molinete cuando las unidades de corte están bajadas. Palanca de control simple para la transmisión del molinete hacia delante/punto muerto/ marcha atrás. Tres palancas de control de subida/bajada de las cinco unidades de corte centrales y las dos laterales en el TG4650, y de las tres centrales y las dos laterales en el TG3400. Sistema eléctrico: 12 V Vehículo de remolque: 45 kW mínimo 4.3 ESPECIFICACIÓN HIDRÁULICA __________________________________________ Descripción Litros / minuto Válvula de liberación de presión Unidades 1, 2 y 3 27,54 207 Bar Unidades 4, 5, 6 y 7 27,54 138 Bar 8,1 172 Bar Corte Circuito de subida es-10 4 ESPECIFICACIONES 4.4 ESPECIFICACIONES DE LA UNIDAD DE CORTE ____________________________ Magna Sportcutter Longitud de molinete 762 mm 762 mm Número de cuchillas 6 8 Número de cuchillas N/D N/D Diámetro de los molinetes (nuevo) 254 mm 197 mm Diámetro mínimo de los molinetes (antes de recambio) 235 mm 178 mm Construcción Altura de corte de cabezal fijo (cuchilla estándar) 12,7 mm - 89 mm Altura de corte de cabezal flotante (cuchilla estándar) 12,7 mm - 35,7 mm Altura de corte de cabezal flotante (cuchilla fina) 9 mm - 32 mm Rodillo trasero 60 mm de diámetro Sistema de tornillos ajustables en el rodillo trasero Ajuste de la altura de corte Transmisión Sistema de tornillos ajustables en el rodillo delantero y trasero Por motor hidráulico a través de engranaje y pińón a molinete. Máxima velocidad de molinete a la máxima velocidad de PTO 1240 rpm NOTA Estas unidades de corte están diseñadas para cortar hierba de una altura máxima de 100 mm rebajándola a la altura disponible de la gama de corte. 4.5 LUBRICANTES RECOMENDADOS ________________________________________ Aceite hidráulico: ISO VG 46. Caja de engranajes Transimisión de bomba: 80W-90 Unidad de corte: Shell Gadus S2 V220 Grasa: Grasa a base de litio para uso general. 4.6 RENDIMIENTO DE CORTE (ÁREA) ________________________________________ TG3400 3,6 hectáreas/hora a 12 km/h TG4650 5 hectáreas/hora a 12 km/h Se incluye un 10% de margen para superposición normal y para giros al final de cada corte. 4.7 RENDIMIENTO DE CORTE (FRECUENCIA) _________________________________ Cabezal fijo de 6 cuchillas: Cabezal flotante de 8 cuchillas: 24 cortes/metro a 12 km/h 32 cortes/metro a 12 km/h es-11 4 ESPECIFICACIONES 4.8 CERTIFICADOS DE CONFORMIDAD ______________________________________ DECLARATION OF CONFORMITY ƒ ȾȿɄɅȺɊȺɐɂə ɁȺ ɋɔɈɌȼȿɌɋɌȼɂȿ ƒ PROHLÁŠENÍ O SHODċ ƒ OVERENSSTEMMELSESERKLÆRING ƒ CONFORMITEITSVERKLARING ƒ VASTAVUSDEKLARATSIOON ƒ VAATIMUSTENMUKAISUUSVAKUUTUS ƒ DECLARATION DE CONFORMITE ƒ KONFORMITÄTSERKLÄRUNG ƒ ǻǾȁȍȈǾ ȈȊȂȂȅȇĭȍȈǾȈ ƒ MEGFELELėSÉGI NYILATKOZAT ƒ DICHIARAZIONE DI CONFORMITÀ ƒ ATBILSTƮBAS DEKLARƖCIJA ƒ ATITIKTIES DEKLARACIJA ƒ DIKJARAZZJONI TAL-KONFORMITÀ ƒ DEKLARACJA ZGODNOĝCI ƒ DECLARAÇÃO DE CONFORMIDADE ƒ DECLARAğIE DE CONFORMITATE ƒ VYHLÁSENIE O ZHODE ƒ IZJAVA O SKLADNOSTI ƒ DECLARACIÓN DE CONFORMIDAD ƒ DEKLARATION OM ÖVERENSSTÄMMELSE ƒ SAMRÆMISYFIRLÝSING ƒ KONFORMITETSERKLÆRING Business name and full address of the manufacturer ƒ Ɍɴɪɝɨɜɫɤɨ ɢɦɟ ɢ ɩɴɥɟɧ ɚɞɪɟɫ ɧɚ ɩɪɨɢɡɜɨɞɢɬɟɥɹ ƒ Obchodní jméno a plná adresa výrobce ƒ Producentens firmanavn og fulde adresse ƒ Bedrijfsnaam en volledig adres van de fabrikant ƒ Tootja ärinimi ja täielik aadress ƒ Valmistajan toiminimi ja täydellinen osoite ƒ Nom commercial et adresse complète du fabricant ƒ Firmenname und vollständige Adresse des Herstellers ƒ ǼʌȦȞȣȝȓĮ țĮȚ IJĮȤȣįȡȠȝȚțȒ įȚİȪșȣȞıȘ țĮIJĮıțİȣĮıIJȒ ƒ A gyártó üzleti neve és teljes címe ƒ Ragione sociale e indirizzo completo del fabbricante ƒ UzƼƝmuma nosaukums un pilna ražotƗja adrese ƒ Verslo pavadinimas ir pilnas gamintojo adresas ƒ Isem kummerƛjali u indirizz sƫiƫ tal-fabbrikant ƒ Nazwa firmy i pełny adres producenta ƒ Nome da empresa e endereço completo do fabricante ƒ Denumirea comercială úi adresa completă a producătorului ƒ Obchodný názov a úplná adresa výrobcu ƒ Naziv podjetja in polni naslov proizvajalca ƒ Nombre de la empresa y dirección completa del fabricante ƒ Tillverkarens företagsnamn och kompletta adress ƒ Fyrirtækisheiti og fullt heimilisfang framleiðanda ƒ Firmanavn og full adresse for produsenten Ransomes Jacobsen Limited West Road, Ransomes Europark, Ipswich, England, IP3 9TT Product Code ƒ Ʉɨɞ ɧɚ ɩɪɨɞɭɤɬɚ ƒ Kód výrobku ƒ Produktkode ƒ Productcode ƒ Toote kood ƒ Tuotekoodi ƒ Code produit ƒ Produktcode ƒ ȀȦįȚțȩȢ ʌȡȠȧȩȞIJȠȢ ƒ Termékkód ƒ Codice prodotto ƒ Produkta kods ƒ Produkto kodas ƒ Kodiƛi tal-Prodott ƒ Kod produktu ƒ Código do Produto ƒ Cod produs ƒ Kód výrobku ƒ Oznaka proizvoda ƒ Código de producto ƒ Produktkod ƒ Vörunúmer ƒ Produktkode LHAC201 LHAC202 LHAB201 LHAB202 Machine Name ƒ ɇɚɢɦɟɧɨɜɚɧɢɟ ɧɚ ɦɚɲɢɧɚɬɚ ƒ Název stroje ƒ Maskinnavn ƒ Machinenaam ƒ Masina nimi ƒ Laitteen nimi ƒ Nom de la machine ƒ Maschinenbezeichnung ƒ ȅȞȠȝĮıȓĮ ȝȘȤĮȞȒȝĮIJȠȢ ƒ Gépnév ƒ Denominazione della macchina ƒ IekƗrtas nosaukums ƒ Mašinos pavadinimas ƒ Isem tal-Magna ƒ Nazwa urządzenia ƒ Nome da Máquina ƒ Numele echipamentului ƒ Názov stroja ƒ Naziv stroja ƒ Nombre de la máquina ƒ Maskinens namn ƒ Heiti tækis ƒ Maskinnavn Designation ƒ ɉɪɟɞɧɚɡɧɚɱɟɧɢɟ ƒ Oznaþení ƒ Betegnelse ƒ Benaming ƒ Nimetus ƒ Tyyppimerkintä ƒ Pažymơjimas ƒ Bezeichnung ƒ ȋĮȡĮțIJȘȡȚıȝȩȢ ƒ Megnevezés ƒ Funzione ƒ ApzƯmƝjums ƒ Lithuanian ƒ Denominazzjoni ƒ Oznaczenie ƒ Designação ƒ SpecificaĠie ƒ Oznaþenie ƒ Namen stroja ƒ Descripción ƒ Beteckning ƒ Merking ƒ Konstruksjon Serial Number ƒ ɋɟɪɢɟɧ ɧɨɦɟɪ ƒ Sériové þíslo ƒ Serienummer ƒ Serienummer ƒ Seerianumber ƒ Valmistusnumero ƒ Numéro de série ƒ Seriennummer ƒ ȈİȚȡȚĮțȩȢ ĮȡȚșȝȩȢ ƒ Sorozatszám ƒ Numero di serie ƒ SƝrijas numurs ƒ Serijos numeris ƒ Numru Serjali ƒ Numer seryjny ƒ Número de Série ƒ Număr de serie ƒ Sériové þíslo ƒ Serijska številka ƒ Número de serie ƒ Serienummer ƒ Raðnúmer ƒ Serienummer Ransomes Hydraulic TG3400 Ransomes Hydraulic TG4650 Towed Reel Mower UA000301 - UA999999 UB000301 - UB999999 UC000301 - UC999999 UD000301 - UD999999 Engine ƒ Ⱦɜɢɝɚɬɟɥ ƒ Motor ƒ Motor ƒ Motor ƒ Mootor ƒ Moottori ƒ Moteur ƒ Motor ƒ ȂȘȤĮȞȒ ƒ Modulnév ƒ Motore ƒ DzinƝjs ƒ Variklis ƒ Saƫƫa Netta Installata ƒ Silnik ƒ Motor ƒ Motor ƒ Motor ƒ Motor ƒ Motor ƒ Motor ƒ Vél ƒ Motor Not Applicable Net Installed Power ƒ ɇɟɬɧɚ ɢɧɫɬɚɥɢɪɚɧɚ ɦɨɳɧɨɫɬ ƒ ýistý instalovaný výkon ƒ Installeret nettoeffekt ƒ Netto geïnstalleerd vermogen ƒ Installeeritud netovõimsus ƒ Asennettu nettoteho ƒ Puissance nominale nette ƒ Installierte Nettoleistung ƒ ȀĮșĮȡȒ İȖțĮIJİıIJȘȝȑȞȘ ȚıȤȪȢ ƒ Nettó beépített teljesítmény ƒ Potenza netta installata ƒ ParedzƝtƗ tƯkla jauda ƒ Grynoji galia ƒ Wisa’ tal-Qtugƫ ƒ Moc zainstalowana netto ƒ Potência instalada ƒ Puterea instalată netă ƒ ýistý inštalovaný výkon ƒ Neto vgrajena moþ ƒ Potencia instalada neta ƒ Nettoeffekt ƒ Nettóafl vélar ƒ Netto installert kraft Not Applicable Cutting Width ƒ ɒɢɪɨɱɢɧɚ ɧɚ ɪɹɡɚɧɟ ƒ ŠíĜka Ĝezu ƒ Skærebredde ƒ Maaibreedte ƒ Lõikelaius ƒ Leikkuuleveys ƒ Largeur de coupe ƒ Schnittbreite ƒ ȂȒțȠȢ ȝȚıȚȞȑȗĮȢ ƒ Vágási szélesség ƒ Larghezza di taglio ƒ Griešanas platums ƒ Pjovimo plotis ƒ Tikkonforma mad-Direttivi ƒ SzerokoĞü ciĊcia ƒ Largura de Corte ƒ LăĠimea de tăiere ƒ Šírka záberu ƒ Širina reza ƒ Anchura de corte ƒ Klippbredd ƒ Skurðbreidd ƒ Klippebredde 340 cm 465cm Conforms to Directives ƒ ȼ ɫɴɨɬɜɟɬɫɬɜɢɟ ɫ ɞɢɪɟɤɬɢɜɢɬɟ ƒ SplĖuje podmínky smČrnic ƒ Er i overensstemmelse med direktiver ƒ Voldoet aan de richtlijnen ƒ Vastab direktiividele ƒ Direktiivien mukainen ƒ Conforme aux directives ƒ Entspricht Richtlinien ƒ ǹțȠȜȠȣșȒıIJİ ʌȚıIJȐ IJȚȢ ȅįȘȖȓİȢ ƒ Megfelel az irányelveknek ƒ Conforme alle Direttive ƒ Atbilst direktƯvƗm ƒ Atitinka direktyvǐ reikalavimus ƒ Valutazzjoni tal-Konformità ƒ Dyrektywy związane ƒ Cumpre as Directivas ƒ Respectă Directivele ƒ Je v súlade so smernicami ƒ Skladnost z direktivami ƒ Cumple con las Directivas ƒ Uppfyller direktiv ƒ Samræmist tilskipunum ƒ I samsvar med direktiv 2006/42/EC 2004/108/EC Conformity Assessment ƒ Ɉɰɟɧɤɚ ɡɚ ɫɴɨɬɜɟɬɫɬɜɢɟ ƒ Hodnocení plnČní podmínek ƒ Overensstemmelsesvurdering ƒ Conformiteitsbeoordeling ƒ Vastavushindamine ƒ Vaatimustenmukaisuuden arviointi ƒ Evaluation de conformité ƒ Konformitätsbeurteilung ƒ ǻȚĮʌȓıIJȦıȘ ȈȣȝȝȩȡijȦıȘȢ ƒ MegfelelĘség-értékelés ƒ Valutazione della conformità ƒ AtbilstƯbas novƝrtƝjums ƒ Atitikties Ƴvertinimas ƒ Livell tal-Qawwa tal-ƪoss Imkejjel ƒ Ocena zgodnoĞci ƒ Avaliação de Conformidade ƒ Evaluarea conformităĠii ƒ Vyhodnotenie zhodnosti ƒ Ocena skladnosti ƒ Evaluación de conformidad ƒ Bedömning av överensstämmelse ƒ Samræmismat ƒ Konformitetsvurdering Not Applicable Measured Sound Power Level ƒ ɂɡɦɟɪɟɧɨ ɧɢɜɨ ɧɚ ɡɜɭɤɨɜɚ ɦɨɳɧɨɫɬ ƒ NamČĜený akustický výkon ƒ Målte lydstyrkeniveau ƒ Gemeten geluidsniveau ƒ Mõõdetud helivõimsuse tase ƒ Mitattu äänitehotaso ƒ Niveau de puissance sonore mesuré ƒ Gemessener Schalldruckpegel ƒ ȈIJĮșȝȚıȝȑȞȠ İʌȓʌİįȠ ȘȤȘIJȚțȒȢ ȚıȤȪȠȢ ƒ Mért hangteljesítményszint ƒ Livello di potenza sonora misurato ƒ IzmƝrƯtais skaƼas jaudas lƯmenis ƒ Išmatuotas garso stiprumo lygis ƒ Livell tal-Qawwa tal-ƪoss Iggarantit ƒ Moc akustyczna mierzona ƒ Nível sonoro medido ƒ Nivelul măsurat al puterii acustice ƒ Nameraná hladina akustického výkonu ƒ Izmerjena raven zvoþne moþi ƒ Nivel de potencia sonora medido ƒ Uppmätt ljudeffektsnivå ƒ Mælt hljóðaflsstig ƒ Målt lydeffektnivå Not Applicable Guaranteed Sound Power Level ƒ Ƚɚɪɚɧɬɢɪɚɧɨ ɧɢɜɨ ɧɚ ɡɜɭɤɨɜɚ ɦɨɳɧɨɫɬ ƒ Garantovaný akustický výkon ƒ Garanteret lydstyrkeniveau ƒ Gegarandeerd geluidsniveau ƒ Garanteeritud helivõimsuse tase ƒ Taattu äänitehotaso ƒ Niveau de puissance sonore garanti ƒ Garantierter Schalldruckpegel ƒ ǼȖȖȣȘȝȑȞȠ İʌȓʌİįȠ ȘȤȘIJȚțȒȢ ȚıȤȪȠȢ ƒ Szavatolt hangteljesítményszint ƒ Livello di potenza sonora garantito ƒ GarantƝtais skaƼas jaudas lƯmenis ƒ Garantuotas garso stiprumo lygis ƒ Livell tal-Qawwa tal-ƪoss Iggarantit ƒ Moc akustyczna gwarantowana ƒ Nível sonoro farantido ƒ Nivelul garantat al puterii acustice ƒ Garantovaná hladina akustického výkonu ƒ Zajamþena raven zvoþne moþi ƒ Nivel de potencia sonora garantizado ƒ Garanterad ljudeffektsnivå ƒ Hljóðaflsstig sem ábyrgð er tekin á ƒ Garanter lydeffektnivå Not Applicable Conformity Assessment Procedure (Noise) ƒ Ɉɰɟɧɤɚ ɡɚ ɫɴɨɬɜɟɬɫɬɜɢɟ ɧɚ ɩɪɨɰɟɞɭɪɚɬɚ (ɒɭɦ) ƒ Postup hodnocení plnČní podmínek (hluk) ƒ Procedure for overensstemmelsesvurdering (Støj) ƒ Procedure van de conformiteitsbeoordeling (geluid) ƒ Vastavushindamismenetlus (müra) ƒ Vaatimustenmukaisuuden arviointimenettely (Melu) ƒ Procédure d’évaluation de conformité (bruit) ƒ Konformitätsbeurteilungsverfahren (Geräusch) ƒ ǻȚĮįȚțĮıȓĮ ǹȟȚȠȜȩȖȘıȘȢ ȈȣȝȝȩȡijȦıȘȢ (ĬȩȡȣȕȠȢ) ƒ MegfelelĘség-értékelési eljárás (Zaj) ƒ Procedura di valutazione della conformità (rumore) ƒ AtbilstƯbas novƝrtƝjuma procednjra (troksnis) ƒ Atitikties Ƴvertinimo procednjra (garsas) ƒ Proƛedura tal-Valutazzjoni tal-Konformità (ƪoss) ƒ Procedura oceny zgodnoĞci (poziom hałasu) ƒ Processo de avaliação de conformidade (nível sonoro) Procedura de evaluare a conformităĠii (zgomot) ƒ Postup vyhodnocovania zhodnosti (hluk) ƒ Postopek za ugotavljanje skladnosti (hrup) ƒ Procedimiento de evaluación de conformidad (ruido) ƒ Procedur för bedömning av överensstämmelse (buller) ƒ Samræmismatsaðferð (hávaði) ƒ Prosedyre for konformitetsvurdering (støy) Not Applicable UK Notified Body for 2000/14/EC ƒ ɇɨɬɢɮɢɰɢɪɚɧ ɨɪɝɚɧ ɜ Ɉɛɟɞɢɧɟɧɨɬɨ ɤɪɚɥɫɬɜɨ ɡɚ 2000/14/ȿɈ ƒ ÚĜad certifikovaný podle smČrnice þ. 2000/14/EC ƒ Det britiske bemyndigede organ for 2001/14/EF ƒ Engels adviesorgaan voor 2000/14/EG ƒ Ühendkuningriigi teavitatud asutus direktiivi 2000/14/EÜ mõistes ƒ Direktiivin 2000/14/EY mukainen ilmoitettu tarkastuslaitos Isossa-Britanniassa ƒ Organisme notifié concernant la directive 2000/14/CE ƒ Britische benannte Stelle für 2000/14/EG ƒ ȀȠȚȞȠʌȠȚȘȝȑȞȠȢ ȅȡȖĮȞȚıȝȩȢ ǾȞȦȝȑȞȠȣ ǺĮıȚȜİȓȠȣ ȖȚĮ 2000/14/ǼȀ ƒ 2000/14/EK – egyesült királyságbeli bejelentett szervezet ƒ Organismo Notificato in GB per 2000/14/CE ƒ 2000/14/EK AK reƧistrƝtƗ organizƗcija ƒ JK notifikuotosios Ƴstaigos 2000/14/EC ƒ Korp Notifikat tar-Renju Unit gƫal 2000/14/KE ƒ Dopuszczona jednostka badawcza w Wielkiej Brytanii wg 2000/14/WE ƒ Entidade notificada no Reino Unido para 2000/14/CE ƒ Organism notificat în Marea Britanie pentru 2000/14/CE ƒ Notifikovaný orgán Spojeného kráĐovstva pre smernicu 2000/14/ES ƒ Britanski priglašeni organ za 2000/14/ES ƒ Cuerpo notificado en el Reino Unido para 2000/14/CE ƒ Anmält organ för 2000/14/EG i Storbritannien ƒ Tilkynntur aðili í Bretlandi fyrir 2000/14/EC ƒ Britisk teknisk for 2000/14/EF es-12 Number: 1088 Sound Research Laboratories Limited Holbrook House, Little Waldingfield Sudbury, Suffolk CO10 0TH 4 ESPECIFICACIONES Operator Ear Noise Level ƒ Ɉɩɟɪɚɬɨɪ ɧɚ ɧɢɜɨɬɨ ɧɚ ɞɨɥɨɜɢɦ ɨɬ ɭɯɨɬɨ ɲɭɦ ƒ Hladina hluku v oblasti uší operátora ƒ Støjniveau i førers ørehøjde ƒ Geluidsniveau oor bestuurder ƒ Müratase operaatori kõrvas ƒ Melutaso käyttäjän korvan kohdalla ƒ Niveau de bruit à hauteur des oreilles de l’opérateur ƒ Schallpegel am Bedienerohr ƒ ǼʌȓʌİįȠ șȠȡȪȕȠȣ ıİ ȜİȚIJȠȣȡȖȓĮ ƒ A kezelĘ fülénél mért zajszint ƒ Livello di potenza sonora all’orecchio dell’operatore ƒ TrokšƼa lƯmenis pie operatora auss ƒ Dirbanþiojo su mašina patiriamo triukšmo lygis ƒ Livell tal-ƪoss fil-Widna tal-Operatur ƒ Dopuszczalny poziom hałasu dla operatora ƒ Nível sonoro nos ouvidos do operador ƒ Nivelul zgomotului la urechea operatorului ƒ Hladina hluku pôsobiaca na sluch operátora ƒ Raven hrupa pri ušesu upravljavca ƒ Nivel sonoro en el oído del operador ƒ Ljudnivå vid förarens öra ƒ Hávaðastig fyrir stjórnanda ƒ Støynivå ved operatørens øre Harmonised standards used ƒ ɂɡɩɨɥɡɜɚɧɢ ɯɚɪɦɨɧɢɡɢɪɚɧɢ ɫɬɚɧɞɚɪɬɢ ƒ Použité harmonizované normy ƒ Brugte harmoniserede standarder ƒ Gebruikte geharmoniseerde standaards ƒ Kasutatud ühtlustatud standardid ƒ Käytetyt yhdenmukaistetut standardit ƒ Normes harmonisées utilisées ƒ Angewandte harmonisierte Normen ƒ ǼȞĮȡȝȠȞȚıȝȑȞĮ ʌȡȩIJȣʌĮ ʌȠȣ ȤȡȘıȚȝȠʌȠȚȒșȘțĮȞ ƒ Harmonizált szabványok ƒ Standard armonizzati applicati ƒ Izmantotie saskaƼotie standarti ƒ Panaudoti suderinti standartai ƒ Standards armonizzati uĪati ƒ Normy spójne powiązane ƒ Normas harmonizadas usadas ƒ Standardele armonizate utilizate ƒ Použité harmonizované normy ƒ Uporabljeni usklajeni standardi ƒ Estándares armonizados utilizados ƒ Harmoniserade standarder som används Not Applicable BS EN 1032:2003+A1:2008 BS EN ISO 20643:2008 BS EN ISO 5349-1:2001 BS EN ISO 5349-2:2002 BS EN ISO 14982:1998 BS EN ISO 12100-1:2003+A1:2009 BS EN ISO 61310-1:2008 Parts 1 to 3 BS EN 836-1997 Technical standards and specifications used ƒ ɂɡɩɨɥɡɜɚɧɢ ɬɟɯɧɢɱɟɫɤɢ ɫɬɚɧɞɚɪɬɢ ɢ ɫɩɟɰɢɮɢɤɚɰɢɢ ƒ Použité technické normy a specifikace ƒ Brugte tekniske standarder og specifikationer ƒ Gebruikte technische standaards en specificaties ƒ Kasutatud tehnilised standardid ja spetsifikatsioonid ƒ Käytetyt tekniset standardit ja eritelmät ƒ Spécifications et normes techniques utilisées ƒ Angewandte technische Normen und Spezifikationen ƒ ȉİȤȞȚțȐ ʌȡȩIJȣʌĮ țĮȚ ʌȡȠįȚĮȖȡĮijȑȢ ʌȠȣ ȤȡȘıȚȝȠʌȠȚȒșȘțĮȞ ƒ MĦszaki szabványok és specifikációk ƒ Standard tecnici e specifiche applicati ƒ Izmantotie tehniskie standarti un specifikƗcijas ƒ Panaudoti techniniai standartai ir techninơ informacija ƒ Standards u speƛifikazzjonijiet tekniƛi uĪati ƒ Normy i specyfikacje techniczne powiązane ƒ Normas técnicas e especificações usadas ƒ Standardele tehnice úi specificaĠiile utilizate ƒ Použité technické normy a špecifikácie ƒ Uporabljeni tehniþni standardi in specifikacije ƒ Estándares y especificaciones técnicas utilizadas ƒ Tekniska standarder och specifikationer som används ƒ Samræmdir staðlar sem notaðir eru ƒ Benyttede harmoniserte standarder Not Applicable The place and date of the declaration ƒ Ɇɹɫɬɨ ɢ ɞɚɬɚ ɧɚ ɞɟɤɥɚɪɚɰɢɹɬɚ ƒ Místo a datum prohlášení ƒ Sted og dato for erklæringen ƒ Plaats en datum van de verklaring ƒ Deklaratsiooni väljastamise koht ja kuupäev ƒ Vakuutuksen paikka ja päivämäärä ƒ Lieu et date de la déclaration ƒ Ort und Datum der Erklärung ƒ ȉȩʌȠȢ țĮȚ ȘȝİȡȠȝȘȞȓĮ įȒȜȦıȘȢ ƒ A nyilatkozat kelte (hely és idĘ) ƒ Luogo e data della dichiarazione ƒ DeklarƗcijas vieta un datums ƒ Deklaracijos vieta ir data ƒ Il-post u d-data tad-dikjarazzjoni ƒ Miejsce i data wystawienia deklaracji ƒ Local e data da declaração ƒ Locul úi data declaraĠiei ƒ Miesto a dátum vyhlásenia ƒ Kraj in datum izjave ƒ Lugar y fecha de la declaración ƒ Plats och datum för deklarationen ƒ Tæknistaðlar og tæknilýsingar sem notaðar eru ƒ Benyttede tekniske standarder og spesifikasjoner ƒ Staður og dagsetning yfirlýsingar ƒ Sted og dato for erklæringen Ransomes Jacobsen Limited West Road, Ransomes Europark, Ipswich, England, IP3 9TT 4th January 2010 Signature of the person empowered to draw up the declaration on behalf of the manufacturer, holds the technical documentation and is authorised to compile the technical file, and who is established in the Community. ɉɨɞɩɢɫ ɧɚ ɱɨɜɟɤɚ, ɭɩɴɥɧɨɦɨɳɟɧ ɞɚ ɫɴɫɬɚɜɢ ɞɟɤɥɚɪɚɰɢɹɬɚ ɨɬ ɢɦɟɬɨ ɧɚ ɩɪɨɢɡɜɨɞɢɬɟɥɹ, ɤɨɣɬɨ ɩɨɞɞɴɪɠɚɳ ɬɟɯɧɢɱɟɫɤɚɬɚ ɞɨɤɭɦɟɧɬɚɰɢɹ ɢ ɟ ɨɬɨɪɢɡɢɪɚɧ ɞɚ ɢɡɝɨɬɜɢ ɬɟɯɧɢɱɟɫɤɢɹ ɮɚɣɥ ɢ ɟ ɪɟɝɢɫɬɪɢɪɚɧ ɜ ɨɛɳɧɨɫɬɬɚ. Podpis osoby oprávnČné sestavit prohlášení jménem výrobce, držet technickou dokumentaci a osoby oprávnČné sestavit technické soubory a založené v rámci Evropského spoleþenství. Underskrift af personen, der har fuldmagt til at udarbejde erklæringen på vegne af producenten, der er indehaver af dokumentationen og er bemyndiget til at udarbejde den tekniske journal, og som er baseret i nærområdet. Handtekening van de persoon die bevoegd is de verklaring namens de fabrikant te tekenen, de technische documentatie bewaart en bevoegd is om het technische bestand samen te stellen, en die is gevestigd in het Woongebied. Ühenduse registrisse kantud isiku allkiri, kes on volitatud tootja nimel deklaratsiooni koostama, kes omab tehnilist dokumentatsiooni ja kellel on õigus koostada tehniline toimik. Sen henkilön allekirjoitus, jolla on valmistajan valtuutus vakuutuksen laadintaan, jolla on hallussaan tekniset asiakirjat, joka on valtuutettu laatimaan tekniset asiakirjat ja joka on sijoittautunut yhteisöön. Signature de la personne habilitée à rédiger la déclaration au nom du fabricant, à détenir la documentation technique, à compiler les fichiers techniques et qui est implantée dans la Communauté. Unterschrift der Person, die berechtigt ist, die Erklärung im Namen des Herstellers abzugeben, die die technischen Unterlagen aufbewahrt und berechtigt ist, die technischen Unterlagen zusammenzustellen, und die in der Gemeinschaft niedergelassen ist. ȊʌȠȖȡĮijȒ ĮIJȩȝȠȣ İȟȠȣıȚȠįȠIJȘȝȑȞȠȣ ȖȚĮ IJȘȞ ıȪȞIJĮȟȘ IJȘȢ įȒȜȦıȘȢ İț ȝȑȡȠȣȢ IJȠȣ țĮIJĮıțİȣĮıIJȒ, Ƞ ȠʌȠȓȠȢ țĮIJȑȤİȚ IJȘȞ IJİȤȞȚțȒ ȑțșİıȘ țĮȚ ȑȤİȚ IJȘȞ İȟȠȣıȚȠįȩIJȘıȘ ȞĮ IJĮȟȚȞȠȝȒıİȚ IJȠȞ IJİȤȞȚțȩ ijȐțİȜȠ țĮȚ Ƞ ȠʌȠȓȠȢ İȓȞĮȚ įȚȠȡȚıȝȑȞȠȢ ıIJȘȞ ȀȠȚȞȩIJȘIJĮ. A gyártó nevében meghatalmazott személy, akinek jogában áll módosítania a nyilatkozatot, a mĦszaki dokumentációt Ęrzi, engedéllyel rendelkezik a mĦszaki fájl összeállításához, és aki a közösségben letelepedett személy. Firma della persona autorizzata a redigere la dichiarazione a nome del fabbricante, in possesso Della documentazione tecnica ed autorizzata a costituire il fascicolo tecnico, che deve essere stabilita nella Comunità. TƗs personas paraksts, kura ir pilnvarota deklarƗcijas sastƗdƯšanai ražotƗja vƗrdƗ, kurai ir tehniskƗ dokumentƗcija, kura ir pilnvarota sagatavot tehnisko reƧistru un kura ir apstiprinƗta KopienƗ. Asmuo, kuris yra gana žinomas, kuriam gamintojas suteikơ Ƴgaliojimus sudaryti šią deklaraciją, ir kuris ją pasirašơ, turi visą techninĊ informaciją ir yra Ƴgaliotas sudaryti techninơs informacijos dokumentą. Il-firma tal-persuna awtorizzata li tfassal id-dikjarazzjoni f’isem il-fabbrikant, gƫandha d-dokumentazzjoni teknika u hija awtorizzata li tikkompila l-fajl tekniku u li hija stabbilita fil-Komunità. Podpis osoby upowaĪnionej do sporządzenia deklaracji w imieniu producenta, przechowującej dokumentacjĊ techniczną, upowaĪnioną do stworzenia dokumentacji technicznej oraz wyznaczonej ds. wspólnotowych. Assinatura da pessoa com poderes para emitir a declaração em nome do fabricante, que possui a documentação técnica, que está autorizada a compilar o processo técnico e que está estabelecida na Comunidade. Semnătura persoanei împuternicite să elaboreze declaraĠia în numele producătorului, care deĠine documentaĠia tehnică, este autorizată să compileze dosarul tehnic úi este stabilită în Comunitate. Podpis osoby poverenej vystavením vyhlásenia v mene výrobcu, ktorá má technickú dokumentáciu a je oprávnená spracovaĢ technické podklady a ktorá je umiestnená v Spoloþenstve. Podpis osebe, pooblašþene za izdelavo izjave v imenu proizvajalca, ki ima tehniþno dokumentacijo in lahko sestavlja spis tehniþne dokumentacije, ter ima sedež v Skupnosti. Firma de la persona responsable de la declaración en nombre del fabricante, que posee la documentación técnica y está autorizada para recopilar el archivo técnico y que está establecido en la Comunidad. Undertecknas av den som bemyndigad att upprätta deklarationen å tillverkarens vägnar, innehar den tekniska dokumentationen och är bemyndigad att sammanställa den tekniska informationen och som är etablerad i gemenskapen. Undirskrift aðilans sem hefur umboð til að gera yfirlýsinguna fyrir hönd framleiðandans, hefur undir höndum tæknigögnin og hefur leyfi til að taka saman tækniskýrsluna, og er viðurkenndur innan evrópska efnahagssvæðisins. Signaturen til personen som har fullmakt til å utferdige erklæringen på vegne av produsenten, er i besittelse av den tekniske dokumentasjonen, har autorisasjon til å utarbeide den tekniske filen og som har tilhold i EU. Tim Lansdell Technical Director 4th January 2010 Ransomes Jacobsen Limited West Road, Ransomes Europark, Ipswich, England, IP3 9TT Certificate Number ƒ ɇɨɦɟɪ ɧɚ ɫɟɪɬɢɮɢɤɚɬ ƒ ýíslo osvČdþení ƒ Certifikatnummer ƒ Certificaatnummer ƒ Sertifikaadi number ƒ Hyväksyntänumero ƒ Numéro de certificat ƒ Bescheinigungsnummer ƒ ǹȡȚșȝȩȢ ȆȚıIJȠʌȠȚȘIJȚțȠȪ ƒ Hitelesítési szám ƒ Numero del certificato ƒ SertifikƗta numurs ƒ Sertifikato numeris ƒ Numru taƛ-ƚertifikat ƒ Numer certyfikatu ƒ Número do Certificado ƒ Număr certificat ƒ ýíslo osvedþenia ƒ Številka certifikata ƒ Número de certificado ƒ Certifikatsnummer ƒ Númer skírteinis ƒ Sertifikatnummer 4126504 (Rev.2) es-13 4 ESPECIFICACIONES DECLARATION OF INCORPORATION ƒ ȾȿɄɅȺɊȺɐɂə ɁȺ ɈȻȿȾɂɇȿɇɂȿ ƒ PROHLÁŠENÍ O ZALOŽENÍ SPOLEýNOSTI ƒ INKORPORERINGSERKLÆRING ƒ INCORPORATIEVERKLARING ƒ KINNITUS ÜHENDAMISE KOHTA ƒ ASENNUSTODISTUS ƒ DECLARATION D’INCORPORATION ƒ EINBAUBESCHEINIGUNG ƒ ǻǾȁȍȈǾ ȂǾ ȈȊȂȂȅȇĭȍȈǾȈ ƒ BEÉPÍTÉSI NYILATKOZAT ƒ DICHIARAZIONE DI INCORPORAZIONE ƒ NOFORMƜŠANAS DEKLARƖCIJA ƒ PRIJUNGIMO DEKLARACIJA ƒ DIKJARAZZJONI TA’ INKORPORAZZJONI ƒ DEKLARACJA ZGODNOĝCI DLA PODZESPOŁU ƒ DECLARAÇÃO DE INCORPORAÇÃO ƒ DECLARAğIE DE ÎNCORPORARE ƒ VYHLÁSENIE O ZABUDOVANÍ SÚýASTI ƒ IZJAVA ZA VGRADNJO ƒ DECLARACIÓN DE INCORPORACIÓN ƒ INBYGGNADSDEKLARATION ƒ YFIRLÝSING UM ÍSETNINGU ƒ PRODUSENTENS ERKLÆRING Business name and full address of the manufacturer ƒ Ɍɴɪɝɨɜɫɤɨ ɢɦɟ ɢ ɩɴɥɟɧ ɚɞɪɟɫ ɧɚ ɩɪɨɢɡɜɨɞɢɬɟɥɹ ƒ Obchodní jméno a plná adresa výrobce ƒ Producentens firmanavn og fulde adresse ƒ Bedrijfsnaam en volledig adres van de fabrikant ƒ Tootja ärinimi ja täielik aadress ƒ Valmistajan toiminimi ja täydellinen osoite ƒ Nom commercial et adresse complète du fabricant ƒ Firmenname und vollständige Adresse des Herstellers ƒ ǼʌȦȞȣȝȓĮ țĮȚ IJĮȤȣįȡȠȝȚțȒ įȚİȪșȣȞıȘ țĮIJĮıțİȣĮıIJȒ ƒ A gyártó üzleti neve és teljes címe ƒ Ragione sociale e indirizzo completo del fabbricante ƒ UzƼƝmuma nosaukums un pilna ražotƗja adrese ƒ Verslo pavadinimas ir pilnas gamintojo adresas ƒ Isem kummerƛjali u indirizz sƫiƫ tal-fabbrikant ƒ Nazwa firmy i pełny adres producenta ƒ Nome da empresa e endereço completo do fabricante ƒ Denumirea comercială úi adresa completă a producătorului ƒ Obchodný názov a úplná adresa výrobcu ƒ Naziv podjetja in polni naslov proizvajalca ƒ Nombre de la empresa y dirección completa del fabricante ƒ Tillverkarens företagsnamn och kompletta adress ƒ Fyrirtækisheiti og fullt heimilisfang framleiðanda. ƒ Firmanavn og full adresse for produsenten. Ransomes Jacobsen Limited West Road, Ransomes Europark, Ipswich, England, IP3 9TT Description and identification of the partly completed machinery. ƒ Ɉɩɢɫɚɧɢɟ ɢ ɢɞɟɧɬɢɮɢɤɚɰɢɹ ɧɚ ɱɚɫɬɢɱɧɨ ɡɚɜɴɪɲɟɧɢɬɟ ɦɚɲɢɧɢ. ƒ Popis a identifikace þásteþnČ dokonþeného strojního zaĜízení. ƒ Beskrivelse og identifikation af den delvist fremstillede maskine. ƒ Beschrijving en identificatie van de gedeeltelijk voltooide machinerie. ƒ Osaliselt komplekteeritud masina kirjeldus ja määratlus. ƒ Osittain kootun laitteiston kuvaus ja määrittely. ƒ Description et identification de la quasi-machine. ƒ Bezeichnung und Identifizierung der teilgefertigten Vorrichtung ƒ ȆİȡȚȖȡĮijȒ țĮȚ ʌȡȠıįȚȠȡȚıȝȩȢ ȘȝȚIJİȜȠȪȢ ȝȘȤĮȞȒȝĮIJȠȢ. ƒ A részlegesen megépített gép leírása és meghatározása. ƒ Descrizione e identificazione della quasi-macchina ƒ DaƺƝji pabeigtas iekƗrtas apraksts un identifikƗcija. ƒ Dalinai užbaigtos Ƴrangos aprašymas ir identifikacija. ƒ Deskrizzjoni u identifikazzjoni tal-makkinarju li jkun lest parzjalment. ƒ Opis i oznaczenie czĊĞciowo ukoĔczonego urządzenia ƒ Descrição e identificação do equipamento parcial ƒ Descrierea úi identificarea echipamentului finalizat parĠial ƒ Opis a identifikácia podzostavy strojného zariadenia ƒ Opis in identifikacija delno dokonþanega stroja. ƒ Descripción e identificación de la maquinaria parcialmente completada ƒ Beskrivning och identifiering av maskindelarna ƒ Fyrirtækisheiti og fullt heimilisfang framleiðanda ƒ Lýsing og auðkenni hálfsamsetta vélbúnaðarins ƒ Erklæring og identifikasjon for det delvis ferdigstilte maskineriet Description Magna 250 6 Knife Fixed Head - Right Hand Drive Product Code LMAB592 Serial Number XQ200301 - XQ299999 LMAB591 XP300301 - XP399999 Magna 250 6 Knife Fixed Head - Left Hand Drive LMAB352 UV200301 - UV299999 Sport 200 8 Knife Floating Head - Left Hand Drive LMAB353 UW300301 - UW399999 Sport 200 8 Knife Floating Head - Right Hand Drive We undertake to transmit, in response to a reasoned request by the national authorities, relevant information on the partly completed machinery. This shall be by hardcopy and shall be without prejudice to the intellectual property rights of the manufacturer of the partly completed machinery. ɇɢɟ ɨɛɟɳɚɜɚɦɟ ɞɚ ɩɪɟɞɚɞɟɦ, ɩɪɟɞɚɞɟɦ ɜ ɨɬɝɨɜɨɪ ɧɚ ɨɫɧɨɜɚɬɟɥɧɨ ɢɫɤɚɧɟ ɨɬ ɧɚɰɢɨɧɚɥɧɢɬɟ ɨɪɝɚɧɢ ɨɪɝɚɧɢ, ɫɴɨɬɜɟɬɧɚ ɢɧɮɨɪɦɚɰɢɹ ɡɚ ɱɚɫɬɢɱɧɨ ɡɚɜɴɪɲɟɧɢɬɟ ɦɚɲɢɧɢ. ɦɚɲɢɧɢ Ɍɨɜɚ ɳɟ ɫɟ ɨɫɴɳɟɫɬɜɢ ɱɪɟɡ ɞɨɤɭɦɟɧɬ ɢ ɧɹɦɚ ɞɚ ɛɴɞɟ ɜ ɧɚɪɭɲɟɧɢɟ ɧɚ ɩɪɚɜɚɬɚ ɡɚ ɢɧɬɟɥɟɤɬɭɚɥɧɚ ɫɨɛɫɬɜɟɧɨɫɬ ɧɚ ɩɪɨɢɡɜɨɞɢɬɟɥɹ ɧɚ ɱɚɫɬɢɱɧɨ ɡɚɜɴɪɲɟɧɢɬɟ ɦɚɲɢɧɢ. Zavazujeme se na základČ zdĤvodnČné žádosti ze strany národních úĜadĤ poskytnout pĜíslušné informace o þásteþnČ dokonþeném strojním zaĜízení. Informace budou pĜedány v tištČné podobČ a nepoškodí práva k duševnímu vlastnictví výrobce týkající se þásteþnČ dokonþeného strojního zaĜízení. Som svar på en begrundet anmodning fra de nationale myndigheder forpligter vi os til at videregive oplysninger om den delvist fremstillede maskine. Dette bliver gjort i papirudgave og med forbehold for de immaterielle rettigheder, som indehaves af producenten af den delvist fremstillede maskine. We zijn van plan, in reactie op een redelijk verzoek van de nationale autoriteiten, relevante informatie over de gedeeltelijk voltooide machinerie te verzenden. Dit wordt gedaan in de vorm van fysieke kopieën en deze kopieën zullen onder alle voorbehoud behoren tot de intellectuele eigendomsrechten van de fabrikant van de gedeeltelijk voltooide machinerie. Me kohustume riigisiseste asutuste põhjendatud nõudmisel edastama asjakohast teavet osaliselt komplekteeritud masina kohta. Andmed edastatakse paberkandjal ning sellega ei tohi piirata osaliselt komplekteeritud masina tootja õigusi intellektuaalsele omandile. Sitoudumme toimittamaan osittain koottua laitteistoa koskevat olennaiset tiedot vastineena kansallisten viranomaisten perusteltuun pyyntöön. Tiedot toimitetaan paperitulosteena. Ne eivät rajoita valmistajan osittain koottua laitteistoa koskevia immateriaalioikeuksia. Nous nous engageons à fournir, en réponse à une demande rationnelle des autorités nationales, toute information appropriée concernant la quasi-machine. Ceci se fera par copie papier et sans préjuger des droits de propriété intellectuelle du fabricant de la quasi-machine. Wir verpflichten uns, auf eine begründete Aufforderung durch die nationalen Behörden hin, relevante Informationen über die teilgefertigte Maschine zu übersenden. Diese werden als Ausdruck übersandt und dürfen sich nicht nachteilig auf die Rechte am geistigen Eigentum des Herstellers der teilgefertigten Maschine auswirken. ǹȞĮȜĮȝȕȐȞȠȣȝİ ȞĮ ȝİIJĮȕȚȕȐıȠȣȝİ, ʌȡȠȢ ĮʌȐȞIJȘıȘ İȪȜȠȖȘȢ ĮȓIJȘıȘȢ IJȦȞ İșȞȚțȫȞ ĮȡȤȫȞ, IJȚȢ ıȤİIJȚțȑȢ ʌȜȘȡȠijȠȡȓİȢ ȩıȠȞ ĮijȠȡȐ IJȠ ȘȝȚIJİȜȑȢ ȝȘȤȐȞȘȝĮ. ǹȣIJȩ șĮ ʌȡȑʌİȚ ȞĮ ȖȓȞİȚ ȖȡĮʌIJȫȢ țĮȚ įȓȤȦȢ ȞĮ șȓȖİȚ IJĮ ʌȞİȣȝĮIJȚțȐ įȚțĮȚȫȝĮIJĮ IJȠȣ țĮIJĮıțİȣĮıIJȒ IJȠȣ ȘȝȚIJİȜȠȪȢ ȝȘȤĮȞȒȝĮIJȠȢ. Vállaljuk, hogy átadjuk – a nemzeti hatóságok megalapozott kérésére válaszul – a részlegesen megépített gépre vonatkozó információkat. Az információkat nyomtatott példányban adjuk át. A nyomtatott példány átadása a részlegesen megépített gép gyártójának szellemi tulajdonjogaira tett kötelezettség nélkül történik. Ci impegniamo a trasmettere, in risposta ad una richiesta adeguatamente motivata delle autorità nazionali, informazioni pertinenti sulla quasi-macchina. L’impegno sarà redatto in forma cartacea e lascerà impregiudicati i diritti di proprietà intellettuale del fabbricante della quasi-macchina. Atsaucoties uz pamatotu valsts iestƗžu pieprasƯjumu, mƝs apƼemamies nodot saistƯto informƗciju par daƺƝji pabeigtu iekƗrtu. TƗ bnjs cietƗ kopija un neradƯs kaitƝjumus daƺƝji pabeigtƗs iekƗrtas ražotƗja intelektuƗlƗ Ưpašuma tiesƯbƗm. Atsakydami Ƴ nacionaliniǐ valdžios organǐ užklausą, pateikiame informaciją apie dalinai užbaigtus mechanizmus. Šis dokumentas yra atspausdintas elektroninio originalo variantas ir be jokio išankstinio nusistatymo neturi tikslo pažeisti dalinai užbaigto mechanizmo gamintojo intelektualinơs nuosavybơs teisiǐ. Aƫna nwiegƫdu li nippreĪentaw, meta mitlubin mill-awtoritajiet nazzjonali, l-informazzjoni relevanti dwar il-makkinarju li jkun lest parzjalment. Din l-informazzjoni gƫandha tkun f’forma stampata u mingƫajr preƥudizzju gƫad-drittijiet tal-proprjetà intelletwali tal-fabbrikant tal-makkinarju li jkun lest parzjalment. Na uzasadnioną proĞbĊ instytucji paĔstwowych zobowiązujemy siĊ do przekazania wszelkich informacji na temat czĊĞciowo ukoĔczonego urządzenia. BĊdą one przekazane na piĞmie. Strona przekazująca w/wym. dokumentacjĊ nie bĊdzie roĞciła sobie Īadnych praw do własnoĞci intelektualnej producenta czĊĞciowo ukoĔczonego urządzenia. Na sequência de pedido razoável por parte das autoridades nacionais, comprometemo-nos a transmitir informações importantes sobre o equipamento parcial. Tal será feito por meio de hardcopy e sem prejuízo para os direitos de propriedade intelectual do fabricante do equipamento parcial. Ne angajăm să transmitem, ca răspuns la o solicitare motivată a autorităĠilor naĠionale, informaĠii relevante privind echipamentul finalizat parĠial. Aceasta se va efectua în format hârtie úi fără a aduce atingere drepturilor de proprietate intelectuală ale producătorului echipamentului finalizat parĠial. Zaväzujeme sa, že na základe odôvodnenej požiadavky národných orgánov predložíme dôležité informácie o podzostave strojného zariadenia. Musí to byĢ v tlaþenej forme a bez ujmy na právach duševného vlastníctva výrobcu podzostavy strojného zariadenia. Zavezujemo se, da bomo na utemeljeno zahtevo nacionalnih organov predložili zadevne informacije o delno dokonþanem stroju. Informacije bodo v tiskani obliki in ne bodo posegale v pravice intelektualne lastnine proizvajalca delno dokonþanega stroja. Nos comprometemos a transmitir, en respuesta a una petición razonada por parte de las autoridades nacionales, información relevante sobre la maquinaria parcialmente completada. Ésta será transmitida en copia impresa y no afectará a los derechos de propiedad intelectual del fabricante de la maquinaria parcialmente completada. Vi åtar oss att vidarebefordra relevant information om maskindelarna vid en motiverad förfrågan från nationella myndigheter. Informationen ska erhållas i form av papperskopior och ska vara utan men för maskindelstillverkarens immateriella rättigheter. Berist okkur rökstudd beiðni frá landsyfirvöldum um að senda mikilvægar upplýsingar um hálfsamsetta vélbúnaðinn, munum við verða við slíkri beiðni. Beiðnin skal vera í prentriti og gilda með fyrirvara um hugverkarétt framleiðanda hálfsamsetta vélbúnaðarins. Vi vil, på anmodning fra nasjonale myndigheter, formidle all relevant informasjon om det delvis ferdigstilte maskineriet. Informasjonen vil bli formidlet i papirutgave og skal være uten prejudise for åndsrettighetene til produsenten av det delvis ferdigstilte maskineriet. es-14 4 ESPECIFICACIONES Partly completed machinery must not be put into service until the final machinery into which it is to be incorporated has been declared in conformity with the provisions of Directive 2006/42/EC. ɑɚɫɬɢɱɧɨ ɡɚɜɴɪɲɟɧɢɬɟ ɦɚɲɢɧɢ ɧɟ ɬɪɹɛɜɚ ɞɚ ɛɴɞɚɬ ɩɭɫɤɚɧɚ ɜ ɭɩɨɬɪɟɛɚ, ɞɨɤɚɬɨ ɤɪɚɣɧɢɬɟ ɦɚɲɢɧɢ, ɜ ɤɨɢɬɨ ɫɚ ɜɝɪɚɞɟɧɢ, ɧɟ ɫɚ ɩɪɢɜɟɞɟɧɢ ɜ ɫɴɨɬɜɟɬɫɬɜɢɟ ɫ ɩɨɫɬɚɧɨɜɥɟɧɢɹɬɚ ɧɚ ɞɢɪɟɤɬɢɜɚ 2006/42/EɈ. ýásteþnČ dokonþené zaĜízení nesmí být uvedeno do provozu, dokud koneþné zaĜízení, do kterého bylo uvedené zaĜízení namontováno, neodpovídá ustanovením SmČrnice þ. 2006/42/EC. Delvist fremstillede maskiner må ikke indsættes i driften, før den endelige maskine, som den skal inkorporeres i, er blevet erklæret I overensstemmelse med bestemmelserne i Direktiv 2006/42/EF. Gedeeltelijk voltooide machinerie mag niet in dienst worden genomen, totdat er voor de definitieve machinerie, waarvan gedeeltelijk voltooide machinerie onderdeel uitmaakt, een conformiteitsverklaring is ontvangen onder de voorwaarden van Richtlijn 2006/42/EG. Osaliselt komplekteeritud masinat ei tohi kasutusele võtta enne, kui lõplikult komplekteeritud masin, millega see ühendatakse, on tunnistatud direktiivi 2006/42/EÜ sätetele vastavaks. Osittain koottua laitteistoa ei saa ottaa käyttöön, ennen kuin lopullinen laitteisto, johon se asennetaan, on vakuutettu direktiivin 2006/42/EY säännösten mukaiseksi. La quasi-machine ne doit pas être mise en service avant que la machine finale dans laquelle elle doit être incorporée n’ait été déclarée conforme aux dispositions de la directive 2006/42/CE Die teilgefertigte Vorrichtung darf erst in Betrieb genommen werden, wenn die Konformität der Maschine, in die sie eingebaut wird, entsprechend den Bestimmungen der Richtlinie 2006/42/EG erklärt worden ist. ĬĮ ʌȡȑʌİȚ ȞĮ İțIJİȜİıIJİȓ ıȑȡȕȚȢ ıIJȠ ȘȝȚIJİȜȑȢ ȝȘȤȐȞȘȝĮ ȝȑȤȡȚ IJȠ IJİȜȚțȩ ȝȘȤȐȞȘȝĮ ıIJȠ ȠʌȠȓȠ șĮ İȞıȦȝĮIJȦșİȓ ȞĮ ȑȤİȚ IJȘ įȒȜȦıȘ ıȣȝȝȩȡijȦıȘȢ, ıȪȝijȦȞĮ ȝİ IJȚȢ įȚĮIJȐȟİȚȢ IJȘȢ ȅįȘȖȓĮȢ 2006/42/ǼȀ. A részlegesen megépített gépet tilos üzembe helyezni mindaddig, amíg a 2006/42/EK irányelv rendelkezéseivel összhangban a részlegesen megépített gépet be nem építik a végleges változatba, és errĘl nem nyilatkoznak. La quasi-macchina non deve essere messa in servizio finché la macchina finale in cui deve essere incorporata non è stata dichiarata conforme, nel caso, alle disposizioni della Direttiva 2006/42/CE. DaƺƝji pabeigtu iekƗrtu nedrƯkst nodot ekspluatƗcijƗ, lƯdz galƯgƗ iekƗrta, kurƗ tƗ ir jƗiebnjvƝ, ir deklarƝta atbilstoši direktƯvas Nr. 2006/42/EK noteikumiem. These accessories have been designed to be fitted to the Ransomes Hydraulic TG3400 & TG4650 LHAC201, LHAC202, LHAB201, LHAB202. Dalinai užbaigto mechanizmo negalima paleisti kol kiti mechanizmai, kurie dar bus prijungti, nebus patvirtinti kaip atitinkantys 2006/42/EC Direktyvos reikalavimus. Il-makkinarju li jkun parzjalment lest ma gƫandux jibda jitƫaddem sakemm il-makkinarju finali li fih ikun se jiƥi inkorporat ikun ƥie ddikjarat konformi mad-dispoĪizzjonijiet tad-Direttiva 2006/42/KE. Urządzenia czĊĞciowo ukoĔczonego nie wolno uĪytkowaü aĪ do orzeczenia zgodnoĞci urządzenia w postaci kompletnej z wymaganiami dyrektywy 2006/42/WE. O equipamento parcial não poderá entrar em funcionamento antes do mecanismo final no qual vai ser incorporado ser declarado como estando em conformidade com as condições da Directiva 2006/42/CE. Echipamentul finalizat parĠial nu trebuie pus în funcĠiune până ce echipamentul final în care va fi încorporat nu este declarat ca fiind conform cu prevederile Directivei 2006/42/CE. Podzostava strojného zariadenia nesmie byĢ uvedená do prevádzky, pokiaĐ finálne strojné zariadenie, ktorého sa stane súþasĢou, nebude vyhlásené ako zhodné s ustanoveniami smernice 2006/42/ES. Delno dokonþanega stroja ni dovoljeno dati v obratovanje, dokler se dokonþani stroj, v katerega se vgradi delno dokonþani stroj, ne potrdi kot skladen z doloþbami Direktive 2006/42/ES. La maquinaria parcialmente completada no debe ponerse en servicio hasta que la maquinaria final a la que debe incorporarse cumpla con las provisiones de la Directiva 2006/42/CE. Maskindelarna får ej tas i bruk förrän maskinen som delen tillhör har deklarerats som överensstämmande med föreskrifterna I direktivet 2006/42/EG. Hálfsamsettan vélbúnað má ekki taka í notkun fyrr en vottað hefur verið að endanlegi vélbúnaðurinn sem setja á hann í samræmist ákvæðum tilskipunar 2006/42/EC. Delvis ferdigstilt maskineri skal ikke tas i bruk før det endelige maskineriet som dette skal integreres i, er erklært å være i overensstemmelse med bestemmelsene i direktiv 2006/42/EF. The place and date of the declaration ƒ Ɇɹɫɬɨ ɢ ɞɚɬɚ ɧɚ ɞɟɤɥɚɪɚɰɢɹɬɚ ƒ Místo a datum prohlášení ƒ Sted og dato for erklæringen ƒ Plaats en datum van de verklaring ƒ Deklaratsiooni väljastamise koht ja kuupäev ƒ Vakuutuksen paikka ja päivämäärä ƒ Lieu et date de la déclaration ƒ Ort und Datum der Erklärung ƒ ȉȩʌȠȢ țĮȚ ȘȝİȡȠȝȘȞȓĮ įȒȜȦıȘȢ ƒ A nyilatkozat kelte (hely és idĘ) ƒ Luogo e data della dichiarazione ƒ DeklarƗcijas vieta un datums ƒ Deklaracijos vieta ir data ƒ Il-post u d-data tad-dikjarazzjoni ƒ Miejsce i data wydania deklaracji ƒ Local e data da declaração ƒ Locul úi data declaraĠiei ƒ Miesto a dátum vyhlásenia ƒ Slovenian ƒ Lugar y fecha de la declaración ƒ Plats och datum för deklarationen ƒ Staður og dagsetning yfirlýsingar ƒ Sted og dato for erklæringen Ransomes Jacobsen Limited West Road, Ransomes Europark, Ipswich, England, IP3 9TT 4th January 2010 Signature off the up the holds Si t th person empowered d to t draw d th declaration d l ti on behalf b h lf off the th manufacturer, f t h ld the th technical t h i l documentation d t ti and d is i authorised th i d to compile the technical file, and who is established in the Community. ɉɨɞɩɢɫ ɧɚ ɱɨɜɟɤɚ, ɭɩɴɥɧɨɦɨɳɟɧ ɞɚ ɫɴɫɬɚɜɢ ɞɟɤɥɚɪɚɰɢɹɬɚ ɨɬ ɢɦɟɬɨ ɧɚ ɩɪɨɢɡɜɨɞɢɬɟɥɹ, ɤɨɣɬɨ ɩɨɞɞɴɪɠɚɳ ɬɟɯɧɢɱɟɫɤɚɬɚ ɞɨɤɭɦɟɧɬɚɰɢɹ ɢ ɟ ɨɬɨɪɢɡɢɪɚɧ ɞɚ ɢɡɝɨɬɜɢ ɬɟɯɧɢɱɟɫɤɢɹ ɮɚɣɥ ɢ ɟ ɪɟɝɢɫɬɪɢɪɚɧ ɜ ɨɛɳɧɨɫɬɬɚ. Podpis osoby oprávnČné sestavit prohlášení jménem výrobce, držet technickou dokumentaci a osoby oprávnČné sestavit technické soubory a založené v rámci Evropského spoleþenství. Underskrift af personen, der har fuldmagt til at udarbejde erklæringen på vegne af producenten, der er indehaver af dokumentationen og er bemyndiget til at udarbejde den tekniske journal, og som er baseret på stedet. Handtekening van de persoon die bevoegd is de verklaring namens de fabrikant te tekenen, de technische documentatie bewaart en bevoegd is om het technische bestand samen te stellen, en die is gevestigd in het Woongebied. Ühenduse registrisse kantud isiku allkiri, kes on volitatud tootja nimel deklaratsiooni koostama, kes omab tehnilist dokumentatsiooni ja kellel on õigus koostada tehniline toimik. Sen henkilön allekirjoitus, jolla on valmistajan valtuutus vakuutuksen laadintaan, jolla on hallussaan tekniset asiakirjat, joka on valtuutettu laatimaan tekniset asiakirjat ja joka on sijoittautunut yhteisöön. Signature de la personne habilitée à rédiger la déclaration au nom du fabricant, à détenir la documentation technique, à compiler les fichiers techniques et qui est implantée dans la Communauté. Unterschrift der Person, die berechtigt ist, die Erklärung im Namen des Herstellers abzugeben, die die technischen Unterlagen aufbewahrt und berechtigt ist, die technischen Unterlagen zusammenzustellen, und die in der Gemeinschaft niedergelassen ist. ȊʌȠȖȡĮijȒ ĮIJȩȝȠȣ İȟȠȣıȚȠįȠIJȘȝȑȞȠȣ ȖȚĮ IJȘȞ ıȪȞIJĮȟȘ IJȘȢ įȒȜȦıȘȢ İț ȝȑȡȠȣȢ IJȠȣ țĮIJĮıțİȣĮıIJȒ, Ƞ ȠʌȠȓȠȢ țĮIJȑȤİȚ IJȘȞ IJİȤȞȚțȒ ȑțșİıȘ țĮȚ ȑȤİȚ IJȘȞ İȟȠȣıȚȠįȩIJȘıȘ ȞĮ IJĮȟȚȞȠȝȒıİȚ IJȠȞ IJİȤȞȚțȩ ijȐțİȜȠ țĮȚ Ƞ ȠʌȠȓȠȢ İȓȞĮȚ įȚȠȡȚıȝȑȞȠȢ ıIJȘȞ ȀȠȚȞȩIJȘIJĮ. A gyártó nevében meghatalmazott személy, akinek jogában áll módosítania a nyilatkozatot, a mĦszaki dokumentációt Ęrzi, engedéllyel rendelkezik a mĦszaki fájl összeállításához és a közösségben letelepedett személy. Firma della persona autorizzata a redigere la dichiarazione a nome del fabbricante, in possesso della documentazione tecnica ed autorizzata a costituire il fascicolo tecnico, che deve essere stabilita nella Comunità. TƗs personas paraksts, kura ir pilnvarota deklarƗcijas sastƗdƯšanai ražotƗja vƗrdƗ, kurai ir tehniskƗ dokumentƗcija, kura ir pilnvarota sagatavot tehnisko reƧistru un kura ir apstiprinƗta KopienƗ. Tim Lansdell Technical Director 4th January 2010 Ransomes Jacobsen Limited West Road, Ransomes Europark, Ipswich, England, IP3 9TT Asmuo, kuris yra gana žinomas, kuriam gamintojas suteikơ Ƴgaliojimus sudaryti šią deklaraciją, ir kuris ją pasirašơ, turi visą techninĊ informaciją ir yra Ƴgaliotas sudaryti techninơs informacijos dokumentą. Il-firma tal-persuna awtorizzata li tfassal id-dikjarazzjoni f’isem il-fabbrikant, gƫandha d-dokumentazzjoni teknika u hija awtorizzata li tikkompila l-fajl tekniku u li hija stabbilita fil-Komunità. Podpis osoby upowaĪnionej do sporządzenia deklaracji w imieniu producenta, przechowującej dokumentacjĊ techniczną, upowaĪnioną do stworzenia dokumentacji technicznej oraz wyznaczonej ds. wspólnotowych. Assinatura da pessoa com poderes para emitir a declaração em nome do fabricante, que possui a documentação técnica, que está autorizada a compilar o processo técnico e que está estabelecida na Comunidade. Semnătura persoanei împuternicite să elaboreze declaraĠia în numele producătorului, care deĠine documentaĠia tehnică, este autorizată să compileze dosarul tehnic úi este stabilită în Comunitate. Podpis osoby poverenej vystavením vyhlásenia v mene výrobcu, ktorá má technickú dokumentáciu a je oprávnená spracovaĢ technické podklady a ktorá je umiestnená v Spoloþenstve. Podpis osebe, pooblašþene za izdelavo izjave v imenu proizvajalca, ki ima tehniþno dokumentacijo in lahko sestavlja spis tehniþne dokumentacije, ter ima sedež v Skupnosti. Firma de la persona responsable de la declaración en nombre del fabricante, que posee la documentación técnica y está autorizada para recopilar el archivo técnico y que está establecido en la Comunidad. Undertecknas av någon som bemyndigad att upprätta deklarationen å tillverkarens vägnar, innehar den tekniska dokumentationen och är bemyndigad att sammanställa den tekniska informationen och som är etablerad i gemenskapen. Undirskrift aðilans sem hefur umboð til að gera yfirlýsinguna fyrir hönd framleiðandans, hefur undir höndum tæknigögnin og hefur leyfi til að taka saman tækniskýrsluna, og er viðurkenndur innan evrópska efnahagssvæðisins. Signaturen til personen som har fullmakt til å utferdige erklæringen på vegne av produsenten, er i besittelse av den tekniske dokumentasjonen, har autorisasjon til å utarbeide den tekniske filen og som har tilhold i EU. Certificate Number ƒ ɇɨɦɟɪ ɧɚ ɫɟɪɬɢɮɢɤɚɬ ƒ ýíslo osvČdþení ƒ Certifikatnummer ƒ Certificaatnummer ƒ Sertifikaadi number ƒ Hyväksyntänumero ƒ Numéro de certificat ƒ Bescheinigungsnummer ƒ ǹȡȚșȝȩȢ ȆȚıIJȠʌȠȚȘIJȚțȠȪ ƒ Hitelesítési szám ƒ Numero del certificato ƒ SertifikƗta numurs ƒ Sertifikato numeris ƒ Numru taƛ-ƚertifikat ƒ Numer certyfikatu ƒ Número do Certificado ƒ Număr certificat ƒ ýíslo osvedþenia ƒ Številka certifikata ƒ Número de certificado ƒ Certifikatsnummer ƒ Númer skírteinis ƒ Sertifikatnummer Ransomes 3400-UD-4650-UC-Incorp-r2 es-15 5 ETIQUETAS 5.1 ETIQUETAS DE SEGURIDAD ___________________________________________ 5.2 ETIQUETAS DE INSTRUCCIONES _______________________________________ es-16 5 ETIQUETAS Etiquetas de seguridad A903491 Lea el Manual del operario. A903489 Manténgase a una distancia segura de la máquina. A911411 Precaución. Toma de fuerza (PTO). Mantenerse alejado cuando esté funcionando. A903494 Precución: Cuhillas girando. A903493 Aléjese de los líquidos que salgan a presión. Consulte el Manual técnico en lo que respecta a los procedimientos de servicio. Etiquetas de instrucciones A. Punto de tracción B. Punto de subida C. Aceite hidráulico D. Transferencia de peso E. Controles de subida de la unidad de corte/Control de rotación del circuito de corte & activación real TG4650 F. Controles de subida de la unidad de corte/Control de rotación del circuito de corte & activación real TG3400 G. Presión de neumático H. Activación de la unidad de corte es-17 6 CONTROLES 6.1 PALANCAS DE ENGANCHE DE SEGURIDAD _________________________ Todos los enganches de seguridad deben estar en u sitio cuando se transporta la máquina en carretera con las unidades subidas. Los enganches pueden encontrase en el bastidor principal y pueden mantener fijados los brazos de elevación. ADVERTENCIA Antes de soltar las palancas del enganche de seguridad es importante que todas las unidades de corte estén totalmente levantadas. 1. Aparque la máquina en terreno llano. 2. Con el motor funcionando a velocidad de trabajo y el PTO activado, suba las unidades de corte al máximo activando las palancas de subida sentado en la posición de conducción. 3. Desactive todas las unidades, pare el motor y asegúrese de que todas las piezas móviles estén paradas. Pongas los frenos y saque la llave de encendido. 4. Ahora puede soltar las palancas del enganche de seguridad. 6.2 FRENO DE ESTACIONAMIENTO ____________________________________ El receptor de la máquina lleva un freno de estacionamiento que debe ponerse cuando se desengancha la máquina del vehículo de remolque. Asegúrese de que la palanca del freno de mano esté totalmente bajada (desactivada) cuando esté trabajando. es-18 6 CONTROLES 6.3 PALANCAS DE CONTROL ________________________________________ ROTACIÓN DEL CILINDRO DE CORTE Esta palanca (A) tiene tres posiciones y en su posición central de punto muerto los cilindros de corte no girarán. Si se mueve la palanca hacia el operario, los cilindros de corte girarán para realizar corte. Si se aleja la palanca del operario, los cilindros de corte girarán hacia atrás para limpiar y esmerilar. NOTA: Cuando se bajan las unidades de corte al suelo, no girarán hasta que se active el interruptor de corte de la izquierda del panel de control. SUBIDA DE LA UNIDAD DE CORTE Tres palancas controlan la subida de la unidad de corte. La palanca central (B) controla las unidades de corte 1, 2 y 3 del TG4650 y las unidades de corte 1, 2 y 3 del TG3400. La palanca derecha C controla las unidades de corte 4 y 6 del TG4650 y la unidad de corte 4 del TG3400. La palanca manual izquierda D control las unidades de corte 5 y 7 del TG4650 y la unidad de corte 5 del TG3400. Cada palanca tiene tres posiciones: 1. Alejada del operario para bajar las unidades de corte al suelo y a la posición de flotación. 2. Hacia el operario para subir las unidades de corte. 3. La posición central es de punto muerto. ADVERTENCIA ADVERTENCIA: Las palancas de control sólo deben ser activadas desde la cabina del vehículo de remolque con el operario en el asiento. Interruptor de corte Este interruptor (E) hace que los cilindros de corte comiencen a girar cuando las unidades de corte han sido bajadas al suelo. 6.4 VÁLVULA DE TRANSFERENCIA DE PESO ___________________________ La válvula de transferencia de peso (A) está situada detrás de la mampara, debajo de la cubierta superior y encima de la caja de engranajes. Apriete el pomo de control para reducir el peso en las unidades de corte. El ajuste debe realizarse con las unidades de corte bajadas y el PTO a velocidad de trabajo (sin la transmisión activada). NO CIERRE NUNCA COMPLETAMENTE LA VÁLVULA. ADVERTENCIA Hay que tener cuidado al ajustar la válvula de transferencia de peso ya que los brazos de la unidad de corte pueden subir si el ajuste es excesivo. es-19 7 FUNCIONAMIENTO 7.1 INSPECCIÓN DIARIA _________________________________________________ PRECAUCIÓN La inspección diaria se debe llevar a cabo sólo cuando el motor del tractor esté apagado y todos los líquidos estén fríos. Baje al suelo los aperos, ponga el freno de estacionamiento del tractor, pare el motor y retire la llave de encendido. 1. Realice una inspección visual de toda la máquina, busque indicios de desgaste, piezas sueltas y componentes perdidos o dañados. Verifique si hay o no fugas de aceite para cerciorarse de la estanqueidad de las conexiones y de que los tubos y mangueras están en buenas condiciones. 2. Todos los líquidos deben estar en la marca de nivel lleno cuando estén fríos. 3. Asegúrese de que las unidades de corte estén ajustadas a la misma altura de corte. es-20 7 FUNCIONAMIENTO 7.2 PROCEDIMIENTO DE OPERACIÓN ______________________________________ PRECAUCIÓN Lleve siempre gafas protectoras, zapatos o botas de trabajo de cuero, un casco y protectores de oídos para no lesionarse. 1. No trabaje con componentes sueltos, dañados o extraviados. Siempre que sea posible corte la hierba cuando esté seca. 2. Primero, corte césped en una zona de prueba para familiarizarse completamente con el funcionamiento de los controles. 3. Examine la zona para determinar el procedimiento óptimo y más seguro de funcionamiento. Tenga en cuenta la altura del césped, el tipo de terreno y el estado de la superficie. Cada uno de estos estados requerirá ciertos ajustes o precauciones. 4. Nunca dirija la descarga de material hacia los transeúntes ni permita que nadie se acerque a la máquina mientras esté funcionando. El propietario/operario es responsable de las lesiones producidas a los peatones y/o daños a su propiedad. 5. Trabaje con cuidado cerca de zonas con gravilla (caminos, zonas de estacionamiento, senderos para carros, etc.). Las piedras lanzadas por las herramientas pueden lesionar gravemente a los transeúntes o dañar el equipo. PRECAUCIÓN Quite todos los escombros del lugar antes de cortar. Entre en una nueva área con precaución. Opere siempre a velocidades que le permitan tener un control completo del cortacésped. 6. Desembrague los motores cortadores e ice los útiles cuando cruce sendas o carreteras. Esté atento al tráfico. 7. Pare y revise el equipo en busca de daños inmediatamente después de chocar con un obstáculo o si la máquina comienza a vibrar anormalmente. Repare el equipo antes de reanudar el trabajo. PRECAUCIÓN Para evitar lesiones, antes de limpiar, ajustar o reparar este equipo, desactive siempre todas las transmisiones, baje los accesorios al suelo, ponga el freno de estacionamiento del tractor, pare el motor y quite la llave de contacto. 10. No trabaje con componentes sueltos, dañados o extraviados. es-21 7 FUNCIONAMIENTO 7.3 ACOPLAMIENTO DE LA MÁQUINA AL TRACTOR _________________________ 1. Antes de poder realizar el acoplamiento al tractor, es esencial que estén disponibles los siguientes elementos: (a) Receptor oscilante o enganche de recogida en el tractor. (c) Enchufe de 7 patillas para el cable de iluminación. (d) El receptor del tractor debe tener al menos 60 mm de separación vertical dentro de la boca para permitir libertad de movimiento al viajar por terreno irregular. El ojo del enganche no debe verse limitado por la adición de collarines para reducir la separación en la boca. 2. Asegúrese de que el eje de transmisión telescópica del PTO haya sido cortado a la longitud adecuada necesaria para la unidad transmisora. (a) La longitud puede medirse enganchando el ojo del receptor de la máquina a la boca del enganche de la unidad transmisora y midiendo el eje de transmisión en la posición más corta. (b) Con el eje se suministran instrucciones para cortar el eje de transmisión. 3. Monte el eje de transmisión a la unidad transmisora usando los pasadores de liberación rápida y acople la cadena de seguridad. NOTA: Estas cadenas de seguridad, que deben conetarse, evitan que las protecciones exteriores giren. 4. (a) Después de asegurarse de que el ojo del receptor esté fijado al enganche en la unidad transmisora, mueva el asa del impulsor para subir el impulsor a su posición más alta. NOTA: El asa del impulsor debe girarse totalmente hacia arriba hasta que el eje quede firme. (b) (c) El anclaje del lateral del eje puede soltarse para subir la rueda y el eje. Vuelva a sujetar la abrazadera. 5. (a) (b) Acople el cable de suministro al vehículo de remolque y conéctelo a la batería. El cable rojo (A) con el fusible acoplado debe conectarse al terminal positivo (+). El cable negro (B) debe conectarse al terminal negativo (-). NOTA: Esto es aplicable a los vehículos de remolque con toma de tierra negativa. 6. Conecte los cables de iluminación y de corriente. El cable de corriente (negro pequeño) (A) lleva un enchufe negro y el cable de iluminación (negro) (B) lleva un enchufe negro de 7 patillas. es-22 7 FUNCIONAMIENTO 7. El cable de iluminación está prebobinado y cuando no se conecta a la unidad de suministro debe ponerse en posición de “aparcamiento” en el bastidor principal (A) del lateral izquierdo. 8. Quite el freno de estacionamiento (A) del lateral del receptor y acople el aro de seguridad y el cable (B) en un punto adecuado del vehículo de remolque. NOTA: El cable de seguridad debe montarse de manera que se pueda girar. 9. Monte las palancas de control del operario en la cabina de la unidad de corriente. es-23 7 FUNCIONAMIENTO 7.4 FUNCIONAMIENTO DE LA MÁQUINA ___________________________________ Consulte siempre el Manual del operario del fabricante del tractor y el Manual de seguridad y funcionamiento del cortacésped antes de manejar esta máquina. CORTE: 1. Compruebe que todas las transmisiones y engranajes estén en punto muerto y que el freno de estacionamiento esté puesto. 2. Compruebe que se hayan puesto los pestillos de seguridad. 3. Encienda el motor. 4. Baje las unidades de corte al suelo. 5. Seleccione la velocidad de PTO a 540 rpm y active la transmisión del PTO. Aumente la velocidad del PTO a 540 rpm. (velocidad máxima del PTO). 6. Active la transmisión del cilindro de corte. 7. Seleccione la marcha adecuada para obtener una velocidad hacia delante de entre 5 y 12 km/h dependiendo de las condiciones. 8. Pulse el interruptor de corte para que los cilindros de corte comiencen a girar. 9. Comience a conducir hacia delante. NOTA IMPORTANTE: Al cortar, la velocidad del PTO debe ser siempre de 540 rpm. Esto garantizará un funcionamiento eficaz, un ahorro de combustible, un desgaste mínimo del cilindro y la cuchilla inferior y un corte limpio en condiciones difíciles. Si el motor comienza a funcionar, la velocidad hacia delante de la máquina debe reducirse reduciendo una marcha. PARADA: 1. Quite la marcha del tractor y ponga el freno de estacionamiento. 2. Suba las unidades de corte a su posición elevada. 3. Reduzca la velocidad del PTO. Pare la transmisión del cilindro de corte moviendo el interruptor de control del cortador a la posición central (punto muerto). Pare el PTO. 6. Apague el motor. es-24 7 FUNCIONAMIENTO es-25 8 MANTENIMIENTO Y LUBRICACIÓN 8.1 CUADRO DE MANTENIMIENTO Y LUBRICACIÓN __________________________ CUADRO DE MANTENIMIENTO Y LUBRICACIÓN Intervalo Artículo Sección Primeras 50 horas Cambie el aceite de la caja de engranajes de la P.T.O. Diariamente Cada 10 horas Compruebe el nivel de líquido hidráulico. Limpiar la máquina. Semanalmente Cada 50 horas Comprobar que no haya componentes sueltos Comprobar que no haya fugas hidráulicas Compruebe el aceite de la caja de engranajes de la P.T.O. Lubrique todos los accesorios de engrase de la unidad de corte. Lubrique la P.T.O. Lubrique toda la articulación de válvulas de control. Cada 400 horas Lubricar el eje del motor de transmisión directa de la unidad de Final de temporada Cada 1.000 horas Cambie el filtro y el aceite hidráulico Cambie el aceite de la caja de engranajes de la P.T.O. corte Lubricar todos los accesorios de engrase semanalmente A = Pivote central del brazo de elevación, B =Pivote de la unidad de corte, C = Alojamiento de los cojinetes de la unidad de corte (véase diagrama) REQUISITOS DE LOS LÍQUIDOS Cantidad Tipo A Aceite hidráulico (con filtro) 150 litros ISO VG 46 B Caja de engranajes de la P.T.O. 0,85 litros Shell Spirax G90 C Lubricación general - Grasa a base de litio para uso general similar a Darina R2 de Shell D Eje de la toma de fuerza (PTO) - Grasa Rocol GP1 E Eje del motor de la unidad de corte - Grasa Shell S7222 (MBE3927) es-26 8 MANTENIMIENTO Y LUBRICACIÓN 8.2 LUBRICACIÓN ________________________________________________________ Antes de usar la máquina por primera vez: (a) Lubrique todos los puntos (consulte la ‘lubricación semanal’). (b) Compruebe que la caja de engranajes de la bomba esté llena de aceite. La cantidad correcta es alcanza cuando el aceite está nivelado con la marca superior de la varilla (B), ver ‘Final de temporada’. (c) Compruebe que el depósito hidráulico haya sido llenado con Shell Tellus 46 hasta el nivel correcto (hasta la mitad de la mirilla, (A)). IMPORTANTE: NO haga funcionar la máquina si el nivel de aceite está por debajo de la mirilla. Diariamente (cada 10 horas de trabajo): Compruebe el nivel de aceite hidráulico. Semanalmente (cada 50 horas de trabajo): Filtro de aceite hidráulico Compruebe el indicador A del filtro de retorno para determinar la condición. Si el indicador del cabezal del filtro aparece rojo con la temperatura normal de funcionamiento significa que el filtro debe cambiarse. Consulte las instrucciones para cambiar el filtro. El indicador puede verse desde la parte trasera de la máquina. NOTA: La bomba debe estar funcionando a velocidad de trabajo cuando se compruebe el indicador del filtro. Semanalmente (cada 50 horas de trabajo): 1. (a) Lubrique lo siguiente con lubricante Shell Darina R2 o equivalente. Rodillos de la unidad de corte (2 lubricadores) (A). Gire el rodillo continuamente durante la lubricación. NOTA: Lubrique más a menudo en ambietes secos y con polvo. es-27 8 MANTENIMIENTO Y LUBRICACIÓN (b) Pivotes del bastidor del cojinete (A). (c) Brazos de subida interior y exterior (A). Pivotes del brazo de elevación interior (A). (d) Ranuras de ajuste de altura (A). es-28 8 MANTENIMIENTO Y LUBRICACIÓN (e) Receptor (A). 2. Lubrique con lubricante Rocol GP.1: (a) (b) Cojinetes del eje del PTO (A). Porción deslizante del eje PTO. 3. Lubrique lo siguiente con compuesto antiadherente Rocol: (a) Tornillos de ajuste del cilindro de corte (A). LUBRICACIÓN DEL MOTOR HIDRÁULICO DE DIRECCIÓN DIRECTA (Cada 400 horas) Baje todas las unidades de corte al suelo. Antes de abandonar la posición de conducción, pare el motor y asegúrese de que todas las piezas móviles están paradas. Ponga los frenos, desengrane las transmisiones y saque la llave de encendido. El motor hidráulico de transmisión directa se puede retirar de la unidad de corte sacando los dos tornillos y arandelas que sujetan el motor al bastidor del cojinete. Saque con cuidado el motor del bastidor del cojinete, es importante no contaminar el eje del motor ni las ranuras del cilindro de corte. Si por cualquier motivo se contaminan, se deberán limpiar desengrasando. Lubrique a fondo el motor y las ranuras del cilindro con grasa Shell S7222 (Pieza Textron MBE3927) antes de montar. es-29 8 MANTENIMIENTO Y LUBRICACIÓN 8.3 MANTENIMIENTO_____________________________________________________ Diariamente (cada 10 horas de trabajo): Presiones de los neumáticos: Las presiones de los neumáticos deben comprobarse y mantenerse siguiendo el cuadro de presión de los neumáticos de la sección Especificaciones. Retirada de la rueda SI es necesario quitar una rueda, siga las siguientes instrucciones: (a) Afloje ligeramente las tuercas de la rueda con la misma en el suelo. (b) Levante el lateral de la máquina usando un punto de apoyo adecuado bajo el chasis. (c) Saque las tuercas de la rueda y saque la rueda. (d) Después de cambiar la rueda, fíjela con tuercas para rueda a 115 Nm. NOTA IMPORTANTE: TENGA MUCHO CUIDADO al apoyar la máquina. es-30 8 MANTENIMIENTO Y LUBRICACIÓN PUERTOS DE PRUEBA DEL INDICADOR DE PRESIÓN DEL SISTEMA HIDRÁULICO Si se experimentan problemas con el sistema hidráulico, existen unos puertos de servicio que permiten comprobar las presiones. PUERTOS DE PRUEBA: NOTA: A sól es aplicable a TG4650. A. Presión de la transmisión de la unidad de corte 6 y 7: 138 bar (2000 psi) B. Presión de subida del cilindro de corte: 170 bar (2500 psi) C. Presión de la transmisión de la unidad de corte 1, 2 y 3: 207 bar (3000 psi) D. Presión de la transmisión de la unidad de corte 4 y 5: 138 bar (2000 psi) NOTA: Cualquier servicio del sistema hidráulico debe ser realizado por personal de servicio capacitado. es-31 8 MANTENIMIENTO Y LUBRICACIÓN es-32 9 AJUSTES 9.1 CORTE DE TRANSMISIÓN DEL CILINDRO _______________________________ MECANISMO DE DESVÍO DE CORTE DE TRANSMISIÓN DEL CILINDRO (Fig.20) La distancia entre la bobina de la válvula de desvío Ay la varilla de mando Bdebe ser de 1 mm Ccuando el brazo de subida esté levantado con la bobina totalmente metida (posición detenida). Para ajustar (Fig 21): a. Suelte la tuerca cilíndrica A. b. Gire la varilla de mando B para obtener la separación correcta. c. Apriete la tuerca de fijación A. 9.2 DESACTIVACIÓN DE LA TRANSMISIÓN DE LA UNIDAD (FIG.23) ____________ Las válvulas de desvío activadas por los brazos de subida deben desactivar automáticamente la transmisión de la unidad de corte cuando la cuchilla inferior de la unidad de corte está a no más de 400 mm del suelo. Para ajustar: a. Suelte el tornillo de fijación de la leva A. b. Gire la leva B para obtener el ajuste correcto. c. Apriete el tornillo de fijación A. es-33 9 AJUSTES 9.3 VÁLVULA DE POSICIÓN DEL BRAZO DE SUBIDA (UNIDADES 6 & 7) SÓLO TG4650 ____________________________________________________________ Las válvulas divisoras adicionales operadas por los brazos 6 & 7 permiten que la presión de la transferencia de peso actúe en el extremo de la corona circular del ariete de subida sin actuar en el extremo del pistón cuando la unidad de corte está bajada. No debe haber separación entre el rodillo y la leva con el brazo de subida bajado (sin comprimir la válvula divisora). Para ajustar: a. Afloje los dos pernos de montaje de la válvula divisora A. b. Deslice la válvula divisora B para obtener el ajuste correcto. c. Apriete los pernos de montaje. 9.4 AJUSTE DE FUNCIONAMIENTO_______________________________________ La válvula divisora debe comprimirse 2 mm cuando la cuchilla inferior de la unidad de corte esté subida 400 mm por encima del suelo. Para ajustar: a. Suelte el tornillo de fijación de la leva A. b. Gire la leva B para obtener el ajuste correcto. c. Apriete el tornillo de fijación A. es-34 9 AJUSTES 9.5 1. (a) (b) (c) FRENOS (AUTOMÁTICOS TRASEROS) _________________________________ Los frenos de las ruedas deben ajustarse como sigue: Gire siempre la rueda hacia delante en todo momento durante el ajuste. Usando la tuerca de ajuste (A) del interior de la placa del freno, gire hasta que las zapatas del freno se bloqueen en el tambor. Afloje ligeramente hasta que no sienta resistencia durante el giro de la rueda. Puede realizarse más ajuste en el igualador (A). Asegúrese de que las tuercas de fijación (B) estén fijadas después de hacer los ajustes. es-35 9 AJUSTES 9.6 ALTURA DE CORTE_________________________________________________ La altura de corte se puede ajustar entre: 13 y 51 mm en el cabezal fijo Magna 250. 13 y 101 mm en el cabezal fijo Sport 200. 13 y 35 mm en el cabezal flotante Sport 200 con cuchilla estándar. 7 y 30 mm en el cabezal flotante Sport 200 con cuchilla fina. Para ajustar: 1. Gire la ruedecilla o tuerca (A) situada en el volante de mano a la derecha (+) para aumentar la altura de corte y a la izquierda (-) para disminuirla. 2. Asegúrese de hacer un ajuste por igual en los dos ajustadores en todas las unidades de corte. Para poder obtener una ajuste por igual, se incluyen indicadores (B) a cada extremo de la unidad del rodillo. NOTA: Los números 1 a 9 sólo son para referencia de un lado al otro del rodillo y no tienen ninguna relación con la altura de corte excepto que cada graduación da aproximadamente 6,25 mm de movimiento de altura de corte para unidades de cabezal fijo y 3,75 mm para unidades de cabezal flotante. Estos indicadores están ajustados en fábrica y cuando el puntero esté ajustado igual en cada extremo del rodillo, éste estará paralelo con la cuchilla inferior. Si debido a cualquier razón, el rodillo y la cuchilla inferior no están paralelas entre sí, el rodillo se podrá ajustar paralelo con la cuchilla inferior girando una de las ruedas dentadas, ajustar un indicador aflojando el pequeño tornillo de sujeción en el centro de la placa indicadora y colocar el indicador con relación al puntero en el extremo opuesto a la unidad del rodillo. 3. No es necesario ningún otro ajuste. 4. ES UN MECANISMO DE BLOQUEO AUTOMÁTICO POR LO QUE NO HAY NECESIDAD DE DESBLOQUEAR NI BLOQUEAR EL MECANISMO. AJUSTE ADICIONAL AL CABEZAL FIJO SPORT 200 1. El ajuste de peso extra en el ajuste de corte está incorporado en el pivote central de la unidad de corte. 2. Al colocar de nuevo el perno del pivote central trasero, se puede obtener una altura de corte de hasta 101 mm. 9.7 AJUSTE DEL RODILLO DELANTERO CON CABEZAL FLOTANTE SPORT 200 1. El extremo derecho del rodillo delantero es fijo. Para poner el rodillo paralelo a la cuchilla inferior es necesaria una tuerca de anclaje excéntrica en el bastidor del cojinete del rodillo delantero. 2. Afloje los pernos de anclaje del bastidor del cojinete del rodillo izquierdo. 3. Gire la tuerca excéntrica para que el rodillo esté paralelo a la cuchilla inferior. 4. Apriete los pernos de anclaje del bastidor del cojinete del rodillo mientras impide que gire la tuerca excéntrica. es-36 9 AJUSTES 9.8 AJUSTE DEL CILINDRO DE CORTE A LA CUCHILLA INFERIOR _____________ Para comprobar si el cilindro de corte está ajustado a la cuchilla inferior correctamente, coloque un trozo fino de papel entre el borde de la cuchilla y los cortadores en espiral y gire el cilindro manualmente. El papel deberá cortarse claramente a lo largo de la longitud de la cuchilla inferior; de no ser así será necesario realizar algún ajuste. NO APRIETE DEMASIADO. También es posible que haya que esmerilar antes de ajustar del cilindro si éste está desgastado. Para ajustar: 1. Para ajustar el cilindro a la cuchilla inferior gire las ruedas de mano izquierda y derecha (C) a la derecha para seleccionar corte. Se notará un ruido cuando se gira la rueda de mano a la derecha, y este ruido se produce al mover el cilindro en incrementos de aproximadamente 0,035 mm hacia la cuchilla inferior. 2. La posición correcta de corte debe conseguirse al aflojar el ajuste del mecanismo (entre muescas). Un requisito del ajuste manual es que el cilindro siempre debe moverse hacia la cuchilla inferior (giro a la derecha de las ruedas de mano) para conseguir la relación correcta del cilindro y la cuchilla inferior. NO COLOQUE NUNCA EL CILINDRO DE POSICIÓN DE CORTE, intente conseguir la relación correcta de corte girando la rueda de mano a la derecha. 3 Si el cilindro se pone bruscamente en la posición de corte, deberá ser ajustado para alejar la cuchilla inferior girando a la izquierda la rueda de mano y volviendo a ajustar la cuchilla inferior. 4. ES UN MECANISMO DE BLOQUEO AUTOMÁTICO POR LO QUE NO HAY NECESIDAD DE DESBLOQUEAR NI BLOQUEAR EL MECANISMO. 9.9 COJINETES DEL CILINDRO DE CORTE _________________________________ Los cojinetes del cilindro de corte son cónicos auto ajustables y no necesitan por tanto ningún ajuste. 9.10 COJINETES DE LOS RODILLOS DELANTERO Y TRASERO_________________ Los cojinetes del rodillo son cónicos auto ajustables y no necesitan por tanto ningún ajuste. 9.11 DEFLECRTOR DE HIERBA ____________________________________________ El deflector de hierba puede colocarse manualmente porque las tuercas lo anclan por fricción (apretar las tuercas aumentará el efecto de anclaje). es-37 9 AJUSTES 9.12 ESMERILADO _____________________________________________________ El esmerilado de rutina del cilindro forma parte del plan general de mantenimiento para los cortacéspedes de cilindros. NOTA: Incluso cuando el motor está APAGADO, el girar un molinete puede hacer que gire el otro. Seguir el siguiente procedimiento con el motor apagado y los molinetes engranados. 1. Lavar los cilindros y las cuchillas inferiores 2. Retirar ligeramente el cilindro hasta el ajuste de la cuchilla inferior. 3. Poner compuesto de esmerilado a los cilindros ANTES de arrancar el motor y engranar los cilindros. NOTA: NO poner compuesto de esmerilado a los cilindros A MENOS que el motor esté apagado y los cilindros desengranados. NO poner compuesto de esmerilado a los cilindros mientras giran. 4. Bajar las unidades de corte para que esté firmemente en el terreno, poner el freno de estacionamiento, colocar la palanca de control del cilindro (A) en la posición de esmerilado. Con el operario en la posición de operación, arrancar el motor. NO mantenga el motor en marcha en una zona cerrada. 5. Haga funcionar el motor al ralentí. Conecte el PTO. Active la transmisión de los molinetes (B) desde la posición del operario en la máquina. Es posible que haya que aumentar las revoluciones del motor para permitir que las unidades se activen y volverlas a poner en ralentí para limitar la velocidad del moliente. 6. Esmerilar los molinetes durante varios minutos, desengranar periódicamente la dirección del cilindro, cerrar el motor y revisar la condición de la cuchilla. Añadir compuesto adicional de esmerilado y ajustar el cilindro a la holgura de la cuchilla inferior. Vuelva a la posición de trabajo y siga esmerilando hasta que todas las cuchillas estén afiladas por igual. 7. Desengranar la dirección del cilindro, apagar el motor y lavar a fondo todo el compuesto de esmerilado de los cilindros y las cuchillas inferiores. Ponga una capa ligera de aceite a todas las superficies afiladas. 8. Para obtener un corte más fino, limar por la cara delantera de la cuchilla inferior para quitar cualquier viruta del filo. 9. Ajustar el cilindro a la cuchilla inferior (ver el manual de la unidad de corte). es-38 9 AJUSTES es-39 10 CALIDAD DE CORTE 10.1 SOLUCIÓN DE PROBLEMAS PARA LA CALIDAD DEL CORTE ______________ Se recomienda que se lleve a cabo un “corte de prueba” para comprobar el funcionamiento del cortacésped antes de empezar reparaciones. Debe haber una área donde se puedan hacer “cortes de prueba”. Este área debe ofrece condiciones conocidas y sistemáticas para permitir un análisis preciso del funcionamiento del cortacésped. Se debe realizar otro “corte de prueba” después de completar las reparaciones y/o los ajustes para verificar el funcionamiento del cortacésped. Antes de realizar un “corte de prueba” para diagnosticar el aspecto del corte y el funcionamiento del cortacésped, se deben verificar los siguientes elementos para asegurar un “corte de prueba” preciso. 10.2 1. Velocidad de corte (suelo). 2. Condiciones de los cojinetes del molinete y ajuste de precarga (holgura longitudinal). 3. Afilamiento del molinete y de la cuchilla fija. 4. Alineamiento de la cuchilla fija al molinete. 5. Contacto del molinete a cuchilla fija. 6. Altura de corte (HOC). 7. Condiciones del rodillo y del cojinete del rodillo. SUPERFICIE ONDULADA ____________________________________________ La superficie ondulada es un modelo cíclico de alturas de corte cambiantes que ocasionan un aspecto de corte al estilo de un oleaje. En la mayoría de los casos, la distancia de punta a punta de la onda es aproximadamente 15-20 cm. También puede observarse una variación de color (de claro a oscuro). Este estado normalmente es causado por un movimiento oscilante en la(s) unidad(es) de corte. Mayoritariamente, este estado se encuentra en cortacéspedes con múltiples unidades de corte (suspendidas), pero otras causas pueden producir el mismo resultado. Las superficies onduladas también pueden ser causadas por variaciones en el césped. TN0159 NOTA: La flecha indica la dirección del desplazamiento. Causa probable Solución Velocidad de corte demasiado rápida. Reduzca la velocidad de corte. La hierba se acumula en el rodillo. Limpie el rodillo y use raspadores o cepillos. El rodillo ha perdido su forma redonda. Reemplace el rodillo. Corte en la misma dirección. Cambie la dirección de corte con regularidad. Uso de una rastrilladora en la pasada de limpieza. Las rastrilladoras deben usarse sólo en línea recta. es-40 10 CALIDAD DE CORTE 10.3 ONDULAMIENTOS EN LÍNEAS SUCESIVAS_____________________________ Los ondulamientos en líneas sucesivas, como la formación de superficies onduladas, es un modelo cíclico de alturas de corte cambiantes que ocasionan un aspecto de corte al estilo de un oleaje. En la mayoría de los casos, la distancia de punta a punta de la ola es aproximadamente 2 in. (5cm) o menos. TN0220 NOTA: La flecha indica la dirección del desplazamiento. Causa probable Solución Velocidad de corte demasiado rápida. Reduzca la velocidad de corte. El ajuste de la altura de corte (HOC) es demasiado bajo para las condiciones del césped. Compruebe/ajuste la altura de corte para el estado del césped. El diámetro del molinete de corte está desgastado. Compruebe el diámetro del molinete de corte y reemplácelo si está gastado. es-41 10 CALIDAD DE CORTE 10.4 CORTE ESCALADO__________________________________________________ El corte escalado ocurre cuando la hierba se corta más alta en un lado de un molinete que en el otro o en una unidad de corte que en otra. Normalmente esto es causado por un desgaste manual o por un rodillo incorrecto o un ajuste incorrecto de altura de corte (HOC). TN0221 NOTA: La flecha indica la dirección del desplazamiento. Causa probable Solución Ajustes de altura de corte distintos desde el lado de un molinete al lado del otro o desde una unidad de corte a la otra. Comprobar el ajuste de altura de corte de las unidades de corte. Cojinetes desgastados del rodillo delantero. Compruebe/reemplace los cojinetes del rodillo frontal. El contacto del molinete a la cuchilla fija es diferente de un lado de la unidad de corte a al otro o de una unidad de corte a la otra. Compruebe el contacto del molinete a cuchilla fija. El movimiento del molinete de corte está restringido. Compruebe/quite la obstrucción del movimiento del molinete de corte. Variaciones en la densidad del césped. Cambie la dirección de corte. La distribución del peso de la máquina no es uniforme. Compruebe/ajuste la presión de inflado de los neumáticos. es-42 10 CALIDAD DE CORTE 10.5 PELADO __________________________________________________________ El pelado es un estado en el cual áreas de hierba se cortan perceptiblemente más cortas que las áreas de alrededor, resultando en un parche verde claro o incluso marrón. Normalmente esto es causado por un ajuste de altura de corte (HOC) excesivamente bajo y/o por un césped no uniforme. TN0222 NOTA: La flecha indica la dirección del desplazamiento. Causa probable Solución Los ajustes de la altura de corte (HOC) son más bajos de lo normal. Compruebe/ajuste los ajustes de altura de corte. Ajuste inapropiado del molinete a la cuchilla fija. Ajuste el ajuste de molinete a cuchilla fija para la altura de corte deseada. Césped demasiado irregular para que el cortacésped siga. Cambie la dirección de corte. Se corta demasiada hierba cada vez. Corte más a menudo. Velocidad de corte demasiado rápida. Reduzca la velocidad de corte. es-43 10 CALIDAD DE CORTE 10.6 PENACHOS ________________________________________________________ Los penachos son briznas sueltas de hierba no cortada o cortada escasamente. TN0223 NOTA: La flecha indica la dirección del desplazamiento. Causa probable Solución La cuchilla fija no está ajustada adecuadamente. Ajuste los valores del molinete y la cuchilla fija. Molinete o filos de corte de la cuchilla fija desafilados. Afile o reemplace la cuchilla del molinete y la cuchilla fija como sea necesario. Velocidad de corte demasiado rápida. Reduzca la velocidad de corte. Césped demasiado alto. Corte más a menudo. Corte en la misma dirección. Cambie la dirección de corte con regularidad. Mellas en el molinete o la cuchilla fija. Lime, afile o reemplace las cuchillas del molinete y la cuchilla fija como sea necesario. es-44 10 CALIDAD DE CORTE 10.7 VETAS____________________________________________________________ Una veta es una línea de hierba no cortada. Normalmente esto es causado por una cuchilla fija mellada o doblada. TN0224 NOTA: La flecha indica la dirección del desplazamiento. Causa probable Solución Cuchilla fija dańada. Reemplace la cuchilla fija. Molinete dańado y desgastado de forma no uniforme. Inspeccione molinete. Reemplácelo según sea necesario. Faltan los fijadores de la cuchilla fija o están flojos. Compruebe los tornillos de la cuchilla fija. Apriete los tornillos sueltos, recambie los tornillos que faltan. Los giros se hacen demasiado agresivamente. Las unidades de corte no se solapan alrededor de los giros en pendientes. Gire menos agresivamente para permitir que las unidades de corte se solapen. Cambie la dirección de corte o la forma en pendientes. El neumático aplana y rebaja la hierba antes de que sea cortada. Compruebe/ajuste la presión de inflado de los neumáticos. La hierba mojada se aplana y rebaja antes de que sea cortada. Corte cuando la hierba está seca. es-45 10 CALIDAD DE CORTE 10.8 FORMACIÓN DE HILERAS ____________________________________________ Las hileras son el depósito de recortes concentrado al final de unidad(es) de corte o entre dos unidades de corte, formando una línea en la dirección del desplazamiento. TN0225 NOTA: La flecha indica la dirección del desplazamiento. Causa probable Solución Césped demasiado alto. Corte más a menudo. Se corta mientras la hierba está mojada. Corte cuando la hierba está seca. Acumulación de hierba en rodillo(s). Limpie rodillo(s) y raspador(es). La hierba se junta en la cuchilla fija. Ajuste los valores del molinete y la cuchilla fija. es-46 10 CALIDAD DE CORTE 10.9 ESTRIADO O FORMACIÓN DE REGUEROS _____________________________ El estriado o la formación de regueros es un modelo de alturas variantes de corte, el cual ocasiona un aspecto de corte similar a un oleaje, normalmente debido a puntos pesados de contacto en un molinete y/o cuchilla fija. NOTA: La flecha indica la dirección del desplazamiento. Causa probable Solución El molinete y/o la cuchilla fija están desgastados de manera no uniforme. Inspeccione la cuchilla fija y el molinete. Afile o reemplace el molinete y la cuchilla fija como sea necesario. Faltan los tornillos de la cuchilla fija, están flojos o apretados excesivamente. Instale, reemplace o apriete los tornillos de la cuchilla fija hasta un ajuste apropiado de apriete. Velocidad de corte demasiado rápida. Reduzca la velocidad de corte. 10.10 UNIDADES DE CORTE DESIGUALES __________________________________ Las unidades de corte desiguales es una forma de alturas variantes de corte, la cual ocasiona un aspecto de corte escalonado, normalmente debido a un ajuste desigual de la altura de corte (HOC) de una unidad de corte a la otra. NOTA: La flecha indica la dirección del desplazamiento. Causa probable Solución Altura de corte desigual de una unidad de corte respecto de la otra. Compruebe/ajuste la altura de corte de las unidades de corte. Diferencia en la altura de circulación del cortacésped de un lado respecto al otro. Compruebe/ajuste la presión de inflado de los neumáticos. es-47 11 GARANTÍA 11.1 GARANTÍA ___________________________________________________________ GARANTÍA GARANTIZAMOS que en el supuesto de que surgiera algún defecto de mano de obra o material en la mercancía dentro del plazo de DOS AÑOS o hasta un máximo de dos mil horas (en modelos equipados con contadores horarios), o cual sea que ocurra antes. Una excepción a esta garantía lo conformarán los productos de aireación, los cuales están cubiertos durante un periodo de DOS AÑOS o quinientas horas (en modelos equipados con contadores horarios), cual sea que ocurra antes. Repararemos o reemplazaremos, según juzguemos conveniente, el componente defectuoso sin cargo alguno por mano de obra o materiales, siempre y cuando la reclamación bajo la presente garantía se efectúe a través de un representante oficial y que se nos devuelva el componente defectuoso si así lo solicitamos, ya sea a nosotros directamente o al representante. La presente garantía se suma a, sin excluirlos, cualesquiera términos o garantías implícitas en la ley, exceptuando que no aceptamos responsabilidad por mercancías usadas/de segunda mano, ni por defectos que, según nuestro criterio, sean atribuibles al mal uso, falta de cuidado razonable o al desgaste normal; así mismo, tampoco nos responsabilizamos del ajuste de recambios, repuestos o componentes extras que no hubieran sido suministrados o aprobados por nosotros para el fin en cuestión. La garantía quedará anulada si se utilizan aceites o lubricantes no recomendados. La garantía no cubre los daños que se puedan ocasionar durante el transporte de la máquina o los motivados por el desgaste normal. La garantía se extiende al comprador original únicamente y no es transferible a subsiguientes propietarios. El período de garantía comienza en la fecha en que el producto es entregado al usuario final (cliente), a menos que se acuerde de modo distinto con el fabricante. Al terminar el primer año, el propietario debe hacer que un representante oficial efectúe un mantenimiento para tener el derecho al segundo año de cobertura de garantía. es-48 Ransomes Jacobsen Limited West Road, Ransomes Europark, Ipswich, IP3 9TT, Inglaterra Número de registro de empresa inglesa 1070731 www.ransomesjacobsen.com +44 (0) 1473 270000 Jacobsen, A Textron Company 11108 Quality Drive, Charlotte, NC 28273, EE.UU. www.Jacobsen.com 800-848-1636